If sunshine had a taste, it would taste like this Lemon Curd Cake! Moist lemon cake with a creamy layer of lemon curd and a decadent lemon cream cheese frosting. Yum. If you’re looking for a new favorite Spring dessert, you might just fall in love with…
If sunshine had a taste, it would taste like this Lemon Curd Cake! Moist lemon cake with a creamy layer of lemon curd and a decadent lemon cream cheese frosting. Yum. If you're looking for a new favorite Spring dessert, you might just fall in love with this one. Fluffy, moist, lemon cake is layered...
This article was written and published by Oh My Veggies. It may not be reproduce or republished without permission of the author. The original article can be found here: Lemon Curd Cake.
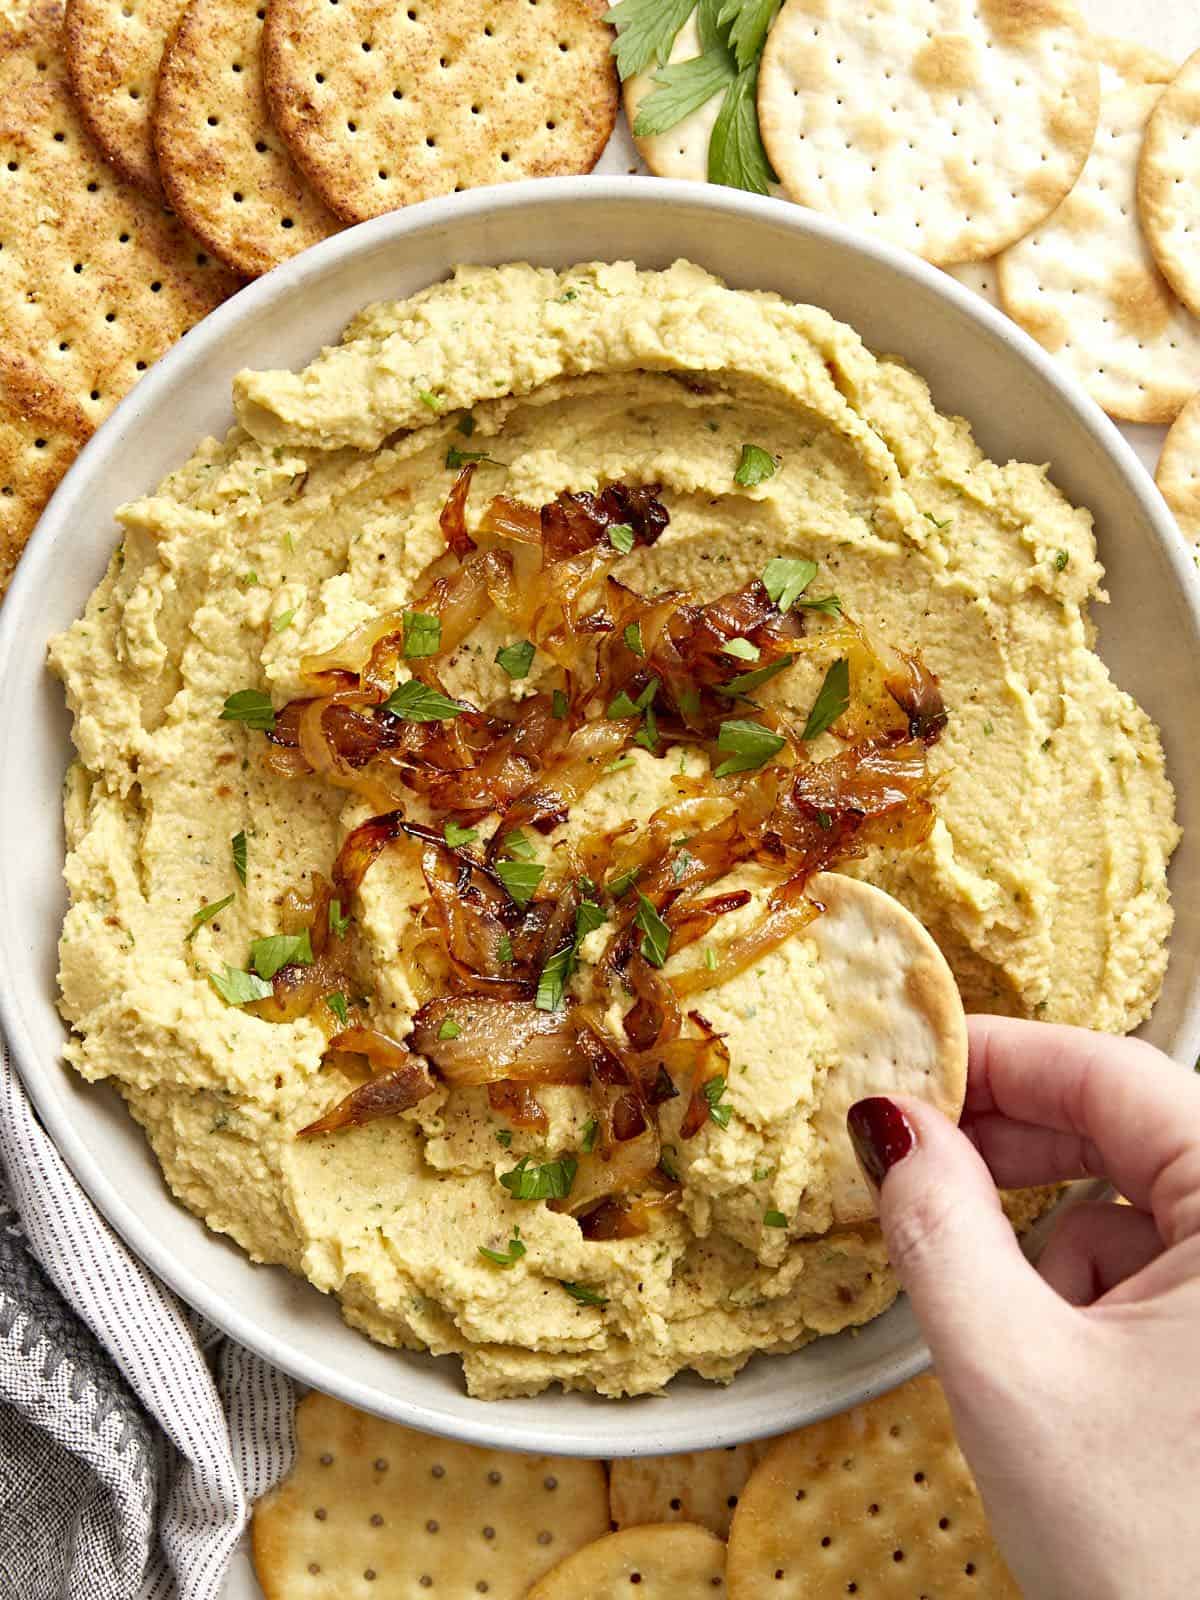
This simple but elegant chickpea spread combines sweet caramelized onions with a creamy, savory puréed chickpea spread, the perfect appetizer for any occasion!
Party season is just around the corner so it’s time to start bookmarking all the good appetizer recipes to bring to holiday gatherings! When I saw this simple but elegant (and budget-friendly!) Chickpea Spread with Caramelized Onions in Michal Korkosz’s new book, Polish’d: Modern Vegetarian Cooking from Global Poland, I knew I had to try it because I l-o-v-e turning a humble can of beans into something special. And guess what? This dip was every bit as delicious as it looked. So big thanks to Michal and his publisher for letting us share this amazing recipe with you today, just in time for the holidays!
What’s in This Chickpea Spread?
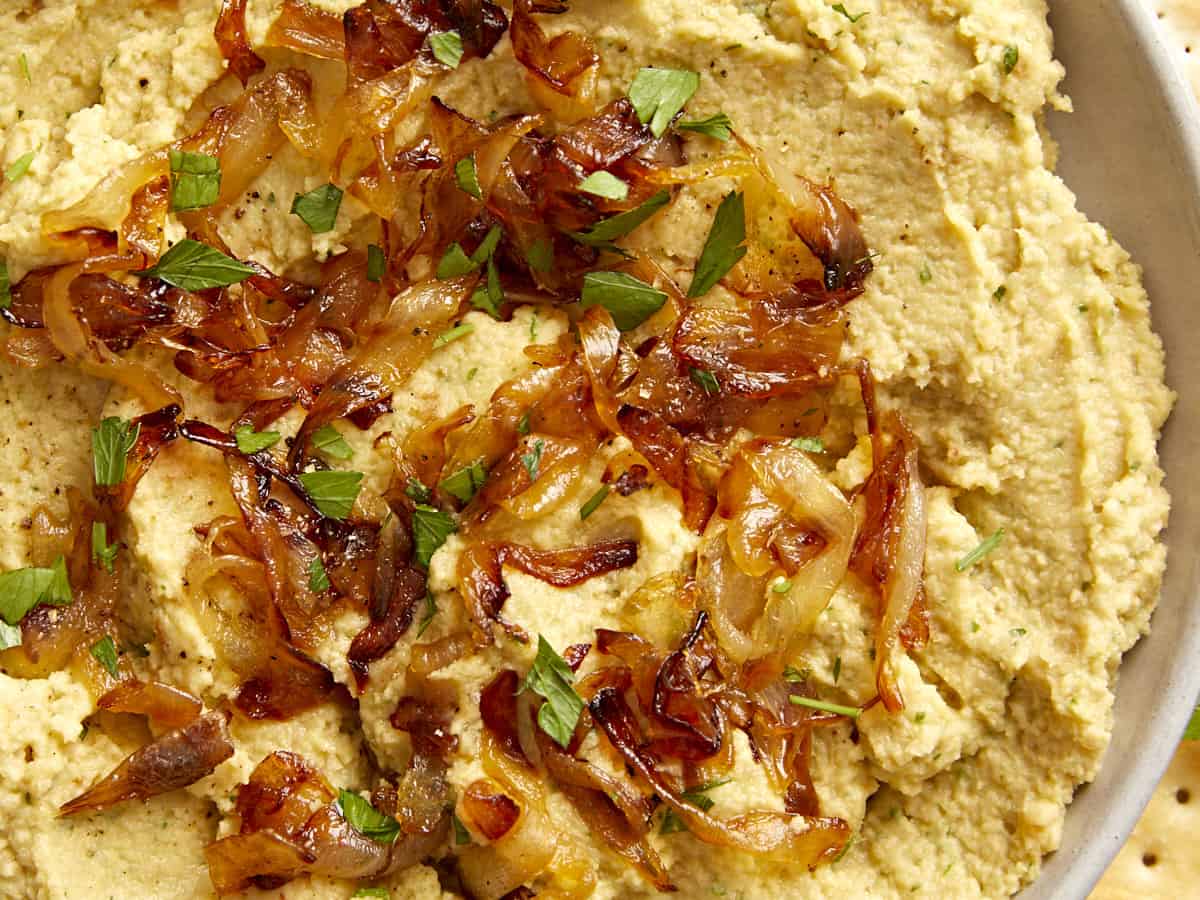
The base of the chickpea spread is simply chickpeas brightened up with a little lemon juice and puréed until smooth with cold water. To give the spread a boost of flavor, caramelized onions and fresh parsley are added to the mix. The caramelized onions give the chickpeas a subtly sweet and savory flavor, while the parsley adds a breath of freshness. The combination of flavors is absolutely divine and it will definitely have you coming back for dip after dip!
How to Serve the Chickpea Spread
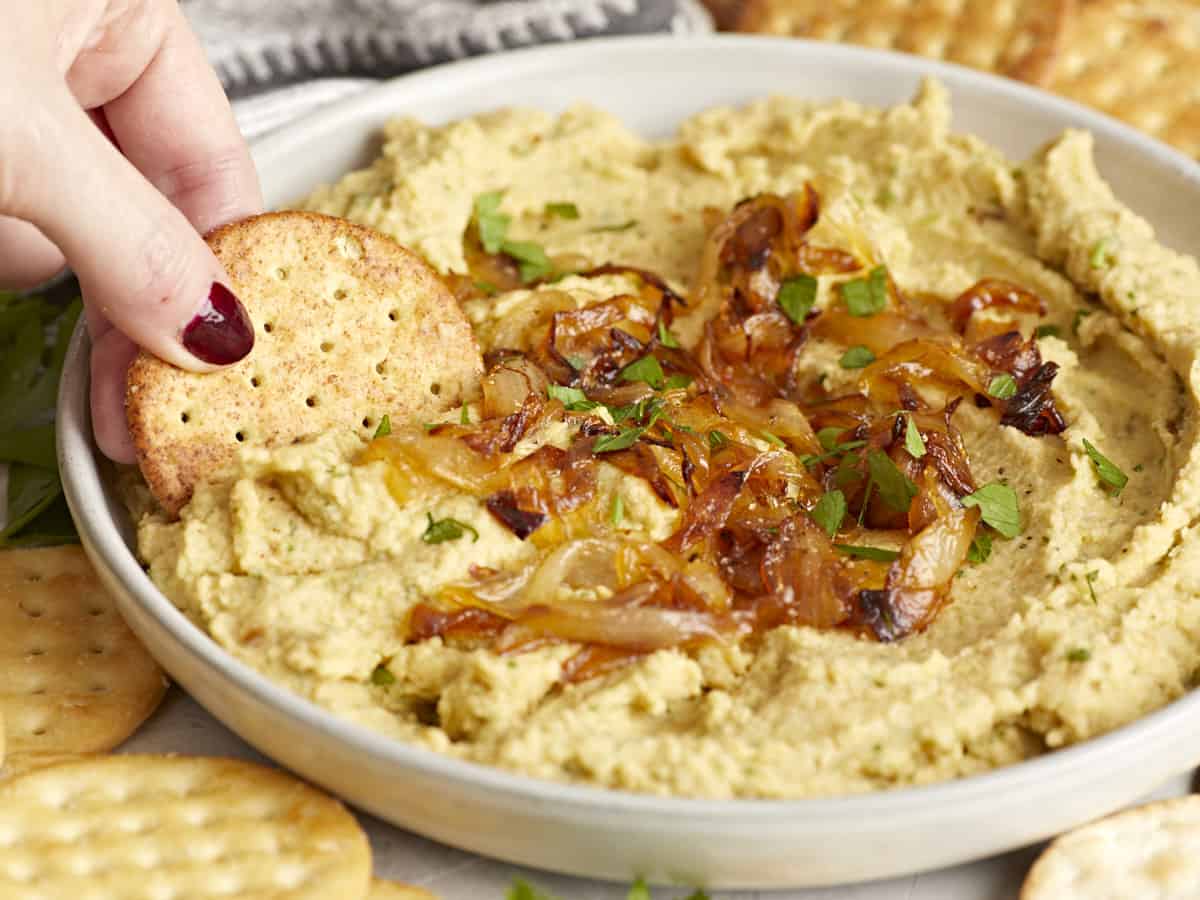
This appetizer is best served with a variety of crackers or bread for dipping, but I think it would also make an amazing spread to add to sandwiches or even just a slice of toast. Michal notes in his book to serve with bread and dill pickles. Yum!
Storing Leftovers
The chickpea spread will stay good in the refrigerator for about 3-4 days, but the presentation is definitely best on the day it’s made when the caramelized onions are at their most beautiful. Caramelized onions do tend to get a little cloudy when refrigerated as they absorb moisture.
This simple but elegant chickpea spread combines sweet caramelized onions with a creamy, savory puréed chickpea spread, the perfect appetizer for any occasion!
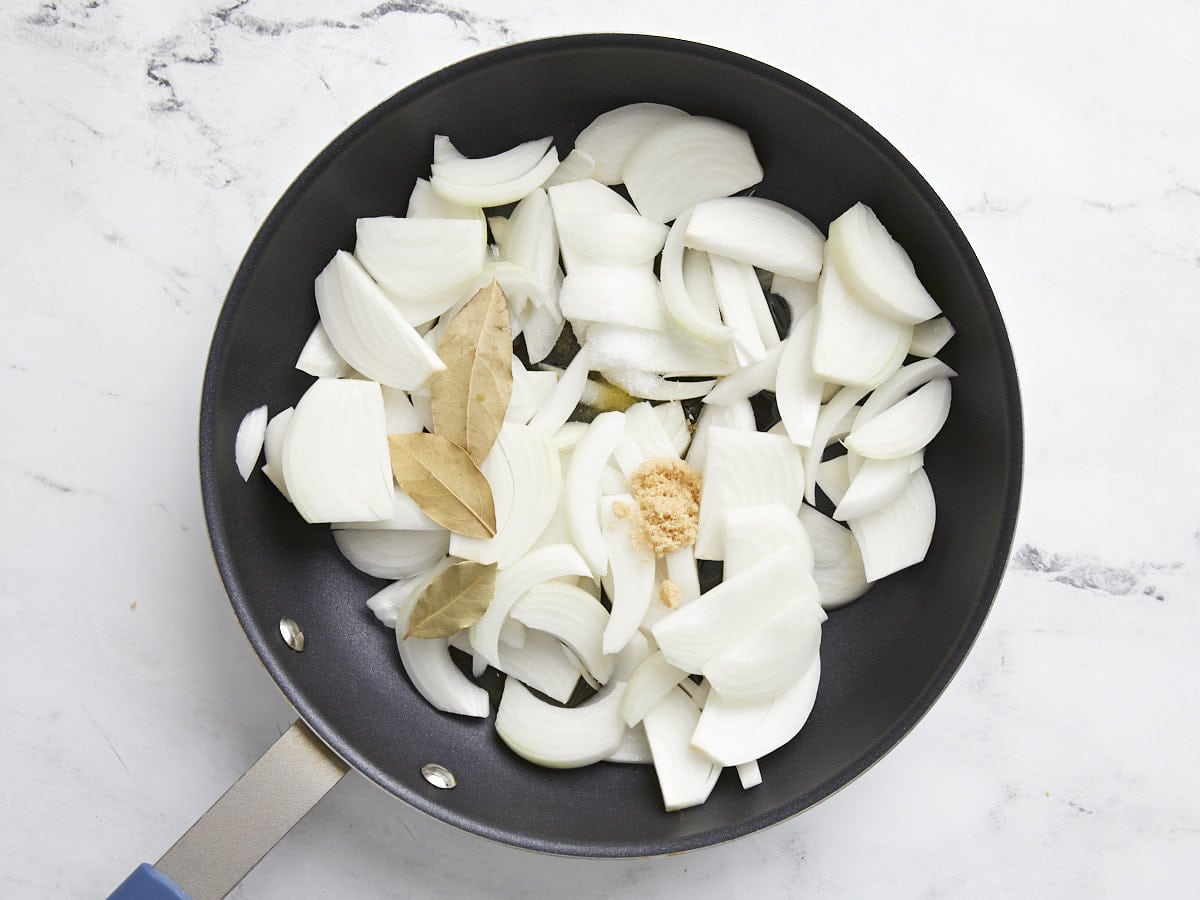
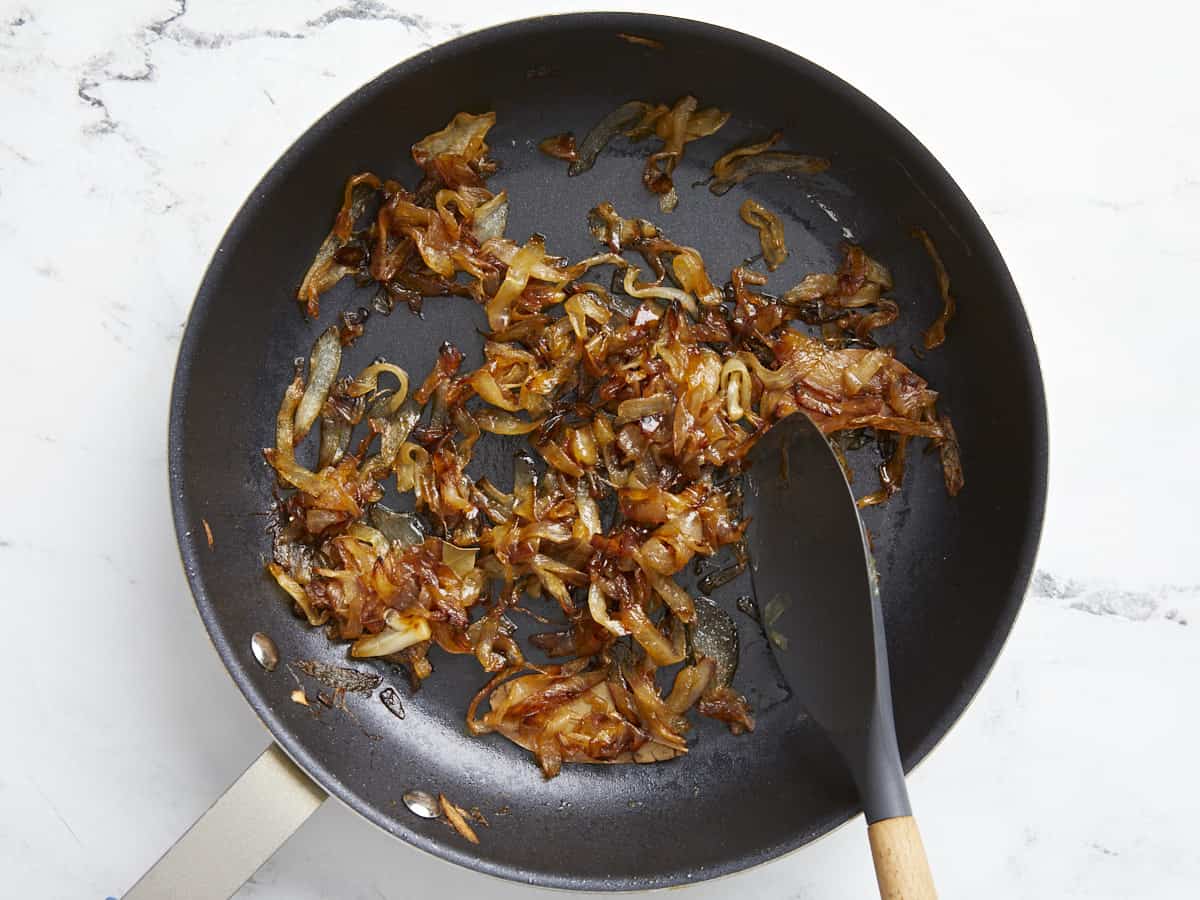
Heat the oil in a large skillet over medium heat. Add the onions, bay leaves, ½ teaspoon of the salt, and the brown sugar. Cook over low heat, stirring occasionally, until golden brown and caramelized, about 25 minutes. Remove the bay leaves and discard.
Place the chickpeas in a food processor with the cold water and remaining ½ tsp salt. Blend until smooth, about 2 minutes. Add the caramelized onions (save some for the garnish) and the lemon juice and parsley. Pulse once or twice to combine. Season with pepper.
Transfer to a serving bowl. Top with the remaining caramelized onions and season with more pepper. Serve with your favorite bread and dill pickles.
How to Make Chickpea Spread with Caramelized Onions
Start caramelizing the onions first, as they’ll take about a half hour to cook. Slice one pound of white onions and add them to a skillet with ¼ cup olive oil, 3 bay leaves, ½ tsp salt, and ½ tsp brown sugar.
Cook the onions over low heat, stirring occasionally, until they deep golden brown and caramelized. You can increase the heat to medium-low if they are taking too long, just make sure to stir often. Discard the bay leaves.
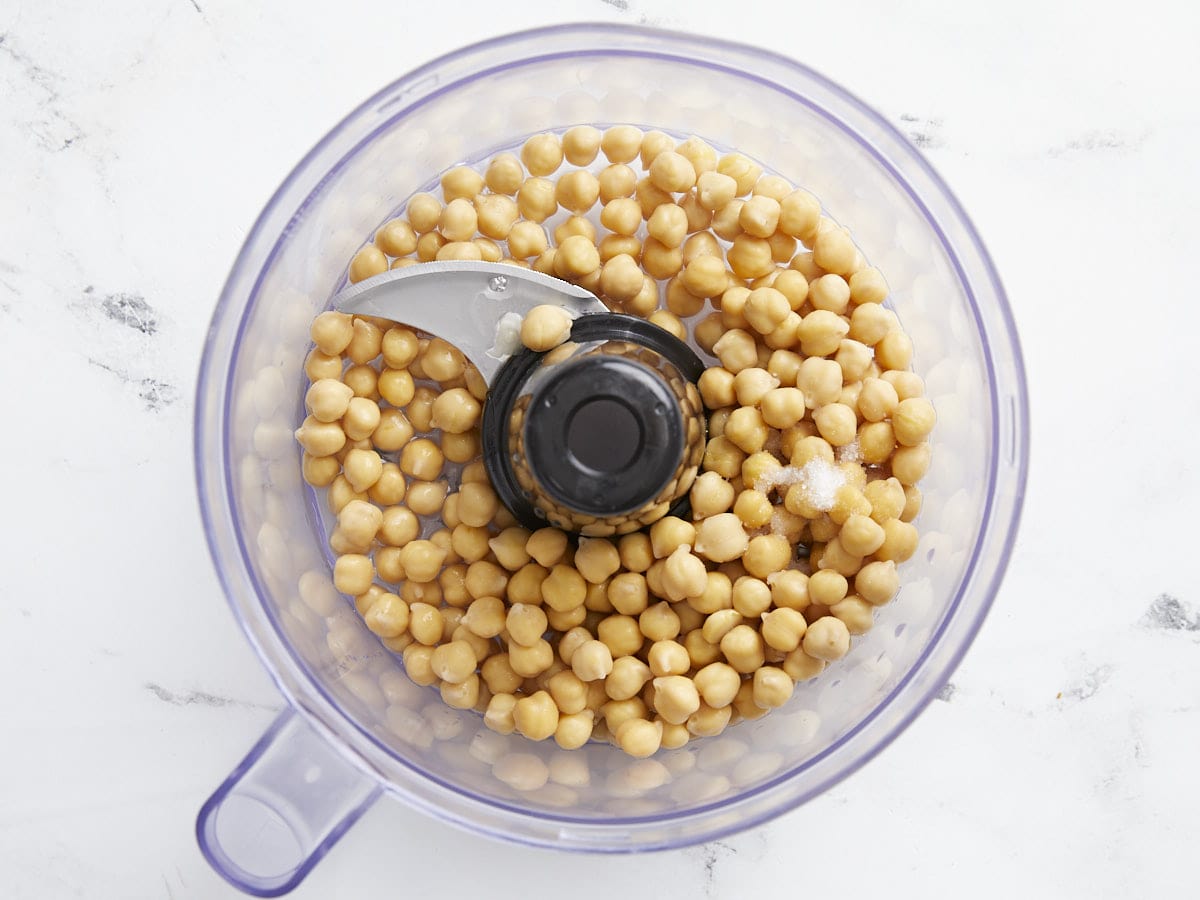
Drain one 15oz. can of chickpeas and add them to a food processor with ½ tsp salt and ⅓ cup cold water.
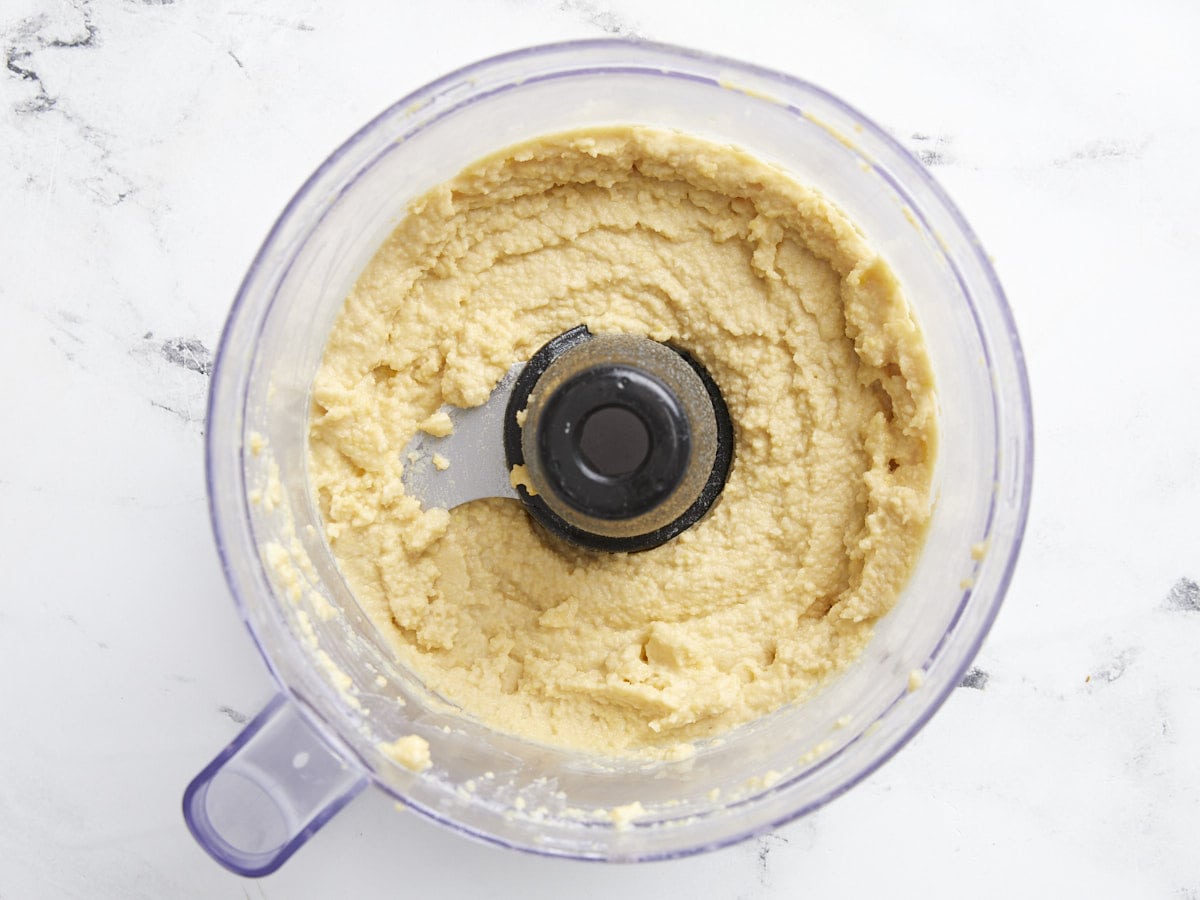
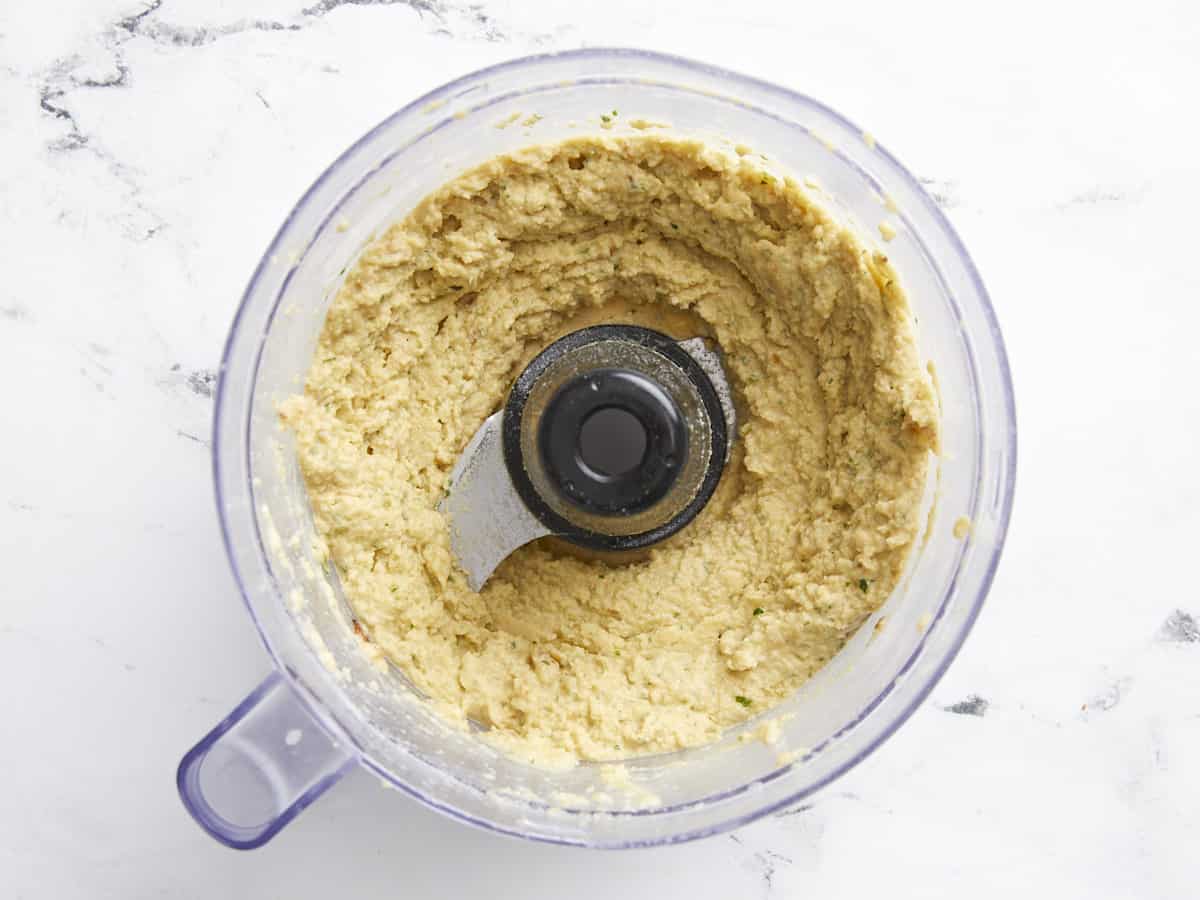
Purée the chickpeas until smooth. If the chickpeas seem dry, you can add a little extra water or olive oil until they blend smoothly.
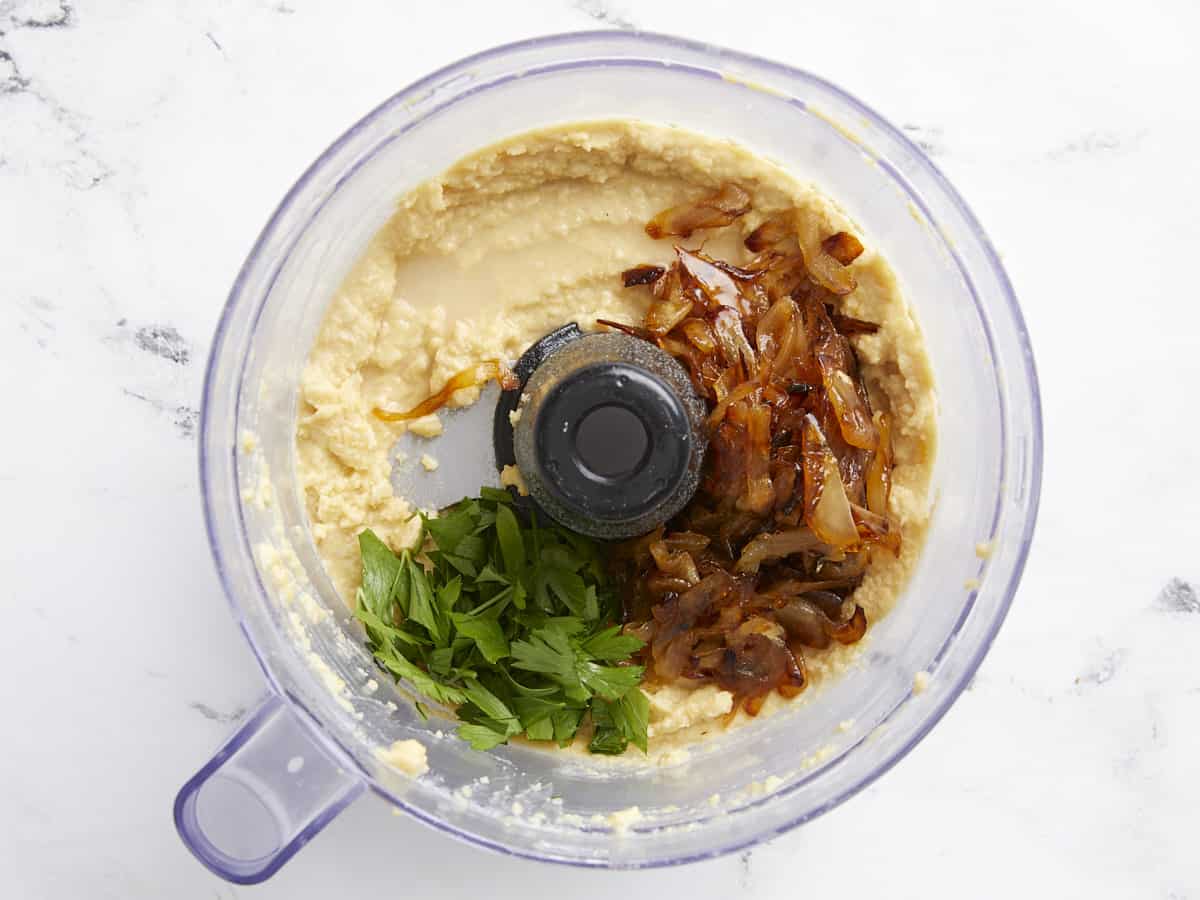
Add 1 Tbsp lemon juice, half of the caramelized onions, and about ¼ cup fresh parsley to the food processor.
Pulse the chickpeas to combine with the parsley and caramelize onions. Give it a taste, season with pepper, and adjust the salt, lemon, or other ingredients to your liking.
Serve the chickpea spread in a bowl, topped with the remaining caramelized onions, and some freshly cracked pepper. Enjoy!
I always get a warm and cozy feeling anytime I make homemade applesauce. The smell of apples and cinnamon spreads through the kitchen as it cooks and soon the scent of Fall has filled the entire house. Fall is also the best time to make this homemade applesauce recipe because apples are in season so there are a lot of varieties to choose from, their flavor is at their peak, and they’re inexpensive. Sure you can buy store-bought applesauce, but trust me it’s no comparison to the taste of homemade applesauce!
Ingredients for Homemade Applesauce
You only need 4 simple ingredients to make this easy homemade applesauce recipe:
Apples – Of course, there are lots of different apples to choose from when making applesauce, but in general you’ll want to stick with sweet or semi-sweet varieties. If you choose a tart apple, like granny smith, you may want to add some additional sugar. We used Gala apples for this recipe.
Water – Water is used to cook the apples. Using water instead of apple juice or apple cider allows the fresh flavor of the apples to shine through!
Ground cinnamon – A touch of ground cinnamon goes a long way and tastes great with cooked apples. It also gives the applesauce just a hint of flavor.
Lemon juice – A little lemon juice brightens up the applesauce and helps the flavors pop. Don’t skip this one!
That’s it! Perfect homemade applesauce and no added sweetener needed.
What Kind of Apples Are Best For Making Applesauce?
You can honestly use several different types of apples to make applesauce. But to keep from having to add any sugar or sweetener, I suggest using a sweeter or semi-sweet variety of apple, like Fuji, Gala, Pink Lady, or Honeycrisp. You can use just one kind or a combination of 2 varieties if you want. And, of course, if you’re making your applesauce during the fall season, you’ll find the best deals and the sweetest apples during this time of year. ;)
Should You Peel The Apples?
This is a great question and it honestly depends on personal preference. I like to peel my apples when making applesauce in order to get a smoother consistency. But it’s definitely not required. If you’re short on time, just give them a good wash and leave the peel on.
How To Store Homemade Applesauce?
Homemade applesauce stores very well in the refrigerator and the freezer. Just store any leftover applesauce in an airtight container in the refrigerator for 4-5 days or in the freezer for up to 3 months. To thaw the applesauce, let it sit in the refrigerator overnight.
Wash, peel, and remove the core from the apples. Chop the apples into small 3/4 inch chunks.
Add the chopped apples, ground cinnamon and water to a medium pot and place a lid on top. Heat the apples over medium, allowing them to come up to a simmer. Continue to simmer the apples for 15-20 minutes, stirring occasionally, until they are tender. The total cook time will vary depending on the variety of apple used.*
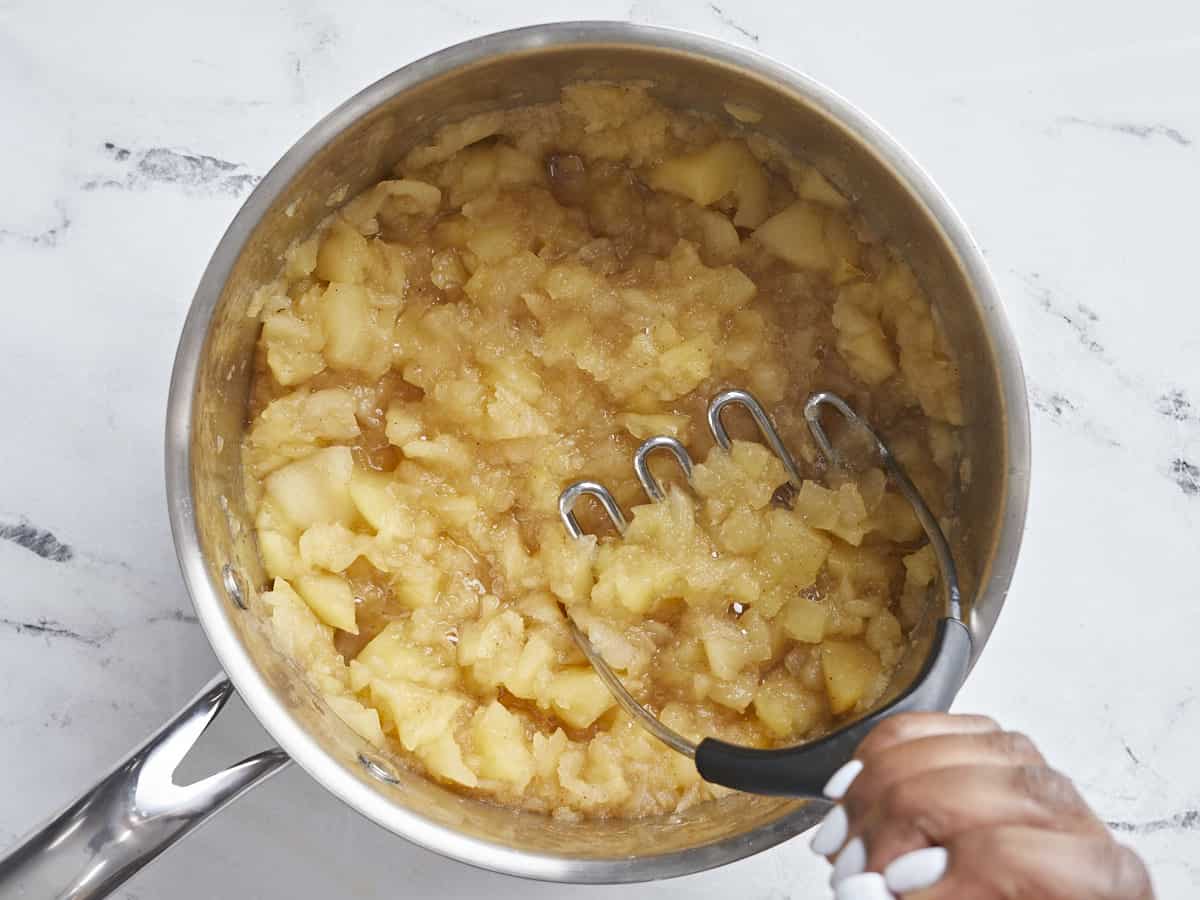
Remove the pot from heat. Mash the apples with a potato masher inside the pot for a chunky texture. Or allow the apples to cool slightly and blend with an immersion blender or carefully inside a blender for a smoother texture.
Add the lemon juice to the applesauce and stir to combine. Serve homemade applesauce warm or chilled in the refrigerator.
How to Make Homemade Applesauce – Step by Step Photos
Wash, peel, and remove the core from 6 apples. Chop the apples into 3/4 inch small chunks.
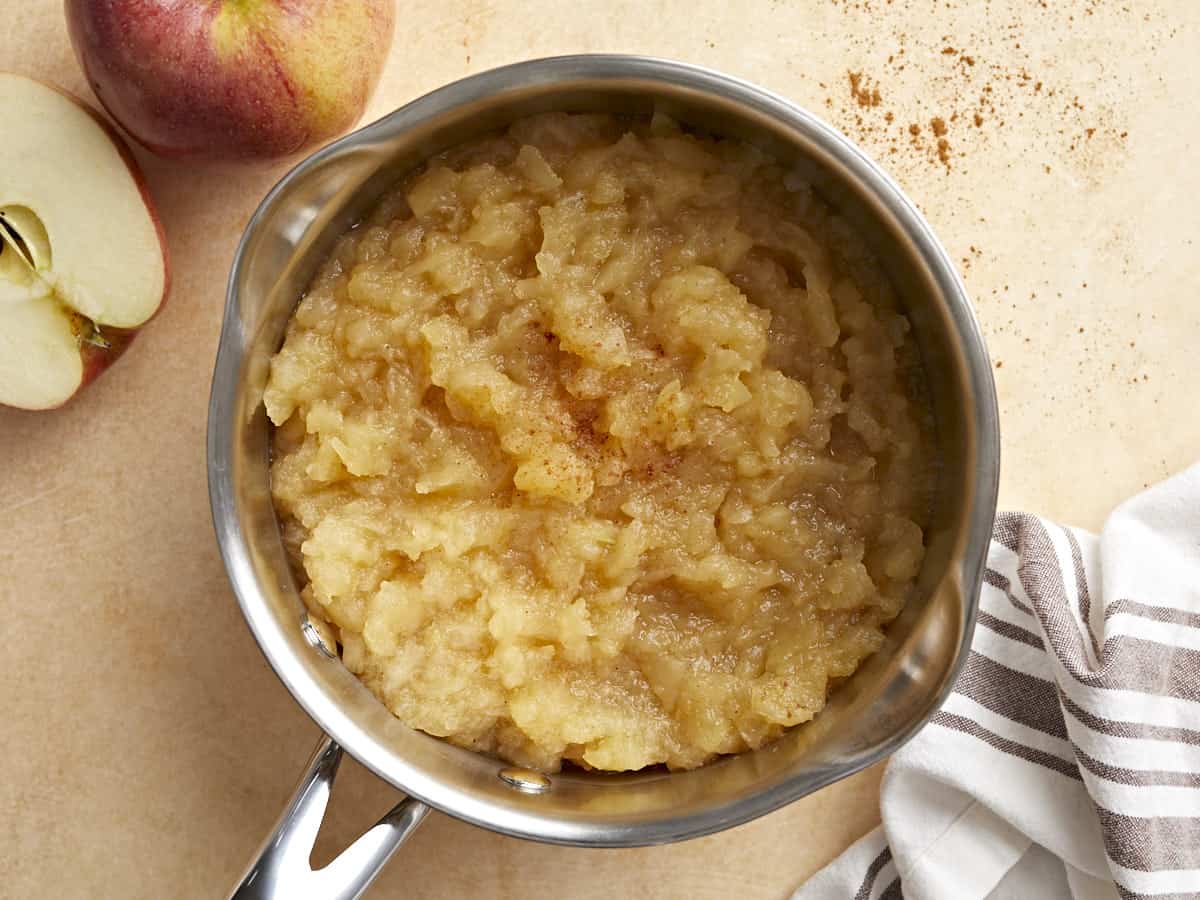
Add the chopped apples, 1/4 tsp ground cinnamon, and 3/4 cup of water to a medium pot and place a lid on top. Heat the apples over medium heat, allowing them to come up to a simmer. Continue to simmer the apples for 15-20 minutes, stirring occasionally, until they are tender. The total cook time will vary depending on the variety of apple used.
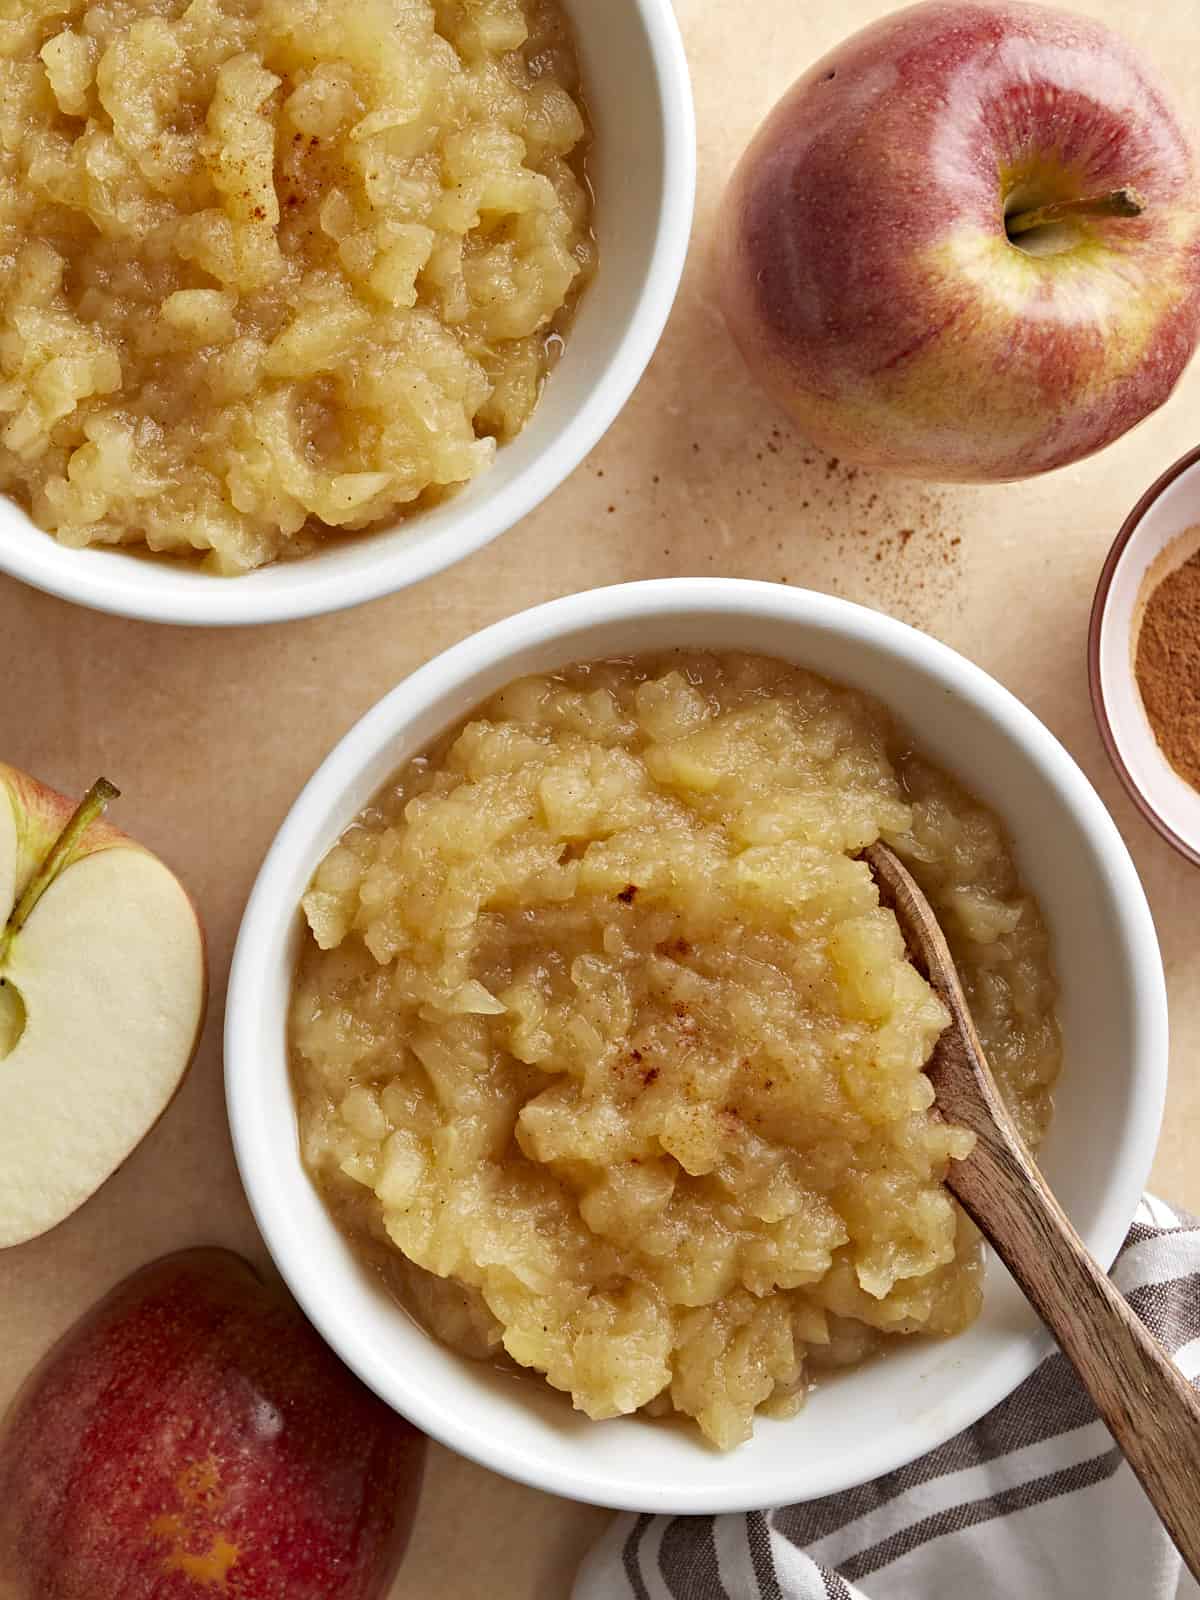
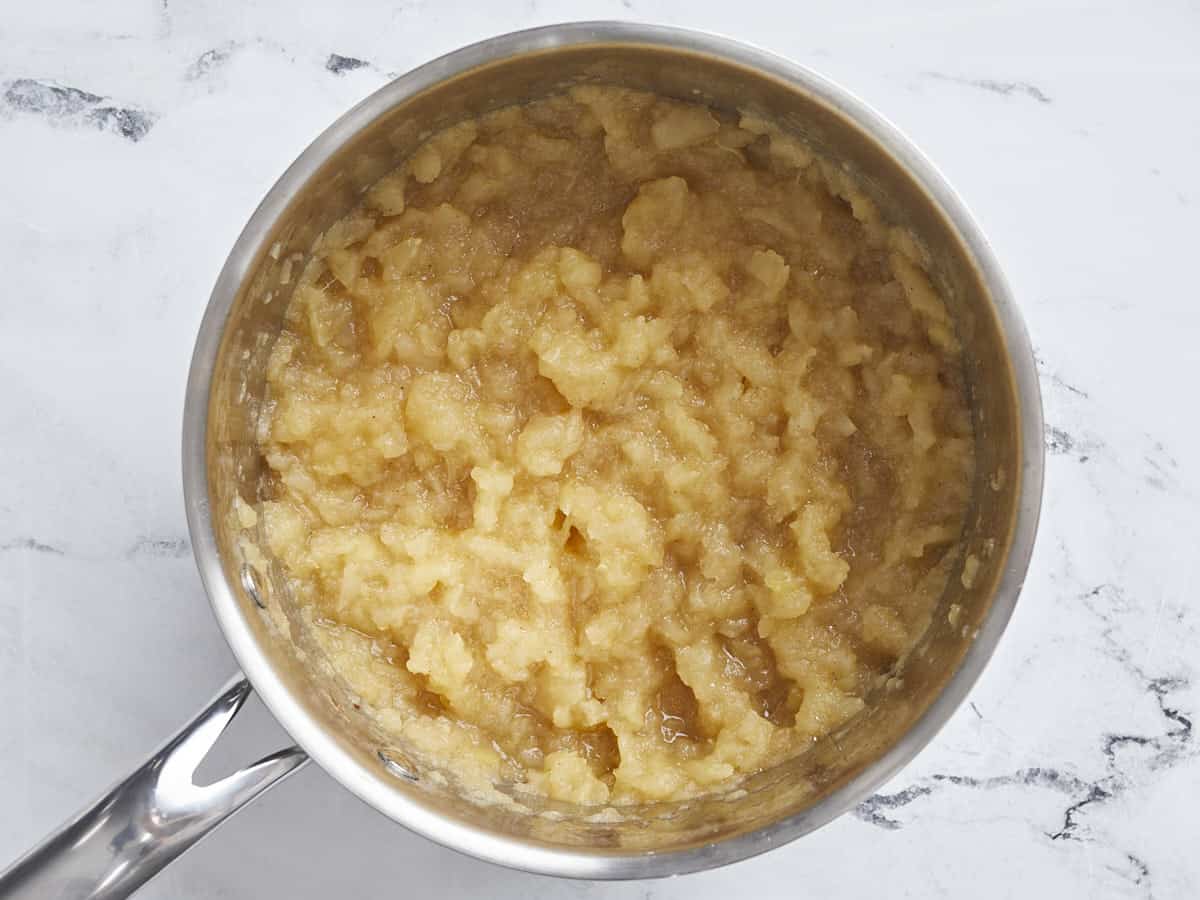
Remove the pot from heat. Mash the apples with a potato masher inside the pot for a chunky texture. Or allow the apples to cool slightly and blend with an immersion blender or carefully inside a blender for smoother texture.
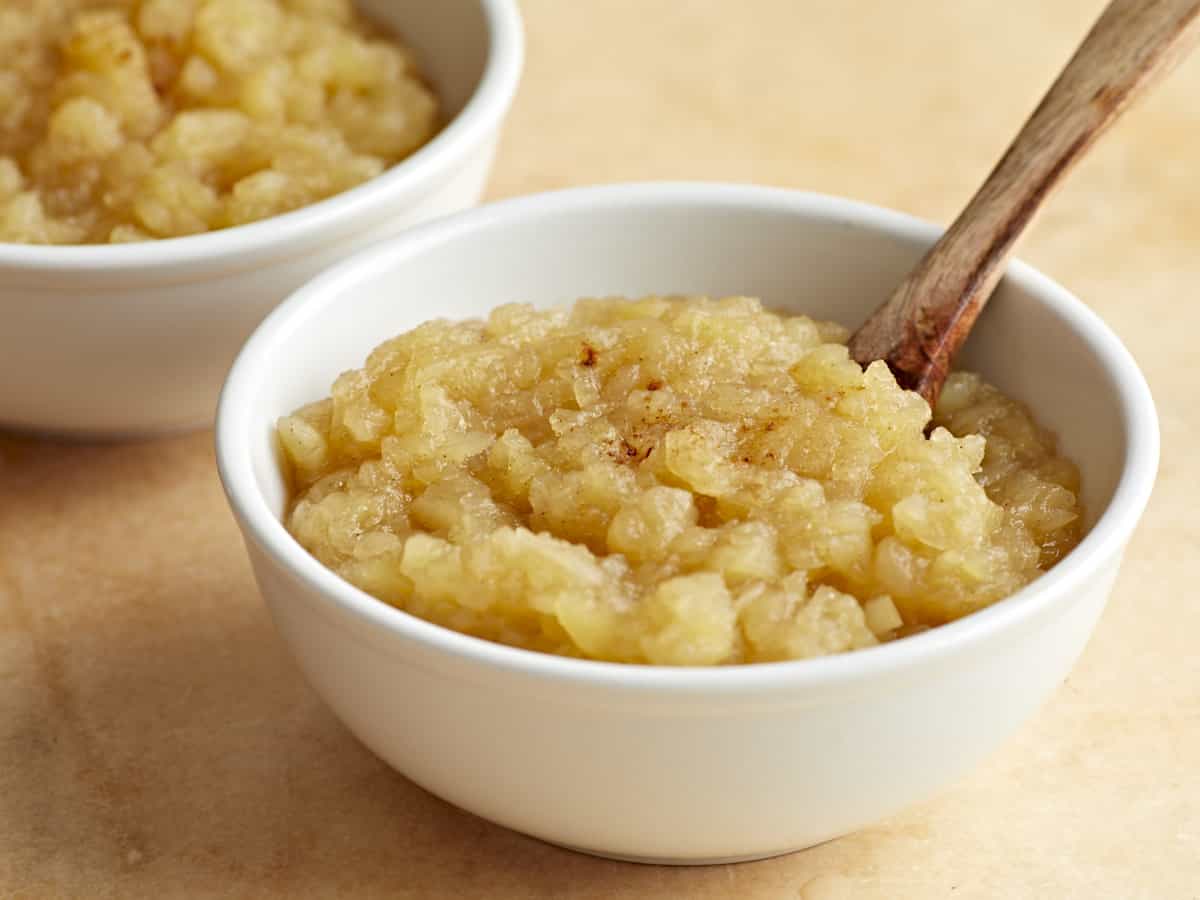
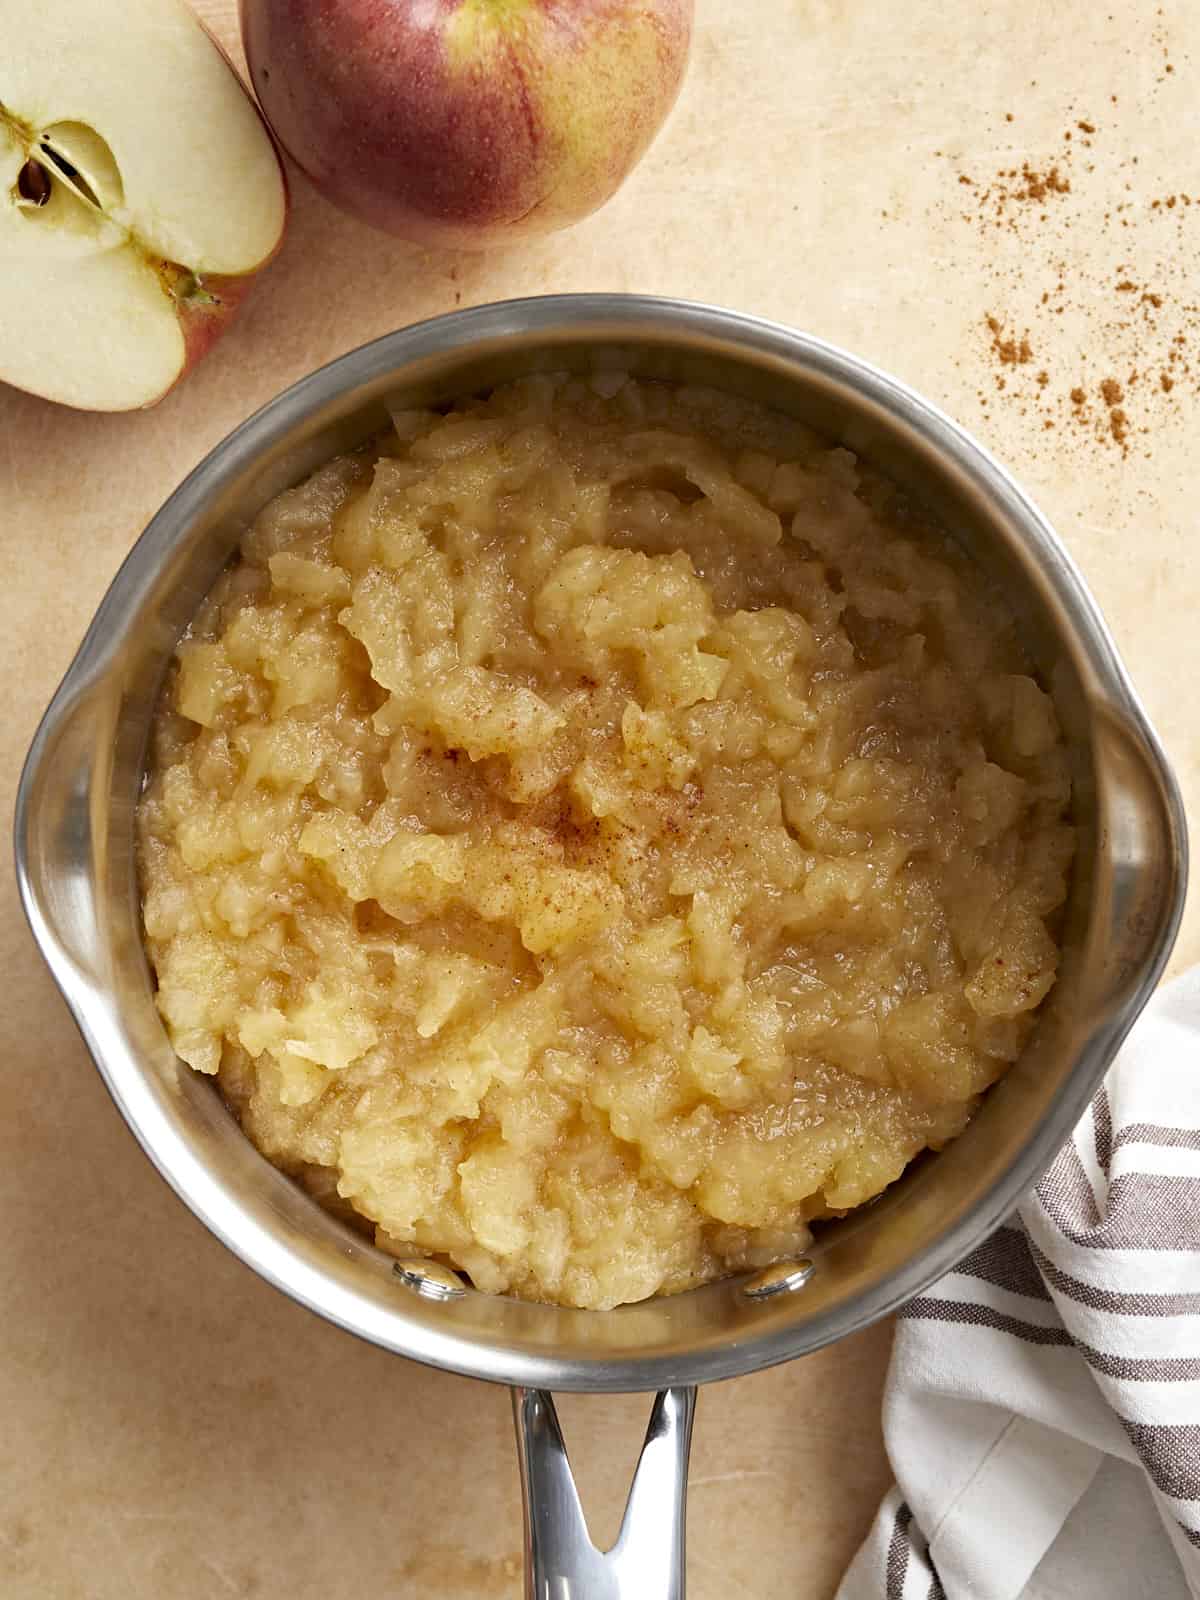
Add the 2 tsp of lemon juice to the applesauce and stir to combine. Serve homemade applesauce warm or chilled in the refrigerator. Enjoy!
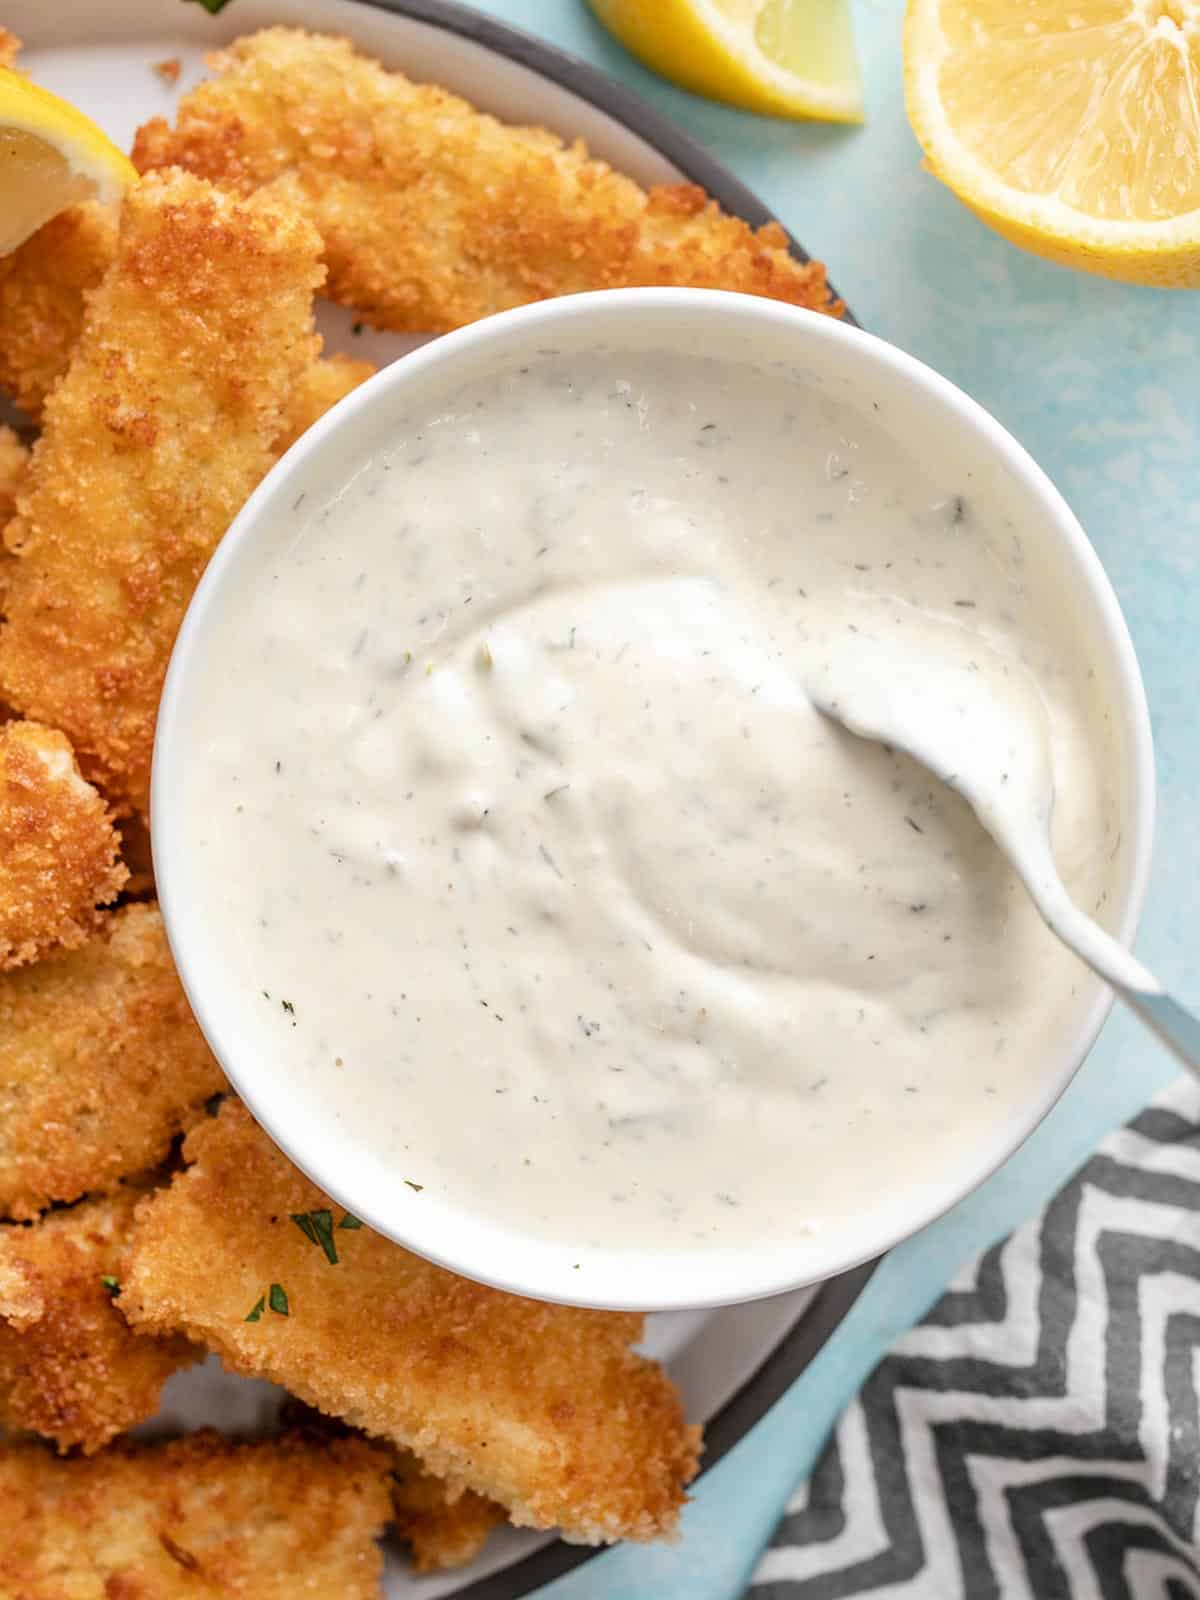
I’m always on a quest to reduce the number of half-used bottles of sauce in my fridge (the struggle is real…) Instead of buying every single sauce under the sun, I keep a few basic condiments on hand so I can make any other homemade sauce whenever I want and in whatever quantity I need. This Homemade Tartar Sauce is the perfect example. I don’t eat tartar sauce often, but when enjoying homemade fish sticks it’s an absolute must! It takes just a few minutes to whip up, uses only six (or less!) pantry and fridge staples, and I can make any amount that I need with NO leftovers. #win
What is Tartar Sauce?
Tartar sauce is a rich and tangy mayonnaise-based sauce that is perfect for serving with any type of fish or seafood. It’s incredibly simple to make, and you might just have all of the ingredients on hand!
Ingredients for Tartar Sauce
Here are the ingredients for our super easy homemade tartar sauce recipe:
Mayonnaise: This is the rich and creamy base for tartar sauce. You can use your favorite brand, but I usually lean towards Hellmann’s or Dukes.
Plain Yogurt (optional): I like to do a half-and-half mix of mayonnaise and yogurt because the yogurt lightens up the sauce just a bit and makes the flavor slightly brighter. You can use all mayo if you prefer a richer sauce. You can use regular-style yogurt for a thinner tartar sauce, or Greek-style yogurt for a thicker tartar sauce.
Dijon Mustard: Dijon adds a nice tanginess to the tartar sauce, plus a little complexity to the flavor.
Lemon Juice: Lemon and fish are BFF’s, so a little lemon juice in the mix helps the tartar sauce pair perfectly with the seafood and it helps cut the heaviness of the mayo.
Dill Relish: Relish gives the sauce some much-needed texture and the dill flavor goes perfectly with lemon.
Dried Dill: We’re doubling down on the dill flavor with a little more dried dill. It amps up the flavor and adds a little more color to the sauce.
What Else Can I add?
This easy tartar sauce recipe is a great base that can then be modified to fit your taste buds or other ingredients you may have on hand. Try adding these ingredients to customize your tartar sauce:
Try adding a dash or two of hot sauce or a small spoonful of horseradish for some kick!
Got leftover capers? Stir them in for some extra briney flavor.
Finely diced red onion would add even more crunch and savory flavor.
Add a dash of Worcestershire sauce for some more umami.
Add a tablespoon of freshly chopped parsley for more freshness.
*You can use regular style yogurt for a thinner sauce, or Greek style yogurt for a thicker sauce. Or, substitute with more mayonnaise for an ultra rich and thick tartar sauce.
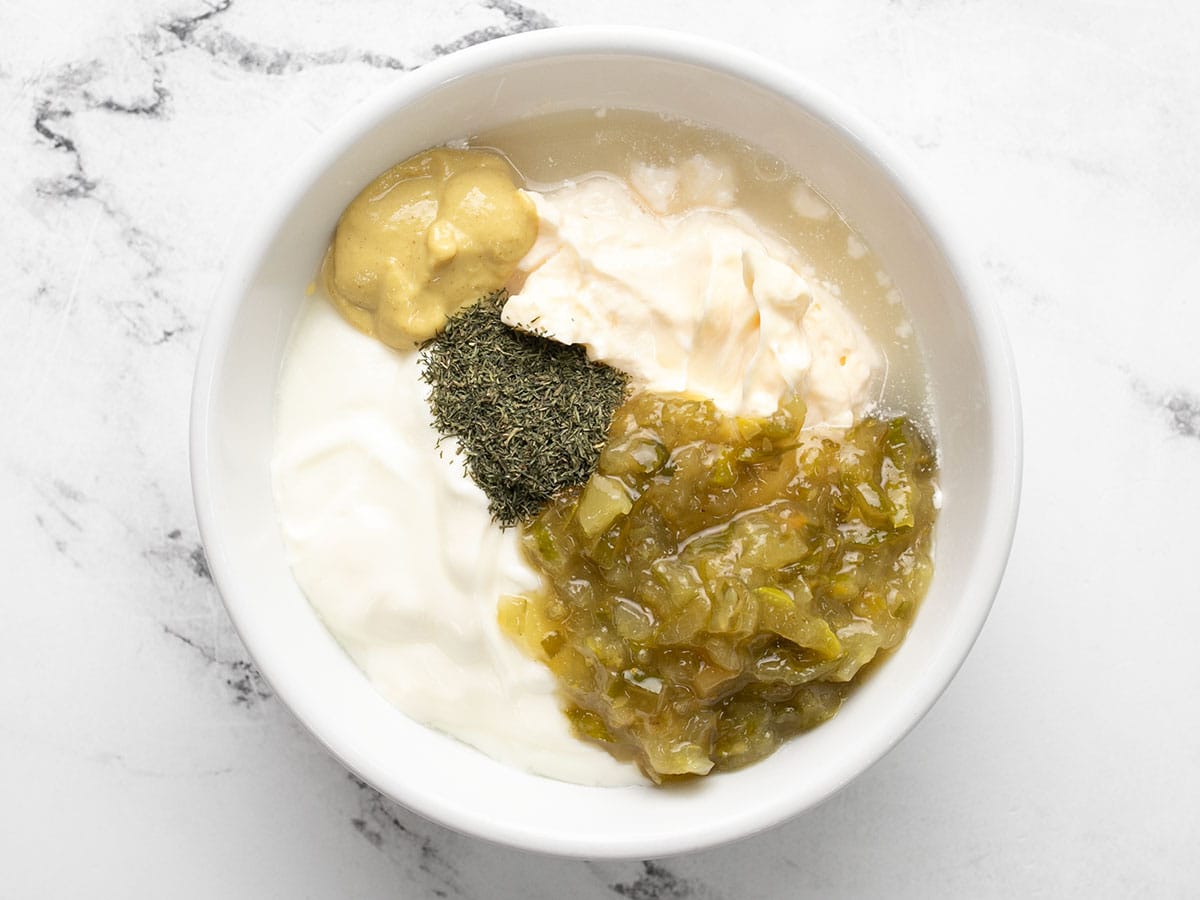
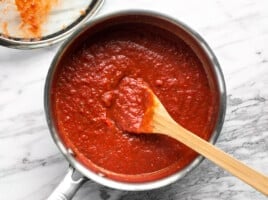
All you have to do to make tartar sauce is stir together ½ cup mayonnaise, ½ cup plain yogurt (or just do 1 cup total mayonnaise), ¼ cup dill relish, 1 Tbsp Dijon mustard, 1 Tbsp lemon juice, and ½ tsp dried dill.
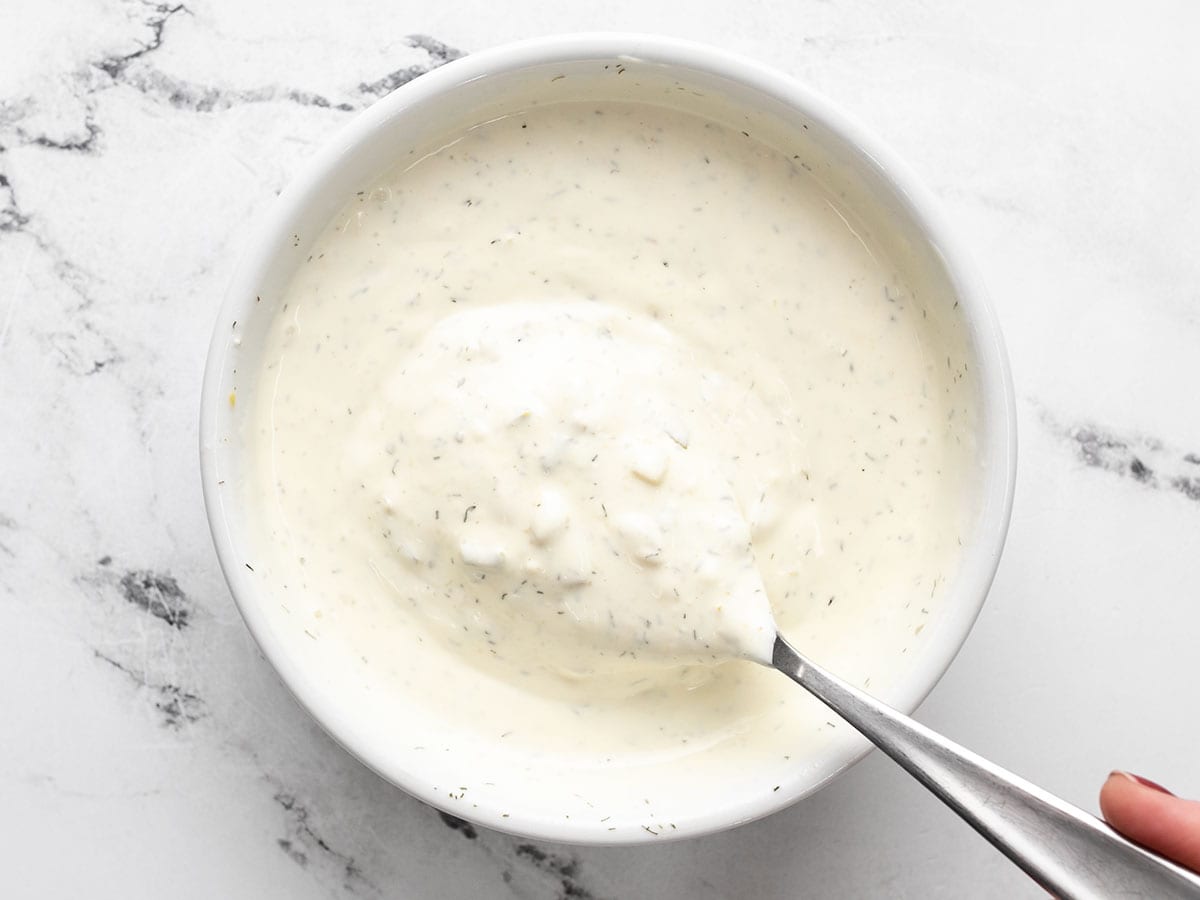
Stir it all together and you’re good to go! You can store this sauce in the fridge for up to five days. If you prefer a thicker tartar sauce, use Greek-style yogurt, or skip the yogurt and use all mayonnaise.
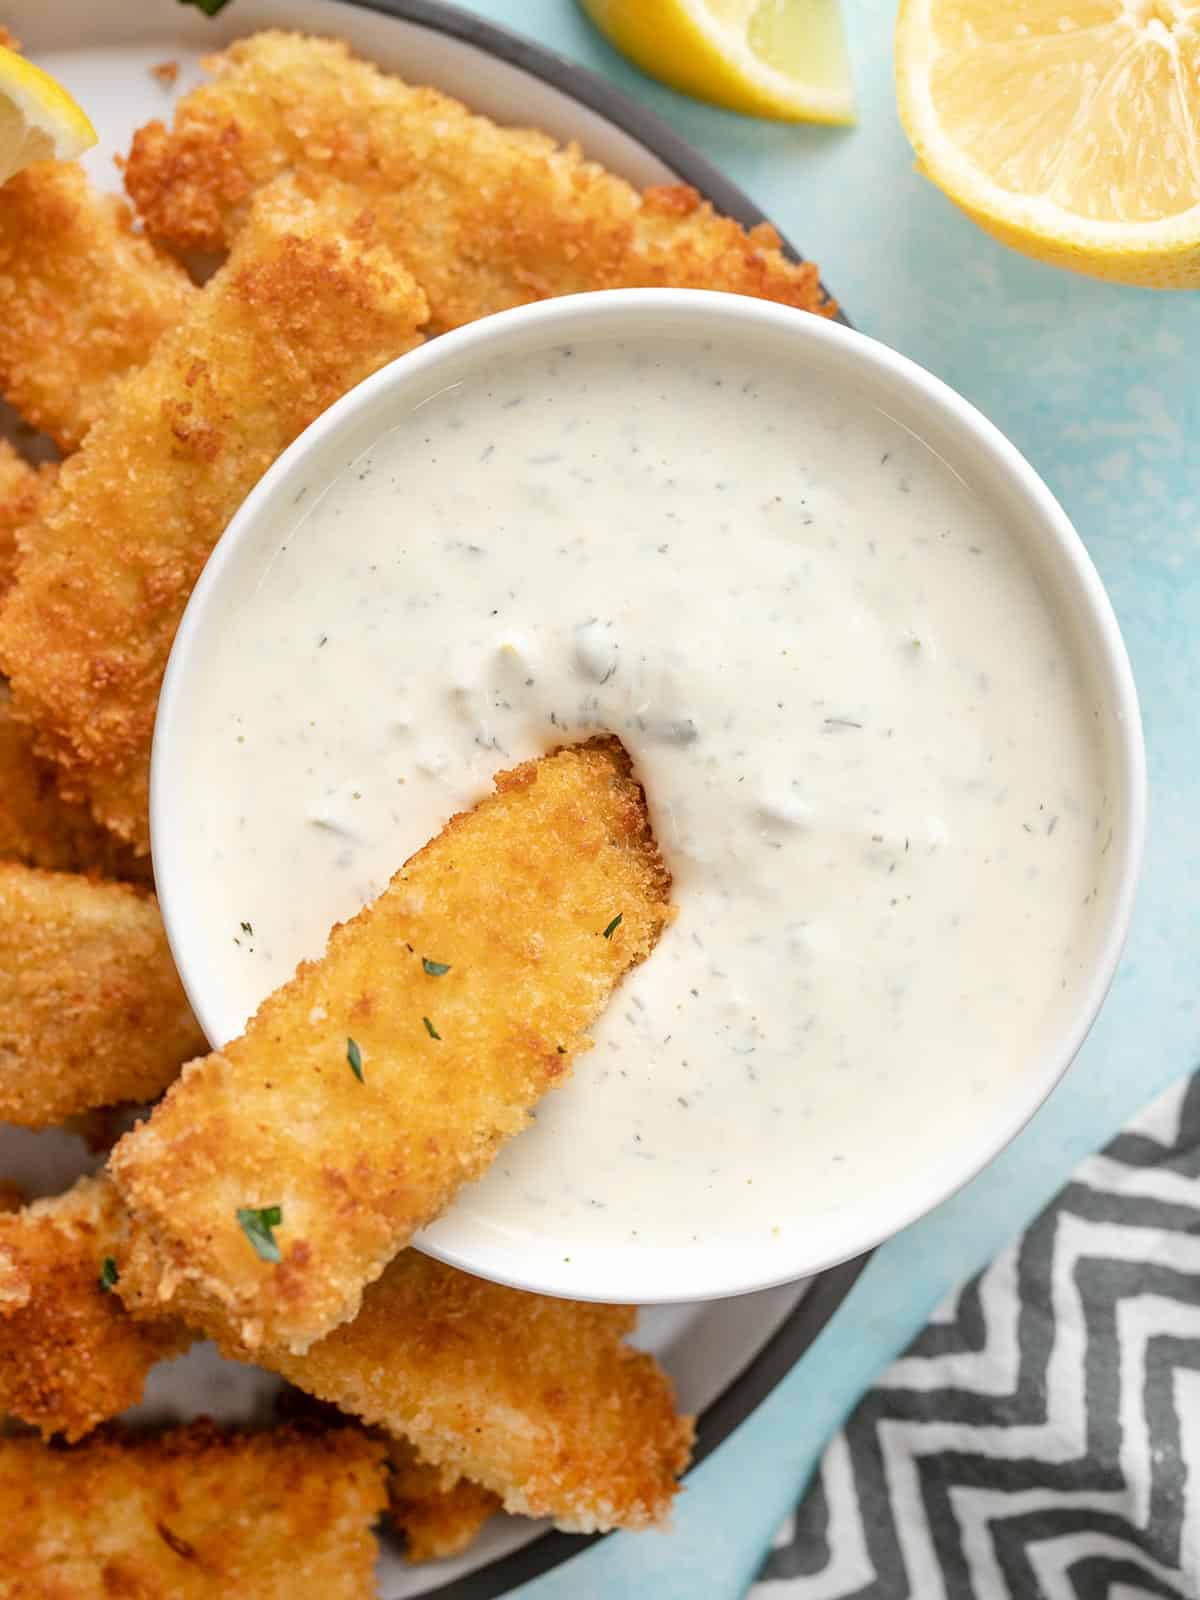
Serve with your favorite seafood, roasted vegetables, or even as a sandwich spread!
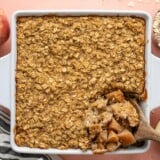
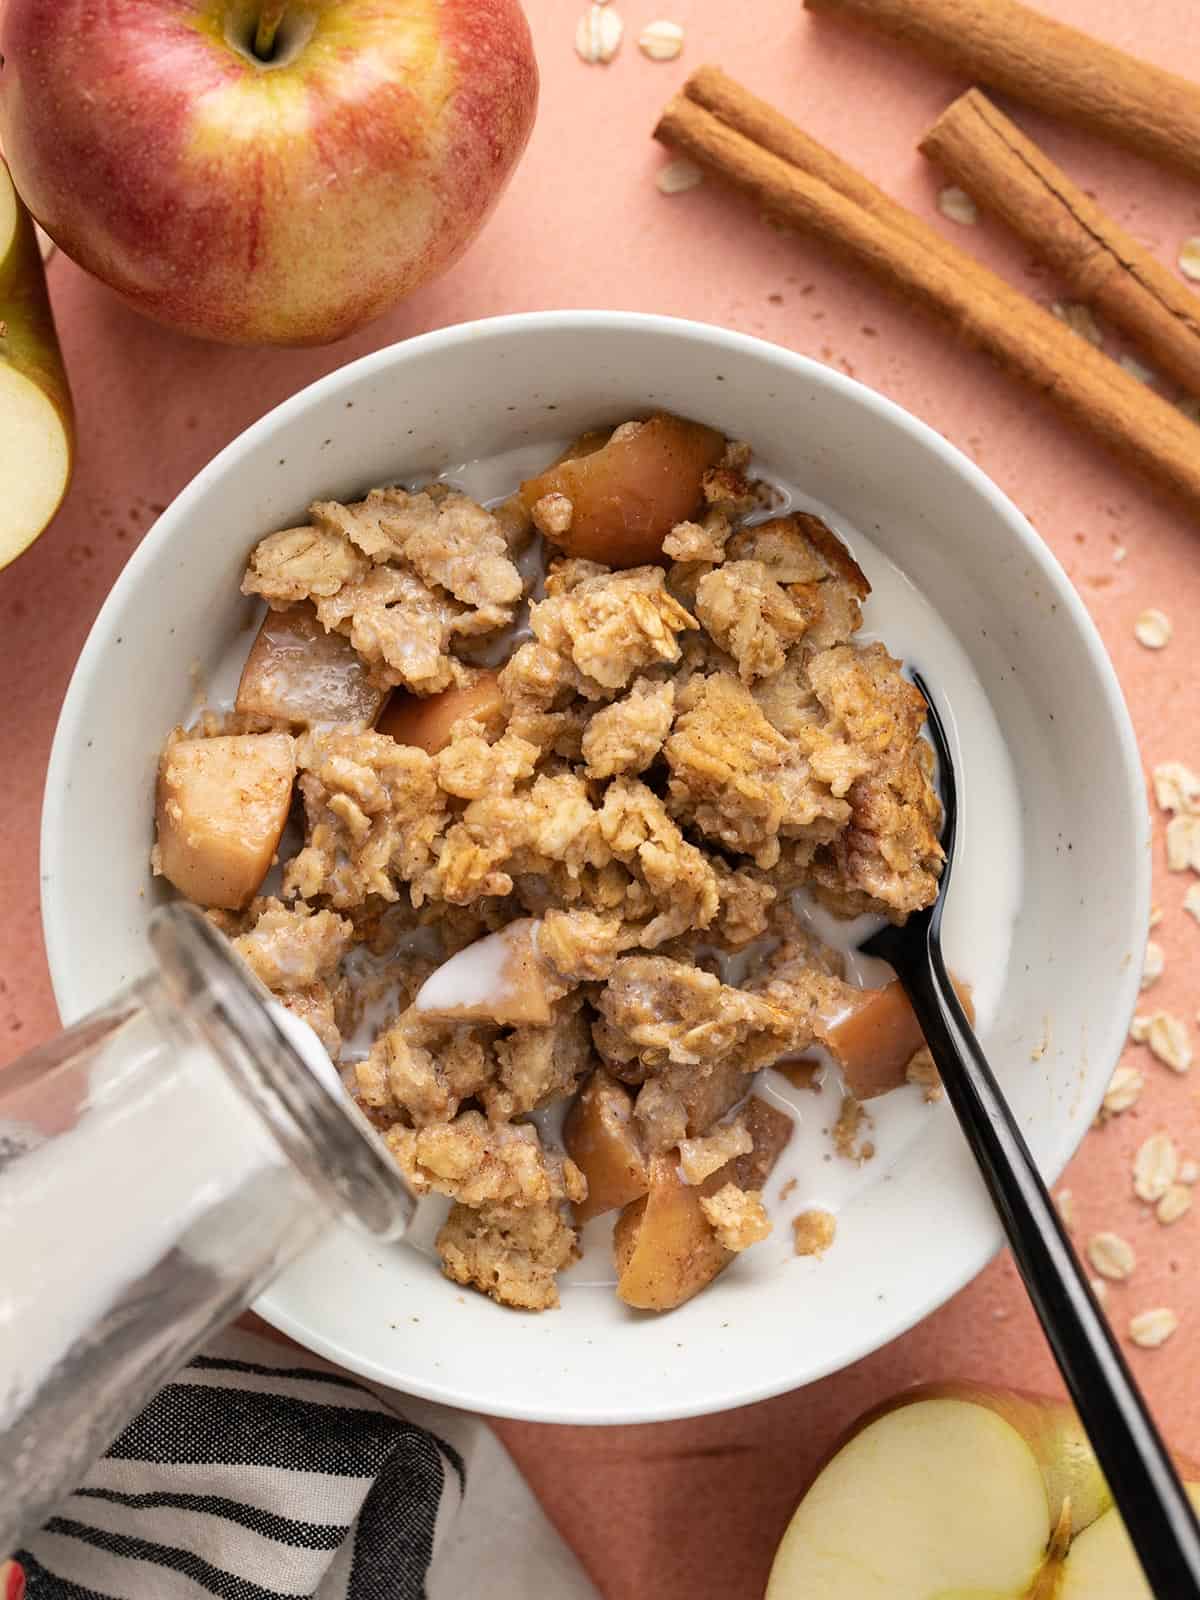
Who needs those autumn-themed candles when you’ve got Apple Cinnamon Baked Oatmeal in the oven? NO ONE. This warm and cozy oatmeal casserole, of sorts, is the epitome of fall vibes. Not only will this baked oatmeal make your house smell amazing, but it’s an easy way to meal prep breakfast for the week ahead. It’s cozy, delicious, filling, and EASY. 🙌
What is Baked Oatmeal?
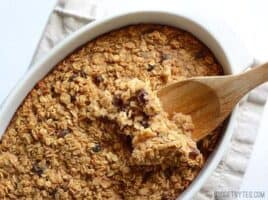
If you’re new to baked oatmeal, it’s kind of like bread pudding, but made with oats instead of chunks of bread. It’s sweet, rich, hearty, and absolutely amazing. The texture is soft and moist, but not goopy like traditional oatmeal can be, and it gets just a little bit crispy around the edges of the baking dish. You can eat it hot out of the oven and the leftovers can be eaten cold or reheated in the microwave. I like to pour a little cold milk over top for a delicious hot-cold combo. Baked oatmeal can also be frozen in single-serving containers for quick reheatable weekday breakfasts!
Ingredients for Apple Cinnamon Baked Oatmeal
This apple cinnamon baked oatmeal combines our usual baked oatmeal base with apples that are coated in a little cinnamon and sugar, and then baked until they form an apple pie-like layer on the bottom of the oats. Here are the ingredients you’ll need to make this incredible apple cinnamon baked oatmeal:
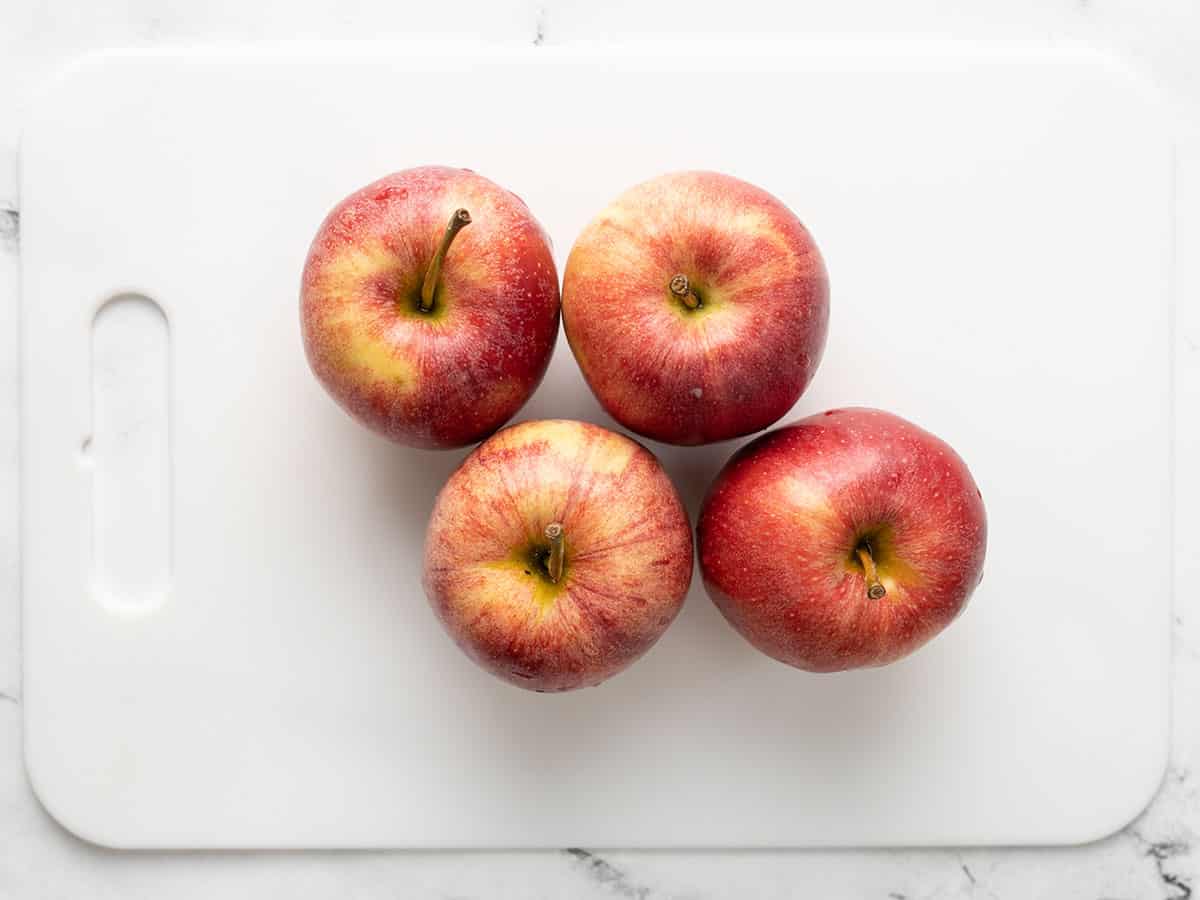
Fresh apples: Pick a sweet or semi-sweet variety of apple, like Fuji, Gala, or Honeycrisp. And, of course, take advantage of the fresh fall apples for the best price and flavor!
Oats: Make sure to use old-fashioned rolled oats for this recipe, not quick oats or minute oats, to achieve the best texture. Quick oats are too thin and will create a mushier texture.
Milk and eggs: Milk and eggs create a custard that keeps the baked oats soft, tender, and moist. I like to use whole milk, but you can substitute it with non-dairy milk if needed.
Brown sugar and applesauce: Using both broth sugar and applesauce to sweeten the baked oatmeal creates an even bigger apple pie-like flavor without having to use too much added sugar.
Spices: Cinnamon, cloves, and vanilla make these baked oats that classic fall aroma!
Lemon juice: A little lemon juice brightens up the baked apples and really makes their flavor shine.
Cornstarch and baking powder: These two ingredients are added for texture. The cornstarch helps thicken the apple juices as they bake, creating a pie-filling-like texture. The baking powder lightens the oat mixture just a touch so it’s not quite so heavy.
How to Serve Apple Cinnamon Baked Oatmeal
Baked oatmeal is pretty versatile. You can eat it either hot OR cold. I love it just out of the oven with a little cold milk poured over top, but it’s also great cold after it’s been refrigerated overnight. You can top it with some nuts or even some whipped cream for an even more dessert-like treat!
How to Store The Leftovers
After baking, divide the oatmeal into single-serving portions and refrigerate until completely cool. The baked oatmeal can be stored in the refrigerator for 4-5 days, or you can transfer it to the freezer for longer storage (about three months). Refrigerated or frozen baked oatmeal can be reheated quickly in the microwave.
Preheat the oven to 375ºF. Core and dice the apples.
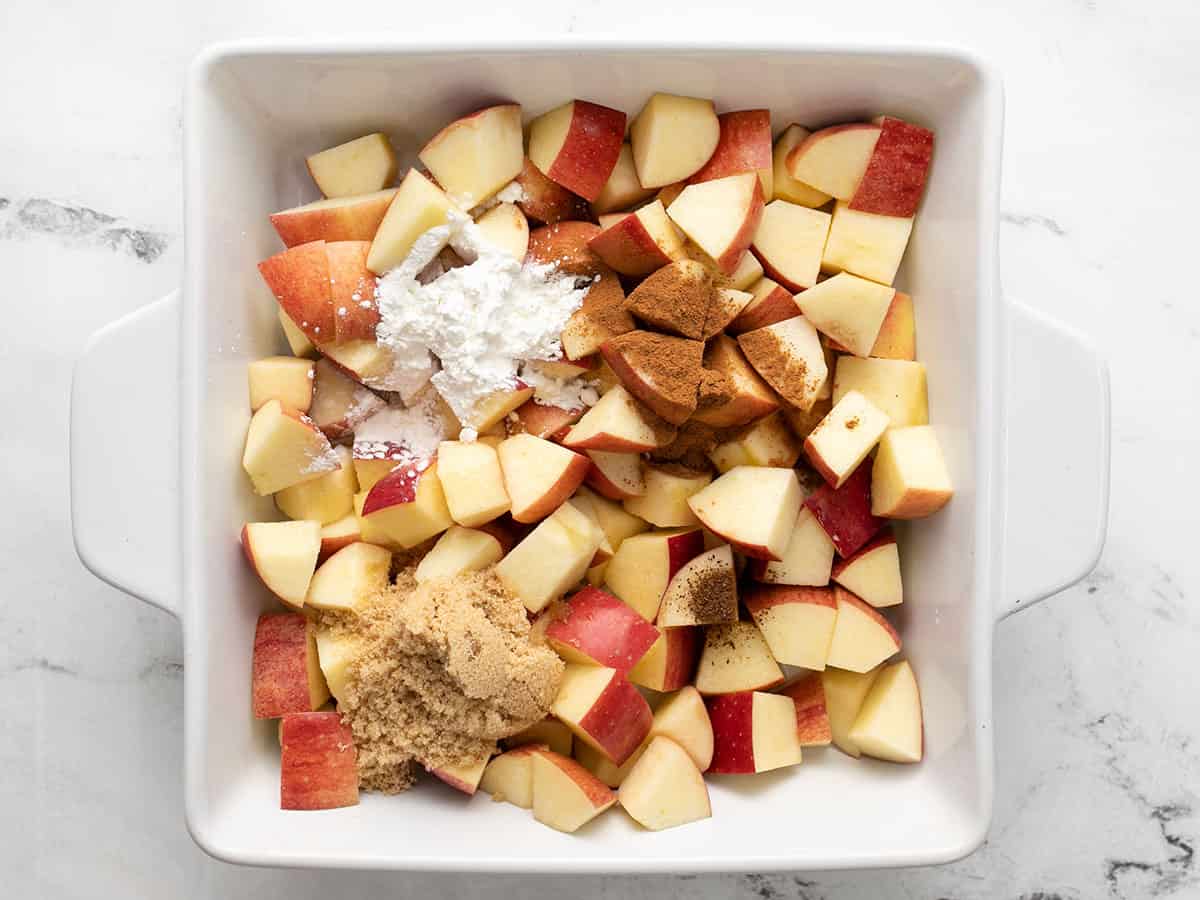
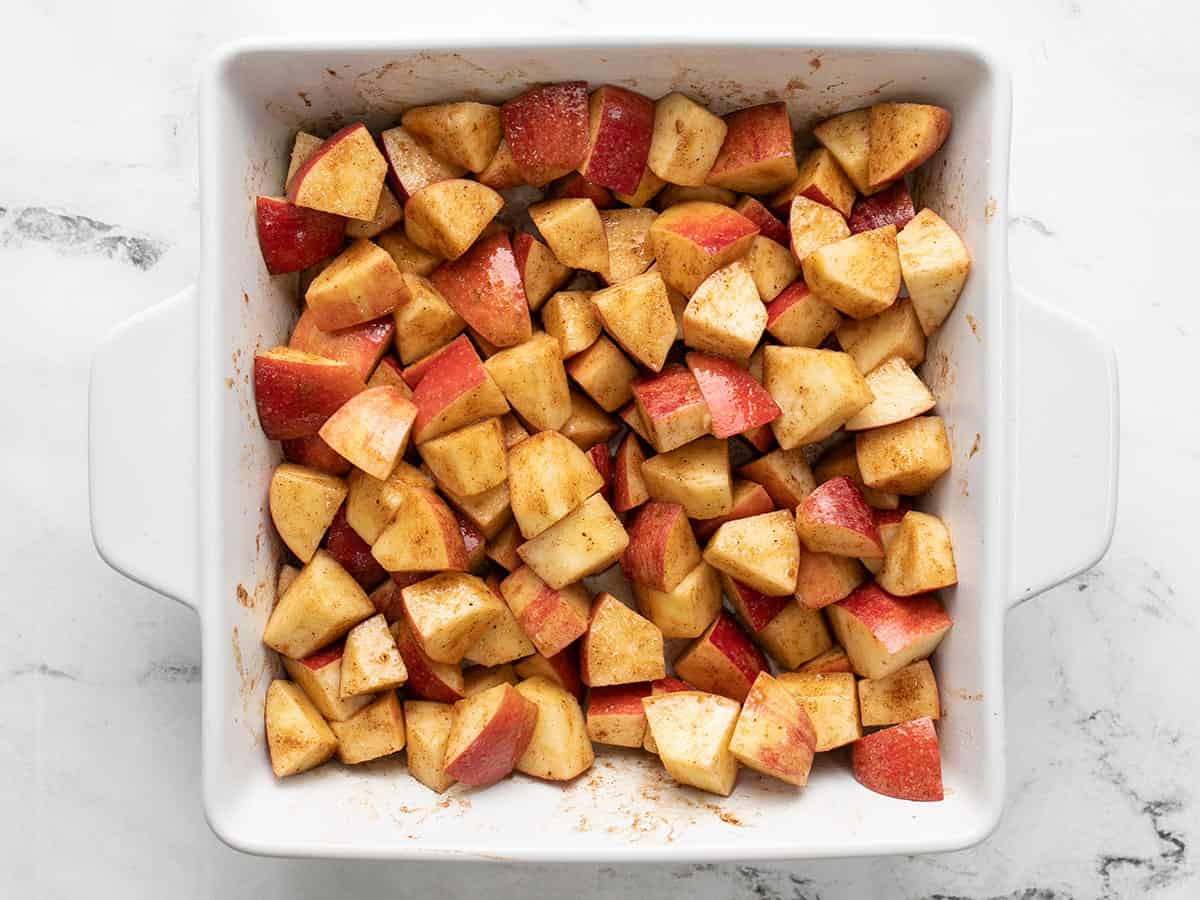
Place the diced apples in the bottom of a 9×9-inch (or 2 qt.) casserole dish. Add the lemon juice, brown sugar, cornstarch, cinnamon, and cloves. Stir until the apples are coated in sugar and spices.
Cover the dish with foil and bake for 15 minutes.
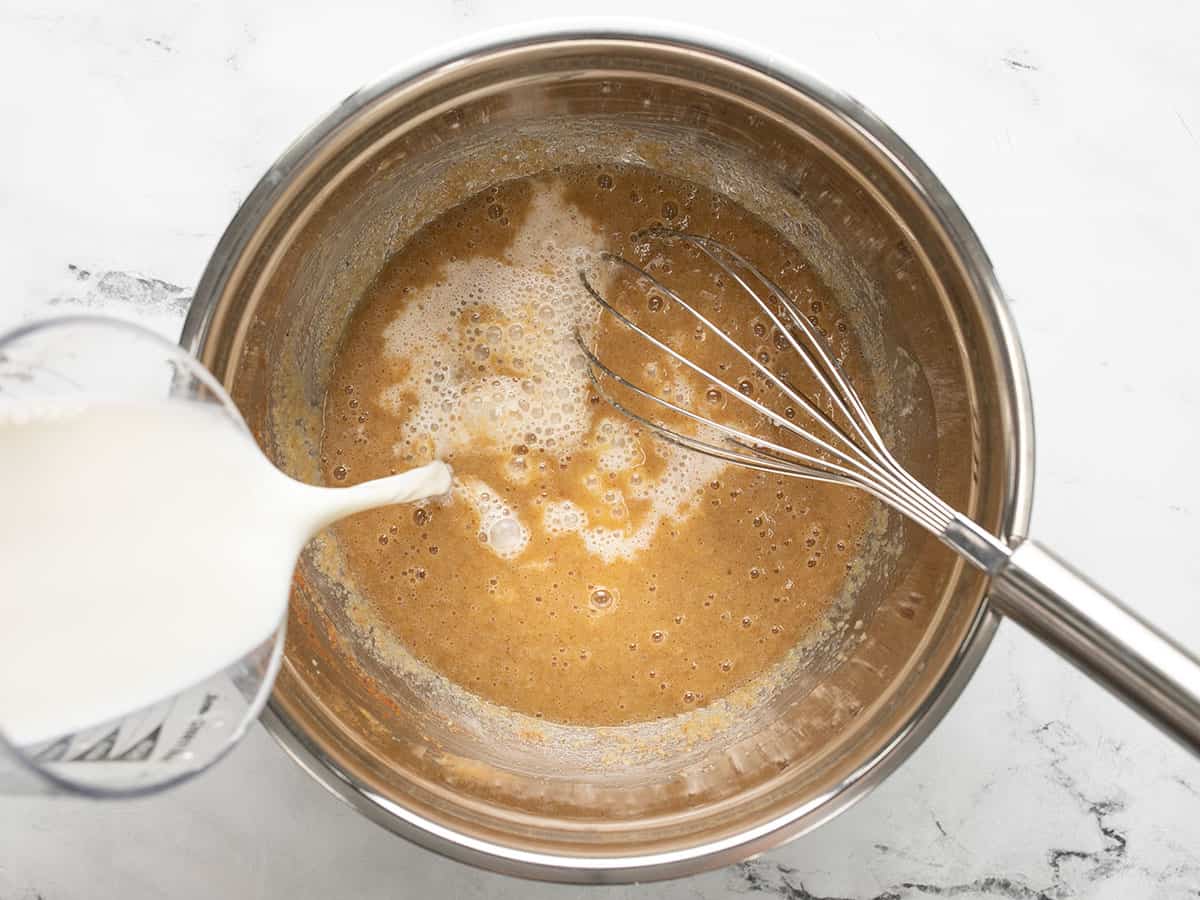
While the apples are baking, prepare the baked oatmeal mixture. In a large bowl, whisk together the applesauce, brown sugar, eggs, vanilla, salt, baking powder, and cinnamon. Then add the milk and whisk to combine again.
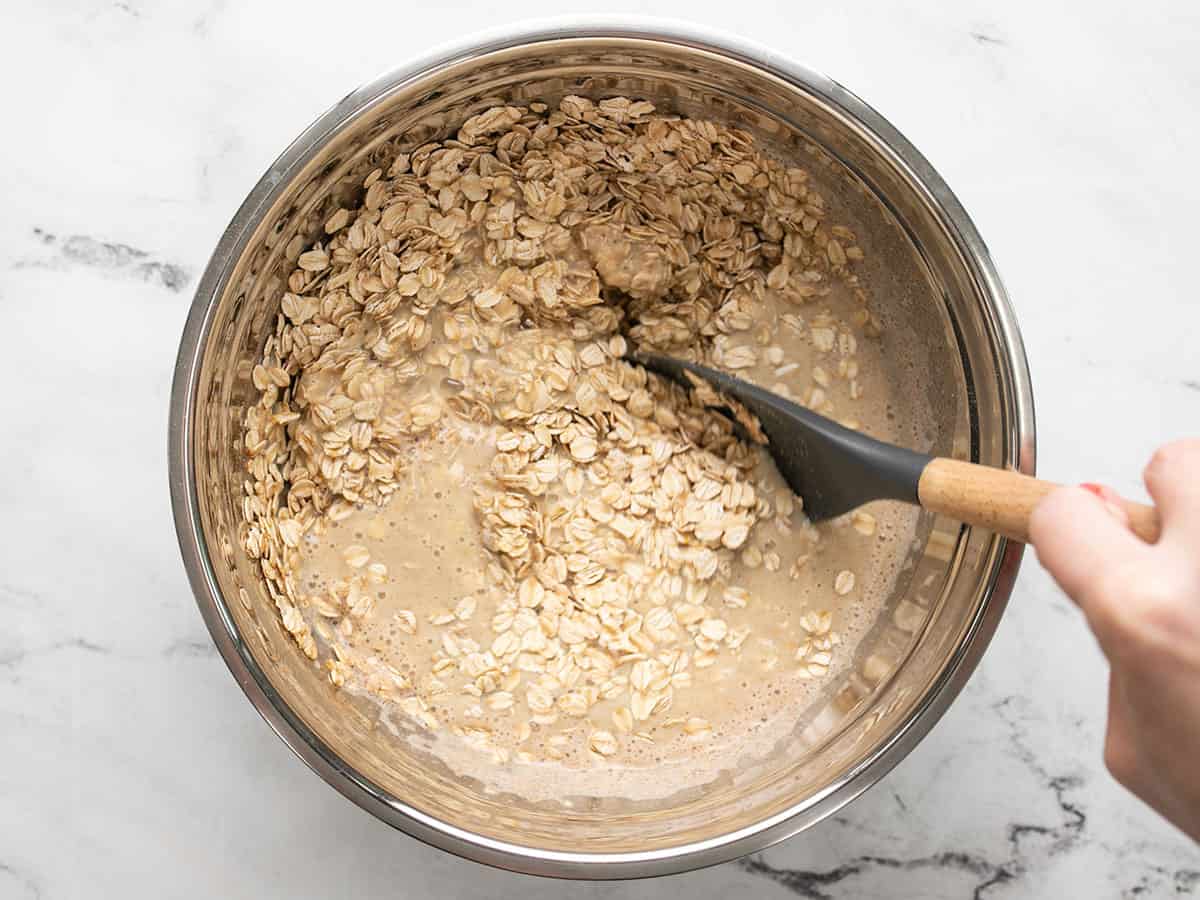
Finally, stir the dry oats into the applesauce mixture and stir until fully combined.
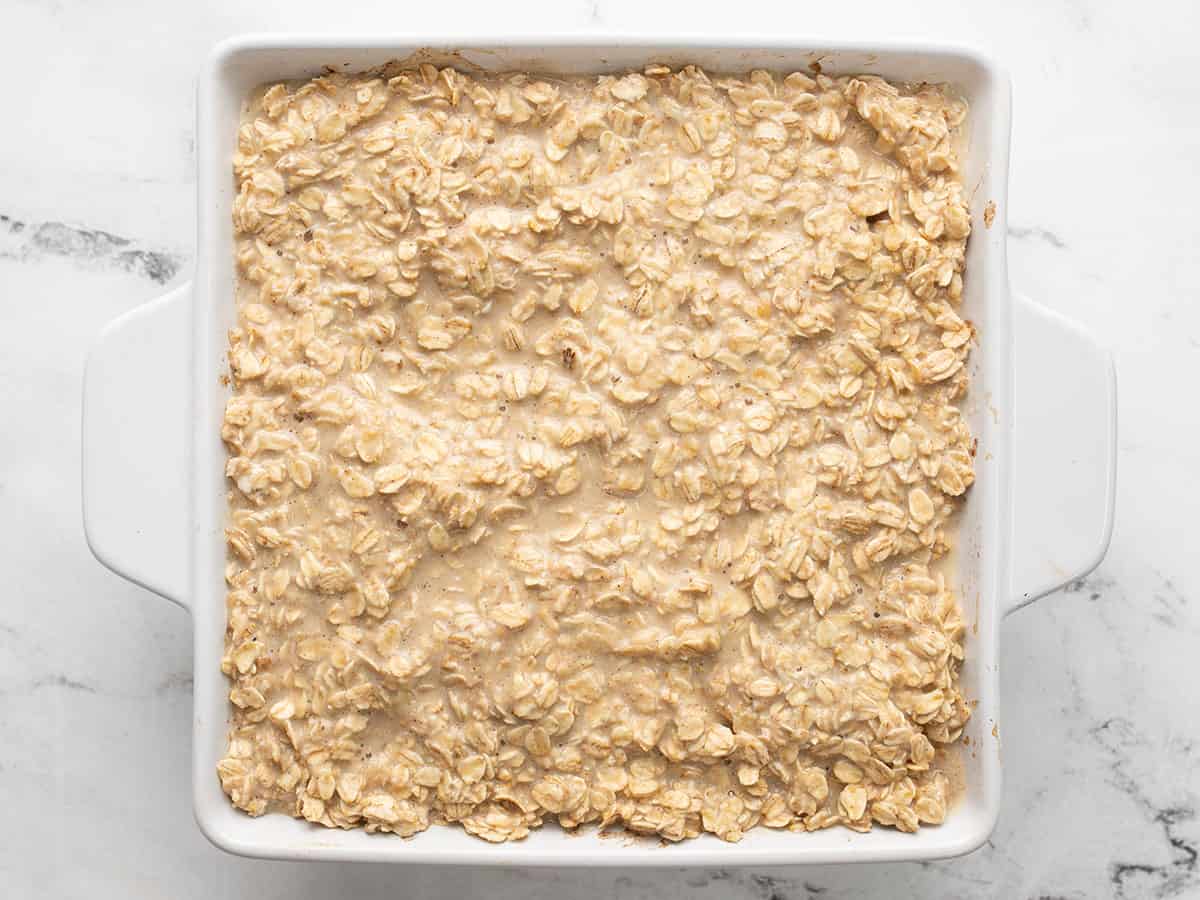
After the apples come out of the oven, give them a good stir, then pour the oat mixture over top. Return the dish to the oven (uncovered) and bake for an additional 30 minutes.
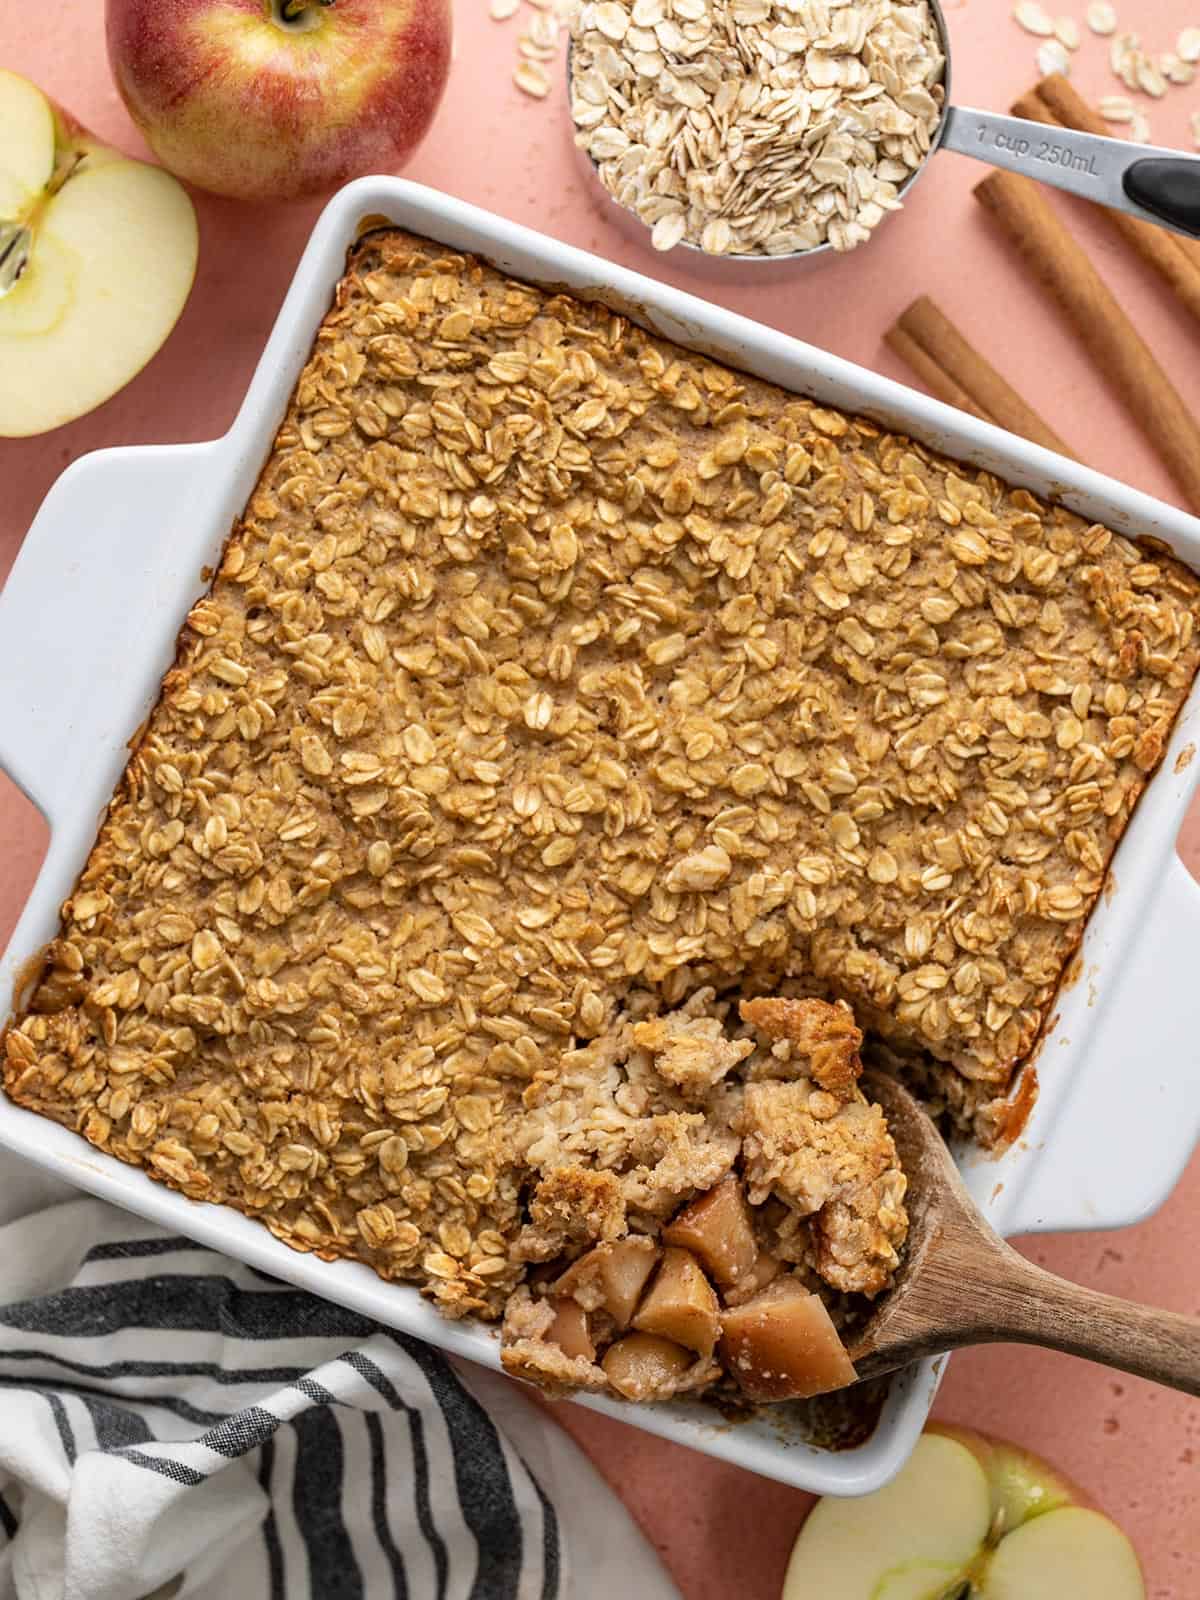
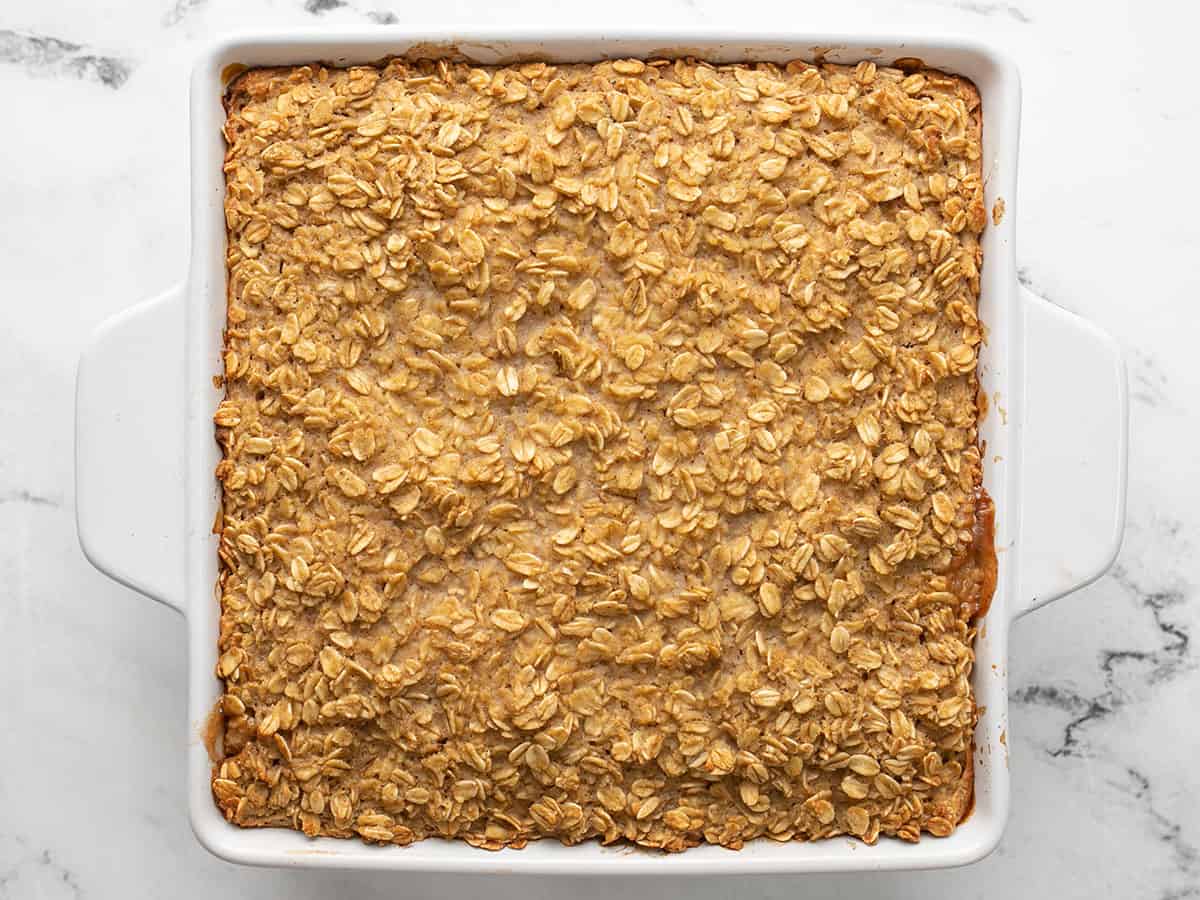
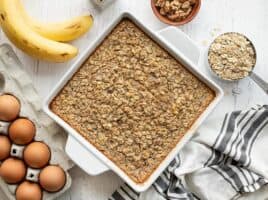
After baking for 30 more minutes the oats should be golden brown on top and you may see some of the apple cinnamon layer bubbling up around the edges. Let the oats cool for about five minutes before serving.
How to Make Apple Cinnamon Baked Oatmeal – Step by Step Photos
Preheat the oven to 375ºF. Core and dice four medium apples (about ½ lb. each).
Place the apples in the bottom of a 9×9-inch or 2-quart casserole dish. Add 1 Tbsp lemon juice, 2 Tbsp brown sugar, 1 Tbsp cornstarch, ½ tsp cinnamon, and ⅛ tsp cloves. Stir until the apples are evenly coated in sugar and spices.
Cover the dish with foil and bake the apples for 15 minutes in the preheated 375ºF oven.
While the apples are baking, begin preparing the oat mixture. In a large bowl, whisk together 2 large eggs, 1.5 cups unsweetened applesauce, 1 tsp vanilla, 1 tsp salt, 1 tsp baking powder, 1 tsp cinnamon, and ¼ cup brown sugar.
Add 1.5 cups milk to the applesauce mixture, then whisk again to combine.
Add 2.5 cups rolled oats (not quick oats) and stir until everything is evenly combined.
After the baked apples come out of the oven, give them a stir, then pour the oat mixture over top of the apples. Place the dish back into the oven (uncovered) and bake for 30 minutes more.
After 30 minutes the oats should be golden brown around the edges and you might see some of the apple cinnamon layer bubbling up around the edges. Remove the baked oatmeal from the oven and let it cool for about 5 minutes before serving.
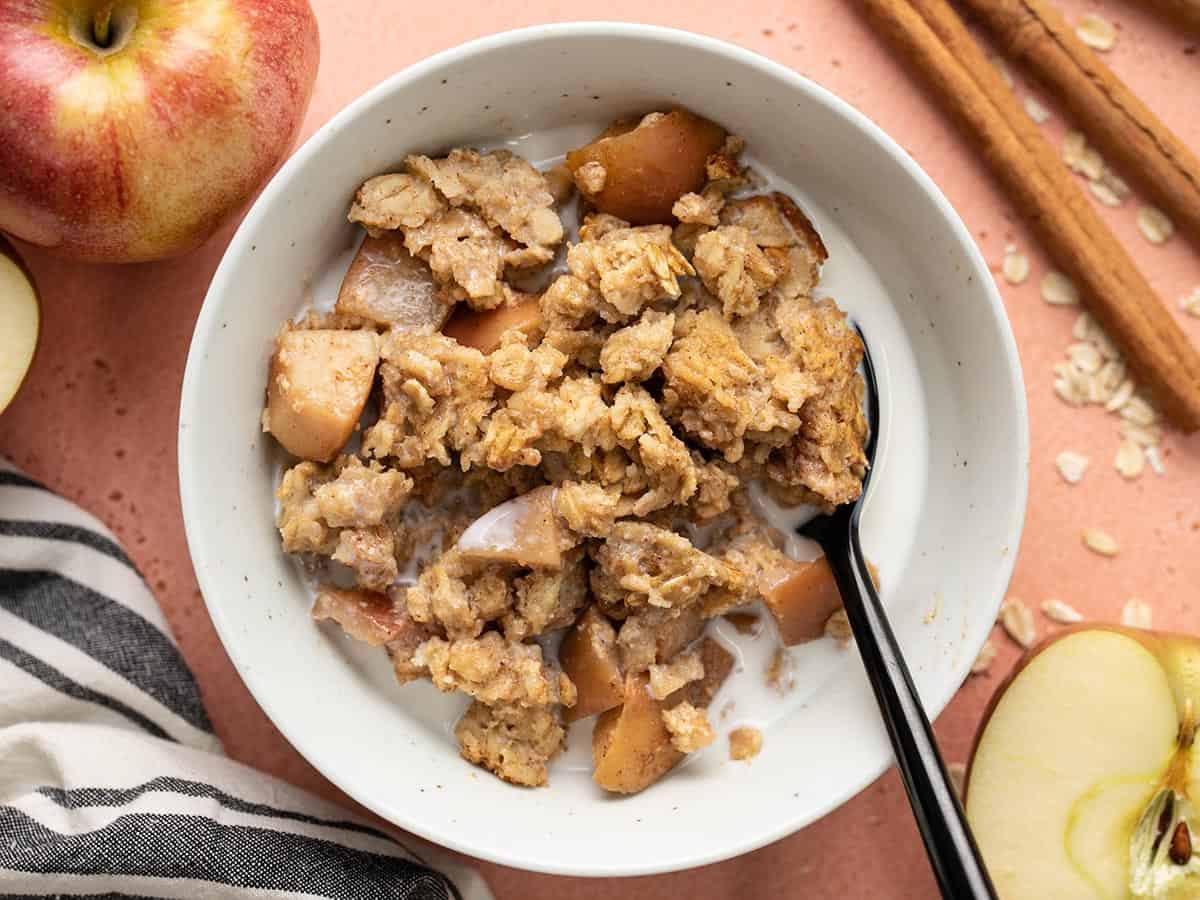
The bottom layer will be sweet and tender baked apples and the top layer will be a soft baked oatmeal. SO GOOD!
I like to eat my apple cinnamon baked oatmeal with a splash of cold milk on top!
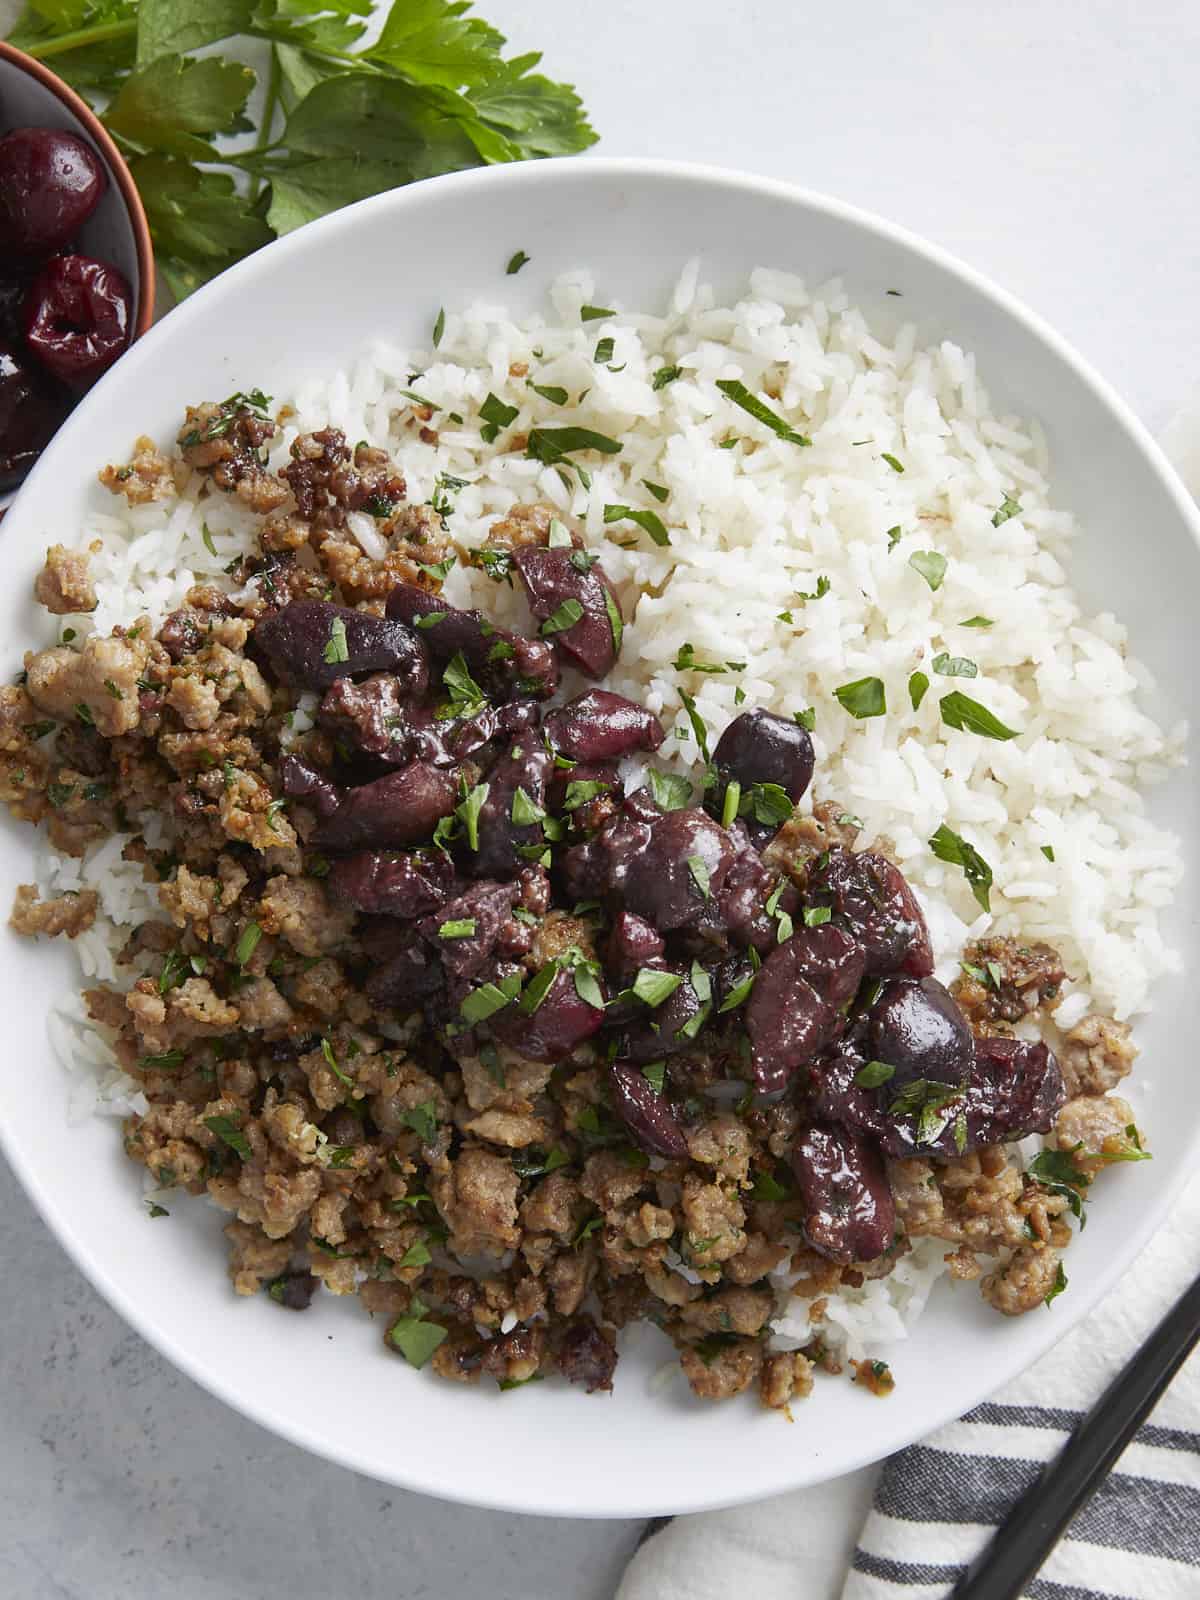
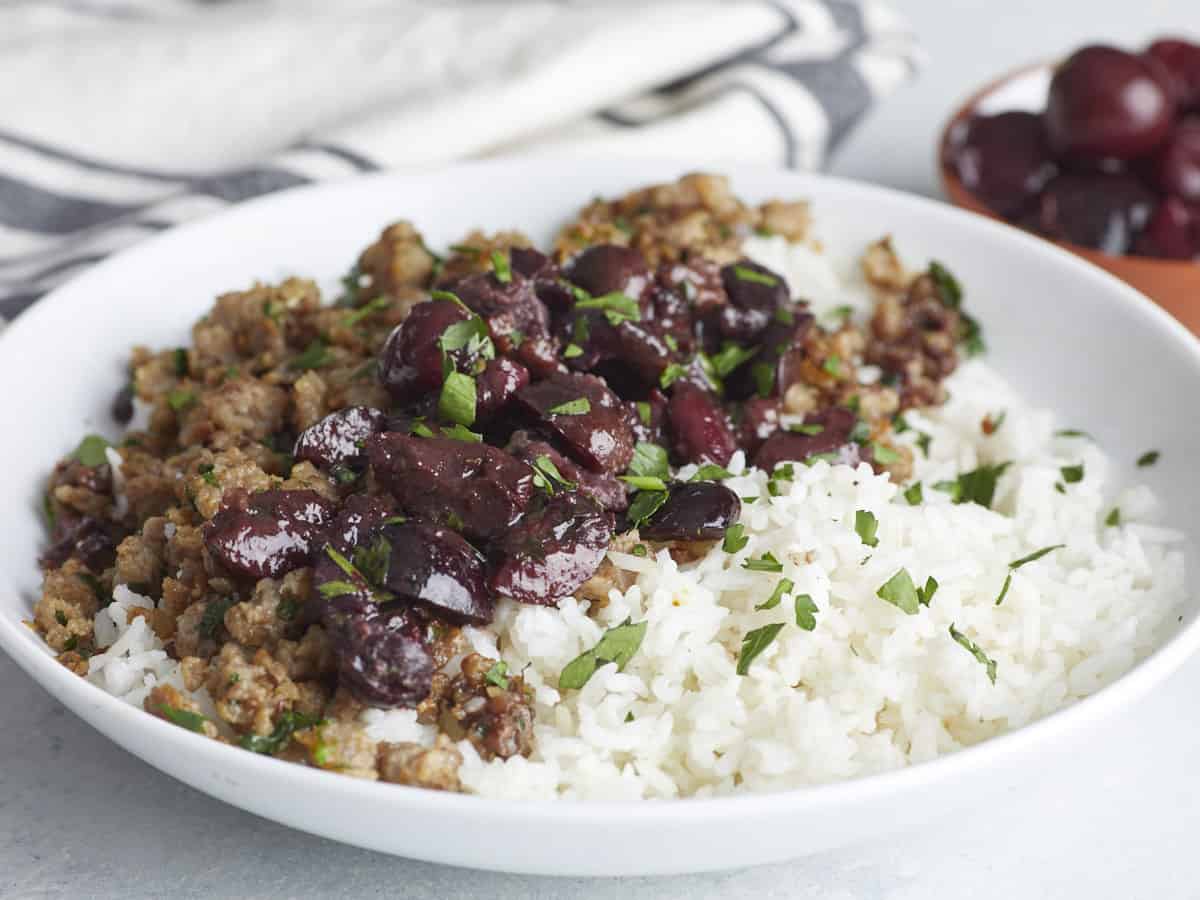
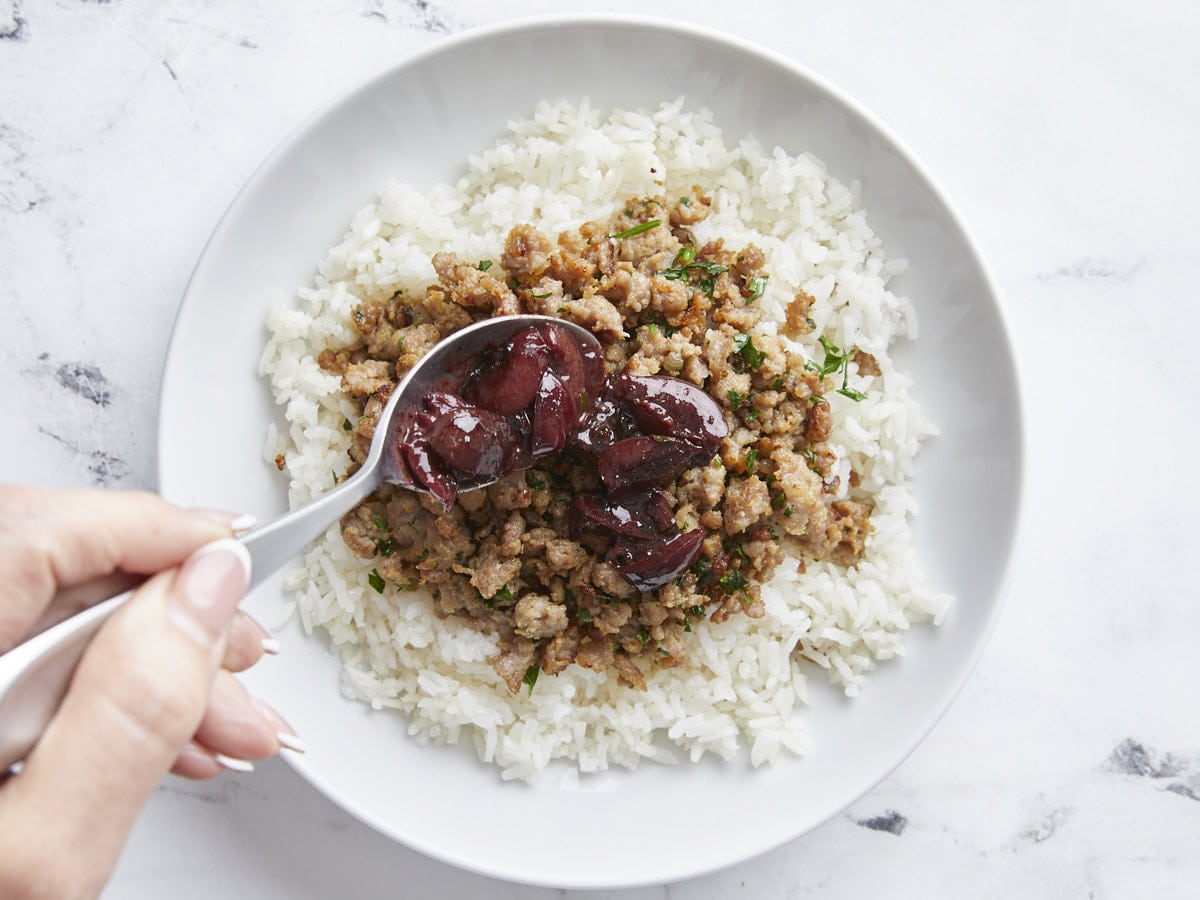
If you want to break free from the same old same old, these Pork and Cherry Rice Bowls are a ridiculously delicious and unique twist on the classic rice bowl. Sweet and juicy cherries are a perfect contrast for unctuous, savory (and super budget-friendly) ground pork. The dish is finished with an acidic cherry sauce made with pork drippings that truly brings it all together. The best part: It’ll be on the table in about a half hour!
What Is A Pork And Cherry Rice Bowl?
Ultimately, it’s a rice bowl. You have a grain, some protein, and produce. But rice bowls can get boring, and this out-of-the-box combination is savory with a touch of tart sweetness. For me, it was love at first bite.
Ingredients For Apple Slaw
While these rice bowls are easy enough for a weeknight meal (they come together in about a half hour!), their bold flavor makes them perfect for a special occasion. Here’s what you’ll need to make Pork and Cherry Rice Bowls:
Rice: This is the foundation of this rice bowl. I use jasmine rice in this recipe, feel free to use your favorite type, though of course the water ratio and cooking times might change depending on the type of rice used. If you need it, check out our handy tutorial on How To Cook Rice.
Ground Pork: I use ground pork sausage patties because they’re budget-friendly and super convenient. They are already seasoned, so you only have to cook the pork through. Pork sausage patties are usually made with fennel or sage, seasonings that pair perfectly with savory cherries. You can, of course, use your favorite ground pork or plant-based sausage here; just make sure it isn’t something way out there like beer and cheese jalapeño.
Cherries: I use frozen sweet cherries that are pitted and ready to go. They break down quickly into a sauce. Any type of sweet cherry will do here. If you want to use fresh, you’ll need to make sure they are pitted before putting them in the mix. Canned sweet cherries are fine as long as the don’t have added sugar. This is a savory preparation. If you don’t like cherries, I recommend you try one of our other fantastic rice bowls.
Red Wine: Helps create our cherry sauce and adds depth of flavor. The alcohol thoroughly cooks out, so you won’t be getting anyone tipsy. If you want to skip the wine, use cranberry juice or chicken stock.
Red Pepper Flakes: Add dimension by bringing a touch of smoky heat. Though it is a subtle heat and nothing that will knock your socks off, feel free to omit it if you’re not a fan.
Lemon Juice: Adds a touch of acidity to the sauce. If you don’t have lemon juice, use apple cider vinegar.
Italian Parsley: Adds herbaceous notes to the mix and is also used for garnish.
Garlic and Yellow Onion: These are aromatics that help add bulk and flavor to the ground pork. You can substitute the onion with a tablespoon of onion powder and the garlic with ½ teaspoon of garlic powder. If you can’t do onions and garlic, skip them.
Butter: Helps pull the sauce together and gives it a nice sheen.
Store the rice and ground pork separately in airtight containers; otherwise, the rice will soak up that delicious sauce. You can refrigerate for up to 3 days or freeze for up to 3 months. Reheat in a microwave or on a stovetop until steaming.
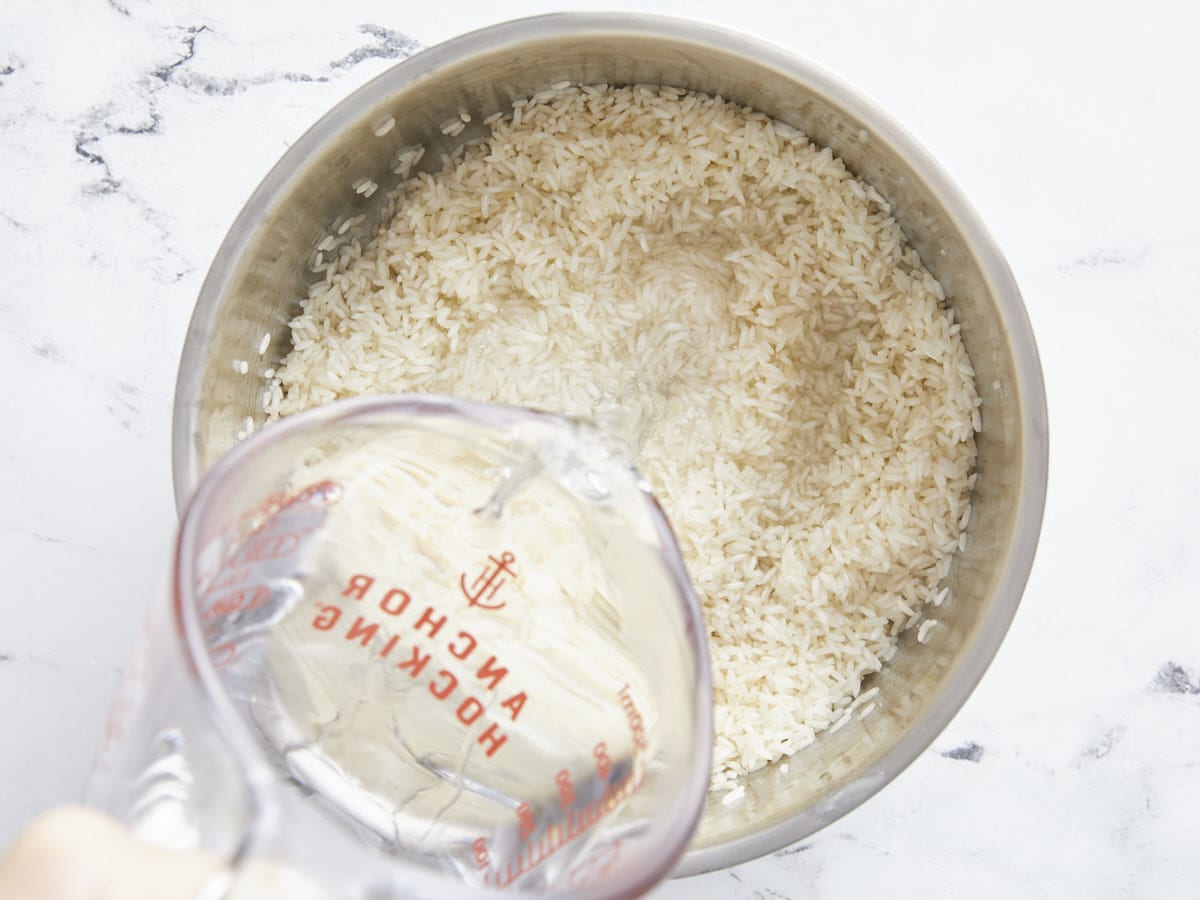
In a medium pot with a heavy lid or in a rice cooker, melt 2 tablespoons of butter and mix in the rice. Toast the rice in the butter, stirring until fragrant. Then add the boiling water and 1/8 teaspoon salt.
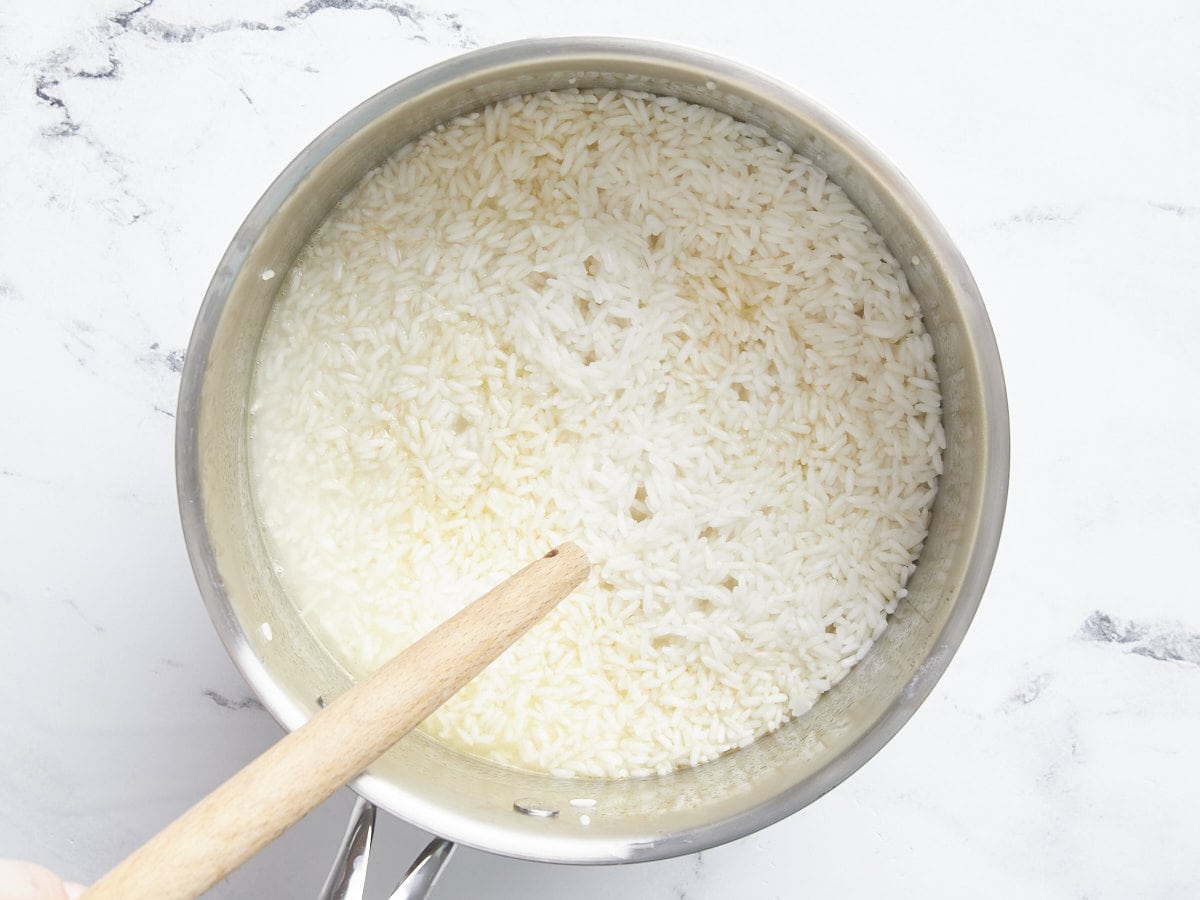
Once the rice comes to a boil and there are small steam vent holes across the surface, cover and cook for 15 minutes. When the fifteen minutes are up, remove the rice from the heat, but do not uncover the pan. Allow the rice to steam for an additional 10 minutes before removing the lid.
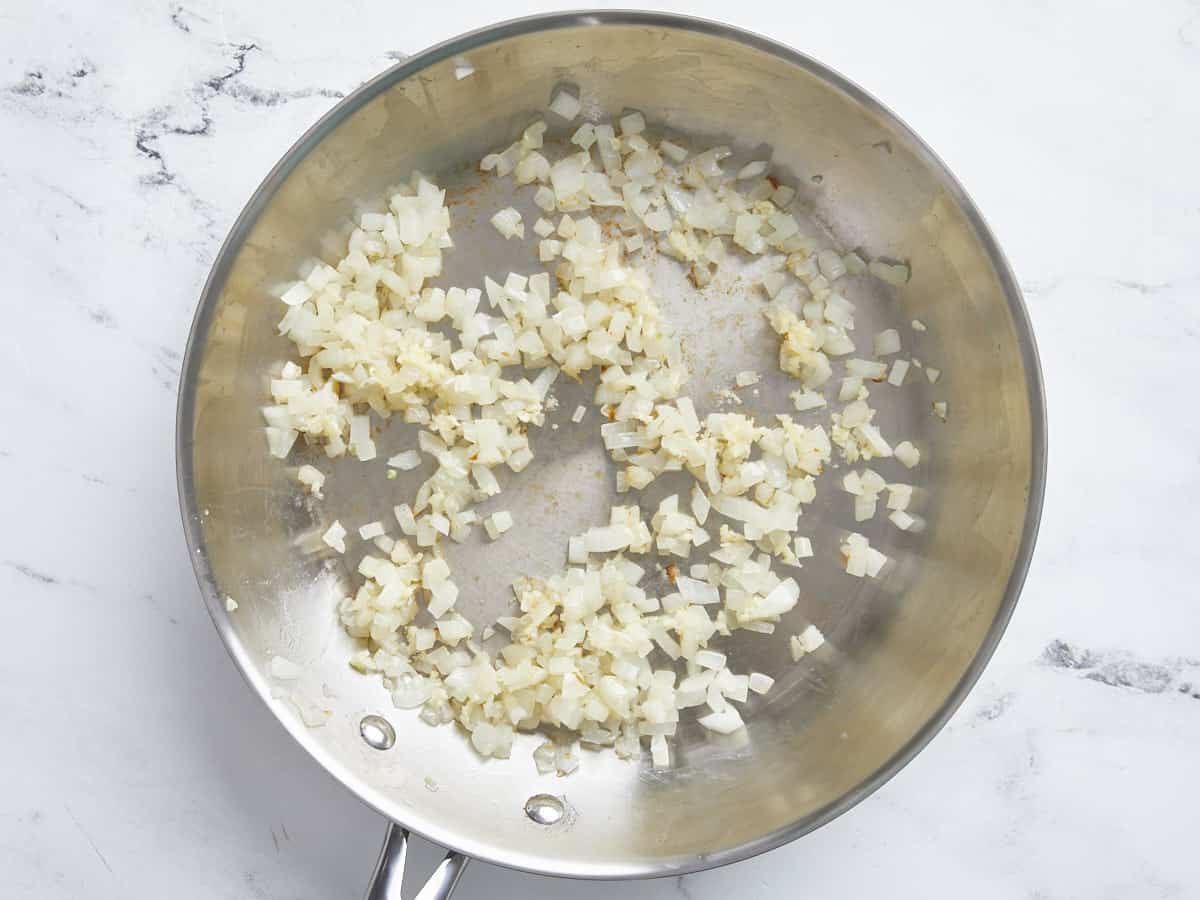
In the meantime, place a skillet over medium-high heat and melt 1 tablespoon of butter in it. Add the diced yellow onion and cook until soft and translucent, about 2 minutes. Add the minced garlic cloves and cook until fragrant, about 30 seconds.
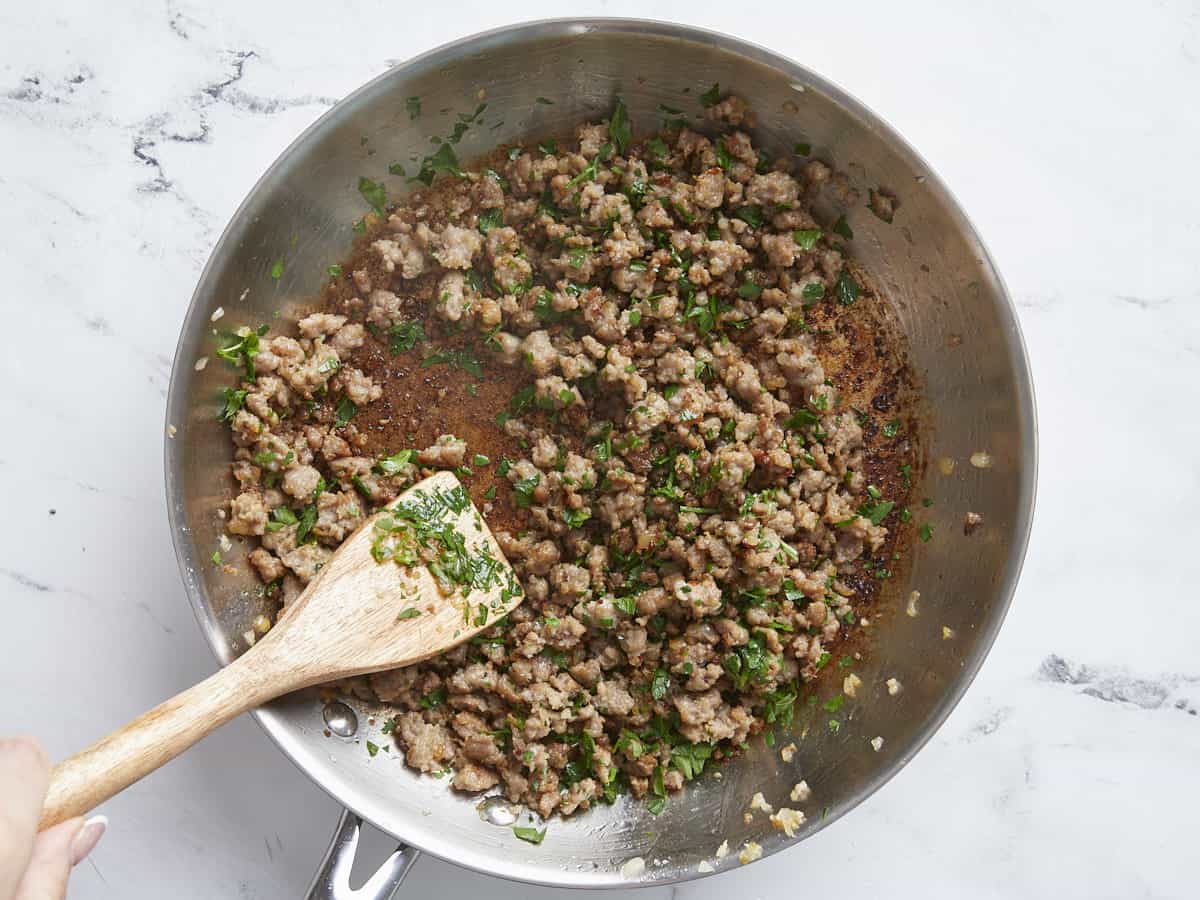
Add the pork sausage to the pan and cook until browned, about 5 minutes. Mix the chopped Italian Parsley into the pork.
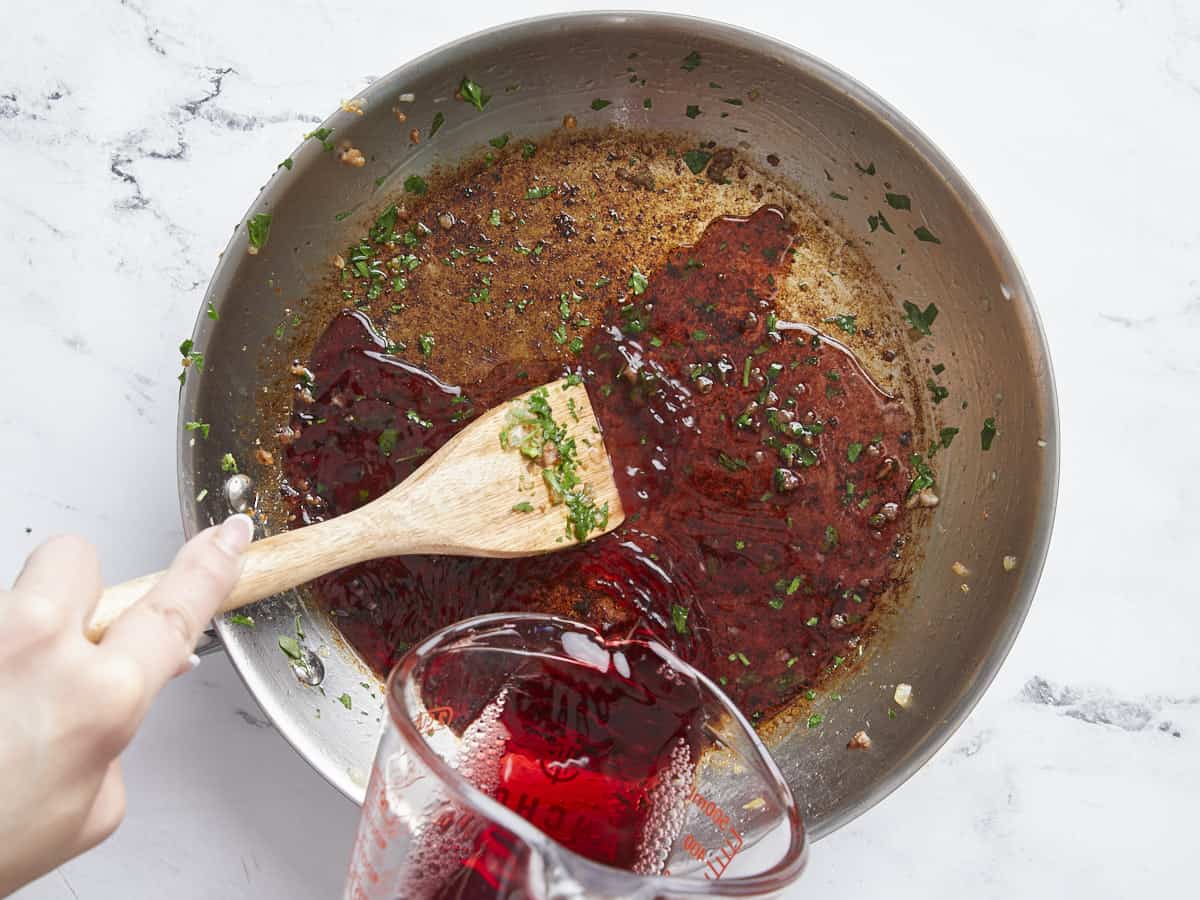
Remove the pork from the pan, leaving the juices in the pan. Add the red wine to the pan and deglaze it, using a wooden spoon to scrape up all the brown bits. This should take about 1 minute.
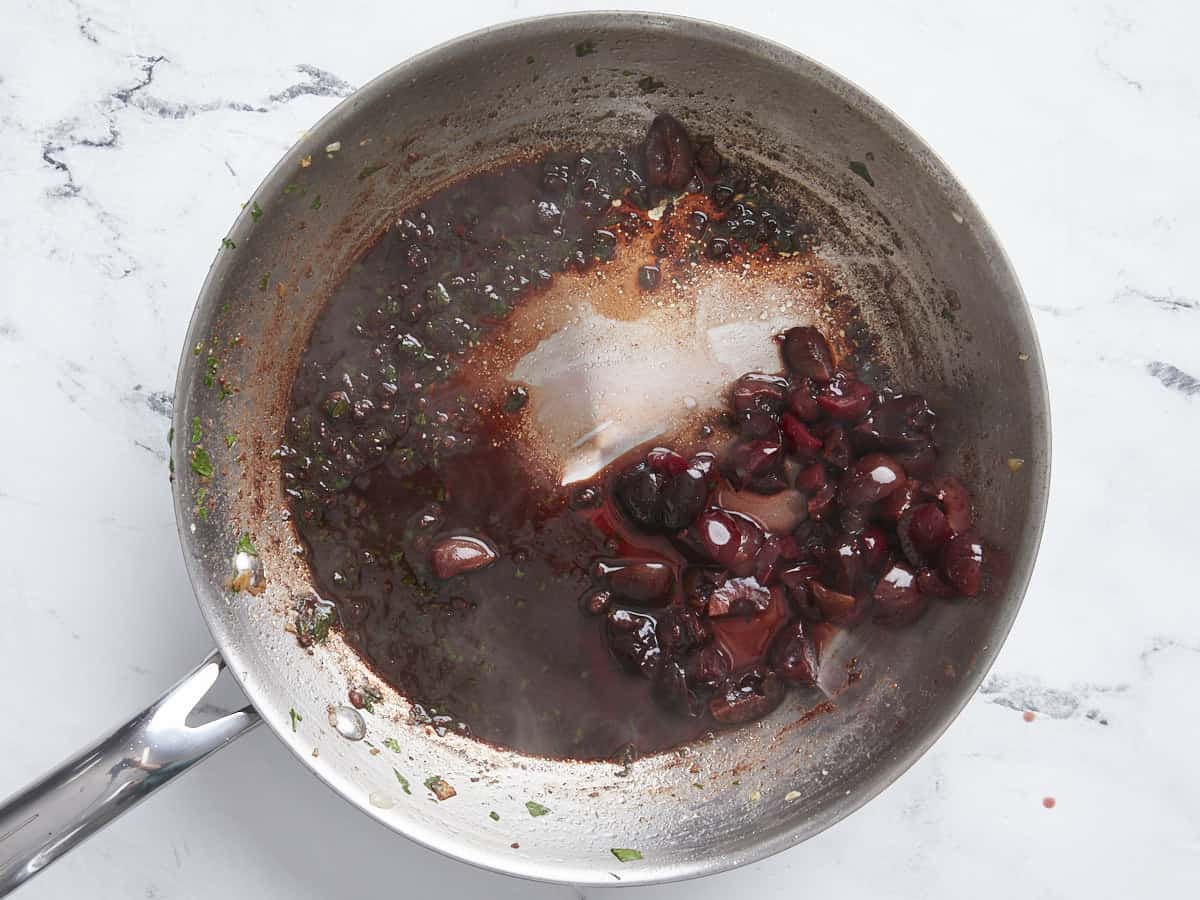
Chop the cherries into quaraters and add them to the deglazed pan, stirring occasionally until the liquid reduces into a thin syrup, about 5 minutes. Take the cherries off the heat. The rice should also be done cooking by now, so make sure to take it off the heat and allow it to steam for 10 minutes.
Add the remaining 1/8 teaspoon salt, red pepper flakes, black pepper, and lemon juice to the cherry sauce. Stir to incorporate. Add the final tablespoon of butter to the cherry sauce and stir until it melts.
Once the ten-minute resting time for the rice is up, uncover and fluff it. Taste for salt and adjust the seasoning if necessary.
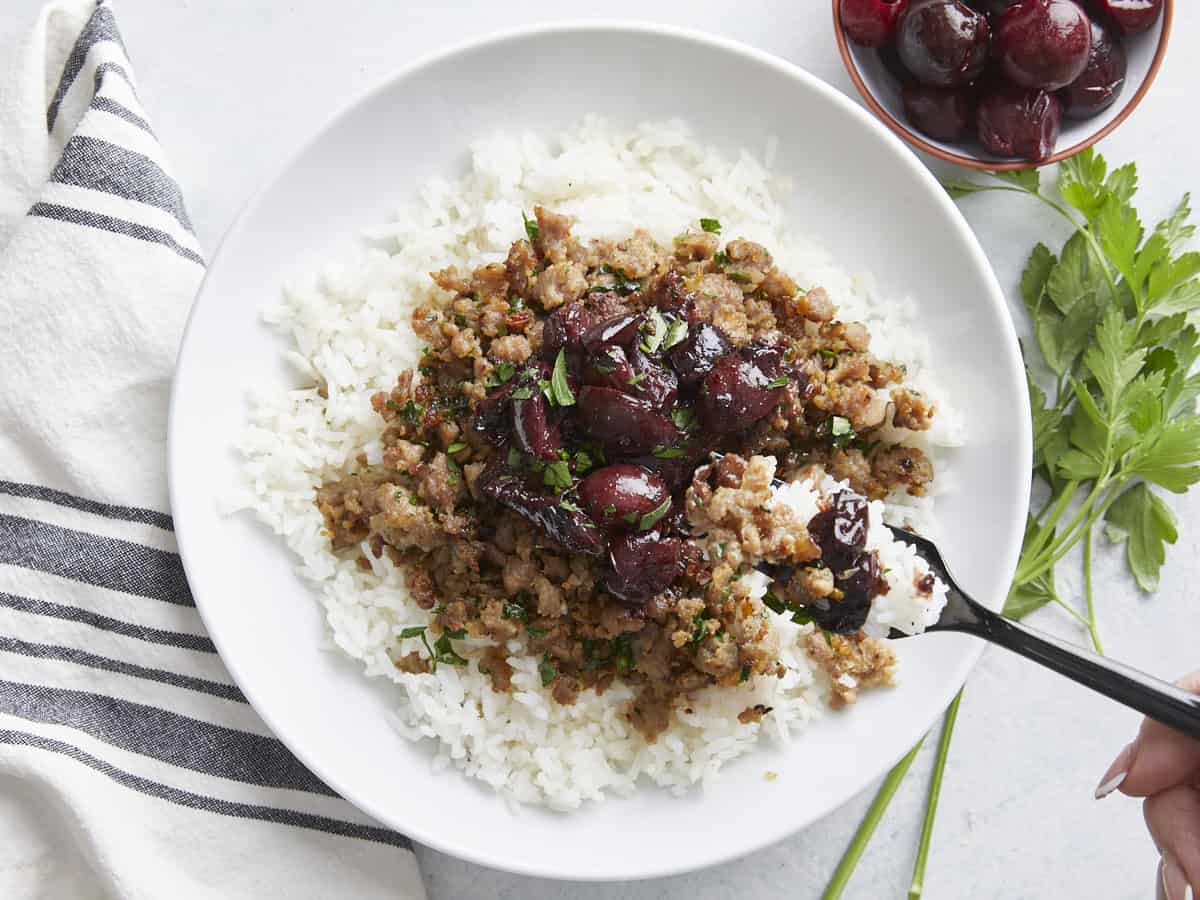
Divide the rice between four bowls. Top the rice with the ground pork. Drizzle with cherry sauce. Garnish with Italian parsley and serve.
How to Make Pork and Cherry Rice Bowls – Step by Step Photos
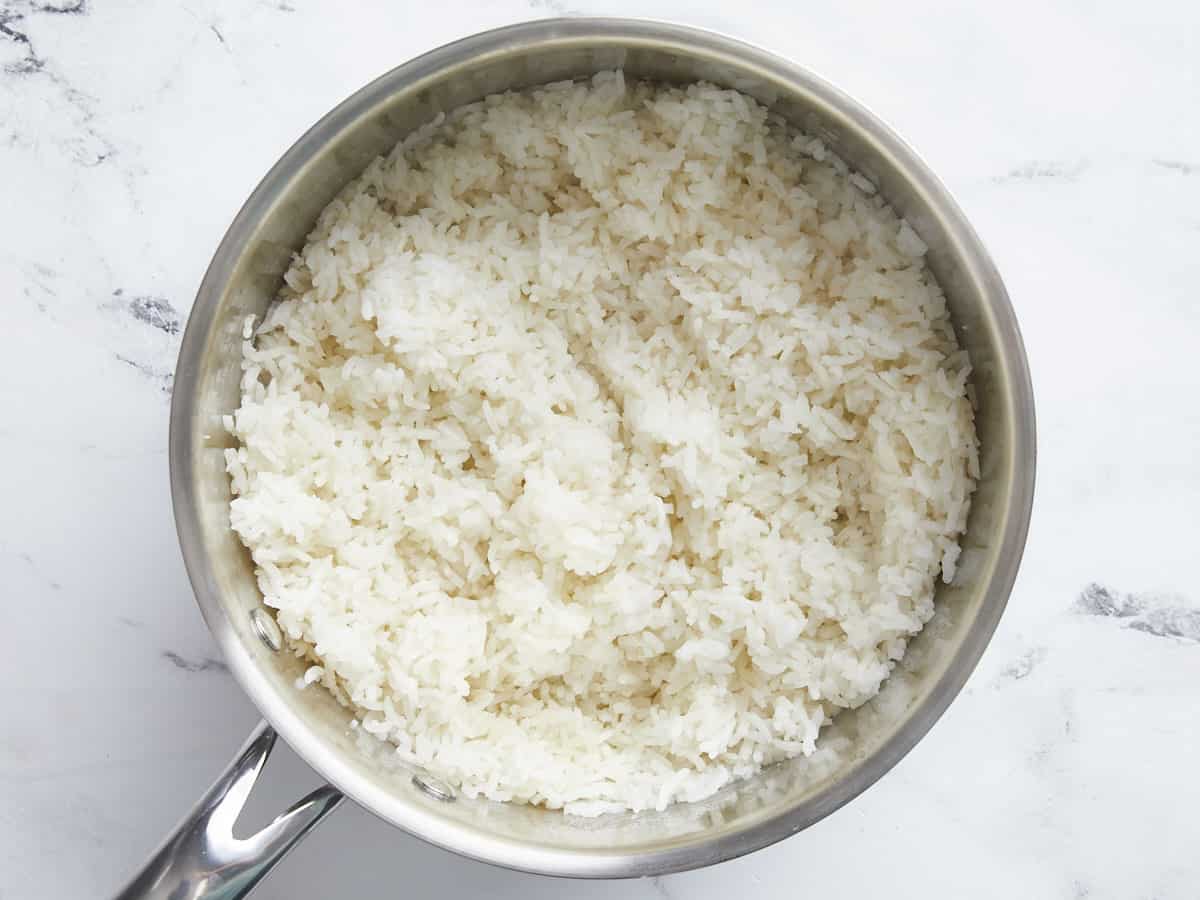
In a medium pot with a heavy lid or in a rice cooker, melt 2 tablespoons of butter and mix in 2 cups of rice. Toast the rice in the butter, stirring until fragrant. Then add 2 1/2 cups boiling water and 1/8th teaspoon salt.
Once the rice comes to a boil and there are small steam vent holes across the surface, cover and cook for 15 minutes. When the fifteen minutes are up, remove the rice from the heat, but do not uncover the pan. Allow the rice to steam for an additional 10 minutes before removing the lid.
In the meantime, place a skillet over medium-high heat and melt 1 tablespoon of butter in it. Add 1 diced yellow onion and cook until soft and translucent, about 2 minutes. Add 2 minced garlic cloves and cook until fragrant, about 30 seconds.
Add 12 ounces of pork sausage to the pan and cook until browned, about 5 minutes. Mix ½ cup chopped Italian Parsley into the pork.
Remove the pork from the pan, leaving the juices in the pan. Add 1/2 cup red wine to the pan and deglaze it, using a wooden spoon to scrape up all the brown bits. This should take about 1 minute.
Chop 1/2 cup fresh or frozen sweet cherries into quarters, then add them to the deglazed pan, stirring occasionally until the liquid reduces into a thin syrup, about 5 minutes. Take the cherries off the heat. The rice should also be done cooking by now, so make sure to take it off the heat and allow it to steam for 10 minutes.
Add the remaining 1/8th tsp salt, 1/8 tsp red pepper flakes, 1/4 tsp black pepper, and 1/4 tsp lemon juice to the cherry sauce. Stir to incorporate. Add the final tablespoon of butter to the cherry sauce and stir until it melts.
Once the ten-minute resting time is up, uncover the rice and fluff it. Taste for salt and adjust the seasoning if necessary.
Divide the rice between four bowls. Top the rice with the ground pork. Drizzle with cherry sauce. Garnish with Italian parsley and serve.
Say hello to your new summer obsession: Lemon Blueberry Cheesecake Bars! Tart, fresh lemon paired with sweet, juicy blueberries- all wrapped up in a creamy cheesecake layer and a crunchy graham cracker crust. Yum! Perfect for picnics, potlucks, or just…
Say hello to your new summer obsession: Lemon Blueberry Cheesecake Bars! Tart, fresh lemon paired with sweet, juicy blueberries- all wrapped up in a creamy cheesecake layer and a crunchy graham cracker crust. Yum! Perfect for picnics, potlucks, or just a treat-yourself moment, these cheesecake bars are sure to become a staple in your dessert...
This article was written and published by Oh My Veggies. It may not be reproduce or republished without permission of the author. The original article can be found here: Lemon Blueberry Bars.
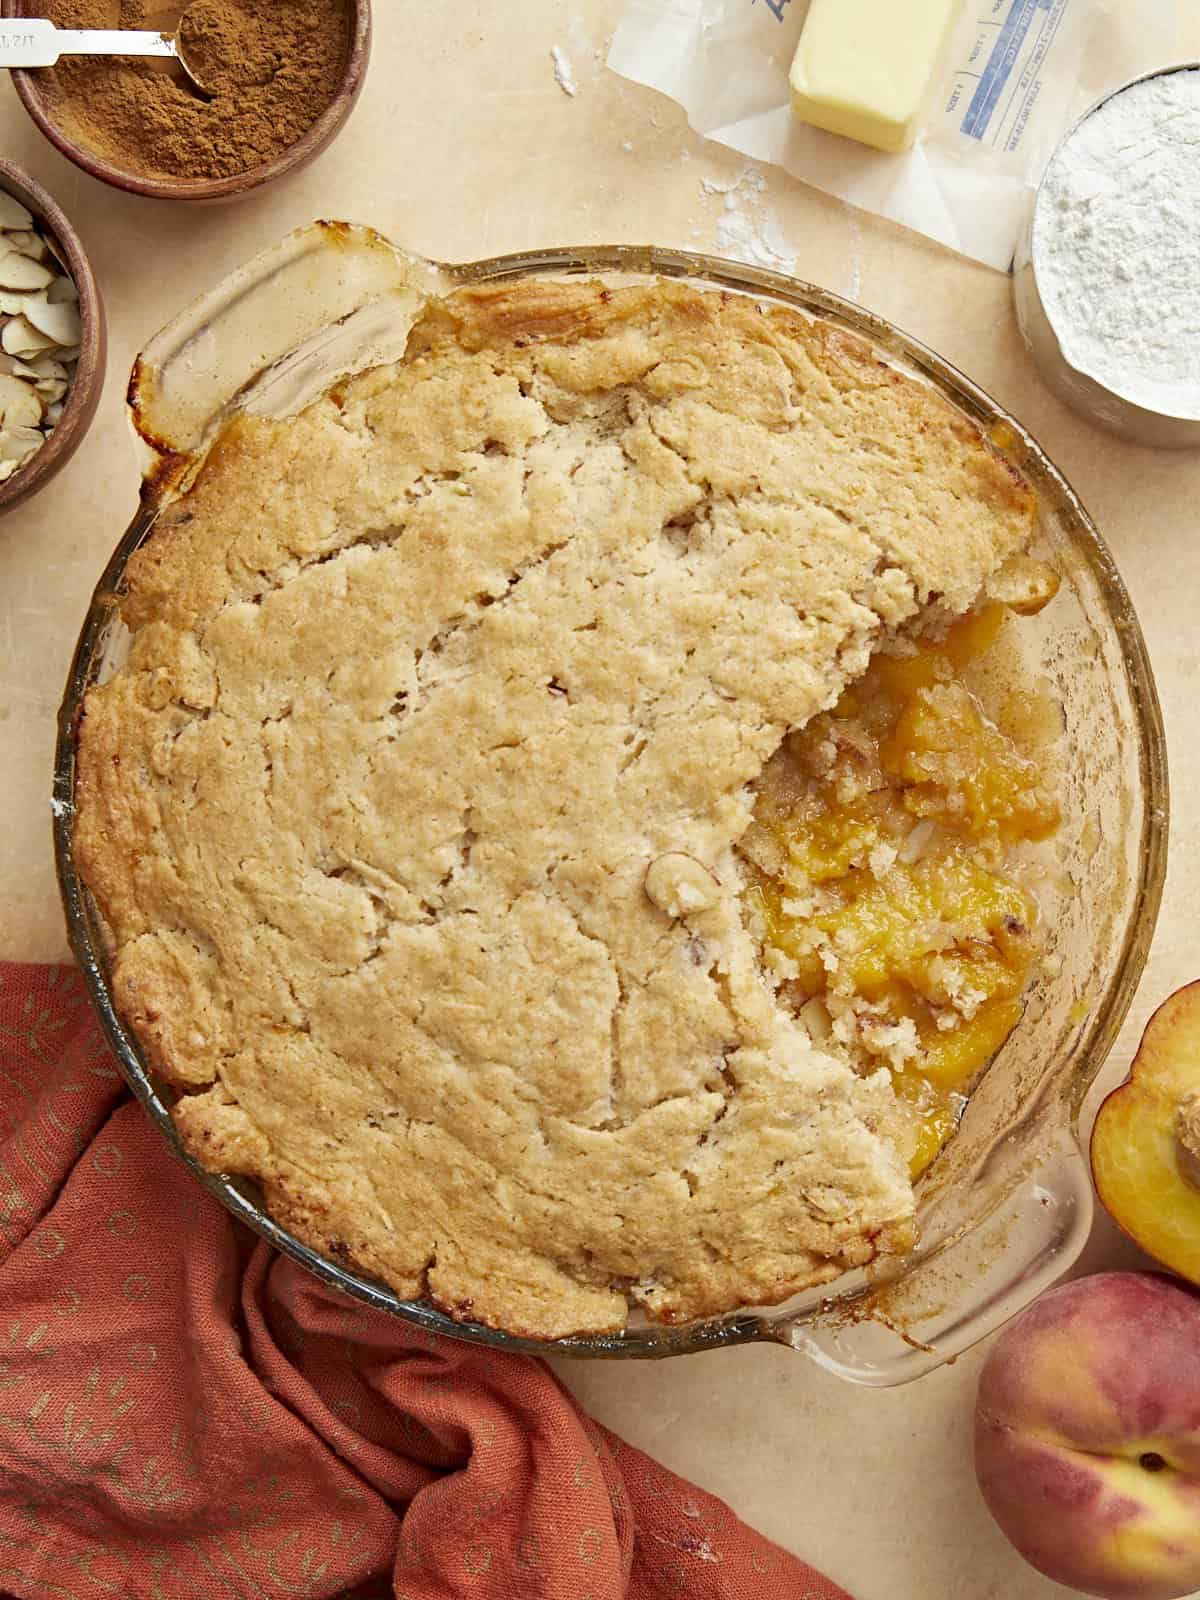
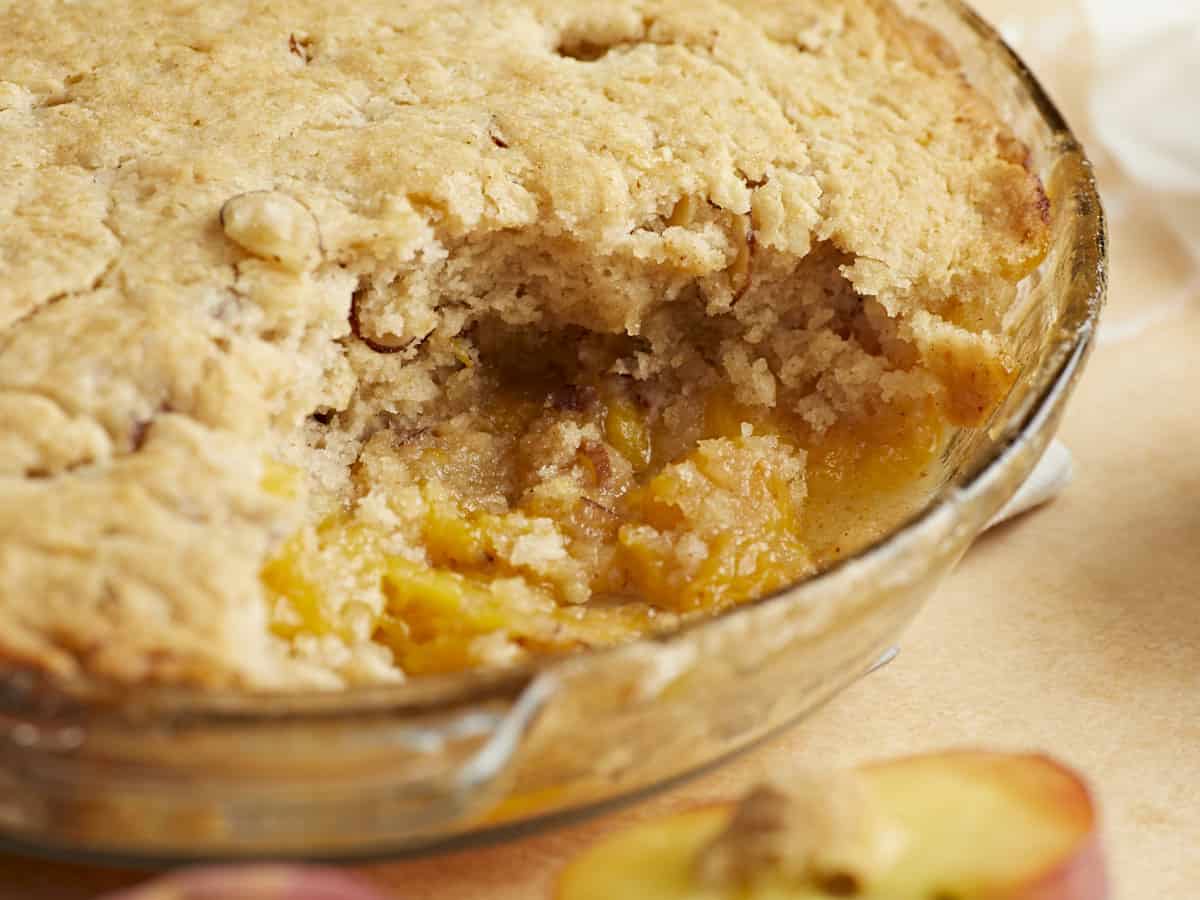
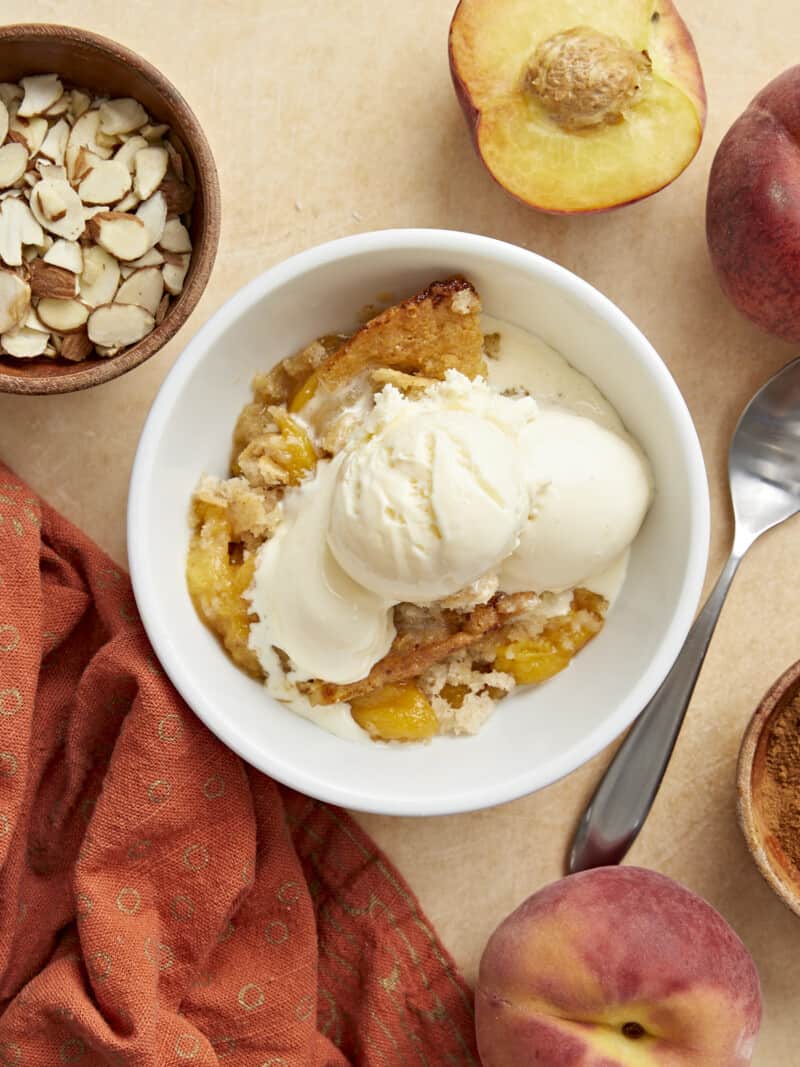
This buttery old-fashioned peach cobbler hits! Juicy summer peaches and a crispy cake-like topping will always be a crowd-pleaser, which is why this homemade peach cobbler recipe is perfect for any occasion, from a simple weeknight dessert to the star of the potluck. Plus, you can make it with fresh, canned, or frozen peaches, so it’s an easy recipe that’s also easy on your wallet! (It comes in at under a dollar a serving! Woot!!)
What Is Peach Cobbler
Peach Cobbler is often credited as a dessert created in the American South, but it’s actually Native American in origin. This dish of sweet, juicy summer peaches baked with a simple buttery batter is so easy to make and so yummy it’s almost criminal. Be warned: it smells so good that your loved ones will beg to devour it straight from the oven. Let it rest a few minutes before you dig in because it’s LAVA HOT. I speak from experience.
Ingredients For Peach Cobbler
You might want to double this recipe for Peach Cobbler because it will go fast, and you might have some feelings about that. I recently had two teenagers destroy the whole thing before I finished my first serving, and I was inundated with waves of deep resentment. Here’s what you’ll need to make Peach Cobbler:
Peaches– are the star of the show here. You can use fresh, canned, or frozen. You don’t have to peel your peaches if you don’t want to. It’s a textural thing for me. If using canned, get them in their own juices, and don’t discard the juices. If they are canned in syrup, again, keep the juices, but omit the brown sugar in the recipe. If using frozen, let them thaw before mixing with the other ingredients.
Sugar – helps sweeten the batter and the filling and deepens the color of the crust. You’ll use brown and granulated, though if you only have one type, use what you have. This recipe is very forgiving.
Spices – cinnamon pairs beautifully with peaches, adding a gentle dimension to the flavor profile. I also use a touch of ground ginger and nutmeg to create a deeper flavor, but if your peaches are super tasty, feel free to skip them both.
Lemon Juice– adds a much-needed acidity to the sweet filling and helps thicken the peach juices. You can use fresh or bottled.
Cornstarch– helps thicken the peach juices while keeping them clear and glossy. If you don’t have cornstarch, thicken the filling with 2 teaspoons of all-purpose flour. FYI, it might get a little cloudy.
All Purpose Flour– creates the batter for the cobbler. We have not tested this recipe with gluten-free flour and can’t give any specific guidance, though I bet it would be tasty with almond flour.
Baking Powder – leavens and aerates the batter. If you don’t have baking powder, use 1/2 teaspoon of baking soda and add a tablespoon of lemon juice to the cup of milk called for in this recipe.
Almonds – pair incredibly with peaches and add texture to the cobbler. While I use sliced, feel free to use chopped. You can substitute the almonds with pecans or walnuts. Skip the almonds if you have a nut allergy or if they’re not as budget-friendly as you’d like.
Milk and Butter– create the batter. The fat in the milk keeps the crumb velvety, so use whole or add a tablespoon more butter if you’re using 2% milk. If you want to keep things vegan, use plant-based butter and milk.
Vanilla – scents the batter but can also be skipped if you don’t have any on hand.
Peach cobbler is good for up to three days. Since it contains dairy, you’ll want to refrigerate it after it cools in an air-tight container. If you have leftovers, try to enjoy them within a day, as the flavors and textures dull quickly. You can also freeze peach cobbler. Cool it before storing it in an air-tight container with parchment paper on the surface. It will keep for up to 3 months.
How To Reheat Peach Cobbler
It’s best to reheat peach cobbler in a 350°F oven until steaming. If reheating from frozen, it’s fine to put the cobbler in the oven straight from the freezer. While you can reheat peach cobbler leftovers in a microwave, the texture of the cobbler will change. If you choose to go the microwave route, heat it in 30-second increments until steaming.
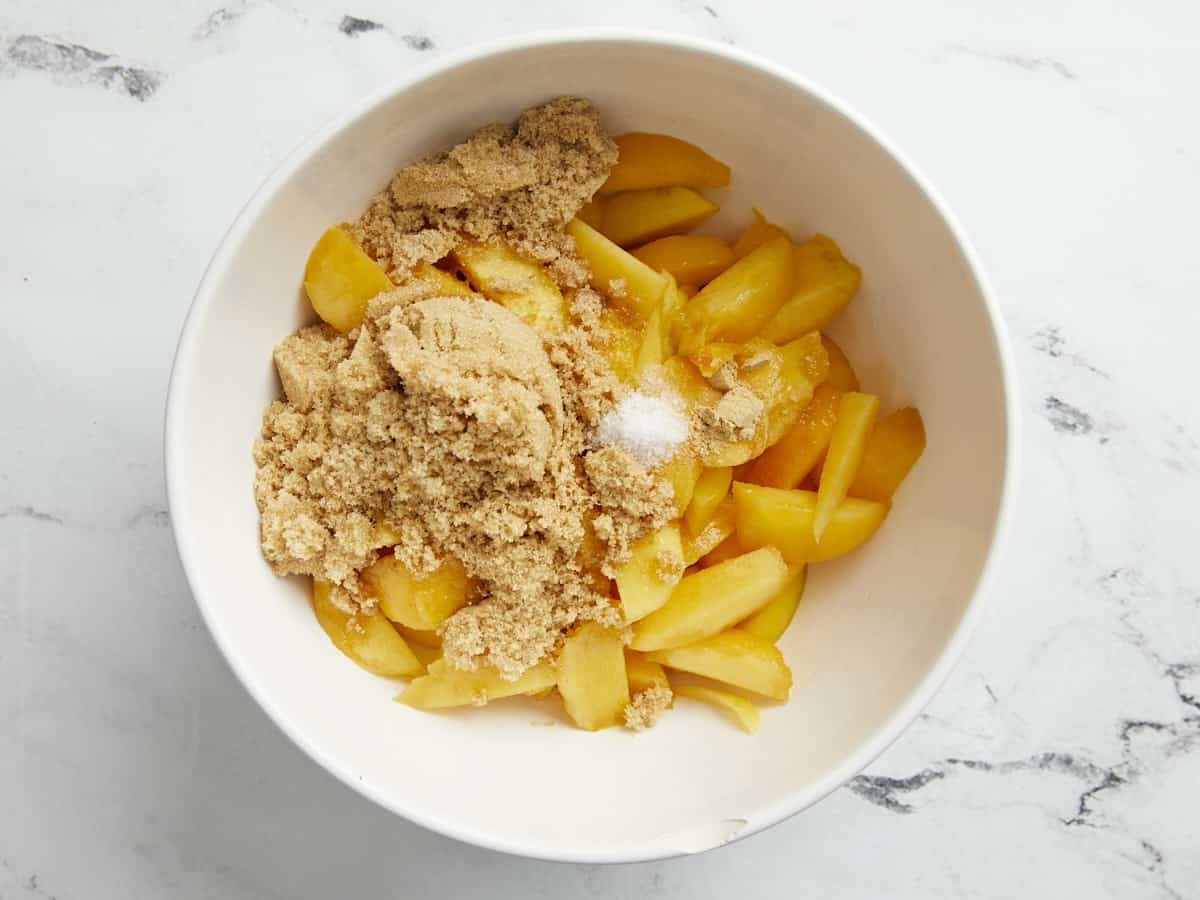
Set a rack in the middle of the oven and preheat it to 350°F. In a large bowl, mix the sliced peaches, brown sugar, salt, and ground ginger. Let the peaches sit for five minutes to absorb the sugar and spices and release their juices.
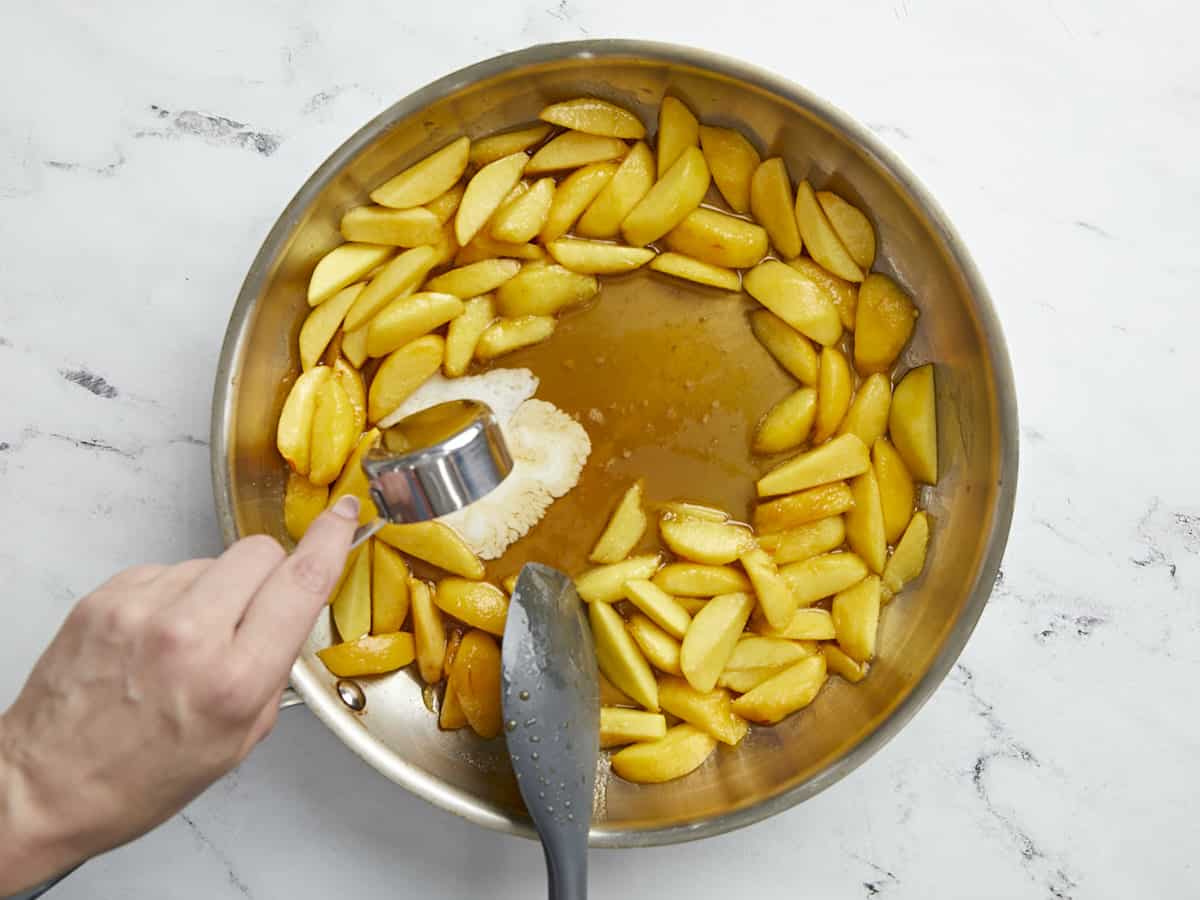
Set a large skillet over medium heat and add the peaches and their juices. Cook down the juices for about 5 minutes. Mix the cornstarch with the lemon juice to create a slurry, then add it to the peaches and stir well. Turn the heat to mid-high and bring to a boil.
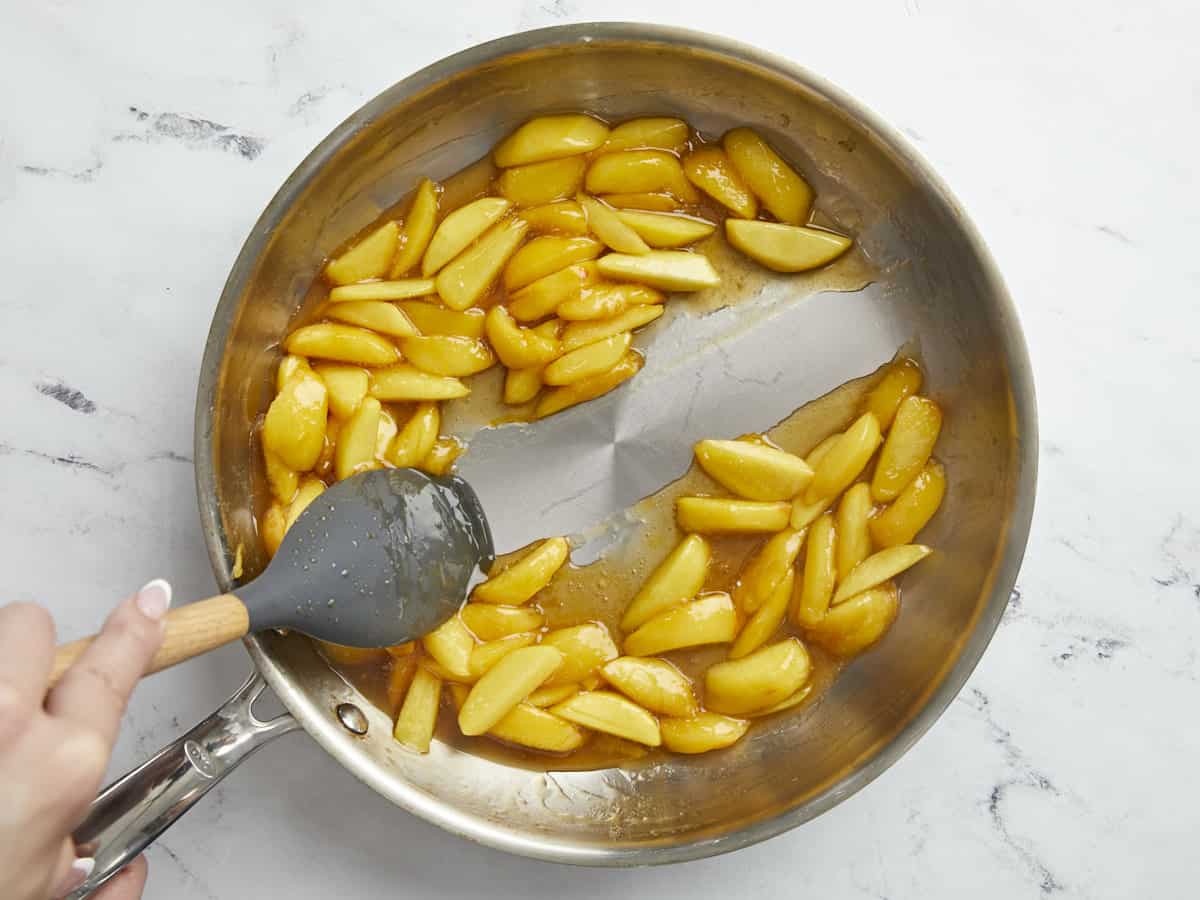
When the juices have thickened to the point that they stay separated when you run a spoon through them (about 5 minutes), take the pan off the heat.
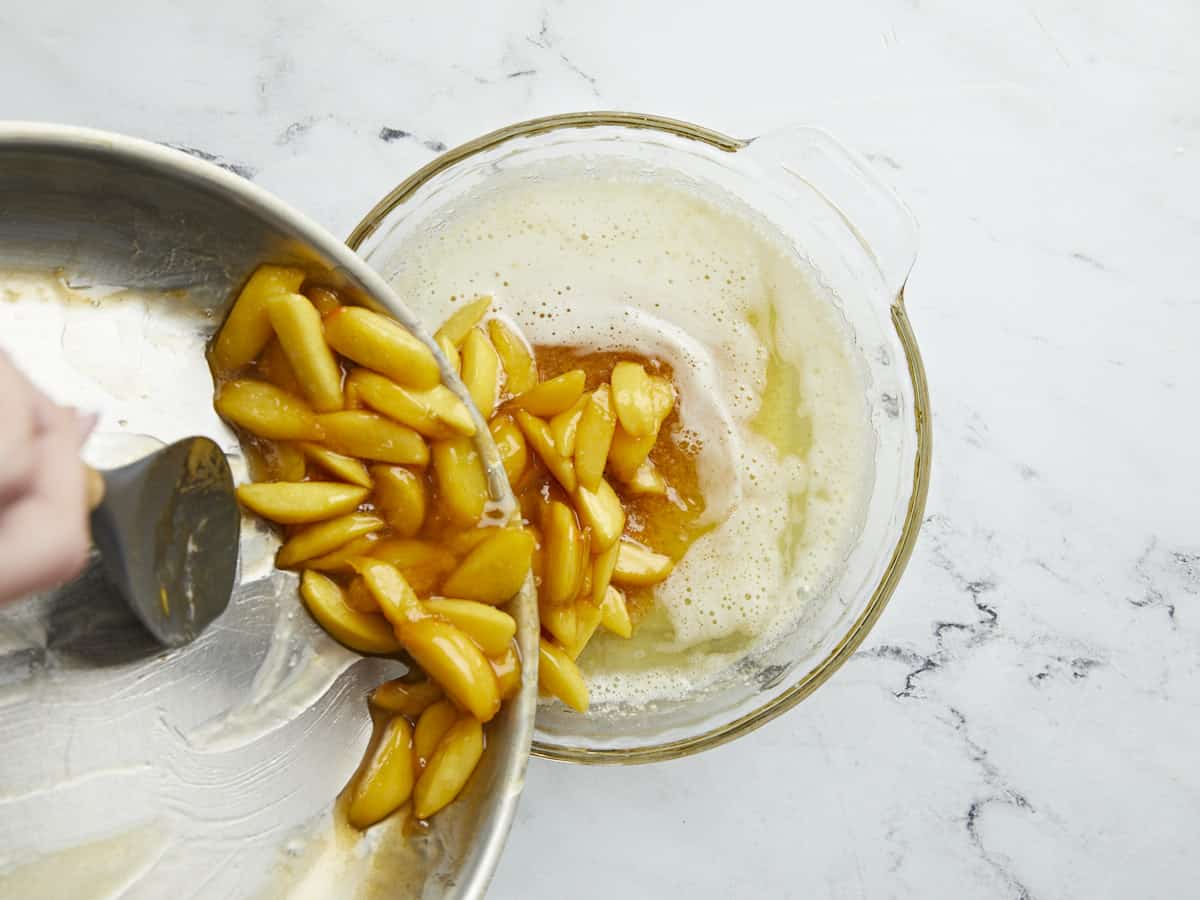
Add the melted butter to the pie dish and add the cooked peaches and their juices to the dish.
In a large bowl, mix the flour, sugar, sliced toasted almonds, baking powder, cinnamon, nutmeg, and salt.
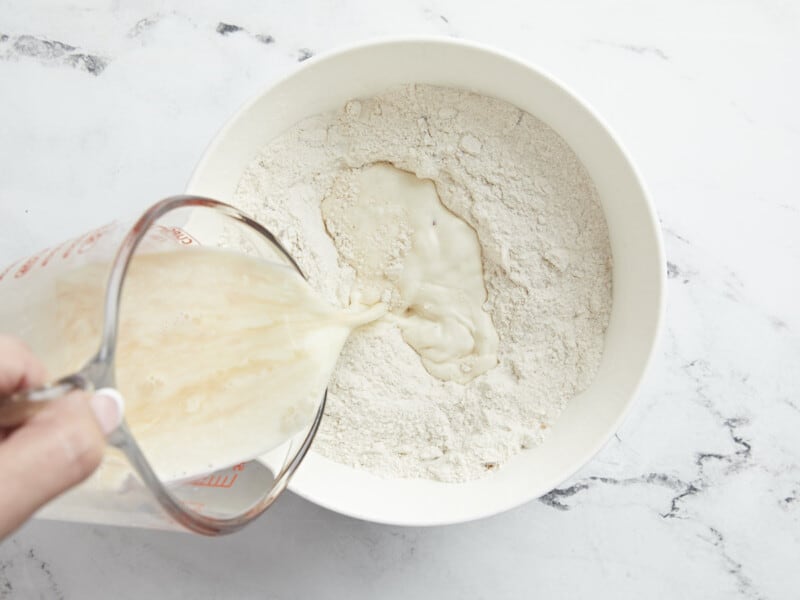
Stir in the milk and vanilla and mix lightly, just until a batter forms. Pour the batter on top of the peaches.
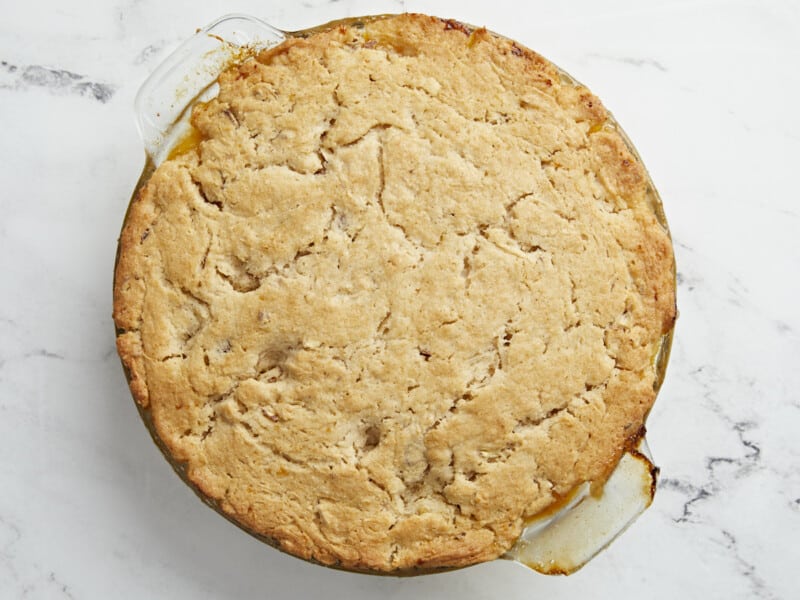
Bake until the cobbler is golden brown, about 35 minutes. Cool before serving and enjoy!!
*You do not have to peel the peaches if you don’t want to. If using canned peaches, use two 15-ounce cans of peaches in their own juices. Do not drain the juices. If using frozen sliced peaches, use 2 pounds, but thaw them before mixing them with the brown sugar.
Set a rack in the middle of the oven and preheat it to 350°F. In a large bowl, mix the 6 sliced peaches, 1/2 cup brown sugar, 1/4 teaspoon salt, and 1/8 teaspoon ground ginger. Let the peaches sit for five minutes to absorb the sugar and spices and release their juices.
Set a large skillet over medium heat and add the peaches and their juices. Cook down the juices for about 5 minutes. Mix 1 teaspoon of cornstarch with 1 tablespoon of lemon juice to create a slurry, then add it to the peaches and mix in well. Turn the heat to mid-high and bring to a boil.
When the juices have thickened to the point that they stay separated when you run a spoon through them (about 5 minutes), take the pan off the heat.
Add 8 tablespoons of melted butter to the pie dish and add the cooked peaches and their juices to the dish.
In a large bowl, mix the 1 1/2 cups flour, 1 cup sugar, 1/2 cup sliced toasted almonds, 1 1/2 teaspoons baking powder, 1/4 teaspoon cinnamon, 1 pinch nutmeg, and 1/4 teaspoons salt. Stir in 1 cup milk and 1 teaspoon vanilla and mix lightly, just until a batter forms.
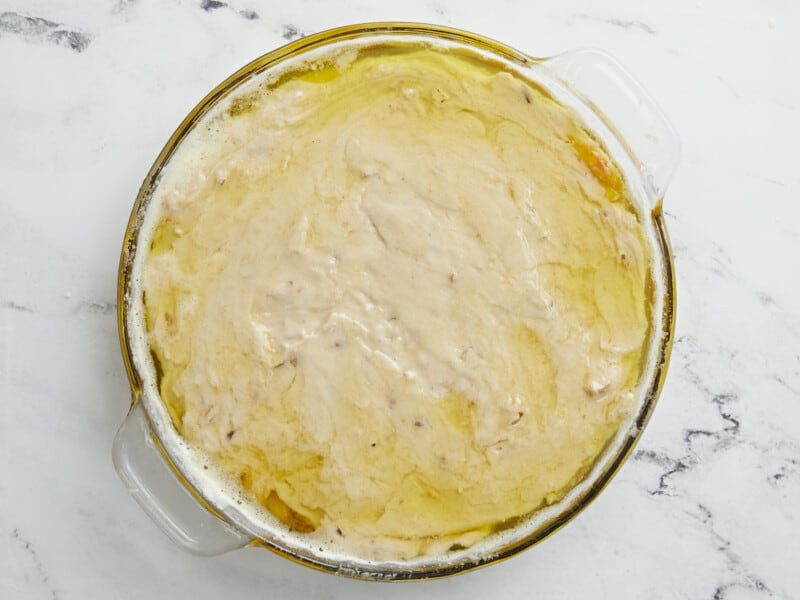
Pour the batter on top of the peaches. The butter will rise to the top. I prefer a buttery, crispy topping, so I don’t stir the batter into the peaches. If you’d like to have some of the peaches popping through the topping, mix it lightly into the peaches.
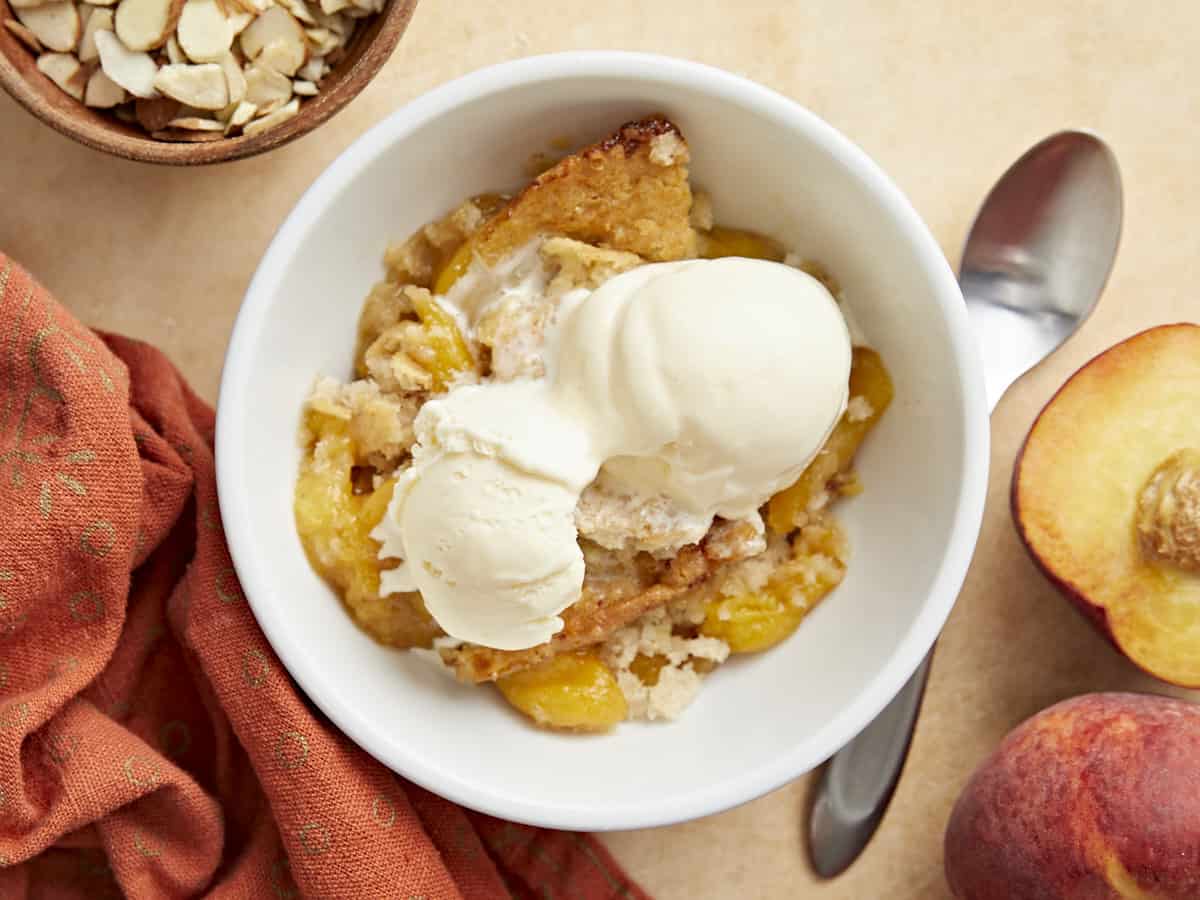
Bake until the cobbler is golden brown, about 35 minutes. Let it cool for a few minutes before serving and collecting ALL OF THE COMPLIMENTS. For the most amazing experience, top it with ice cream or whipped cream!
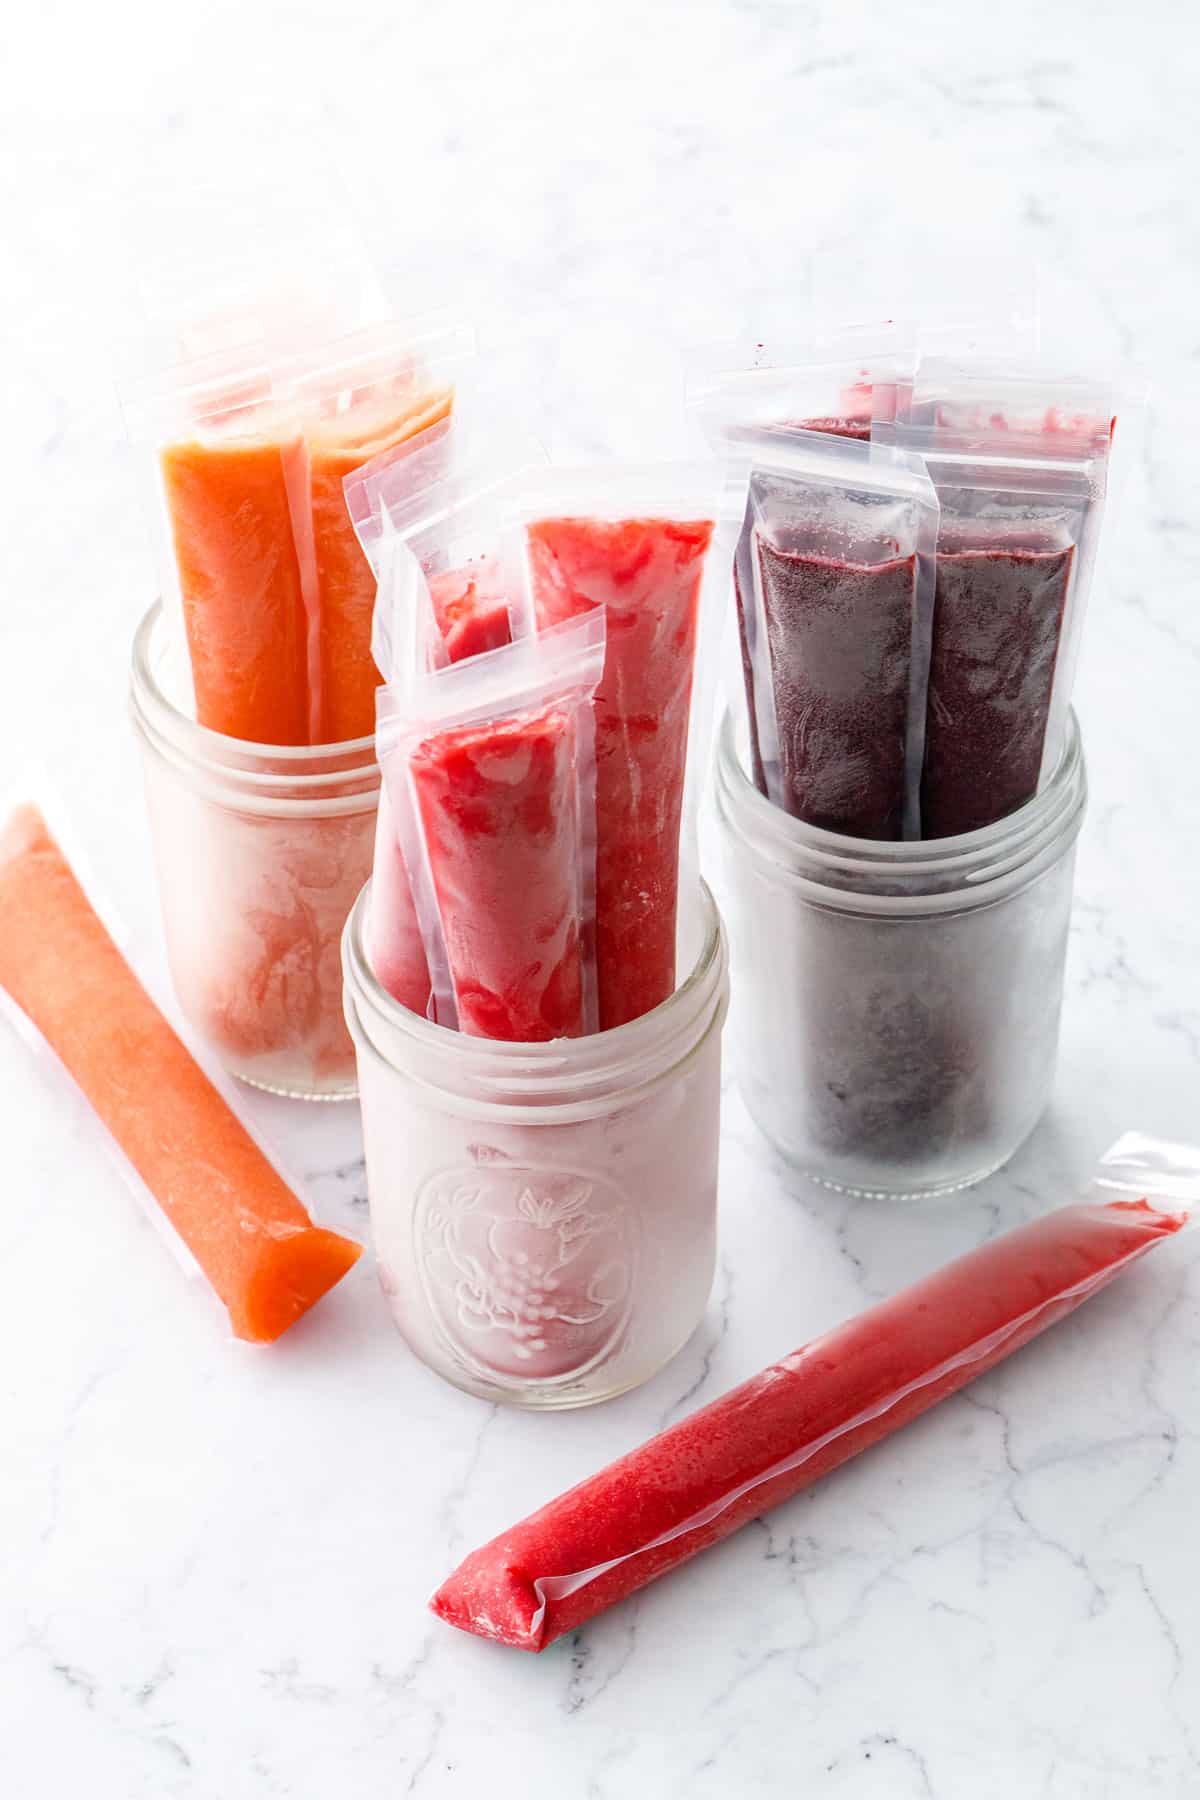
These summery fresh fruit freeze pops are made with pectin for a less icy, more pleasing mouthfeel; they’re essentially a quick freezer jam in popsicle form! The beauty of this recipe is its unique consistency, but also its versatility—I’ve used strawberries, blueberries, and peaches here, but you can use pretty much any fruit you want […]
These summery fresh fruit freeze pops are made with pectin for a less icy, more pleasing mouthfeel; they’re essentially a quick freezer jam in popsicle form!
The beauty of this recipe is its unique consistency, but also its versatility—I’ve used strawberries, blueberries, and peaches here, but you can use pretty much any fruit you want (the sky is the limit!)
The freezer provides ample opportunities to preserve seasonal fruit for later, and these freezer jam pops do exactly that in a way that’s both fun to eat and as tasty as (or tastier than!) biting into a juicy ripe peach or strawberry or blueberry or any fruit, really.
Whether you call them freeze pops, otter pops, flavor ice, icy poles, freezies (hiya, Canada pals!) or Zooper Doopers (hello Aussie mates!) one thing is for sure: these refreshing summer treats are sure to beat the heat.
While fresh fruit popsicle recipes abound, this recipe has a uniquely pleasing texture that comes from a (not so) secret ingredient: pectin. The pectin makes the pops smoother, less icy, and softer to bite. With just a little bit of sugar plus a lemon juice and citric acid to make the flavors even brighter, you have yourself one perfect summer treat.
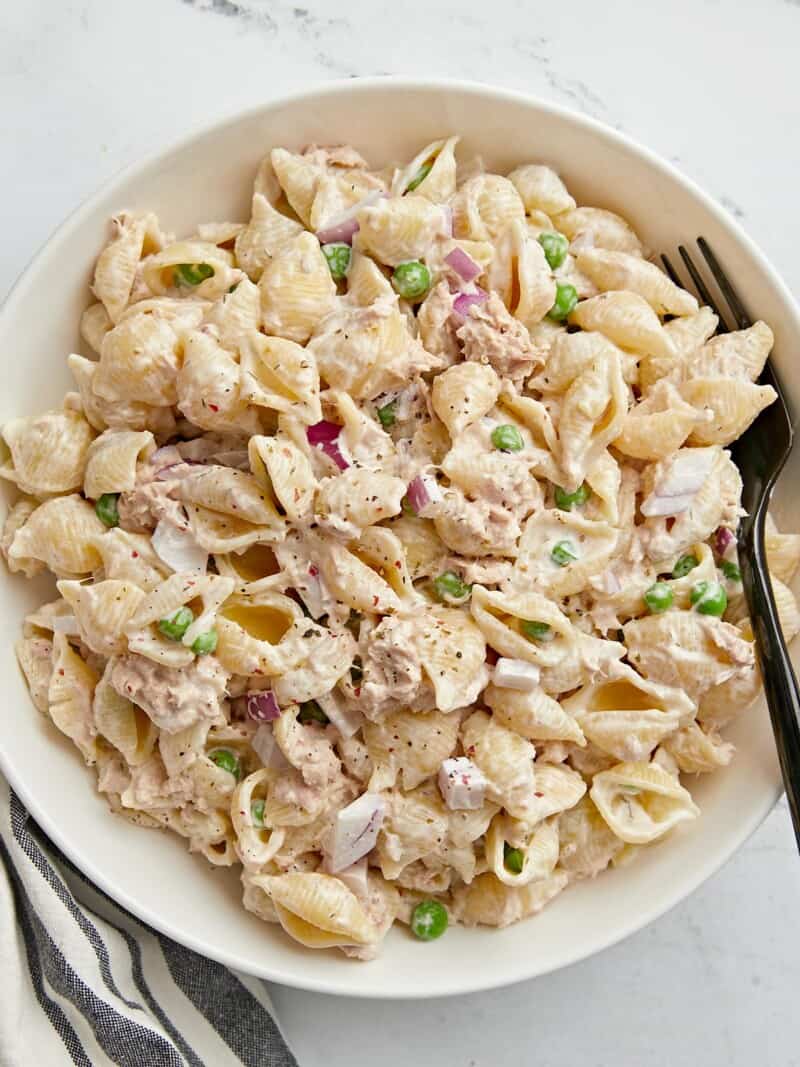
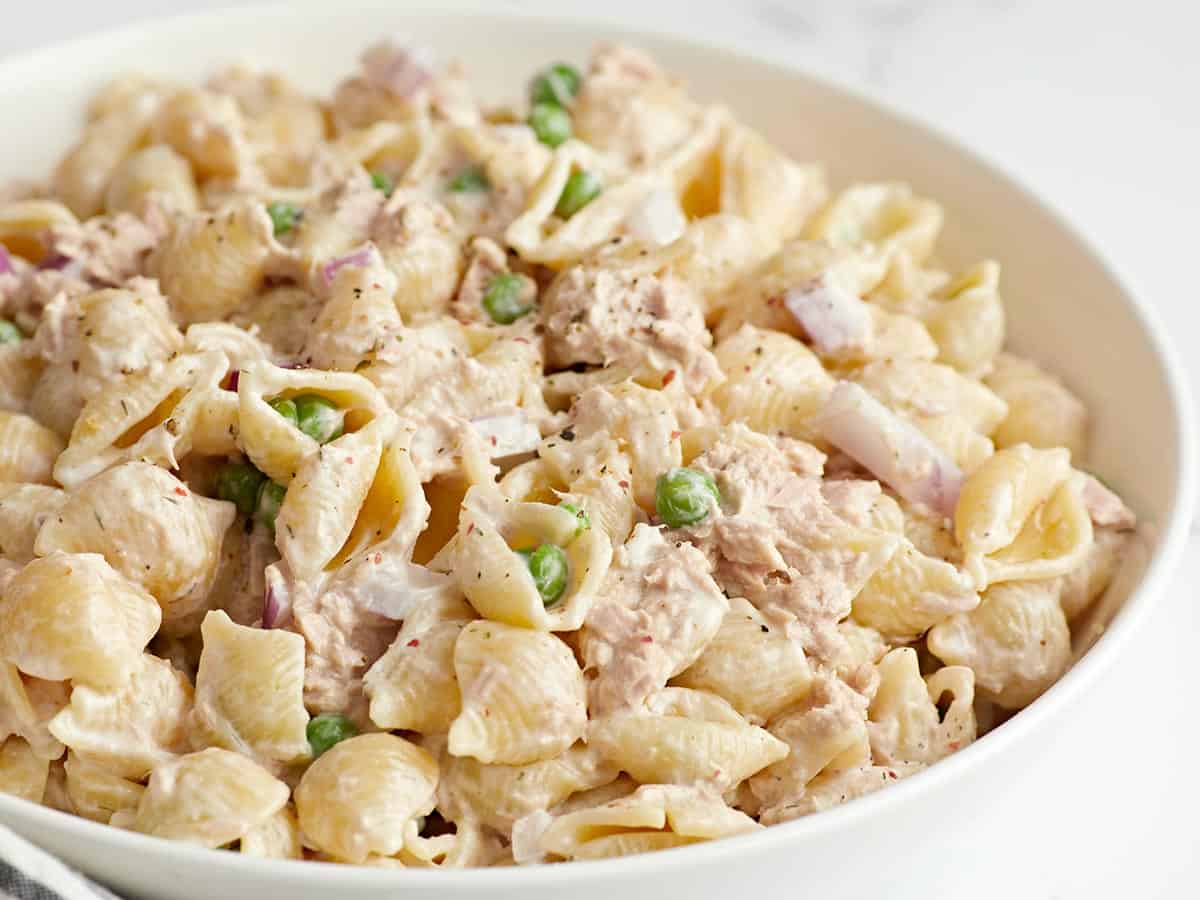
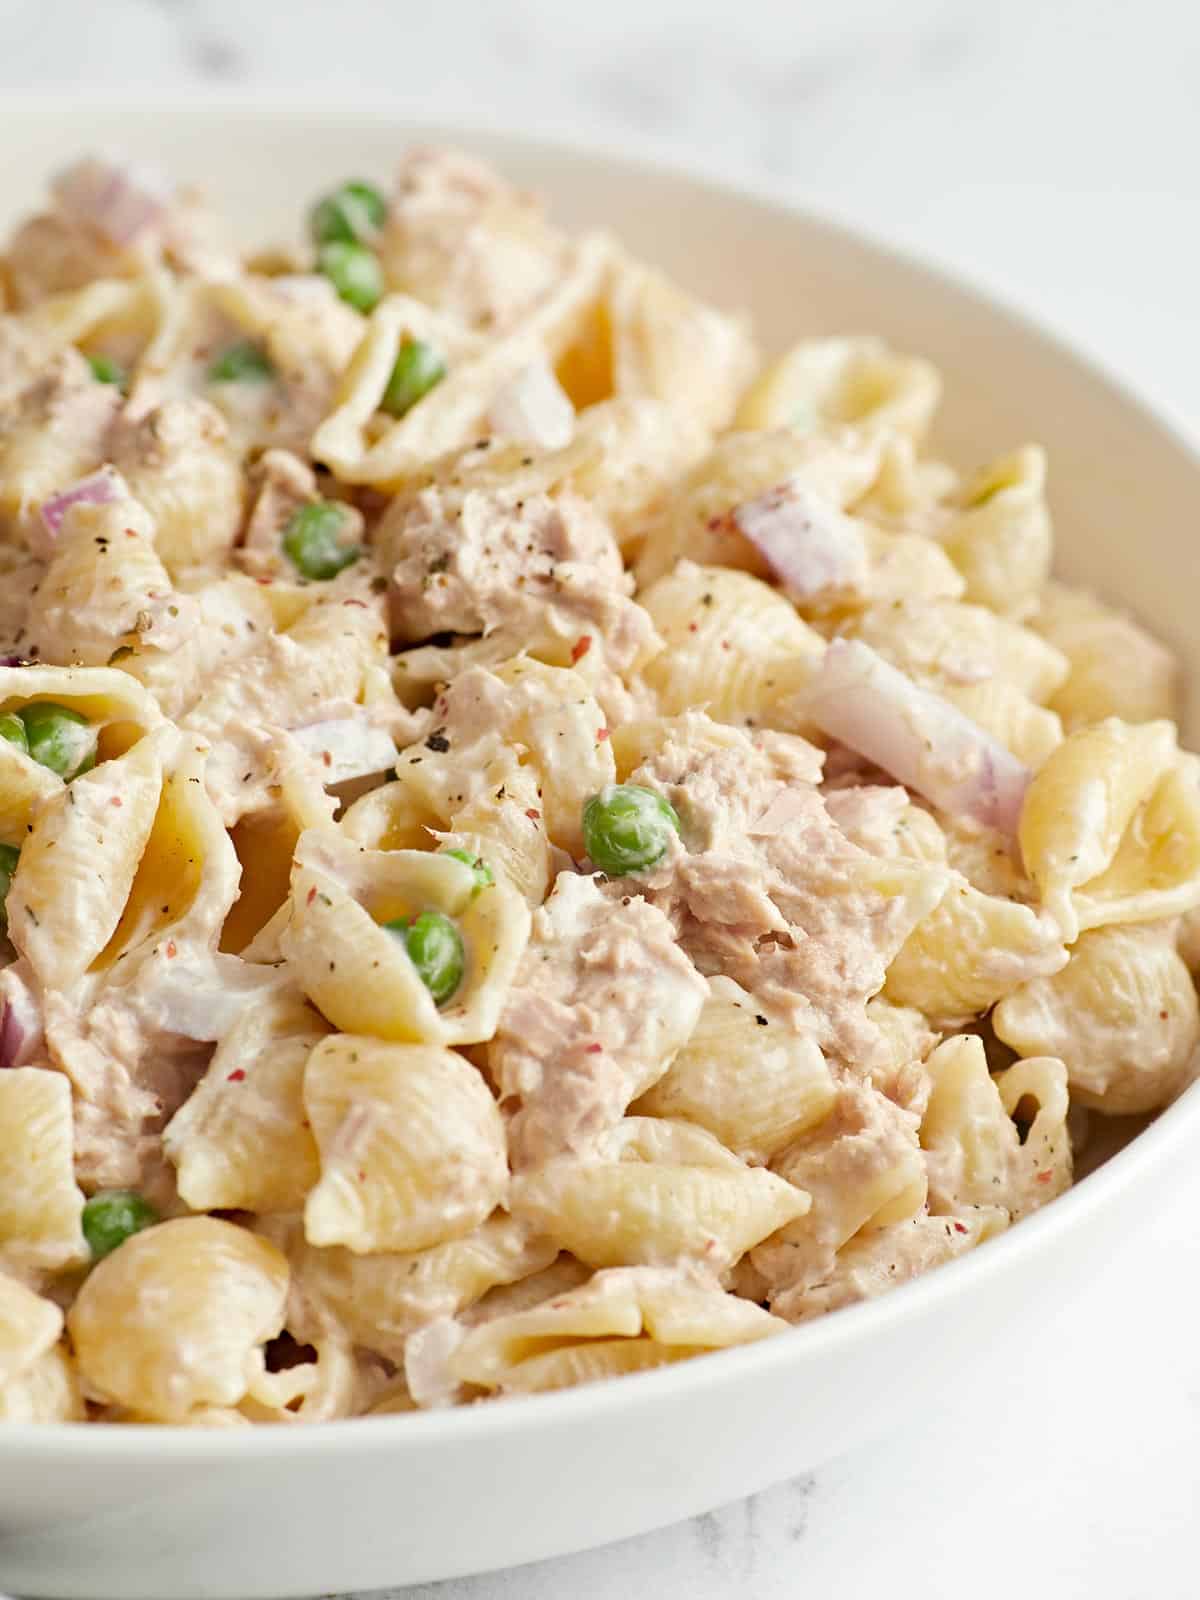
It’s officially H.O.T. outside, so I’m leaning into my cold pasta salads hard these days! This Tuna Pasta Salad is an easy classic that is cool, creamy, inexpensive, and it keeps me full. This one is seriously simple and it’s the perfect salad for summer BBQs, potlucks, to pack for lunches, or to have a quick cold meal when you’re sweating it out in this heat. So bookmark it now because you’ll want to revisit it, again and again, this summer!
What’s In Tuna Pasta Salad
This classic recipe is really simple and most of the ingredients are fairly inexpensive. To make this tuna pasta salad you’ll need:
Pasta – We used small shells, but you can use any small shape. Bowtie pasta is another great option.
Tuna – Canned tuna is probably the most expensive ingredient in this pasta salad, but a little goes a long way! We used two 5oz. cans to span all six servings. If you want to reduce the price even further, drop down to one can and increase the amount of peas for more protein!
Onion – A little onion adds depth of flavor and a lot of great crunch to this salad. We used red onion for color, but a sweet onion also works!
Dressing – This tuna salad uses a super simple homemade dressing made with mayonnaise, lemon juice, salt, pepper, and dried dill. Simple but good!
what Kind of Tuna to Use
I prefer chunk light tuna for this pasta salad because it’s a good balance between affordable and having a good texture for the salad. Tuna labeled “solid” will have larger prettier pieces, but usually fetches a higher price. Albicore or white tuna will have a lighter color and a milder flavor. …but I kind of like the stronger taste of tuna for this salad!
Variations on Tuna Pasta Salad
Tuna pasta salad has been a classic for decades and everyone makes it a little different. If you want to branch out from the recipe below, here are some other ingredients you can try:
Add diced cheddar for more richness
Substitute half of the mayonnaise with plain Greek yogurt for a slightly lighter flavor
Substitute the onion with shallots for a milder onion flavor
Add diced celery for more crunch
Add diced hard-boiled egg for more inexpensive protein
Add a couple tablespoons of dill or sweet relish for more flavor
Try canned salmon in place of the tuna
Add fresh herbs (dill, parsley, tarragon, green onion)
Can You Make Tuna Pasta Salad Ahead?
You can make tuna pasta salad ahead of time, which can be helpful for potlucks and BBQs, but it’s definitely best when eaten on the same day it’s prepared. I would advise against making it more than one day ahead because it will begin to dry out the longer it stays in the refrigerator. Luckily, this pasta salad is a snap to make, so it’s easy to whip up on the day of!
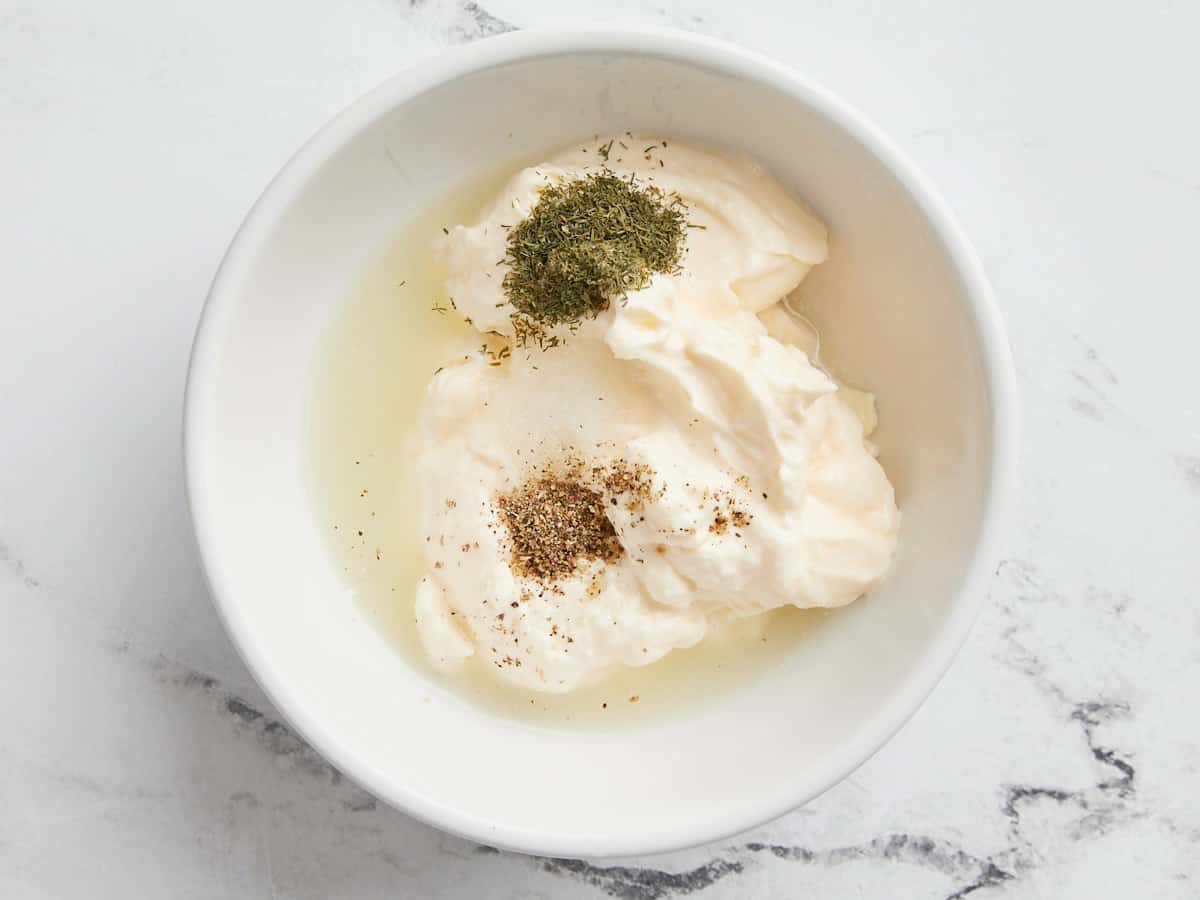
Make the dressing first. Combine the mayonnaise, lemon juice, dill, salt, and pepper in a bowl, then set the dressing aside.
Finely dice the red onion and measure out the frozen peas.
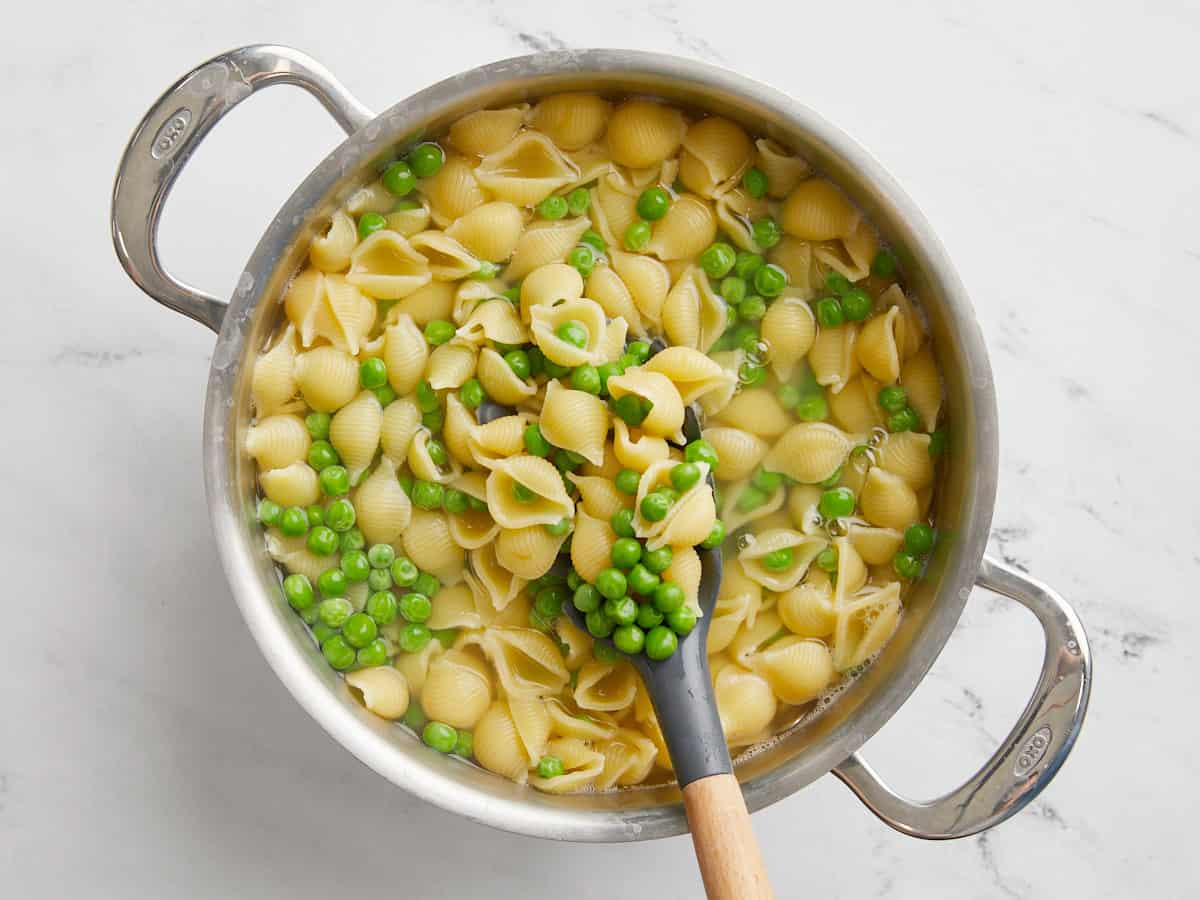
Bring a large pot of salted water to a boil over high heat. Once boiling, add the pasta and continue to boil until it's almost fully tender (about 5-6 minutes), then add the frozen peas. Continue to cook the pasta and peas together for the last minute or two, or until the pasta is fully tender. Drain the pasta and peas well in a colander, allowing them to cool.
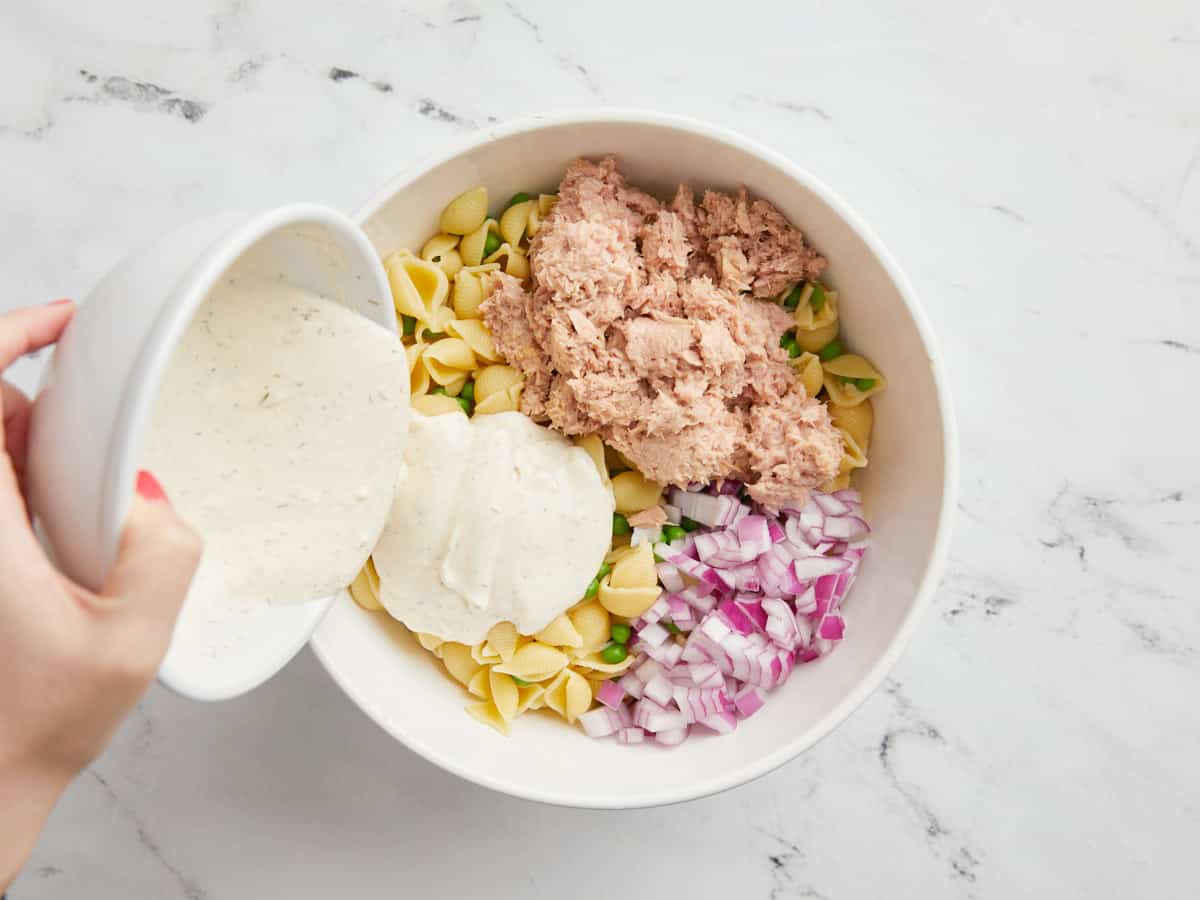
Once the pasta and peas are well drained and mostly cooled, transfer them to a large bowl. Add the diced red onion, drained tuna, and prepared dressing. Fold the ingredients together until everything is evenly combined and coated in dressing. Serve immediately or refrigerate until ready to eat.
How to Make Tuna Pasta Salad – Step By Step Photos
Make the dressing first. Combine ¾ cup mayonnaise, 2 Tbsp lemon juice, ¾ tsp salt, ¼ tsp pepper, and ¼ tsp dried dill. Stir everything together, then set the dressing aside.
Finely dice about ½ cup of red onion. Measure 1 cup of frozen peas.
Bring a large pot of salted water to a boil. Once boiling, add 12 oz. small shell pasta (or any other small shape) and boil just until tender. When the pasta is almost cooked through, add the frozen peas and let them cook with the pasta for the last two minutes. Drain the pasta and peas well in a colander, allowing them to cool.
When the pasta and peas have drained well and cooled down (slightly warm is okay), add them to a large bowl with two drained 5oz. cans of tuna, the diced red onion, and the prepared dressing.
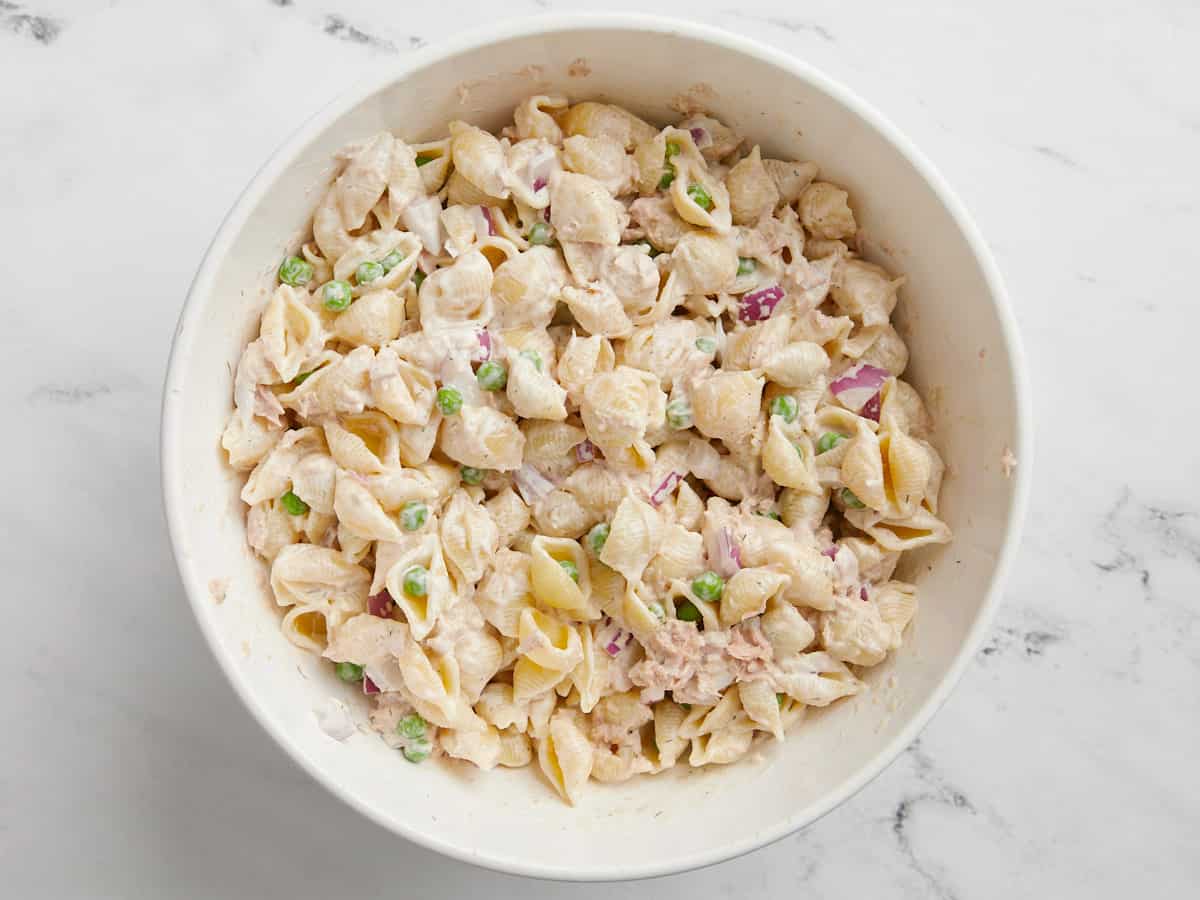
Gently fold the ingredients together until everything is evenly mixed and coated in dressing.
Serve immediately or refrigerate until ready to eat!