Mediterranean Lentil Soup

This vegan Mediterranean Lentil Soup is bright and refreshing. Finished with a squeeze of lemon, it’s the perfect meal for rainy spring days.

The post Mediterranean Lentil Soup appeared first on Budget Bytes.

In my opinion, a bright and refreshing soup is the perfect way to welcome spring, and this vegan Mediterranean Lentil Soup is the perfect comforting meal for the rainy days to come. A rich and flavorful broth loaded with veggies, lentils, and kale will fill you up for pennies and is a great recipe for fridge clean out day. Finish it off with a squeeze of lemon juice for a delicious and easy weeknight meal.
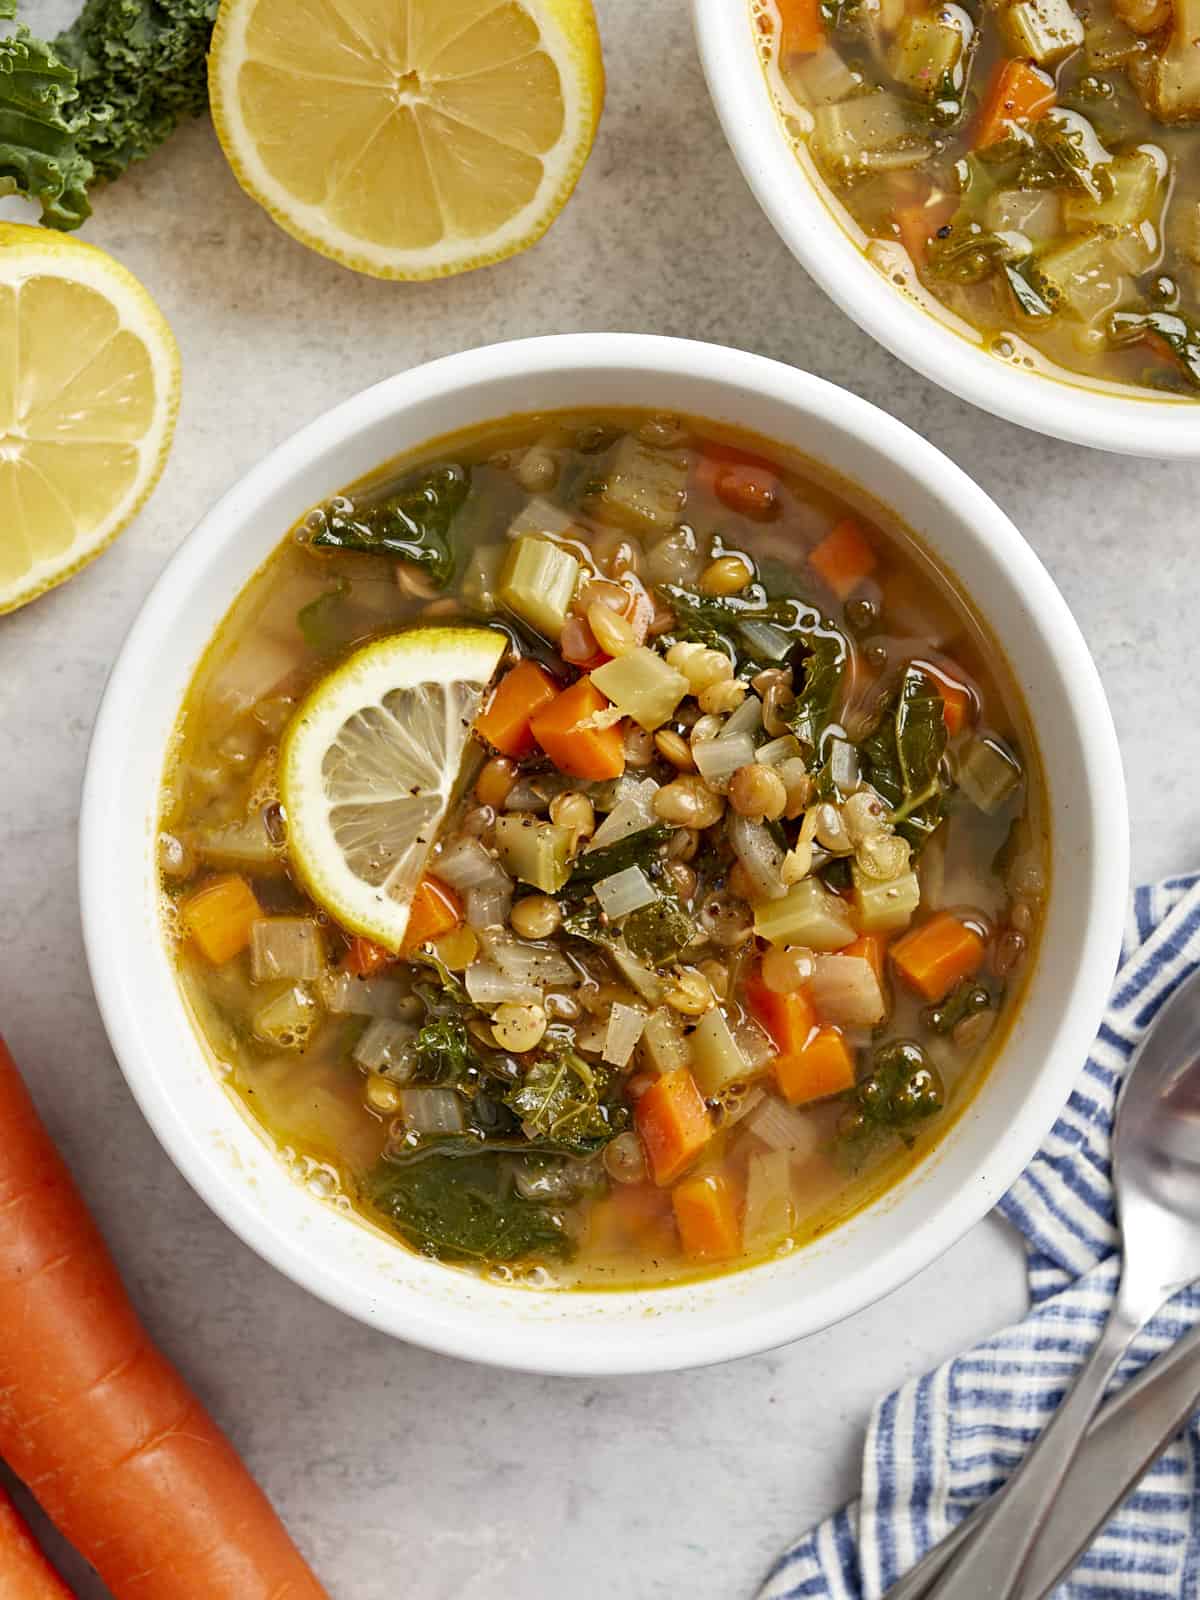
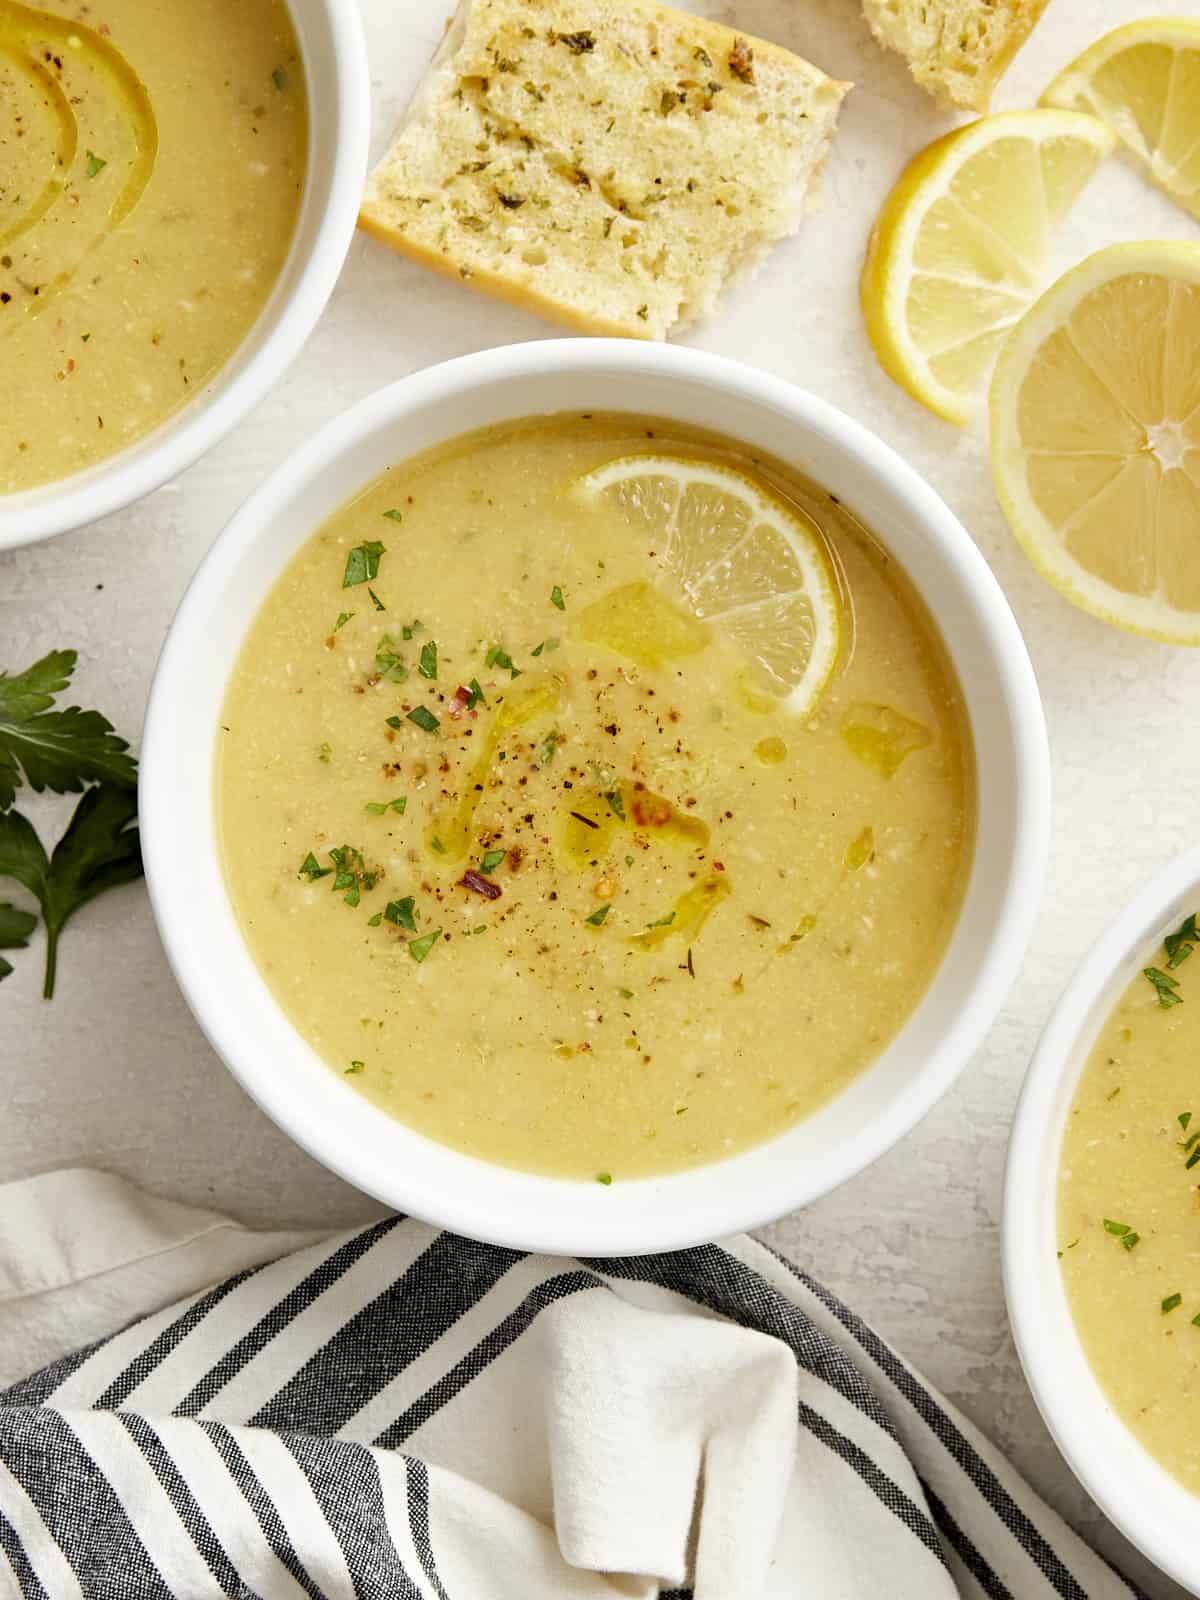
overhead view of a bowl of mediterranean lentil soup with lemon slices.

Why Make Mediterranean Lentil Soup?

The first time I experienced cinnamon in a savory dish was while cooking at a Lebanese restaurant and it was life changing! This Mediterranean Lentil Soup is the perfect introduction to the savory use of cinnamon. This clean and flavorful lentil soup is a vegan flavor explosion. It’s loaded with protein and fiber, naturally gluten-free, and super versatile. You can toss in just about any veggie or green, so raid the fridge and get cooking!

Ingredients for Mediterranean Lentil Soup

Here’s what you’ll need to make Mediterranean lentil soup:

  • Oil: Olive oil is our preferred choice in this recipe for its Mediterranean flavor profile, but vegetable or canola oil will work in a pinch.
  • Mirepoix: A combination of small diced yellow onion, carrots, and celery creates an earthy and sweet base of flavor for this soup.
  • Garlic: The large pieces of crushed garlic versus mincing it fine is intentional to bring out the natural sweetness and flavor of cooked garlic instead of the sometimes-overwhelming bite it has when minced.
  • Cumin: Adds a savory and nutty Mediterranean flavor to this soup.
  • Cinnamon: A great savory application of the spice! It will warm you up from the inside out and make your house smell fantastic.
  • Lentils: We used brown lentils for their firm texture.
  • Vegetable Broth: We used Vegetable flavored Better Than Bouillon in this recipe. If using another brand, make sure salt is not the first ingredient or it’s a waste of money!
  • Lemon Juice: Gives the soup a brightness that is seriously addictive. You can use fresh-squeezed lemon juice and save half of your lemon for garnishing each bowl, or you can use a bottled lemon juice. I always have lemons in the kitchen, so we had some to garnish with, too!
  • Kale: Swiss chard, rainbow chard, spinach, escarole, and all varieties of kale work great, too.
  • Salt and Pepper: Enhance the natural flavors of the soup.

Which color lentils are best for soup?

Brown or green lentils work best for this soup, as they will keep their shape after cooking, which is what we’re looking for texture-wise. Red lentils are not recommended because they cook quicker and will dissolve into the soup as they cook, creating a thick and mushy texture.

How to Store Leftovers

Store leftover Mediterranean lentil soup in an air-tight container in the refrigerator for up to 4 days. This soup also freezes super well for up to 3 months when stored properly in an air-tight container. Let thaw overnight in the refrigerator before reheating in a pot set over medium-low heat until warmed through.
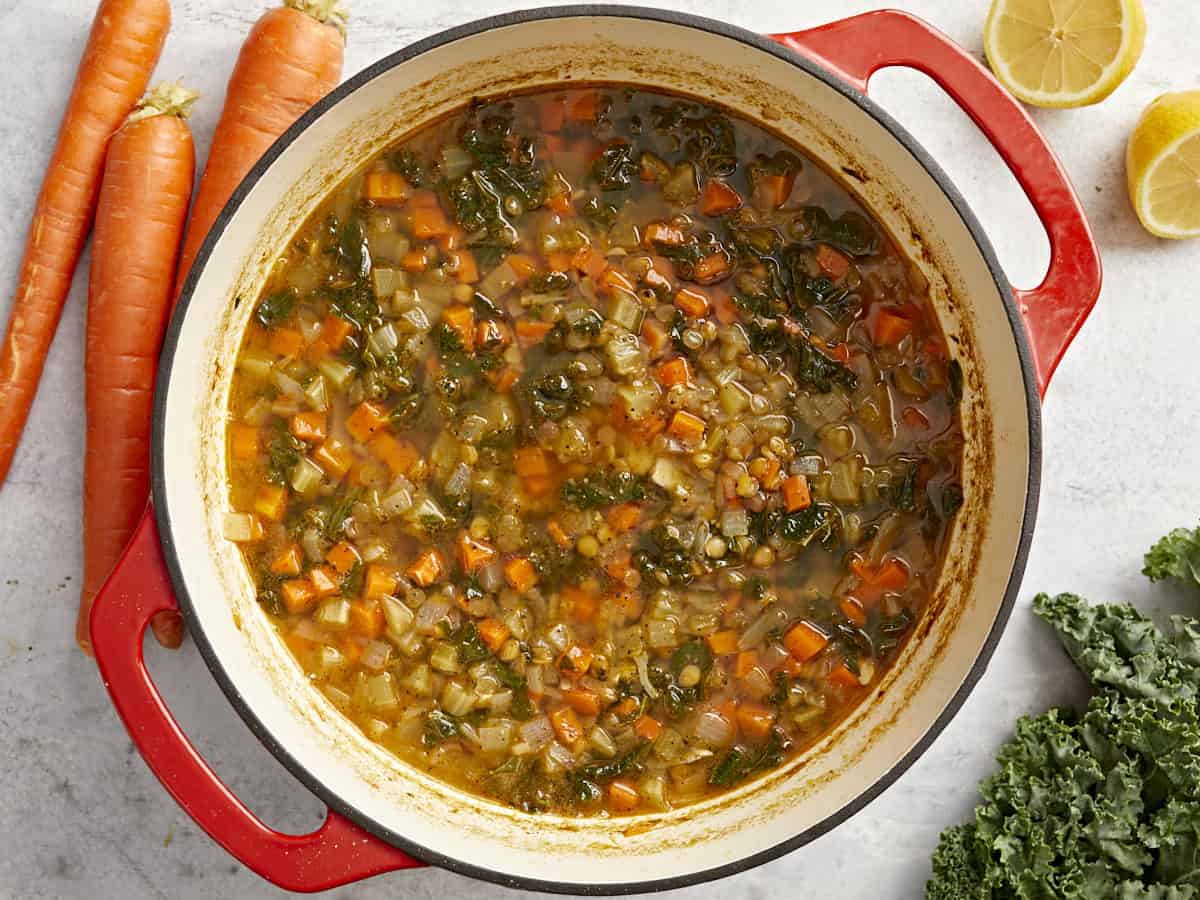
overhead view of mediterranean lentil soup in a red dutch oven.
overhead view of 2 bowls of mediterranean lentil soup with lemon slices.
Print

Mediterranean Lentil Soup

This vegan Mediterranean Lentil Soup is bright and refreshing. Finished with a squeeze of lemon, it's the perfect meal for rainy spring days.
Course Main Course, Soup
Cuisine Mediterranean
Total Cost $7.59 recipe / $1.08 serving
Prep Time 15 minutes
Cook Time 55 minutes
Total Time 1 hour 10 minutes
Servings 7 (about 1.5 cups each)
Calories 185kcal

Equipment

Ingredients

  • 2 Tbsp olive oil $0.32
  • 1 large yellow onion, diced small $0.78
  • 2 medium carrots, diced small $0.24
  • 3 stalks celery, diced small $0.36
  • 5 cloves garlic, crushed $0.30
  • 2 tsp ground cumin $0.20
  • 1 tsp cinnamon $0.16
  • 1 cup uncooked brown or green lentils $0.68
  • 8 cups vegetable broth $1.44
  • 4 oz. lemon juice $0.48
  • 3 cups kale, chopped and lightly packed $2.48
  • 1 tsp salt $0.05
  • 2 tsp freshly cracked black pepper $0.10

Instructions

  • Rinse the lentils in a strainer under cold water until the water runs clear.
  • Heat the oil in a large soup pot set over medium-high heat. Add in the onions, carrots, and celery and cook until they become tender, about 6-7 minutes, stirring frequently. Season with salt and pepper.
  • Stir in the garlic, cumin, and cinnamon. Heat until fragrant, about 60 seconds. Add the lentils to the pan and heat for 1-2 minutes to slightly toast.
  • Pour in the vegetable broth, water, and lemon juice, then bring the pot to a boil. Reduce heat to low and simmer until the lentils are tender, about 30-45 minutes.
  • Stir in the greens, season with additional salt, pepper, and lemon juice to taste before serving.

See how we calculate recipe costs here.

Nutrition
Serving: 1.5cups | Calories: 185kcal | Carbohydrates: 28g | Protein: 9g | Fat: 5g | Sodium: 1452mg | Fiber: 11g
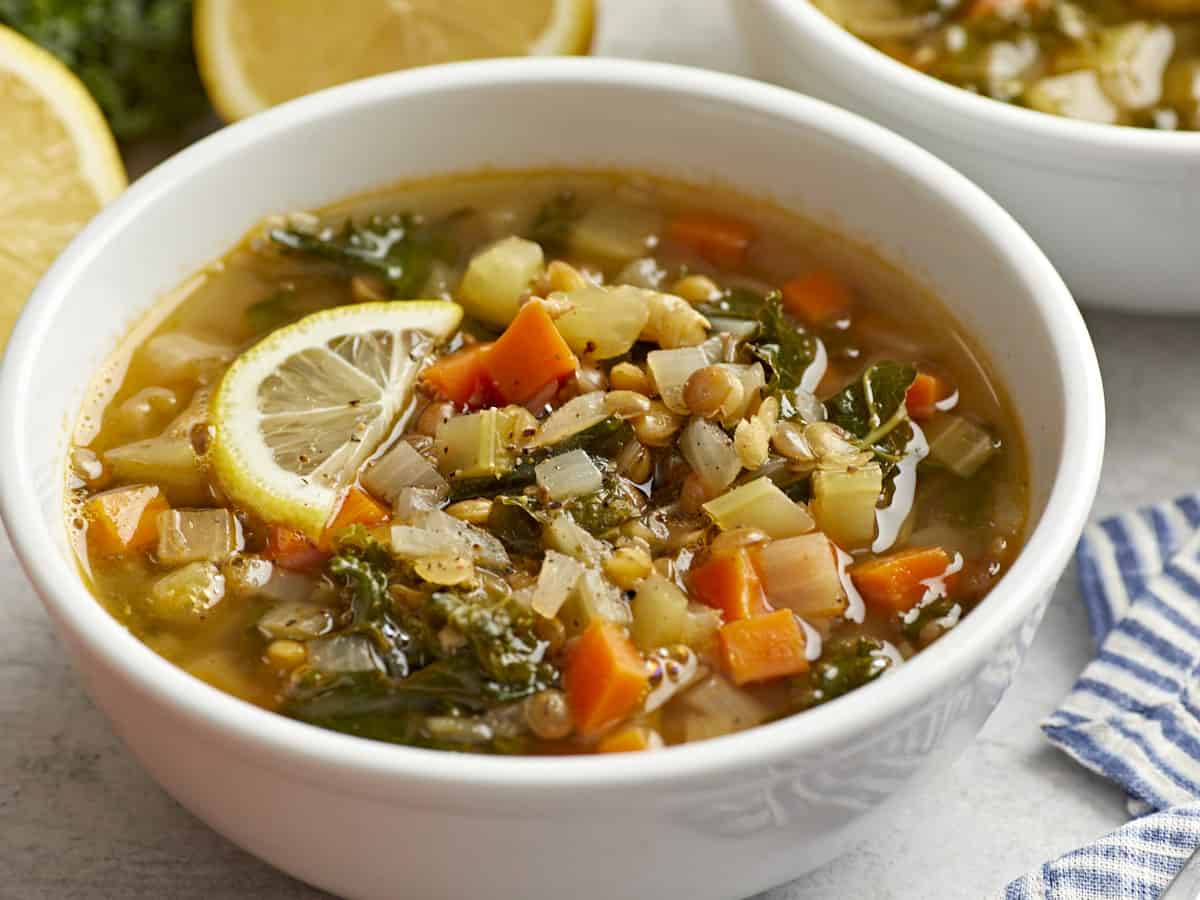
three-quarters view of mediterranean lentil soup in a white bowl with a lemon slice.

how to make Mediterranean Lentil Soup – step by step photos
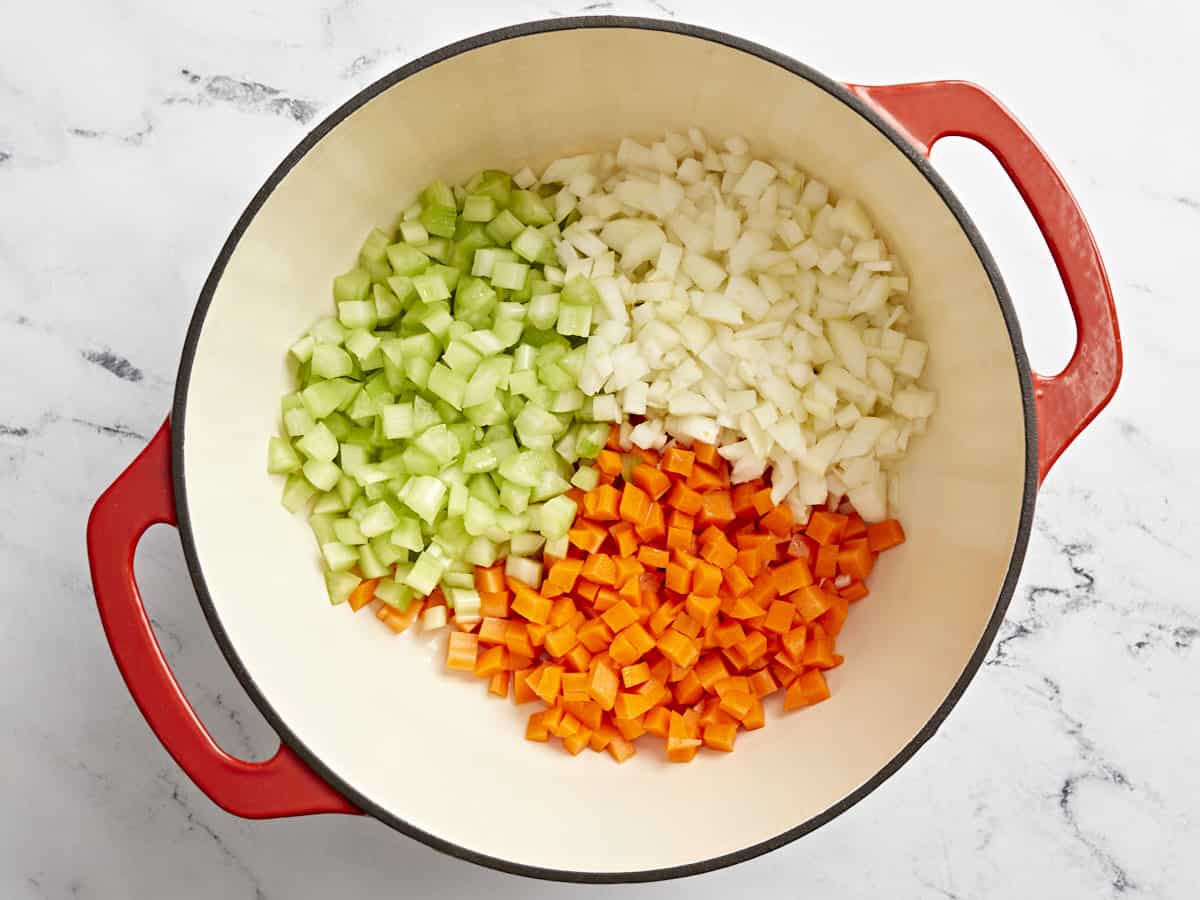
mirepoix in a red dutch oven.

Rinse 1 cup brown or green lentils in a strainer under cold water until the water runs clear. Heat 2 Tbsp olive oil in a large soup pot set over medium-high heat. Add in 1 diced yellow onion, 2 diced medium carrots, and 3 diced stalks celery and cook until they become tender, about 6-7 minutes, stirring frequently. Season with 1 tsp salt and 2 tsp pepper.
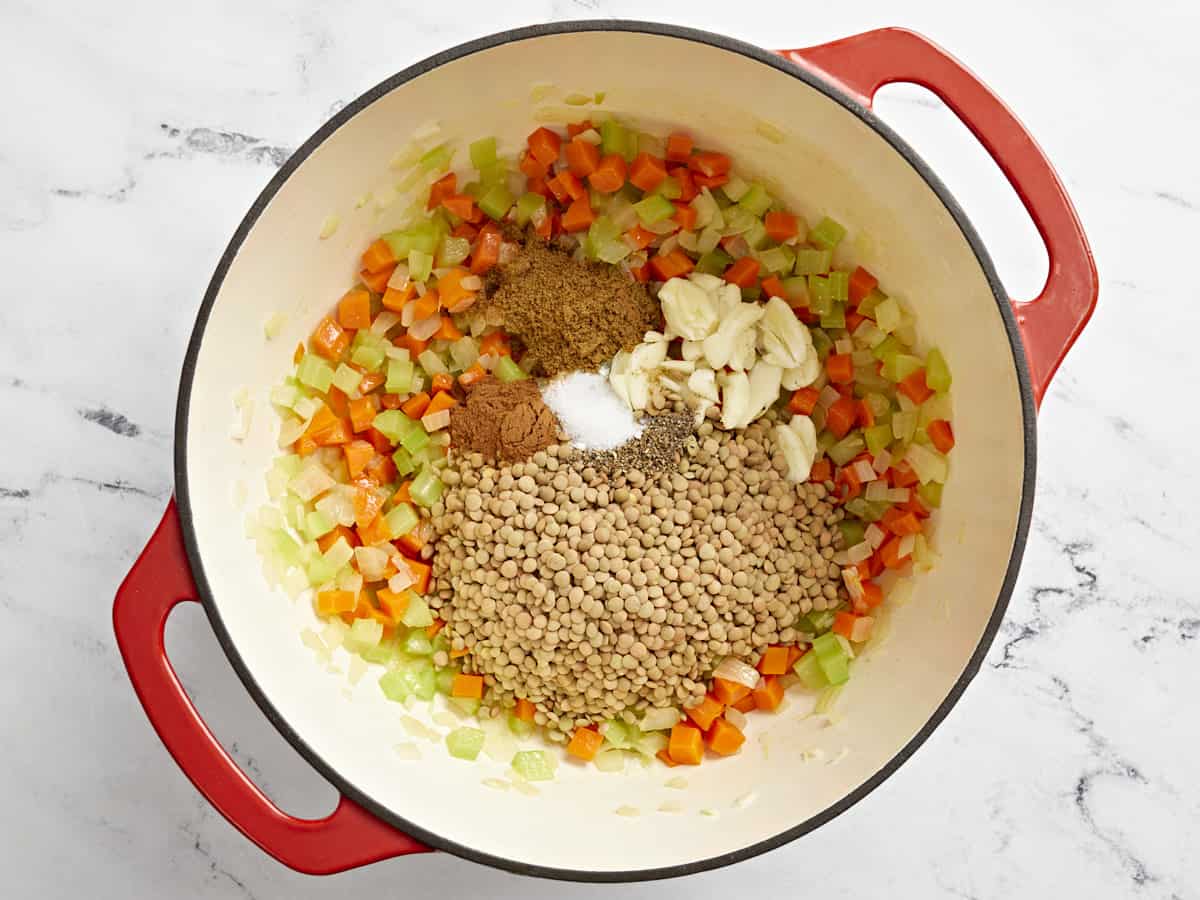
mirepoix, spices, and lentils in a red dutch oven.

Stir in 5 crushed cloves garlic, 2 tsp ground cumin, and 1 tsp cinnamon. Heat until fragrant, about 60 seconds. Add the lentils to the pan and heat for 1-2 minutes to slightly toast.
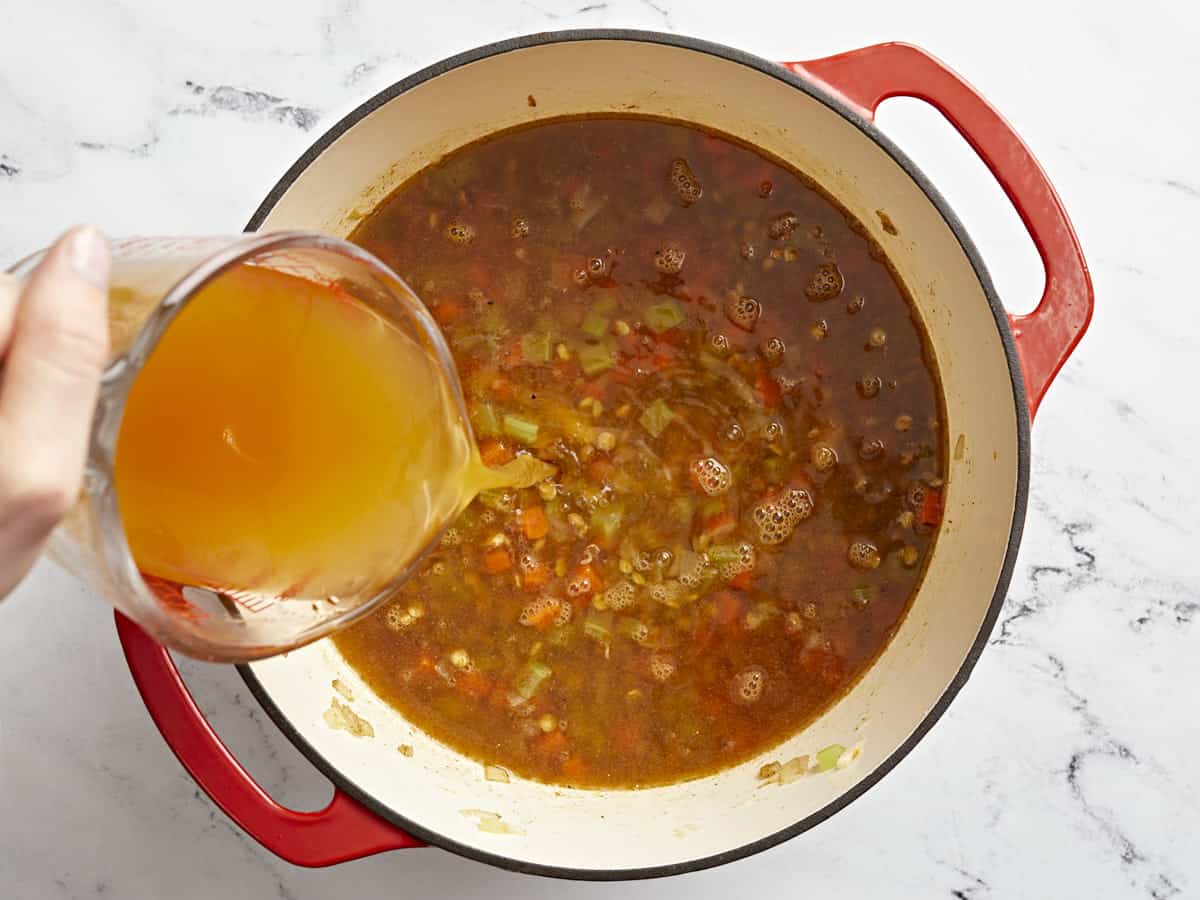
broth added to lentil soup in a red dutch oven.

Pour in 8 cups vegetable broth and 4 oz. lemon juice, then bring the pot to a boil. Reduce heat to low and simmer until the lentils are tender, about 30-45 minutes.
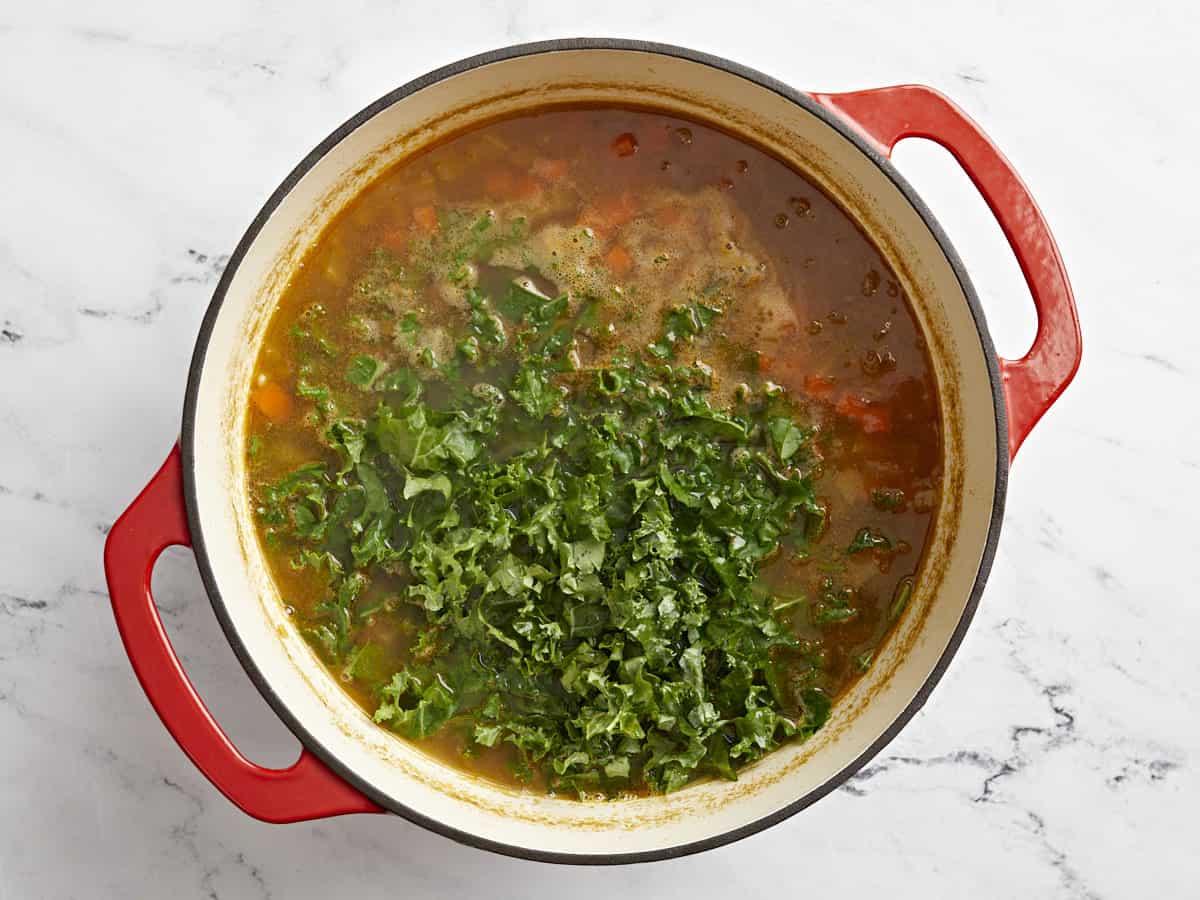
kale added to lentil soup in a red dutch oven.

Stir in 3 cups chopped kale, season with additional salt, pepper, and lemon juice to taste before serving.
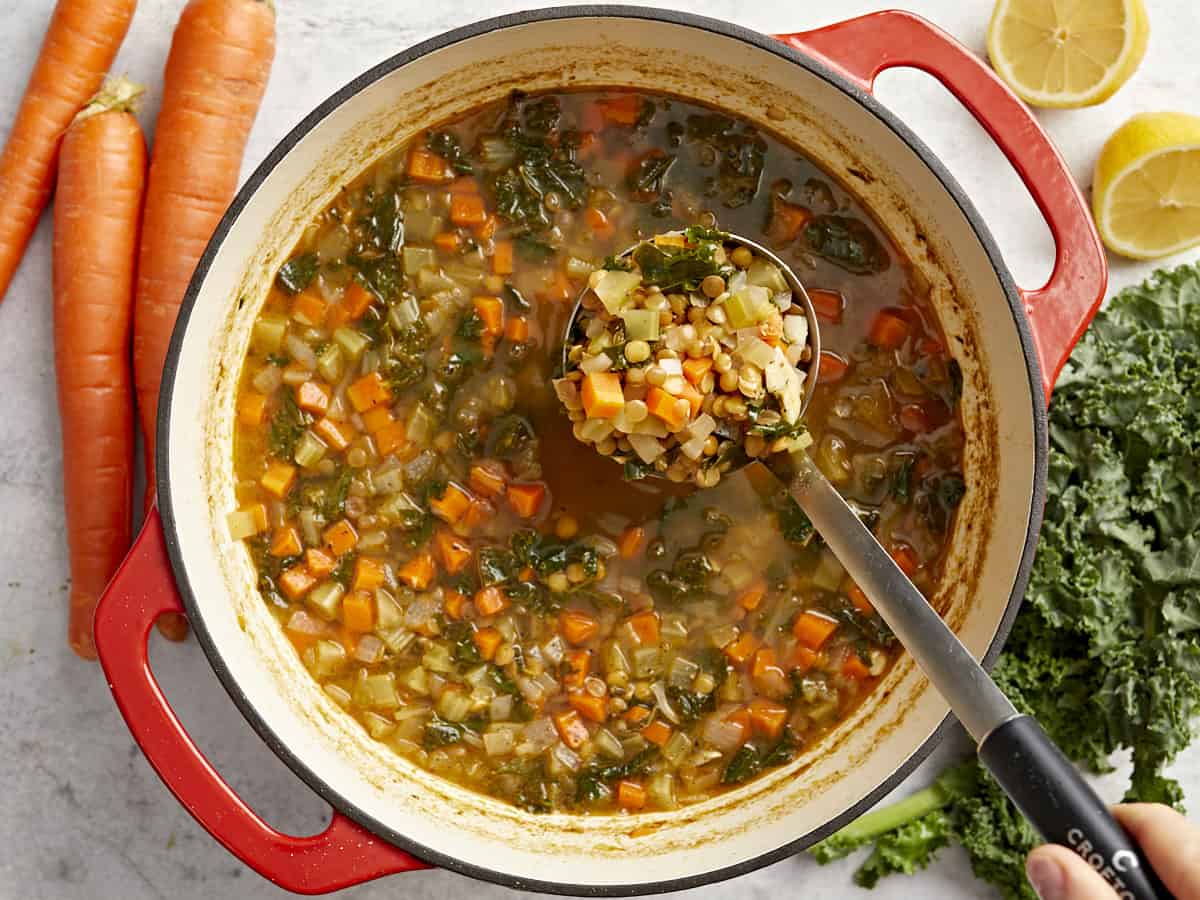
overhead view of a spoon lifting a scoop of mediterranean lentil soup from a red dutch oven.

This Mediterranean lentil soup is going to be your new favorite!

The post Mediterranean Lentil Soup appeared first on Budget Bytes.

Lemony Chickpea Soup

This Lemony Chickpea Soup recipe is simple, budget-friendly, and delicious. It’s the perfect comforting low-effort meal for busy nights.

The post Lemony Chickpea Soup appeared first on Budget Bytes.

Quick and easy soups made with canned beans have become my favorite go-to easy meal when I’m too tired to cook and too broke to eat out. I’ve made several variations of this soup over the years, including the viral Rosemary Garlic White Bean Soup, but this week I made a Mediterranean-inspired Lemony Chickpea Soup. It’s fast, easy, has bright flavors, and pairs perfectly with some crusty bread for a simple no-fuss meal.

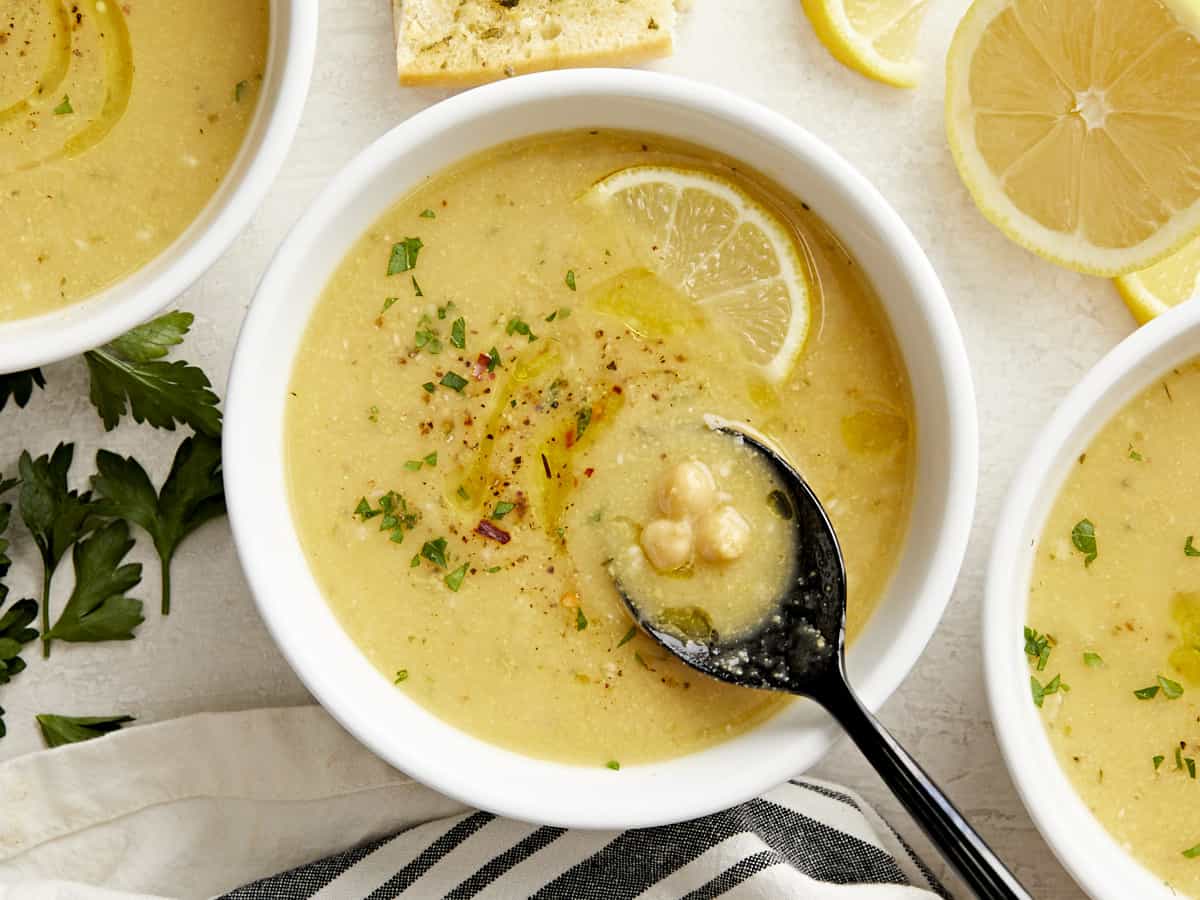
Overhead view of three bowls of lemony chickpea soup garnished with a lemon slice.

This incredibly simple Lemony Chickpea soup combines puréed chickpeas, broth, and some seasoning to create a perfectly comforting and flavorful bowl of soup. And since most of these ingredients are shelf-stable, this is a pantry meal you can make any time with no planning head.

Ingredients for Lemony Chickpea Soup

Here’s all you’ll need to make this deliciously easy chickpea soup:

  • Garlic: A hefty dose of garlic gives this soup a deep savory flavor and perfectly balances the bright lemon.
  • Olive Oil: Olive oil is used to sauté the garlic and give the soup a little bit of richness in the mouthfeel.
  • Chickpeas: This recipe uses canned chickpeas to make the entire preparation fast and easy. If you prefer to use chickpeas cooked from dry, you’ll need about 4-5 cups of cooked chickpeas.
  • Chicken Broth: Broth adds a lot of savory depth to the soup as well as the salt needed to make each flavor pop.
  • Lemon: A splash of lemon juice brightens up the flavors in the soup, provides a nice contrast to the savory garlic flavor, and gives the soup a fresh Mediterranean flavor.
  • Seasoning: The seasoning profile for the soup is fairly simple with just a little bit of thyme, oregano, red pepper, and black pepper. Keeping the seasoning light gives the soup a bright and fresh flavor.

What to Serve with Lemony Chickpea Soup

This chickpea soup is just begging for some crusty bread for dipping, so I highly suggest making a loaf of our easy no-knead bread or focaccia rolls. Or, if you need something a little faster, homemade garlic bread would also be amazing with this soup. And, if you want some veggies on the side, a simple side salad would be awesome, or you could go with something a little heftier, like tortellini salad.

Tips for Smooth Chickpea Soup

Canned chickpeas can often be a bit on the firm side, so to make sure your chickpea soup is extra smooth you may need to pre-boil the chickpeas, but it depends largely on the brand of chickpeas. Some canned chickpeas are quite soft, while others are very firm or borderline undercooked.

If your chickpeas are very firm, simply empty the can and liquid into a small saucepot and simmer them for about 10 minutes. Let the chickpeas cool before transferring to the blender to purée.

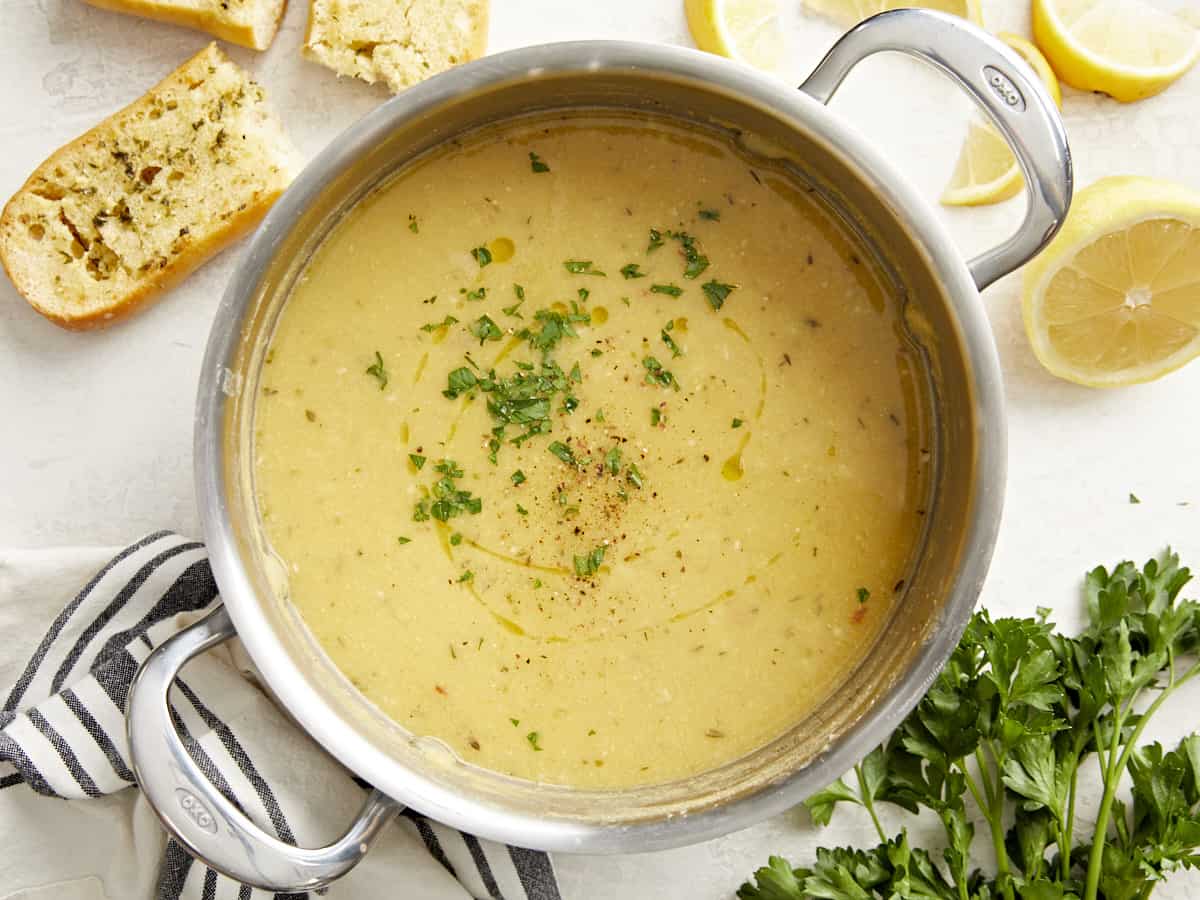
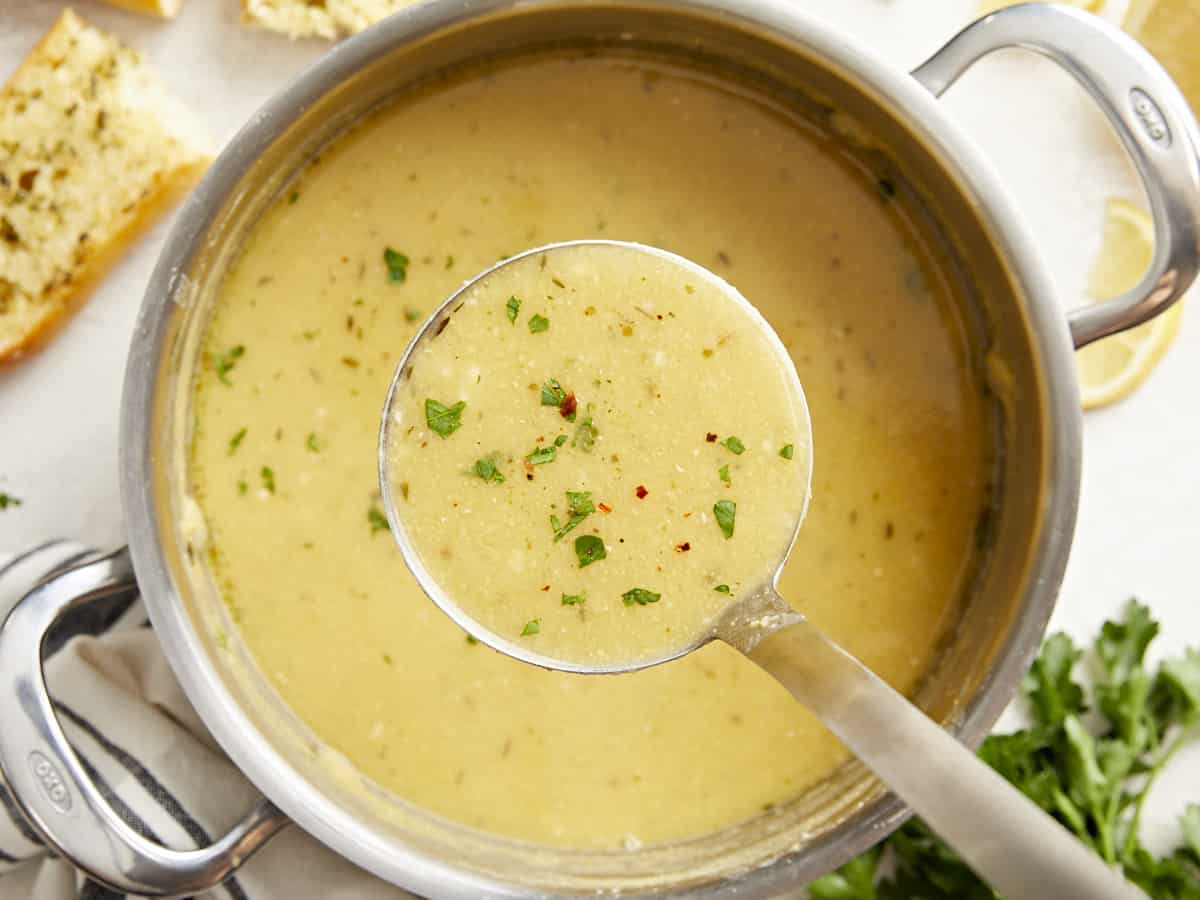
Overhead view of a pot full of lemony chickpea soup with garlic bread on the side.
Overhead view of a bowl of lemony chickpea soup with a spoon in the middle.
Print

Lemony Chickpea Soup

This Lemony Chickpea Soup recipe is simple, budget-friendly, and delicious. It's the perfect comforting low-effort meal for busy nights.
Course Dinner, Lunch, Soup
Cuisine American, Mediterranean
Total Cost $4.52 recipe $1.13 serving
Prep Time 5 minutes
Cook Time 18 minutes
Total Time 23 minutes
Servings 4 (1.25 cups each)
Calories 375kcal

Ingredients

  • 3 15oz. cans chickpeas, divided $2.67
  • 4 cloves garlic $0.32
  • 2 Tbsp olive oil $0.32
  • 2 cups chicken broth $0.26
  • 1/2 tsp dried thyme $0.05
  • 1/2 tsp dried oregano $0.05
  • 1 pinch crushed red pepper $0.02
  • 1 lemon $0.79
  • 1/4 tsp salt (or to taste) $0.02
  • 1/4 tsp Freshly cracked black pepper $0.02

Instructions

  • Add 2 of the cans of chickpeas to a blender with the liquid in the can and purée until smooth.* Drain the third can of chickpeas and set aside.
  • Mince the garlic and add it to a saucepot with the olive oil. Sauté the garlic over medium heat for about one minute, or just until the garlic becomes very fragrant.
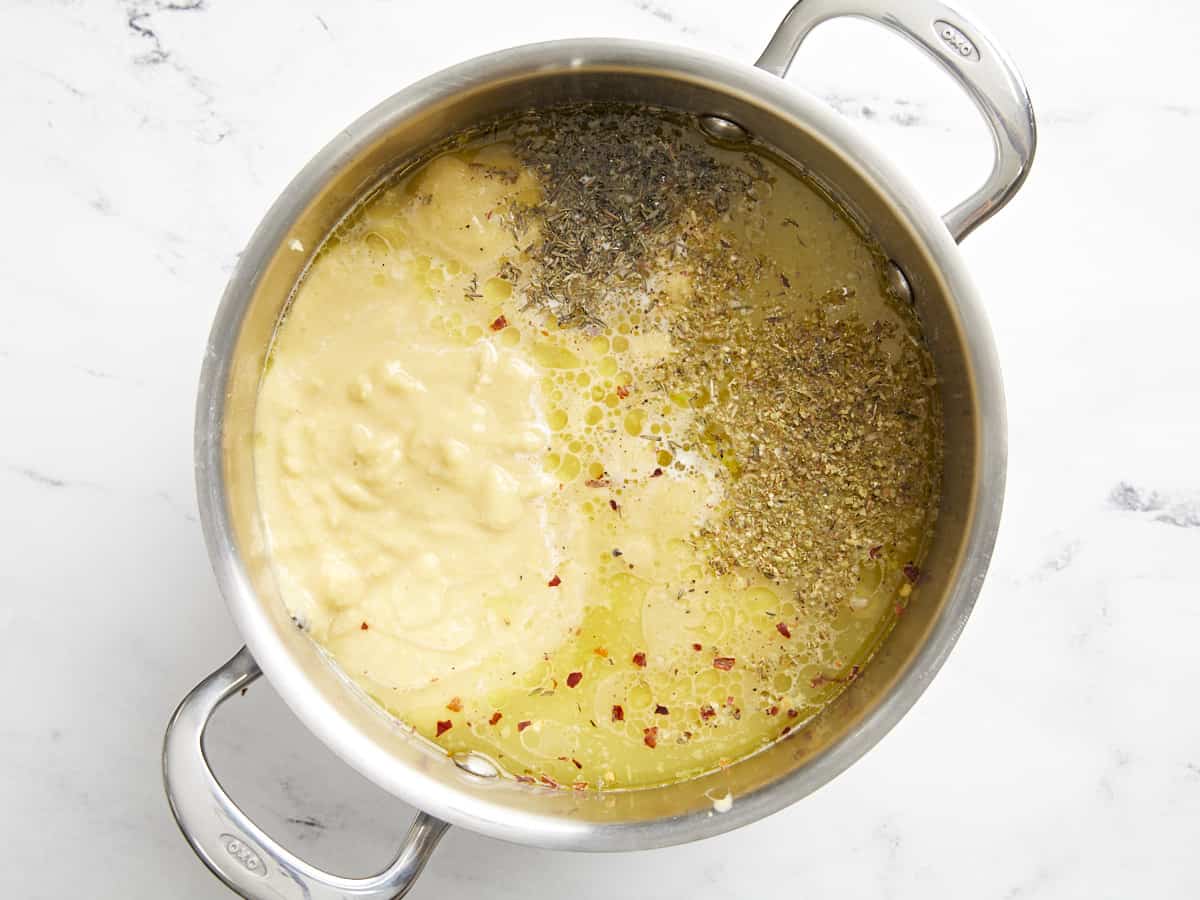
  • Add the puréed chickpeas, drained chickpeas, chicken broth, thyme, oregano, red pepper, salt, and pepper to the soup pot with the garlic. Stir to combine.
  • Allow the soup to come up to a simmer, then simmer for 10 minutes, stirring occasionally.
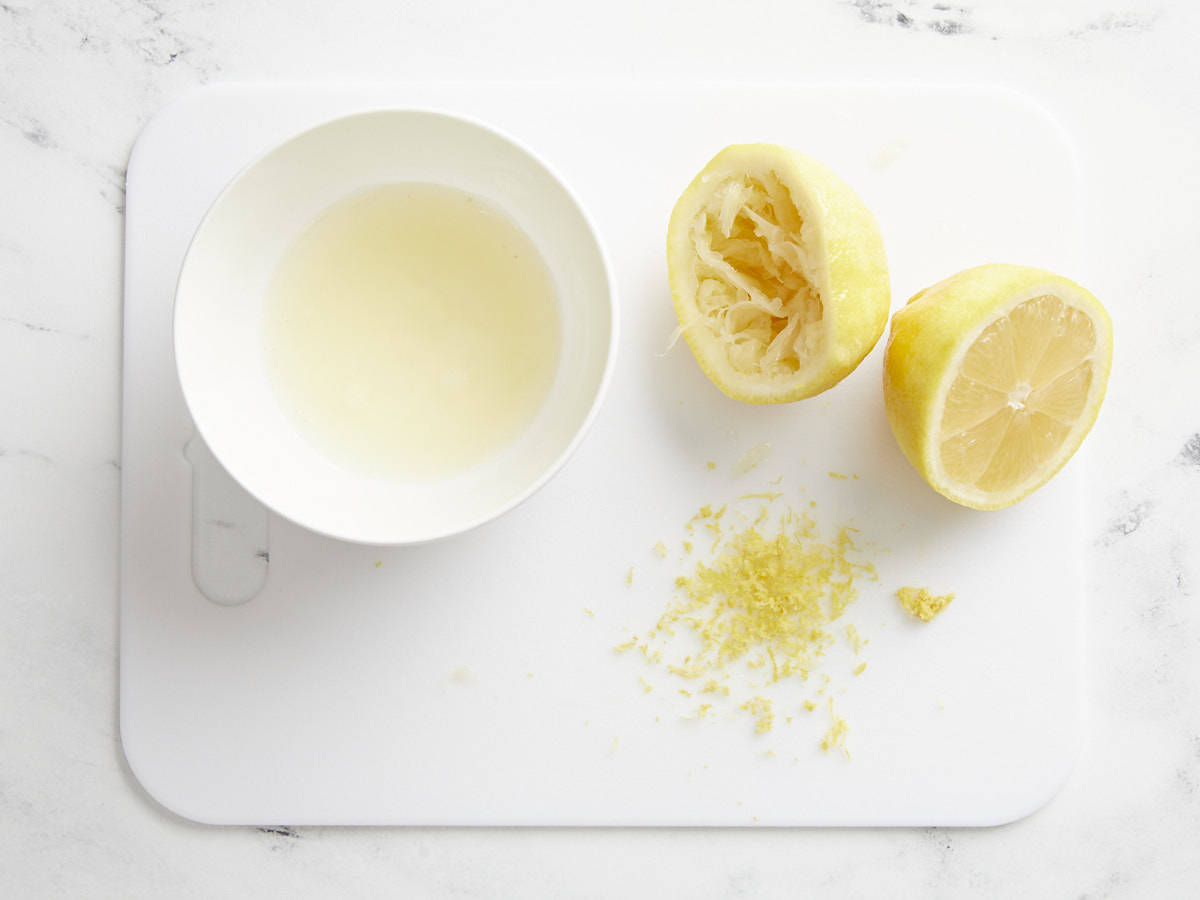
  • While the soup simmers, zest and juice half of the lemon (you'll need about 2 Tbsp juice and ½ tsp zest). Slice the remaining lemon for garnish.
  • After the soup has simmered, add 2 Tbsp juice and a pinch of lemon zest, then stir to combine.
  • Taste the soup and adjust the salt, lemon juice, pepper, or other herbs to your liking. The amount of salt needed to properly flavor the soup will depend on the salt content of your broth, so make sure to salt to taste at the end.
  • Garnish the soup with the remaining lemon slices and zest, a drizzle of olive oil, and more pepper if desired, then serve with crusty bread and enjoy!

See how we calculate recipe costs here.

Notes

*Some brands of canned chickpeas are quite firm. To make the soup really smooth you may need to pre-simmer the beans for about 10 minutes to make them softer before blending. 

Nutrition

Serving: 1.25cup | Calories: 375kcal | Carbohydrates: 48g | Protein: 18g | Fat: 14g | Sodium: 1527mg | Fiber: 15g
Overhead view of three bowls of lemony chickpea soup garnished with slices of lemon.

How to Make Lemony Chickpea Soup – Step by Step Photos

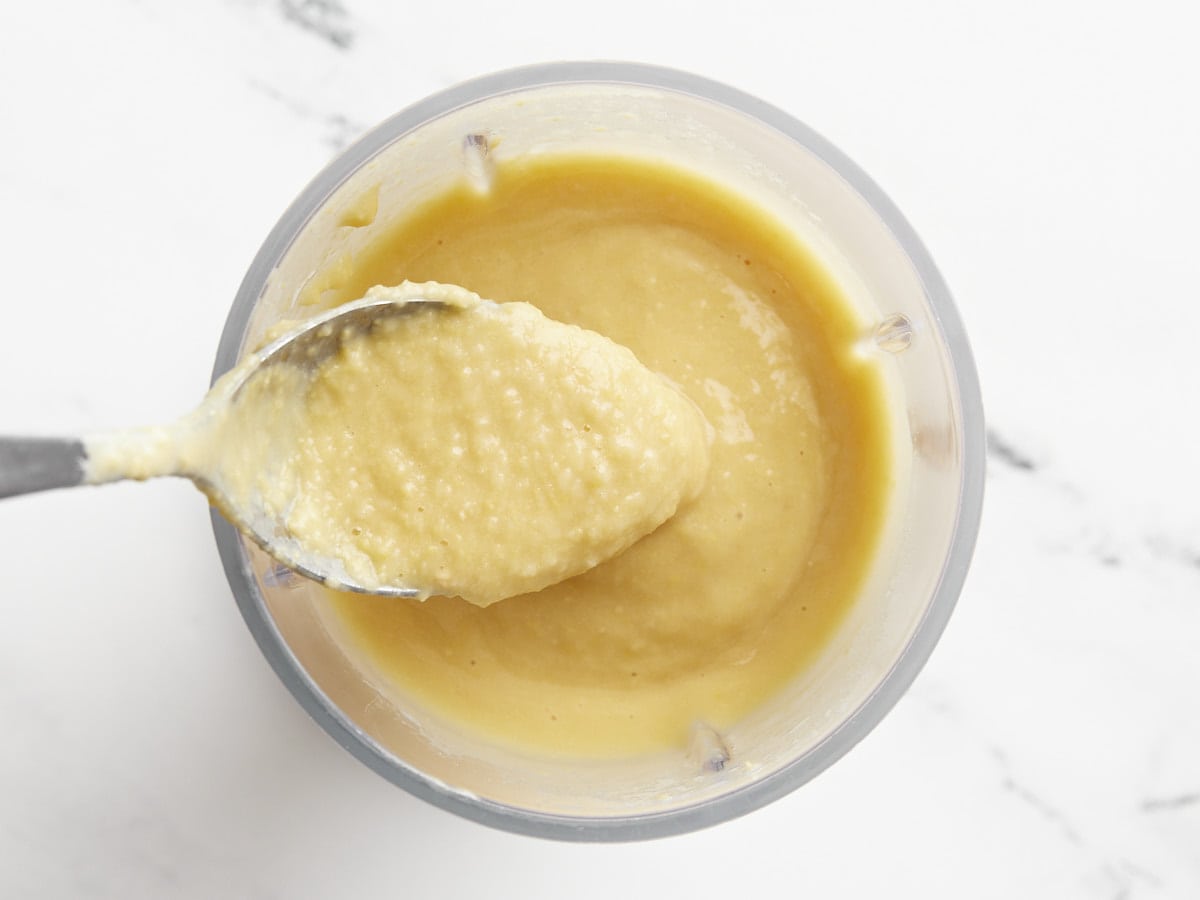
Blended chickpeas in a blender with a spoon.

Add two 15oz. cans of chickpeas to a blender, with the liquid in the can, and purée until smooth. If the brand of chickpeas you’re using are extra firm, you may want to simmer the chickpeas in the liquid for about 10 minutes before blending to soften them more. Let the simmered chickpeas cool slightly before blending, as blending hot liquids can be dangerous.

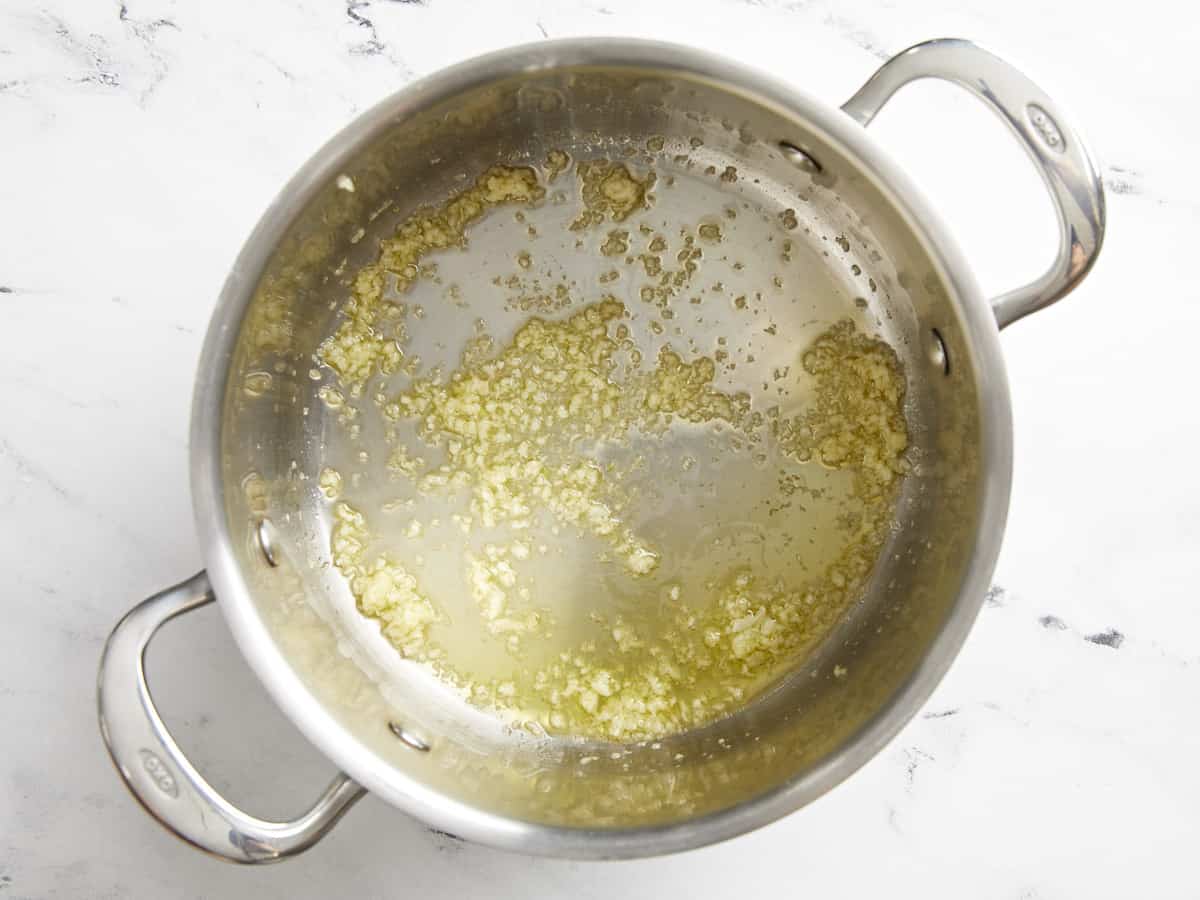
Minced garlic in a soup pot with olive oil.

Mince four cloves of garlic (or more, if you’d like!) and add them to a saucepot with 2 Tbsp olive oil. Sauté the minced garlic over medium heat for about one minute, or just until the garlic becomes very fragrant.

Beans, broth, and herbs in the soup pot.

Add the puréed beans, one can of drained chickpeas, 2 cups of chicken broth, ½ tsp dried thyme, ½ tsp dried oregano, 1 pinch of crushed red pepper, ¼ tsp salt, and ¼ tsp pepper to the pot. Stir to combine and bring the soup up to a simmer over medium heat.

Zested and juiced lemon.

Let the soup simmer for about 10 minutes, stirring occasionally. Meanwhile, zest and juice half of a lemon (you’ll need 2 Tbsp juice and about ½ tsp zest). Slice the other half of the lemon to use as a garnish.

Lemon juice being added to the soup.

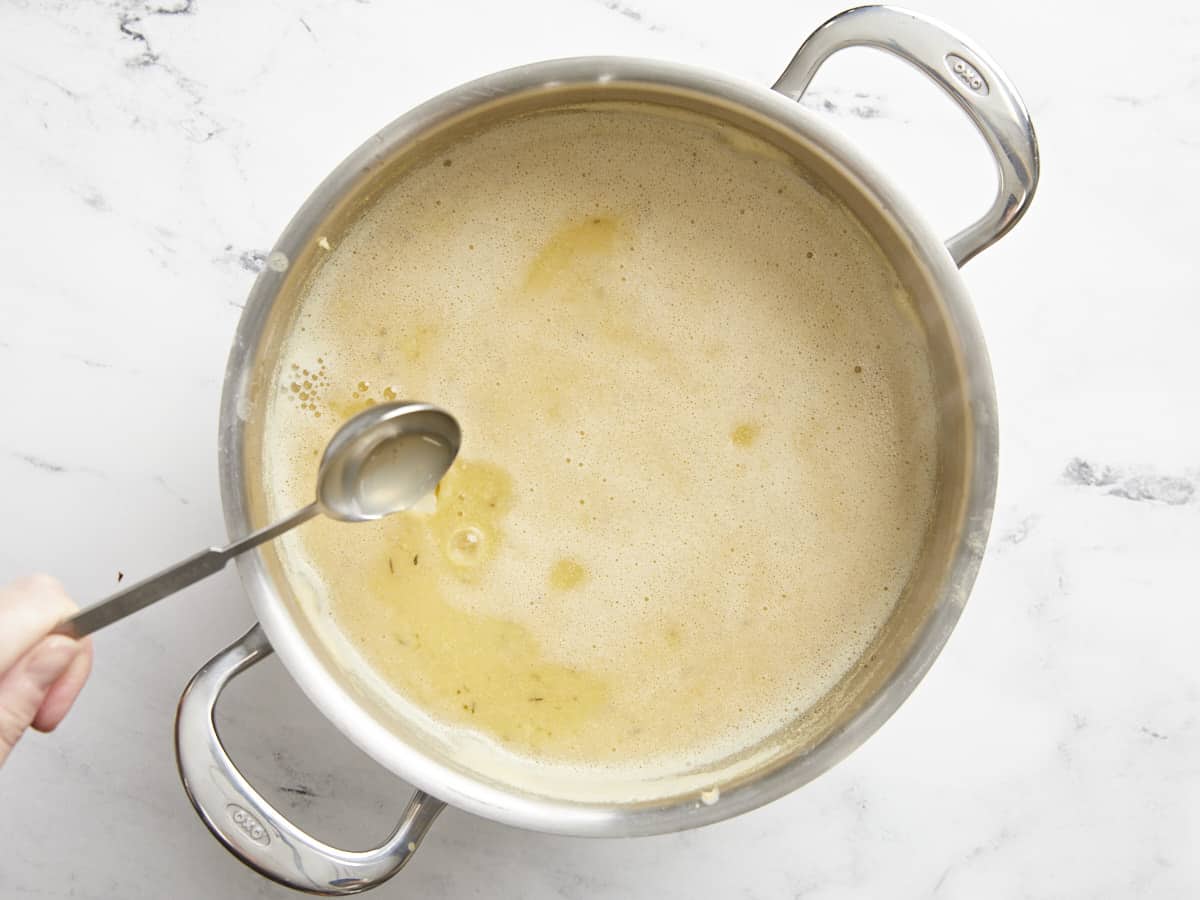
After the soup has simmered for about 10 minutes, add 2 Tbsp lemon juice to the soup along with a pinch of lemon zest.

Finished soup being stirred in the pot.

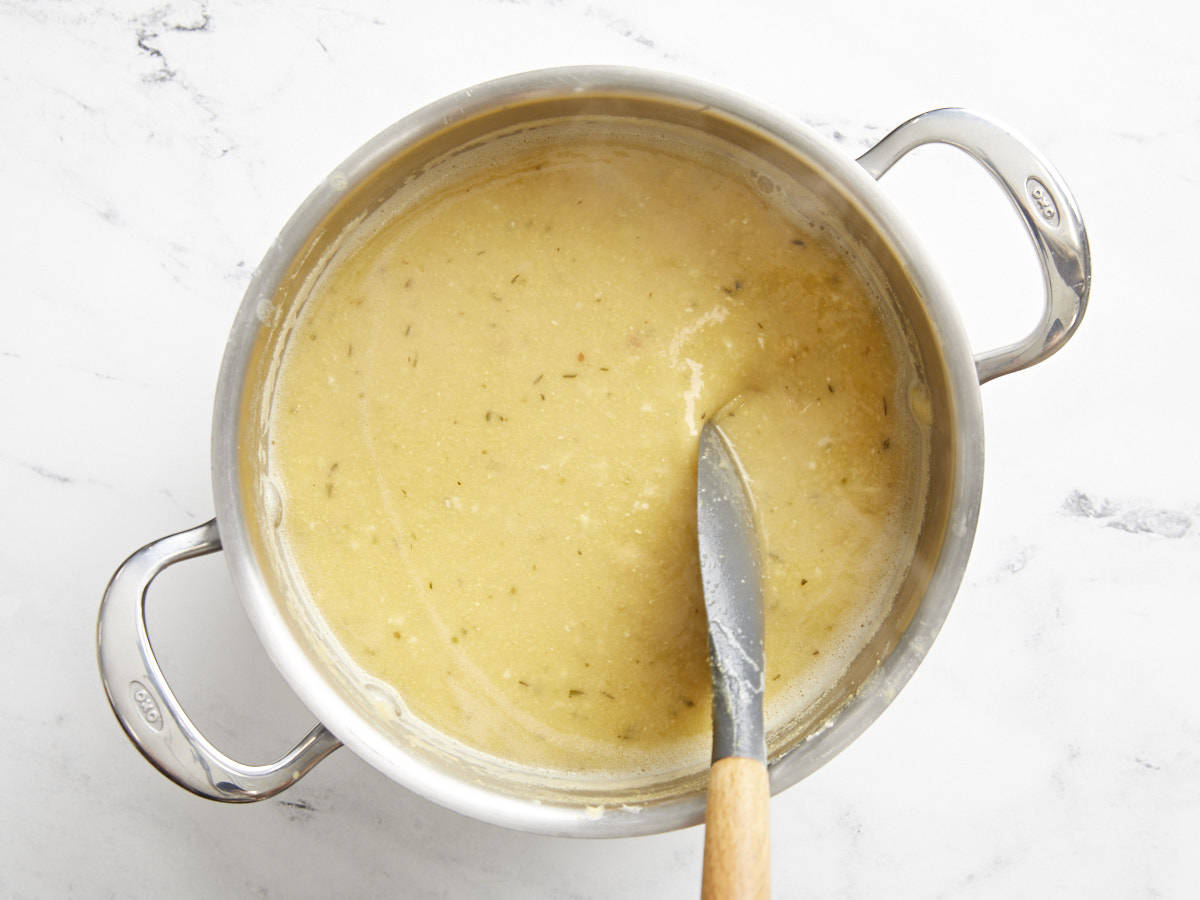
Taste the soup and adjust the salt, lemon juice, zest, or other herbs to your liking. The amount of salt needed will depend on the salt content of the broth used and it can really help the flavors pop, so make sure to salt to taste at the end.

A ladle full of lemony chickpea soup held close to the camera over the pot of soup.

Garnish the soup with the remaining slices of lemon and lemon zest, extra pepper, and a drizzle of olive oil. We also had some parsley in the fridge, so we added some of that for color.

Overhead view of a bowl of lemony chickpea soup with a spoon in the middle.

The post Lemony Chickpea Soup appeared first on Budget Bytes.

Salmorejo

Salmorejo is a cold Spanish soup that’s delicious, creamy, easy to make, and a great way to use up summer tomatoes and day-old bread!

The post Salmorejo appeared first on Budget Bytes.

Salmorejo is a classic chilled Spanish soup that’s delicious, creamy, and a fabulous way to use up summer tomatoes and day-old bread! I had it for the first time in Barcelona and was hooked as soon as I tasted its tangy, velvety perfection. Because it’s an absolute breeze to put together and incredibly elegant, this Salmorejo recipe is often my first choice when throwing a summer dinner party, especially when I don’t want to spend loads of money or any time in a sweltering kitchen.

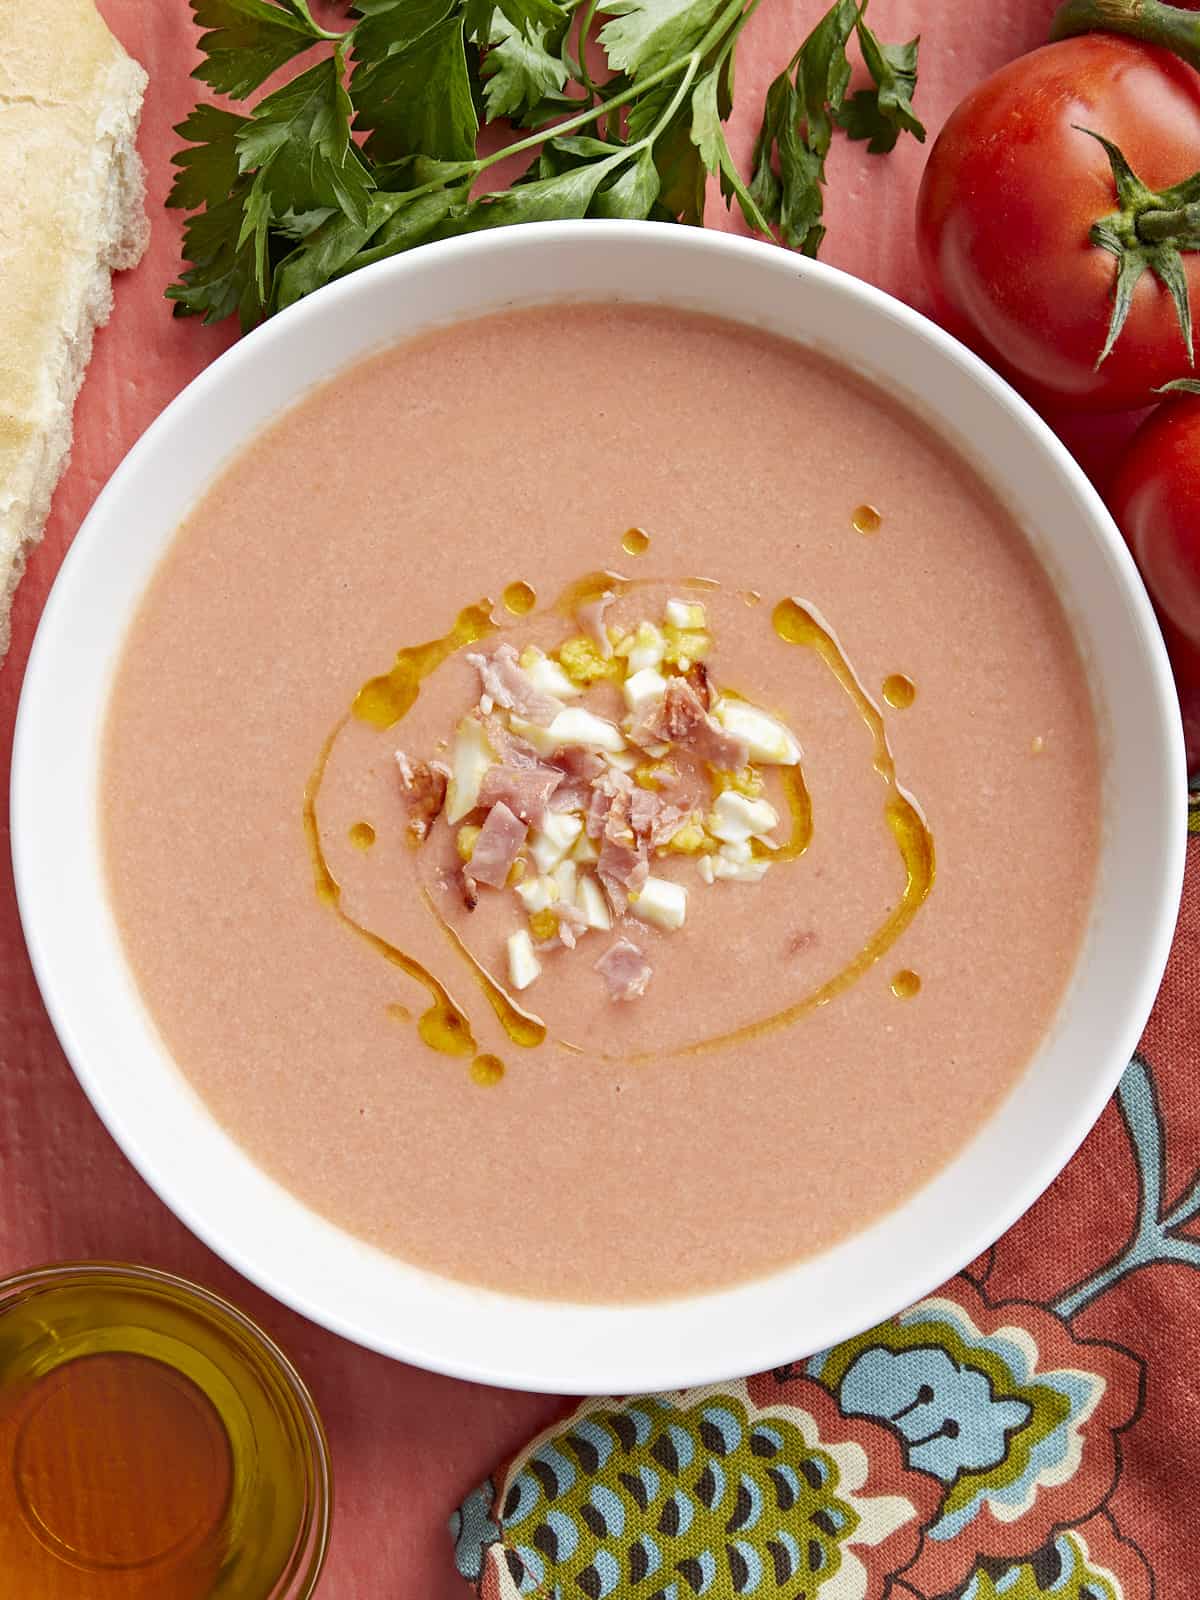
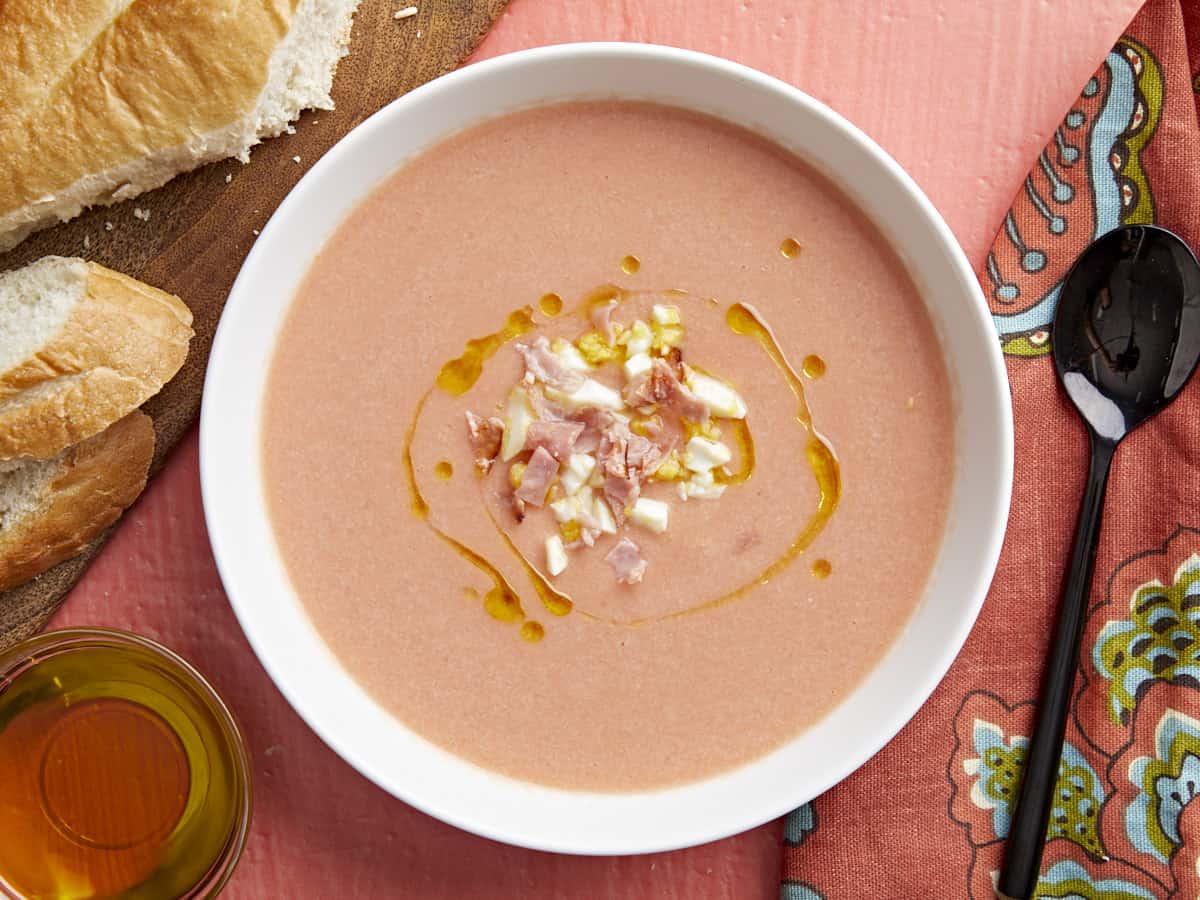
Overhead shot of a white bowl of Salmorejo garnished with a drizzle of olive oil, chopped hard-boiled eggs, and crispy ham crumbles.

What Is Salmorejo?

Salmorejo is a traditional cold tomato soup from Spain. Traditionally, Salmorejo is garnished with a simple drizzle of olive oil but it can also be garnished with chopped hard-boiled eggs and ham. If you want to keep things plant-based, it’s also wonderful when garnished with diced strawberries, watermelon, and fresh summer basil. You can also garnish with chopped fresh zucchini and summer squash with Italian parsley.

What Is The Difference Between Gazpacho and Salmorejo?

Like Gazpacho, Salmorejo is made with ripe tomatoes, garlic, and olive oil. The big difference is that the tomatoes are blended with day-old bread and then strained, giving this cold summer soup a velvety body and silky mouthfeel.

Ingredients For Salmorejo

It’s hilarious how excited I am to share this recipe with you! I love it so much I’m making 350 portions this coming week for a fancy food festival in Portland. Since the soup has just a few ingredients, you’ll want to make sure you get the best you can afford. Here’s what you’ll need to make Salmorejo:

  • Tomatoes – are the base of this cold summer soup. Any tomato will do as long as it is flavorful and ripe. To create depth, I often blend different types like grape, cherry, plum, heirloom, and beefsteak tomatoes. I don’t recommend making this recipe if you don’t like tomatoes.
  • Day-Old Crusty White Bread – adds body and texture to the soup. Use a Baguette, Ciabatta, Boule, or a Country Loaf. Don’t use sliced white or wheat bread, as the dough’s preservatives and stabilizers will make the soup gummy. If your bread is fresh, remove the crust, chop it into large cubes, put it in a sheet pan, and dry it in a 250°F oven for ten to fifteen minutes or until it hardens.
  • Olive Oil -helps flavor the soup and creates its signature velvety mouth feel. If you don’t like how your olive oil tastes by itself, don’t use it in this recipe. With so few ingredients, there won’t be any way to mask the flavor. You can get fabulous olive oil at the grocery store on a budget. Just know what to look for: cold-pressed, extra-virgin, and packaged in a dark glass container or, better yet, a metal container. California Olive Ranch, Trader Joe’s, 365, Simple Truth, and Bertolli are wonderful budget-friendly choices.
  • Vinegar – Adds a hit of acidity. Use rounder, softer vinegar like sherry, red wine, or apple cider. If your tomatoes are very tangy and acidic then skip the vinegar.
  • Garlic – Adds loads of intense flavor. If you don’t like garlic, you can skip it, though the soup will taste flat. Try blending a tablespoon of raw onion into the soup instead.
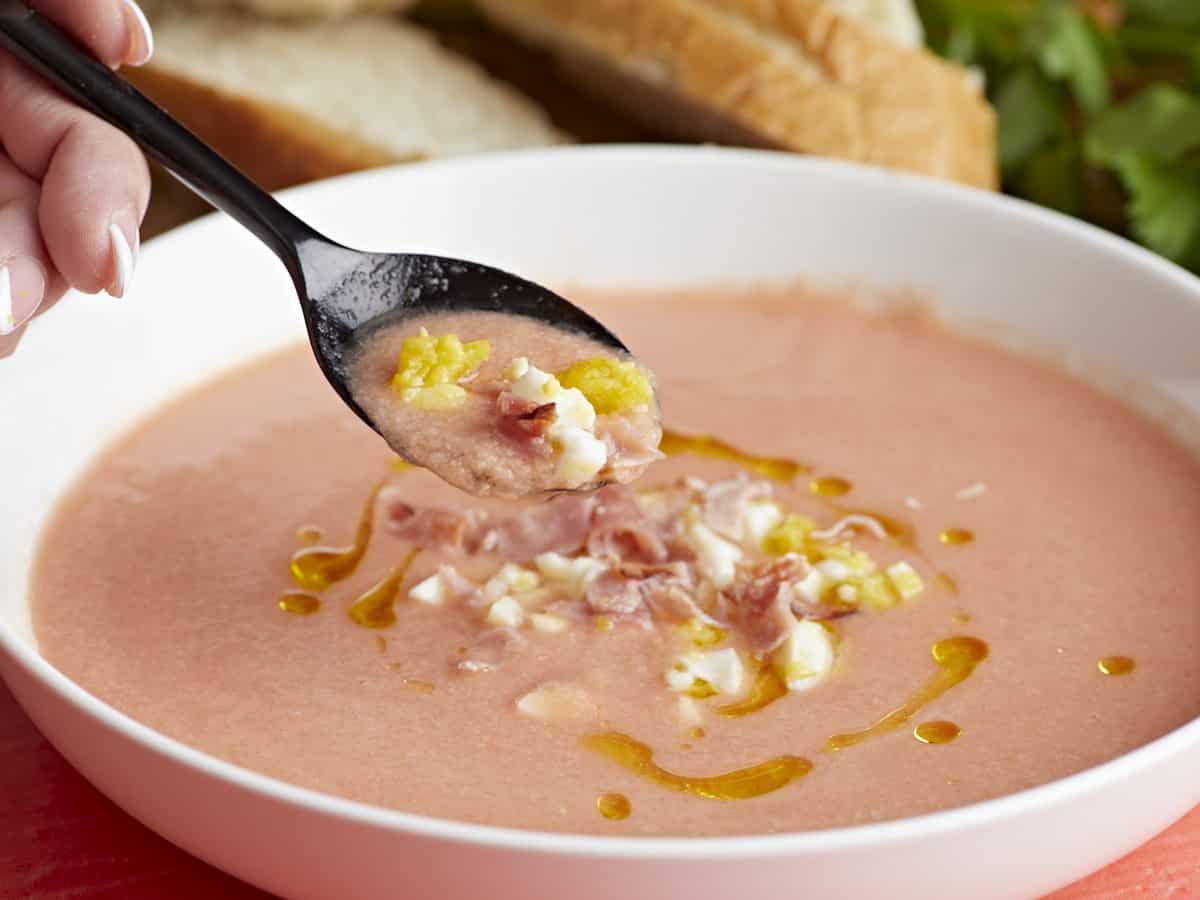
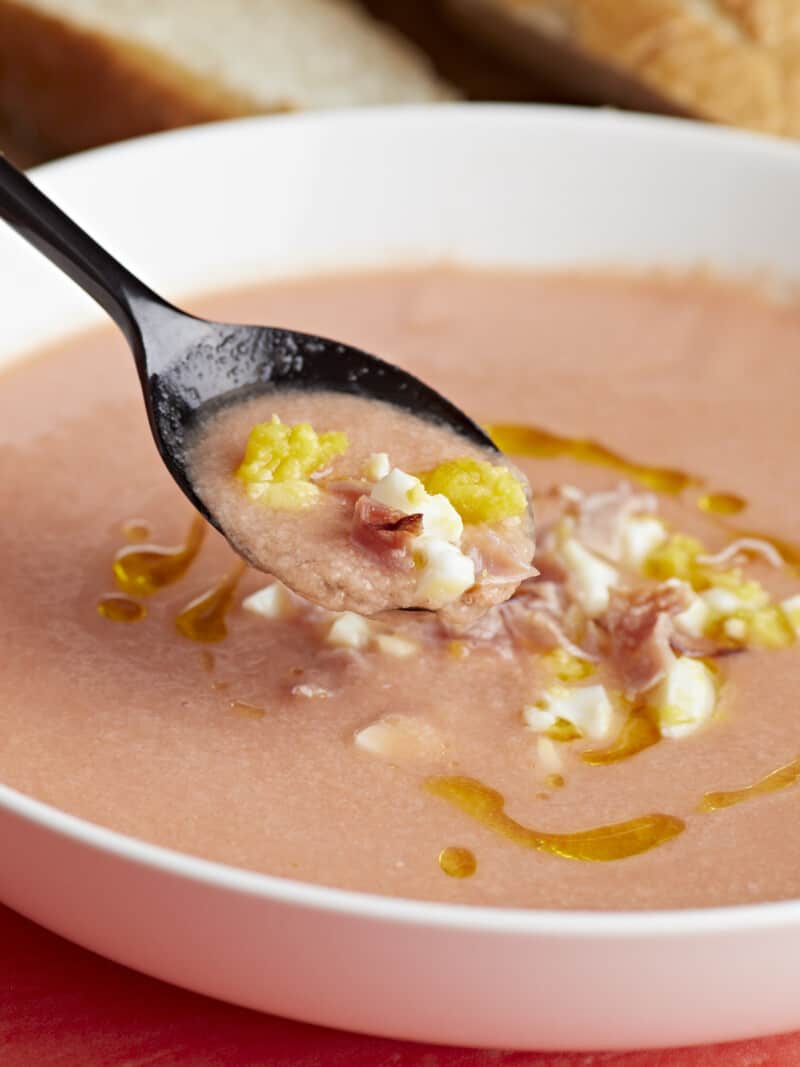
Side shot of a white bowl of Salmorejo garnished with a drizzle of olive oil, chopped hard-boiled eggs, and crispy ham crumbles with a black spoon coming out of it.

Tips For Making Salmorejo

  1. Use ripe tomatoes. The riper the tomatoes, the sweeter and more flavorful the soup will be. Ripe tomatoes are fragrant, heavy for their size, and have firm flesh with a little give.
  2. Use day-old bread. Fresh bread will make your soup gummy, so dry it in a 250°F oven if necessary.
  3. Don’t over-blend the soup, which will make it gummy. 
  4. Experiment with different garnishes. While a simple drizzle of olive oil or hard-boiled eggs and chopped ham are traditional, try garnishing with other summer produce. Salmorejo pairs well with strawberries, watermelon, avocado, zucchini, summer squash, bell peppers, and fresh herbs like basil, parsley, cilantro, and thyme. Get creative and have fun!

What To Serve With Salmorejo

Salmorejo is incredible served with light summer salads like Creamy Cucumber Salad, Summer Sweet Corn Salad, and Panzanella. You can also serve it with heartier dishes like Tortellini Salad, Pasta Primavera, or Bruschetta Pasta.

How To Store Salmorejo

Store salmorejo in an air-tight container in the refrigerator for up to 3 days. You can freeze salmorejo, but it will dull the flavor a touch. While it will keep for up to 6 months in the freezer, the longer it’s frozen, the more flavor it loses. The components will separate during freezing, so blend again before serving. Do not heat the soup to thaw it. Leave it on the counter or thaw for no more than two hours or let it thaw overnight in the fridge.

Overhead shot of a white bowl of Salmorejo garnished with a drizzle of olive oil, chopped hard-boiled eggs, and crispy ham crumbles.
Print

Salmorejo

Salmorejo is a cold Spanish soup that's delicious, creamy, easy to make, and a great way to use up summer tomatoes and day-old bread! On a hot summer day, it's pure tangy, velvety, perfection.
Course Appetizer, Dinner, Lunch
Cuisine Spanish
Total Cost ($9.78 recipe / $1.22 serving)
Prep Time 15 minutes
Total Time 15 minutes
Servings 8 cups
Calories 216kcal

Ingredients

  • 3 lps tomatoes $6.57
  • 1/4 cup extra-virgin olive oil $0.72
  • 1 lb crusty white bread $2.00
  • 3 cloves garlic $0.24
  • 1 Tbsp apple cider vinegar $0.06
  • 1/2 cup water $0.00
  • 1/4 tsp salt $0.01
  • 1 Tbsp extra-virgin olive oil (optional garnish) $0.18

Instructions

  • Core the tomatoes by cutting them in quarters and removing the hard white center. Then chop them roughly. Roughly chop the garlic cloves. Add the vinegar to the water. Remove the crust from the bread and cut into large cubes.
  • Place the water, tomatoes, garlic, and bread in a blender. Puree until smooth. Do not over-blend, as it will create a gummy texture. If working with a smaller blender, divide the ingredients in half and blend in batches.
  • With the blender on low speed, slowly drizzle in the olive oil, then season with salt. Blend for a second or two and, if necessary, add more salt to taste. Cover and chill the soup in the refrigerator for at least 30 minutes before serving.
  • Strain the soup through a fine mesh sieve before plating. Use the back of a ladle to make quick work of it. Discard solids in the sieve.
  • Garnish with a drizzle of olive oil and get ready to enjoy your new favorite summer soup!

See how we calculate recipe costs here.

Nutrition

Serving: 1cup | Calories: 216kcal | Carbohydrates: 30g | Protein: 6g | Fat: 8g | Sodium: 415mg | Fiber: 1g

How to Make Salmorejo – Step by Step Photos

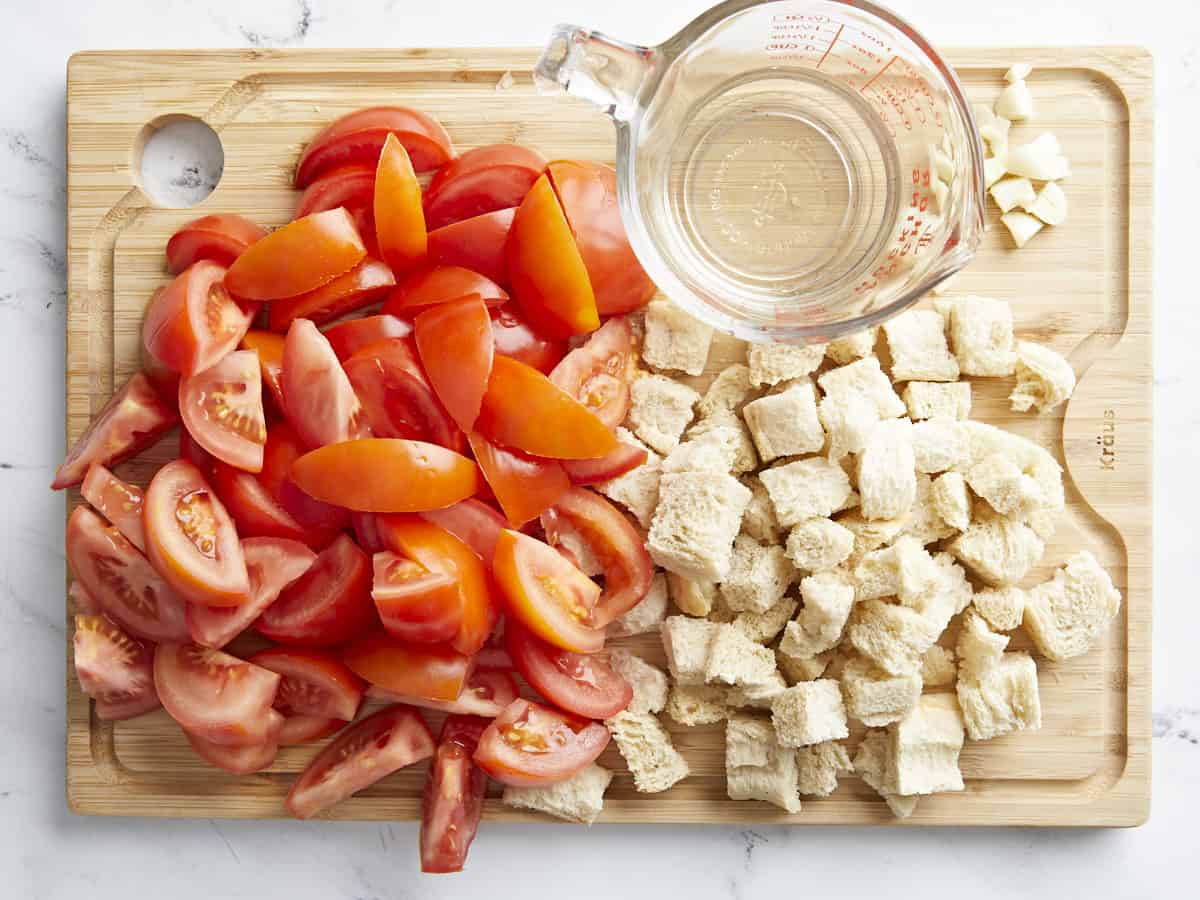
Overhead shot of Salmorejo's main ingredients: chopped fresh tomato, chopped day-old bread, and water, on a wood cutting board.

Core 3 pounds of tomatoes by cutting them in quarters and removing the hard white center. Then chop them roughly. Roughly chop 2 large garlic cloves. Add 1 tablespoon of vinegar to 1/2 cup of water. Remove the crust from the pound of crusty white bread and cut it into large cubes. If it’s fresh bread, toast the cubes in a 250°F oven for 10 to 15 minutes or until it hardens.

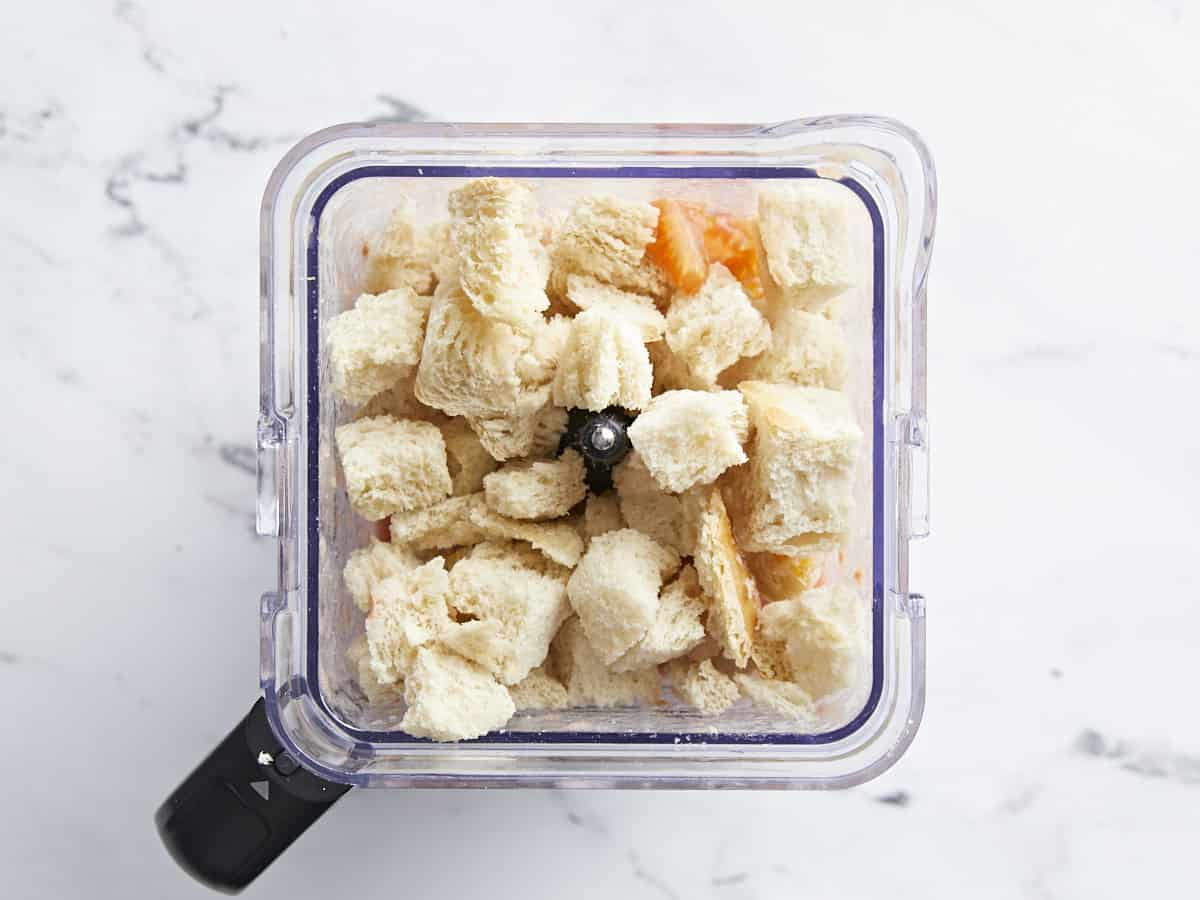
Overhead shot of Salmorejo ingredients topped with cubed bread in a blender jar.

Place the vinegar water, chopped tomatoes, chopped garlic, and cubed bread in a blender. Puree until smooth. Do not over-blend, as it will create a gummy texture. If working with a smaller blender, divide the ingredients in half and blend in batches.

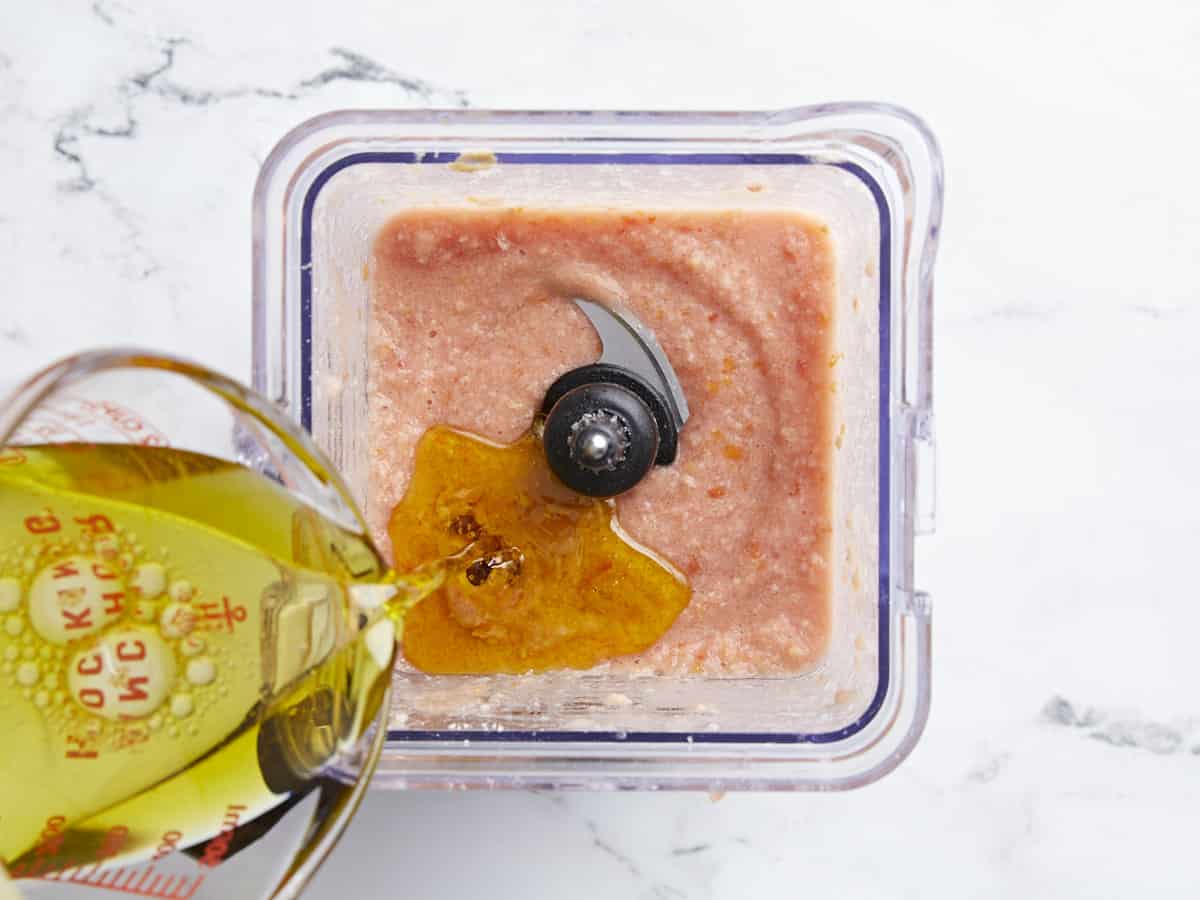
Overhead shot of olive oil being drizzled into a blender jar full of pureed tomato and bread.

With the blender on low speed, slowly drizzle in the 1/4 cup of olive oil, then season with 1/4 teaspoon of salt. Blend for a second or two and, if necessary, add more salt to taste. Cover and chill the soup in the refrigerator for at least 30 minutes before serving.

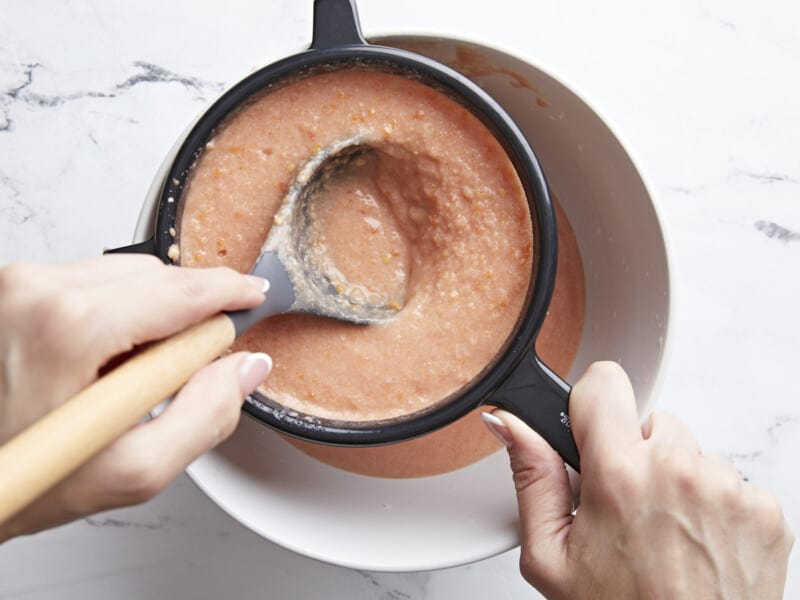
Overhead shot of a hand using a gray ladle to push Salmorejo through a fine mesh sieve with a black handle into a white bowl.

Strain the soup through a fine mesh sieve and into a large bowl before plating. Use the back of a ladle to make quick work of it. Discard the solids in the sieve.

Side shot of a white bowl of Salmorejo garnished with a drizzle of olive oil, chopped hard-boiled eggs, and crispy ham crumbles with a black spoon coming out of it.

Finally, plate the Salmorejo, garnish with a drizzle of the remaining tablespoon of olive oil, and get ready to enjoy your new favorite summer soup! It’s optional, but I love to also garnish my Salmorejo with a chopped, hard-boiled egg and sliced ham. You can also garnish with chopped fresh summer produce like bell peppers, zucchini, strawberries, watermelon, and fresh herbs like basil and Italian parsley.

More Easy Tomato Soup Recipes

The post Salmorejo appeared first on Budget Bytes.
Tortellini Salad

This fresh, vibrant, and utterly delicious Tortellini Salad feeds a crowd on a dime. The best part: you can put it together in minutes!

The post Tortellini Salad appeared first on Budget Bytes.
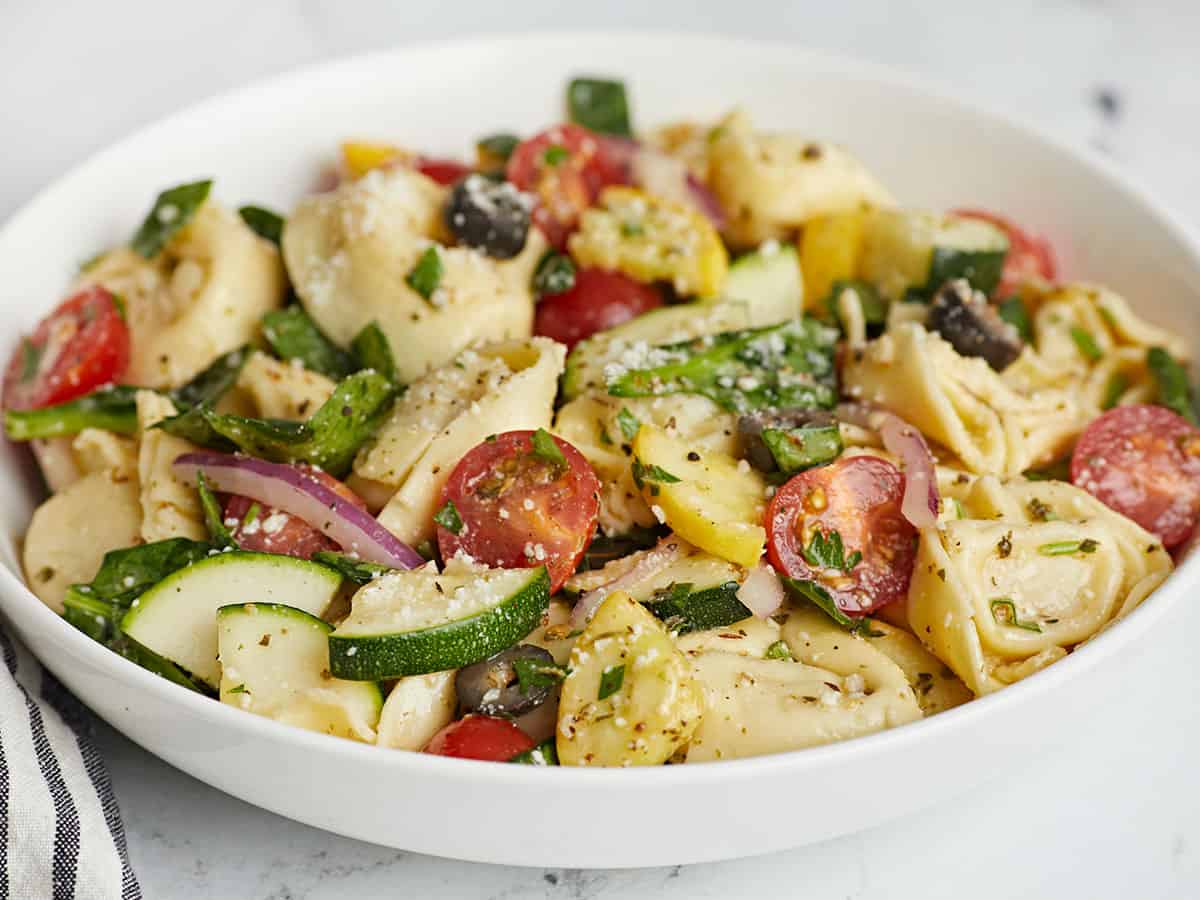
This fresh, vibrant, and utterly delicious Tortellini Salad feeds a crowd on a dime. My favorite part? It only takes a few minutes to put together. Plus, you can make it ahead of time and store it in the fridge for up to 3 days. Win! Win! Win! It’s perfect for picnics, potlucks, or a light lunch at home. Get ready to put this Tortellini Salad recipe on repeat!

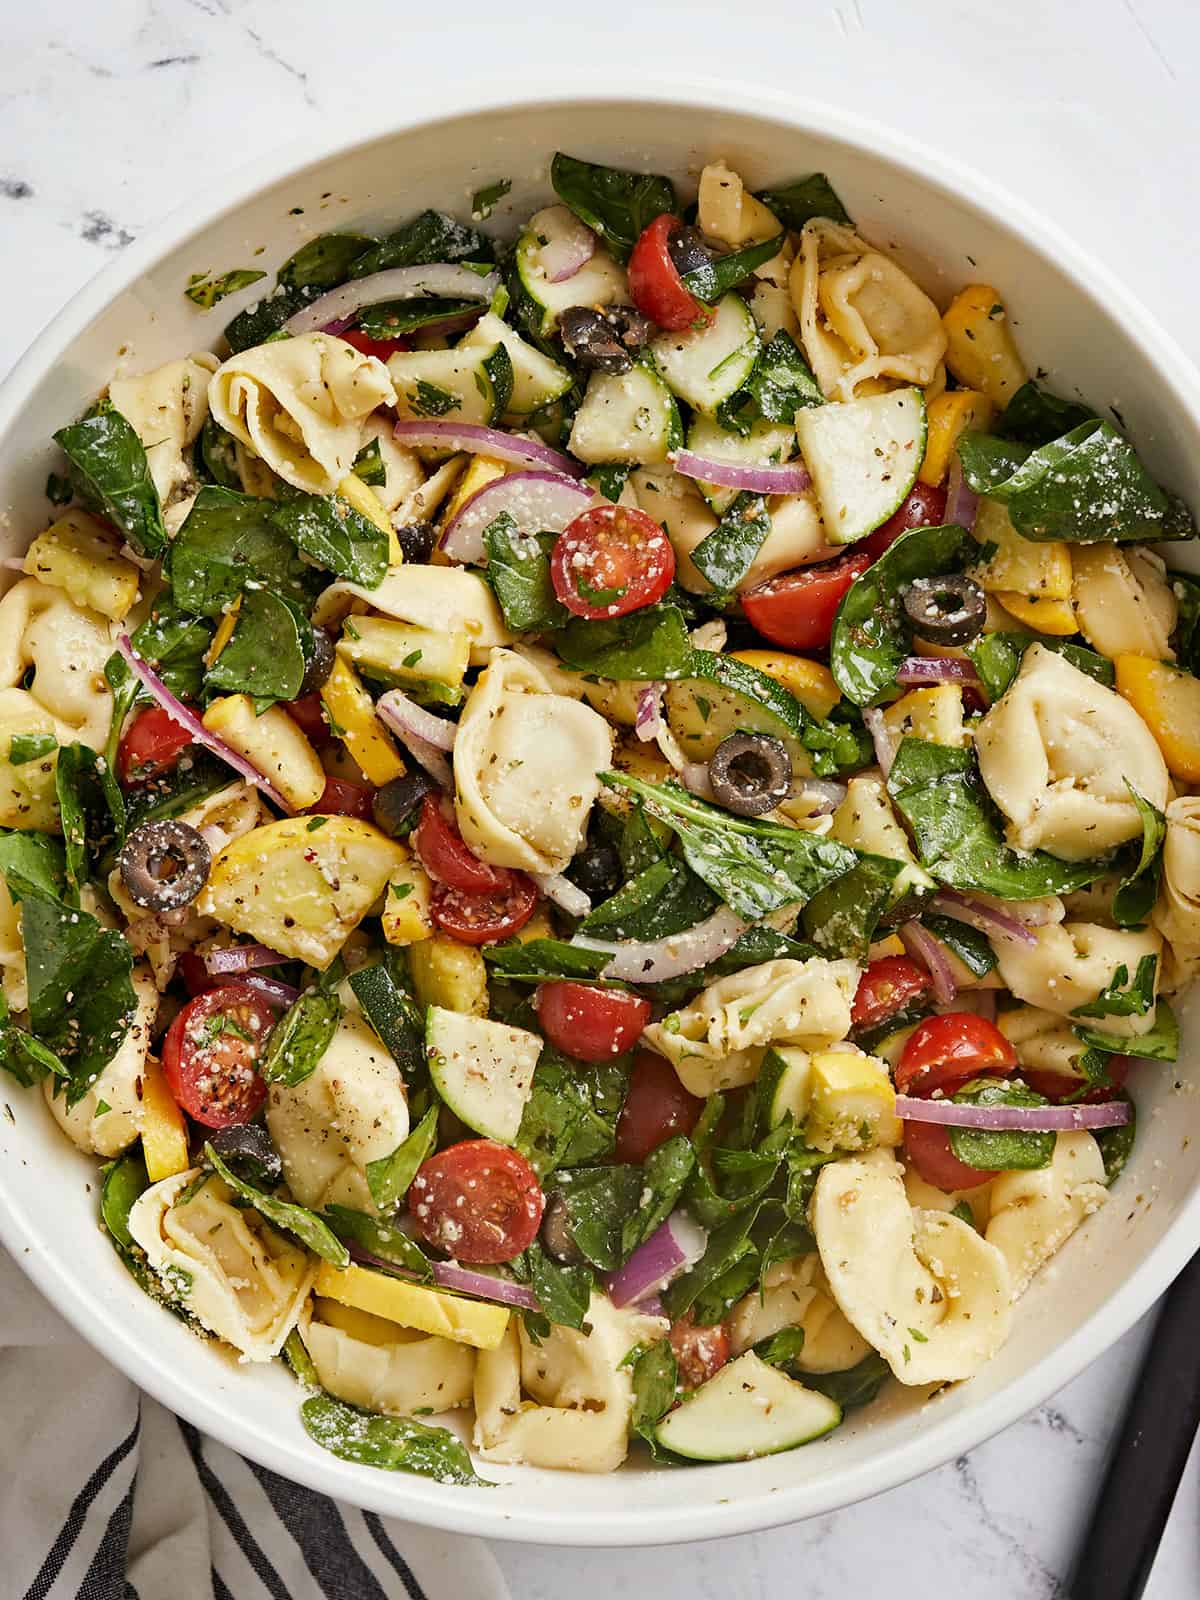
Overhead shot of tortellini salad in a white bowl.

What is Tortellini Salad?

Tortellini is a type of pasta stuffed with meat, vegetables, or cheese, then shaped into a small ring. To make the salad, the cooked and cooled tortellini is mixed with summer vegetables, herbs, greens, and a vinaigrette. Sometimes chopped cured meats or pickled peppers are added. For me, the pure joy of it is that it comes together in three steps, it’s super filling, and it’s a perfect choice for when you have an army to feed but don’t want to spend a lot of time in the kitchen.

Ingredients for Tortellini Salad

The pasta is the star here, and though you can use any kind of tortellini, we chose cheese tortellini to keep the flavor profile simple. Here’s what you need to make Tortellini Salad:

  • Tortellini– any kind will do. If you can’t access this ingredient, substitute it with rotini, farfalle, penne, orecchiette, or gnocchi. (And call it Pasta Salad!)
  • Cherry tomatoes – these bring a pop of color and a touch of sweetness and acidity to the party. If you’re not a fan of tomatoes, try using red bell peppers instead.
  • Red onion– sharp, assertive, and spicy, this ingredient is a great way to break up the fattiness of the tortellini. You can substitute with green onion, white onion, or yellow onion.
  • Summer vegetables like squash and zucchini– these fresh veggies add more texture than flavor and also help bulk up your salad. Substitute with cucumber or carrots.
  • Black olives– add a touch of brininess. Substitute with green olives or capers.
  • Baby spinach and Italian Pasley– add herbaceous peppery notes. Substitute the spinach with kale or arugula. If you’re not a fan of parsley, use basil.
  • Parmesan cheese – helps round out the flavors and adds a touch of nuttiness.
  • Italian Dressing– pulls everything together and adds zing. Substitute with any lightly flavored vinaigrette.
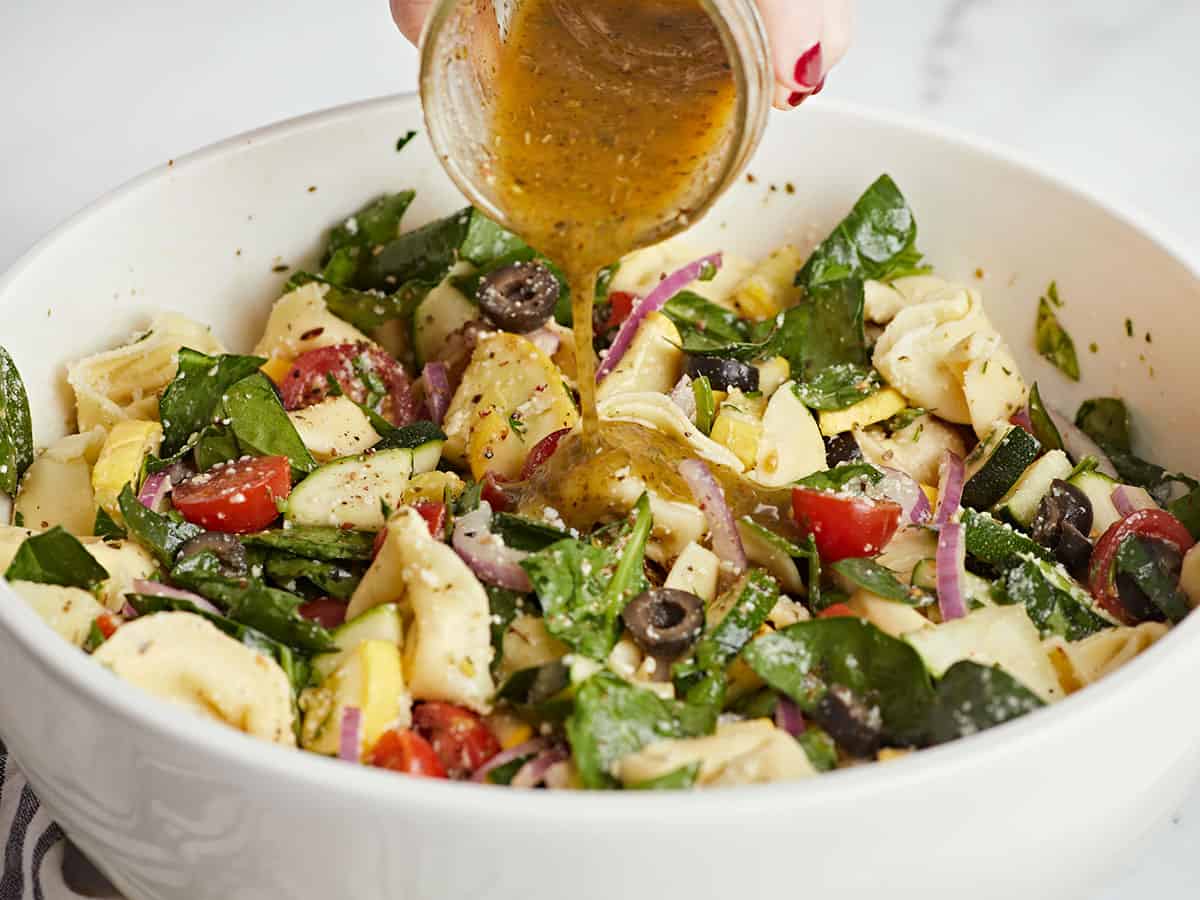
Side shot of tortellini salad in a white bowl with dressing being poured in.

Tips For Making The Best Tortellini Salad

  • You can use store-bought Italian dressing for convenience, but for a more flavorful salad, use our recipe for Italian Dressing.
  • Bulk up the salad with more low-cost, in-season veg to transform a pound of tortellini into 16 servings instead of 12. Use any fresh veg, greens, and fresh summer herbs you have on hand. Just cut everything in similar sizes.
  • Add a little acidity and heat with pickled cherry peppers or banana peppers.
  • For a heartier salad, add chopped grilled chicken or shrimp. Or try adding chopped salami.

What To Serve with Tortellini Salad

Though it makes a wonderful meal on its own, you can also serve Tortellini Salad as part of a larger meal, like a backyard barbecue or picnic. It’s a perfect side for Greek Marinated Chicken or Quick Garlic Butter Shrimp. I love serving it with No-Knead Homemade Focaccia and Balsamic Roasted Vegetables.

How To Store Tortellini Salad

Tortellini salad keeps up to 3 days in the fridge. Just make sure to store leftovers in an airtight container. If you want to make the salad ahead of time, I recommend making the tortellini, chopping and salting the squash and zucchini, and prepping the rest of the ingredients. Add the tortellini to a large container and top with the veg and then the greens. Mix with Parmesan and dressing when you’re ready to serve.

Side shot of tortellini salad in a white bowl.
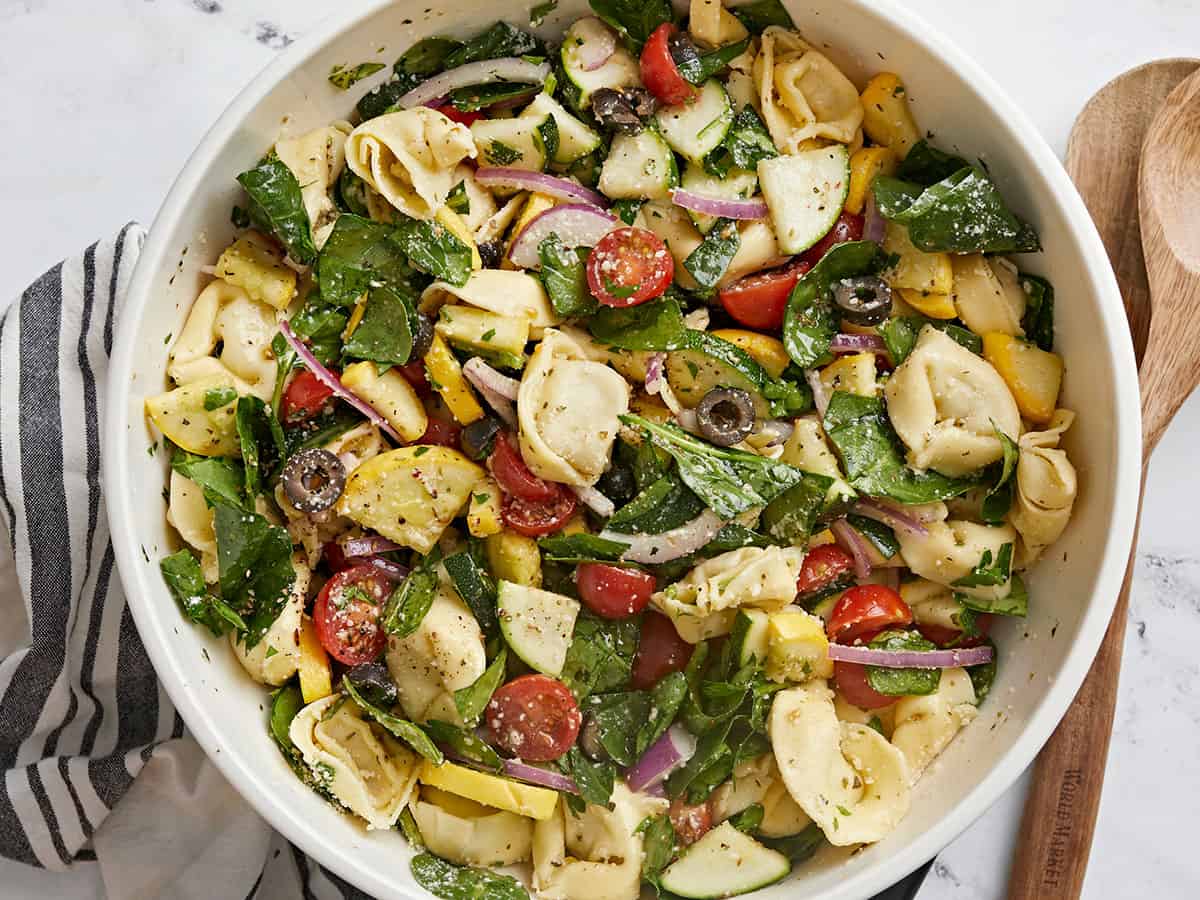
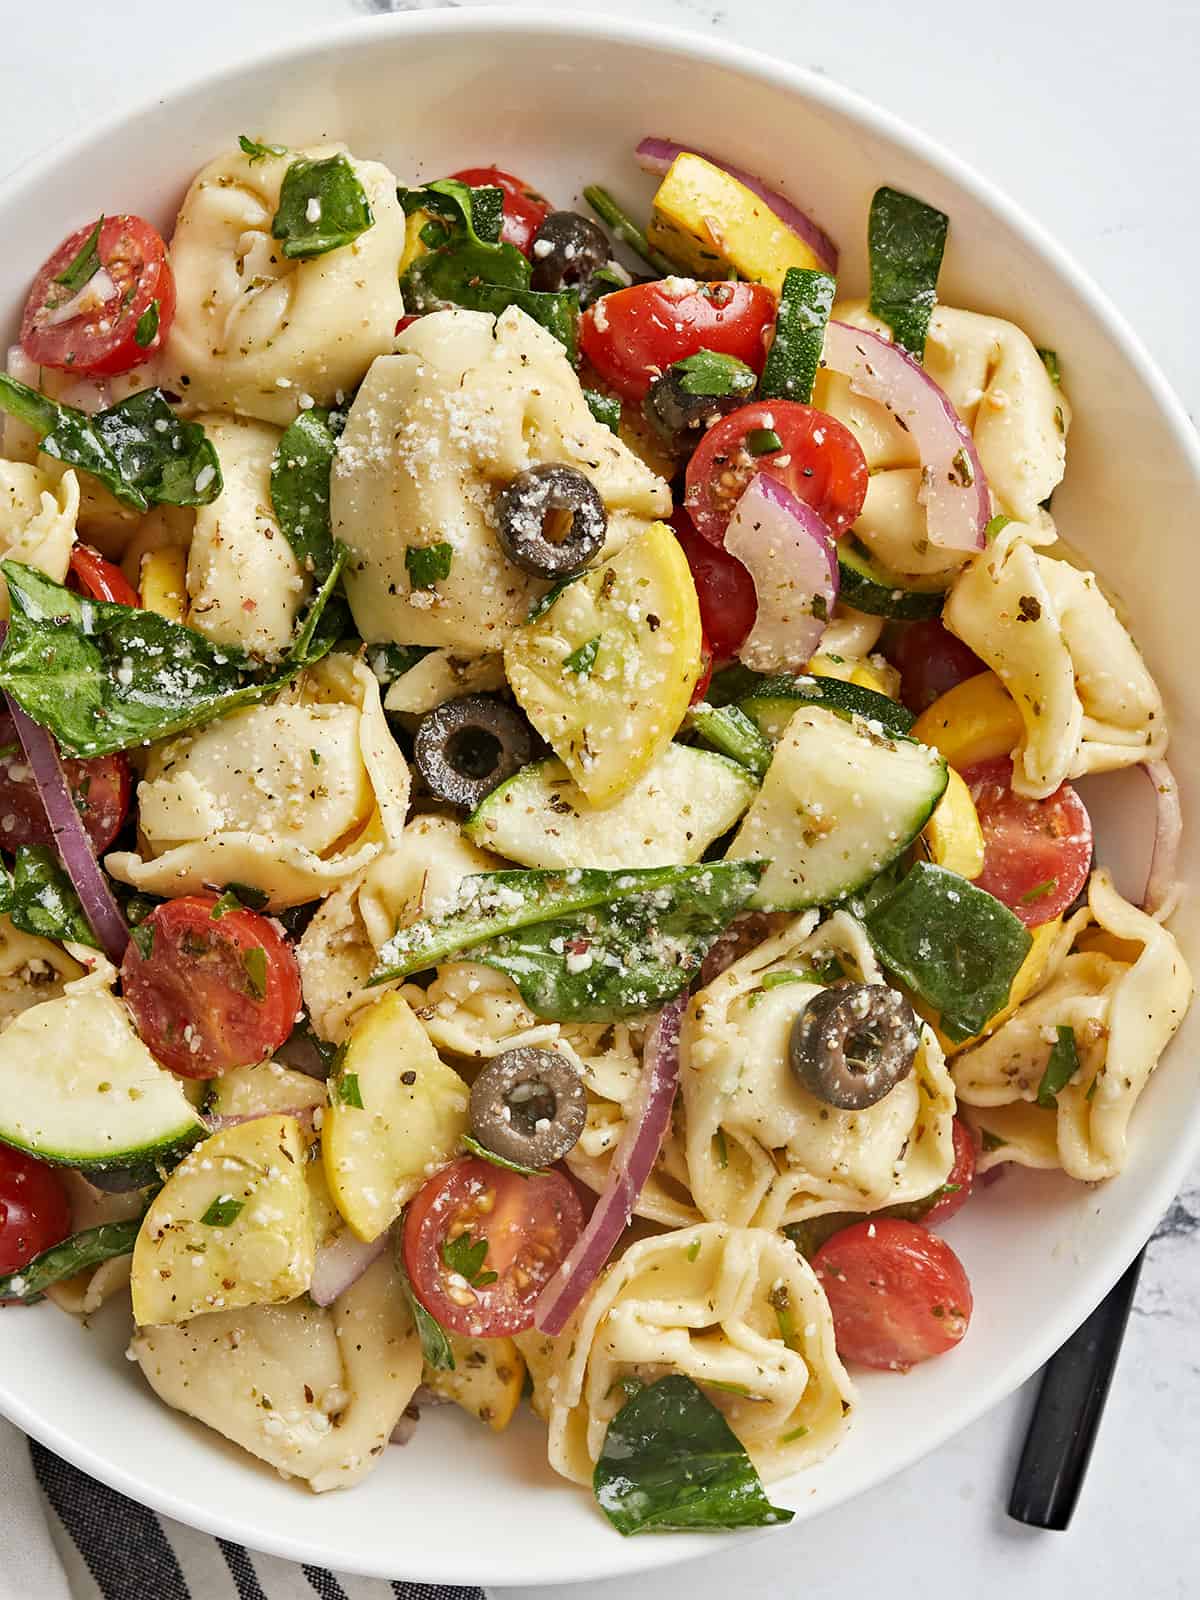
Overhead shot of tortellini salad in a white bowl.
Print

Tortellini Salad

This fresh, vibrant, and utterly delicious Tortellini Salad feeds a crowd on a dime. The best part: you can put it together in minutes!
Course Brunch, Dinner, Lunch
Cuisine Italian
Total Cost ($17.57 recipe / $1.46 serving)
Prep Time 5 minutes
Cook Time 10 minutes
Total Time 15 minutes
Servings 12 cups
Calories 186kcal

Ingredients

  • 1 summer squash $1.10
  • 1 zucchini $0.75
  • 1/2 tsp salt $0.02
  • 1 pint cherry tomatoes $3.00
  • 1/2 red onion $0.38
  • 2 cups fresh baby spinach, packed $3.49
  • 1/2 cup sliced black olives $1.99
  • 3/4 cup Italian dressing $1.42
  • 1/2 cup chopped Italian Parsley $0.30
  • 1/4 cup Parmesan cheese $0.33
  • 1 lb cheese tortellini $4.79

Instructions

  • First, cook the tortellini according to the package directions. Then drain well and cool in a very large bowl in the fridge.
  • While the tortellini is cooking, slice the summer squash and the zucchini into 1/4-inch rounds and then quarter the rounds. Add them to a large bowl and sprinkle with salt and mix.
  • Slice the cherry tomatoes in half. Slice the red onion in 1/4 inch half moons and soak it in cold water to dull its sharp flavor. Chop the parsley, and if the baby spinach leaves are large, chop them as well.
  • Once the tortellini has cooled, top it with the cherry tomatoes, red onion, baby spinach, and sliced black olives. Then drizzle with 1/2 cup of Italian dressing.
  • Next, top the salad with chopped Italian parsley and Parmesan cheese. Then drizzle with the final 1/4 cup of Italian dressing. Finally, mix, and serve! Wasn't that easy?

See how we calculate recipe costs here.

Notes

*Soak the red onion in cold water for a few minutes to dull the sharp flavor.

Nutrition

Serving: 1cup | Calories: 186kcal | Carbohydrates: 22g | Protein: 7g | Fat: 8g | Sodium: 543mg | Fiber: 3g
Overhead shot of tortellini salad in a white bowl.

How to Make Tortellini Salad – Step By Step Photos

Overhead shot of tortellini cooking in a silver pot with a wood-handled spoon in it.

First, cook one pound of tortellini according to the package directions. Then drain well and cool in a very large bowl in the fridge.

Overhead shot of chopped veggies in a white bowl with salt being sprinkled on top.

While the tortellini is cooking, slice the summer squash and the zucchini into 1/4-inch rounds and then quarter the rounds. Add them to a large bowl and sprinkle with salt and mix.

Overhead shot of chopped tomato, onion, and spinach.
Slice the cherry tomatoes in half. Slice the red onion in 1/4 inch half moons and soak it in cold water to dull its sharp flavor. Chop the parsley, and if the baby spinach leaves are large, chop them as well.
Overhead shot of dressing being poured on tortellini with veggies and greens on top of it in a white bowl.

Once the tortellini has cooled, you’re ready to assemble. First, top the tortellini with 1 pint of halved cherry tomatoes, 1/2 sliced red onion, 2 cups fresh baby spinach, and 1/2 cup sliced black olives. Then drizzle with 1/2 cup of Italian dressing.

Overhead shot of dressing being poured on tortellini with veggies and greens on top of it in a white bowl.

Next, top the salad with 1/2 cup of chopped Italian parsley and 1/4 cup of Parmesan cheese. Then drizzle with the final 1/4 cup of Italian dressing. Finally, mix, and serve! Wasn’t that easy? Now go feed your army and enjoy your time with them instead of spending it in your kitchen!

Overhead shot of tortellini salad in a white bowl.

More Easy Salads

The post Tortellini Salad appeared first on Budget Bytes.
Mediterranean Turkey Bowls

These Mediterranean Turkey Bowls are the perfect filling and fresh meal prep lunch for Spring and Summer. Plus, they’re super versatile!

The post Mediterranean Turkey Bowls appeared first on Budget Bytes.
Bowl meals have always been my favorite type of meal because they’re super flexible, you get a lot of colors, textures, and flavors in every bowl, and they’re perfect for meal prep (I LOVE having grab-n-go lunches ready). This week, I made these Mediterranean Turkey Bowls. They’re simple, super fresh, and very filling. Plus, I can swap out ingredients depending on what I have on hand, or what I’m craving. So if you’re looking for something new, easy, and fresh to prep for lunch, give these bowls a try!

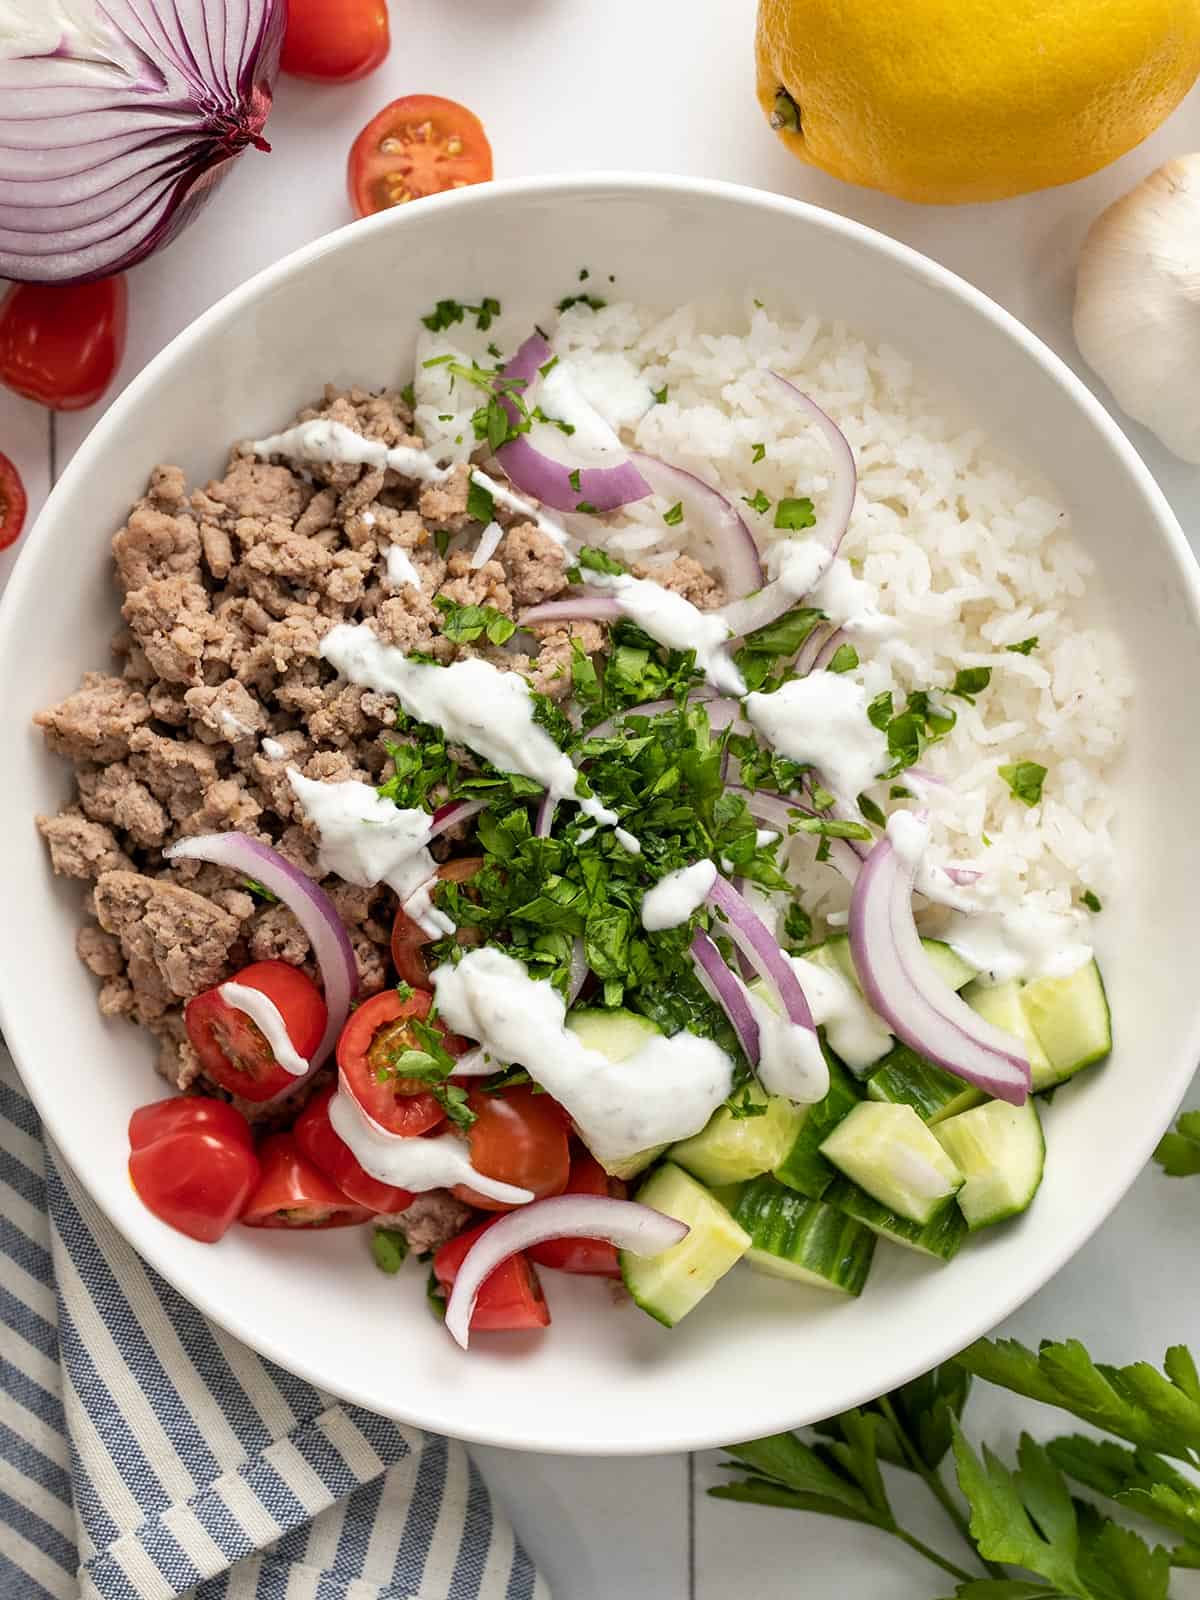
Overhead view of Mediterranean Turkey Bowl with ingredients on the sides.

Can I Use Different Meat?

These bowls are endlessly customizable, and that includes the meat or protein. I used some ground turkey that I seasoned with garlic and oregano, but you could easily swap that out for ground beef, or make some Yogurt Marinated Chicken and chop it into pieces before adding it to your bowl.

Want to make it vegetarian? Toss some chickpeas or cannellini beans with the same seasonings that I used for the ground turkey, and maybe a small squeeze of lemon, then add them to your bowl.

What Else Can You Add?

Comb your fridge and freezer for ingredients that have a Mediterranean flair and toss ’em in your bowl! Here are a few delicious ideas:

  • Feta
  • Olives
  • Chickpeas
  • Capers
  • Spinach
  • Green Onion
  • Hummus
  • Bell peppers
  • Artichoke hearts
  • Quinoa
  • Zucchini (fresh or grilled)

P.S. You can also make these bowls over a bed of greens instead of a bed of rice!

How Long Do They Last?

I prepared these bowls for my meal prep and, in general, I only like to prep for four days at a time because I find that the freshness of my prepared meals degrade too much after that amount of time. So I suggest keeping these bowls for up to four days in the fridge for the best flavor and texture. These Mediterranean Turkey Bowls are not a good candidate for freezing due to the fresh vegetables and yogurt sauce.

Are They Served Hot or COld?

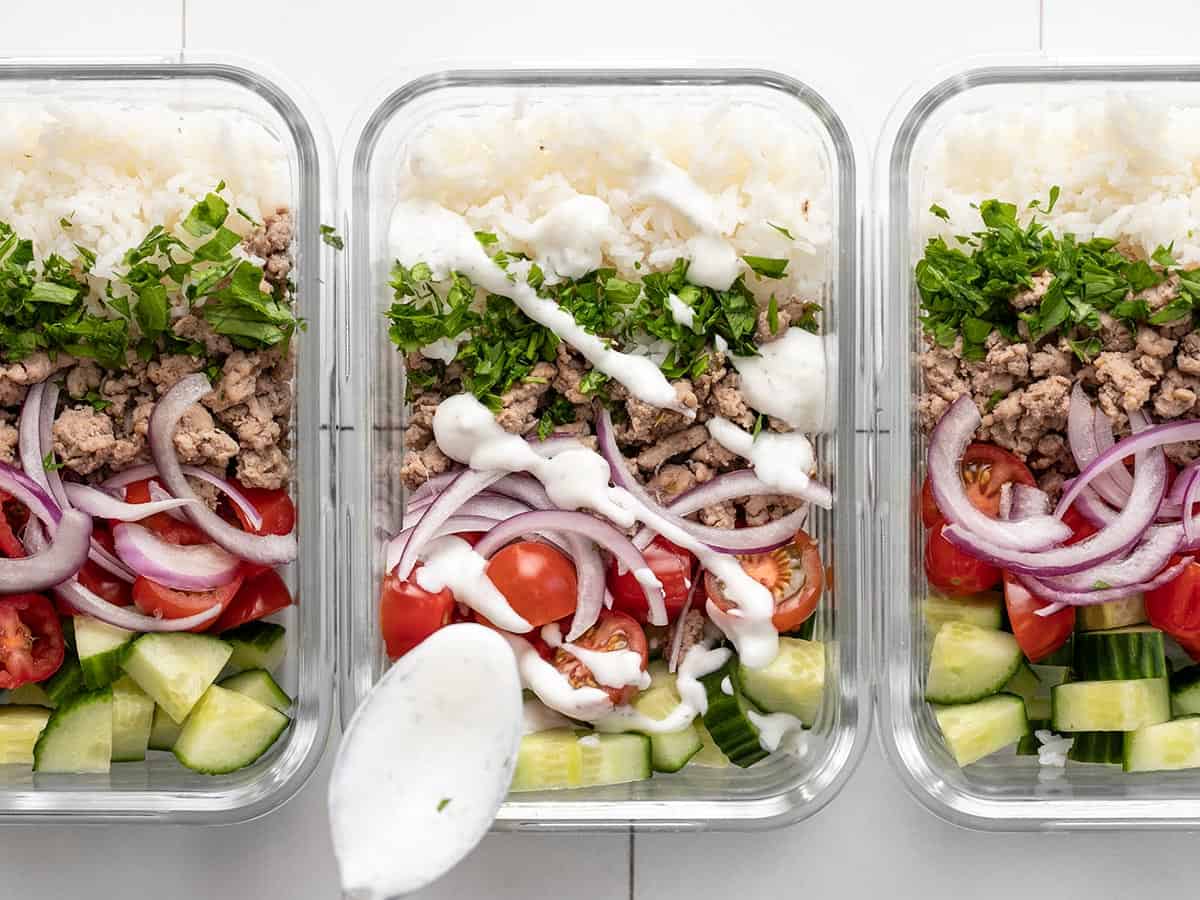
I love these bowls both warm and cold. When eating them just after preparation, the rice and turkey will be warm, which contrasts nicely with the fresh cold vegetables. When eating the leftovers as meal prep, I eat them cold like a salad. I think they’re delicious both ways! If you prefer to reheat the rice and turkey for meal preps, just package the rice and turkey in one container and the fresh vegetables in a separate container so you can reheat one and then top with the cold vegetables just before eating.

Three meal prep turkey bowls lined up with yogurt sauce being drizzled over the middle one.
Overhead view of a Mediterranean Turkey Bowl with yogurt sauce drizzled over top.
Print

Mediterranean Turkey Bowls

These Mediterranean Turkey Bowls are the perfect filling and fresh meal prep lunch for Spring and Summer. Plus, they're super versatile!
Course Dinner, Lunch, Main Course
Cuisine American, Mediterranean
Total Cost $10.11 recipe / $2.53 recipe
Prep Time 15 minutes
Cook Time 20 minutes
Total Time 35 minutes
Servings 4
Calories 403kcal

Ingredients

Garlic Dill Yogurt Sauce

  • 1 cup full-fat plain yogurt $1.12
  • 1 Tbsp lemon juice $0.06
  • 1/4 tsp garlic powder $0.02
  • 1/4 tsp dried dill $0.03
  • 1/4 tsp salt $0.02

Ground Turkey

  • 1 Tbsp olive oil $0.12
  • 1 lb. ground turkey $4.99
  • 2 cloves garlic, minced $0.16
  • 1/2 tsp dried oregano $0.05
  • 1/2 tsp salt $0.02
  • 1/4 tsp freshly cracked pepper $0.02

Bowls

  • 1 cup uncooked rice* $0.43
  • 1 pint grape tomatoes $1.89
  • 1 cucumber $0.79
  • 1/4 red onion $0.19
  • 1/4 cup chopped parsley $0.20

Instructions

  • Make the garlic dill yogurt sauce first, so the flavors have time to blend. Stir together the yogurt, lemon juice, garlic powder, dill, salt, and pepper in a bowl. Refrigerate until ready to serve.
  • Next, begin cooking the rice using your preferred method (rice cooker or stove top). You can use any type of rice, just make sure to follow cooking instructions for the type of rice you're using.
  • While the rice is cooking, cook the ground turkey. Add the olive oil to a large skillet and heat over medium. Once hot, add the ground turkey and continue to cook over medium heat.
  • When the turkey is almost cooked through, add the minced garlic, dried oregano, salt, and pepper to the skillet. Stir to combine with the turkey and continue cooking for 2-3 minutes more or until the turkey is cooked through. Remove the turkey from the heat.
  • Slice the grape tomatoes in half, chop the cucumber into quarter-rounds, thinly slice the red onion, and finely chop the parsley.
  • When all of the ingredients are prepped, it's time to build your bowls. Divide the rice, ground turkey, tomatoes, cucumber, red onion, and parsley between four bowls or meal prep containers. Drizzle with the yogurt sauce just before serving and enjoy!

See how we calculate recipe costs here.

Notes

*You can use any type of rice (white, brown, jasmine, basmati, etc). Just make sure to follow the cooking instructions for the particular type of rice chosen. For more help with cooking rice, check out our How to Cook Rice tutorial. 

Nutrition

Serving: 1bowl | Calories: 403kcal | Carbohydrates: 48g | Protein: 34g | Fat: 8g | Sodium: 535mg | Fiber: 3g
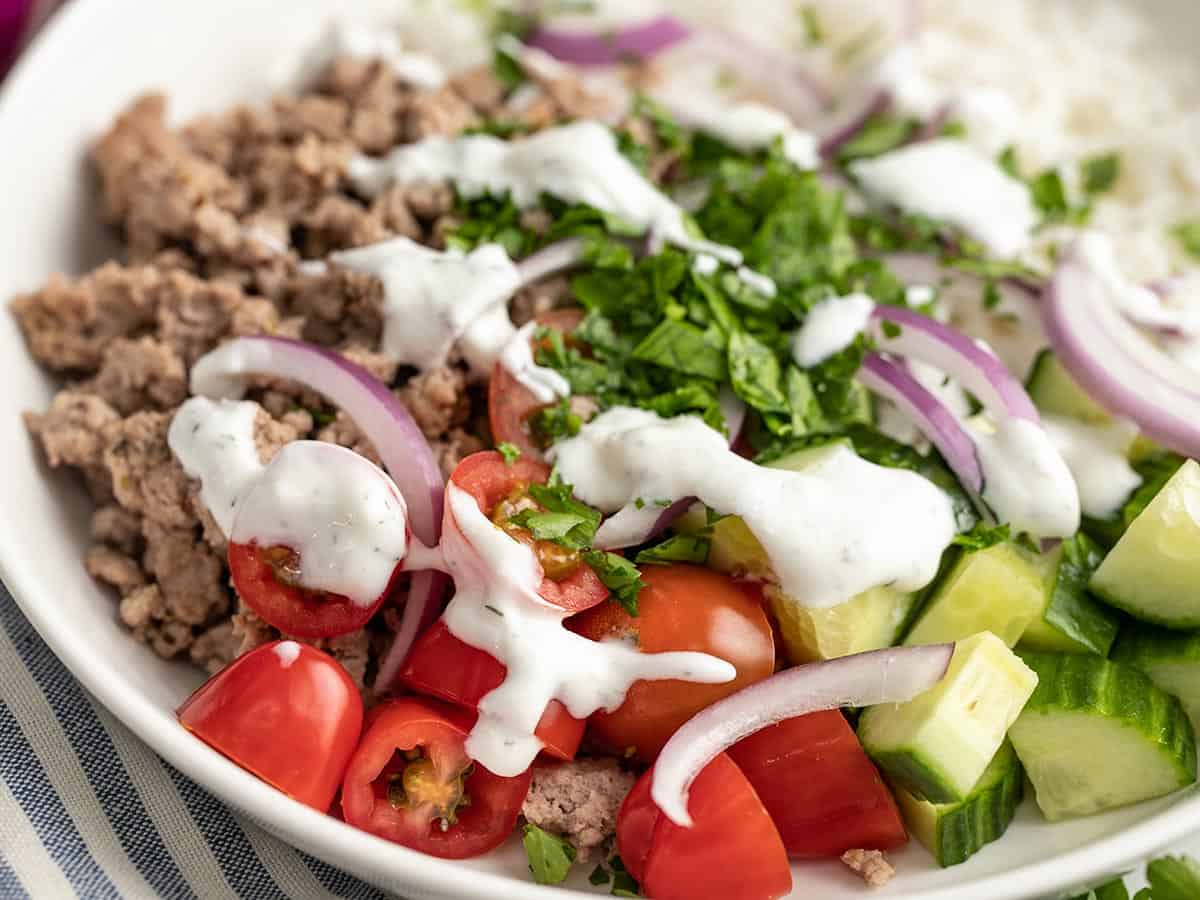
Close up side view of a Mediterranean Turkey Bowl.

How to Make Mediterranean Turkey Bowls – Step by Step Photos

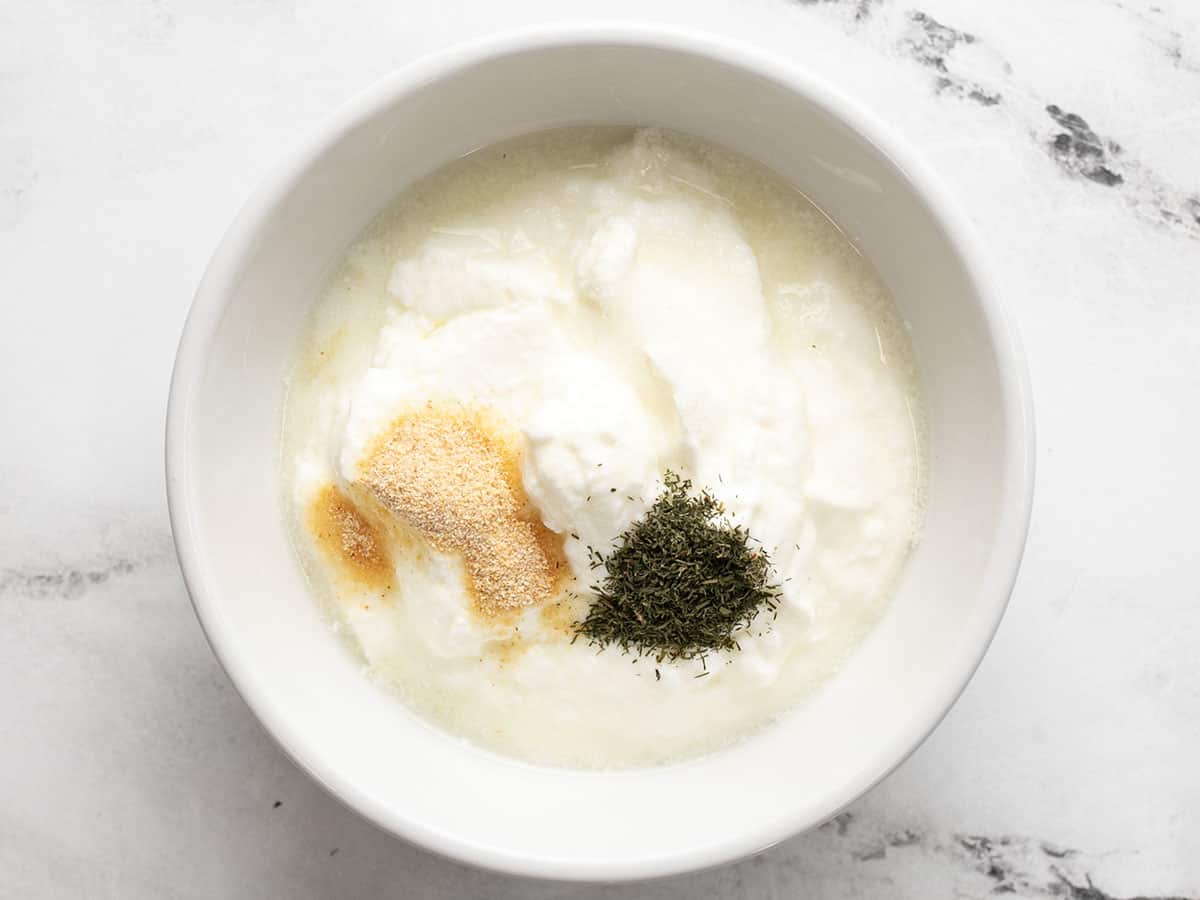
Garlic dill yogur sauce ingredients in a bowl, unstirred.

Prepare the garlic dill yogurt sauce first so the flavors have some time to blend. Combine 1 cup full-fat plain yogurt with 1 Tbsp lemon juice, ¼ tsp garlic powder, ¼ tsp dried dill, and ¼ tsp salt. Refrigerate the sauce until ready to serve.

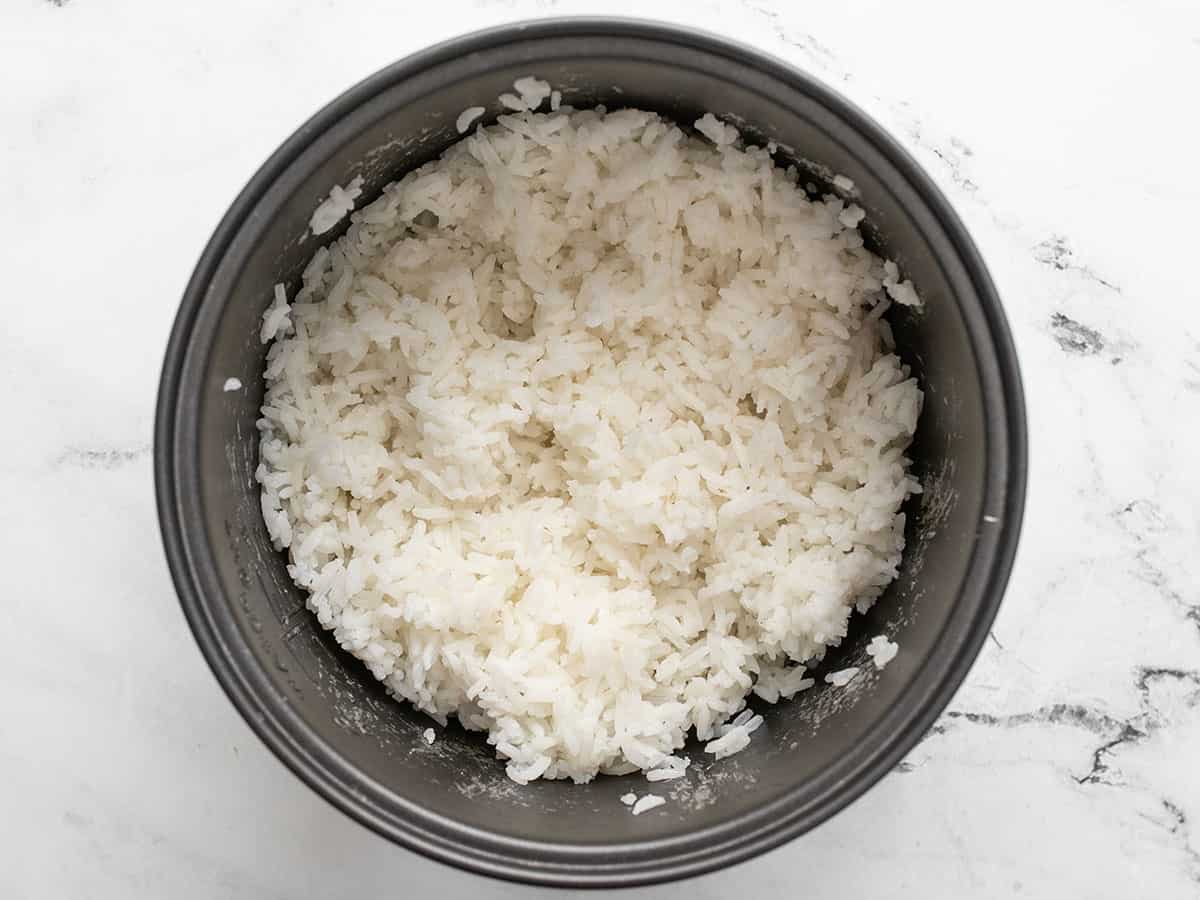
Cooked rice in a rice cooker.

Next, cook one cup rice (one cup uncooked yields about 3 cups once cooked). I used a rice cooker for convenience, but if you’d like to do it on the stove top, check out our How to Cook Rice tutorial.

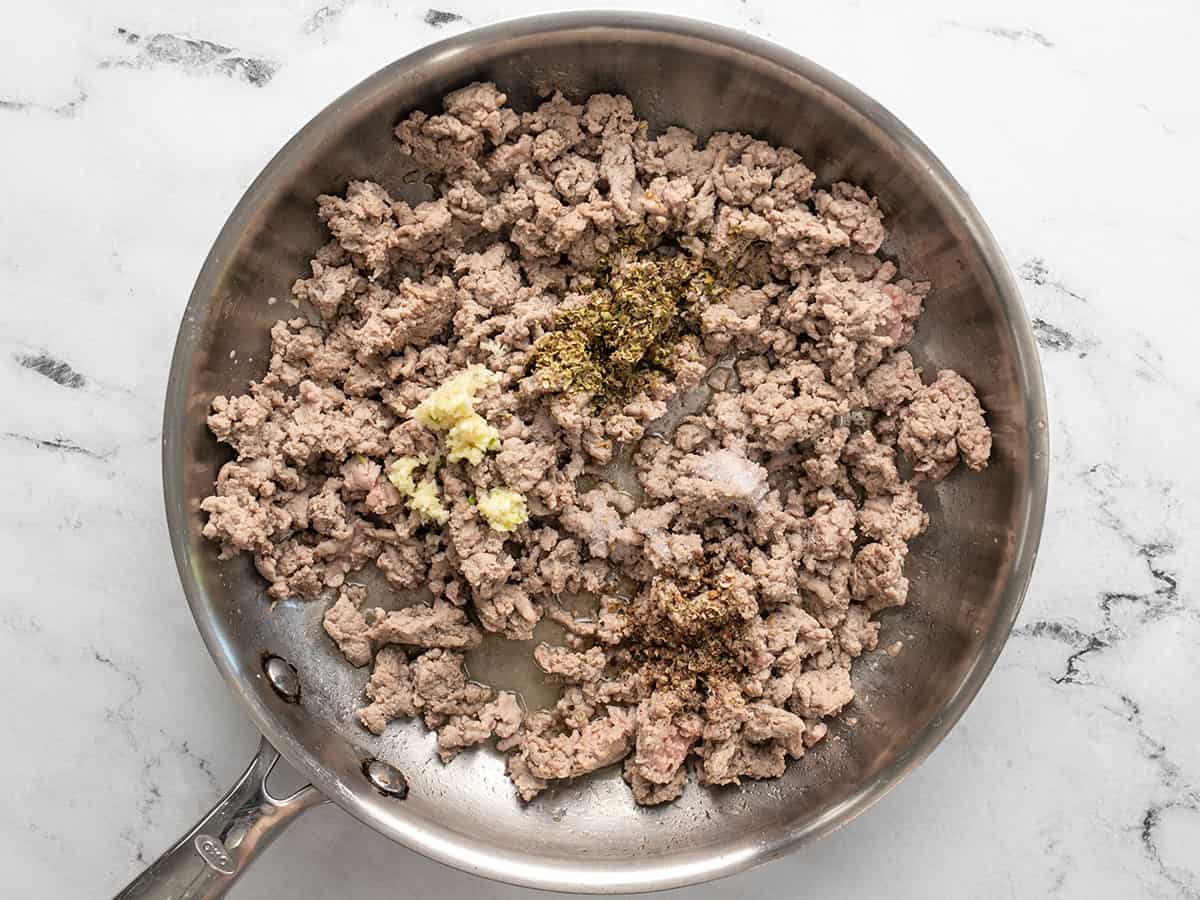
Cooked ground turkey in a skillet with garlic and oregano added on top.

While the rice is cooking, prepare the ground turkey. Add 1 Tbsp olive oil to a large skillet and heat over medium. Once hot, add 1 lb. ground turkey. Cook the turkey over medium heat until it’s almost cooked through. At that point, add 2 minced cloves of garlic, ½ tsp dried oregano, ½ tsp salt, and ¼ tsp freshly cracked pepper. Continue to cook for 2-3 minutes more, or until the turkey is cooked through. Remove the turkey from the heat.

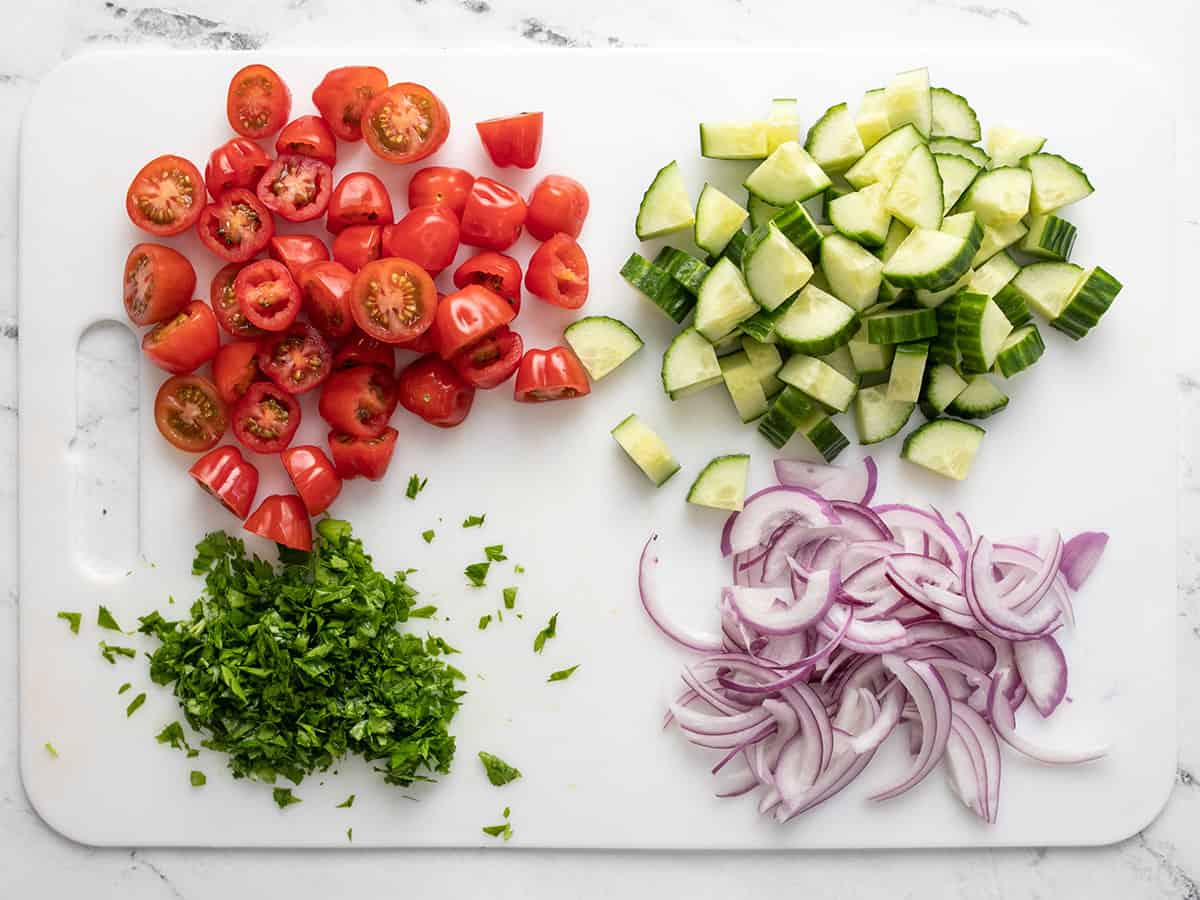
Prepped tomatoes, cucumbers, onions, and parsley on a cutting board.

Slice one pint of grape tomatoes in half, chop one cucumber into quarter-rounds, thinly slice ¼ of a red onion, and finely chop about ¼ cup of fresh parsley. If you want the red onions to be a little more mild, you can soak them in ice water for about five minutes.
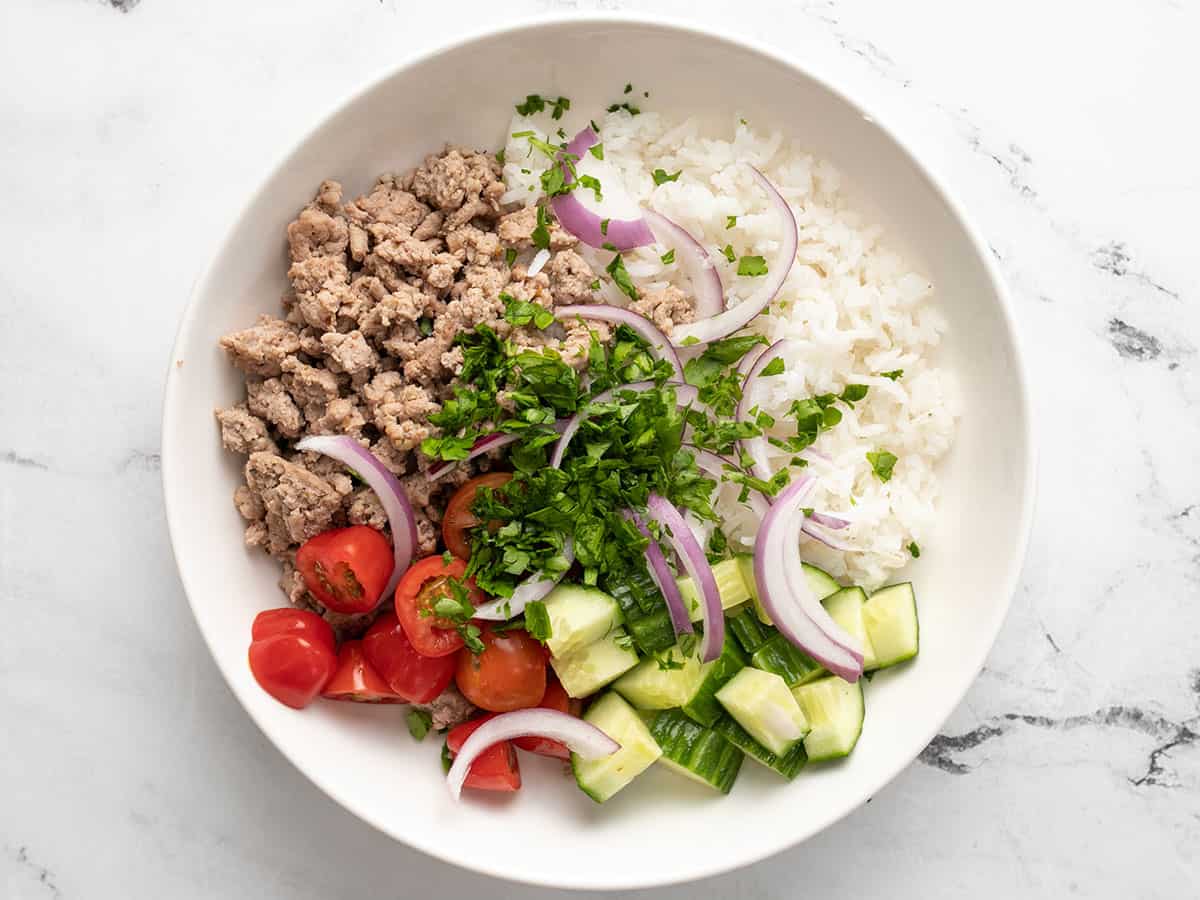
Mediterranean turkey bowls prepped without the yogurt sauce.

Once all of the ingredients are prepped, begin to build the bowls. Add about ¾ cup cooked rice to each bowl, then top with ¼ of the ground turkey. Divide the tomatoes, cucumber, onion, and parsley between the four bowls.

Yogurt sauce being drizzled over top of the turkey bowl.

Just before you’re ready to eat, drizzle the yogurt sauce (about ¼ cup per bowl) over top.

Half eaten Mediterranean Turkey Bowl.

Dig in and enjoy all the fresh flavors!

The post Mediterranean Turkey Bowls appeared first on Budget Bytes.