Kids and adults can’t resist doughy, sweet, pull-apart monkey bread! This easy 5-ingredient monkey ... Read more
The post Easy Monkey Bread Recipe appeared first on Sugar and Charm.
all things food
Kids and adults can’t resist doughy, sweet, pull-apart monkey bread! This easy 5-ingredient monkey … Read more
The post Easy Monkey Bread Recipe appeared first on Sugar and Charm.
Kids and adults can’t resist doughy, sweet, pull-apart monkey bread! This easy 5-ingredient monkey ... Read more
The post Easy Monkey Bread Recipe appeared first on Sugar and Charm.
Perfect heart-shaped red velvet donuts! These baked donuts have all the red … Read more
The post Baked Red Velvet Donuts with Cream Cheese Glaze appeared first on Sugar and Charm.
Perfect heart-shaped red velvet donuts! These baked donuts have all the red ... Read more
The post Baked Red Velvet Donuts with Cream Cheese Glaze appeared first on Sugar and Charm.
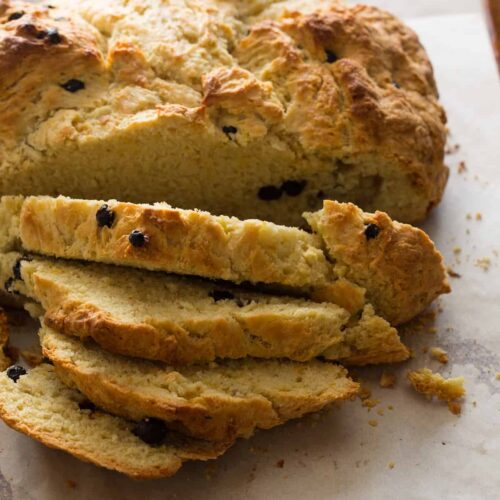
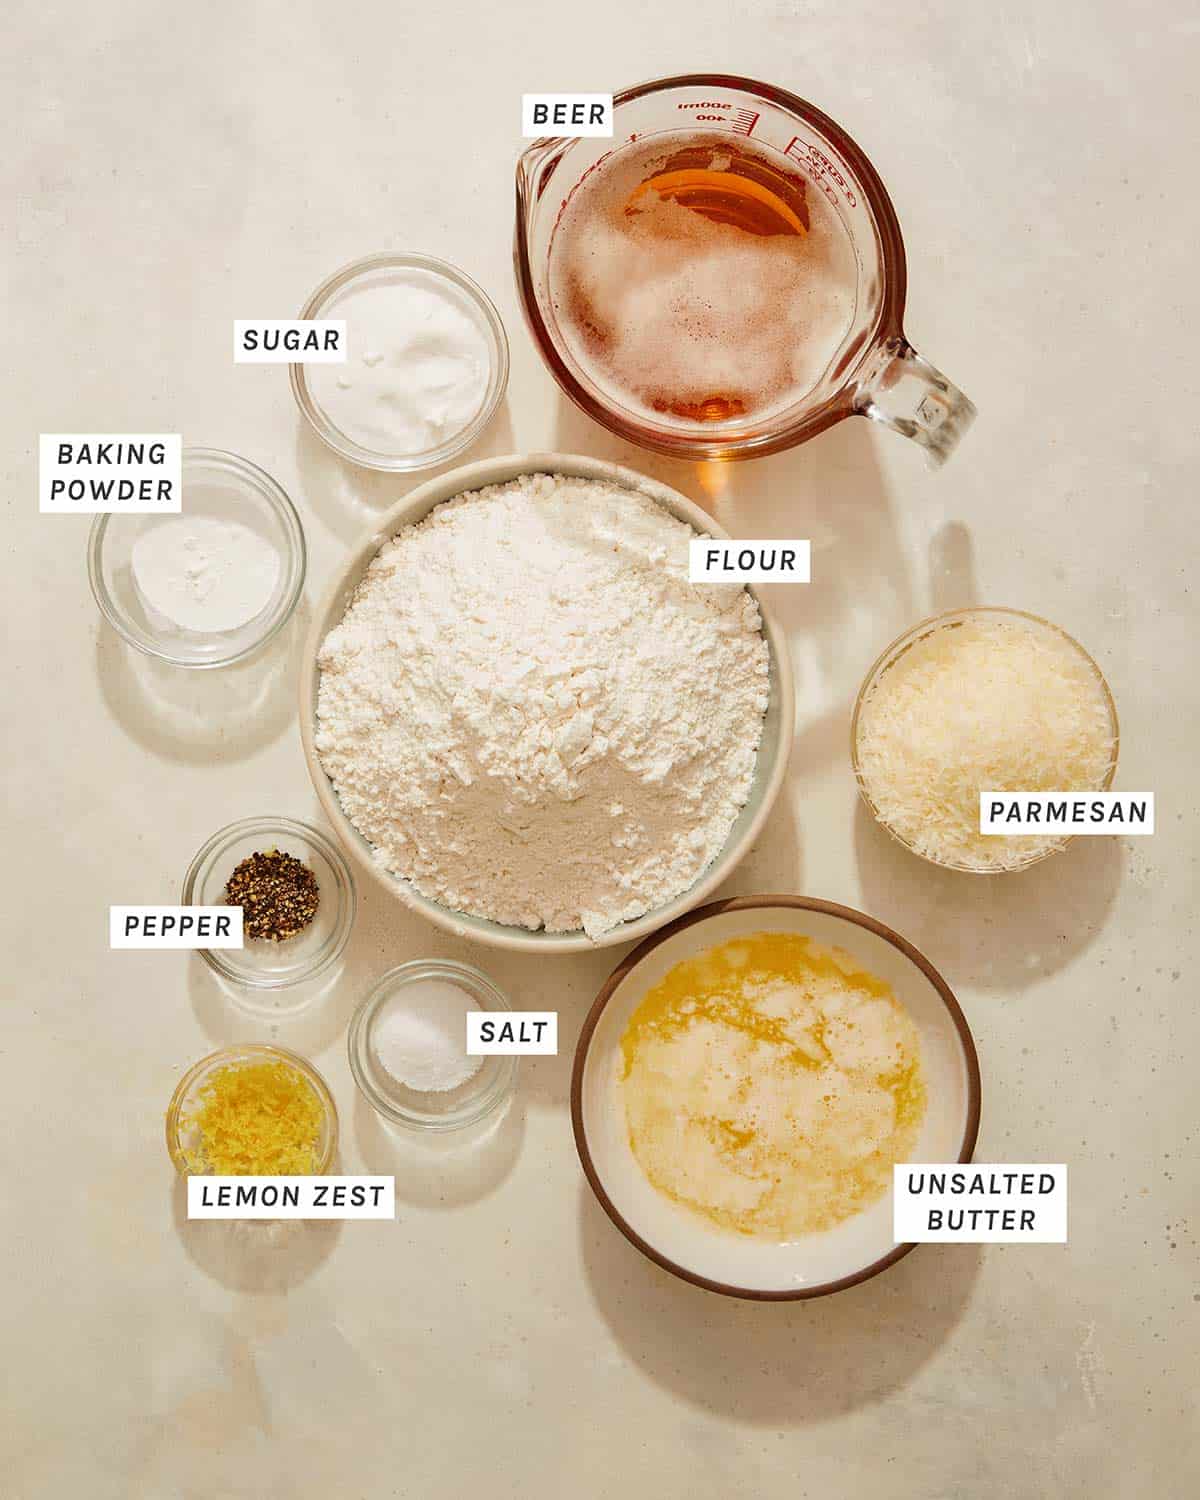
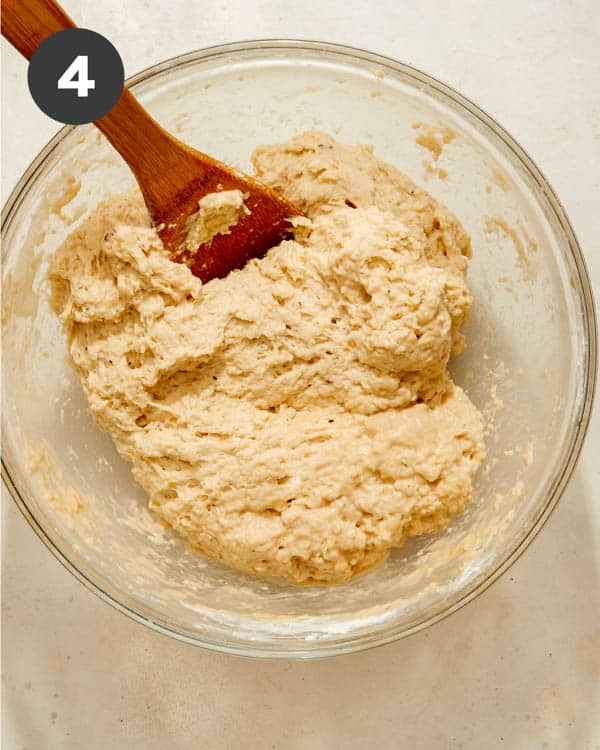
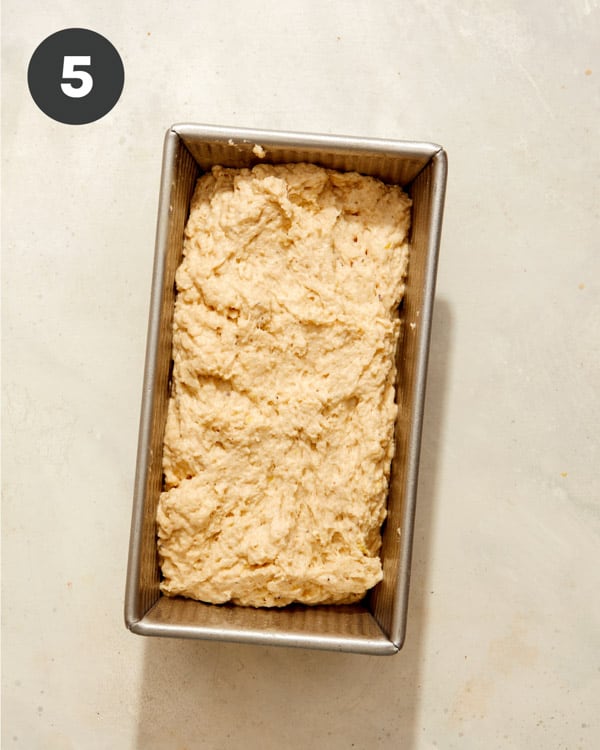
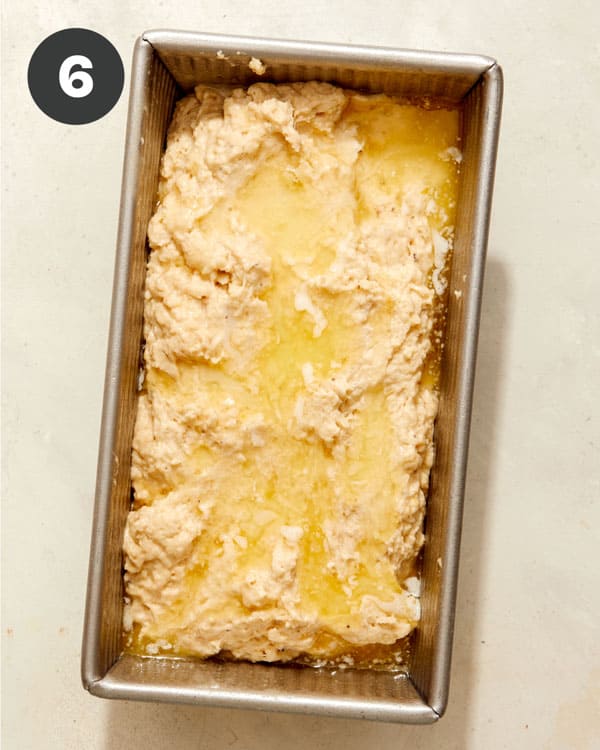
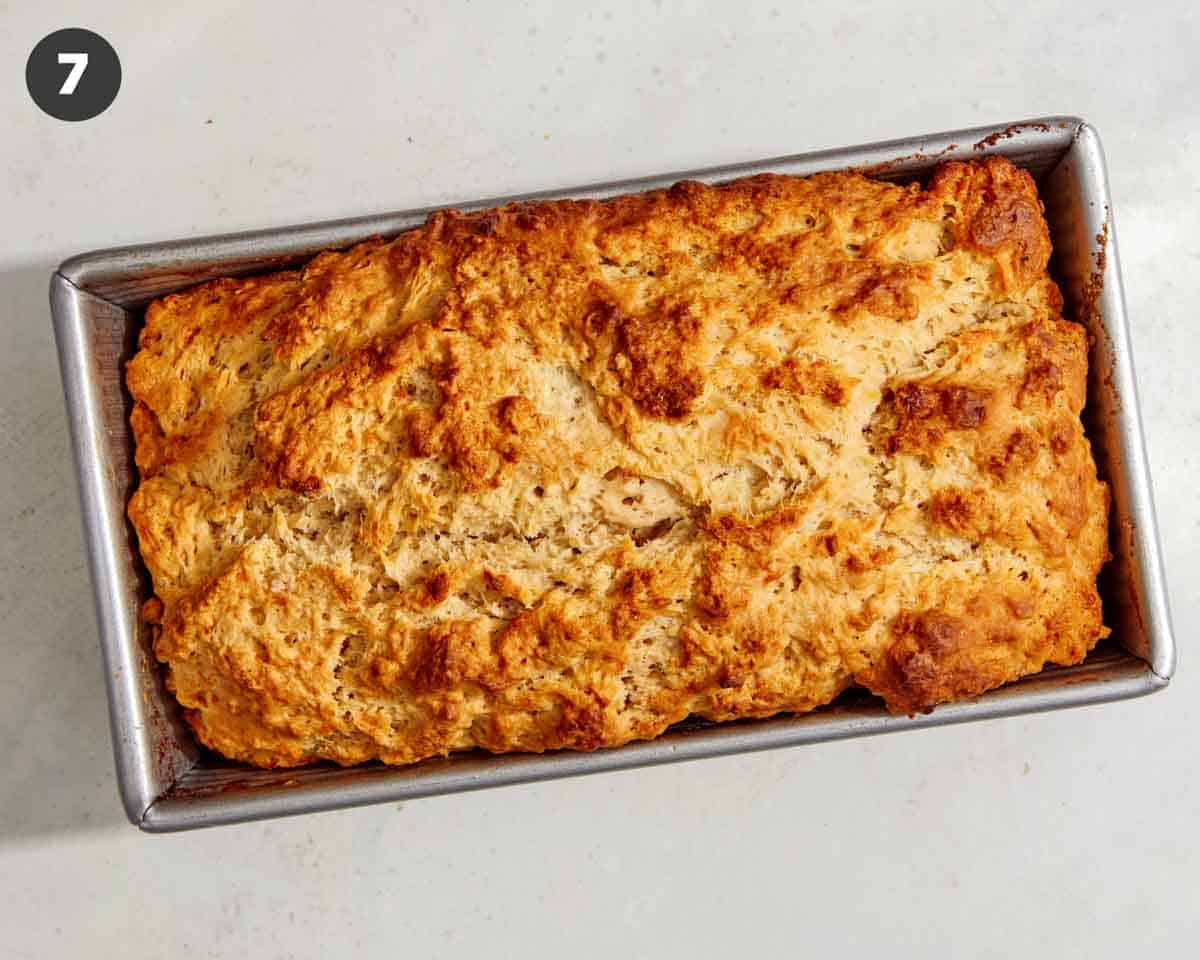
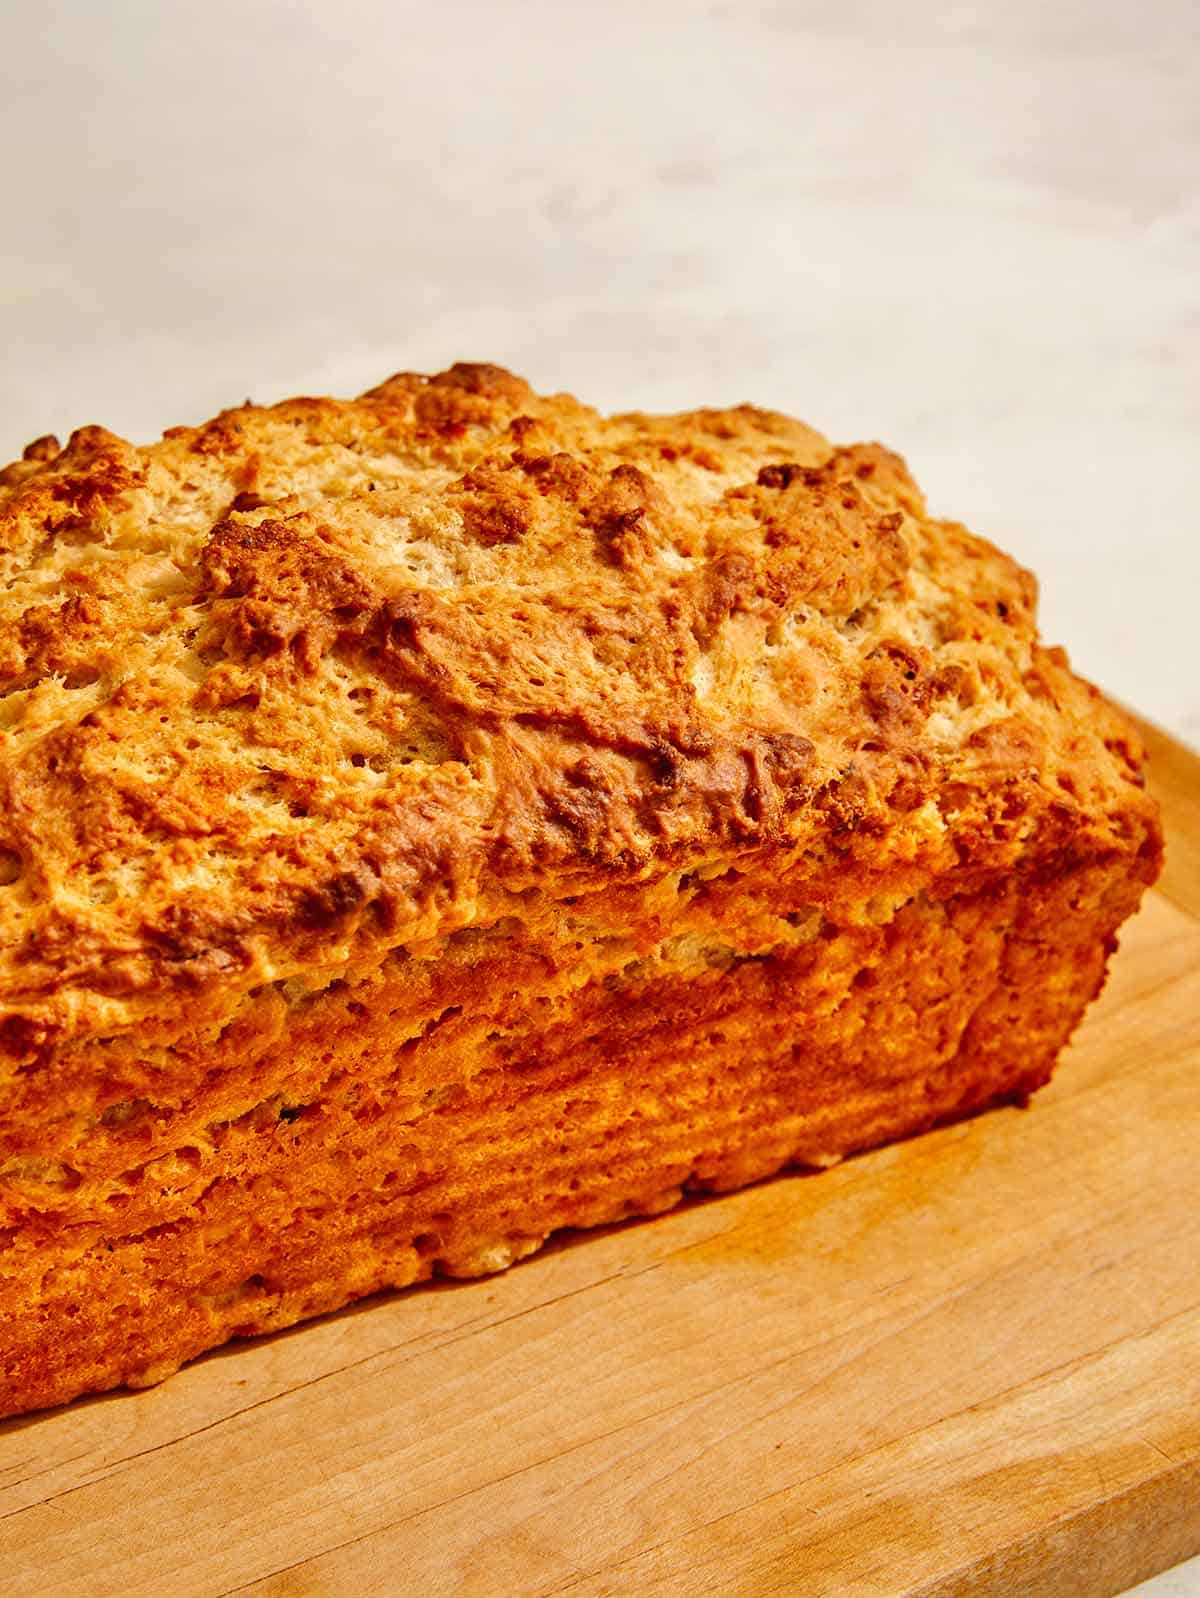
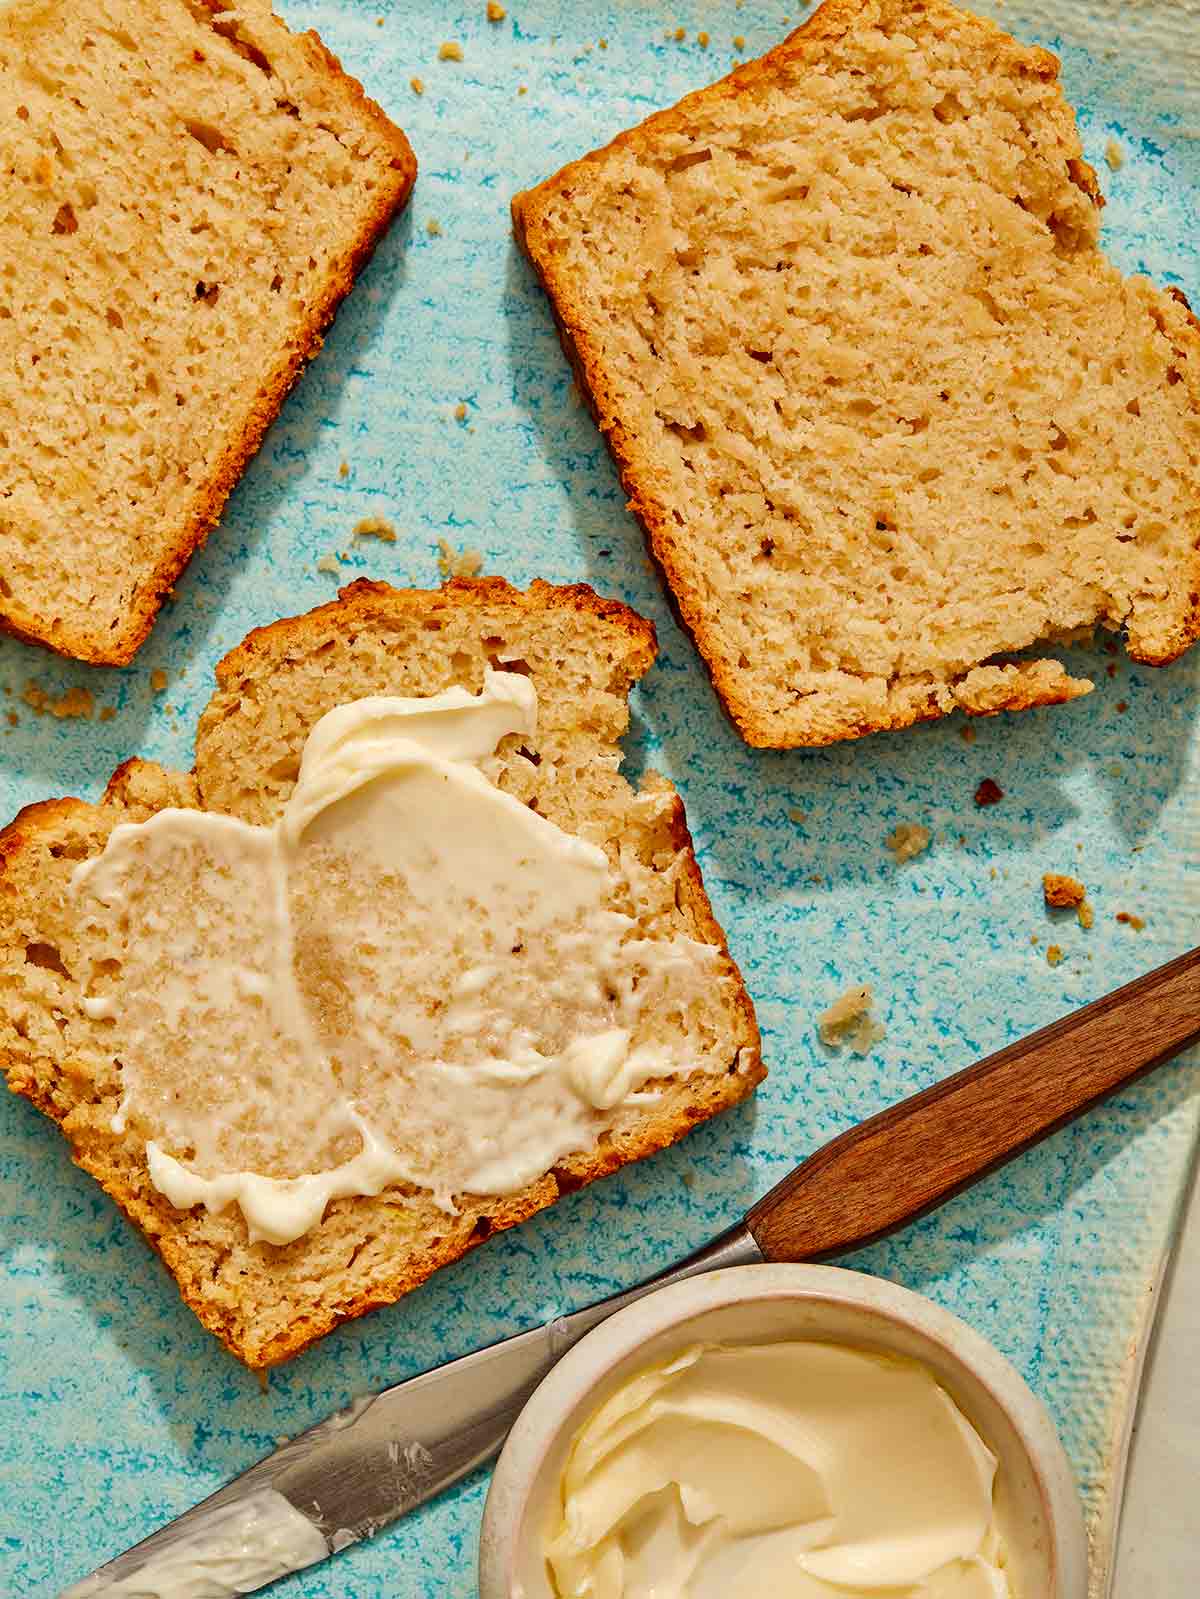
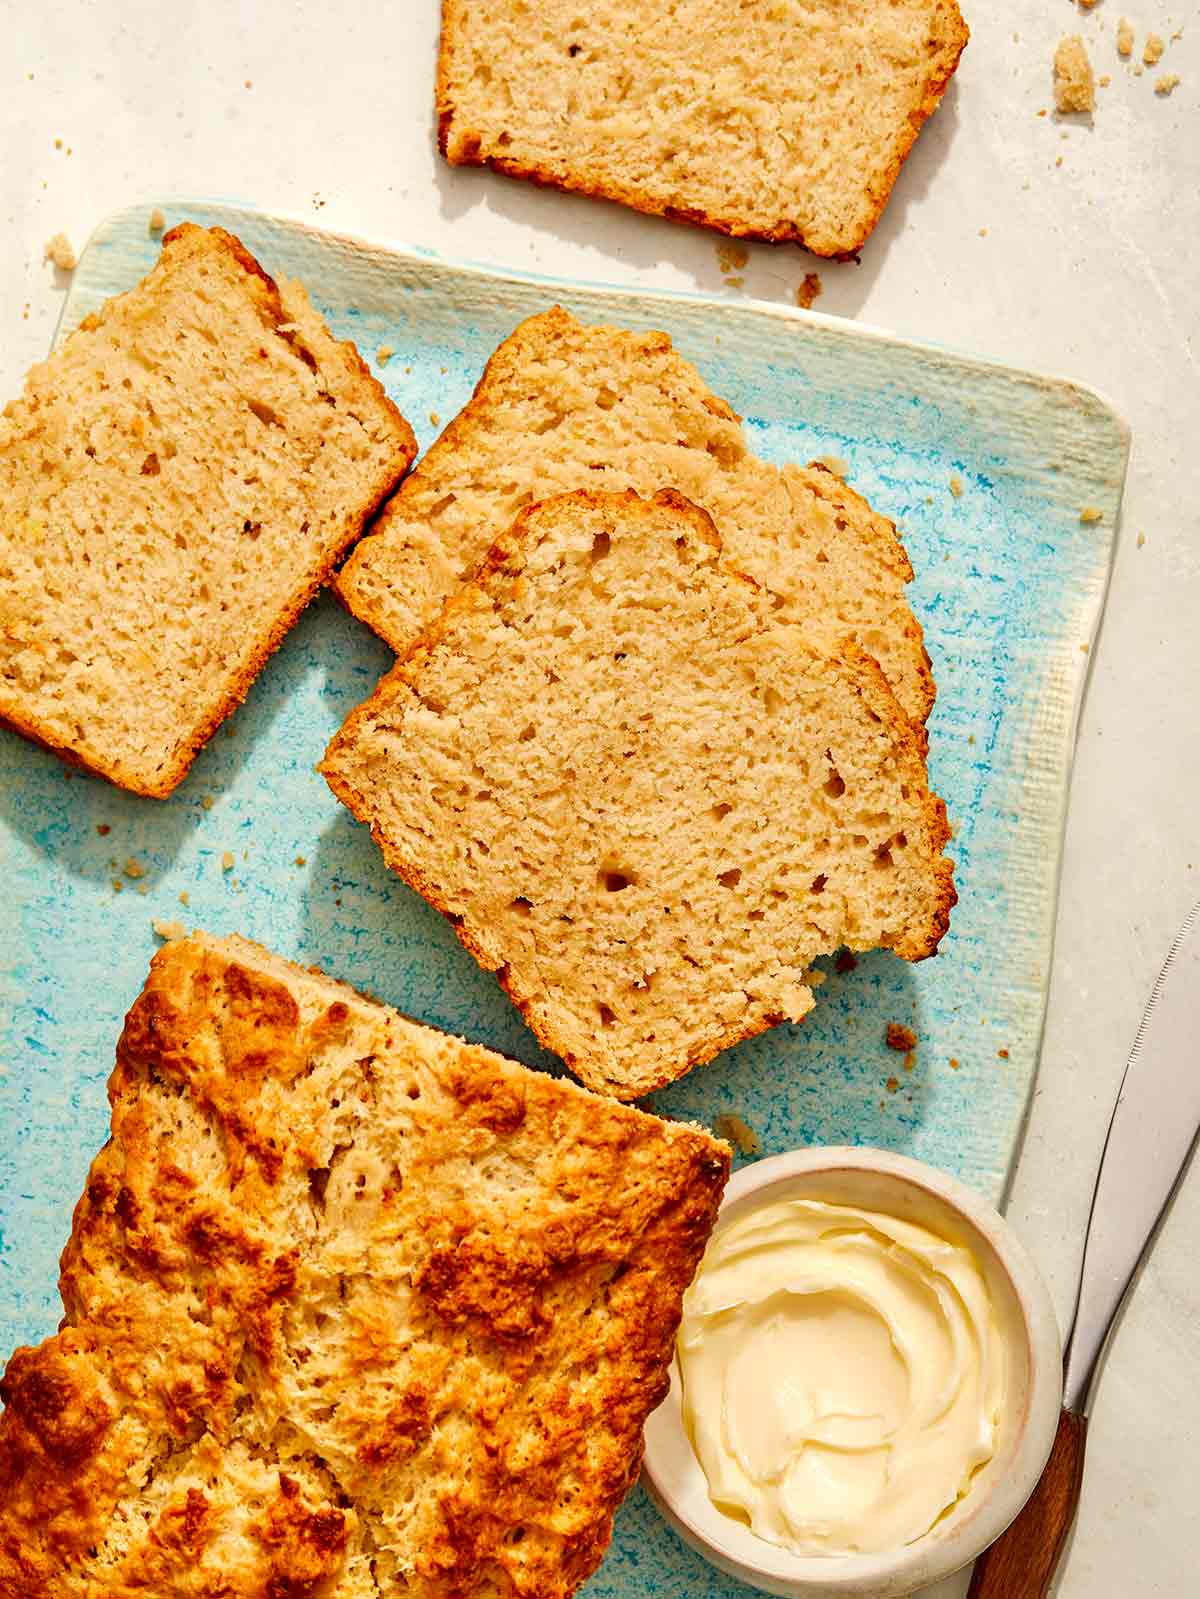
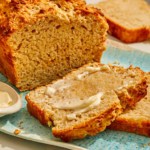
Have you ever tried making bread with beer? This beer bread recipe is simple and incredibly flavorful with the addition of parmesan cheese and freshly cracked black pepper and the texture is perfectly tender and buttery. While we love this beer bread with just a generous pat of butter slathered on top, it’s even better when dipped into a big bowl of chili or broccoli cheddar soup! If you’re looking for a quick bread with…
The post Beer Bread Recipe (with Parmesan and Black Pepper) appeared first on Spoon Fork Bacon.
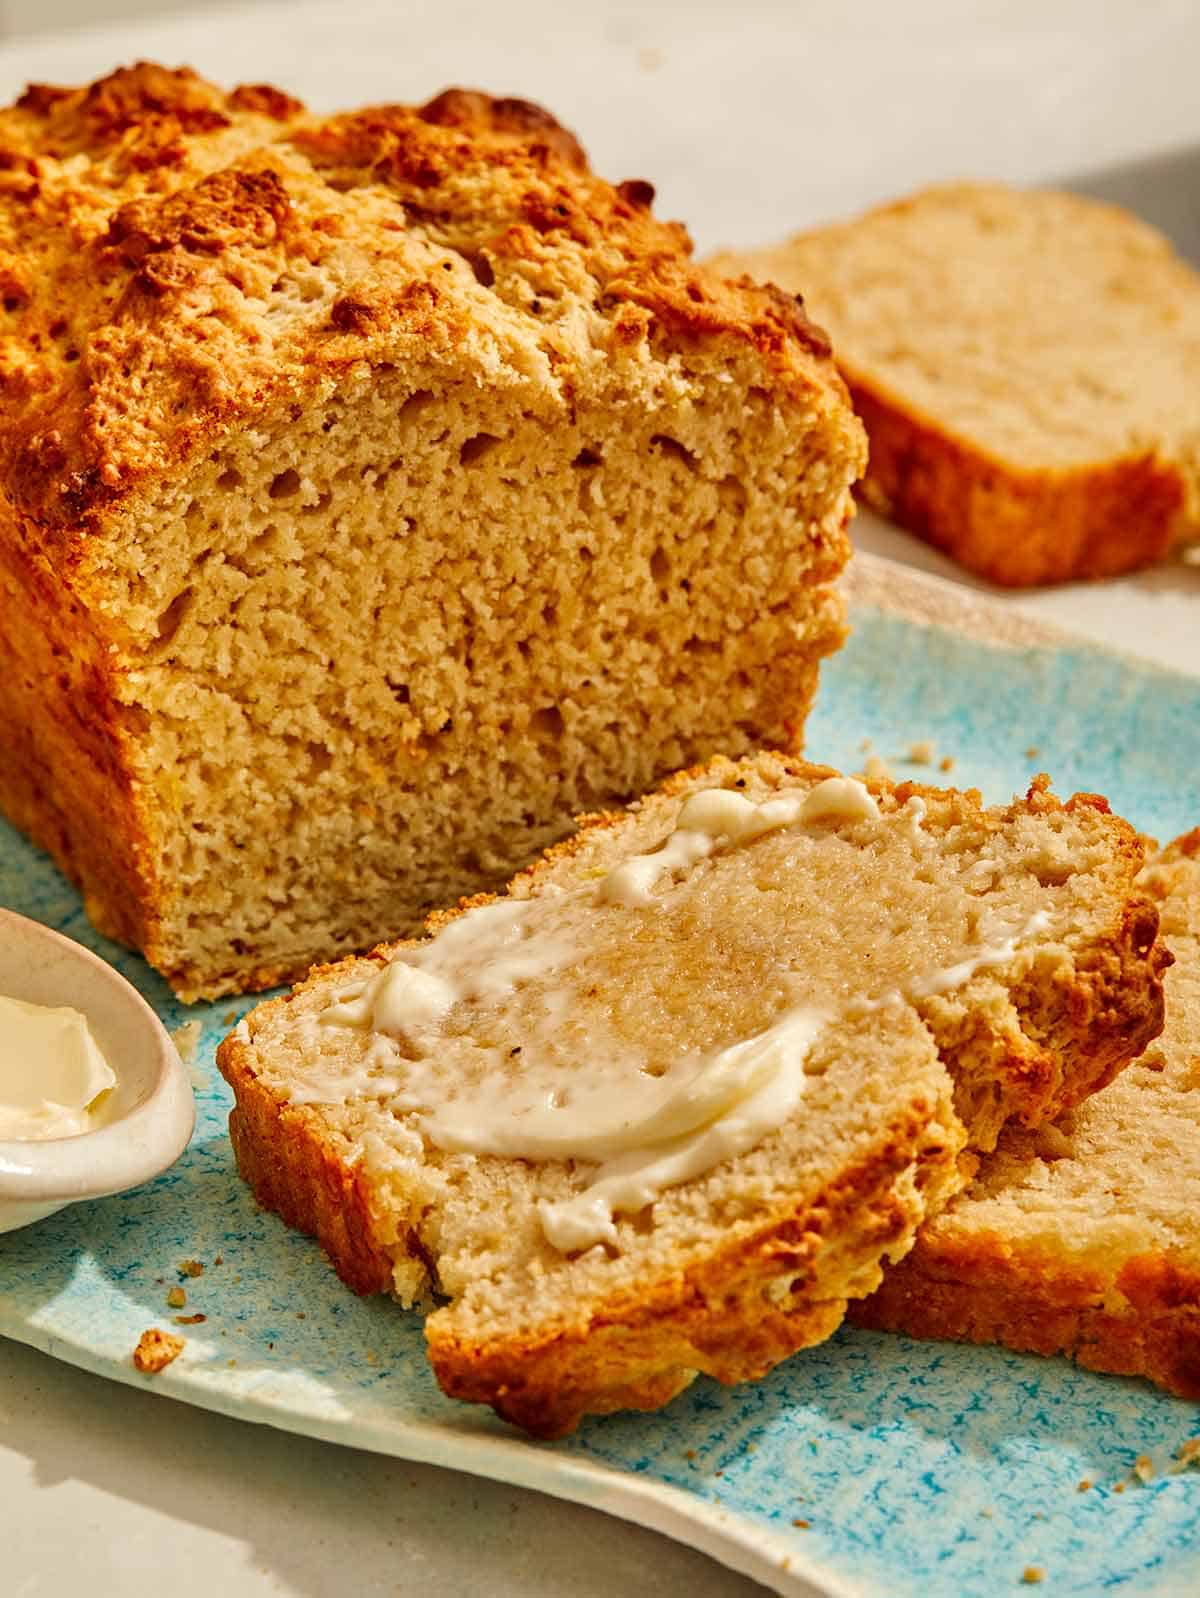
Have you ever tried making bread with beer? This beer bread recipe is simple and incredibly flavorful with the addition of parmesan cheese and freshly cracked black pepper and the texture is perfectly tender and buttery. While we love this beer bread with just a generous pat of butter slathered on top, it’s even better when dipped into a big bowl of chili or broccoli cheddar soup! If you’re looking for a quick bread with tons of savory flavor, this recipe is about to be your new favorite!
Want a deliciously comforting loaf of bread that doesn’t require hours of proofing yeast, rising, and baking? Beer bread is a quick bread that uses the natural yeasts in beer to activate a rise. The beer reacts with baking powder to help the bread rise as it bakes. Depending on the type of beer you use, you’ll also add extra flavor to the bread. But don’t worry, all or most of the alcohol cooks out of the bread, leaving you with all the flavor but no alcohol.
Choose a flavorful beer. Craft beers, stouts, ales, or any darker beer are likely to have yeast present that will help the bread rise while also lending a nice flavor to the bread. Some beers have yeast filtered out, like Sam Adams Boston Lager, Miller Lite, or Heineken, and may not be the best choice.
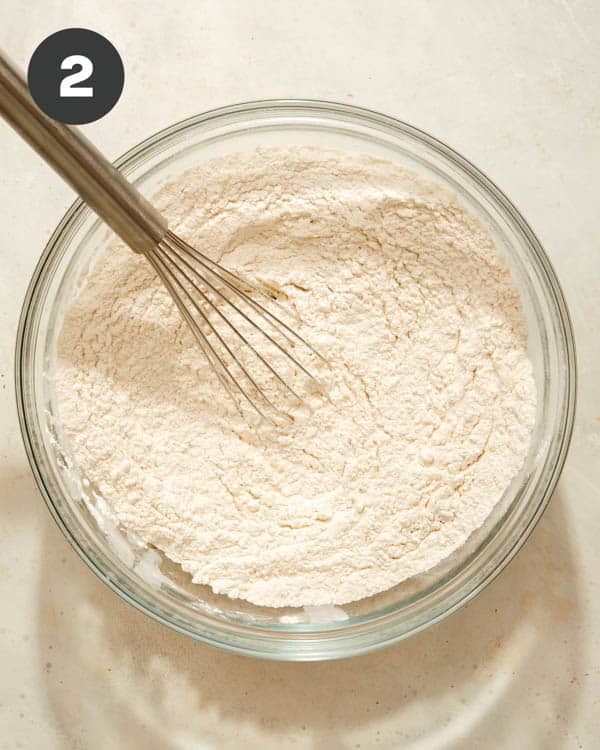
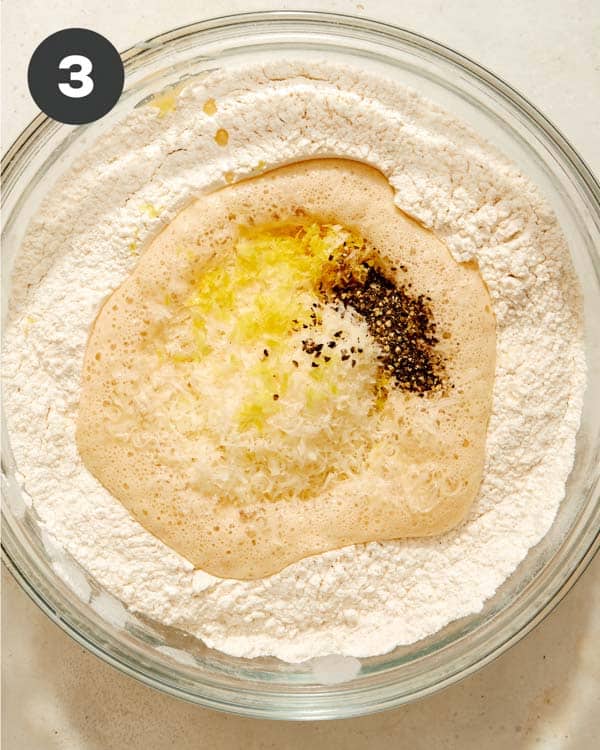
Don’t overmix the batter. Be sure to just mix the batter until most of the flour pockets are gone. Stirring too much will lead to a dense loaf.
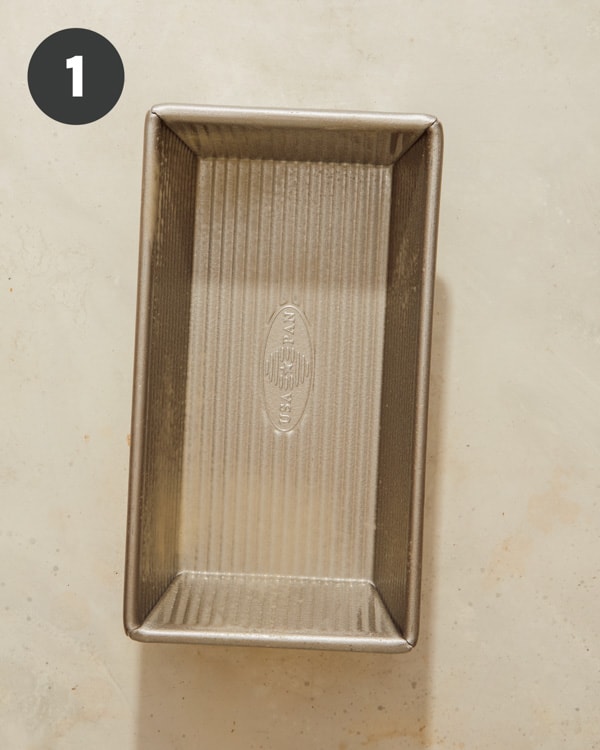
Don’t let the batter sit too long. Once the batter is mixed, get it into the pan and into the oven within 10-15 minutes. If you wait too long, the baking soda and beer will react too much before the heat is added, preventing a good rise.
Bake just until the toothpick comes out clean. If you overbake the bread, it may become dry and crumbly instead of tender.
Let the bread cool before slicing. Letting the bread rest for an hour to an hour and a half before slicing will help the slices hold their shape.
Switch up the beer. Choose your favorite craft beer or a spiced seasonal variety to add a little extra flavor to the bread. Darker beers, like Guinness, will also add more flavor to your beer bread.
Add cheese. We added parmesan cheese to this recipe, but sharp cheddar, Gruyere, mozzarella, or Monterrey Jack can also be used.
Mix in the herbs. Fresh herbs, including rosemary, thyme, dill, or oregano, can add a new, fun flavor to the bread. Freshly minced garlic or garlic powder also adds incredible flavor to this bread!
Make it spicy. Add chopped fresh jalapeno peppers, red pepper chili flakes, or pepper jack cheese.
Make it sweet. Add dried fruit like raisins, cranberries, or chopped apricots to the bread, along with chopped walnuts, pecans, or pistachios. Don’t forget a drizzle of honey as well!
To keep your beer bread fresh, let it cool completely, then wrap it in plastic wrap and place it in an airtight container for up to 2-3 days on the counter.
You can also freeze baked beer bread by wrapping it in plastic and then in an airtight freezer-safe container. Freeze for up to 3 months. Thaw on the counter or in the refrigerator and store in the refrigerator for up to 3 days after thawing.
One of the best things about beer bread is that it tastes incredible by itself but can also be eaten with a wide variety of different foods:
Eat it with a dip like Spinach and Artichoke Dip or Hot Crab Dip.
Enjoy it along with a hearty BBQ Chicken Salad or Summer Steak Salad.
Use it to sop up a bowl of Creamy Pumpkin Soup or Chicken Gnocchi.
The post Beer Bread Recipe (with Parmesan and Black Pepper) appeared first on Spoon Fork Bacon.
Have you ever tried making bread with beer? This beer bread recipe is simple and incredibly flavorful with the addition of parmesan cheese and freshly cracked black pepper and the texture is perfectly tender and buttery. While we love this beer bread with just a generous pat of butter slathered on top, it’s even better when dipped into a big bowl of chili or broccoli cheddar soup! If you’re looking for a quick bread with…
The post Beer Bread Recipe (with Parmesan and Black Pepper) appeared first on Spoon Fork Bacon.
Have you ever tried making bread with beer? This beer bread recipe is simple and incredibly flavorful with the addition of parmesan cheese and freshly cracked black pepper and the texture is perfectly tender and buttery. While we love this beer bread with just a generous pat of butter slathered on top, it’s even better when dipped into a big bowl of chili or broccoli cheddar soup! If you’re looking for a quick bread with tons of savory flavor, this recipe is about to be your new favorite!
Want a deliciously comforting loaf of bread that doesn’t require hours of proofing yeast, rising, and baking? Beer bread is a quick bread that uses the natural yeasts in beer to activate a rise. The beer reacts with baking powder to help the bread rise as it bakes. Depending on the type of beer you use, you’ll also add extra flavor to the bread. But don’t worry, all or most of the alcohol cooks out of the bread, leaving you with all the flavor but no alcohol.
Choose a flavorful beer. Craft beers, stouts, ales, or any darker beer are likely to have yeast present that will help the bread rise while also lending a nice flavor to the bread. Some beers have yeast filtered out, like Sam Adams Boston Lager, Miller Lite, or Heineken, and may not be the best choice.
Don’t overmix the batter. Be sure to just mix the batter until most of the flour pockets are gone. Stirring too much will lead to a dense loaf.
Don’t let the batter sit too long. Once the batter is mixed, get it into the pan and into the oven within 10-15 minutes. If you wait too long, the baking soda and beer will react too much before the heat is added, preventing a good rise.
Bake just until the toothpick comes out clean. If you overbake the bread, it may become dry and crumbly instead of tender.
Let the bread cool before slicing. Letting the bread rest for an hour to an hour and a half before slicing will help the slices hold their shape.
Switch up the beer. Choose your favorite craft beer or a spiced seasonal variety to add a little extra flavor to the bread. Darker beers, like Guinness, will also add more flavor to your beer bread.
Add cheese. We added parmesan cheese to this recipe, but sharp cheddar, Gruyere, mozzarella, or Monterrey Jack can also be used.
Mix in the herbs. Fresh herbs, including rosemary, thyme, dill, or oregano, can add a new, fun flavor to the bread. Freshly minced garlic or garlic powder also adds incredible flavor to this bread!
Make it spicy. Add chopped fresh jalapeno peppers, red pepper chili flakes, or pepper jack cheese.
Make it sweet. Add dried fruit like raisins, cranberries, or chopped apricots to the bread, along with chopped walnuts, pecans, or pistachios. Don’t forget a drizzle of honey as well!
To keep your beer bread fresh, let it cool completely, then wrap it in plastic wrap and place it in an airtight container for up to 2-3 days on the counter.
You can also freeze baked beer bread by wrapping it in plastic and then in an airtight freezer-safe container. Freeze for up to 3 months. Thaw on the counter or in the refrigerator and store in the refrigerator for up to 3 days after thawing.
One of the best things about beer bread is that it tastes incredible by itself but can also be eaten with a wide variety of different foods:
Eat it with a dip like Spinach and Artichoke Dip or Hot Crab Dip.
Enjoy it along with a hearty BBQ Chicken Salad or Summer Steak Salad.
Use it to sop up a bowl of Creamy Pumpkin Soup or Chicken Gnocchi.
The post Beer Bread Recipe (with Parmesan and Black Pepper) appeared first on Spoon Fork Bacon.
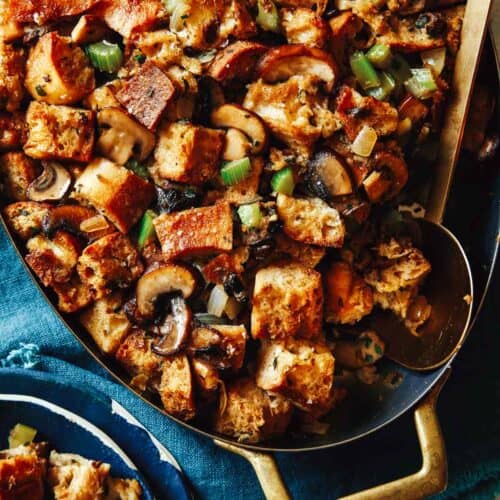
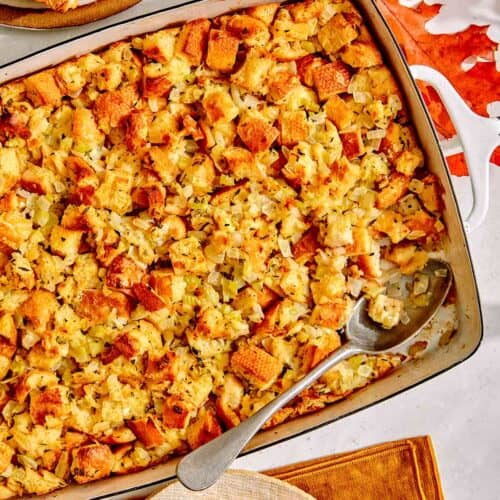
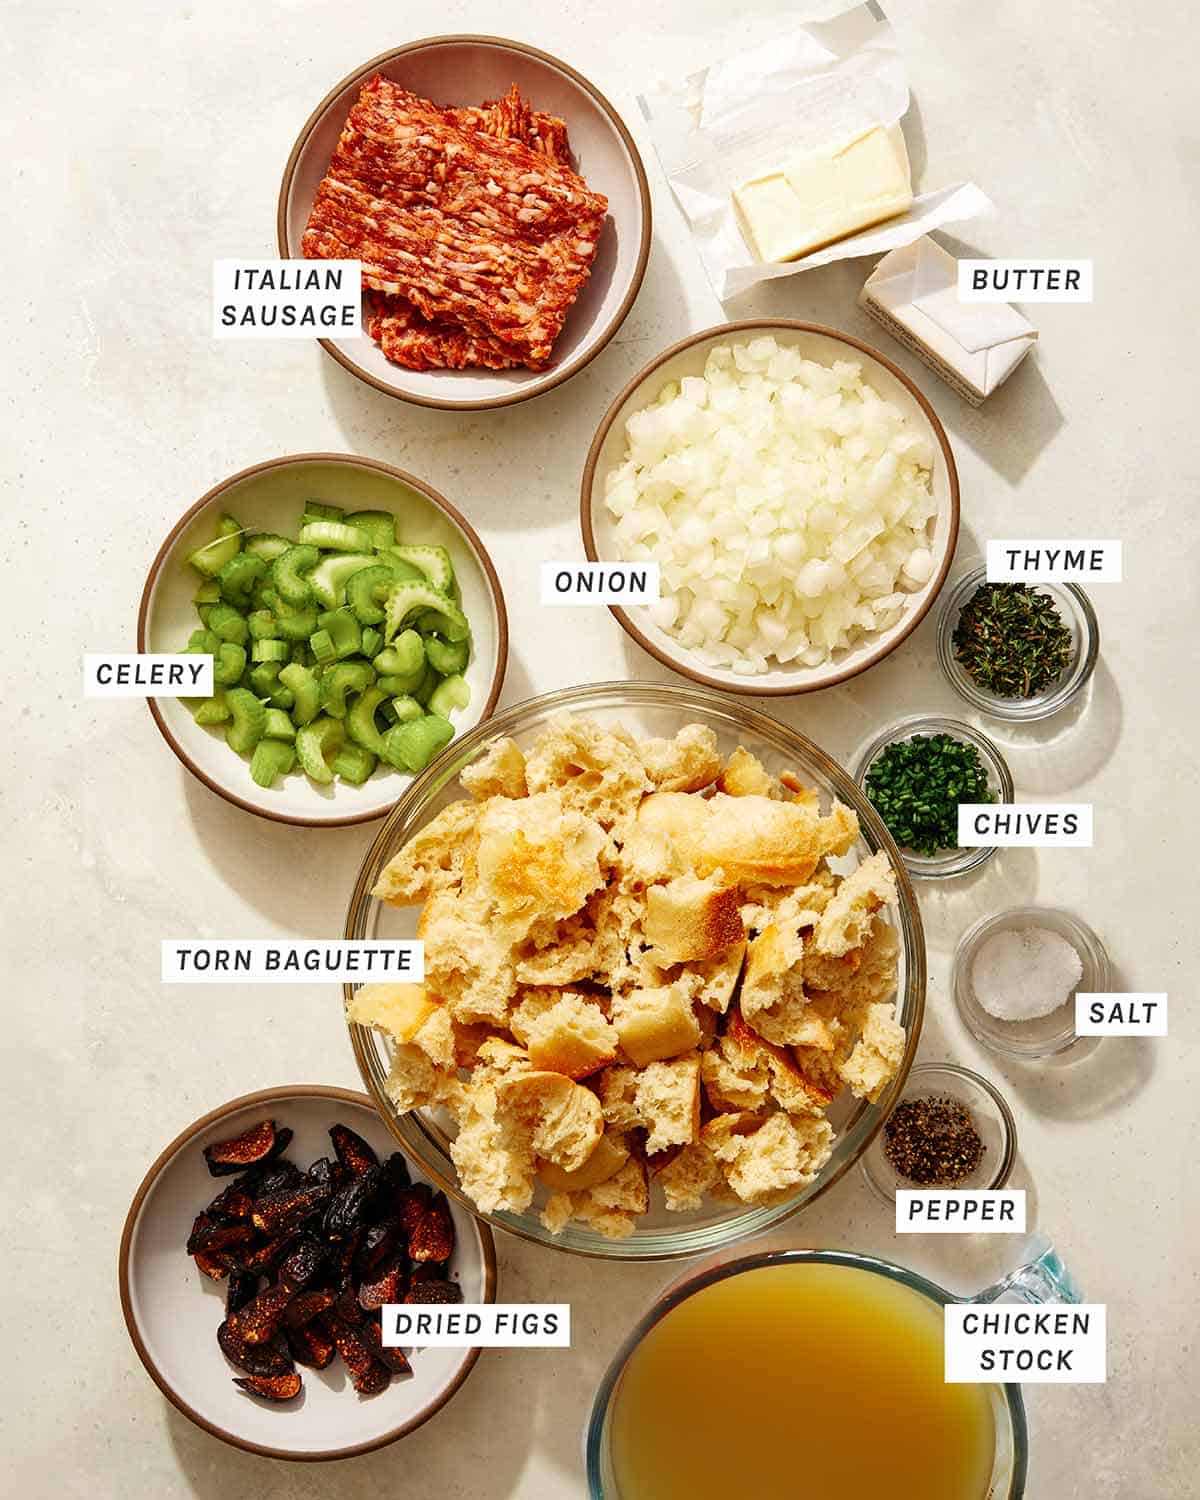
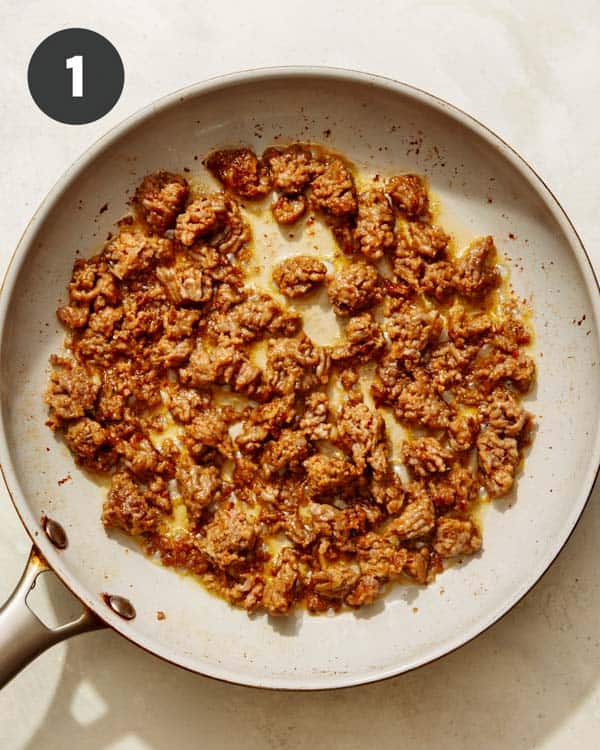
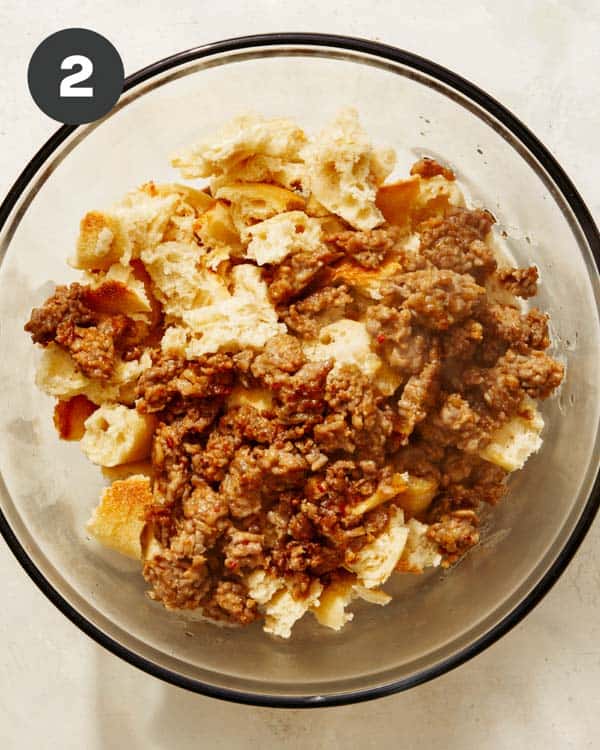
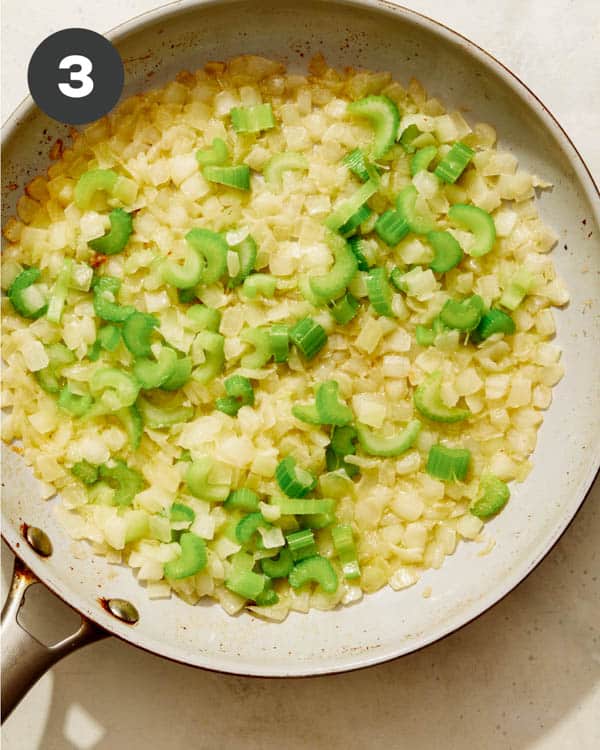
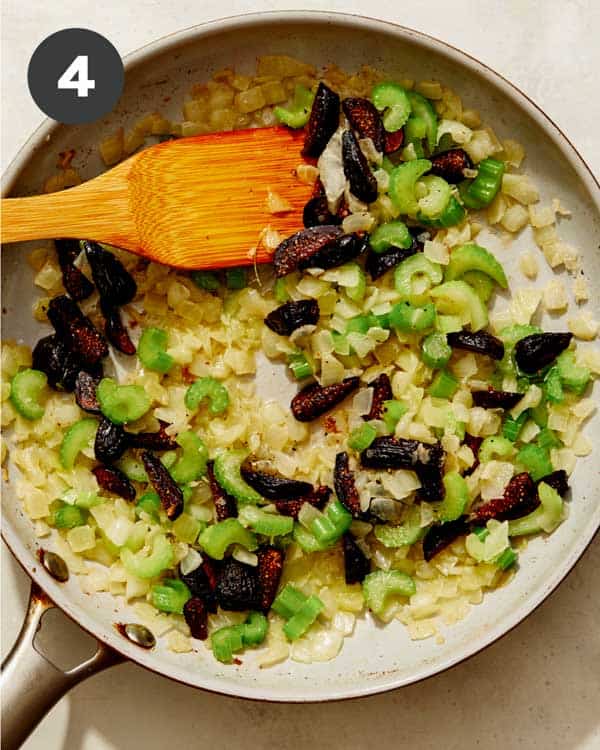
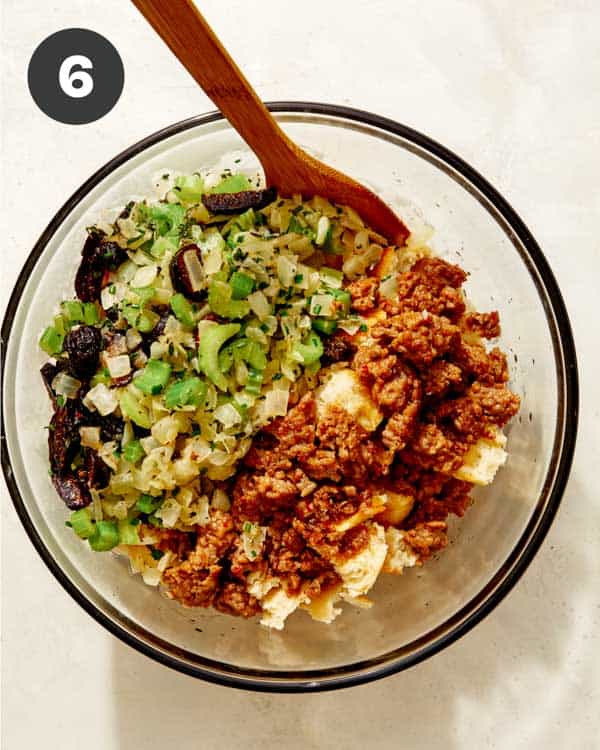
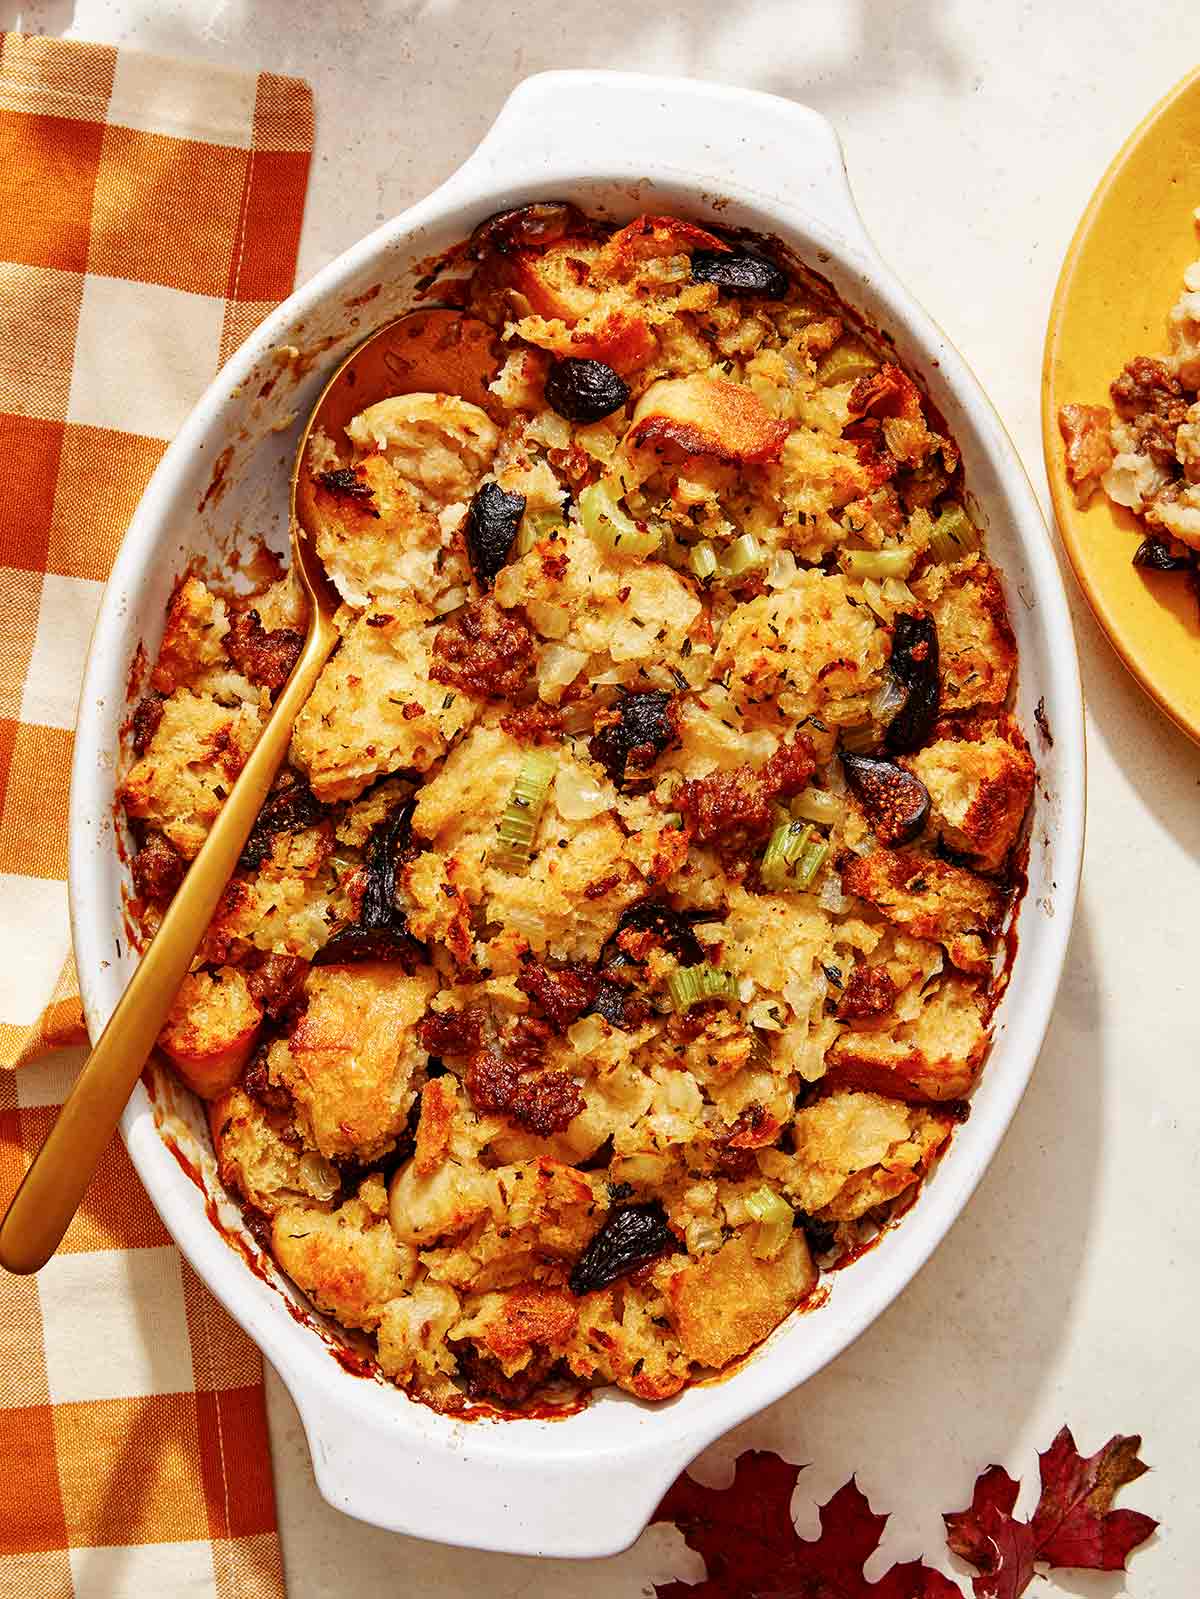
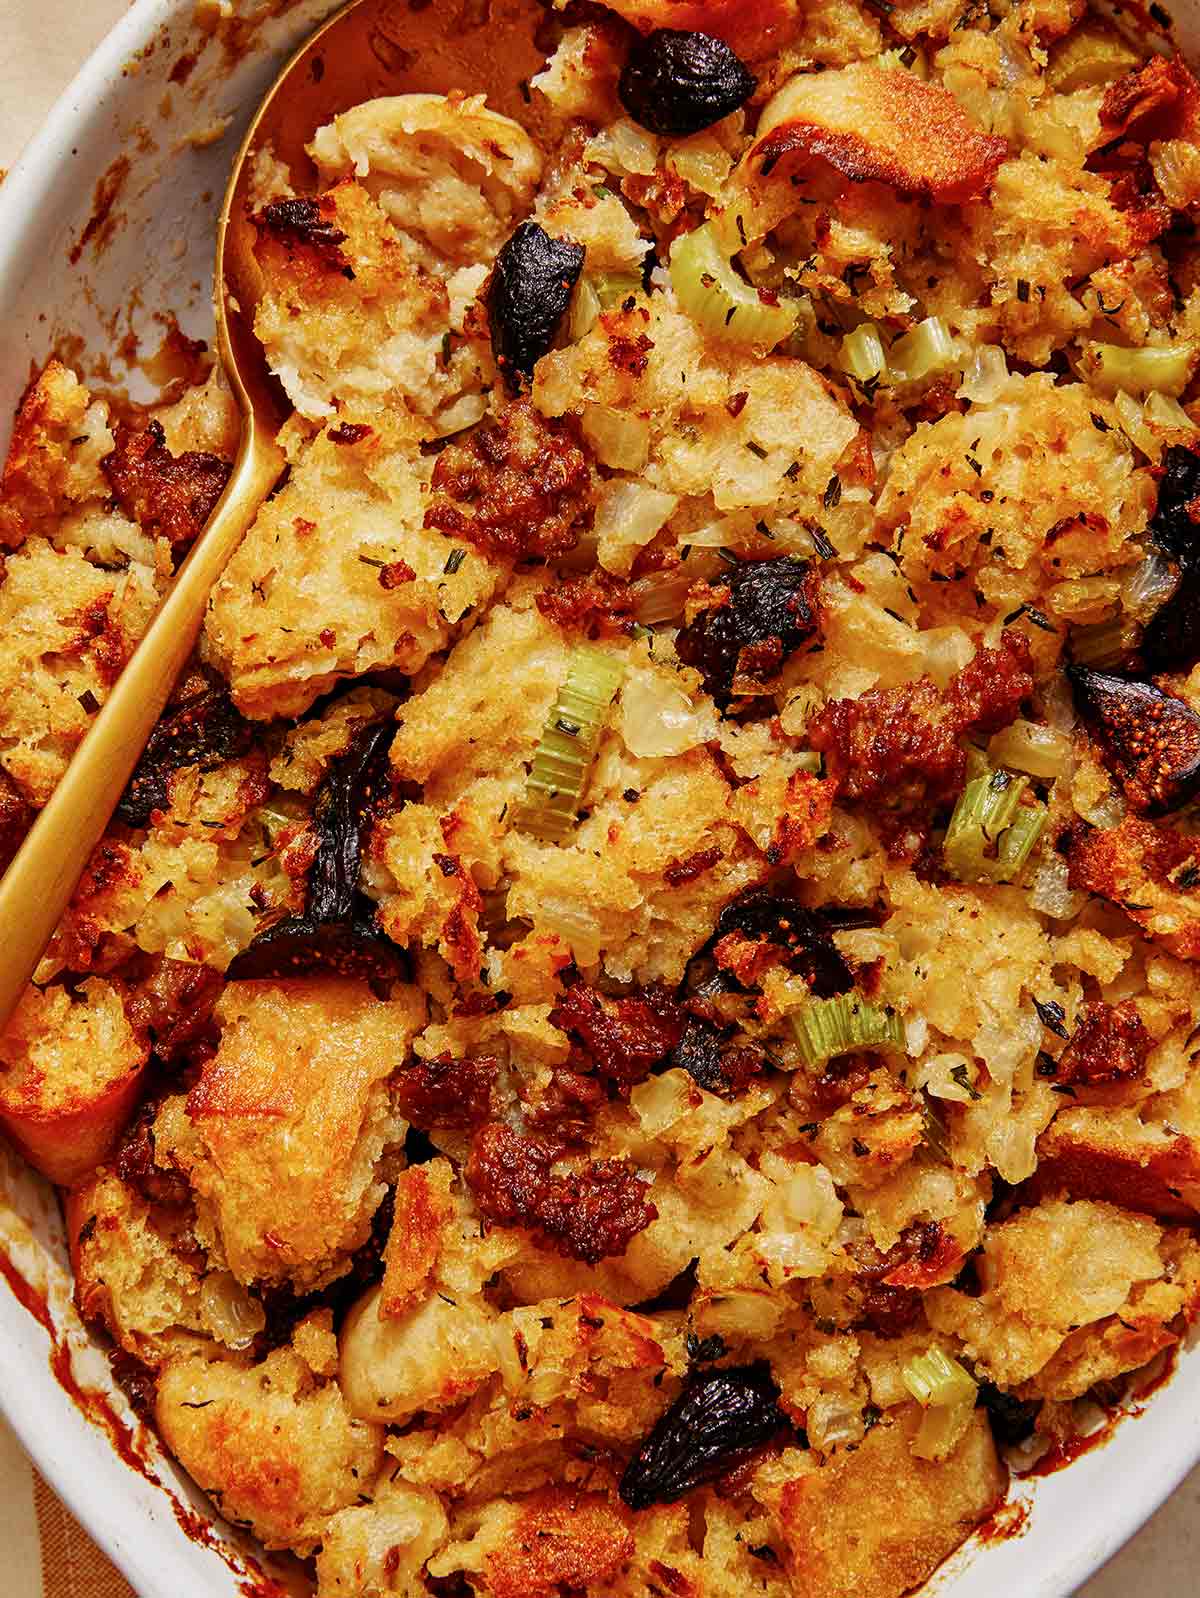
We love this Sausage Stuffing Recipe SO much! It might be our ideal stuffing. It’s very savory and delicious, but the dried figs add a hint of tart and sweet, which balances the flavors out very well! I have been making this stuffing almost every thanksgiving for the last 8 years and don’t plan on stopping any time soon! It’s the truly the best sausage stuffing ever! How to Make Our Sausage Stuffing Recipe Ingredients…
The post Sausage Stuffing Recipe (with Figs) appeared first on Spoon Fork Bacon.
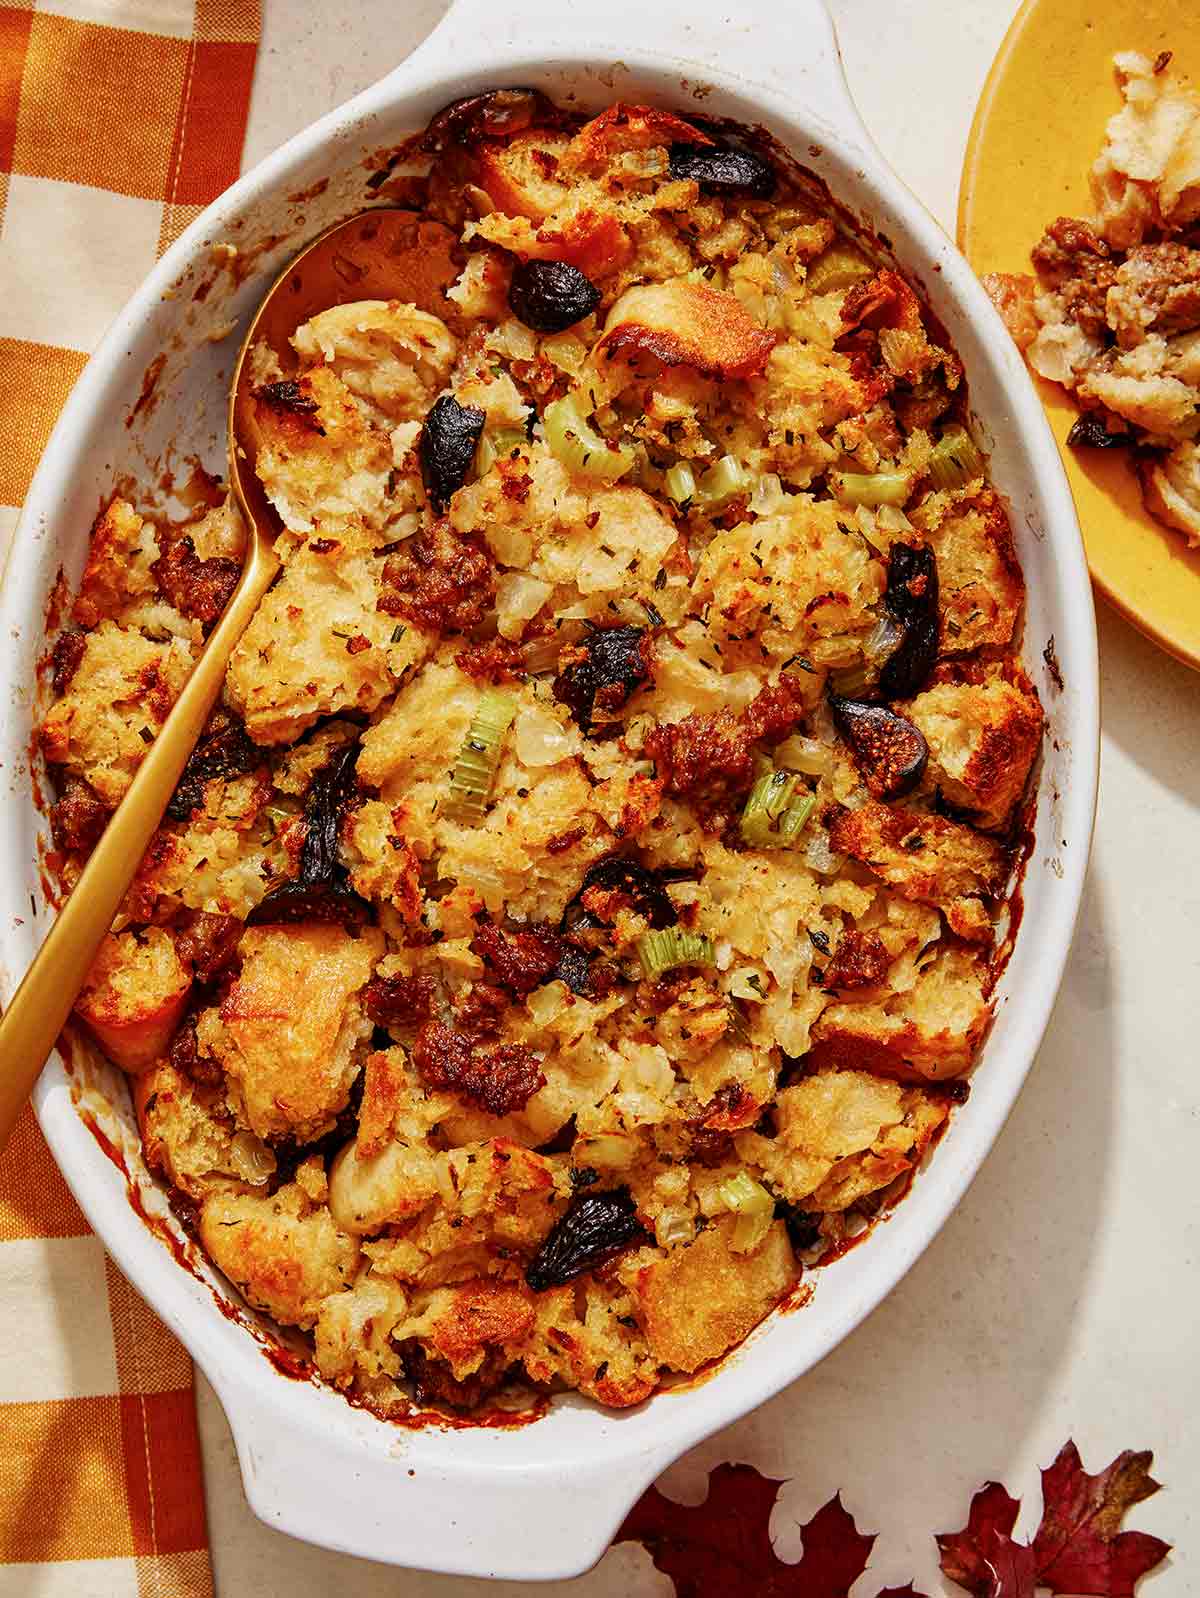
We love this Sausage Stuffing Recipe SO much! It might be our ideal stuffing. It’s very savory and delicious, but the dried figs add a hint of tart and sweet, which balances the flavors out very well!
I have been making this stuffing almost every thanksgiving for the last 8 years and don’t plan on stopping any time soon! It’s the truly the best sausage stuffing ever!


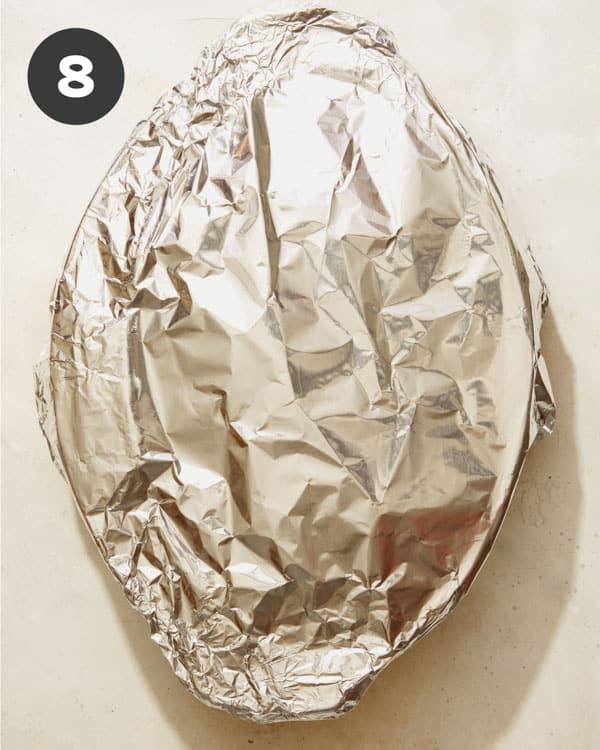
Our sausage stuffing recipe can be assembled up to 2 days ahead of time. Just assemble everything into the baking dish, tightly cover with foil (pre-bake) and refrigerate until ready to bake.
If the stuffing seems a little dry upon removing it from the refrigerator, just drizzle about 1/2 cup stock/broth over the baking dish and allow the stuffing to sit at room temperature for about 15 minutes (so some of the excess liquid can be absorbed).

The post Sausage Stuffing Recipe (with Figs) appeared first on Spoon Fork Bacon.
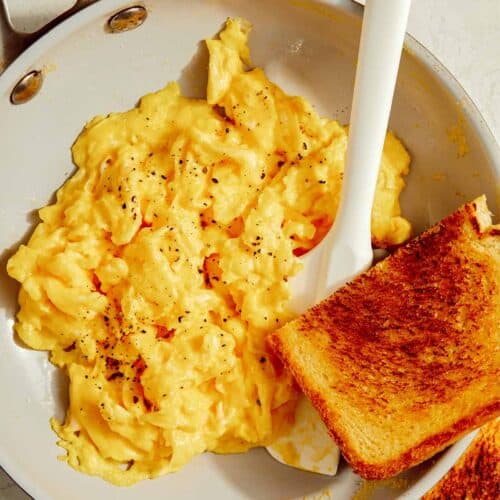
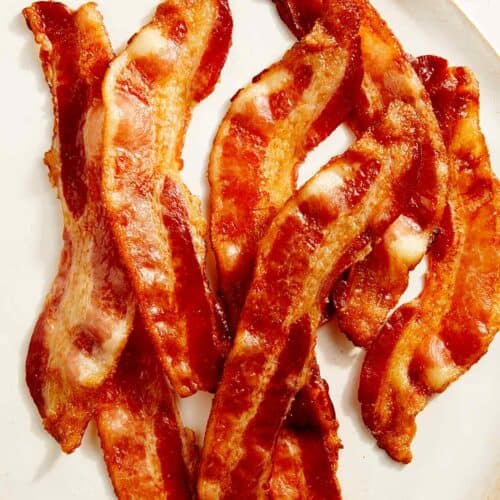
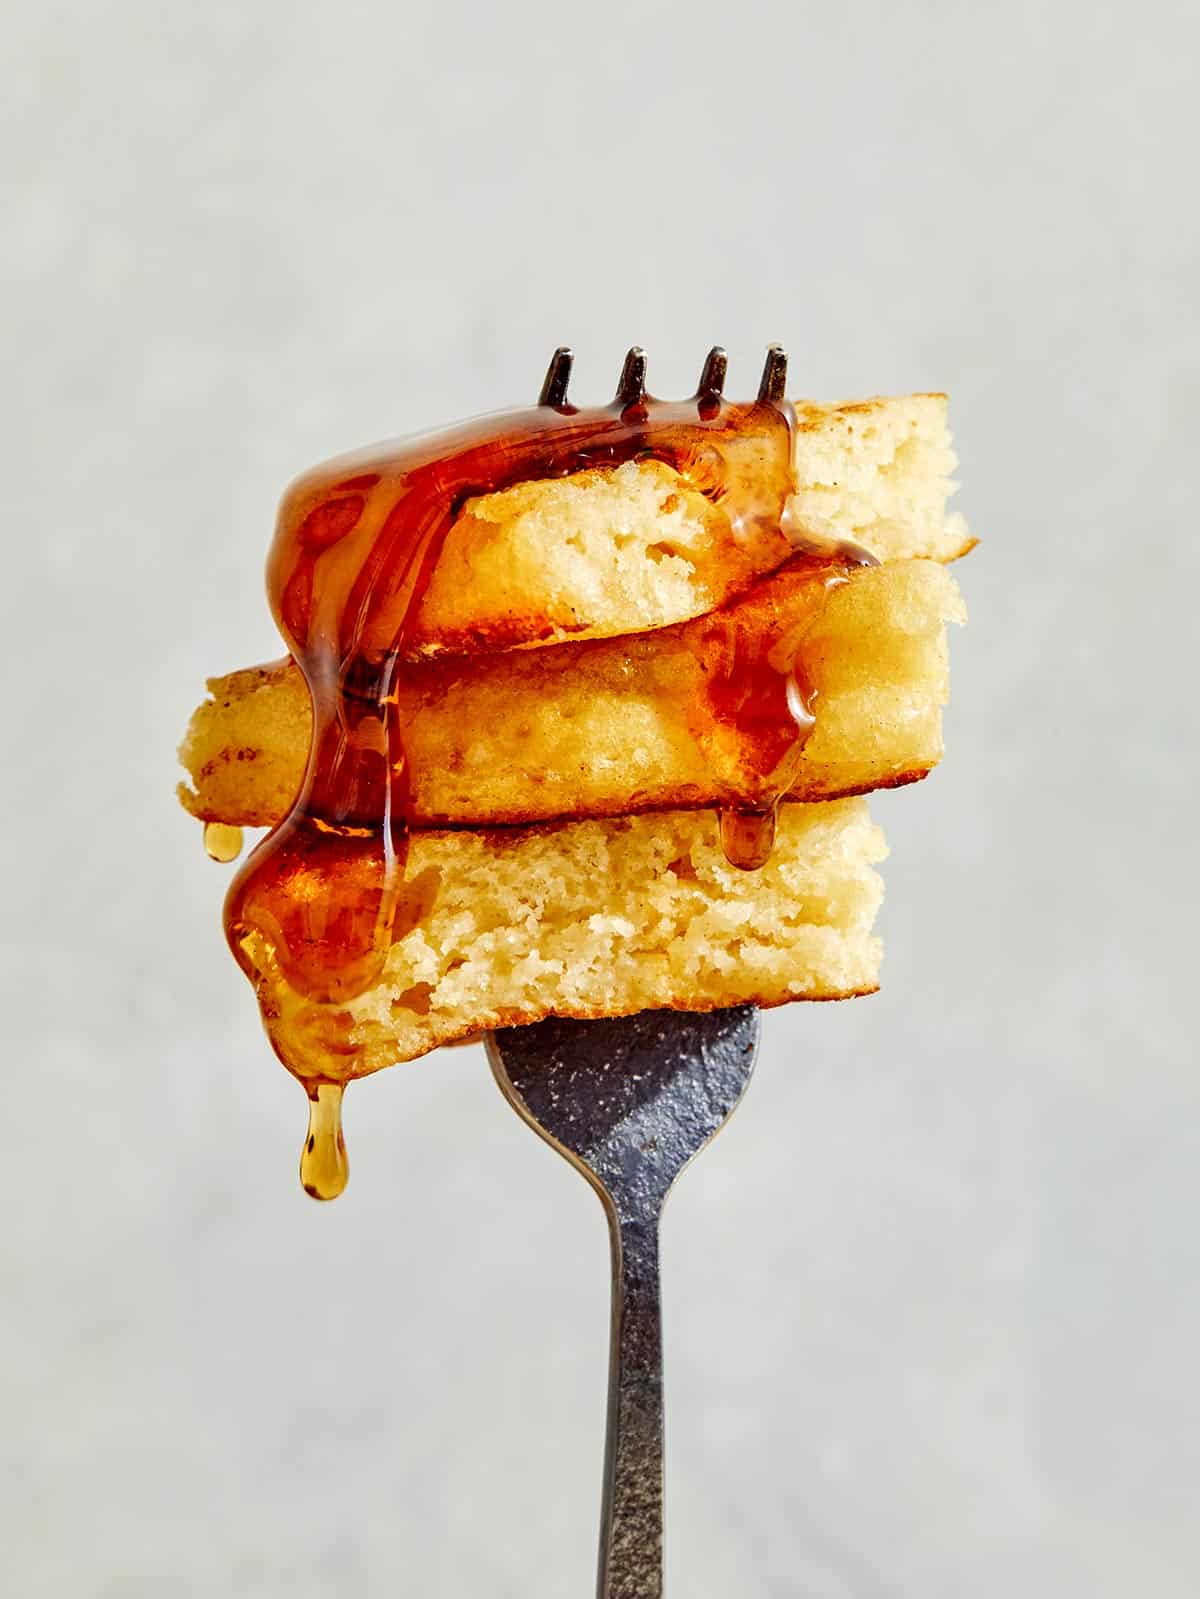
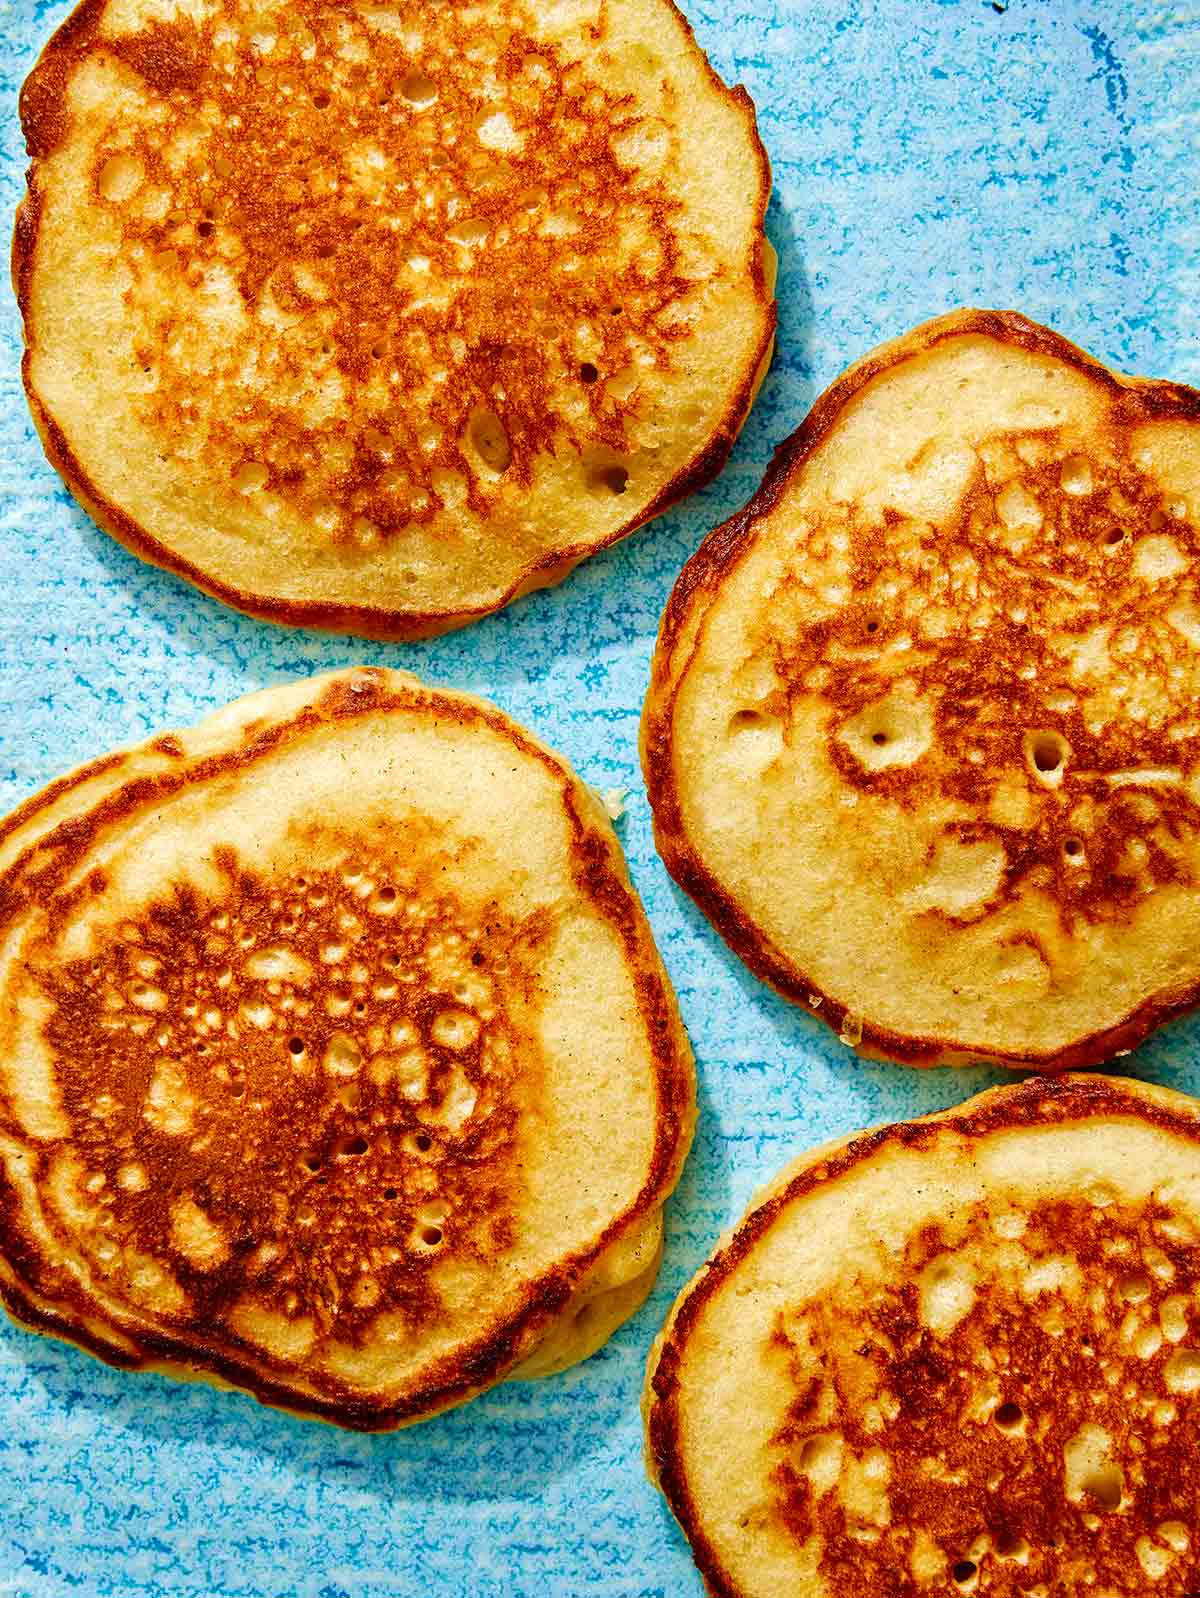
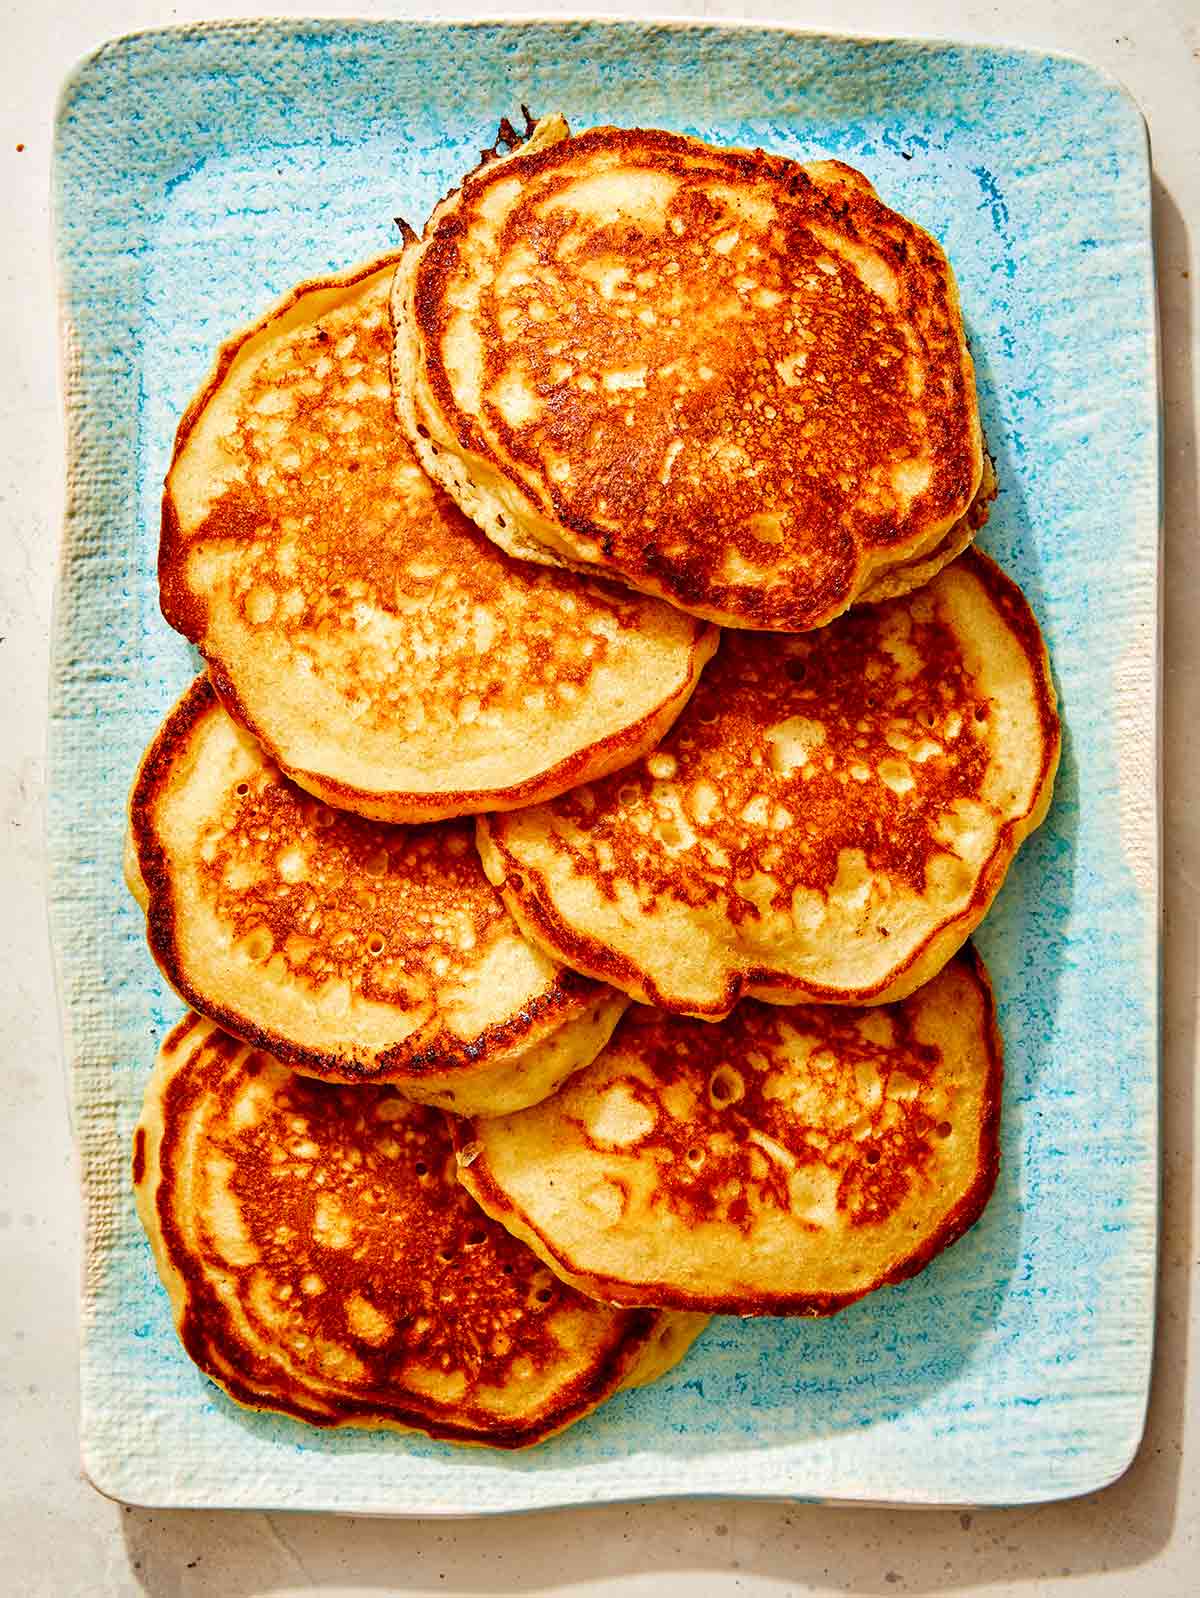
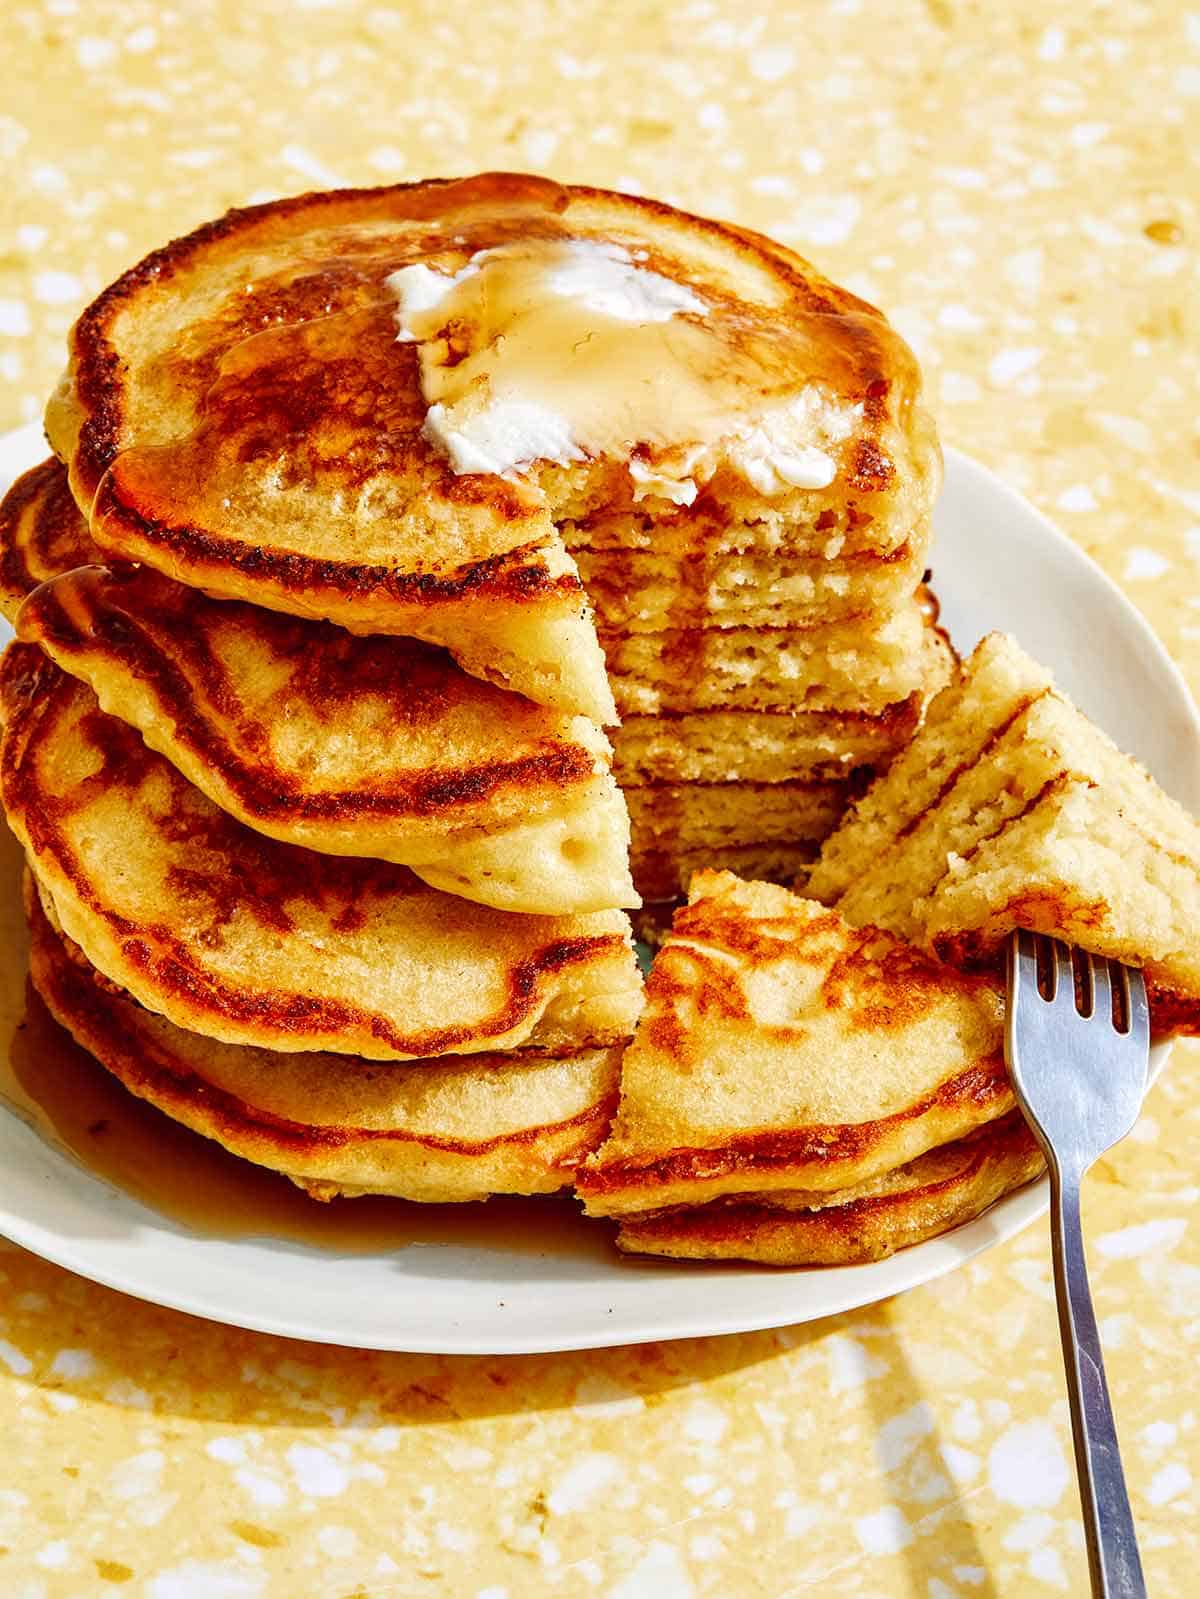
No Sunday morning breakfast is complete without a tall stack of pancakes. But if you’re tired of flat flapjacks, we’re about to change your breakfast world with this buttermilk pancake recipe. You’ll love how light and fluffy these pancakes are, the tangy sweet flavor, and the little crunch that comes from the butter-browned edges. Serve these buttermilk pancakes with a little blackberry jam, syrup, and a side of bacon and scrambled eggs for a simple,…
The post The BEST Buttermilk Pancakes appeared first on Spoon Fork Bacon.
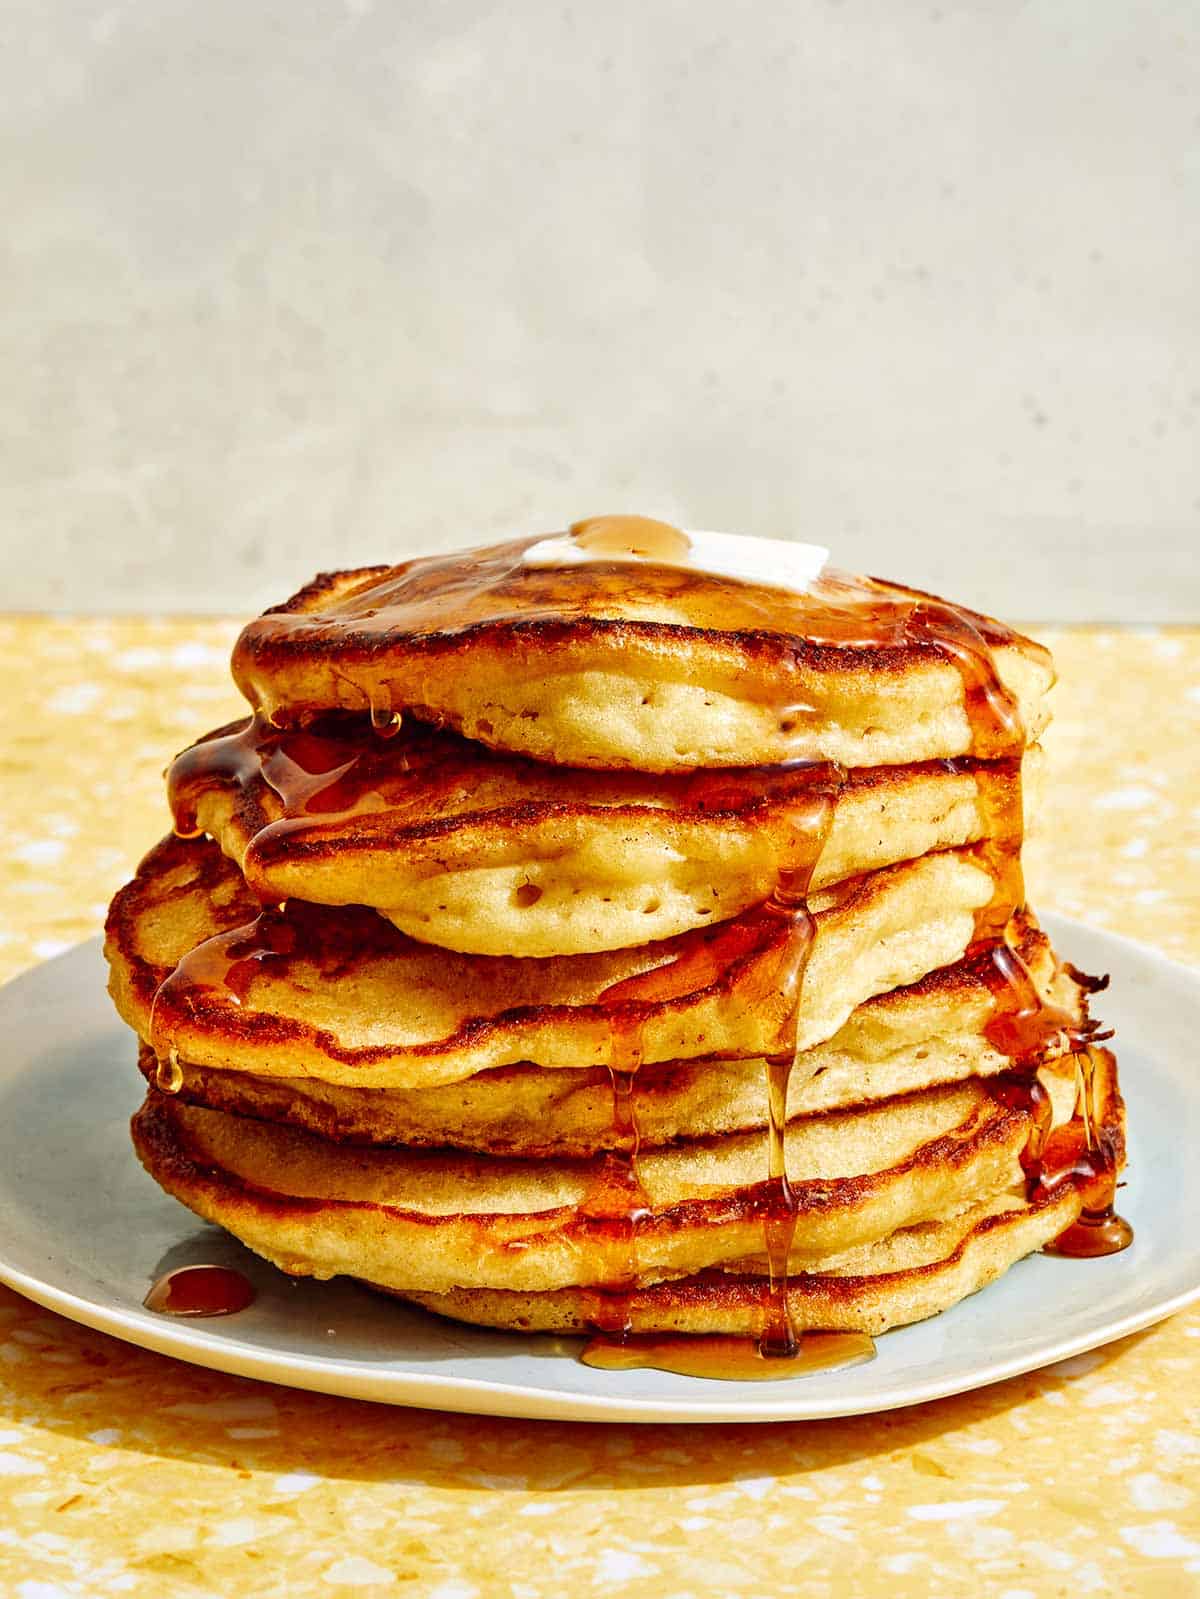
No Sunday morning breakfast is complete without a tall stack of pancakes. But if you’re tired of flat flapjacks, we’re about to change your breakfast world with this buttermilk pancake recipe. You’ll love how light and fluffy these pancakes are, the tangy sweet flavor, and the little crunch that comes from the butter-browned edges.
Serve these buttermilk pancakes with a little blackberry jam, syrup, and a side of bacon and scrambled eggs for a simple, filling, and incredibly delicious breakfast. And if you want to enjoy these pancakes any day of the week, make extras and freeze them. They’re perfect for warming up in the toaster for a 5-minute breakfast on a busy morning!
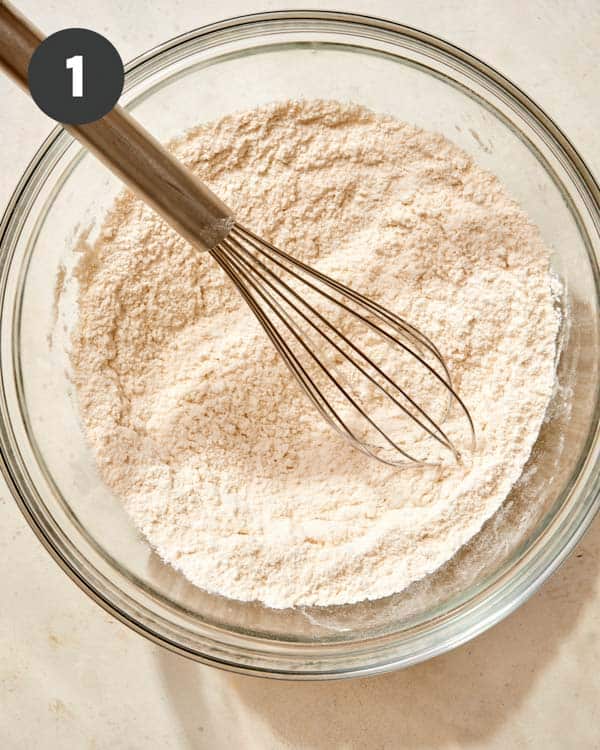
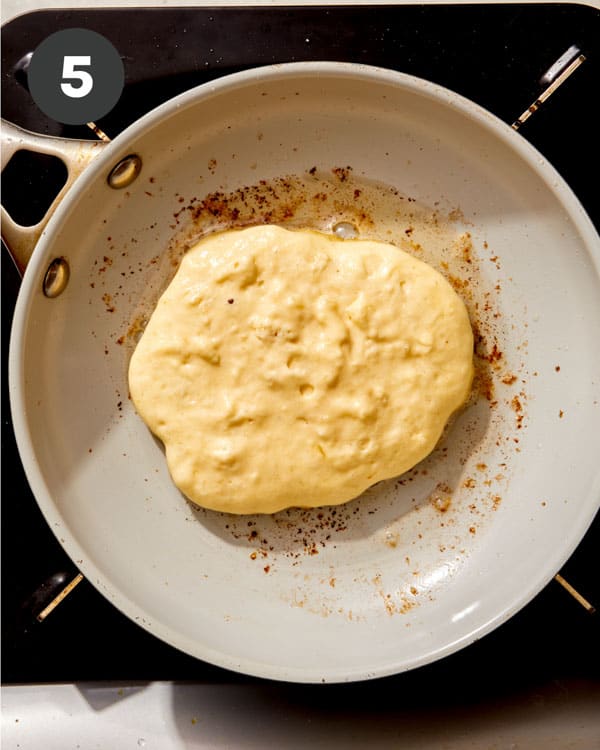
1.Place all of the dry ingredients into a mixing bowl and whisk together until combined.
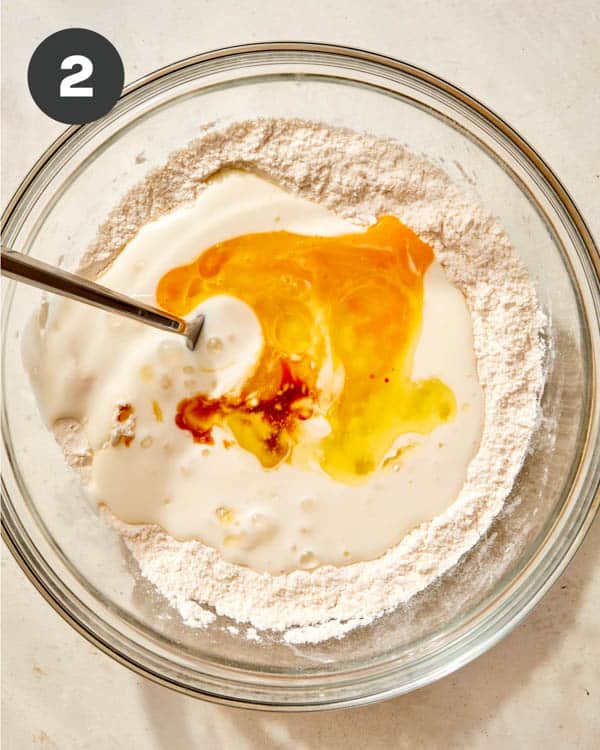
2. Add all remaining ingredients, except for the 3 tablespoons of (un-melted) butter.
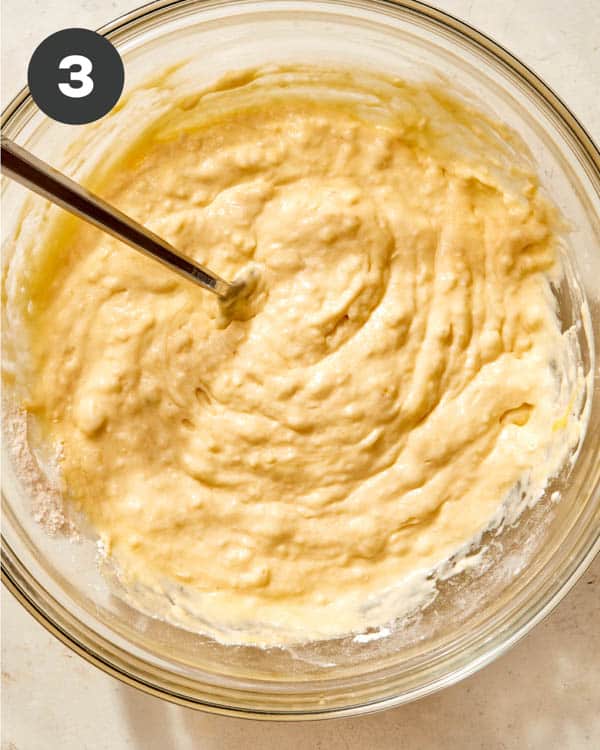
3. Whisk the wet ingredients into the dry with a fork until no dry spots remain but the batter is still lumpy.
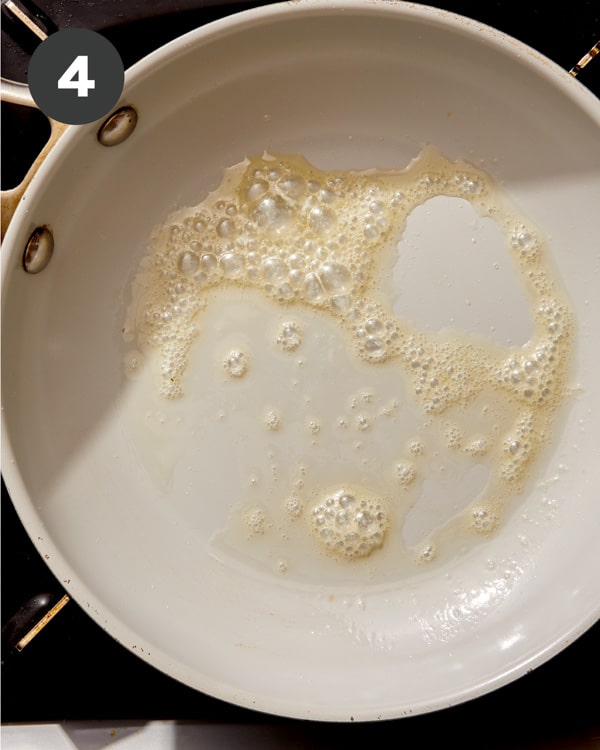
4. Place a griddle or skillet over medium heat. Add remaining butter and melt (if using skillet, melt butter and make pancakes in batches).
5. Pour 1/3 cup batter over melted butter and lower heat to medium-low. Cook pancakes until the top begins to bubble and barely set, about 3 to 4 minutes.
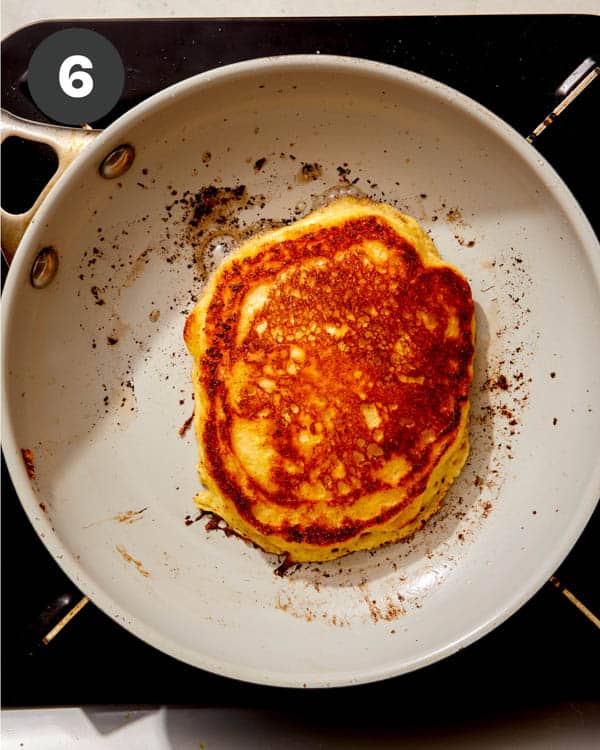
6. Flip and continue to cook until set, about 2 to 3 minutes. Remove from heat and serve.
While these pancakes are amazing when just served with a bit of butter and syrup, you can always try these delicious options as well!
While you may be able to store some types of pancake batter in the refrigerator or freezer, buttermilk batter doesn’t keep as well. As this batter sits too long, the pancakes won’t fluff up like they will when the batter is freshly made that same day.
You can, however, store leftover cooked buttermilk pancakes. And we highly recommend doing so!
Whether you end up with a few extra pancakes or double the batch with the intention of leftovers, these pancakes can be refrigerated or frozen to enjoy later. **We recommend slightly undercooking the pancakes you intend to reheat at a later date.
To store leftover pancakes in the refrigerator: Place them on a platter or a pan in a single layer or place a small sheet of parchment paper in between a stack of pancakes. Keep them in an airtight container in the refrigerator for up to 3 days. To reheat, we recommend a toaster oven or a toaster. Just pop them in the toaster and toast on low or until they’re heated through.
To store leftover pancakes in the freezer: Place the pancakes on a sheet pan in a single layer and freeze for 2-4 hours. Then, add all of the pancakes to an airtight container or freezer bag and freeze for up to 3 months. To reheat frozen buttermilk pancakes, pop them into the toaster until heated.
Buttermilk pancakes go well with any breakfast spread (or just on their own if we’re being honest!), but especially these breakfast favorites!

The post The BEST Buttermilk Pancakes appeared first on Spoon Fork Bacon.
This is a super moist and delicious pumpkin cornbread recipe. It’s made … Read more
The post Super Moist and Easy Pumpkin Cornbread Recipe appeared first on Sugar and Charm.
This is a super moist and delicious pumpkin cornbread recipe. It’s made ... Read more
The post Super Moist and Easy Pumpkin Cornbread Recipe appeared first on Sugar and Charm.
Baked banana donuts are a sweet and delicious treat topped with creamy … Read more
The post Baked Banana Donuts with Glaze appeared first on Sugar and Charm.
Baked banana donuts are a sweet and delicious treat topped with creamy ... Read more
The post Baked Banana Donuts with Glaze appeared first on Sugar and Charm.
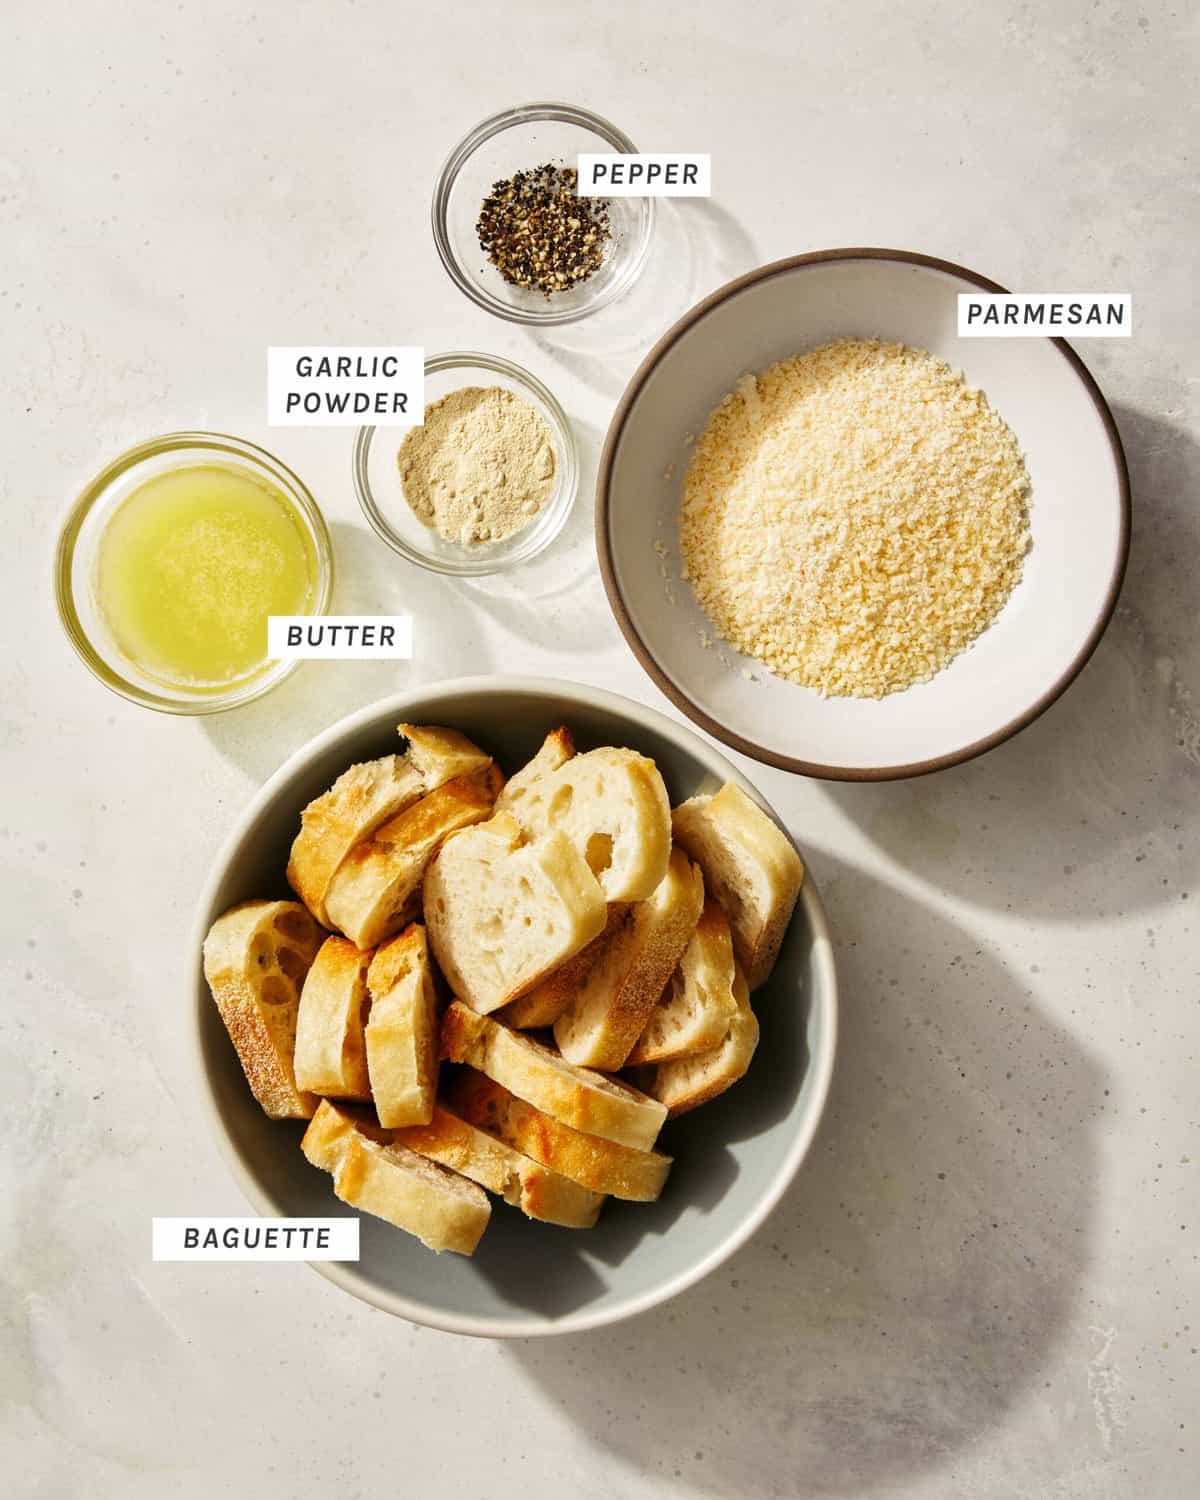
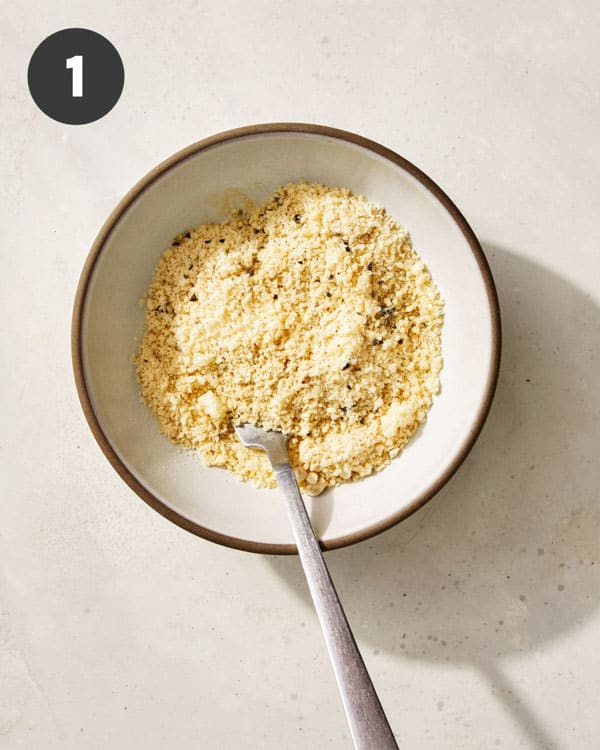
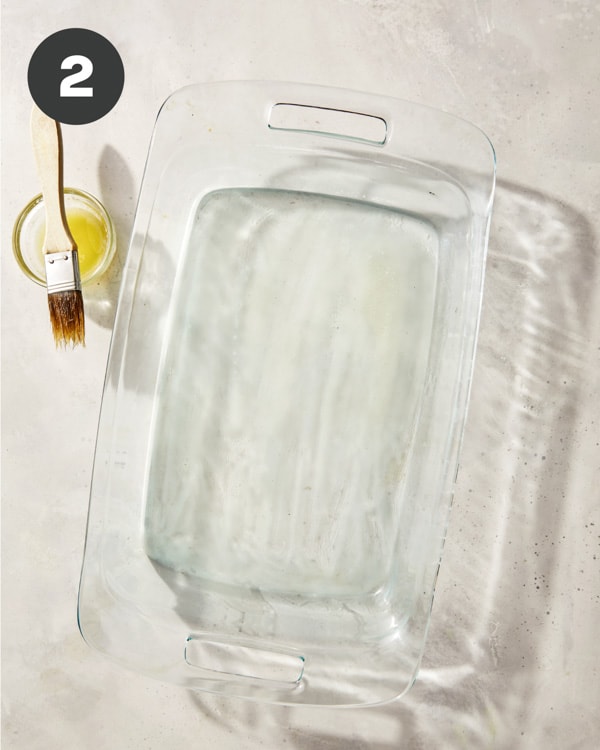
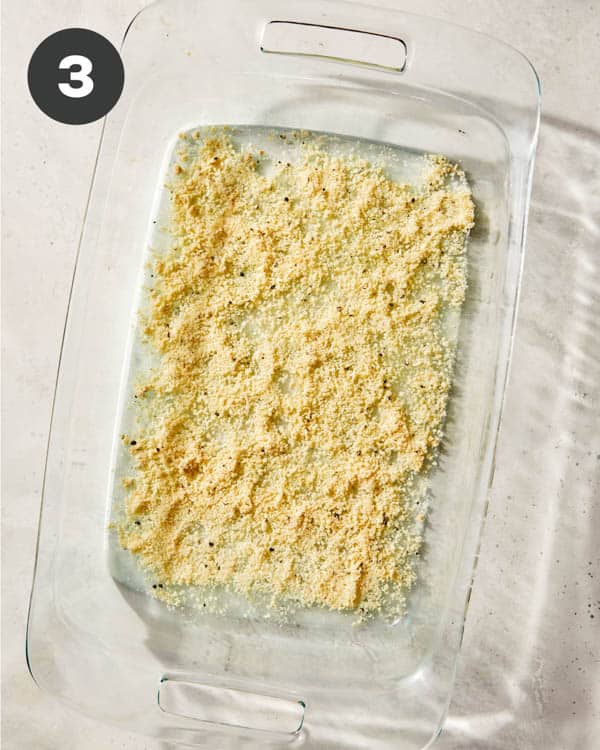
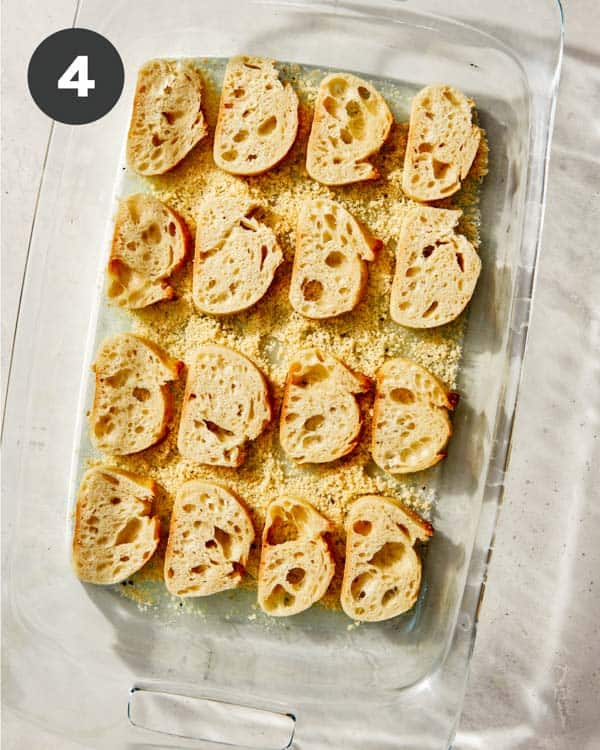
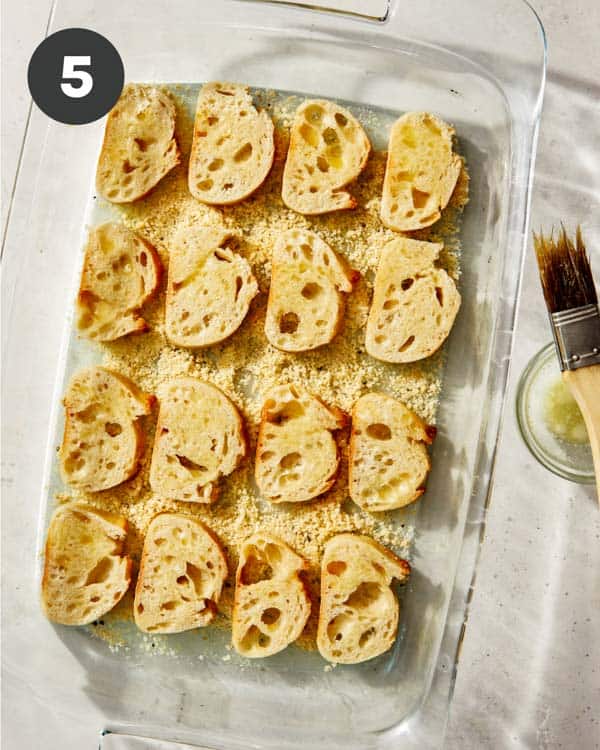
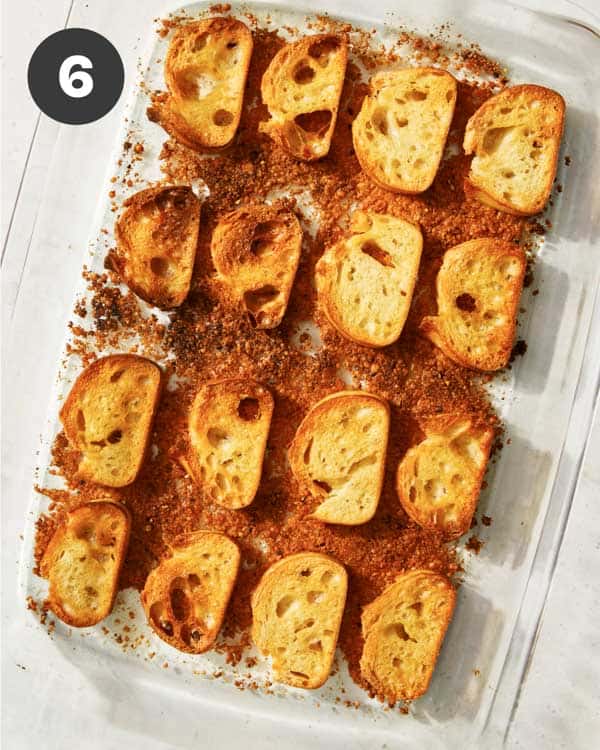
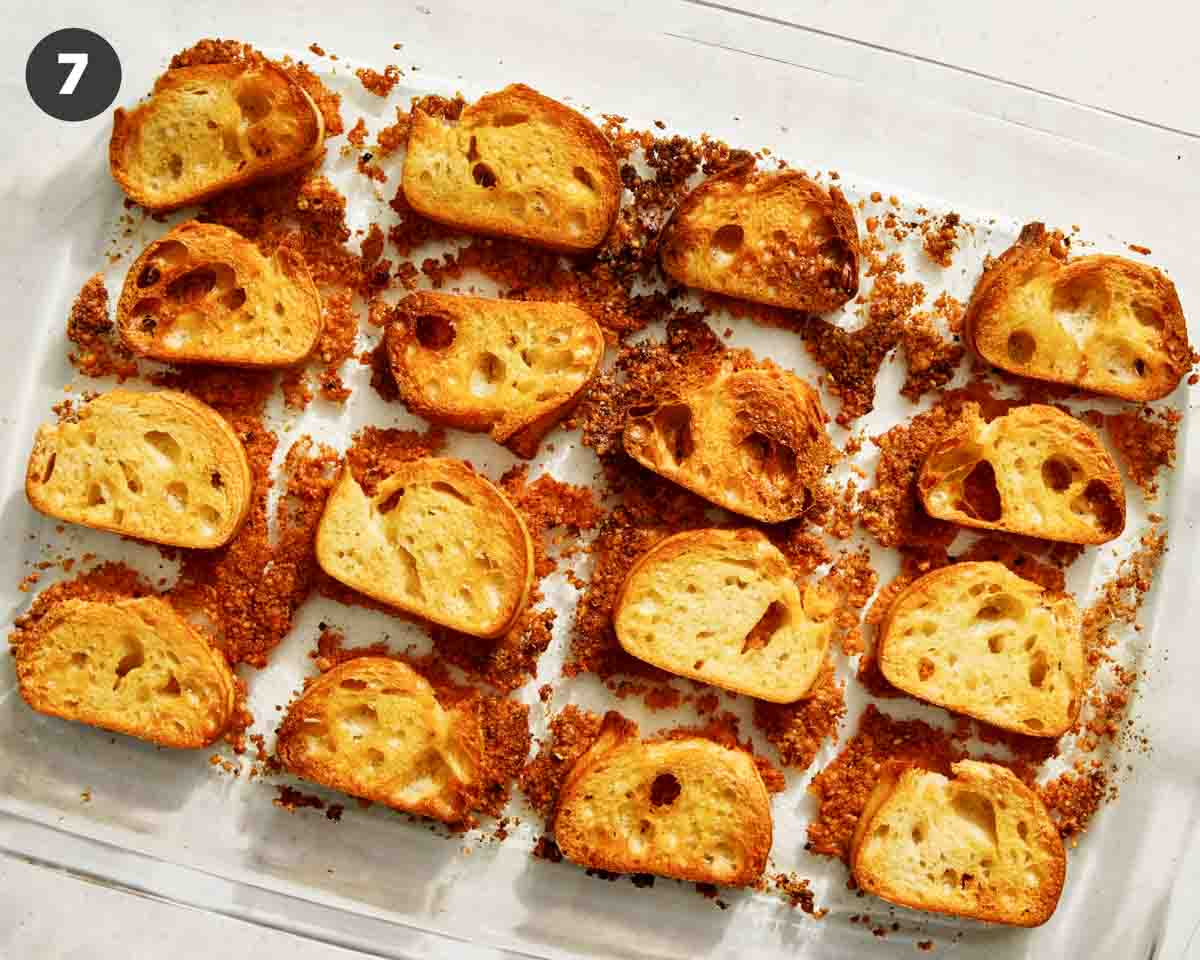
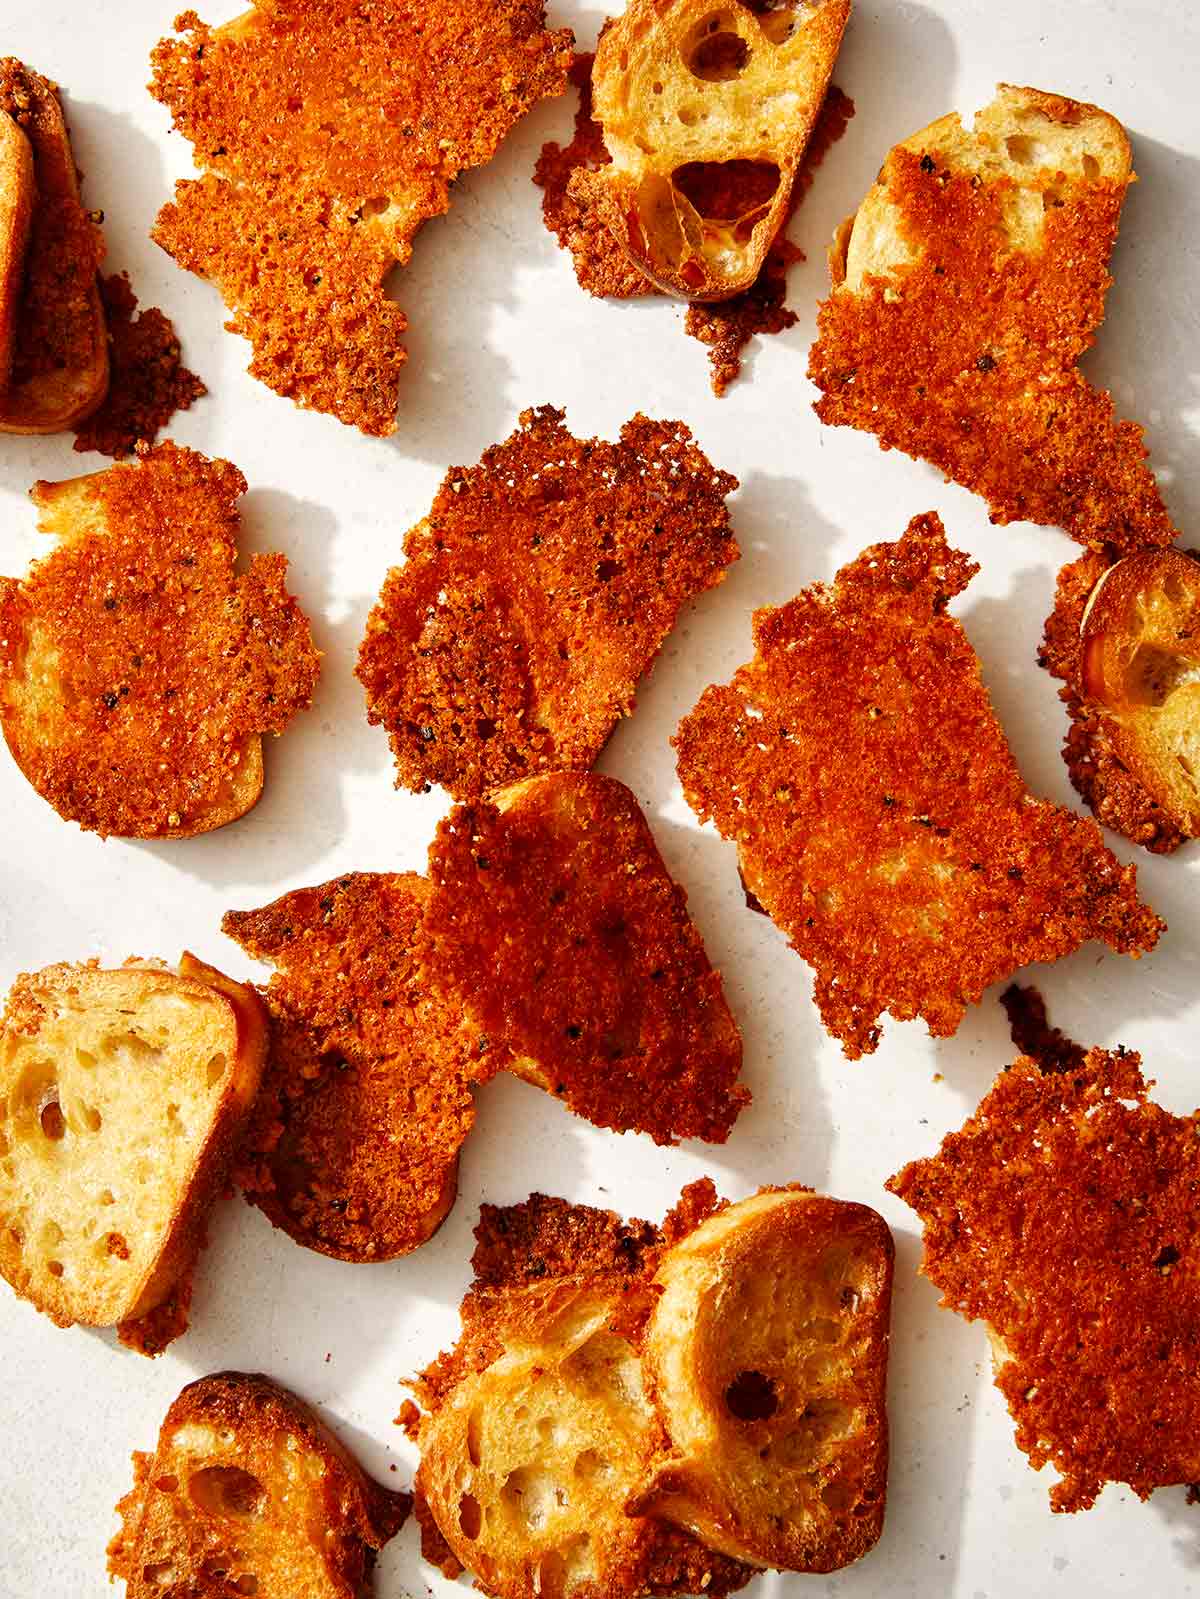
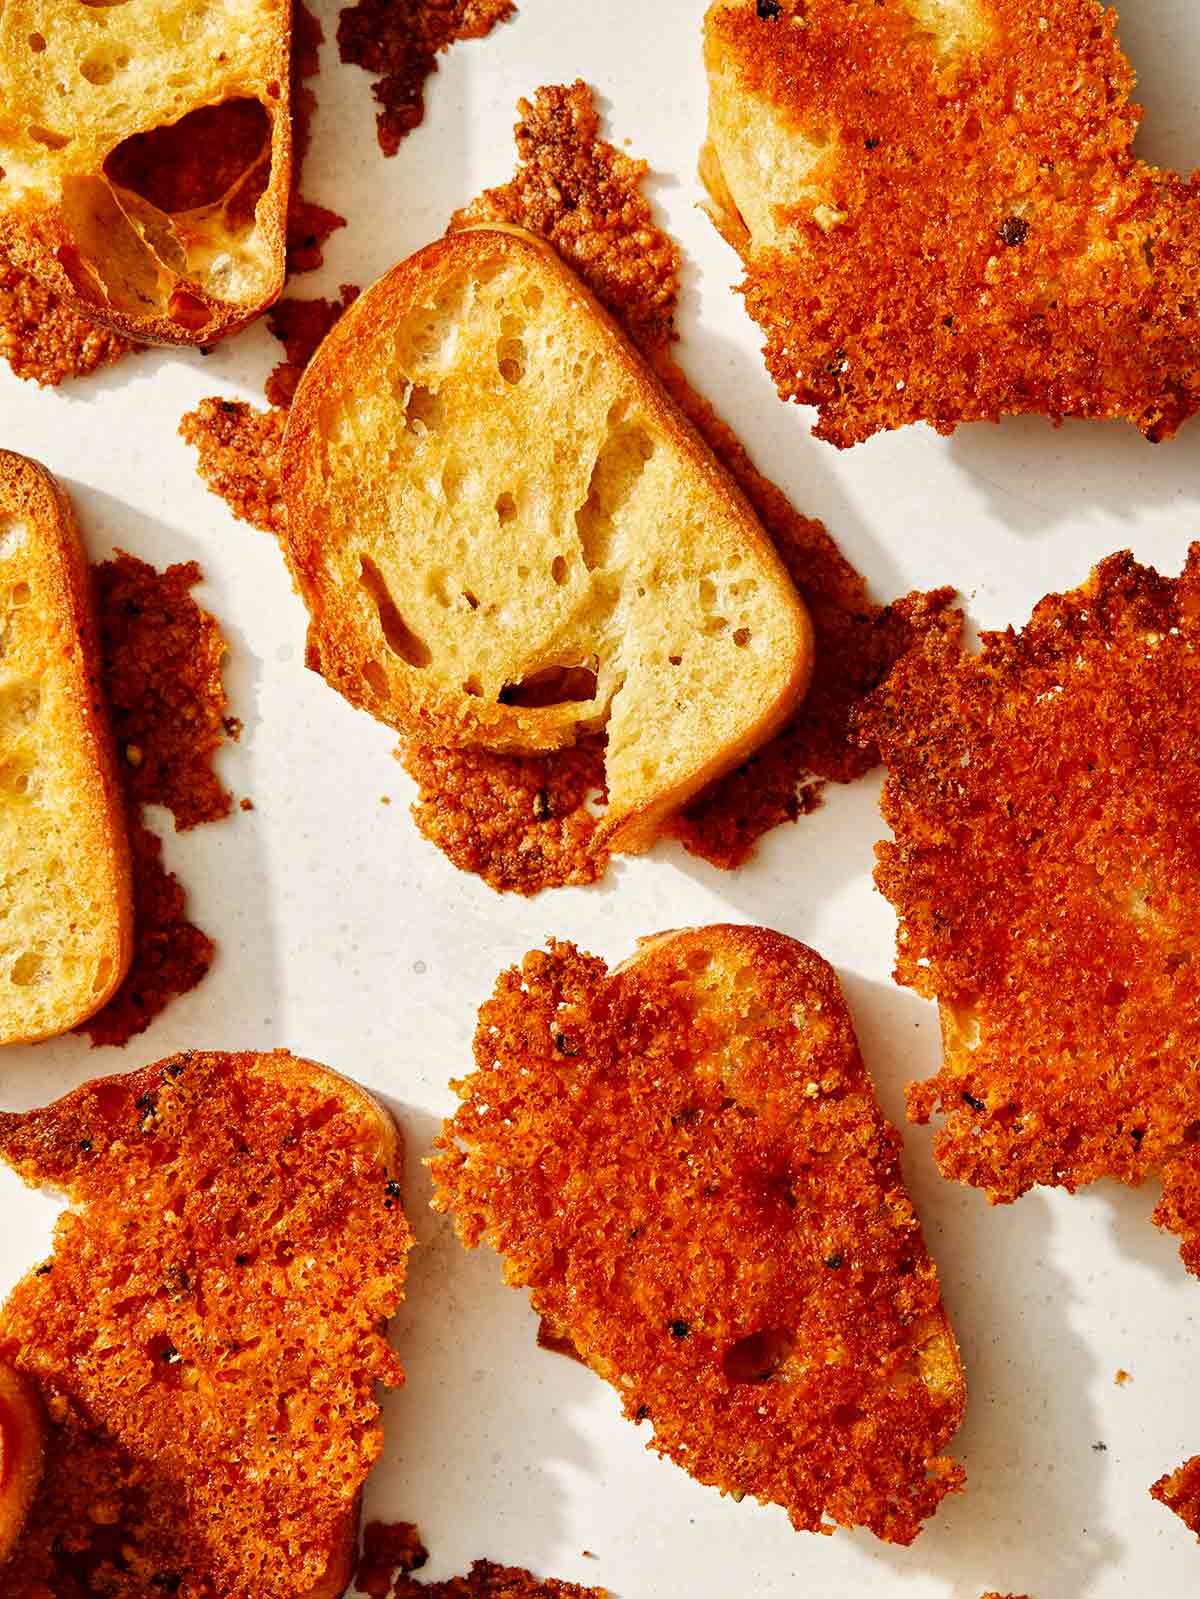
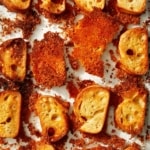
We love parmesan crusted ANYTHING and these Parmesan Crusted Crostini are no exception! Modeled after the viral Parmesan Crusted Potatoes, we thought these crostini would surely be a hit! We were right. These are definitely the best crostini we’ve ever made and we might like them even more than the potato version bc of how versatile they are! Not only do they make delicious snacks on their own, but they also make the most delicious…
The post Parmesan Crusted Crostini appeared first on Spoon Fork Bacon.
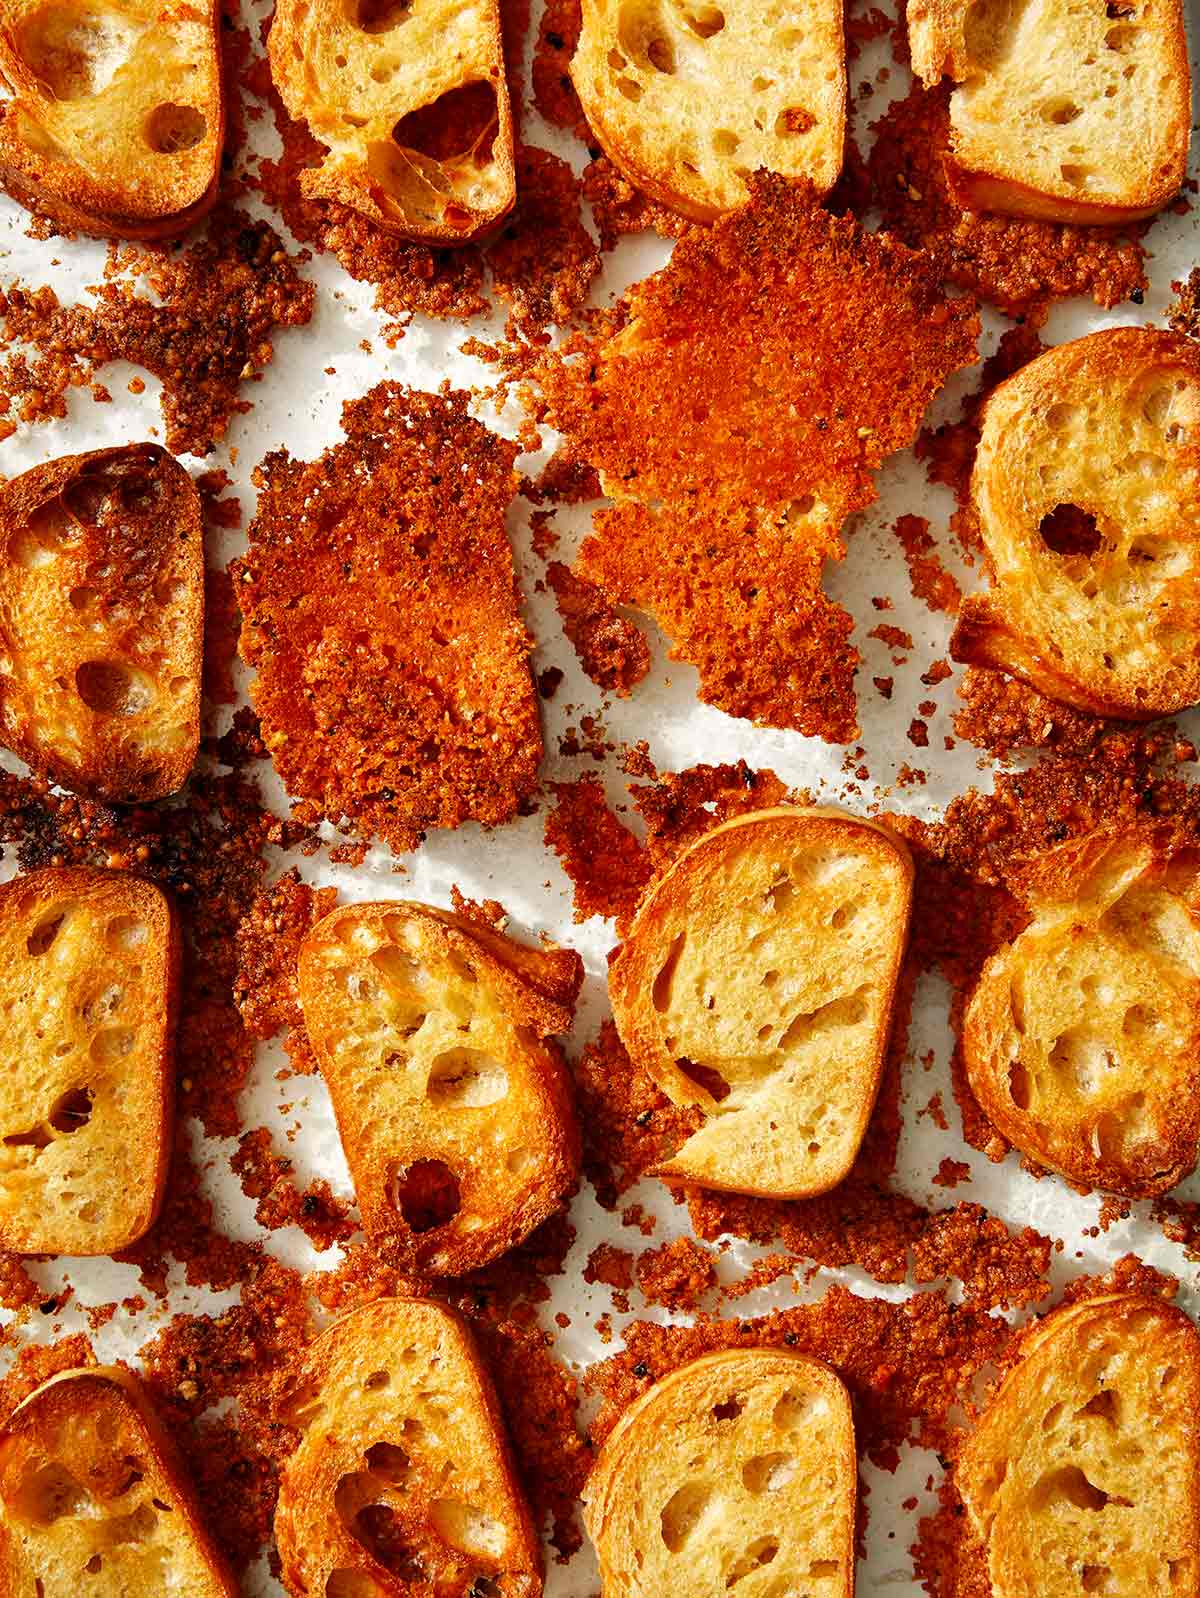
We love parmesan crusted ANYTHING and these Parmesan Crusted Crostini are no exception! Modeled after the viral Parmesan Crusted Potatoes, we thought these crostini would surely be a hit! We were right.
These are definitely the best crostini we’ve ever made and we might like them even more than the potato version bc of how versatile they are! Not only do they make delicious snacks on their own, but they also make the most delicious crostini, topped with nearly anything you can imagine!
These parmesan crusted crostini taste best when enjoyed fresh from the oven, but they also store well in an airtight container, at room temperature, for up to 3 days.
We mentioned earlier how these make the most delicious snack just on their own, but we also LOVE topping them with a variety of things. They truly are the best crostini ever! Some of our favorite toppings and pairings are:
The post Parmesan Crusted Crostini appeared first on Spoon Fork Bacon.
This easy blueberry muffin recipe makes the most tender, moist, buttery homemade blueberry muffins … Read more
The post The Best Homemade Blueberry Muffins appeared first on Sugar and Charm.
This easy blueberry muffin recipe makes the most tender, moist, buttery homemade blueberry muffins ... Read more
The post The Best Homemade Blueberry Muffins appeared first on Sugar and Charm.