Sheet Pan Pancakes

These sheet pan pancakes make breakfast on weekends a breeze! They’re easy to whip up and they’re freezer-friendly. Perfect for breakfast meal prep!

The post Sheet Pan Pancakes appeared first on Budget Bytes.

I’m always looking for ways to get breakfast and dinner on the table faster and these Sheet Pan Pancakes might just be my new best friend! Not only are they easy to whip up, but they’re super convenient. You can pour the entire pancake batter on one baking sheet and top it with your favorite toppings, or leave it plain and let everyone add their own toppings after it bakes. What I love most about these sheet pan pancakes are that they’re perfect for breakfast meal prep. They freeze perfectly and whenever I need a quick breakfast, I just pop 2 pancakes in my toaster and breakfast is done!🙌
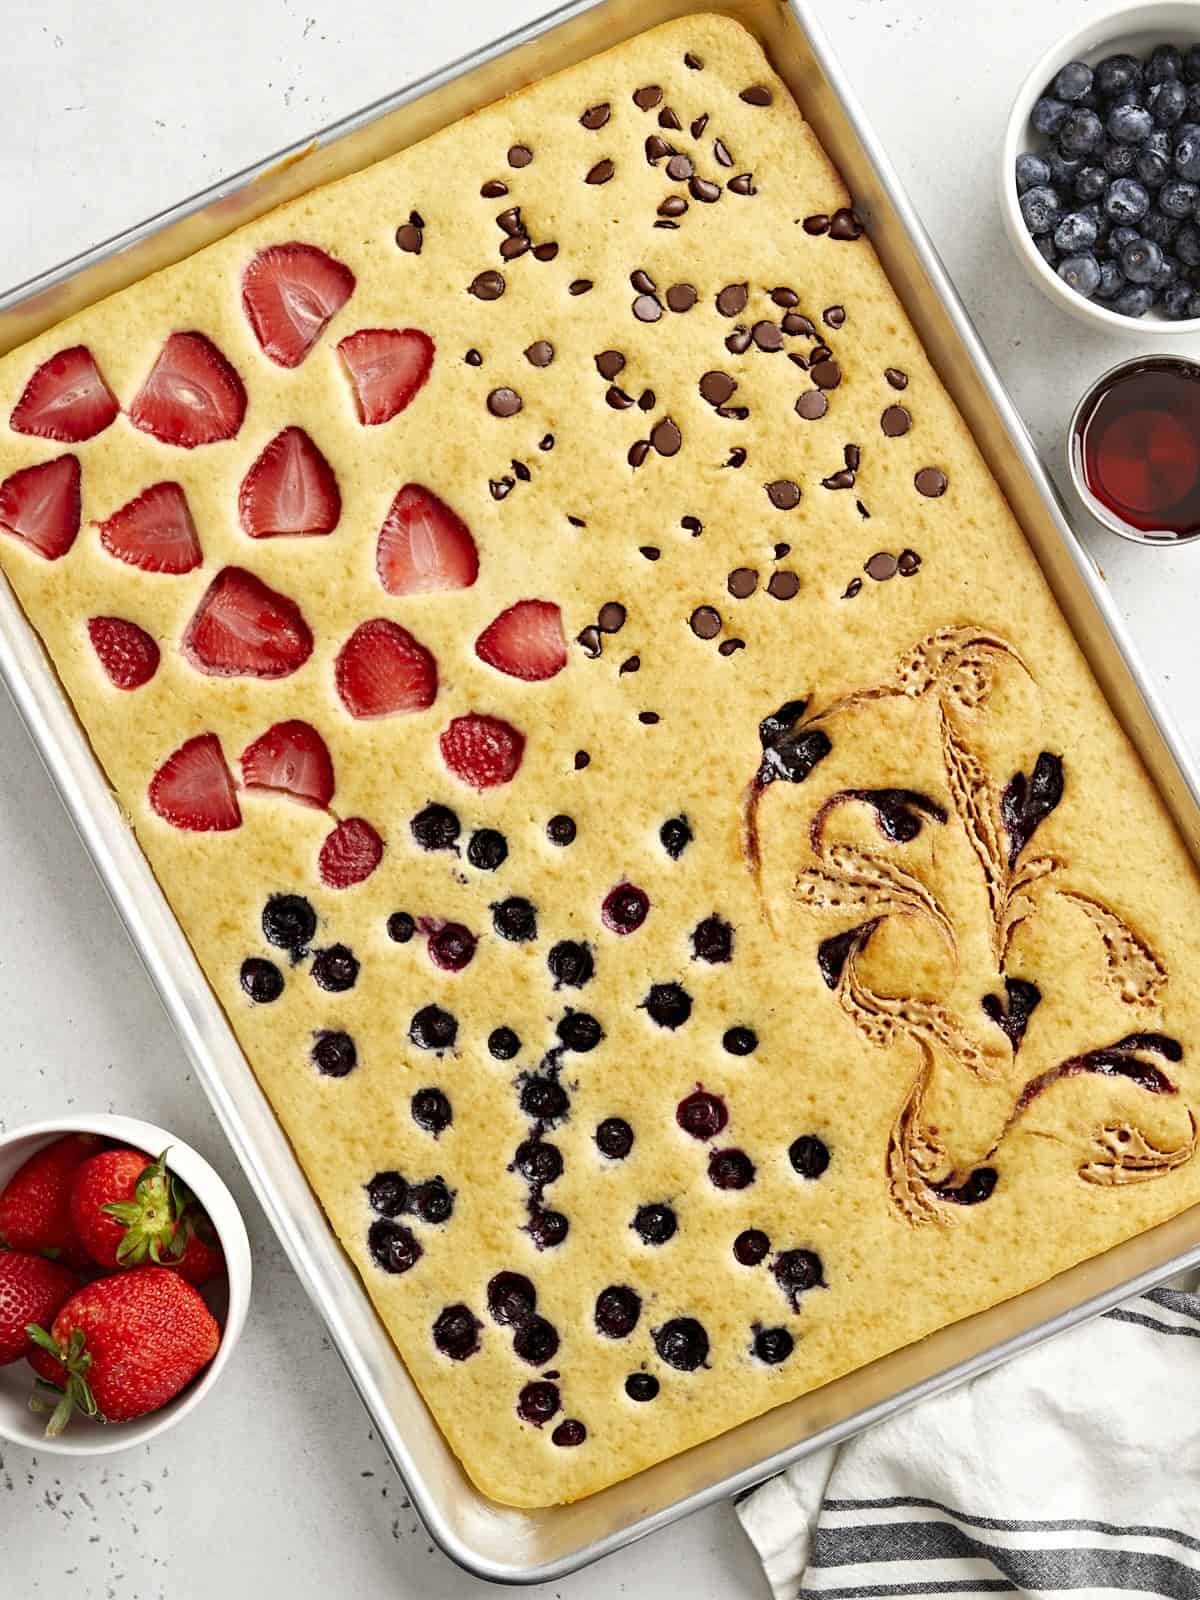
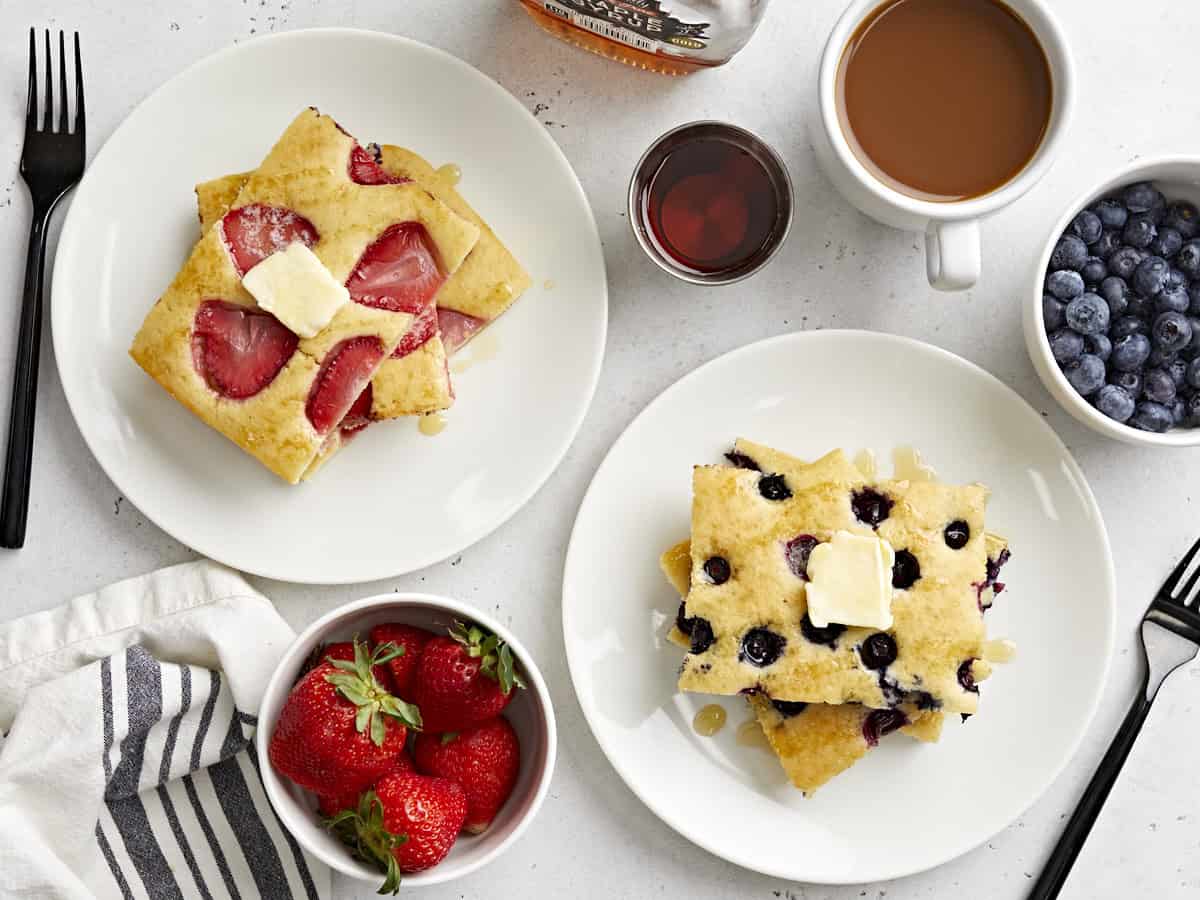
Overhead view of sheet pan pancakes with fresh fruit and maple syrup on the side.

Why Sheet Pan Pancakes?

I’m not sure if your family loves pancakes as much as mine, but it has now turned into our Saturday morning routine. But flipping and making several batches of regular pancakes takes quite a while. And I have to try and keep the first few batches warm in the oven, while I make the rest of the pancakes. Sheet Pan Pancakes keeps you from having to do that back and forth dance. You can make pancakes for the whole family in one big batch, all on one baking sheet, and customize it with their favorite mix-ins and toppings. It’s honestly genius!

Ingredients For Sheet Pan Pancakes

To make these sheet pan pancakes, I used our homemade pancakes recipe as a base foundation and adjusted the measurements to accommodate a larger portion size. Here’s what you’ll need:

  • All-Purpose Flour: Flour adds structure and is the foundation of the pancakes.
  • Baking Powder: Baking powder is what makes the pancakes light and fluffy instead of dense and gummy.
  • Sugar: A little bit of sugar adds the perfect amount of sweetness to the pancakes.
  • Milk: Milk combines with the flour to add moisture and helps create the batter.
  • Egg: Eggs help hold the pancakes together and also helps leaven the pancakes.
  • Butter: Butter adds flavor and richness to the pancakes.
  • Vanilla Extract: A small amount of vanilla extract adds a wonderful flavor and depth to the pancake.
  • Salt: A little bit of salt helps enhance the flavor of the pancakes.
  • Toppings: This is where you can really have fun! I used a combination of my favorite fruits like strawberries and blueberries. And for some variety I added some chocolate chips and peanut butter & raspberry jam.

More Toppings and Mix-in Ideas

My favorite part about making sheet pan pancakes is adding different mix-ins and toppings. I personally love adding fresh fruit, but here are some more topping ideas for you to try:

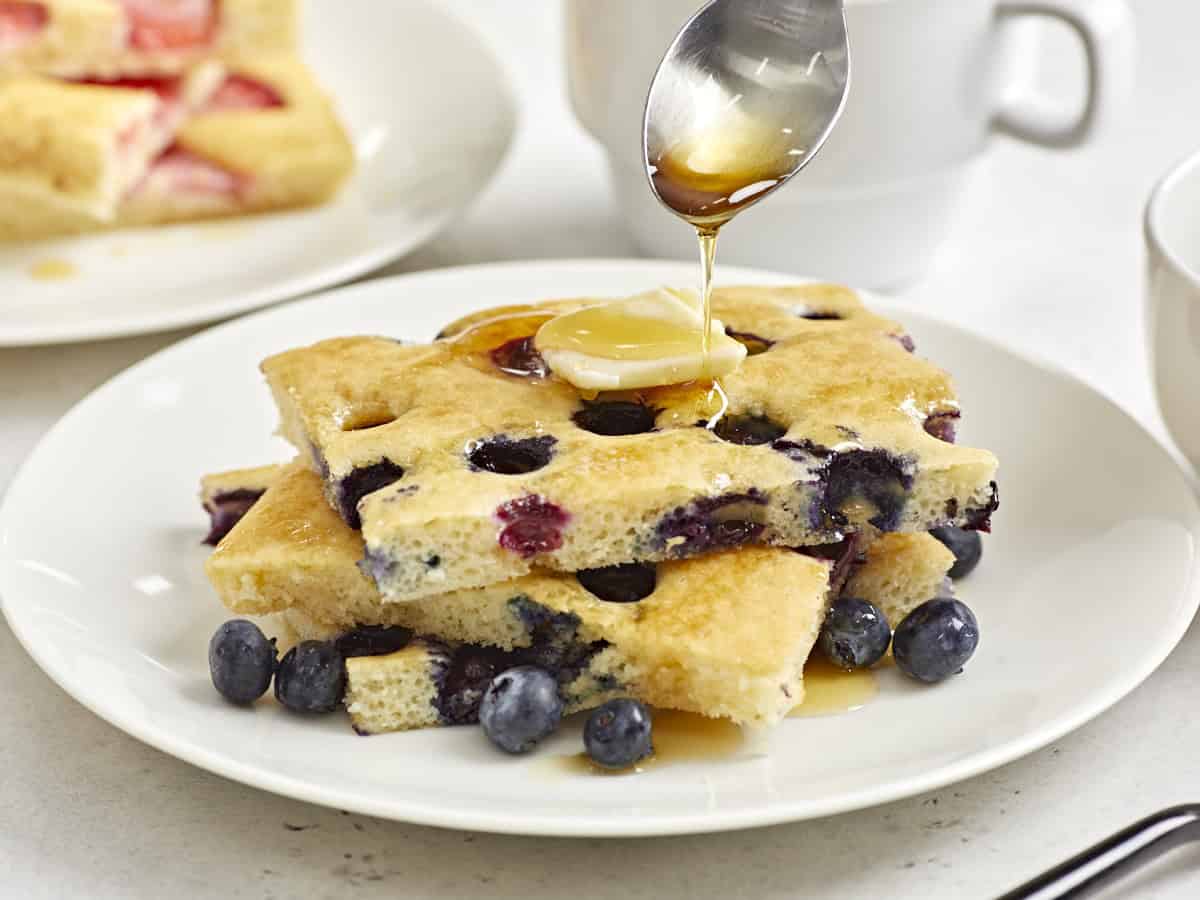
Close up side view of sheet pan pancakes on a serving plate with maple syrup being drizzled over the top.

Recipe Tips!

  1. Don’t overmix the batter. Stir the dry and wet ingredients together until they are just combined and there are no traces of dry flour left in the bowl. Over-mixing the batter will develop the gluten in the flour and make the pancakes rubbery rather than soft and fluffy.
  2. Grease your sheet pan well. Make sure to generously coat your sheet pan well with cooking spray to keep the pancakes from sticking.
  3. Dry your fruit well. If you’re adding fresh fruit, make sure to wash and dry your fruit well with paper towels to prevent any excess water or fruit juices from bleeding into the pancake batter.
  4. If necessary, use some parchment paper. Sheet pan pancakes seem to work better with baking sheets that aren’t too old. So if your baking sheet is older or a little beat up, you may want to line it with some parchment paper first.

How To Store & Freeze Sheet Pan Pancakes

What I love most about making sheet pan pancakes is that they’re extremely easy to store and freeze for later when you need a quick & easy breakfast. To store, let the pancakes cool completely, then transfer them to an airtight container and refrigerate for up to 3 days.

To freeze, place the cooled pancakes in a freezer safe storage bag, in single layers with parchment paper between the layers to prevent sticking. Freeze for up to 3 months. You can easily reheat frozen pancakes in a toaster or in the microwave until hot.
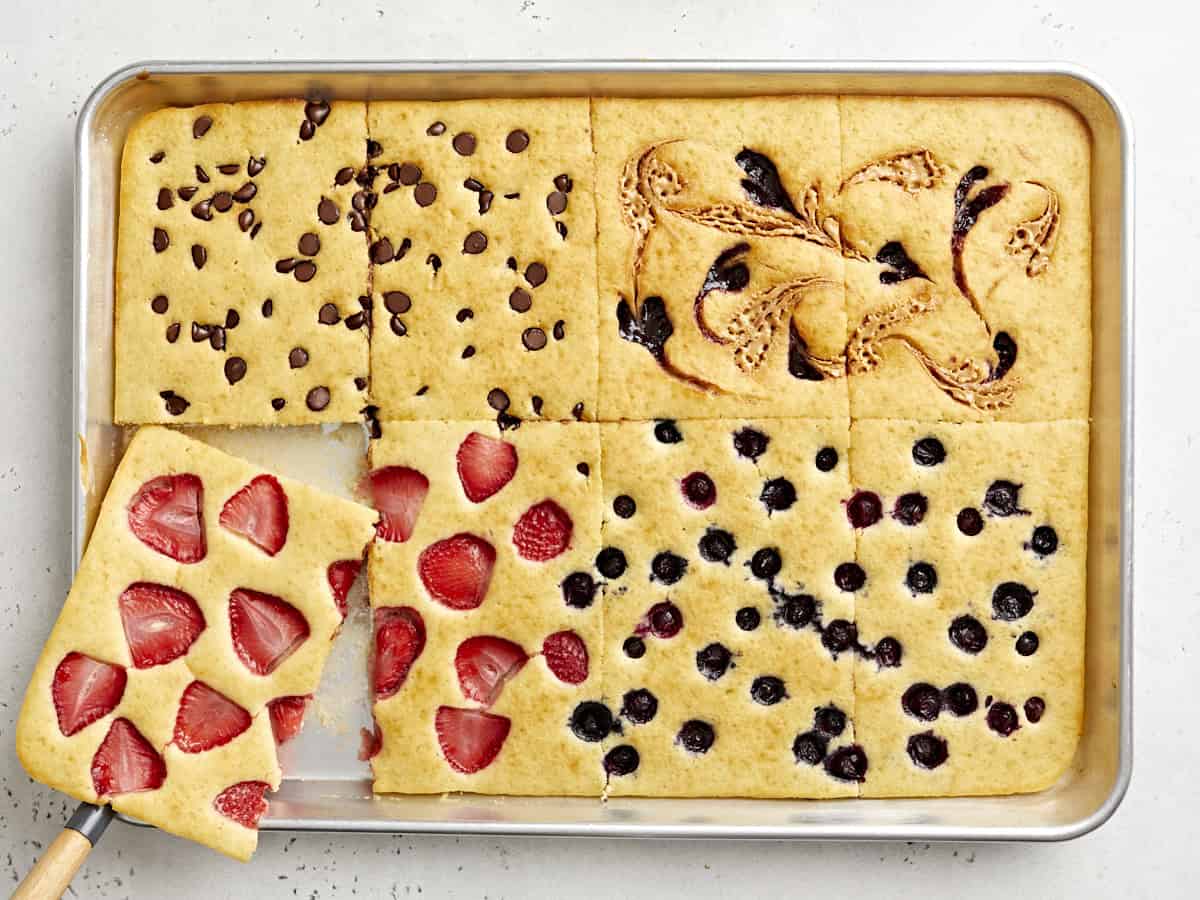
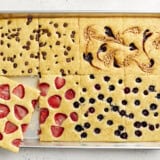
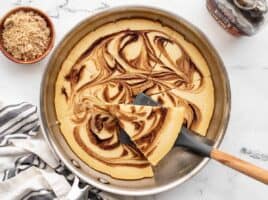
Overhead view of sheet pan pancakes cut into squares with one slice being lifted out.
Print

Sheet Pan Pancakes

These sheet pan pancakes make breakfast on weekends a breeze! They’re easy to whip up and they’re freezer-friendly. Perfect for breakfast meal prep!
Course Breakfast, Brunch
Cuisine American
Total Cost $2.22 recipe / $0.55 serving
Prep Time 10 minutes
Cook Time 20 minutes
Total Time 30 minutes
Servings 4 (2 pancakes each)
Calories 467kcal

Equipment

Ingredients

  • 2 cups all-purpose flour $0.40
  • 1/4 cup granulated sugar $0.10
  • 1 Tbsp baking powder $0.18
  • 3/4 tsp salt $0.08
  • 1 1/2 cup milk $0.30
  • 2 large eggs $0.33
  • 4 Tbsp butter, melted $0.53
  • 1 tsp vanilla extract $0.30
  • cooking spray

Optional Toppings*

  • fresh strawberries, sliced
  • blueberries
  • chocolate chips
  • peanut butter and fruit jam

Instructions

  • Preheat the oven to 425°F. In a large bowl whisk together the flour, sugar, baking powder, and salt.
  • In the same bowl, add in the milk, eggs, melted butter, and vanilla extract. Whisk the wet ingredients together with the dry ingredients until just combined. Be careful not to over mix.
  • Generously coat a 11×17-inch rimmed baking sheet with cooking spray. Pour the pancake batter onto the baking sheet. Spread the batter evenly around the baking sheet with a rubber spatula or tap the pan a few times on the counter to even out the batter.
  • Visually divide the pancake batter into four equal sections and add your desired toppings on top into each section. I used a combination of sliced strawberries, blueberries, chocolate chips, and a peanut butter and raspberry jam swirl. To make the pb&j swirl, I simply added dollops of natural peanut butter and jam, then swirled the two together using a toothpick.
  • Place the sheet pan in the oven and bake for 18-20 minutes or until golden brown.
  • Allow the pan to cool slightly, then slice the sheet pan pancake into 8 equal portions. Feel free to make smaller slices if you want to make more servings. Serve warm with syrup and extra toppings if you like. Enjoy!

See how we calculate recipe costs here.

Notes

*I added about 1/4 cup of chocolate chips and blueberries. For the strawberries and PB&J swirl, I simply eyeballed it until I filled up each section.

Nutrition

Serving: 2pancakes | Calories: 467kcal | Carbohydrates: 66g | Protein: 12g | Fat: 17g | Sodium: 912mg | Fiber: 2g
Overhead view of sliced sheet pan pancakes on two serving dishes with fruit and syrup on the side.

How to Make Sheet Pan Pancakes – Step by Step Photos
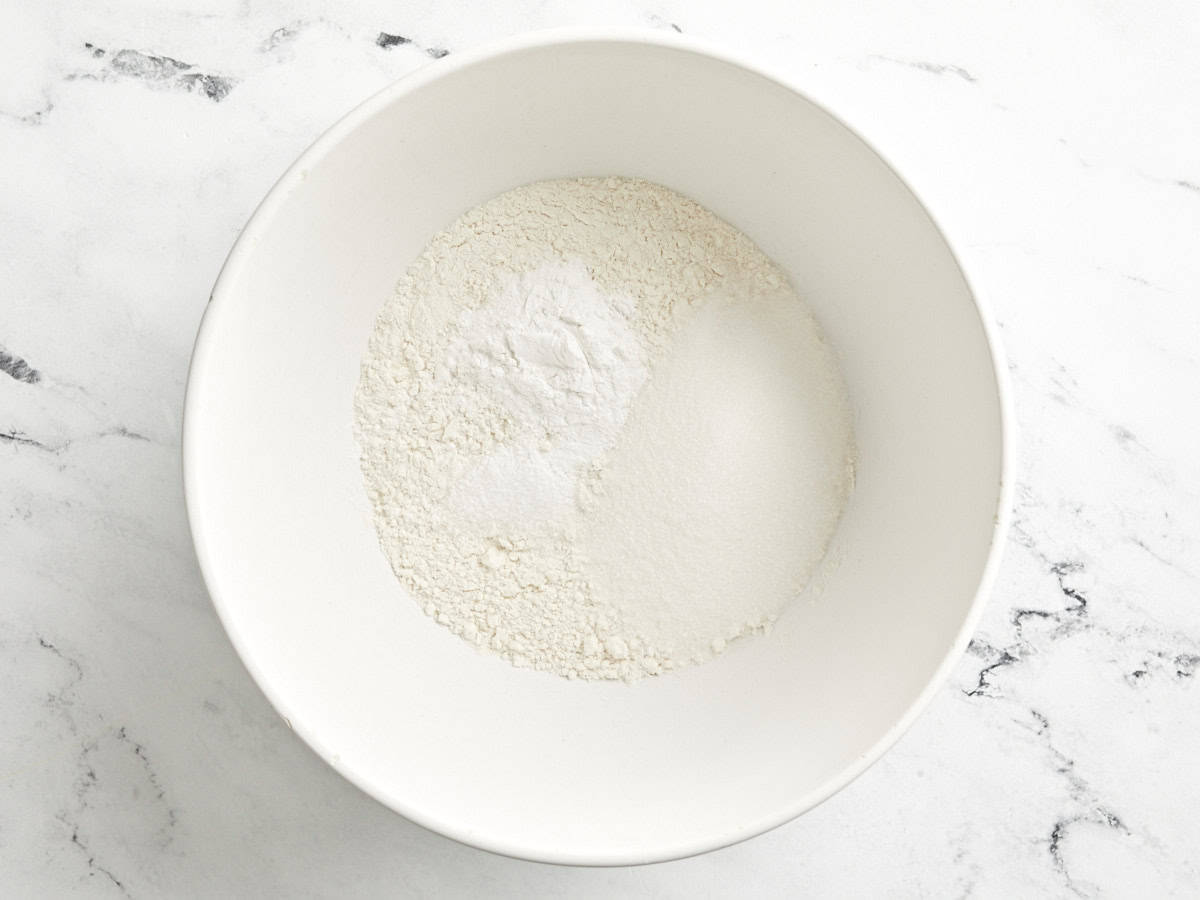
Dry ingredients in a bowl for sheet pan pancakes.

Preheat the oven to 425°F. In a large bowl whisk together 2 cups all-purpose flour, 1/4 cup granulated sugar, 1 Tbsp baking powder, and 3/4 tsp salt.
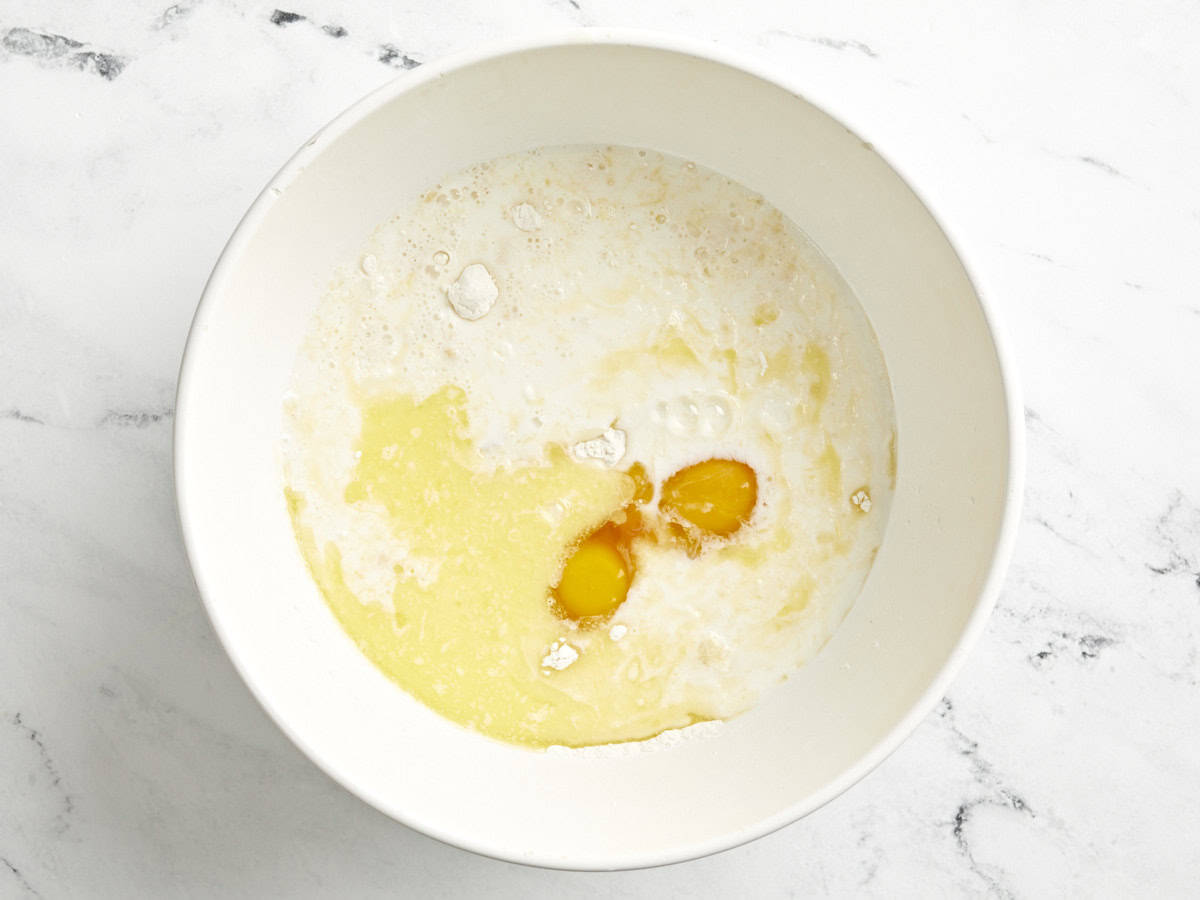
Dry and wet ingredients in a bowl for sheet pan pancakes.

In the same bowl, add in 1 1/2 cups milk, 2 large eggs, 4 Tbsp melted butter, and 1 tsp vanilla extract.
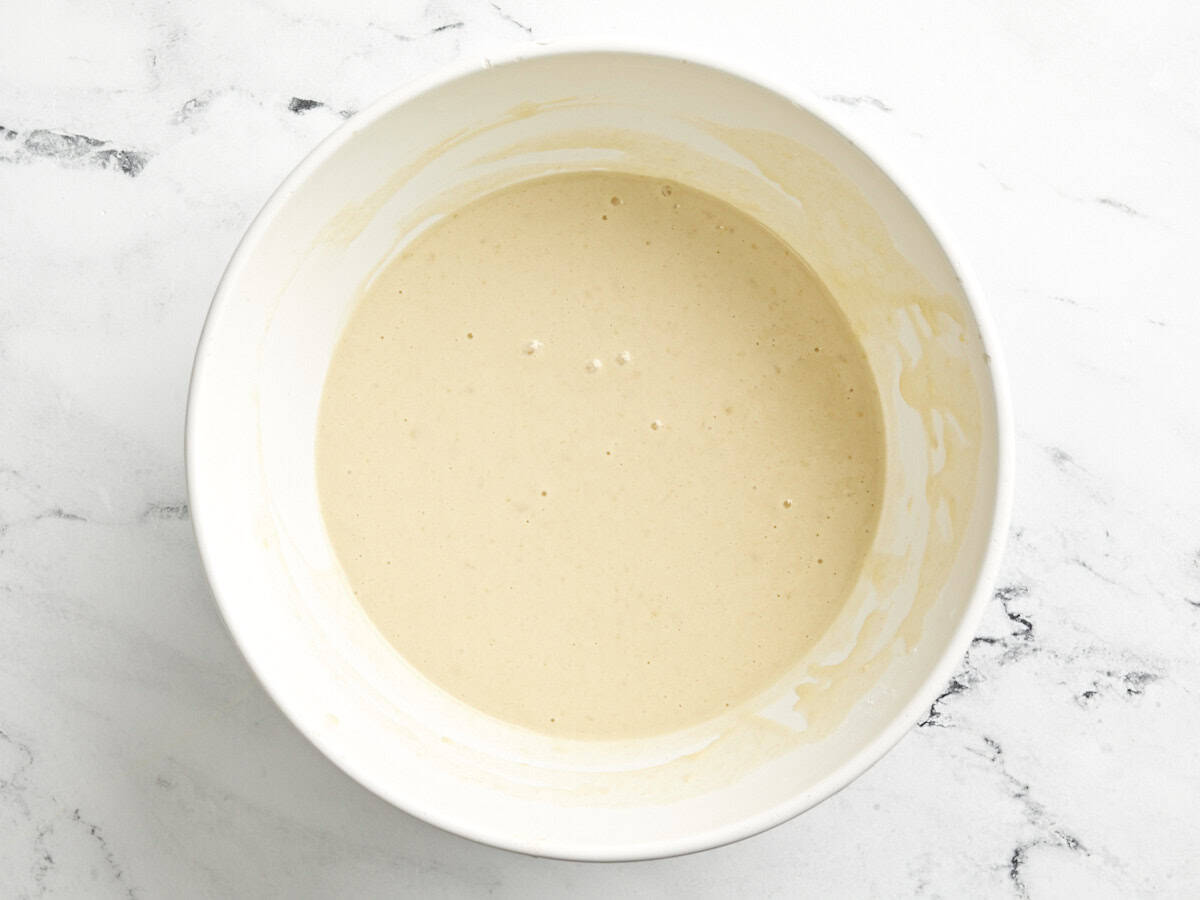
Sheet pan pancake ingredients mixed in a bowl.

Whisk the wet ingredients together with the dry ingredients until just combined. Be careful not to over mix at this point.
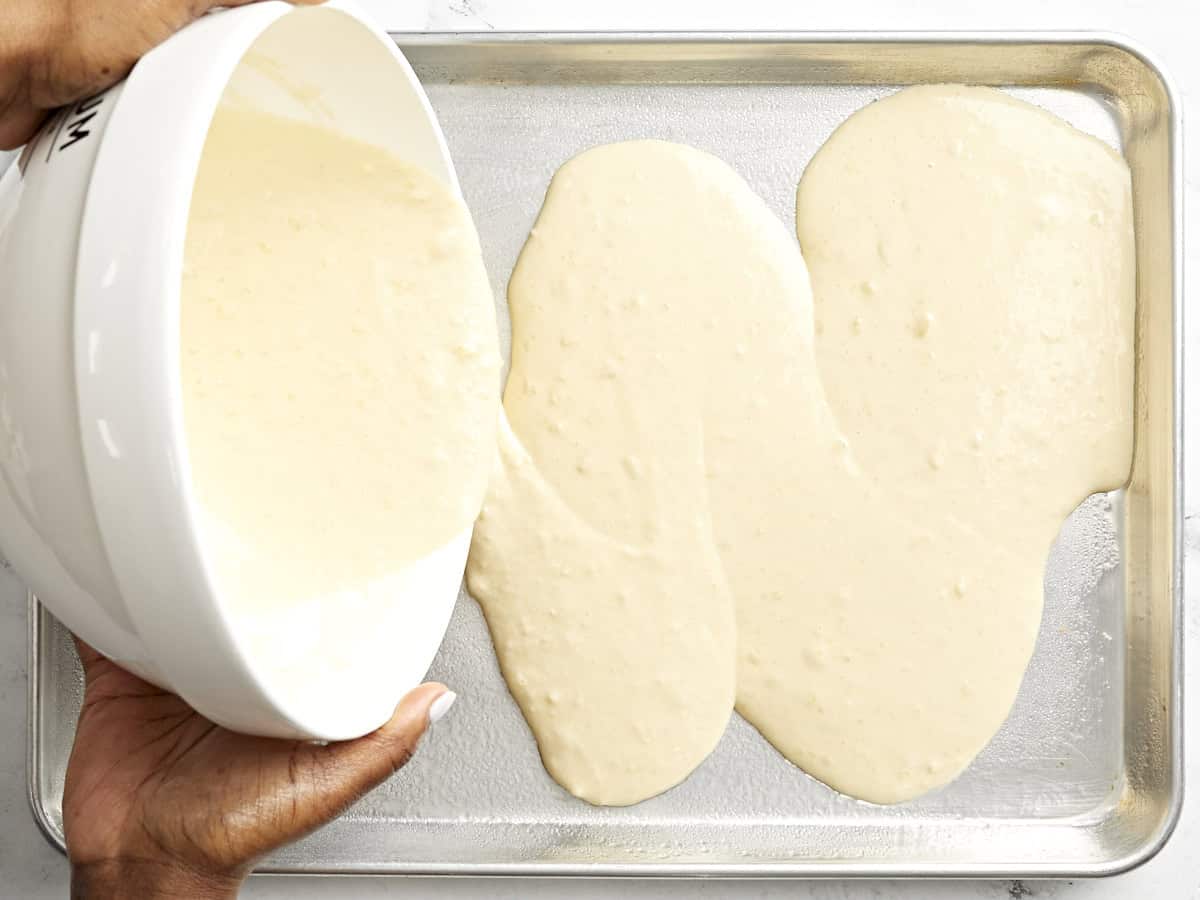
Sheet pan pancake batter poured onto a sheet pan.

Generously coat an 11×17-inch rimmed baking sheet with cooking spray. Pour the pancake batter onto the baking sheet. Spread the batter evenly around the baking sheet with a rubber spatula or tap the pan a few times on the counter to even out the batter.
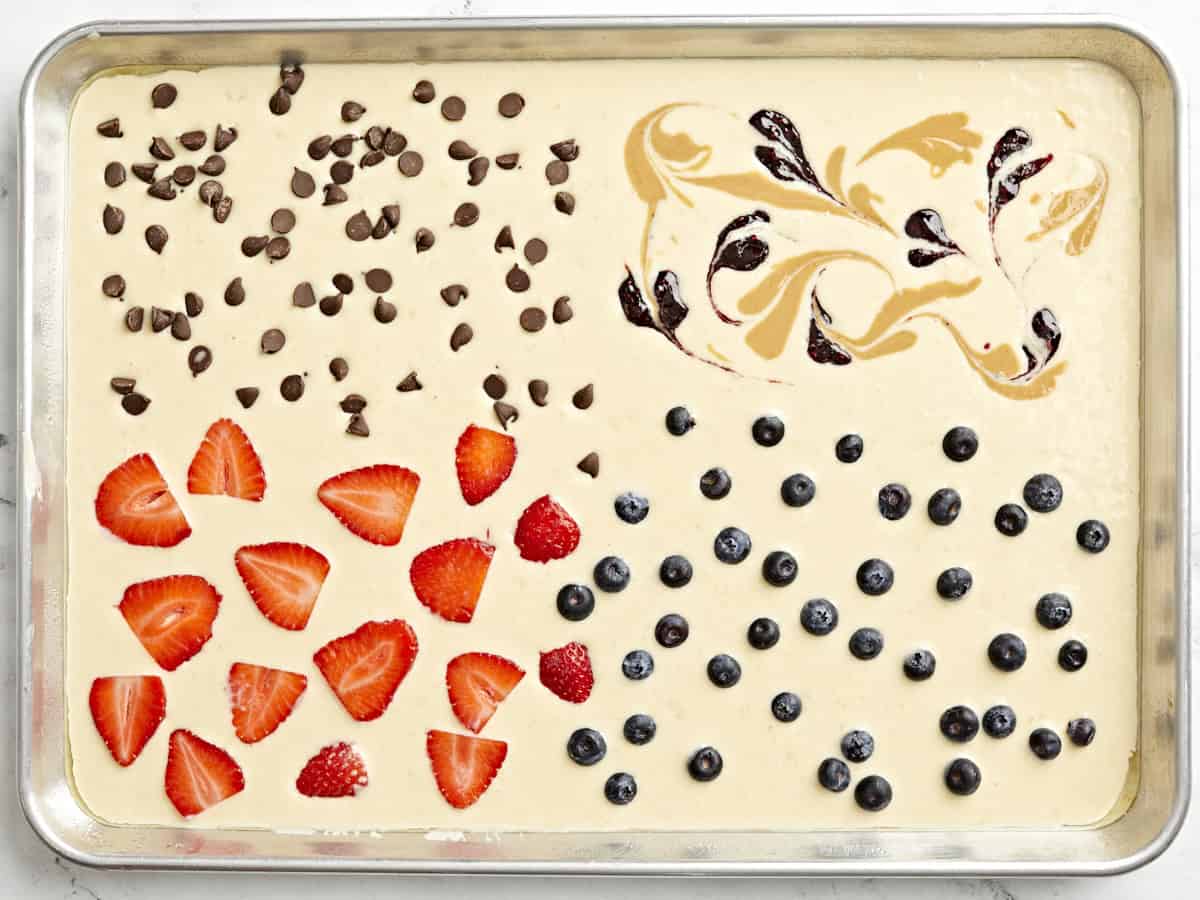
Sheet pan pancake batter with fruit added on top poured onto a sheet pan.

Visually divide the pancake batter into four equal sections and add your desired toppings on top into each section. I used a combination of sliced strawberries, blueberries, chocolate chips, and a peanut butter and raspberry jam swirl. To make the pb&j swirl, I simply added dollops of natural peanut butter and jam, then swirled the two together using a toothpick.
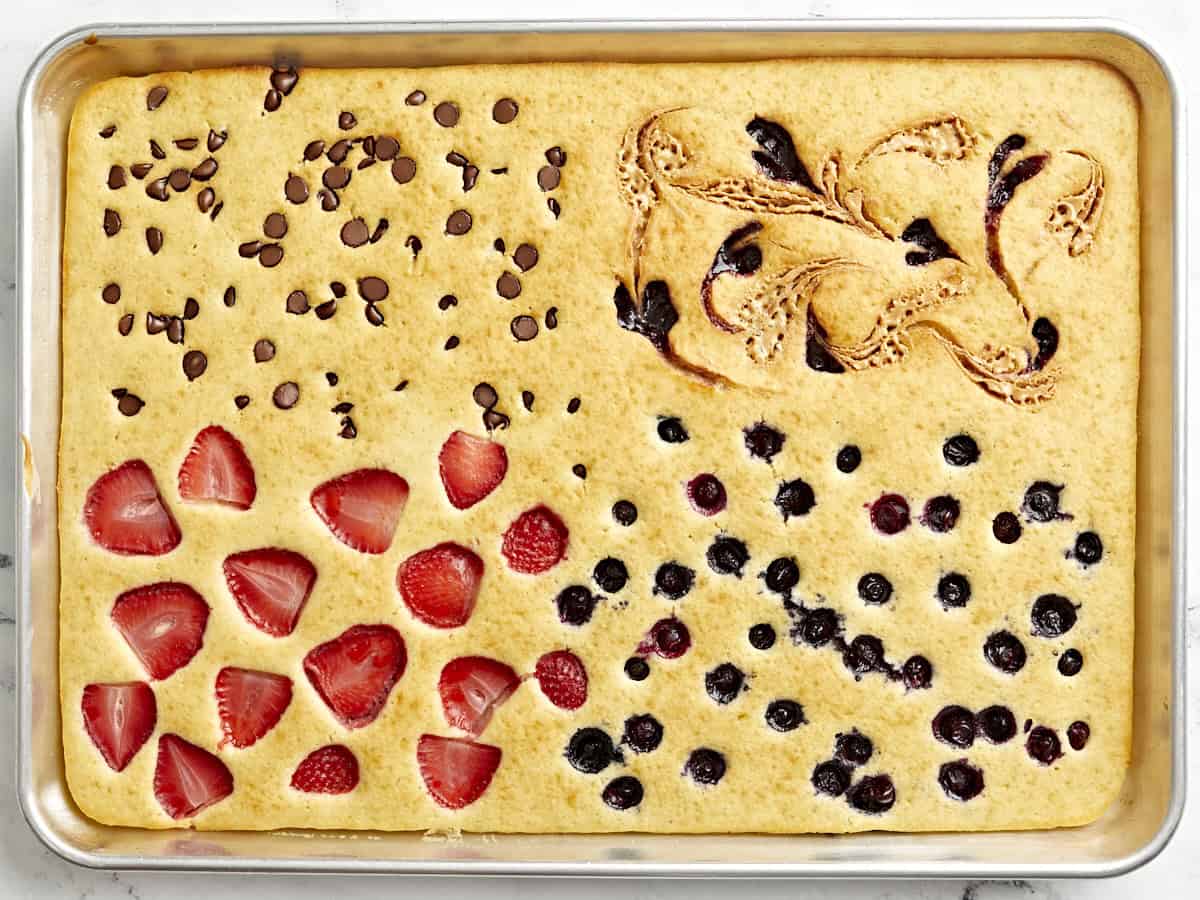
Finished sheet pan pancakes with four different toppings on top.

Place the sheet pan in the pre-heated oven and bake for 18-20 minutes or until golden brown.

Overhead view of sheet pan pancakes cut into squares with one slice being lifted out.

Allow the pan to cool slightly, then slice the sheet pan pancake into 8 equal portions. Feel free to make smaller slices if you want to make more servings. Serve warm with syrup and extra toppings if you like!
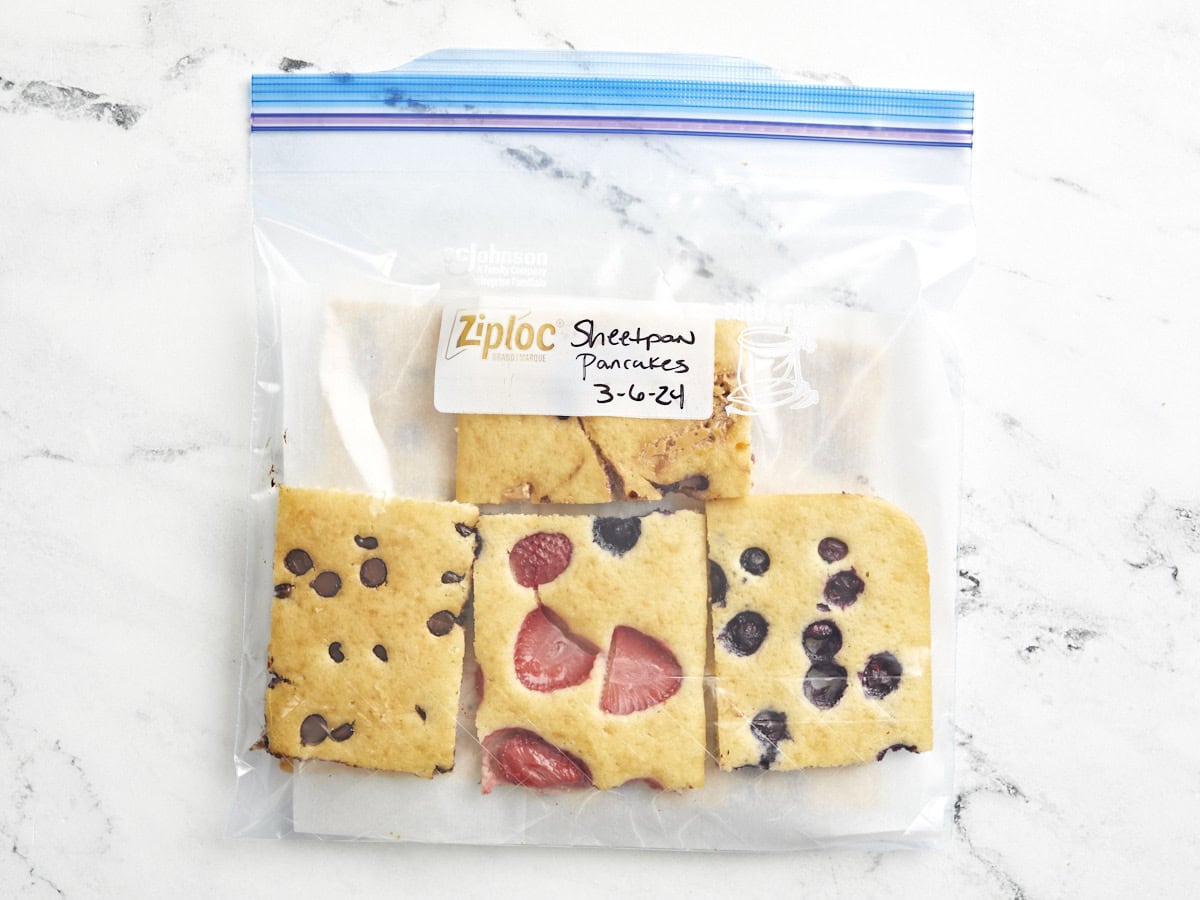
Sheet pan pancakes in a freezer bag.

These pancakes are super easy to freeze! Just place the cooled pancakes in a freezer safe storage bag, in single layers with parchment paper between the layers to prevent sticking. Freeze for up to 3 months.
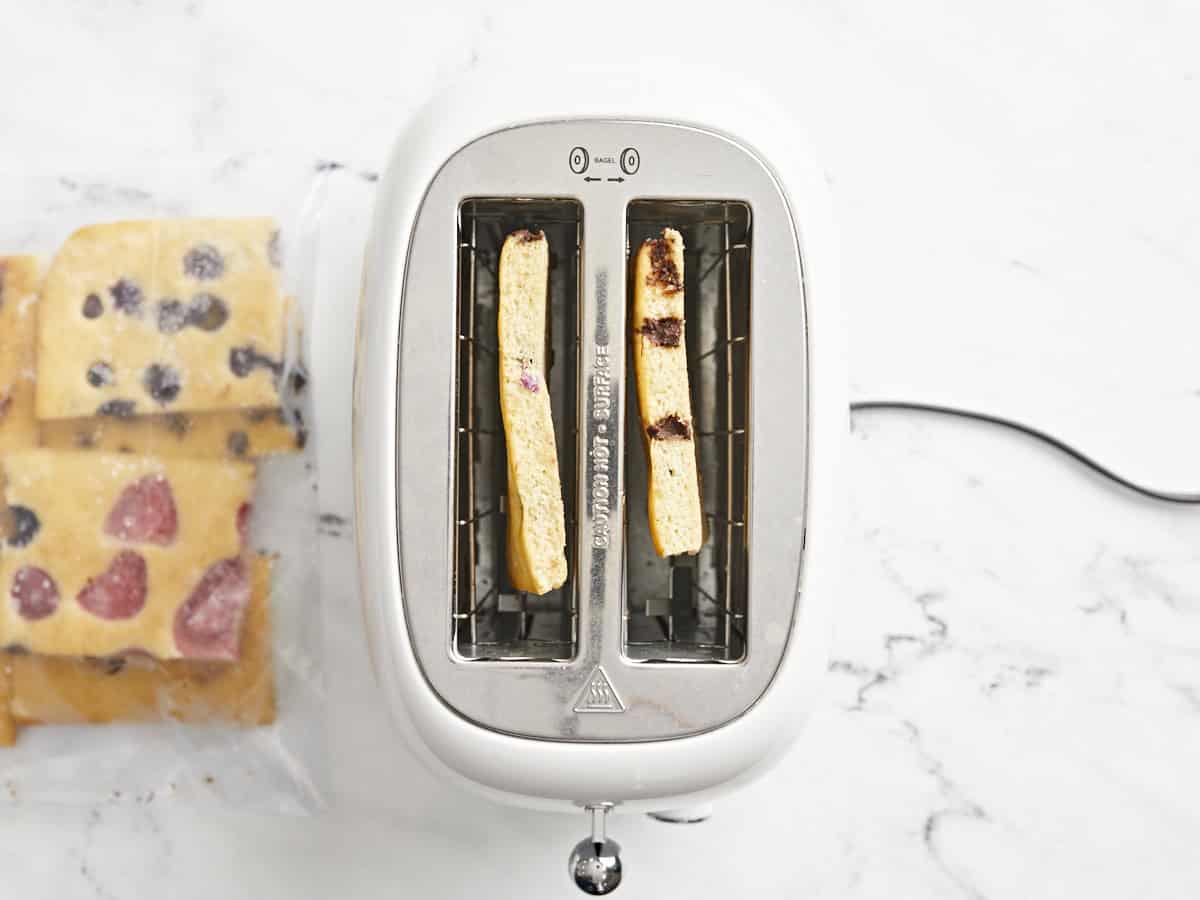
Frozen sheet pan pancakes in a toaster.

You can easily reheat frozen pancakes in a toaster or in the microwave until hot.
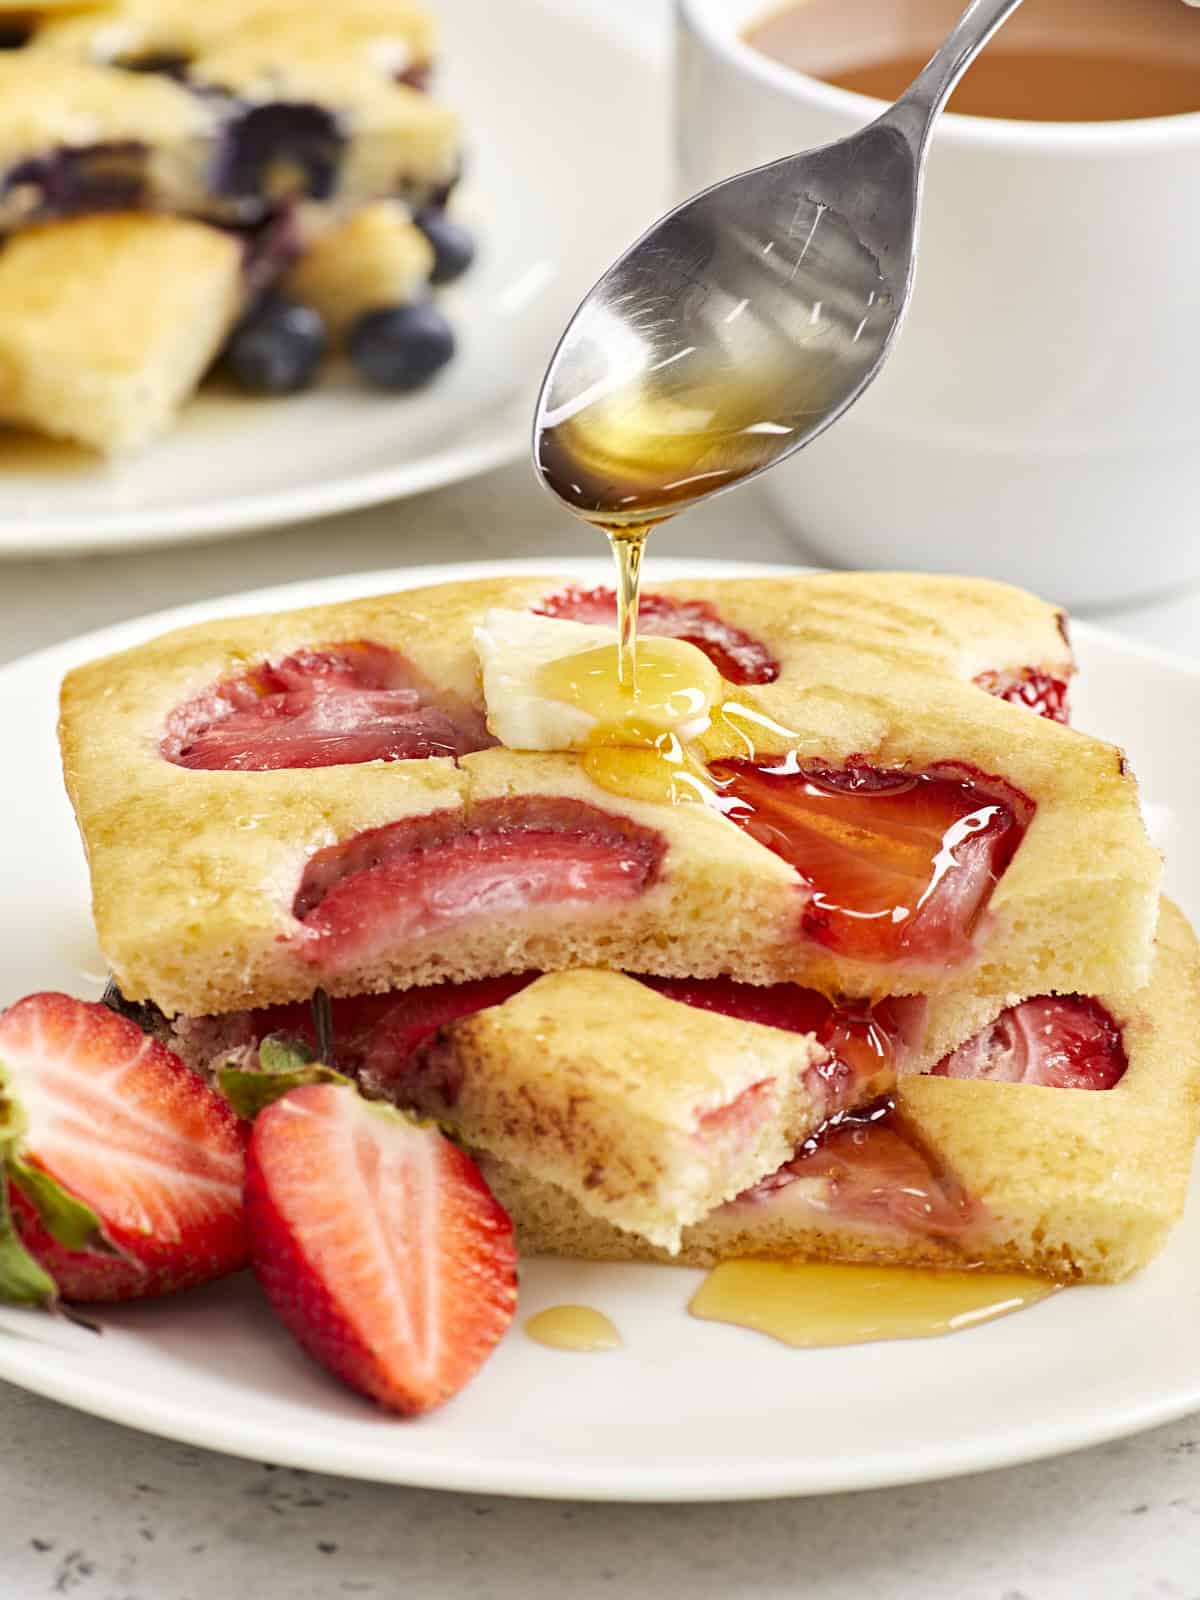
Close up side view of strawberry sheet pan pancakes on a serving plate with maple syrup being drizzled over the top.

The post Sheet Pan Pancakes appeared first on Budget Bytes.
Broccoli Salad

This broccoli salad is the perfect creamy, crunchy, rich, and flavorful side to go with any meal. It’s my new go-to for parties!

The post Broccoli Salad appeared first on Budget Bytes.

It’s nearly grilling season, and I need a reliable side dish to bring to parties, family reunions, and barbecues. This broccoli salad is the perfect creamy, crunchy, rich, and flavorful side to go with any meal. It has a great balance of sweet and tangy flavors, and the texture is unbeatable. It’s a fact that if you add bacon to any vegetable dish, even the most discerning meat eaters will give it a try. Baby steps, right?! I love making sure my loved ones eat their vegetables!

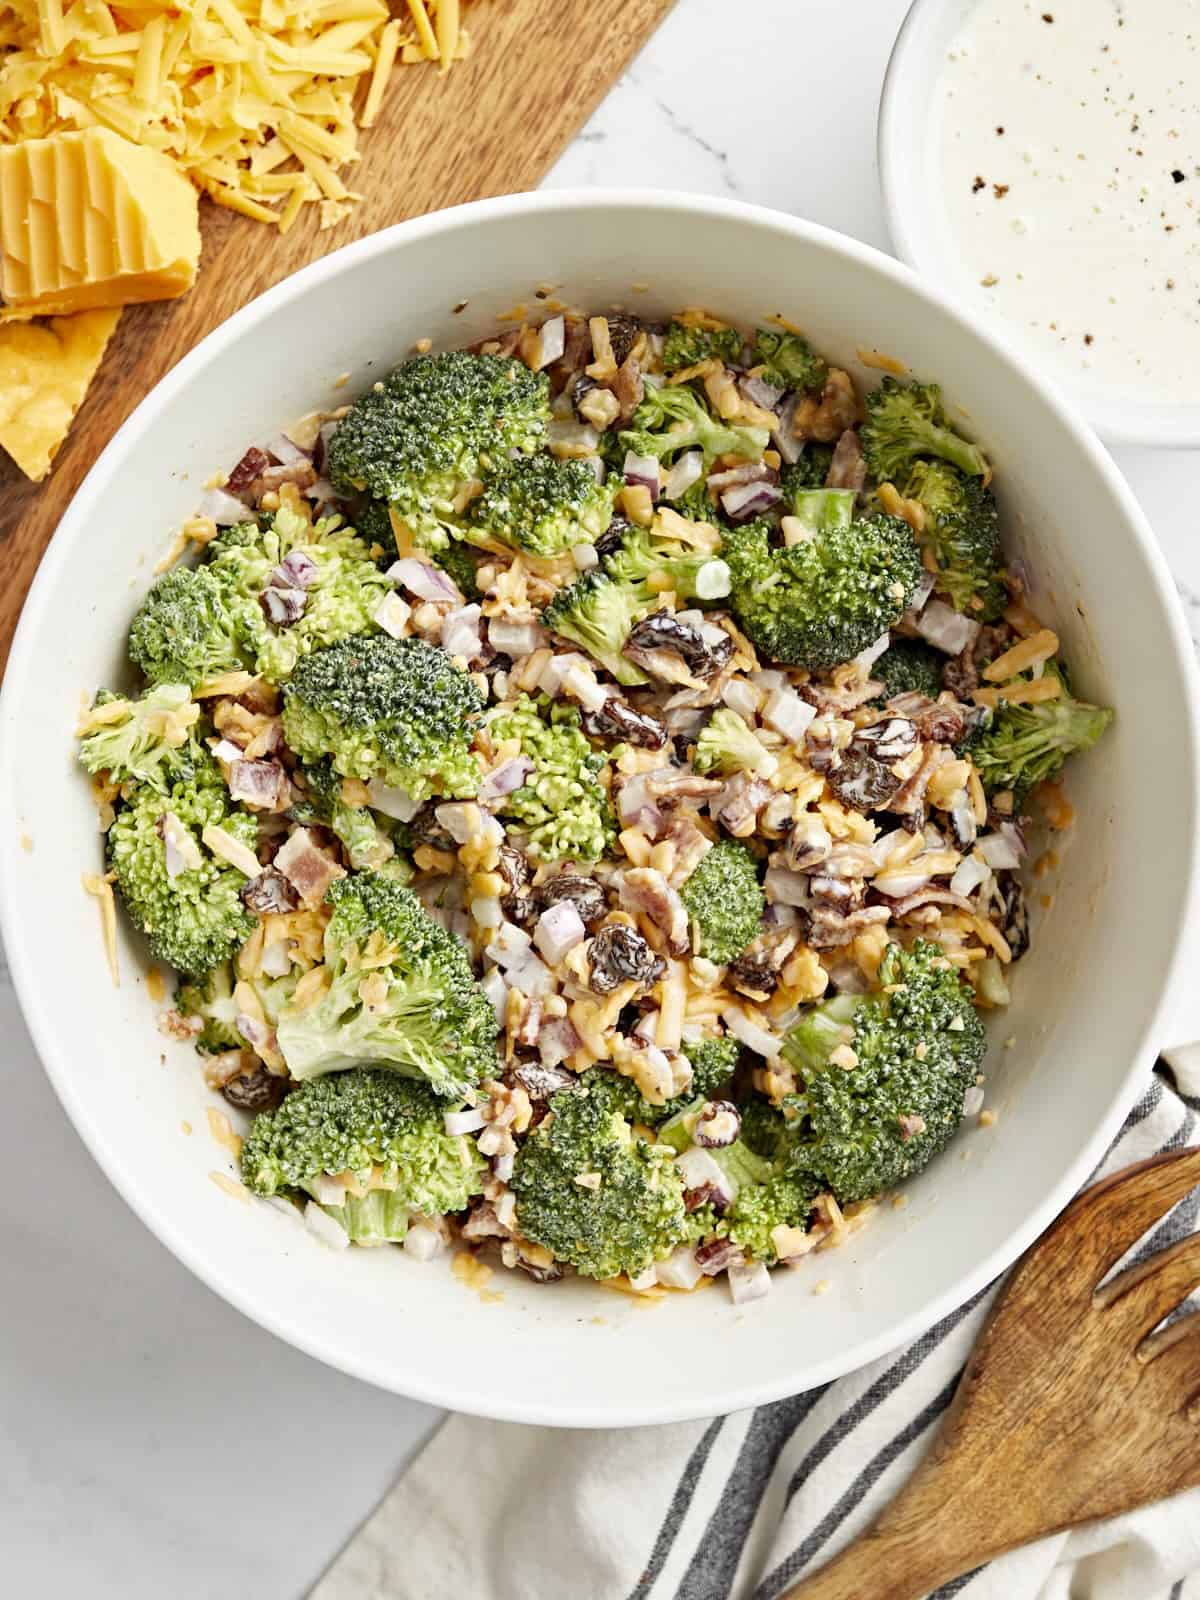
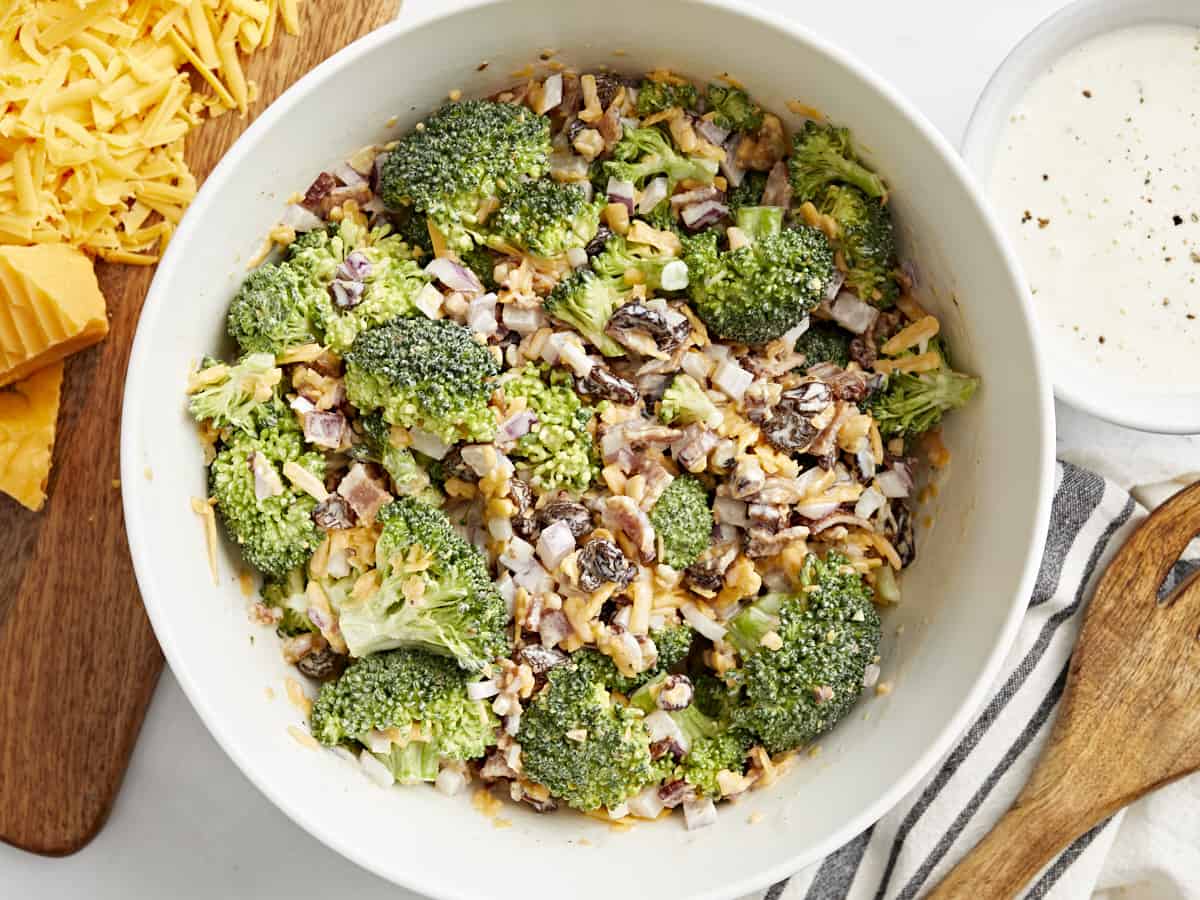
overhead view of broccoli salad in a white bowl.

What Is Broccoli Salad?

Broccoli salad is a classic side dish made from broccoli florets tossed with cheddar cheese, raisins, bacon, walnuts, and red onion, coated in a creamy and tangy dressing. This salad has a wonderful balance of flavors and textures and is so versatile!

Ingredients

Here’s what you’ll need to make broccoli salad:

  • Broccoli: Has an earthy and slightly sweet, slightly bitter flavor, as well as a delightful crunch!
  • Cheddar Cheese: Adds a creamy and salty component to the salad.
  • Raisins: Add a pop of sweet and fruity flavor.
  • Bacon: Adds a great savory and umami flavor. You’ll need 6 strips of cooked bacon. Vegetarian? No problem, just leave it out. Sometimes I put the bacon on the side for gatherings where there might be varied dietary restrictions.
  • Walnuts: Add a nutty flavor and delicious crunch.
  • Red Onion: Adds a bit of bite to the recipe and a wonderful crunchy texture, creating a great contrast to the sweet and chewy raisins.
  • Mayo: Adds richness and creaminess to the dressing.
  • Greek Yogurt: Makes the dressing extra creamy and tangy with fewer calories and fat than sour cream. I highly recommend Greek yogurt over plain yogurt or sour cream for its thicker, creamy texture.
  • White Vinegar: Adds a refreshing brightness and tanginess to the dressing to balance the richness.
  • Sugar: Adds sweetness to balance out the vinegar.
  • Salt and Pepper: Enhance the overall flavor of the salad.

Should I Blanch The Broccoli?

In testing, I preferred the final texture of raw broccoli over blanched, but you certainly can blanch the broccoli if you prefer. The blanching process takes out some of the natural bitter flavor from the broccoli; simply drop the florets in a large pot of salted boiling water for 1 minute, then quickly shock in a bowl of ice water. Instead, I opted to simply rinse my broccoli florets in hot water to make them extra bright green and make sure they were nice and clean.

Top Tip

To keep your broccoli salad from turning out watery, make sure to thoroughly dry the florets. The salt in the dressing will naturally draw out some of the moisture from the veggies, so making sure they are dry after washing them is an important step! I like to spread them out on a clean kitchen towel and gently pat them dry with another towel laid on top while I prep the rest of my ingredients.

What To Serve with Broccoli Salad

Broccoli salad is such a fresh and crunchy dish with a ton of flavor, so I suggest pairing it with simple proteins, like air fryer chicken breast or glazed pork chops.

close up of broccoli salad on a white plate.
overhead view of broccoli salad in a white bowl.
Print

Broccoli Salad

This broccoli salad is the perfect creamy, crunchy, rich, and flavorful side to go with any meal. It's my new go-to for potlucks!
Course Salad
Cuisine American
Total Cost ($5.79 recipe / $0.96 serving)
Prep Time 15 minutes
Cook Time 5 minutes
Total Time 20 minutes
Servings 6 (about 1 cup each)
Calories 305kcal

Ingredients

Broccoli Salad

  • 1 large broccoli crown, separated into florets (about 4 cups) $1.10
  • 1 cup shredded cheddar cheese $1.24
  • 1/4 cup raisins $0.39
  • 6 strips bacon $0.90
  • 1/4 cup walnuts, crushed $0.80
  • 1/4 red onion, diced into small pieces $0.21

Broccoli Salad Dressing

  • 1/2 cup mayo $0.75
  • 2 Tbsp Greek yogurt $0.21
  • 1 Tbsp white vinegar $0.04
  • 1 Tbsp sugar $0.05
  • 1/4 teaspoon salt $0.05
  • 1/4 teaspoon pepper $0.05

Instructions

  • Cook the bacon until crispy. Let cool on clean paper towel-lined plate. Chop into bite sized bits and set aside.
  • In a small mixing bowl, combine mayo, Greek yogurt, white vinegar, sugar, salt, and pepper. Whisk together and set dressing aside.
  • Cut broccoli into florets, shred the cheddar cheese, gather raisins, crumble bacon, crush walnuts, and dice red onion.
  • Combine salad ingredients in a large mixing bowl and toss to combine.
  • Pour the dressing over broccoli salad and toss together until completely coated. Serve immediately, or let it marinate and get extra yummy in the fridge for up to 5 days!

See how we calculate recipe costs here.

Nutrition

Serving: 1serving | Calories: 305kcal | Carbohydrates: 9g | Protein: 9g | Fat: 26g | Sodium: 477mg | Fiber: 1g
overhead view of broccoli salad in a white bowl.

how to make Broccoli Salad – step by step photos

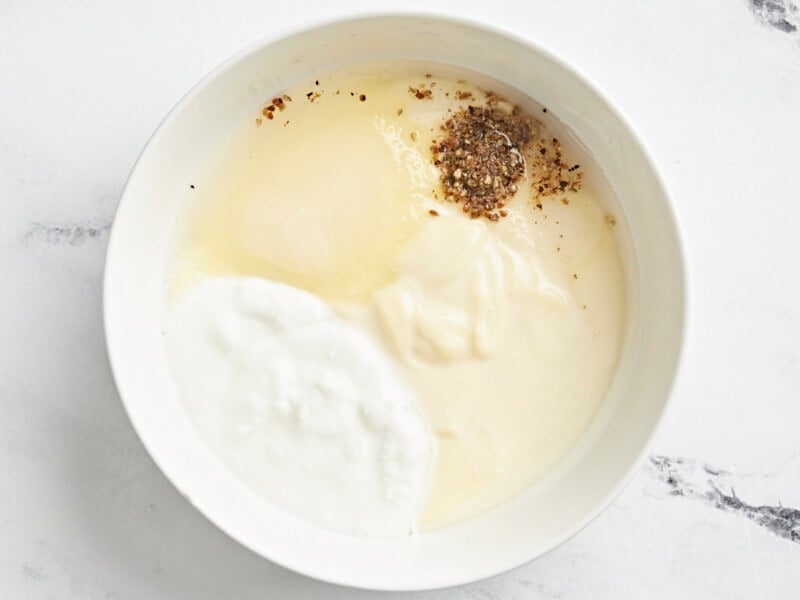
ingredients for salad dressing in a white bowl.

In a small mixing bowl, combine 1/2 cup mayo, 2 Tbsp Greek yogurt, 1 Tbsp white vinegar, 1 Tbsp sugar, 1/4 tsp salt, and 1/4 tsp pepper.

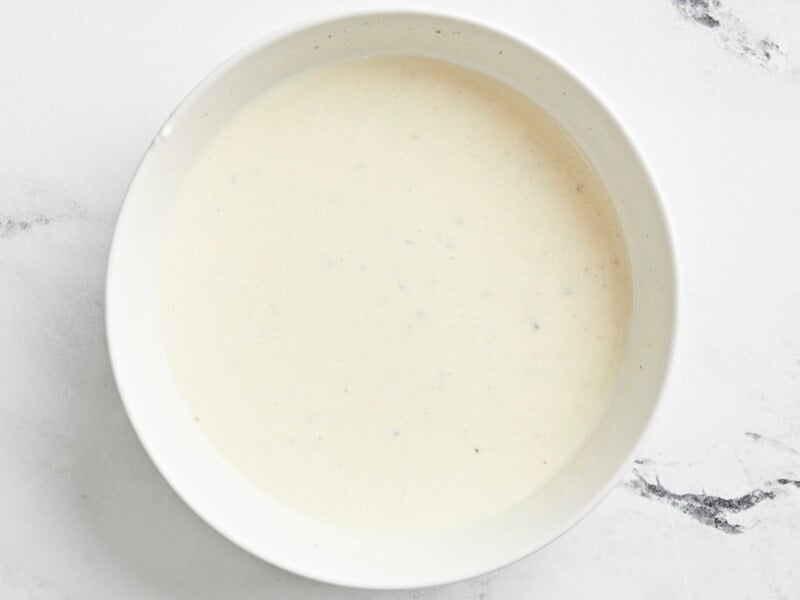
creamy dressing in a white bowl.

Whisk together and set dressing aside.

overhead view of ingredients for broccoli salad on a wooden cutting board.

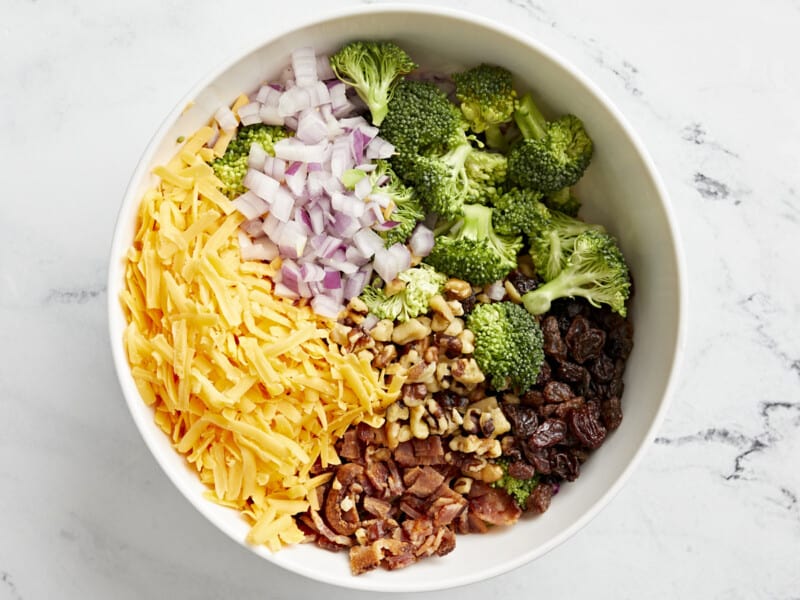
Cut 1 large crown of broccoli into florets, shred 1 cup of cheddar cheese, gather 1/4 cup of raisins, crumble 6 strips of crispy bacon, crush 1/4 cup walnuts, and dice 1/4 of a red onion.

ingredients for broccoli salad in a white bowl.

Combine salad ingredients in a large mixing bowl and toss to combine.

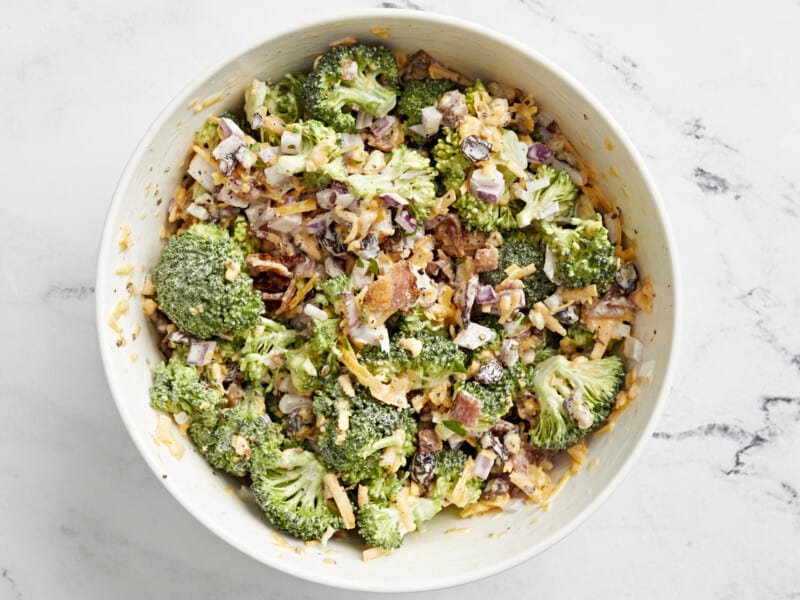
broccoli salad in a white bowl.

Pour the dressing over broccoli salad and toss together until completely coated. Serve immediately, or let it marinate and get extra yummy in the fridge for up to 5 days!

The post Broccoli Salad appeared first on Budget Bytes.

Taco Dip

This 4-ingredient Taco Dip is creamy, super easy to make, and has the perfect amount of spice. It’s great for parties or to treat yourself!

The post Taco Dip appeared first on Budget Bytes.

I’m that person who always chooses queso or spinach dip when I go out to my favorite restaurants. Dips are my absolute favorite appetizer and they’re perfect for sharing at parties and family gatherings. This 4-ingredient Taco Dip is creamy, super easy to make, and has the perfect amount of spice. Toppings are optional but I loved adding some tomatoes, jalapeños and sliced green onions on top of mine. And you don’t have to wait until the next big event to make this taco dip recipe…treat yourself this weekend to some chips & dip, you deserve it!😉

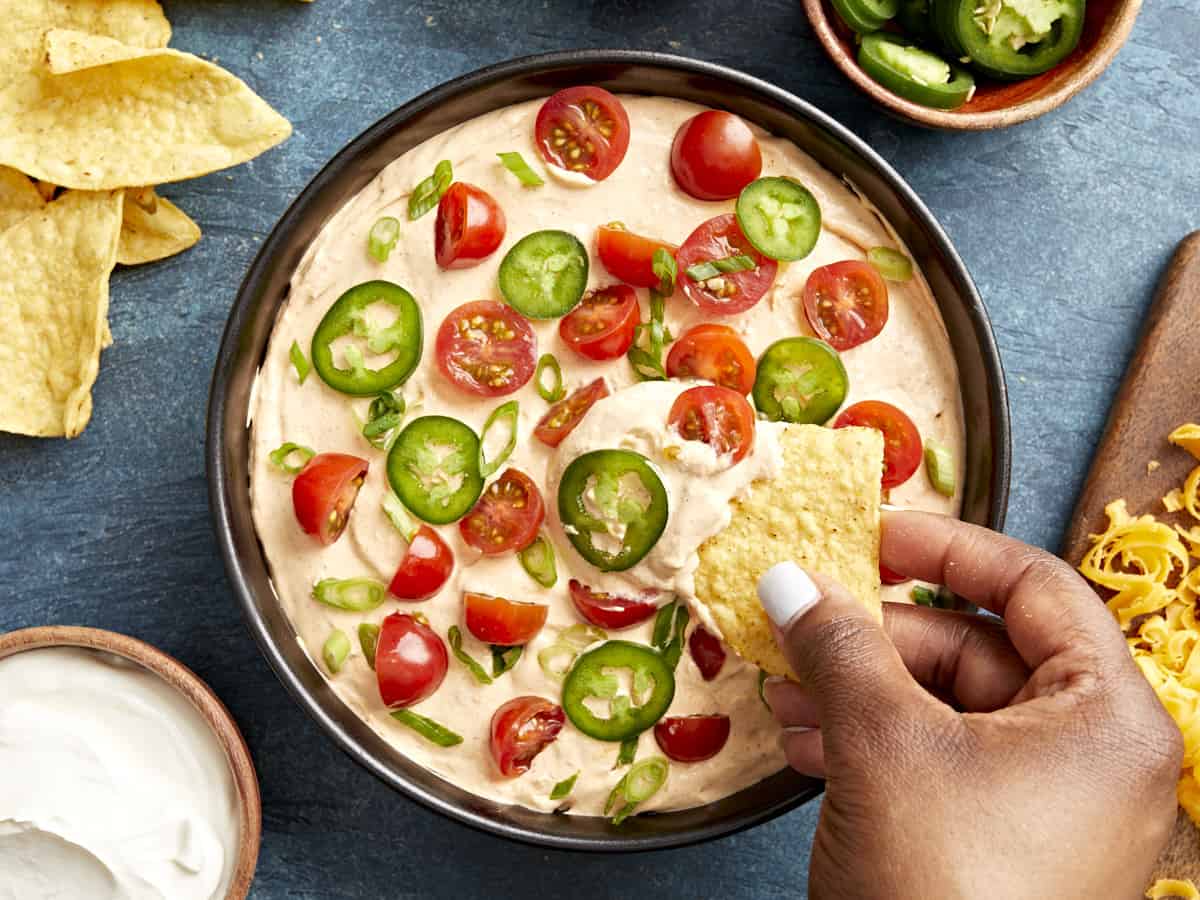
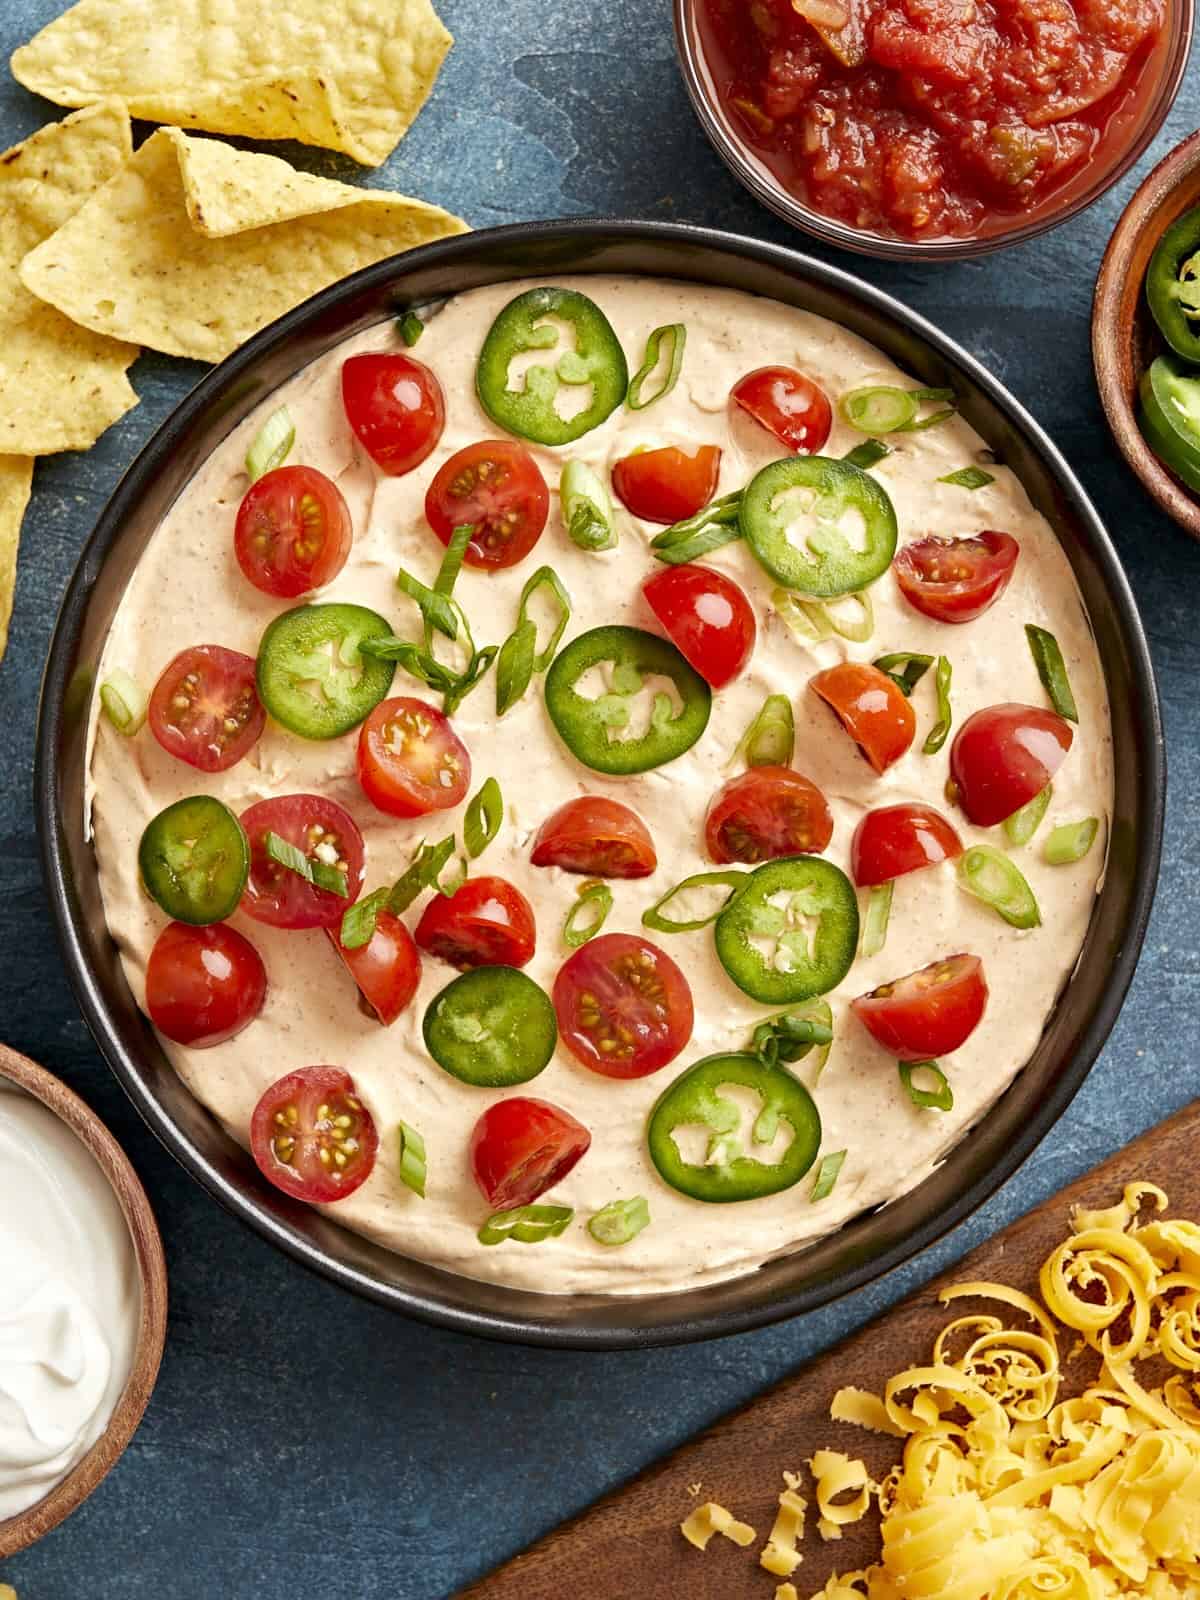
Overhead view of a serving bowl full of taco dip, topped with cherry tomatoes and jalapenos and chips served on the side.

What’s In Taco Dip?

When I say this dip recipe is super easy, I really mean it. It’s one of those recipes you can memorize after making it one time and it’s easy to keep all the ingredients on hand for whenever you want to whip up a quick batch. For this taco dip we simply used cream cheese, sour cream, taco seasoning, and a little bit of salsa. That’s it! You can customize it by adding your favorite toppings or keep it simple and enjoy with lots of tortilla chips!

Can I Add Meat?

Oftentimes you may see taco dip made similar to our 7 layer dip recipe with ground beef added and layered with lots of veggies. I opted for a simpler version that can be made quickly with fewer ingredients, but still packs in lots of those Mexican-inspired flavors that I love. With that being said, you can definitely add some seasoned taco meat if you want to make this dip more filling. I suggest adding ½ lb. of seasoned ground beef on top of the cream cheese layer, then finish with your favorite toppings.

Topping Ideas

I love adding my favorite nacho-style toppings to this creamy dip. You can keep things simple like we did with a few tomatoes, sliced jalapeños, and sliced green onions or have fun adding any of these toppings listed below:

Making It Ahead & Storing Leftovers

You can easily make this taco dip ahead of time and just wait to add on any extra toppings. Follow the recipe listed below then cover the dip tightly with plastic wrap or in an airtight container and place it in the refrigerator until you’re ready to serve. Store any leftovers covered tightly in the refrigerator for up to 3 days.

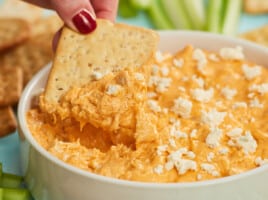
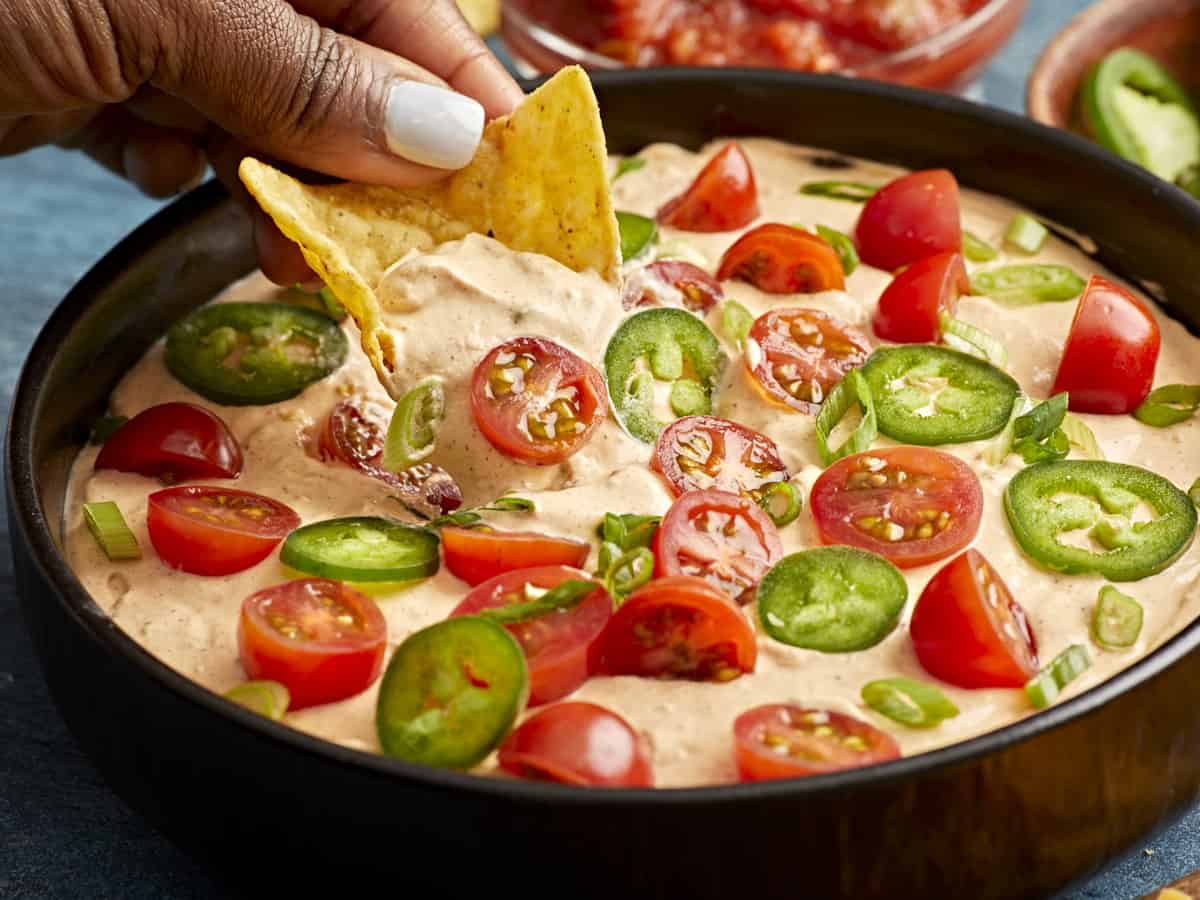
Side view of a hand scooping some taco dip with a tortilla chip.
Overhead view of Taco Dip in a serving bowl with a chip scooping some out.
Print

Taco Dip

This 4-ingredient Taco Dip is creamy, super easy to make, and has the perfect amount of spice. It’s great for parties or to treat yourself!
Course Appetizer, Dip
Cuisine American
Total Cost $3.98 recipe / $0.40 serving
Prep Time 10 minutes
Total Time 10 minutes
Servings 10 (about 1/4 cup each)
Calories 128kcal

Equipment

Ingredients

  • 8 oz. cream cheese, softened* $1.85
  • 1 cup sour cream $1.12
  • 2 Tbsp taco seasoning** $0.59
  • 1/4 cup salsa $0.42

Instructions

  • In a large bowl combine the softened cream cheese, sour cream, taco seasoning, and salsa.
  • Using a hand mixer blend all the ingredients together until completely smooth and the cream cheese is fully incorporated.
  • Add the taco dip to a serving dish and top with your favorite toppings. I topped mine with some grape tomatoes, sliced jalapeño, and sliced green onions. Enjoy!

See how we calculate recipe costs here.

Notes

*Make sure your cream cheese is softened so the ingredients can blend easily and smoothly.
**You can use our homemade taco seasoning recipe or a store-bought taco seasoning packet. The store-bought packets are about 3 Tbsp of seasoning mix. You can use the entire packet for a more intense flavor or measure out 2 Tbsps and save the rest for later. I tested this recipe with 2 Tbsp of seasoning mix vs. the entire seasoning packet, and 2 Tbsp was definitely the way to go!

Nutrition

Serving: 1serving | Calories: 128kcal | Carbohydrates: 3g | Protein: 2g | Fat: 12g | Sodium: 161mg | Fiber: 0.2g

How to Make Taco Dip – Step by Step Photos

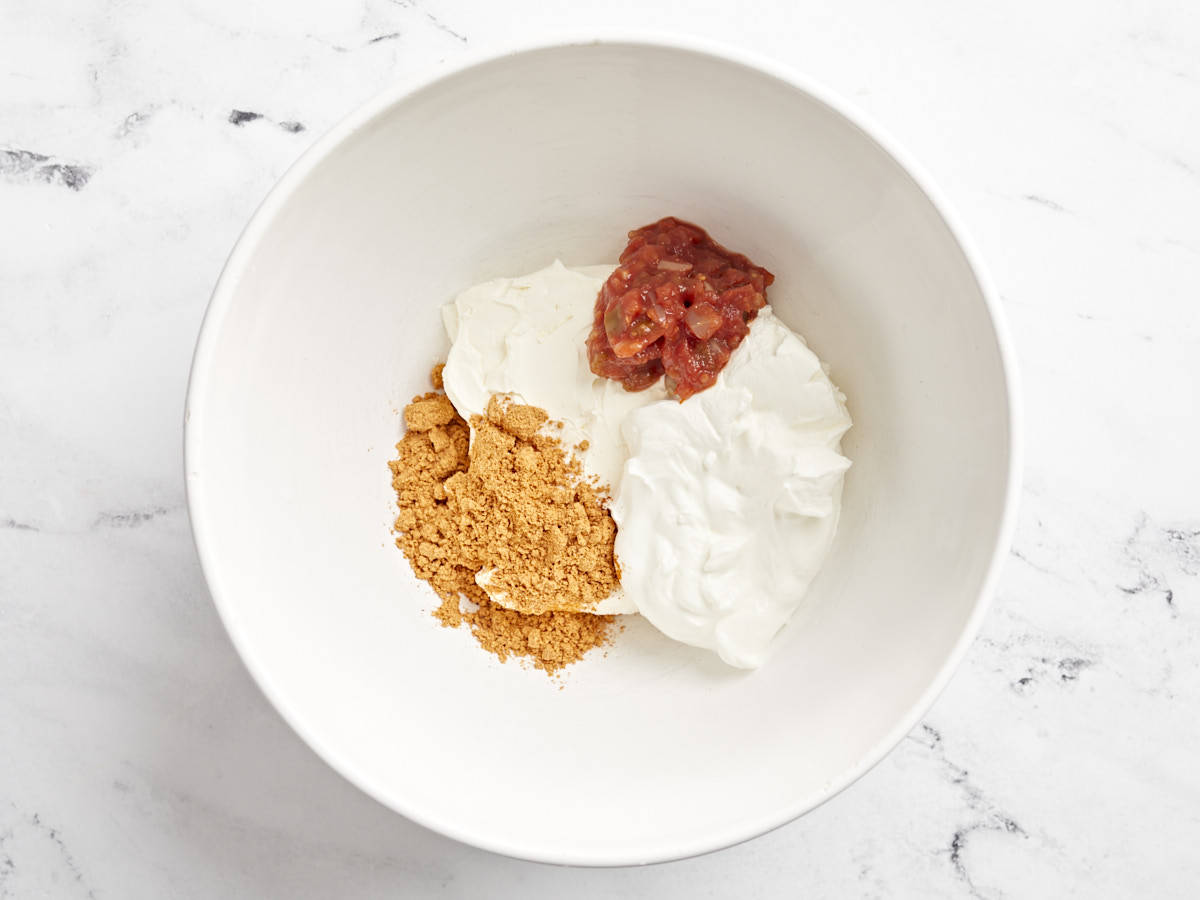
Taco Dip ingredients in a white bowl.

In a large bowl combine 8 oz. softened cream cheese, 1 cup sour cream, 2 Tbsp taco seasoning, and 1/4 cup salsa. I like using chunky mild salsa.

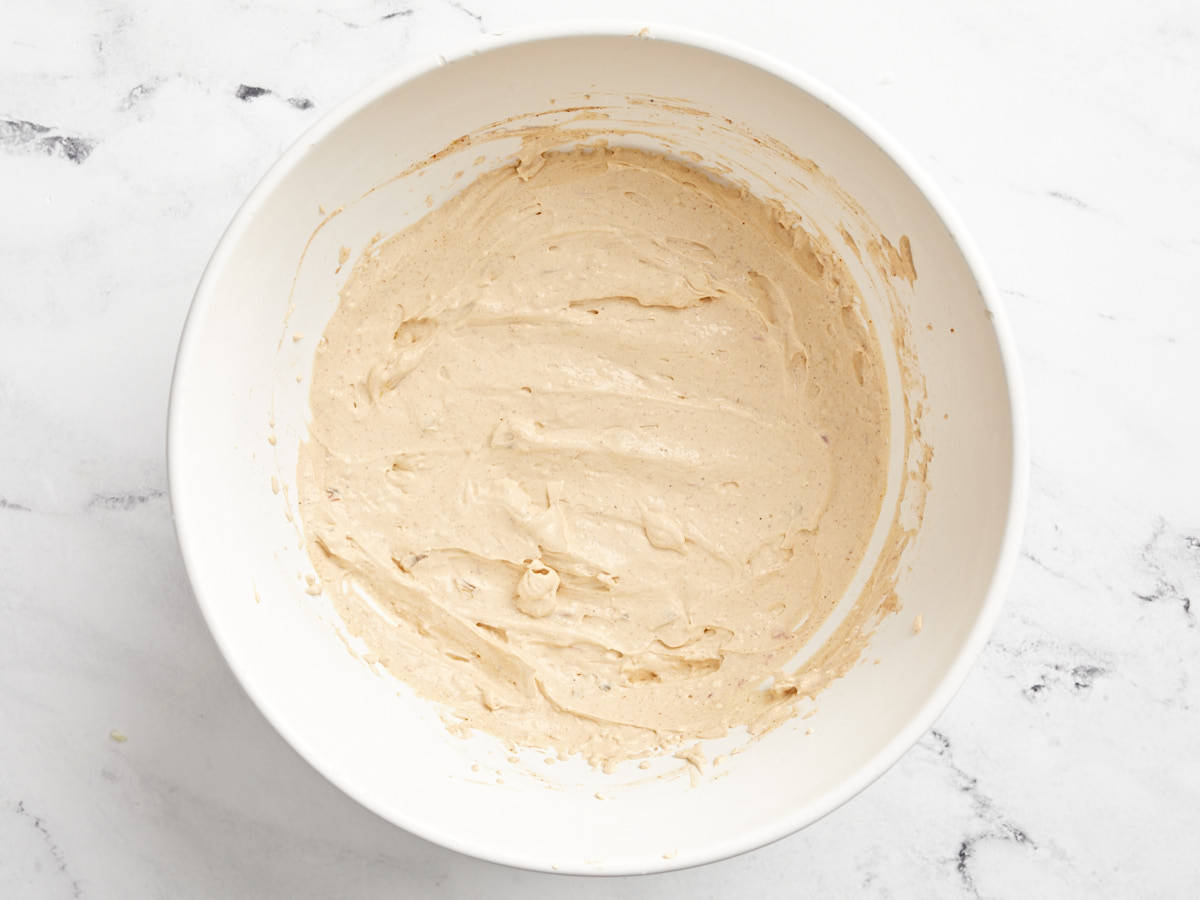
Taco Dip mixed together in a white bowl.

Using a hand mixer blend all the ingredients together until completely smooth and the cream cheese is fully incorporated.

Taco Dip spread out in a serving bowl.

Transfer the taco dip to a serving dish or bowl and top with your favorite toppings. I topped mine with some grape tomatoes, sliced jalapeño, and sliced green onions.

Overhead view of Taco Dip in a serving bowl with a chip scooping some out.

Now just grab a bag or tortilla chips and enjoy by yourself or with your family and friends!

The post Taco Dip appeared first on Budget Bytes.

Air Fryer Potatoes

Air fryer potatoes are soft on the inside, crispy on the outside, and made for dipping. They’re the perfect side for any meal!

The post Air Fryer Potatoes appeared first on Budget Bytes.
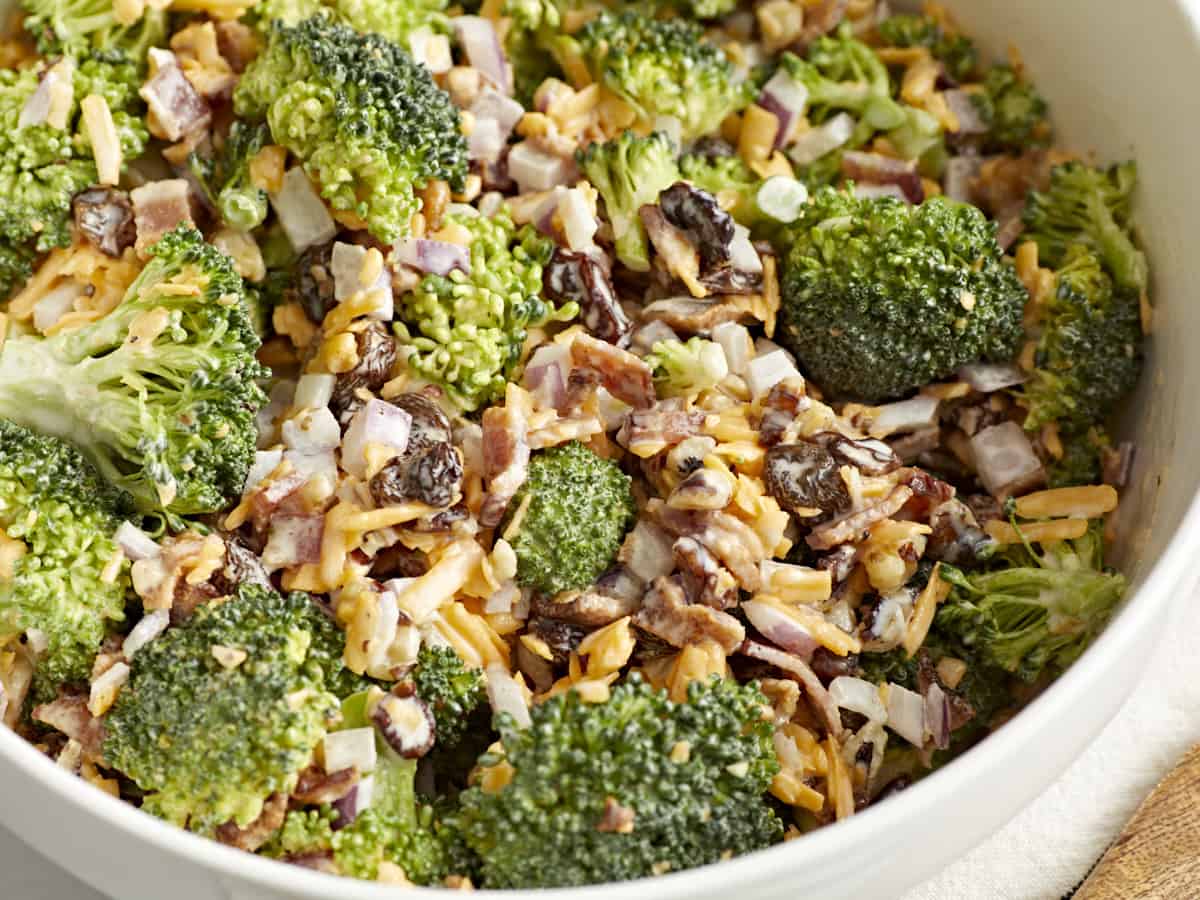
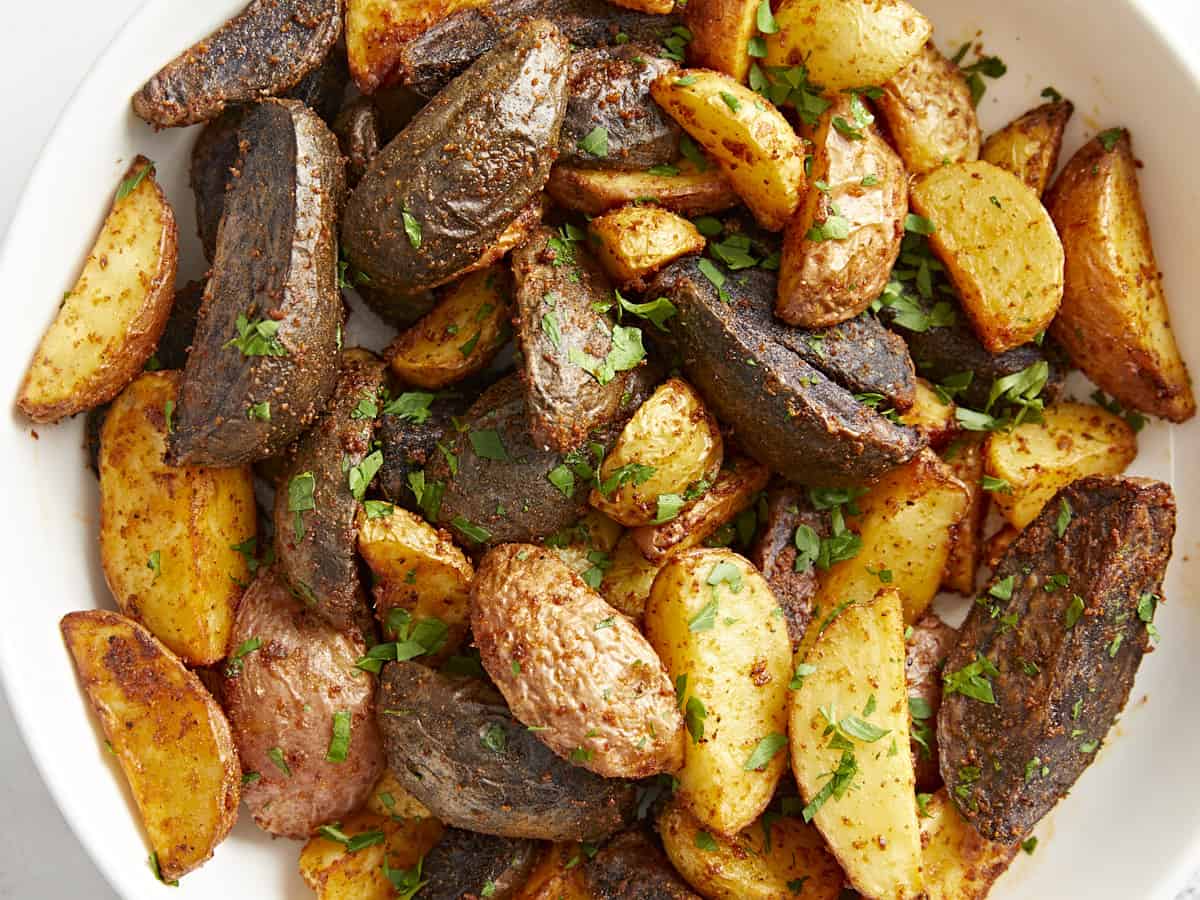
Potatoes, or “spuds” as my Irish brother-in-law affectionately calls them, are truly a favorite for just about everyone. Potatoes can be cooked 1,000 ways and they always steal the show! These air fryer potatoes are proof of that. Soft on the inside and crispy on the outside, they’re like mini baked potatoes. They are seriously delicious dipped in ketchup, mayo, or Comeback Sauce. This air fryer potato recipe is great to use with whatever potatoes you have on hand, making it the perfect recipe for fridge clean out day.

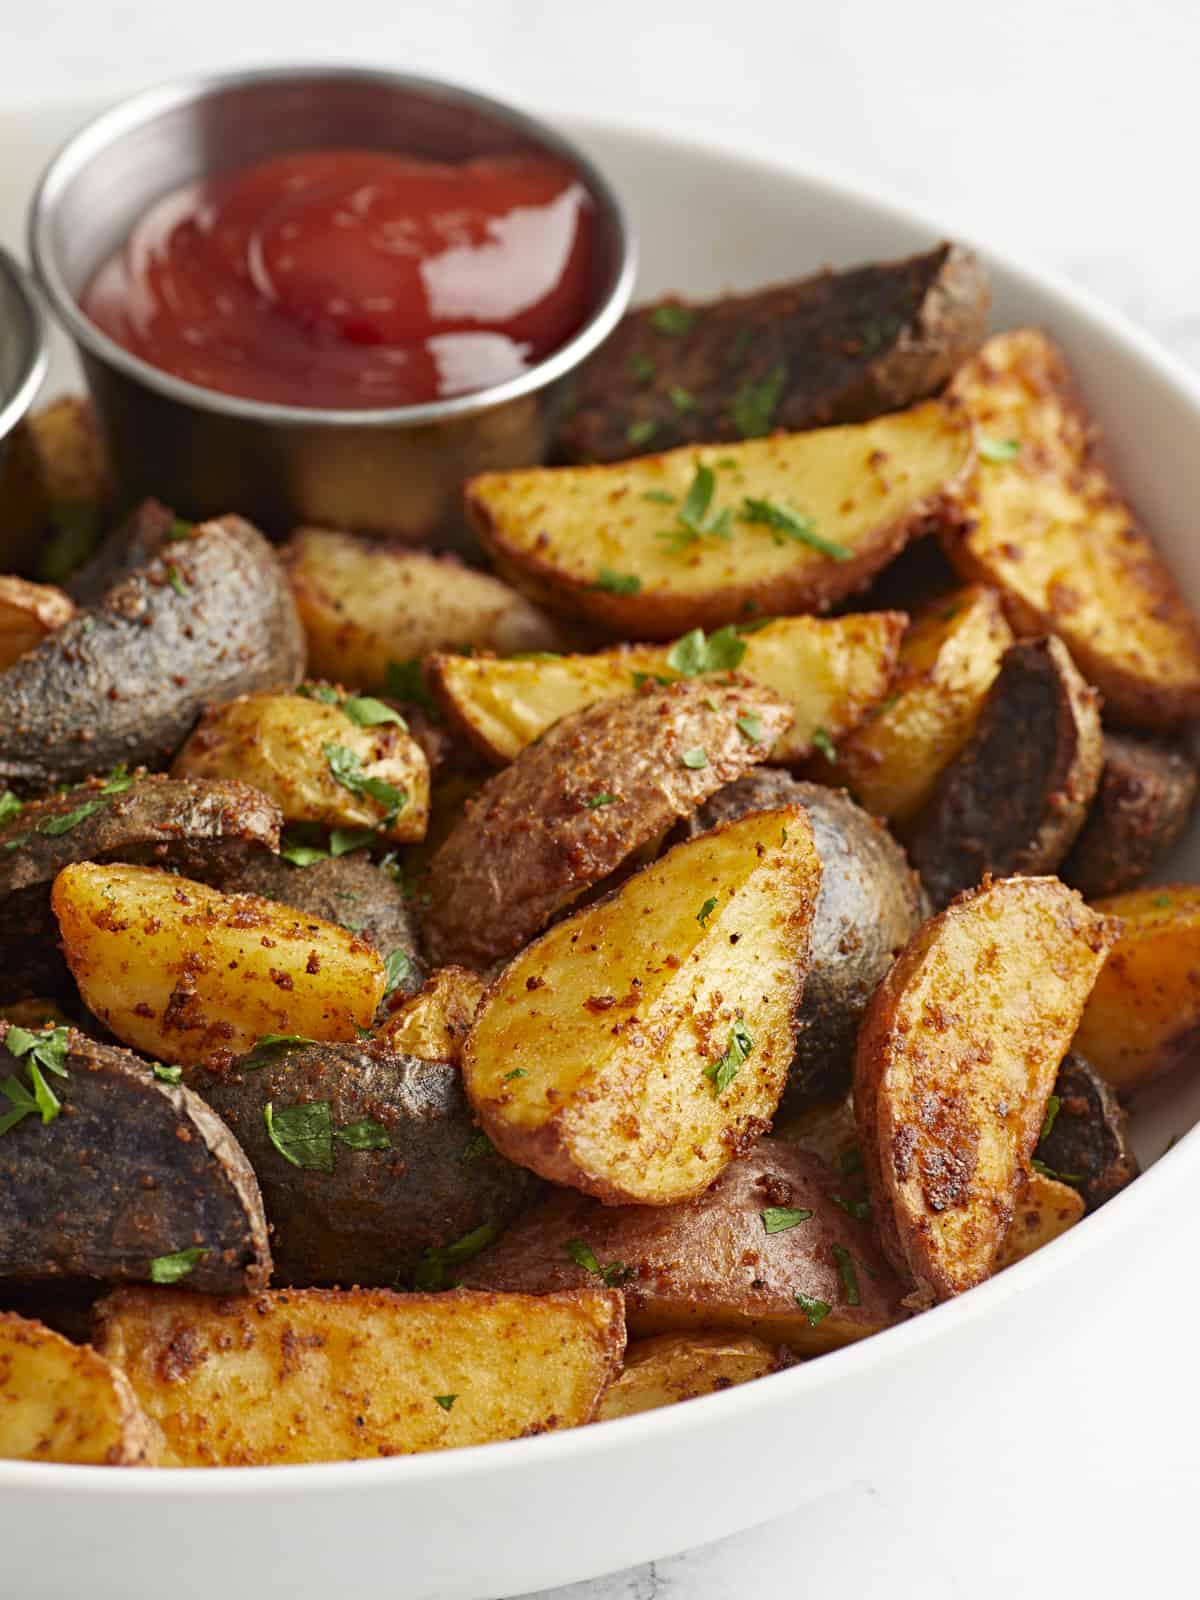
air fryer potatoes in a bowl with ketchup.

Why Make Potatoes in the Air Fryer?

Listen, we love roasted potatoes. They’re simple and delicious. But sometimes you need potatoes right now, and roasting just isn’t quick enough. Using an air fryer, these potatoes are roasted to perfection in less than half the time. So, the next time you have a potato emergency, this air fryer potato recipe is here for you. You can thank us later!

Ingredients for Air Fryer Potatoes

Here’s what you’ll need to make air fryer potatoes:

  • Potatoes: You can use any variety of mini potatoes. We found some tri-color potatoes on sale, so we used those!
  • Oil: Helps keep the potatoes moist as they cook and helps them get nice and crispy on the outside. We used olive oil, but you could also use vegetable or canola oil.
  • Spices: A combination of garlic powder, onion powder, smoked paprika, salt, and pepper creates a smoky and savory flavor and the paprika adds a pop of color.
  • Fresh Parsley: Adds a little bit of greenery and freshness.

Should I Soak the Potatoes?

We did not do this, but cutting and soaking potatoes in cold water releases some of the starches and can make the potatoes crispier! Our potatoes were more like tiny bites of the perfect baked potato!

What Else Can I Put On Air Fryer Potatoes?

We love the seasoning mix listed in the recipe below, but the sky is the limit! Here are some other ways you can season your air fryer potatoes:

What To Serve With Air Fryer Potatoes

These air fryer potatoes are a great side dish for breakfast, lunch, or dinner. They go great with dishes like Breakfast FrittatasAir Fryer Bacon, Homemade Meatloaf, or Baked Chicken Drumsticks.

Or, if you want to just add some dip and serve them as a snack, try dipping them in Comeback SauceLemon Dill Tahini DressingChimichurri Sauce, or Homemade Ranch Dressing.

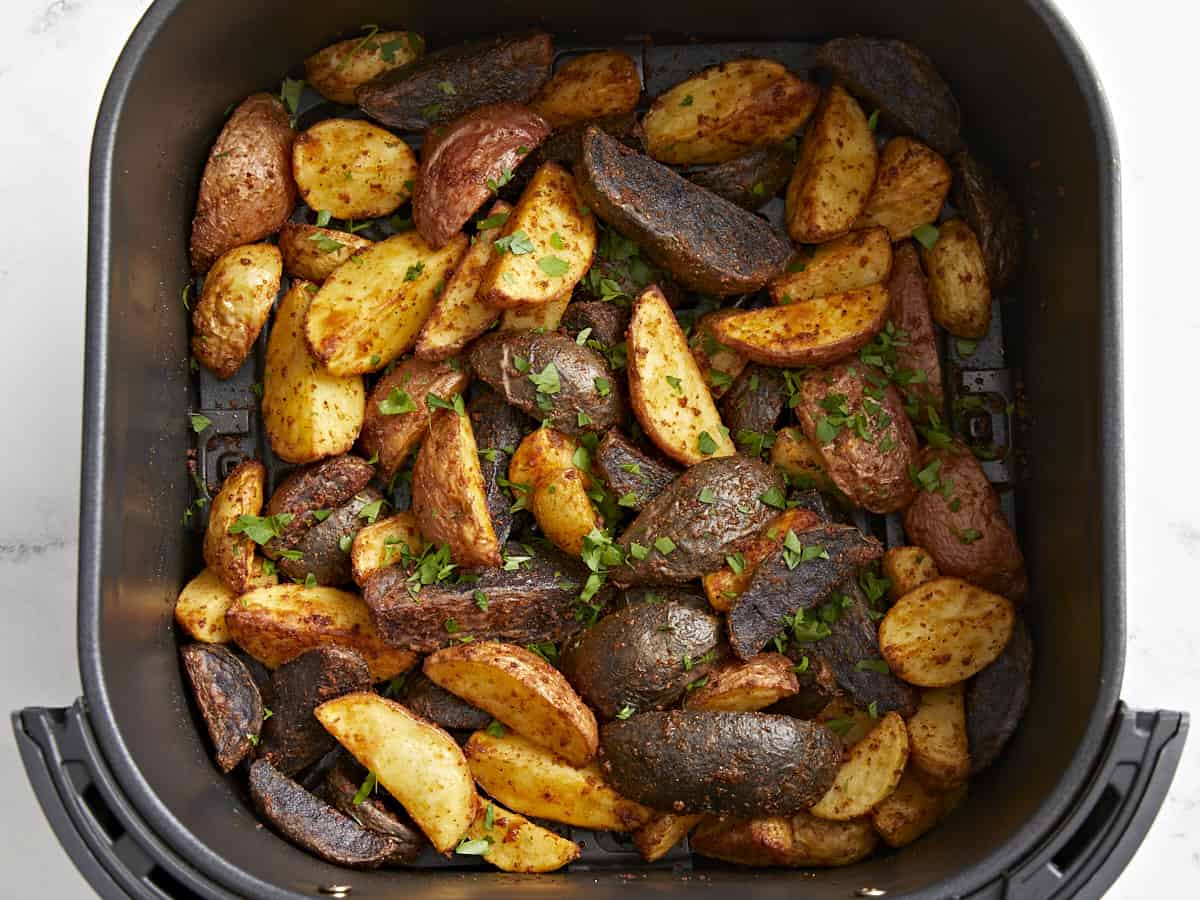
seasoned potatoes in an air fryer basket with herbs.
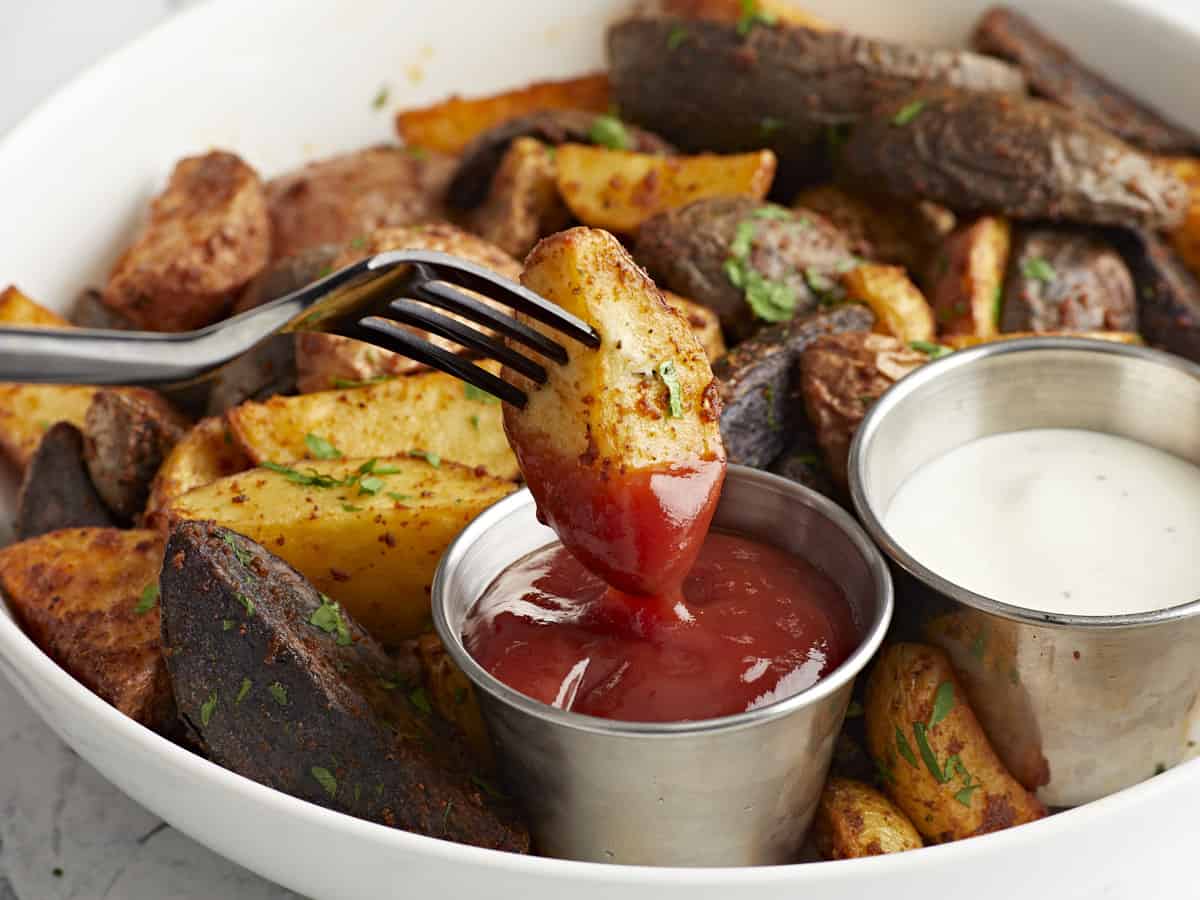
fork dipping an air fryer potato into ketchup.
Print

Air Fryer Potatoes

Air fryer potatoes are soft on the inside, crispy on the outside, and made for dipping. They're the perfect side for any meal!
Course Side Dish
Cuisine American
Total Cost $3.60 recipe / $0.90 serving
Prep Time 15 minutes
Cook Time 15 minutes
Total Time 30 minutes
Servings 4
Calories 106kcal

Equipment

Ingredients

Instructions

  • Preheat air fryer to 400°F for 4 minutes. Wash and quarter the baby potatoes.
  • Add the potatoes to a large bowl. Toss the potatoes with olive oil, garlic powder, onion powder, smoked paprika, salt and pepper.
  • Cook for 15 minutes in the air fryer, until golden brown with crispy edges, stopping halfway through to shake.
  • Garnish with minced parsley and additional salt and pepper, if needed.

See how we calculate recipe costs here.

Nutrition

Serving: 1serving | Calories: 106kcal | Carbohydrates: 20g | Protein: 2g | Fat: 2g | Sodium: 17mg | Fiber: 3g
seasoned potatoes in a bowl with herbs.

how to make Air Fryer Potatoes – step by step photos

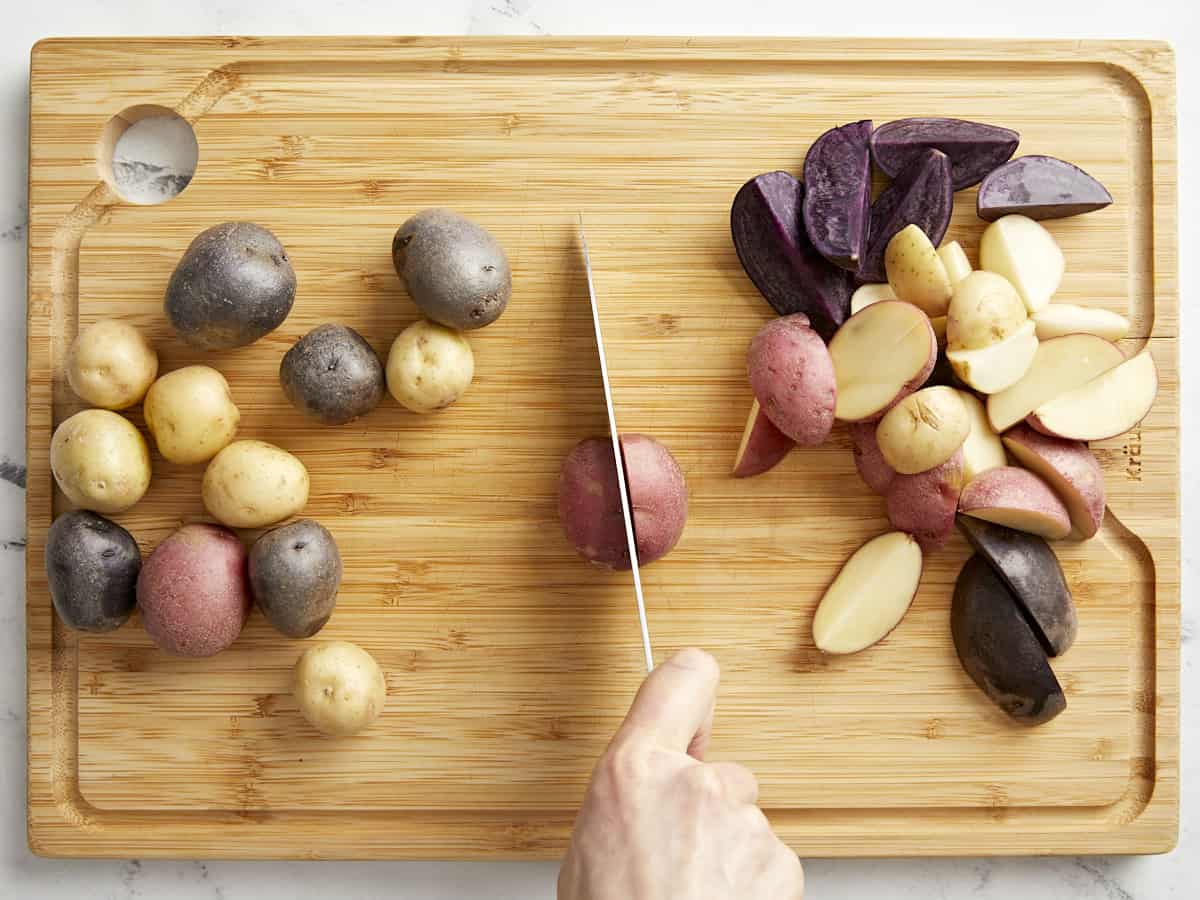
cutting tricolored potatoes on a bamboo cutting board.

Preheat the air fryer to 400°F for 4 minutes. Quarter 1 lb. of baby potatoes.

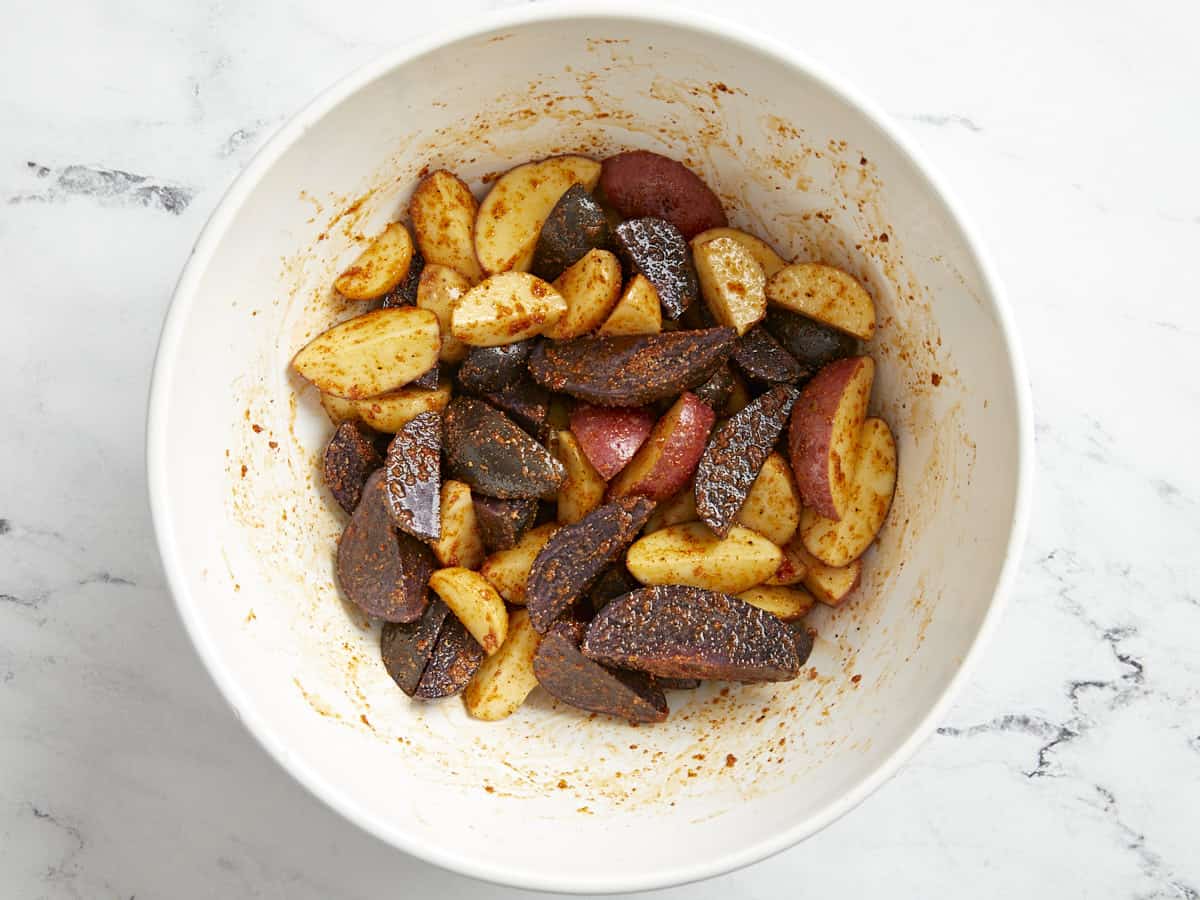
seasoned potato wedges in a white bowl.

Add the potatoes to a large bowl. Toss the quartered baby potatoes with 1/2 Tbsp olive oil, 1/2 tsp garlic powder, 1/2 tsp smoked paprika, 1/2 tsp onion powder, and a pinch of salt and pepper.

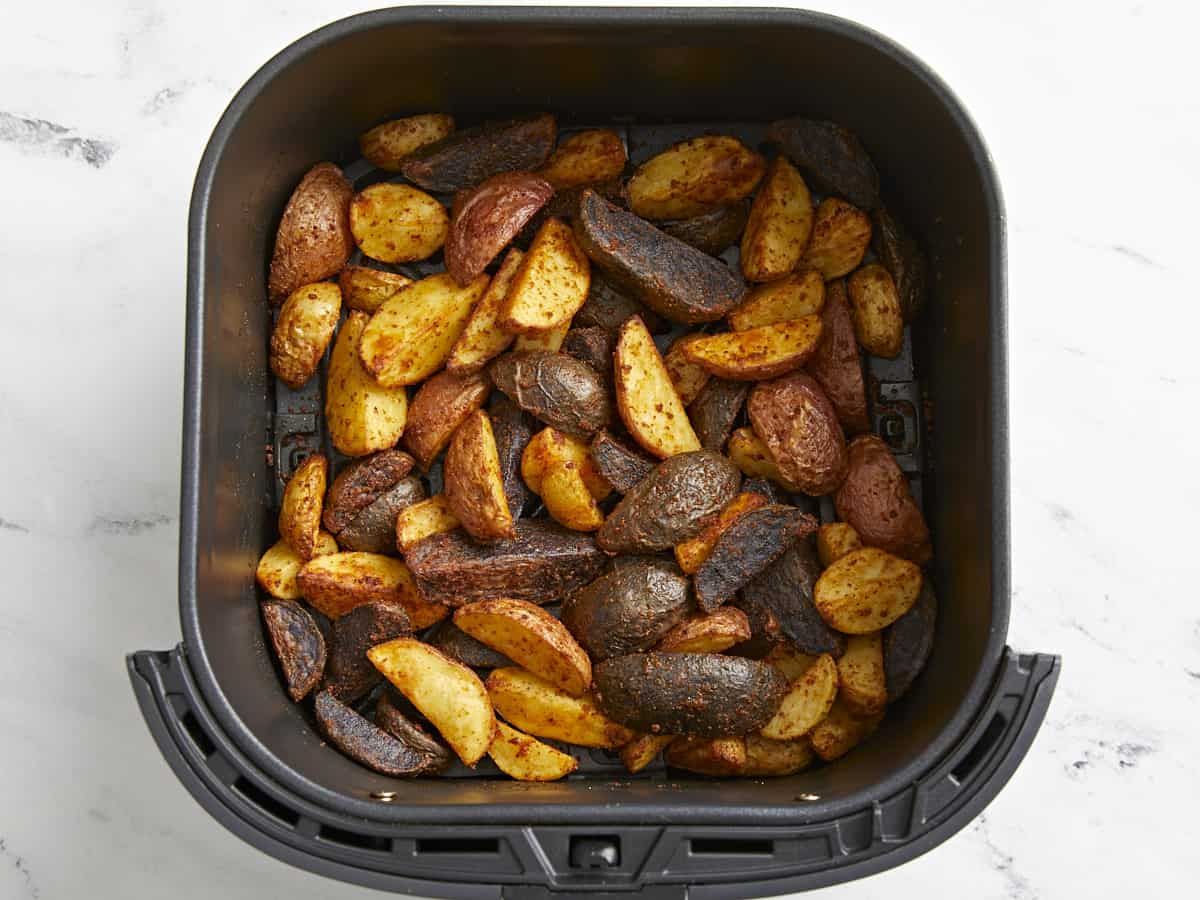
seasoned potatoes in an air fryer basket.

Cook for 15 minutes in the air fryer, until golden brown with crispy edges, stopping halfway through to shake. Garnish with 1 tsp minced fresh parsley and additional salt and pepper, if needed.

fork dipping an air fryer potato into ketchup.

These air fryer potatoes are the ultimate crispy side dish!

The post Air Fryer Potatoes appeared first on Budget Bytes.
Orange Julius

This perfect Orange Julius recipe is refreshing, easy-to-make, and packed with creamy citrus flavor for a quick summer treat or healthy snack.

The post Orange Julius appeared first on Budget Bytes.
I know it’s still spring, but the days are getting warmer, the sun is starting to shine, and I am ready for summer and all of its cold, fruity drinks. And let me tell you, this Orange Julius is going to be the drink of the summer for me. It only takes a few minutes to whip up this super easy Orange Julius recipe and is the perfect cold and creamy treat to make me feel like I’m vacationing somewhere in the tropics (a girl’s gotta dream). Not to mention, there are so many ways you can vary this Orange Julius recipe to make it more dessert-like, more healthy like a breakfast smoothie, or even turn it into an afternoon cocktail, so I’m truly going to be sipping this one all. summer. long. Don’t miss my variation suggestions below!

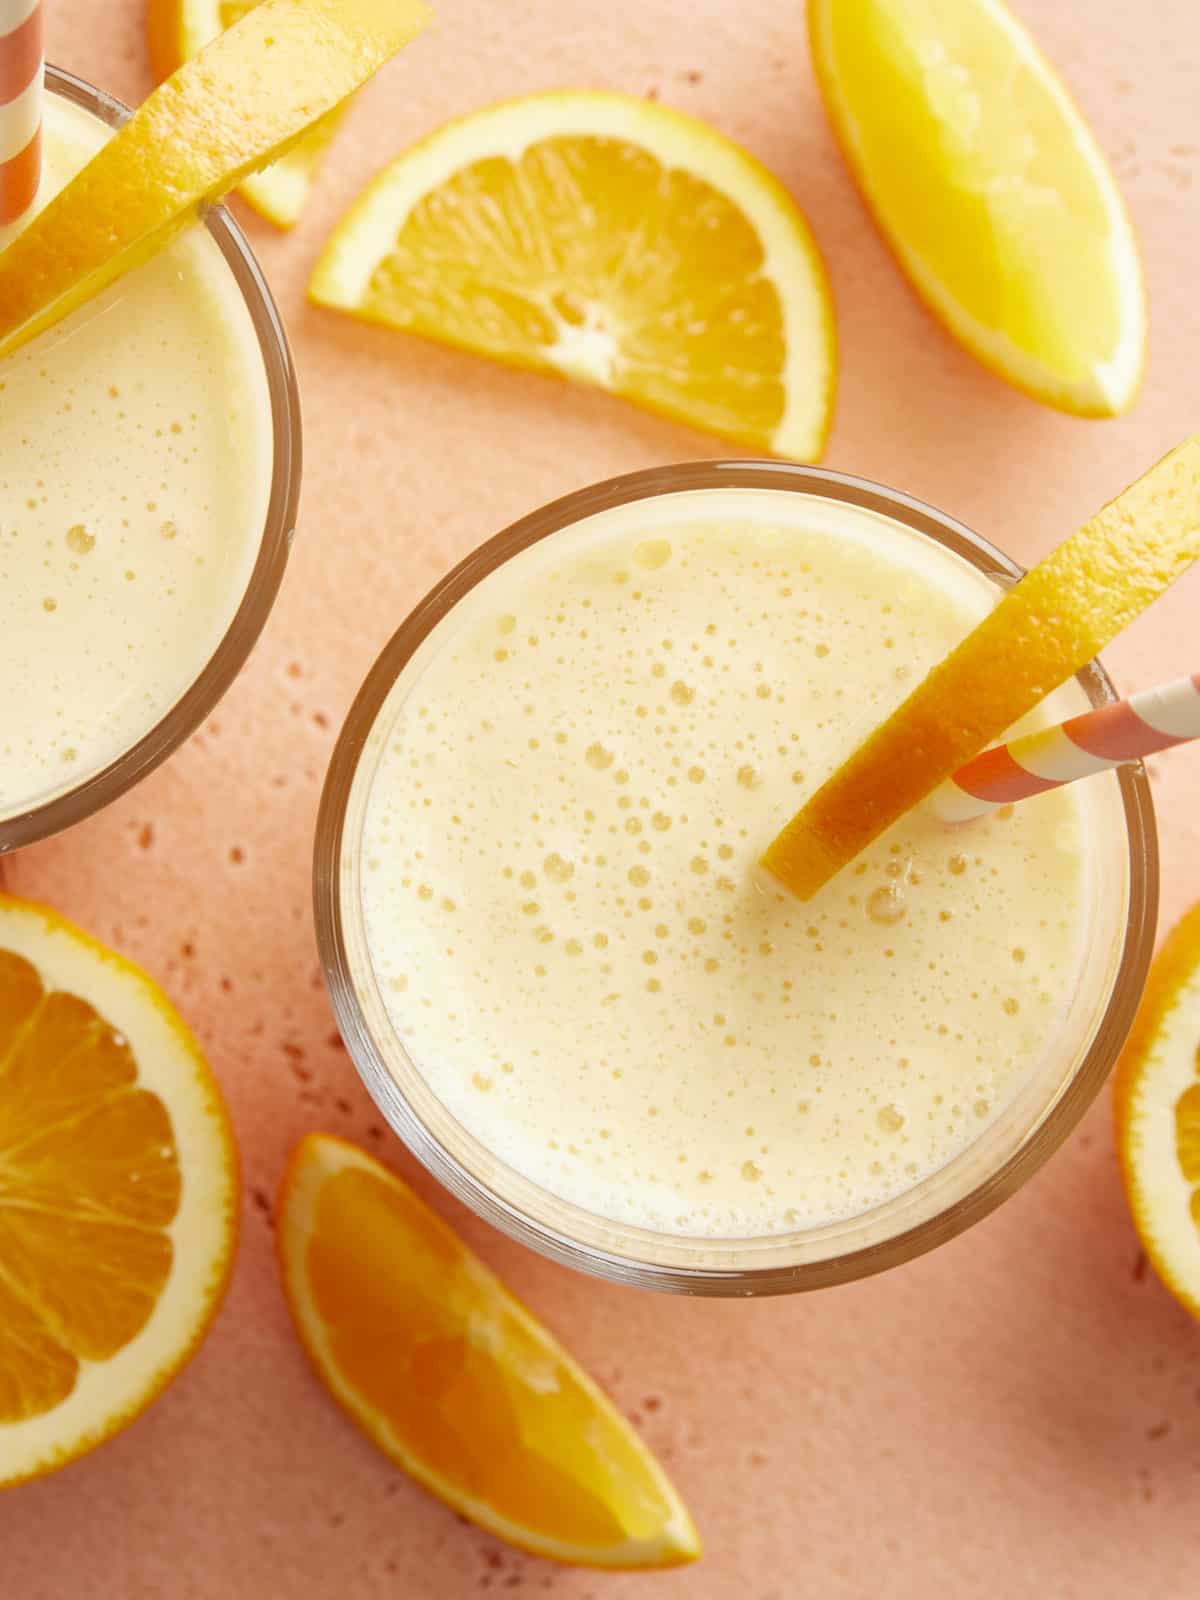
overhead view of two glasses full of orange juilius with straws and orange slices.

What is An Orange Julius?

Orange Julius is a refreshing and creamy orange drink made with orange juice, milk, sugar, vanilla, and egg whites which create a super frothy texture. The drink was invented by Julius Freed at his Los Angeles juice stand in 1926 and has been a summertime favorite ever since. The drink grew in popularity over the years and was even deemed the official drink of the 1964 World’s Fair Exposition. In the decades since it has become a staple in shopping malls and on Dairy Queen’s menu. Today’s it’s usually made without egg white, but it’s still just as dreamy and creamy as ever. And the best part? You don’t have to shell out $6 per Julius at an ice cream stand because these deliciously creamy citrus drinks are so easy to make at home!

Ingredients for Orange Julius

You’ll only need four simple ingredients to make a homemade Orange Julius (plus ice). Here’s what you’ll need for this recipe:

  • Frozen Orange Juice Concentrate: This is the secret ingredient for making a super citrusy Orange Julius without it getting too watery. The orange juice concentrate adds a ton of sweet-tart orange flavor while allowing the smoothie to stay thick and frothy.
  • Milk: Whole milk is added to balance the acidity in the orange juice and give the Orange Julius its characteristic creamy flavor. While you can use a lower fat milk, it will affect the creaminess of the drink. Whole milk is recommended.
  • Sugar: A little bit of sugar helps balance the acidity and bitterness in the orange juice concentrate so the Julius has a deliciously sweet and smooth finish.
  • Vanilla: Vanilla adds to the creamy flavor profile and gives the drink an orange creamsicle-like flavor.
  • Ice: Ice makes the Orange Julius super cold and helps create a deliciously thick and frothy texture. You can increase or decrease the ice to make the smoothie your desired texture.

Can You Make Orange Julius with Orange Juice?

The recipe below uses frozen orange juice concentrate to deliver a really strong orange flavor while keeping the smoothie thick and rich. You can substitute about 2 cups of fresh orange juice in place of the orange juice concentrate, but it will make the Julius much less thick and the flavor will not be as bold. For the richest, boldest flavor, definitely buy orange juice concentrate. The remainder of the can can be easily stored in your freezer for your next Orange Julius, so it’s worth purchasing!

Orange Julius Variations

I love a simple classic Orange Julius, but there are so many fun ways you can change the recipe to make it your own. Here are some other ingredients you can add to an Orange Julius for variety:

  • Fruity Flavors: Try adding banana, mango, or pineapple for a tropical twist, or strawberries for a summery flavor.
  • Vegan Orange Julius: Make it vegan by replacing the whole milk with canned light coconut milk (not the kind in a carton that is intended as a milk substitute).
  • Protein Julius: Turn it into a protein smoothie by adding vanilla Greek yogurt or your favorite vanilla protein powder.
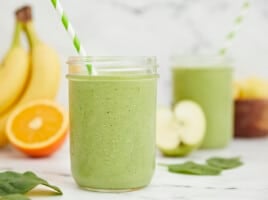
  • Green Julius: Add a handful or two of baby spinach to make a creamy, citrusy, green smoothie.
  • Boozy Orange Julius: Add vodka or rum to make a fun “adult” Orange Julius.
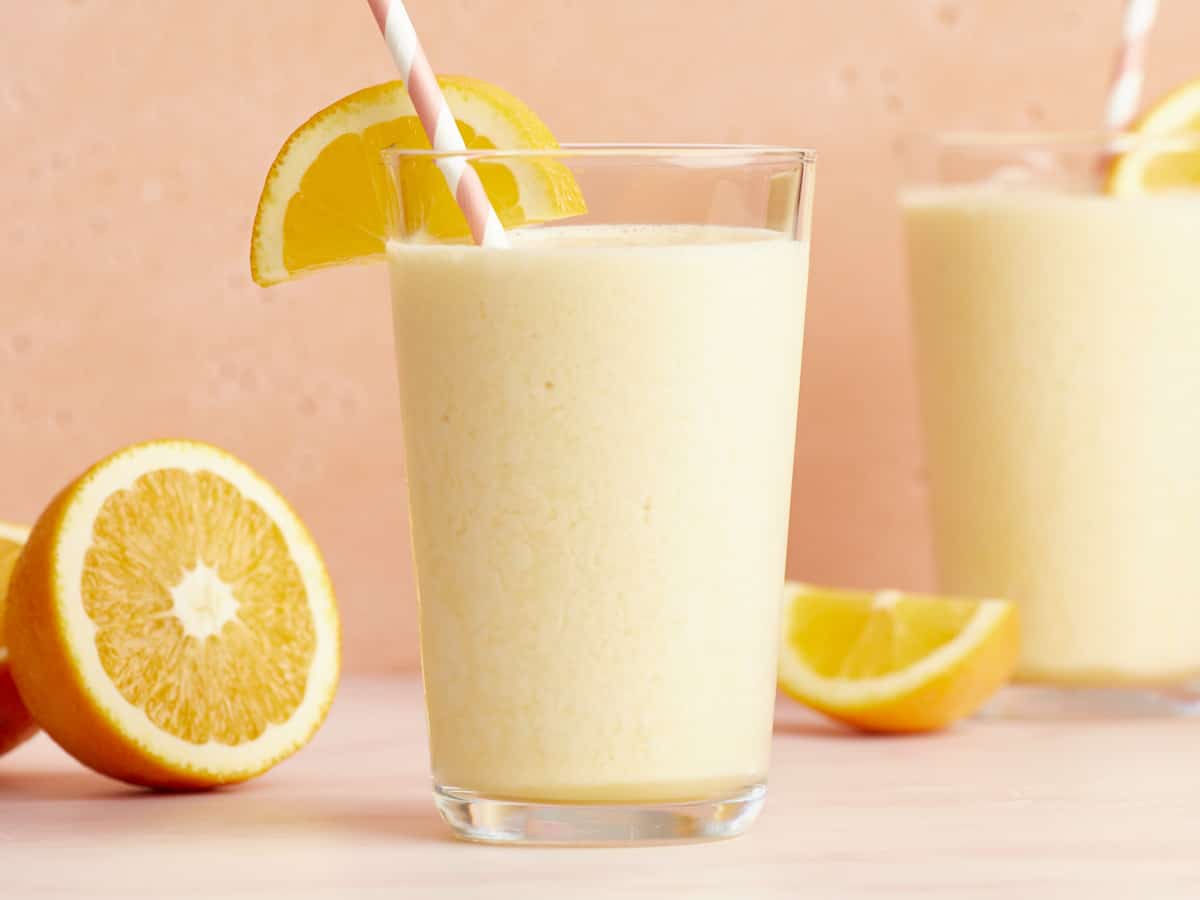
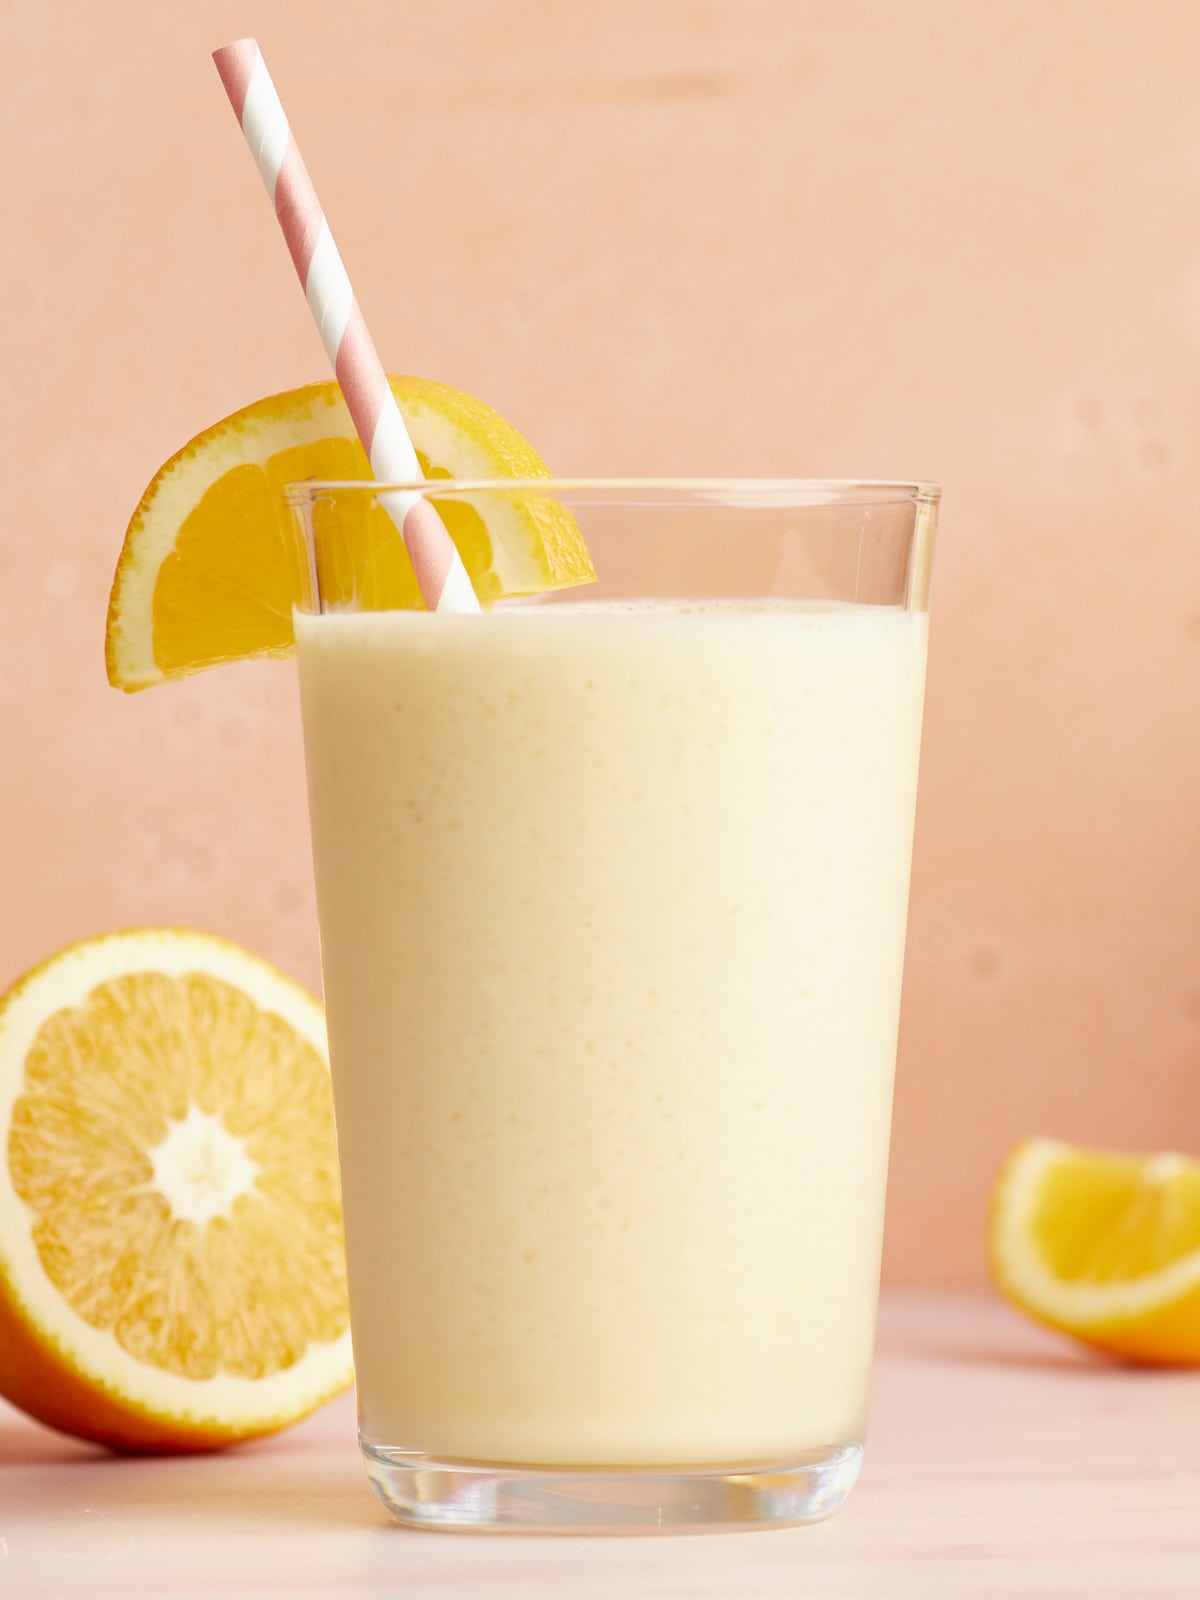
Side view of two glasses full of Orange Julius with striped straws and orange slices.
Overhead view of two glasses of orange julius with straws and orange slices.
Print

Orange Julius

This perfect Orange Julius recipe is refreshing, easy to-make, and packed with creamy citrus flavor for a quick summer treat or healthy snack.
Course Beverage, Breakfast, Dessert
Cuisine American
Total Cost $1.87 recipe / $0.94 serving
Prep Time 5 minutes
Total Time 5 minutes
Servings 2 (12oz. each)
Calories 253kcal

Equipment

Ingredients

  • 1/2 cup frozen orange juice concentrate $1.16
  • 1 cup whole milk $0.20
  • 1 tsp vanilla extract $0.45
  • 3 Tbsp granulated sugar $0.06
  • 1 cup ice $0.00

Instructions

  • Place all of the ingredients in a blender and blend until smooth and frothy.
  • If your Orange Julius is not thick enough, add more ice. If the Julius is too thick, add a little water or milk and blend again until you reach the desired consistency. Serve immediately and enjoy!

See how we calculate recipe costs here.

Nutrition

Serving: 12oz | Calories: 253kcal | Carbohydrates: 49g | Protein: 6g | Fat: 4g | Sodium: 58mg | Fiber: 1g

How to Make An Orange Julius – Step by Step Photos

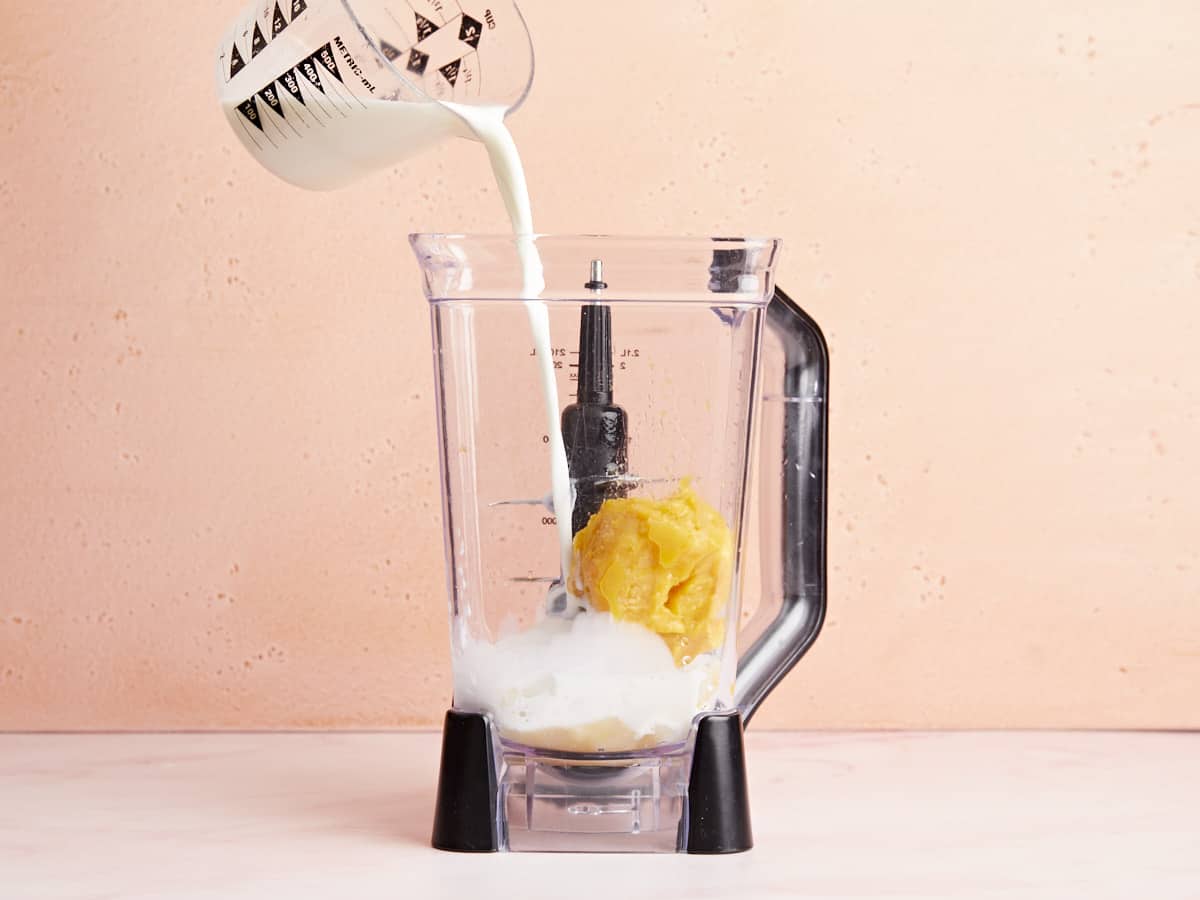
Ingredients being added to a blender.

Add ½ cup frozen orange juice concentrate, 1 cup whole milk, 1 tsp vanilla extract, 3 Tbsp granulated sugar, and 1 cup ice to a blender.

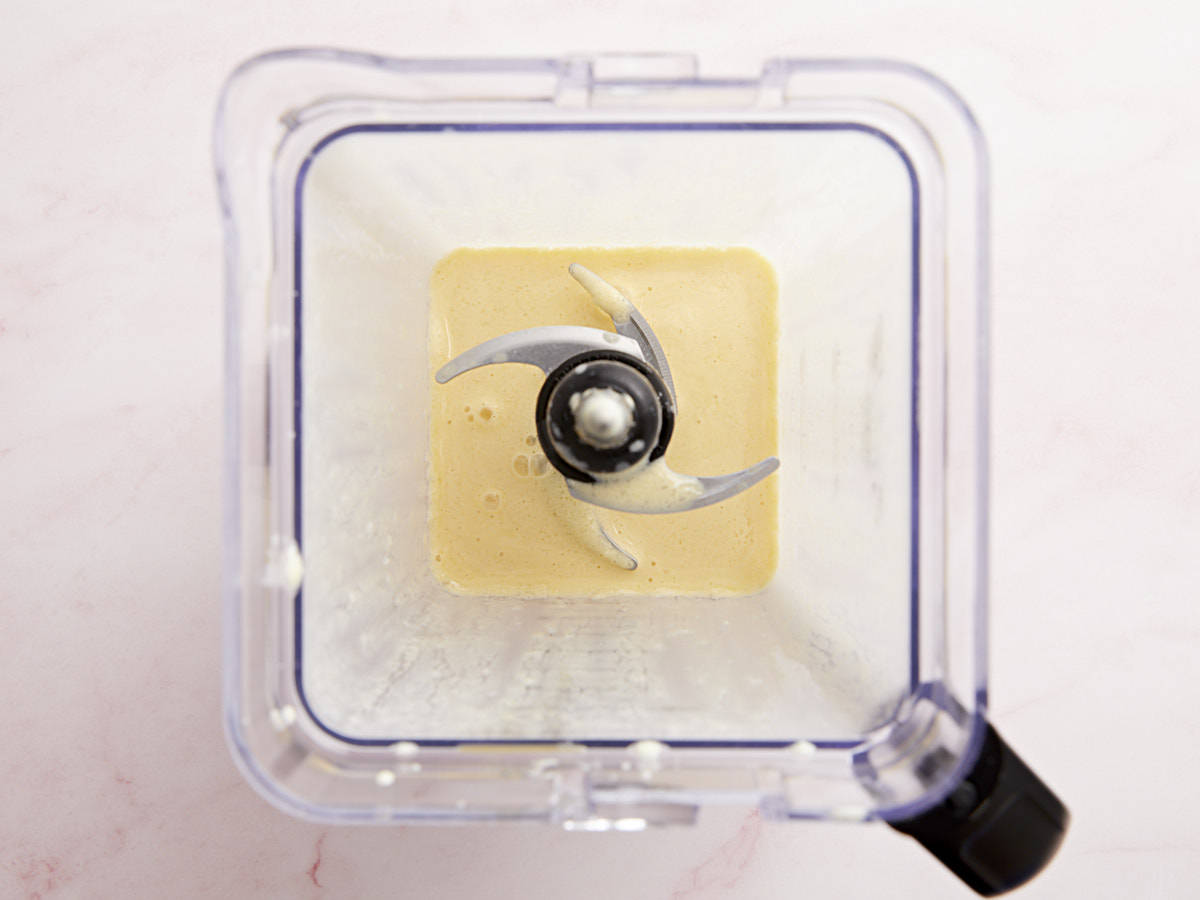
Blended Orange Julius in a blender from above.

Blend everything together until it is smooth and frothy. Adjust the consistency of your Orange Julius by adding more ice to make it thicker or adding a little water or milk to thin it out.

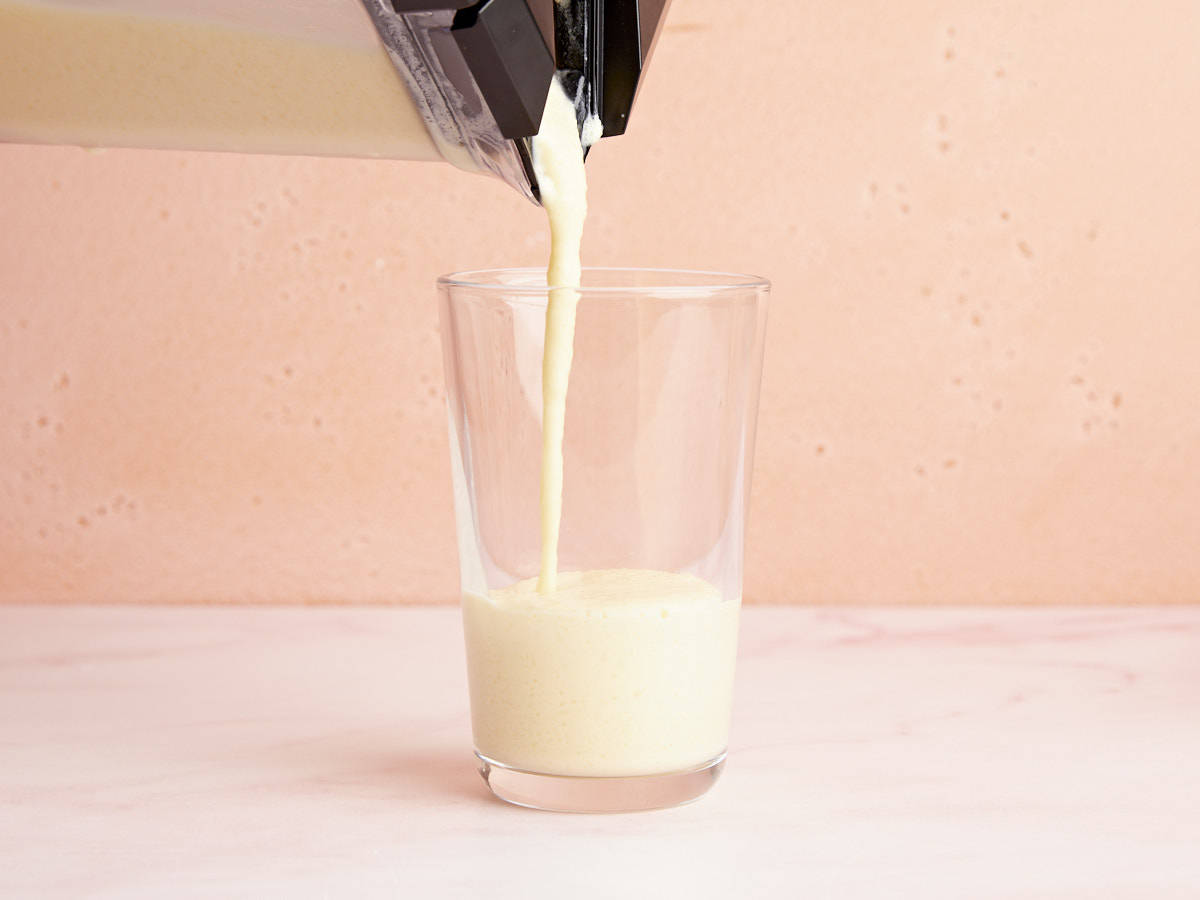
Orange Julius being poured from the blender into a glass.

Pour the homemade Orange Julius into a large glass and enjoy immediately!

Side view of an Orange Julius in a glass with a striped straw and orange slices.

The post Orange Julius appeared first on Budget Bytes.
Air Fryer Carrots

These Air Fryer Carrots are savory, super easy to make, inexpensive and the perfect compliment to any weeknight dinner meal.

The post Air Fryer Carrots appeared first on Budget Bytes.
Lately I’ve been loving how easy it is to cook vegetables in the air fryer. Just prep, season, and air fry. It’s almost too easy. And carrots are a great inexpensive vegetable to cook any time of the year. Plus, they last a long time in the fridge…WIN! We have lots of roasted carrots recipes on our site, but these Air Fryer Carrots are my new favorite. They’re seasoned with a savory and herby seasoning mix and they’re the perfect compliment for any weeknight dinner meal.

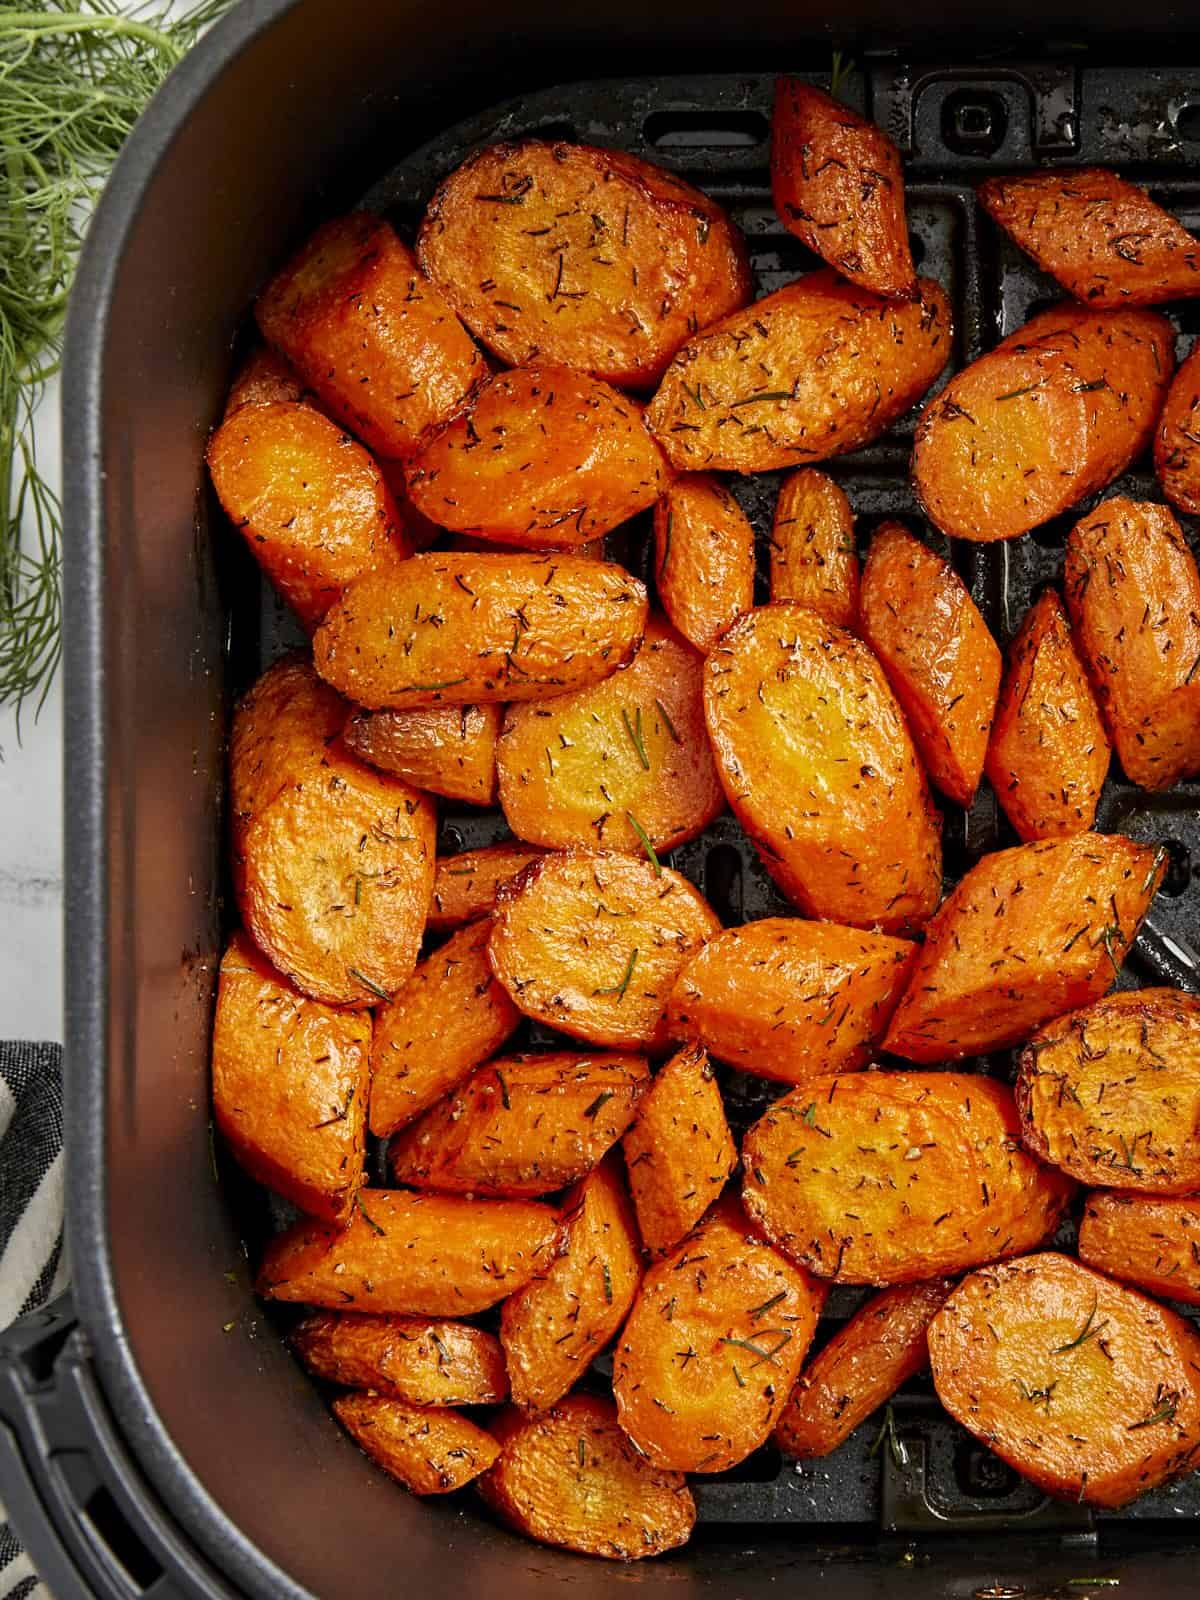
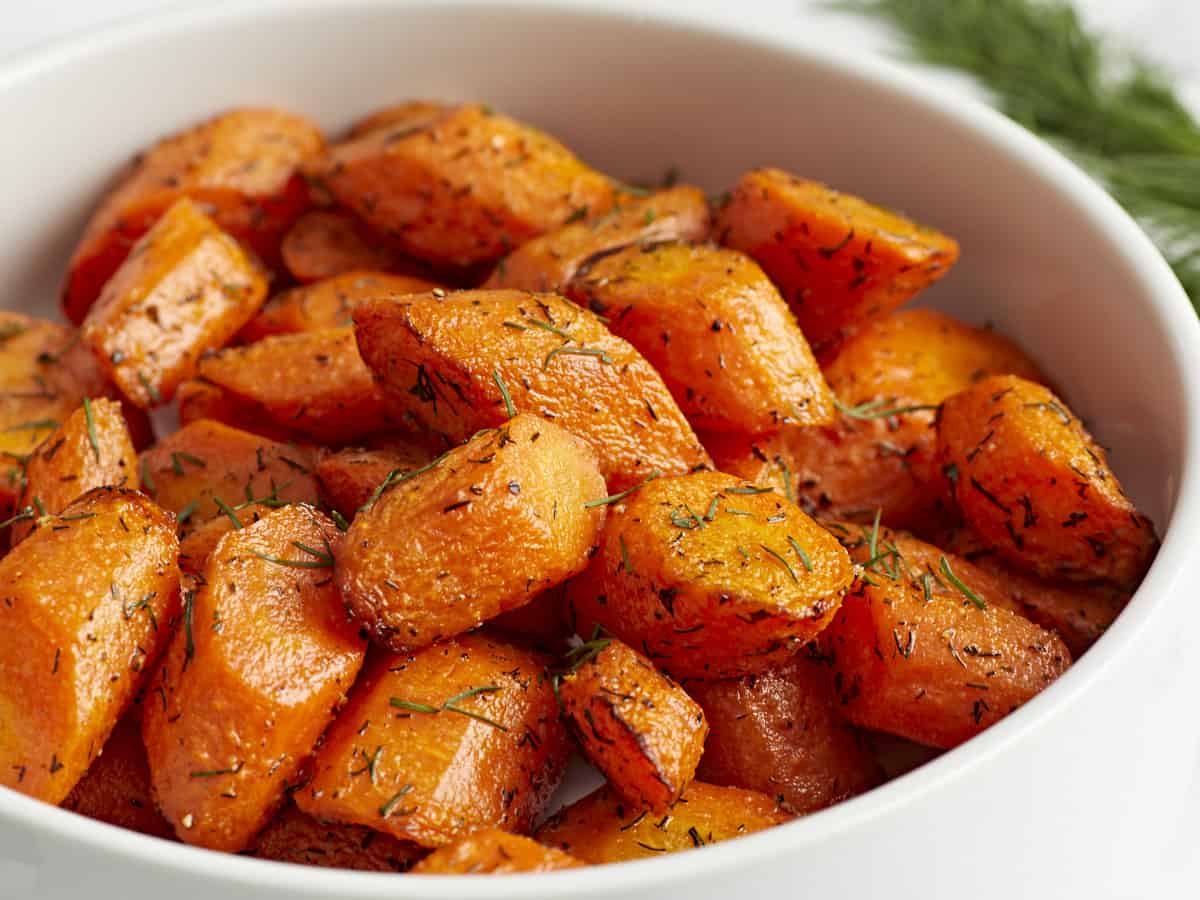
Overhead view of cooked carrots in a black air fryer basket.

Ingredients For Air Fryer Carrots

Here’s everything you need to make these easy Air Fryer Carrots:

  • Carrots: Look for whole carrots that are fairly even in length and girth so they’ll cook more evenly. You can either scrub or peel the carrots, however I prefer to peel them. 
  • Olive Oil and Butter: I used both olive oil and butter for this recipe to keep the carrots moist and to combine with the seasoning mix. And I just love the flavor that you get from using both butter and olive oil.
  • Seasoning: A simple seasoning mix of salt, pepper, garlic powder, and dried dill is all you’ll need. And I decided to double down on the dill by adding a little fresh dill at the end to garnish. You can certainly omit the dill if you want, although it does add a nice herby and savory flavor to the carrots. In case you want to switch things up, I’ll share a few more seasoning options below.

Can You Air Fry Baby Carrots?

To make this recipe super easy, you can certainly use baby carrots instead of peeling and cutting whole carrots. Just use the same seasoning mix for a pound of baby carrots and adjust the cook time. Air fry baby carrots at 370°F for approximately 8-10 minutes or until tender to your liking.

Seasoning Ideas

I used a mix of salt, pepper, garlic powder, and dried dill for these carrots, but there are so many flavors and spices to choose from. Here are some other seasoning ideas for your air fryer carrots:

What To Serve With These Air Fryer Carrots

Air Fryer Carrots are so versatile and can be served with a number of meals. Try them with our Air Fryer Chicken Breasts, salmon, pork chops, or juicy Pan-Seared Chicken Breasts. And you can easily pair them with another side dish like these Air Fryer Brussels Sprouts or Steamed Green Beans to make a meal!

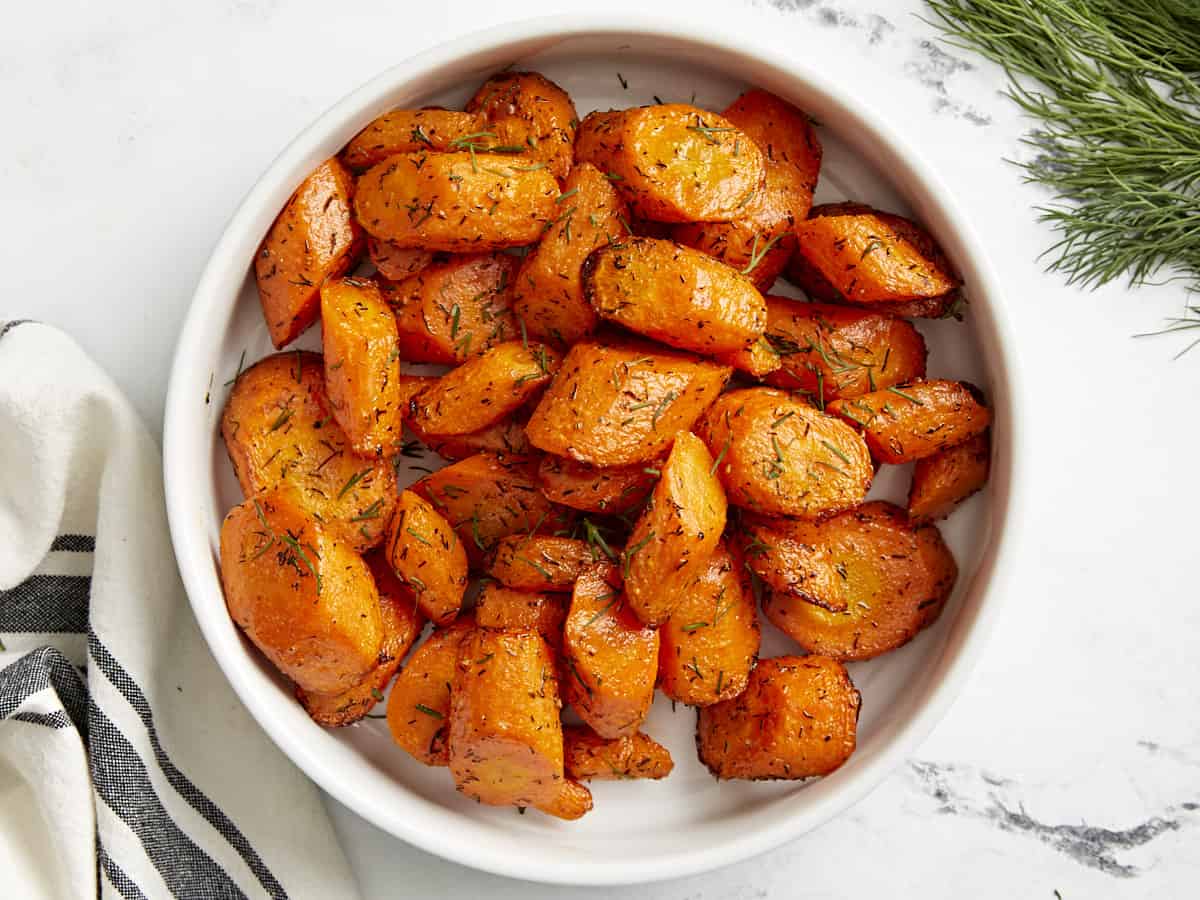
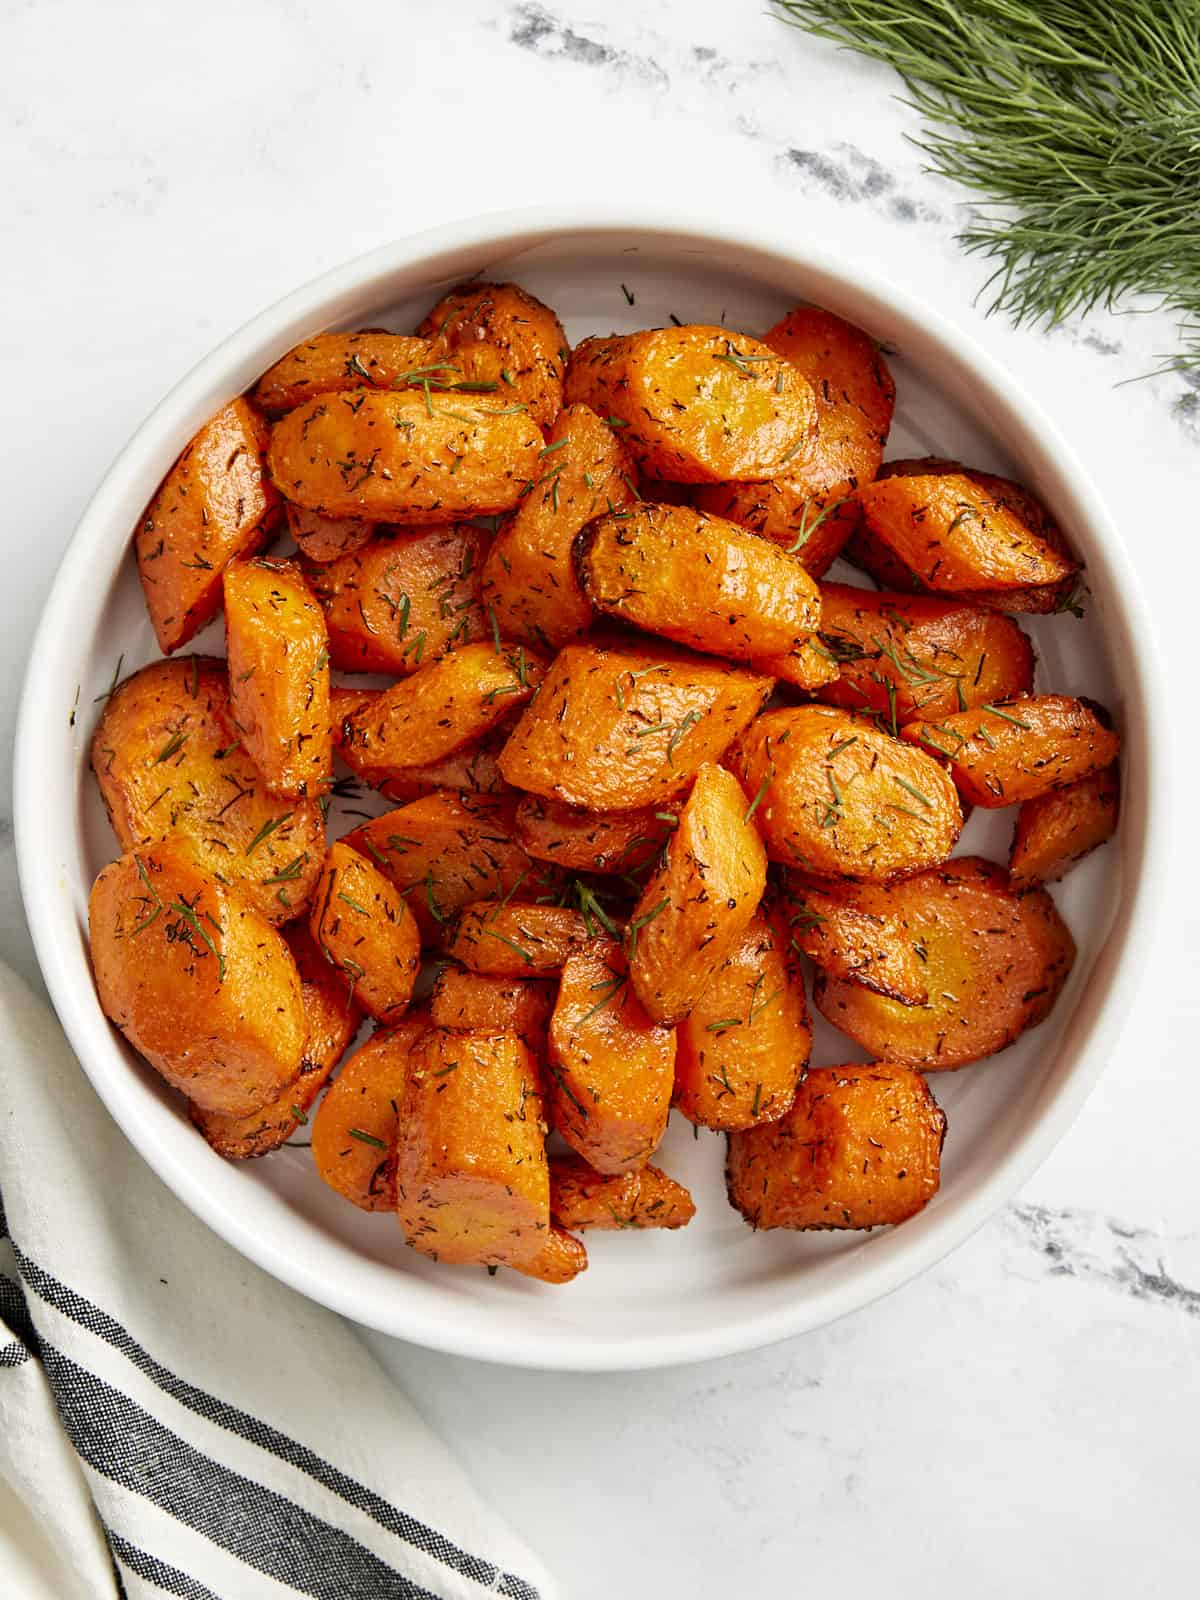
Overhead view of Air Fryer Carrots in a white serving dish.
Print

Air Fryer Carrots

These Air Fryer Carrots are savory, super easy to make, inexpensive and the perfect compliment to any weeknight dinner meal.
Course Side Dish
Cuisine American
Total Cost $2.51 recipe / $0.62 serving
Prep Time 10 minutes
Cook Time 14 minutes
Total Time 24 minutes
Servings 4
Calories 105kcal

Equipment

Ingredients

Instructions

  • Wash, peel, and cut the carrots diagonally into 1-inch pieces. Add the carrots to a large bowl.
  • In a separate small bowl, add the butter and melt in the microwave. Then add the olive oil, salt, pepper, garlic powder, and dried dill to the same bowl. Stir everything together to combine.
  • Pour the butter mixture over the carrots. Toss or stir to coat all of the carrots.
  • Add seasoned carrots to the air fryer basket. Air fry at 370°F for 12-14 minutes until tender, shaking the basket halfway through. Once done garnish with fresh chopped dill (optional).

See how we calculate recipe costs here.

Nutrition

Serving: 1serving | Calories: 105kcal | Carbohydrates: 11g | Protein: 1g | Fat: 7g | Sodium: 537mg | Fiber: 3g
Close up side view of Air Fryer Carrots in a white serving dish.

How to Make Air Fryer Carrots – Step by Step Photos

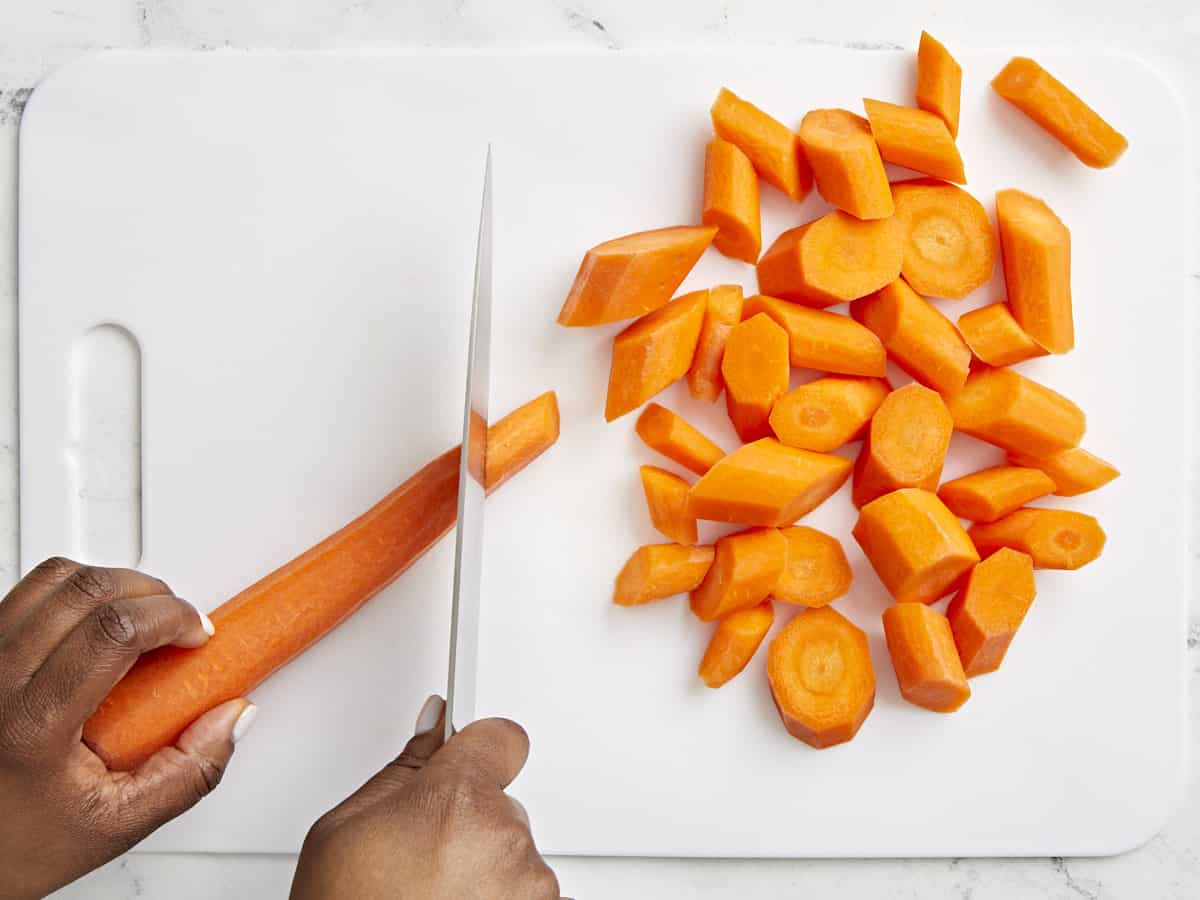
Carrots being chopped on a cutting board.

Wash, peel, and cut 1 lb. of carrots diagonally into 1-inch pieces. Add the carrots to a large bowl.

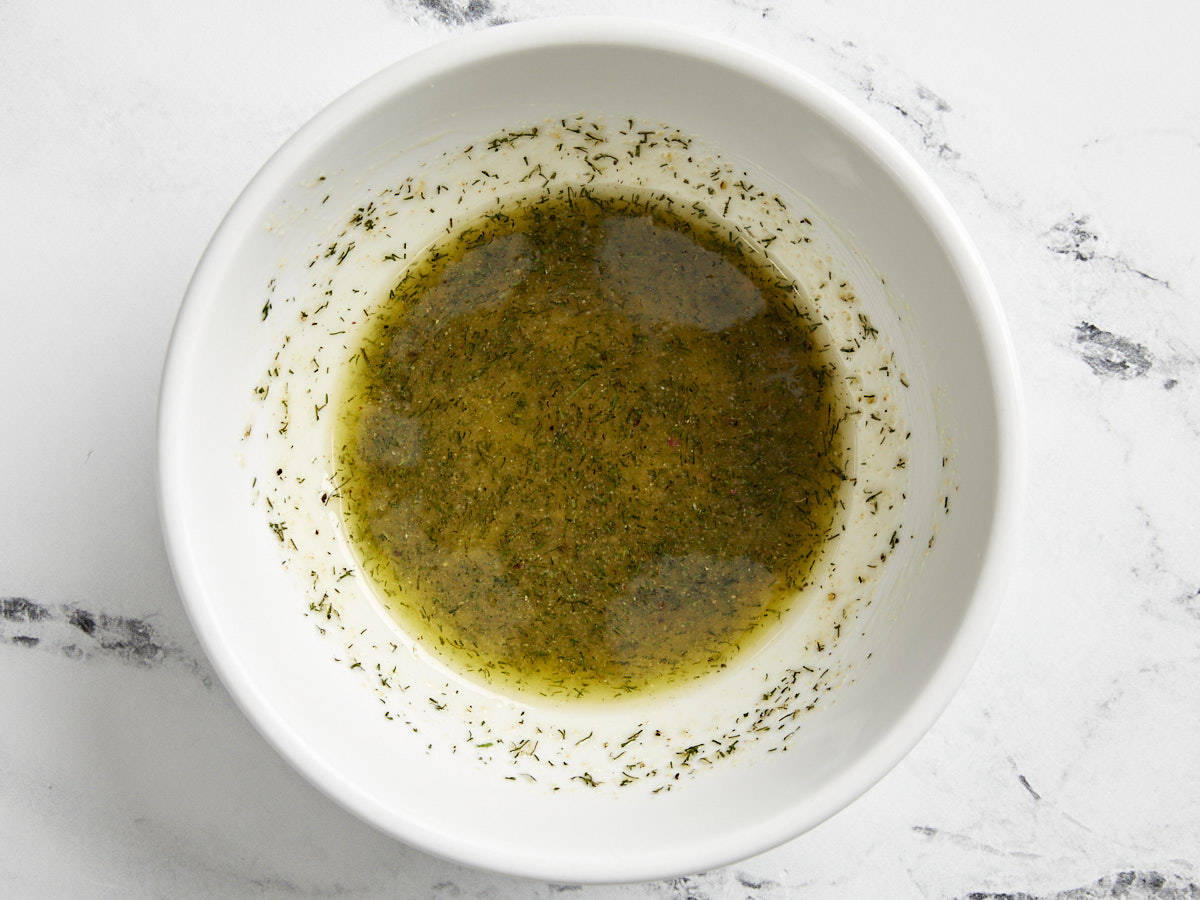
Butter, oil, and seasoning mixed together in a bowl.

In a separate small bowl, add 1 Tbsp of butter and melt in the microwave. Then add 1 Tbsp olive oil, 3/4 tsp salt, 1/2 tsp freshly cracked black pepper, 1/2 tsp garlic powder, and 1/2 tsp dried dill to the same bowl. Stir everything together to combine.

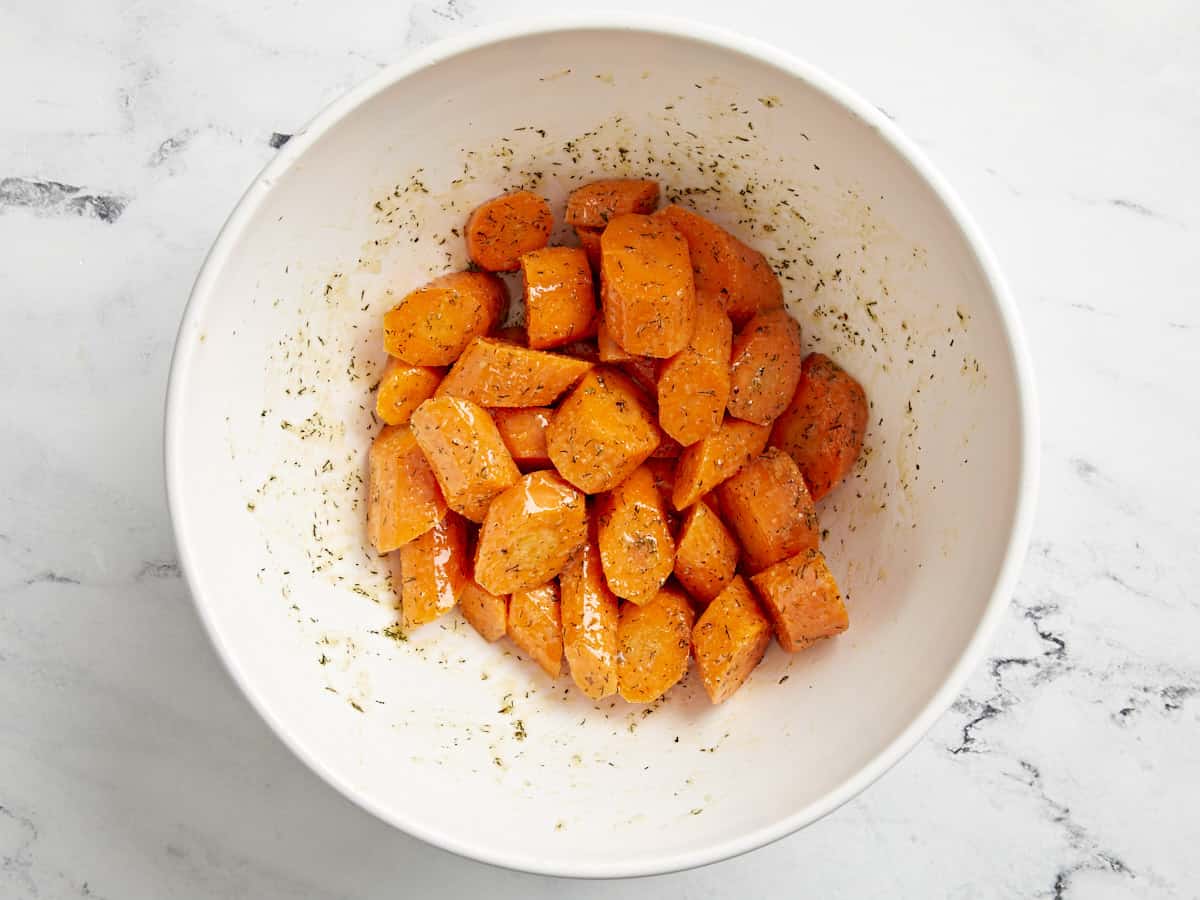
Carrots mixed with butter and dill seasoning in a bowl.

Pour the butter mixture over the carrots. Toss or stir to coat all of the carrots.

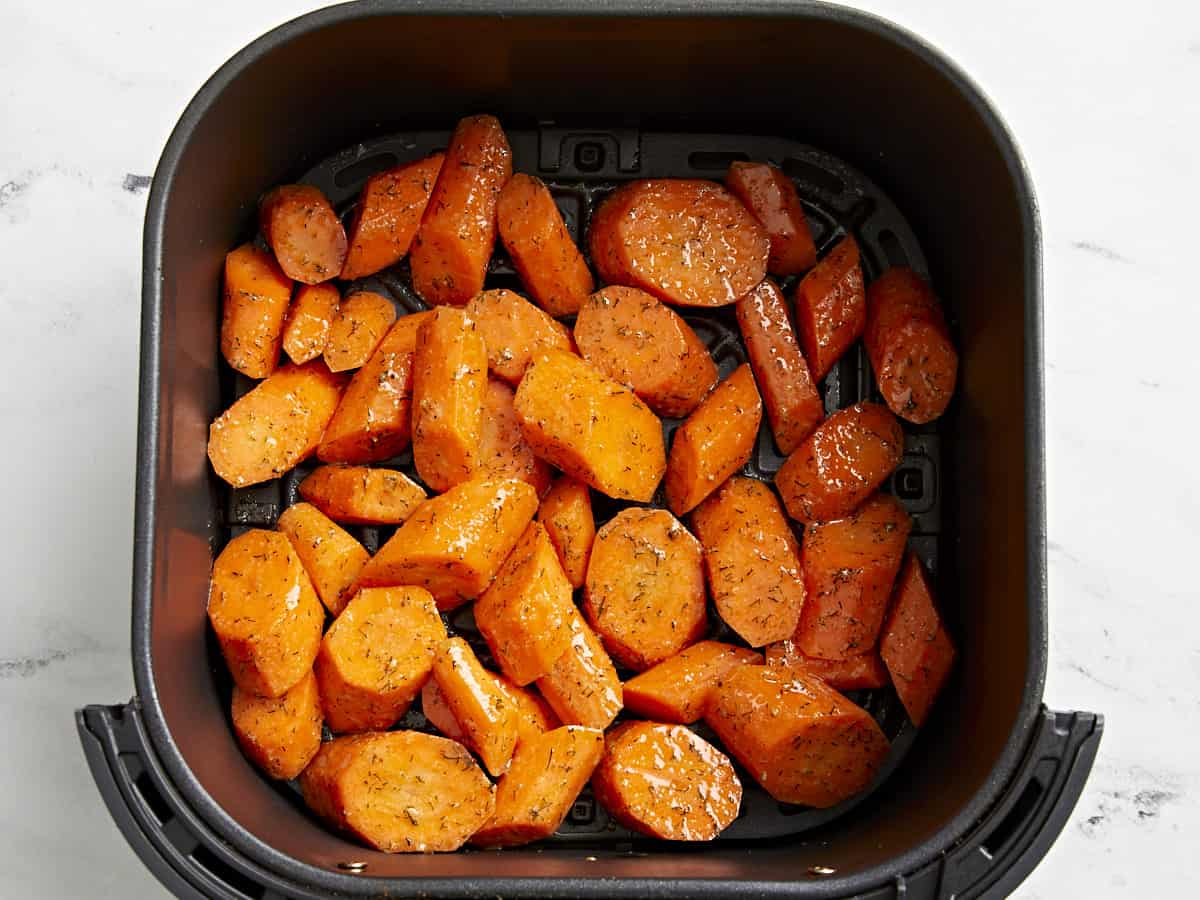
Uncooked carrots added to the air fryer basket.

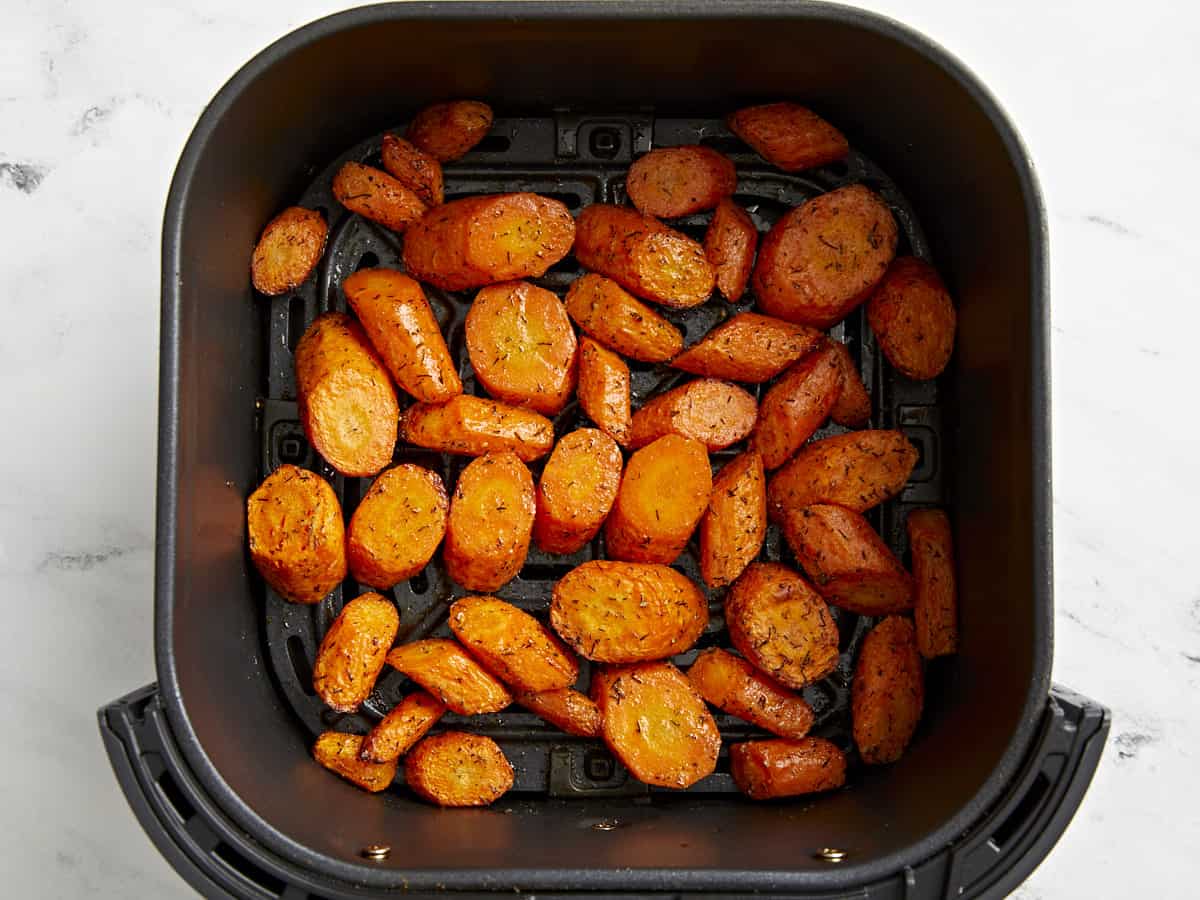
Add seasoned carrots to the air fryer basket. Air fry at 370°F for 12-14 minutes until tender, shaking the basket halfway through.

Cooked Air fryer carrots in an air fryer basket.

Once done garnish with 1 tsp fresh chopped dill (optional) and enjoy!

Overhead view of Air Fryer Carrots in a white serving dish.

The post Air Fryer Carrots appeared first on Budget Bytes.

Deviled Eggs

This easy Deviled Eggs recipe is perfect for parties, potlucks and holidays. They’re guaranteed to disappear fast!

The post Deviled Eggs appeared first on Budget Bytes.
Deviled Eggs are a classic appetizer that’s always fun to serve at parties, Easter, potlucks, and during the holidays. It’s one of my mom’s favorite dishes to make for family gatherings and it always surprises me how fast they disappear! But it doesn’t have to be a special occasion to make these tasty little bites. They’re easy enough to make any day of the week and they’re a lot cheaper to make homemade. Keep the toppings simple or play around with some of our favorites listed below!😉

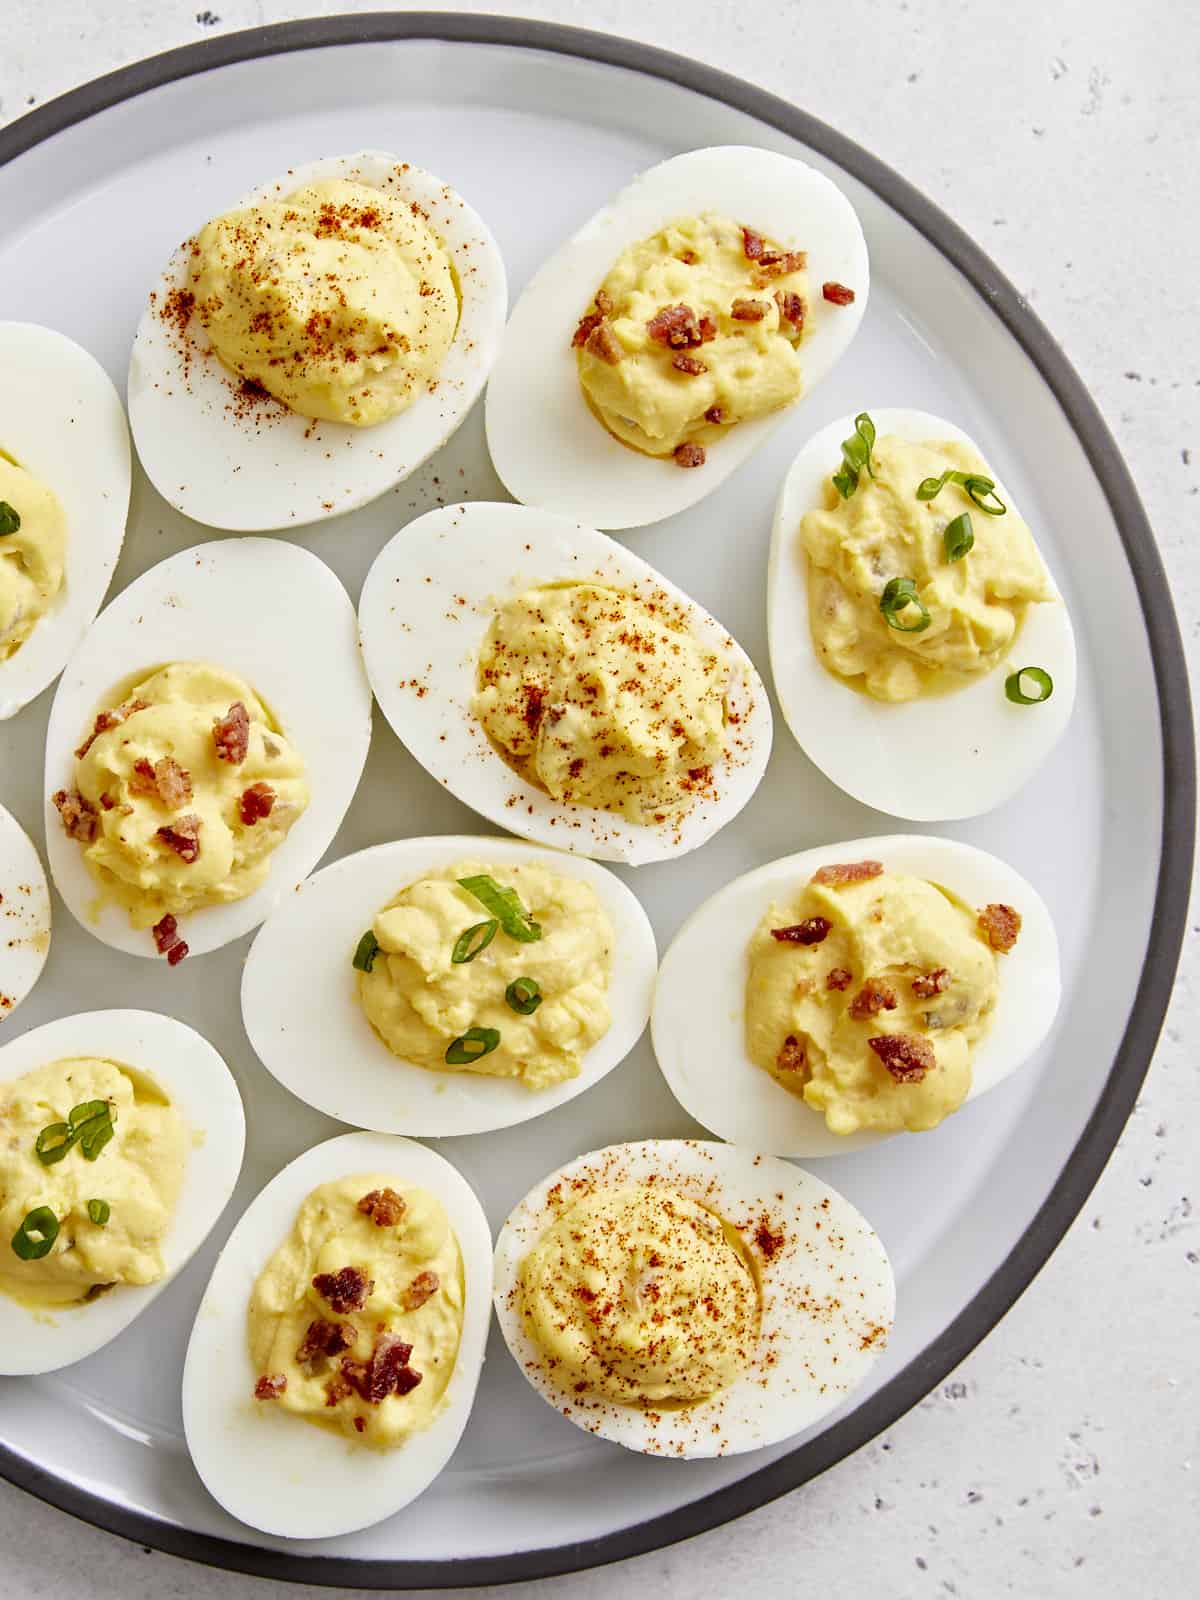
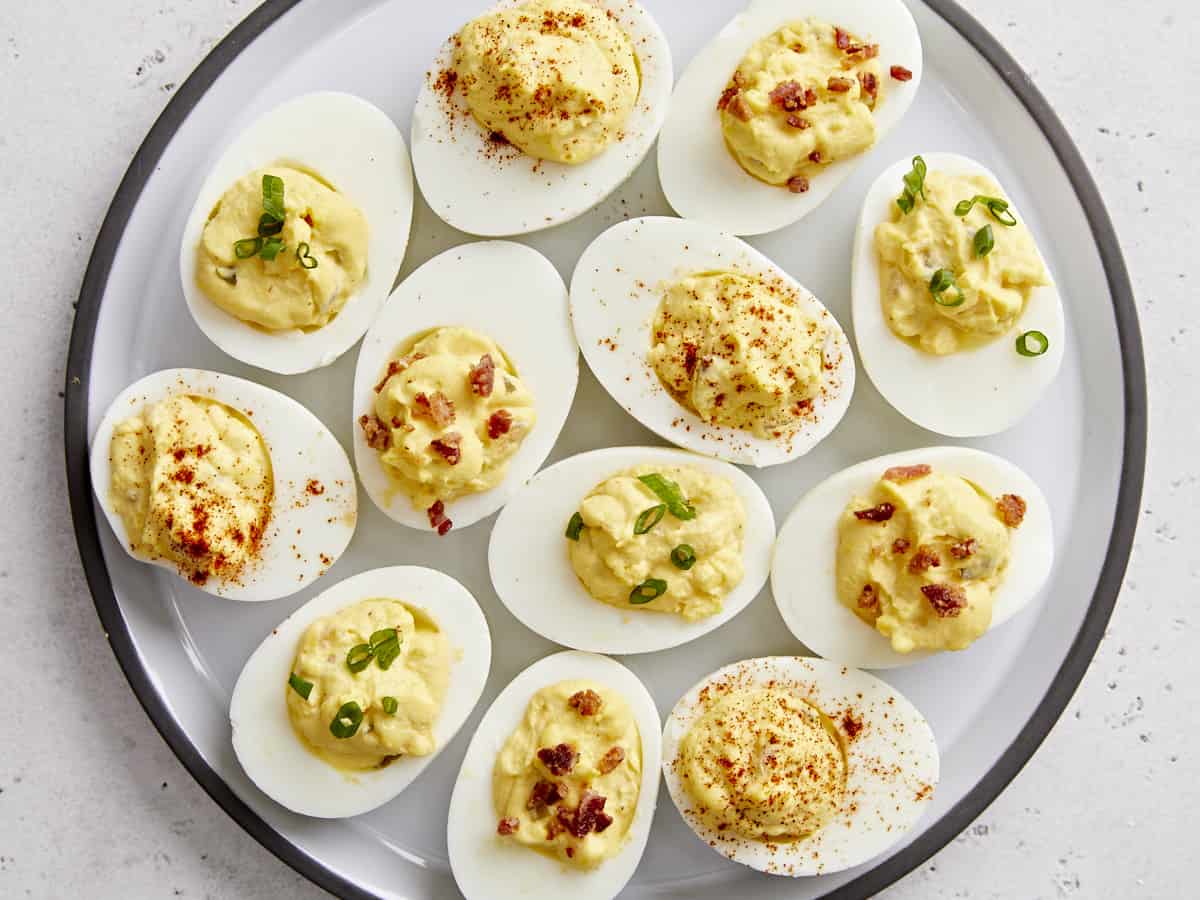
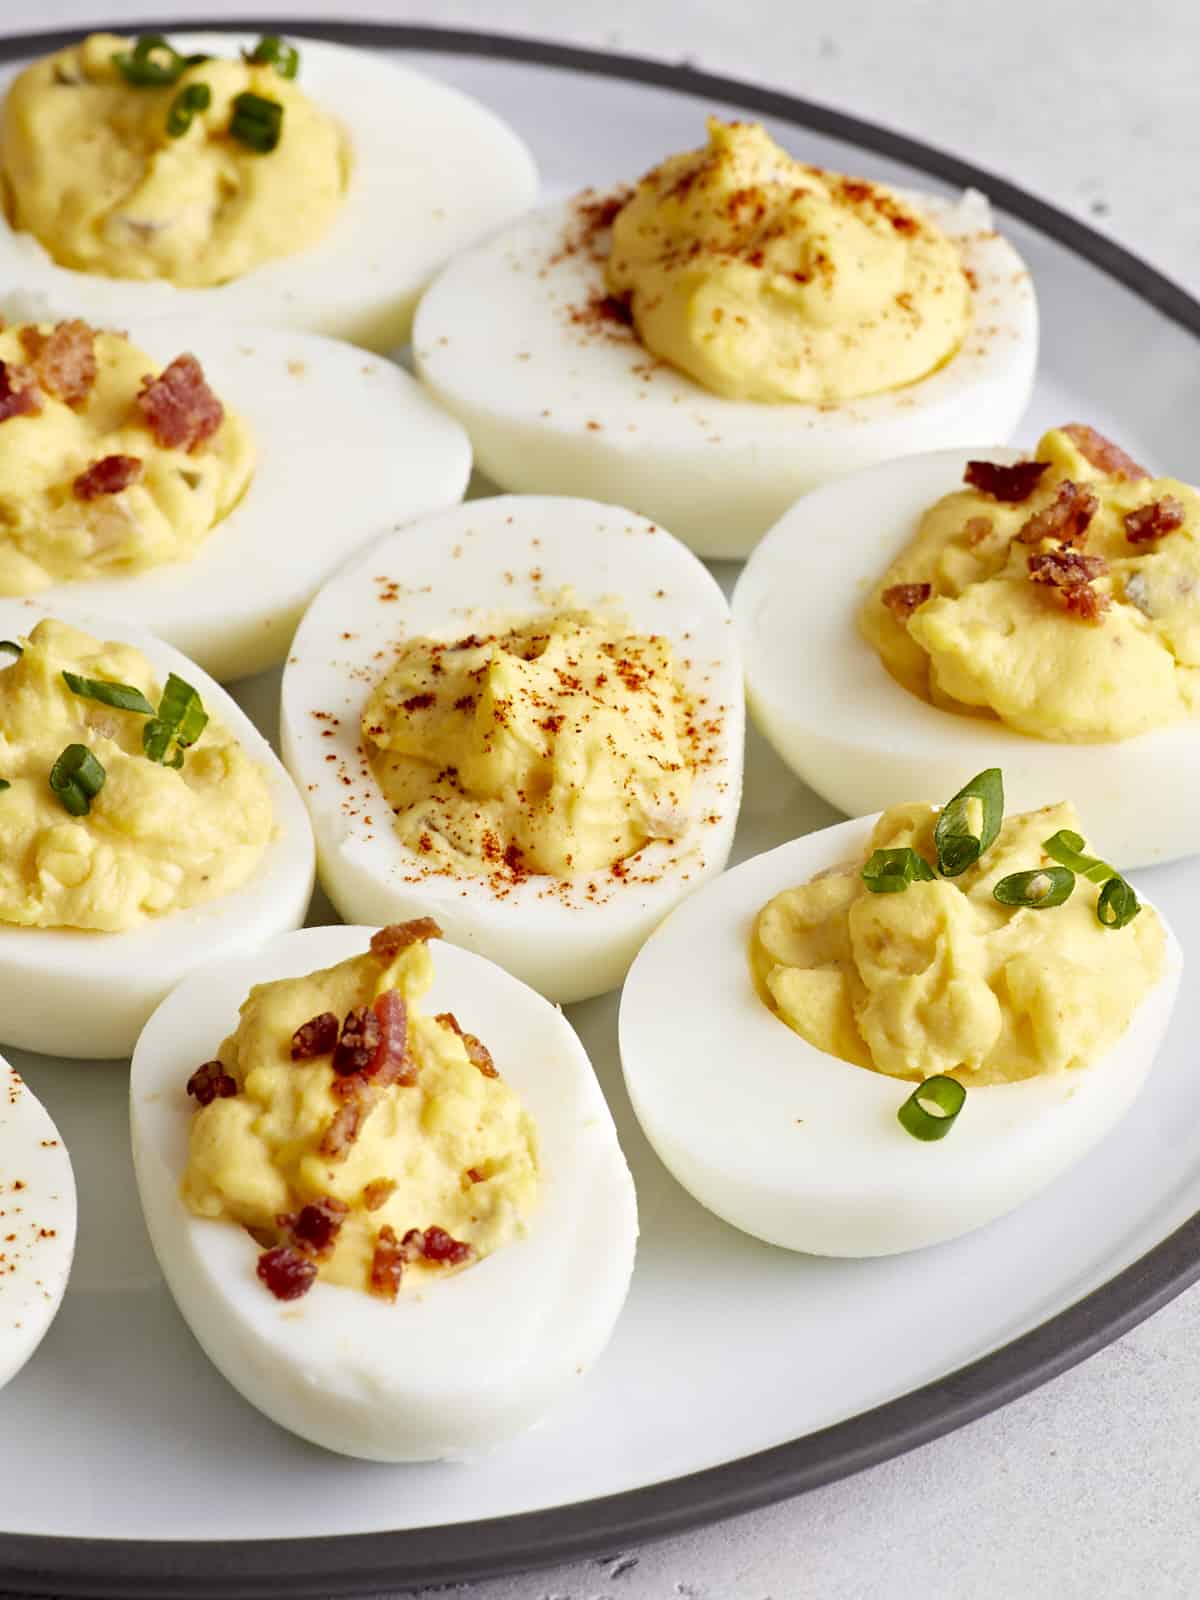
Overhead view of deviled eggs on a platter with different toppings.

What Are Deviled Eggs?

Deviled eggs are eggs that have been hard-boiled, cut in half, then the yolks mixed with other ingredients before stuffing them back into the whites. They can be basic, super fancy, or anywhere in between. They’re perfect for parties, potlucks, family gatherings, and during the holidays. Or during the week when you just have a craving for some tasty deviled eggs! There are so many options and different toppings to choose from when making deviled eggs, which makes them a LOT of fun!

Ingredients For Deviled Eggs

To make things easy we followed the same formula as our small batch deviled eggs recipe, that we already love, with one extra addition. So here’s everything you’ll need:

  • Eggs: We use large eggs and boil them following our easy how-to guide on How To Make Hard Boiled Eggs.
  • Mayonnaise: Mayo gives the filling a creamy, smooth texture.
  • Dijon mustard: Dijon mustard adds great tang and flavor to the deviled eggs.
  • Seasoning salt: To season the egg mixture we use Tony Chachere’s Creole seasoning, but you can use any brand of seasoning salt like Lawry’s, Morton’s, or even a generic store brand. 
  • Dill relish: Relish is the extra added ingredient and my personal favorite! It adds lots of great dill flavor and some much-needed texture to the filling.

How Long Should You Boil Your Eggs?

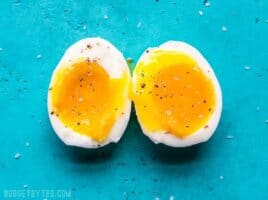
When it comes to how long to boil eggs for deviled eggs, I followed our step-by-step guide on How To Make Hard Boiled Eggs and the eggs came out perfect!

The short answer is – boil large eggs for about 12 minutes to make hard boiled eggs. But there are a few other factors to keep in mind. I’ll share more details below.

Topping Ideas

This is where it really gets fun! We topped our deviled eggs with some chopped air fryer bacon, sliced green onions, and a little bit of paprika. But you can use all sorts of other toppings to make them your own or just to use up different ingredients in your fridge. Here are some more ideas for deviled eggs toppings:

How To Store Leftovers

If you don’t eat them all in one sitting, you can store any leftover deviled eggs in an airtight container in the refrigerator for up to two days.

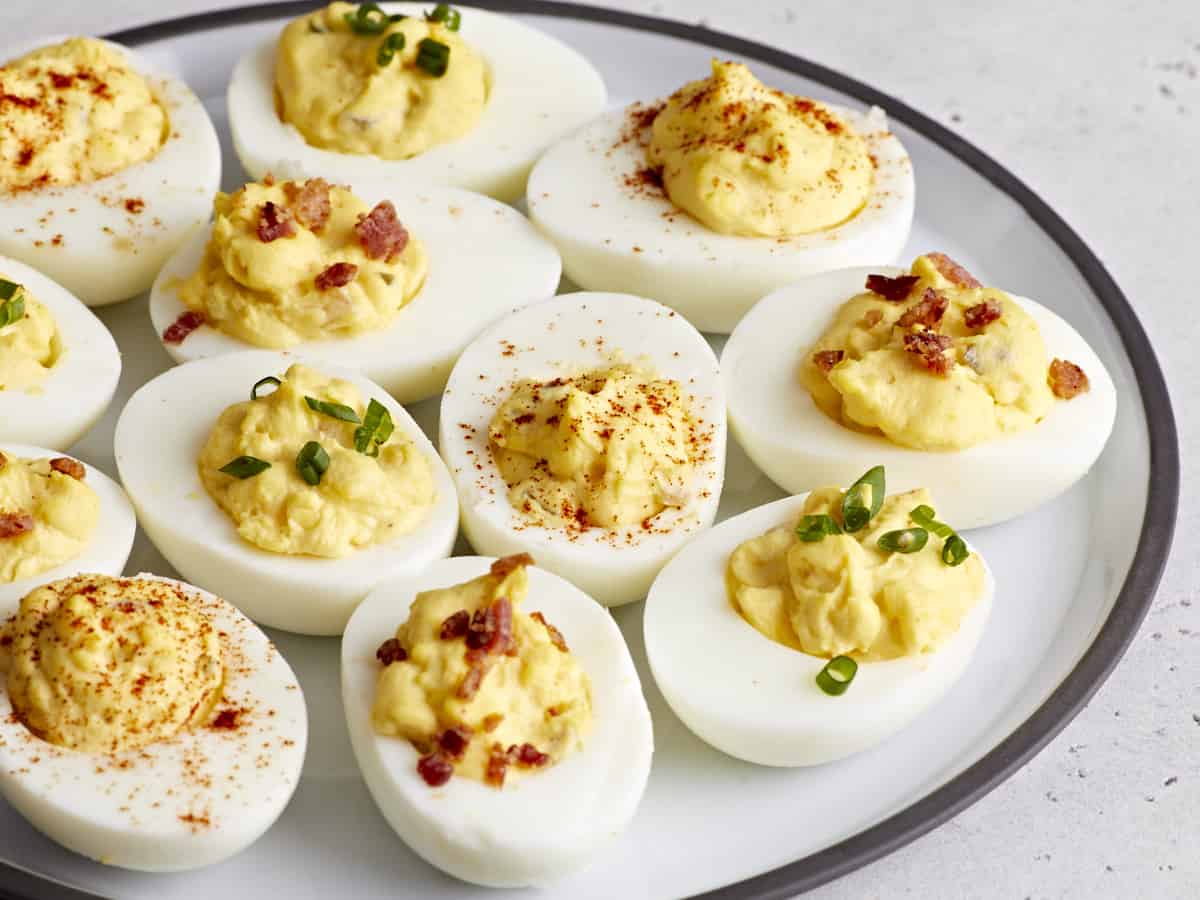
Side view of deviled eggs on a serving platter.
Overhead view of deviled eggs with different toppings on a serving platter.
Print

Deviled Eggs

This easy Deviled Eggs recipe is perfect for parties, potlucks and holidays. They’re guaranteed to disappear fast!
Course Appetizer
Cuisine American
Total Cost $1.73 recipe / $0.29 serving
Prep Time 10 minutes
Cook Time 15 minutes
Total Time 25 minutes
Servings 6 (2 halves each)
Calories 129kcal

Ingredients

Instructions

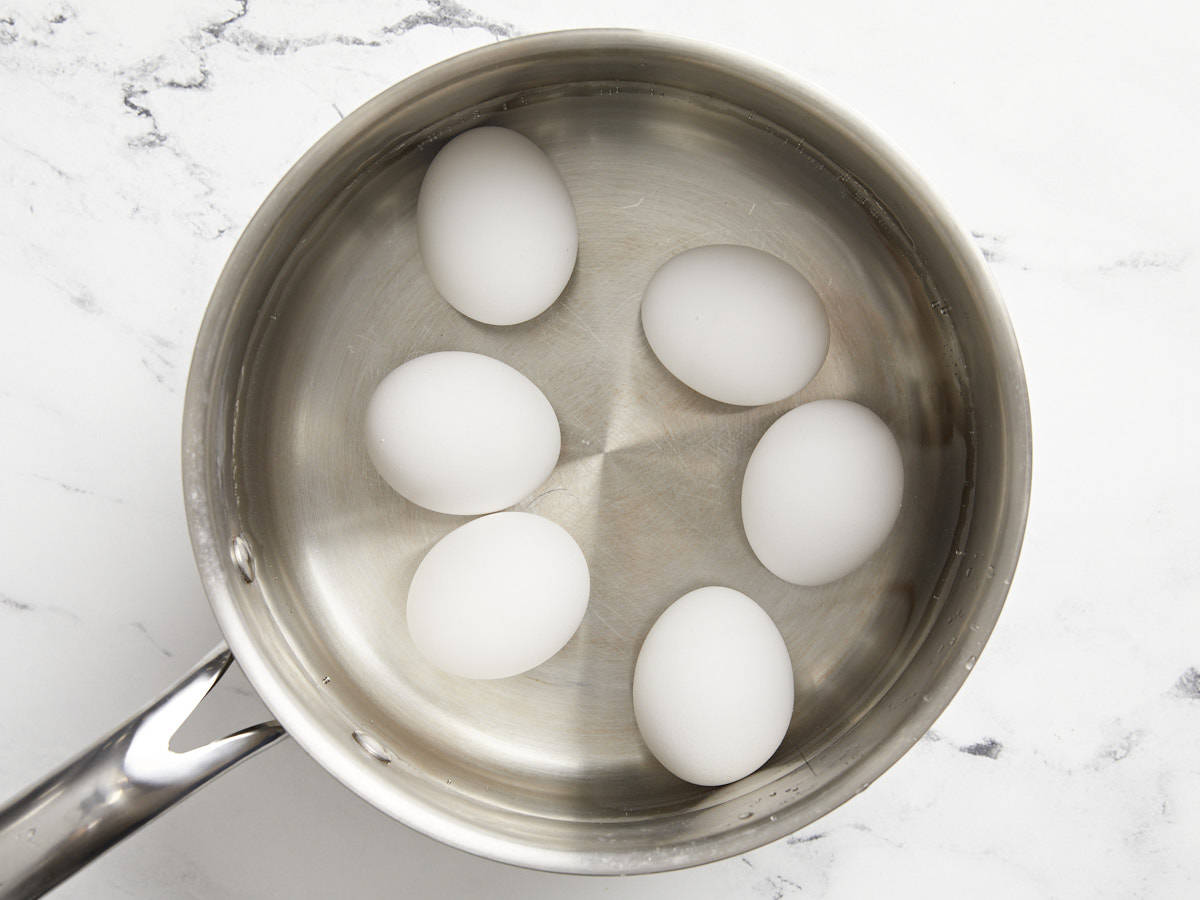
  • Add the cold eggs to a saucepot. Add enough water to the pot to cover the eggs by one inch.
  • Place a lid on the pot and bring the water up to a boil over high heat. Once the water reaches a full rolling boil, turn the heat off and leave the pot on the burner (with the lid on) for about 12 minutes.
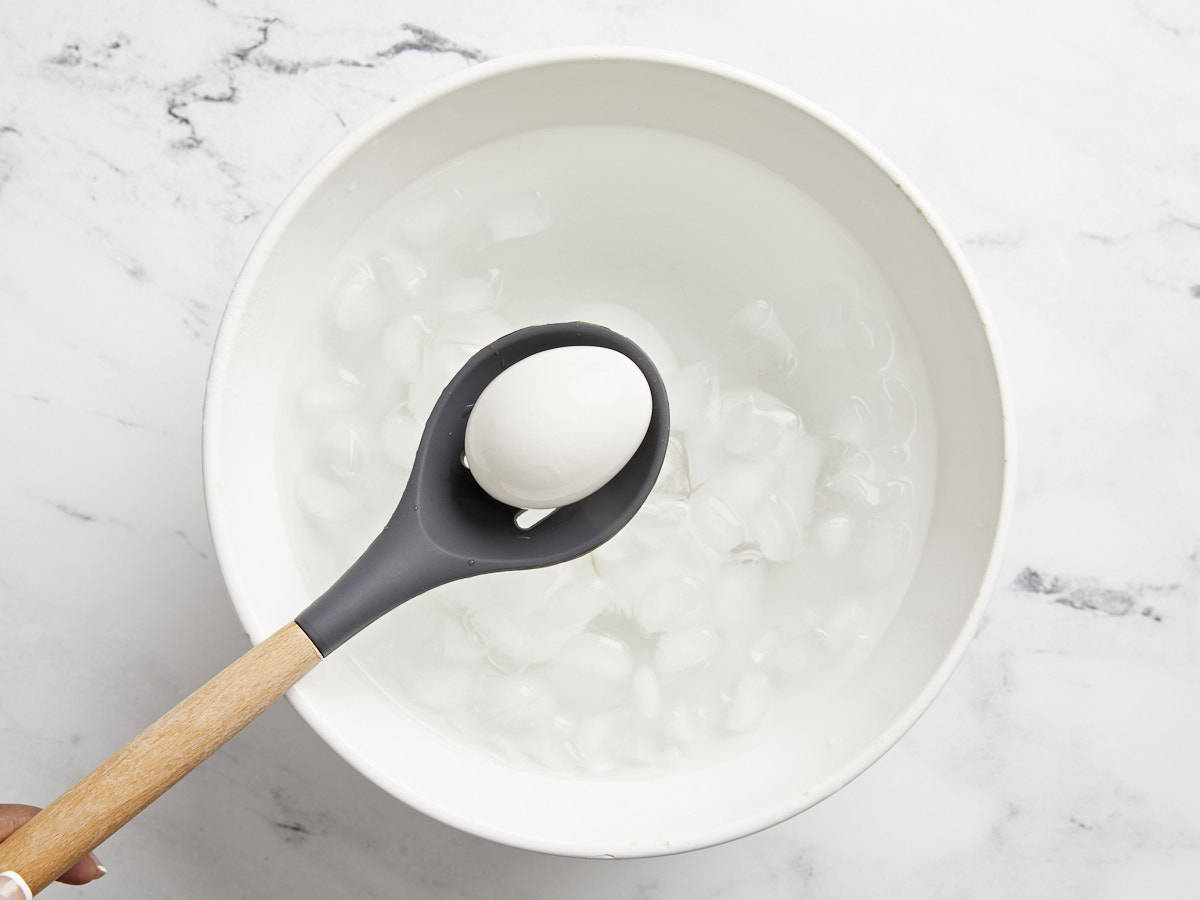
  • After 12 minutes, transfer the eggs to a bowl of ice water and chill the eggs for about 5 minutes.
  • Next, peel the eggs then slice them in half. Pop the yolks out of the white and place them in a bowl. Add the mayonnaise, Dijon mustard, seasoning salt, and dill relish and mash everything together to combine.
  • Spoon the seasoned yolk mixture back into the whites or place the mixture in a sandwich or freezer bag, snip off one corner of the bag, and pipe the filling into the egg whites.
  • Garnish the deviled eggs with your favorite toppings like paprika, chopped bacon, or sliced green onions. Serve and enjoy!

See how we calculate recipe costs here.

Notes

*We used Tony Chachere’s Creole seasoning to season our egg mixture, but you can use any brand of seasoning salt like Lawry’s or Morton’s.

Nutrition

Serving: 2halves | Calories: 129kcal | Carbohydrates: 1g | Protein: 6g | Fat: 11g | Sodium: 253mg | Fiber: 0.1g
Overhead view of deviled eggs on a platter with different toppings.

How to Make Deviled Eggs – Step by Step Photos

Six eggs in a pot of boiling water

Add 6 large cold eggs to a sauce pot. Add enough water to the pot to cover the eggs by one inch. Place a lid on the pot and bring the water up to a boil over high heat. Once the water reaches a full rolling boil, turn the heat off and leave the pot on the burner (with the lid on) for about 12 minutes.

Hard boiled eggs being placed in an ice bath.

After 12 minutes, transfer the eggs to a bowl of ice water for about 5 minutes.

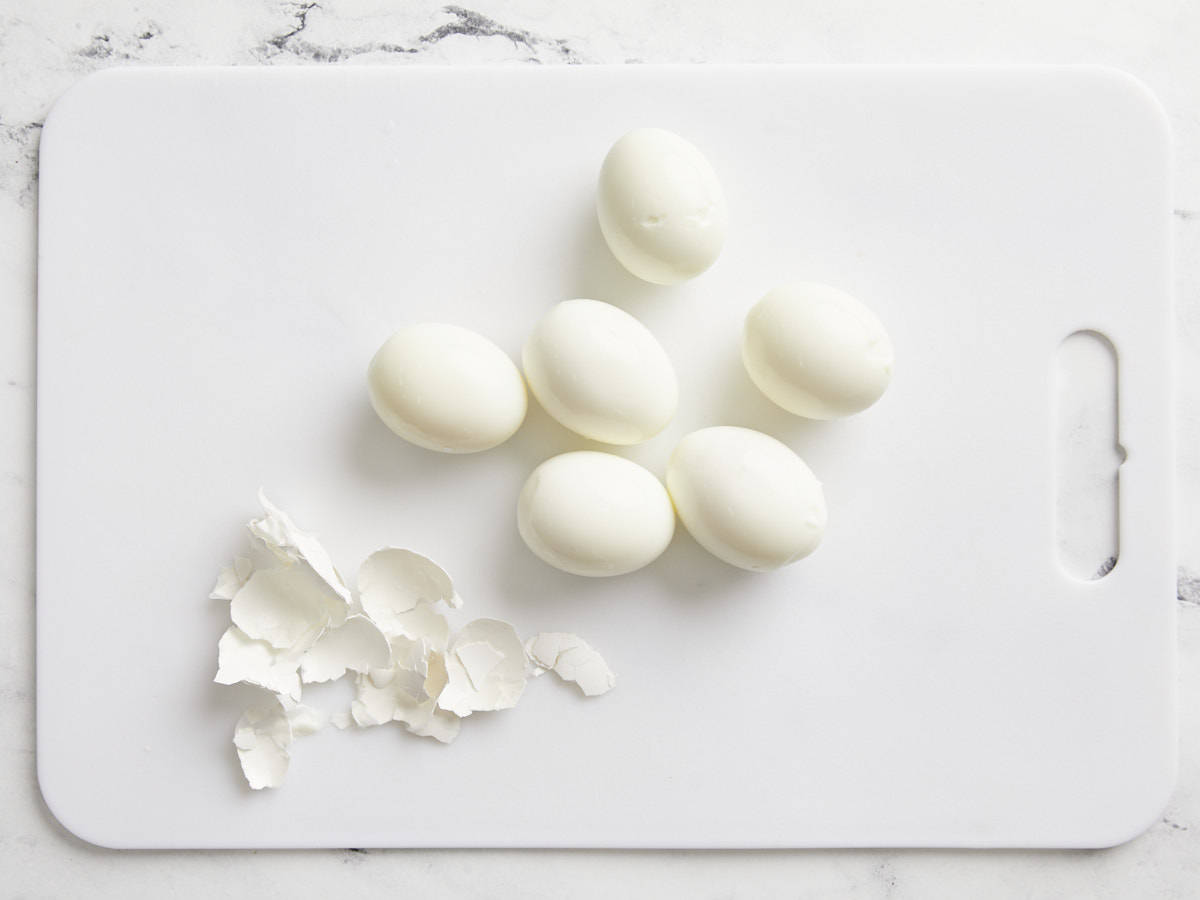
Six hard boiled eggs peeled on a cutting board.

After the eggs have chilled, carefully peel the eggs then slice them in half.

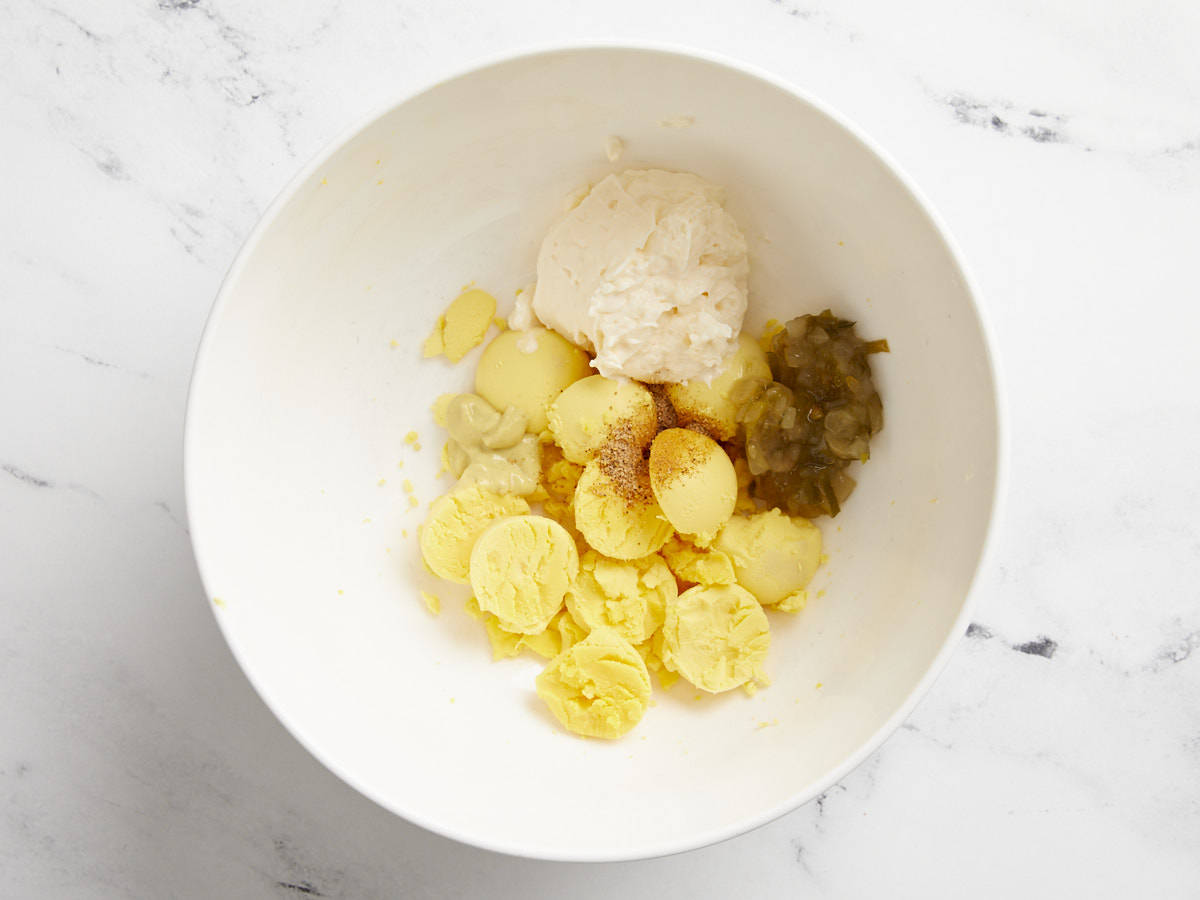
The filling ingredients for deviled eggs in a small mixing bowl.

Pop the yolks out of the white and place them in a bowl. Add 1/4 cup mayonnaise, 3/4 tsp Dijon mustard, 1/4 tsp seasoning salt, and 1 Tbsp dill relish.

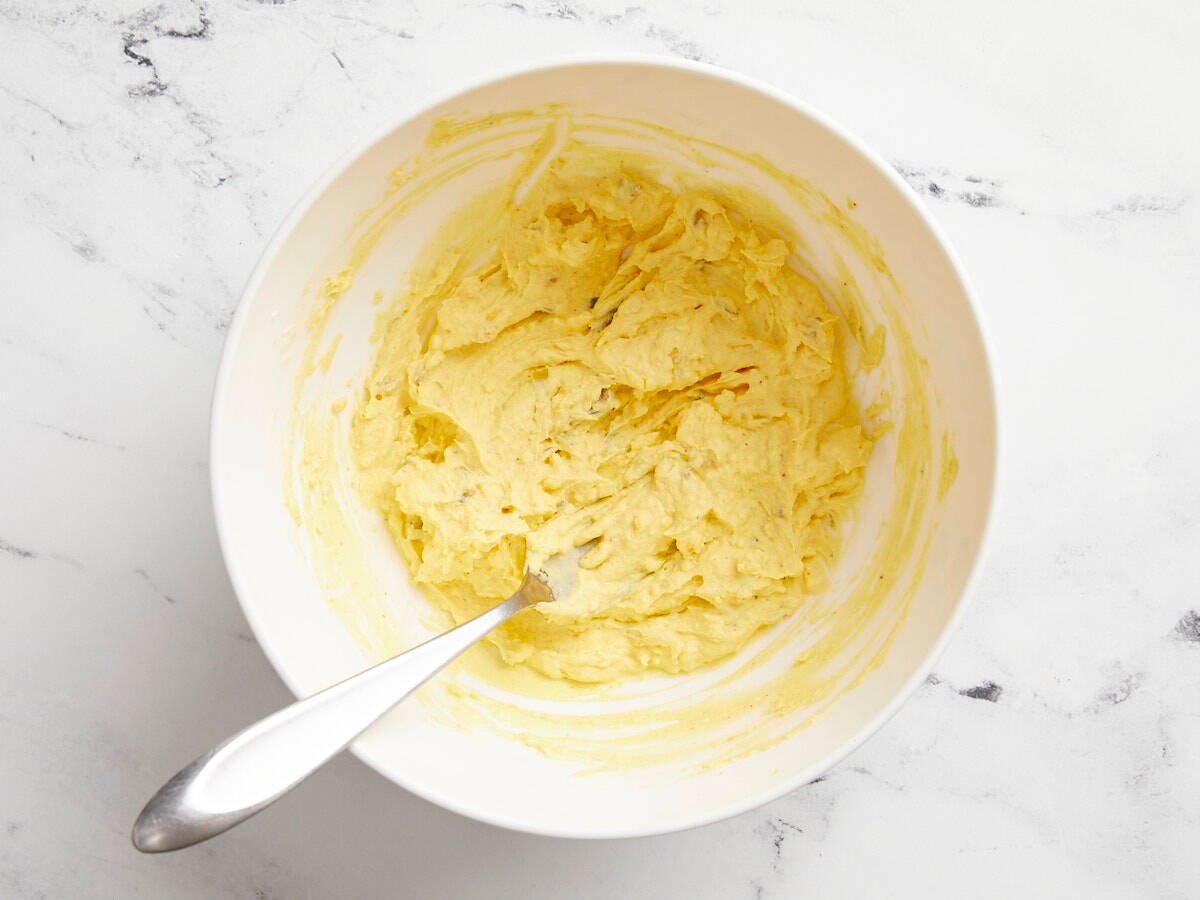
Deviled eggs filling ingredients mixed together.

Mash the yolks together with the rest of the ingredients to combine.

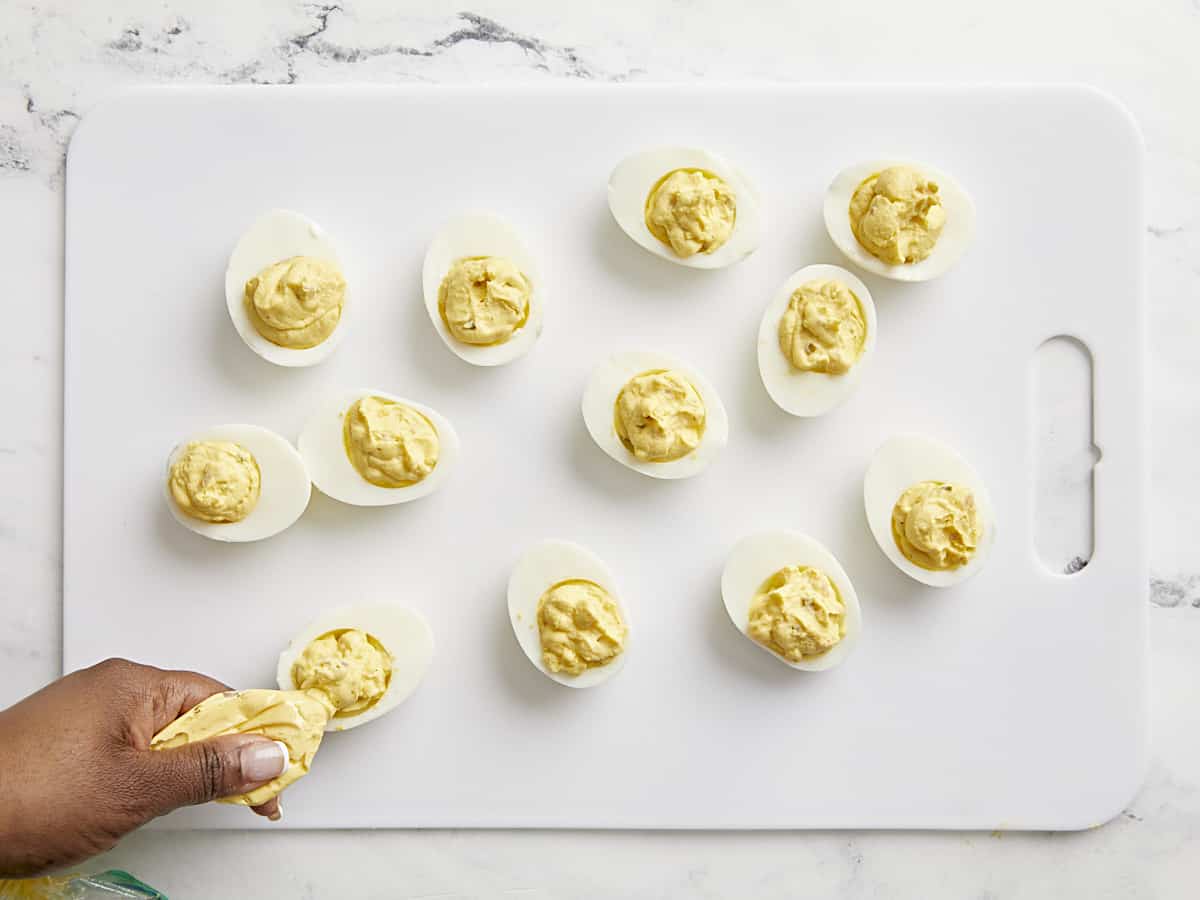
Hard boiled eggs cut in half with deviled egg ingredients being pipped inside.

Spoon the seasoned yolk mixture back into the whites or place the mixture in a sandwich or freezer bag, snip off one corner of the bag, and pipe the filling into the egg whites.

Overhead view of deviled eggs on a platter with different toppings.

Garnish the deviled eggs with your favorite toppings like paprika, chopped bacon, or sliced green onions. Serve and enjoy!

Side view of deviled eggs on a serving platter.

The post Deviled Eggs appeared first on Budget Bytes.
Pea Salad

Super simple and inexpensive, this creamy pea salad is the perfect side dish for your next family get-together.

The post Pea Salad appeared first on Budget Bytes.
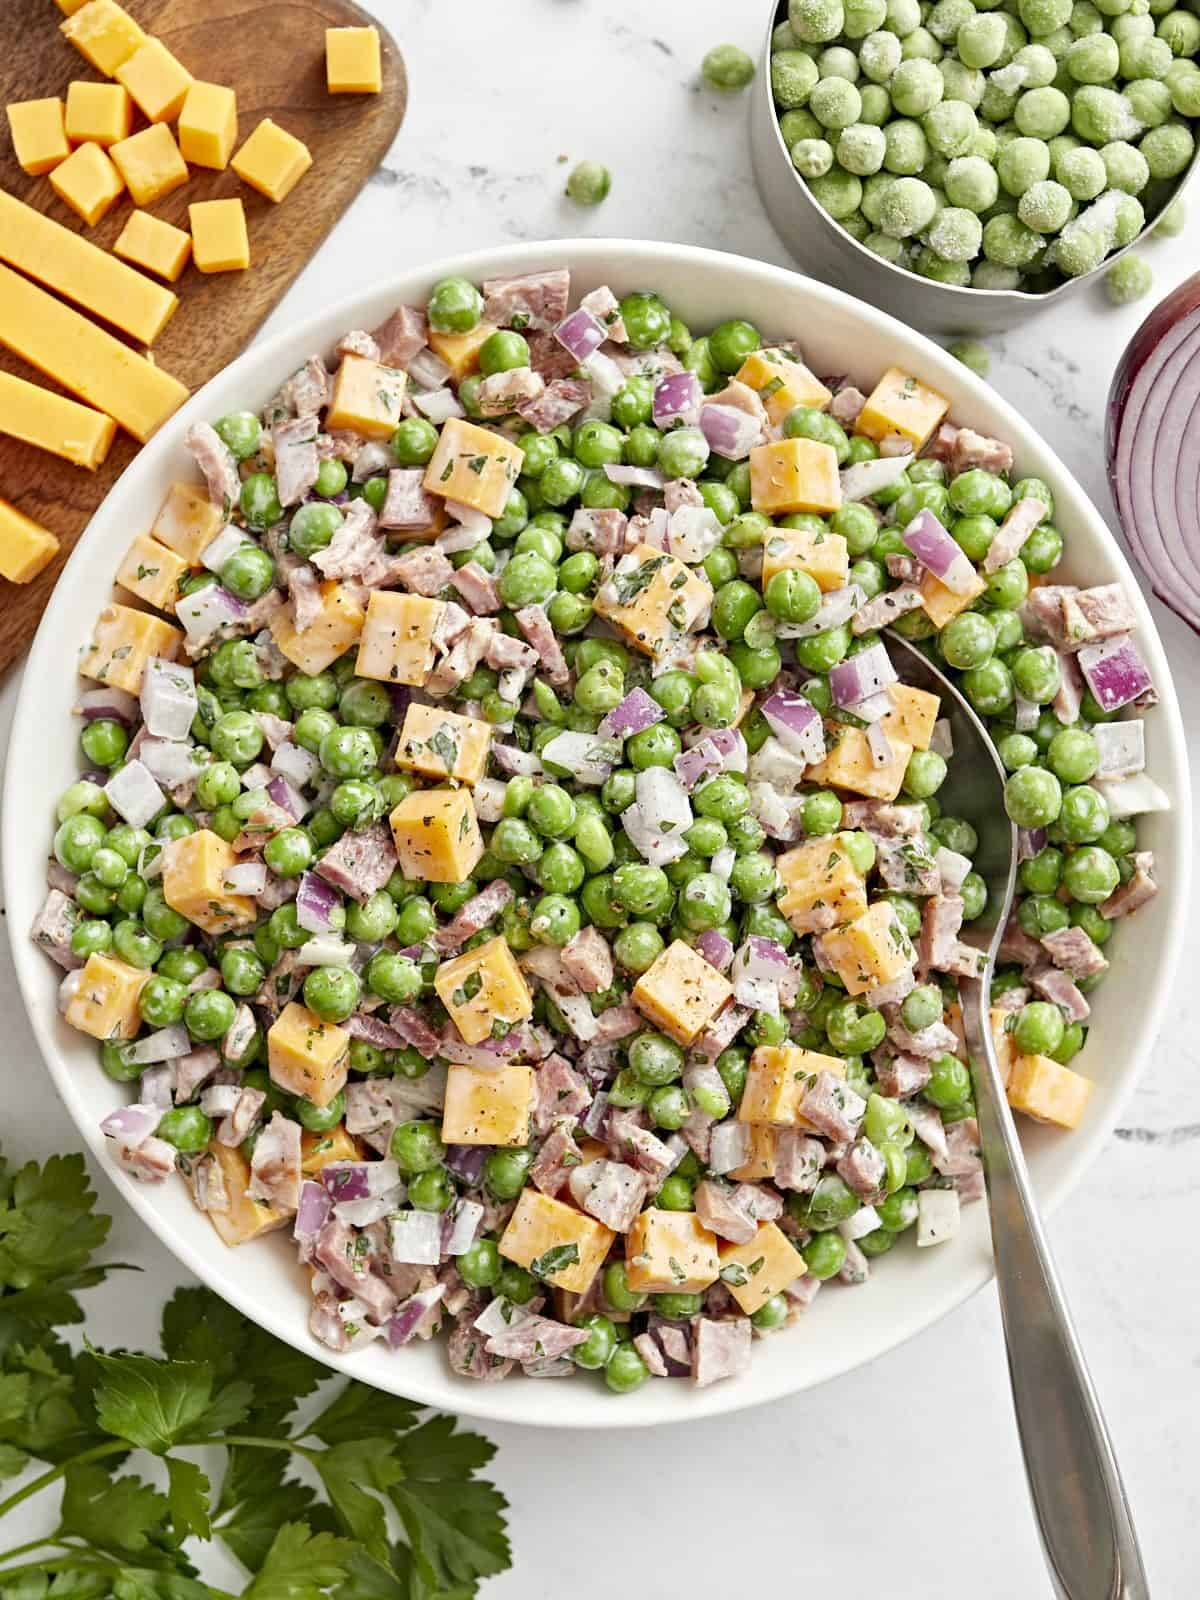
Super simple and inexpensive, this creamy pea salad is the perfect side dish for your next family get-together. We coat sweet peas, salty ham, and savory cheddar cheese in a creamy dressing, creating the perfect balance of sweet and savory flavors. It makes a huge batch and comes together in just minutes, no cooking required!

overhead view of pea salad with a spoon.

What is Pea Salad?

Pea salad is a classic side dish made from sweet peas tossed with ham, cheddar cheese, and red onion, and coated in a creamy and tangy dressing. This salad has a beautiful balance of flavors and is so versatile!

Ingredients for Pea Salad

Here’s what you’ll need to make pea salad:

  • Greek Yogurt: Makes the dressing creamy and tangy with fewer calories and fat than sour cream. We highly recommend Greek yogurt over plain yogurt or sour cream for its thicker texture.
  • Mayonnaise: Adds richness and creaminess to the dressing.
  • White Vinegar: Adds a refreshing tanginess to the dressing to balance the creaminess.
  • Parsley: Adds a pop of freshness.
  • Frozen Peas: Just as bright and flavorful as fresh, these are a great budget option for this salad.
  • Ham Steak: You’ll need a 12 oz. ham steak, or you can use leftover ham or cooked bacon. Vegetarian? No problem! If you leave out the ham, this pea salad is still flavorful and fresh.
  • Red Onion: Adds a bit of bite to the recipe and a wonderful crunchy texture, creating a great contrast to the sweet peas.
  • Cheddar Cheese: Adds a creamy and salty component to this delicious salad.
  • Salt and Pepper: Enhance the overall flavor of the salad.

What Else Can I Add to Pea Salad?

This creamy salad is a great recipe to add leftovers to. We like to add:

  • Leftover short noodles, like macaroni or bowties
  • Finely diced carrots
  • Chopped broccoli florets
  • Raisins or other dried fruits
  • Vegetarian meat substitutes also work well.

Budget-Saving Tip!

If you want to make your money stretch a little bit further, then this is a great recipe to use up any leftover ham that you might have from the holidays. It will help reduce waste and make the recipe cheaper. That’s a win-win!😊

What to Serve with Pea Salad

This cold pea salad is the perfect refreshing side for smoky BBQ ribs, savory smash burgers, or garlic marinated chicken.

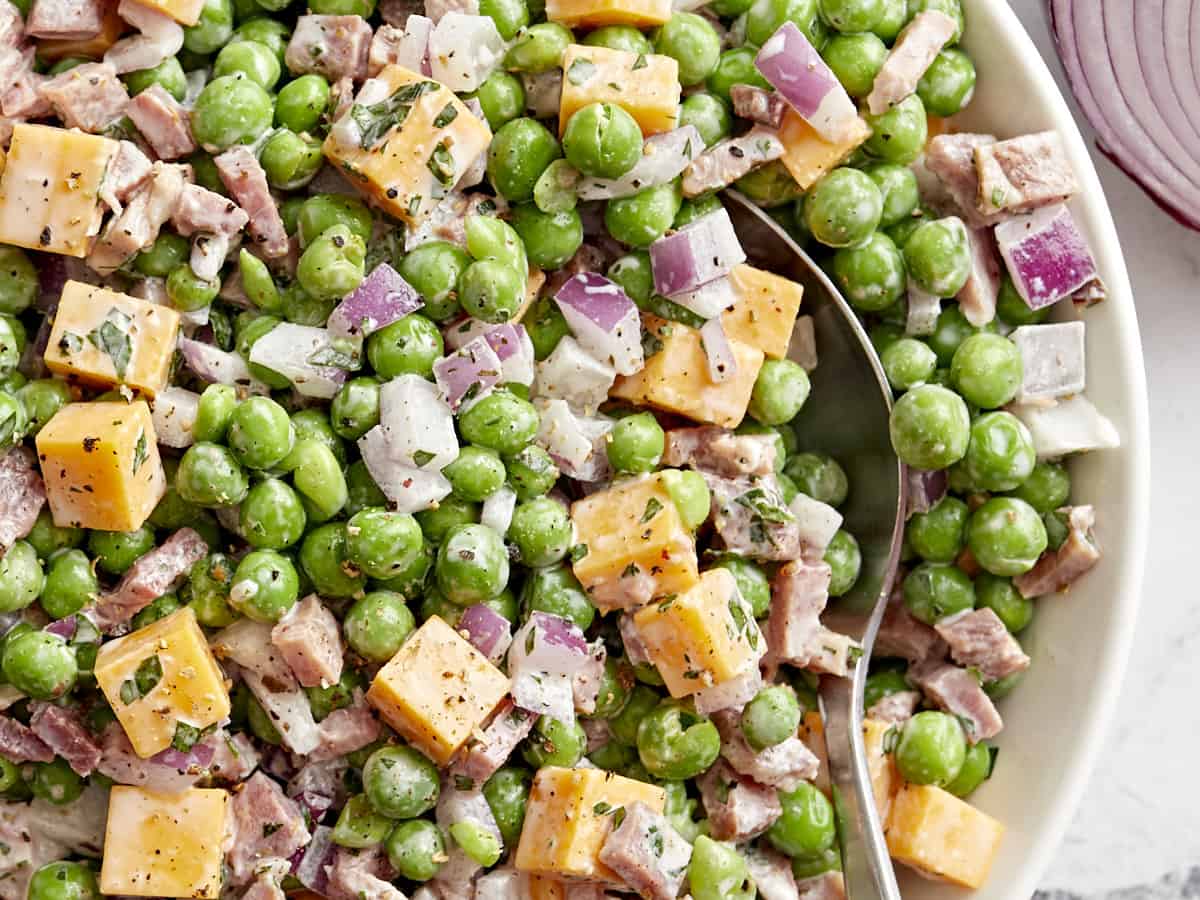
close up view of pea salad with a spoon.
overhead view of pea salad with a spoon.
Print

Pea Salad

Super simple and inexpensive, this creamy pea salad is the perfect side dish for your next family get-together.
Course Side Dish
Cuisine American
Total Cost $9.54 recipe / $0.95 serving
Prep Time 10 minutes
Cook Time 0 minutes
Total Time 10 minutes
Servings 10 (1 cup each)
Calories 214kcal
Author Jess Rice

Ingredients

  • 4 cups frozen peas $2.28
  • 2 cups cubed ham steak $3.99
  • 1/2 small red onion, diced small $0.22
  • 8 oz. cheddar cheese, cubed small $2.49
  • 1 Tbsp minced parsley $0.05
  • 1/3 cup plain Greek yogurt $0.32
  • 1 Tbsp mayonnaise $0.07
  • 1 Tbsp white vinegar $0.02
  • 1 tsp salt $0.05
  • 1 tsp freshly cracked black pepper $0.05

Instructions

  • Rinse the frozen peas in cool water. Strain and leave out at room temperature. Meanwhile, cut the ham into small dice cubes and prep the red onion, cheddar cheese, and parsley.
  • In a small mixing bowl, whisk together Greek yogurt, mayonnaise, white vinegar, minced parsley, and salt and pepper.
  • Toss all ingredients together in a large bowl. Serve immediately or enjoy all week!

See how we calculate recipe costs here.

Nutrition

Serving: 1serving | Calories: 214kcal | Carbohydrates: 10g | Protein: 18g | Fat: 11g | Sodium: 996mg | Fiber: 3g
pea salad in a white bowl.

how to make Pea Salad – step by step photos

ingredients for pea salad on a cutting board.

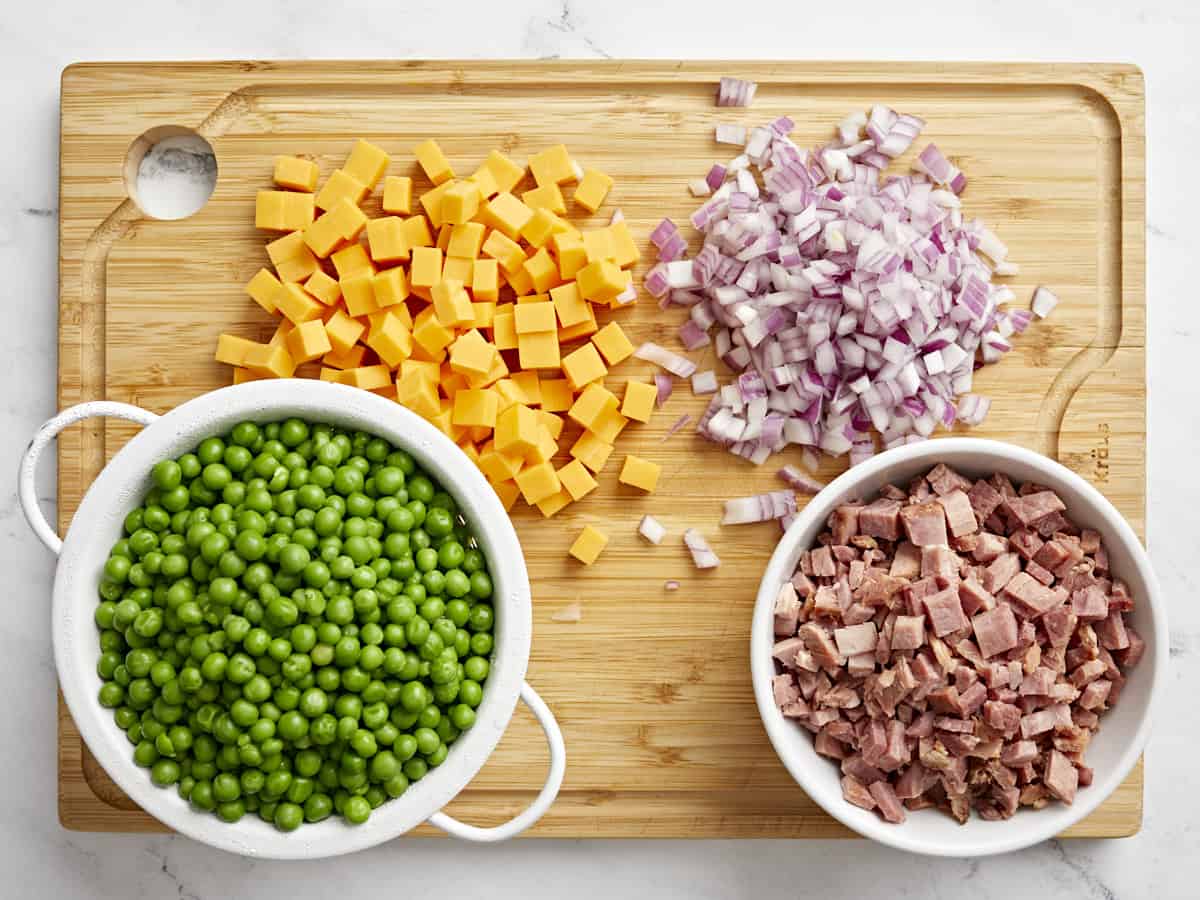
Rinse 4 cups frozen peas in cool water. Strain and leave out at room temperature. Meanwhile, cut 2 cups ham into small dice cubes, dice 1/2 small red onion, cube 8 oz. cheddar cheese, and mince 1 Tbsp fresh parsley.

stirred mayonnaise dressing with herbs in a white bowl.

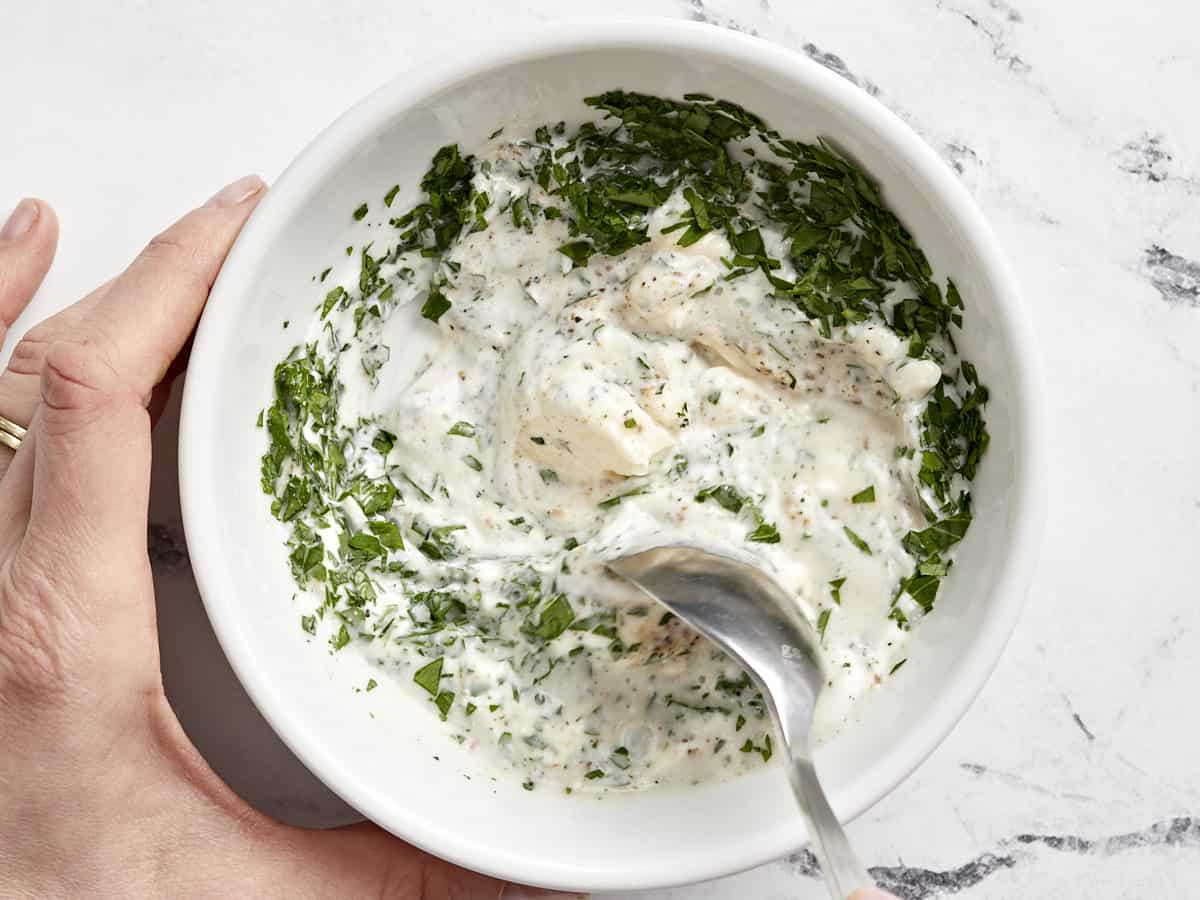
In a small mixing bowl, whisk together 1/3 cup Greek yogurt, 1 Tbsp mayonnaise, 1 Tbsp white vinegar, the minced parsley, and 1 tsp each salt and pepper.

ingredients for pea salad in a white bowl.

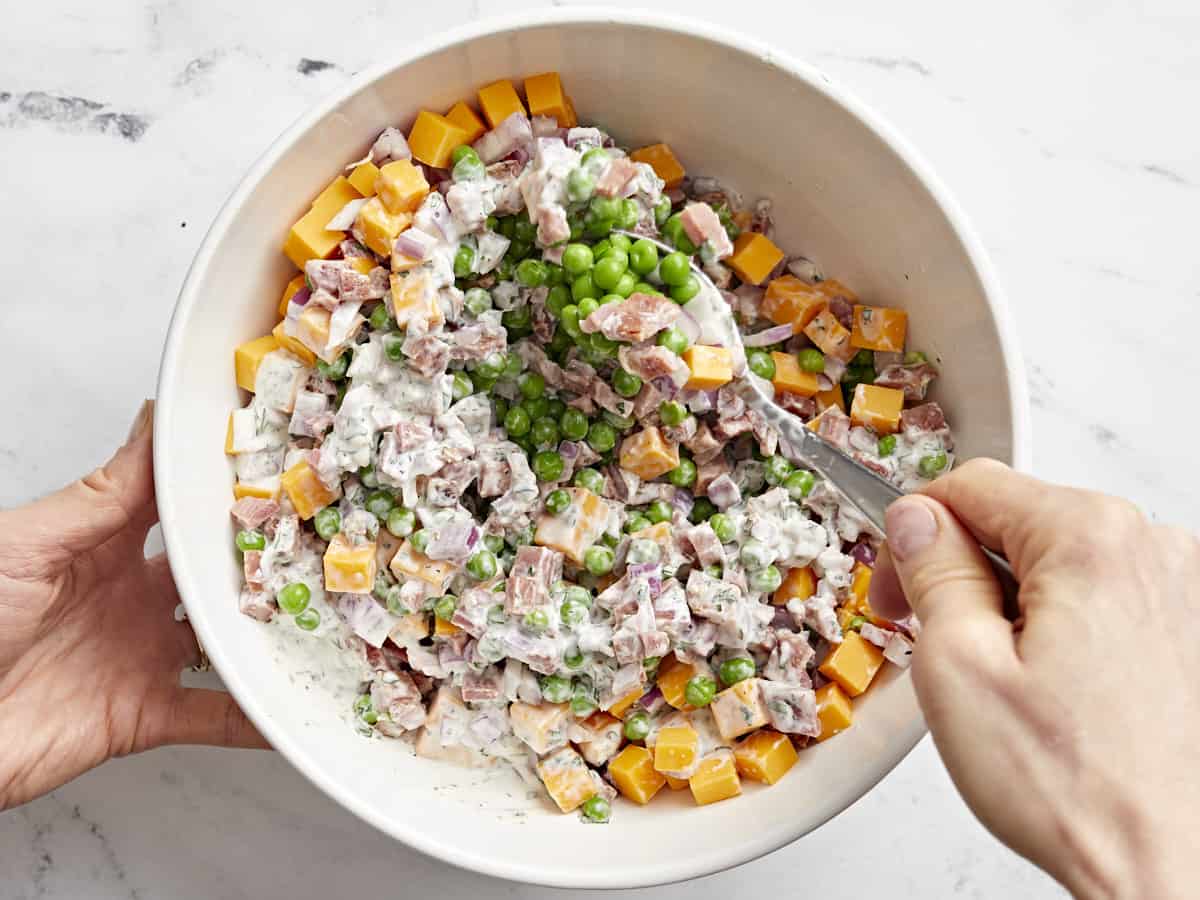
Toss all ingredients together in a large bowl. Serve immediately or enjoy all week!

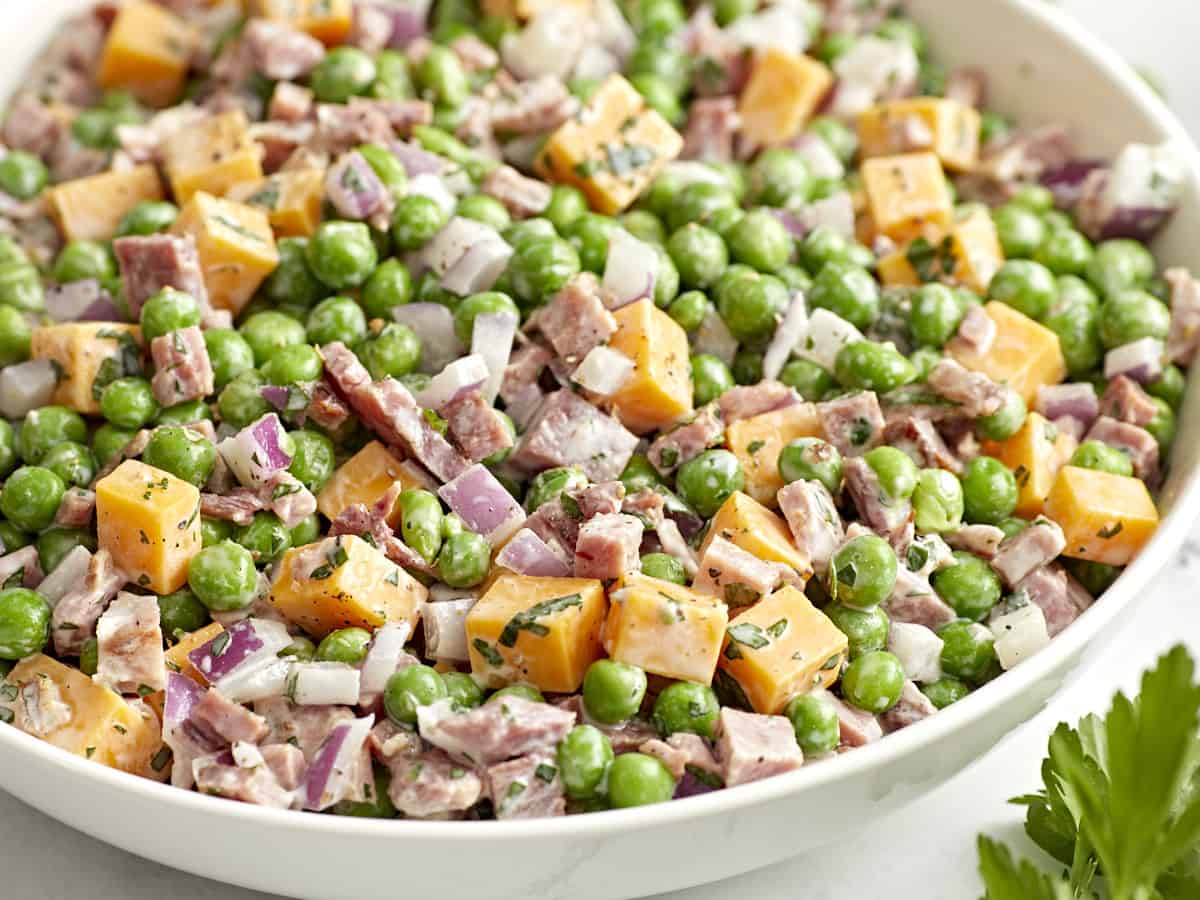
overhead view of pea salad in a white bowl.

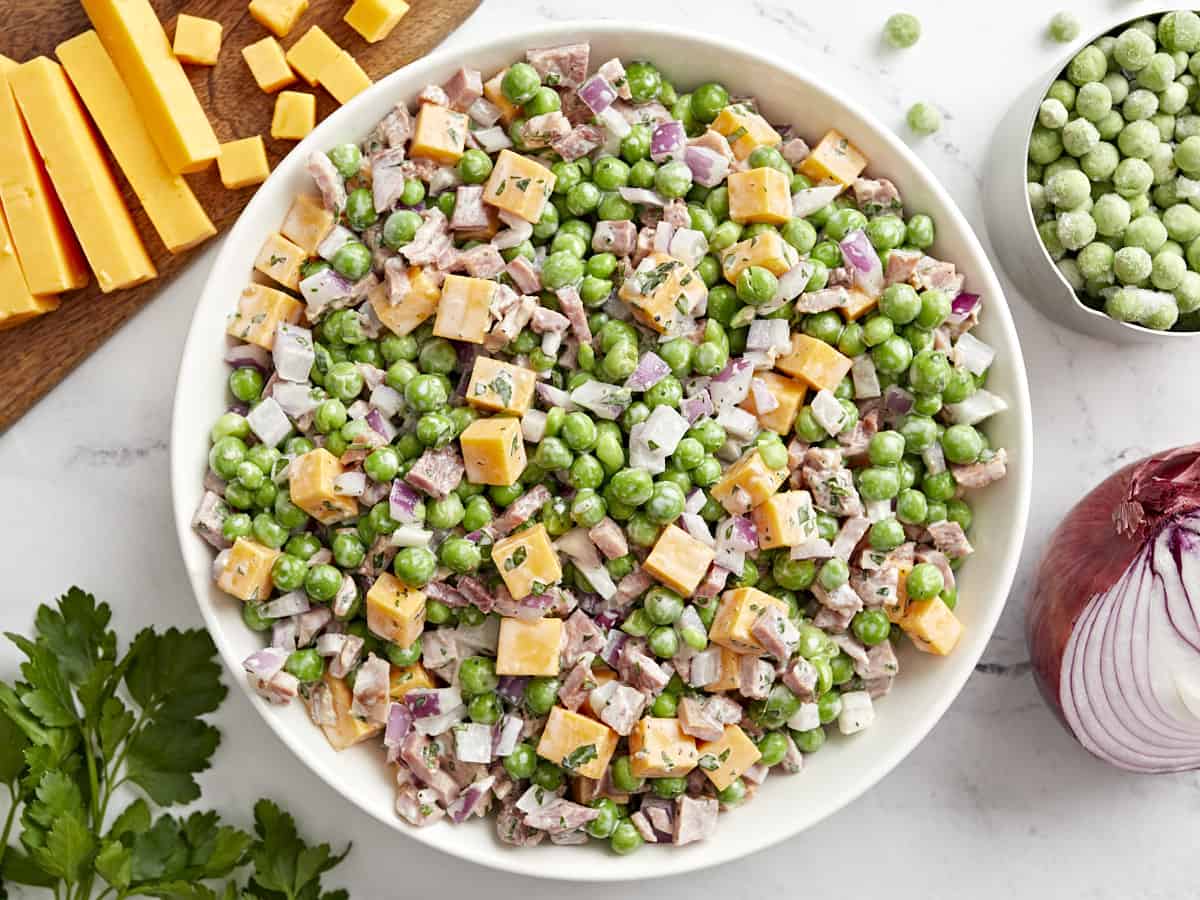
This pea salad is such a beautiful centerpiece to any table!

The post Pea Salad appeared first on Budget Bytes.
Potato Casserole

Make those potatoes go the extra mile with this cheesy potato casserole! Fit to serve a crowd, this casserole is the ultimate comfort food.

The post Potato Casserole appeared first on Budget Bytes.
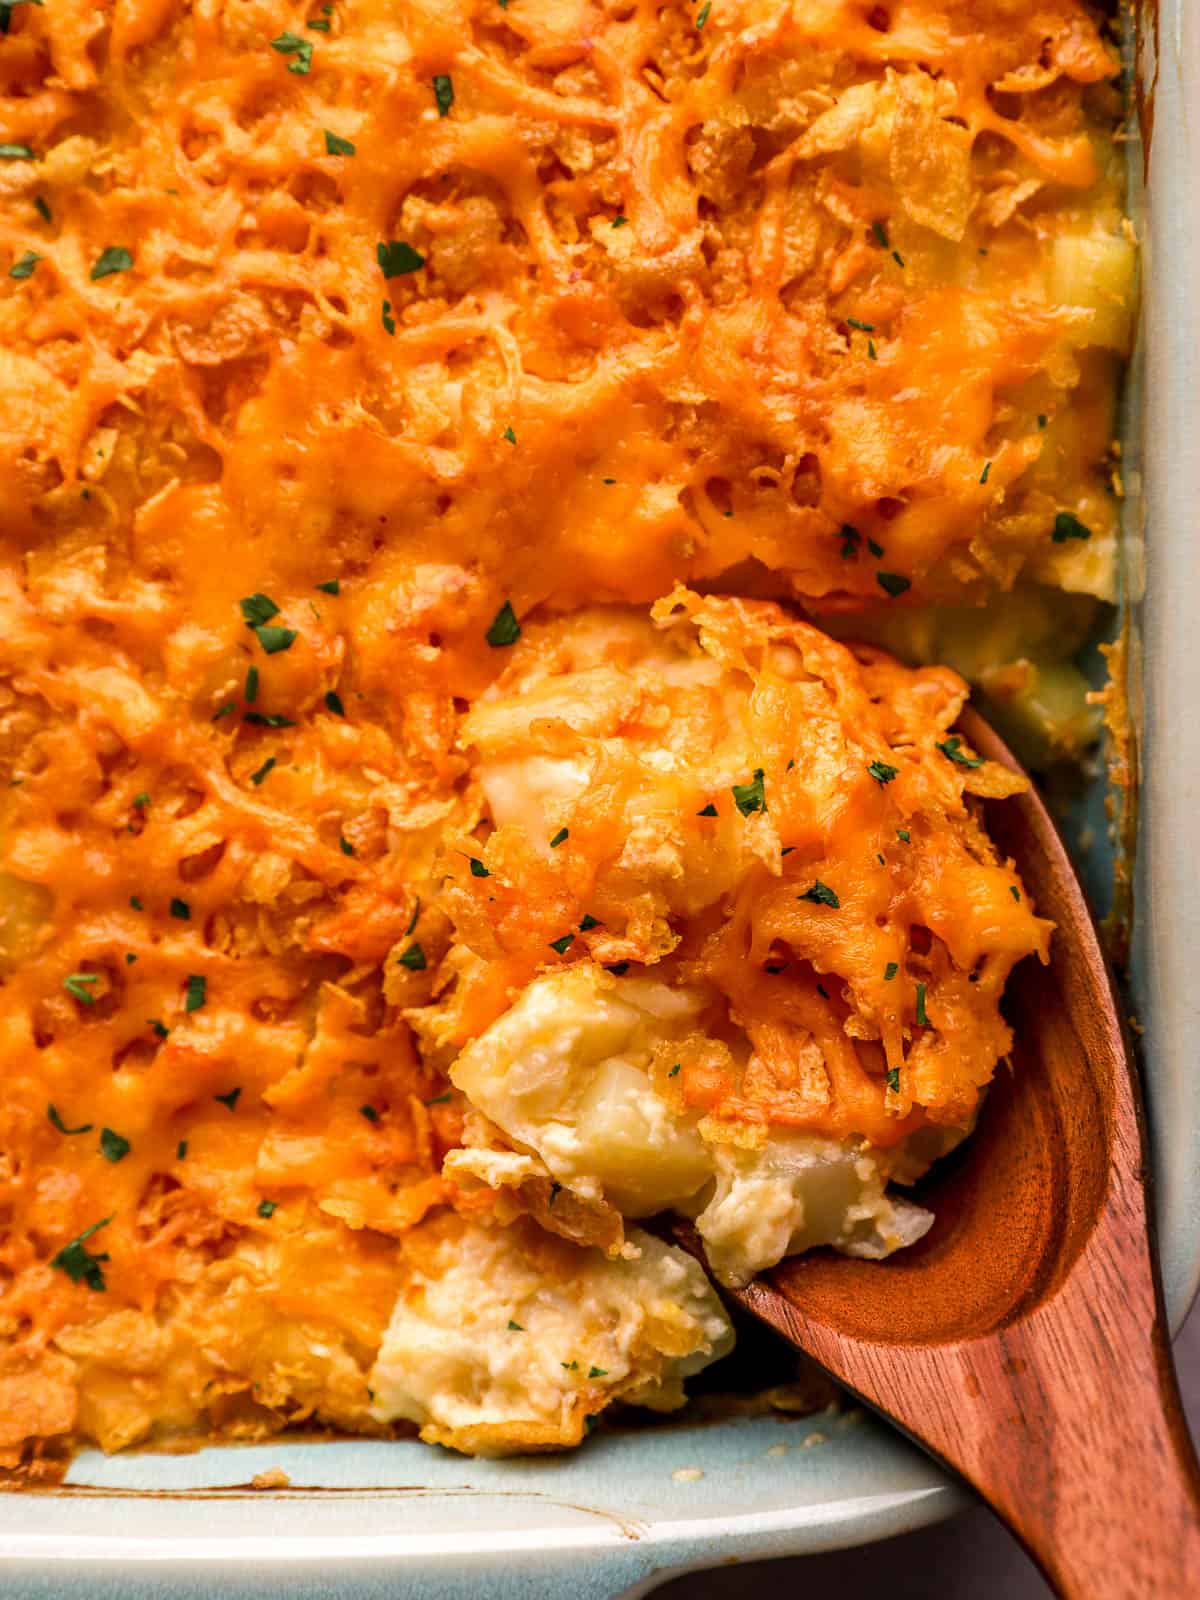
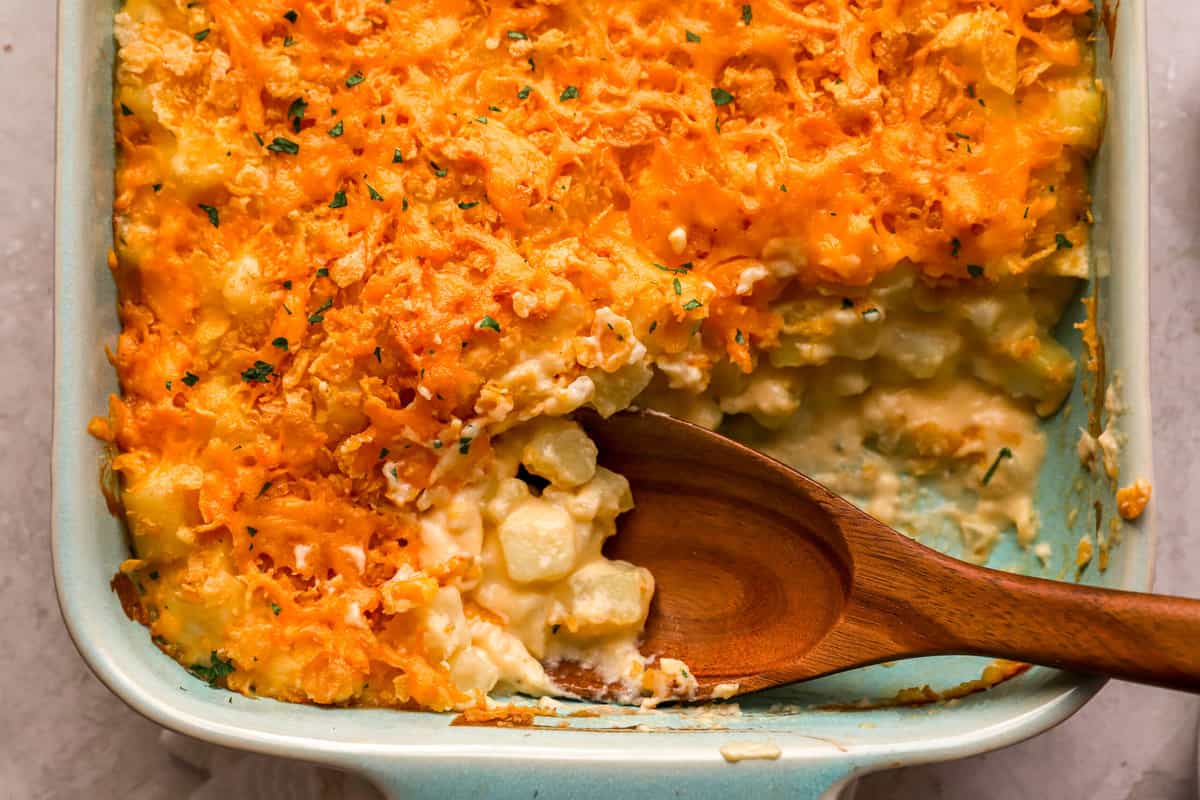
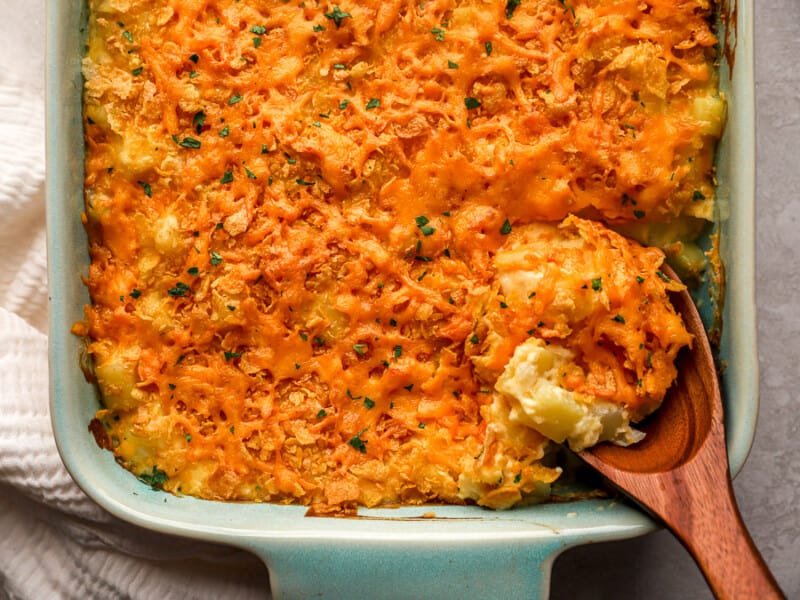
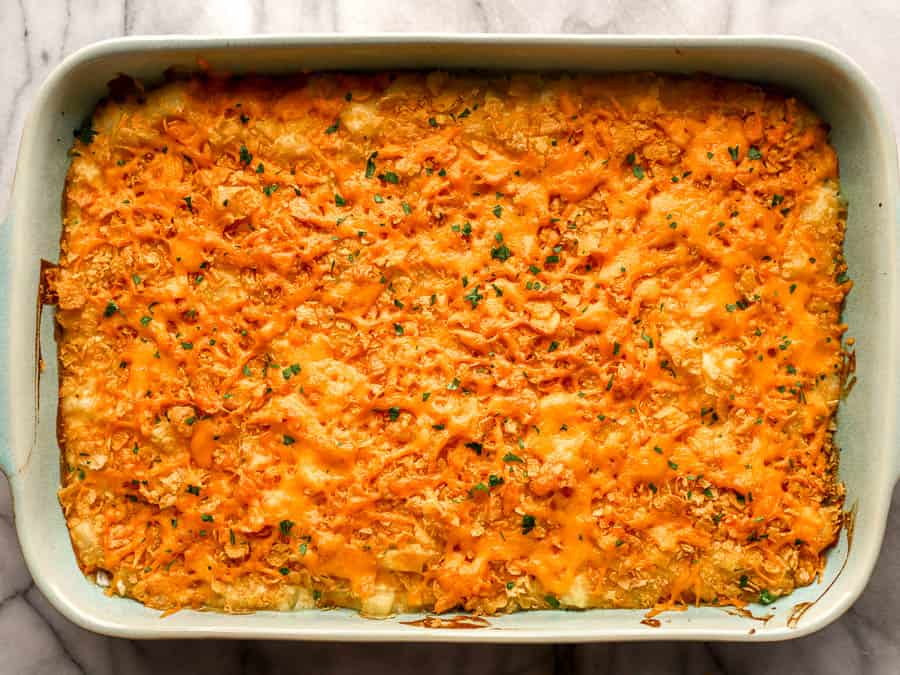
Make those potatoes go the extra mile with this creamy, cheesy potato casserole! Fit to serve a crowd, this potato casserole recipe is comfort food at its best. The crunchy, cheesy topping is a little sweet, a lot savory, and makes this the perfect side for Easter, Thanksgiving, or Christmas.

What is Potato Casserole?

Diced potatoes are blanketed in a sauce made from cheddar cheese, milk, and sour cream; seasoned with onions and garlic; and topped with crunchy corn flake cereal. It’s the ultimate cheesy, creamy, and crunchy side dish. So grab a 5 lb. bag or potatoes and get cooking!

Ingredients for Potato Casserole

  • Yukon Gold Potatoes: These potatoes are in between starchy and waxy, making them perfect for this casserole since they hold their shape well. You’ll need 3 lbs. or about 6 medium potatoes.
  • Butter: Unsalted butter adds a rich flavor to the dish and helps prevent the onions and garlic from burning in the pan.
  • Onion and Garlic: These alliums add a classic earthy and sweet flavor that adds depth to this dish.
  • Salt: Kosher salt enhances the natural flavor of the potatoes.
  • All-Purpose Flour: A little bit of flour helps to thicken up the sauce.
  • Milk: Milk adds moisture to the sauce. You can use any kind of milk you have on hand, including plant-based.
  • Extra Sharp Cheddar Cheese: We love the flavor of extra sharp, but any kind of cheddar works well.
  • Sour Cream: Sour cream adds a touch of brightening tanginess and richness to the dish.
  • Corn Flake Cereal: Crushed corn flakes create the perfect slightly sweet, super crunchy topping for this casserole. You can also use Panko breadcrumbs or crushed butter crackers if that’s what you have on hand.

What Else Can I Add To Potato Casserole?

This is a great recipe for using up leftovers. Got some bacon or ham burning a hole in your refrigerator? Throw it in! You can swap the sour cream for Greek Yogurt if that’s what you have on hand. And feel free to top it with any leftover herbs you have lying around– parsley, chives, or scallions would all be delicious!

How to Serve Potato Casserole

Serve this creamy, cheesy potato casserole with Air Fryer Chicken Breasts, Classic Homemade Meatloaf, or some Turkey Meatballs. It’s also great for breakfast with Fried Eggs or Maple Sage Breakfast Sausage.

How to Store Leftovers

Store leftover potato casserole tightly covered with aluminum foil in the refrigerator for up to 5 days, or you can wrap it in a double-layer of plastic wrap and aluminum foil to store in the freezer for up to 3 months. You can reheat it covered with foil in a 350°F oven for 20-30 minutes, or until warmed through and bubbly.

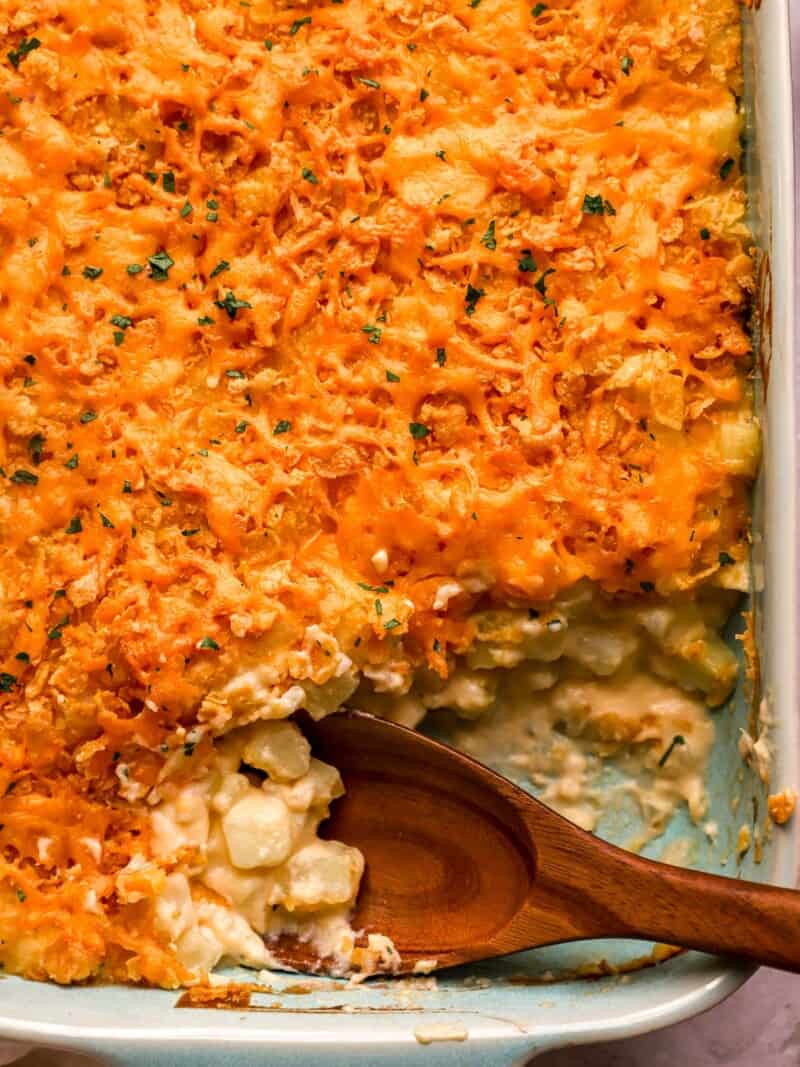
close up view of a wooden spoon in potato casserole.
Print

Potato Casserole

Make those potatoes go the extra mile with this cheesy potato casserole! Fit to serve a crowd, this casserole is the ultimate comfort food.
Course Side Dish
Cuisine American
Total Cost $9.06 recipe / $0.90 serving
Prep Time 30 minutes
Cook Time 20 minutes
Total Time 50 minutes
Servings 10
Calories 459kcal

Ingredients

  • 3 lbs. Yukon gold potatoes $3.00
  • 1/4 cup butter $0.53
  • 1/2 onion $0.16
  • 2 cloves garlic $0.16
  • 1/2 tsp salt $0.02
  • 1/4 cup all-purpose flour $0.05
  • 2 cups milk $0.96
  • 3 1/2 cups extra sharp cheddar cheese, divided $3.21
  • 1/2 cup sour cream $0.53
  • 1 cup crushed corn flake cereal $0.44

Instructions

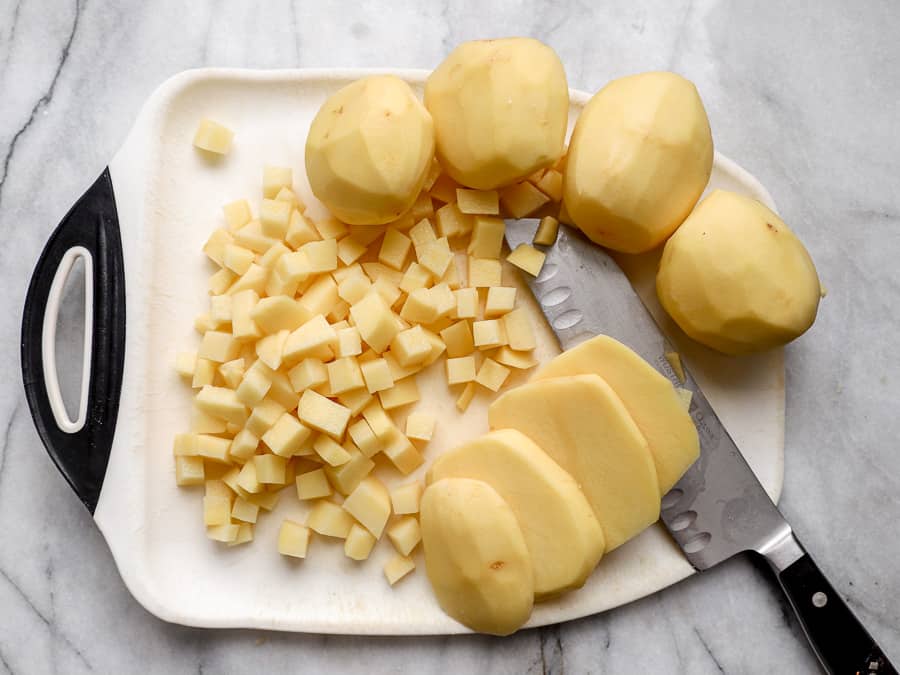
  • Preheat the oven to 375°F. Peel and dice the potatoes, finely chop the onion, and mince the garlic.
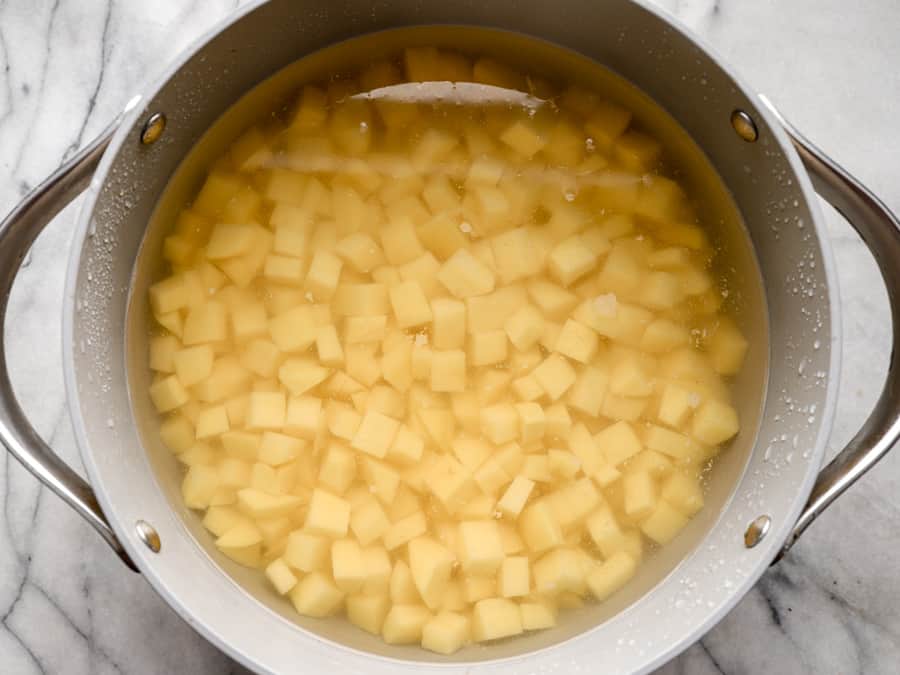
  • Add the potatoes to a large pot of water. Bring to a boil, cooking for 8-10 minutes until fork tender. Strain in a colander. Then, transfer the potatoes to a greased 9×13 casserole dish.
  • While the potatoes are boiling, melt the butter in a large saucepan or pot over medium heat.
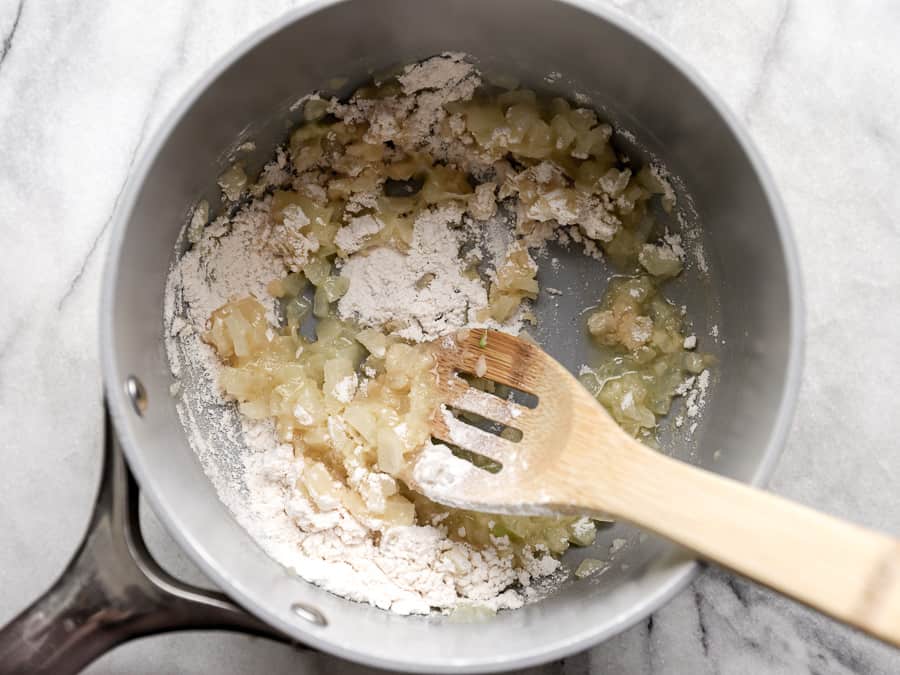
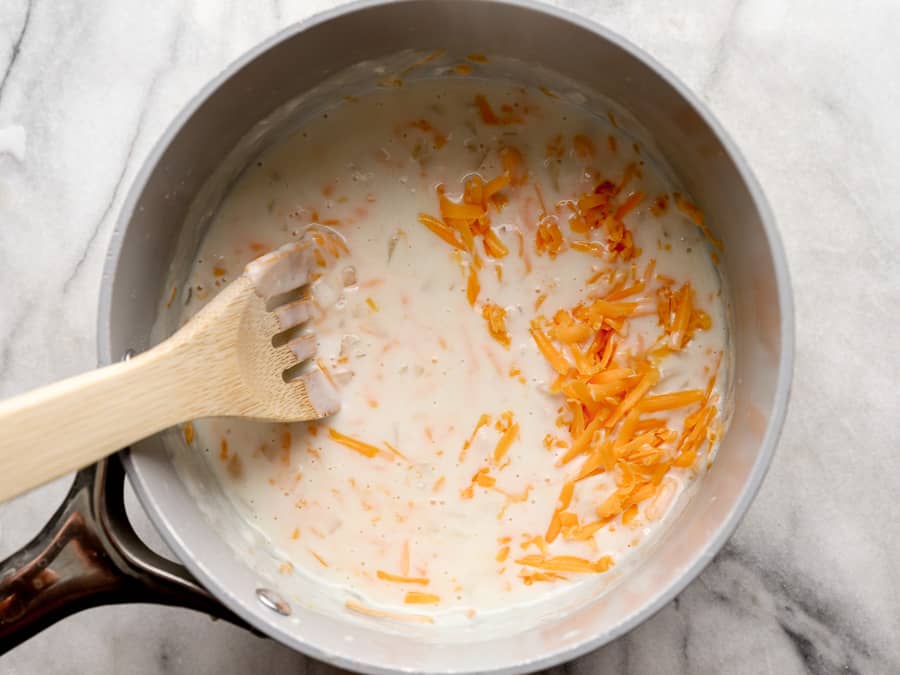
  • Add in the onion and salt, and cook for a few minutes until softened. Add in the garlic and cook for a minute. Then, stir in the flour.
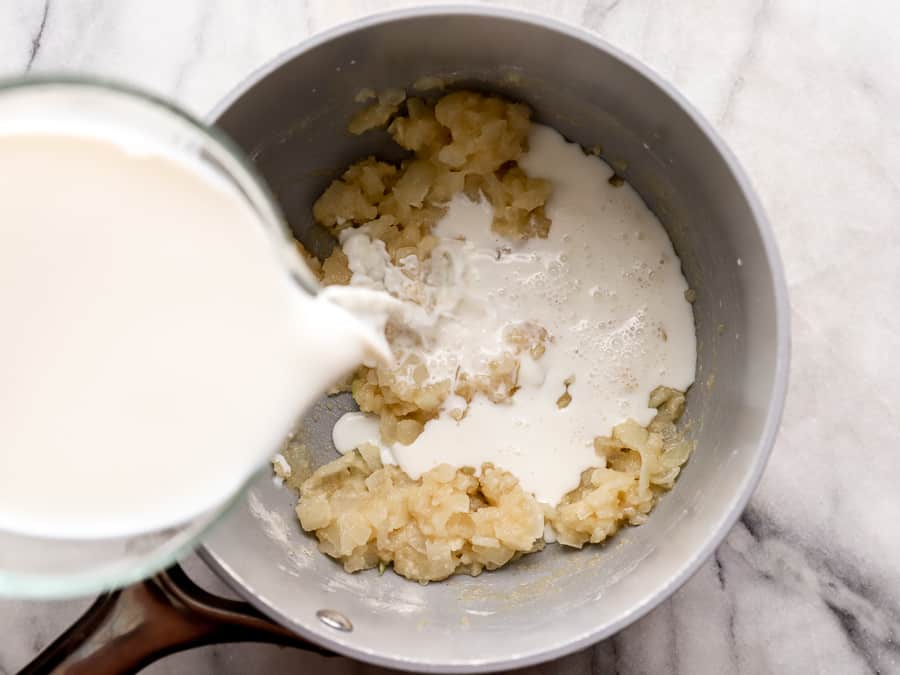
  • Slowly pour in the milk while whisking to incorporate.
  • Add in 2 cups of cheese and the sour cream. Stir until melted and incorporated.
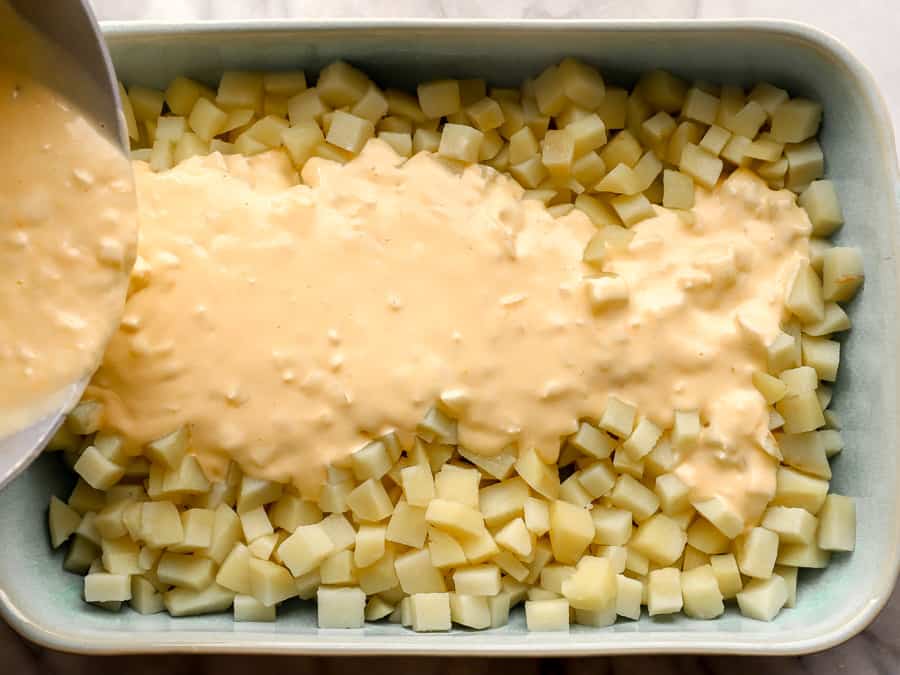
  • Pour the cheese sauce over the potatoes. Gently combine until the potatoes are fully coated.
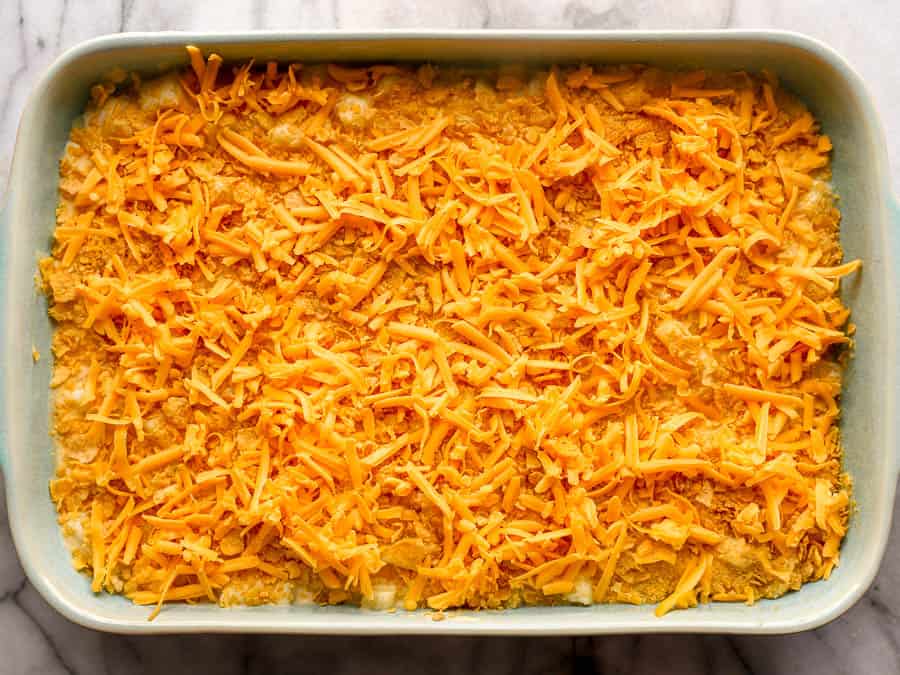
  • Top with the crushed cereal and the remaining 1 1/2 cups of cheddar cheese.
  • Bake for 20 minutes until the cheese is bubbly.

See how we calculate recipe costs here.

Nutrition

Serving: 1serving | Calories: 459kcal | Carbohydrates: 51g | Protein: 16g | Fat: 22g | Sodium: 615mg | Fiber: 4g

how to make Potato Casserole – step by step photos

Preheat the oven to 375°F. Peel and dice 3 lbs. Yukon gold potatoes, finely chop 1/2 onion, and mince 2 cloves garlic.

Add the potatoes to a large pot of water. Bring to a boil, cooking for 8-10 minutes until fork tender. Strain in a colander. Then, transfer the potatoes to a greased 9×13 casserole dish.

While the potatoes are boiling, melt 1/4 cup butter in a large saucepan or pot over medium heat. Add in the onion and 1/2 tsp salt, and cook for a few minutes until softened. Add in the garlic and cook for a minute. Then, stir in 1/4 cup all-purpose flour.

Slowly pour in 2 cups milk while whisking to incorporate.

Add in 2 cups of cheese and 1/2 cup sour cream. Stir until melted and incorporated.

Pour the cheese sauce over the potatoes. Gently combine until the potatoes are fully coated.

Top with 1 cup crushed corn flake cereal and the remaining 1 1/2 cups of cheddar cheese.

Bake for 20 minutes until the cheese is bubbly.

This savory and cheesy potato casserole is the perfect side dish for your next brunch or dinner party!

The post Potato Casserole appeared first on Budget Bytes.
Fried Cabbage

This fried cabbage recipe is a super easy side dish that goes with just about any meal. It’s flavorful, budget-friendly comfort food at its best!

The post Fried Cabbage appeared first on Budget Bytes.
Fried cabbage is an incredibly underrated side dish, IMHO. It’s cheap, you only need a handful of simple ingredients, and it goes with everything. Plus, cabbage is one of my favorite budget ingredients because it’s so filling and nutritious, and you really don’t need a lot to make it taste great. This Fried Cabbage recipe is as easy as it gets and it’s so good that I find myself making it over and over. It’s one of those recipes where I actually look forward to eating the leftovers!

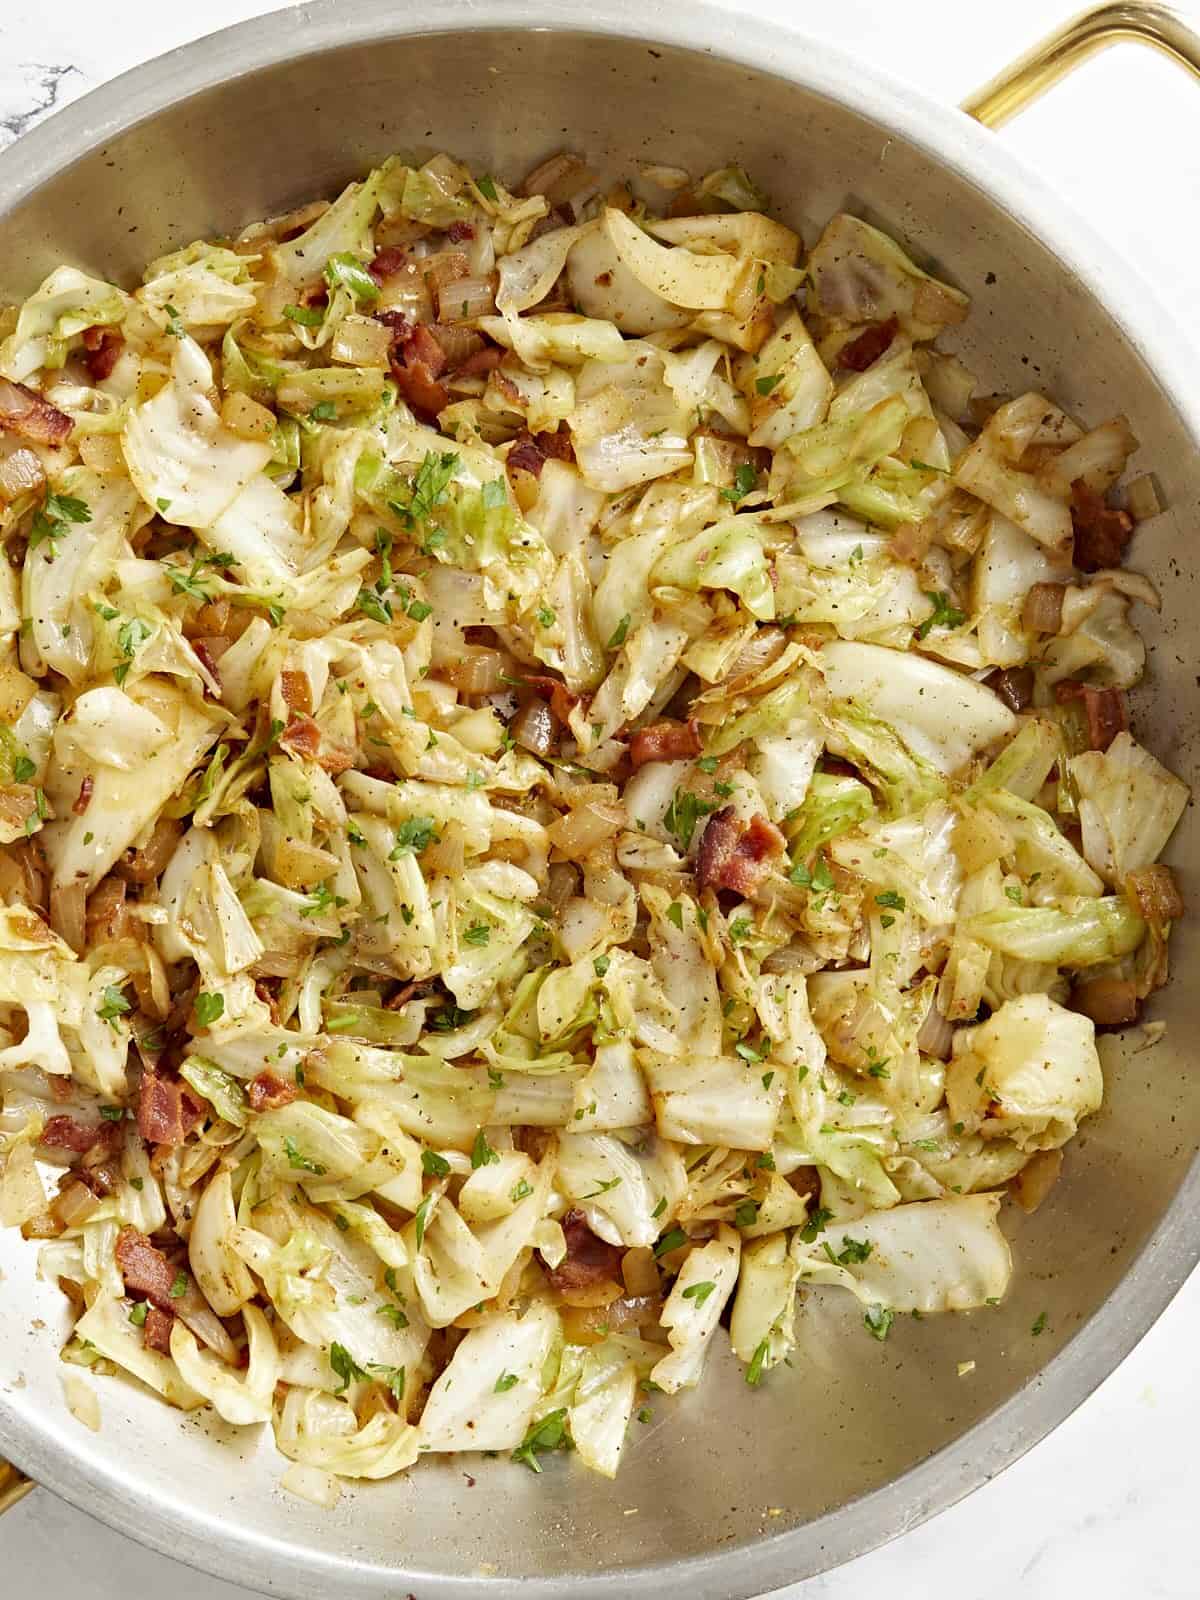
Overhead view of fried cabbage in a skillet.

Fried cabbage is a classic Southern side dish that you’re likely to find at BBQ joints and soul food kitchens across the Southern United States. It’s simply chopped cabbage that has been fried in bacon grease until golden brown and delicious. Seriously, words can not describe how amazing this melt-in-your-mouth cabbage is.

Ingredients for Fried Cabbage

It doesn’t take a lot to make fried cabbage taste incredible. Here are the few simple ingredients you’ll need to make this fried cabbage recipe:

  • Cabbage: This is the bulk of the recipe. It’s inexpensive, filling, and has tons of fiber (yay)! Look for cabbage that has a nice green color and isn’t very heavy for its size. Dense, compact cabbage can be underripe, have a tough texture, and lack flavor.
  • Bacon: Bacon adds flavor, salt, and fat to the cabbage, making it extra finger-licking good. See below for suggestions if you prefer a vegetarian fried cabbage or can’t eat pork.
  • Onion: Adding an onion to the fried cabbage brings both savory and sweet flavors to the table. The onion caramelizes a bit in the skillet bringing a slight natural sweetness.
  • Chicken Broth: Liquid helps steam and soften the cabbage, which can otherwise be quite tough. Using chicken broth instead of plain water ensures maximum flavor. You can substitute with other broth flavors, if preferred.
  • Seasoning Salt: I like to season my fried cabbage with an all-in-one seasoning salt, like Lawry’s or Tony Chacherie’s. We used Tony’s because I love the slightly spicy kick, but Lawry’s is equally as delicious.
  • Butter: A little bit of butter melted into the cabbage at the end gives the fried cabbage a deliciously rich finish.

Vegetarian Fried Cabbage

The bacon and chicken broth bring a large portion of the flavor to this dish, but you do have options if you’d like to make a vegetarian fried cabbage recipe. Simply swap out the chicken broth for vegetable broth or a vegetarian “chicken” flavored broth to start. To replace the smoky flavor and fatty mouthfeel of the bacon, I suggest either adding more butter or a tablespoon of coconut oil and some smoked paprika. You may also want to increase the seasoning salt to replace the salt from the bacon.

What to Serve with Fried Cabbage

Fried cabbage is the perfect side dish for any Southern-style dinner. Try pairing it with Pulled Pork, BBQ chicken, pork chops, potato salad, black-eyed peas, cornbread, or ham.

How to Store Leftovers

Fried cabbage is quite delicious as a leftover and you don’t need to take any special measures when refrigerating it. Simply place it in a food storage container and refrigerate for up to five days. To reheat the fried cabbage you can either microwave until hot or place it back into a non-stick skillet and sauté over medium heat until heated through. I do not suggest freezing fried cabbage as it will likely get very mushy upon thawing.

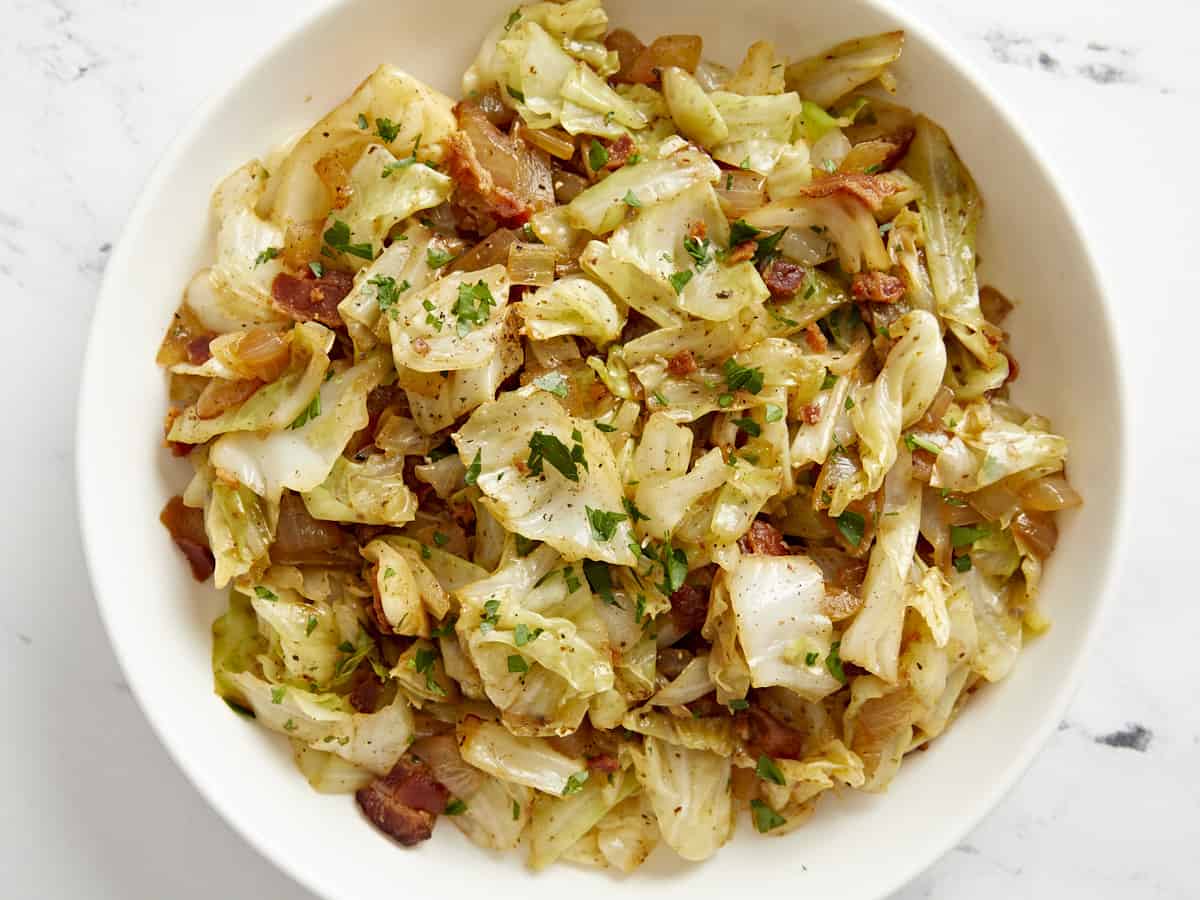
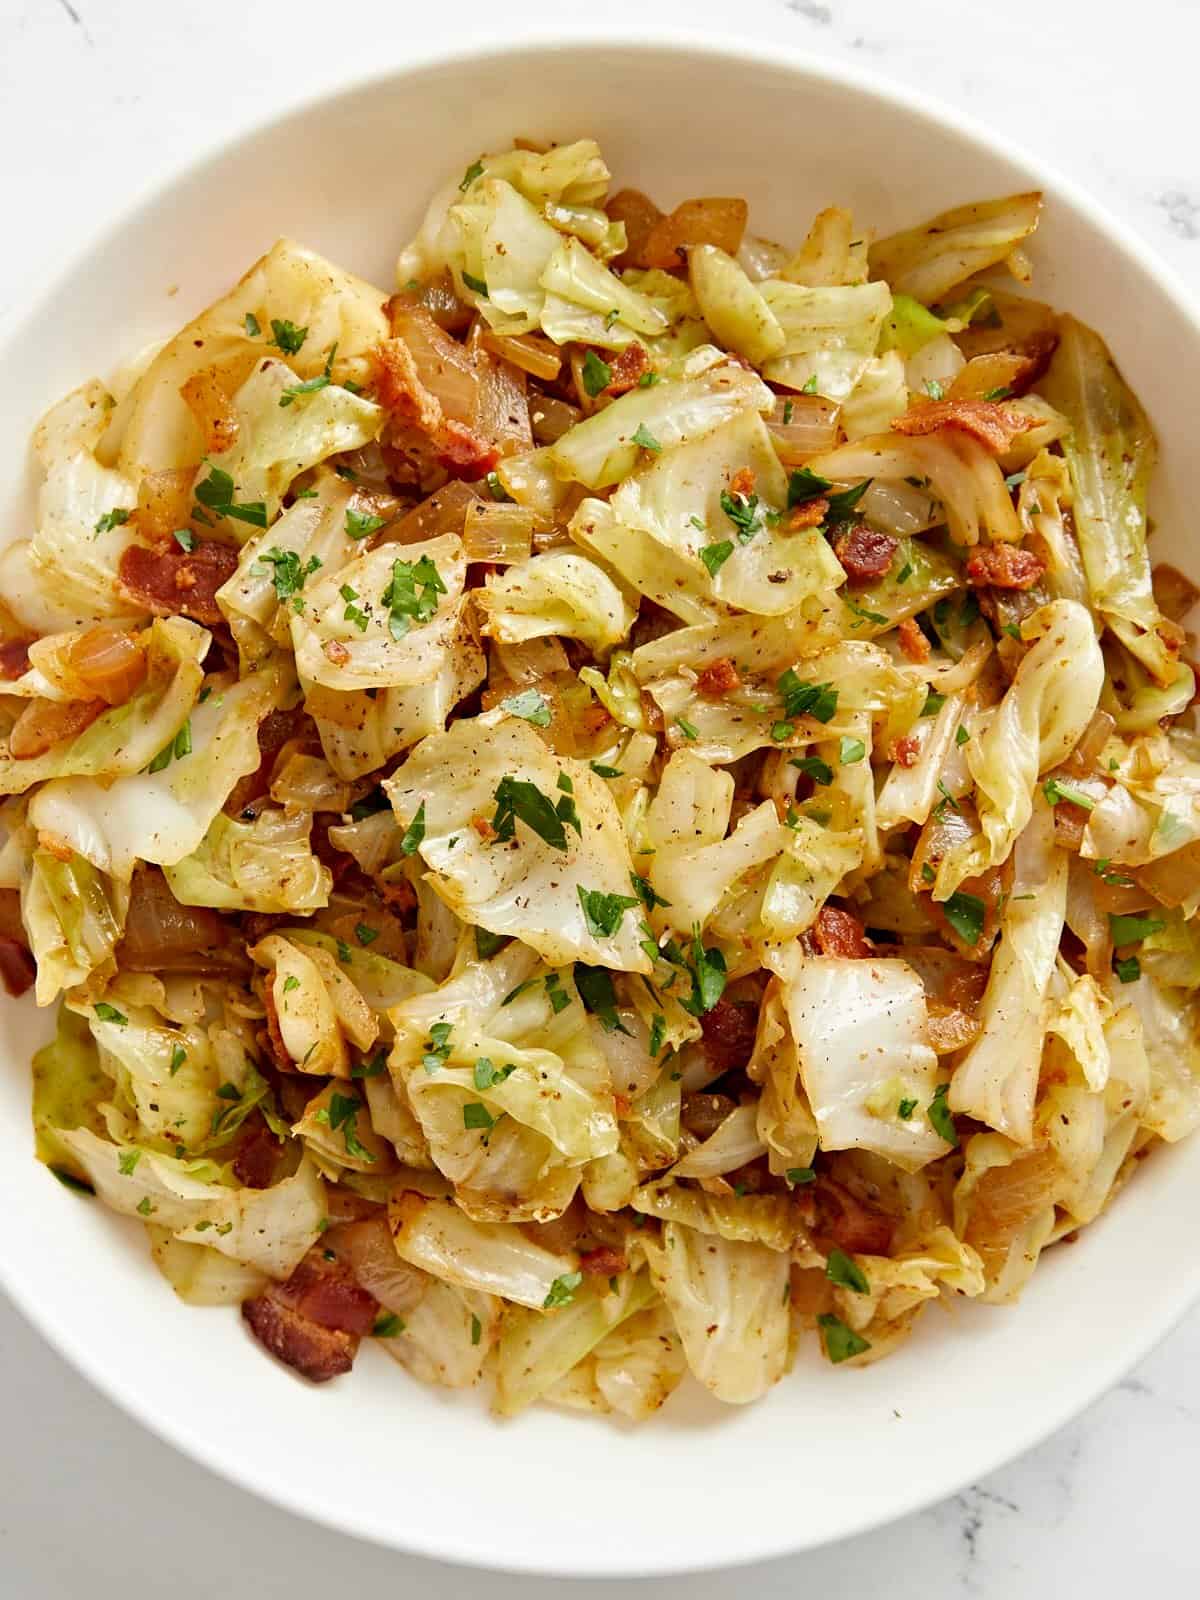
Overhead view of fried cabbage in a bowl.
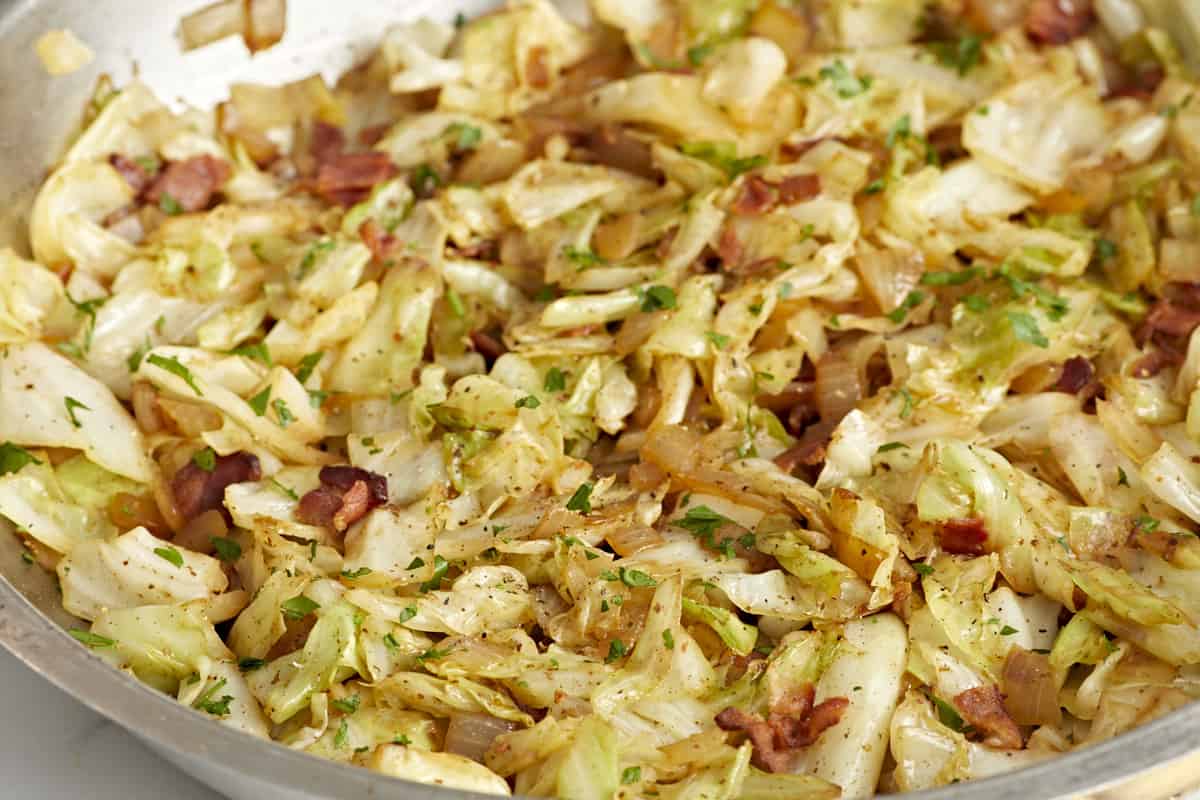
Close up overhead view of fried cabbage in a skillet.
Print

Fried Cabbage

This fried cabbage recipe is a super easy side dish that goes with just about any meal. It's flavorful, budget-friendly comfort food at its best!
Course Dinner, Side Dish
Cuisine American
Total Cost $3.39 recipe / $0.85 serving
Prep Time 10 minutes
Cook Time 20 minutes
Total Time 30 minutes
Servings 4 (about 1 cup each)
Calories 184kcal

Ingredients

  • 4 oz. bacon $1.33
  • 1/2 head green cabbage (about 1.25 lbs or 6 cups chopped) $0.99
  • 1 yellow onion $0.37
  • 1/4 cup chicken broth $0.52
  • 1/2 tsp seasoning salt $0.05
  • 1 Tbsp butter $0.13

Instructions

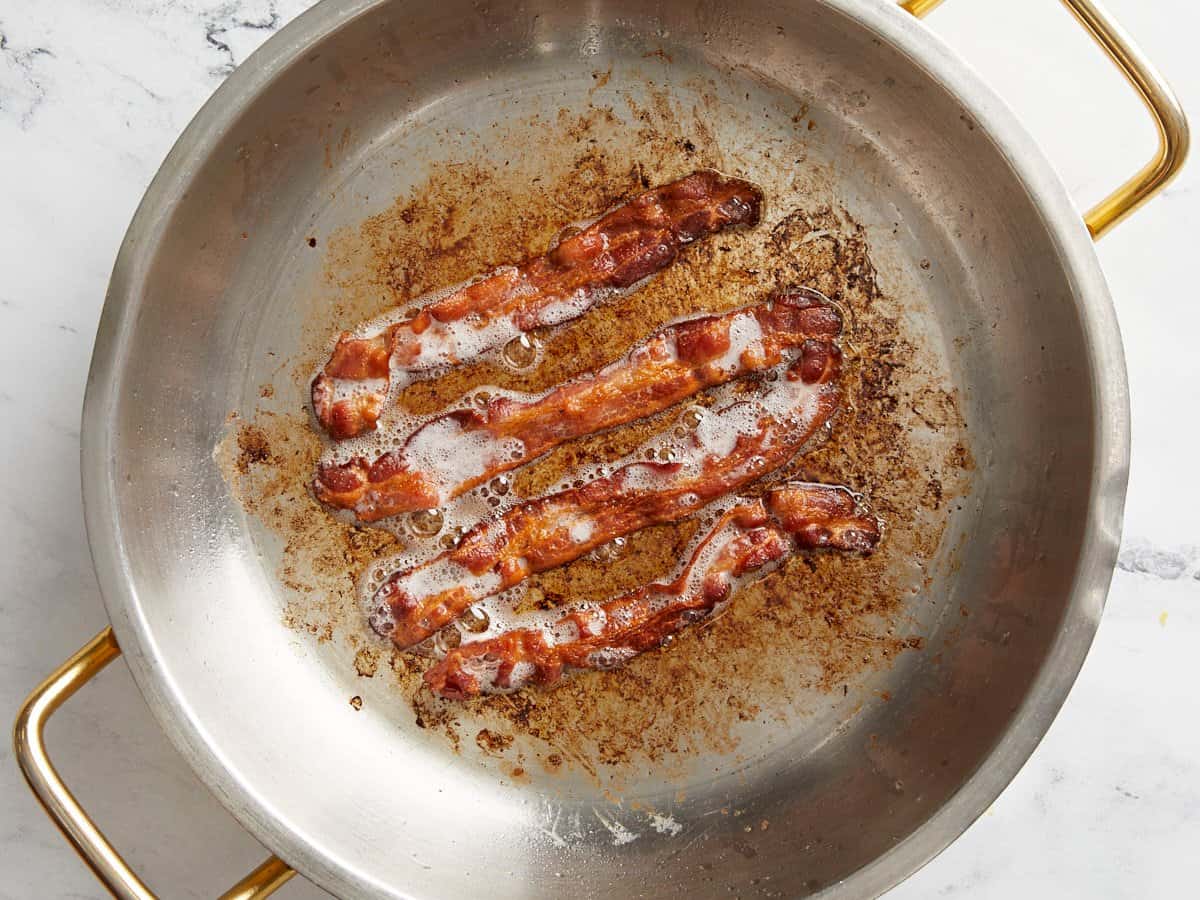
  • Add the bacon to a very large skillet and cook over medium heat until the bacon is brown and crispy. Remove the bacon from the skillet and drain the excess bacon fat, leaving about 2 Tbsp in the skillet (reserve the drained fat for later).
  • While the bacon is cooking, finely dice the onion and chop the cabbage into 1-inch pieces.
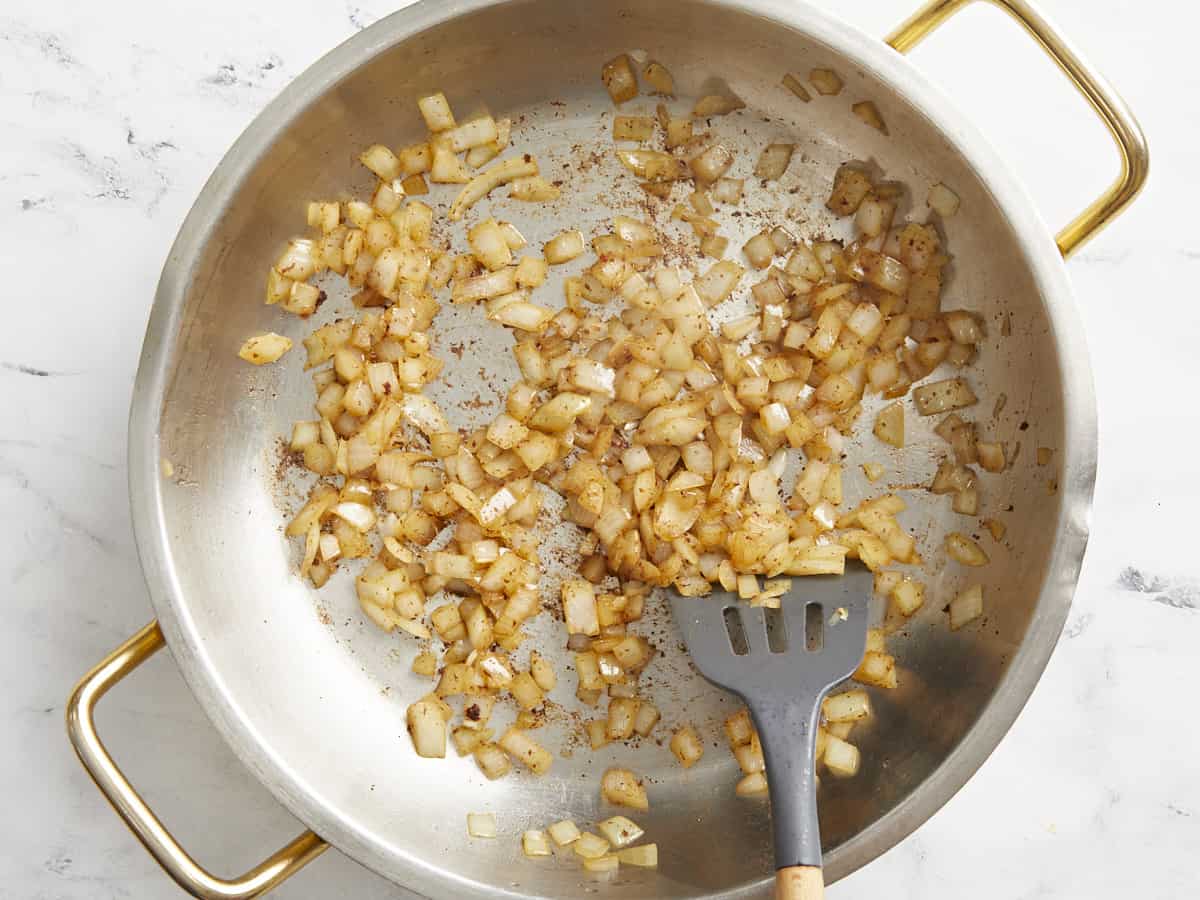
  • After removing the bacon from the skillet, add the diced onion and continue to sauté over medium heat until the onions become soft and translucent (about 5 minutes). The moisture from the onions will begin to dissolve the browned bacon bits from the bottom of the skillet.
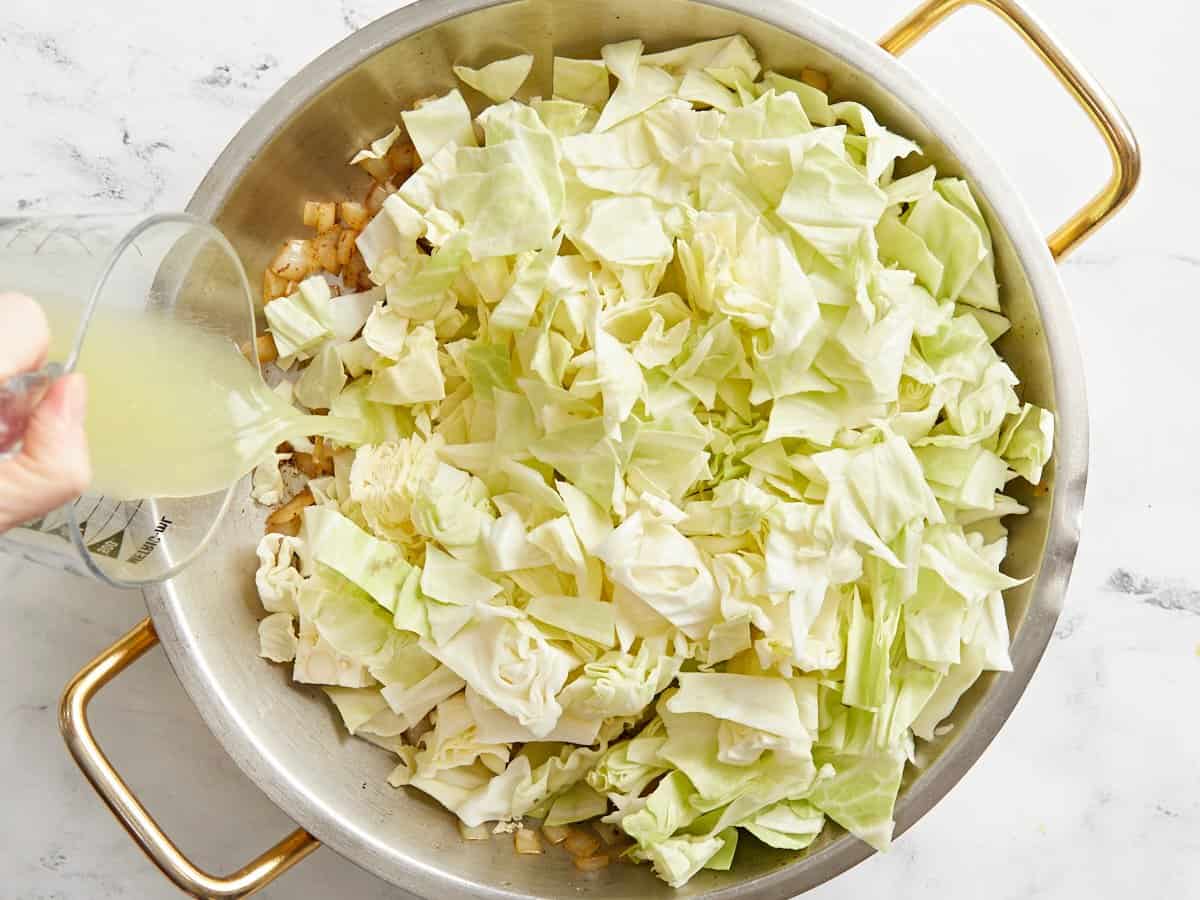
  • Once the onions are soft, add the chopped cabbage and chicken broth. Continue to let the cabbage cook over medium, stirring occasionally, until it has softened, most of the liquid has evaporated, and the edges begin to brown. If the skillet dries up before the cabbage is soft, add 2 Tbsp of water and continue to sauté until softened.
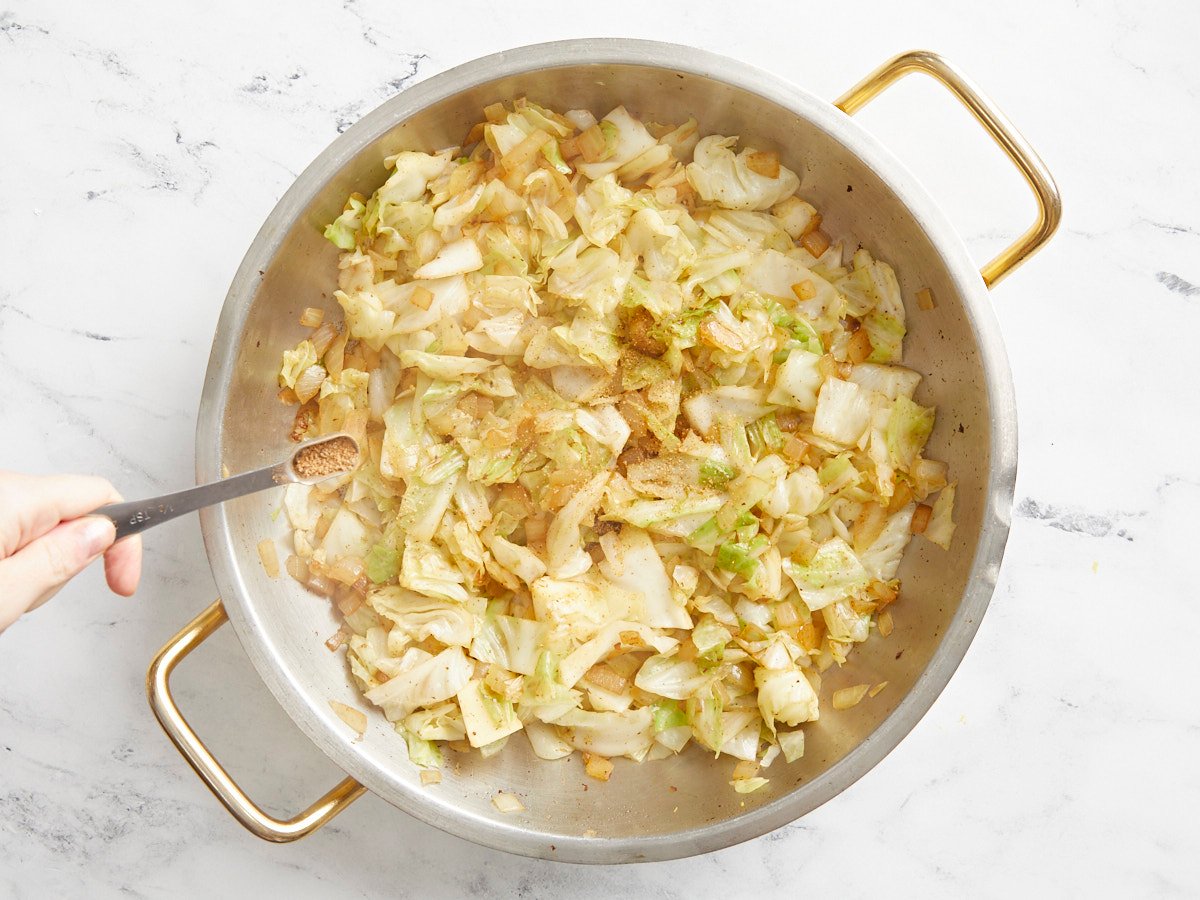
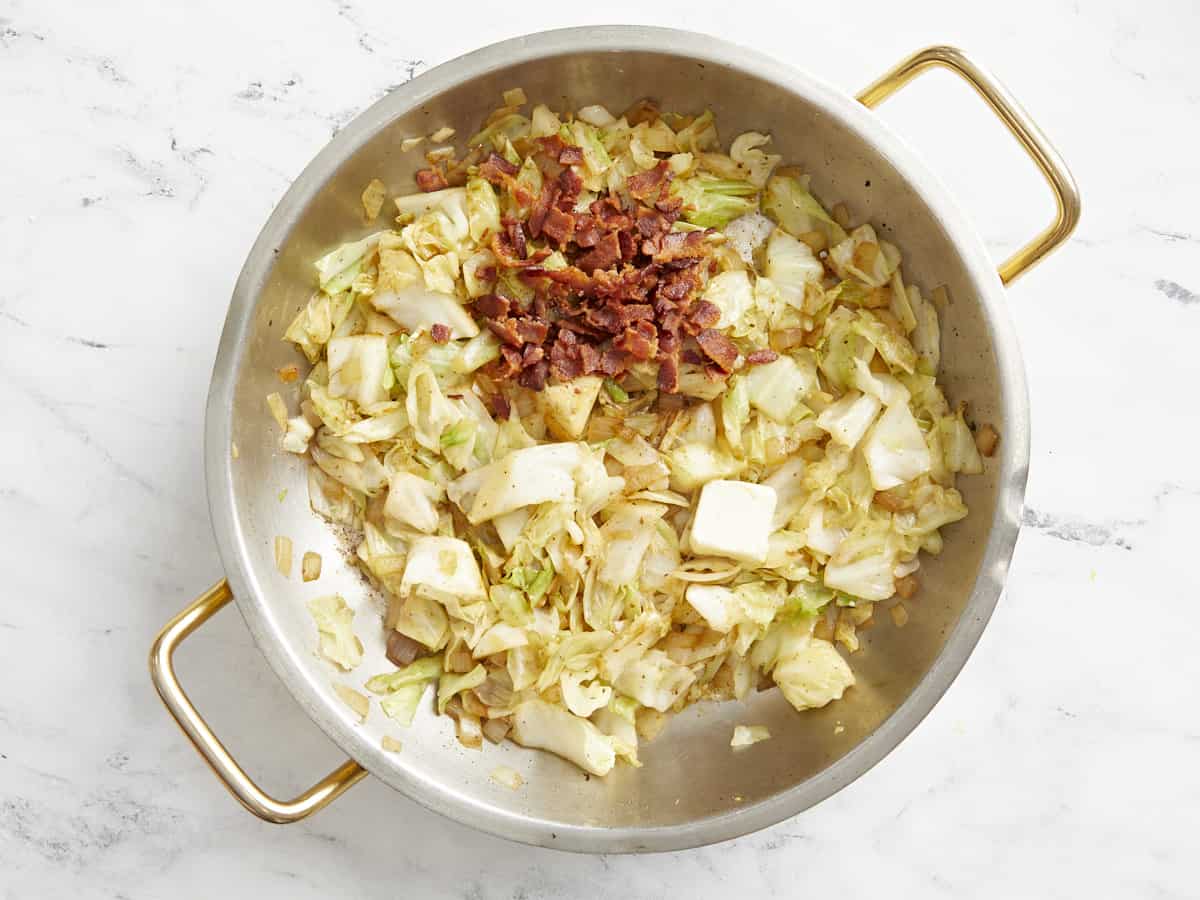
  • Once the cabbage is soft and the liquid has evaporated, add the butter to the skillet and stir until it has melted and coated the cabbage. Turn the heat off and add the seasoning salt, starting with ¼ tsp, then adding more to taste.
  • Finally, crumble the cooked bacon and stir it back into the cabbage. Give the cabbage a taste and adjust to your liking. Garnish with some freshly cracked pepper, serve, and enjoy!

See how we calculate recipe costs here.

Nutrition

Serving: 1cup | Calories: 184kcal | Carbohydrates: 10g | Protein: 5g | Fat: 14g | Sodium: 577mg | Fiber: 3g
Close up side view of fried cabbage in the skillet.

How to Make Fried Cabbage – Step by Step Photos

Cooked bacon in a large skillet.

Cook 4oz. of bacon in a very large skillet over medium heat until well browned and crispy. While the bacon is cooking, finely dice one yellow onion and chop ½ head of cabbage into 1-inch pieces (about 6 cups once chopped).

Sautéed onion in the bacon fat.

Once the bacon is cooked, remove it from the skillet and drain most of the bacon fat leaving about 2 Tbsp in the skillet (reserve the drained bacon fat for later). Add the diced onion and continue to sauté over medium heat until the onions are soft and translucent. The moisture from the onions should dissolve the browned bacon bits from the bottom of the skillet.

Chopped cabbage added to the skillet, broth being poured into the side.

Add the chopped cabbage and chicken broth to the skillet. Let the cabbage cook over medium heat, stirring occasionally, allowing it to wilt down. If the skillet becomes too dry before the cabbage has softened, reduce the heat and add a couple of tablespoons of water.

Wilted cabbage in the skillet, seasoning being sprinkled over top.

Continue cooking the cabbage until it has softened, most of the liquid in the skillet has evaporated, and the edges of the cabbage begin to brown. Once the cabbage is soft, add 1 Tbsp butter and stir until it has melted and coated the cabbage. Turn the heat off and season with the seasoning salt, starting with ¼ tsp and adding more to taste (we used about ½ tsp).

Crumbled bacon added to the cabbage.

Finally, crumble the cooked bacon and stir it into the cabbage.

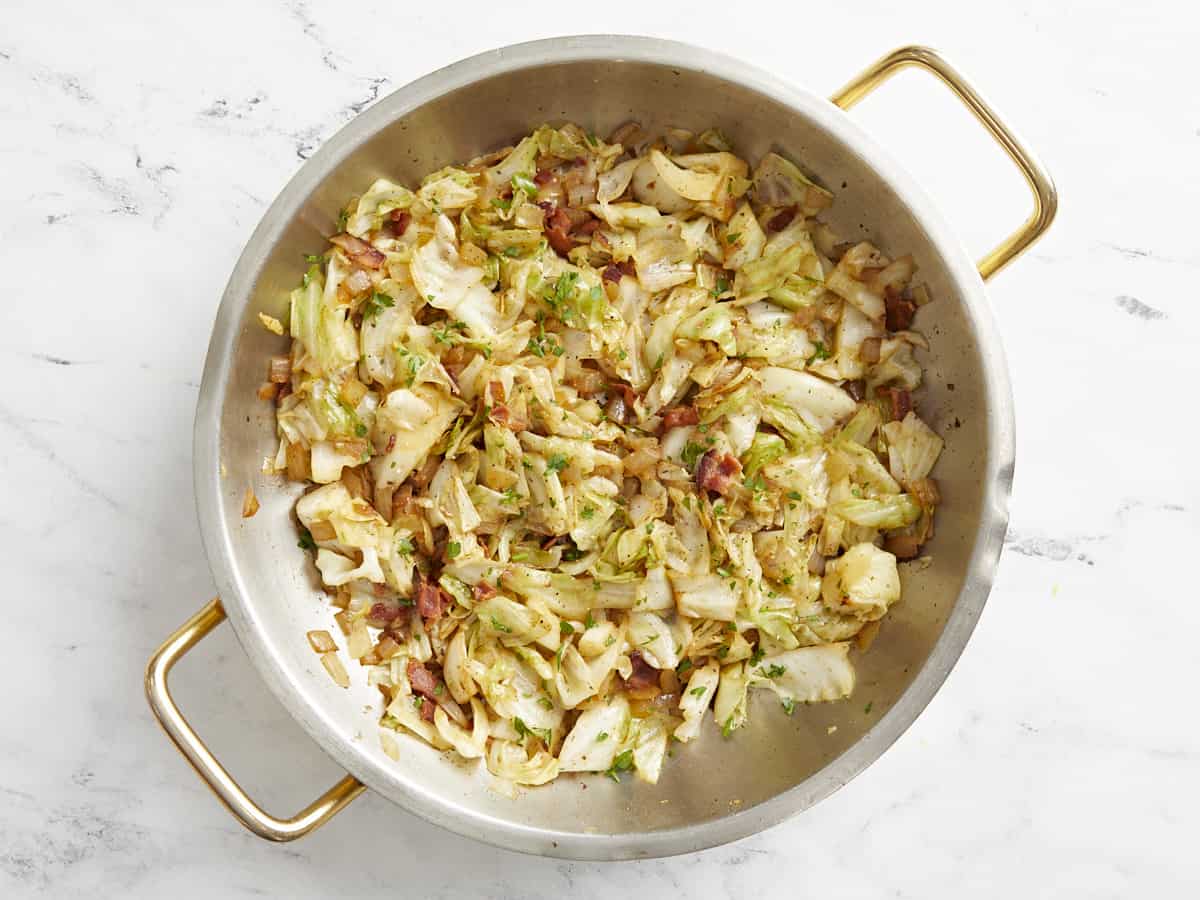
Finished fried cabbage in the skillet.

Taste the cabbage and adjust to your liking. You can garnish with chopped parsley, if desired, and freshly cracked pepper.

Close up overhead view of fried cabbage in a bowl.

The post Fried Cabbage appeared first on Budget Bytes.