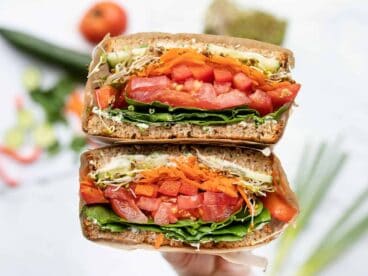
Sheet Pan Pancakes

These sheet pan pancakes make breakfast on weekends a breeze! They’re easy to whip up and they’re freezer-friendly. Perfect for breakfast meal prep!

The post Sheet Pan Pancakes appeared first on Budget Bytes.

I’m always looking for ways to get breakfast and dinner on the table faster and these Sheet Pan Pancakes might just be my new best friend! Not only are they easy to whip up, but they’re super convenient. You can pour the entire pancake batter on one baking sheet and top it with your favorite toppings, or leave it plain and let everyone add their own toppings after it bakes. What I love most about these sheet pan pancakes are that they’re perfect for breakfast meal prep. They freeze perfectly and whenever I need a quick breakfast, I just pop 2 pancakes in my toaster and breakfast is done!🙌
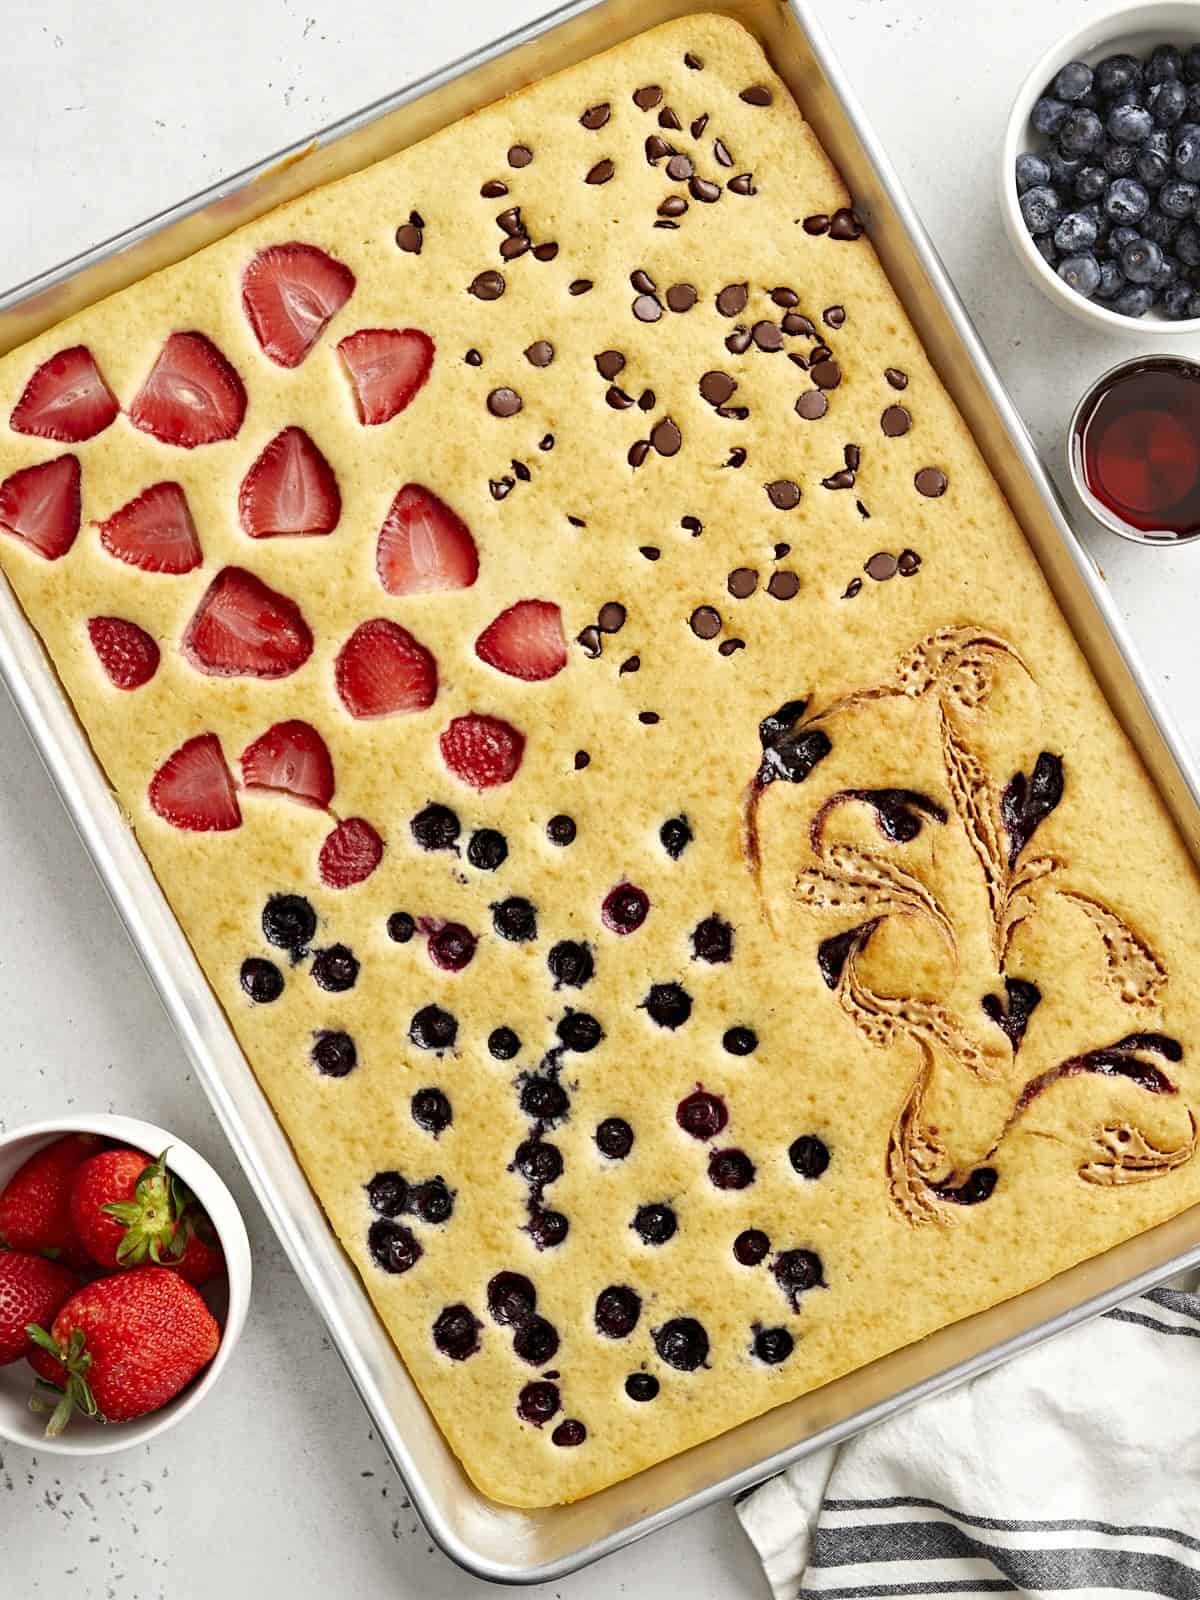
Overhead view of sheet pan pancakes with fresh fruit and maple syrup on the side.

Why Sheet Pan Pancakes?

I’m not sure if your family loves pancakes as much as mine, but it has now turned into our Saturday morning routine. But flipping and making several batches of regular pancakes takes quite a while. And I have to try and keep the first few batches warm in the oven, while I make the rest of the pancakes. Sheet Pan Pancakes keeps you from having to do that back and forth dance. You can make pancakes for the whole family in one big batch, all on one baking sheet, and customize it with their favorite mix-ins and toppings. It’s honestly genius!

Ingredients For Sheet Pan Pancakes

To make these sheet pan pancakes, I used our homemade pancakes recipe as a base foundation and adjusted the measurements to accommodate a larger portion size. Here’s what you’ll need:

  • All-Purpose Flour: Flour adds structure and is the foundation of the pancakes.
  • Baking Powder: Baking powder is what makes the pancakes light and fluffy instead of dense and gummy.
  • Sugar: A little bit of sugar adds the perfect amount of sweetness to the pancakes.
  • Milk: Milk combines with the flour to add moisture and helps create the batter.
  • Egg: Eggs help hold the pancakes together and also helps leaven the pancakes.
  • Butter: Butter adds flavor and richness to the pancakes.
  • Vanilla Extract: A small amount of vanilla extract adds a wonderful flavor and depth to the pancake.
  • Salt: A little bit of salt helps enhance the flavor of the pancakes.
  • Toppings: This is where you can really have fun! I used a combination of my favorite fruits like strawberries and blueberries. And for some variety I added some chocolate chips and peanut butter & raspberry jam.

More Toppings and Mix-in Ideas

My favorite part about making sheet pan pancakes is adding different mix-ins and toppings. I personally love adding fresh fruit, but here are some more topping ideas for you to try:

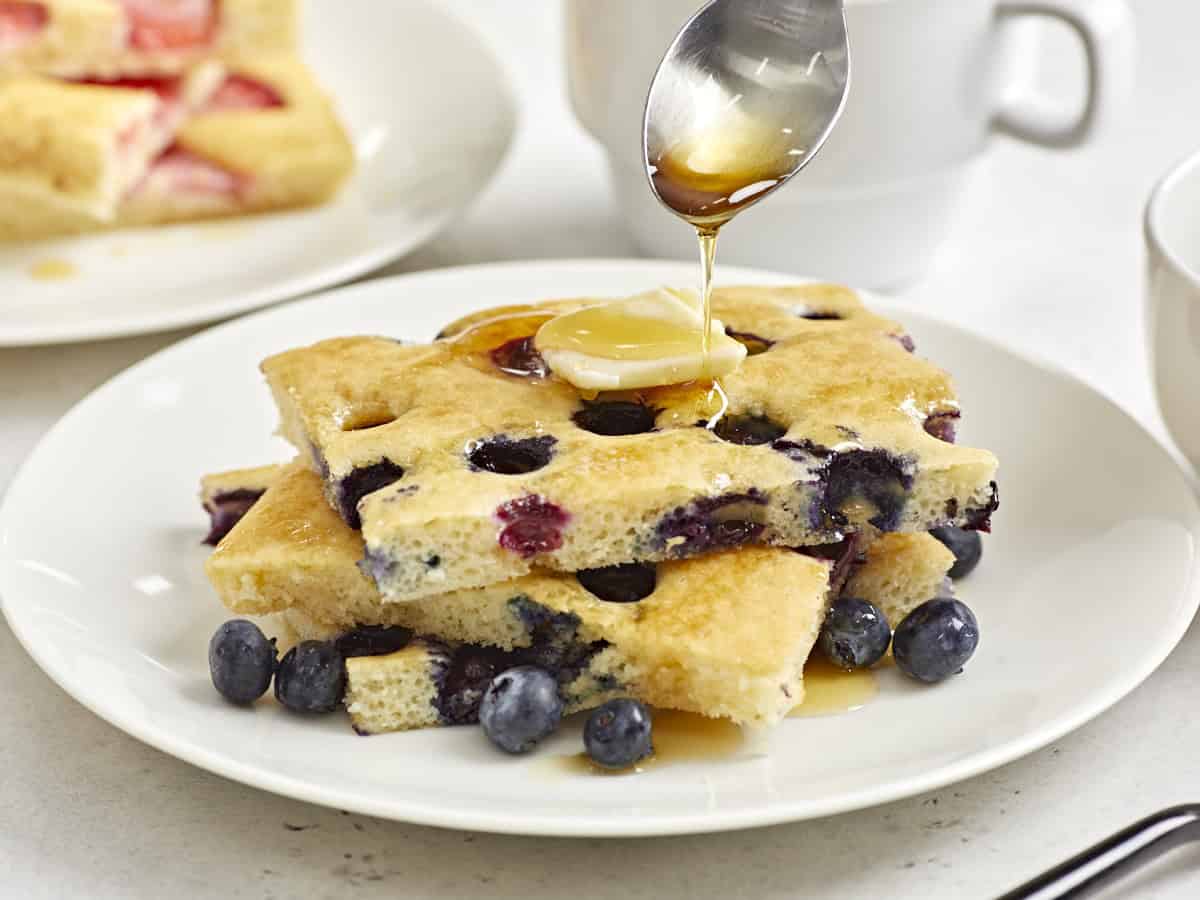
Close up side view of sheet pan pancakes on a serving plate with maple syrup being drizzled over the top.

Recipe Tips!

  1. Don’t overmix the batter. Stir the dry and wet ingredients together until they are just combined and there are no traces of dry flour left in the bowl. Over-mixing the batter will develop the gluten in the flour and make the pancakes rubbery rather than soft and fluffy.
  2. Grease your sheet pan well. Make sure to generously coat your sheet pan well with cooking spray to keep the pancakes from sticking.
  3. Dry your fruit well. If you’re adding fresh fruit, make sure to wash and dry your fruit well with paper towels to prevent any excess water or fruit juices from bleeding into the pancake batter.
  4. If necessary, use some parchment paper. Sheet pan pancakes seem to work better with baking sheets that aren’t too old. So if your baking sheet is older or a little beat up, you may want to line it with some parchment paper first.

How To Store & Freeze Sheet Pan Pancakes

What I love most about making sheet pan pancakes is that they’re extremely easy to store and freeze for later when you need a quick & easy breakfast. To store, let the pancakes cool completely, then transfer them to an airtight container and refrigerate for up to 3 days.

To freeze, place the cooled pancakes in a freezer safe storage bag, in single layers with parchment paper between the layers to prevent sticking. Freeze for up to 3 months. You can easily reheat frozen pancakes in a toaster or in the microwave until hot.
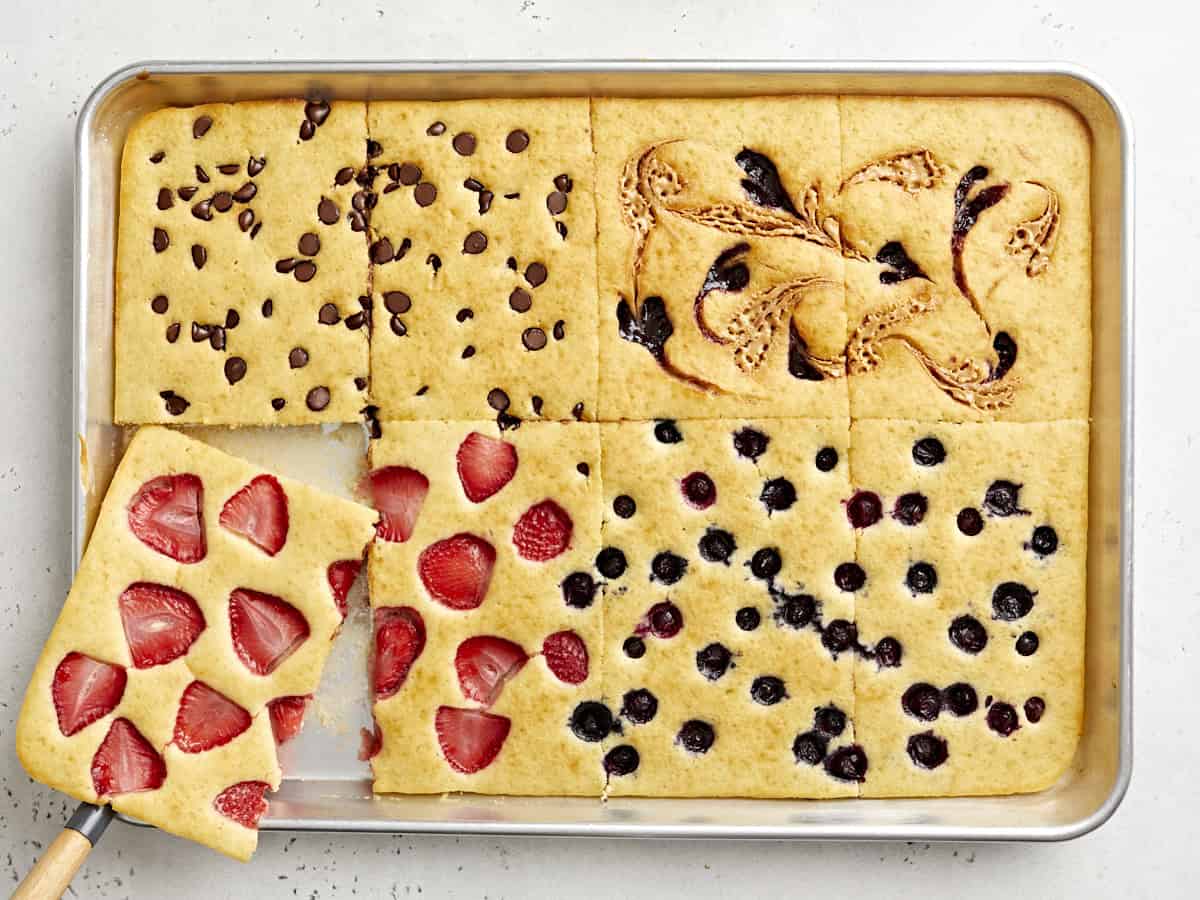
Overhead view of sheet pan pancakes cut into squares with one slice being lifted out.
Print

Sheet Pan Pancakes

These sheet pan pancakes make breakfast on weekends a breeze! They’re easy to whip up and they’re freezer-friendly. Perfect for breakfast meal prep!
Course Breakfast, Brunch
Cuisine American
Total Cost $2.22 recipe / $0.55 serving
Prep Time 10 minutes
Cook Time 20 minutes
Total Time 30 minutes
Servings 4 (2 pancakes each)
Calories 467kcal

Equipment

Ingredients

  • 2 cups all-purpose flour $0.40
  • 1/4 cup granulated sugar $0.10
  • 1 Tbsp baking powder $0.18
  • 3/4 tsp salt $0.08
  • 1 1/2 cup milk $0.30
  • 2 large eggs $0.33
  • 4 Tbsp butter, melted $0.53
  • 1 tsp vanilla extract $0.30
  • cooking spray

Optional Toppings*

  • fresh strawberries, sliced
  • blueberries
  • chocolate chips
  • peanut butter and fruit jam

Instructions

  • Preheat the oven to 425°F. In a large bowl whisk together the flour, sugar, baking powder, and salt.
  • In the same bowl, add in the milk, eggs, melted butter, and vanilla extract. Whisk the wet ingredients together with the dry ingredients until just combined. Be careful not to over mix.
  • Generously coat a 11×17-inch rimmed baking sheet with cooking spray. Pour the pancake batter onto the baking sheet. Spread the batter evenly around the baking sheet with a rubber spatula or tap the pan a few times on the counter to even out the batter.
  • Visually divide the pancake batter into four equal sections and add your desired toppings on top into each section. I used a combination of sliced strawberries, blueberries, chocolate chips, and a peanut butter and raspberry jam swirl. To make the pb&j swirl, I simply added dollops of natural peanut butter and jam, then swirled the two together using a toothpick.
  • Place the sheet pan in the oven and bake for 18-20 minutes or until golden brown.
  • Allow the pan to cool slightly, then slice the sheet pan pancake into 8 equal portions. Feel free to make smaller slices if you want to make more servings. Serve warm with syrup and extra toppings if you like. Enjoy!

See how we calculate recipe costs here.

Notes

*I added about 1/4 cup of chocolate chips and blueberries. For the strawberries and PB&J swirl, I simply eyeballed it until I filled up each section.

Nutrition

Serving: 2pancakes | Calories: 467kcal | Carbohydrates: 66g | Protein: 12g | Fat: 17g | Sodium: 912mg | Fiber: 2g
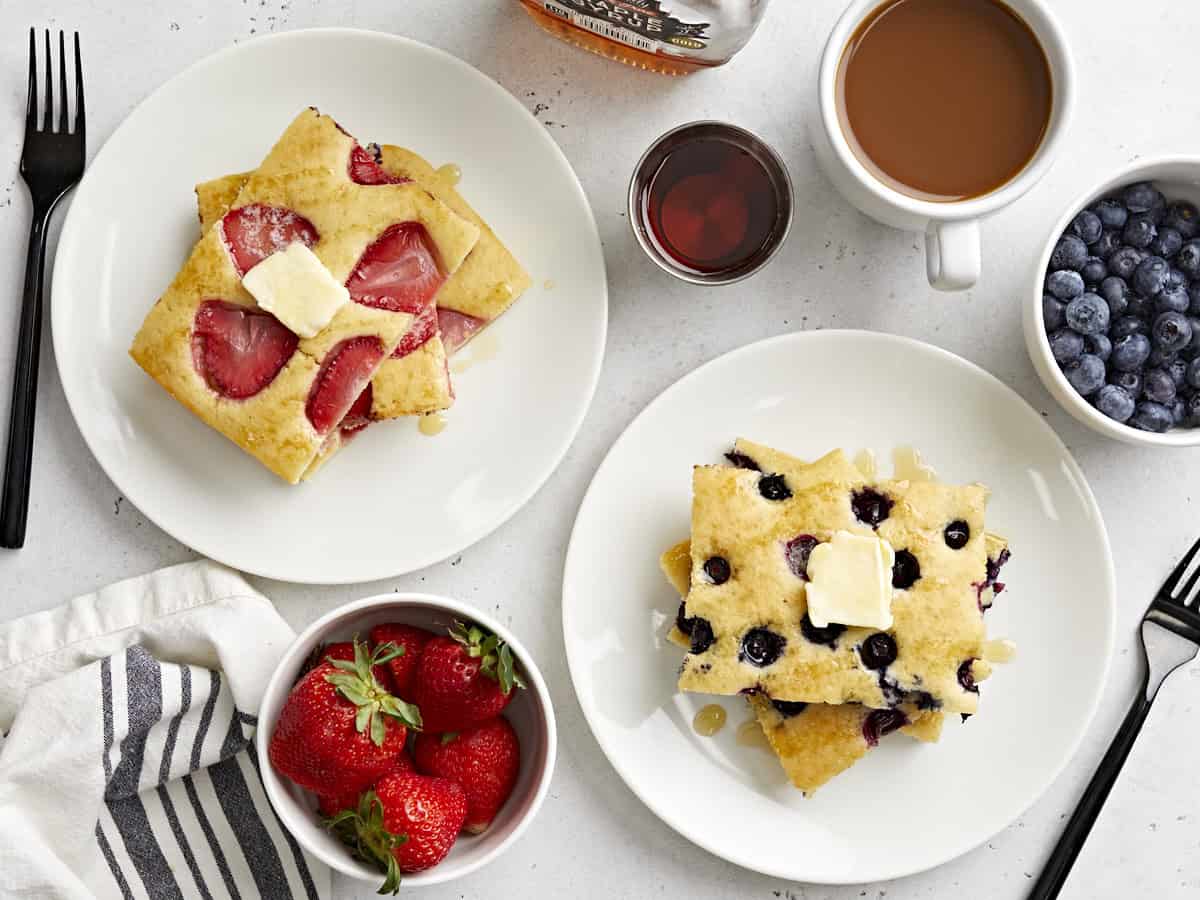
Overhead view of sliced sheet pan pancakes on two serving dishes with fruit and syrup on the side.

How to Make Sheet Pan Pancakes – Step by Step Photos
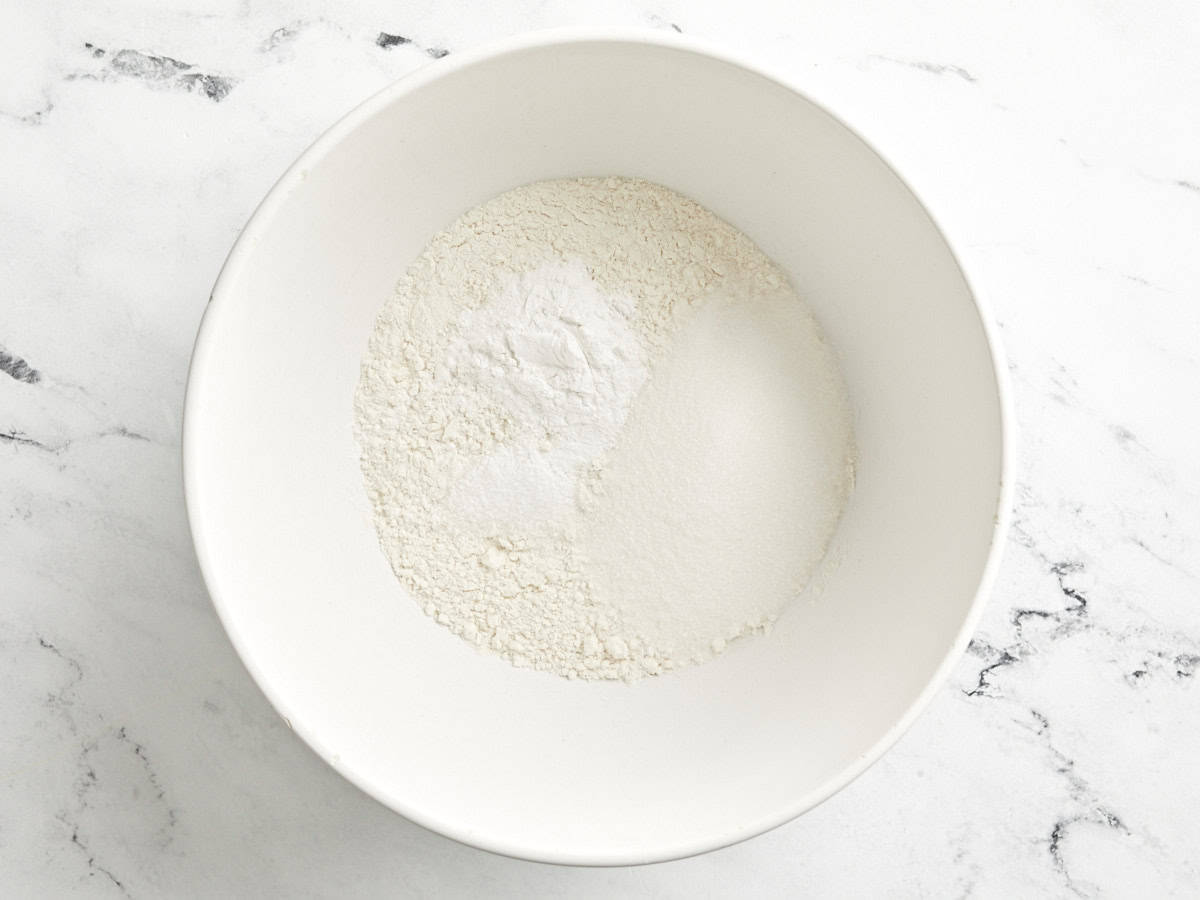
Dry ingredients in a bowl for sheet pan pancakes.

Preheat the oven to 425°F. In a large bowl whisk together 2 cups all-purpose flour, 1/4 cup granulated sugar, 1 Tbsp baking powder, and 3/4 tsp salt.
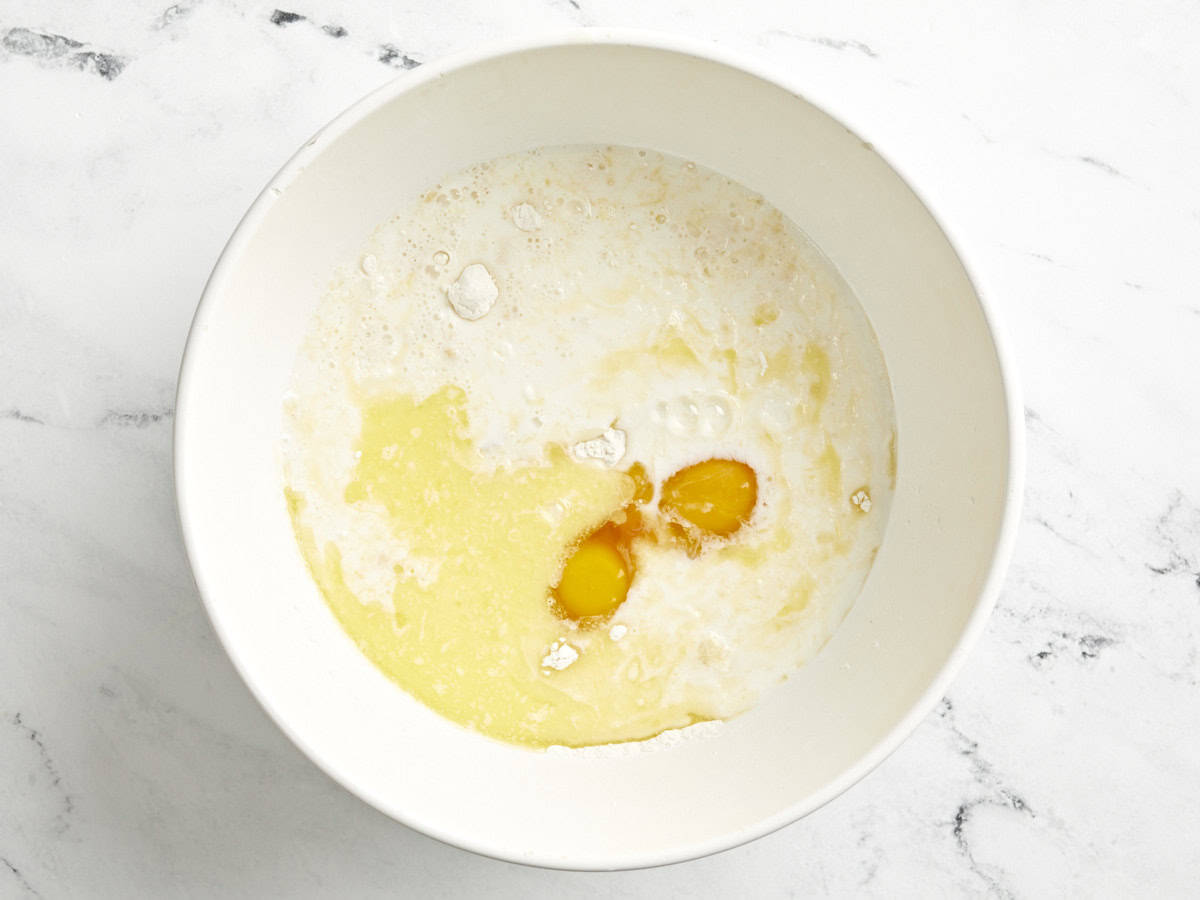
Dry and wet ingredients in a bowl for sheet pan pancakes.

In the same bowl, add in 1 1/2 cups milk, 2 large eggs, 4 Tbsp melted butter, and 1 tsp vanilla extract.
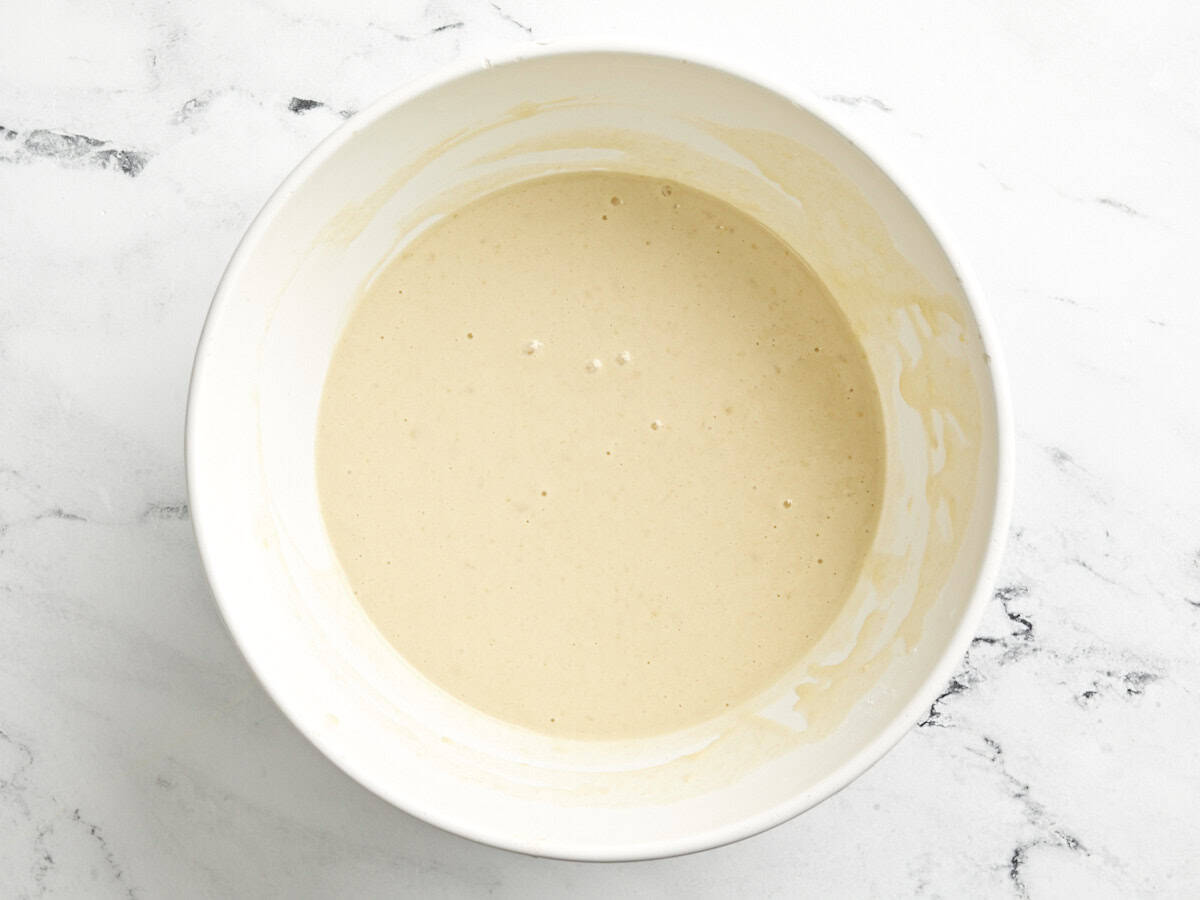
Sheet pan pancake ingredients mixed in a bowl.

Whisk the wet ingredients together with the dry ingredients until just combined. Be careful not to over mix at this point.
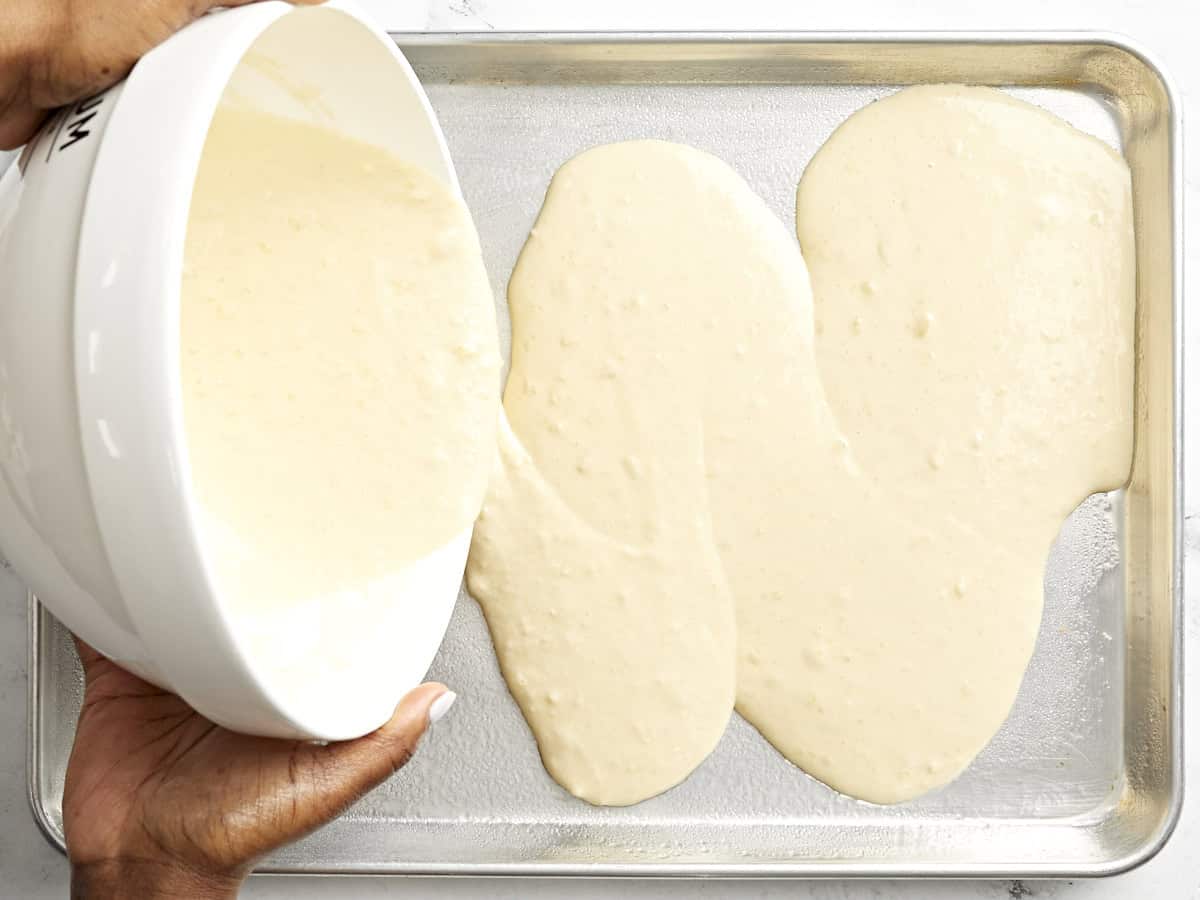
Sheet pan pancake batter poured onto a sheet pan.

Generously coat an 11×17-inch rimmed baking sheet with cooking spray. Pour the pancake batter onto the baking sheet. Spread the batter evenly around the baking sheet with a rubber spatula or tap the pan a few times on the counter to even out the batter.
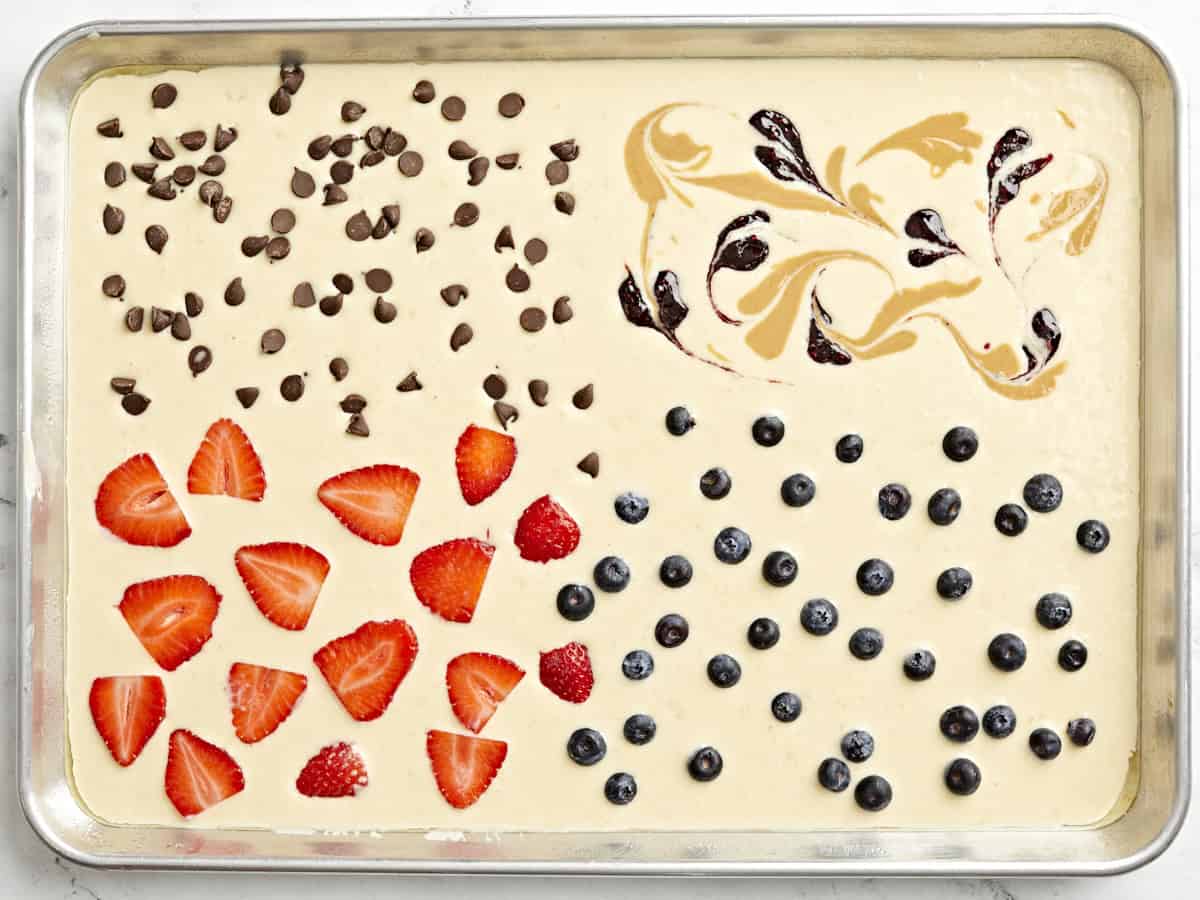
Sheet pan pancake batter with fruit added on top poured onto a sheet pan.

Visually divide the pancake batter into four equal sections and add your desired toppings on top into each section. I used a combination of sliced strawberries, blueberries, chocolate chips, and a peanut butter and raspberry jam swirl. To make the pb&j swirl, I simply added dollops of natural peanut butter and jam, then swirled the two together using a toothpick.
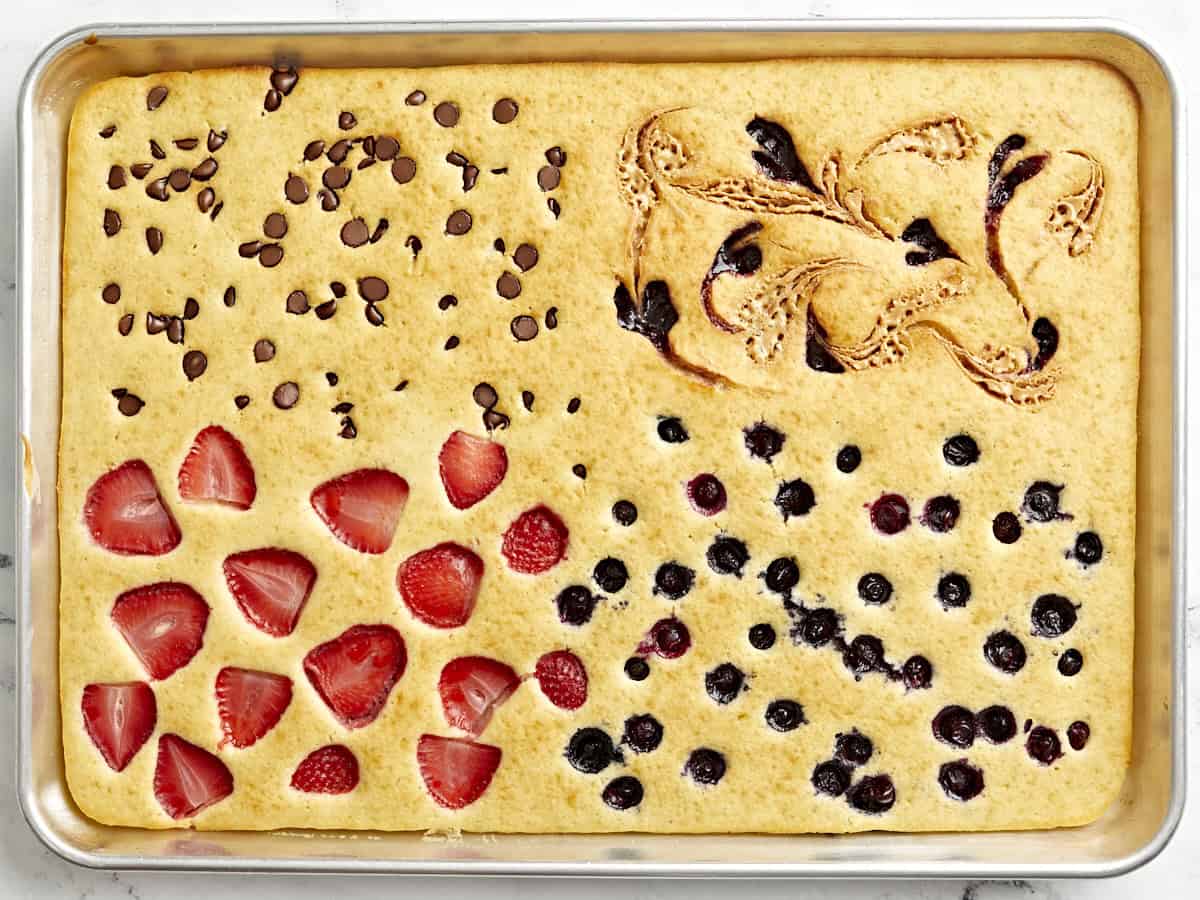
Finished sheet pan pancakes with four different toppings on top.

Place the sheet pan in the pre-heated oven and bake for 18-20 minutes or until golden brown.

Overhead view of sheet pan pancakes cut into squares with one slice being lifted out.

Allow the pan to cool slightly, then slice the sheet pan pancake into 8 equal portions. Feel free to make smaller slices if you want to make more servings. Serve warm with syrup and extra toppings if you like!
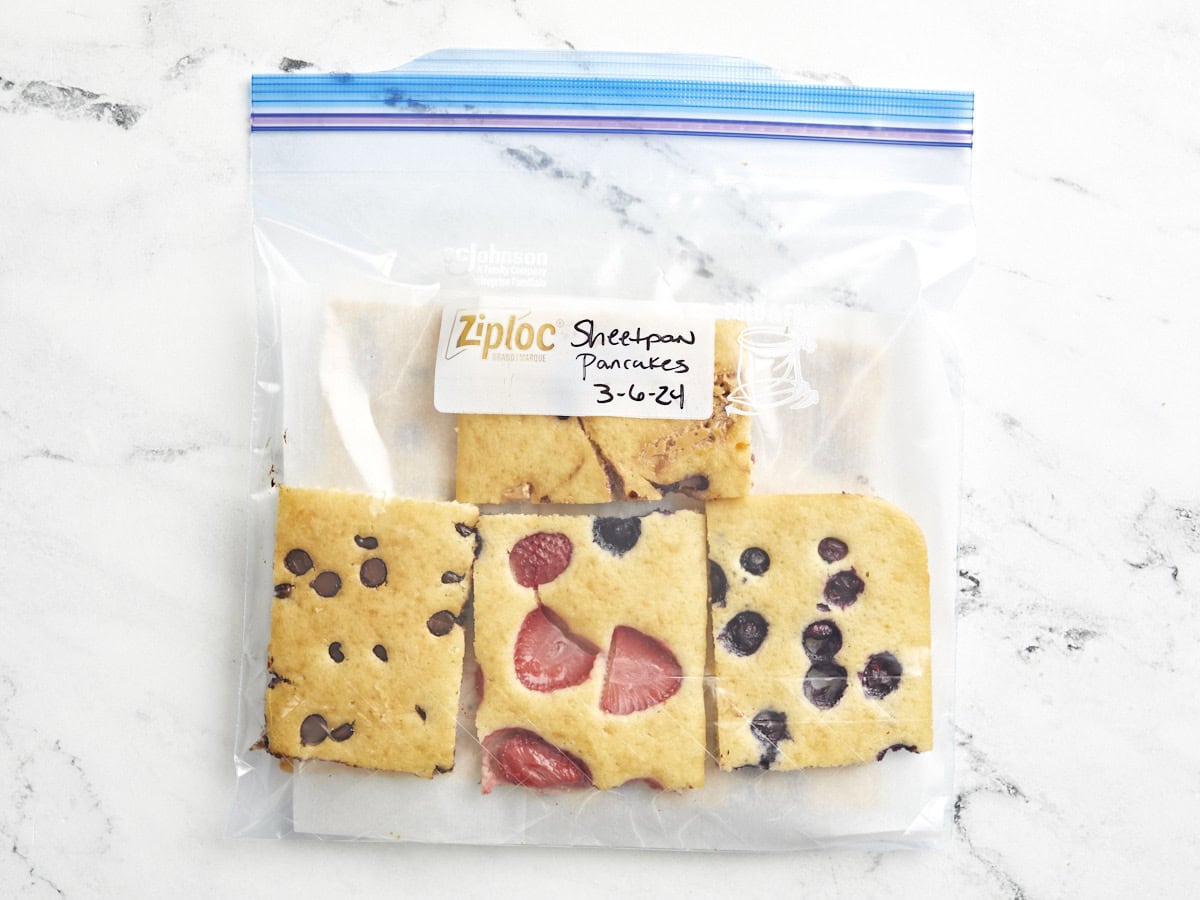
Sheet pan pancakes in a freezer bag.

These pancakes are super easy to freeze! Just place the cooled pancakes in a freezer safe storage bag, in single layers with parchment paper between the layers to prevent sticking. Freeze for up to 3 months.
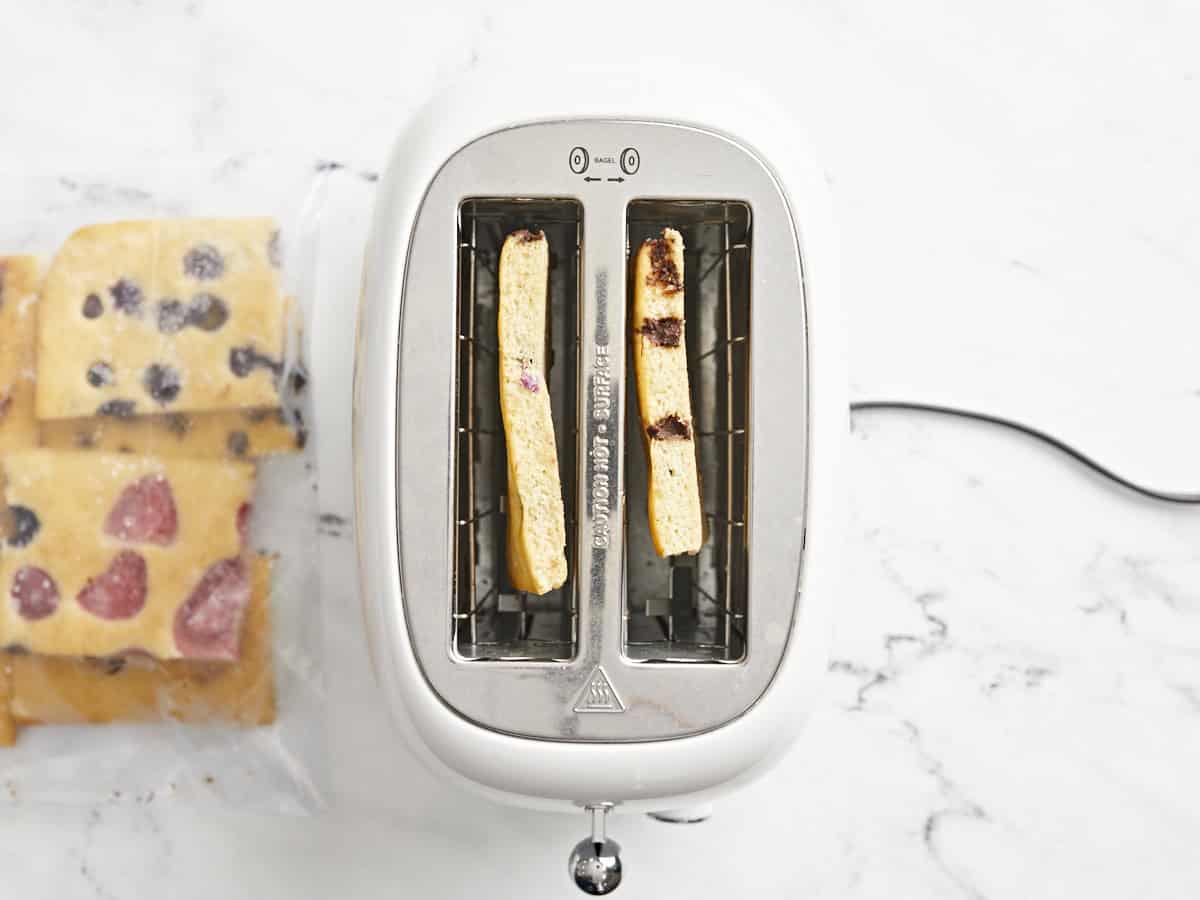
Frozen sheet pan pancakes in a toaster.

You can easily reheat frozen pancakes in a toaster or in the microwave until hot.
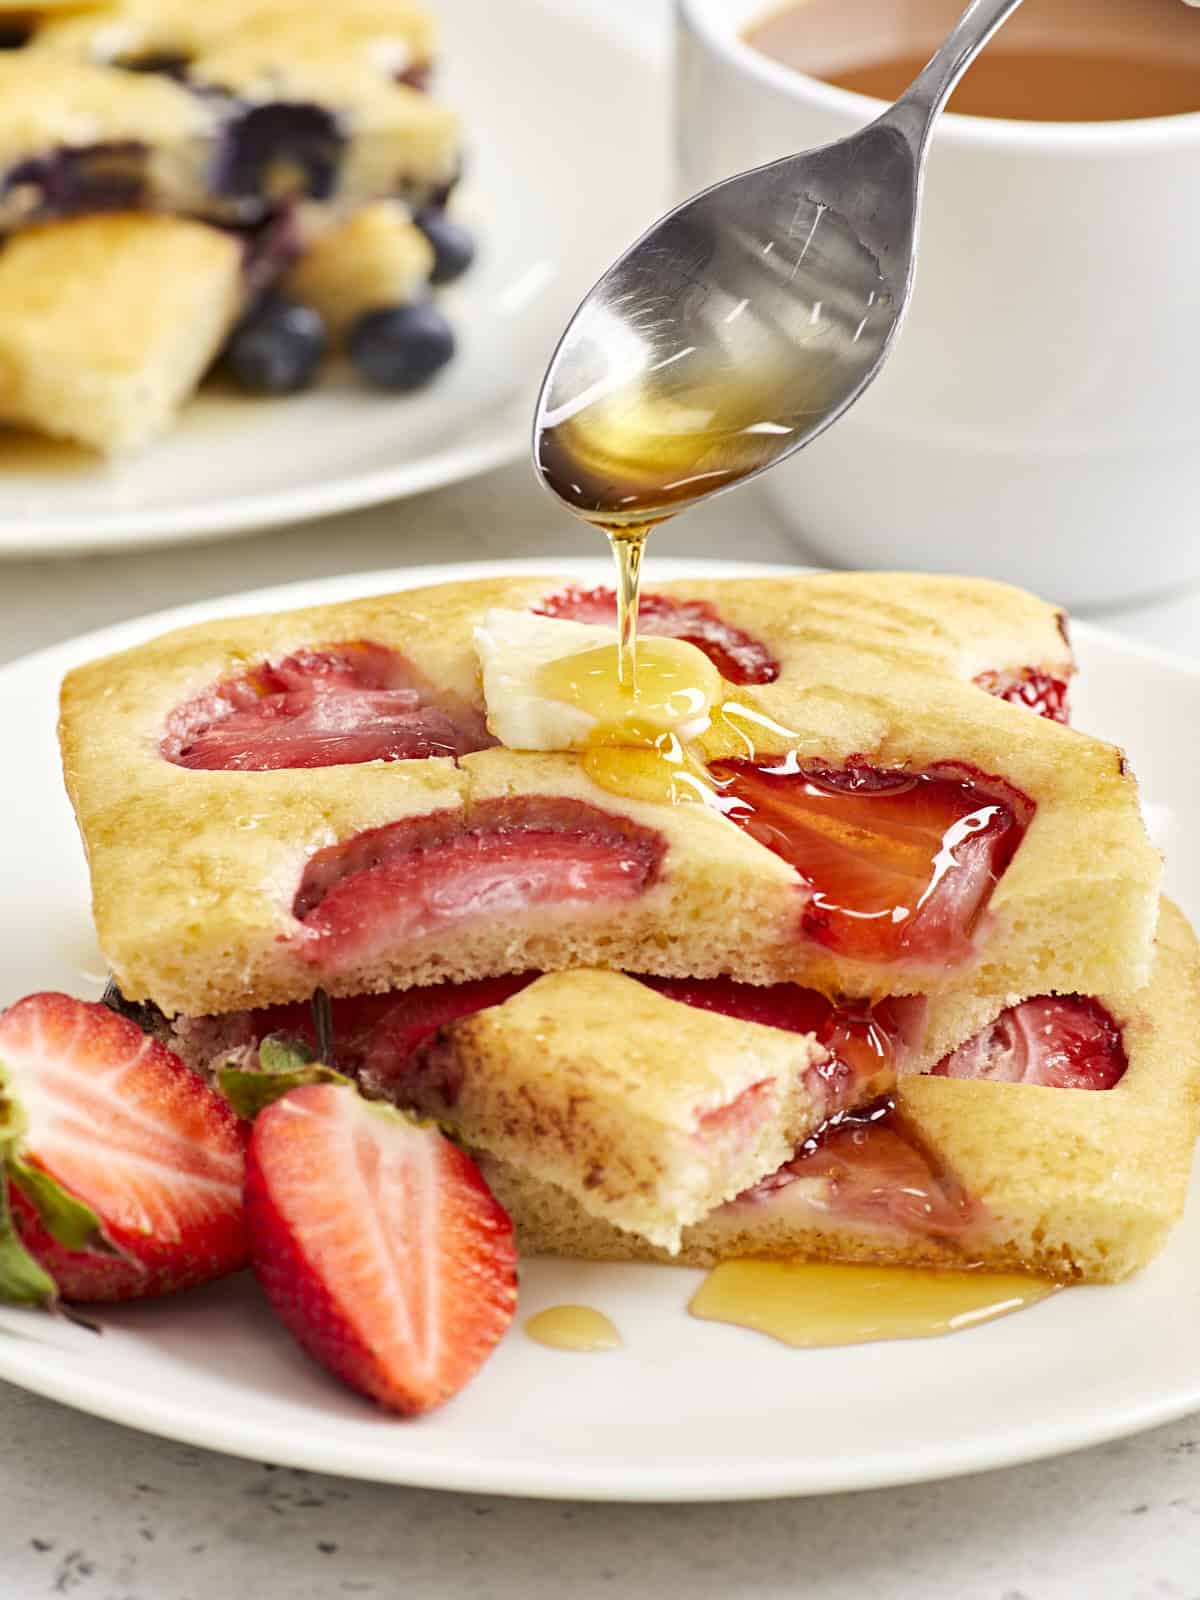
Close up side view of strawberry sheet pan pancakes on a serving plate with maple syrup being drizzled over the top.

The post Sheet Pan Pancakes appeared first on Budget Bytes.

Taco Salad

This taco salad recipe is super customizable without compromising on its hearty and satisfying flavors. It’s the ultimate meal prep salad!

The post Taco Salad appeared first on Budget Bytes.

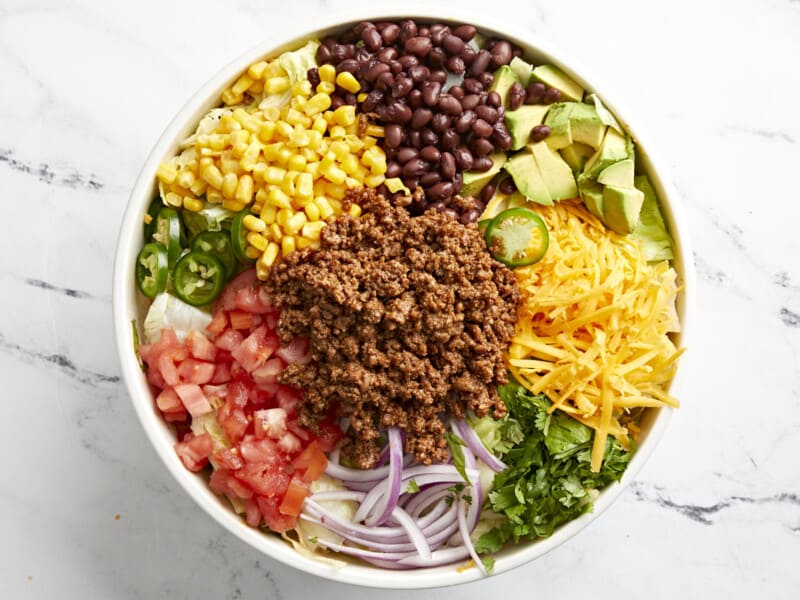
Listen, I love Taco Tuesday as much as the next gal, but Taco Salads are really where it’s at. I have always said that salad is the ultimate “fast food”, and I’m sticking to it. Think about it, they’re quick, easy, and almost always require very little cooking. When you want a little extra somethin’ special, this taco salad with lean ground beef is it. You can make taco salad at home for a fraction of the price and have enough salad to meal prep all week long.

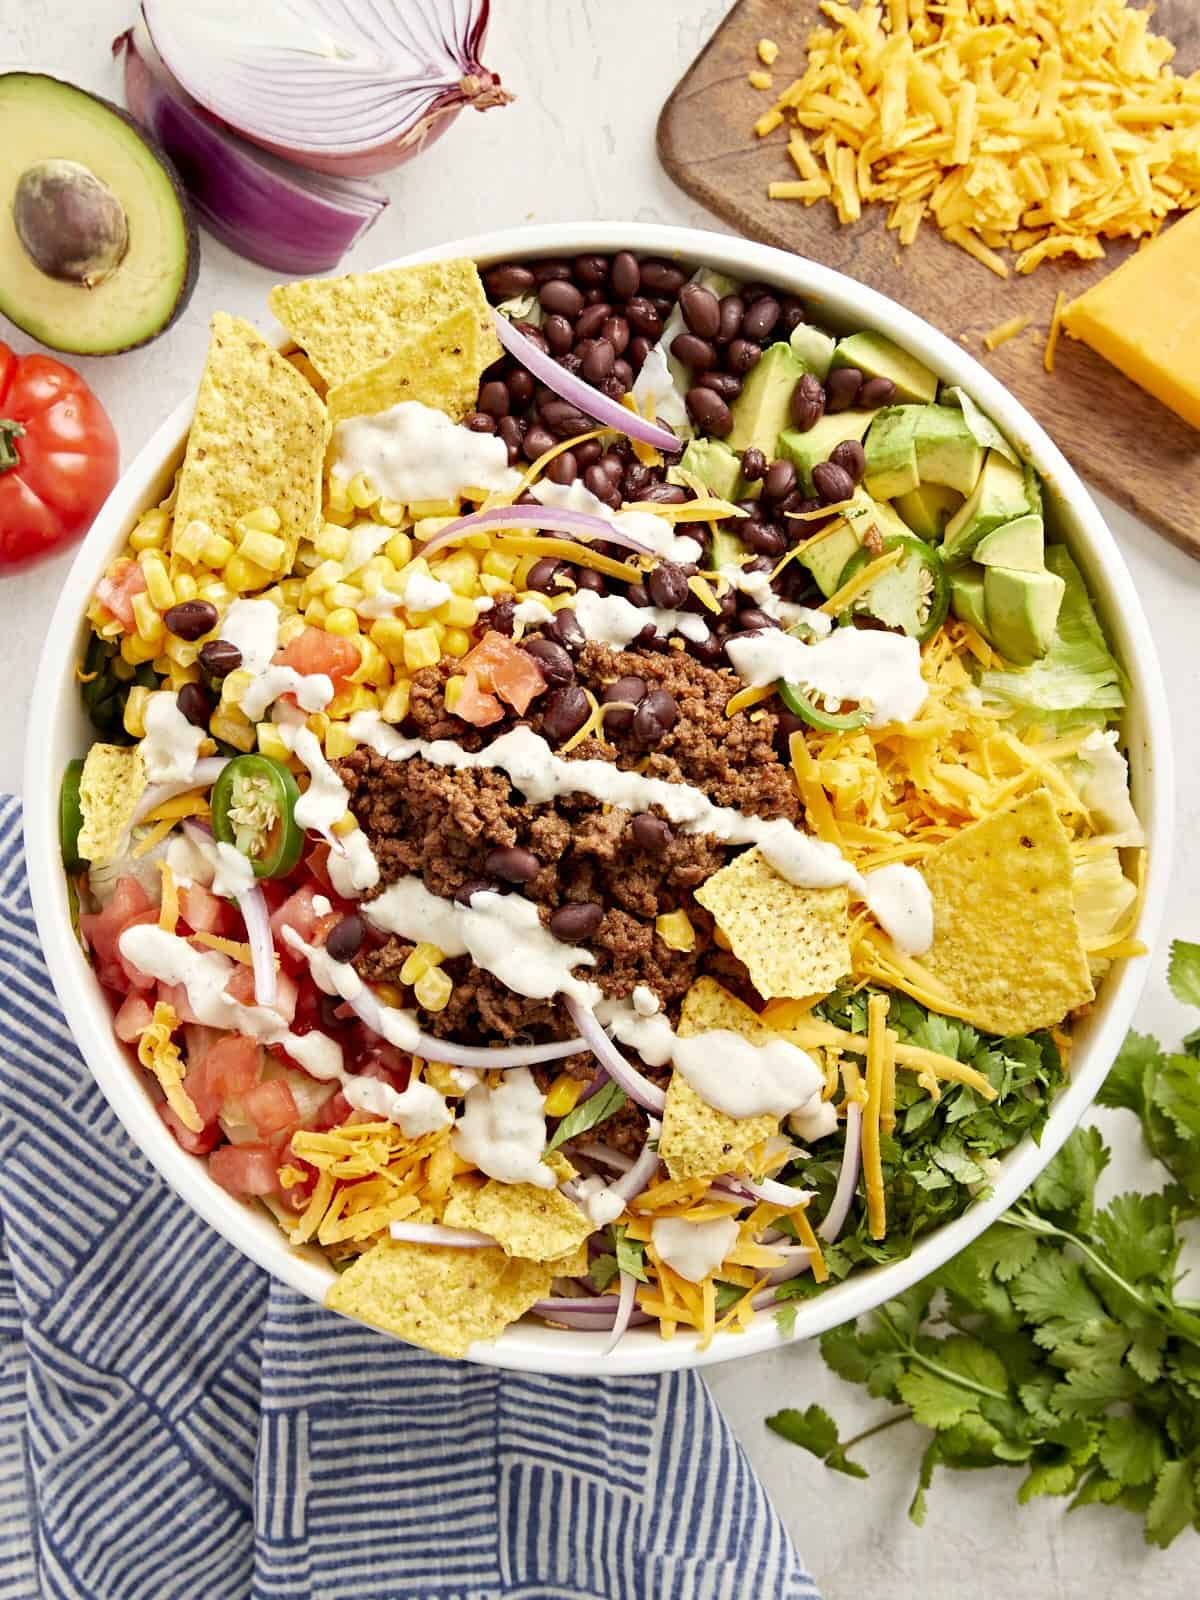
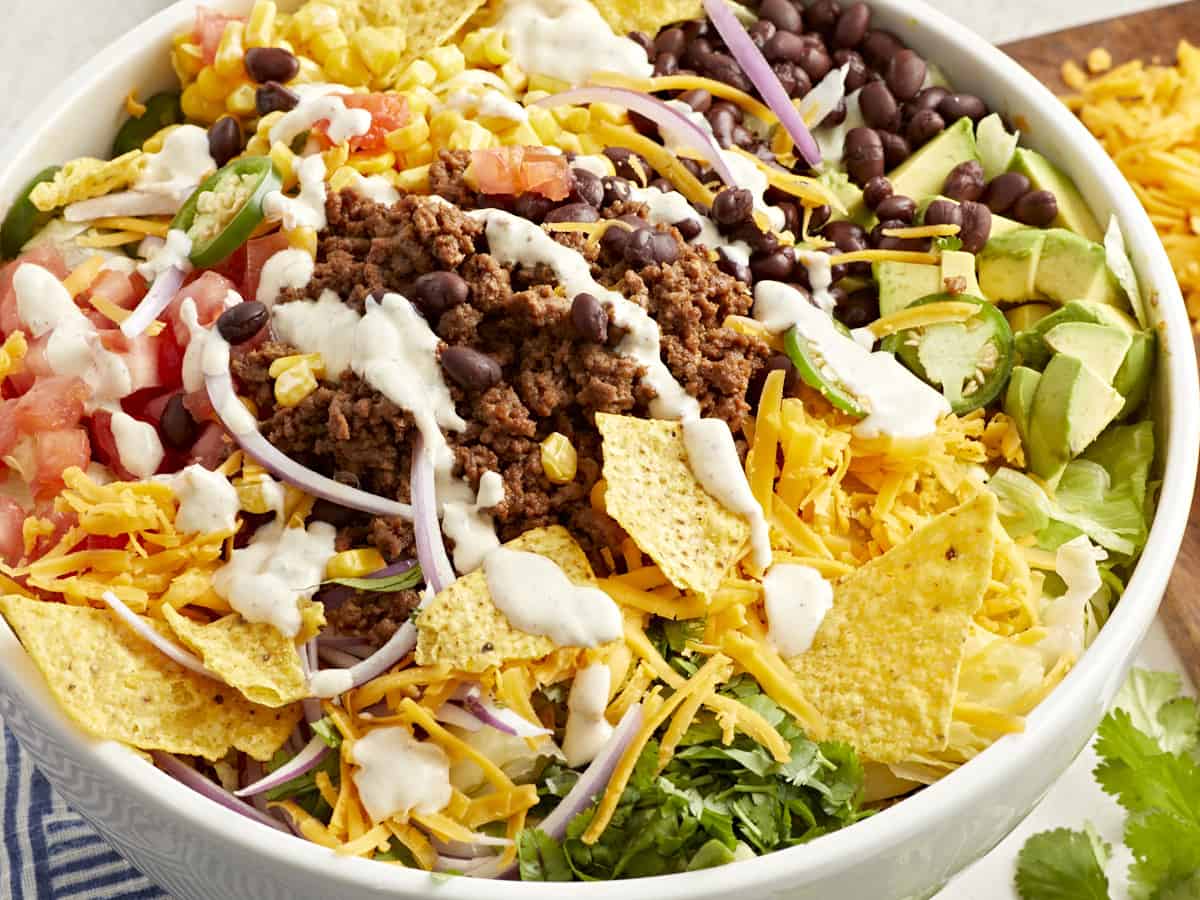
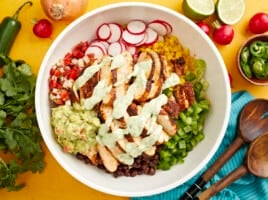
overhead view of taco salad with creamy white dressing and corn chips in a white bowl.

What Is Taco Salad?

Taco salad is everything you love about crispy beef tacos but in salad form! I’ve made sure it’s jam-packed with lettuce and extra veggies to keep you full all day long.

Ingredients

Here’s what you’ll need to make this taco salad:

  • Sour Cream: Forms the creamy and tangy base of the dressing.
  • Lime: The juice and zest of two limes adds acidity and bright citrus flavor to the dressing.
  • Garlic: Adds a balancing earthiness to the dressing.
  • Seasonings: Salt, chili powder, and sugar balance out the flavor of the dressing.
  • Olive Oil: Helps to emulsify the dressing.
  • Ground Beef: The classic choice for a taco salad. You could easily swap for ground chicken or turkey if you prefer. I used a lean ground beef, so I didn’t have to strain off any fat from cooking, saving me a little time. Vegetarian? No problem! This salad is crazy flavorful with or without the meat.
  • Taco Seasoning: Adds that classic Mexican flavor.
  • Vegetables: Red onion, tomato, corn, avocado, and jalapeño add freshness, crunch, and a touch of spice.
  • Black Beans: Add creaminess and extra protein.
  • Corn Chips: Add saltiness and crunch.
  • Cheddar Cheese: Adds creamy, cheesy flavor.
  • Iceberg Lettuce: The perfect neutral crunchy base lettuce to let the veggies shine.

What Else Can I Add?

I love that this is a great recipe to clean out those leftovers from the fridge. Here are some ideas:

Recipe Tip!

This salad is a crowd-pleaser! If I’m entertaining and have guests or family members who don’t eat certain ingredients, I keep everything separate so everyone can build their own perfect taco salad! I like mine without the ground beef and always use extra beans… yum! I love that everyone can enjoy this salad together with a wide range of toppings and feel full and content.

three-quarters view of taco salad in a white bowl.
overhead view of taco salad with creamy white dressing and corn chips in a white bowl.
Print

Taco Salad

This taco salad recipe is super customizable without compromising on its hearty and satisfying flavors. It's the ultimate meal prep salad!
Course Main Course
Cuisine Mexican
Total Cost ($17.89 recipe / $2.98 serving)
Prep Time 25 minutes
Cook Time 5 minutes
Total Time 30 minutes
Servings 6 salads (about 2 cups each)
Calories 804kcal

Ingredients

Dressing

  • 4 oz. sour cream $0.49
  • 2 limes, juiced and zested $1.00
  • 1 clove minced garlic $0.05
  • 1/4 tsp salt $0.01
  • 1/4 tsp chili powder $0.03
  • 1/2 tsp sugar $0.01
  • 4 Tbsp olive oil $0.80

Ground Beef Mixture

Additional Toppings

  • 1/2 red onion, julienned $0.37
  • 2 roma tomatoes $0.60
  • 1 cup corn kernels $1.66
  • 1 15-oz. can black beans, drained and rinsed $0.89
  • 1 avocado, diced $0.99
  • 1 cup tortilla chips, crushed $1.44
  • 1 cup shredded cheddar (about 1/2 of an 8-oz. block) $1.25
  • 1 jalapeno, sliced into thin rings $0.30
  • 1 head iceberg lettuce, chopped into bite-sized pieces $1.79

Instructions

  • Gather and prep all topping ingredients: julienne red onion, chop tomato, defrost frozen corn, drain and rinse black beans, dice avocado, crush tortilla chips, shred cheddar cheese, and slice jalapeno. Set aside or mix together in a large serving bowl.
  • Chop iceberg lettuce into bite-sized pieces.
  • Combine sour cream, juice and zest from limes, minced garlic, salt, chili powder, sugar, and oil in a small mixing bowl. Whisk to combine.
  • Add lean ground beef and taco seasoning packet to skillet. Break apart the ground beef with a spatula and mix in the taco seasoning. Cook until all of the ground beef has turned brown.*
  • Top chopped lettuce with prepped veggies and cooked ground beef. Toss all ingredients together.
  • Drizzle a generous helping of dressing over the top with crumbled tortilla chips! Serve and enjoy.**

See how we calculate recipe costs here.

Notes

*I used a lean ground beef, so I added my seasoning and beef at the same time. I didn’t have any fat to strain off at the end, which saved me a little prep time.
**If you are meal prepping, keep the wet ingredients (like the beef and salad dressing) separate so your veggies and lettuce do not wilt and the tortilla chips do not get soggy. Just dress and toss when you’re ready for lunch.

Nutrition

Serving: 1salad | Calories: 804kcal | Carbohydrates: 56g | Protein: 28g | Fat: 55g | Sodium: 1228mg | Fiber: 13g
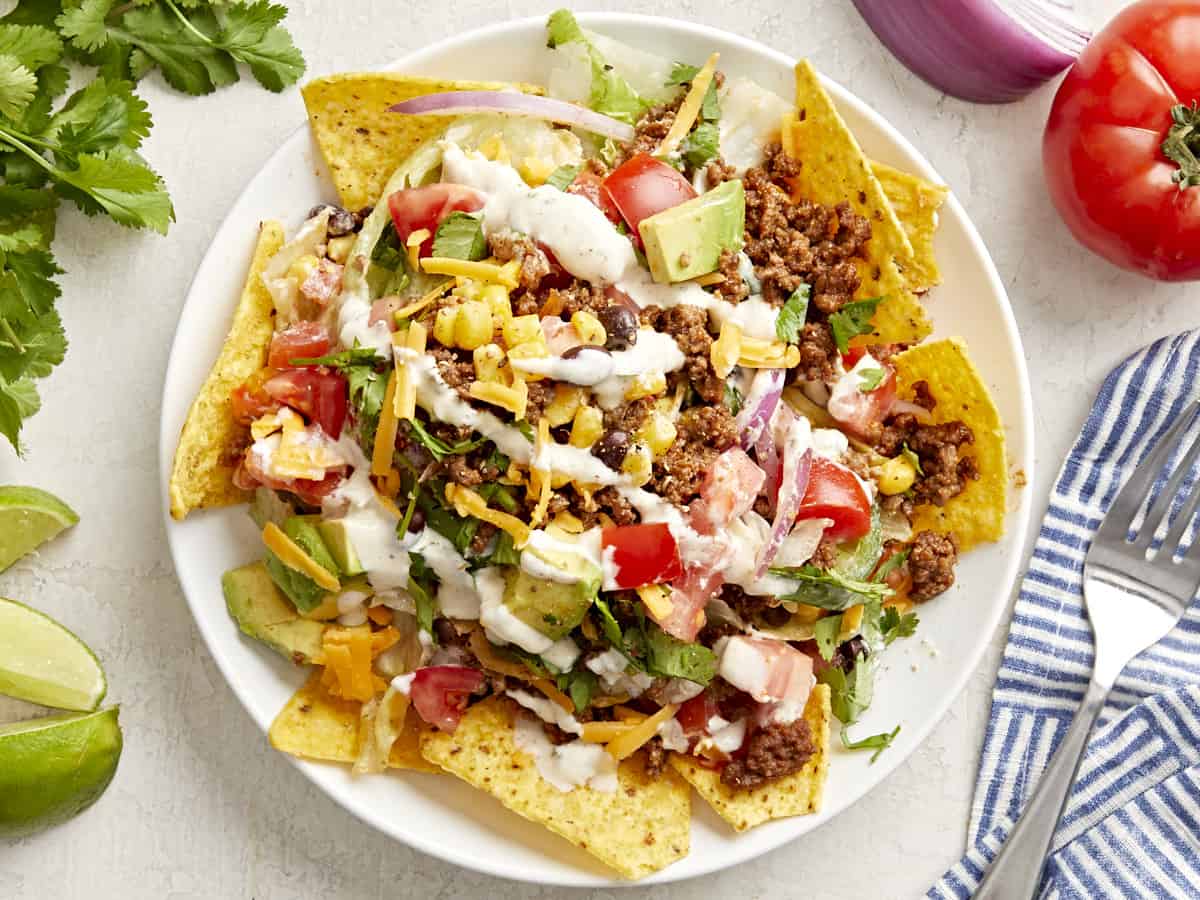
overhead view of a serving of taco salad on a white plate.

how to make Taco Salad – step by step photos

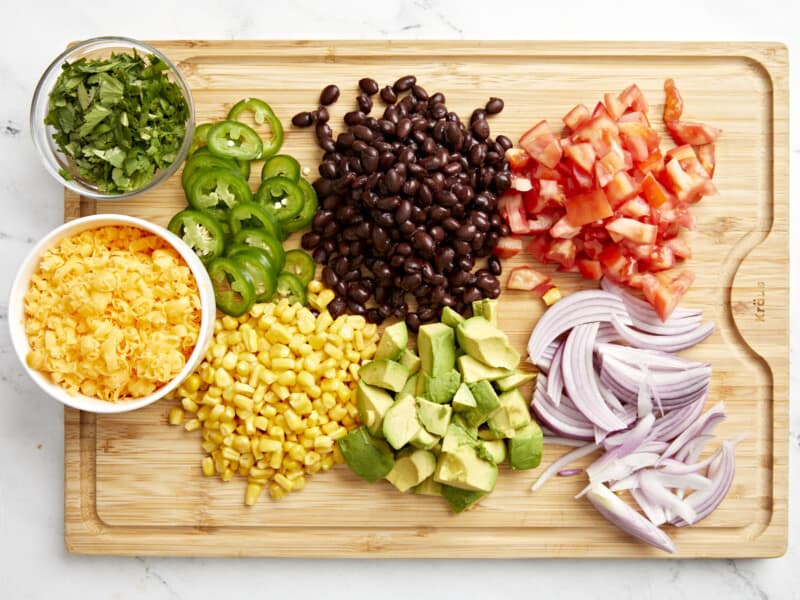
overhead view of chopped veggies on a cutting board.

Gather all topping ingredients. Julienne 1/2 red onion, chop 2 roma tomatoes, defrost 1 cup frozen corn, drain and rinse 1 can black beans, dice 1 avocado, crush 3 cups of tortilla chips, shred 1 cup cheddar cheese, slice 1 jalapeno. Set aside or mix together in a large serving bowl.

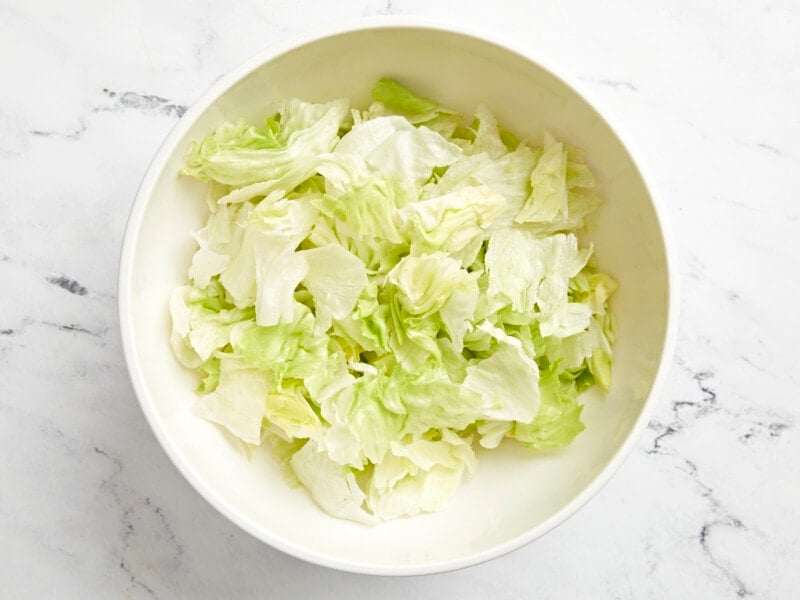
chopped lettuce in a white bowl.

Chop 1 head of iceberg lettuce into bite-sized pieces.

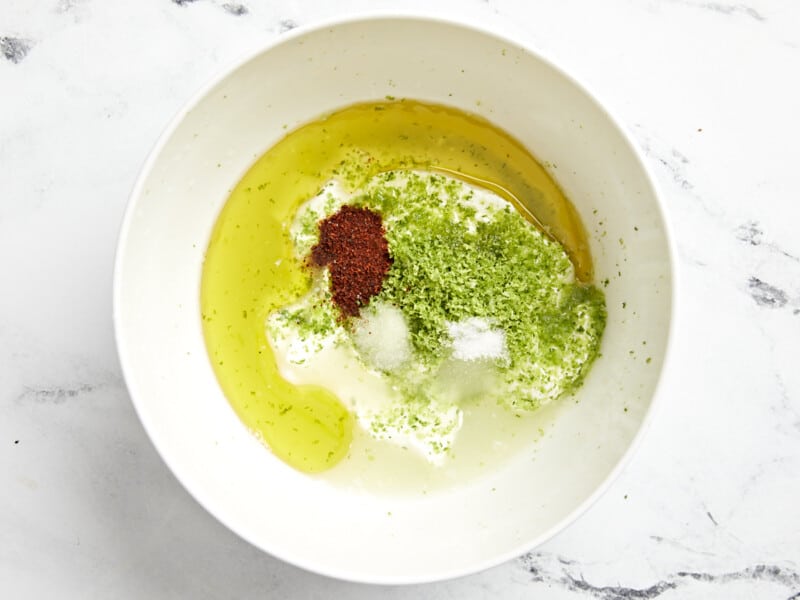
dressing ingredients in a white bowl.

Combine 4 oz sour cream, juice and zest from 2 limes, 1 clove of minced garlic, 1/4 tsp salt, 1/4 tsp chili powder, 1/2 tsp sugar, and 4 Tbsp oil in a small mixing bowl.

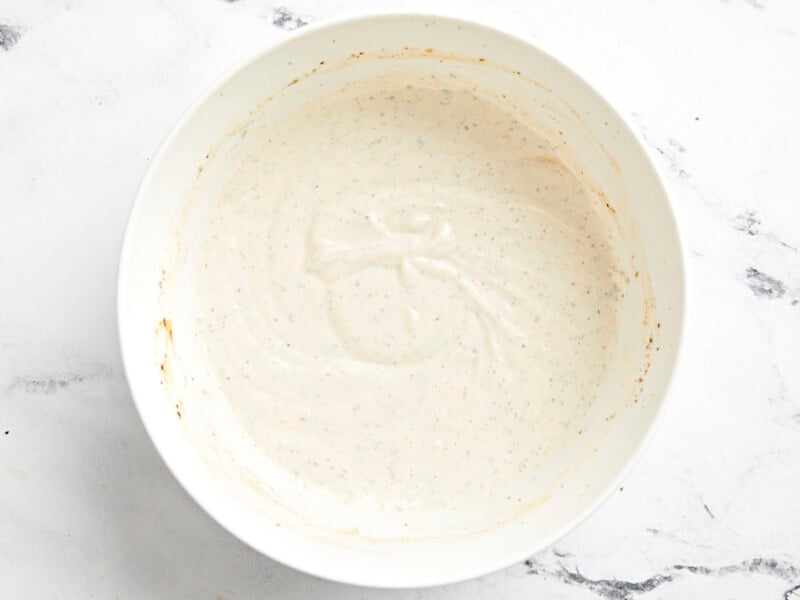
creamy white dressing in a white bowl.

Whisk to combine.

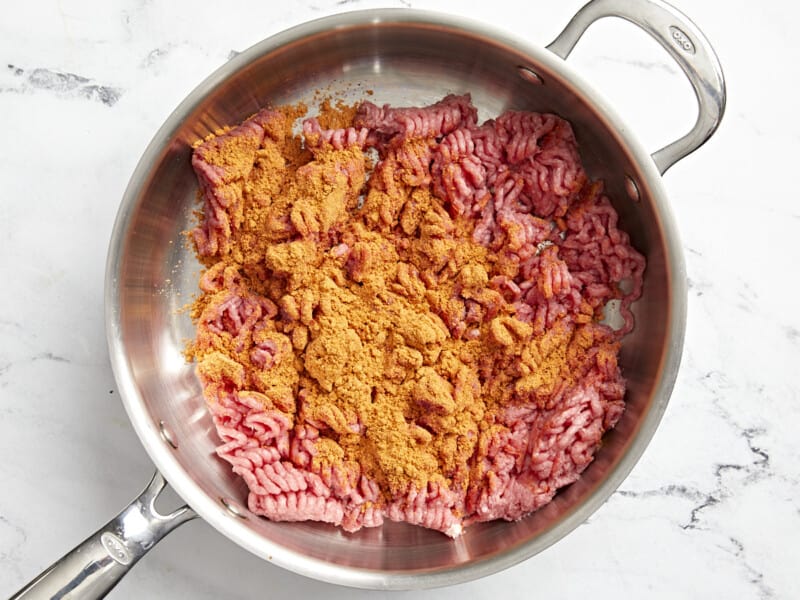
raw ground beef and spices in a frying pan.

Add 1 pound lean ground beef and 1 packet of taco seasoning to skillet. Break apart the ground beef with a spatula and mix in the taco seasoning.

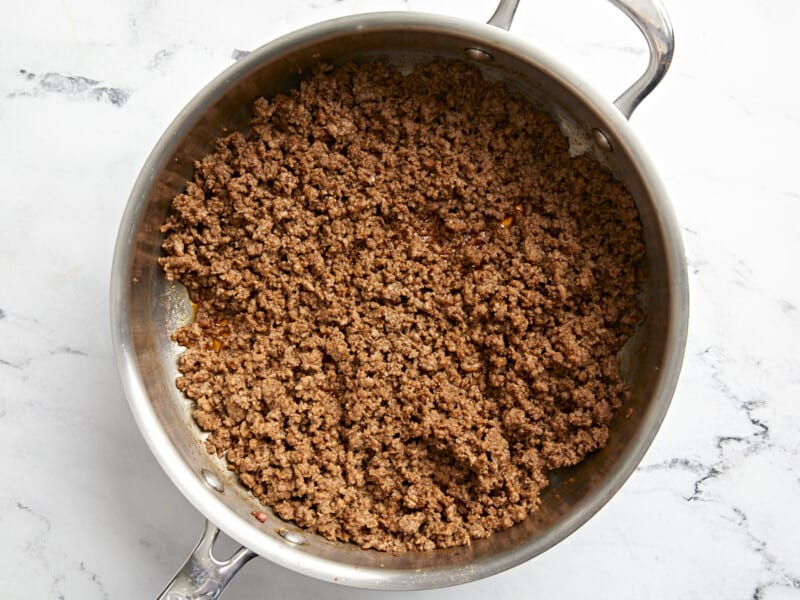
cooked seasoned ground beef in a frying pan.

Cook until all of the ground beef has turned brown. I used a lean ground beef, so I added my seasoning and beef at the same time. I didn’t have any fat to strain off at the end, which saved me a little prep time.

overhead view of taco salad with ingredients separated in a white bowl.

Top chopped lettuce with prepped veggies and cooked ground beef.

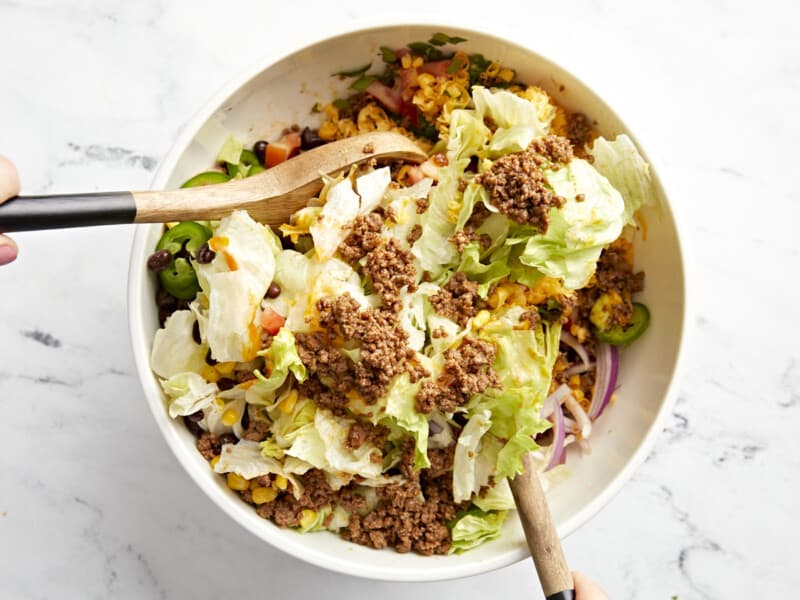
tossing taco salad in a white bowl.

Toss all ingredients together.

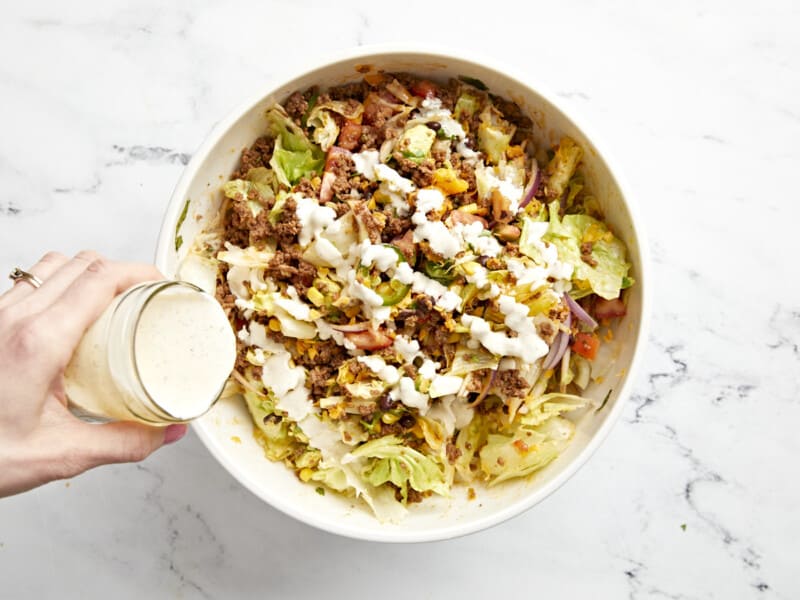
drizzling dressing over taco salad in a white bowl.

Drizzle a generous helping of dressing over the top with crumbled tortilla chips! Serve and enjoy.

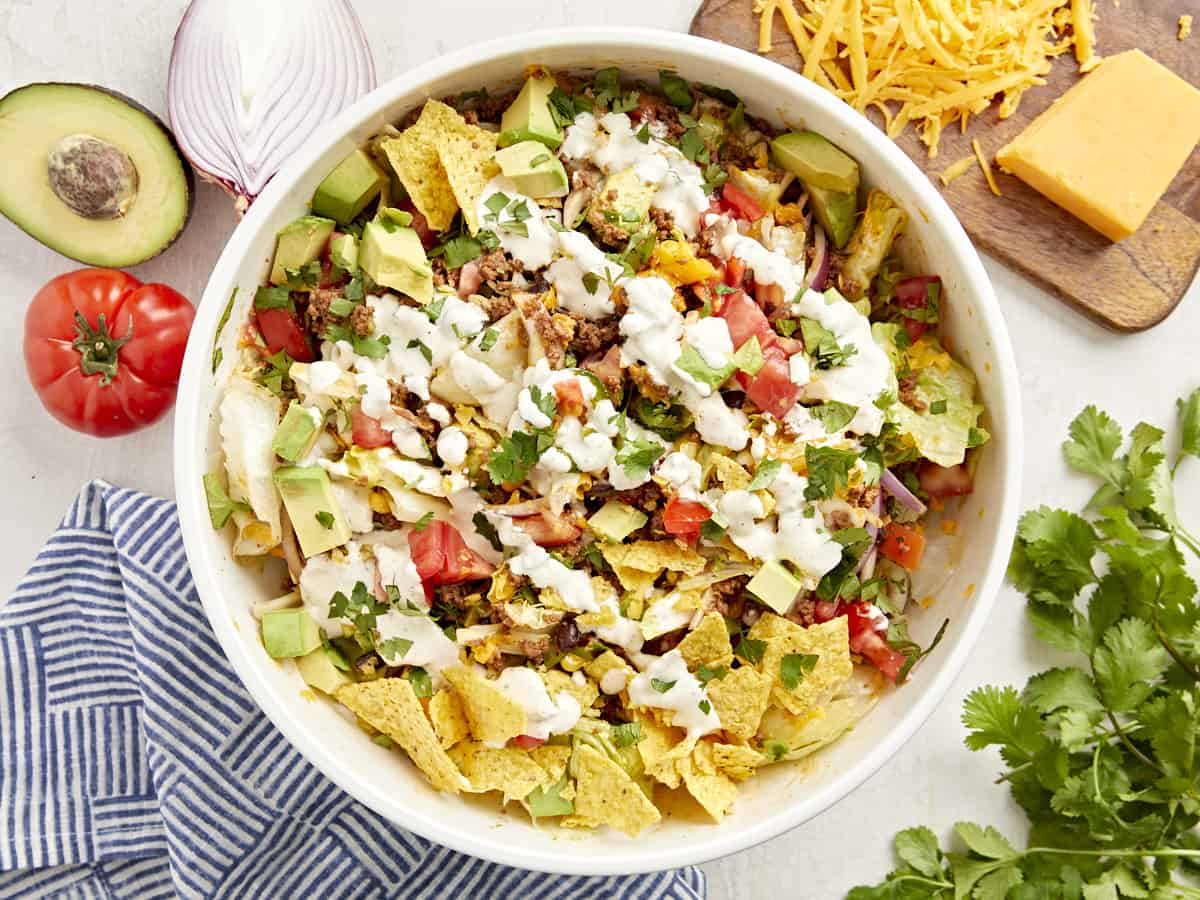
overhead view of taco salad with creamy white dressing in a white bowl.

This hearty taco salad is sure to satisfy!

More Southwest-Inspired Recipes

The post Taco Salad appeared first on Budget Bytes.

Egg Muffins

These super easy and delicious high protein egg muffins are the perfect meal prep breakfast to make weekday mornings a breeze.

The post Egg Muffins appeared first on Budget Bytes.
It’s that time of year when we all try to get back into the groove of daily life, make a fresh fresh start, and rebuild good habits after the chaos of the holidays. Meal prepping has always been one of the things that really helps me save time, stay on budget, and keep overwhelm to a minimum. Especially meal prepping breakfast. Knowing that I don’t have to put any mental energy into breakfast every morning is a godsend! These super simple and versatile egg muffins have been my go-to meal prep breakfast for a few months now. With endless add-ins and flavor possibilities, I never get sick of this egg muffin recipe. Plus, they help me use up the odds and ends in my refrigerator every week!

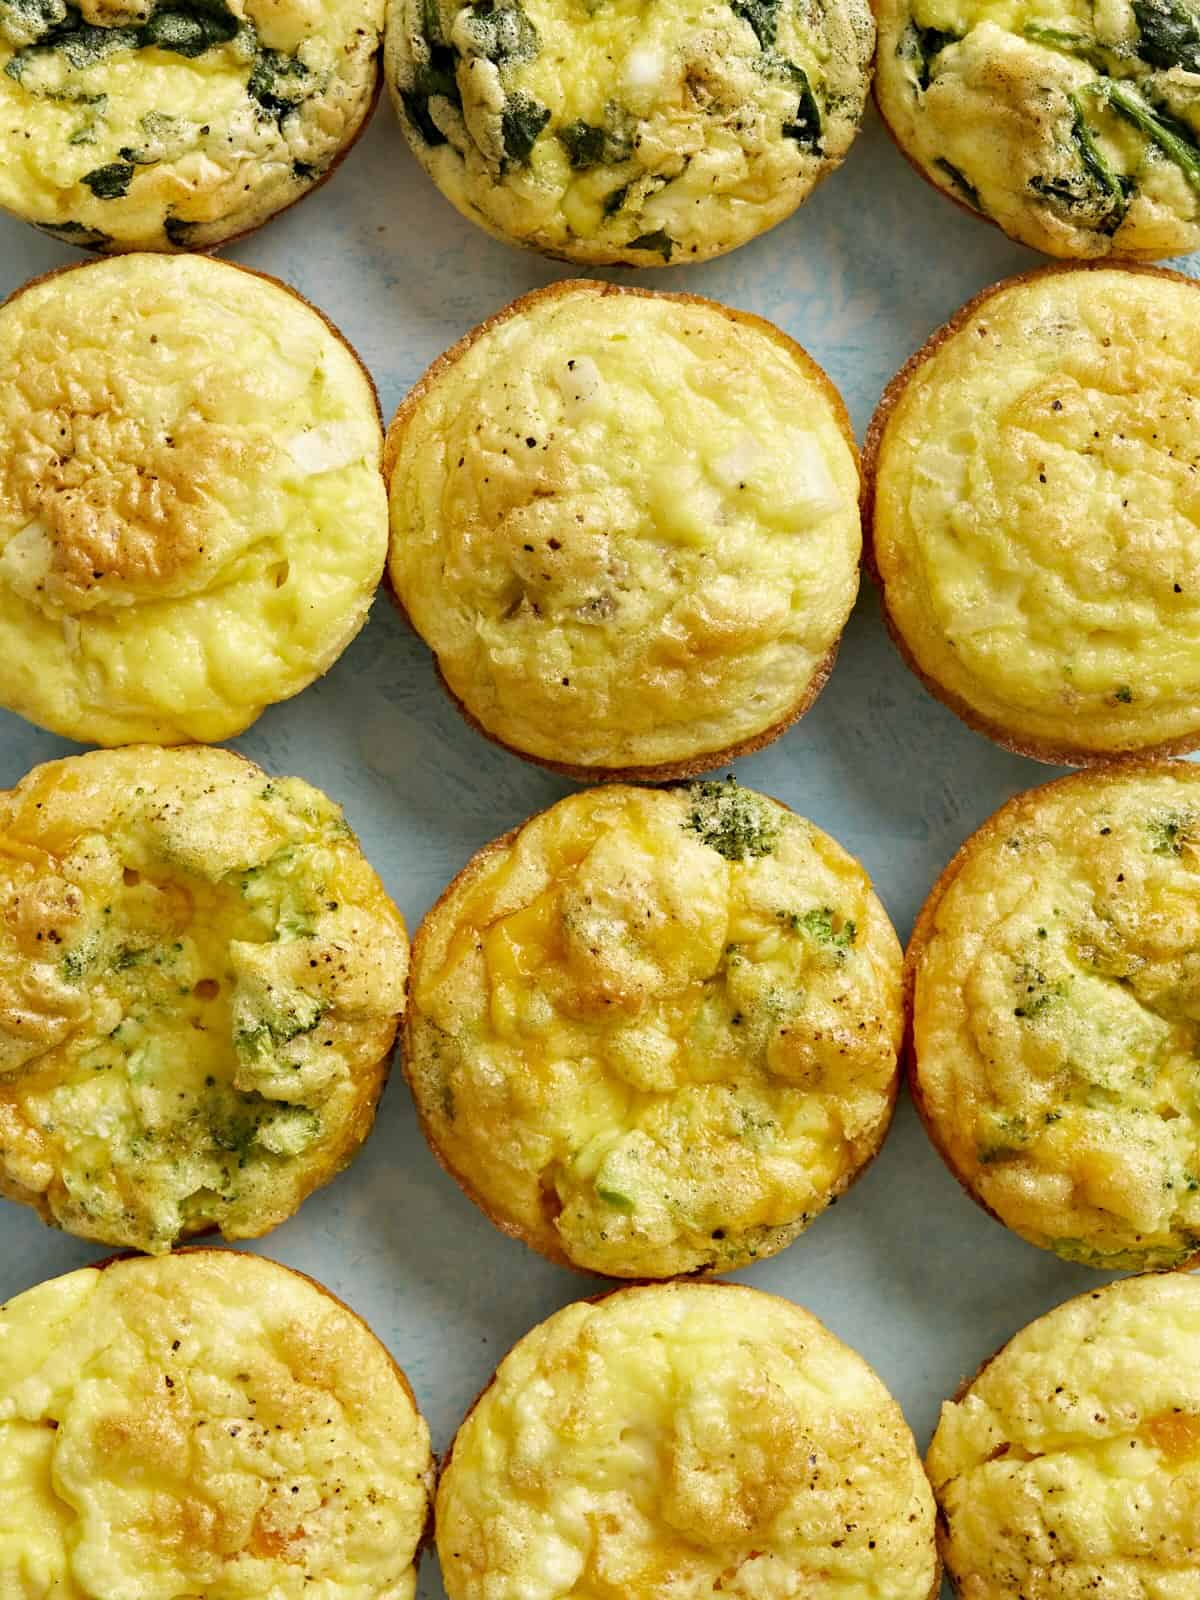
Overhead view of egg muffins lined up in a grid on a blue background.

What Are Egg Muffins

Egg muffins, also known as egg bites, are eggs baked into a muffin tin with add-ins like vegetables, cheese, or meat. You can think of them like individual mini-sized frittatas! They’re small enough to be handheld and don’t require any utensils, so they make the perfect grab-and-go meal prep breakfast. They’re a great way to use up odds and ends in your refrigerator and since you can toss in just about any ingredient, and your taste buds will never get bored.

Ingredients for Egg Muffins

Egg bites are super simple and you’ll only need a few ingredients! Here’s what we use to make our soft and tender egg muffins:

  • Eggs: We used large eggs for this recipe, so make sure you have the correct size egg to keep the proportions the same.
  • Cottage Cheese: Mixing cottage cheese into the eggs adds more protein, more flavor, and helps keep the egg muffins super soft and tender (instead of rubbery). If you don’t like the texture of cottage cheese, don’t worry! It gets blended until smooth and creamy and you won’t even notice it.
  • Salt & Pepper: The eggs are seasoned simply with salt and pepper, but you could always experiment with other seasonings if you prefer.
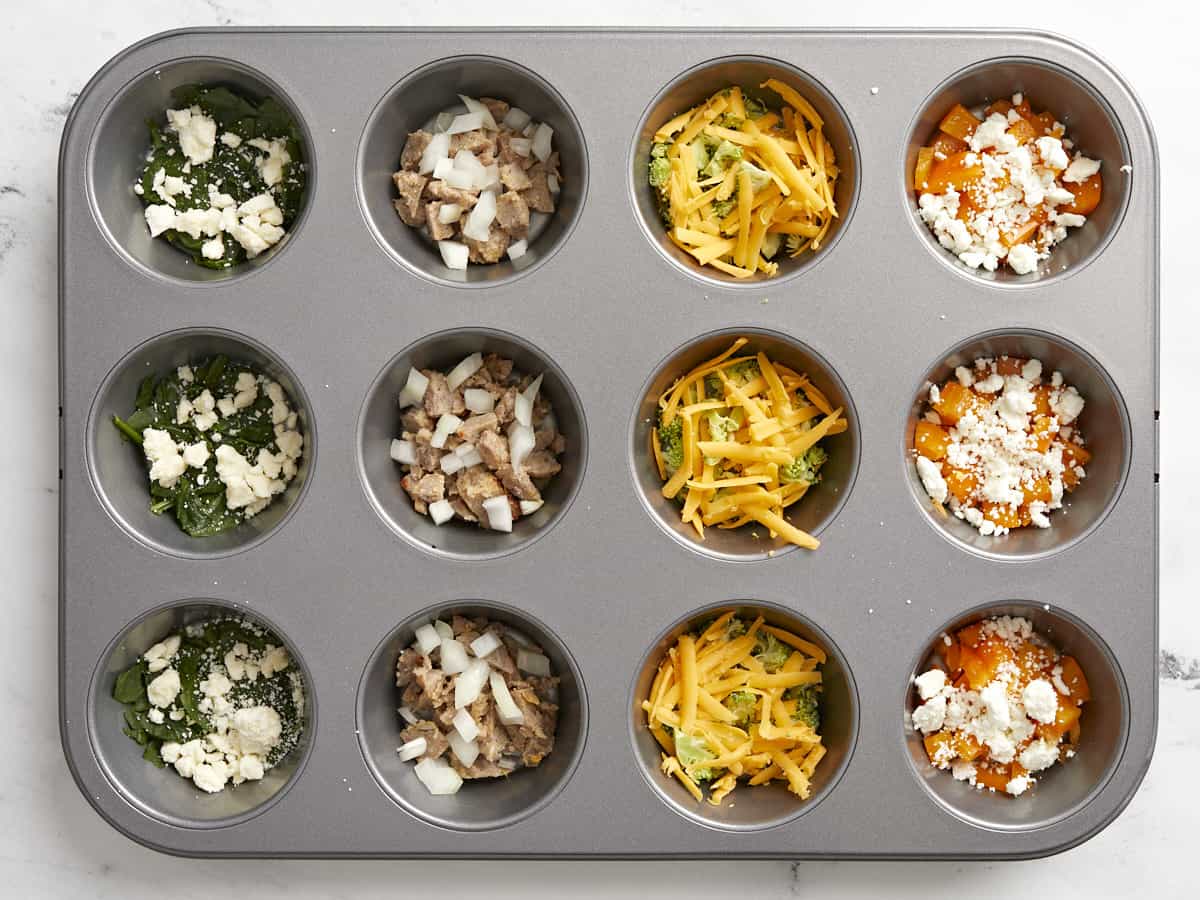
  • Add-ins: We used a variety of add-ins below, like vegetables, cheese, and meat. We scavenged our fridge for this batch and made four flavors: spinach & feta, sausage & onion, broccoli & cheddar, and red pepper & goat cheese. See our suggested list of flavor combinations below!

How to Keep Egg Muffins Soft

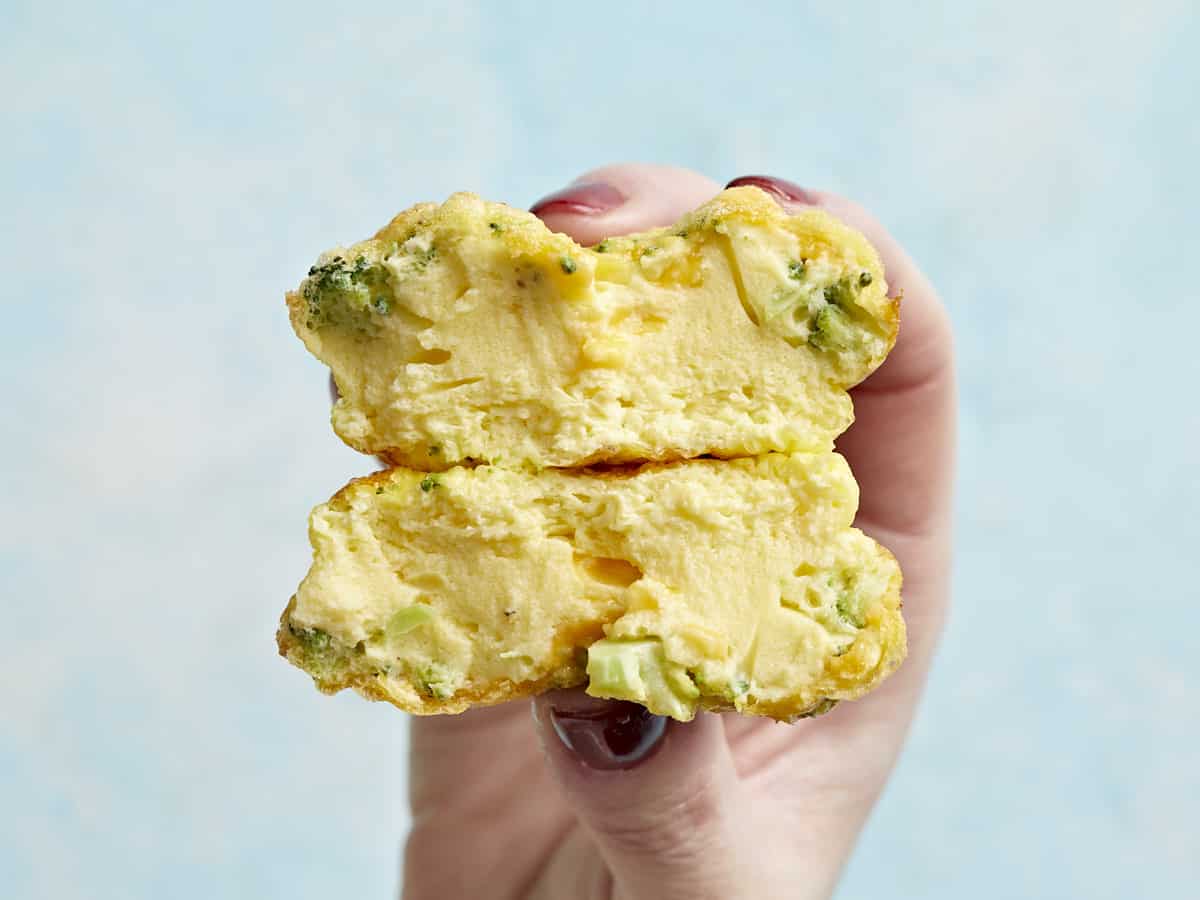
Eggs tend to get rubbery if overcooked, so we use some tricks to keep these egg muffins soft and smooth instead of rubbery or spongey. Blending cottage cheese into the eggs helps the eggs cook more evenly and it helps stabilize the proteins a bit so they don’t get quite as stiff. It’s also important to keep a close eye on the egg muffins while they’re in the oven. The longer they cook, the more spongey they will become. Remove the egg muffins from the oven as soon as they are puffed in the center, no longer look wet in the center, and are just barely golden on the edges. If they’ve browned a lot on top, chances are they’re overcooked inside.

Egg Muffin Flavor Ideas

The fun part about egg muffins is that you can make so many different flavors! Here are some of my favorite ingredient combinations and flavor ideas:

  • Broccoli cheddar
  • Red pepper and goat cheese
  • Bacon and onion
  • Spinach and feta
  • Ham and cheese (cheddar or Swiss)
  • Sausage and onion
  • Spinach and tomato (sun dried or grape tomatoes)
  • Mushroom and onion

How to Store and Reheat Egg Muffins

After allowing the egg muffins to cool, they can be stored in an air-tight container in the refrigerator for about four days. To reheat, simply place the egg muffins on a plate and microwave for a brief 30 seconds on high power, or until heated through. Take care not to overcook the egg muffins while reheating, or they can become rubbery.

An egg muffin cut in half and held in a hand to show the inside.
Cooked egg muffins lined up in a grid on a blue surface.
Print

Egg Muffins

These super easy and delicious high protein egg muffins are the perfect meal prep breakfast to make weekday mornings a breeze.
Course Breakfast
Cuisine American
Total Cost $2.01 recipe / $0.34 serving
Prep Time 10 minutes
Cook Time 18 minutes
Total Time 28 minutes
Servings 6 (2 each)
Calories 137kcal

Ingredients

  • 10 large eggs $1.47
  • 1/2 cup cottage cheese* $0.50
  • 1/2 tsp salt $0.02
  • 1/4 tsp pepper $0.02
  • 1.5 cups chopped or shredded add-ins** prices vary

Instructions

  • Preheat the oven to 375ºF. Finely chop or shred your chosen add-in ingredients. Add 2 Tbsp of add-ins to each well of a non-stick 12 muffin tin. If your non-stick pan is older or the finish is a bit worn, you may want to grease the wells first with butter or oil.
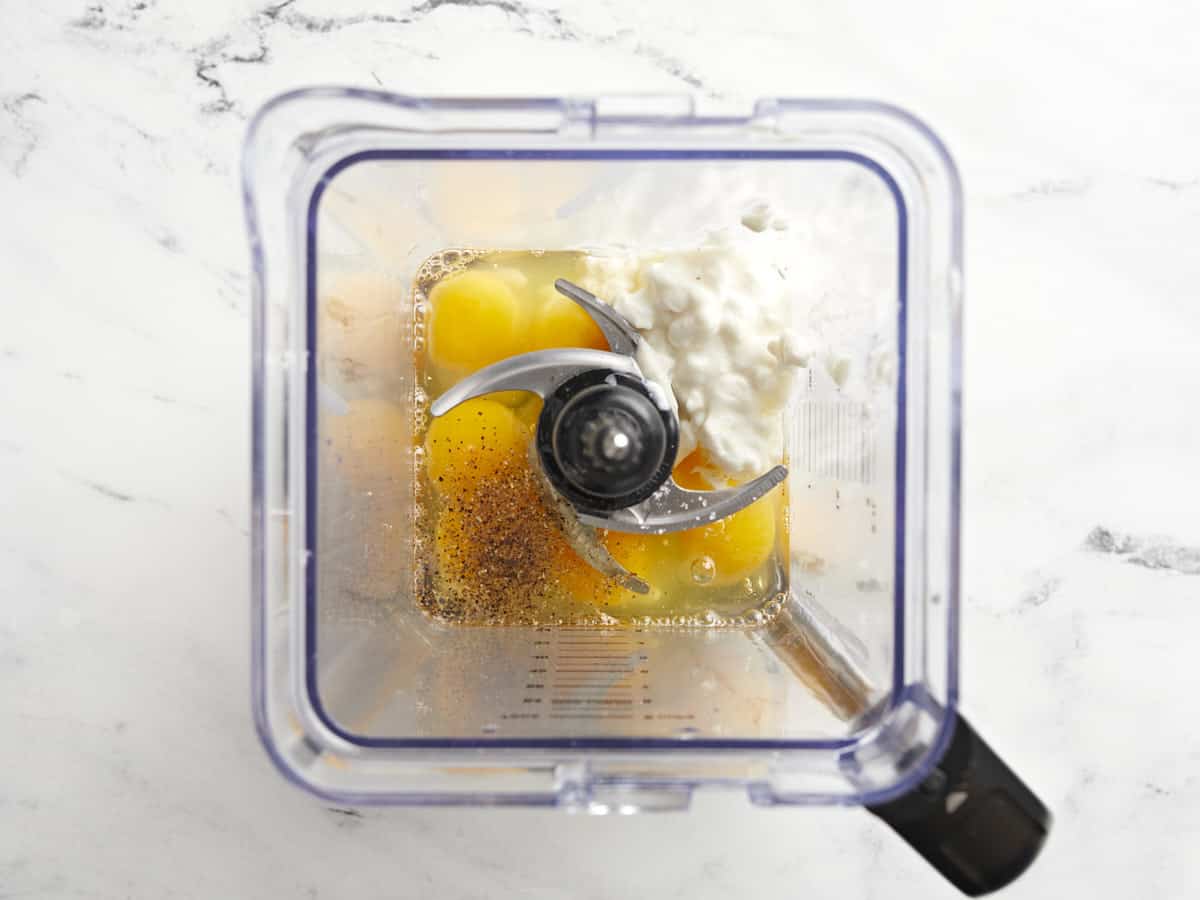
  • Add the eggs, cottage cheese, salt, and pepper to a large blender. Purée for about 30 seconds or until smooth.
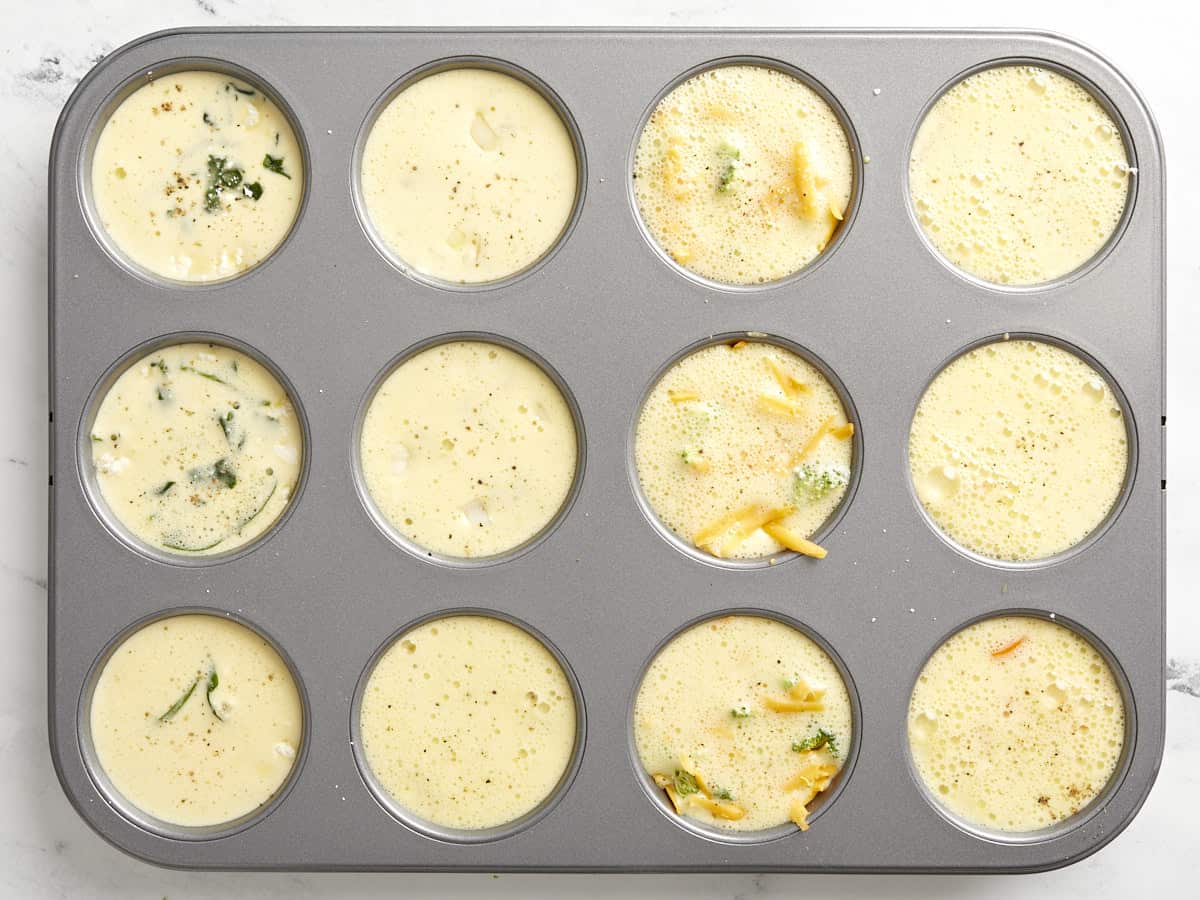
  • Pour the egg mixture into the wells of the muffin tin, dividing evenly between each well. It should fill them almost to the top.
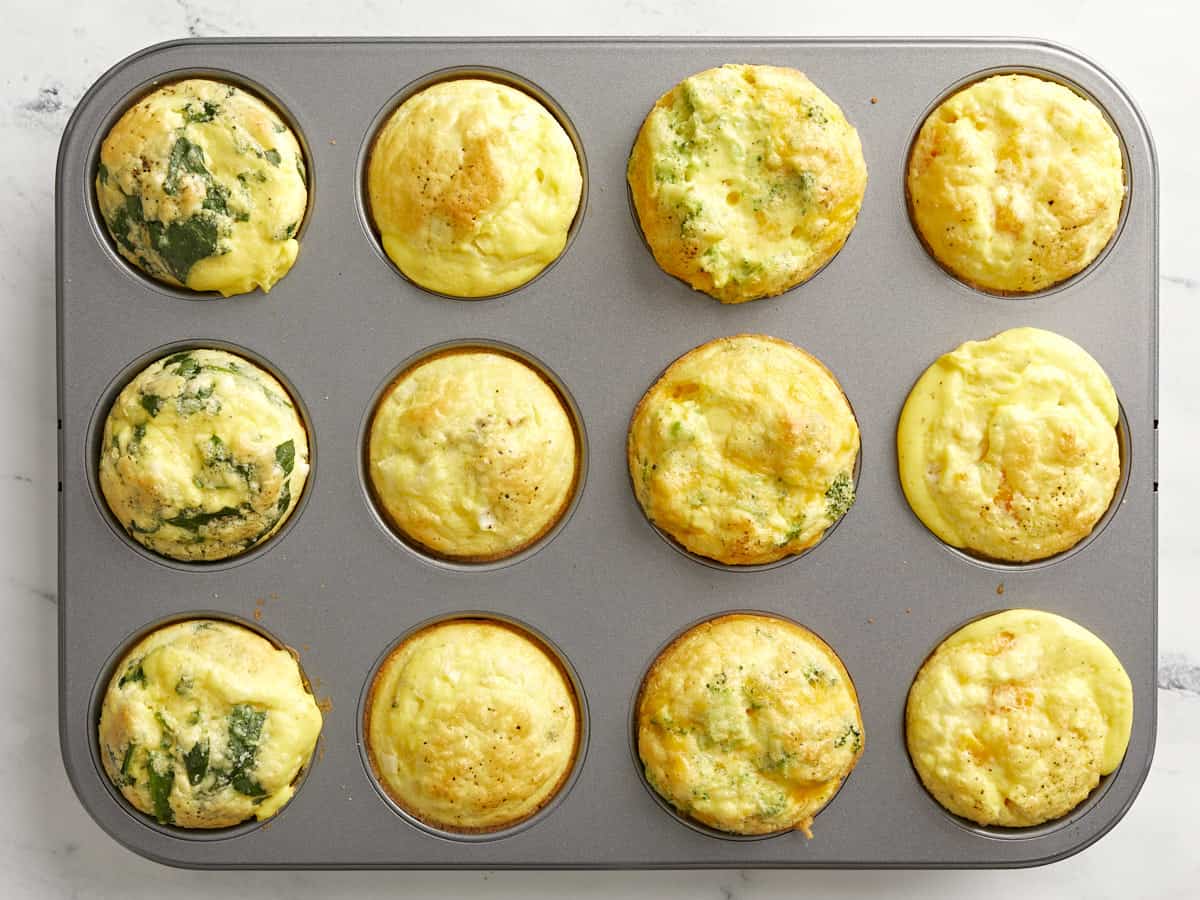
  • Bake the egg muffins in the preheated oven for 18 minutes, or just until the centers no longer look wet and they are barely golden around the edges. Avoid overcooking the egg muffins or they'll become spongey. The egg muffins will puff up quite a bit as they bake and deflate as they cool. This is normal.
  • Allow the muffins to cool in the muffin tin just enough to handle, then loosen them gently with a knife and remove them from the tin. Allow the egg muffins to finish cooling on a wire rack. Enjoy warm or refrigerate until ready to eat.

See how we calculate recipe costs here.

Notes

*4% milkfat cottage cheese creates the softest egg muffins. You can use a lower fat cottage cheese, but it will affect the texture slightly.
**To make this recipe as budget-friendly as possible, check your fridge for any leftover ingredients that can be used as add-ins. You can use any meat, cheese, or vegetables. You’ll need 2 Tbsp total for each muffin. Make sure they’re finely chopped or shredded. We used spinach & feta, sausage & onion, broccoli & cheddar, and red pepper & goat cheese.

Nutrition

Serving: 2muffins | Calories: 137kcal | Carbohydrates: 1g | Protein: 12g | Fat: 9g | Sodium: 367mg | Fiber: 0.02g

How to Make Egg Muffins – Step by Step Photos

Cheese, meat, and vegetables in muffin tin.

Preheat the oven to 375ºF. Next, decide what add-ins you’d like in your egg muffins. You’ll need about 2 Tbsp of finely chopped or shredded add-ins per muffin well. We did spinach & feta, breakfast sausage (leftovers) & onion, broccoli & cheddar, and red pepper & goat cheese. Make sure to use a non-stick muffin tin. If the muffin tin is older and the non-stick surface is worn, you may want to grease the tin with butter or oil. We did not use any butter or oil.

Eggs and cottage cheese in a blender.

Add 10 large eggs, ½ cup of cottage cheese, ½ tsp salt, and ¼ tsp pepper to a blender. Blend for about 30 seconds, or until smooth.

Egg mixture poured into the muffin tin.

Pour the blended egg mixture into the muffin tin, dividing equally between all twelve wells. It should come close to filling each well up to the top.

Baked egg muffins in the muffin tin.

Bake the egg muffins in the preheated 375ºF oven for about 18 minutes, or just until they no longer look wet in the center and they are barely golden around the edges. Be careful not to overcook the egg muffins or they’ll become spongey. The egg muffins will puff up quite a bit as they cook but will deflate back down as they cool. This is normal.

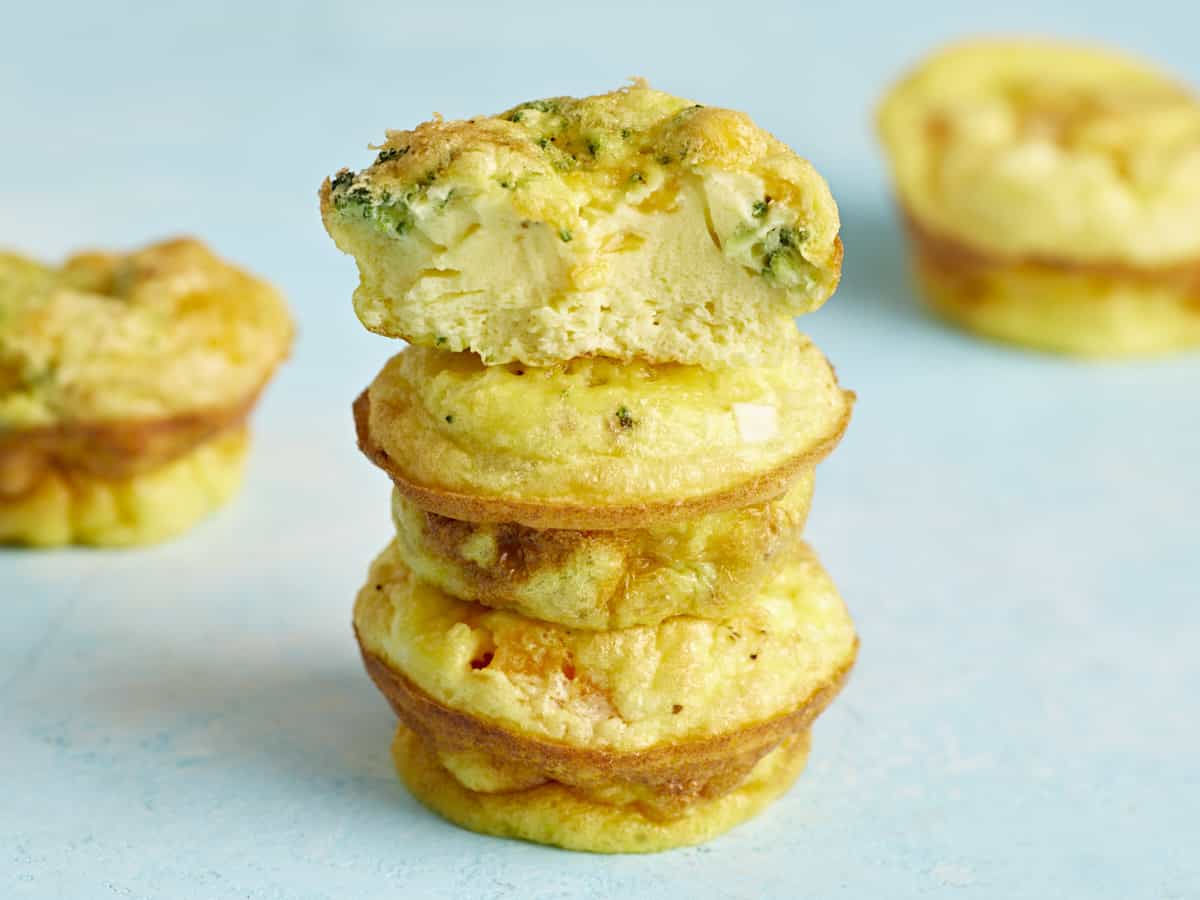
A stack of egg muffins on a blue background.

Allow the egg muffins to cool just until cool enough to handle, then gently wiggle them from the muffin tin and allow them to finish cooling on a wire rack (to prevent condensation). Enjoy warm or refrigerate until ready to eat!

Cooked egg muffins lined up in a grid on a blue surface.

The post Egg Muffins appeared first on Budget Bytes.
Air Fryer Chicken Breast

This juicy, tender, Air Fryer Chicken Breast is super flavorful and ready in less than 20 minutes. Perfect for meal prepping!

The post Air Fryer Chicken Breast appeared first on Budget Bytes.
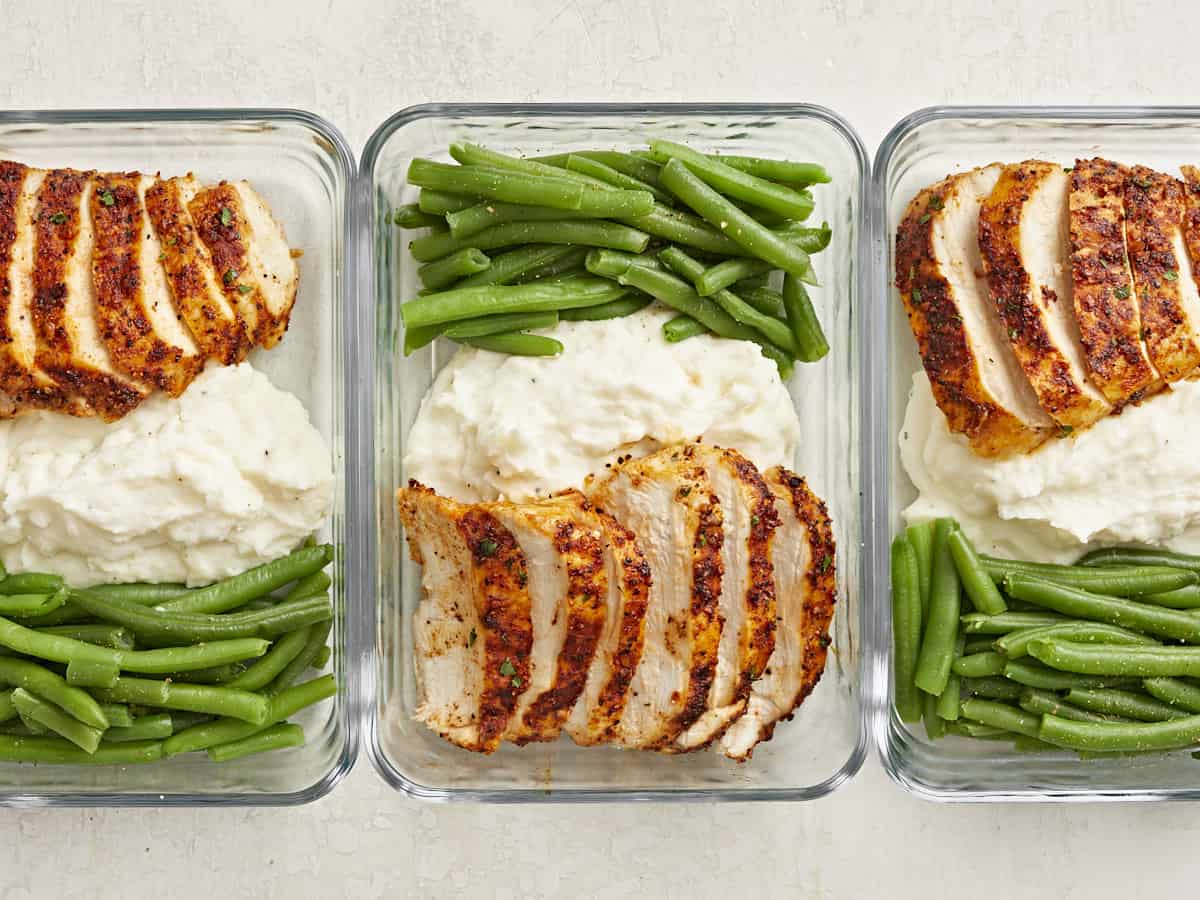
I’m sure by now we all know that the air fryer makes life just a little bit easier, so if you’re looking for a simple way to cook chicken breasts, then you can’t miss with this easy Air Fryer Chicken Breast recipe. I happen to love chicken breasts and I cook them quite often, so being able to cook juicy, tender, and super flavorful chicken breasts in less than 20 minutes is a huge win for me! These air fryer chicken breasts are also great for meal prep. You can cook them at the beginning of the week, slice them up, then store them in meal prep containers along with your favorite sides. Because chicken breasts are so versatile, this is simply a great recipe to keep in your back pocket!

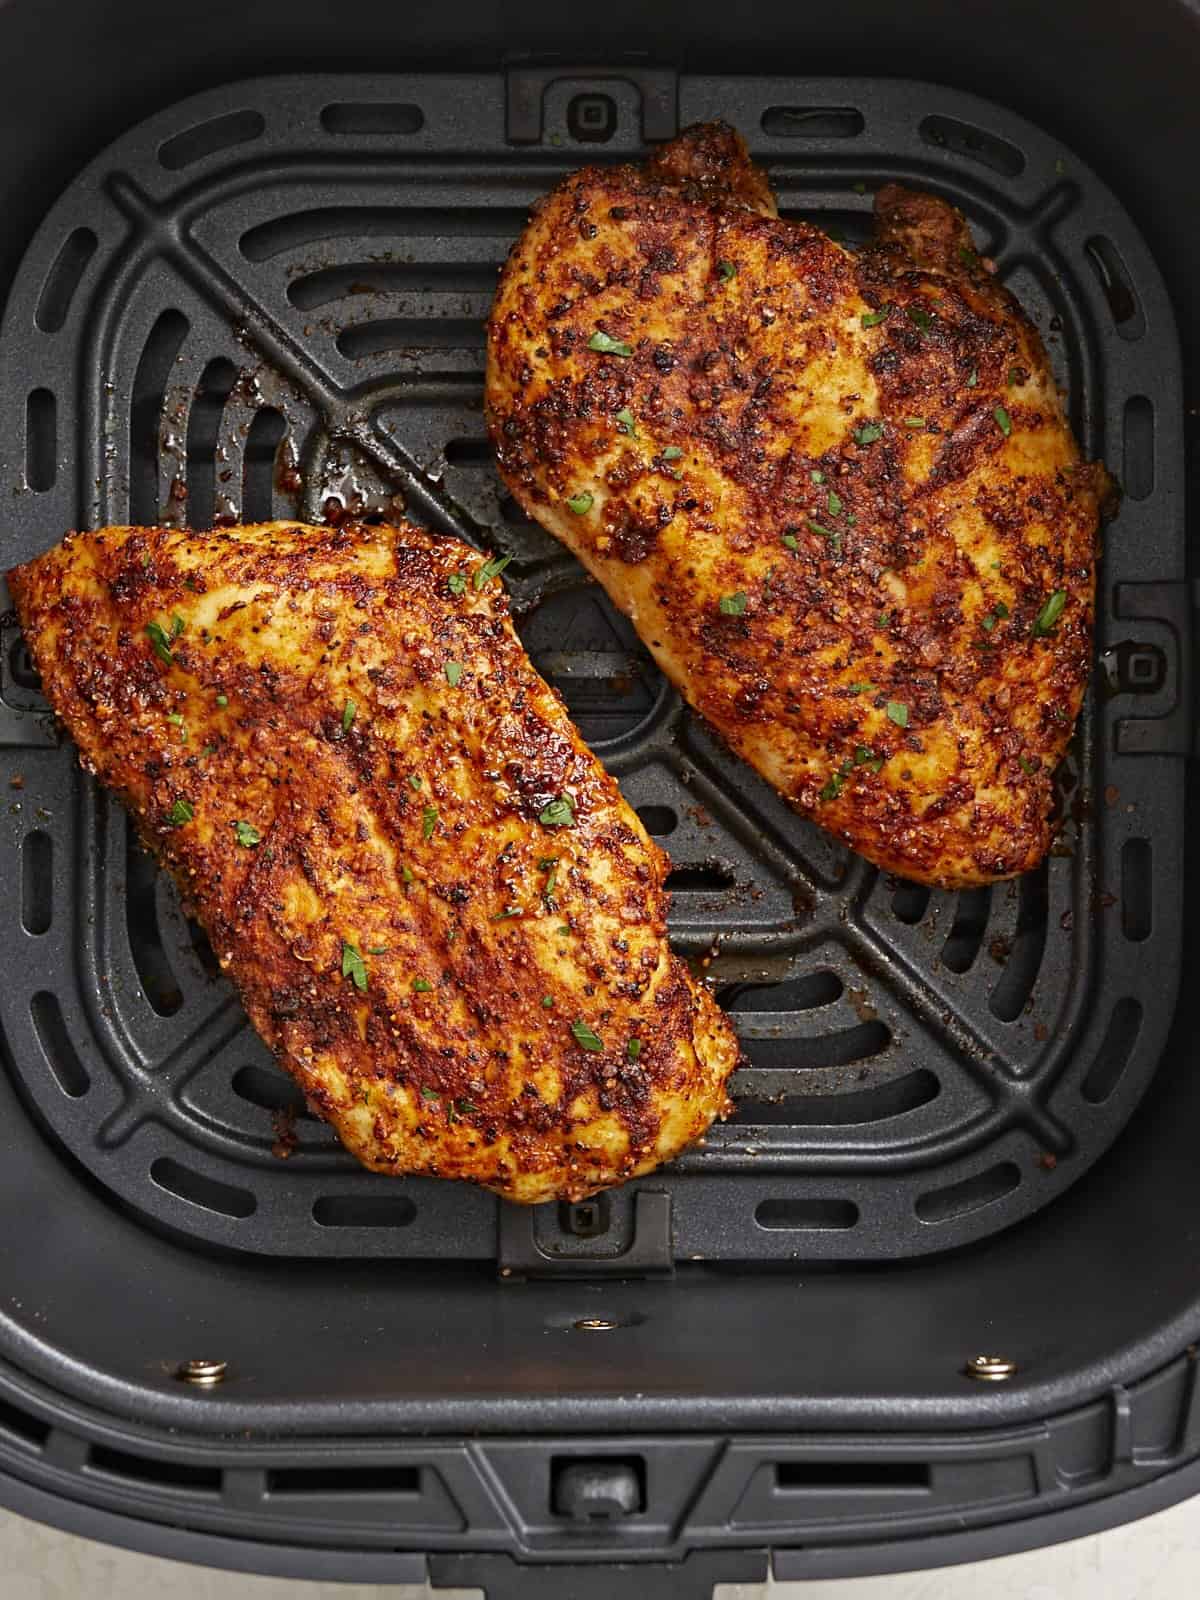
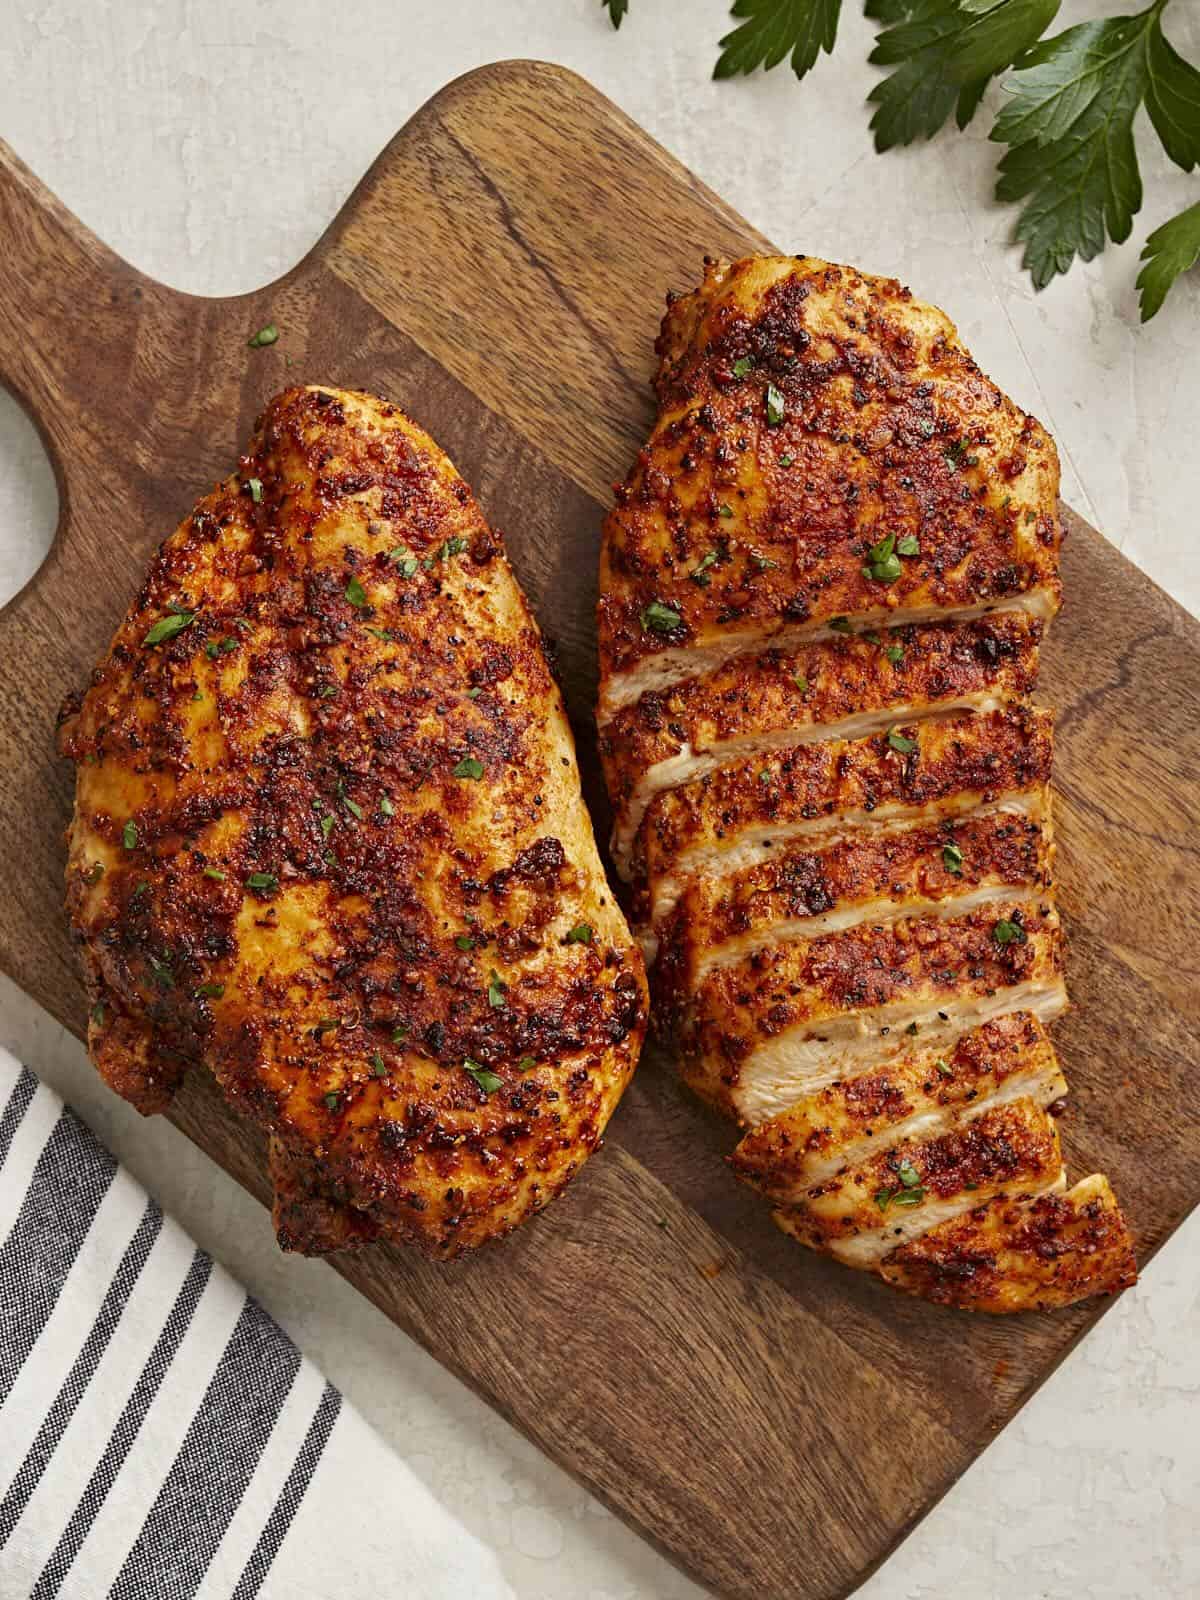
Cooked overhead view of Air Fryer Chicken Breasts in an air fryer basket.

Ingredients For Air Fryer Chicken Breast

Here are the ingredients we used to make these flavorful air fryer chicken breasts:

  • Boneless, Skinless Chicken Breast: We were able to fit two boneless, skinless chicken breasts that were roughly 2/3 lb. each into our 5-quart air fryer with plenty of room on the sides for air to circulate. If chicken thighs are more your style, then you’ll love our Air Fryer Chicken Thighs recipe!
  • Olive Oil: Olive oil helps the seasoning adhere to the chicken breasts and gives the chicken breasts a nice golden brown color.
  • Seasoning: We went with a simple spice blend using steak seasoning, paprika, and freshly cracked black pepper. Steak seasoning usually includes a good amount of salt, so no extra salt was needed for this recipe. You can also mix things up and try different seasoning mixes. I’ll list a few different options below.

More Seasoning Ideas

If you want to switch things up, here are some other ways you can season your air fryer chicken breasts:

Tips For Making Air Fryer Chicken Breasts

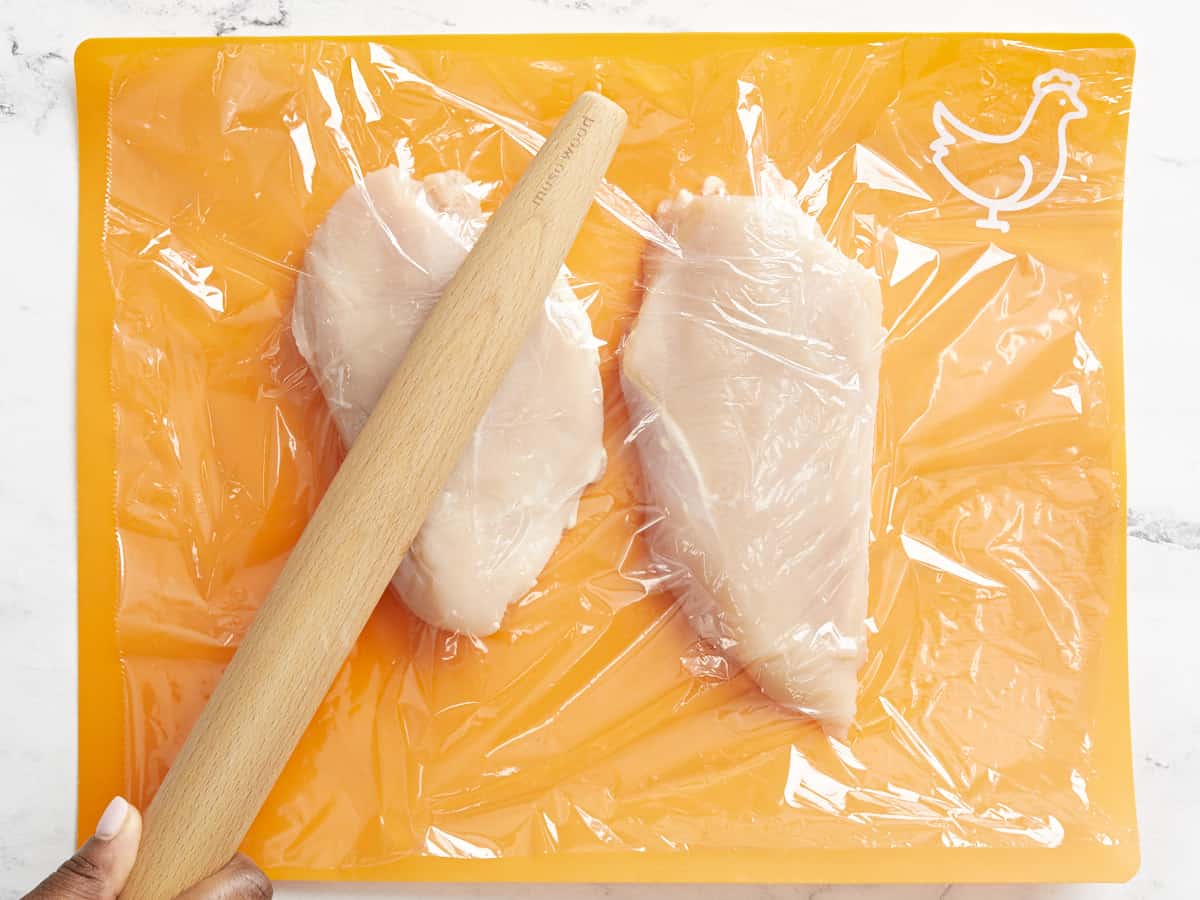
  1. Thick chicken breasts take longer to cook in the air fryer. In order to make sure the chicken breasts cook evenly, use a rolling pin or the flat side of a meat tenderizer to gently pound the thicker side of the chicken breast until the breast is an even thickness from one end to the other (about 1/2 to 3/4 inch thick).
  2. Once the chicken breasts are cooked, remove them promptly from the air fryer to stop the cooking process. This will help prevent the chicken breast from overcooking and drying out.  
  3. Allow the chicken breasts to rest for 5 minutes on a cutting board before slicing and serving. This helps the chicken breast retain all of those yummy juices.

Serving Suggestions

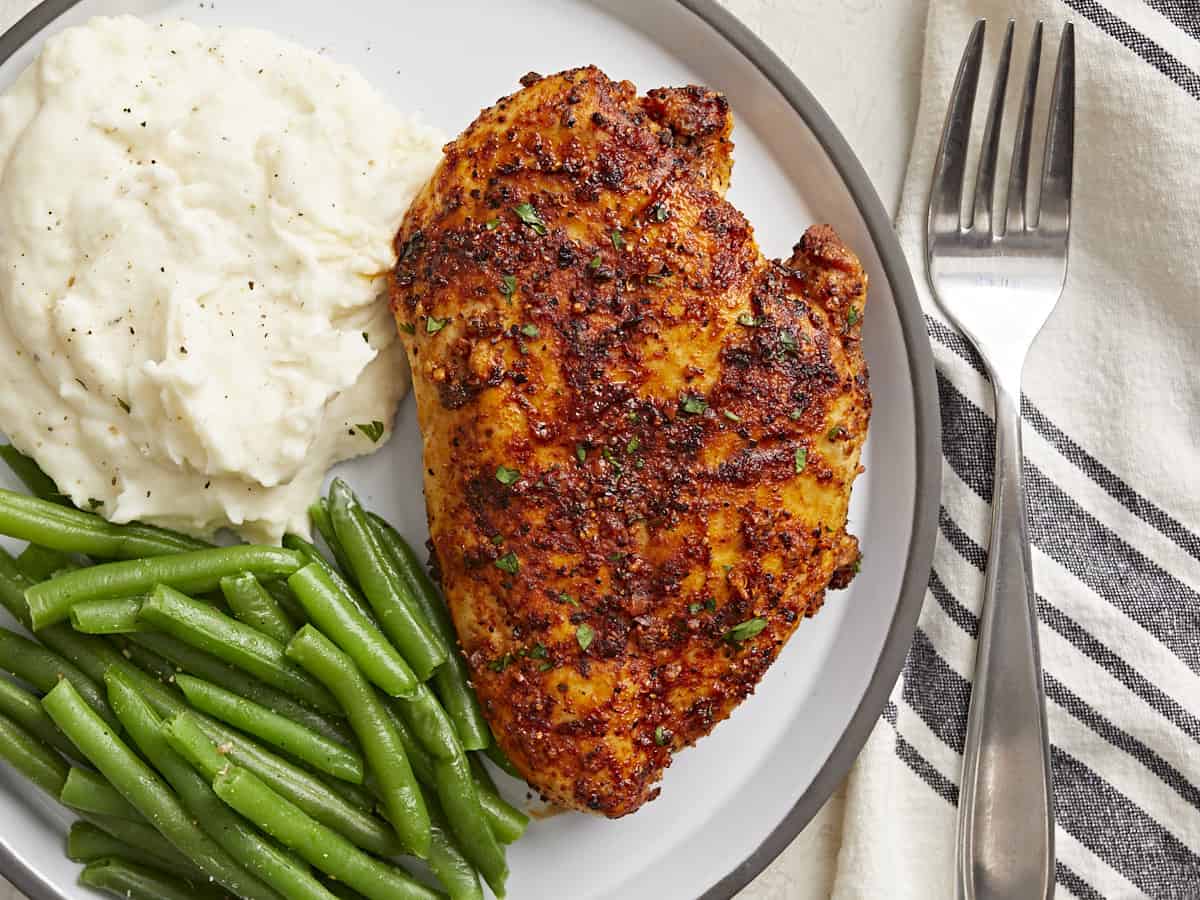
There are so many options to choose from when picking a side to serve with your air fryer chicken breasts. You could make a simple side salad, mashed potatoes, homemade mac and cheese, or a side of steamed green beans. And if you have a few extra minutes you can always add a side of roasted vegetables like our roasted broccoli or our oven baked steak fries!

Meal Prep Ideas

Meal prepping is a great way to save time, money, and reduce waste in the kitchen. And these Air Fryer Chicken Breasts are absolutely perfect for meal prep! You can easily slice them into equal portions for your meal prep containers, then just add in your favorite sides and vegetables.

Chicken breasts are also great to meal prep with salads, sandwiches, wraps, and even chicken burrito bowls! And if you love meal prepping as much as we do, then make sure to check out our full list of budget-friendly meal prep ideas.

Air Fryer Chicken Breast sliced in meal prep containers with green beans and mashed potatoes on the side.
Overhead view of Air Fryer Chicken Breast on a plate with a side of mashed potatoes and green beans.
Print

Air Fryer Chicken Breast

This juicy, tender, Air Fryer Chicken Breast is super flavorful and ready in less than 20 minutes. Perfect for meal prepping!
Course Dinner, Lunch
Cuisine American
Total Cost $5.74 recipe / $1.43 serving
Prep Time 5 minutes
Cook Time 13 minutes
Total Time 18 minutes
Servings 4
Calories 204kcal

Ingredients

Instructions

  • In a small bowl mix the steak seasoning, sweet paprika, smoked paprika, and black pepper together.
  • Place both chicken breasts on a cutting board, cover them with plastic wrap or parchment paper, then use a rolling pin or the flat side of a meat tenderizer to gently pound the thicker side of the chicken breast until the entire breast is an even thickness from one end to the other (about 1/2 to 3/4 inch thick).
  • Preheat the air fryer to 400°F. Brush the olive oil over both sides of each chicken breast.
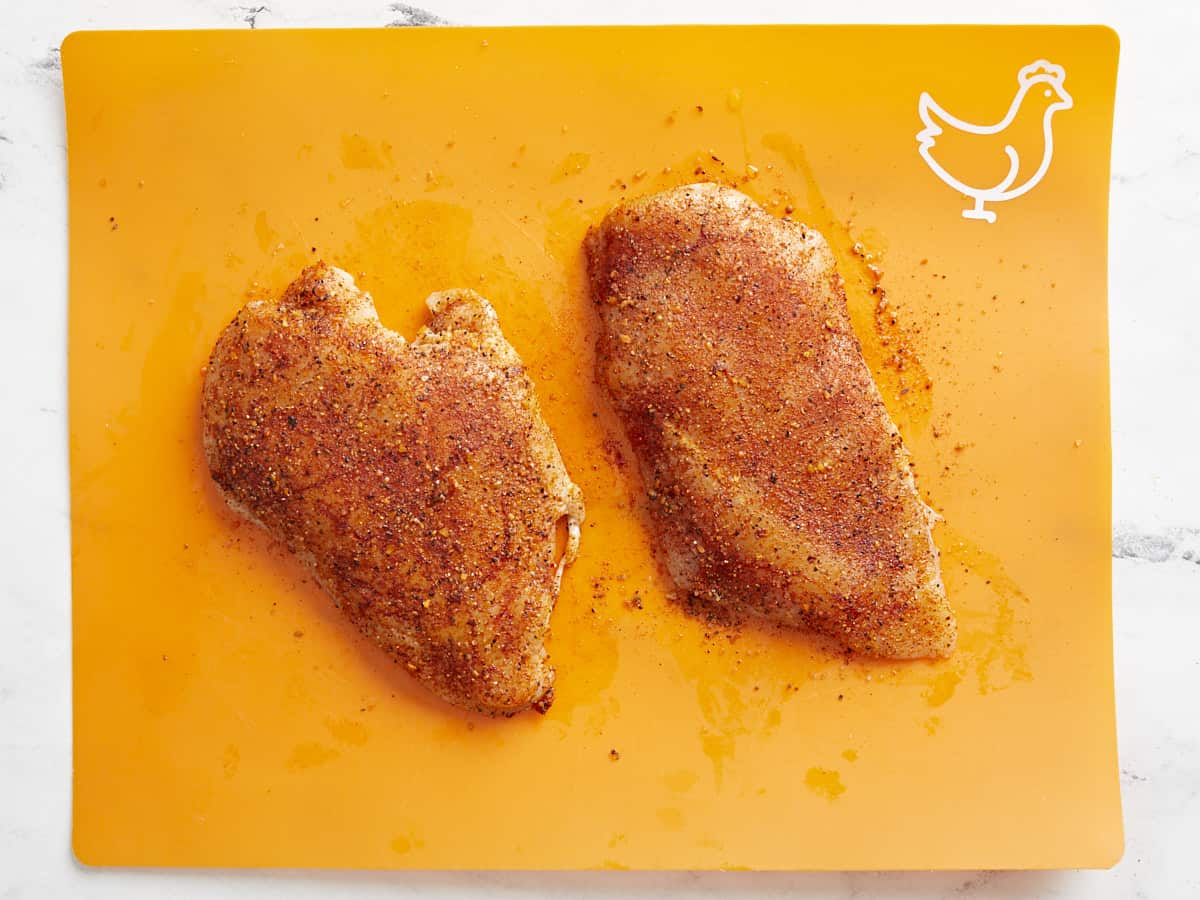
  • Generously coat both sides of each chicken breast with the seasoning blend. Rub the seasoning into the breasts with your hands making sure the entire chicken breast is evenly coated with spices.
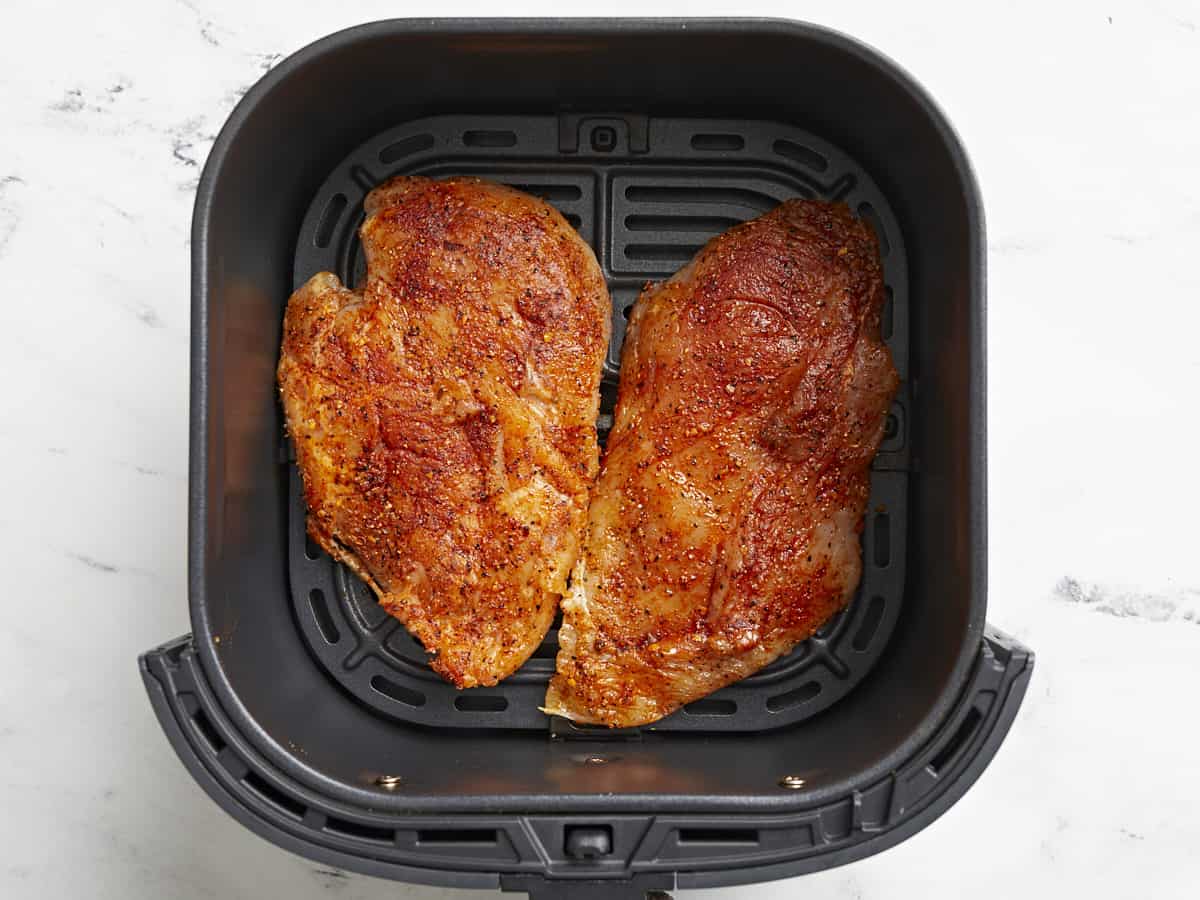
  • Place both chicken breasts inside the air fryer basket and cook for 7 minutes. Then flip the chicken breasts and cook for 6 more minutes. After a total of 13 minutes, use a meat thermometer to check the chicken breasts and make sure the internal temperature has reached 165°F, and if not, cook for 1-2 minutes longer.
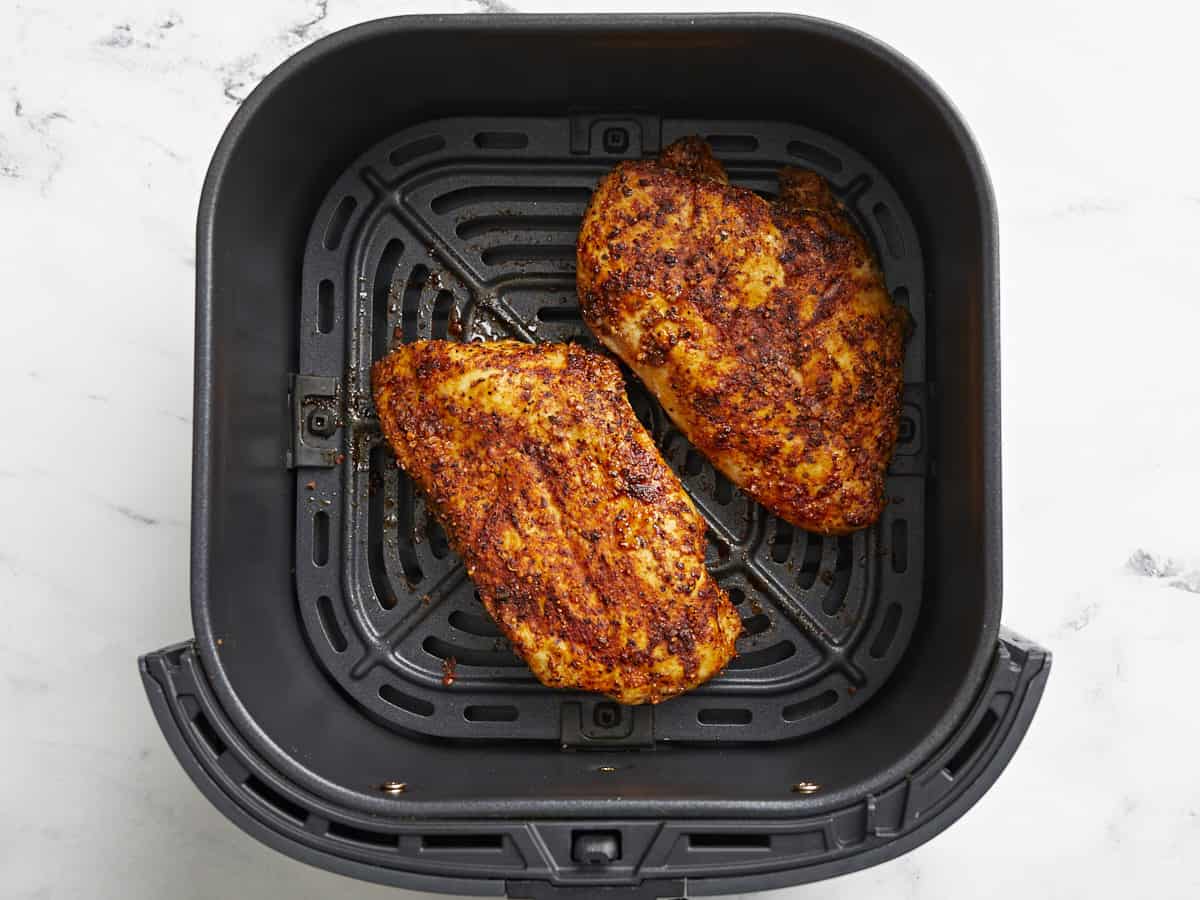
  • Promptly remove the chicken breasts from the air fryer basket and rest on a clean cutting board for 5 minutes before slicing. Serve the chicken breasts with your favorite sides and enjoy.

See how we calculate recipe costs here.

Nutrition

Serving: 1serving | Calories: 204kcal | Carbohydrates: 1g | Protein: 32g | Fat: 7g | Sodium: 172mg | Fiber: 0.4g
Overhead view of Air Fryer Chicken Breast on a plate with a side of mashed potatoes and green beans.

How to Make Air Fryer Chicken Breasts – Step by Step Photos

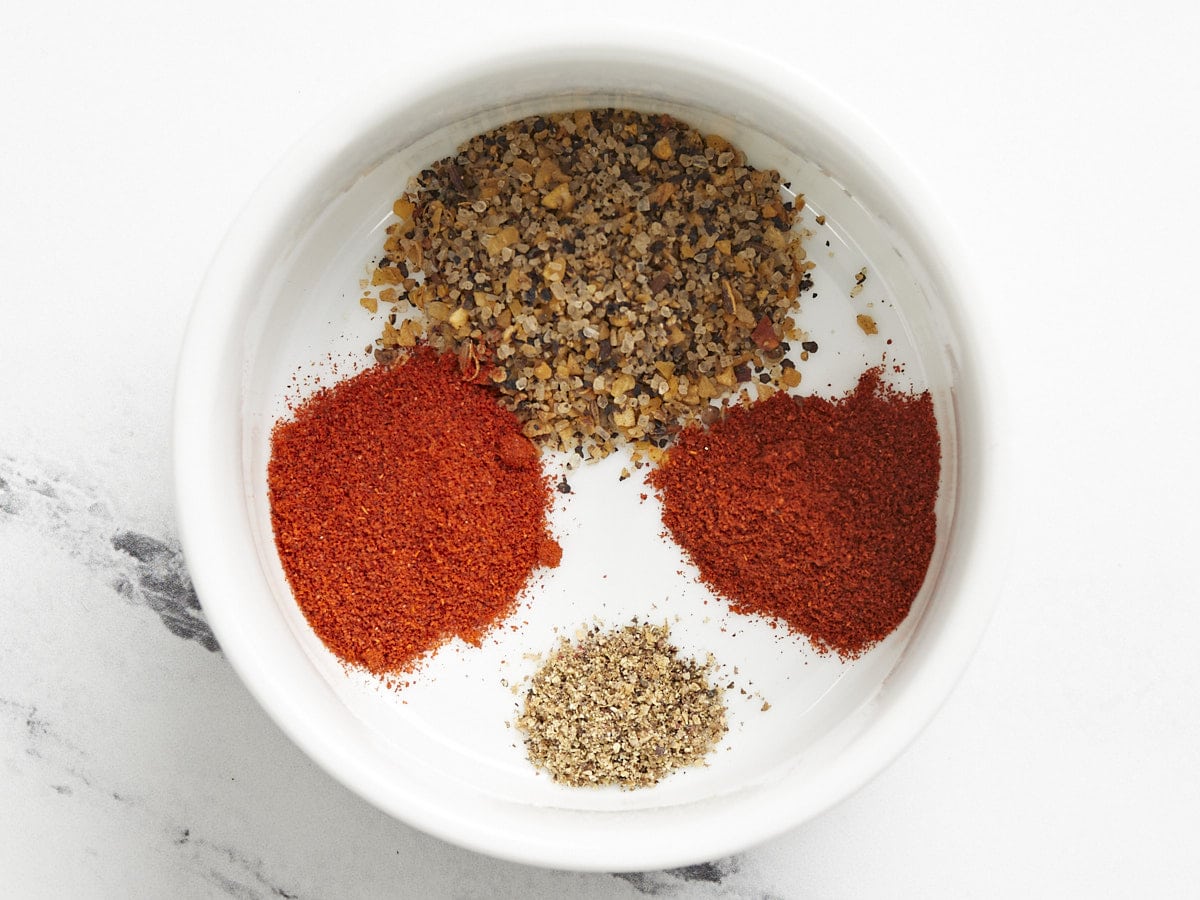
Spices for air fryer chicken breast in a small bowl.

In a small bowl mix together 2 tsp steak seasoning, 1 tsp sweet paprika, 1/2 tsp smoked paprika, and 1/4 tsp freshly cracked black pepper together. Set the seasoning mix to the side.

chicken breasts on a cutting board being pounded with a rolling pin.

Place 2 chicken breasts on a cutting board, cover them with plastic wrap or parchment paper, then use a rolling pin or the flat side of a meat tenderizer to gently pound the thicker side of the chicken breast until the entire breast is an even thickness from one end to the other (about 1/2 to 3/4 inch thick).

Seasoned chicken breasts on a cutting board.

Preheat the air fryer to 400°F. Brush 1 Tbsp of olive oil over both sides of each chicken breast. Then generously coat both sides of each chicken breast with the seasoning mix. Rub the seasoning into the breasts with your hands making sure the entire chicken breast is evenly coated with spices.

Uncooked chicken breasts added to an air fryer basket.

Place both chicken breasts inside the air fryer basket and cook for 7 minutes. Then flip the chicken breasts and cook for 6 more minutes. After a total of 13 minutes, use a meat thermometer to check the chicken breasts and make sure the internal temperature has reached 165°F, and if not, cook for 1-2 minutes longer.

Cooked chicken breasts inside an air fryer basket.

Promptly remove the chicken breasts from the air fryer basket and rest on a clean cutting board for 5 minutes before slicing. Enjoy these juicy, flavorful air fryer chicken breasts with your favorite sides for dinner, in a salad or sandwich for lunch, or for an easy meal prep protein!

Sliced Air Fryer Chicken Breasts on a wood cutting board.

The post Air Fryer Chicken Breast appeared first on Budget Bytes.
Southwest Lentils And Rice Skillet

This Southwest Lentils and Rice Skillet is packed with veggies and bold flavors for a super filling, budget-friendly, and easy to make one pot skillet meal!

The post Southwest Lentils And Rice Skillet appeared first on Budget Bytes.
I don’t know about you all, but I love one pot skillet meals! This simple Southwest Lentils and Rice Skillet was inspired by a protein meal bag that I used to buy in the grocery freezer section. I loved the flavors and combination of ingredients, but I realized that I could make 3 times as much and save more money by making it at home. But the best part about this dish is that it’s a “pantry cleaning” recipe. Meaning most of the ingredients are pantry staples like canned beans and tomatoes, lentils, rice, corn, herbs and spices. It’s truly budget-friendly, super filling, easy to make, and probably your new favorite meal prep recipe! :)

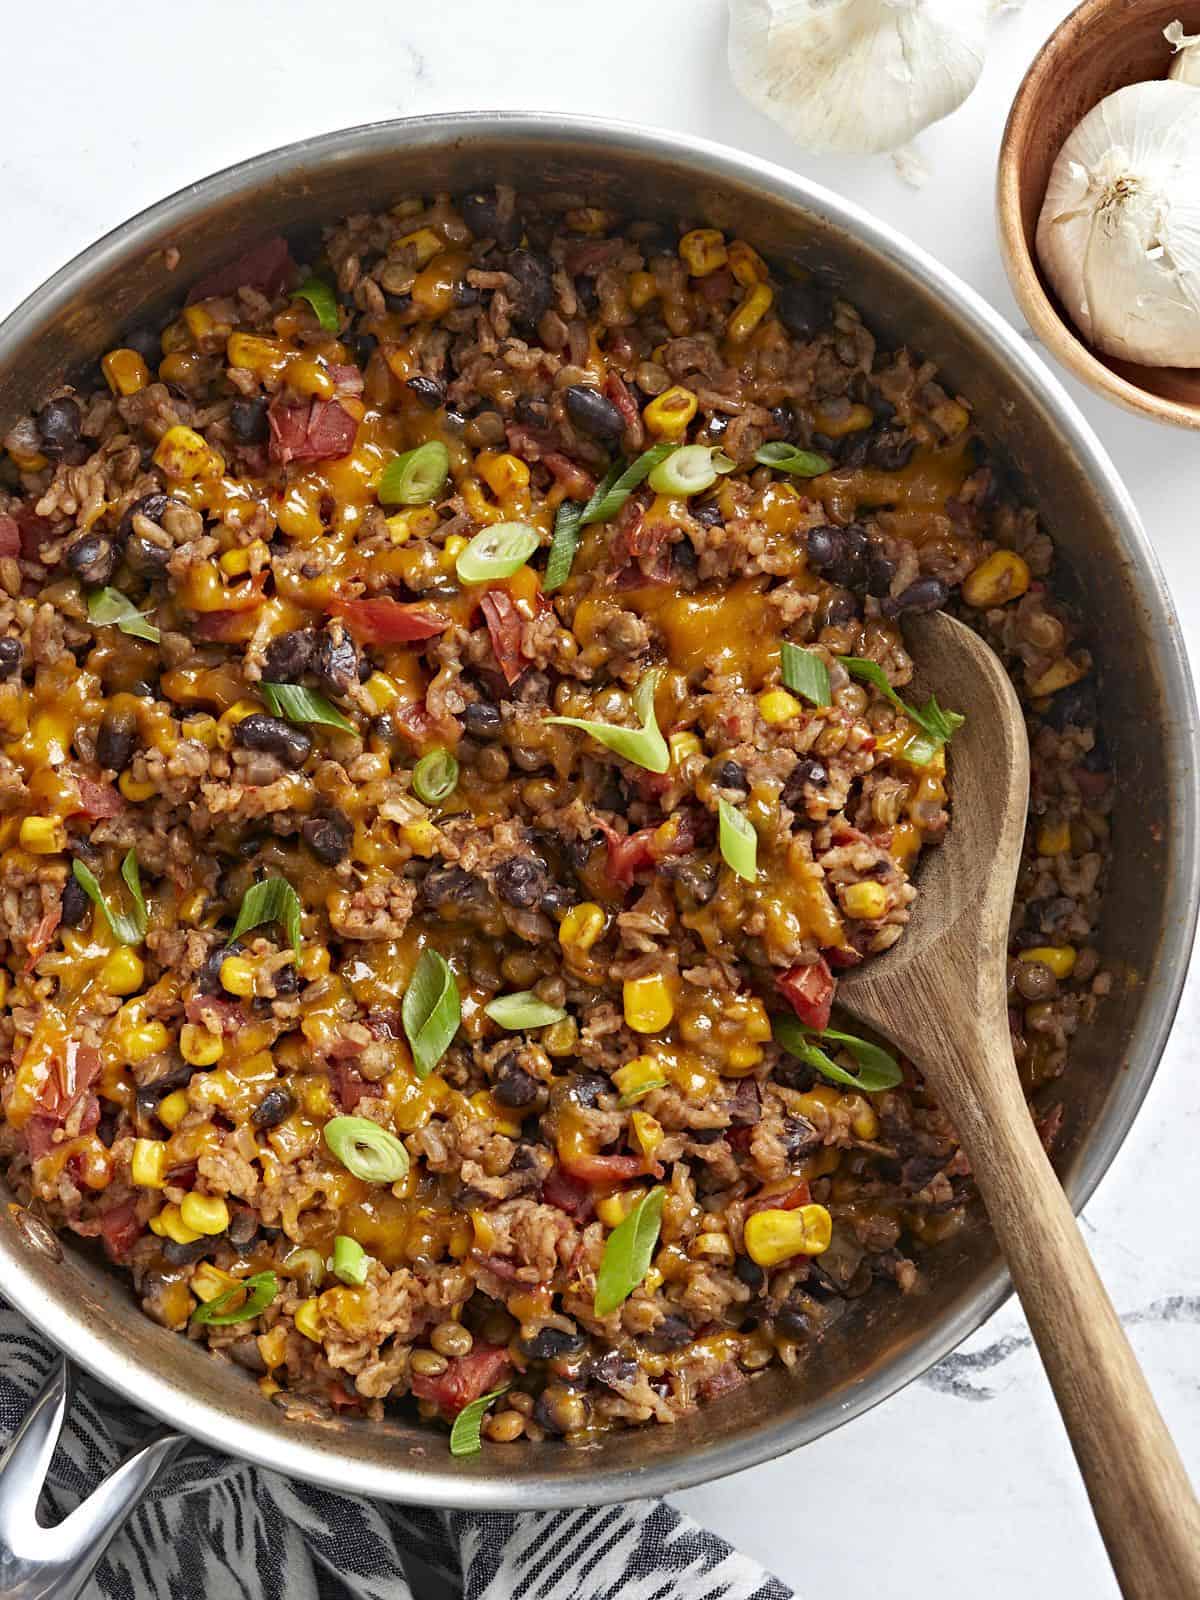
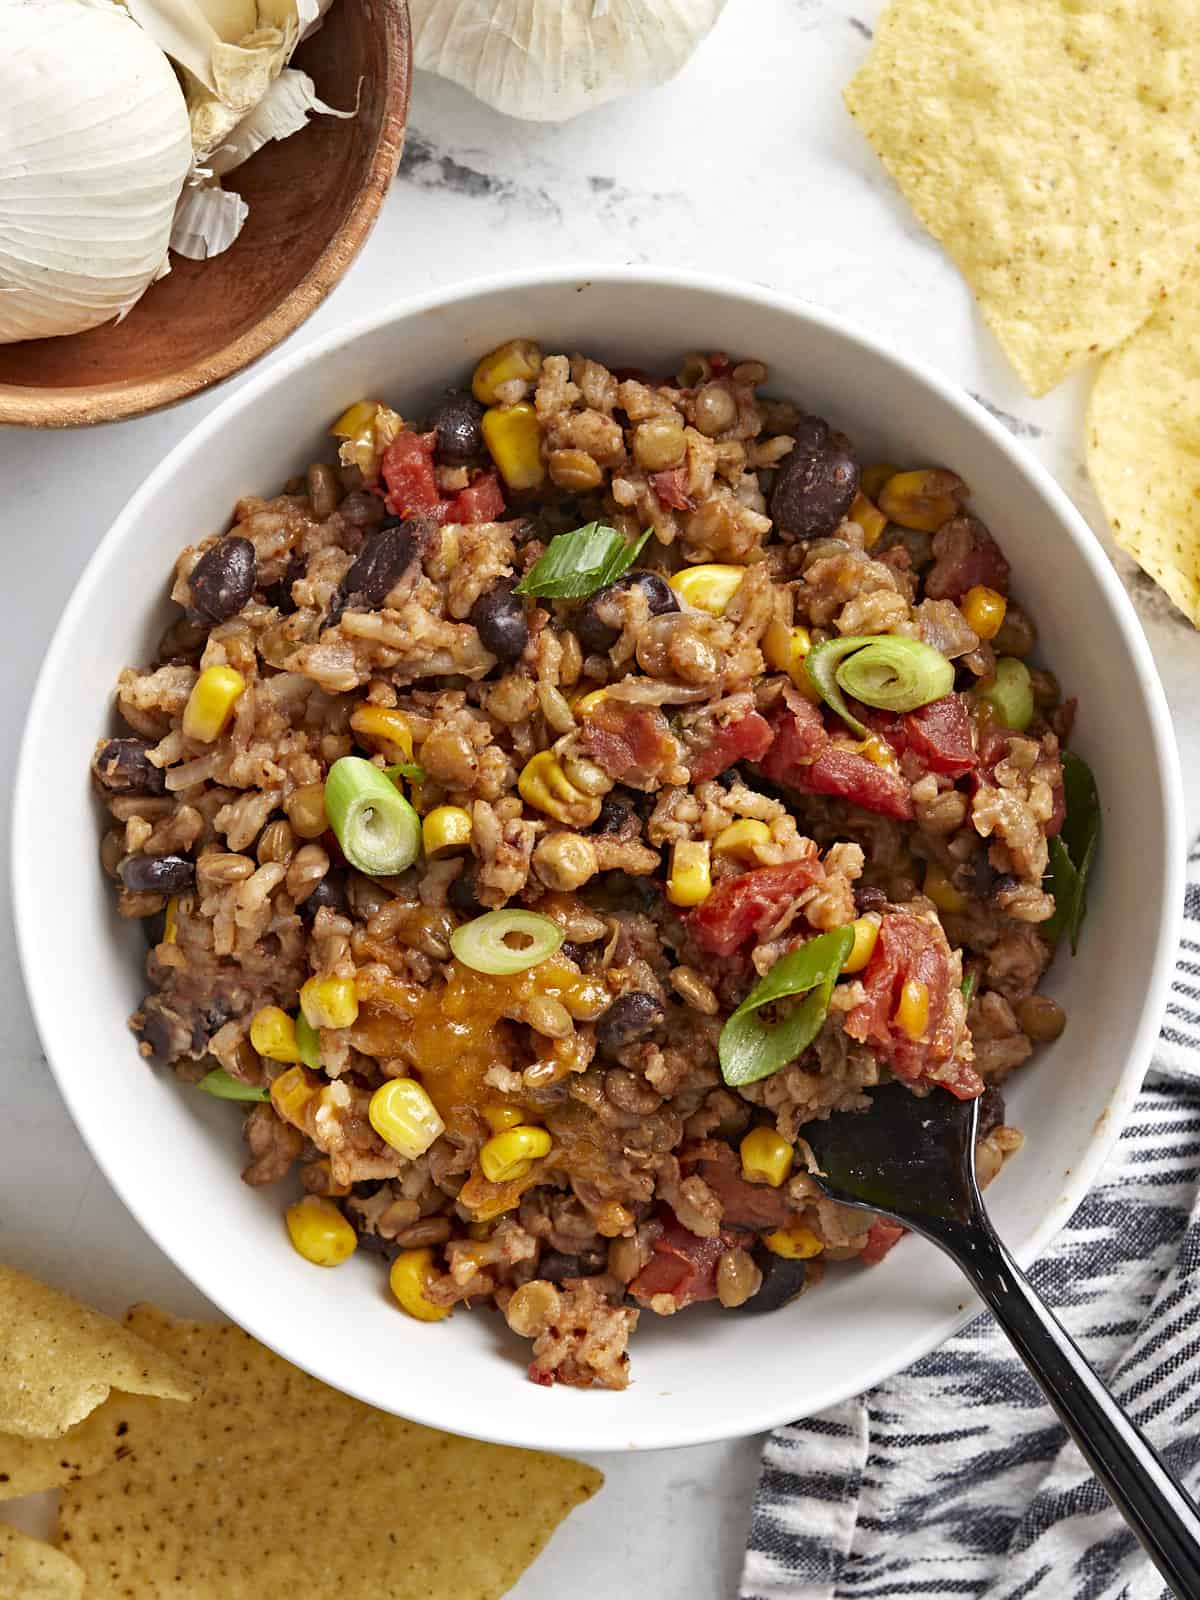
Overhead shot of southwest lentils and rice skillet garnished with green onions and a wooden spoon placed inside the skillet.

What’s in Southwest Lentils and Rice Skillet?

The good news is you probably already have most of these ingredients for this tasty skillet meal in your pantry right now! So here’s a brief rundown of what you’ll need:

  • Lentils & Rice – Lentils and rice are the base components of this recipe and a great combination for a filling meal. There are several different types of lentils, but we used brown lentils and long-grain white rice for this recipe. I’ll provide more details about lentils in the section below.
  • Vegetables – I used a simple combination of black beans, fire-roasted tomatoes, and frozen corn for this recipe. Feel free to use canned corn (drained) or regular diced tomatoes if that’s what you have on hand. Just know you’ll be missing out on the smoky flavor you would get from using fire-roasted tomatoes.
  • Red Onion and Garlic – Both of these aromatics add depth and great flavor to the dish. You can certainly substitute yellow onion instead of red onion if you prefer.
  • Vegetable Broth – Vegetable broth to cook the lentils and rice and to keep this recipe vegetarian. Feel free to use chicken broth if that’s what you have on hand.
  • Spices – Spices like cumin, chili powder, adobo seasoning, and oregano create a bold Southwest-inspired flavor base for this skillet meal.
  • Cheddar Cheese & Green Onions – We topped things off with some fresh shredded cheddar cheese and sliced green onions for extra flavor and color.

What Type of Lentils To Use?

There’s usually a wide variety of lentils sold in grocery stores these days including brown, red, yellow, black and french-style lentils. For this recipe you’ll want to use brown or brownish-green lentils which cook with about 20 minutes of simmering and do not require soaking. I don’t suggest using red or yellow lentils for this recipe because they break down quickly when cooked and they don’t hold their shape as well as brown lentils.

Can I use Brown Rice?

This recipe would be a little tricky to substitute brown rice in because brown rice takes much longer to cook than white rice, and it requires more liquid. The longer cook time would also cause the lentils to become mushy. So I recommend just sticking with the white rice for this recipe.

Topping Ideas

One of the best parts about this Southwest Lentils & Rice skillet is being able to customize it with all your favorite taco-style toppings! You can top it with some cilantro, your favorite cheese, and even a few diced tomatoes.

Or get really fancy with some diced avocado, pickled jalapeños, or a drizzle of lime crema. My personal favorite is to just serve it with shredded cheese, green onions, a side of salsa, and some tortilla chips. Sooo good!! :)

Storing & Reheating

This lentils and rice meal holds up great in the fridge. Store any leftovers in an airtight container in the fridge for up to 4 days. And it’s perfect for meal prep! I’ve meal-prepped this recipe quite a few times in separate storage containers, reheated in the microwave until warm, and boom…a quick and easy lunch or dinner any day of the week!

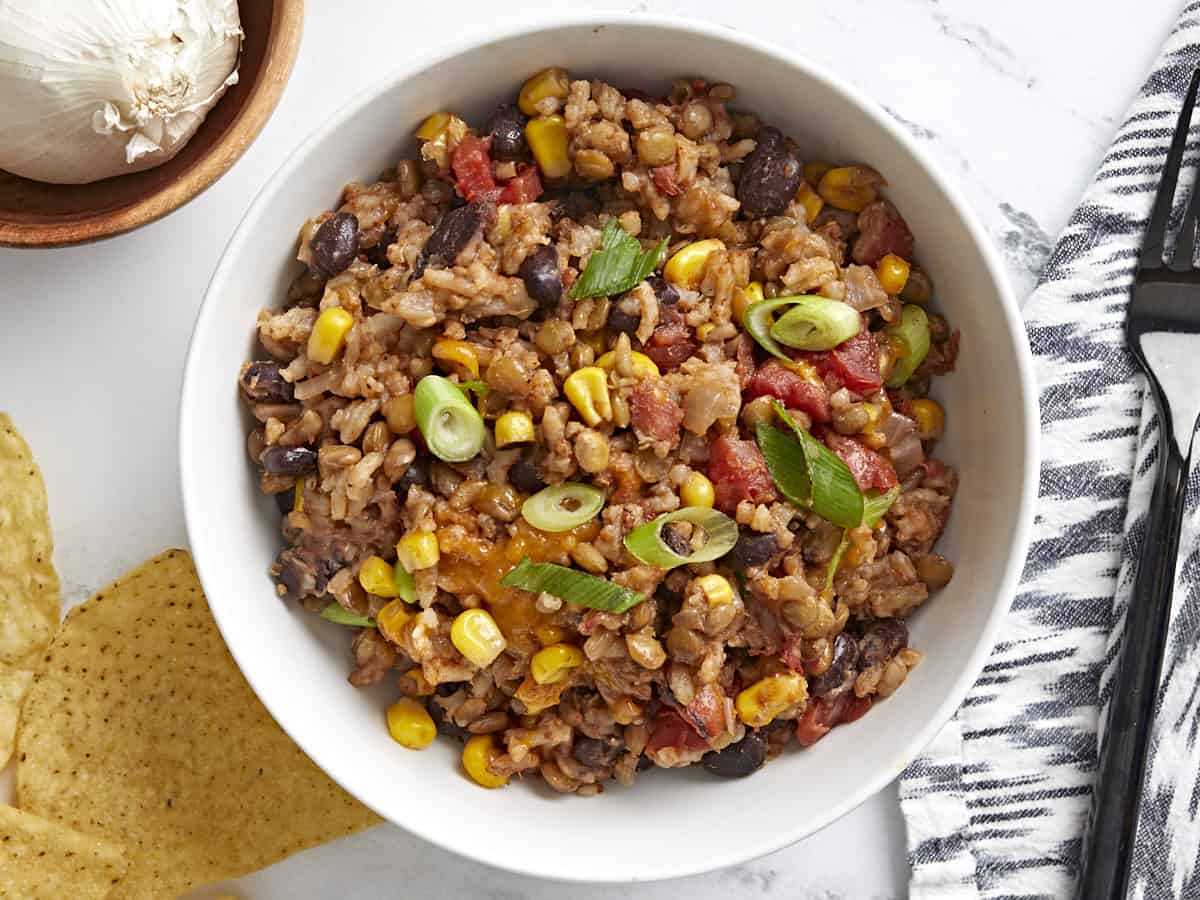
Overhead view of a white bowl full of southwest lentils and rice with tortilla chips, a napkin, and black fork on the side.
Overhead shot of southwest lentils and rice skillet garnished with green onions and a wooden spoon placed inside the skillet.
Print

Southwest Lentils and Rice Skillet

This Southwest Lentils and Rice Skillet is packed with veggies and bold flavors for a super filling, budget-friendly, and easy to make one pot skillet meal!
Course Dinner, Lunch
Cuisine Mexican
Total Cost $5.65 recipe / $1.41 serving
Prep Time 10 minutes
Cook Time 35 minutes
Total Time 45 minutes
Servings 4 (1.5 cups each)
Calories 369kcal

Ingredients

  • 1 Tbsp olive oil $0.11
  • 1 small red onion $0.42
  • 2 cloves garlic $0.16
  • 1.5 tsp cumin $0.15
  • 1 tsp chili powder $0.10
  • 1 tsp adobo seasoning $0.10
  • 1/2 tsp dried oregano $0.05
  • 1/2 tsp salt $0.04
  • 1/4 tsp freshly cracked black pepper $0.02
  • 1/2 cup brown lentils, rinsed $0.38
  • 1 15oz. can black beans, drained & rinsed $0.79
  • 1 14.5oz. can fire roasted tomatoes $1.25
  • 1 cup frozen corn $0.60
  • 2 cups vegetable broth $0.34
  • 3/4 cup long grain white rice, rinsed $0.32
  • 1/2 cup shredded cheddar cheese $0.58
  • 2 green onions, sliced $0.24

Instructions

  • Dice the red onion and mince the garlic. Add olive oil and onion to a large deep skillet over medium heat and sauté until onions are translucent, approximately 2-3 minutes. Add minced garlic and sauté an additional 30 seconds or until garlic is fragrant.
  • Add the cumin, chili powder, adobo, oregano, salt, and pepper to the skillet, stir and toast spices for about 30 seconds.
  • Next add in the lentils, black beans, fire roasted tomatoes (with juices), corn, and vegetable broth. Stir everything to combine. Place a lid on the skillet, turn the heat up to medium-high, and allow the mixture to come to a full boil. Once boiling, immediately reduce the heat to medium-low and simmer for 5 minutes. This will allow the lentils to start cooking first before adding the rice.
  • After 5 minutes, remove the lid and add the rice. Stir briefly just to evenly distribute the rice, cover with a lid, bring the skillet back to a boil, then reduce the heat again and simmer for 20 minutes.
  • While the mixture is cooking, grate the cheddar cheese and slice the green onions.
  • After 20 minutes, remove the skillet from the heat and let it rest, with the lid on, for 5 minutes. After it has rested, remove the lid, fluff the rice and gently stir to redistribute the veggies.
  • Top the lentils and rice mixture with shredded cheese and sliced green onions. Serve with more of your favorite toppings and enjoy!

See how we calculate recipe costs here.

Nutrition

Serving: 1.5cups | Calories: 369kcal | Carbohydrates: 59g | Protein: 14g | Fat: 9g | Sodium: 872mg | Fiber: 10g
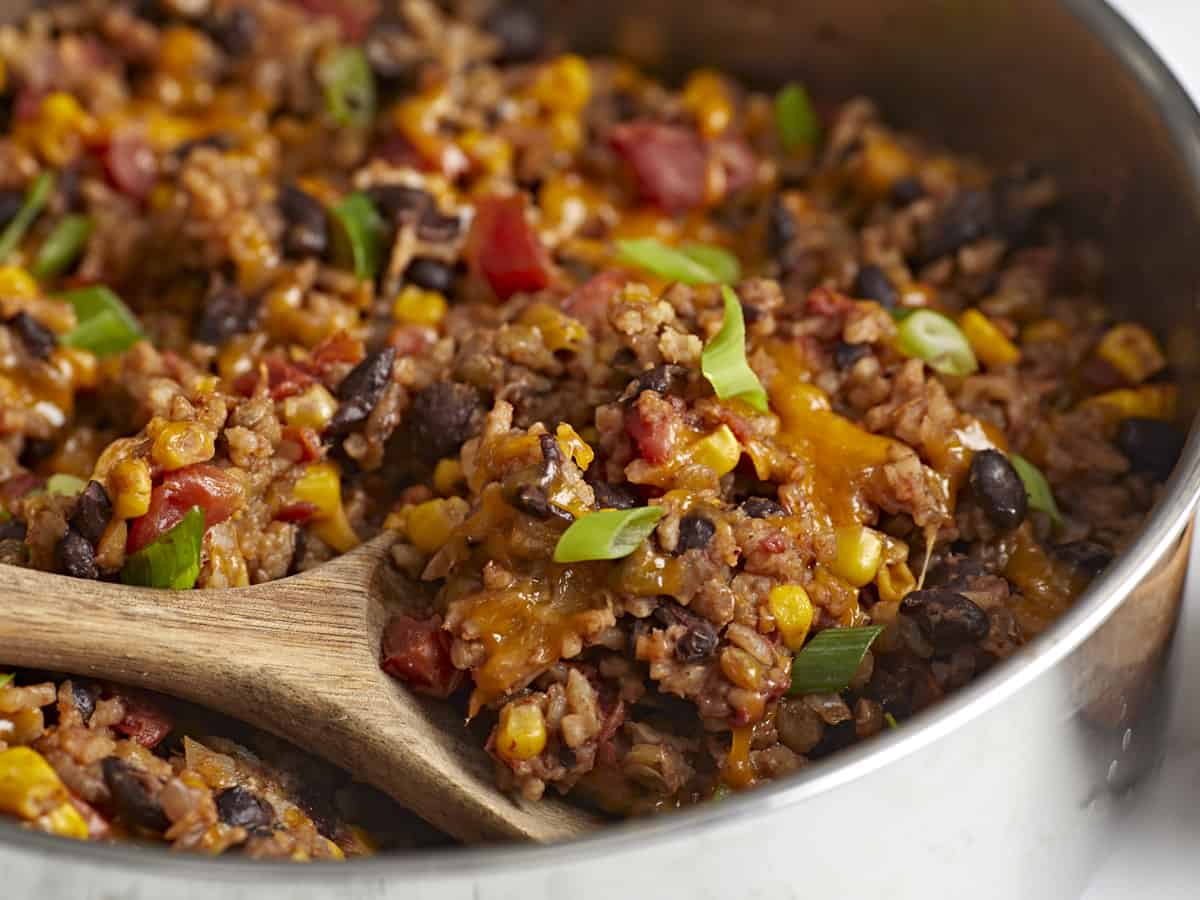
Side front view of southwest lentils and rice skillet with a wooden spoon scooping some out.

How to Make Southwest Lentils And Rice Skillet – Step by Step Photos

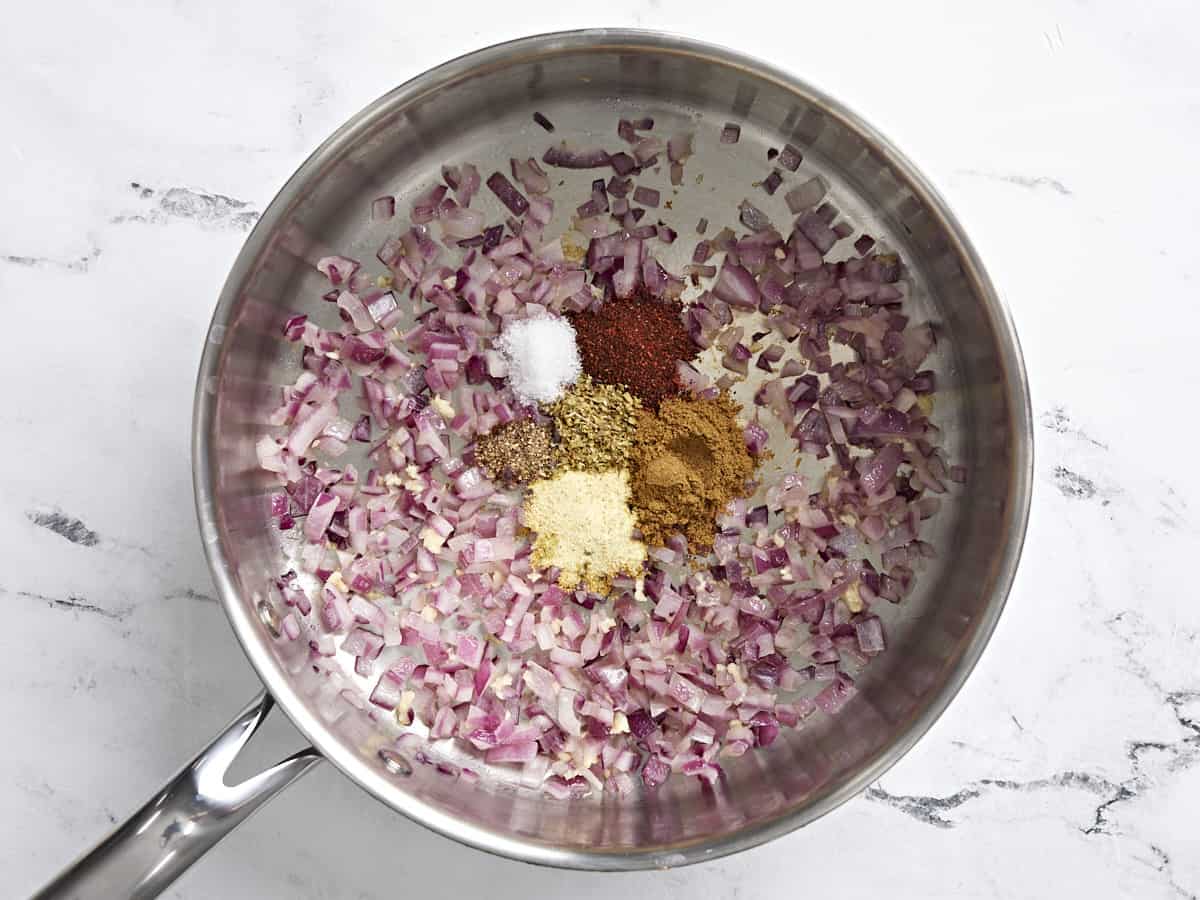
Diced red onion, garlic, and spices in a skillet.

In a large deep skillet, add 1 Tbsp olive oil and 1 small red onion, diced. Sauté over medium heat until onions are translucent, approximately 2-3 minutes. Add 2 minced garlic cloves and sauté an additional 30 seconds. Now add 1 1/2 tsp cumin, 1 tsp chili powder, 1 tsp adobo seasoning, 1/2 tsp dried oregano, 1/2 tsp salt, and 1/4 tsp cracked black pepper. Stir and toast the spices for about 30 seconds.

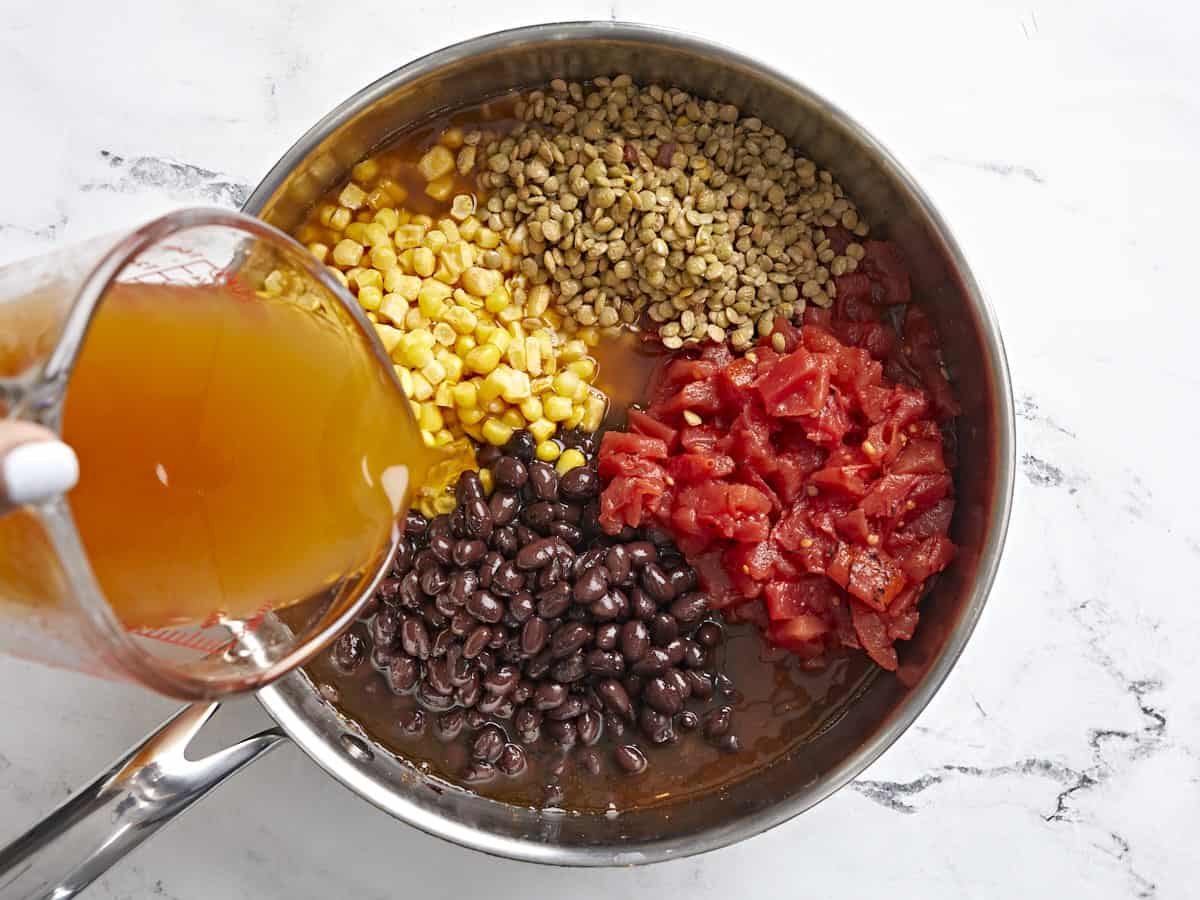
Lentils, fire-roasted tomatoes, black beans, corn, and vegetable broth added to the skillet.

Add 1/2 cup brown lentils, one 15oz. can black beans (drained & rinsed), one 14.5oz. can fire roasted tomatoes (with juices), 1 cup frozen corn, and 2 cups of vegetable broth to the skillet. Stir everything to combine. Place a lid on the skillet, turn the heat up to medium-high, and allow the mixture to come to a full boil. Once boiling, immediately reduce the heat to medium-low and simmer for 5 minutes. This will allow the lentils to start cooking first before adding the rice.

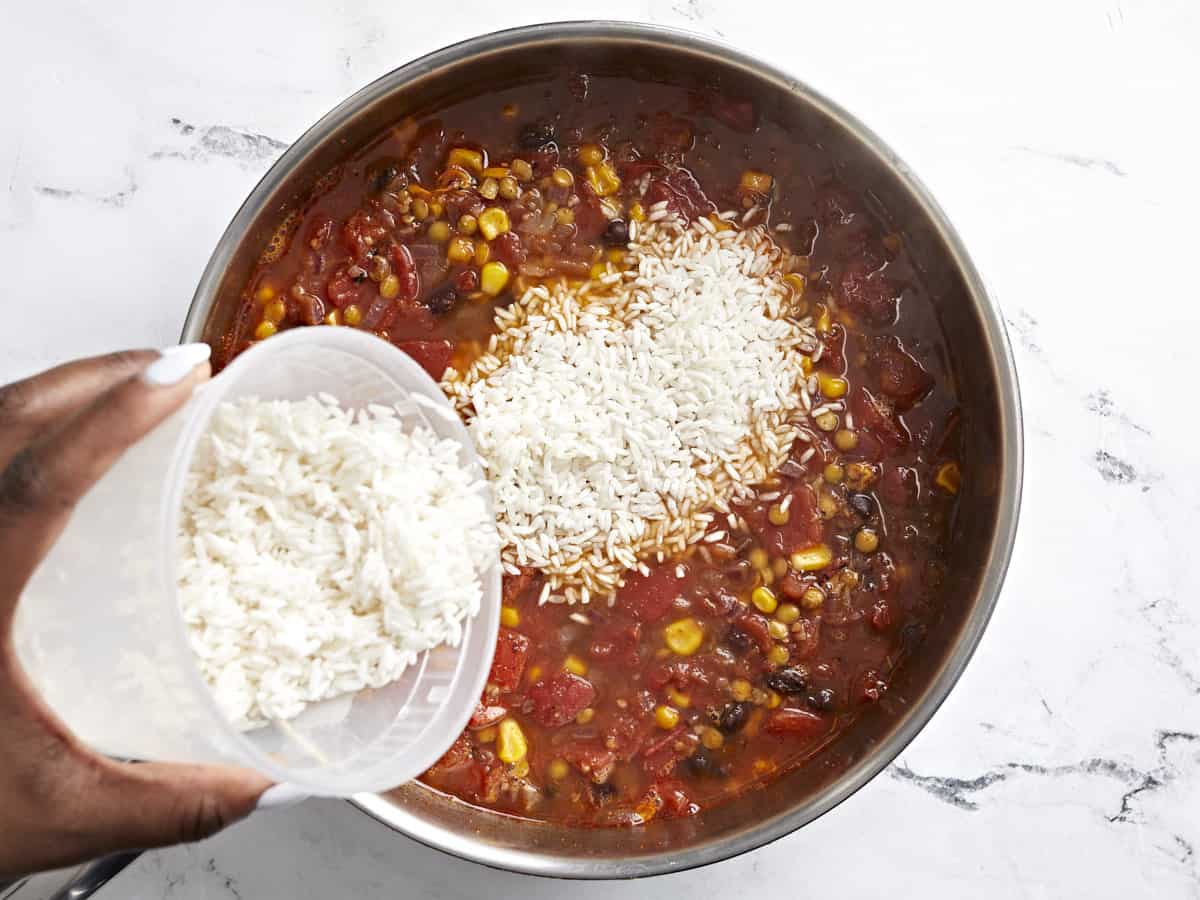
Long grain white rice being added to the skillet.

After 5 minutes, remove the lid and add 3/4 cups long grain white rice (rinsed). Stir briefly just to evenly distribute the rice, cover with a lid, bring the skillet back to a full boil, then reduce the heat again and simmer for 20 minutes. While the mixture is cooking, grate 1/2 cup cheddar cheese and slice two green onions.

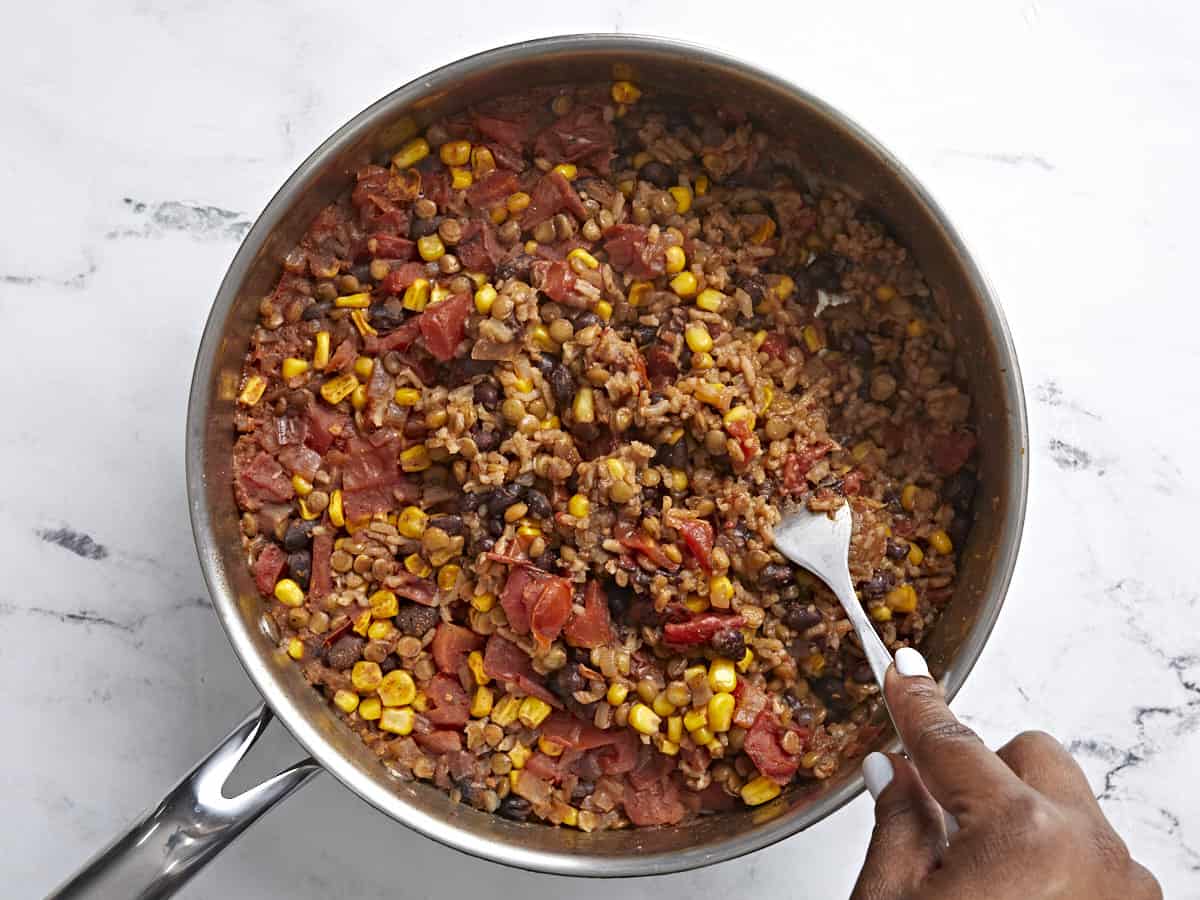
Cooked southwest lentils and rice skillet with rice being fluffed with a fork.

After 20 minutes, remove the skillet from the heat and let it rest, with the lid on, for 5 minutes. After it has rested, remove the lid, fluff the rice and gently stir to redistribute the veggies.

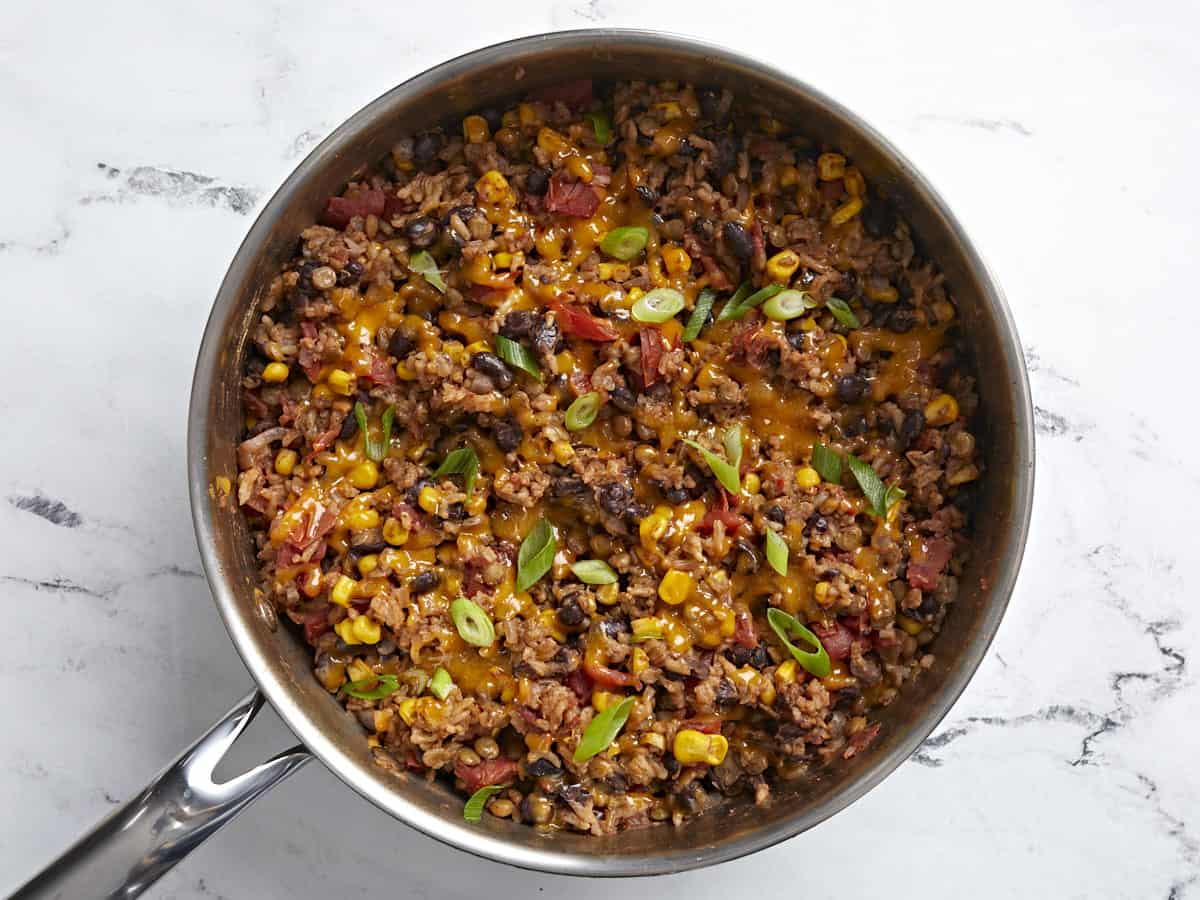
Finished Southwest Lentils and Rice Skillet with shredded cheddar cheese and sliced green onions on top.

Top the lentils and rice mixture with the shredded cheese and sliced green onions.

Overhead view of a white bowl full of southwest lentils and rice with tortilla chips, a napkin, and black fork on the side.

Serve with more of your favorite toppings and enjoy!

The post Southwest Lentils And Rice Skillet appeared first on Budget Bytes.
Mediterranean Turkey Bowls

These Mediterranean Turkey Bowls are the perfect filling and fresh meal prep lunch for Spring and Summer. Plus, they’re super versatile!

The post Mediterranean Turkey Bowls appeared first on Budget Bytes.
Bowl meals have always been my favorite type of meal because they’re super flexible, you get a lot of colors, textures, and flavors in every bowl, and they’re perfect for meal prep (I LOVE having grab-n-go lunches ready). This week, I made these Mediterranean Turkey Bowls. They’re simple, super fresh, and very filling. Plus, I can swap out ingredients depending on what I have on hand, or what I’m craving. So if you’re looking for something new, easy, and fresh to prep for lunch, give these bowls a try!

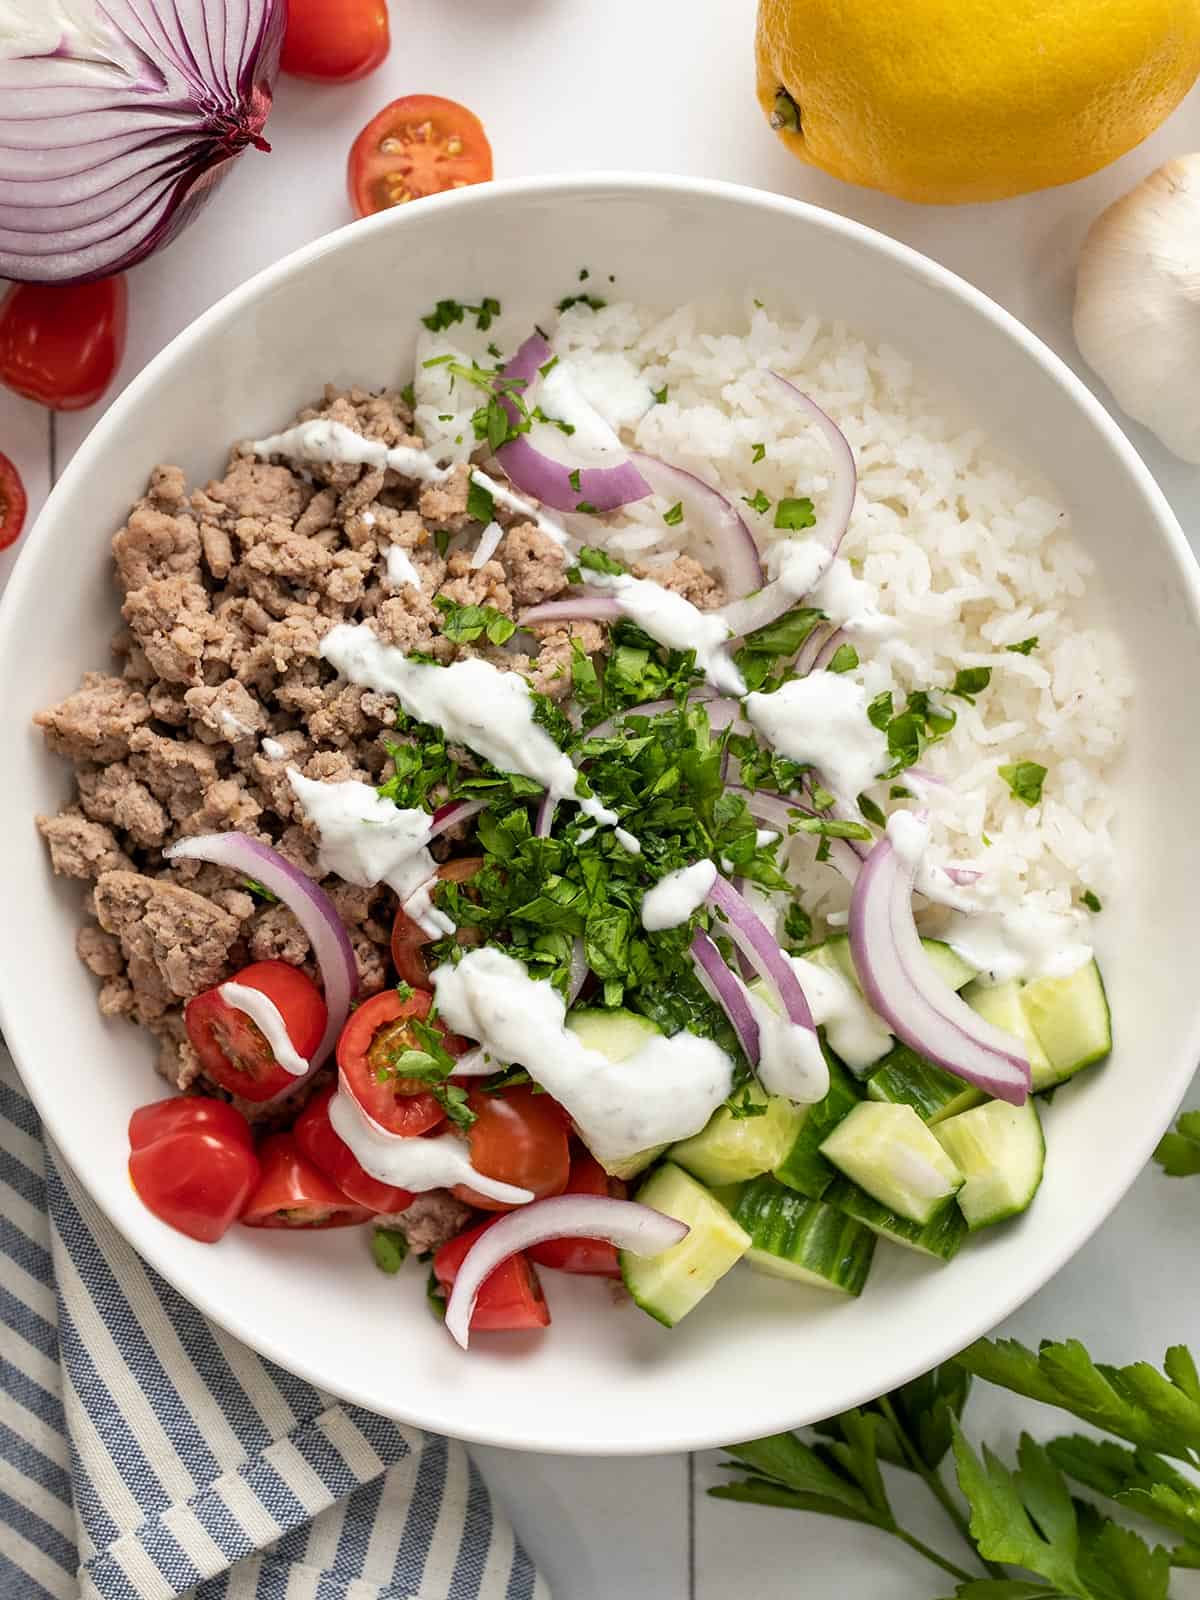
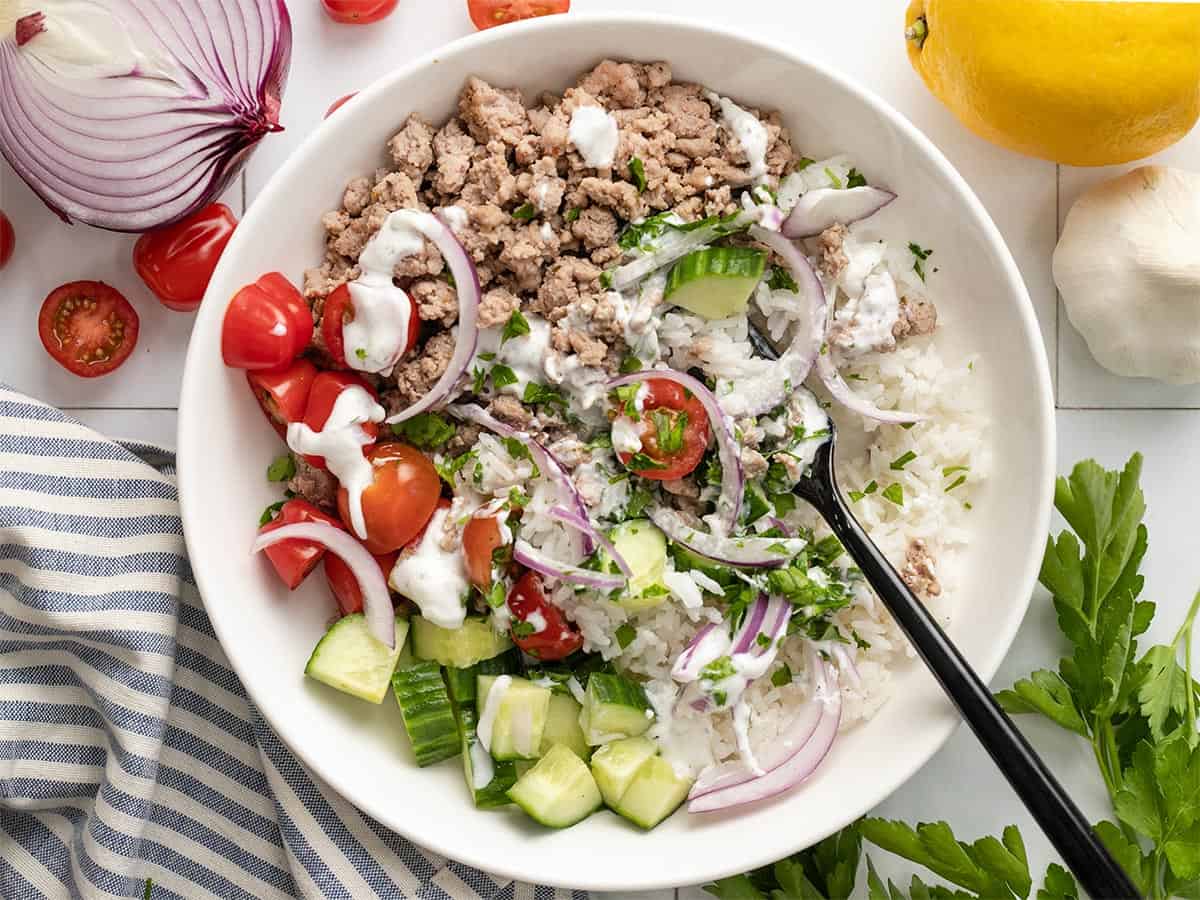
Overhead view of Mediterranean Turkey Bowl with ingredients on the sides.

Can I Use Different Meat?

These bowls are endlessly customizable, and that includes the meat or protein. I used some ground turkey that I seasoned with garlic and oregano, but you could easily swap that out for ground beef, or make some Yogurt Marinated Chicken and chop it into pieces before adding it to your bowl.

Want to make it vegetarian? Toss some chickpeas or cannellini beans with the same seasonings that I used for the ground turkey, and maybe a small squeeze of lemon, then add them to your bowl.

What Else Can You Add?

Comb your fridge and freezer for ingredients that have a Mediterranean flair and toss ’em in your bowl! Here are a few delicious ideas:

  • Feta
  • Olives
  • Chickpeas
  • Capers
  • Spinach
  • Green Onion
  • Hummus
  • Bell peppers
  • Artichoke hearts
  • Quinoa
  • Zucchini (fresh or grilled)

P.S. You can also make these bowls over a bed of greens instead of a bed of rice!

How Long Do They Last?

I prepared these bowls for my meal prep and, in general, I only like to prep for four days at a time because I find that the freshness of my prepared meals degrade too much after that amount of time. So I suggest keeping these bowls for up to four days in the fridge for the best flavor and texture. These Mediterranean Turkey Bowls are not a good candidate for freezing due to the fresh vegetables and yogurt sauce.

Are They Served Hot or COld?

I love these bowls both warm and cold. When eating them just after preparation, the rice and turkey will be warm, which contrasts nicely with the fresh cold vegetables. When eating the leftovers as meal prep, I eat them cold like a salad. I think they’re delicious both ways! If you prefer to reheat the rice and turkey for meal preps, just package the rice and turkey in one container and the fresh vegetables in a separate container so you can reheat one and then top with the cold vegetables just before eating.

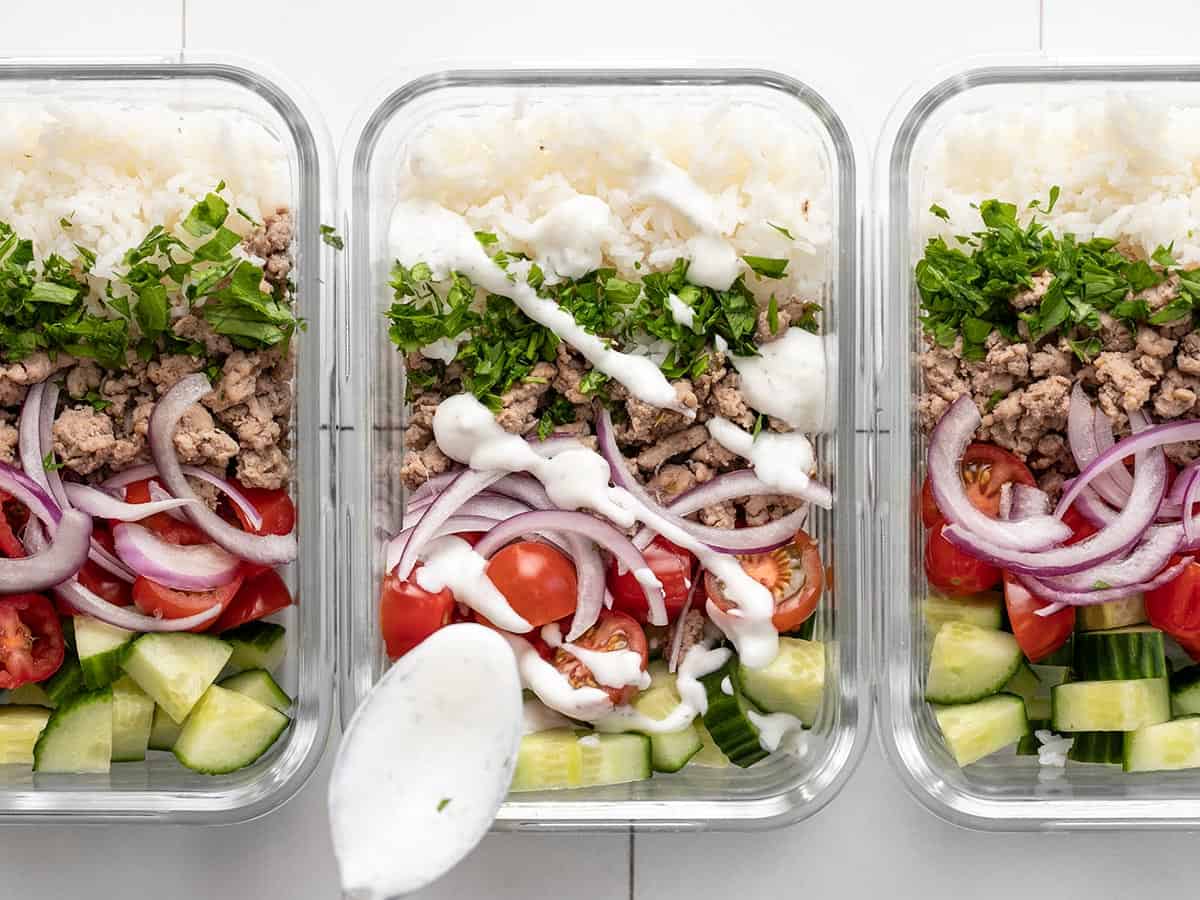
Three meal prep turkey bowls lined up with yogurt sauce being drizzled over the middle one.
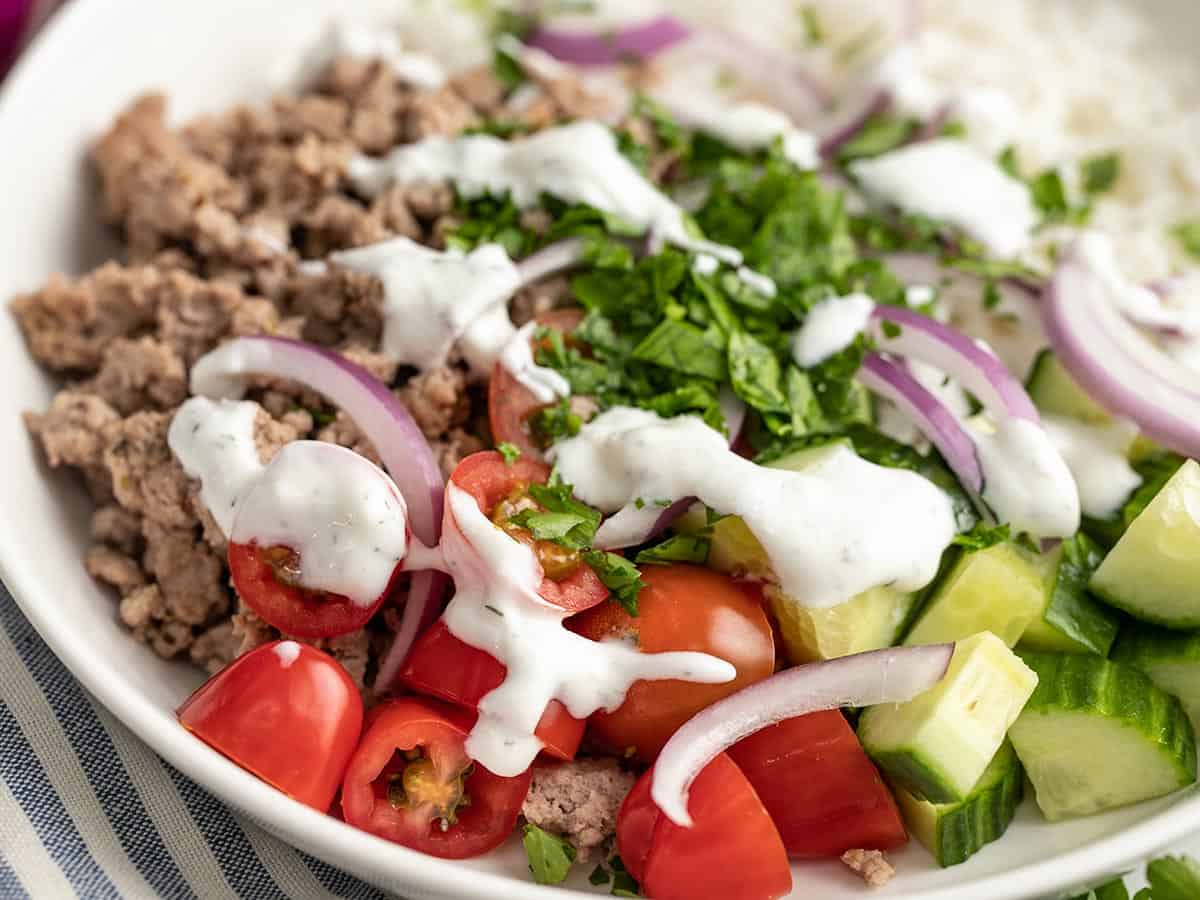
Overhead view of a Mediterranean Turkey Bowl with yogurt sauce drizzled over top.
Print

Mediterranean Turkey Bowls

These Mediterranean Turkey Bowls are the perfect filling and fresh meal prep lunch for Spring and Summer. Plus, they're super versatile!
Course Dinner, Lunch, Main Course
Cuisine American, Mediterranean
Total Cost $10.11 recipe / $2.53 recipe
Prep Time 15 minutes
Cook Time 20 minutes
Total Time 35 minutes
Servings 4
Calories 403kcal

Ingredients

Garlic Dill Yogurt Sauce

  • 1 cup full-fat plain yogurt $1.12
  • 1 Tbsp lemon juice $0.06
  • 1/4 tsp garlic powder $0.02
  • 1/4 tsp dried dill $0.03
  • 1/4 tsp salt $0.02

Ground Turkey

  • 1 Tbsp olive oil $0.12
  • 1 lb. ground turkey $4.99
  • 2 cloves garlic, minced $0.16
  • 1/2 tsp dried oregano $0.05
  • 1/2 tsp salt $0.02
  • 1/4 tsp freshly cracked pepper $0.02

Bowls

  • 1 cup uncooked rice* $0.43
  • 1 pint grape tomatoes $1.89
  • 1 cucumber $0.79
  • 1/4 red onion $0.19
  • 1/4 cup chopped parsley $0.20

Instructions

  • Make the garlic dill yogurt sauce first, so the flavors have time to blend. Stir together the yogurt, lemon juice, garlic powder, dill, salt, and pepper in a bowl. Refrigerate until ready to serve.
  • Next, begin cooking the rice using your preferred method (rice cooker or stove top). You can use any type of rice, just make sure to follow cooking instructions for the type of rice you're using.
  • While the rice is cooking, cook the ground turkey. Add the olive oil to a large skillet and heat over medium. Once hot, add the ground turkey and continue to cook over medium heat.
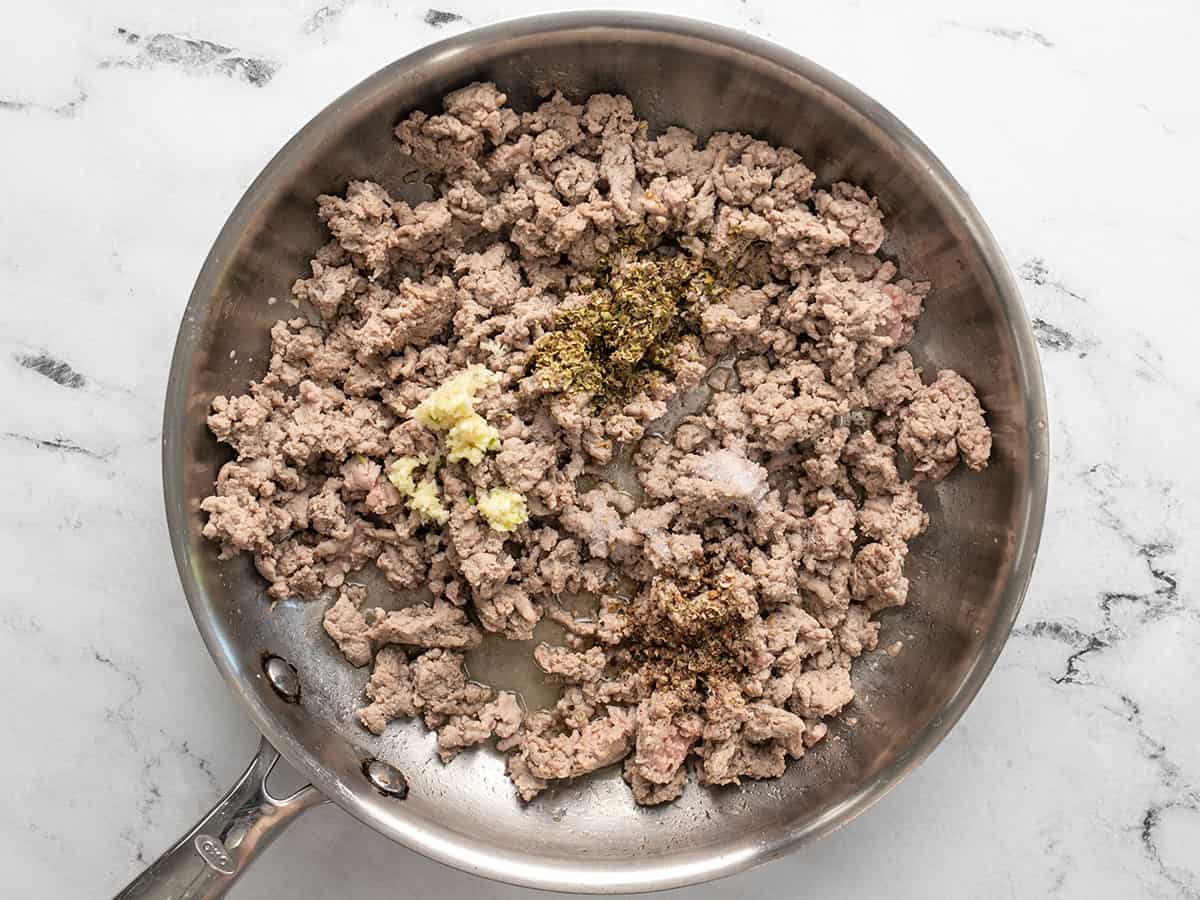
  • When the turkey is almost cooked through, add the minced garlic, dried oregano, salt, and pepper to the skillet. Stir to combine with the turkey and continue cooking for 2-3 minutes more or until the turkey is cooked through. Remove the turkey from the heat.
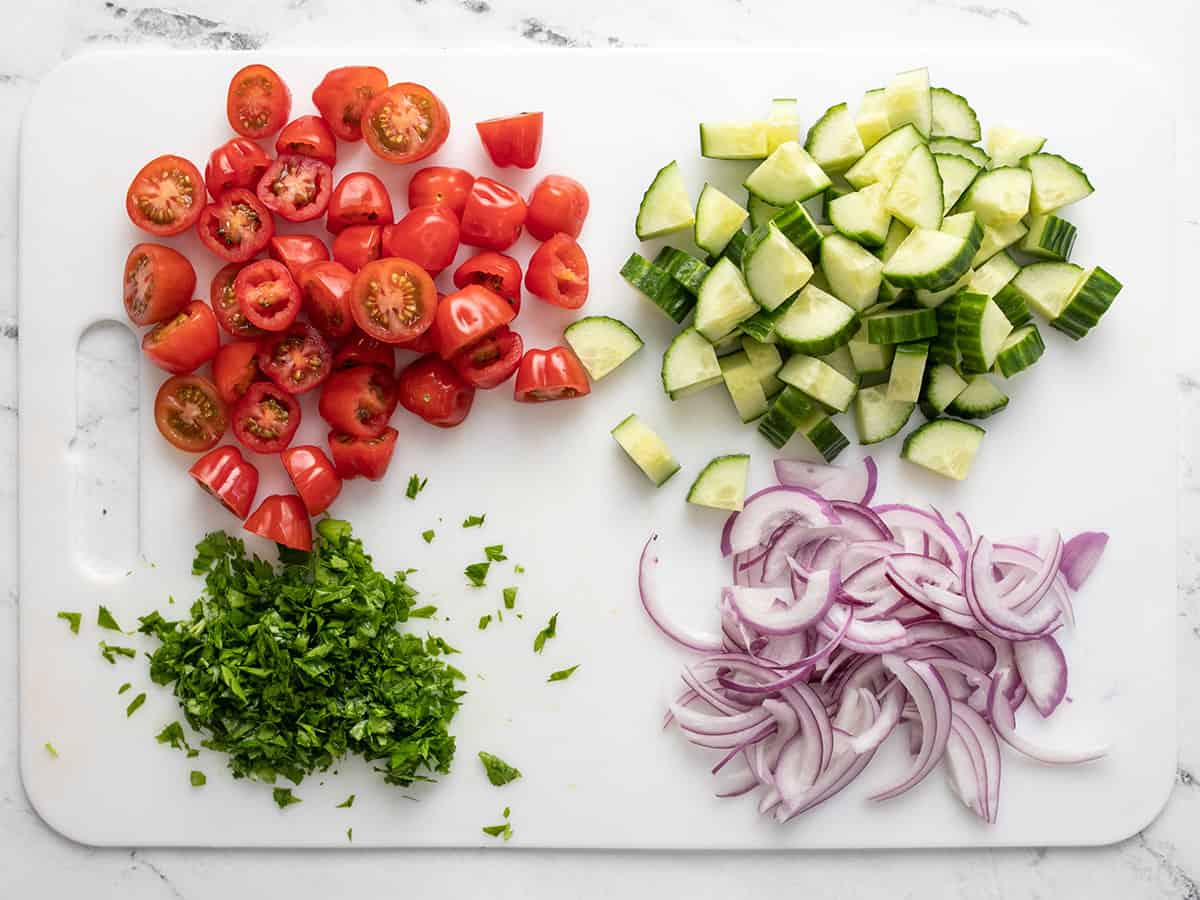
  • Slice the grape tomatoes in half, chop the cucumber into quarter-rounds, thinly slice the red onion, and finely chop the parsley.
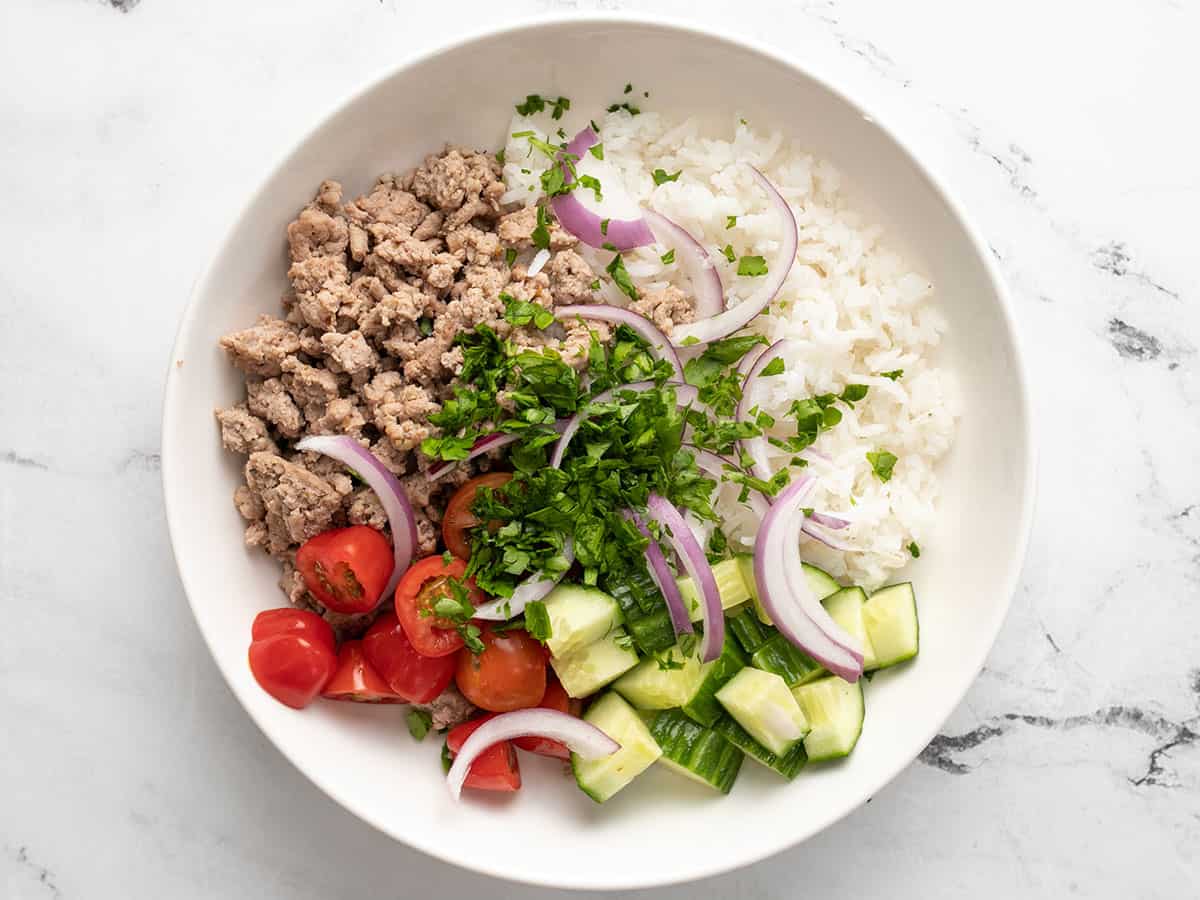
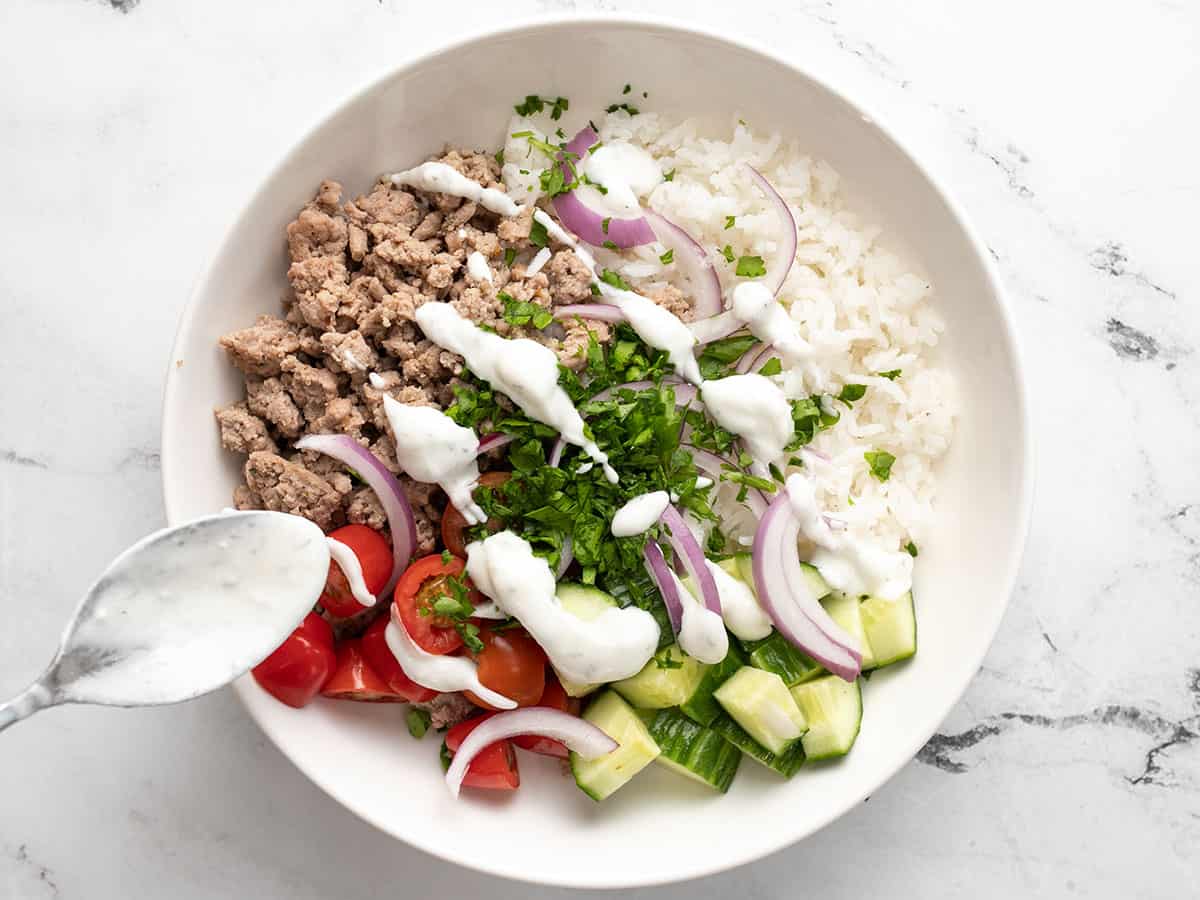
  • When all of the ingredients are prepped, it's time to build your bowls. Divide the rice, ground turkey, tomatoes, cucumber, red onion, and parsley between four bowls or meal prep containers. Drizzle with the yogurt sauce just before serving and enjoy!

See how we calculate recipe costs here.

Notes

*You can use any type of rice (white, brown, jasmine, basmati, etc). Just make sure to follow the cooking instructions for the particular type of rice chosen. For more help with cooking rice, check out our How to Cook Rice tutorial. 

Nutrition

Serving: 1bowl | Calories: 403kcal | Carbohydrates: 48g | Protein: 34g | Fat: 8g | Sodium: 535mg | Fiber: 3g
Close up side view of a Mediterranean Turkey Bowl.

How to Make Mediterranean Turkey Bowls – Step by Step Photos

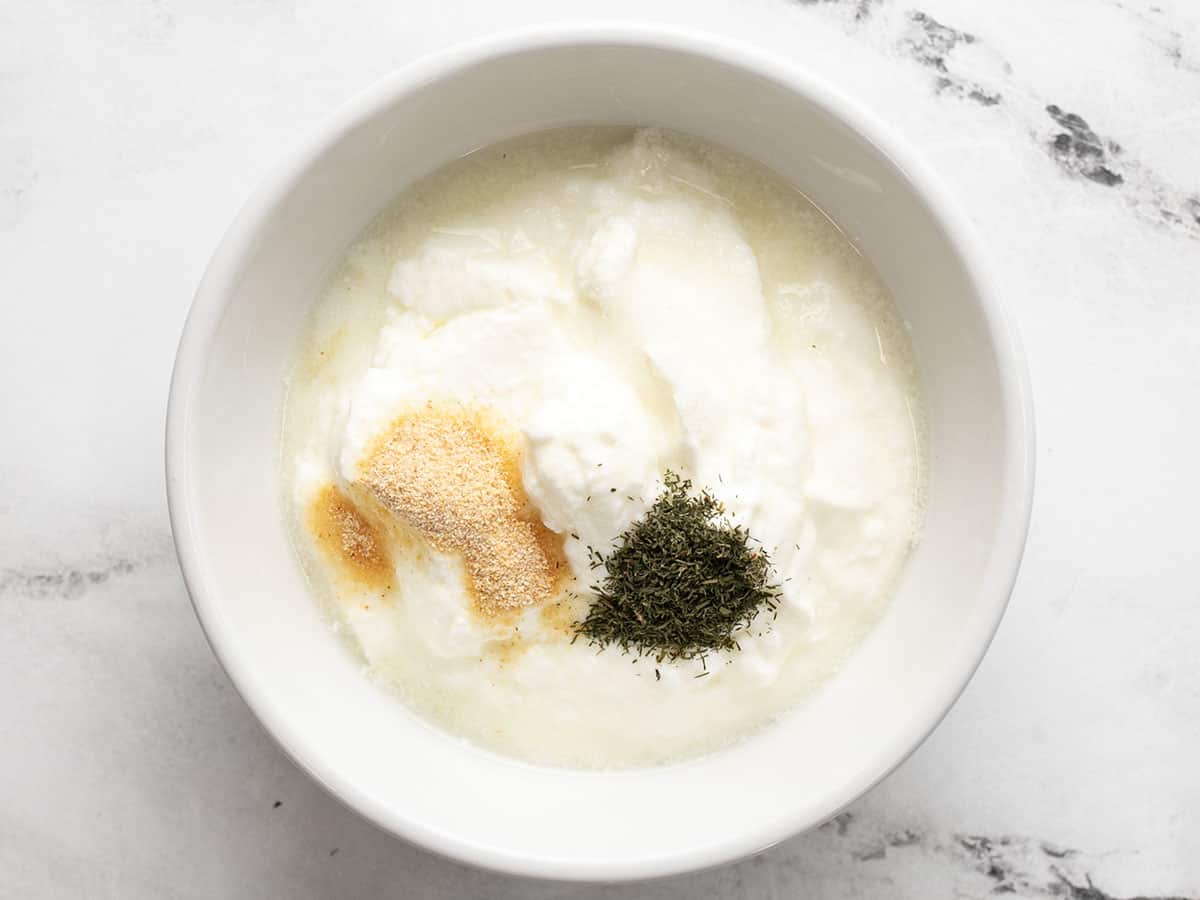
Garlic dill yogur sauce ingredients in a bowl, unstirred.

Prepare the garlic dill yogurt sauce first so the flavors have some time to blend. Combine 1 cup full-fat plain yogurt with 1 Tbsp lemon juice, ¼ tsp garlic powder, ¼ tsp dried dill, and ¼ tsp salt. Refrigerate the sauce until ready to serve.

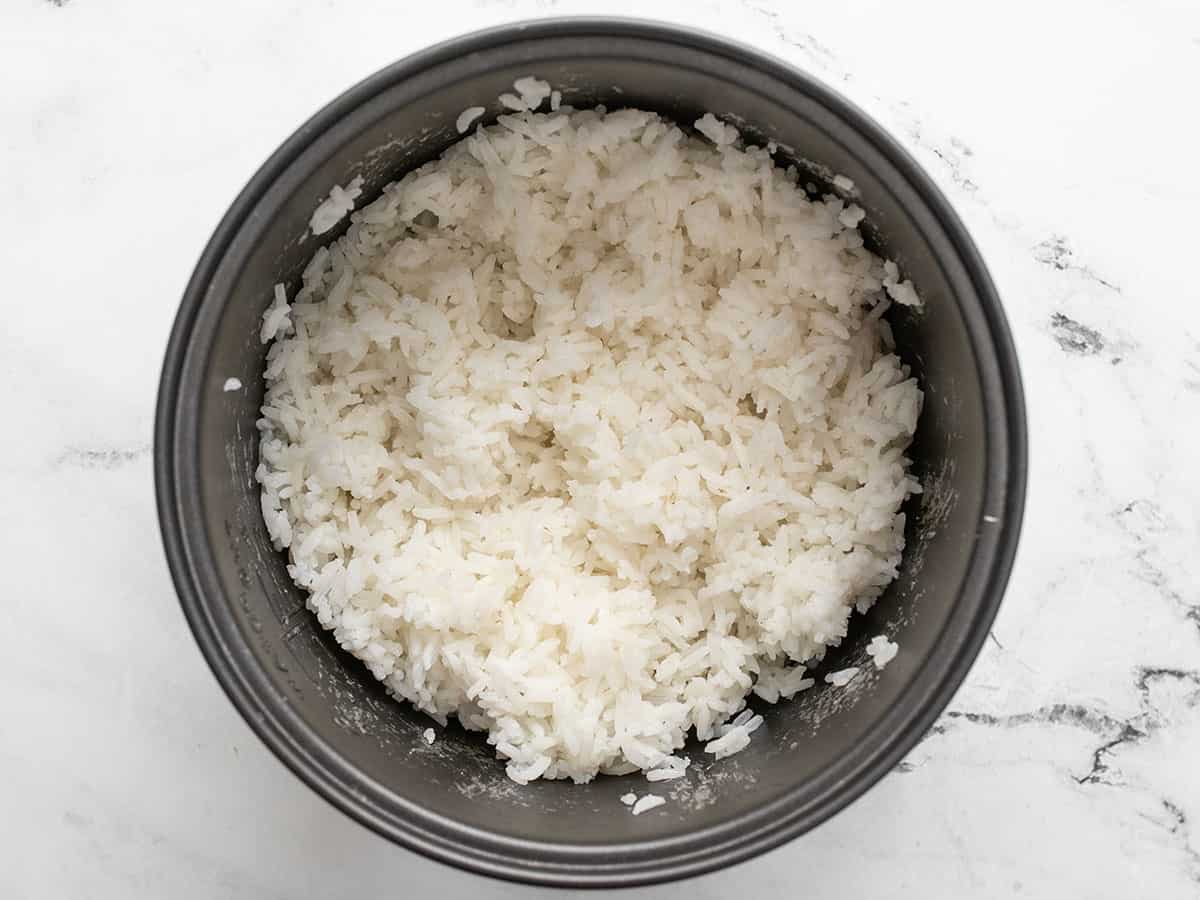
Cooked rice in a rice cooker.

Next, cook one cup rice (one cup uncooked yields about 3 cups once cooked). I used a rice cooker for convenience, but if you’d like to do it on the stove top, check out our How to Cook Rice tutorial.

Cooked ground turkey in a skillet with garlic and oregano added on top.

While the rice is cooking, prepare the ground turkey. Add 1 Tbsp olive oil to a large skillet and heat over medium. Once hot, add 1 lb. ground turkey. Cook the turkey over medium heat until it’s almost cooked through. At that point, add 2 minced cloves of garlic, ½ tsp dried oregano, ½ tsp salt, and ¼ tsp freshly cracked pepper. Continue to cook for 2-3 minutes more, or until the turkey is cooked through. Remove the turkey from the heat.

Prepped tomatoes, cucumbers, onions, and parsley on a cutting board.

Slice one pint of grape tomatoes in half, chop one cucumber into quarter-rounds, thinly slice ¼ of a red onion, and finely chop about ¼ cup of fresh parsley. If you want the red onions to be a little more mild, you can soak them in ice water for about five minutes.

Mediterranean turkey bowls prepped without the yogurt sauce.

Once all of the ingredients are prepped, begin to build the bowls. Add about ¾ cup cooked rice to each bowl, then top with ¼ of the ground turkey. Divide the tomatoes, cucumber, onion, and parsley between the four bowls.

Yogurt sauce being drizzled over top of the turkey bowl.

Just before you’re ready to eat, drizzle the yogurt sauce (about ¼ cup per bowl) over top.

Half eaten Mediterranean Turkey Bowl.

Dig in and enjoy all the fresh flavors!

The post Mediterranean Turkey Bowls appeared first on Budget Bytes.
Turkey Pinwheels

Turkey Pinwheels are a fun and easy spin on simple sandwiches, and the perfect recipe to make ahead for lunch meal prep or bring to a potluck.

The post Turkey Pinwheels appeared first on Budget Bytes.
I started making Turkey Pinwheels for my daughter (a picky eater) to make her meals a little more fun. It’s also a great way to sneak some extra wholesome ingredients into her lunch undetected. (Mom hack!) Since you can make the cream cheese spread in advance, this Turkey Pinwheel recipe is also perfect for meal prep! Pinwheels are also super versatile and make an affordable appetizer that’s easy to throw together for brunches, party buffets, and potlucks. It’s as simple as making a sandwich…but with a twist!

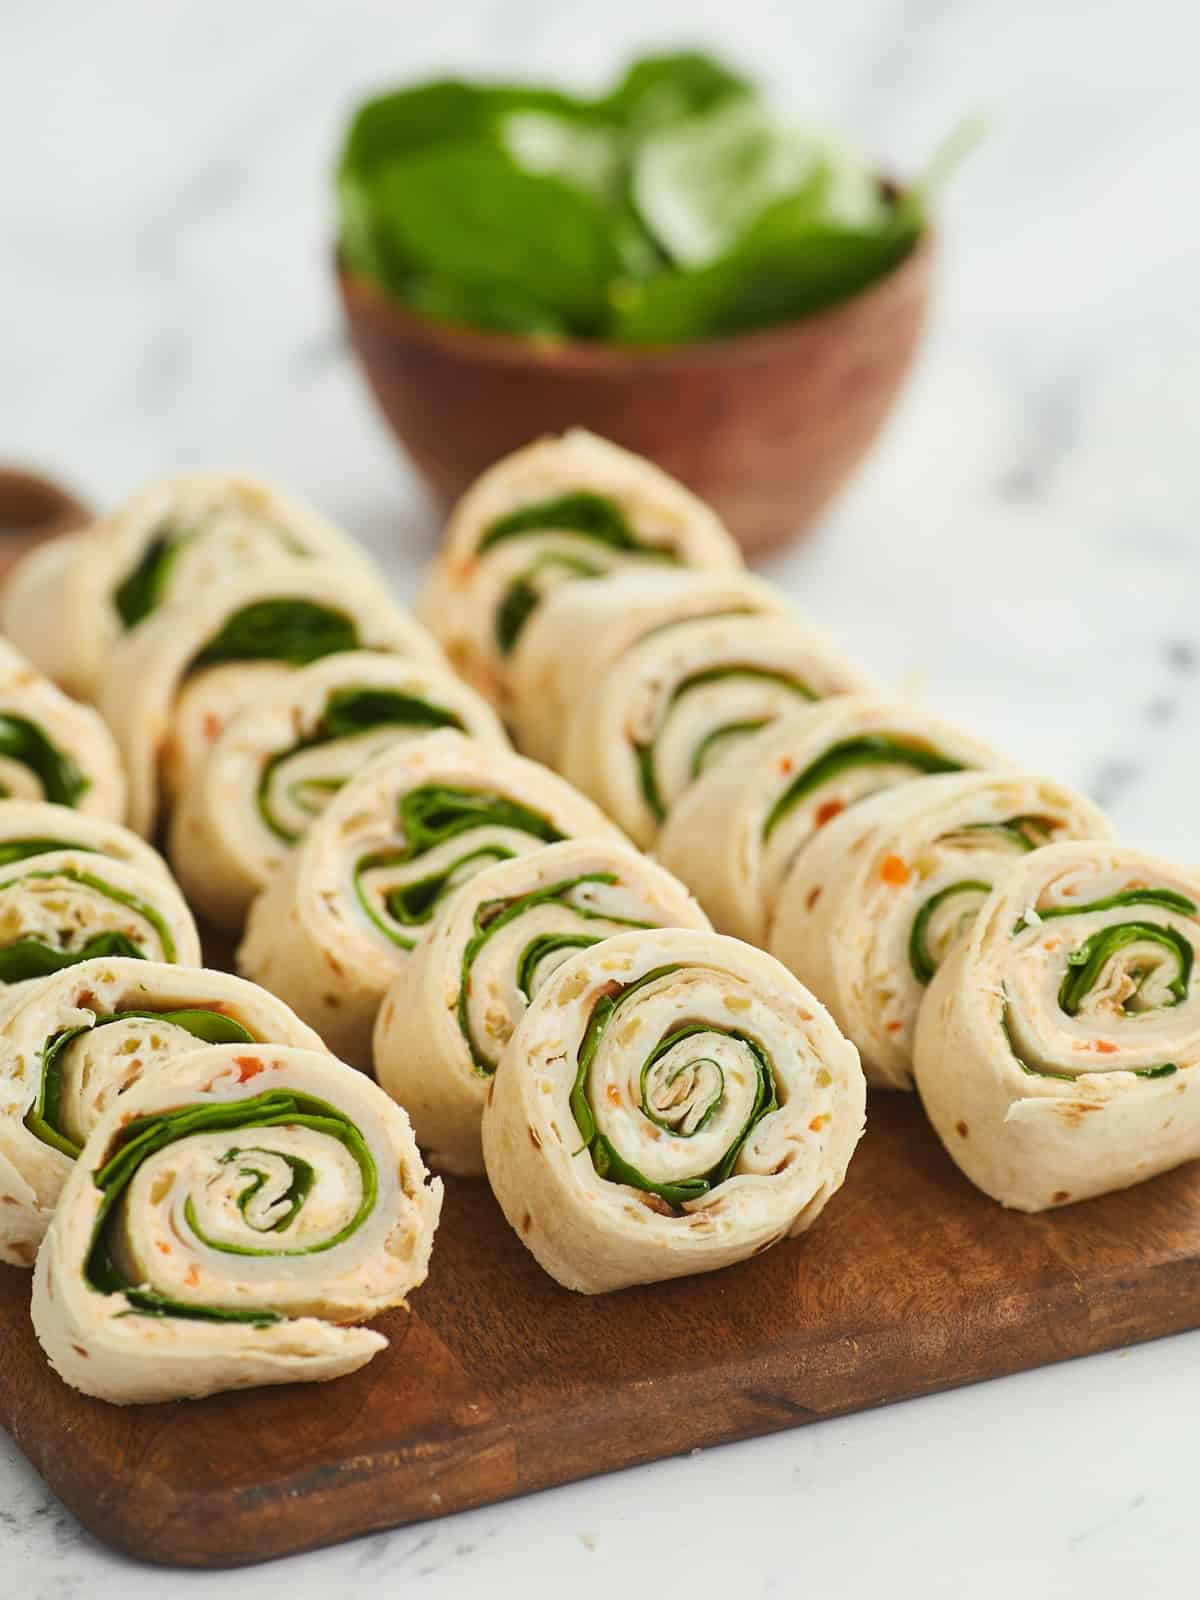
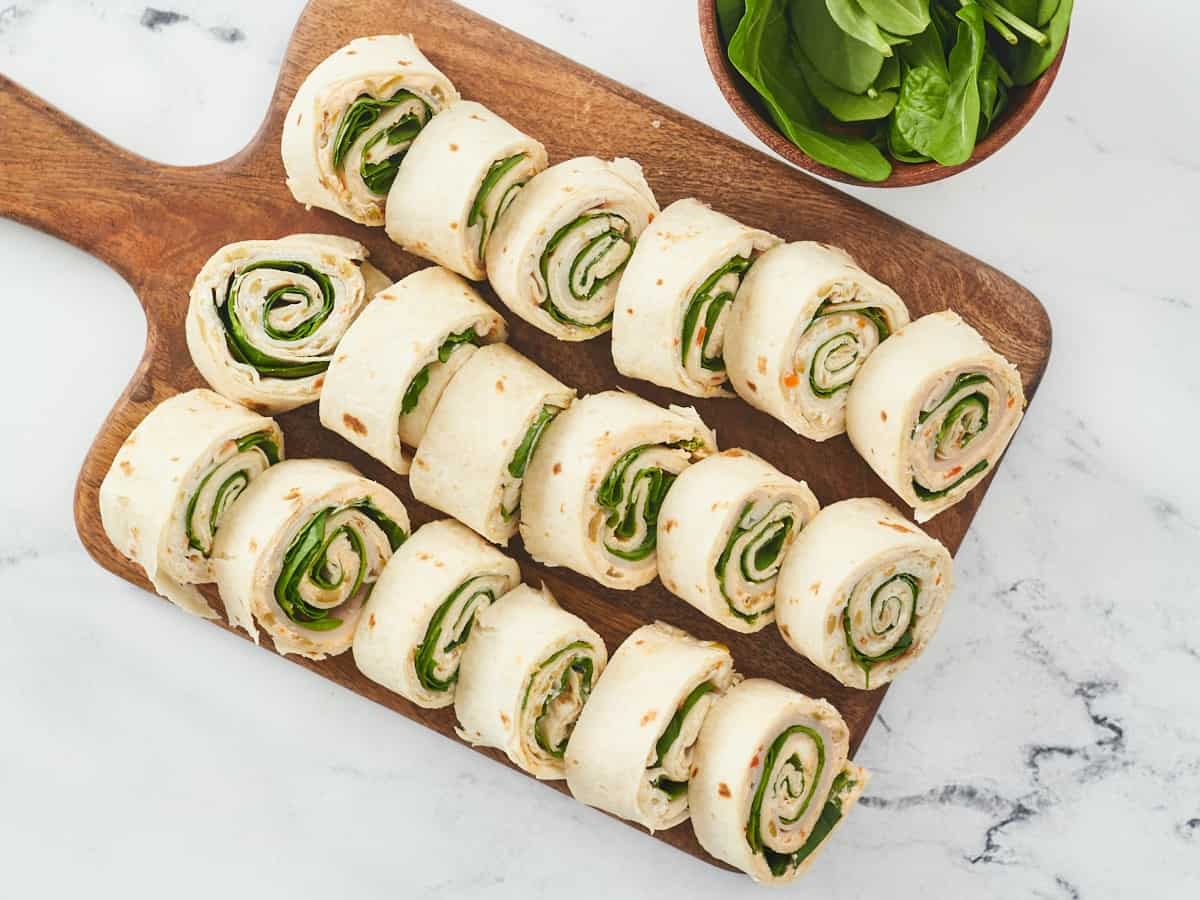
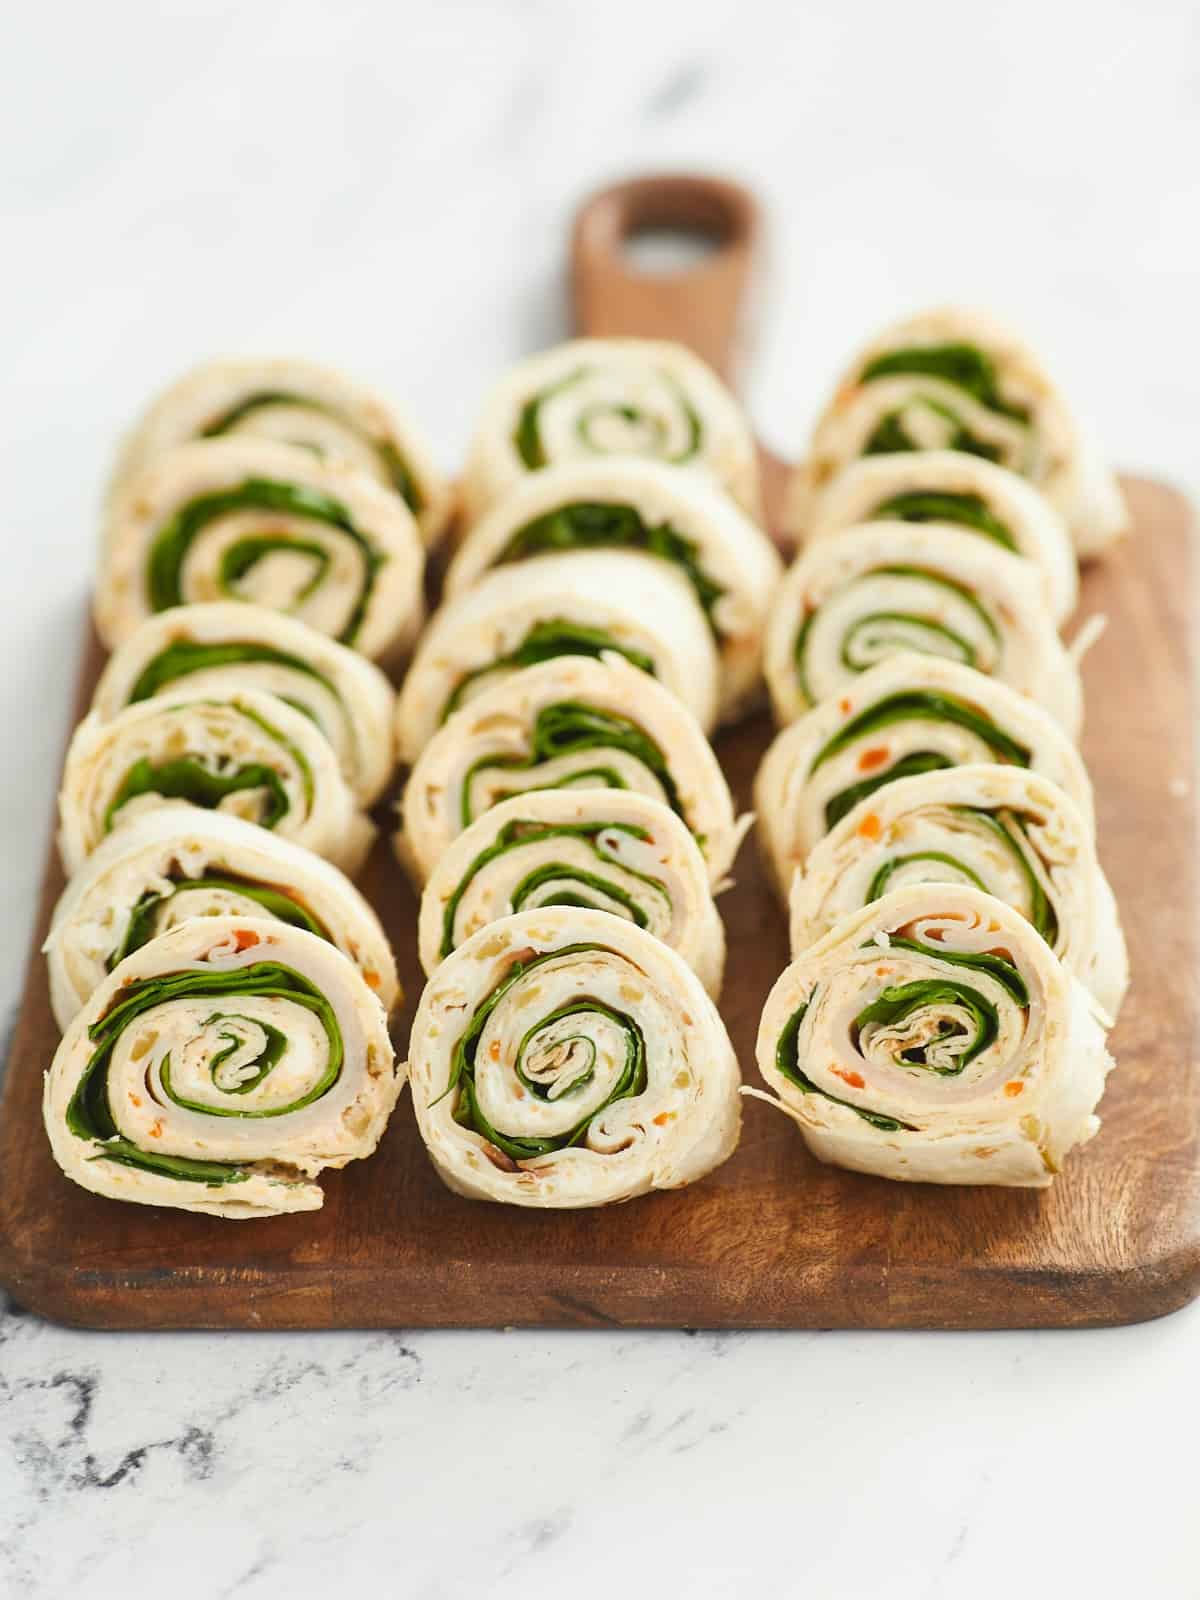
A close up shot of Turkey Pinwheels arranged in three rows on a wooden cutting board with a white background and a bowl of spinach blurred in the background

What are pinwheel sandwiches?

Turkey Pinwheels are made by evenly spreading cream cheese on one side of a flour tortilla (which acts as the glue), layering on classic sandwich ingredients, and then tightly rolling it all up into a log that’s sliced into 1” pieces. When each pinwheel is turned on its side, it will reveal a lovely spiral of the ingredients inside.
Pinwheel 101

Our simple recipe for Turkey Pinwheels uses deli meat, spinach, and a savory cream cheese spread inspired by pimento cheese. However, this is a super versatile recipe that can be made with many different combinations of ingredients. Here is what you need to make pinwheels: 
  • Extra-Large Flour Tortillas: Burrito-size flour tortillas are best for pinwheels. They’re easier to roll, make a distinct spiral, and yield more per tortilla. You can use any flavor (plain, wheat, spinach, sun-dried tomato, etc.). Since corn tortillas are less pliable and tear easily, they are not an ideal choice.
  • A sticky spread: Typically, pinwheels are held together with cream cheese, but anything similar (like hummus or nut butter) can be used.
  • Deli Meat: Pinwheels usually include some kind of deli meat (turkey, chicken, ham, salami, etc.), but that can also be replaced with thinly-sliced veggies. 
  • Cheese: Sliced cheeses are great for creating an added layer of filling. Shredded cheeses can be mixed in with cream cheese (like in our recipe) so they don’t fall out.
  • Salad greens and other sandwich toppings: These will help to create color contrast in the pinwheel’s spiral, and round out the other rich ingredients with freshness and flavor!
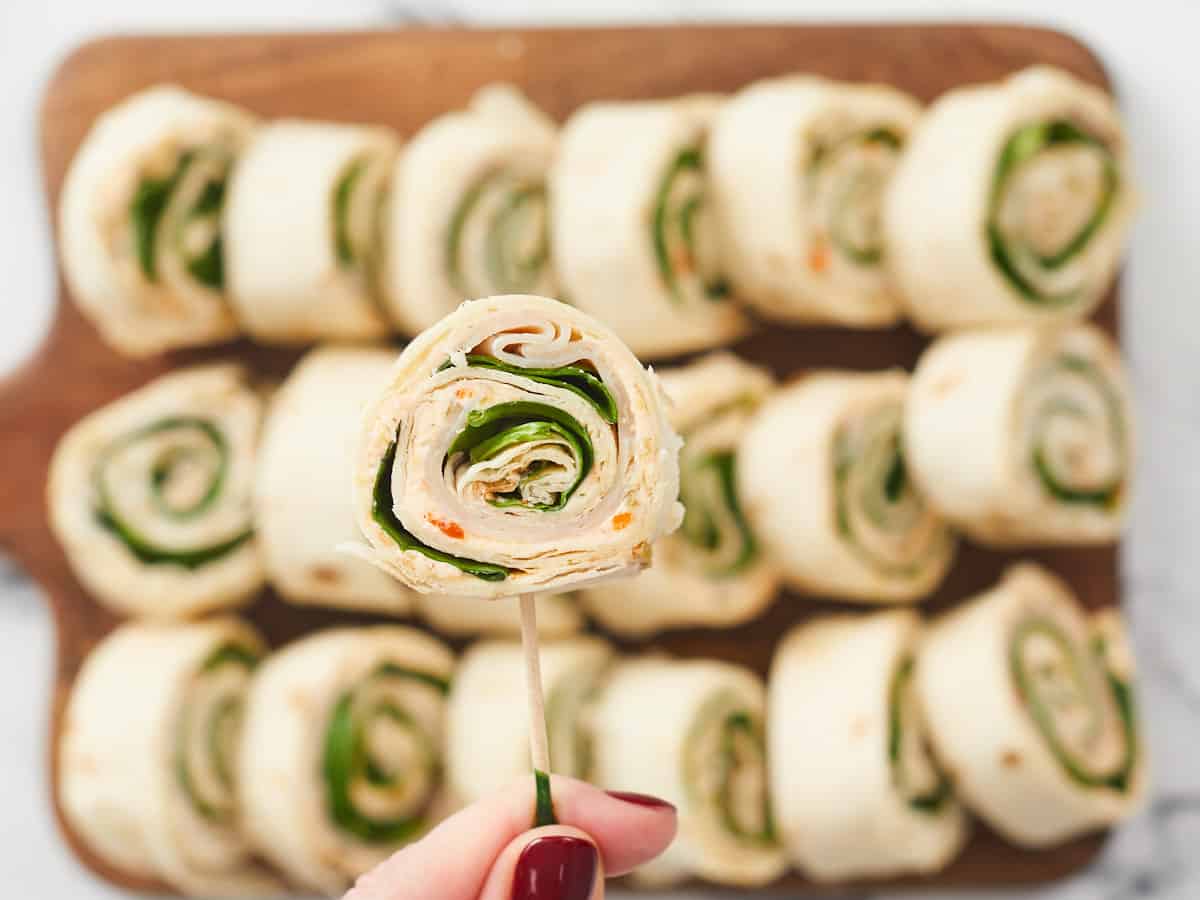
An extreme close up of one turkey pinwheel. In the background, there are many turkey pinwheels arranged in three rows on a wooden cutting board.

MORE PINWHEEL flavor COMBINATIONS TO TRY: 

  • Ham + swiss cheese + dill pickles + yellow mustard
  • Salami + provolone cheese + iceberg lettuce + pepperoncinis
  • Chicken + hummus + cucumber slices + tabbouleh
  • Smoked salmon + red onion + capers + everything bagel seasoning
  • Nut butter + honey + banana slices
  • Nutella + toasted coconut + strawberry slices

CAN TURKEY PINWHEELS be made in advance?

Turkey Pinwheels are a great recipe to make ahead for a party or help fill the gaps in your weekly meal prep. The cream cheese spread can be kept in an air-tight container and refrigerated for about a week. Pre-made pinwheels will also keep in the fridge for 2-3 days before they start to get soggy.

A close up of three rows of turkey pinwheels on a wooden cutting board.
Print

Turkey Pinwheels

Turkey Pinwheels are a fun and easy spin on simple sandwiches, and the perfect recipe to make ahead for lunch meal prep or take to a party or potluck.
Course Appetizer, Lunch, Meal Prep
Cuisine American
Prep Time 15 minutes
Total Time 15 minutes
Servings 4 8 pinwheels
Calories 225kcal

Ingredients

  • 4 oz. cream cheese, softened $1.10
  • 1/8 cup sharp cheddar cheese, finely shredded $0.87
  • 1/3 cup pimento-stuffed olives, finely chopped $0.99
  • 1 Tbsp olive brine
  • 1/2 tsp garlic powder $0.05
  • 1/4 tsp black pepper $0.01
  • 4 extra-large or burrito-style flour tortillas $1.15
  • 1 9oz. package sliced turkey $4.99
  • 1 cup spinach $0.80

Instructions

  • Stir together the softened cream cheese, finely-shredded cheddar cheese, finely-chopped pimento-stuffed olives, olive brine, garlic powder, and black pepper until very well combined.
  • Lay the tortillas out flat. Spread 2-3 tablespoons of the cream cheese mixture on one side of each tortilla, coating the entire face evenly from edge to edge.
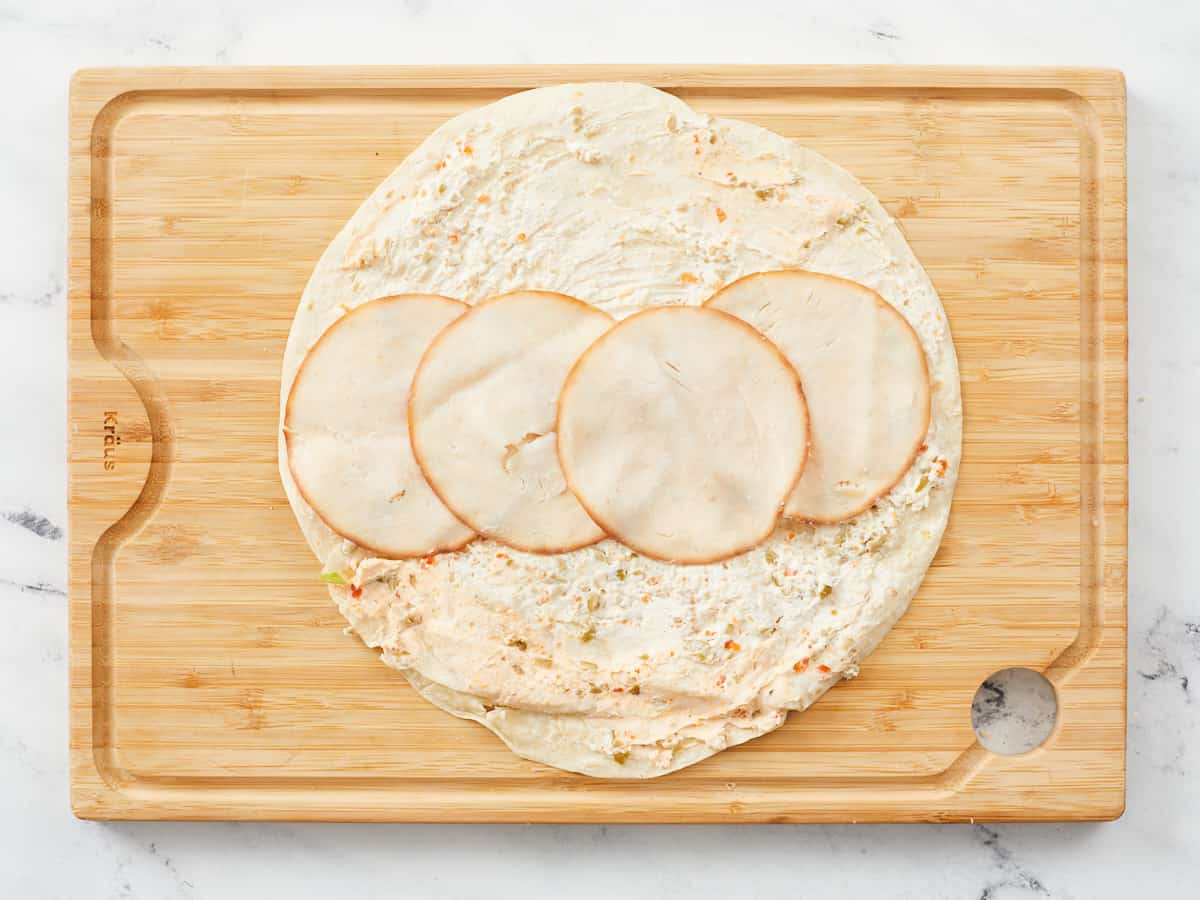
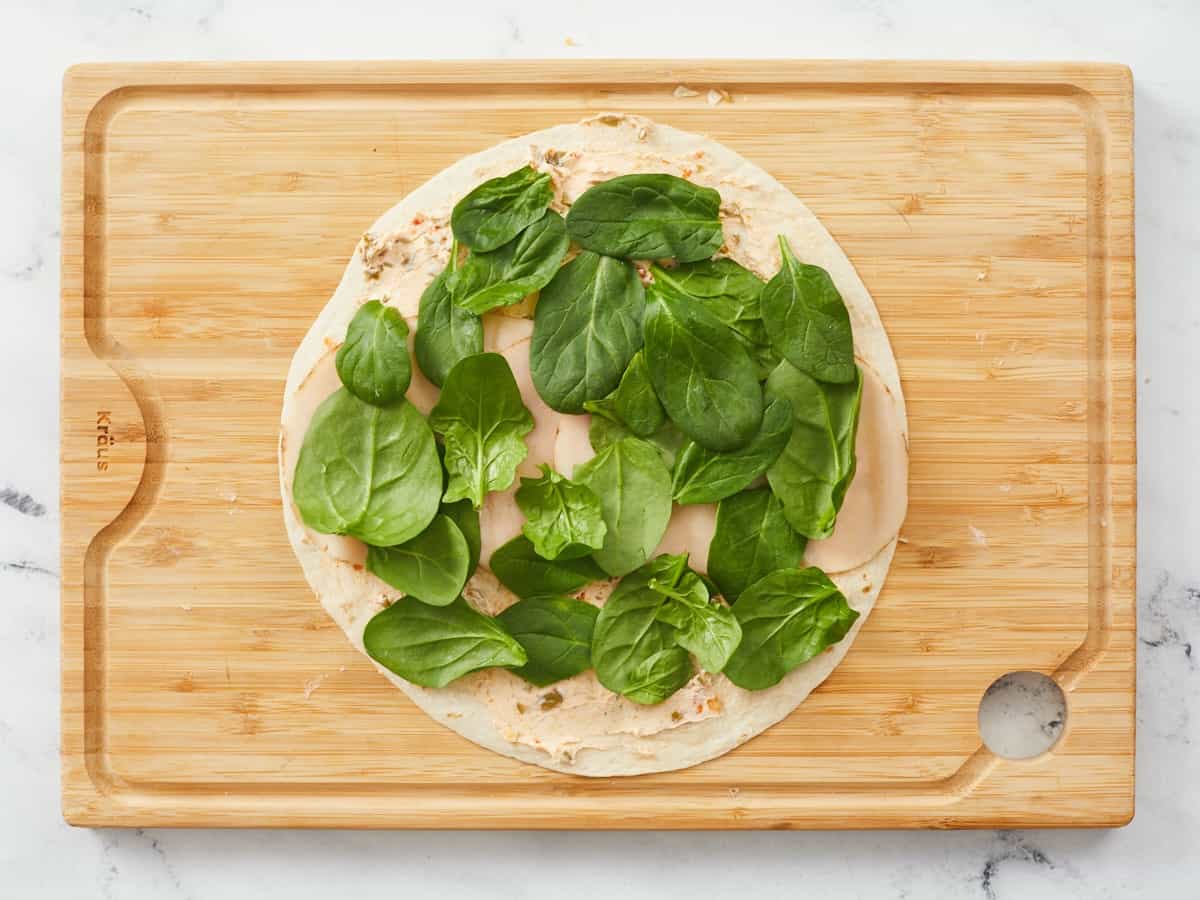
  • Arrange 3-4 slices of turkey along the center of the tortilla, overlapping them as little as possible to make an even layer, and leaving about ¼” of the cream cheese spread exposed on the top and bottom edges of the tortilla to help it stick together. Then add a single layer of spinach leaves on top of the turkey.
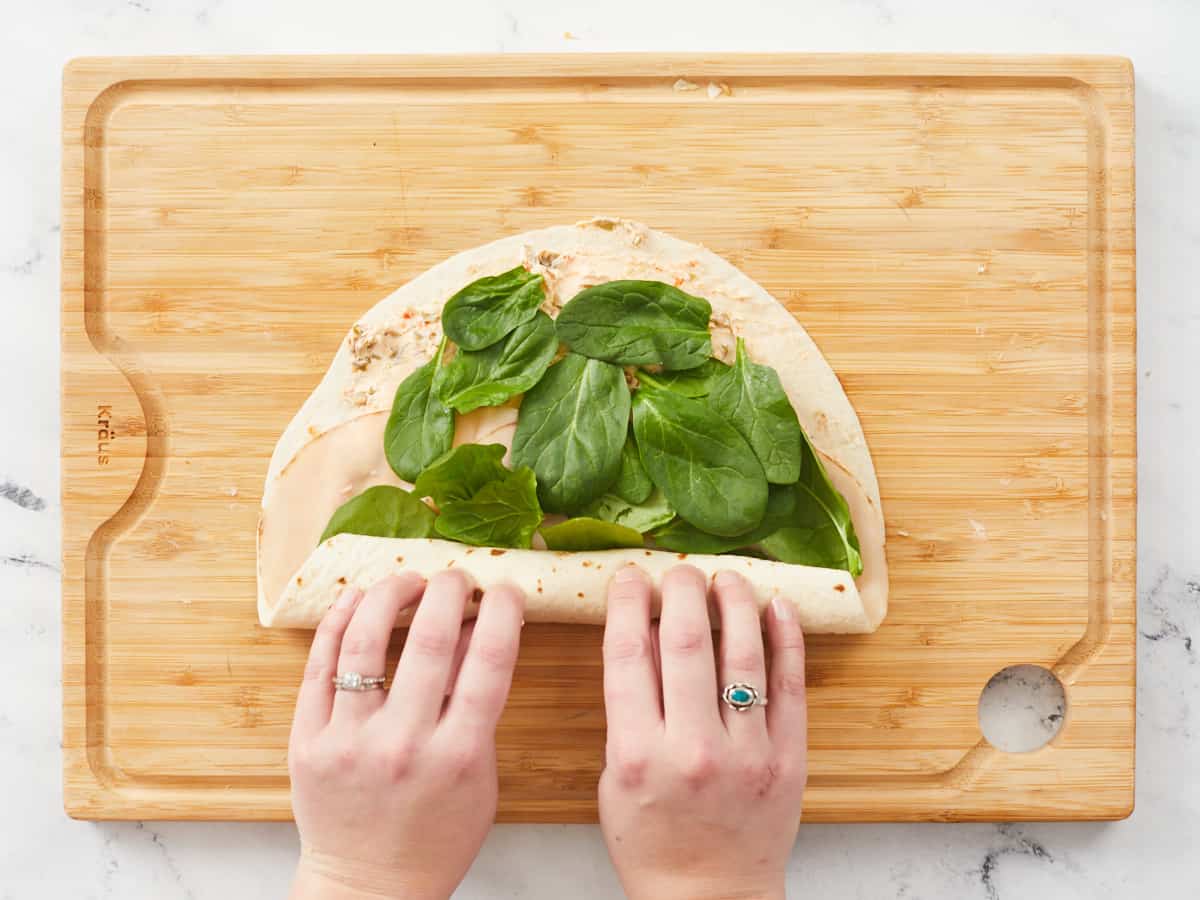
  • Starting with the edge closest to you, fold over the tortilla so it sticks, and then roll it up as tightly as possible, tucking in the fillings as you go.
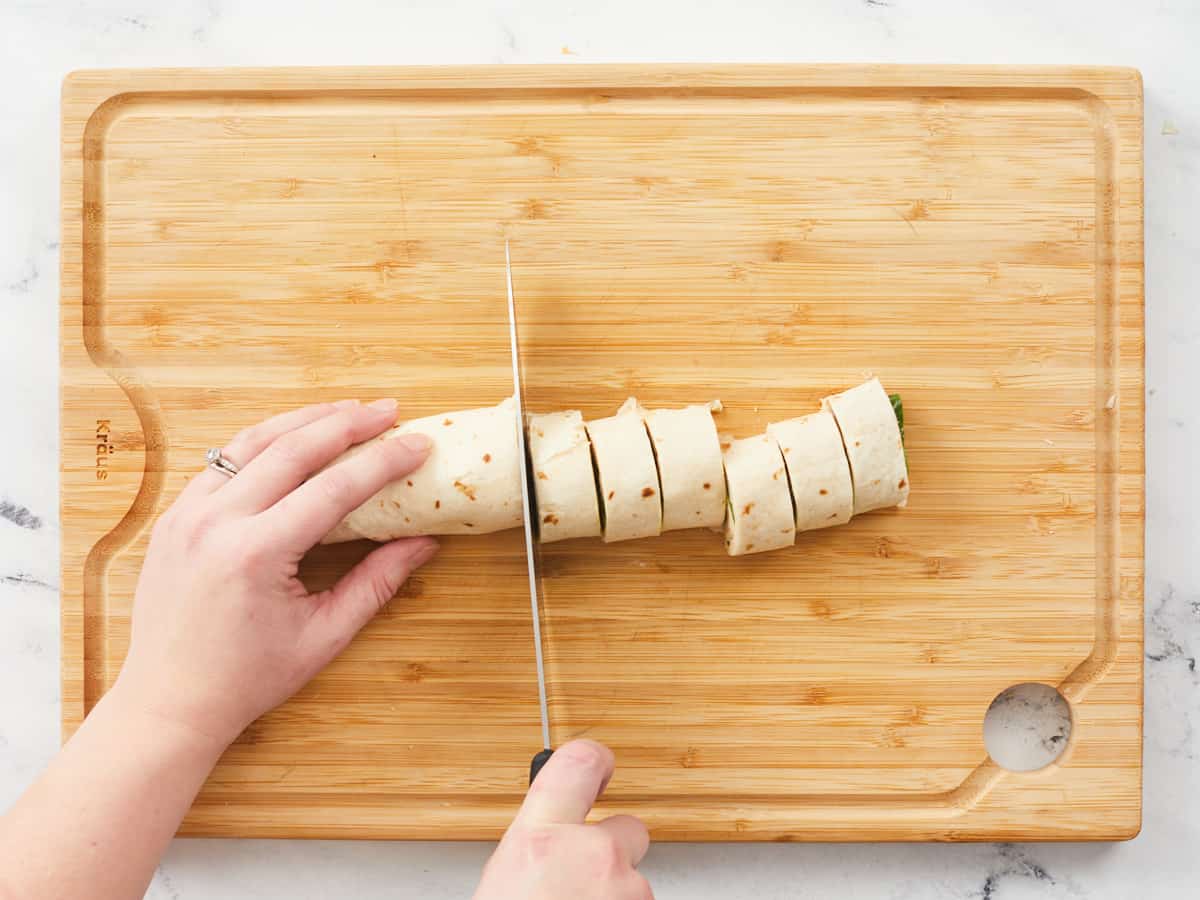
  • With the seam side facing down, slice the roll into 1" wide pieces.
  • Flip each pinwheel on its face, exposing the spiral, and transfer it to a serving platter or air-tight meal prep container. The pinwheels should hold together on their own, but if desired, you can insert a decorative toothpick into each.

See how we calculate recipe costs here.

Nutrition

Serving: 8pinwheelss | Calories: 225kcal | Carbohydrates: 18g | Protein: 5g | Fat: 15g | Sodium: 626mg | Fiber: 2g
An overhead shot of 18 turkey pinwheels lined up into three rows on top of a wooden cutting board next to a wooden bowl of fresh spinach on a white marble background.

How to Make TuRKEY PINWHEELS – Step by Step Photos

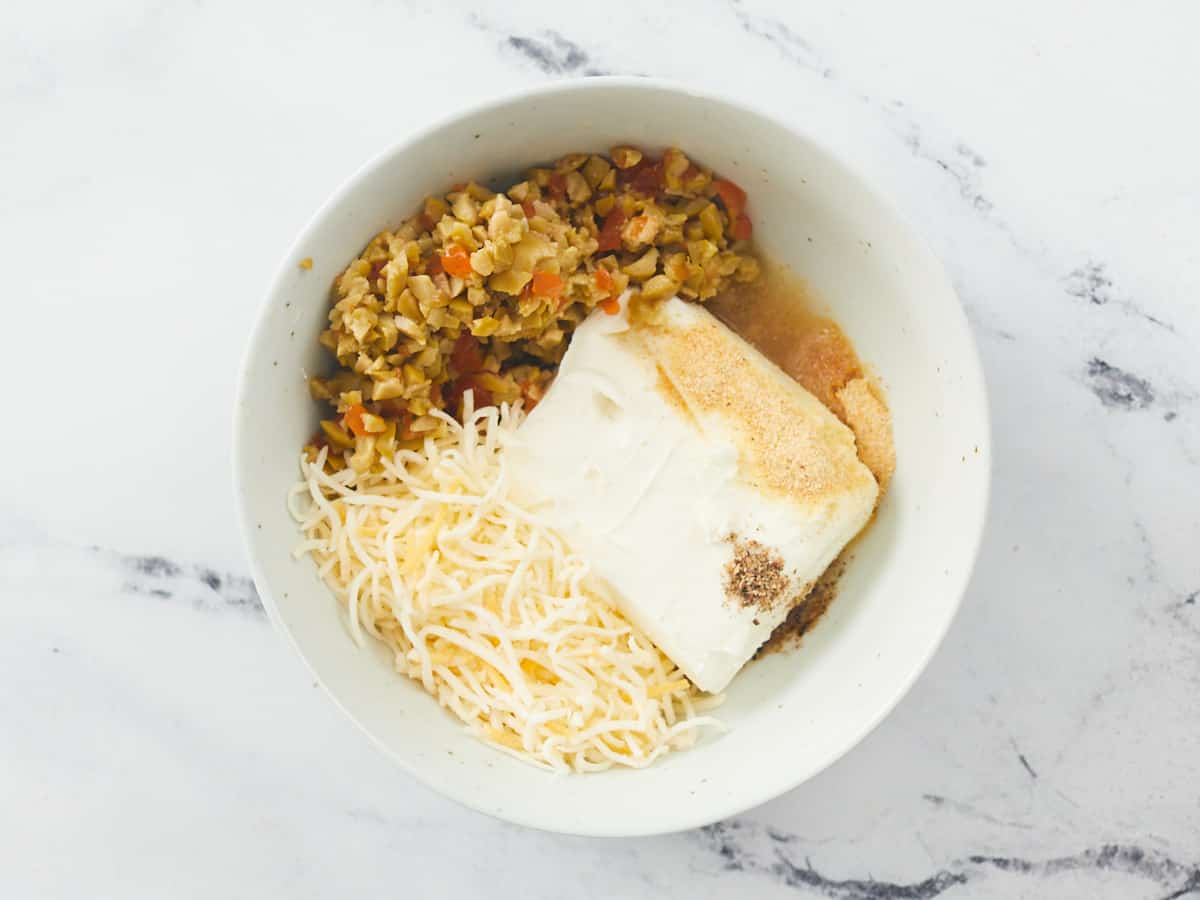
A small white bowl filled with unmixed ingredients of a cream cheese spread, including a block of cream cheese, shredded cheddar cheese, chopped pimento-stuffed olives and olive brine on a white marble background.

In a small bowl or air-tight container, make the cream cheese spread by stirring together 4 oz. of room-temperature cream cheese (cold cream cheese will be extremely difficult to mix and will likely create unpleasant lumps in the mixture), 1/8 cup of finely-shredded cheddar cheese, 1/3 cup of finely-chopped pimento-stuffed olives, 1 tablespoon of olive brine (which helps thin the cream cheese and eliminates the need for added salt), 1/2 teaspoon garlic powder, and 1/4 teaspoon of pepper until very well mixed.

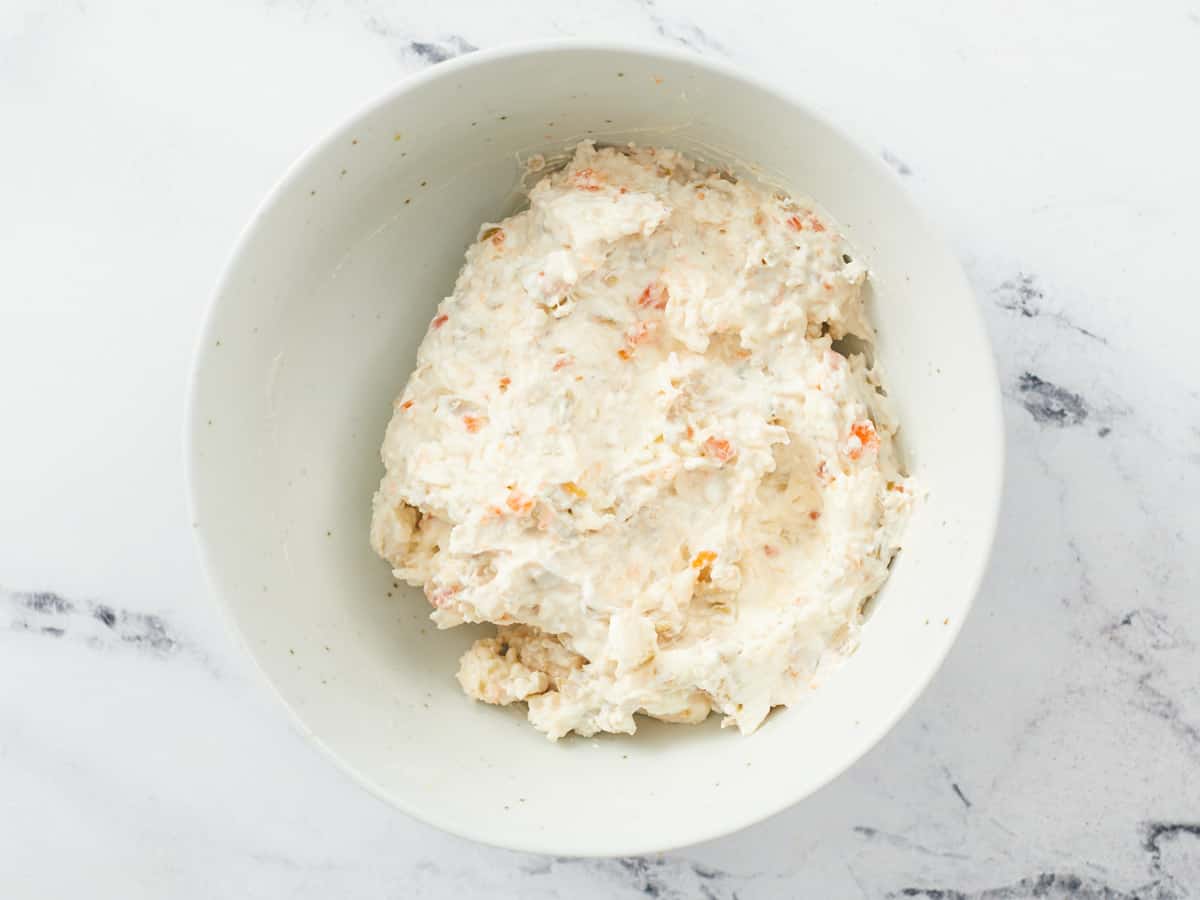
A small white bowl filled with a savory cream cheese spread inspired by pimento cheese dip on a white marble background.

This savory cream cheese spread, which is inspired by pimento cheese dip, can be made ahead and kept refrigerated for at least a week. If coming from the fridge, you will want to re-soften this mixture at room temperature (for about 30 minutes) before trying to spread it on the tortillas in the following step.

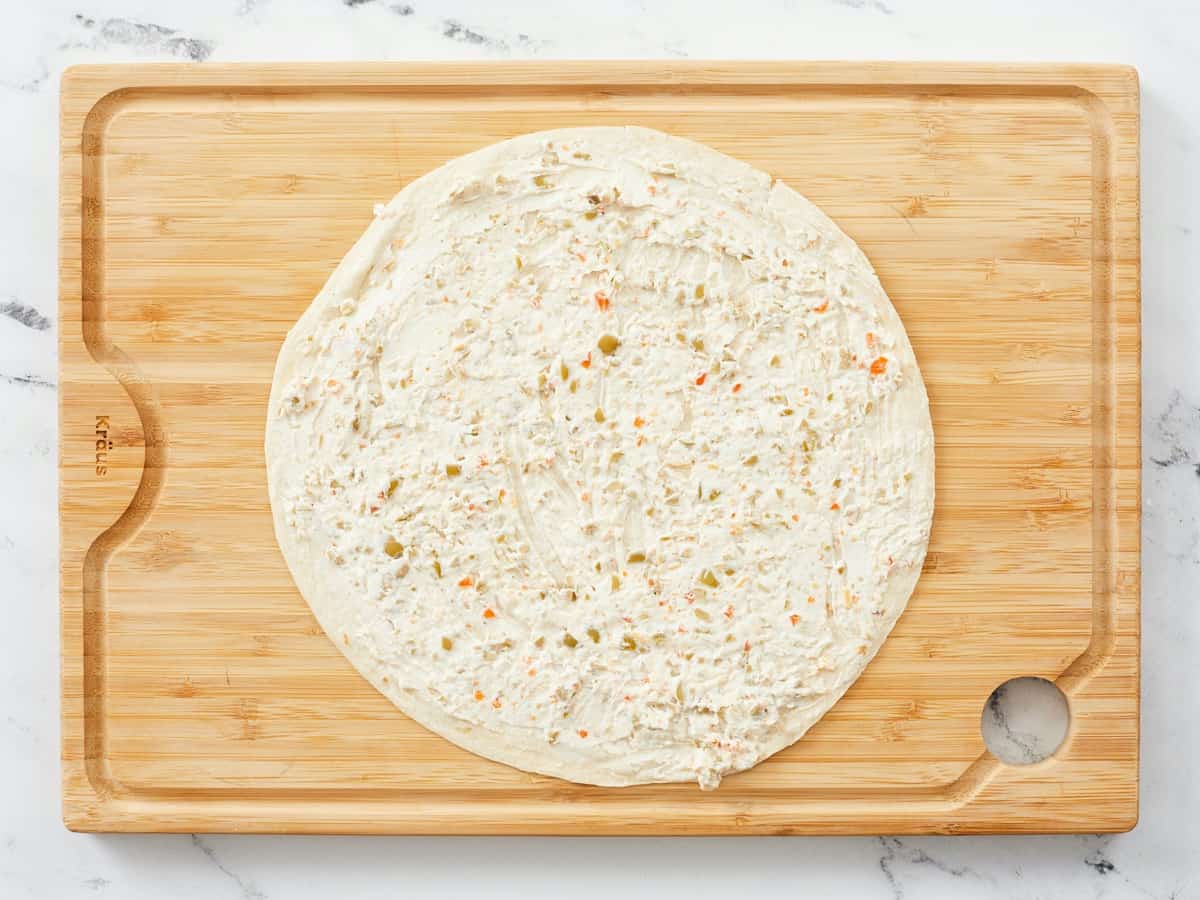
An extra large burrito shell smeared from edge to edge with a savory cream cheese spread, sitting on a wooden cutting board with a white marble background.

Lay each tortilla out flat on a clean work surface, and spread each tortilla with 2-3 tablespoons (about 1/4 of the mixture) of the savory cream cheese spread, covering it evenly from edge to edge. You can always add a bit more “glue” as you roll (or after slicing) if needed, but it’s much easier to do at this step.

A large tortilla covered with savory cream cheese spread, and in the middle of the tortilla there are four turkey slices line up and overlapping slightly. The tortilla is sitting on a wooden cutting board against a background of white marble.

Arrange 3-4 slices of turkey across the center of the tortilla, overlapping them slightly to make an even layer depending on the size and thickness of each slice. (Since ours were super thin, we overlapped the slices more so each bite was still as satisfying!)

A large tortilla on a wooden cutting board covered with savory cream cheese, a row of turkey slices and covered in a single layer of baby spinach leaves.

Add a single layer of spinach leaves on top of the turkey, leaving about ¼” of the cream cheese spread exposed along the top and bottom edges of the tortilla so it will stick properly. I usually like to take the extra step of removing the longer stems.

Hands rolling up a large tortilla on a wooden cutting board. The tortilla is covered with a savory cream cheese spread, a row of turkey slices and covered in a single layer of baby spinach leaves.

Starting with the end closest to you, fold in the edge of the tortilla so it sticks, and then roll it all the way up, as tightly as possible, tucking and rearranging the fillings as you go — just to make sure you get a little bit of everything in every bite!

Two hands clicing a log of turkey pinwheels into one-inch pieces on a wooden cutting board.

Adjust the log so that the exposed seam is secured against the cutting board before slicing it. Then, using a very sharp knife, slice the log into 8 even portions (about 1” wide). Be as gentle as possible, so the pinwheels maintain their shape as much as possible and the filling doesn’t squish out. To help, you can rotate the log as you slice, or just use a good knife and adjust them all here and there after slicing (as I have done!)

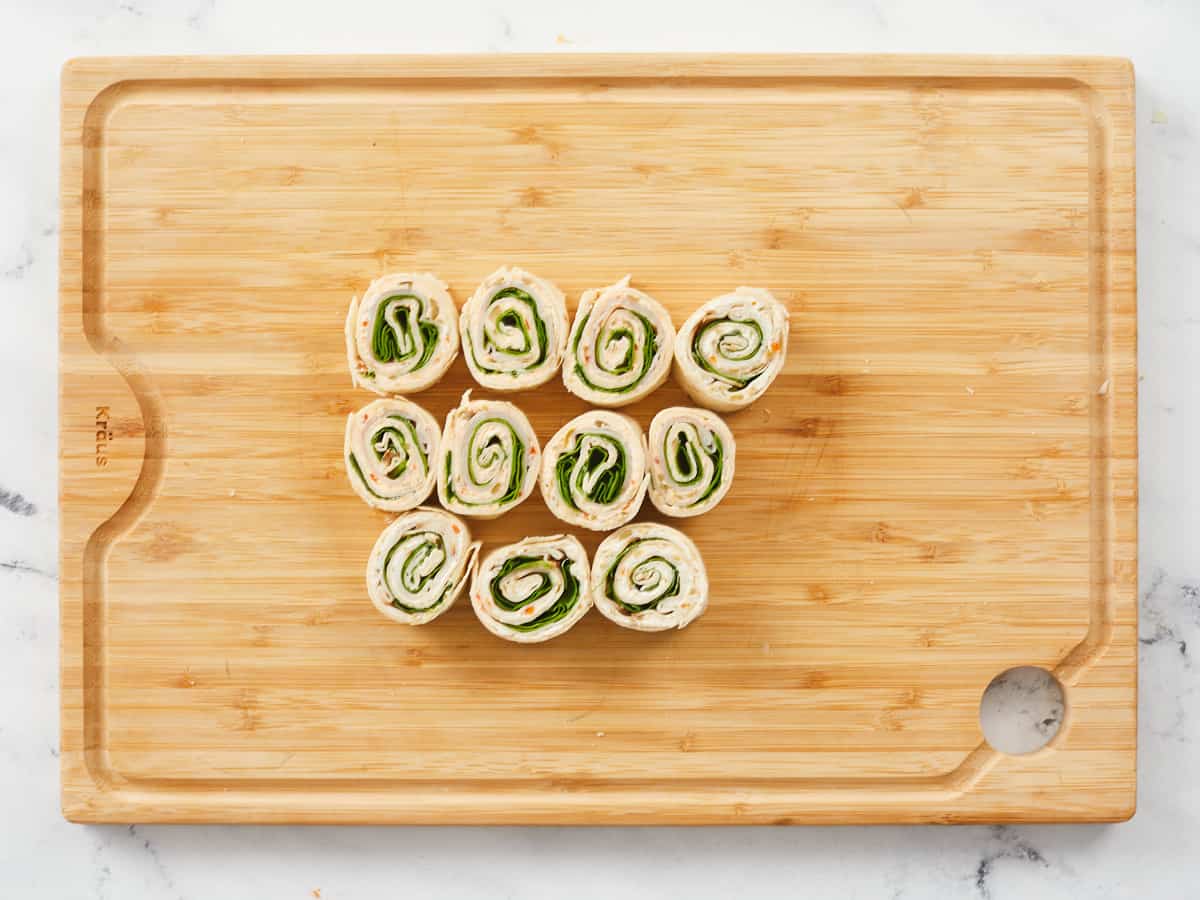
Eleven turkey pinwheels arranged on a wooden cutting board.

Flip each pinwheel on its face, exposing the spiral, and transfer to a serving platter or air-tight container. The pinwheels should hold together on their own, but if desired, you can insert a decorative toothpick into each pinwheel, starting with the outermost edge, to ensure they won’t unravel.

Three rows of pinwheels, each leaning on the one next two it halfway, in three rows placed on a wooden cutting board.
Making and eating these Turkey Pinwheels will totally have you feelin’ like a kid again!

The post Turkey Pinwheels appeared first on Budget Bytes.