It’s nearly grilling season, and I need a reliable side dish to bring to parties, family reunions, and barbecues. This broccoli salad is the perfect creamy, crunchy, rich, and flavorful side to go with any meal. It has a great balance of sweet and tangy flavors, and the texture is unbeatable. It’s a fact that if you add bacon to any vegetable dish, even the most discerning meat eaters will give it a try. Baby steps, right?! I love making sure my loved ones eat their vegetables!

What Is Broccoli Salad?
Broccoli salad is a classic side dish made from broccoli florets tossed with cheddar cheese, raisins, bacon, walnuts, and red onion, coated in a creamy and tangy dressing. This salad has a wonderful balance of flavors and textures and is so versatile!
Ingredients
Here’s what you’ll need to make broccoli salad:
- Broccoli: Has an earthy and slightly sweet, slightly bitter flavor, as well as a delightful crunch!
- Cheddar Cheese: Adds a creamy and salty component to the salad.
- Raisins: Add a pop of sweet and fruity flavor.
- Bacon: Adds a great savory and umami flavor. You’ll need 6 strips of cooked bacon. Vegetarian? No problem, just leave it out. Sometimes I put the bacon on the side for gatherings where there might be varied dietary restrictions.
- Walnuts: Add a nutty flavor and delicious crunch.
- Red Onion: Adds a bit of bite to the recipe and a wonderful crunchy texture, creating a great contrast to the sweet and chewy raisins.
- Mayo: Adds richness and creaminess to the dressing.
- Greek Yogurt: Makes the dressing extra creamy and tangy with fewer calories and fat than sour cream. I highly recommend Greek yogurt over plain yogurt or sour cream for its thicker, creamy texture.
- White Vinegar: Adds a refreshing brightness and tanginess to the dressing to balance the richness.
- Sugar: Adds sweetness to balance out the vinegar.
- Salt and Pepper: Enhance the overall flavor of the salad.
Should I Blanch The Broccoli?
In testing, I preferred the final texture of raw broccoli over blanched, but you certainly can blanch the broccoli if you prefer. The blanching process takes out some of the natural bitter flavor from the broccoli; simply drop the florets in a large pot of salted boiling water for 1 minute, then quickly shock in a bowl of ice water. Instead, I opted to simply rinse my broccoli florets in hot water to make them extra bright green and make sure they were nice and clean.
Top Tip
To keep your broccoli salad from turning out watery, make sure to thoroughly dry the florets. The salt in the dressing will naturally draw out some of the moisture from the veggies, so making sure they are dry after washing them is an important step! I like to spread them out on a clean kitchen towel and gently pat them dry with another towel laid on top while I prep the rest of my ingredients.
What To Serve with Broccoli Salad
Broccoli salad is such a fresh and crunchy dish with a ton of flavor, so I suggest pairing it with simple proteins, like air fryer chicken breast or glazed pork chops.


Broccoli Salad
Ingredients
Broccoli Salad
- 1 large broccoli crown, separated into florets (about 4 cups) $1.10
- 1 cup shredded cheddar cheese $1.24
- 1/4 cup raisins $0.39
- 6 strips bacon $0.90
- 1/4 cup walnuts, crushed $0.80
- 1/4 red onion, diced into small pieces $0.21
Broccoli Salad Dressing
- 1/2 cup mayo $0.75
- 2 Tbsp Greek yogurt $0.21
- 1 Tbsp white vinegar $0.04
- 1 Tbsp sugar $0.05
- 1/4 teaspoon salt $0.05
- 1/4 teaspoon pepper $0.05
Instructions
- Cook the bacon until crispy. Let cool on clean paper towel-lined plate. Chop into bite sized bits and set aside.
- In a small mixing bowl, combine mayo, Greek yogurt, white vinegar, sugar, salt, and pepper. Whisk together and set dressing aside.
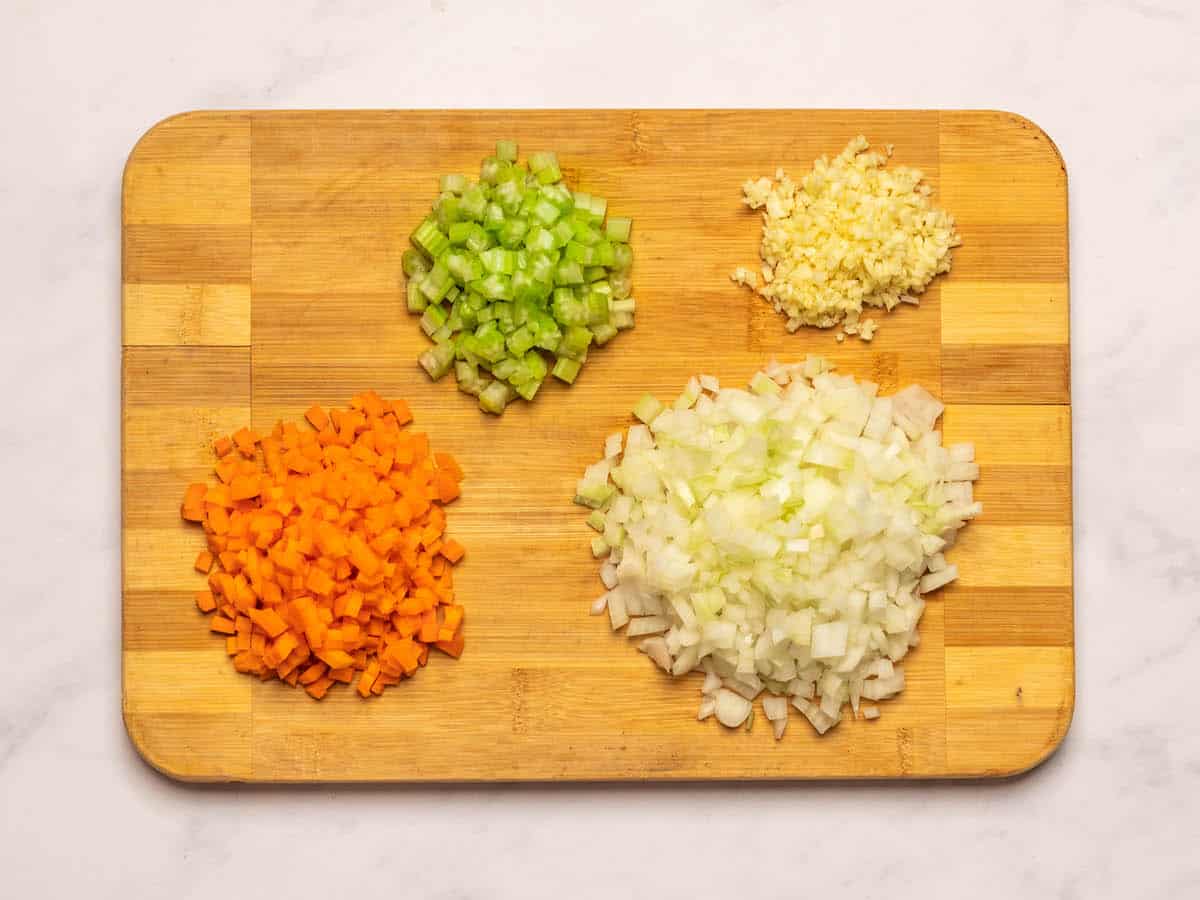
- Cut broccoli into florets, shred the cheddar cheese, gather raisins, crumble bacon, crush walnuts, and dice red onion.
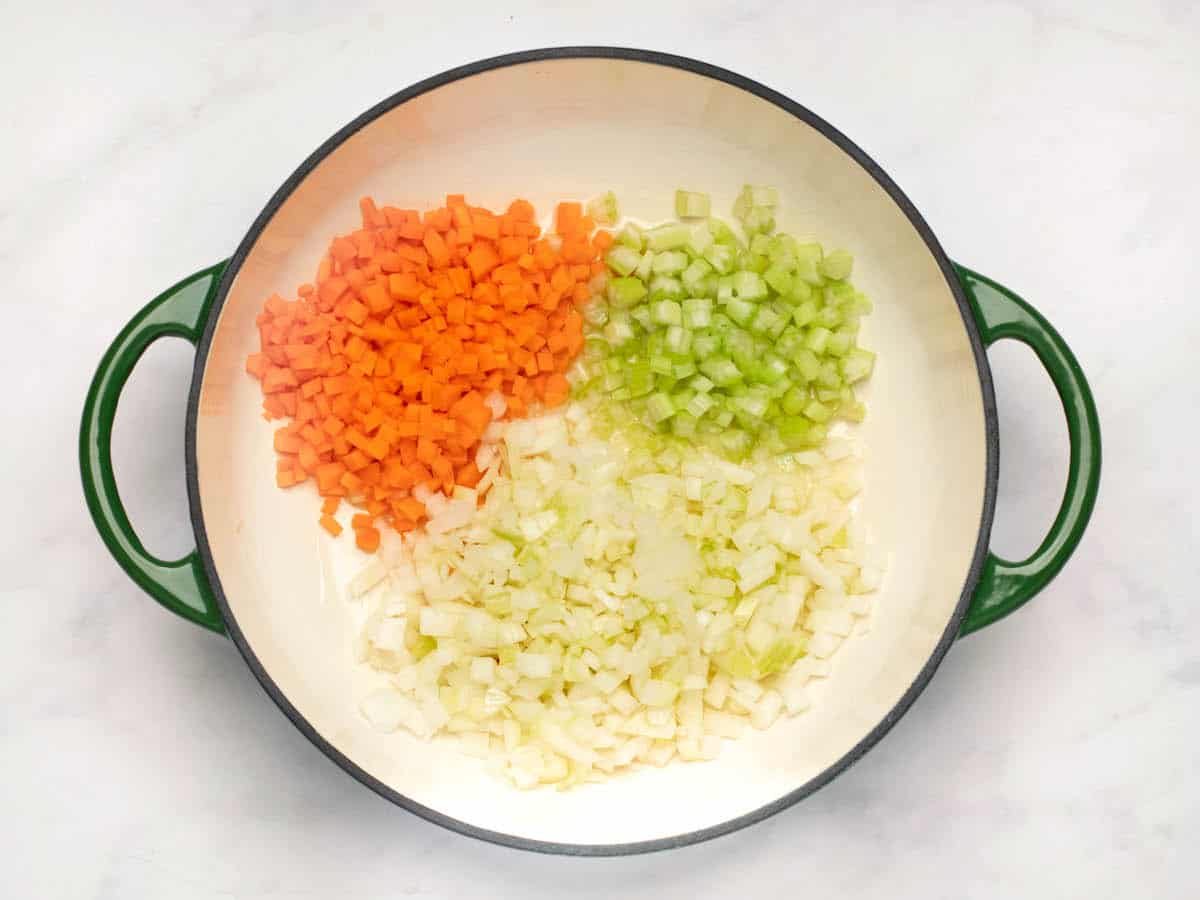
- Combine salad ingredients in a large mixing bowl and toss to combine.
- Pour the dressing over broccoli salad and toss together until completely coated. Serve immediately, or let it marinate and get extra yummy in the fridge for up to 5 days!
See how we calculate recipe costs here.
Nutrition

how to make Broccoli Salad – step by step photos

In a small mixing bowl, combine 1/2 cup mayo, 2 Tbsp Greek yogurt, 1 Tbsp white vinegar, 1 Tbsp sugar, 1/4 tsp salt, and 1/4 tsp pepper.

Whisk together and set dressing aside.

Cut 1 large crown of broccoli into florets, shred 1 cup of cheddar cheese, gather 1/4 cup of raisins, crumble 6 strips of crispy bacon, crush 1/4 cup walnuts, and dice 1/4 of a red onion.

Combine salad ingredients in a large mixing bowl and toss to combine.
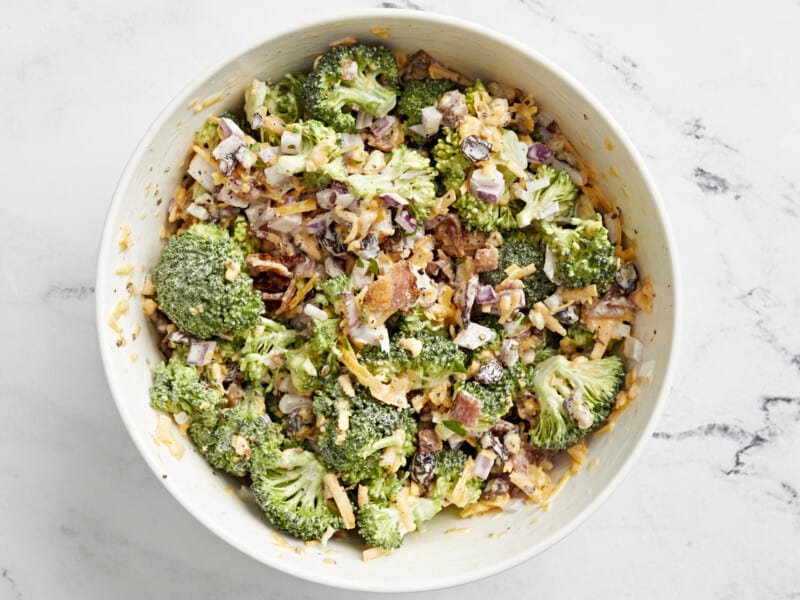
Pour the dressing over broccoli salad and toss together until completely coated. Serve immediately, or let it marinate and get extra yummy in the fridge for up to 5 days!
The post Broccoli Salad appeared first on Budget Bytes.


 Mexican Wedding Cookies are a Christmas cookie favorite, but there are SO many different names for these little buttery pecan cookies. What do you call them? I call them Mexican Wedding Cookies because that is what my family calls them. To be honest though, when I was little I didn’t really like them. I always…