Easy Marinara Sauce

This easy homemade marinara sauce recipe only uses a few simple ingredients to create a rich and bold flavor, perfect for pasta and more!

The post Easy Marinara Sauce appeared first on Budget Bytes.

I know it’s super easy just to open up a jar of store-bought marinara sauce and pour it over your pasta, and sometimes that’s all the energy we have (no shame), but hear me out. This easy marinara sauce recipe is surprisingly simple, super inexpensive, and you get to control the ingredients (great for those watching their sugar or sodium intake). Plus, homemade marinara sauce is very freezer-friendly, so you can make a double batch now and save the other half for the nights when you have no energy. It heats through in minutes and you’re good to go with zero effort!

Overhead view of a pot full of homemade marinara sauce with a wooden spoon in the center.

What is Marinara Sauce?

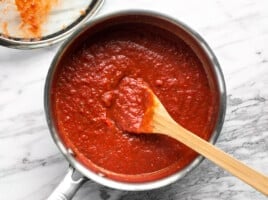
Marinara sauce is a simple tomato-based pasta sauce. It’s characterized by its simple list of ingredients, which leads to an uncomplicated and bright tomato flavor. The texture of marinara sauce is usually very uniform without large chunks, which allows it to coat pasta evenly. Marinara sauce is most often used as a sauce for pasta, but it can also be used in many other dishes or as a dipping sauce.

Ingredients for Marinara Sauce

Marinara sauce in its most simple form is just puréed tomatoes (or passata) and a small amount of herbs and spices. I’ve added a couple more ingredients here to satisfy my American palate, but the recipe remains very simple. Here’s what you’ll need to make this marinara sauce recipe:

  • Onion: The natural sugars in onion add a touch of sweetness to the sauce, which helps balance the acidity of the tomatoes.
  • Garlic: Garlic pairs so well with tomato sauce that I just had to add some to round out the savory flavors. That being said, you can skip it for a more traditional marinara sauce flavor.
  • Olive Oil: Olive oil helps the onion sauté without burning and it adds some body to the sauce.
  • Crush Tomatoes: A large can of crushed tomatoes provides bulk to this sauce with a fairly smooth texture. If you can not get crushed tomatoes where you live, passata will also work.
  • Tomato Paste: A little bit of tomato paste added to the sauce helps thicken it up and intensifies the tomato flavor.
  • Herbs: Dried basil and oregano round out the flavor of this sauce and give it a subtle herbal finish.
  • Brown Sugar: Adding sugar is a short cut with tomato sauce that helps balance the acidity without having to simmer the sauce for a long period of time. You can skip the brown sugar, but I love the balance it brings to the flavor.
  • Salt: Salt is arguably the most important ingredient in any dish as it helps our tongue distinguish between different flavors. If your sauce is not properly salted, you will not be able to taste its full flavor.

What Kind of Tomatoes to Use for Marinara Sauce

This recipe is written using canned crushed tomatoes, which offer both convenience and a low price. While you most definitely can make marinara sauce using fresh tomatoes, that would require several more steps and a reformulation of the recipe to account for the extra water and flavor differences.

When choosing the canned crushed tomatoes for this recipe, keep in mind that there can be quite a drastic flavor difference between brands. If budget is your main concern, this recipe makes a great sauce even when using generic-brand canned tomatoes. But, if you want to get a bit fancier, you can opt for a premium or imported brand, or even buy whole canned San Marzano tomatoes and purée them yourself. Even when you opt for a more expensive canned tomato, this recipe is still very easy and budget-friendly, making it a great option for special occasions like date night in!

How to Use Marinara Sauce

We all know that marinara sauce is great on pasta, but you can use it for other recipes, as well! Here are some other ways to use this easy homemade marinara sauce:

  • Use it on pizza for a lighter tomato flavor. It’s particularly great on Margherita pizzas.
  • Use it as a dipping sauce for homemade focaccia or breadsticks.
  • Combine it with other sauces like pesto or alfredo sauce to make a new pasta or dipping sauce.
  • Add it to sandwiches, like Meatball Subs.
  • Use it as a base for soup by adding more seasoning, broth, and other items like pasta, meatballs, or vegetables.

How to Store And Reheat

As mentioned, this marinara sauce recipe freezes beautifully. After cooking the marinara sauce, transfer it to the refrigerator until completely chilled. The sauce will stay good in the refrigerator for 4-5 days, or you can transfer it to the freezer for longer storage. Just make sure the sauce is in a freezer-safe container, label and date it, and then freeze for up to three months. To reheat, simply transfer the frozen sauce to a saucepot and heat over medium-low, stirring often, until heated through.

A fork twirling into a pile of pasta covered in marinara sauce.
Overhead view of finished marinara sauce in the pot surrounded by pasta and herbs.
Print

Easy Marinara Sauce

This easy homemade marinara sauce recipe only uses a few simple ingredients to create a rich and bold flavor, perfect for pasta and more!
Course Dinner, Main Course
Cuisine American, Italian
Total Cost $3.11 recipe / $0.39 serving
Prep Time 5 minutes
Cook Time 40 minutes
Total Time 45 minutes
Servings 8 (½ cup each)
Calories 73kcal

Ingredients

  • 1 small yellow onion $0.37
  • 2 cloves garlic $0.16
  • 2 Tbsp olive oil $0.32
  • 2 Tbsp tomato paste $0.20
  • 1 28oz. can crushed tomatoes $1.89
  • 1/2 tsp dried basil $0.05
  • 1/2 tsp dried oregano $0.05
  • 1 tsp brown sugar (optional) $0.02
  • 1 tsp salt (or to taste) $0.05

Instructions

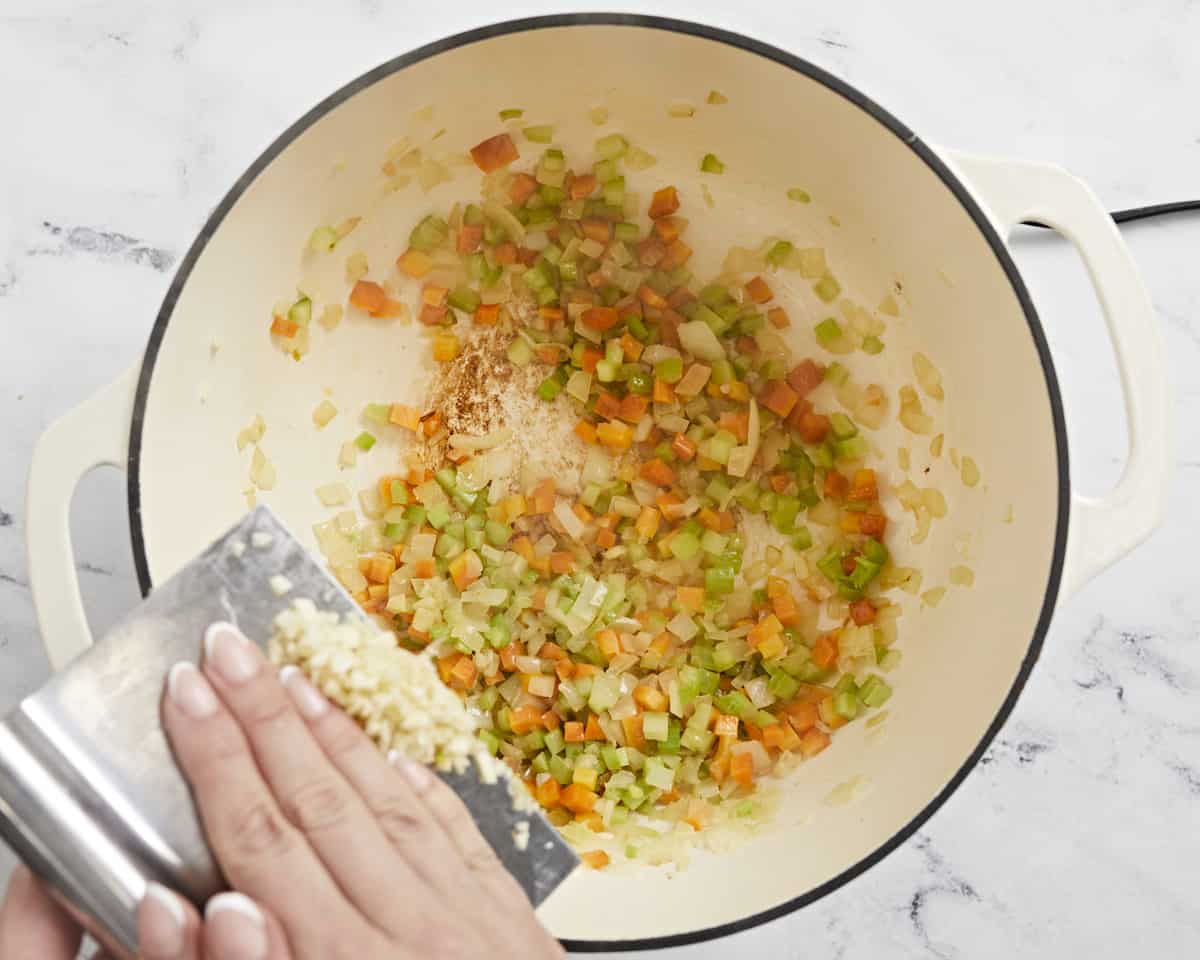
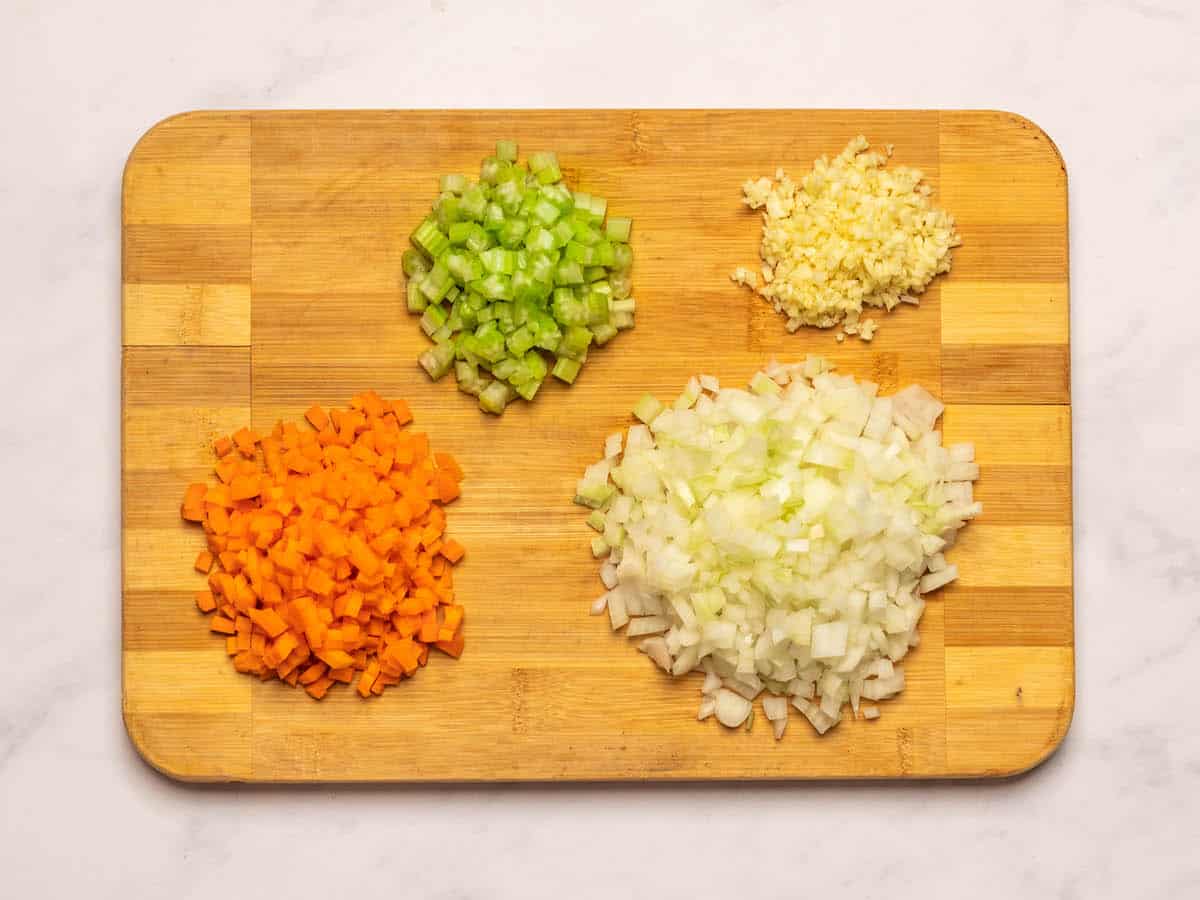
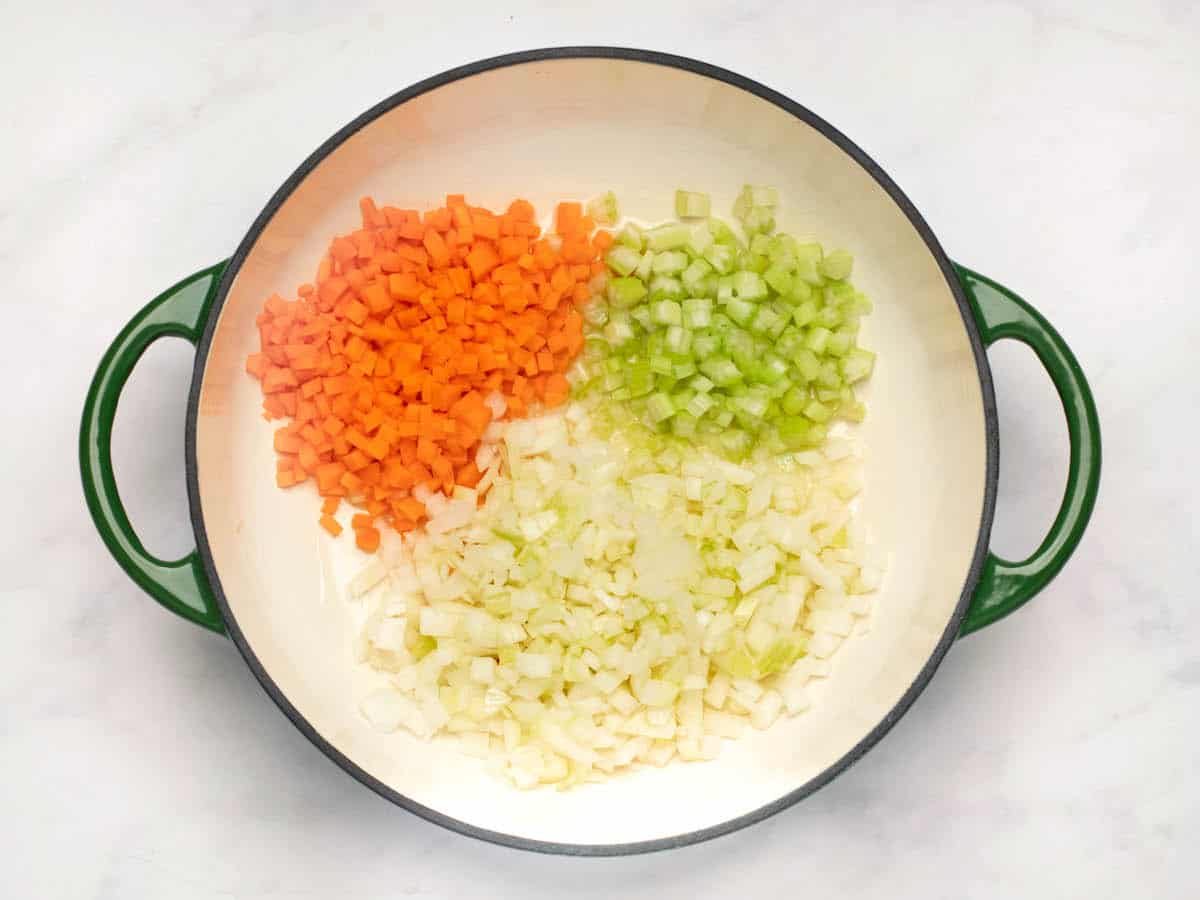
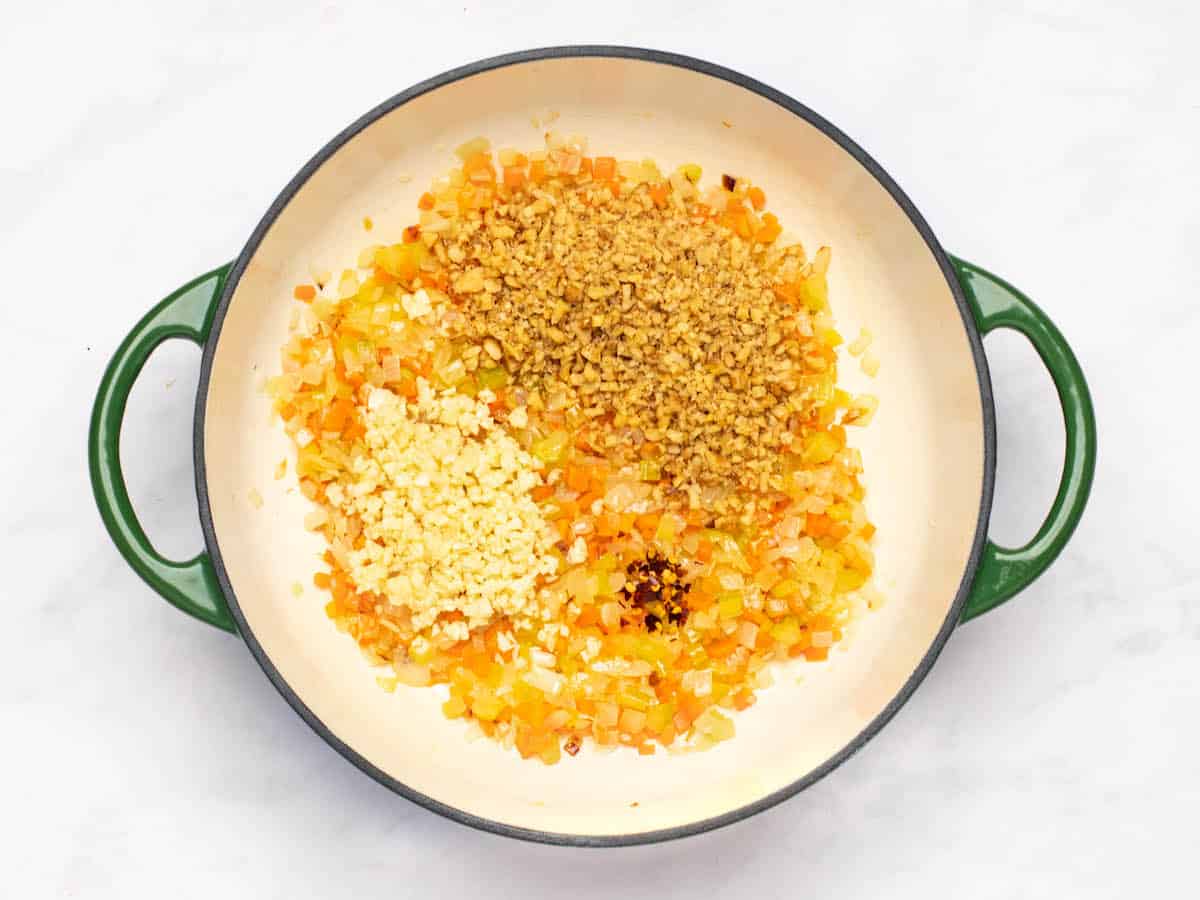
  • Dice the onion and mince the garlic. Add the onion, garlic, and olive oil to a sauce pot and sauté over medium heat until the onions are soft and translucent (about 5 minutes).
  • Add the tomato paste and continue to stir and cook for 3-5 minutes more, or until the tomato paste takes on a slightly darker color. This caramelizes the sugars in the tomato paste to give it a slightly sweeter and less acidic flavor.
  • Add the crushed tomatoes, basil, oregano, brown sugar, and salt to the pot. Stir to combine and dissolve any tomato paste from the bottom of the pot.
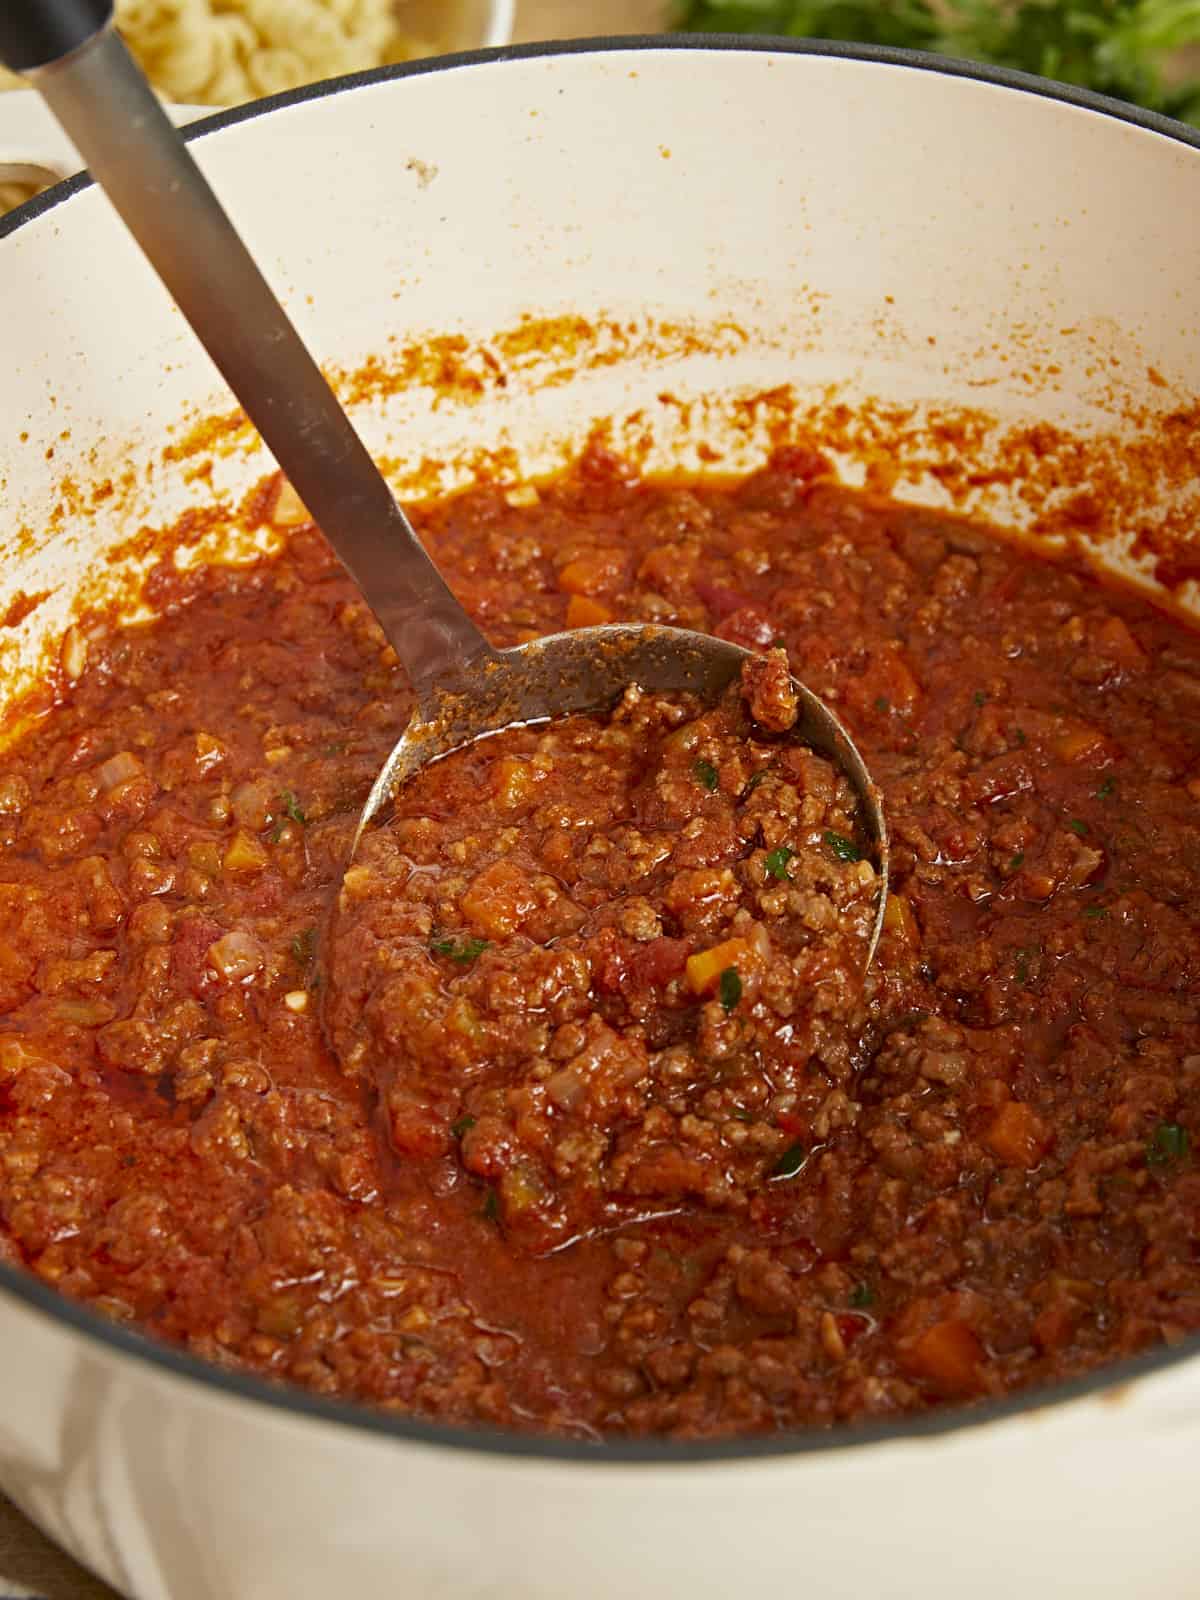
  • Allow the sauce to come to a gentle simmer, then reduce the heat to medium-low, partially cover the pot, and allow the sauce to simmer for about 30 minutes, stirring occasionally.
  • After simmering for 30 minutes, taste the sauce and adjust the salt, sugar, or other seasonings to your liking. If the sauce is too acidic for your liking, you can let it simmer longer (about one hour) or add more sugar. Serve hot or refrigerate until ready to eat.

See how we calculate recipe costs here.

Nutrition

Serving: 0.5cup | Calories: 73kcal | Carbohydrates: 10g | Protein: 2g | Fat: 4g | Sodium: 454mg | Fiber: 2g
Close up side view of marinara sauce being stirred in the pot with a wooden spoon.

How to Make Marinara Sauce – Step by Step Photos

Sautéed onion and garlic in a saucepot.

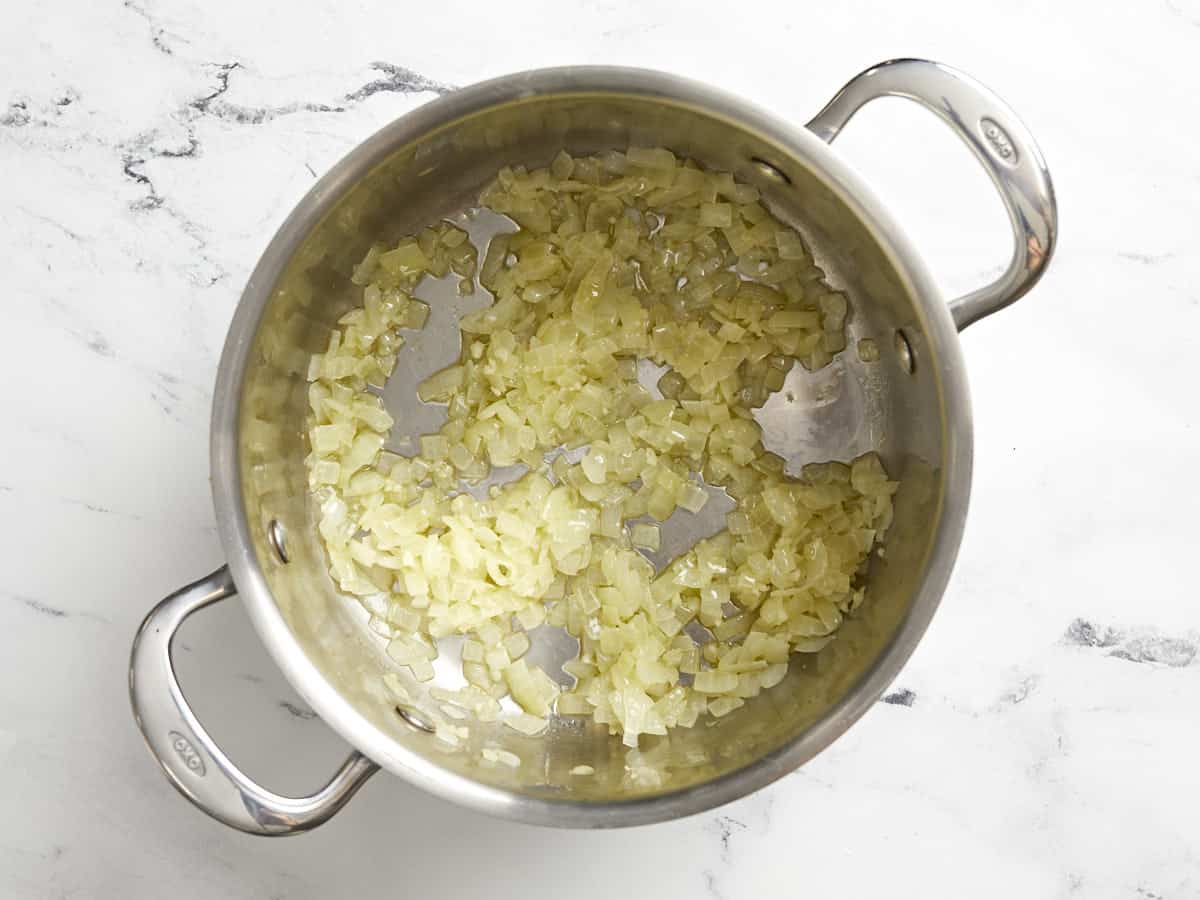
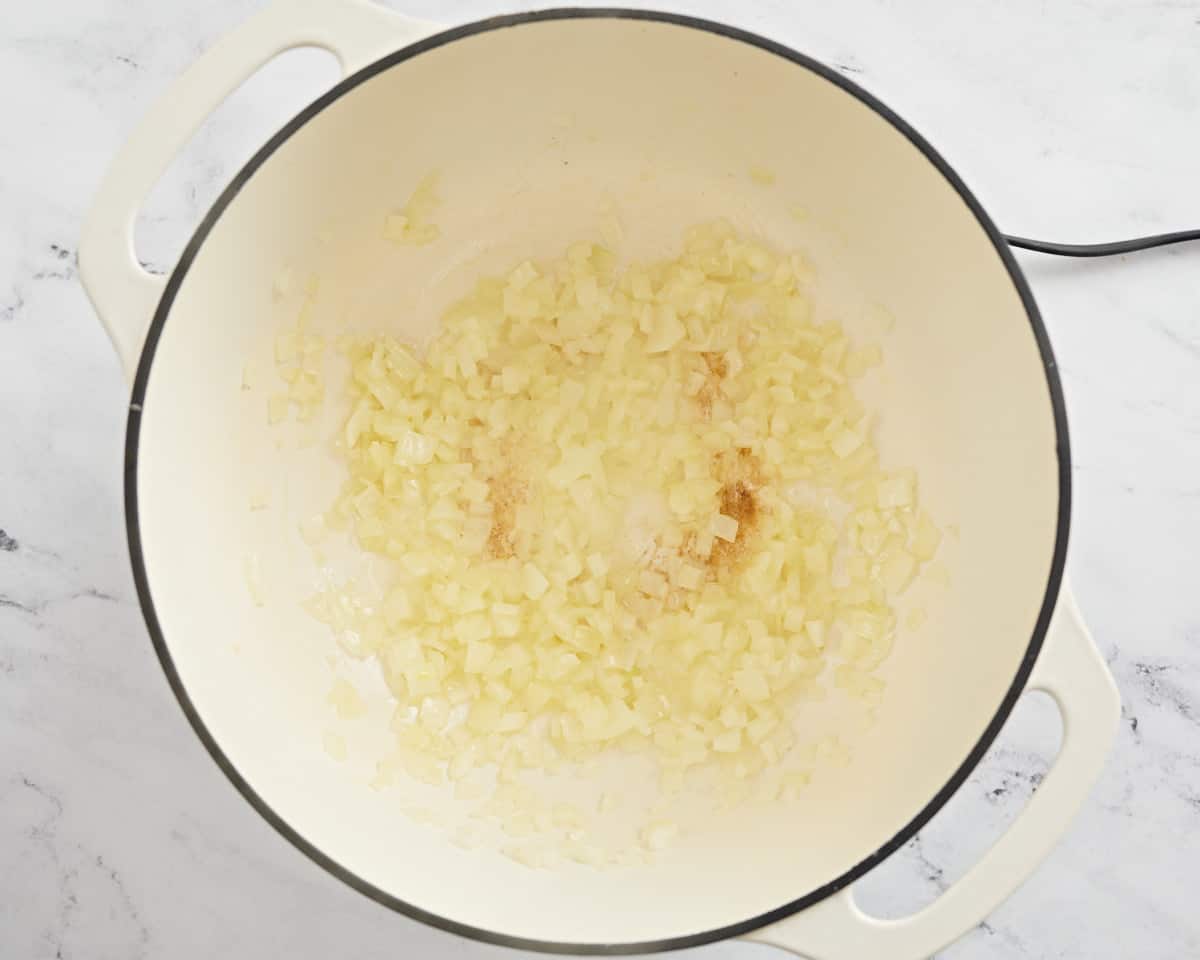
Dice one yellow onion and mince two cloves of garlic. Add the onion, garlic, and 2 Tbsp olive oil to a sauce pot and sauté over medium heat until the onions are soft and translucent (about 5 minutes).

Tomato paste stirred into the onions and garlic in the saucepot.

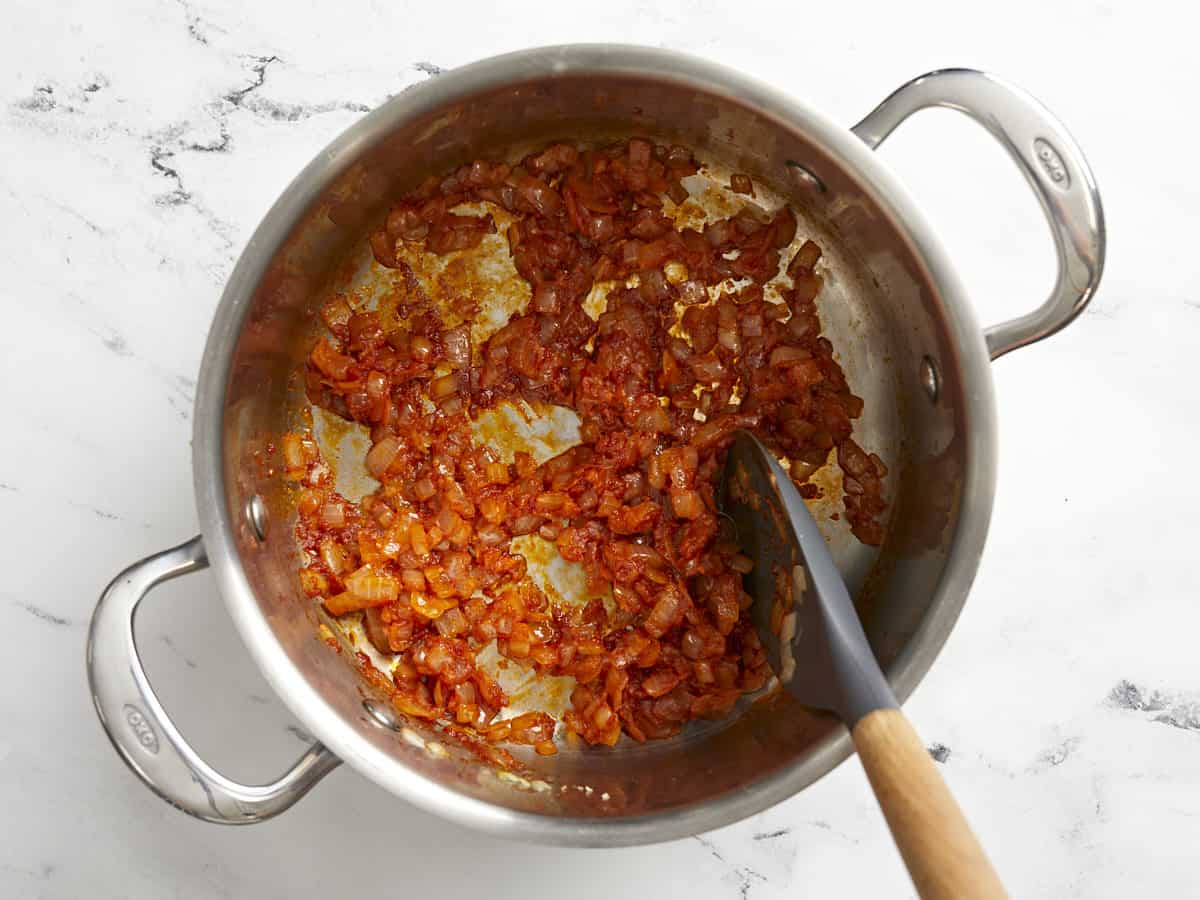
Add 2 Tbsp of tomato paste to the pot and continue to stir and cook for 3-5 minutes more, or until the tomato paste takes on a slightly darker color. This caramelizes the sugars in the tomato paste, adding a natural sweetness.

Crushed tomatoes, sugar, and herbs added to the pot.

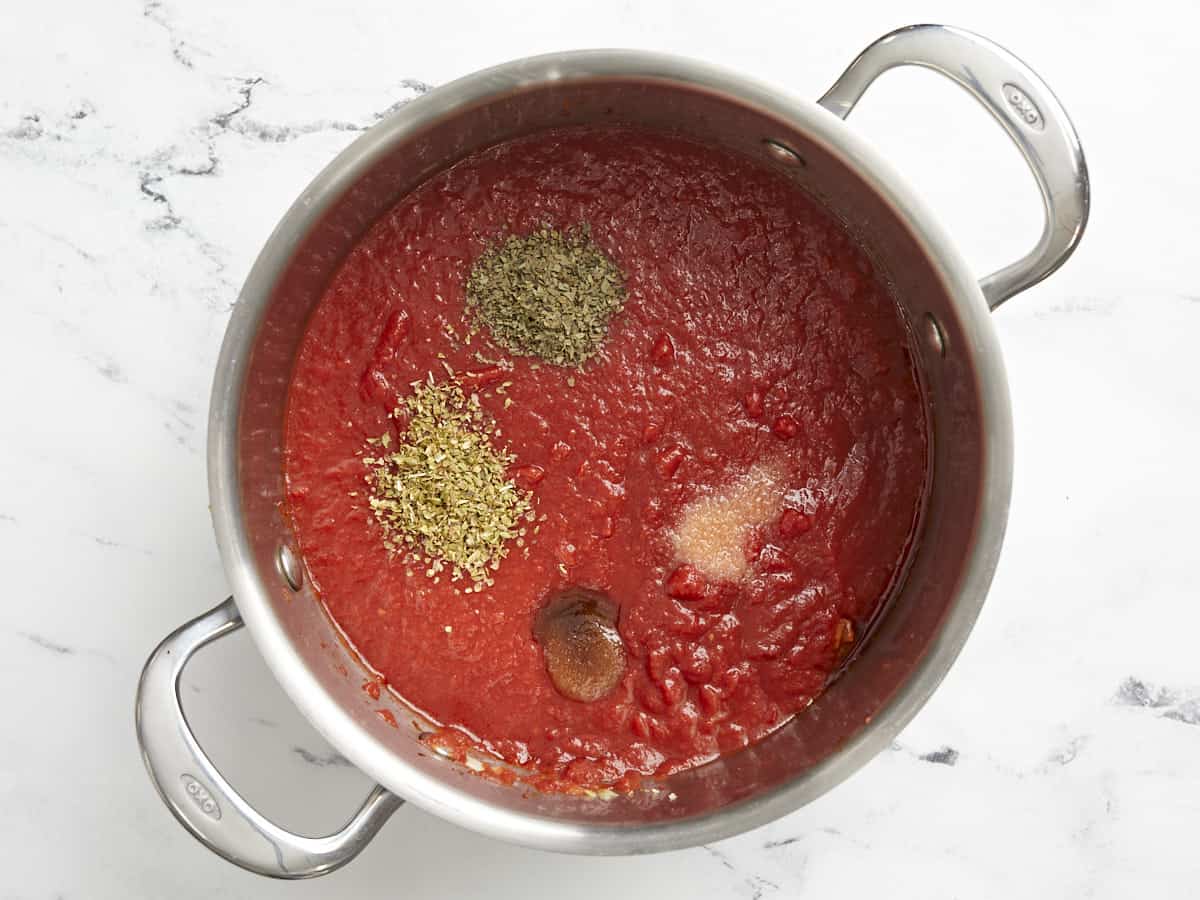
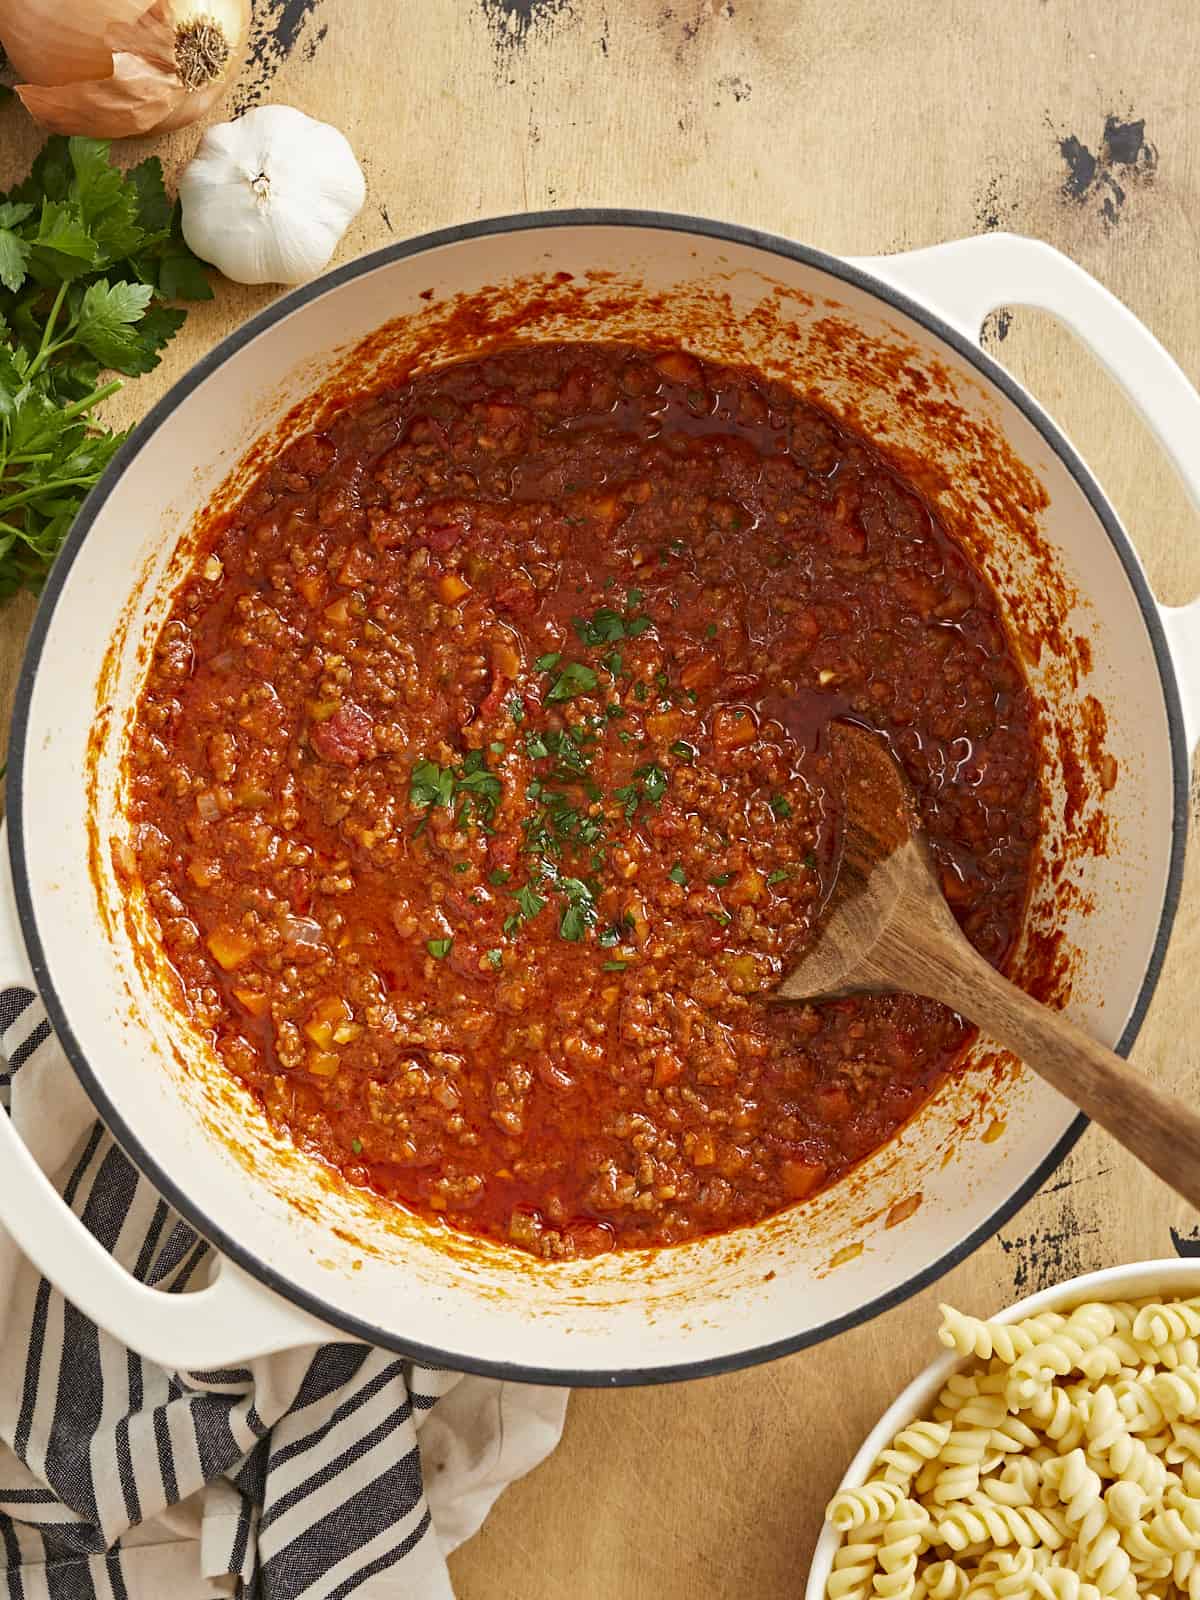
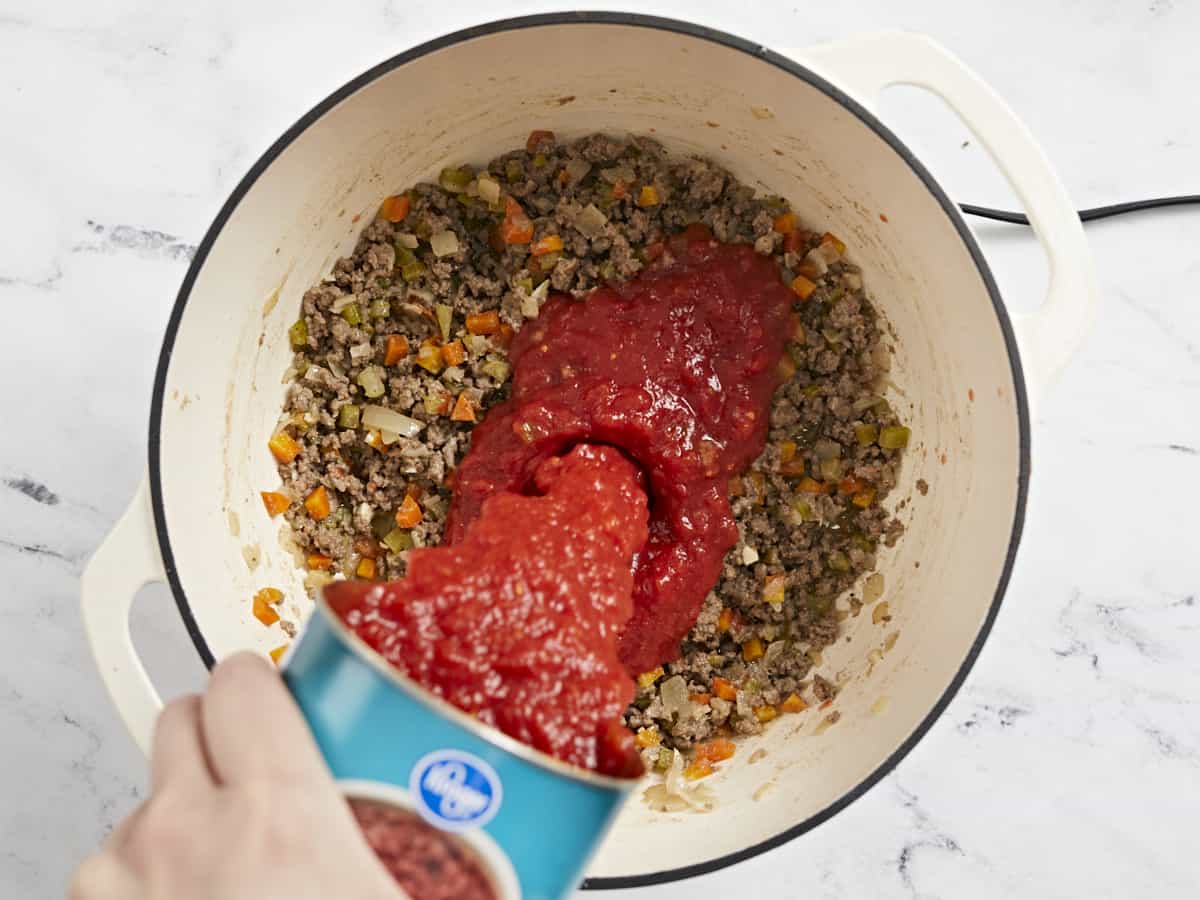
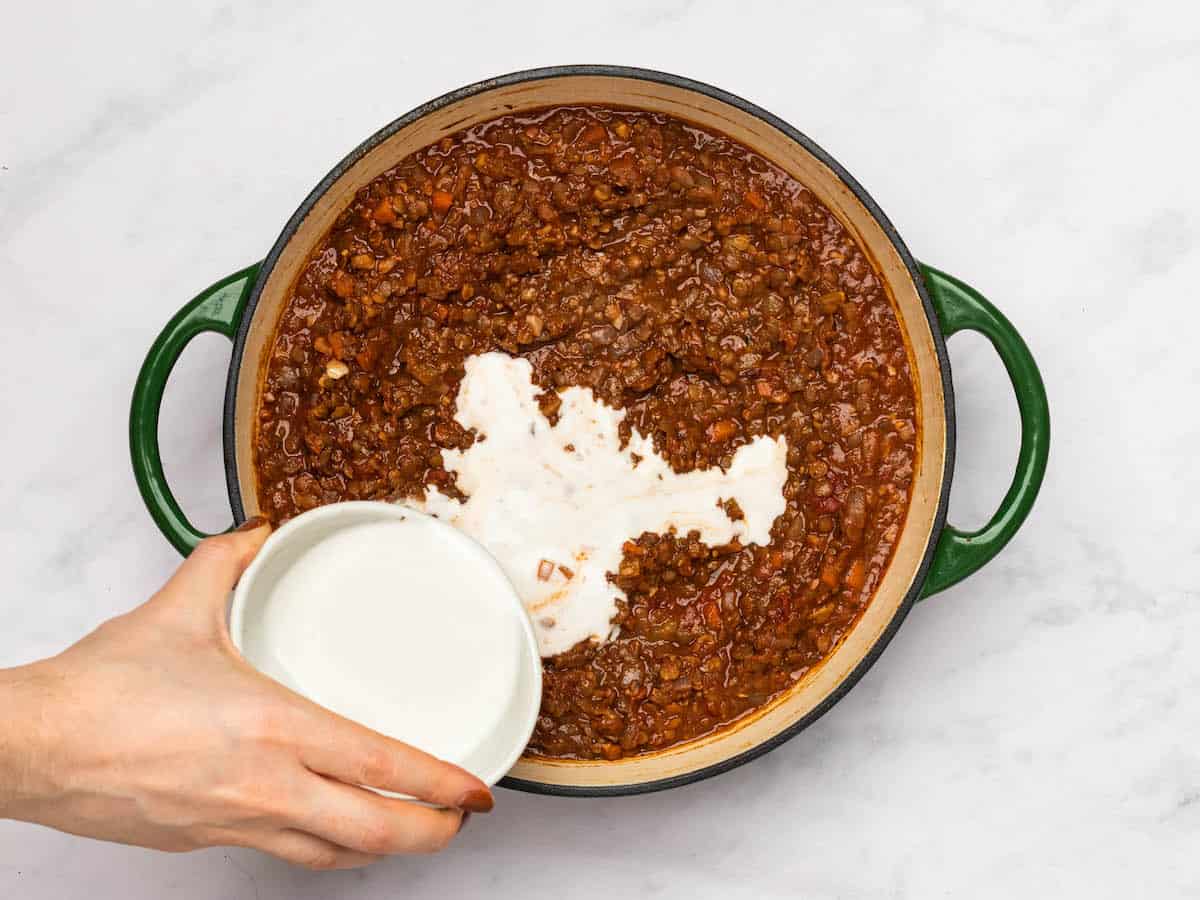
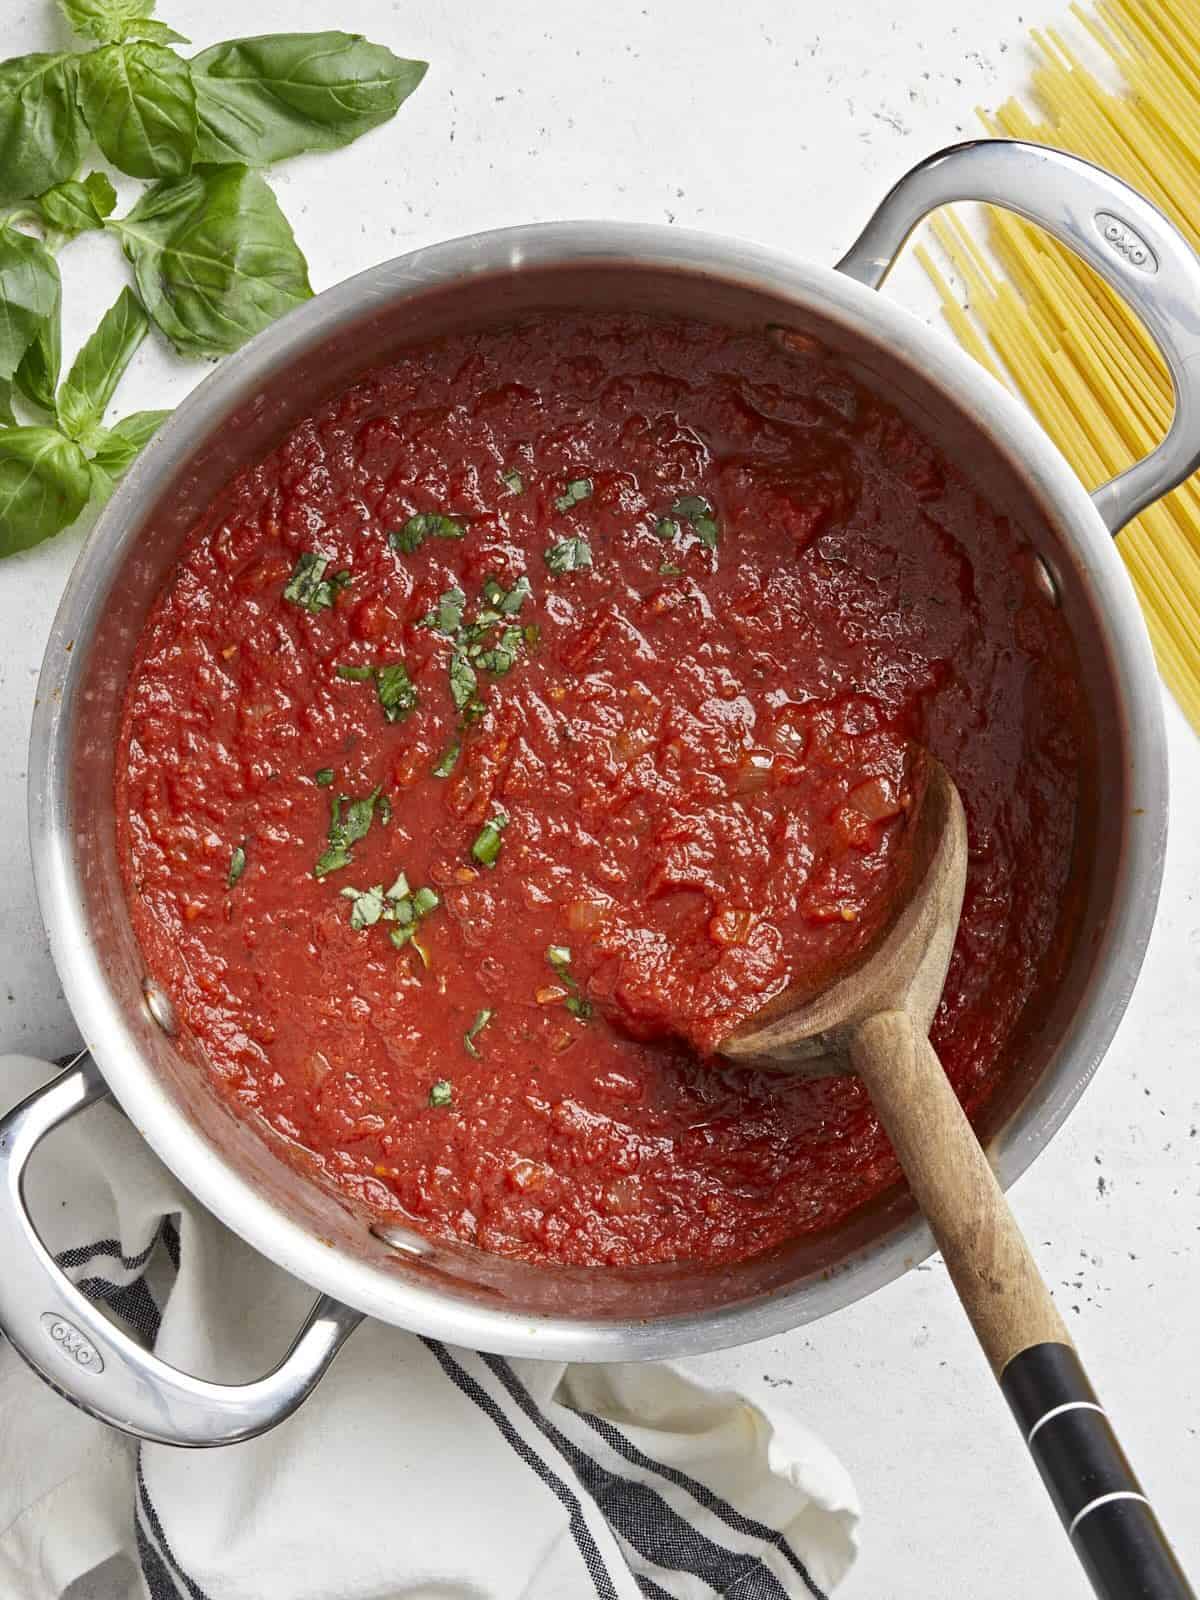
Finally, add one 28oz. can of crushed tomatoes, ½ tsp dried basil, ½ tsp dried oregano, 1 tsp brown sugar, and 1 tsp salt. Stir to combine and dissolve any tomato paste from the bottom of the pot. Allow the sauce to come to a gentle simmer.

Marinara sauce being stirred in the pot.

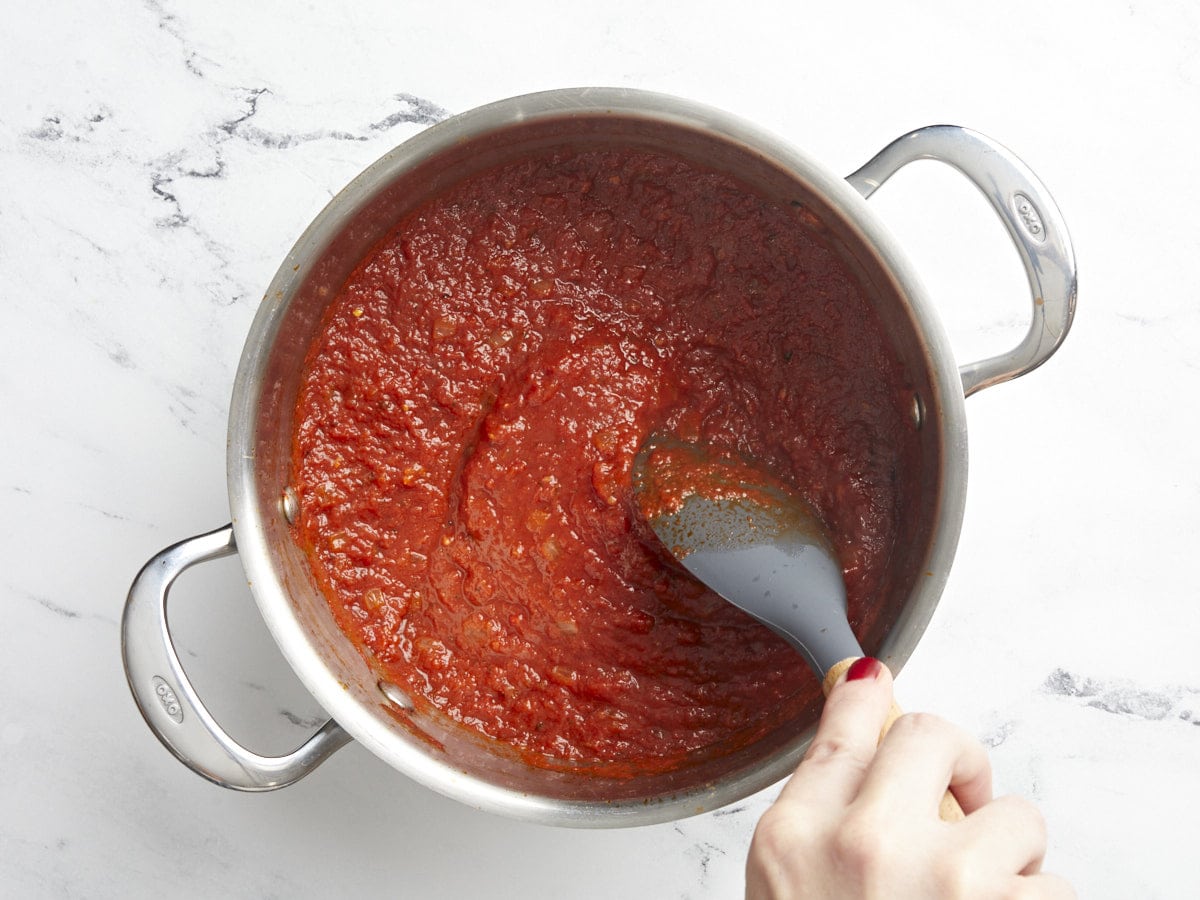
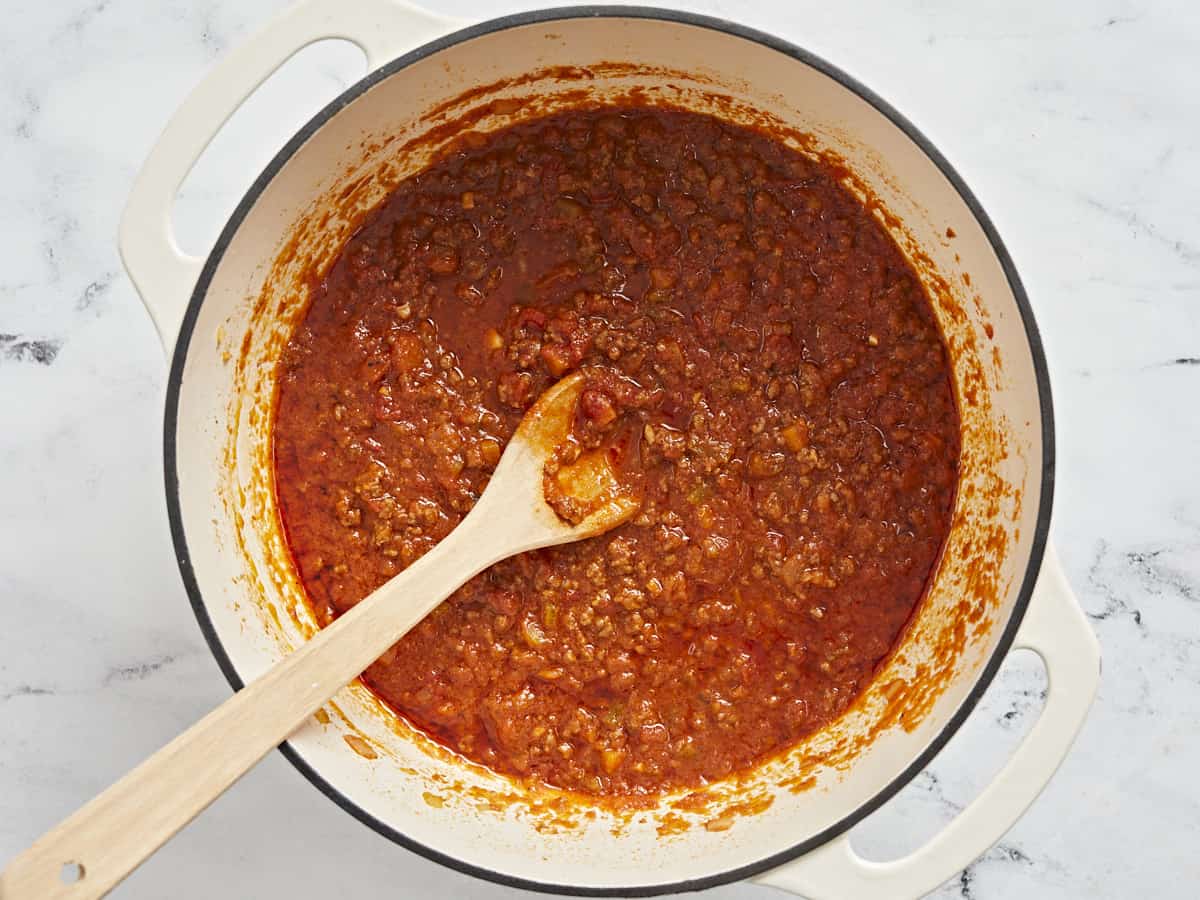
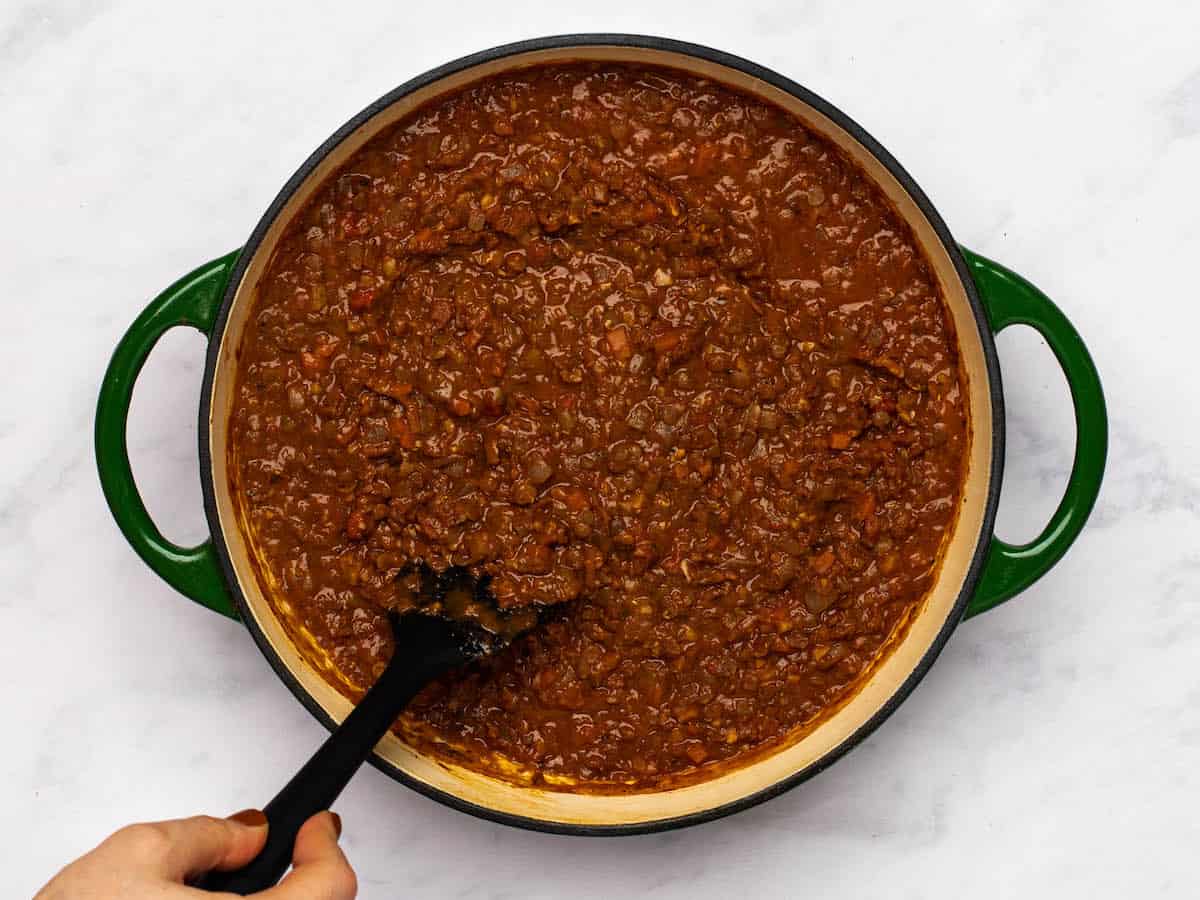
Once simmering, turn the heat down to medium-low, partially cover the pot, and let the sauce simmer for about 30 minutes, stirring occasionally. Leaving a lid on the pot but slightly ajar can help prevent splatter.

Overhead view of finished marinara sauce in the pot surrounded by pasta and herbs.

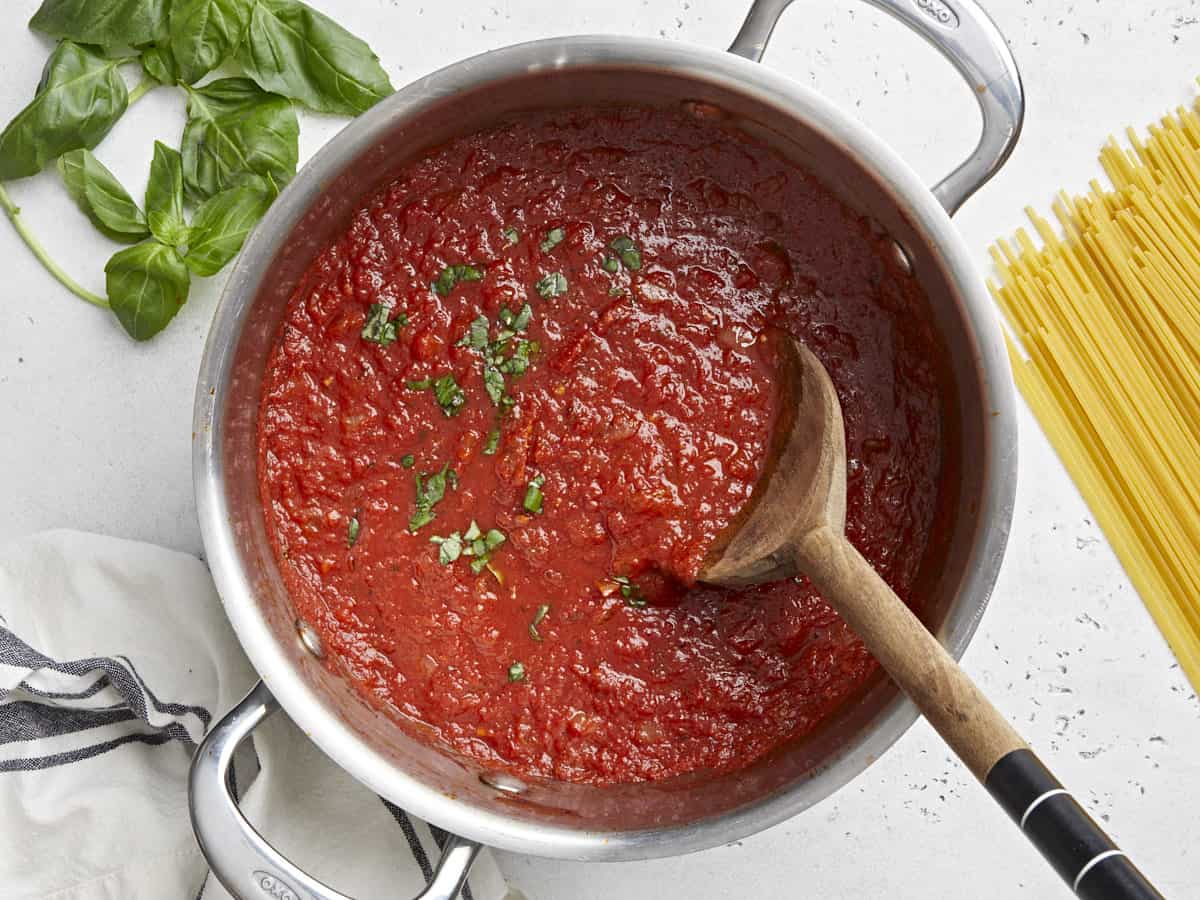
After simmering for 30 minutes, give the marinara sauce a taste and adjust the salt or other herbs to your liking. If it’s still too acidic for your taste, you can either simmer it longer (around 1 hour total), or add more sugar.

Marinara sauce being spooned over a plate of pasta.

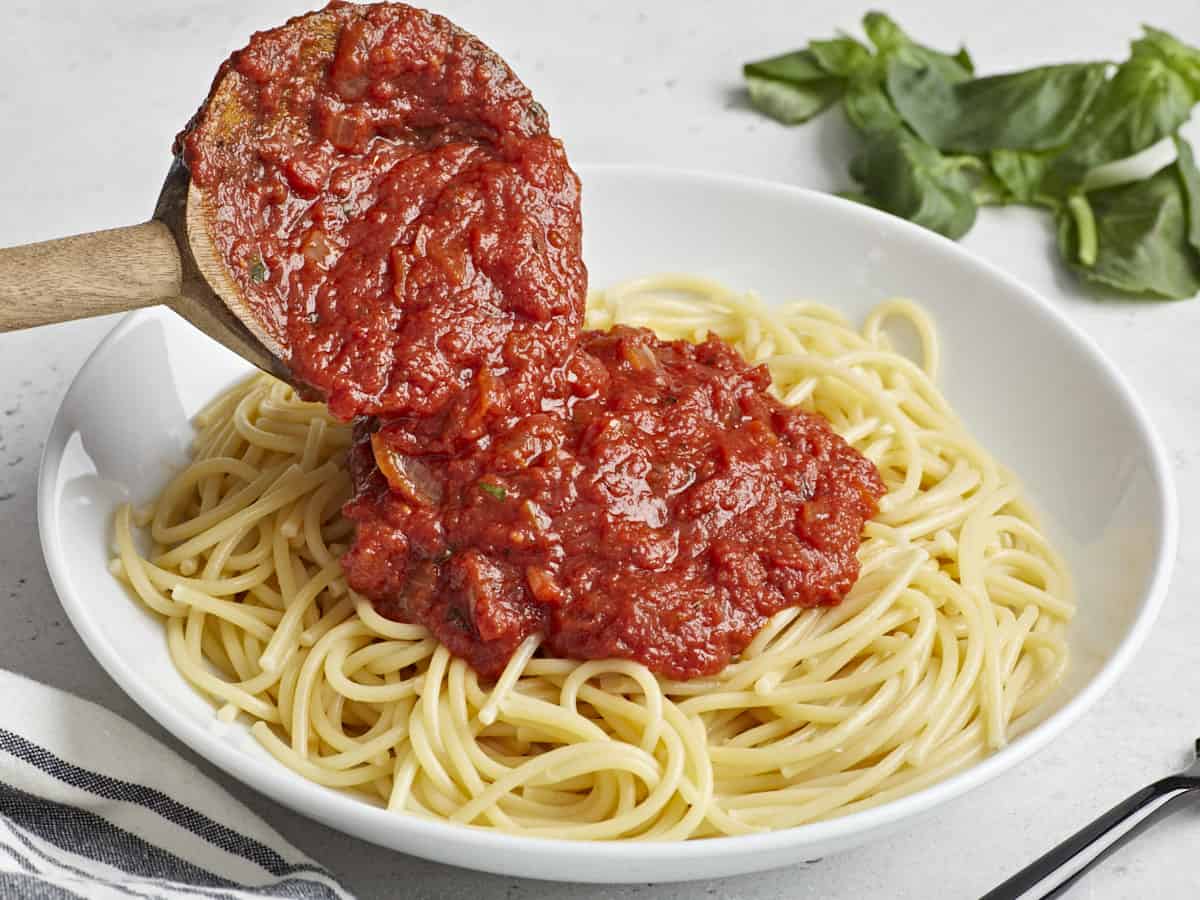
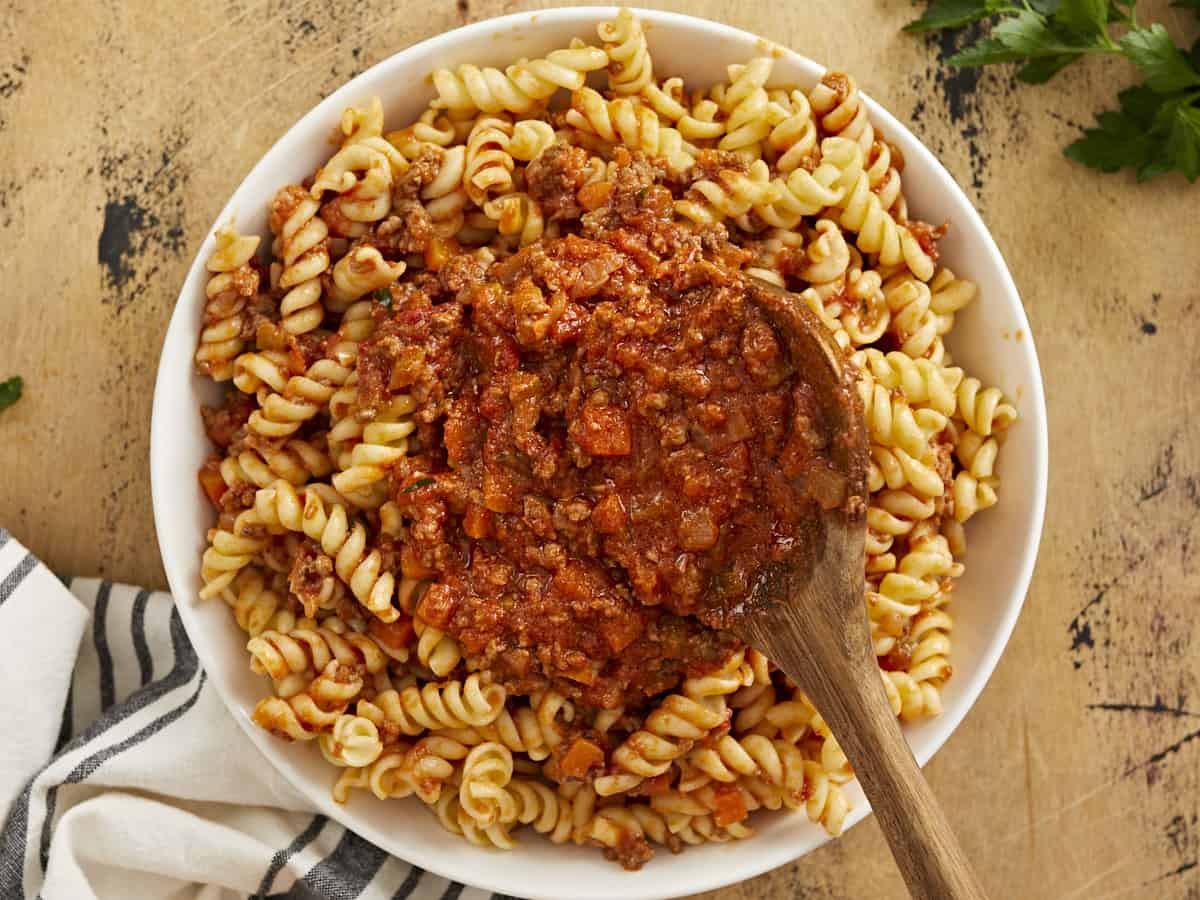
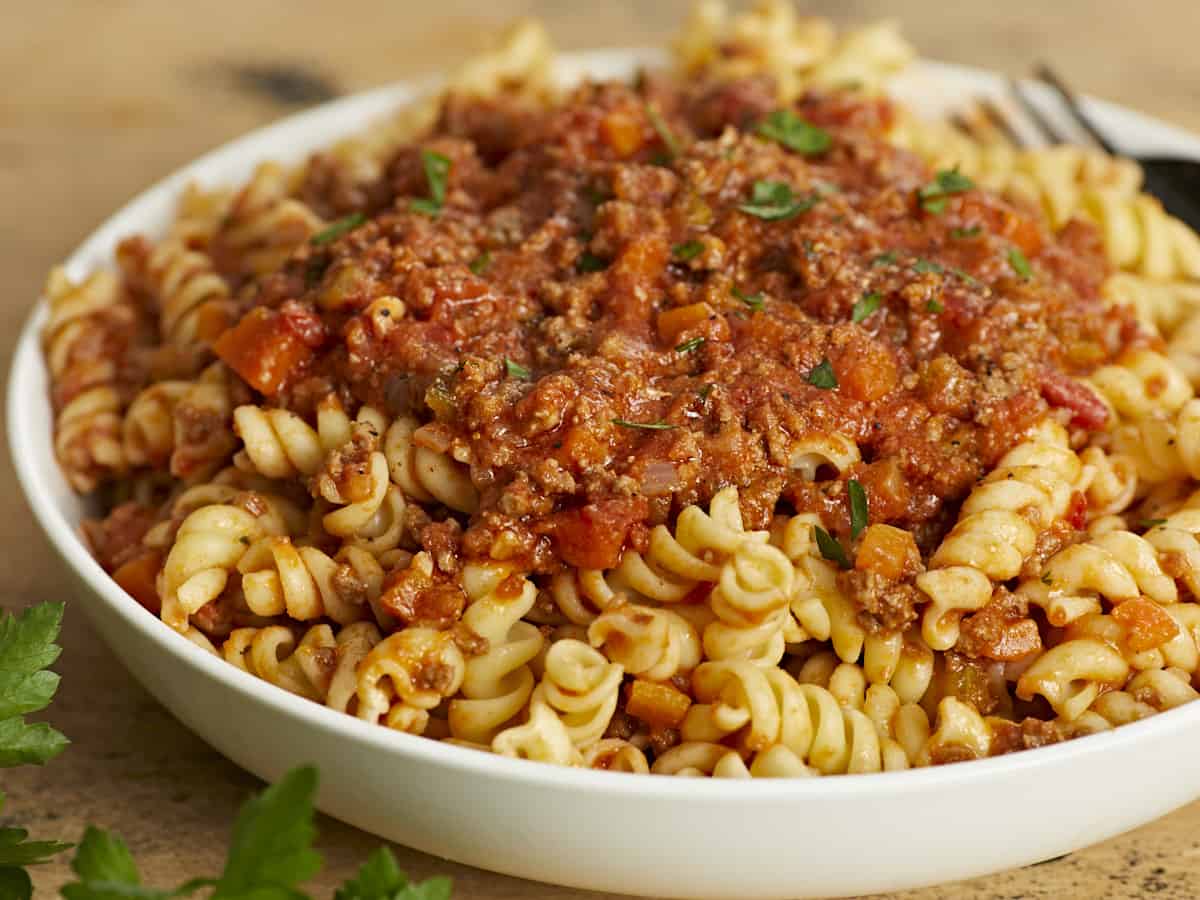
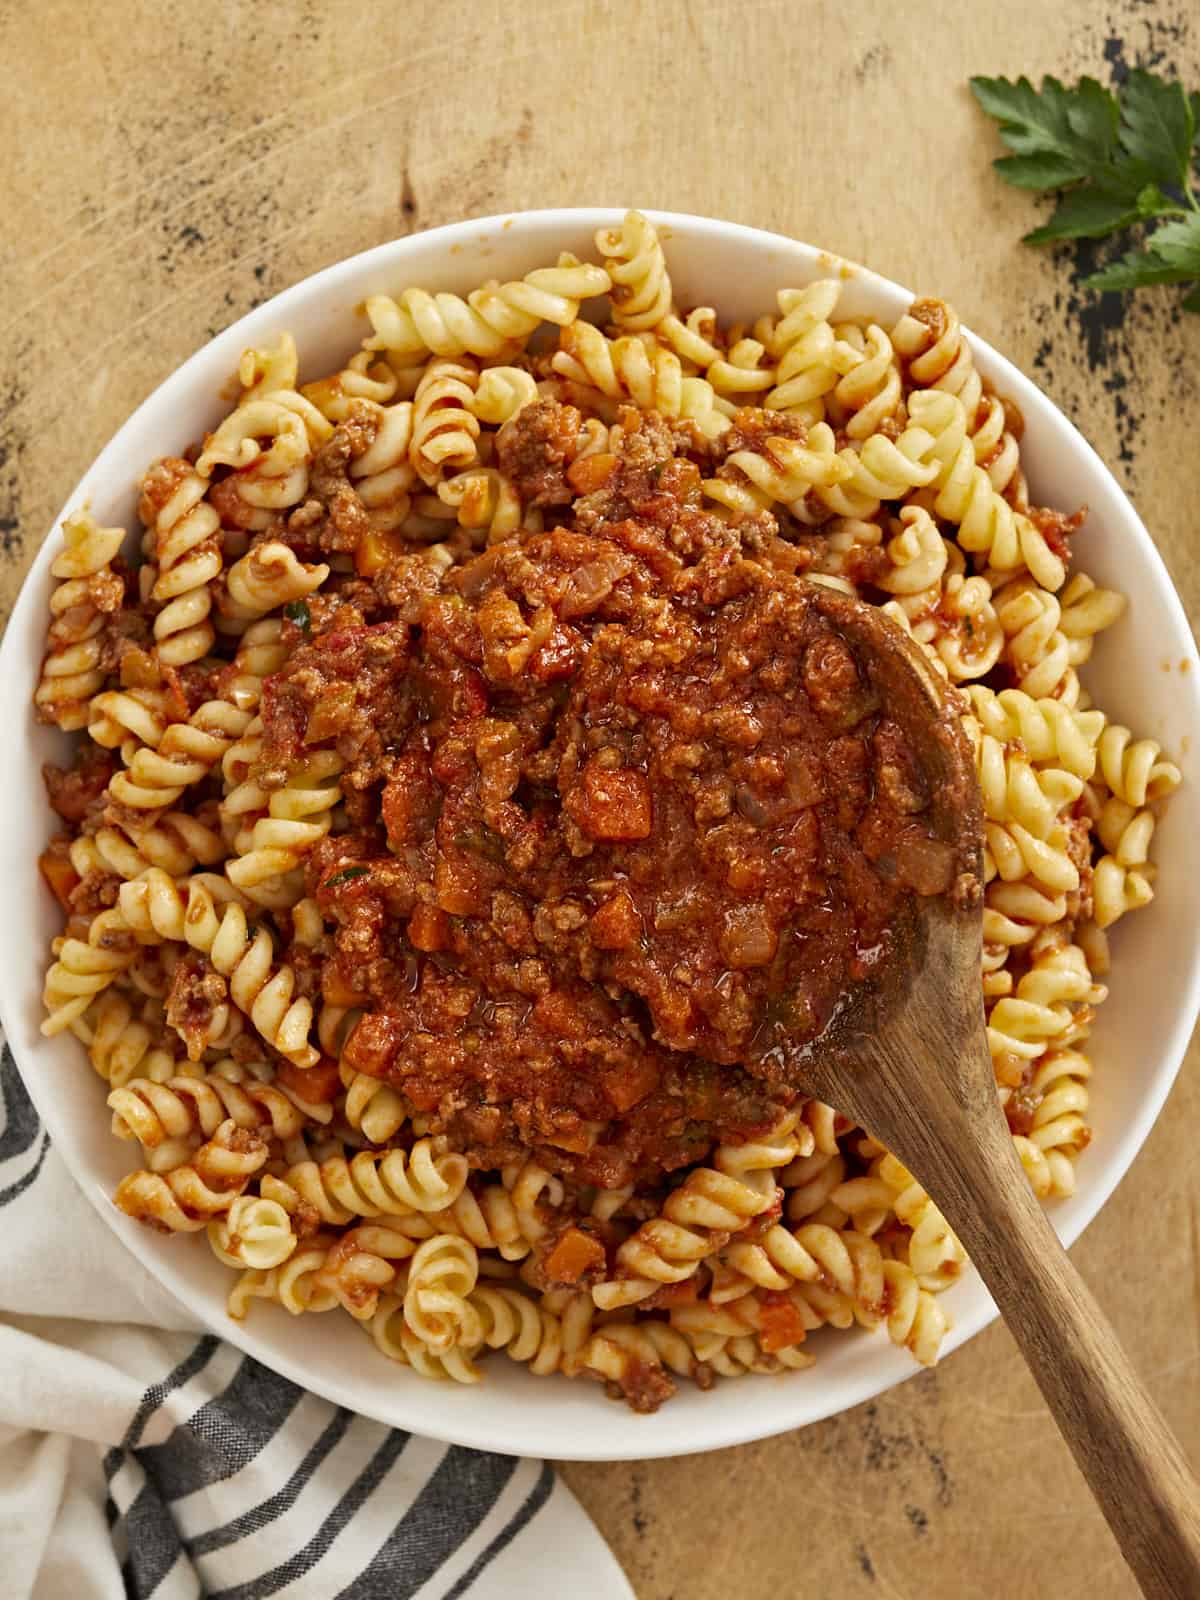
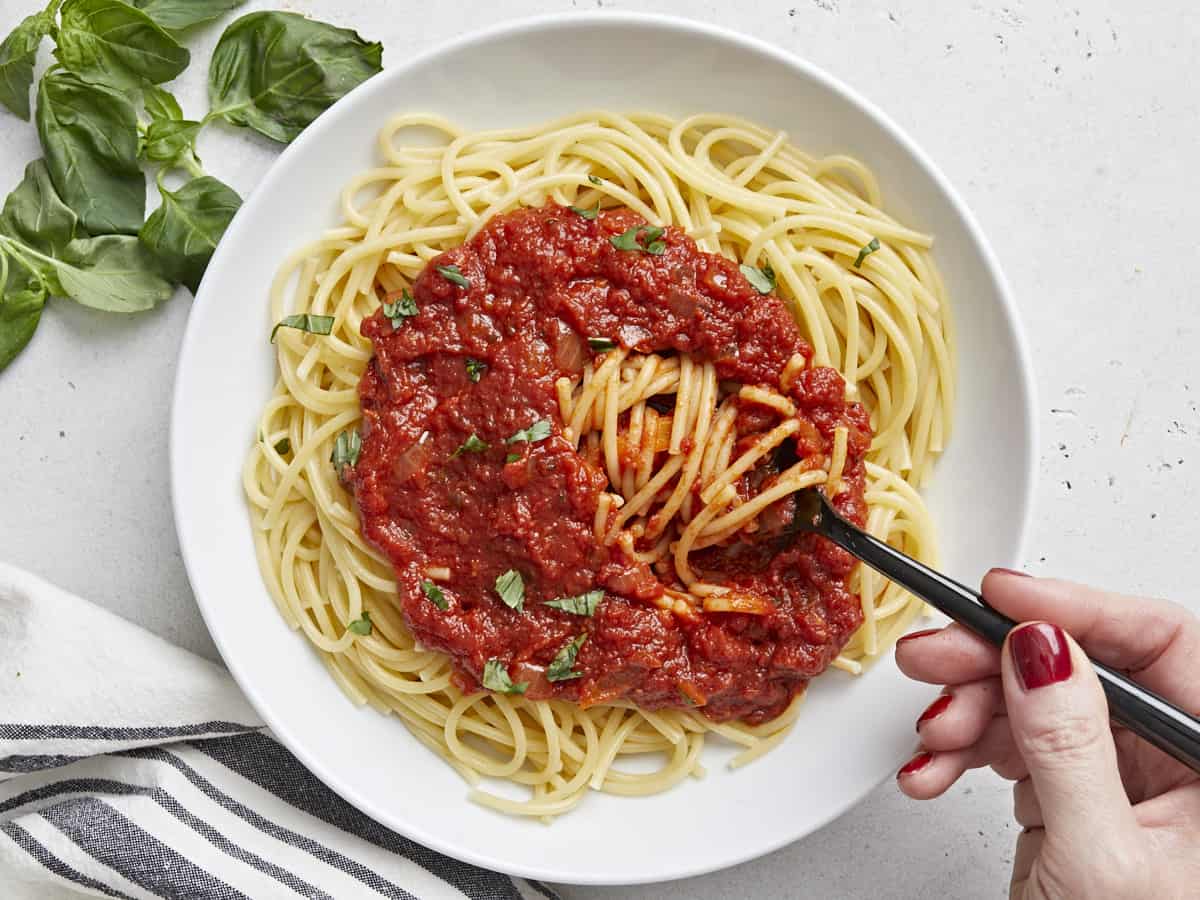
Serve the homemade marinara sauce over pasta, use it for a dipping sauce, or freeze it for later!

The post Easy Marinara Sauce appeared first on Budget Bytes.

Homemade Cranberry Sauce

This easy three ingredient homemade cranberry sauce is fast, flavorful, and the perfect addition to your Thanksgiving meal!

The post Homemade Cranberry Sauce appeared first on Budget Bytes.

I guess I take pleasure in the little things because I get the most excited about this Homemade Cranberry Sauce recipe out of all the Thanksgiving food every year! The amount of flavor that comes out of just three simple ingredients is unreal. And because homemade cranberry sauce is this easy to make, I’ve started making it as a side dish for my dinners all winter long. It’s great with so many different meals!

Overhead view of a pot full of homemade cranberry sauce being stirred.

Need more easy Thanksgiving recipes? Check out our Easy Thanksgiving Dinner for Beginners guide!

Ingredients for Cranberry Sauce

Cranberry sauce is so incredibly easy to make that you’ll only need these simple ingredients:

  • Cranberries: You can use fresh or frozen cranberries to make this sauce. Make sure to look for plump and firm cranberries and pass on any that look dull, mushy, or wrinkled.
  • Sugar: Cranberries are incredibly tart on their own, so we’ll need a good dose of sugar to balance their tart flavor.
  • Water: A little water helps the cranberries boil and creates a saucy texture with the sugar.
  • Orange: This ingredient is optional, but I find that the addition of a little orange juice and a pinch of orange zest really adds a nice little dose of freshness on top of the bright cranberry flavor.

Sugar Substitutions

If you don’t want to use white sugar in your cranberry sauce, you can substitute the sugar with honey or maple syrup, keeping in mind that they will produce slightly different flavors and textures in the final sauce. And while I have seen recipes that use sugar-free sweeteners, like stevia or erythritol, I have not tried making cranberry sauce with these ingredients myself.

What Else Can I Add?

This simple cranberry sauce recipe can be modified in various ways to add other flavors. Here are some other ingredients you can add to cranberry sauce to make it your own:

  • Jalapeños
  • Red wine
  • Apples
  • Figs
  • Raspberries
  • Cinnamon or Nutmeg
  • Vanilla extract
  • Cloves
  • Ginger
  • Balsamic vinegar

How to Store Leftovers

This cranberry sauce holds up beautifully in the refrigerator, so feel free to make it a day or two ahead of your Thanksgiving meal. It will stay good in the refrigerator for about 4-5 days, or you can freeze it for up to three months.

How to Use Cranberry Sauce

We all know and love cranberry sauce with Thanksgiving turkey, but it’s also awesome served in other ways! Try adding it to chicken, stirring it into your oatmeal, adding it on top of buttered toast or an English muffin, on top of a bagel with cream cheese, or even on some vanilla ice cream! And you can use it to make my favorite Cranberry Cream Cheese Dip for New Year’s Eve. ;)

Overhead view of cranberry sauce in a bowl with orange zest and a spoon.
Thickened cranberry sauce in the pot being stirred.
Print

Homemade Cranberry Sauce

This easy three ingredient homemade cranberry sauce is fast, flavorful, and the perfect addition to your Thanksgiving meal!
Course Dinner, Sauce, Side Dish
Cuisine American
Total Cost $3.17 recipe / $0.53 serving
Prep Time 5 minutes
Cook Time 15 minutes
Total Time 20 minutes
Servings 6 (1/2 cup each)
Calories 93kcal

Ingredients

  • 12 oz. fresh or frozen cranberries $2.00
  • 1/2 cup sugar $0.18
  • 1 cup water $0.00
  • 1 small orange $0.99

Instructions

  • Add the sugar and water to a medium saucepot. Stir to combine. Bring the water to a boil over medium heat, stirring to dissolve the sugar.
  • Rinse the cranberries, then add them to the boiling sugar water, and place a lid on top. Allow the water to come back up to a boil, at which point the cranberries will begin to pop.
  • Once all the cranberries have popped, remove the lid, give it a stir, and turn the heat down to medium-low. Let the pot continue to simmer over medium-low heat for 5-7 minutes, stirring occasionally, or until the cranberries have completely broken down and the mixture has thickened. You can simmer longer if you prefer an extra thick cranberry sauce.
  • While the cranberries simmer, zest and juice the orange
  • Once the cranberry sauce has thickened, remove it from the heat and stir in2 Tbsp orange juice and 1/4 tsp zest to the sauce. Allow the sauce to cool slightly, then serve.

See how we calculate recipe costs here.

Video

Nutrition

Serving: 0.5cup | Calories: 93kcal | Carbohydrates: 24g | Protein: 0.3g | Fat: 0.1g | Sodium: 3mg | Fiber: 2g

Try serving this homemade cranberry sauce over a wheel of baked brie for an extra special holiday treat!

How to Make Homemade Cranberry Sauce – Step by Step Photos

Water being poured into a pot with sugar.

Start by adding 1/2 cup sugar and 1 cup water to a medium sauce pot. Stir to combine, then place the pot over medium heat and allow it to come to a boil.

Fresh cranberries added to the pot with the water and sugar.

While waiting for the water and sugar to boil, rinse one 12oz. package of fresh cranberries. You can actually use either fresh or frozen cranberries for this recipe. If using frozen, just allow them to thaw first. Add the rinsed cranberries to the boiling sugar water. Place a lid on top and allow it to return to a boil. 

Half boiled cranberries in the pot.

When the pot returns to a boil the cranberries will begin to pop (that’s why you need a lid). Once all of the cranberries have popped, remove the lid, give it a good stir, and reduce the heat to medium-low.

Thickened cranberry sauce being stirred.

Continue to let the cranberries simmer over medium-low, without a lid, until they have broken down and thickened (about 5-7 minutes). Stir the mixture occasionally as it simmers.

Juiced and zested orange.

While the cranberries are simmering, zest and juice one small orange. You’ll only need about ¼ tsp zest and 2 Tbsp juice unless you really like citrus and then you can measure with your heart!

Zest and juice added to the pot.

Stir the juice and zest into the cooked cranberry sauce.

Finished cranberry sauce in the pot.

Stir everything together then let it cool slightly (it will thicken as it cools). Then it’s ready to serve! You can make this a day or two ahead of time if needed.

Thickened cranberry sauce in the pot being stirred.

Fresh cranberry sauce is so delicious and you can put it on just about anything. Of course, it is good on all of the usual Thanksgiving items but don’t forget it on your turkey sandwich the next day! Because it is so jam-like it’s also amazing on a piece of toast with butter in the morning. Try it over ice cream too! What do you put your cranberry sauce on?

A bowl of thick cranberry sauce ready for serving on your holiday table

The post Homemade Cranberry Sauce appeared first on Budget Bytes.

Homemade Tartar Sauce

Homemade tartar sauce is incredibly easy to make and pairs perfectly with any baked or fried fish or seafood.

The post Homemade Tartar Sauce appeared first on Budget Bytes.

I’m always on a quest to reduce the number of half-used bottles of sauce in my fridge (the struggle is real…) Instead of buying every single sauce under the sun, I keep a few basic condiments on hand so I can make any other homemade sauce whenever I want and in whatever quantity I need. This Homemade Tartar Sauce is the perfect example. I don’t eat tartar sauce often, but when enjoying homemade fish sticks it’s an absolute must! It takes just a few minutes to whip up, uses only six (or less!) pantry and fridge staples, and I can make any amount that I need with NO leftovers. #win

Overhead view of a bowl of tartar sauce on a plate of fish sticks, being stirred with a spoon.

What is Tartar Sauce?

Tartar sauce is a rich and tangy mayonnaise-based sauce that is perfect for serving with any type of fish or seafood. It’s incredibly simple to make, and you might just have all of the ingredients on hand!

Ingredients for Tartar Sauce

Here are the ingredients for our super easy homemade tartar sauce recipe:

  • Mayonnaise: This is the rich and creamy base for tartar sauce. You can use your favorite brand, but I usually lean towards Hellmann’s or Dukes.
  • Plain Yogurt (optional): I like to do a half-and-half mix of mayonnaise and yogurt because the yogurt lightens up the sauce just a bit and makes the flavor slightly brighter. You can use all mayo if you prefer a richer sauce. You can use regular-style yogurt for a thinner tartar sauce, or Greek-style yogurt for a thicker tartar sauce.
  • Dijon Mustard: Dijon adds a nice tanginess to the tartar sauce, plus a little complexity to the flavor.
  • Lemon Juice: Lemon and fish are BFF’s, so a little lemon juice in the mix helps the tartar sauce pair perfectly with the seafood and it helps cut the heaviness of the mayo.
  • Dill Relish: Relish gives the sauce some much-needed texture and the dill flavor goes perfectly with lemon.
  • Dried Dill: We’re doubling down on the dill flavor with a little more dried dill. It amps up the flavor and adds a little more color to the sauce.

What Else Can I add?

This easy tartar sauce recipe is a great base that can then be modified to fit your taste buds or other ingredients you may have on hand. Try adding these ingredients to customize your tartar sauce:

  • Try adding a dash or two of hot sauce or a small spoonful of horseradish for some kick!
  • Got leftover capers? Stir them in for some extra briney flavor.
  • Finely diced red onion would add even more crunch and savory flavor.
  • Add a dash of Worcestershire sauce for some more umami.
  • Add a tablespoon of freshly chopped parsley for more freshness.

How to Serve Tartar Sauce

Tartar sauce is obviously great with Homemade Fish Sticks, but it’s also delicious with Chicken Nuggets, Steak Fries, Garlic Butter Shrimp, or Tuna Patties. And since it’s simply a lemon-dill flavored mayonnaise, it could also be used as a spread on sandwiches and wraps!

Overhead view of a bowl full of tartar sauce with lemons on the side.
Overhead view of a bowl of tartar sauce with a spoon, on a plate of fish sticks.
Print

Tartar Sauce

Homemade tartar sauce is incredibly easy to make and pairs perfectly with any baked or fried fish or seafood.
Course Dip, Sauce, Side Dish
Cuisine American
Total Cost $1.65 recipe / $0.33 serving
Prep Time 5 minutes
Total Time 5 minutes
Servings 5 (about ¼ cup each)
Calories 174kcal

Ingredients

  • 1/2 cup mayonnaise $0.67
  • 1/4 cup plain yogurt* $0.53
  • 1/4 cup dill relish $0.32
  • 1 Tbsp Dijon mustard $0.02
  • 1 Tbsp lemon juice $0.06
  • 1/2 tsp dried dill $0.05

Instructions

  • Add all of the ingredients to a bowl and stir to combine. Serve immediately or refrigerate for up to five days.

See how we calculate recipe costs here.

Notes

*You can use regular style yogurt for a thinner sauce, or Greek style yogurt for a thicker sauce. Or, substitute with more mayonnaise for an ultra rich and thick tartar sauce.

Nutrition

Serving: 0.25cup | Calories: 174kcal | Carbohydrates: 4g | Protein: 1g | Fat: 17g | Sodium: 314mg | Fiber: 0.3g
A bowl of homemade tartar sauce on a plate of fish sticks with lemons on the side.

How to Make Tartar Sauce – Step By Step Photos

Tartar sauce ingredients in a bowl not stirred together.

All you have to do to make tartar sauce is stir together ½ cup mayonnaise, ½ cup plain yogurt (or just do 1 cup total mayonnaise), ¼ cup dill relish, 1 Tbsp Dijon mustard, 1 Tbsp lemon juice, and ½ tsp dried dill.

Finished tartar sauce in a bowl with a spoon.

Stir it all together and you’re good to go! You can store this sauce in the fridge for up to five days. If you prefer a thicker tartar sauce, use Greek-style yogurt, or skip the yogurt and use all mayonnaise.

A fish stick being dipped into a bowl of tartar sauce.

Serve with your favorite seafood, roasted vegetables, or even as a sandwich spread!

The post Homemade Tartar Sauce appeared first on Budget Bytes.

Cherry Sauce

Make this easy and delicious Cherry Sauce recipe for a sweet and tart topping for your favorite desserts or as a filling for Cherry Turnovers!

The post Cherry Sauce appeared first on Budget Bytes.

This sweet and tart Cherry Sauce is a delicious and simple way to add a fantastic finishing touch to your desserts. It’s ridiculously versatile and an absolute knockout drizzled over ice cream, cakes, or pancakes. This easy Cherry Sauce recipe is made with frozen sweet cherries, so it’s also incredibly budget-friendly. But you can also use fresh sweet cherries, which are really easy on your wallet when they’re in season. Win!!

Overhead view of a glass dish full of cherry sauce.

What Is Cherry Sauce?

Cherry Sauce is a tangy syrupy dessert dressing made with fresh or frozen cherries. It can be served warm or cold as a topping for ice creams, pancakes, waffles, flan, and cheesecake. This easy cherry sauce recipe is also wonderful drizzled over chocolate, lemon, and vanilla cakes! It can also be used as a filling for Cherry Pie and Cherry Turnovers. (OMG, am I making a Cherry Sauce-inspired dessert table at my next brunch? Don’t doubt it!)

Ingredients For Cherry Sauce

I love that you can cook this yummy Cherry Sauce in about fifteen minutes with very minimal effort. And then all you have to do is not eat it all in before you pour it over your favorite dessert. (That’s a lot harder than it sounds. Trust.) Here’s what you’ll need to make this easy Cherry Sauce recipe:

  • Sweet Cherries: have more sugar and less acidity than tart cherries. They’re usually labeled Dark Sweet Cherries. You can use fresh or frozen dark sweet cherries or mixed variety cherries. If you use tart cherries (usually a lighter brighter red) you’ll have to up the sugar content of this sauce by 2 to 4 tablespoons of sugar, depending on the tartness of the fruit.
  • Sugar: Helps to sweeten the sauce and balance out the natural tartness of cherries. We use granulated white sugar but feel free to use brown sugar for deeper caramel notes.
  • Lemon: The zest adds a nice citrus note to the sauce while the juice also adds flavor and naturally thickens the sauce with pectin.
  • Cornstarch: helps thicken the sauce and gives it a glossy finish.

What To Serve With Cherry Sauce

Cherries pair perfectly with the flavor of almonds, lemon, orange, cream, caramel, cheese, vanilla, and chocolate. These are just a few of the recipes it will take over the top:

How To Store Cherry Sauce

Once the sauce has cooled, refrigerate it in an airtight container. It will keep for up to 2 weeks. You can also freeze Cherry Sauce. Store it in an airtight container with plastic or beeswax wrap directly on the surface of the sauce. It will keep for up to 3 months. Then, thaw it out in your refrigerator overnight.

Cherry sauce being drizzled over a piece of cheesecake.
Overhead view of cherry sauce in a glass dish.
Print

Cherry Sauce

Make this easy and delicious Cherry Sauce recipe for a sweet and tart topping for your favorite desserts or as a filling for Cherry Turnovers!
Course Dessert
Cuisine American
Total Cost $3.88 recipe / $0.24 serving
Prep Time 5 minutes
Cook Time 10 minutes
Total Time 15 minutes
Servings 16 (2 Tbsp each)
Calories 37kcal

Ingredients

  • 2 cups frozen or fresh sweet cherries $3.33
  • ½ cup sugar $0.22
  • 1 pinch salt $0.01
  • 1 lemon $0.30
  • 1 Tbsp cornstarch $0.03
  • 3/4 cup water $0.00

Instructions

  • Place a medium-sized pot over medium heat. Add cherries, sugar, salt, and 1/2 cup of water. Stir to incorporate and bring the mixture to a soft boil.
  • Use a vegetable peeler to zest the lemon in long strips. Then juice the lemon. Add the zest and just 1/2 tablespoon of the lemon juice to the pot. Stir to incorporate.
  • In a separate bowl, mix the cornstarch into the remaining 1/4 cup of water until it is completely dissolved and creates a slurry. Add the cornstarch slurry and stir until incorporated. Boil the sauce for at least one more minute to activate the cornstarch.
  • Continue to stir until the syrup in the cherry sauce is bubbling softly and has thickened enough to coat the back of a spoon. Take the cherry sauce off the heat, allow it to cool, and remove the strips of lemon zest. It will thicken as it cools. Enjoy!

See how we calculate recipe costs here.

Nutrition

Serving: 2Tbsp | Calories: 37kcal | Carbohydrates: 10g | Protein: 0.2g | Fat: 0.1g | Sodium: 3mg | Fiber: 0.4g

How to Make Cherry Sauce – Step by Step Photos

Cherries, sugar, and water in a sauce pot.

Place a medium-sized pot over medium heat. Add 2 cups frozen cherries, 1/2 cup sugar, 1 pinch of salt, and 1/2 cup of water. Stir to incorporate and bring the mixture to a soft boil.

Lemon peels added to the sauce pot.

Use a vegetable peeler to zest 1 lemon in long strips. Then juice the lemon. Add the zest and just 1/2 tablespoon of the lemon juice to the pot.

Cornstarch slurry being added to the sauce.

In a separate bowl, mix the cornstarch into the remaining 1/4 cup of water until it is completely dissolved and creates a slurry. Add the cornstarch slurry and stir until incorporated. Boil the sauce for at least one more minute to activate the cornstarch.

Finished cherry sauce coating the back of a spoon.

Continue to stir until the syrup in the cherry sauce is bubbling softly and has thickened enough to coat the back of a spoon. Take the cherry sauce off the heat, allow it to cool, and remove the strips of lemon zest. It will thicken as it cools. Enjoy!

Finished cherry sauce in a glass dish, viewed from the side.

The post Cherry Sauce appeared first on Budget Bytes.

Mayo Ketchup

Sweet and tangy Mayo Ketchup is a perfect dipping sauce for fried food and is also a fantastic sandwich spread, salad dressing, or marinade.

The post Mayo Ketchup appeared first on Budget Bytes.

Sweet and tangy Mayo Ketchup may be the perfect dipping sauce you’ve never heard of. This zesty blend of mayonnaise and ketchup is traditionally a dip for Tostones and other Puerto Rican delicacies. (Don’t you dare put fried food on a Puerto Rican table without Mayo Ketchup, homie!) But it’s also fabulous used as a sandwich spread, a salad dressing, or a marinade. Did I mention this mayo Ketchup recipe is ridiculously easy to make?

Overhead shot of Mayo ketchup in a small white bowl surrounded by tostones.

What Is Mayo Ketchup?

A staple of the Puerto Rican table, Mayo Ketchup is also a popular condiment in many different countries, where it can be known as fry sauce, salsa rosada, or pink sauce. The combination of mayonnaise and ketchup creates a rich and creamy dressing with slightly honeyed and tart notes. The two ingredients complement each other perfectly, creating a sauce that is surprisingly flavorful and versatile, like Snoop Dog and Martha Stewart.

Ingredients For Mayo Ketchup

You can now find this delicious concoction at many supermarkets, but making your own is much cheaper. Plus, you can doctor it up with a few extra ingredients to make it your own. Sometimes I add a sprinkle of adobo seasoning for depth and grate a fresh garlic clove to add pungency. Here’s what you’ll need to make a basic Mayo Ketchup:

  • Mayonnaise: adds richness and body to the sauce. Feel free to use vegan mayo here, if you’re plant-based.
  • Ketchup: provides sweetness and acidity. It also gives the sauce its signature salmon pink color.
  • Hot Sauce: adds a spicy kick. Use your favorite brand. Hot pepper brine is also fantastic. In a pinch, add a sprinkle of cayenne pepper.

What TO PAIR With It

Mayo Ketchup is a perfect dip for anything fried, and Tostones are an uber-traditional pairing. You can also try it with Air Fryer Fried Chicken, Oven Baked Steak Fries, and Baked Zucchini Fries. PS I love it as a spread on Tomato Sandwiches(stand down, traditionalists!) or a Smash Burger.

Side shot of toston being dipped in Mayo Ketchup in a small white bowl.
Overhead shot of Mayo ketchup in a small white bowl surrounded by tostones.
Print

Mayo Ketchup

Sweet and tangy Mayo Ketchup is a perfect dipping sauce for fried food and is also a fantastic sandwich spread, salad dressing, or marinade.
Course Dip
Cuisine Latin
Total Cost ($0.64 recipe / $0.16 serving)
Prep Time 1 minute
Total Time 1 minute
Servings 4 servings
Calories 103kcal

Ingredients

  • 1/4 cup mayonnaise $0.40
  • 2 Tbsp ketchup $0.10
  • 1 tsp hot sauce $0.14

Instructions

  • Add mayonnaise, ketchup, and hot sauce to a small bowl.
  • Mix ingredients until no white streaks remain. Use right away or refrigerate in an airtight container for up to 30 days.

See how we calculate recipe costs here.

Nutrition

Serving: 1serving | Calories: 103kcal | Carbohydrates: 2g | Protein: 0.2g | Fat: 10g | Sodium: 183mg | Fiber: 0.02g

How to Make Mayo Ketchup – Step by Step Photos

Overhead shot of Mayo Ketchup ingredients in a small white bowl surrounded by tostones.

To a small bowl add 1/4 cup mayonnaise, 2 tablespoons ketchup, and 1 teaspoon hot sauce.

Overhead shot of sauce in a small white bowl.

Mix ingredients until thoroughly combined and no white streaks remain. Use right away or refrigerate in an airtight for up to 30 days. Serve with your favorite crispy fried or oven-baked foods. Tostones are my favorite but the possibilities are endless!

Side shot of toston being dipped in Mayo Ketchup in a small white bowl.

More Easy Dipping Sauces

The post Mayo Ketchup appeared first on Budget Bytes.

Bolognese

Bolognese, the dreamy (and easy) Italian meat sauce, pairs with more than pasta. Work it into baked potatoes, bell peppers, rice, or nachos!

The post Bolognese appeared first on Budget Bytes.

There’s something incredibly satisfying about letting bolognese, the famous Italian meat sauce, simmer on the stove for hours, perfuming your whole house with its meaty aromas. Sigh! While this bolognese recipe is usually served with hearty pasta, you can also work it into baked potatoes, bell peppers, or nachos! I loved it so much that I ate it with rice. (Editor’s note: Dear Beth, have I ever said anything more Puerto Rican?)

Overhead shot of bolognese in a beige Dutch oven with a wood spoon in it.

What Is Bolognese?

Bolognese is the traditional meat sauce of Bologna, Italy. It’s mostly ground beef with a bit of pork thrown in, stewed in tomatoes, with a touch of milk and butter added to round out the sauce’s acidity. You won’t find aromatics like rosemary, garlic, oregano, or bay leaves in traditional bolognese. Flavors are developed over a long simmer.

What You’ll Need

Our bolognese recipe is not traditional. To keep things budget-friendly, we omitted the pork that’s usually paired with ground beef. Instead, we used a bit of garlic to add depth. Here’s what you’ll need to make bolognese.

  • Soffritto– the lightly fried flavor base of many Italian dishes. It’s simply sauteed carrots, celery, and onion.
  • Ground Beef– because, after all, it is a meat sauce. The beef should be fatty. Lean beef does not work well for this recipe.
  • Milk and Butter– adding dairy to the sauce helps round out the acidity of the tomatoes.
  • Wine– you can use red or white. But if you use red, the sauce must cook much longer to mellow the flavor. White wine cooks down much faster, which is why I used it in this recipe. If you don’t want to use wine, substitute it with white grape juice with a bit of white vinegar.
  • Crushed Tomatoes– traditional bolognese uses pureed fresh tomatoes that take many hours to break down into a sauce. We opted for canned crushed tomatoes for time’s sake and for their budget-friendliness. But feel free to use fresh if you prefer.
  • Garlic– this is not a traditional ingredient. I added garlic to the recipe to create dimension since our sauce does not simmer all day and does not contain pork. If you want to keep it strictly traditional, omit the garlic, and let the sauce simmer for a few more hours.
Overhead shot of bolognese served over rotini in a white bowl with a wood spoon in it.

What’s the Difference Between Bolognese and Meat Sauce?

The biggest difference between Bolognese and meat sauce is the ratio of meat to tomato. Bolognese is technically a meat sauce, or as they say in Italy, ragù. It differs from American meat sauce because it has a higher ratio of beef to tomato, making it much thicker. It’s also creamier as it’s made with a touch of milk.

How To Make Bolognese Taste Better

  • Use a large heavy-bottomed pot. A Dutch oven is perfect, as it retains heat and simmers ingredients without scorching them.
  • Chop the onions, carrots, and celery into small dice. Ensuring all veg is the same size helps them melt into the sauce and creates deeper flavor.
  • Be patient. Bolognese is a long game. Cook at a simmer for a minimum of 3 hours. Do not boil.
Side shot of bolognese served over rotini in a white bowl.

What To Serve With Bolognese

If you’re looking for some great budget-friendly dishes to serve with bolognese, I’ve got you covered! Try any of these Budget Bytes favorites:

How To Store Bolognese

Store the sauce in an airtight container, preferably glass or ceramic, as it stains plastic. It will keep in the fridge for up to 4 days and in the freezer for up to 3 months. If you’re freezing bolognese, try doing so in portions, so you only thaw it once. Reheat on the stovetop over medium heat, or in the microwave until it starts to steam. If microwaving it, top it with a paper towel over it so it doesn’t splatter everywhere.

Side shot of bolognese in a beige Dutch oven with a metal spoon in it.
Overhead shot of bolognese in a beige Dutch oven with a wood spoon in it.
Print

Bolognese

Bolognese, the dreamy (and easy) Italian meat sauce, pairs with more than pasta. Work it into baked potatoes, bell peppers, rice, or nachos!
Course Dinner
Cuisine Italian
Total Cost $10.28 recipe / $1.29 serving
Prep Time 10 minutes
Cook Time 3 hours 20 minutes
Total Time 3 hours 30 minutes
Servings 8 cups
Calories 280kcal

Equipment

Ingredients

  • 4 Tbsp butter, divided $0.56
  • 1 medium onion, diced $0.38
  • 1/2 tsp salt, divided $0.01
  • 2 stalks celery, diced $0.48
  • 1 large carrot, diced $0.18
  • 2 cloves garlic, minced $0.11
  • 1 lb ground beef, 80/20 $5.49
  • 1/4 tsp pepper $0.01
  • 1 cup milk $0.23
  • 1 cup wine (red or white) $1.14
  • 28 oz crushed tomatoes $1.69

Instructions

  • Place a heavy-bottomed pot over medium heat. Add butter to the pan. When the butter foams, add the onion and 1/4 teaspoon salt. Sautée until translucent.
  • Add the celery and carrot and sautée for two minutes, until they have softened some.
  • Next, add the garlic and sautée until fragrant, about 1 minute
  • Add the ground beef and pepper. Brown the beef, breaking it up with a wooden spoon as it cooks.
  • Once the beef has browned, add the milk, wine, and the remaining 1/4 teaspoon salt. Stir occasionally and simmer until the liquid has evaporated completely.
  • Add the crushed tomatoes. Mix until incorporated. Lower the heat as soon as the tomatoes come up to a boil.
  • Cook, uncovered, for 3 hours. Stir occasionally. If the sauce dries out, stir in a half cup of water. Once it is finished, taste for salt and pepper.

See how we calculate recipe costs here.

Nutrition

Serving: 1cup | Calories: 280kcal | Carbohydrates: 12g | Protein: 13g | Fat: 18g | Sodium: 386mg | Fiber: 3g
Overhead shot of bolognese served over rotini in a white bowl with a wood spoon in it.

How to Make Bolognese – Step by Step Photos

Overhead shot of onion in Dutch oven.

Place a heavy-bottomed pot (like a Dutch oven) over medium heat. Add 4 tablespoons of butter to the pan. When the butter foams, add 1 medium diced onion and 1/4 teaspoon salt. Sautée until translucent.

Overhead shot of celery, onion, and carrot in Dutch oven.

Add the 2 stalks of diced celery and the diced carrot and sautée for two minutes, until they have softened some.

Overhead shot of garlic being added to the veg.

Next, add the 2 cloves of minced garlic and sautée until fragrant, about 1 minute.

Overhead shot of sauteed veg with ground beef in it.

Add the pound of ground beef and 1/4 teaspoon of pepper. Brown the beef, breaking it up with a wooden spoon as it cooks.

Overhead shot of sauteed beef and veg with milk in it.

Once the beef has browned, add the cup of milk, the cup of wine, and the remaining 1/4 teaspoon salt. Stir occasionally and simmer until the liquid has evaporated completely.

Overhead shot of crushed tomatoes being poured into the browned meat.

Add the 28-ounce can of crushed tomatoes. Mix until incorporated. Lower the heat as soon as the tomatoes come up to a boil.

Overhead shot of bolognese in a beige Dutch oven with a wood spoon in it.

Cook, uncovered, for 3 hours. Stir occasionally. If the sauce dries out, stir in a half cup of water. Once it is finished, taste for salt and pepper and adjust the seasoning. Serve this over hearty pasta like tagliatelle, pappardelle, or rotini. You can also pair it with a baked potato, stuff it into a bell pepper, or serve it over rice or nachos!

The post Bolognese appeared first on Budget Bytes.

Homemade Caesar Dressing

This rich, tangy, and flavorful homemade Caesar dressing is easy to prepare, and will take all your homemade salads to the next level.

The post Homemade Caesar Dressing appeared first on Budget Bytes.

Is there anything quite like the rich, tangy, and umami-filled flavor of Caesar dressing? It’s no wonder Caesar salads are relatively simple. With a dressing like that, you don’t need much else! Homemade Caesar dressing is also very simple, despite its complex flavor, so don’t shy away from making it yourself at home. Our simple recipe takes has all that bold flavor you’ll find with a restaurant dressing made with just a few simple ingredients (and maybe just one special ingredient 😉).

Overhead view of Caesar dressing being poured over a salad.

What is Caesar Dressing?

Caesar dressing is a rich and tangy dressing with strong savory and umami flavors balanced with bright acidity and flecks of vibrant black pepper. It’s typically served over a simple bed of crisp Romaine lettuce, with freshly grated Parmesan, croutons, and sometimes a protein like chicken, salmon, or shrimp.

Ingredients for Caesar Dressing

You only need a few simple ingredients to make homemade Caesar dressing, and our version is even faster and easier thanks to the use of mayonnaise instead of making our own egg and oil emulsion. Here’s what you’ll need to make your own homemade Caesar dressing:

  • Garlic: Fresh garlic provides both a savory flavor and a little kick of heat to the dressing.
  • Anchovies: These little fish add a ton of deep umami flavor to this dressing, which really sets it apart from other creamy salad dressings. And don’t worry, it doesn’t make the dressing taste like fish! It just adds some subtle, deep, savory flavor.
  • Lemon: You’ll use both the juice and zest from a fresh lemon for this recipe. The juice provides acidity, while the zest adds a nice fresh flavor to balance the savory anchovies.
  • Mayonnaise: Making Caesar dressing from scratch usually involves emulsifying egg and oil to make a creamy dressing base, but we took a shortcut by using mayonnaise, which is pre-emulsified egg and oil! Easy peasy!
  • Dijon Mustard: Dijon adds another layer of slightly tangy flavor to the dressing.
  • Parmesan: Nutty Parmesan cheese makes the dressing even more rich, and punches up the umami flavor even more.
  • Black Pepper: Flecks of spicy black pepper add pops of flavor to Caesar dressing so that no bite is boring!

How to Store Caesar Dressing

Homemade Caesar dressing can be stored in the refrigerator in an air-tight container for 4-5 days. If you don’t think you can eat the entire batch within that time, use the serving adjuster in the recipe below to make a half batch and reduce waste. We don’t recommend freezing homemade Caesar dressing as it will likely separate upon thawing.

How to Use Caesar Dressing

Caesar salads are the obvious way to use Caesar dressing, but this mouth-wateringly delicious homemade dressing is great on a lot more than just salad! So don’t let your leftover dressing go to waste. Try using Caesar dressing in these creative ways:

  • Drizzle over roasted vegetables
  • Use it a sandwich spread
  • Use it as a dressing for pasta salad
  • When breading chicken or fish, use Caesar dressing in place of the eggwash
  • Toss chicken wings in Caesar dressing instead of buffalo sauce
  • Use it in the place of dressings for chicken and tuna salads, or coleslaw
Caesar dressing dripping off a spoon into a jar.
Print

Homemade Caesar Dressing

This rich, tangy, and flavorful homemade Caesar dressing is easy to prepare, and will take all your homemade salads to the next level.
Course Salad
Cuisine American
Total Cost $2.71 recipe / $0.34 serving
Prep Time 10 minutes
Total Time 10 minutes
Servings 8 2 Tbsp each
Calories 117kcal

Ingredients

Instructions

  • Zest and juice the lemon. You'll need about 3 Tbsp juice and 1 tsp lemon zest. Mince the garlic and anchovy filets. Reserve about ½ tsp of the oil from the anchovy container.
  • Add the lemon juice, zest, minced garlic, minced anchovies, anchovy oil, and pepper to a boil. Whisk to combine.
  • Add the Dijon, mayonnaise, and grated Parmesan and whisk to combine again. Taste the dressing and adjust the ingredients to your liking. Serve with a fresh salad or you favorite foods.

See how we calculate recipe costs here.

Nutrition

Serving: 2Tbsp | Calories: 117kcal | Carbohydrates: 1g | Protein: 2g | Fat: 12g | Sodium: 240mg | Fiber: 0.2g
Homemade Caesar dressing in a bowl with a whisk.

How to Make Homemade Caesar Dressing – Step by Step Photos

Lemon juice, zest, anchovies, garlic, and pepper in a bowl.

Zest and juice one lemon. Mince three cloves of garlic, and mince three anchovies. Add the lemon juice (about 3 Tbsp), zest (about 1 tsp), minced garlic, minced anchovies, ½ tsp of the anchovy oil from the package, and ¼ tsp freshly cracked black pepper to a bowl. Whisk to combine.

Mayonnaise, Dijon, and Parmesan added to the bowl.

Add 2 Tbsp Dijon mustard, ½ cup mayonnaise, and ¼ cup grated Parmesan cheese.

Whisked Caesar dressing in a bowl with a whisk.

Whisk the dressing until smooth. Taste and adjust the ingredients to your liking.

Caesar dressing being poured over a salad.

Pour the dressing over your favorite salad or vegetables, spread it onto a sandwich, or use it as a dip for any of your favorite foods!

Caesar dressing dripping off a spoon into a jar.

SO GOOD! 🤤

The post Homemade Caesar Dressing appeared first on Budget Bytes.

Easy Nacho Cheese

This easy no-roux nacho cheese sauce recipe is smooth, melty, and absolutely fool-proof. Great for nachos, vegetables, and more!

The post Easy Nacho Cheese appeared first on Budget Bytes.

Our original 5-Minute Nacho Cheese Sauce has been a reader favorite for years, but the traditional cheese sauce method using a flour and butter roux can be a bit tricky for new cooks. But everyone deserves to have a ooey-gooey cheese sauce, even if you’re new in the kitchen. 😉 So here’s a super simple no-roux nacho cheese sauce that only requires a few simple ingredients and is guaranteed to bee smooth and delicious every time. Promise!

A plate of nachos with pickled jalapeño and a hand taking one chip.

The Science of Cheese Sauces

Cheese sauces can be tricky for new cooks because the fat in cheese and the water in milk tend to repel each other, making it difficult for them to melt together into a smooth sauce. To get around this oil and water conundrum you can do two things: use an emulsifier (a molecule that attracts both water and oil) or use a milk product with very little water content so the fat isn’t repelled.

Traditional cheese sauces use a mix of flour and butter that act as the emulsifier, but this technique can be a little tricky. For this nacho cheese sauce recipe, we just eliminate most of the water to begin with by using evaporated milk instead of whole milk. The fat and proteins in the evaporated milk combine seamlessly with the fat in the cheese, making a smooth and creamy sauce with no special tricks needed!

Do I Have to Use Evaporated Milk?

The low water content of the evaporated milk is what allows the cheese to melt into the sauce smoothly without using an emulsifier. Another low-water option to use in place of the evaporated milk is heavy cream, although that will create an extremely rich cheese sauce. Regular milk is far too watery and will not work for the method presented below. Instead, in order to make nacho cheese with milk you’ll need to use the technique used in our 5-Minute Nacho Cheese Sauce.

What Kind of Cheese Is Best for Nacho Cheese

Sharp cheddar gets my vote for nacho cheese. It melts smoothly without being stringy, while having a nice flavorful punch. You can use mild or medium cheddar if you prefer, but the flavor will be a bit blander. Monterey jack and pepper jack also melt really well into sauces and make a great white nacho cheese sauce.

And ALWAYS buy block cheese and shred it yourself for cheese sauces rather than buying pre-shredded cheese, which is coated in anti-caking agents and will not melt as smoothly.

How to Serve Nacho Cheese

On nachos, of course! But you can also use this thick and smooth cheese sauce on many other dishes. Dry pouring it over vegetables (like broccoli or asparagus), bowl meals, mashed, roasted, or baked potatoes, or even pasta for a quick mac and cheese dupe!

Can It Be Reheated?

One of the other benefits of using evaporated milk is that it makes this cheese sauce very stable. This sauce reheats well over low heat without separating (just don’t over heat it or the cheese will break!). You can also keep it warm for parties using the low setting on a slow cooker.

close up side view of a plate of nachos with jalapeños.
Overhead view of a plate of nachos with a hand stealing one chip.
Print

Easy Nacho Cheese

This easy no-roux nacho cheese sauce recipe is smooth, melty, and absolutely fool-proof. Great for nachos, vegetables, and more!
Course Appetizer
Cuisine American
Total Cost $3.62 recipe / $0.45 serving
Prep Time 5 minutes
Cook Time 10 minutes
Total Time 15 minutes
Servings 8 ¼ cup each
Calories 160kcal

Equipment

Ingredients

  • 8 oz. sharp cheddar $2.49
  • 1 cup evaporated milk $1.00
  • 1/4 tsp chili powder $0.02
  • 1 Tbsp pickled jalapeño brine (optional) $0.10
  • 1/8 tsp salt $0.01

Instructions

  • Shred the cheddar cheese.
  • Add the evaporated milk and chili powder to a sauce pot and heat over medium. Allow the evaporated milk to come up to a simmer.
  • Reduce the heat to low and start adding the shredded cheese, one handful at a time, stirring it in until fully melted before adding another handful. Continue until all of the cheese has been melted into the sauce.
  • Add the pickled jalapeño brine and stir to combine. Give the nacho cheese a taste and add a pinch of salt, if needed. Enjoy the cheese poured over your favorite foods!

See how we calculate recipe costs here.

Nutrition

Serving: 0.25cup | Calories: 160kcal | Carbohydrates: 4g | Protein: 9g | Fat: 12g | Sodium: 284mg | Fiber: 0.02g
Nacho cheese running off a spoon into a saucepot.

How to Make Nacho Cheese – Step by Step Photos

Shredded cheddar cheese on a cutting board with the cheese grater.

Start by shredding an 8 oz. block of sharp cheddar cheese. Using block cheese that you shred yourself instead of pre-shredded cheese makes a much better sauce.

Evaporated milk and spices in a saucepot being stirred.

Add one cup of evaporated milk to a sauce pot along with ¼ tsp chili powder. Heat and stir over medium-high until it comes to a simmer.

Shredded cheese being added to the evaporated milk.

When it reaches a simmer, turn the heat down to low. Begin adding the shredded cheese, one handful at a time, stirring it in until completely melted before adding the next handful.

Finished nacho cheese sauce being stirred with a spoon.

Continue adding cheese until it has all been added to the sauce. Finally, stir in 1 Tbsp brine from pickled jalapeños. Give the cheese a taste and add a pinch of salt, if needed.

Overhead view of a plate of nachos with jalapeños.

Pour your nacho cheese sauce over a plate of chips, your favorite vegetables, or just about anything. Cheese makes everything better. :P

The post Easy Nacho Cheese appeared first on Budget Bytes.

Homemade Alfredo Sauce

This thick, creamy Homemade Alfredo Sauce recipe is a quick and easy way to make a delicious, budget-friendly dinner in less than 30 minutes!

The post Homemade Alfredo Sauce appeared first on Budget Bytes.

Ditch the jar sauce and whip up your own batch of Homemade Alfredo Sauce from scratch! (And have dinner on the table in less than 30 minutes!) This easy recipe will help you make deliciously creamy pasta dishes that are way better, and cheaper, than anything you can order at Olive Garden. The best part is this recipe for Homemade Alfredo Sauce can be made ahead of time and stored in the fridge for up to 4 days!

A large white bowl filled with cooked penne pasta dressed with homemade alfredo sauce, a hand is holding the right side of the bowl and a black metal fork, various props surround the bowl including a grey striped dish cloth, a block of parmesan cheese, a wooden bowl of salt and a mason jar of alfredo sauce.

WHAT IS ALFREDO SAUCE?

This thick, creamy Alfredo Sauce—what we like to call an “Amerifredo” or an American-style alfredo sauce—is a decadent pasta sauce made with butter, garlic, heavy cream, and tons of Parmesan cheese. Authentic Roman alfredo sauce does not include any heavy cream or garlic, and it derives all of its creaminess and flavor from the butter and really good Parmesan. But if you’re used to the “alfredo” served in American restaurants or bought in a jar in U.S. grocery stores, that’s what this recipe delivers.

CAN I USE MILK INSTEAD OF CREAM?

To make Homemade Alfredo Sauce that is thick, creamy, and delicious, you need to use heavy cream. Using whole milk or half & half will not work as well because the high water content in these ingredients will not allow the Parmesan to emulsify and melt smoothly into the sauce. The sauce will end up runnier, it may not cling to the pasta as well, and it will likely be a little clumpy or gritty in texture.

#1 Tip for success? heat control.

Make sure the heat is on low before stirring in the Parmesan cheese—even taking the pot off of the burner for a minute so the cream is no longer boiling—otherwise, the sauce could break. High heat separates the proteins and fats in cheese, which will give you a lumpy, unappetizing sauce. Waiting until the cream is no longer boiling will also help prevent it from sticking to the bottom of the pot and not melting into the sauce properly.

What kind of parmesan is best for alfredo sauce?

We tested this recipe using grated Parmesan cheese (the kind in a can). It’s the most budget-friendly option, and will still give you insanely-delicious results! If you have the money to splurge, freshly shredded Parmesan will make the most creamy, dreamy Alfredo Sauce you’ve ever tasted.

tip: save your parmesan rind!

Dropping big bucks on a block of Parmesan cheese is absolutely not necessary (see above), but I do enjoy working it into my budget now and then. To make the most of every single morsel, SAVE THE RIND! Stash it in the freezer for your next soup or stew. Simply toss it in the pot while everything’s simmering and infuse the broth with rich, Parmesan flavor! (Remove it before serving…or sneak a bite when no one’s looking.) Add a leftover Parmesan rind to these soup and stew recipes:

EAT LEFTOVERS ALL WEEK!

One of the best parts about this recipe is that you can make it ahead. No more terrible re-heated leftover creamy pasta! Instead, let the alfredo sauce cool and store it in a tightly sealed container in the refrigerator for up to 4 days. Then gently reheat and add to freshly cooked pasta. 

WHAT TO SERVE WITH HOMEMADE ALFREDO SAUCE

Drench this ultra-rich sauce over plain pasta or add some chicken, shrimp, and hearty vegetables even use it in a decadently cheesy pasta bake. And make sure to serve some garlic bread and a simple side salad on the side!

A large white bowl filled with cooked penne pasta, a hand is pouring alfredo sauce in the center of the bowl from a glass mason jar in the lower left side of the image, and there are various ingredients around the bowl mostly out of frame.
A mason jar filled with alfredo sauce and a metal spoon raised above the jar after it's been dipped into the sauce so it's dripping off, and blurred in the background is a block of parmesean cheese, a bowl of uncooked pasta and some fresh italian parsley.
Print

Homemade Alfredo Sauce

This thick, creamy Homemade Alfredo Sauce recipe is a quick and easy way to make a delicious, budget-friendly dinner in less than 30 minutes!
Course Dinner, Sauce
Cuisine American, Italian
Total Cost $2.67 RECIPE / $ 0.67 SERVING
Prep Time 5 minutes
Cook Time 10 minutes
Total Time 15 minutes
Servings 4
Calories 335kcal

Ingredients

  • 2 Tbsp salted butter $0.30
  • 2 cloves garlic $0.15
  • 1 cup heavy cream $1.00
  • 1/2 tsp Italian seasoning $0.05
  • 1/2 tsp salt $0.01
  • 1/2 tsp black pepper $0.01
  • 3/4 cup Parmesan cheese $1.15

Instructions

  • Melt the butter in a medium saucepot over medium heat. Add the minced garlic and saute for two minutes or until the garlic becomes fragrant.
  • Whisk in the heavy cream, Italian seasoning, salt, and pepper.
  • Allow the cream to come up to a boil. Once boiling, reduce the heat to low and stir in the Parmesan cheese. Continue to stir the mixture until all the cheese has melted and the sauce thickens.
  • Serve over your favorite pasta, chicken, vegetables, and more!

See how we calculate recipe costs here.

Nutrition

Serving: 0.33cup | Calories: 335kcal | Carbohydrates: 5g | Protein: 7g | Fat: 32g | Sodium: 680mg | Fiber: 0.2g
A large white bowl filled with cooked penne pasta dressed with homemade alfredo sauce, a hand is holding the right side of the bowl and a black metal fork, various props surround the bowl including a grey striped dish cloth, a block of parmesan cheese, a wooden bowl of salt and a mason jar of alfredo sauce.

How to Make Homemade alfredo sauce – Step by Step Photos

Garlic being sautéed in melted butter and stirred with a balloon whisk in a stainless steel skillet on a white marble backdrop.

Melt 2 Tablespoons of butter in a medium saucepot over medium heat. Add 2 minced garlic cloves and saute for two minutes or until the garlic becomes fragrant.

Heavy cream being poured into the left side of a stainless steel skillet with sauteed garlic, salt, pepper and italian season in seperate piles on the right side of the skillet.

Whisk in 1 cup of heavy cream, 1/2 teaspoon of Italian seasoning, 1/2 teaspoon of salt, and 1/2 teaspoon of freshly-cracked black pepper into the sauteed garlic. Allow the cream to come up to a boil. (About 5 minutes.)

A hand dumping parmesan cheese from a small white bowl into the bottom right hand side of a stainless steel skillet that contains mixed heavy cream, melted butter, sauteed garlic and spices.

Once the cream is boiling, reduce the heat to low. and stir in the Parmesan cheese. If needed, take the pot off of the hot burner for a minute so the cream is no longer boiling. (High heat could cause the cheese to separate.)

A whisk sitting in a stainless steel skillet after it was used to combine parmesan cheese with heavy cream, garlic, melted butter and spices to create alfredo sauce.

Continue to stir the mixture until all the cheese has melted and the sauce thickens. (About 5 minutes.)

A hand is holding a metal serving spoon over a skillet of homemade alfredo sauce to show the thickness and consistency of the sauce once it has reduced and cooled slightly.

Serve over your favorite pasta, chicken, vegetables, or more! This homemade alfredo sauce can also be stored in an airtight container and refrigerated for up to 4 days.

A mason jar filled with alfredo sauce and a metal spoon raised above the jar after it's been dipped into the sauce so it's dripping off, and blurred in the background is a block of parmesean cheese, a bowl of uncooked pasta and some fresh italian parsley.

Oh, heck yeah! Who’s eating pasta all week?! (We definitely did!) ~ Marion :)

The post Homemade Alfredo Sauce appeared first on Budget Bytes.

Lentil Bolognese

Lentil bolognese is a rich and hearty pasta sauce that is budget-friendly and full of bold flavors. Plus, it makes tasty leftovers!

The post Lentil Bolognese appeared first on Budget Bytes.

It feels like meat is getting more and more expensive every day, y’all. But you know what is still cheap? LENTILS. 🙌 I know we’ve sung their praises a thousand times, but lentils are cheap, versatile, and will keep you full all. day. long. So they’re a great substitute for meat in bolognese, whether you’re vegan or not. This lentil bolognese is rich, hearty, full of big savory flavor, and budget-friendly!

close up side view of lentil bolognese on a plate of rigatoni being pierced with a fork.

What is Bolognese

Bolognese is a super rich Italian meat sauce reigning from the city of Bologna, Italy. Typically, this sauce starts with finely diced vegetables (onion, celery, carrot) that are cooked down with fatty beef and pork. Tomatoes or tomato sauce are added to give the ragú a tomato base, and white wine and milk are added to give the sauce extra richness. This extra lush sauce is typically served over pasta.

Because meat is getting so darn expensive these days, we decided to make a bolognese-like sauce using lentils instead of meat. The lentils make the bolognese sauce extra hearty for pennies on the dollar, and also add a great dose of fiber. We made sure to add tons of delicious herbs and spices, as well as some rich coconut milk, to make this lentil bolognese just as rich and flavorful as its meaty counterpart.

What kind of lentils to use

You’ll want to use red lentils for this recipe because they break down quickly, helping the sauce thicken up and get extra rich. They’ll retain just enough texture to feel “meaty,” without looking like lentils. The red/orange color of the cooked lentils also helps the bolognese sauce retain a nice deep red/brown color.

How to Serve Lentil Bolognese

Serve this hearty sauce over a pile of your favorite pasta, with some garlic bread and a light salad on the side. Because this sauce is so rich and thick, it pairs really well with larger pasta shapes, like rigatoni or tagliatelle because it clings well to pasta even without lots of ridges or crevices.

Overhead view of a Dutch Oven full of Lentil Bolognese.
Side view of a plate full of pasta and lentil bolognese with a fork in the side.
Print

Lentil Bolognese

Lentil bolognese is a rich and hearty pasta sauce that is budget-friendly and full of bold flavors. Plus, it makes tasty leftovers!
Course Dinner, Main Course
Cuisine Italian
Total Cost $5.58 recipe / $1.40 serving
Prep Time 10 minutes
Cook Time 45 minutes
Total Time 55 minutes
Servings 4 1 cup sauce
Calories 478kcal
Author Dalya Rubin

Equipment

Ingredients

  • 1 yellow onion $0.37
  • 1 carrot $0.15
  • 1 stalk celery $0.10
  • 2 Tbsp cooking oil $0.08
  • 4 cloves garlic $0.32
  • 1/4 tsp crushed red pepper $0.02
  • 1/2 cup finely chopped walnuts $1.07
  • 1 cup uncooked red lentils $0.67
  • 1 15oz. can crushed tomatoes $1.00
  • 3 Tbsp tomato paste $0.27
  • 1 tsp dried oregano $0.10
  • 1 tsp dried basil $0.10
  • 1 tsp garlic powder $0.10
  • 1 Tbsp sugar $0.02
  • 1/2 tsp salt $0.02
  • 1/4 tsp black pepper $0.02
  • 3 cups vegetable broth $0.36
  • 1/2 cup full-fat coconut milk $0.81

Instructions

  • Finely dice the onion, carrot, and celery. Mince the garlic.
  • Add the olive oil, onion, celery and carrot to a large pot. Sauté the vegetables for about 5 minutes over a medium until the onions are translucent and the vegetables have softened.
  • Once vegetables have softened, add the minced garlic, crushed red pepper and walnuts to the pot. Saute for 2 minutes over medium-low heat, or until the garlic is fragrant.
  • Add the lentils, crushed tomatoes, tomato paste, dried oregano, dried basil, garlic powder, salt, sugar, pepper, and vegetable broth to the pot. Mix everything together and bring the sauce to a boil.
  • Reduce the heat to low and simmer, semi covered with a lid, stirring occasionally for 20-25 minutes. After about 25 minutes the lentils should be soft and the sauce thickened. If the sauce is still too thin for your liking, continue simmering until it has reached your desired consistency.
  • Once the bolognese has reached your desired consistency and texture, stir in the coconut milk and simmer for another 5 minutes. Taste the bolognese and add salt to taste. Turn off the heat. The bolognese will continue to thicken as it cools.

See how we calculate recipe costs here.

Nutrition

Serving: 1cup | Calories: 478kcal | Carbohydrates: 52g | Protein: 18g | Fat: 25g | Sodium: 1261mg | Fiber: 19g
Overhead view of a plate of pasta with lentil bolognese on top.

How to Make Lentil Bolognese – Step by Step Photos

Chopped vegetables on a cutting board.

Finely dice one yellow onion, one carrot, and one stalk celery, and mince four cloves of garlic.

Chopped vegetables in the pot.

Add 2 Tbsp cooking oil to a large pot and heat over medium. Add the onion, celery, and carrot and sauté until the vegetables are soft and the onions are translucent.

Garlic, walnuts, and red pepper added to the pot.

Add the minced garlic, ¼ tsp crushed red pepper, and ½ cup finely chopped walnuts. Sauté over medium-low heat for about two minutes more.

Lentils, tomatoes, and spices in the pot, broth being poured in the side.

Add 1 cup uncooked red lentils, 1 tsp dried oregano, 1 tsp dried basil, ½ tsp salt, 1 Tbsp sugar, 1 tsp garlic powder, ¼ tsp black pepper, one 14.5 oz. can crushed tomatoes, and 3 Tbsp tomato paste to the pot. Add 3 cups vegetable broth and stir to combine.

Simmered bolognese sauce being stirred in the pot.

Allow the sauce to come up to a boil, then reduce the heat to low and let it simmer for 20-25 minutes, stirring occasionally.

Coconut milk being poured into the sauce in the pot.

After about 25 minutes, the lentils should be soft and the sauce should be thick. If the sauce is still too thin for your liking, allow the sauce to simmer a bit longer. If the lentils are not yet soft, continue to simmer, adding a small amount of water as needed to prevent it from drying out.

Parsley being sprinkled on the pot of finished lentil bolognese.

Once the sauce is thickened, stir in ½ cup full fat coconut milk and simmer for 5 minutes longer.

Overhead view of the pot full of lentil bolognese garnished with parsley.

Taste the sauce and add salt if needed.

The post Lentil Bolognese appeared first on Budget Bytes.