5-minute Salted Caramel

Salted Caramel is the perfect sauce for ice cream, cakes or pies. With just 5 ingredients it’s done in 5 minutes and it’s an easy caramel sauce that is absolutely spoon-worthy. The BEST part about this recipe is how easy it is. There’s no guesswork – it works every time! Caramel is one of the…

The post 5-minute Salted Caramel appeared first on Crazy for Crust.

Salted Caramel is the perfect sauce for ice cream, cakes or pies. With just 5 ingredients it’s done in 5 minutes and it’s an easy caramel sauce that is absolutely spoon-worthy. The BEST part about this recipe is how easy it is. There’s no guesswork – it works every time!

spoon above jar of caramel dripping caramel back into jar.

Caramel is one of the fall flavors I look forward to every year. I love adding caramel to apple strudel and cheesecake as well as serving it over ice cream. I’ve made caramel before (cinnamon and pumpkin flavors) but those are somewhat labor intensive.

If you’re looking for an easy caramel recipe that takes no time to make and has just 5 simple ingredients, then this is the easy caramel recipe for you. It’s perfect for pouring over ice cream OR using in any caramel dessert. Plus it takes just 5 minutes to make and you don’t need a candy thermometer or heavy cream!

ingredients on counter with words.

5 Ingredients Needed

  • Brown Sugar: I know traditionally caramel is made with granulated sugar but I love the richness that brown sugar adds.
  • Unsalted Butter: If you’re using salted butter you can reduce the amount of salt in the recipe.
  • Milk: Whole milk is best – the lower the fat content the thinner the caramel will be.
  • Vanilla extract: Only buy PURE vanilla extract.
  • Salt: All caramel needs salt – regardless of if it’s salted caramel or not. This recipe just has a little extra to make the salt a bit more prominent.

How much salt goes in Homemade Salted Caramel Sauce?

I recommend starting with 1/4 teaspoon of sea salt or kosher salt. You can use regular table salt, but I prefer kosher or sea salt (regular or maldon). Once the caramel has cooled a bit you can taste the salted caramel sauce and add more salt to your preference.

How To Make Salted Caramel Sauce

  1. Simply melt the butter over medium-high heat. Stir in the brown sugar and milk with a wooden spoon or whisk.
  2. Boil for 2 minutes: the important part is waiting to set the clock until it’s BOILING. Simmering doesn’t count as boiling, so once it’s bubbling all the way through, then set your timer. The sauce will be a nice amber color.
  3. Add the vanilla and salt, pour into a glass jar or airtight container, and let cool.
spoon with caramel resting on open jar of caramel.

How to use Salted Caramel

Salted Caramel is good in SO MANY THINGS! Here are a few of my favorite ways to use it:

Caramel Sauce Variations

spoon above jar of caramel dripping caramel back into jar.

Expert Tips

  • Once it’s cooked you should cool the salted caramel for about 10 minutes before using it on ice cream, so it doesn’t melt it.
  • You can also let it cool in a jar or bottle and store it to use over the week. It’s a creamy caramel sauce that’s thin enough to pour but thick enough that it’s not runny.
  • It’s important to wait to set your timer until the mixture is fully boiling (not simmering).
  • The caramel is thin when hot, thicker but pourable when room temperature, and firm when cold. To thin cold caramel, simply warm in the microwave or on the stove.

How to Store Caramel

It’s best to store this in the refrigerator if you’re not using it all the day it’s made. However, it will solidify in the refrigerator but that’s okay!

To thin, just heat it slowly in the microwave (just a few seconds, stir, then heat more).

Thick from the fridge it’s perfect to add to cupcakes as a filling!

FAQs

Why do you use brown sugar? Isn’t that butterscotch?

Technically I guess it’s butterscotch when it has brown sugar – but I prefer brown sugar caramel. I find it is more flavorful and much easier to make. This recipe doesn’t need as much babysitting as regular caramel with white sugar.

spoon above jar of caramel dripping caramel back into jar.
Print

5-minute Salted Caramel Recipe

5-minute salted caramel sauce has just 5 ingredients and is the perfect ice cream topping or caramel sauce for cake or pie!
Course Dessert
Cuisine American
Cook Time 5 minutes
Total Time 5 minutes
Servings 16 servings
Calories 109kcal
Cost $5

Ingredients

  • ½ cup (113g) unsalted butter , cubed
  • 1 cup (200g) packed brown sugar
  • ¼ cup (59ml) milk
  • 1 teaspoon vanilla extract
  • ¼ teaspoon kosher salt or sea salt (more to taste)

Instructions

  • Place butter in a saucepan and melt over medium-low heat.
  • Add the brown sugar and milk and turn heat to medium. Stir constantly until the mixture boils. Boil for 2 minutes.
  • Remove from heat and stir in vanilla and salt. (Once it cools a bit, you can add more salt to taste.)
  • Pour into jar. Let cool slightly before using. Cover. Store in refrigerator if not using the day it's made.
  • If mixture separates as it cools, just stir it up or shake it.
  • If it becomes to thick to pour after chilling, you can heat it in the microwave for a few seconds and stir.

Video

Notes

  • You can use whole milk, 2% or nonfat but whole milk is best. Because this recipe doesn’t use heavy cream you can also use nondairy milk, but the caramel might be thinner.
  • Make sure to start the clock once it’s BOILING. That means big bubbles all over the pan, not little bubbles around the edge (that’s simmering).
 
Recipe adapted from AllRecipes.

Nutrition

Serving: 1serving | Calories: 109kcal | Carbohydrates: 14g | Protein: 1g | Fat: 6g | Saturated Fat: 4g | Cholesterol: 17mg | Sodium: 6mg | Potassium: 23mg | Sugar: 13g | Vitamin A: 191IU | Calcium: 17mg | Iron: 1mg

Favorite Caramel Recipes

The post 5-minute Salted Caramel appeared first on Crazy for Crust.

Classic Hummus Recipe

Make our favorite hummus recipe to whip up this creamy, flavorful dip at home! Discover how to make this Middle…

Make our favorite hummus recipe to whip up this creamy, flavorful dip at home! Discover how to make this Middle Eastern dip, including the classic hummus ingredients, ways to serve it, our special tricks, and more.

Hummus recipe

Why we love this recipe

A big pile of creamy, savory, garlicky hummus is essential when it comes to snacking, in our opinion! Hummus is basically it’s own food group, these days. But Alex and I have found store-bought hummus can be expensive and not taste so great.

So when we have time, we love to whip up a batch of chickpea dip at home! This our family favorite hummus recipe that has stood the test of time. It’s simple to make and has pure, lemony garlicky flavor. As two cookbook authors, we’ve tested this recipe to perfection: it’s our go-to for snacks, lunches, and parties. Give it a try: we hope you love it as much as we do!

Hummus ingredients

The key ingredients for any hummus recipe is chickpeas and tahini, a paste made from sesame seeds. From there, hummus can be made with any number of ingredients.

The classic flavorings are garlic, lemon juice, and salt. For our hummus recipe, we like adding in cumin to bring in additional savory notes, but it’s optional. Some hummus recipes have olive oil and some do not. We’ve found this recipe tastes great without it, so our recipe doesn’t require this ingredient.

In addition to the ingredients listed above, this hummus recipe uses aquafaba, the liquid form the chickpea can, to make it creamy. This is our trick to the best fluffy, creamy hummus! You don’t have to buy anything extra, so you technically need only 5 hummus ingredients (without the optional cumin!).

Hummus Ingredients

Tips for this hummus recipe

If you’ve got 5 minutes and a food processor, this recipe tastes great and is potentially cheaper than many purchased brands. Plus, it’s also fun to whip up knowing that you made it with your bare hands. Here are a few tricks:

  • Use a food processor. A food processor makes the best hummus because it’s too thick to make in a blender..
  • Use aquafaba to make a creamy texture. The thick liquid from the chickpea is called aquafaba (you can also use it as a vegan replacement for eggs in some recipes). Here, it gives the hummus a creamy, smooth body.
  • Blend the garlic with the lemon juice first. This helps to mellow the garlic flavor a bit.

Hummus without tahini

Don’t have tahini? No problem! We’ve got a special variation just for you. This Hummus without Tahini is delicious spin with a secret ingredient in place of tahini.

Variations on hummus recipes

Check out our classic homemade hummus recipe below! Or try one of the recipes below:

Ways to eat hummus

There are so many ways to eat this hummus recipe! Here are a few ideas to get you started:

  • Veggie dip with carrots, celery, cucumber slices, bell pepper, radishes, snap or snow peas, broccoli, and more
  • Dip for bread or chips like pita bread, pita chips, flatbread, pretzel chips, bagel chips, crackers, or crostini
  • Layered dip like Loaded Hummus Dip, topped with veggies and feta cheese
  • Bowl meals like this quick Hummus Bowl, served in a bowl with veggies, olives, and rice, orzo or couscous
  • Sandwiches like this Hummus Sandwich, spread on bread and layered with vegetables
  • Hummus roll ups or wraps, spread inside a sandwich wrap instead of mayo

Dietary notes

This hummus recipe is vegetarian, vegan, plant-based, gluten-free, and dairy-free.

Frequently asked questions

Can you freeze hummus?

Yes, you can. Simply freeze in an airtight container, leaving room for the hummus to expand (and drizzle a little olive oil on top). Here’s How to Freeze Hummus.

Is hummus gluten free? Is hummus vegan? Is hummus keto?

Yes, homemade hummus is gluten free and vegan.

No, hummus is not keto friendly.

How many calories in hummus?

A serving of ¼ cup of hummus is approximately 160 calories.

Does hummus have to be refrigerated?

Yes, store hummus in a sealed container in the refrigerator.

How long does hummus last? Does hummus go bad?

Hummus lasts for up to 5 days refrigerated. Hummus does go bad; it can become moldy if stored longer than 5 days.

Does hummus have protein?

Yes, hummus is a great source of plant-based protein! A ¼ cup serving of hummus has 7 grams of protein or 14% of your daily protein intake.

Where is hummus in the grocery store?

It’s different in every grocery store, but hummus is in the refrigerated section, usually near the produce.

Print
Hummus recipe

Classic Hummus Recipe (5 Ingredients)


5 Stars 4 Stars 3 Stars 2 Stars 1 Star

4 from 1 review

  • Author: Sonja Overhiser
  • Prep Time: 5 minutes
  • Cook Time: 0 minutes
  • Total Time: 5 minutes
  • Yield: 1 ½ cups (12 ounces)
Save Recipe

Description

What’s in hummus? Here are all the typical hummus ingredients so that you can make it at home. It’s one of our top recipes for healthy snacks!


Ingredients

  • 1 medium garlic clove
  • 1 15-­ounce can chickpeas, plus the can liquid (aquafaba)
  • 1 large lemon (3 tablespoons to ¼ cup lemon juice)
  • ⅓ cup tahini
  • ¼ teaspoon ground cumin (optional)
  • ¾ teaspoon kosher salt

Instructions

  1. Peel the garlic. Drain the chickpeas into a liquid measuring cup. Juice the lemon.
  2. Add the garlic and lemon juice to the bowl of a food processor and process until finely chopped. Add the tahini, kosher salt, and 4 tablespoons liquid from the chickpea can (aquafaba). Puree for 30 to 1 minute, then scrape down the bowl.
  3. Add the chickpeas, cumin and salt and blend again, adding 1 to 2 tablespoons more aquafaba until it becomes smooth. Puree for 1 to 2 minutes to come to a creamy consistency.
  4. Top the hummus a drizzle of olive oil if desired. Serve with veggies, pita bread, or pita chips. Store refrigerated for 5 days.
  • Category: Appetizer
  • Method: Blended
  • Cuisine: Middle Eastern
  • Diet: Vegan

No-Bake Sushi Casserole

This Sushi Casserole is everything you love about avocado cucumber sushi rolls made into casserole form. Tangy sushi rice, crunchy vegetables, creamy avocado, and a umami-rich furikake topping that ties everything together. Get ready to satisfy that sushi craving!

The post No-Bake Sushi Casserole appeared first on Sweet Simple Vegan.

This Sushi Casserole is everything you love about avocado cucumber sushi rolls made into casserole form. Tangy sushi rice, crunchy vegetables, creamy avocado, and a umami-rich furikake topping that ties everything together. Get ready to satisfy that sushi craving!

This easy vegan sushi casserole deserves a place at your dinner table or your next gathering! It is the perfect mix of salty, creamy and crunchy + it requires just 6 simple ingredients to make. #sushi #casserole #easy #6ingredients #vegan #vegansushi #easyvegan #veganparty #partyrecipe #foolproof #musttryvegan #musttry #avocado #easysushi #entree #party #lunch #dinner

Vegan casseroles are some of our favorite weeknight dinners to make. They’re quick, often use simple pantry staples, require little hands-on time, and can feed a hungry crowd!

 And while you’ve likely had a more classic casserole dish, like Eggplant Parmesan, a Broccoli & Rice Casserole, or our incredible Loaded Baked Potato Casserole, this deconstructed sushi roll is easily one of our all-time favorites.

It’s a Sweet Simple Mom original and inspired by the sushi casserole we used to make growing up. My mom realized how eat it would be to veganize our childhood favorite, and since then, has been sharing this no-bake recipe with our friends and family at potlucks, parties, and more. 

It’s a repeat recipe that’s always a hit amongst everyone, vegan or not. If you’ve tried our deconstructed sushi bowls or sushi donuts, you have to try this easy casserole!

This easy vegan sushi casserole deserves a place at your dinner table or your next gathering! It is the perfect mix of salty, creamy and crunchy + it requires just 6 simple ingredients to make. #sushi #casserole #easy #6ingredients #vegan #vegansushi #easyvegan #veganparty #partyrecipe #foolproof #musttryvegan #musttry #avocado #easysushi #entree #party #lunch #dinner

Ingredients You’ll Need 

  • Sushi rice: The foundation of our easy sushi “bake” recipe (and any vegan sushi roll!). Unlike long-grain rice like jasmine rice, classic sushi rice sticks and clumps together when cooked, making it an ideal base for this sushi casserole. We love to use the Lundberg Sushi Rice OR the Lotus Foods Jade Pearl Rice. If needed, opt for another type of short grain rice of choice.
  • Seasoned rice vinegar: Adds a subtle tang and sweetness to the rice and enhances the overall stickiness. This helps the rice hold its shape when sliced into individual servings. Sushi vinegar is a good substitute.
  • Avocado: Adds creaminess and richness, balancing the crunch in the vegetables and tanginess in the rice. 
  • Fresh vegetables: We like to use fresh carrots and Persion cucumbers for their added freshness and crunch. Feel free to swap in your favorite sushi veggies!
  • Furikake: A Japanese seasoning mix that adds a boost of umami and a slight crunch. We recommend trying our homemade furikake, made from toasted nori seaweed sheets, sesame seeds, coarse salt, and a pinch of sugar. Or, if you prefer store-bought, ensure it’s vegan by avoiding furikake made with with bonito flakes (made from tuna).

Casserole Add-Ins

The best part of making a homemade sushi casserole is you can customize it to include your favorite sushi ingredients. Load up your sushi casserole with your favorite sushi flavors by adding one or more of these add-in ideas:

  • Tofu “Spam”: Make this sushi casserole a spin on our Tofu Musubi recipe by layering slices of our homemade tofu spam on top of the sushi rice.
  • Smoky tofu: Similar to the “spam” musubi, our smoked tofu adds a boost of smoky flavor.
  • Vegan cream cheese: Adds a rich, creamy layer, similar to the flavor of a Philadelphia sushi roll. Use a store-bought vegan cream cheese, or try our homemade vegan cream cheese
  • Spicy mayo: Made with a mixture of vegan mayonnaise (or vegan kewpie mayonnaise) and sriracha, spicy mayo drizzled on top is a great final addition. 
  • Vegan Lox: Layer on our Carrot Lox for a spin on lox nigiri or a lox and avocado roll. Pair it with our vegan cream cheese for the ultimate recipe! 
  • Soy sauce: A splash of soy sauce can boost the umami flavor and saltiness. Drizzle it on right before eating or serve on the side with wasabi and pickled ginger for dipping. 
  • Green onions: Adds a fresh, mild onion flavor.
  • Vegan unagi: Try this incredible Vegan Unagi Recipe complete with a homemade eel sauce!

Equipment Needed

This easy vegan sushi casserole deserves a place at your dinner table or your next gathering! It is the perfect mix of salty, creamy and crunchy + it requires just 6 simple ingredients to make. #sushi #casserole #easy #6ingredients #vegan #vegansushi #easyvegan #veganparty #partyrecipe #foolproof #musttryvegan #musttry #avocado #easysushi #entree #party #lunch #dinner

How to Make Homemade Furikake Seasoning

  1. Blend ingredients. Put all ingredients except the sesame seeds in a blender or food processor and pulse until a coarse meal is formed.
  2. Mix and store. Pour the blended contents into a large bowl, mix in the sesame seeds, and transfer to an airtight container. Store in a cool, dry place until ready to use.

This easy vegan sushi casserole deserves a place at your dinner table or your next gathering! It is the perfect mix of salty, creamy and crunchy + it requires just 6 simple ingredients to make. #sushi #casserole #easy #6ingredients #vegan #vegansushi #easyvegan #veganparty #partyrecipe #foolproof #musttryvegan #musttry #avocado #easysushi #entree #party #lunch #dinner

How to Make this No-Bake Sushi Casserole

  1. Rinse the rice. Rinse the sushi rice until the water runs clear. Transfer it to a rice cooker or pot and add the appropriate amount of water as per your packaging instructions. Soak the rinsed rice in the water for 30 minutes before cooking.
  2. Cook the rice. If using a rice cooker, set it to cook. For stovetop cooking, bring the soaked rice to a boil. Once boiling, cover the pot with a lid and reduce heat to a low simmer. Cook for 20 minutes, then remove from heat and let it sit for 10 minutes without lifting the lid. Fluff the warm rice with a fork once done.
  3. Season the rice. Once the rice has cooled to room temperature, mix in the seasoned rice vinegar, adding more to taste if desired.
  4. Prepare the base. Press the cooked rice into the bottom of your baking dish and sprinkle with 2 tablespoons of furikake.
  5. Layer vegetables. Evenly layer the julienned carrots and then the sliced cucumbers on top of the rice.
  6. Add avocado. Score the avocado halves, then using a spoon, scoop the avocado onto the casserole. Spread with a spatula to create an even, smooth layer. Sprinklethe top of the sushi “bake” with remaining furikake.
  7. Serve. Slice the sushi casserole like a lasagna and serve with a side of nori sheets and your favorite toppings. Enjoy!

This easy vegan sushi casserole deserves a place at your dinner table or your next gathering! It is the perfect mix of salty, creamy and crunchy + it requires just 6 simple ingredients to make. #sushi #casserole #easy #6ingredients #vegan #vegansushi #easyvegan #veganparty #partyrecipe #foolproof #musttryvegan #musttry #avocado #easysushi #entree #party #lunch #dinner

Serving Suggestions 

We like to eat this sushi casserole with our hands. Grab the sheet of nori (seaweed snack sheets are great for this!), then using your hands or a spoon, scoop the casserole into the nori sheet and dig in! 

This casserole can be enjoyed as a main dish, side dish, or even a hearty afternoon snack! 

We like to enjoy it as a main, alongside a bowl of Miso Soup and steamed edamame. It’s also delicious with a simple green salad dressed with our Ginger Miso Dressing.

Storage Instructions

This casserole is best served fresh, but can be refrigerated for up to 3 days. To keep the rice as moist as possible, store directly in the casserole dish tightly covered with plastic wrap, or transfer individual slices to an airtight container. 

Freezing is not recommended as it would negatively affect the texture of the fresh vegetables and avocado. 

This easy vegan sushi casserole deserves a place at your dinner table or your next gathering! It is the perfect mix of salty, creamy and crunchy + it requires just 6 simple ingredients to make. #sushi #casserole #easy #6ingredients #vegan #vegansushi #easyvegan #veganparty #partyrecipe #foolproof #musttryvegan #musttry #avocado #easysushi #entree #party #lunch #dinner

More Vegan Casserole Recipes You May Enjoy:

Make sure you tag us on Instagram @sweetsimplevegan and @consciouschris and hashtag #sweetsimplevegan if you make this recipe. We love to see your photos!

Print
This easy vegan sushi casserole deserves a place at your dinner table or your next gathering! It is the perfect mix of salty, creamy and crunchy + it requires just 6 simple ingredients to make. #sushi #casserole #easy #6ingredients #vegan #vegansushi #easyvegan #veganparty #partyrecipe #foolproof #musttryvegan #musttry #avocado #easysushi #entree #party #lunch #dinner

No-Bake Sushi Casserole


5 Stars 4 Stars 3 Stars 2 Stars 1 Star

5 from 1 review

  • Author: Jasmine @ Sweet Simple Vegan
  • Total Time: 1 hour 5 minutes
  • Yield: 6 servings

Description

This Sushi Casserole is everything you love about avocado cucumber sushi rolls made into casserole form. Tangy sushi rice, crunchy vegetables, creamy avocado, and a umami-rich furikake topping that ties everything together. Get ready to satisfy that sushi craving!


Ingredients

  • 2 cups sushi rice*
  • 12 tablespoon seasoned rice vinegar, or to taste
  • 2 large Hass avocados or 4 small
  • 1 medium carrots, shredded
  • 2 small Persian cucumbers, cut into small matchsticks
  • 1/4 cup furikake + more as desired, storebought or homemade (recipe below)
  • 9x11” glass baking dish (or dish of choice)

Homemade Furikake

  • 2 sheets toasted nori seaweed
  • 1/4 cup toasted white and/or black sesame seeds (or a mix of both)
  • 1 teaspoon coarse salt
  • 1 teaspoon coconut sugar or sugar of choice

Serve with (optional)

  • Small or large sheets of nori*
  • Soy sauce

Instructions

  1. Rinse the rice until the water runs clear. Transfer it to a rice cooker or pot and add in the appropriate amount of water depending on your packaging directions (we used 3 cups). Soak the rinsed rice in the water for 30 minutes before cooking. If you are using a rice cooker, set it to cook (set it to “sweet rice” if you have the option). If you are cooking it on the stovetop, bring the soaked rice to a boil. Once boiling, cover the pot with a lid and reduce heat to low simmer. Cook for 20 minutes and then remove the pot from heat (do not remove the lid) for 10 minutes. Once set, uncover and fluff with a fork.
  2. Once cooled, mix in the seasoned rice vinegar, adding more as desired to taste.
  3. Press the rice into the bottom of the baking dish and then sprinkle it with 2 tablespoons of furikake.
  4. Evenly layer on the julienned carrots followed by the sliced cucumbers. Lastly, add the avocado on top as desired. What we like to do is score the avocado into thin squares, scoop the whole avocado out onto the casserole and spread it over with a spatula to get a flat and smooth layer. Sprinkle the remaining 2 tablespoons of furikake on top + more as desired.
  5. Slice the sushi casserole as you would a lasagna and serve with a side of nori. We like to eat this casserole with our hands, as you would sushi! Grab the nori sheet, and using either your hands or a spoon, scoop off a piece of the casserole into the nori sheet and dig in!

Homemade Furikake

  1. Put all ingredients except the sesame seeds in a blender/food processor and pulse until a coarse meal is formed (you still want each ingredient to be visible).
  2. Pour the blended contents into a large bowl and mix in the sesame seeds. Transfer it to an airtight container and store it in a cool and dry place.

Notes

  • Prep Time: 45 minutes
  • Cook Time: 20 minutes

Disclaimer: This is not a sponsored post. However, this page may contain affiliate links, thank you for supporting Sweet Simple Vegan!

The post No-Bake Sushi Casserole appeared first on Sweet Simple Vegan.

Sandwich Kabobs

Make party appetizers fun and easy with these delicious Sandwiches on a Stick! Perfect for grab-and-go, Sandwich Kabobs feature all your favorite sandwich ingredients in a convenient kabob skewer. You’re in control! Feel free to make these vegeta…

Make party appetizers fun and easy with these delicious Sandwiches on a Stick! Perfect for grab-and-go, Sandwich Kabobs feature all your favorite sandwich ingredients in a convenient kabob skewer. You’re in control! Feel free to make these vegetarian-only options as well. Ingredients: How to make Sandwich Kabobs Prepare the Ingredients: Assemble the Skewers: Serving Suggestions:...

The post Sandwich Kabobs appeared first on Salty Side Dish.

Limoncello Spritz

Here are the secrets to making a limoncello spritz, a delightful Italian cocktail bursting with sunshine lemon flavor and a…

Here are the secrets to making a limoncello spritz, a delightful Italian cocktail bursting with sunshine lemon flavor and a delightful fizz. It’s easy to prepare and guaranteed to transport you to a carefree summer state of mind.

Limoncello spritz in stemmed glass with mint.

Here’s an Italian cocktail that’s bubbly and flavored with pure lemon: the Limoncello Spritz! Limoncello is a liqueur that’s often sipped for after-dinner shots, but this ultra strong lemon elixir shines in mixed drinks, too.

Why we love this recipe: This spin on the popular Aperol spritz is full of bright lemon flavor from the limoncello. As two cocktail experts and certified mixologists, we think it’s even better than the original! It’s bubbly and effervescent, with a searing citrus bite.

What’s a spritz?

The spritz is a drink invented in Italy that combines three ingredients: liqueur, sparkling wine (usually Prosecco) and soda water. You can make a spritz of any type using these two ingredients and any mixer of your choosing. The basic spritz ratio is 3 parts sparkling wine, 2 parts liqueur, 1 part soda water.

Ingredients in a limoncello spritz

The limoncello spritz is a spin on the popular Aperol spritz, an Italian aperitif. While the spritz concept has been around for hundreds of years, it wasn’t until the 1950’s that the Aperol spritz took the form it has today. The limoncello spritz just substitutes limoncello for Aperol, an Italian amaro.

Spritzes are trending in popularity, so it’s not a surprise that this sunny spin is a top choice when it comes to summer cocktails. Here’s what you need to make a limoncello spritz:

  • Limoncello: A sweet, lemon-flavored liqueur originating from southern Italy.
  • Prosecco: A sparkling white wine from Italy’s Veneto region, known for its delicate flavor and light bubbles. You can use any type of champagne if desired.
  • Soda water: Use club soda or unflavored sparkling water (we use our SodaStream to make it at home). Avoid tonic water, since it is flavored with quinine and lightly sweetened.

🍾 Tip: A 750 ml bottle of Prosecco is 25 ounces, enough for 8 drinks. If you’re making 2 drinks, a mini bottle is perfect—it holds 187 mL or about 6 ounces!

How to make a limoncello spritz

The limoncello spritz is an incredibly easy to make drink! The spritz requires no cocktail shaker or juicing of citrus: you can build the drink it right in the glass. This makes it a great choice for entertaining, especially in the summer. Here are the basic steps for how to make a limoncello spritz:

Step 1: Add the limoncello to a glass with ice. Add Prosecco and soda water.

Step 1: Stir 2 oz limoncello in a glass with ice to make it cold. Add 3 oz Prosecco and 1 oz soda water.

Step 2: Garnish with mint and serve the limoncello spritz.

Step 2: Garnish with fresh mint and serve.

More about limoncello

If you’ve ever visited Italy, you know limoncello. But what actually is it this ultra strong yellow liquid?

  • Limoncello is an Italian lemon liqueur made by infusing lemon peels into vodka or other neutral spirits. It’s got a searing, straightforward lemon flavor and is the second most popular liqueur in Italy after Campari. You can get it everywhere in Italy, and it’s often served as shots after a big meal.
  • How much does limoncello cost? Limoncello has become very popular in the US, so you should be able to find it easily at your local liquor store. It costs about $20.
  • What else can limoncello be used for? The most popular use for limoncello is drinking it as shots, but it’s equally as good in cocktails! Try it in a Limoncello Mojito with lime and rum, or a Limoncello Martini with vodka and lemon juice.

Step it up: try clear ice!

Want to take your limoncello spritz to the next level? Try making clear ice! This type of ice is crystal clear and looks like what you’d get at a fancy bar. But you can make it at home! All you need is a cooler and 24 hours. Go to How to Make Clear Ice.

Limoncello spritz in stemmed glass with mint.

Other spritz recipes

The spritz is one of the most refreshing cocktails of all time! There are lots of different styles of spritz recipes to try after you try this limoncello spritz:

More lemon cocktails

Lemon flavored cocktails are some of the most refreshing alcoholic drinks! They’ve earned a place in our hearts for their forward citrusy flavor. Here are a few more lemon cocktails if you love limoncello:

Frequently asked questions

What is a Limoncello Spritz?

This refreshing Italian cocktail is a delightful blend of limoncello, prosecco, and soda water. It’s a close cousin to the Aperol Spritz, but with a brighter lemon flavor.

Is a Limoncello Spritz strong?

Compared to some cocktails, it’s on the lighter side. The prosecco has a lower alcohol content than some spirits, and the limoncello typically has less alcohol than rum or vodka. However, always drink responsibly.

What’s the ideal ratio for a Limoncello Spritz?

The classic ratio is 3 parts prosecco, 2 parts limoncello, and 1 part soda water. Feel free to adjust these proportions to your taste preference.

Do I need a special glass for a Limoncello Spritz?

Not at all! A stemmed wine glass or a tumbler filled with ice works perfectly.

What are some fun garnishes for a Limoncello Spritz?

A lemon wedge is a classic and refreshing choice. You can also get creative with a sprig of fresh mint, a few raspberries, or even a thin slice of orange.

Print
Limoncello spritz

Limoncello Spritz


  • Author: Sonja Overhiser
  • Prep Time: 5 minutes
  • Cook Time: 0 minutes
  • Total Time: 5 minutes
  • Yield: 1 drink

Description

Want a bubbly citrus cocktail? Try the limoncello spritz! Here are the secrets to making this delightful Italian cocktail, bursting with sunshine lemon flavor and a delightful fizz. It’s easy to prepare and guaranteed to transport you to a carefree summer state of mind.


Ingredients

  • 2 ounces (4 tablespoons) limoncello, chilled if possible
  • 3 ounces (6 tablespoons) Prosecco or other sparkling wine, chilled
  • 1 ounce (2 tablespoons) soda water
  • Ice (try clear ice!)
  • For the garnish: mint, lemon rounds

Instructions

  1. Add the limoncello to a glass filled with ice and stir.
  2. Top with the sparkling wine and soda water. Add mint and serve. 
  • Category: Drink
  • Method: Poured
  • Cuisine: Cocktails
  • Diet: Vegan

Keywords: Limoncello spritz

Beer Margarita

Beergarita, beerita: call it what you will! This beer margarita recipe is a refreshing twist on the classic, blending tangy…

Beergarita, beerita: call it what you will! This beer margarita recipe is a refreshing twist on the classic, blending tangy lime and tequila with the crispness of your favorite beer. It’s easy to make, perfect for parties, and guaranteed to be a crowd-pleaser.

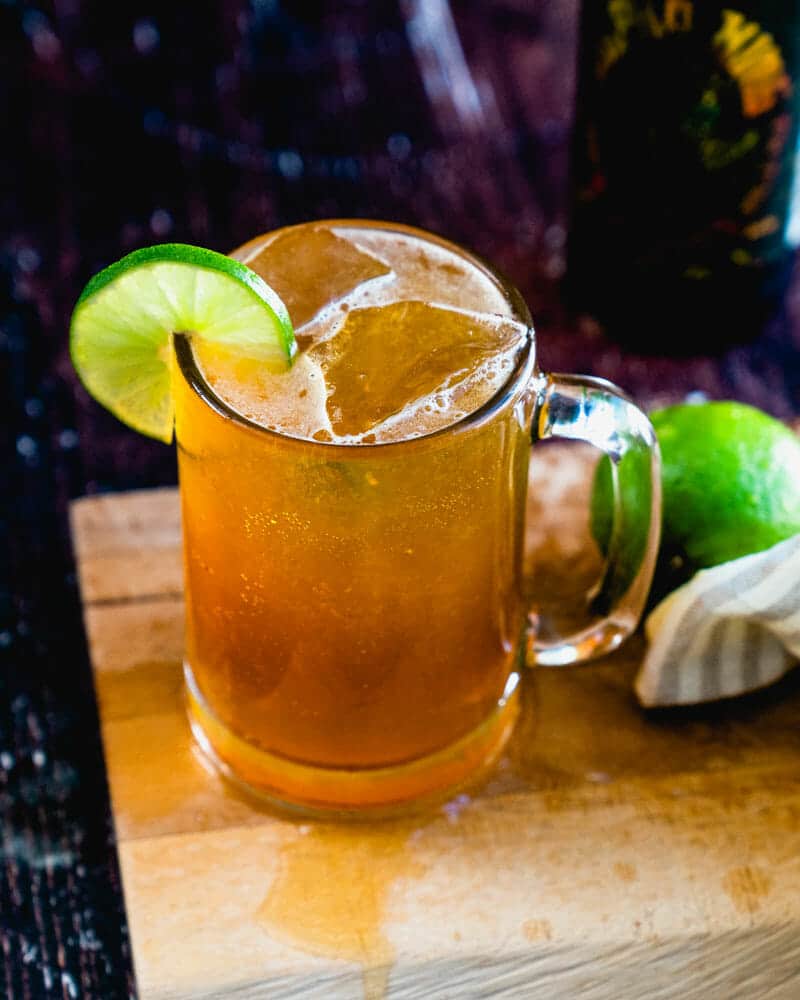
Beer Margarita in glass mug with lime.

Why not add a little lager to your margarita? Yes, a beer margarita is a fun spin on the classic margarita, also known as a beergarita or a beerita. Turns out, hops pair perfectly with the tart lime and orange perfume of a margarita.

Why we love this recipe: Many beer margarita recipes call for frozen limeade concentrate. But that’s not what a great cocktail is made of, is it? This beer margarita recipe has no limeade: just pure lime juice against the citrus and bitter notes of a beer. It became an instant favorite around here!

🍺 Want more beer cocktails? Try the Michelada or Chelada!

What’s in a beer margarita?

As the name suggests, a beer margarita is simply a margarita served with beer. The margarita itself is a classic alcoholic drink on the list of International Bartender Association’s IBA official cocktails. The beerita adds beer to the mix, along with a little simple syrup:

  • Tequila
  • Cointreau (orange liqueur)
  • Lime juice
  • Beer
  • Simple syrup

As mentioned above: most beer margarita recipes call for frozen limeade concentrate. For our take, we wanted to stick with the classic margarita: so we simply used our margarita recipe, plus beer and a hint of simple syrup. The flavor is so pure, tangy, and nuanced from the beer: it was an instant hit at our house!

Beer margarita recipe.

The type of beer for a beergarita

To make a great beer margarita, you can’t use just any old beer! There are a few options we recommend:

  • Use a lager for a classic flavor, like Corona since it’s a Mexican beer. Or,
  • Step it up Craft IPA! This is what we did for ours, and it really took it over the top. Choose a hoppy IPA with citrus notes.
  • Avoid strong or hoppy beers that might overpower the margarita flavors.

How to make a beer margarita

To mix up your own beer margarita, there’s not much to it! You don’t even need to use a cocktail shaker with this one, which makes it even easier. Here’s what to do:

  1. Rim the glass with salt. Salt enhances the sweet and sour flavors in the drink, and gives you that classic margarita flavor.
  2. Stir together in the serving glass. Take the tequila, lime juice, simple syrup, and Cointreau, and stir it together in a glass.
  3. Add ice and pour in the chilled beer. The beer adds just the right bubbly carbonation to this classic drink.
Beergarita in glass mug with lime and clear ice.

Ideas for the salt rim

For this beer margarita, we skipped the salt rim for a little variation. (Hey, we have 25 other margarita recipes and they all have a salt rim!) It’s not needed for the flavor. But if you love that classic margarita salty zing, feel free to add it prior to mixing up your beergarita.

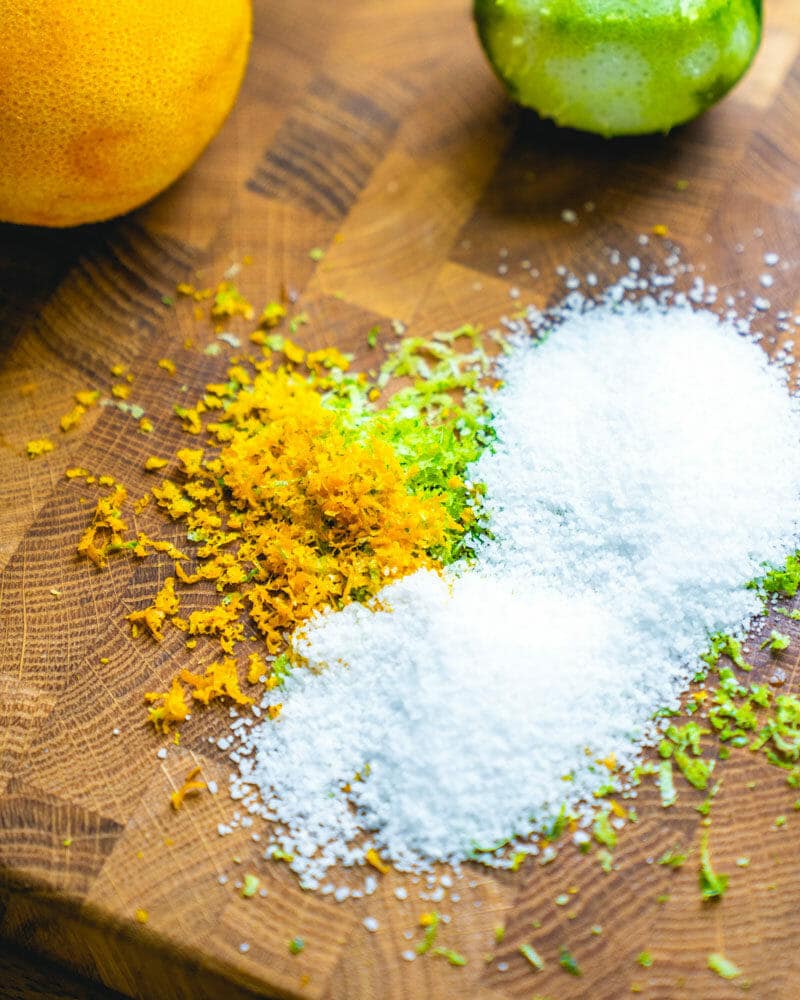
The best salt for a salt rim? Use kosher salt or flaky sea salt, since they have the best coarse texture. If you want to make it look even more festive, try a batch of our margarita salt. The green and orange colors of lime and orange zest look beautiful against the glass.

Beerita in mug.
This beer margarita uses clear ice for a stunning look

How to serve a beer margarita

The beergarita is really perfect for anytime you’d serve a regular margarita! It’s great with Mexican-style food of all kinds: serve with shrimp tacos, guacamole, salsa, and grilled corn for a stellar meal.

More margarita recipes

We’ve got all sorts of variations on the margarita outside of this beerita! Pick from one of these fun and fruity margarita recipes.

Frequently asked questions

What is a beer margarita?

This unique cocktail combines the classic margarita flavors of tequila, lime juice, and orange liqueur with the crispness and fizz of your favorite beer.

Won’t it taste weird?

Surprisingly, no! The tartness of the margarita complements the bitterness of the beer, creating a refreshingly balanced drink.

What kind of beer is best for a beer margarita?

Light beers like lagers, pilsners, or wheat beers work best. Avoid strong or hoppy beers that might overpower the margarita flavors.

Should I build the drink or shake it?

Building the drink (layering ingredients) is the preferred method. Shaking it can create too much foam.

Do I need a special glass for a beer margarita?

Not at all! We suggest using a glass mug, pint glass, or mason jar for a more casual feel.

Print
Beer cocktails

Beer Margarita


  • Author: Sonja Overhiser
  • Prep Time: 5 minutes
  • Cook Time: 0 minutes
  • Total Time: 5 minutes
  • Yield: 1 drink

Description

Beergarita, beerita: call it what you will! Here’s the best beer margarita recipe: fresh and all natural with real lime and tequila.


Ingredients

  • 1 ½ ounces* tequila blanco or reposado*
  • 1 ounce Cointreau
  • 1 ounce fresh lime juice
  • ½ ounce simple syrup
  • 4 ounces chilled beer (lager for classic taste, hoppy IPA with citrus notes for something more interesting)
  • Ice, to serve
  • Garnish: lime wheel
  • Optional: kosher salt for salt rim

Instructions

  1. Optional: Cut a notch in a lime wedge, then run the lime around the rim of a glass. Dip the edge of the rim into a plate of flaky sea salt (or for a festive look, use our Margarita Salt).
  2. Add tequila, Cointreau, lime juice, and simple syrup to the serving glass and stir to combine.
  3. Add ice and pour beer over top. Garnish with a lime wheel.

Notes

*To convert to tablespoons, 1 ounce = 2 tablespoons. 

  • Category: Drinks
  • Method: Stirred
  • Cuisine: Cocktails
  • Diet: Vegan

Keywords: Beer margarita, Beer margarita recipe, Beergarita, Beerita

Strawberry Margarita

This strawberry margarita recipe is frosty, fruity and refreshing! It’s easy to make with frozen berries and a blender, a…

This strawberry margarita recipe is frosty, fruity and refreshing! It’s easy to make with frozen berries and a blender, a delightful balance of sweet and tart that’s perfect for parties.

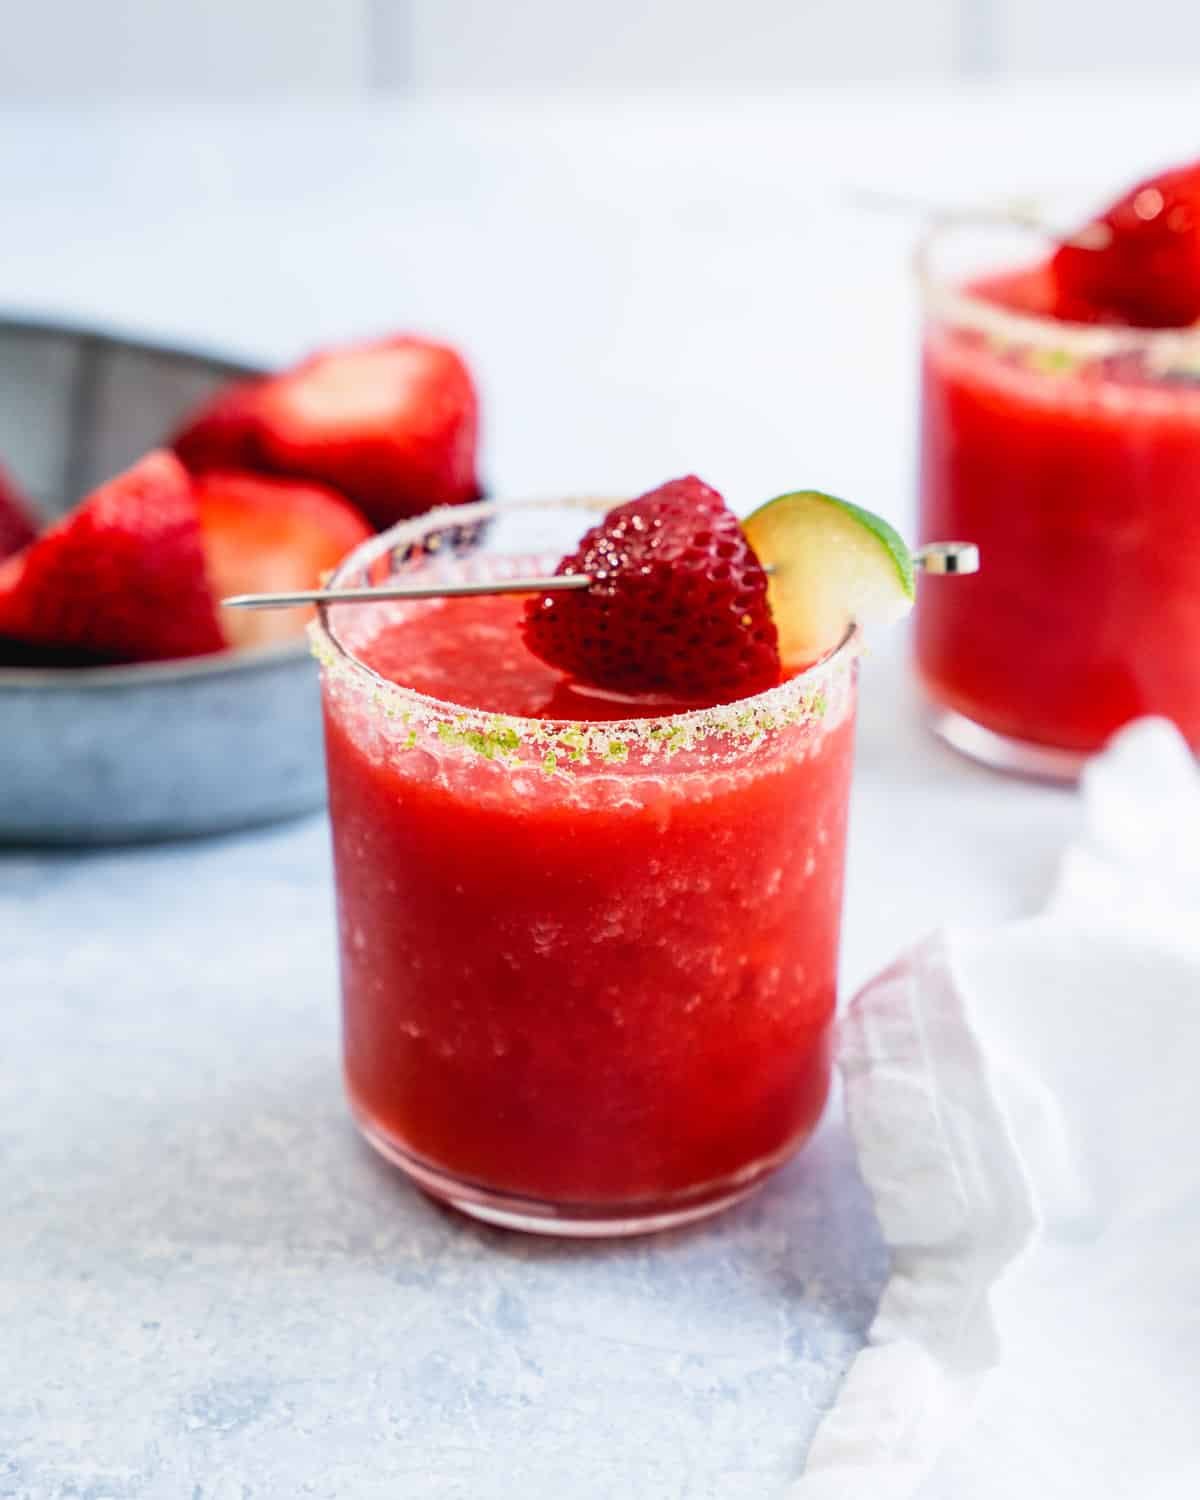
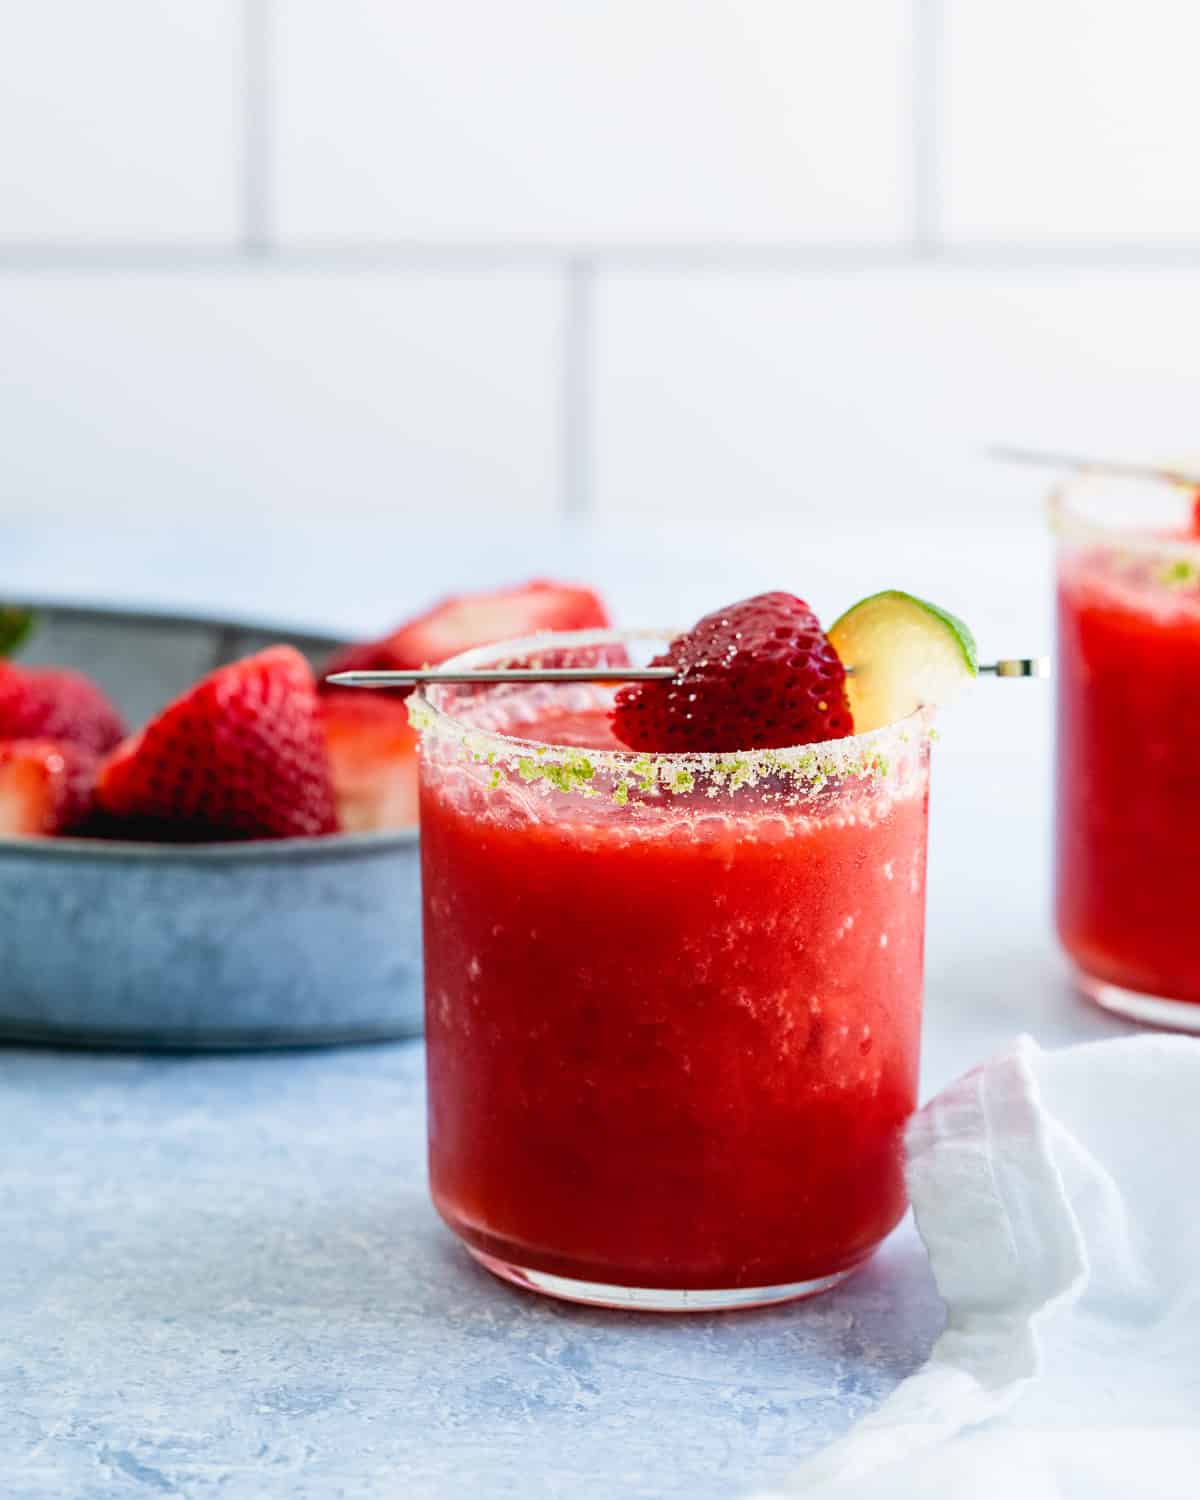
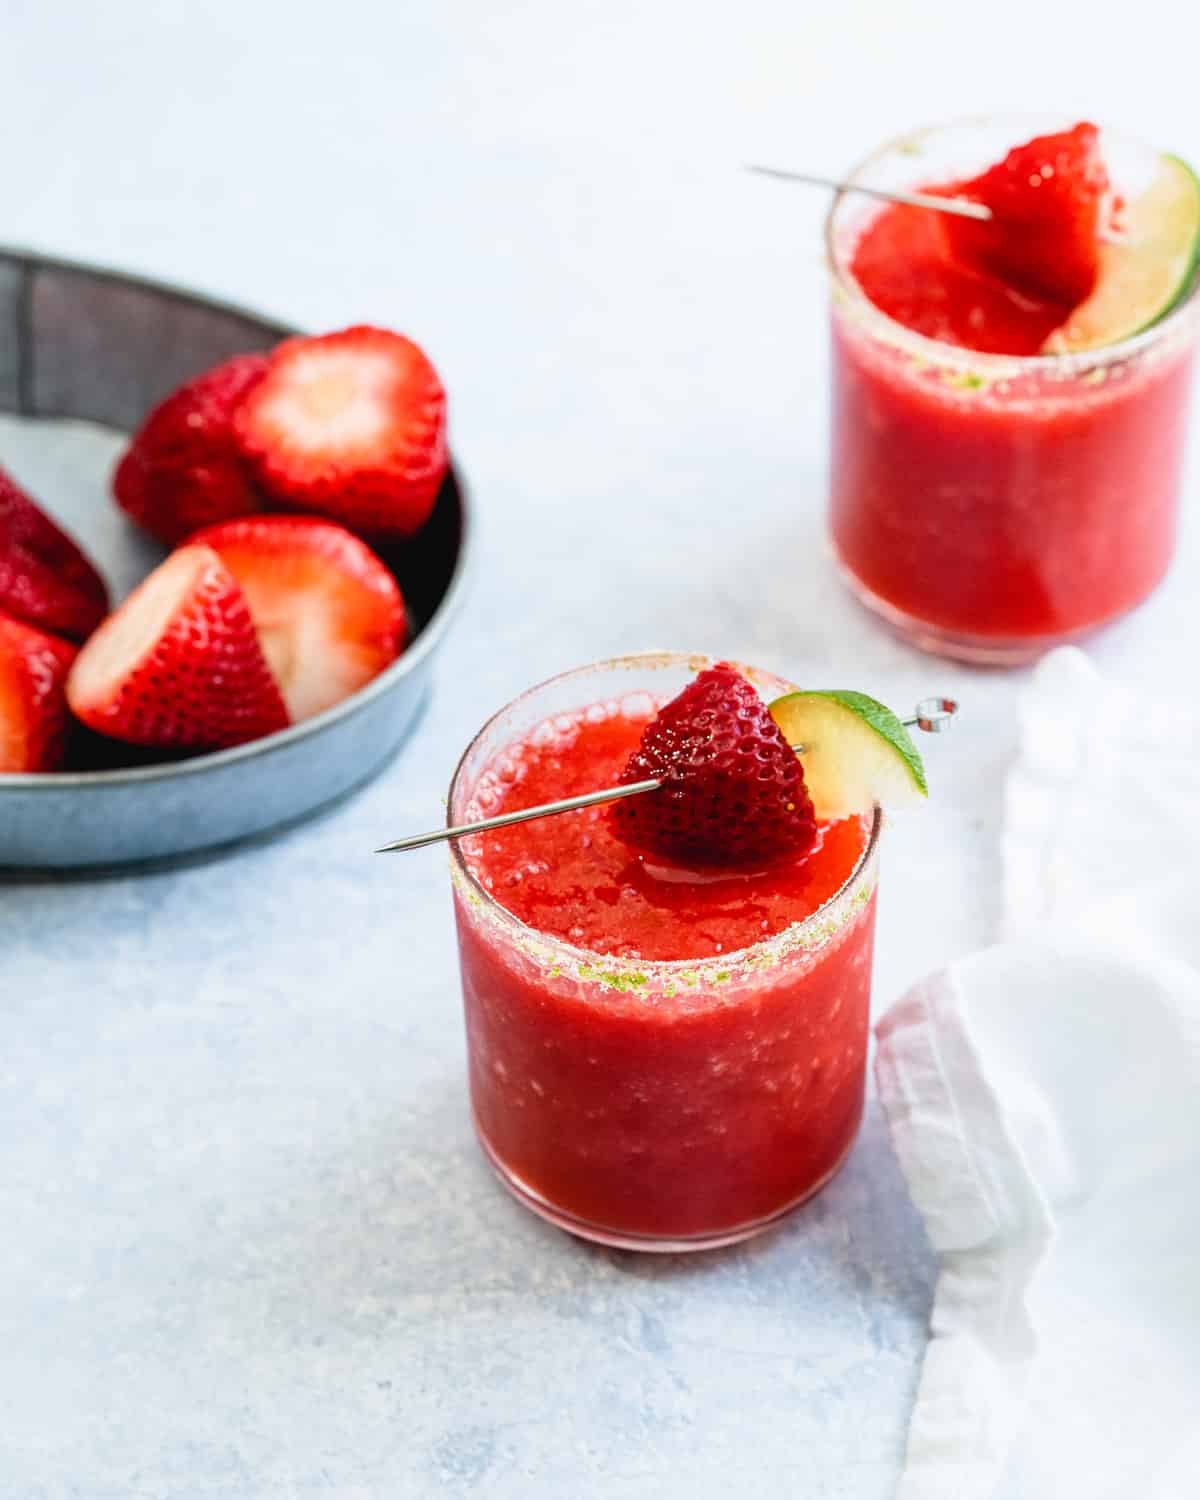
Strawberry Margarita in rocks glass with salt rim and strawberry garnish

Love margaritas but want a fruity spin? Try this tasty and refreshing Strawberry Margarita recipe! This one is frosty and fruity, full of sweet berry flavor and perfectly complimented with the zing of lime and tequila.

Why we love this recipe: The margarita pairs perfectly with fruit, and we’ve already got several fruity margarita recipes under our belt, like watermelon, mango and peach. But the strawberry margarita is our favorite! We’re 100% in love with its vibrant red color and sweet tart flavor.

Ingredients in a strawberry margarita

The margarita is one of the most popular cocktails of all time, and the classic definition has just three ingredients: lime juice, Cointreau, and tequila. That’s what’s in our classic margarita recipe, our very favorite of them all. This strawberry margarita is like a combination between the classic and a frozen margarita! It’s made in a blender, and comes out with a frosty texture. Here are the ingredients you’ll need:

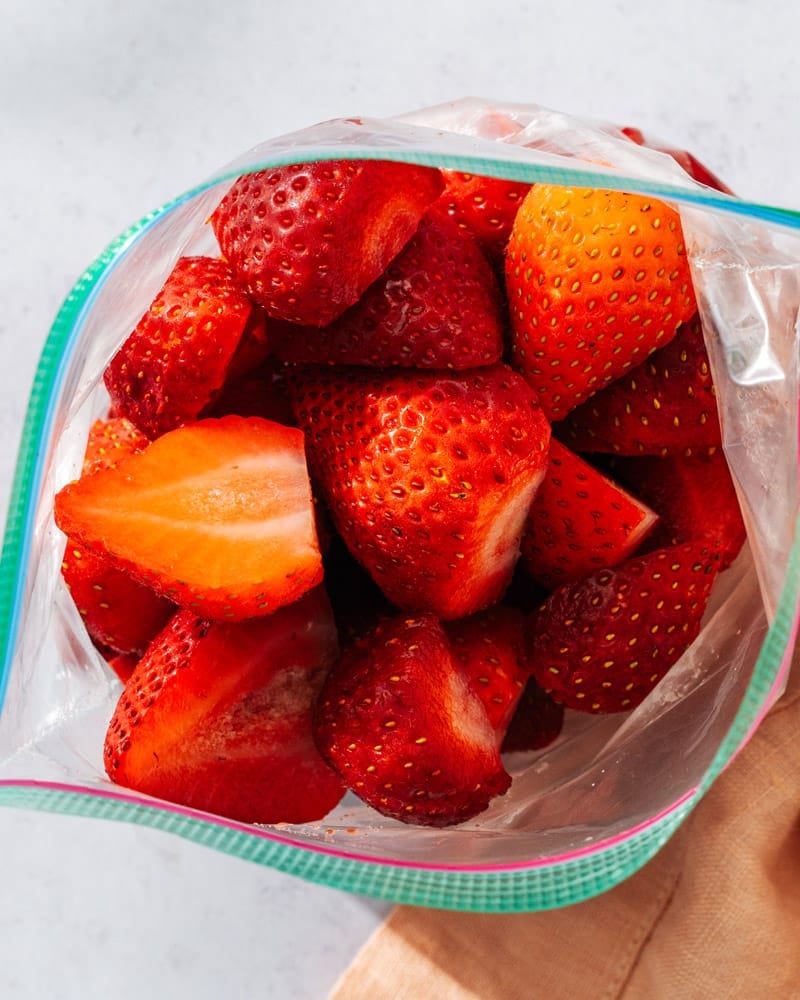
Frozen strawberries

How to make a strawberry margarita

The strawberry margarita is made in a blender, so it’s not the standard way to make a classic margarita. It’s actually even easier, since you don’t need a cocktail shaker! This strawberry margarita recipe makes two drinks, so you can drink with a friend or partner, or increase the amounts of a larger size. Here’s what to do (or go to the full recipe below):

  1. Step 1: A salted rim is a must: the salt enhances the sweet and sour flavors in the drink.
  2. Blend! Place all ingredients in a blender and blend until it’s full combined and creamy.

For a more liquid texture, keep on blending

The texture of this strawberry margarita is icy, but you can also make it more of a room temperature fruity margarita. Just keep blending it! If you blend for a few minutes, it will become less icy and have more of a blended, juice like texture.

  • Icy texture: Keep it frozen for a smoothie-like texture by blending just until it’s fully integrated and icy.
  • Juicy texture: If you keep blending for a few minutes, you can get to a texture that’s more like juice. It’s still cold, but you can taste the flavors even more when it’s not as icy.

Which texture do we prefer? Well, we like it both ways! Personally I like it a little warmer so I can taste the sweet berries and edge of the tequila. But keep it icy and it’s a perfect summer cocktail for a hot afternoon on the patio.

How to make a strawberry margarita: margarita glass with strawberry garnish

What tequila for strawberry margaritas?

You can use any type of tequila for this strawberry margarita, but keep the following in mind:

  • Buy at least mid-range tequila. This cocktail tastes only as good as the quality of alcohol. Look for 750 ml bottles in the range of $22 to $35.
  • Tequila blanco or reposado works, but fruity margaritas are best with tequila blanco. We love the nuance that comes with using tequila reposado (aged) in margaritas. But for this fruity margarita with an icy texture, you can use tequila blanco! Some brands we recommend are Espolon Blanco, El Tesoro Blanco, Patrón Silver, and Casamigos.

Can I use fresh strawberries instead of frozen?

You can use either ripe fresh strawberries or frozen strawberries in this strawberry margarita recipe! Using fresh berries, the texture will come out with the juicy texture mentioned above.

The advantage of using frozen berries is the icy texture, kind of like a strawberry daiquiri but not as thick. Frozen berries are also very easy to store, making it simple to whip up strawberry margaritas on demand!

🍓 Want more with strawberries? Try our Best Strawberry Cocktails.

Ideas for the salt rim

To take the drink presentation over the top, try our homemade margarita salt for the salt rim! You can even skip the orange zest and simply use lime (as shown). Tajín is another great option for the rim, a Mexican seasoning blend that adds a burst of tangy, spicy flavor.

Strawberry margarita recipe

More margarita recipes

We have lots of margarita recipes! We’ve got one for just about any occasion! Let us know if you find a favorite:

Frequently asked questions

What kind of strawberries are best for a margarita?

Frozen strawberries are ideal for this strawberry margarita recipe. Fresh strawberries can be used too, and they make for more of a juicy texture.

Do I need to muddle the strawberries?

This is a blender margarita recipe, so muddling is not needed!

What type of tequila should I use?

A silver or blanco tequila is the most common choice for margaritas, including the strawberry version. It offers a clean and crisp base that allows the strawberry flavor to shine.

Can I use a different type of sweetener?

Yes! Simple syrup, agave nectar, or even honey can be used to sweeten your margarita to taste.

What can I add for a spicy kick?

Add the slices of ¼ jalapeno pepper, deseeded, and blend to combine.

Print
Strawberry Margarita

Perfect Strawberry Margarita


  • Author: Sonja Overhiser
  • Prep Time: 5 minutes
  • Cook Time: 0 minutes
  • Total Time: 5 minutes
  • Yield: 2 drinks

Description

This strawberry margarita recipe is frosty, fruity and refreshing! It’s easy to make with frozen berries and a blender, a delightful balance of sweet and tart that’s perfect for parties.


Ingredients

  • 3 ounces (6 tablespoons) tequila*
  • 3 ounces (6 tablespoons) Cointreau
  • 2 ounces (4 tablespoons) fresh lime juice
  • 10 ounces (1 ½ cups) frozen whole strawberries (fresh work too!)
  • 1 tablespoon simple syrup, agave syrup, or maple syrup
  • 1 cup ice

Instructions

  1. Cut a notch in a lime wedge, then run the lime around the rim of two glasses. Dip the edge of each rim into a plate of salt (or for a festive look, use margarita salt).
  2. Place all ingredients in a blender. Blend until fully combined: you can blend until it’s an icy texture, or keep blending for a minute or so until it’s more liquid. Taste and add additional sweetener if desired. Pour into the glasses and serve.

Notes

*Easily doubles for 4 drinks or triples for 6 drinks, based on the size of your blender (use the 2x and 3x button). 

For a sweet margarita: Add make it with double the simple syrup or maple syrup, and add more to taste if desired.

For other fruit variations: Replace half of the frozen strawberries with frozen mangoes, peaches, or pineapple for different flavor combinations. Adjust the sweetener to taste.

For a spicy margarita: Remove the seeds from ¼ jalapeño pepper and roughly chop it. Add it to the blender and blend.

Rim variations: Try margarita salt or a Tajín rim, a Mexican seasoning blend of chili peppers, lime, and salt that adds a burst of tangy, spicy flavor.

  • Category: Drink
  • Method: Blended
  • Cuisine: Vegan
  • Diet: Vegan

Keywords: Strawberry margarita recipe, strawberry margarita

Pineapple Margarita

This pineapple margarita is a tropical spin on the classic! The winning combination of pineapple, tequila, and lime makes a…

This pineapple margarita is a tropical spin on the classic! The winning combination of pineapple, tequila, and lime makes a refreshing cocktail bursting with flavor.

Pineapple Margarita in rocks glass with pineapple garnish.

Here’s a tropical drink that marries the perfect combination of pineapple, tequila and lime: the pineapple margarita! Over the years, Alex and I have become experts in all the margarita recipes, from the classic to the more funky and off-the-wall. This juicy, fruity summer cocktail has become a favorite that works in any season.

What we love about this recipe: The sweet pineapple goes hand in hand with the sharp bite of the tequila and zingy lime. Add Cointreau orange liqueur to the mix, and it’s bursting with tropical flavor. It’s just as easy as the classic, but makes an even bigger statement (we think). It’s perfect for parties, and we love serving up the spicy variation, too!

What’s in a pineapple margarita?

The classic margarita recipe is one of the most famous cocktails of all time, invented back in the 1930’s. In fact, it’s on the list of International Bartender Association’s IBA official cocktails. This means that there’s an “official” definition of the ingredients in a margarita: lime juice, Cointreau, and tequila. We’re margarita purists and we love the simplicity of this drink made the right way.

This pineapple margarita is spin on the classic that’s in the same vein. The sweetness of the pineapple juice and the hint of sugar in the Cointreau make it the perfect sweet tart flavor. If you prefer a sweeter margarita, you can always add simple syrup or agave syrup. Here’s what you’ll need for a pineapple margarita:

  • Pineapple juice
  • Tequila (use blanco or reposado)
  • Cointreau
  • Fresh lime juice
Pineapple margarita

How to make a pineapple margarita

This pineapple margarita is “on the rocks,” meaning it’s served over ice. It’s a classic “shaken” cocktail you can mix up in a cocktail shaker. The salt rim is optional, but it adds just the right searing saltiness to each sip. Here’s what to do:

  1. Step 1: Rim the glass with salt. Cut a notch in a lime and use it to wet the rim. Place salt on a plate, then place the glass into the salt and rotate so just the outside of the rim is covered.
  2. Step 2: Shake in a cocktail shaker. Place the pineapple juice, tequila, Cointreau, and lime juice in a cocktail shaker with 1 handful of ice and shake until cold.
  3. Strain into a glass and add ice. Strain it into a glass and serve with clear ice if serving on the rocks. We like to garnish with a fresh pineapple wedge, but that’s just for looks!

The best tequila for margaritas

You can use any type of tequila in this pineapple margaritas recipe. Our rule of thumb is to buy a mid-price range bottle: the price usually corresponds to the quality of liquor! Look for 750 ml bottles in the range of $22 to $35. You can use either blanco or reposado tequila here.

  • Tequila blanco (or “new” tequila) has been aged less than 2 months and has a strong, straightforward flavor.
  • Tequila reposado (“rested” in Spanish) is aged longer, from 2 to 12 months. It has a more nuanced flavor, with notes of oak and vanilla.

Ideas for the salt rim

To take the drink presentation over the top, try our homemade margarita salt for the salt rim! The festive green and orange from the citrus peel look beautiful against the yellow of the pineapple margarita! Tajín is another great option for the rim, a Mexican seasoning blend that adds a burst of tangy, spicy flavor.

Spicy variation: add jalapeño pepper!

🌶 Want to mix up this pineapple margarita? Make it spicy! Add 3 to 4 jalapeño pepper slices when making the cocktail, or go this Pineapple Jalapeno Margarita and Spicy Pineapple Margarita. The heat and tangy brightness of the pepper pairs perfectly with the tropical pineapple.

Make a pineapple margarita pitcher for a crowd

Want to mix up a batch for a crowd? Instead of making single drinks, mix up a big pitcher. Here’s what to do: we did the math so you don’t have to! To make a pitcher that serves 8 drinks, mix together in a pitcher:

  • 1 ½ cups tequila
  • 2 cups pineapple juice
  • ¾ cup Cointreau
  • ¾ cup lime juice

Add 3 handfuls of ice and stir until cold. Pour into glasses and serve!

A few more margarita recipes

Want more margarita ideas? We have lots more where this comes from. Here are some margarita recipes to try:

🍍Love pineapple? Try all our pineapple juice cocktails, like the tropical Pineapple Rum Cocktail or Pineapple Vodka Cocktail.

Frequently asked questions

My pineapple margarita is too sweet or tart! How can I adjust it?

Taste your margarita as you go. If it’s too sweet, add a little more lime juice for tartness. You can also add a bit of simple syrup or agave nectar in the recipe.

What’s the best way to rim a glass for a pineapple margarita?

For a classic touch, rim your glass with coarse kosher salt. You can also get creative with a superfine sugar rim or a chili lime salt or Tajin rim for a spicy kick.

Can I make a frozen pineapple margarita?

Yes, go to our Frozen Margarita recipe and substitute 4 cups frozen pineapple for the ice.

Print
Pineapple margarita

Pineapple Margarita Recipe


  • Author: Sonja Overhiser
  • Prep Time: 5 minutes
  • Cook Time: 0 minutes
  • Total Time: 5 minutes
  • Yield: 1 drink

Description

This pineapple margarita is a tropical spin on the classic! The winning combination of pineapple, tequila and lime makes a killer cocktail.


Ingredients

  • 1 ½ ounces (3 tablespoons) tequila blanco or reposado*
  • 2 ounces (¼ cup) pineapple juice
  • ¾ ounce (1 ½ tablespoons) Cointreau
  • ¾ ounce (1 ½ tablespoon) fresh lime juice
  • Kosher salt, flaky sea salt, or margarita salt for the rim (optional)
  • Ice, for serving (try clear ice)
  • For the garnish: pineapple wedge

Instructions

  1. Cut a notch in a lime wedge, then run the lime around the rim of a glass. Dip the edge of the rim into a plate of salt (or for a festive look, use Margarita Salt).
  2. Place all ingredients in a cocktail shaker and fill it with ice. Shake until cold. (For a sweeter margarita, taste and add a hint of simple syrup or agave syrup, to taste.) Strain the margarita into the glass with the salted rim. Fill the glass with ice and serve.

Notes

Pitcher variation: To make a pineapple margarita pitcher that serves 8, mix together in a pitcher: 1 ½ cups tequila, 2 cups pineapple juice, ¾ cup Cointreau, and ¾ cup lime juice. Add 3 handfuls of ice and stir until cold. Pour into glasses and serve!

For a sweet margarita: Add simple syrup or agave syrup, to taste, starting with 1 teaspoon and gradually increasing. 

For a spicy margarita: Add 3 to 4 slices jalapeño pepper to the cocktail shaker, or go to Pineapple Jalapeno Margarita or Spicy Pineapple Margarita.

Rim variations: Try margarita salt or a Tajín rim, a Mexican seasoning blend of chili peppers, lime, and salt that adds a burst of tangy, spicy flavor.

  • Category: Drink
  • Method: Shaken
  • Cuisine: Cocktails
  • Diet: Vegan

Keywords: Pineapple margarita, pineapple tequila cocktail

St Germain Spritz

The St Germain Spritz is a delightful blend of elderflower liqueur, sparkling wine, and soda water. It’s perfect for sipping…

The St Germain Spritz is a delightful blend of elderflower liqueur, sparkling wine, and soda water. It’s perfect for sipping on patios, enjoying at brunch, or anytime you crave a lightly sweet and bubbly cocktail!

St germain spritz in stemmed cocktail glass with thyme garnish.

Here’s a light and refreshing cocktail that’s vying for summer’s best drink: the St Germain Spritz! It’s floral and bubbly, full of delicately sweet flavor and effervescence.

Why we love it: There are lots of spritz cocktails, from the popular Aperol Spritz to the bitter Campari Spritz. But I must say, we like this one even better (we do have a soft spot for St-Germain!). It’s easy to drink, perfect for poolside sipping, brunch, or with an afternoon book. Oh, and it takes 3 minutes to mix up, making it one of our top summer cocktails.

Ingredients in a St Germain spritz

The St Germain spritz is variation on the popular Aperol spritz, an Italian aperitif. The spritz was invented back in the 1800’s in Italy as a way to water down sparkling wine, but it wasn’t until the 1950’s that the Aperol spritz took the form it has today. The St Germain spritz simply swaps in this elderflower liqueur for the Aperol in this classic formula. Here’s what’s in a St Germain spritz:

  • St Germain: This popular elderflower liqueur tastes light, sweetly floral, and fragrant. It’s quite popular and easy to find at most liquor stores.
  • Sparkling wine: Either Prosecco or champagne work here, though Prosecco is most traditional. We tend to prefer Prosecco since it has great flavor and it’s more economical, pricewise.
  • Soda water: Use club soda or unflavored sparkling water (we use our SodaStream to make it at home).

🍾 Tip: A 750 ml bottle of Prosecco is 25 ounces, enough for 8 drinks. If you’re making 2 drinks, a mini bottle is perfect—it holds 187 mL or about 6 ounces!

St Germain Spritz by St-Germain bottle

How to make a St Germain spritz

The St Germain spritz is so easy to make: there’s no real technique involved at all! Just stir ingredients and top with bubbles. Here are the basic steps (or skip to the full recipe):

  • Step 1: Stir 2 oz St Germain in a glass with ice to make it cold.
  • Step 2: Add 3 oz Prosecco and 1 oz soda water.
  • Step 3: Squeeze in juice from a lemon wedge and serve. Garnish with a thyme sprig if desired!

Variation: the Hugo spritz

The Hugo spritz is a popular variation on the St Germain spritz that’s essentially the same drink! Simply add a garnish of fresh mint and a lime wedge to the glass.

Champagne pouring into St Germain Spritz glass

More about St-Germain liqueur

We’re big fans of St-Germain, a liqueur that’s made with elderflowers, the small white flowers of an elderberry plant. The flavor is light, sweetly floral, and fragrant—though it’s hard to truly describe the flavor you taste it! It adds a unique smooth finish to the flavor of cocktails.

The vintage-looking bottle makes it seem like it has hundreds of years of history. But St-Germain was actually invented in 2007 (here’s the story behind it!).

How to pronounce St-Germain? 

The name is French, so say “Sahn-jer-MAHN” with your best French accent.

Spritz recipes in stemmed glasses: Campari spritz, amaro spritz, St Germain spritz

The spritz ratio

The classic spritz ratio is present in all spritzes, from Aperol to this amaro spritz. The basic idea is 3 parts sparkling wine, 2 parts liqueur, 1 part soda water. Once you’ve memorized this ratio, you can use it to make endless variations of spritzes. Use any type of liqueur, from Italian bitters to…of course, St Germain! Here are a few more spritz recipes to try:

Step it up: try clear ice!

Take your St Germain spritz to the next level with clear ice! It’s homemade artisan ice that’s crystal clear, with none of the cloudiness of normal ice. Once we started making clear ice, it took our drinks to the next level! All you need is 24 hours and a small cooler. Here’s to How to Make Clear Ice.

A few more drinks with St Germain

We’re majors fans of this elderflower liqueur! Here are some of our favorite St Germain cocktails to use up a bottle:

What is St-Germain?

St-Germain is a French liqueur made from elderflowers. It has a light, floral flavor with hints of sweetness and pear.

What kind of sparkling wine should I use?

A dry sparkling wine like Prosecco or Champagne works best. Avoid anything too sweet, as it will clash with the floral notes of the St. Germain.

Is soda water necessary?

Club soda adds a refreshing touch and essential fizziness. However, if you don’t have it, a splash of plain seltzer water will work too.

What’s the best way to garnish a St Germain Spritz?

A lemon or lime wedge is the classic garnish. For a more floral touch, add a sprig of fresh elderflower (if available) or lavender. A slice of cucumber can also be a refreshing addition.

Print
St germain spritz

St Germain Spritz


  • Author: Sonja Overhiser
  • Prep Time: 3 minutes
  • Cook Time: 0 minutes
  • Total Time: 3 minutes
  • Yield: 1 drink

Description

Bubbly and floral, this St Germain Spritz is the ideal refreshing cocktail! An easy way to use this elderflower liqueur, it takes only 3 minutes to make.


Ingredients

  • 2 ounces (4 tablespoons) St Germain
  • 3 ounces (6 tablespoons) sparkling wine, such as Prosecco or champagne, chilled
  • 1 ounce (2 tablespoons) soda water
  • Ice (try clear ice!)
  • For the garnish: lemon wedge, fresh thyme, lavender or rosemary, and a straw if you’d like

Instructions

  1. Add the St Germain to a glass filled with ice and stir. Top with the sparkling wine and soda water.
  2. Squeeze in the lemon wedge and stir gently. Serve with fresh herbs, and if you’d like, a straw to minimize dilution!
  • Category: Drink
  • Method: Stirred
  • Cuisine: Cocktails
  • Diet: Vegan

Keywords: St Germain spritzer

25 Best Margarita Recipes to Make at Home

Dive into our collection of the best margarita recipes to make at home, featuring classic, frozen, and fruity variations—all deliciously…

Dive into our collection of the best margarita recipes to make at home, featuring classic, frozen, and fruity variations—all deliciously easy! Learn the ingredients and ratio to make the classic recipe, plus popular riffs on this drink.

Margarita recipes: margarita in glass with pink sea salt.

Crisp, zingy, and salty, the margarita is one of the most popular cocktails of all time. As two cocktail experts, Alex and I have made the classic margarita recipe more times than we can count—and just about every variation!

Types of margaritas

Here we’ve reviewed our library of cocktail recipes to find our top margarita recipes you can make at home! Because we’re purists, we recommend starting with the classic simple margarita.

Then try all the different types: frozen, spicy with jalapeño, smoky with mezcal, Italian with amaretto, and fruity with strawberry, mango, pineapple, and more. There are so many ways to change up this popular tequila cocktail, and we’re here for them all!

25 best margarita recipes to make at home

🍹Want a recipe for a party? Try a margarita pitcher!

A few more fun margarita recipes

We couldn’t narrow it down! Try these deliciously fun margarita recipes and flavors:

Want to mix up margaritas based on alcohol? Here are a few margarita recipes with a twist:

Best tequila for a margarita

What’s the best tequila for margaritas? A cocktail is only as good as the alcohol you use. Here are a few pointers:

  • Any mid-priced tequila tastes great in a margarita. Look for 750 ml bottles in the range of $22 to $35.
  • Tequila blanco is ideal for margaritas. It has a straightforward agave-centric flavor and spicy finish. Some brands we recommend are Espolon Blanco, El Tesoro Blanco, Patrón Silver, and Casamigos.
  • Tequila reposado (aged) makes a smooth, sophisticated margarita. Tequila reposado is aged 2 to 12 months in oak barrels (reposado means “rested” in Spanish). It has a smooth flavor and notes of oak, vanilla, and caramel. Some brands we like include Casamigos, Milagro Reposado, and Suerte Reposado.
Tequila

Margarita ingredients & ratio

When it comes to margarita recipes, there’s nothing better than a classic margarita! It’s tart, with just the right bite from the tequila and scent of orange from the Cointreau. Many bars and mixes load it down with sugar, but that strays far from the classic cocktail recipe. The margarita recipe for the classic margarita is:

  • 1 ½ ounces tequila
  • 1 ounce Cointreau
  • ¾ ounce lime juice

Tip: Some people like a margarita ratio that is 3, 2, 1: 3 parts tequila, 2 parts orange liqueur and 1 part lime. Alex and I like our margaritas on the tart side, so we use the ratio above. Feel free to experiment and find the ratio that’s right for you!

How to make margaritas at home: step by step

Once you’ve got the ingredients, it’s time to mix up your drink! Here’s how to make margaritas at home:

  1. Step 1: Rim the glass with salt. The salt enhances the sweet and sour flavors in the drink!
  2. Step 2: Place the tequila, Cointreau and lime juice in a cocktail shaker with 4 ice cubes, and shake until cold.
  3. Step 3: Strain the margarita into a glass, and add ice if serving on the rocks. The margarita is often served in a lowball or Old Fashioned glass, though of course you can use the classic margarita glass too.
Margarita salt

How to make a salt rim

The salt rim is essential to these margarita recipes. The salt enhances the flavors in the drink, and gives it that classic look. Try our margarita salt for a colorful flair with lime zest and orange zest! Here’s how to make a salt rim:

  • Spread on a plate: Spread the kosher salt, flaky sea salt, or margarita salt on a plate in an even layer.
  • Wet the glass with a lime: Take a lime wedge and cut a notch in the middle: then slide it around the rim of the glass.
  • Rim the outside edge only: Tilt the glass so that only the outside edge goes into the salt. Then shake off any loose salt into the sink.

Try clear ice to look like a pro!

❄ Want a professional look to your margarita recipes? Add clear ice! It will make your drink look like it came from a trendy bar, but you can easily make it in your own home. All you need is a small cooler and 24 hours. Go to How to Make Clear Ice.

Frequently asked questions

What are the classic types of margaritas?

Original Margarita: The foundation – tequila, lime juice, orange liqueur (like Cointreau or Triple Sec), and a salt rim.

Frozen Margarita: A delicious icy version of the classic, perfect for hot days.

Tommy’s Margarita: A purist’s choice, made with just tequila, lime juice, and agave nectar (no orange liqueur).

What are some popular fruity margarita variations?

Strawberry Margarita: Blend frozen strawberries for a burst of sweet and tart flavor.

Mango Margarita: Tropical twist with fresh or frozen mango chunks.

Peach Margarita: A delightful summer option with fresh or frozen peaches.

Watermelon Margarita: Refreshing and perfect for poolside, uses blended watermelon or watermelon juice.

What’s the best tequila for margaritas?

A 100% agave blanco tequila is ideal for many, but tequila reposado also adds interesting flavor notes. Look for a mid-range priced tequila – you don’t need the top shelf for mixed drinks, but avoid the very bottom shelf options.

Salt or no salt?

It’s a personal preference! The salt rim adds a nice contrast to the sweet and tart flavors. (We like it best with salt.)

Frozen or on the rocks?

Frozen margaritas are great for hot weather, while on-the-rocks offers a more sophisticated, classic presentation.

What’s the best way to serve a margarita?

Margarita glasses with a salted rim are classic, but we generally prefer rocks or lowball glasses.

Print
Margarita recipe

Best Margarita Recipe


  • Author: Sonja Overhiser
  • Prep Time: 5 minutes
  • Cook Time: 0 minutes
  • Total Time: 5 minutes
  • Yield: 1 drink

Description

Dive into our collection of homemade margarita recipes, featuring classic, frozen, and fruity variations—all easy to make at home! Learn the ingredients and ratio to make the classic recipe, plus popular riffs on this drink.


Ingredients

  • 1 ½ ounces* tequila blanco or reposado
  • 1 ounce Cointreau (or triple sec)
  • ¾ ounce fresh lime juice
  • Kosher salt or flaky sea salt, for the rim
  • For the garnish: Lime wedge

Instructions

  1. Cut a notch in a lime wedge, then run the lime around the rim of a glass. Dip the edge of the rim into a plate of flaky sea salt (or for a festive look, use our Margarita Salt).
  2. Place all ingredients in a cocktail shaker with 4 ice cubes and shake until cold.
  3. Strain the margarita into the glass with the salted rim. Fill the glass with ice and serve.

Notes

To convert to tablespoons, 1 ounce = 2 tablespoons. 

For a margarita pitcher (8 servings): Place 1 ½ cups tequila, 1 cup Cointreau or Triple Sec, and ¾ cup lime juice in a pitcher. Add 3 handfuls ice and stir until cold. Pour into the prepared glasses. 

  • Category: Cocktails
  • Method: Shaken
  • Cuisine: Mexican
  • Diet: Vegan

Keywords: Margarita recipes, margarita recipe, How to make margaritas at home