The Best Banana Cookies

This banana cookies recipe is the best, hands down! Each bite is soft and chewy, infused with the rich flavor…

A Couple Cooks – Recipes worth repeating.

This banana cookies recipe is the best, hands down! Each bite is soft and chewy, infused with the rich flavor of brown butter and spiced with warm cinnamon.

Banana Cookies on a tray with bananas and cinnamon sticks

Forget everything you thought you knew about banana cookies. These are the absolute best, hands down! The brown butter infuses them with a rich, nutty flavor, while the warm cinnamon adds a touch of spice that takes them to the next level. Every bite is soft, chewy, and bursting with the delicious taste of ripe bananas. You won’t be able to resist them!

Why these are the best banana cookies

These banana cookies are the absolute best, and here’s why: they have the best banana-scented flavor and chewy, buttery texture. We had one ripe banana on hand and wanted cookies, but didn’t want to create just another blob-like cakey cookie like many cookies with banana. No, this had to be buttery, chewy, and crinkly (if possible). And we achieved it! Here’s what make these cookies great:

  • They have a chewy, soft and crinkly texture. When adding fruits like banana and pumpkin to cookies, they can get very cakey instead of buttery. Like our pumpkin cookies, these banana cookies have just enough butter to make the perfect texture.
  • Brown butter adds rich, caramel undertones. Brown butter adds nuanced flavor notes that take these cookies over the top.
  • Our friends and family can’t resist them! When we made these, our friends and family couldn’t stop talking about them. (Wow, that is good!) So we knew this recipe was a winner.
  • They store well. Cookie storage is important, since you’re likely not going to eat them all at once. These hold up very well at room temperature, refrigerated, or frozen.
Banana Cookies

The most important part: a ripe banana!

This banana cookies recipe requires just one ripe banana, which is nice for when you don’t have enough bananas on hand for banana bread or banana muffins.

As with any banana baked good, you’ll want a very ripe banana: the blacker the better! Bananas with a blackened peel bring added moisture, sweetness, and pure fruity flavor to baked goods like bread, muffinspancakes, cookies, cake, and more. Don’t try making this recipe with anything but an extremely ripe banana.

Banana Cookies

Tips for baking banana cookies

Cookies can be temperamental, and banana cookies are no different. It’s challenging to get cookies that look perfectly identical. Here are a few tips for upping your baking game:

  • Use a cookie scoop. If you have a 1 ½ tablespoon cookie scoop, it’s helpful for portioning the dough perfectly.
  • If you have high quality non-stick cookie sheets, you can bake both sheets at once. This has become our preferred method for cookies. We recommend using two of these non-stick cookie sheets for the most even bake (keep reading for more).
  • If not, bake each tray separately. Refrigerate the cookie dough while the first tray bakes.
  • Remember, the crinkles happen while the cookies cool. You’ll remove the cookies when they are puffed, then they will cool and settle into crinkles.

Another tip for this banana cookies recipe is the quality of pans matters! We’ve experimented and when we used shiny aluminum pan with parchment paper, the size and shape of the cookies was completely off. However, baking on this non-stick cookie sheet worked great.

So, we recommend using two of these non-stick cookie sheets for the most even bake! The entire batch baked on these, rotating the sheets in the middle of baking, should come out out beautifully consistent.

Banana Cookies Recipe

Optional: add a glaze

Want to step up these banana cookies? You can add a glaze or icing! Keep in mind that the glaze adds additional moisture so the cookies don’t hold up as well during storage. You’ll want to store the cookies refrigerated for best results with a glaze. You can either add an icing drizzle with a fork or dip the cookies into the glaze. Here are a few ideas:

Storage for banana cookies

These banana cookies hold up well over time. This is a must for cookies in our opinion, since you’re making them in such a big batch. Here’s what to note about storing these cookies:

  • Store in a sealed container at room temperature for 1 week. The texture holds up well: no need to add anything to the container.
  • Store refrigerated for 2 weeks. Allow to come to room temperature before serving.
  • Store frozen for up to 3 months. 

More banana recipes

Want more with ripe bananas? Here are our favorite ways to use them?

This banana cookies recipe is…

Vegetarian.

Print
Banana Cookies

The Best Banana Cookies


  • Author: Sonja Overhiser
  • Prep Time: 20 minutes
  • Cook Time: 15 minutes
  • Total Time: 35 minutes
  • Yield: 24 to 26

Description

This banana cookies recipe is the best, hands down! Each bite is soft and chewy, infused with the rich flavor of brown butter and spiced with warm cinnamon.


Ingredients

  • 10 tablespoons unsalted butter
  • 2 cups (280 g) all-purpose flour
  • 1 teaspoon baking soda
  • 1 tablespoon cinnamon
  • ½ teaspoon kosher salt
  • 1 cup granulated sugar, plus more for rolling
  • 1 egg yolk
  • 1 teaspoon vanilla extract
  • ½ cup mashed very ripe bananas

Instructions

  1. Preheat the oven to 350°F.
  2. Slice the butter into pieces and place it in a skillet over medium heat. Heat for about 5 minutes until it melts, turns foamy, and then becomes golden brown in color and smells nutty. Immediately remove from the heat and transfer to a bowl. Transfer to the freezer for 15 minutes to cool (you can also do this in advance and cool it to room temperature).
  3. In a medium bowl, whisk the flour, baking soda, cinnamon, and salt.
  4. Add the cooled browned butter to the bowl of a stand mixer. Add the sugar and mix on High speed for 1 minute, until light and fluffy. Add the egg yolk and vanilla extract, and beat on High speed for 1 minute. Add the mashed banana and mix just until incorporated, scraping once. Pour in the bowl of dry ingredients and mix on Low speed until just combined.
  5. Line a baking sheet with parchment paper. Place ¼ cup granulated sugar on a plate. Roll the dough in 1 ½ tablespoon balls, using a cookie scoop if possible, then roll the ball into the plate of sugar. Repeat to make 2 trays of 12 cookies (24 to 26 total).
  6. Add the trays to the oven and bake 12 to 13 minutes, until puffed, reversing the trays at the 7 minute mark (the cookies will settle into the crinkles when the cool.) Allow to cool on the pan 5 minutes before removing to a baking rack.
  7. Store at room temperature for about 1 week, refrigerated for 2 weeks (bring to room temperature before serving), or frozen for 3 months (un-iced cookies freeze best).
  • Category: Dessert
  • Method: Baked
  • Cuisine: Cookies
  • Diet: Vegetarian

Keywords: Banana cookies, banana cookies recipe, banana cookie recipe

A Couple Cooks - Recipes worth repeating.

Gingerbread Cake

This gingerbread cake recipe is moist and cozy-spiced! Its rich molasses flavor tastes like a soft and fluffy version of…

A Couple Cooks – Recipes worth repeating.

This gingerbread cake recipe is moist and cozy-spiced! Its rich molasses flavor tastes like a soft and fluffy version of the iconic cookie.

Gingerbread Cake

Here’s the perfect easy holiday dessert: try gingerbread cake! This soft, moist version of the iconic cookie is so easy to whip up: no rolling or cutting out down required! You don’t even need a mixer. Stir up the batter and bake it into this beautiful moist and spiced cake. The rich molasses flavor tastes like a soft and fluffy version of the cutout cookies, and it’s made in a big pan to feed a crowd. We became obsessed with the concept and have now perfected it into our new favorite Christmas dessert.

Why to make this gingerbread cake recipe

There are lots of gingerbread cake recipes out there: so why make this one? Here are a few things we love about the recipe:

  • It’s quick and easy. This recipe uses melted butter, so you don’t need stand mixer or to wait for room temperature butter. Just mix together all ingredients by hand!
  • It has just the right flavor without a topping. Many gingerbread cake recipes are pretty bitter on their own, intended to be served with a hard butter sauce or cream cheese frosting. This one is sweet enough so you can top it simply with either powdered sugar and/or whipped cream.
  • It serves a crowd. This gingerbread cake is intended for celebrations, so make it in a big 9 x 13-inch pan to serve a crowd. Plus, leftovers!
Gingerbread Cake

Ingredients in gingerbread cake

Gingerbread is centuries old: in fact, gingerbread cookies were sold in European markets as early as the 17th century! The hallmark flavors of this baked good are the spices ginger, cinnamon and cloves and the sweetener molasses, which adds rich, bittersweet undertones and a dark brown color.

Everyone knows gingerbread cookies, of course: but what about a soft gingerbread cake? This version tastes just like the cookie, but it’s soft, moist and fluffy. You can top it with just powdered sugar if you like, or serve with whipped cream or cream cheese frosting. Either way, you will fall for it just like we did! Here’s what you’ll need:

  • All purpose flour: All-purpose flour makes the backbone of this classic cake. Weigh the flour if you can for the most accurate measurement.
  • Baking powder, baking soda, and salt: Two leaveners make this fluffy cake rise.
  • Ginger, cinnamon, and cloves: The classic combination of these three spice heavy-hitters are required for this cake. Make sure the spices are fresh so they pack a flavor punch.
  • Molasses: Use unsulphured molasses here. We’ve adjusted the molasses flavor to make sure it’s enough to come through but not so much that it leaves a bitter aftertaste.
  • Boiling water: Boiling water helps to make a moist cake and help the molasses to dissolve.
  • Butter: Melted butter brings rich body to the cake.
  • Granulated sugar and brown sugar: A combination of granulated and brown sugar brings nuance in flavor and just the right sweetness.
  • Eggs: Eggs make a smooth batter and fluffy crumb.
Gingerbread Cake

Tips for making the cake

This gingerbread cake recipe is so simple, there aren’t many things to know related to technique. However, there are a few best practices to keep in mind when making it:

  • A 9 x 13″ pan with square edges makes the best look. We like when the pieces look nice and squared-off, and this 9 x 13″ pan does the trick.
  • Bake until the top is set and springs back lightly to the touch. You can use the toothpick test, but this cake is done when it’s fully set and springy to the touch in the center. If you use a toothpick to judge, it can be either clean or have a few clinging crumbs.
  • Allow to cool to room temperature before dusting with powdered sugar. Otherwise, the powdered sugar melts into the cake.

Toppings for gingerbread cake

This gingerbread cake recipe is unique because it’s sweet enough to enjoy without an elaborate topping. Some types of gingerbread cake are intended to be served with a hard butter sauce or cream cheese frosting to bring in the sweetness. You can do that here, but this cake can also be enjoyed simply. Here are a few of our top topping ideas:

  • Powdered sugar: Simply dust the entire cake with a generous helping of powdered sugar.
  • Whipped cream (recommended): We love this dessert with a dollop of homemade whipped cream.
  • Bourbon sauce: If desired, you can top with a hard sauce like this bourbon sauce. This will make the entire dessert much sweeter, so we recommend decreasing the granulated sugar in the cake to ½ cup.
  • Cream cheese frosting: This cream cheese frosting adds quite a bit of sweetness to the cake, but it does make a nice counterpoint to the bittersweet molasses notes in the cake.
Gingerbread Cake Recipe

More holiday deseserts

We love serving gingerbread cake as a Christmas dessert: it’s like an easier version of our Christmas cranberry pudding and goes over well with everyone! Here are a few more holiday desserts to enjoy:

This gingerbread cake recipe is…

Vegetarian.

Print
Gingerbread Cake

Easy Gingerbread Cake


  • Author: Sonja Overhiser
  • Prep Time: 20 minutes
  • Cook Time: 30 minutes
  • Total Time: 50 minutes
  • Yield: 12 large or 16 small pieces

Description

This gingerbread cake recipe is moist and cozy-spiced! Its rich molasses flavor tastes like a soft and fluffy version of the iconic cookie.


Ingredients

  • 2 ½ cups [350 g] all-purpose flour
  • 2 teaspoons baking powder
  • 1 teaspoon baking soda
  • 2 teaspoons ground ginger
  • 2 teaspoons ground cinnamon
  • ½ teaspoon ground cloves
  • ½ teaspoon kosher salt
  • ¾ cup unsulphured molasses
  • 1 cup boiling water
  • ½ cup butter, melted
  • 2/3 cup granulated sugar
  • ½ cup brown sugar
  • 2 large eggs
  • Powdered sugar, to top
  • Homemade whipped cream, for serving (optional but recommended!) or cream cheese frosting

Instructions

  1. Preheat the oven to 350°F.
  2. Butter a 9 x 13″ baking dish.
  3. In a medium bowl, whisk the all-purpose flour, baking powder, baking soda, ginger, cinnamon, cloves, and kosher salt.
  4. In a separate medium bowl, whisk together the molasses and boiling water. Whisk in the melted butter and sugar. Then whisk in the eggs and vanilla extract.
  5. Pour the wet ingredients into the dry ingredients and whisk until smooth.
  6. Pour the batter into the prepared pan. Bake 30 to 35 minutes until the center is set and feels springy, and an inserted toothpick is clean or has moist crumbs. Allow to cool until room temperature before dusting with powdered sugar. Serve with whipped cream.
  • Category: Dessert
  • Method: Baked
  • Cuisine: American
  • Diet: Vegetarian

Keywords: Gingerbread cake, gingerbread cake recipe

A Couple Cooks - Recipes worth repeating.

Blueberry Pie

This blueberry pie recipe stars a luscious berry filling encased in a golden lattice pastry crust. Here are the tricks…

A Couple Cooks – Recipes worth repeating.

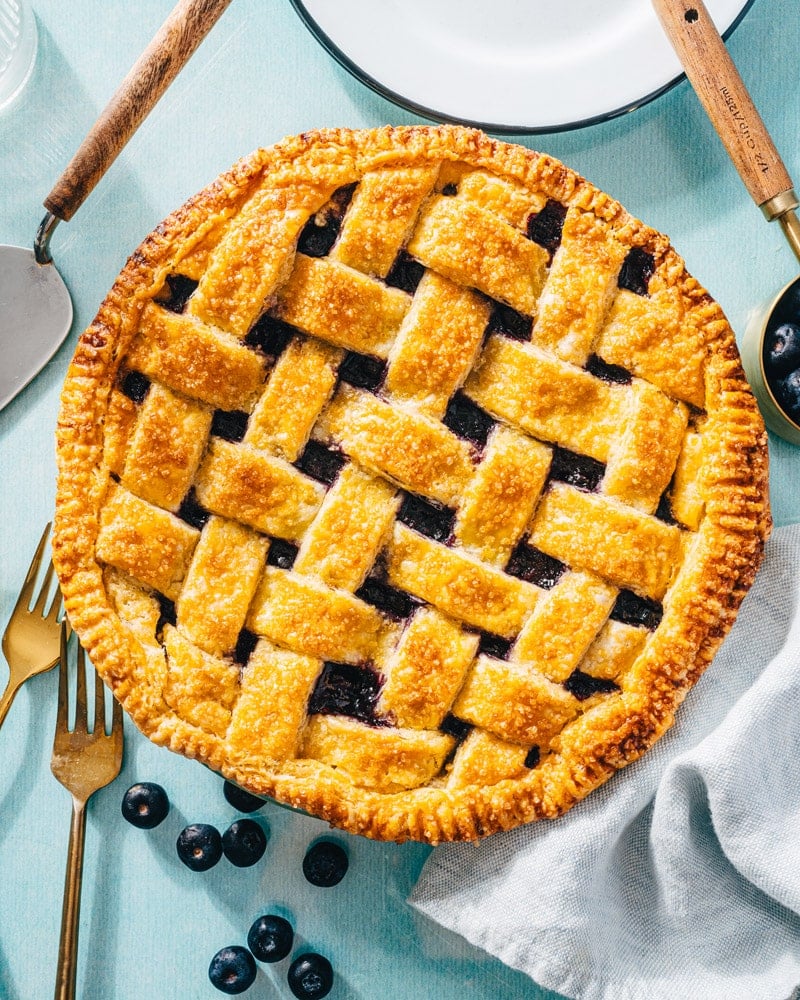
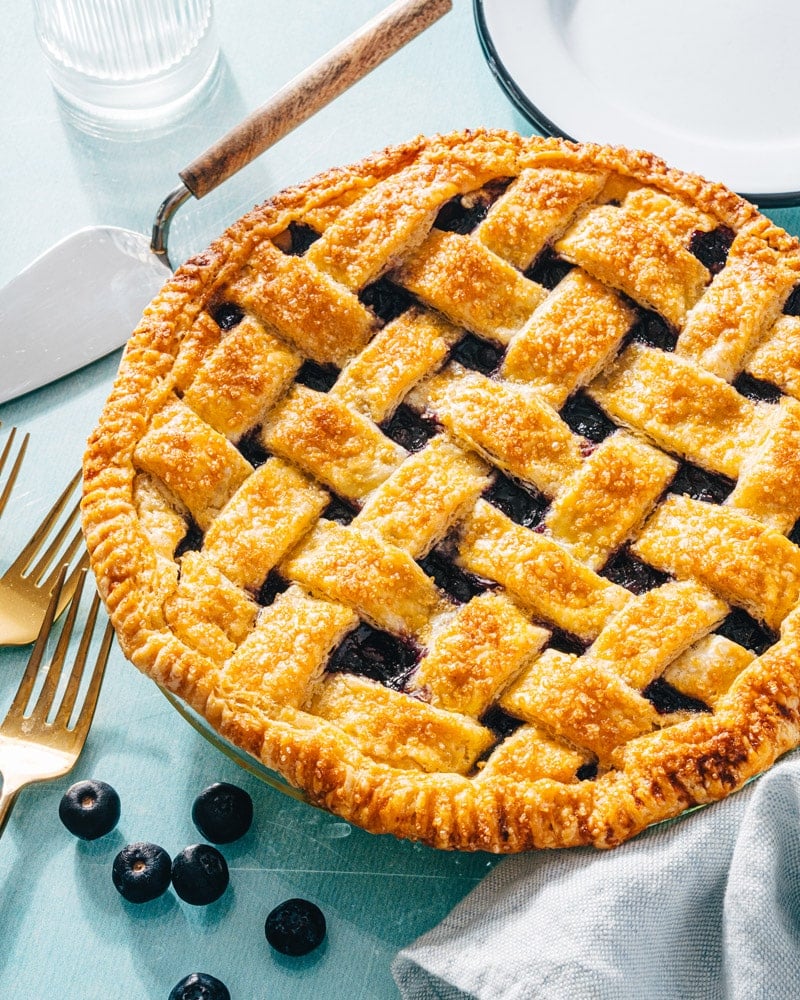
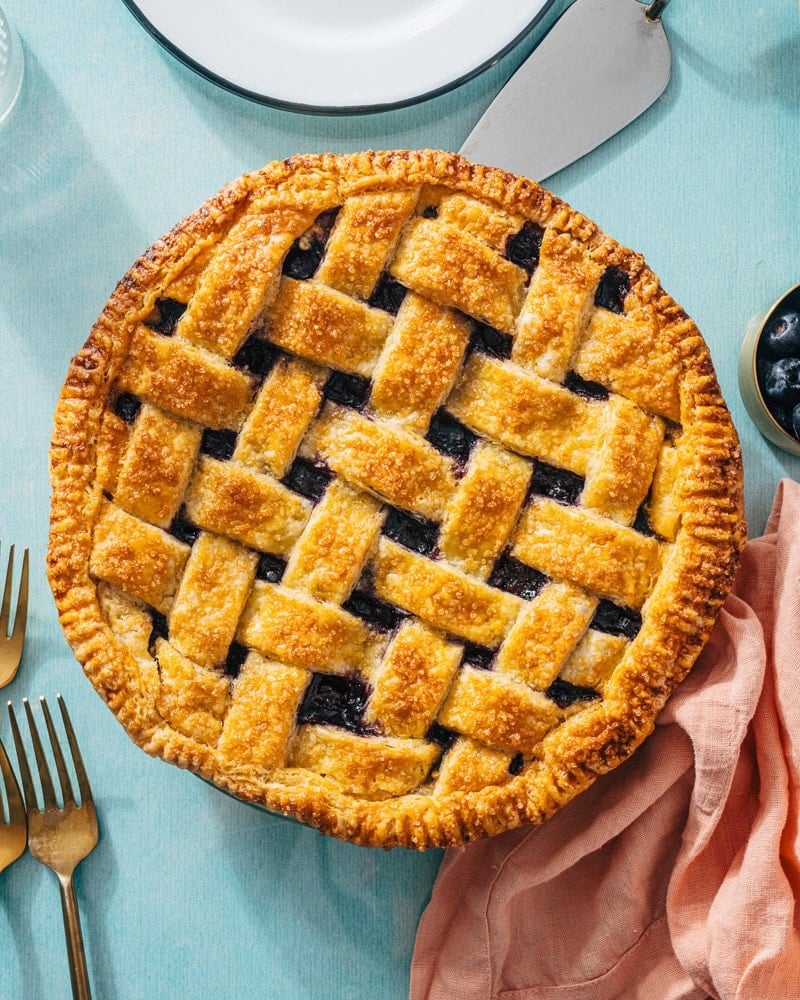
This blueberry pie recipe stars a luscious berry filling encased in a golden lattice pastry crust. Here are the tricks to the best pie!

Blueberry pie recipe

Is there a more quintessential summer dessert than blueberry pie? It tastes of backyard cookouts and the 4th of July, Grandma’s bake sale and lazy summer afternoons. There’s no better way to use a load of fresh berries than baking them into this classic pastry. This blueberry pie recipe is something special: it’s got a luscious, thick berry filling and a golden, buttery lattice-topped crust. Here’s how to make a fool-proof blueberry pie that will make everyone come running!

Ingredients in this blueberry pie recipe

Blueberry pie is as classic as they come here in the USA, though of course a good old apple or cherry pie come close! This one is a celebration of summer, with a thick sweet filling that’s best for eating on the back porch with a little melty vanilla ice cream. Like most pies, it’s a bit of a project: but it’s worth every minute. We’ve fool-proofed this recipe so you don’t end up with a gooey mess: it comes out perfectly golden with a thick filling every time. Here’s what you’ll need:

  • 1 recipe Homemade Pie Crust (2 crusts, or your favorite recipe)
  • Fresh blueberries
  • Sugar
  • Cornstarch
  • Maple syrup
  • Lemon juice and zest
  • Cinnamon
  • Vanilla extract
  • Salt
  • Egg, for egg wash
  • Turbinado sugar, for sprinkling
Blueberry pie

The trick to a fool-proof blueberry pie

Ever baked a pie, only to end up with a runny filling that collapses when you cut it? Fruit pie fillings can vary based on the ripeness of the specific fruit you use. Blueberries are approximately 85% water, which is activated when the fruit is heated. We had a few test pies that come out totally runny, so we came up with a solution: pre-cooking the filling! This way, it comes out perfectly set every time. Here are a few tips:

  • Pre-cook the filling with cornstarch for 5 to 6 minutes. Cooking the filling gives it time to interact with the cornstarch, making a thick and gooey filling. Cook it just long enough so that the cornstarch is activated, but not enough that the fruit texture starts to disintegrate.
  • Allow the filling to cool while making the crust. If the filling is too hot, it can heat up the top crust of the pie which can cause the butter to melt. Making the filling first allows it time to cool.
  • Fully cool the pie for 2 hours, then refrigerate before serving. This is the most important step, which allows the filling to fully set after baking.

Can you use frozen blueberries?

Want to use frozen berries instead of fresh? Pies are the perfect place to do it! Frozen blueberries can bleed into the batter of baked goods like muffins and breads, making them turn purple in color! But frozen berries work wonderfully here, especially since the filling is cooked down before baking.

Blueberry pie recipe

Tips for homemade pie crust

What makes this blueberry pie? The homemade pie crust recipe! It’s much tastier than purchased dough, and an important baking skill that’s fun to master. Here are a few tips and tricks that make this a stand-out pie crust:

  • Use Irish butter if you can find it. Irish butter has a higher fat content and lower water than American butter. It gives baked goods a richer flavor and flakier texture, which is the absolute best for pie crust! The most popular brand of Irish butter is Kerrygold, which is easy to find at most grocery stores.
  • Keeping pie crust cold is essential. Add ice cold water to the crust when making the dough to make sure the butter doesn’t melt. Then, refrigerate the pie crust for 1 hour before rolling it out. This allows the gluten to relax and the fat to firm up, which makes an extra flaky and helps it hold its shape.
  • When rolling, pick up the dough and rotate it occasionally so it doesn’t stick. Liberally flour the work surface and the rolling pin. Roll as perfect of a circle as possible. If the starts to stick, dust with a bit more flour and rotate the dough.
  • Weave the lattice. The lattice top makes the pie! If you’ve never woven a lattice pattern before, use this video tutorial to guide you.

Use an egg wash!

For the best golden finish to this blueberry pie crust, we recommend an egg wash. It makes a golden laminated exterior and gives a nice golden sheen to the surface. Whisk together 1 egg, then brush it onto the exposed crust with a pastry brush. Then sprinkle with crunchy turbinado sugar for a glittery finished look.

Serving blueberry pie

The most important thing to remember about blueberry pie? Make sure to cool it for at least 2 hours, then refrigerate until serving! This helps to firm up the filling so that you can cut a perfect slice.

Once you’re ready to serve, allow the pie to stand for about 20 to 30 minutes so that it warms back to room temperature (unless you enjoy cold pie!). It’s great with a dollop of homemade whipped cream or vanilla ice cream.

Blueberry pie

More pie recipes

Love baking up pies? Here are some of our favorite classic pie recipes:

This blueberry pie recipe is…

Vegetarian.

Print
Blueberry pie

Blueberry Pie Recipe


  • Author: Sonja Overhiser
  • Prep Time: 1 hour
  • Cook Time: 1 hour
  • Total Time: 2 hours
  • Yield: 1 pie (8 slices)

Description

This blueberry pie recipe stars a luscious berry filling encased in a golden lattice pastry crust. Here are the tricks to the best pie!


Ingredients

  • 1 recipe Homemade Pie Crust (2 crusts; or use your favorite recipe)
  • 6 cups fresh blueberries (or substitute frozen)
  • ¾ cup plus 2 tablespoons granulated sugar
  • ¼ cup cornstarch
  • 2 tablespoons maple syrup
  • 2 tablespoons lemon juice
  • 2 teaspoon lemon zest
  • ½ teaspoon cinnamon
  • ½ teaspoon vanilla extract
  • ¼ teaspoon fine salt
  • 1 egg, for egg wash
  • Turbinado sugar, for sprinkling

Instructions

  1. Make the Homemade Pie Crust. Chill the dough for 1 hour (or up to 24 hours).
  2. Meanwhile, stir together the blueberries, granulated sugar, cornstarch, maple syrup, lemon juice, lemon zest, cinnamon, vanilla extract, and salt in a saucepan and heat over medium heat for 4 to 5 minutes, stirring frequently, until the sauce is thick. Transfer the blueberries and sauce to a bowl and cool at least 30 minutes, until the crust is ready.
  3. Preheat the oven to 425°F. Place a rack in the lower third of the oven with a rimmed baking sheet covered in foil to preheat.
  4. Grease a 9” standard pie pan.
  5. Dust flour over a clean work surface. (Or if you have a pastry cloth, set it up and dust it with flour.) Dust a rolling pin in flour. Place one ball of dough on the work surface and gently roll it evenly from the center to the edge, until the dough is about ⅛-inch thick. Pick up the dough and rotate it occasionally as you work, keeping as perfect of a circle as possible and making sure it’s not sticking to the work surface. If it’s sticking, dust with a bit more flour. Roll the dough to a 12-inch wide circle (which corresponds to the 9-inch circle on a pastry cloth). Visible chunks of butter are expected: that’s what makes it flaky!
  6. Gently drape the dough over then rolling pin, then transfer it the prepared pie pan. Gently center and push the pastry towards the bottom of the pan.
  7. Allow the 1-inch of overhanging dough to drape over the edge. Fill the dough with the blueberries and sauce and place the entire pan in the freezer while rolling out the next dough.
  8. Roll out the second dough ball. Use a pizza cutter to cut the dough into 1 inch strips. Remove the pie from the freezer and weave a lattice pattern using the strips (see this video for a demonstration). Use kitchen scissors to cut off excess from the strips, then fold the draped dough over the top and crimp the edges with a fork.
  9. Whisk the egg in a small bowl, then brush the top of the lattice and crust with the egg wash using a pastry brush. Sprinkle generously with turbinado sugar.
  10. Place the pie directly onto the preheated baking sheet lined with foil. Bake immediately for 15 minutes (at 425°F). Leaving the pie in the oven, reduce the oven temperature to 375°F and bake for 60 minutes, until browned and the filling has small bubbles. Check at 40 minutes and if necessary, add a foil tent if the crust is already very golden brown.
  11. Cool at least 2 hours, then refrigerate until ready to serve. Bring to room temperature before serving.
  • Category: Dessert
  • Method: Baked
  • Cuisine: American
  • Diet: Vegetarian

Keywords: Blueberry pie, blueberry pie recipe

A Couple Cooks - Recipes worth repeating.

Lemon Blueberry Muffins

These lemon blueberry muffins have just the right sweet and citrusy kick! Drizzle with a lemon glaze and they’re irresistible.…

A Couple Cooks – Recipes worth repeating.

These lemon blueberry muffins have just the right sweet and citrusy kick! Drizzle with a lemon glaze and they’re irresistible.

Lemon Blueberry Muffins

What’s better than the combination of zingy lemon and pure sweet blueberry? These Lemon Blueberry Muffins are the epitome of the pairing, with a bright citrusy kick from the lemon and studded with pops of purple berries. Heighten the flavor with a lemon drizzle, which takes these muffins from good to wow. This spin on our classic blueberry muffins is a new favorite over here. Here’s how it’s done!

Ingredients for lemon blueberry muffins

Our Classic Blueberry Muffins are a favorite around here, and we designed those to not require lemon for ease of the recipe. But if you’ve got a lemon around or if you’re craving this tasty combo: blueberry lemon muffins are where it’s at. Here’s what you’ll need for this recipe:

  • All-purpose flour
  • Granulated sugar
  • Cinnamon, baking powder, and salt
  • Eggs
  • Vegetable oil
  • Greek yogurt
  • Milk
  • Lemon juice and lemon zest
  • Blueberries
Lemon blueberry muffins

For the lemon glaze

In our opinion, these lemon blueberry muffins aren’t complete without the lemon glaze. Of course, you can make them without: and it actually simplifies storage (see below). But the glaze adds just the right pop of sweet citrusy lemon: it’s like adding a few more pinches of salt to a savory dish to bring out the flavor even more.

All you need are powdered sugar and lemon juice, which you’ll mix into a thick icing. Make sure to let the muffins cool completely before drizzling the icing. A tip? A fork makes the best drizzle (not a spoon!).

Can you use frozen blueberries?

Got frozen blueberries on hand? Frozen blueberries can bleed into the batter of muffins and breads, making them turn purple in color! If you’d like to use frozen berries, we recommend rinsing them well and patting them dry with paper towels per these instructions from King Arthur Baking.

Blueberry lemon muffins

Tips for lemon blueberry muffins

Ready to bake up your lemon blueberry muffins? Here are a few tips to what makes this recipe work:

  • Add a hefty amount of lemon zest. 1 ½ tablespoons lemon zest might seem like a lot, but it’s crucial for the lemon flavor. This is the amount you can get from 1 large or 2 small lemons.
  • Resist the urge to overmix. Overmixing muffin batter causes holes in the crumb and a denser texture. Mix just until the streaks of flour disappear.
  • Baking at 400 degrees makes a taller muffin. After experimenting for years, our favorite temperature for baking muffins is 400 degrees Fahrenheit (versus 350 which is standard). It makes a taller and fluffier muffin: and it’s quicker to bake!

Storage info

The lemon glaze adds a little complication to the storage info for these lemon blueberry muffins. Here are best practices:

  • Room temperature: Store at room temperature in a sealed container lined with a paper towel to absorb extra moisture. Iced muffins last about 2 days and un-iced last about 4 days.
  • Refrigerator: Store refrigerated without glaze for up to 1 week or more (allow to come to room temperature before serving).
  • Frozen: Freeze un-iced muffins in a sealable container and store up to 3 months. Add the glaze once they are defrosted.
Lemon Blueberry Muffins

More muffin recipes

Love to bake? Here are a few more of our favorite muffin recipes:

This lemon blueberry muffins recipe is…

Vegetarian.

Print
Lemon Blueberry Muffins

Lemon Blueberry Muffins


  • Author: Sonja Overhiser
  • Prep Time: 30 minutes
  • Cook Time: 20 minutes
  • Total Time: 50 minutes
  • Yield: 12

Description

These lemon blueberry muffins have just the right sweet and citrusy kick! Drizzle with a lemon glaze and they’re irresistible.


Ingredients

  • 1 ½ cups fresh blueberries*
  • 2 cups all-purpose flour
  • 1 cup granulated sugar, plus more for sprinkling
  • 1 teaspoon cinnamon
  • 1 tablespoon baking powder
  • ½ teaspoon kosher salt
  • 2 eggs
  • ½ cup vegetable oil
  • ½ cup Greek yogurt (or sour cream)
  • ¾ cup milk
  • 1 teaspoon plus 1 tablespoon lemon juice, divided
  • 1 ½ tablespoons lemon zest (1 large or 2 small lemons)
  • ½ cup powdered sugar (for the glaze)

Instructions

  1. Preheat: Preheat the oven to 400 degrees Fahrenheit. Spray a standard 12-cup muffin tin with cooking spray or add muffin cup papers.
  2. Wash and dry the blueberries. 
  3. Make the batter: In a large bowl, whisk the all-purpose flour, sugar, cinnamon, baking powder, and salt. In a separate medium bowl, whisk the eggs, then whisk in the vegetable oil, yogurt, milk, the 1 teaspoon lemon juice and the lemon zest until smooth. Stir the wet ingredients into the dry ingredients with a spatula until a thick dough forms. Fold the blueberries into the batter with a spatula. 
  4. Scoop the batter evenly into the muffin cups: the cups will be full to the top, using about a heaping ¼ cup per muffin. Sprinkle the tops with a pinch of granulated sugar.
  5. Bake: Bake the muffins for 18 to 20 minutes, until puffed and golden and a toothpick comes out clean. Cool for 5 minutes in the pan, then transfer to a rack to cool fully, about 1 hour.
  6. When ready to glaze, in a medium bowl mix together the 1 tablespoon lemon juice and the powdered sugar until a thick icing forms. If the texture is not drizzlable, add a few more drops lemon juice and continue stirring until it comes together. Drizzle a small amount with a fork over each of the muffins. (If you like a large quantity of icing, make it with 1 ½ tablespoons lemon juice and ¾ cup powdered sugar.)
  7. Eat the muffins immediately. Store at room temperature in a sealed container lined with a paper towel to absorb extra moisture, about 2 days if iced or 4 days if un-iced. Store refrigerated without glaze for up to 1 week or more (allow to come to room temperature before serving), or frozen without glaze for up to 3 months.

Notes

*Frozen blueberries can bleed into the batter and make it turn purple in color! If you’d like to use frozen berries, we recommend rinsing them well and patting them dry with paper towels per these instructions from King Arthur Baking.

  • Category: Muffins
  • Method: Baked
  • Cuisine: Muffins
  • Diet: Vegetarian

Keywords: Lemon blueberry muffins, blueberry lemon muffins

A Couple Cooks - Recipes worth repeating.

Blueberry Banana Bread

This blueberry banana bread recipe is sweet and moist, punctuated by sweet tart berries! It’s the perfect treat for anytime.…

A Couple Cooks – Recipes worth repeating.

This blueberry banana bread recipe is sweet and moist, punctuated by sweet tart berries! It’s the perfect treat for anytime.

Blueberry banana bread

If there are two fruits that go hand in hand, it’s tart blueberries and fruity sweet banana. They meet in perfect harmony in this Blueberry Banana Bread recipe! Any kind of banana bread always hits the spot, but this one is a favorite around here. It’s moist, sweet, and punctuated by bursts of tangy purple berries. This quick bread is the ideal use for those brown bananas sitting on your counter. Here’s how to make it!

Ingredients in blueberry banana bread

Blueberry banana bread is a standard sort of banana bread with blueberries mixed in. This recipe is just sweet enough, moist and banana-scented. As always, use the darkest, ripest bananas you can for best results. Here’s what you’ll need:

  • Ripe bananas
  • Fresh blueberries
  • Flour
  • Baking soda
  • Cinnamon and salt
  • Sugar
  • Neutral oil like grapeseed oil, organic vegetable oil or canola oil
  • Eggs
  • Vanilla extract
  • Turbinado sugar
Blueberry banana bread

Tips for baking blueberry banana bread

This blueberry banana bread is similar to any standard banana bread, with a few tricks for working with the blueberries. Here’s what to know:

  • Use an aluminum baking pan for best results. We’ve realized our ceramic and glass pans don’t cook as evenly. Use aluminum if you can!
  • Wash and dry the blueberries, then mix with flour. Dry the blueberries very well, then toss them with 1 tablespoon flour. This helps them to not sink in the bread while baking.
  • Bake 45 minutes, then add foil and bake 15 more. Adding the foil helps so the top doesn’t become too brown.

Can you use frozen blueberries?

Want to use frozen berries instead of fresh? Here’s the thing: frozen blueberries can bleed into the batter of muffins and breads, making them turn purple in color! If you’d like to use frozen berries, we recommend rinsing them well and patting them dry with paper towels per these instructions from King Arthur Baking.

Banana blueberry bread

Variations and mix-ins

Want to mix up this banana blueberry bread? Try adding a few mix ins to change the flavor profile! Here are a few ideas:

  • Chopped nuts: Add ¼ to ½ cup chopped almonds, pecans or walnuts
  • Lemon zest: Add 2 teaspoons lemon zest to the batter
  • White chocolate chips: White chocolate and blueberry go well together; add ¾ cup chips to the batter

And that’s it! Let us know what you think of this bread recipe in the comments below.

Diet variations

Want to make this blueberry banana bread recipe vegan? Replace the eggs with flax eggs: a simple mix of flax and water that you can make at home. Want gluten-free? Add blueberries to this Gluten Free Banana Bread (toss them with a bit of gluten free flour first).

More blueberry recipes

Got more berries? Here are a few more great blueberry recipes we love:

This blueberry banana bread recipe is…

Vegetarian. For vegan, use flax eggs.

Print
Blueberry banana bread

Blueberry Banana Bread


  • Author: Sonja Overhiser
  • Prep Time: 20 minutes
  • Cook Time: 1 hour
  • Total Time: 1 hour 20 minutes
  • Yield: 12

Description

This blueberry banana bread recipe is sweet and moist, punctuated by sweet tart berries! It’s the perfect treat for anytime.


Ingredients

  • 1 ½ cups all-purpose flour, plus 1 tablespoon
  • 1 teaspoon baking soda
  • 1 teaspoon cinnamon
  • ½ teaspoon kosher salt
  • 1 ¼ cups mashed very ripe bananas (3 medium bananas)
  • ¾ cup granulated sugar
  • ½ cup neutral oil
  • 2 large eggs (or flax eggs for vegan)
  • 2 teaspoons vanilla extract
  • 1 ½ cups fresh blueberries*
  • Turbinado sugar, for sprinkling

Instructions

  1. Preheat: Preheat oven to 350 degrees Fahrenheit. Butter an 8 or 9-inch loaf pan.
  2. Wash and dry the blueberries.
  3. Make the batter: Add the 1 ½ cups flour, baking soda, cinnamon, and kosher salt to a bowl and mix. Mash the bananas in the bottom of a large bowl, enough for 1 ¼ cup. Whisk in the sugar, oil, eggs, and vanilla extract. Add to the bowl with the wet ingredients and stir together with a spoon.
  4. Prep the blueberries: Place the blueberries in a bowl and toss with 1 tablespoon flour. Gently fold all but ¼ cup of the blueberries into the batter. 
  5. Bake: Pour the batter into the prepared loaf pan and top with the reserved blueberries. Sprinkle the top with turbinado sugar. Bake 45 minutes, then add foil to loosely cover the top of the bread. Bake for another 15 minutes, until a toothpick inserted into the center of the loaf comes out clean (or the internal temperature is 200 degrees). The exact timing will depend on the size of the pan. 
  6. Cool: Cool in the pan for 15 minutes. Then run a knife around the edge and invert the loaf onto a cooling rack. Serve warm or at room temperature. Storage info: The bread lasts 4 to 5 days at room temperature wrapped in aluminum foil, refrigerated for 10 days, or frozen for 3 months (slice it into pieces and wrap it in plastic wrap then a freezer-safe bag or container).

Notes

*Frozen blueberries can bleed into the batter and make it turn purple in color! If you’d like to use frozen berries, we recommend rinsing them well and patting them dry with paper towels per these instructions from King Arthur Baking.

  • Category: Bread
  • Method: Baked
  • Cuisine: Bread
  • Diet: Vegetarian

Keywords: Blueberry banana bread, banana blueberry bread, blueberry banana bread recipe, banana bread with blueberries

A Couple Cooks - Recipes worth repeating.