Homemade Fish Sticks

Homemade fish sticks are easy to make, deliciously crispy on the outside, and light, flakey, and moist on the inside.

The post Homemade Fish Sticks appeared first on Budget Bytes.

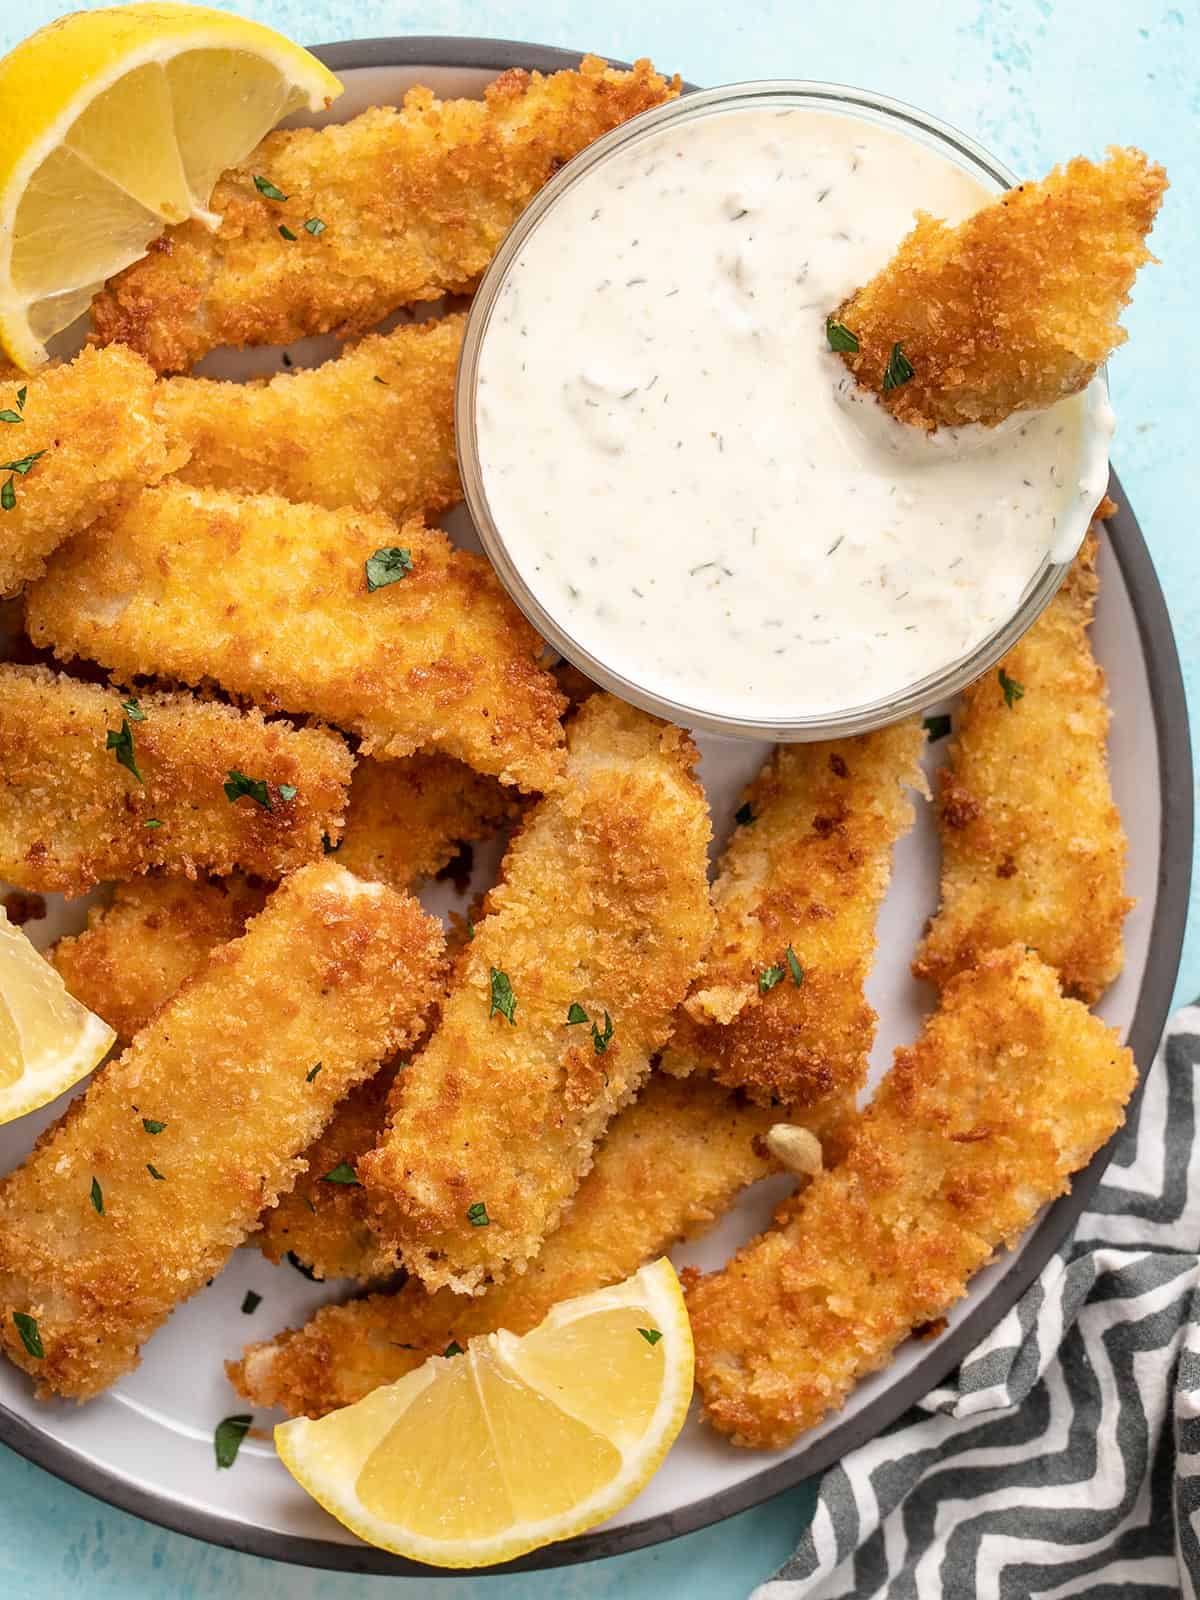
Every now and then I get a MAJOR craving for fish sticks, but I’m not really a fan of store-bought frozen fish sticks. So instead, I use this homemade fish sticks recipe to get my fix. They’re surprisingly simple to make, they’re deliciously crispy on the outside, and light, flakey, and moist on the inside. Dip them in some homemade tartar sauce and I’m in heaven!

Close up overhead view of a plate full of fish sticks with one dipped into tartar sauce.

Fish sticks are seriously easy to make. They have two main components, the fish and the crispy breading. Super easy! Once you make your own fish sticks at home, there’s no going back to frozen.

Ingredients for Fish Sticks

Here’s what you’ll need to make these homemade fish sticks:

  • White Fish: You’ll want to use a mild white fish to make fish sticks, like cod, flounder, tilapia, or grouper. I used frozen flounder this time around because that’s what was available at the store for a good price, but I’ve also used cod many times. Frozen fish is usually a little more affordable than fresh, and it works great for fish sticks!
  • Flour, Eggs, Breadcrumbs: The crispy breadcrumb coating is made with just a few simple ingredients: flour, eggs, and Panko breadcrumbs (plus a little seasoning). Panko is the best type of breadcrumb for fish sticks because it’s extra light and crispy, so it doesn’t overpower the delicate fish.
  • Seasoning: You’ll definitely want a little seasoning to keep your fish sticks from being boring, so I made it easy by adding a Creole seasoning blend that includes salt. Any type of seasoning salt will work well.
  • Oil: Use high-heat cooking oil to shallow fry the fish sticks, like canola, vegetable, peanut, light olive, or sesame oil (not toasted).

Alternate Cooking Methods

I chose to shallow fry my homemade fish sticks because it’s SUPER fast and creates the most crispy and delicious bread coating. If you’re not a fan of this method, it is possible to bake them in an oven or use an air fryer, although the results won’t be quite as scrumptious. Here is how to cook fish sticks in an oven or air fryer:

Baked Fish Sticks: Preheat the oven to 400ºF. Stir 2 Tbsp cooking oil into the seasoned Panko breadcrumbs (this helps the fish sticks brown and crisp evenly). Place the breaded fish sticks on a wire cooling rack placed on a baking sheet. Bake the fish sticks for 10-15 minutes, or until golden brown and cooked through.

Air Fryer Fish Sticks: Preheat the air fryer to 400ºF. Stir 2 Tbsp cooking oil into the seasoned Panko breadcrumbs (this helps the fish sticks brown and crisp evenly). Place the fish sticks in the air fryer basket in batches, being careful not to overcrowd the air fryer. Cook the fish sticks at 400ºF for 8-10 minutes, or until lightly golden.

Seasoning Ideas for Fish Sticks

I used Tony Chachere’s to season my fish stick recipe, but there are a lot of other great seasonings that would also work well. Just remember, if the seasoning blend you use does not contain salt, you’ll need to add about 1/4 tsp to the flour mixture and 1/2 tsp to the panko breadcrumbs. Here are some alternate seasoning ideas for your homemade fish sticks:

What to Serve with Fish Sticks

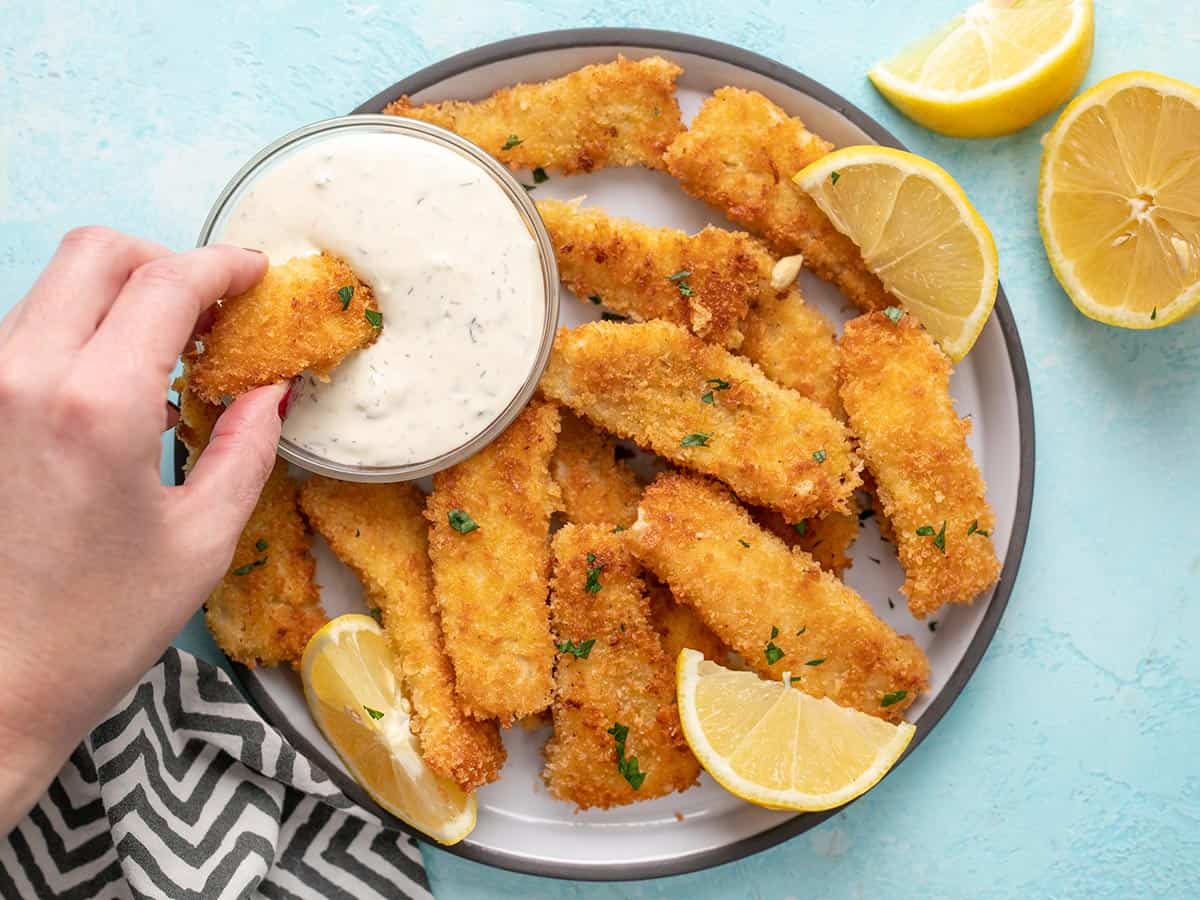
You’ll probably want a little something delicious to dip your fish sticks in, so I would suggest a creamy tartar sauce, a zingy comeback sauce, creamy-tangy mayo ketchup, or plain ketchup (if that’s how you roll).

To round out your fish stick meal, try pairing them with a creamy coleslaw or a zippier cumin lime coleslaw, go “fish and chips” style with some steak fries, or get some greens with a side of roasted broccoli. Or, go full on comfort food with some creamy mac and cheese. ;)

A hand dipping a fish stick into a bowl of tartar sauce.
Overhead view of a plate full of fish sticks with tartar sauce and lemon wedges.
Print

Homemade Fish Sticks

Homemade fish sticks are easy to make, deliciously crispy on the outside, and light, flakey, and moist on the inside. 
Course Dinner, Lunch
Cuisine American
Total Cost $7.32 recipe / $1.83 serving
Prep Time 15 minutes
Cook Time 18 minutes
Total Time 33 minutes
Servings 4 (about 4 fish sticks each)
Calories 384kcal

Ingredients

  • 1 lb. white fish $6.00
  • 1/2 cup all-purpose flour $0.16
  • 2 tsp Tony Chachere's seasoning, divided* $0.20
  • 2 large eggs $0.18
  • 1 cup panko breadcrumbs $0.62
  • 1/4 cup cooking oil $0.16

Instructions

  • If the fish is frozen, thaw completely, then pat with a paper towel to remove any excess moisture. Cut the fish into "sticks" about three inches long and ½-inch wide, and no more than ½-inch thick (if using a thicker fish filet).
  • Prepare the breading by combining the flour and 1 tsp seasoning (Tony Chachere's or seasoning of choice) in a bowl. In a separate bowl, whisk the eggs. In a third bowl, combine the panko breadcrumbs and remaining 1 tsp seasoning.
  • Begin to bread the fish sticks by dipping them one at a time into the flour, then egg, then panko breadcrumbs. Place the breaded fish sticks on a plate or cutting board once breaded.
  • Heat the cooking oil in a small skillet over medium heat. When the oil is hot enough that a breadcrumb dropped into the pan sizzles strongly as soon as it hits the oil, you're ready to fry the fish sticks.
  • Fry the fish sticks in batches, making sure not to overcrowd the pan, frying for 2-4 minutes on each side or until the breading is golden brown. Transfer the fried fish sticks to a paper towel-lined plate to drain as you fry the rest. If the oil gets too hot as you fry, remove the pan from the heat to allow it to cool slightly before continuing. Do not let the oil smoke. If needed, add slightly more oil and allow it to fully heat before cooking more fish sticks.
  • Allow the fish sticks a few minutes to cool slightly before enjoying with your favorite dipping sauce.

See how we calculate recipe costs here.

Notes

*Use your favorite seasoning salt or seasoning blend. See the blog text above the recipe for more seasoning ideas.
The sodium content listed does not account for the fact that most of the seasoning salt is discarded with the unused flour and panko after breading the fish sticks. 

Nutrition

Serving: 4fish sticks | Calories: 384kcal | Carbohydrates: 23g | Protein: 30g | Fat: 19g | Sodium: 1367mg | Fiber: 1g
Close up of a fish stick dipped in tartar sauce.

How to Make Fish Sticks – Step by Step Photos

thawed flounder filets on a cutting board.

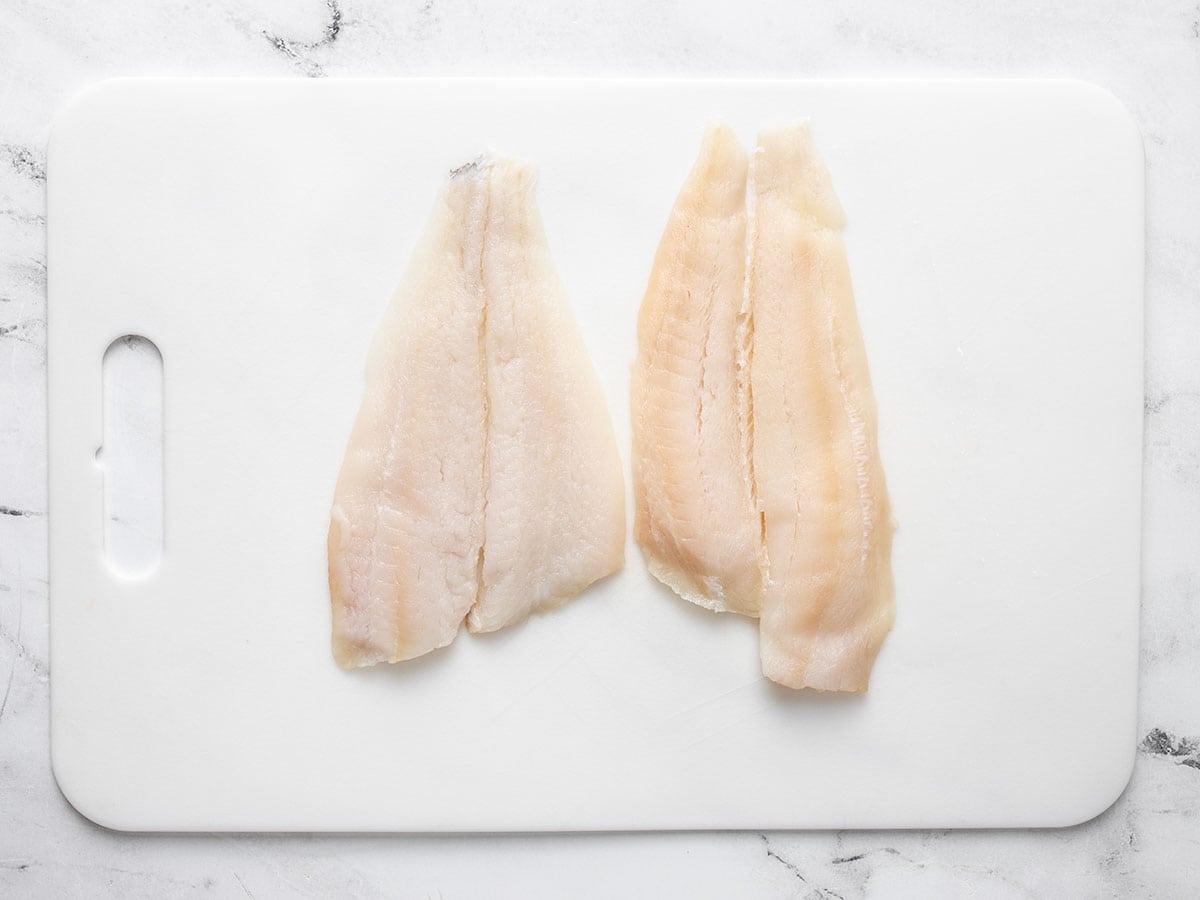
Thaw about 1 lb. of white fish, then dab with a paper towel to remove excess moisture. I used flounder because that’s what was available, but cod, tilapia, or grouper all work great.

Fish filets cut into fish sticks on a cutting board.

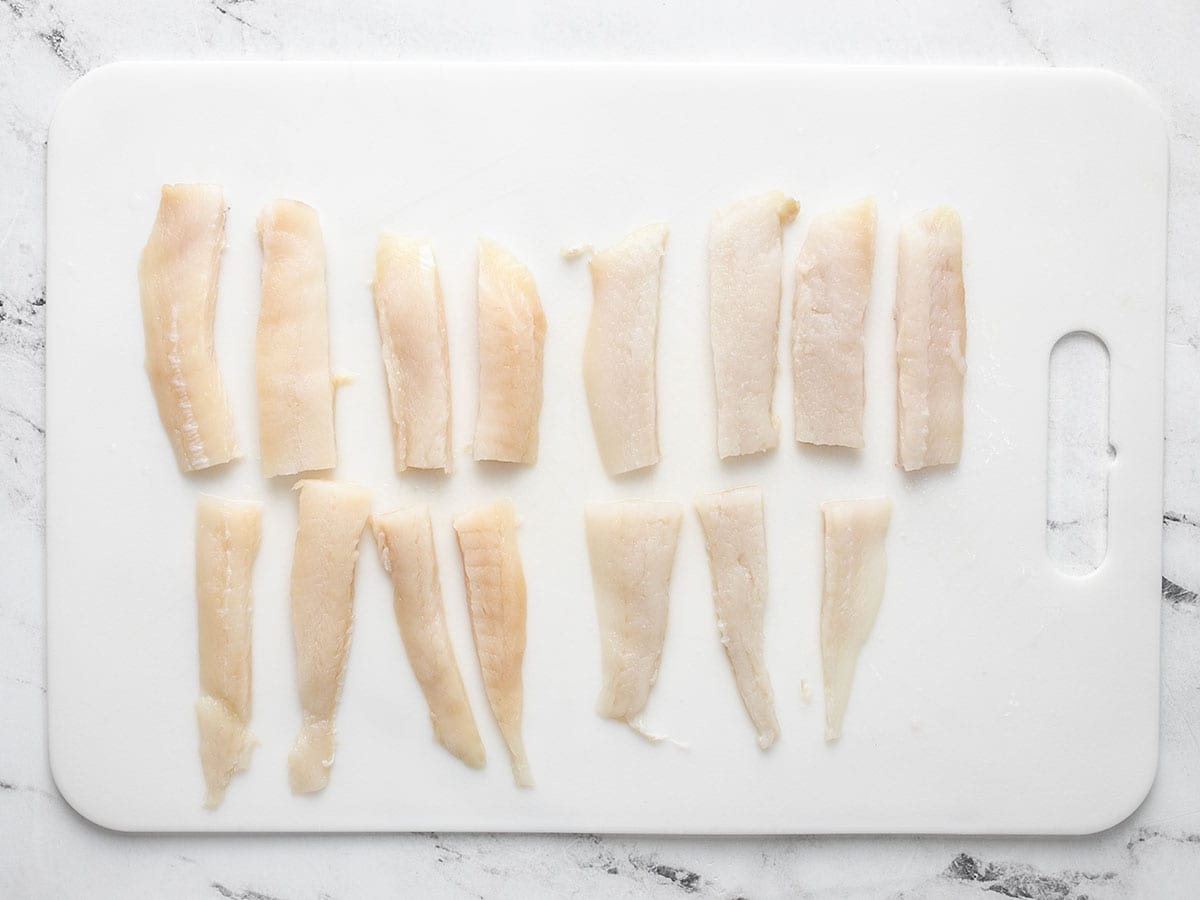
Cut the fish into “sticks” about three inches long and ½-inch wide. If you are using thicker pieces of fish, like a cod, filet the pieces in half to make sure they are not thicker than ½-inch.

Three bowls with ingredients for the breading (flour, eggs, breadcrumbs).

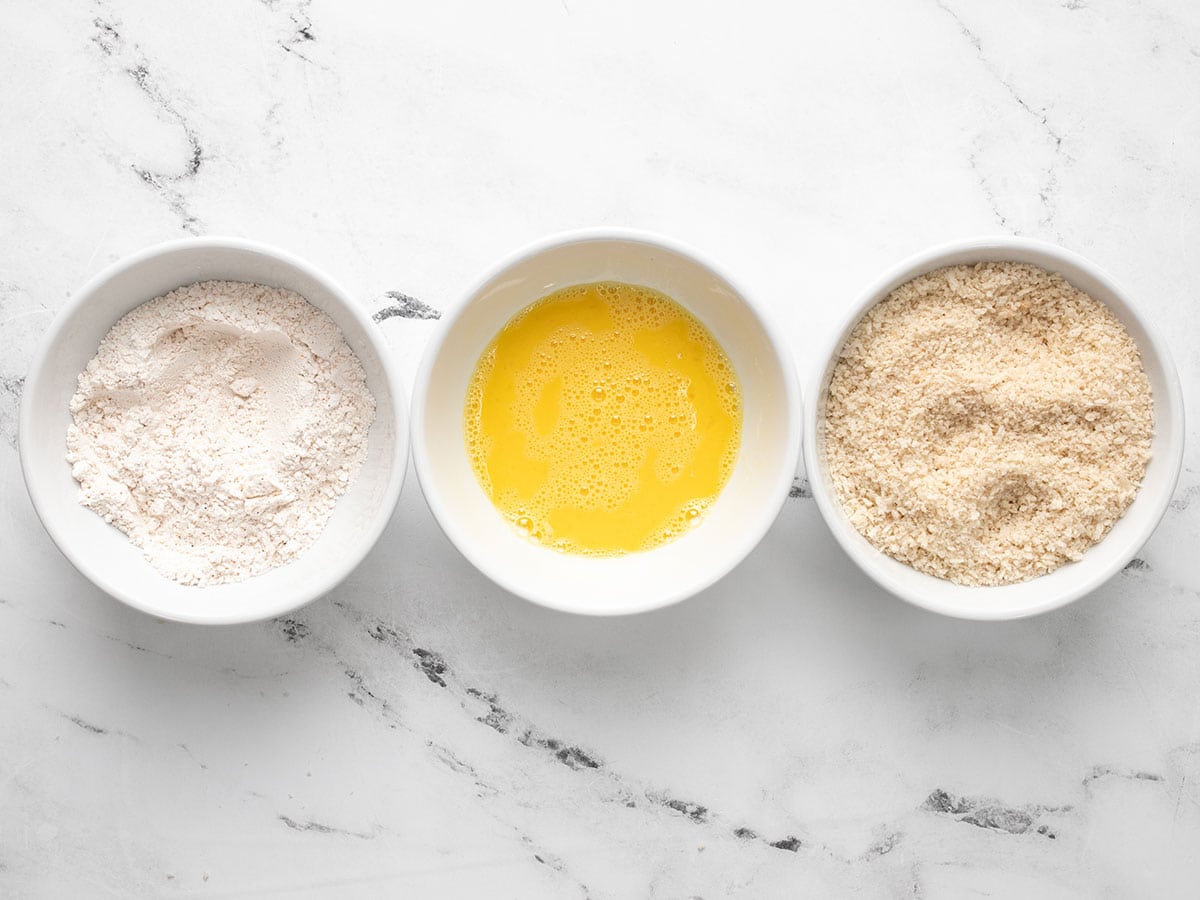
Prepare the ingredients for the three layers of the breadcrumb coating. In one bowl, combine ½ cup flour with 1 tsp Tony Chachere’s seasoning (see blog text above for alternate seasoning ideas). In a separate bowl, whisk two large eggs. In a third bowl, combine 1 cup Panko breadcrumbs with 1 tsp Tony Chachere’s seasoning.

Breaded fish sticks on a cutting board next to the three bowls of ingredients.

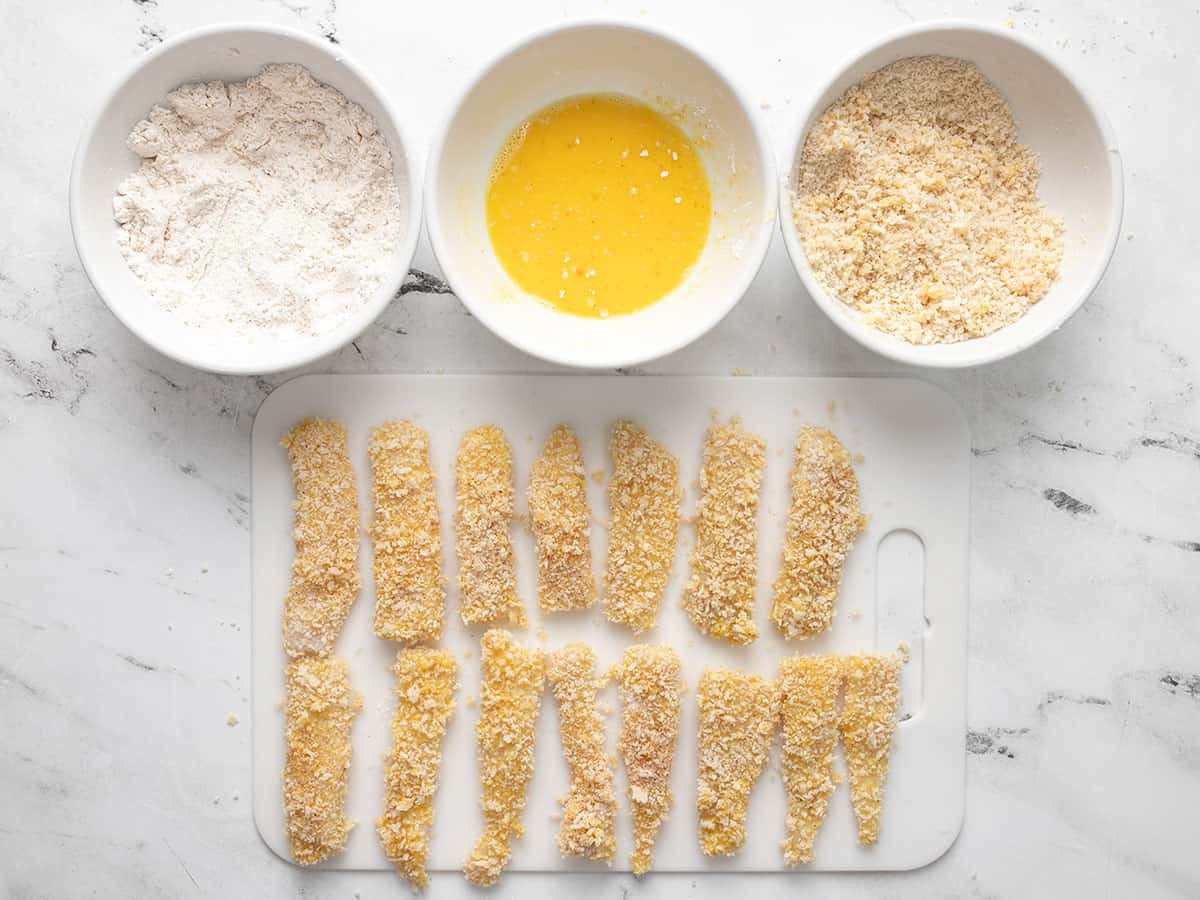
Begin breading the fish sticks by first dipping them in the seasoned flour, shaking off the excess, then dipping them into the whisked eggs, and finally into the seasoned breadcrumbs until fully coated. Place the breaded fish sticks on a plate or cutting board.

Fish sticks being fried in a small pan.

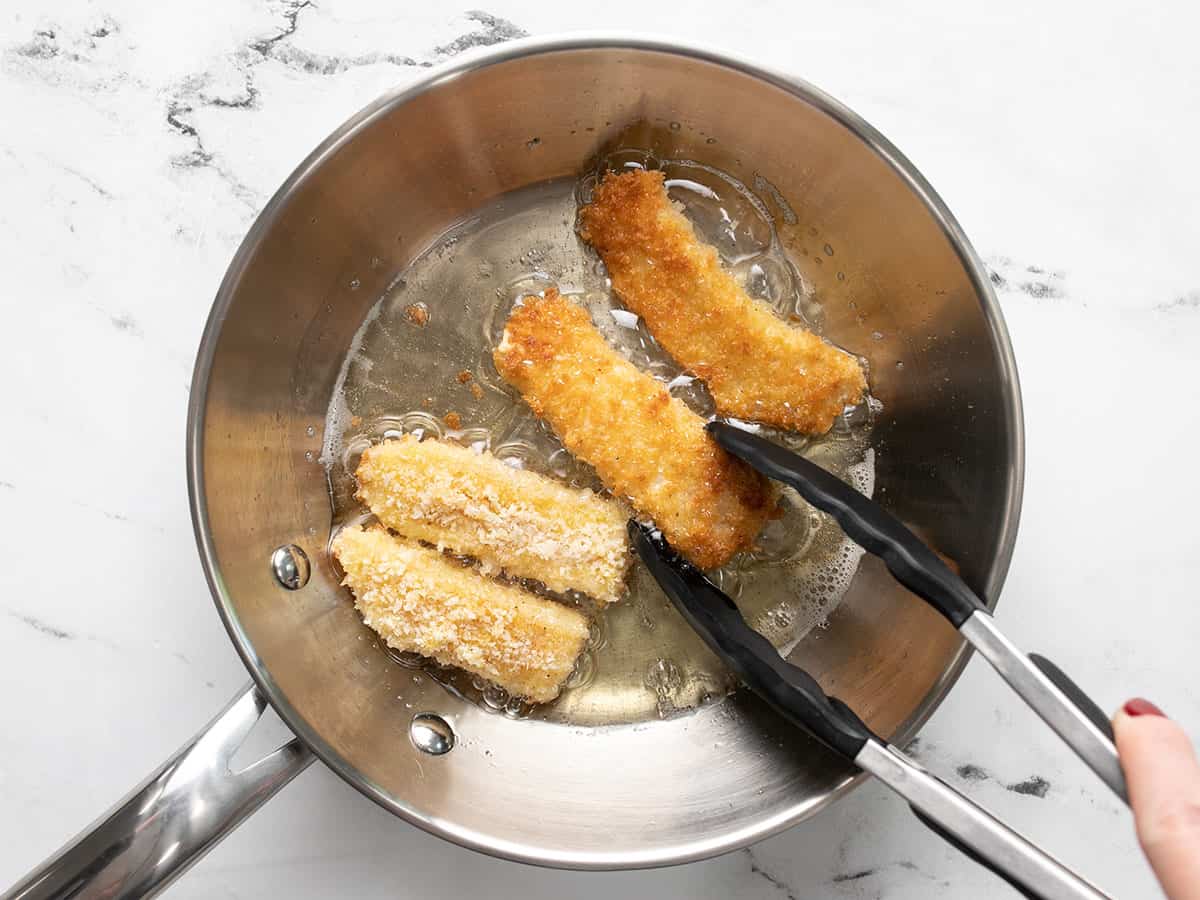
Add ¼ cup high-heat cooking oil (like canola, vegetable, peanut, light olive oil) to a small skillet and heat over medium. Test the heat of the oil by dropping in a pinch of Panko breadcrumbs. When the breadcrumb sizzle furiously as soon as it hits the oil, it’s ready to fry the fish sticks. Work in small batches, taking care not to overcrowd the pan. Fry the fish sticks for 2-4 minutes on each side, or until golden brown. If the oil becomes too hot, take the pan off the heat for a moment or two before proceeding. If the oil begins to smoke, take it off the heat immediately.

Fried fish sticks on a paper towel lined plate.

Transfer the fried fish sticks to a paper towel-lined plate to drain as you cook the remaining fish sticks. Let them cool for just a few minutes before serving and enjoying!

Overhead view of a plate full of fish sticks with tartar sauce and lemon wedges.

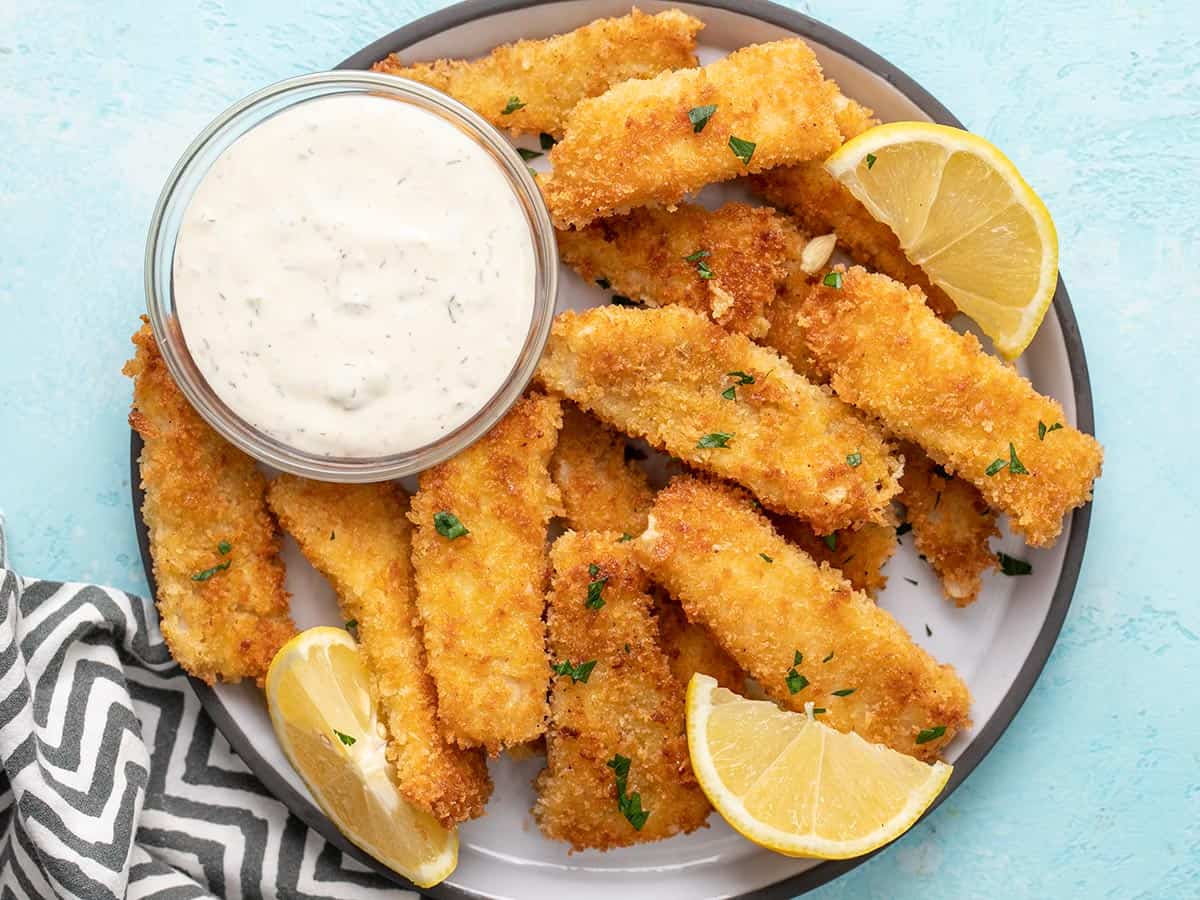
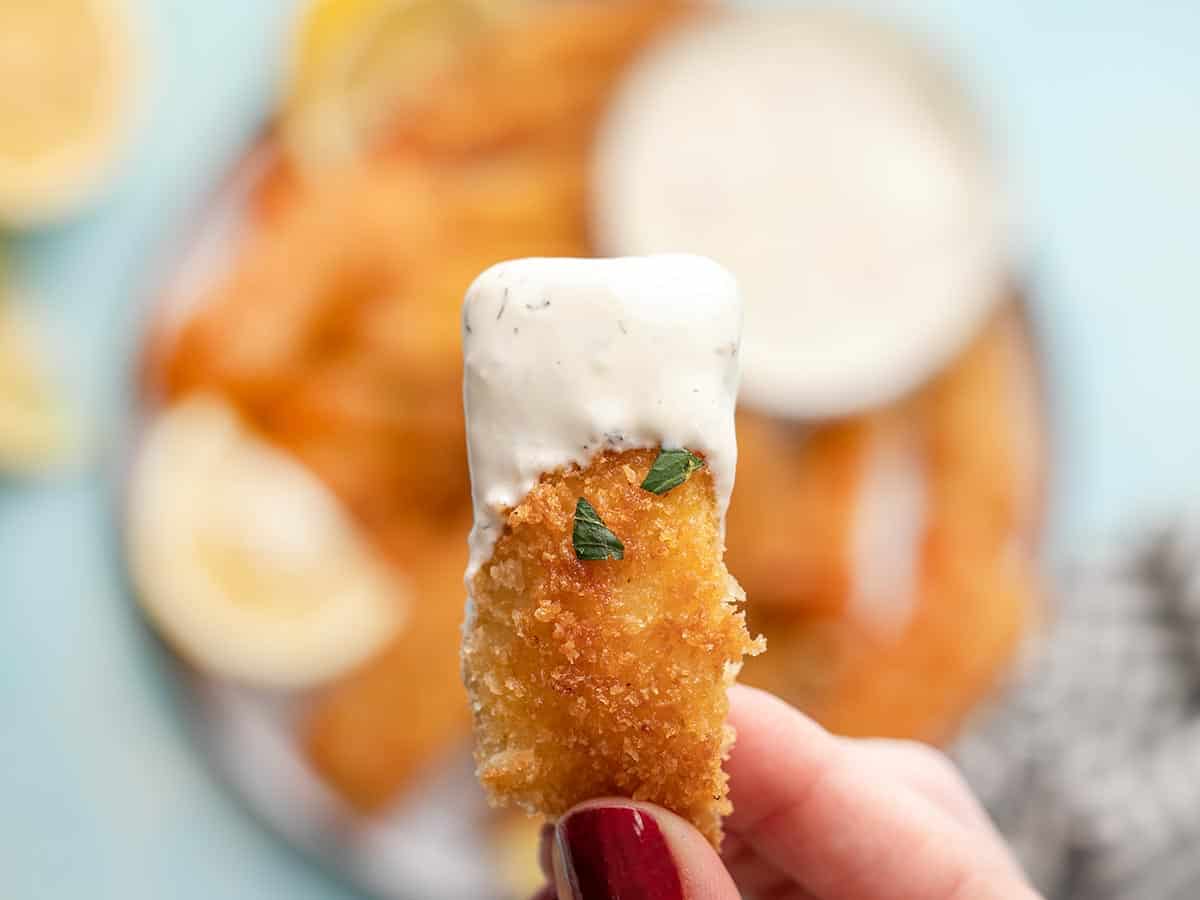
These things are SERIOUSLY SO GOOD. I already want to make another batch. 😜

Close up of a fish stick with a bite taken out, showing the flakey interior.

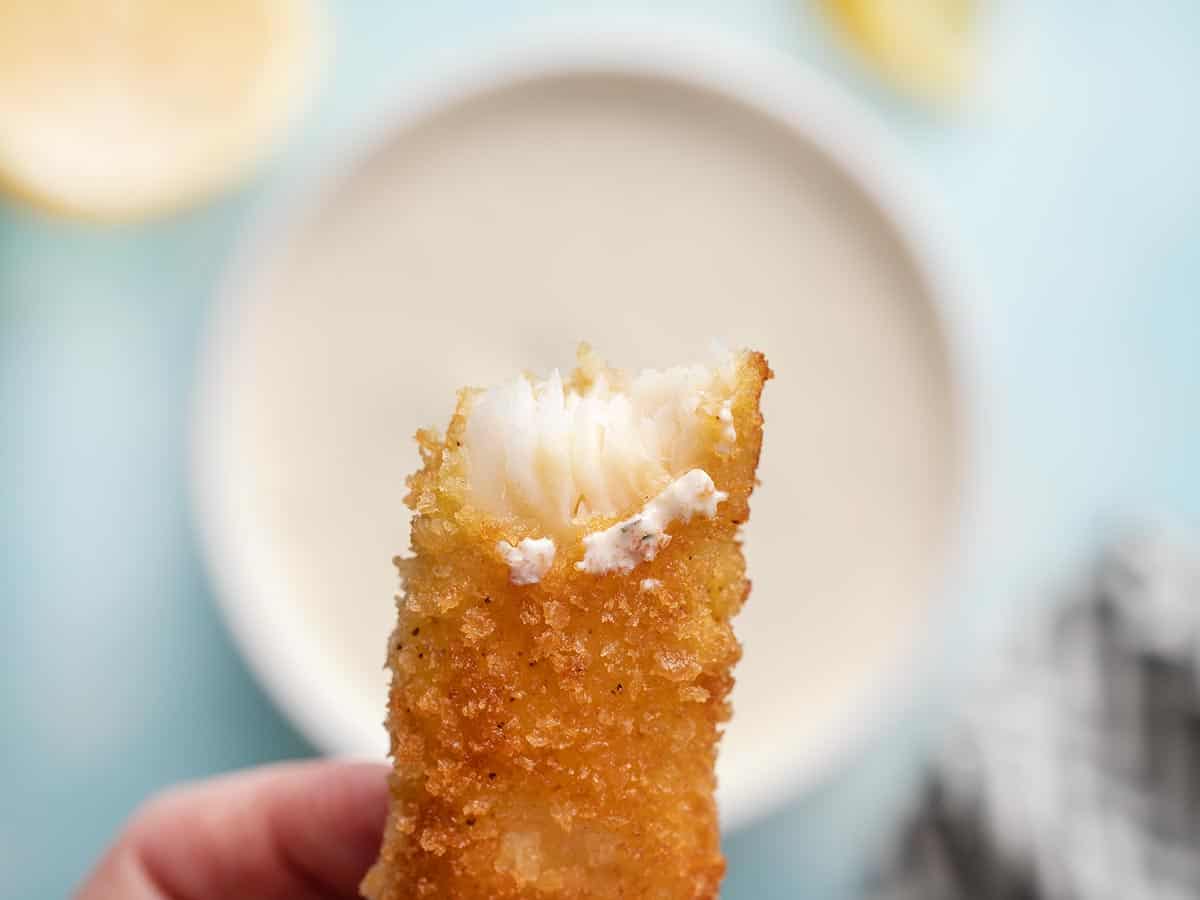
The outside is so crispy and the inside is so moist and flakey. Fish stick PERFECTION!

The post Homemade Fish Sticks appeared first on Budget Bytes.

Hummingbird Cake

This luscious Hummingbird Cake is dotted with bananas, pineapple, and pecans, then smothered in cream cheese frosting- and it’s under $20!

The post Hummingbird Cake appeared first on Budget Bytes.

Hummingbird Cake doesn’t last- you’ll reach for a second slice before you finish your first! If you’ve never heard of it, this luscious banana cake is dotted with pineapple and pecans, then smothered in scrumptious cream cheese frosting. You’ll pay up to $80 for this beauty at a bakery, but I’m showing you how to make Hummingbird Cake for under $20! Here’s the best part: you can slice and freeze it, then gobble it up whenever you crave it!

What is Hummingbird Cake?

Hummingbird cake is a classic Southern recipe that originated in Jamaica. The batter goes heavy on the fruit and nuts; almost half of it is chopped banana, pineapple, and pecans. Once baked, the cake is layered and topped with buttery cream cheese frosting and garnished with more pecans or pineapple.

What You’ll Need

Is this an easy breezy recipe? No. But it’s manageable, and it’s worth it! Bakeries sell this cake for $50 to $80, but I’m showing you how to put it together for under $20! Here’s what you’ll need to make Hummingbird Cake.

  • Pecans – add texture and earthiness. You can omit them if there is a nut allergy.
  • Pineapple and Bananas– add sweetness and flavor. They also add moisture and tenderize the cake.
  • All Purpose Flour – creates the structure you need to stand up to all the fruit in the batter.
  • Sugar – sweetens the cake and locks in moisture.
  • Baking Soda and Baking Powder – these leavening agents help your cake rise.
  • Vegetable Oil – helps the cake bake evenly and rise higher.
  • Vanilla Extract – helps flavor the cake batter and the frosting.
  • Cream Cheese and Butter – add flavor and also give the frosting its structure, making it easier to spread.
  • Powdered Sugar – sweetens the frosting and gives the frosting structure.

Tips For The Best Hummingbird Cake

  • Use very ripe bananas and don’t drain the crushed pineapple.
  • Do not overmix the batter. The more you mix, the denser the cake becomes.
  • Prepare your pans like a pro: grease them, line the bottom with parchment, and then grease and flour the parchment and the sides of the pan.
  • Pour equal amounts of batter into the cake pans by using a dry measuring cup.
  • Cool the layers completely before frosting them and frost from the center out.

Can I Make It Ahead Of Time?

Yes, you can make your Hummingbird Cake layers ahead of time! Allow them to cool completely before wrapping them in a double layer of plastic wrap. You can keep them at room temperature for up to a day, refrigerate them for up to two days, or freeze them for up to a month. Frozen cake layers are easier to frost anyway. You can also make the frosting ahead of time. Keep it in an airtight container with plastic wrap over the surface of the frosting, and refrigerate for up to 5 days

How To Store Hummingbird Cake

You can store Hummingbird Cake in an airtight container or wrapped in plastic wrap in your refrigerator for up to 5 days. (Your loved ones will devour it way before then.) Hummingbird Cake also freezes well and can be stored in an airtight container or wrapped in a double layer of foil and plastic for up to 4 months. I usually portion mine in thick slices and keep them in the freezer for future cravings. Frozen cake on a hot summer day is AMAZING.

Side shot of Hummingbird Cake with a slice being taken out of it.
Print

Hummingbird Cake

This luscious Hummingbird Cake is dotted with bananas, pineapple, and pecans, then smothered in cream cheese frosting. It's scrumptious!
Course Dessert
Cuisine American
Total Cost $15.90 recipe / $1.33 serving
Prep Time 30 minutes
Cook Time 30 minutes
Resting Time 1 hour
Total Time 2 hours
Servings 12 slices
Calories 1287kcal

Ingredients

For the Cake

  • 1 cup chopped pecans $4.59
  • 3 cups all-purpose flour, plus more for dusting pans $0.42
  • 2 cups sugar $0.78
  • 1 tsp salt $0.08
  • 1 tsp baking soda $0.02
  • 1/2 tsp baking powder $0.03
  • 1 tsp ground cinnamon $0.08
  • 3 large eggs, lightly beaten $1.17
  • 1 ½ cups cooking oil $1.12
  • 1 ½ tsp vanilla extract $0.86
  • 1 (8 oz) can crushed pineapple in juice, undrained* $0.56
  • 2 cups chopped bananas (about 4 medium bananas) $1.00

For the Frosting

  • 12 oz cream cheese, softened $2.62
  • 12 Tbsp salted butter, softened $0.38
  • 3/4 tsp vanilla extract $0.43
  • 1 pinch salt $0.01
  • 6 cups powdered sugar $1.75

Instructions

  • Set a rack in the center of your oven and preheat it to 350°F. While the oven preheats, set a heavy-bottomed skillet over medium heat and add the pecans in a thin layer. Toast the pecans for 5 to 8 minutes, stirring occasionally.
  • While the pecans toast, whisk together the flour, sugar, salt, baking soda, baking powder, and cinnamon in a large bowl.
  • Add the eggs and vegetable oil, stirring just until the wet ingredients moisten the dry ingredients and no more.
  • Add vanilla, crushed pineapple in its juices, chopped bananas, and toasted pecans. Stir the ingredients as little as possible while fully incorporating them.
  • Grease three 9-inch cake pans. Cover the bottoms with parchment paper, grease the parchment, and lightly dust the bottom and sides of the pans with flour. Divide the batter evenly between the pans and bake until a toothpick inserted in the center comes out clean, about 25 to 30 minutes. Cool pans for 10 minutes before removing the cake layers. Cool layers for 1 hour.
  • While the cake bakes, in a very large bowl, add the cream cheese, salted butter, vanilla, and a pinch of salt. Beat with an electric mixer on medium speed until smooth. Then add the powdered sugar cup by cup, beating at low speed after each addition.
  • Once the sugar has been fully incorporated, increase the speed to medium-high, and beat until fluffy, 1 to 2 minutes.
  • Place the first cake layer on a serving platter or cake stand. Spread 1 cup of the frosting on top, starting from the center and working your way out. You want a layer of frosting that is ¼ inch deep.
  • Top with the second cake layer and spread with 1 cup of frosting, working from the center out.
  • Top with the third layer, and spread the remaining frosting over the top and lightly around the sides. Garnish the top with pecans, berries, or candied pineapple rings.*

See how we calculate recipe costs here.

Notes

*An 8 ounce can contains ⅓ cup pineapple juice plus ½ cup crushed pineapple.
*This recipe is for a naked cake, IE the sides are barely frosted. If you’d like to frost the sides with a thicker layer, use 2 sticks of butter, 2 packages of cream cheese, 8 cups of powdered sugar, and 1 teaspoon of vanilla.
*To candy the pineapple rings cover them in a thick layer of brown sugar and fry them in 2 tablespoons of butter per ring over medium heat until golden.

Nutrition

Serving: 1slice | Calories: 1287kcal | Carbohydrates: 195g | Protein: 10g | Fat: 57g | Sodium: 510mg | Fiber: 8g

How to Make Hummingbird Cake – Step by Step Photos

Set a rack in the center of your oven and preheat it to 350°F. While the oven preheats, set a heavy-bottomed skillet over medium heat and add 1 cup of chopped pecans in a thin layer. Toast the pecans for 5 to 8 minutes, stirring occasionally. They’re ready when they have slightly deepened in color and the air smells toasty.

While the pecans toast, whisk together 3 cups of flour, 2 cups of sugar, 1 teaspoon of salt, 1 teaspoon of baking soda, 1/2 teaspoon of baking powder, and 1 teaspoon of cinnamon in a large bowl.

Add the 3 eggs and 1 1/2 cups vegetable oil, stirring just until the wet ingredients moisten the dry ingredients. Do not overmix.

Add 1 1/2 teaspoons of vanilla, 8 ounces of crushed pineapple, 2 cups of chopped bananas, and a cup of toasted pecans. Then stir the ingredients as little as possible while fully incorporating them.

Grease three 9-inch cake pans. Cover the bottoms with parchment paper, grease the parchment, and lightly dust the bottom and sides of the pans with flour. Use a dry cup measure to divide the batter evenly. Bake until a toothpick inserted in the center comes out clean, about 25 to 30 minutes. Cool the pans on wire racks for 10 minutes before removing the cakes from the pans. Cool the layers on wire racks before frosting for 1 hour.

While the cake bakes, in a very large bowl, add the 12 ounces of cream cheese, the 12 tablespoons of salted butter, 3/4 teaspoon vanilla, and a pinch of salt. Beat with an electric mixer on medium speed until smooth. Then add the powdered sugar cup by cup, beating at low speed after each addition until blended.

Once the sugar has been fully incorporated, increase the speed to medium-high, and beat until fluffy, 1 to 2 minutes.
To frost, first, place one cake layer on a serving platter or cake stand. Then spread 1 cup of the frosting on top, starting from the center and working your way out. You want a layer of frosting that is ¼ inch deep.
Next, top the cake with the second cake layer and spread with 1 cup of frosting, working from the center out.
Next, top the cake with the third layer, and spread the remaining frosting over the top and lightly around the sides. Finally, garnish the top with pecans, berries, or candied pineapple rings.*

Is this Hummingbird Cake a beauty, or what?! It’s truly a dessert you can’t get enough of. So much so, that Beth and I have slices of it in the test kitchen freezer for whenever our sweet tooth strikes! (Which is every single day TBH.) We were literally just looking at this post, contemplating driving to the test kitchen to get a slice! Get your cake pans ready for a win that’s under $20!

More Budget-Friendly Cakes

The post Hummingbird Cake appeared first on Budget Bytes.