birthday battenberg

6AA75CDC-5272-4A3F-94A6-6EF9AFFDB937.JPG
77A1DFC8-BAC3-4B66-9375-A01CA26D7233.JPG
ADB779F6-57F4-4210-B31C-9FECF33921B8.JPG
C3564053-CDE1-42E4-8227-3FCE6FFB548E.JPG
9E1933A9-1B28-4F2D-B9A3-3252D27F2EC0.JPG

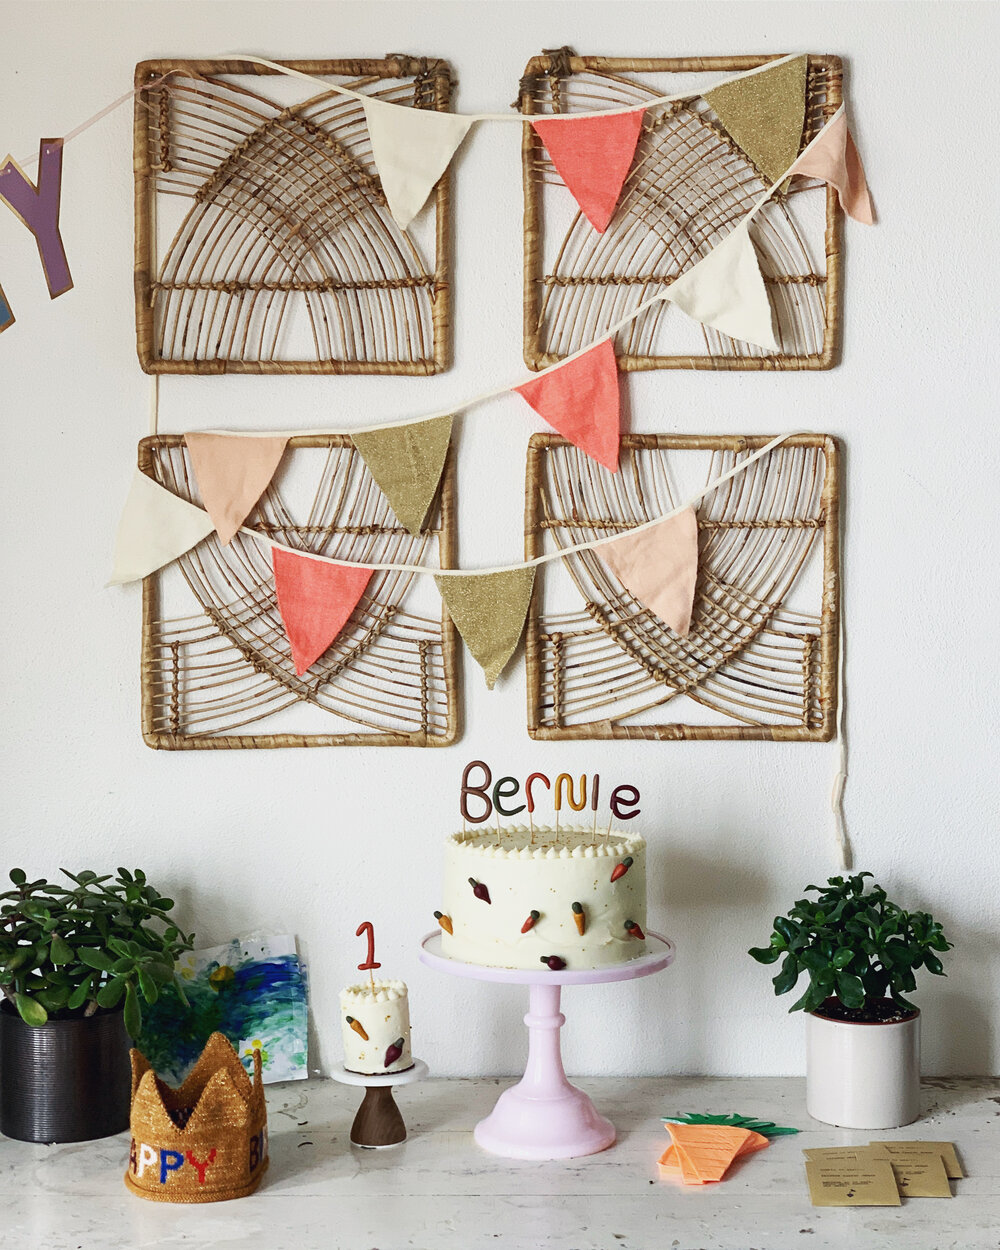
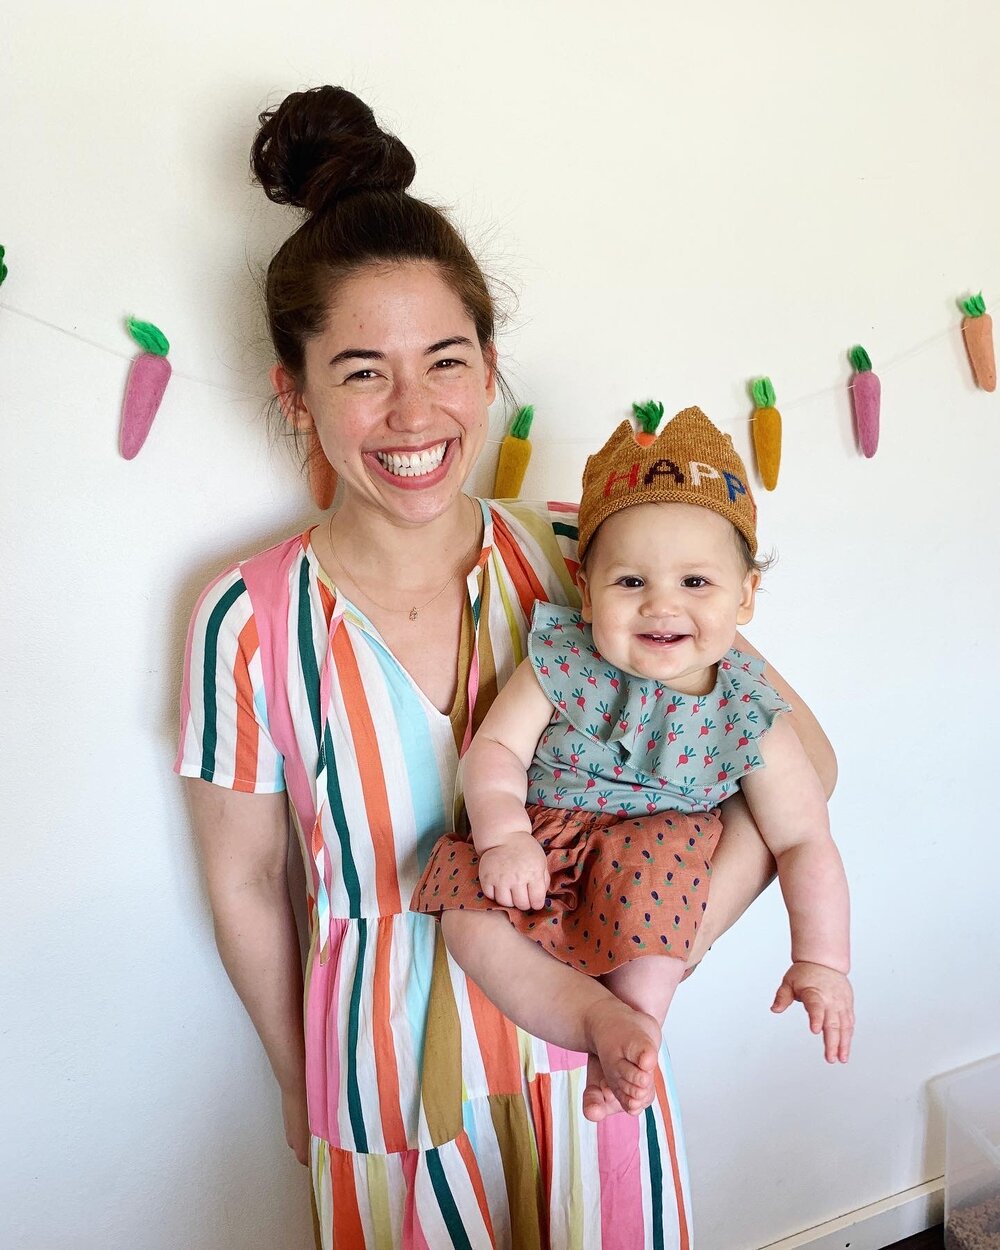
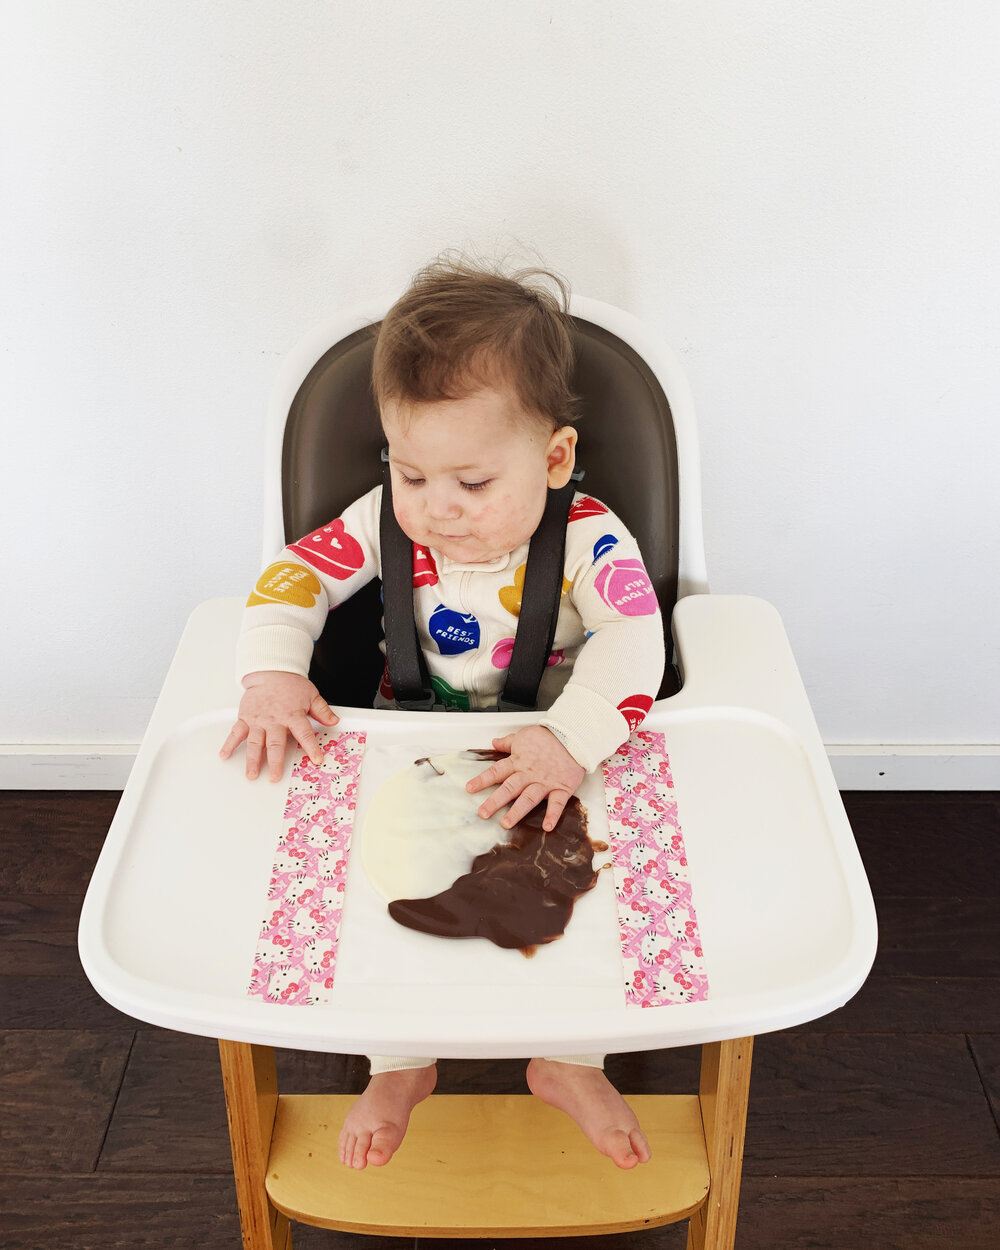
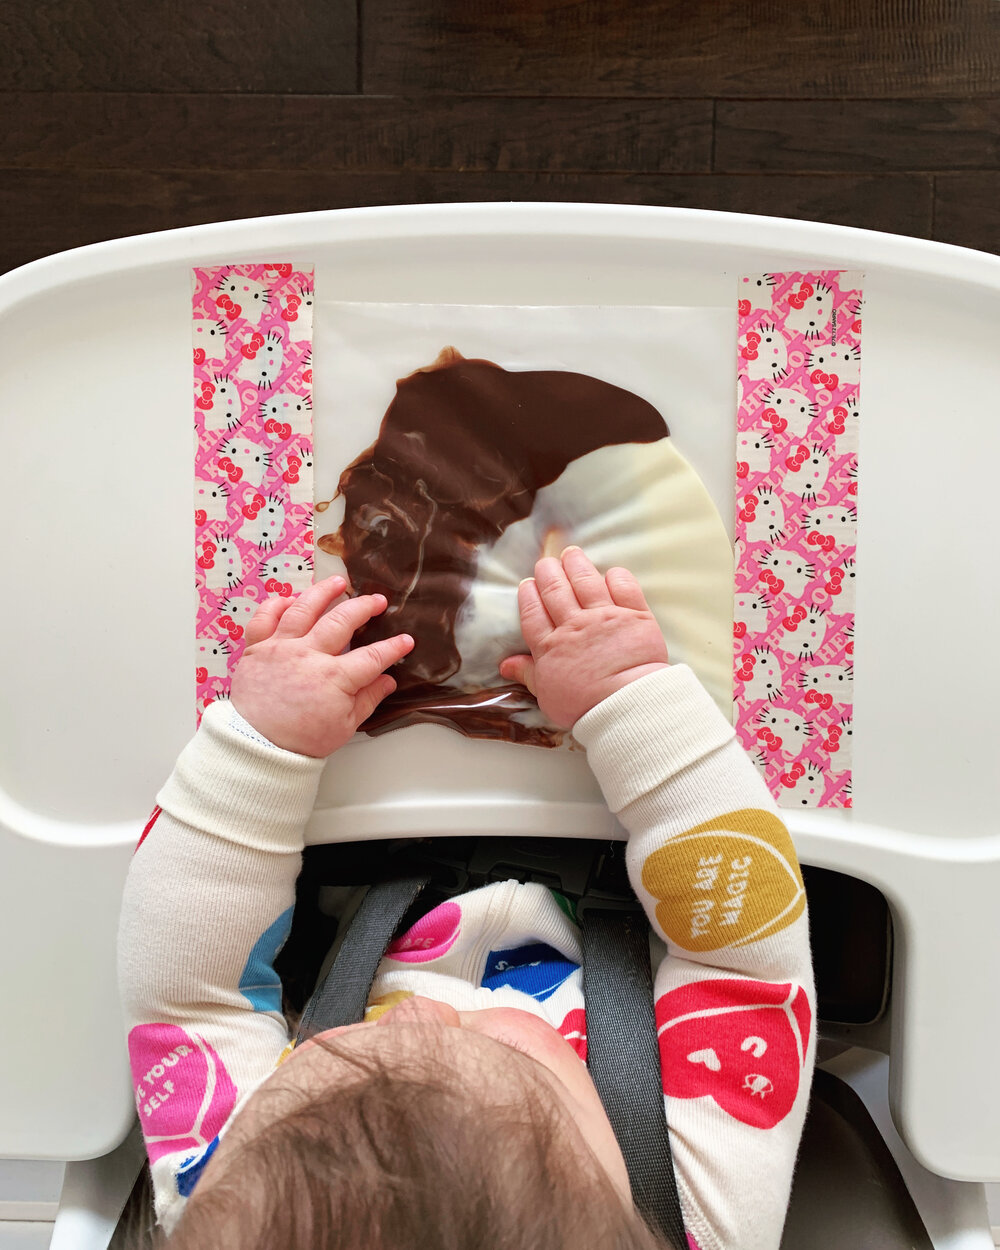
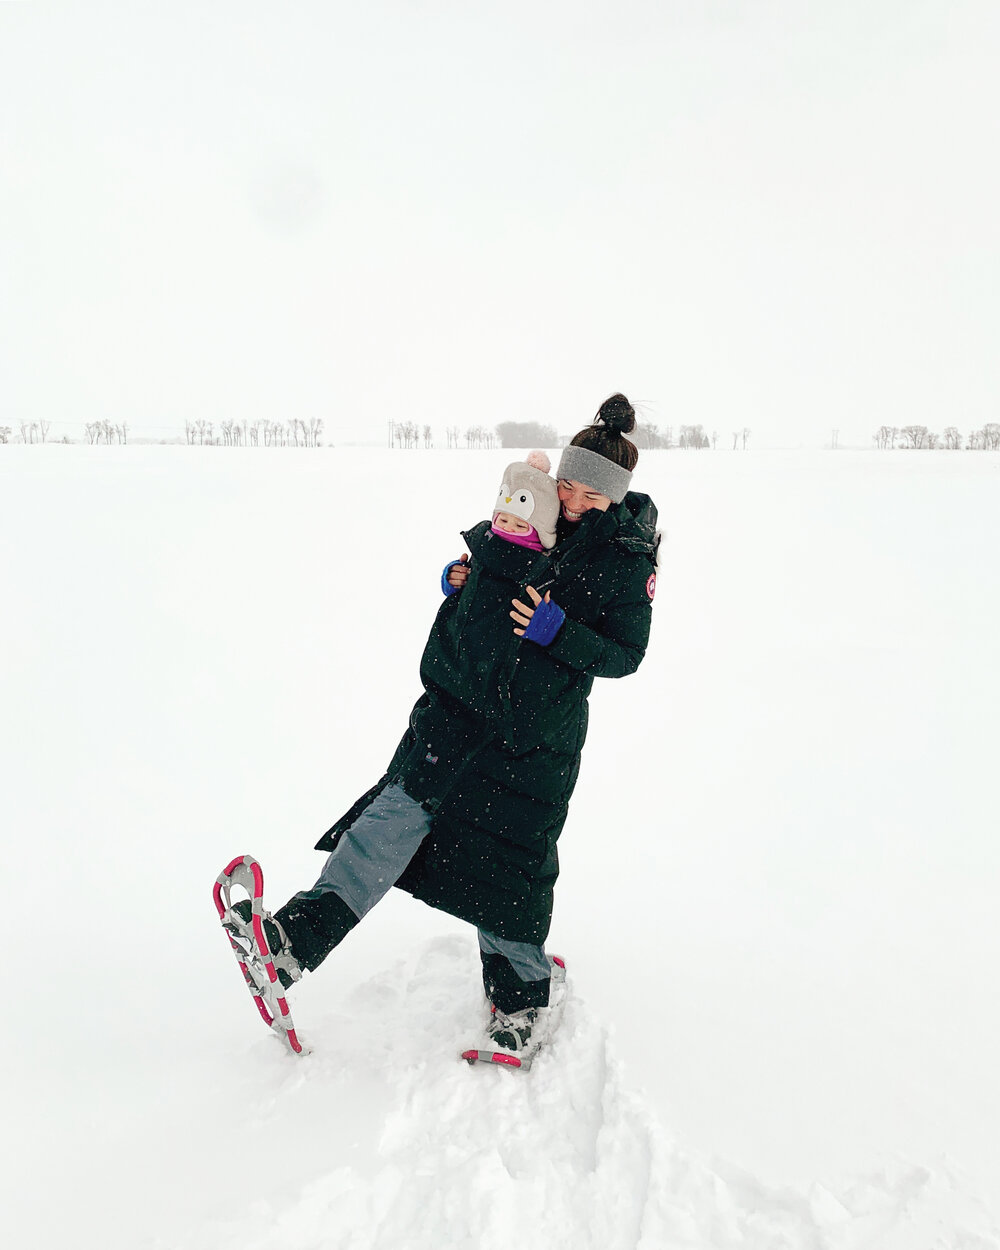
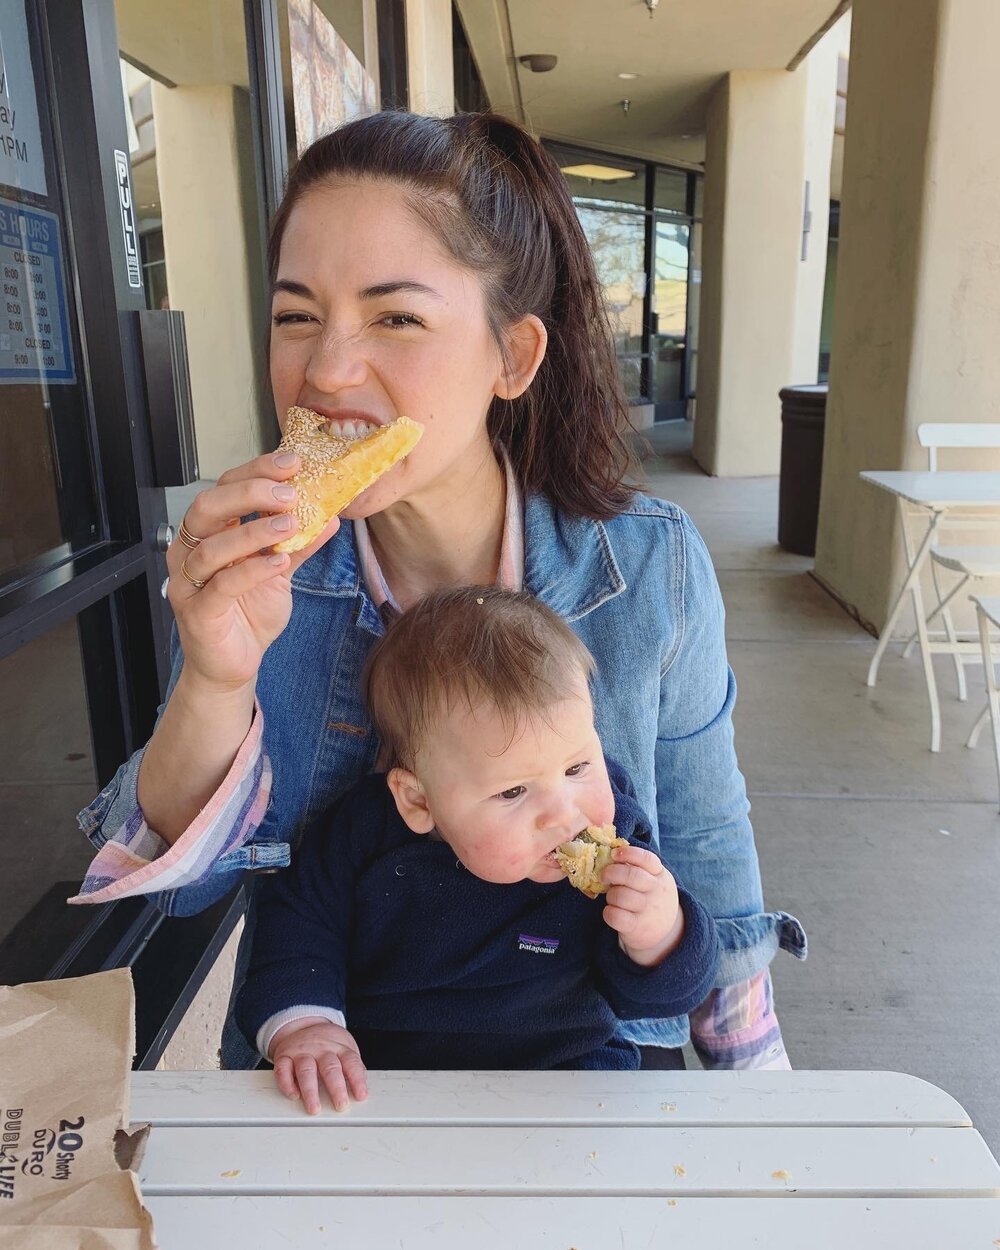
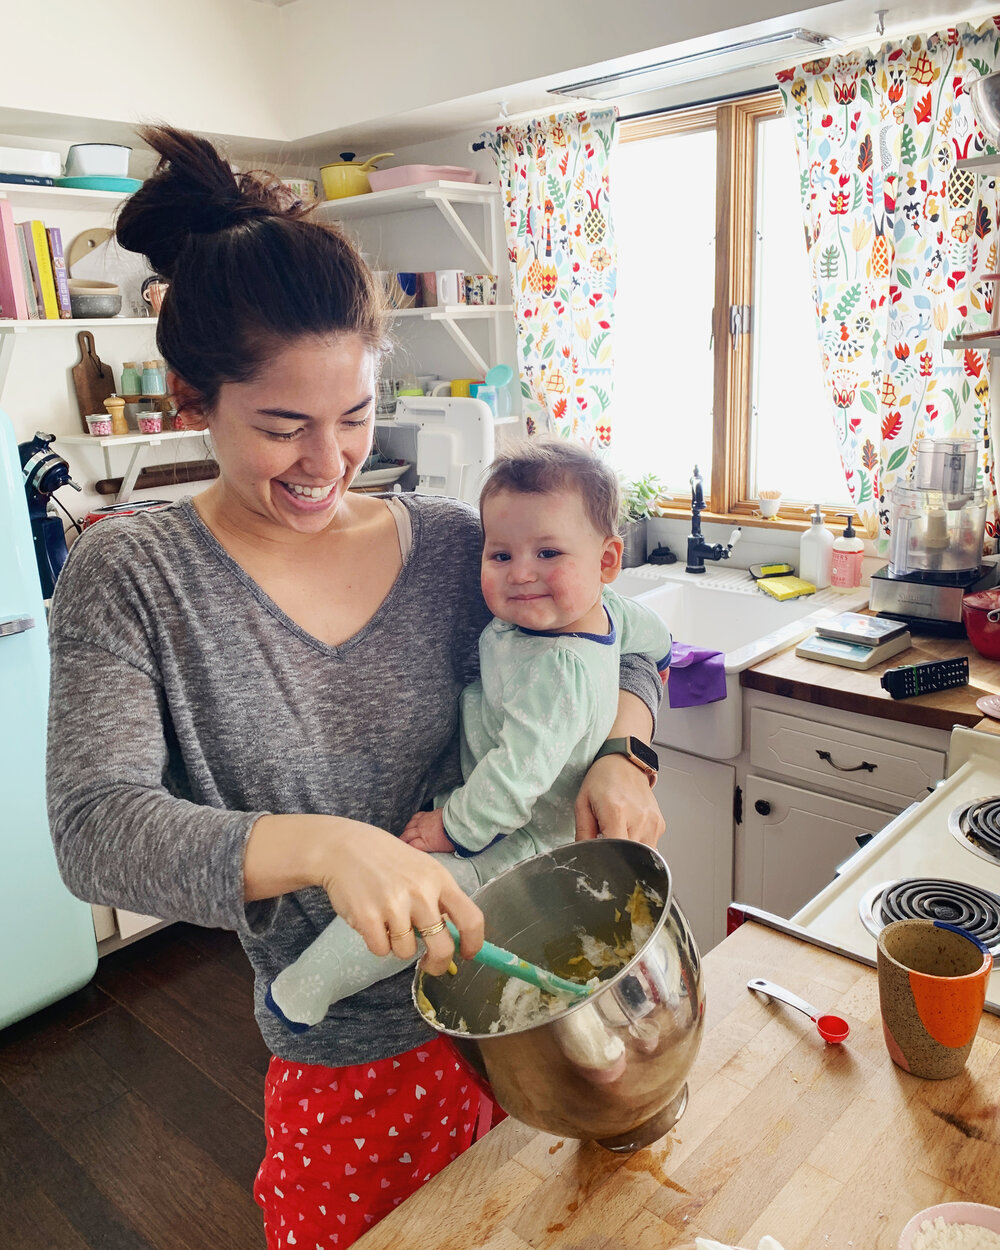
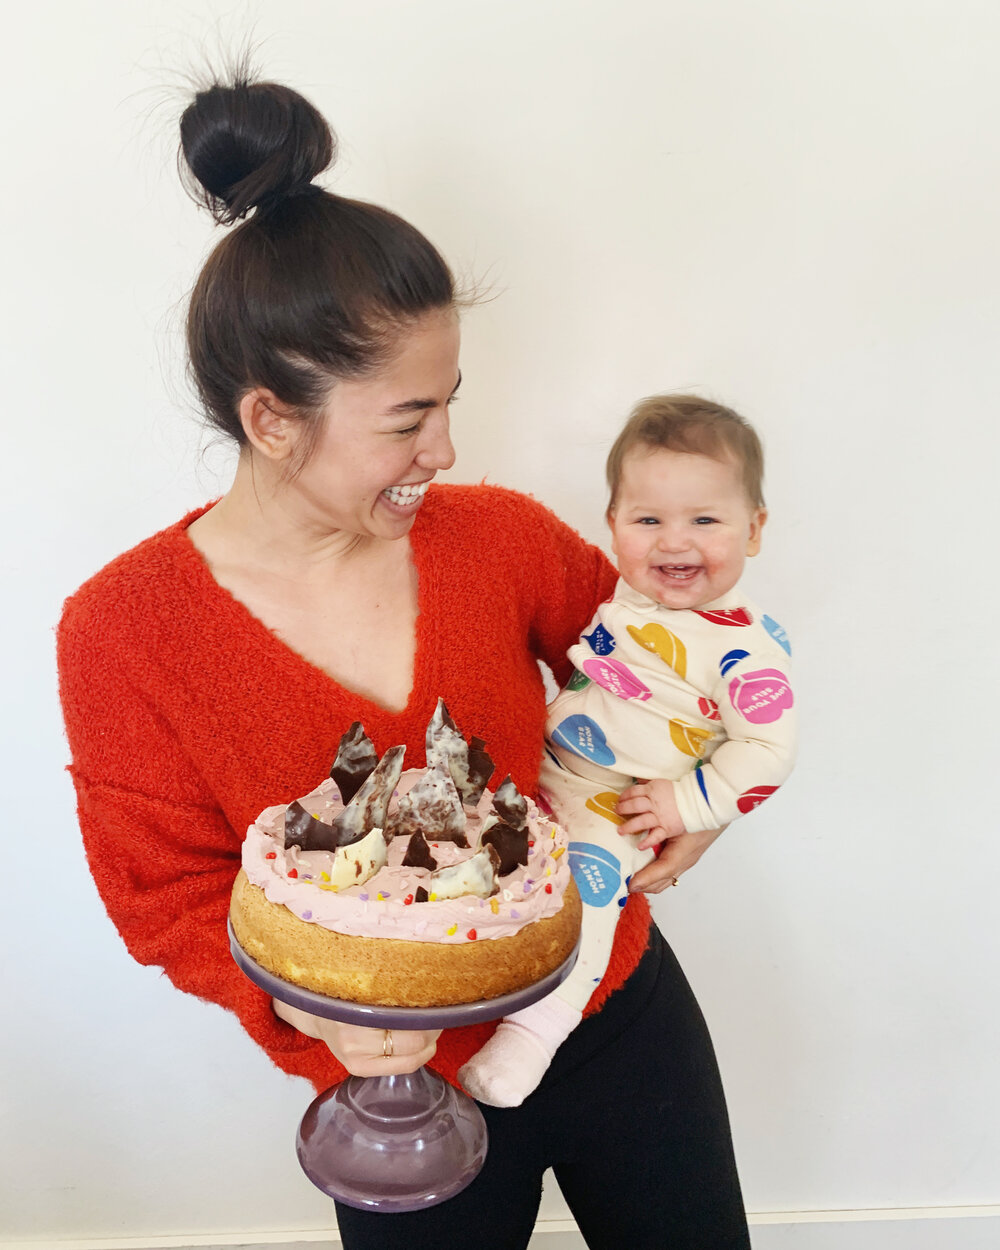
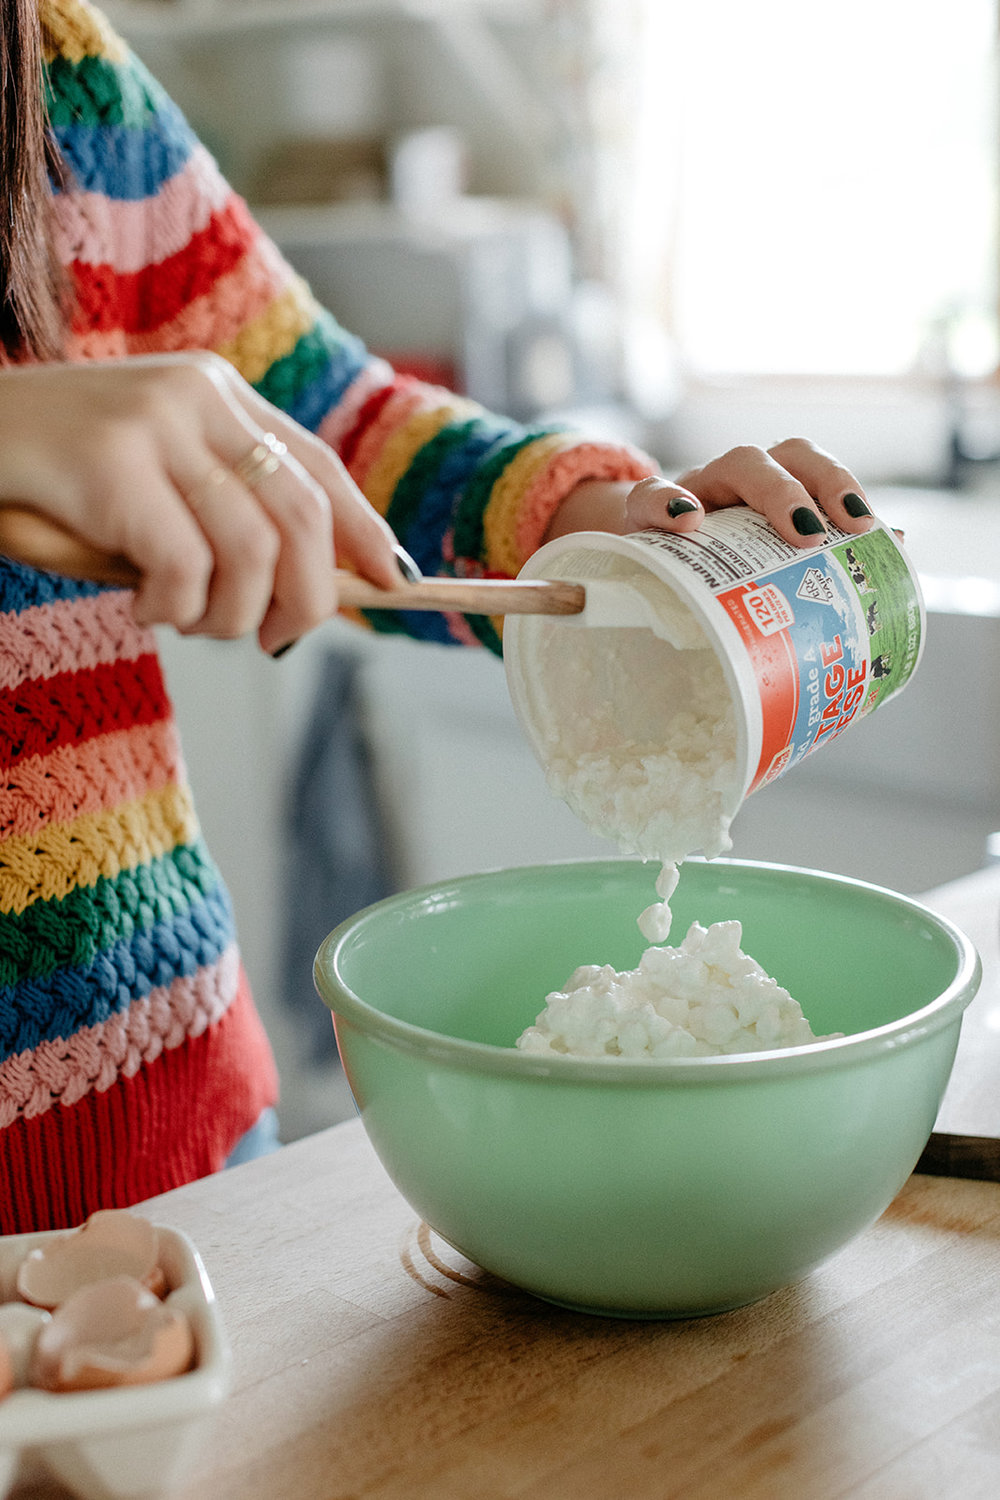
hello, hi! how are you doing? are you enjoying this weather? can you believe that it is... summer kind of?? bernie and i have been lapping up the sun like thirsty puppies. nearly every afternoon, we pack a little bag of water, bamba or freeze-dried berries, sunscreen, books, and toys, and bring it out to a blanket on our lawn where we bask and play and listen to the sound of music. sometimes my phone doesn't get very good reception however so instead of julie andrews serenading us it becomes me squeaking out i-am-16-going-on-17-doo-doo-dee-doo-dee-doo because i don't know the words and the whole time i have to ignore the vision in my head of john mulaney doing the creepy version on SNL. it's really awful when we have to resort to me singing, i can’t wait for the future when cell phone reception is better. regardless, these pre-mosquito days are idyllic. bernie is in this painfully perfect sweet spot where she has learned not to put everything in her mouth (dirt, bugs, the cold noodles leftover in the grass from her sensory play weeks ago) and she can't yet walk or run very fast so i don't have to chase after her worried that she's going to run into the construction hole in our yard (more on that eventually…!). we can just sit contentedly on the blanket with crayons or balls for hours and i love it.

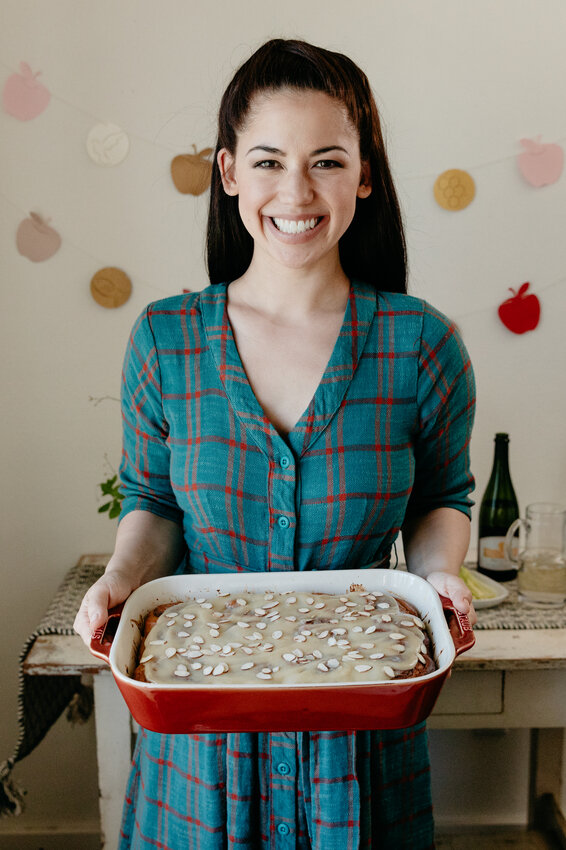
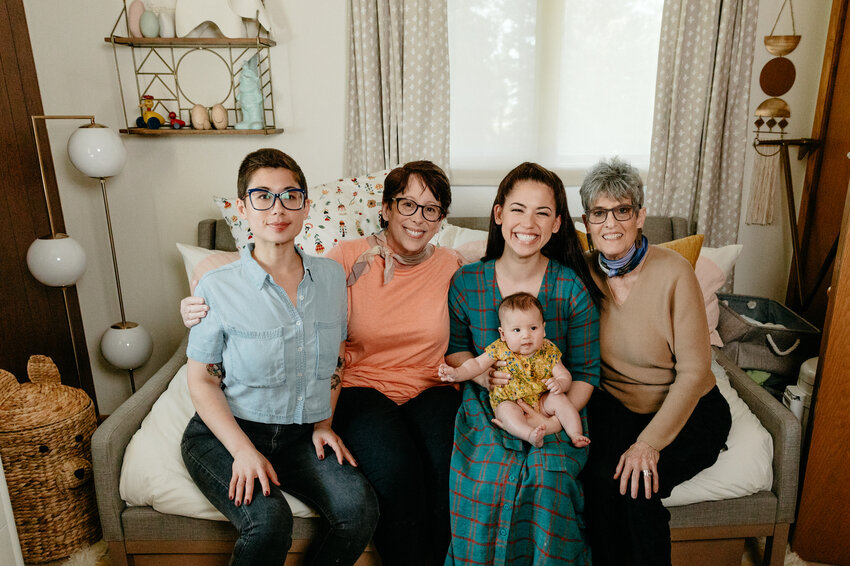
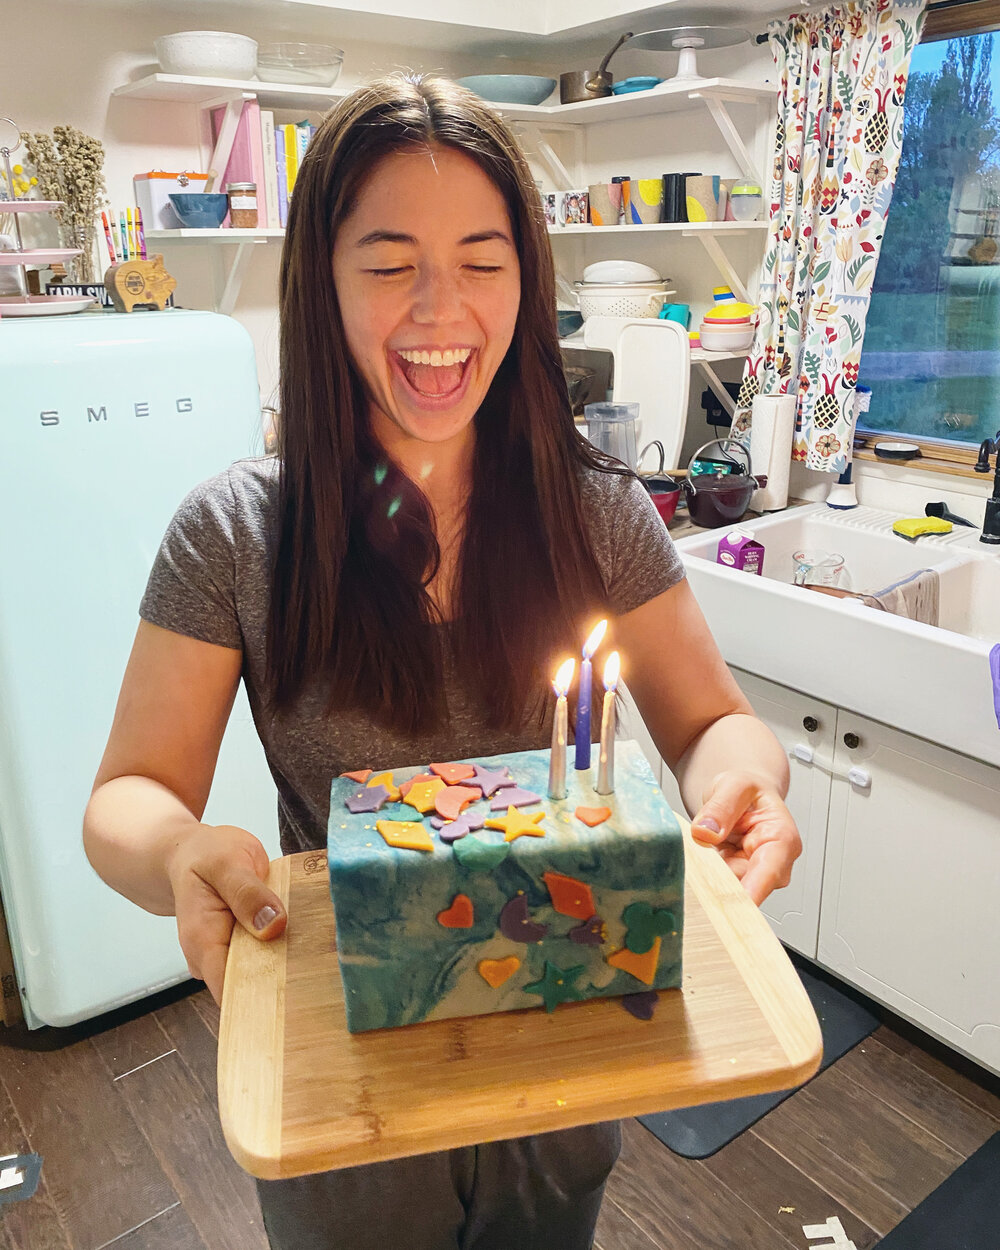
so that's what we did on my birthday last friday! nick was planting sugar beets and bernie and i spent the day outside. we blew up her new kiddie pool and tested out what it would be like to sit in it (it was still a little chilly for water) and zoomed with all of our people. we had homemade egg mcmuffins, as is tradition on my birthday, and sausagey pizza for dinner. after bernie went to bed, i zoom aperol spritz’d with rob and brian and then watched center stage. center stage is SO GOOD. 

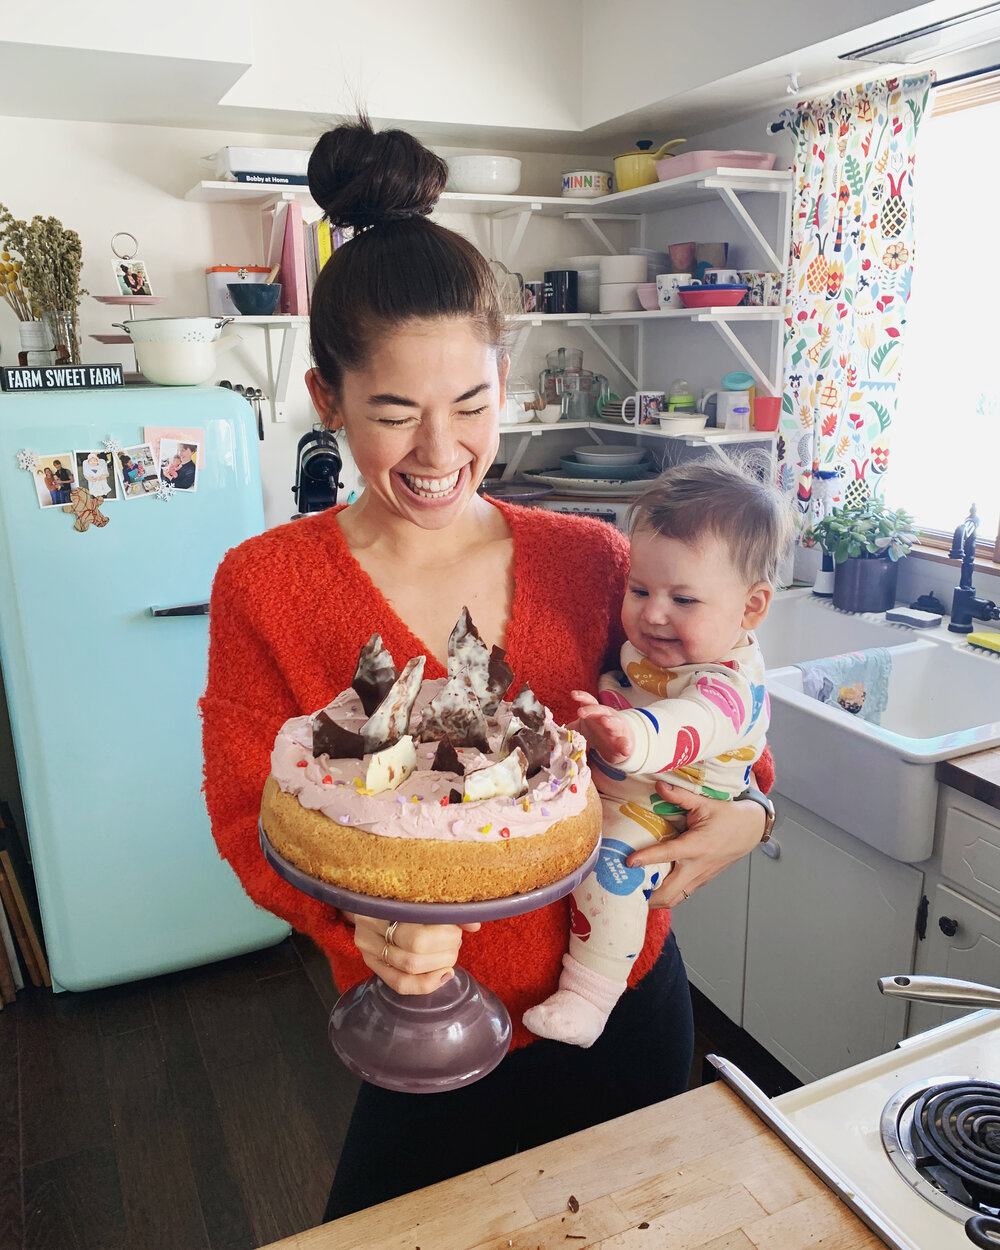
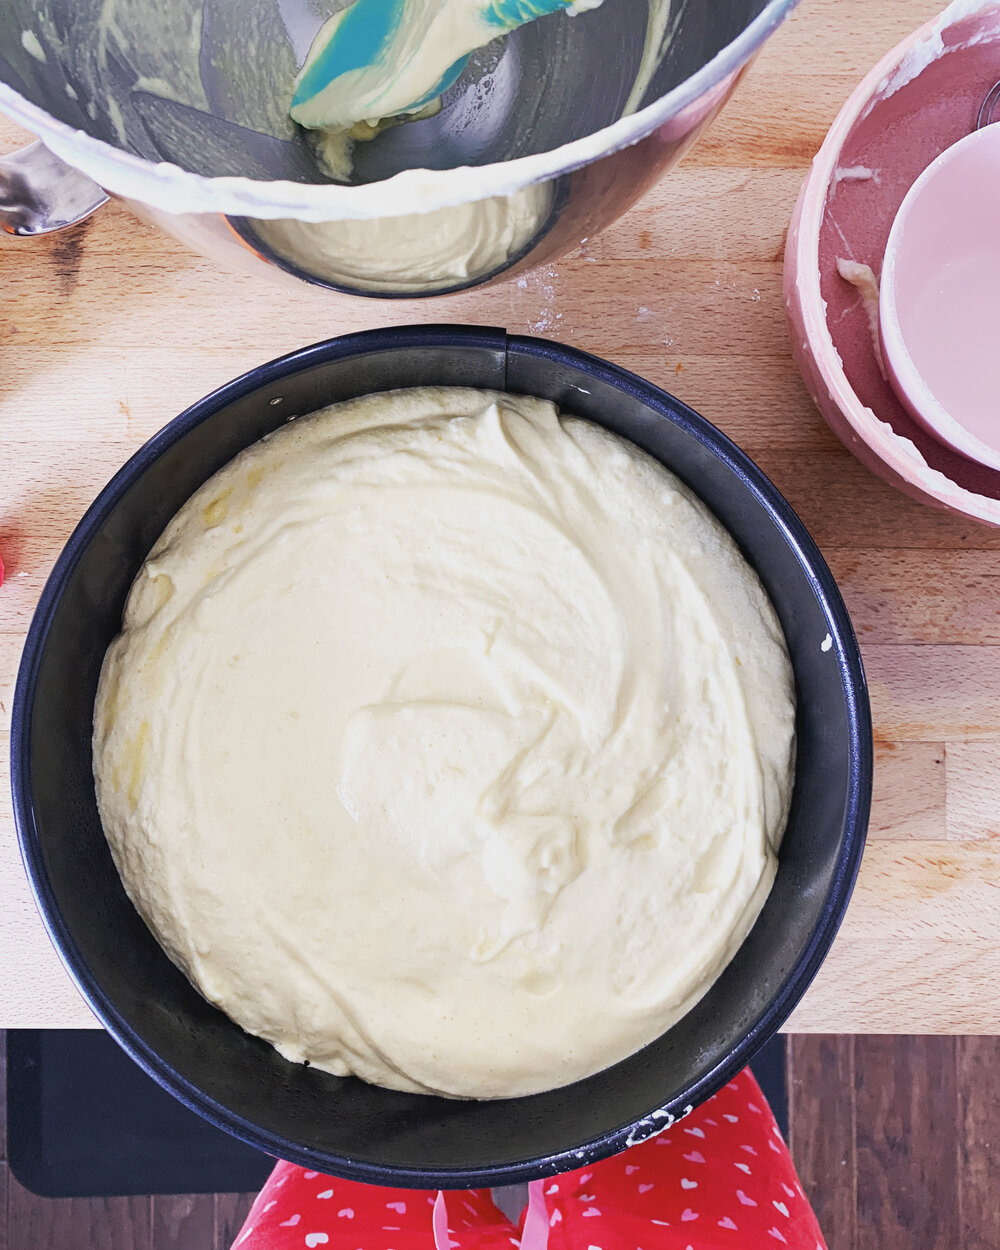
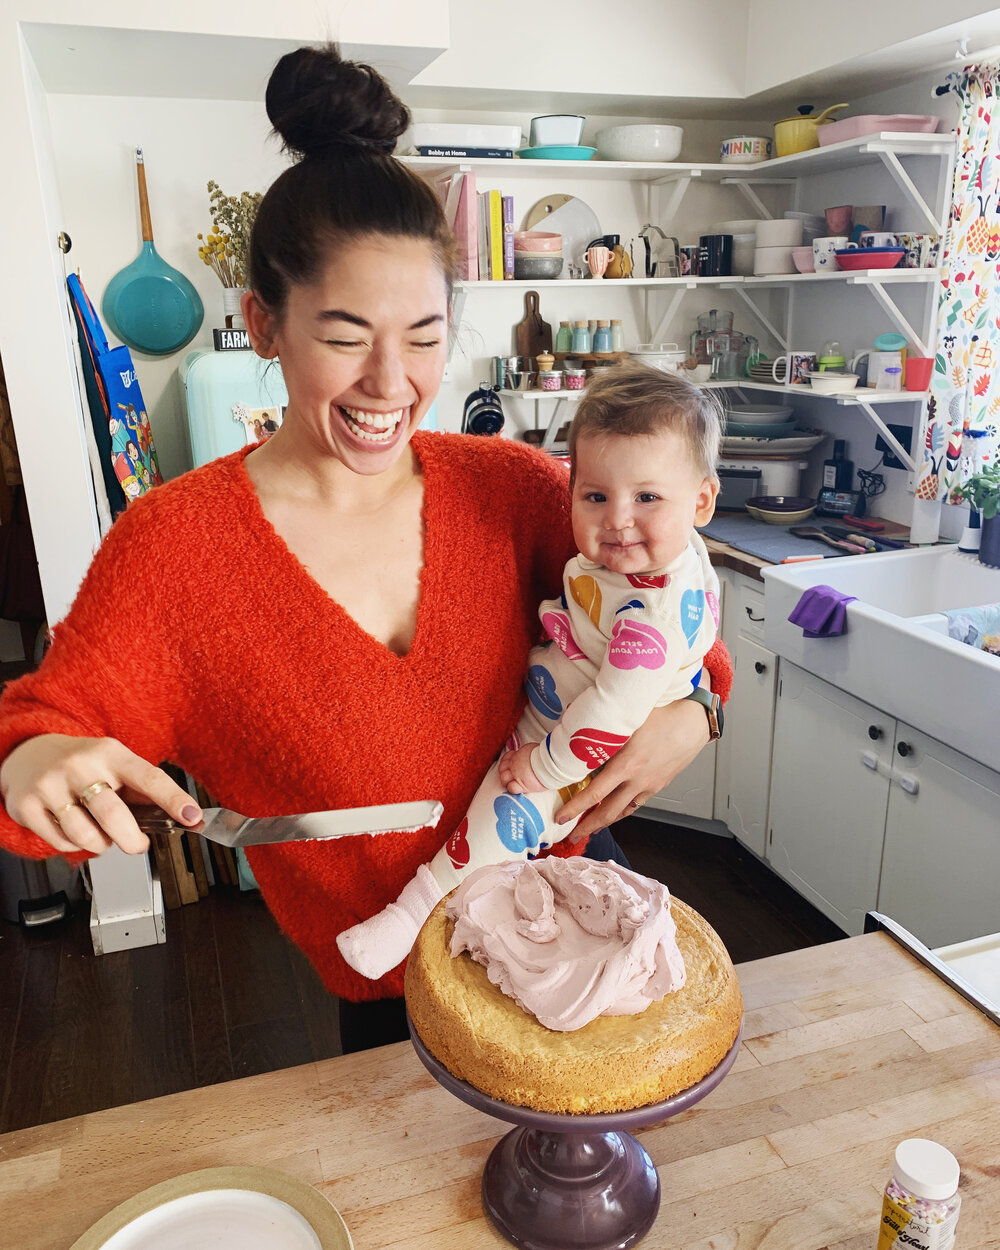
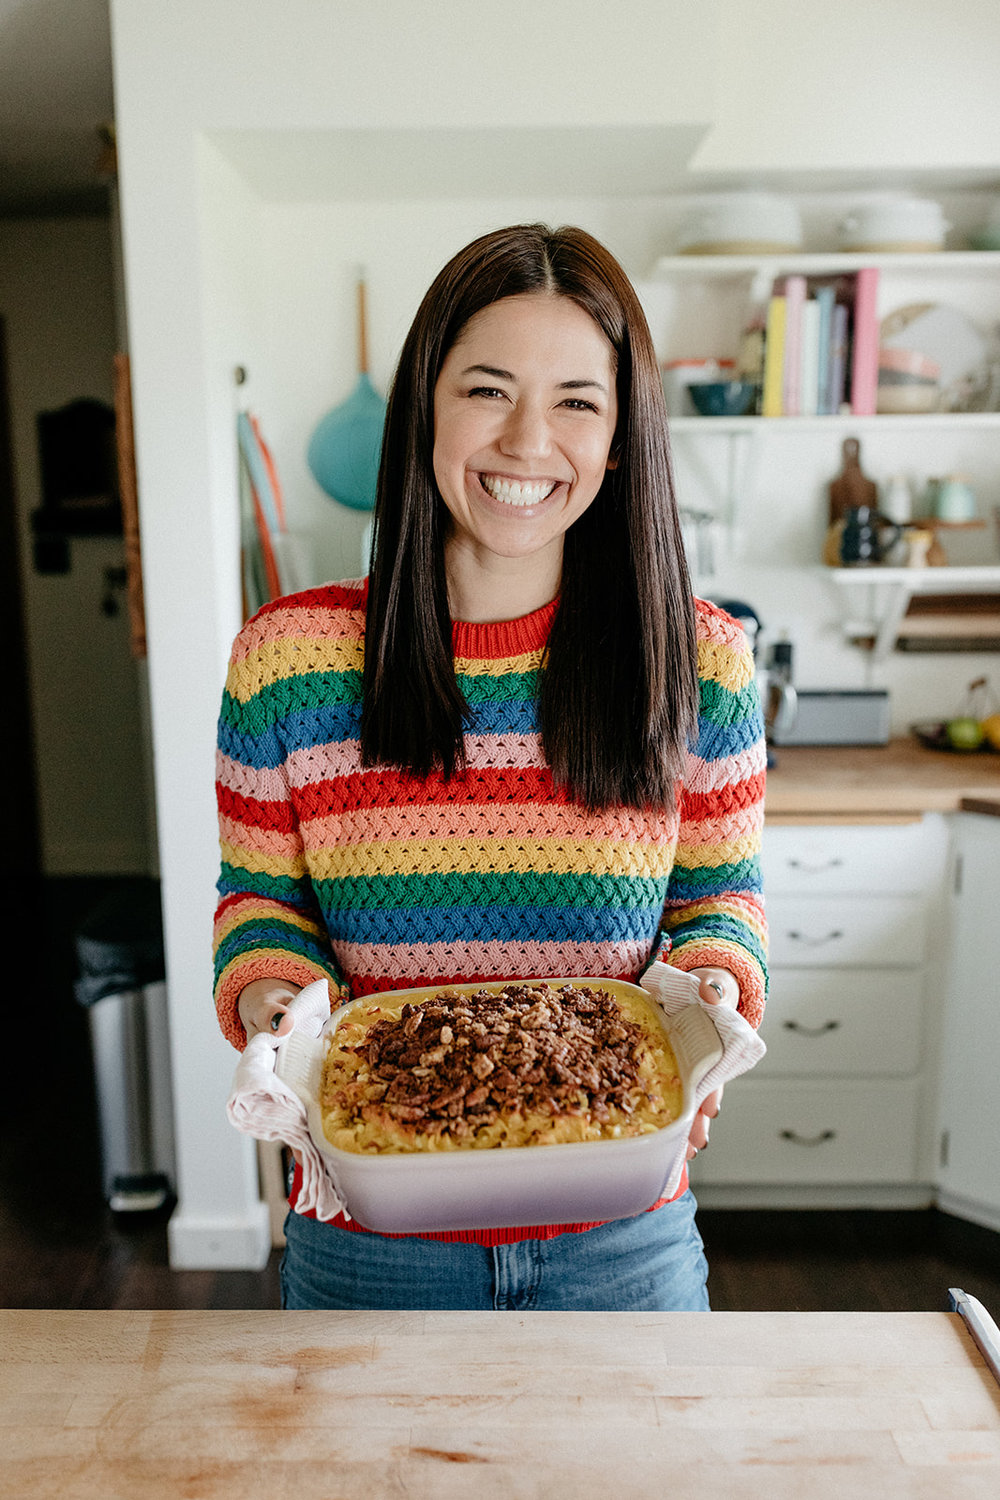
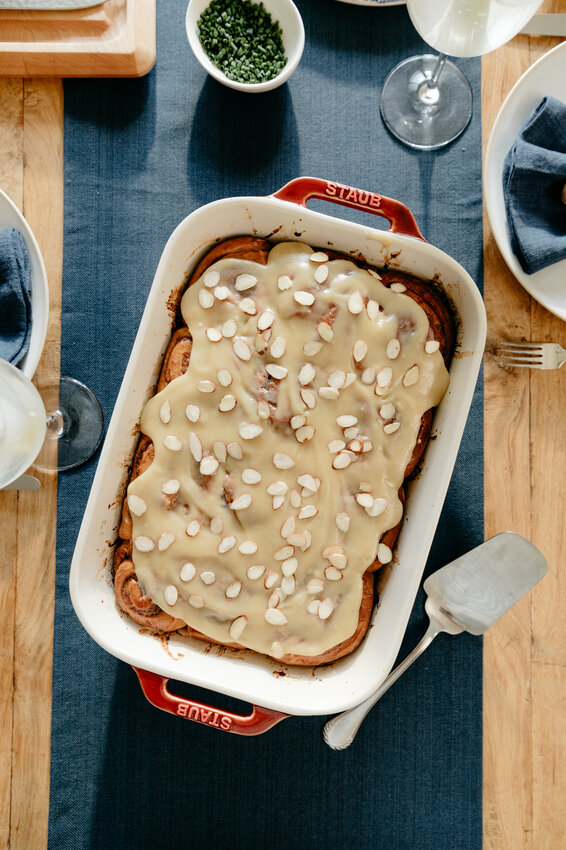
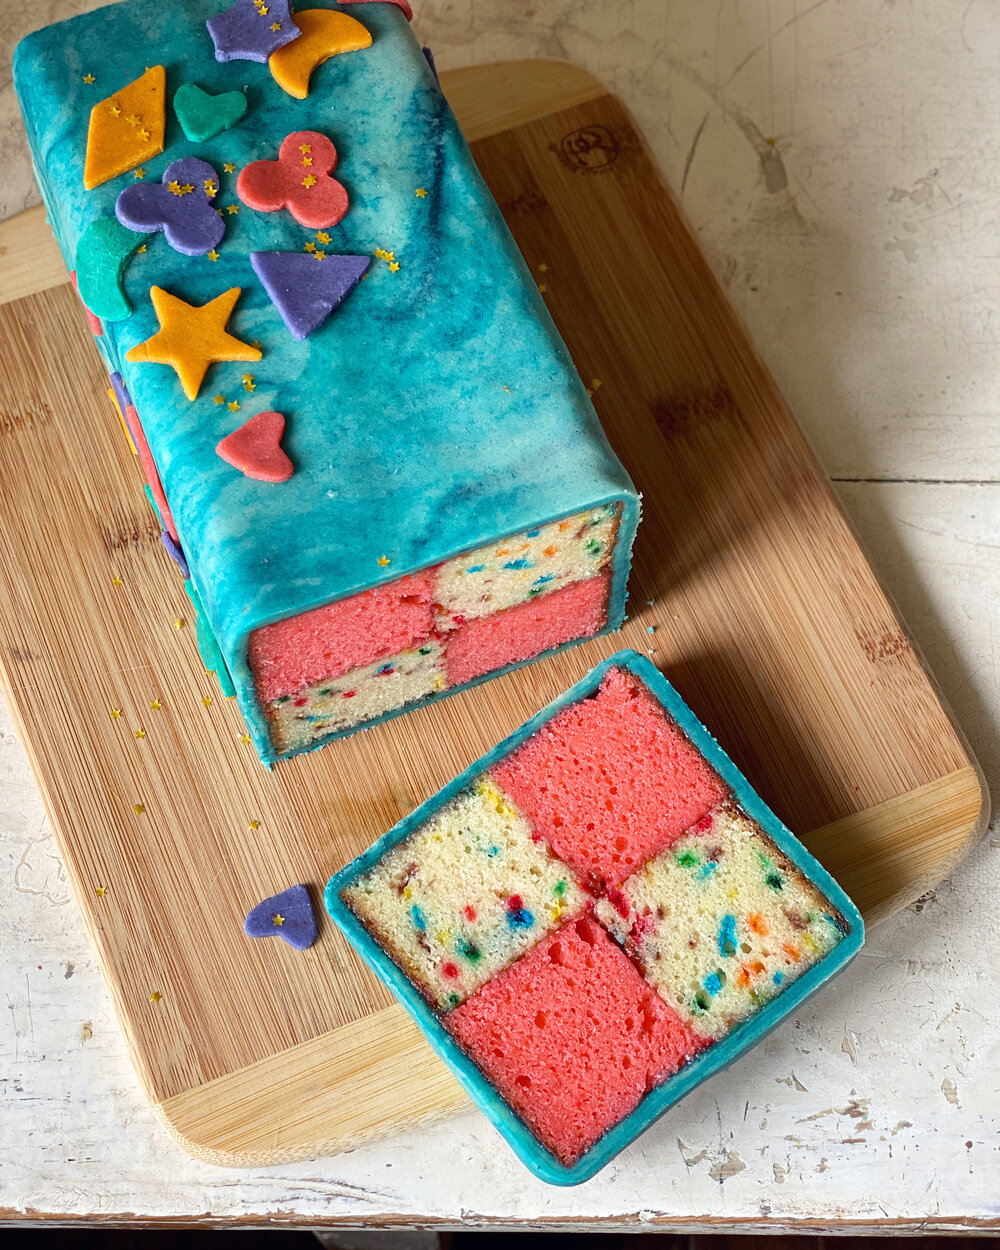
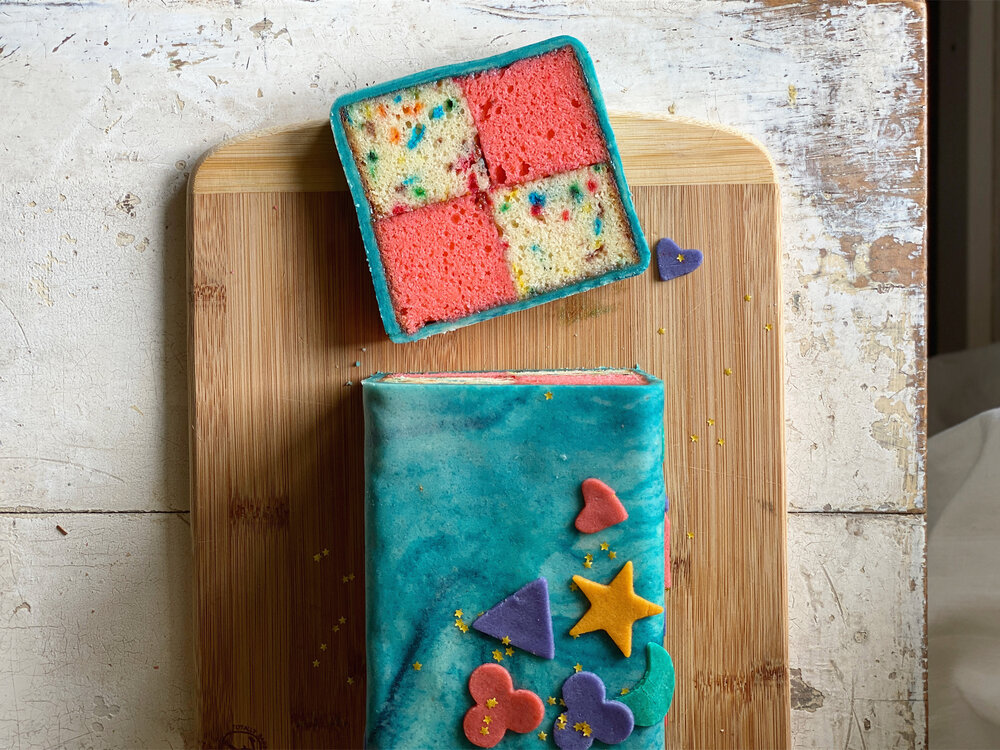
for my birthday cake this year, i decided to make a battenberg cake! 1) because it’s been a long time since the last time i made a battenberg, 2) it's fun, and 3) it's a great cake for a tiny party of three because it's small yet festive. it also lasts for a good few days so you can chip away at it without feeling the rush to gobble it up, and the fact that it has no frosting gives it this sense of snackiness which lends a tiny bit more legitimacy to the urge you'll have when you’re passing through the kitchen and just want to shave off one bite. 

IMG_5320.JPG
IMG_5321.jpg
IMG_5330.JPG
IMG_5444.JPG
IMG_5445.JPG
FE4CC34C-1556-4AD7-BB27-FF82C61E2498.JPG
D4422D1E-4BEB-4E1F-9C2F-CA465A1AE88C.JPG
C2CD18E9-3C2F-4544-9A82-62591F566D1B.JPG
F7094099-D414-49E1-92DD-54394B1EE78A.JPG
73A837E5-EB16-408F-ABB4-C5D72048AA53.JPG
284E5295-6471-4B44-B2DB-07CAB450CF7C.JPG
CB8F8573-4C74-4091-905F-C618EE1E9B8A.JPG

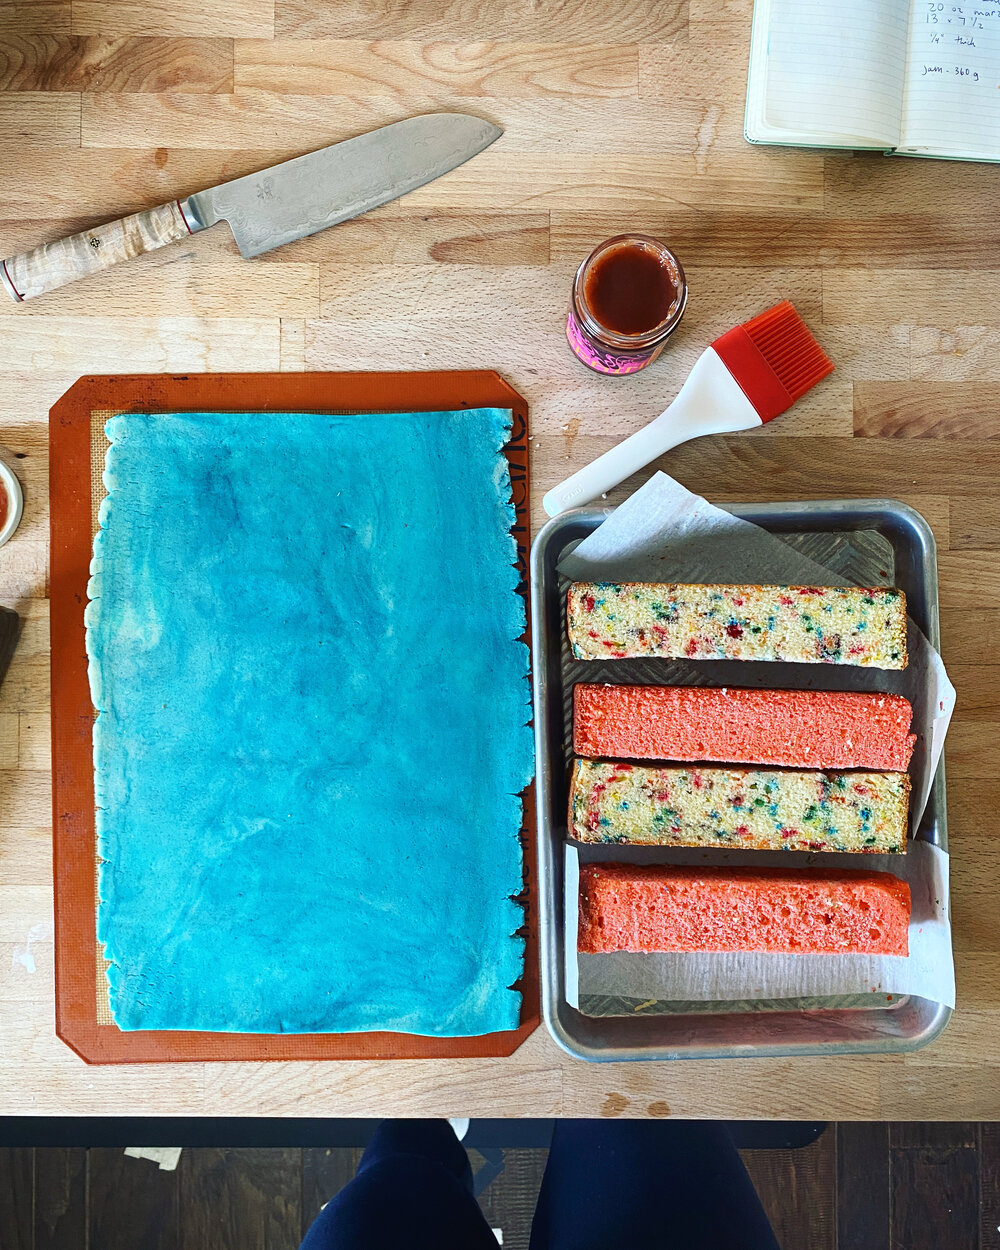
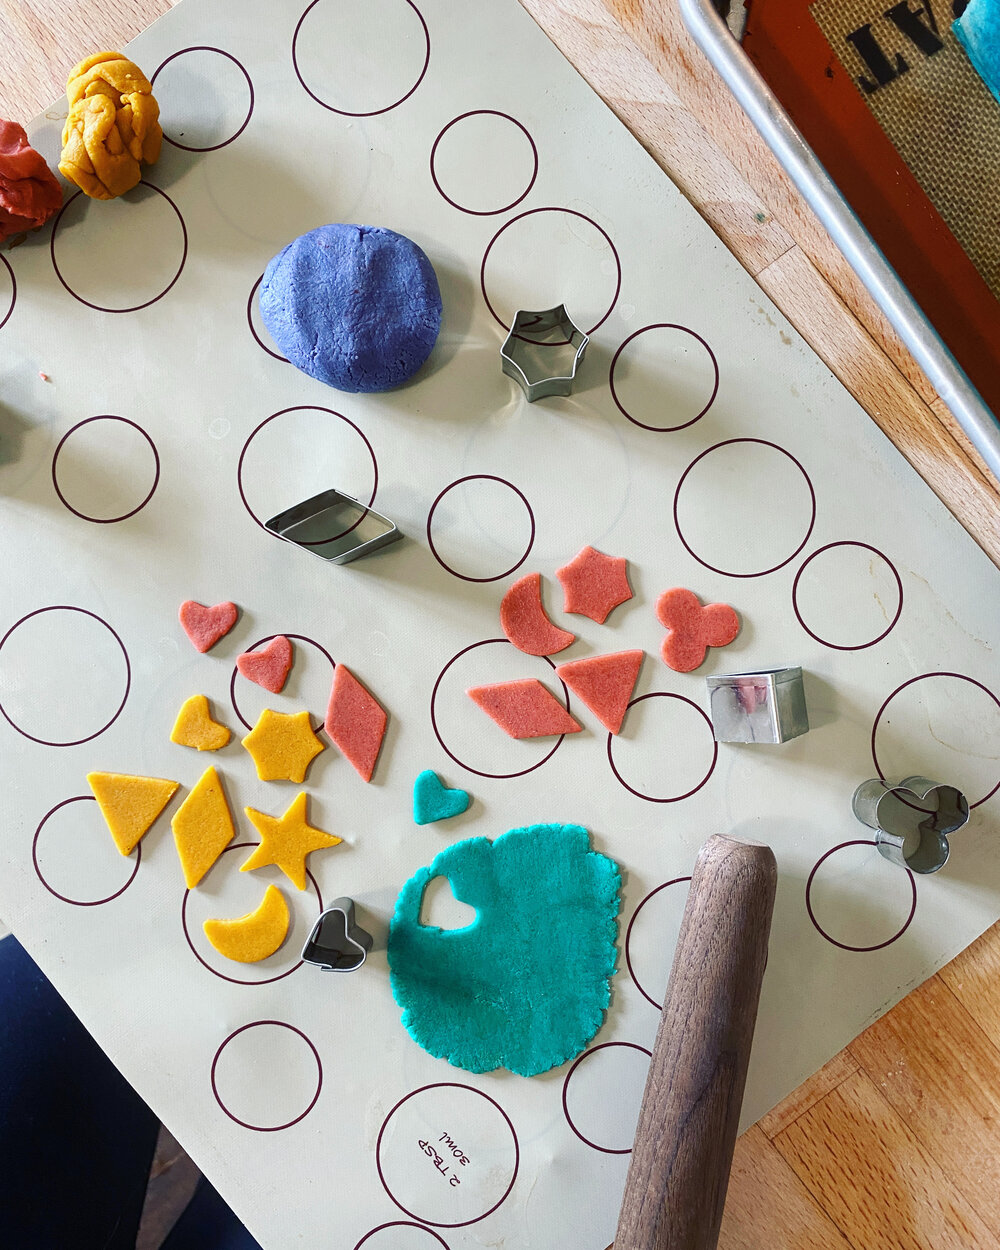
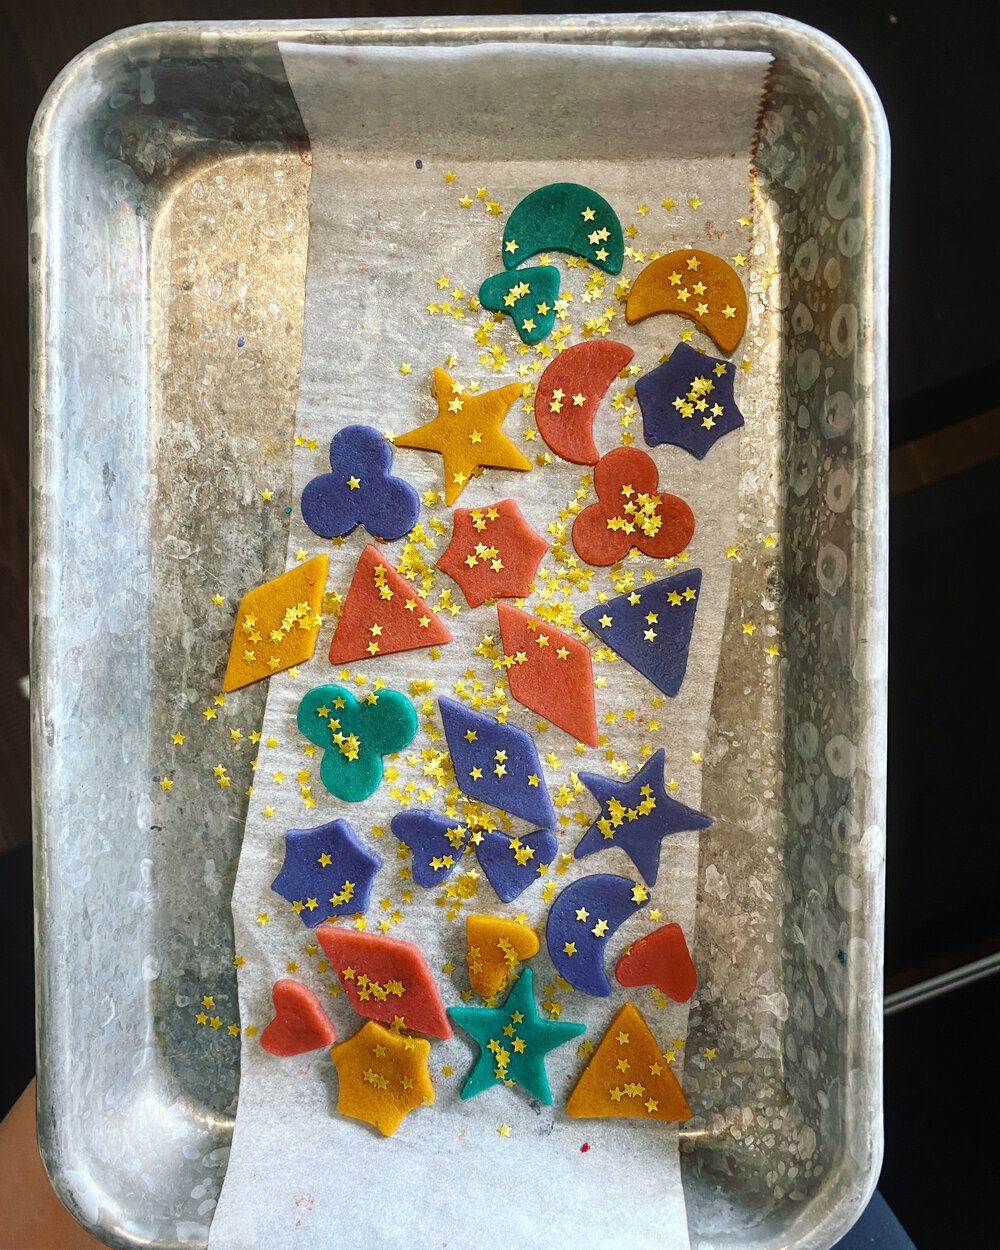
the cake itself is dense and delicious, with a hint of rose. as with most of my butter-based cakes, i added a little coconut oil to ensure that this cake has no choice but to be moist. you can use unrefined to add some coconut flavor, but i chose to go with refined so that it wouldn't interfere with the power couple of marzipan and rose. for the jam, i used an amazing strawberry rhubarb kumquat situation that my aunt gifted me from sqirl. design wise, my laziness to fully knead the food coloring into the marzipan made it look like my tie dye sweats that i wear every day so i just went with it! then i cut out marzipan "stickers" using tiny cookie cutters and smooshed them right on. 

my biggest battenberg tips are: roll the marzipan out on a silicone mat! you don’t get the scrunchy lines in it like you would if it was on parchment and you don't get it messy with powdered sugar (which is fine for the interior surface of the marzipan but on the outside it’s not a great look). also, let the cakes cool completely before trimming them so you can get the cleanest edges, and use a very sharp knife (i’ve been loving this knife for this). once the cakes are trimmed, you can definitely stick them in the freezer, wrapped in plastic, for up to a few weeks until you're ready to decorate (or up to a few months if you also wrap in foil). once you decorate, let the cake come to room temp before serving!

happy battenberg-ing, everyone!

4D2C13E1-6112-4D5F-8D4C-D34B85774DC6.JPG

Birthday Battenberg

Makes 1 loaf cake

Ingredients

Cake:

2 2/3 c (347g) all-purpose flour

2 1/4 tsp baking powder

1 tsp kosher salt

1 c (240g) heavy cream

1/4 c (60g) sour cream

3/4 c (169g) unsalted butter, softened

6 tb (75g) refined coconut oil

1 1/2 c (300g) sugar

3 large eggs

2 tsp vanilla extract

2 tsp rosewater

3 tb (36g) rainbow sprinkles (classic cylinders are ideal, not nonpareils)

Pink food coloring


Assembly:

14 oz marzipan, plus more for decorations as desired

Food coloring

Powdered sugar, for dusting

6 tb (120g) jam

Clues:

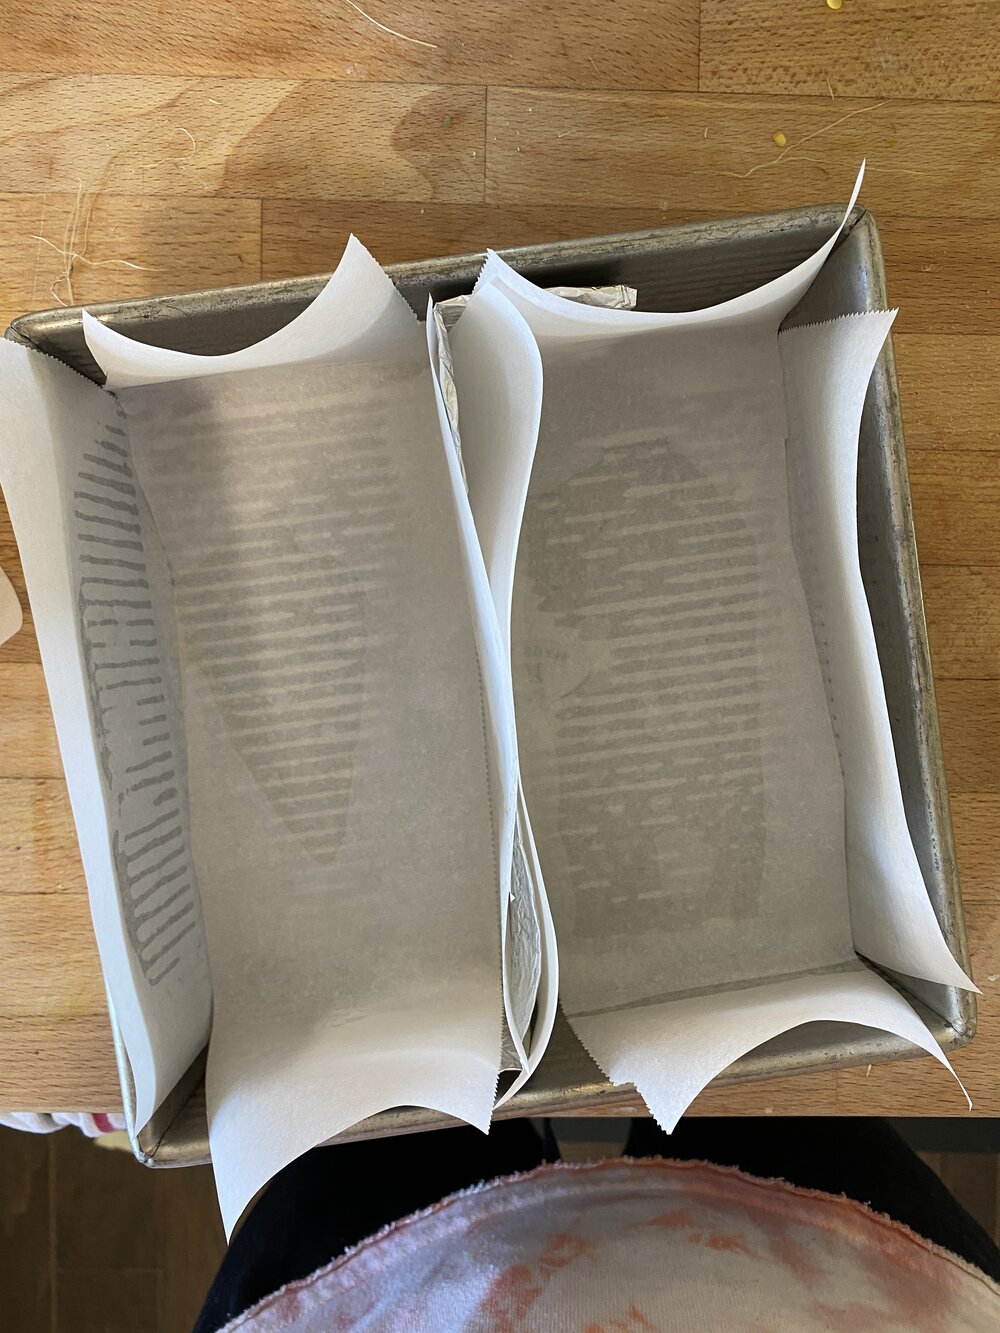
preheat the oven to 350ºf. turn an 8” square baking pan into a battenberg pan: first, fold a long piece of foil onto itself a couple of times to a create a foil barrier to divide your pan in half, making sure that the barrier is at least the height of the pan or even a little more. then spray the pan and each side of the foil with cooking spray (to help the parchment stick) and line each half of the pan with two overlapping pieces of parchment paper, one going widthwise and one going lengthwise, with enough parchment paper to come all the way up the sides and then some. get your scissors out and trim the parchment so that it lays nicely and doesn’t curl around the corners and make you go crazy. sorry, i know this is a lot of parchment paper (i reuse parchment all the time!). ok, set this aside.

in a medium bowl, sift together the flour and baking powder, and then lightly stir in the salt and set aside. in a large measuring cup, whisk together the heavy cream and sour cream and set aside. 

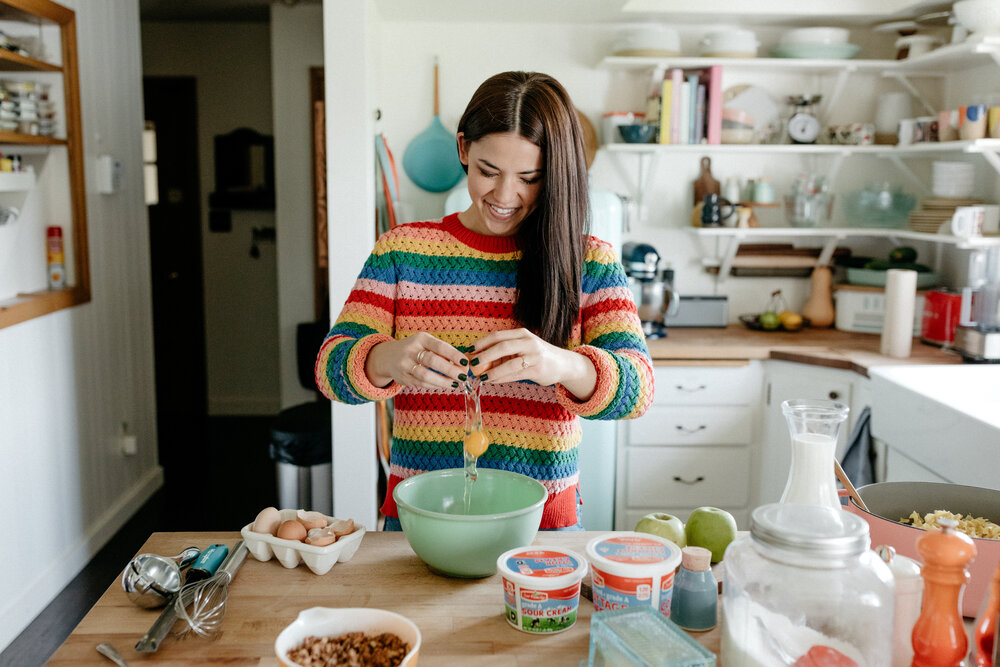
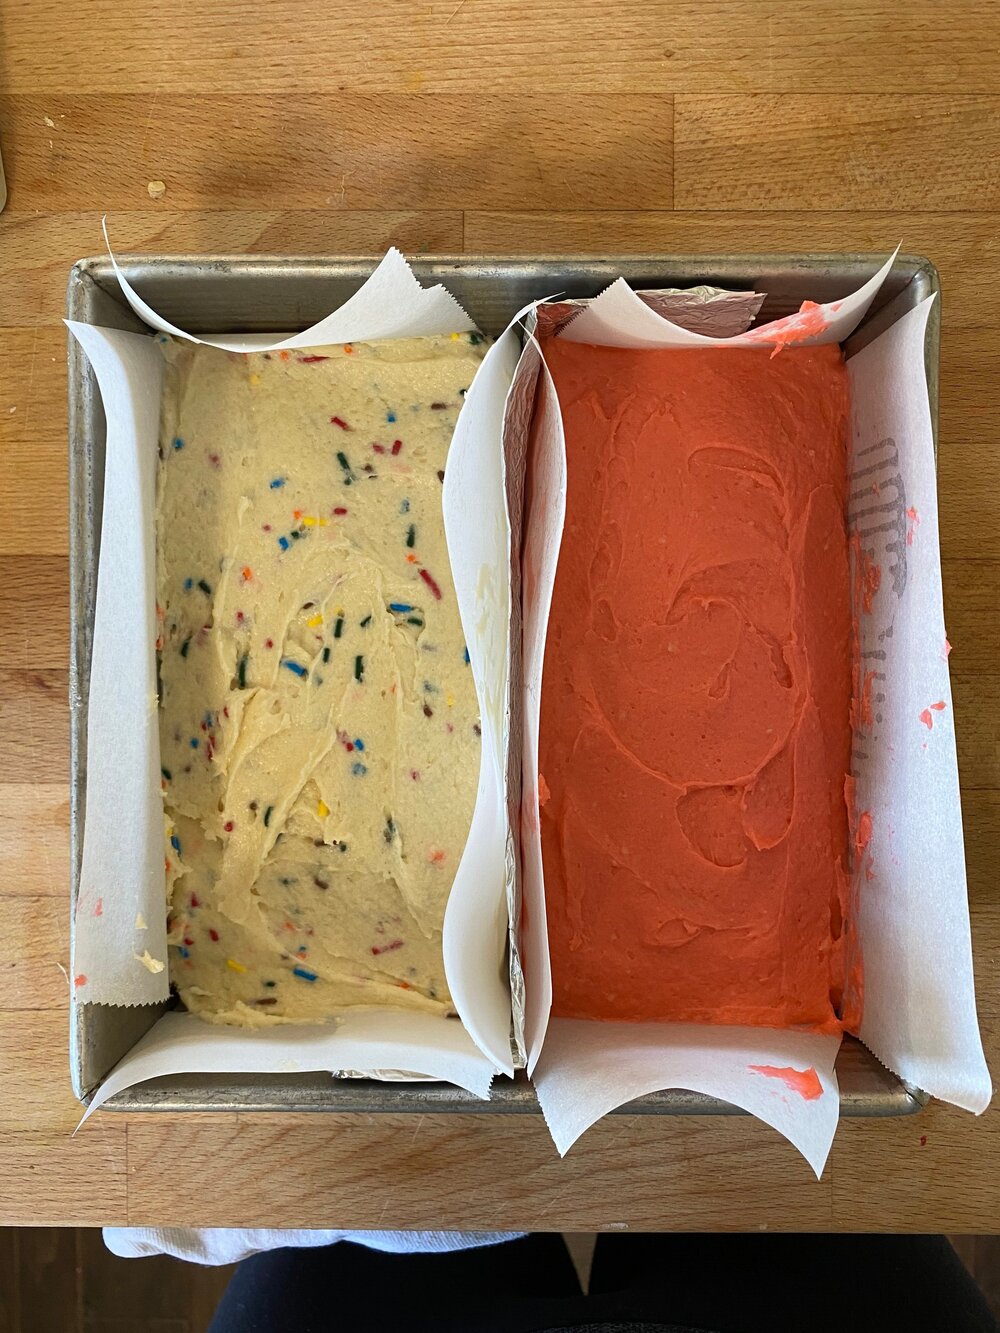
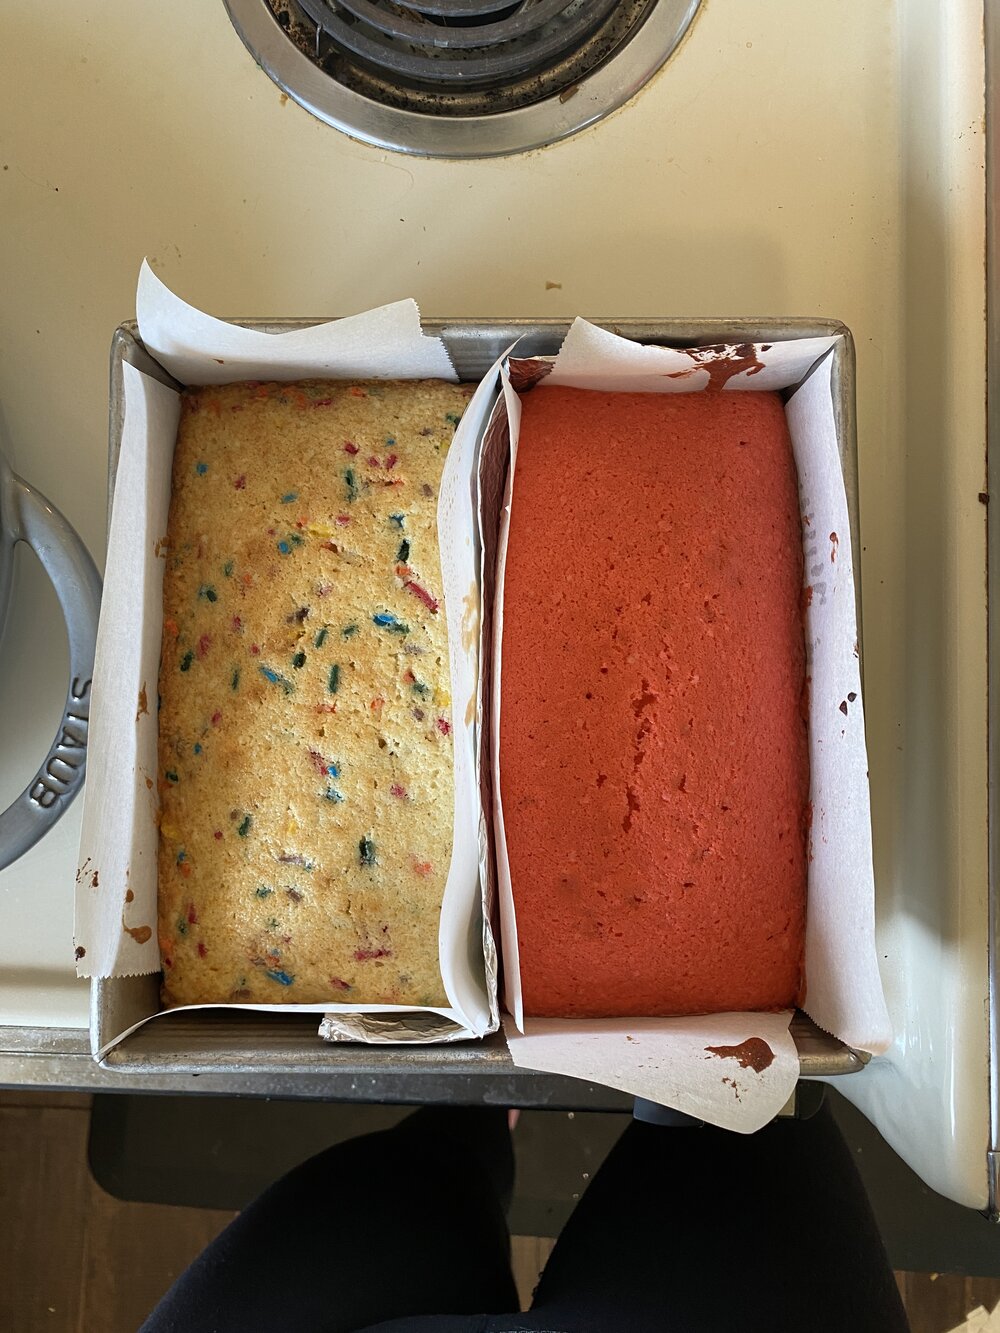
in a stand mixer fitted with a paddle, cream together the butter, coconut oil, and sugar on medium high for 3-4 minutes, until light and fluffy. add the eggs, one at a time, beating well after each and periodically scraping the sides of the bowl with a rubber spatula. add the vanilla and rosewater and mix to combine. reduce the mixer to medium low and add the dry mixture and cream mixture in 3 alternating additions, mixing until 80% combined. divide the mixture in half. in the first half, fold in the sprinkles as you mix until the batter is combined. pour into one side of the pan and use a small offset spatula or a spoon to carefully spread it out evenly. in the second half of the batter, add a few drops of pink food coloring and fold it in as you mix until the batter is combined. pour into the other side of the pan and use a small offset spatula or a spoon to carefully spread it out evenly. bake until the tops of the cakes are browned and a toothpick inserted into the center comes out with a few crumbs on it; begin checking for doneness at 45 minutes. let cool in the pans for 10 minutes and then use the parchment wings to left them out of the pans and onto a wire rack to cool completely. 

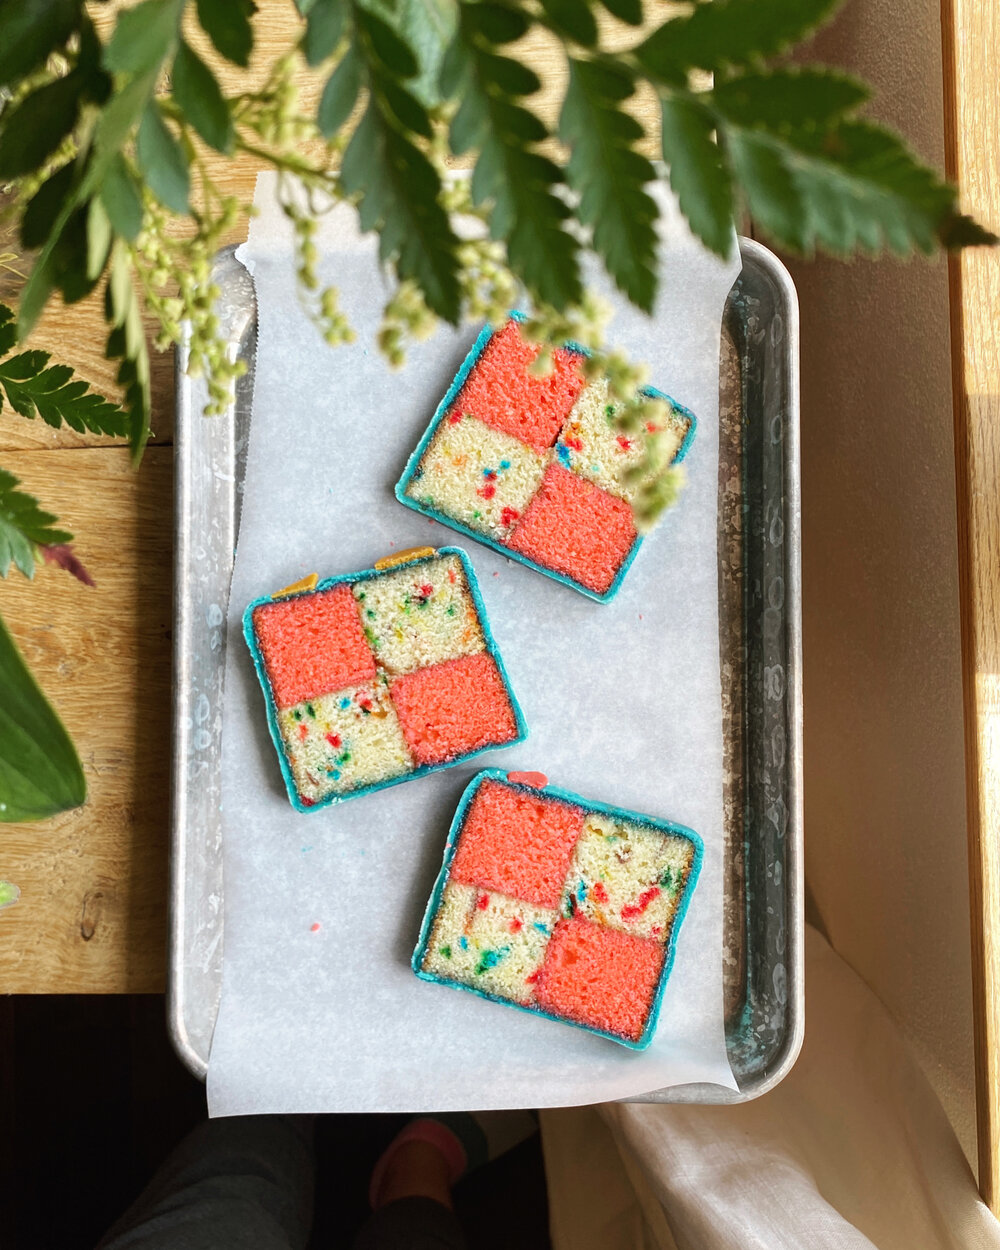
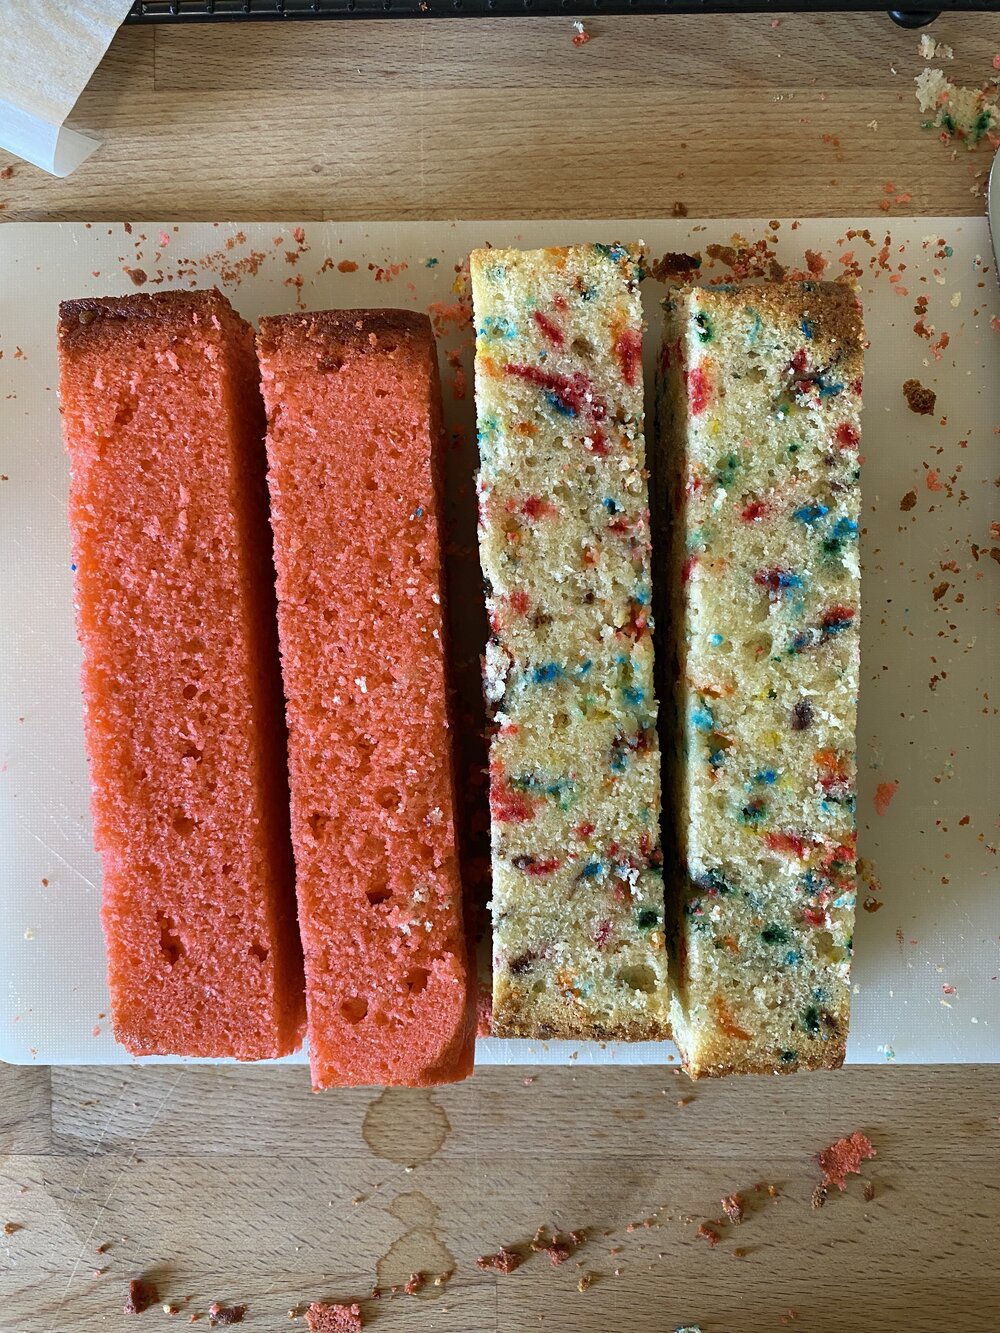
once the cakes are cooled, level them and trim off the sides if they're uneven. cut into 4 equal rectangles that are as wide as they are thick (measure the thickness of the cake once it’s leveled and then turn your ruler 90º to measure that same amount on top of the cake and score with an accordion pastry cutter). enjoy a bite of cake scraps and set these aside.

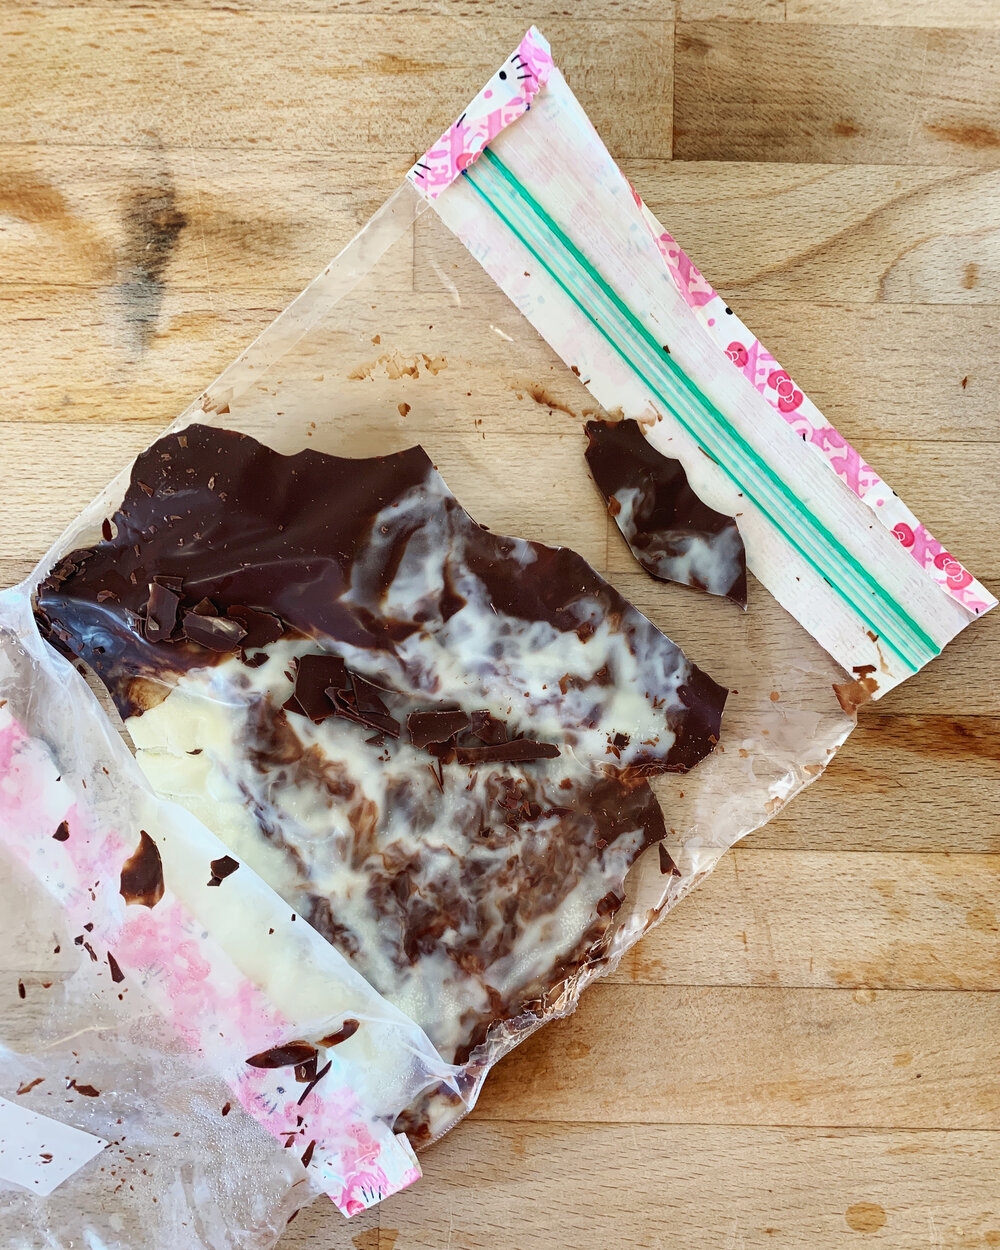
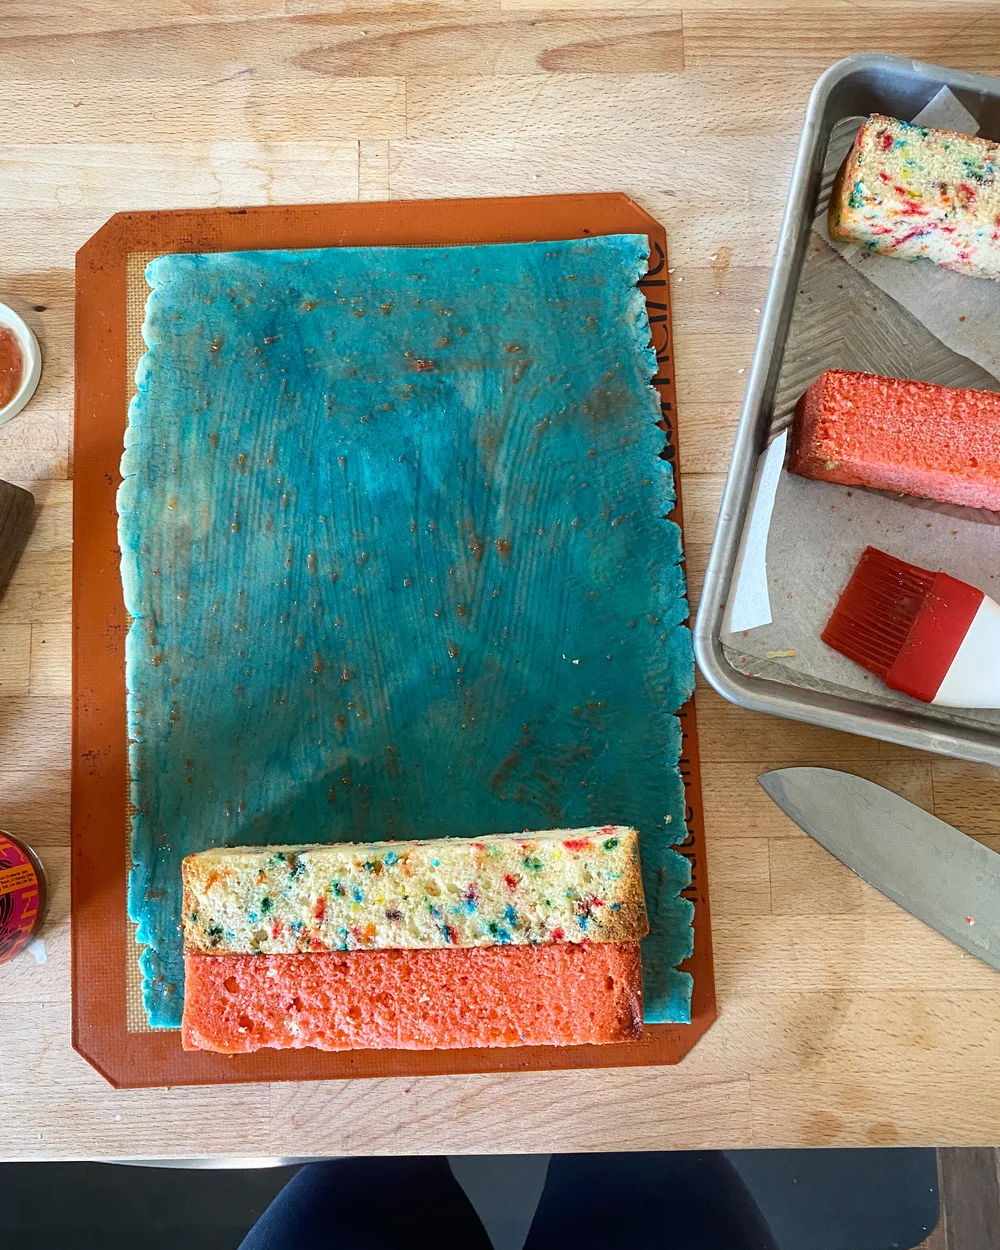
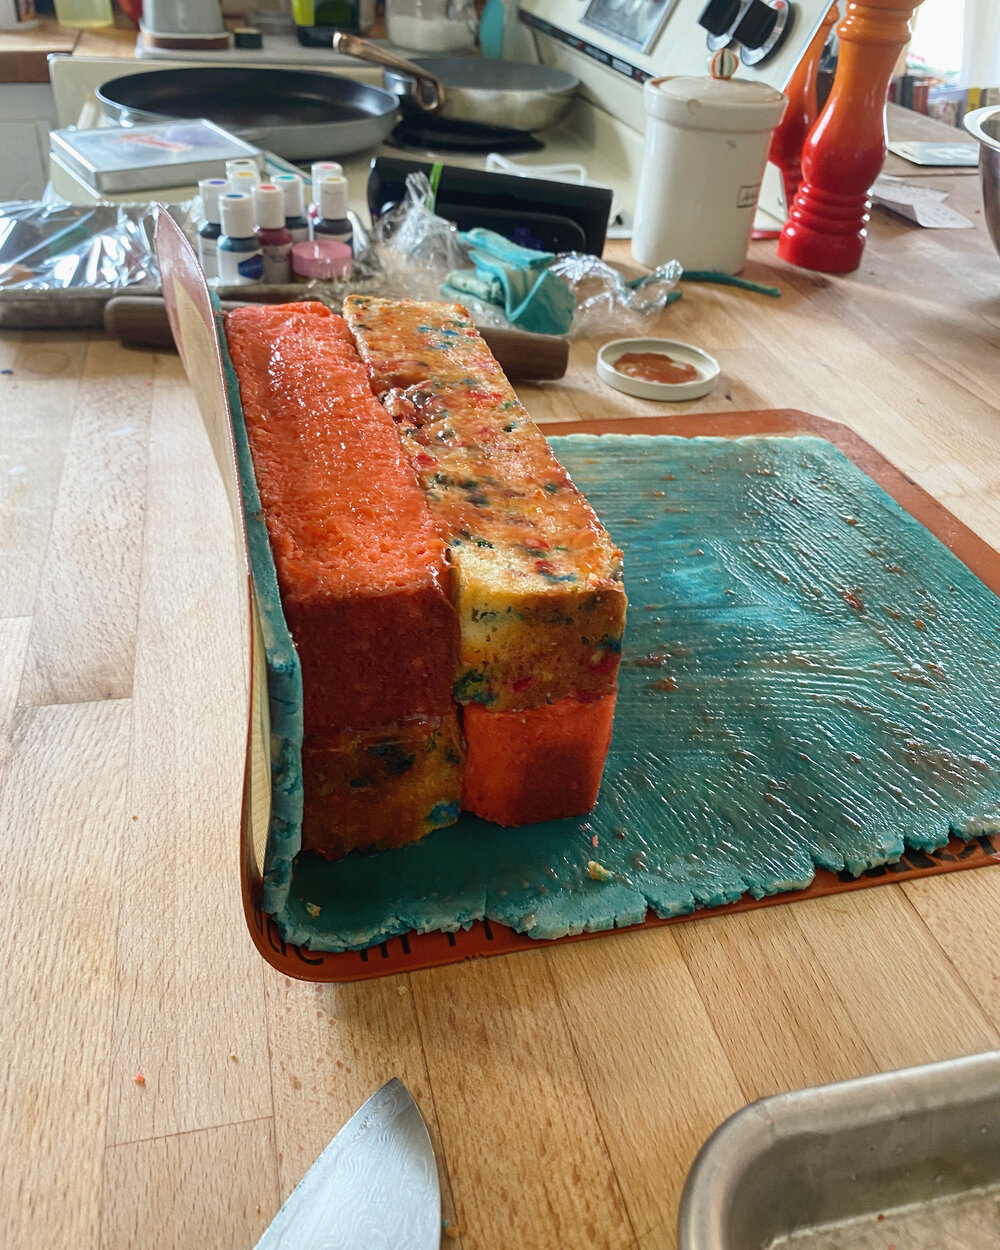
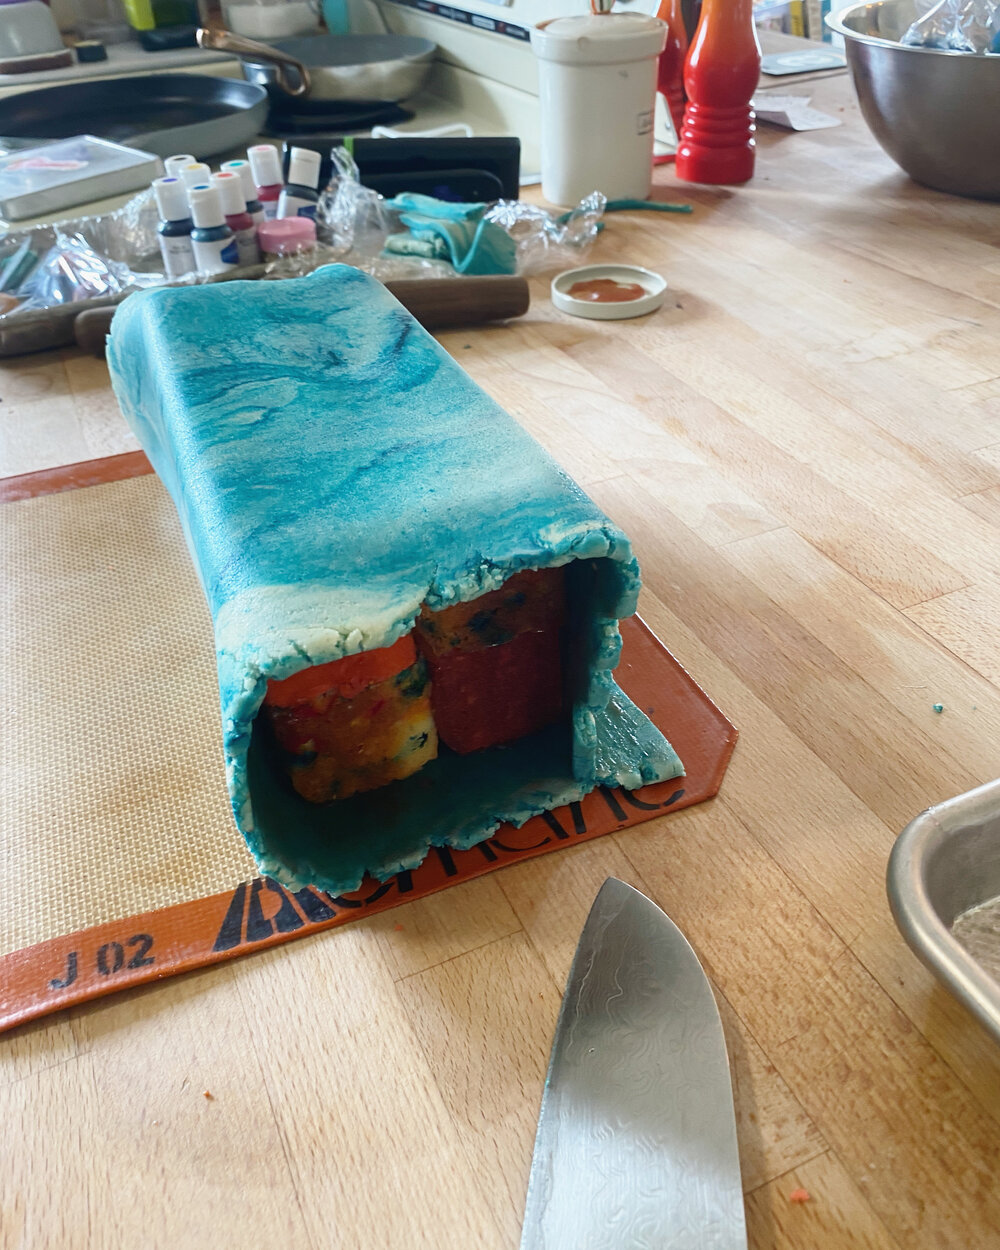
knead the marzipan with food coloring to get your desired color, dusting with powdered sugar if it gets too sticky. on a silicone mat (or a big piece of parchment or a counter dusted with powdered sugar, but i strongly recommend a silicone mat so that you don't get powdered sugar all over what will eventually become the outside surface of the marzipan) roll the marzipan out into a rectangle that's about 7 1/2” wide by about 13” long, dusting the top with powdered sugar as needed to prevent sticking. trim the edges so they’re straight. brush all over with a thin layer of jam and place a rectangle of pink cake at one end. brush the exposed surfaces with a thin layer of jam. squish a rectangle of sprinkle cake right next to it and brush the exposed surfaces with a layer of jam. stack the other two rectangles of cake on top, brushing with jam, to form a checkerboard pattern. carefully roll it onto its side, pressing the marzipan all over so that it sticks, and then continue to roll until the cake is covered. trim off any excess marzipan, wrap in firmly plastic wrap and let set in the fridge for a couple of hours. decorated with additional marzipan decorations and sprinkles as desired. let come to room temperature and enjoy!

this cake will last at room temperature, wrapped in plastic or in an airtight container for up to a week.

Print this recipe

-yeh!

naturally colored rainbow cake + bernie is one!!

791C57BC-6394-41DB-935E-CB03A0A8B6B2.JPG
3AC4C10B-B40F-406E-9CE0-EC4EBB9EC22C.JPG
53EA659F-402C-4F35-81EE-0A7791F50539.JPG
6BBFE4E7-B92A-4BE0-8D77-209A4D81A3B3.JPG
27946505-663C-4650-8AD3-21EE2DCB58CC.JPG
4534DDF6-41C0-43DA-B6E8-9F0478805514.JPG

Bernie is ONE!! Yes, it went by so quickly! Yes, she gets more delicious every day!! Yes, I began planning her vegetable-themed birthday party more than six months ago and spent hours and hours searching for the perfect garlands and outfits, hand drawing her invitations, developing new recipes, sketching out her table scape, typewriter-ing the seed packet party favors, and scheduling the prep down to the minute. (And yes, in retrospect, I see what Nick meant when he said that I am… crazy…) And then yes, we had to cancel it ☹️! But!! Even though we missed our fronds and family dearly, it was truly a magical beautiful Bernie day and we loved every single moment of it. We had sprinkle pancakes and blueberries for breakfast, homemade chicken and stars soup for lunch, and turkey spinach meatballs with freshly made fettuccine for dinner. In between, we played in pools of Cheerios and visited the farm cats. And then we had cake! Obviously!

4D21BC22-103D-4B1A-A402-D94F5FE4D47E.JPG
2423B66A-7E6A-492B-8F53-163A220089B7.JPG
D13FEDB8-8D54-4E79-B813-DD2A804ACAD1.JPG
B3CD5C61-0E50-4B40-9872-1492EFACE20A.JPG
BF79587C-7892-431B-BF02-ADA38208A0F9.JPG
AEC00D8A-0054-48E2-86D3-7B4194ED746C.JPG

I am so pleased with how this naturally colored rainbow cake turned out. It took a bunch of experimenting and tweaking to get the shades to match and to figure out a method that wouldn’t require too much fussiness/juicing/boiling of beets/etc. I tried using turmeric but that was too bright, and I tried using a store-bought precooked beet but that wasn’t bright enough and just got messy. In the end, I went with a combination of store-bought carrot juice, store-bought beet juice, and a big bunch of fresh mint. The cake is based on my go-to vanilla butter cake that is so incredibly moist, dense, and delicious. It’s one of my proudest cakes! The flavor of the beets and the carrots is undetectable and the flavor of the fresh mint shines through just a wee bit, enough to lend its herby flavor but it’s far from overpowering. I went with a basic cream cheese frosting to add some nice tang and decorated with Fimo clay cake toppers.

For Bernie’s mini cake, I stacked up the scraps that I cut off from leveling the layers and cut out tiny layers with a biscuit cutter. No separate cake pans necessary. I was so excited when I realized this would work! The cake is so moist that the scrap layers stuck together without a need for frosting between them. Bernie loved it! I took enough photos of her eating it to break my phone and she didn’t even make a huge mess which makes me think that one day she’ll make a great cook that will be good at the whole clean-as-you-go thing. 

61B3F53F-4DE7-4526-B995-B9B5F380C99B.JPG
34013E6E-87AA-45EB-BAD0-F105D01E0D16.JPG
FA7943B3-8AFF-484B-8D57-E46BCE87A53A.JPG
B12BDFD1-7AE2-4365-A1BD-3DD97152D572.JPG

Weeks ago, I baked the cake layers, let them cool, formed Bernie’s mini cake, wrapped everything in plastic wrap and froze them so that I could have one more thing checked off my to-do list for the party. It also made frosting them, especially the mini cake, way way easier. I always like to frost frozen cakes (and then allow to sit at room temperature for a few hours or overnight before serving). 

Important note about the layers! This cake was originally supposed to be three layers (pink, yellow, and green) but I added a blue layer at the last minute because we were going to be expecting more guests than my usual three-layer cake serves and also because I needed to test two of the layers again so figured I’d experiment with a blue layer for the third. The blue layer is not a part of the recipe below but if you’d like to make a blue layer, simply use the same method as the green layer but sub out the mint for wild blueberries (I used frozen). You’ll have to either add another third batch of batter (using a scale and weighted measurements will help with this and ugh sorry about the 1/3 of an egg thing!) or replace one of the other colors with the blue. I’m sorry for any confusion that this causes!!


Naturally Colored Rainbow Cake

Makes one 3-layer 8” cake (and a mini cake!)

Ingredients

3 1/2 c (450g) all-purpose flour

1 tb baking powder

1 1/2 tsp kosher salt

1 c (225g) unsalted butter, room temperature

1/2 c (112g) refined coconut oil, room temperature

2 1/4 c (450g) sugar

4 large eggs, room temperature

1 tb vanilla bean paste or extract

1/2 c (120g) sour cream, room temperature

1 c (236g) whole milk, divided

1/4 c carrot juice

1/4 c beet juice (storebought is fine, the one I get has a little lemon juice added and that’s ok)

1/4 c firmly packed fresh mint leaves


Frosting:

1 c** (225g) good quality unsalted butter, room temperature

8 oz (224g) cream cheese, room temperature

4 c** (480g) powdered sugar

1/8 tsp kosher salt

1 1/2 tsp vanilla bean paste or extract

3 tb** (45g) heavy cream

**if you’re making a mini cake, I recommend adding another 1/2 c of butter, 1 c of sugar, and 1 tb of heavy cream to the frosting in order to have enough!

Clues

To make the cake layers: preheat the oven to 350ºf. Grease and line the bottoms of three 8” cake pans with parchment and set aside. (For a 4-layer cake, which is the one on the pictures, please see my note above!)

In a large bowl, sift together the flour and baking powder, and then lightly stir in the salt and set aside.

In a stand mixer fitted with a paddle attachment, cream together the butter, coconut oil, and sugar on medium high for 3-4 minutes, until light and fluffy. Add the eggs, one at a time, beating well after each. Reduce the mixer to low and add the vanilla and sour cream. Gradually add the dry mixture and mix until about 80% combined (you’re going to continue to mix once you add the coloring so only partially mixing at this stage prevents over mixing the batter). Divide the batter evenly into 3 bowls (using a scale helps with this!). In the first bowl, add 1/4 cup of milk and the carrot juice and fold together until smooth and just combined. In the second bowl, add 1/4 cup of milk and the beet juice and fold together until smooth and just combined. In a blender, blend together the mint leaves with the remaining 1/2 cup of milk until very smooth. Add this to the third bowl and fold together until smooth and just combined. Transfer the batters to the cake pans and spread them out evenly. 

Bake until the edges of the cakes are lightly browned and a toothpick inserted into the center comes out with a few crumbs on it; begin checking for doneness at 30 minutes and try your darnedest not to let it over bake. Let in the pans for 10 minutes and then transfer to a wire rack to cool completely. 

To make the buttercream: 

In a stand mixer fitted with a paddle attachment, beat together the butter and cream cheese until creamy. Gradually add the powdered sugar, and then mix in the salt, vanilla, and heavy cream. Mix until creamy.

To frost the cake, level the top of the layers and then stack them up with a layer of frosting in between. (The cakes bake up generally pretty flat so there won’t actually be that much to level off.) Frost all over and decorate as desired.

To make a mini cake, stack the leveled scraps of cake up, give them a good firm pat so they stick, and cut out four 2 1/2 inch circles with a biscuit cutter. Don’t worry if some of the scraps tear, the cake is moist enough that when you stack up the scraps, they’ll all smoosh together. Stack them on top of each other and, if you have the time, wrap the cake tightly in plastic wrap and freeze for a few hours or even a few weeks. This will make frosting this tiny cake way easier! Frost while frozen and let come to room temp before serving.

This cake is super moist that you could definitely decorate the day before serving. Let it sit at room temperature overnight.

Print this recipe

-yeh!

valentine’s day almond cake

D246D29B-A2CB-404D-9B3B-20EF47757806.JPG
3FA217C1-7BAE-4E5C-9F31-4CA3CB7D47D3.JPG
B56CA55F-15CF-44CA-9470-2F9C505B8FD1.JPG
3D742C7E-E053-4566-9F83-36DA39AC1E2D.JPG
63315EA5-AC92-4746-8834-BA48E206873A.JPG
5F657BC3-C499-47B3-91B1-9C9E31283C10.JPG
DE746504-2DA4-4A4C-89B6-D92F89DC5B79.JPG
85608B6D-24A7-46BD-B488-8EF4E0188992.JPG

Holy guacamole snowstorm almond paste, where did January and the better part of February go?? It seems like just yesterday that I was rolling around with Bernie under the Chrismukkah bush and staring down my kransekake asking what am I going to do with you? (Oh wait, that definitely was yesterday because a) we still have the bush up and b) nobody ate my kransekake and it’s still in our pantry/prop/piano room looking as handsome as ever.) My point is that wow time flies when you’re belting Sesame Street and braving the snowstorm to go to library story time. I’m so sorry I haven’t written to you in forever!!! Are we still fronds? Are we fronds on Instagram?? I find it’s much more manageable these days to document directly from my phone during nap time and in between readings of Cloudy with a Chance of Meatballs rather than opening up my computer for a longer form blog post. So for the time being, let’s just hover between Instagram and a less frequent but not totally infrequent blog post correspondence, ok??? Navigating the internet and balancing time with Bernie and other projects is hard! But I love them all so I promise to blog as often as I can!

Let me ketchup on what we’ve been doing this winter!

A6A2A05A-3BBE-4840-A266-676B1D117E53.JPG
IMG_0603.JPG
326D0B14-025A-4832-B9C0-3D0D1A80FC30.JPG
EF81CD95-FE79-4667-8175-BB9F5A88D6B6.JPG
5533CFEA-6C75-41CD-A3AE-36366E69BBB7.JPG
F8C41FED-988B-45D8-B011-6E477F66D38A.JPG
5F07A05E-019B-4610-8D92-7100C8BC8FCD.JPG
IMG_0803 2.JPG
IMG_0903.JPG
IMG_1472.JPG
IMG_1405.JPG
IMG_1232.JPG

We’ve been snowshoeing in the yard, finger painting, tasting the finger paint, cheering on Jason Brown’s quad, screaming for Mariah Bell’s nationals moment, testing Girl Meets Farm season 6 enchiladas again and again, avoiding the flu, going to the spa in Winnipeg, and scrubbing oatmeal off of a high chair three times a day every single day. We’ve reached peak coziness on the couch, taken swim lessons, and zipped down to Arizona to see the sun. We’ve eaten plenty of pot pies and kept up our pizza Friday habit, and Bernie’s had her first boureka, hawaij, harissa, and bamba. Next week we’ll get another little dose of sun in South Beach and then before we know it, we’ll be filming again and then after that it’s spring planting! Ugh I love winter so much. How have you been? Are you staying warm? Ready for the spring??

F70BC484-9A3E-4F21-A27B-4F115E7F94D1.JPG
485D7B0E-3D6C-48B4-B749-ED08AB3CF714.JPG
64195711-2750-4AB1-979D-18D563A76E3F.JPG
90C9AC41-CF59-49F4-8690-9A7A732FB173.JPG

On to the cake. It is time for Bernie’s very first annual Valentine’s Day almond cake and oh my good gosh geez, I’ve been dreaming of this moment for so very long. As you know, I make this same exact cake every single year for Valentine’s Day and have way too much fun thinking of different ways to decorate it. The cake itself is a light spongey almond cake with fluffy whipped cream and it’s so good and not too rich. (See below for links to the cakes I’ve made every year since the start of this blog.) This year I spent a really long time brainstorming ways for Bernie to help decorate, taking into account the fact that most Valentine’s candies are choking hazards and all she wants to do is put everything into her mouth. So inspired by a painting method that Hayley, the art director for Girl Meets Farm, did with Bernie to make paintings for our refrigerator, I taped a bag of melted (and mostly cooled) chocolate to her high chair tray and let her mush it around. She loves squishing things!! When she was done with her masterpiece, we put the bag in the freezer (carefully, to maintain Bernie’s artistic vision) and when the chocolate firmed up, we used it as the decorations on the cake!

3843BEA5-5C95-46D5-8AD1-6CB4163A0D96.JPG

This is by far my favorite Valentine’s Day cake of all time. I’m so stinkin excited to eat it. We’re going to have it with heart shaped pizza and it’s gonna be the best!!! Happy Valentine’s Day, everyone!!

(And you can see all of my past valentine’s cakes here! 2019 / 2018 / 2017 / 2016 / 2015 / 2014 / 2013 / 2012 / 2011 / 2010)


valentine's day almond cake

serves 10-12

ingredients

cake:

1/2 c (64g) all-purpose flour

1 tsp baking powder

8 oz almond paste

6 large eggs, separated

1/2 tsp kosher salt

1/2 c (100g) sugar

1 tsp vanilla extract

1/2 tsp almond extract


whipped cream:

1 1/2 c (360g) heavy whipping cream

1/2 c (60g) powdered sugar

1 tsp almond extract

pink food coloring (the food coloring in the photo is americolor’s mauve colored gel), optional


assembly:

chocolate
sprinkles of all sorts

clues

preheat the oven to 350ºf. grease and line the bottom of a 9” springform pan and set aside.

in a small bowl, whisk together the flour and baking powder.

in the bowl of a stand mixer fitted with a whisk attachment, beat the egg whites and salt to soft peaks and then gradually beat in the sugar, about 1 tablespoon at a time. continue beating to stiff peaks and then set aside.

in the bowl of a stand mixer fitted with a paddle attachment (i usually just scoop the whites out of the bowl and transfer them to a separate bowl and then reuse my stand mixer bowl without having to wash it for this step), combine the almond paste and egg yolks and beat on high for 2 minutes until pale and fluffy (but allow some almond paste chunks to remain in tact), scraping down the sides of the bowl as needed. mix in the vanilla and almond extract. gently fold the whites into the yolk mixture and then fold in the flour mixture. pour the batter into the pan and then bake until a toothpick inserted into the center comes out clean. begin checking for doneness at 30 minutes.

cool in the pan on a rack for 10 minutes and then remove to the rack to cool fully.

to make the whipped cream, in the bowl of a stand mixer fitted with a whisk attachment, beat the heavy cream, powdered sugar, and almond extract to stiff peaks. add a few drops of pink food coloring if desired.

spread the whipped cream on top of the cake. decorate with chocolate and/or sprinkles as desired and enjoy!!

store leftovers in the fridge for up to a few days.

Print this recipe

-yeh!

a chrismukkah kransekake

10-18-19-molly-yeh-kransekake-1.jpg
10-18-19-molly-yeh-kransekake-22.jpg
10-18-19-molly-yeh-kransekake-17.jpg
10-18-19-molly-yeh-kransekake-14.jpg
10-18-19-molly-yeh-kransekake-11.jpg
10-18-19-molly-yeh-kransekake-6.jpg
10-18-19-molly-yeh-kransekake-8.jpg

Around here, it just isn’t the holidays if, after being buried under a mountain of cookies all month, I don’t then emerge to make a holiday cake. It usually has marzipan or a storm of coconut snow or some type of gingerbread house-inspired element, and it’s typically my contribution to Nick’s extended family’s holiday party. This year I decided that it was time to tackle the magical Kransekake!

Kransekake is a Norwegian and Danish cake that’s traditional to have at big celebrations like weddings, Christmas celebrations, and Syttende Mai (Norwegian Constitution Day). In my eyes it’s the centerpiece of the celebration. It presides over the party. Whenever I’m in the room with one I just gaze at it with heart eyes because it’s so stunning and geometrically pleasing. The circles stacked up look so clean and pretty and I just always assumed that it would be extremely complicated and time consuming to make. So I started my research months ago and tapped friends and family for their recipes and tips. I learned of secret almond paste sources and admired Erin’s gingerbread version and got the story from Chantell and Brett on the wedding tradition of pulling off the top ring to see how many other rings stick to it and that symbolizes how many children you’ll have (!!!) Hah. I love it. 

Probably my favorite thing that I learned was [whispers] that it’s actually easy to make. It may look delicate and time consuming, but in reality it’s quite sturdy and pretty difficult to screw up. The dough is easy to work with and there’s no gluten in it so you don’t have to worry about overworking it. The only thing that requires pre-planning is ordering the molds on Amazon. Past that, you don’t need a stand mixer or fancy ingredients or days and days of time. With good time management, you can crank one out in a day. 

Also!!!! It’s so tasty!!! It’s basically baked marzipan. Crisp on the outside, super chewy on the inside, it bursts with almond flavor, and it also kinda lasts forever so you can totally make it far in advance. I can’t sing enough praises about Kransekake. It’s officially my favorite Norwegian thing since Bernie. 

My version is a Chrismukkah Kransekake. It’s decorated with a paper chain that’s a miniature version of the rainbow felt chain that Nick and I made years ago for our Chrismukkah bush. (It’s rainbow because rather than going with a red/green Christmas theme or a blue/white Hanukkah theme, we just went with all of the colors!) It’s a pretty standard Kransekake recipe that I’ve embellished slightly with rosewater or orange blossom (both go so well with almond) and I like to grease the pans with coconut oil for a hint of coconut flavor. You could always go with butter though.

So if you’re looking to impress all of your fronds with a holiday party centerpiece that’s less labor intensive than a gingerbread house (and, well, much tastier), make this!!!! 


Kransekake

Makes 1 large Kransekake

Ingredients

500g (4 c + 7 tb) almond meal, plus more for dusting

500g (4 c + 3 tb) powdered sugar

1/2 tsp kosher salt

4 large egg whites

1 tsp almond extract

1/2 tsp orange blossom water or rosewater, optional

Softened butter or coconut oil, for greasing

For assembly

Royal icing (I just bought meringue powder from my local grocery and followed the recipe on the back!)

Sprinkles, paper chains, flags, any other fun decor!

Clues

In a large bowl, whisk together the almond meal, powdered sugar, and salt. Add the egg whites, almond extract, and orange blossom water or rosewater (if using) and stir with a spatula to combine. At first it will seem like there is not enough liquid to hold everything together but just keep on mixing and it will eventually form a dough. Pat the dough into 2 discs, wrap in plastic wrap, and refrigerate for 2 hours or up to overnight.

Preheat the oven to 400ºf and position the racks in the center of the oven. Use your hands to grease your kransekake molds liberally with butter or coconut oil and set aside. I prefer to set the molds on large baking sheets so that they’re easier to move around. 

Working with one dough disc at a time, chop off a piece of dough and roll it into a rope that’s a generous 1/2” thick (or, if you’re pulling your kitchen ruler out, just go with 5/8” thick…), dusting with additional almond flour if the dough is sticky. Coil the rope into the molds, pinch off any excess dough, and pinch the ends to seal them together. Continue this, re-rolling scraps as needed, until all of the molds are filled. Don’t worry about overworking the dough! Bake until golden; begin checking for doneness at 9 minutes. You’ll likely need to bake these layers in batches, which is totally fine, just keep any dough that you’re not working with covered and in the refrigerator. 

Let the rings cool in the pans and then carefully pop them out (a small offset spatula or butter knife will help) and transfer to a baking sheet or wire rack. 

Make your royal icing and stack the rings up and then pipe on your decorations or pipe on your decorations, let them dry, and then stack them up. When you stack them up, “glue” them together with dots of royal icing (I do dots at 12 o’clock, 3 o’clock, 6 o’clock, and 9 o’clock). Let the icing dry and then decorate with sprinkles, paper chains, flags, or other decor as desired! This is good for at least a few days uncovered at room temperature, so feel free to make this in advance!

Print this recipe

-yeh!

photos by chantell and brett quernemoen

hazelnut gelt cookies

10-4-19-molly-yeh-hazelnut-gelt-cookies-20.jpg
10-4-19-molly-yeh-hazelnut-gelt-cookies-17.jpg
10-4-19-molly-yeh-hazelnut-gelt-cookies-6.jpg
10-4-19-molly-yeh-hazelnut-gelt-cookies-15.jpg
10-4-19-molly-yeh-hazelnut-gelt-cookies-10.jpg
10-4-19-molly-yeh-hazelnut-gelt-cookies-12.jpg
10-4-19-molly-yeh-hazelnut-gelt-cookies-19.jpg

These cookies were born out of my desire to build a repertoire of Hanukkah cookies in a Christmas cookie world! I mean I obviously love a Christmas cookie but I also love a Hanukkah dessert that a) doesn’t require me to fry anything and, b) can allow me to pull out all of the sprinkles and decorate stuff. A few years ago, I learned the joys of making homemade gelt. It’s so simple yet fun! You just melt blobs of chocolate and add any toppings you want. And you can control your own currency and game the dreidel system so that whatever happens, you’re rich! (Oh, your gelt is topped with sunflower seeds? Well mine is way more valuable since it’s topped with sea salt. Therefore I win.) So this year I decided to up the ante and put this gelt right on top of a cookie. Gelt on cookies is nothing new, but homemade gelt on a thick soft hazelnut cookie is a thing of modern beauty! You could obviously schmear melted chocolate on any kind of cut out cookie but I’ve used these hazelnutty orange zesty pucks here because they’ve got more personality than your standard holiday sugar cookie. The result is a combination of textures (soft cookie + snappy chocolate) and flavors (hazelnut + chocolate + orange) that is worthy of a prime spot in your Hanukkah cookie box.

So have at it and let your creativity run wild! Make some for your Ultimate Hanukkah Challenge viewing party*!!! 

*Your daily reminder that the Ultimate Hanukkah Challenge is a show that exists and it is premiering on December 21st at 9pm/8c on Food Network.


Hazelnut Gelt Cookies

makes about 26 cookies

ingredients

for the cookies:

3 1/2 c (448g) all-purpose flour, plus more for dusting

1 1/3 c (150g) ground toasted hazelnuts (you can make your own or buy hazelnut flour, bob’s red mill sells it!)

1 tsp baking powder

3/4 tsp kosher salt

1 c (226g) unsalted butter, softened

2/3 c (137g) granulated sugar

2/3 c (80g) powdered sugar

Zest of 1 orange

2 large eggs

1 tsp vanilla extract

for the topping:

6 oz (168g) chopped milk chocolate or milk chocolate chips

sprinkles

clues

to make the cookies, in a medium bowl, combine the flour, ground hazelnuts, baking powder, and salt and set aside. in the bowl of a stand mixer fitted with the paddle, cream together the butter, sugars, and orange zest on medium high until pale and fluffy, about 3-4 minutes. add the eggs, one at a time, beating after each, and then add the vanilla.

reduce the speed to low and gradually add the flour mixture, mixing until blended. at this point you can wrap the dough in plastic wrap and refrigerate for an hour, or up to two days, or you can get going on rolling out your dough and cutting out your cookies immediately. 

when ready to bake, preheat the oven to 350ºf. line two baking sheets with parchment and set aside. working with half of the dough at a time, roll it out on a lightly floured surface to a thickness that’s just under 1/2” thick. cut out 2 1/2” circles with a biscuit cutter and then transfer to a baking sheet, 1" apart. re-roll scraps and cut out more shapes. bake until they’re lightly browned on the bottom; begin checking for doneness at 12 minutes. let cool on the baking sheets for 5 minutes and then carefully transfer to a wire rack to cool completely. 

To decorate, melt the chocolate in a double boiler or in a microwavable bowl in 30-second increments, stirring after each. Melt until it’s just smooth and then remove from heat. Spoon a teaspoon of chocolate onto the top of each cookie, and spread it around with a spoon into a little Gelt-sized circle. Top with sprinkles and let set in the fridge or at room temperature. Enjoy!

Print this recipe

-yeh!

photos by chantell and brett quernemoen

pizza latkes

10-18-19-molly-yeh-pizza-latkes-7.jpg
10-18-19-molly-yeh-pizza-latkes-12.jpg
10-18-19-molly-yeh-pizza-latkes-3.jpg
10-18-19-molly-yeh-pizza-latkes-8.jpg
10-18-19-molly-yeh-pizza-latkes-11.jpg

Sometime last spring (when all of the good Hanukkah R and D happens), I was knee deep in latke brainstorming when my extremely cool friend Natasha texted me a picture of Erin’s cheesy potato pancake with the commentary “omg, pizza latke.” To which the only proper response was, “omg, let’s.” 

Because omg what is better than a crispy fried potato pancake that is topped with melty gooey cheese-pull cheese??? Or if you look at it the other way, what is better than a pizza that basically has a hash brown crust??? Potato, potahto, it was inevitable. We make matzo pizza on Passover pizza Friday, why have we not made pizza latkes on Hanukkah pizza Friday? Dang it, they are so freaking good. I can’t stop eating them. The fact that they’re handheld and small and easy to eat in multiples of four doesn’t make things any easier. My only regret is that Natasha and I never crossed paths for long enough to make these together because she lives in LA-slash-Barcelona. One day!!!!

A great added bonus about these is that because they get cooked twice (fried in a pan, then topped with toppings, and then stuck in the oven so that the cheese melts), you have a fairly easy solution to the thing I always whine about, which is having to stand at the stove for the entire Chrismukkah party, tending to the latkes. With these, just make all of your latkes ahead of time, put them on a baking sheet, top with toppings, and keep them in the fridge for up to a day before your party. And then stick them in the oven before the party and pull out a steaming hot tray of latkes! They won’t be as crispy as a freshly fried latke, but no one will care because they’ll be covered in cheese.

That’s all I have to say about pizza latkes but since we’re on the subject of latkes, I have to tell you about the Ultimate Hanukkah Challenge!! It is (Food Network’s first??) Hanukkah-themed cooking competition and I got to host it and judge alongside Duff Goldman and Sharone Hakman!!! You guys, it was so much fun to film. I wore sufganiyot nail decals and star of David sparkly hair clips and ate piles of latkes, sufganiyot, and brisket. I can’t give any spoilers obviously but there are plot twists and Hanukkah miracles and the most incredible personalities, I am so excited about it and I hope you’ll tune in on December 21st at 9pm/8c on Food Network!!!! 

10-18-19-molly-yeh-pizza-latkes-1.jpg

Pizza Latkes

Makes about 20

Ingredients

1 batch of latkes (here’s my go-to recipe), freshly fried or made a day ahead and cooled, or just use leftover latkes! 

About 1 c marinara sauce

1 lb fresh mozzarella, cut into 1/4” slices

(Any other toppings!)

A shower of parmesan

Sprinkles of crushed red pepper

Chopped fresh basil

Clues

Preheat the oven to 450ºf. Line two baking sheets with parchment paper and arrange the latkes an inch apart. Top each with about 2 teaspoons marinara sauce and a slice of mozzarella and any other toppings you’d like and stick in the oven until the cheese is melty and has brown splotchy spots; begin checking for doneness at 7 minutes. Top with a shower of parmesan, sprinkles of crushed red pepper, and basil, and devour. 

Print this recipe

-yeh!

photos by chantell and brett quernemoen

Noodle Kugel with Cardamom and Apples

8-23-19-molly-yeh-our-family-kugel-32.jpg
8-23-19-molly-yeh-our-family-kugel-2.jpg
8-23-19-molly-yeh-our-family-kugel-8.jpg
8-23-19-molly-yeh-our-family-kugel-15.jpg
8-23-19-molly-yeh-our-family-kugel-25.jpg
8-23-19-molly-yeh-our-family-kugel-31.jpg
8-23-19-molly-yeh-our-family-kugel-40.jpg

Hotdish : My Upper Midwest Fronds :: Kugel : Me. 

[Hotdish is to my upper Midwest fronds as kugel is to me.]

Not in the way that kugel was a dish that we ate on a regular basis for dinner growing up, but rather in the way that I just assumed that everybody grew up with it and took a nostalgic comfort in it. Like I literally thought that everyone knew kugel until last year, when Alana talked to me about her first experience about it. I was in shock that she’d never had it! It’s like a… sweet mac and cheese? It was… interesting! But in a good way! And then I met a dozen more people with the same reaction at the Fargo Hotdish Festival when Bernbaum’s brought an amazing kugel to compete with tater tot hotdishes of all sorts. It dawned on me then that not everyone knows this dish that was so central to my childhood holidays and I suddenly had to figure out a way to explain it and convince my fronds that it totally deserved to be classified as a hotdish.  

And seriously, if you bend the definition of a vegetable to mean, well, fruit then you’ve got it: the cottage cheese mixture is your sauce, the noodles are your starch, the nuts are your protein, and the raisins/cherries/apples are your produce. Hotdish. Sold. 

Flavor-wise, think of it as rice pudding made with noodles! And baked! Or, ok, a slightly sweet, a teensy bit sour, and kind of soufflé-like mac and cheese. And for all of the times I’ve made fun of Eggboy for having sweet cookie salad alongside the main course of his meal (as opposed to as dessert), I now owe him an apology because kugel, in all of its dessert-leaning glory, is part of the main course.

The kugel that my mom made growing up was based on Emeril’s recipe. It was such a great combination of richness and milkiness and it had the perfect touch of cinnamon and sugar, as well as a toasty nutty topping. It was, and continues to be, the only place that I will eat cottage cheese. For some reason it’d been a really really long time since we had it at holidays and it wasn’t until the Fargo Hotdish Festival that I was reminded of it because Bernbaum’s kugel was so similar. It brought me right back to kugel of my youth, but it had the one inspiring addition of granny smith apples. I LOVED this addition because it added color, crunch, and brightness to an otherwise super heavy dish. So I stole the idea. I added it to my family kugel, along with some cardamom and a bit of lemon for additional depth of flavor, and I fine tuned the sweetness to create the new and improved family kugel that Bernie is going to grow up with. 

And it’s of course only fitting that I’m using Our Family goodies to make Our Family Kugel! They make it easy to make this recipe since their cottage cheese and sour cream comes in big enough tubs that you end up using just a whole big tub of each. 

Make this for Rosh Hashanah or it’s also great prepped in advance, so make it for Yom Kippur break fast.

L’Shana Tovah, everyone! 

8-23-19-molly-yeh-our-family-kugel-30.jpg

Noodle Kugel with Cardamom and Apples

Serves 8

ingredients

Kosher salt

1 lb Our Family wide egg noodles

6 tb (85g) unsalted butter, divided

5 large eggs

1 lb Our Family cottage cheese

1 lb Our Family sour cream

3/4 c (150g) sugar

1 c (236 mL) whole or 2% milk

2 tsp cinnamon, divided

1/2 tsp cardamom

1 tb vanilla extract

Zest and juice of 1 lemon

2 granny smith apples, chopped

2 c (260g) pecans, chopped

1/2 c (100g) light brown sugar

clues

Preheat oven to 350ºf. Grease a 9” x 13” casserole dish or similar (pictured is a deep 9” x 9” casserole) and set aside.

Bring a large pot of salted water to a boil and cook the egg noodles to al dente, about 4-5 minutes. Drain and toss with 4 tablespoons of butter.

In a large bowl, combine the eggs, cottage cheese, sour cream, sugar, milk, 1 teaspoon of cinnamon, cardamom, vanilla, lemon zest, and 1 1/2 teaspoons salt. In a small bowl, toss the apples with the lemon juice. Fold the noodles and apples into the cottage cheese mixture and then transfer to the casserole dish. 

In a small bowl, melt the remaining 2 tablespoons of butter and add the pecans, brown sugar, remaining teaspoon of cinnamon, and a good pinch of salt. Sprinkle it all over the top of the noodles. Bake until set, about 1 hour. Let cool slightly and serve.

To prep it the day before, do everything up until the step where you top it with the nuts. Cover and refrigerate. When ready to bake, top it with the nuts and bake as directed, but tack on another few minutes to the baking time. 

Print this recipe

-yeh!

8-23-19-molly-yeh-our-family-kugel-45.jpg

photos by chantell and brett quernemoen

this recipe was created in partnership with our family!

Apple and Honey and Marzipan Rolls

Molly Yeh's Apple Butter Rolls with Honey Marzipan Frosting.jpeg
Host Molly Yeh with her Apple Butter Rolls with Honey Marzipan Frosting.jpeg

My concept of time right now is all thrown off, I’ve just gotten home from celebrating Hanukkah* (and I have the dreidels on my nails to show it), summer has decided to come back for a weird unwelcome encore (get away!!), and I spent all last week testing Christmas cookie recipes. And the tomatoes have finally decided to turn red. Have you ever had a tomato and mayonnaise sandwich for lunch followed by a piece of stollen for dessert? It’s so weird. I mean, ok, I can’t complain, it’s all good things except for the gross 80 degree heat but I am ready to truly immerse myself in the upcoming high holidays because I think Rosh Hashanah is my preferred new year out of the three new years that we do. I just feel like the fact that it happens at the beginning of the school year and the start of sweater weather makes it feel way more like the dawn of something exciting than the Gregorian New Year (which hasn’t really been fun since I was 22 and could drink a Red Bull and vodka together) and the Chinese New Year (which is delicious and great but January as a month is kinda a drag. And I’m too old to get envelopes of money now 🤷🏻‍♀️). 

*We just filmed the Hanukkah Cooking Championship for Food Network! It was a dream. I even got kinda emotional over the fact that there is actually going to be a Hanukkah show on Food Network!! The food was so delicious and the other people on it were the bee’s knees. Whether or not you celebrate Hanukkah, you guys are going to lurrrv this show. 

Host Molly Yeh with her sister Jenna, mom Jody, daughter, Bernie, and aunt Cathy.jpeg

Speaking of celebrating Jewish holidays on the TV (!), this weekend is the Rosh Hashanah brunch episode of Girl Meets Farm! Both Stoopie and my silly Aunt Cathy came to town to film this episode and it was a blast. I cooked brisket with my mom, made a celery cocktail with Aunt Cathy, and introduced Bernie to her crazy family. The recipe I’m most excited about is these apple butter rolls, which look just like cinnamon rolls, but they’re better because they’re topped with honey marzipan frosting. If you’ve ever thought omg challah baking in the oven is the best smell evarrr, try filling little swirly rolls of challah with a very cinnamony apple butter and grated almond paste and, wow, your pumpkin spice candle didn’t stand a chance. And then they get topped with a frosting made of marzipan butter and honey which is thick, glossy, luxurious, parve, and perfect. So you’re checking all of the Rosh Hashanah boxes with these rolls: Round challah? Check. Apples? Check. Honey? Check. A make-ahead situation? Check check. And marzipan, because a few years back I started including marzipan with the apples and honey tradition since almonds go so well with both apples and honey, and it just decided to stick around. They are so soft and fluffy and decadent and good. Exactly the ticket for a sweet New Year!


Apple and Honey and Marzipan Rolls

Makes 12 rolls

ingredients

1 c (236ml) almond milk, warm (105-110ºf)

2 1/4 tsp active dry yeast

1 tsp + 1/4 c (50g) sugar

4 1/2 c (585g) all-purpose flour

1 tsp kosher salt

1 tsp cinnamon

a pinch of cardamom

2 large eggs

1/2 c (100g) flavorless oil

1/4 c (84g) honey

1 tsp vanilla


filling

3/4 c (204g) apple butter, store-bought or homemade

1 tsp cinnamon

6 oz (170g) almond paste, grated on the big holes of a box grater or finely chopped

Eggwash: 1 large egg beaten with a splash of water


frosting

1 1/2 c (192g) blanched almonds

1/4 c (84g) honey

Zest from 1/2 a lemon

1/4 tsp kosher salt

1 tsp almond extract

6 tb (89ml) almond milk

Toasted sliced almonds, for topping

clues

Combine the milk, yeast, and 1 teaspoon of sugar and swirl together. Let sit for 5 minutes, or until foamy on top.

In a large bowl or bowl of a stand mixer fitted with a dough hook, combine the flour, remaining sugar, salt, cinnamon, and cardamom. In a medium bowl, whisk together the eggs, oil, honey, and vanilla. Stir the yeast mixture and the oil mixture into the dry mixture and then knead, either on a work surface or with the dough hook, adding more flour as needed, until the dough is smooth and slightly sticky, 7-10 minutes. Place in an oil bowl, cover with plastic wrap, and let rise for 1 1/2-2 hours, or until doubled in size. 

Turn the dough out onto a clean surface and roll it out into a large 18” x 12” rectangle. Spread it with the apple butter and sprinkle with the cinnamon and almond paste. Roll it up tightly the long way, and pinch the edges to seal. Cut into 12 rolls and place evenly spaced in a 9” x 13” baking dish (3 rows of 4). Cover with plastic wrap and refrigerate overnight, or let rise at room temperature for another hour and then go directly to the baking step.

When ready to bake, remove the rolls from the refrigerator and let sit at room temperature for 1-2 hours, until puffy. Preheat the oven to 350ºf. Remove the plastic wrap and brush with the egg wash. Bake until the rolls are lightly browned; begin checking for doneness at 35 minutes. 

To make the frosting: Blend the almonds in a food processor, scraping the sides occasionally, until creamy and spreadable, about 5-10 minutes. Add the honey, lemon zest, salt, and almond extract and continue to blend (it may clump together at this point up that’s ok) as you drizzle in the milk. Blend until creamy. This can be made the day before and stored in the fridge.

When the rolls come out of the oven, spread them with the frosting, sprinkle with the almonds and serve.

Print this recipe

-yeh!

photos by chantell and brett quernemoen.