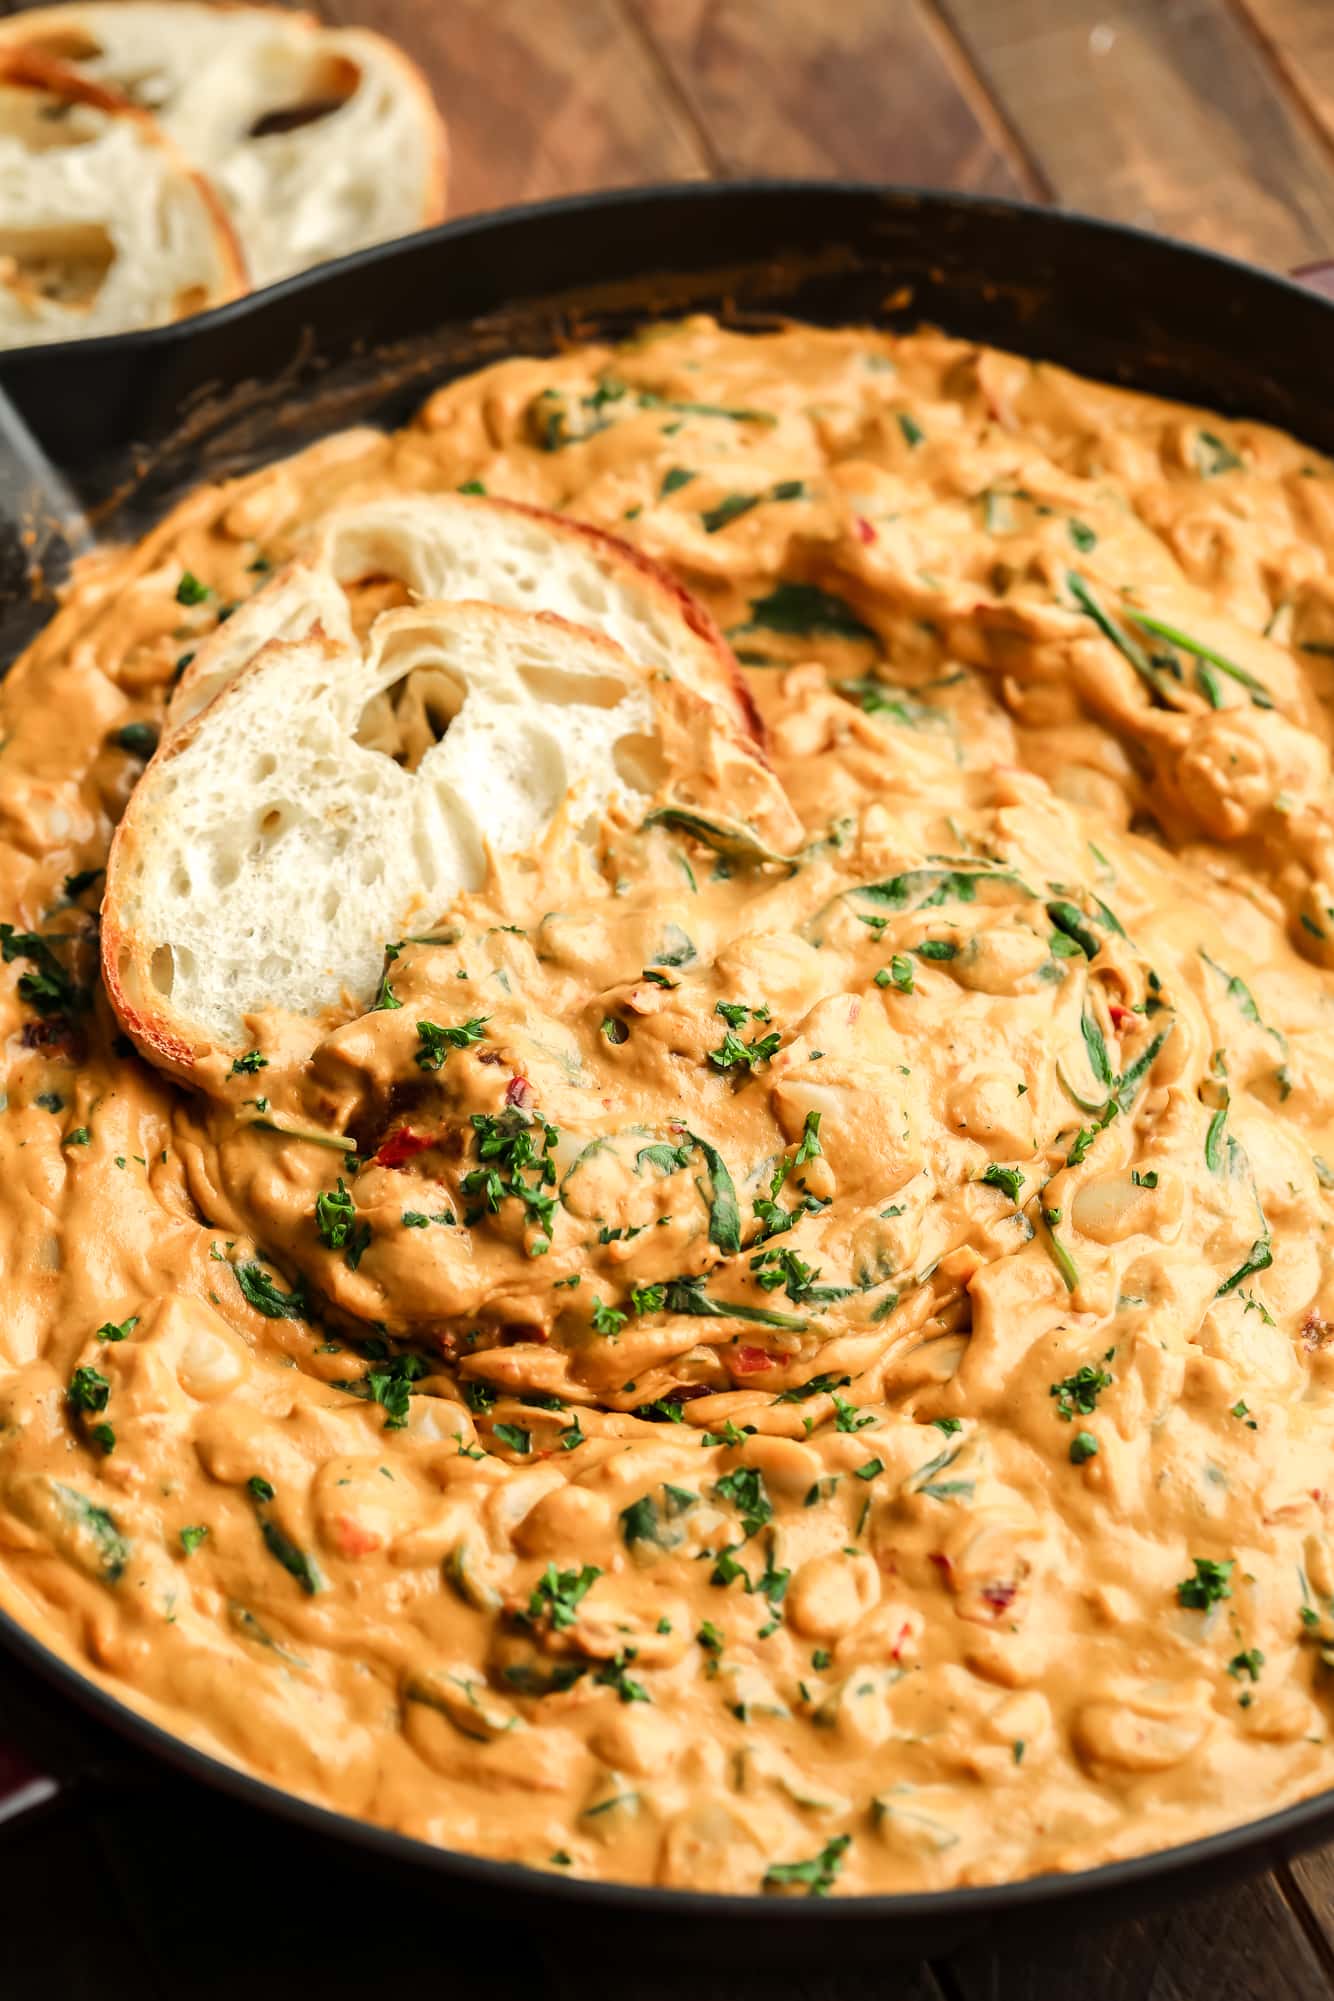
This one-pan Marry Me Chickpeas recipe puts a vegan twist on the viral comfort food, Marry Me Chicken! Get ready to fall in love with this indulgent 15-minute meal.
For more easy ways to use the canned chickpeas in your cupboard, check out my Chickpea Salad Sandwich, Italian Chickpea Soup, Chickpea Burger, and Biscuit Topped Chickpea Pot Pie recipes!
The viral Marry Me Chicken recipe is no match for my vegan-friendly Marry Me Chickpeas. It’s as creamy, indulgent, and family-friendly as the original, but made without dairy or meat!
What’s better is that this one-pan meal is totally foolproof. Just simmer the protein-packed chickpeas in the dreamy Tuscan sun dried tomato cream sauce for 15 minutes, then enjoy it for family dinners or date nights at home. Don’t forget the hunks of crusty bread for scooping up every luxurious bite!
Why you’ll love this easy plant based recipe
- Rich Tuscan-inspired flavors – Like my Tuscan Vegan Gnocchi, vegan marry me chickpeas feature incredible Italian-inspired flavors that will keep you going back for more.
- Packed with protein – Two cans of chickpeas pack this dish with about 30 grams of plant-based protein!
- An easy one-pan meal – The everyday ingredients in this dish are cooked together in one pan in just 15 minutes.
How to make marry me chickpeas
Find the complete recipe with measurements in the recipe card below.
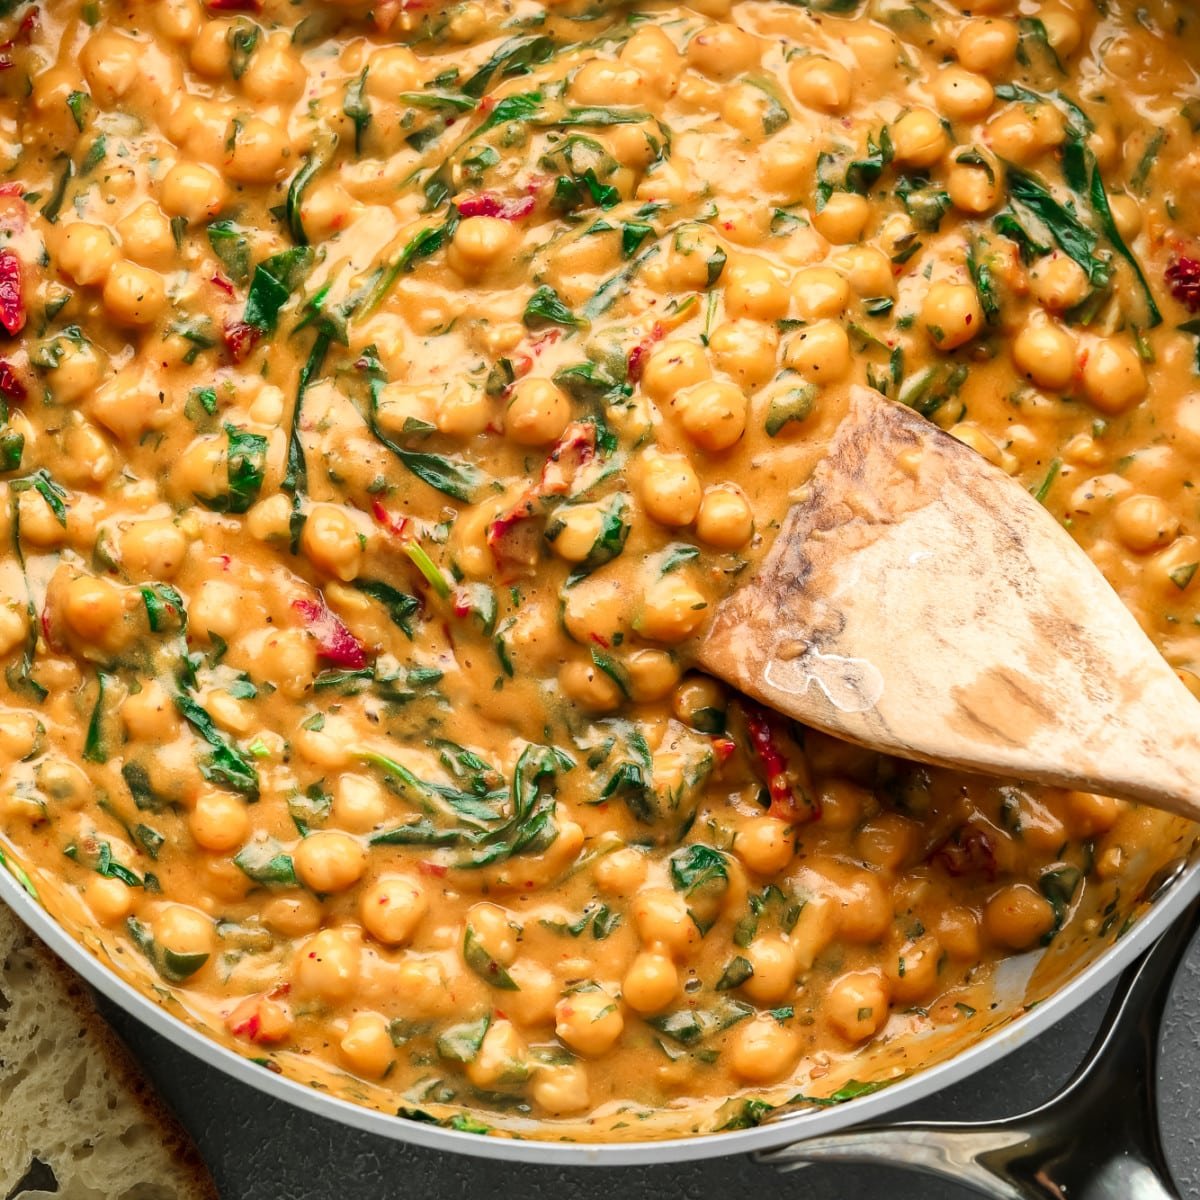
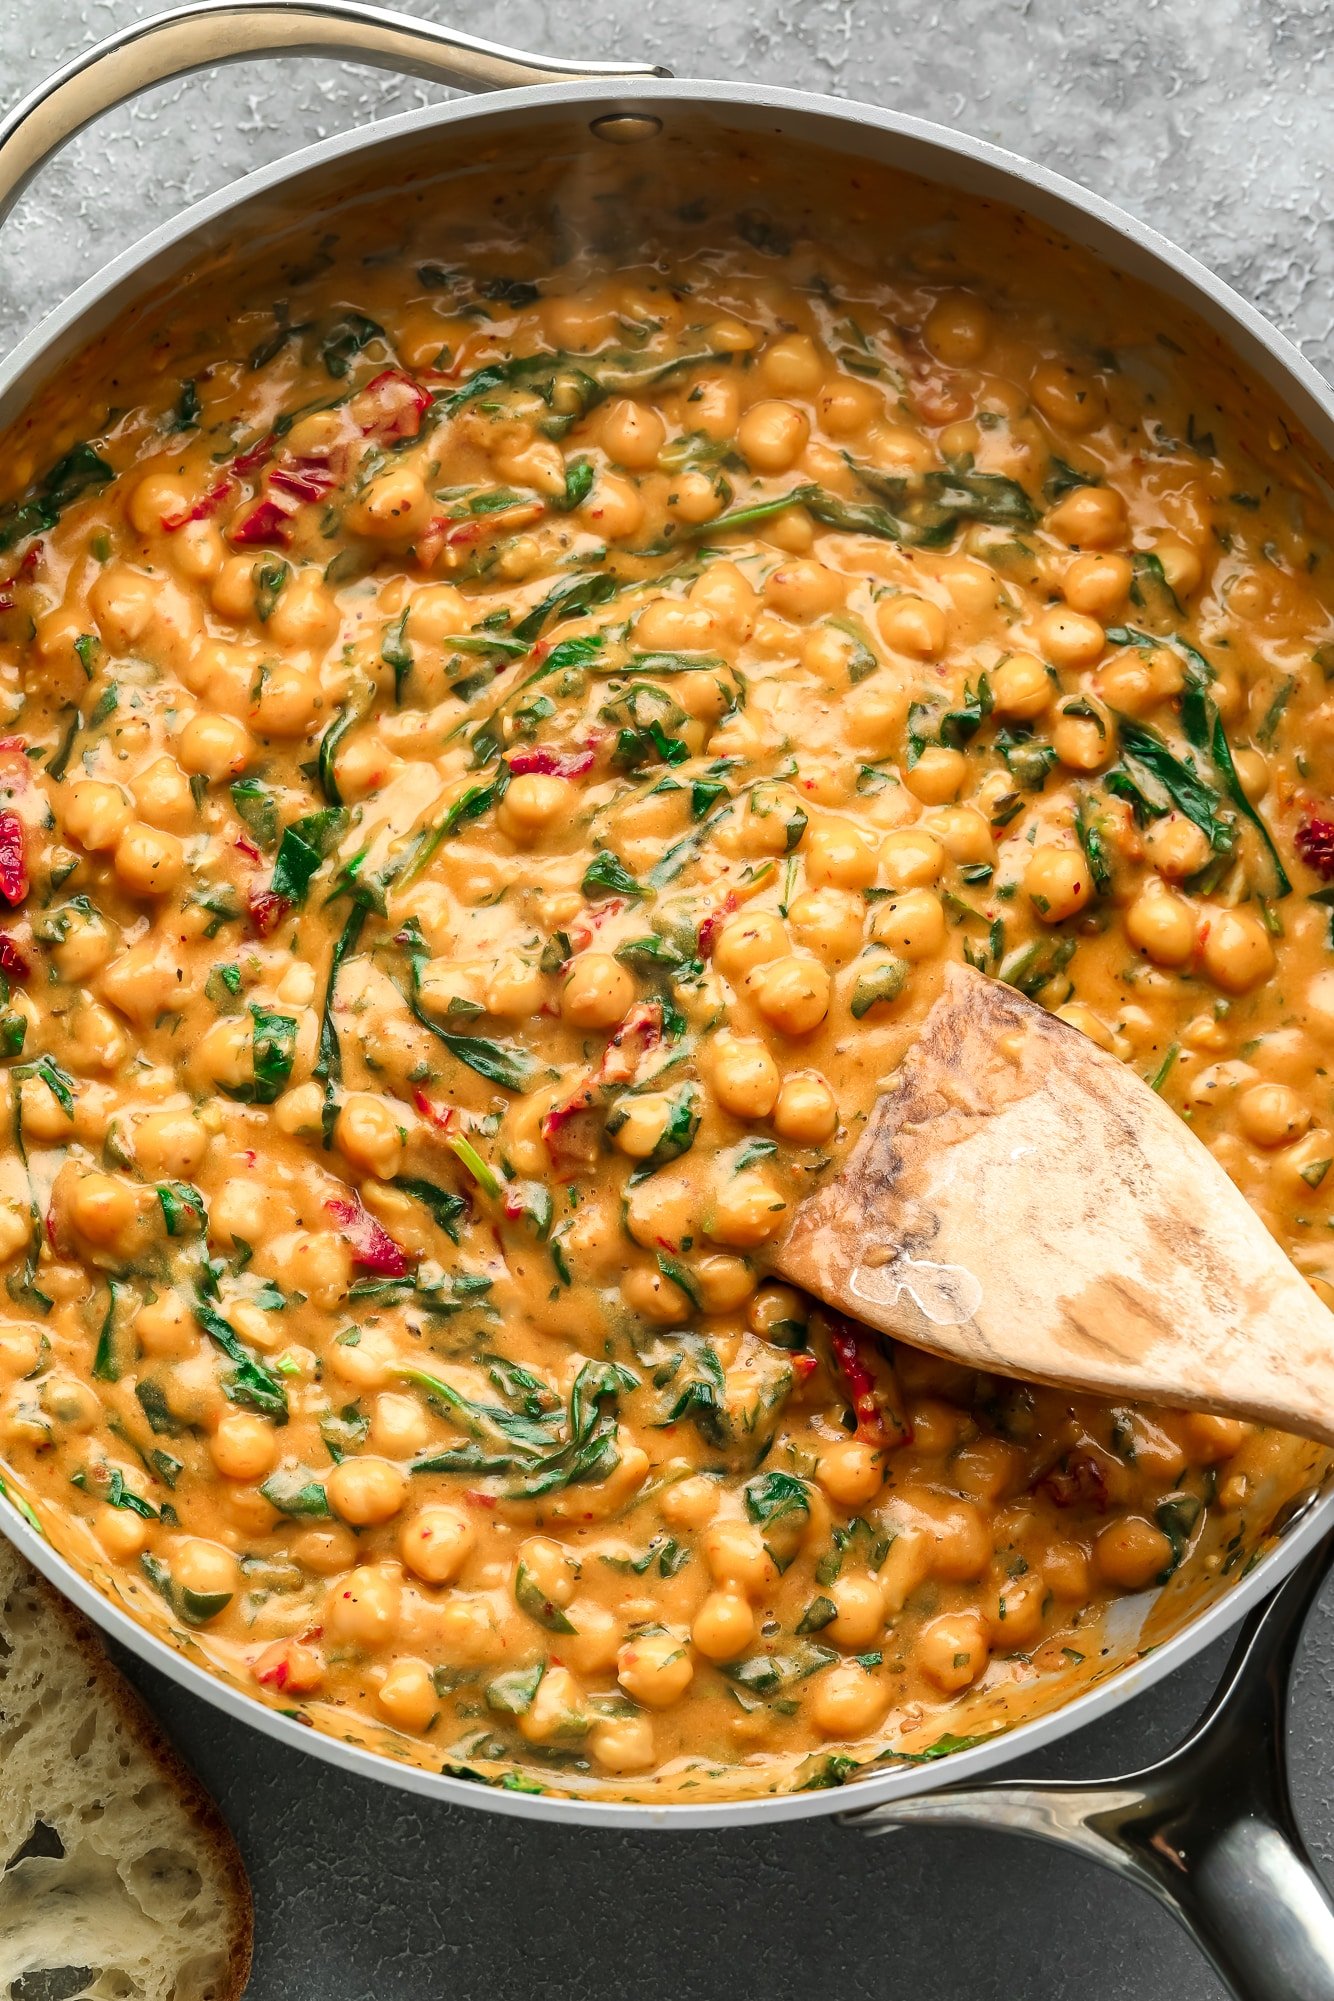
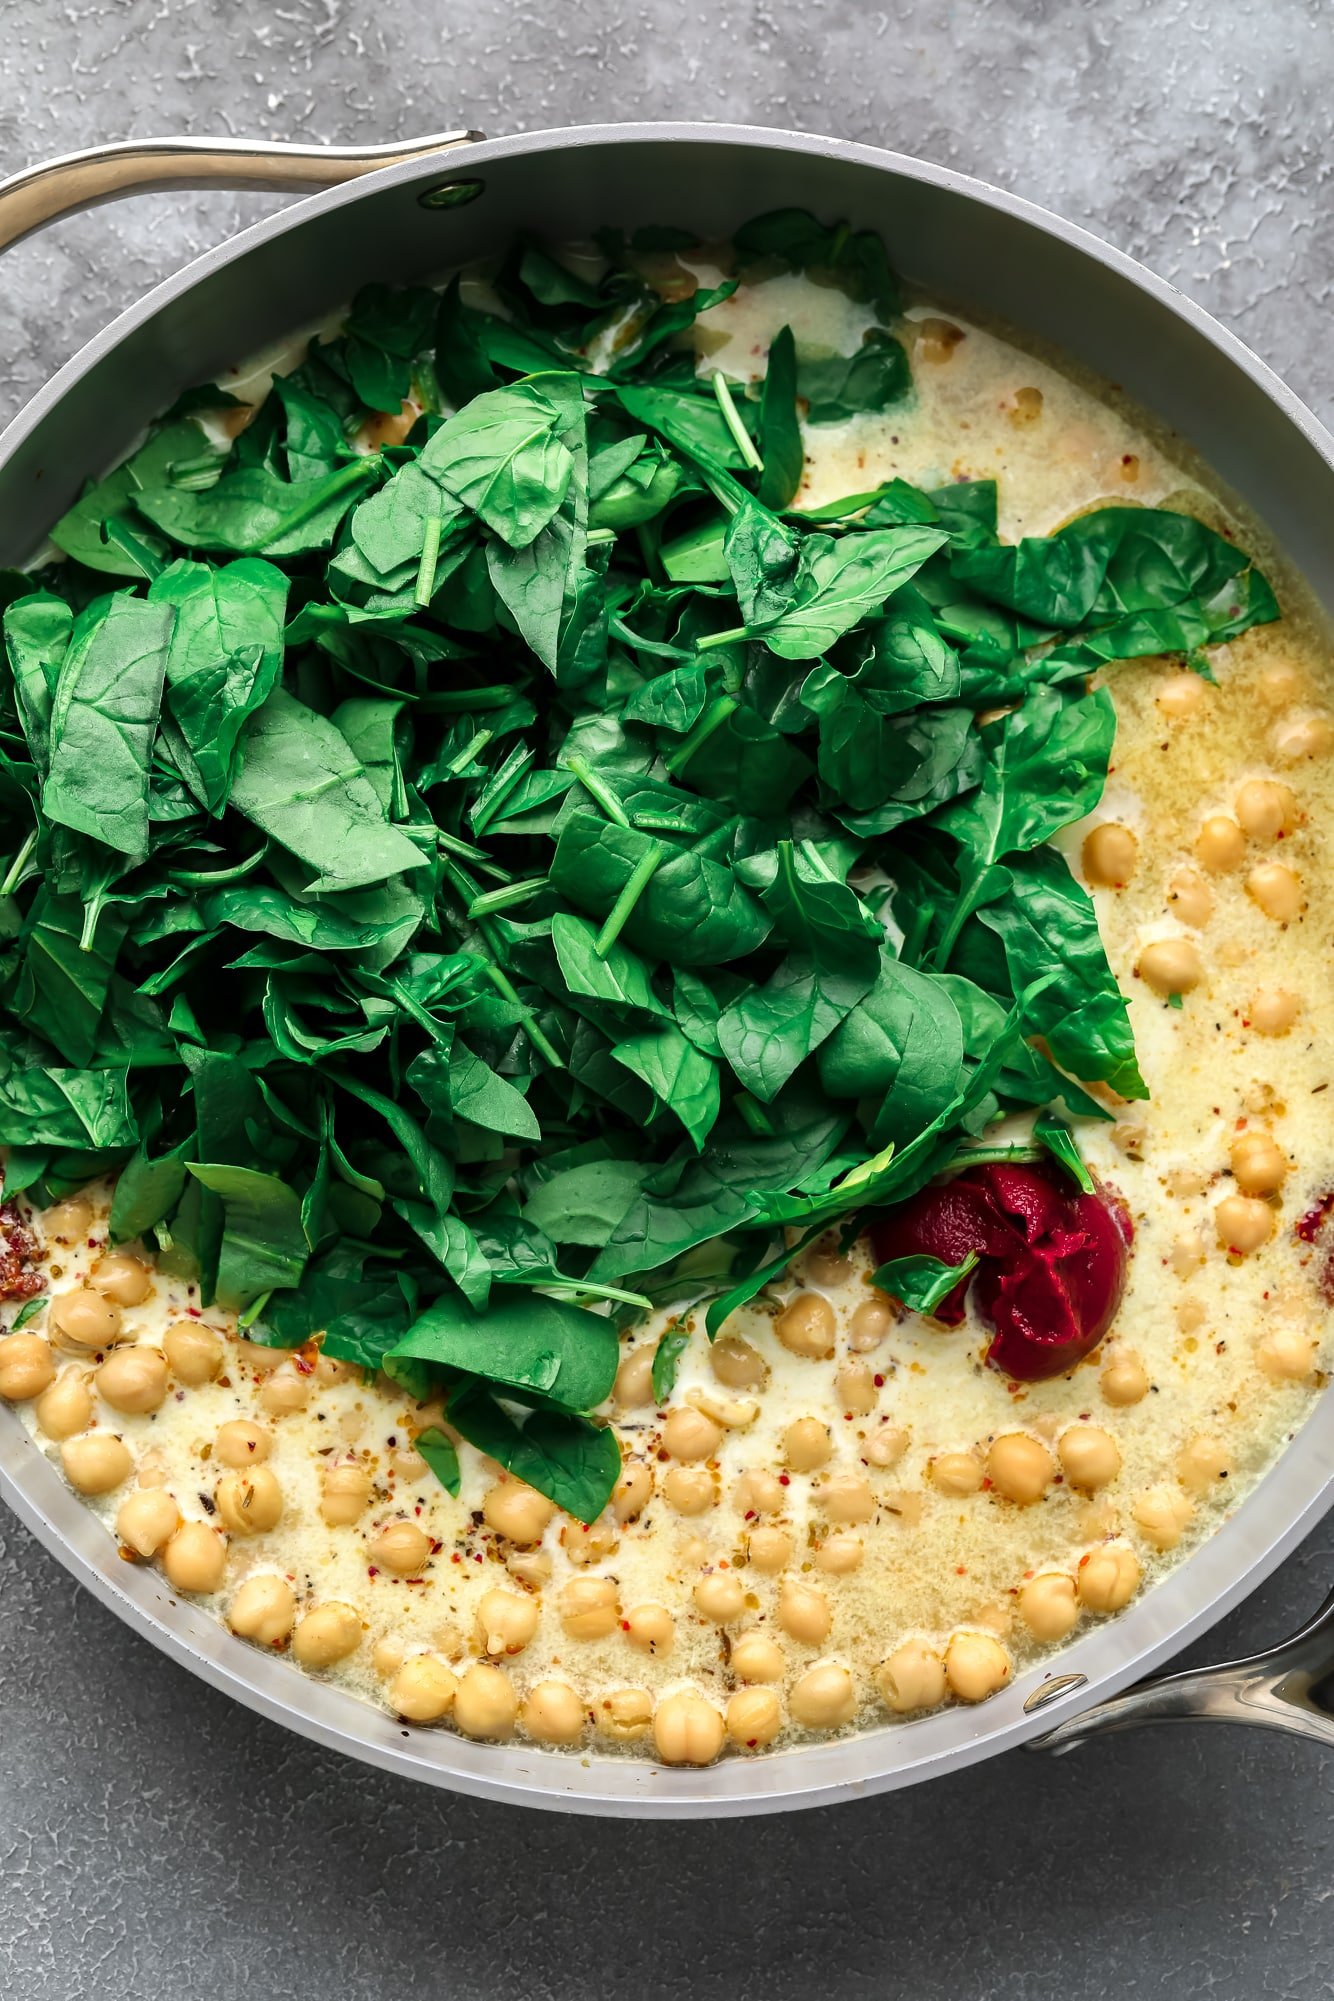
Warm the olive oil in a large pan over low-medium heat. Once hot, add the garlic and sauté until fragrant. Stir in the sun dried tomatoes, oregano, red pepper flakes, salt, and ground black pepper.
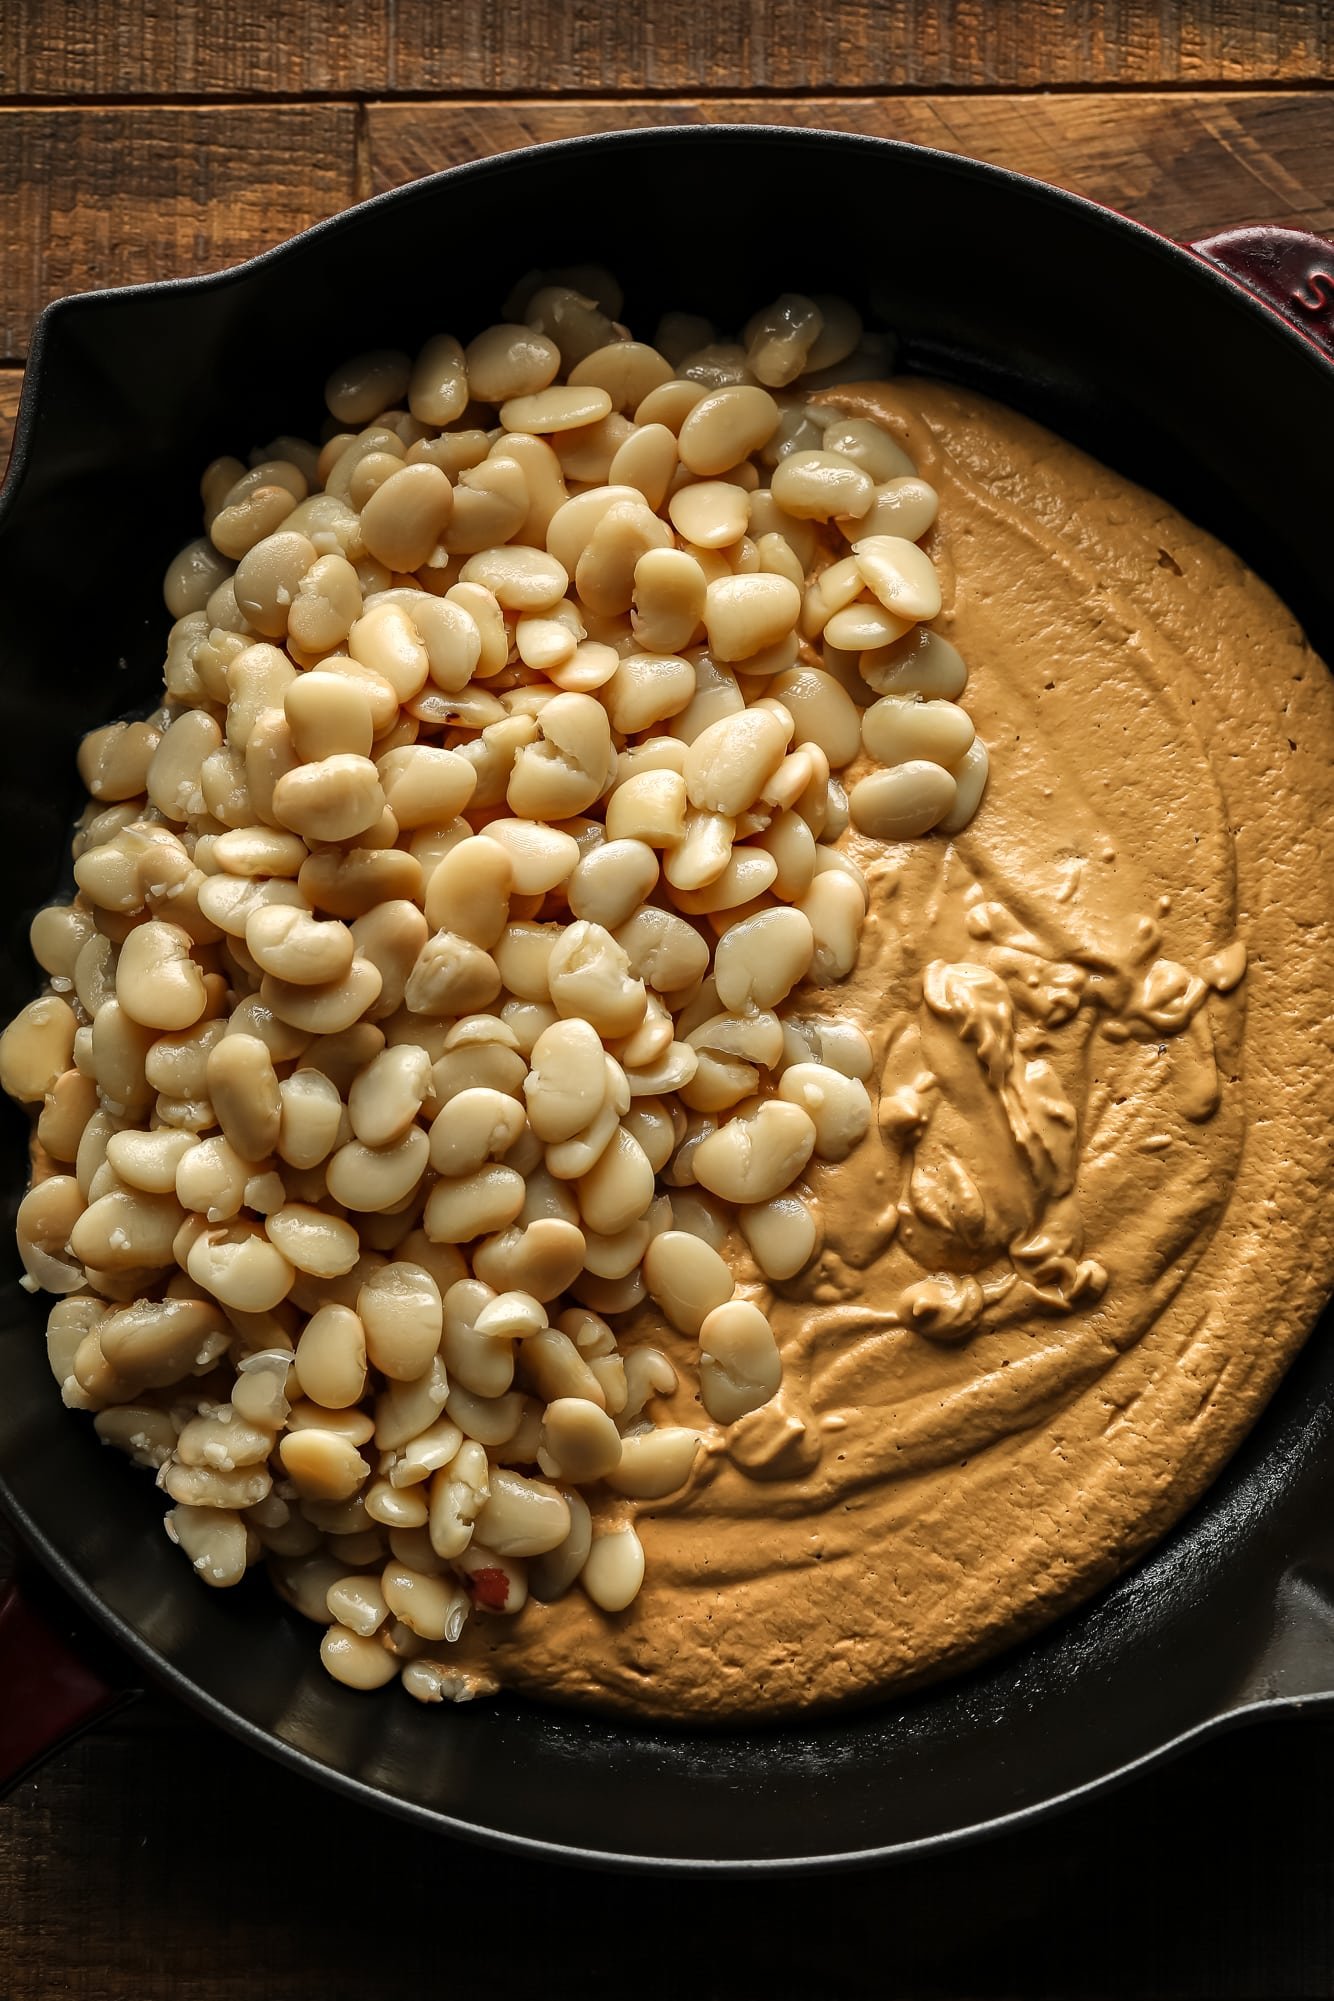
Add the chickpeas, vegetable broth, tomato paste, vegan cream, and spinach to the pan. Simmer until the sauce is warmed through and the spinach is wilted.
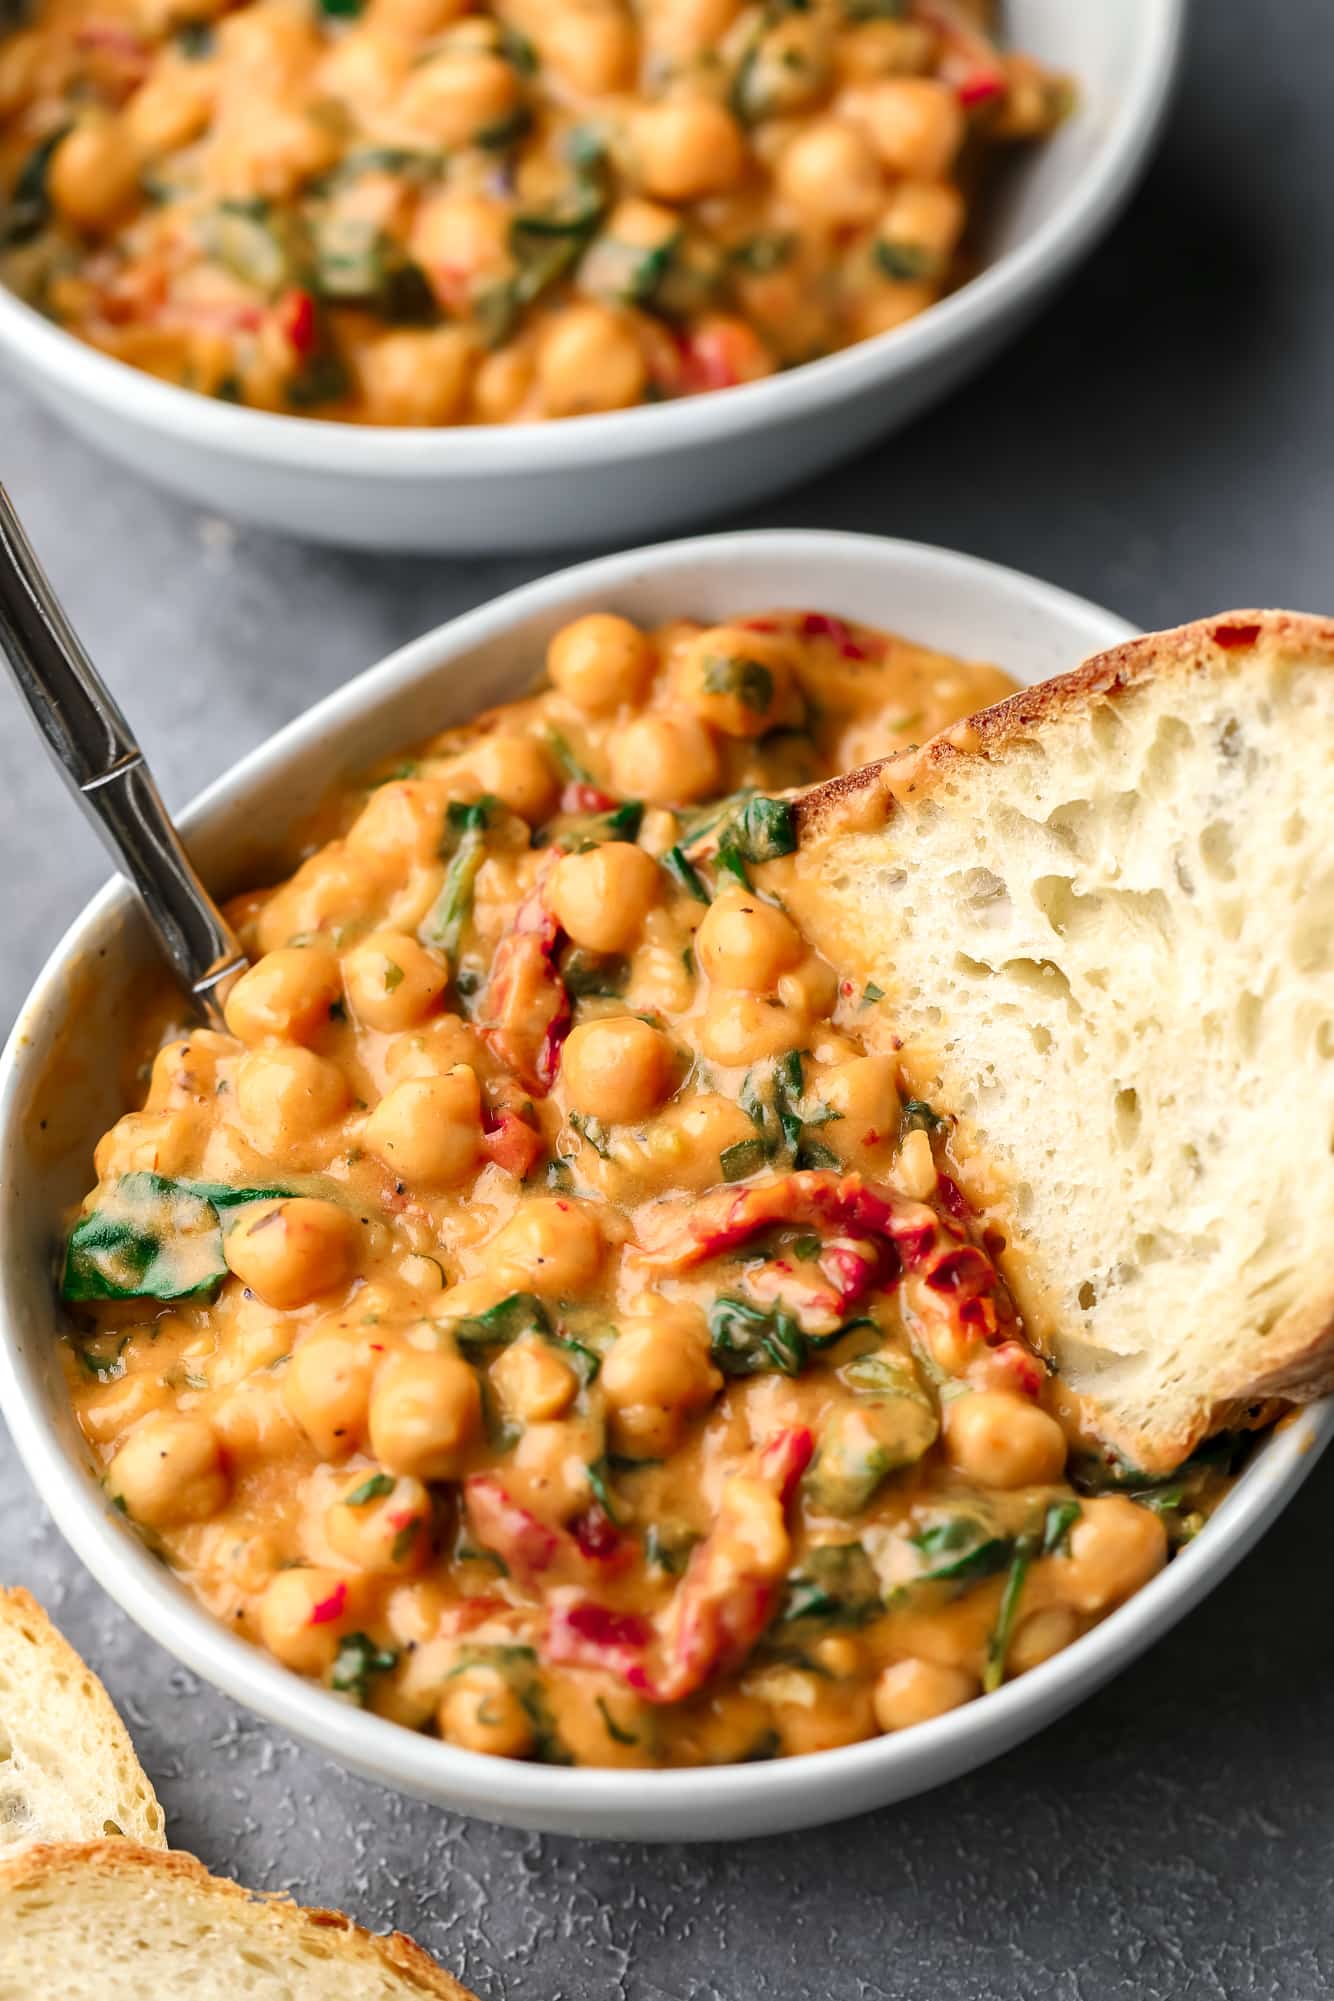
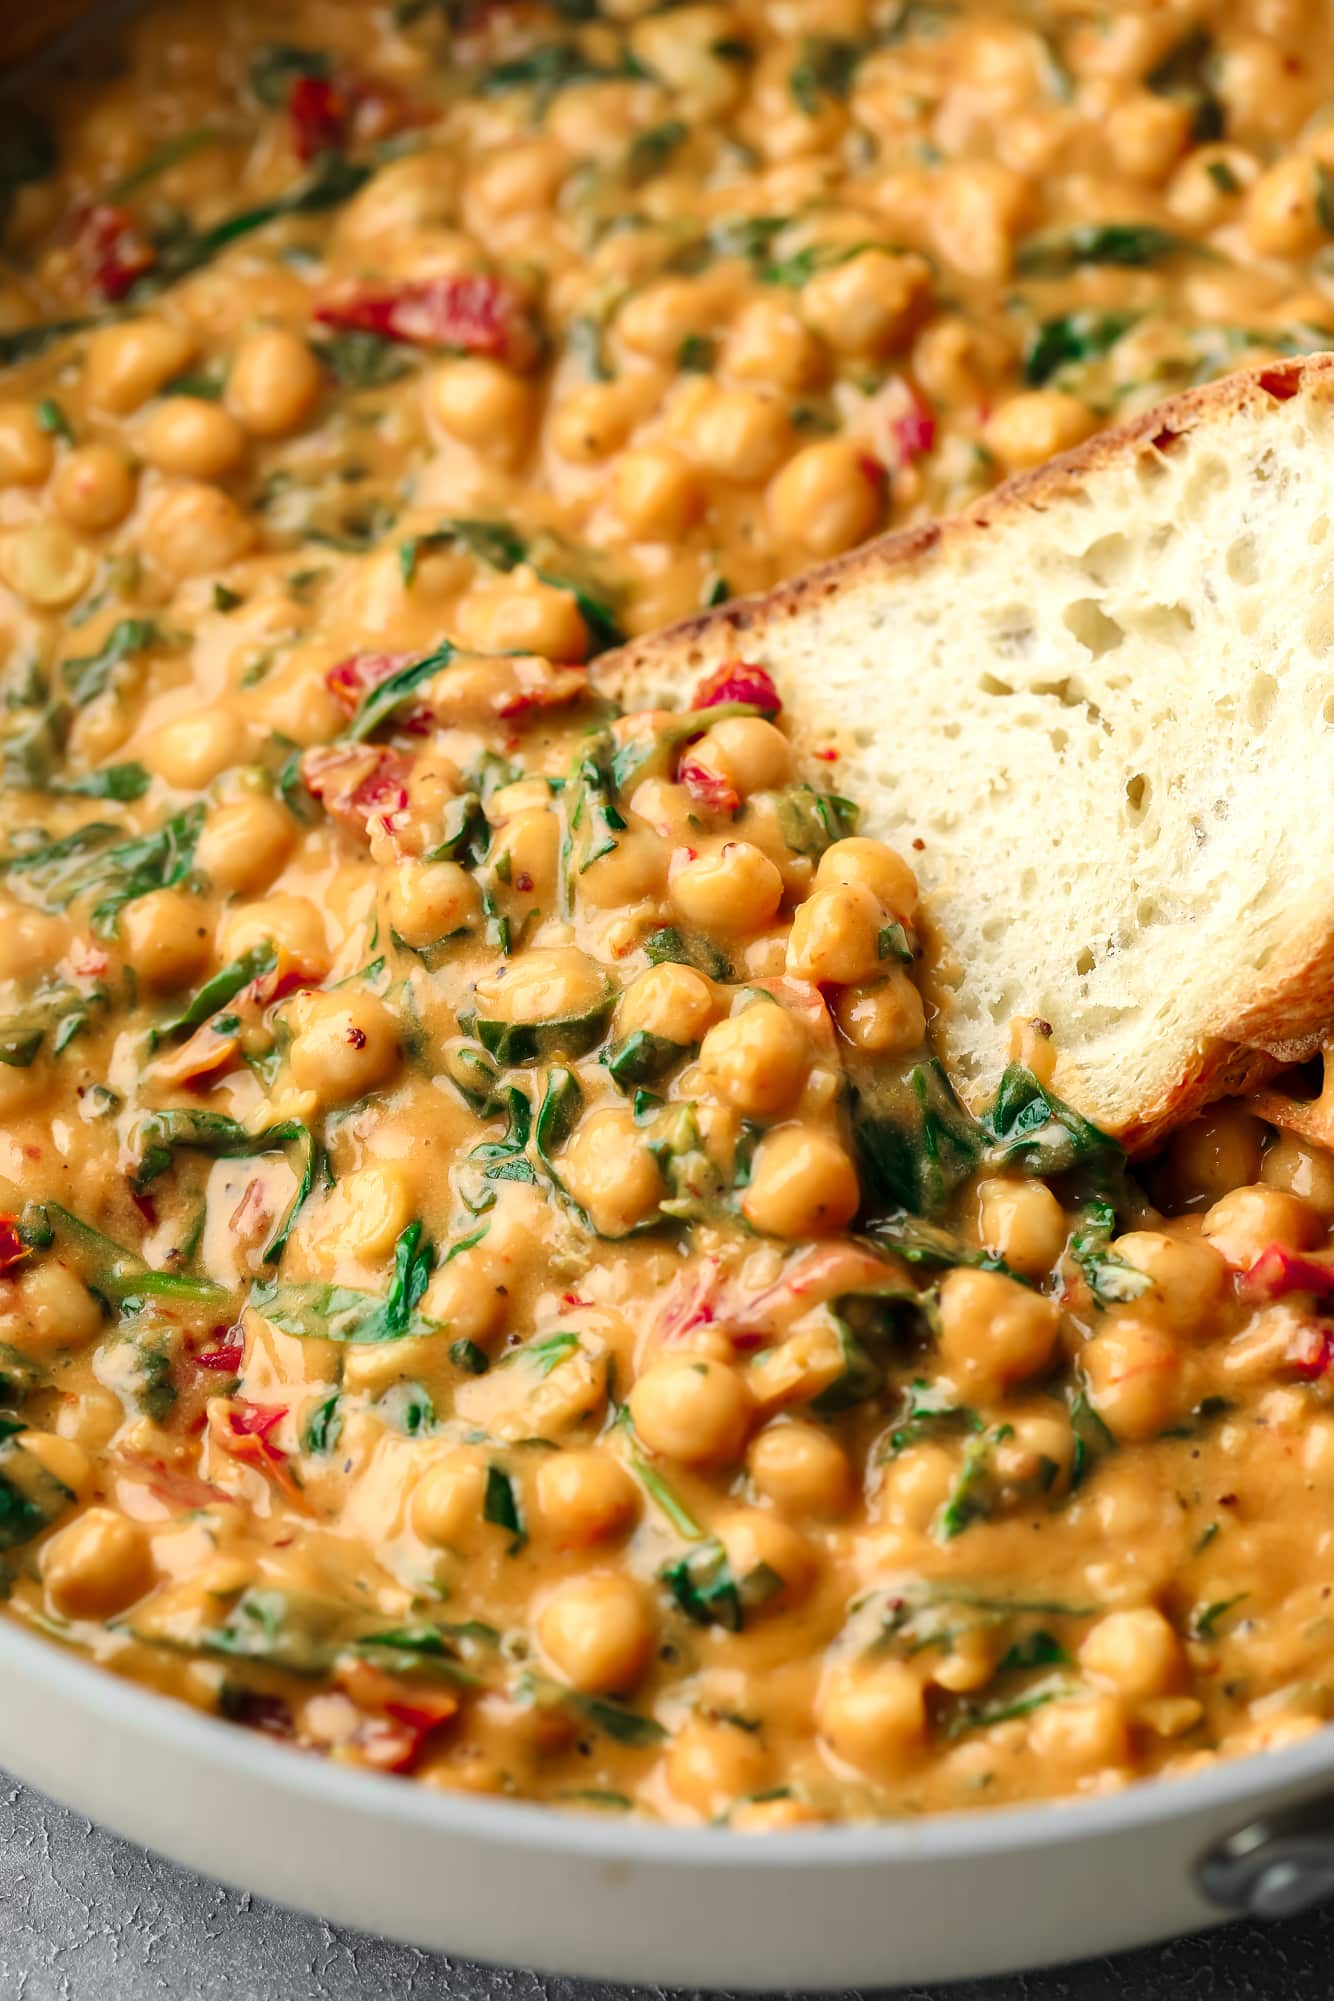
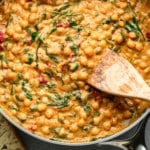
Garnish the Tuscan chickpeas with chopped fresh basil and vegan parmesan. Scoop up every bite with crusty bread or serve it over rice, pasta, or baked sweet potatoes. Enjoy!
Frequently asked questions
Marry Me Chicken is a dish that combines cooked chicken with a sun dried tomato and garlic cream sauce. The original recipe is made with heavy cream and chicken breasts, but in vegan marry me chicken recipes, they’re swapped for vegan cream and canned chickpeas.
It’s simple: the silky smooth cashew cream sauce, Italian flavors, and hearty chickpeas in every bite are so good that you’re bound to get a marriage proposal from anyone you serve it to!
Canned cannellini beans or another white bean will work well. For a meatier dish, you can use my Vegan Chicken recipe, homemade seitan bites, or baked tofu.
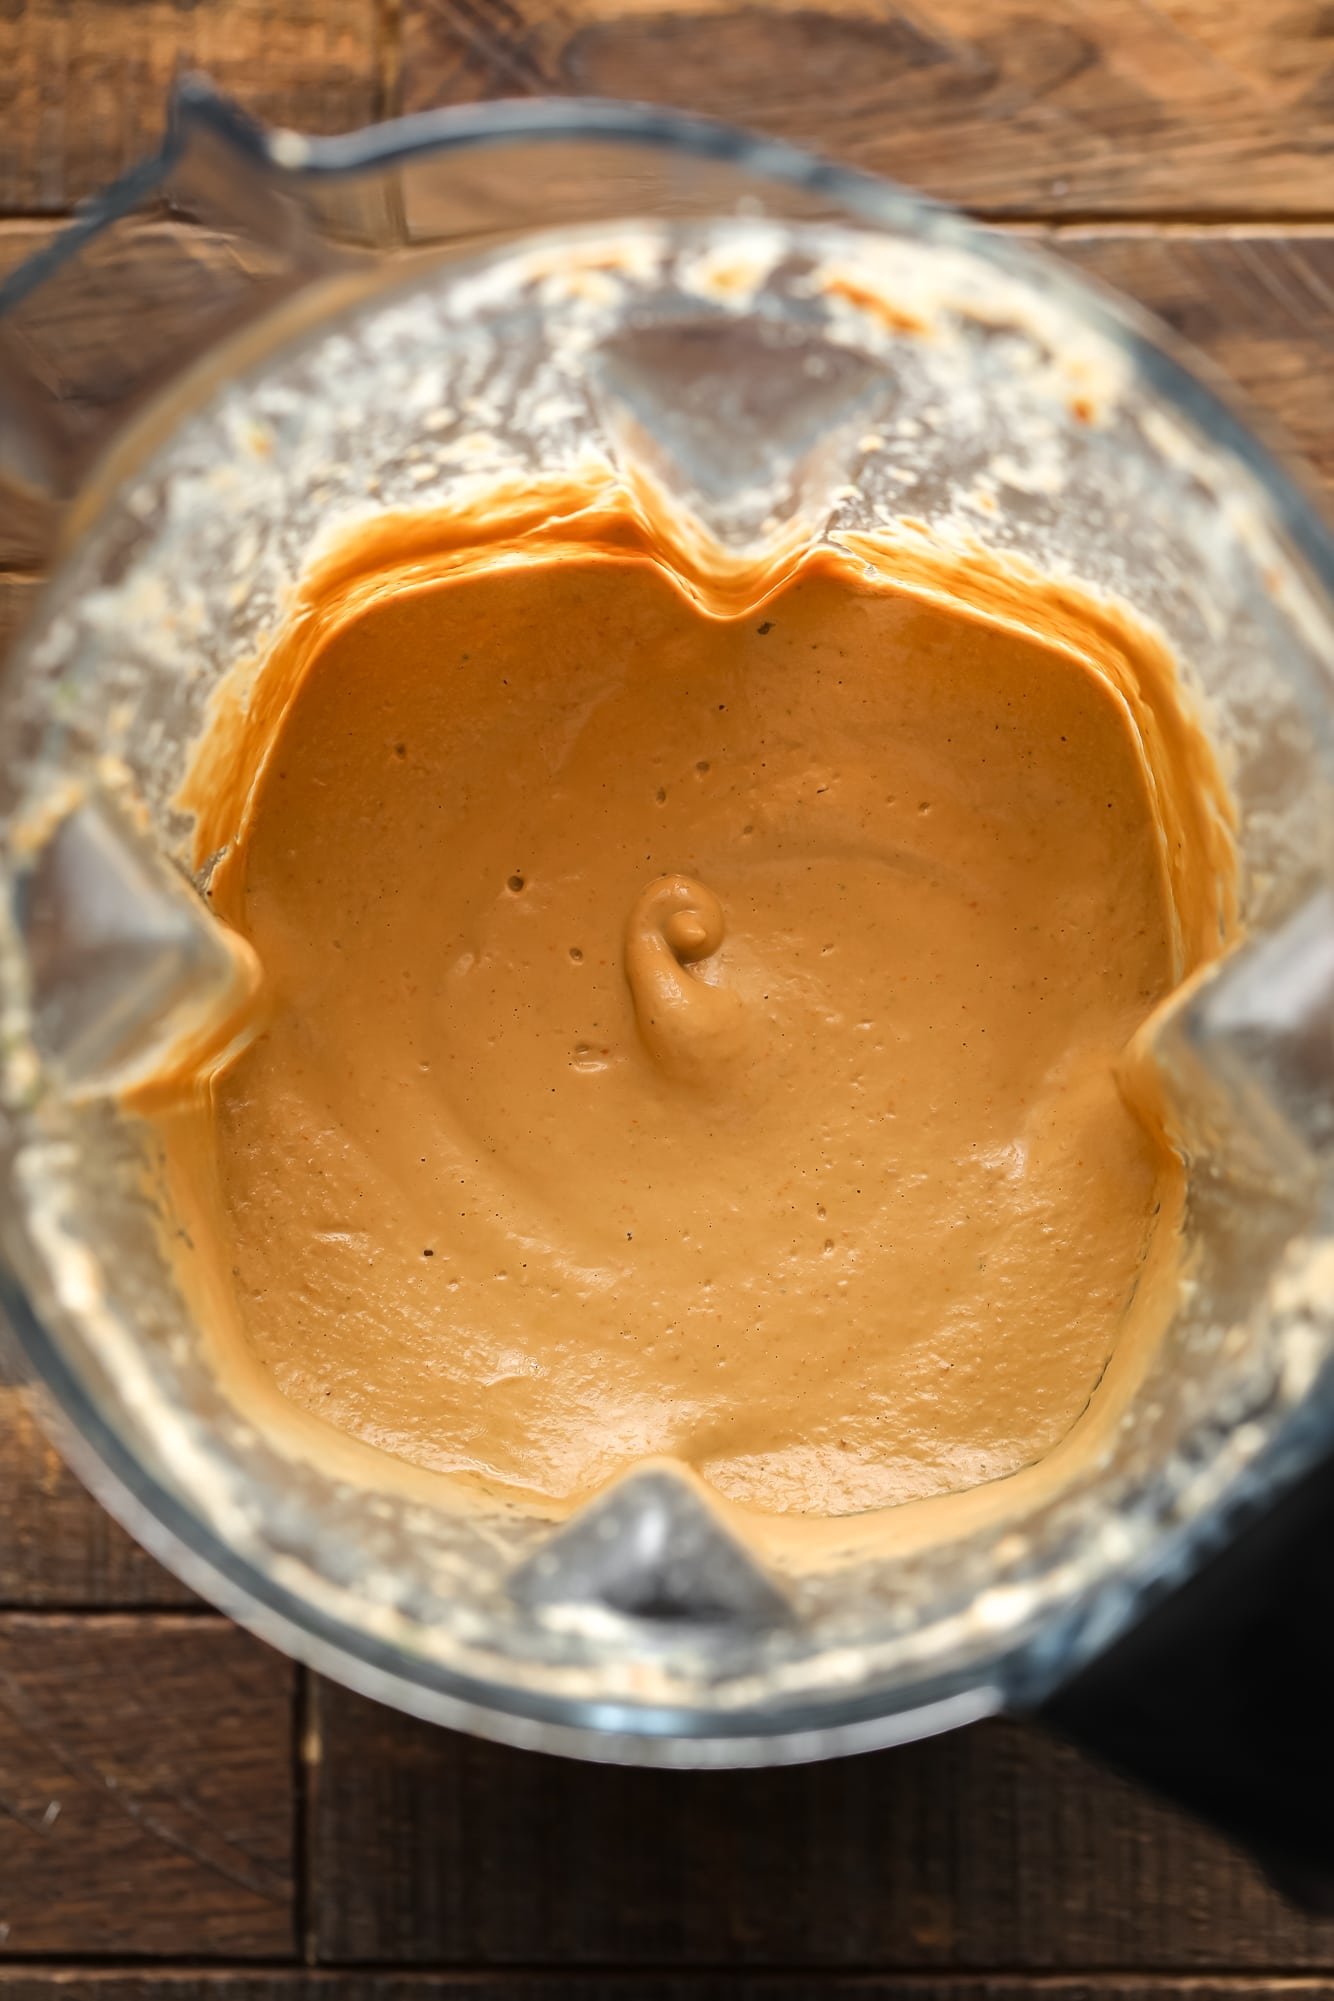
I recommend making the cream sauce with cashew cream for a thick and luxurious consistency. While store-bought vegan cream (I love Ripple’s dairy free half and half) or coconut milk also work, they’ll make the sauce slightly thinner. To help thicken it, stir a cornstarch slurry (made by mixing 1 tablespoon cornstarch with 3 tablespoons water in a small bowl) into the sauce at the end and gently simmer until it thickens.
The leftovers will keep for up to 5 days when stored in an airtight container in the fridge. Enjoy them for quick and easy meals or meal prep throughout the week! To reheat, zap the chickpeas and sauce in the microwave or warm them in a saucepan on the stove until heated through.
Marry Me Chickpeas
Ingredients
- 1 tablespoon olive oil
- 5 cloves garlic minced
- 1/2 cup sun dried tomatoes chopped
- 1/2 teaspoon oregano
- 1/2 teaspoon red chili flakes
- 1 teaspoon salt
- 1/4 teaspoon ground black pepper
- (2) 15-ounce cans chickpeas drained and rinsed
- 1 cup vegetable broth
- 1 tablespoon tomato paste
- 1 cup vegan cream See Notes
- 2 cups baby spinach sliced
- 4-5 fresh basil leaves chopped
- optional: 1/2 cup grated vegan parmesan cheese I used Violife
Instructions
- In a large sauté pan over low-medium heat, warm the olive oil. Add the garlic and cook for 1-2 minutes, stirring frequently, until fragrant.
- Stir in the sun dried tomatoes, oregano, red chili flakes, salt and black pepper. Cook for 1 minute.
- Now add the chickpeas, broth, tomato paste, cream and spinach and stir well. Bring to a gentle simmer over medium heat and cook for about 5 minutes, until warm and the spinach has wilted. Taste; add more salt, pepper or red pepper flakes as desired.
- Remove from heat and stir in the fresh basil and grated parmesan. Serve immediately with crusty bread for dipping, or on to of cooked rice, pasta or even a baked sweet potato. Enjoy!
Notes
-
For vegan marry me chicken, try substituting the chickpeas for any vegan chicken you like, including my homemade seitan chicken. Or make my crispy baked tofu and use that instead.
- For the cream, you can use any store bought dairy free creamer (I love Ripple’s Half and Half), full fat coconut milk, another unsweetened plant milk or best of all, homemade cashew cream.
- To make cashew cream for the cream – Bring 2-3 cups of water to a boil (I use my tea kettle). Pour the hot water over ¾ cup raw cashews and let soak for 5 minutes or up to an hour. Drain the cashews and add to a high powered blender with 1 cup of fresh water and blend until creamy and smooth.
-
If you use a store bought cream or coconut milk, you may want to thicken the chickpeas as the sauce won’t be as thick. To do this, mix 1 tablespoon cornstarch and 3 tablespoons water in a bowl, then stir it into the chickpea mixture at the end. It should thicken up nicely.

 Tip: A 750 ml bottle of Prosecco is 25 ounces, enough for 8 drinks. If you’re making 2 drinks, a mini bottle is perfect—it holds 187 mL or about 6 ounces!


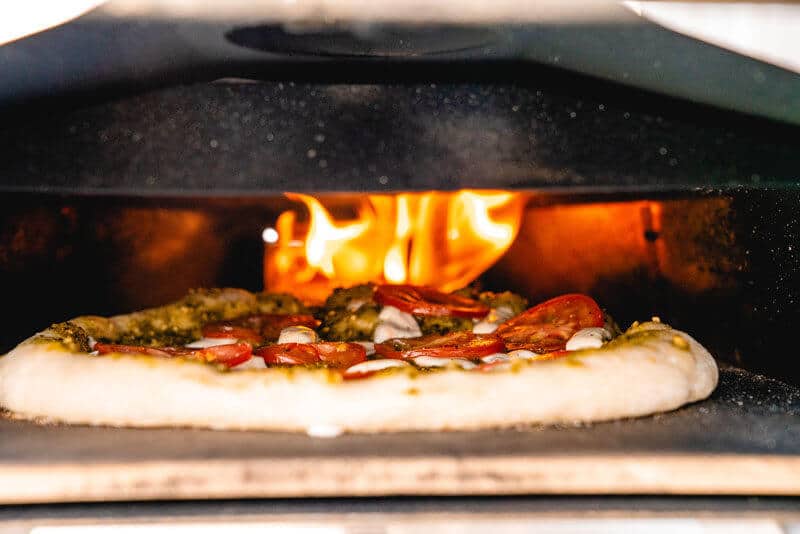
 Try a pizza oven if you really want to step up your game! True artisan pizza is cooked at temperatures much hotter than your standard oven can achieve. The oven we recommend is relatively inexpensive and heats quickly to 1000°F.
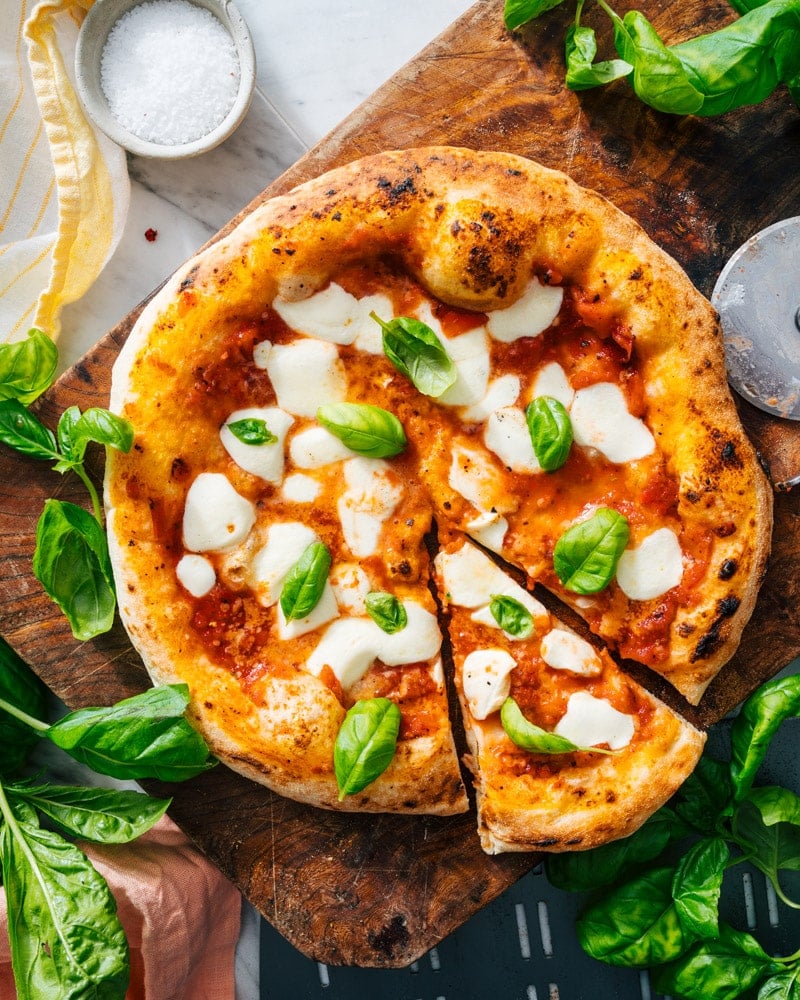


 Most Neapolitan pizza recipes call for placing tomatoes right onto the dough. The San Marzano variety of tomato is a type of Italian tomato that is most often used on Neapolitan pizza. You can find canned San Marzano tomatoes in many grocery stores in the United States these days.
 Like any famous recipe, there are lots of opinions on what makes an authentic Neapolitan pizza recipe. If you’re making a


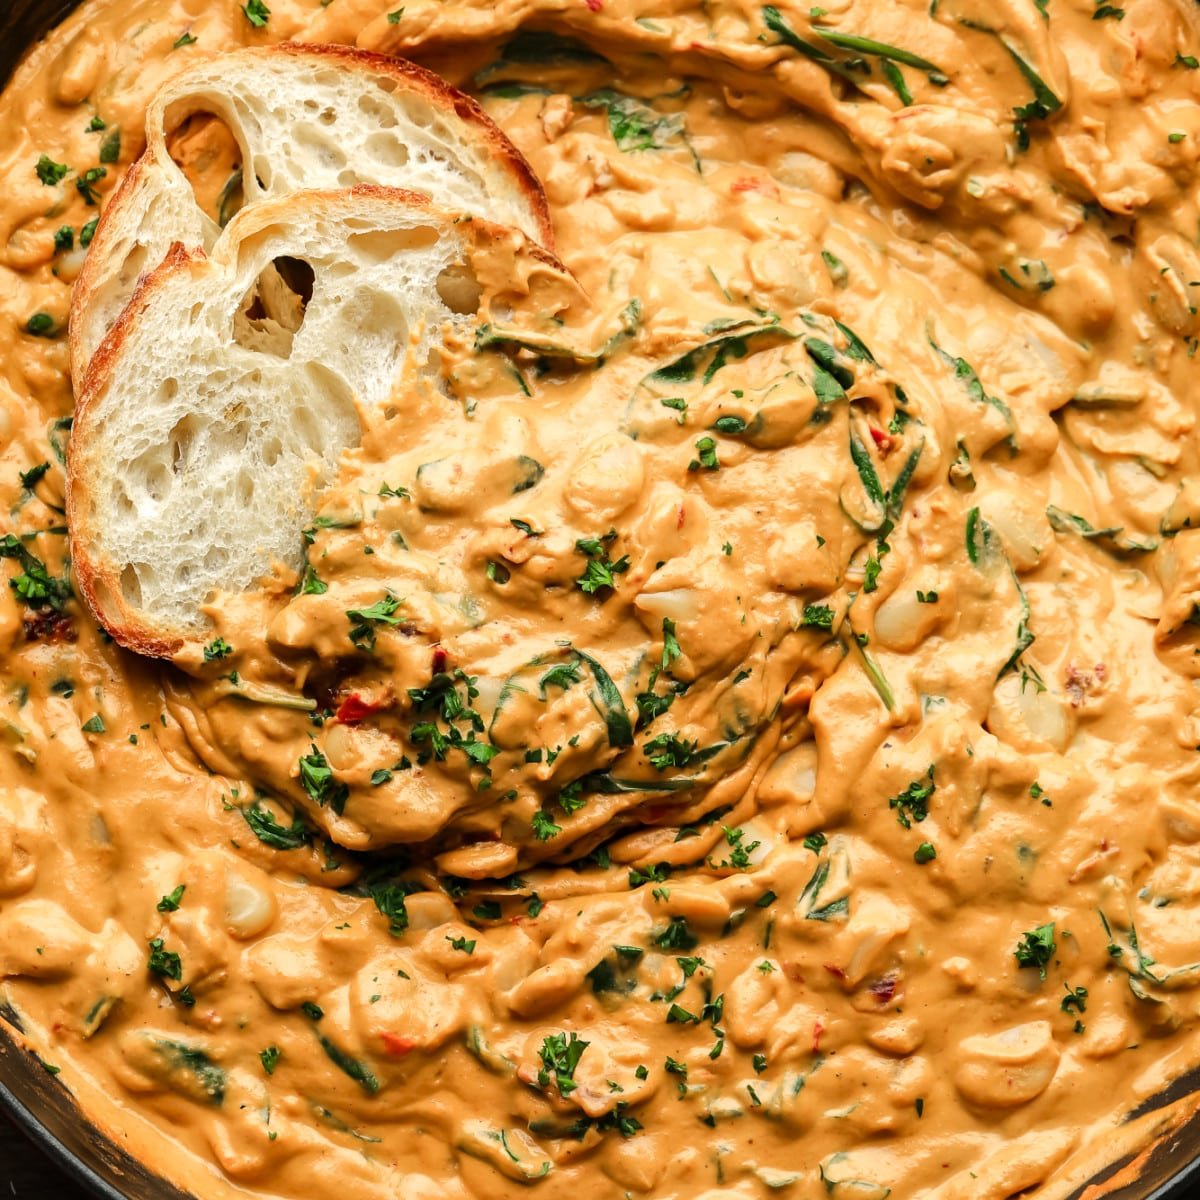 This Tuscan-inspired butter beans recipe tosses canned butter beans in a rich and creamy sun dried tomato sauce. It’s incredibly comforting, healthy, and ready in just 20 minutes! Transform more of the canned beans in your pantry with these Best Vegan Baked Beans, Easy Chickpea Curry, and White Bean Soup recipes! You’ll never look at…
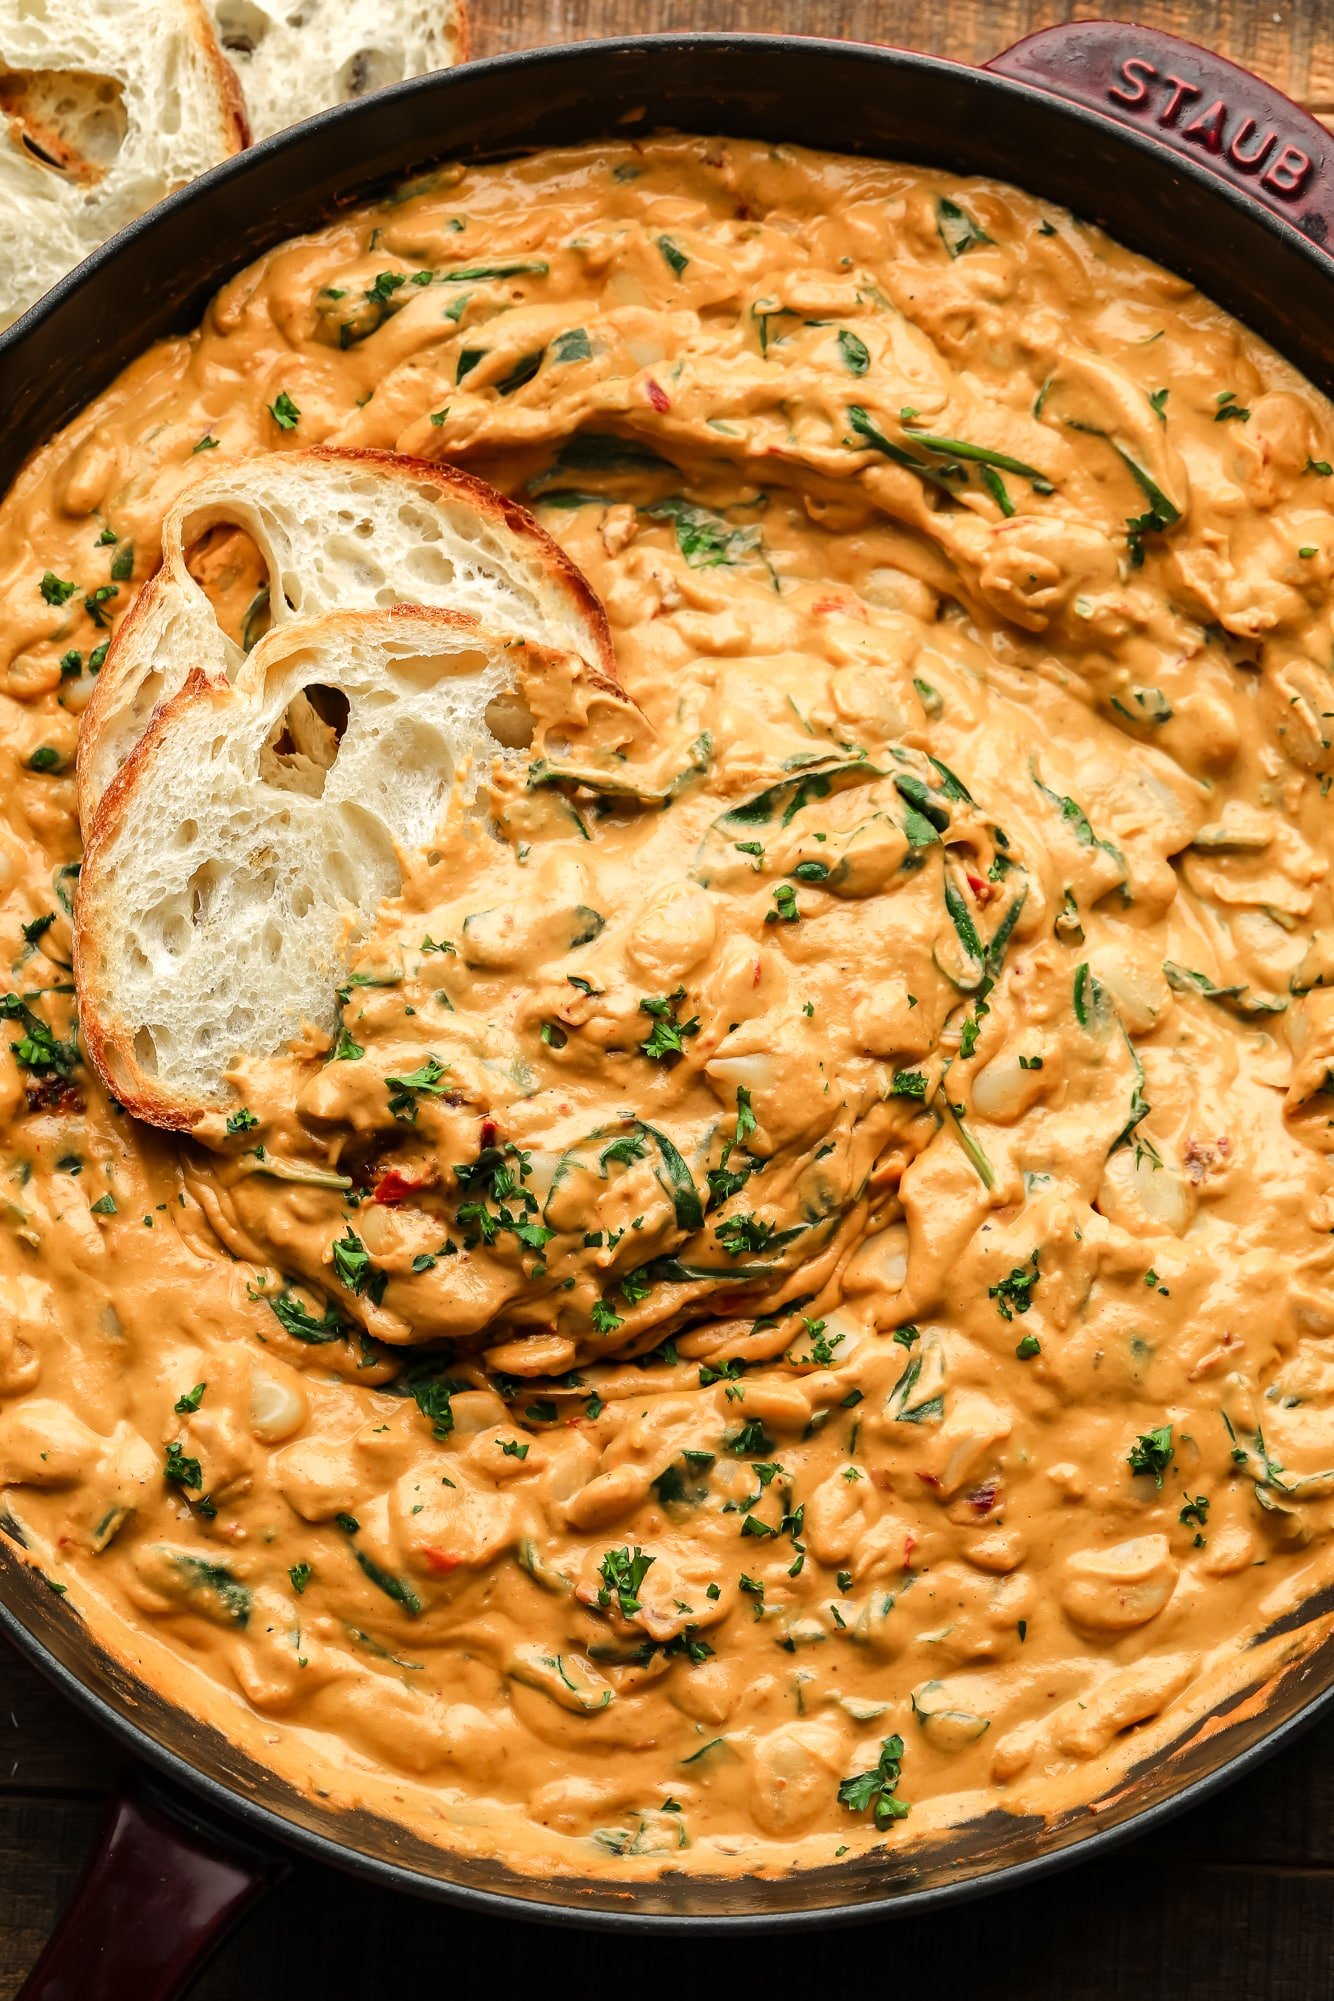


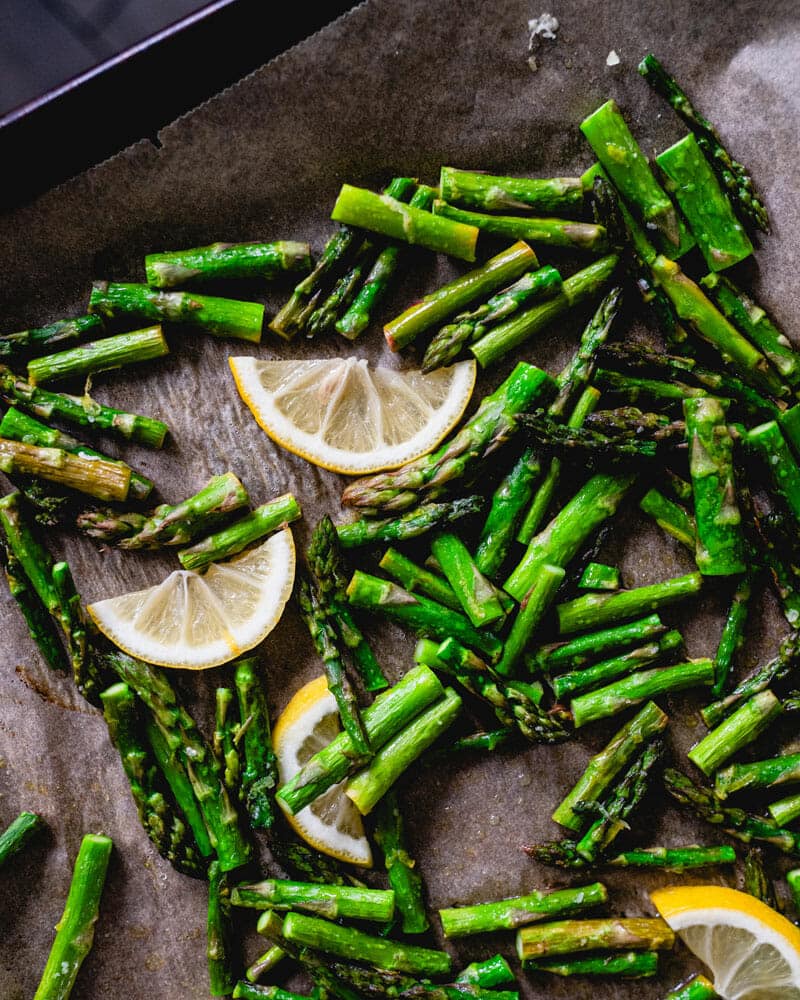
 Savor the flavor of these tender, roasted veggies!