This Grilled Tofu recipe marinates thick slabs of tofu in a delicious marinade before they’re charred to perfection on the grill. It’s an easy way to cook tofu and one of the best plant proteins for grilling season!
Take your tofu from blah to yum! with my Perfect Fried Tofu, Crispy Baked BBQ Tofu, Air Fryer Tofu, and Crispy Baked Tofu recipes as well.
Introducing my new favorite way to cook tofu: on the grill! This recipe will show you how to make tofu taste amazing using a simple marinade and a hot grill. Who knew it could be so easy?
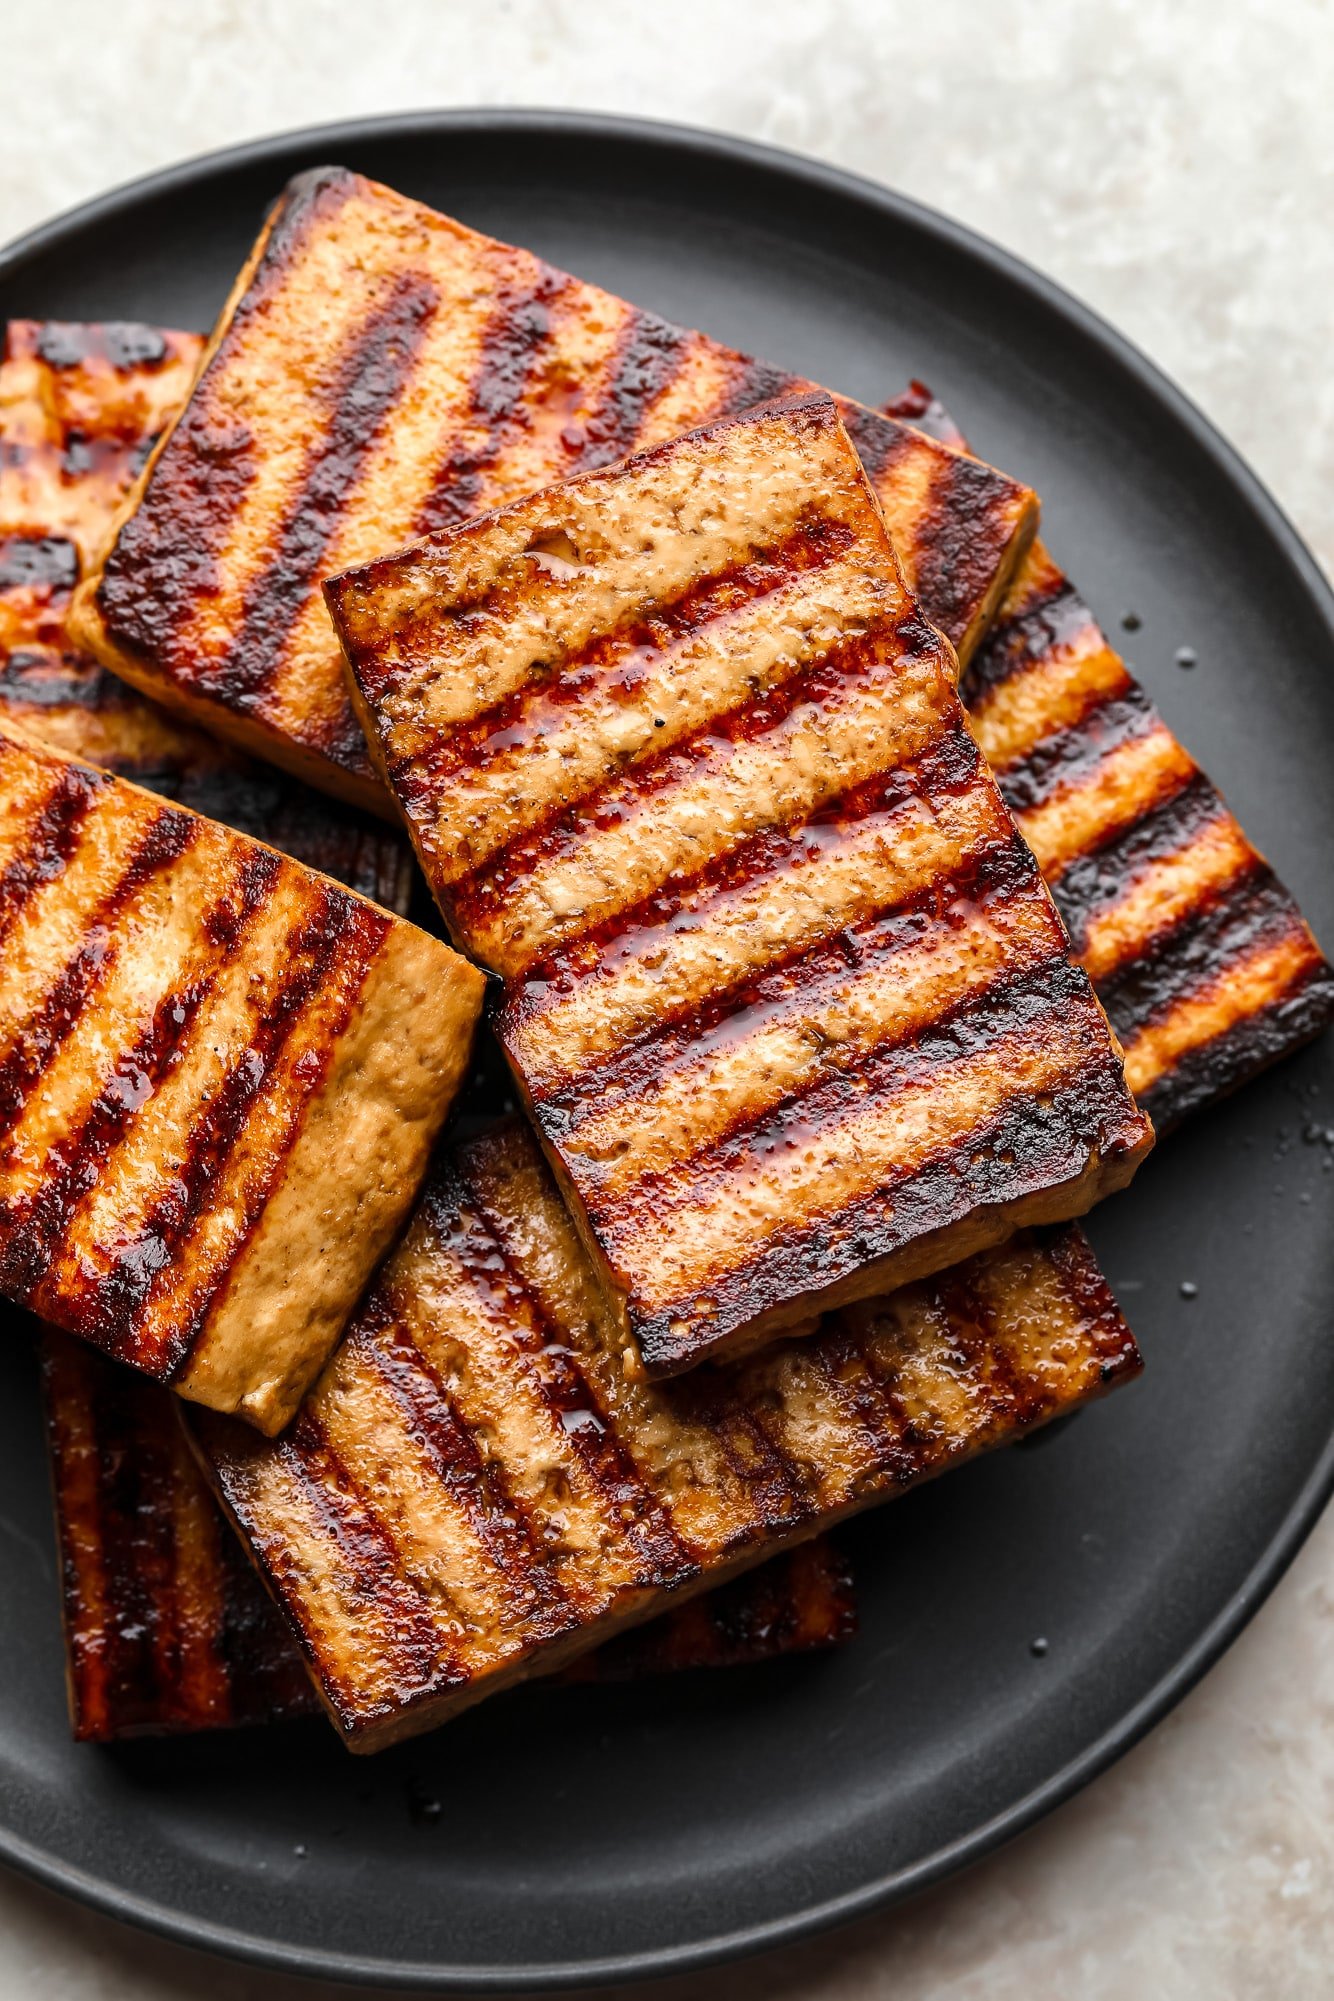
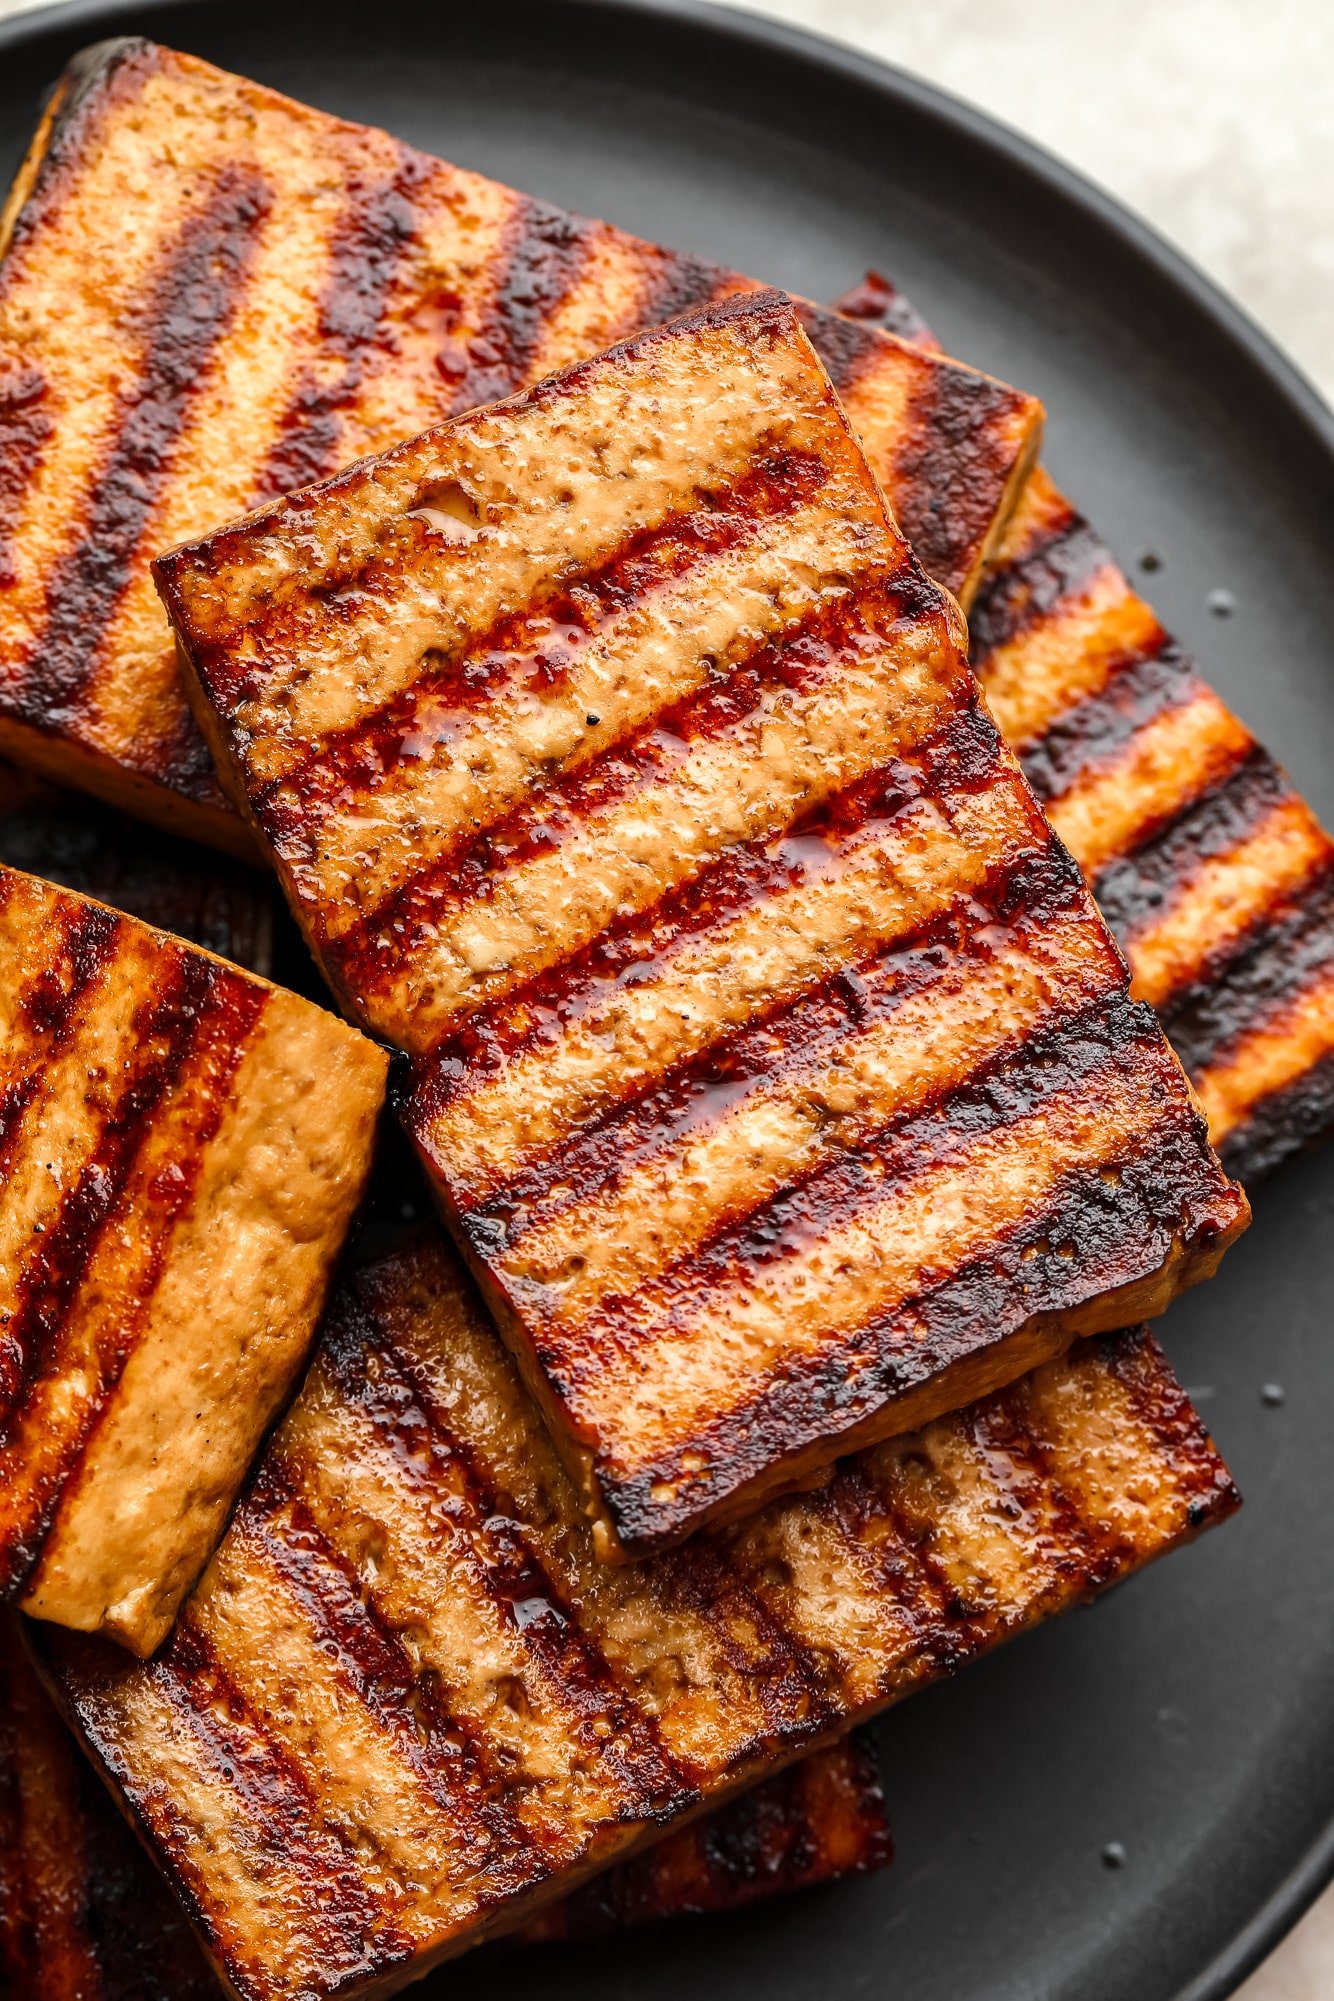
The blocks of tofu are sliced into wide and thick slabs and then dunked in a savory marinade made from 5 pantry staples. The tofu soaks in those wonderful flavors for a few hours before it’s fired on the grill. From the gorgeous grill marks to the classic barbecue flavors to the endless ways to enjoy them, these grilled tofu steaks are too good to pass up!
Pair them with all of your grilling season go-to’s, like my Sticky BBQ Tempeh Ribs, Vegan Veggie Kebabs, the Best Veggie Burgers, and more.
Why you’ll love this grilled tofu recipe
- Golden on the outside, meaty on the inside – The high heat gives the marinated tofu steaks irresistible golden grill marks on the outside while the inside stays tender and meaty.
- An easy summer protein – Make in advance and fire the pieces on the grill anytime you need an easy and delicious plant protein for your summer dinners.
- The easiest and most delicious marinade – Like my Marinated Tofu recipe, I marinated the tofu slices in a 5-ingredient marinade to give them rich and savory flavors.
How to grill tofu
Find the complete recipe with measurements in the recipe card below.
Press the blocks of tofu for at least 30 minutes. Meanwhile, whisk the soy sauce, avocado oil, seasoned rice vinegar, sesame oil, and garlic powder together in a small bowl.
Pro tip: Use extra firm or super firm tofu for this recipe! Softer varieties, like medium or soft tofu, will crumble and fall through the grill grates.
Slice the tofu block into thick slices and place them in a large shallow dish or large ziplock bag. Pour the marinade over the tofu, then cover the dish or seal the bag and leave it to marinate in the fridge.
Take the tofu slabs out of the marinade and place them on a preheated grill. Grill the tofu on both sides until golden brown grill marks appear. When done, transfer the grilled tofu steaks to a platter and cover them with aluminum foil to keep them warm.
Before serving, simmer the reserved marinade in a saucepan until it thickens slightly, then pour it over the tofu. Enjoy!
Tofu sticking to grill?
There are a few tricks to get your tofu to release easily from the grill (or a grill pan).
- Use only extra-firm or even super-firm tofu. And press extra-firm tofu to get rid of excess water.
- Use oil on the grill, and in the marinade.
- Don’t attempt to move the tofu for several minutes, until marks form and it cooks long enough on one side. This helps it to release easily. Use a fork to slowly and carefully pop them off to release the tofu from the grill without tearing. Don’t roughly handle the tofu with tongs, or it may fall apart and rip.

Frequently asked questions
Yes, pressing the water out of the tofu blocks is a crucial step. Pressed tofu not only has a firmer and meatier texture but also absorbs flavors more easily.
To press the tofu, either use a tofu press or wrap each block in a few paper towels, place a plate or pan on top, and put a couple of heavy books on top of that. The only way to avoid pressing tofu is to use the super firm variety in a vacuum pack.
I recommend marinating the tofu for at least 1 hour at room temperature or in the refrigerator overnight. Basically, the longer you marinate, the more flavorful they’ll be. Just don’t go over the 24-hour mark or else the tofu will start to crumble.
Depending on how thick you slice the tofu, each piece should need to cook for about 5 to 7 minutes per side on a medium-high heat grill. The tofu is grilled perfectly when you see golden brown grill marks.
All of your summer favorites! Once they’re slathered in the marinade or barbecue sauce, I like to serve the tofu with my Vegan Broccoli Salad, Vegan Potato Salad, and Vegan Baked Beans on the side. Some grilled vegetables, like zucchini, corn, and bell peppers, would be amazing, too.
You can also repurpose the grilled tofu and serve it on top of a salad or grain bowl, layer it in a sandwich, or fold it in a veggie wrap for more protein and flavor. The sky’s the limit!

Grilled Tofu
Ingredients
- (2) 14.5 ounce blocks extra-firm tofu or super firm
- 1/2 cup low sodium soy sauce or tamari
- 1/4 cup avocado oil or canola oil
- 6 tablespoons seasoned rice vinegar
- 2 teaspoons toasted sesame oil
- 1/2 teaspoon garlic powder
Instructions
- Press the tofu: Wrap the block of tofu in paper towels. Place a plate or pan on top of the wrapped tofu, and put a couple of heavy books on top of that. Let the tofu press for 30 minutes, or up to an hour.
- In a small bowl, whisk the soy sauce, avocado oil, seasoned rice vinegar, sesame oil and garlic powder to combine.
- Slice the tofu into thick slices, about 4 slices per block of tofu. Place in a large shallow dish (or large ziplock type bag), then pour the marinade over the tofu.
- Cover and place in the refrigerator to marinate for at least 1 hour, or even overnight. The longer you marinate, the more flavor. But I wouldn't go over 24 hours.
- Preheat an outdoor grill (or indoor grill pan) over medium-high heat and lightly oil. Remove the tofu from the marinade (but keep it nearby) and place on the hot grill. Cook for about 5-7 minutes on each side until golden brown marks appear. Turn with a metal spatula or fork, carefully loosening the tofu from the grate. Cook 5-7 minutes on the other side, then transfer to a platter and cover to keep warm.
- If desired, pour the reserved marinade into a saucepan and simmer for about 3 minutes. Pour as much as desired over the tofu for even more flavor and serve.
Notes
- Use only extra-firm tofu that has been pressed well, OR the super firm variety (which does not need pressing).
- May use gluten free tamari for gluten free grilled tofu.
- Another vegetable oil works in place of avocado, like vegetable, canola or even olive oil.
- Leftover tofu keeps in the refrigerator for 4-5 days.
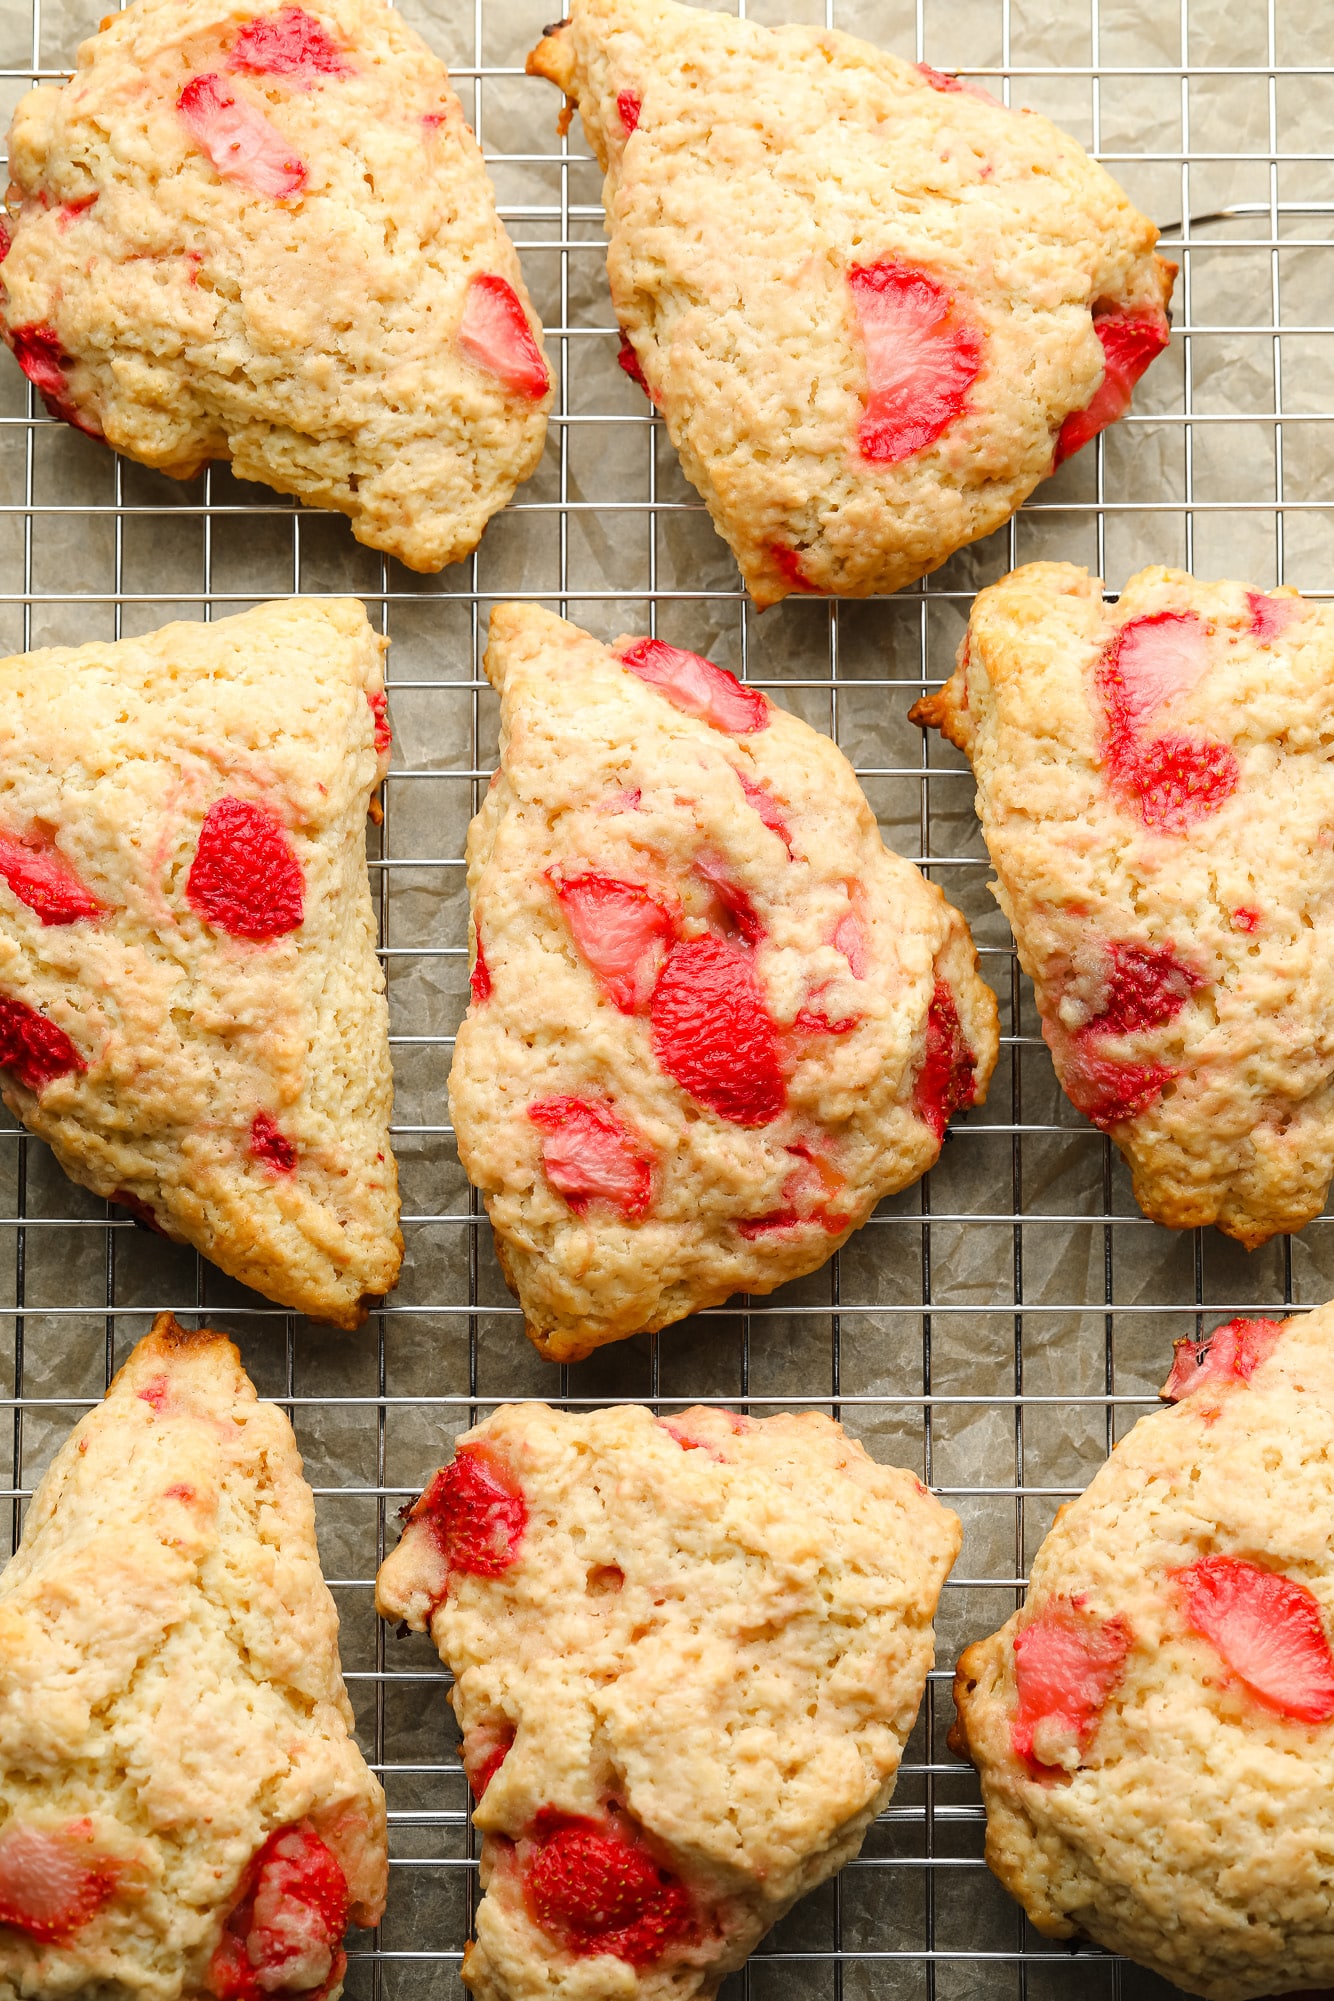
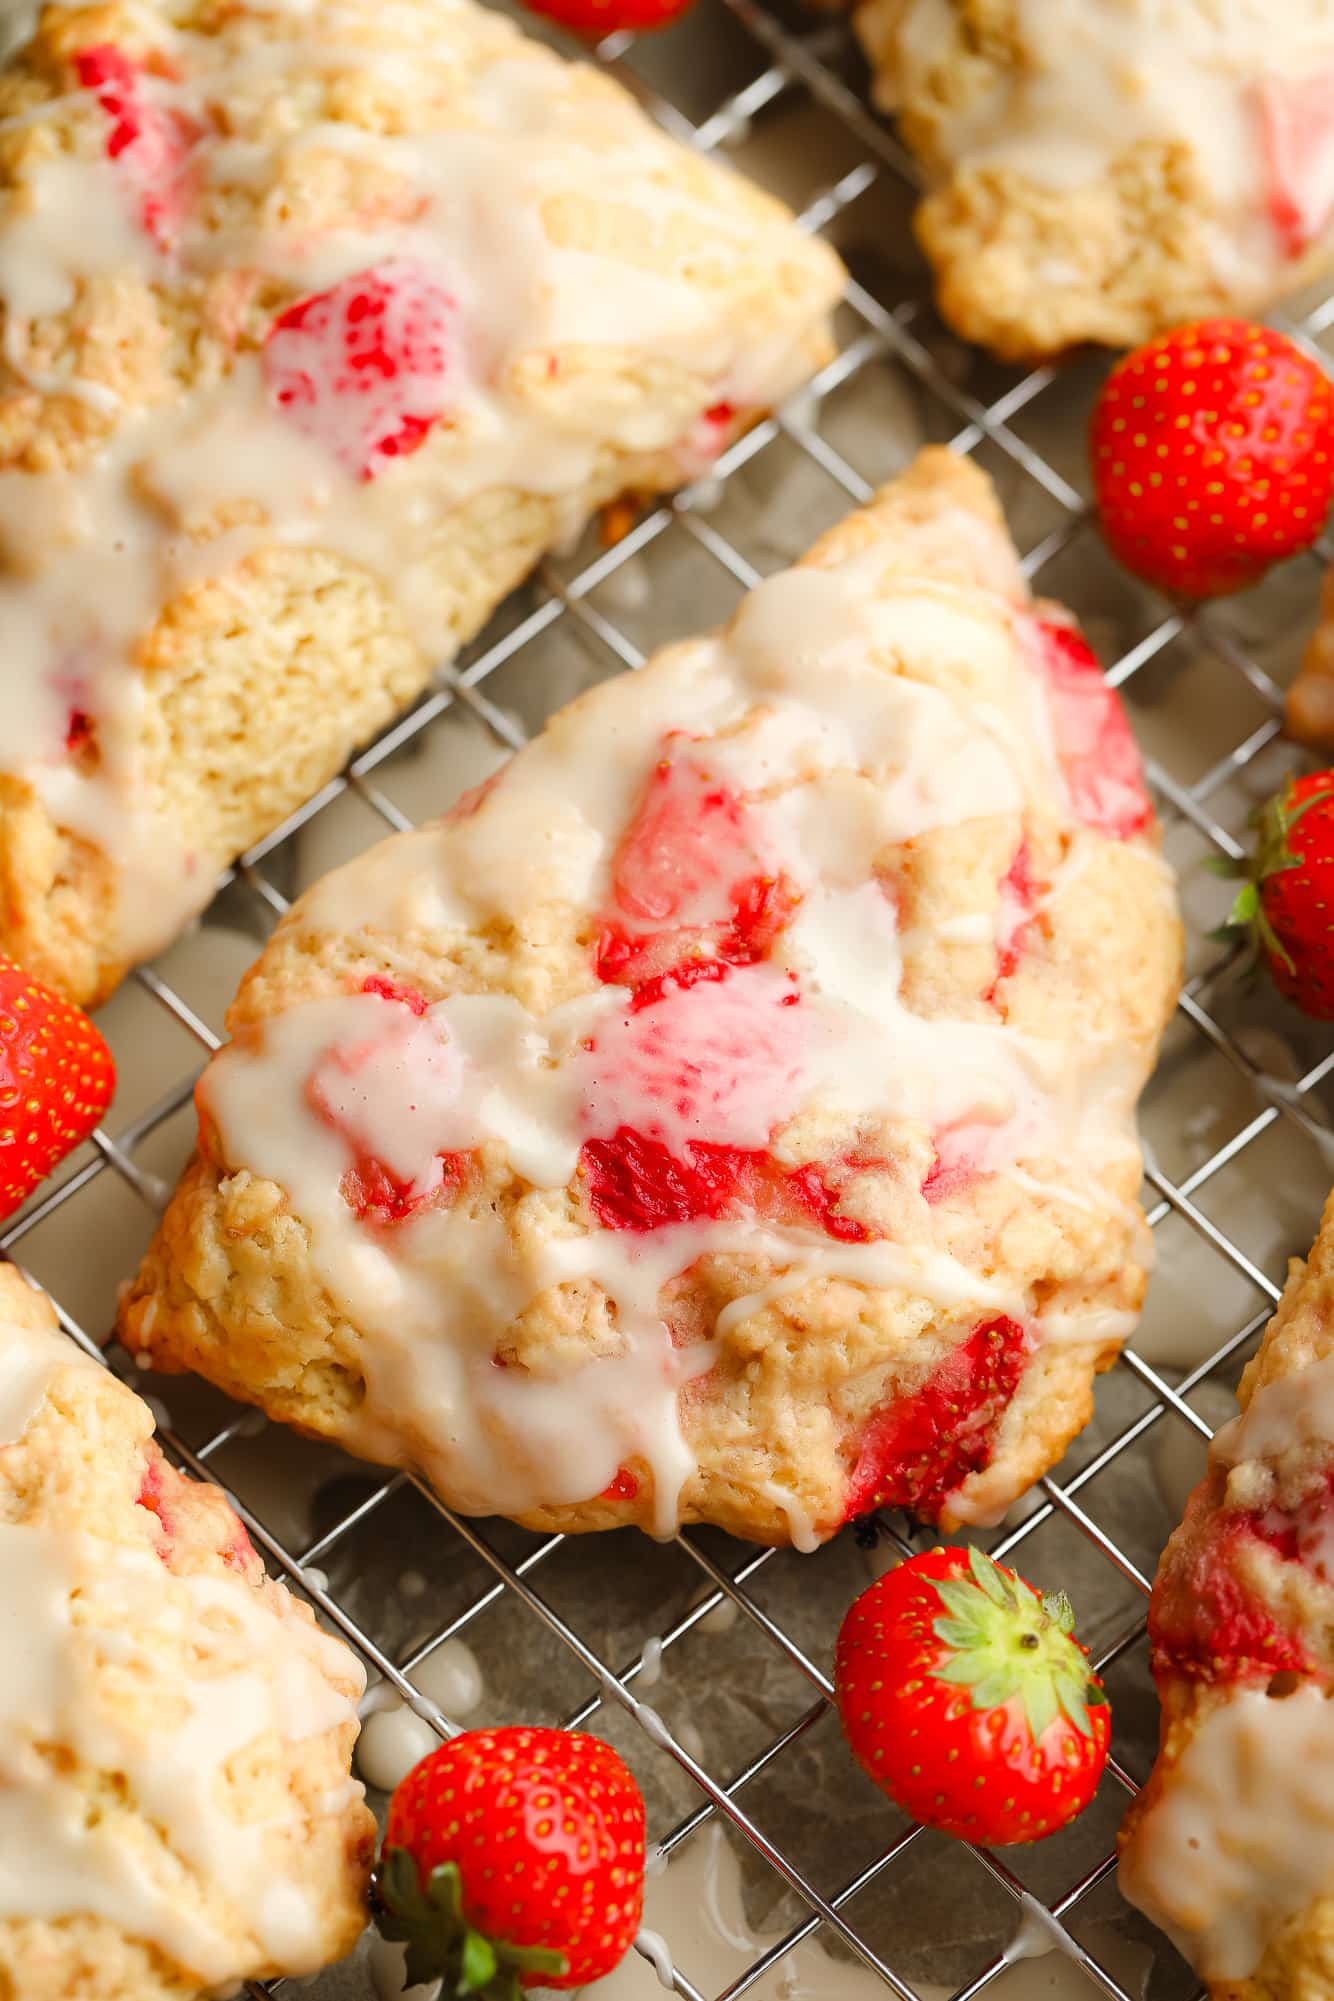
 These Vegan Strawberries and Cream Scones are so flaky, moist, and have fresh strawberries and cream in every bite! An easy one-bowl recipe to make for breakfast or brunch. For more quick and easy vegan scones, check out my recipes for Vegan Blueberry Scones, Peach Scones, and Vegan Pumpkin Scones. Strawberries bring me so much…
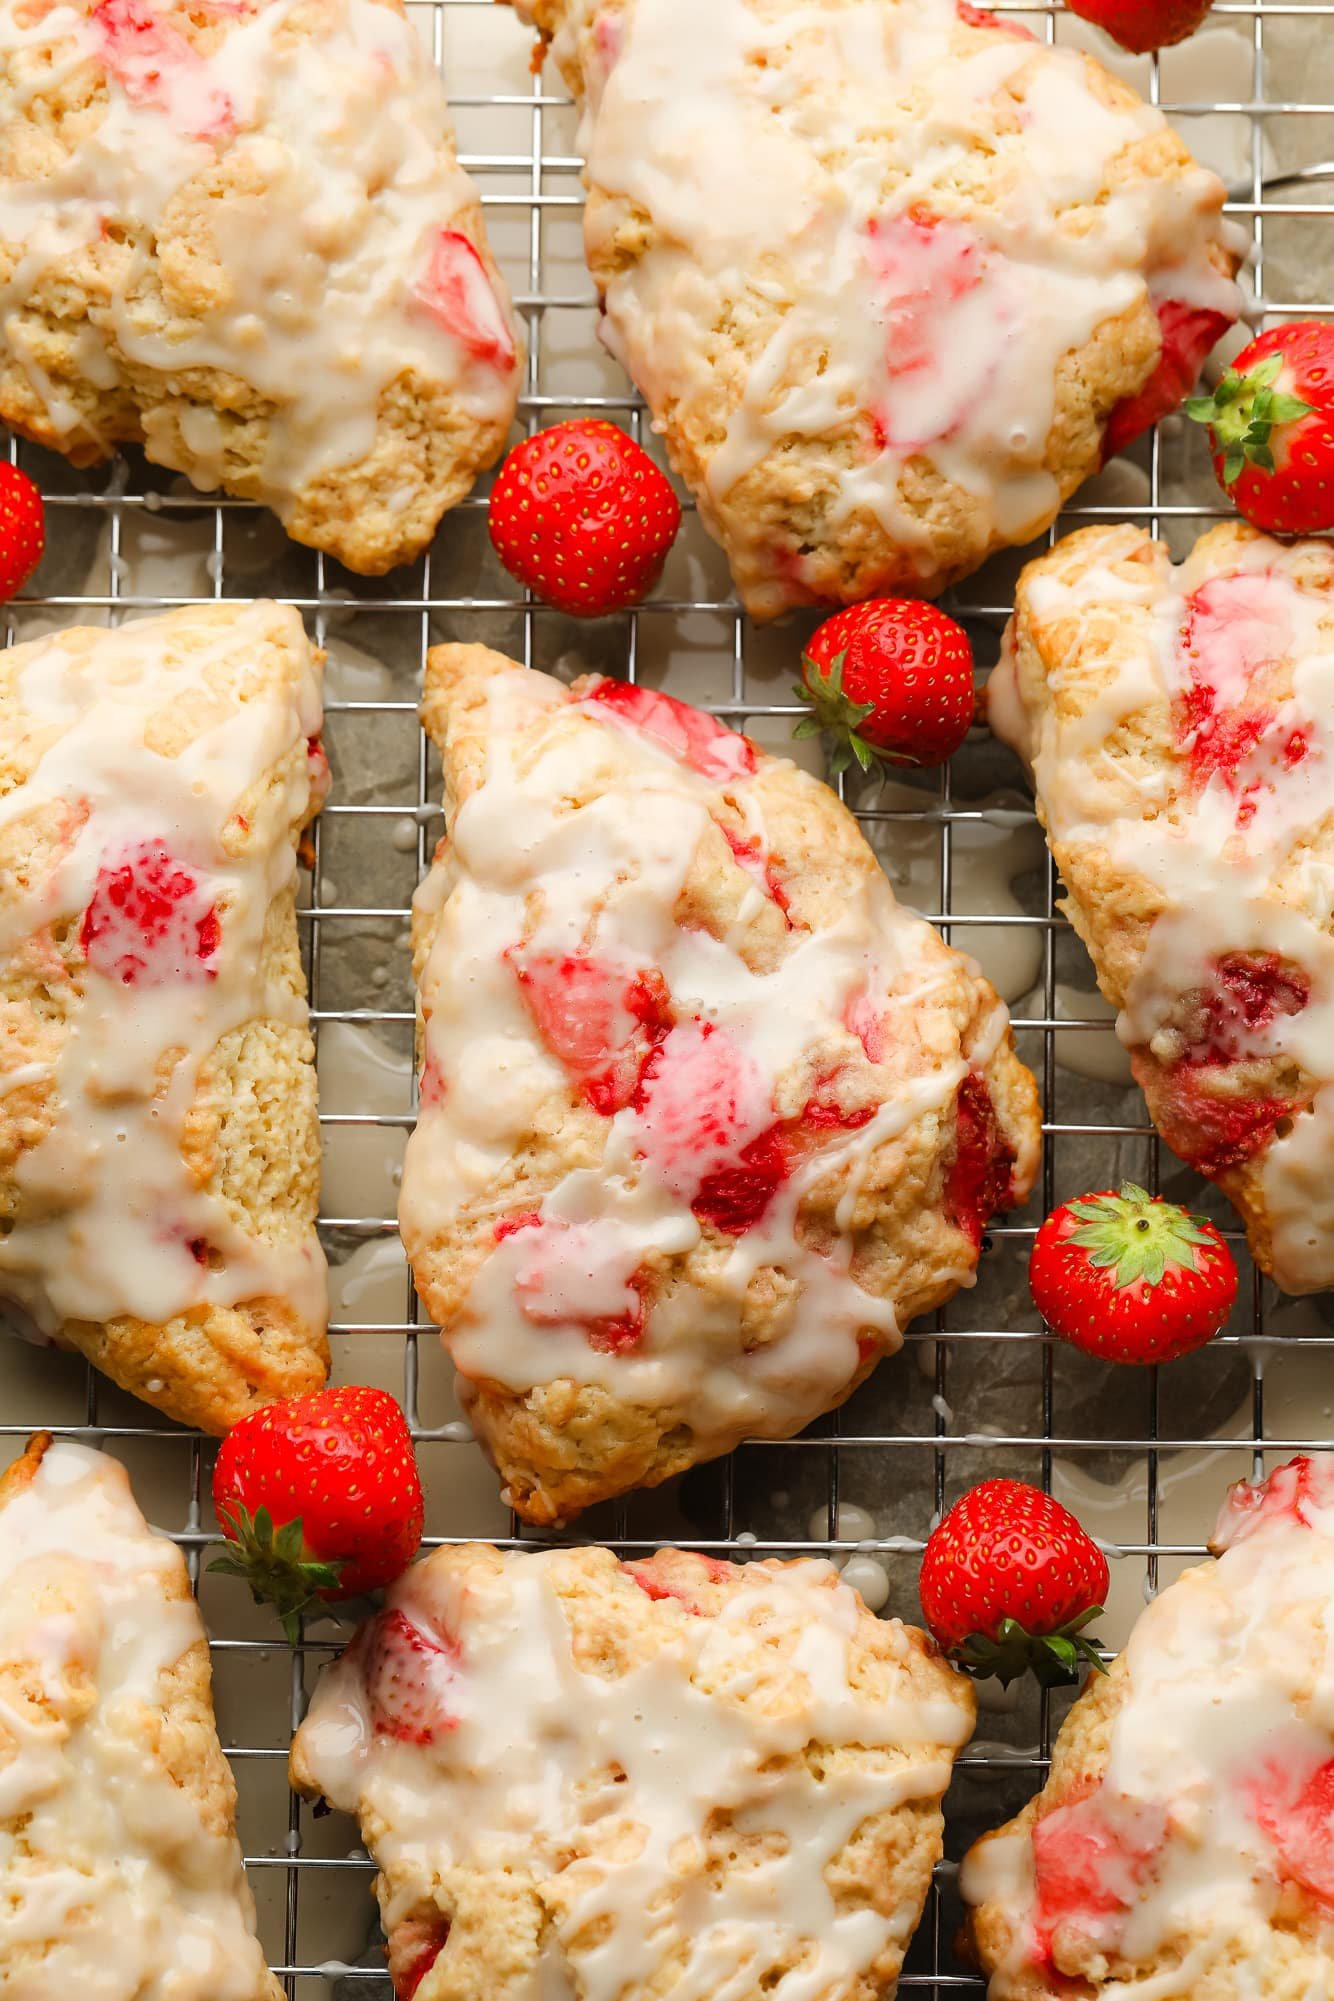


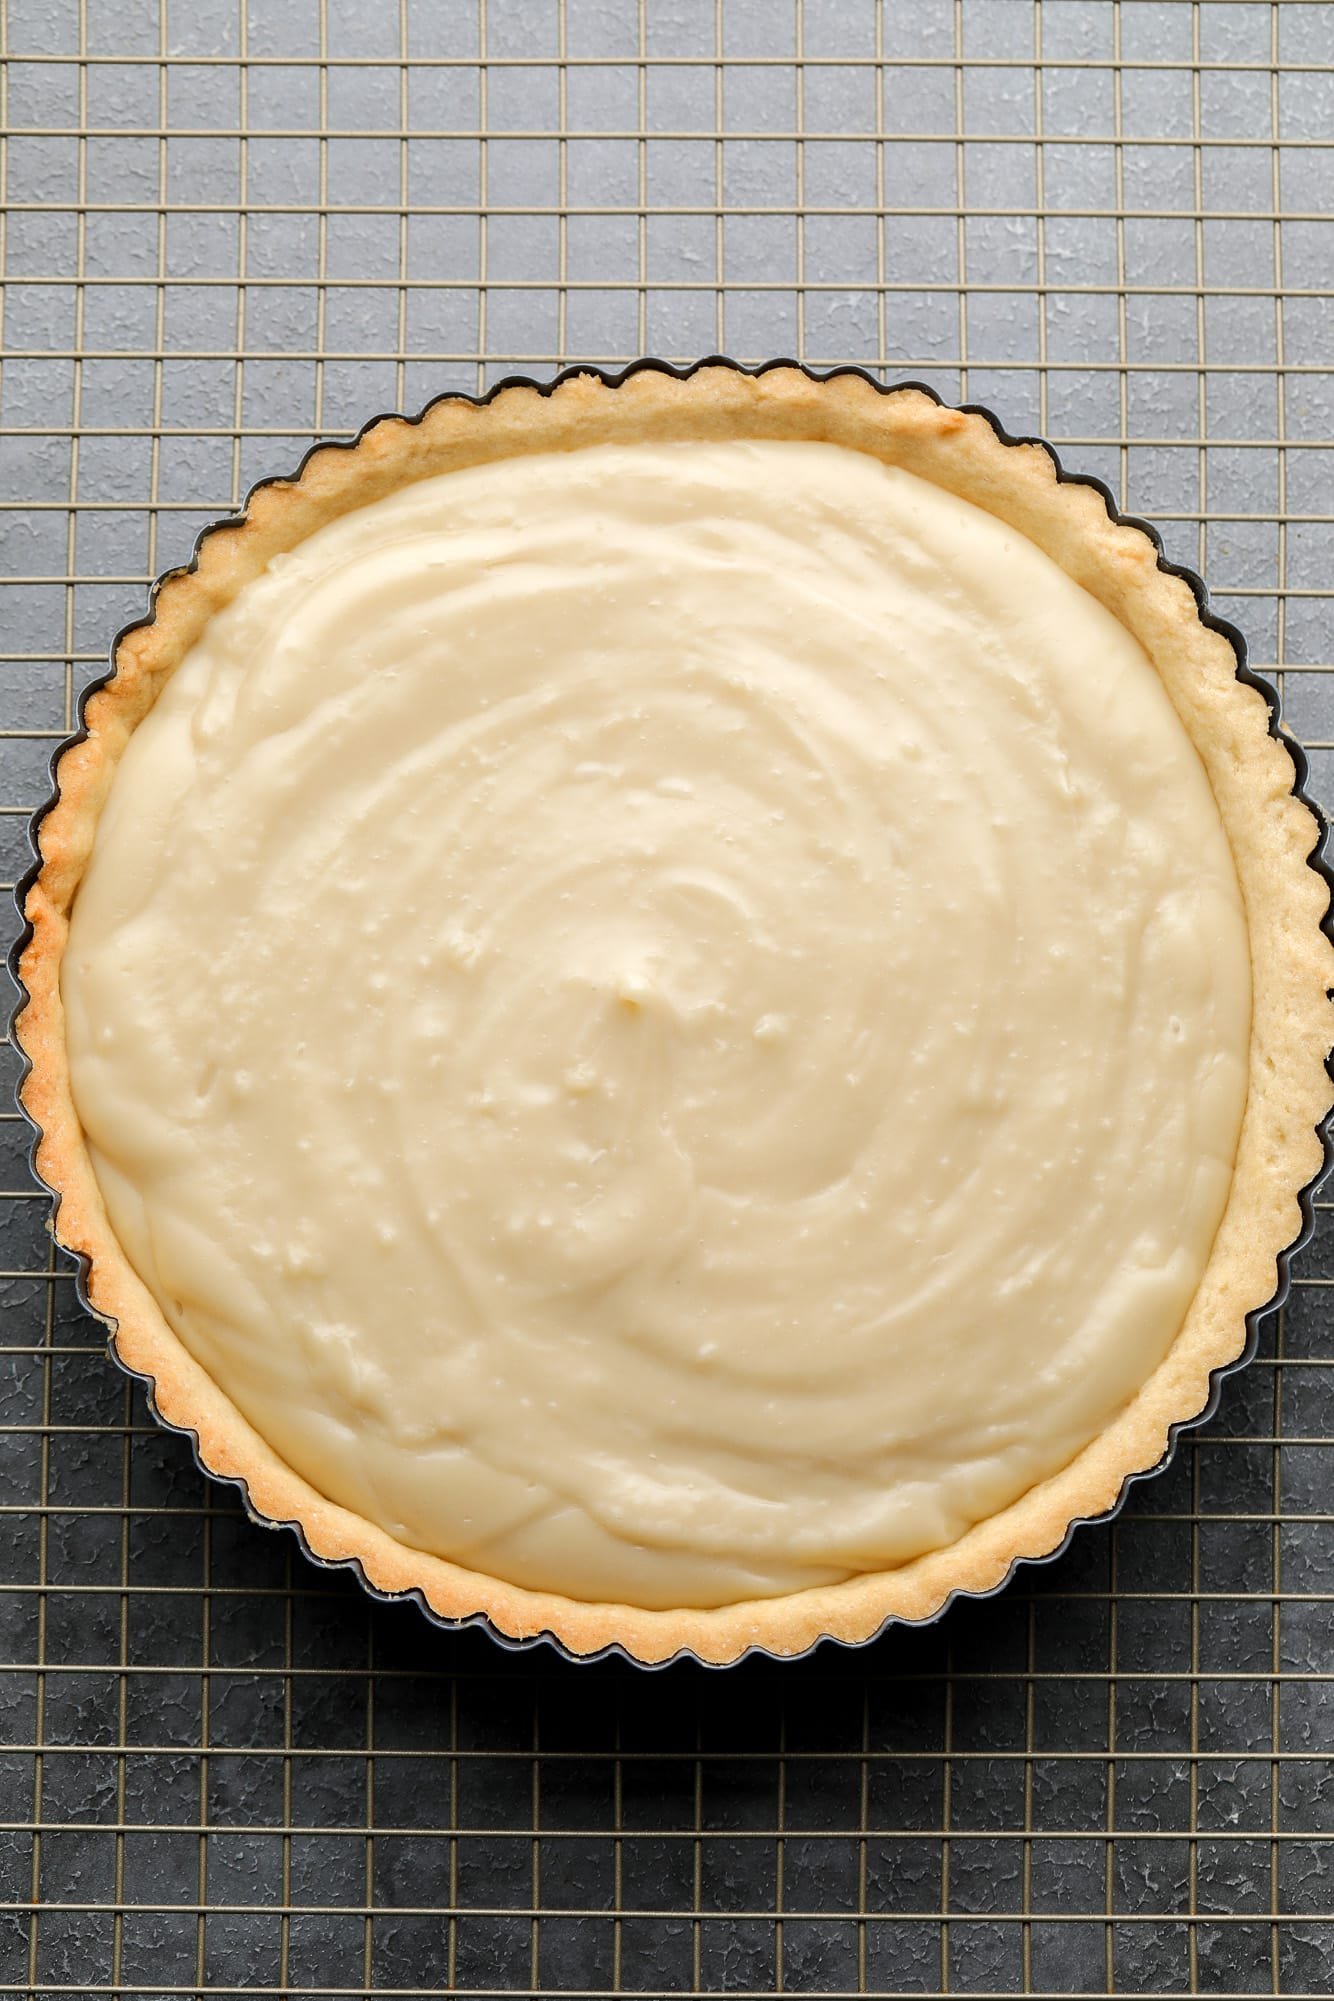
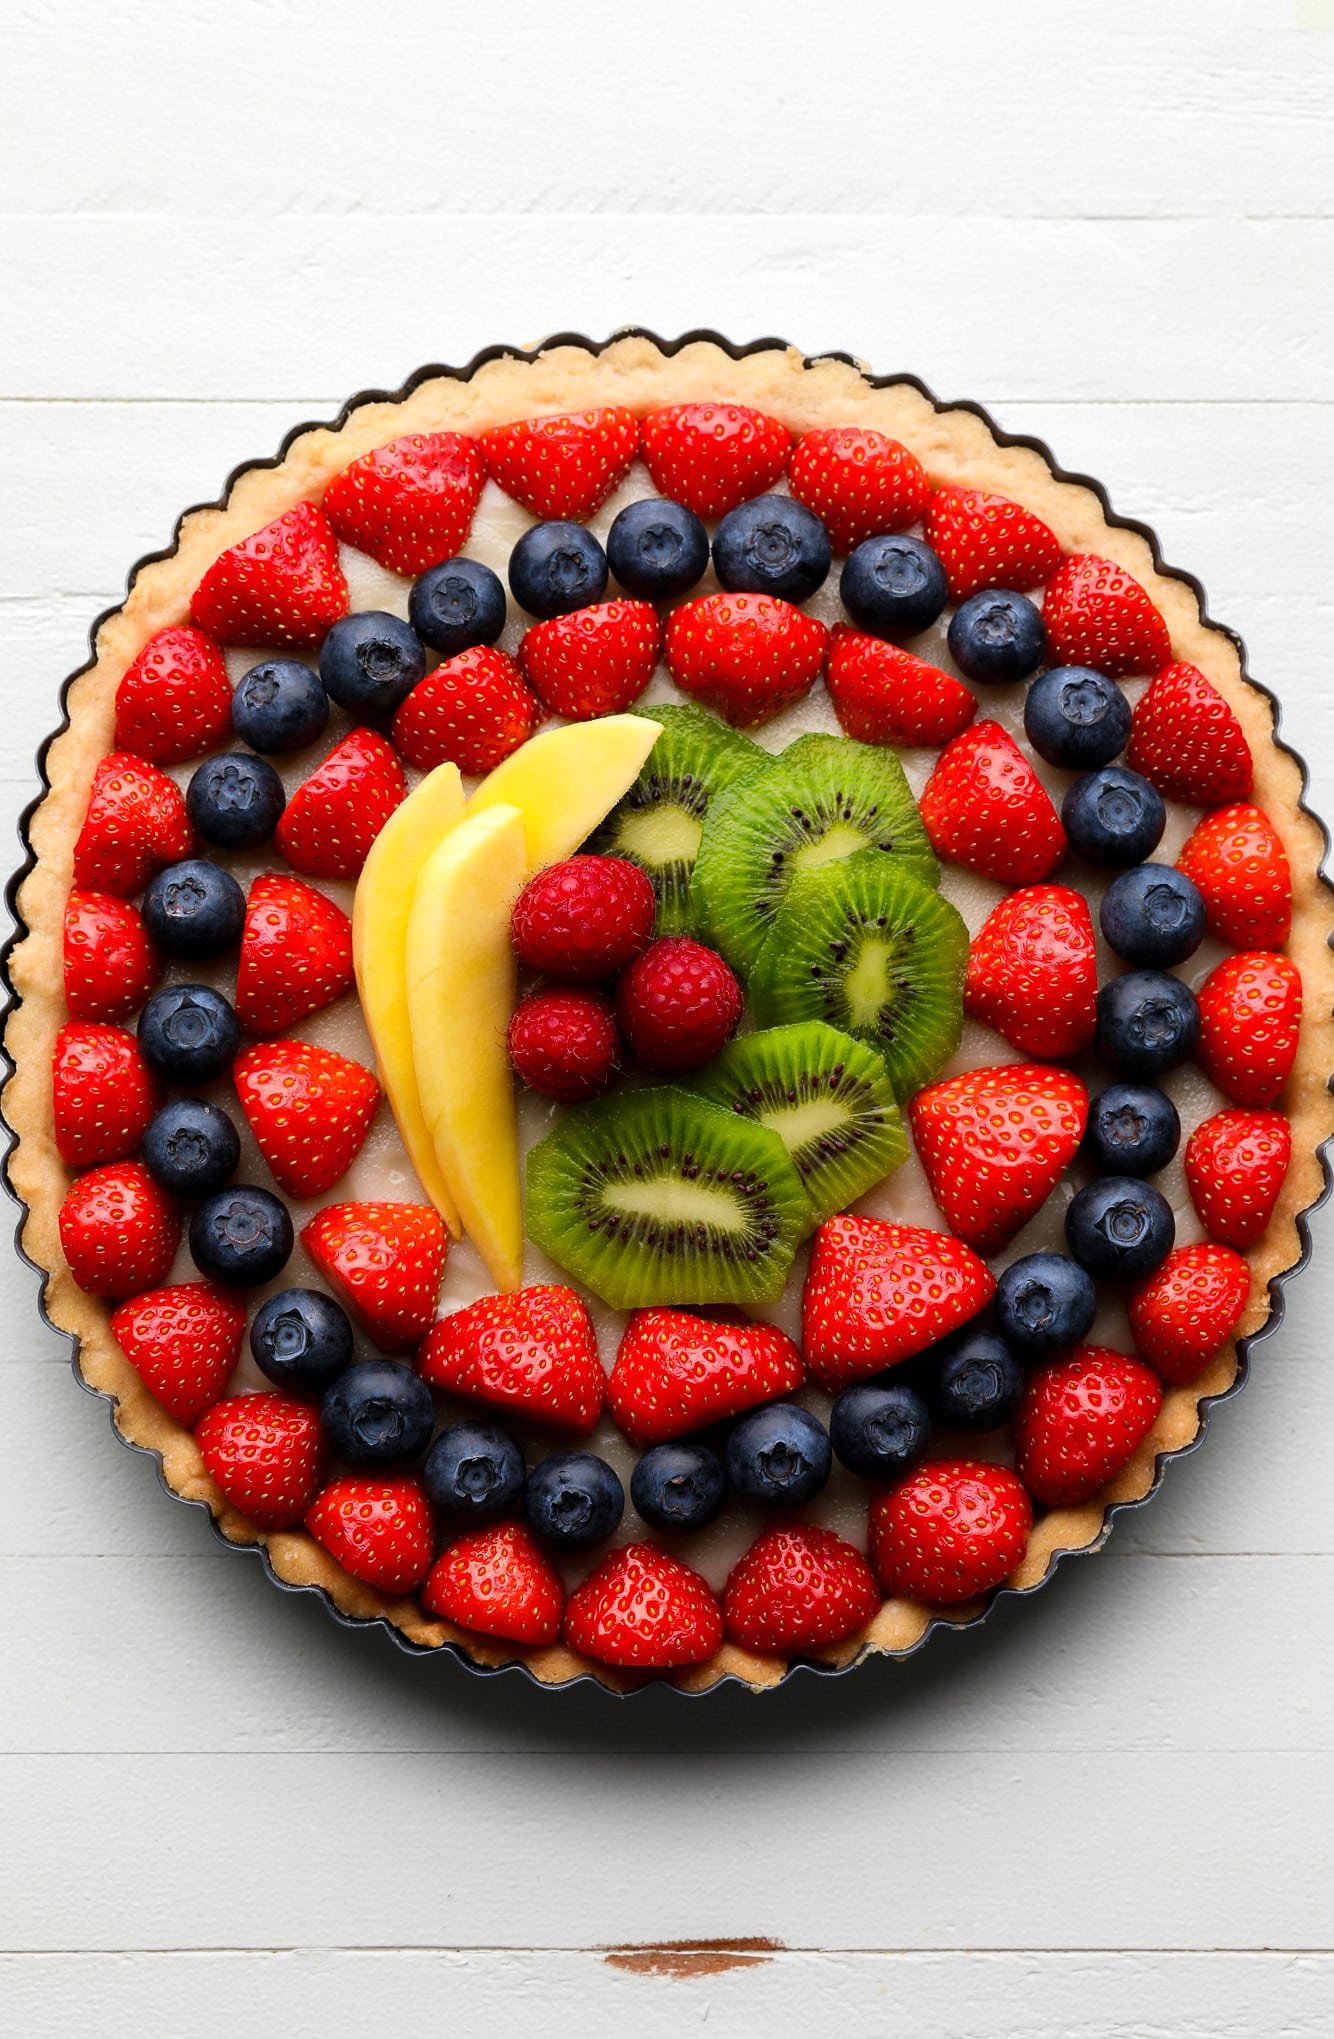
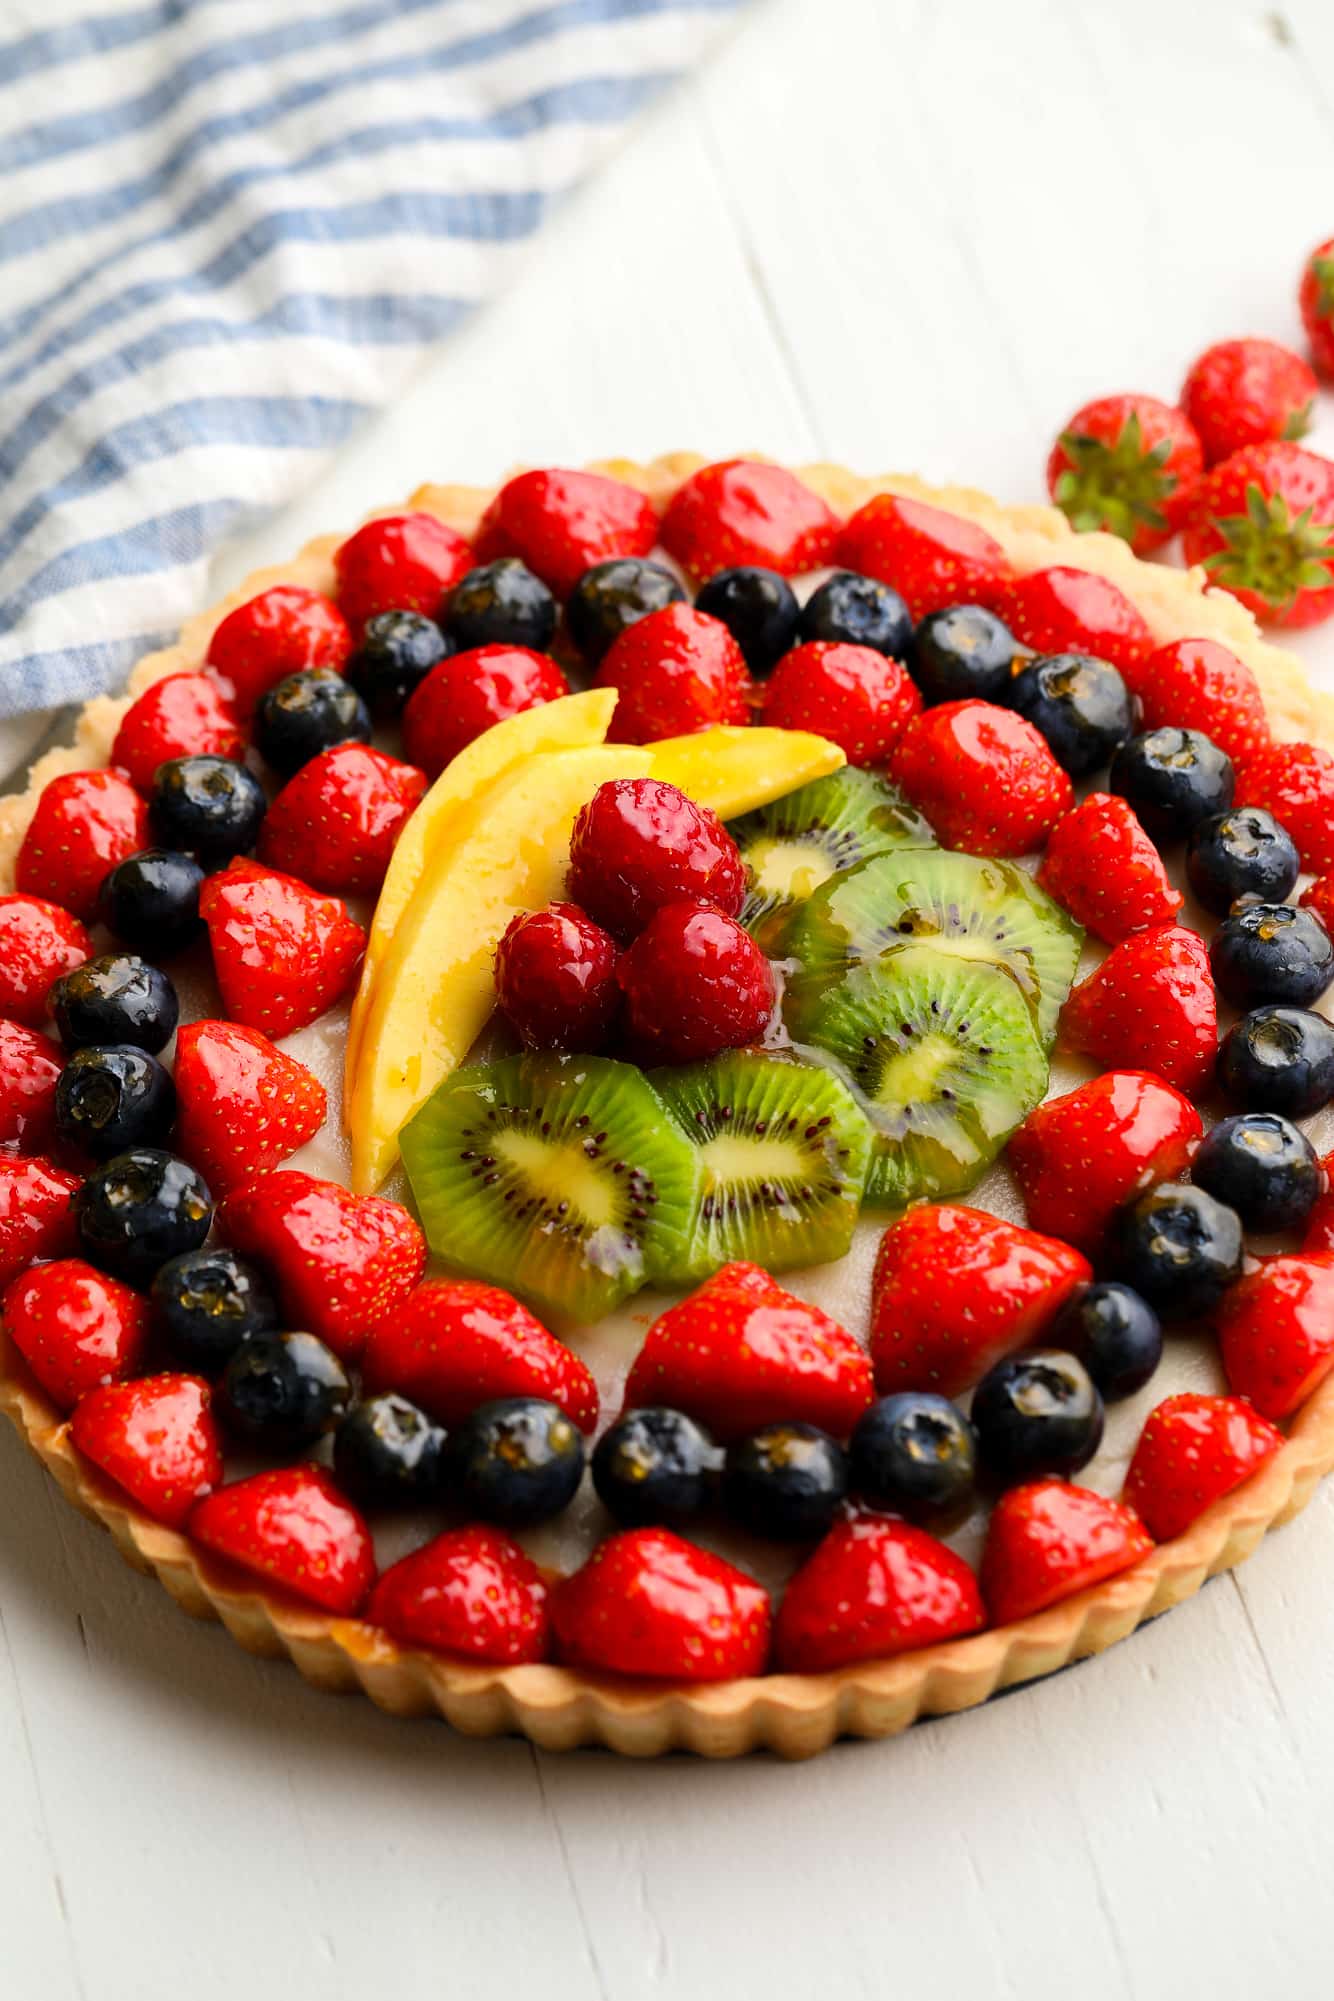
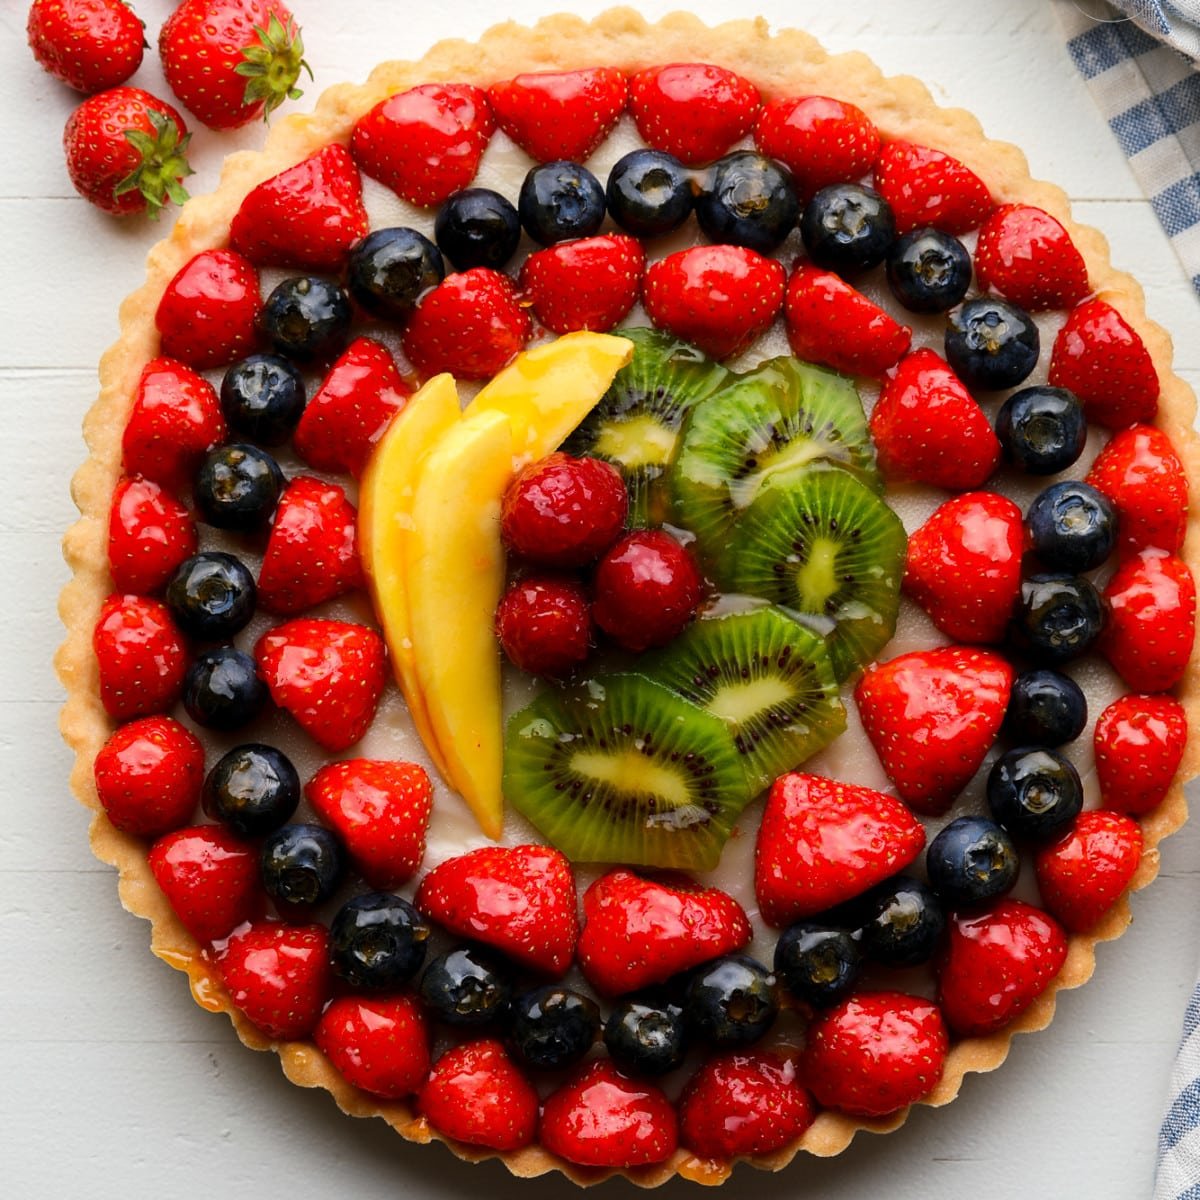 This eye-catching Vegan Fruit Tart features rows of glistening glazed fruit layered over a decadent custard in a homemade sweet tart crust. A fancy dessert for any occasion! Treat yourself to more elegant vegan desserts, like my Vegan Creme Brulee, Vegan Pain au Chocolat, and Vegan Strawberry Cheesecake. Would it shock you if I told…
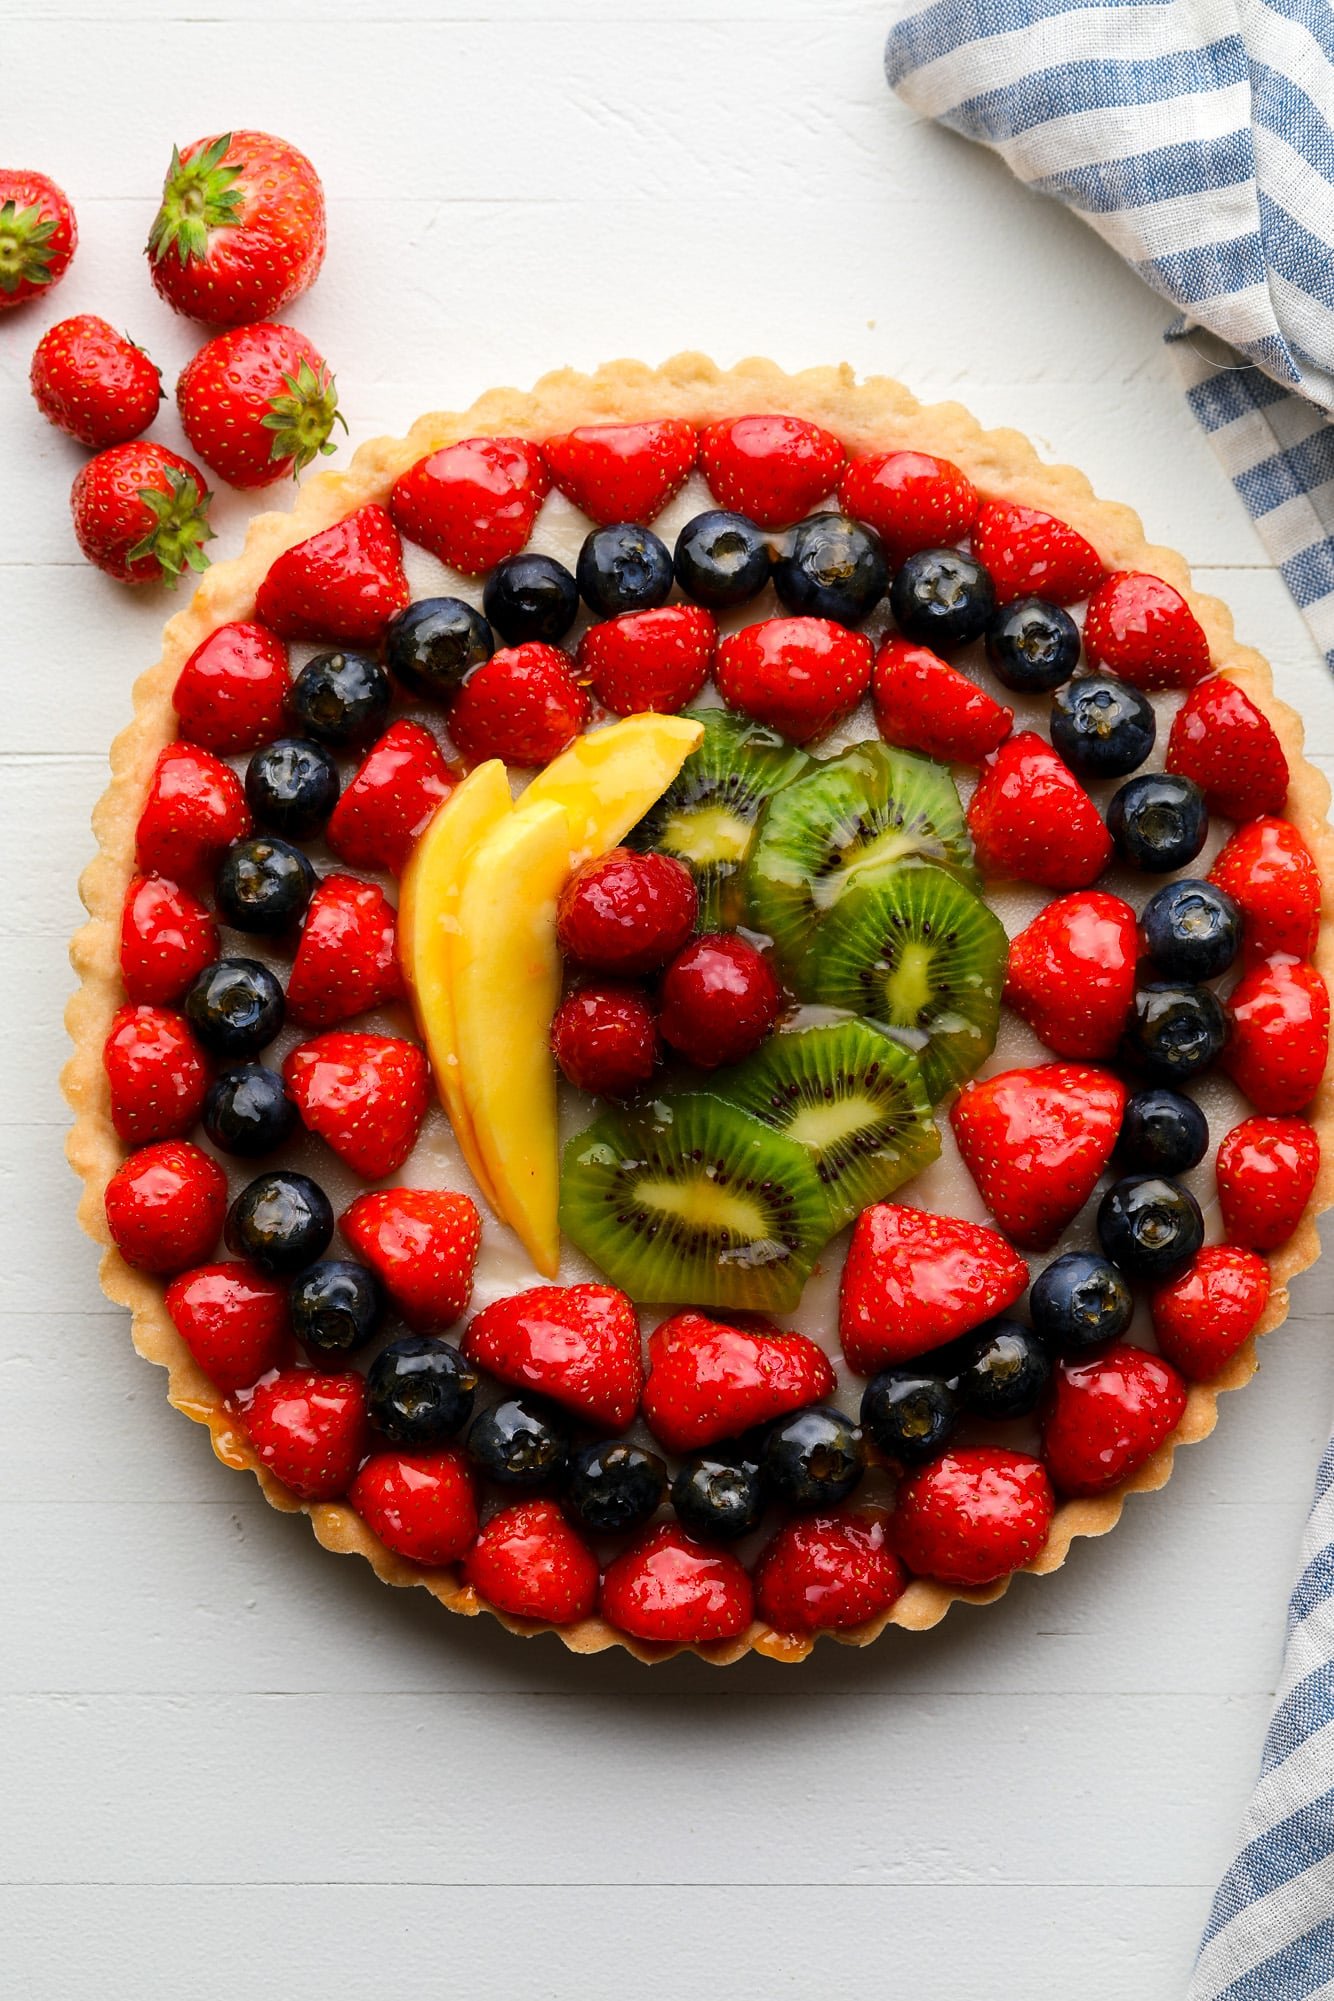

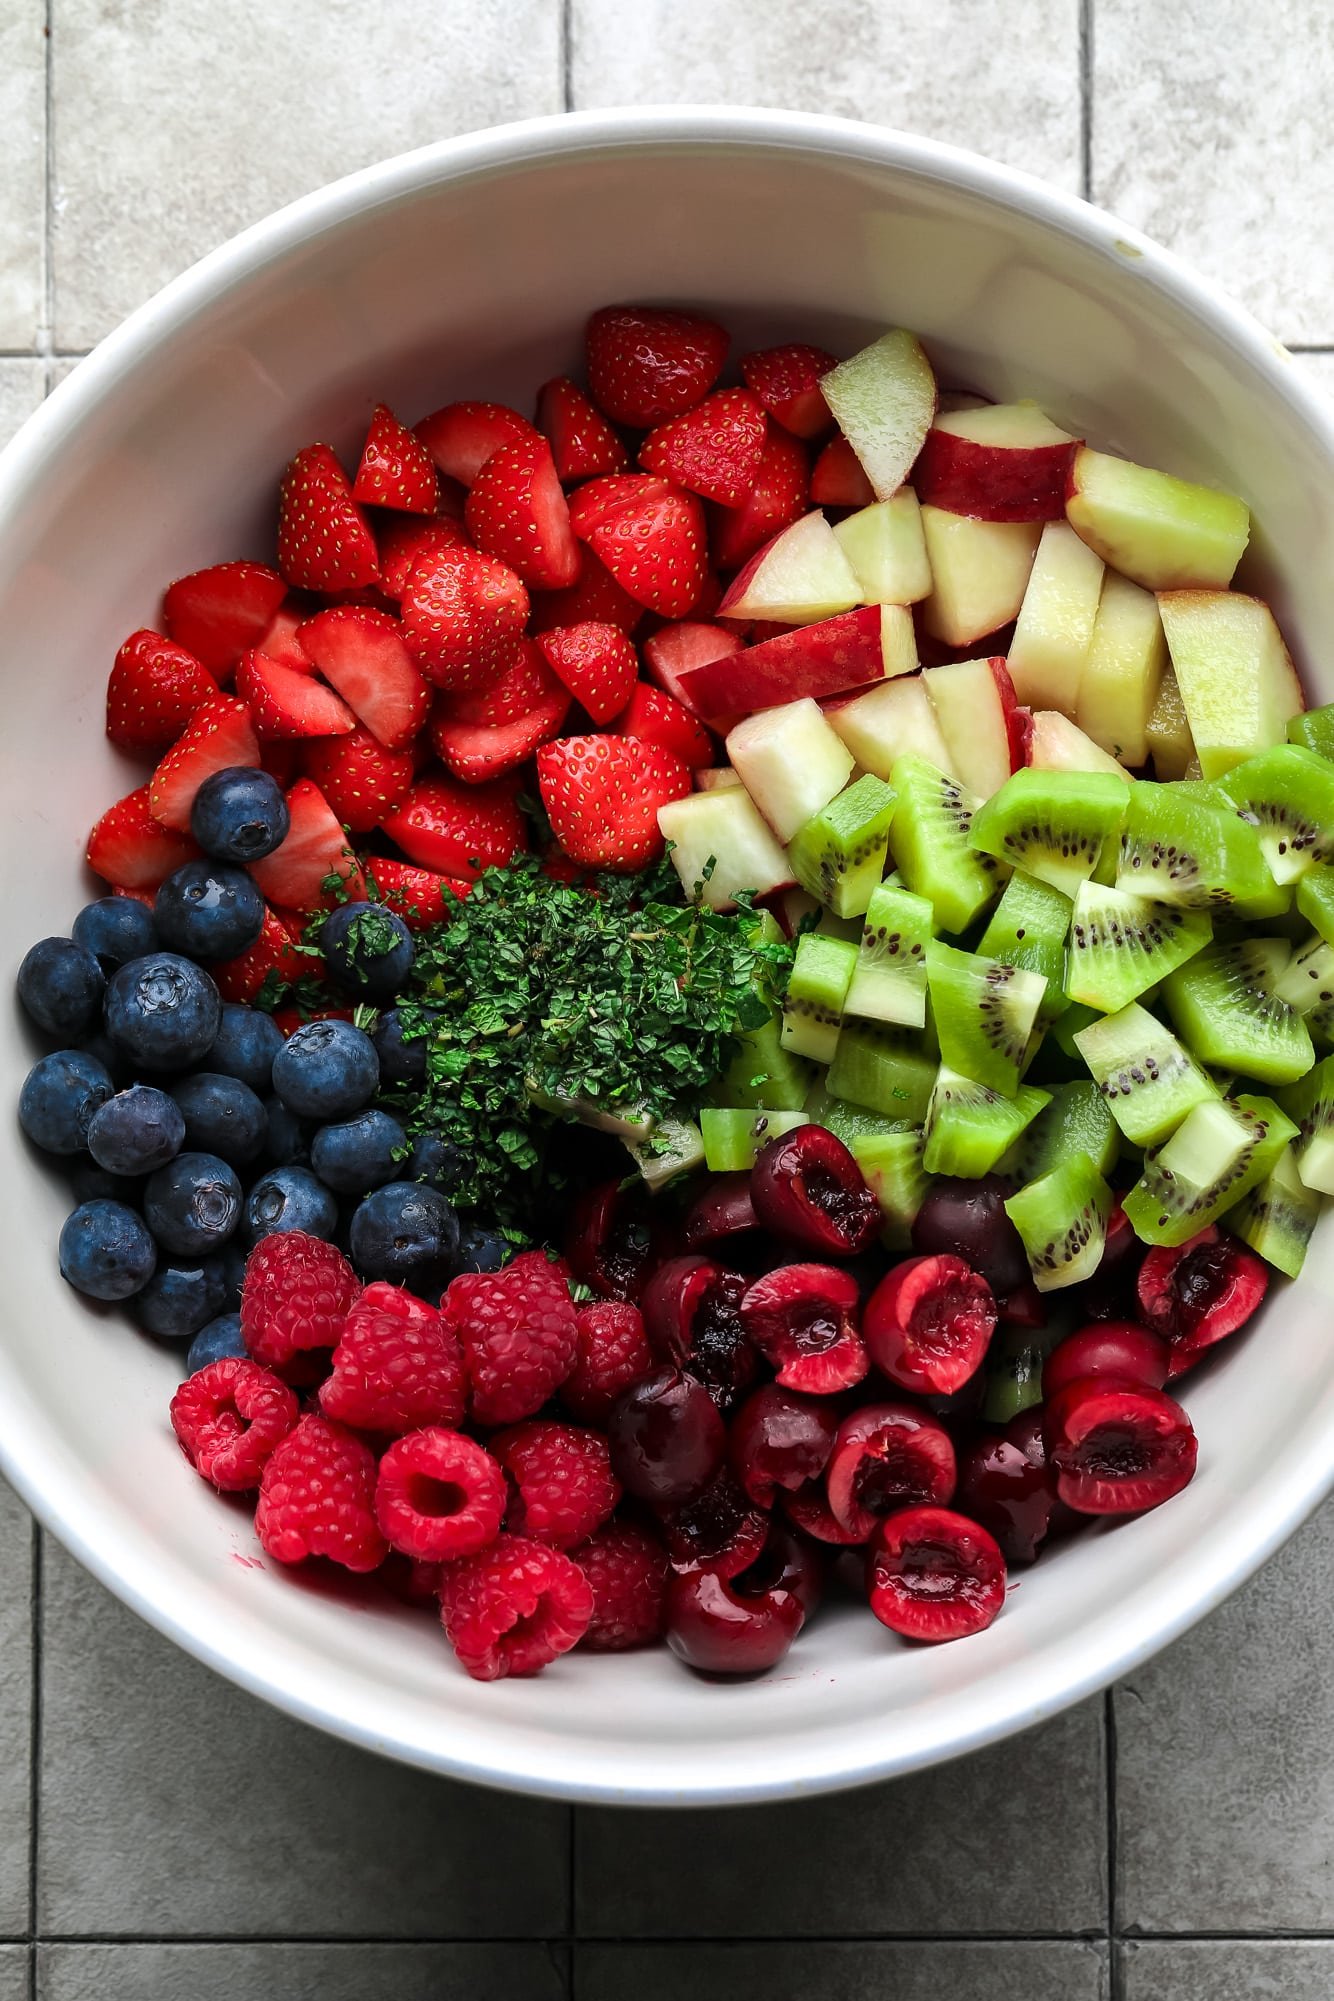
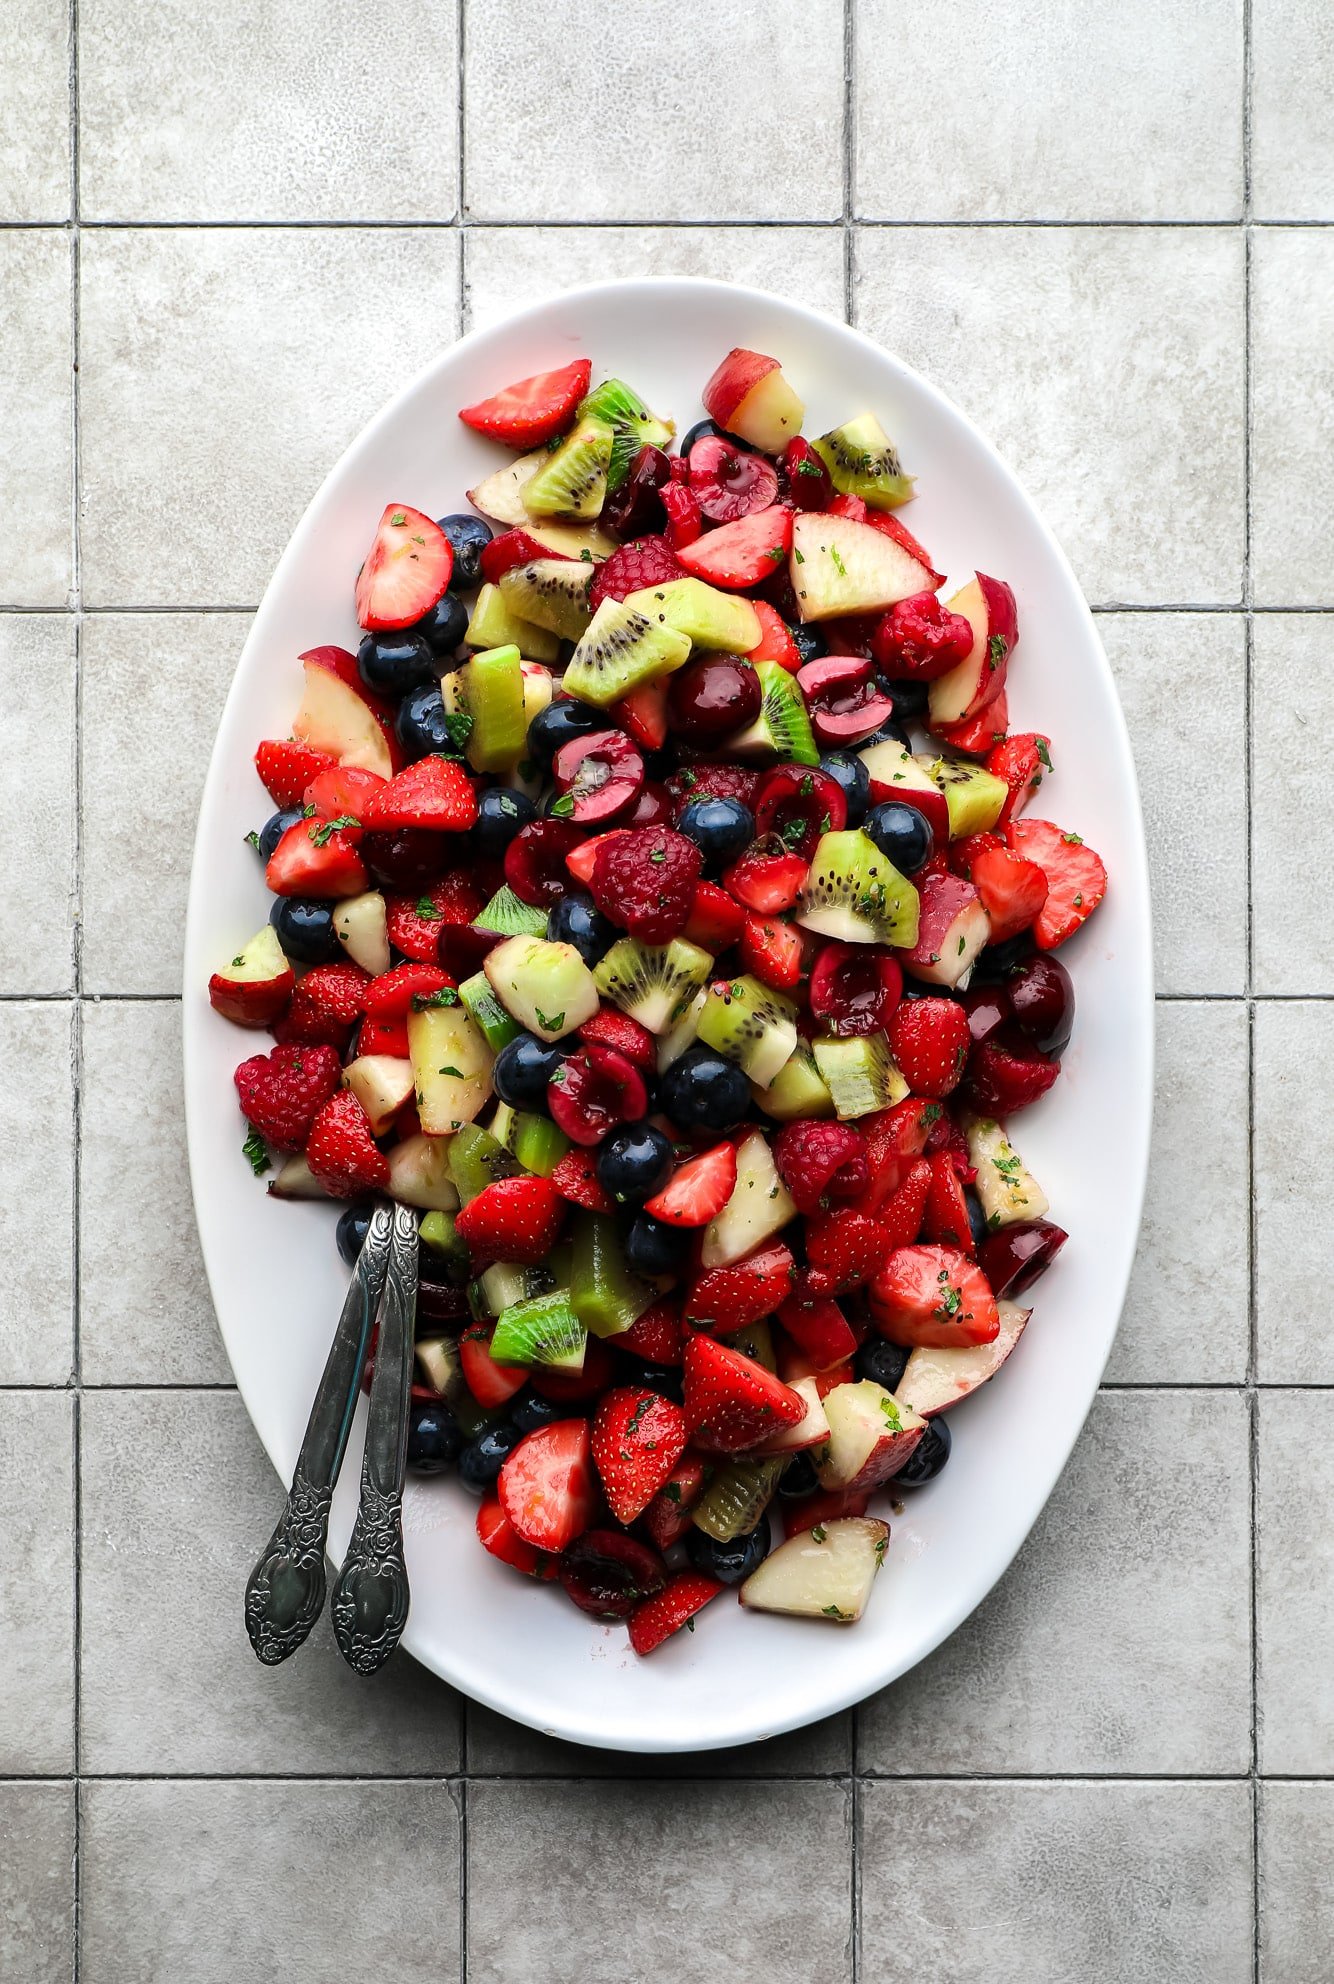
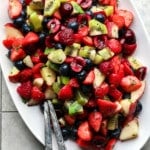
 The best fruit salad you’ve ever tasted! This summer Fruit Salad tosses fresh berries, stone fruit, kiwi, and mint leaves in a sweet and zesty agave lime dressing. For more sweet summer recipes, check out my Watermelon Salad with Mint and Feta, Vegan Blueberry Cake, The Best Vegan Ice Cream, and Dairy Free Kid Friendly…
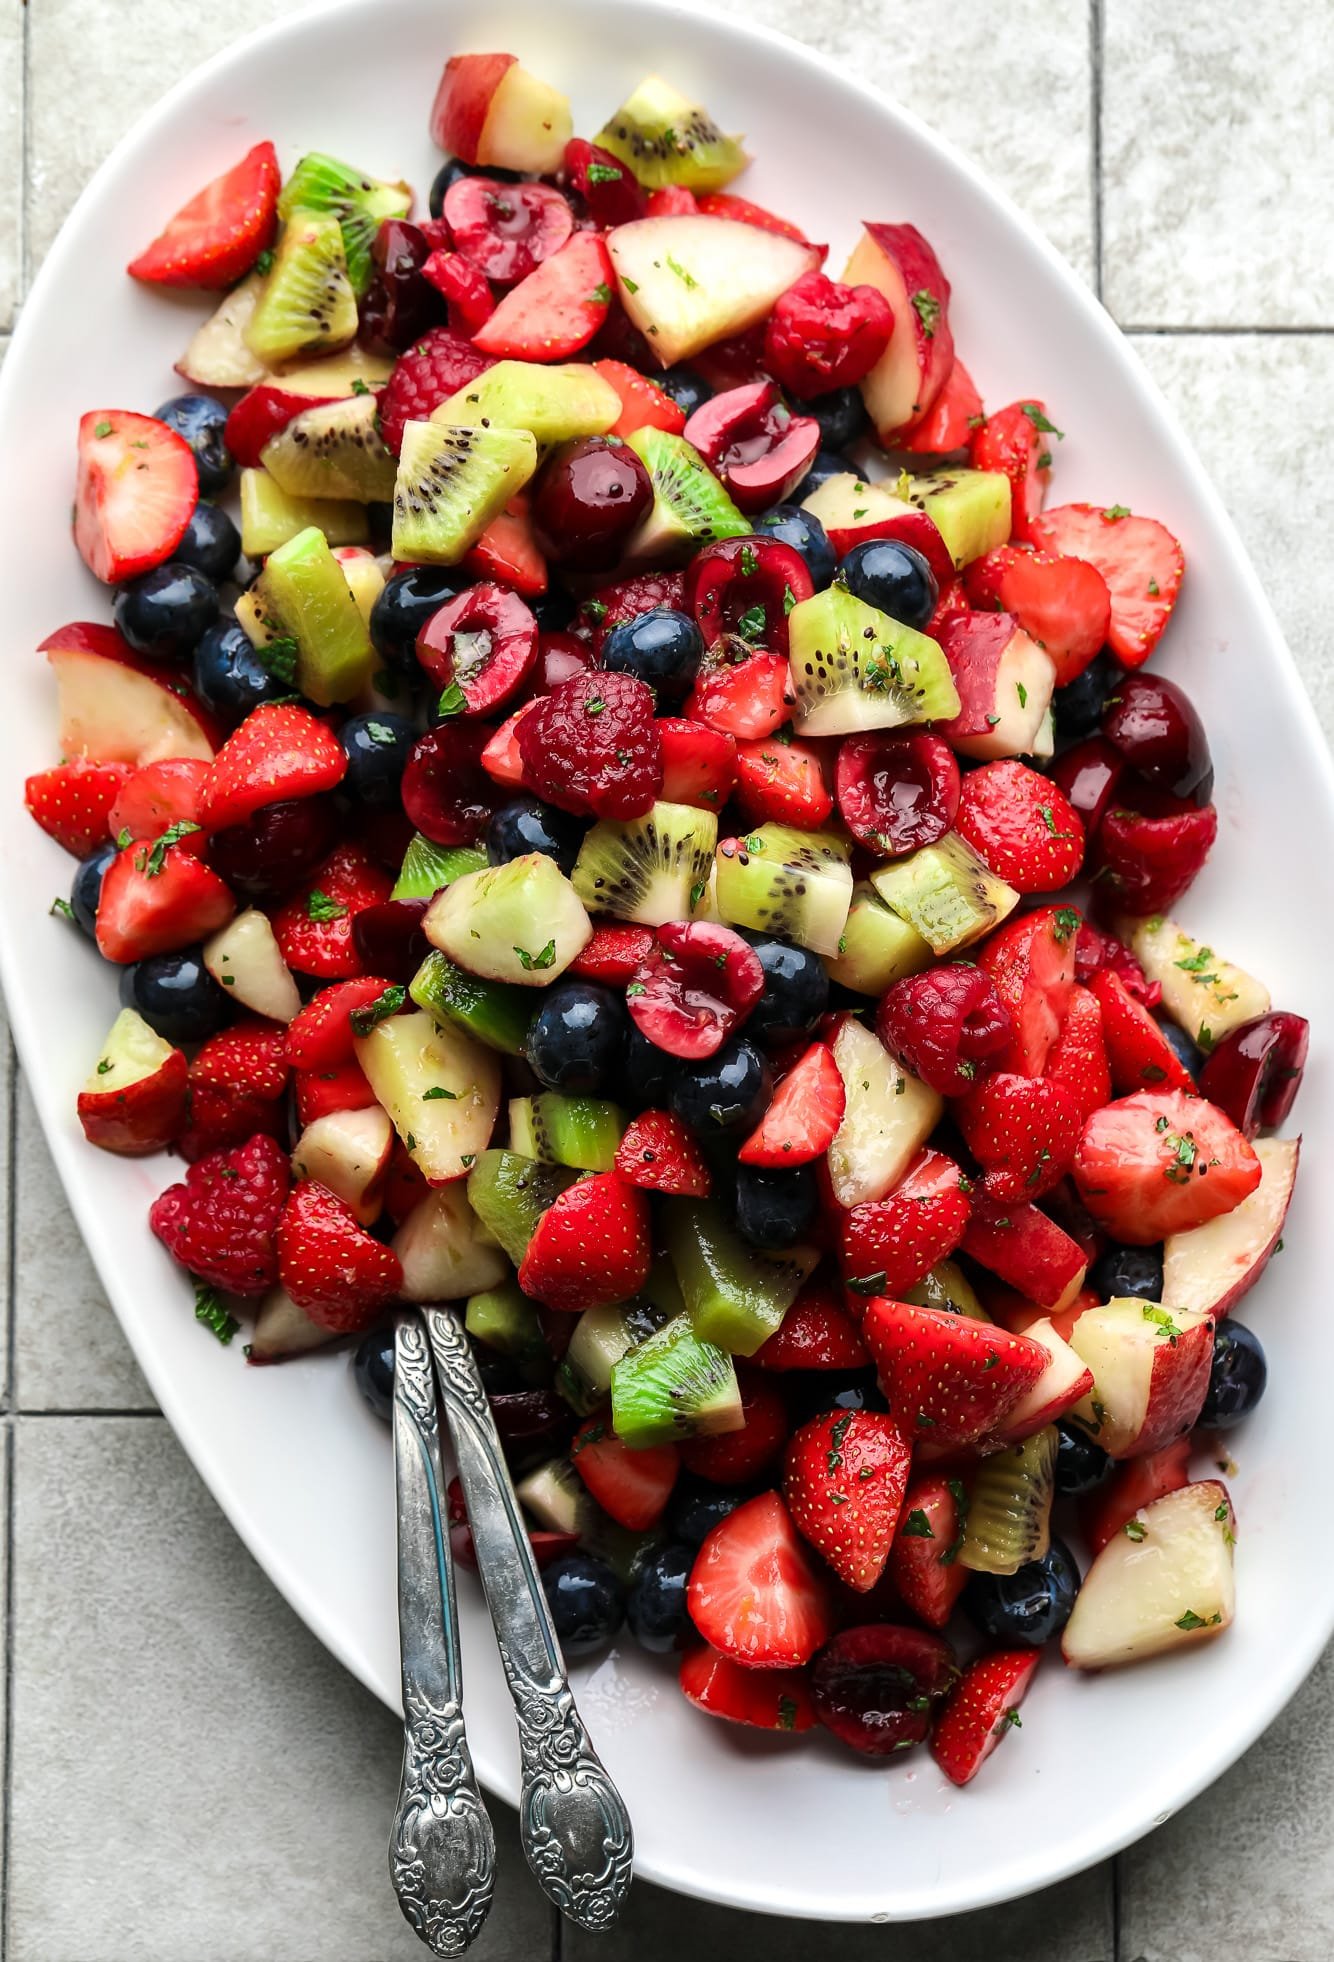
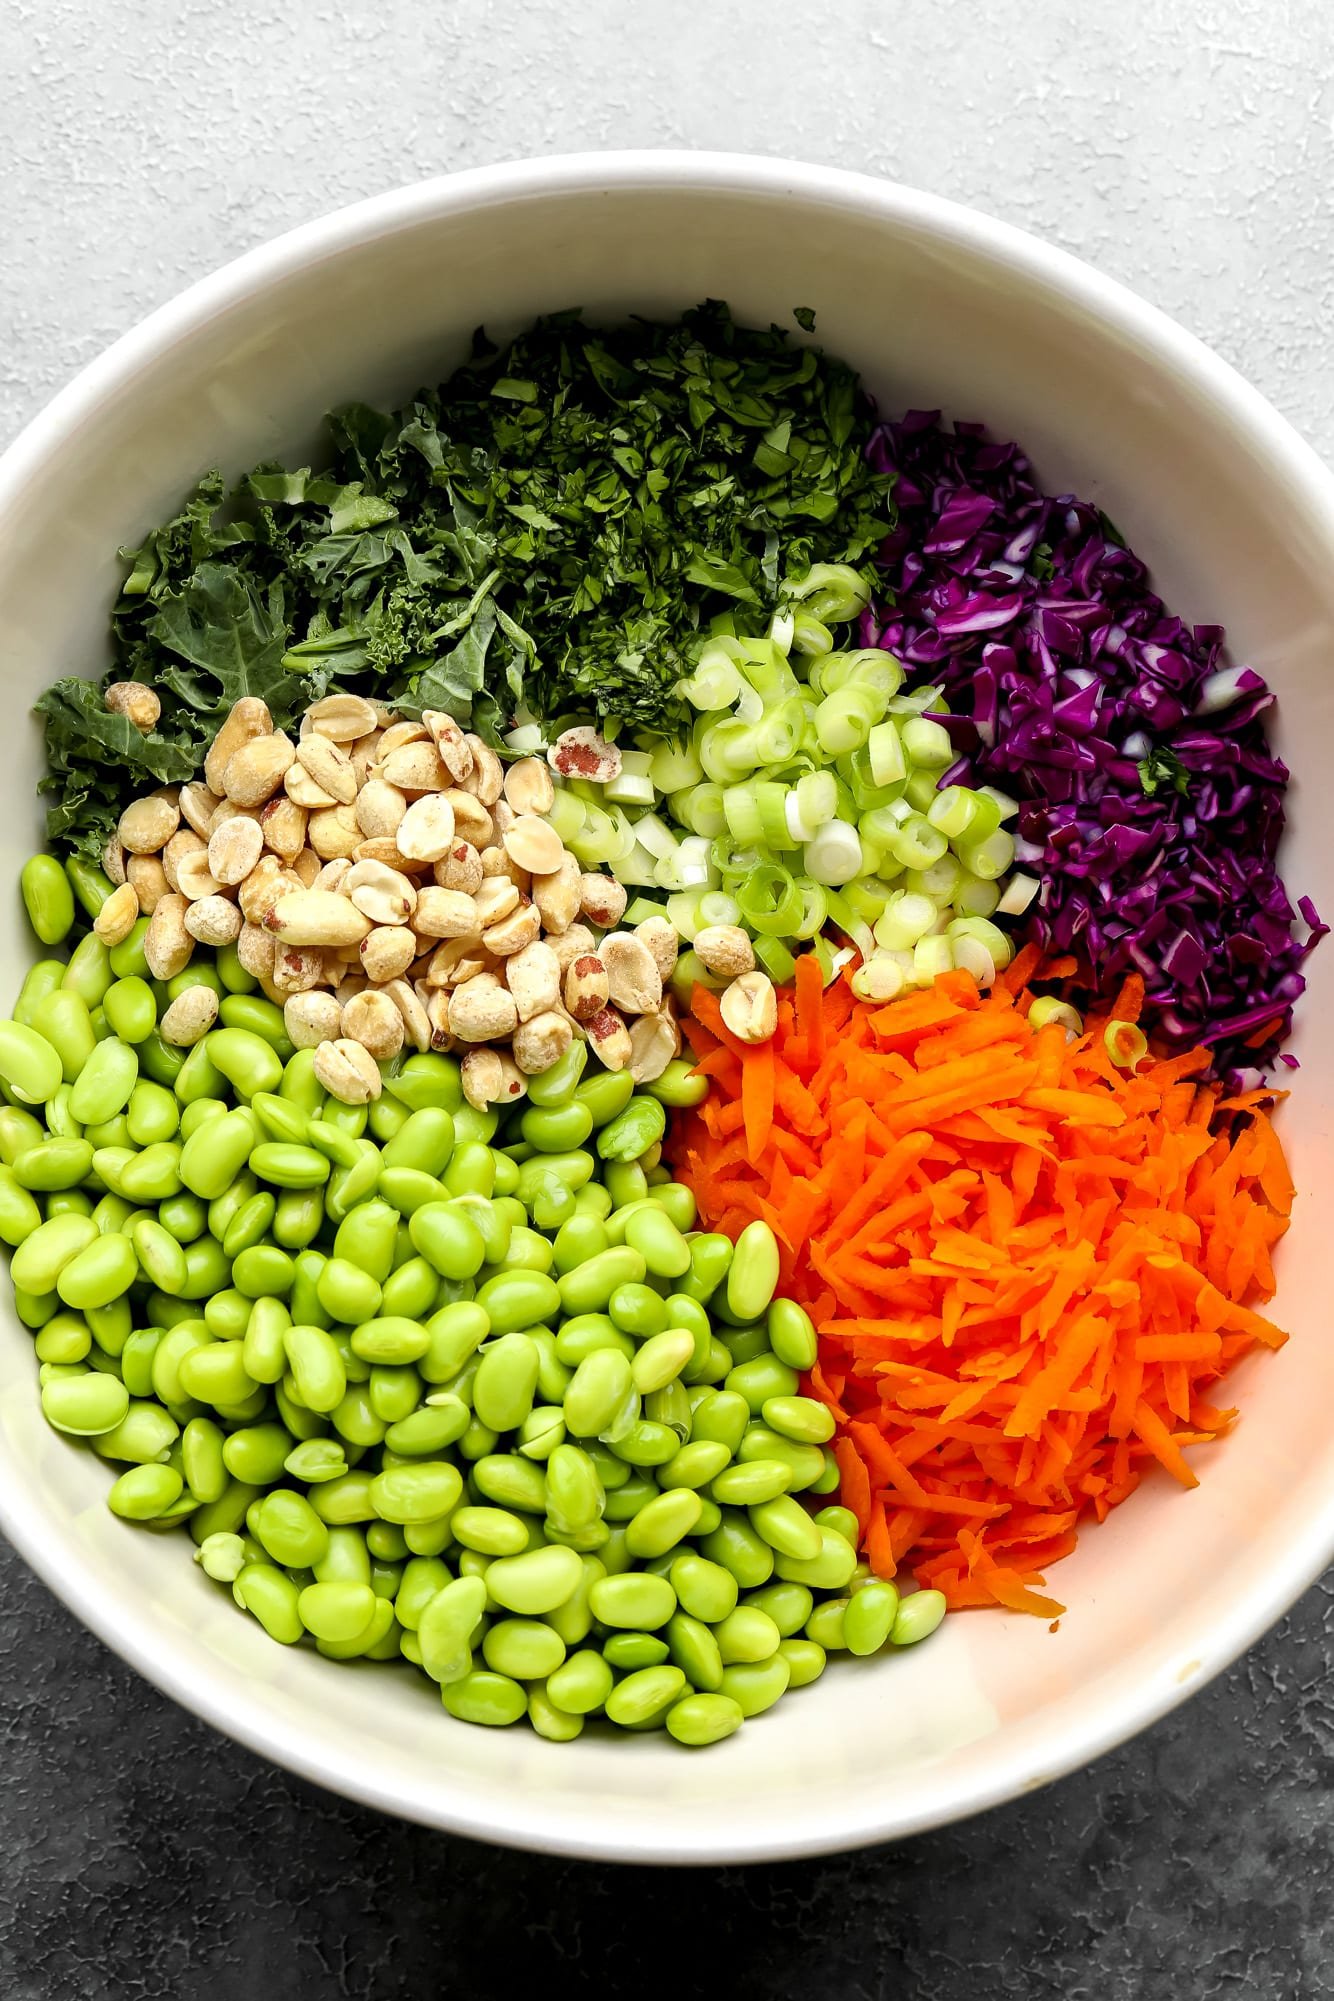
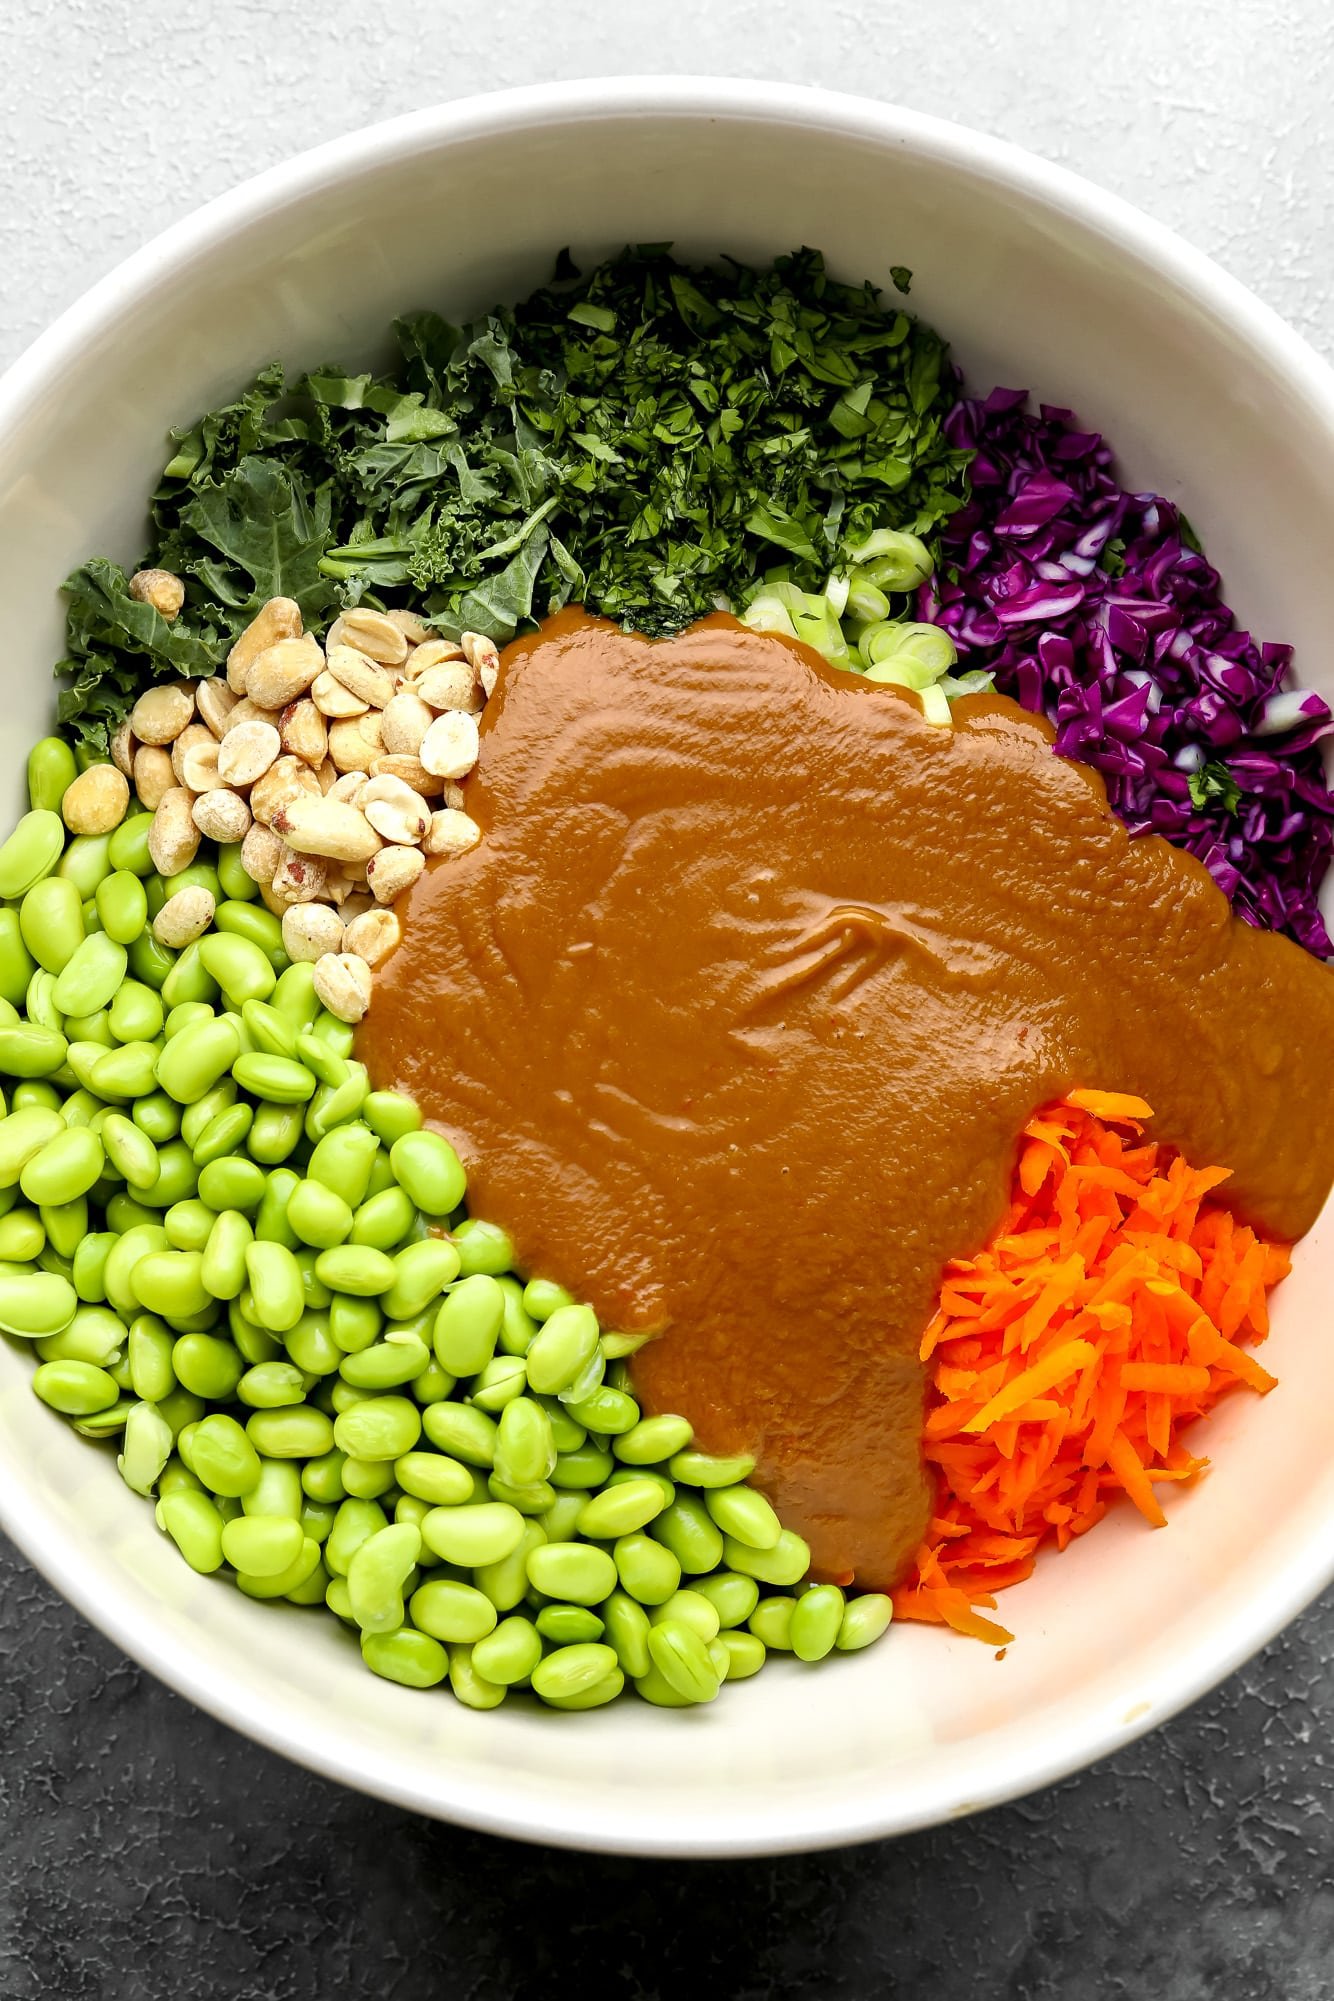
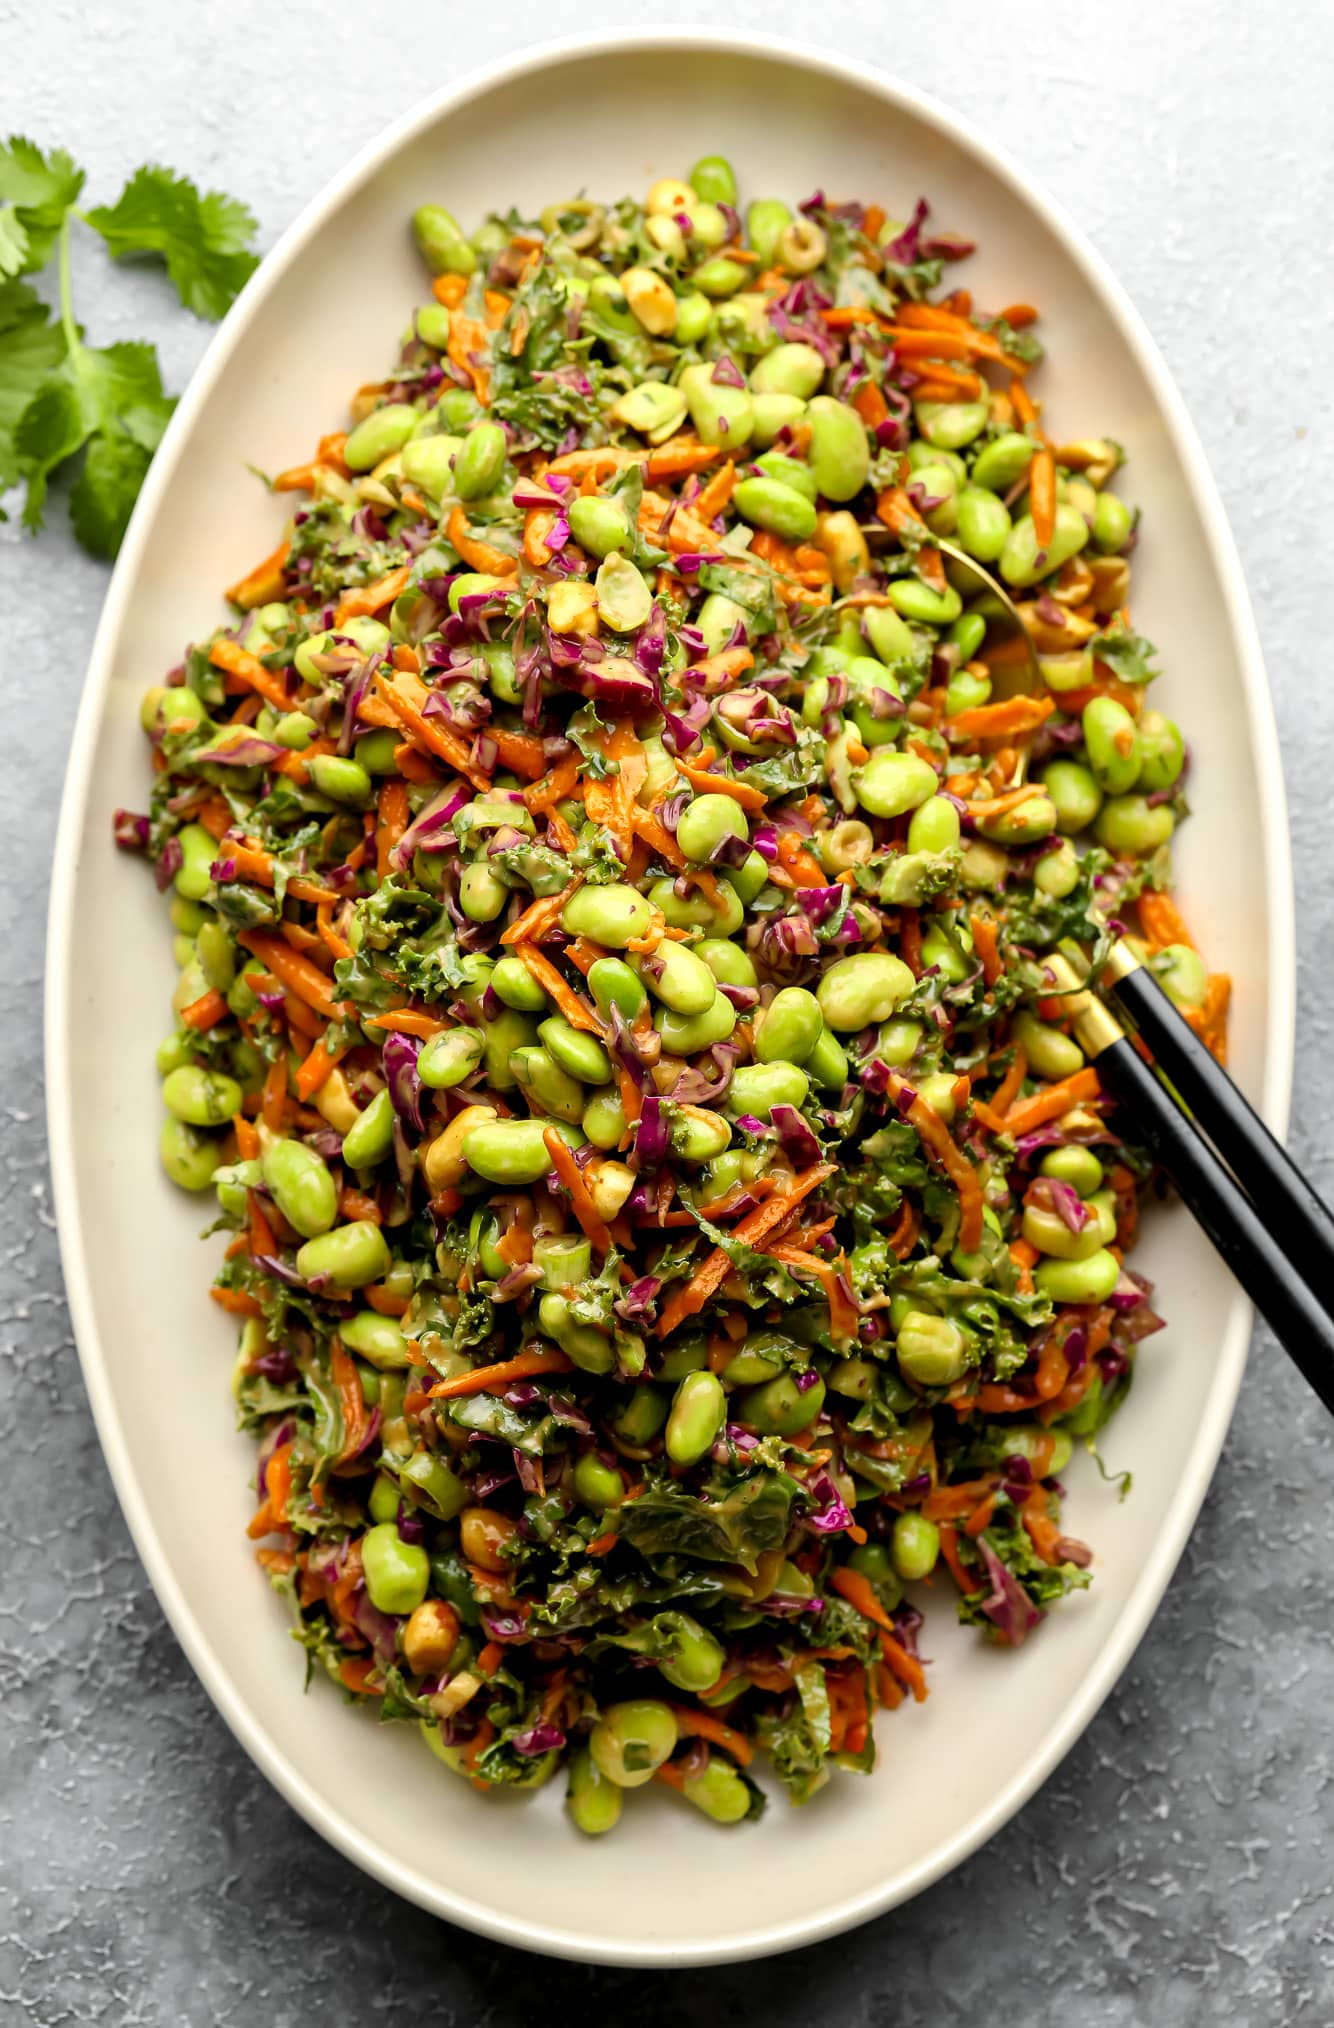
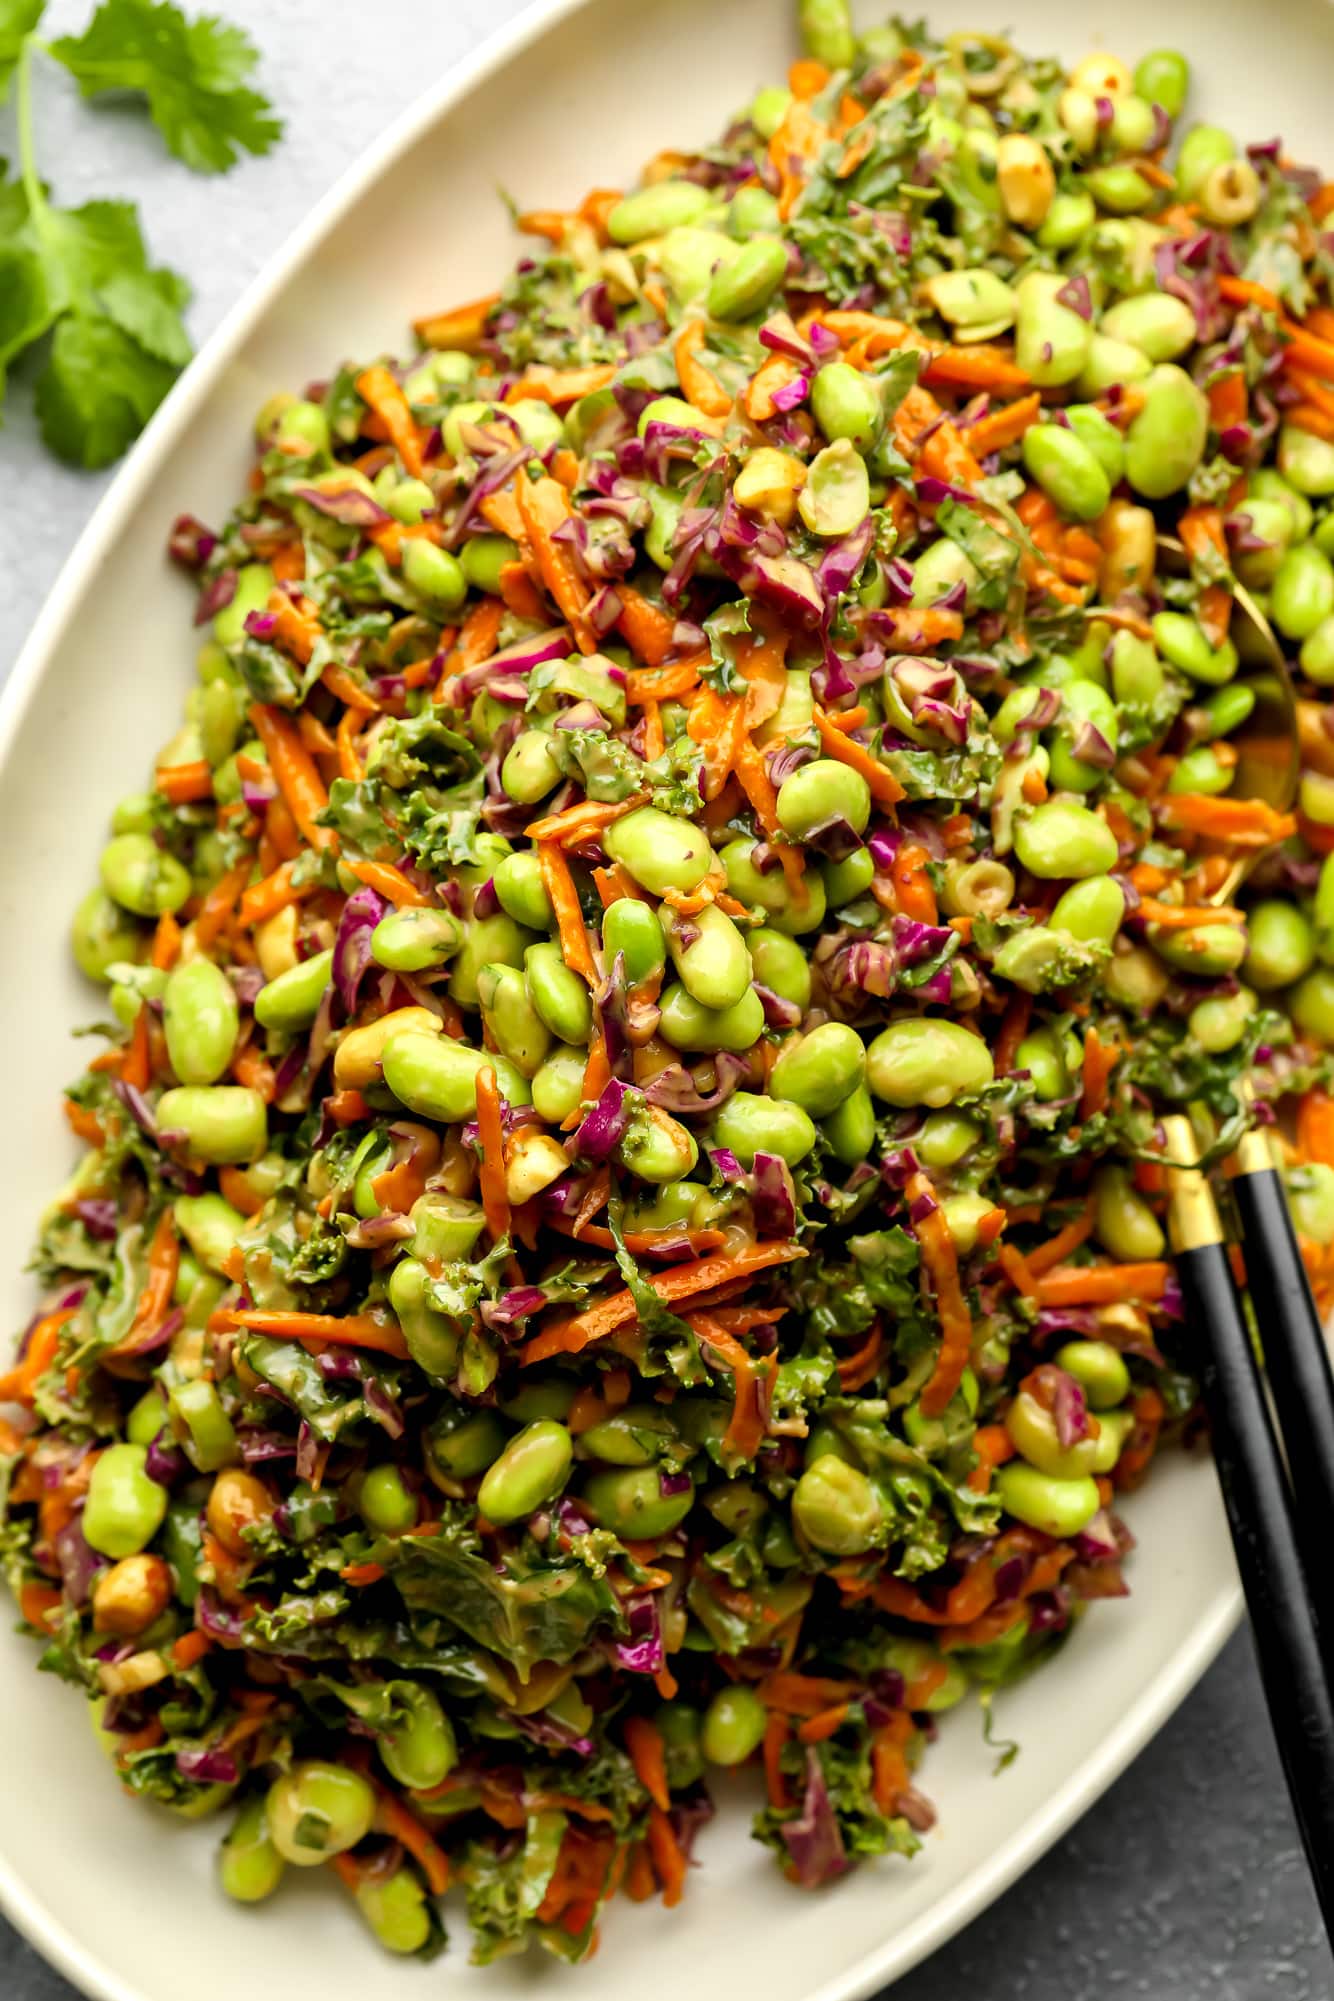
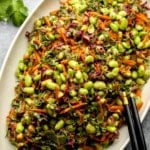
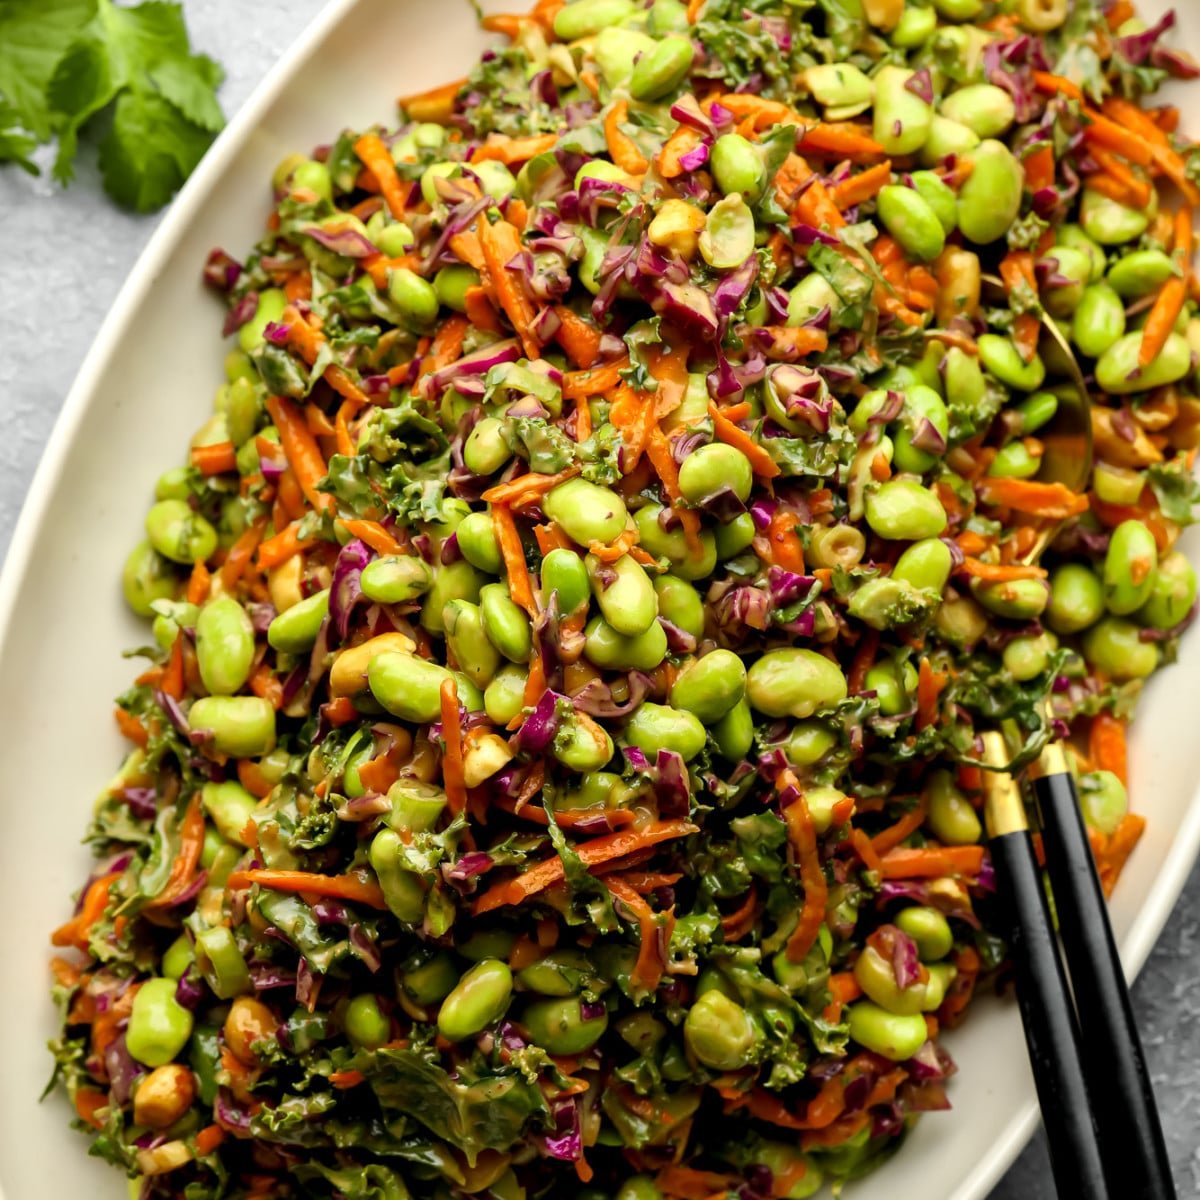 This protein-packed Edamame Salad tosses crunchy and colorful vegetables in a Thai-inspired peanut dressing. Enjoy it as a refreshing side dish or a hearty meal! If you’re on the lookout for more plant-based meal-prep recipes, you’ll also love my White Bean Salad, Creamy Carrot and Lentil Soup, and Easy Chana Masala. I’m tofu’s #1 fan…
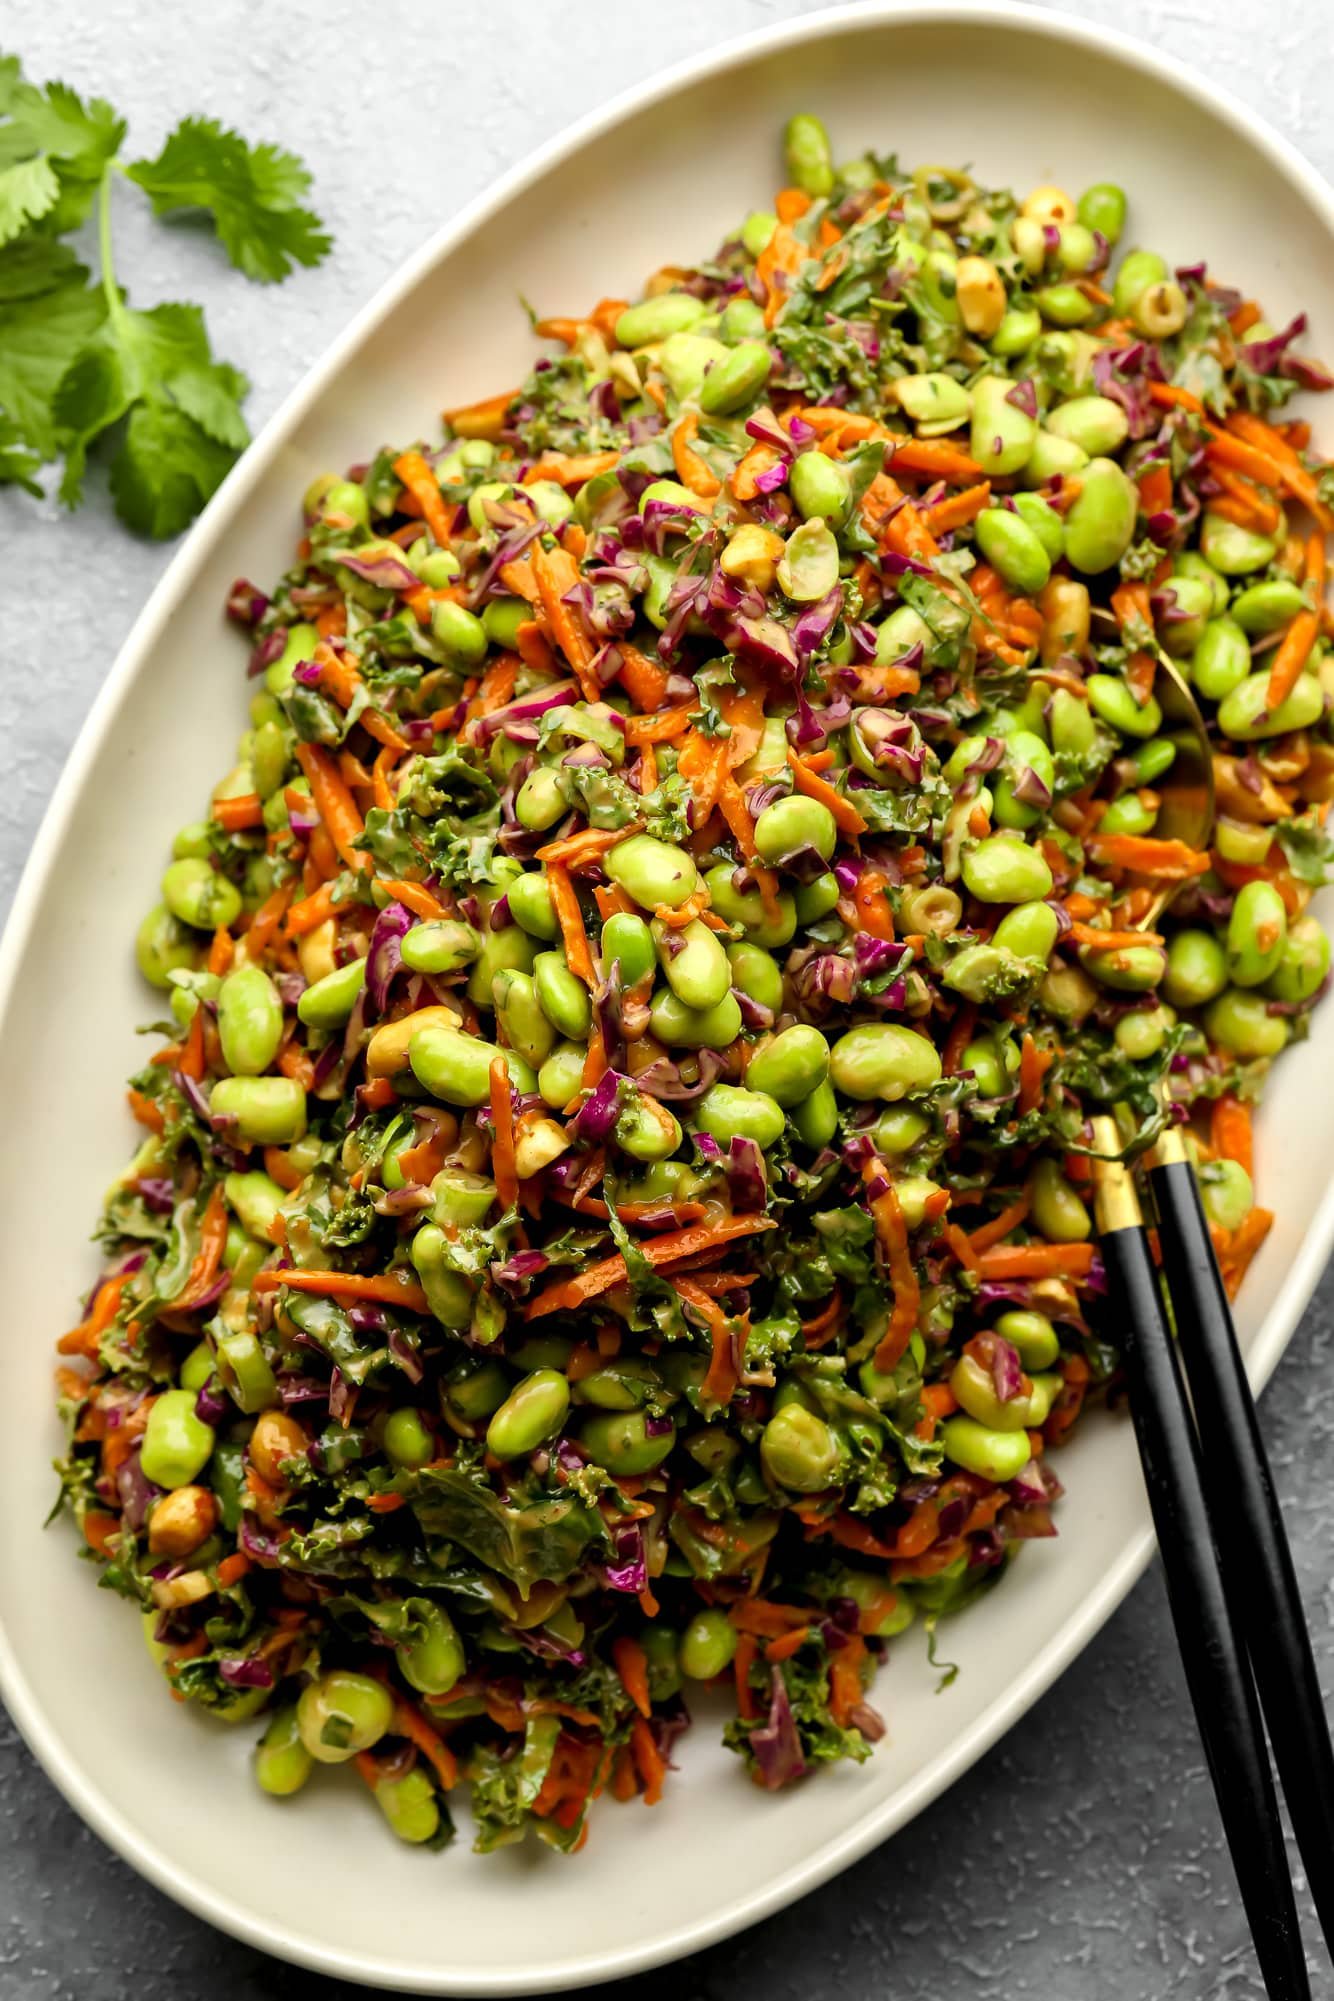
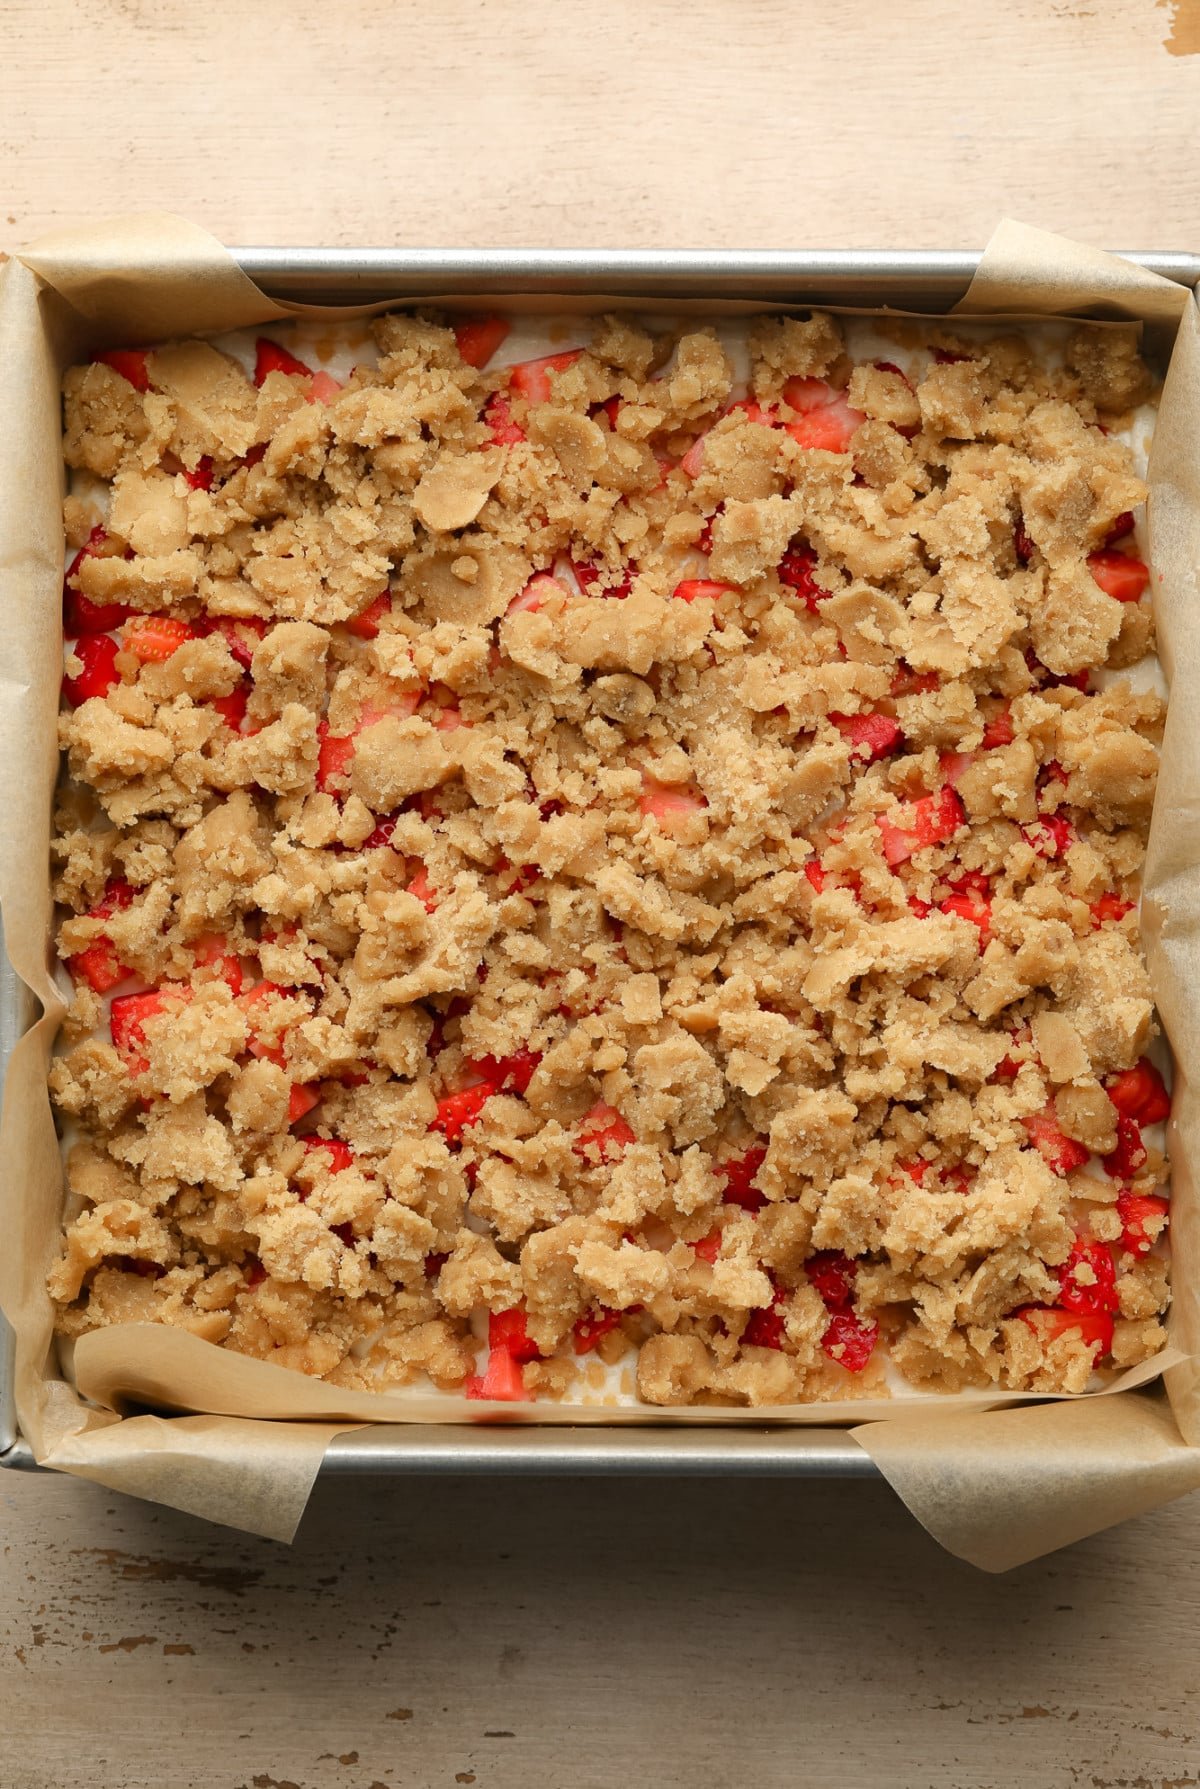
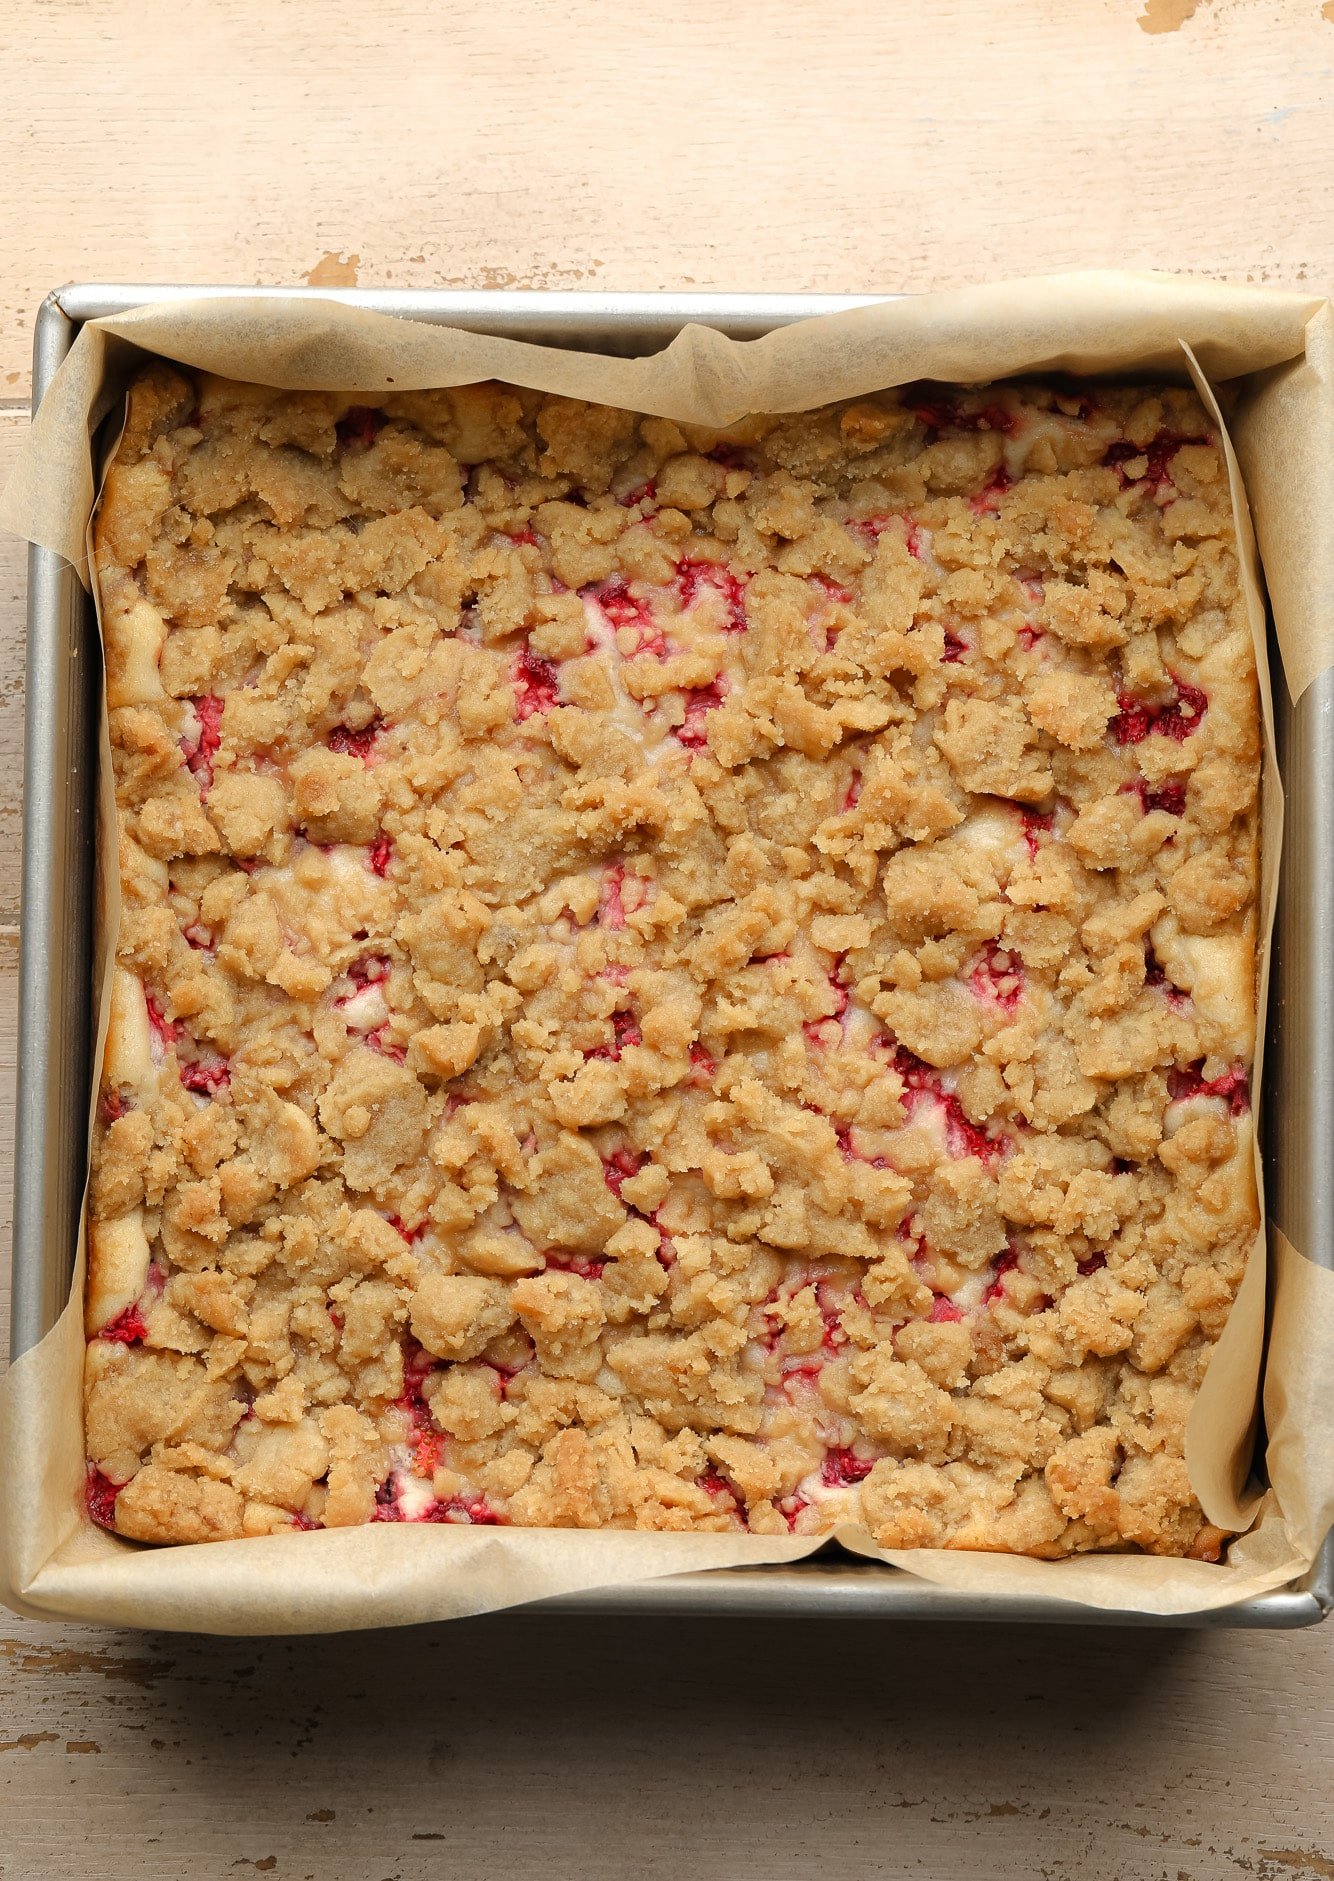
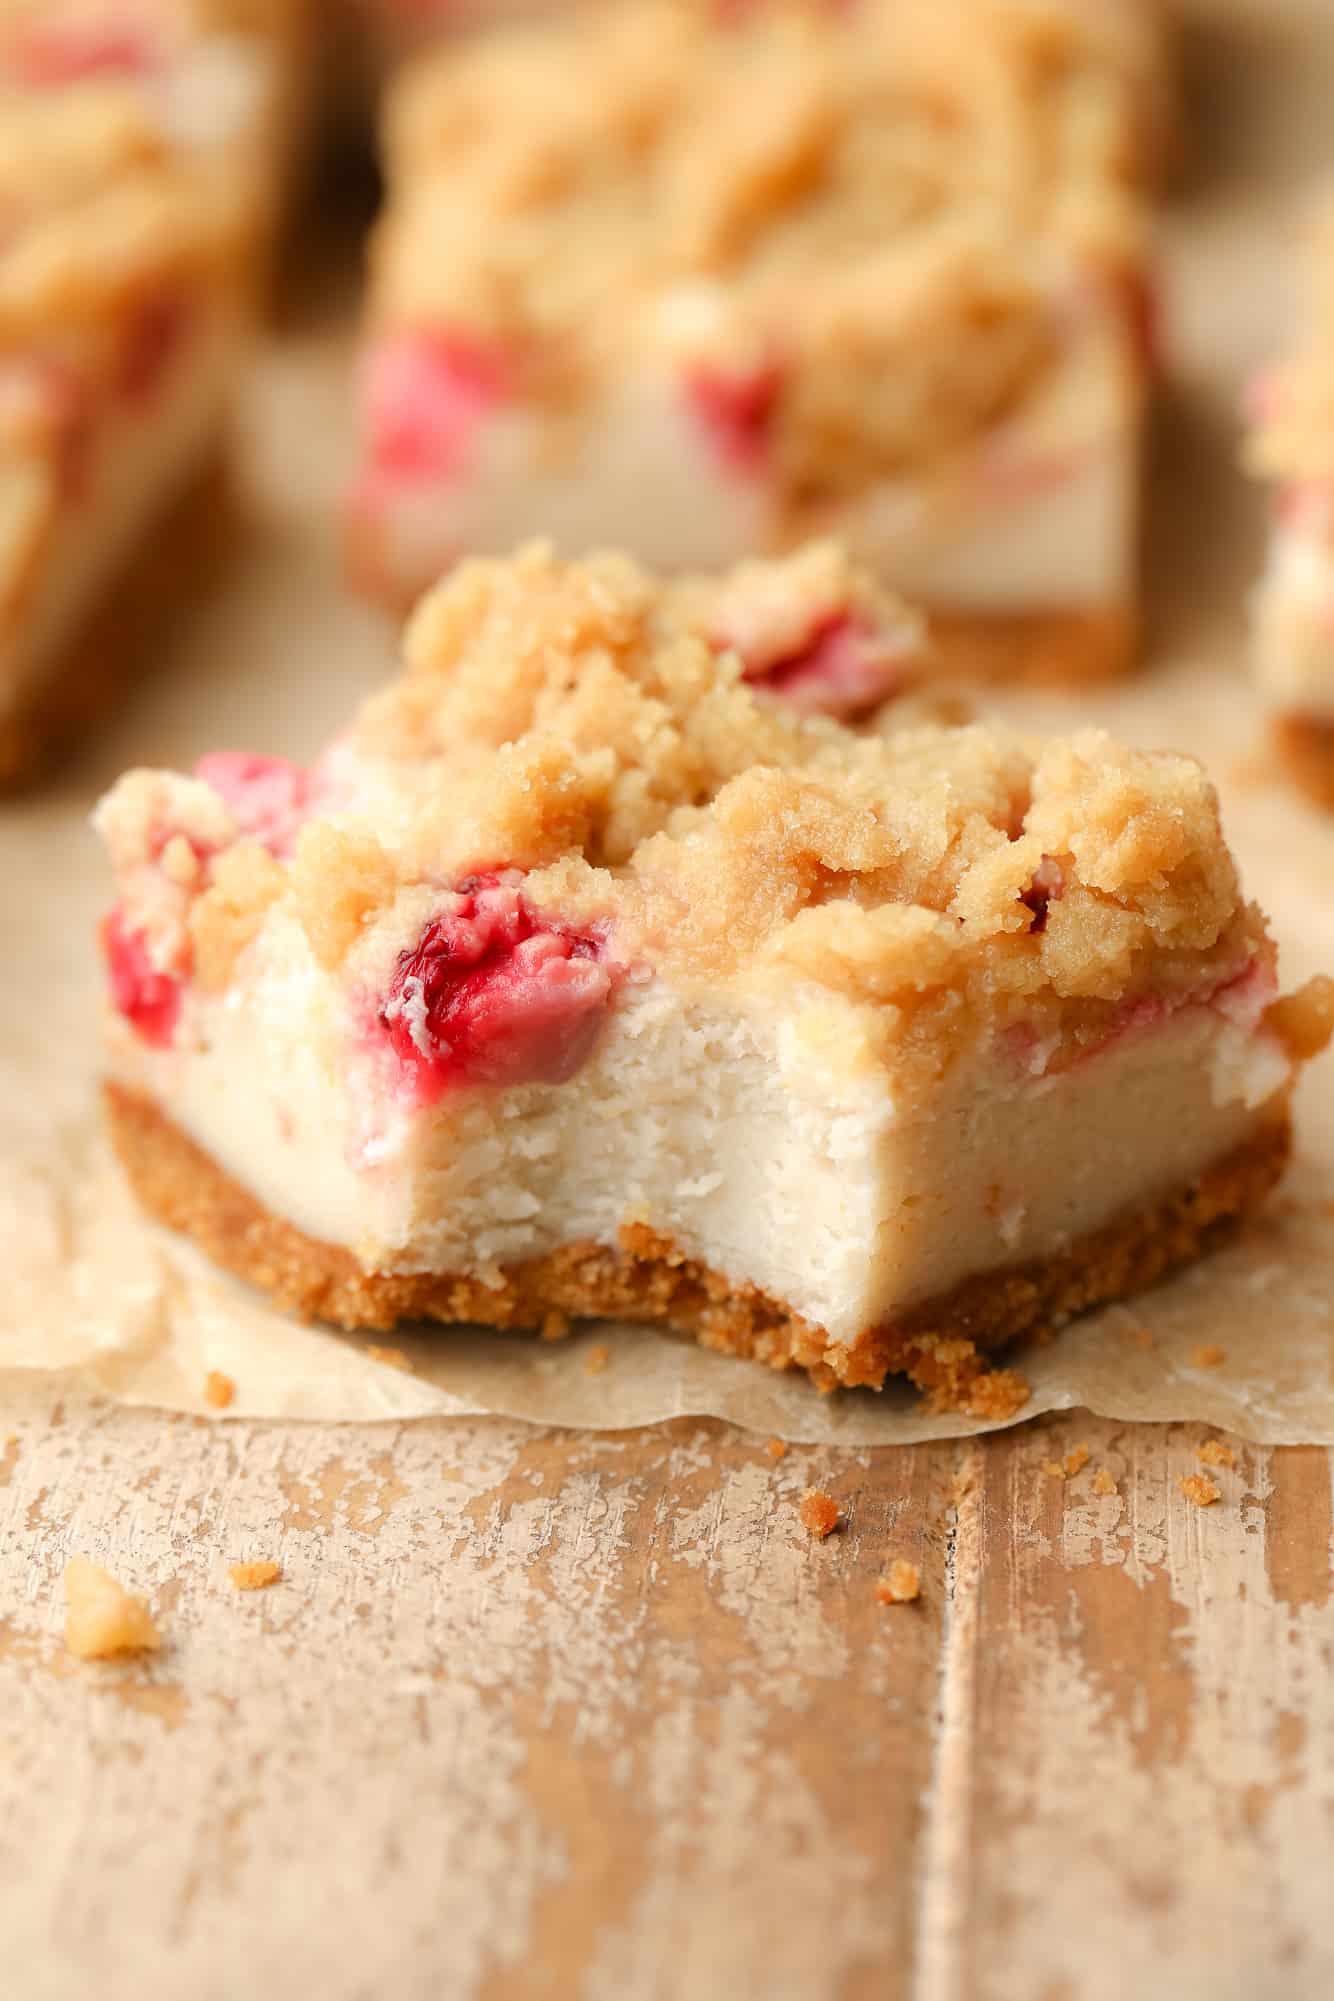
 Craving strawberry cheesecake AND strawberry crumble? These Vegan Strawberry Cheesecake Crumble Bars have the best of both worlds! Rich, creamy, and sweet, they’re a wonderful dessert for any celebration. Have the best strawberry season ever with these cheesecake bars, as well as my Easy Vegan Strawberry Shortcake, Vegan Strawberry Cupcakes, and Strawberry Rolls recipes! These…


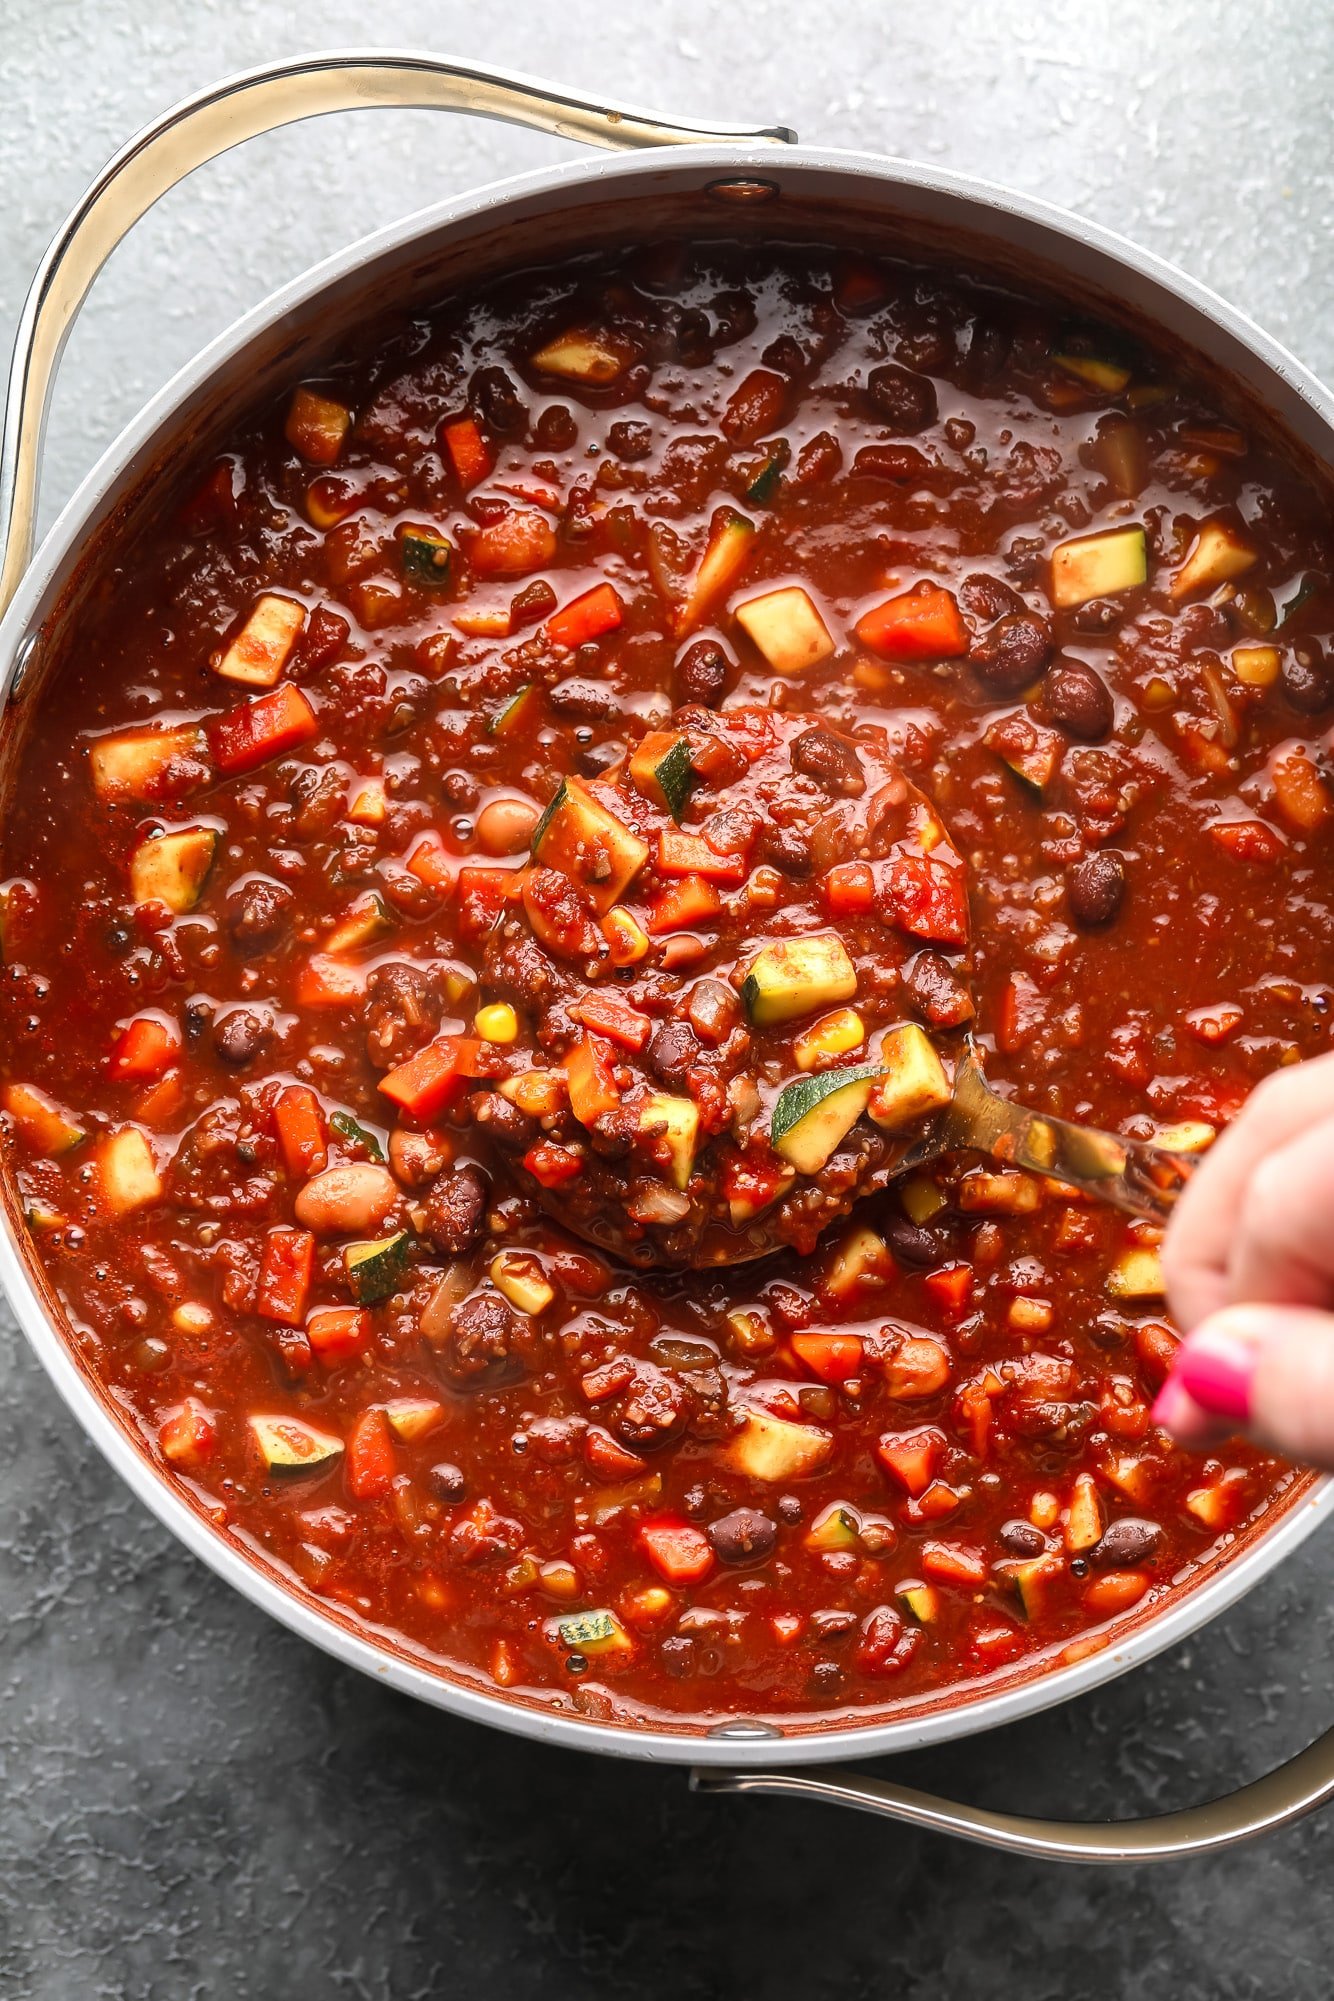
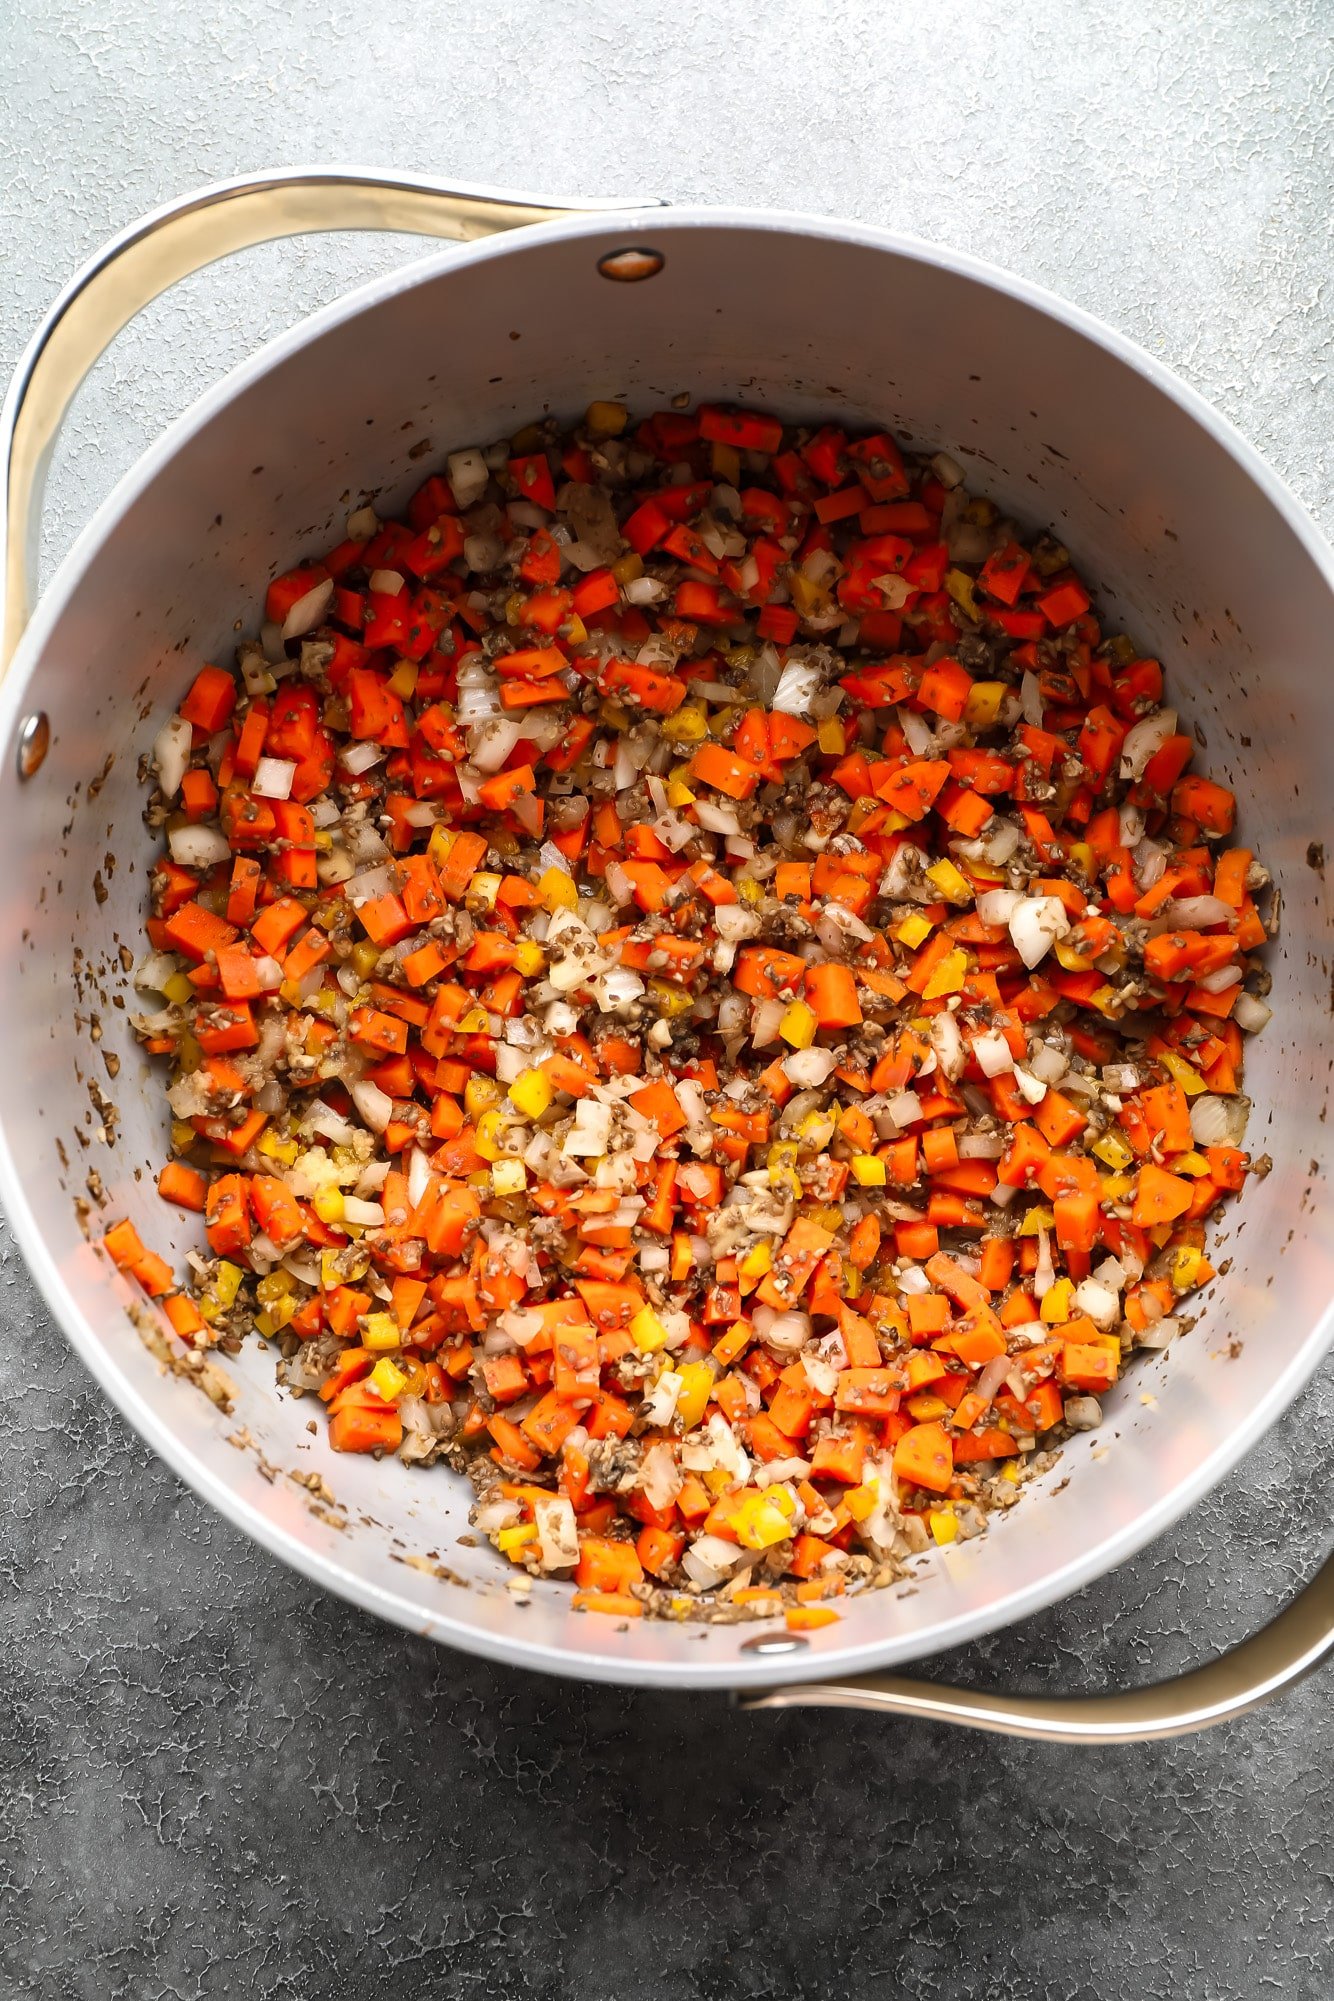
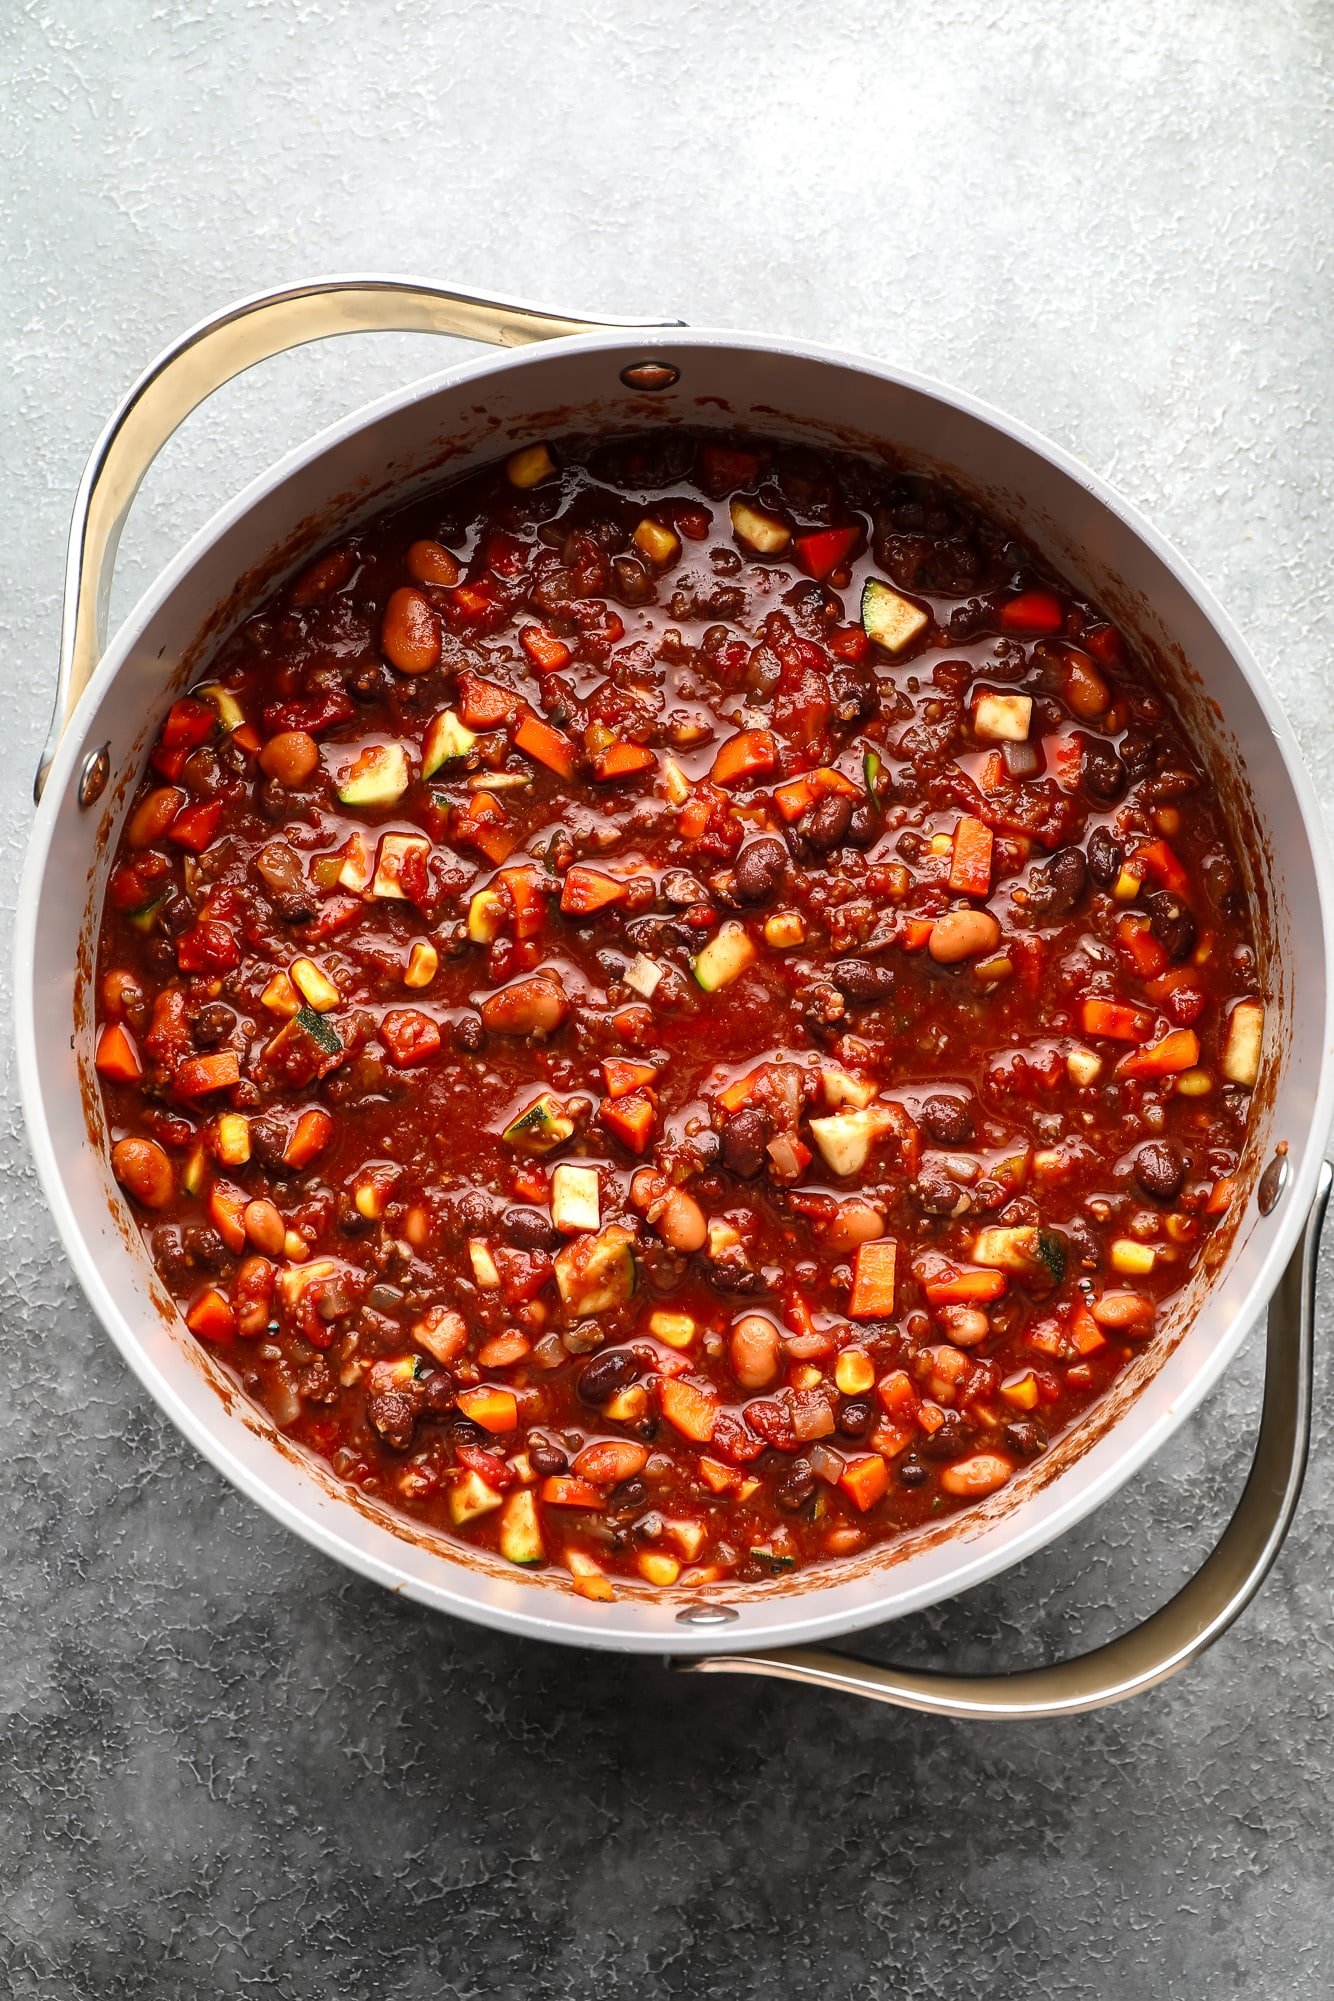
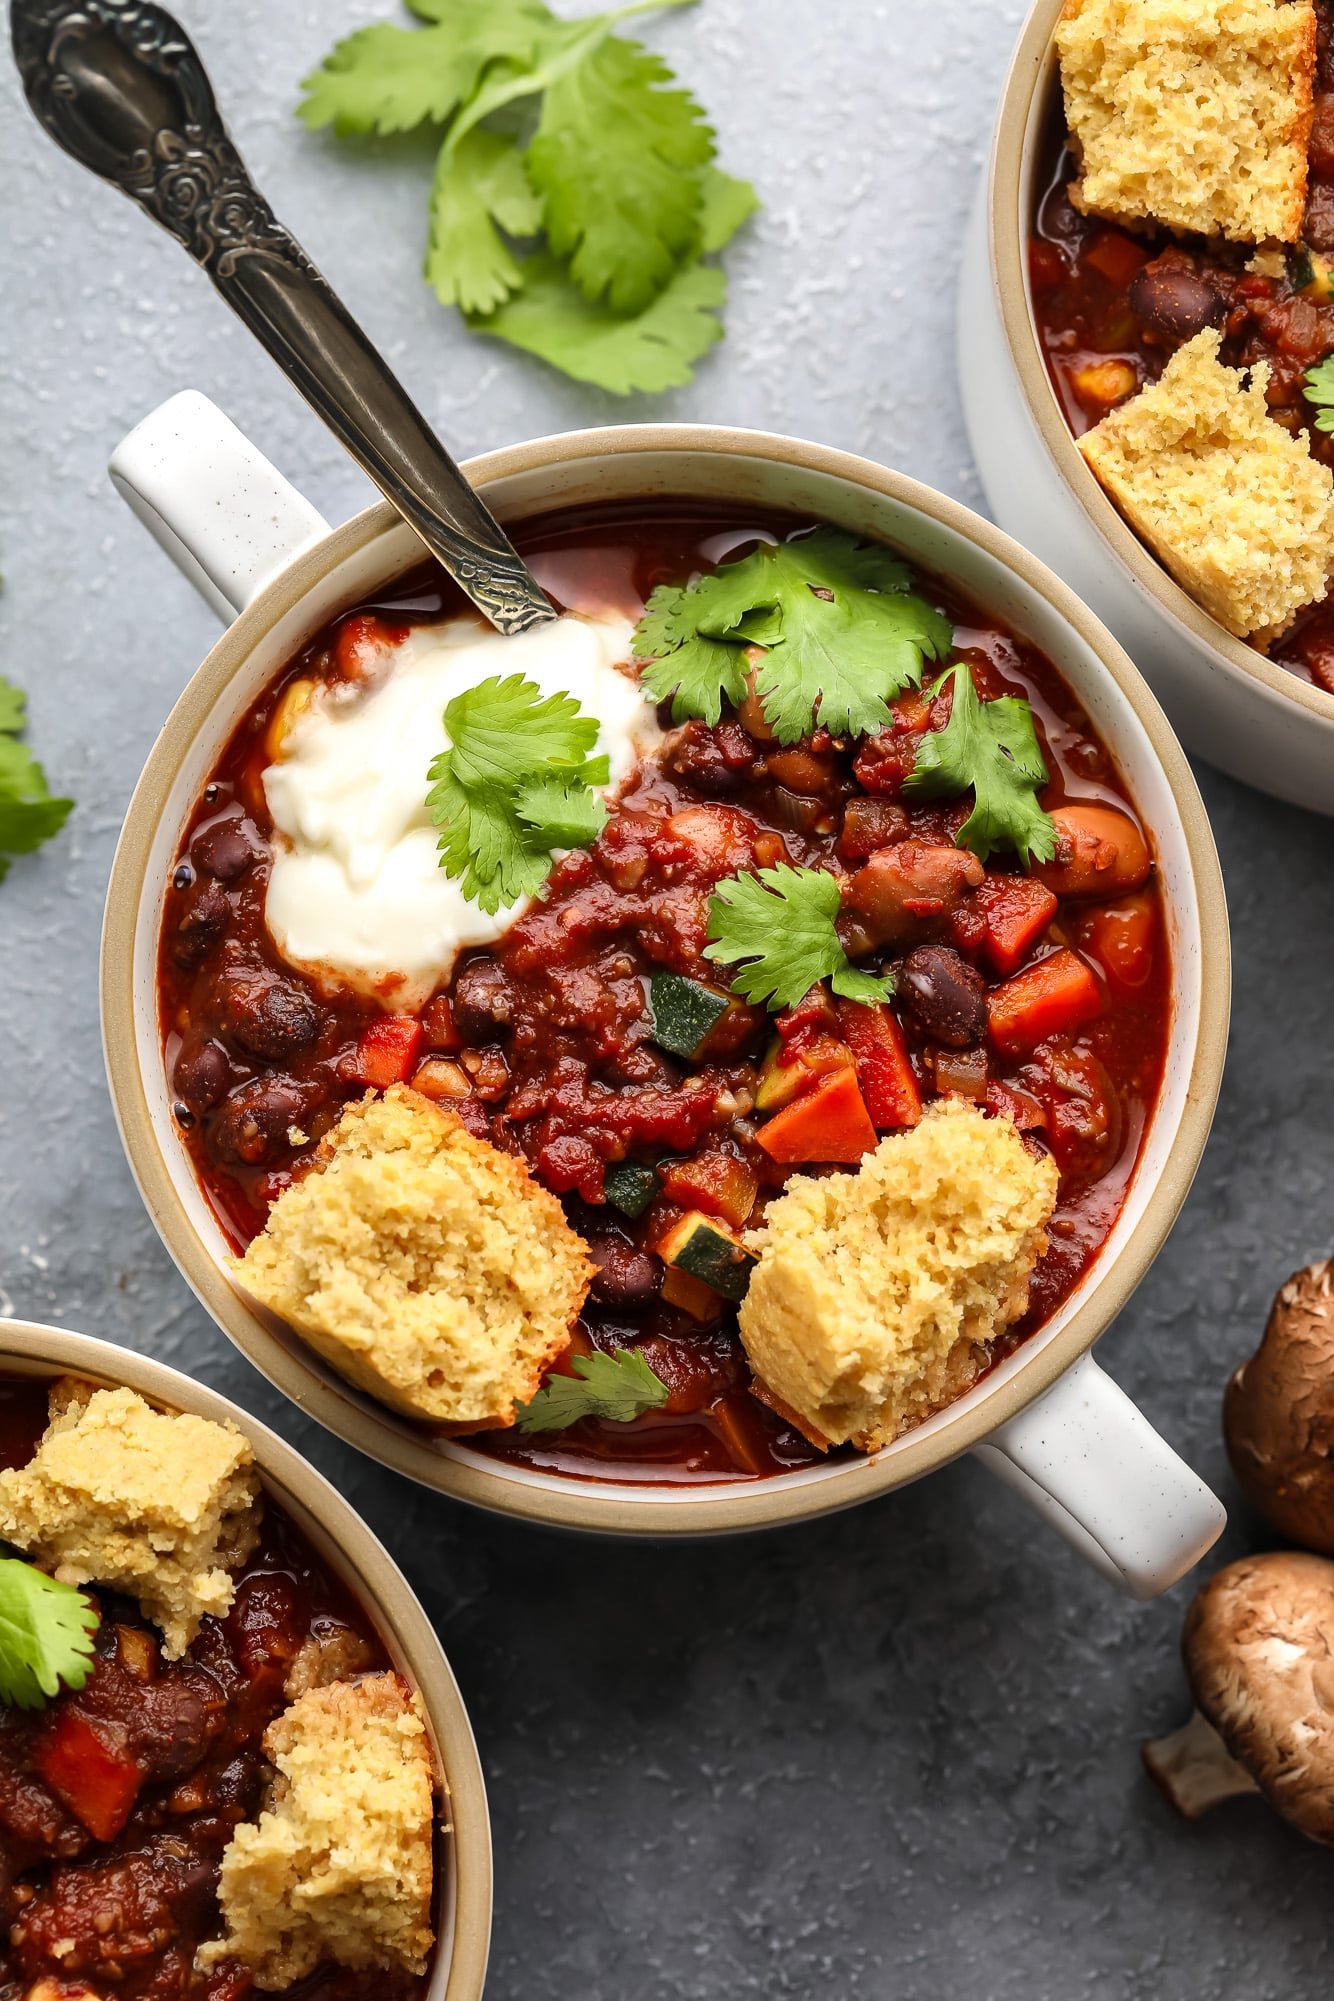
 This Veggie Chili features a colorful combination of mushrooms, carrots, bell peppers, zucchini and corn. It includes two kinds of beans and bulgur, which adds a meaty texture. The ultimate vegetarian chili for every kind of eater. If you’re a chili lover like me, you’ll also get a kick out of these Ultimate Vegan Chili…
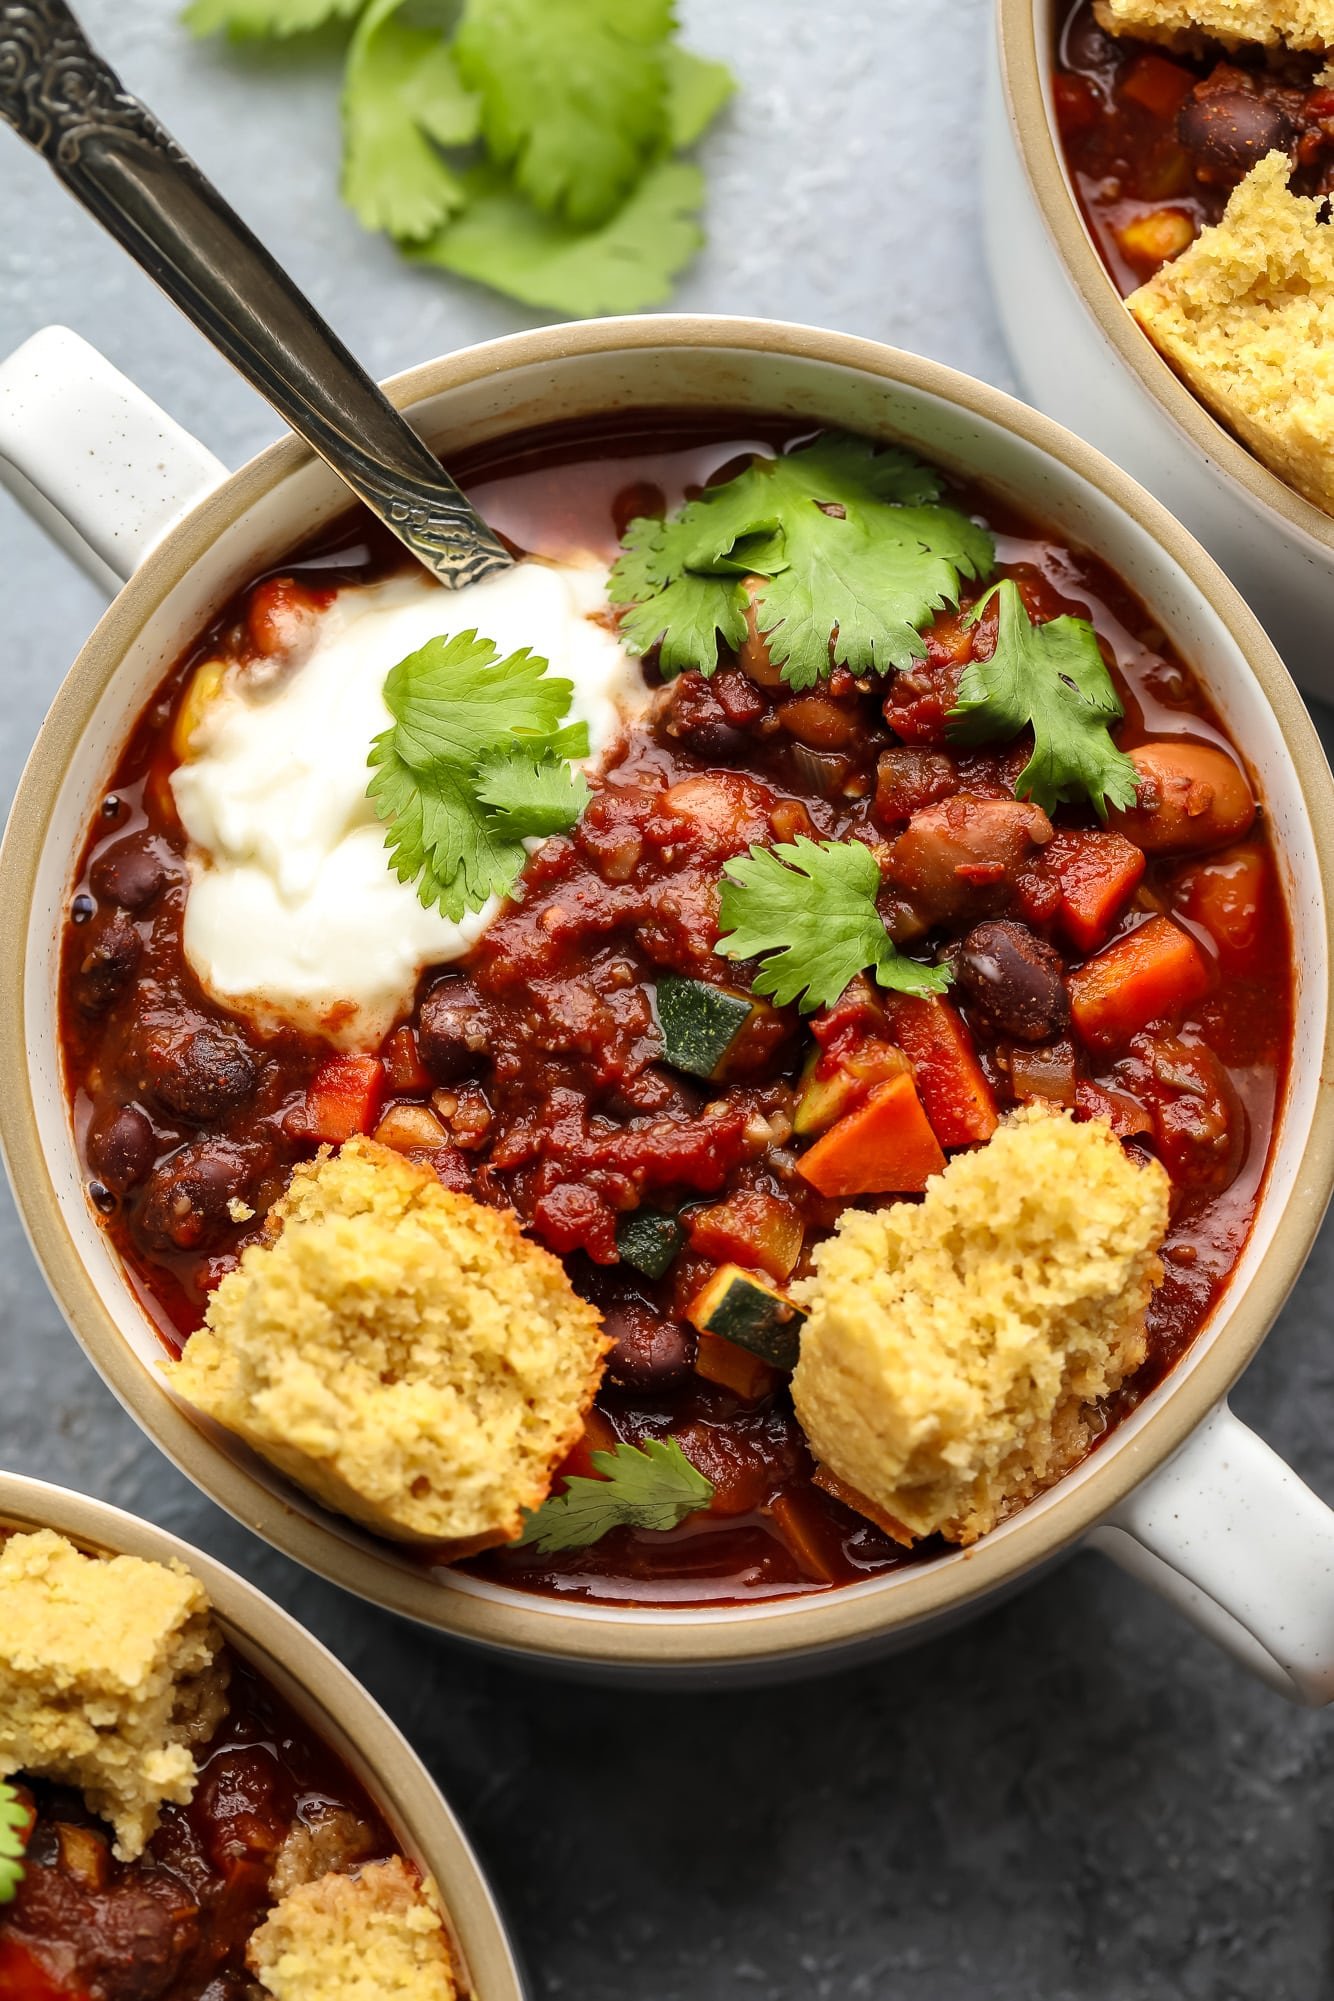

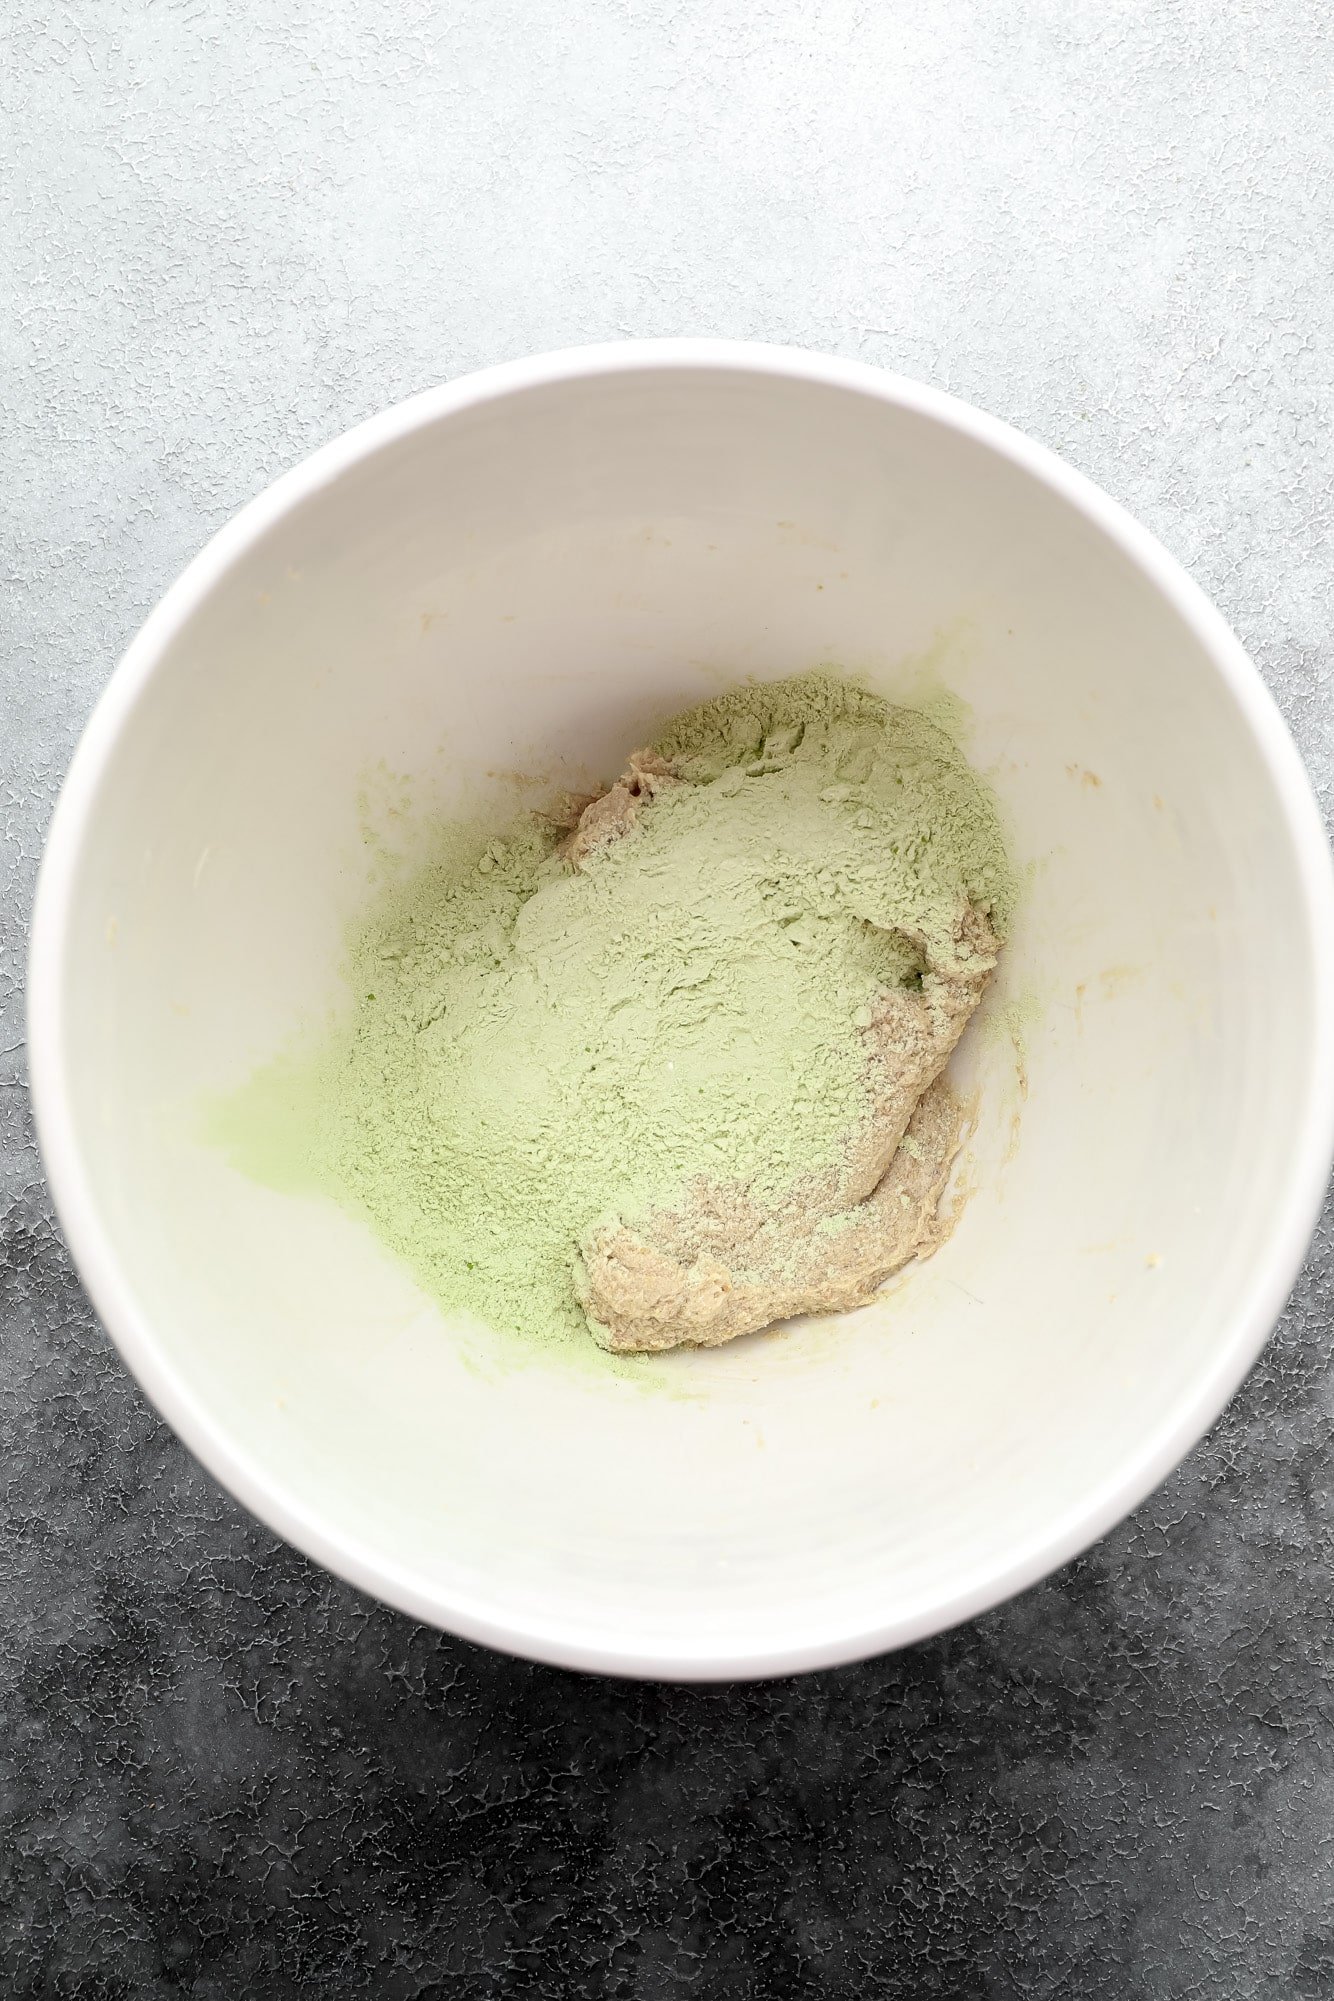
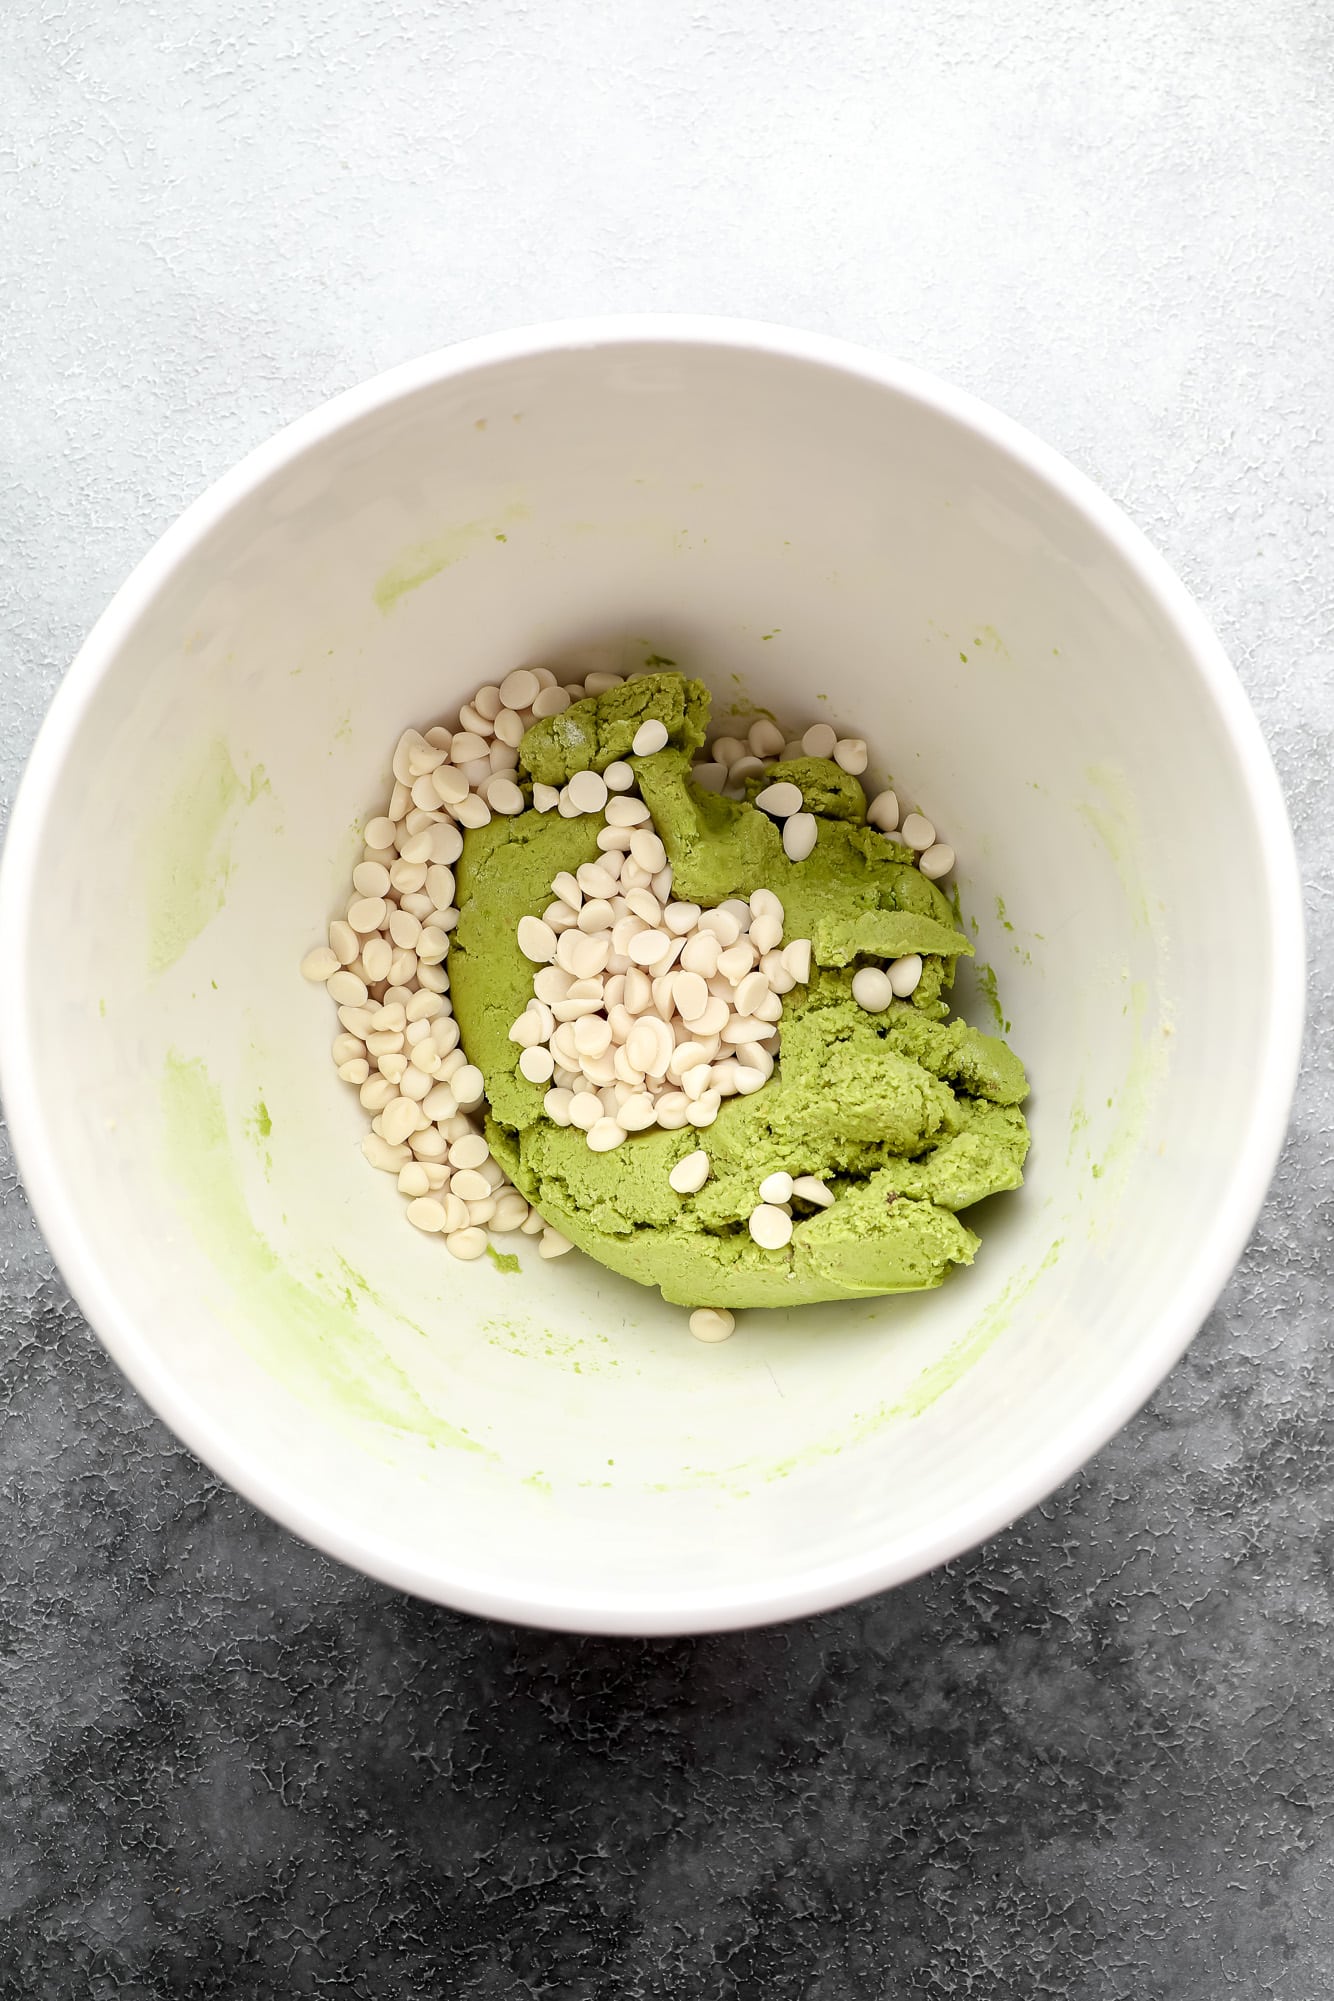
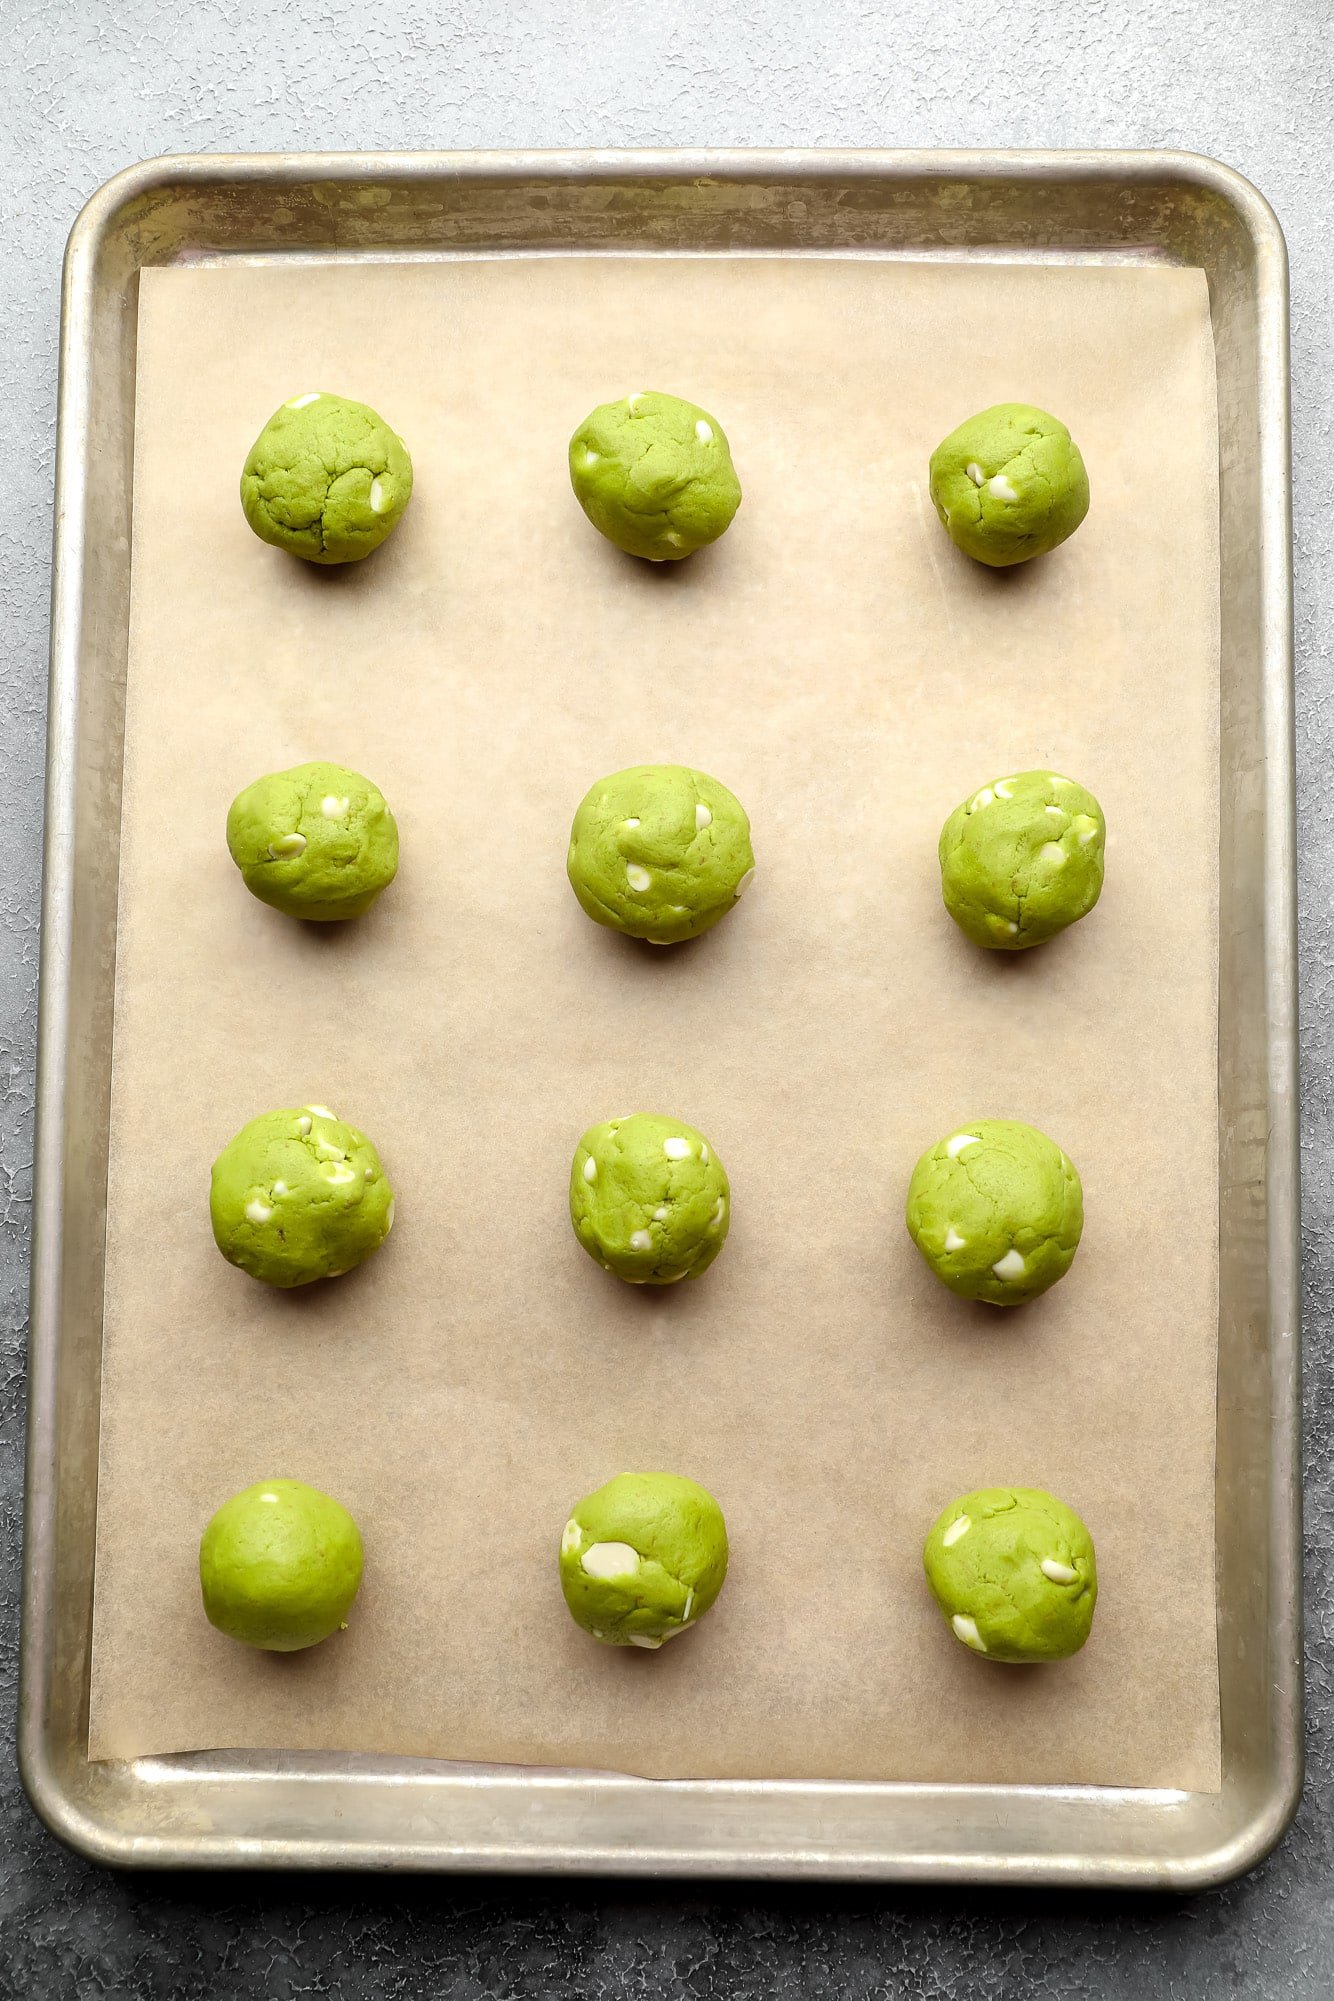
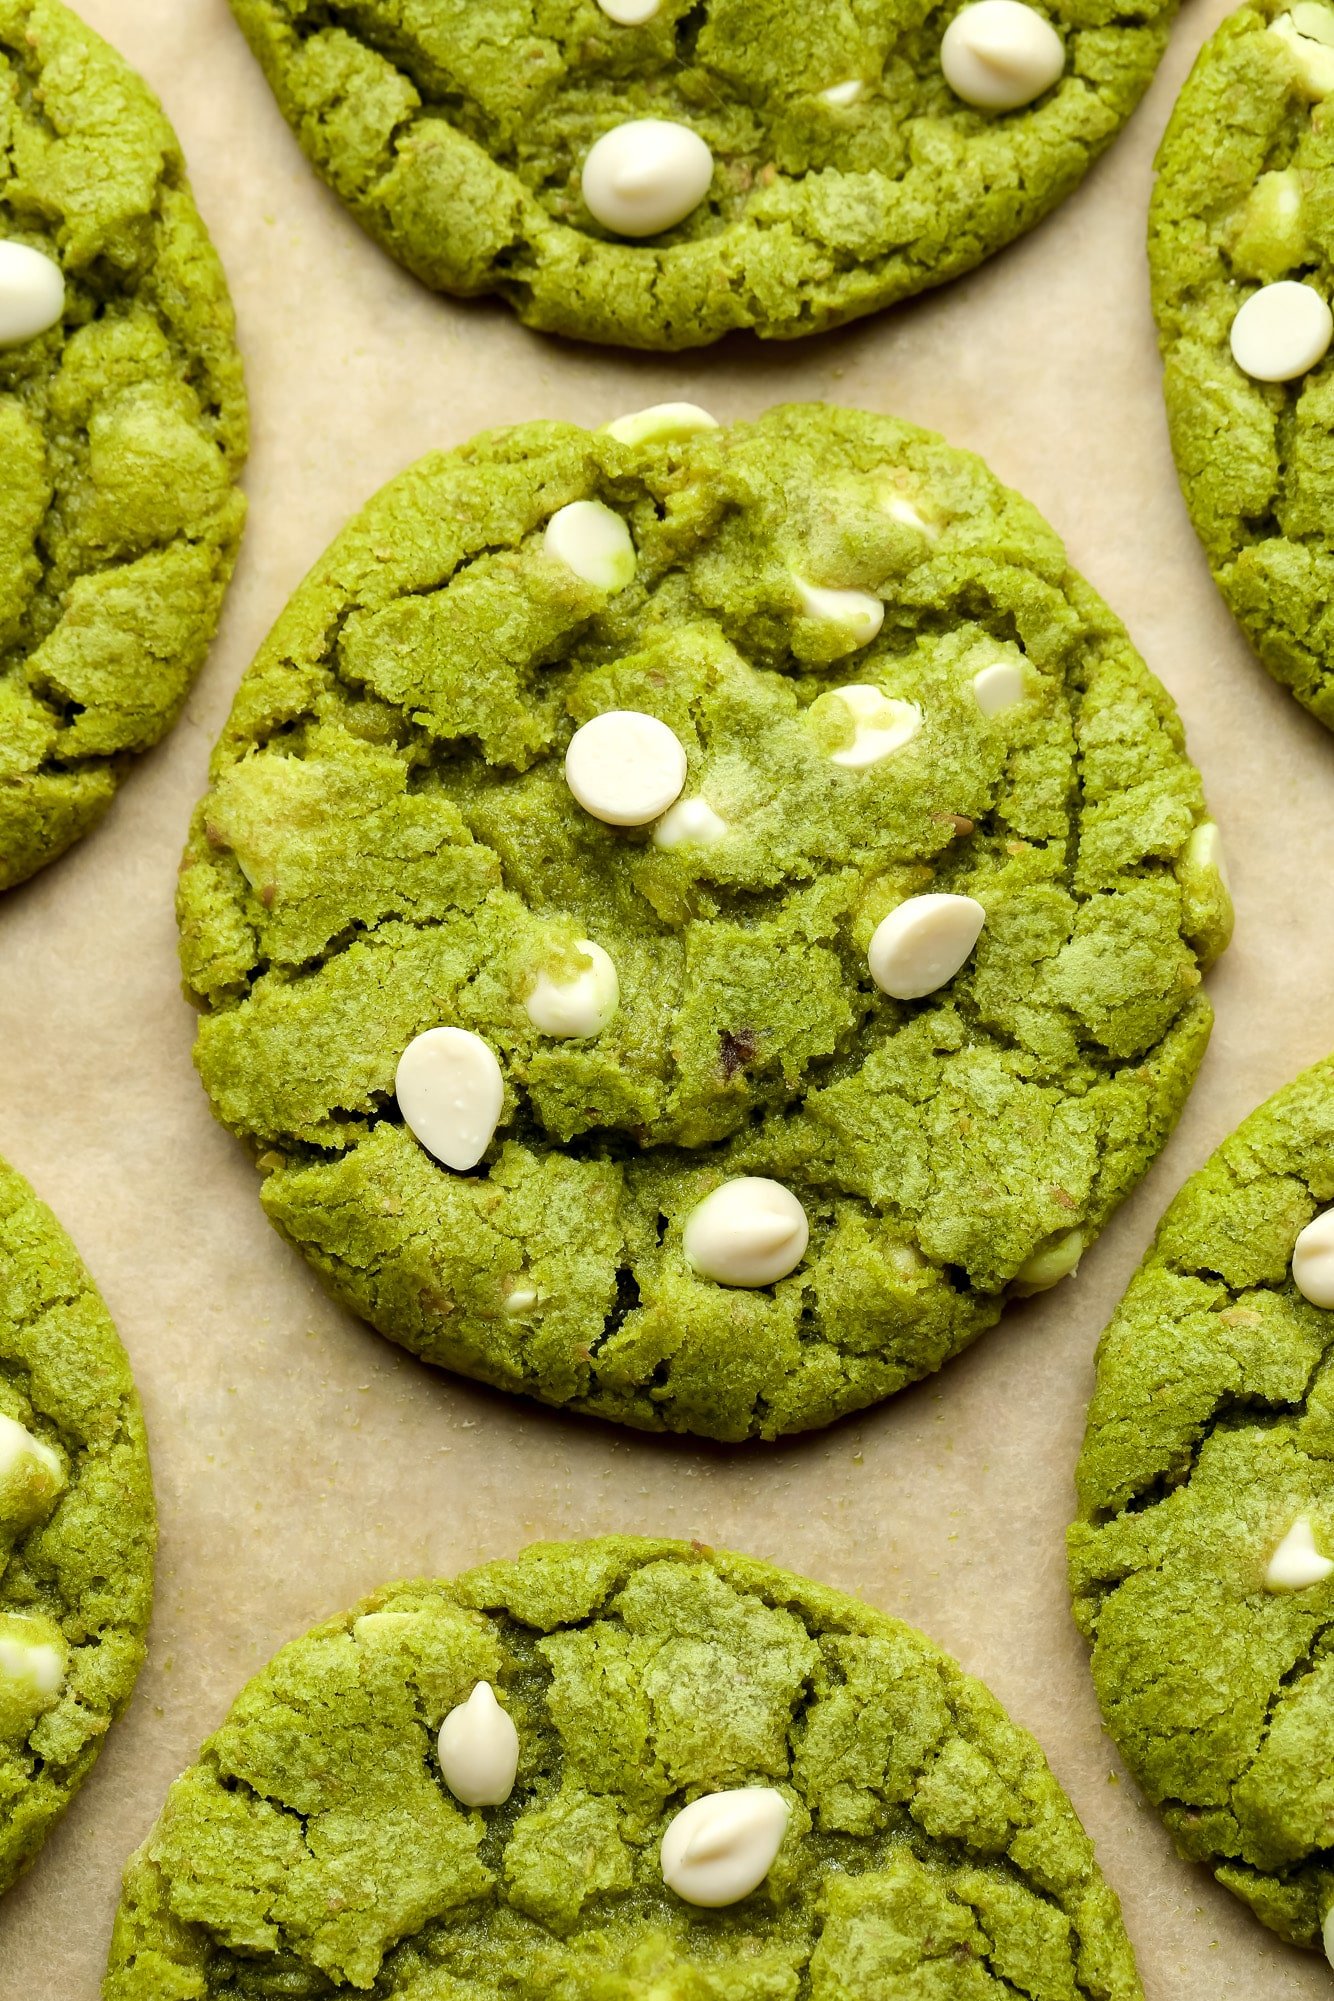
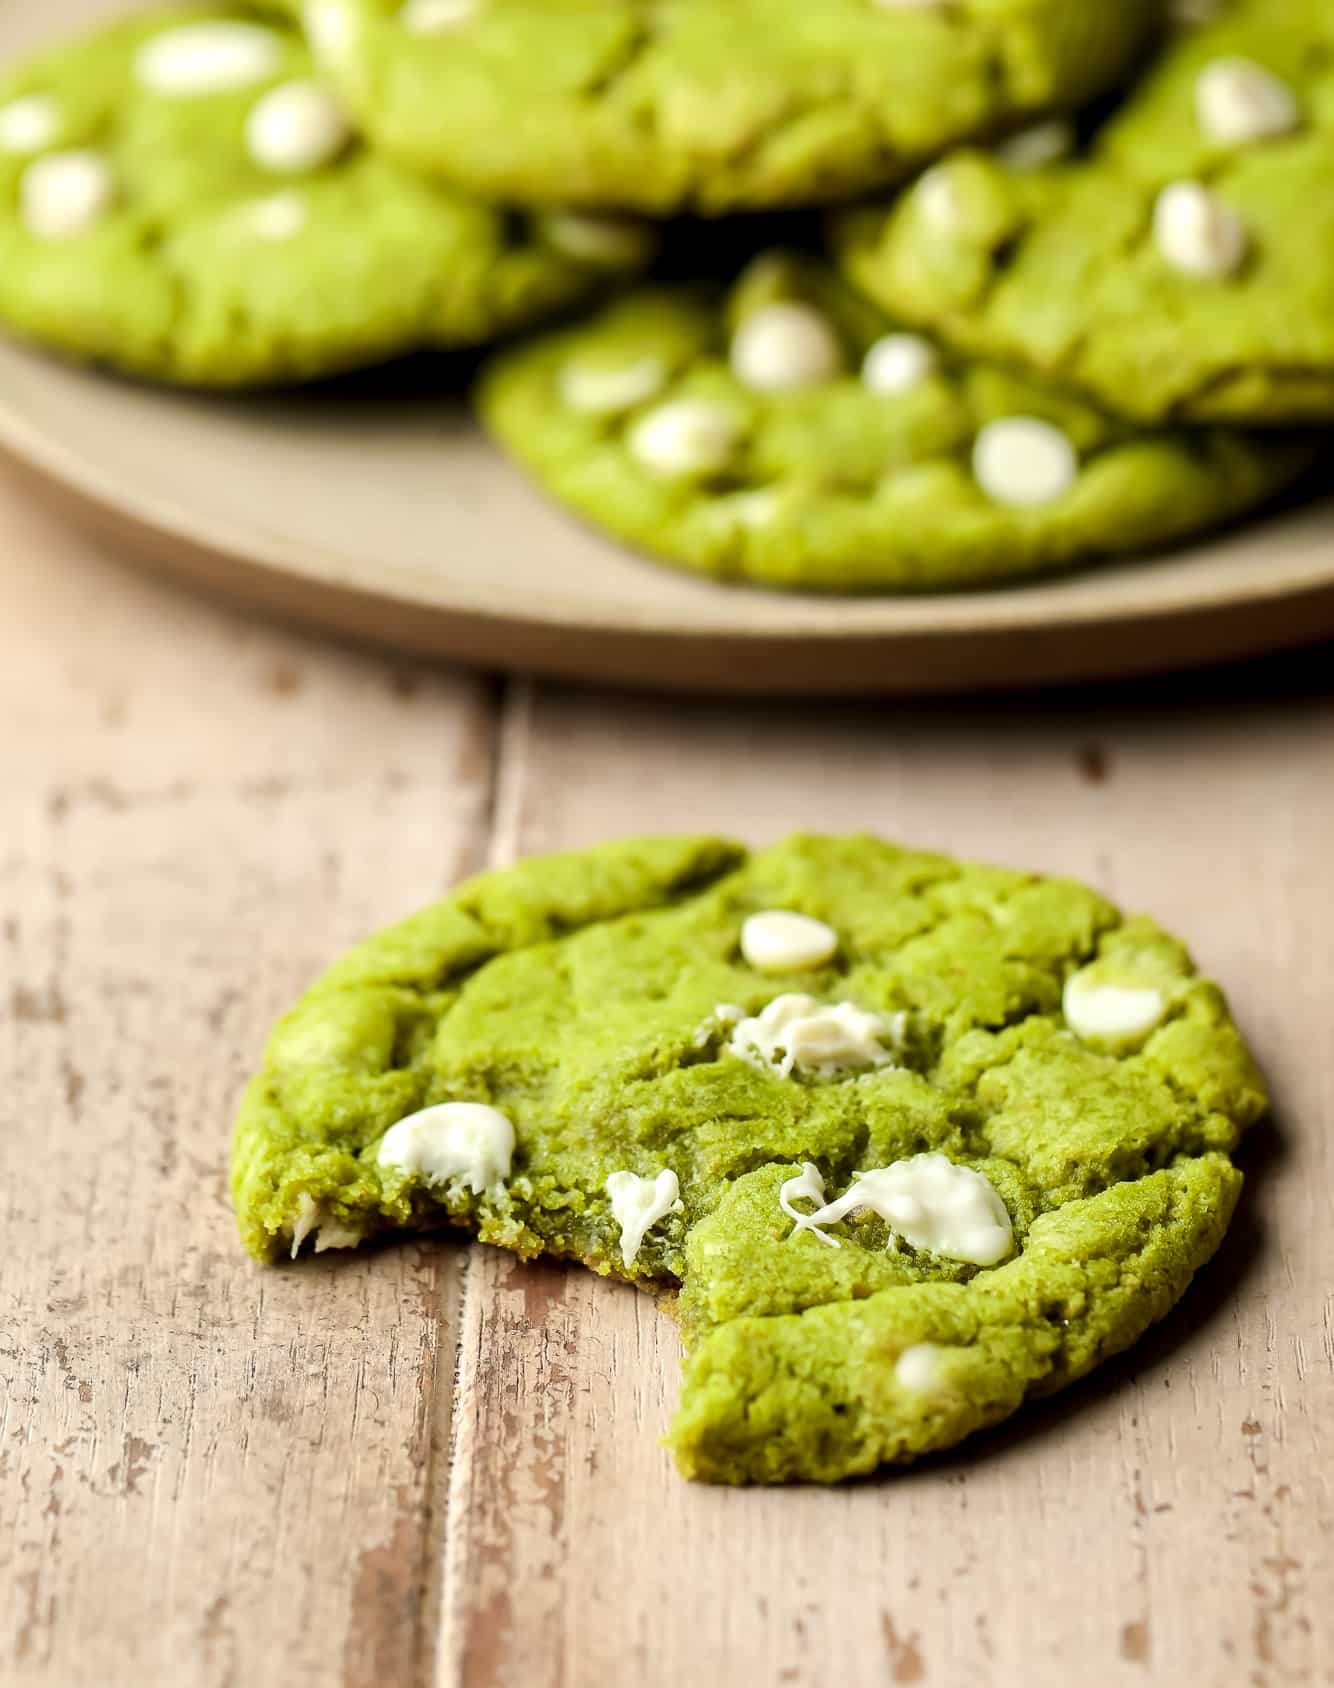
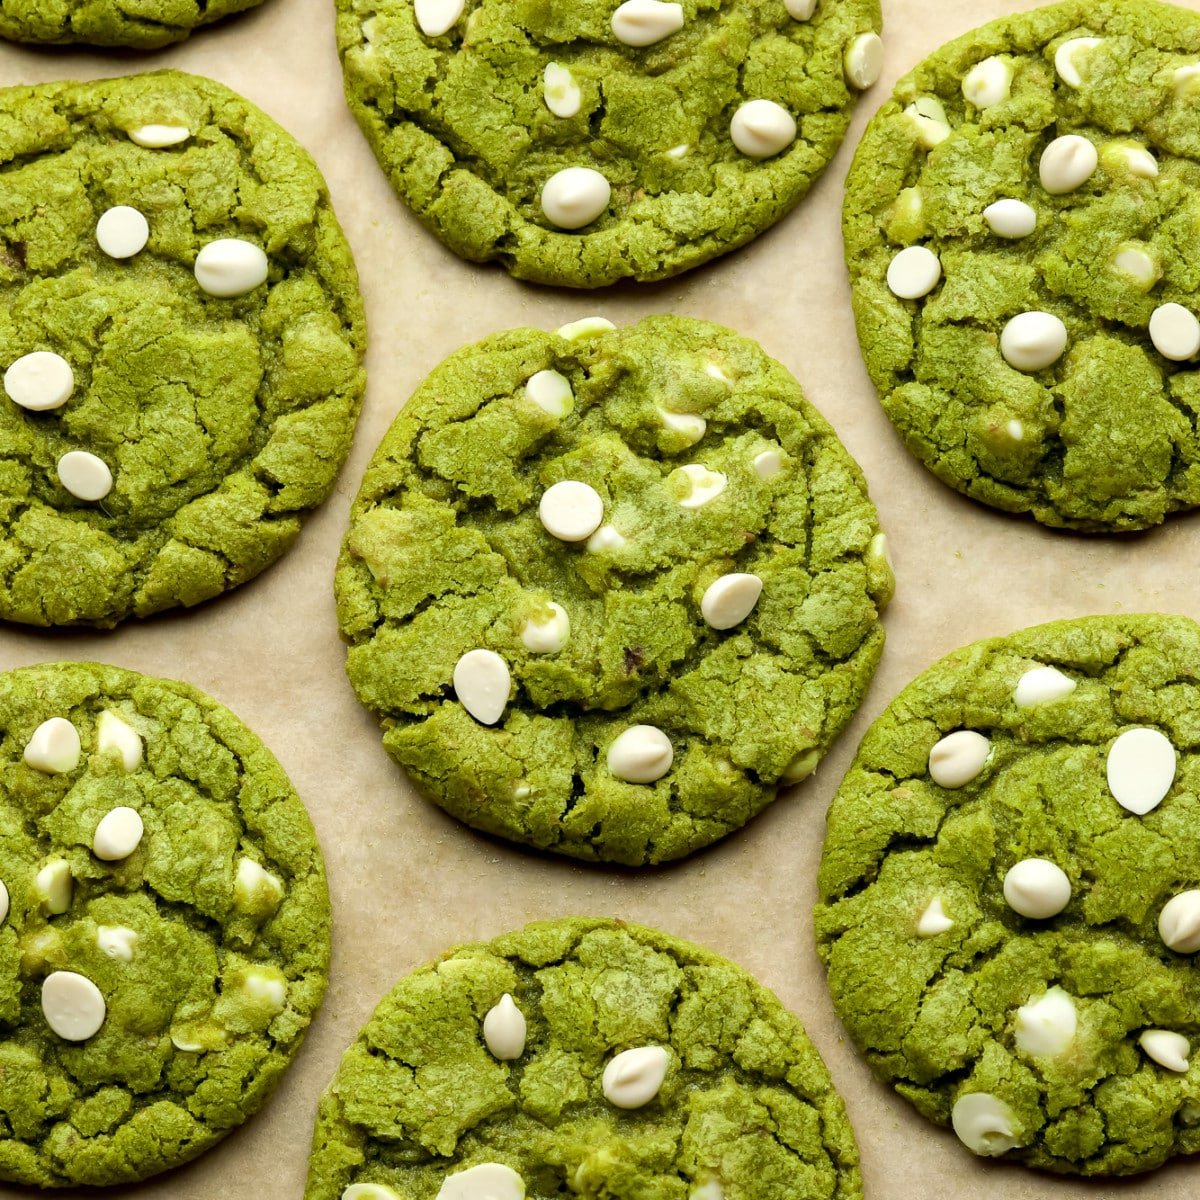 These Matcha Cookies are chewy and soft on the inside, have the best earthy-sweet flavors, and are loaded with white chocolate chips. A unique sweet treat to enjoy with a cup of tea or for an afternoon pick-me-up! For more unforgettable vegan cookies, be sure to check out these Vegan Sugar Cookie Bars, Vegan Almond…
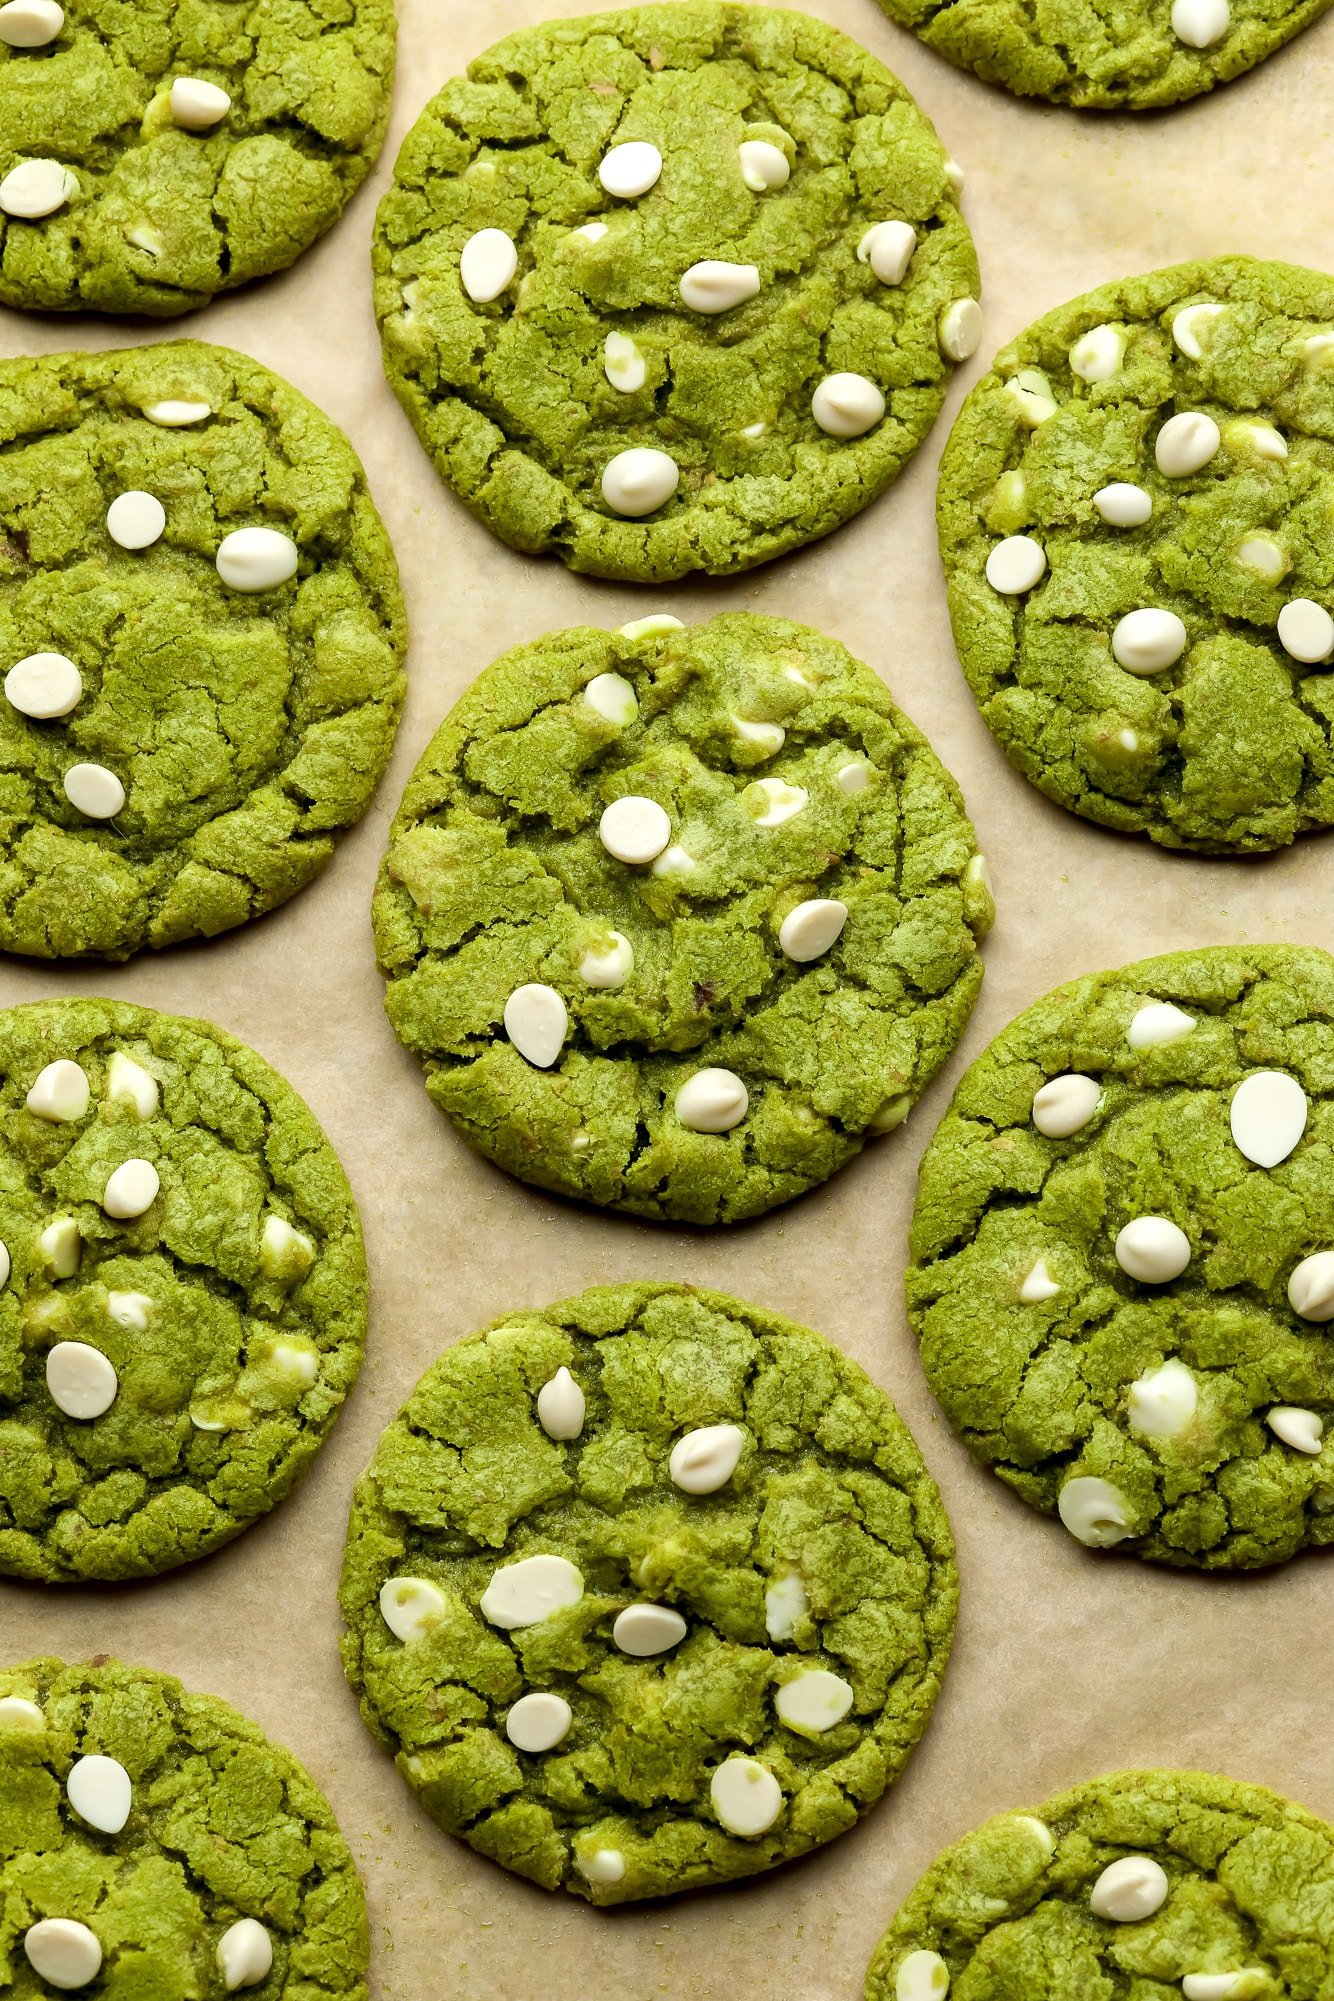


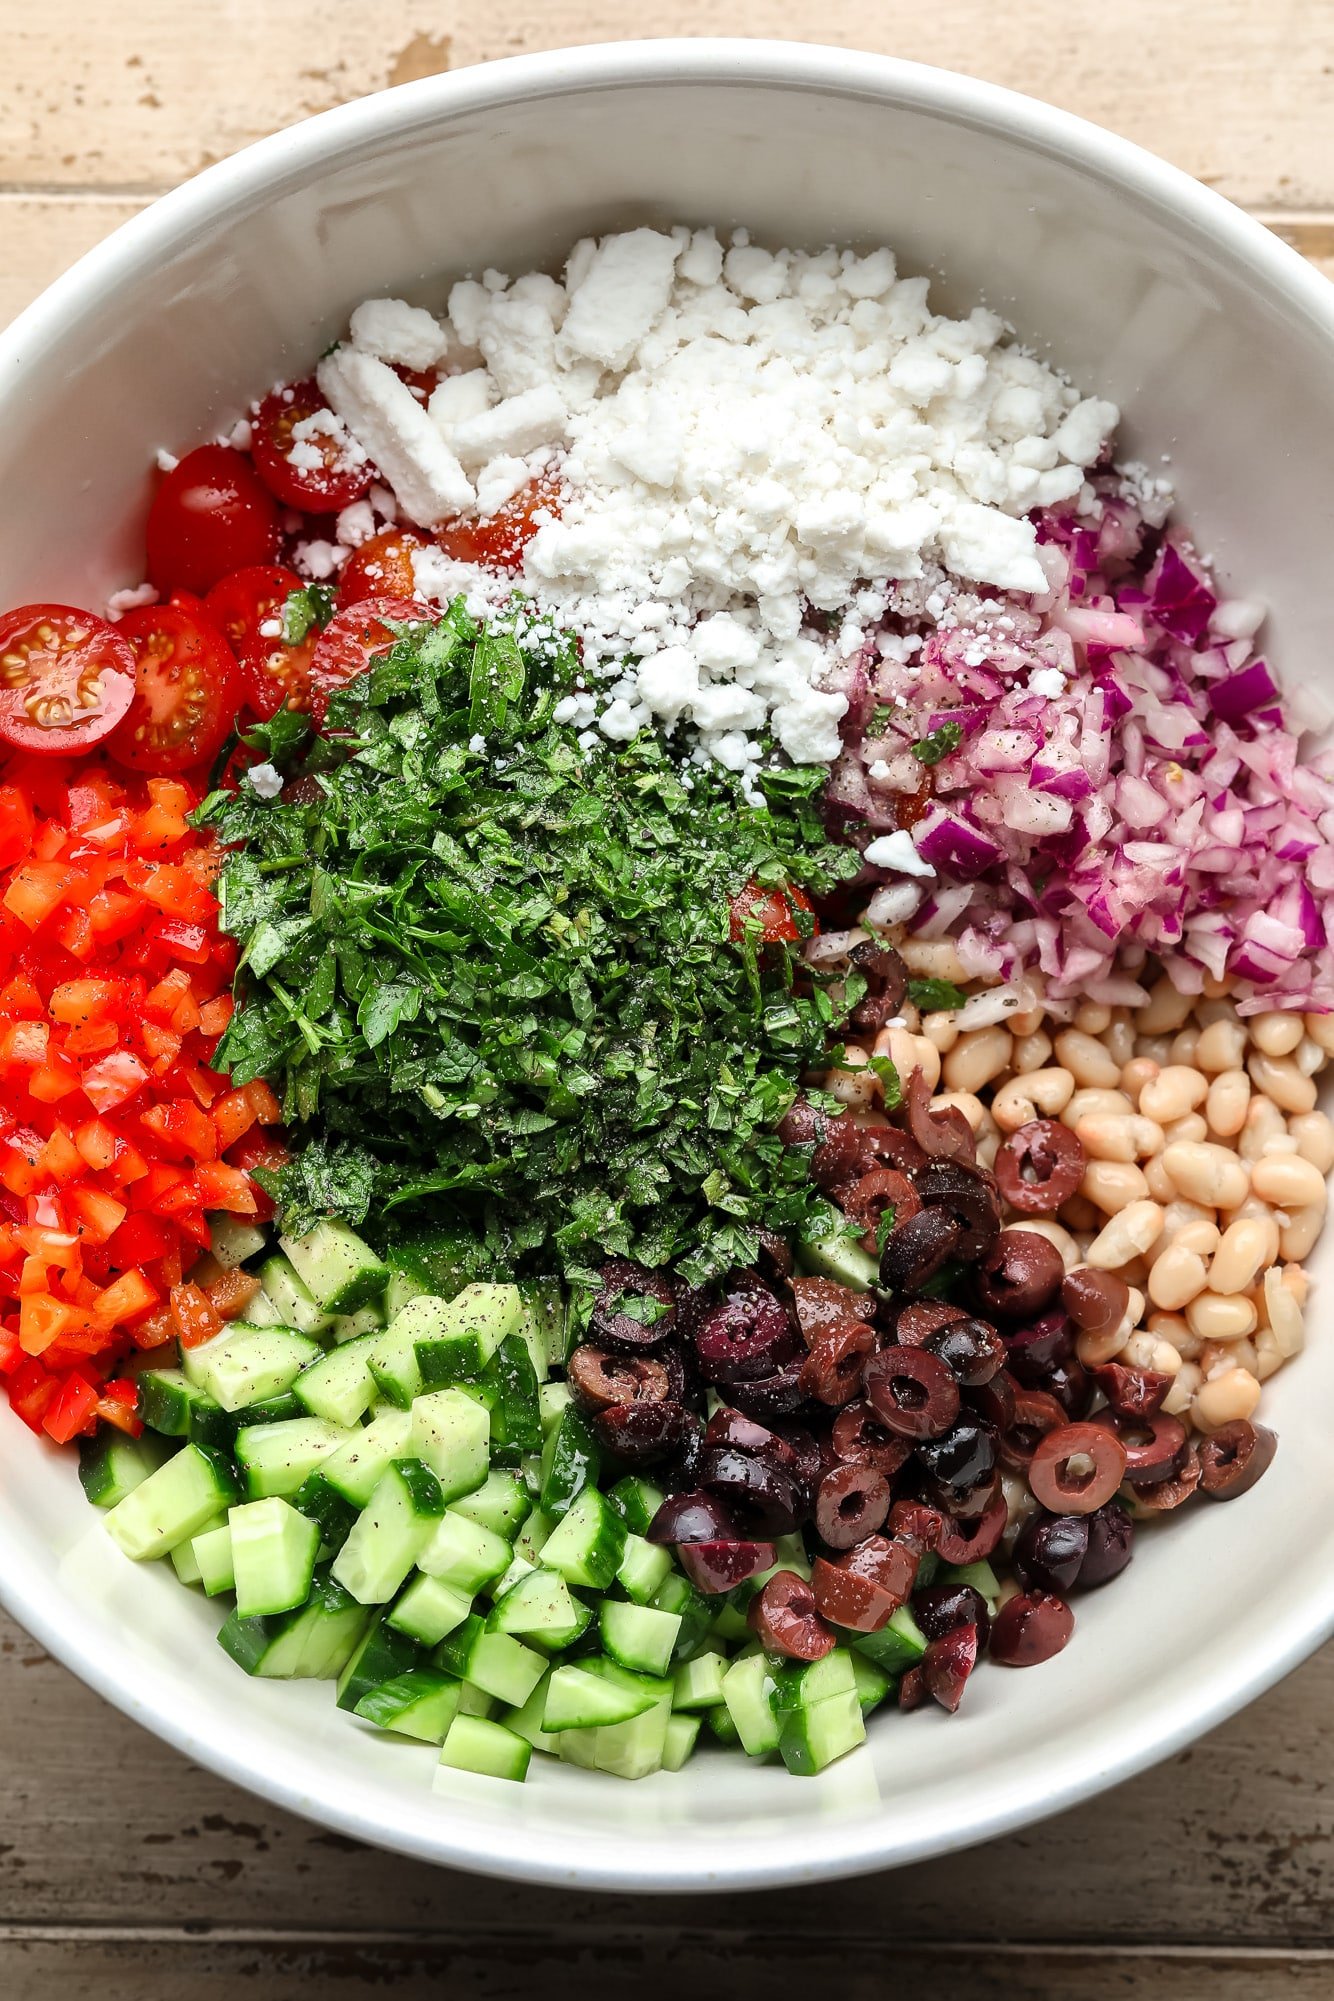
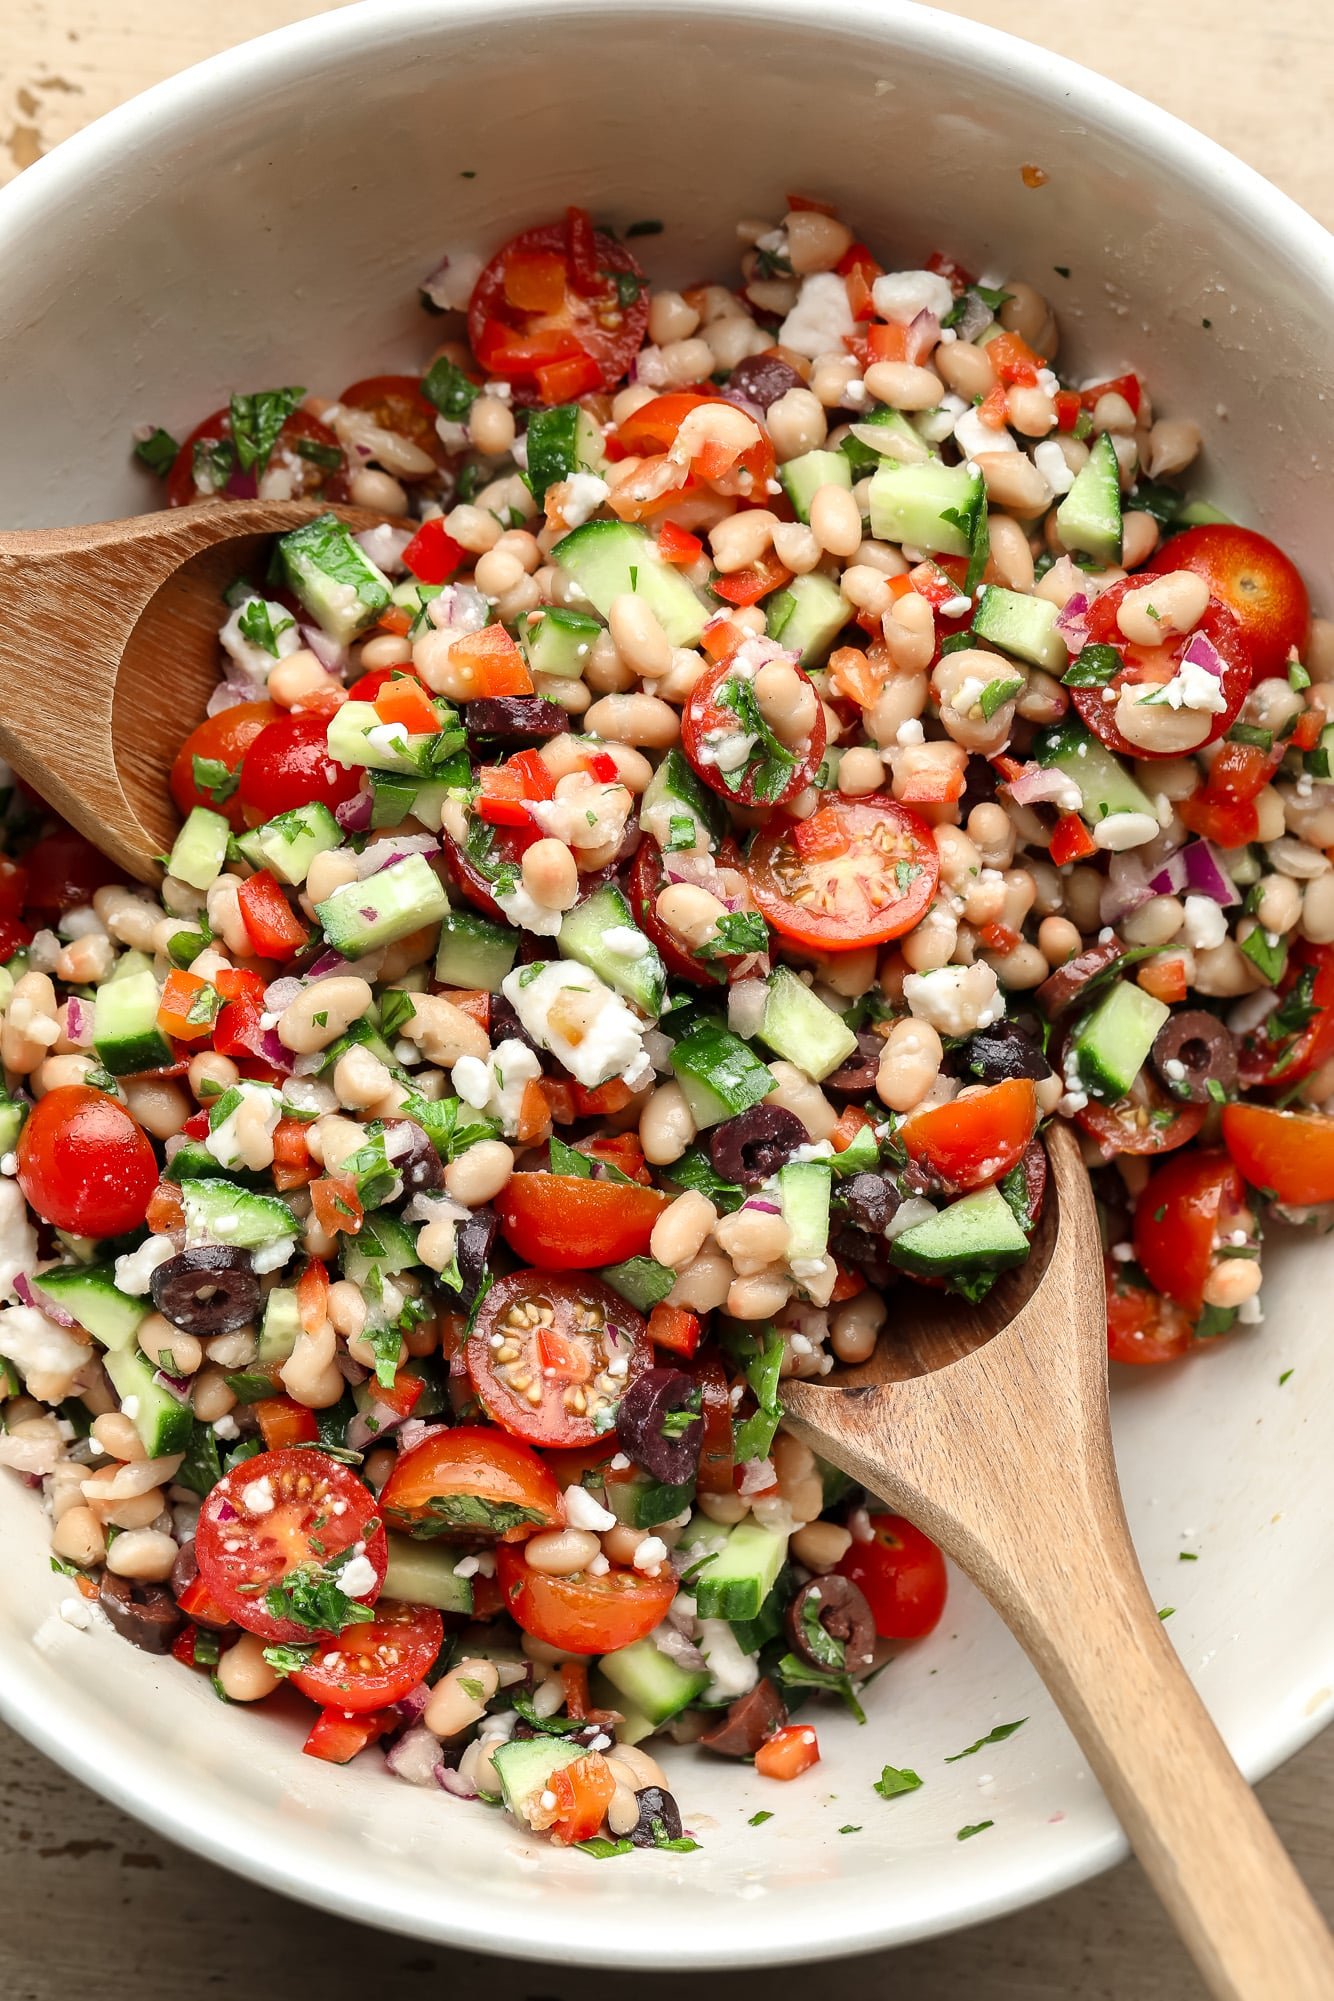
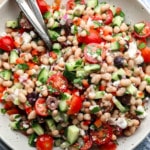
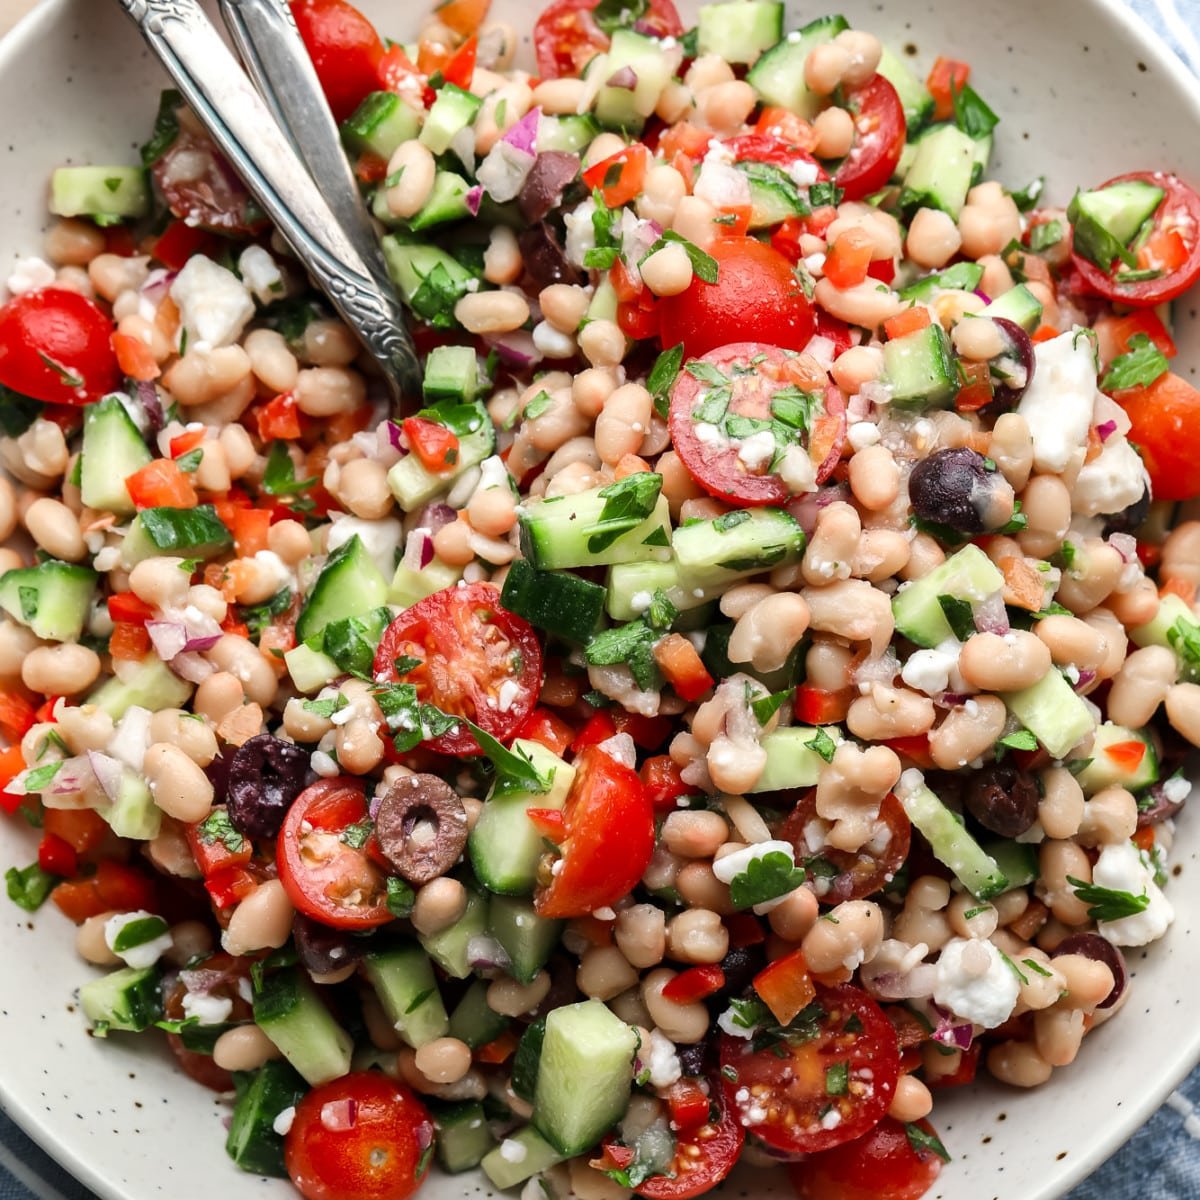 This simple White Bean Salad is the ultimate summer salad! It’s quick and easy to make but doesn’t skimp on flavor thanks to a mix of refreshing Mediterranean vegetables, fresh herbs, creamy cannellini beans, and lemon vinaigrette. Craving more fresh summer salads? Check out my Watermelon Salad with Mint and Feta, Broccoli Salad, Macaroni Salad,…
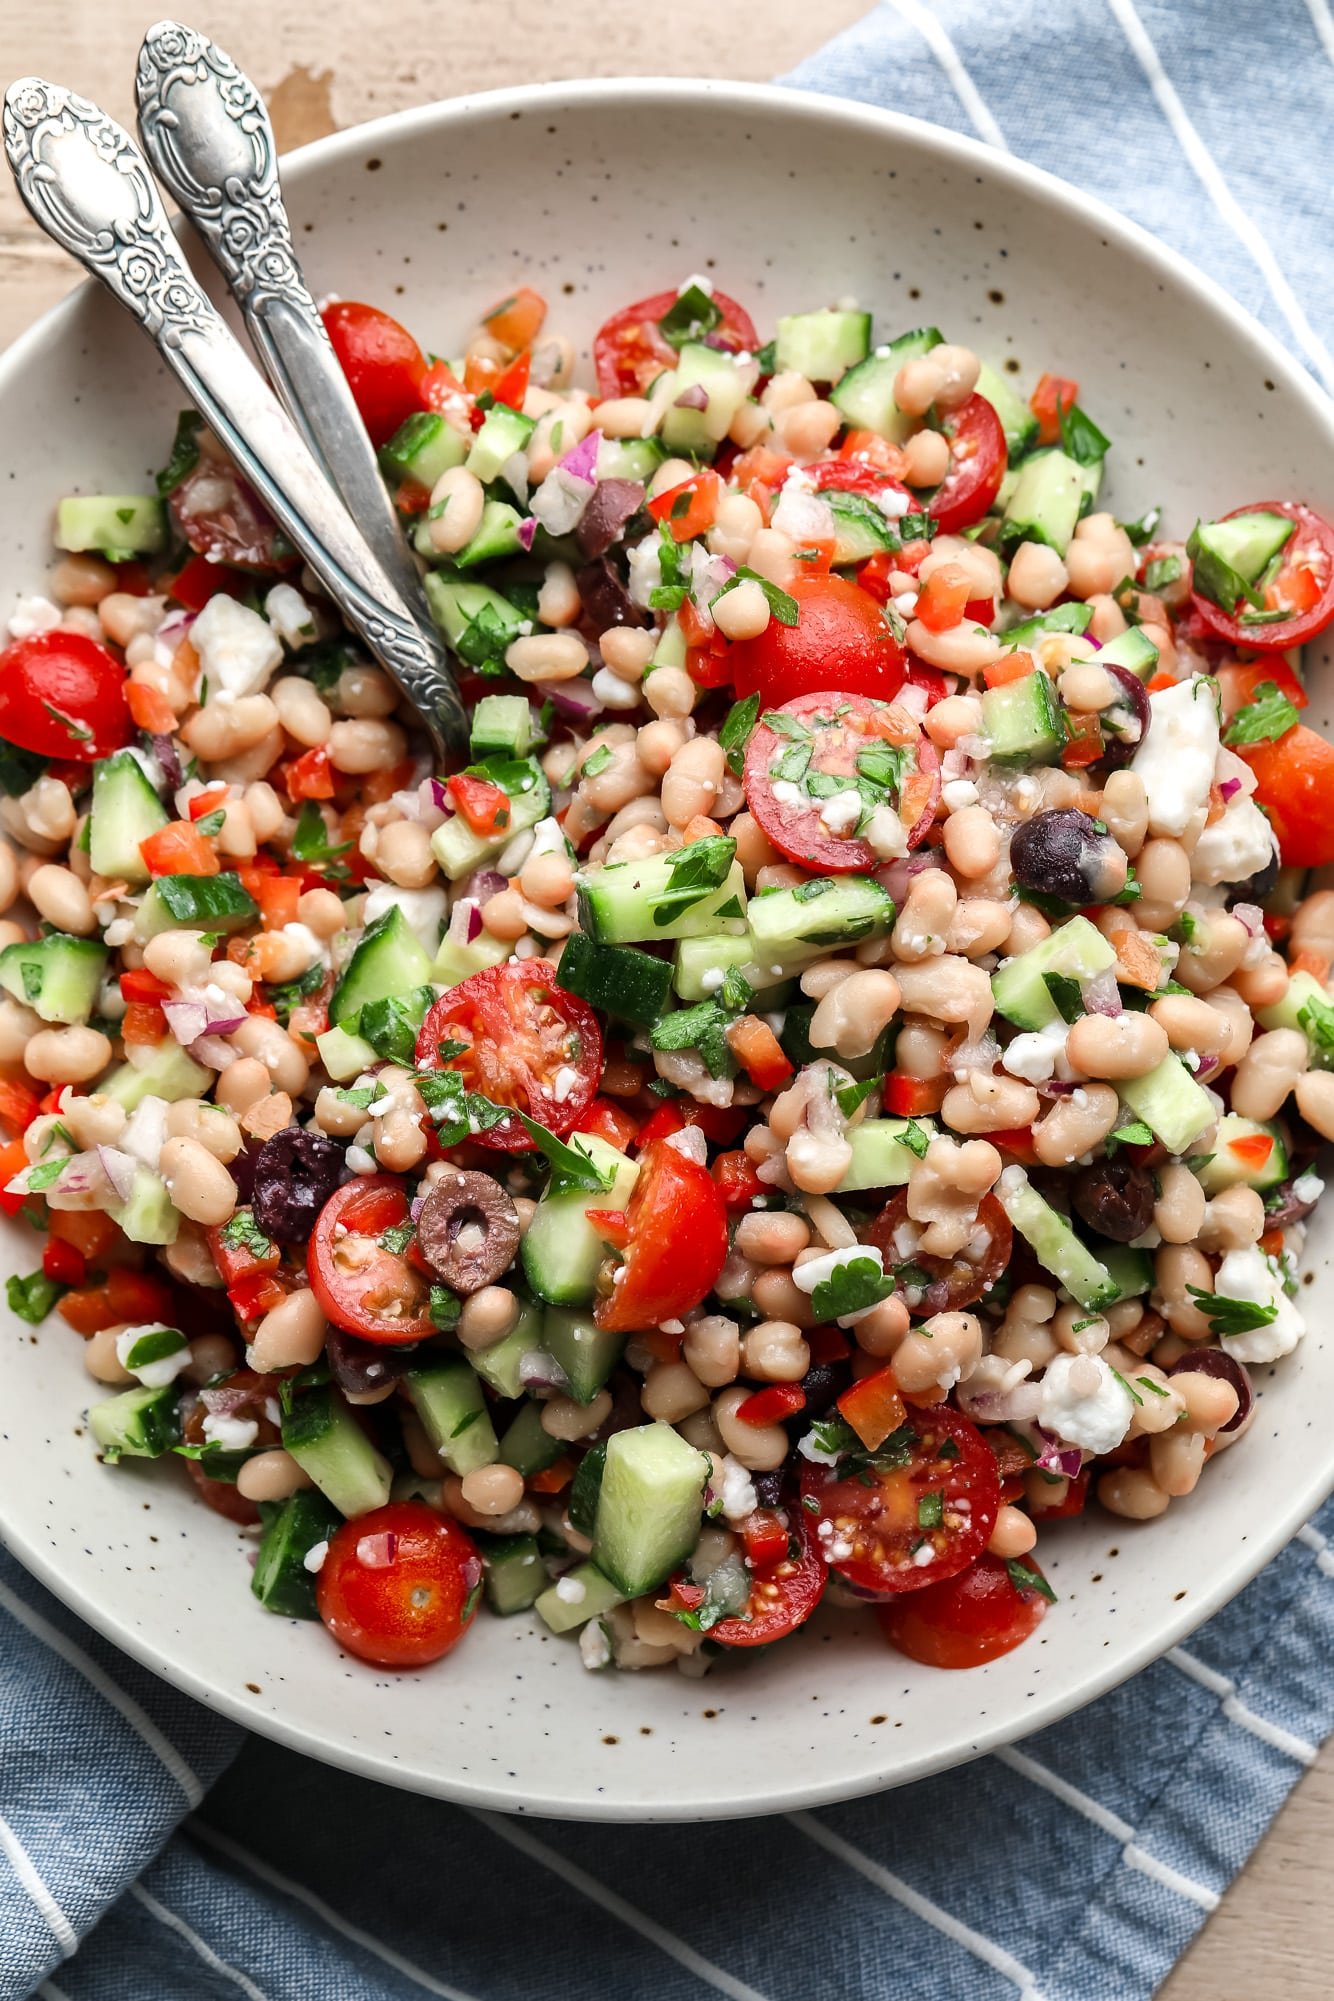
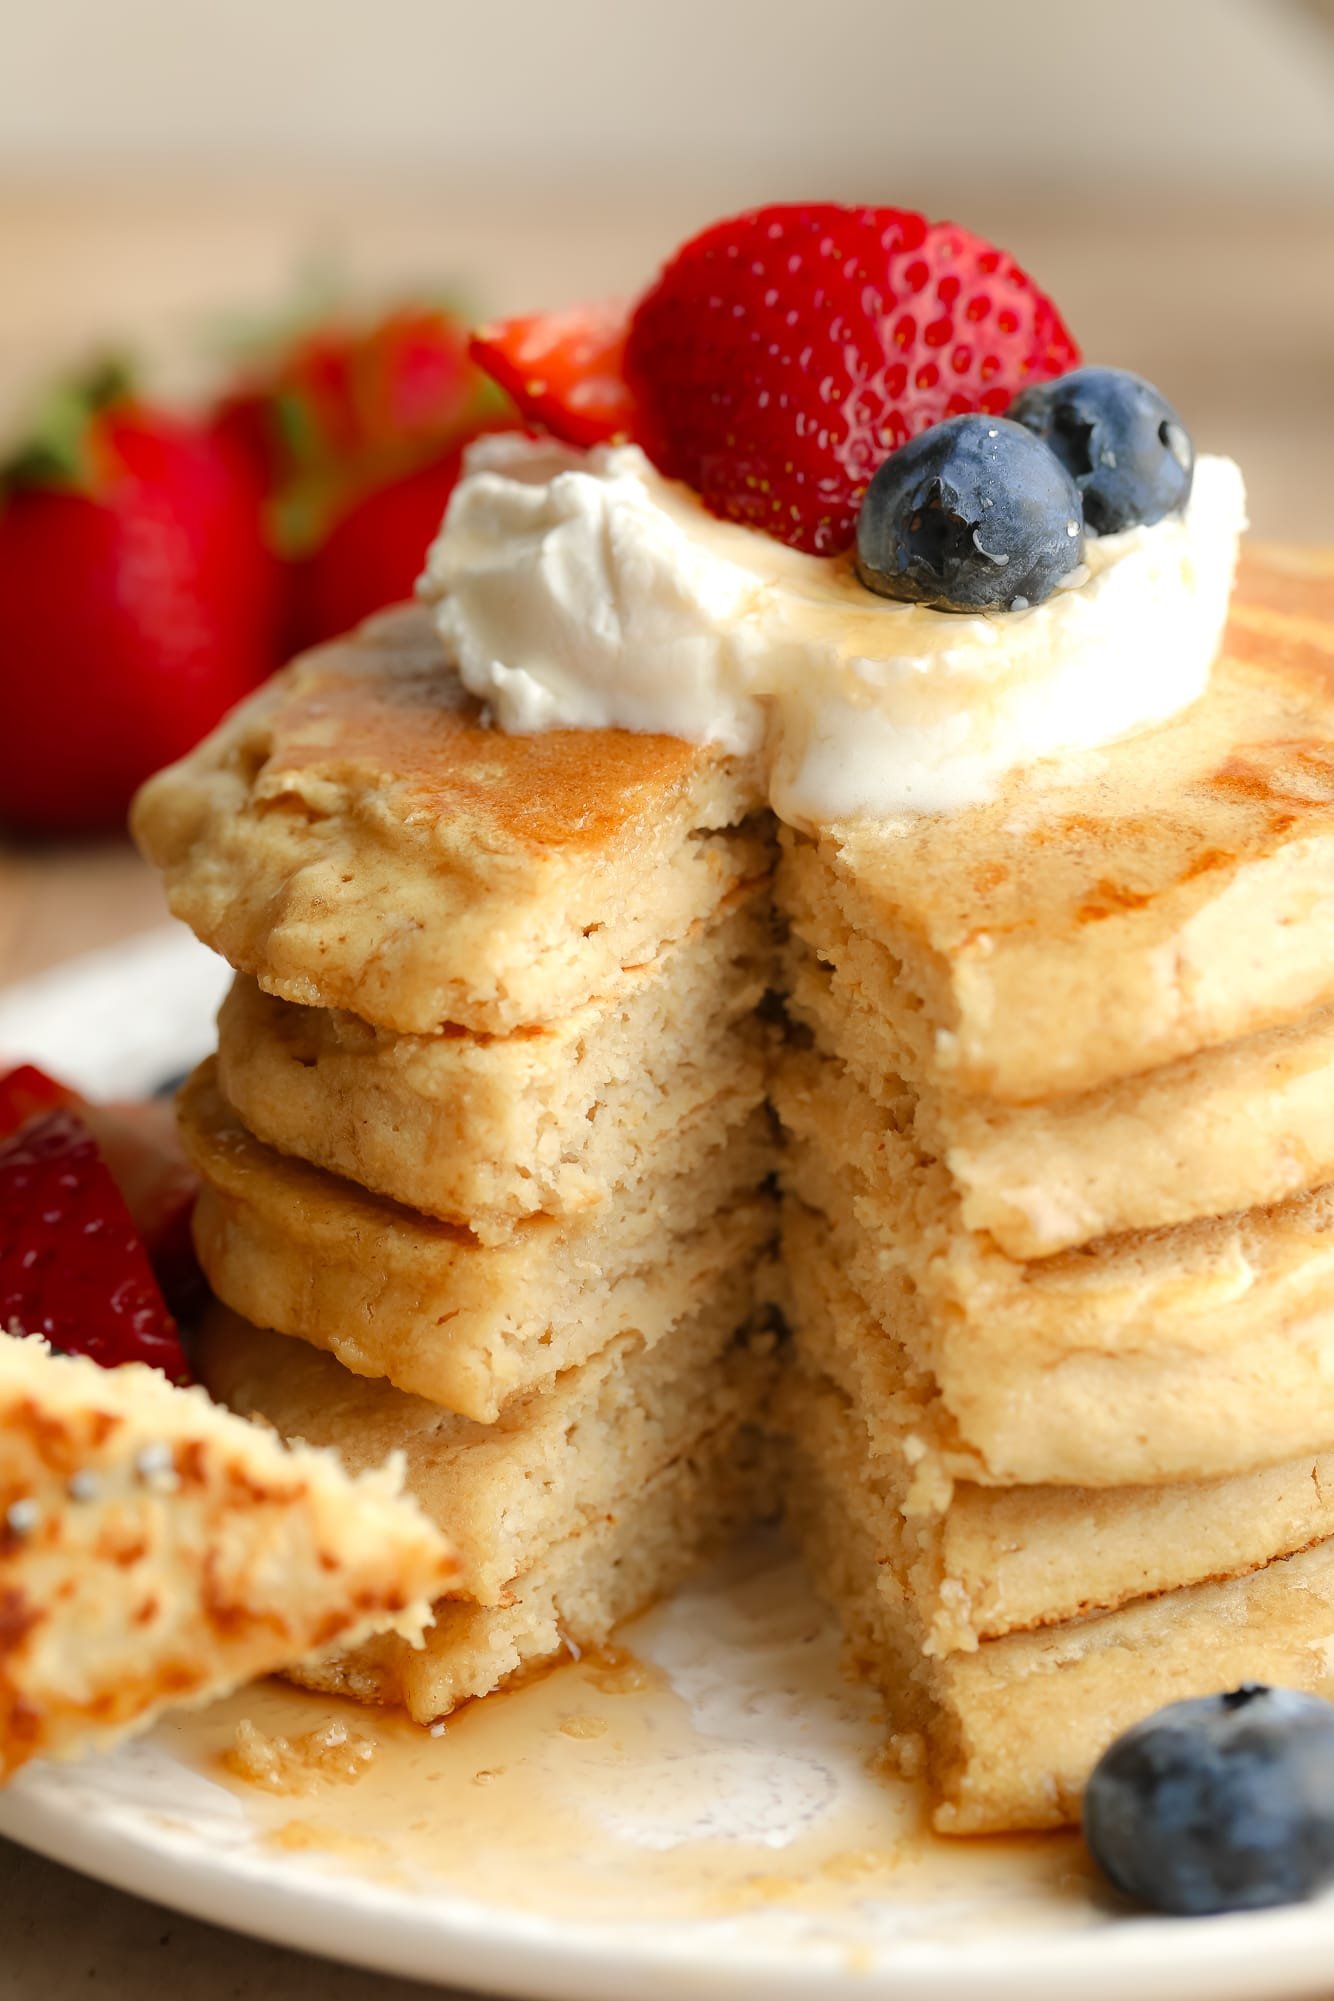
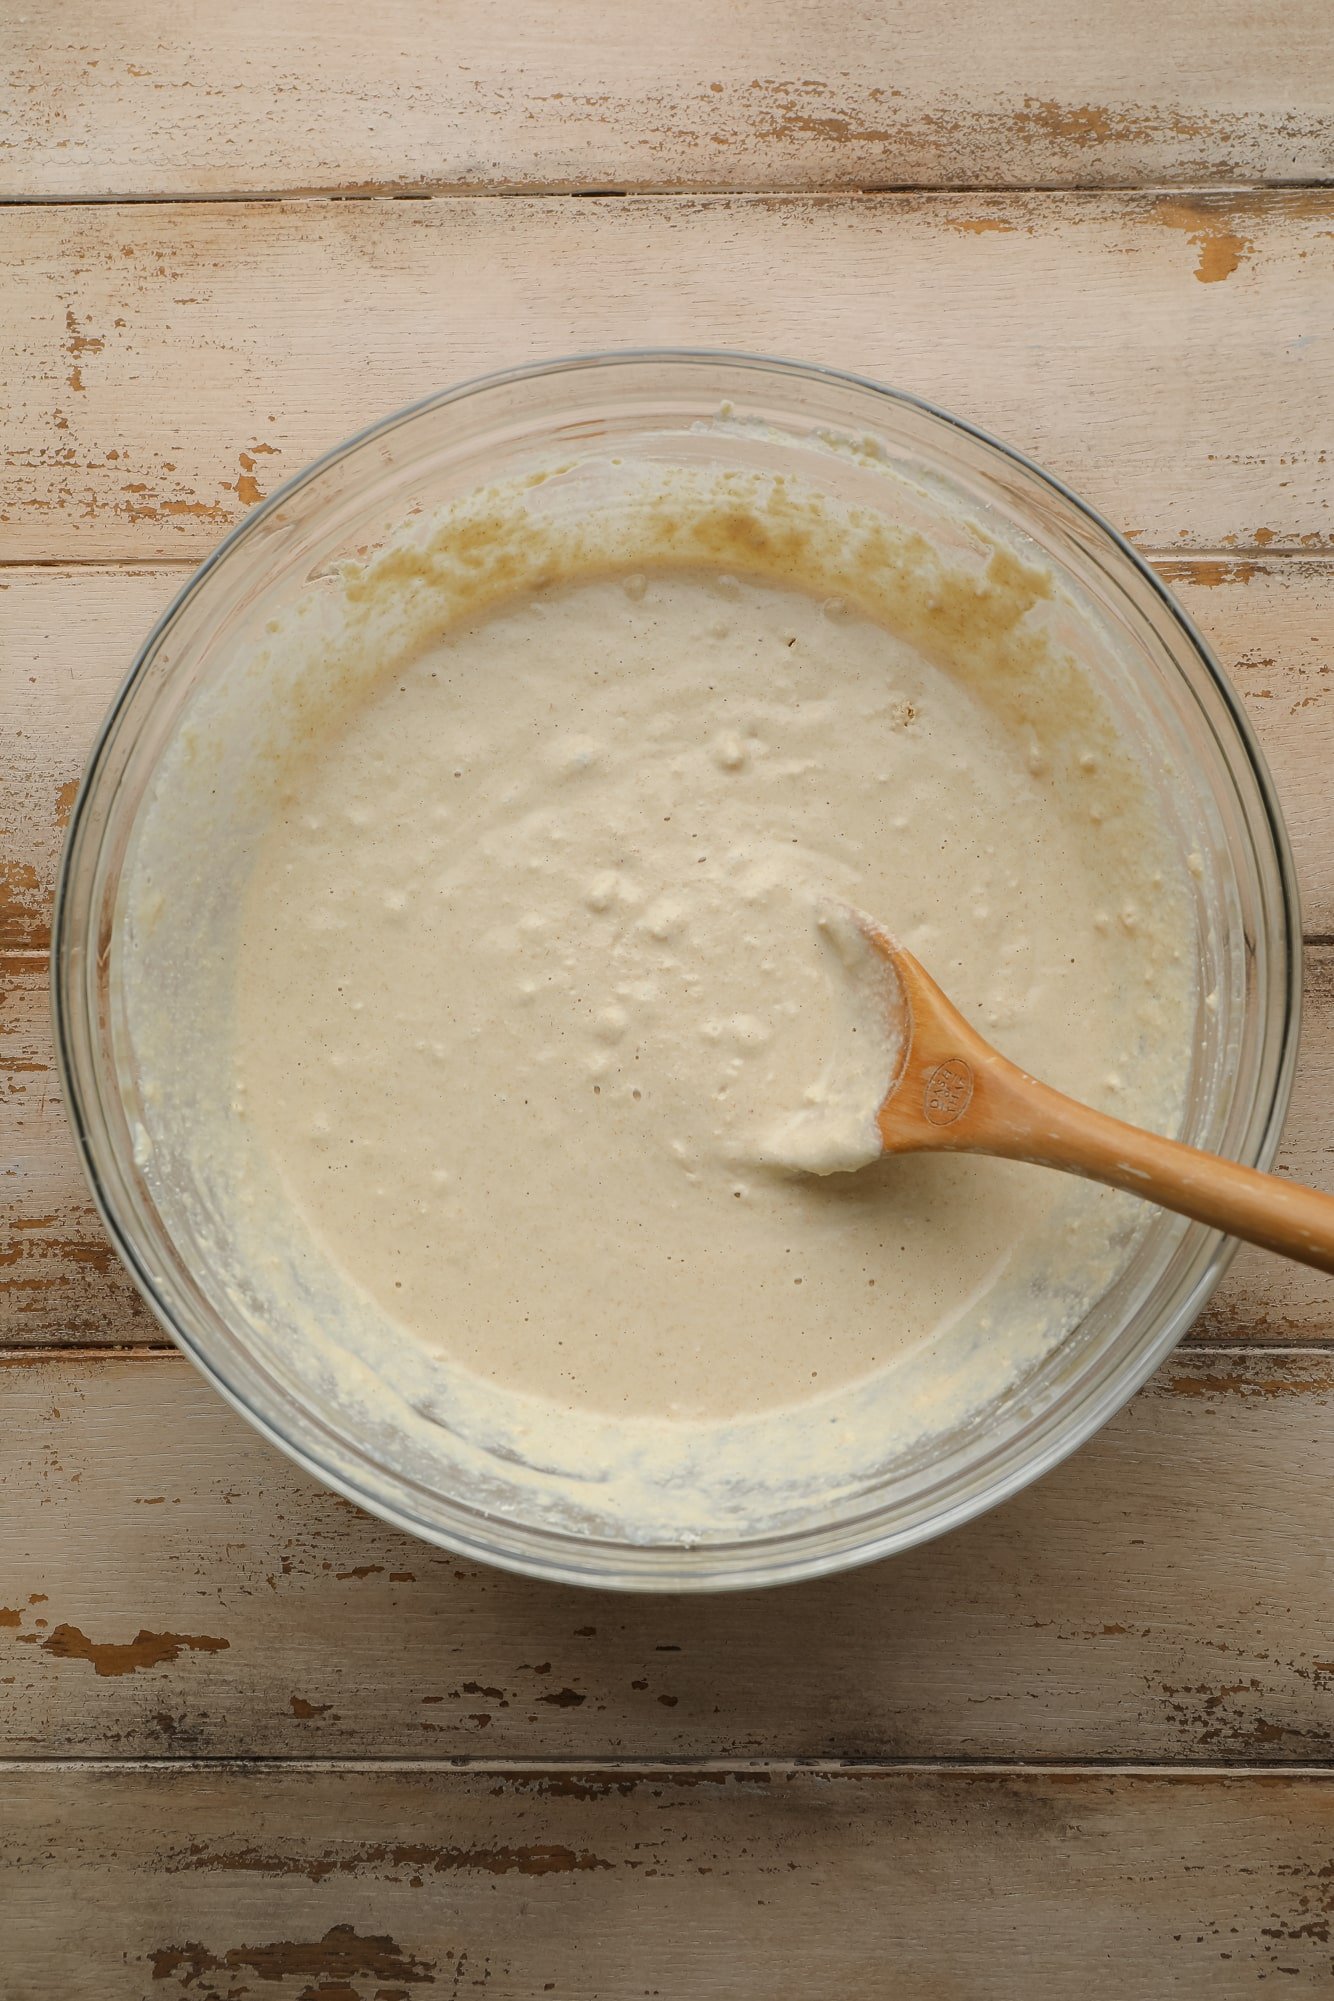
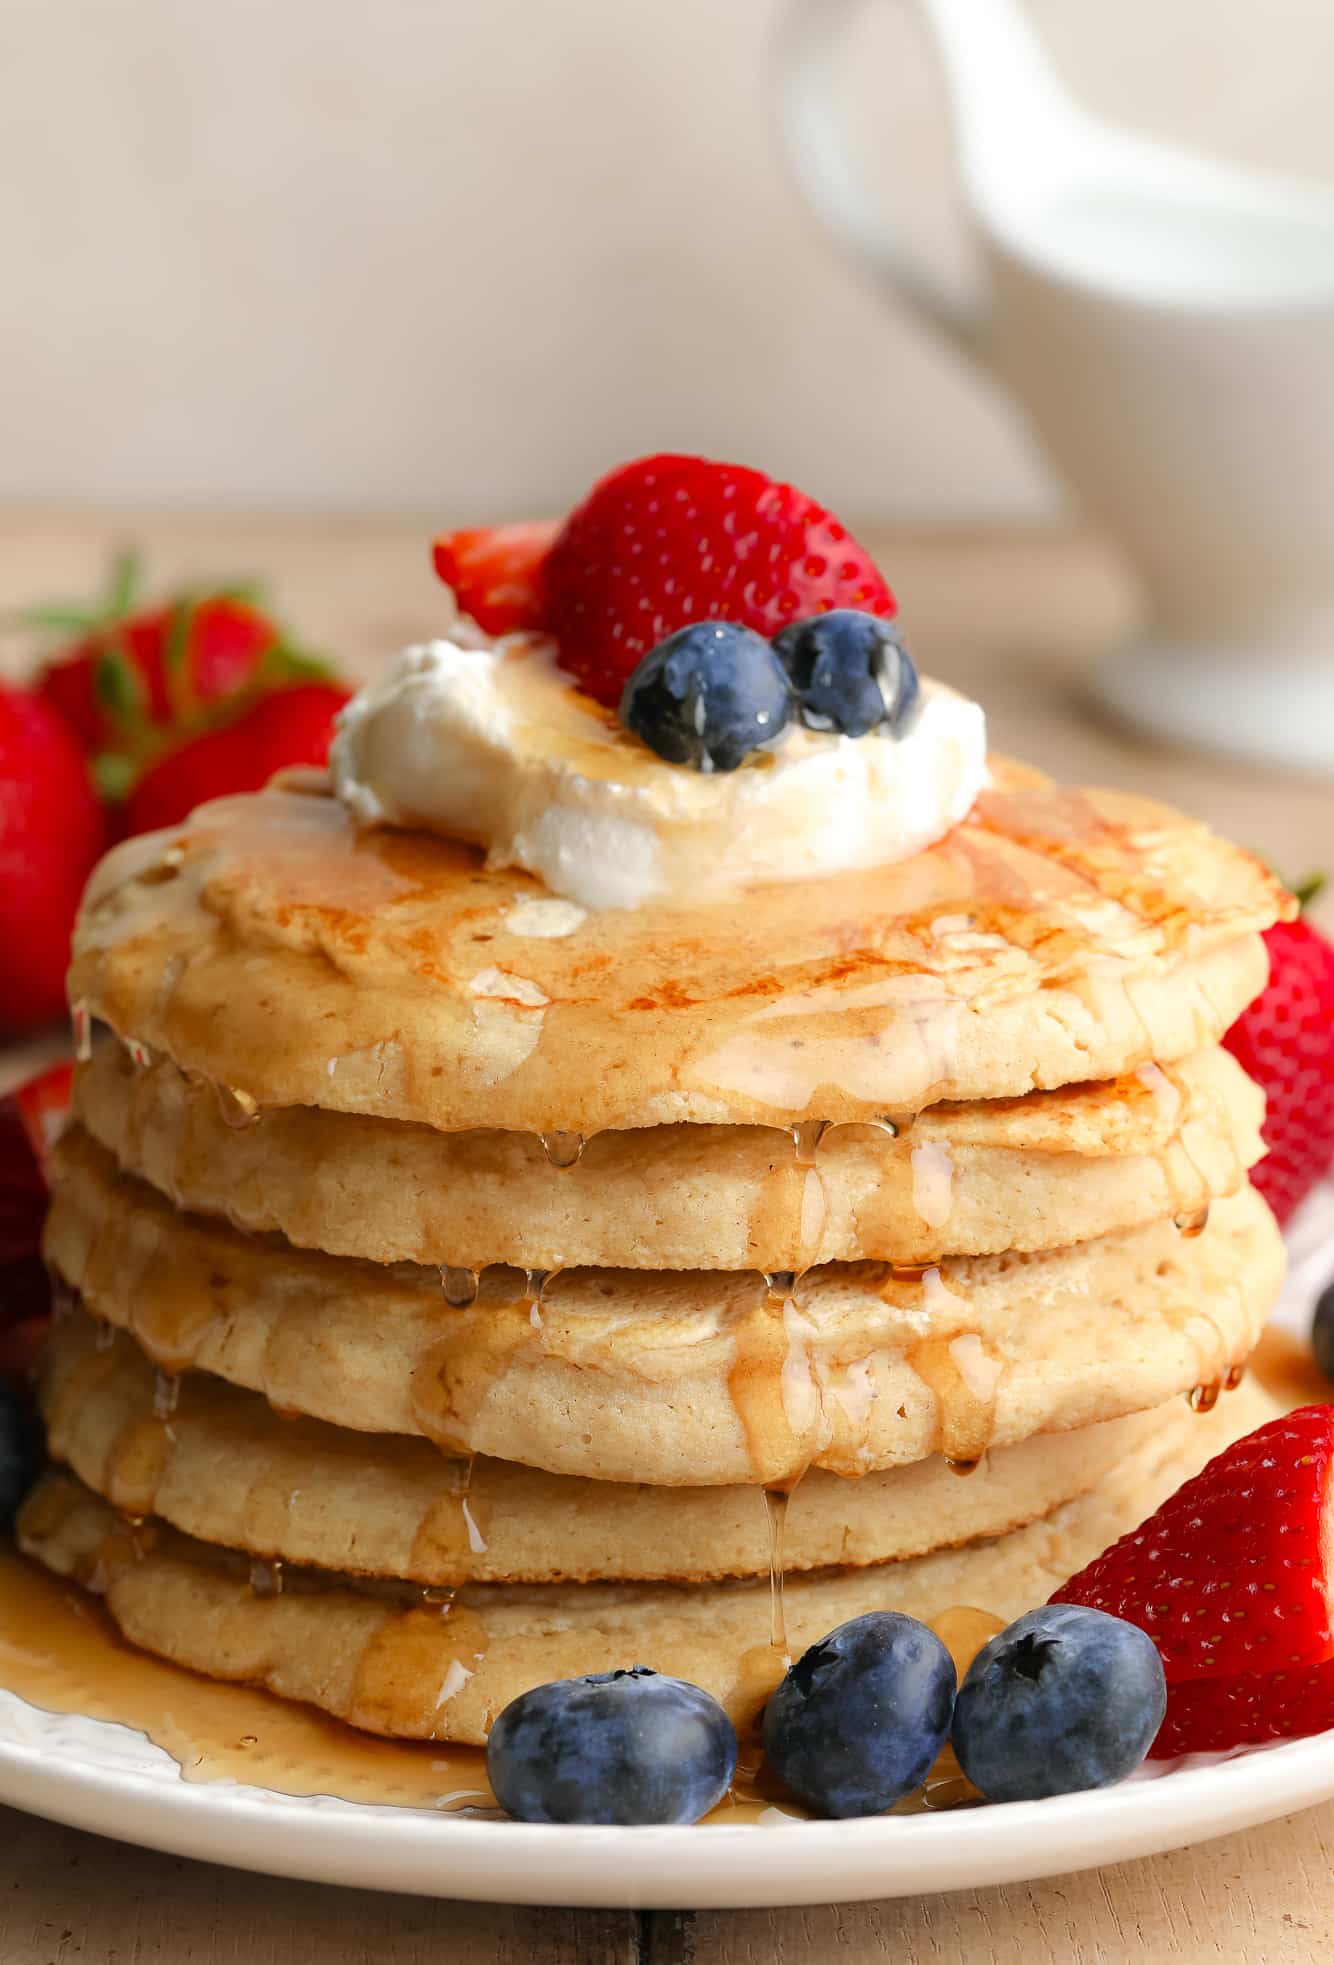
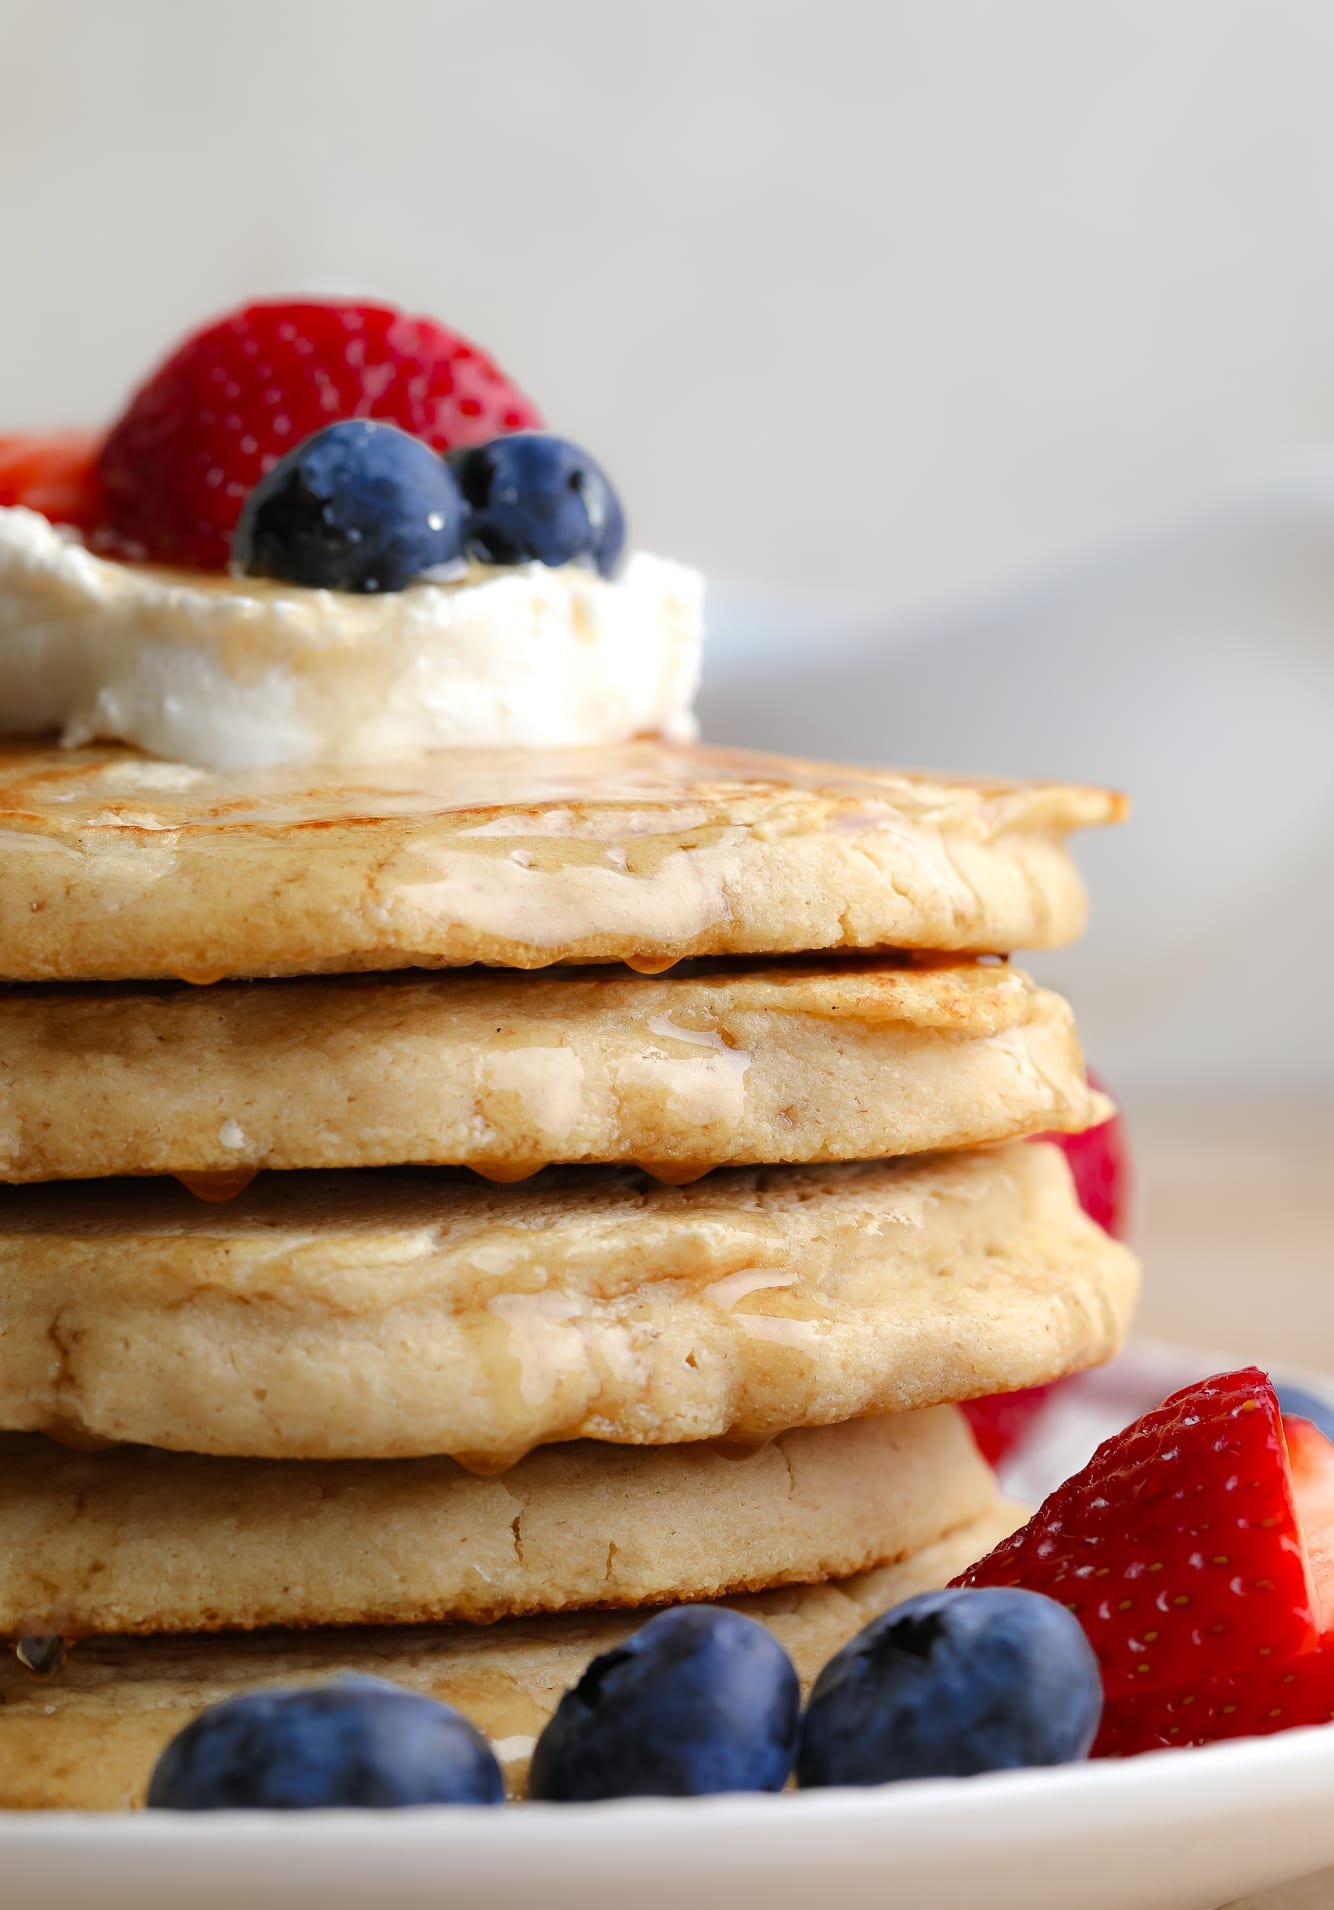
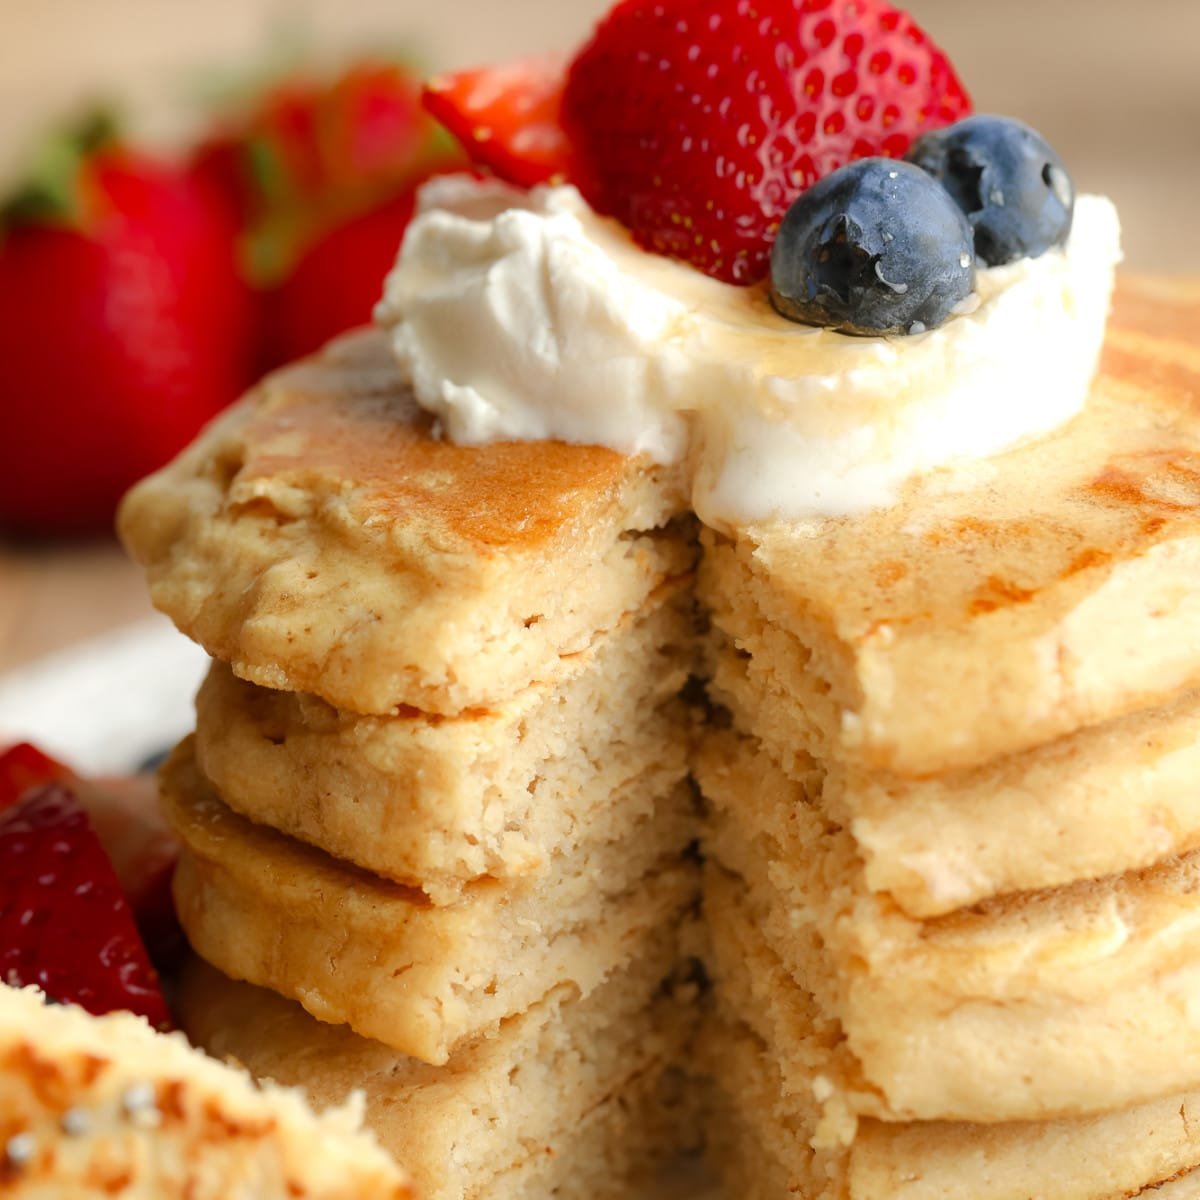 These Oat Flour Pancakes are easy to make with only 7 ingredients! Fluffy and soft, they’re a naturally gluten-free and fiber-rich breakfast the whole family will adore. Looking for more easy pancake recipes? Check out my Vegan Protein Pancakes, Vegan Banana Pancakes, Chocolate Pancakes, and Blueberry Pancakes! Want a nourishing breakfast that tastes amazing AND…