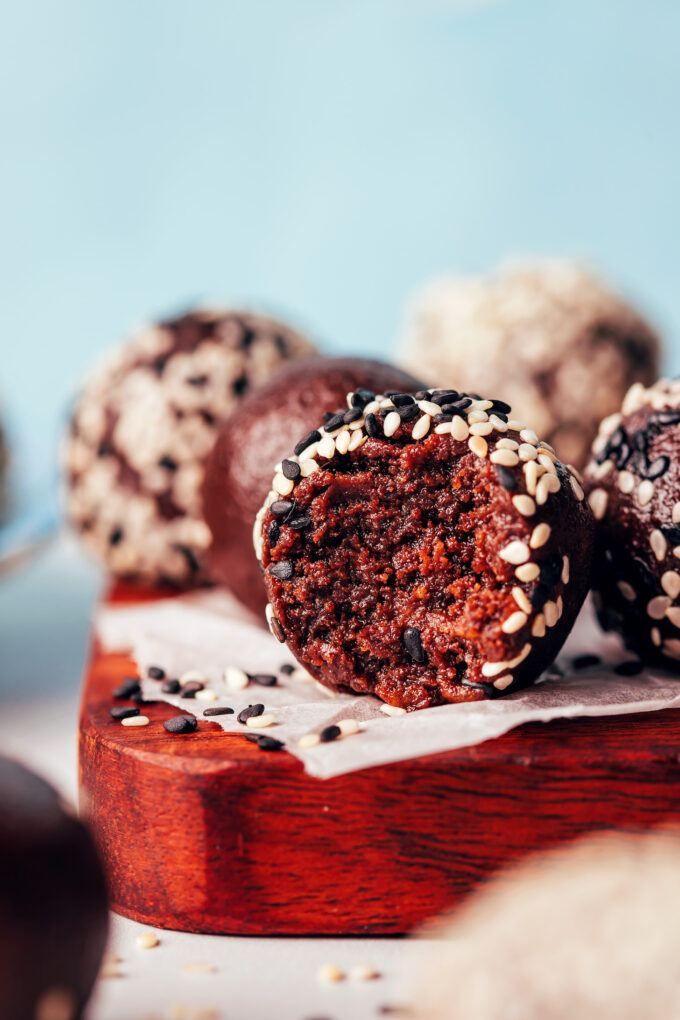
Our new favorite fudgy, not-too-sweet truffles are inspired by a similar treat from Margalaxy in Portland, Oregon. They’re creamy and complex thanks to the inclusion of tahini, bitter and chocolaty because of cocoa powder, and dates lend the perfect te…
Our new favorite fudgy, not-too-sweet truffles are inspired by a similar treat from Margalaxy in Portland, Oregon. They’re creamy and complex thanks to the inclusion of tahini, bitter and chocolaty because of cocoa powder, and dates lend the perfect texture and sweetness.
These seriously snack-able truffles disappeared quickly in the test kitchen. And they’re SO easy to make — just 5 ingredients and 15 minutes required!
With creamy, ultra-flavorful layers of tropical passionfruit and bold raspberry semifreddo and a dark chocolate crumb for a bit of sweet and salty crunch, this no-churn frozen dessert is truly next-level. A semifreddo is an Italian frozen dessert (literally translating to half frozen) that, texturally, falls somewhere between an ice cream and a frozen mousse. […]
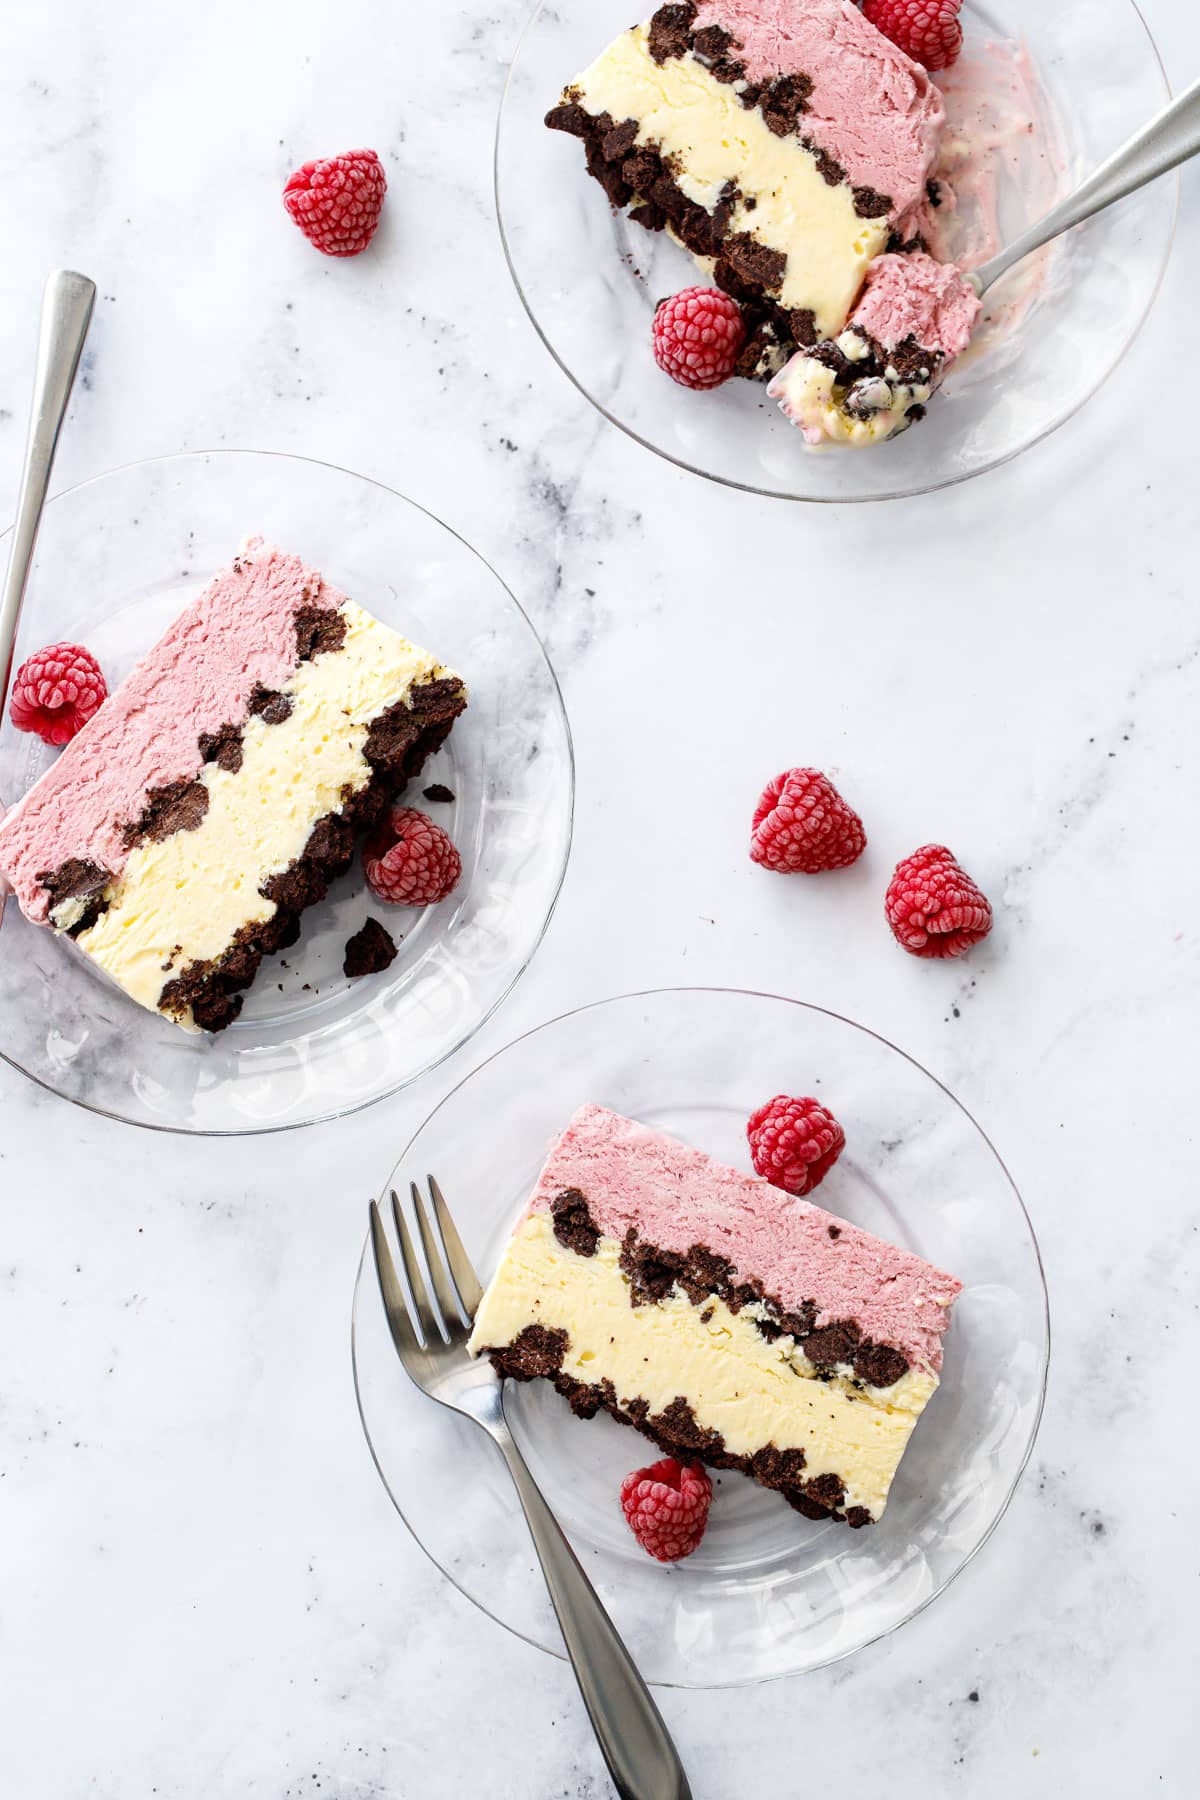
With creamy, ultra-flavorful layers of tropical passionfruit and bold raspberry semifreddo and a dark chocolate crumb for a bit of sweet and salty crunch, this no-churn frozen dessert is truly next-level.
A semifreddo is an Italian frozen dessert (literally translating to half frozen) that, texturally, falls somewhere between an ice cream and a frozen mousse. It is a great option if you’re craving a frozen treat but don’t have an ice cream maker.
This recipe was created in partnership with Amoretti (use coupon code LOVEANDOLIVEOILFREESHIP for free shipping on your order!) All opinions expressed here are my own.
Spoiler alert: this is not Neapolitan! At first glance you may think you’re seeing the classic strawberry-vanilla-chocolate combo, but don’t be fooled, this sweet frozen treat is anything but ordinary, a next-level-Neapolitan if you will, featuring the trifecta of raspberry, passionfruit, and chocolate flavors.
The texture is lighter than ice cream thanks to the folded-in whipped cream, giving the consistency of a luscious frozen mousse that softens into a velvety smooth texture on your tongue. And thanks to the custard base, it has all the creaminess that you love in ice cream without the extra effort of churning.
The beauty of a molded frozen dessert like this is its layering ability, a benefit that poor ice cream certainly can’t claim. Here I’ve stacked layers of bright passionfruit and bold raspberry with Milk Bar-style chocolate crumbs in between and on top for the prefect foil of salty to sweet, crunchy to creamy.
We’ve done brownies before (exhibits A, B, C, D, E, and F)…but these are different, friends! We couldn’t hold out on you. Introducing: shiny, CRACKLY TOP, chewy, decadent, REAL DEAL brownies that are undetectably vegan and gluten-free (!!). …
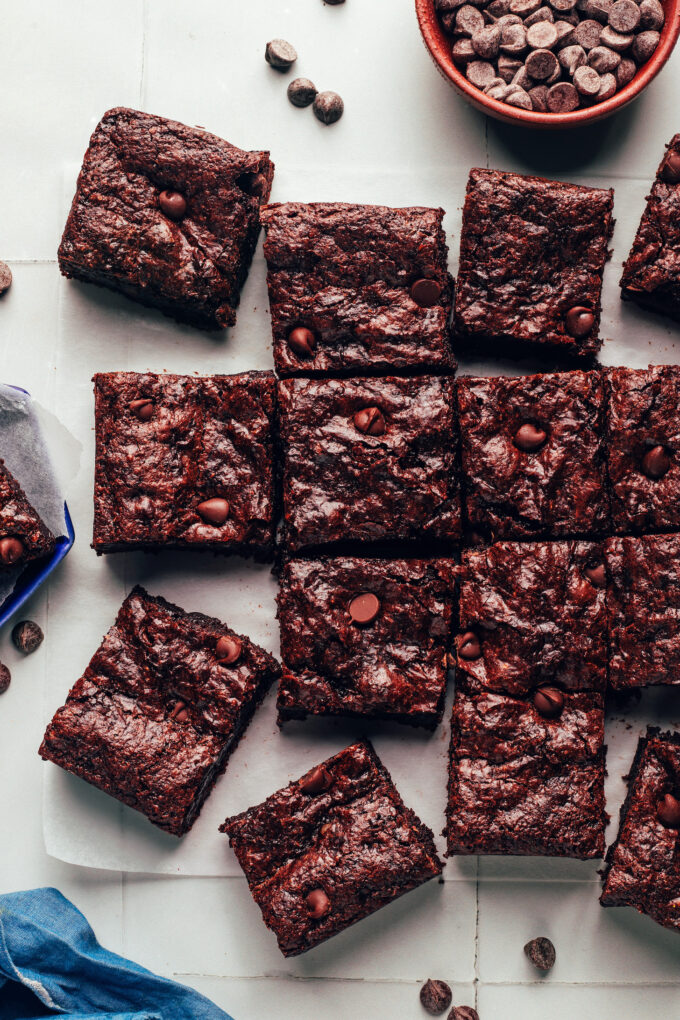
We’ve done brownies before (exhibits A, B, C, D, E, and F)…but these are different, friends! We couldn’t hold out on you. Introducing: shiny, CRACKLY TOP, chewy, decadent, REAL DEAL brownies that are undetectably vegan and gluten-free (!!).
They’re also SO easy to make with simple methods and just 1 bowl + 9 ingredients. Prepare for your brownie dreams to become a reality! Let’s bake!
How to Make Fudgy Crackly Top Vegan + Gluten-Free Brownies
These tender, deeply chocolate cupcakes are made with extra virgin olive oil and freshly squeezed blood orange juice, topped with a swirl of flavorful blood orange buttercream and crowned with a jewel-like candied blood orange slice. The blood orange buttercream is the star of the show: with a punchy orange flavor and gorgeous pale pink […]
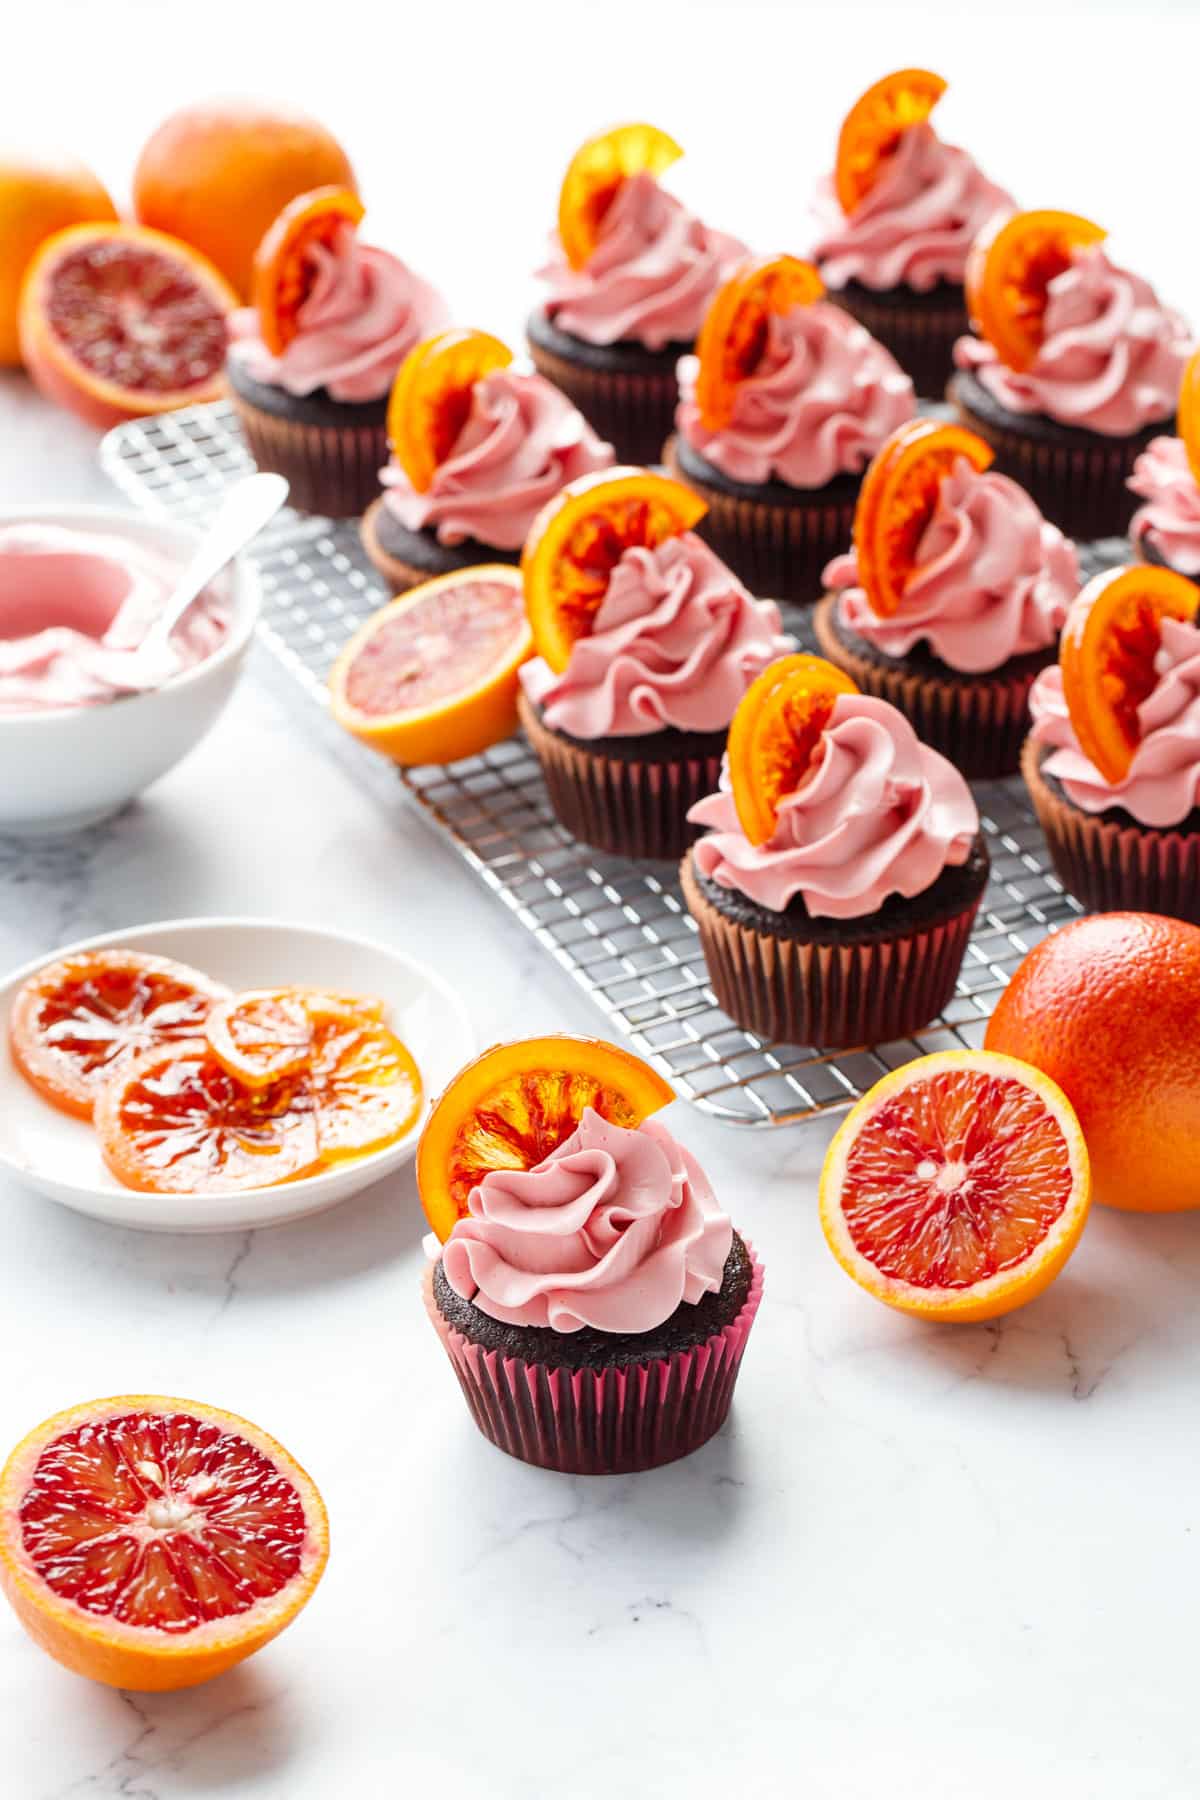
These tender, deeply chocolate cupcakes are made with extra virgin olive oil and freshly squeezed blood orange juice, topped with a swirl of flavorful blood orange buttercream and crowned with a jewel-like candied blood orange slice.
The blood orange buttercream is the star of the show: with a punchy orange flavor and gorgeous pale pink hue. The unique eggless mock meringue method produces a frosting that’s much creamier and less sweet than traditional American buttercreams.
This recipe was created in partnership with Amoretti (use coupon code LOVEANDOLIVEOILFREESHIP for free shipping on your order!) All opinions expressed here are my own.
Happy blood orange season to all who celebrate!
I am a big fan of blood oranges, more than any other kind of citrus. While you’ll rarely, if ever, see me sit down and eat a regular orange, I will devour a blood orange and even choose it as an afternoon snack over chips or chocolate (gasp! I know!) I just love the bright flavor, which is like a sweeter version of a classic orange, both sweet and tart at the same time, with underlying notes of red berries. Not to mention the vibrant red color makes me ever so happy.
Needless to say, you can be sure that when blood oranges appear for a few short weeks in the middle of winter, I’ll be there, eating my fill before they disappear for another year. You can also assume I’ll be cooking, baking, or canning something with blood oranges this time of year (assuming I have some left over after stuffing my face, that is). And sure enough, I’ve put out one new blood orange recipe pretty consistently every year (there’s also a Strawberry Blood Orange marmalade recipe you’ll only find in my book, trust me when I say it’s not to be missed).
This year, I decided to revisit an old favorite and re-make my favorite chocolate blood orange cupcakes. The sunset-hued buttercream and the moist chocolate cake spiked with blood orange flavor are, simply put, stunning in both taste and appearance. Add in some fruity extra virgin olive oil in place of the usual vegetable oil in the cupcake, and you have yourself one delicious treat.
This time around I topped my cupcakes with jewel-like slices of candied blood orange, which are as gorgeous as they are delicious, and add the perfect finishing touch to the swirl of pink buttercream frosting.
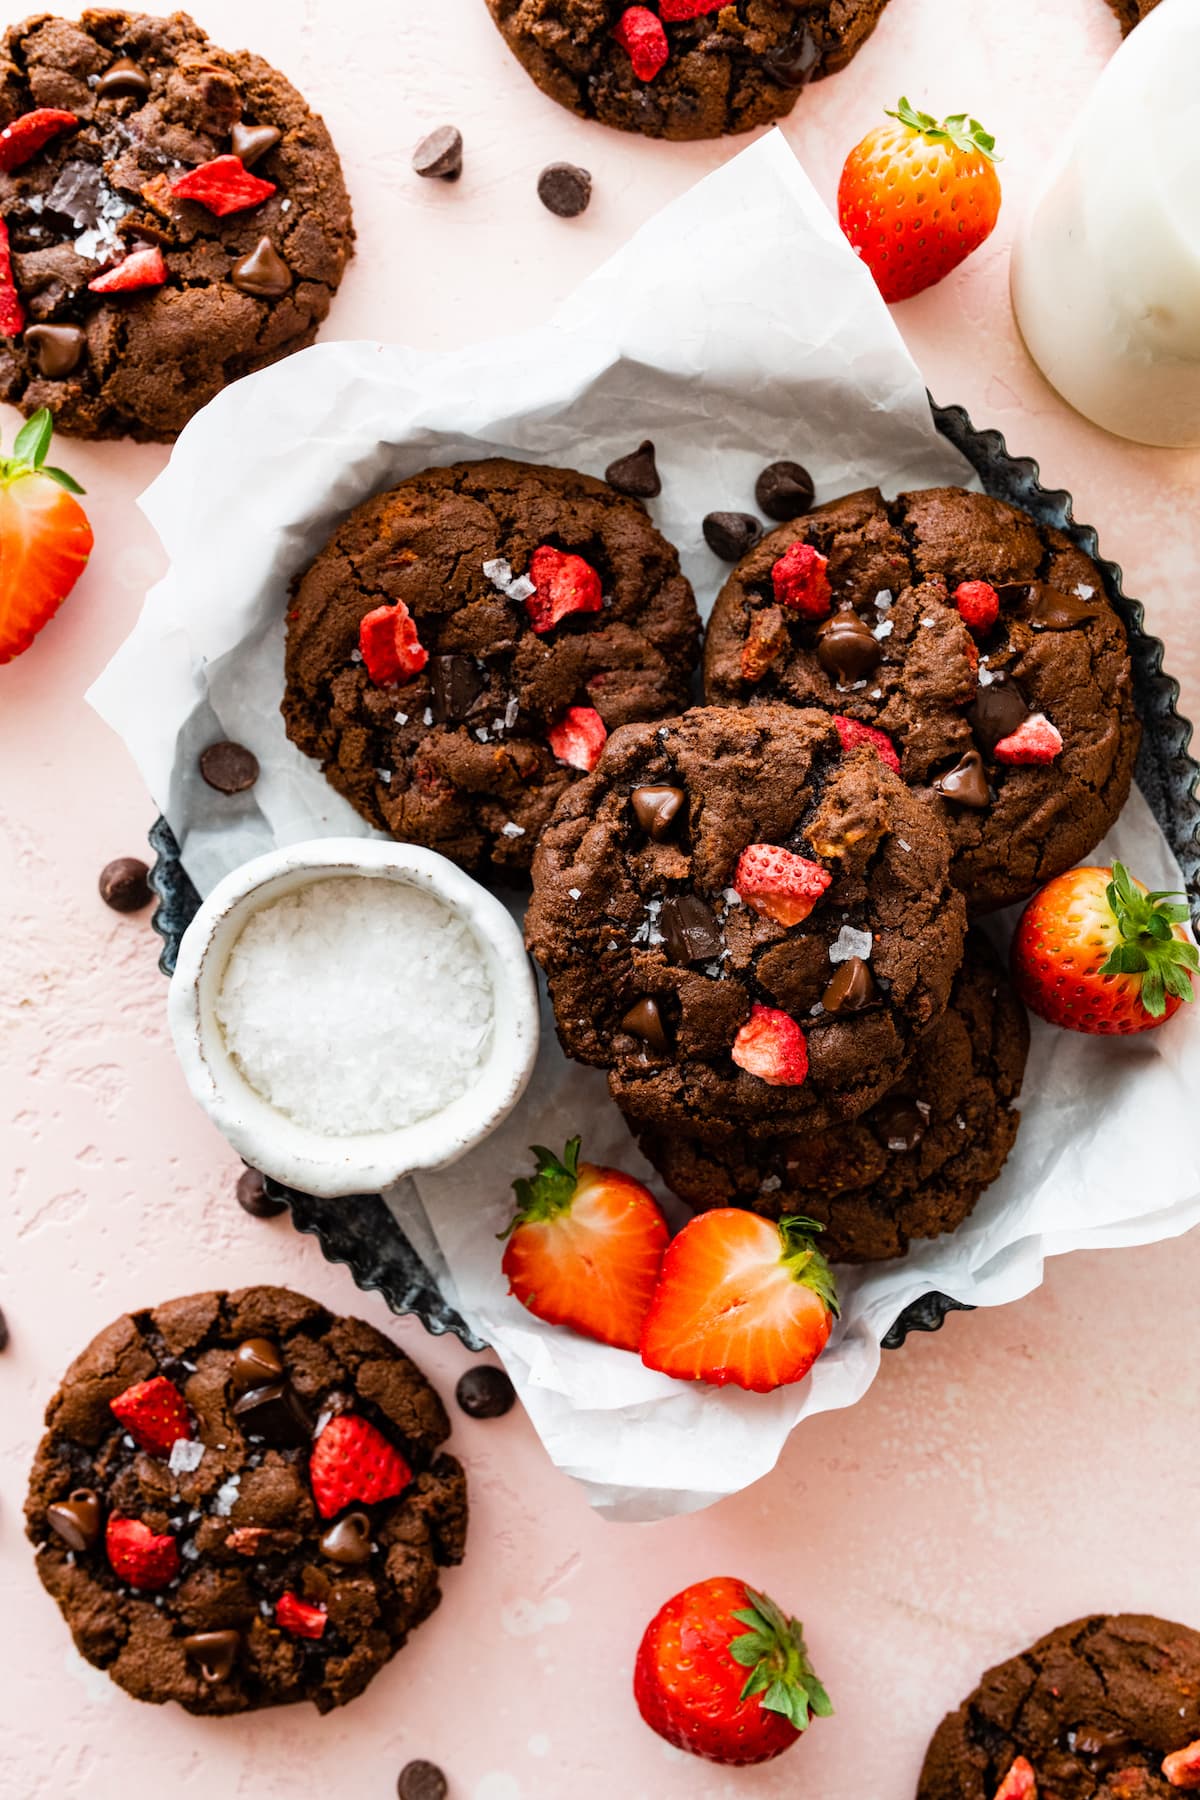
Strawberries and chocolate are a match made in heaven. Chocolate covered strawberries are a classic dessert and have you tried my strawberry chocolate cake? SO delicious! Cookies are my favorite dessert so of course I had to combine the two ingredients…
Strawberries and chocolate are a match made in heaven. Chocolate covered strawberries are a classic dessert and have you tried my strawberry chocolate cake? SO delicious! Cookies are my favorite dessert so of course I had to combine the two ingredients in a cookie! These Strawberry Chocolate Cookies are DIVINE. They remind me of chocolate…
It’s no secret that chocolate cake is my favorite cake. I love my chocolate bundt cake, flourless chocolate cake, and easy chocolate cake. They are all AMAZING! But whenever I am celebrating something special, I like to make this layered bakery-s…
It’s no secret that chocolate cake is my favorite cake. I love my chocolate bundt cake, flourless chocolate cake, and easy chocolate cake. They are all AMAZING! But whenever I am celebrating something special, I like to make this layered bakery-style Chocolate Cake. It is the perfect dessert for any celebration! The cake is super…
Anyone else have an awkwardly long list of modifications when ordering drinks from coffee shops? Welcome to the club. Sometimes we spare ourselves the embarrassment and make them at home.
Inspired by the dangerously delicious Mayan Mocha from Picnik, t…
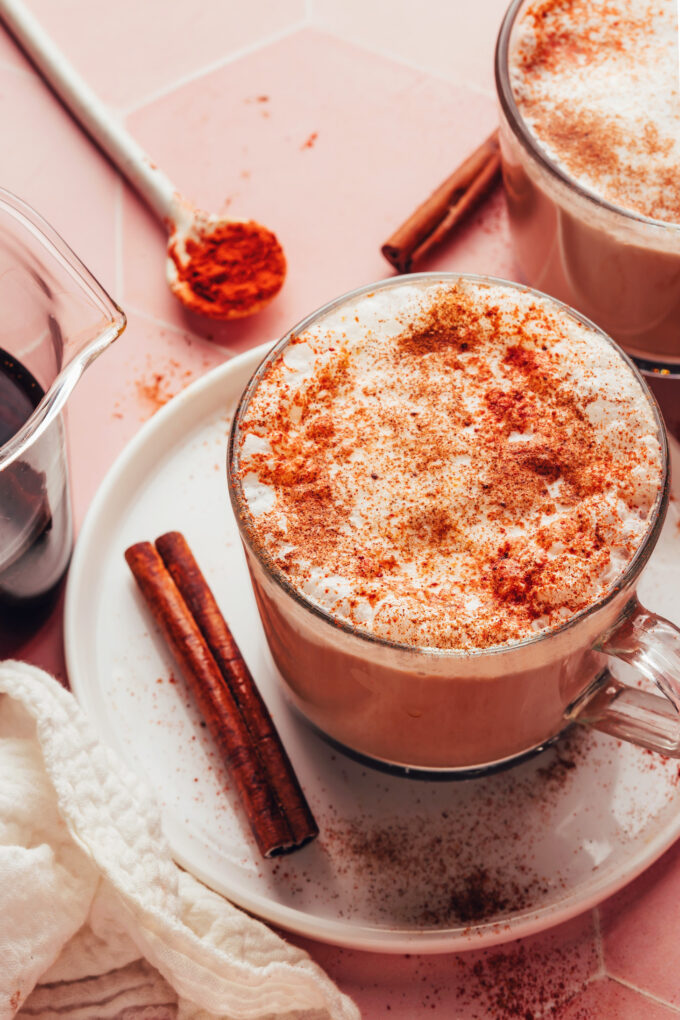
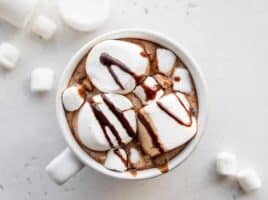
Anyone else have an awkwardly long list of modifications when ordering drinks from coffee shops? Welcome to the club. Sometimes we spare ourselves the embarrassment and make them at home.
Inspired by the dangerously delicious Mayan Mocha from Picnik, this creamy, dreamy drink is a little sweet, spicy, and chocolaty. It’s also dairy-free and can be made with dandelion root for a low-caffeine, coffee-free option. Let us show you how it’s done!
Here’s a perfect addition to your Christmas table: a light and fluffy chiffon cake roll made with red and white striped batter, and filled with a spiral of chocolate peppermint whipped cream for a festive cake that’s dressed to impress. This peppermint roll cake looks and tastes like a giant candy cane (if candy canes […]
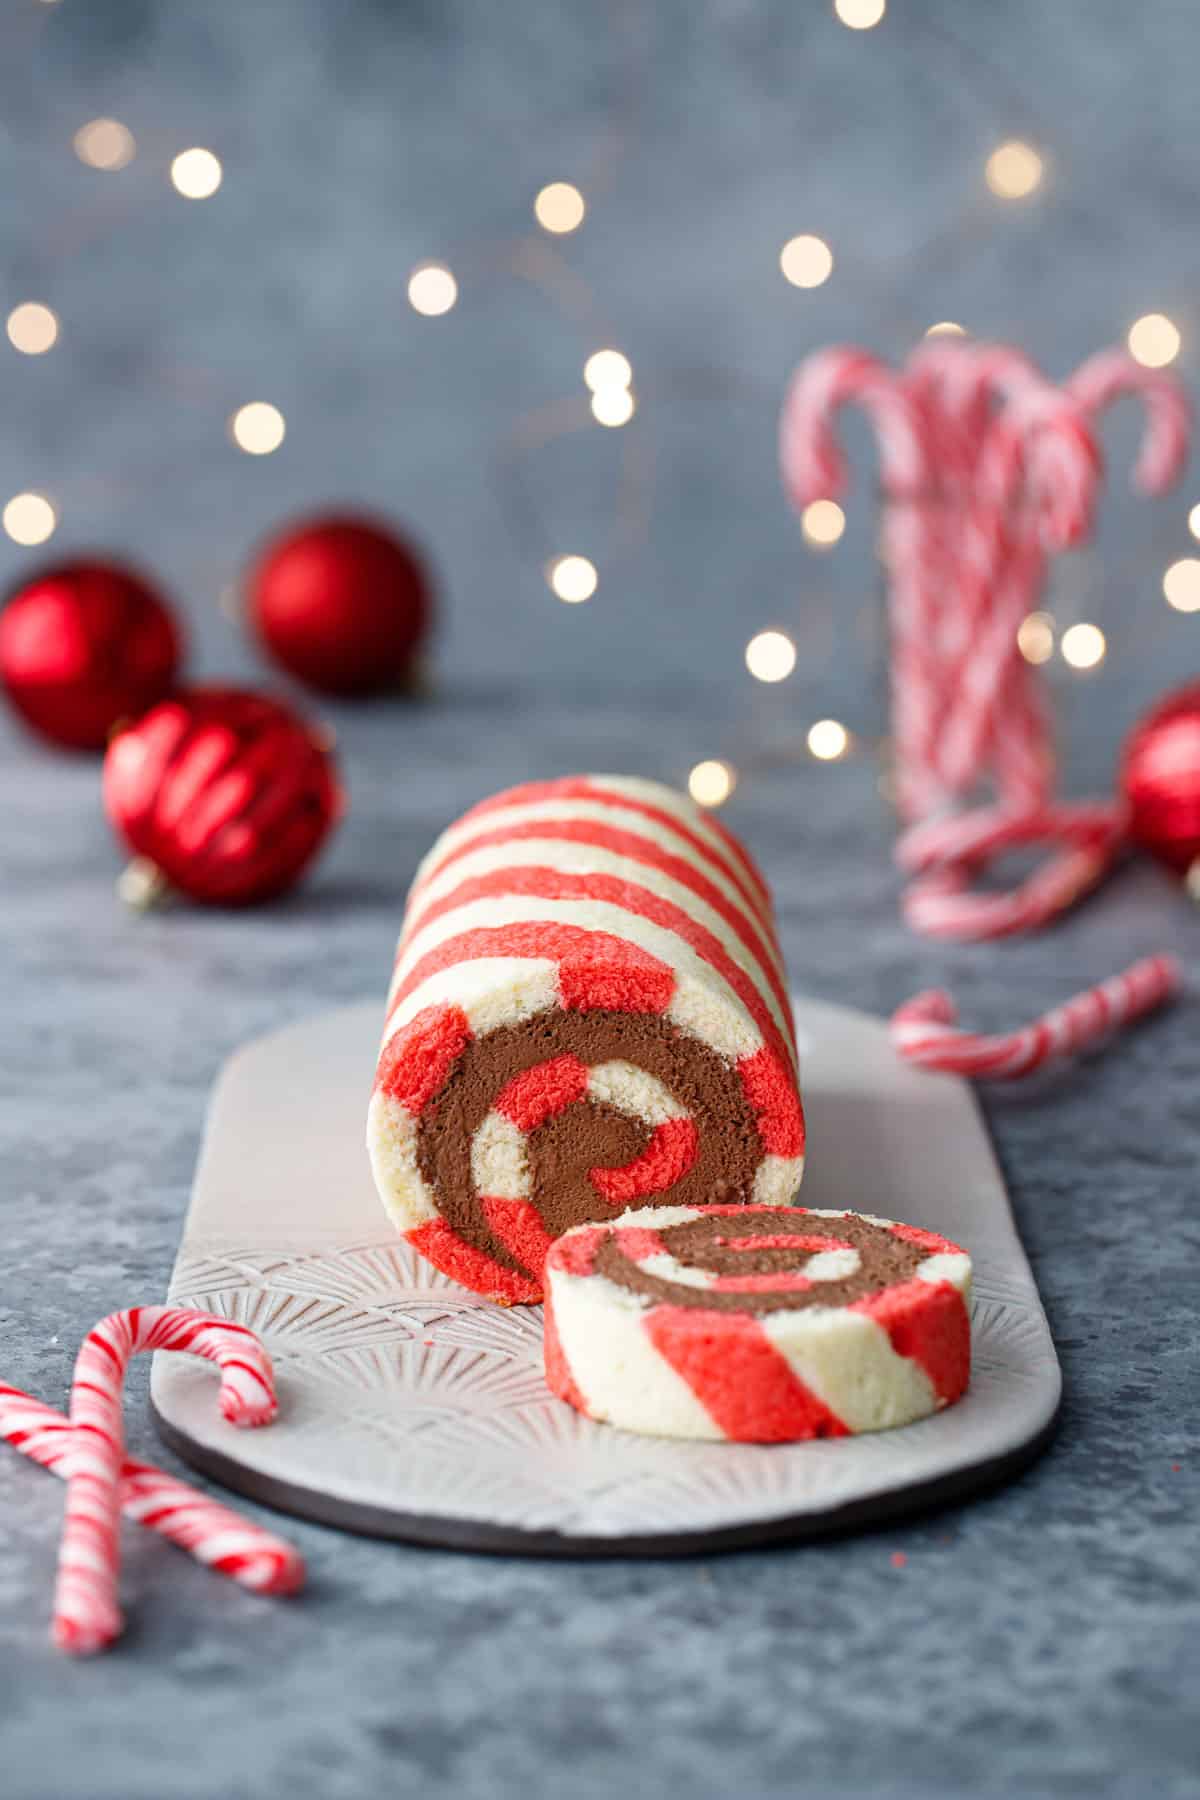
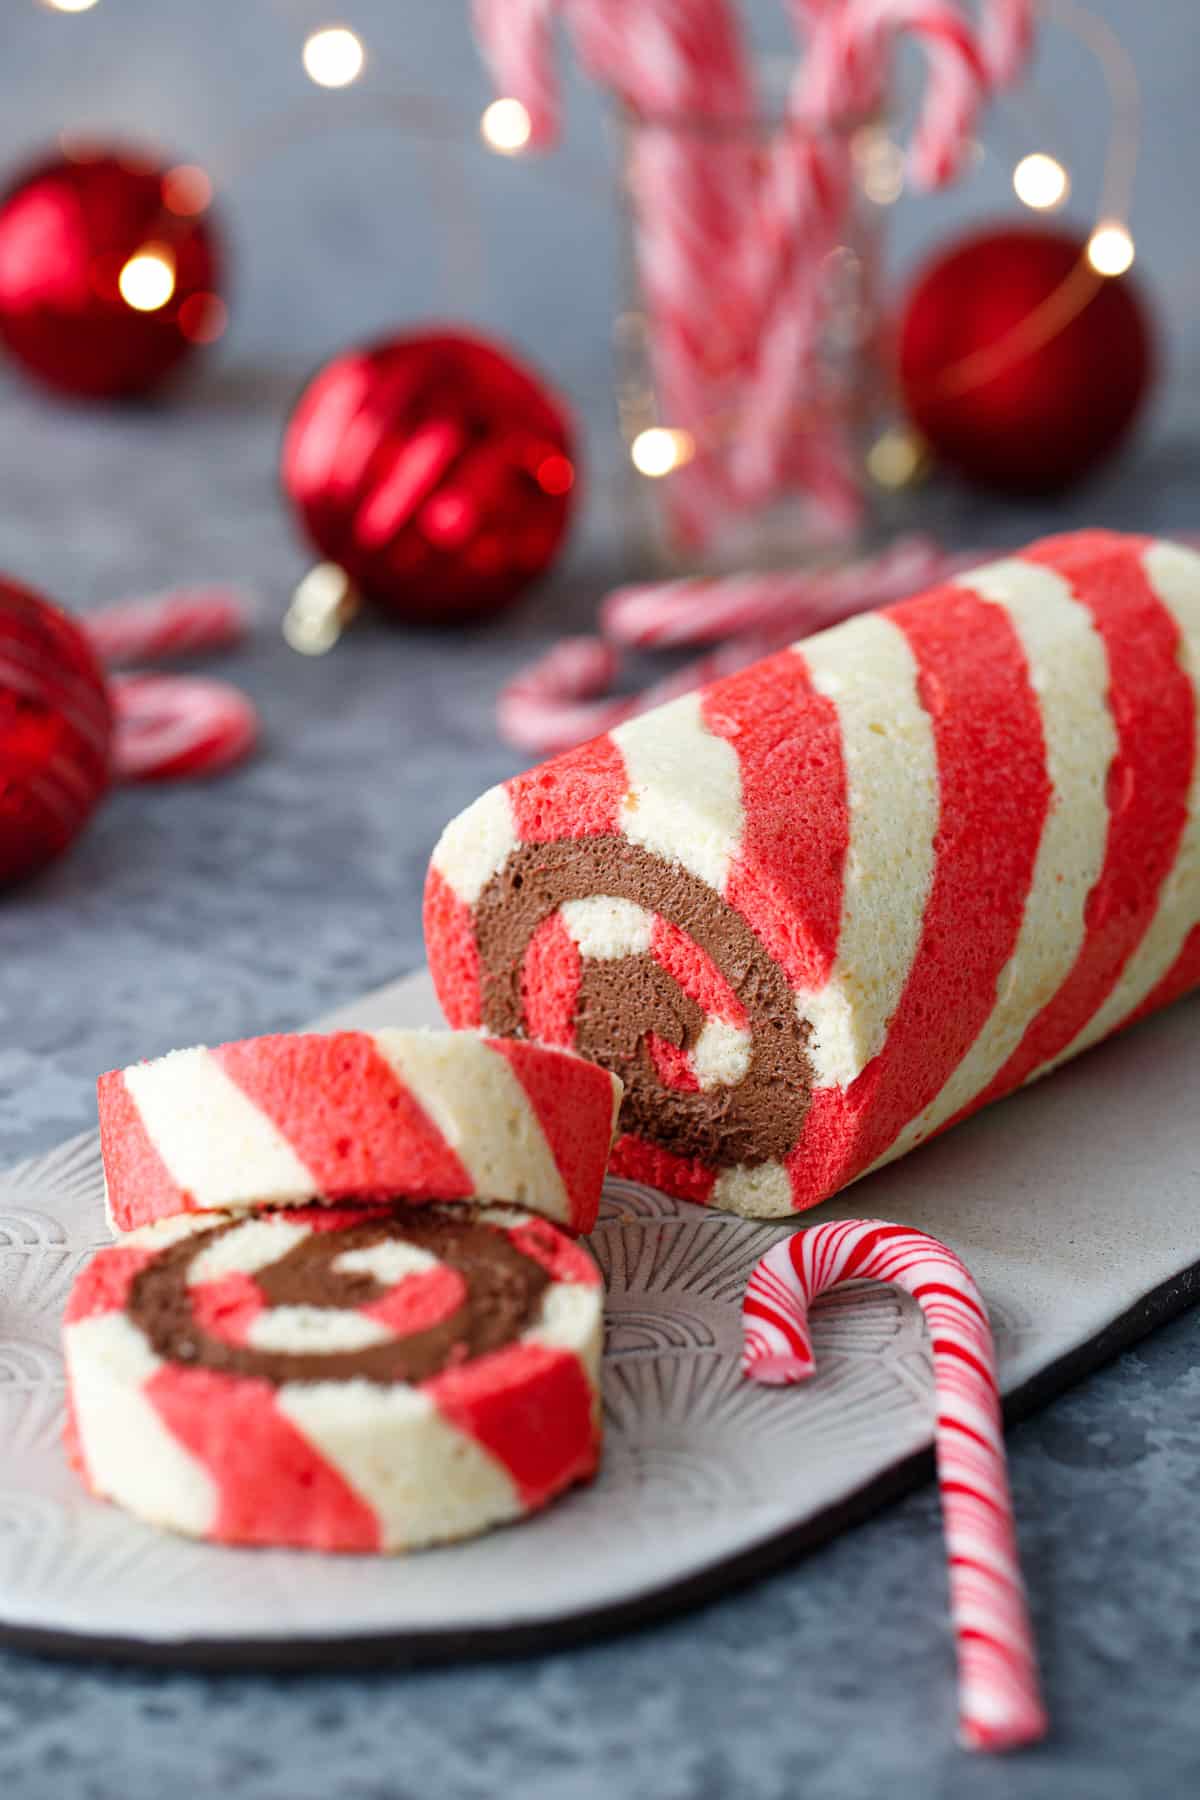
Here’s a perfect addition to your Christmas table: a light and fluffy chiffon cake roll made with red and white striped batter, and filled with a spiral of chocolate peppermint whipped cream for a festive cake that’s dressed to impress.
This peppermint roll cake looks and tastes like a giant candy cane (if candy canes were soft and fluffy and filled with chocolate peppermint whipped cream). While patterned cake rolls can be challenging to bake, the work can be split up into a few days (making them a perfect make-ahead dessert!)
Plus, I’ve included lots of tips and tricks and how-to photos in this post to help you succeed in making this impressive looking dessert for your holiday celebration!
This recipe was created in partnership with Amoretti (use coupon code LOVEANDOLIVEOILFREESHIP for free shipping on your order!) All opinions expressed here are my own.
A festive holiday cake roll is quickly becoming a household tradition around here. My own version of the yule log, if you will (this one not quite as obviously log-like as my chocolate chestnut cake roll which has a literal wood grain design baked right in).
I love Japanese-style cake rolls like this because they aren’t overly sweet (not to mention they’re just gosh darn cute). If you are the kind of person who finds most buttercream-frosted cakes far too sweet, chances are you’ll love this style of cake!
The cake itself is lightly sweetened and pillowy soft, with a hint of vanilla and peppermint in the cake itself, and then filled with a chocolate peppermint whipped cream filling with an ultra rich chocolate flavor while still remaining incredibly light (I think it tastes like a decadent peppermint hot chocolate that’s been whipped to a cloud-like fluff).
Let’s talk about our feelings for a second. Excuse me, I meant fillings, not feelings, because let’s face it, that spiral of whipped chocolate goodness is really the star of the flavor train here, packed with chocolate and a lovely peppermint flavor courtesy of Amoretti’s Peppermint Extract.
For chocolate lovers, you’ll be chuffed to know that it’s not just a whipped cream with some cocoa powder added. No, I’ve used dark chocolate in addition to Dutch process cocoa powder, for a rich and chocolately cream filling that falls somewhere between a whipped ganache and a whipped cream in terms of texture (it’s denser and silkier than plain whipped cream, but lighter and airier than a mousse or whipped ganache).
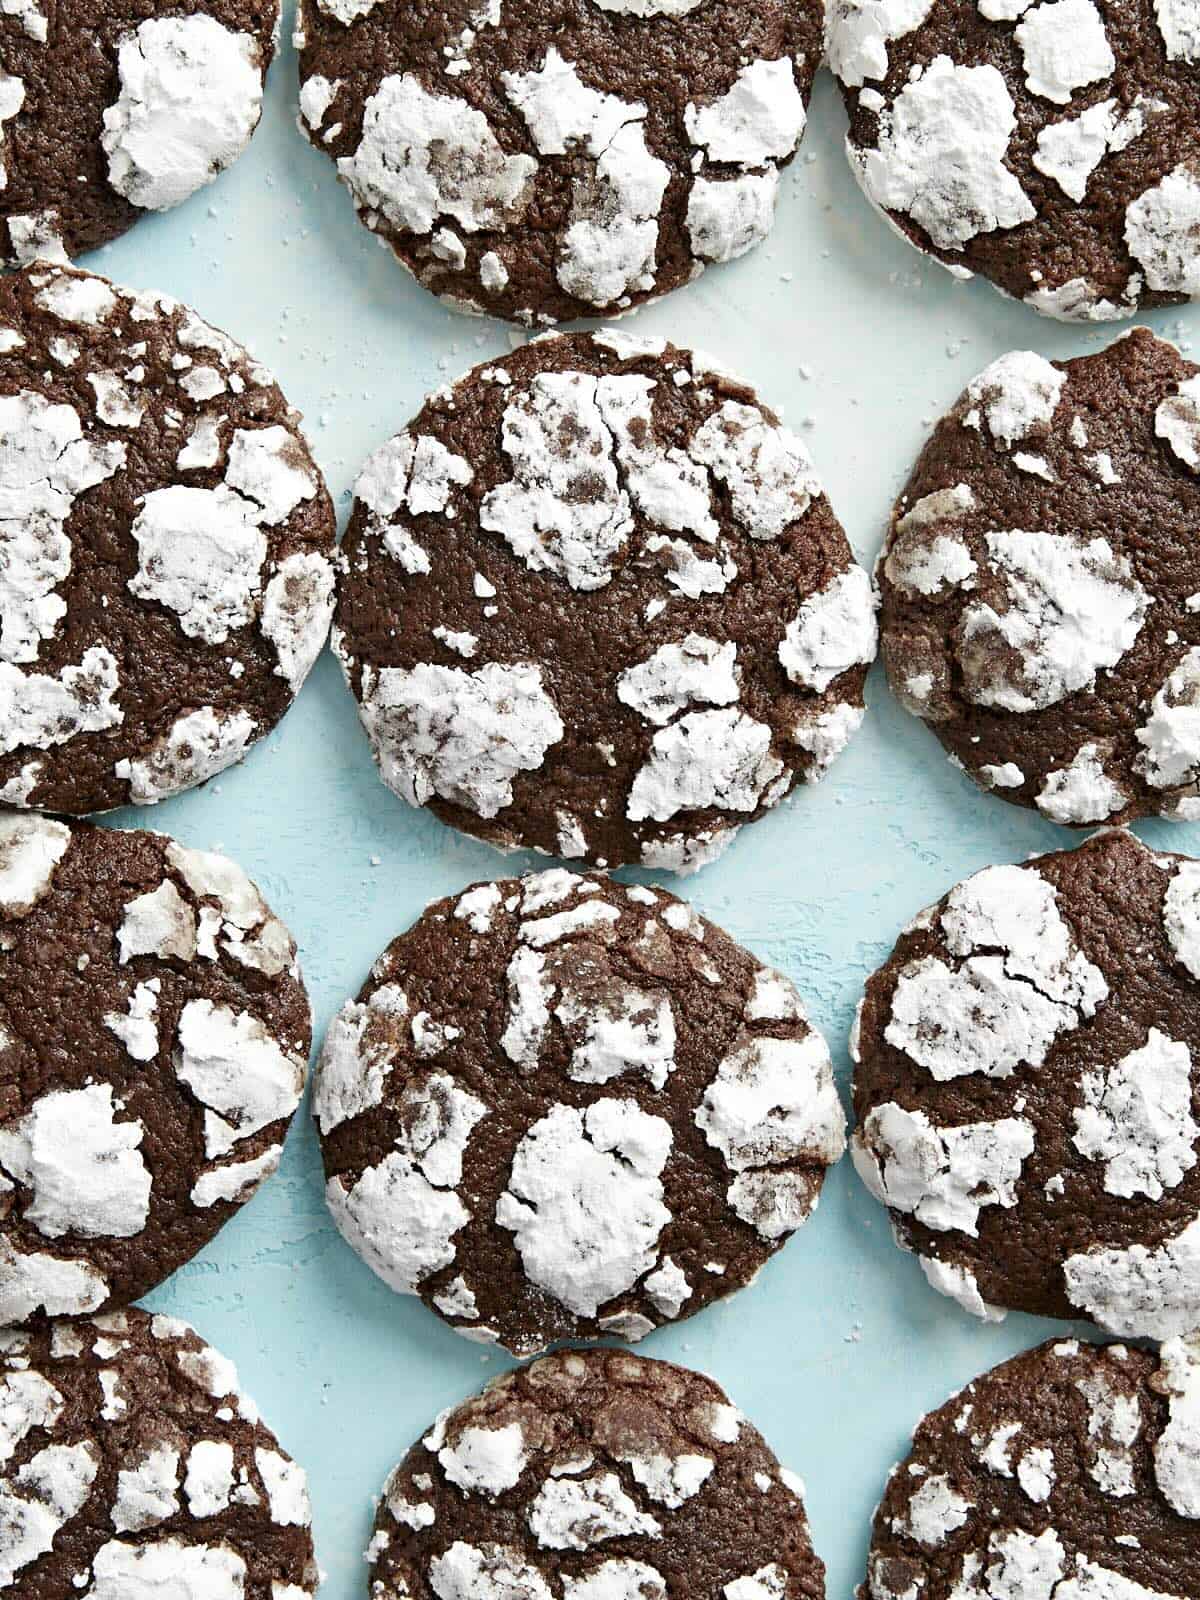
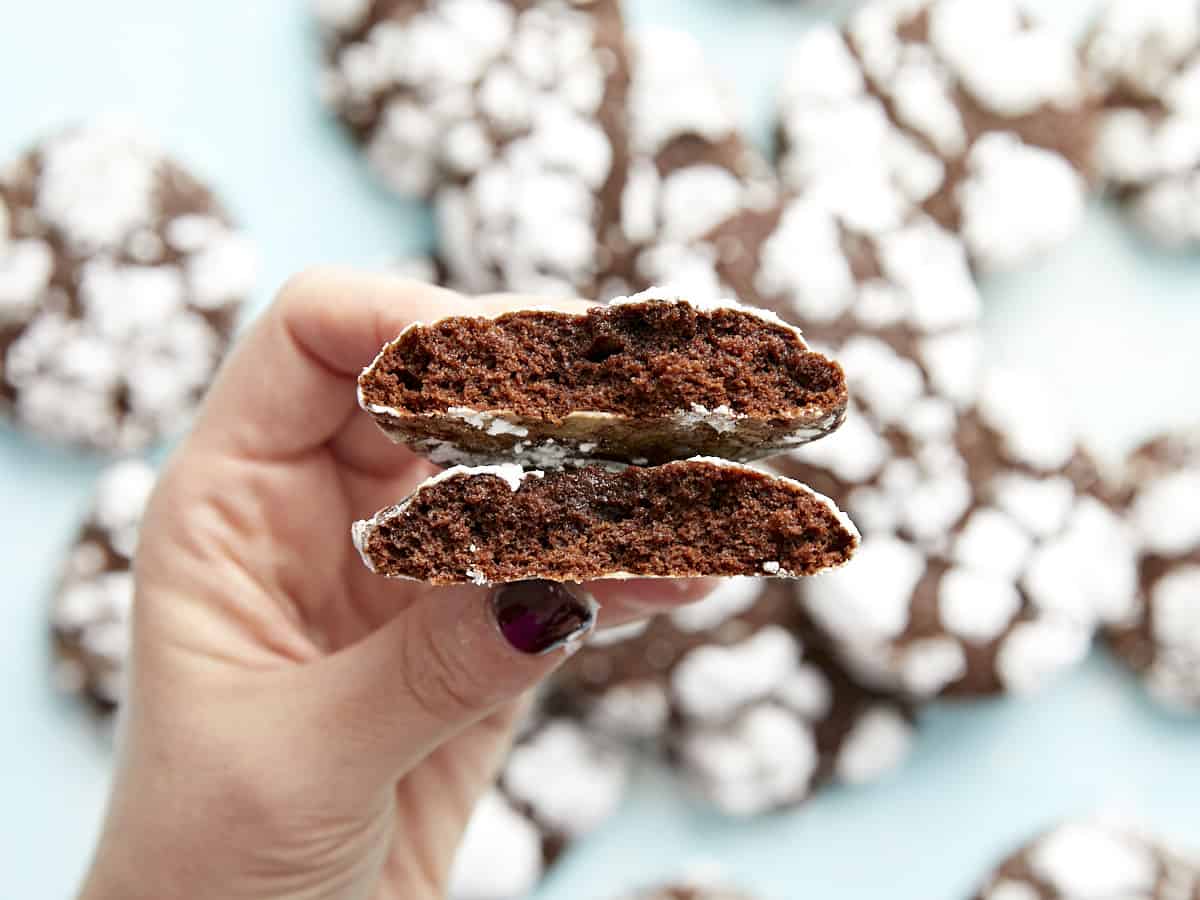
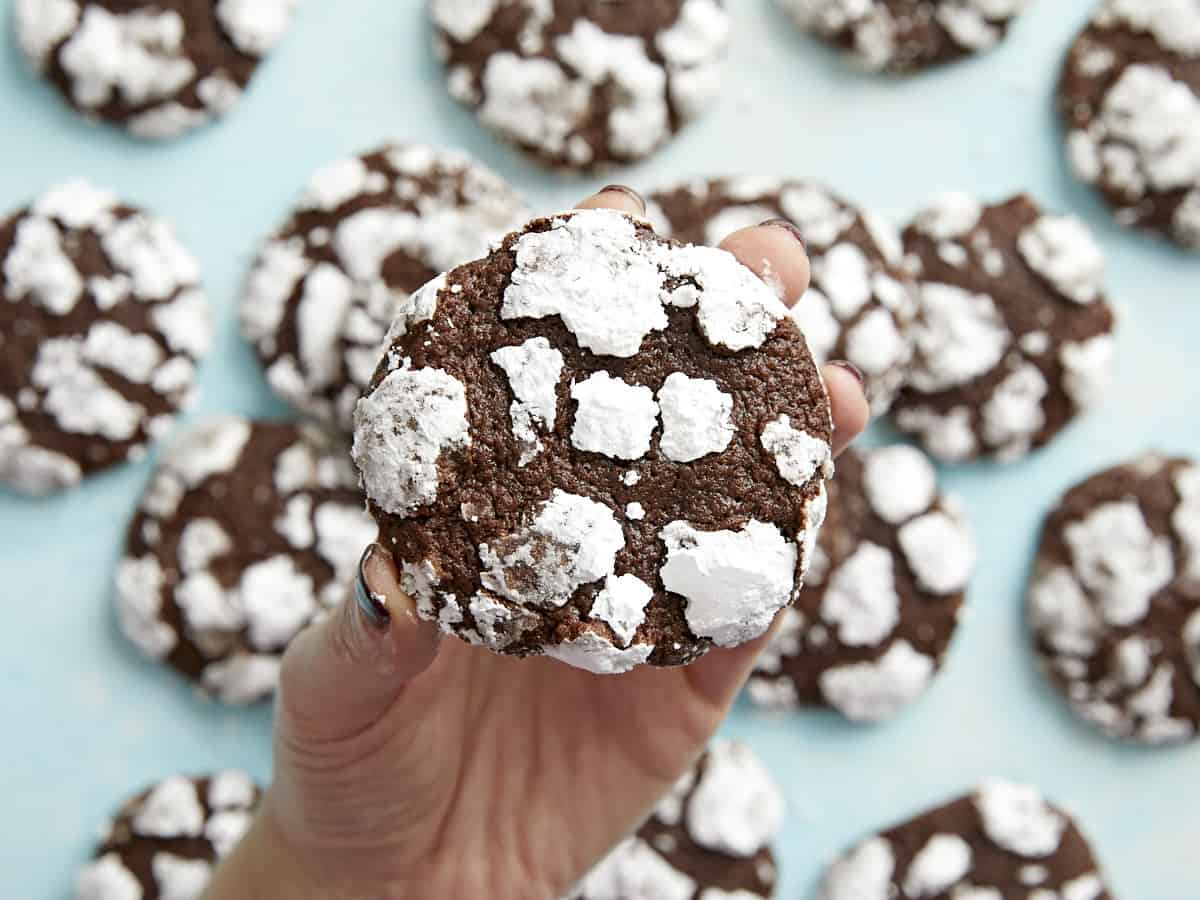
It wouldn’t be Christmastime without cookies, and these Chocolate Crinkle Cookies are one of the best. Their fluffy, melt-in-your-mouth texture is to die for and the powdered sugar coating really gives them that snowy, wintry feel. Chocolate Crinkle Cookies are an absolute must on any Christmas cookie platter!
What Are Chocolate Crinkle Cookies Like?
I love chocolate crinkle cookies because they have a fairly unique texture. They’re light and cakey, but they kind of melt into a rich and fudgy texture in your mouth. The powdered sugar instantly dissolves on your tongue, giving them an almost cooling wintry effect. They’re SO GOOD!
Ingredients for Chocolate Crinkle Cookies
The ingredients for these cookies are super basic, making them really easy to make without much planning. Here’s what you’ll need to make chocolate crinkle cookies:
Butter: All cookies need a good dose of butter for that rich, dessert-like finish! A lot of chocolate crinkle cookie recipes use oil, but I wanted that all-butter flavor. We use salted butter because we always have that on hand.
Sugar: The combination of butter and sugar is what makes cookies so irresistible. You’ll need granulated sugar for the batter and some powdered sugar to get that cool crinkle effect.
Eggs: Eggs help the cookies puff up in the oven and give them strength to stay that way once baked.
Vanilla: Vanilla extract always helps chocolate taste much richer.
All-Purpose Flour: Flour gives the cookies body and strength to hold their shape.
Baking Powder: A little baking powder gives the cookies extra power to puff up in the oven, giving them that nice airy, cakey texture.
Cocoa Powder: Unsweetened cocoa powder gives these cookies all the chocolatey goodness they need.
Salt: A little salt helps the individual flavors in the cookies stand out so every bite is delicious!
What Else Can I Add?
This chocolate crinkle cookie recipe can be modified in several different ways. Try adding a ½ tsp peppermint extract to make a chocolate peppermint cookie, or rolling the cookies in some crushed candy canes after rolling in powdered sugar. You can also stir some mini chocolate chips into the batter for a double-chocolate crinkle! Or, add a Tablespoon or two of instant coffee to the batter to make cafe mocha-flavored crinkles!
Make them Ahead
You can make the dough for these chocolate crinkle cookies and refrigerate up to 2 days before portioning, shaping, and baking, making them a great option if you have several types of cookies you want to bake for Christmas!
How to Store Chocolate Crinkle Cookies
Allow the cookies to cool to room temperature, then store them in an air-tight food storage container at room temperature for about 5 days, or you can freeze them for up to three months.
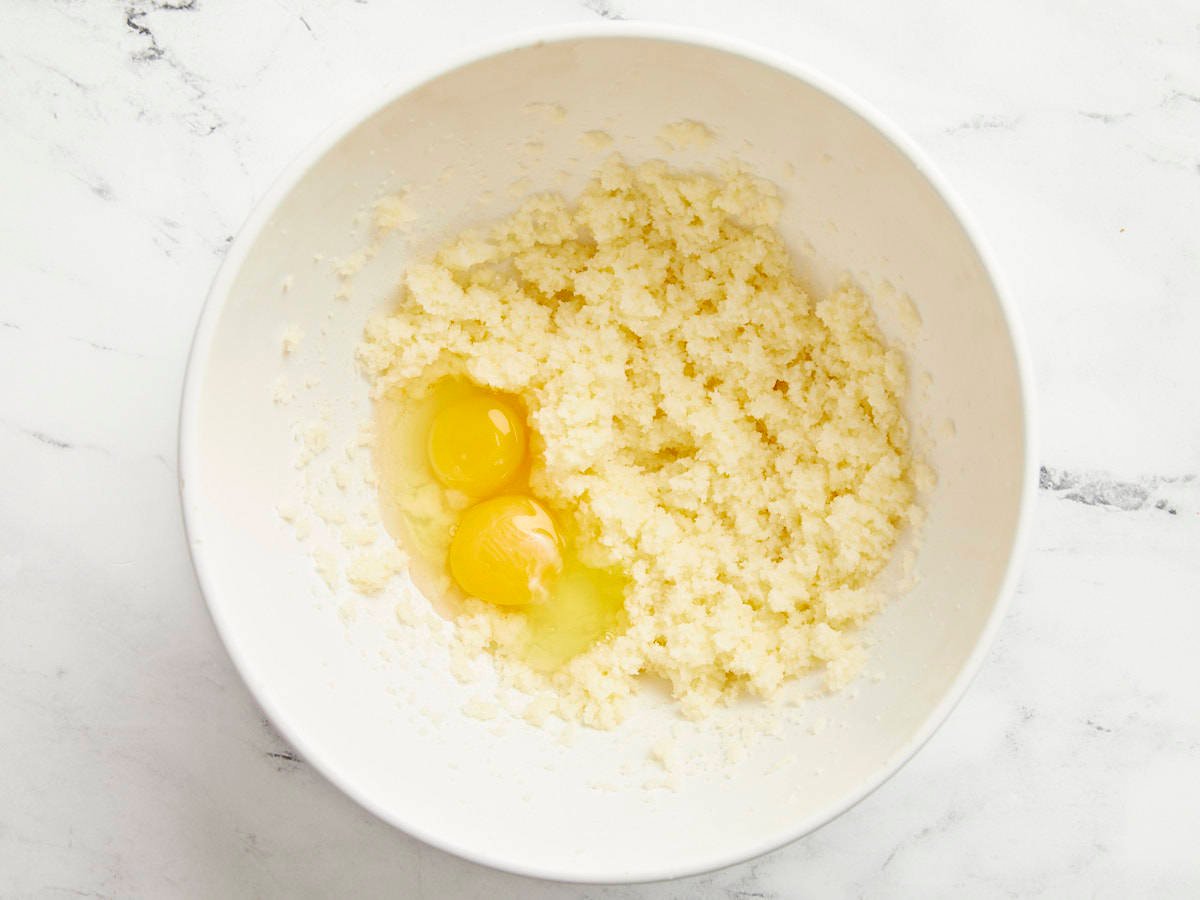
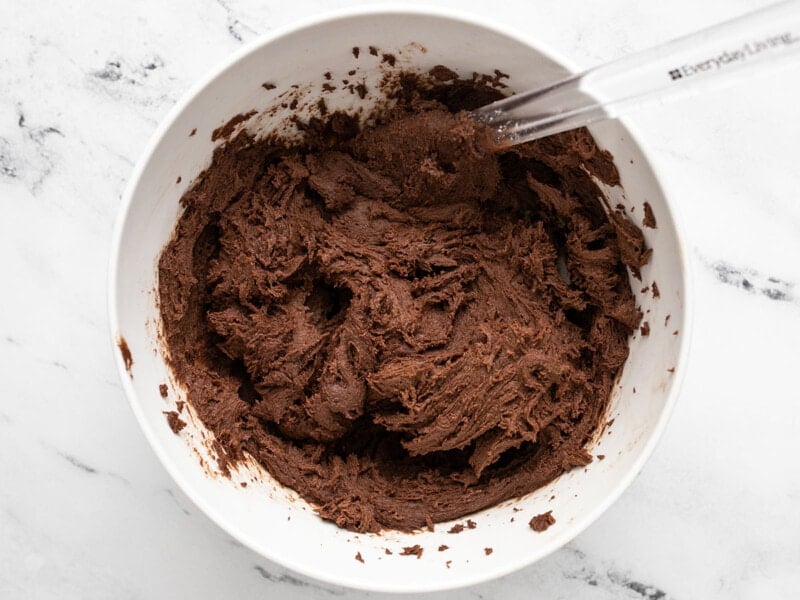
Beat the butter an granulated sugar together on high until light and fluffy (2-3 minutes). Add the eggs and vanilla extract and beat on high again until the mixture is light and creamy (another 2 minutes).
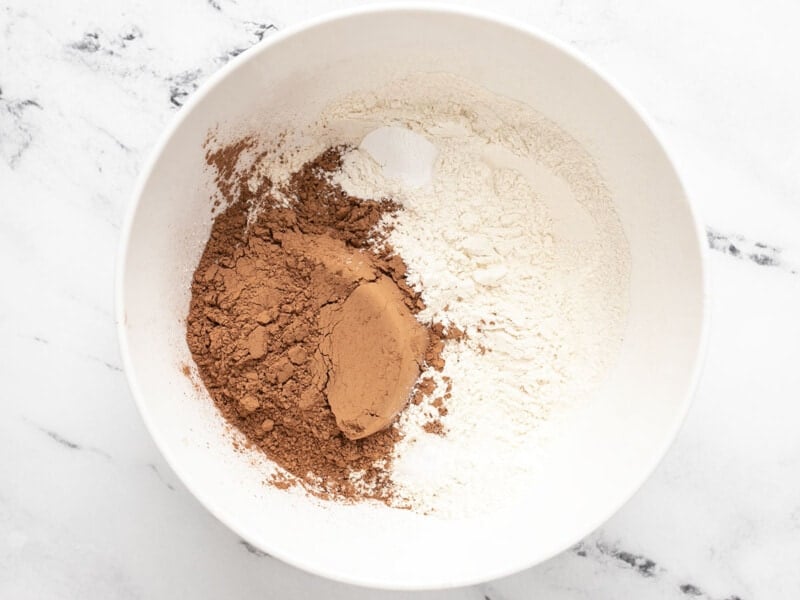
In a separate bowl, whisk together the flour, cocoa powder, baking powder, and salt until evenly combined.
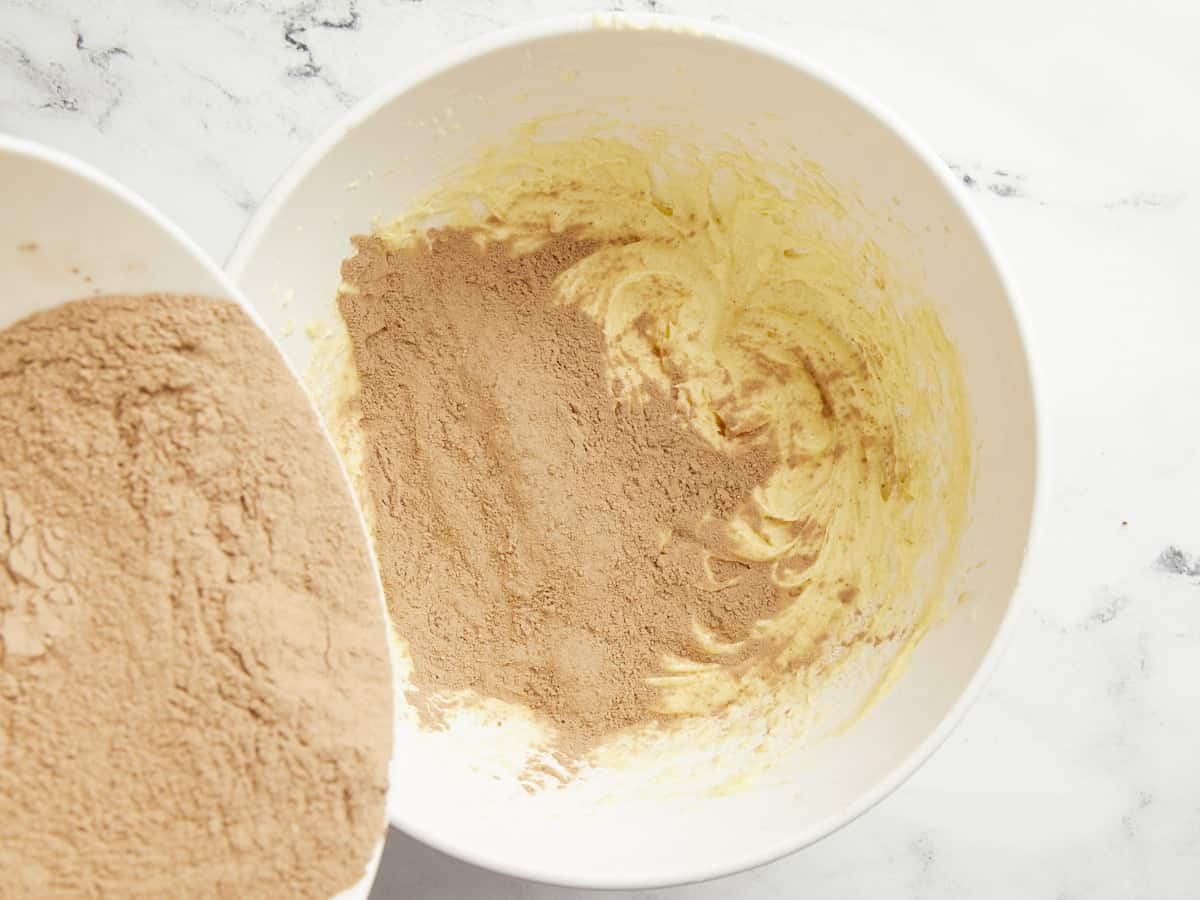
Pour half of the flour mixture into the butter mixture and beat on low until incorporated. Add the remaining flour mixture and beat or stir until incorporated again. The dough should be very thick.
Cover the bowl of cookie dough with plastic and refrigerate for two hours or up to two days.
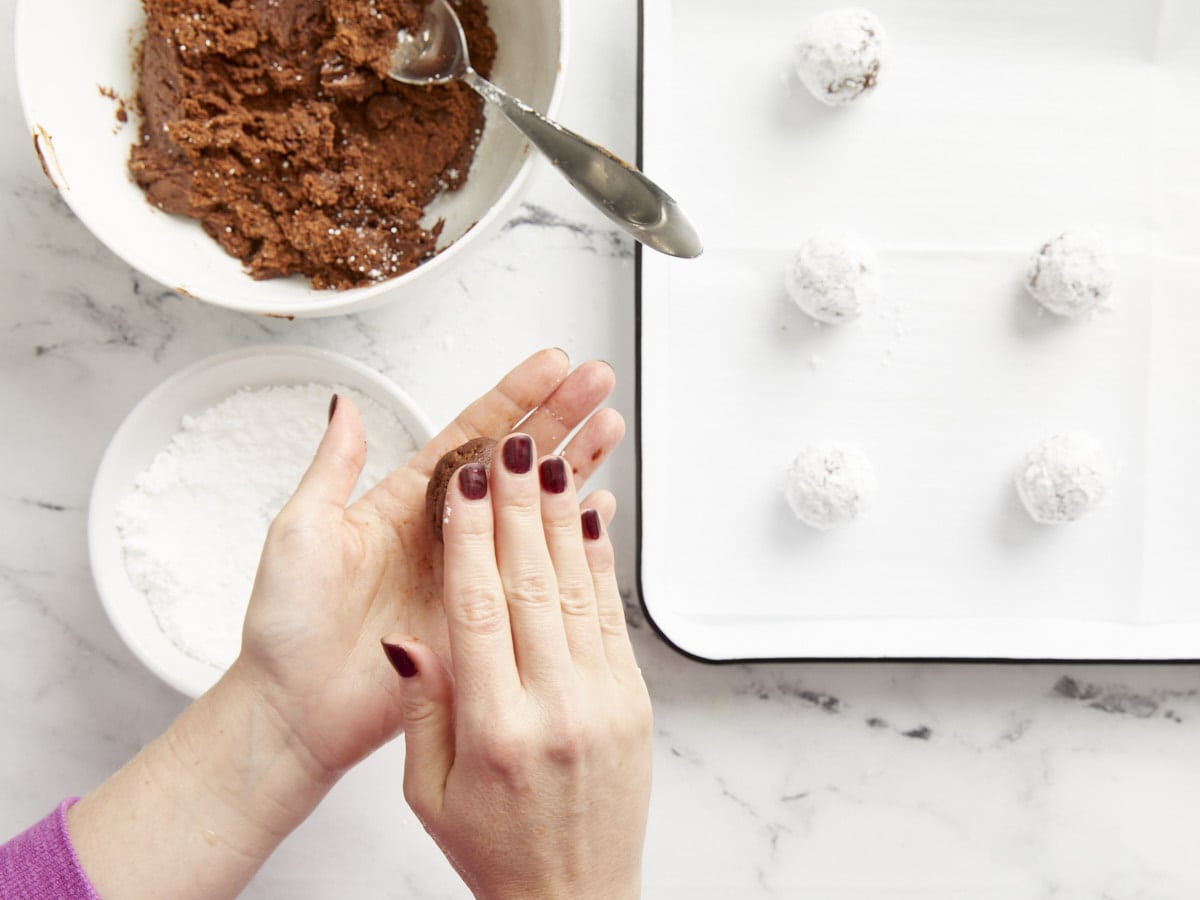
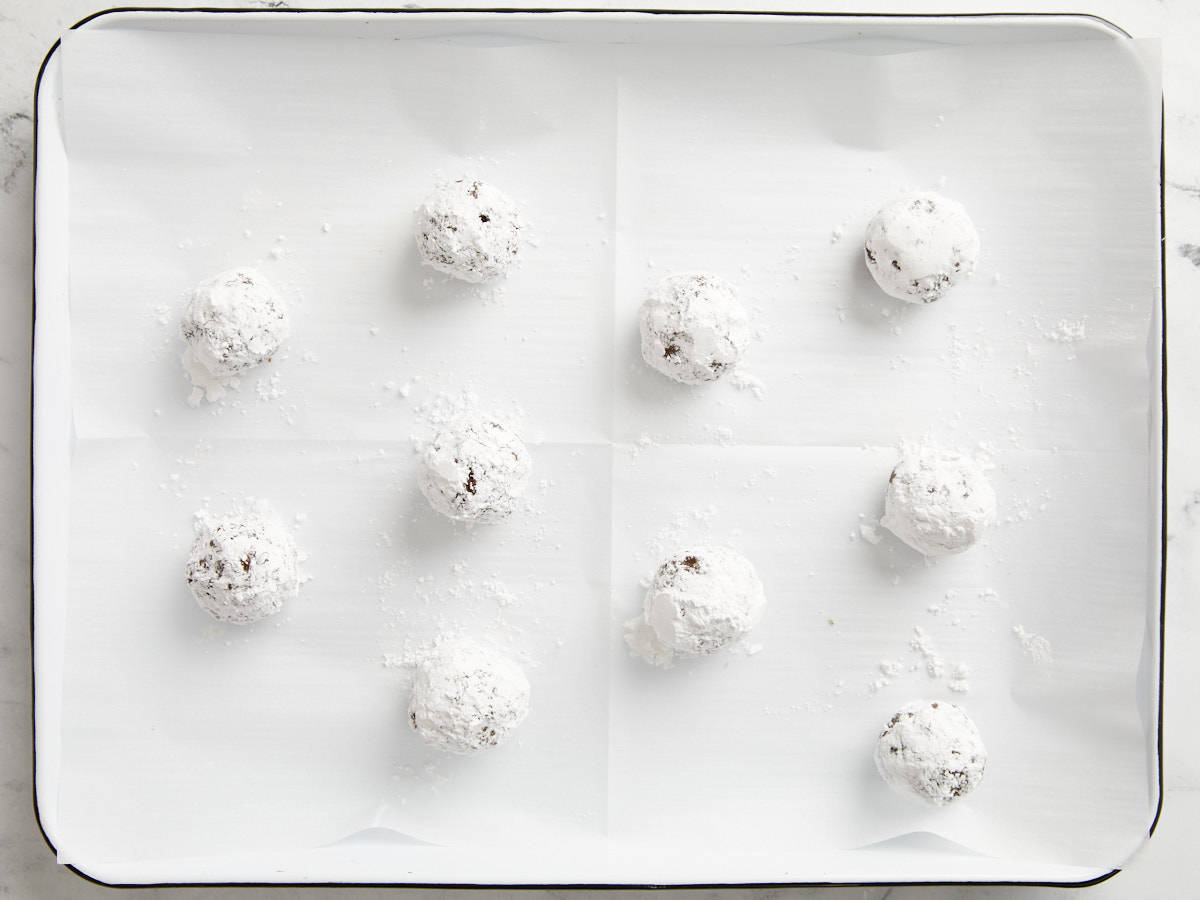
Once ready to bake, preheat the oven to 350ºF. Place the powdered sugar in a bowl for rolling and line a baking sheet with parchment paper. Scoop the cookie dough in 2 Tbsp portions, roll into a ball, then roll to coat in powdered sguar. Place the rolled and coated cookies on the baking sheet 2-3 inches apart. You'll likely need to cook in batches, so keep the remaining dough chilled until ready to roll and bake. Avoid coating the cookies in powdered sugar until just before they go into the oven.
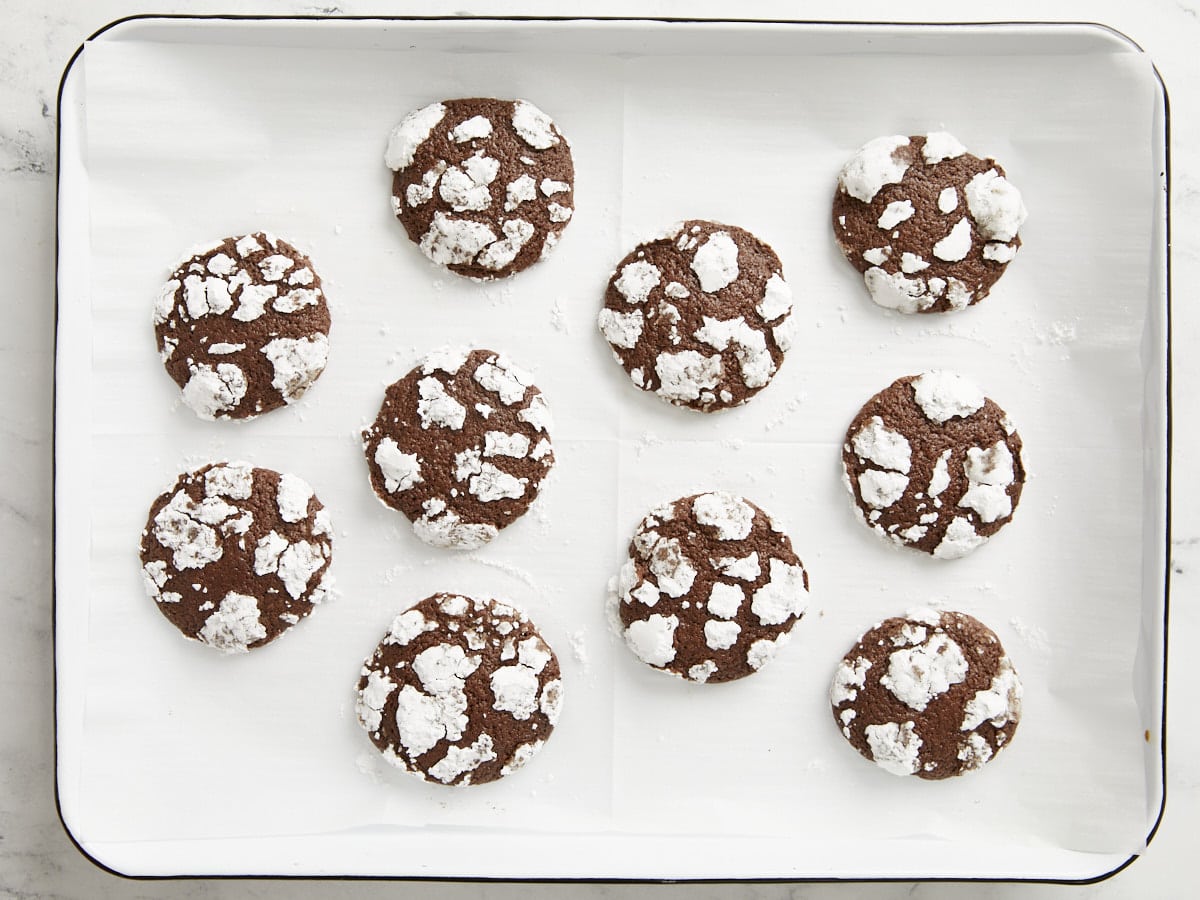
Bake the cookies for 10-12 minutes, or until they're puffed and the powdered sugar is cracked on top. Allow the cookies to cool, then enjoy!
How to Make Chocolate Crinkle Cookies – Step by Step Photos
In a large bowl, cream together 8 Tbsp salted butter and 1 cup granulated sugar with a mixer until light and fluffy. Add two large eggs and 1 tsp vanilla, and beat together again until the mixture is light and creamy.
In a separate large bowl, whisk together 1 1/4 cups all-purpose flour, 1 tsp baking powder, ¼ tsp salt, and ½ cup unsweetened cocoa powder.
Add half of the dry ingredients to the butter mixture and beat on low speed until combined, then add the remaining half and beat again over low until a batter forms.
The batter should be very thick and fairly stiff. Cover the bowl with plastic and refrigerate for 2 hours. This will stiffen the batter even further, making it much easier to shape and it will help the cookies bake without flattening out so much.
When ready to bake, preheat the oven to 350ºF and place ½ cup powdered sugar in a bowl. Take the chilled dough out of the refrigerator and, working quickly, scoop it up in 2 Tbsp portions rolling each portion into a ball, then rolling in the powdered sugar.
Place the rolled sugar-coated cookies on a parchment-lined baking sheet with 2-3 inches between each (they will spread quite a bit when baked). You’ll likely need to bake them in two batches, so keep the dough chilled between each batch. Do not roll the cookies in powdered sugar until just before they go into the oven
Bake the chocolate crinkle cookies for 10-12 minutes, or until they’re puffed and the powdered sugar has “cracked” all over their surface. Allow the cookies to cool before serving and enjoying.
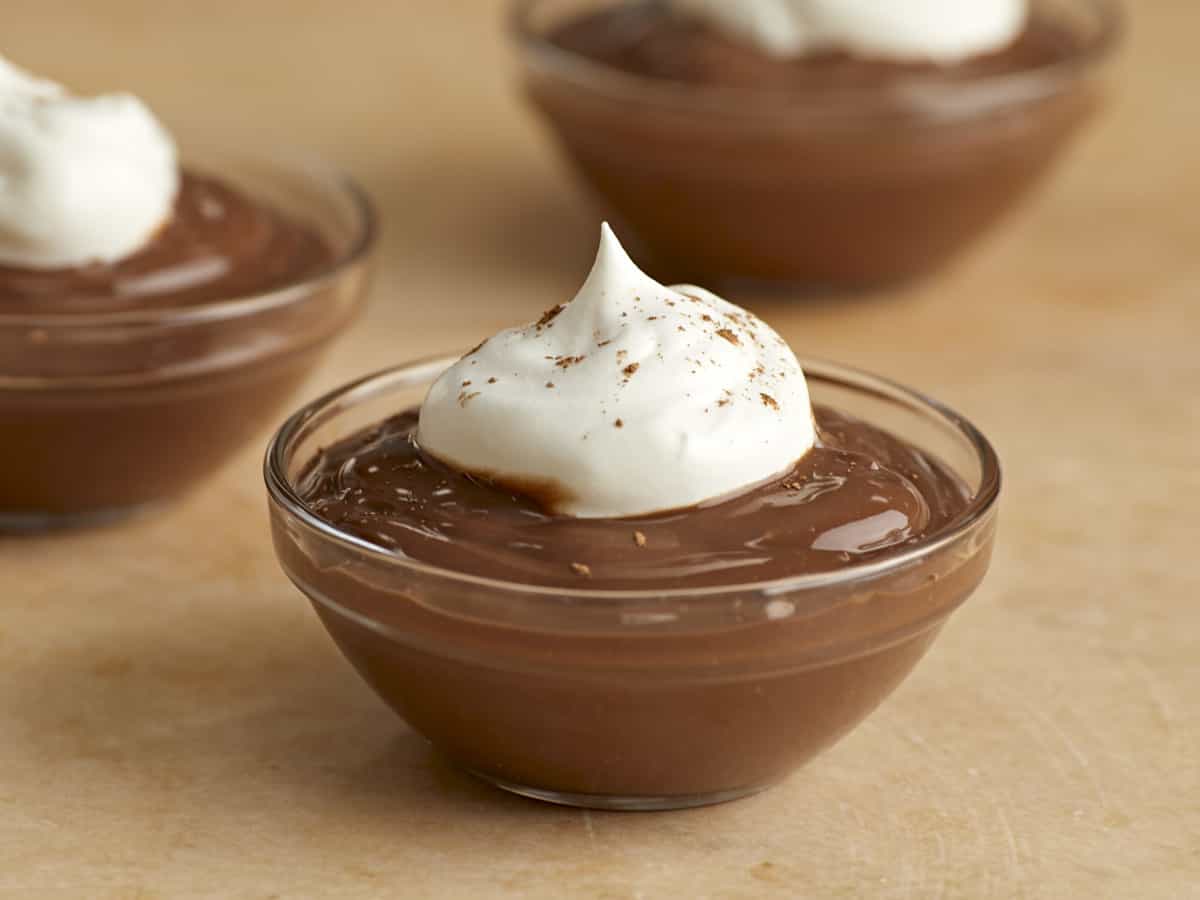
One of the first recipes that I posted to Budget Bytes back in 2010 was a really simple microwave chocolate pudding that we used to make for dessert when we were growing up (read: it’s so easy even kids can make it). But that recipe was from the 90’s when only drank skim milk and made everything possible in the microwave. 😅 Today my cooking style is little different, so here’s my new and (very much) improved chocolate pudding recipe that is rich, creamy, chocolatey, and so fast you’ll wonder why anyone would need a box of “instant” pudding mix.
When I tell you this chocolate pudding recipe is fast, I mean it. The recipe comes together in the amount of time that it takes to measure the five simple ingredients and for it to come to a simmer on the stovetop. It’s ridiculously easy, so much so that it might just be dangerous. 😏
Ingredients for Chocolate Pudding
You probably have everything you need to make this chocolate pudding already in your kitchen. Here are the five simple ingredients you’ll need:
Sugar: Simple white sugar gives the pudding sweetness without muddying up the chocolate flavor. You can adjust the sugar up or down according to your taste buds.
Unsweetened Cocoa Powder: Simple, inexpensive chocolate flavor at your finger tips!
Cornstarch: This is what thickens the pudding into that classic pudding texture. No egg yolks or complicated tempering techniques needed! The cornstarch thickens the milk as soon as it comes to a simmer.
Half and Half: This is the base of the pudding that provides the rich creamy flavor. You can do this with whole milk, if you prefer, but I love the richness of half and half. You can also make your own half and half by using half whole milk and half heavy cream.
Vanilla Extract: Vanilla and chocolate are made for each other! Vanilla extract gives the pudding a little extra richness.
Make it Dairy-Free
This chocolate pudding can easily be made dairy-free by substituting the half and half with your favorite dairy-free milk. Keep in mind that the richness of the milk substitute will determine the richness of the pudding, so I would suggest using something like coconut milk, which has a rich flavor. Light canned coconut milk would probably be perfect.
How to Serve Chocolate Pudding
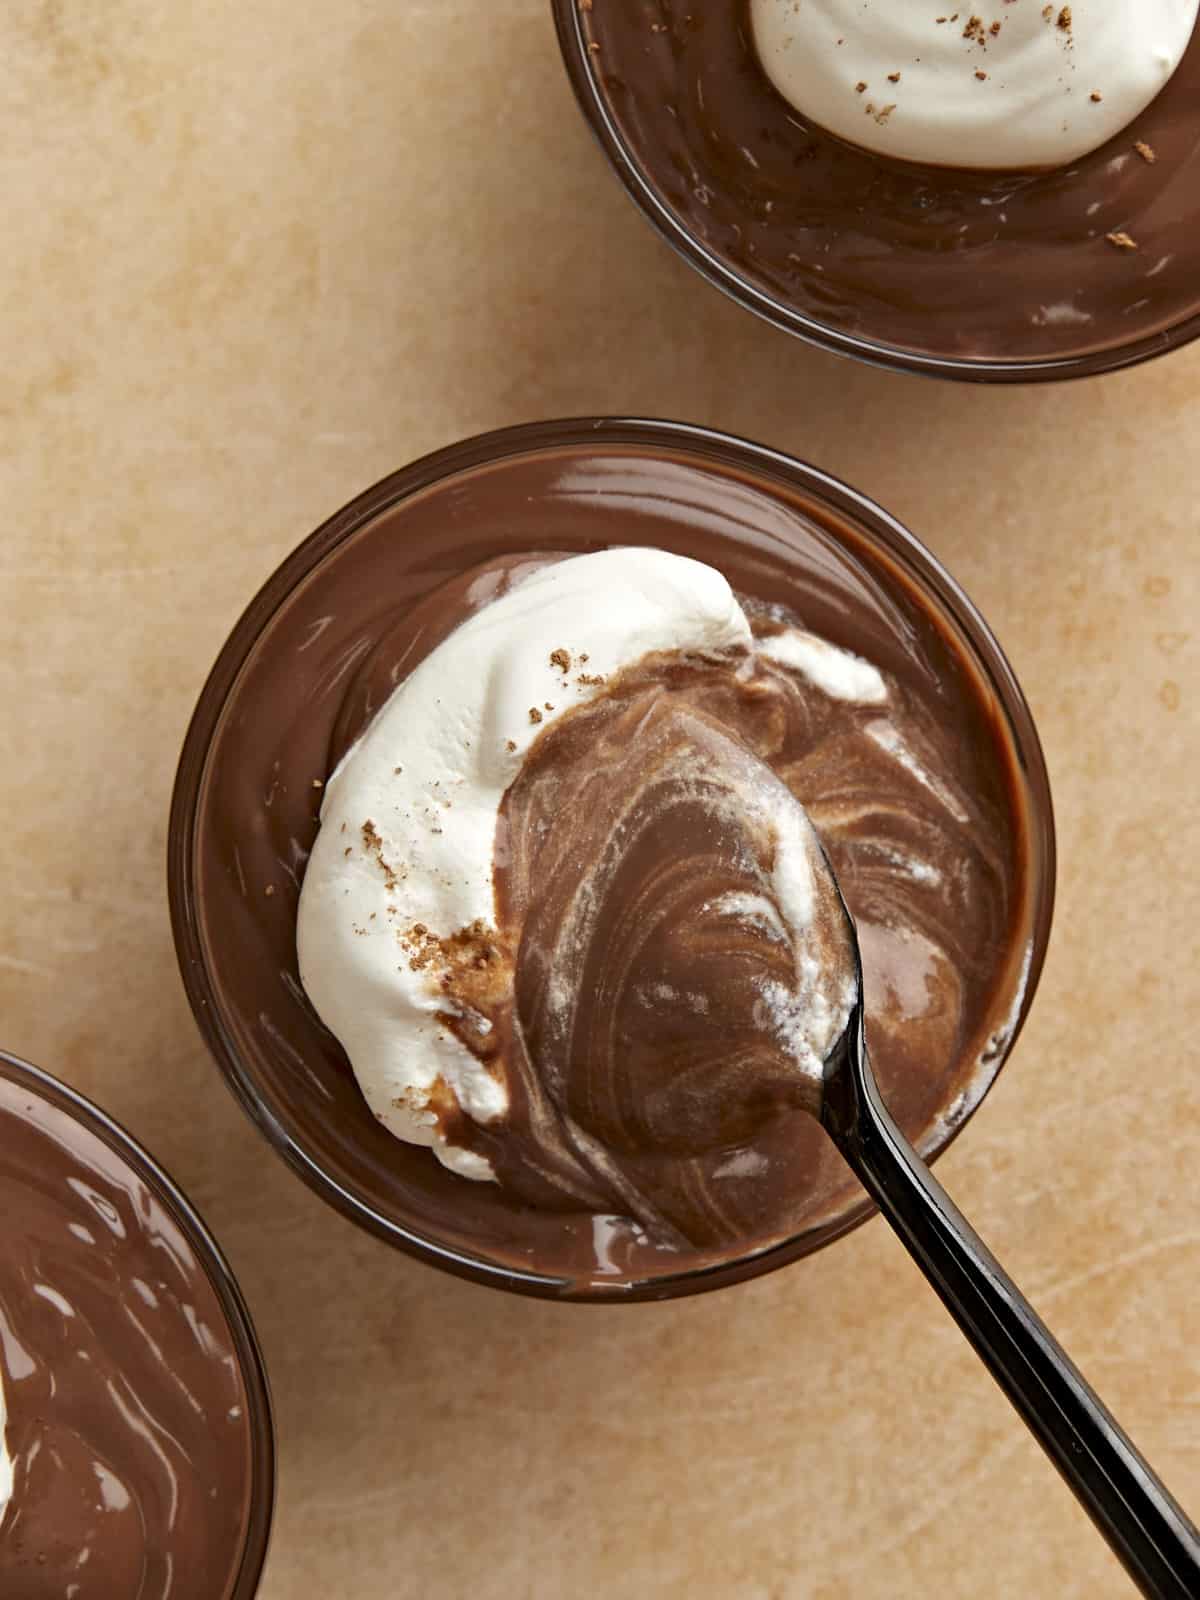
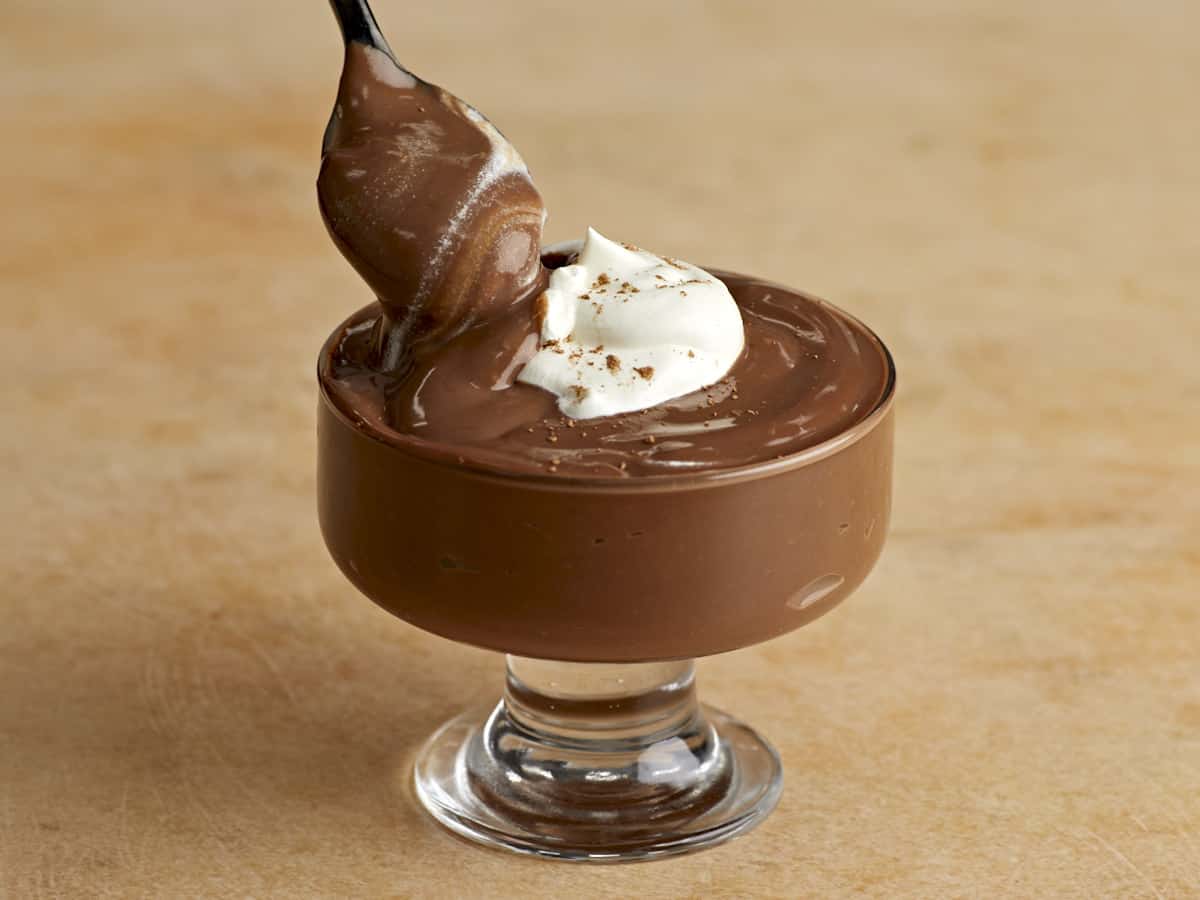
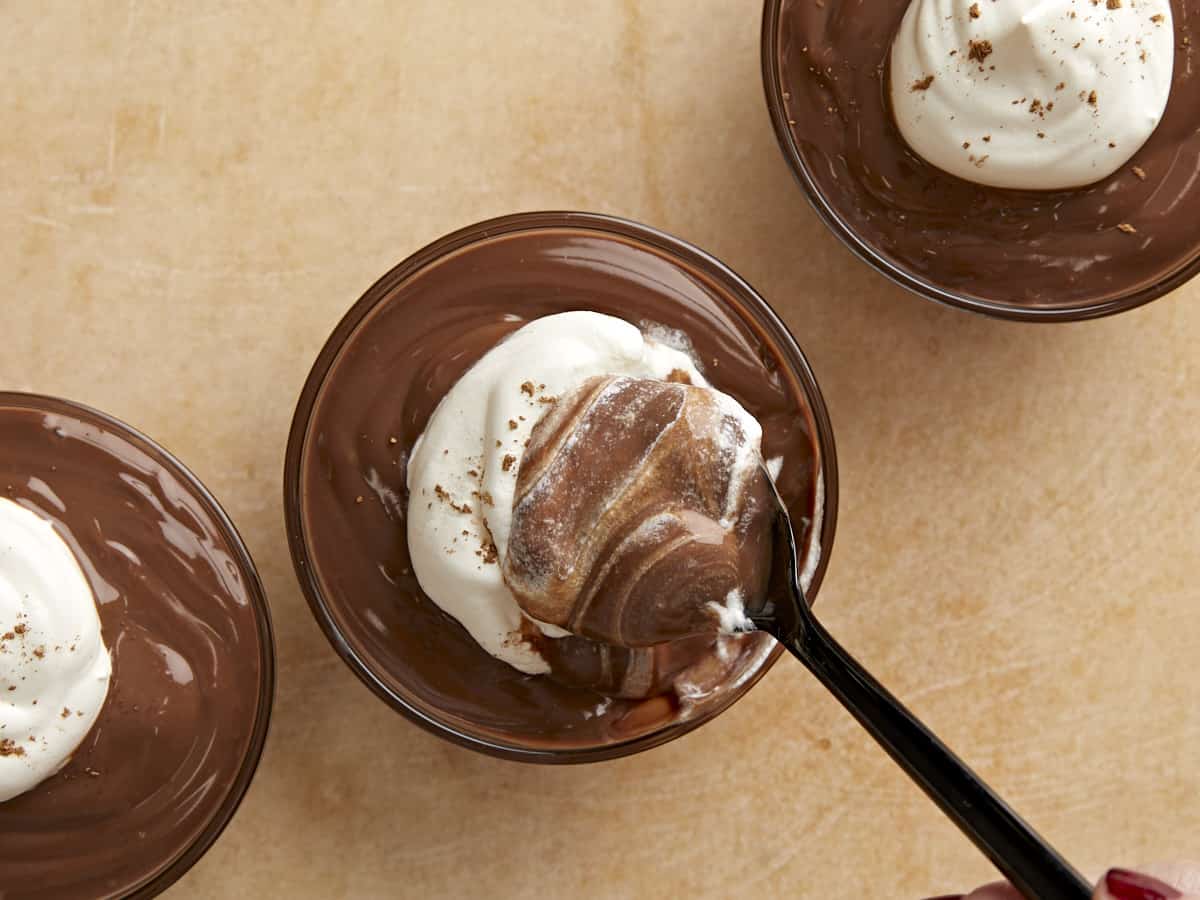
This incredible chocolate pudding is great served either hot or cold. Personally, I get a little too impatient to wait for it to chill in the refrigerator, especially after smelling that chocolate goodness as it comes up to a simmer, so I dig in when it’s still warm!
Try topping the chocolate pudding with a dollop of whipped cream, fresh berries, or even some shaved chocolate to make it extra fancy!
How to Store Homemade Chocolate Pudding
If you prefer to eat your pudding chilled, just make sure to place a layer of plastic wrap or parchment onto the surface of the pudding before chilling to prevent it from forming a skin on top. I still suggest chilling it in an air-tight container, in addition to placing the plastic film on top. The chocolate pudding will stay good in the refrigerator for 4-5 days, making it great to pack for lunches. I do not suggest freezing this homemade chocolate pudding because it will separate upon thawing.
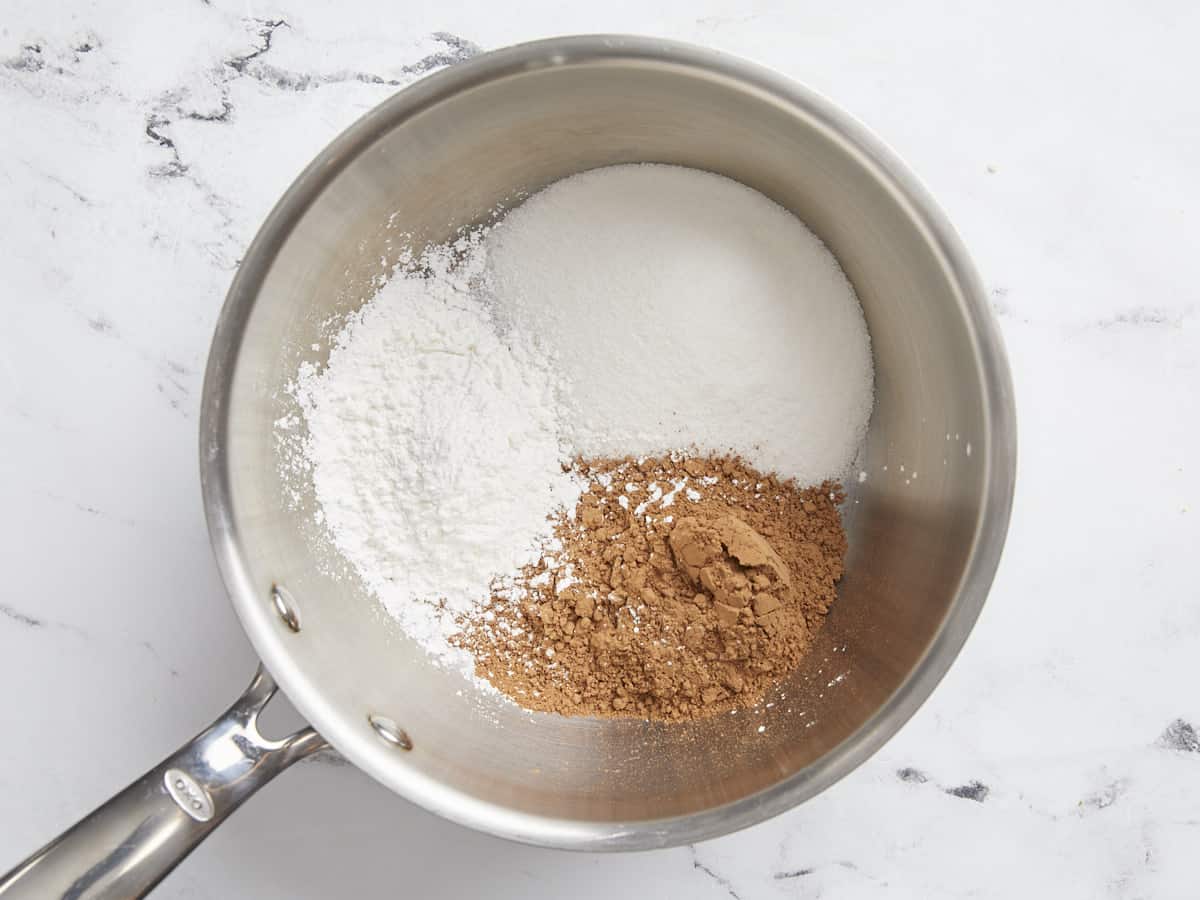
Add the sugar, cocoa powder, and cornstarch to a small sauce pot and stir to combine.
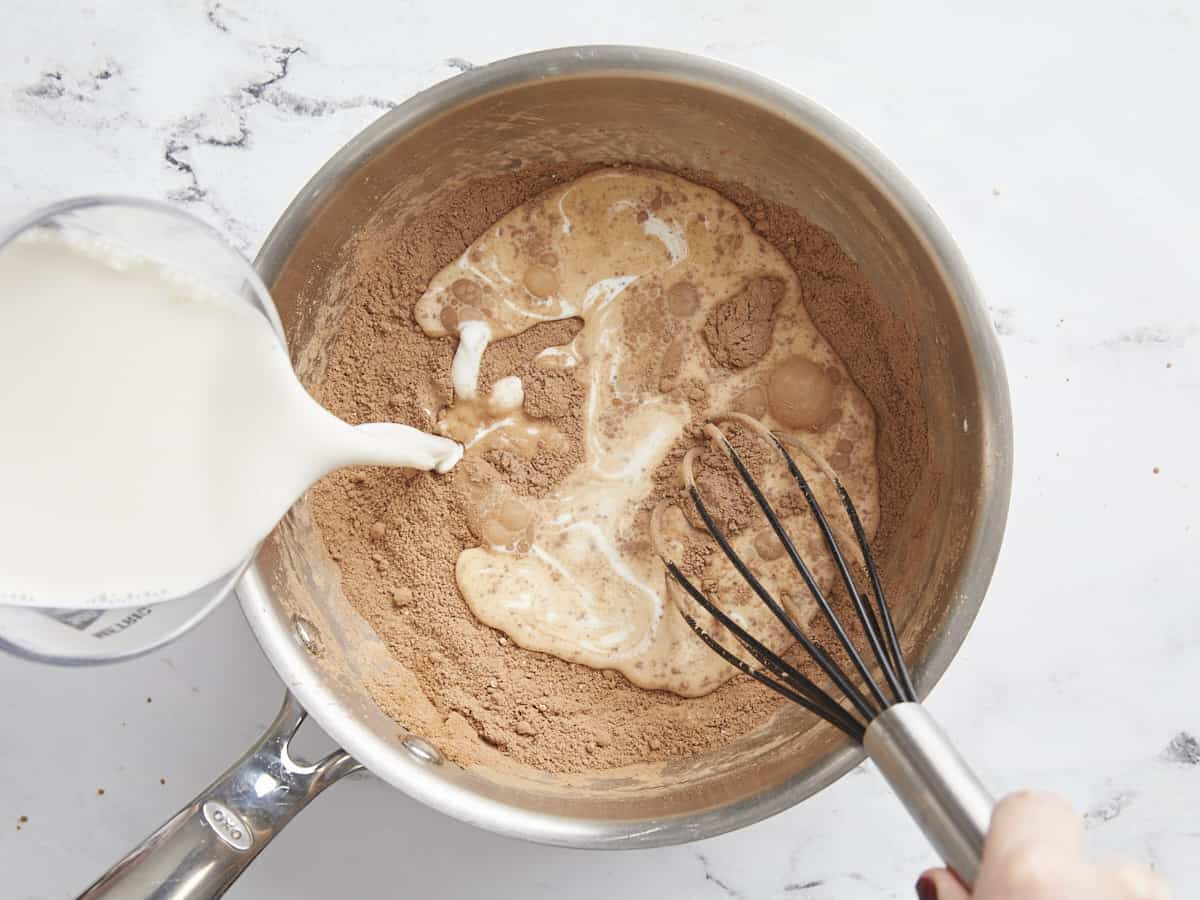
Add the half and half and vanilla extract to the sauce pot. Place the pot over medium heat and begin to whisk everything together. The cocoa will repel the liquid at first, but as the half and half begins to warm, they will come together.
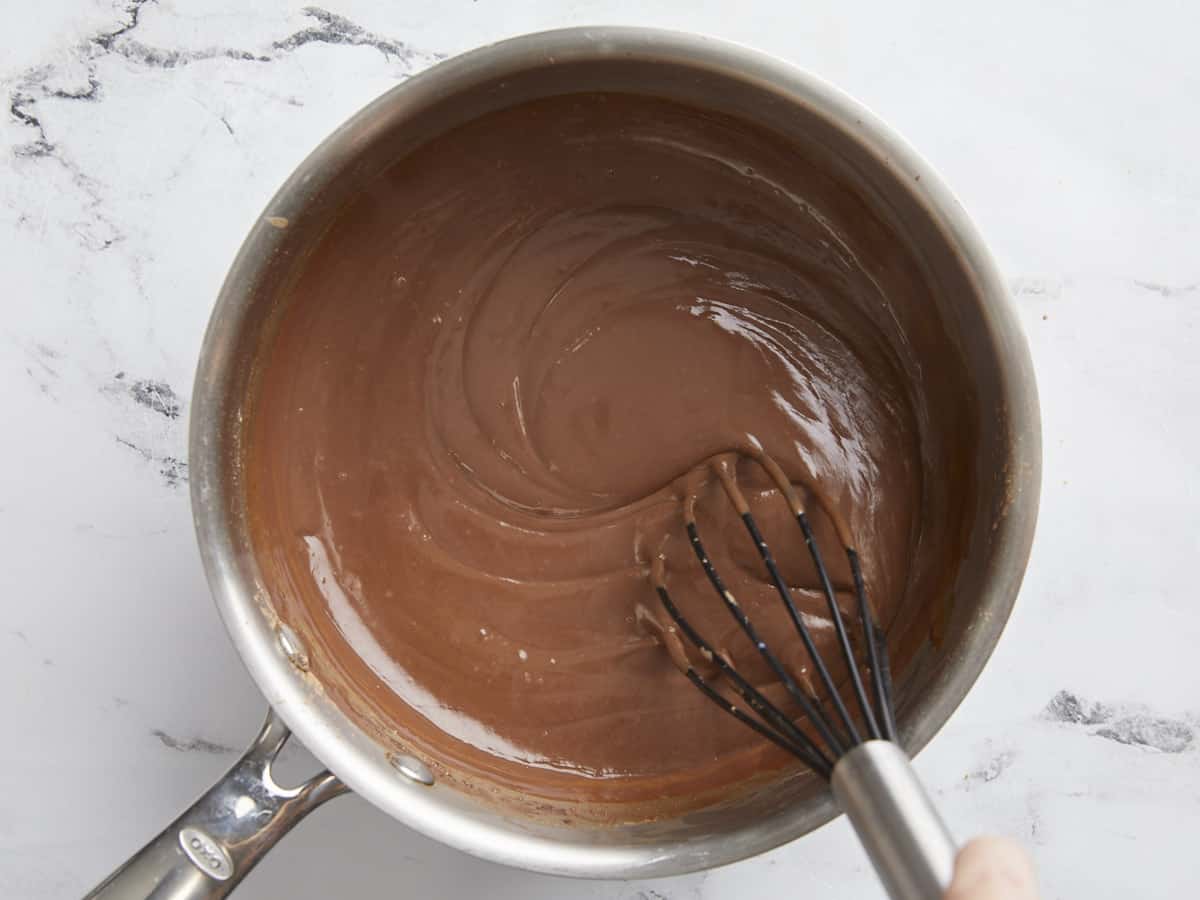
Continue to heat the mixture while whisking until it comes to a gentle simmer, at which point it will thicken into a pudding. Remove the pudding from the heat.
Serve the chocolate pudding warm, or refrigerate until cool. To refrigerate, place a layer or plastic wrap or parchment on the surface of the pudding to prevent a skin from forming on top.
* You can use any dairy or non-dairy milk in place of the half and half, but keep in mind that the richness of the “milk” determines the richness of the pudding. Half and half is my favorite.
Add ½ cup sugar, ⅓ cup unsweetened cocoa powder, and 3 Tbsp cornstarch to a small sauce pot. Stir to combine.
Add 2 cups half & half (or 1 cup whole milk and 1 cup heavy cream) to the sauce pot. Place the pot over medium heat and begin to whisk the milk into the cocoa mixture. The cocoa will repel the liquid at first, but as it warms it will begin to whisk in.
Continue to cook and whisk as the half and half warms. Allow it to come to a simmer, at which point the cornstarch will thicken the mixture into a pudding. Remove the pudding from the heat.
Serve the pudding warm, or chill for two hours (place plastic or parchment on the surface of the pudding to prevent it from forming a skin). Serve as-is, or top with whipped cream, fresh berries, or shaved chocolate.
 Strawberries and chocolate are a match made in heaven. Chocolate covered strawberries are a classic dessert and have you tried my strawberry chocolate cake? SO delicious! Cookies are my favorite dessert so of course I had to combine the two ingredients in a cookie! These Strawberry Chocolate Cookies are DIVINE. They remind me of chocolate…
 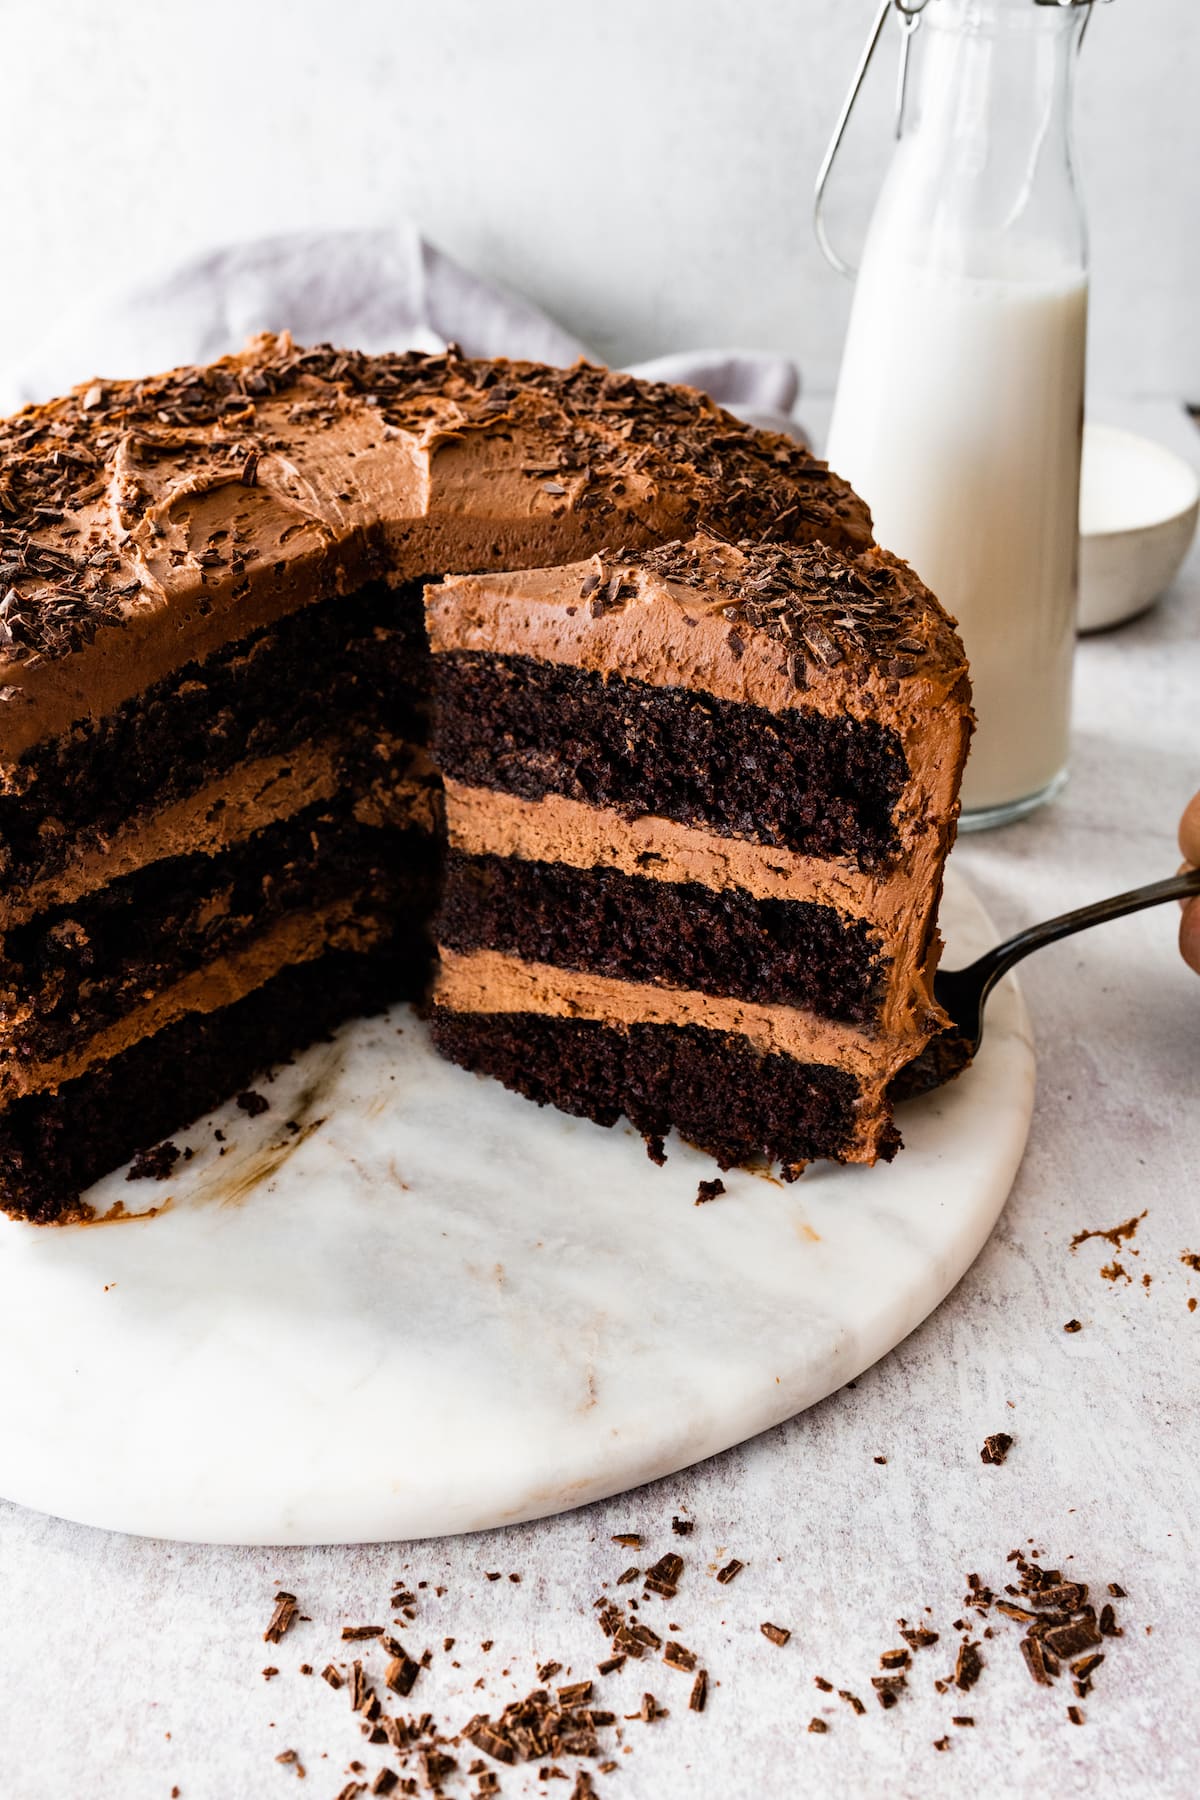 It’s no secret that chocolate cake is my favorite cake. I love my chocolate bundt cake, flourless chocolate cake, and easy chocolate cake. They are all AMAZING! But whenever I am celebrating something special, I like to make this layered bakery-style Chocolate Cake. It is the perfect dessert for any celebration! The cake is super…