Stuffed Mushrooms

This Stuffed Mushrooms recipe is the best appetizer or veggie side dish! They’re bite-sized and packed with a herby cream cheese filling.

The post Stuffed Mushrooms appeared first on Budget Bytes.

When I’m feeding skeptical meat-eaters vegetarian cuisine, mushrooms are one of my favorite magic tricks. Mushrooms are one of the few vegetarian ingredients that are included when chefs talk about umami. Umami is a savory, rich, “meaty” taste sensation that’s one of the five basic tastes, and these Stuffed Mushrooms are packed with it. I stuff button mushrooms with a herby cream cheese filling, which is made even more delicious thanks to the garlic, parmesan cheese, sun dried tomatoes, and crispy breadcrumbs. Everything comes together in one savory, bite-sized package. These make the best appetizer, game-day snack, or veggie side dish on a budget!

Side view of stuffed mushrooms on a wooden chopping board.

Ingredients

Here’s what you’ll need to make these cream cheese stuffed mushrooms:

  • Fresh Button Mushrooms: You can use any type of button mushroom you like! The filling is enough to fill 20 mushroom caps, which is approx 16 oz. of button mushrooms. Just note larger mushrooms will use more filling, so the total serving size will vary. 
  • Cream Cheese: Makes the filling creamy, tangy, and rich—just like the stuffed mushrooms you get at a restaurant. 
  • Yellow Onion & Garlic: These infuse the cream cheese filling with more flavor. 
  • Salted Butter: Sautes the onion, garlic, and rosemary and adds richness to the filling.
  • Italian Breadcrumbs: Like in my Tuscan white bean stuffed tomatoes recipe, breadcrumbs help bind the filling together and add texture. Plain panko breadcrumbs will also work if you don’t have Italian breadcrumbs on hand. 
  • Crushed Walnuts: Gives the filling a little crunch and texture.
  • Sun Dried Tomatoes in Oil: We had some left over from our pesto sun dried tomato grilled cheese recipe, and they add even more umami flavor to this dish. (They’re also one of my favorite ingredients for minimally processed meat substitutes!) I recommend getting the sun dried tomatoes in oil, as we use both the tomatoes and the oil. Alternatively, you could use olive oil and dehydrated sun dried tomatoes—I’ve included steps for rehydrating dried tomatoes in the recipe card notes below.
  • Shredded Parmesan: Adds a salty and slightly nutty flavor to the filling. 
  • Fresh Rosemary & Parsley: A sprig of rosemary and minced parsley add freshness, aroma, and even more flavor to the mushrooms.
  • Salt & Black Pepper: Enhances the other flavors and brings everything together.

A note on Button Mushrooms

Did you know white button mushrooms are the same mushroom as crimini? And the brown mushroom, as well as the portobello? The difference is simply their age; they are all “Agaricus bisporus“. The brown crimini and the large, brown portobello are more mature versions of the very same mushroom. White button mushrooms are almost always cheaper than baby Bella and portobello mushrooms, so use this knowledge to your advantage when you’re working on your food budget! ($2.18 for “baby bella” mushrooms vs. $1.98 for “white button mushrooms” when I checked earlier this week!)

Recipe Tips and Suggestions

  • I clean my mushrooms using a dry towel to gently wipe off any dirt or debris. If your mushrooms are particularly dirty, you can also wipe them with a damp (not soaking wet) cloth or a mushroom brush. Avoid submerging mushrooms in water as they’re extremely porous and will absorb liquid, making them soggy when cooked! This is one of the reasons why they are so great for marinating!
  • You could make this stuffed mushrooms recipe an omnivore’s delight by using ground Italian sausage instead of sun dried tomatoes or by adding some chopped bacon to the filling.
  • Vegan? No problem! You can easily substitute dairy-free cream cheese and cheese in this recipe to make these stuffed mushrooms completely plant-based.
  • For a make-ahead option, prepare the filling and mushroom caps, stuff, cover, and refrigerate. When ready to bake, continue with the recipe as directed. I’d use the pre-prepared ingredients within 2 days of refrigeration.
  • Don’t throw out the mushroom stems! Instead, use them in homemade mushroom soup, mushroom rice, mushroom herb gravy, or make an easy vegetable stir fry. They can also be added to stocks and broths for extra flavor.

What Goes with Stuffed Mushrooms?

I’d serve these mushrooms with other finger foods like bruschetta, baked zucchini fries, and mini broccoli cheddar quiches for a fun appetizer spread! You could also enjoy them as a side dish with anything you like, such as sweet corn risotto, grilled salmon, chicken Parmesan, or pasta dishes like our orzo pasta salad.

However, I also love these mushrooms as a veggie-packed main dish! Try them with a side of rice (arroz verde would be amazing) or served over creamy polenta or mashed potatoes—so satisfying and tasty!

Storage Instructions

Once baked, you can keep these vegetarian stuffed mushrooms in the fridge for 3-4 days. Let them cool completely before storing them in an airtight container. Reheat them in the oven before serving.

Overhead view of stuffed mushrooms on a wooden chopping board.
Side view of stuffed mushrooms on a wooden chopping board.
Print

Stuffed Mushrooms

This Stuffed Mushrooms recipe is the best appetizer or veggie side dish! They're bite-sized and packed with a herby cream cheese filling.
Course Appetizer, Side Dish
Cuisine American
Total Cost ($11.58 recipe / $1.93 serving)
Prep Time 20 minutes
Cook Time 15 minutes
Total Time 35 minutes
Servings 6 servings (20 mushroom caps, 3-4 caps per person)
Calories 286kcal

Ingredients

  • 2 Tbsp salted butter $0.26
  • ½ yellow onion, diced small $0.47
  • 1 sprig rosemary $0.29
  • 3 garlic cloves, minced $0.09
  • 1 tsp parsley, minced (reserve a pinch for garnishing) $0.05
  • 2 Tbsp crushed walnuts $0.42
  • 1 8 oz package of cream cheese $1.83
  • ½ tsp salt $0.01
  • ½ tsp freshly cracked black pepper $0.08
  • ½ cup Italian breadcrumbs (or plain panko) $0.93
  • cup shredded Parmesan $2.21
  • 3 Tbsp sun dried tomatoes in oil, minced + 1 Tbsp oil, reserved* $0.96
  • 16 oz fresh button mushrooms $3.98

Instructions

  • In a medium size skillet, melt butter and sauté diced onion with rosemary sprig over medium heat until soft and translucent, about 4 minutes.
  • Add garlic and cook until fragrant, about 2 minutes.
  • Remove the rosemary leaves from the sprig and discard the stem. Add the rosemary leaves, cooked onions, garlic, and butter from the pan to a food processor on top of fresh minced parsley (reserve a pinch for garnishing), walnuts, cream cheese, salt and pepper.
  • Pulse in food processor until combined but still chunky
  • Fold in breadcrumbs, Parmesan cheese, and minced sun dried tomatoes.
  • Clean mushrooms with a dry towel to remove any dirt. Remove stems and use a spoon to scoop out the gills of the mushrooms. Discard the gills and stuff mushrooms gently with a spoon so they are overflowing.
  • Drizzle with reserved sun dried tomato oil and rub the bottom of each mushroom in any oil that is leftover or has dripped onto your baking sheet.*
  • Bake the mushrooms in 400 degree oven on a lightly greased, parchment-lined baking sheet for 15 minutes
  • When done, simply garnish with the reserved minced parsley and a crank of salt and pepper on top! Enjoy.

See how we calculate recipe costs here.

Notes

*If you did not buy the kind of sun dried tomatoes that are stored in oil, you can rehydrate dehydrated sun dried tomatoes by soaking them in water on your countertop until they are soft and pliable. You can also soak them in olive oil until the same consistency is achieved! If you do not have sun dried tomato oil to drizzle on top, regular olive oil will do just fine.

Nutrition

Serving: 1serving | Calories: 286kcal | Carbohydrates: 15g | Protein: 9g | Fat: 22g | Sodium: 589mg | Fiber: 2g
A hand taking a stuffed mushroom from a wooden chopping board.

how to make Stuffed Mushrooms – step by step photos

Diced onion and a sprig of rosemary sauteing in a skillet.

In a medium size skillet, melt 2 Tbsp salted butter and sauté ½ a diced yellow onion with 1 rosemary sprig over medium heat until soft and translucent, about 4 minutes.

Minced garlic added to diced onion and rosemary in a skillet.

Add 3 minced garlic cloves and cook until fragrant, about 2 minutes.

Cooked onions, with chopped walnuts, cream cheese, and parsley in a food processor.

Remove the rosemary leaves from the sprig and discard the stem. Add the rosemary leaves, cooked onions, garlic, and butter from the pan to a food processor on top of 1 tsp fresh minced parsley (reserve a pinch for garnishing), 2 Tbsp crushed walnuts, 1 8oz package of cream cheese, ½ tsp salt, and ½ tsp pepper.

Pulse in food processor until combined but still chunky.

Stuffed mushroom filling with parmesan, sun dried tomatoes and breadcrumbs in a mixing bowl.

Fold in ½ cup breadcrumbs, ⅓ cup shredded Parmesan, and 3 Tbsp minced sun dried tomatoes.

Mushroom caps on a baking sheet with a spoon scooping out the insides for stuffing.

Clean 16 oz of fresh button mushrooms with a dry towel to remove any dirt. Remove stems and use a spoon to scoop out the gills of the mushrooms. Discard the gills and stuff mushrooms gently with a spoon so they are overflowing.

Stuffed mushrooms on a baking sheet with a spoon drizzling oil over.

Drizzle with 1 Tbsp reserved sun dried tomato oil and rub the bottom of each mushroom in any oil that is leftover or has dripped onto your baking sheet.*

Freshly baked stuffed mushrooms on a baking sheet.

Bake the mushrooms in 400 degree oven on a lightly greased, parchment-lined baking sheet for 15 minutes. When done, simply garnish with the reserved pinch of minced parsley and a crank of salt and pepper on top! Enjoy.

Side view of stuffed mushrooms on a wooden chopping board.

I love serving these easy stuffed mushrooms at parties and gatherings. They’re quick to prepare, budget-friendly, and always disappear quickly!

The post Stuffed Mushrooms appeared first on Budget Bytes.

Herbed pork steak with savory cream sauce

Pork steak is a savory one-skillet meal that is quick and easy. Juicy pork steaks are seasoned with herbs and roasted, then served with a rich cream and garlic sauce.

Pork steak is a savory one-skillet meal that is quick and easy. Juicy pork steaks are seasoned with herbs and roasted, then served with a rich cream and garlic sauce.

Cube Steak with Balsamic Onion Gravy

Tender and flavorful cube steak is slow-cooked to juicy perfection with balsamic onion gravy in a Dutch oven. Serve over mashed potatoes for an elegant homemade meal the whole family will love.

Tender and flavorful cube steak is slow-cooked to juicy perfection with balsamic onion gravy in a Dutch oven. Serve over mashed potatoes for an elegant homemade meal the whole family will love.

How To Make Your Own Italian Seasoning

Making homemade Italian seasoning is easy; just blend dried herbs and spices for a custom mix that elevates so many dishes. Add it to soup, pasta, marinades, or sauces!

Making homemade Italian seasoning is easy; just blend dried herbs and spices for a custom mix that elevates so many dishes. Add it to soup, pasta, marinades, or sauces!

Tuscan White Bean Stuffed Tomatoes

This Tuscan White Bean Stuffed Tomatoes recipe is hearty, warming, and deeply satisfying. It’s also budget-friendly and easy to make!

The post Tuscan White Bean Stuffed Tomatoes appeared first on Budget Bytes.

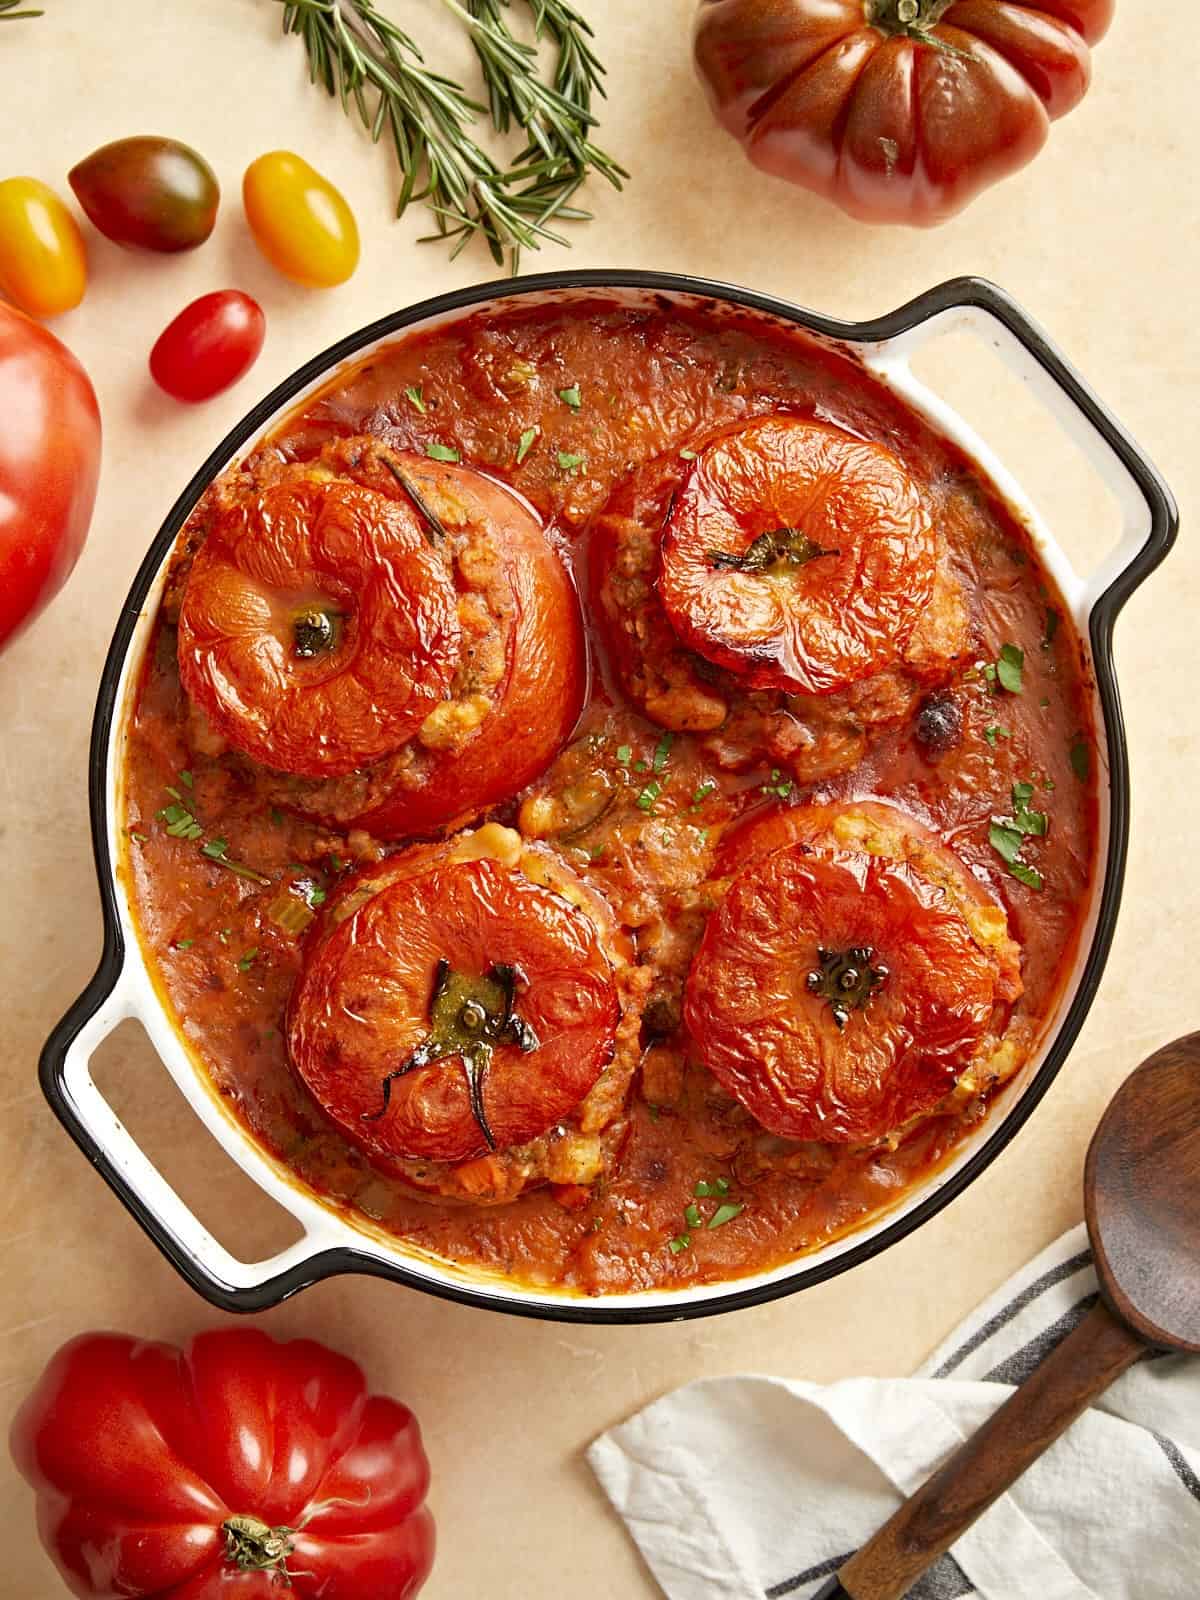
This recipe for Tuscan White Bean Stuffed Tomatoes is hearty, warming, and deeply satisfying. These stuffed tomatoes can easily be served over a bed of pasta or rice—super budget-friendly and extremely filling! Every time you cut into one of the tomatoes, it’s like you’re making the sauce for whatever you’ve paired them with. This recipe is absolutely delicious and a great way to use up those summer tomatoes!

Tuscan white bean stuffed tomatoes in a baking dish.

What Are Tuscan White Bean Stuffed Tomatoes?

Stuffed tomatoes are such an underrated dish. You can stuff them with almost anything you have on hand—grains, beans, meats, veggies, cheese! In this recipe, I take inspiration from Tuscan cuisine and stuff the tomatoes with a hearty mixture of cannellini beans, four types of diced vegetables, breadcrumbs, Italian seasonings, tomato sauce, and shredded cheese. Each tomato is then baked until it’s tender, juicy, and bursting with flavor. They’re like mini casseroles in tomato form!

Ingredients for Tuscan White Bean Stuffed Tomatoes

Here’s what you’ll need to make this stuffed tomato recipe:

  • Tomatoes: I use large “slicing” tomatoes (the kind you might use for a sandwich). You can also use smaller, on-the-vine tomatoes if you’re cooking for more than 4 people or want them as a side dish.
  • Cannellini Beans: Adds protein and fiber, making this recipe even more filling and nutritious.
  • Vegetables: Carrots, yellow onion, and celery cook down to be soft, sweet, and succulent. I also add some diced zucchini for extra texture and flavor. 
  • Herbs: A sprig of rosemary and a dried Italian seasoning blend help give these tomatoes a Tuscan twist. Half a teaspoon of dried rosemary will also work if you don’t have fresh.
  • Seasonings: A little salt, black pepper, and red pepper flakes help to enhance the other flavors.
  • Olive Oil: Softens the veggies as they cook and helps the tomatoes to brown in the oven.
  • Apple Cider Vinegar: The tanginess helps balance out the tomatoes’ sweetness and tenderizes the vegetables as they cook. It really helps the flavorful herbs pop!
  • Garlic: Freshly minced garlic infuses the filling with flavor.
  • Bread Crumbs: These help to absorb the extra moisture from the vegetables and create a nice, hearty texture. You can use any type of breadcrumbs you prefer.
  • Tomato Sauce: Use your favorite canned tomato sauce, or make your own from scratch!
  • Italian Cheese Blend: Makes the filling creamy and savory. I used the shredded Italian cheese blend from my local Kroger, but any type of cheese you enjoy and have on hand will work. Dairy-free? No problem. This recipe is great without the cheese, too.

What Type Of Tomato is Best for Stuffing?

You want large, firm, and ripe ”slicing” tomatoes for this recipe. Beefsteak and large heirloom tomatoes are also great options because they’re big and easy to stuff. Roma tomatoes could also work, but the oval shape makes stuffing a bit more challenging. For serving a crowd, I use smaller vine-ripened tomatoes so the filling goes further. Whichever variety you choose, make sure your tomatoes are firm and not mushy!

Tips and Suggestions

  • Dairy-free? Leave out the cheese. Trust me, the white beans add to the dense texture and creaminess of the filling, so they’re great no matter what your dietary restrictions are.
  • You can make the filling up to 24 hours ahead of time and store it in the fridge until you’re ready to stuff and bake your tomatoes. Cook the stuffed tomatoes for a couple of minutes longer to heat the filling through.
  • This recipe isn’t just for tomatoes! You can use the same filling to stuff large mushrooms or bell peppers (stuffed bell peppers are delicious!)

Storage Instructions

Leftover Tuscan white bean stuffed tomatoes will last up to 3-4 days in the fridge when stored in an airtight container. To reheat, cover with foil and bake at 350°F for about 15 minutes or until heated through. I wouldn’t freeze this recipe as the tomatoes may become too watery after thawing. However, the filling freezes well.

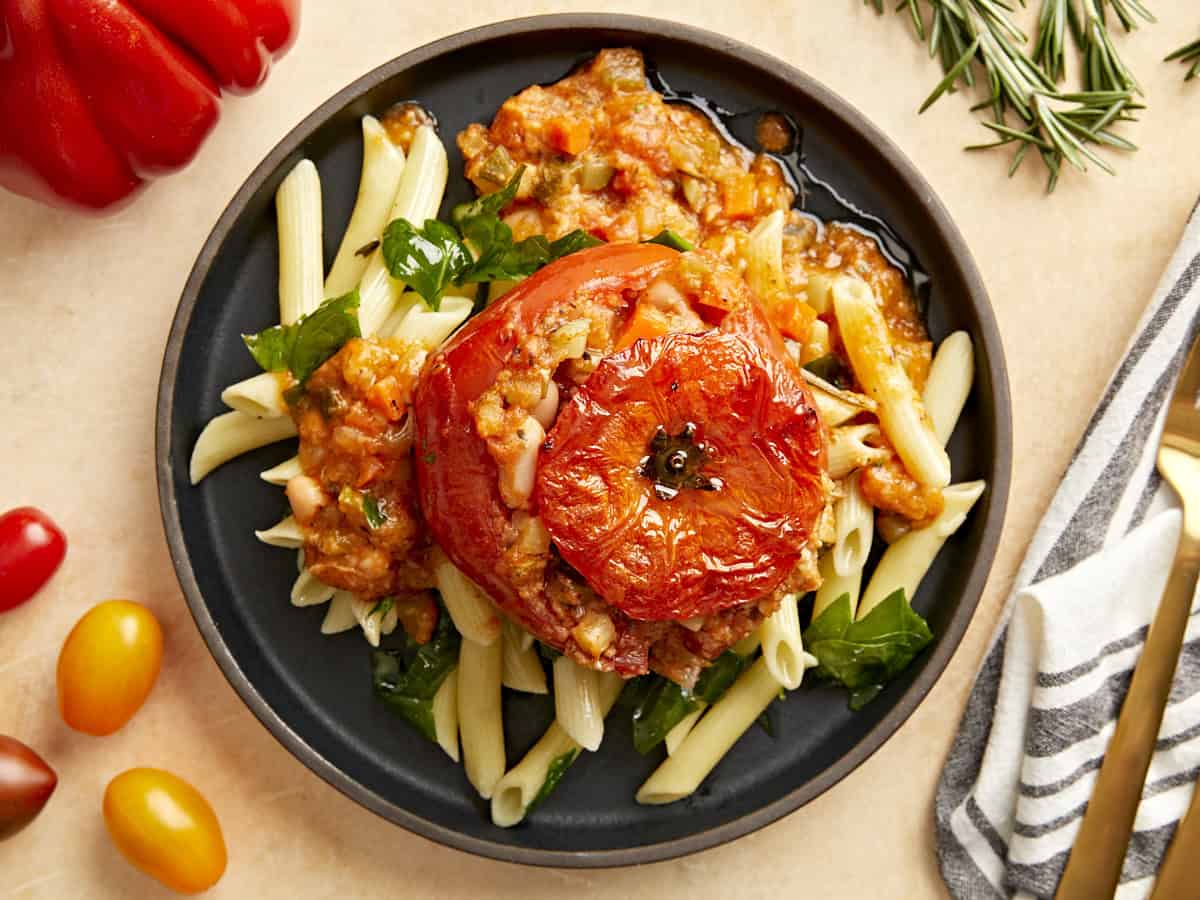
A tuscan white bean stuffed tomato with pasta.
Print

Tuscan White Bean Stuffed Tomatoes

This Tuscan White Bean Stuffed Tomatoes recipe is hearty, warming, and deeply satisfying. It's also budget-friendly and easy to make!
Course Main Course, Side Dish
Cuisine Italian
Total Cost ($9.42 recipe / $2.35 serving)
Prep Time 15 minutes
Cook Time 51 minutes
Total Time 1 hour 6 minutes
Servings 4 servings, 1 tomato per person
Calories 197kcal

Ingredients

  • 4 large “slicing” tomatoes* $4.54
  • 1 can cannellini beans $0.86
  • 1 carrot, peeled $0.10
  • ½ yellow onion $0.47
  • 2 sticks celery $0.10
  • 2 Tbsp olive oil, divided $0.38
  • 1 zucchini, diced small $0.93
  • 1 sprig rosemary** $0.19
  • ½ Tbsp dried Italian herb blend $0.29
  • tsp salt $0.01
  • 1 Tbsp apple cider vinegar $0.03
  • ½ tsp freshly cracked black pepper $0.12
  • ½ tsp red pepper flakes $0.06
  • 3 cloves garlic, minced $0.15
  • 8oz can tomato sauce $0.74
  • ¼ cup bread crumbs $0.16
  • ½ cup shredded Italian cheese blend*** $0.29

Instructions

  • Hollow out 4 large tomatoes, keeping the tops and transferring the juicy seeds and inside flesh to a medium mixing bowl. Reserve everything!
  • Dice the carrot, yellow onion, and celery sticks into small pieces to make mirepoix (which is a combination of diced veggies used to flavor a recipe).
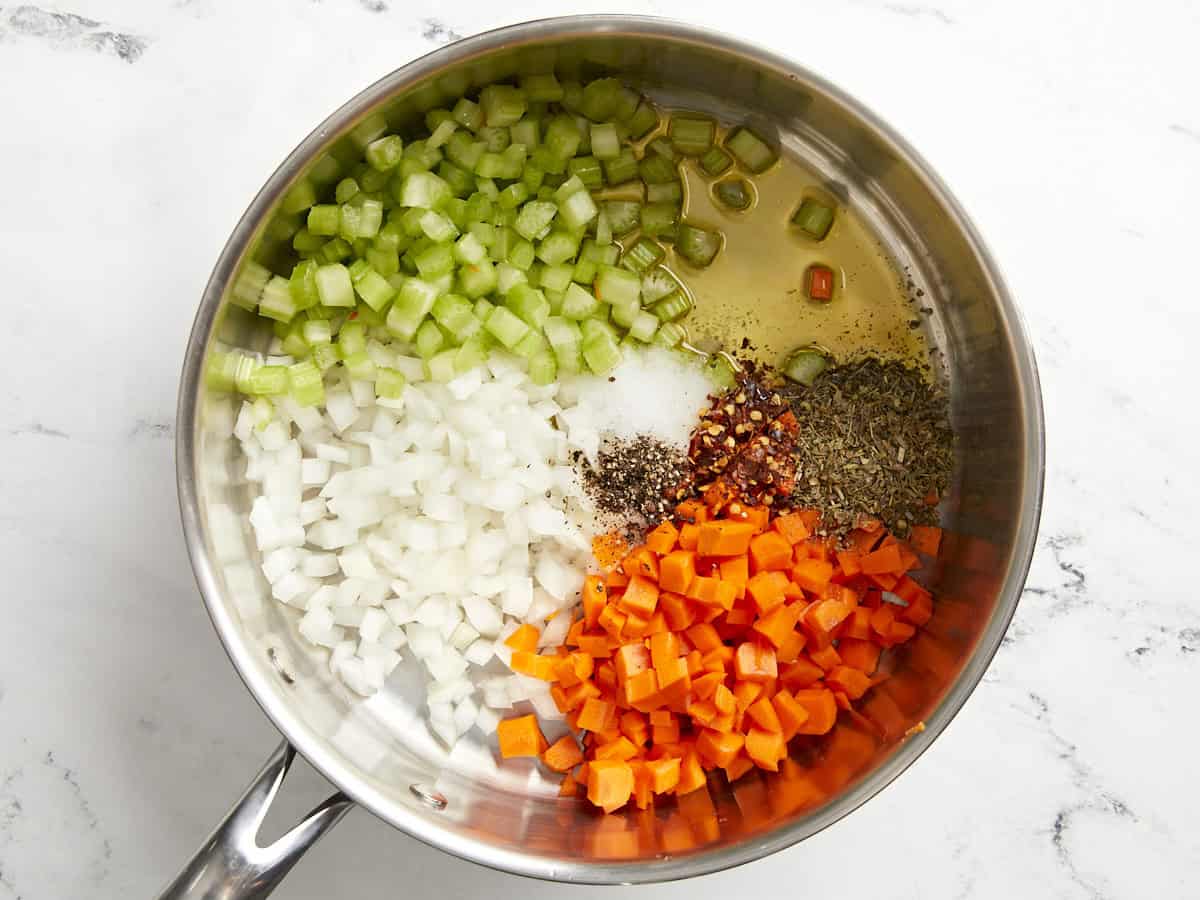
  • Pour 1 ½ Tbsp olive oil into a saucepan with salt, pepper, red pepper flakes, Italian herbs, and the diced carrots, onions, and celery.
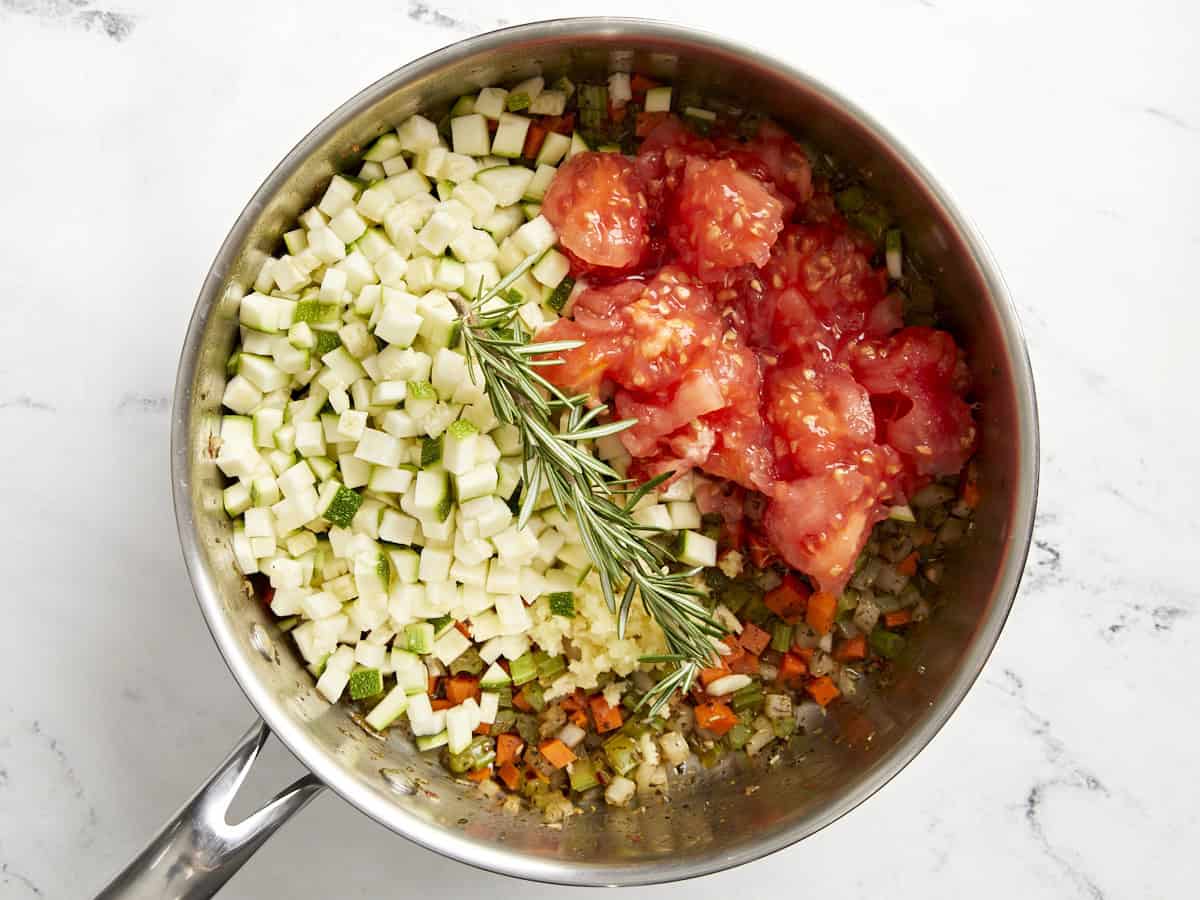
  • Once cooked down, about 5 minutes or until veggies are softened and glossy, add the insides from the tomatoes, diced zucchini, rosemary, garlic, and apple cider vinegar and simmer of on medium heat uncovered until a chunky filling forms and some of the juices cook down, about 10 min.
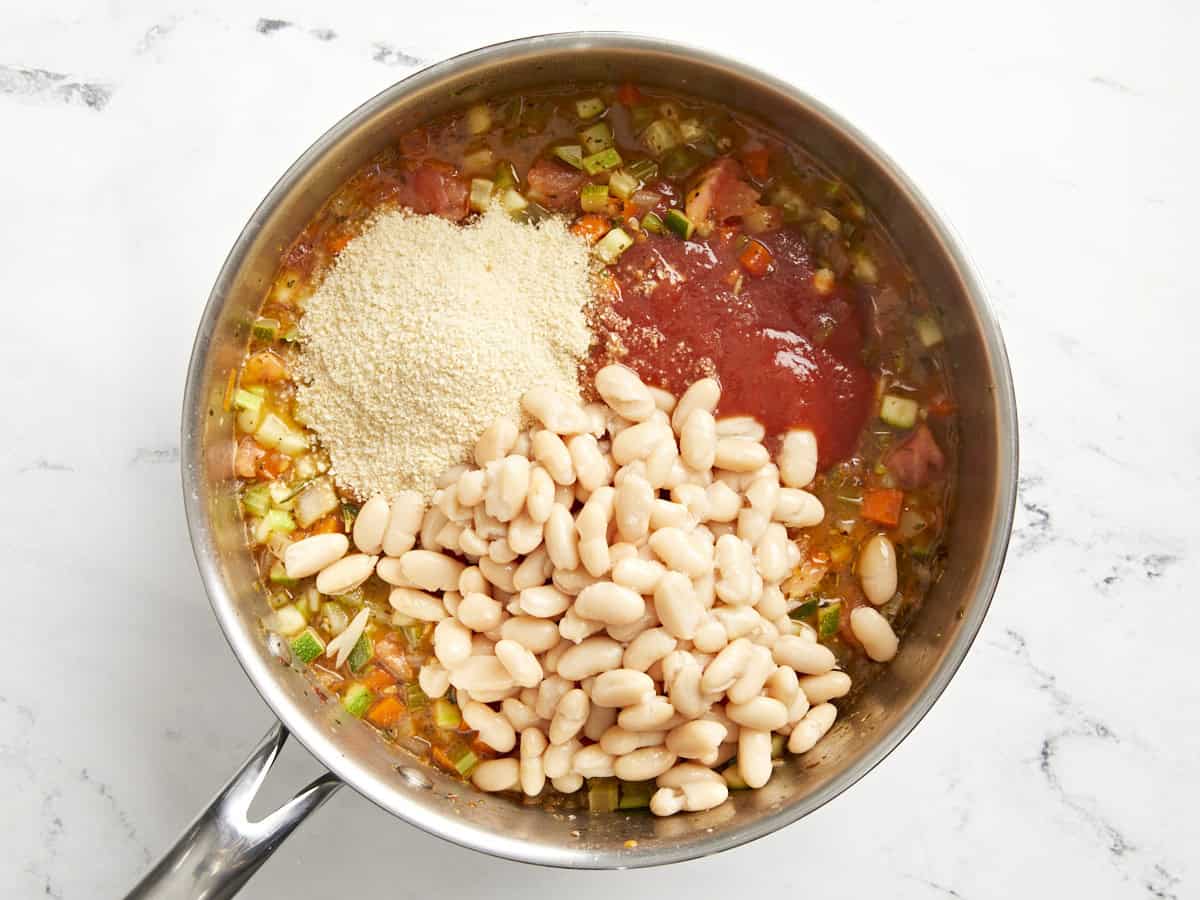
  • Add bread crumbs, white cannellini beans and tomato sauce. Stir until combined. Cook for 3 minutes.
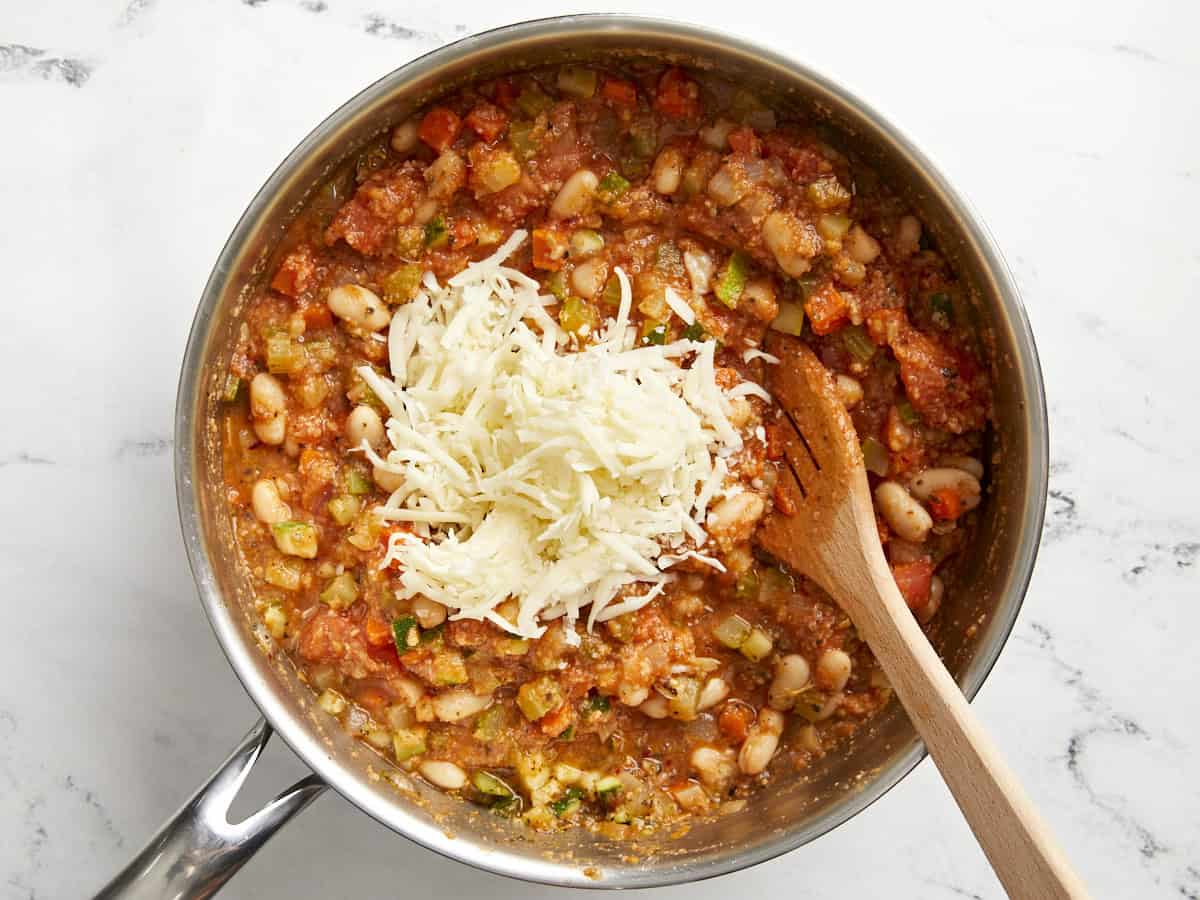
  • Turn off heat and fold in shredded Italian cheese blend. Set aside.
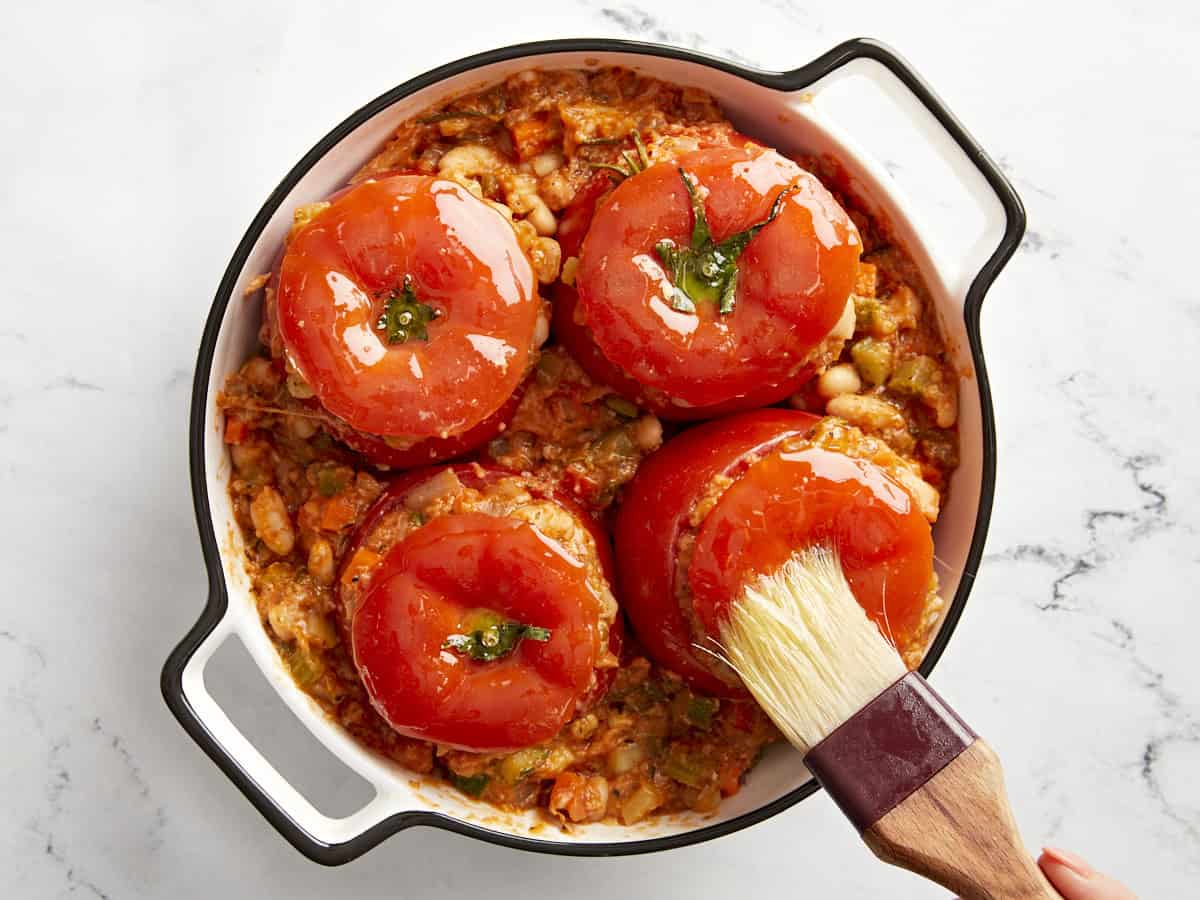
  • Place hollowed out tomatoes in a lightly oiled baking dish. Fill each hollowed out tomato with the cheesy white bean filling and put their tomato “lids” on. Fill in around each tomato with any extra filling. Brush remaining olive oil on top of all 4 tomatoes and cover the entire baking dish lightly with tinfoil. Bake for 15 min at 375°F.
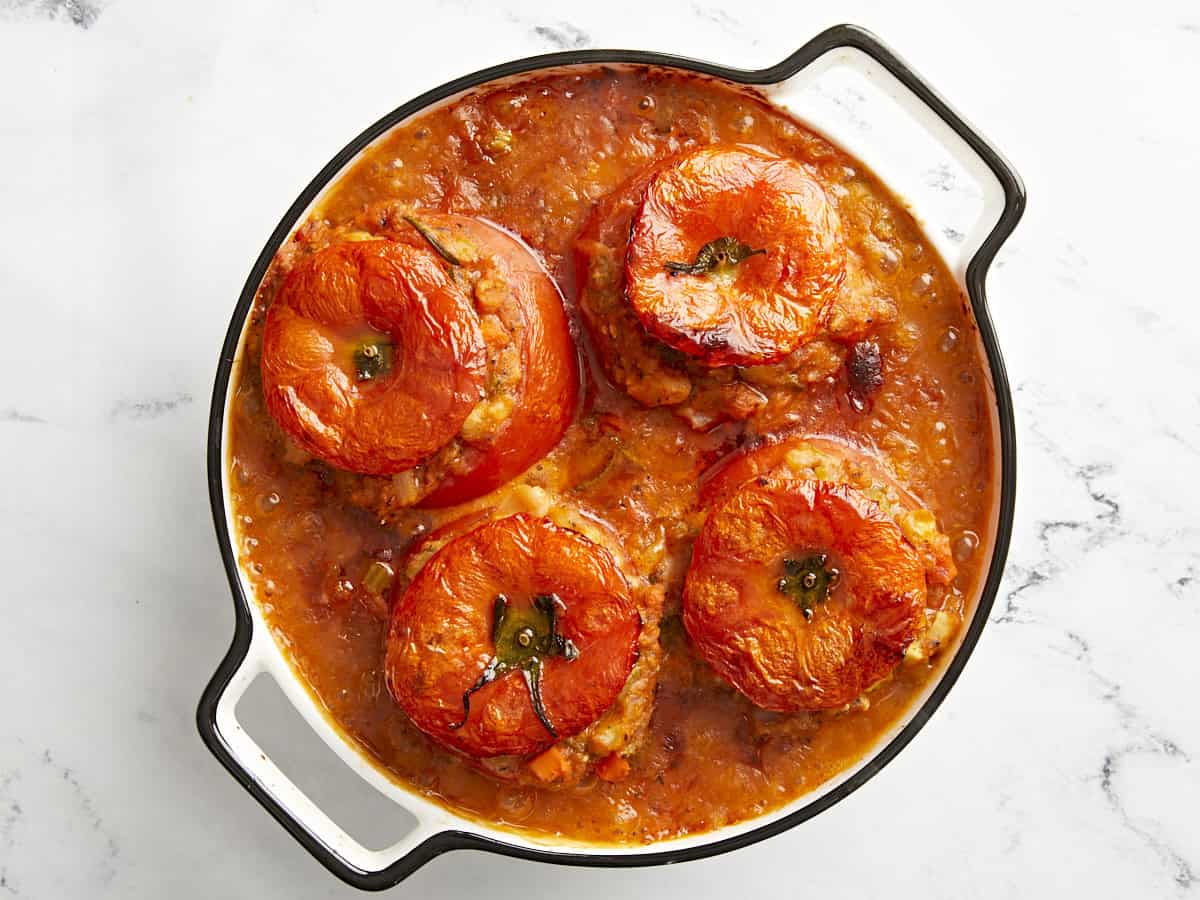
  • Remove tinfoil and bake an additional 15 minutes. Broil on high for the last 3 minutes to get some color on top of the tomatoes, if needed.
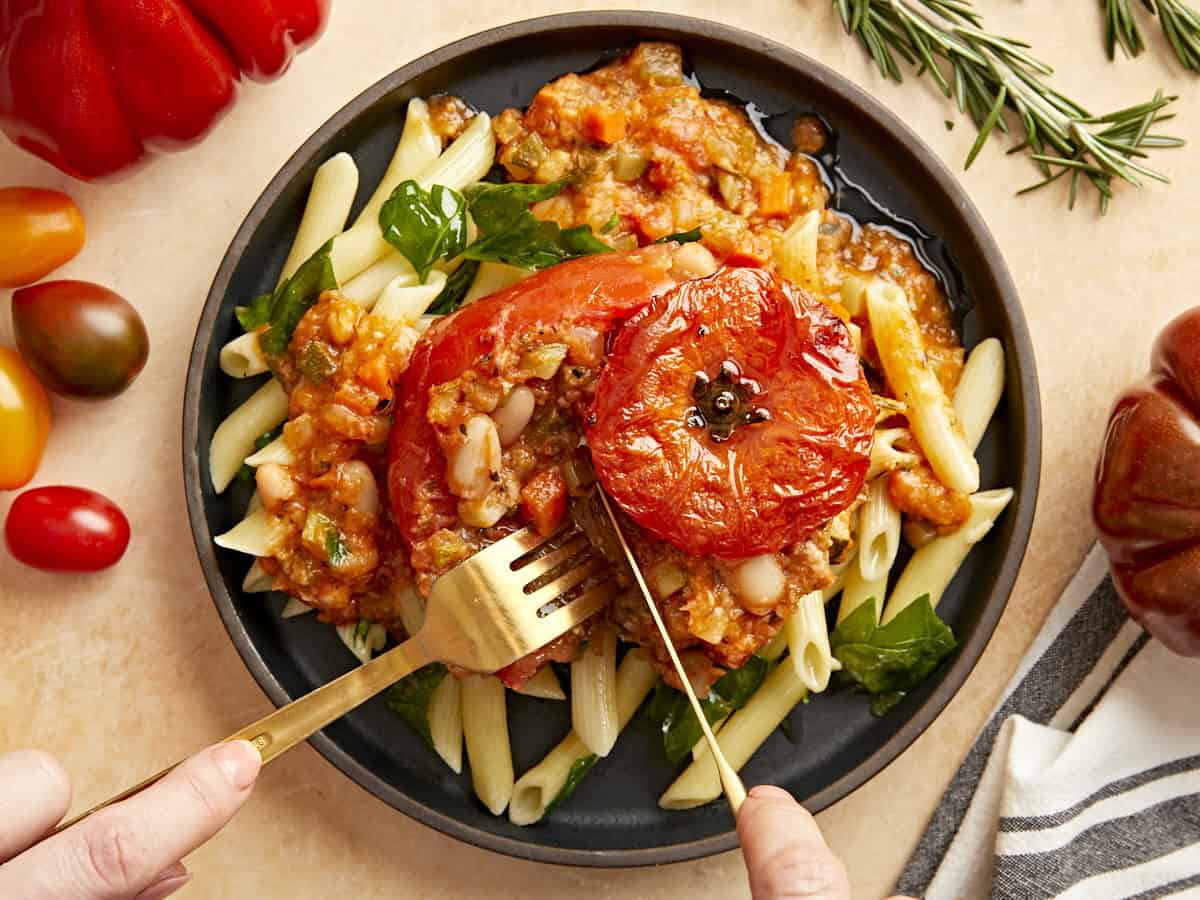
  • Serve each tomato over pasta or rice.

See how we calculate recipe costs here.

Notes

*If you want to stretch this recipe further for more than 4 people, you can buy slightly smaller tomatoes on the vine and follow these same instructions, serving the smaller stuffed tomatoes with more pasta or rice to keep your guests happy and full! In my experience, you can find tomatoes for much cheaper (and more flavorful!) when they are in season.
**Dried rosemary also works well.
*** I chose the shredded Italian cheese blend at my local Kroger, but provolone, mozzarella, Parmesan, and even cheddar cheese work well in this recipe—use whatever you have on hand!

Nutrition

Serving: 1stuffed tomato | Calories: 197kcal | Carbohydrates: 19g | Protein: 7g | Fat: 12g | Sodium: 1245mg | Fiber: 4g
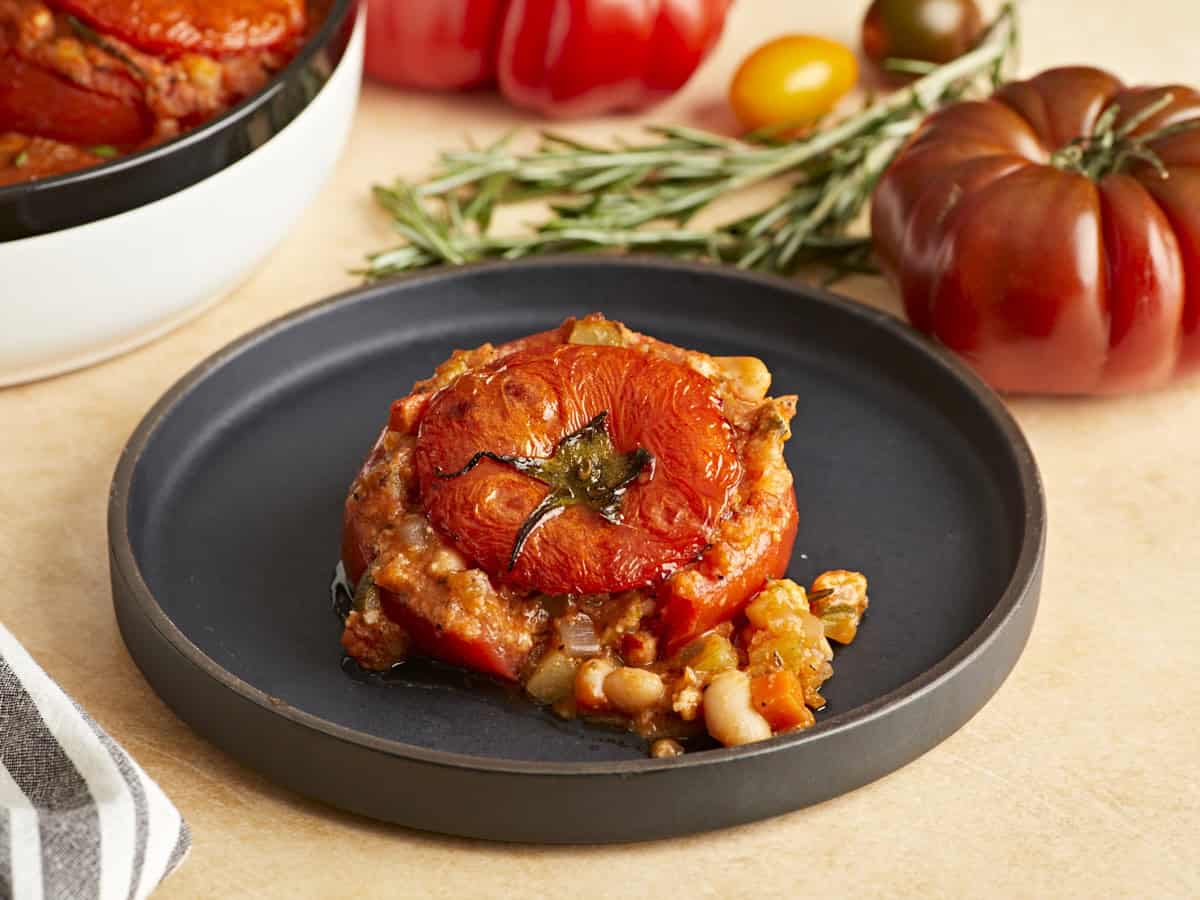
A tuscan white bean stuffed tomato on a plate.

how to make Tuscan White Bean Stuffed Tomatoes – step by step photos

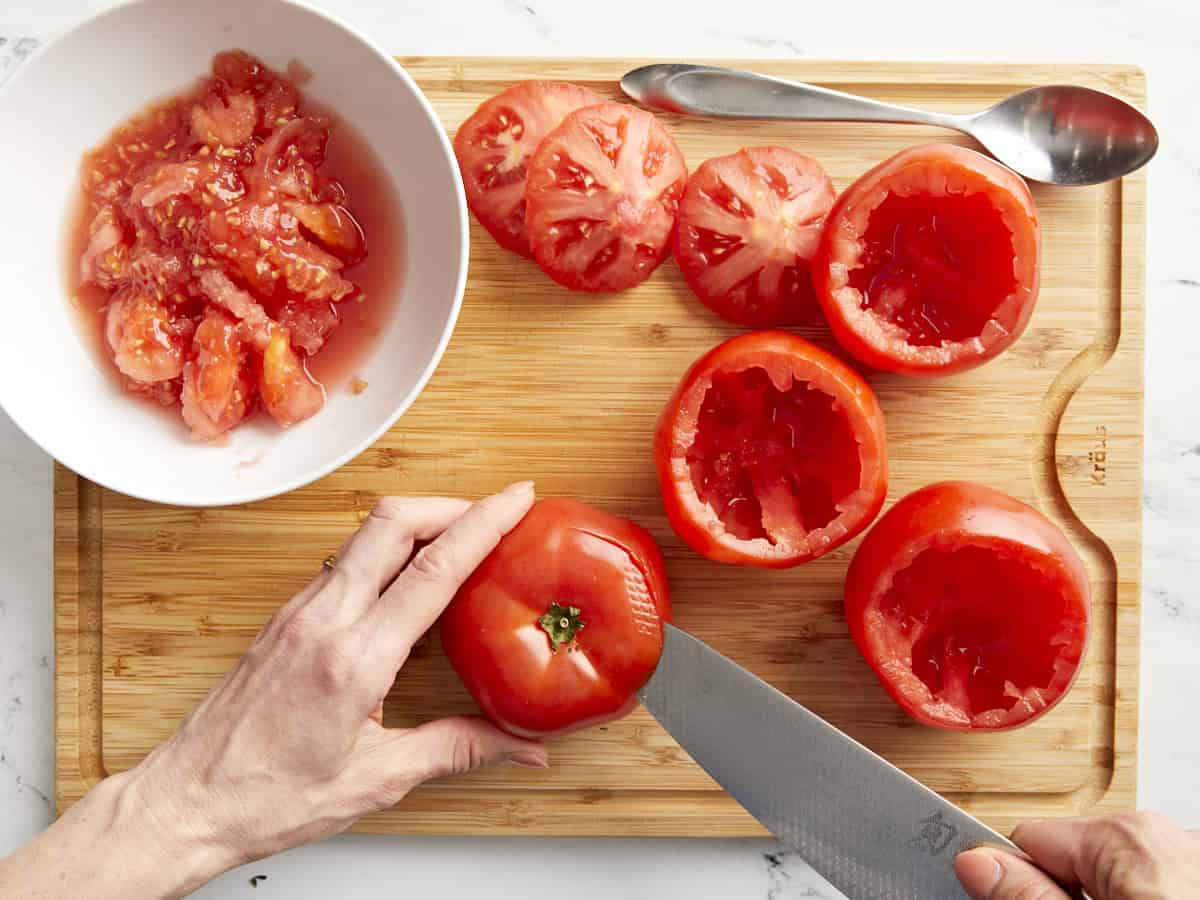
A knife cutting the top off a tomato on a chopping board next to hollowed out tomatoes and a bowl containing scooped out tomato seeds.

Hollow out 4 large tomatoes, keeping the tops and transferring the juicy seeds and inside flesh to a medium mixing bowl. Reserve everything!

Diced onions, carrots, and celery in a saucepan with salt and pepper.

Dice 1 peeled carrot, ½ a yellow onion, and 2 celery sticks into small pieces to make mirepoix (which is a combination of diced veggies used to flavor a recipe). Pour 1 ½ Tbsp olive oil into a saucepan with 1½ tsp salt, ½ tsp pepper, ½ tsp red pepper flakes, ½ Tsp Italian herbs, and the diced carrots, onions, and celery.

Filling for tuscan white bean stuffed tomatoes in a saucepan.

Once cooked down, about 5 minutes or until veggies are softened and glossy, add the insides from the tomatoes, 1 diced zucchini, 1 sprig of rosemary, 3 minced garlic cloves, and 1 Tbsp of apple cider vinegar and simmer of on medium heat uncovered until a chunky filling forms and some of the juices cook down, about 10 min.

Filling for tuscan white bean stuffed tomatoes in a saucepan.

Add ¼ cups of bread crumbs, 1 can of white cannellini beans, and an 8-oz can of tomato sauce. Stir until combined. Cook for 3 minutes.

Filling for tuscan white bean stuffed tomatoes in a saucepan topped with shredded cheese.

Turn off heat and fold in ½ a cup of shredded Italian cheese blend. Set aside.

A spoon adding the tuscan white bean filling to hollowed out tomatoes in a baking dish.

Place hollowed out tomatoes in a lightly oiled baking dish. Fill each hollowed out tomato with the cheesy white bean filling and put their tomato “lids” on.

Tuscan white bean stuffed tomatoes in a baking dish being brushed with oil.

Fill in around each tomato with any extra filling. Brush remaining ½ Tbsp of olive oil on top of all 4 tomatoes and cover the entire baking dish lightly with tinfoil. Bake for 15 min at 375°F.

Tuscan white bean stuffed tomatoes in a baking dish.

Remove tinfoil and bake an additional 15 minutes. Broil your baked stuffed tomatoes on high for the last 3 minutes to get some color on top of the tomatoes, if needed. Serve each tomato over pasta or rice.

A knife and fork cutting into a tuscan white bean stuffed tomato on a plate with pasta.

You NEED to try these protein-packed Tuscan white bean stuffed tomatoes the next time you’re craving something warm, hearty, and delicious!

The post Tuscan White Bean Stuffed Tomatoes appeared first on Budget Bytes.

Healthy Vegan Lemon Bars

These vegan lemon bars are the spring dessert of your dreams! They’re made with the perfect balance of tart and sweet, plus made sweet and luxurious without vegan butter, refined sugar, and all-purpose flour. All you need is a few simple ingredients! 

The post Healthy Vegan Lemon Bars appeared first on Sweet Simple Vegan.

These vegan lemon bars are the spring dessert of your dreams! They’re the perfect balance of tart and sweet, plus they’re sweet and luxurious without vegan butter, refined sugar, and all-purpose flour. All you need is a few simple ingredients! 

slices of vegan lemon bars on white marble board
bitten creamy vegan lemon bar in white marble board

Just like Vegan Lemon Cake and Vegan Lemon Curd, these classic lemon bars are a must-bake once Spring has sprung. They’re creamy, dreamy, and filled with tons of fresh lemons and plant-based nutrition. 

They’re the perfect vegan dessert to impress a crowd, yet SO easy to make from scratch, buttery crust included! The hardest part is waiting long enough for these healthy lemon bars to set in the fridge. Now let’s get baking!

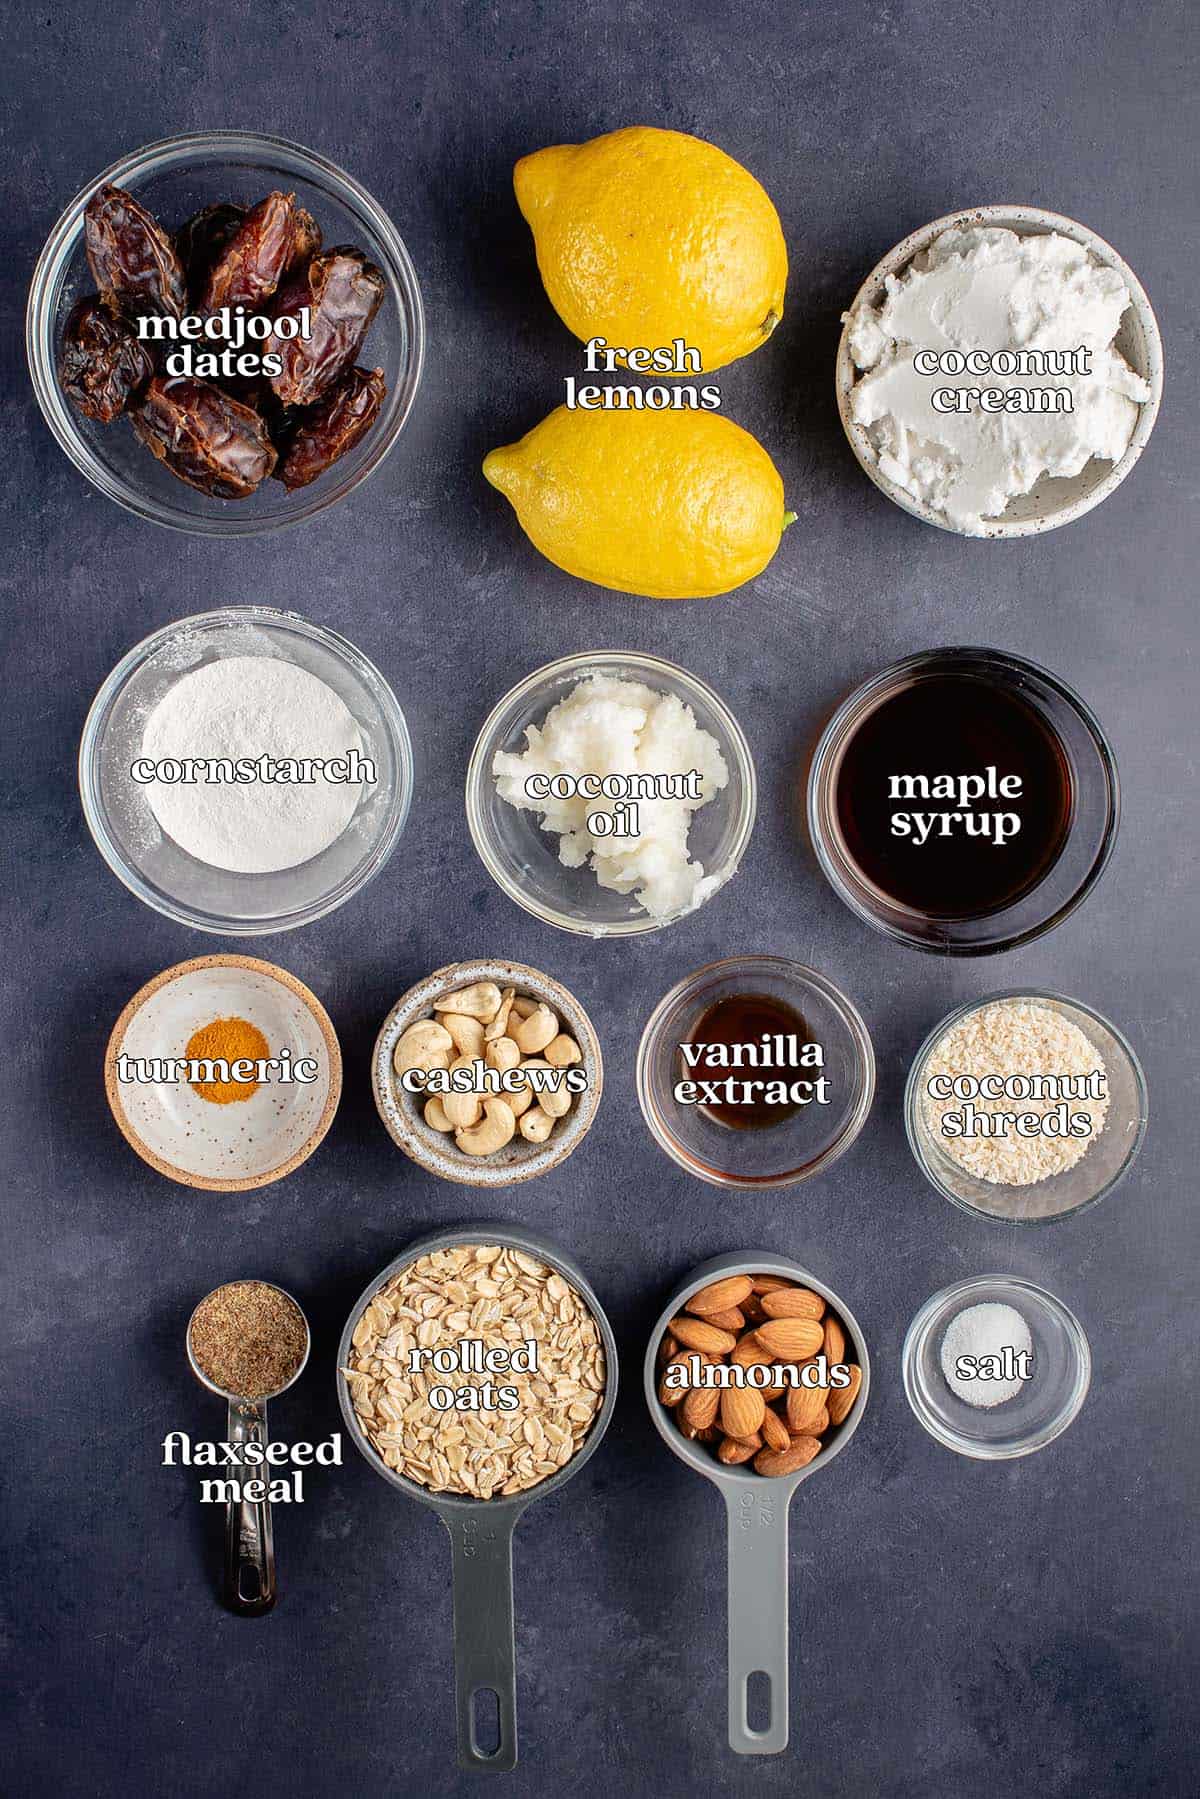
labeled ingredients for vegan lemon bars: medjool dates,  lemons, coconut cream, cornstarch, coconut oil, maple syrup, turmeric, cashews, vanilla, coconut shreds, flaxseed meal, rolled oats, almonds and salt

Ingredients You’ll Need 

for the crust:

  • Flax egg: Acts as a vegan egg replace and helps to bind the crust ingredients together. If needed, substitute chia seeds and make a chia egg instead. 
  • Oats and almonds: Old-fashioned rolled oats and raw, unsalted almonds make up the base of the crust and keep this recipe gluten-free. If you are gluten-intolerant or have celiac disease, make sure to use certified gluten-free rolled oats.
  • Coconut shreds: Adds additional texture and a hint of coconut flavor. If needed, replace with additional oats. 
  • Medjool dates: Adds natural sweetness and their stickiness helps to bind the crust together. Make sure to pit the dates before using! 
  • Coconut oil: Adds moisture and fat and helps the crust to set and harden when chilled. If you don’t care for the flavor of coconut, opt for refined coconut oil.

for the filling: 

  • Cashews: Most of the fat, creaminess, bright yellow color, and structure of regular lemon bars comes from chicken eggs. In this vegan version, we’re swapping in raw, unsalted cashews. They add a great, mild creaminess and similar level of fat content. 
  • Full-fat coconut milk: Adds richness and additional fat that makes the filling so creamy and dreamy! 
  • Lemon juice: For the best bright, tangy lemon flavor, you’ll need freshly squeezed lemon juice AND fresh lemon zest! We recommend a full tablespoon of lemon zest (from about 1 lemon!).
  • Cornstarch: Helps to set and thicken the filling. Without this, the filling would be really runny and not set properly. 
  • Maple syrup: Naturally sweetens these lemon bars and keeps them refined-sugar-free. Agave is a good substitute. 
  • Vanilla extract: Adds depth of flavor and helps to enhance the sweetness. 
  • Turmeric: Optional, but a pinch of turmeric helps to add a natural yellow color to the lemon bars without affecting the flavor. 

Equipment Needed

How to Make Vegan Lemon Bars

  1. Chill the coconut milk. Before getting started, refrigerate your coconut milk overnight to ensure the coconut cream separates from the coconut water properly.
  2. Soften the cashews. Soak the cashews in a large mixing bowl with boiling hot water for at least 20 minutes. This will help them blend completely smooth.
  3. Prepare the vegan flax egg. In a small bowl, combine the flaxseed meal with water. Set aside for 15 minutes to thicken.
  4. Preheat and prep. Preheat your oven to 350°F and line an 8×8” baking dish with parchment paper. Set aside.
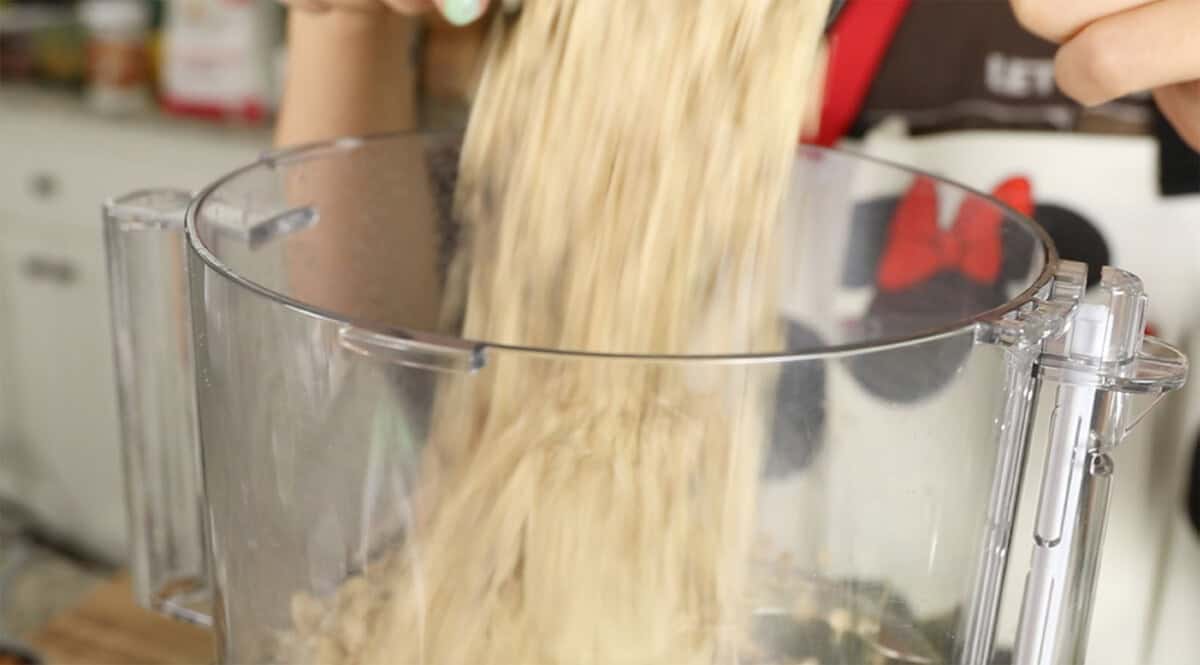
  5. Begin making the crust. In a food processor, add the rolled oats, almonds, coconut, rosemary, and salt. Process on high until a fine meal is reached.
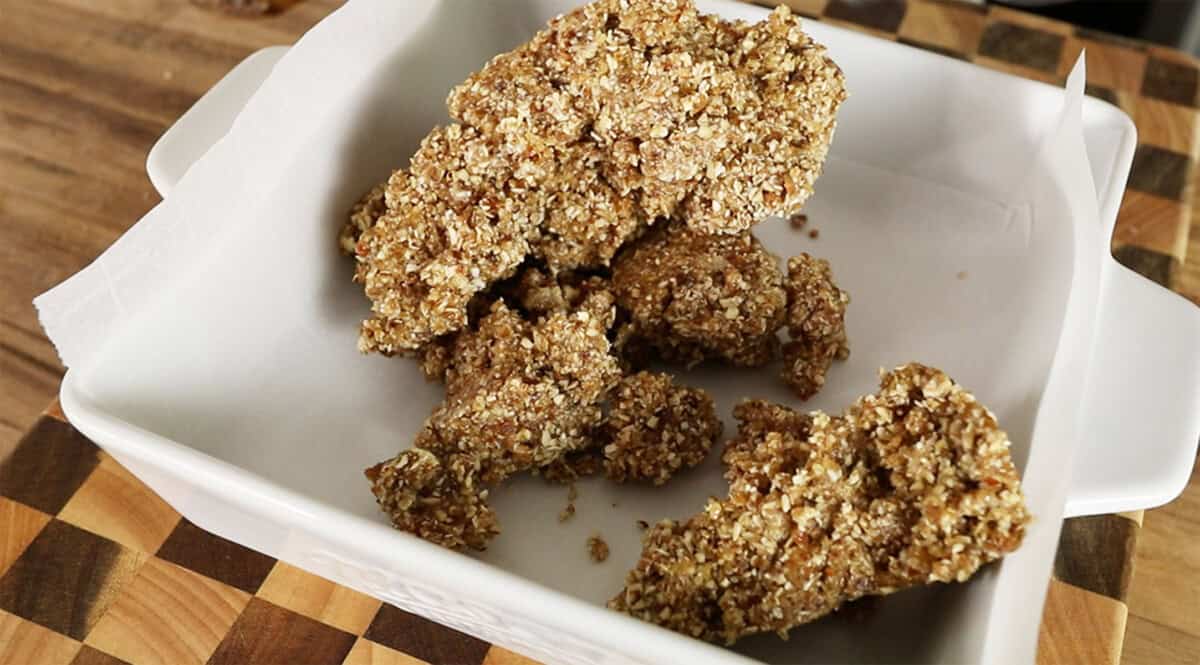
  6. Add dates and wet ingredients. Add the Medjool dates and process until broken down and uniform. Add the flax egg and 4 tablespoons of melted coconut oil. Process until the mixture forms a dough that holds together when squeezed. If it’s too dry, add another tablespoon of coconut oil.
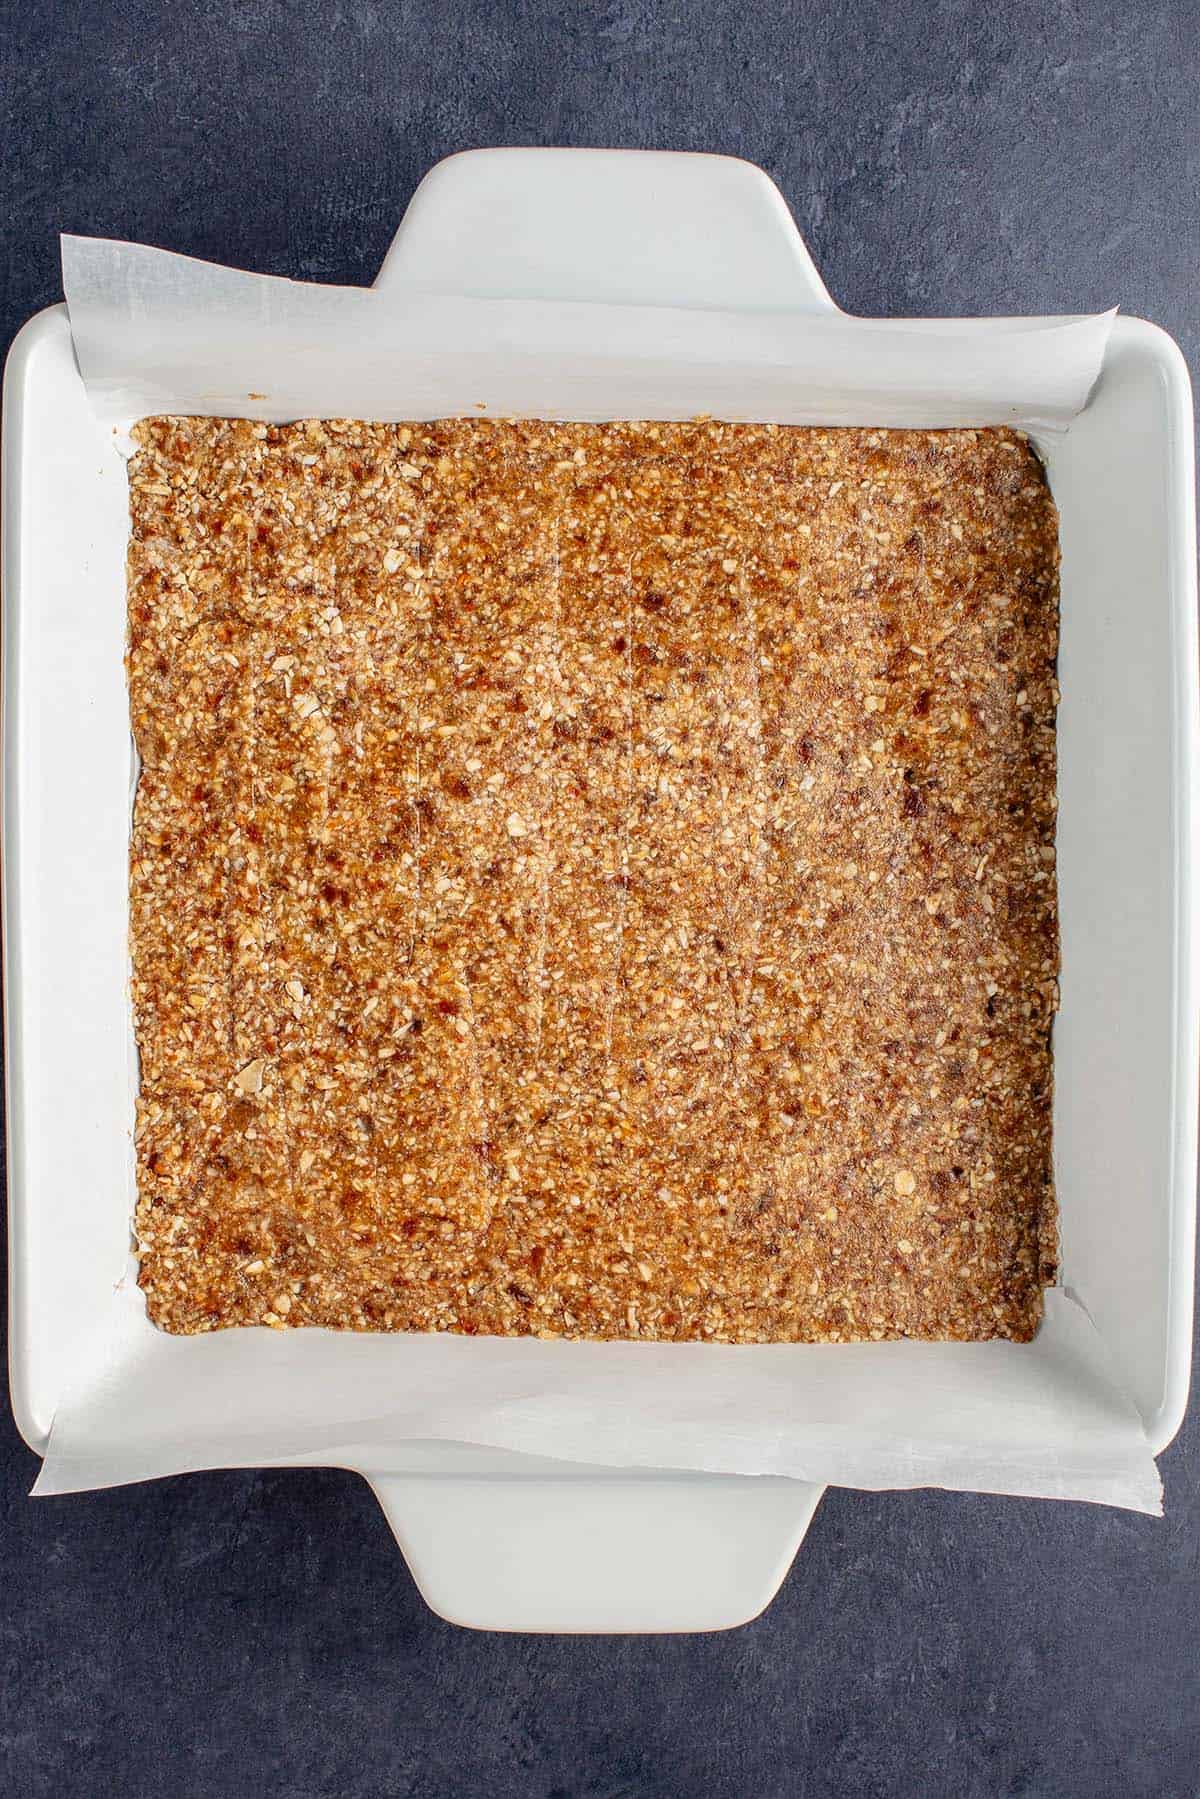
  7. Par-bake the crust. Pour the crust mixture into the lined baking dish and press it down evenly with your fingers or a spatula. Bake for 20 minutes or until light golden brown. Cool for at least 15 minutes.
  8. Scoop out the coconut cream. Remove the chilled coconut milk from the fridge and scoop out the thick cream, avoiding the liquid. Measure out 3/4 cup of the cream and set aside.
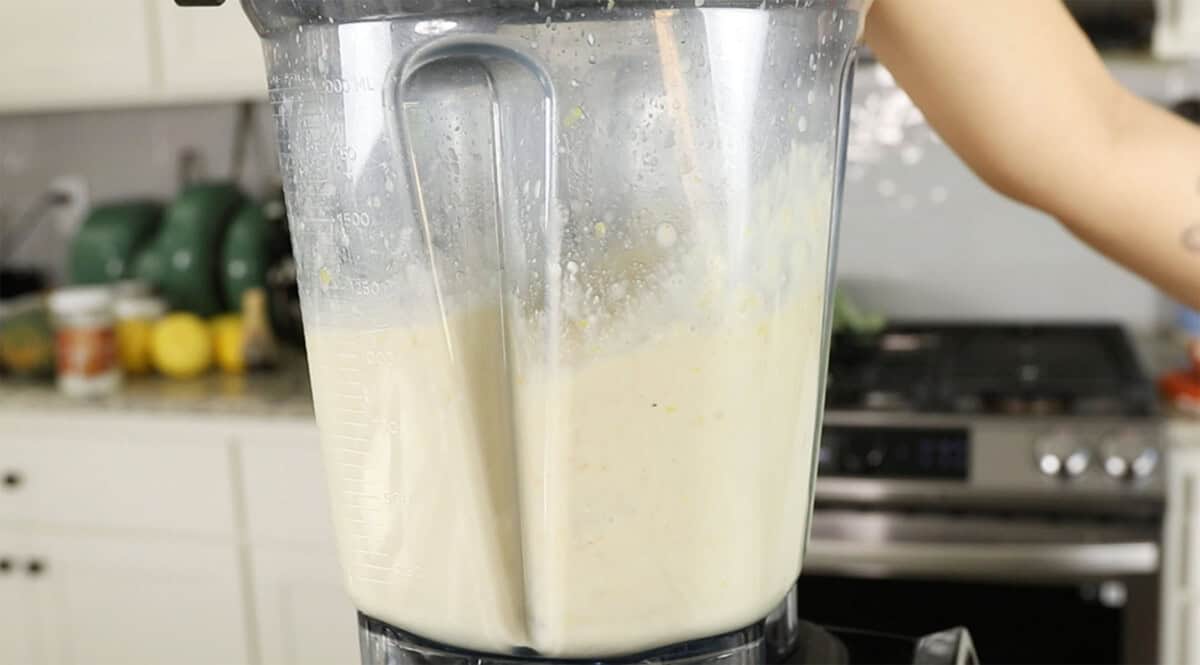
  9. Make the lemon filling. Drain the soaked cashews and add them to a high-speed blender along with the coconut cream, lemon juice, cornstarch, lemon zest, maple syrup, vanilla extract, turmeric, and a pinch of salt. Blend on high until smooth, stopping to scrape down the sides as needed. Taste the filling and adjust the sweetness or add more turmeric if needed.
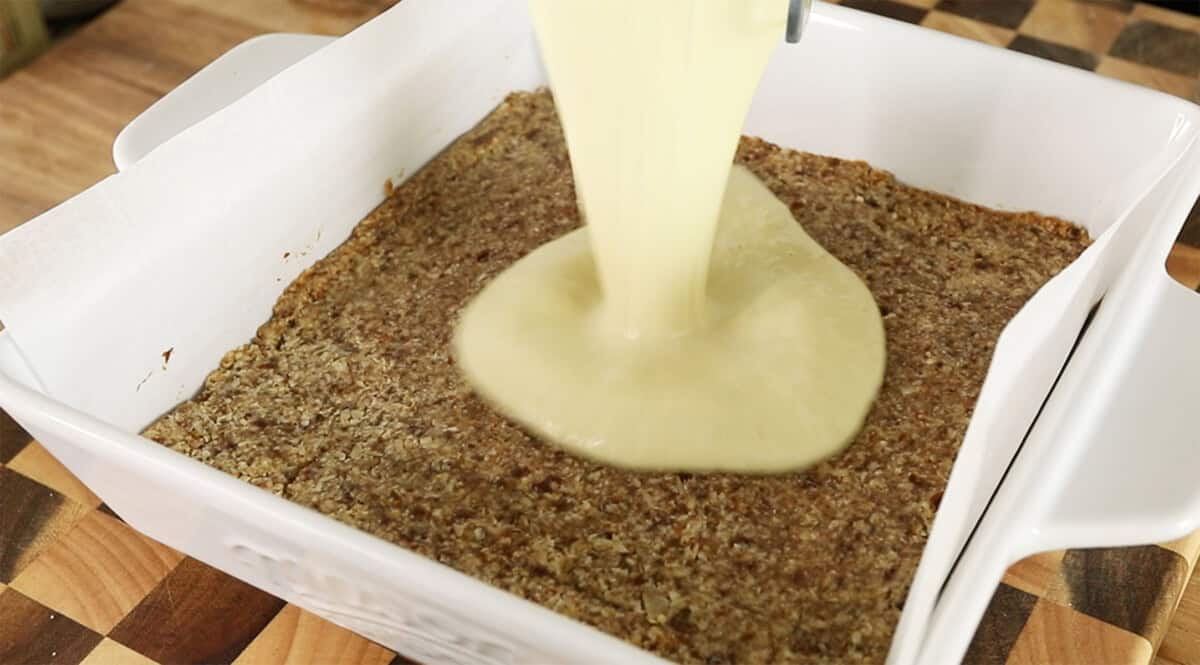
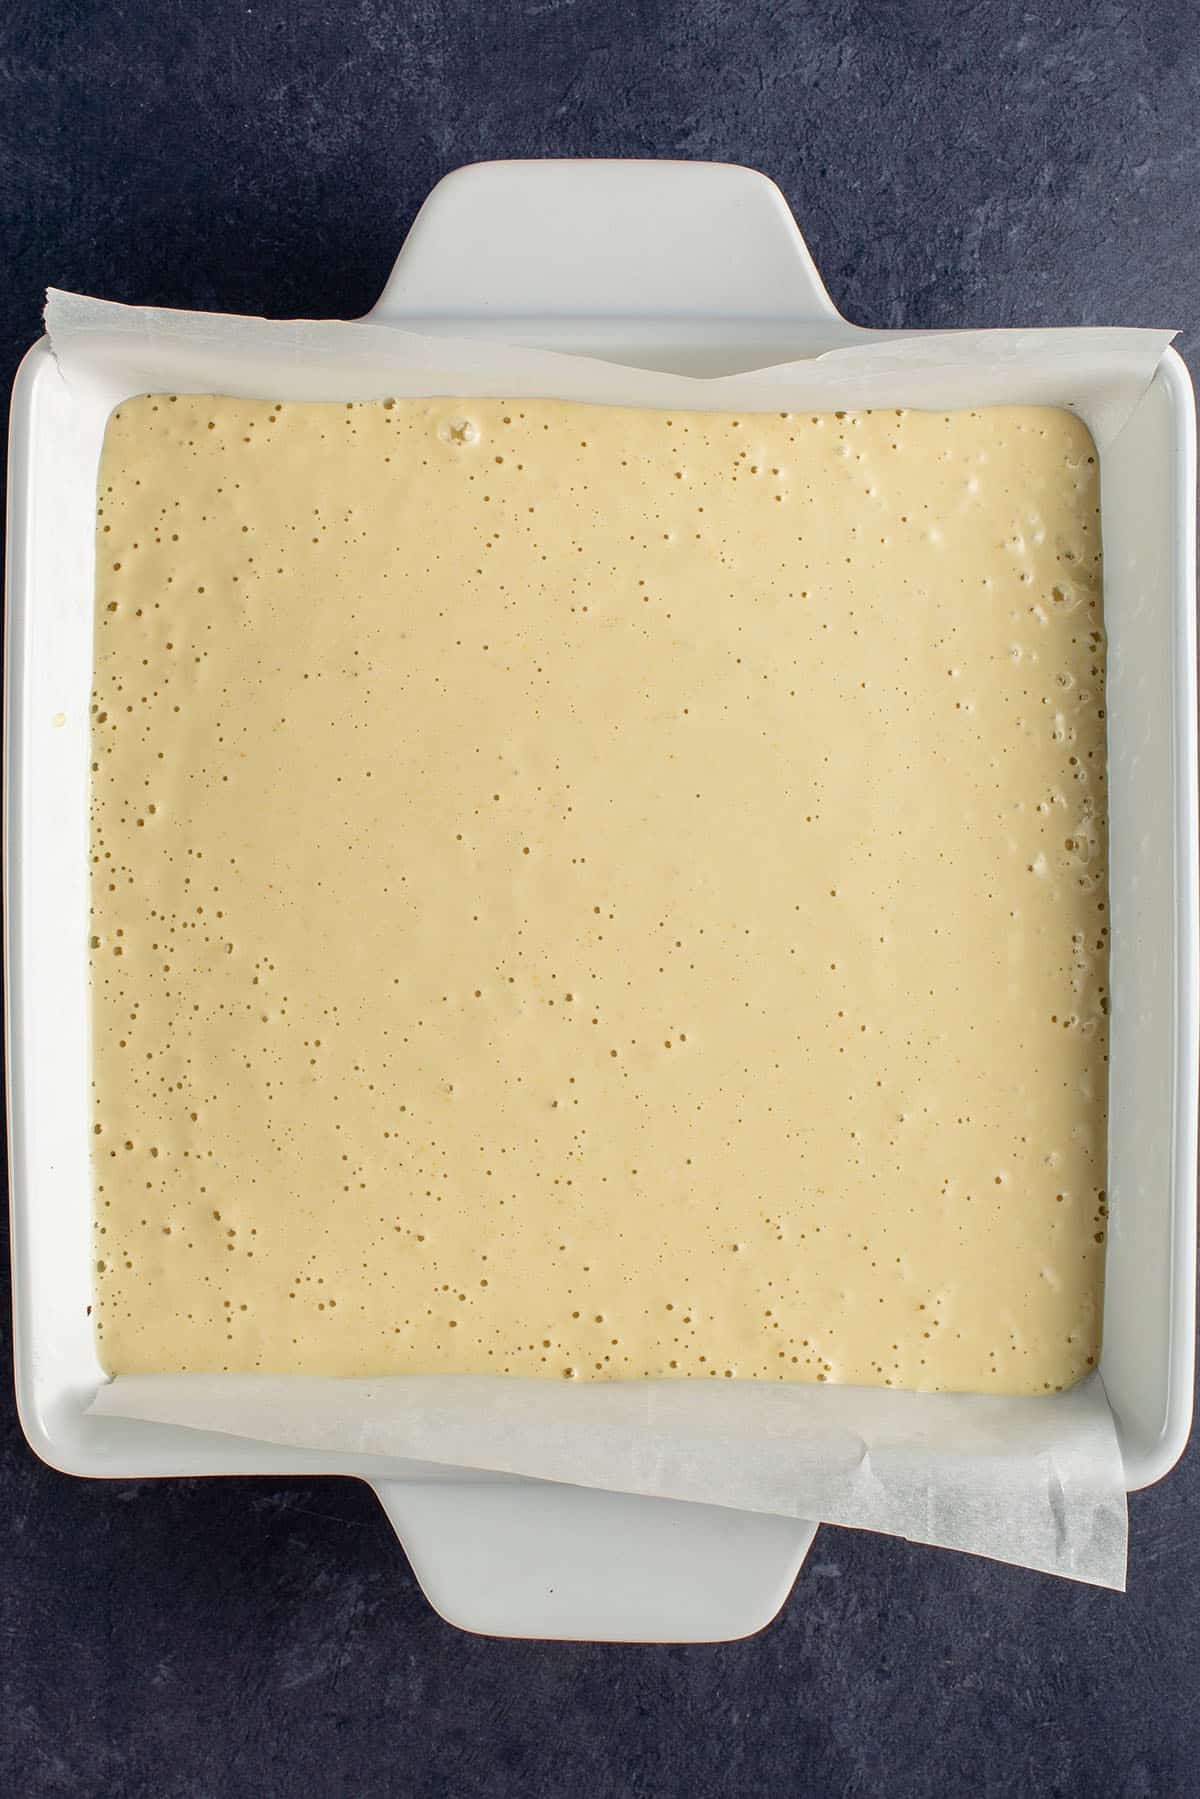
  10. Add filling to the crust. Once the crust has cooled, pour the filling over it and spread evenly with a silicone spatula. Tap the dish on the counter to remove any air bubbles.
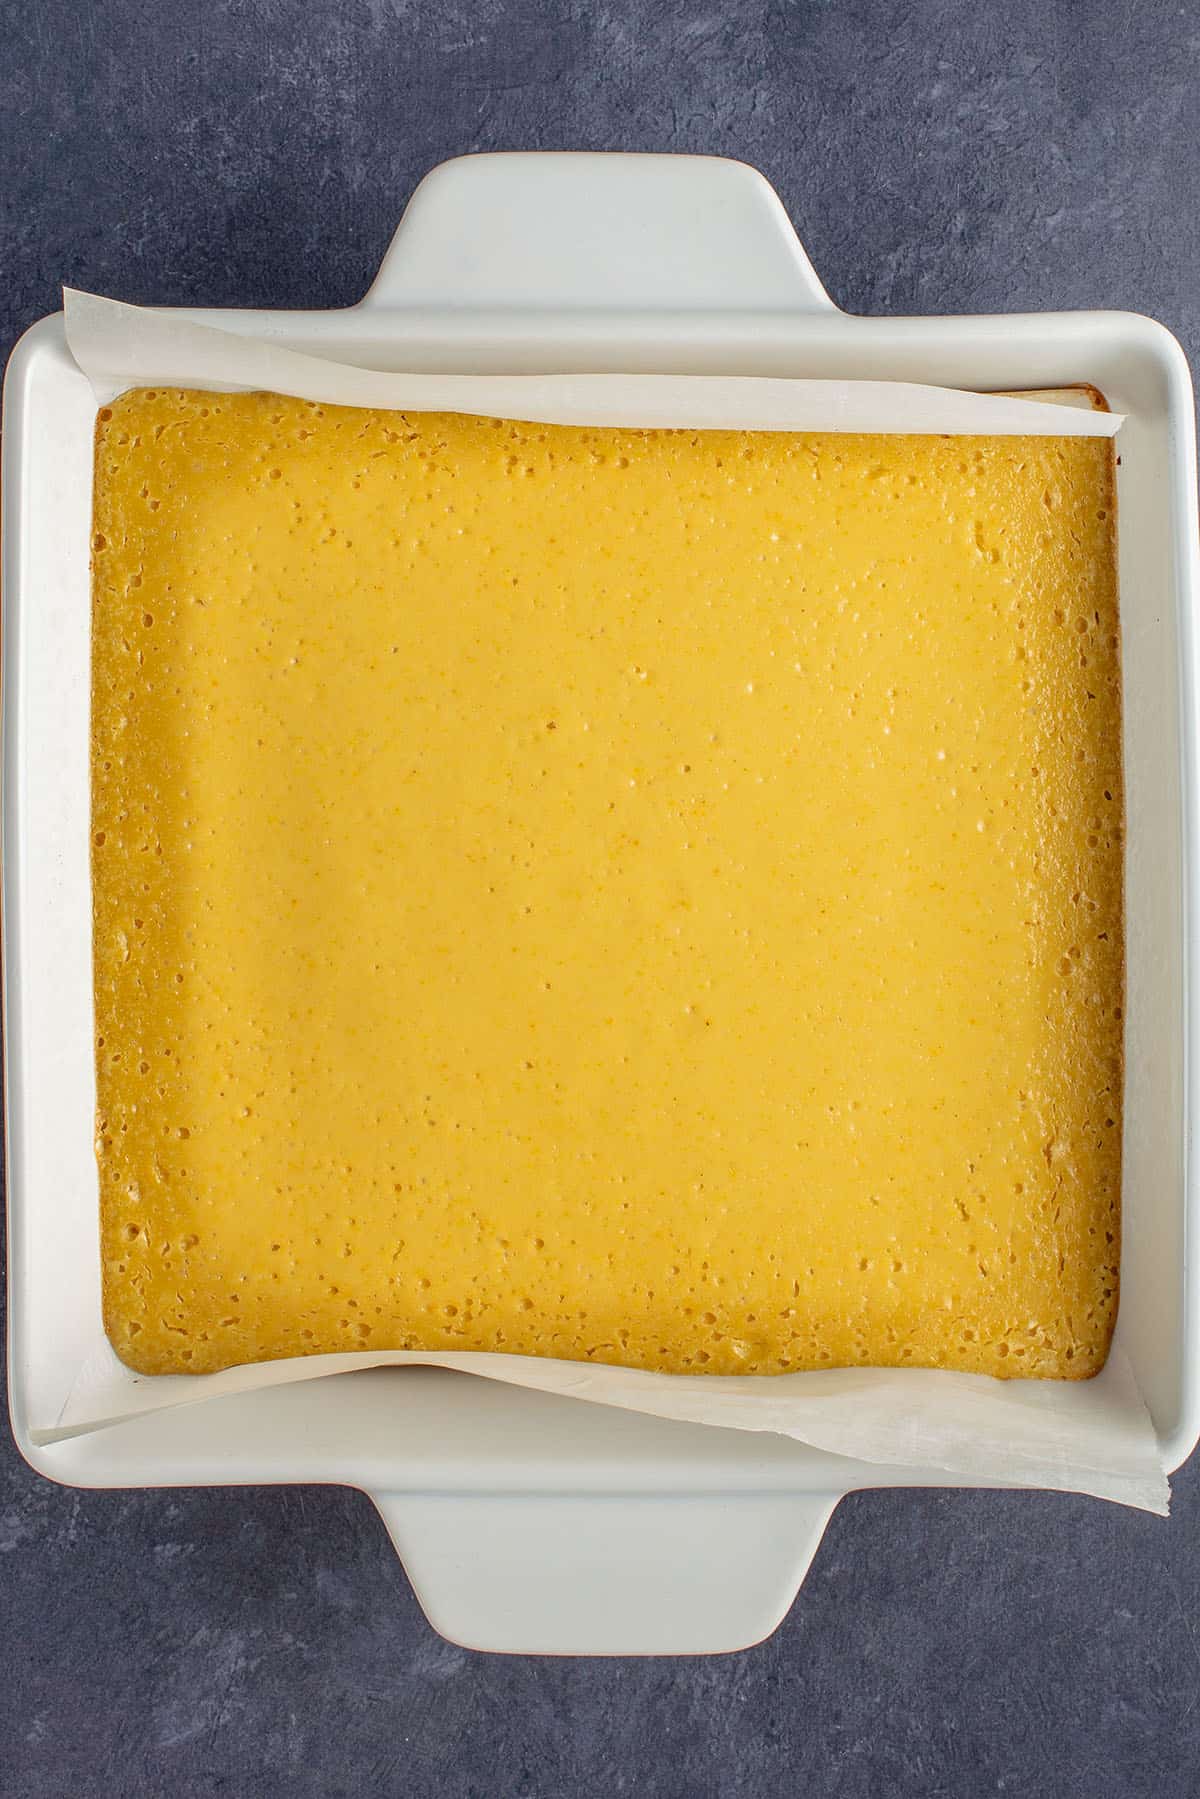
  11. Bake the vegan lemon bars. Place the dish back in the oven and bake for 20-25 minutes, or until the edges start to dry out and the filling is set.
  12. Cool and refrigerate. Remove from the oven and cool for 20 minutes. Cover and transfer to the refrigerator to set overnight.
  13. Slice and serve. Transfer the chilled lemon bars (with parchment paper) to a cutting board and slice into squares. Optionally, top with lemon slices, rosemary, coconut flakes, or a dusting of powdered sugar. Enjoy! 
slice of healthy vegan lemon bars

Recipe FAQs

What can I replace the cornstarch with?

Cornstarch is a key ingredient that helps to thicken the filling into the right consistency. We have not tested an alternative and are not sure if common substitute such as arrowroot powder (arrowroot starch) will work. If you decide to experiment and experience good results, please share a comment down below to help other readers. 

Can I make these lemon bars nut-free?

These bars contain nuts in the filling (cashews) and crust (almonds). We have not tested a nut-free version and cannot advise at this time. Instead, you may like our Vegan Lemon Loaf. It is naturally made without nuts. 
How many people does this vegan dessert serve?

We typically cut these vegan lemon bars into 9 bars, but if you are sharing this recipe at a party, you can cut them into 16 smaller bite-sized bars!  

overhead photo of vegan lemon bars on white marble board

Storage Instructions

These lemon bars are best enjoyed while fresh, but will keep for up to 4 days in an airtight container. Freezing is not recommended.

More Vegan Spring Desserts YOu May Enjoy:

Make sure you tag us on Instagram @sweetsimplevegan and @consciouschris and hashtag #sweetsimplevegan if you make this recipe. We love to see your photos! 

Print
slices of vegan lemon bars on white marble board

Healthy Vegan Lemon Bars Recipe


5 Stars 4 Stars 3 Stars 2 Stars 1 Star

5 from 1 review

  • Author: Sweet Simple Vegan
  • Total Time: 1 hour 45 minutes
  • Yield: 9 bars

Description

These vegan lemon bars are the spring dessert of your dreams! They’re made with the perfect balance of tart and sweet, plus made sweet and luxurious without vegan butter, refined sugar, and all-purpose flour. All you need is a few simple ingredients!

Ingredients

Crust

  • 1 flax egg (1 tablespoon flaxseed meal + 3 tablespoons water)
  • 1 cup gluten-free rolled oats
  • 1/2 cup raw unsalted almonds
  • 1/4 cup unsweetened desiccated coconut coconut shreds (or sub more oats)
  • Optional: 1 tablespoon rosemary, finely chopped
  • 1/4 teaspoon sea salt
  • 11 Medjool dates, pitted and packed (or 3/4 cup packed)
  • 45 tablespoons unrefined organic coconut oil, melted

Filling

  • 1 cup raw cashews
  • 1 can of full-fat coconut milk to yield 3/4 cup coconut cream*
  • 1/2 cup lemon juice (about 2 lemons)
  • 2 1/2 tablespoons cornstarch
  • 1 tablespoon lemon zest (about 1 lemon)
  • 1/4 cup maple syrup
  • 1 teaspoon vanilla extract
  • 1/81/4 teaspoon turmeric (optional, for color)
  • Pinch of salt

Toppings (optional)

  • Thin slices of lemon
  • Rosemary sprigs
  • Shredded coconut
  • Powdered sugar

Equipment


Instructions

  1. Chill the coconut milk. Before getting started, refrigerate your coconut milk overnight to ensure the coconut cream separates from the coconut water properly.
  2. Soften the cashews. Soak the cashews in a large mixing bowl with boiling hot water for at least 20 minutes. This will help them blend completely smooth.
  3. Prepare the vegan flax egg. In a small bowl, combine the flaxseed meal with water. Set aside for 15 minutes to thicken.
  4. Preheat and prep. Preheat your oven to 350°F and line an 8×8” baking dish with parchment paper. Set aside.
  5. Begin making the crust. In a food processor, add the rolled oats, almonds, coconut, optional rosemary, and salt. Process on high until a fine meal is reached.
  6. Add dates and wet ingredients. Add the Medjool dates and process until broken down and uniform. Add the flax egg and 4 tablespoons of melted coconut oil. Process until the mixture forms a dough that holds together when squeezed. If it’s too dry, add another tablespoon of coconut oil.
  7. Par-bake the crust. Pour the crust mixture into the lined baking dish and press it down evenly with your fingers or a spatula. Bake for 20 minutes or until light golden brown. Cool for at least 15 minutes.
  8. Scoop out the coconut cream. Remove the chilled coconut milk from the fridge, being sure not to mix it or turn it over. Scoop out the thick cream, avoiding the liquid. Measure out 3/4 cup of the cream and save the rest of the coconut milk can for another use.
  9. Make the lemon filling. Drain the soaked cashews and add them to a high-speed blender along with the coconut cream, lemon juice, cornstarch, lemon zest, maple syrup, vanilla extract, turmeric, and a pinch of salt. Blend on high until smooth, stopping to scrape down the sides as needed. Taste the filling and adjust the sweetness or add more turmeric if needed.
  10. bOnce the crust has cooled, pour the filling over it and spread evenly with a silicone spatula. Tap the dish on the counter to remove any air bubbles.
  11. Bake the vegan lemon bars. Place the dish back in the oven and bake for 20-25 minutes, or until the edges start to dry out and the filling is set.
  12. Cool and refrigerate. Remove from the oven and cool for 20 minutes. Cover and transfer to the refrigerator to set overnight.
  13. Slice and serve. Transfer the chilled lemon bars (with parchment paper) to a cutting board and slice into squares. Optionally, top with lemon slices, rosemary, coconut flakes, or a dusting of powdered sugar. Enjoy! 

Notes

  • Adapted from Minimalist Baker.
  • Coconut cream is the hard layer at the top of a full-fat coconut milk can.
  • Storage: We prefer to serve the bars immediately for best results, but they can be stored in the refrigerator in an airtight container for up to 4 days.
  • Prep Time: 1 hour
  • Cook Time: 45 minutes
  • Category: Dessert
  • Method: Oven
  • Cuisine: Vegan, Guten-free

Disclaimer: This is not a sponsored post. However, this page may contain affiliate links, thank you for supporting Sweet Simple Vegan!

The post Healthy Vegan Lemon Bars appeared first on Sweet Simple Vegan.

Warm Sautéed Olives with Lemon & Rosemary

Ordinary olives? No, siree! Take your next antipasto spread from basic to brilliant with these warm sautéed olives with lemon and rosemary. Simply sautéing whole olives in extra virgin olive oil and serving them warm brings out their most flavorful characteristics; with the addition of fresh lemon peel and sprigs of verdant rosemary, they are […]

The post Warm Sautéed Olives with Lemon & Rosemary first appeared on Love and Olive Oil.

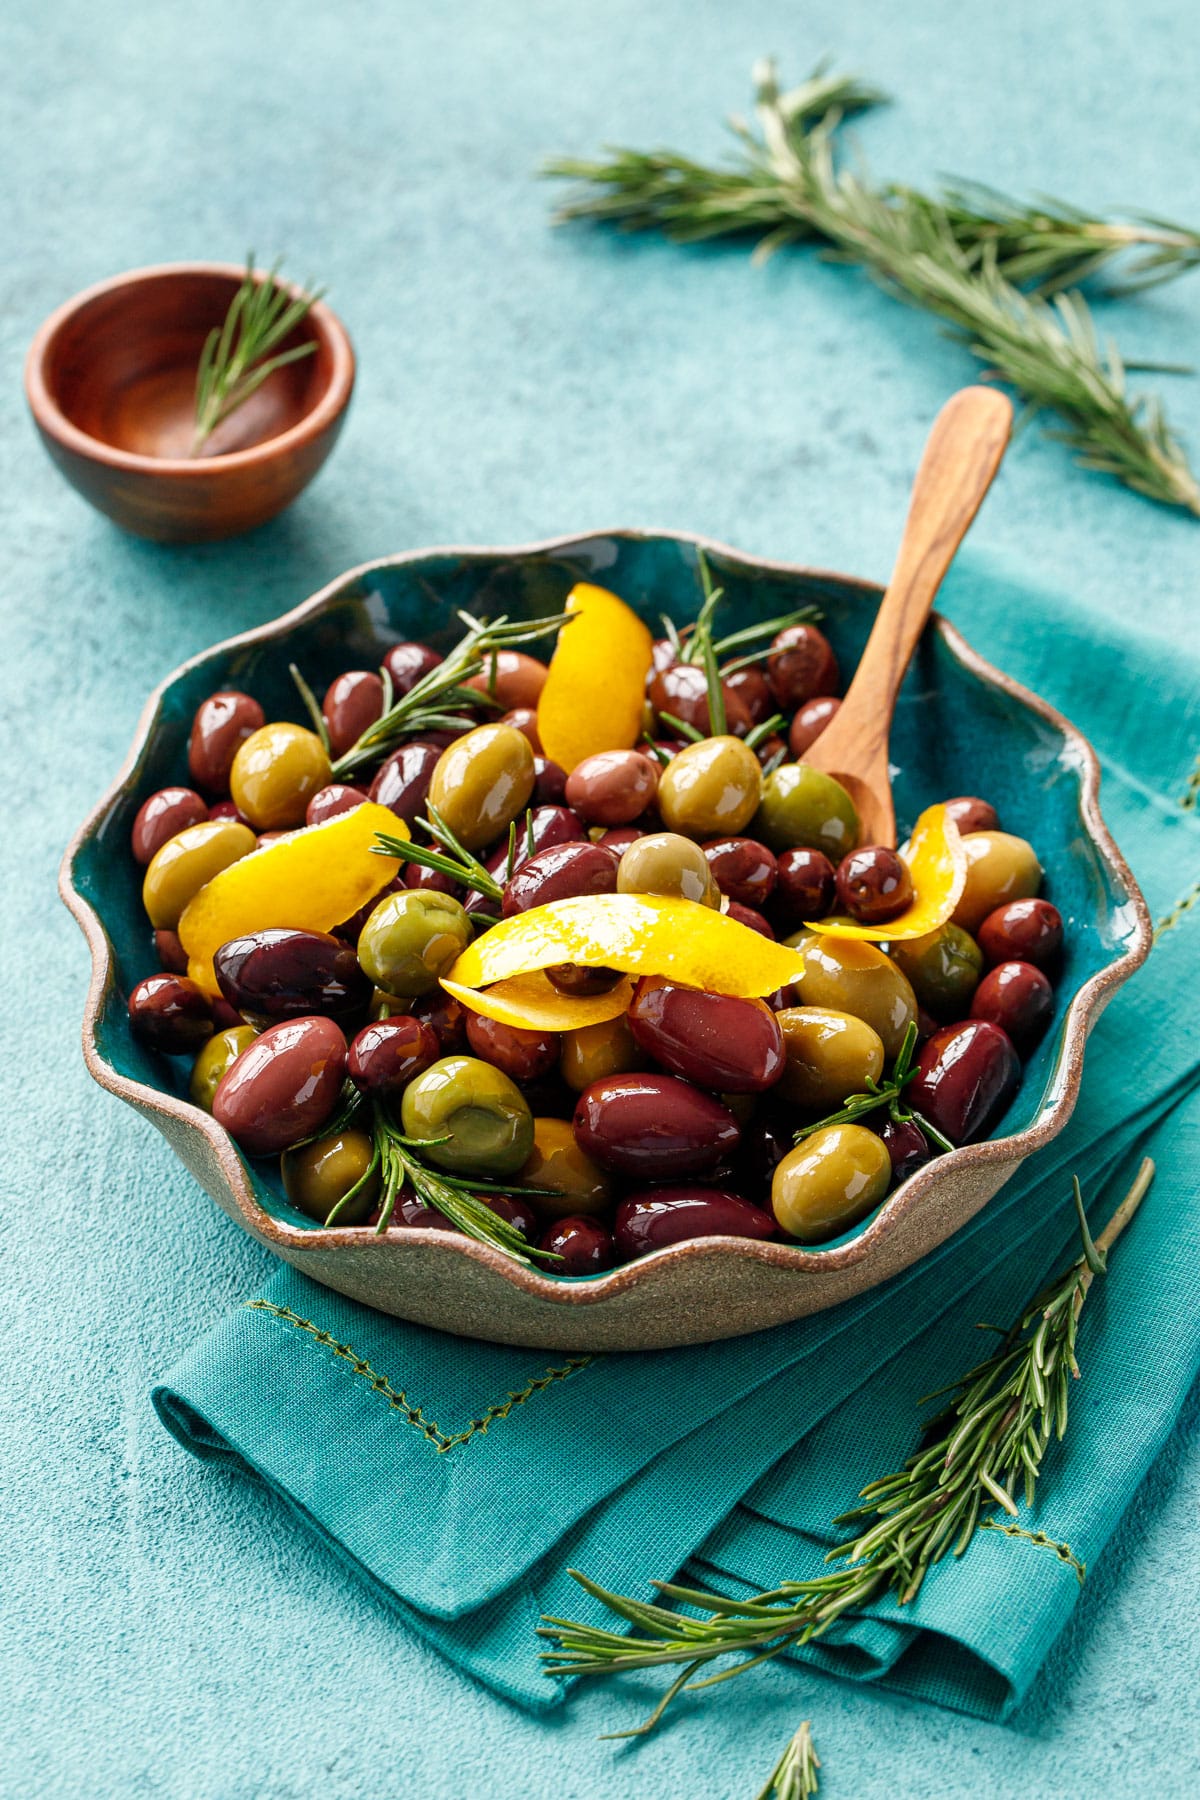
Ordinary olives? No, siree! Take your next antipasto spread from basic to brilliant with these warm sautéed olives with lemon and rosemary.

Simply sautéing whole olives in extra virgin olive oil and serving them warm brings out their most flavorful characteristics; with the addition of fresh lemon peel and sprigs of verdant rosemary, they are are oh so juicy and simply bursting with flavor.

Turquise ceramic dish with warm mixed color olives, shiny with pieces of lemon peel and fresh rosemary, on a turquoise background.

I’ve always loved to snack on olives (the fact that I felt like I had my own personal olive brand possibly had something to do with that).

But as much as I love olives of all kinds, I have to say that warm olives are truly a revelation—the heat allows the true flavors of the olives to shine, while allowing the firm flesh to absorb even more flavor from the olive oil, lemon, and rosemary it’s cooked with.

It’s almost magical, how much better olives become by simply warming them.

(more…)