Spiced Coconut Spinach

The perfect simple, spinach side dish – toast a few spices, add a pile of shredded spinach to the skillet, and finish things off with a burst of lemon juice and some shredded coconut.

Continue reading Spiced Coconut Spinach on 101 Cookbooks

This is a quick post for an easy, fast and spinach-packed side dish. It’s the type of thing I get excited about – simple, but bold on flavor. Even better, all the ingredients come together in one pan. I stumbled on this recipe for Coconut-laced Spiced Spinach as I was flipping through Anjum Anand’s book new book, in early 2011. Not much more than ten minutes later, we were sitting down to the table with it as part of our meal. I’ve cooked variations of in endlessly in the years since.
Coconut Spiced Spinach Recipe

Spiced Coconut Spinach: The Technique

The key here is having all your ingredients cleaned, prepped and ready to go. You toast a few spices, add a pile of shredded spinach to the skillet, and finish things off with a burst of lemon juice and golden-toasted coconut.
Coconut Spiced Spinach Recipe

A Few Ideas

I think I’m so excited about this in part because it is so versatile. While it makes a great side – I also like it in, on and under lots of things. Case in point, alongside one of these special quesadillas. It’s also great on an open-faced veggie burger, in tacos, in a wrap, over brown rice or farro, etc. I also like to make a meal of it with some grilled tofu, paneer, or fried egg. Let me know if you end up making it, and what you do with it! 
Coconut Spiced Spinach Recipe

The Spice Profile & Variations

The cumin is really nice here, I’ve dialed it up over the years. My advice? Don’t skimp. The same goes for the red pepper profile. I’ve added more over time, but it’s one of those things where you really just want to add it to your liking. I talk through some other ideas in this list of variations as well.

  • Add-ins: I often add other extra quick-cooking vegetables to the skillet along with my spinach. Segments of thin asparagus work well, as does small broccoli or cauliflower florets.
  • Herb It Up: If I have any fresh herbs on hand – chopped cilantro, basil, chives, and/or dill – adding them after the spinach has cooked is a nice way to experiment with the flavor profile.
  • Swap your chiles: Use a chopped serrano chile in place of the red chile flakes for a greener spiciness.
  • Burst of Ginger: Mince a small knob of peeled ginger along with the garlic-shallot paste if you love ginger.

Coconut Spiced Spinach Recipe

Cooking Spinach

The main thing to remember – resist the urge to overcook the spinach. You want to cook it just long enough for it to collapse, cook through, and brighten up. And keep in mind it continues to cook after you pull it from the heat.

Hope you like this as much as I do. And thank you Anjum for the inspiration – I’m really enjoying the Ayurvedic angle of this book.

Continue reading Spiced Coconut Spinach on 101 Cookbooks

10 Recipes That Teach You How To Cook Asparagus Like A Pro

Asparagus is the workhorse of the springtime kitchen. Here are a handful of asparagus winners that will teach you how to cook asparagus like a pro!

Continue reading 10 Recipes That Teach You How To Cook Asparagus Like A Pro on 101 Cookbooks

If you want to know how to cook asparagus, this is a great place to start. Asparagus is the workhorse of the springtime kitchen. Unlike the fussier darlings (I still love them), fava beans, peas, and artichokes, all of which require copious amounts of preparation time. Asparagus is relatively simple. Instead of partaking in tasks like shelling, trimming, and de-choking, asparagus can be at its pinnacle with a simple trim, quick blanch, drizzle of olive oil, and dusting of salt. We get pencil-thin asparagus here, as well as asparagus thick as a candle – and everything in between. Here are a range of asparagus winners that will teach you how to cook asparagus like a pro. Happy spring, and enjoy!

1. A Simple Aspragus Soup (101 Cookbooks)
A great starter recipe. Everyone should have a good asparagus soup in their back pocket. This one is tops – fresh asparagus, new potatoes, a bit of green curry paste, and coconut milk are pureed to make this spring favorite. Get the recipe here.

10 Recipes That Teach You How To Cook Asparagus Like A Pro

2. Avocado Asparagus Tartine (101 Cookbooks)
An excellent impromptu springtime lunch tartine: avocado smeared across toasted day-old slabs of sesame bread, layered with arugula and garlicky-caraway pan cooked asparagus + toasted pepitas. Get the recipe here.

10 Recipes That Teach You How To Cook Asparagus Like A Pro

3. Grilled Asparagus Plate + Cilantro Pepita Pesto (Sprouted Kitchen)
Cheers to spring produce from Sprouted Kitchen. Love this simple grilled asparagus preparation with a special pesto. It has a surprise kiss of chipotle in it, along with a hint of lime. Perfection. It’s great as a side dish or as a component in something like a grain bowl. Get the recipe here.

10 Recipes That Teach You How To Cook Asparagus Like A Pro

4. Weeknight Ponzu Pasta (101 Cookbooks)
All things green in a quick, weeknight pasta option. It’s feel-good food that won’t weigh you down – garlic and chile ponzu dressing, green vegetables, and the pasta of your choice. Swap asparagus in for the green beans here, and you’re all good. It’s a recipe that demonstrates how to boil asparagus (or other tender green vegetables) in your existing pasta water. Get the recipe here.

10 Recipes That Teach You How To Cook Asparagus Like A Pro

5. Walnut Miso Noodles with Asparagus (101 Cookbooks)
A hearty noodle bowl recipe. Whole grain noodles and asparagus are tossed with a creamy, walnut-miso dressing plus a dollop of chile paste. Get the recipe here.

Miso Walnut Noodles with Asparagus

6. Asparagus Stir-fry (101 Cookbooks)
A favorite stir-fry recipe. Asparagus and tofu form the base, but it has quite a lot going on beyond that. You get a bite of tang from the lime, heat from the red chiles and fresh ginger, mint and basil cool things down, and a touch hoisin sauce gives you just enough sweetness to balance it all out. Get the recipe here.

10 Recipes That Teach You How To Cook Asparagus Like A Pro

7. Fava Bean and Asparagus Salad (Bon Appétit)
Love this Alison Roman recipe. It’s the kind of thing to make when you’re ready to use your vegetable peeler. Also, a good opportunity to get your fava shelling fix on. Get the recipe here.

10 Recipes That Teach You How To Cook Asparagus Like A Pro

8. Asparagus Cilantro Salad (101 Cookbooks)
I love this salad so much. And, unless you absolutely loathe cilantro, you must try it. Simply cilantro leaves and stems tossed with a simple shallot-forward soy sauce dressing, plus peanuts, and asparagus. So good. Get the recipe here.

10 Recipes That Teach You How To Cook Asparagus Like A Pro

9. Grilled Asparagus Spring Rolls (Bojon Gourmet)
Yes to spring rolls. Yes to ginger lime dipping sauce. This recipe will also walk you through how to grill asparagus. Get the recipe here.

10 Recipes That Teach You How To Cook Asparagus Like A Pro

10. Asparagus Panzanella (101 Cookbooks)
A simple asparagus panzanella – a quick, mustard buttermilk dressing accents good asparagus, alongside crusty shards of toasted bread, and a dusting of sesame seeds. Shred a hard boiled egg over the top and you’ve got an even more substantial meal. I also love this using grilled asparagus, especially as the weather improves and the grill gets dusted off. Get the recipe here.

10 Recipes That Teach You How To Cook Asparagus Like A Pro

Continue reading 10 Recipes That Teach You How To Cook Asparagus Like A Pro on 101 Cookbooks

Feel-good Lunch Ideas

Leveling up lunch on-the-go with lots of color, clever use of leftovers, and feel-good ingredients. These are two lunchboxes I packed recently.

Continue reading Feel-good Lunch Ideas on 101 Cookbooks

One of the things I’ve been trying to be better about is lunches on-the-go. Coming up with inspired lunch ideas takes some effort. Often times, let’s be honest, it’s re-marketing leftovers. Too often, if we’re not going to be home for the day, we just wing it. And I’m nearly always sorry we didn’t make the effort to pack a good lunch. This is especially true if we’re on some sort of trip, towing the Airstream. Because on those days parking dictates where you’re lunching. And just thinking about it is making me cringe. So yeah, we’re trying to do better over here and I thought I’d share some recent wins.
An Assortment of lunch ideas arranged on a table including hard-boiled egg, pickled cauliflower, edamame and a wedge of orange

Lunch Ideas #1 

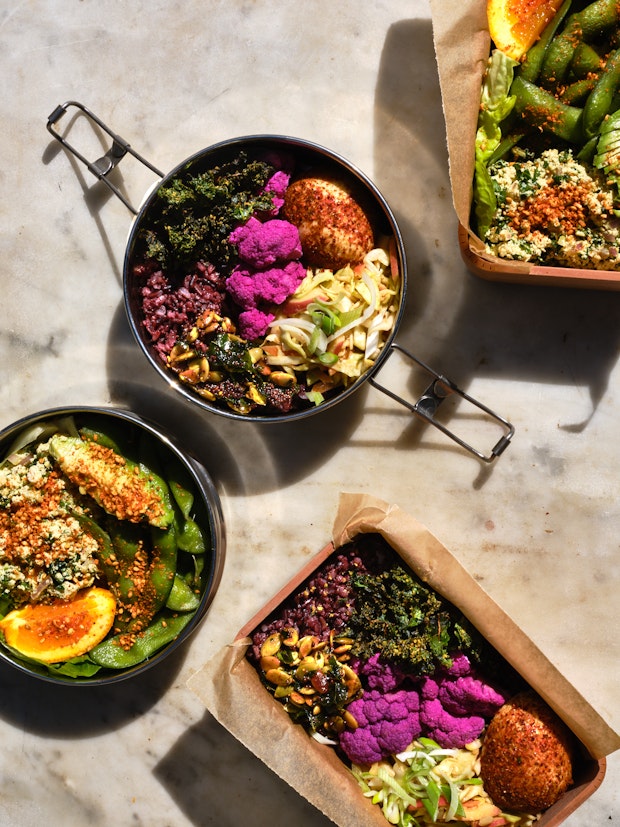
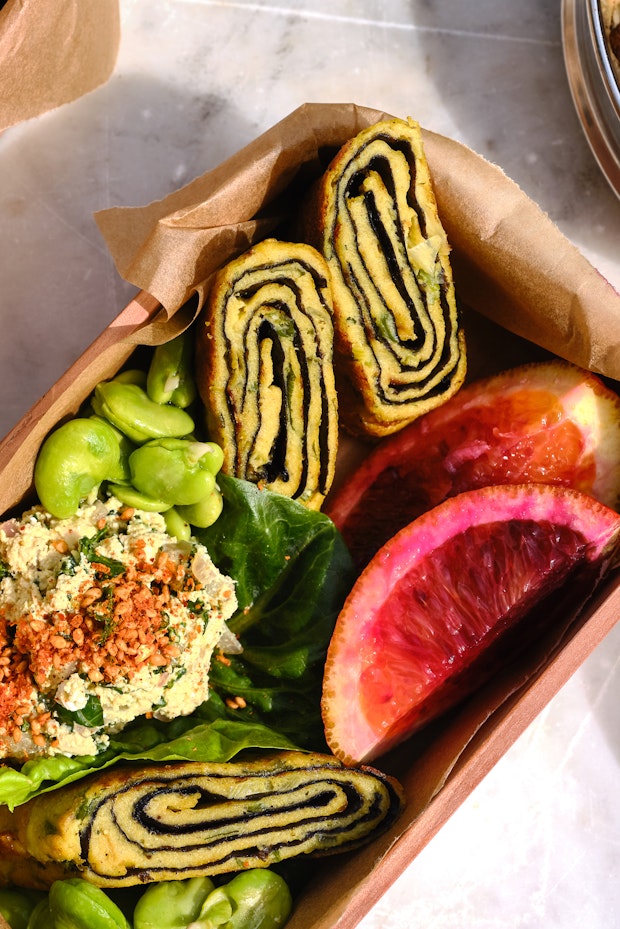
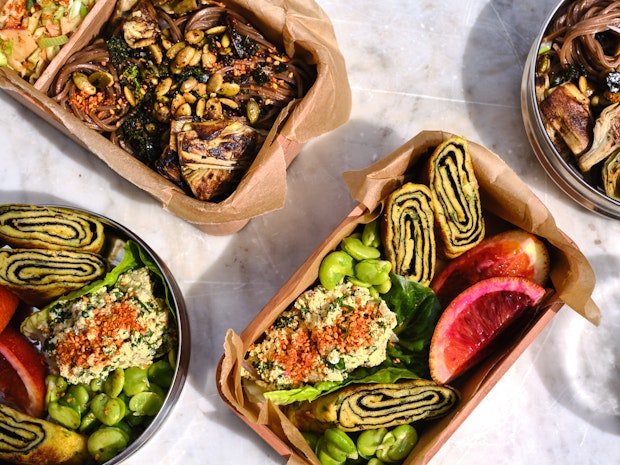
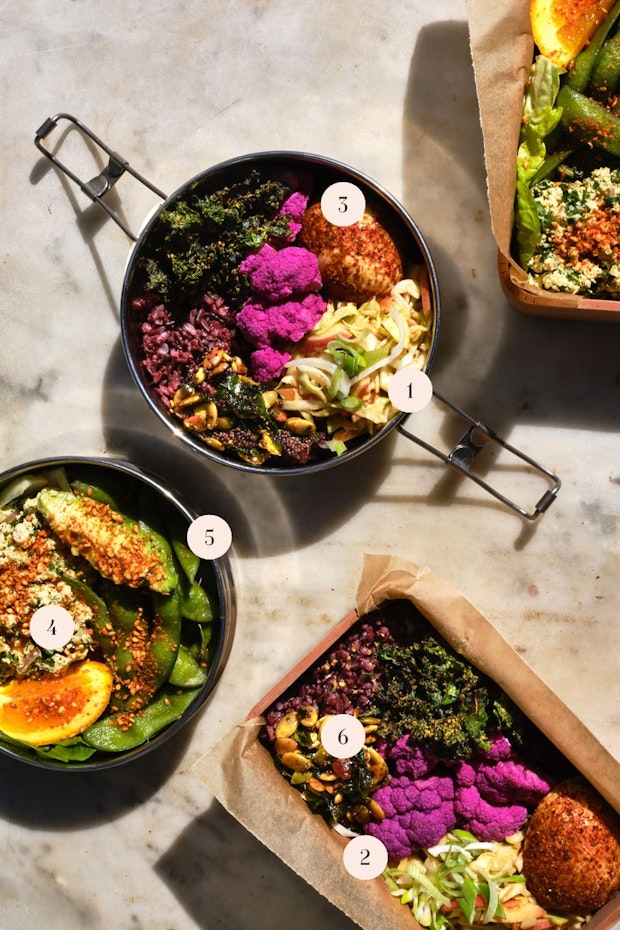
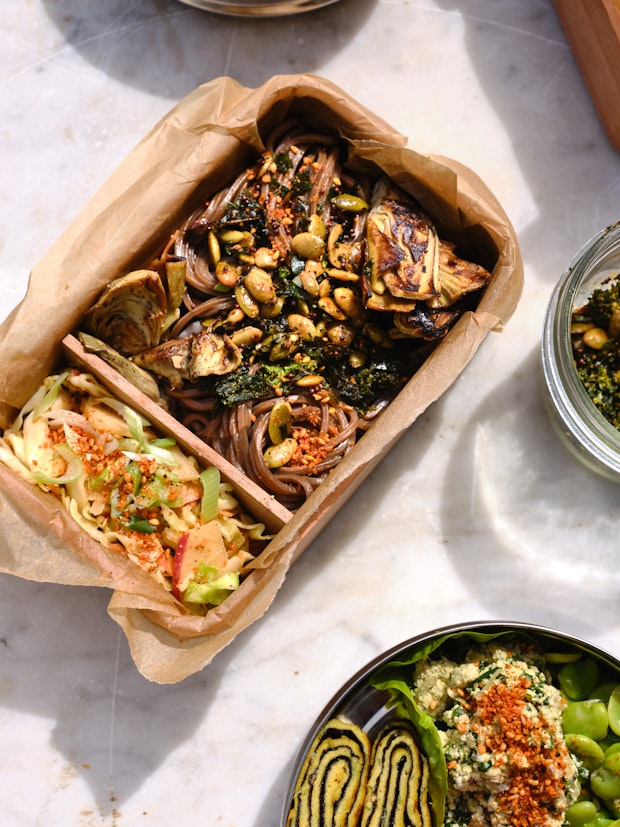
These lunch boxes (above) came together pretty quickly. Nearly everything was a leftover, or component of a previous meal. To pull it together I peeled and chile-dusted the hard-boiled egg, sliced the avocado and sliced the mandarin.

1. Spicy Sesame Coleslaw: You’ve seen it before, you’ll see it again. Lol. It’s my favorite coleslaw, and I’ll basically tuck in anywhere. Feathery green and red cabbages along with carrots, apples, and scallions tossed with a spicy, creamy sesame dressing.

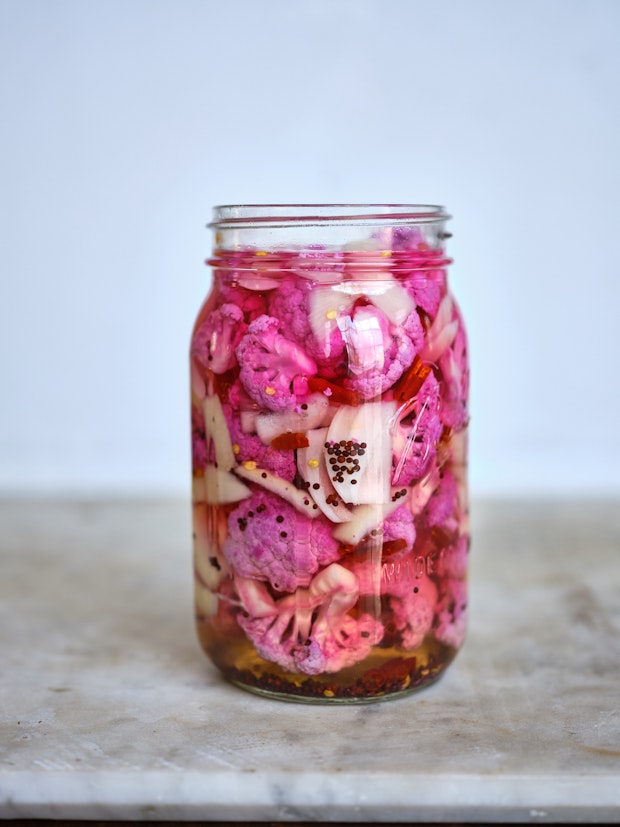
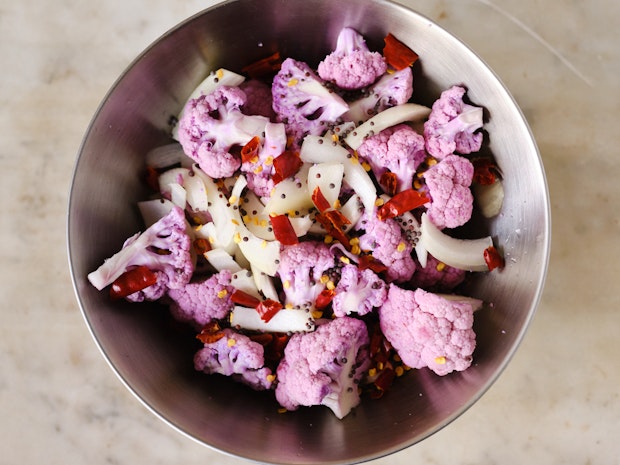
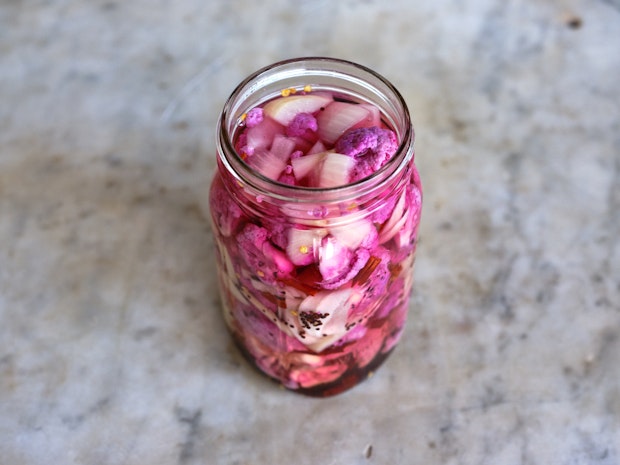
2. Pickled Cauliflower: The pop of color you need in your lunch. This quick pickled cauliflower delivers a good amount of tang and crunch in the midst of less structured components. I make mine with chiles, mustard seeds and slivered onion, but you can play around.

3. Chile-dusted Hard-boiled Egg: Here’s how to make these. Combine equal parts chile powder and MDH chana masala powder in a small bowl. I like to use this Kashmiri chillie powder, but use what you have (and like). Peel your egg, rinse it, dab it a bit on a clean towel to take off excess water, then roll it around in the spice mixture until completely covered. Slice and serve, or pack into lunch.

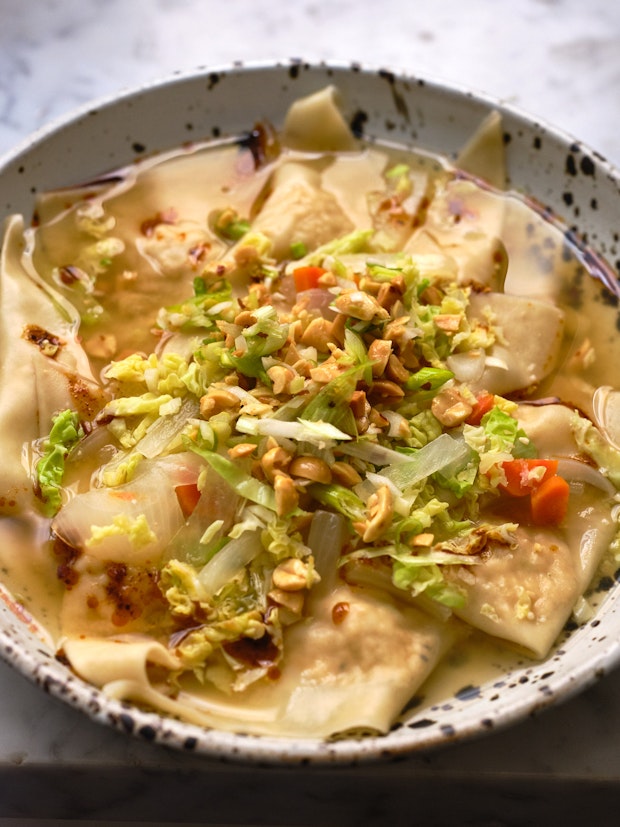
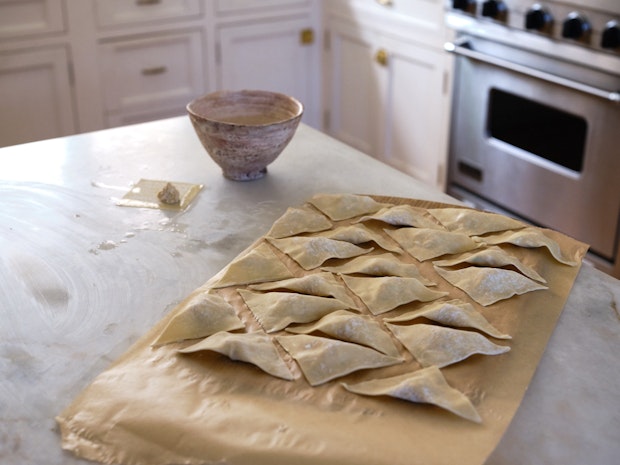
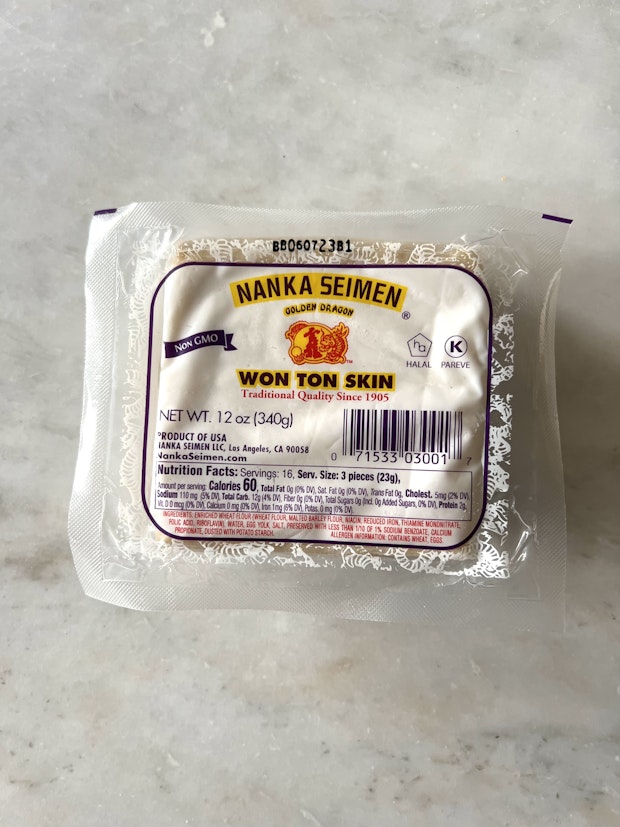
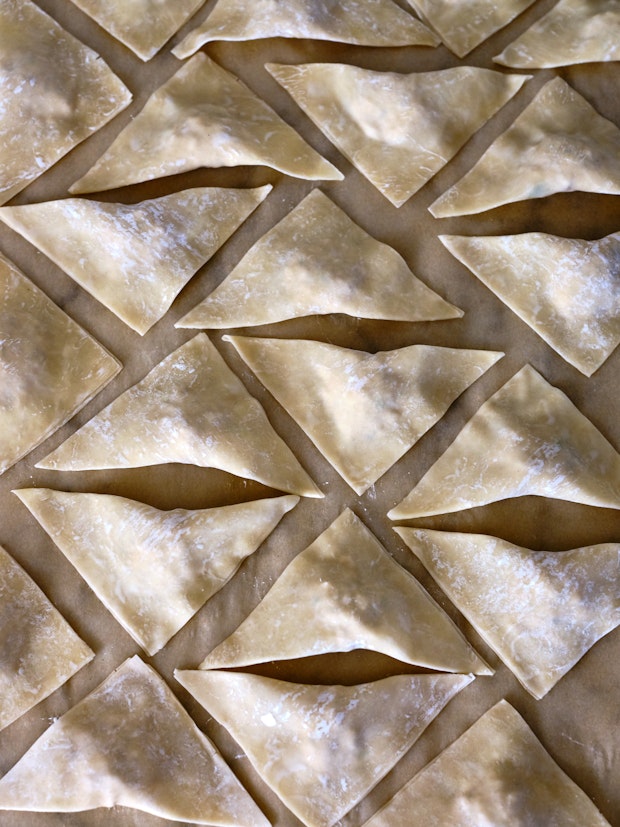
4. Turmeric-Scallion Tofu Spread: This is actually leftover wonton filling from my last round of wonton soup. But it’s also great as a lettuce wrap filling, cracker and sandwich spread, and on its own. Here, I nestle it into a stack of 2-3 little gem leaves. Get the recipe – it’s the first part of the recipe on this page, minus the wrappers.

5. Red-spiced Edamame: I’ll write this up as its own recipe soon, it’s a homemade spice blend made by crushing Kashmiri chillies, smoked paprika, brown sugar, sesame, dried onion flakes, salt, and a kiss of cardamom together. Sprinkle generously. There are a lot of other spice blend ideas in the Spice / Herb / Flower / Zest PDF that members get. Just about any of those are great here. Experiment!

6. Pepita & Curry Leaf Tadka: I’ve definitely over-stripped my young curry tree making this lately. Toast a cup of pepitas and set aside. Heat 2 tablespoons of oil in a small saucepan over medium-high heat, stir in 50-ish fresh curry leaves. Continue to stir and when the leaves begin to crisp up add 2 teaspoons black mustard seeds. Keep stirring and when the seeds have toasted a bit and stopped popping, add 1/2 teaspoon chile powder. Pour this over your pepitas, toss well, and salt to taste. good on everything, Including the soba in the next lunch.

Also: purple rice, sliced avocado, mandarin wedge, nutritional yeast kale chips

An assortment of lunch ideas arranged on a table including soba noodles, tamagoyaki, coleslaw, and spiced seeds

Lunch Ideas #2 

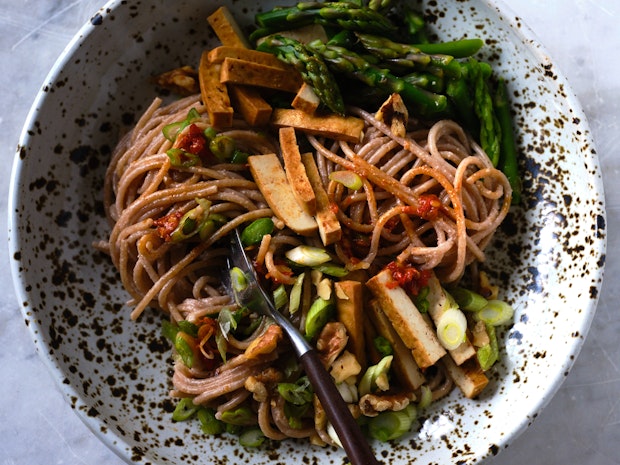
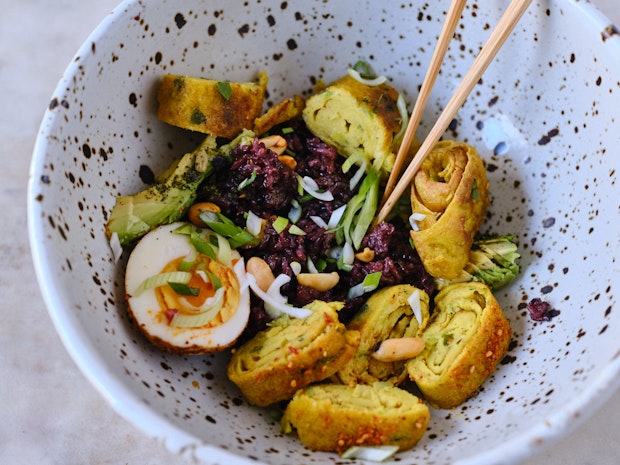
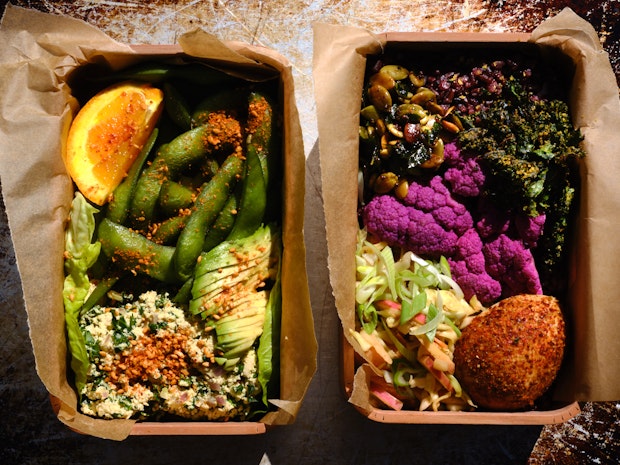
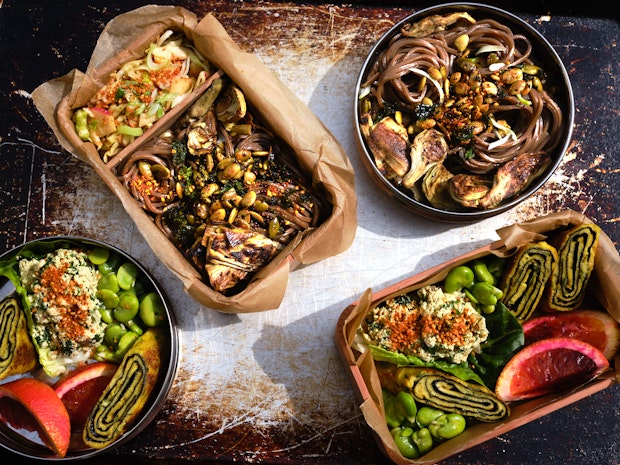
The one component of the lunch boxes (above) that wasn’t made ahead of time, was the soba noodles. I boiled them, and ran them under cold water just before packing up. 

6+. Soba with Pepita & Curry Leaf Tadka:  The same pepitas as above (lunch ideas #1), this time tangled with cold soba.

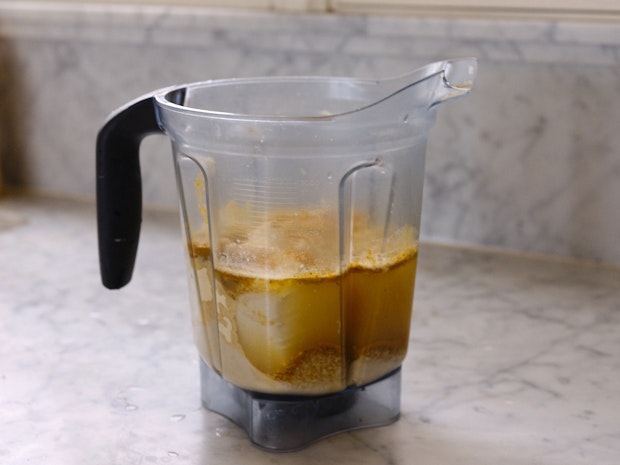
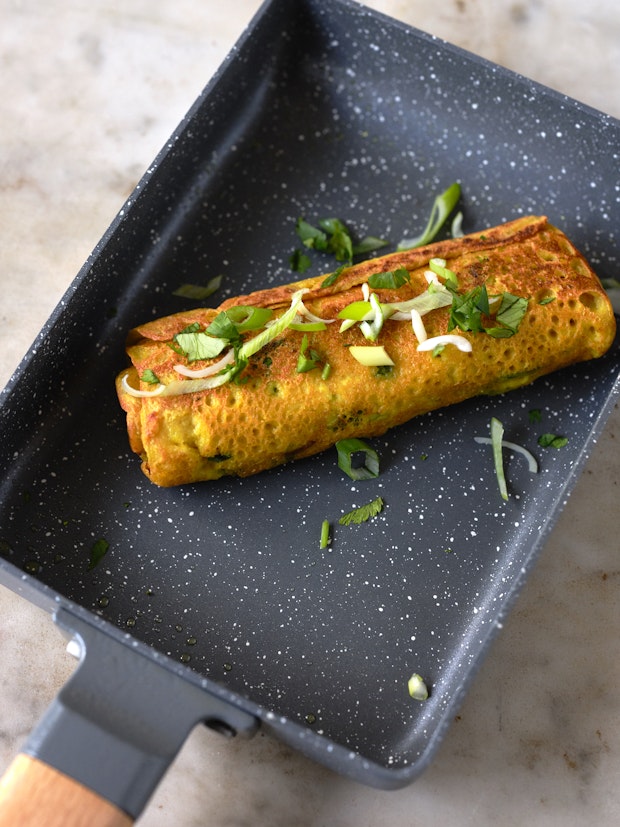
7. Vegan Tamagoyaki: This is a vegan version of tamagoyaki, the much-loved Japanese rolled omelette. I like to make chickpea-tofu version, and this one is lined with nori and seasoned with scallions and herbs. They’re fantastic lunchbox heroes because you can make and roll them ahead of time. They’ll keep for a few day so you can slice and go.

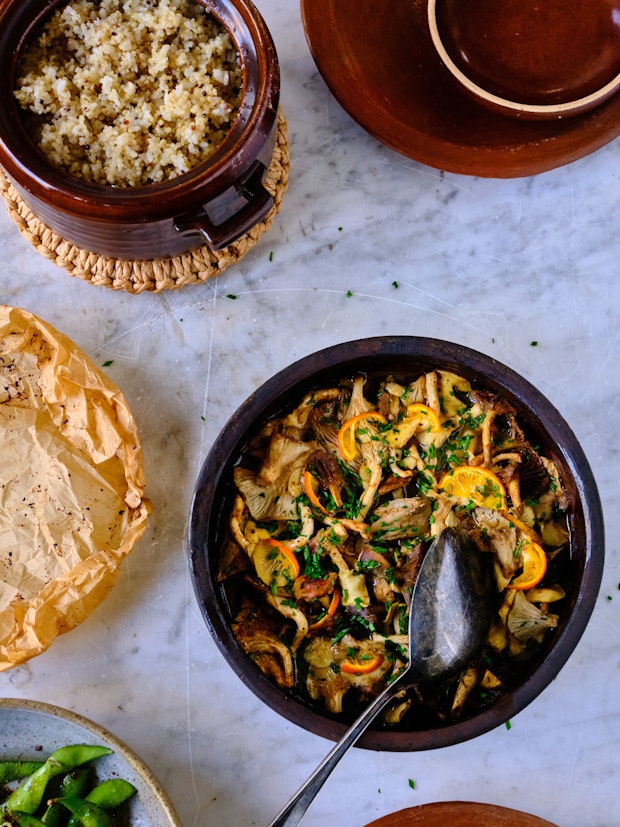
8. Blistered Artichoke Hearts: Leftovers from dinner the previous night. I cooked these from frozen. So easy, so good. I wrote a long post about how to cook artichokes – both fresh and frozen. So, if you love artichokes, but think they’re too much work, read this. Same goes if you think the frozen ones are going to be bad. They aren’t and they’re great in scenarios like this one, quick pastas, casseroles, etc.

9. Fava Beans Tossed with Citrus Olive Oil: These are fava beans that have been shelled, boiled for a flash, shelled again, and then splashed with a bit of lemon olive oil, and tossed with a pinch of salt. From previous dinner. I do the same with edamame, but favas are in season and I they’re worth all the shelling and peeling drama.

10. Kale Chips: Some extra crushed kale chips tossed with the remaining pepitas. My method for epic kale chips is this: buy curly kale, make sure it’s dry if you recently washed it. Toss the kale with olive oil and scrunch it all up with your hands, be sure it’s all coated. Toss with a lot of nutritional yeast, get a good coating going. Season with salt and bake at 375F-ish until the chips at the edges start browning. Toss well. Continue to bake until crispy but still mostly green.

Also: blood orange wedges for dessert

Two bento boxes filled with lunch

A Couple Pro-tips

There’s actually just one main tip, but I’ll add more as I think of them. Line your bentos with parchment paper for easy clean-up.  This isn’t as important with stainless steel containers, they clean up quite quickly. Bentos, often made of cedar, are a bit more fragile and take more care if you want them to last for many years. Also, clean up as soon as you get home. The reset is key to looking forward to your next special box lunch.
Close-up of soba noodles and coleslaw

Favorite Lunchbox Containers

Bentos: I have (and love) my small collection of bento boxes. They’re beautifully crafted and fit the perfect amount of food. They often come with small dividers to create separation between food, but you can also use lettuce, or other small containers to divide things up. 

Tiffins (or dhabbas): These containers have long been used in India to enable healthful, homemade meals outside the home. I have a circular, triple-stack stainless steel version I love for a number of reasons including durability, compactness, and security. The tiers nestle tightly making spills and accidents unlikely. I have my eye on a rectangular version as well.

Both bentos and tiffins have a tradition of enabling meals made with care and love. And continuing this tradition is something I try to channel when I’m packing a lunch for myself or someone I care about.

Lunch arranged and ready to eat
I don’t mind mixing different types of lunch containers. And sometimes I’ll make an individual lunch for each person, each in its own container. But, other times I think it’s fine to load up a few family-style containers and do it that way. I think that works great for components that can be more communal, like edamame, or a bunch of dumplings, a stack of paratha, vegan sushi or quesadillas, quinoa patties, etc.

Hot Lunch!

Use a thermos to bring hot miso soup or tea or rasam or whatever else you can think of. This is always the icing on the cake and unfailingly makes me happy (or happier!) When I really have things lined up, I’ll bring green tea, miso soup, or soba tea and a durable glass or two wrapped in cloth. Simply rewrap when you’re finished.
A sampling of lunch ideas arranged on a marble table
I hope this provides a bit of inspiration! It’s really wonderful to take a bit of time to sit down to a thoughtfully prepared, healthful homemade lunch and I’m never sorry about making the extra effort (in the long run). Even if it can make a morning a bit more demanding than usual, I know when I do it, I’ll eat better, feel better, and get excited about sitting down to lunch. Enjoy! -h

Continue reading Feel-good Lunch Ideas on 101 Cookbooks

Pickled Cauliflower

Step by step instructions for how to make quick pickled cauliflower. Cauliflower is combined with slivered onions, mustard seeds and dried chiles and covered in a hot vinegar. The florets are tangy with a kiss of salty sweetness and super good!

Continue reading Pickled Cauliflower on 101 Cookbooks

Pickled cauliflower is great to have on hand. You can make it with any color cauliflower you like, although I can’t resist purple cauliflower because the compounds in it react with the hot vinegar solution to turn the florets a beautiful neon. The perfect punctuation to any plate. Keep a jar on hand and serve these alongside tacos and spring rolls, inside bentos and as an accent in salads.
Quick Pickled Cauliflower in a Mason Jar
Here (below) you can see the pickled cauliflower as part of a bento lunch situation. The cauliflower is nestled between a chile-coated hard-boiled egg, spicy sesame coleslaw, purple rice, a curry leaf and pepita tadka, and a bunch of kale chips. It delivers a good amount of tang and crunch in the midst of less structured components.
Pickled Cauliflower in a bowl along with other lunch food

Pickled Cauliflower: The Process

It’s possible to have a jar full of pickled cauliflower done in ten minutes. The steps are straight-forward and quick. The first thing to do is toss your florets with any other ingredients and seasonings you might be using. I like to use onions, mustard seeds, and dried chiles – reflected in the recipe below. You can do the same or play around. Sometimes I’ll add carrot coins, other times I’ll substitute shallots for the onions, etc. 
Cauliflower florets, onions, mustard seeds and chile in a glass mason jar

Pack the Jar

The next step is transferring the mixture to a quart-sized Mason jar. Fill nearly all the way to the top as you can see pictured below.Side view of a jar filled with cauliflower florets, onions, mustard seeds and chiles

Make A Hot Vinegar Solution

The last stage in the process is heating a mixture of vinegar, salt, and sugar in a small saucepan. It simmers until the grains of sugar and salt have dissolved. The hot vinegar is poured over the cauliflower until it is completely covered. This is when you’ll see the color shift if using purple cauliflower.Quick Pickled Cauliflower in a Mason Jar

A Great Make-ahead Component

I love making pickled cauliflower this way because you can enjoy a crunchy hot bite just a few minutes after the hot vinegar hits. And then things get even better in the days following. I tend to try to use any quick pickles within about a week, but they usually are enjoyed before then.
Pickled Cauliflower as a part of lunch spread
If you’re interested in more of the feel-good lunch ideas pictured, here’s where you can find the spicy sesame coleslaw, and the tofu salad is actually just my favorite wonton filling from this wonton soup recipe. Enjoy!


Continue reading Pickled Cauliflower on 101 Cookbooks

Vegan Tamagoyaki

A vegan version of tamagoyaki, the much-loved Japanese rolled omelette. This chickpea-tofu version is seasoned with scallions and herbs.

Continue reading Vegan Tamagoyaki on 101 Cookbooks

Tamagoyaki are Japanese rolled omelettes, a favorite bento component and, around here, a lunchtime heavy lifter. Sometimes I like to make them the classic way, using beaten eggs. I also, often, make a vegan version using a blended chickpea and tofu mixture. I’ve been working on a post about feel-good lunch ideas (coming soon) and the vegan tamagoyaki are a cornerstone component. You can season these tamagoyaki endless ways, make them ahead of time, and enjoy tamagoyaki on the go. The perfect protein-rich player.
Vegan Tamagoyaki in a Bento Box on a Marble Table

Vegan Tamagoyaki: Inspiration

There used to be a vegan frittata I loved at Go Get Em Tiger in Los Feliz, Los Angeles made from a rich batter of chickpea flour and a lot of olive oil – I don’t see it on the current menu. It was streaked with kale and dotted with cherry tomatoes, shallots were involved, and the “egg” component was fluffy and fantastic. There’s a lot of olive oil in that vegan frittata, more than I like to use in an everyday-type recipe, so I go with a chickpea flour base blended with silken tofu and less oil. It works out great, cooks up (and browns) beautifully, and is a great plant-based alternative to classic tamagoyaki. This recipe makes other big leaps from traditional tamagoyaki recipes which tend to be sweetened with mirin or sugar, and seasoned with dashi and soy sauce. That said, once you finesse your technique, you can play with all the seasoning variables and make yours as classic or experimental as you like. A blender of chickpea and tofu tamagoyaki batter
The chickpea, tofu, and seasoning mixture is simple to make by using a blender (or hand blender). It will keep refrigerated for days, which is great for on-the-fly rolls.
Rolled tamagoyaki cooking in rectangular pan

Choosing a Tamagoyaki Pan

You have a number of options when it comes to pans here. I have a simple, rectangular, classic, small cast iron tamagoyaki pan that makes wonderful egg-based tamagoyaki (not pictured). It really doesn’t do as well with vegan tamagoyaki. The batter sears and sticks and honestly, its a big mess. So, I have a ceramic pan that I use for these, and it’s great. It’s super slippery, responsive, and generally easy to use. The front edge is sloped for easier rolling. It’s this one – highly recommend.

Can I make Tamagoyaki Without the Special Pan?

Yes, and no. It’s exceptionally difficult to establish the classic rectangular shape without using a pan with four corners. But, if you have a small, round skillet there’s no reason not to go for a round version. Simply pour enough of your tamagoyaki mixture into the middle of the pan, and quickly swirl until you have thin coverage across the flat bottom of the pan – avoiding the sides. And proceed from there. Keep in mind this mixture loves a slippery surface, and it’s one of the few occasions I break out a non-stick pan.
Vegan Tamagoyaki in a Bento Box on a Marble Table

Make-ahead Considerations

Tamagoyaki are great because you can do multiple levels of “make-ahead.” The vegan tamagoyaki mixture fits in a quart-sized jar and will keep refrigerated for 5-6 days. Then, when you have a window of time, you can cook all (or some) of your tamagoyaki and once. Allow them to cool, wrap individually, for example, tightly in parchment paper – they will keep refrigerated for 3-4 days. When you’re ready to pack a lunch or make a meal, slice and enjoy.
Two vegan Tamagoyaki on a Cutting Board to Cool

Variations

Nori-lined Tamagoyaki: Trim sheets of nori so they’re just a bit smaller than the base of your pan. Immediately after coating the pan with the tamagoyaki mixture, place a sheet of nori on top of the wet mixture. It will shrink up a bit and sometimes starts curling at the edges a bit. Proceed with rolling per the recipe. If you’re doing a double thick tamagoyaki, through down a second sheet of nori after your second allocation of tamagoyaki mixture has spread across the pan. Once it has set, roll and proceed with the recipe.
Vegan Tamagoyaki in a Bento Box
Caramellized Onion Tamagoyaki: If you have any jammy, deeply caramelized onions on hand – this is a great way to use them. Drop some of the onions onto still-wet tamagoyaki mixture just after it hits the pan. It works really well with this chickpea-tofu combination.

Water vs. broth: This recipe call for 1 3/4 cups of water, but you can absolutely play around with other liquids. I’ve made this tamagoyaki using strong mushroom tea in place of the water, or a favorite herby vegetable broth. Play around!
Vegan Tamagoyaki in a Bento Box on a Marble Table
Here’s another example of vegan tamagoyaki as a component in a simple rice bowl for lunch. There’s purple rice, sliced avocado, chana masala spice-dusted hard-boiled egg, and peanuts. I drizzled it with a spicy sesame soy sauce. All the components here were pre-made (aka leftovers). To pull together lunch I heated the rice, and pulled the other components from the refrigerator an hour or so ahead of time to bring them up to room temperature. Have fun experimenting, and enjoy!

Continue reading Vegan Tamagoyaki on 101 Cookbooks

Wonton Soup

A hearty wonton soup featuring pillows of wontons stuffed with tofu, cream cheese, shredded kale, scallions, and curry powder floating in a spicy miso broth and topped with a peanut-scallion sprinkle.

Continue reading Wonton Soup on 101 Cookbooks

If I look back through my notebook over the past year, one of the things I’ve cooked most is this wonton soup. Like, weekly. Top three recipe. What I find notable about this is: making wonton soup isn’t particularly quick or convenient. Especially if you take as long to shape each wonton as I do. But my enthusiasm for slurping up tender flavor-packed pillows from a spicy miso broth is intense. The wonton soup recipe you see down below has become our “house” wonton with a filling of finely crumbled tofu and a bit of cream cheese to bring it together. I load the base with minced kale, lemon zest, curry powder, black pepper and scallions. The broth is always miso spiked with something spicy, sometimes served simply, other times with with added chopped vegetables and cabbage (as in this version). Little of this is conventional, but oh my god do I love to eat it.
Wonton Soup in a Shallow Bowl

Inspiration

I tend to go through intense periods of dumpling-making or pasta shaping – gyoza, wontons, ravioli, pappardelle, cavatelli – I’m game for all of them. The meditative repetition of the process feels good to me and the payoff is always a series of the kind of meals I love – hand-made, a bit rustic, full of flavor and love. The last year of wonton-making was kicked off after I made the Smoky Tofu-Nori Wontons from a preview of Andrea Nguyen’s new book Ever-Green Vietnamese. Andrea has you make nori and smoked paprika-seasoned wontons that are brushed with oil and baked until sizzling, browned, and crispy. They were so amazing I started making double and triple batches of the filling, eventually swapping in other ingredients depending on what was on hand. There was a lot of free-styling going on. To switch things up, instead of baking, I started boiling a handful of these wontons in a quick spicy broth when I wanted a fast meal. And here we are.
Preparing Wontons and arranging on Parchment-lined Surface

Wonton Soup: Make-ahead Game Plan

I rarely shape my wontons on the same day I make the filling. By making the filling one day, you have a good amount ready for impromptu wonton soup meals. It’ll keep for up to five days, refrigerated. Making the wontons from this point becomes an easy lift and can go fast, especially if you have an extra set of hands (or two). The broth always comes together super quickly, so that’s no big deal. The wontons freeze well, so after shaping, freeze any that you aren’t planning on cooking immediately. I go into more detail on that down below.

So, to clarify the process. I make the filling and refrigerate it until I’m ready to shape wontons. I’ll either shape the wontons ahead of each meal, or, if I have a good chunk of time, shape them all at once. I like to freeze any that aren’t going to be cooked immediately.
Preparing Wontons and arranging on Parchment-lined Surface

Which wonton wrappers should I buy?

When it comes to making dumplings, wontons, gyoza and the like, your success or failure can be at the hands of the wrappers you choose. I’ve worked with a wide range of them over the years, both organic and not, and some are thicker or thinner than others. Some tear more easily than others. Some seem to dry out more quickly, etc. It’s easy to get frustrated if your wrappers are a problem. The wrapper brand I’ve had the most consistent success with lately is Nanka Seiman (pictured above). They are supple and tend to work great whether my wontons are bound for a soup, brushed with oil and baked crisp, or are destined to be pan-fried.

I’m also noticing Andrea wrote this primer on what to look for when buying wonton wrappers. She talks through vegan considerations as well how to check for freshness. Another thing, most of the wrappers have some sort of preservatives and/or additives added, it kind of is what it is, unfortunately. If you have a wrapper brand you love with a more pared-back ingredient list, give a shout in the comments. Or, you can always make your own dumpling wrappers – Andrea has a recipe in her Asian Dumplings book. She made fresh wrappers as part of a dinner at a friend’s house (maybe a decade ago?!?) and I still remember how special they were. And she made it look easy.
Close-up Photo of Wontons Arrange in Multiple Rows

How To Freeze Wontons

The most convenient way to freeze wontons is to arrange them on a parchment-lined baking sheet (see above) before placing in the freezer. Once frozen you can transfer them to a freezer bag. You can boil or bake oil-brushed wontons direct from the freezer.

Substitutions & Variations

  • Goat cheese vs. cream cheese: I went to make my wonton filling one night, and realized we were out of cream cheese. I did have goat cheese, so decided to try that instead and it worked out nicely – a bit of tang.
  • The spicy component: I like to have a little something spicy in my wonton filling. You’ll notice the minced serrano in the recipe below, it’s my favorite option. That said, I’ve made versions substituting everything from habanero jelly (1 tablespoon) to Kashmiri chile (1 teaspoon) with good results.
  • Something green: I like the idea of getting a mix of “good stuff” all in one bite. It’s part of the reason I started adding minced kale to my wonton filling. When I don’t have kale, I’ll add chopped cabbage, or a handful of mixed herbs. Have fun experimenting!

More Soup Recipes

If you love these types of soups, here’s where you can explore all the soup recipes. This rustic cabbage soup has been quite popular lately, and I love this ribollita, this vegan pozole, and this simple tomato soup.

Continue reading Wonton Soup on 101 Cookbooks

Ribollita

Ribollita, a beautifully thick Tuscan stew made with dark greens, lots of beans, vegetables, olive oil, and thickened with day-old bread. One of my favorites.

Continue reading Ribollita on 101 Cookbooks

Ribollita is a thick Tuscan stew – dark greens, lots of beans, vegetables, olive oil, thickened with day-old bread. It is hearty, filling, infinitely nourishing, and flat-out, the sort of food I crave. The amount of kale you collapse into each pot is impressive, and you’ll be patting yourself on the back before, during, and after you eat. Here are the details – it’s a soup I make constantly this time of year.
Ribollita, a beautifully thick Tuscan stew with dark greens, lots of beans, vegetables, olive oil, and thickened with day-old bread
I should mention, with ribollita, it’s one of those things where there are as many ways to make it as there are cooks. I normally use whole canned tomatoes this time of year – torn up. But had crushed tomatoes on hand, and they worked out nicely. You can use canned beans, beans cooked from dried, or cooked beans you’ve frozen and thawed. As far as guidelines go? Your ribollita should be thick – eventually. A sloppy sounding, bread stew. Use day old bread, preferably a rustic loaf cut (or torn) into big chunks. The bread absorbs the broth and simmers into beautifully plump zones of pillowy dumplings.
Ribollita, a beautifully thick Tuscan stew with dark greens, lots of beans, vegetables, olive oil, and thickened with day-old bread

Ribollita Shortcuts

This isn’t a difficult soup to cook, although it does require some chopping. If you’re looking for a few ways to shave off some prep time. Use canned beans, and buy pre-washed & chopped kale. Also keep in mind, this recipe results in a large pot of soup. Enough for a couple days of leftovers, or more, depending on the size of your family.
Ribollita, a beautifully thick Tuscan stew with dark greens, lots of beans, vegetables, olive oil, and thickened with day-old bread

Ribollita Adaptations

There are a bunch! In addition to the tweaks I mentioned up above, I suspect a number of you will want to know how to make it GF. Yes, you can absolutely make it without the bread. it’s not the same stew, and not really ribollita, but it is still wonderful. Bump up the amount of beans you use (both the whole & mashed). I’ve also taken to substituting a cup of the white beans with 1 cup of uncooked French lentils (added with the tomatoes). Once the lentils are fully cooked proceed with the addition of the kale, beans, etc.

Toppings!

I like to add a bit of lemon zest to each bowl for a bit of brightness, and because I can’t help myself. And I also like the saltiness of a few olives alongside the kale, so that’s a little bonus as well. I’ll also drizzle a little thinned out pesto on top if I have it on hand, or, an herb oil made by pureeing olive oil, a couple garlic cloves, parsley, and marjoram together. This bowl was topped with a shallot and chiles oil.
Ribollita, a beautifully thick Tuscan stew with dark greens, lots of beans, vegetables, olive oil, and thickened with day-old bread

Freezer-friendly Ribollita

This is an excellent freezer friendly stew. I like to make an extra-large pot of it, let it cool, and transfer it to freezer-safe containers. It’s good for a month or so frozen. If I know it’s a pot primarily bound for the freezer, I sometimes hold off on adding the bread. I’ll add it when I reheat later. But really, you can do it either way.

I hope you love this, and I hope you make it. It has all the good stuff in one pot. It’s what I like to make when I feel like I need a bit of a re-boot.

This is the place if you’re looking for more soup recipes, and I included this recipe in my list of best bean recipes, so be sure to check it out if you’re looking for more bean-centric inspiration. Enjoy! -h

Continue reading Ribollita on 101 Cookbooks

Rustic Cabbage Soup

Hearty, healthy, and satisfying – this cabbage soup recipe is super simple to make. Slice a cabbage into thin ribbons and cook it down in a simple pot of sautéed potatoes, onions, beans, garlic and flavorful broth. Finish each bowl with a generous drizzle of great olive oil, a couple dollops of sour cream and a jolt of something spicy.

Continue reading Rustic Cabbage Soup on 101 Cookbooks

Today’s cabbage soup recipe was inspired by the a mystery box delivery from Mariquita Farm in Watsonville, Ca. I show up to a designated pick-up spot, pay $25 and in turn get what feels like twenty pounds of beautiful produce direct from the farm. This time of year I might see the eyes of impossibly petite potatoes peering back at me, they could be nestled alongside a kaleidoscope of vibrantly colored carrots, or shouldered up against a of pile of parsnips.
Soup and Sourdough Bread on a Table

Cabbage Soup Ingredients

Taking inspiration from a beautiful moon-shaped cabbage and potatoes in the mystery box, I sliced a the cabbage into thin ribbons and cooked it down in a simple pot of sautéed potatoes, beans, onions, garlic and flavorful broth. Each bowl was finished with a generous drizzle of great olive oil, a couple dabs of sour cream and a jolt of something spicy – in this case a bit of Calabrian chile paste. Couldn’t be more simple.
Soup Bowls on a Marble Table Near a Window

But before I get too far ahead of myself on the soup front, let me tell you a bit more about Mariquita Farm and what Andy and Julia are doing. There’s a bit of back story. I used to buy produce from Mariquita at the farmers market on Saturdays. After many years they decided not to do the market anymore. Mariquita sells my favorite rainbow carrots, and I was convinced I was going to have to find a new source. Not the case, Julia emailed some of her regulars last summer mentioning that she would be making the occasional delivery to San Francisco…“would we be interested in doing a pick-up?” She also mentioned the option of buying one of Andy’s specially curated mystery boxes – which have since become very popular.

This isn’t a CSA, it’s more guerilla than that. As it stands now, every other week(ish) Julia and Andy pack a huge delivery truck with many, many mystery boxes. Julia then climbs into the big truck and navigates her way over the Santa Cruz mountains down into Silicon Valley and then north toward San Francisco. She parks the truck in front of a previously designated neighborhood restaurant and people come from all over the city to trade cash for mystery crops. It’s great. I end up trying all manner of ingredients I might not buy otherwise. The crops are beautiful and bright because Andy takes such care in growing and handling them.

With out sounding too mushy, this is just one more reason I love living in San Francisco. On a good night, not only do I go home with the box (er, bag – the boxes get reused), but sometimes I even get to sit down for a drink or slice of pizza and catch up with Julia. It’s a real treat.

A few related links:

Rustic Cabbage Soup

Cabbage Soup Variations

Back to the soup – there are a bunch of variations I’ve made over the years cooking this. Here are a few stand-outs.

  • Parmesan Cabbage Soup: There are nights when I keep this super simple, finishing things off with a generous dusting of Parmesan cheese and a few chopped herbs.
  • Curried Cabbage Soup: Add a scant tablespoon of curry powder to the pot prior to stirring in the broth.
  • Lemony Cabbage Soup: Make the soup as written but serve each bowl topped with freshly grated lemon zest and a generous drizzle of lemon olive oil.

Rustic Cabbage Soup

Cabbage Soup Leftovers

This is a great next-day soup. So keep that in mind. Generally speaking, there are a couple ways to deal with leftovers here (like, if you make a double pot). Cabbage soup freezes well, so eat your fill of the soup for a couple days, and freeze the remaining. You’ll want to make sure it is room-temperature or cold prior to freezing. Allow to thaw before reheating.

I suspect many of you have all the ingredients needed on hand – aside from the cabbage. I’m going to encourage you to give this a try! It’s a great staple recipe to have in your back pocket. This recipe was posted in early 2008, and I’ve cooked it many times in the years since. Enjoy! -h
Rustic Cabbage Soup

More Favorite Soup Recipes

Here’s where you can browse all the soup recipes. I love this broccoli cheddar soup, and this coconut red lentil soup is much loved by everyone who tries it. This ribollita is a reliable winter warmer, and if you enjoy making soups as much as I do, you’ll want to start making your own homemade bouillon powder. Oh! And this wonton soup has been a favorite this year. I also love make-ahead soups like this Tortellini Soup ,these Spicy Coconut Curry Noodles, and this Italian Barley Soup

Continue reading Rustic Cabbage Soup on 101 Cookbooks

Baked Mushrooms with Miso Butter

Baked mushrooms are the ultimate low-lift creation. Here, mushrooms are tossed in a simple ponzu marinade, topped with cubes of butter and citrus slices, then baked into perfection in a hot oven.

Continue reading Baked Mushrooms with Miso Butter on 101 Cookbooks

I’ve been lucky to live in the vicinity of some world-class mushroom growers for most of my life. Far West Funghi were a staple at the weekly Ferry Building Farmers’ market in San Francisco and Long Beach Mushrooms are a bright spot now that we are farther south. I’ve cooked a lot of mushrooms over the years and simple, baked mushrooms are an easy go-to for me. What you see here are mushrooms tossed in a simple ponzu marinade topped with little cubes of butter and citrus slices. Everything is covered and baked into succulent perfection in a hot oven. The sauce creates itself in the base of the dish. This is the type of preparation that is great whether you have regular button mushrooms or a fancy mix of exotic varietals. Promise.

Baked Mushrooms in a Casserole Dish

The Inspiration

Using soy sauce or ponzu as an anchor ingredient in a mushroom marinade is a fantastic combination. You see skewered soy-brushed mushrooms grilled as standard fare at many izakayas in Japan. I do variations on this at home a lot, switching variables up depending on what ingredients are on hand, and what cooking method is available. For example, the recipe today bakes the mushrooms in a hot oven, alternately, you might make a foil or parchment pocket and grill or bake that way. I tend to use ponzu sauce, and made a fresh batch of it recently. The citrus accent is key, and I like to use whatever citrus is coming out of the garden – in this case Rangpur lime. I’m equally happy using lemon, Meyer lemon, lime, slivered market lime leaves, or orange. Use whatever you have access to!

Baked Mushrooms with Rice and More on a Marble Table

Make it Vegan

I like the richness and flavor the little dabs of butter lend to the recipe as written, the miso in the marinade melds with the butter into a fantastic sauce as the mushrooms bake. That said, a generous drizzle of good olive oil before baking would work nearly as well.
Close-up photo of specialty mushrooms - oyster mushrooms, mother of pearl mushrooms, chestnut mushrooms and more

Baked Mushrooms: What Kind?

You have a lot of latitude here. The mushrooms you see pictured are beautiful cultivated types from a local mushroom grower including oyster mushrooms, mother of pearl, lion’s mane, pioppino, chestnut, and golden oyster mushrooms. I like doing versions with enoki and nameko as well. I also made a fantastic version earlier in the week with straight-ahead grocery store cremini mushrooms – absolutely perfect over a bowl of steaming hot rice. So, don’t sweat it if that is what is available. This is still going to be great. One pro-tip, I like to break (or cut) the mushrooms into slightly bigger than bite-sized pieces before tossing with the marinade. They will go on to collapse as they bake.Raw mushrooms before baking
Above you can see the raw mushrooms in the dish they will eventually bake in. Some of the larger mushrooms, the oyster mushrooms for example, are torn into smaller pieces.
Marinated mushrooms before baking in a baking dish
In this shot (above) you can see the mushrooms after they’ve been tossed in the ponzu marinade. They are topped with citrus and a bit of butter. At this point you will cover and bake for about 20 minutes.
Baked Mushrooms in a Casserole Dish
Here’s what the finished mushrooms look like less than a minute after removing from the oven. I like to sprinkle fresh herbs on them before serving, chives are top of that list. And if you want to get a bit decadent, a dollop of sour cream or creme fraiche is magic.

This is so simple to through together, I hope you give it a try. And for the mushroom fans, here’s where you can have a look through all the mushroom recipes.

Continue reading Baked Mushrooms with Miso Butter on 101 Cookbooks

Homemade Ponzu Sauce

Ponzu is a much loved Japanese sauce appreciated for its tangy, salty, citrus profile. It’s simple to make at home and a great way to use your favorite citrus.

Continue reading Homemade Ponzu Sauce on 101 Cookbooks

Ponzu sauce is one of the ways I like to put a dent in the steady supply of off-beat citrus growing on our patio this time of year. Ponzu is often used in Japanese (and Japanese-influenced) dishes and making your own allows for some citrus-centric experimentation. If you’re aiming to make a better version of a grocery store ponzu sauce you’ll likely hit the citrus note by using lemon, but I love to make it with Meyer lemons, yuzu, makrut lime or oro blanco grapefruit (or a blend). My favorite is ponzu sauce made with Rangpur lime. It’s a bit tangy, plenty salty, perfumed with citrus – perfect in and on so many things.Homemade Ponzu Sauce

The Origins of Ponzu

This can be a bit confusing, but let’s dive it. If you want to geek out on ponzu, poke around on the internet a bit, and then read this and this. They’re the most interesting articles I’ve read about ponzu. That said, when you buy ponzu in the U.S. or see it called for in English-language cookbooks, the assumption is that ponzu is made with soy sauce, citrus, vinegar, etc. That’s the recipe on this page, but there is more to know.

According to Sceaphierde’s article, ponzu was introduced by the Dutch to Nagasaki during the Edo period. Nearly every other page about ponzu will deliver a boilerplate about how the word ponzu can be broken down into two parts: pon, related to the Dutch word pons, meaning punch (the beverage); and the Japanese word su meaning vinegar. But what those pages tend to leave out is this – that ponzu was yellow (or not dark). It seems like it may have been a citrus alcohol beverage of the Dutch – no soy sauce. Over time ponzu has evolved. The ponzu you’re likely imagining, or the recipe you’re looking for, is probably more along the lines of “true” ponzu combined with soy sauce – ajipon – flavor (aji) and (pon) ponzu. Or ponzu shoyu – according to Naoko Takei Moore in her Donabe cookbook, “it’s more commonly referred to as ponzu.” That’s what we’re rolling with here.


How To Make Ponzu Sauce

I like to make ponzu using the technique I learned from Tadashi Ono and Harris Salat’s The Japanese Grill (Ten Speed Press 2011). I’ve landed on a ratio of ingredients that I’ve tweaked to my liking over the years. The version you’ll see below tends to be a bit citrus-forward, pulled back on the vinegar a shade. To make ponzu sauce you combine soy sauce, mirin, sake, citrus juice, water, kombu, and shaved bonito flakes (katsuobushi). You allow the ingredients to steep for a period of time. Then strain and bottle.

Vegetarian Ponzu Sauce

To make the vegetarian ponzu sauce we use here at home, I omit the bonito flakes and instead use dried mushrooms. Dried shiitake are the obvious choice here for their sea-forward flavor notes, but I typically reach for dried porcini mushrooms. They’re a powerhouse of flavor, umami, and I feel like they round out the ponzu nicely. Play around to see what you like!Homemade Ponzu Sauce

To Cook or Not?

A lot of ponzu sauce recipes you’ll see will have you cook all (or most) of the ingredients together. That’s not what you’ll see here and it’s part of what I’ve always liked about the approach Harris and Tadashi take. The only ingredients you cook together are the sake and mirin. The two ingredients cool to room temperature before they are combined with the citrus juice, vinegar, seaweed, etc. It results in a ponzu with clean lines and a directness that can be muddled with a cooked version. Imagine hot, cooked orange or lemon juice compared to freshly squeezed – they’re just different beasts altogether. So I stick with this version, not hot plus an overnight steeping. You can, of course, play around – do a gentle steeping with a warmed version, etc. Or cook everything and hold back the citrus until late. And you can, of course, experiment with how long you leave the ingredients to co-mingle. I like to go overnight.
Baked Mushrooms with Ponzu Sauce

Ways to Use Ponzu

Ponzu can be used in so many dishes – imagine tart, tangy, and salt accents all at play together. It makes a great marinade for tofu and mushrooms. Splashed over noodles or rice is a no-brainer. I also love it as a component in salad dressings, skip the salt and add ponzu to taste to your favorite vinaigrette.

Continue reading Homemade Ponzu Sauce on 101 Cookbooks