25 Best Vodka Cocktails

Here are all the best vodka cocktails to unleash the versatility of this spirit! Pick from all the classic vodka…

Here are all the best vodka cocktails to unleash the versatility of this spirit! Pick from all the classic vodka mixed drinks and unique cocktails for any occasion, from the Moscow mule to the Cosmo.

Vodka cocktails and mixed drinks

Got a bottle of vodka and need to use it up? There are so many great vodka cocktails to try, mixed drinks that are as varied as you could imagine! Because of its neutral flavor, vodka easily takes on the character of a drink.

Types of vodka cocktails

Pretty much anything goes with vodka! You’ve got fruity vodka cocktails like the Bay Breeze, classy drinks like the Gimlet and Cosmo, spicy ones like the Bloody Mary, and intriguing possibilities like endless types of martinis. These vodka mixed drinks should be in every enthusiasts repertoire. Want to start simple? Try these 2 ingredient vodka drinks or browse vodka cocktails for every season.

And now, the best vodka cocktails & mixed drinks to try!

Best vodka for drinks

The best vodka for vodka cocktails? unlike liquors with strong personalities like whiskey or rum, the ideal vodka for mixed drinks should be smooth and clean. It shouldn’t overpower the other ingredients in your cocktail, but rather act as a neutral base that allows the flavors to shine.

We recommend a mid-priced vodka, avoiding very inexpensive or high-end vodka. Brands like Tito’s, Ketel One, Absolut and Smirnoff are good options, as well as mid-range brands like Grey Goose vodka. Ultimately, the best choice depends on your budget and flavor preference. Don’t be afraid to experiment with different brands to find your perfect match.

More types of cocktails

Outside of these vodka cocktails, there are so many more great cocktail recipes! Here are some of our best mixed drink collections:

Frequently asked questions

Isn’t vodka just for boring drinks like screwdrivers and vodka tonics?

Absolutely not! Vodka’s neutral flavor profile makes it a perfect base for countless creative and delicious cocktails. From refreshing summer drinks to sophisticated classics, vodka shines in a vast array of recipes.

What are some classic vodka cocktails I should try?

Here are a few iconic vodka cocktails to get you started:
Moscow Mule: A refreshing mix of vodka, ginger beer, and lime juice.
Cosmopolitan: A sophisticated blend of vodka, cranberry juice, Cointreau, and lime juice.
White Russian: A creamy and decadent combination of vodka, coffee liqueur, and cream.
Bloody Mary: A savory and tangy brunch favorite with vodka, tomato juice, and spices.

What are some essential ingredients for making vodka cocktails?

While specific ingredients vary by recipe, some common staples include:
Citrus juices: Lemon, lime, and grapefruit juice add a refreshing tartness.
Sweeteners: Simple syrup, honey, or fruit liqueurs provide sweetness and balance the tartness.
Bitters: A few dashes of bitters like Angostura or orange bitters enhance complexity and depth.
Soda water and tonic water: These add fizz and lightness.
Fruits and herbs: Fresh or muddled fruits and herbs like mint, basil, or berries add vibrant flavors and visual appeal.

Are there any tips for making delicious vodka cocktails?

Here are some helpful tips:
Use high-quality vodka: While top-shelf isn’t always necessary, a decent vodka will make a noticeable difference.
Chill your ingredients: Cold ingredients ensure a refreshing final drink.
Measure accurately: Balanced flavors are key, so following recipe measurements is important.
Get creative! Don’t be afraid to experiment with different ingredients and flavor combinations, like adding muddled fruits or herbs.

Print
Vodka gimlet

Vodka Gimlet (& More Easy Vodka Cocktails)


5 Stars 4 Stars 3 Stars 2 Stars 1 Star

5 from 1 review

  • Author: Sonja Overhiser
  • Prep Time: 5 minutes
  • Cook Time: 0 minutes
  • Total Time: 5 minutes
  • Yield: 1 drink

Description

Here are all the best vodka cocktails to unleash the versatility of this spirit! Pick from all the classic vodka mixed drinks and unique cocktails for any occasion, from the Moscow mule to the Cosmo.


Ingredients

  • 2 ounces (4 tablespoons) vodka
  • 1 ounce (2 tablespoons) lime juice
  • ¼ ounce (½ tablespoonsimple syrup or maple syrup
  • For the garnish: lime wedge or wheel

Instructions

  1. Add vodka, lime juice, and syrup to a cocktail shaker. Fill with a handful of ice and shake until cold.
  2. Strain the drink into a coupe or martini glass and top with a splash of soda water, if desired. Garnish with a lime wedge or wheel and serve.
  • Category: Drink
  • Method: Shaken
  • Cuisine: Cocktails
  • Diet: Vegan

Classic Asparagus Quiche

This asparagus quiche recipe is a total showstopper! Flaky pastry crust, tender asparagus spears, and a savory cheese filling come…

This asparagus quiche recipe is a total showstopper! Flaky pastry crust, tender asparagus spears, and a savory cheese filling come together for a satisfying and impressive dish.

Asparagus Quiche in pie pan with feta cheese garnish.

The buttery scent of this asparagus quiche recipe in the oven may win you one or two marriage proposals—or at least it will have the neighbors wandering by to snatch up a slice! It’s packed with savory, cozy flavor, perfect for spring brunches or light dinners with a crisp glass of white wine.

Why we love this recipe: This asparagus quiche is worth every second of time for the satisfaction you’ll get from making a quiche from scratch. Plus, it’s easy to make in advance. We served it to guests who went gaga over this one. Come: let’s make quiche!

How to make this asparagus quiche recipe: an overview!

In under 2 hours, you’ve got a complete masterpiece of an asparagus quiche recipe: made completely from scratch. That includes a homemade quiche crust. Want a shortcut? You can do store-bought crust too: see below. But we highly recommend the homemade crust: it’s crispy, buttery perfection. Here’s what to expect from this process timing-wise:

Make the quiche dough20 minutes, active
Freeze the crust15 minutes, inactive
Blind bake the dough + make the filling25 minutes, active
Bake the quiche40 to 50 minutes, inactive

Here is an overview in photographs of how to make this asparagus quiche. For all the details, jump to the full recipe below.

Step 1: Blind bake the quiche crust.

Step 1: Make the quiche crust (go this quiche crust recipe for instructions). Freeze it for 15 minutes. Blind bake the crust with pie weights at 375°F for 15 minutes.

Step 2: Saute the asparagus and make the filling.

Step 2: Make the filling: sauté the asparagus. Whisk together the eggs, milk, cream, salt, and pepper. Place grated smoked mozzarella cheese in bottom of the crust. Pour the egg mixture over the top. Sprinkle the sauteed asparagus and feta cheese crumbles.

Step 3: Bake the quiche.

Step 3: Bake the quiche for 40 to 50 minutes at 350°F.

Tips for homemade quiche crust

Ever made a quiche crust from scratch? It’s pretty simple, but you do need a few dough-making techniques. Working with dough takes time and practice. If it’s your first time, give yourself patience and grace.

  • Use a standard 9-inch pie plate, not deep dish. Deep dish will be too thick for the filling amount here.
  • A pastry cloth can be helpful (optional). It helps for rolling out the dough so it doesn’t stick on the counter. If you don’t have one, just lightly dust the counter with flour.
  • Use the tines of a fork to decorate the edge. This is easier than a fluted edge, though either works.
  • You’ll freeze the crust 15 minutes before blind baking it. This helps the crust to hold its shape while blind baking. This freezer method shortcuts refrigerating for a few hours. (You’re welcome!)
Asparagus Quiche slice with fork.

Blind baking is key for the crust

The biggest key to making an asparagus quiche recipe is blind baking the crust. Blind baking is baking a pie crust without the filling. This makes sure that crust is perfectly firm before you add the wet filling, which is especially important for a custard pie like a quiche because the filling is so wet. If you don’t blind bake, you’ll get soggy bottom crust for sure (we did!). Here’s what to know about blind baking and how to get the perfect flaky crust:

  • Prick holes with a fork all over the crust. This is called docking the crust: it makes it puff up less while in the oven.
  • Add pie weights: like dried beans or rice! You can use ceramic pie weights (we used these) to weigh down the crust so it doesn’t get too puffy. Or, you can use dried beans or dry rice! It doesn’t harm the beans or rice: you can still cook them as normal after using them as weights.

Shortcut: use store-bought crust

Yes, you can short-cut the effort to make your homemade crust and go with a store-bought pastry crust. Any type of purchased pie crust works (we don’t have a favorite brand since we always make our own). You’ll still need to blind bake the store-bought crust! So start in the recipe below at Step 3.

Asparagus Quiche with slice out and table setting.

Make ahead instructions

Yes, it takes about 2 hours to make! But here’s the thing: only about 1 hour of it is active time. Even better: it saves VERY well. It’s so easy to make the night before, or even a few days in advance! Here’s what to do:

  • Make the entire quiche 1 to 3 days in advance. Then refrigerate it until serving!
  • Warm in a 200 degree oven for about 20 minutes before serving. It’s also delicious cold, but we like it warmed up.
  • Saves 5 days refrigerated. Wrap it in plastic or aluminum to keep it fresh.

Ways to serve asparagus quiche

This asparagus quiche recipe is a total showstopper! We served this at a spring birthday brunch for my mom and everyone went crazy over it. In fact, it was suddenly gone before we knew it! It was absolutely perfect for a festive occasion (it would be great for Easter or Mother’s Day). While recipe testing, we also ate it for dinner: which was perfect as well. Here are some ways to serve quiche:

Dietary notes

This asparagus quiche is vegetarian.

Frequently asked questions

Do I need to pre-cook the asparagus?

Pre-cooking the asparagus for a few minutes is essential to ensure it’s tender throughout the quiche.

How can I avoid a soggy quiche crust?

Soggy quiche crust can happen for a few reasons. Make sure your dough is chilled before baking to prevent it from melting too quickly. It’s essential to pre-bake (blind bake) the crust for a few minutes before adding the filling.

Can I use a store-bought pie crust?

Absolutely! Using a store-bought crust is a great time-saver. Just follow the package instructions for pre-baking.

How can I tell when my quiche is done?

The quiche is done when the center is no longer jiggly and a toothpick inserted comes out clean. The crust should also be golden brown.

Print
Quiche crust

Classic Asparagus Quiche


5 Stars 4 Stars 3 Stars 2 Stars 1 Star

No reviews

  • Author: Sonja Overhiser
  • Prep Time: 30 minutes
  • Cook Time: 1 hour 15 minutes
  • Total Time: 1 hour 45 minutes
  • Yield: 8

Description

This asparagus quiche recipe is a total showstopper! Flaky pastry crust, tender asparagus spears, and a savory cheese filling come together for a satisfying and impressive dish.


Ingredients

For the quiche crust*

  • 1 cup all-purpose flour
  • ½ teaspoon kosher salt
  • ¼ teaspoon baking powder
  • 6 tablespoons unsalted butter
  • 4 to 6 tablespoons ice water

For the asparagus quiche

  • 4 ounces asparagus (about 8 thin stalks)
  • 1 tablespoon olive oil
  • 1 teaspoon kosher salt, divided
  • 3 large eggs
  • 1 cup milk
  • ½ cup heavy cream
  • Fresh ground black pepper
  • 3 ounces (about ¾ cup) smoked mozzarella or smoked gouda, grated
  • ¼ cup feta cheese crumbles

Instructions

  1. Make the quiche crust: Preheat the oven to 375°F. In a medium bowl, mix the all-purpose flour, kosher salt, and baking powder. Slice the butter into pieces, then cut it into the flour mixture using a pastry blender until a coarse meal texture is obtained. Sprinkle the ice water over the flour 1 tablespoon at a time, mixing gradually with fork until the dough sticks together. Add additional water by the tablespoon until the dough comes together but is not sticky. Form the dough into a ball.
  2. Roll out and freeze the dough: If you have a pastry cloth, set it up and dust it with flour; otherwise, flour a clean work surface. Put on a rolling pin cover (optional), and either way, dust the pin in flour. Roll the dough to an even 12-inch circle (which corresponds to the 9-inch pie pan). Use a rolling pin to transfer the dough to the pie pan (make sure it is standard and not deep dish). Fold the overhanging dough backwards and seal it to form a rim. Then press it with the tines of a fork to decorate the edges (see the photos). Use a fork to gently prick holes in the bottom and sides of the crust (this helps it to not puff up while blind baking). Freeze the crust for 10 minutes before blind baking. 
  3. Blind bake the crust: Remove the dough from the freezer and place a sheet of parchment paper on top of the crust. Fill the dough with pie weights (we used two sets of these), dry beans, or dry rice. Bake for 15 minutes, then carefully remove the parchment and weights and bake additional 8 minutes until the bottom is lightly browned. Remove from the oven and go to Step 5.
  4. Sauté the asparagus: Meanwhile, wash the asparagus and trim off the ends. Cut the stalks into bite-sized pieces. In a large skillet, heat the olive oil over medium high heat. Add the asparagus, ¼ teaspoon kosher salt, and a few grind black pepper. Cook, stirring occasionally, until the largest pieces are tender, about 5 to 8 minutes. This depends on the thickness and maturity of the asparagus, so it’s different every time! Taste and remove when it’s just tender and still bright green, but not crunchy.
  5. Reduce the oven heat: When the crust is done blind baking, remove it from the oven and reduce the heat of the oven to 350°F. 
  6. Make the filling: In a medium bowl, whisk together the eggs, milk, cream, ¾ teaspoon kosher salt, and several grinds black pepper. Place the grated smoked mozzarella cheese in bottom of the crust. Pour the egg mixture over the top. Sprinkle the sauteed asparagus and feta cheese crumbles.
  7. Bake: Bake 40 to 50 minutes minutes, until the center is set and the top is lightly browned. Cool at least two hours. It’s easiest to make the night before, so you can refrigerate until serving. Re-warm in a 200°F oven for 20 minutes. (You can also serve it cold.) Leftovers stay for 5 days refrigerated. 

Notes

*You can also use a storebought pastry crust to shortcut some time. You’ll still need to blind bake the crust, so start with Step 3.

  • Category: Main dish
  • Method: Baked
  • Cuisine: American
  • Diet: Vegetarian

Sunny Side Up Eggs

Here’s how to make sunny side up eggs with a perfectly runny yolk! Eat them for breakfast, sandwiches, rice bowls,…

Here’s how to make sunny side up eggs with a perfectly runny yolk! Eat them for breakfast, sandwiches, rice bowls, and more.

How to make sunny side up eggs

Want to make anything into a meal? Put an egg on it! Alex and I learned that slogan early in our cooking journey, and we still use it to this day. Eggs aren’t just for breakfast: they make a rice bowl or sesame noodles into a filling meal.

So here’s one of our top kitchen basic skills for you: how to make sunny side up eggs! This easy technique makes perfectly cooked whites and a runny, gooey egg yolk: and it’s perfect for breakfast, lunch or dinner. Ready to get frying?

Ingredients and equipment you need

How to make the very best sunny side up eggs? We’ve got your covered. There are a few tips you’ll need to know before you jump into the frying pan, so to speak! Here’s what to know:

  • Fresh eggs are best. You can use any eggs here. but the best sunny side up eggs are made with fresh eggs. If your eggs have been in the fridge for a while, the white will spread a lot when it hits the pan. However, this doesn’t affect the flavor and you can move it back with a spatula to round out the shape.
  • Use a non-stick or cast iron skillet. These types of pans are the best when it comes to the ease of cooking eggs. While you can still cook in an aluminum pan, non-stick is preferable.
Sunny side up eggs

How to make sunny side up eggs

Ready to start frying? Remember: you’ll want to cook eggs on medium low or low heat. The slower the better with eggs, since they’re delicate and can easily be overcooked. Here are the basic steps to a perfectly cooked sunny side up egg:

Step 1: Heat ½ tablespoon butter over medium low heat.

Step 2: Add 1 or 2 eggs and sprinkle with a pinch of kosher salt and a few grinds black pepper. 

Step 3: Cook for 2 to 3 minutes, until the whites are firm but the yolk is still runny (don’t flip). Remove to a plate and serve.

The best spatula to use is a fish spatula for a cast iron pan or a nylon spatula for a non-stick pan. The cooking process is simple, but it does require a little finesse and confidence. The more you practice, the easier it becomes!

Ways to serve sunny side up eggs

There’s not much that doesn’t taste better with an egg on it! You can literally add an egg to anything and it’s a fantastic boost of protein. (See below for more egg nutrition.) And eggs aren’t just for breakfast! Here are our top ways to serve sunny side up eggs:

Sunny side up eggs

Egg nutrition

Eggs are some of the most nutritious foods on the planet, though they sometimes get a bad rap! Recent research has found that instead of avoiding eggs for cholesterol reasons, they can increase the good cholesterol the body needs. Eggs are an affordable and easy-to-eat source of high quality protein. They’re also especially helpful for vegetarian diets as a natural source of B12. One egg has:

More egg basics

Want to know how to cook eggs…every way possible? Here are tutorials on the most popular ways to cook eggs:

How to make a fried egg

Dietary notes

This sunny side up eggs recipe is vegetarian, dairy-free, and gluten-free.

Frequently asked questions

What’s the difference between sunny side up and fried eggs?

Sunny side up eggs are cooked with the yolk unbroken, while fried eggs can have the yolk broken or cooked all the way through. Sunny side up eggs typically have a slightly runny yolk and crispy whites.

My yolk breaks when I make sunny side up eggs! How can I prevent that?

Fresh eggs with firm yolks are ideal for sunny side up. Crack the egg on a flat surface first to check for cracks. Use a gentle touch when sliding it into the pan.

What can I eat with sunny side up eggs?

Sunny side up eggs pair well with various breakfast sides:
Toast (perfect for soaking up the runny yolk!)
Bacon, sausage, or ham
Hash browns or home fries
Sautéed vegetables
Avocado toast

Are sunny side up eggs safe to eat?

Sunny side up eggs are generally safe as long as the whites are cooked through. However, if you’re concerned about consuming raw egg whites (due to a weakened immune system), consider cooking them to a firmer consistency.

Can I make sunny side up eggs with different types of pans?

While a non-stick pan makes flipping the eggs easier, you can use any pan with a good heat distribution. Cast iron skillets are a popular choice for achieving crispy whites.

Print
How to fry an egg

*Perfect* Sunny Side Up Eggs


5 Stars 4 Stars 3 Stars 2 Stars 1 Star

5 from 4 reviews

  • Author: Sonja Overhiser
  • Prep Time: 0 minutes
  • Cook Time: 3 minutes
  • Total Time: 3 minutes
  • Yield: 2 eggs

Description

Here’s how to make sunny side up eggs with a perfectly runny yolk! Eat them for breakfast, sandwiches, rice bowls, and more.


Ingredients

  • ½ tablespoon butter (or neutral oil for dairy-free)
  • 2 fresh eggs (fresh is best*)

Instructions

  1. In a large cast iron or non-stick skillet, melt ½ tablespoon butter over medium low heat until starting to foam (eggs are best on low to medium low heat**).
  2. Add the eggs and sprinkle with a pinch of kosher salt and a few grinds black pepper. Cook for 2 to 3 minutes, until the white is firm but the yolk is still runny (do not flip). Remove to a plate and serve.

Notes

*Fresh eggs are best for frying because the whites hold their shape. The whites on older eggs tend to spread: simply use a spatula to pull back the egg whites towards the middle (it just won’t look as pretty!). 

**The slower the better with eggs: they can easily get overcooked. Note that if you’re cooking a second batch, you may need to lower the heat to avoid overcooking the egg since the skillet is already hot. 

This is the non-stick skillet we use. This is the cast-iron skillet we use.

  • Category: Essentials
  • Method: Stovetop
  • Cuisine: Eggs
  • Diet: Vegetarian

Easy Honey Garlic Sauce

This honey garlic sauce recipe is simple to make and works with anything! Try it on salmon, chicken, stir fries,…

This honey garlic sauce recipe is simple to make and works with anything! Try it on salmon, chicken, stir fries, and more.

Honey Garlic Sauce with spoon in bowl.

Need a simple, homemade sauce that will dress up any meal? Try this Honey Garlic Sauce recipe! It comes together with just 8 ingredients in less than 10 minutes, making it an easy, no-hassle sauce for quick meals.

You’ll want to paint a swath of this sticky, flavor-popping sauce on just about anything! It’s great for salmon, chicken, stir fries, and more. We first made it for our Honey Garlic Salmon, which was so good we’ve been making the sauce ever since.

“Just made this for some salmon. I followed the recipe to a T. Wow! This is my new sauce for everything.” -Rick

Ingredients in honey garlic sauce

This honey garlic sauce has a short ingredient list of mostly pantry ingredients, which magically come together into a sticky, thick glaze. It’s great for stir fries, though we love it best painted on a lovely fillet of salmon. Even our 5 year old son loves it, which is a big win in our book! Here are the ingredients you’ll need for this simple recipe:

  • Soy sauce: We like using regular soy sauce for the most full flavor (not low sodium). Substitute tamari for gluten-free.
  • Honey: Honey brings a nuanced sweetness. For vegan, substitute maple syrup.
  • Rice vinegar: Rice vinegar is a vinegar made with fermented rice that’s often used in Asian cuisine; it has a lightly sweet, tangy flavor. 
  • Olive oil: Olive oil is our preferred cooking oil, but you can substitute with any neutral oil. Sesame oil would work well here.
  • Garlic and garlic powder: For a flavor packed sauce, use both fresh garlic (not jarred) and garlic powder.
  • Ginger root: Ginger root packs spicy, zingy flavor to this sauce. You can leave it out if it’s not a refrigerator staple for you, but it adds a depth that we think is absolutely worth the purchase.
  • Cornstarch: Cornstarch gives a shiny, thick body to the sauce (arrowroot powder works as a good substitute).

Pro tip

Use a microplane for easy grating! You can use it for both the garlic and ginger: you don’t even need to peel the ginger!

Honey garlic sauce in bowl.

How to make honey garlic sauce: step by step

This honey garlic sauce is so quick and simple to make: it will take you longer to read about it than actually make the recipe itself! Here’s what to do:

Step 1: In a small saucepan, combine the soy sauce, honey, rice vinegar, oil, garlic powder, grated ginger and grated garlic over medium heat. Bring to a simmer and then reduce the heat to low.

Step 2: In a small bowl, whisk together the water and cornstarch. Pour the mixture into the saucepan and whisk until the sauce thickens, about 1 minute. Remove from the heat.

More about the cornstarch slurry

This honey garlic sauce recipe uses a cornstarch slurry, which is a mix of cornstarch and water (or another room temperature liquid). Here’s why:

  • If dry cornstarch is added directly to heated foods, it clumps up. It’s best to add it to sauces and stir fries mixed with a little liquid first.
  • Cornstarch must be heated to around 203°F for the thickening to occur. It’s called “starch gelatinization”: the process where the the particles of cornstarch absorb water. You’ll notice that once you add the cornstarch slurry to the warm sauce, it immediately starts to thicken: the starch gelatinization has been activated!
Honey garlic sauce on salmon with green onions on platter.

Ways to use honey garlic sauce

How do you plan to use your honey garlic sauce? This recipe is extremely versatile and works with many different types of foods. Here are a few ideas:

Storing leftovers

This recipe is quick to whip up and stores well. Store homemade honey garlic sauce refrigerated for up to 2 weeks. After 2 weeks, it starts to lose some of the potency in flavor.

More sauce recipes

Love making homemade sauces? Here are a few sauce recipes to try:

Dietary notes

This honey garlic sauce recipe is vegetarian, plant-based, dairy-free and gluten-free. For vegan, use maple syrup or agave syrup instead of honey.

Frequently asked questions

What is honey garlic sauce made of?

This versatile sauce typically combines soy sauce, honey, garlic, ginger, and sometimes rice vinegar or sriracha for a touch of heat.

What does honey garlic sauce taste like?

It’s a beautiful balance of sweet and savory! The honey adds a touch of sweetness that complements the savory notes of soy sauce and the pungent kick of garlic and ginger.

What can I use honey garlic sauce for?

The possibilities are endless! Here are some ideas:
Marinade: Marinate chicken, fish, tofu, or tempeh for a flavorful and sticky glaze.
Dipping sauce: Perfect for dumplings, spring rolls, chicken wings, or anything that needs a delicious dip.
Stir-fry sauce: Toss your stir-fry veggies and protein in honey garlic sauce for a quick and flavorful meal.
Glaze: Brush honey garlic sauce on chicken, salmon, or tofu during the last few minutes of cooking for a sweet and sticky glaze.
Noodle sauce: Toss cooked noodles with honey garlic sauce for a simple and satisfying dish.

Can I make honey garlic sauce ahead of time?

Absolutely! This sauce keeps well in an airtight container in the refrigerator for up to 2 weeks.

How can I make my honey garlic sauce spicier?

Add a pinch of red pepper flakes, sriracha, or a chopped fresh chili pepper to the sauce while cooking.

Print
Honey garlic sauce

Easy Honey Garlic Sauce


5 Stars 4 Stars 3 Stars 2 Stars 1 Star

5 from 5 reviews

  • Author: Sonja Overhiser
  • Prep Time: 5 minutes
  • Cook Time: 3 minutes
  • Total Time: 8 minutes
  • Yield: ½ cup

Description

This honey garlic sauce recipe is simple to make and works with anything! Try it on salmon, chicken, stir fries, and more.


Ingredients

  • ¼ cup regular soy sauce
  • ¼ cup honey
  • 1 tablespoon rice vinegar
  • 1 tablespoon olive oil
  • ¼ teaspoon garlic powder
  • 2 garlic cloves, grated
  • ½ teaspoon fresh grated ginger
  • 1 tablespoon cornstarch
  • 6 tablespoons water

Instructions

  1. In a small saucepan, combine the soy sauce, honey, rice vinegar, oil, garlic powder, grated ginger and grated garlic over medium heat. Bring to a simmer and then reduce the heat to low.
  2. In a small bowl, whisk together the water and cornstarch. Pour the mixture into the saucepan and whisk until the sauce thickens, about 1 minute. Remove from the heat. Use immediately or refrigerate for up to 2 weeks.
  • Category: Sauce
  • Method: Stovetop
  • Cuisine: American
  • Diet: Vegetarian

10 Simple Gin Cocktails

Craving a fun gin drink but short on time? Here’s how to craft simple gin cocktails with just a few…

Craving a fun gin drink but short on time? Here’s how to craft simple gin cocktails with just a few ingredients and minimal effort.

Gin and Lemonade

Sometimes you’ve got time to mix up some fun cocktails, but other times you want something that’s quick and easy. If you’ve got a bottle of gin on hand, here are our top simple gin cocktails that are easy to throw together.

What’s a simple gin cocktail?

How do we define simple here? We’ve got a whole list of our best gin cocktails that includes all the classics. This collection is a sub-set of gin cocktails that take 5 minutes and are made with only a few ingredients and no fancy techniques. Many of them you can build right in the glass, so you don’t even need to dirty a cocktail shaker!

There’s everything from two-ingredient gin cocktails to simple bubbly highballs. Here’s what to mix with gin (tonic water and beyond!) to make an easy, breezy drink to enjoy. Alex and I have made these recipes multiple times, and we love every one of them! Some top favorites are the Gin Rickey, Gin Gin Mule, and Salty Dog.

The recipes: our top 10 simple gin cocktails

Best types of gin

The general rule around gin cocktails: the better the gin, the better the drink. Don’t buy the cheapest gin you can find. Try to invest in a mid-price range gin: the drink will only taste as good as the gin you invest in! Here are a few notes:

  • MalfyAviationBeefeater London Dry have a developed, botanical flavor that blends well in cocktails.
  • Locally distilled gin is a great option! In Indianapolis, we like 8th Day Distillery, Hotel Tango, and Big Heart Gin.
  • Steer clear of strong flavored sipping gins in cocktails. For us this includes brands like Tanqueray gin (very floral) and Opihr gin (spice-forward). These types of gin can overpower the subtlety in many mixed drinks.

More gin cocktails

Looking for more gin cocktail ideas? We’ve got recipes for every season! Here are a few of our top ideas:

03

Top 10 Winter Gin Cocktails

Here are all the top winter gin cocktails for when the weather is chilly! Winter citrus, honey, and warm liqueurs…

Frequently asked questions

What kind of gin should I use for these cocktails?

Malfy, Aviation, and Beefeater London Dry is a versatile choice for most simple cocktails. However, you can explore other styles like juniper-forward gins or citrusy gins depending on your taste preference.

Do I need fancy ingredients for these cocktails?

Not at all! Most recipes use readily available ingredients like citrus juice, tonic water, and simple syrup.

Can I make these cocktails without a shaker?

Absolutely! Many of the recipes, like the Gin and Tonic, Gin Rickey, and Gin and Lemonade can be built directly in the glass. For drinks requiring mixing, a mason jar or even a tightly sealed mug can work in a pinch.

How can I add a personal touch to these simple cocktails?

Experiment with different garnishes! Fresh herbs like mint, rosemary, or thyme can add a touch of elegance. You can also use slices of cucumber, orange, or lemon for a pop of color and flavor.

Print
Gin and lemonade

10 Simple Gin Cocktails


  • Author: Sonja Overhiser
  • Prep Time: 2 minutes
  • Cook Time: 0 minutes
  • Total Time: 2 minutes
  • Yield: 1 drink

Description

Gin and lemonade are the best combination! Make this quick and easy 2 ingredient cocktail that’s perfectly sweet tart.


Ingredients

  • 6 ounces (¾ cup) homemade lemonade or purchased lemonade*
  • 2 ounces (¼ cup) gin
  • Ice, for serving (try clear ice)
  • Fresh mint and lemon slices, for garnish

Instructions

  1. By the glass: In a glass, pour in the lemonade and gin. Add ice and garnish with fresh mint and lemon slices.
  2. By the pitcher: Mix 6 cups lemonade with 2 cups gin. Add ice and serve.
  • Category: Drink
  • Method: Stirred
  • Cuisine: Cocktails
  • Diet: Vegan

Hugo Spritz

Cool down with a refreshing Hugo Spritz! This bubbly cocktail mixes elderflower liqueur, sparkling wine, and fresh mint for a…

Cool down with a refreshing Hugo Spritz! This bubbly cocktail mixes elderflower liqueur, sparkling wine, and fresh mint for a light and flavorful summer drink that’s easy to make at home.

Hugo Spritz cocktail with St-Germain bottle.

This cocktail might be the literal definition of refreshing. If you love bubbly spritzes, run don’t walk to try the Hugo Spritz cocktail! This Italian cocktail is a spin-off on the Aperol spritz and even better, in our opinion.

Why we love this recipe: A Hugo Spritz is made with delicate floral elderflower liqueur and bubbly Prosecco, which compliment each other perfectly. The bubbly combination transports you right to Northern Italy, where this cocktail was born and is popular to this day! It’s nuanced and lightly sweet, compared to the bold sweetness of an Aperol spritz.

What’s a Hugo Spritz?

The Hugo cocktail is a spritz cocktail made with Prosecco, elderflower syrup, and soda water. The drink was invented in 2005 by Roland Gruber in Northern Italy (the South Tyrol region just south of Austria). He created the drink as an alternative to the classic Aperol spritz, and it quickly spread across the country and into Europe.

Hugo Spritz ingredients

The Hugo Spritz cocktail is light and floral, accented with the delicate bubbles of Prosecco. Where the Aperol spritz is sweet and citrusy, this spin is sophisticated and even more refreshing. The original Hugo Spritz used elderflower syrup. Here in the US it’s easier to find a bottle of St Germain elderflower liqueur, so it’s a natural substitute. Here’s are the ingredients you need:

  • St-Germain liqueur: St-Germain is a liqueur made with elderflower, known for its floral flavor.
  • Prosecco: This Italian sparkling white wine is from the Veneto region, with a delicate flavor and light bubbles. You can use any type of champagne if desired.
  • Soda water: Use club soda or unflavored sparkling water (we use our SodaStream to make it at home). Avoid tonic water here, since it is flavored with quinine and lightly sweetened.
  • Fresh mint: Fresh mint as a garnish is what makes it a Hugo Spritz.

🍾 Tip: A 750 ml bottle of Prosecco is 25 ounces, enough for 8 drinks. If you’re making 2 drinks, a mini bottle is perfect—it holds 187 mL or about 6 ounces!

How to make a Hugo Spritz cocktail

The Hugo cocktail is so easy to make: you don’t even have to dirty a cocktail shaker! The spritz family of drinks is fantastic because you simply pour the ingredients into a glass.

The Hugo spritz is easy to make, and you can build the drink it right in the glass. This makes it a great choice for entertaining, especially as a summer cocktail. Here are the basic steps (or jump to the full recipe):

Step 1: Add St-Germain to a glass filled with ice and stir. Top with sparkling wine.

Step 2: Add soda water and garnish with mint.

Step 2: Add soda water. Garnish with fresh mint and serve.

More about St-Germain

The key to this Hugo spritz cocktail is the elderflower liqueur, which infuses a delicate floral flavor throughout the drink. St-Germain is one of our favorite unique liquors to stock. Here’s a bit more about it:

  • St-Germain is a liqueur that’s made with elderflowers, the small white flowers of an elderberry plant. The flavor is light, sweetly floral, and fragrant.
  • How do you say St Germain? The name is French, so say “Sahn-jer-MAHN” with your best French accent.
  • Fun fact: it’s relatively new to the scene. Get this: St Germain was invented in 2007! The vintage-looking bottle makes it seem like it has hundreds of years of history, but it’s a newcomer. (Here’s the story behind it.)
  • What cocktails can you make with St-Germain? Try the French Gimlet and all our top St Germain Cocktails.
Hugo Spritz cocktail with mint garnish.

Prosecco & more sparkling wines

Traditionally a Hugo spritz cocktail uses Prosecco, the Italian version of champagne. But you can use any type of sparkling wine you like! Make sure it is “Brut,” which means that it is dry. Here’s a breakdown of the major types of sparkling wine including Prosecco vs Champagne:

  • Prosecco: Italian sparkling wine. It’s a slightly sweeter than champagne and has lighter bubbles. It’s fruity and flowery, with notes of apple, pear and lemon.
  • Champagne: French sparkling wine. It tastes bubbly and fruity, with undertones of almond and orange. It’s typically the most expensive sparkling wine.
  • Cava: Spanish sparkling wine. It has more citrus notes, and is a little more savory and less fruity.

More spritz recipes

There are lots of members of the spritz family! The Aperol spritz is the most popular, but try these other types of spritz recipes to enjoy bubbly drinks all season long:

Frequently asked questions

What’s the difference between a Hugo Spritz and an Aperol Spritz?

Both are refreshing spritzes, but Aperol Spritz uses a bitter orange liqueur, while Hugo Spritz features the floral and delicate elderflower liqueur (like St-Germain).

I don’t have elderflower liqueur. What can I use instead?

St-Germain is the classic choice, but you can substitute with another elderflower liqueur or elderflower syrup. Elderflower is key the flavor here.

How can I customize my Hugo Spritz?

Get creative! Try adding muddled berries, a squeeze of citrus, or a sprig of rosemary for a unique twist.

Print
Hugo cocktail

Hugo Cocktail


5 Stars 4 Stars 3 Stars 2 Stars 1 Star

No reviews

  • Author: Sonja Overhiser
  • Prep Time: 5 minutes
  • Cook Time: 0 minutes
  • Total Time: 5 minutes
  • Yield: 1 drink

Description

Cool down with a refreshing Hugo Spritz! This bubbly cocktail mixes elderflower liqueur, sparkling wine, and fresh mint for a light and flavorful summer drink that’s easy to make at home.


Ingredients

  • 1 ounces (2 tablespoons) St Germain liqueur (chilled if possible)
  • 3 ounces (6 tablespoons) Prosecco or other sparkling wine, chilled
  • 1 ounce (2 tablespoons) soda water
  • Ice, for serving (try clear ice!)
  • For the garnish: fresh mint

Instructions

  1. Add the St Germain to a glass filled with ice and stir.
  2. Top with the sparkling wine and soda water. Add mint and serve. 
  • Category: Drink
  • Method: Stirred
  • Cuisine: European
  • Diet: Vegan

Top 10 Mediterranean Diet Desserts

Try these delicious and healthy Mediterranean diet desserts! From refreshing fruit variations to whole food spins on classics, find the…

Try these delicious and healthy Mediterranean diet desserts! From refreshing fruit variations to whole food spins on classics, find the perfect way to end your meal.

Mediterranean diet desserts: strawberry sorbet

Eating the Mediterranean diet and want a treat to end your meal? This way of eating has been called one of the healthiest in the world. As you might guess with this lifestyle—all treats are acceptable in moderation! But there are a few fun ways to incorporate the principles behind this diet into sweet treats, too.

Here at A Couple Cooks, we’ve been eating this way for over a decade and we’ve never felt better! Here are our top 50 Mediterranean Diet Recipes of all time. You’ll notice there aren’t a ton of desserts in that post, so we’ve rounded up all of our favorites that fit into this way of eating!

What’s the Mediterranean diet?

The Mediterranean diet has been called one of the best diets in the world, according to US News and World Report. This way of eating and living derives from the countries that border the Mediterranean Sea, like Italy and Greece. It’s not a strict diet, but more a set of guidelines. Here’s how the Mayo Clinic defines the Mediterranean diet:

  • Daily consumption of vegetables, fruits, whole grains and healthy fats (like olive oil)
  • Weekly consumption of fish, poultry, legumes (beans & lentils), and eggs
  • Moderate portions of dairy products
  • Limited intake of red meat and added sugar

A study by The American Journal of Medicine found that “the Mediterranean diet is arguably the best-studied and most evidence-based diet to prevent not only cardiovascular disease, but also other chronic diseases, as it has become the standard for healthy eating.”

Let’s see what Mediterranean diet desserts look like

Balance and moderation are key when it comes to treats in the Mediterranean diet. Eating any type of treat in moderation is okay, from fruit desserts to chocolate desserts. There’s nothing really “healthy” about eating a healthy dessert, no matter how you try to spin it.

Trying to limit your intake of added sugar is what is important on the Mediterranean diet. But if you want to eat a Mediterranean diet dessert that fits into that way of eating, try to prioritize whole grains (like oats), fruits and vegetables, and nuts and seeds. Per the Cleveland Clinic, here is what desserts on the Mediterranean diet should look like:

  • Whole grains like oats
  • Fruits and vegetables
  • Nuts and seeds
  • Yogurt and milk in moderation (per the Cleveland Clinic and Mayo Clinic)
  • Eggs in moderation (1 egg per day)
  • Olive oil (instead of butter)
  • Dark chocolate in moderation (per the New York Times)
  • Limited added sugar

Enjoy occasionally and incorporate the lifestyle

The lifestyle is really what’s important when it comes to the Mediterranean diet. This eating philosophy originated based on the longevity of people in the Mediterranean, and researchers noticed there were factors beyond food that contributed to overall health. One key when it comes to added sugars is eating treats in moderation.

It’s also important to also stay active and exercise regularly, avoid smoking, reduce the amount of stress in your lifestyle, and be invested and engaged in your community. Keep this in mind as you browse these recipes!

Our top 10 Mediterranean diet desserts

Frequently asked questions

Can I really have dessert on the Mediterranean diet?

Absolutely! The Mediterranean diet emphasizes balance and moderation, not deprivation. You can enjoy sweet treats occasionally.

What makes a dessert “Mediterranean diet-friendly”?

These desserts typically focus on whole foods like fresh fruits, nuts, honey, and yogurt. They limit added sugar, processed ingredients, and unhealthy fats.

Can I still have cake or cookies on the Mediterranean diet?

Occasional indulgence is okay! Look for recipes that use natural sweeteners like dates or maple syrup, and healthy fats like olive oil. Remember, portion control is key.

What are some substitutes for sugar in Mediterranean diet desserts?

Honey
Dates
Figs
Maple syrup
Ripe fruits like bananas or applesauce (can add sweetness and moisture)

Print
Mediterranean diet desserts

Strawberry Sorbet & More Mediterranean Diet Desserts!


  • Author: Sonja Overhiser
  • Prep Time: 30 minutes
  • Cook Time: 0 minutes
  • Total Time: 30 minutes
  • Yield: 1 quart (4 cups or 8 servings)

Description

This strawberry sorbet recipe has the best fruity flavor and frosty texture! This Mediterranean diet dessert is easy and impresses everyone.


Ingredients

  • 2 pounds strawberries, hulled
  • 1 cup granulated sugar
  • 3 tablespoons lime juice
  • 1 pinch kosher salt
  • ½ cup ice
  •  

Instructions

Note: Make sure the base of the ice cream maker is frozen overnight before making this recipe.

  1. Place the strawberries in a food processor or high-powered blender and puree. Add the sugar, lime juice, salt and ice and puree until smooth. (To make ahead, you can refrigerate at this point until you want to churn, up to 2 days.)
  2. Pour the mixture into an ice cream maker and freeze for 20 to 25 minutes. The texture will be very frosty and creamy at this point. Serve immediately. Or, line a container with parchment paper and freeze up to 2 hours for a scoopable texture. Store in a parchment lined sealed container for up to 1 week; allow to come to room temperature for about 20 to 30 minutes before scooping.
  • Category: Dessert
  • Method: Frozen
  • Cuisine: Mediterranean Diet
  • Diet: Vegan

Keywords: Mediterranean diet desserts

20 Tasty Green Salad Recipes

These tasty and easy green salad recipes are so versatile! They pair with just about any main dish, from pasta…

These tasty and easy green salad recipes are so versatile! They pair with just about any main dish, from pasta to pizza to salmon to chili.

Green salad recipes

It’s tricky to find good side salad recipes. Alex and I often want to accessorize our meal with a salad. But what green salad recipes are the right fit? Browsing for recipes online can take too long: sometimes it feels like you’re in a bargain store trying to comb through sweaters to find the just right thing to wear.

So, we’ve decided to take the guess work out for you! As two cookbook authors and recipe developers, we’ve put together a list of our top green salad recipes that make the perfect side salad for just about anything. Most of them are extremely versatile and vibe with many types of main dishes, whether you’re pairing baked salmon or a pizza recipe.

And now, our 20 best green salad recipes

More green salad ideas

Want to make your own green salad? Try some of our simple salad dressings with the greens of your choice!

Add protein to make it a meal

When we go out to eat, we love that many restaurants have the option to add protein to any of their side salads. That works with all of these green salad recipes as well: turn them into a main dish by adding protein! Here are a few ideas of what we’d add here:

A few more salad recipes by season

There are so many salad ideas to try! Here are a few more recipes by season:

Frequently asked questions

I’m new to making salads. Where do I start?

Here’s a basic green salad formula to get you started:
Greens: Choose a base of your favorite greens like romaine, spinach, arugula, or a mix.
Veggies: Add chopped vegetables for flavor, texture, and nutrients. Popular options include tomatoes, cucumbers, bell peppers, carrots, and onions.
Fruits: Fresh fruits like berries, apples, or pears add a touch of sweetness and a delightful contrast.
Protein (optional): For a more filling salad, incorporate protein sources like grilled chicken, tofu, hard-boiled eggs, or nuts and seeds.
Dressing: The dressing ties everything together! Experiment with vinaigrettes, creamy dressings, or homemade options.

What are some tips for making delicious green salads?

Here are some helpful tips:
Freshness matters: Use fresh, crisp greens and vegetables for the best flavor and texture.
Variety is key: Don’t be afraid to experiment with different ingredients and flavor combinations.
Balance the flavors: Aim for a balance of sweet, salty, sour, and bitter elements.
Chop ingredients similarly: Ensure all ingredients are chopped into similar sizes for even distribution and a pleasant eating experience.
Dress your salad last: Dressing a salad too early can make the greens wilt.

Can green salads be a complete meal?

Absolutely! By incorporating protein, healthy fats, and whole grains, green salads can be a satisfying and nutritious main course.
Bonus Tip: Leftover roasted vegetables or grilled chicken can be repurposed in a delicious green salad the next day!

Print
How to make chopped salad

Chopped Green Salad Recipe


5 Stars 4 Stars 3 Stars 2 Stars 1 Star

5 from 2 reviews

  • Author: Sonja Overhiser
  • Prep Time: 15 minutes
  • Cook Time: 0 minutes
  • Total Time: 15 minutes
  • Yield: 8

Description

This chopped green salad will amaze everyone around the table! Homemade Italian dressing, crunchy veggies and Parmesan cheese combine into one extraordinary side salad.


Ingredients

  • 1 recipe Homemade Italian Dressing
  • 1 Romaine heart (3 cups)
  • 5 cups leafy lettuce
  • 1 large shallot
  • 1 English cucumber (2 cups chopped)
  • ½ cup cherry tomatoes
  • ½ cup ripe green olives, halved
  • ½ cup jarred sliced pepperoncini
  • ¼ cup Parmesan shavings or shreds, plus more to serve
  • ¼ teaspoon red pepper flakes, optional

Instructions

  1. Make the Homemade Italian Dressing.
  2. Chop romaine and lettuce. Thinly slice the shallot. Peel and chop cucumber. Slice tomatoes and olives in half.
  3. Mix together all the ingredients for the salad, including the dressing, and toss to combine. If making in advance, refrigerate the components separately; bring the dressing to room temperature before serving.
  • Category: Salad
  • Method: Raw
  • Cuisine: Italian

Easy Strawberry Compote

This strawberry compote recipe makes a thick, sweet sauce that’s perfect for drizzling over ice cream, waffles, cheesecake and more!…

This strawberry compote recipe makes a thick, sweet sauce that’s perfect for drizzling over ice cream, waffles, cheesecake and more!

Strawberry Compote in a jar with spoon.

Got ripe berries? Here’s a quick and fun way to use them: make strawberry compote! Cooking down strawberries with a bit of sugar reduces it into glossy, luxurious tangy sauce that’s like an amped version of taking a bite into this sweet berry.

Why we love this recipe: This strawberry compote is outrageously tangy and bursting with sweet berry flavor! Alex and I love whipping this up as a versatile topping for ice cream, pancakes, waffles, or oatmeal. A compote is a great way to use fruit that’s almost overripe, but there’s no need to wait for that for this recipe. Anytime is the perfect excuse!

Ingredients for strawberry compote

A compote is a fruit sauce where the fruit is cooked with water, sugar, and seasonings until thickened. Compote works as a sweet sauce for desserts, or to spoon over breakfast items like yogurt, oatmeal and waffles. This strawberry compote has a minimal ingredient list and comes together in just 15 minutes! Here’s what you’ll need:

  • Fresh strawberries: Both fresh strawberries and frozen berries work in a compote. It’s quick to make with either and there’s no thawing required.
  • Granulated sugar: This type of sugar brings out the most intense sweet tart flavor and helps to make a thick, syrupy compote. You can also substitute pure maple syrup or honey as natural sweeteners, and the taste is comparable.
  • Lemon zest: Fresh lemon zest brings a pop to the flavor; the acidity of the lemon is almost like salt in a savory dish. While it’s optional, we highly recommend it!
  • Cornstarch: Using cornstarch makes a thick, glossy body to this sauce. A good cornstarch substitute is arrowroot powder.
  • Vanilla extract and salt: These ingredients around out the flavor.
Strawberries in container.

How to make strawberry compote (basic steps)

Strawberry compote is quick and simple to make: you’ll need about 5 minutes to prep the strawberries and 5 minutes to cook them. Here are the basic steps (or jump to the full recipe):

Step 1: Add the strawberries to a small saucepan with the sugar, lemon zest, and 2 tablespoons of the water. Cook over medium heat, stirring occasionally while it bubbles gently.

Step 2: After 5 to 7 minutes when strawberries start to break down, whisk 2 tablespoons water with 1 tablespoon cornstarch. Pour the mixture into the pan and stir until thickened, 1 minute. Reduce the heat. Mash the strawberries with a potato masher or fork.

Step 3: Remove from the heat and stir in the salt and vanilla. Taste and add additional sweetener, depending on the ripeness of your berries. The compote will thicken as it cools. Serve warm or cooled slightly.

Using a cornstarch slurry

This strawberry compote recipe uses a cornstarch slurry: a mix of cornstarch and water (or another room temperature liquid). If dry cornstarch is added directly to a dish, it clumps up. So, it’s best to add it to sauces and stir fries mixed with a little liquid first.

Cornstarch must be heated to around 203°F for the thickening to occur. It’s called “starch gelatinization,” which is a fancy word for the process where the the particles of cornstarch absorb water. Once you add the cornstarch slurry to the warm sauce, it immediately starts to thicken: the starch gelatinization has been activated!

Strawberry Compote in jar with spoon and strawberries.

Storage info

How long does homemade strawberry compote last? Store it refrigerated for up to 2 weeks. Or, you can freeze it in a freezer safe container for up to 6 months.

Compote becomes very thick when it’s cooled, so make sure to bring to room temperature or warm it on the stovetop before serving. This is especially important if you’re serving with a warm food like pancakes or waffles.

Strawberry Compote in a jar with gold spoon.

Ways to serve strawberry compote

There are so many ways to serve strawberry compote! This fruit sauce is versatile enough to work with desserts or breakfast food items. Here are a few ideas for how to serve fruit compote:

More strawberry recipes

Got more berries? Here are a few more strawberry recipes to try:

Dietary notes

This strawberry compote recipe is vegetarian, vegan, plant-based, dairy-free and gluten-free.

Frequently asked questions

What’s the difference between strawberry compote and strawberry jam?

Compote is a looser and fresher-tasting fruit sauce compared to jam. It uses less sugar and cooks the strawberries for a shorter time, preserving their shape and some of their natural texture.

Can I use frozen strawberries for compote?

Absolutely! Thaw frozen strawberries completely before using them in the compote. They might release more liquid, so adjust the cooking time slightly to achieve the desired consistency.

What are some other fruits I can use for compote?

The possibilities are endless! Berries like blueberries, raspberries, or blackberries work well. You can also try stone fruits like peaches, plums, or cherries. Try our Blueberry Compote, Peach Compote, Easy Raspberry Compote, or Rhubarb Compote.

Print
Strawberry Compote

Easy Strawberry Compote


  • Author: Sonja Overhiser
  • Prep Time: 5 minutes
  • Cook Time: 10 minutes
  • Total Time: 15 minutes
  • Yield: 1 ½ cups

Description

This strawberry compote recipe makes a thick, sweet sauce that’s perfect for drizzling over ice cream, waffles, cheesecake and more!


Ingredients

  • 1 pound fresh strawberries
  • ¼ cup granulated sugar
  • ½ teaspoon lemon zest
  • ¼ cup water, divided
  • 1 tablespoon cornstarch
  • 1 pinch kosher salt
  • 1 teaspoon vanilla extract

Instructions

  1. Clean, hull and quarter the strawberries.
  2. Add the strawberries to a small saucepan with the sugar, lemon zest, and 2 tablespoons of the water. Cook over medium heat, stirring occasionally while it bubbles gently.
  3. After about 5 to 7 minutes when strawberries start to break down, whisk 2 tablespoons water with 1 tablespoon cornstarch. Pour the mixture into the pan and stir until thickened, about 1 minute. Reduce the heat. Mash the strawberries to the desired texture with a potato masher or fork.
  4. Remove from the heat and stir in the salt and vanilla. Taste and add additional sugar if desired, depending on the ripeness of your berries. The compote will thicken as it cools. If it’s too thick, add a little water.
  5. Serve warm or cooled slightly. Store in a sealed container refrigerated for up to 2 weeks (or cool and freeze up to 6 months). Warm on the stovetop before serving.
  • Category: Sauce
  • Method: Stovetop
  • Cuisine: Sauce
  • Diet: Vegetarian

Keywords: Strawberry compote, strawberry compote recipe

25 Top Sides for Pizza

Need a few easy sides to go with a pizza party? Here are our top sides for pizza, the most…

Need a few easy sides to go with a pizza party? Here are our top sides for pizza, the most delicious and satisfying ways to complement your favorite pies.

Sides for pizza

Ready for a pizza night? It can be tricky to find the right sides to go with pizza. Salad is a natural, but it’s got to have the right vibe. Plus, it can’t be so much effort that it takes away from the main event!

Alex and I have pizza nights often, but it can be harder than we think to find the right side dishes to accessorize with our meals. We love to make sides that are vegetable-forward, because we feel more satisfied when we’re done with the meal (and we go through less pizzas!).

Types of sides to pair

Here we’ve combed through our library of thousands of recipes for the best sides for pizza! Salads are the most fitting choice: they’re full of colorful vegetables and you don’t have to use your oven. But we’ve also got a few ideas for sauteed vegetables or even veggie dips that mix up the standard salad. Either way, you won’t be using your oven for any of these side dishes.

You’ll find something for everyone here, from a casual pizza night to a dinner party. If you’re going for a family-friendly with kids, you might want to try our ranch dip with veggies with our cheese pizza. For a fancy night of entertaining, try a classy citrus salad or radicchio salad with a truffle pizza or burrata pizza. Ready to get started?

The recipes: our top sides for pizza!

More pizza resources

Love a great homemade pizza? Alex and I have got all the resources you need to make your own killer pizza at home: Here are a few more of our favorite pizza recipes:

Frequently asked questions

Do I even need sides with pizza?

Pizza is delicious on its own, but sides can add variety, texture, and well-roundedness to your meal. They can also help balance the richness of pizza with lighter options or offer a refreshing contrast.

What kind of sides are best with pizza?

The possibilities are endless! Here are some popular categories to consider:
Salads: A light and refreshing salad balances the heavier flavors of pizza. Opt for a simple green salad with a light vinaigrette, or get creative with chopped vegetables, fruits, and cheeses.
Appetizers: Finger foods like garlic knots, breadsticks, or mozzarella sticks add a fun and shareable element to your pizza feast.
Veggie sides: Roasted vegetables like broccoli, cauliflower, or Brussels sprouts add essential vitamins and a healthy counterpoint to pizza’s richness.

I’m looking for something healthy. What are some good options?

Caprese salad: Fresh tomatoes, mozzarella cheese, and basil with a drizzle of balsamic glaze offer a light and flavorful option.
Grilled vegetables: Grill zucchini, eggplant, bell peppers, or asparagus for a smoky and healthy side dish.
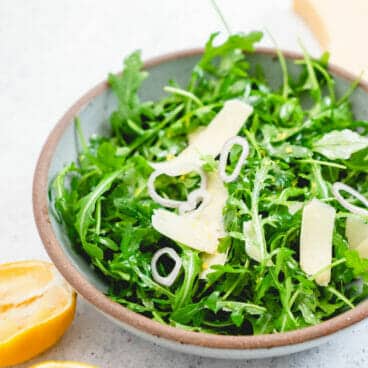
Arugula salad with shaved parmesan: Arugula’s peppery flavor pairs well with pizza, and the shaved parmesan adds a touch of salty richness.
Fruit salad: A refreshing fruit salad with a light honey dressing can cleanse the palate after pizza.

Print
Kale salad

25 Sides for Pizza: Tuscan Kale Salad & More!


5 Stars 4 Stars 3 Stars 2 Stars 1 Star

No reviews

  • Author: Sonja Overhiser
  • Prep Time: 15 minutes
  • Cook Time: 0 minutes
  • Total Time: 15 minutes
  • Yield: 3 to 4

Description

The best side to go with pizza is this incredible Tuscan kale salad! A dressing of lemon, garlic and Parmesan cheese transforms kale into tangy goodness.


Ingredients

  • 1 large bunch Tuscan kale (about 8 ounces)*
  • 1 very small or 1/2 medium garlic clove
  • ¼ teaspoon kosher salt
  • 3 tablespoons olive oil
  • 1 lemon (3 to 4 tablespoons juice, plus zest)
  • ¼ cup freshly grated Parmesan cheese
  • ⅛ teaspoon red pepper flakes
  • Fresh ground black pepper
  • Homemade croutons (optional)

Instructions

  1. Wash and dry the kale. Then destem and roughly chop the kale leaves.
  2. Peel and mince the garlic clove. Sprinkle it with the kosher salt, then holding the blunt edge of the knife, scrape the sharp edge of the blade over the minced garlic, holding the knife at an angle and mashing the garlic into a paste.
  3. Place the paste in a medium bowl. Add the olive oil, lemon juice, red pepper flakes, and fresh ground black pepper, and whisk to combine. Add the Parmesan cheese and stir to combine.
  4. Toss the dressing with the kale leaves. Serve topped with lemon zest (and additional Parmesan cheese, if desired).  If desired, serve with homemade croutons.

Notes

*1 bunch of kale makes a moderate serving size of 4: consider doubling the recipe if feeding hungry eaters.

Adapted from 101 Cookbooks

  • Category: Salad
  • Method: Raw
  • Cuisine: Italian