Basic Quiche Recipe

This quiche recipe features a hearty, savory filling encased in a flaky pastry crust! Brunch just got better. It’s savory,…

A Couple Cooks – Recipes worth repeating.

This quiche recipe features a hearty, savory filling encased in a flaky pastry crust! Brunch just got better.

Quiche Recipe

It’s savory, hearty and works for breakfast, brunch, or a light dinner: it’s quiche! A good quiche recipe can move mountains (we think). We’ve become obsessed with honing the perfect recipe and discovering all the best tips and fillings. This quiche has a simple filling of onion, garlic, spinach and sundried tomato, and it’s encased in a golden flaky pastry crust. Try this filling idea or use it as a base for your own variation (see below). Here’s what to do!

How to make quiche (overview)

A quiche is a French tart filled with custard and savory fillings. It’s become a classic brunch recipe in the Western world, stuffed with fillings from cheese to spinach to bacon (quiche Lorraine).

This classic quiche recipe comes together in less than 2 hours, made completely from scratch with a homemade quiche crust. Or, you can use store-bought refrigerated pie crust as a shortcut. Here’s what to expect:

Make the quiche crust (or use purchased)20 minutes, active
Freeze the dough15 minutes, inactive
Blind bake the dough + make the filling30 minutes, active
Bake the quiche40 to 50 minutes, inactive

Quiche recipe filling

This quiche recipe has a basic formula that you can use for creating filling variations of your choice! It’s got a custard base, then various vegetable fillings. If you want to add more volume of veggies, you can remove one egg from the mixture (see below). Keep in mind that most vegetables should be sauteed, but some you can use raw (green onion, sundried tomato, and bell pepper). Here’s what’s in this basic quiche recipe filling:

  • Custard: 5 large eggs, ¾ cup milk, ½ cup heavy cream, ½ teaspoon each dried mustard and oregano, salt and pepper
  • Sauteed vegetables: Butter, ¼ cup minced white onion, 2 garlic cloves, 3 cups baby spinach
  • Raw vegetables: 2 green onions, ⅓ cup sundried tomatoes
  • Cheese: ¾ cup shredded mild cheddar cheese, ¼ cup Parmesan cheese
Quiche recipe

For the quiche crust

The best way to make a quiche recipe is with homemade quiche crust! However, you can use purchased refrigerated pie dough if you prefer. There are pros and cons to each method.

  • Homemade crust holds its shape better and tastes better.  This quiche crust tastes so much better than store-bought: it’s more buttery and flaky. It can also hold a crimped crust better (at least with the purchased brands we’ve tested!).
  • Purchased crust is faster, but can lose its shape. Purchased crust works too! It’s not quite as delicious, but it comes close. We’ve had some issues with refrigerated pie dough holding its shape, so we recommend using the shape where you press the fork tines into the crust (see photo below).
How to make quiche

Blind baking the crust is key

The biggest key to making a quiche? Blind bake the crust! This means you bake the pastry crust without the filling first to avoid a soggy bottom. This is essential with quiche because the filling is so liquid (but not required with say, apple pie which has a chunkier filling). Here’s how to blind bake a crust:

  • Prick holes with a fork all over the crust. This is called docking: it helps keep the crust from puffing up while in the oven without filling. (Make sure to dock gently so you don’t create holes in the dough!)
  • Add parchment paper then pie weights, dried beans, or rice! Pour them right into the crust. We use two sets of these pie weights. Bake for 12 minutes at 400°F, then reduce the heat to 350°F.
  • Remove the pie weights. Remove the weights and bake 20 to 25 more minutes until the crust is golden. Then the quiche is ready to fill.

How to make a pie crust shield

For this quiche recipe, you’ll also need to use a pie crust shield. This tool prevents pie crust from burning in the oven by covering just the crust, allowing the filling to bake normally. There are two options for a pie crust shield:

  • Make a pie crust shield with aluminum foil. Cut a hole in the center of a large sheet of foil that’s the diameter of your pie plate. The foil will rest on the crust, but allow the filling to bake uncovered. Here’s a video with instructions for more details.
  • Or, buy a metal pie crust shield. Here’s a link to buy a pie crust shield online.
Quiche recipe

Quiche recipe ideas (variations)

There are so many different ways to fill a quiche! Here are a few classic flavors:

Spinach: Use 4 eggs instead of 5 and increase to 1 teaspoon kosher salt in the custard. For the filling, keep the onion and garlic. Add 8 ounces defrosted frozen spinach with all liquid squeezed out (no need to saute). See this Spinach Quiche recipe.

Broccoli: Use 4 eggs instead of 5. For the filling, saute 2 cups very small broccoli florets with the onion and garlic and an extra ¼ teaspoon kosher salt.

Asparagus: Use 4 eggs instead of 5. For the filling, saute 4 ounces asparagus (about 8 thin stalks) with the onion and garlic, and an extra ¼ teaspoon kosher salt. Use smoked gouda cheese instead of cheddar and top with feta crumbles instead of Parmesan. See this Asparagus Quiche recipe.

Breakfast quiche: Use 4 eggs instead of 5 and increase to 1 teaspoon kosher salt in the custard. Remove the onion and garlic. Add 1 cup (4 ounces) frozen or refrigerated hashbrowns to the bottom of the crust. Top with 2 sliced green onions, ¼ cup finely diced red pepper and feta cheese crumbles instead of Parmesan.

01

Classic Spinach Quiche

This spinach quiche recipe has a flaky pastry crust and a savory, cheesy interior! It’s perfect for brunch or a…

02

Classic Asparagus Quiche

This asparagus quiche recipe is a total showstopper! Smoked mozzarella and feta make an irresistible filling for the flaky pastry…

03

Quiche Crust Recipe

This quiche crust recipe makes a crisp, buttery crust with no soggy bottom! Here’s the secret to the perfect pie…

This quiche recipe is…

Vegetarian.

Print
Quiche recipe

Basic Quiche Recipe


  • Author: Sonja Overhiser
  • Prep Time: 45 minutes
  • Cook Time: 45 minutes
  • Total Time: 1 hour 30 minutes
  • Yield: 8

Description

This quiche recipe features a hearty, savory filling encased in a flaky pastry crust! Brunch just got better.


Ingredients

  • 1 Homemade Quiche Crust (made through Step 4) or 1 refrigerated pie dough
  • 1 tablespoon butter
  • ¼ cup white onion, finely minced
  • 2 garlic cloves, minced
  • 3 cups baby spinach
  • ¾ teaspoon plus 1 pinch kosher salt, divided
  • 5 large eggs
  • ¾ cup milk
  • ½ cup heavy cream
  • ½ teaspoon dried mustard
  • ½ teaspoon dried oregano
  • Fresh ground black pepper
  • ¾ cup shredded mild cheddar cheese
  • ¼ cup shredded Parmesan cheese
  • 2 green onions, sliced
  • ⅓ cup chopped sundried tomatoes

Instructions

  1. Prepare the crust: If using Homemade Quiche Crust, prepare it in the pie pan using the steps in the linked recipe. If using refrigerated pie dough, transfer the dough to the pie pan (make sure it is standard and not deep dish). Fold the overhanging dough backwards and seal it to form a rim. With refrigerated crust, it’s easiest to press in the tines of the fork to decorate the edges (like in this asparagus quiche; it’s harder to get the crimped edges to keep their shape while baking). Use a fork to gently prick holes in the bottom and sides of the crust (which helps it to not puff up while blind baking).
  2. Freeze the crust: Freeze the crust in the pan for 15 minutes.
  3. Preheat the oven: Preheat the oven to 400°F.
  4. Blind bake the crust at 400°F: Place a sheet of parchment paper on top of the crust. Fill the dough with pie weights (we used two sets of these), dry beans, or dry rice. Bake for 12 minutes.
  5. Reduce the oven temperature and blind bake at 350°F: Reduce the oven temperature to 350°F and carefully remove the parchment and weights. Bake 20 to 25 minutes until the bottom is lightly browned (or more if necessary for refrigerated pie crust). Remove from the oven and add the filling once it is ready.
  6. Prepare the filling: Meanwhile, in a medium skillet, heat the butter over medium heat. Add the onion and garlic and sauté for 5 minutes. Add the spinach and a pinch of salt and cook until wilted, about 2 to 3 minutes. Set aside.
  7. Make the filling: In a medium bowl, whisk the eggs, milk, cream, dried mustard, dried oregano, ¾ teaspoon kosher salt, and several grinds black pepper. Place the cheddar and Parmesan cheese in bottom of the crust, followed by the sliced green onions and sundried tomatoes (saving out a few to sprinkle on top). Add an even mix of the spinach, onion and garlic. Pour the egg mixture over the top. Sprinkle the top with another handful of shredded cheese and the reserved green onions and sundried tomatoes.
  8. Bake: Add a pie crust shield (purchased or homemade with foil*). Bake at 350°F for 40 to 50 minutes minutes, until the center is set and the top is lightly browned. Cool at least 30 minutes, then serve or refrigerate. Re-warm in a 200 degree oven for 20 minutes. (You can also serve it cold.) Leftovers stay for 5 days refrigerated.

Notes

*To make your own crust shield, cut a hole in the center of a large sheet of foil that’s the diameter of your pie plate. The foil will rest on the crust but let the pie filling be uncovered. Here’s a video with instructions for more details.

  • Category: Brunch
  • Method: Baked
  • Cuisine: French inspired
  • Diet: Vegetarian

Keywords: Quiche recipe, how to make quiche, how to make a quiche

A Couple Cooks - Recipes worth repeating.

Lemon Blueberry Bread

This lemon blueberry bread recipe is perfection! It’s moist and zesty, studded with fruit and topped with a sweet drizzle.…

A Couple Cooks – Recipes worth repeating.

This lemon blueberry bread recipe is perfection! It’s moist and zesty, studded with fruit and topped with a sweet drizzle.

Lemon blueberry bread

Here’s a bright, zingy quick bread that will make friends and family come running: this Lemon Blueberry Bread! This one is beautifully moist and lemon-scented, thanks to a secret ingredient. Drizzle it with a cream cheese glaze, which makes a festive look and another pop of sweet to each bite. We’ve made a lot of quick breads but this one is a family favorite: it’s so refreshing and delicately soft! This one’s a must try, in our opinion: perfect for spring and summer baking.

Ingredients in lemon blueberry bread

This lemon blueberry bread has the best zingy flavor and moist texture. In fact, it turned out even better than we were expecting! The lemon extract and lemon zest really make magic here (more on that below). Aside from those and blueberries, most of the ingredients you may already have on hand in your pantry or refrigerator. Here’s what you’ll need:

  • All-purpose flour
  • Granulated sugar
  • Baking powder
  • Eggs
  • Neutral oil
  • Greek yogurt or sour cream
  • Milk
  • Lemon juice and lemon zest
  • Lemon extract
  • Blueberries
Blueberry lemon bread

The secret ingredient: lemon extract

One ingredient you can’t leave out in this blueberry lemon bread? Lemon extract. Here’s why:

  • Lemon extract adds a citrusy lemon flavor to the bread without adding too much acid or sour flavor, which happens with lemon juice.
  • It’s easy to find lemon extract in the baking aisle near the vanilla. A bottle lasts for up to 4 years in the pantry, so it’s a worthwhile purchase.
  • Using extract eliminates the need for buying another fresh lemon: so you only need one for this recipe! This cuts down on cost in the long term.

Can you use frozen blueberries?

Got frozen blueberries on hand? Frozen blueberries can bleed into the batter of muffins and breads, making them turn purple in color! If you’d like to use frozen berries, we recommend rinsing them well and patting them dry with paper towels per these instructions from King Arthur Baking.

Lemon blueberry bread recipe

For the glaze

You can make this lemon blueberry bread without a glaze: it actually simplifies storage! But the glaze adds just the right pop of sweet: it’s like adding a few more pinches of salt to a savory dish to bring out the flavor even more. There are two glaze recipes that are ideal for topping this bread:

  • Cream cheese glaze: This cream cheese drizzle is just 3 ingredients and adds just the right tangy sweet pop. (This is what is pictured in the photographs.)
  • Lemon glaze: Want even more lemony flavor? Add this zingy lemon glaze to take this bread to new heights.

Tips for baking blueberry lemon bread

This lemon blueberry bread recipe is easier than many baked goods: since it’s made with oil, you don’t need to use a mixer to cream together butter and sugar. Here are a few tips for baking lemon blueberry bread:

  • Use an aluminum baking pan for best results. Ceramic and glass pans don’t cook as evenly for quick breads. Use aluminum if you can! We recommend a 9-inch loaf pan, but you can use an 8-inch pan too: just increase the bake time slightly.
  • Don’t overmix. Overmixing a quick bread batter leads to holes in the texture of the crumb. Mix until the batter is combined and there are no dry spots remaining.
  • Cover loosely with aluminum foil at 30 minutes. Add a bit of foil to prevent the top from browning too much. Pull the bread just when a toothpick comes out clean, about 55 to 65 minutes. The internal temperature should be between 200°F and 205°F.
Lemon blueberry bread

Storage tips

How to store this lemon blueberry bread once you’ve baked up a loaf? The glaze makes storage slightly tricky (but it’s still totally worth it, in our opinion!). Here’s what to know:

  • Glazed cranberry bread lasts 3 to 4 days at room temperature wrapped in aluminum foil.
  • Store the bread refrigerated for 10 days wrapped in aluminum foil, making sure to bring the slice to room temperature before enjoying.
  • Freeze un-iced bread for up to 3 months. Slice it into pieces and wrap it in plastic wrap then a freezer-safe bag or container.

More blueberry recipes

This lemon blueberry bread is at the top of our favorite blueberry recipes: but there are so many more to choose from! Here are a few more popular recipes:

This lemon blueberry bread recipe is…

Vegetarian.

Print
Lemon blueberry bread

Lemon Blueberry Bread


  • Author: Sonja Overhiser
  • Prep Time: 30 minutes
  • Cook Time: 1 hour
  • Total Time: 1 hour 30 minutes
  • Yield: 12 slices

Description

This lemon blueberry bread recipe is perfection! It’s moist and zesty, studded with fruit and topped with a sweet drizzle.


Ingredients

  • 2 cups (280 g) all-purpose flour, plus 1 teaspoon
  • 1 cup (200 g) granulated sugar, plus more for topping
  • 2 teaspoons baking powder
  • ½ teaspoon kosher salt
  • 2 eggs
  • ½ cup neutral oil (grapeseed, vegetable or canola)
  • ½ cup Greek yogurt or sour cream
  • ¾ cup milk
  • 1 tablespoon lemon juice
  • 1 tablespoon lemon zest (zest from 1 large lemon)
  • 1 teaspoon lemon extract
  • 1 ½ cups fresh blueberries*, rinsed and patted dry (or substitute frozen, not thawed), plus 1 handful extra for the top
  • 1 recipe Cream Cheese Glaze or Lemon Glaze

Instructions

  1. Preheat: Preheat the oven to 375°F. Grease a 9-inch aluminum loaf pan.
  2. Make the batter: In a large bowl, whisk the all-purpose flour, sugar, baking powder, and salt. In a separate medium bowl, whisk the eggs, then whisk in the oil, yogurt, milk, lemon juice, zest and lemon extract until smooth. Stir the dry ingredients into the wet ingredients with a spatula until a thick, smooth batter forms. 
  3. Prep the blueberries: Wash and dry the blueberries. Place the blueberries in a bowl and toss with the 1 teaspoon flour. Gently fold them into the batter. 
  4. Bake: Pour the batter into the prepared loaf pan. Top with a sprinkle of another handful of blueberries, pressing them into the top. Then sprinkle with a few teaspoons of additional granulated sugar. 
  5. Bake: Bake 55 to 65 minutes, covering loosely with aluminum foil at 30 minutes, until the top springs back when touched and a toothpick inserted comes out clean. The exact timing will depend on your oven and baking pan.
  6. Cool: Cool the bread in the pan for 30 minutes. Then run a knife around the edge and invert the loaf onto a cooling rack. Allow to cool fully to room temperature (about 30 minutes to 1 hour).
  7. Add glaze: Mix the ingredients in a small bowl until it comes together into a smooth icing (if it is too runny add a bit more powdered sugar; if it’s too thick add a few drops more liquid). Use a fork to drizzle the top of the bread with the icing.
  8. Storage info: The bread lasts 3 to 4 days at room temperature wrapped in aluminum foil or refrigerated for 10 days wrapped in foil (bring to room temperature before enjoying). You can also freeze un-iced bread for up to 3 months (slice it into pieces and wrap it in plastic wrap then a freezer-safe bag or container).
  • Category: Bread
  • Method: Baked
  • Cuisine: Baked
  • Diet: Vegetarian

Keywords: Lemon blueberry bread, blueberry lemon bread, lemon blueberry bread recipe

A Couple Cooks - Recipes worth repeating.

21 Easy Carrot Recipes

Explore these easy carrot recipes for the best creative ways to use this colorful vegetable! Try them glazed, roasted, in…

A Couple Cooks – Recipes worth repeating.

Explore these easy carrot recipes for the best creative ways to use this colorful vegetable! Try them glazed, roasted, in soups and salads, and even baked into desserts.

Carrot recipes, sauteed carrots in pan

Looking for the best ways to eat carrots? These bright orange, healthy veggies are good for so much more than just your eyesight, like the old mantra. They’re packed full of vitamins and nutrients! Luckily: they’re also delicious. And there are so many more ways to eat them than raw carrots sticks!

Here we’ve compiled all the best carrot recipes in two groups: first, recipes where carrots are the star! Think: carrot soup, roasted carrots, carrot cake cookies. But second, and just as important: recipes where carrots play an important supporting role. What’s a good coleslaw or noodle soup without carrots? Let’s get to the recipes.

And now…our best easy carrot recipes!

Carrots nutrition

Carrot are one of the 20 best vegetables you can eat! What’s so great about carrots? Here are some nutrition benefits (source):

  • Vitamin A / Beta Carotene: Carrots have 428% of your daily vitamin A in 1 cup! It’s present as beta-carotene, an antioxidant could help in cancer prevention. Your body converts beta carotene into Vitamin A.
  • Vitamins C, K and potassium: Carrots also are high in these vitamins.

Want more resources? Go to Quick Guide to Carrots or Can You Freeze Carrots?

Print
Carrot recipes, sauteed carrots in pan

21 Easy Carrot Recipes


  • Author: Sonja Overhiser
  • Prep Time: 3 minutes
  • Cook Time: 7 minutes
  • Total Time: 10 minutes
  • Yield: 4

Description

Here are the best sauteed carrots you’ll ever have! The perfect easy side dish, they’re made with just 3 ingredients and done in 10 minutes.


Ingredients

  • 8 medium carrots (1 pound)
  • 2 tablespoons olive oil
  • ¼ teaspoon plus 1 pinch kosher salt
  • 1 tablespoon chopped fresh thyme (or other fresh herbs — we used a combination of thyme and chives)

Instructions

  1. Peel the carrots and slice them diagonally into rounds (on the bias).
  2. Heat the olive oil in a large skillet over medium high heat. Add the carrots and cover. Cook for 4 minutes without stirring.
  3. Remove the lid, stir, and add the ¼ teaspoon kosher salt. Continue to saute uncovered 3 to 4 minutes until browned, stirring occasionally. Remove from the heat and stir in the fresh herbs and a few more pinches kosher salt to taste. Serve immediately.
  • Category: Side Dish
  • Method: Sauteed
  • Cuisine: Vegan

Keywords: Carrot Recipes, Sauteed Carrots, Easy Sauteed Carrots

More on eating your veggies!

Need more inspiration outside of these carrot recipes? We’ve got lots of it. Here are a few more resources for eating more vegetables:

  • 20 Best Vegetables to Eat Today We’ve all heard, “Eat more vegetables.” But how to do it? Here are the healthiest vegetables to get into your diet, and recipes for how to eat them!
  • 28 Day Vegetarian Meal Plan Here’s a month-long vegetarian meal plan with planning ideas and a meal planning calendar with food to cook.
  • Plant Based Diet for Beginners Everything you need to know about eating a plant based diet, including plant based protein ideas and recipes for every meal of the day!

A Couple Cooks - Recipes worth repeating.

Garlic Roasted Potatoes

Here’s a recipe that impresses every time: garlic roasted potatoes! They’re tossed with Parmesan and garlic butter for a knockout…

A Couple Cooks – Recipes worth repeating.

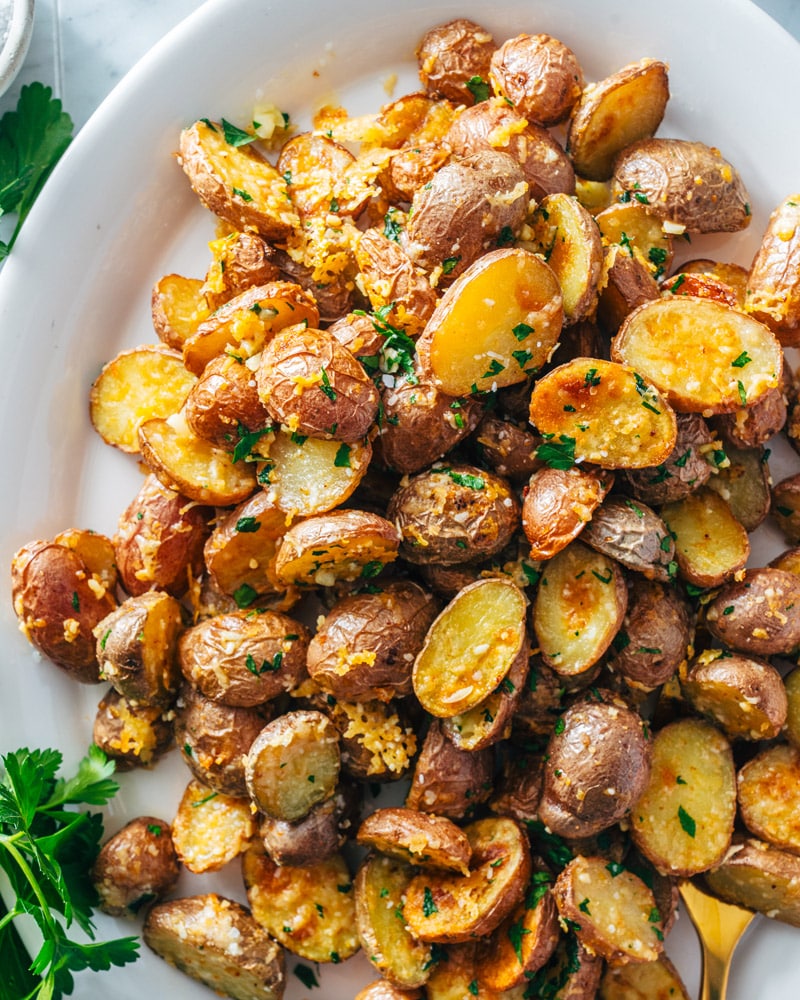
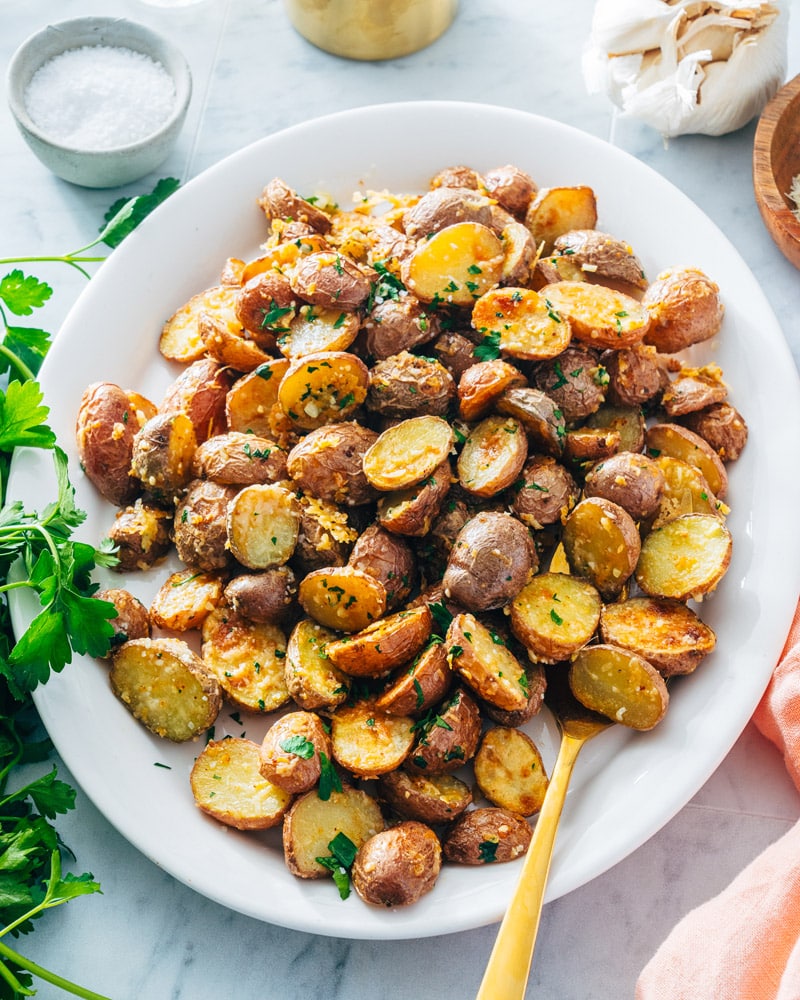
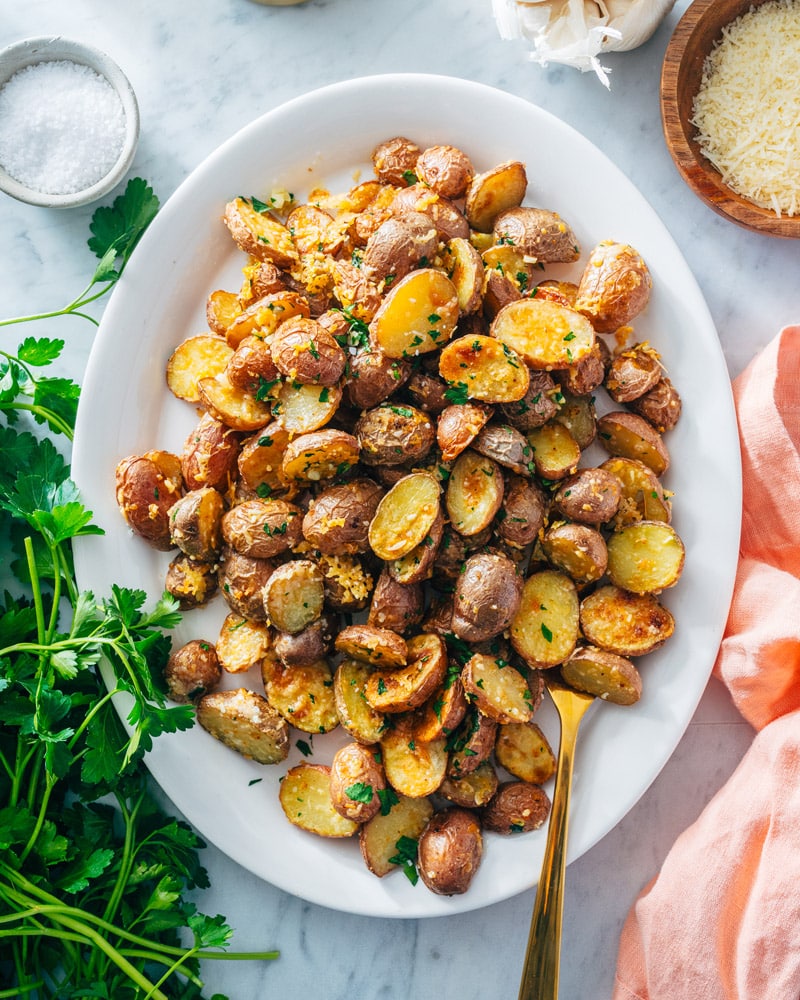
Here’s a recipe that impresses every time: garlic roasted potatoes! They’re tossed with Parmesan and garlic butter for a knockout side dish.

Garlic Roasted Potatoes

Here’s a fun side dish that impresses every time: Garlic Roasted Potatoes! This one is our go-to for both weeknight meals and dinner parties: and you won’t be able to stop sneaking bites. The tender potatoes are roasted with garlic powder and Parmesan cheese for extra crispiness, then tossed with garlic butter after they’re nice and tender. The double hit of garlic adds a bit of magic! Here’s how to make them.

Ingredients in garlic roasted potatoes

This garlic roasted potatoes recipe is simple to put together and makes a splash hit on any dinner table. The potatoes take 35 minutes to roast, and you can prep everything while your oven is preheating. Here are the ingredients you’ll need for this easy side dish:

  • Baby red potatoes or red potatoes
  • Olive oil
  • Garlic powder
  • Kosher salt and black pepper
  • Parmesan cheese (optional)
  • Salted butter
  • Garlic
  • Fresh parsley
Garlic roasted potatoes

Key to making garlic roasted potatoes

The big key to garlic roasted potatoes? Add the garlic after roasting. Many recipes specify to add minced garlic at the beginning of the roasting time. In our house, that equals browned and burned garlic bits. Adding the garlic in a garlic butter mixture afterwards makes sure the garlic stays beautifully savory without burning.

Types of potatoes for this recipe

The best type of potatoes for this garlic roasted potatoes recipe is red potatoes. They’re part of a family called waxy potatoes that have thin, shiny skin and creamy flesh. Waxy potatoes are low in starch, so they hold their shape well when cooked. Starchy potatoes like russet potatoes have a fluffy texture when cooked, so we don’t recommend that variety here. You can find a few different types of potatoes at the store:

  • Red potatoes: Potatoes labeled as such are usually medium sized, with a shiny reds skin
  • Baby red potatoes: Baby red potatoes are a younger stage of red potatoes: they have an even more delicate flavor
  • Mini red potatoes or creamer potatoes: These are also younger stages of red potatoes and may be similar to baby potatoes, or even smaller.

Can’t find red potatoes? You can use other types of waxy potatoes here, like fingerling potatoes or even Yukon gold potatoes, chopped into bite-sized pieces.

Garlic roasted potatoes

We like this recipe best as garlic Parmesan roasted potatoes, with a little cheese tossed in halfway through the bake time. Why? The Parmesan cheese helps to make the exterior of the potatoes even crispier. You also end up with little crispy bits of Parmesan where it falls off the potatoes onto the baking sheet. It’s not required, but it sure does step this recipe up a notch.

Diet variations

Made as written, this recipe is gluten-free and vegetarian. Want to make vegan garlic roasted potatoes? The Parmesan cheese isn’t required. Simply omit the Parmesan and use vegan butter in place of the butter.

More roasted potato recipes

There are so many different ways to roast potatoes! Here are a few more ideas for roasting types of potatoes:

This garlic roasted potatoes recipe is…

Vegetarian and gluten-free. For vegan, omit the Parmesan cheese and use vegan butter.

Print
Garlic Roasted Potatoes

Garlic Roasted Potatoes


  • Author: Sonja Overhiser
  • Prep Time: 10 minutes
  • Cook Time: 35 minutes
  • Total Time: 45 minutes
  • Yield: 4

Ingredients

  • 2 pounds baby red potatoes (or chopped medium red potatoes)
  • 2 tablespoons olive oil
  • 1 teaspoon garlic powder
  • 1 teaspoon kosher salt
  • Fresh ground black pepper
  • ⅓ cup shredded Parmesan cheese (optional)
  • 1 ½ Tbsp salted butter (or vegan butter, for vegan)
  • 1 large or 2 small garlic cloves, finely minced (2 teaspoons minced)
  • 1 Tbsp finely chopped fresh parsley

Instructions

  1. Preheat the oven to 425°F.
  2. Wash the potatoes, then slice them in half (for baby potatoes) or dice them into 1/2-inch cubes.
  3. In a large bowl, stir together potatoes, olive oil, garlic powder, kosher salt, and several grinds of fresh ground black pepper. 
  4. Line two baking sheets with parchment paper. Spread the potatoes in an even layer on the sheet cut and make sure they are side down. Roast for 20 minutes. Toss with the Parmesan cheese and rotate the pans. Roast another 10 to 15 minutes until browned, depending on the size of the pieces. 
  5. Meanwhile, melt the butter in a small saucepan with the minced garlic and parsley, then remove from the heat and set aside.
  6. Remove the potatoes from the oven. Toss with garlic butter and another pinch of salt. Serve warm. 
  • Category: Side dish
  • Method: Roasted
  • Cuisine: Vegetables
  • Diet: Vegetarian

Keywords: Garlic roasted potatoes, roasted garlic potatoes, garlic parmesan roasted potatoes, roasted potatoes with garlic

A Couple Cooks - Recipes worth repeating.

Easy Tuna Wrap

A tuna wrap makes a tasty, easy lunch filled with tuna salad and crunchy veggies! Bookmark this recipe for lunchtime…

A Couple Cooks – Recipes worth repeating.

A tuna wrap makes a tasty, easy lunch filled with tuna salad and crunchy veggies! Bookmark this recipe for lunchtime inspiration.

Tuna wrap

Tuna might be underrated, but it’s a big win in our book! A cheap protein that requires no cooking and is pantry stable for years? Sign us up. This tuna wrap recipe is a fun, tasty way to mix up your lunch routine: no cooking required. It’s bursting with flavor, featuring a zingy tuna salad filling and fresh, crunchy veggies. Roll it all up in a tortilla and you’re ready for an easy healthy lunch or a simple, no-cook dinner. Here’s what you’ll need for a killer tuna wrap!

Ingredients in this tuna wrap recipe

Everyone does a tuna wrap differently. Ours is a spin on our classic tuna salad filling, paired with crunchy veggies and rolled up in a wrap. Keep in mind: you’ll need good creamy tuna salad for this one: we tried it with our Mediterranean tuna salad and it soaked through the wrap. Mix up the tuna salad filling, then add your favorite crunchy veg! Here’s what you’ll need:

  • White meat tuna
  • Celery
  • Green onion
  • Dill pickles
  • Mayonnaise
  • Dijon mustard
  • Dried dill and salt
  • Parmesan cheese
  • Romaine lettuce
  • Red cabbage
  • Red pepper
  • 10-inch burrito style wraps
Tuna wrap recipe

Tips for buying canned tuna

Canned tuna has gotten somewhat of a bad rap over the years, but there’s lots that’s good about this healthy fish! Here are a few things to note when you’re shopping for tuna:

  • Look for light tuna caught by pole and line fishing, which is the most sustainable choice. Light tuna that comes from skipjack has the lowest mercury levels of all types of tuna. (Read more here.)
  • Buy BPA free cans. Look for cans that are BPA free. Alternatively, some tuna is now sold in BPA free pouches.
  • Oil packed or water packed work. Some canned tuna comes packed in oil, whereas others are packed with water. Either works, but drain the can before using.

Important: use burrito sized wraps!

Another important thing for this tuna wrap recipe: use burrito-sized tortillas that are at least 10-inches in diameter. Wraps that are smaller are very difficult to roll and don’t fit much filling. They don’t have as nice of a look as with the large tortilla.

Also, this recipe tastes best with a flour tortilla! You can use a low carb or gluten-free wrap, but some of these types of wraps don’t have satisfying flavor. Only use it if you have a brand you love (feel free to let us know suggestions in the comments below!).

Tuna wrap

Tuna wrap variations

There are lots of ways to vary this tuna wrap recipe! Use your favorite tuna salad recipe, or add different veggies to the mix. Here are a few more ideas we love:

Tuna wrap storage and make ahead info

Another important thing to know about tuna wraps is storage instructions. Here’s what to know:

  • Tuna wraps can make the tortillas soggy over time. For this reason, we recommend making it only up to 8 hours in advance.
  • Wrap the tuna wrap in parchment paper or wax paper for storage. Do not store them in plastic! It retains moisture and causes the wraps to become soggy.
  • Another make-ahead option is refrigerating all components separately. Make the tuna salad and chop the veggies, then store them in separate containers. Roll up the tortilla when you’re ready to serve. This works great for office desk lunches! But it should also work if you make the wrap in the morning and store in parchment paper.

More tuna recipes

It might sound straight out of the 1960’s, but there’s so much to do with a can of tuna! This versatile protein is perfect for making tasty lunches and simple dinners. Here are a few of our favorites:

Print
Tuna wrap

Easy Tuna Wrap


  • Author: Sonja Overhiser
  • Prep Time: 15 minutes
  • Cook Time: 0 minutes
  • Total Time: 15 minutes
  • Yield: 2 wraps

Description

A tuna wrap makes a tasty, easy lunch filled with tuna salad and crunchy veggies! Bookmark this recipe for lunchtime inspiration.


Ingredients

  • 1 5-ounce can white meat tuna
  • ¼ cup finely chopped celery
  • ¼ cup finely chopped green onion
  • ¼ cup finely chopped dill pickles
  • ¼ cup mayonnaise
  • 1 tablespoon Dijon mustard
  • ¼ teaspoon dried dill
  • ¼ teaspoon kosher salt
  • 1 tablespoon shredded or grated Parmesan cheese (optional)
  • 2 handfuls chopped romaine lettuce
  • 1/4 red cabbage, shredded
  • 1/2 red pepper, sliced into strips
  • 2 10-inch burrito style wraps

Instructions

  1. Drain the tuna. Place it in a bowl and use a fork to break apart any large clumps.
  2. Use a fork to mix together the tuna, chopped celery, green onion, dill pickles, mayonnaise, Dijon mustard, dried dill, and kosher salt. Add the Parmesan cheese if desired (it really steps it up a notch!). 
  3. Place an even layer of lettuce on a tortilla, and top it with some of the red cabbage and red pepper. Place half of the tuna salad filling on top (see the photo). 
  4. Make a burrito style-wrap by folding in each side of the tortilla, then rolling it up from the bottom. (A small amount filling may come out after rolling.) Slice the wrap in half.
  5. Eat immediately, or wrap it up in parchment or wax paper for storage and refrigerate until serving, up to 8 hours. (Do not wrap in plastic, or the wrap becomes soggy. To make ahead, you can also pack the tuna salad and chopped veggies in separate containers and refrigerate, then assemble the wrap directly before serving.)
  • Category: Lunch
  • Method: No Cook
  • Cuisine: Lunch

Keywords: Tuna wrap, tuna wrap recipe, tuna salad wrap

A Couple Cooks - Recipes worth repeating.

10 Spring Salad Recipes

Need a spring salad? These recipes are bursting with the best seasonal produce: fresh lettuces, asparagus, radishes, and more. In…

A Couple Cooks – Recipes worth repeating.

Need a spring salad? These recipes are bursting with the best seasonal produce: fresh lettuces, asparagus, radishes, and more.

Spring salad

In a season all about new life, what better to celebrate than a fresh spring salad? This season is bursting with new produce: tender green lettuces, spicy radishes, and vegetal asparagus. Throw them together with a tasty homemade salad dressing and you’ve got the green newness of the season…in a bite! Here are some of our top salad recipes for the season, starring everything from asparagus to romaine to butter lettuce to herby Green Goddess dressing.

And now…10 great spring salad recipes!

More for spring

Love embracing the season? Outside of these spring salad recipe, here are a few more seasonal spring recipes to use your produce:

Print
Romaine salad

10 Spring Salad Recipes


  • Author: Sonja Overhiser
  • Prep Time: 20 minutes
  • Cook Time: 0 minutes
  • Total Time: 20 minutes
  • Yield: 4

Description

This spring romaine salad is simple and stunning! It pairs the refreshing lettuce with creamy Green Goddess dressing and crunchy breadcrumbs.


Ingredients

  • 2 romaine hearts (about 8 cups chopped)
  • 2 radishes, thinly sliced
  • 1 shallot, thinly sliced
  • ½ cup Green Goddess Dressing (or Cilantro Sauce for vegan)
  • ¼ cup Italian panko*
  • Parmesan shavings, for garnish (optional)

Instructions

  1. Chop the romaine hearts. Thinly slice the radishes and shallot.
  2. Make the Green Goddess Dressing.
  3. Place the romaine on salad plates or a large platter. Top with the sliced radishes, shallot, and Parmesan cheese shavings. Drizzle with dressing and sprinkle with Italian panko.

Notes

*Panko is a Japanese-style breadcrumb mixture that is airier and lighter than traditional breadcrumbs. It has a crunchy texture which is more satisfying on salads (breadcrumbs are much finer with almost a sand-like texture). “Italian” means herbs and salt are added. You should be able to find Italian panko or plain panko easily at your local grocery store (often they also sell gluten-free). If all you have is plain panko, you can season it: mix ½ cup panko with ⅛ teaspoon kosher salt and ½ tablespoon Italian seasoning (or 1 teaspoon dried oregano and ¼ teaspoon each dried basil and thyme).

  • Category: Side dish
  • Method: Raw
  • Cuisine: Salad
  • Diet: Vegetarian

Keywords: Spring salad

A Couple Cooks - Recipes worth repeating.

Carrot Cake Muffins

This carrot cake muffins recipe is a showstopper! The muffins are moist and spiced, topped with a tangy cream cheese…

A Couple Cooks – Recipes worth repeating.

This carrot cake muffins recipe is a showstopper! The muffins are moist and spiced, topped with a tangy cream cheese drizzle.

Carrot cake muffins

Here’s a muffin recipe you need in your arsenal: carrot cake muffins! These are beautifully moist and spiced, with cozy spices interspersed with pecans and bright strands of carrots. Add a tangy cream cheese glaze to decorate the tops, and it takes them into rockstar territory! This recipe is perfect in the spring, but we like it anytime of year: it’s a hit with friends and family alike!

Ingredients in this carrot cake muffins recipe

This carrot cake muffins recipe takes everything you like about the popular cake and boils it down into muffins. They’re lightly sweet so they’re not too heavy, and drizzled with just a bit of cream cheese icing (instead of the usual generous layers). There’s nothing better than a great muffin, and this one satisfies every bit of a muffin craving. Here’s what you’ll need:

  • All purpose flour
  • Brown sugar and granulated sugar
  • Cinnamon, cloves, allspice and nutmeg
  • Baking powder
  • Salt
  • Pecans (or raisins)
  • Eggs
  • Applesauce
  • Vegetable oil
  • Vanilla extract
  • Carrots

A few ingredient notes: the applesauce in the muffins keeps them beautifully moist without using more oil. If you love nuts, pecans are the perfect mix-in! You can swap them out for raisins, or you can do both (if you’re a fan of raisins in carrot cake).

Carrot cake muffins recipe

For the cream cheese glaze

The best part of these carrot cake muffins? The cream cheese glaze! This glaze is a play on our powdered sugar icing, but using cream cheese instead. Turns out, softened and warmed cream cheese makes an excellent glaze. Here are a few tips to keep in mind:

  • Heat the cream cheese. Here you’ll want to heat it so that it becomes very soft and easy to stir. We did it in the microwave, but you can also use a small saucepan and use medium low heat on the stovetop.
  • Adjust the powdered sugar and/or milk in very small quantities. The goal is a drizzle-able glaze. Powdered sugar can have some variability when you measure it, so you can add a little more if the icing is too thin. Add a bit more milk if the icing is too thick.
  • Use a fork for drizzling. The best way to drizzle icing on muffins? Use a fork, not a spoon! It makes the best lines as it drizzles off of the tines of the fork.
Carrot cake muffins recipe

Mix-ins and variations

Love a great carrot cake? There are loads of variations on carrot cake, and you can work them into these muffins easily. Here are a few more ideas:

  • Raisins: use ½ cup as noted above
  • Walnuts: use chopped walnuts instead of pecans
  • Coconut: add ¼ to ½ cup sweetened shredded coconut
  • Pineapple: add ½ cup chopped canned pineapple in place of ½ cup of the shredded carrots
  • White chocolate chips: Add another sweet layer with chips

Carrot cake muffins storage

These carrot cake muffins are so delicious, you’ll want to eat them all the day of baking! But this makes a batch of 12, which is probably more than you’ll need. Here are a few notes on storing leftovers:

  • The muffins last best uniced. If making the muffins in advance, store them un-iced and refrigerated; add the drizzle directly before serving.
  • Store with a paper towel in the container. The muffins last at room temperature in a sealed container lined with a paper towel to absorb extra moisture, about 2 days if iced or 4 days if un-iced. The glaze becomes soft during storage, but it holds its shape.
  • Store refrigerated for up to 1 week or more. Allow to come to room temperature before serving. Again, the glaze becomes softer during storage but holds up.
  • You can also freeze the muffins without the glaze. They last up to 3 months frozen.
Carrot cake muffins

More carrot recipes

This carrot cake muffins recipe is perfect for spring, Easter, or Mother’s Day brunch, but it also works any time of year. Love making recipes with this orange vegetable? Here are some ideas for carrot recipes:

This carrot cake muffins recipe is…

Vegetarian.

Print
Carrot cake muffins recipe

Carrot Cake Muffins


  • Author: Sonja Overhiser
  • Prep Time: 30 minutes
  • Cook Time: 25 minutes
  • Total Time: 55 minutes
  • Yield: 12

Description

This carrot cake muffins recipe is a showstopper! The muffins are moist and spiced, topped with a tangy cream cheese drizzle.


Ingredients

For the muffins

  • 1 ¾ cups [245 g] all-purpose flour
  • ½ cup [100 g] light brown sugar
  • ⅓ cup [67 g] granulated sugar
  • 2 teaspoons cinnamon
  • ½ teaspoon cloves
  • ½ teaspoon allspice
  • ¼ teaspoon nutmeg
  • 2 teaspoon baking powder
  • ¼ teaspoon kosher salt
  • ½ cup chopped pecans (or raisins)*
  • 2 eggs
  • 2/3 cup applesauce
  • ⅓ cup vegetable oil
  • ½ tablespoon vanilla extract
  • 2 cups peeled and grated carrots (4 to 5 medium)

For the glaze

  • 3 tablespoons cream cheese
  • ½ cup powdered sugar
  • ½ teaspoon milk

Instructions

  1. Preheat the oven to 400°F. Spray a standard 12-cup muffin tin with cooking spray or add muffin cup papers.
  2. In a large bowl, whisk the flour, light brown sugar, granulated sugar, cinnamon, cloves, allspice, nutmeg, baking powder, and kosher salt. Stir in the chopped pecans.
  3. In a separate medium bowl, whisk the eggs, then whisk in the apple sauce, vegetable oil, and vanilla extract until smooth. Stir in the carrots with a spatula. Add the dry ingredients into the wet ingredients and mix with a spatula until a thick, smooth batter forms. 
  4. Scoop the batter evenly into the muffin cups: the cups will be full to the top. 
  5. Bake the muffins for 23 to 25 minutes, until puffed and golden and a toothpick comes out clean. Cool for 5 minutes in the pan, then transfer to a rack to cool fully, about 1 hour. 
  6. To make the glaze, place the cream cheese in a glass measuring cup or bowl and microwave for about 20 seconds until warm (alternatively, warm it in a small saucepan over medium low heat on the stovetop). Stir in the powdered sugar and milk and mix until a drizzlable glaze forms. Use a fork to drizzle it over the muffins. (If making the muffins in advance, store them un-iced and refrigerated; add the drizzle directly before serving.)
  7. Eat the muffins immediately. Or, store at room temperature in a sealed container lined with a paper towel to absorb extra moisture, about 2 days if iced or 4 days if un-iced. Store refrigerated for up to 1 week or more (allow to come to room temperature before serving). The glaze becomes soft during storage, but it holds its shape. You can also store frozen without glaze for up to 3 months.

Notes

*If you love raisins in a carrot cake, you can use them instead of pecans: or use ½ cup of both!

  • Category: Muffins
  • Method: Baked
  • Cuisine: American
  • Diet: Vegetarian

Keywords: Carrot cake muffins, carrot cake muffins recipe, carrots muffin cake recipe

A Couple Cooks - Recipes worth repeating.

Pasta alla Norma

Pasta alla Norma is a signature Italian dish of pasta and eggplant! A tangy red sauce and salty cheese complete…

A Couple Cooks – Recipes worth repeating.

Pasta alla Norma is a signature Italian dish of pasta and eggplant! A tangy red sauce and salty cheese complete this Sicilian masterpiece.

Pasta alla Norma

Looking for a pasta recipe to impress? Try the signature Italian dish Pasta alla Norma! This impressive recipe hails from Sicily and like any classic Italian dish, it’s all about elegant simplicity. Sauteed eggplant tastes savory and meaty against a tangy tomato sauce, al dente pasta and salty ricotta salata cheese. The combination of flavors and textures is a true masterpiece! Simply called “la Norma” when you order it in Sicily, it’s a standout Italian pasta that will impress everyone.

What is Pasta all Norma?

Pasta alla Norma is an Italian pasta dish made of eggplant, tubular pasta, tomato sauce and ricotta salata cheese. It’s the specialty in the city of Catania in Sicily, but it’s served all over the island.

Why Norma? (That’s what we said.) It’s said to be named after the opera Norma by composer Vincenzo Bellini. Apparently an Italian writer tasted the pasta and said it was “a real Norma,” an 1830’s way of saying it was a masterpiece. The name stuck and it’s been around to this day.

Pasta alla Norma

Ingredients in Pasta alla Norma

This Pasta alla Norma recipe is inspired by some stories set in Sicily we’ve been enjoying lately (the book From Scratch by Tembi Locke and of course the HBO show White Lotus!). So we set about to recreate this iconic dish to get a little taste of the country. We adapted our version from this authentic Sicilian recipe.

Like any Italian pasta, the genius of La Norma is its simplicity. Here’s what you’ll need for pasta alla Norma:

  • Eggplant
  • Olive oil
  • Garlic
  • Fresh parsley and basil
  • Crushed canned tomatoes
  • Oregano
  • Salt and pepper
  • Pasta
  • Ricotta salata cheese
  • Pecorino Romano cheese

Why you need ricotta salata

What’s ricotta salata cheese, and is it necessary for this recipe? Well, this special type of cheese is iconic for the dish.

  • Ricotta salata is a Sicilian version of ricotta that’s pressed and aged. It’s nothing like soft fresh ricotta, which is very mild and creamy. Ricotta salata is hard like Parmesan cheese and needs to be grated to add to a dish. It has a unique salty, briny flavor.
  • What are substitutes? If you can’t find it, the Greek cheese Mizithra is a great substitute. Don’t use fresh ricotta, which is soft and creamy instead of salty and aged.
  • Can’t find either? Use feta cheese for a similar flavor, or omit the ricotta salata and just use Pecorino Romano cheese.

We’ve tried both ricotta salata and Mizithra cheeses and they’re incredibly close in flavor and texture. This cheese is essential if you’re trying to recreate the Sicilian dish, but don’t let it dissuade you from making the recipe entirely. It’s nearly as tasty with simply Pecorino Romano as the garnish!

Pasta alla Norma

Cook the pasta to al dente

The most important thing to remember when making Pasta all Norma? Cook your pasta to al dente! This means “to the bite” in Italian: ideally when it’s tender with a small white speck inside when you bite into a piece. There’s nothing worse than soft, rubbery pasta. Here are a few tips for the perfect al dente pasta:

  • Boil the pasta a few minutes less than indicated on the package instructions. Often package instructions make for overcooked pasta.
  • Start taste testing early. Start taste testing and stop cooking when the pasta is just tender but you can still see a small white speck inside.

And that’s it! Head to the recipe below to try Pasta alla Norma: and let us know what you think! We’d love to hear from you: especially if you are Sicilian or have sampled this dish in Sicily.

More pasta recipes

Want more tasty Italian pasta recipes and pasta sauces? Here are a few more ideas:

This Pasta alla Norma recipe is…

Vegetarian.

Print
Pasta alla Norma

Pasta alla Norma


  • Author: Sonja Overhiser
  • Prep Time: 5 minutes
  • Cook Time: 25 minutes
  • Total Time: 30 minutes
  • Yield: 4 servings

Description

Pasta alla Norma is a signature Italian dish of pasta and eggplant! A tangy red sauce and salty cheese complete this Sicilian masterpiece.


Ingredients

  • 1 large eggplant (about 1 ½ pounds), chopped into 3/4” inch pieces
  • 1 teaspoon kosher salt, divided
  • 4 tablespoons olive oil, divided
  • 4 garlic cloves, minced 
  • ¼ cup roughly chopped fresh parsley, plus more for garnish
  • ¼ cup roughly chopped fresh basil, plus more for garnish
  • 28 ounce can high quality crushed tomatoes, such as San Marzano 
  • ½ teaspoon dried oregano 
  • Freshly ground black pepper
  • ¼ teaspoon sugar, optional
  • 12 ounces large tubular pasta (rigatoni or we used calamarata)
  • ¼ cup grated ricotta salata*, to serve
  • Grated Pecorino Romano cheese, to serve

Instructions

  1. In a large skillet, heat 3 tablespoons olive oil over medium heat. Add the eggplant and ½ teaspoon kosher salt. Sauté for 7 to 10 minutes until browned and tender, stirring often so the eggplant doesn’t stick (the pan will be pretty dry, but this is as expected). Remove the eggplant to a bowl.
  2. Reduce the heat to low and add 1 tablespoon olive oil, along with the garlic, parsley and basil and cook for 1 to 2 minutes, until fragrant. Add the tomatoes, oregano, ½ teaspoon kosher salt and freshly ground black pepper. Bring to a simmer and simmer 15 minutes, until the flavors meld. Stir in ¼ teaspoon the sugar. Add in the eggplant just before serving.
  3. Meanwhile, bring a large pot of salted water to a boil. Boil the pasta to al dente and drain. Add the pasta back to the pot with a drizzle of olive oil. Pour the sauce with eggplant over the pasta and gently toss to combine. Add salt and pepper to taste.
  4. Serve topped with grated ricotta salata cheese, grated Pecorino Romano, and chopped fresh parsley and basil.

Notes

*Ricotta salata is a Sicilian aged ricotta cheese with a hard texture similar to Parmesan and a salty flavor like feta cheese. If you can’t find it, the Greek cheese Mizithra is a great substitute. Don’t use fresh ricotta, which is soft and creamy instead of salty and aged. If you can’t find either, feta cheese has a similar flavor: or you can omit and simply use Pecorino Romano cheese.

  • Category: Main dish
  • Method: Stovetop
  • Cuisine: Italian
  • Diet: Vegetarian

Keywords: Pasta alla Norma

A Couple Cooks - Recipes worth repeating.

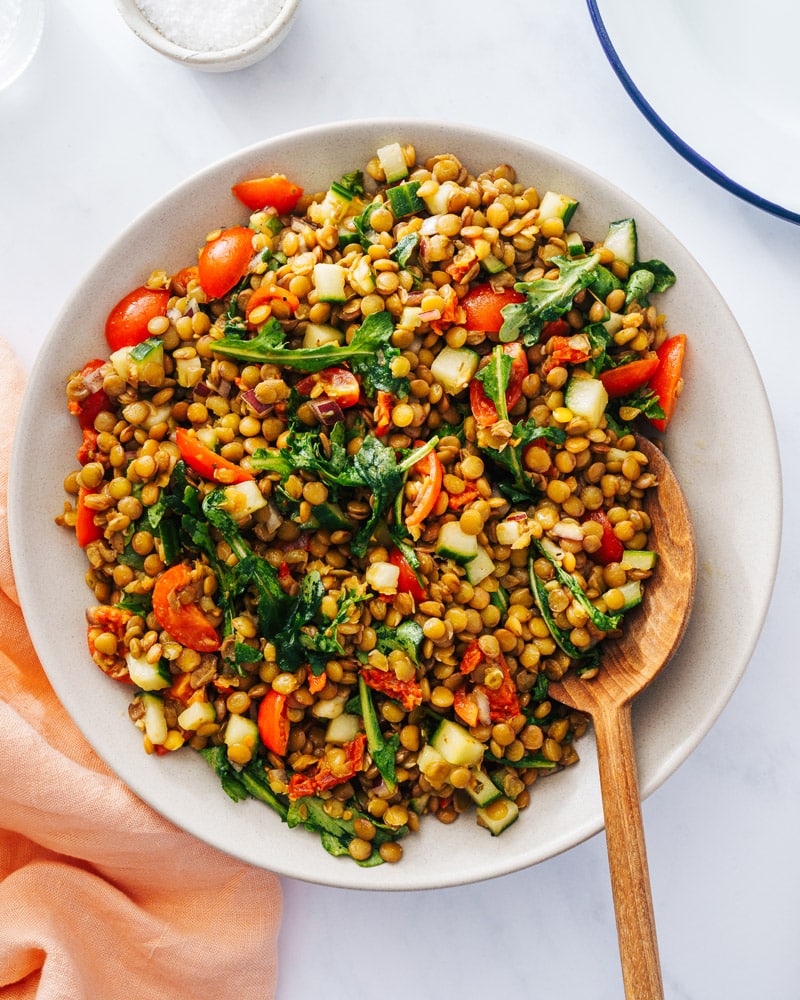
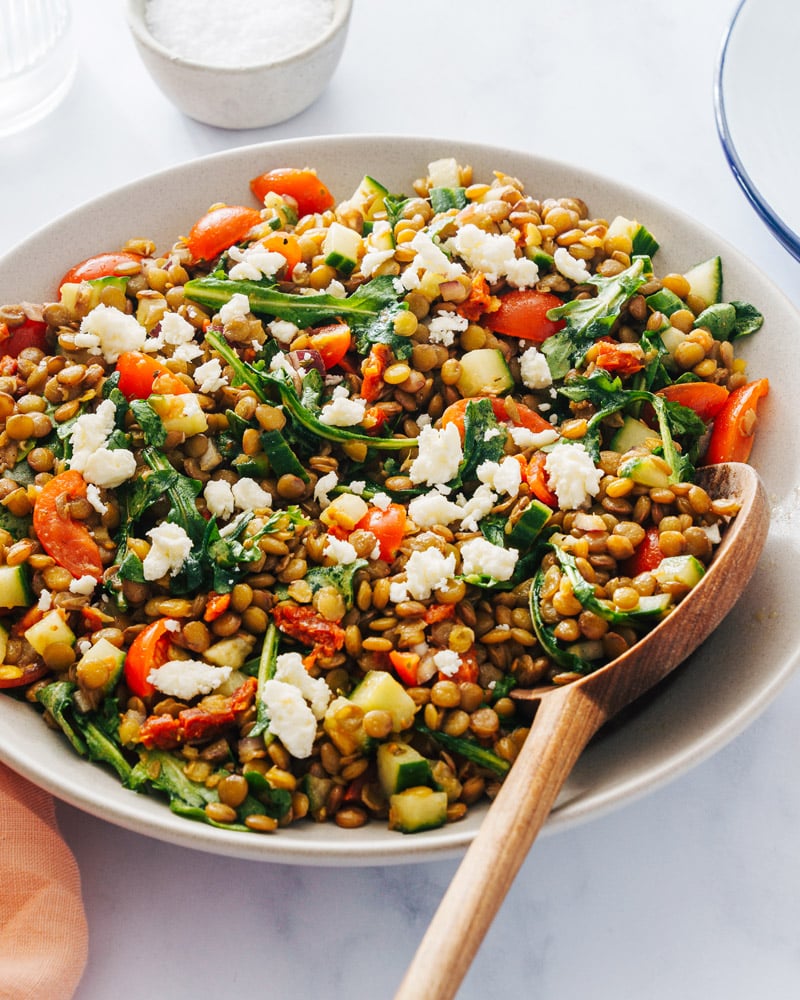
Favorite Lentil Salad

This lentil salad recipe is everyone’s favorite: bursting with flavor and texture contrasts! It’s the perfect side dish or lunch…

A Couple Cooks – Recipes worth repeating.

This lentil salad recipe is everyone’s favorite: bursting with flavor and texture contrasts! It’s the perfect side dish or lunch idea.

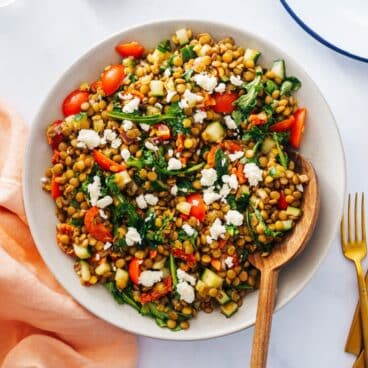
Lentil salad

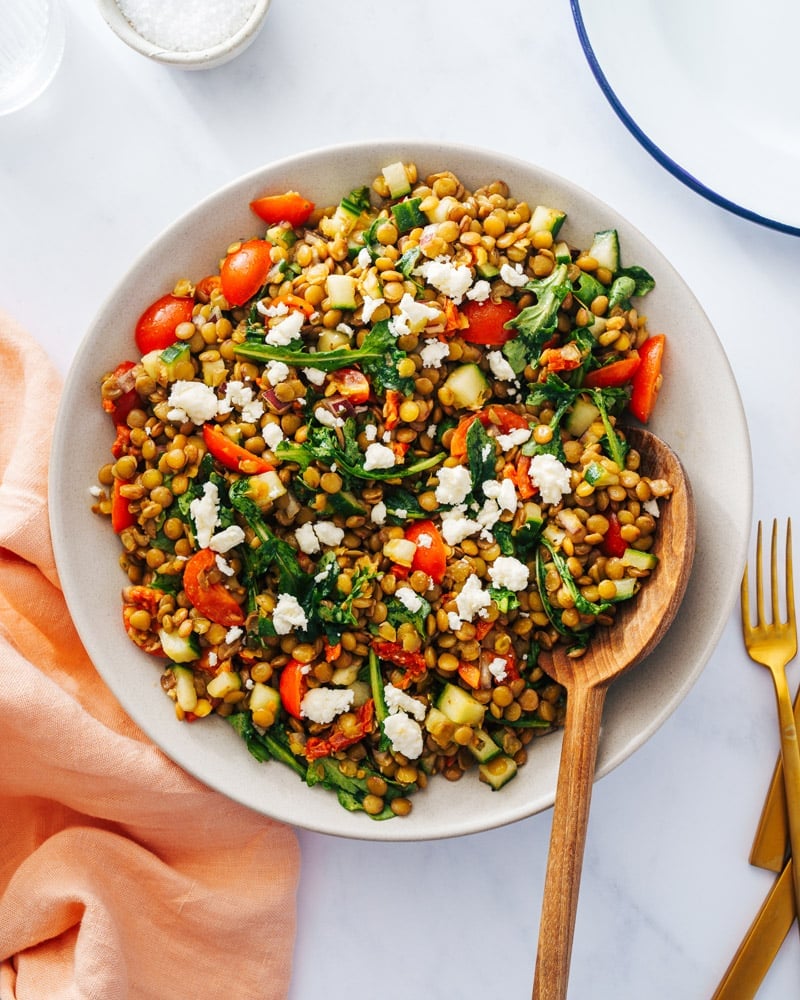
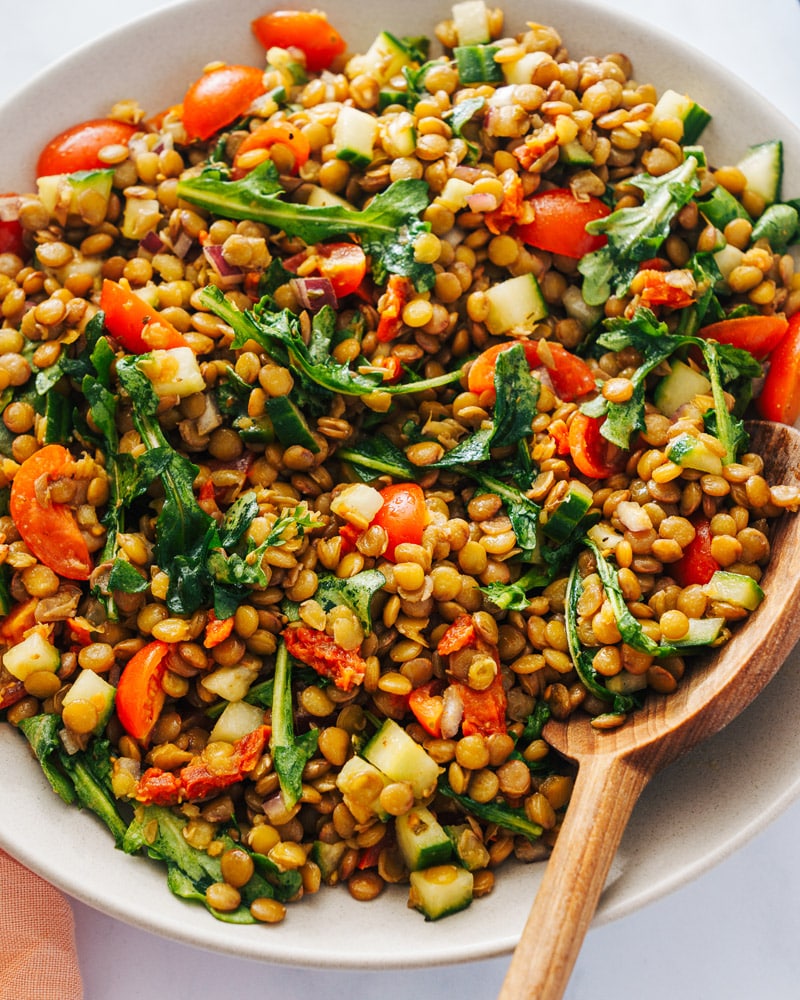
When it comes to side dishes and lunch ideas, there’s nothing quite like the humble lentil. Introducing, our family favorite lentil salad recipe! This recipe takes everything that’s good about this protein-packed legume and makes it sing. The flavor pops with tangy and savory notes: tender lentils coated in zippy white wine vinegar Dijon dressing, with crunchy cucumber and salty feta. It stays flavorful in the fridge for days, making leftovers even better.

Ingredients in this lentil salad recipe

This lentil salad recipe has classic, zingy flavors that get even better over time. This protein-packed salad is the perfect side dish, especially for vegetarian and vegan meals because it helps you to feel more satisfied than leafy greens. It’s also great as a lunch salad as it holds up well in the refrigerator: and again, that plant-based protein helps to keep you satiated all afternoon. Here’s what’s in our perfect lentil salad recipe:

  • Brown lentils: you can also use green lentils, since they cook similarly
  • Vegetable broth
  • Cherry tomatoes
  • English cucumber
  • Red onion
  • Baby arugula
  • Sun-dried tomatoes
  • White wine vinegar
  • Olive oil and neutral oil
  • Sugar
  • Dijon mustard
  • Oregano, garlic powder, and salt
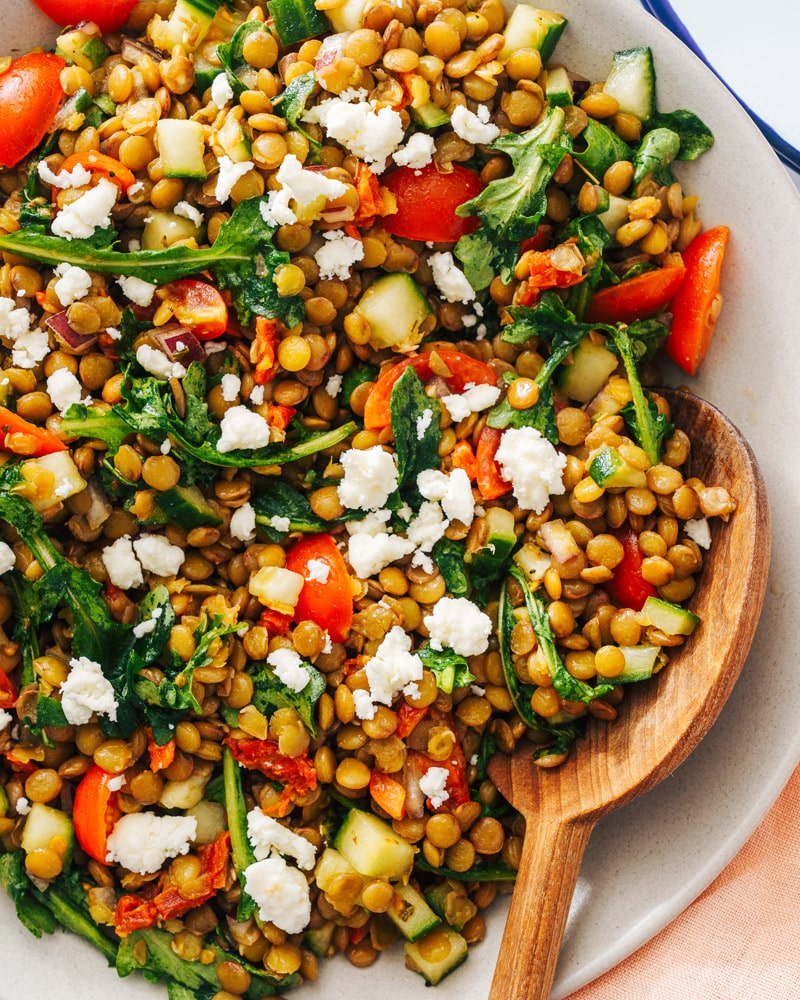
  • Feta cheese, optional
Lentil salad recipe

Types of lentils

Brown lentils are the most “standard” varieties when you think of lentils. They cook quickly and tend to fall apart when cooked instead of hold their shape. They’re brown in color and have a flat, lens-like shape. What other types of lentils work for this recipe?

  • You can substitute green lentils for brown lentils. Green lentils have a more peppery flavor than brown lentils.
  • French lentils or black lentils are smaller and hold their shape when cooked. Cook until tender using the instructions below. These also work here, though we prefer the flavor with brown lentils.
  • Do not use red lentils. Red lentils break down quickly and become mushy; they’re best for soups and stews.
Lentil salad

Key to this lentil salad dressing

This lentil salad recipe has a dressing similar to the dressing from our favorite tortellini salad recipes. The key? A combination of neutral oil and olive oil. The olive oil is as healthy oil that adds distinctive flavor, but it can solidify and become chunky in the refrigerator. Neutral oil holds up well in the fridge, so mixing it with olive oil makes the salad texture save well over time.

Leftovers taste even better

This lentil salad saves well and leftovers taste even better! The dressing marinates even more with the lentils and they soak up the flavors more. This recipe a perfect contender to make for healthy lunches throughout the week. You can also use it for “throw-together” dinners because it’s perfect for adding vegetarian protein to a plate.

Lentil salad

A lentil salad for every diet

This lentil salad recipe tastes great on its own. If you eat feta, it adds a great salty punch: but it’s not needed! Here are a few notes on diet preferences:

  • For vegetarian and gluten-free, follow the recipe below.
  • For vegan and dairy-free, omit the feta cheese. You may want to add a few more pinches of salt.
Lentil salad recipe

More lentil recipes

Lentils are one of the most versatile legumes around! Here are a few more lentil recipes we love:

Print
Lentil salad

Favorite Lentil Salad


  • Author: Sonja Overhiser
  • Prep Time: 15 minutes
  • Cook Time: 15 minutes
  • Total Time: 30 minutes
  • Yield: 6

Ingredients

  • 1 ½ cups dry brown lentils
  • 4 cups vegetable broth
  • 1 teaspoon kosher salt, divided
  • 1 cup quartered cherry tomatoes (5 ounces)
  • 1 cup finely diced English cucumber (½ cucumber)
  • ¼ cup finely diced red onion
  • ¼ cup sun-dried tomatoes (packed in oil), roughly chopped
  • 2 cups baby arugula (or chopped spinach)
  • 2 Tbsp white wine vinegar
  • 2 Tbsp olive oil
  • 2 Tbsp neutral oil (grapeseed, vegetable or canola oil)
  • ½ tablespoon granulated sugar
  • ½ tablespoon Dijon mustard
  • 1 teaspoon dried oregano 
  • ½ teaspoon garlic powder
  • ¼ cup feta cheese, to garnish (optional)

Instructions

  1. In a large saucepan, simmer the lentils with the broth and ½ teaspoon kosher salt for 15 to 20 minutes until tender. Drain them into a colander, then let them sit for 5 minutes to cool.
  2. Meanwhile, prepare the tomatoes, cucumber, red onion, and sundried tomatoes as noted above.
  3. In a medium bowl, whisk together the white wine vinegar, olive oil, neutral oil, granulated sugar, Dijon mustard, oregano, garlic powder, and ½ teaspoon kosher salt.
  4. When the lentils are cooled, mix them in a large bowl with the dressing and the tomatoes, cucumber, red onion, sundried tomatoes, and arugula. If desired, add the feta cheese (if serving without feta, taste and add a few pinches of salt if necessary). Serve immediately or refrigerate for up to 5 days. 
  • Category: Side dish
  • Method: Stovetop
  • Cuisine: American
  • Diet: Vegan

Keywords: Lentil salad, lentil salad recipe

A Couple Cooks - Recipes worth repeating.

Classic Spinach Quiche

This spinach quiche recipe has a flaky pastry crust and a savory, cheesy interior! It’s perfect for brunch or a…

A Couple Cooks – Recipes worth repeating.

This spinach quiche recipe has a flaky pastry crust and a savory, cheesy interior! It’s perfect for brunch or a light dinner.

Spinach Quiche

Want a knockout brunch idea? Try this Spinach Quiche recipe, the perfect savory pie for any occasion! This one features a savory filling with spinach and cheddar cheese, scented with garlic and just the right seasoning to make it irresistible not to take another bite. Pour it all into a flaky pastry crust and bake until puffed and golden. It’s the best idea for wow-ing a crowd at brunch, and it works as a light dinner too with a salad. This one got rave reviews over here (especially with our crust-loving 6 year old!).

How to make spinach quiche: an overview

A quiche is a French tart filled with custard and savory fillings. Leave it to the French to invent the idea of pie as a main dish! It’s become a classic brunch recipe, with spinach as one of the top vegetarian fillings.

Want to make a spinach quiche recipe? You can make this classic recipe in less than 2 hours, made completely from scratch with a homemade quiche crust. Or, you can use store-bought refrigerated pie crust for a shortcut. However, we highly recommend the homemade crust for its crispy, buttery texture: and it holds its shape better! Here’s what to expect:
Make the homemade quiche crust (or use purchased)20 minutes, active
Freeze the dough15 minutes, inactive
Blind bake the dough + make the filling30 minutes, active
Bake the quiche40 to 50 minutes, inactive
Spinach quiche

Ingredients in the spinach quiche filling

This spinach quiche filling is savory and cheesy, with just the right nuance in flavor from onion and garlic. The key? Frozen spinach, which makes this quiche easy to assemble. Cooking that amount of spinach from fresh just isn’t practical here, and the texture from frozen spinach is actually better for this application. Here’s what you’ll need for the filling:

  • Frozen spinach
  • Butter
  • White onion
  • Garlic
  • Eggs
  • Milk
  • Heavy cream
  • Dried mustard and dried dill
  • Salt and pepper
  • Shredded cheddar cheese and Parmesan cheese
Spinach quiche recipe

Tip: blind bake the crust

The biggest key to making a quiche? Blind bake the crust! Blind baking is baking a pastry crust without the filling. This makes sure the bottom won’t get soggy because the crust is perfectly firm before you add the filling. If you don’t blind bake, you’ll get soggy bottom crust (we did). Here’s what to know about how to get the perfect flaky crust:

  • Freeze the crust 15 minutes. This helps the crust to hold its shape while blind baking.
  • Prick holes with a fork all over the crust. This is called docking: it helps keep the crust from puffing up while in the oven without filling.
  • Add parchment paper then pie weights, dried beans, or rice! Pour them right into the crust. We use two sets of these pie weights. Bake for 12 minutes at 400°F, then reduce the heat to 350°F.
  • Remove the pie weights. Remove the weights and bake 20 to 25 more minutes until the crust is golden. Then the quiche is ready to fill.

Homemade vs purchased quiche crust

You can use purchased refrigerated pie dough for this recipe: but we’ve found we like homemade quiche crust much better! Why?

  • Homemade crust holds its shape better. We’ve had some issues with refrigerated pie dough holding its shape, even when blind baking! It can lose the crimping on the edges and come out looking uneven.
  • Homemade crust tastes better. It only takes a few minutes to make homemade quiche crust: and it tastes so much better! The flavor is much more developed and it’s even flakier and crisper than a purchased crust (at least the brands we’ve used!). Feel free to weigh in if you have a refrigerated quiche crust brand you love.
Spinach quiche

Make ahead instructions for quiche

Quiche saves very well: in fact, it’s even better after it’s cooled to room temperature or even cold. Here’s what to know about making quiche in advance:

  • Make the quiche 1 to 3 days in advance. Then refrigerate it until serving! You can eat it cold, room temperature or warm.
  • To reheat, warm in a 200 degree oven for about 20 minutes.
  • The quiche saves 5 days refrigerated. Wrap it in plastic or aluminum foil to keep it fresh.

More quiche recipes

Want more quiche? Here are a few more ideas for savory pies:

This spinach quiche recipe is…

Vegetarian.

Print
Spinach quiche

Classic Spinach Quiche


  • Author: Sonja Overhiser
  • Prep Time: 45 minutes
  • Cook Time: 45 minutes
  • Total Time: 1 hour 30 minutes
  • Yield: 8

Description

This spinach quiche recipe has a flaky pastry crust and a savory, cheesy interior! It’s perfect for brunch or a light dinner.


Ingredients

  • 1 Homemade Quiche Crust (made through Step 4) or 1 refrigerated pie dough
  • 8-ounces frozen spinach
  • 1 tablespoon unsalted butter
  • ¼ cup white onion, finely minced
  • 2 garlic cloves, minced
  • 4 large eggs
  • ¾ cup milk
  • ½ cup heavy cream
  • ½ teaspoon dried mustard
  • ¼ teaspoon dried dill
  • 1 teaspoon kosher salt
  • Fresh ground black pepper
  • ¾ cup shredded cheddar cheese, plus more to garnish
  • ⅓ cup Parmesan cheese

Instructions

  1. Prepare the crust: If using Homemade Quiche Crust, prepare it in the pie pan using the steps in the linked recipe. If using refrigerated pie dough, transfer the dough to the pie pan (make sure it is standard and not deep dish). Fold the overhanging dough backwards and seal it to form a rim. With refrigerated crust, it’s easiest to press in the tines of the fork to decorate the edges (like in this asparagus quiche; it’s harder to get the crimped edges to keep their shape while baking). Use a fork to gently prick holes in the bottom and sides of the crust (which helps it to not puff up while blind baking). 
  2. Freeze the crust: Freeze the crust in the pan for 15 minutes.
  3. Preheat the oven: Preheat the oven to 400°F.
  4. Blind bake the crust at 400°F: Place a sheet of parchment paper on top of the crust. Fill the dough with pie weights (we used two sets of these), dry beans, or dry rice. Bake for 12 minutes.
  5. Reduce the oven temperature and blind bake at 350°F: Reduce the oven temperature to 350°F and carefully remove the parchment and weights. Bake 20 to 25 minutes until the bottom is lightly browned (or more if necessary for refrigerated pie crust). Remove from the oven and add the filling once it is ready.
  6. Prepare the filling: Meanwhile, thaw the frozen spinach. Squeeze out all the moisture with your fingers (or use a strainer) until the spinach is dry and crumbly. In a medium skillet, heat the butter over medium heat. Add the onion and garlic and sauté for 5 minutes. Set aside.
  7. Make the filling: In a medium bowl, whisk together the eggs, milk, cream, dried mustard, dried dill, kosher salt, and several grinds black pepper. Place the cheddar and Parmesan cheese in bottom of the crust, along with even crumbles of the thawed and dried spinach and the cooked onions and garlic. Pour the egg mixture over the top. Sprinkle the top with another handful of shredded cheddar cheese.
  8. Bake: Bake at 350°F for 40 to 50 minutes minutes, until the center is set and the top is lightly browned. (Check at 30 minutes and if the crust is browning too much, add a crust guard.*) Cool at least 30 minutes, then serve or refrigerate. Re-warm in a 200 degree oven for 20 minutes. (You can also serve it cold.) Leftovers stay for 5 days refrigerated.

Notes

*You can make your own crust guard by cutting a circle out of aluminum foil to protect the crust but leave the filling uncovered.

  • Category: Main dish
  • Method: Baked
  • Cuisine: Brunch
  • Diet: Vegetarian

Keywords: Spinach quiche, spinach quiche recipe

A Couple Cooks - Recipes worth repeating.