Better Breakfast Cereal

This is going to make your mornings better. Combine entire boxes of healthful cereal into your biggest bowl, add extra oats, oat bran, ground flax seeds, and freeze-dried berries. Now you have plenty of breakfasts ready to go.

Continue reading Better Breakfast Cereal on 101 Cookbooks

I’m going to share with you a bigger, better, crunchier breakfast cereal. Also more nutritious. Some of you aren’t going to be interested in this concept at all, and that’s cool. For some of you, this is going to be a game changer. Because all of the the components are dry, your are rewarded with weeks of quick breakfasts, and you can easily scoop some into baggies for simple travel breakfasts.

A large jar filled with homemade breakfast cereal

I had been making my own dry cereal breakfast blends for months before things started to get more interesting. I started making it in increasingly larger, and larger batches. We eventually got to the point where I like to cherry-pick boxes of favorite cereals, dump entire boxes into the most massive bowl I can find, and add quick oats, oat bran, ground flax, and freeze dried fruit. After that, give everything a good toss, and transfer to two XXXL glass Weck jars. The big-batch thing is the magic. Especially if you’re at all lazy, but still want a great breakfast.
Closeup photo of better breakfast cereal

A Custom Blend: Choosing Your Cereals

I’m including the recipe down below for what I think of as my “base” cereal recipe. That said, I encourage you to use it as a jumping off point. Try not to get hung up on whether you can track down the exact cereals I use. My cereals of choice are oat flakes, shredded wheat, plus some sort of dense nugget cereal. Broadly speaking, a mix of sugar-free / whole grain / high-fiber cereals is what you’re going for. Said another way, a mix of textures, and nutrient diversity.

two bowls filled with breakfast cereal

Better Breakfast Cereal: Variations

This is the berry version (photos above and below). But there are times I do a tropical version, swapping out the berries for freeze-dried bananas, pineapple, and apples. Big flakes of toasted coconut is also a good add. You can also introduce fresh fruit when you add the milk, along with anything else you have on hand that might be a bonus.

A Big, Crunchy, Better Breakfast Cereal

More Make-Ahead Breakfast Recipes

Continue reading Better Breakfast Cereal on 101 Cookbooks

Walnut Olive Miso Magic Sauce

A chunky, walnut olive miso creation worthy of its name. You combine toasted walnuts, olives, miso, a dusting of oregano, and a dollop of tahini into a blockbuster condiment of sorts.

Continue reading Walnut Olive Miso Magic Sauce on 101 Cookbooks

While, in my book, this will forever be the original magic sauce, this chunky walnut olive miso creation is worthy of the name as well. It works its magic by making everything it goes on more delicious in a deep, savory, nutty, umami way. You combine toasted walnuts, olives, miso, a dusting of oregano, and a dollop of tahini into a chunky condiment of sorts. The tahini lends just the right hint of creaminess.

walnut olive miso sauce in a small white bowl on a marble counter

Walnut Olive Miso Magic Sauce: Ideas

When I say this boosts everything, I mean pasta and crackers, salads and soups, tarts and toasts. You think something is good? A dollop (or more!) of this will make it better. Some ideas:

Variations

This is the sort of thing that is also quite flexible. You can make it with hazelnuts, or pine nuts, or even toasted almonds. I even make it with green olives and then stir it into farro for a quick meal. Delish! You can experiment with the type of miso you use.

More Sauce Recipes

Continue reading Walnut Olive Miso Magic Sauce on 101 Cookbooks

A Lesson in Juicing

I inherited a professional juicer, juiced everything in sight, and learned some things in the process.

Continue reading A Lesson in Juicing on 101 Cookbooks

Let’s take a deep dive into all things juicing. I quite like my juicer(!), and I love the possibilities it lends to expanding the culinary palette. I enjoy the way it makes me think about ingredients in new ways. Fresh juice is invigorating – straight up, blended, or as part of whatever I’m making. That said, I’ve learned somethings over the years and will share some of that here.
A waring centrifugal juicer on a counter

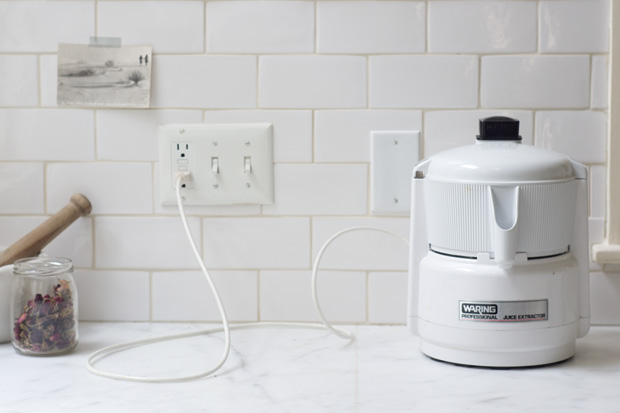
My dad gave me this centrifugal juicer forever ago. It’s a workhorse and although I’ve had my eye on one of the macerating juicers for a while now – I haven’t made the move (yet!). We’ll talk about the different types of juices down below.

The Foundation of Good Juicing

There are a couple keys to getting great juice out of your kitchen. The first (and most important) thing is to use vibrant, healthy produce. Use the best quality produce you can get. It’s important to seek out organic or sustainably grown fruits and vegetables. If that’s not happening, wash it gently, but thoroughly. The second is to get your hands on a decent juicer. We’ll get into the different types and considerations down below.

And while were on the topic, a blender and a juicer are entirely different beasts. I know this seems obvious, but the blender does chop-chop, and the juicer separates all the fibers and solids from the juices. The juicer produces essences that are incredibly intense, alive, and bright. The flavor is main-lined. In both cases beyond fruits and vegetables, you can experiment with grains and nuts (see below).

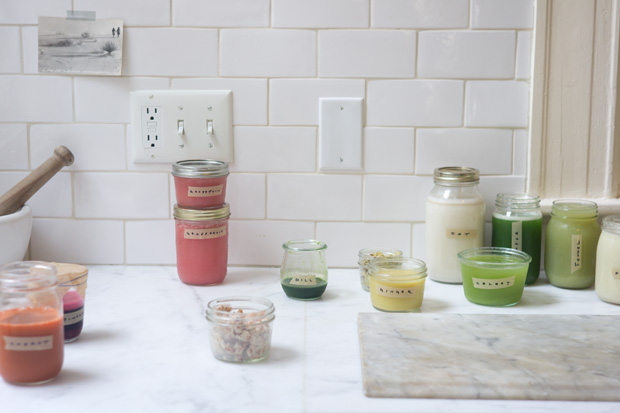
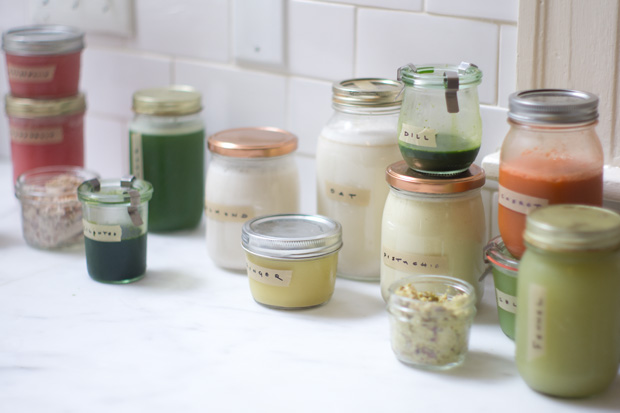
My perception is that nearly everyone seems to think using a juicer is a royal pain. Primarily the clean-up part. And that is partially true. It seems most convenient to juice in batches, set aside what you might use in the immediate future as well as the forthcoming day or two, and then freeze any juice beyond that immediately. Not as perfect as freshly juiced, but still better than no juice.
A kitchen counter after a juicing session with jars filled with different juices

A Juicer Can Work With Lots of Ingredients!

Before I dive into all the things I’ve used my juicer for, one thing I’ll add is this: read your juicer’s instructions before diving in. What works in mine might not work in your model. There are a range of different types of juicers, and a range of ways they extract juice.
Lessons in Juicing

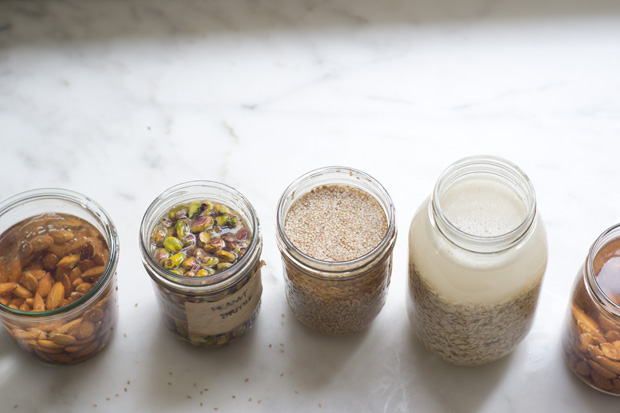
Juicing Nuts & Seeds

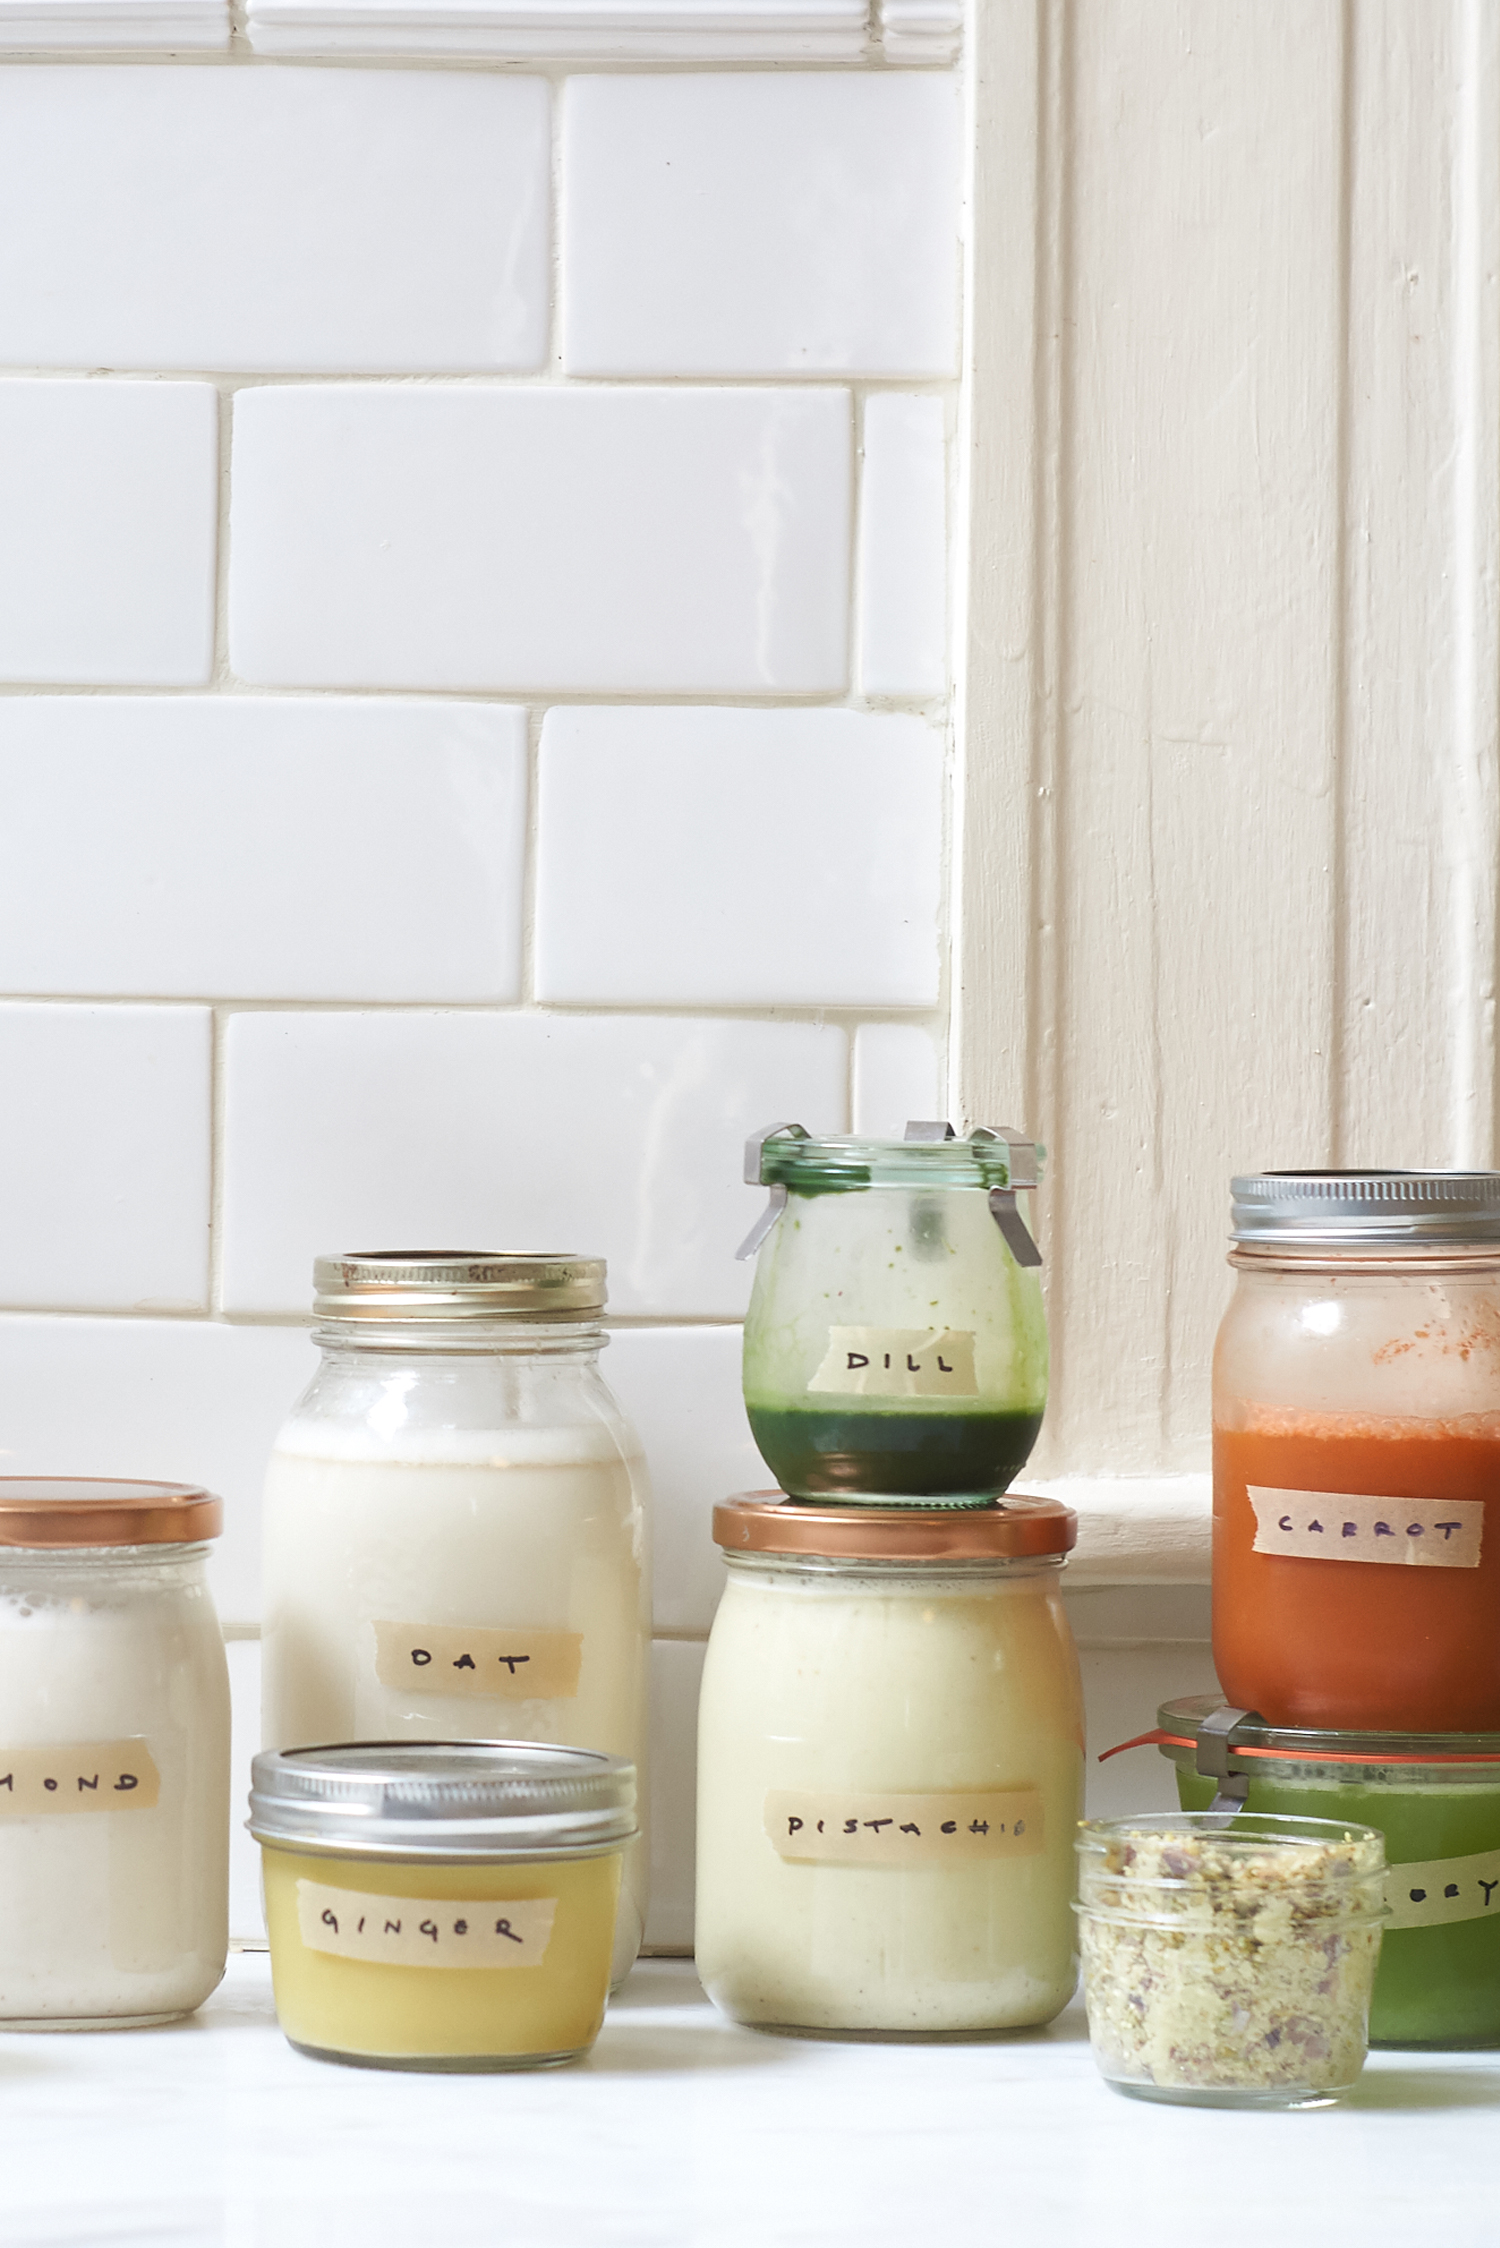
  • Almond Milk: Soak 1 cup / 5 oz almonds overnight, covered, in filtered water. Drain. Add three cups water, and ladle into juicer. This produces a full-bodied almond milk. If you like it a bit thinner, go with 4 cups water. The flavor really sings when you season it with a touch of salt and sugar. Just go with your taste buds, until it tastes good to you. Makes about 3 1/2 cups. Also, be sure to keep the meaty by-product of making the almond milk, just scrape it out of the juicer. Salt it a bit, and it’s a great homemade almond butter.
  • Oat Milk: Soak 1 cup / 3 oz rolled oats (not instant) overnight, covered, in filtered water. Drain, add 3 cups water, and ladle into juicer. Makes about 4 cups. Note to self to try a version with toasted oats. I could imagine experimenting with it as and ingredient in custards, puddings, french toast, and the like.
  • Pistachio Milk: Soak 1 cup pistachios / 5 oz overnight, covered, in filtered water. Drain, combine with 3 cups water, and ladle into juicer. This was my favorite non-fruit juice by a stretch. Really nice. I kept trying to combine it with little accents like orange blossom water, or citrus zest, but in the end I liked it best straight. Makes about 3 1/2 – 4 cups. And like the almond milk be sure to keep the meaty by-product of making the pistachio milk, just scrape it out of the juicer. Salt it a bit, and it’s a great pistachio butter.
  • Sesame Milk: Had high hopes for this one but it really didn’t work. The un-hulled seeds never broke down in the juicer.

Lessons in Juicing Ingredients in the process of being juiced

Juicing Fruits  & Vegetables

Fennel Juice: Trim the root end, but use all the rest of it. 1 large bulb = ~1 cup juice.

Carrots: 1 lb = 1 cup juice. You know, it’s just occurring to me as I’m typing this to try a carrot soup with pure juiced carrot. Use it to make the silkiest, brothy carrot soup ever.

Celery: Lob off the root end and use the rest. And I didn’t bother stringing. 1 medium bunch = 1 1/2 – 2 cups juice. I’m enjoying using the celery juice as a component in all things brothy. The fennel juice as well, but to a lesser extent.

Cucumber: Juice it all. And leave the skin on, it lends a nice color. 1 large (8 oz) cucumber yields about 1 cup of juice. Super cooling.

Cilantro: 1 big bunch, leaves and stems = 1/3 cup juice. I threw a couple serranos (deveined and deseeded) into the juicer here as well for a spicy version. You just know it’s going to be good swirled into yogurt or creme fraiche and spooned into a bowl of roasted tomato soup!

Dill: 1 large bunch (stems and fronds) yields about 3 tablespoons juice. Equal parts dill juice + olive oil and a pinch of salt has been great over greens, savory pancakes, and eggs this week. I imagine like the other intense herb juices, it would be welcome as a vinaigrette component, drizzled over gratins, and tarts as well.

Lessons in Juicing A rainbow of juices in jars

Ginger: 8 ounces unpeeled yields about 3/4 cup ginger juice. Freezes quite well. I’ve been using in teas, broths, citrus juice (grapefruit-ginger is my favorite), dipping sauces, etc.

Grapefruit: 1 large = 1 cup juice. I could live on this during the winter.

Pomegranate: I’m not sure I’d recommend using a juicer here. Mine definitely wasn’t happy. That said, the resulting juice is electric – straight-up incredible. Juice the seeds only, but review your juicer’s guidelines before an attempt. 1 large pomegranate = ~ 1 cup of seeds = 1/3 cup fresh juice.

Sidebar: Pomegranate Juicing Tips

In the comments Elise weighed in about juicing pomegranates, “…regarding pomegranate juicing, my parents have a huge pomegranate tree which produces a gazillion poms every fall. My mom juices most of them. The fastest way is to cut them in half horizontally, and put them in an orange press. This is what we do when we are overwhelmed with the number of pomegranates to juice. What my mom usually does however, is to carefully extract the seeds from the pomegranate, and place them in a blender. Pulse a couple times, just enough to break through the arils, but not enough to pulverize the hard tips of them. Those harder pieces tend to sink to the bottom of the blender. She pours out the juice through a strainer to catch any remaining hard bits. Works great!” Thanks Elise!

Jane also has this insight, “Gently squeeze and massage the whole pom until it feels softened. Avoid breaking the skin. Cut a 1″ hole in the blossom end and just suck out the juice. I grew up in Florida also doing this with oranges.”
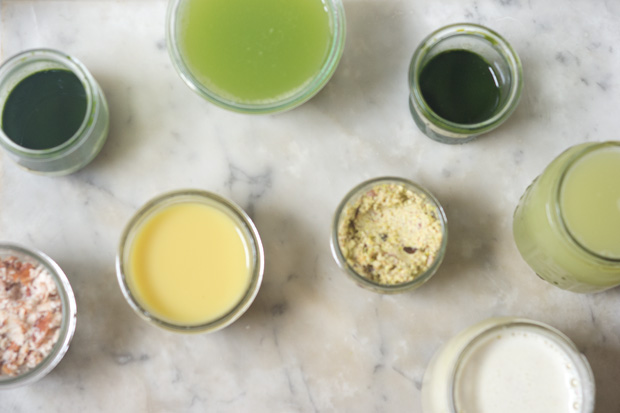
Juice Combinations

Here are a few juice combinations I love. I’m also going to include a bunch of the amazing juicing recipes you posted to the comments. I’ll put those in the recipe section down below. 

Pistachio Milk: 1/2 cup pistachio milk, 3/4 teaspoon honey or sugar, 1/8 teaspoon sea salt, tiny pinch of ground clove. But like I said up above, this is really good straight.

Spicy Carrot: 1/4 cup carrot juice + 1/4 cup almond milk + 1/16 teaspoon cayenne + 1/2 teaspoon ginger juice + 1/8 teaspoon fine grain sea salt + 2 tablespoons celery juice.

Pomegranate Almond: 1/4 cup pomegranate juice + 1/4 cup almond juice + 2 drop rose water + pinch of salt, 1 teaspoon lemon juice + sweeten to taste.

Cucumber Celery: 1/4 cup cucumber + 1/4 cup celery + 1/16 cayenne + pinch of salt.

More Juicing Recipes

What To Do With Juicing Pulp?

Juicing leaves you with a lot of pulpy, fiber-rich, by product. A lot of people like to mix this into their muffin and quick bread batter. I’ll add that you can freeze it until you’re ready to use it. There were also some great suggestions in the comments.

  • Rita shares,”…I was also wary of the waste of all the pulp. But you can use it as a filling for wraps, etc. if you add a little nut mayo and seasonings. You can wrap it in a raw cabbage or collard leaf. It’s delicious!”
  • Jonc says,” I use the pulp from the Omega 8006 to make baby food.”
  • My sister has an actual juicer and saves all her “pulp” to make to most amazing veggie burger patties! they are sooo good and nothing goes to waste. I guess if you have chickens or a great compost those are perfect uses for the pulp too.” Love these ideas shared by Kari.

What Kind of Juicer To Buy?

Broadly speaking. There are a number of considerations when deciding which juicer to buy. There are juicers that are centrifugal (like mine, pictured at the top) and others that are macerating. And then there are the high-powered blenders (for example: Vitamix). Blenders turn whole fruits and vegetables into milks and smoothies – different thing from the juicers altogether. The macerating juicers are able to really get an amazing amount of juice from ingredients, leaving you with a dry-ish pulp. Each option comes with a range of price points, but broadly speaking masticating juicers seem to be larger and more spendy. A lot of you have juicing opinions -here’s a list of some that might be helpful.

  • A lot of people love the Brevile. Brittany cites, “I’m obsessed with my breville juicer.” Julia weighs in with, “ received a Breville as an engagement gift and fell in love! The clean up is easy peasy and the combo of pink grapefruit, lemon, lime and orange is heaven in the winter.”
  • Daniella weighs in, “I love our juicer! We just got the Breville one over the holidays and we’re obsessed. Ours is really quite easy to clean up as well. I don’t mind it at all! I’m really liking juice better than smoothies… no seeds and no jammed blender anymore!”
  • A counter point from Jonc, ”I have an Omega 8006 juicer. Love it to death. We also have a Vitamix 5200. Love it to death. Had a breville. Don’t use it anymore.”
  • Then there is the Vitamix camp. This is a bit of a different beast because you’re blending, not really juicing perse. Eadie states, “I’m in the vitamix camp, love my vitamix for all the nutritional reasons (fibre, extra nutrients otherwise lost in the pulp) and generally begin my day with a veggie based smoothie.”
  • Angela says, “After spending some time with my VitaMix, I “moved up” to an Omega juicer and really love it – love making nut milks as well as fruit and vegetable juices. I mostly use it for green juices to drink, but have made some really exquisite compound vegetable sauces by cooking any particularly succulent, seasonal vegetable in it’s own juice and then pureeing.”
  • Sun mentions the Nutri-bullet, “Nutri-bullet, which creates ‘smoothies’ – not “juice” specifically. This gadget is about 1/2 the size & we use about 1/3 of the quantity of fruits/veggies. I still miss some of our “juice” blends but for those wanting a quicker option, here ya go.”
  • Jack LaLane represent in the comments as well. Julie shares,”I have a Jack LaLane juicer that will juice a “rock” Love it!”
  • Ellen says, “I love my Hurom Slow Juicer. It does an excellent job of extracting juice from fruits and veggies, leaving behind very dry pulp, especially compared to the Jack LaLanne juicer that I had prior to investing in the Hurom.”
  • Rita, “I have an Omega VRT and I love it. It’s very much like the Hurom juicer. Super easy to clean, I leave it on the counter and use it at least once or twice a day.”
  • Related, Josh G says, “My wife and I use the Hurom slow juicer and it is amazing. It has approximately 5 parts and is super easy to clean. From chopping to cleaning its altogether 15-20 mins. It has become part of our day and a great energy shot in the mornings.”
  • I love this note from SA, “…next time you’re in Turkey, or anywhere in the Middle East, find a hand cranked heavy duty juicer at the flea markets. They work absolutely best with pomegranates. By the way, by juicing only the seeds of a pomegranate, you lose most of the nutrition they carry. Like an orange, all the good stuff is in the bitter peel. So actually juicing like an orange is the way to go anyway.”

So, as you can see, people are passionate about their juicers! If you’re in the market really dive in and research how you imagine using it. I’ve read good things about the Nama J2. If I was looking to purchase something on a budget, I’d have a closer look at the Tribest Shine. I’ve also noticed the Hurom Slow Juicer has a new “easy clean” model (2023). So, set a budget, think about how it will work within your lifestyle, and go from there! You can keep en eye out for refurbished models at a discount or wait for sales that seem to come around a few times per year.

Lastly. if you’re a juicer, this is a plea to let me know what you use yours for the most. You’ve already proven to me that a good chunk of you don’t allow your juicer to collect dust! Adding a note here (years after the initial post!) – your hundreds of suggestions in the comments are amazing. I’ve threaded some back up into the post, but keep them coming!

Continue reading A Lesson in Juicing on 101 Cookbooks

Heather’s Quinoa

A one-skillet quinoa recipe – quinoa, corn, chopped kale and pan-toasted tofu tossed with a big dollop of pesto and finished off with a few roasted cherry tomatoes.

Continue reading Heather’s Quinoa on 101 Cookbooks

This quinoa recipe is an odd bird of sorts, but it was so well received that I thought I’d share it with you. Heather, my sister was on her way over for lunch. Wanting to avoid a trip to the store, I committed myself to throwing lunch together using whatever I had on hand. 
Big plate of quinoa with tomatoes, pesto, and pepitas
Now, I rarely combine tofu with Italian-style sauces, but this (and a few other questionable culinary moves) came into play as I reached for ingredients from both fridge and freezer. Working toward a nutritious, somewhat balanced, in-the-realm-of-healthy main course here’s where I ended up. In a sentence – a skillet of quinoa, corn, chopped lacinato kale and pan-toasted tofu tossed with a big dollop of pesto and finished off with a few roasted cherry tomatoes.

Roasted cherry tomatoes on a baking sheet
I’ve cooked this many times in the years since, and it’s a great late-summer recipe that comes together quickly, especially if you keep a few of the components on hand. For example, I like to keep big jars of roasted tomatoes at the ready. Toasted pepitas are often in a bowl on the counter. And at some point during any given week there is leftover quinoa.
pepitas toasted on a baking sheet

Heather’s Quinoa: Variations

There are infinite ways to switch this up. If I have paneer cheese on hand, I like to swap that in for the tofu. You brown the paneer in a skillet, the same way you would tofu, and it gets nice and sizzly. So good.

And while you can certainly swap in a wide range of grains here – rice, millet, etc. – I love it with quinoa. You see it pictured here with tri-color quinoa, but I often make it with the white variety. Th recipe calls for three cups of cooked quinoa, if you’re not sure how to make it, here’s a page with my preferred method of how to cook quinoa.

Pepitas are my go to for crunch. Seconds choice is toasted cashews (chopped  just a bit).

Big plate of quinoa with tomatoes, pesto, and pepitas
If you want to make this even more substantial, you can add in a couple hard boiled eggs, sliced into quarters, around the perimeter. 
Big plate of quinoa with tomatoes, pesto, and pepitas

I hope you enjoy this one as much as we did. The first time I made this was in 2008, and we still make it regularly. Especially when it is peak pesto season and cherry tomatoes are abundant. 

More Quinoa Recipes

Continue reading Heather’s Quinoa on 101 Cookbooks

Hand-Rolled Pici Pasta

Pici is one of the most charming pasta shapes. It is a quirky favorite requiring a short list of simple ingredients hand-rolled into long, slightly irregular strands. Pici love forever.

Continue reading Hand-Rolled Pici Pasta on 101 Cookbooks

Pici is a Tuscan form of spaghetti-style pasta typically made from flour and water. Arguably one of the most charming shapes in the pasta kingdom, it is shaped by hand and is quirky, irregular and purposefully imperfect. Three of my favorite qualities in both people and cooking. If you’re intimidated by the thought of making fresh pasta, it’s a great shape to start with.

Strands of pici pasta on an baking sheet
How it works. To make pici you combine flour(s), warm water and salt, mix it in tough a dough, and knead it into a smooth ball of pasta dough over the course of a few minutes. Let the dough rest for 45 minutes or so, lob off a hunk of it and then section that into little strips of dough to be rolled into long strands using your hands. There are process photos below to demonstrate the shaping process. But, if you can make a skinny snake shape with Play-Doh, you can make pici.
Pici on a white plate with garlic, tomatoes, breadcrumbs and chives

Pici: Let’s talk Flour Types

You can find pici made with semolina flour, 00 flour, all-purpose flour or a blend of all of these. Over the years I’ve made it with all of the above, experimenting with different ratios, typically coming back to the recipe I’ll share today. It combines equal *weights* of semolina flour and either “00” (or all-purpose flour). This dough is a pleasure to work with. Rolling it out is a breeze. You end up with delightful strands of hearty, tender, slurp-able, sunny-shaded yellow pasta noodles. 
A single strand of pici on a marble countertop
Pici made with 00 flour results in a much softer, looser, tender pasta dough (pictured below). The noodles picture below were made using 350g “00” and 175g warm, salted water. They are pale in color, lacking the yellow of the semolina flour. They can be a bit fussier to roll out. If you go this route, keep extra flour at the ready to counter any stickiness. Alternately, use spritzes from a spray bottle of water if you need to add moisture to your dough a bit at a time.
Pici pasta tangled on a marble countertop
Generally speaking, my advice? Once you get a feel for the dough play around with the ratio of flours. More semolina is going to give you more heartiness and structure. More 00 or unbleached all-purpose flour will deliver a softer, more refined dough. I like a good amount of semolina in my pici dough, especially if the weather is cooler and I’m pairing it with a hearty sauce. The ratio I use most often, and the one reflected in the recipe below is equal *weights* of the following: semolina flour, 00 or all-purpose flour, and salted water. And I just want to emphasize that we’re talking equal weight, not volume.
A hand holding strands of pici pasta

Pici is traditionally made without egg, but many people make it with egg dough too. For reference, 93 year old Giuseppina Spiganti’s pici is featured in Pasta Grannies. She uses 00 flour and one egg in her pici dough. Missy Robbins references an egg dough for the pici in Pasta, also made with 00 flour. Paul Bertolli makes pici eggless in Cooking By Hand. And Jodi Williams and Rita Sodi use a blend of 00 and semolina flour with no egg in Via Carota. The pici I encountered in Siena was most often made from flour and water only. I most often go the no-egg route for pici. But, there are definitely times when I have some straight-forward pasta dough on hand, made with egg, and decide to shape some pici. Guess what? It’s all wonderful.

How To Make Pici: Step by Step in Photos

The great thing about pici is you don’t need any special equipment to make it. It’s a fantastic family activity – everyone loves to hand-roll this pasta. Precision isn’t what it’s about – the charm of pici is that they are perfectly imperfect. The one thing I would be mindful of is this. Err on the side of thinner versus thick pici. They will swell a bit when cooking, and when they are too thick the texture is off and timing can be tricky when cooking. Also, broadly attempt to make them the same-ish thickness. Don’t obsess over it, but you want them to cook in the same amount of time.
pasta dough on a marble countertop
Above: pici dough rolled out about 1/4-inch thick and cut into strips.
Hands rolling a strand of pici pasta
Use hands to roll pici. Start in the center and work outward.
Hands rolling a strand of pici pasta
If your dough is being cranky, i.e. not wanting to stretch, set that noodle aside for a few minutes to rest while you move on to another. Come back to it.
Hands holding pici
How long? I tend to make my pici on the longer side. My intention is to be able to arrange them across my largest baking sheets (dust well with flour to prevent sticking), but more often than not they hang over.
Many strands of pici pasta on an baking sheet
If you’re not going to cook the pici right away, coax any overhanging noodles back onto the pan, cover with plastic wrap, and refrigerate for up to one day. You can dust pici well with flour, and arrange into nests, but arranging pici like this is a safer bet if you’re concerned about your pasta nest clumping together when you go to cook. 
Hands holding up a piece of piece pasta before cooking

Pici: Sauce Pairings

I love pici with this mushroom ragu. Especially in the winter and fall. You see it served traditionally with meaty ragu-style sauces and mushrooms. I don’t do the meat side of things, but lean in hard on the mushrooms. In summer, I’ll lighten things up a bit with whatever looks great and in-season at the farmers’ market. Here are a few recent pici sauce pairings we’ve enjoyed. I’ll add more over time. Some, not at all traditional, but super tasty nonetheless!
Pici on a white plate with garlic, tomatoes, breadcrumbs and chives

  • Pici with Oven-Roasted Cherry Tomatoes and Breadcrumbs (pictured above): Toss halved cherry tomatoes in some olive oil and roast in a 375F oven until blistered. Rip some good sourdough into tiny shreds, toss with some garlic and olive oil, and bake until crisp as well (while you’re doing the tomatoes) – crush these with something heavy, and make them your breadcrumbs. Gently saute 4-5 cloves of chopped garlic in 3 tablespoons of olive oil over medium low heat in your largest skillet. Just to soften, not to brown. Remove from heat and stir in some crushed red pepper flakes, good black pepper, and zest of one lemon. Cook the pici until tender and add to skillet along with a ladle full of pasta water and some freshly grated pecorino or Parmesan cheese. Stir until well coated and then turn out onto a platter. Top with roasted tomatoes, breadcrumbs, and whatever herbs you have – in this case I snipped some chives from the garden.
  • Pici with Chopped Mushrooms and So Much Garlic: Sauté sliced mushrooms in a skillet over high heat in some olive oil + butter and salt. Once deeply browned stir in 5 cloves of chopped garlic and remove from heat after 20 seconds or so. Remove just the peel from a (Meyer) lemon and slice into thin slivers, add this to the hot pan with tons of freshly ground black pepper, and a handful of freshly grated Pecorino cheese. Add pici to skillet along with a ladle of pasta water, stir well until pici is coated and serve topped with chives.

Pici tangled on a flour-dusted counter

More Pasta Recipes

Favorite Pasta Sauces

Other Favorite Italian Recipes


Continue reading Hand-Rolled Pici Pasta on 101 Cookbooks

Turmeric Chickpeas with Garlic Tahini

A quick lunch. And a compelling reason to always keep turmeric chickpeas on hand!

Continue reading Turmeric Chickpeas with Garlic Tahini on 101 Cookbooks

This was a quick, clean out the refrigerator lunch, and a compelling reason to always keep some of these turmeric chickpeas on hand. Turmeric Chickpeas with Garlic Tahini – simple, filling, and all-around good.

Turmeric Chickpeas with Garlic Tahini in a Bowl

With the tahini under-dressing and the broccoli situation, we’re not that far from this Curried Sheet Pan Broccoli. But here there’s no oven involved, and there’s the special chickpeas, and then whatever other green things you might have at the ready in your refrigerator. The whole thing is pretty loose, I mean you can toss pretty much anything on top of the tahini sauce, and it’s a yes.

More Chickpea Recipes

Continue reading Turmeric Chickpeas with Garlic Tahini on 101 Cookbooks

Green Bean Salad with Peaches

This green bean salad with peaches can anchor many summer meals. It features caramelized onions, toasted nuts, dates, a jolt of serrano pepper and a unifying oregano-garlic drizzle.

Continue reading Green Bean Salad with Peaches on 101 Cookbooks

If you’re looking for the perfect side situation for all your summer meals, this green bean salad with peaches could be it. Plenty of caramelized onions, peach chunks, and toasted nuts make this salad seem a bit decadent. And then the heat of a serrano chile pepper along with a drizzle of strong oregano-garlic oil levels up the flavor in unexpected ways. Basically, it’s what I’ll be making with all my green beans in the coming weeks. It’s peak summer deliciousness.

green bean salad with peaches, nuts, caramelized onions in a pink bowl

Green Bean Salad with Peaches: The Ingredients

Here are a couple pointers as you’re sourcing ingredients for this recipe.

  • Green Beans: Look for tender green beans. I used green beans here, but I also look forward to making it with the beautiful yellow string beans we are starting to see at the market this time of year. Either will work beautifully. If I have extra time, I like to trim the tops and tails from the beans, cut them into bite-sized segments, and (extra credit) split them in half along the length. See photo above.
  • Nuts: You see toasted pine nuts used here. Toasted almond slices are also wonderful along with the peaches, and I can imagine toasted walnuts or pecans working well if you shifted into a late summer version of the salad. You could swap in roasted tomatoes for the peaches, etc.

ingredients for green bean salad arranged in small bowls

  • Peaches: Aim for ripe, flavorful peaches that aren’t overly soft. You want them to maintain structure when tossed with all the other ingredients.
  • Fresh oregano: You can also substitute fresh marjoram if that is what you have.

two peaches on a marble counter

The Garlic-Oregano Oil

This is the magic component here. I have you make more of this oil than needed because you’ll never want to be without it. It’s perfect drizzled on just about everything. Drizzle on grilled vegetables, quesadillas, tacos, baked pastas, fresh pastas, bean dishes, green salads. I could literally go on forever.
green bean salad with peaches, nuts, caramelized onions in a pink bowl

More Salad Recipe

Spicy Sesame Coleslaw

Coconut Corn Salad

Quinoa Salad

Cucumber Salad

Heirloom Tomato Salad

Summer Fruit Salad

– more salad recipes


Continue reading Green Bean Salad with Peaches on 101 Cookbooks

Otsu

You have to try this one! Soba noodles are tossed with a fiery ginger-sesame dressing and a generous amount of cucumbers, scallions, and pan-seared tofu. For over twenty years this has been a desert island recipe in our house.

Continue reading Otsu on 101 Cookbooks

The last time I worked on this page was the day it was published here – July 19, 2004! We still make Otsu regularly, especially as the weather warms, and I thought this favorite deserved some fresh photos and a little update. I originally sold this recipe hard and asked you to “listen up close, because I am going to tell you about the best recipe I’ve come across all year.” Lol. Bold! Twenty years on though, I stand by this sentiment. It’s a great recipe, and here’s the story behind it.

otsu noodle bowl with soba, cucumbers and tofu

July, 2004 – A couple weeks back Wayne came home, pulled a page ripped from a magazine out of his pocket, unfolded it, and placed it on my desk. It was a recipe for a dish named Otsu, and was from a neat little restaurant nearby called Pomelo. Pomelo is tiny — and when I say tiny, I mean it is smaller than my kitchen here at home, the kind of place where you feel as if you can almost reach out and touch all four walls. The food there is delicious, and unless you are sitting at one of two tables, you will get to see your food prepared to order on a four burner stove as you sit at a stylish little counter overlooking the kitchen. We go to the Pomelo on Judah, there is another one on Church Street, and I think that one may be bigger.
ingredients on counter including soba, cucumber, dressing, cilantro, green onions

Otsu in Japanese can mean something is strange; quaint; stylish; chic; spicy; witty; tasty; romantic. In line with its namesake, this buckwheat noodle salad has a few distinctive sides to it. It is amazingly flavorful. It is substantial. And it has a feisty kick to it while being cool and refreshing at the same time. The noodles are tossed with a cayenne-spiked ginger-sesame dressing plus lots of cucumbers, scallions, and pan-seared tofu.

close-up photo of soba noodles

Otsu is great in so many scenarios! Lunch, dinner, potluck, picnic, warm or cold — this salad is going to be a hit. After you eat a serving of Otsu, you feel full but not sluggish, and you are ready to get on with your day.

plate of otsu on table with soba, cucumbers and tofu
The recipe was published in a publication called Culture & Cuisine. I wanted to share the recipe with you all so I emailed Rolf Bachmann at Pomelo and he was generous enough to give me permission. Enjoy!
otsu noodle bowl with soba, cucumbers and tofu

More Noodle Recipes

Continue reading Otsu on 101 Cookbooks

Shredded Un-Chicken Salad

A vegetarian take on the Chinese chicken salad of my youth. Toss shredded lettuces and cabbage, lots of cilantro, green onions, and the protein of your choice with a strong sesame-soy dressing punctuated with the bite of hot mustard. Forever one of my favorite salads.

Continue reading Shredded Un-Chicken Salad on 101 Cookbooks

This has been an evolving recipe over the past twenty years and I think it *finally* nails all the notes I love in a great Chinese chicken salad. Specifically, it’s a vegetarian take on what I think of as the amazing Chinese chicken salads of my youth, circa the 1980s. This version includes all my favorite components – the awesome super-strong hot mustard & sesame-soy dressing, the pile-it-on approach to cilantro, the scallions and toasted nuts. Then, with this version, you introduce some sort of alternate protein (or plant-based chicken). The whole situation is compiled into a feathery, light mountain of deliciousness.
vegetarian version of chinese chicken salad recipe - salad served in a large, wide bowl

Protein: You Have Options

In place of shredded chicken, in the traditional version, you have options. I’ll be honest and say, I’m not a huge fan of the highly-processed plant-based meats available, but there is one brand of plant-based chicken Wayne buys on occasion. This one – green bag, original (*not sponsored). I occasionally reach for it, especially in a recipe like this one, when I’m really chasing the nostalgia. Anyway, it’s the best I’ve tasted. Alternately, if you’re willing to let go of the chicken angle – a hard-boiled egg, or a bit of pan-fried tofu is all you need to make a one bowl meal of things.
ingredients for shredded un-chicken salad arranged on a countertop

On The Go: Shredded Un-chicken Salad in a Jar

This makes a great on-the-go salad. Here’s the plan. Place the lettuce / cabbage mixture in a large jar, with the plant-based chicken, egg or tofu tucked into that jar as well. The dressing should go in a separate jar, and a little side container is the way to keep the nuts crunchy. Deploy a little ice pack. Then when you’re ready, a quick toss, and you’ve got a beautiful, vibrant salad. It’s a good one for work, or picnic, or potluck.

ingredients for shredded un-chicken salad arranged on a countertop


One More (optional) Component

There was always a crunchy component to the chicken salads I love most as a kid. It was either tons of strips of fried wonton wrappers or fried thin rice noodles (vermicelli). I don’t love deep frying, so I normally skip this component when I make this salad at home, but you can certainly add it if you like.
vegetarian version of chinese chicken salad recipe - salad served in a large, wide bowl
The photo above is the version I made yesterday using plant-based chicken, apples, and cashews along with shredded cabbage, arugula, and little gem lettuces. And the version below is from a few years back. You can see there’s a bit of radicchio, sprouts, peanuts, and some watermelon radishes. This is a long way of saying, you can play around with different components of this salad based on what you have on hand. The dressing really brings is all together!
vegetarian version of chinese chicken salad recipe - salad served in a large, wide bowl

More Salad Recipes

Few people love a shredded salad or slaw more than me. So, if you’re ready to show off your knife skills here are a few favorites.

vegetarian version of chinese chicken salad recipe
Enjoy and let me know in the comments if you land on any adaptation that you like in particular!

Continue reading Shredded Un-Chicken Salad on 101 Cookbooks

Tofu Scramble

This tofu scramble is fast, flavorful, and a wonderful egg-free savory breakfast. Made with spinach, curry powder, nutritional yeast, garlic, and onions, this is the version we’ve been making for years!

Continue reading Tofu Scramble on 101 Cookbooks

Tofu scramble — two words that trigger visions of 70s-era hippie cookbooks, but also the college town vegetarian cafes of the 80s and 90s. And I’m here for it. Still! After all these years. A tofu scramble is a great savory breakfast or brunch option, and deservedly more popular than ever. There are endless variations out there, but more often than not, I stick close to the spinach-flecked version I’ve been making most of my adult life. It is flavor-packed with curry powder, starts with a simple onion-garlic base, and comes together in no time.
tofu scramble with skillet potatoes in a bowl

A Bit of Context

As someone who has lived nearly my whole life in coastal California, tofu scrambles have always been around. Or, that’s how it has felt. I associated the tofu scramble with the vegetarian and vegan diets popular among hippie communities of the 1960s and 1970s. Over the years, tofu scramble recipes were published in niche cookbooks and counter-cultural books that became immensely popular – for example, Diet For a Small Planet, Rebar: Modern Food Cookbook, The Tassajara Recipe Book, The Modern Vegetarian Kitchen, and Vegetarian Cooking for Everyone. Newspapers and magazines increasingly published tofu scramble recipes in the 1980s and 1990s and the popularity of the preparation expanded. Then the internet came along and boosted the reach to new audiences more rapidly through blog posts and socially networked videos, and here we are!

Why are tofu scrambles increasingly popular?

People seem to be looking to replace what is familiar to them with meat-free alternatives to traditional breakfast dishes. As people aspire to increase the number of plant-based meals into their lives, an eggless scramble is a satisfying, hearty, and versatile vegan breakfast option that can be customized to suit a wide range of taste and dietary preferences. It’s high in protein, delicious, and (when done well) packed with flavor.

Switch it up!

Think of it this way, a tofu scramble is a great vegan alternative to scrambled eggs. If you miss the taste and feel of scrambled eggs, a tofu scramble can be a great alternative. The word “scramble” is misleading in this context, because you’re not scrambling eggs in this case, but you get the idea. Even if you do eat eggs, this recipe is worth a try. It’s a versatile alternative, and an all-around crowd-pleaser. But, honestly, you don’t need to think of it as an alternative to anything. It’s just a delicious something to eat in its own right. And! It’s a great one-pan camping recipe, and clean up is a breeze.
spinach and tofu ingredient on plates

Secrets To Making a Great Tofu Scramble

For this tofu scramble recipe, there are a few things to pay attention to.

  1. Buy extra-firm tofu: For this recipe, go with extra-firm tofu. Keyword is extra.
  2. Press the tofu: The goal here is to confidently press as much liquid from the tofu as possible. Wrap the tofu in a clean towel, or bundle of paper towels until all the extra moisture is gone. Some people have  If you the patience to let the tofu sit under a press for a long time, but typically that’s not me. Sourcing extra-firm tofu, and a quick press is all you need for this scramble.
  3. Use strong seasoning: Perceived blandness of the tofu is one of the common criticisms leveled against a tofu scramble recipe. Tofu can be a beautiful ingredient, simply prepared on its own, but in this case we’re looking to super-charge it with color and flavor. Use a favorite curry powder, and be sure to season the scramble to taste prior to serving with salt. This little step makes all the difference.
  4. Add seasonal vegetables: One of the great things about a tofu scramble is the versatility. In this recipe I feature spinach as the vegetable. It brings, color, nutrition, and diversity to the scramble, but I encourage you to use what is available and in season. You can all other quick cooking vegetables along with the spinach or in place of it. Asparagus, broccoli florets, cabbage, cauliflower florets, zucchini, and cherry tomatoes are all great options.

tofu scramble ingredients on a table

Key Tofu Scramble Ingredients

  • Tofu: This recipe calls for extra-firm tofu. It crumbles into curd-like clusters, mimicking the shape and texture of a well-cooked scrambled egg. There is an argument for experimenting with silken tofu here. Silken tofu lends a creamier, loose texture to a scramble. There is a technique to cooking a tofu scramble with silken tofu, I hope to feature here in the near future. For this recipe, extra-firm is the key.
  • Spices & Seasonings: No one loves a bland scramble. Spices and seasonings are the key to a great tasting version.

chopped onions and garlic cooking in a large skillet
I made this scramble the other morning while we were camping. It’s the sort of one-pan meal I love when I’m cooking on a small stove.
onions, garlic, curry powder cooking in a skillet
Here you see the onions and garlic cooking in the hot pan. The curry powder is sprinkled into the pan and it smells absolutely amazing!
tofu scramble ingredients cooking in a skillet
Then the tofu is added. You can see the size of the crumble here in this picture. How large or small you crumble the tofu is up to you. I like some larger pieces, they simulate some of the texture you get with traditional scrambled eggs.
tofu scramble with added spinach in a hot skillet
In goes the spinach. The leaves will collapse quickly as you stir and flip the mixture.
smashed skillet potatoes in a skillet
Once the scramble is cooked, I like to use the same skillet to make a side of smashed skillet potatoes from potatoes I boiled the night before.
tofu scramble served on a plate on a picnic table

What To Eat with Tofu Scramble

One of the things I love about a tofu scramble, it the versatility. Many of the things you can do with a traditional egg-based scramble, work nicely with tofu scramble as well. Here are some favorites:

  • Potatoes: smashed skillet potatoes are a favorite accompaniment. Pictured throughout this post.
  • Tacos: use the scramble as a component in breakfast tacos.
  • Breakfast sandwiches: smear bagels, toast, or English muffins with avocado or another favorite slather. This will help hold the scramble in place. Start with good bread, make it toast, and go from there.
  • Breakfast burrito: use the scramble as a component in a breakfast burrito. Beans, avocado, salsa, and whatever else you love to put in your morning burrito.

tofu scramble in a bowl with skillet potatoes

More Favorite Tofu Recipes

More Camping Recipes


Continue reading Tofu Scramble on 101 Cookbooks