Air Fryer Meatballs

Get perfectly cooked meatballs using your air fryer! Air fryer meatballs have a crisp crust on the outside and a moist, tender texture inside. These flavorful meatballs are great for pasta night, using in sliders and sandwiches, or even using as an appetizer! This post contains affiliate links. This is the time of year in …

The post Air Fryer Meatballs appeared first on My Baking Addiction.

Get perfectly cooked meatballs using your air fryer! Air fryer meatballs have a crisp crust on the outside and a moist, tender texture inside. These flavorful meatballs are great for pasta night, using in sliders and sandwiches, or even using as an appetizer!

Close up of several air fryer meatballs set on top of a bed of spaghetti.

This post contains affiliate links.

This is the time of year in the Midwest when we all just want winter to be over. Unfortunately, we still have at least a couple more months to go.

My solution when I can’t stand the gray winter days any more is to make lots of comfort food dinners. Things like crockpot Mississippi pot roast, homemade sloppy joes, chicken and wild rice soup, and spaghetti and meatballs.

There are so many ways to make and cook meatballs, and one of my favorites is to cook them in the air fryer. Air fryer meatballs are crisp on the outside, moist and tender on the inside, and so versatile to use!

(more…)

The post Air Fryer Meatballs appeared first on My Baking Addiction.

Smoky Black Bean & Quinoa Chili Bowl

When everyone in the test kitchen agrees a new recipe will be on dinner rotation, it’s a winner! This hearty and nourishing chili bowl is inspired by the Chipotle Chili Bowl at Harlow in Portland. We love them, and we love this bowl! 
Not only is …

Smoky Black Bean & Quinoa Chili Bowl

When everyone in the test kitchen agrees a new recipe will be on dinner rotation, it’s a winner! This hearty and nourishing chili bowl is inspired by the Chipotle Chili Bowl at Harlow in Portland. We love them, and we love this bowl! 

Not only is this plant-based meal full of fiber and protein — it’s also easy to assemble and perfect for meal prep! Let us show you how it’s done!

Smoky Black Bean & Quinoa Chili Bowl from Minimalist Baker →

Cauliflower Fried Rice

This cauliflower fried rice recipe is one of the best meals I’ve eaten recently. It just checks all my boxes! It’s quick and easy to make, it’s chock-full of veggies, and, most importantly, it’s seriously PACKED with flavor. If …


This cauliflower fried rice recipe is one of the best meals I’ve eaten recently. It just checks all my boxes! It’s quick and easy to make, it’s chock-full of veggies, and, most importantly, it’s seriously PACKED with flavor. If you’re still a cauliflower rice skeptic, it’s time to give it a chance! I’m willing to bet that this recipe will make you love it. So, what exactly makes this cauliflower fried rice so flavorful? Well, instead of modeling it off a Chinese-style fried rice, I took inspiration from Korean kimchi fried rice and used chopped kimchi to load this dish […]

1-Pot Chipotle Black Bean Chili

Chilly weather calls for chili. We don’t make the rules! This black bean chili has all the hearty satisfaction you know and love about chili, with a new smoky chipotle twist. YUM.
This fiber-packed dish is the perfect plant-based meal for cooler days, …

1-Pot Chipotle Black Bean Chili

Chilly weather calls for chili. We don’t make the rules! This black bean chili has all the hearty satisfaction you know and love about chili, with a new smoky chipotle twist. YUM.

This fiber-packed dish is the perfect plant-based meal for cooler days, or any time you’re craving a warm bowl of nourishment! Just 1 pot and 30 minutes required! 

This hearty, 1-pot black bean chili begins with a naturally sweet and savory base of sautéed onion, bell pepper, and garlic.

1-Pot Chipotle Black Bean Chili from Minimalist Baker →

Beef Stew

This is a scrumptious, simple beef stew recipe that’s perfect for warming your after a long winter day.

This is a scrumptious, simple beef stew recipe that’s perfect for warming your after a long winter day.

My favorite cut of beef is perfect for this roast. This is boneless beef shank, which takes a long time to stew, but the resulting roast is perfect. The shank is one of the meatiest and most collagen-rich parts of the animal.

These chunks are great for goulash, thick winter soups, and stew. They are rich in connective tissue that breaks down into a silky texture when cooked slowly, making a wonderful gravy. The meat is tender and flavorful.

What to serve with the beef stew? Mashed potatoes, pasta with olive oil or butter (sprinkle with cheese if you like), and rice. I love eating it with pickles.

How to thicken beef stew? You can flour the meat before frying. Or when the stew is ready, fry a 1 tbsp of flour in 1 tbsp of butter, pour in half a cup of cold water and stir to avoid lumps. Pour the mixture into the stew. Cook 5 min. But boneless beef shank and vegetables makes a rich gravy.

PREP TIME COOK TIME MAKES
15 minutes 120 minutes 5-6 servings

INGREDIENTS (serves 5-6)

  • 2.2 lbs (1 kg) beef shank (boneless)
  • 2 stalks leek
  • 3 carrots
  • 4 celery stalks
  • 2 big tomatoes 
  • 3 cloves of garlic
  • 1 glass (150 ml) dry red wine

  • 2 tsp paprika
  • ⅓ ground allspice
  • 1 tso ground coriander
  • 1 tsp ground black pepper
  • ½ -1 tsp chili pepper flakes
  • ⅓ tsp grated nutmeg
  • 2 bay leaves
  • 3-4 thyme sprigs
  • 4-5 tbsp oil for frying

INSTRUCTIONS

You can find the video recipe of Beef stew in my InstagramLet’s be friends!

  1. Cut the meat into small pieces. Pour the frying oil into a heavy-bottomed pot or deep frying pan. Put the meat.
  2. Add all the spices except herbs (coriander, ground black pepper, allspice, ground pepper, paprika, grated nutmeg, and chili) to the meat and fry everything together.
  3. Cut the leek lengthwise and chop coarsely. Cut the carrots into thick slices or circles. Coarsely chop the celery and add it, along with the carrots, leek, and finely chopped garlic, to the meat.
  4. Continue frying, then pour in the wine, add the diced tomatoes, thyme, and bay leaves.
  5. Simmer over a very low heat until the meat is tender (this will take about 2 hours).

If, despite the warnings, you were not cooking on a very low heat and you did not get enough gravy, add just a little water.

  1. Salt and add sprigs of parsley 10 minutes before readiness. Serve with mashed potatoes, rice, or pasta.

UKRAINIAN HOME COOKING
Favorite recipes with love

The book is available on Amazon in different countries.

50% of each sale will be donated to Charity to help the children and people of Ukraine.


New recipes in your inbox

Processing…
Success!

You may like these too…

New Recipes

Bestsellers

CANNED CHICKPEA HUMMUS

An easy and quick recipe for the perfect canned chickpea hummus.

It’s really hundreds of times better than ready-made hummus in a jar with a bunch of preservatives. Buy a can of tahini and canned chickpeas and you’ll have homemade hummus anytime in 5 minutes. Of course, you can use not only canned, but also boiled chickpeas.

Canned chickpea hummus

Recipe

PREP TIME COOK TIME MAKES
2-3 minutes 10 minutes 2-3 servings

INGREDIENTS (serves 2-3)

  • 14 oz (400 g) canned chickpeas
  • 3 tbsp tahini
  • 1 garlic clove
  • 2 tbsp lemon juice or juice of ½ lemon
  • ½ tsp salt
  • ⅓ tsp coriander
  • ⅓ tsp cumin
  • 1 tbsp olive oil

INSTRUCTIONS

You can find a short video recipe in my Instagram. Let’s be friends!

  1. Set aside 2 tbsp of whole chickpeas for garnish.
  2. Put the rest of the chickpeas with liquid, tahini, lemon juice, chopped garlic, spices, oil, and half the salt into the blender bowl.
  3. Blend until smooth. Check the texture and try. Add more water and salt if needed. 5 tbsp of water and ½ tsp of salt were enough for me.
  4. Place in refrigerator for at least 30 minutes.
  5. Put it on a plate in the center. Spread the hummus on a plate with a tablespoon. Move the plate in a circular motion with one hand, and move the spoon from the center to the edges. Garnish with whole chickpeas and drizzle with regular or spicy olive oil. Sprinkle with chili or paprika to taste.


UKRAINIAN HOME COOKING
Favorite recipes with love

The book is available on Amazon in different countries.

50% of each sale will be donated to Charity to help the children and people of Ukraine.

You may like these too…

New Recipes

New recipes in your inbox

Processing…
Success!

DERUNY – UKRAINIAN POTATO FRITTERS

Crispy potato fritters – Ukrainian traditional dish.

Use potatoes with a high starch content. Never soak potatoes after peeling. Just rinse them quickly. To check how starchy your potatoes are, cut a potato in half and join the two pieces together. If they stick to each other, it means that the potato is high in starch. If not, add 1–2 teaspoons of starch per 4 medium-sized potatoes.

How to make potato fritters? Basic rules for cooking Deruny:

  1. Potatoes should be high in starch when cooking potato fritters. To check this, cut the potatoes into 2 parts and put them together. If the halves stick to each other, the potatoes are good for deruny.
  2. Grate the onion first. Immediately stir in potatoes and onions so the potatoes don’t turn brown.
  3. Drain out excess liquid.
  4. Fry potato fritters well, they should turn dark golden.
  5. Don’t cover it with the lid.
  6. Place them on paper towels to absorb excess oil and keep the deruny crispy.

Deruny – Ukrainian Potatoes Fritters without flour

Recipe

PREP TIME COOK TIME MAKES
5 minutes 20-25 minutes 2-3 servings

INGREDIENTS (serves 2-3)

  • 4 medium-sized high-starch potatoes
  • 1 onion
  • 1 large egg
  • Oil, salt and black pepper
  • Sour cream for serving

INSTRUCTIONS

  1. Grate the onion first. Then grate the peeled potatoes. Mix together. Onions will prevent the potatoes from getting dark. If there is too much juice, drain a little. Do not squeeze.
  2. Season with salt. Mix and drain a juice.
  3. Stir in the egg, add black pepper and mix.
  4. Spoon the mixture onto a preheated frying pan with oil. Flatten a little so that the fritter is thin in the middle and cooks well.
  5. Fry over medium heat on both sides, they should turn dark golden. Place them on paper towels to absorb excess oil and keep the pancakes crispy.


UKRAINIAN HOME COOKING
Favorite recipes with love

The book is available on Amazon in different countries.

50% of each sale will be donated to Charity to help the children and people of Ukraine.

You may like these too…

New Recipes

New recipes in your inbox

Processing…
Success!

Esquites Tacos

*I’m proud to partner with Watkins to bring you this story and recipe. It’s quite evident in my recipes that I’m a big fan of flavor and I rely on good, fresh organic spices and dried herbs. Watkins uses only USDA Certified Organic and Non-GMO Project Verified ingredients in its spices, spice blends, and herbs…. Read more »

*I’m proud to partner with Watkins to bring you this story and recipe. It’s quite evident in my recipes that I’m a big fan of flavor and I rely on good, fresh organic spices and dried herbs. Watkins uses only USDA Certified Organic and Non-GMO Project Verified ingredients in its spices, spice blends, and herbs. You can find their products at Watkins1868.com and select stores nationwide.

As always, the words and photos are mine. I appreciate your support and the companies who graciously partner with me so I can continue to share my stories through the recipes that fill our table.


You may have heard of the popular street food recipe in Mexico called Elote. If not, it’s an incredible dish that starts with corn on the cob; grilled until blackened and smoky then slathered in a creamy and spicy sauce before being rolled in cheese then finished with fresh lime juice. It is now absolutely my preferred way of eating corn. Esquites is the same idea but minus the cob. Corn kernels are blackened (or the cobs are grilled then the kernels removed) and then mixed with mayonnaise, cheese, chili powder, cilantro leaves, ground cumin, adobo seasoning and lots of lime.

Because I’m a believer in “all things are better when wrapped in a tortilla” we’ve turned this classic Mexican corn dish into a taco. It’s paired with what is basically a chunky guacamole that is loaded with scallions and a touch of sour cream (or if you’re an Antoni fan you can use Greek yogurt).

This recipe is written to feed a crowd or to have plenty of leftovers. I also added slow simmered pinto beans to bulk up the tacos but you can add grilled fish, chicken, steak, or carnitas – the options are endless.


Esquites Tacos

Ingredients

Esquites

1/4 cup mayonnaise

1/2 cup crumbled Cotija or Parmesan cheese

2 tsp lime zest

1/4 cup lime juice

1/2 tsp salt1 tsp Watkins Organic Chili Powder

2 TBL butter

8 corn cobs, kernels removed (or about 24 ounces corn kernels – you can use frozen corn here too)

Instructions

In a medium size bowl stir together the mayonnaise, cheese, lime zest, juice, salt and chili powder. Feel free to add more chili powder if you want more heat.

Add the butter to a large skillet set over medium high heat. When the butter sizzles add the corn then let blacken. Give a quick stir after a couple of minutes then let sit again. Add a hefty pinch of salt then turn off the heat.

Stir the blackened corn into the creamy mayonnaise mixture.

Alternately you can grill the corn cobs then let cool and remove the kernels from the cob before stirring into the creamy sauce.

Creamy Avocado and Scallion Salsa

2 large avocados, peeled and diced

5 scallions, white and green parts thinly sliced

2 TBL sour cream

1/2 tsp Watkins Organic Ground Cumin

1/2 tsp Watkins Organic Adobo Seasoning Pinch salt

1 TBL fresh lime juice

2 garlic cloves, minced

1 TBL minced jalapeño (more or less depending on your spice preference)

1 TBL Watkins Organic Cilantro Leaves

In a medium size bowl stir together the avocado, scallions, cumin, adobo, salt, lime juice, garlic, jalapeño and dried cilantro. Taste and adjust seasoning as desired

Tacos

12 small flour or corn tortillas

Meat or beans (optional)

Crumbled cotija or queso fresco

Pickled jalapeños

Warm the tortillas then serve with meat or beans, esquites, salsa and whatever other toppings you prefer. I’ve listed my favorites.


Rosemary Pasta with Lemon Butter Sauce

*I’m proud to partner with Watkins to bring you this story and recipe. It’s quite evident in my recipes that I’m a big fan of flavor and I rely on good, fresh spices and dried herbs. Watkins uses only USDA Certified Organic and Non-GMO Project Verified ingredients. You can find their products at Watkins1868.com and… Read more »

*I’m proud to partner with Watkins to bring you this story and recipe. It’s quite evident in my recipes that I’m a big fan of flavor and I rely on good, fresh spices and dried herbs. Watkins uses only USDA Certified Organic and Non-GMO Project Verified ingredients. You can find their products at Watkins1868.com and select grocery stores nationwide.

As always, the words and photos are mine. I appreciate your support and the companies who graciously partner with me so I can continue to share my stories through the recipes that fill our table.


We dump the flour on the table, a simple action that is right but feels a bit defiant. With our hands, they are in fact the best tool for the job, we dip into the cool powder to form a soft bowl to hold the eggs. While Ivy cracks the fragile white shells, I anticipate the day when we can cross our backyard and visit our hens (who are now chicks) to gather eggs, still warm with yolks that practically glow. I’m interrupted from this dream as the last egg runs out of our flour bowl and onto the table. Ivy and I both laugh while we attempt to capture the runaway egg. Once safely contained she generously shakes fragrant rosemary onto the dough. We both breathe in deep, taking in the piney scent that now surrounds us.

While kneading the sturdy dough I take in the simplicity of this moment, these ingredients. It’s a rare reprieve from the noise and chaos that has grown familiar in my mind. Here in this moment, with all my senses engaged, I can be at the table, fingers covered in dough, laughing with my daughter while stories of past pasta making memories entertain us during our kneading.

We knead the dough until smooth then tuck it in for rest. This is not a rushed process, nor is it complicated. It’s simple yet asks you to be present, to adjust an otherwise busy schedule around its timing, not ours. I gladly accept this offer for it is also an invitation to be here now. To meditate while covered in flour and bask in gratitude with a fragrant bowl of homemade pasta under our nose.

It’s a simple act, humble, messy and imperfect but as with so much in life these are the ones that make all the difference.


Rosemary Pasta with Lemon Butter Sauce

Yield 6-8 Servings

The pasta dough quantity here is enough for 6 – 8 servings. The sauce quantity below is enough for about 1/3 of the dough. You can easily double or triple the sauce to feed a crowd. The pasta dough can be made in advance. The dough and any leftovers can be covered and refrigerated for one day. The color may shift just slightly.

Ingredients

400 grams all-purpose flour4 large eggs1 tablespoon Watkins Organic Rosemary

For 2 large or 4 small servings (about 1/3 of the above pasta dough)

60 grams/4 tablespoons unsalted butter1 tablespoon fresh lemon juiceSea saltWatkins Organic Ground Black Pepper2 teaspoons lemon zest1/2 cup freshly grated Parmesan

Instructions

For the pasta.Dump the flour on a large surface. Make a shallow and wide bowl in the middle of the flour. Crack the four eggs directly into the flour bowl. Add the Watkins Organic Rosemary to the eggs.Using a fork gently start to whisk the eggs, incorporating a little bit of the flour at a time. Continue to do this until the eggs and flour are the consistency of waffle batter. At this point it’s best to get your hands dirty and start kneading. Pasta dough should feel quite stiff. If it’s too dry you may add a touch of water but not too much, we don’t want a sticky dough. Knead until smooth, for about 5 to 7 minutes. Wrap well in plastic wrap then let the dough rest on the counter for at least 30 minutes. During this rest the gluten will relax and absorb the liquid. The dough will feel much smoother and cohesive after its nap.

You may use a rolling pin to make the pasta dough but if you have a pasta machine it will go quite a bit faster.Take about 1/10th of the pasta dough and keep the rest covered. On the widest setting of your pasta maker run the dough through then fold in half and run through again. Repeat at least three times. This is another way to knead the dough which will strengthen the gluten and give the pasta a pleasant bite in the end. Continue rolling the dough until you reach the desired thickness, for my pasta machine that is a 6 out of 8 settings. Add a little flour to the dough if there is any stickiness. Fold the pasta sheet in half, then half again, and again, until it’s about 2 inches wide. Using a sharp knife, cut the dough in rough 1/2-inch strips. Set aside on a lightly floured sheet pan.

Prepare the sauce.

green shakshuka pizza

9-20-19-molly-yeh-green-shakshuka-pizza-our-family-49.jpg
9-20-19-molly-yeh-green-shakshuka-pizza-our-family-2.jpg
Webp.net-gifmaker (8).gif
9-20-19-molly-yeh-green-shakshuka-pizza-our-family-18.jpg
9-20-19-molly-yeh-green-shakshuka-pizza-our-family-46.jpg
9-20-19-molly-yeh-green-shakshuka-pizza-our-family-51.jpg

Well this has been a weird few weeks! It’s the middle of October and I am sitting at my kitchen table, eating a Chrismukkah cookie, looking outside at a blanket of snow, and the sun is out and Eggboy is putzing around inside the house. The middle of October typically means sweaters not parkas, tiptoeing around the mud in socks with sandals, and only ever having Eggboy sightings at random times in the middle of the night since during the days he’s harvesting sugar beets. I guess the Chrismukkah cookie things remains the same though because Emily’s cookie swap is just two months away and I’ve got a title to defend. 

Beet harvest, which is supposed to start every year on October 1st, has yet to start, due to the weather, and as of yet, the fate of the beets is totally unknown. They’re in the ground still and we don’t even know if they’ll ever make it out of the ground. Each day brings so many questions. What do the fields look like after yesterday’s weather event? What will they look like after tomorrow’s weather event? When did I start referring to storms as “weather events”? What will the beet processing plant do? Should I continue stocking our freezer with baked goods for the drivers?? This whole situation is totally unprecedented and confusing.

And another thing that this weather has screwed up?? My trip to New York this past weekend :(!! I’d been looking forward to it for FOREVER and had been building my dumpling tolerance, rehearsing my hotdish demo, and also had all of these plans in place for Bernie’s first nights away from both me and Eggboy (assuming he’d be harvesting). But then on Friday there was a perfect storm of getting sick and the blizzard. And then I was glued to my couch (cuddling with Bernie, at least!!) watching the Mighty Ducks. It was a major bummer but then seeing Bernie’s face on her first sled ride cheered me way way up. 

The weather, the snow, the harvest, the flights!

Anytime life is weird like this, I try to maintain some sense of sanity by working extra hard to eat greens. My green smoothie in the morning, spinach salads at lunch, a few extra piles of kale in my quesadillas, all feel even more important because if life is gonna be weird, I at least want to try and feel not as weird physically. Yes I still stress eat the extra Chrismukkah cookie, but I strive to balance it with an extra pile of kale so that I have the energy to deal with all of the unknowns.

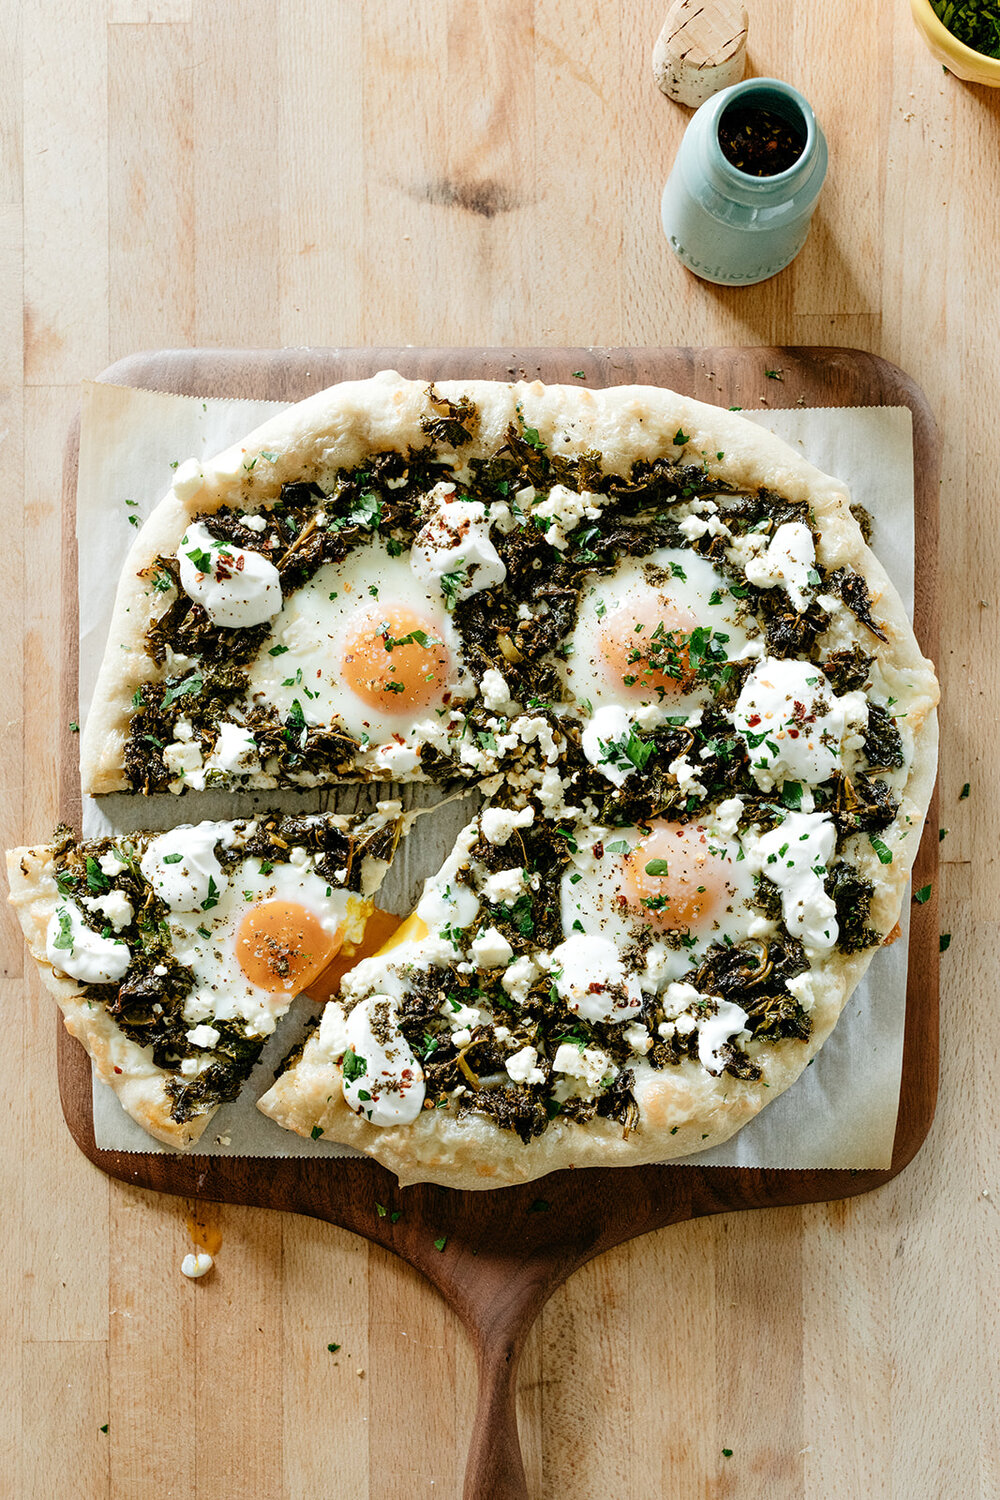
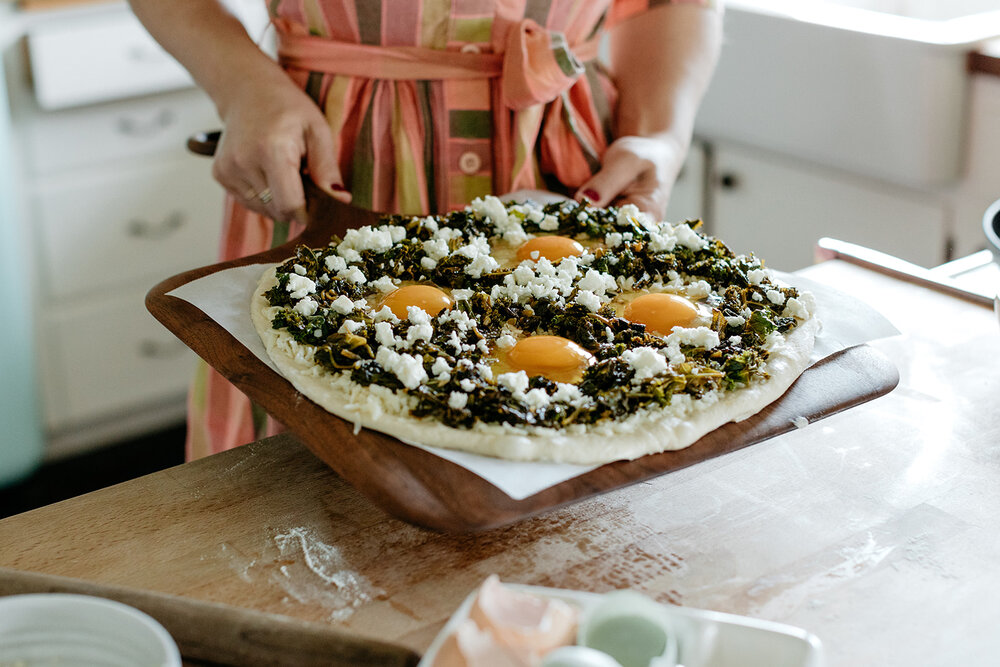
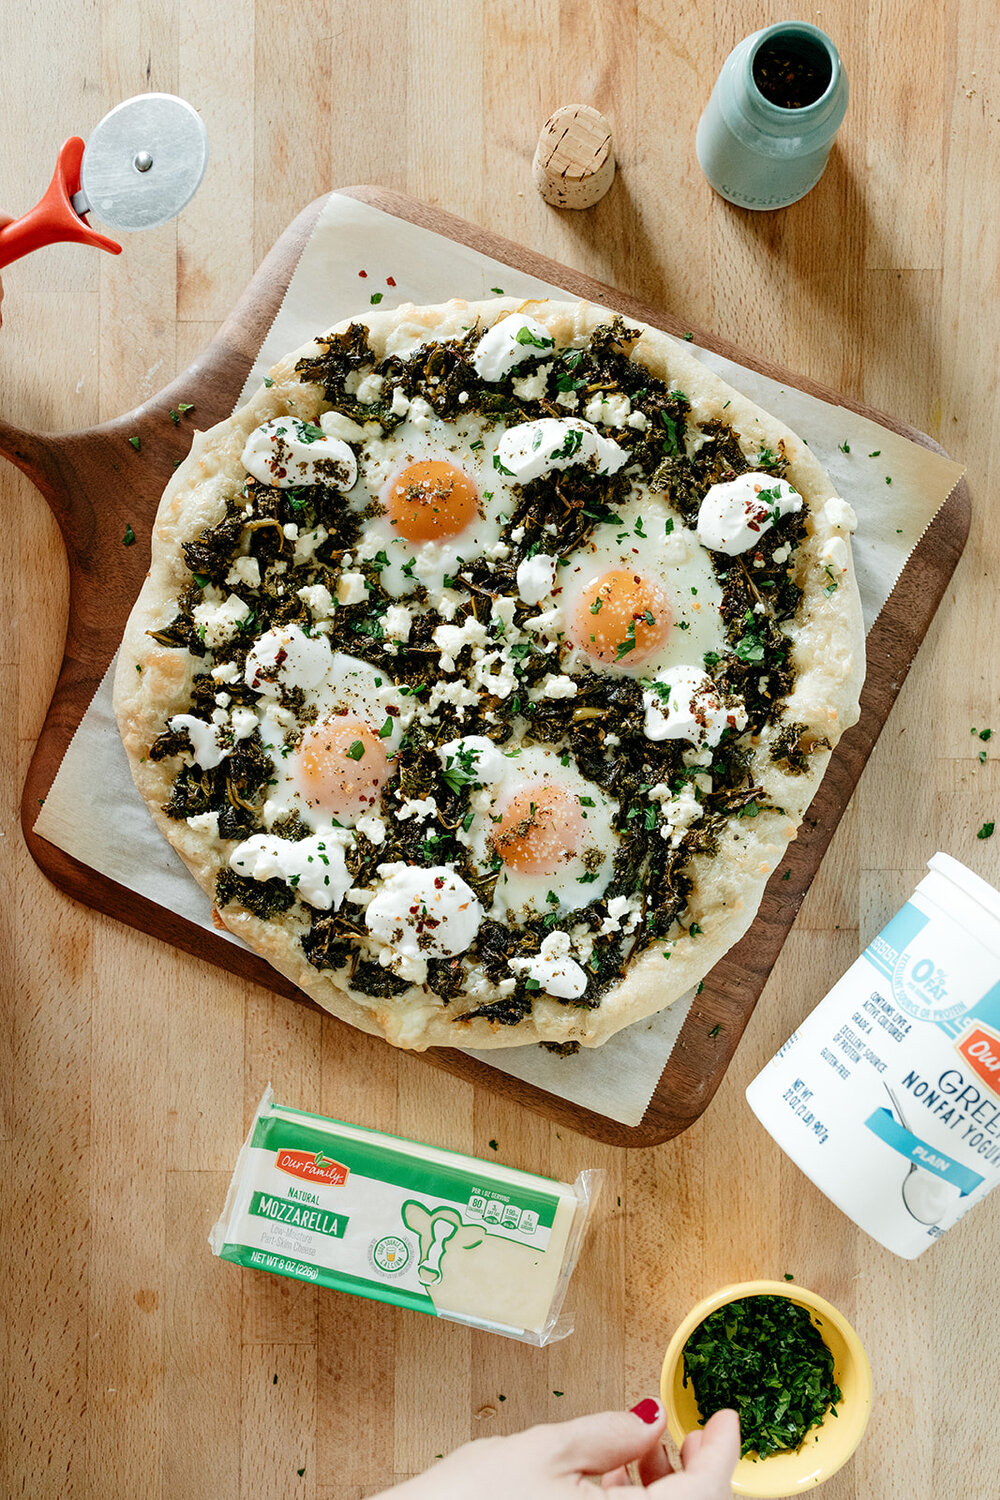
And pizza night is no exception! Sure, there is the salad pizza route. But now that’s snowy, Eggboy and I have been craving more of a hot situation. Enter: green shakshuka pizza. A gigantic pile of greens on a bed of chewy pizza dough and melty mozzarella with runny eggs, all brightened up by a sprinkle of salty feta and drizzley drizz of tangy yogurt. And obviously za’atar. (If you’re the kind of person who likes ranch on their pizza, try yogurt + za’atar!!!) There are so many delicious flavors and textures up in here that strike the perfect balance of healthy-ish and doughy cheesy comfort. It’s also pretty because look @ that oozy egg!!!!!

I am using Our Family yogurt and mozzarella here, two reliable staples in my fridge that I turn to regularly on pizza night. And if you’re coming to my Our Family event in Fargo on Saturday, give me a shout!!! Can’t wait to see you :)

9-20-19-molly-yeh-green-shakshuka-pizza-our-family-21.jpg

Green Shakshuka Pizza

Makes one 12” pizza

Ingredients

2 tb olive oil

2 cloves garlic, minced

1 jalapeño pepper, seeded and finely chopped

1 tsp sweet paprika

6 oz kale, stemmed and coarsely chopped

4 oz spinach

2 tb veggie, chicken stock, or water

Kosher salt

Black pepper

Crushed red pepper

Juice of 1/2 lemon

1 lb pizza dough (storebought or homemade, I love Jim Lahey’s dough)

All-purpose flour, for dusting

6 oz Our Family mozzarella, shredded

4 large eggs

4 oz crumbled feta

Our Family plain Greek yogurt, za’atar, and chopped flat-leaf parsley, for topping

clues

Preheat the oven to 425ºf with a pizza stone if you have one. In a large skillet, heat the olive oil over medium heat. Add the garlic, jalapeño, and paprika and cook, stirring, for a minute, and then add the kale and spinach in a couple of batches, allowing it to wilt slightly in between so it doesn’t overflow the pot. Add a good pinch of salt and cook, stirring often, for 7 minutes. Stir in the stock or water and cook for 5 more minutes. Add a few turns of black pepper, a pinch of crushed red pepper (or more to taste), and the lemon juice. Taste and adjust seasoning as desired. Remove from heat and set aside to cool slightly while you roll out the pizza dough.

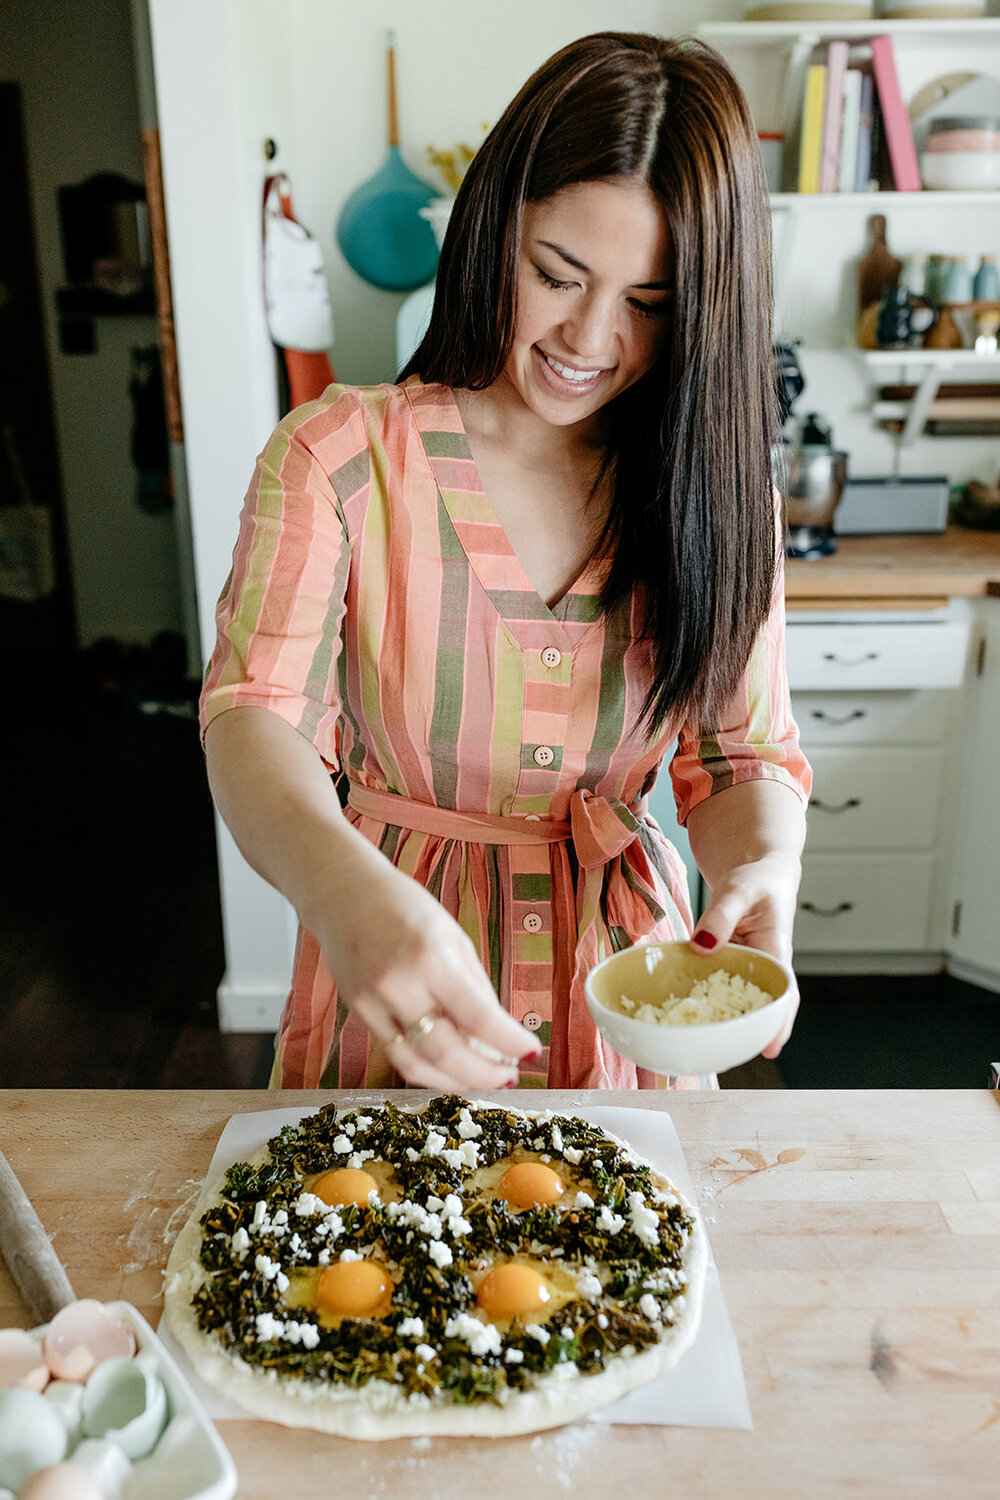
Roll out the dough on a lightly floured piece of parchment into a 12” round. Sprinkle with the mozzarella and then use tongs to transfer the kale mixture to the pizza (discarding any excess moisture that’s in the skillet). Create 4 wells in the kale mixture and crack in the eggs, taking care not to break the yolks. To ensure that the yolks don’t break, I like to crack the eggs into a separate little bowl first and then pour them on the pizza. That way if I break I yolk while cracking the egg, I can use that egg for something else. Sprinkle on the feta. Carefully slide onto the pizza stone (if you don’t have one, slide it on a baking sheet) and bake until the egg whites are firm but the yolks are still runny; begin checking for doneness at 10 minutes. 

Top with dollops of yogurt and sprinkles of za’atar, parsley, salt, pepper, and crushed red pepper and enjoy!

Print this recipe
9-20-19-molly-yeh-green-shakshuka-pizza-our-family-42.jpg

-yeh!

photos by chantell and brett quernemoen

thank you, our family, for sponsoring this post!!