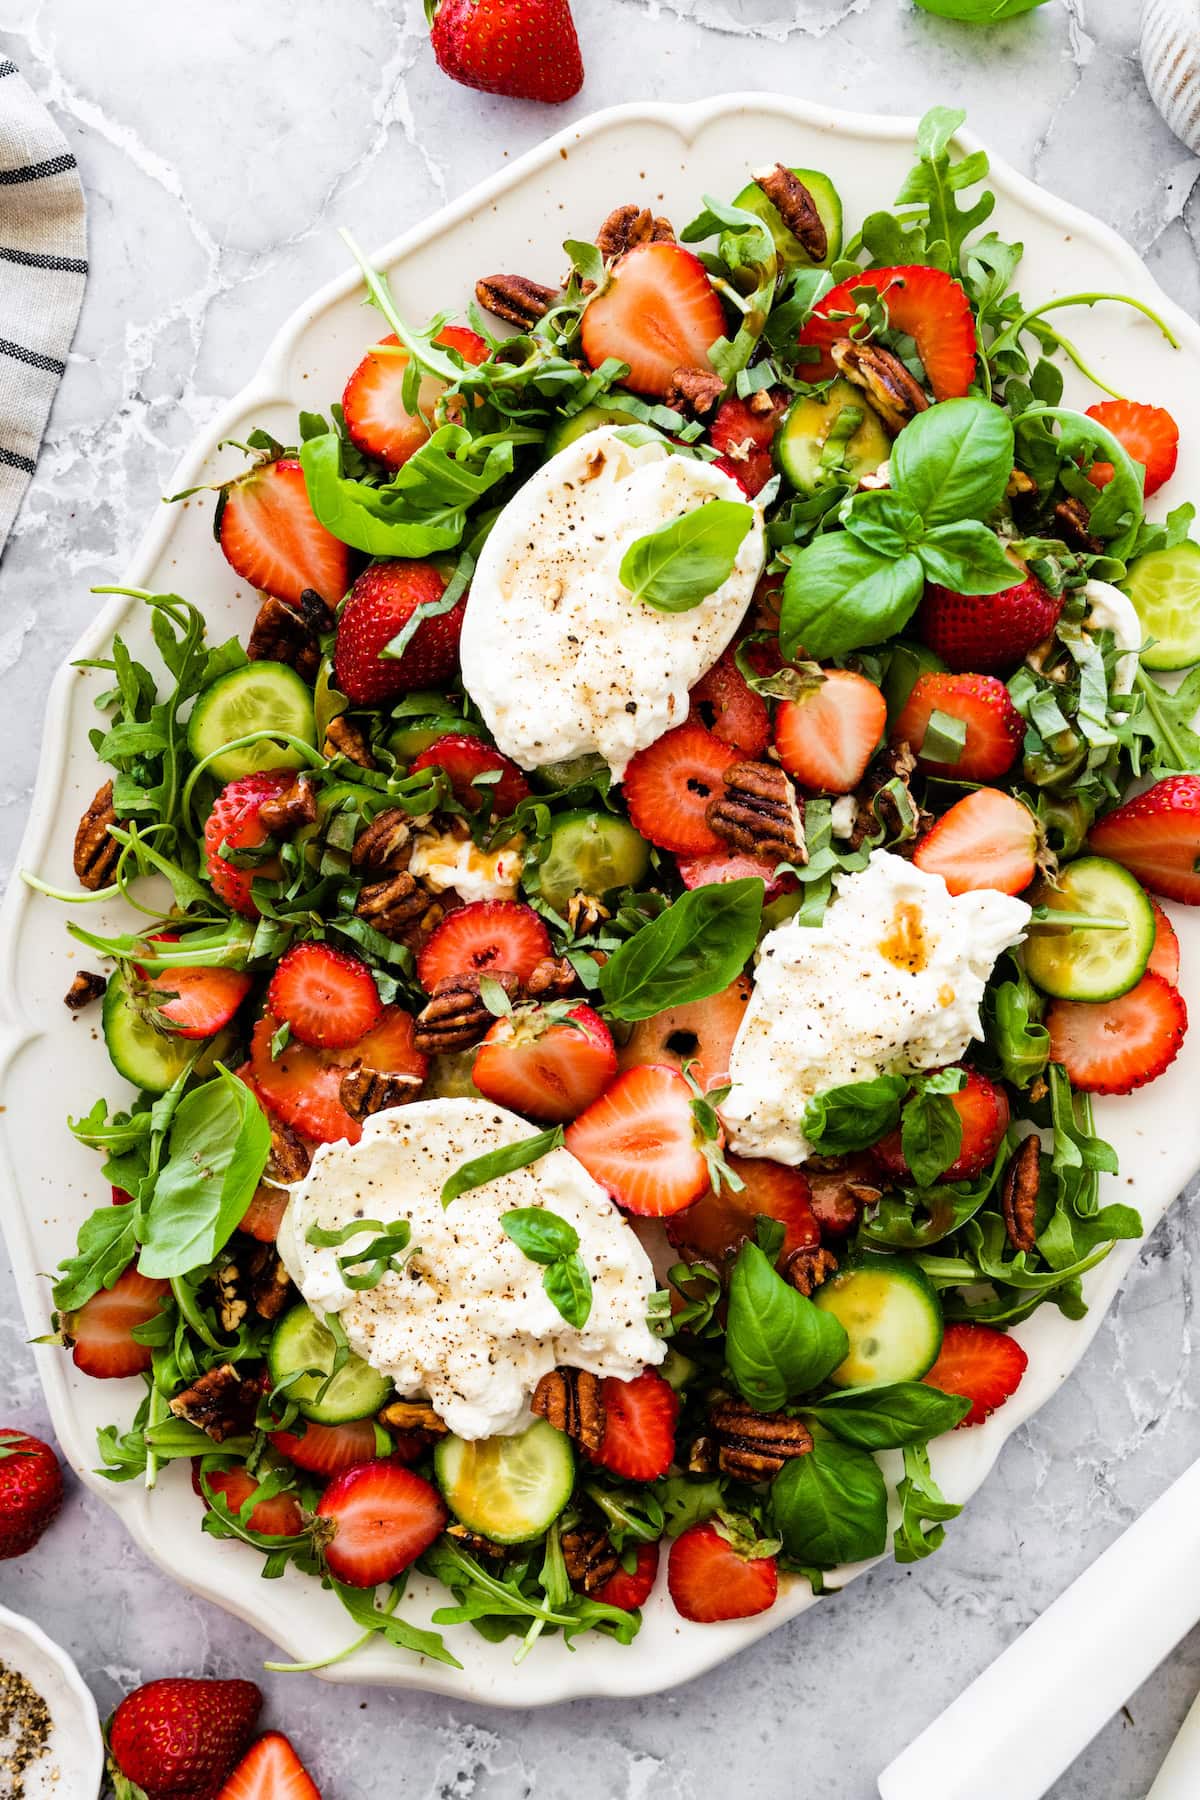
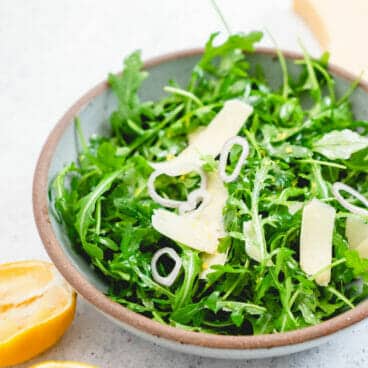
This strawberry cucumber salad is made with peppery arugula greens, creamy goat cheese, ripe strawberries and refreshing cucumbers. It’s drizzled with a strawberry balsamic dressing and topped with a savory pistachio granola. So delicious! I have a salad that will just scream SPRING! This strawberry cucumber salad is made with arugula greens, baby spinach, goat […]
The post Strawberry Cucumber Salad with Savory Granola. appeared first on How Sweet Eats.
This strawberry cucumber salad is made with peppery arugula greens, creamy goat cheese, ripe strawberries and refreshing cucumbers. It’s drizzled with a strawberry balsamic dressing and topped with a savory pistachio granola. So delicious!
I have a salad that will just scream SPRING!

This strawberry cucumber salad is made with arugula greens, baby spinach, goat cheese, strawberries, cucumbers and a whole bunch of crunchy savory granola. It’s drizzled with a strawberry balsamic dressing for the ultimate punch!
And it’s heavy in the rotation over here. We adore strawberries.

I think I could fulfill my kids’ college funds with the amount we spend on berries each week. And they are gone in a day or two!

So, remember my amazing blueberry salad? Blueberries, cucumbers, balsamic dressing? It’s such a simple recipe but one that is fabulous. Everyone adores it.
That is where I got the inspiration for this salad! It has the same feel – berries, cucumbers, some goat cheese, a tangy dressing, lots of nuts. But I gave it an elevated twist.
Also, I will forever love strawberries more than blueberries. It’s just who I am.

The base for this salad uses peppery arugula and baby spinach. Then we have juicy strawberries, refreshing cucumbers and lots of crumbly, tangy goat cheese. Yum yum yum.
But the best part? The GRANOLA!!
In my book The Pretty Dish, I have an avocado orange salad recipe with almond granola. It’s SO delicious. Sweet, savory, salty and crunchy. It has all the textures and flavors going on.
I love using savory granola in salad for that reason. It adds so much – more crisp and crunch than your traditional crouton. It also adds satiety with the nuts and seeds. You can mix it up with sweet, savory and even spicy flavors.

I also like making savory granola because it stretches so many meals! I can make a batch at the beginning of the week and have it to sprinkle on all of my salads. It also stays great in the fridge for around two weeks or so, and that is menu planning gold!
Way to elevate a meal and make it feel fancy and special. Make a salad with granola!

This savory granola starts with oats, pistachios and sunflower seeds. Talk about dreamy.
It also has some garlic powder and chives in it, mixed with a bit of honey, olive oil and even crushed red pepper.
It’s SO good.
I could eat a little bowl of this on its own, no problem.

The whole combination of this salad is so fresh, spring-like and full of flavor. While there are a few components to the dish, the flavors are simple and likable, making it a great party salad! It’s also so pretty and perfect for Mother’s Day. (more…)
The post Strawberry Cucumber Salad with Savory Granola. appeared first on How Sweet Eats.

 I love making salads, especially during the spring and summer months when the weather is nice and lots of produce is in season. This Strawberry Burrata Salad is a favorite when strawberries are ripe and in season. It is simple to make and GORGEOUS to serve! Every time I make this salad for family and…


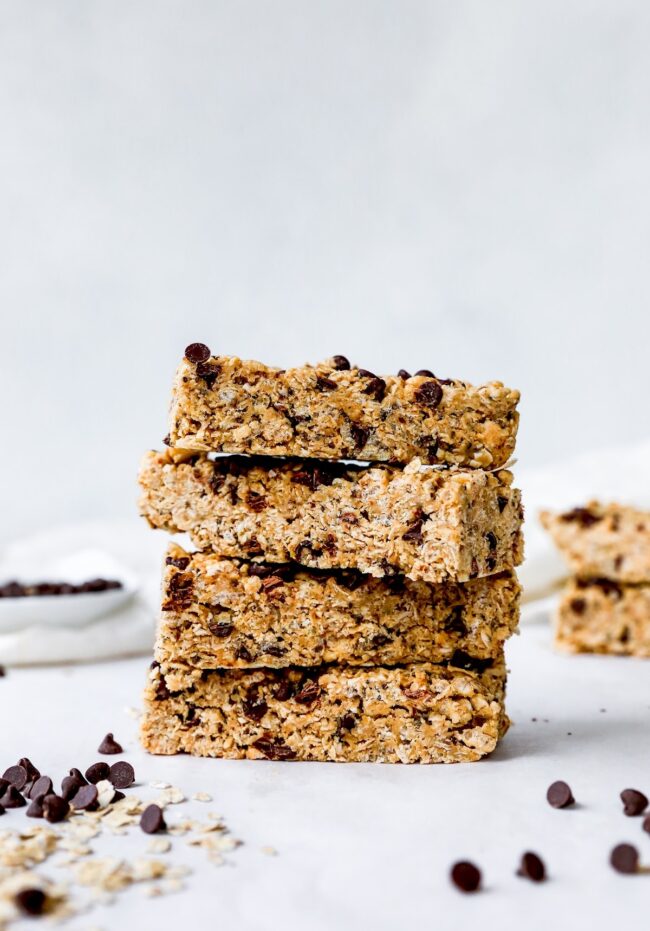 I try to always have homemade granola bars in the fridge for an easy grab and go breakfast or snack. These granola bars are easy to make and made with basic pantry ingredients. They are satisfying, sweet, and taste so much better than store bought granola bars. These are our favorite granola bars because we…
