Ground Beef Meals You’ll Want To Make This Week

Ground beef is so delicious and easy to cook with, but sometimes we get caught in the routine of making the same ground beef recipes over and over. Erm, we’re looking at you, tacos. Instead, here are some fantastic recipes that will change up your recipe game and throw your tastebuds for a loop in the […]

The post Ground Beef Meals You’ll Want To Make This Week appeared first on Forkly.

Ground beef is so delicious and easy to cook with, but sometimes we get caught in the routine of making the same ground beef recipes over and over. Erm, we’re looking at you, tacos. Instead, here are some fantastic recipes that will change up your recipe game and throw your tastebuds for a loop in the best way possible! Tonight, pull out some ground beef and get ready to create your new favorite go-to meal that will please every family member.

1. One Skillet Mexican Beef and Rice

This Mexican beef and rice recipe is an easy and very filling dish that only takes one skillet to create! Anybody else in favor of minimal dishes? Add some guacamole to take this amazing recipe to the next level, or some fresh local veggies to make it come alive.

Following the recipe takes just 35 minutes and makes six servings. The best part is you can top this dish with whatever suits your fancy like sour cream, diced avocado, salsa, and more!

Alexander Prokopenko / Shutterstock

2. Mediterranean Meatball Gyros Sandwich

Mediterranean Meatball Gyros Sandwich are so simple, yet so memorable! Instead of opting for the fast food gyro option at the mall or on the street, head home and create it in your own kitchen. The soft pita bread is the perfect way ingredient to wrap the meatballs and cucumber tomato salad in.

Dice up the produce and pair with a homemade tzatziki sauce to wow your friends and family the next time they come for supper

Nadir Keklik / Shutterstock

3. Beef Stuffed Zucchini Boats

Make a bunch of these beef stuffed zucchini boats on Sunday night to bring to work with you for the whole week. Lunch? Done! Add some veggies in with your ground beef or add them afterward as a topping. It’s a flavorful, low-carb way to fill up midday and take a little over 30 minutes to make.

There are only three steps to follow, making it easy and probably guaranteeing it will become a go-to meal for you each week.

Beef Stuffed Zucchini / Shutterstock

4. Single Serve Lasagna In A Bowl

Making lasagna is fantastic for a big group of people, but what about when you are craving that delicious, cheesy food without your friends? This single-serve lasagna is a great option when you’re cooking for one.

It is also super helpful with picky eaters! Allow each person to make their own lasagna so they have no excuse not to eat it! Plus, it takes less than 10 minutes to make when you’re in a hurry to eat a hearty meal.

marco mayer / Shutterstock

5. Individual Cottage Pie with Cauliflower Mash

Another individual dish that will save you time and dishes when it’s just you and maybe one other person dining is this individual cottage pie recipe. It will cook quicker and therefore, you can eat sooner! That’s a win in our books.

The recipe uses 13 ingredients, takes 25 minutes to prepare in the oven, and is best served with cauliflower mash. If you prefer, this recipe can also be made in a single casserole dish.

hlphoto / Shutterstock

6. Juicy Burger

Homemade burgers are simply unbeatable, so we had to include them on this list. These burgers are so simple that they bring us back to the basics of why we first fell in love with hamburgers – quality, juicy meat.

These burgers can be grilled or prepared on the stovetop, depending on your preference. You’ll be skipping fast food burgers forever after preparing these homemade versions one time. Top the burger with your favorite ingredients and enjoy!

Drozhzhina Elena / Shutterstock

7. Meatloaf Muffins

Meatloaf has never been so chic! These adorable bite-sized meatloaves are colorfully decorated with delicious mashed sweet potato to look like savory cupcakes. Set out as little appetizers or bake them in a regular sized cupcake pan for an entree!

This recipe takes 10 minutes to prepare and 20 minutes to cook, making it the perfect option when you’re in need of a quick dinner. It’s a fresh take on an old favorite that will quickly become a fan favorite.

Iaroshenko Maryna / Shutterstock

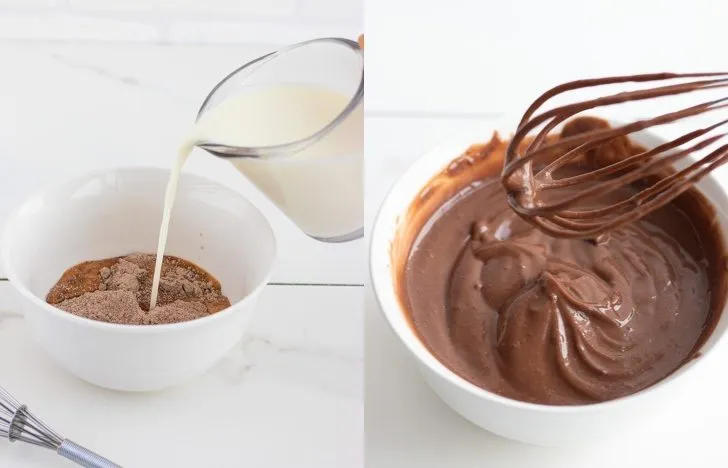
8. Quick & Easy Instant Pot Deconstructed Lasagna

There is no comfort food quite like lasagna and I’m not talking about the frozen version hastily grabbed from the grocery store. I mean, rich, cheesy, homemade lasagna. But it’s a lot of work to make it from scratch!

Enter this Forkly deconstructed lasagna recipe, which is essentially a smashed up version that, while not quite as pretty, tastes identical in a small fraction of the time it would normally take. Perfect for both picky and adventurous eaters!

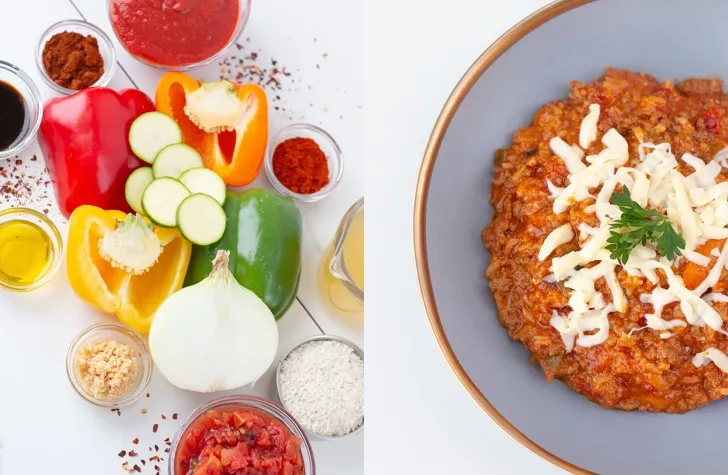
9. Stuffed Pepper Pasta Casserole

When stuffed peppers are simply not filling enough, this casserole combines a delicious meal with pasta to create an absolute masterpiece. It’s rich and cheesy and not as finicky to make! This recipe uses farfalle pasta, orange and green bell peppers, ground beef, and more tasty ingredients.

Once the pasta is cooked and all the ingredients are loaded into the prepared baking dish, this casserole takes about 15 to 17 minutes in the oven. Enjoy!

Graficam Ahmed Saeed / Shutterstock

10.  Easy One Pot Lasagna Soup

Make a big batch of this one pot lasagna soup and freeze for later! It’s a quick and easy meal to reheat just in time for unexpected hungry dinner guests to dig into. Plus, it requires only a fraction of the time and effort traditional lasagna takes!

It tastes just like lasagna since it’s loaded with cheesy noodles, rich marinara sauce, and Italian spices. Plus, it’s loaded with three irresistible cheeses — Parmesan, mozzarella, and ricotta.

Food Via Lenses / Shutterstock

11. Instant Pot Unstuffed Pepper Casserole

This easy weeknight dinner is packed with flavor and is a great way to hide a ton of veggies in your kiddo’s meal. It’s also a great way to use up those vegetables that have started to soften or wilt in the fridge, so you don’t have to throw them out!

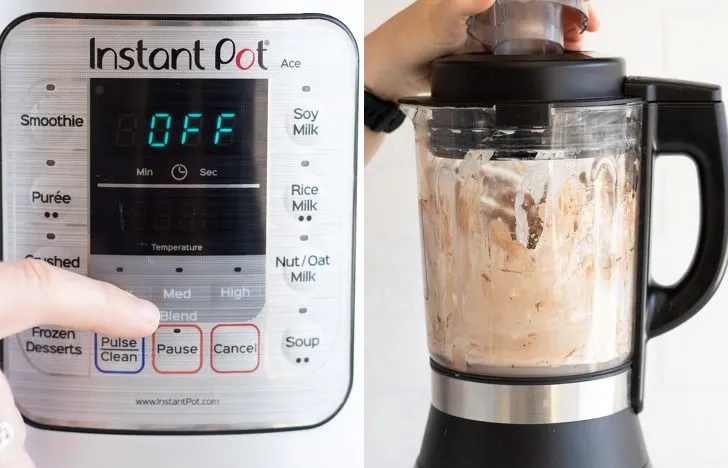
This Forkly recipe yields eight servings and is made by using an Instant Pot. All in all, a delicious dinner and a tasty new recipe to try if you have an Instant Pot.

12. Easy Weeknight Instant Pot Copycat Hamburger Helper

Clean up the ingredients of this family favorite dinner by making it from scratch in your Instant Pot! This copycat hamburger helper recipe from Forkly cooks incredibly quickly and has the same flavors that you love with none of the additives of the store bought version.

What’s great about this recipe is how it’s made entirely with an Instant Pot. It yields six to eight servings and takes just five steps to complete from start to finish.

The post Ground Beef Meals You’ll Want To Make This Week appeared first on Forkly.

Easy Chicken Dinner Recipes in Under 30 Minutes!

There are countless reasons why chicken is a go-to food for every meal. Not only is it delicious, it’s also easy to prepare and (especially when you get it on sale) fairly inexpensive, at least compared to most of the alternatives. When it comes to meal planning, there are two key elements to finding success: Timing […]

The post Easy Chicken Dinner Recipes in Under 30 Minutes! appeared first on Forkly.

There are countless reasons why chicken is a go-to food for every meal. Not only is it delicious, it’s also easy to prepare and (especially when you get it on sale) fairly inexpensive, at least compared to most of the alternatives. When it comes to meal planning, there are two key elements to finding success: Timing and variety. If you don’t mix things up, everyone in your family will get bored of eating the same thing week to week. Balancing variety with timing (sometimes you only have a few minutes to throw together a meal before heading out to soccer, dance or other weeknight commitments that leave you strapped for time) can sometimes seem like an impossible task. Luckily, we’re here to help. There are so many ways to spice up chicken breasts. From salads and stir-fries to pasta dishes and wraps, there are plenty of quick and easy meal ideas that will please everyone in your family and leave you with time to spare.

Here are some delicious chicken dinners in under 30 minutes:

1. Chicken Stir-Fry

A stir fry is an excellent way to eat lots of crunchy vegetables with plenty of vitamins retaining their original texture and flavor. This recipe from Oh Sweet Basil combines fresh vegetables with juicy chicken to create the perfect healthy and delicious dinner. The best part? It takes only 15 minutes to make four servings!

Grab your cast iron skillet and begin cooking the chicken. Once that’s cooked, you can move it onto a plate and start frying up the vegetables. The homemade sauce you whisk together is made up of soy sauce, stock, honey, brown sugar, ginger, garlic and cornstarch. Toss all the elements together for a fusion of flavor you’ll be craving for days.

Timolina / Shutterstock

2. Grilled Chicken Wrap

This is a super quick meal you can make in a flash with just a few ingredients. It makes a great lunch or even a light dinner. I like to serve mine with a fresh salad, but feel free to pair it with whatever else you’re craving like sweet potato fries or crackers. Add in any of your favorite veggies or even switch up the dressing to customize it to your liking.

There are so many possibilities with this versatile recipe and it requires little skill to whip up. Simply grill some chicken or use store-bought chicken that’s already prepared. Grab your tortilla and load it with chicken, lettuce, tomato, shredded cheese, and dressing. Roll it up and enjoy!

stockcreations / Shutterstock

3. 30-Minute Instant Pot Orange Chicken Dump Dinner

Put your Instant Pot to good use by following this delicious chicken recipe from Forkly. The name of this chicken dish says it all! Start to finish, this citrusy sweet dinner is done in less than 30 minutes. Just throw the ingredients in your Instant Pot, lid it, and walk away. At-home Asian cuisine at its finest!

This recipe uses boneless chicken, orange juice, orange marmalade, and other ingredients to create that recognizable orange chicken taste. It’s enhanced with ingredients such as minced garlic and ginger, paired with rice to make it extra filling, and topped with broccoli for a bit of a crunch.

4. Bruschetta Chicken Pasta Salad

A bruschetta pasta paired with grilled chicken and balsamic glaze. Does it get much better than this? Following this recipe from Cafe Delites will quickly make it a fan favorite for dinner in your household. It’s made up of Italian seasoned grilled chicken, spaghetti pasta, a burst of garlic, and lots of parmesan cheese.

The easy recipe yields eight servings and takes just 25 minutes from start to finish. Serve this dish immediately while warm, or let it cool for a perfect chilled chicken pasta salad. The perfect weeknight meal (and the perfect next-day lunch if you happen to have leftovers).

MaraZe / Shutterstock

5. Chicken Parmesan Pasta

For an elevated dish that’s easy to follow even for novice home cooks, this chicken parmesan pasta recipe from Forkly is the way to go. You won’t have to worry about cleaning a mountain of dishes after cooking since it’s baked all on one-pan! Each serving is given a heaping of marinara sauce, mozzarella cheese, and fresh basil.

With chicken breasts simply dredged and breaded in panko and cheese, smothered in savory marinara and topped with more cheese, it only gets better as it’s served along with roasted broccoli. You’ll know it’s ready once the cheese is melted and brown.

6. Instant Pot Chicken Pot Pie

From cooking the fillings on the stove top to rolling out the pie dough to baking the whole dish in the oven – just thinking about making traditional chicken pot pie is exhausting! While it was one of my favorite meals as a child, my now busy lifestyle doesn’t accommodate labor-intensive recipes! With that said we set out to find a way to make this family-favorite meal easy, without sacrificing flavor. Thanks to the Instant Pot, we have the perfect solution.

This Forkly recipe yields four servings. To make the dinner even better, serve it alongside a hot biscuit. You can buy store-bought biscuits and simply follow the directions on the package.

7. Easy Chicken Cheesesteaks

Nothing fancy or complicated here — just delicious, simple chicken cheesesteak sandwiches, jazzed up with a few different kinds of peppers. These are requested frequently in my house, and I hope you love them as much as we do! This recipe from Easyhealth Living teaches you how to make low-carb cheesesteak bowls, making it a cool twist on the classic cheesesteak.

It takes about 25 minutes to make three servings. The dish guarantees a mouthful of flavor with every bite thanks to the diced bell pepper, garlic powder,  Worcestershire sauce, and provolone cheese. Serve with or without the bun and dig in!

Moving Moment / Shutterstock

8. Easy Weeknight Leftover Chicken Quesadillas

Put your leftover chicken to good use by following this delicious Forkly recipe. These quesadillas use leftover or rotisserie chicken to make a quick dinner that’s oh so easy and cheesy and toasted up just perfectly into little triangles for the whole family to devour. These quesadillas would taste great dipped in some guacamole.

To take these quesadillas to the next level, make our homemade Copycat Chipotle Burrito Sauce that’s partially made out of mayo and sriracha. It uses just five ingredients to deliver a creamy and spicy sauce your tastebuds will love. Plus, it only takes five minutes to whip up!

9. Spicy Piri Piri Chicken Burger

Piri Piri (also spelled Peri Peri) is a popular spice in Portuguese food and is becoming more and more popular in North America. This recipe from Taste.com gives step by step instructions on making your own piri piri sauce which is the cooking base to this recipe! The twist? This chicken is served up on a burger for a handheld dinner that will taste great.

This recipe yields about four servings. You’ll start by making the chilli mixture that’s flavored with garlic, ginger, lemon juice, and salt. The other steps are just as easy to follow and will ultimately be worth the extra time it takes to complete this dish.

Konmac / Shutterstock

10. Instant Pot Kung Pao Chicken

Takeout is delicious, but nothing beats the satisfaction of knowing exactly what goes into your meal by preparing it yourself and this Kung Pao Chicken will take less time than takeout delivery – we promise! This Forkly recipe is made courtesy of your Instant Pot, making it a low-maintenance recipe that will become a go-to on weeknights.

The recipe yield about four servings. For an extra crunch, feel free to add in about half a cup of roasted peanuts. While this recipe uses chilli paste to add spiciness, you can add less to have less heat. Alternatively, you can also add more to make it spicier. Just customize the amount to your liking!

11. Caprese Chicken

Basil always adds the perfect fresh touch to any dish, and this Caprese chicken is no exception! Topped with rich cheese and tangy balsamic reduction, this meal will look like it took forever to make, but it really only takes 30 minutes when you follow this recipe from Foodie Crush.

Using store-bought pesto will ensure you get this dish cooked and served in just half an hour. What’s great is this mela is a one-pan recipe for minimal dishes after cooking. The fresh mozzarella cheese and tomatoes will give the chicken a summertime flair that you can enjoy all year long.

AS Food studio / Shutterstock

12. Quick & Easy Instant Pot Tuscan Chicken Pasta

This Tuscan Chicken Pasta is creamy, filling, and absolutely packed with flavor. But best of all, it’s quick and easy to make! This filling Forkly recipe is prepared using your Instant Pot. It combines bowtie pasta, boneless chicken breasts, cream cheese, and a bunch of other flavors that will leave you begging for seconds.

Some ingredients included in this recipe are sun-dried tomatoes, roasted red peppers, spinach, minced garlic, and a few others. Garnish with some fresh basil and bon appetit! If you have any leftovers, just allow it to cool completely before storing it in an airtight container in the refrigerator.

The post Easy Chicken Dinner Recipes in Under 30 Minutes! appeared first on Forkly.

Easy 3-Ingredient Spooky Pretzel Spiderwebs

Not everyone can be a Pinterest-level chef when it comes to celebrations and holidays. But we can try! Or we can accept fate and choose a recipe that is easy and no-fail. If that’s the type of homemade treat you’re looking for this Halloween, then look no further. With just three ingredients, you can whip up these […]

The post Easy 3-Ingredient Spooky Pretzel Spiderwebs appeared first on Forkly.

Not everyone can be a Pinterest-level chef when it comes to celebrations and holidays. But we can try! Or we can accept fate and choose a recipe that is easy and no-fail. If that’s the type of homemade treat you’re looking for this Halloween, then look no further. With just three ingredients, you can whip up these spooky pretzel spiderwebs in no time.

This simple treat is as delicious as it is cute! They’re perfect to send for your child’s school Halloween party or to enjoy as a spooky snack before you head out to trick or treat. Everyone young and old will enjoy each and every sweet and salty bite! So head out to your local bulk store, grab those three inexpensive ingredients and get cooking! Just kidding – you only need the microwave, so there’s no way this could wrong.

Happy Halloween!

Servings: 10

Ingredients

  • Pretzel sticks (approximately 12 per web)
  • 2 cups white chocolate candy melts
  • 1/2 cup dark chocolate candy melts
  • 10 gummy spiders

Equipment

  • Parchment paper
  • Cookie sheets

Method

  • Place candy melts in separate microwave-safe bowls. Microwave 30 seconds at a time, stirring in between, until completely melted (about 60 seconds). Be careful to not overheat or they will burn.
  • Put a dab of the white chocolate candy melts on a parchment paper covered cookie sheet. Place pretzel sticks (about 12) in a fan shape with one end in the chocolate until you've got a full circle.
  • Drizzle 2 spoonfuls of white chocolate on top of the pretzel "fan" in a circular motion to achieve the "web" look.
  • Using a fork, drizzle a very small amount of dark chocolate on top of the web in a circular motion (if desired).
  • Place a gummy spider candy somewhere on the web, adding a small amount of extra chocolate to make it stick if necessary.
  • Let harden, putting them in the refrigerator if you want them to harden faster.
  • Carefully pull the webs off of the parchment paper and enjoy!

The post Easy 3-Ingredient Spooky Pretzel Spiderwebs appeared first on Forkly.

Easy Nut-Free No-Bake Chocolate Chip Granola Bars

Granola bars are perfect for so many moments: breakfast time; an at-work or school-safe snack; a picnic, playground, or on-the-trail treat; an after-school “moooooooom I’m hungry” snack; or even (if they’re really good) an after dinner snack to crush your sugar cravings. But did you know that they’re super easy to make at home and have […]

The post Easy Nut-Free No-Bake Chocolate Chip Granola Bars appeared first on Forkly.

Granola bars are perfect for so many moments: breakfast time; an at-work or school-safe snack; a picnic, playground, or on-the-trail treat; an after-school “moooooooom I’m hungry” snack; or even (if they’re really good) an after dinner snack to crush your sugar cravings. But did you know that they’re super easy to make at home and have way less sugar than their storebought counterparts? We’ve got this easy granola bar recipe for you today that is packed full of protein and healthy fats AND doesn’t have nuts making it 100% school safe should you decide to pop one into your little one’s lunch bag. So let’s get started!

Love these granola bars and want to try your hand at granola? You’ll love this very similar Best Ever Simple Nut-Free Granola.

Start by throwing all of the dry ingredients into a large bowl, including the oats, pumpkin and sunflower seeds, coconut and coconut smiles, and cinnamon. Give it a good stir to get that cinnamon well mixed in!

Grab another bowl, this one microwavable, and add the wet ingredients including real maple syrup, coconut oil, soy or seed butter, and salt. The real maple syrup provides a hint of sweetness, the seed butter adds lots of protein, and the coconut oil adds healthy fats – a perfect way to fuel your day.

Microwave for 30 seconds at a time until the mixture is runny and the coconut oil has melted. Give it a good stir to mix in the oil as much as possible! It won’t completely combine, but do your best using the photo here as a reference.

Pour the liquid into the big bowl of dry ingredients and stir well to coat. The granola should be wet, but not soaked. If it seems too wet, add another handful of oats to thicken up the mix.

Dump in the chocolate chips of your choosing (milk, semi-sweet, dark, mini – whatever you want!) and stir to distribute them through the oat mixture. Spray a square 8-inch by 8-inch or 9-inch by 9-inch pan well with coconut oil cooking spray and spoon the granola bar mix into the pan. Use the back of a greased spoon to press the mixture down into the pan, being sure to compact it as much as possible to bind the ingredients.

Cover the pan and set in the fridge or freezer for at least an hour to solidify the bars, allowing for overnight if possible. Once it’s set, use a sharp knife to cut them into 12 rectangular bars.

Store in the pan in the fridge until they’re going to be packed in a lunch or eaten! Remove them carefully since they crumble more easily than storebought granola bars. They should keep for up to two weeks, if they don’t get gobbled down sooner! We hope you and your family enjoy!

Servings: 12

Ingredients

  • 3 cups rolled oats
  • ½ cup shredded coconut
  • ½ cup coconut smiles
  • ½ cup sunflower seeds
  • ½ cup pumpkin seeds
  • ½ cup mini dark chocolate chips
  • ½ cup coconut oil
  • ½ cup seed or soy butter
  • ½ cup maple syrup
  • ½ tsp salt
  • 1 tsp cinnamon
  • Coconut oil spray

Equipment

  • 8x8” pan

Method

  • Add the oats, coconut and coconut smiles, sunflower seeds, pumpkin seeds, cinnamon, and chocolate chips to a large bowl and mix.
  • Add coconut oil, seed butter, maple syrup, and salt to a glass bowl and microwave for 30-60 seconds until melted. Stir well to combine the ingredients.
  • Pour liquid mixture onto dry ingredients and stir well to coat.
  • Spray pan with oil and dump mixture in. Spread evenly and pack down tightly either using your fingers or the back of a greased spoon.
  • Cover pan with plastic wrap and set in the freezer to set for at least 1 hour before cutting into bars. Store in the refrigerator in an airtight container for up to one week or in the freezer for up to one month.

The post Easy Nut-Free No-Bake Chocolate Chip Granola Bars appeared first on Forkly.

Low-Carb Keto Italian Sausage and Veggie Foil Packets

I’m all about grilling in the summertime! In fact, we make most of our meals on the barbecue when the weather cooperates. It’s a great way to make meal prep more social, as my husband and I sit outside with a drink and catch each other up on our days while dinner cooks. Foil packets are one […]

The post Low-Carb Keto Italian Sausage and Veggie Foil Packets appeared first on Forkly.

I’m all about grilling in the summertime! In fact, we make most of our meals on the barbecue when the weather cooperates. It’s a great way to make meal prep more social, as my husband and I sit outside with a drink and catch each other up on our days while dinner cooks. Foil packets are one of my favorite ways to grill because they’re a foolproof way to add variety since it’s easy to do personalized packets!

Keto-dieters and everyone else will absolutely love this low-carb healthy dinner option that can be whipped up on the grill in about half an hour! It’s a hearty meal that requires little barbecuing knowledge that the whole family will enjoy! Pro tip: Buy the extra wide heavy duty tin foil. It’s a game changer for grilling, especially for groups of people, because you can fit more food in each packet and it won’t rip on you. So go ahead and get grilling!

Servings: 4-6

Ingredients

  • 1 package spicy Italian smoked sausages, sliced
  • 1/2 yellow onion, diced
  • 1 cup cremini mushrooms, pre-sliced
  • 3 bell peppers, sliced
  • 1/2 bunch asparagus
  • 1 tbsp garlic, minced
  • 1 tsp dried parsley
  • 1 tsp dried basil
  • 1 tsp dried oregano
  • 1/2 tsp onion powder
  • 1/2 tsp dried thyme
  • Salt and pepper
  • Olive oil
  • Parmesan cheese, for garnish
  • Fresh parsley (optional), for garnish

Equipment

  • Barbecue
  • Extra wide heavy duty tin foil

Method

  • Turn the grill on and let it come to medium heat.
  • In a large bowl, combine all vegetables, sausage, olive oil, garlic, salt and pepper, and all dried spices. Stir to coat.
  • Divide the mixture between 2 large pieces of tin foil. Fold up the packets so that they are completely sealed.
  • Put packets on the grill for 25-30 minutes, checking for doneness starting at about 15 minutes.
  • Once cooked, remove packets from grill and open carefully.
  • Top with parmesan cheese and fresh parsley. Serve hot!

The post Low-Carb Keto Italian Sausage and Veggie Foil Packets appeared first on Forkly.

Easy Copycat Big Mac Bites

These Big Mac Bites are absolutely drool-worthy and the Copycat Big Mac Sauce is spot on – you wouldn’t even know it didn’t come out through the drive-thru! Perhaps the best part? These little snacks or appys are perfect for barbeque and patio season when hosting commitments, parties, and potlucks are in full swing. They’re […]

The post Easy Copycat Big Mac Bites appeared first on Forkly.

These Big Mac Bites are absolutely drool-worthy and the Copycat Big Mac Sauce is spot on – you wouldn’t even know it didn’t come out through the drive-thru! Perhaps the best part? These little snacks or appys are perfect for barbeque and patio season when hosting commitments, parties, and potlucks are in full swing. They’re easy to serve and eat without much mess (hello anything on a skewer!) and they’re small enough that they pair well with other traditional BBQ sides.

Speaking of sides, check out our Absolute Best Instant Pot Potato Salad if you’re looking for something to accompany these bites!

Looking for a low carb, keto version? Check out our Easy Low-Carb (Keto) Big Mac Bites instead!

The concept is quite simple – take all the components of a Big Mac and skewer them, using the Homemade Big Mac Sauce as a sauce or dip! Start by making our Easy Copycat Big Mac Sauce to accompany the bites. Whip it together and set it aside in the fridge while you cook the rest of the dish.

Next, it’s patty time! In a large bowl, mix together the ground beef, onion, garlic, and salt until well combined. Make sure the onions are very finely diced before adding them to the mixture as this will ensure you get the flavor without big chunks in your little burgers!

Pinch off pieces and roll into balls, then press slightly in the palms of your hands to flatten into a patty. In our recipe, one pound of meat made ten small patties, but this recipe will easily double or triple without any issues. Lay them out on a plate or baking tray as you make them until you’re ready to fry them up.

To cook these little burger bites, heat a frying pan on medium-high heat and then add a drizzle of olive oil. Fry each side for about 2 minutes, checking for doneness either by cutting one open or using a meat thermometer. The patties are done when the internal temperature has reached 160°F. Get them out of the pan and add a piece of cheese on top to melt slightly.

As a side note, you could easily barbeque these instead if you like. Just make sure that internal temperature is correct!

Now you’re ready to assemble! Spread a generous amount of Big Mac Sauce on the bottom mini slider bun. Stack the patty, cheese, lettuce, and pickle on top of the bottom bun. Drizzle some more Big Mac Sauce, add the top bun and then put a skewer through the middle. Repeat until you’ve used up all of the patties. That’s it. You’re done!

Serve up the Big Mac Bites on a wooden board or platter, smothered in the Copycat Big Mac Sauce with extra on the side for dipping, dunking, or drizzling! Your guests are sure to love these little burgs on a patio, instead of sitting at a sticky fast-food table or inside the car on-the-go! Enjoy!

Servings: 10

Ingredients

  • 1 pound ground beef
  • 1 tbsp minced garlic
  • ¼ cup onion, diced
  • 1 tsp salt
  • 4 slices American Cheese
  • 10 dill pickle slices
  • 10 mini slider buns
  • Lettuce
  • 1-2 tbsp olive oil

Equipment

  • Kabob skewers
  • Frying pan

Method

  • Cut each cheese slice into four squares. Cut lettuce into large pieces. Slice pickles if they are not pre-sliced.
  • In a bowl, mix beef, minced garlic, onion, and salt. Pinch off a piece of the mixture and roll into a ball. Place in the palm of your hand and press down slightly to flatten the patty until it’s about 1 inch thick. Repeat for all of the meat.
  • Heat oil in a large frying pan on medium-high heat.
  • Cook mini patties in a frying pan for about 1-2 minutes per side until the internal temperature reaches 160°F. Repeat for all patties. As patties come out, place a piece of cheese on top, allowing to melt slightly.
  • Build the skewers by spreading Big Mac sauce on the bottom bun, then sliding on the bottom half of the bun, burger patty, cheese slice, folded up lettuce square, pickle slice, more Big Mac Sauce and top bun.
  • Serve skewers with the extra Copycat Big Mac Sauce on the side for dipping, if desired. Enjoy!

The post Easy Copycat Big Mac Bites appeared first on Forkly.

Easy Fourth of July Marbled Sugar Cookie Hack

The Fourth of July is just around the corner and that means you’re probably starting to plan your menu! In addition to all the savory goodies you’ll be serving up, you’ll want an array of sweets and treats. And boy have we got the best easy way to wow your guests! This marbled sugar cookie hack […]

The post Easy Fourth of July Marbled Sugar Cookie Hack appeared first on Forkly.

The Fourth of July is just around the corner and that means you’re probably starting to plan your menu! In addition to all the savory goodies you’ll be serving up, you’ll want an array of sweets and treats. And boy have we got the best easy way to wow your guests! This marbled sugar cookie hack is as simple as can be, even if you have no experience as a baker! The marbling elevates these cookies in the best possible way without having to shell out some serious money at your local bakery. So let’s get started!

Looking for app ideas instead? Check out our 4th of July Appetizers with sixty drool-worthy ideas to get you going on your big soirée!

Start by making your cookie dough, using a fun cookie cutter (like the stars we used!), baking your cookies and letting them cool completely. You can opt for a storebought sugar cookie mix or make your dough from scratch (which definitely makes it more work, but also makes it tastier!). We opted to use a storebought mix to save time.

Then it’s time to make the royal icing! You may never have made it before, but don’t be deterred – it’s not difficult! Crack your room-temperature eggs and separate the yolks from the whites, discarding the yolks (or using them for something else). Make sure you don’t get any of the yolks in the mixture.

Add the lemon juice and icing sugar to the large bowl with the egg whites. Using electric beaters, beat on high for 7 to 10 minutes until soft peaks form. Alternatively, if you have one, use a stand mixer with the paddle attachment to cut down that time to 5-7 minutes. You’ll know soft peaks have formed when you pull the (turned off) beaters from the mixture and the icing slowly “melts” back into bowl. Scrape down the sides of the bowl at this point and mix for another 15 seconds or so to remove any lumps.

Once soft peaks have formed, you’re ready for the next step. The mixture will definitely be too thick at this point – don’t worry! Add water or more lemon juice (if you like a citrus taste) one teaspoon at a time and beat until it’s thin enough to run off the beaters in a steady stream. Our mixture required roughly 4 teaspoons to get to the consistency we need. Scrape down the sides again.

Now it’s time to add in some color! Using red and blue gel food coloring, zig-zag the red dye back and forth vertically and then zig-zag the blue dye back and forth horizontally over top. We used Witon dye and a toothpick (we’re in Canada!), but if you have access to it, we suggest using Americolor Soft Gel Paste, as it has no taste, won’t separate, and most importantly, won’t affect the consistency of the royal icing. It also comes in a squeezable tube making it easier to get those perfect lines without having to use a toothpick.

Dip each cookie into the icing slowly, carefully twirl the cookie while still in the icing (this is what creates the marbling effect), and pull straight up out of the icing. Hold the cookie a couple of inches up, allowing the excess icing to drip off before giving the cookie a quick twirl and flipping right side up. If there are air bubbles or the icing didn’t fully coat part of the cookie, tap it against your hand or gently drop on the tabletop to release air. If necessary move a toothpick in very small circular movements to move the icing around and release any remaining air. Repeat for all of the cookies, using a different section of icing every time. If needed, repeat the red and blue zig-zags on top.

Place cookies on a wire cooling rack to dry overnight. Royal icing takes up to 24 hours to fully dry, but the cookies can be transferred to a container, unstacked need be. Don’t worry about the cookie itself drying out – sugar cookies last a long time before going stale (think weeks!). If you stack them too soon (or plastic wrap them, for example), the icing will be ruined, so leave them be! After an hour or so, they’ll start to look dry, but it’s only a thin outer layer that has dried at that point.

Every time you dip, the design will look different. Don’t fight it – it’s part of the beauty of these marbled cookies! So what are you waiting for? Time to get going on these beautiful marbled sugar cookies!

Servings: 12-24

Ingredients

  • Sugar cookie dough
  • Red food coloring gel
  • Blue food coloring gel
  • 4 egg whites, room temperature
  • 2 tsp lemon juice
  • 4 cups sifted icing sugar
  • Water, to thin

Equipment

  • Oven
  • Sheet Pan
  • Parchment Paper
  • Star cookie cutter, if desired
  • Electric Beaters or Stand Mixer
  • Toothpicks

Method

  • Roll cookie dough out until it’s about ¼ inch thick. Use a cookie cutter of your choice (we used a star to keep with the patriotic feel) to cut the dough and transfer to a parchment paper lined sheet pan. Bake the sugar cookies according to package instructions. Remove from oven and allow to cool completely on a wire cooling rack.
  • Add the egg whites, lemon juice, and icing sugar to a bowl or the bowl of a stand mixer (which we suggest if you have one). Beat on medium-high until soft peaks begin to form, roughly 7-10 minutes with a stand mixer or slightly longer with a hand mixer, stopping to scrape down the sides if needed.
  • Once soft peaks form remove the beaters/paddle and scrape down the sides. The mixture will likely be too thick at this point, so add water 1 tsp at a time until it’s thinned to the consistency of liquid honey. It should be thin enough that it drips off the spatula in a constant stream.
  • Remove the spatula from the bowl and carefully tap the bowl down on your counter a few times to drive any air bubbles out of the icing.
  • Using the red gel, zip zag the coloring horizontally back and forth across the surface, being sure to leave gaps between the lines where the white icing peaks through. Do the same with the blue gel, adding it vertically on top of red.
  • Dip the cookies one at a time, pressing them into the icing enough to coat the top and pulling them straight up out of the icing. Let them hover over the icing until the excess has dripped off, then with a slight swirl of your wrist flip them right-side up. Place back on the cooling rack to dry.
  • If there are air bubbles in the icing, carefully dip the tip of a toothpick into the bubble and use very small circular movements to force it out. Carefully tap the entire cookie on a hard surface (like your counter).
  • Once you’ve used every undipped area of the icing, redo the pattern of blue and red gel coloring on top again. It will only add to the beautiful marbling effect!
  • Royal icing takes up to 24 hours to fully dry, but the cookies can be transferred to a container, unstacked need be. Don’t worry too much about the cookie itself drying out - sugar cookies last a long time before going stale (think weeks!). If you stack them too soon (or plastic wrap them, for example), the icing will be ruined, so leave them be!

Notes

If you don’t have a star cookie cutter, no problem! These cookies will look just as beautiful if they’re simple circles.

The post Easy Fourth of July Marbled Sugar Cookie Hack appeared first on Forkly.

Easy 5-Ingredient Copycat Wendy’s Frosty

We love a good copycat recipe here at Forkly and this Wendy’s chocolate frosty is no exception! All you need is five simple ingredients and we promise you’ll get an exact replica of a good ole’ Wendy’s Frosty! It’s actually uncanny how identical our copycat version is to the OG. Creamy, dreamy, and oh-so-chocolatey. Have […]

The post Easy 5-Ingredient Copycat Wendy’s Frosty appeared first on Forkly.

We love a good copycat recipe here at Forkly and this Wendy’s chocolate frosty is no exception! All you need is five simple ingredients and we promise you’ll get an exact replica of a good ole’ Wendy’s Frosty! It’s actually uncanny how identical our copycat version is to the OG. Creamy, dreamy, and oh-so-chocolatey. Have it as an afternoon snack outside in the sunshine or an after-dinner dessert to curb your sweet tooth – the choice is yours! What are you waiting for?

Looking for other ways to hack your monthly takeout bill? Check out these Copycat Recipes: Fast Food Favorites You Can Make At Home to get inspired!

All you need is a blender to whip up this magical treat! Dump the entire tub of Cool Whip into the blender, then add the rest of the ingredients: cocoa powder, salt, vanilla, and icing sugar.

Lid the blender and blend on MEDIUM speed until well-combined, about 30-60 seconds. Make sure there aren’t any lumps left. If there are, give it another pulse or two! The blending will not only help combine the frosty, but it’ll add air to the mixture to ensure the final result isn’t too dense. You should see some air bubbles in the frosty after it’s frozen!

Once the frosty is all mixed up, transfer it to a cup that can go in the freezer. We opted for a mason jar (pretty and functional!) and it was the perfect size! Fill up your container, scraping out all of the frosty mixture from the blender. Lid the container and place in the freezer until “frosted” – about 4-6 hours. No need to worry about it freezing solid if you forget about it. The Cool Whip will keep it from becoming too hard.

Once it’s to your desired level of frostiness, pull it from the freezer and grab a spoon! It’s time to dig into this decadant, easy, summer treat!

Servings: 2

Ingredients

  • 1 tub of Cool Whip (1L)
  • 1/4 cup cocoa powder
  • 1/3 cup powdered sugar
  • 2 tsp vanilla
  • Pinch salt

Equipment

  • Blender

Method

  • Add all ingredients to a blender and blend on high until well combined.
  • Transfer to a cup and place in the freezer until frosty - about 4-6 hours or until frozen. Serve frosty!

The post Easy 5-Ingredient Copycat Wendy’s Frosty appeared first on Forkly.

3-Ingredient Pudding Cup Rocket Popsicles

Summer is finally here and it’s a hot one! The easiest way to cool down (besides living in front of the A/C unit) is a cold treat, straight from the freezer! And boy do we have a good one for you! These pudding popsicles are reminiscent of the ones Jell-O used to make, but you […]

The post 3-Ingredient Pudding Cup Rocket Popsicles appeared first on Forkly.

Summer is finally here and it’s a hot one! The easiest way to cool down (besides living in front of the A/C unit) is a cold treat, straight from the freezer! And boy do we have a good one for you! These pudding popsicles are reminiscent of the ones Jell-O used to make, but you can make them at home with only a few ingredients, making them super inexpensive. Both you and your littles are sure to enjoy them, so what are you waiting for?!

Looking for another frosty summer treat? Check out our Easy 5-Ingredient Copycat Wendy’s Frosty!

Start by making the chocolate, butterscotch, and vanilla instant pudding packets according to the instructions on the packaging. We used Jell-O brand and each kind required two cups of cold milk. Allow it to thicken properly before moving onto the next step – this will make the final pop super creamy.

Add a full cup of Cool Whip to each type of pudding and whisk in well, ensuring the no lumps remain. The pudding should look more pastel after the addition of the Cool Whip, making for some very pretty popsicles.

Three boxes makes a lot of pudding, so if you won’t have a ton of popsicles molds, try halving this recipe and only making half of each package of Instant Jell-O Pudding. You can save the rest for the next time you want to make these!

Make sure your popsicle molds are washed and dried. Using a spoon, measuring cup, or piping bag, layer in the vanilla pudding, followed by the butterscotch and chocolate puddings. Make sure that each type fills about 1/3 of each mold. Between each layer, tap the mold onto the table or countertop to even out layers and remove any air bubbles.

Don’t fill them too full! Otherwise, the pudding may overflow and create a bit of a mess. Stick the popsicle sticks into each of the molds and transfer to the freezer for at least 6 hours or until fully frozen.

When they’re fully frozen, they’re ready to be eaten! Gently twist the stick to release the popsicle from the mold and lift out. If you’re having trouble, run some hot water over the sides of the mold of the particular popsicle you’re trying to remove for about 5-10 seconds to help release the pudding pop! Enjoy quickly or it may melt!

Servings: 20-30

Ingredients

  • Box of instant chocolate Jell-O pudding
  • Box of instant vanilla Jello-O pudding
  • Box of instant butterscotch Jello-O pudding
  • 6 cups cold milk
  • 3 cups of Cool Whip

Equipment

  • Popsicle molds
  • Electric beaters or stand mixer

Method

  • In three separate bowls, mix each box of instant pudding with 2 cups of milk each. Whisk well according to package instructions.
  • Add 1 cup of whipped cream (or Cool Whip) into each bowl and whisk until well combined.
  • Allow pudding to sit for five minutes (to thicken).
  • Alternate layers of chocolate, butterscotch, and vanilla pudding in the popsicle molds. Push the stick lids into the molds and freeze for at least 6 hours or overnight.

Notes

If you prefer, replace the Cool Whip with 2 cups of whipping cream, 2 tsp vanilla, and 3 tbsp sugar to make homemade whipped cream.

Switch up or add other pudding flavors to your liking!

Our popsicle molds were quite narrow so we found using a piping bag very helpful to be able to neatly add the layers of pudding.

Between each layer, tap the mold onto the table or countertop to even out layers and reduce air bubbles.

The servings may vary depending on the size and shape of your popsicle molds.

The post 3-Ingredient Pudding Cup Rocket Popsicles appeared first on Forkly.

Simple Salmon Sheet Pan Dinner

Spring has finally sprung and we are all about it. While winter had us craving hearty, comfort food-esque dinners, springtime brings a desire for fresh, lighter foods … and not just because we’re anticipating putting on a bathing suit a few months from now. Sheet pan dinners are a year-round favorite in my home because they’re […]

The post Simple Salmon Sheet Pan Dinner appeared first on Forkly.

Spring has finally sprung and we are all about it. While winter had us craving hearty, comfort food-esque dinners, springtime brings a desire for fresh, lighter foods … and not just because we’re anticipating putting on a bathing suit a few months from now.

Sheet pan dinners are a year-round favorite in my home because they’re very customizable, always delicious, and create a minimal mess. In fact, my family loves them so much we have them almost every Monday … because Mondays are hard enough as is. Sheet pan dinners are also incredibly fast to make, which leaves more time to take advantage of this beautiful weather we’re finally getting!

This salmon sheet pan dinner with crisp green beans and hearty mini potatoes is no exception. The fish came out flaky and packed full of sweet and tangy flavor. So whether you’re just looking for another sheet pan dinner to add into your rotation or want an easy dinner to celebrate Spring (or maybe Easter!), we’ve got you covered with this dijon mustard and honey glazed salmon fillet dinner!

Servings: 6

Ingredients

  • 1 whole, skin-on salmon fillet
  • 1 1/2 cups mini potatoes, quartered
  • 2 cups green beans, ends snipped
  • 3-4 tbsps olive oil
  • 1/4 cup honey
  • 1/4 cup grainy dijon mustard
  • 1 tbsp garlic, minced
  • 1 tsp ginger, minced
  • 1 pinch red pepper flakes
  • 1 tsp fresh thyme, chopped
  • 1/2 lemon, juiced
  • Parsley, chopped
  • Salt & pepper

Equipment

  • Sheet Pan

Method

  • Preheat oven to 400 Degrees Fahrenheit.
  • Place the salmon fillet, mini potatoes, and green beans onto the sheet pan. Drizzle with olive oil and season with salt and pepper. Toss to coat.
  • In a small bowl, combine honey, dijon, garlic, ginger, red pepper flakes, and thyme. Mix well. Reserve 1/4 cup of the marinade.
  • Pour remaining marinade onto salmon and spread evenly with a fork or spoon to coat.
  • Bake in oven for 20-25 minutes.
  • Remove from oven and spread the reserved marinade onto the salmon fillet.
  • Return to the oven and Broil on High for 3-5 minutes.
  • When fully cooked, remove from oven. Top with freshly squeezed lemon juice and fresh parsley.
  • Serve warm and enjoy!

The post Simple Salmon Sheet Pan Dinner appeared first on Forkly.