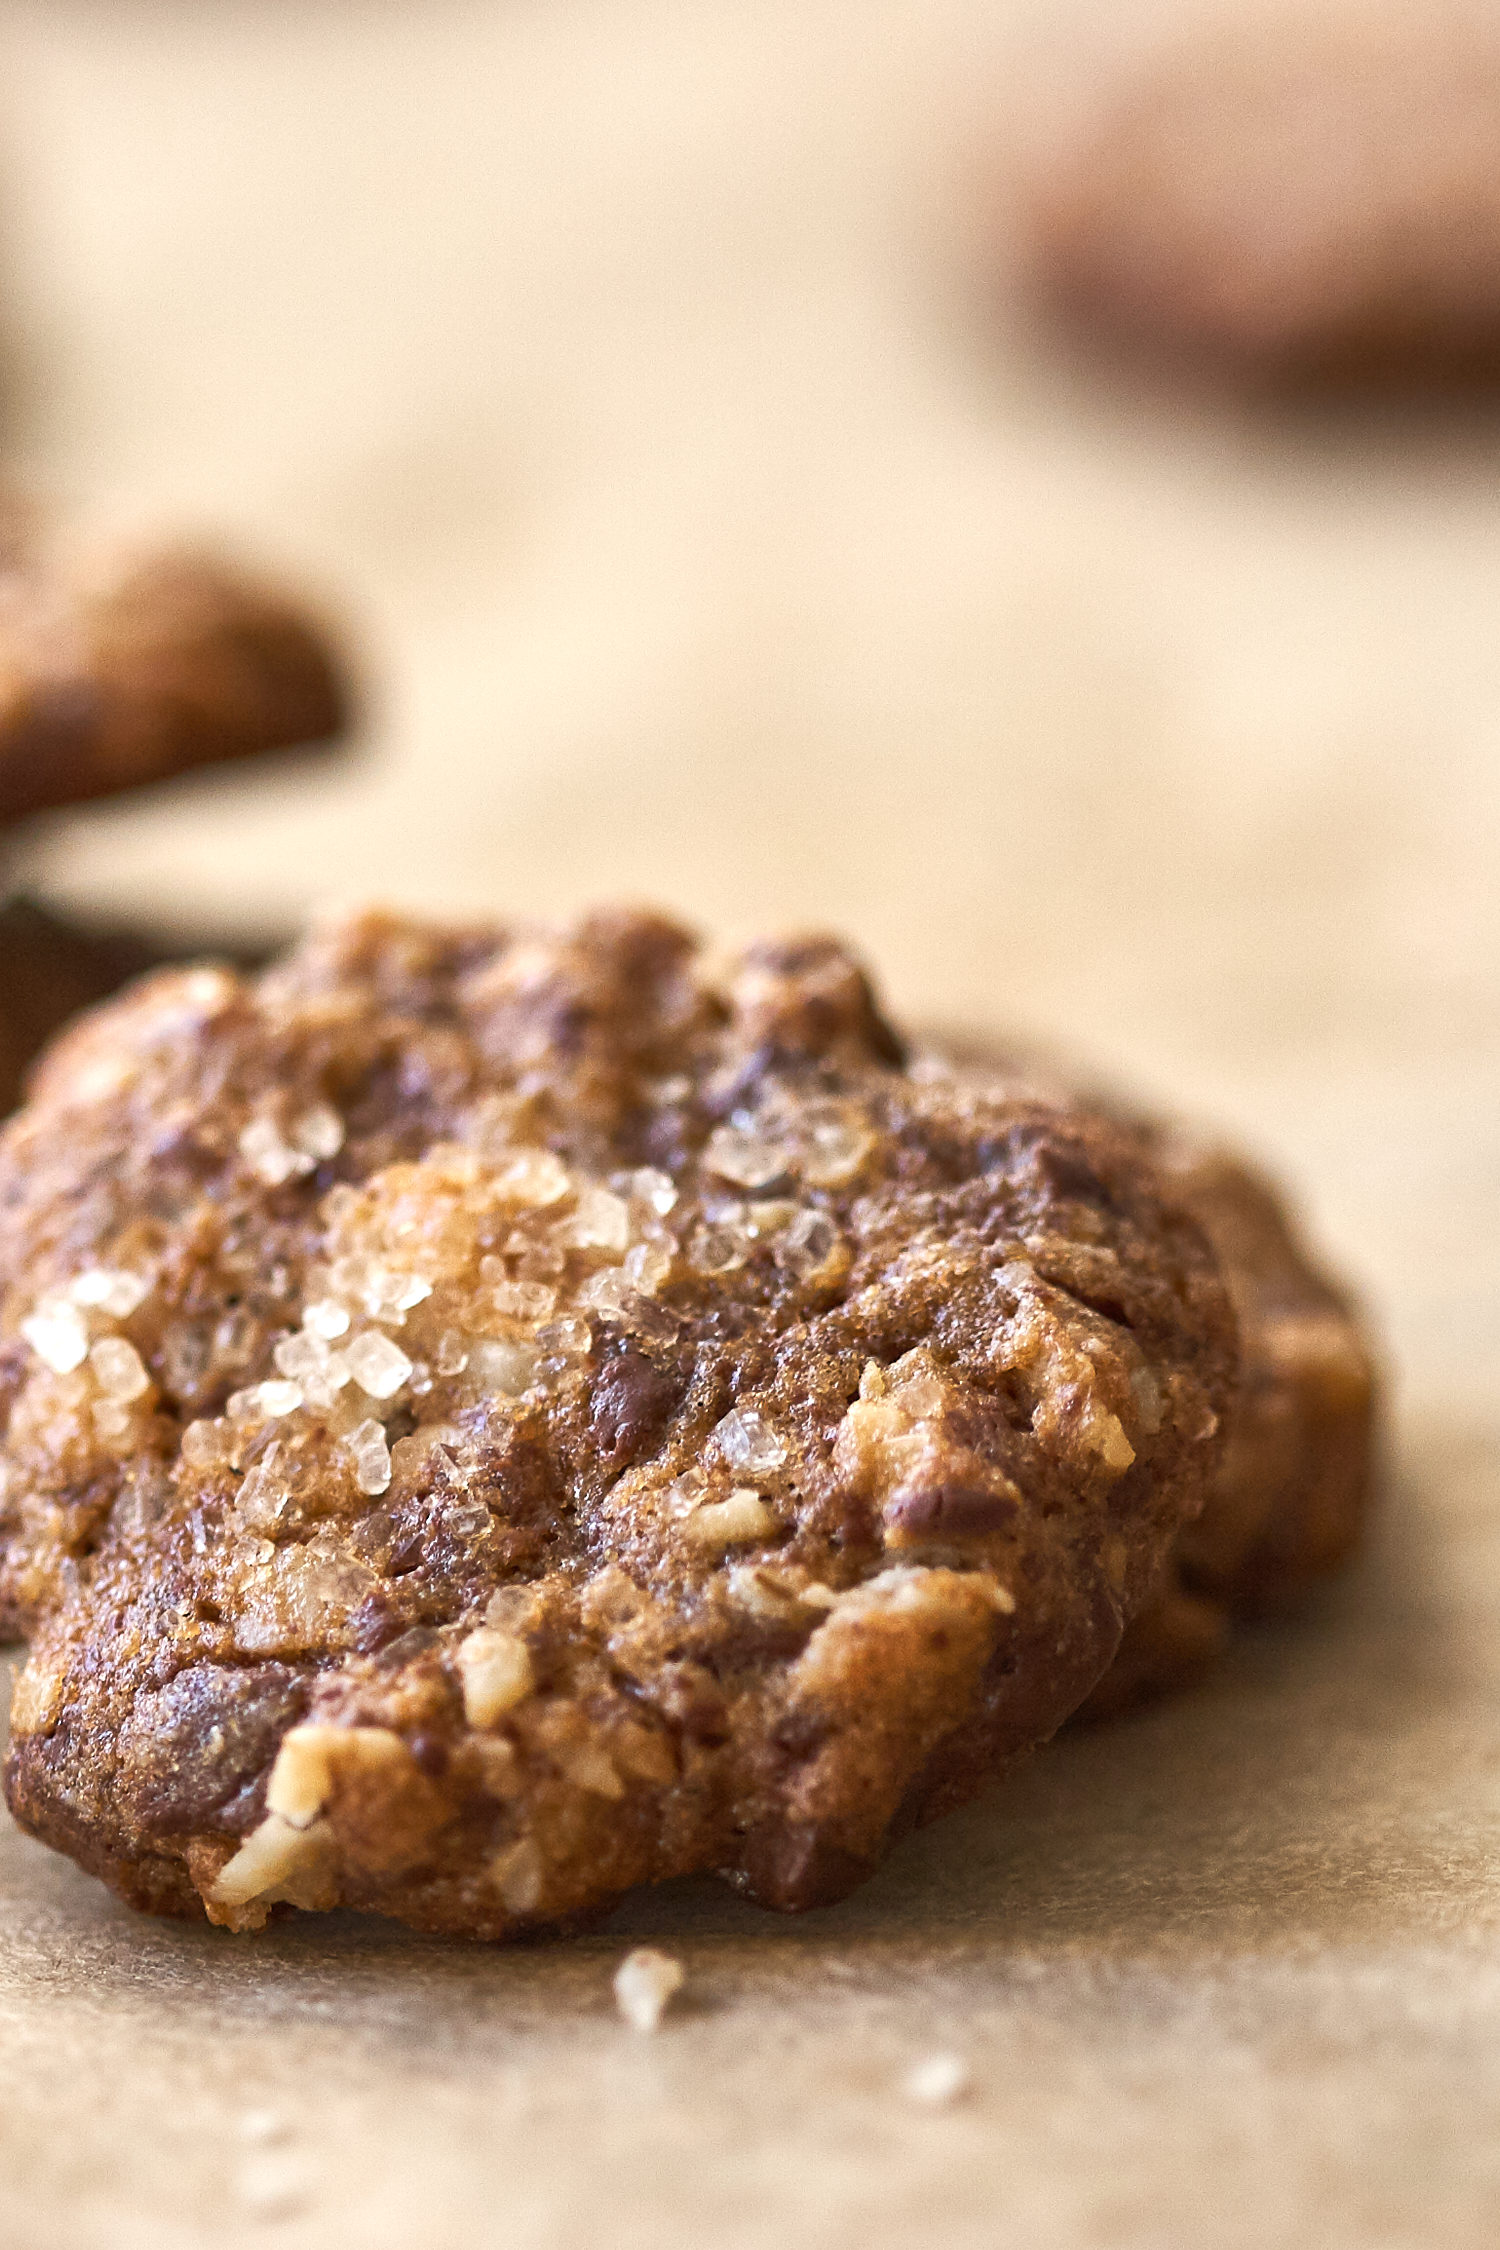
I recognize the lead photo for this post makes these chocolate chip cookies look enormous. They are not. In fact, one of these cookies is about the size of a half-dollar, you might be able to fit a dozen of them in the palm of your hand. And while the photo might be a bit misleading, the trade-off is that you can see all the flecks of shaved chocolate, oats, and walnuts that are packed into every tiny cookie. The grains of sugar on top? They give the cookies just the right amount of crunch. These are the perfect bite-sized cookie, and each batch makes nearly twelve dozen of them.
Itsy Bitsy Chocolate Chip Cookies: The Concept
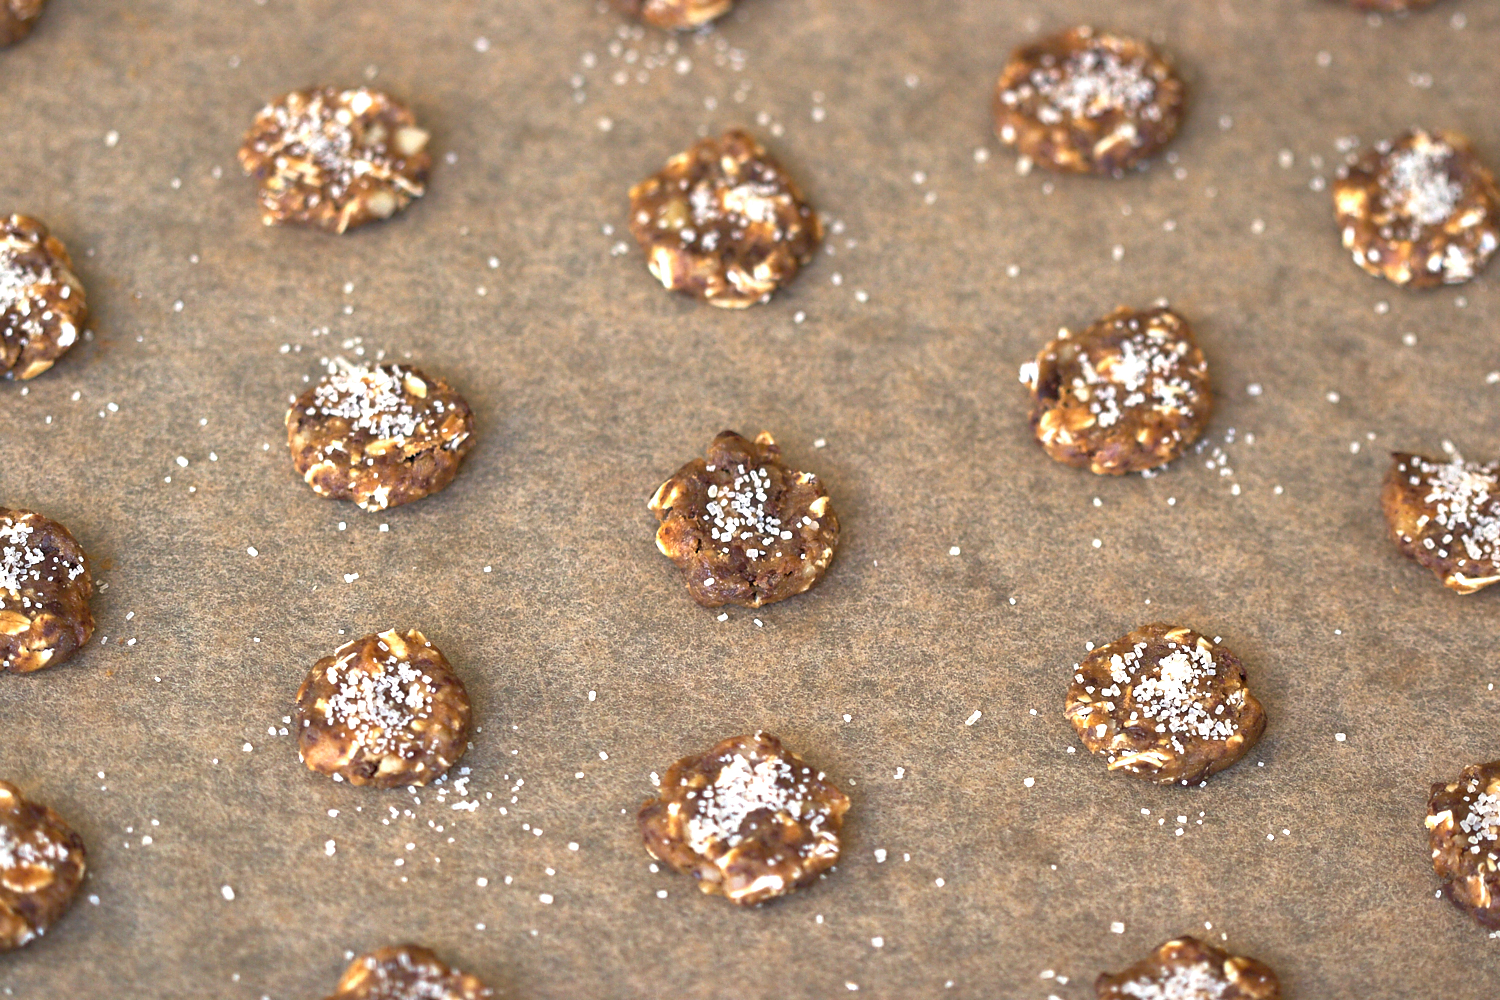
I started working on this recipe over the summer (it took a few tries!). I knew I wanted my cookie to be tiny. I wanted it to be thin, and I wanted it to be golden, crisp, nutty, with plenty of chocolate. I started shaving the chocolate early on, instead of using chips or chunks. It ended up being one of the things that makes these cookies unique -and it allows you to press the dough near flat.
The recipe doubles easily, and I can’t resist mentioning that ice-cream sandwiches made with them are tres cute and tasty. The key is resisting the urge to use too much dough when you’re shaping them.
Variations:
There have been some great substitutions and variations in the comments. I’ll call out a few that caught my attention.
Susie says, “These cookies were AMAZING!! I used date sugar instead of the cane sugar, and they turned out just fine. I gave some to my best friend, and she said, “I’d pay MONEY for these!” “
Leigh went the coconut route, “I made these tonight replacing 1/2 cup of the oats with a mixture of toasted coconut and toasted wheat germ.”
Sassy reports, “I added raisins and Craisins to half the batch. Yum yum!”
Indulge in citrus bliss with this fluffy lemon bread recipe! Its soft texture, vibrant lemon flavor, and zingy glaze make it an irresistible loaf for any season.
It’s that time of year when we start craving lemon, and here’s the latest in our extensive collection of lemon recipes that you must try: this glazed buttermilk lemon bread recipe! We’ve been authors of baking recipes for over 10 years and we’ve learned a thing or two about baked goods, particularly quick breads. Here we’ve created the moistest, fluffiest, zingiest lemon loaf possible, topped with a flavor-popping zingy citrus glaze! It’s easy to whip up with just 10 ingredients.
What people are saying about this lemon bread recipe
When we create a recipe, we often like to have an independent recipe tester take a crack at it to verify that it’s as delicious and fool-proof as we think it is. This lemon bread recipe was tested by reader Lexi, who gave this testimonial:
“This lemon loaf turned out wonderful! The texture is wonderful, slightly moist, with a nice crumb. The lemon flavor is bright and zesty, balanced well with the sweet lemon glaze. It is so good the next day as well. We had it for breakfast this morning!”
3 key ingredients for perfect lemon bread
Alex and I have been creating baking recipes for over 10 years, and we’ve learned a few things about quick breads. What we’ve learned? You can’t cut corners with baked goods: you’ve got to use the very best ingredients and techniques if you want the best flavor and textures! There are three key ingredients to make a perfect lemon bread in our opinion:
Buttermilk: Turns out, buttermilk is the key to the fluffiest quick breads and muffins with the most tender crumb. We tried avoiding it for years since we didn’t regularly stock it, but it truly does wonders in this lemon bread. Don’t be tempted to make a buttermilk substitution! I learned the importance of buttermilk from professional baker and author Sarah Kieffer, and after using it in recipes I’ve seen a big difference in the texture of our baked goods!
Real lemons: In this recipe, you’ll need lemon zest in the bread itself and lemon juice in the icing. Using lemon juice in the bread isn’t necessary, since it can add a sour flavor instead of infusing a zippy nuance.
Lemon extract: The other key to lemony baked goods is using lemon extract! Over years of testing, we’ve found a combination of extract and real lemon zest makes the very best lemon flavor. It’s easy to find in the baking aisle, and you only use small amounts at a time. This is what makes it taste like a Starbucks lemon loaf!
A few quick tips for baking the loaf
There are a few quick tips for baking this lemon bread recipe to make it the best loaf possible. After honing 20 quick bread recipes, here are a few tips for baking a lemon loaf:
Rub the lemon zest into the sugar first. Instead of adding the lemon zest right to the recipe, place the zest in the sugar and use your fingers to rub the zest into the sugar. This activates the essential oils in the zest, helping it to taste more lemony.
Use an aluminum baking pan for best results. Ceramic and glass pans don’t cook as evenly for quick breads. We recommend a 9-inch aluminum loaf pan. You can use an 8-inch pan as well: just increase the bake time slightly.
Use parchment paper to easily remove the bread (and for quicker cooling). We cut the paper so it is the width of the loaf pan, then allow it to extend on either side of the pan to make a “sling” for easily removing the bread. This helps it cool faster, which is required before pouring on the glaze.
That lemon glaze really seals in the zingy flavor!
The best part of this lemon bread recipe is the lemon glaze, which is the literal and figurative icing on top! It makes the bread taste significantly more lemony, almost like adding salt to a savory recipe to make it pop. Don’t be tempted to omit the icing! You can, but the bread will have a mellow quality: it’s nice, but it doesn’t have the “BOOM” flavor that it does with the icing. Here are a few tips for applying the lemon glaze:
Wait until the bread is cool prior to icing. Otherwise, the icing will melt into the bread.
Use a fork for drizzles, or a spatula for a smooth glaze. A fork makes the best drizzly lines: with a spoon it’s a bit too chunky. Use half the glaze for a drizzled look like this lemon blueberry bread. If you’re making the full glaze recipe, use a spatula to spread it on.
Make ahead and storage info
Because it’s made with buttermilk, this lemon bread recipe stays incredibly moist during storage! In fact, it gets even more moist over time. We tested this recipe with sour cream but it came out much drier especially over storage time. Buttermilk for the win!
You can make lemon bread in advance and cover in aluminum foil un-iced, then ice before serving.
The bread lasts at least 5 days at room temperature wrapped in aluminum foil or refrigerated for 10 or more days wrapped in foil (bring to room temperature before enjoying). You can also freeze un-iced bread for up to 3 months. We suggest slicing it into pieces and wrapping it in plastic wrap then a freezer-safe bag or container before freezing.
More of our favorite lemon recipes
There are so many fun lemon recipes try; here are a few of our favorites. Happy cooking!
Indulge in citrus bliss with this fluffy lemon bread recipe! Its soft texture, vibrant lemon flavor, and zingy glaze make it an irresistible loaf for any season.
Grease a 9-inch aluminum loaf pan. Line the pan with a piece of parchment paper, cut so that it extends on two sides to easily remove it from the pan.
In a large bowl, whisk the all-purpose flour, baking powder, baking soda, and salt.
Place the lemon zest in a large bowl with the sugar. Use your fingers to rub the zest into the sugar until it is fragrant (this activates the flavor of the zest).
Whisk in the melted butter, then whisk the eggs one at a time. Whisk in the buttermilk and lemon extract. Switch to a spatula. Add the dry ingredients and stir until smooth. Spread evenly into the prepared pan.
Bake 53 to 55 minutes until the top springs back when touched and a toothpick inserted comes out clean (if the top is not set at this point, bake a few minutes longer). The exact timing will depend on your oven and baking pan.
Cool the bread in the pan for 30 minutes. Then run a knife around the edge and invert the loaf onto a cooling rack. Allow to cool fully to room temperature (about 30 minutes to 1 hour).
Mix the ingredients in a small bowl until it comes together into a smooth icing (if it is too runny add a bit more powdered sugar; if it’s too thick add a few drops more lemon juice). Use a fork to drizzle the top of the bread with the icing (½ recipe) or a spatula to spread it (full recipe).
Make ahead / storage: You can make the bread in advance and cover in aluminum foil un-iced, then ice before serving. The bread lasts at least 5 days at room temperature wrapped in aluminum foil or refrigerated for 10 or more days wrapped in foil (bring to room temperature before enjoying). You can also freeze un-iced bread for up to 3 months (slice it into pieces and wrap it in plastic wrap then a freezer-safe bag or container).
This 3-ingredient strawberry mousse is light, fluffy, and bursting with berry flavor! Made with just strawberries, whipped cream, and a touch of sweetness, it’s the perfect easy dessert for any occasion.
Here at A Couple Cooks we’ve been on a kick of creating 3 ingredient recipes, because who doesn’t love simplicity? (We’re even authors of a cookbook of simple recipes.) Here’s our latest simple dessert idea: this strawberry mousse recipe! A combination of ripe berries, heavy cream, and a touch of sweetener takes just minutes to whip up and makes a pile of fluffy, berry-scented goodness. We saw this concept on social media and created our own spin using maple syrup, an immersion blender, and a whisk. If you’re like us, add a handful of crushed pretzels for that nostalgic sweet and salty hit!
All you need are 3 ingredients for this strawberry mousse
There’s a certain satisfaction to making something with only 3 ingredients, right? This sweet treat is perfect for whipping up in a few minutes for dinner guests or with a kid in your life. You’ll need a small blender (or blender, keep reading for why), a whisk, and this handful of ingredients to make this lusciously fluffy berry mousse. Here are the ingredients you’ll need:
Strawberries: Try to find the ripest, reddest berries you can. Bonus points for local berries! Keep in mind that out of season berries can be tart and tasteless, so making this in the winter months it’s not as tasty (though you can add more sugar to compensate).
Pure maple syrup, honey or sugar: We like this dessert best sweetened with maple syrup, particularly the type marked “Grade A: Dark Color and Robust Flavor” in the US. We find it has the best flavor and avoid any syrups marked amber. Honey works well as a sweetener as well, as does granulated sugar.
Heavy cream: This ingredient is what makes the magic! There are no substitutes for heavy cream here, since the dairy fat is what makes the fluffy texture.
A delicious shortcut for mousse
We will admit this strawberry mousse is not “technically” a traditional mousse like this chocolate mousse, which is cooked on the stovetop and thickened with eggs. Think of it as a delicious shortcut! Because of that, the texture is more light and fluffy than a standard mousse. You can refrigerate the mousse after whipping it up, which helps to make more of a “set” texture.
You can adjust the sweetness to taste
We like making this strawberry mousse recipe with 2 tablespoons sweetener, which makes for a lightly sweet mousse. But if you’re used to very sweet desserts or are cooking for a crowd that is, use 3 tablespoons sweetener for a sweet-tasting strawberry mousse. You also may want to use sugar as your sweetener, as it brings a more direct sweetness compared to the nuanced flavor of maple syrup or honey.
Don’t have a small blender? No problem
This recipe uses a small or immersion blender because the overall quantity of berries is so small, it doesn’t blend well in a standard size of blender. (If you’ve tried it, you know!)
A food processor should also work for this recipe. Or, double the recipe and make it in a standard blender so the quantity is large enough to blend. Then just use half the strawberry puree for the mousse and use the rest in other ways (see these ideas!).
Another way to serve it: as strawberry mousse pie!
This strawberry mousse is delicious served up in little jars with crushed pretzels or graham crackers. Or if you like, you can make double the recipe and pour it into a pretzel crust or graham cracker crust! Make sure to refrigerate it for a few hours before serving to set the mousse to a thicker texture.
Diet considerations, and a trick for vegan
This strawberry mousse recipe is vegetarian and gluten-free. We have not tested a vegan variation, but we’d suggest trying this vegan heavy whipping cream by Nora Cooks and gently folding in the strawberry puree. Let us know if you try it!
More strawberry recipes we love
Embrace the season with more of our favorite strawberry recipes! We hope you love this recipe and let us know what you think in the comments below.
This 3-ingredient strawberry mousse is light, fluffy, and bursting with berry flavor! Made with just strawberries, whipped cream, and a touch of sweetness, it’s the perfect easy dessert for any occasion.
Ingredients
1 cup diced strawberries (about 8 ounces)
2 tablespoons* maple syrup (or honey or sugar)
1 cup heavy cream
Instructions
Clean and chop the strawberries. Using a small blender or immersion blender,** blend the berries with the maple syrup. Add the cream and pulse 2 to 3 times until combined.
Pour the cream mixture into a bowl. Whip with a whisk for 2 minutes until thickened and fluffy.
Serve immediately or refrigerate until serving. Serve with crushed pretzels or graham crackers if desired.
Notes
*2 tablespoons maple syrup makes for a lightly sweet mousse. Use 3 tablespoons if you prefer a sweet mousse.
**A food processor should also work. Doubling the recipe works in a standard blender since the quantity is large enough to blend. If you don’t have a small blender, you can blend double the berries in a large blender and use half the puree for the mousse.
These soft and chewy carrot cake cookies are packed with shredded carrots, cozy spices, and a hint of cream cheese frosting. They’re the perfect recipe to celebrate the season!
As two cookbook authors, we love creating recipes that create a fusion between two equally delicious foods. So here’s a fun mashup up our most popular cookie with our favorite seasonal cake flavor: this carrot cake cookies recipe! These soft and chewy cookies have all the best elements of carrot cake: moist, spiced cake, vibrant flecks of carrot, and crunch of walnuts or pecans—all condensed into bite-sized perfection! Top it all off with a drizzle of cream cheese frosting and it’s a perfect sweet treat for spring (or in any season, we think!).
These carrot cake cookies are outrageously good: chewy, soft, and delicious! We developed them based on our popular chocolate chip cookies, and we might like them even better. Here are a few reasons to love them:
People love them. Our recipe tester Lexi said, “The spices are spot on. They definitely taste like carrot cake, but in cookie form. They were really fun to make and so good! By the way, they taste AMAZING straight from the fridge. Quite addictive.”
They are easy and store well. There’s no chilling the dough required and no special techniques. And, these cookies stay soft and chewy for days!
The cookies have nutritious ingredients. They’re not a health food, but these cookies are loaded with old Fashioned oats, carrots and walnuts.
They’re easy to make vegan. These cookies are eggless and can be made with coconut oil for vegan or with butter!
Ingredients you need
Carrot cake is not hard to make, but whipping up a layer cake does take some time and technique. Instead, these cookies are bite-sized forms of carrot cake that come together simply and require less overall quantities of ingredients. Here’s what you’ll need for these carrot cake cookies:
Baking essentials: Neutral oil (grapeseed, canola or vegetable), butter or coconut oil, granulated sugar, brown sugar, all-purpose flour
Produce: Carrots, applesauce
Pantry ingredients: Old Fashioned oats, walnuts, vanilla extract, almond extract, baking soda, cinnamon, ginger, nutmeg, salt
We highly recommend using the almond extract for the best flavor! The recipe calls for 1/16 teaspoon extract (1 to 2 drops), which is just enough to give it a nuance in flavor but not enough that it is strongly perceptible. We use a ⅛ teaspoon measure and fill it halfway; if you don’t have one, you can approximate using a ¼ teaspoon.
Tips for baking carrot cake cookies
There are a few tips for baking the best carrot cake cookies! Here’s what we do to get even-sized cookies that work every time:
Use a cookie scoop or weigh the batter. If you have a 3 tablespoon cookie scoop, it’s helpful for portioning the dough: just overfill it slightly. You can also weigh out the batter at approximately 50 grams per cookie (or weigh your entire dough and divide by 18).
Non-stick cookie sheets are helpful. This has become our preferred method for cookies. We recommend using two of these non-stick cookie sheets for the most even bake.
Bake each tray separately for the most even bake. If you have a very even oven, you can try baking both sheets at once and rotate the sheets halfway through. However, our oven is pretty uneven so this is what works best! There’s no need to refrigerate the dough in between batches.
For the cream cheese icing
The cream cheese drizzle is what takes these cookies to the next level! You’ll need just cream cheese, powdered sugar, butter, and milk (vegan as desired). We piped on the icing using a piping bag, but you can use a fork to drizzle as well.
Warm 3 tablespoons cream cheese in the microwave or stovetop. Warming it makes it easy to stir into a glaze.
Adjust the liquid as necessary. The icing will feel very thick at first, but keep stirring and it will form into a thick drizzle. That’s all there is to it!
Use a piping bag for neat zig zags, or a fork for a messy, more organic drizzle. Don’t use a spoon, which makes for more of a thick, uneven look.
Dietary swaps: they’re easily vegan!
These carrot cake cookies are easily made vegan! Simply use refined coconut oil, which is our favorite way to make these cookies (the butter is a swap). For the icing, use vegan cream cheese, vegan butter, and the plant-based milk of your choice. Or, go to this Vegan Cream Cheese Icing.
Storage info
Carrot cake cookies hold up well over time, keeping their chewy texture. Here’s what to note about storing them:
Store in a sealed container at room temperature for 1 week. The texture holds up well and they stay chewy with no need to add anything to the container.
Store refrigerated for 2 weeks. Allow to come to room temperature before serving.
Store frozen for up to 3 months.
More cookies recipes
Carrot cake cookies are perfect as a spring recipe or any time of year! Here are a few more cookies you might enjoy:
These soft and chewy carrot cake cookies are packed with shredded carrots, cozy spices, and a hint of cream cheese frosting. They’re the perfect recipe to celebrate the season!
Preheat the oven to 350°F. Line two large baking sheets with parchment paper, or omit if using non-stick cookie sheets (we swear by these).
In the bowl of a stand mixer (or a large bowl), add the neutral oil, coconut oil, brown sugar, and granulated sugar. Mix with the paddle attachment (or an electric mixer) on Medium speed until fully combined, about 1 to 2 minutes. Add the applesauce, vanilla extract, and almond extract and mix until combined, a few seconds.
In a separate bowl, whisk the flour, baking soda, cinnamon, kosher salt, and Old Fashioned oats. Turn on the mixer and gradually add the flour and oats mixture, mixing until just incorporated. Add the carrots and walnuts and mix on low for a few seconds until mixed in. The dough will feel slightly oily, but this is as expected.
Scoop nine 3-tablespoon-sized balls of dough onto the prepared cookie sheet, leaving a few inches between each cookie for spreading (using a cookie scoop is helpful; we overfilled our 2 tablespoon scoop or you can weigh out 50 grams each). Bake one batch for 14 to 15 minutes, or until just golden (baking one batch at a time makes the most even bake). Cool the cookies on the baking sheet for 5 to 10 minutes before transferring them to a cooling rack to cool fully. While the cookies cool, portion out and bake the second batch of dough; don’t refrigerate the dough in between.
Once the cookies are fully cooled, to make the icing, place the cream cheese and butter (cut into a few small pieces) in a glass measuring cup or bowl and microwave for about 20 seconds until warm, then stir together until smooth. (Alternatively, warm it in a small saucepan over medium low heat on the stovetop). Stir in the powdered sugar and milk and mix until a drizzlable glaze forms. If the glaze is too thick, add ½ teaspoon milk at a time until it becomes able to drizzle but still has a thick texture.
Pipe the icing onto the cookies using a piping bag or use a fork to drizzle it over the cookies. Allow to dry for 10 minutes. Store the cookies in a sealed container at room temperature for up to 5 days or refrigerated for 2 weeks (bring to room temperature before serving). If making the cookies in advance, store them un-iced and refrigerated or frozen; add the drizzle directly before serving.
Notes
*We highly recommend using the almond extract for the best flavor! 1/16 teaspoon equates to 1 to 2 drops, just enough to give it a nuance in flavor but not enough that it is strongly perceptible. We use a ⅛ teaspoon measure and fill it halfway; if you don’t have one, you can approximate using a ¼ teaspoon.
Category:Dessert
Method:Baked
Cuisine:Dessert
Diet:Vegan
Keywords: Carrot cake cookies, carrot cake cookies recipe
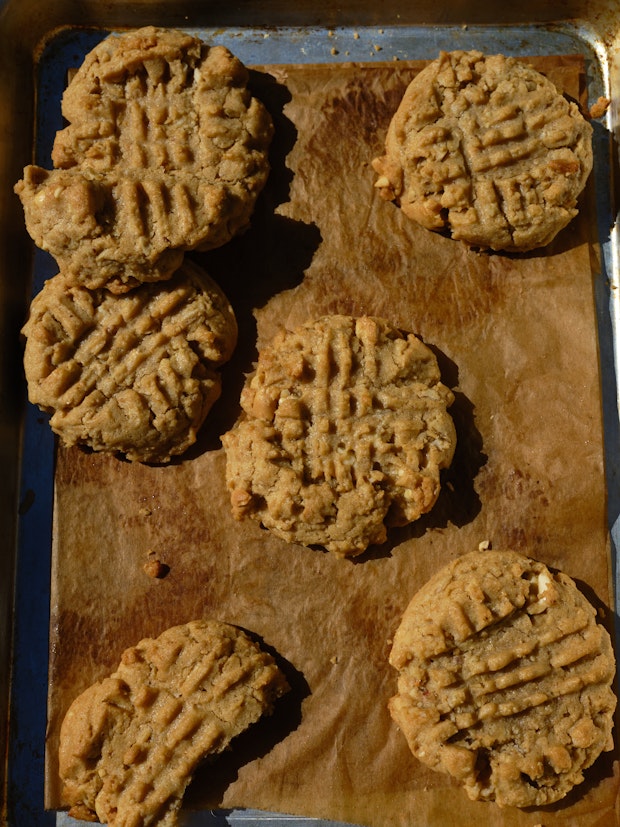
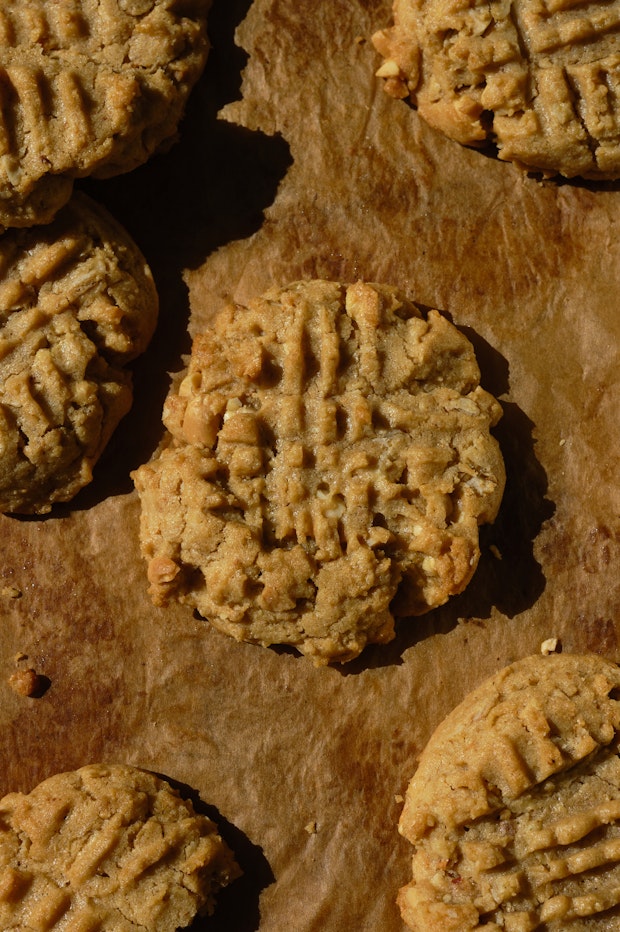
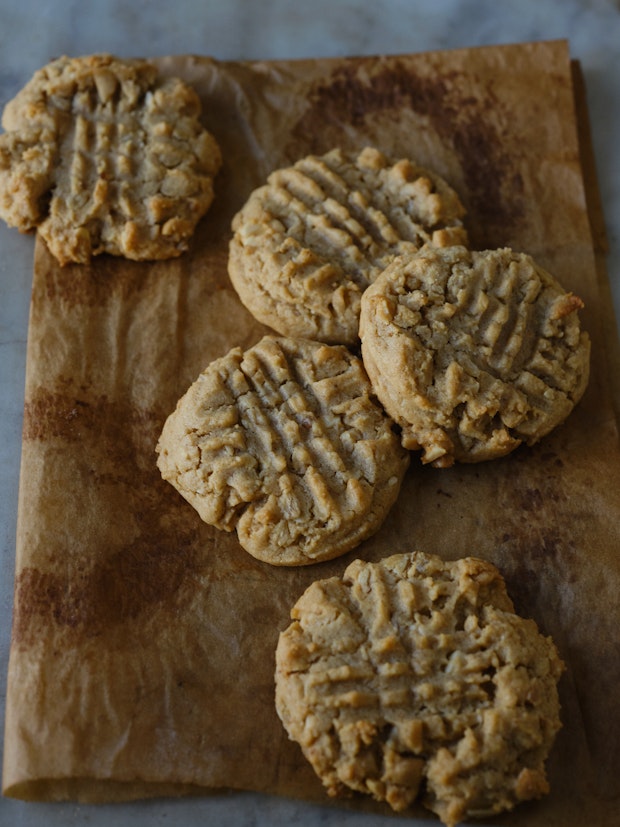
Classic peanut butter cookies flecked with oatmeal and baked until golden. Double down on the peanut front with hand-chopped peanuts and chunky peanut butter.
This is a peanut butter butter cookie flecked with oatmeal and baked until golden. A cookie for the peanut butter lovers out there. Anchored squarely in the PBC zone, the oatmeal is an accent. A hearty, chewy bonus ingredient that levels up a classic cookie. Toasted at the edges, soft and fudgy textured in the center, they’re a peanuty dream. Especially dunked in coffee.
Oatmeal Peanut Butter Cookies: Ingredients
A few notes related to the ingredients in these cookies. The ingredients are all quite straight-forward, and you might have them in your pantry currently.
Peanut Butter: For these cookies, my preference is all-natural peanut butter. I go into more detail down below. That said, if you already have peanut butter on hand, use it! One peanut butter I grab when I see it is this one (not sponsored, just a fan). It’s dark roasted, organic, made simply with roasted peanuts and a bit of salt, with good flavor. Note that it isn’t the “no-stir” variety.
Brown Sugar: You can use whatever brown sugar you have on hand to make these cookies. The cookies you see pictured here were made with light brown sugar, but I often make them with dark brown sugar.
Peanuts: This recipe doubles down on the peanuts, it’s all about the peanut flavor. In addition to the peanut butter, you’ll add about a cup of well-chopped peanuts. Use whatever peanuts you like to snack on.
Oatmeal: Look for old-fashioned rolled oats. Not instant oats.
Can I use Natural Peanut Butter in Peanut Butter Cookies?
Yes, you can absolutely use natural peanut butter in this cookie dough. The cookies you see pictured here were made with natural peanut butter. If you aren’t sure what type of peanut butter you have, check the ingredient list on the back of your jar. I like to see peanuts, and maybe a bit of salt. In contrast, a lot of peanut butter cookie recipes will suggest using more processed peanut butter. The ingredient list for these types of peanut butters will often have added sugars, oils, and/or stabilizers. That said, use what you have. With a more processed p.b. the texture of your cookies might a bit more fudgy, and with the natural peanut butter it’s sometimes a shade more crumbly.
The Key:I’ve found the key to using natural peanut butter is stirring it until it is well blended and completely uniform.
Oatmeal Peanut Butter Cookies: The Technique
Simple to make, these cookies are a basic drop cookie.
Mix the wet ingredients:Cream the butter, sugar, and peanut butter in an electric mixer. Add the eggs and vanilla.
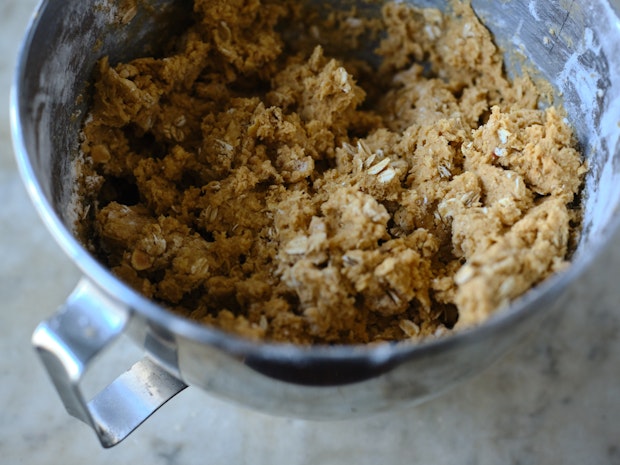
Dry ingredients: Whisk together the flour, baking soda, baking powder, and salt. Add in stages to the wet ingredients. Stir in the peanuts and oats by hand (above).
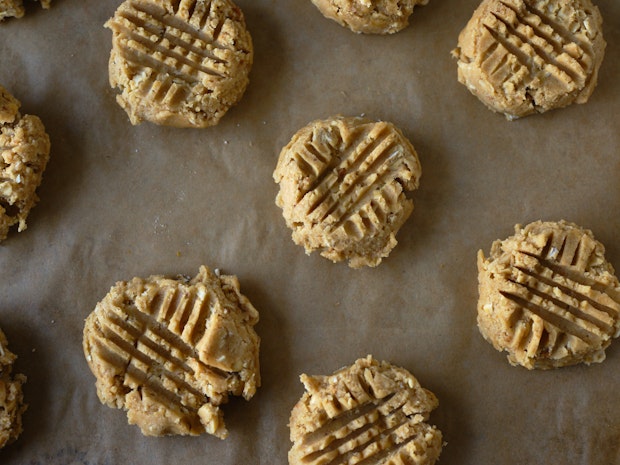
Shape: Scoop the dough onto a baking sheet and chill for 30 minutes.
Criss-cross: Press the tops of each cookie with the tines of a fork twice, in a grid design (above).
Bake: Put the cookies in the oven, bake and then cool.
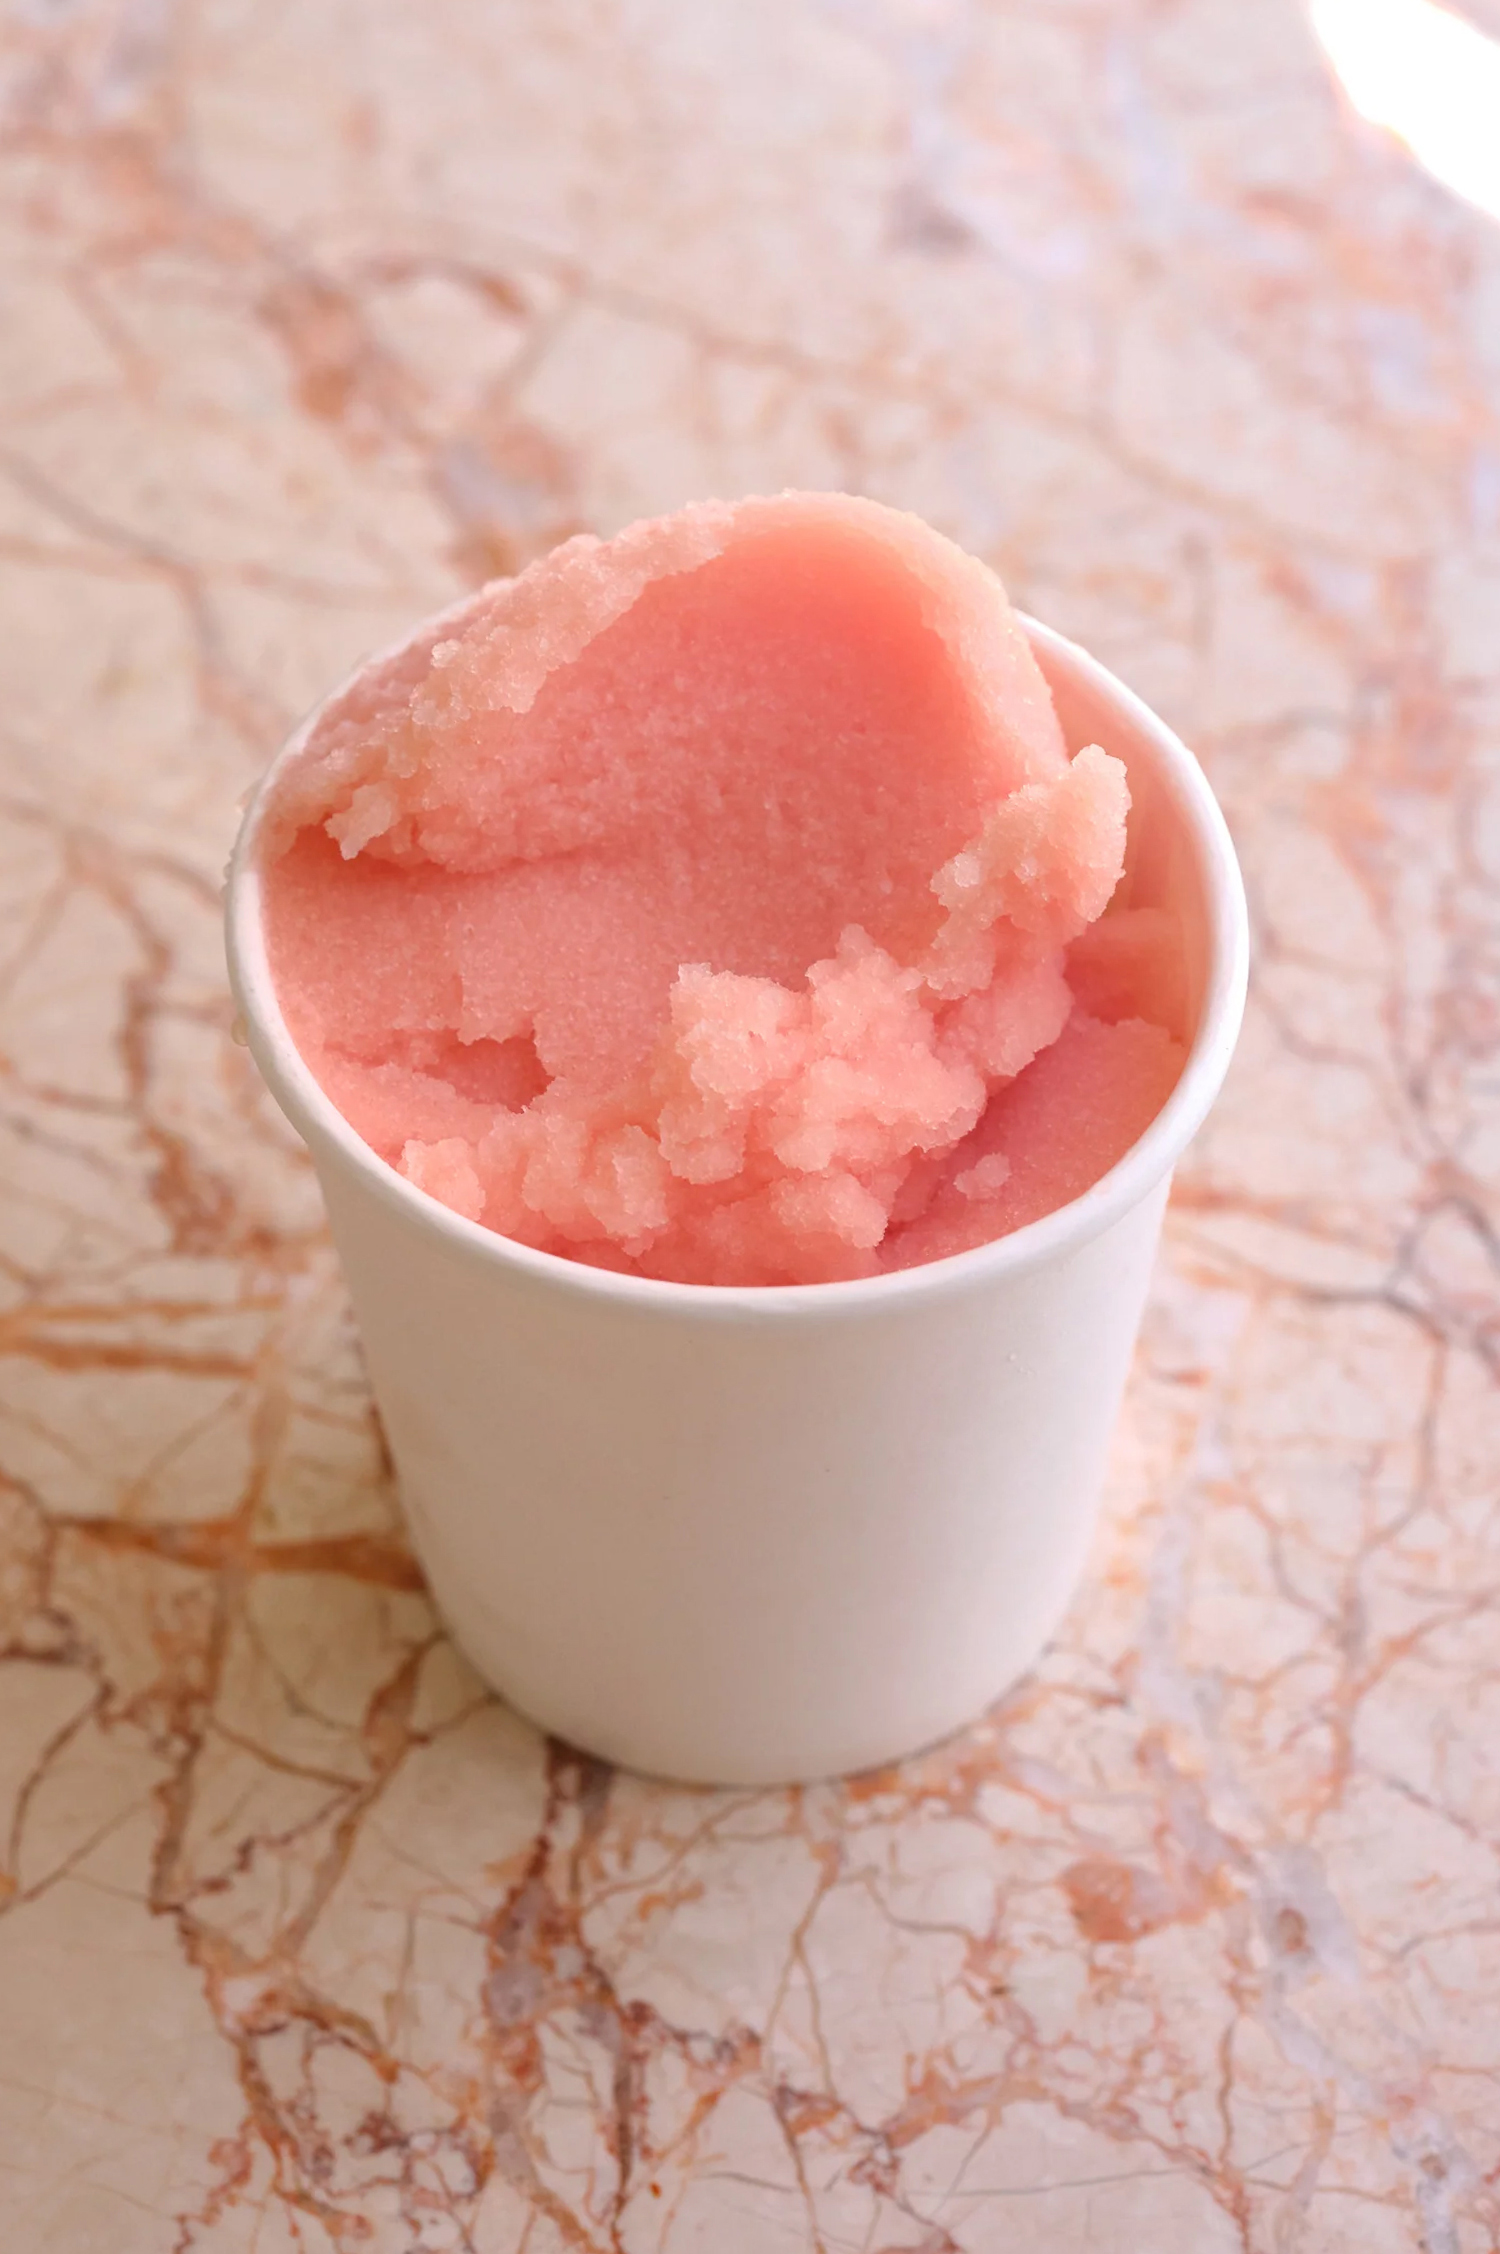
This grapefruit sorbet is inspired by the Paloma cocktail. It is blushingly tart and sweet, a straight-shooting sorbet made with fresh grapefruit juice spiked with a bolt of tequila.
This beautiful grapefruit sorbet is a frosty dream inspired by the paloma cocktail. It’s a straight-shooting sorbet made with freshly squeezed grapefruit juice spiked with a kiss of tequila. The perfect jolt of citrusy sweetness to finish a meal.
Grapefruit Sorbet: The Technique
Citrus juice that has been heated tastes different than juice that hasn’t. To keep this sorbet bright and fresh tasting I cook just a portion of the citrus juice with the sugar – and only long enough to let the sugar dissolve. I find this keeps the flavor more clear, direct, and (in my opinion) better!
Sorbet Variations!
You can take this grapefruit sorbet in a number of subtly different directions, and I’ve noted a few of them in the headnotes down below. That said, you should play around and take notes.
Citrus options: The base in the recipe below is made primarily with fresh grapefruit juice, rounded out with some orange juice. Feel free to play around with your citrus varietals. I used a lot of ruby red grapefruits, and navel orange juice plus a couple small blood oranges. That’s how you get that blushing color.
Tequila and salt: Play around here as well. I like to introduce a whisper of smoky flavor into this sorbet. It’s cuts into the inherent sweetness, and you can do it in two ways here – mezcal or smoked salt. If you use a smoky noted mezcal in place of the tequila called for, you’ll get it. Alternately, you can play around with a smoked salt. A subtle smoky backdrop works really well alongside the grapefruit notes, but don’t go overboard. Think of the smoky flavors as seasoning.
Ginger-spiked: Spiking this grapefruit sorbet with a kiss of ginger juice is another idea. It lends a bit of kick and spice, and stays with you for a bit. Grate a little knob of ginger on a Microplane, and then press any fresh juice against a strainer. Add the fresh ginger juice to the other citrus juices.
Wow is all we can say about these vegan oatmeal cookies! These delightfully chewy, cinnamon-spiced chocolate chip cookies please eaters of any diet: no one will believe they’re vegan. We dare you to eat just one!
Wow is all we can say about these vegan oatmeal cookies: outrageously chewy, full-flavored, and so delicious no one would guess they are plant-based. This spin on our popular vegan chocolate chip cookiesmight be even tastier (if that’s possible!). They’re loaded with hearty Old Fashioned oats, seasoned with cinnamon, and have got just the right chewy texture. We stumbled upon this formula for delicious vegan cookies and have been riffing on it ever since: and these are stupendous if we might say so ourselves!
Key ingredients for vegan oatmeal cookies
Making a vegan cookie is quite the challenge, because vegan baking requires omitting the butter and eggs that make a typical cookie texture. Here at A Couple Cooks we developed a formula for making a great vegan chocolate chip cookie using a combination of neutral oil, coconut oil, and applesauce to stand in for the typical butter and eggs. It works like a charm, making a deliciously chewy cookie with crispy edges, not cakey or dry. The texture really is quite magical!
This basic formula makes a really great vegan oatmeal chocolate chip cookie, with a good amount of Old Fashioned oats mixed in and a handful of chocolate chips (or you can substitute raisins). Here are a few ingredient notes on the key ingredients for these cookies:
Refined coconut oil: Refined is important because it has a neutral flavor; unrefined coconut oil has more of a coconut flavor. Using coconut oil is important for the dough texture because it is a fat that is solid at room temperature, similar to butter.
Neutral oil: You can use grapeseed, canola or vegetable oil; we typically use grapeseed.
Granulated and light brown sugar: The mix of sugars is key for the flavor here, especially the brown sugar since it has hints of molasses in the flavor.
Unsweetened applesauce: Applesauce works surprisingly well in place of the egg to hold the dough together and add moisture. You can substitute sweetened applesauce if desired.
Vanilla extract and almond extract: Vanilla extract is key to cookie dough. But we’ve added one more element: a hint of almond extract! It brings a toasty, complex nuance to the flavor without overpowering it.
Notes on almond extract
We highly recommend using the almond extract for the best flavor! This is helpful for a vegan cookie since it doesn’t have the richness of egg or butter. The recipe calls for 1/16 teaspoon extract, which equates to 1 to 2 drops, just enough to give it a nuance in flavor but not enough that it is strongly perceptible.
It might sound like a random measurement, but don’t be tempted to skip it! We use a ⅛ teaspoon measure and fill it halfway; if you don’t have one, you can approximate using a ¼ teaspoon.
Tips for baking vegan oatmeal chocolate chip cookies
These vegan oatmeal cookies are so simple to put together. Many cookie recipes require the dough to chill before baking, but this recipe requires no wait time at all! Mix up the batter and get to it. Here are a few things to note about equipment that helps to pull these cookies together:
Use a cookie scoop or weigh the batter. If you have a 3 tablespoon cookie scoop, it’s helpful for portioning the dough: just overfill it slightly. You can also weigh out the batter at approximately 50 grams per cookie (or weigh your entire dough and divide by 18).
Non-stick cookie sheets are helpful. This has become our preferred method for cookies. We recommend using two of these non-stick cookie sheets for the most even bake.
Bake each tray separately for the most even bake. Do not refrigerate the cookie dough while the first tray bakes. We found that the dough texture is even better if it’s room temperature. If you have a very even oven, you can try baking both sheets at once and rotate the sheets halfway through.
Allow the cookies to sit on the baking sheet for 5 to 10 minutes before transferring to a baking rack to cool.
Storage info
Vegan oatmeal chocolate chip cookies are tasty warm, after sitting on the baking sheet for 10 minutes and cooling on a baking rack for 10 minutes. The cookies also hold up well over time, keeping their chewy texture. Here’s what to note about storing these vegan oatmeal cookies cookies:
Store in a sealed container at room temperature for 1 week. The texture holds up well: no need to add anything to the container.
Store refrigerated for 2 weeks. Allow to come to room temperature before serving.
Store frozen for up to 3 months.
More vegan cookie recipes
We love making vegan recipes that don’t taste like there are any compromises. Here are a few more vegan desserts and cookies you’ll love:
Wow is all we can say about these vegan oatmeal cookies! These delightfully chewy, cinnamon-spiced chocolate chip cookies please eaters of any diet: no one will believe they’re vegan. We dare you to eat just one!
½ cup dark chocolate chips (we used 63% Guittard) or raisins
Instructions
Preheat the oven to 350°F. Line two large baking sheets with parchment paper, or omit if using non-stick cookie sheets (we swear by these).
In the bowl of a stand mixer (or a large bowl), add the neutral oil, coconut oil, brown sugar, and granulated sugar. Mix with the paddle attachment (or an electric mixer) on Medium speed until fully combined, about 1 to 2 minutes. Add the applesauce, vanilla extract, and almond extract and mix until combined, a few seconds.
In a separate bowl, whisk the flour, baking soda, cinnamon, kosher salt, and Old Fashioned Oats. Turn on the mixer and gradually add the flour and oats mixture, mixing until just incorporated. Add the chocolate chips and mix on low for a few seconds until mixed in. The dough will feel slightly oily, but this is as expected.
Scoop nine 3-tablespoon-sized balls of dough onto the prepared cookie sheet, leaving a few inches between each cookie for spreading (using a cookie scoop is helpful; we overfilled our 2 tablespoon scoop or weigh out 50 grams each). Bake one batch for 12 to 13 minutes, or until just golden (baking one batch at a time makes the most even bake). Cool the cookies on the baking sheet for 5 to 10 minutes before transferring them to a cooling rack to cool fully. They taste great warm after cooling on the rack for about 10 minutes, or fully cooled.
While the cookies cool, portion out and bake the second batch of dough; don’t refrigerate the dough in between. Store in a sealed container at room temperature for up to 5 days or refrigerated for 3 weeks (bring to room temperature before serving).
Notes
*We highly recommend using the almond extract for the best flavor! 1/16 teaspoon equates to 1 to 2 drops, just enough to give it a nuance in flavor but not enough that it is strongly perceptible. We use a ⅛ teaspoon measure and fill it halfway; if you don’t have one, you can approximate using a ¼ teaspoon.
Category:Dessert
Method:Baked
Cuisine:Dessert
Diet:Vegan
Keywords: Vegan oatmeal cookies, vegan oatmeal chocolate chip cookies
Ready to whip up the creamiest, dreamiest, and best hot chocolate you’ve ever tasted? Our crock pot hot chocolate recipe is here to make your cocoa Christmas dreams come true. Here’s the scoop: Transform your winter with the best, most indu…
Ready to whip up the creamiest, dreamiest, and best hot chocolate you’ve ever tasted? Our crock pot hot chocolate recipe is here to make your cocoa Christmas dreams come true. Here’s the scoop: Transform your winter with the best, most indulgent crock pot hot chocolate that’s as easy to make as love. Crock Pot Hot...
Cranberry fluff is a delightful dessert or side dish that combines the tartness of cranberries with the sweetness of pineapple and marshmallows; all enveloped in a creamy whipped topping. Just like old fashioned ambrosia salad and Watergate salad, cran…
Cranberry fluff is a delightful dessert or side dish that combines the tartness of cranberries with the sweetness of pineapple and marshmallows; all enveloped in a creamy whipped topping. Just like old fashioned ambrosia salad and Watergate salad, cranberry fluff salad with cool whip is a popular choice for holiday tables and potlucks. In just...
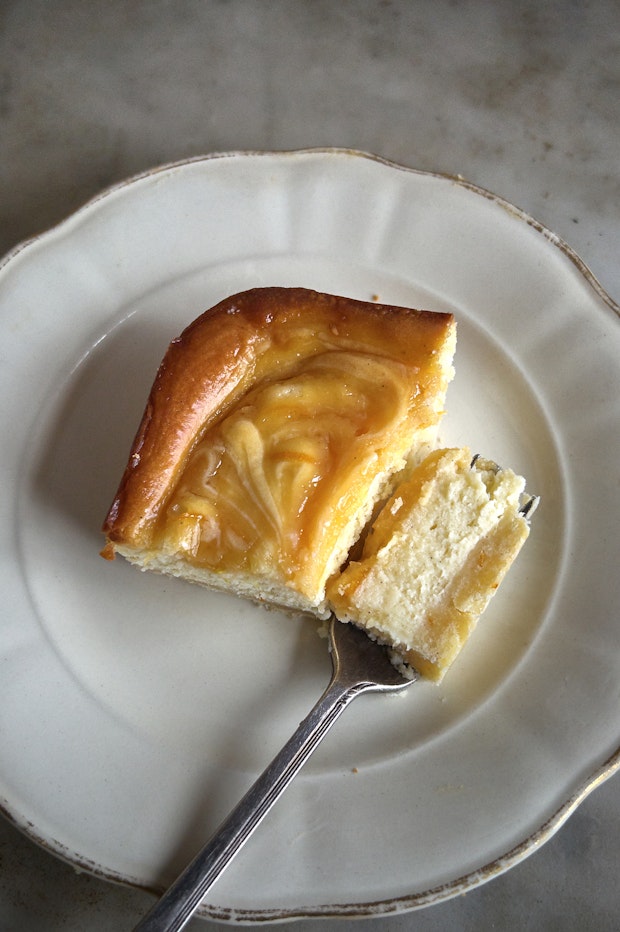
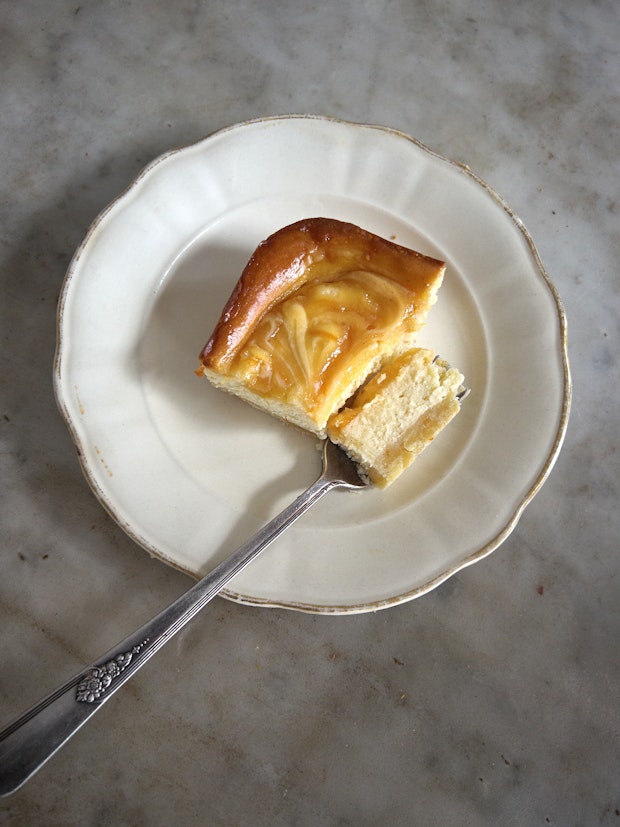
These creamy, decadent cheesecake bars feature a citrus swirled top, vanilla cream cheese filling, and shortbread cookie base. We’ve been baking these for special occasions for over twenty years!
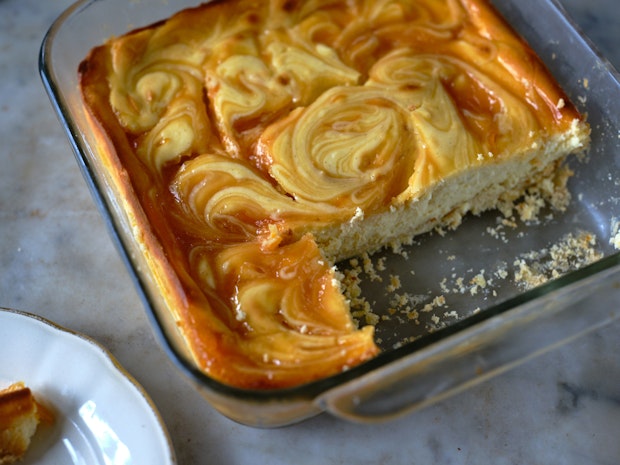
I started making these cheesecake bars twenty years ago. They’re beautiful, wildly decadent, and the perfect special treat. Pools of citrus curd blend into a vanilla flecked cream cheese filling. A shortbread cookie crust provides crunch and structure as the base. With each bite you’re hit with a blast of citrus intensity, and the swirl top is dramatic and beautiful.
Cheesecake Bars: The Inspiration
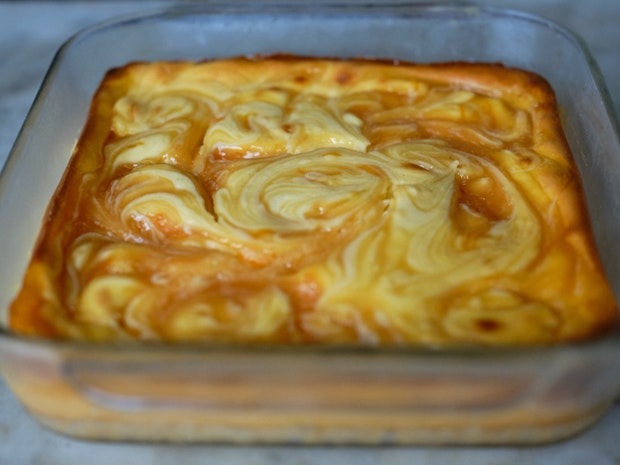
There was a moment in the early 00s where ripple-topped cheesecake bars were having a real moment. I clipped a number of versions from newspapers and magazines including one from Food & Wine magazine and another from the Spring 2004 issue of Donna Hay. These bars were typically lemon flavored but I found over the years that I really love making zesty grapefruit versions, or my absolute favorite (pictured here) – blood orange. I include instructions in the recipe below.
The Ingredients
The ingredient list for these cheesecake bars is quite straight forward. If you keep cream cheese on hand, you might have the rest of the ingredients in your pantry. A couple notes related to key ingredients.
Cream Cheese: Go for the real deal, full fat version here.
Citrus: I call for a blend of orange and lemon juice in this version of the recipe, but you can play around with whatever citrus you have on hand. I’ve had it on my list to experiment with a key lime version (or makrut lime!) for ages.
Sugar: Opt for a fine, granulated sugar here.
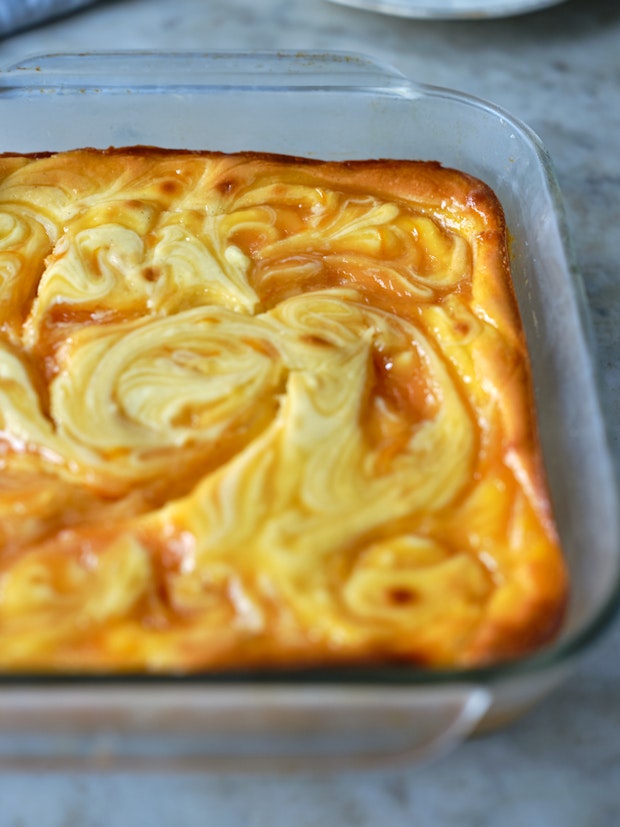
How To Make Cheesecake Bars
There are three main components to these cheesecake bars. The shortbread base, the cream cheese filling, and the citrus topping swirl.
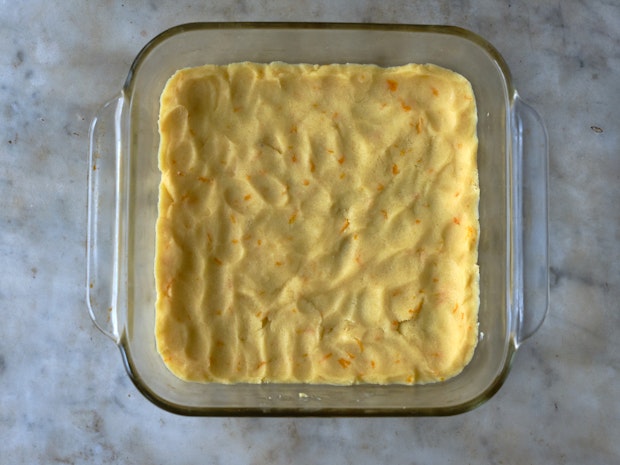
Make the cookie base: You can see the concept pictured here (below). Press and bake cookie dough into your pan and bake until golden.
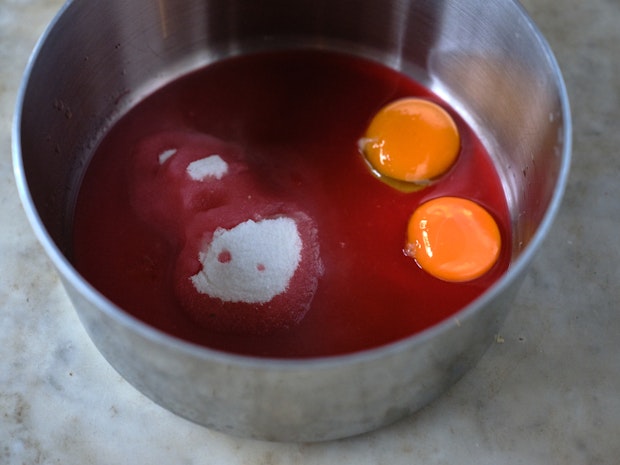
Make the citrus curd swirl mixture: This is done in a saucepan using egg yolks citrus juices, sugar, cornstarch, heat, and patience.
Make the cream cheese filling: This step is a breeze. You basically whip up a lot of cream cheese, then sweeten and flavor it.
Assemble and bake. One of the keys here is avoiding baking too long. You want to bake these bars until they’re just set in the center.
Cheesecake Bars: Variations
As mentioned above, the first way you can switch things up here is to play around with the shape of the pan you bake in. You can make individual tarts or mini-tarts, or bake in a long pan and slice into strips.
Lemon Cheesecake Bars: Use freshly squeezed lemon juice and lemon zest. Bonus points for using Meyer lemons – extra special!
Orange Blossom Cheesecake Bars: This version is beautiful. Use a small splash of good quality orange blossom water in place of the vanilla in the recipe. It accentuates the orange in the recipe and perfumes your entire kitchen as the bars are baking.
Rose Citrus Cheesecake Bars: This is the same idea as the orange blossom version above, substitute a splash of rose water for the vanilla in the recipe. Or! Leave the vanilla in. Rose, vanilla, and orange are a beautiful combination.