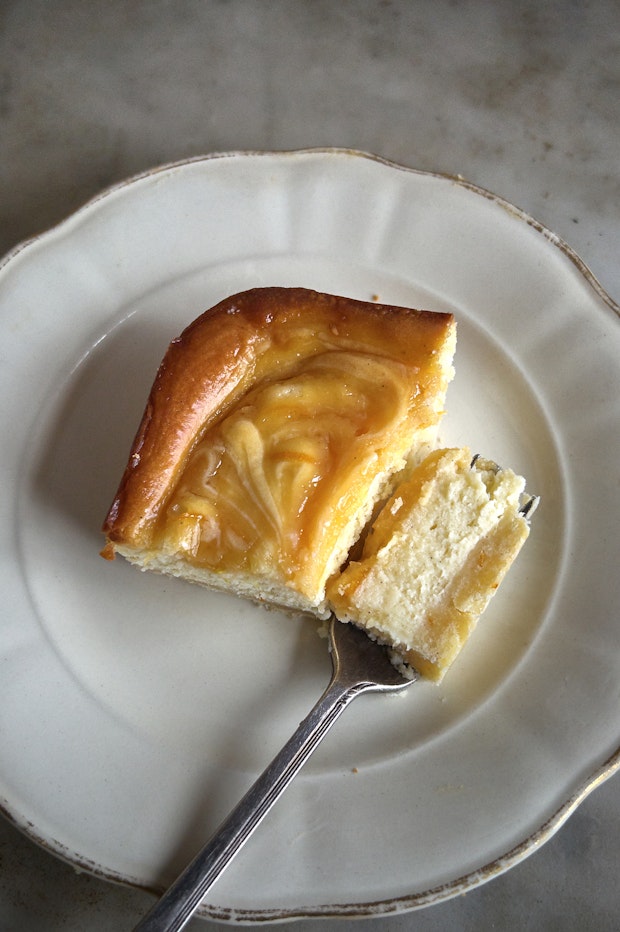
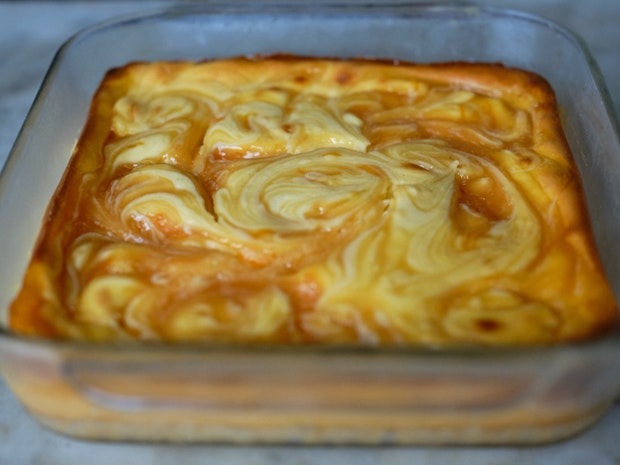
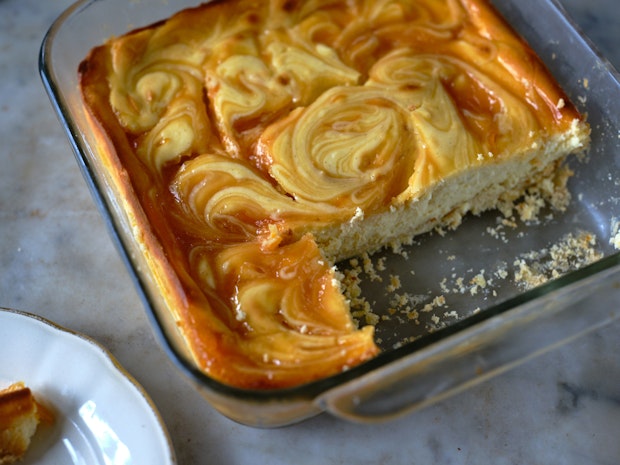
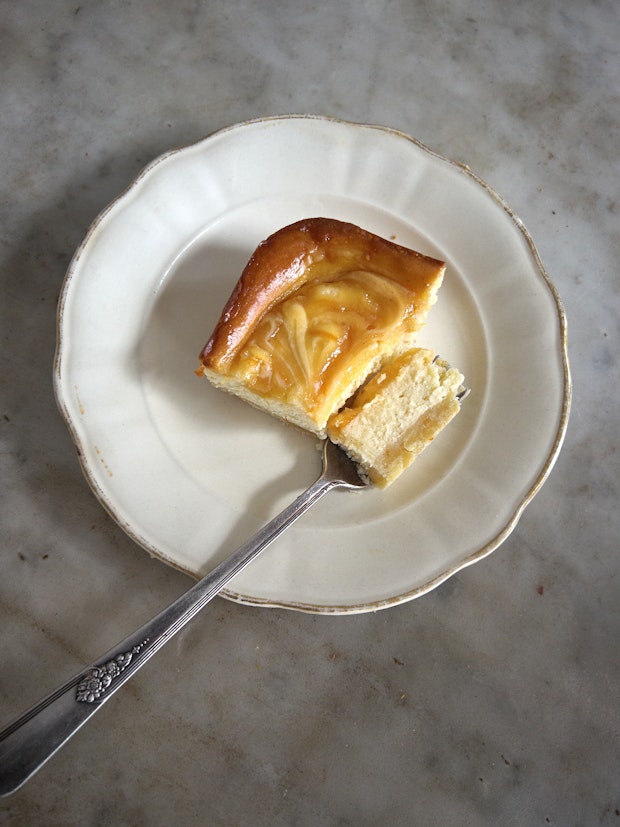
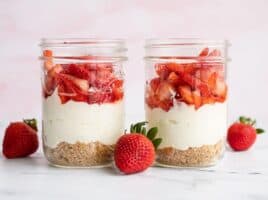
These creamy, decadent cheesecake bars feature a citrus swirled top, vanilla cream cheese filling, and shortbread cookie base. We’ve been baking these for special occasions for over twenty years!
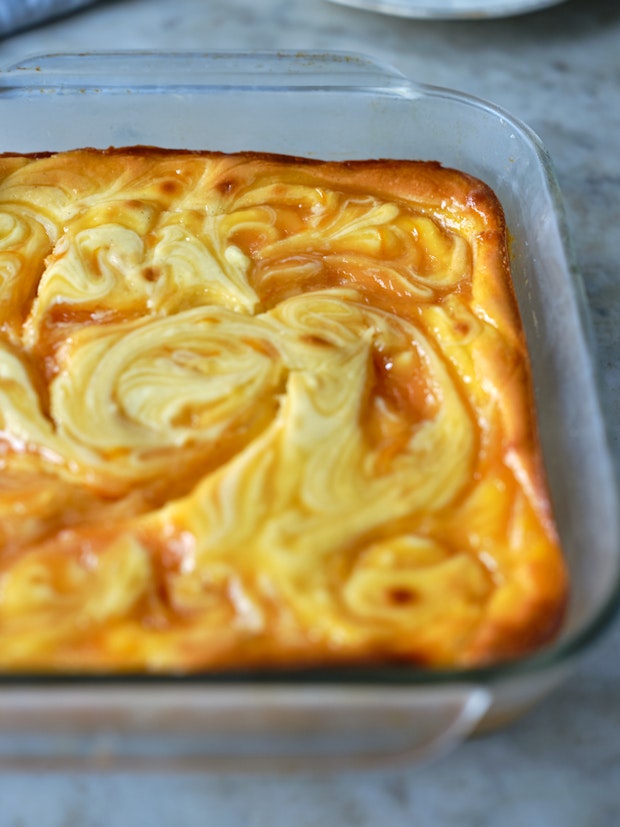
I started making these cheesecake bars twenty years ago. They’re beautiful, wildly decadent, and the perfect special treat. Pools of citrus curd blend into a vanilla flecked cream cheese filling. A shortbread cookie crust provides crunch and structure as the base. With each bite you’re hit with a blast of citrus intensity, and the swirl top is dramatic and beautiful.
Cheesecake Bars: The Inspiration
There was a moment in the early 00s where ripple-topped cheesecake bars were having a real moment. I clipped a number of versions from newspapers and magazines including one from Food & Wine magazine and another from the Spring 2004 issue of Donna Hay. These bars were typically lemon flavored but I found over the years that I really love making zesty grapefruit versions, or my absolute favorite (pictured here) – blood orange. I include instructions in the recipe below.
The Ingredients
The ingredient list for these cheesecake bars is quite straight forward. If you keep cream cheese on hand, you might have the rest of the ingredients in your pantry. A couple notes related to key ingredients.
Cream Cheese: Go for the real deal, full fat version here.
Citrus: I call for a blend of orange and lemon juice in this version of the recipe, but you can play around with whatever citrus you have on hand. I’ve had it on my list to experiment with a key lime version (or makrut lime!) for ages.
Sugar: Opt for a fine, granulated sugar here.
How To Make Cheesecake Bars
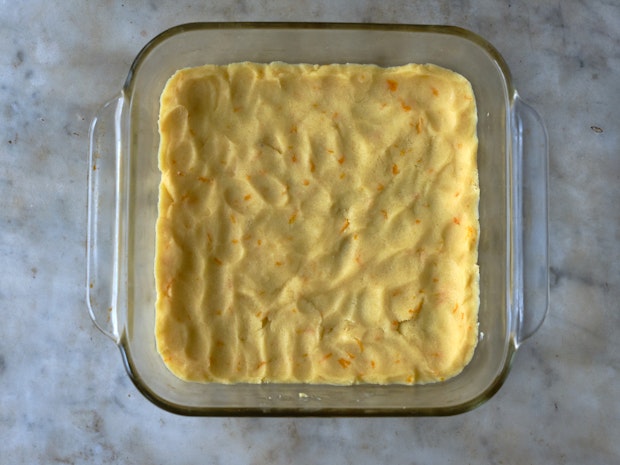
There are three main components to these cheesecake bars. The shortbread base, the cream cheese filling, and the citrus topping swirl.
Make the cookie base: You can see the concept pictured here (below). Press and bake cookie dough into your pan and bake until golden.
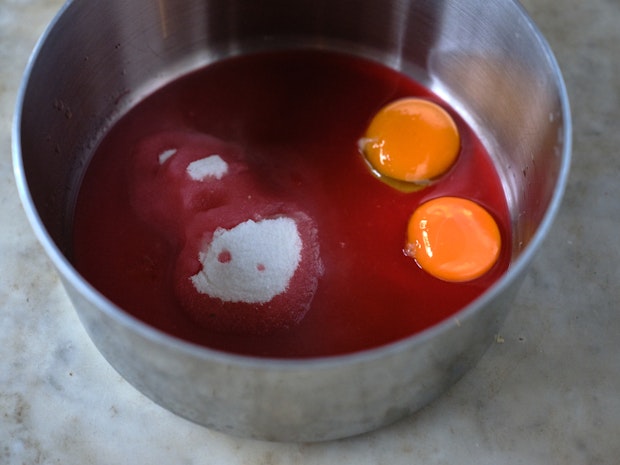
Make the citrus curd swirl mixture: This is done in a saucepan using egg yolks citrus juices, sugar, cornstarch, heat, and patience.
Make the cream cheese filling: This step is a breeze. You basically whip up a lot of cream cheese, then sweeten and flavor it.
Assemble and bake. One of the keys here is avoiding baking too long. You want to bake these bars until they’re just set in the center.
Cheesecake Bars: Variations
As mentioned above, the first way you can switch things up here is to play around with the shape of the pan you bake in. You can make individual tarts or mini-tarts, or bake in a long pan and slice into strips.
Lemon Cheesecake Bars: Use freshly squeezed lemon juice and lemon zest. Bonus points for using Meyer lemons – extra special!
Orange Blossom Cheesecake Bars: This version is beautiful. Use a small splash of good quality orange blossom water in place of the vanilla in the recipe. It accentuates the orange in the recipe and perfumes your entire kitchen as the bars are baking.
Rose Citrus Cheesecake Bars: This is the same idea as the orange blossom version above, substitute a splash of rose water for the vanilla in the recipe. Or! Leave the vanilla in. Rose, vanilla, and orange are a beautiful combination.
This irresistible vegan apple crisp has warm, gooey apples and a golden oat-streusel topping! Made with simple plant-based ingredients, this comforting dessert is the perfect treat.
Looking for a delicious dessert that no one will know is plant-based? This vegan apple crisp! Crisps and crumbles are simple to make into vegan treats, and this one is an absolute flavor explosion. Juicy, caramelized apples mingle with a golden oat topping, and topped with melty vanilla ice cream, it’s truly sensational. In fact, we like this one better than our standard apple crisp!
Ingredient notes for vegan apple crisp
Crisps and crumbles work well transformed into vegan desserts: in fact, most people wouldn’t even guess this one is plant-based! Vegan butter and coconut oil work well as substitutes for butter in a crumble. Here are a few notes about the ingredients:
Vegan butter: Vegan butter works well as a substitute for butter, and there are many great brands that are easy to find in US grocery stores (we like Miyokos). If desired, you can substitute coconut oil; we recommend using refined coconut oil which has a more subtle coconut flavor than unrefined.
All purpose flour: All purpose flour is our standard, but for gluten-free you can also use almond flour with great results. Go to Gluten-Free Apple Crisp.
Old Fashioned rolled oats: Use whole rolled oats for the best crisp texture; avoid instant oats here.
Brown sugar and granulated sugar: Using a mix of sugar types adds nuance to the flavor.
Cinnamon, ginger and allspice: This mix of cozy spices brings in a warm, comforting flavor.
Cornstarch: Cornstarch helps to thicken the filling. As a substitute, try arrowroot powder.
Lemon juice and zest: Citrus accentuates the fruit flavors, like salt does for savory foods. Don’t omit the lemon if you can: it really adds to the flavor here!
Vanilla extract: Vanilla extract adds the final nuance in sweet flavor.
Sweet tart, crisp cooking apples: Tart apples are key; keep reading for our favorite apple types.
Best apples for vegan apple crisp
What’s the best type of apples to use in apple desserts like crisp and apple pie? Use firm, crisp sweet tart cooking apples. The acidity from a tart apple makes the sweet flavor pop, instead of tasty one-note. A firm texture is also helpful since the apples holds their shape when baking instead of becoming mushy.
Avoid varieties like Gala, Fuji or Red Delicious: they don’t perform well in crisps and crumbles. Here are a few of the varieties that shine in this vegan apple crisp recipe:
Pink Lady
Honeycrisp
Golden Delicious
Granny Smith
Jonathon or Jonagold
Ida Red
Make it into a vegan apple crumble
You can also make this into a vegan apple crumble recipe! Simply follow the instructions for the topping in this apple crumble recipe, which omits the oats for the classic crumble feel. Use vegan butter in place of the standard butter, and it comes together like a charm.
How to serve it
Vegan apple crisp is a great dessert for any season: while it’s often served in fall or winter, it’s great in summer too! Like most crisps, the best topping is vanilla ice cream. The contrast of rich cream against the fruit filling is sublime! It’s pretty easy to find vegan ice cream at most well-stocked grocery stores in the US. Or you can make it homemade! The best options for topping vegan apple crisp are:
This crisp tastes best the day it is baked, but it saves very well! The crisp texture holds up well over time. Here are best practices for how to store a crisp:
Keep it loosely covered at room temperature for 1 to 2 days. Keeping it loosely covered helps to maintain the crumble texture.
Refrigerate for up to 3 days. It holds up well in the fridge, and tastes even better when reheated.
Freeze up to 3 months. Freeze for up to 3 months in a sealed container. Reheat it in a 350°F oven until bubbly.
More vegan desserts
Love eating plant-based treats? Here are a few more of our top vegan desserts to try:
This irresistible vegan apple crisp has warm, gooey apples and a golden oat-streusel topping! Made with simple plant-based ingredients, this comforting dessert is the perfect treat.
Ingredients
2 pounds sweet tart, crisp cooking apples, about 6 cups (4 large or 6 medium)
2 tablespoons lemon juice, plus 1 teaspoon lemon zest
1 tablespoon cornstarch
½ cup granulated sugar
2 teaspoons ground cinnamon
½ teaspoonground ginger
½ teaspoon ground allspice
¾ cup all purpose flour (almond flour for gluten-free)
Make the filling: Core, peel and thinly slice the apples. In a large bowl, combine the apples with the lemon juice, lemon zest, cornstarch, granulated sugar, 1 teaspoon of the cinnamon, the ginger, and allspice in a large bowl and toss until well coated. Pour it into a 9 x 9 inch baking dish or 7 x 11 inch baking dish.
In a separate bowl, make the crumble topping: stir together the flour, oats, brown sugar, 1 teaspoon of the cinnamon, and kosher salt. Add the vanilla and stir. Cut the butter into small pieces and add it to the bowl. Use a pastry cutter or fork to mix it into the dry ingredients until fully distributed and a crumbly dough forms. It may take a while, so be patient; mix until all butter chunks are incorporated.
Evenly distribute the crumble over the top of the apples, breaking the topping into small crumbles as you add it.
Bake for 45 to 50 minutes until browned and bubbly. Cool for 1 hour. Then serve with vanilla ice cream. Stores refrigerated for 3 days or freeze up to 3 months in a sealed container. Reheat it in a 350°F oven until bubbly and the topping is crisp.
Category:Dessert
Method:Baked
Cuisine:Dessert
Diet:Vegetarian
Keywords: Vegan apple crisp, vegan apple crisp recipe
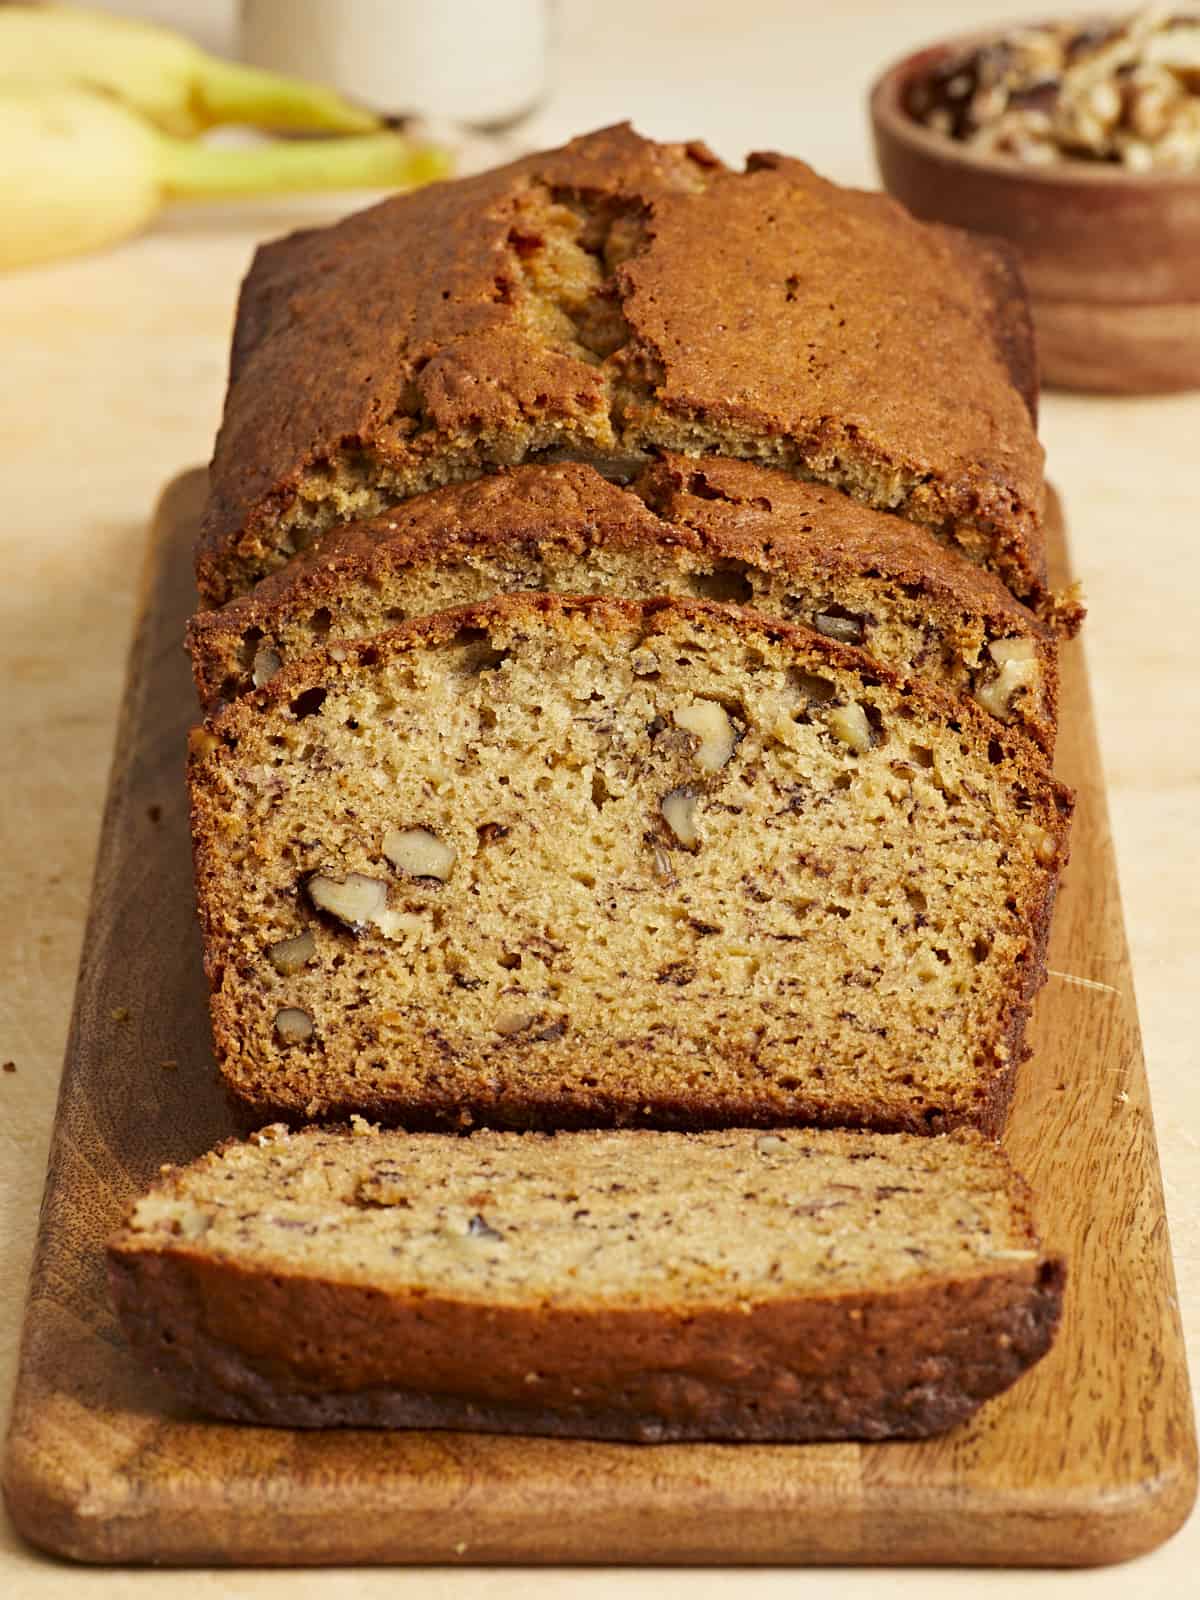
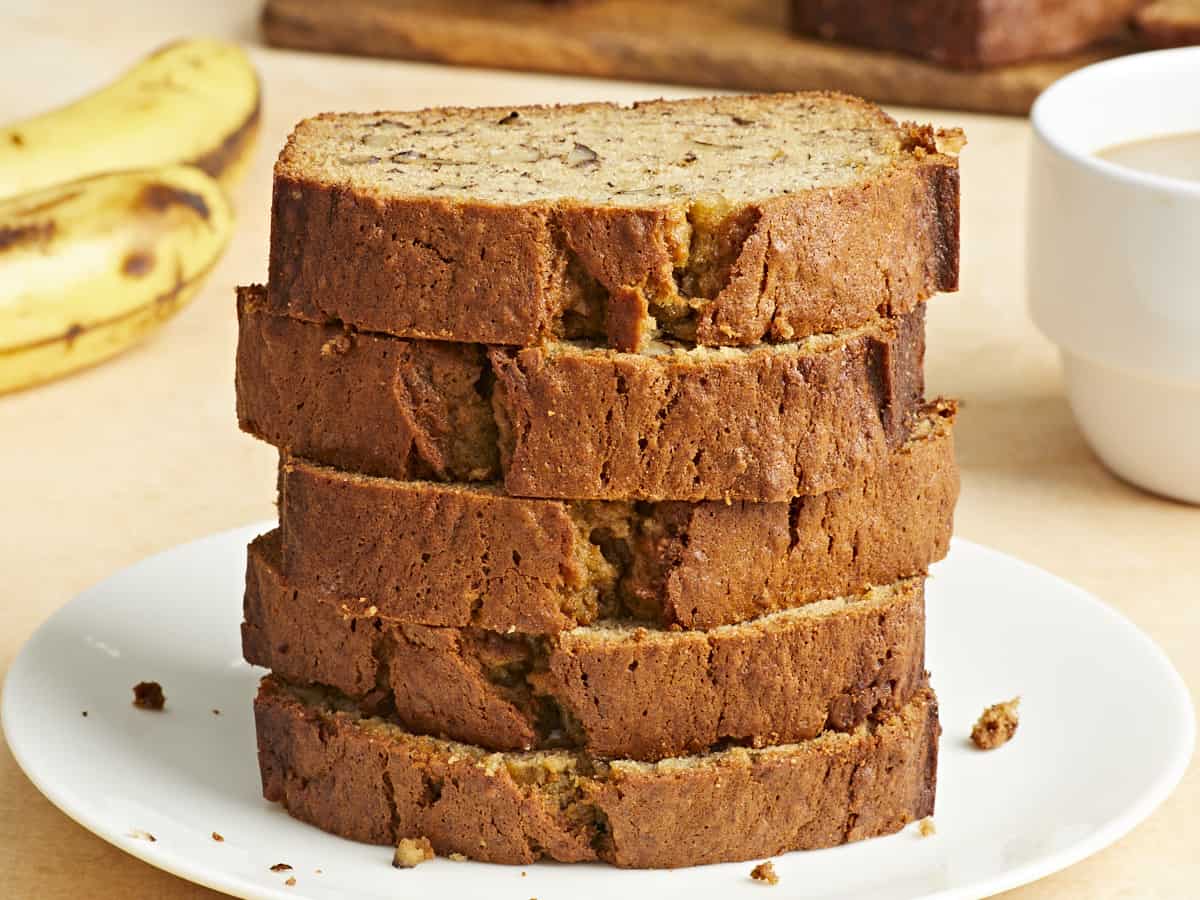
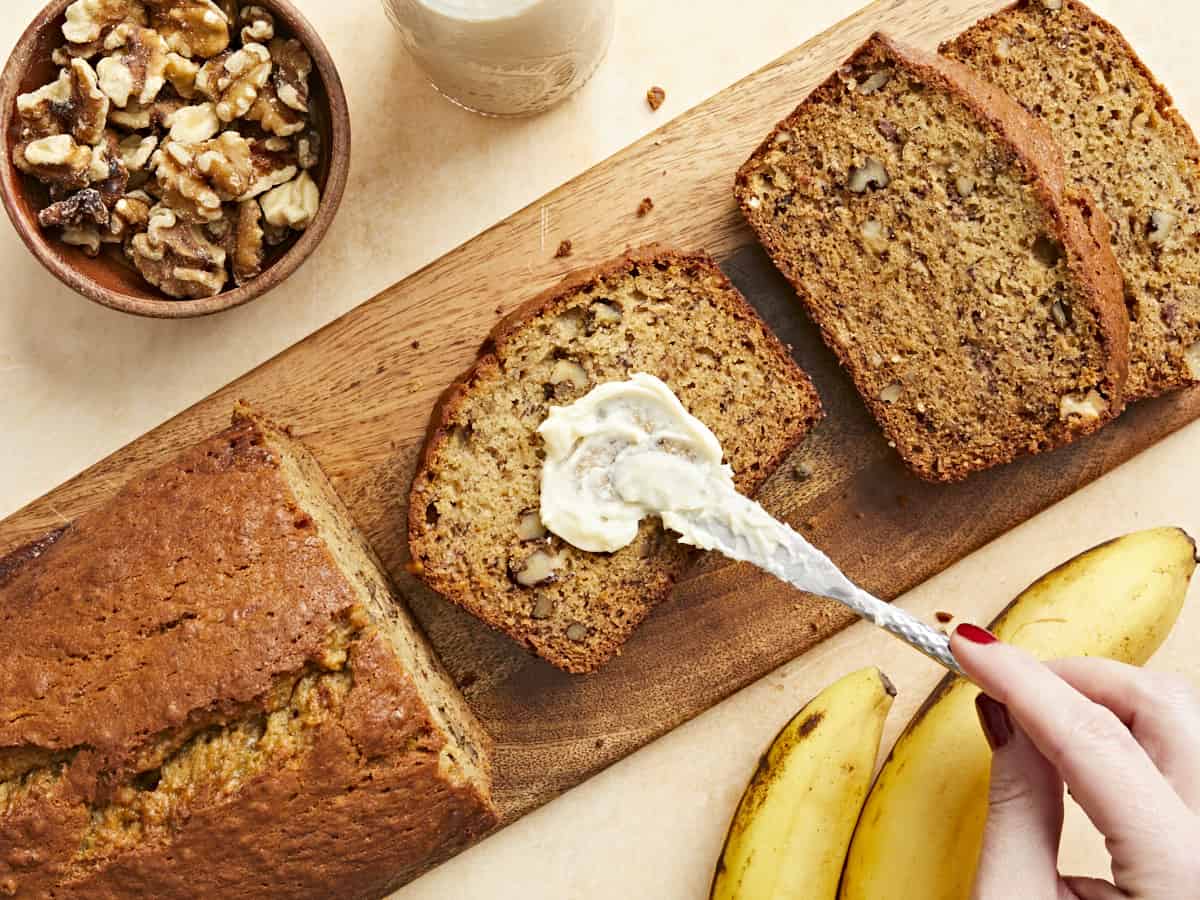
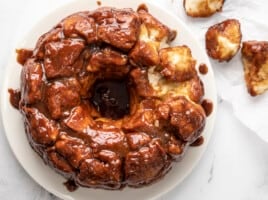
One day a friend was telling me about how she used to be so in love with the Starbucks banana bread and all I could think about was how the price for one slice is probably more than it costs to make a whole loaf, so I had to working on a dupe. It took about eight tries, but I finally made a homemade banana bread recipe that is super rich, moist, and totally melt-in-your-mouth delicious. And the best part? It ended up costing about $0.38 per slice. 😱 Take that, ‘bucks! Anyway, this banana bread was so good that I’ve been dreaming about it ever since. 🤤 So now the question is, is it wrong to make banana bread every single weekend??
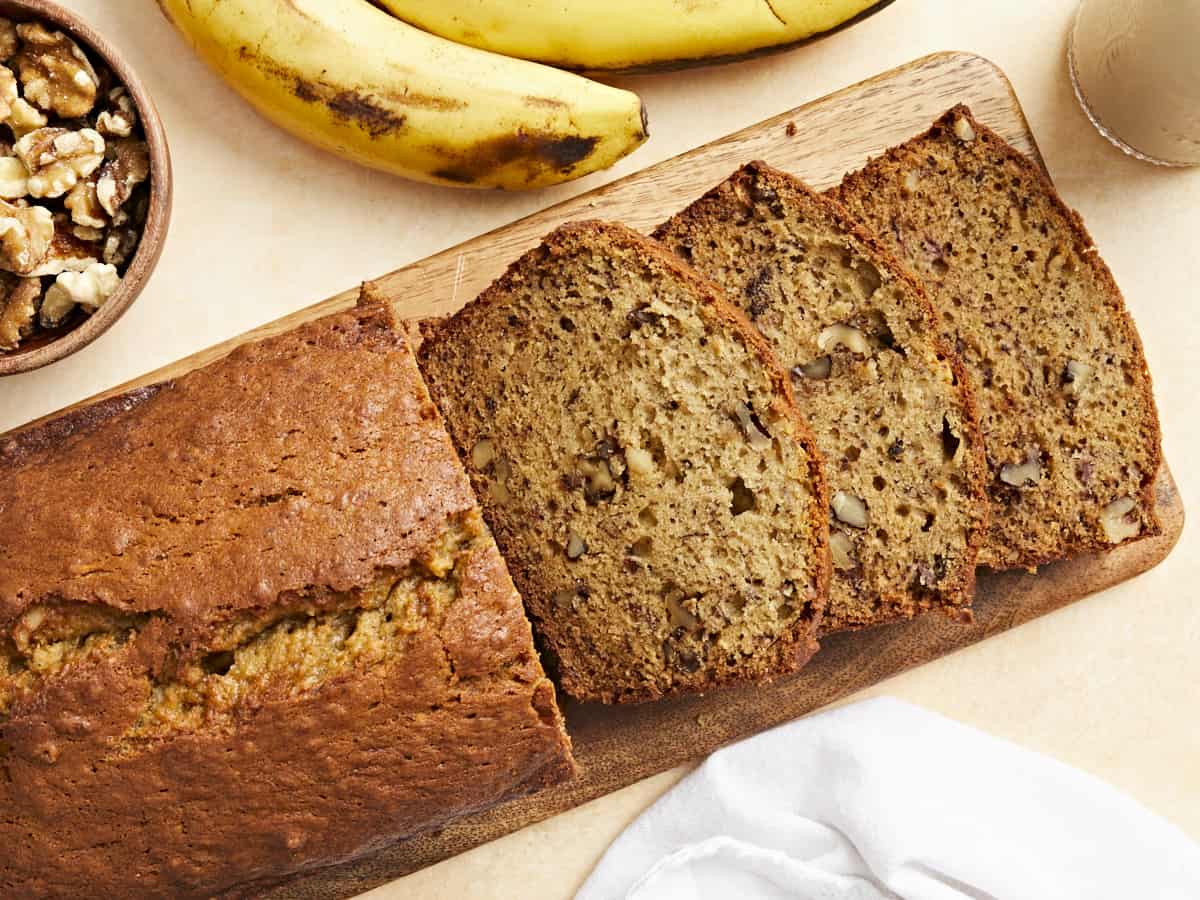
There are so many different recipes for banana bread out there and they create loaves that vary quite a bit in color, size, shape, texture, and of course flavor. My goal for this homemade banana bread recipe was to create a loaf that was super soft and moist, had a really good pronounced banana flavor, the loaf had to rise to a nice doamed shape (not be a flat brick), and did not get too over-browned. It took a combination of ingredients and techniques, but we finally got the perfect loaf of banana bread.
Ingredients for Banana Bread
Here’s what you’ll need to make this incredibly moist and delicious banana bread:
Bananas: You must use very ripe bananas for banana bread. Like, half brown ripe. This will ensure they provide enough sweetness, moisture, and banana flavor to the bread. Underripe bananas will give you a dry, bland loaf.
Butter & Oil: I used a combination of butter and oil for this banana bread. Butter gives the bread a ton of rich flavor, while oil keeps the loaf super moist after it cools in a way that butter can not. It’s a one-two flavor-texture punch!
Eggs: Eggs help give the loaf strength, so it doesn’t crumble, and they also help leaven the loaf so that it bakes up nice and fluffy.
Sugar: Using a combination of brown and white sugar again maximizes the flavor and texture. Brown sugar adds a deep flavor and helps moisten the loaf, while white sugar sweetens without making the batter too heavy.
Flour: All-purpose flour provides strength and body to the banana bread.
Baking Soda: Baking soda helps leaven the loaf so it rises into a pretty doamed loaf shape.
Vanilla: A touch of vanilla extract adds richness to the flavor.
Spices: We add just a little bit of cinnamon, nutmeg, and salt to the batter to add complexity to the flavor without overpowering the banana. They’re supporting roles, not the main character.
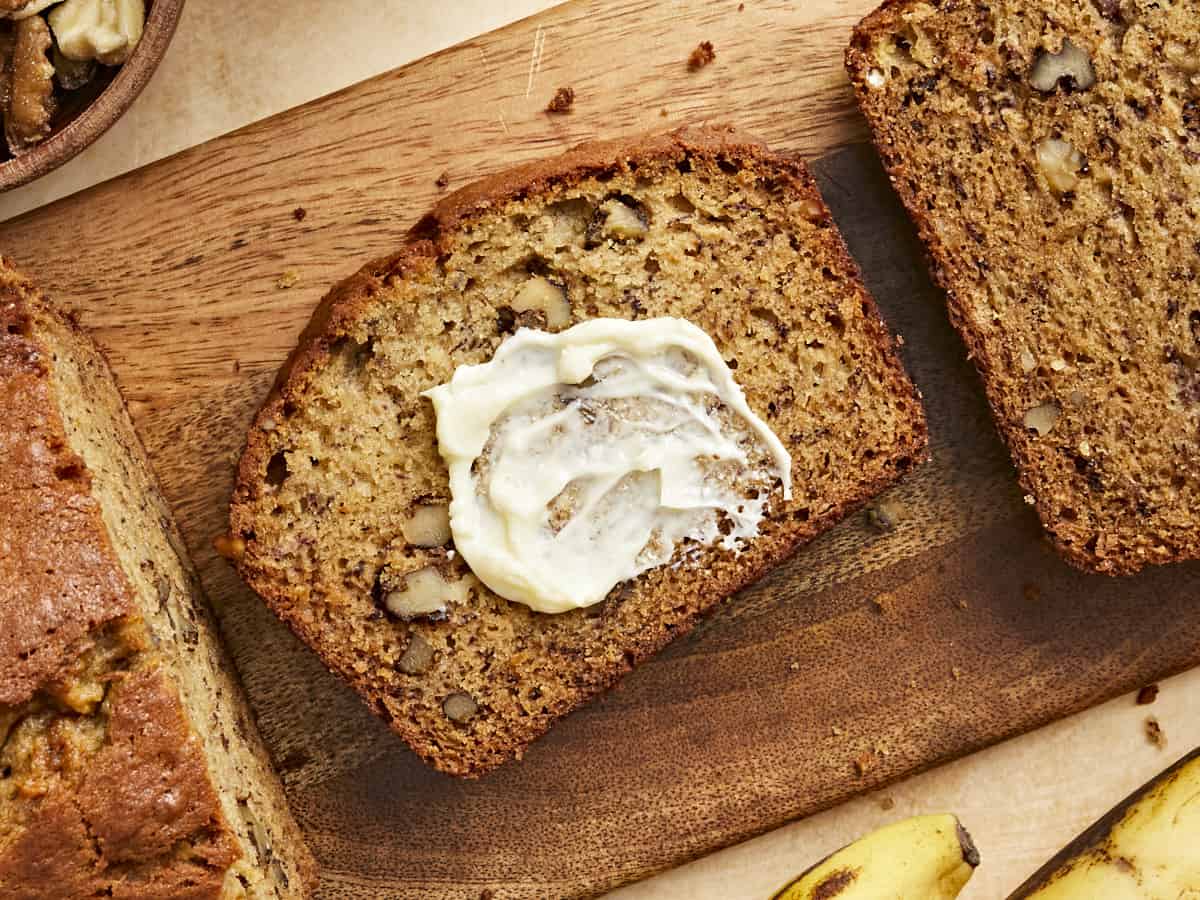
Walnuts: Walnuts are optional, but I love the contrast in flavor and texture they add to the bread. You can also substitute in chocolate chips if that’s your jam!
How to Store Banana Bread
I could eat this whole loaf of banana bread within a few days by myself no problem, but if you’re not a champion eater like myself, here’s how to store the leftovers. Make sure the bread is completely cooled after baking, then cut it into thick slices. The sliced bread can be stored in the refrigerator in an air-tight container for 4-5 days, or it can be frozen for longer storage.
To freeze the banana bread, place sheets of parchment paper between the slices to prevent them from sticking, then place them in a gallon-sized freezer bag. Individual slices can be taken out and thawed at room temperature or briefly microwaved to warm through.
Tips for the Best Banana Bread
I made a LOT of loaves during the development of this recipe, so here are some tips that I found will help you get the absolute best banana bread ever:
Make sure your bananas are VERY ripe. The sugar content of bananas increases as they ripen, so the more ripe your bananas are the sweeter the bread and the more pronounced the banana flavor will be.
Don’t overmix the batter. Stirring the bread batter too much or too vigorously will create a rubbery texture in the banana bread. Fold the wet and dry ingredients together just until evenly combined.
Preheat the oven. This is a non-negotiable when baking. The sudden exposure to high heat (rather than a slow increase of a non-preheated oven) is what helps the loaf rise properly.
How to Make Banana Muffins
This banana bread recipe also bakes up really well as muffins. To make banana muffins simply prepare the batter as listed in the recipe below but divide the batter between 12 wells in a standard-size muffin tin. Bake the banana muffins in a preheated 350ºF oven for about 30 minutes, or until the muffins have risen all the way in the center, they’ve browned nicely, and a toothpick inserted into the center of the muffins comes out clean (crumbs but no wet batter).
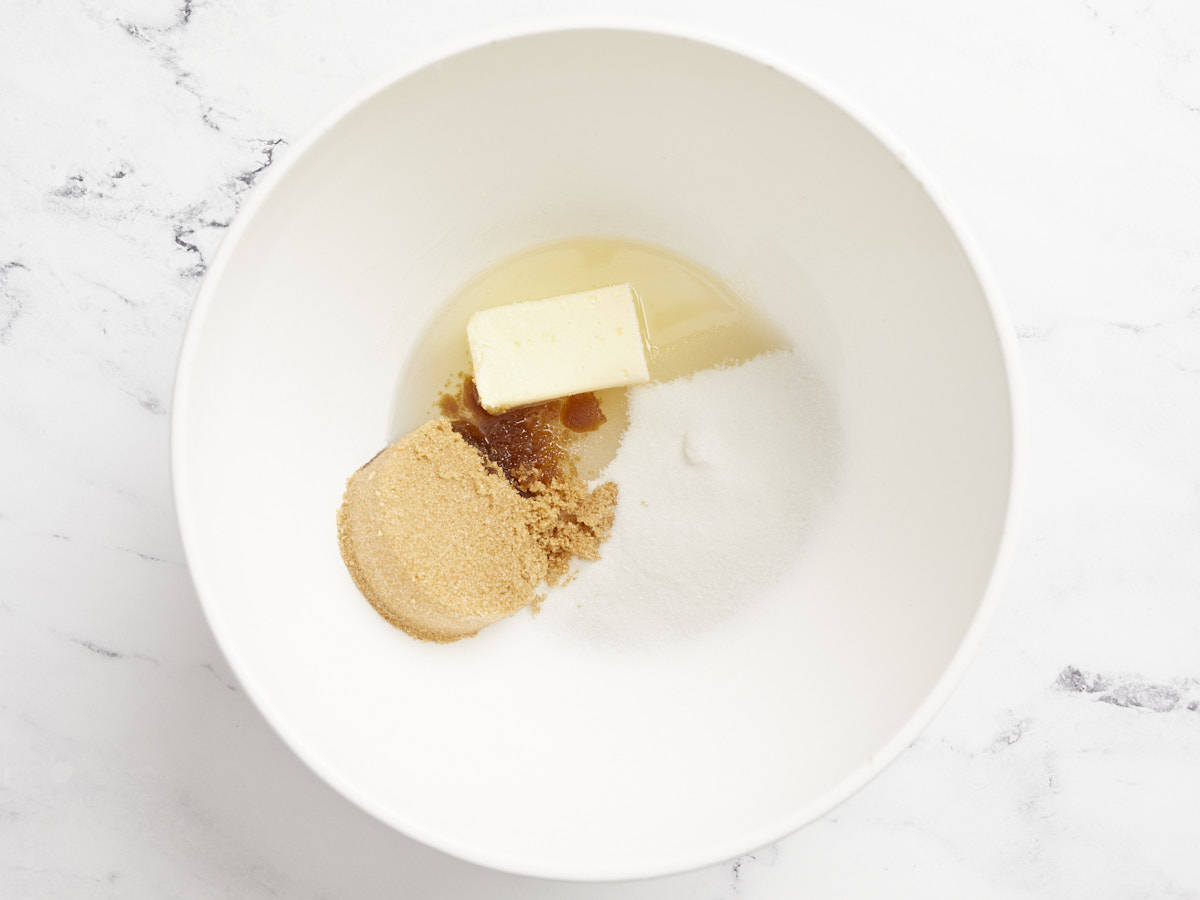
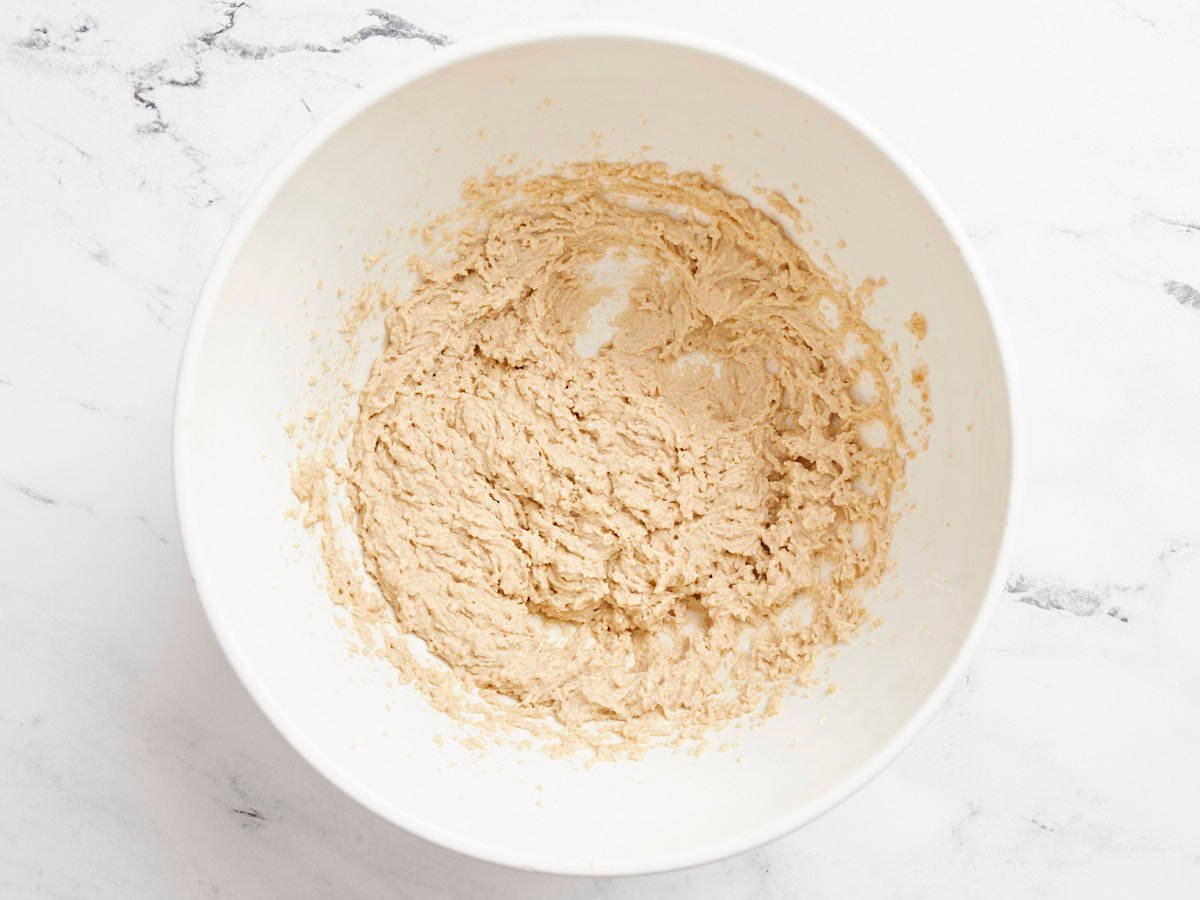
Preheat the oven to 350ºF. Add the room-temperature butter, cooking oil, granulated sugar, and brown sugar to a mixing bowl. Use a hand mixer or stand mixer to beat the ingredients together until they become light and creamy.
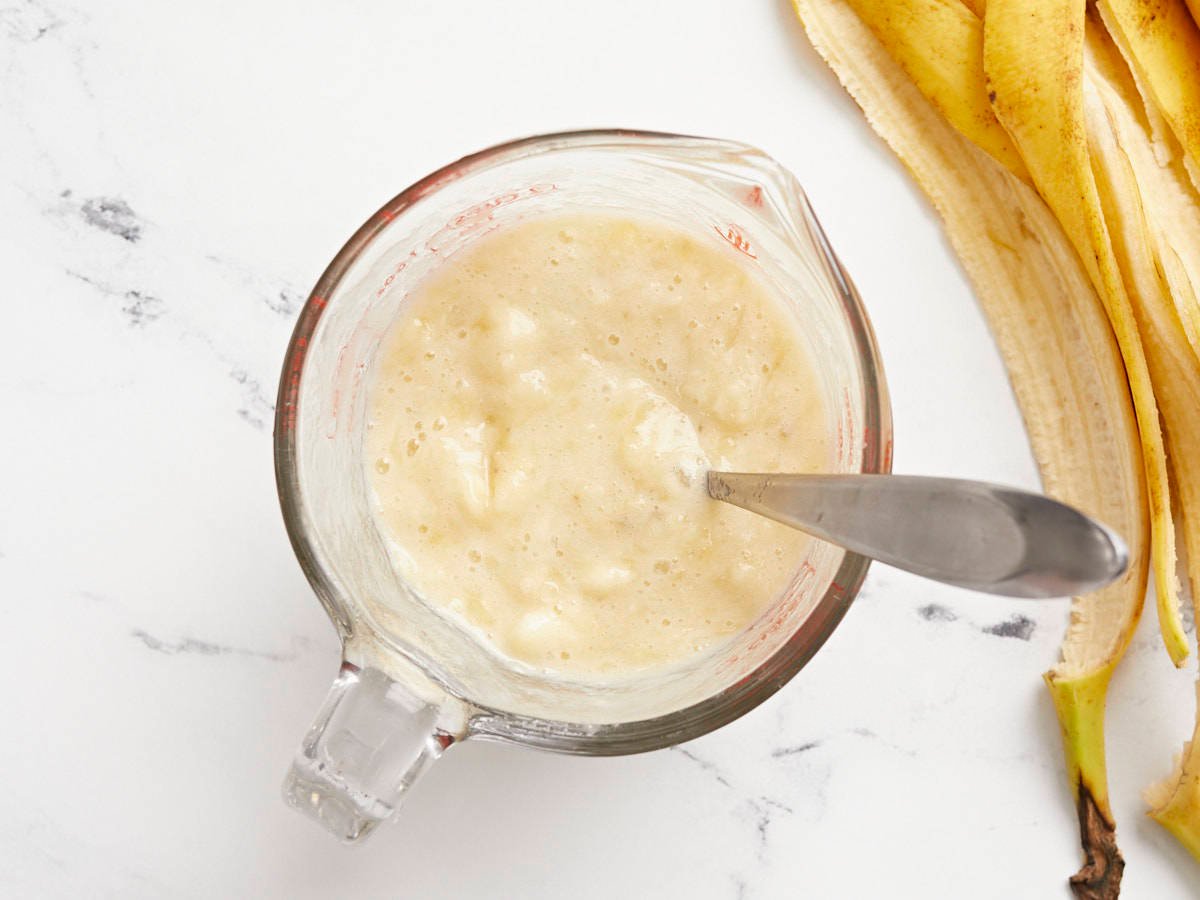
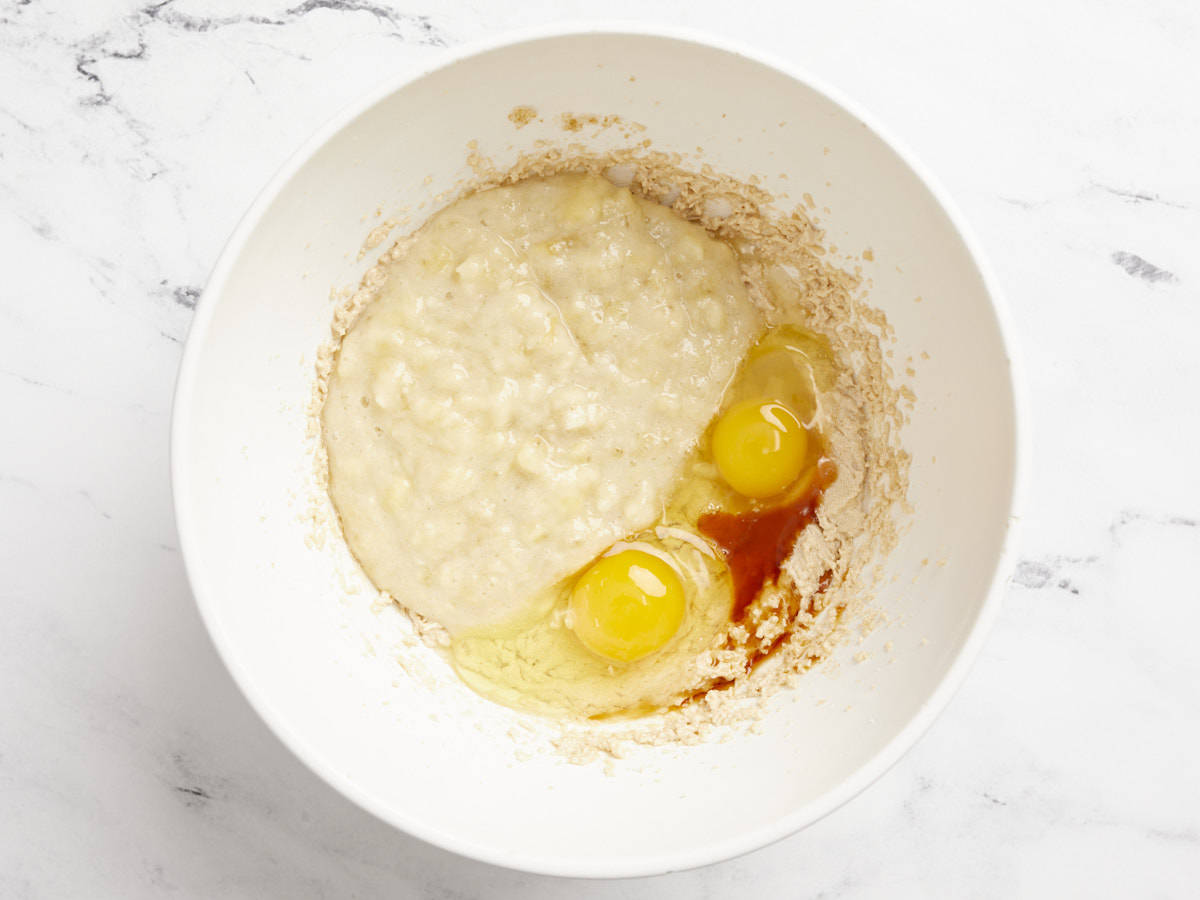
Mash the bananas well, then add them to the mixing bowl with the butter and sugar, along with the eggs and vanilla extract. Use the mixter again to beat the ingredients together until smooth.
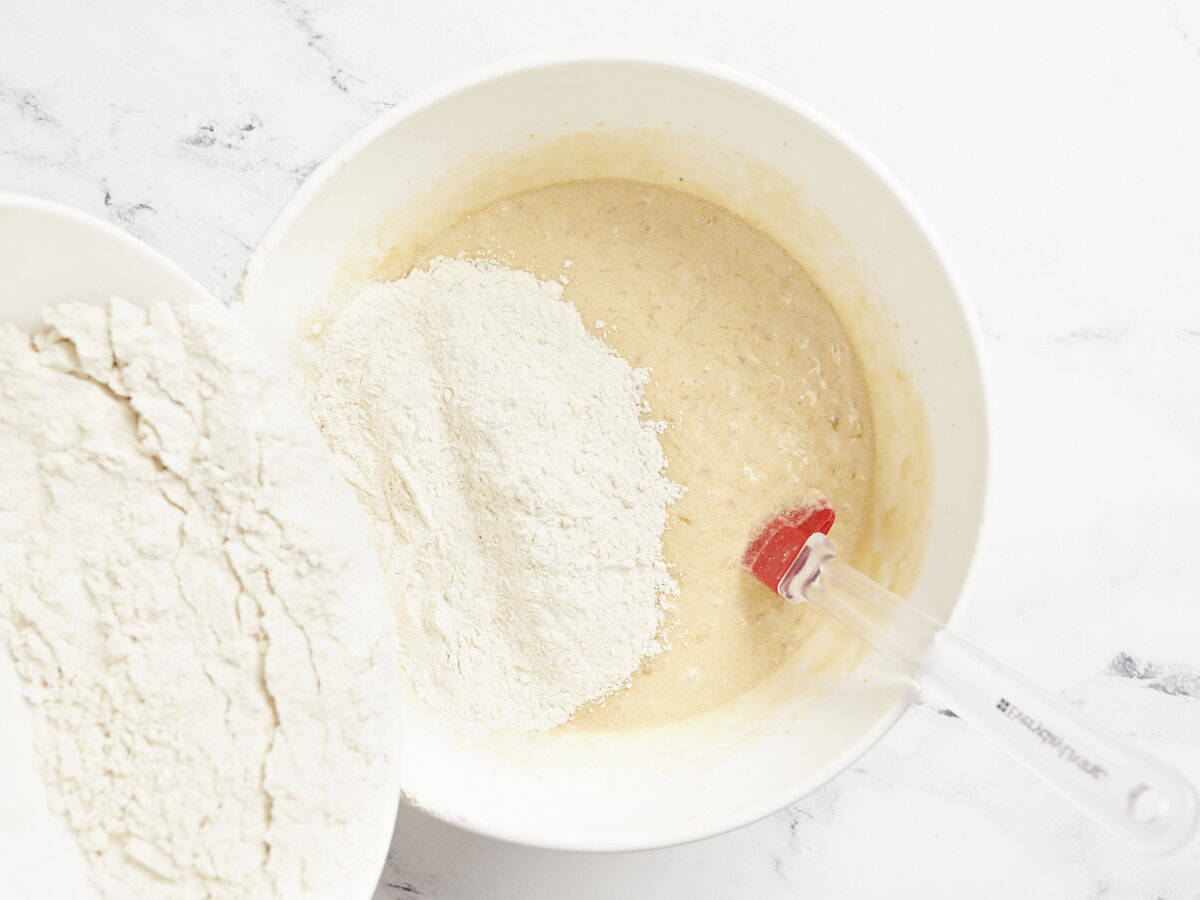
In a separate mixing bowl, stir together the flour, baking soda, salt, nutmeg, and cinnamon until well combined.
Pour the flour mixture into the bowl of wet ingredients and fold them together just until combined. Do not overmix.
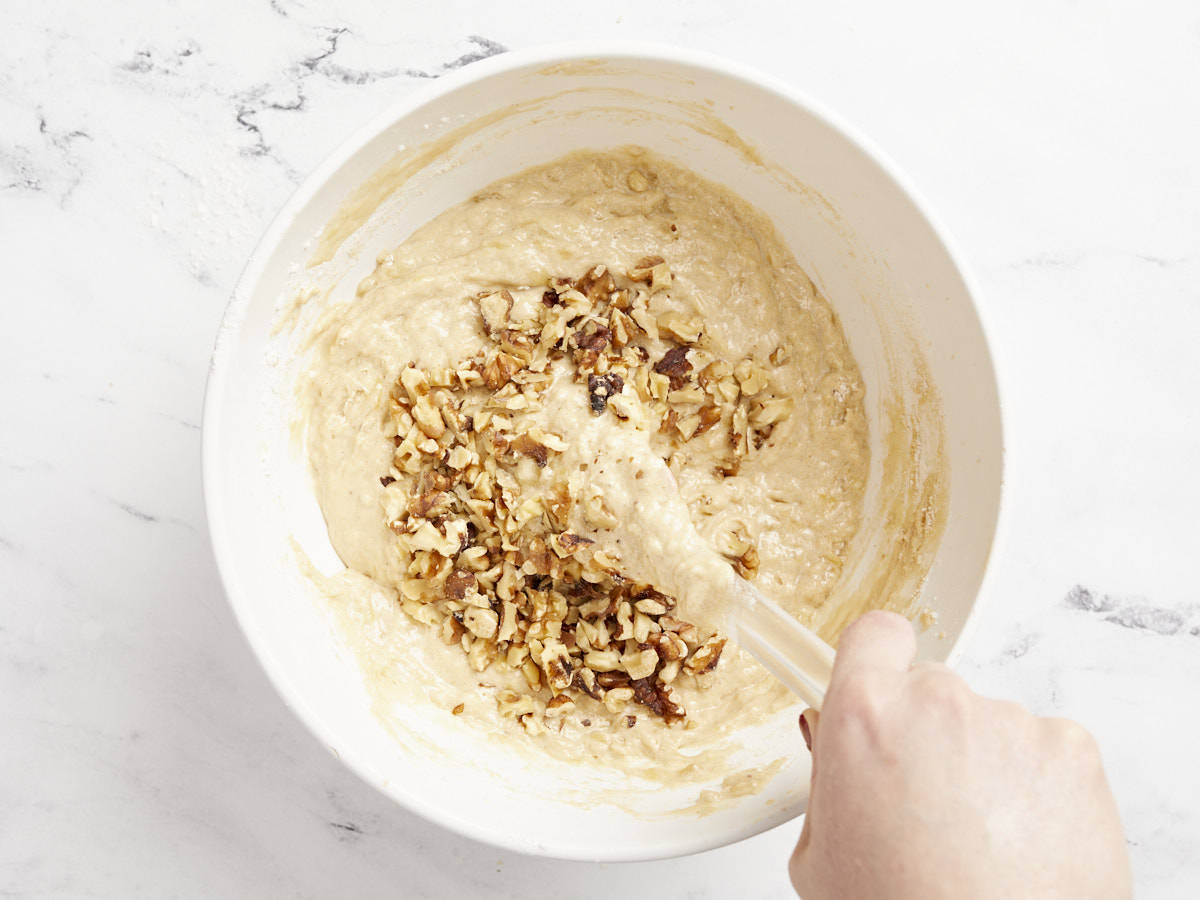
Add the chopped walnuts to the bowl and gently fold to combine again.
Grease an 8.5"x4.5" loaf pan with butter or oil, then add the batter and smooth it out evenly into the pan.
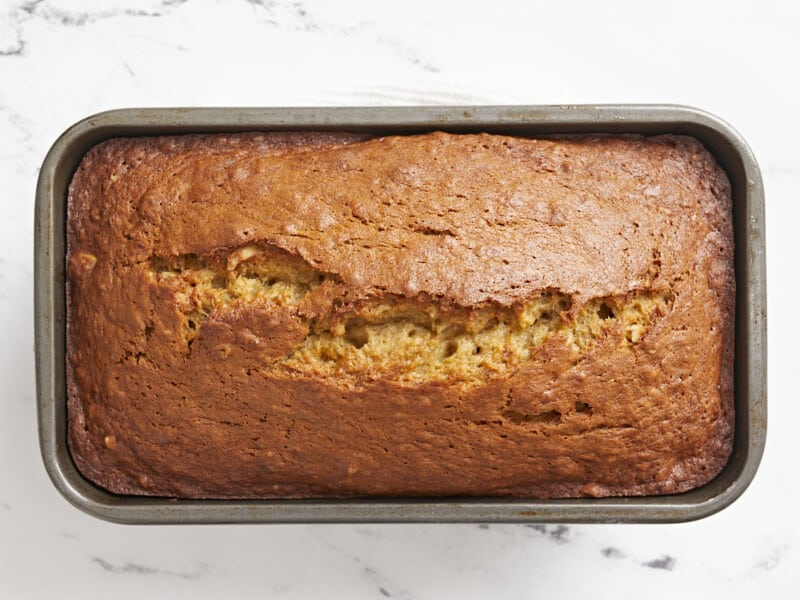
Bake the banana bread in the preheated 350ºF oven until it's deeply golden brown on top, has a crack down the center, and a toothpick inserted into the middle comes out clean (crumbs are okay, but wet batter is not).
Allow the loaf to cool for about 5 minutes in the pan, then gently remove it from the pan and allow it to finish cooling on a wire rack. Once cooled, slice, serve, and enjoy!
Banana Muffins Instructions
Prepare the batter as listed above, then divide it between 12 wells of a standard-size muffin tin.
Bake the banana muffins for 30 minutes in the preheated 350ºF oven or until they have risen all the way in the center, have browned nicely, and a toothpick inserted into the center comes out clean (crumbs are okay, but no wet batter).
Preheat the oven to 350ºF. Add 4 Tbsp of room-temperature salted butter, ¼ cup cooking oil, ½ cup white sugar, and ½ cup brown sugar to a mixing bowl.
Use a hand mixer or stand mixer to cream the butter, sugars, and oil together until it looks light and creamy.
Mash 3-4 bananas, or until you have 1.5 cups of mashed banana.
Add the mashed banana, two large eggs, and 1 tsp vanilla extract to the bowl with the creamed butter and sugar. Use the mixer to mix the ingredients together until smooth.
In a separate bowl, stir together 2 cups of all-purpospe flour, 1 teaspoon baking soda, ½ teaspoon salt, ¼ tsp nutmeg, and ¼ tsp cinnamon until well combined. Pour the flour mixture into the bowl with the wet ingredients and then fold them together just until they form a wet batter. Do not overmix.
Add ½ cup of chopped walnuts to the batter and fold briefly to combine.
Grease a standard 8.5″x4.5″ bread pan. Pour the batter into the pan and then spread it out evenly.
Bake the bread for 60 minutes, or until golden brown on top, cracked in the middle, and a toothpick inserted into the center comes out clean. Allow the bread to cool for about 5 minutes in the pan, then gently remove it from the pan and allow it to finish cooling on a wire rack.
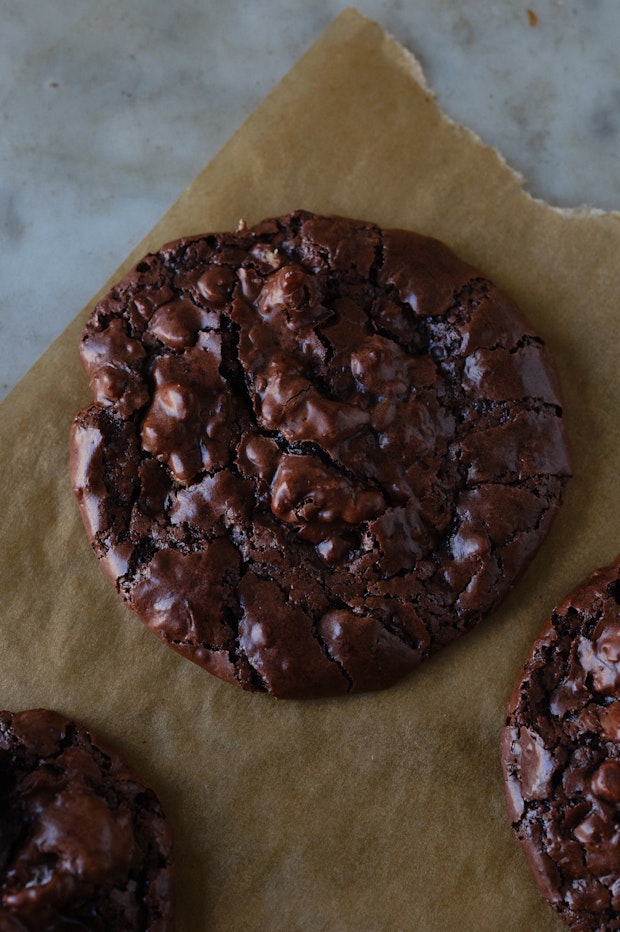
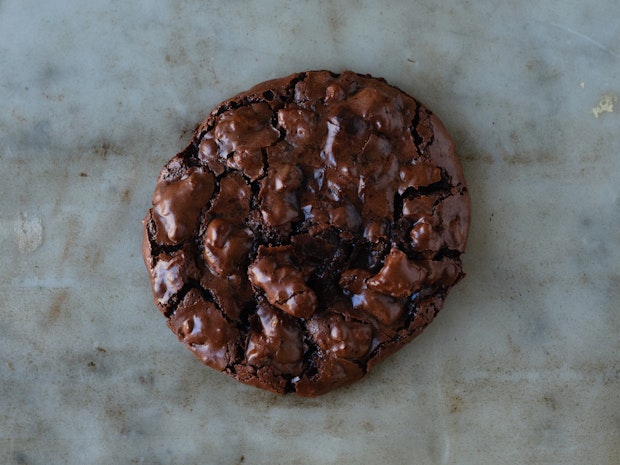
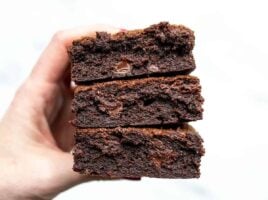
This is the best chocolate cookie I bake. And I don’t say that lightly. It’s a crackle-edged puddle of chocolate with a texture like a collision between a soft meringue and a fudgy brownie. Part of my essential cookie repertoire!
I came across the perfect chocolate cookie when I visited Portland years ago. The cookies were popular in the coffee shop I would visit, and I loved them. Each cookie was a crackle-edged puddle of chocolate with a texture that made me think of a collision between soft meringue and a fudgy brownie. I fell hard. In the years since, we’ve come to call them chocolate puddle cookies, and there are just six ingredients between you a baking sheet of them. No mixer necessary, just a big bowl and wooden spoon.
Chocolate Cookie Inspiration
As far as the origins of this recipe? I came across a recipe shortly after my return from Portland that sounded very close to the cookie I tasted there. The Portland chocolate cookies seemed to be a version of François Payard’s Flourless Chocolate-Walnut Cookie. But, the recipe I was working from didn’t work all that well for me. The good news is, it did provide a good starting point. I adjusted a few ingredients, tweaked my technique, and now I’ve been able to make them reliably making little tweaks along the way. All my insights and ingredient notes are integrated into this page and recipe.
Chocolate Cookies: The Ingredients
The ingredient list here is short and direct. There’s a good chance you have all the ingredients on hand – cocoa, powdered sugar, egg whites, walnuts, vanilla, and a bit of salt. A few related notes:
Cocoa powder: I’ve used a wide range cocoa powder in these cookies over the years. The key here is to use unsweetened. For a long time I tended to use non-alkalized cocoa powder (Scharffen Berger or Dagoba) but also tested with Droste, which is a Dutch-process cocoa powder. And! I just made a fantastic batch using Guittard Cocoa Rough last week. Pictured here. So, use what you like, just be sure it’s not sweetened.
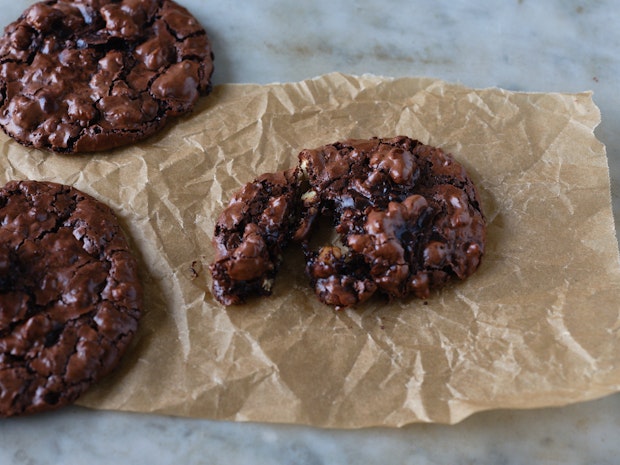
Walnuts: On the walnut front, be mindful of how you toast your walnuts, it’s the single factor that impacts the personality of these cookies most. Using deeply toasted walnuts makes for a much more intense, nutty cookie. Lightly toasted walnuts can sometimes be mistaken for chocolate chips, and make for a much more mild cookie. Both good!
Powdered sugar: I’ve used both 365 organic powdered sugar from Whole Foods, and Hain organic powdered sugar with success.
Eggs: Use large eggs, I suspect if you use extra-large, the batter will run, and you’ll have to compensate with more powdered sugar.
Technique and Pro-tips
Reading this far will pay off, I promise. Here are a couple things that really make a difference here.
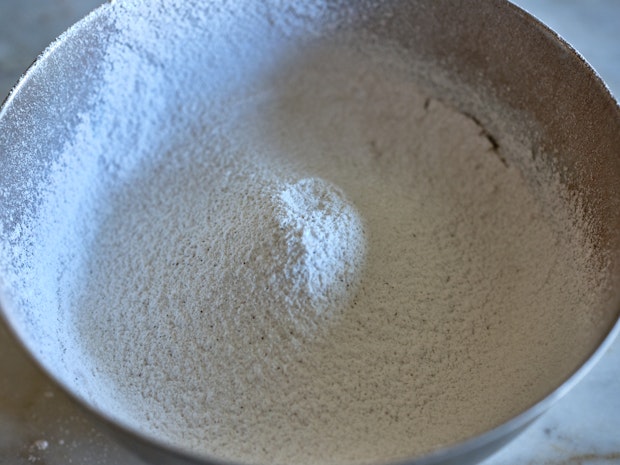
Sift. Really, don’t skip this step. Get all those lumps out.
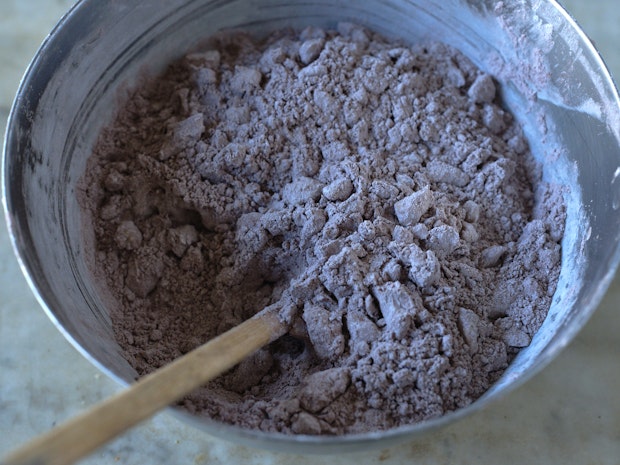
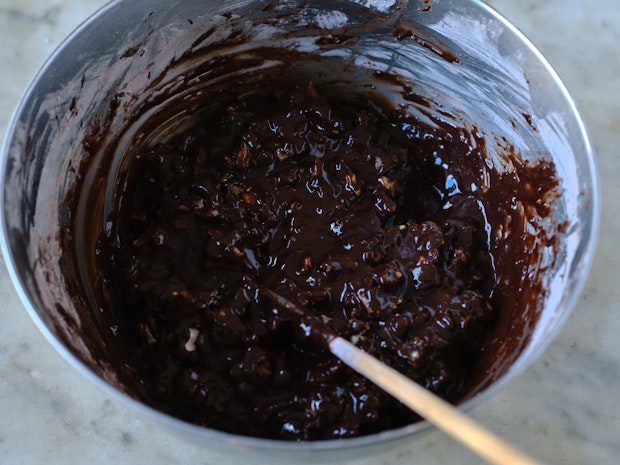
Add ingredients in the correct order. This is what your mixture should look like after mixing in the walnuts. (below)
Consistency. This is roughly what your cookie batter should look like after mixing in the egg whites.
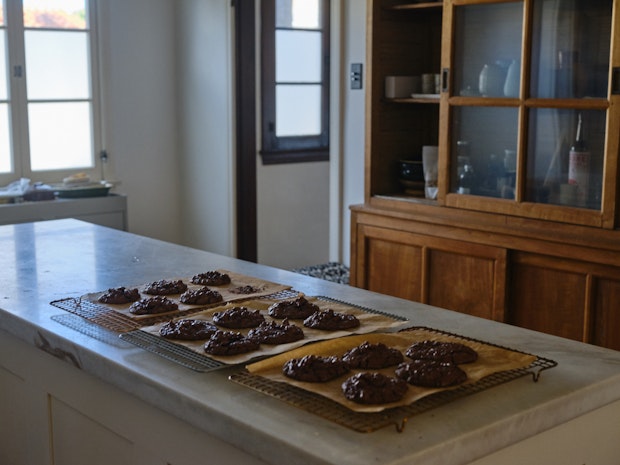
Bake & Cool Completely. Do your best to avoid under-baking, and after baking, allow the cookies to cool completely. A couple hours is best. They will set up beautifully. The goal is a clean break-away from the parchment paper. It’s sometimes hard to tell when these cookies are fully baked, the ones in the picture directly above are slightly underbaked for my tastes. So I adjusted with the remaining two cookie sheets.
Chocolate Cookie Variations
I like to make these just as written in the recipe below. It’s one of those rare cooking endeavors where I don’t mess around much. But there have been many great comments over the years. A lot of people make these chocolate cookies with toasted pecans in place of the walnuts. Some add the zest of an orange. And another person recommended dried cherries. Espresso powder was something I’ve considered but never tried (although some of you have!).And numerous people like to freeze these cookies, and crumble them over ice cream for the win!
I hope you enjoy these as much as I have. They’ve become family favorites.
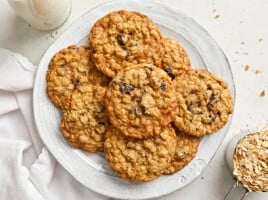
This vegan chocolate chip cookies recipe is outrageously good! It’s easy to make with simple ingredients and has the best rich flavor, chewy with crispy edges. No one will know they are vegan!
Outrageously good is the only way to describe these vegan chocolate chip cookies! In fact, they just taste like one darn good cookie. They’re chewy with crispy edges, sweet with just the right nutty intrigue in the flavor, and studded with dark chocolate chips and a sprinkle of flaky sea salt. They are easy to make with simple ingredients: no vegan substitutes! Plus, there’s no dough refrigeration or wait time (required for cookies, to us). Try them warm out of the oven and you will absolutely melt.
Why these are the best vegan chocolate chip cookies
We think these are the best vegan chocolate chip cookies, but we wanted to make sure it wasn’t just our opinion! A few of our Instagram readers tested this recipe in their kitchens before it became public and here’s what they had to say:
“I love these cookies! They have a great chewy texture with a nice crisp edge. They came together quickly and effortlessly. To taste these, you’d never think they were vegan!” -Lexi
“Delicious! I’ve been trying to shift to a vegan diet but baked goods are one of the hardest things to substitute. These are amazing and taste just like my regular chocolate chip recipe, yum!!!! You can’t even tell there’s no butter!”-Natalie
“They were amazing! Not too sweet and tasted like a really good chocolate chip cookie. My three year old said ‘Mommy you get a prize – these are really good cookies!’ My husband approved too! The recipe was easy to follow and I was thankful it used all regular ingredients.” -Amanda
“All I can say is wow! These cookies blew me away. They are so delicious and I would never have guessed that they are vegan. I really like that they don’t call for any unusual ingredients also. The directions were very easy to follow and the recipe came together really fast. I will without a doubt make these delicious cookies again.” -Annika
“My girls LOVED them. I thought they were really great, too. They have a soft and pillowy texture, and are filled with chocolate. The salt on the top is the perfect compliment. 10/10!” -Haylea
Are you convinced? We hope so. Here’s more about the recipe and techniques!
PS A big thank you to all our recipe testers: Kaela, Natalie, Amanda, Nancy, Liz, Jennifer, Lexi, Renata, Julia, Haylea, Annika, Julie, Sarah, and Lisa! Full feedback from these testers is listed in the comments section below.
Ingredient notes
Vegan baking requires substitution of a few key ingredients that make the texture of a cookie: butter and eggs. Butter is an important fat that adds texture and makes a cookie crispy and soft. Eggs make a smooth dough and help everything come together in a cohesive way. Let us tell you: it’s tricky to make a great vegan chocolate chip cookie recipe.
We tested a few batches with vegan butter and found that it wasn’t as reliable at making a desirable cookie texture. So, we turned to a mix of oils (neutral oil and coconut oil), and used applesauce instead of eggs to bring the dough together. After tweaking and massaging the recipe, it worked even better than expected to get that chewy yet crispy cookie texture! Here’s what you’ll need:
Neutral oil: You can use grapeseed, canola or vegetable oil; we use grapeseed.
Refined coconut oil: Refined is important because it has a neutral flavor; unrefined coconut oil has more of a coconut flavor. Using coconut oil is important for the dough texture because it is a fat that is solid at room temperature, similar to butter.
Granulated and light brown sugar: The mix of sugars is key for the flavor here, especially the brown sugar since it has hints of molasses in the flavor.
Unsweetened applesauce: Applesauce works surprisingly well in place of the egg to hold the dough together and add moisture. You can substitute sweetened applesauce if desired.
Vanilla extract and almond extract: Vanilla extract is key to cookie dough. Here we’ve added one more element: a hint of almond extract! It brings a toasty, complex nuance to the flavor without overpowering it. We found this was helpful for a vegan cookie since it doesn’t have the richness of egg or butter.
All purpose flour, baking soda and salt: These are the traditional baking characters. The salt is important since there is no butter or egg to add flavor.
Dark chocolate chips: Look for dark chocolate chips that are marked “dairy free.” We love the brand Guittard 63%.
Flaky sea salt: This is optional, but there’s nothing better than a good salty-sweet bite.
Tips for vegan chocolate chip cookies
This vegan chocolate chip cookie recipe is simple to put together with minimal equipment. The best part is that many cookie recipes require the dough to chill, but this recipe has no chilling at all. Because once you’ve made up your mind to bake them, who wants to wait hours or even overnight for chocolate chip cookies? Not us. Here are a few things to note about equipment that helps to pull these cookies together:
Use a cookie scoop. If you have a 2 tablespoon cookie scoop, it’s helpful for portioning the dough: just overfill it slightly.
Non stick cookie sheets are helpful. This has become our preferred method for cookies. We recommend using two of these non-stick cookie sheets for the most even bake (keep reading for more).
Bake each tray separately for the most even bake. Do not refrigerate the cookie dough while the first tray bakes. We found that the dough texture is even better if it’s room temperature.
Add 3 to 4 chocolate chips and salt after baking. Adding chocolate chips to the top makes for that signature cookie look.
Notes on substitutes
We recommend not substituting vegan butter for the oil in this recipe. We tested a few batches with vegan butter and found that it wasn’t as reliable at making a desirable cookie texture. In addition, every brand of vegan butter is made with different ingredients, so a recipe becomes very brand specific.
Here the mix of neutral oil and coconut oil is key to the texture. Coconut oil is important because it is solid at room temperature: do not try to substitute it! However, we had a few recipe testers that used avocado oil for the neutral oil with good results.
We do not recommend substituting liquid sweeteners for the sugar in this recipe. Sugar is important to the texture of the cookies (using maple syrup has so much moisture that they become cake-like).
Storage for vegan chocolate chip cookies
These vegan chocolate chip cookies are sublime warm from the oven, after cooling on the tray for 10 minutes and a baking rack for 10 minutes. If you can eat them this way, absolutely do it! But the cookies also hold up well over time. This is a must for cookies in our opinion, since you’re making them in a big batch. Here’s what to note about storing these cookies:
Store in a sealed container at room temperature for 1 week. The texture holds up well: no need to add anything to the container.
Store refrigerated for 2 weeks. Allow to come to room temperature before serving.
Store frozen for up to 3 months.
More vegan dessert recipes
These vegan chocolate chip cookies are our favorite chocolate chip cookie recipe: even though we don’t eat vegan regularly! They’re just that good. Here are a few more vegan desserts you’ll love:
Try Vegan Cookie Dough (edible and not bakeable, so it’s different than below!)
This vegan chocolate chip cookies recipe is outrageously good! It’s easy to make with simple ingredients and has the best rich flavor, chewy with crispy edges. No one will know they are vegan!
1 ¼ cup plus 2 tablespoons dark chocolate chips (we used 63% Guittard)
Flaky sea salt, optional
Instructions
Preheat the oven to 350°F. Line two large baking sheets with parchment paper, or omit if using non-stick cookie sheets (we swear by these).
In the bowl of a stand mixer (or a large bowl), add the neutral oil, coconut oil, brown sugar, and granulated sugar. Mix with the paddle attachment (or an electric mixer) on Medium speed until fully combined, about 1 to 2 minutes. Add the applesauce, vanilla extract, and almond extract and mix until combined, a few seconds.
In a separate bowl, whisk the flour, baking soda and kosher salt. Turn on the mixer and gradually add the flour mixture, mixing until just incorporated. Add 1 ¼ cups chocolate chips and mix on low for a few seconds until mixed in. The dough will feel slightly oily, but this is as expected.
Scoop nine 3-tablespoon-sized balls of dough onto the prepared cookie sheet, leaving a few inches between each cookie for spreading (using a cookie scoop is helpful; we overfilled our 2 tablespoon scoop). Bake one batch for 12 to 13 minutes, or until just golden (baking one batch at a time makes the most even bake). Press 3 to 4 chocolate chips into the top of each warm cookie, then sprinkle with sea salt. Cool cookies on the baking sheet for 10 minutes before transferring them to a cooling rack to cool fully. They taste great warm after cooling on the rack for about 10 minutes, or fully cooled.
While the cookies cool, portion out and bake the second batch of dough; don’t refrigerate the dough in between. Store in a sealed container at room temperature for up to 1 week or refrigerated for 3 weeks (bring to room temperature before serving).
This vegan strawberry cake is the ultimate plant-based dessert. Rich, moist strawberry cake is layered with an indulgent strawberry buttercream frosting. No one would ever guess it’s entirely vegan! This vegan strawberry cake is the latest additi…
This vegan strawberry cake is the ultimate plant-based dessert. Rich, moist strawberry cake is layered with an indulgent strawberry buttercream frosting. No one would ever guess it's entirely vegan! This vegan strawberry cake is the latest addition to my growing collection of vegan cakes. I actually created this one nearly two years ago, but simply...
This article was written and published by Oh My Veggies. It may not be reproduce or republished without permission of the author. The original article can be found here: Vegan Strawberry Cake.
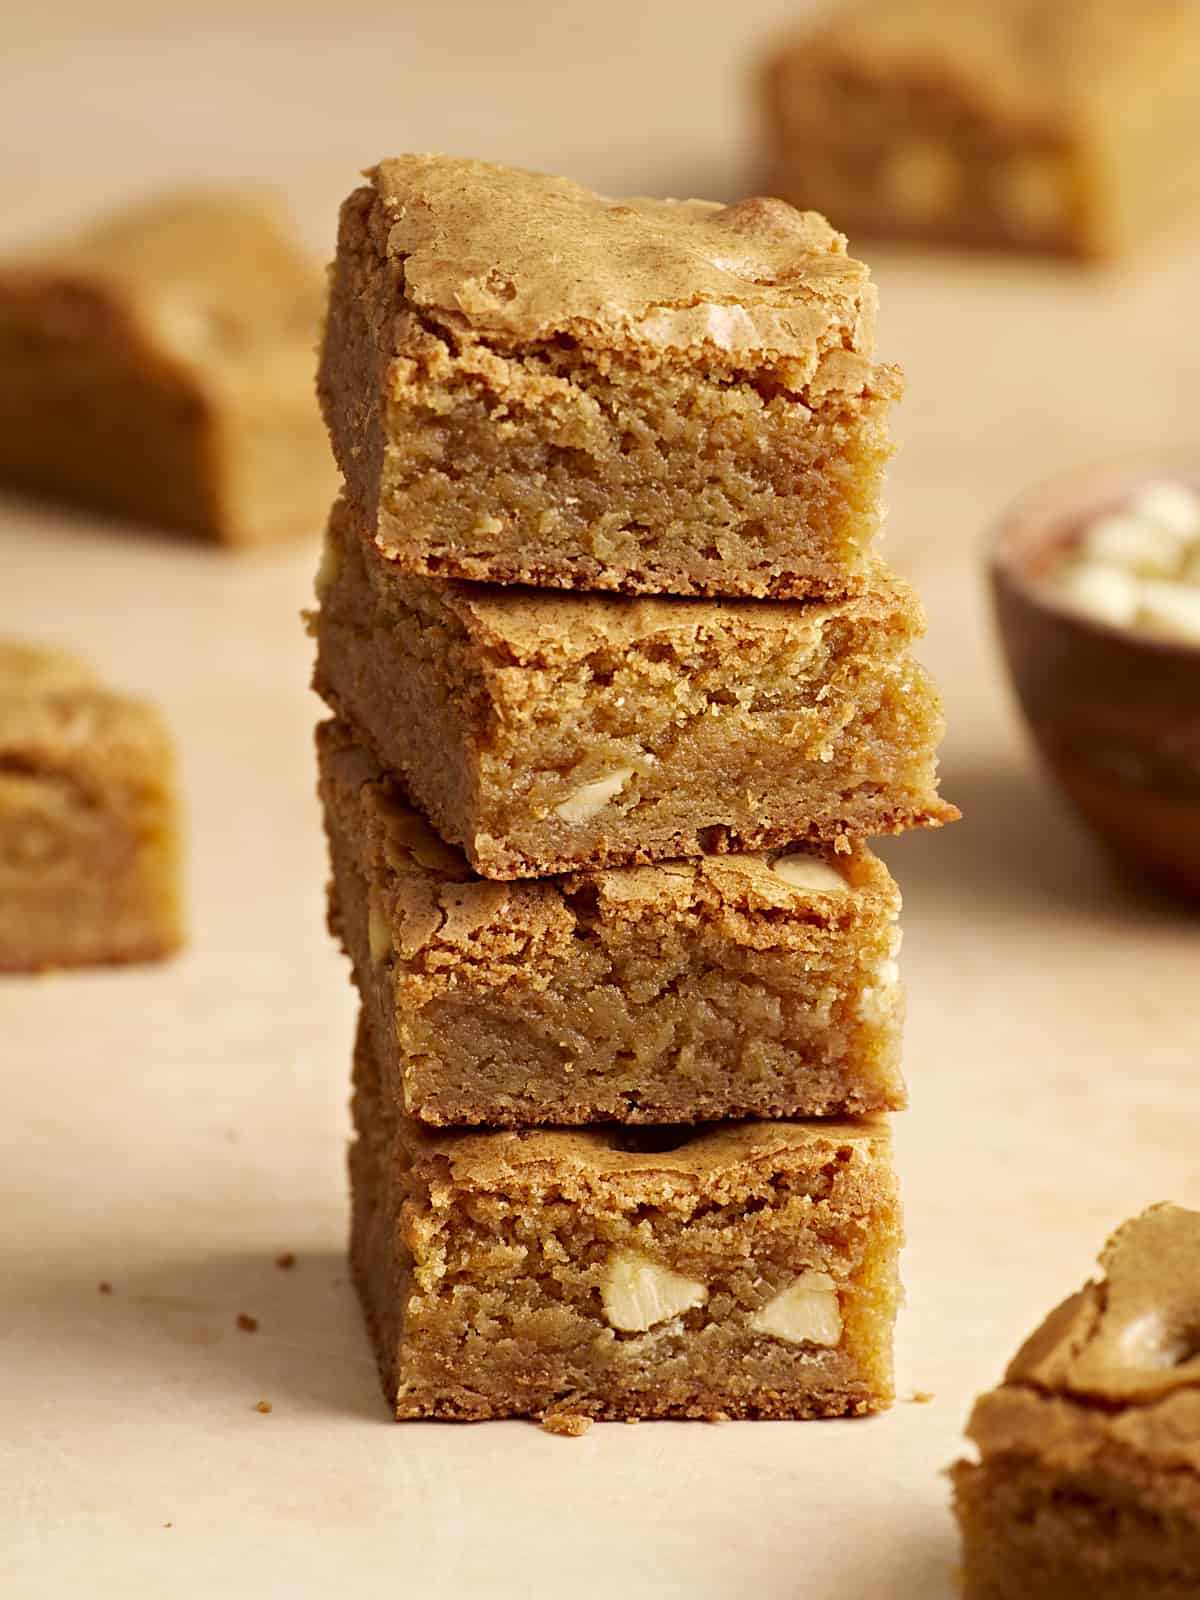
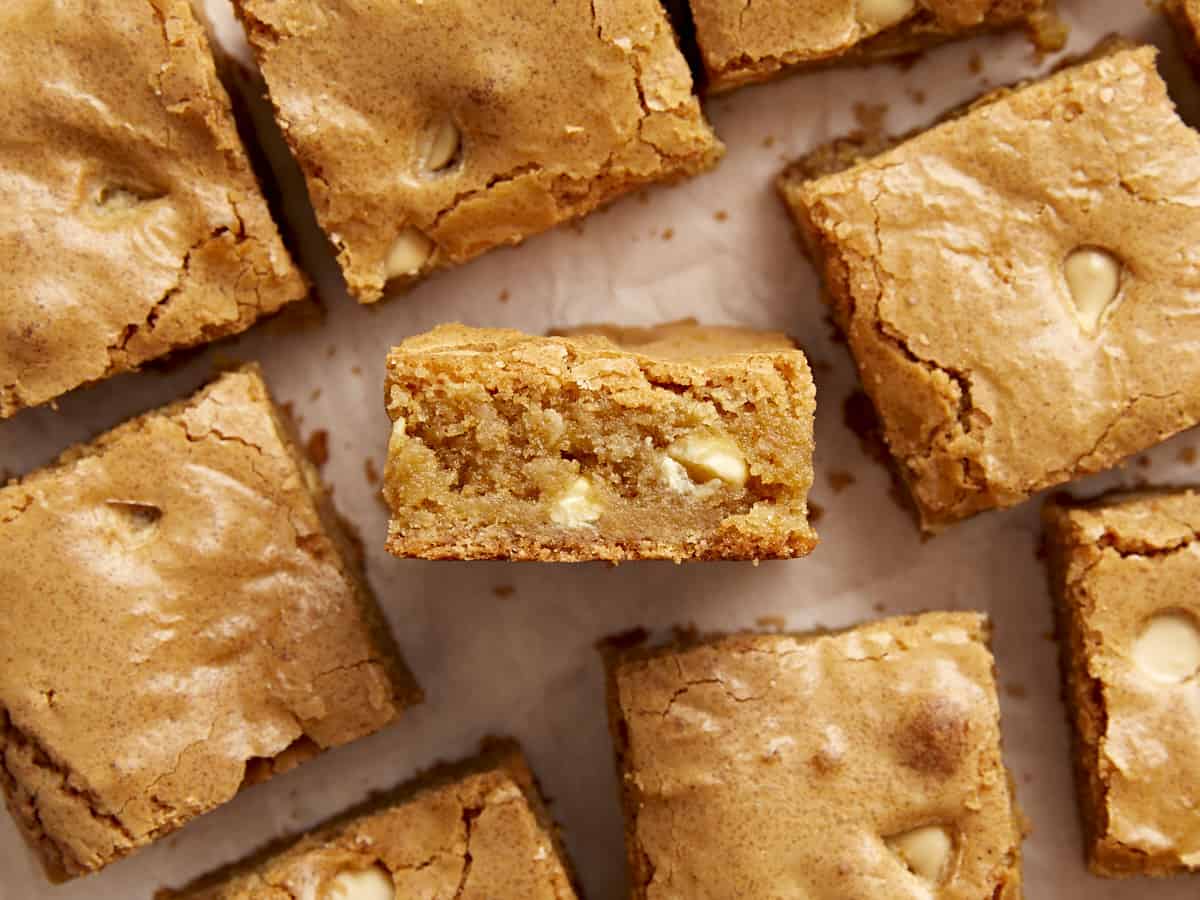
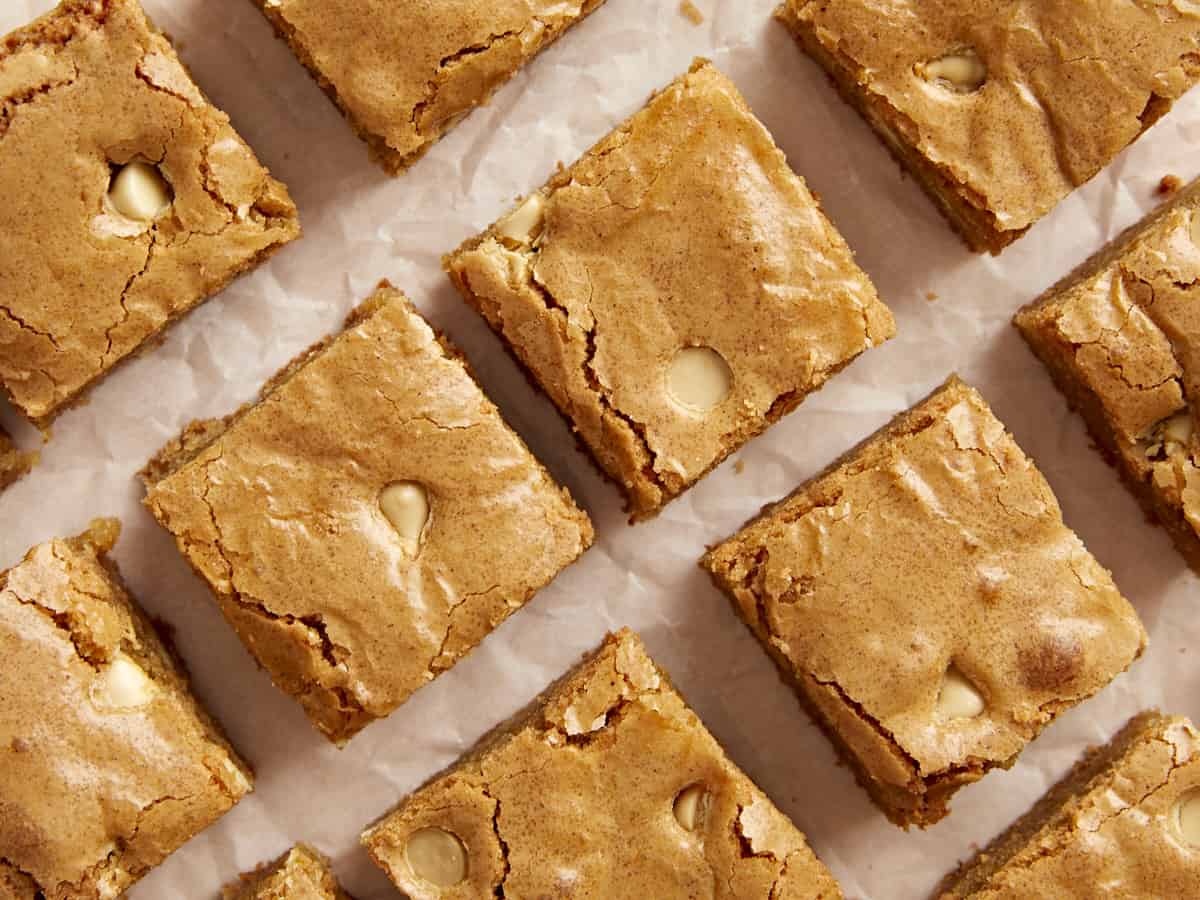
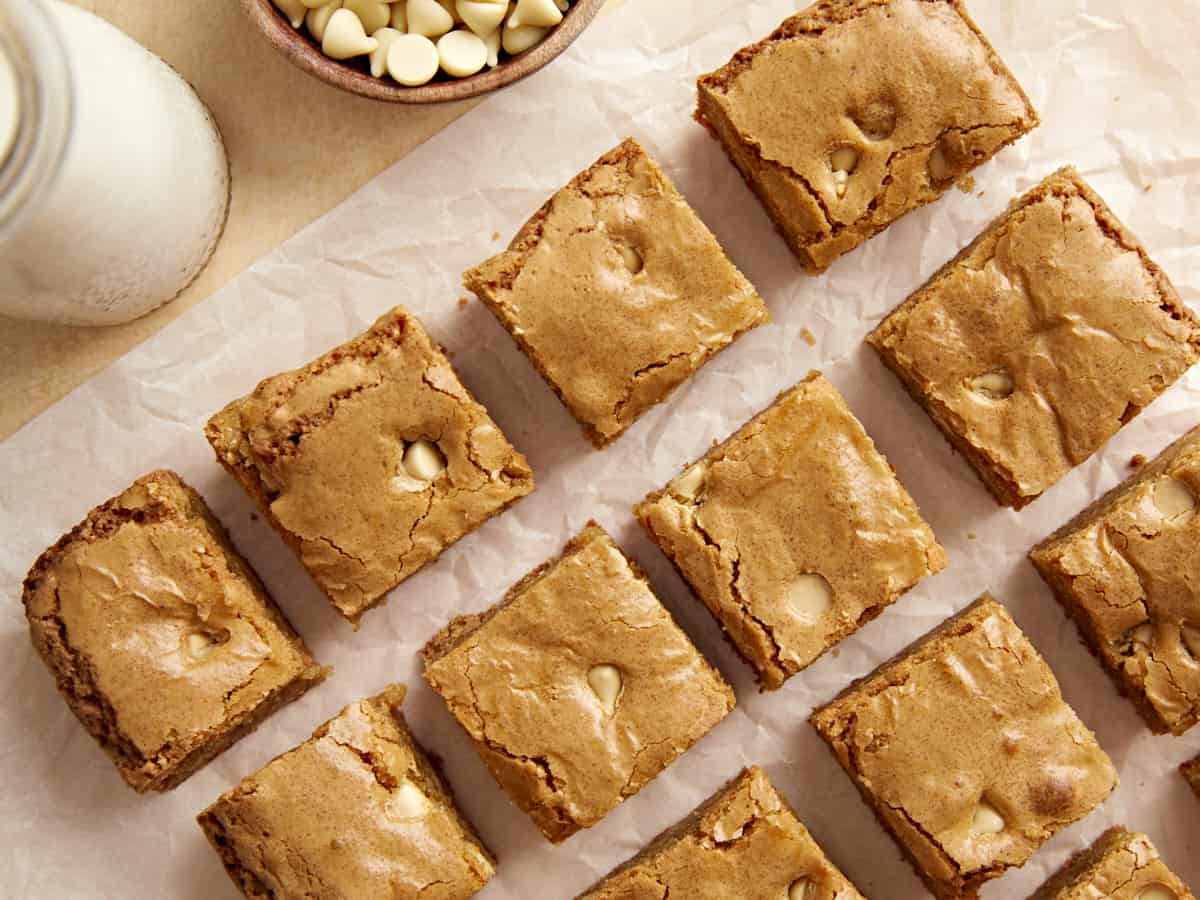
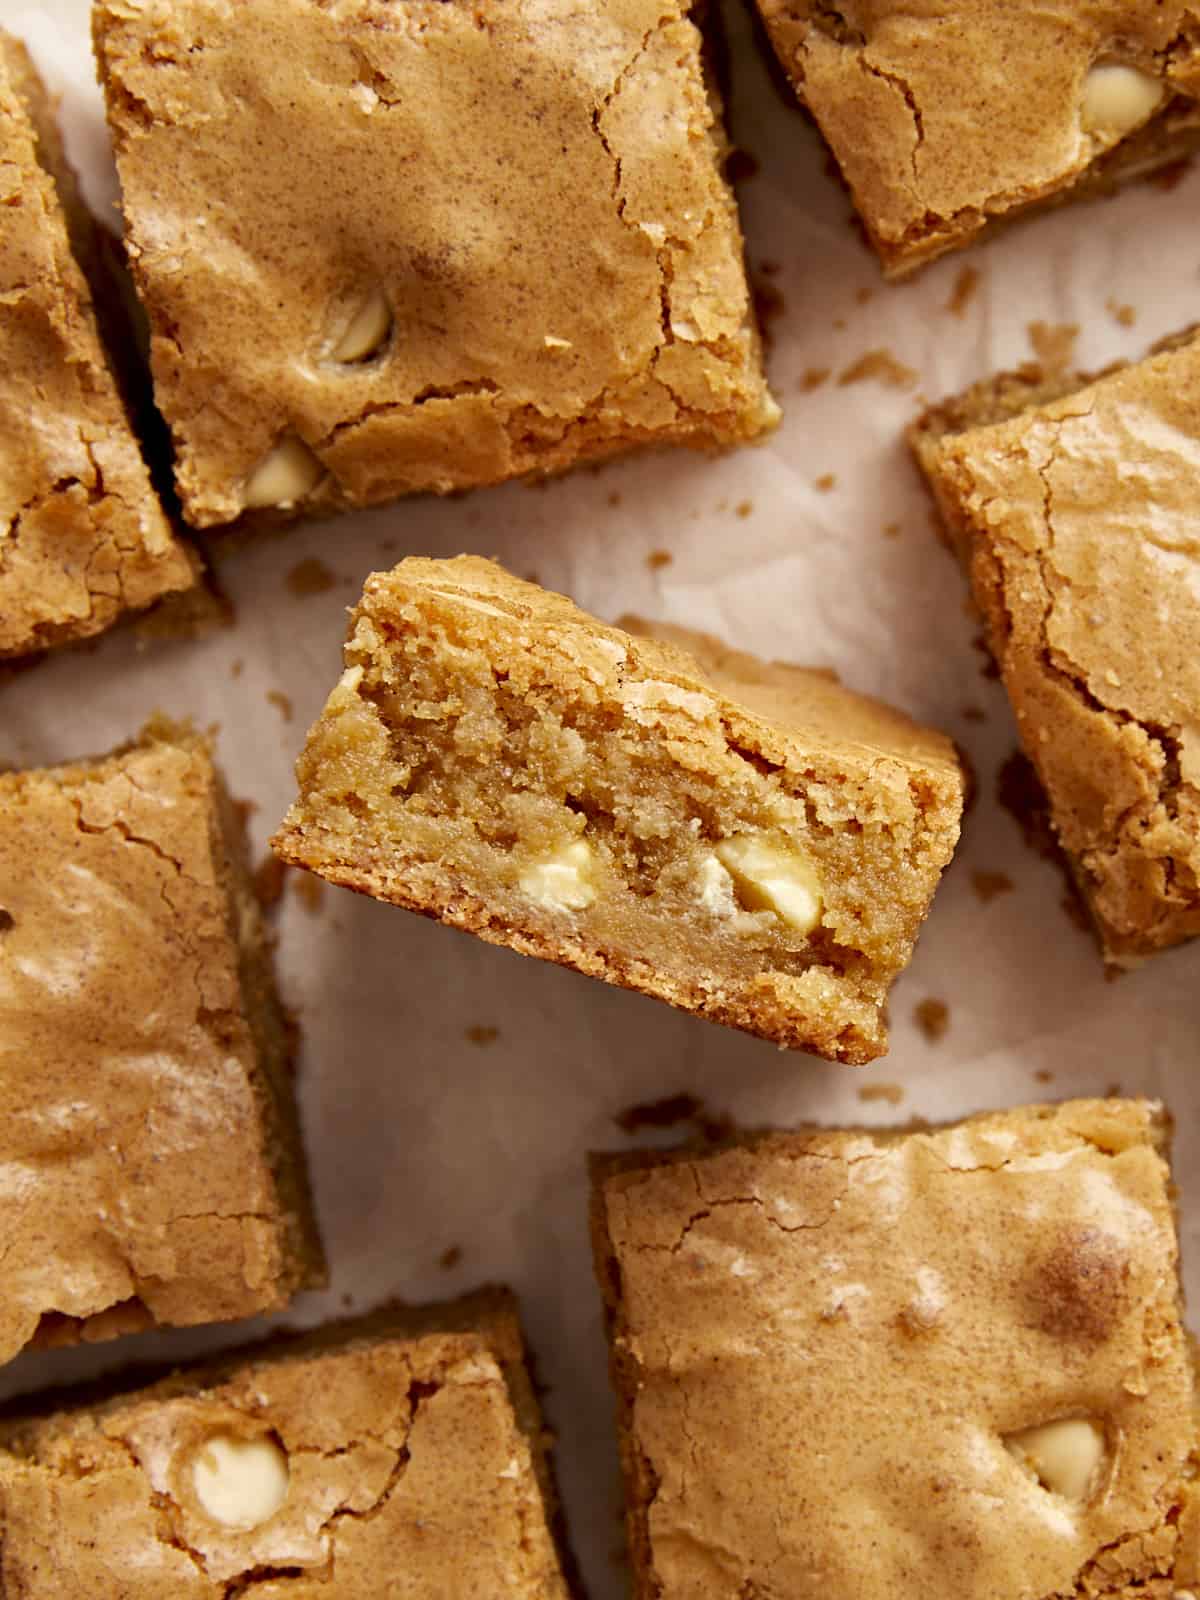
Every now and then I get a taste for something sweet and decadent like homemade cookies, brownies, or carrot cake from my favorite restaurant. But buying pre-made desserts from a store or restaurant can be so expensive. Today, I have a much better option for you! Say hello to these rich, chewy, and buttery Blondies! They’re every bit as delicious as they look and they’re so easy to make. No mixer needed. So if you’re in the mood for baking this weekend or maybe you want to make a sweet treat for Valentine’s Day, these Blondies are sure to be a hit and probably your new favorite dessert!
What Are Blondies?
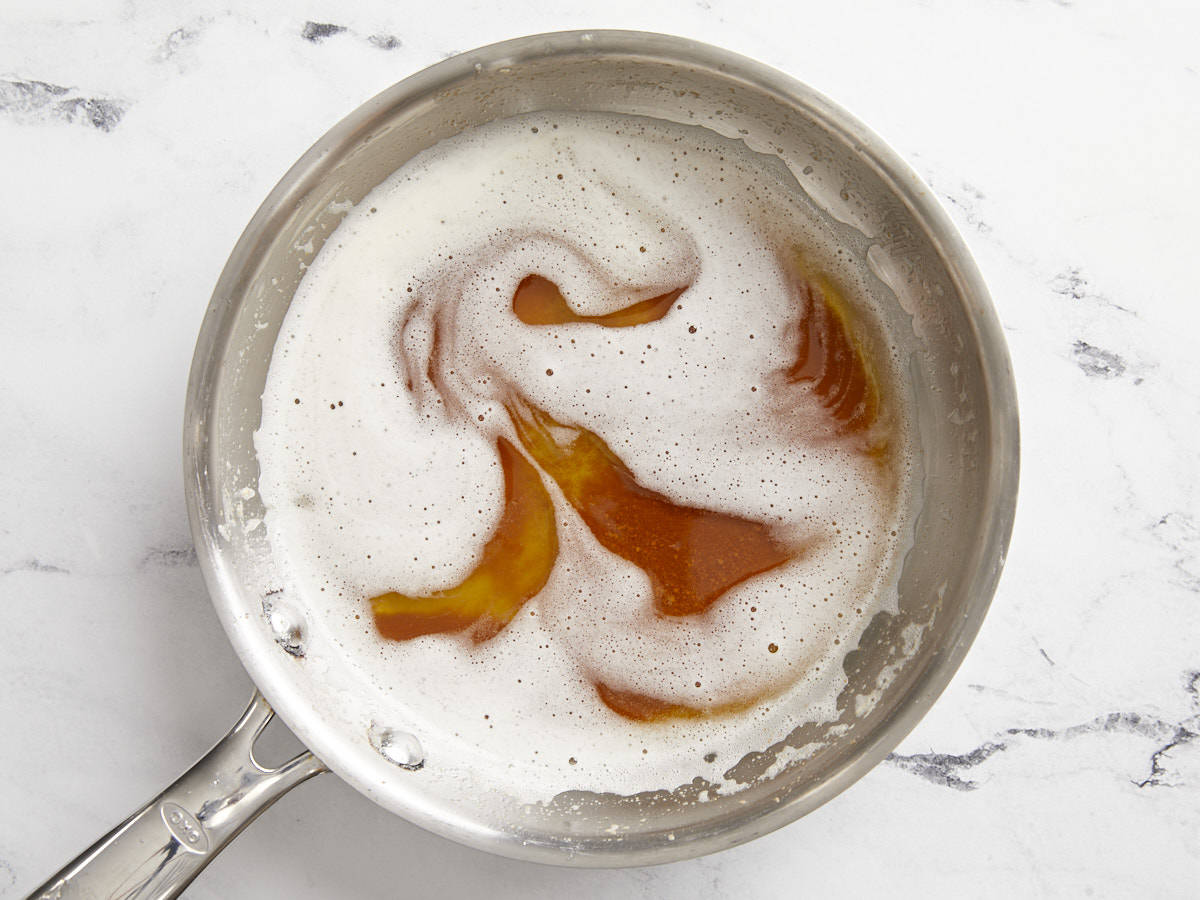
I like to call these sweet little treats the cousin to our favorite Fudgy Homemade Brownies. Blondies are similar to brownies except they are made without the chocolate flavor of cocoa powder. Instead blondies get their rich flavor from a good amount of brown sugar and vanilla extract. And to make these blondies even more special, we used brown butter, which enhances the flavor and all together gives them a slight caramel, butterscotch taste.
Ingredients For Blondies
Here’s everything you need to make these irresistible Blondie bars:
Brown Butter: We used browned butter to add a rich, nutty, caramel flavor to the blondies. It not only gives it double the flavor, but also adds a beautiful golden brown color to these bars.
Brown sugar & Granulated white sugar: Brown sugar is one of the key ingredients and adds sweetness and lots of moisture to the blondies. We tested this recipe with just brown sugar and also using a combination of brown & white sugar. The use of brown & white sugar was the perfect balance and definitely the winner!
Eggs: Eggs give the blondies strength and helps them bake into a sliceable texture.
Vanilla extract: Vanilla extract adds even more rich flavor to the blondies.
All-purpose flour: Flour provides structure and body to the blondies.
Baking Powder: Baking powder helps the blondies rise.
Salt: A little bit of salt helps the flavors pop.
White chocolate chips: Just a few white chocolate chips added a nice contrast and chocolate flavor to the blondies. We only used a small amount because we didn’t want to take away from the deliciousness of the blondie, but feel free to add more if you want!
Blondie Variations
You can easily swap out the white chocolate chips in this recipe for other candies or nuts based on your own personal preference. Here are a few ideas for you:
Butterscotch chips
Dark or Semi-sweet chocolate chips
Peanut butter chips
M&Ms – use festive colored m&ms for special holidays like pastel colors for Easter, red & pink for Valentine’s Day or green & red for Christmas!
Chopped walnuts or pecans
Dried cherries or dried cranberries
A drizzle of Caramel sauce on top of the batter right before baking
Preheat the oven to 350°F. Cut the butter into several tablespoon-sized chunks and add it to a small light-colored skillet. Heat the butter over medium heat, stirring constantly, until the butter solids turn deep brown and develop a nutty aroma (it will first become foamy, then the solids will sink to the bottom and turn brown).
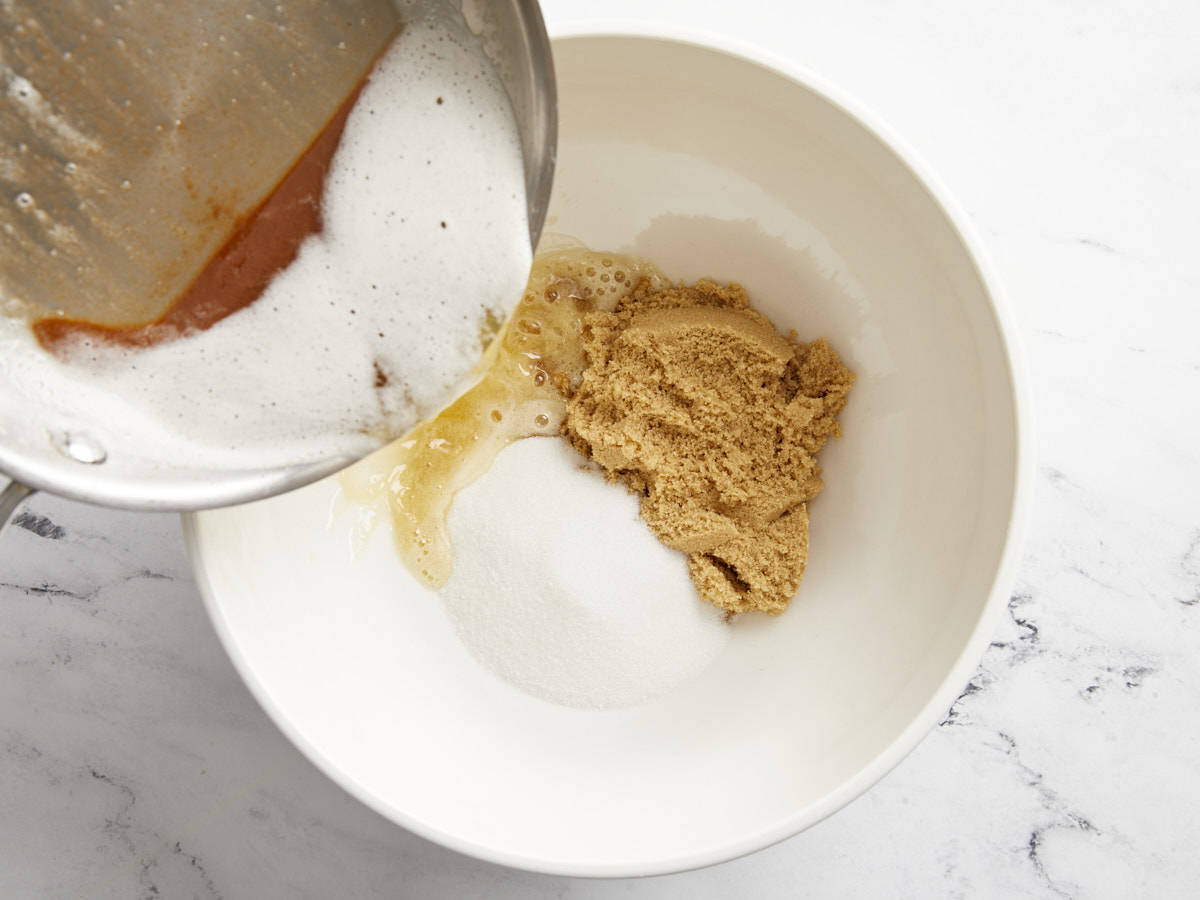
While the butter is browning, add the brown sugar and granulated white sugar to a large mixing bowl.
Once the butter has browned, remove it from the heat immediately to prevent burning, and carefully pour it into the mixing bowl with the sugars. Whisk the brown butter and both sugars together until smooth.
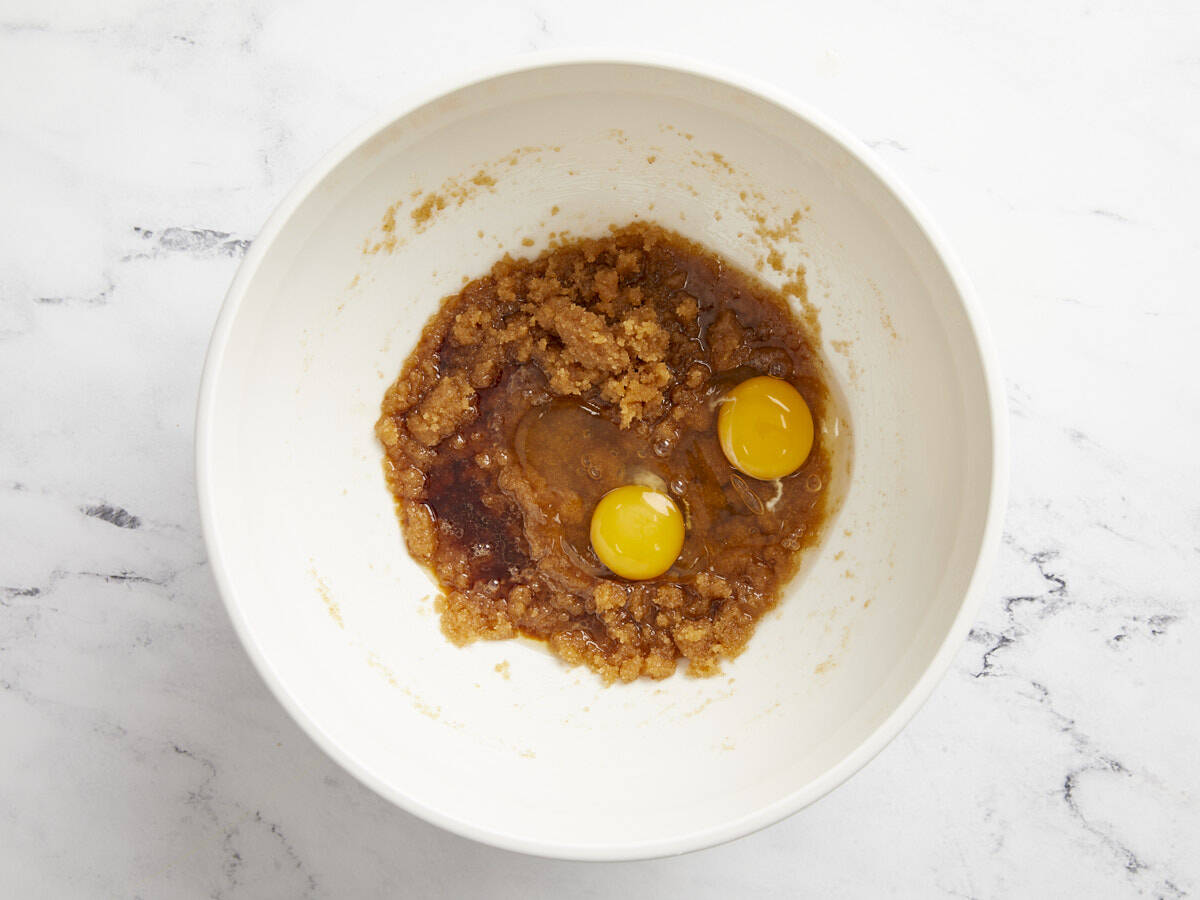
Add the eggs and vanilla extract to the bowl and whisk until smooth.
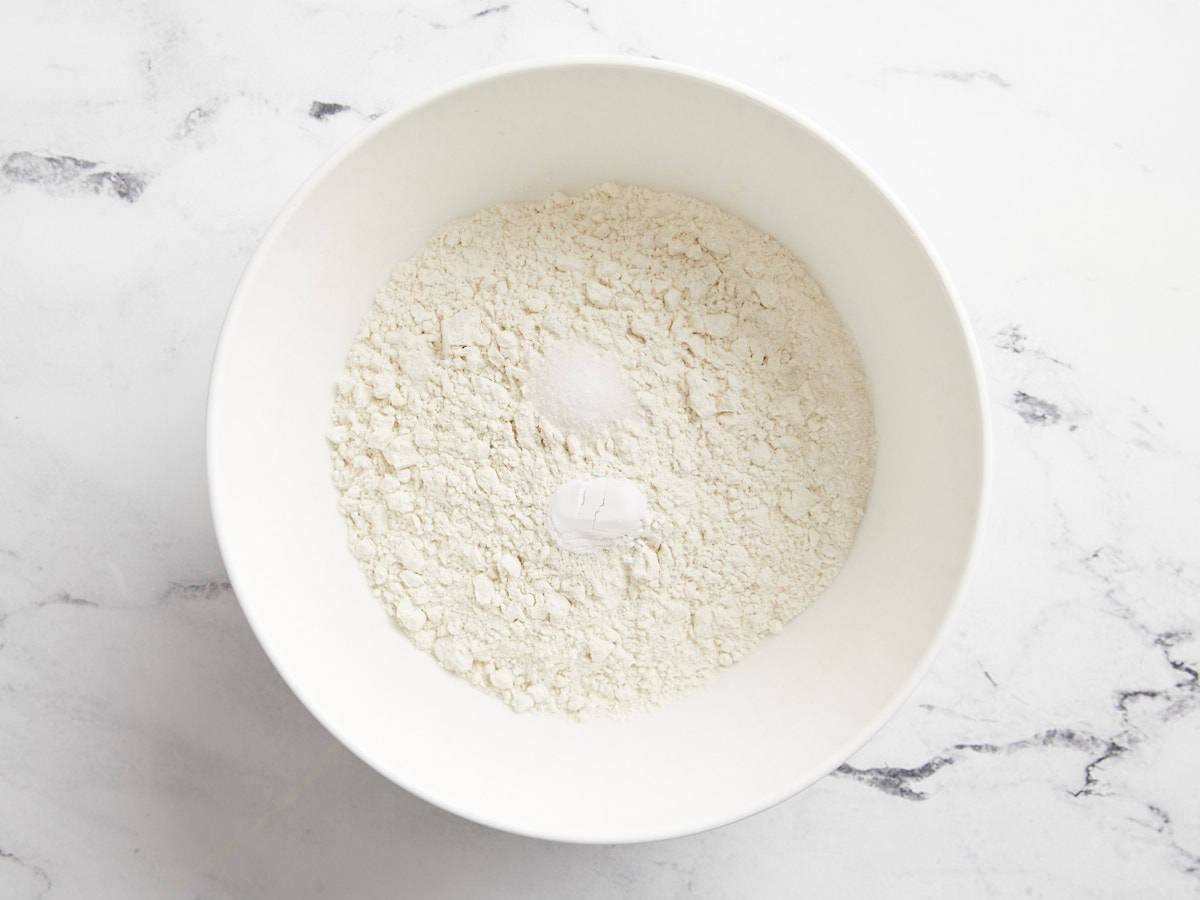
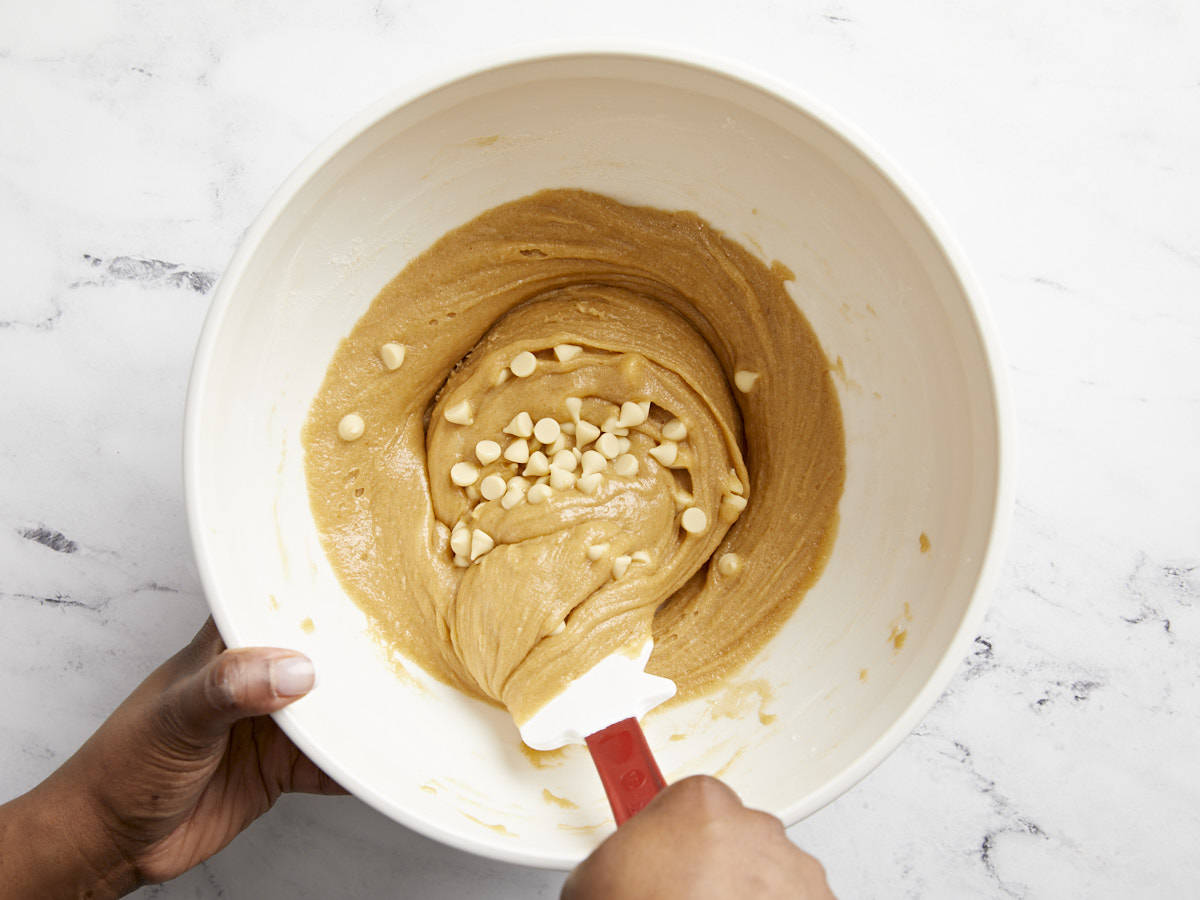
In a separate bowl, stir together the all-purpose flour, baking powder, and salt until well combined. Add the flour mixture to the bowl with the wet ingredients. Use a rubber spatula to stir the flour into the batter until evenly combined.
Finally add the white chocolate chips to the batter and fold them in until just combined.
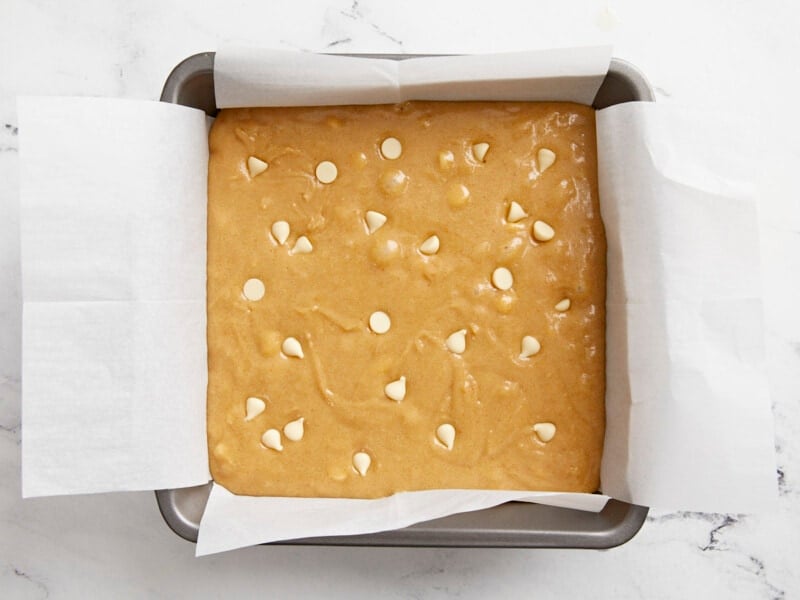
Line an 8×8 baking dish with parchment paper. Add the blondie batter to the baking dish and spread it out evenly. Feel free to add a few more white chocolate chips on top of the batter.
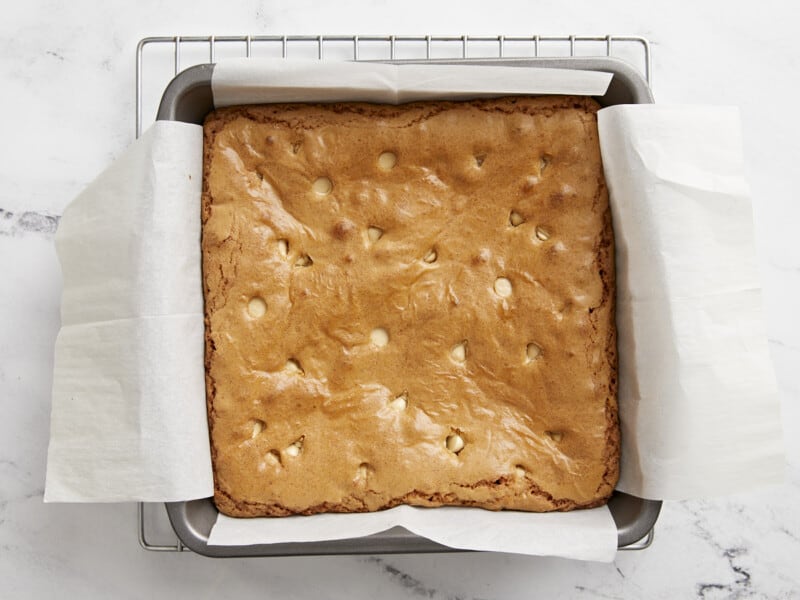
Bake the blondies in the preheated oven for 33-35 minutes or until a toothpick inserted comes out clean.
Remove the blondies from the oven and let them cool for 10-15 minutes before lifting the parchment paper out of the baking dish. Slice into 12 bars and serve.
Preheat the oven to 350°F. Cut 12 Tbsps of butter into several tablespoon-sized chunks and add it to a small light-colored skillet. Heat the butter over medium heat, stirring constantly, until the butter solids turn deep brown and develop a nutty aroma (it will first become foamy, then the solids will sink to the bottom and turn brown).
While the butter is browning, add 1 cup brown sugar and 1/2 cup granulated white sugar to a large mixing bowl. Once the butter has browned, remove it from the heat immediately to prevent burning, and carefully pour it into the mixing bowl with the sugars. Whisk the brown butter and both sugars together until smooth.
Add 2 large eggs and 2 tsp vanilla extract to the bowl and whisk until smooth.
In a separate bowl, stir together 1 1/2 cups all-purpose flour, 1/2 tsp baking powder, and 1/4 tsp salt until well combined.
Add the flour mixture to the bowl with the wet ingredients. Use a rubber spatula to stir the flour into the batter until evenly combined.
Finally add 1/4 cup white chocolate chips to the batter and fold until just combined.
Line an 8×8 baking dish with parchment paper. Add the blondie batter to the baking dish and spread it out evenly. Feel free to add a few more white chocolate chips on top of the batter.
Bake the blondies in the preheated oven for 33-35 minutes or until a toothpick inserted comes out clean.
Remove the blondies from the oven and let them cool for 10-15 minutes before lifting the parchment paper out of the baking dish. Slice into 12 bars and enjoy!
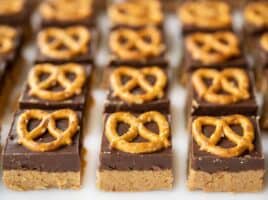
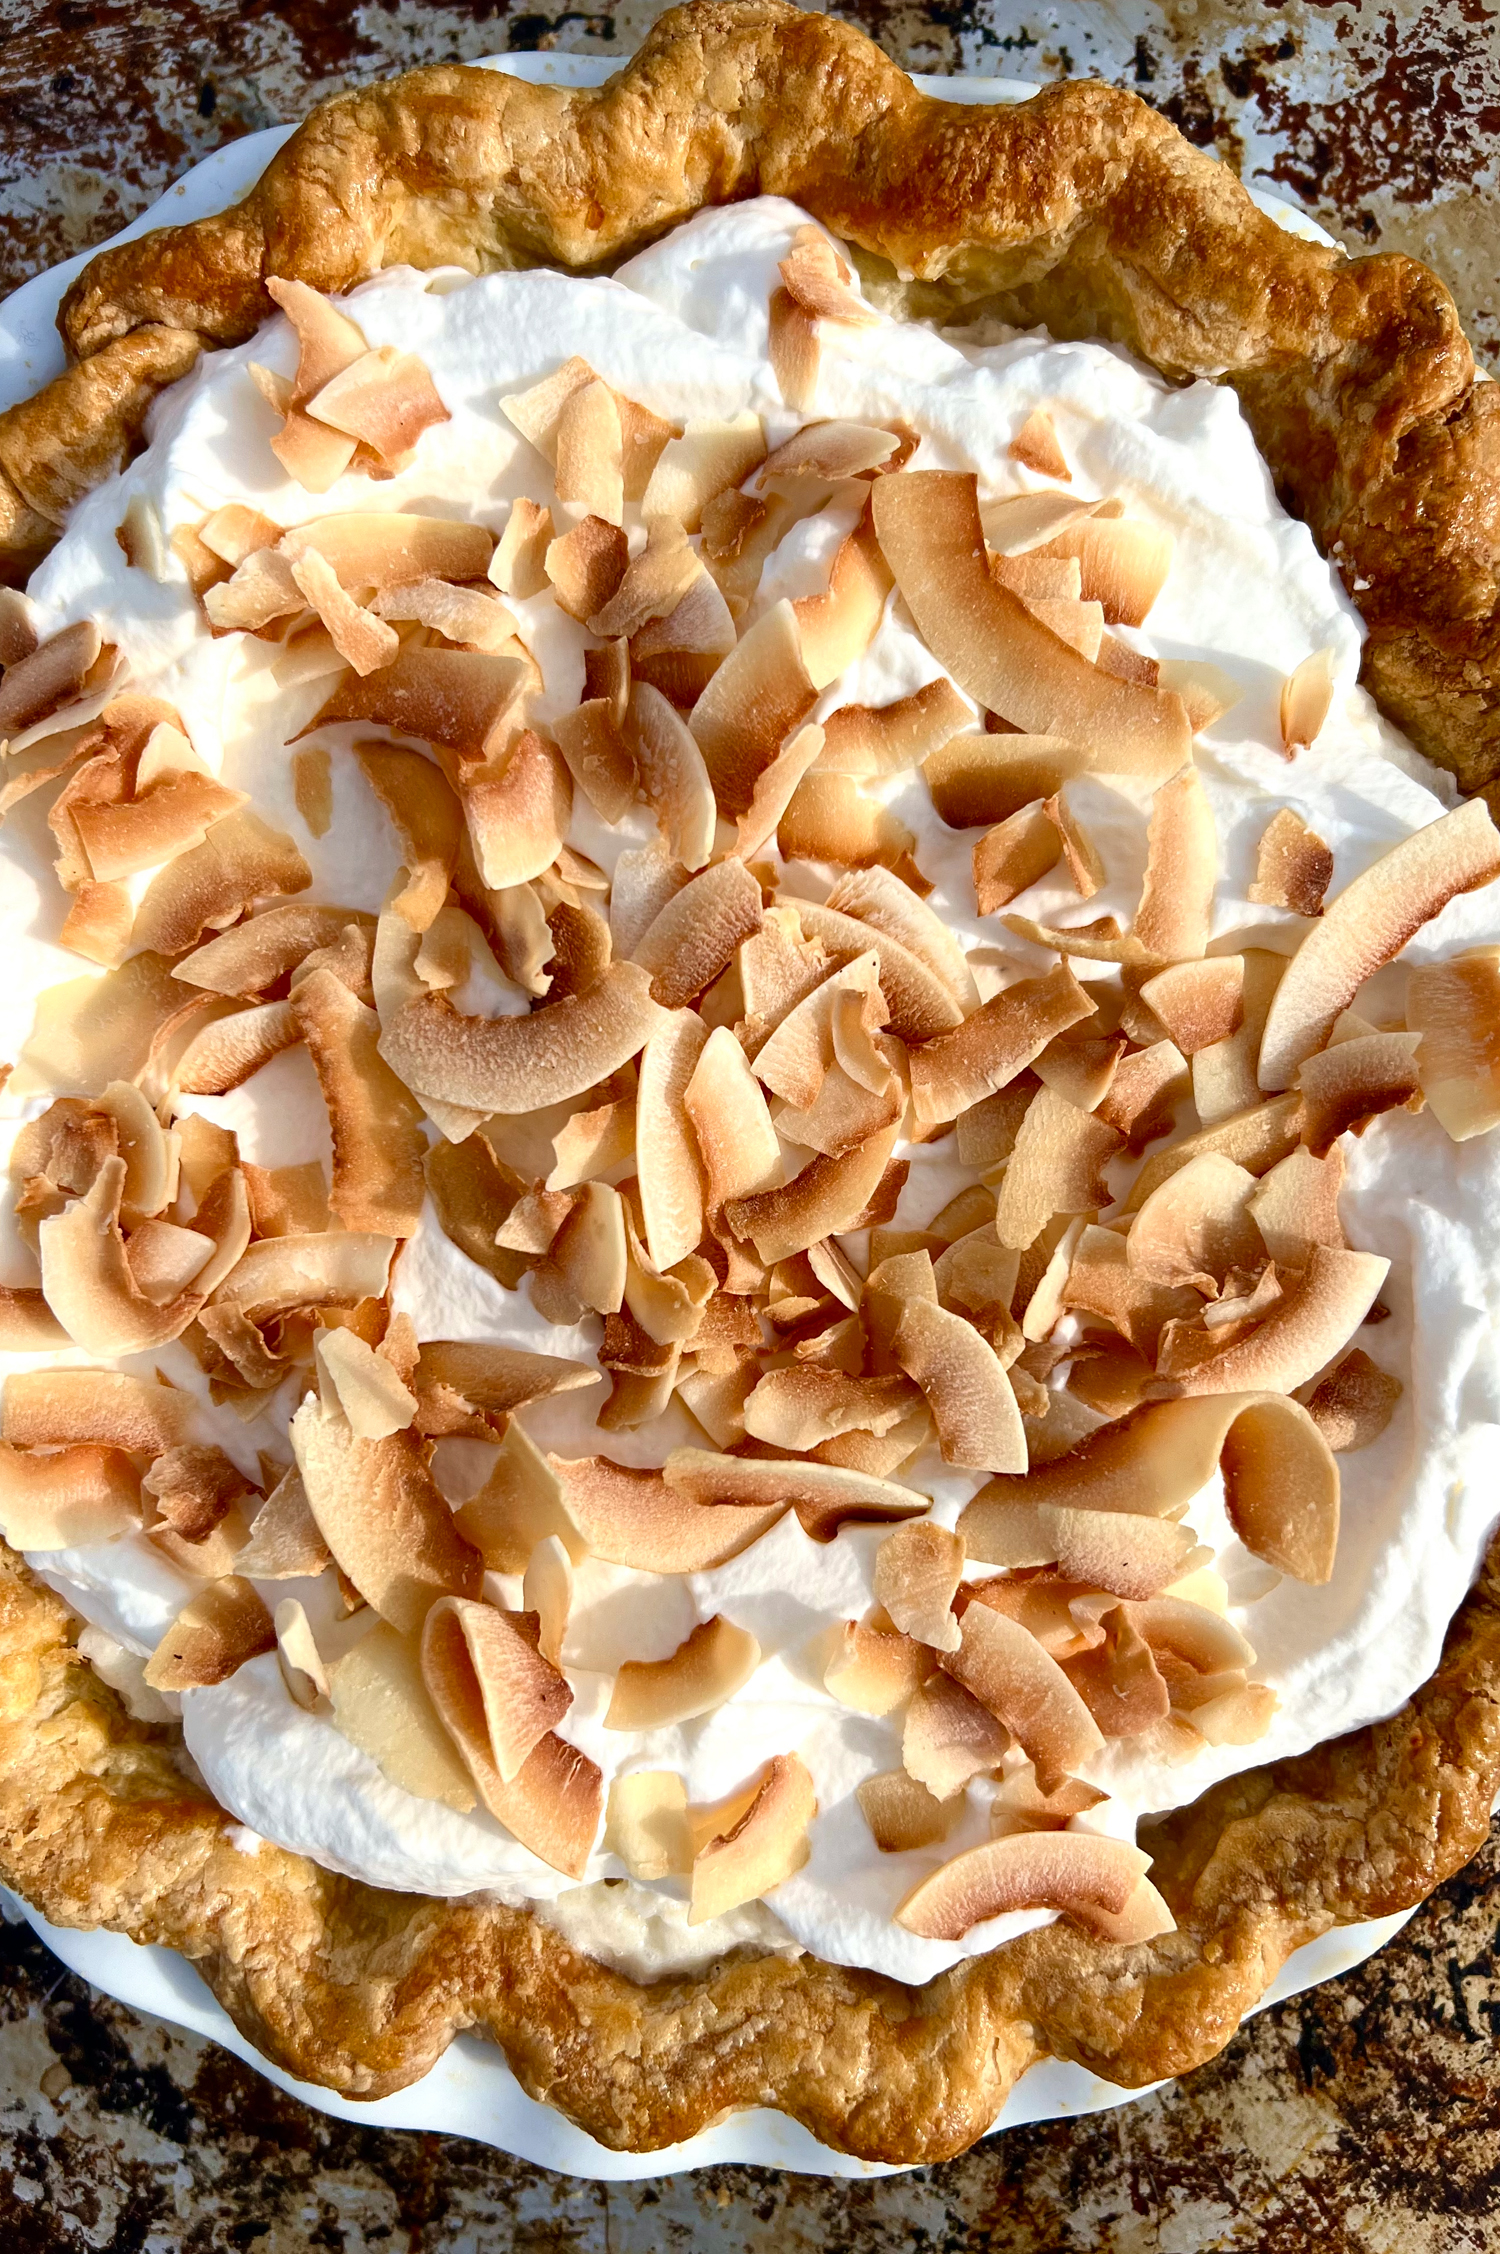
There are a couple details that take this coconut cream pie to the next level. Like many versions, it is made with a homemade, flaky, all-butter pie crust filled with a creamy coconut pudding. It is finished with clouds of whipped cream and plenty of toasted coconut flakes. Using buttermilk and a confident amount of salt to offset some of the sweetness is how you take this pie from good to great.
This pie was inspired by my dad. He requested coconut cream pie in place of cake for his birthday, so I got to work. I knew he was after a homemade, old-fashioned version. It needed to be a creamy, sweet coconut cream pie loaded with whipped cream and coconut flakes. He reminisces about Marie Callender’s version, so I kept a photo of one of their pies on my desktop as reference. Lol. At the same time, I was also aiming for a pie that had some balance. After a few rounds, I landed on using buttermilk and sea salt in the coconut filling for a filling that is hard not to love.
Coconut Cream Pie: The 3 Main Parts
A classic coconut cream pie has three main components.
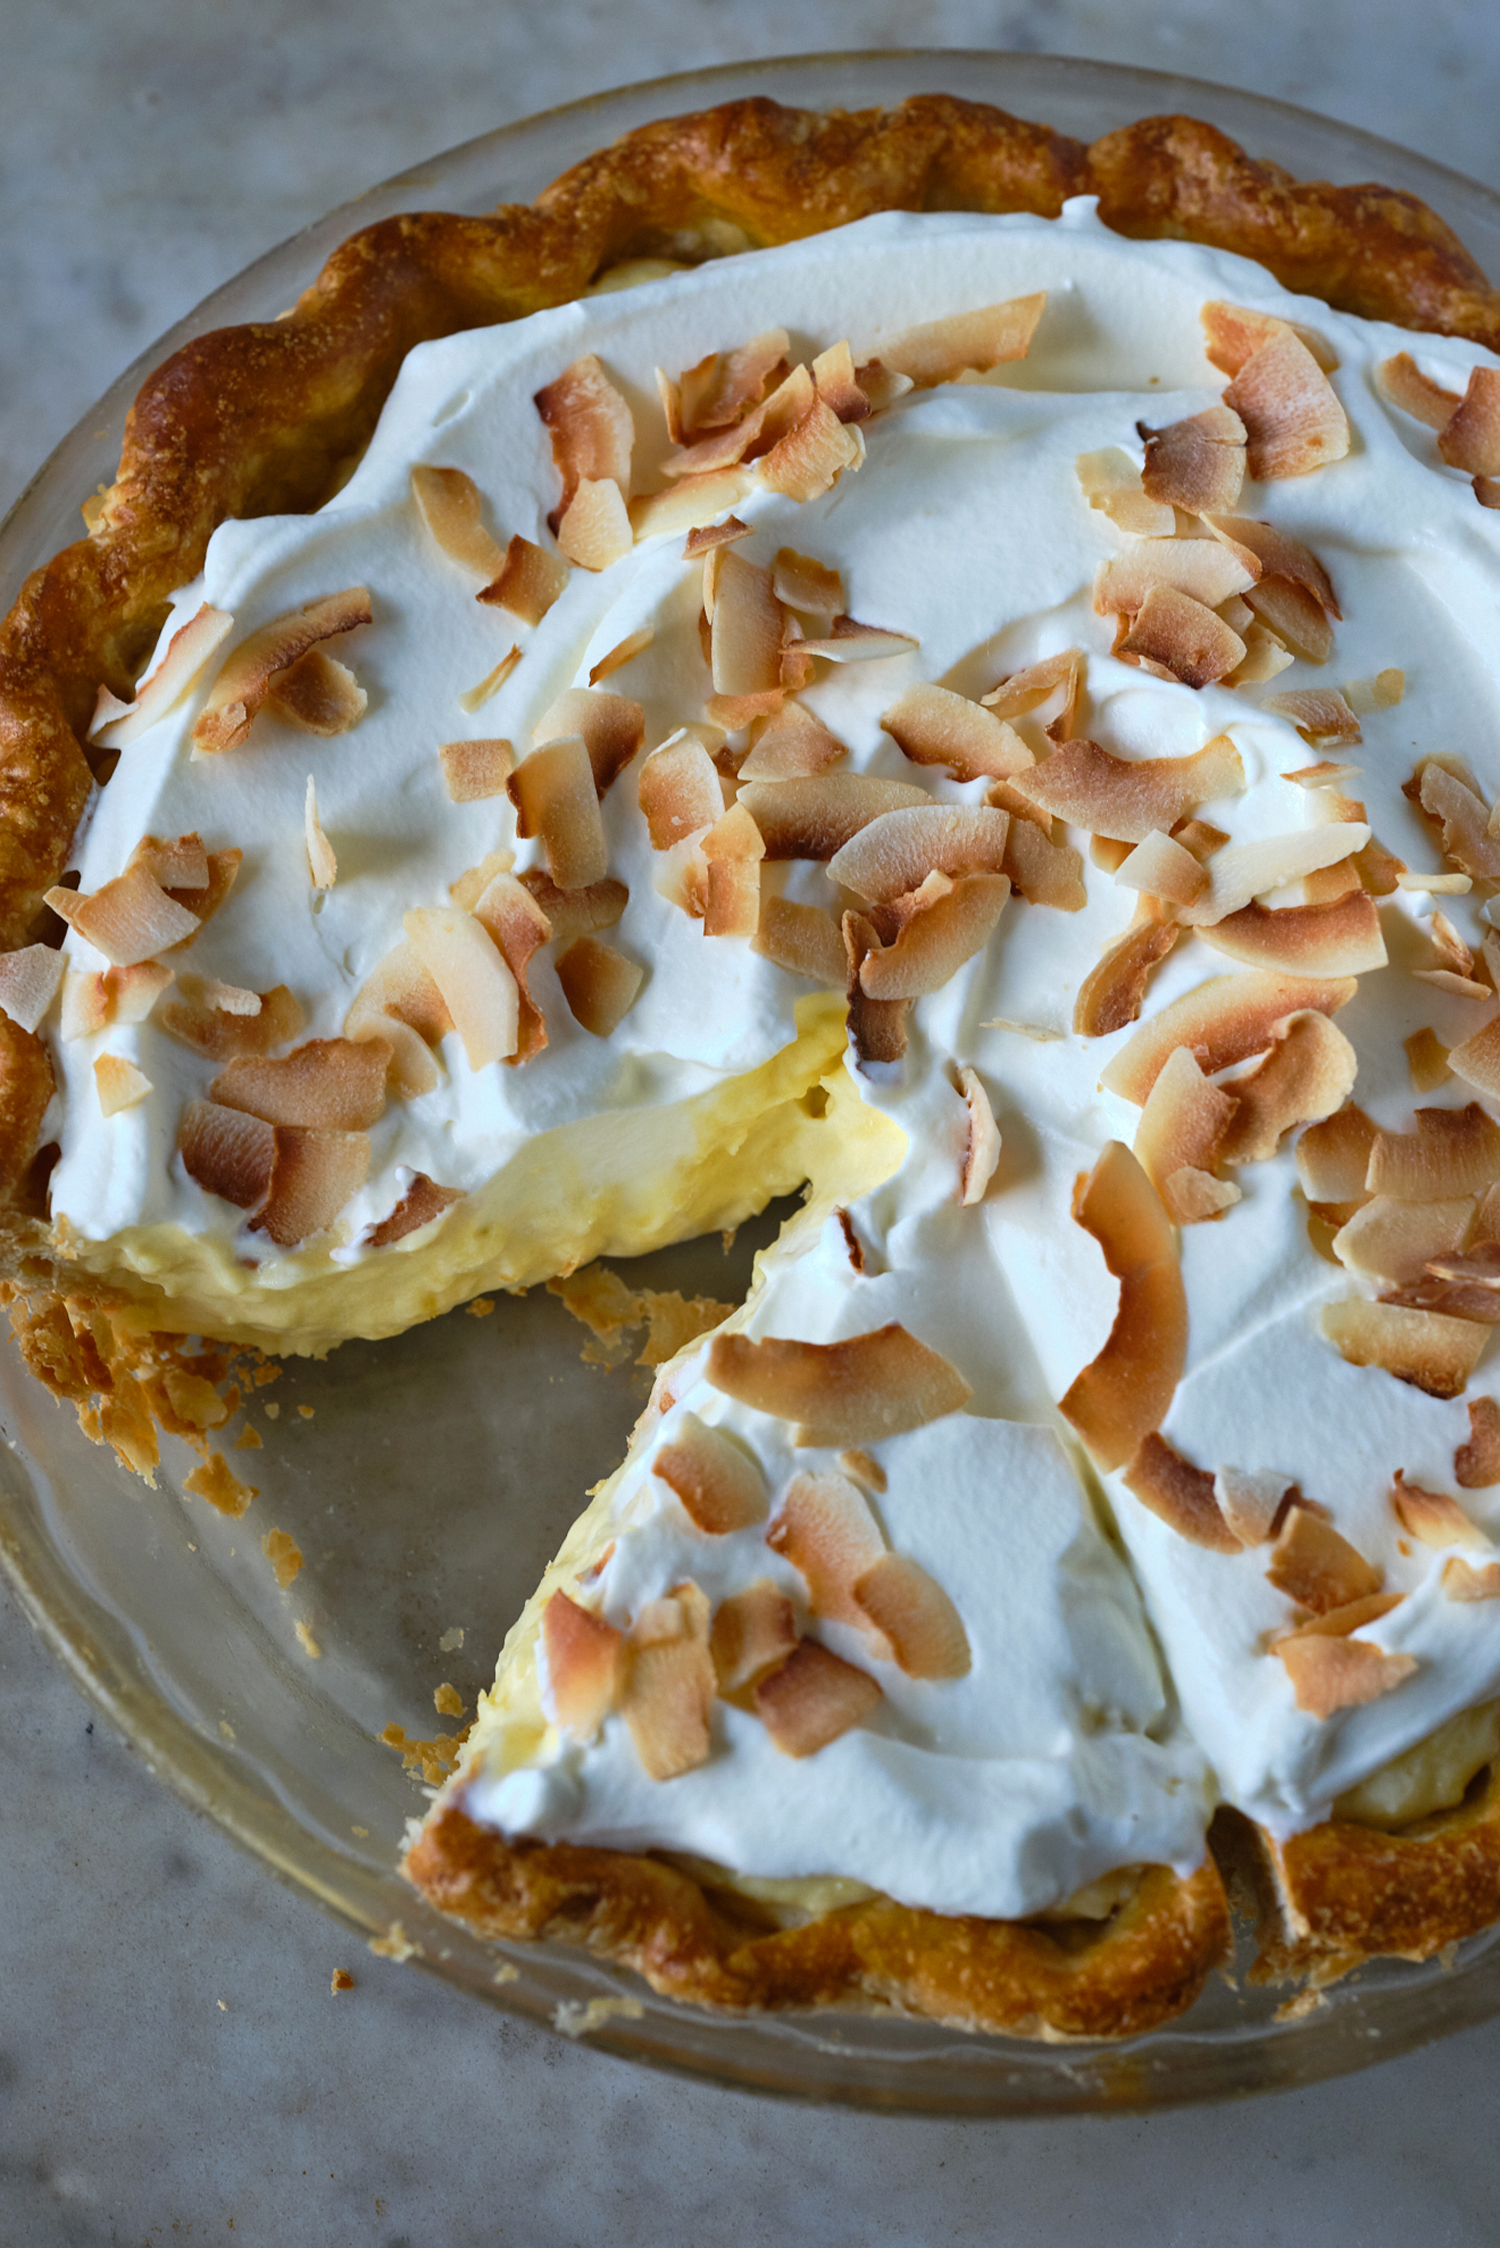
A really good pie crust: Golden, flaky, with good structure. The pie crust will be fully baked prior to filling. Instructions below! I use this pie crust dough for a lot of pies.
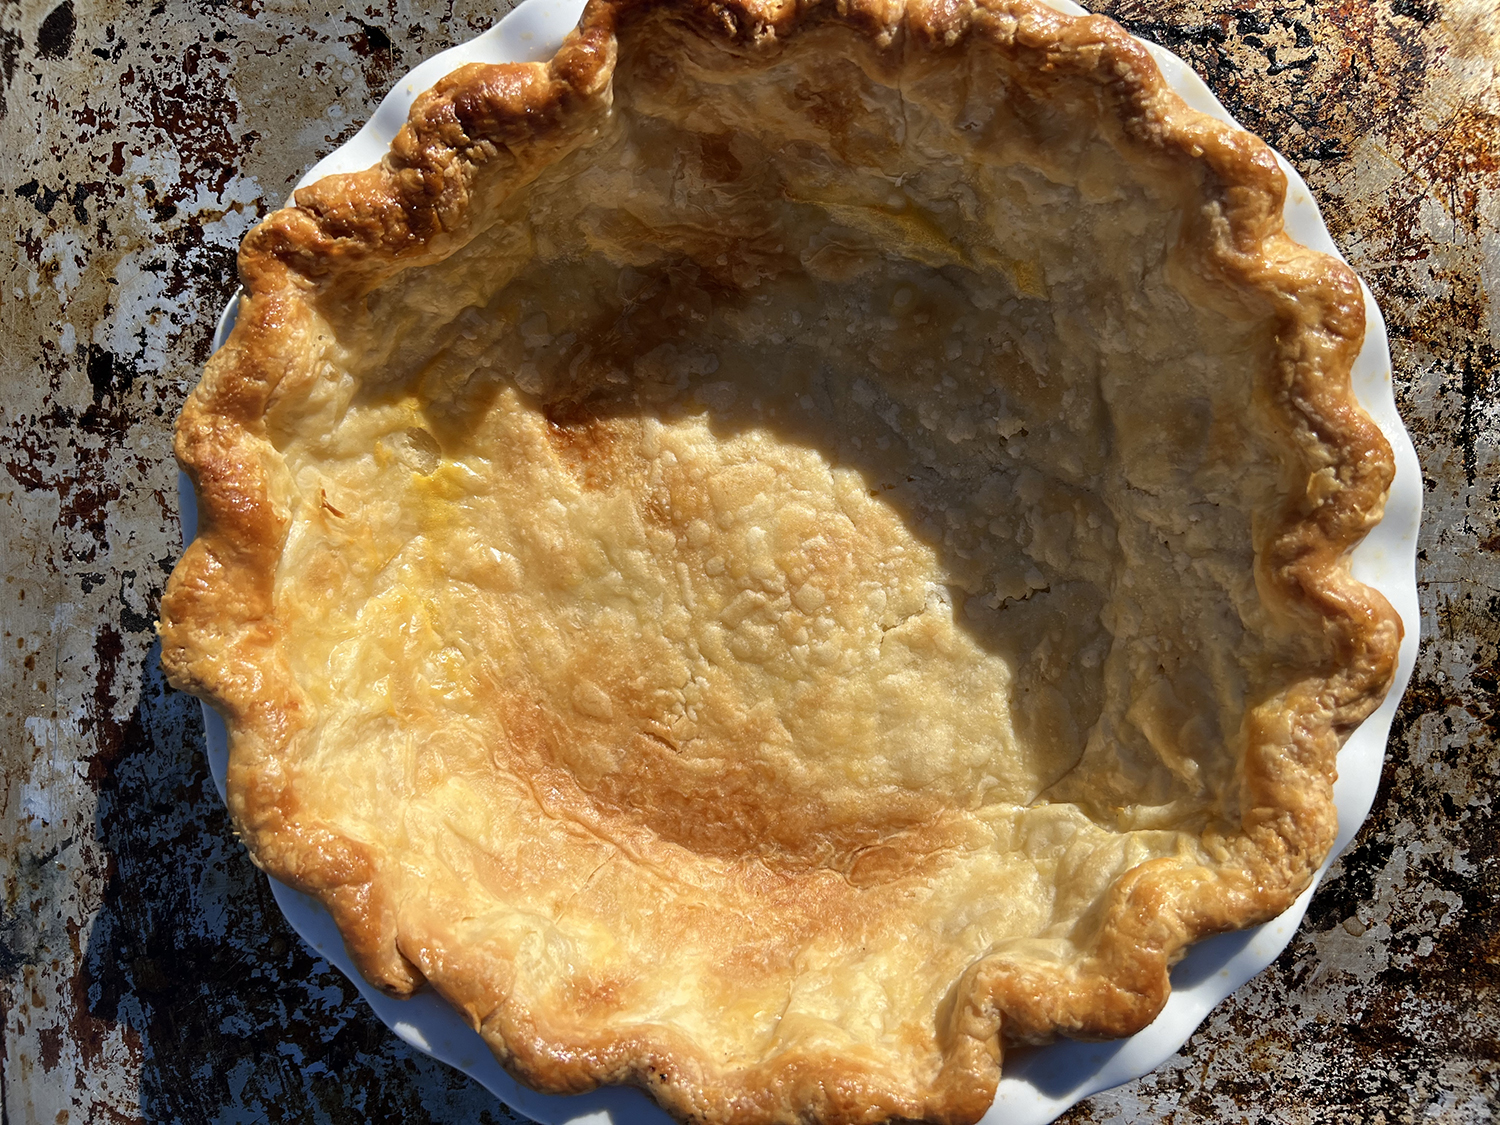
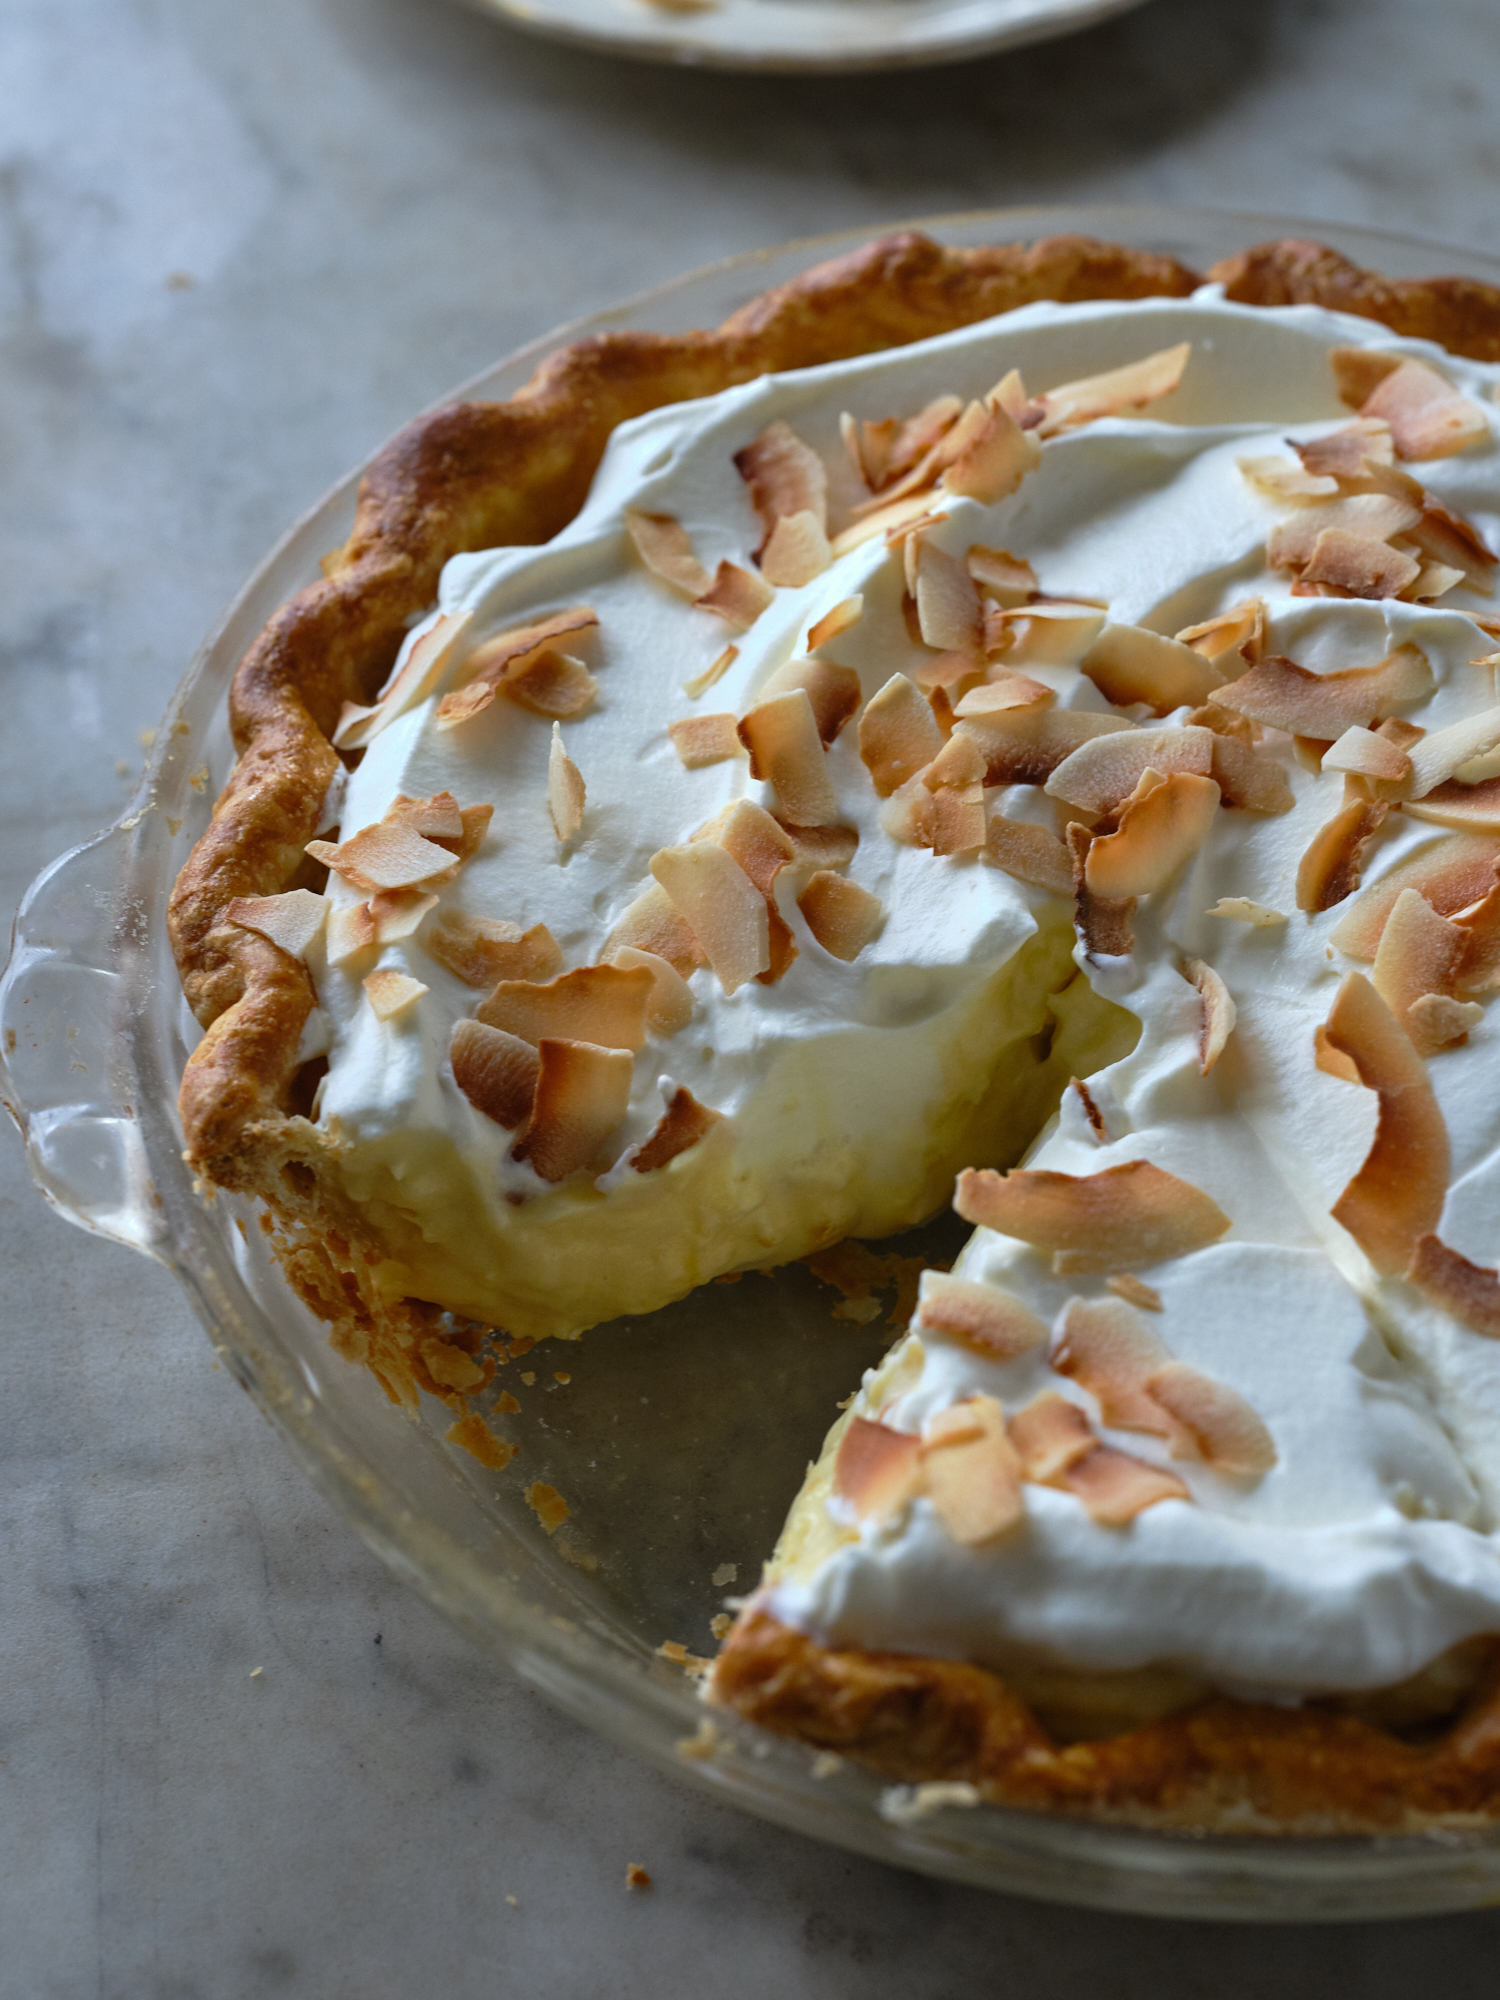
Creamy coconut pudding filling: Arguably the heart and soul of this pie. Spread it across the fully baked pie crust (pictured below). Then refrigerate until set.
Whipped cream topping with toasted coconut: Just before serving whip some heavy cream with a kiss of powdered sugar and pile it on top of the coconut cream filling. Add a finishing touch of toasted coconut flakes, slice into wedges and enjoy!
How To Make the Coconut Cream Pie Filling
There are basically two major ways to approach coconut cream pie filling. You can make a homemade coconut pudding on the stovetop or you can make the filling using pudding mix as the base. This pie uses vanilla pudding mix to provide a quick, stable, reliable foundation. The pudding mix is combined with buttermilk and sea salt to balance out the sweetness contributed by the pudding mix and a lot of sweetened coconut. A bit of whipped cream is folded into the mix to bring a bit of lightness to the filling. You will be able to make the filling in five minutes flat. It’s fool-proof and absolutely delicious.
There’s certainly an argument for making homemade coconut pudding for the filling here. But because this has become one of my favorite “quick” pies to throw together, I go the pudding route. No egg tempering required.
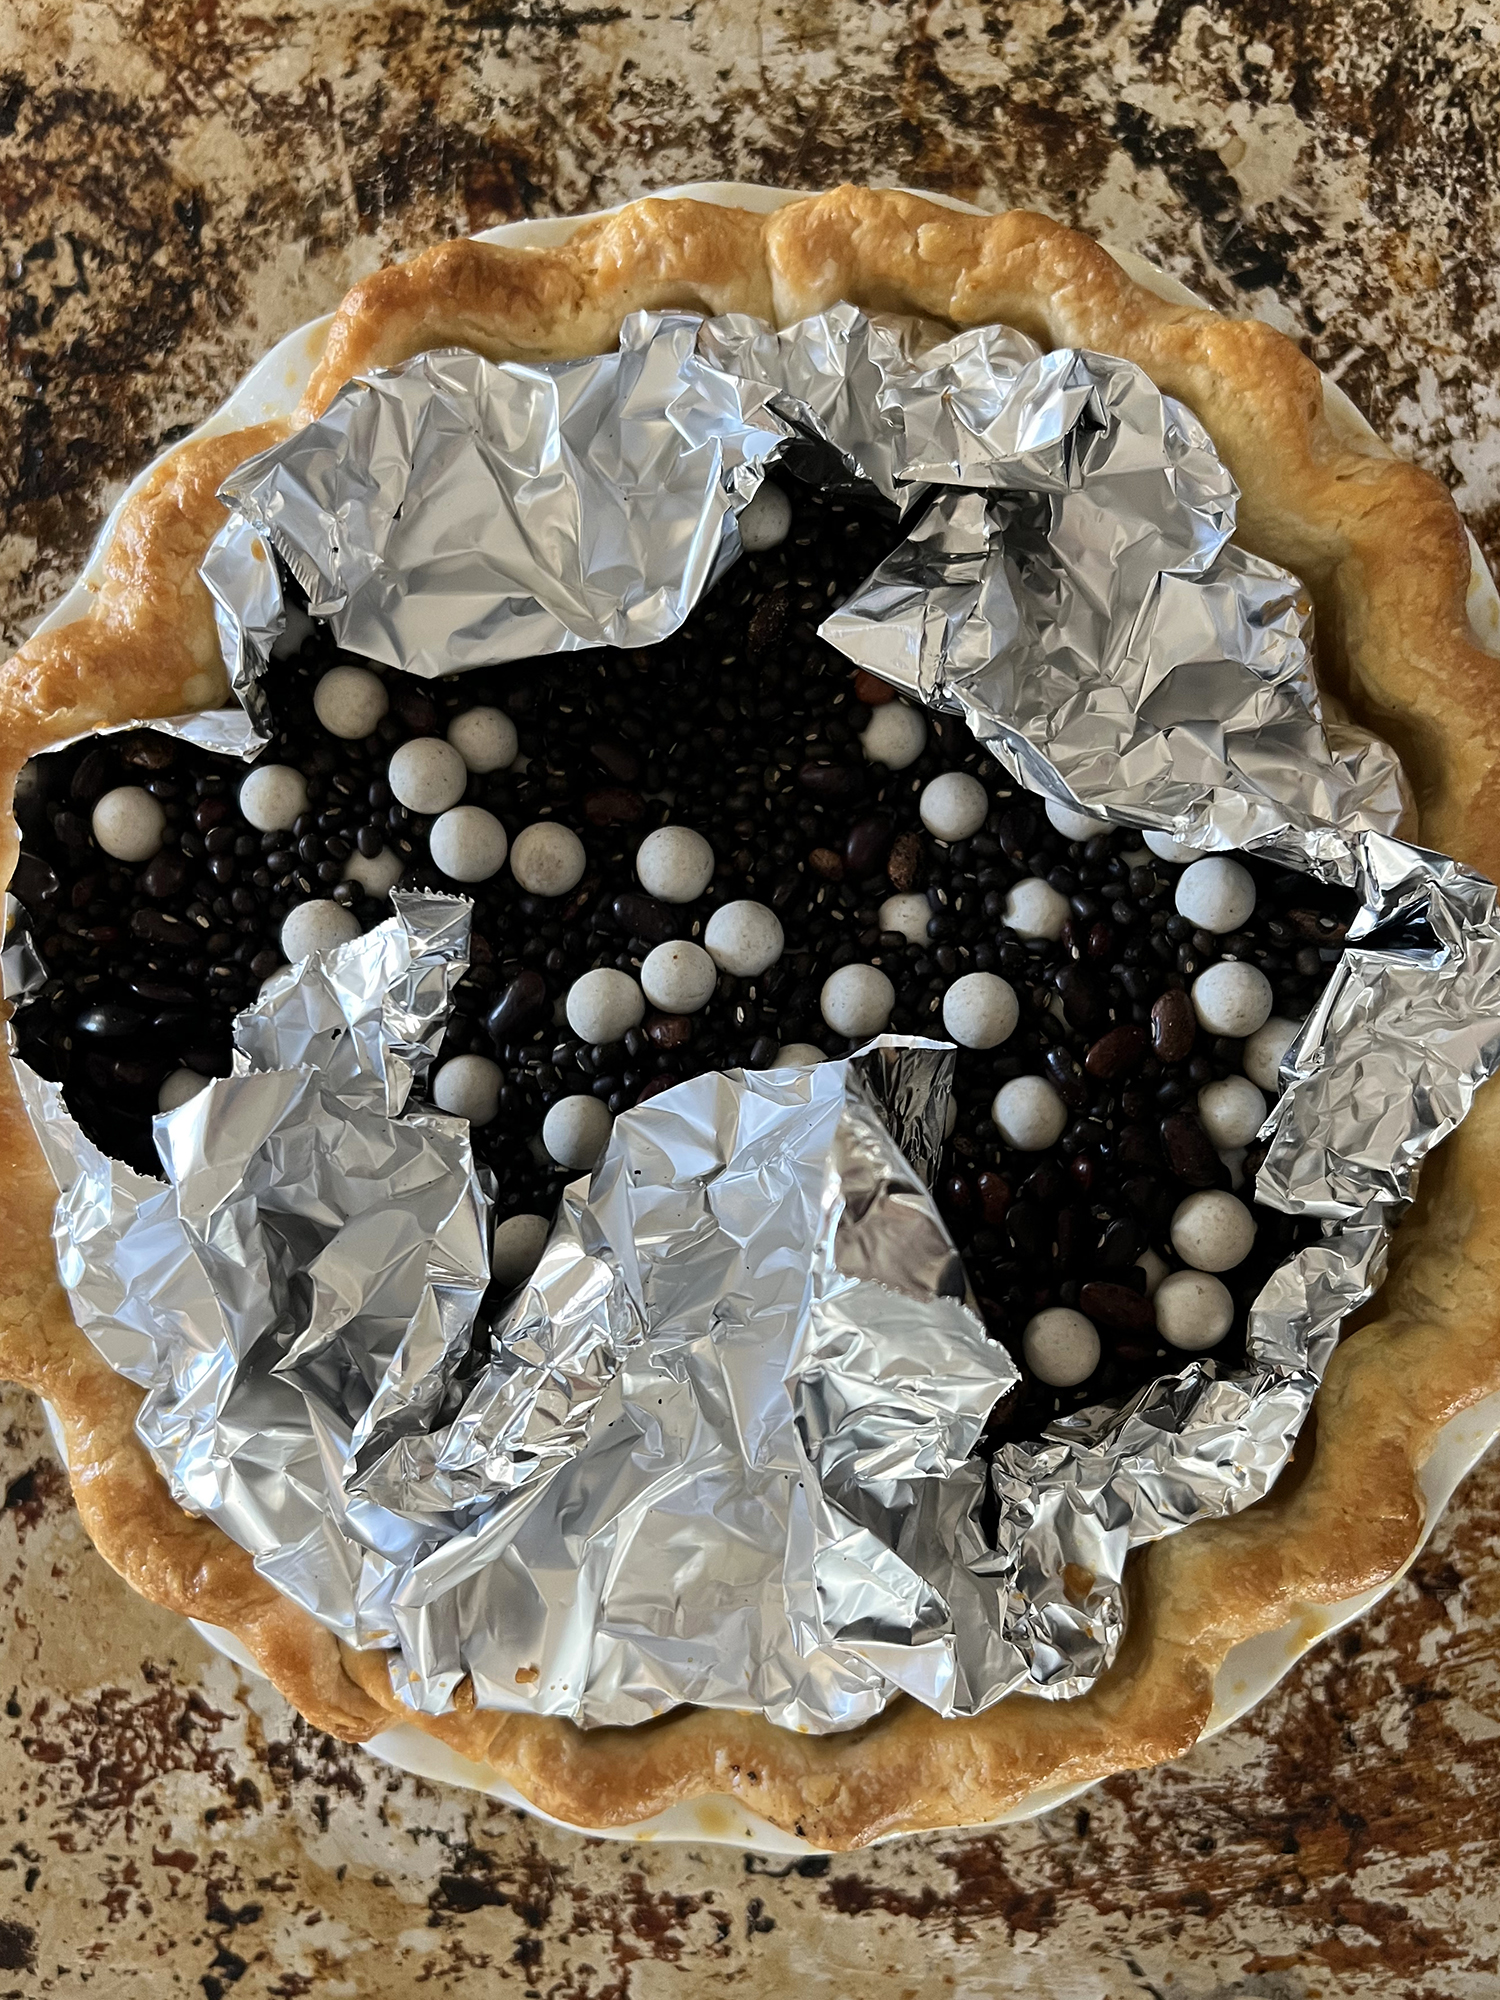
How Do I Blind Bake a Pie Crust?
A pie like this requires a fully baked pie crust also known as a blind baked crust. Blind bake pie crusts are used for pies with a no-bake filling. I include detailed instructions in the recipe, but the picture (above) demonstrates the general set-up. To blind bake a pie crust, line a pie plate with your pie dough. Place a sheet of parchment paper or aluminum foil to cover the dough. Then fill completely with pie weights, or dried beans. Bake until the edges of the pie crust become golden. Carefully remove the pie weights, dock with a fork to prevent air bubbles, and brush the edges with an egg wash. Bake for another 15 minutes or until the entire crust is beautiful golden.
What Kind of Vanilla Pudding Mix Should I Use?
When you go to buy pudding mix for this pie, you want instant pudding mix. That’s the first thing. My recipe calls for two boxes of 3.4-ounce vanilla instant pudding mix. I’ve been using the 365 Whole Foods Market Vanilla Instant Pudding most often – works great. But I’ve also tested with Jell-O instant vanilla pudding (3.7-ounce boxes). Seems a bit sweeter, but works well. Basically, don’t get hung up on the weight of the pudding boxes, just aim for something in the 3.5-ounce size range and confirm it is instant.
Coconut Cream Pie: Variations
Little tweaks to your coconut cream pie filling and topping can have big impact. If you want a classic flavor profile, go the vanilla route. Personally, my favorite version is made with a couple generous splashes of bourbon. It’s boozy, decadent, and wildly good. Instructions for both versions are included in the recipe below.
Bourbon Coconut Cream Pie: Add 2 tablespoons of bourbon to the coconut cream filling and mix until the pudding begins to thicken. Follow the instructions for whipping the cream with powdered sugar. Adding 1 tablespoon bourbon to as soft peaks are forming and continue to mix.
Vanilla Coconut Cream Pie: This is my basic recipe. Some recipes use coconut pudding or coconut pudding mix, and/or coconut extract, and coconut milk in their coconut cream pie. But I feel like the amount of sweetened coconut in the filling delivers plenty coconut flavor. And I prefer the texture and mouthfeel here. I use 2 teaspoon of good vanilla extract in the filling, and 1 teaspoon in the whipped cream topping.
Make Ahead!
This is one of the easiest pies I make. And least time intensive. And it’s a breeze to thread into your life. Even if you only have a few minutes here, and a few minutes there. The most intensive aspect is keeping an eye on the pie crust as it is baking, to get it just right.
Make the pie dough: You can do this weeks ahead of time and place each round of pie dough double-wrapped in the freezer. Or make it a few days ahead of time and keep refrigerated.
Make the filling and fill the pie: You can do this up to a couple days ahead of time.
Dive into a bowl of this creamy, dreamy edible vegan cookie dough! Made with dairy-free plant-based ingredients, it’s packed with rich chocolate chips and ready to satisfy your cravings in the tastiest way possible.
Sure, cookies are tasty. But give us cookie dough any day! That gooey, salty sweet texture mixed with the crunch of the chocolate chips is the ultimate treat. Turns out, there’s no dairy needed. Try this vegan cookie dough, absolutely dreamy using only plant-based ingredients! The flavor and texture are exactly what you (and we) crave. Mix a few ingredients together and cozy up to this bowl of vegan dessert heaven!
Ingredients for vegan cookie dough
There’s no way to spin it: vegan cookie dough is not healthy or wholesome. However, it is a craveable vegan dessert that’s absolutely worth the splurge when you’re looking for a treat. You’ll use a few simple ingredients to whip up this dairy-free goodness. Here’s what you’ll need:
All-purpose flour: Heat treat the flour for best safety (see below). For gluten-free, use almond flour.
Brown sugar: Brown sugar is key to the flavor; do not substitute granulated sugar here.
Vegan butter or refined coconut oil: Vegan butter is our pick, but coconut oil works too. We recommend refined coconut oil, since it has a more neutral coconut flavor.
Vanilla extract: Vanilla is key to the cookie dough flavor!
Kosher salt: Add another pinch of salt to balance the flavor if you’re using coconut oil.
Dairy free dark chocolate chips: Our favorite brand is Guittard 63% dark chocolate chips, which are marked dairy-free on the package.
How to make vegan cookie dough (basic steps)
Vegan cookie dough is very easy to make. All you need is a bowl and a spoon: no special equipment at all! Here are the basic steps:
Step 1: If you’re using all purpose flour, heat treat it (see the section below).
Step 2: Soften the butter in a microwave, then mix it with brown sugar with a spoon. Brown sugar is key to the robust flavor, so don’t substitute another type of sweetener.
Step 3: Mix in the flour, vanilla, salt, milk and chocolate chips! Store refrigerated or frozen rolled into balls.
Why and how to heat treat flour
Most edible cookie dough recipes recommend heat treating the flour. We know, it’s not fun to add this extra step of turning on your oven when you’re not even baking! To be honest, we often skip this step. But here’s why it’s recommended for food safety:
Flour is sold as a raw ingredient intended to be cooked, so there’s not a regulated process to remove bacteria in flour manufacturing.
To heat treat flour, spread it on a baking sheet and bake at 300°F until the temperature reaches 165°F. This should take about 5 minutes.
Cool the flour completely before using. Do not attempt to use the hot flour in cookie dough, since this affects the texture of the dough.
Remember: don’t bake it!
Don’t try baking this vegan cookie dough: it’s optimized for snacking on, not baking! For vegan chocolate chip cookies, head to our Vegan Chocolate Chip Cookies recipe.
Small serving sizes are key
The one thing we’ll say about vegan cookie dough: the serving size is fairly small. One cookie typically satisfies us, but when it comes to cookie dough it’s hard to stop eating spoonfuls. Here’s what to know about serving size:
The serving size is 1 tablespoon. That’s right! All you need is a few bites.
This recipe makes 20 servings, so cut it in half if desired. This way you won’t be temped to eat more.
Freeze rolled into balls. Or, you can freeze half the batch so you can save for later.
Storage info
Vegan cookie dough lasts well in the refrigerator, and it also works frozen as noted above. Here’s what to know about storing this treat:
Refrigerator: You can keep it up to 1 week in the refrigerator.
Freezer: This is our preferred method! Roll it into balls and place them on a cookie sheet, then freeze until solid (about 30 minutes). Transfer to a container and they last about 2 to 3 months.
Variation: add to cookie dough ice cream!
Want to make your own cookie dough ice cream with any flavor? Make this vegan cookie dough into small dollops and freeze them. Then stir them into any purchased vegan ice cream or this homemade vegan ice cream. (We love chocolate ice cream with cookie dough, so this is the best way to do it!) Follow the instructions in our homemade Cookie Dough Ice Cream.
More vegan dessert recipes
This vegan cookie dough recipe is one of our favorite plant-based treats! Here are a few more vegan desserts we love:
Dive into a bowl of this creamy, dreamy edible vegan cookie dough! Made with dairy-free plant-based ingredients, it’s packed with rich chocolate chips and ready to satisfy your cravings in the tastiest way possible.
Ingredients
1 cup white all-purpose flour (for gluten-free, use almond flour)
½ cup brown sugar (do not substitute granulated)
½ cup softened vegan butter, or melted refined coconut oil*
⅓ cup dairy free dark chocolate chips (we like Guittard 63%)
Instructions
Heat treat the all-purpose flour to prevent bacteria growth (optional): Preheat the oven to 300°F. Place the flour on a baking sheet and bake for 4 to 6 minutes until the temperature reaches 165°F, checking every few minutes with a food thermometer. Cool completely before using (be patient: if the flour is warm the texture of the cookie dough will suffer).
Mix the butter and sugar: Soften the butter in the microwave for about 10 seconds until just soft. Mash it with a fork with the brown sugar until fully incorporated.
Make the cookie dough: Mix in all the other ingredients, using as much milk as you’d like to bring it together into a thick or smoother texture. Eat immediately, or store refrigerated for 1 week or roll into balls and store frozen for 3 months. Don’t bake this cookie dough: for bake-able dough, go to our Vegan Chocolate Chip Cookies.
Crockpot cinnamon apple rolls, a deliciously easy breakfast recipe that went viral on TikTok, are one of the most flavorful ways to start the day. With store-bought refrigerated cinnamon rolls at the helm, you need no baking skills to create a gourmet,…
Crockpot cinnamon apple rolls, a deliciously easy breakfast recipe that went viral on TikTok, are one of the most flavorful ways to start the day. With store-bought refrigerated cinnamon rolls at the helm, you need no baking skills to create a gourmet, gooey, soft, and pull-apart roll for breakfast or dessert. TikTok Cinnamon Rolls If...