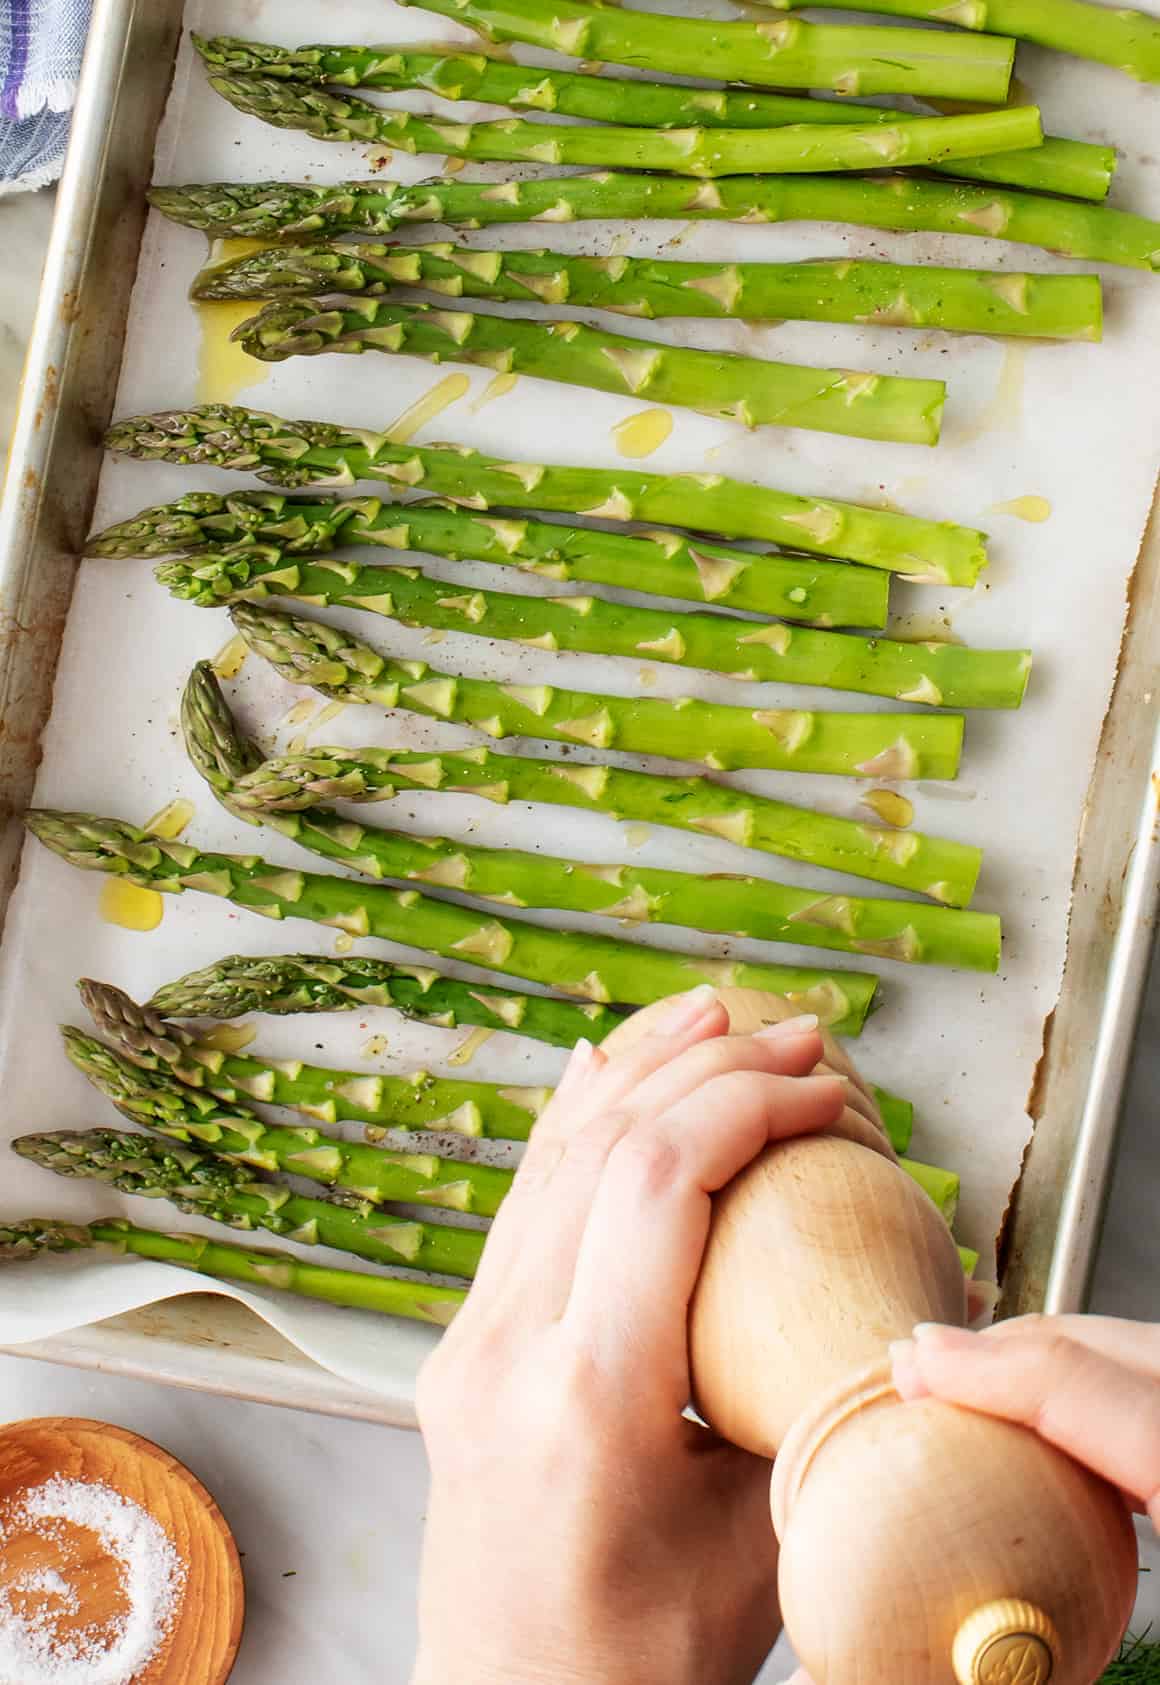
I start daydreaming about asparagus recipes as soon as I notice the first signs of spring. If I see daffodils shooting up in front of a neighbor’s house, I crave an asparagus frittata. If I glimpse green buds forming on a tree, I want a bowl of a…
I start daydreaming about asparagus recipes as soon as I notice the first signs of spring. If I see daffodils shooting up in front of a neighbor’s house, I crave an asparagus frittata. If I glimpse green buds forming on a tree, I want a bowl of asparagus soup. And if the temperature rises above 60°F, I’m already at the grocery store getting the ingredients for pasta primavera. What can I say? After a long winter filled with root veggies and squash, asparagus recipes are an exciting change. They’re fresh, bright, and often quick to prepare—the beginning of the easy, […]
We’ve said it once (OK, maybe more than once, we’ll admit it) and we’ll say it again: Spring has sprung. As we begin bringing entertaining outdoors—whether it’s dinner, brunch, cocktail hour, or just hangin’ on a blanket in the grass—we’re figuring out…
We’ve said it once (OK, maybe more than once, we’ll admit it) and we’ll say it again: Spring has sprung. As we begin bringing entertaining outdoors—whether it’s dinner, brunch, cocktail hour, or just hangin’ on a blanket in the grass—we’re figuring out which indoor dining items can double as outdoor table staples this spring.
This omelette recipe is a staple in our kitchen, and my hope is that it will be in yours too. It’s hands down my favorite method for how to make an omelette. I love it because the results are fantastic (think fluffy, tender, just-set eggs), but i…
This omelette recipe is a staple in our kitchen, and my hope is that it will be in yours too. It’s hands down my favorite method for how to make an omelette. I love it because the results are fantastic (think fluffy, tender, just-set eggs), but it’s easy to master. With a little practice, you’ll be able to pull off a perfect omelette every time! Make one for a hearty breakfast, or whip one up for a quick and easy lunch or dinner. The beauty of this omelette recipe is that it’s a delicious option for any meal. Plus, you […]
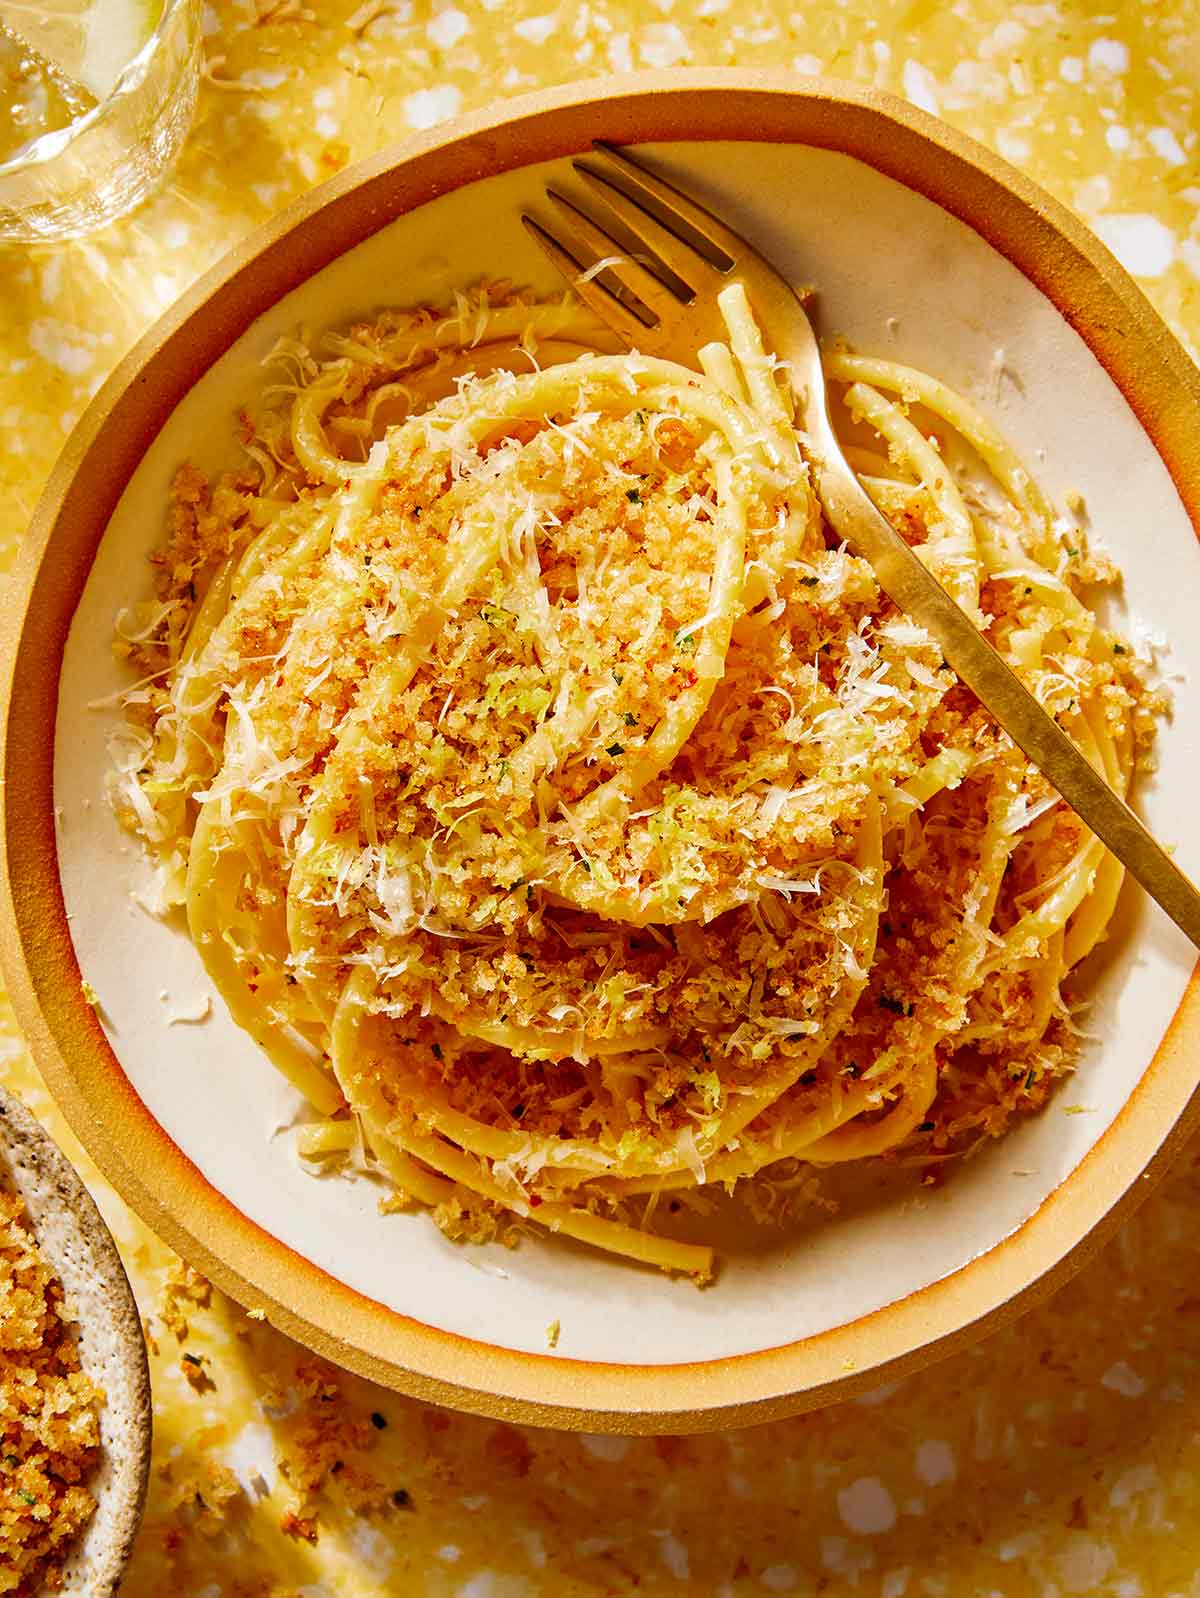
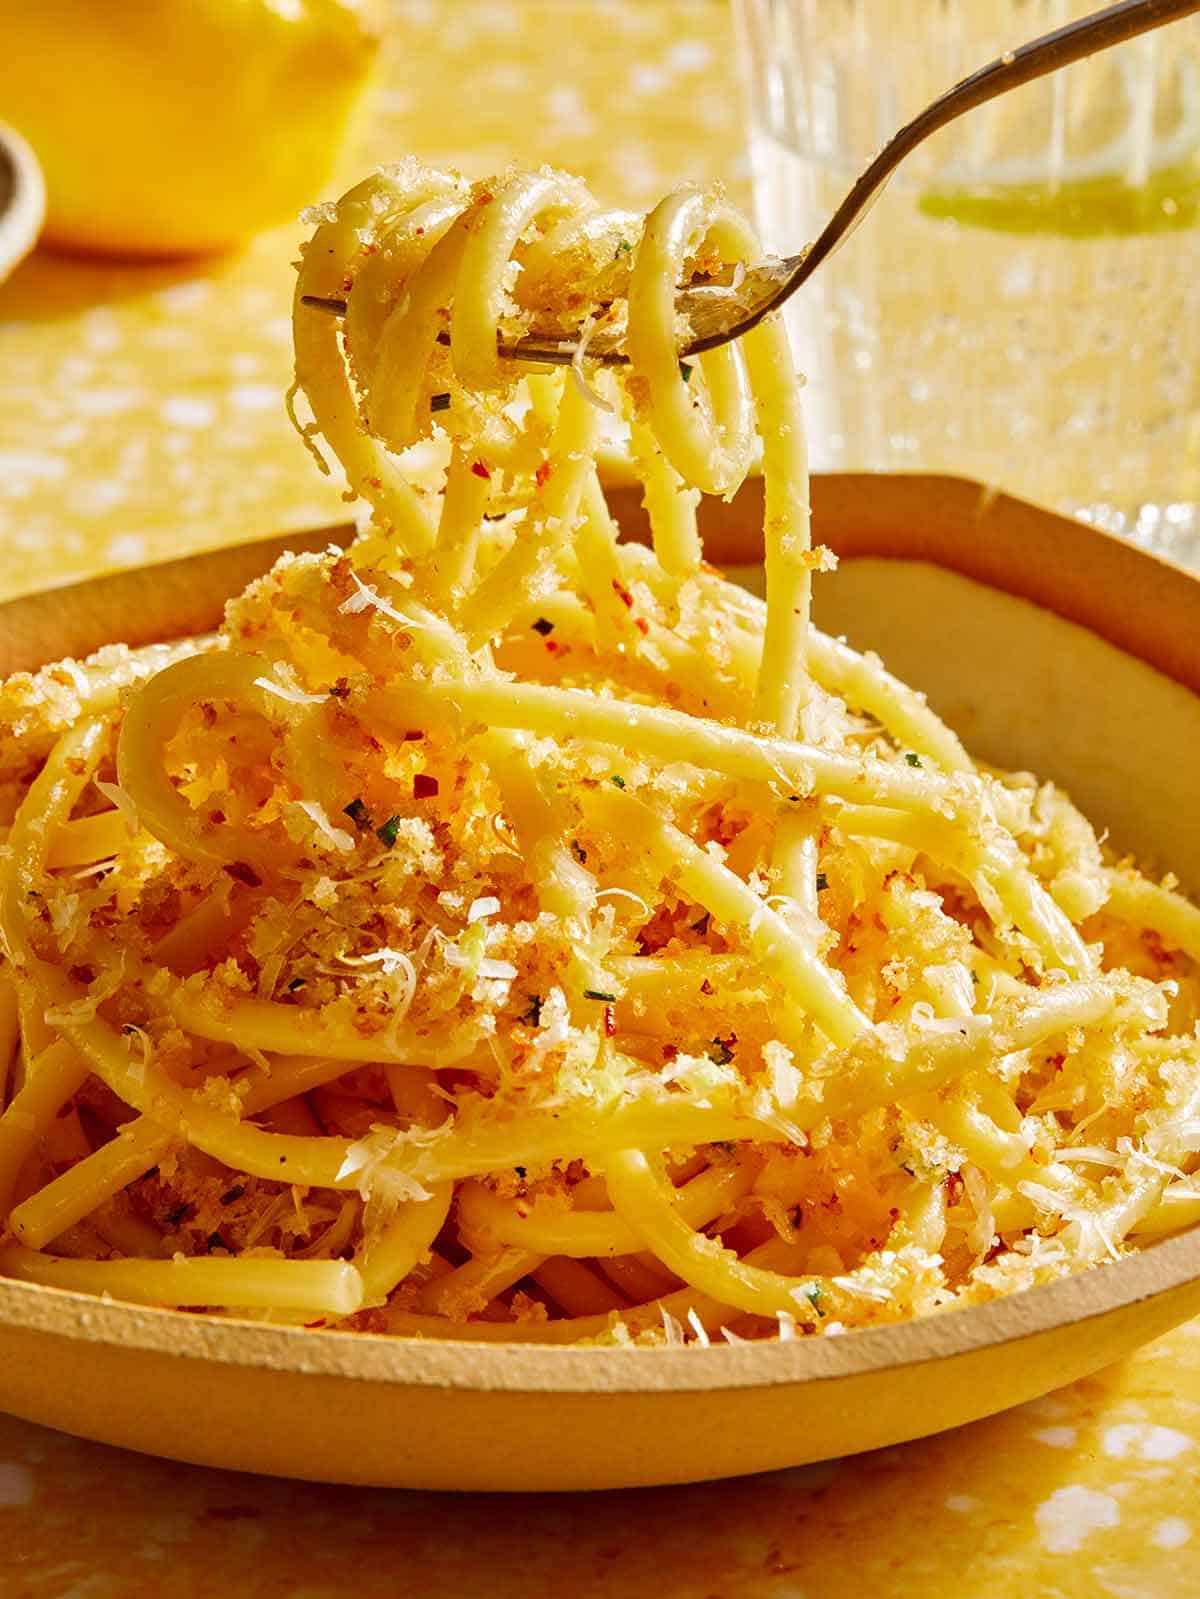
Simple and delicious meals that can be made in under 30 minutes is one of our favorite things to make and our Garlic and Lemon Pasta never fails to make it into both our bi-weekly meal rotations! I really love how simple, but flavorful this pasta always turns out! One of my favorite components about this pasta is the buttery breadcrumb topping. The breadcrumbs add such a nice texture contrast to the soft pasta. It’s…
Simple and delicious meals that can be made in under 30 minutes is one of our favorite things to make and our Garlic and Lemon Pasta never fails to make it into both our bi-weekly meal rotations! I really love how simple, but flavorful this pasta always turns out!
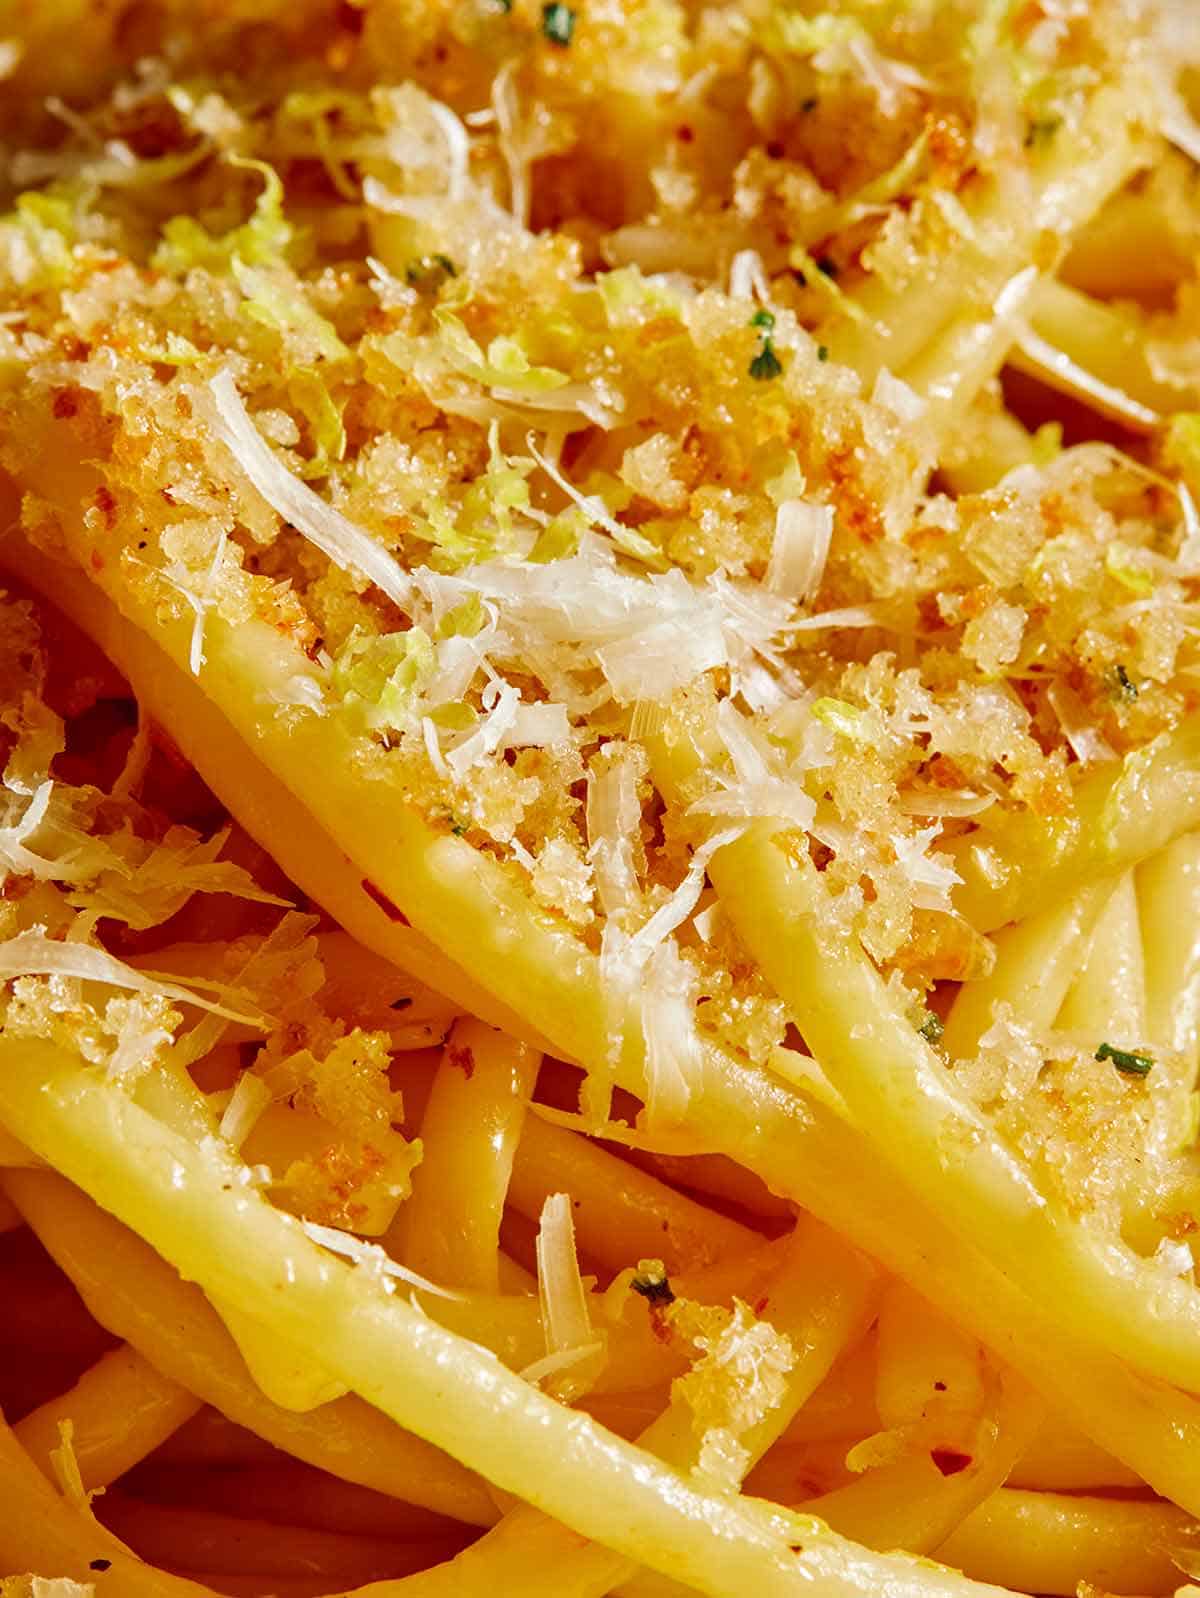
One of my favorite components about this pasta is the buttery breadcrumb topping. The breadcrumbs add such a nice texture contrast to the soft pasta. It’s one of our favorite quick weeknight meals along with our Romesco Sauce Rigatoni (another quick and easy pasta dish)!
Why We Love This Garlic and Lemon Pasta Recipe
We seriously love this pasta so much! It’s one of our favorite meals to make for our families for so many reasons.
It comes together in just 20 minutes – making it a perfect quick and easy weeknight meal!
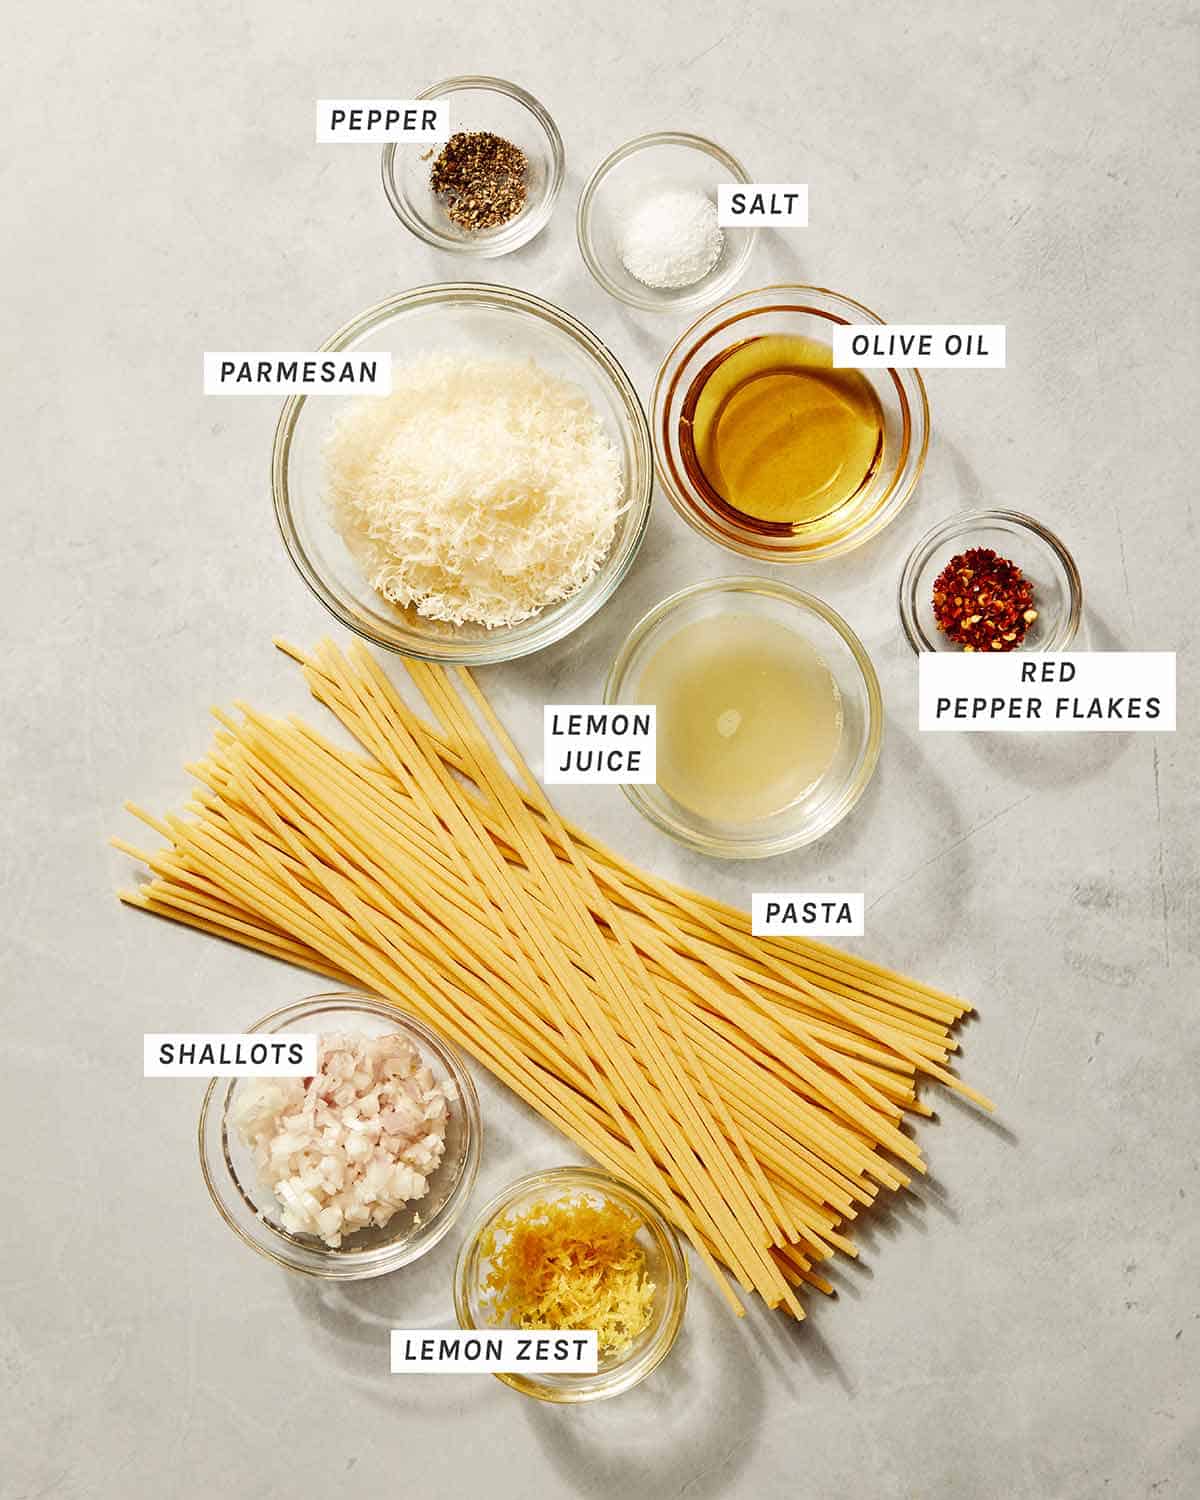
Our pasta uses only a handful of basic ingredients (which you probably already have in your pantry and refrigerator).
It’s a minimal effort meal, which always makes us happy.
It’s very easy to tweak and make your own based on personal preference!
How to Make Garlic and Lemon Pasta
Ingredients
Process
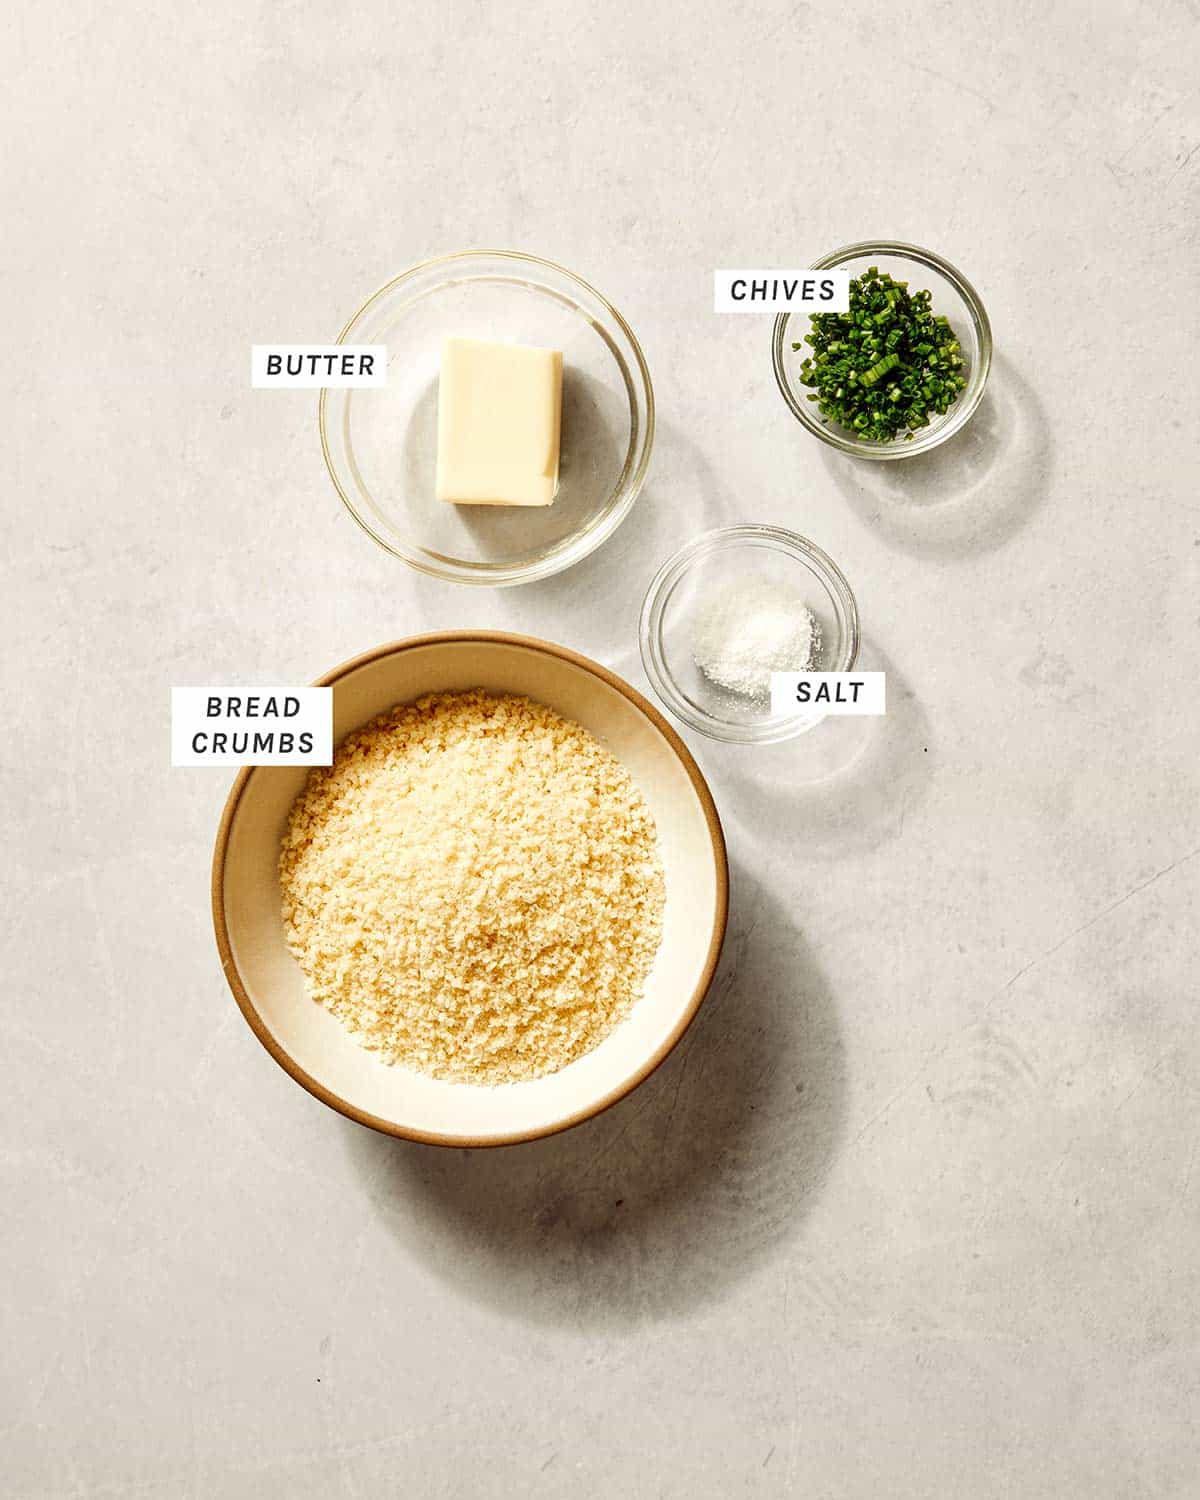
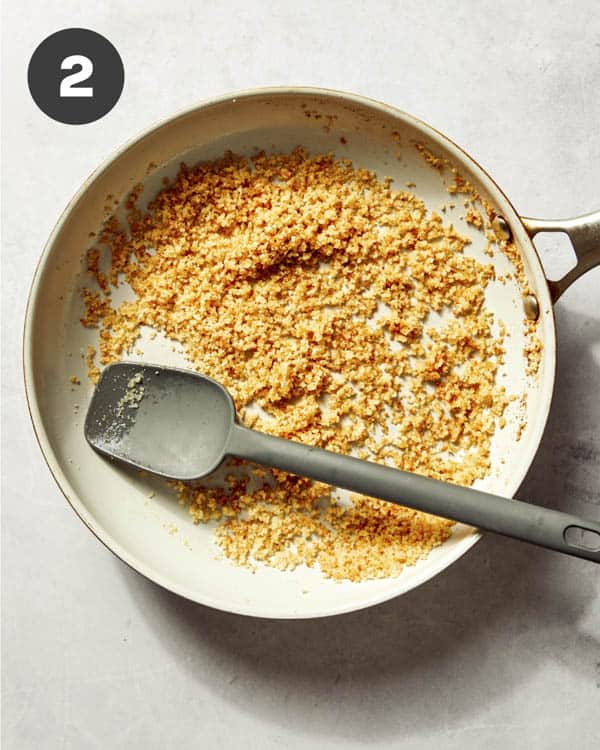
Breadcrumb Topping
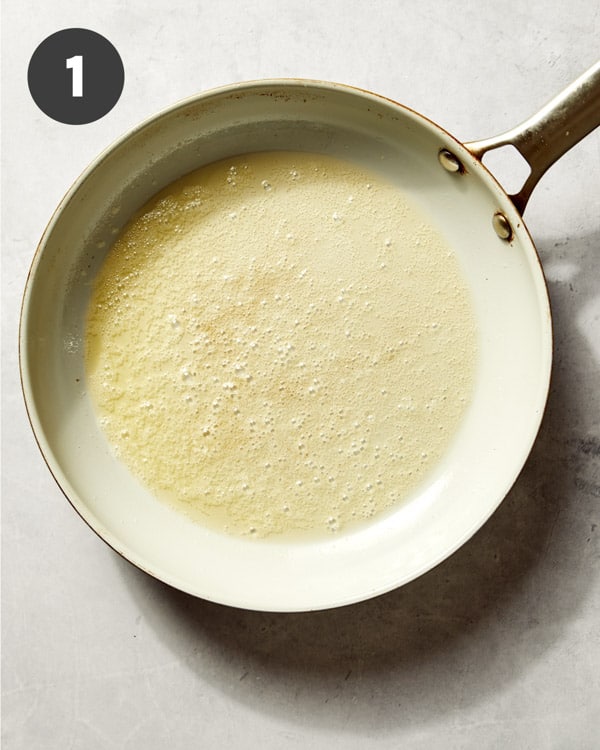
Place a large pan over medium heat and melt butter.
Add breadcrumbs and toast for 1 minute.
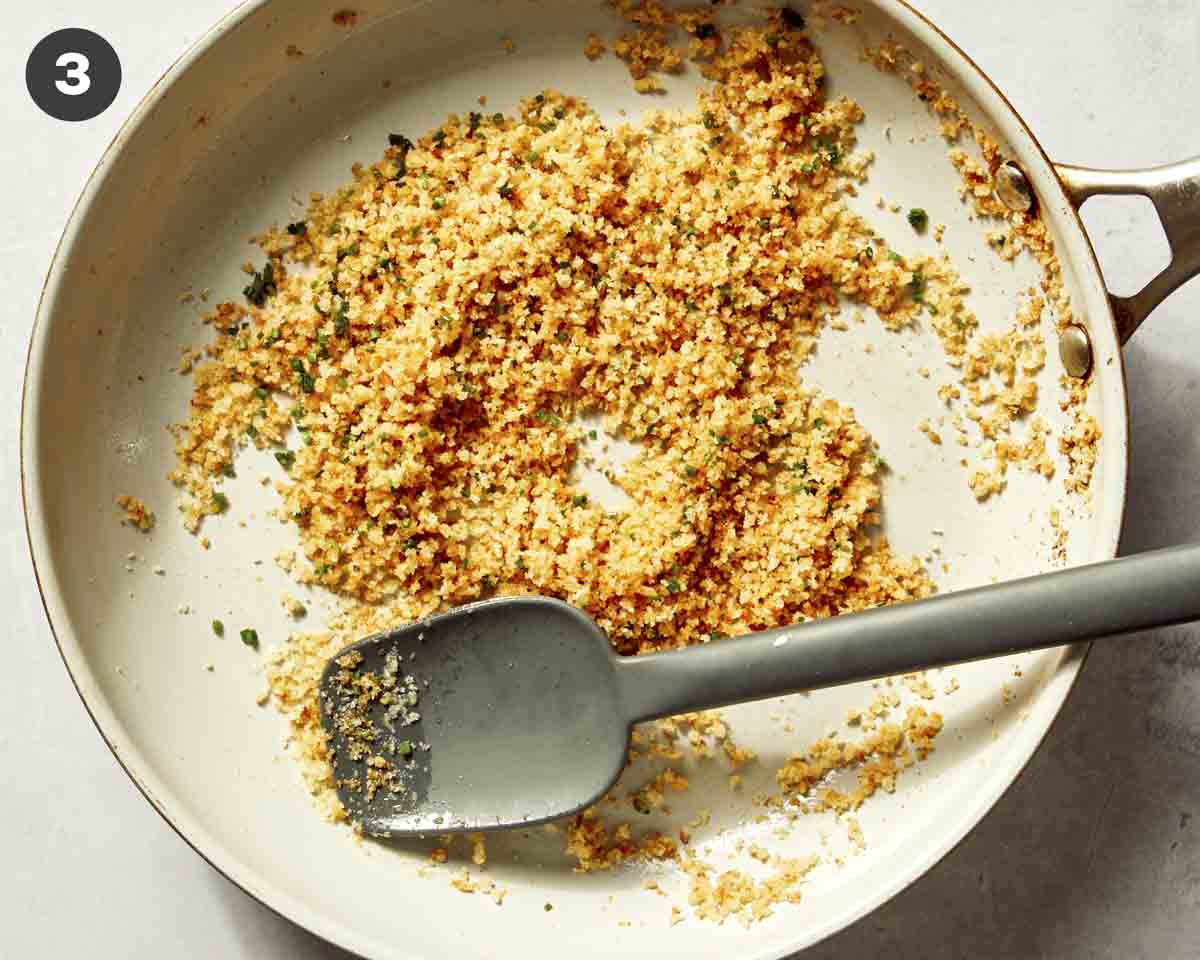
Stir in salt and chives. Remove from heat, transfer to a bowl and set aside.
Pasta
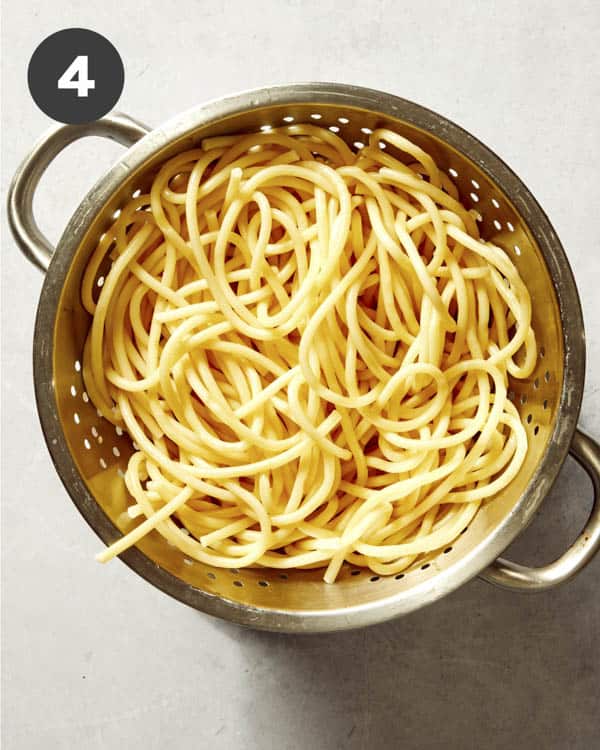
Place a large pot over high heat and bring to a boil. Once water is boiling, add a small handful of salt and spaghetti. Cook spaghetti for 6 to 7 minutes, stirring occasionally, until pasta is al dente. Strain pasta into a colander, reserving 1/2 cup pasta water.
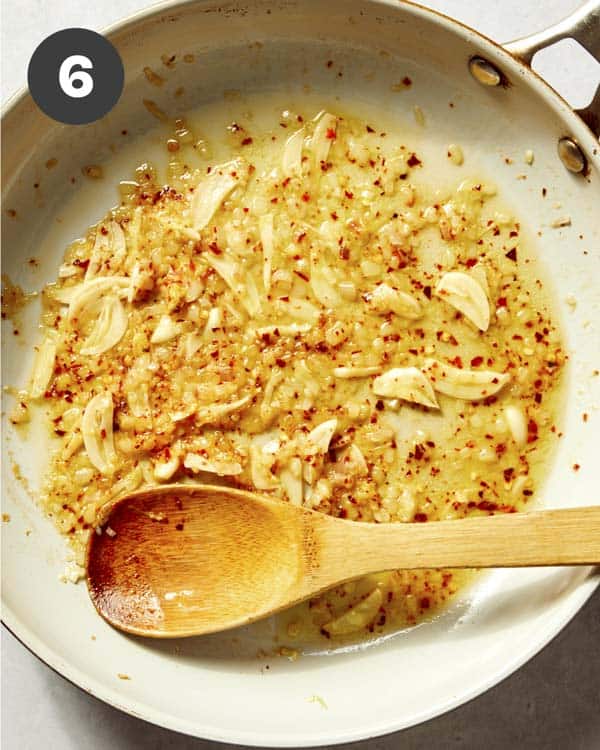
Using a paper towel, wipe out the same pan used for breadcrumbs. Place pan over medium heat and add oil. Add shallots and garlic and sauté for 30 seconds, just until the mixture becomes fragrant, but hasn’t started to brown.
Add lemon zest, juice and crushed pepper flakes and continue to cook for another 30seconds.
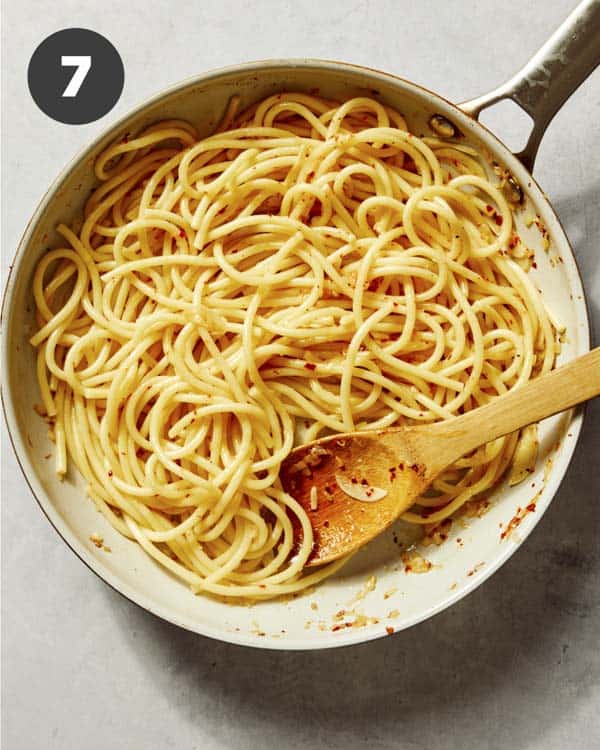
Add pasta and pasta water and toss together. Cook until half the liquid has evaporated, about 1 minute. Add parmesan then season with salt and pepper and toss together until pasta is evenly coated.
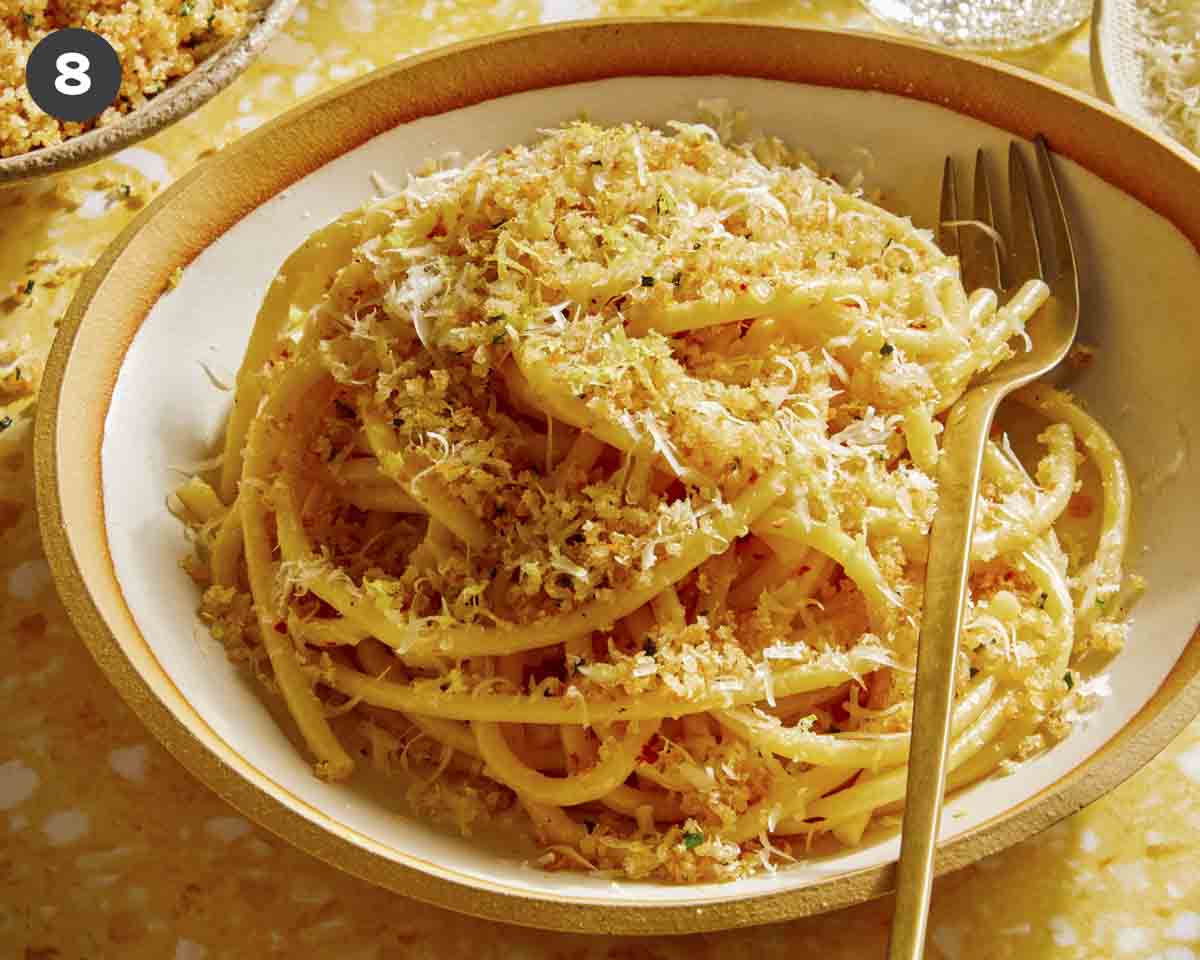
Transfer pasta to serving bowls or plates and top with breadcrumb mixture, more lemon zest and more grated parmesan. Serve.
Lemon Pasta Tips and Tricks for Success
Don’t forget to add a little bit of pasta water to the dish. It really helps to bring the dish together and add a slight creaminess to the overall meal.
Use fresh lemons for the juice/zest! The lemon flavor is such a big part of this pasta, that it really needs the fresh lemon to make it shine.
Variations
Mix up the citrus that’s used. Oranges and limes both make great alternatives (or even additions) to the pasta!
Use Italian breadcrumbs instead of panko, if you want more of a subtle crunch from the topping.
Swap the oil out for butter and add a splash of cream to the mixture (and slightly reduce) before adding the pasta for a creamy sauce.
Boost the flavor even more for some fresh herbs like minced thyme, torn basil or even thinly sliced chives.
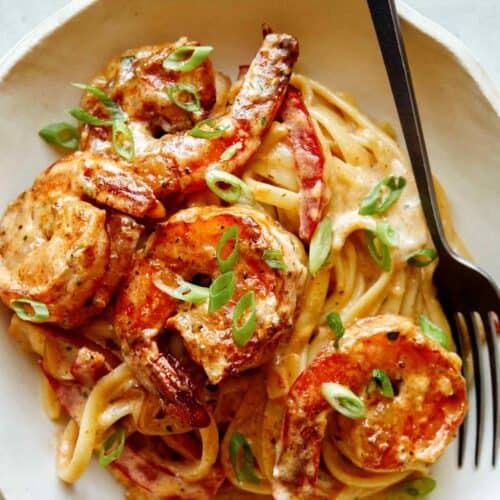
Add some protein like some sautéed chicken or buttery shrimp!
Storing Leftovers and Reheating Garlic and Lemon Pasta
Our lemon pasta can be stored in an airtight container, in the refrigerator, for up to 3 days. To reheat, transfer pasta to a pan with a little bit of water and heat over medium-low heat until pasta has warmed through.
A quick, easy and delicious Garlic and Lemon Pasta dish that can be made in just 20 minutes! We love this simple, minimal ingredient, flavor packed dish! It's the perfect weeknight meal, especially on those extra busy nights.
Place a large pan over medium heat and melt butter.
Add breadcrumbs and toast for 1 minute.
Stir in salt and chives. Remove from heat, transfer to a bowl and set aside.
pasta
Place a large pot over high heat and bring to a boil. Once water is boiling, add a small handful of salt and spaghetti.
Cook spaghetti for 6 to 7 minutes, stirring occasionally, until pasta is al dente. Strain pasta into a colander, reserving 1/2 cup pasta water.
Using a paper towel, wipe out the same pan used for breadcrumbs. Place pan over medium heat and add oil.
Add shallots and garlic and sauté for 30 seconds, just until the mixture becomes fragrant, but hasn’t started to brown.
Add lemon zest, juice and crushed pepper flakes and continue to cook for another 30seconds.
Add pasta and pasta water and toss together. Cook until half the liquid has evaporated, about 1 minute. Add parmesan then season with salt and pepper and toss together until pasta is evenly coated.
Transfer pasta to serving bowls or plates and top with breadcrumb mixture, more lemon zest and more grated parmesan. Serve.
Notes
Tips and Tricks for Success
Don’t forget to add a little bit of pasta water to the dish. It really helps to bring the dish together and add a slight creaminess to the overall meal.
Use fresh lemons for the juice/zest! The lemon flavor is such a big part of this pasta, that it really needs the fresh lemon to make it shine.
Storing Leftovers and Reheating Our lemon pasta can be stored in an airtight container, in the refrigerator, for up to 3 days. To reheat, transfer pasta to a pan with a little bit of water and heat over medium-low heat until pasta has warmed through.
We have a NEW comforting, protein- and fiber-packed dish for your weekly meal plan! This creamy, garlicky skillet meal features white beans, burst cherry tomatoes, and greens cooked in a flavorful cashew cream sauce. Ready in 25 minutes with just 10 in…
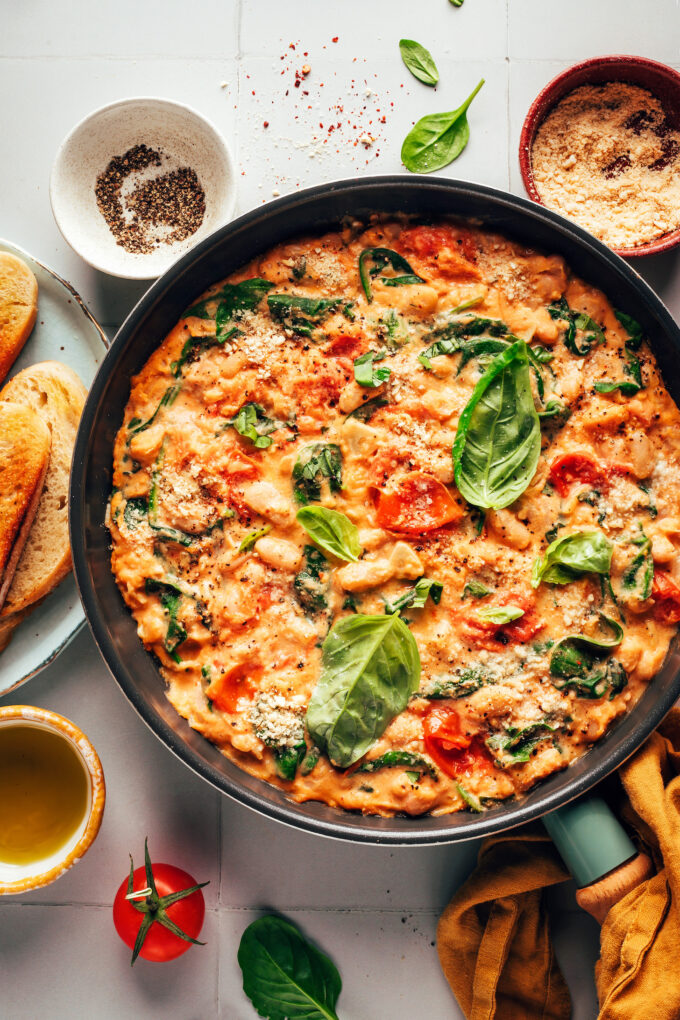
We have a NEW comforting, protein- and fiber-packed dish for your weekly meal plan! This creamy, garlicky skillet meal features white beans, burst cherry tomatoes, and greens cooked in a flavorful cashew cream sauce. Ready in 25 minutes with just 10 ingredients, it’s cozy weeknight perfection!
Pair with pasta or toasted crusty bread for a satisfying meal that will WOW. Let’s make it happen!
This EASY, flavorful recipe starts with a base of sautéed shallot, cherry tomatoes, garlic, red pepper flakes, and sea salt.
Whether you’re eating vegan for a year, month, or just a meal, you should never be sacrificing flavor. Vegan recipes—especially the ones we’ve gathered below—are consistently delicious and often affordable (animal products can be expensive). These are …
Whether you’re eating vegan for a year, month, or just a meal, you should never be sacrificing flavor. Vegan recipes—especially the ones we’ve gathered below—are consistently delicious and often affordable (animal products can be expensive). These are our best vegan recipes of all time, ranked by popularity.
This tomatillo stew is the meatless, bean-having, green chili of your dreams. The spice of jalapeños and diced chiles is perfectly balanced by the freshness of cilantro, lime juice, and whichever cold beer you’ve got in your fridge.
These cod fish tacos are a deliciously easy dinner recipe! Top baked fish with garnishes and a creamy taco sauce.
We’re always on the lookout for fast and easy dinner recipes, and this one is a new family favorite. Meet these quick Cod Fish Tacos! Crust the cod in spices and throw it in the oven. Then whip up a creamy taco sauce while the fish bakes. Add crunchy vegetable garnishes and it’s a meal! This one was so bursting with flavor, even our 6 year old was a huge fan (which is the highest praise we know!).
Tips for buying cod
Cod has a mild, pure flavor without a “fishy” aftertaste. In fact, it’s even more mild than salmon! Cod is a great starting point for people who think they don’t like fish. But the most important part? Start with a great piece of fish. If it’s not high quality, there may still be a fishy taste. Here’s what to know:
Fresh cod tends to be best. The frozen cod we’ve tried has been sub-par, with a fishy aftertaste and watery texture. If you can, nab a piece from your local fish counter.
Buy wild caught. Fish that is wild caught in your country is usually a sustainable choice. There are also quality options in well-regulated farms; see Seafood Watch Consumer Guide.
How to make cod fish tacos
This cod fish tacos recipe is quick and simple, relying on easy cooking methods. Here’s what you’ll need to do:
Bake the fish at 400F for 10 minutes, then broil 2 minutes. Before baking, cover the cod in a spice blend of cumin, smoked paprika, garlic powder and onion powder.
Make the sauce. Mix up the creamy taco sauce of Greek yogurt, mayo, cilantro and spices.
Prep the toppings. To keep these fish tacos simple, you’ll just need to shred cabbage and toss it with a little salt: no need to make a full slaw!
Warm the tortillas. Don’t skip this part! Warm the tortillas so they’re supple and ready to fill.
And that’s it! Top the tortillas with the fish, sauce and veggies. It’s a simple healthy dinner idea that you’ll want to make again and again. (It fits the Mediterranean diet if that’s what you’re looking for!)
Sauce and slaw variations
There are lots of ways to vary these cod fish tacos. Once you’ve made it one way, here are a few more ideas to try:
Preheat the oven to 400°F. While it preheats, prep the fish.
Make the fish: In a small bowl, mix together the dry rub: chili powder, cumin, smoked paprika, garlic powder, and onion powder. Pat the fish dry, then sprinkle it with the ½ tablespoon kosher salt and pat it in. Add the seasoning and pat it to cover the fish. Place the fish on a parchment lined baking sheet. Bake for 10 minutes, until tender. Then broil for 2 minutes until the top is lightly browned. When the fish is done, break it with a fork into bite sized pieces. (Try to serve immediately as the fish gathers moisture as it sits.)
Make the sauce: Meanwhile, in a medium bowl, whisk the cilantro, Greek yogurt, mayonnaise, apple cider vinegar, garlic powder, onion powder, cumin, and salt. If necessary depending on the thickness of the yogurt, add a teaspoon or two of water until the sauce is easy to dollop. Refrigerate until serving.
Prep the toppings: Toss the shredded cabbage with a few pinches kosher salt. Open and drain the pico de gallo.
Warm the tortillas: If desired, char the tortillas by placing them on an open gas flame on medium for a few seconds per side, flipping with tongs, until they are slightly blackened and warm. Or warm them according to How to Warm Tortillas.
Serve: Assemble the tacos by topping the tortillas with fish, cabbage, pico de gallo (removed with a fork to drain of excess liquid), and the sauce. Top with additional chopped cilantro and serve.
If you want a tart that smells like spring, I invite you to this recipe. Where arugula reigns, spinach, and cherry tomatoes. It is perfectly seasoned with fresh tarragon, thanks to which you can feel the freshness while eating. It is juicy, aromatic, and speedy to make. You can prepare the shortcrust pastry the day …
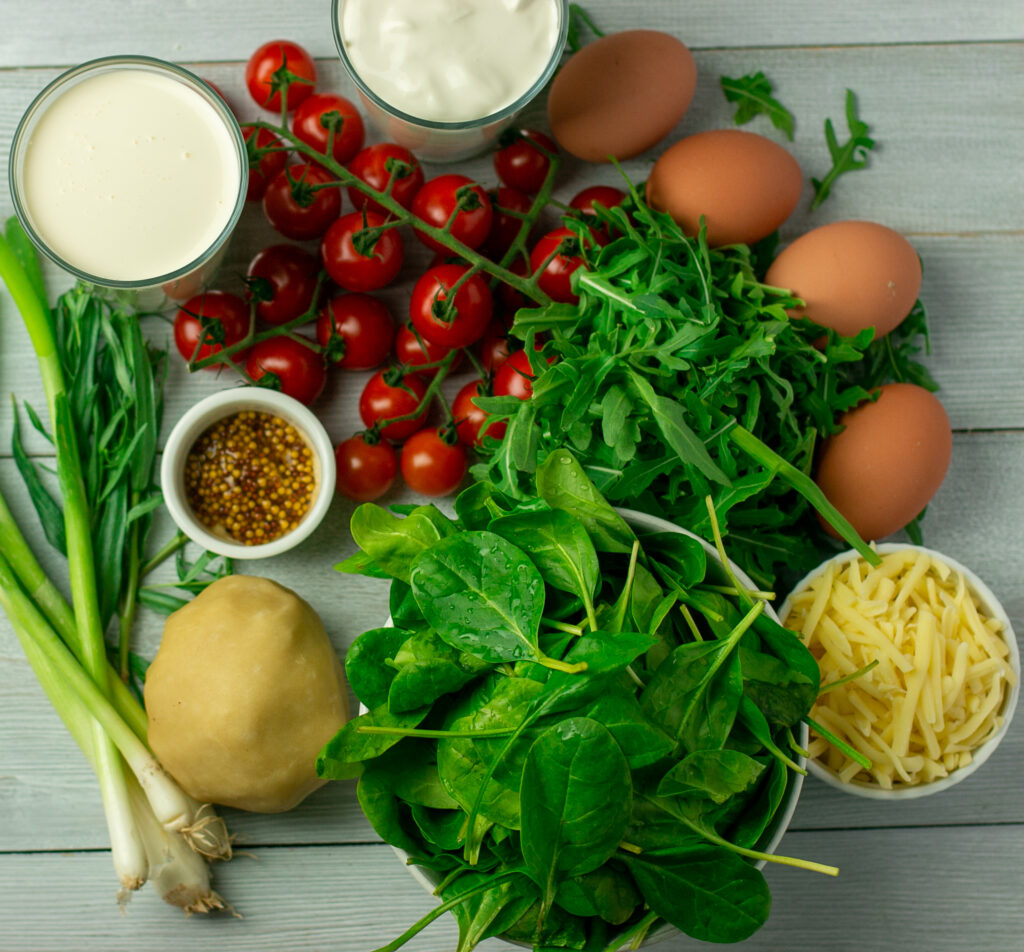
If you want a tart that smells like spring, I invite you to this recipe. Where arugula reigns, spinach, and cherry tomatoes. It is perfectly seasoned with fresh tarragon, thanks to which you can feel the freshness while eating. It is juicy, aromatic, and speedy to make.
You can prepare the shortcrust pastry the day before. I have a few portions in the fridge. This procedure significantly speeds up the enjoyment of the taste of your favorite tart.
How to choose the best ingredients for Arugula Cherry Tomato and Spring Onion Tart
Cherry Tomatoes: The best will be cherry tomatoes, but they also replace other varieties of mini tomatoes. Finally, you can also add standard tomatoes cut into pieces or slices.
Spinach: I always choose young spinach leaves, so peeling them won’t be much fun. Otherwise, you will need to cut the stem off the leaves so you don’t feel them rubbing.
Arugula: I like arugula for its expressiveness and sharpness of taste, I always choose the spicier version, and you choose the one you want.
Eggs: I recommend size L; however, add more if you have smaller ones. It only matters a little with size M, but if you have tiny eggs, it just adds 5-6 pieces.
Creme Fraiche: You can replace creme fraiche with sour cream or, finally, with Greek yogurt.
Single Cream: Single cream is nothing more than sweet cream with 18% fat, and it behaves in cooking just like the 30% fat one with a tiny exception – it cannot be whipped into a stiff foam. So, if you want to slim down your tart, add this version to the pastry. You can also replace it with a fatter version. It all depends on your preferences.
Cheddar Cheese: I like to add cheddar cheese to tarts because it has a sharp, characteristic taste, which additionally emphasizes the taste of the dishes. On the other hand, you can use any of your favorite hard cheeses with this tart, and I recommend spicy flavors so that the pastry is not too bland.
Wholegrain mustard: The mustard gently emphasizes the flavors of the tart. You can add a regular one if you don’t have whole grains. Remember that these are usually spicier; you should add half the portion.
Spring Onions: I like spring onions because later, I can put it in pots and enjoy my own, but if you don’t have them, you can add chives.
Tarragon: Tarragon will be the best fresh. You can grow it in a pot on the window in the kitchen and always have it at hand. You can also replace it dried.
Tips and TricksforArugula Cherry Tomato and Spring Onion Tart
Cover the tart with aluminum foil during the final baking to prevent it from burning too much.
You can have the shortcrust pastry frozen. I usually make 4 servings; thanks to that, I always have something quick and delicious.
Spring onion always uses the ends of the bulbs with roots to plant chives at home and always has them within reach.
Tart is the perfect dish for a quick and effective light dinner or lunch. It will be as quick as preparing the dough in advance, and you can keep it frozen in the fridge or use ready-made shortcrust pastry. In France, both forms are very popular. Arugula Cherry Tomato and Spring Onion Tart are very juicy, smelling of spring and spring vegetables. Therefore it is perfect for spring or winter evenings because currently, young vegetables are available all year round.
Course dinner, lunch
Cuisine France
Keyword Arugula Cherry Tomato and Spring Onion Tart, Cherry tomato Tart, Spring tart
Mediterranean chickpea salad is full of vitamins and protein that can be a good light dinner or lunch. It is ideal for a summer meal, where we do not feel like eating something fresh, tasty, and wholesome but not hot. How to choose the best ingredients for Mediterranean chickpea salad Chickpeas: I like to prepare …
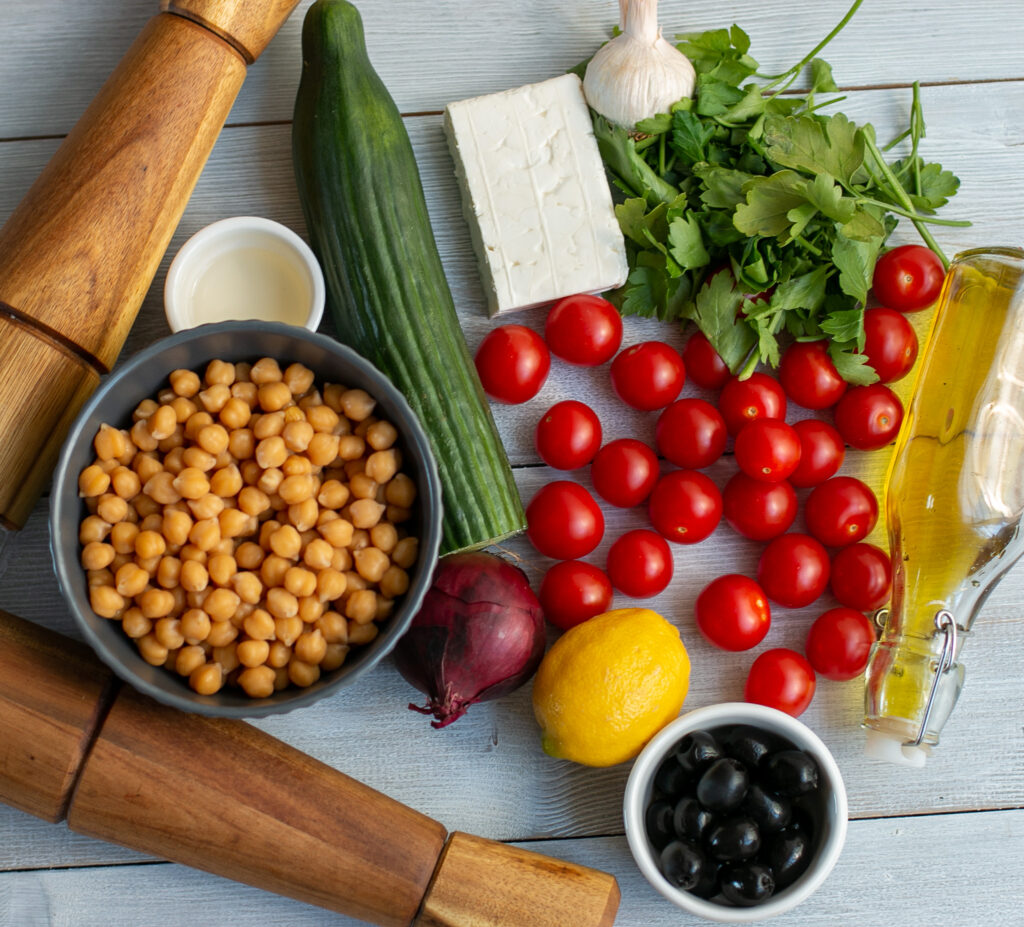
Mediterranean chickpea salad is full of vitamins and protein that can be a good light dinner or lunch. It is ideal for a summer meal, where we do not feel like eating something fresh, tasty, and wholesome but not hot.
How to choose the best ingredients for Mediterraneanchickpea salad
Chickpeas: I like to prepare chickpeas for hummus or salads because I know what I eat, and they have no preservatives. In addition, I have one interesting trick, thanks to which our digestive system will better absorb it. However, I use canned chickpeas when I don’t have time and want to prepare something healthy quickly.
Tomatoes: I recommend these small cherry or baby plum because they look nice and do not fall apart when mixing. However, if you don’t have it, you can use regular large tomatoes, only finely chopped.
Cucumber: I recommend cucumber salad so that it does not have thick skin; it will be tastier. I also recommend not peeling the skin but washing it well; it looks better in a salad and stays fresh longer.
Parsley: Parsley is present in my kitchen almost daily, and I like it very much. It gives spiciness and expressiveness to dishes and makes us add less salt. I was hoping you could choose the best fresh and not wavy version because, in my opinion, the wavy parsley version is more suitable for decoration than eating. Moreover, my taste buds don’t like it at all.
Onion: Red onions are ideal for salads because they are sweeter and more delicate than the usual brown or white ones. So it’s essential in this salad. Only replace it if you like the spicy taste of onions.
Black olives: Black olives can be hollowed out here, which is even more recommended because it will be easier to cut them in half.
Feta: Feta is a long topic; which one to choose? I generally like Greek salad cheeses because they are perfect and give the taste ideally.
Tips and tricks for Mediterranean chickpea salad
If you cook chickpeas yourself, soak them, preferably for 12 hours. Adding half a teaspoon of baking soda to soak it will be more absorbable for the digestive system, and you will not have any surprises ;).
Water in which you soak the chickpeas, rinse the chickpeas thoroughly and pour fresh water over them.
To get 400 g of chickpeas after cooking, you must soak about 180 g.
A quick, easy, and very healthy salad, and exceptionally delicious. What more could you want?
Course Appetizer, diner, lunch
Cuisine Mediterranean
Prep Time 12hours15minutes
Cook Time 2hours30minutes
Servings 4people
Calories 248kcal
Ingredients
400gcooked or canned chickpeas
300gsmall tomatoes can be baby plum tomatoes or cherry tomatoes
1/2piecessalad cucumber
1/2bunchparsley
1/2piecered onion
20piecesblack olives
100gfeta
Dressing
2tbspolive oil
1tbspwine vinegar or apple cider vinegar
juice of 1/2 lemon
2cloves of garlic
salt and pepper to taste
Instructions
Wash all vegetables thoroughly. Cut the tomatoes into quarters, cut the cucumber lengthwise, and do not try to peel the quarters. Then the cucumber will keep its firmness longer.
Wash the parsley well and remove only the youngest sprigs. We chop very finely.
Peel the onions, cut them in half, and cut them into feathers.
Drain the olives from the excess brine and cut lengthwise in half.
Fete crumble or cut into cubes, and it's up to you.
We put everything into a bowl.
To prepare the dressing.
Pour the olive oil, a teaspoon of vinegar, and the juice of half a lemon into the jar.
Peel the garlic and squeeze through the press or finely chop (if we use a press, we can also finely chop the remains that were left in the press and put it in the dressing)
Close the jar and shake vigorously so that the ingredients are well combined.
Move over, butternut squash! Carrots are back and ready to be the new SOUPer star in this creamy vegan carrot soup. It’s rich thanks to coconut milk and subtly spicy from red pepper flakes, making it super warming and perfect for the transition from wi…
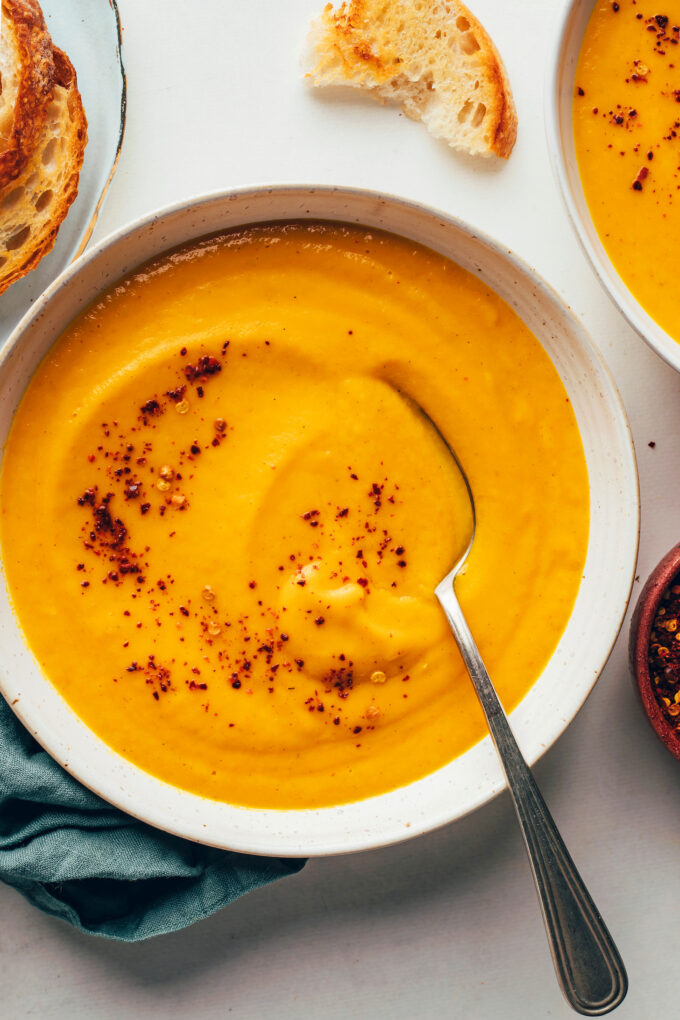
Move over, butternut squash! Carrots are back and ready to be the new SOUPer star in this creamy vegan carrot soup. It’s rich thanks to coconut milk and subtly spicy from red pepper flakes, making it super warming and perfect for the transition from winter to spring!
The best part? It’s made in 1 pot with just 10 ingredients you may have around right now. Let us show you how it’s done!