Who said sweet potato fries were boring? Not me! Ok, well maybe I did think that up until I tried this version. And let’s just say I stand corrected!! These Air Fryer Sweet Potato Fries are tossed with a little bit of olive oil and seasoned with a light coating of Tony Chachere’s Creole seasoning…and all I can say is, Wow! The combination of the natural sweetness from the sweet potato with the spicy kick from the Creole seasoning is seriously a match made in heaven! Not to mention I can make a batch of fries for just over a dollar! Now I can get my weekly sweet potato fix fast and on a budget!

Ingredients For Sweet Potato Fries
You only need 3 simple ingredients to make these easy, tasty, sweet potato fries!
- Sweet Potatoes – Just one pound of sweet potatoes, or approximately 2 small sweet potatoes, is all you’ll need to make one batch of sweet potato fries.
- Olive Oil – A little bit of olive oil (or cooking oil of your choice) to help the seasoning stick to the sweet potatoes and help the potatoes to brown evenly while cooking.
- Tony Chachere’s Creole Seasoning – This is what I consider the “secret ingredient” and makes these sweet potato fries really stand out! If you don’t have access to this particular brand, you can substitute with any seasoning salt blend, like Lawry’s.
Are These Air Fryer Sweet Potato Fries Crispy?
No, they’re not. Even though they are being cooked in an air “fryer”, they are on the thicker side and won’t be as crispy as deep fried sweet potato fries. There are some recipes that call for extra steps and ingredients to try and achieve a crispier texture, but we went with a simple, less complicated method for these sweet potato fries, and they still turned out super delicious!
Tips for making Air Fryer Sweet Potato Fries
- Cut the wedges evenly – Try to cut the sweet potato wedges as even as possible so they can all cook evenly in the air fryer.
- Mix well – Make sure the sweet potato fries are coated evenly in the oil and spices.
- Preheat the air fryer – It’s always good to preheat the air fryer before you add your fries to the basket. If your air fryer does not have a pre-heat function, simply let it run with an empty basket for about 3-4 minutes at 400ºF.
- Cook in intervals – Cook the sweet potato fries in roughly 5 minute intervals and shake the basket (or use silicone tongs) to flip the fries after each interval.
What to Serve With Sweet POtato Fries?
If you love a good dipping sauce, then try serving these sweet potato fries with our Comeback Sauce or our Mayo Ketchup. And since you already have the air fryer out, you could easily pair these with some Air Fryer Chicken Nuggets or maybe some Baked Chicken Wings. And the sweet and spicy flavor of the fries would taste great with some smokey BBQ Bean Sliders or BBQ Chicken Quesadillas. But of course you can always add these on the side with some Smash Burgers or Bacon Ranch Turkey Burgers too!

Pictured with Mayo Ketchup sauce.

Air Fryer Sweet Potato Fries
Equipment
Ingredients
- 1 lb. sweet potatoes $0.99
- 1 Tbsp olive oil $0.11
- 1/2 tsp Tony Chachere's seasoning (or to taste)* $0.03
Instructions
- Wash, peel, then dry the sweet potatoes. Cut the sweet potatoes into wedges.
- Place the sweet potato wedges in a bowl, drizzle with olive oil, then sprinkle seasoning over the top. Toss the sweet potatoes until they're evenly covered in oil and seasoning.
- Preheat the air fryer to 400ºF. Once preheated, add the seasoned sweet potatoes and spread them as evenly as possible inside the air fryer basket. Cook the fries at five-minute intervals, shaking the basket to flip and stir the fries after each interval.
- Continue cooking until the sweet potatoes are slightly blistered and browned on the edges, about 15-20 minutes total. Serve immediately.
See how we calculate recipe costs here.
Notes
Nutrition
Try These Other Homemade Fry Recipes:
- Oven Baked Steak Fries
- Baked Zucchini Fries
- Garlic Parmesan Fries
- Sweet Potato Fries with Peanut Lime Dressing

How to Make Air Fryer Sweet POtato Fries – Step by Step Photos
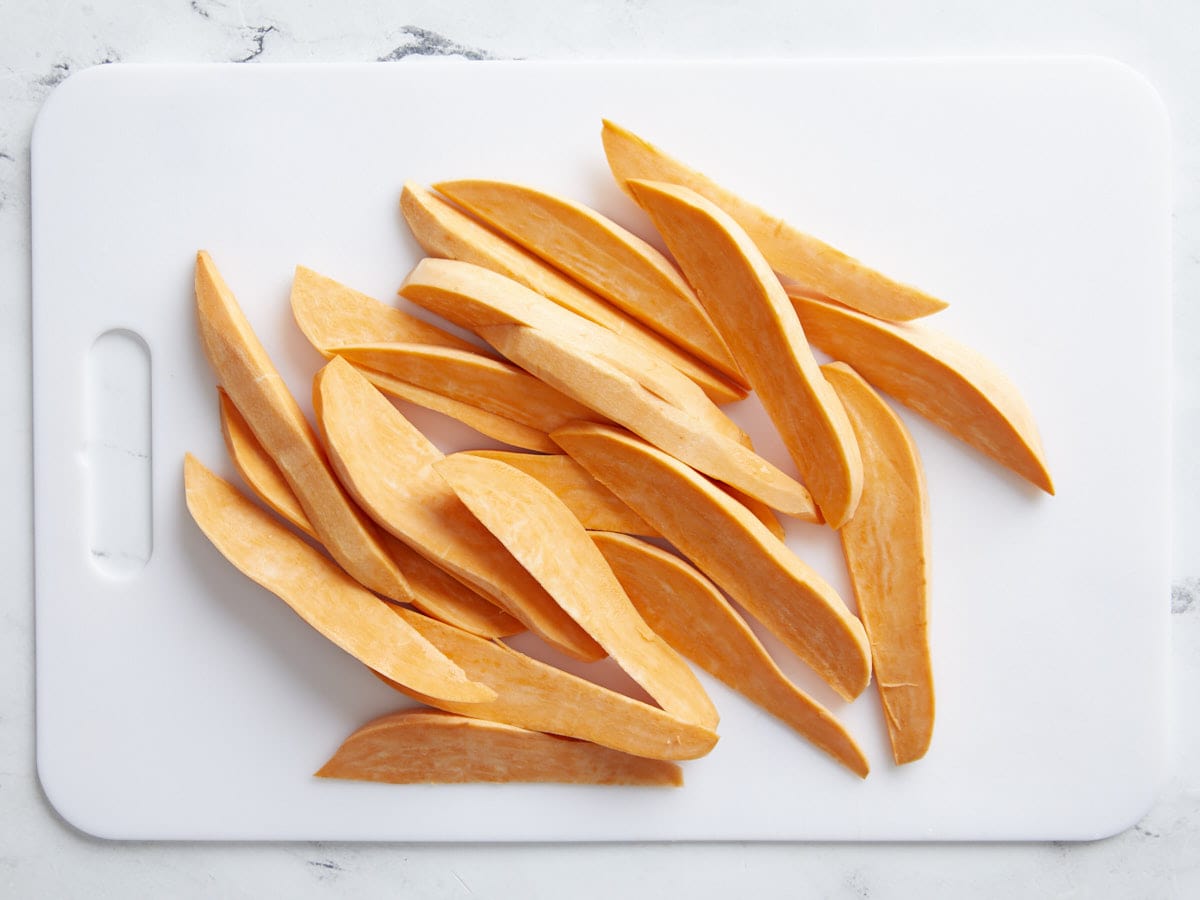
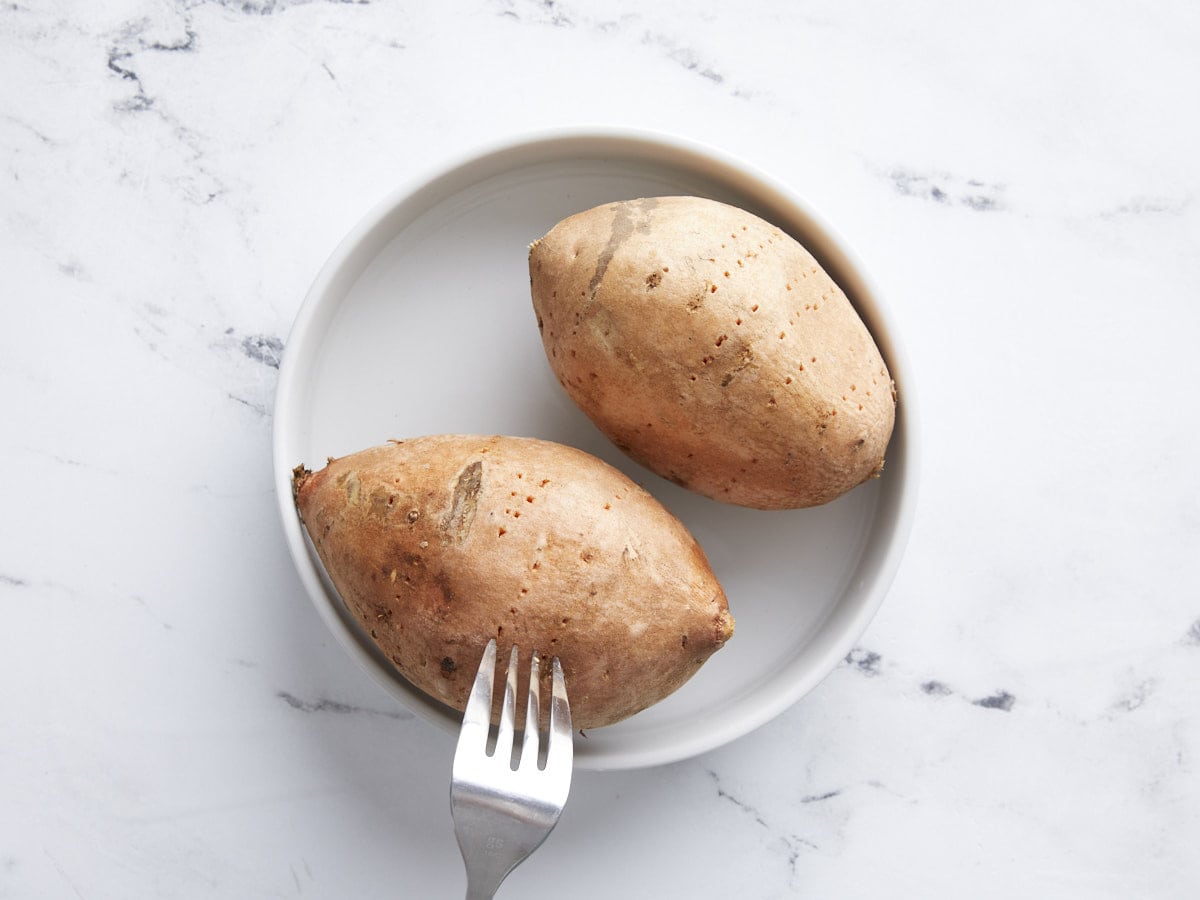
Wash, peel, then dry 1 lb. of sweet potatoes (approx. 2 small sweet potatoes). Cut the sweet potatoes into wedges.
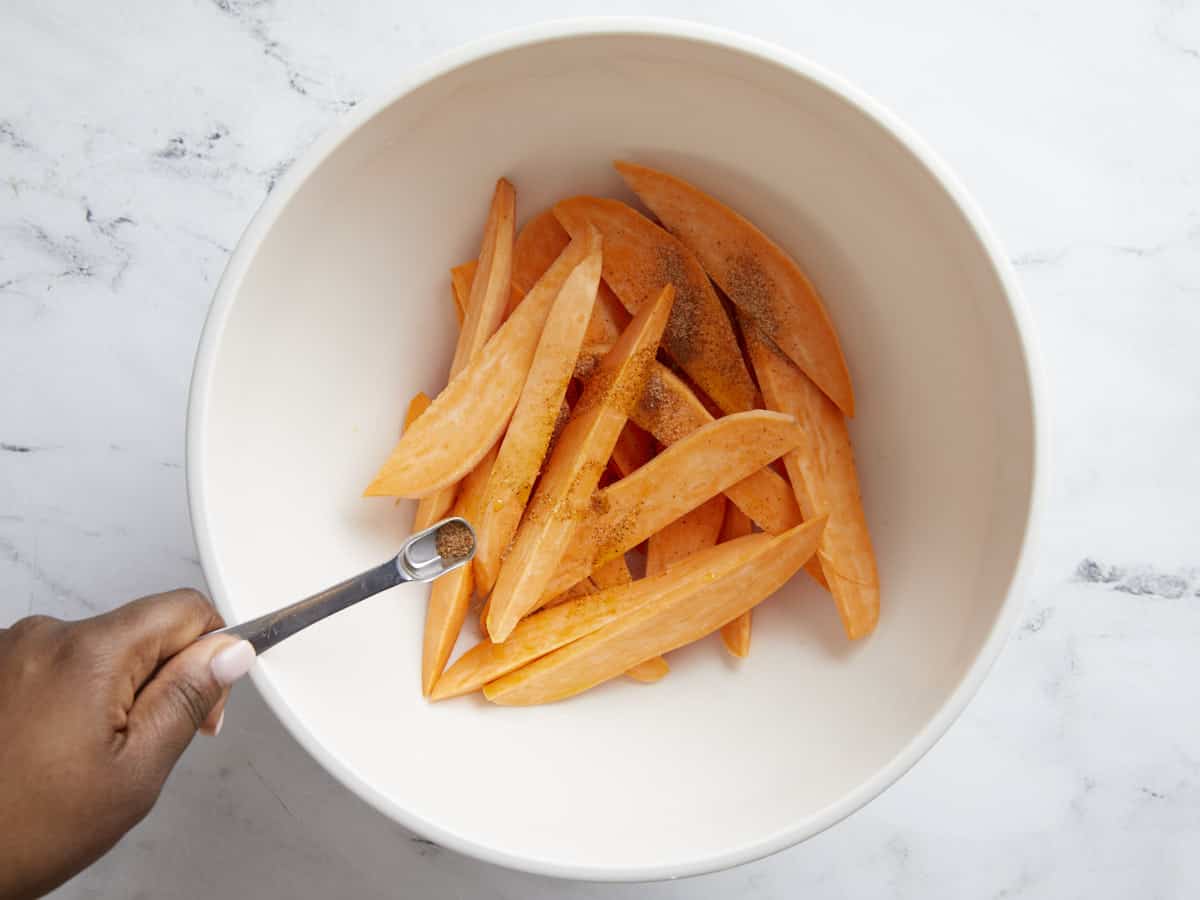
Place the sweet potato wedges in a bowl, drizzle with 1 Tbsp olive oil, then sprinkle 1/2 tsp of seasoning (or more to taste) over the top. Toss the sweet potatoes until they’re evenly covered in oil and seasoning.
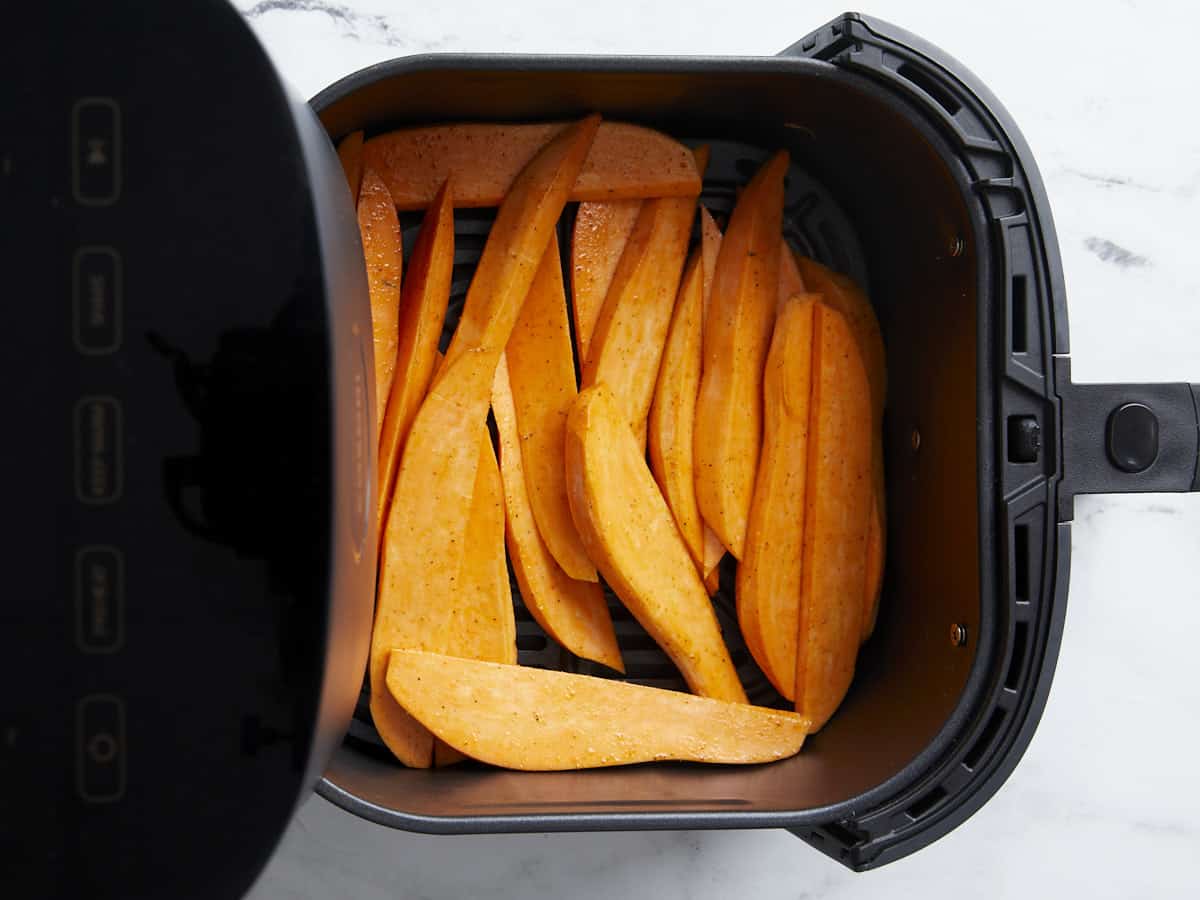
Preheat the air fryer to 400ºF. Once preheated, add the seasoned sweet potatoes and spread them as evenly as possible inside of the air fryer basket. Cook the fries at five-minute intervals, shaking the basket to flip and stir the fries after each interval.

Continue cooking until the sweet potatoes are slightly blistered and browned on the edges, about 15-20 minutes total.

Serve immediately with your favorite dipping sauce and enjoy! Pictured with Mayo Ketchup sauce.

More Air Fryer Recipes


The post Air Fryer Sweet Potato Fries appeared first on Budget Bytes.