Black Beans with Eggs

Eggs poached in seasoned black beans served over a bed of rice with fresh onion and cilantro makes a fast, filling, and budget-friendly meal!

The post Black Beans with Eggs appeared first on Budget Bytes.

What are two of my favorite budget-friendly ingredients? Beans and eggs! And they come together perfectly to create a really simple and filling meal that’s great for breakfast, brunch, or just any time of the day (eggs all day every day, please!). And you really can’t beat the cost of this dish. Even with a few fancier toppings, my price per serving came in just over a dollar. 🙌
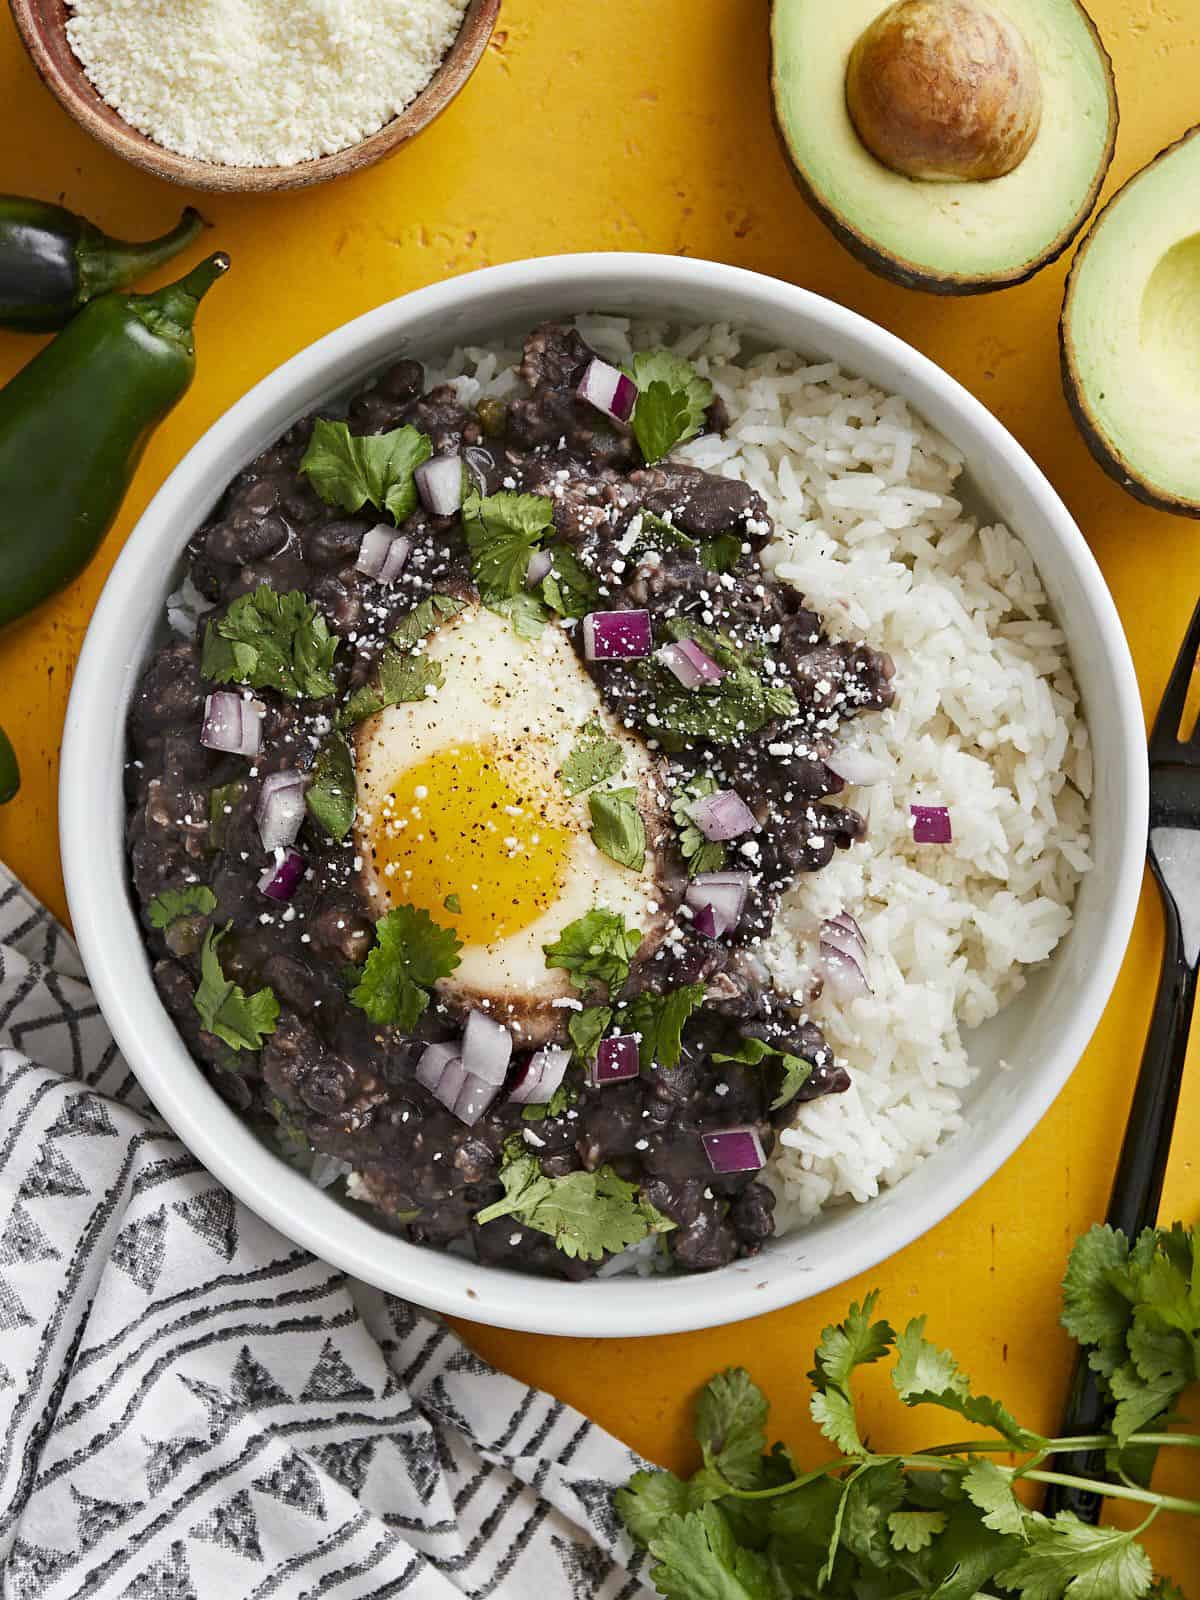
Overhead view of a bowl full of rice, black beans and eggs garnished with onion and cilantro.

I love turning an inexpensive can of beans into a delicious meal, so the other day I was thinking, “Hey, I wonder if you could cook eggs in some saucy beans like you do shakshuka?” So I tried it out and it worked! This recipe is super simple, satisfying, and you can make it as simple or as extravagant as you’d like, depending on how you top it.

Ingredients for Black Beans with Eggs

Here’s all you’ll need to make this super budget-friendly meal:

  • Garlic and Jalapeño: Sautéed fresh garlic and jalapeño create a super flavorful base for the beans, adding depth and a little spicy kick. If you don’t like spicy, you can skip the jalapeño. And you can totally “measure with your heart” for the garlic. ;)
  • Black Beans: Beans provide the bulk for this recipe, making it super filling while staying super cheap, AND adding tons of fiber and nutrients. Win! While you could potentially use any bean for this recipe, black beans definitely fit this flavor profile the best and have the best visual appeal.
  • Eggs: I used four large eggs, but you could certainly add more if you prefer. I chose to cook the eggs so the yolks were still a bit runny, but you can cook them longer if you prefer a solid yolk. Or, you could even scramble them separately and simply top your bowl of beans and rice after the fact!
  • Toppings: The toppings are totally customizable and can make this recipe super fancy or very simple. We used a combination of onion, cilantro, avocado, and Cotija cheese. See our list of other topping ideas below for more inspo!
  • Rice: I served the black beans and eggs over a bed of cooked rice, but you could also scoop them into a tortilla and enjoy them like an enchilada or burrito.

How to Store Leftovers

If you plan to eat your black beans and eggs over the course of a few days, do not pre-poach the eggs in the beans. Simply cook the seasoned beans and store the beans, rice, and toppings separately. Then cook a fresh egg each day to top the beans and rice. You can cook the egg using any method: scrambled, fried, soft-boiled, or hard-boiled.

Topping Ideas

This recipe is just asking for all sorts of fun toppings. You can really dress it up with tons of flavor and color, or keep it super simple and budget-friendly by drizzling some store-bought salsa over top. Here are some ideas for toppings other than what we used below:

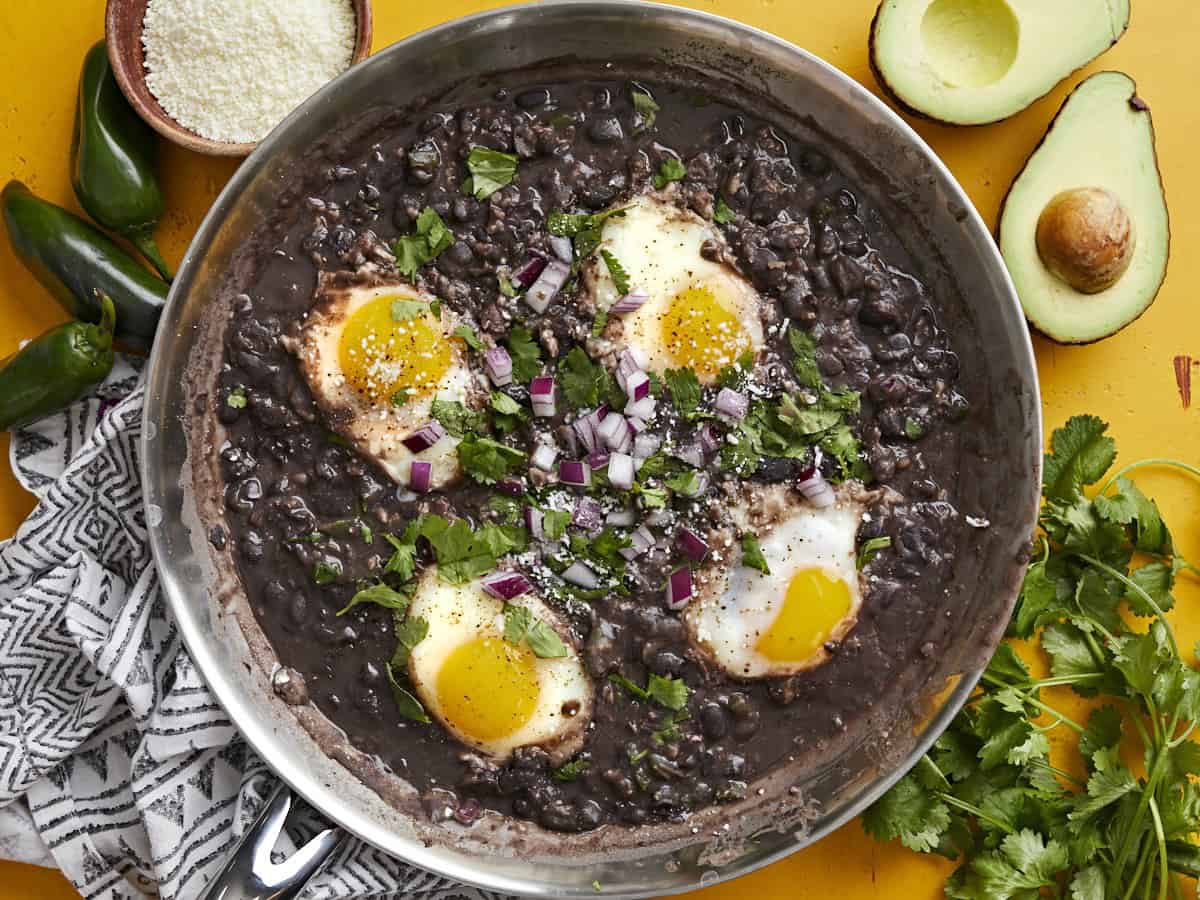
Overhead view of eggs poached in a skillet full of black beans garnished with cilantro and red onion.
Overhead view of a bowl of black beans with eggs over rice with sliced avocado on the side.
Print

Black Beans with Eggs

Eggs poached in seasoned black beans served over a bed of rice with fresh onion and cilantro make a fast, filling, and budget-friendly meal!
Course Breakfast, Brunch, Dinner, Lunch
Cuisine Mexican, Southwest
Total Cost $4.72 recipe / $1.18 serving
Prep Time 5 minutes
Cook Time 15 minutes
Total Time 20 minutes
Servings 4
Calories 529kcal

Ingredients

  • 2 cloves garlic $0.16
  • 1 jalapeño $0.25
  • 1 Tbsp olive oil $0.12
  • 2 15oz. cans black beans $1.58
  • 1 tsp cumin $0.10
  • 1/4 cup water $0.00
  • 4 large eggs $0.42

For Serving (optional)

  • 3 cups cooked rice $0.32
  • 1/4 red onion, diced $0.12
  • 1/4 cup chopped cilantro $0.20
  • 1 avocado, sliced $0.99
  • 1 oz. cotija, crumbled $0.46

Instructions

  • Mince the garlic and dice the jalapeño (seeds removed). Add the garlic and jalapeño to a large skillet with the olive oil and sauté over medium heat for about one minute, or just until the garlic softens a bit and becomes fragrant.
  • Add the canned beans (without draining) to the skillet along with the water and cumin. Stir to combine, then allow the beans to come up to a simmer.
  • Let the beans simmer, stirring often, for about five minutes. After the beans have softened slightly from simmering, use the back of a large spoon to smash some of the beans to thicken.
  • Turn the heat down to medium-low. Crack the eggs onto the beans. Partially cover the skillet with a lid and allow the eggs to simmer in the beans for 7-10 minutes, or until the eggs are cooked to your liking.
  • Top the skillet with your favorite ingredients (we used onion, cilantro, avocado, and cotija), and serve over a bed of warm rice. Enjoy!

See how we calculate recipe costs here.

Nutrition

Serving: 1serving | Calories: 529kcal | Carbohydrates: 70g | Protein: 23g | Fat: 18g | Sodium: 160mg | Fiber: 15g

How to Make Black Beans with Eggs – Step by Step Photos
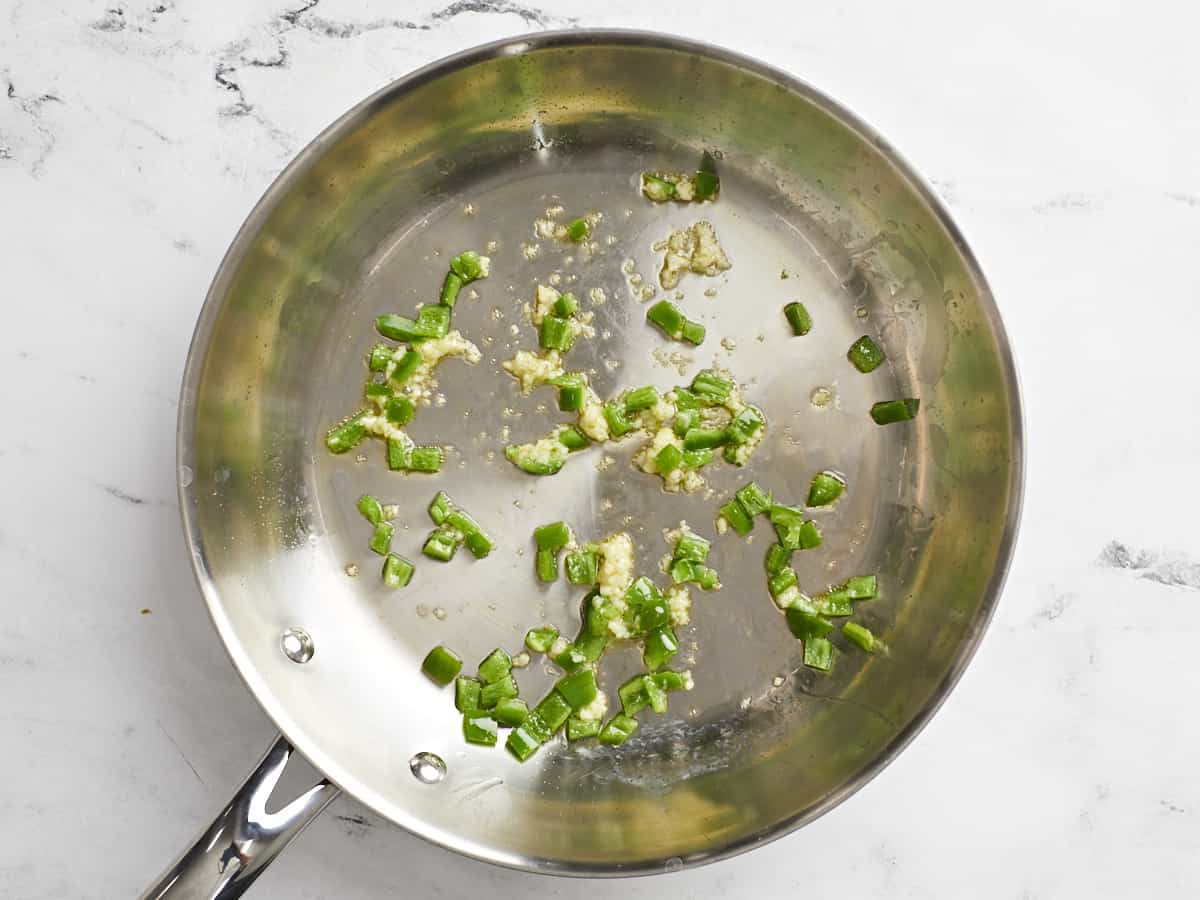
Sautéed garlic and jalapeño in a skillet.

Mince two cloves of garlic (or more, if you’d like!) and one jalapeño (seeds removed). Add the garlic and jalapeño to a large skillet with 1 Tbsp olive oil and sauté over medium heat for 1-2 minutes, or just until the garlic softens a bit and becomes very fragrant. Don’t let the garlic brown.
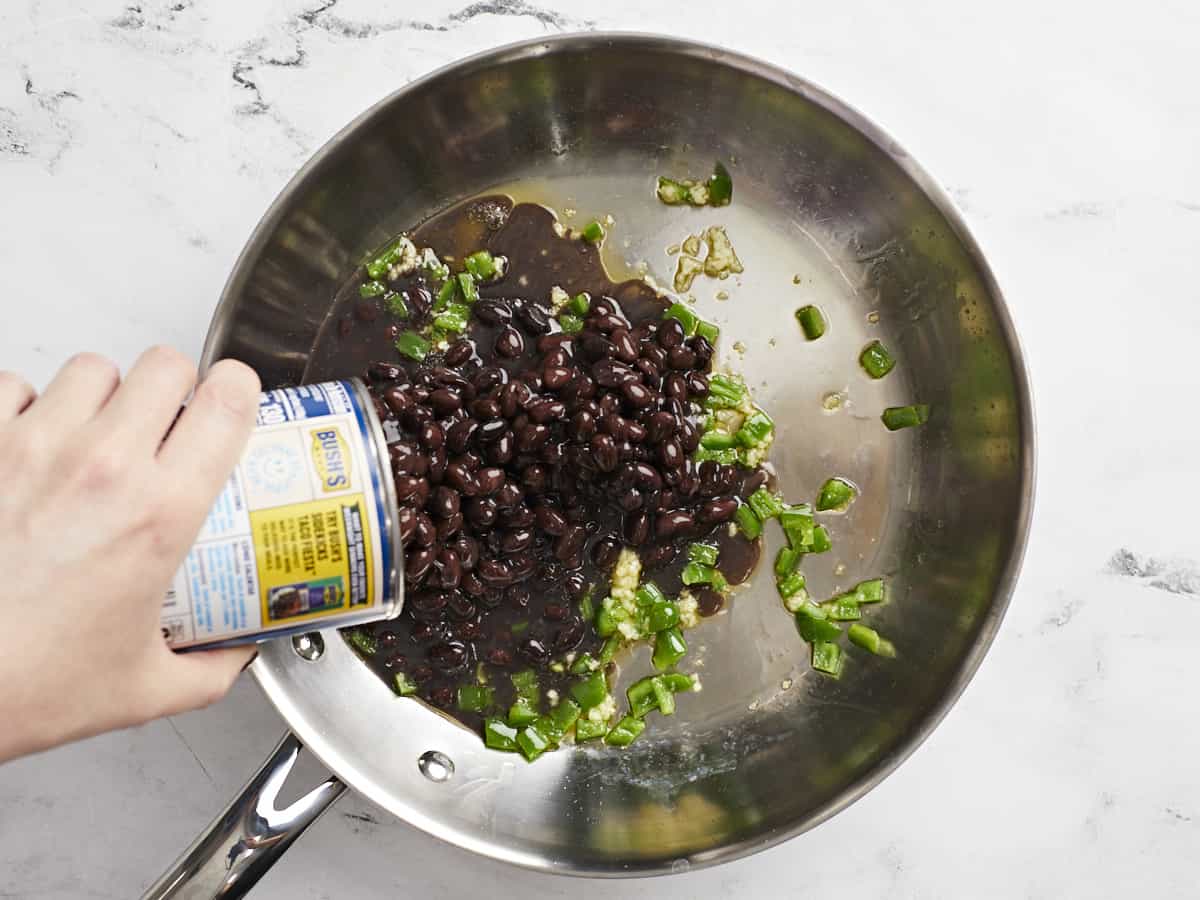
Black beans being poured into the skillet.

Add two undrained cans of black beans to the skillet along with ¼ cup water and 1 tsp cumin.
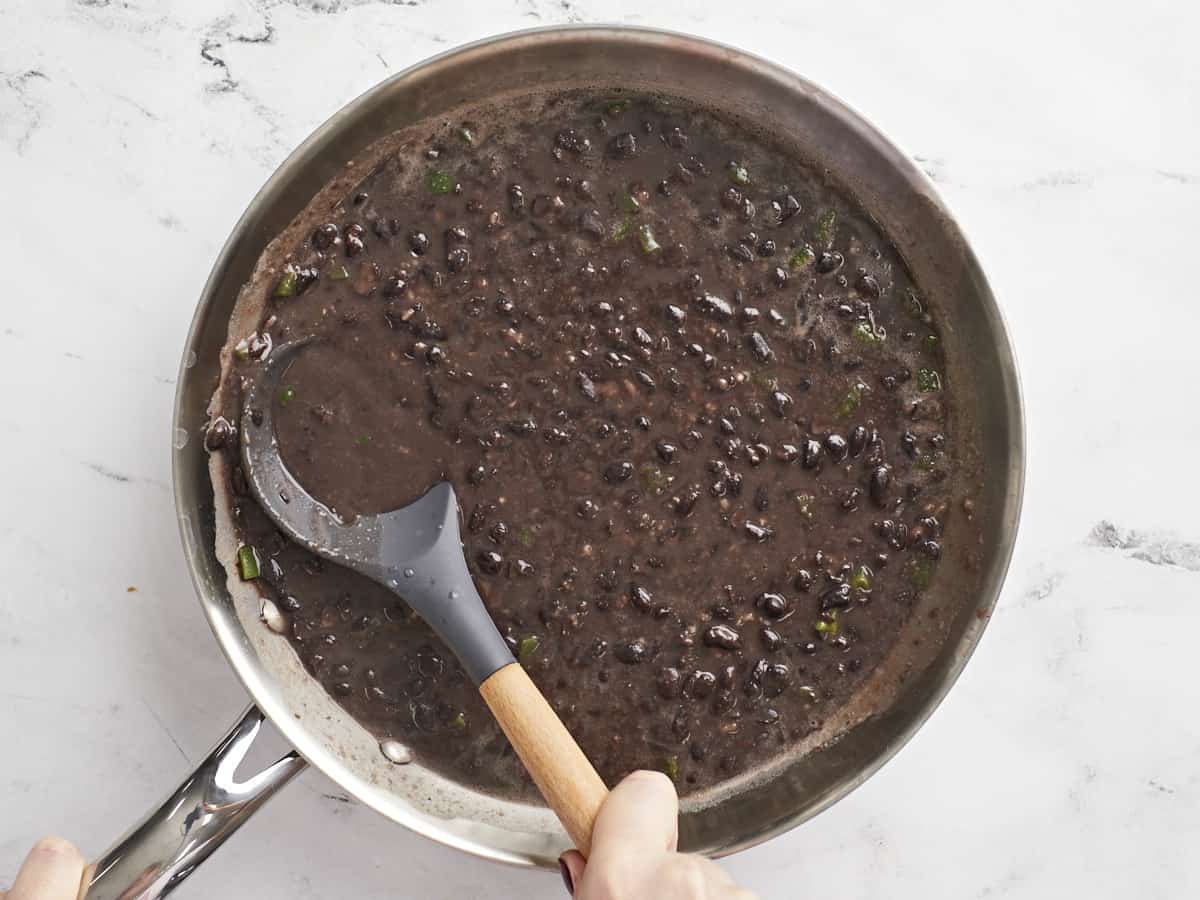
Simmered black beans in the skillet being smashed with the back of a spoon.

Stir everything to combine, then let the beans simmer over medium for about 5 minutes, stirring often to prevent the beans from sticking to the bottom of the skillet. After simmering for five minutes, use the back of a large spoon to smash some of the beans and thicken the sauce.
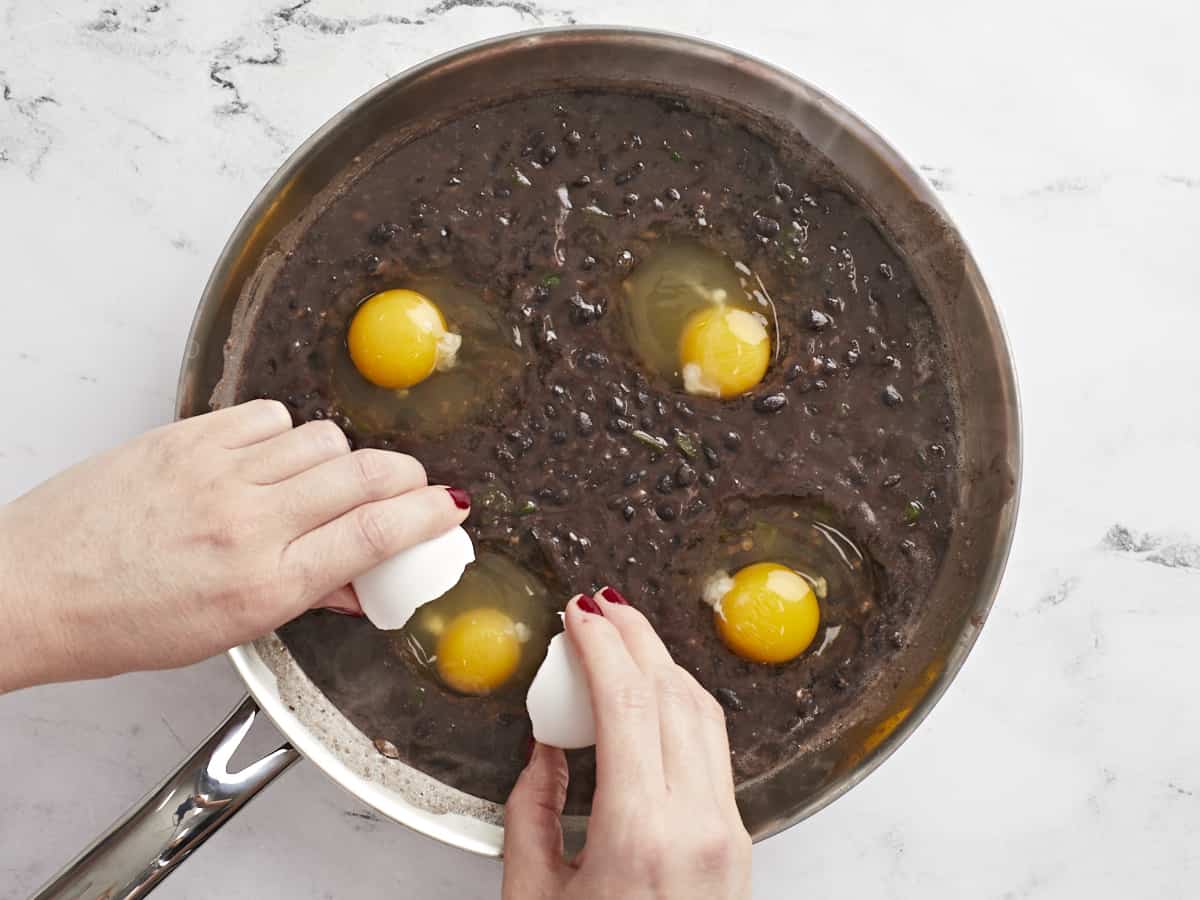
Eggs being cracked into the skillet of black beans.

Turn the heat down to medium-low and crack four large eggs onto the surface of the black beans.
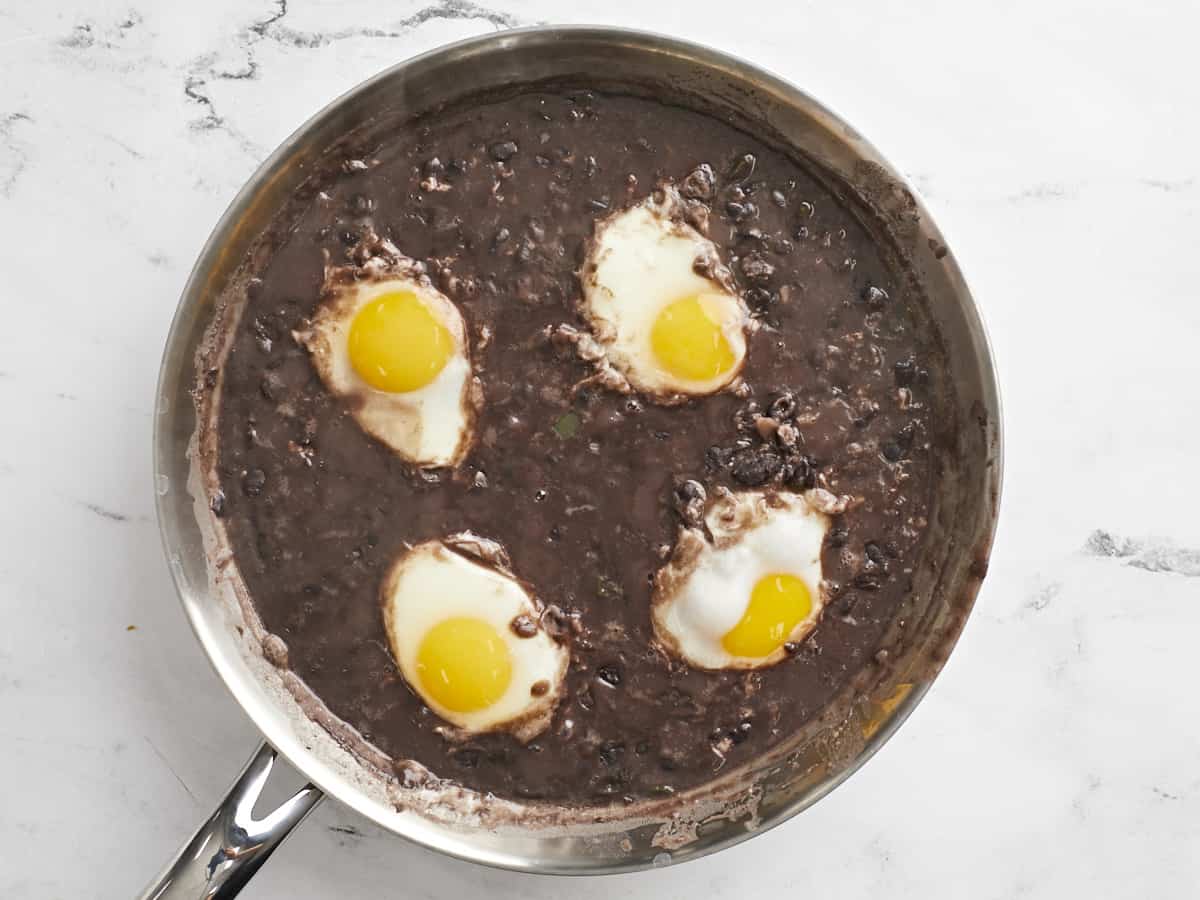
Cooked eggs in the black beans.

Partially cover the skillet with a lid and allow the eggs to simmer in the beans for 7-10 minutes, or until they are cooked to your liking (less time for runny yolks, more time for solid yolks). Cook time can vary depending on how hot the beans are and how cold the eggs are, so watch them closely.
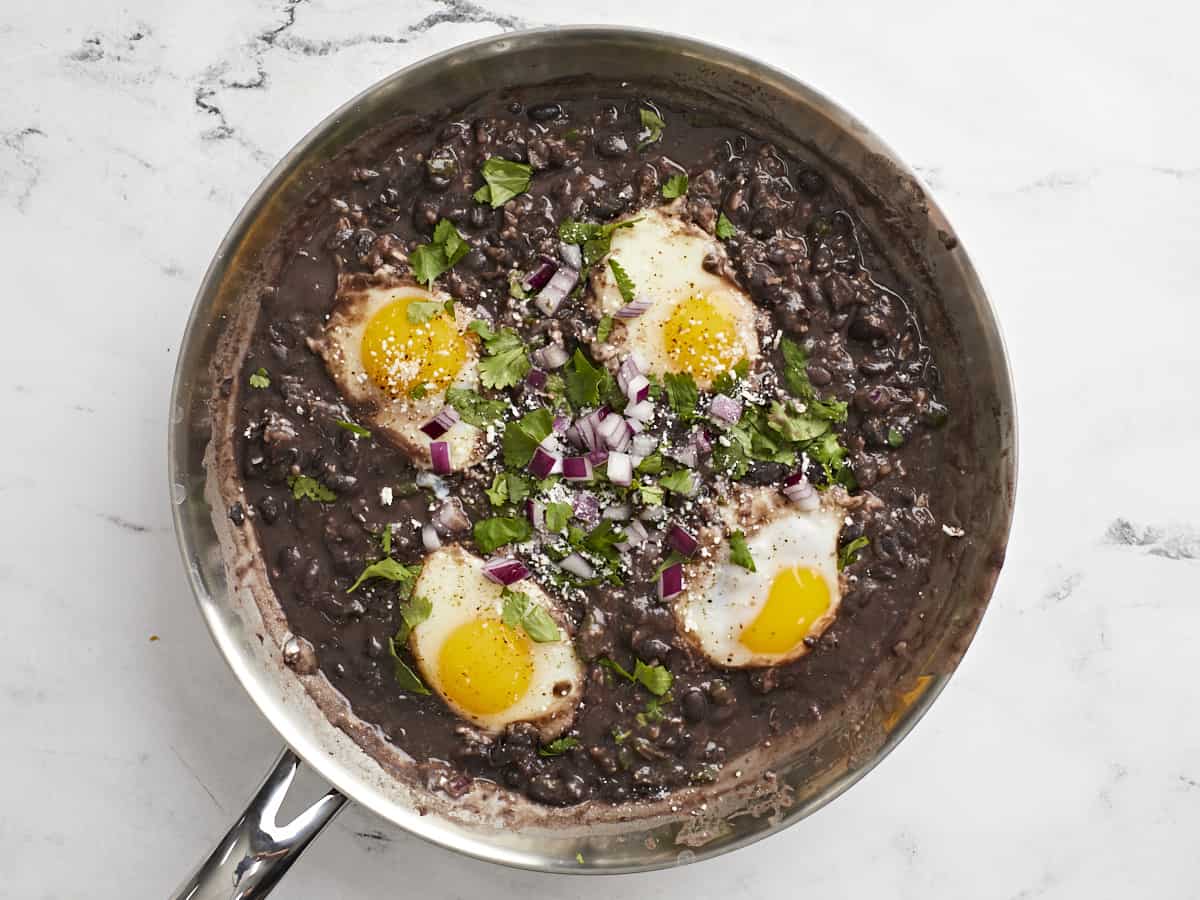
Eggs and beans topped with cilantro and onion.

Top the eggs and black beans with chopped cilantro, diced red onion, and crumbled cotija cheese, or the toppings of your choice.
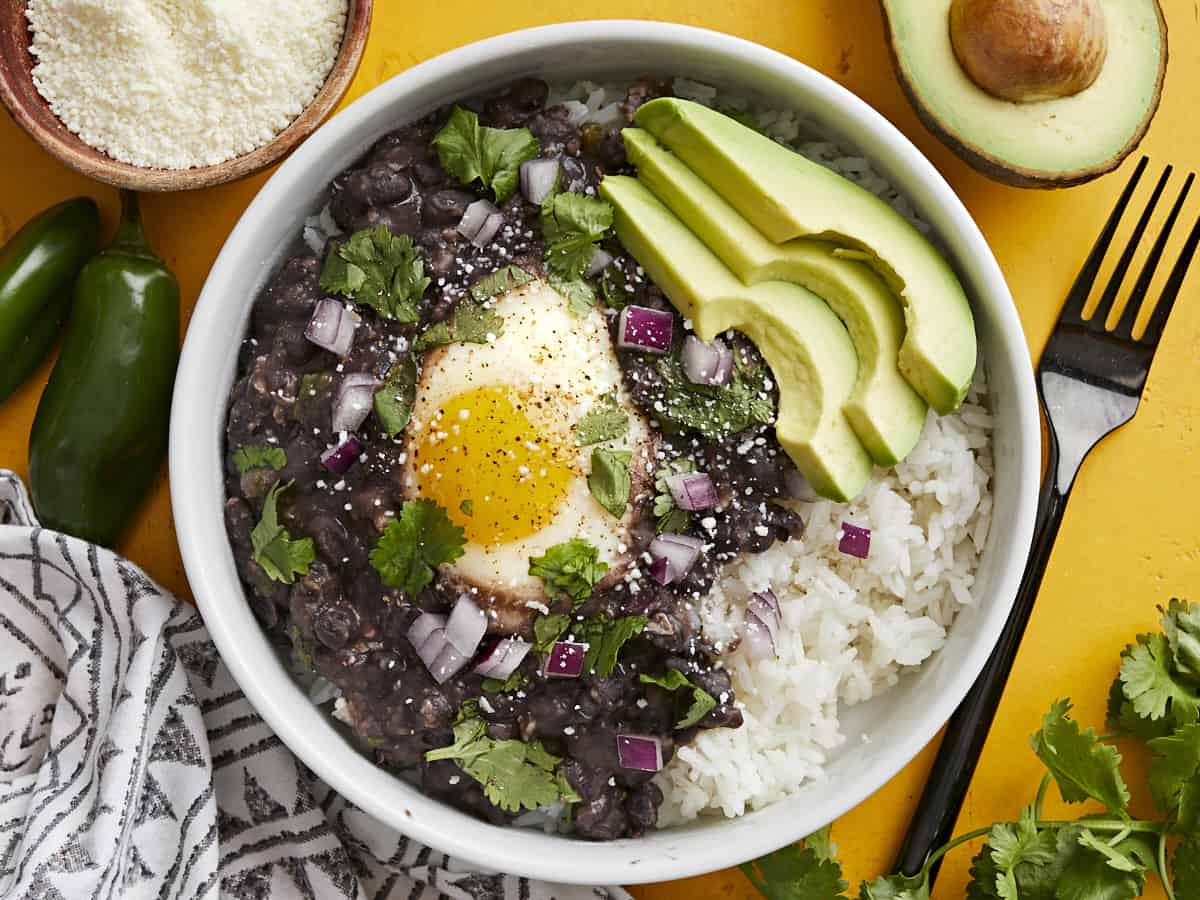
Overhead view of a bowl of black beans with eggs over rice with sliced avocado on the side.

Serve over cooked rice and enjoy!

The post Black Beans with Eggs appeared first on Budget Bytes.
Scrambled Eggs with Rice

Scrambled Eggs with Rice is a simple and delicious budget-friendly meal that can be enjoyed for breakfast, lunch, or dinner!

The post Scrambled Eggs with Rice appeared first on Budget Bytes.

Rice is a quintessential budget-friendly ingredient, and my slogan has always been “put an egg on it!” So when I saw this recipe for Scrambled Eggs with Rice from the new cookbook The Simple Art of Rice: Recipes from Around the World for the Heart of Your Table by JJ Johnson and Danica Novgorodoff, I knew I had to make it. Not to mention, this recipe features the ingredient I currently can’t get enough of, gochujang! If you love fried rice, you’re going to love this recipe for scrambled eggs with rice. It’s just as easy, hearty, and delicious, plus it’s totally customizable. I’m definitely going to add this one to my budget-recipe rotation!

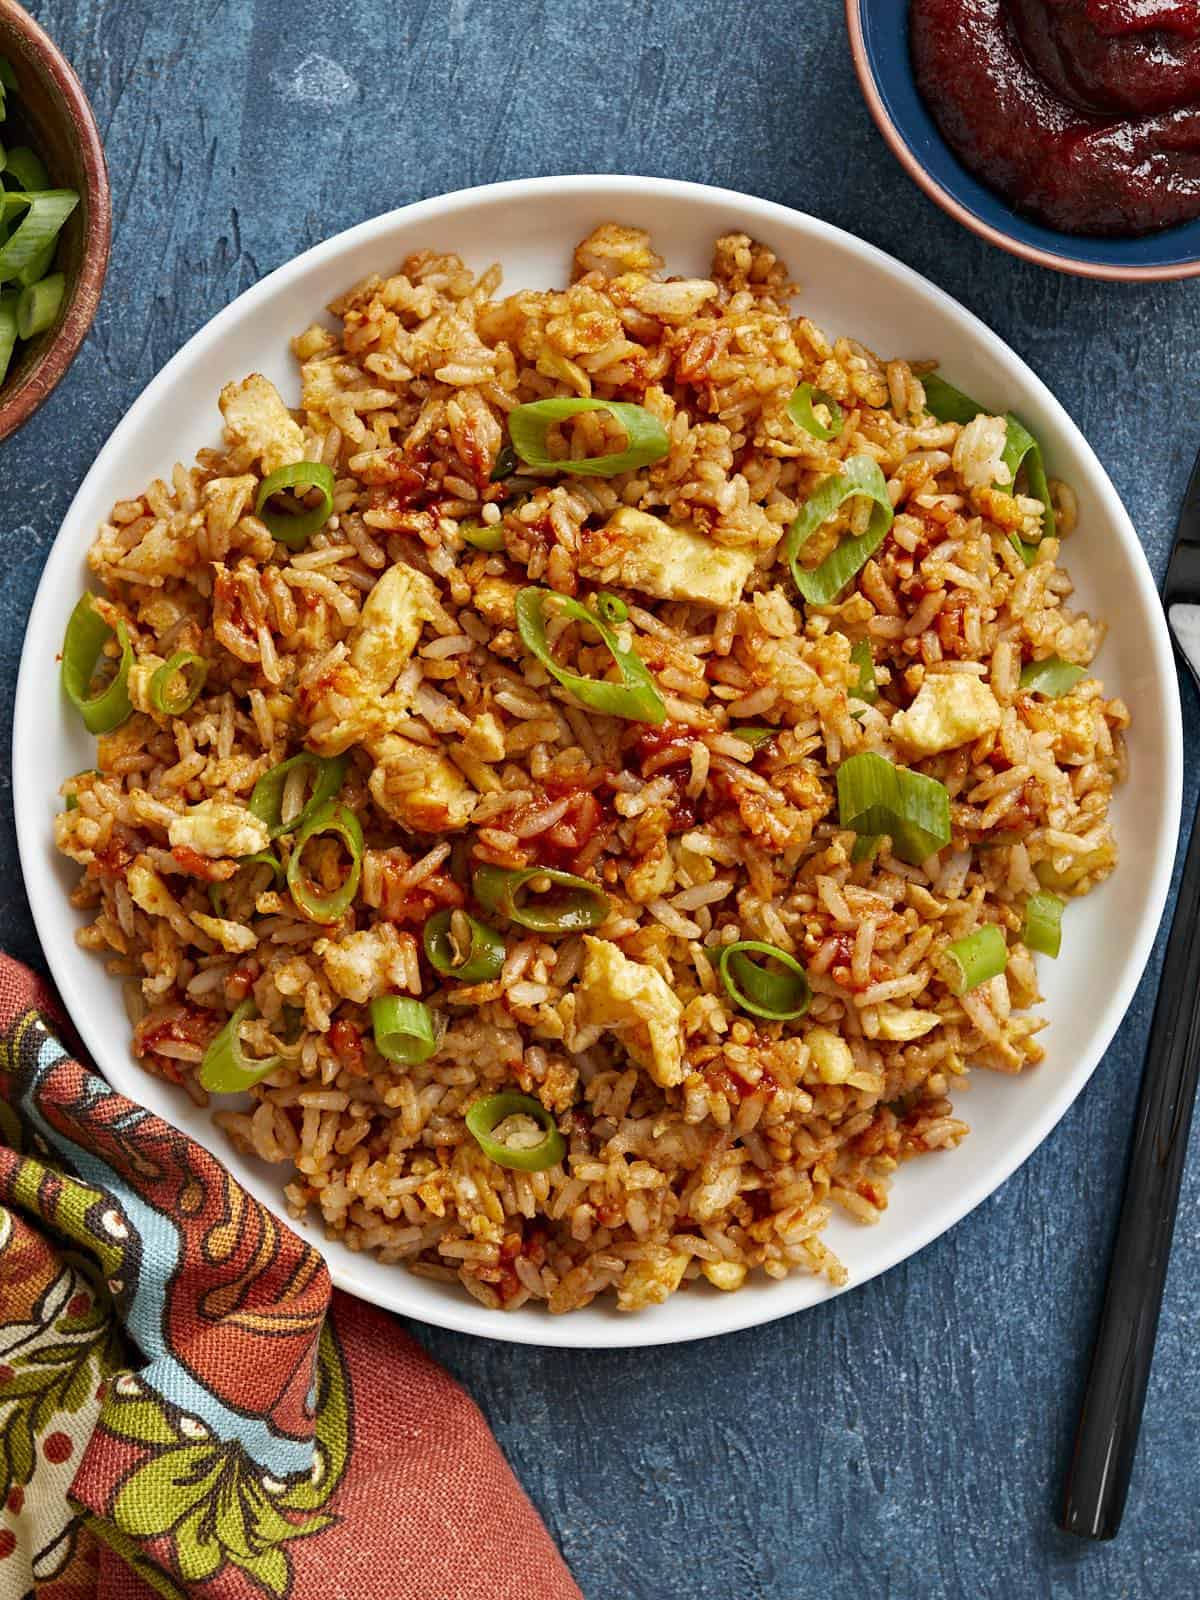
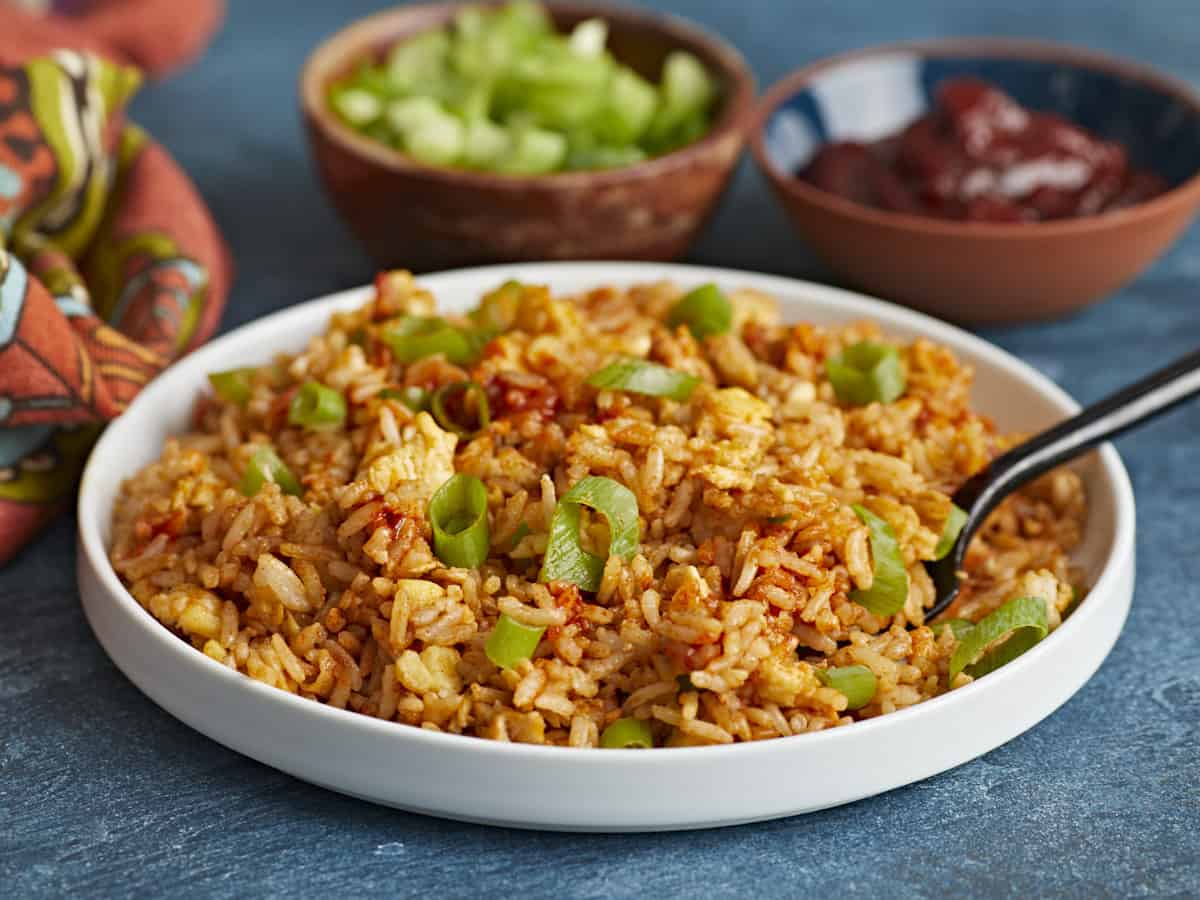
Overhead view of a plate full of scrambled eggs with rice, garnished with green onion.

Chef JJ mentions in his book that the recipe is inspired by breakfast dishes found in both Japanese and Korean cultures. This incredibly simple yet satisfying dish is similar to fried rice, but the ratio between the rice and egg are a bit more even and the rice is stirred into the egg before it’s fully cooked, which gives the dish a slightly creamy texture. Best of all, it’s super fast and easy, so you really can make it on a typical morning (provided you have some cooked rice stashed in the refrigerator). It’s the perfect recipe for using up the leftovers in your fridge!

Ingredients for Scrambled Eggs with Rice

Are you ready to see how easy this is? You’ll only need these simple ingredients to make scrambled eggs with rice:

  • Eggs: Eggs provide fat and protein to this dish, making it extra filling and satisfying. We used large eggs for this recipe. If you have smaller eggs, make sure to add a few more, or if you have extra large eggs, you can probably go with four.
  • Oil: Use your favorite cooking oil to lightly scramble the eggs.
  • Gochujang: This savory, sweet, and spicy Korean chile paste is having a moment in the U.S. right now, so you can probably find some at your local grocery store, although you’ll have a better selection at better prices if you shop at an Asian grocery store. If you can’t find gochujang, you can substitute chile oil or sriracha. The flavor will be different, but still delicious.
  • Rice: The original recipe, in The Simple Art of Rice: Recipes from Around the World for the Heart of Your Table, uses short-grain rice, which I’m sure would be even more spectacular, but we only had long grain on hand and it still made an amazing meal. You can use pretty much any type of rice for this flexible recipe. Whatever rice you’re using, make sure it’s pre-cooked and slightly warm.
  • Soy Sauce: A little soy sauce adds umami and depth to the flavor and enough salt for all of the flavors to pop.
  • Sesame Oil: toasted sesame oil adds a wonderfully nutty flavor to the dish, making it extra comforting and cozy.
  • Green Onions: Garnishing with sliced green onions adds a nice fresh pop of flavor to contrast the cozy meal.

What Else Can I Add?

Simple recipes like this are awesome because there is so much room for customization. Here are a few ideas for other add-ins that will take your scrambled eggs with rice to the next level:

  • Meat: Try sautéing some sliced ham, spam, shrimp, or smoked sausage in the skillet before cooking the eggs (remove from the skillet and stir back in at the end).
  • Vegetables: Just like with fried rice, you can add just about any vegetable to this dish. Onions, spinach, mushrooms, diced bell peppers, or even grape tomatoes would be awesome.
  • Toppings: I could go wild with fun toppings for this egg and rice dish. Cheddar cheese would be great, or how about some sliced avocado, kimchi, or furikake?

How to Store Leftovers

Thankfully, this recipe only takes minutes to whip up because it’s definitely best when freshly prepared. If you can’t eat it all in one sitting, store the rest in the refrigerator in an air-tight container for 2-3 days. Reheat using the microwave, sprinkling just a bit of water over top first (to help rehydrate the rice).

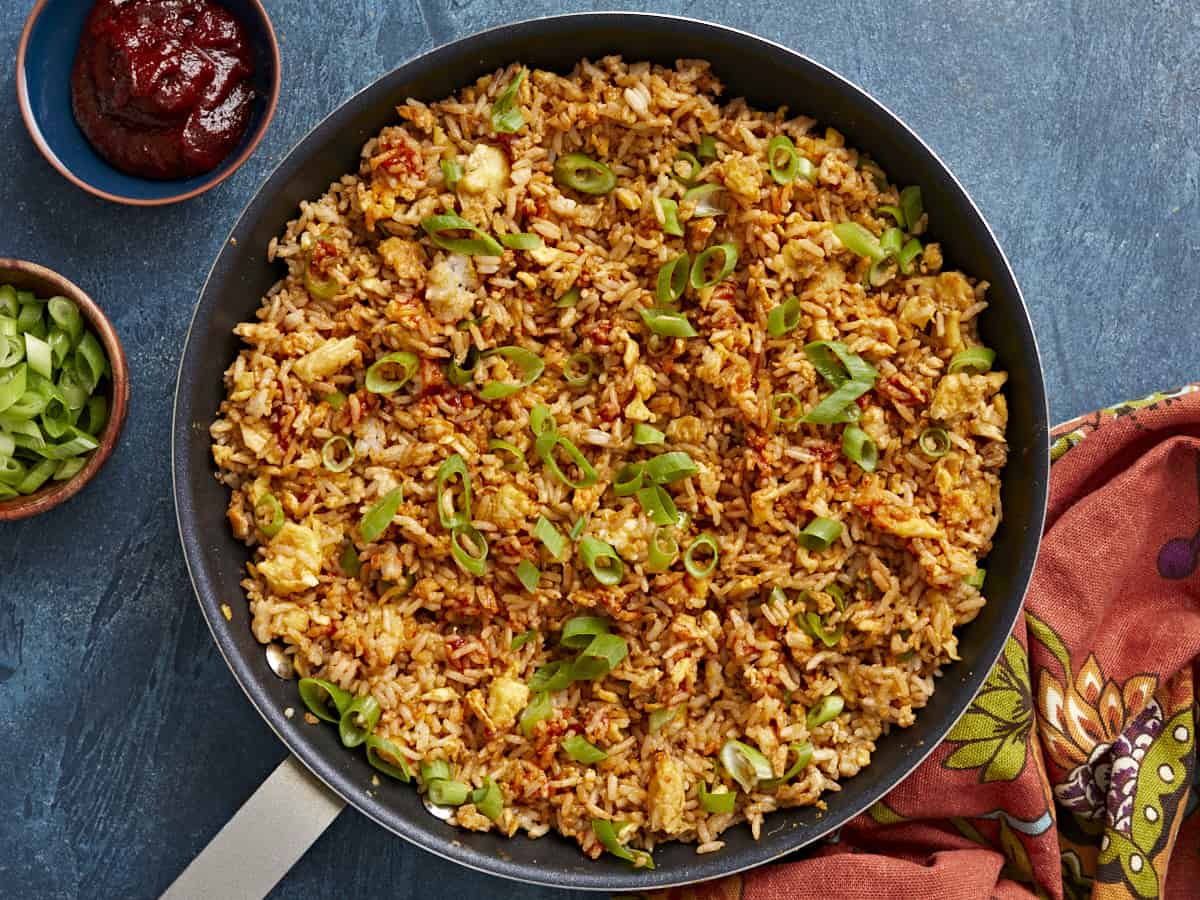
Overhead view of scrambled eggs with rice in the skillet.
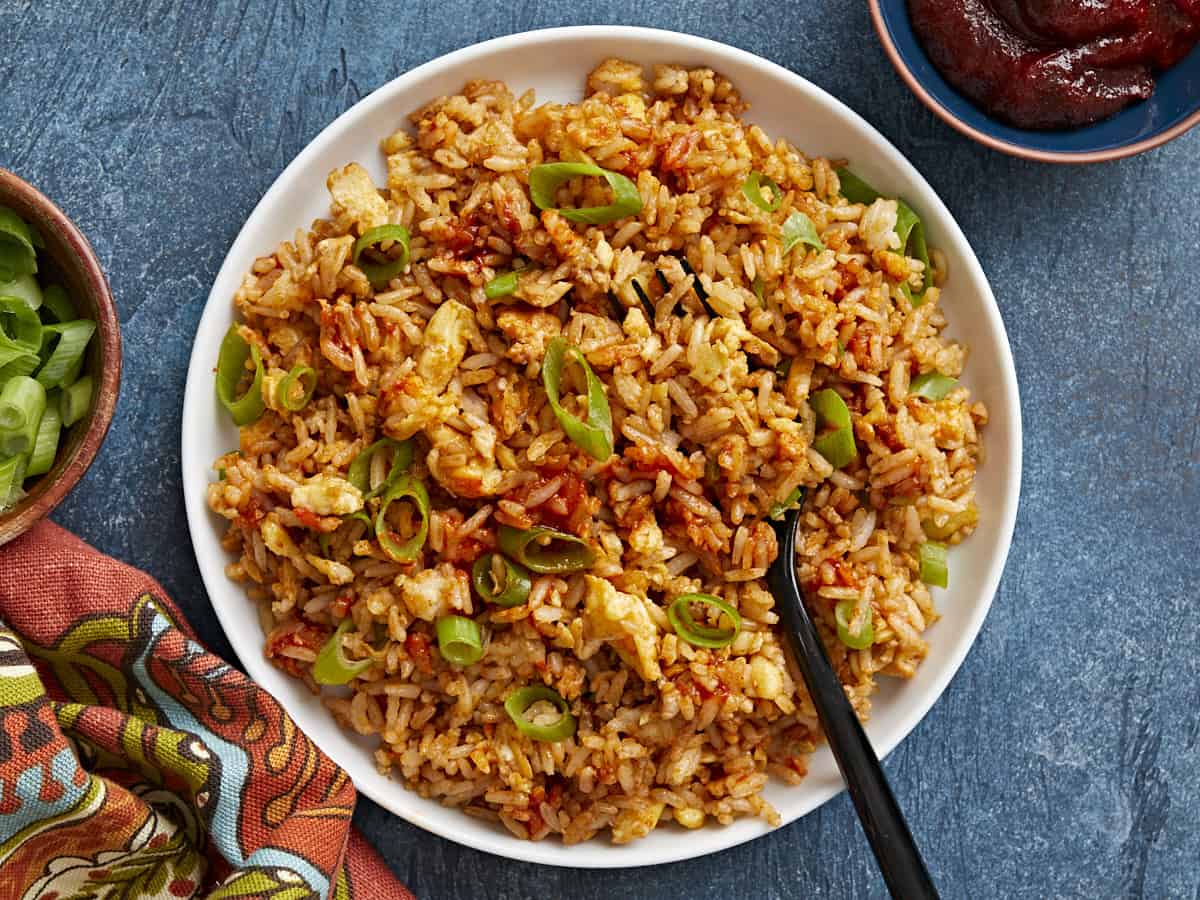
Overhead view of a plate full of scrambled eggs with rice, fork on the side.
Print

Scrambled Eggs with Rice

Scrambled Eggs with Rice is a simple and delicious budget-friendly meal that can be enjoyed for breakfast, lunch, or dinner!
Course Breakfast
Cuisine Japanese, Korean
Total Cost $2.28 recipe / $0.57 serving
Prep Time 5 minutes
Cook Time 10 minutes
Total Time 15 minutes
Servings 4
Calories 420kcal

Ingredients

  • 6 large eggs $0.63
  • 2 Tbsp cooking oil $0.08
  • 2 tsp gochujang (or to taste) $0.16
  • 4 cups cooked rice, warm $0.43
  • 3 Tbsp soy sauce $0.18
  • 1 Tbsp toasted sesame oil $0.30
  • 4 green onions, sliced $0.50

Instructions

  • Crack the eggs into a bowl and beat well with a fork.
  • Warm the vegetable oil in a large non-stick skillet over medium-low heat. Add the eggs and scramble them lightly, leaving them slightly runny. Toward the end of cooking, add the gochujang and stir until well incorporated.
  • Stir in the warmed rice, using a wooden spoon to break up any clumps. Cook for several minutes, until the rice is heated through, then stir in the soy sauce and sesame oil.
  • Serve hot, in individual bowls, topped with the sliced green onions.

See how we calculate recipe costs here.

Nutrition

Serving: 1serving | Calories: 420kcal | Carbohydrates: 47g | Protein: 15g | Fat: 18g | Sodium: 865mg | Fiber: 1g
Side view of a plate full of scrambled eggs with rice and a fork in the side.

How to Make Scrambled Eggs with Rice – Step by Step Photos

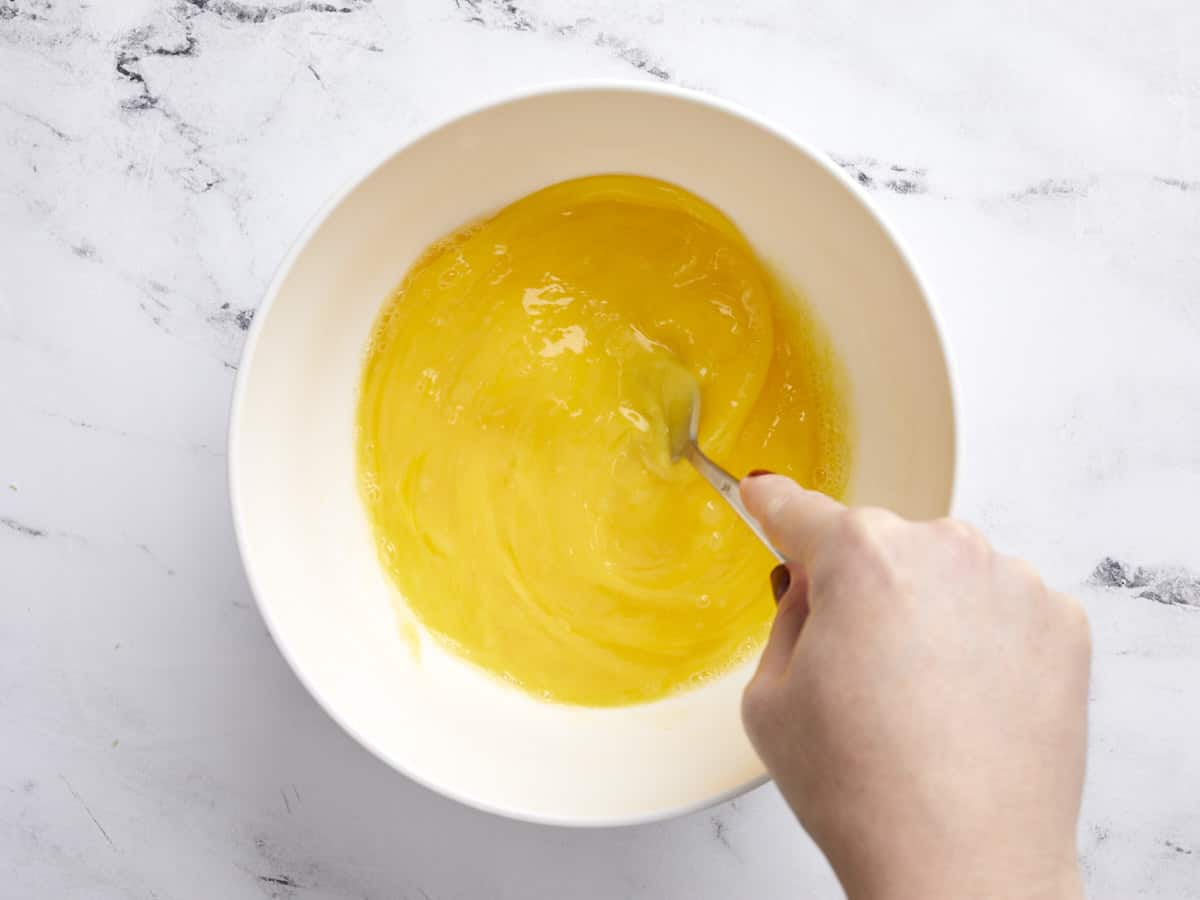
Eggs in a bowl being whisked with a fork.

Crack six large eggs into a bowl and whisk with a fork.

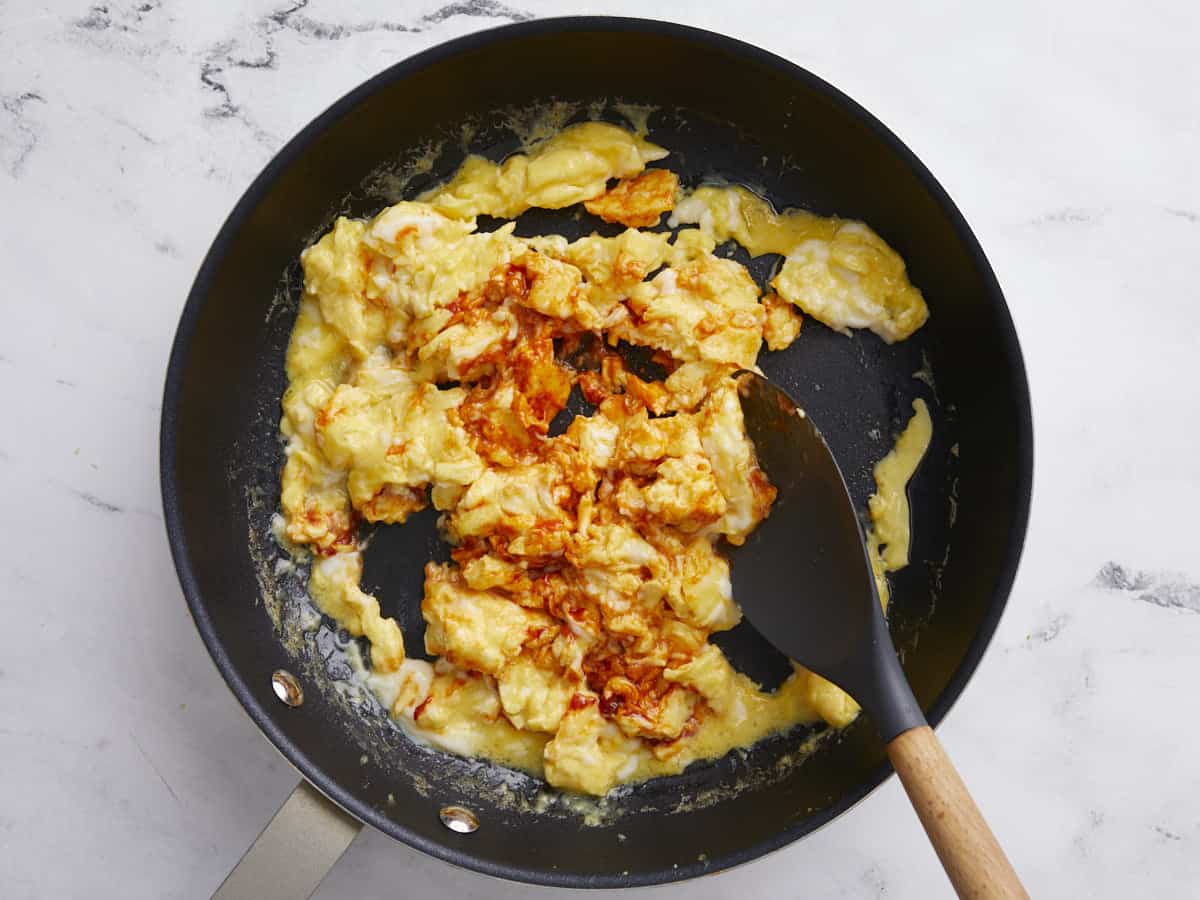
Half-scrambled eggs in a skillet with gochujang added.

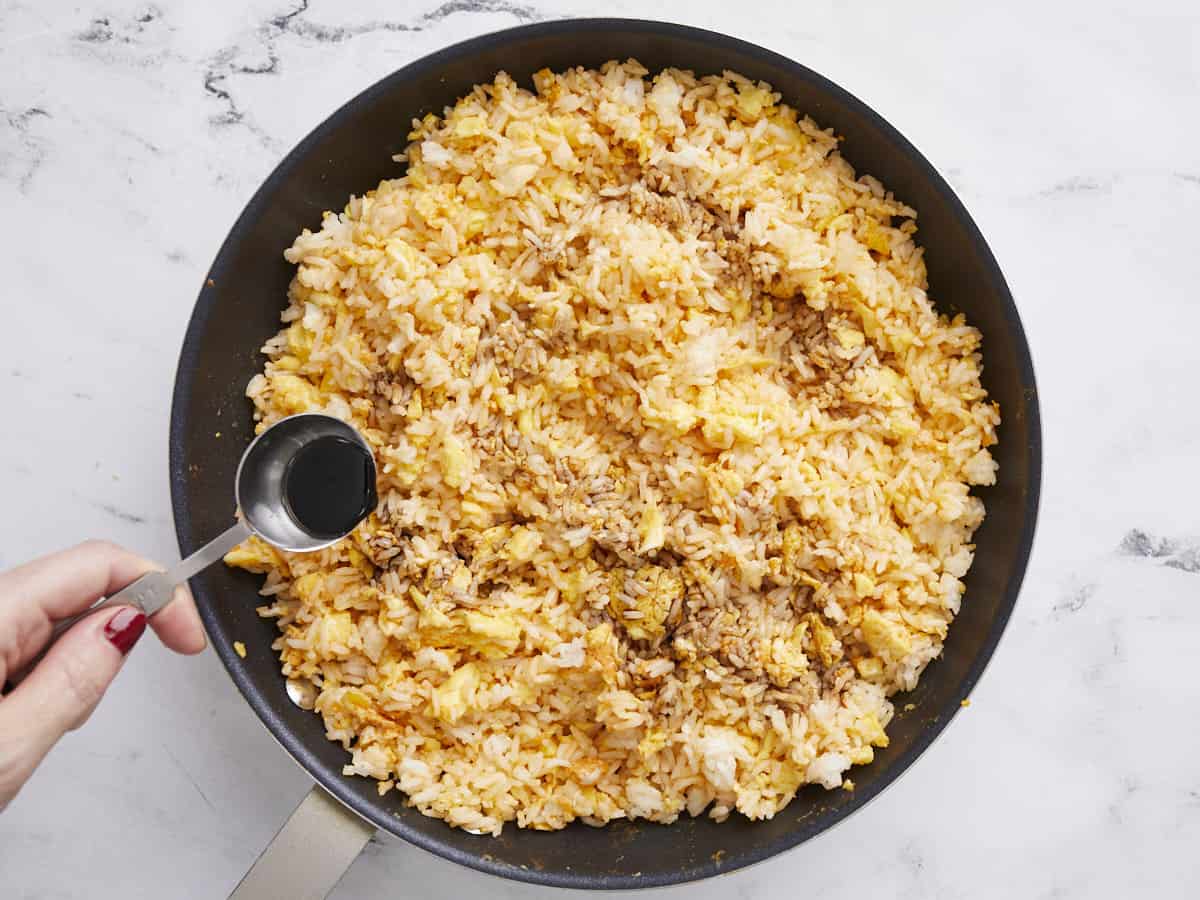
Add 2 Tbsp cooking oil to a large skillet and heat over medium-low. Once hot, add the eggs and lightly scramble. When they’re mostly set, add 2 tsp gochujang and stir to combine.

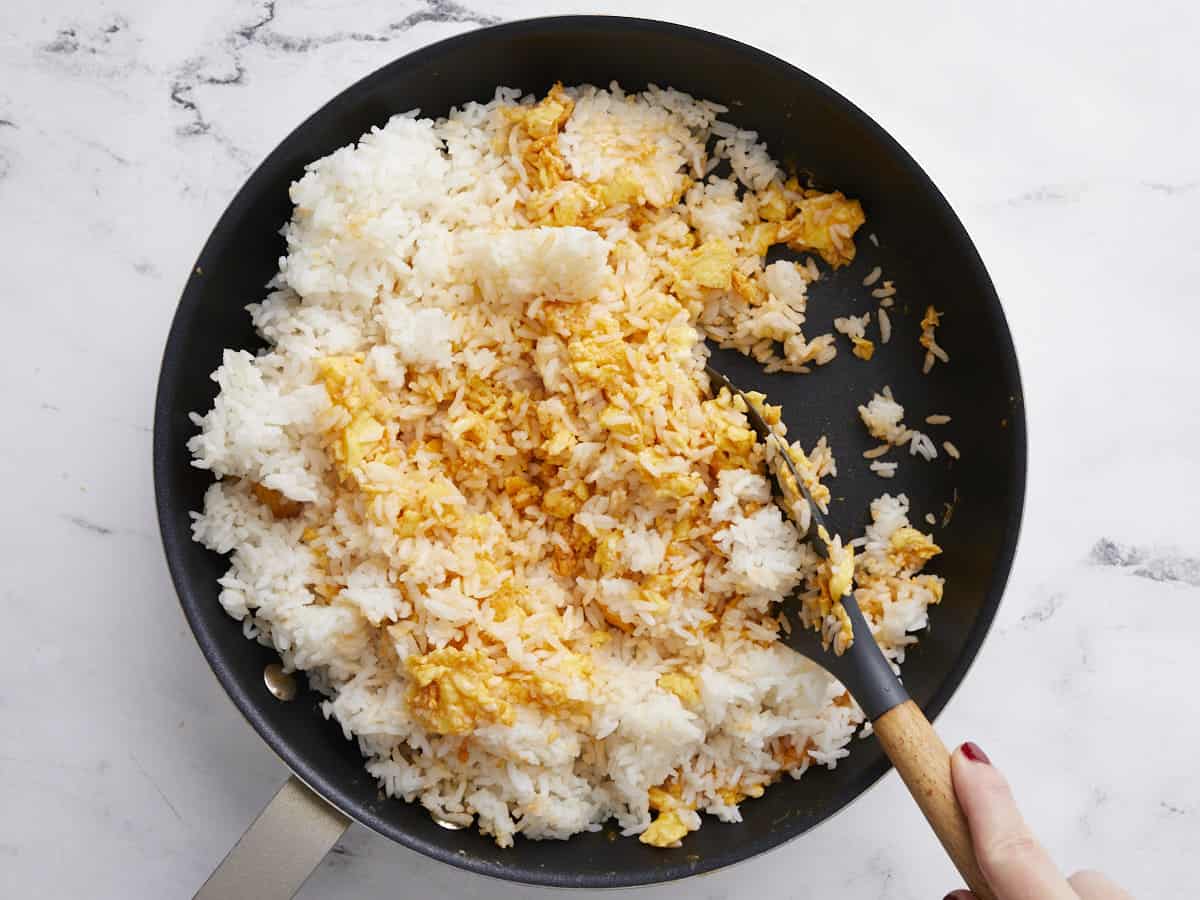
Rice being stirred into the eggs in the skillet.

Add four cups of warm pre-cooked rice and stir to combine.

Rice and eggs being seasoned with soy sauce.

Season the eggs and rice with 3 Tbsp soy sauce and 1 Tbsp toasted sesame oil. Fold to incorporate. Give the mixture a taste and add more gochujang if desired (I like it spicy, so I added more).

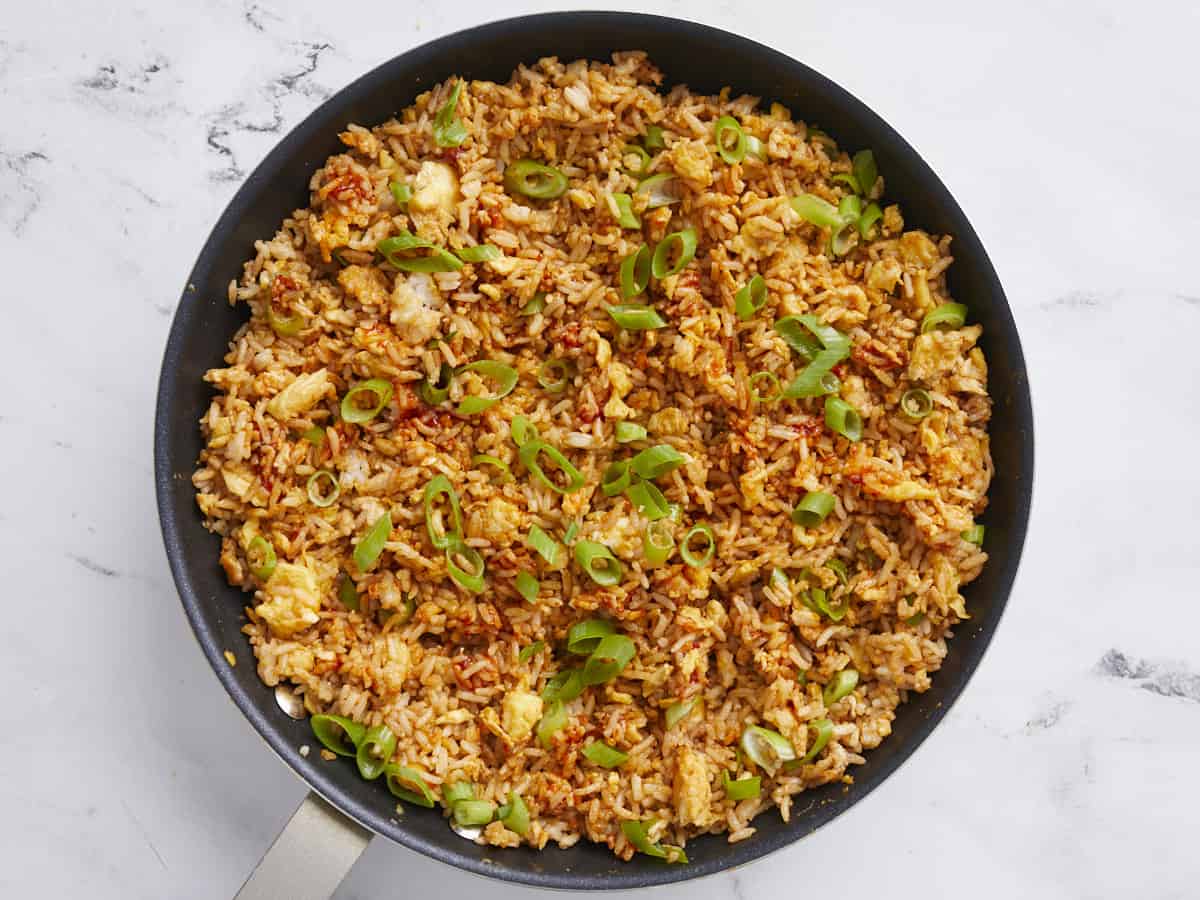
Finished scrambled eggs with rice garnished with sliced green onion.

Garnish with sliced green onions and serve!

Overhead view of a plate full of scrambled eggs with rice, a fork in the side.

The post Scrambled Eggs with Rice appeared first on Budget Bytes.

Chicken Hash Brown Casserole

Dive into a no-egg delight with our hearty chicken hash brown casserole! Featuring frozen hashbrowns, shredded cheese, and savory seasonings, this no-egg
The post Chicken Hash Brown Casserole appeared first on Salty Side Dish.

Dive into a no-egg delight with our hearty chicken hash brown casserole! Featuring frozen hashbrowns, shredded cheese, and savory seasonings, this no-egg

The post Chicken Hash Brown Casserole appeared first on Salty Side Dish.

Pumpkin Muffins

These pumpkin muffins are moist, subtly sweet, full of warm spices and have a hidden dollop of sweet cream cheese in the center.

The post Pumpkin Muffins appeared first on Budget Bytes.

Want a more budget-friendly way to get your pumpkin spice fix than going to Starbucks for a PSL? Then you’ve got to make a batch of these Pumpkin Muffins. These muffins are moist, subtly sweet, full of warm spices, and have a hidden dollop of sweet cream cheese in the middle. They’re totally indulgent and you get a whole batch of twelve pumpkin muffins for about the price of one pumpkin spice latte. Plus, they’re freezer-friendly so you thaw one at a time to have with your morning coffee from now until the end of pumpkin season! 🙌

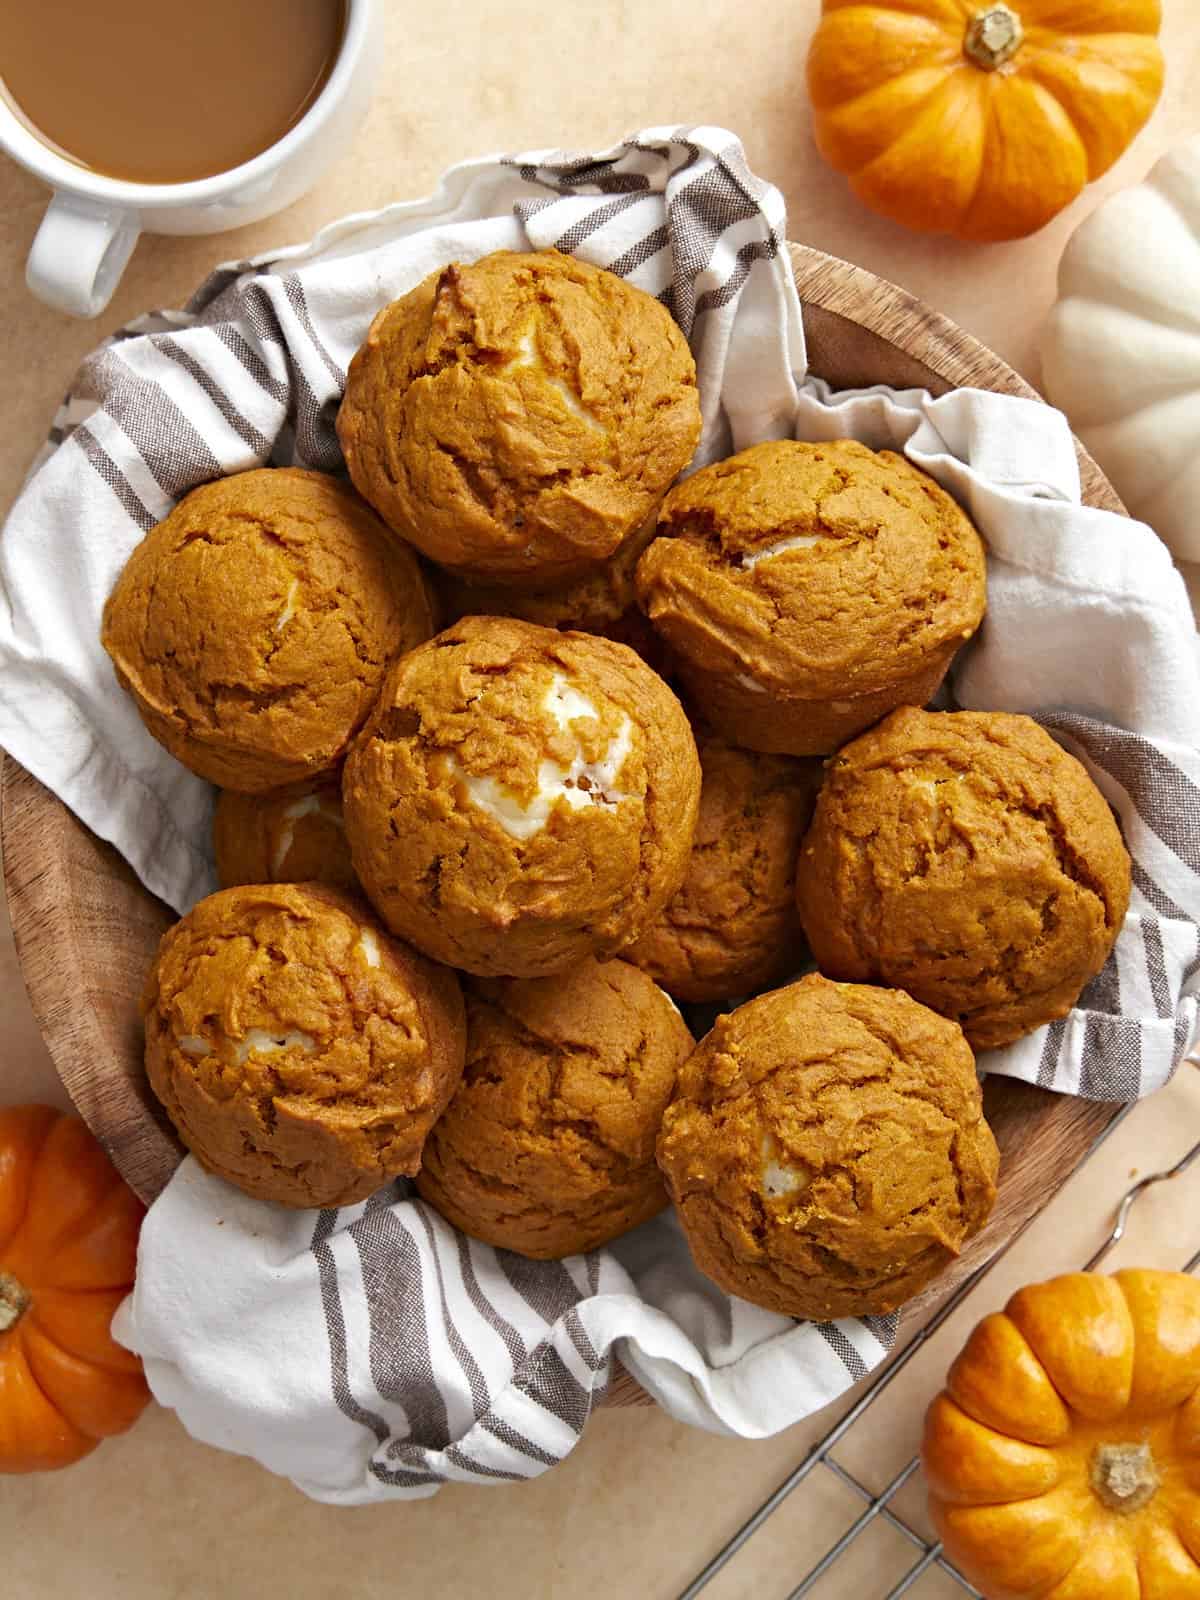
Overhead view of pumpkin muffins in a basket with a tea towel.

What Are Pumpkin Muffins Like?

Pumpkin purée is kind of magic because it can be added to both sweet and savory dishes, and it attracts moisture, which helps keep baked goods super soft, tender, and moist. The pumpkin flavor is slightly earthy with a subtle sweetness that, when paired with the warm pumpkin pie spice, is absolutely COZY. Bake up a batch of these pumpkin muffins on a weekend morning to make your house smell amazing and have the coziest of cozy fall experiences. 🥰

Ingredients for Pumpkin Muffins

Here’s what you’ll need to make this incredible pumpkin muffin recipe:

  • All-Purpose Flour: Flour gives the batter strength and body. It’s the vehicle for all that pumpkin-y goodness!
  • Baking Powder & Baking Soda: These muffins get a one-two punch of leavening to help them bake up light and airy, despite the density of the pumpkin purée.
  • Pumpkin Pie Spice and Vanilla: A simple mix of pumpkin pie spice and warm vanilla extract is all you need to flavor these delicious muffins.
  • White Sugar & Brown Sugar: A combination of white sugar and brown sugar gives the muffins sweetness with a slightly warm richness from the molasses in the brown sugar. The sugars also help keep the muffins moist.
  • Eggs: Eggs also help leaven baked goods when the water in the eggs turn to steam in the oven. When the egg solidifies as it bakes, it helps the muffins hold their puffed shape.
  • Pumpkin Purée: Pumpkin purée provides color, flavor, and moisture to the muffins. It’s the star of the show!
  • Cooking Oil: Oil helps the muffins stay moist and tender, and gives the muffin an extra rich flavor.
  • Cream Cheese & Sugar: A little dollop of sweetened cream cheese in the center of each muffin makes them extra special! But you can skip the cream cheese filling and make plain pumpkin muffins if you prefer.

How to Store Leftovers

This recipe makes a batch of 12 muffins, but that’s no reason to not make them for yourself if you live alone. Simply let the muffins cool completely to room temperature, then transfer to an air-tight food storage container. They’ll last about three days in the refrigerator, or you can freeze them for about three months. Thaw and reheat the frozen muffins with a quick 30 seconds in the microwave, or let them thaw at room temperature for about 15 minutes. Quick, easy, homemade muffins on demand!

Pumpkin Muffin Variations

You can take this basic pumpkin muffin batter and add so many different twists. Here are a couple of fun ideas for making this recipe your own:

  • Skip the cream cheese center and fold in chocolate chips
  • Top the muffins with a mixture of coarse sugar and cinnamon
  • Add chopped pecans to the batter or on top of each muffin
  • Make a quick cinnamon sugar glaze (powdered sugar + cinnamon + milk) to drizzle over the muffins (I did this during testing and while it didn’t look so pretty, it made them taste like cinnamon-coated donuts!)
  • Add a streusel topping
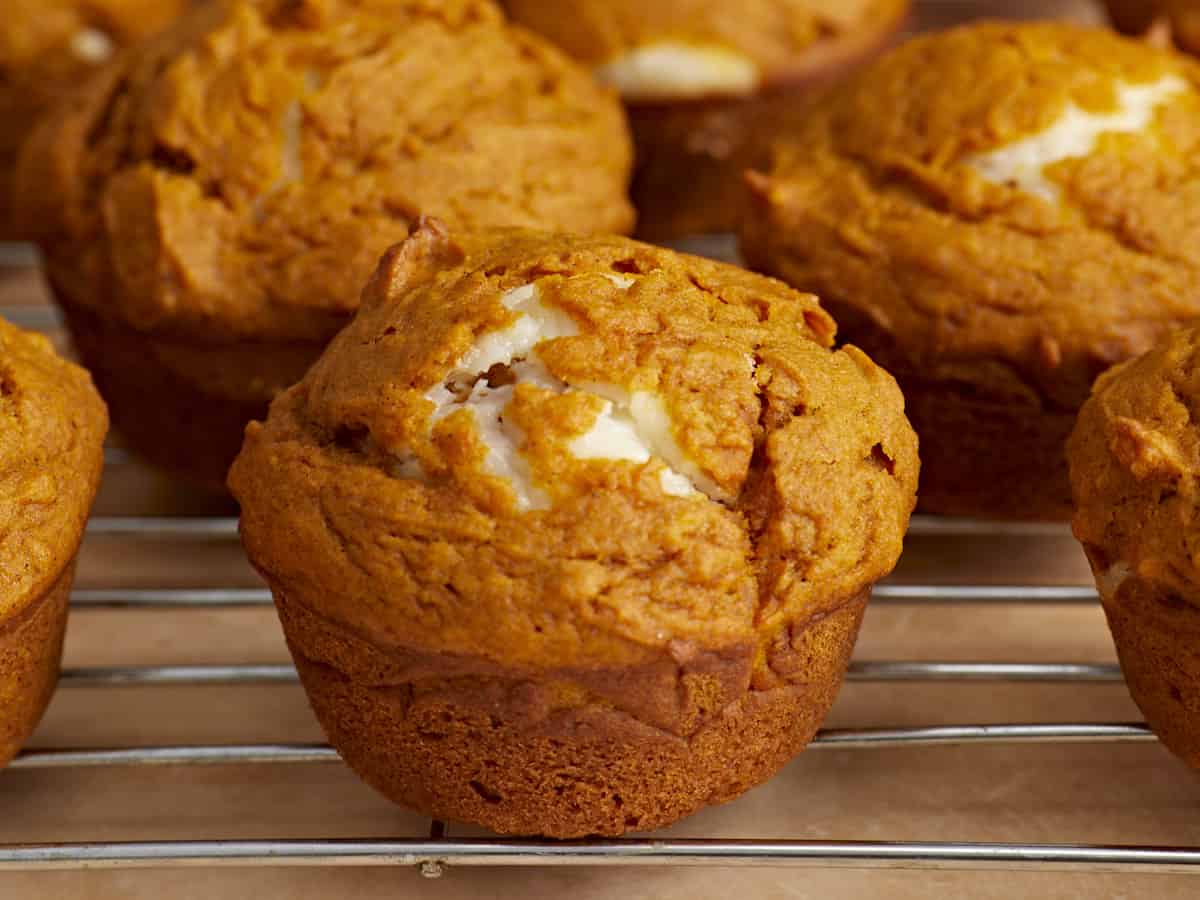
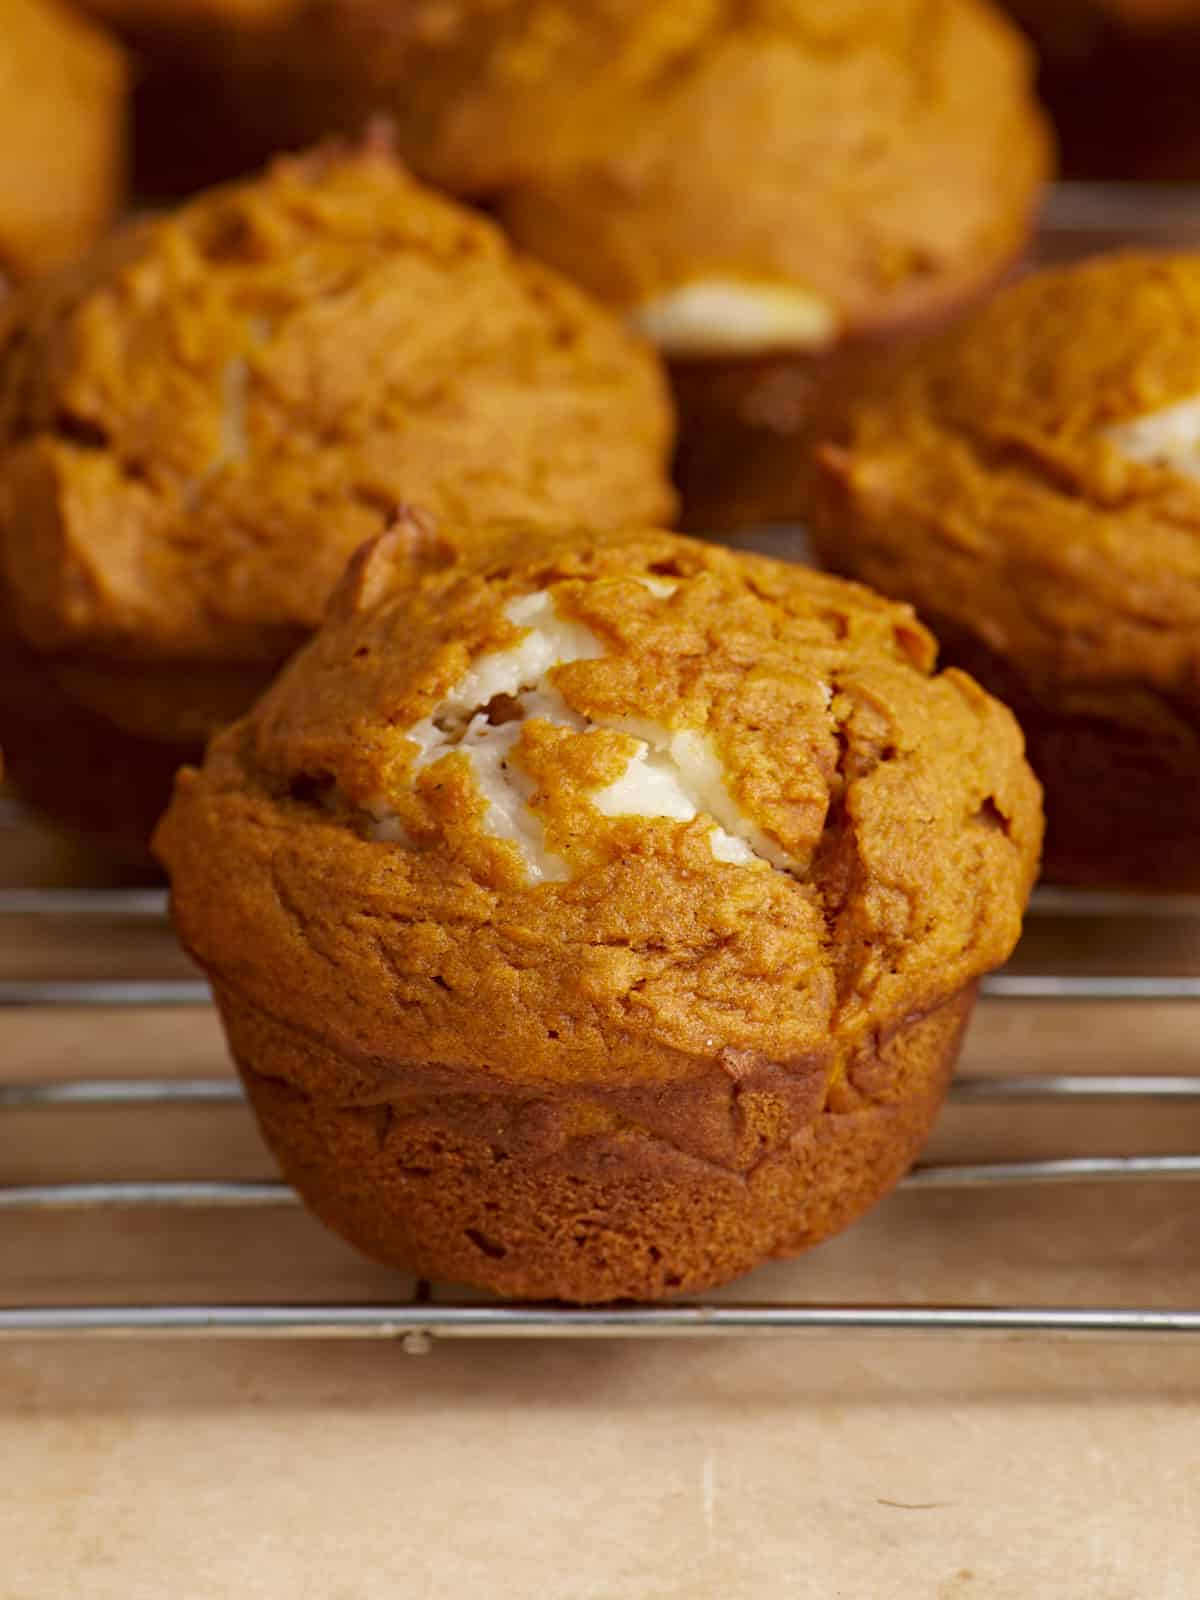
Side view of pumpkin muffins on a wire cooling rack.
Overhead view of a basket full of pumpkin muffins with coffee and pumpkins on the sides.
Print

Pumpkin Muffins

These pumpkin muffins are moist, subtly sweet, full of warm spices and have a hidden dollop of sweet cream cheese in the center. 
Course Breakfast, Dessert
Cuisine American
Total Cost $5.43 recipe / $0.45 each
Prep Time 15 minutes
Cook Time 24 minutes
Total Time 39 minutes
Servings 12 muffins
Calories 292kcal

Equipment

Ingredients

Cream Cheese Filling (optional)

  • 4 oz. cream cheese, room temperature $1.10
  • 2 Tbsp granulated sugar $0.04

Instructions

  • Preheat the oven to 350ºF. In a medium bowl, stir together the flour, baking powder, baking soda, salt, and pumpkin pie spice.
  • In a separate large bowl, whisk together the eggs, granulated sugar, brown sugar, pumpkin purée, oil, and vanilla extract.
  • Pour the bowl of dry ingredients into the bowl of wet ingredients and stir together just until combined. A few small lumps are okay, just try not to overmix.
  • In a separate small bowl, stir together the cream cheese and sugar for the cream cheese filling.
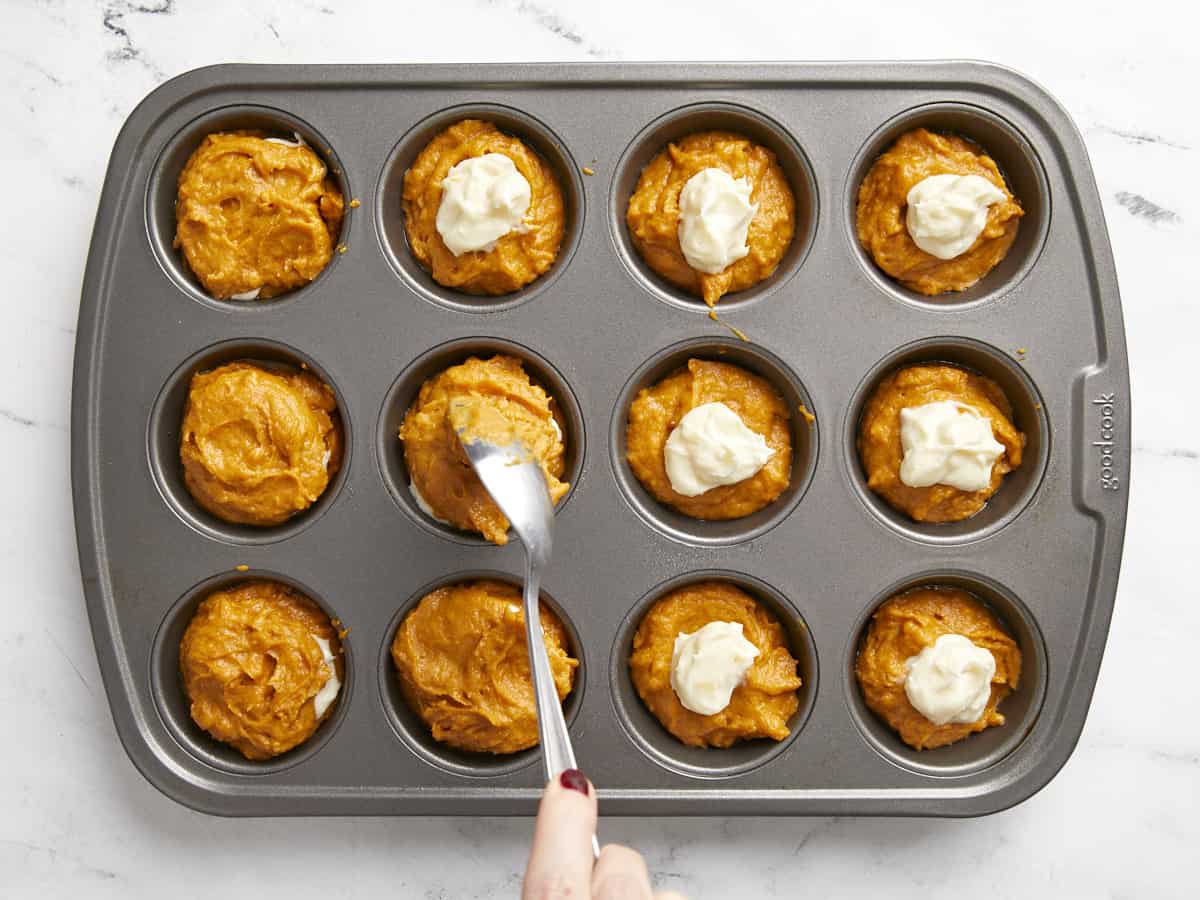
  • Grease a muffin tin or line with muffin liners. Fill each well in the muffin pan about ⅓ full. Add a small dollop of the cream cheese to each well, in the center of the muffin batter. Divide the remaining muffin batter between each well, covering the cream cheese. Each well in the muffin pan should be filled about ¾ full.
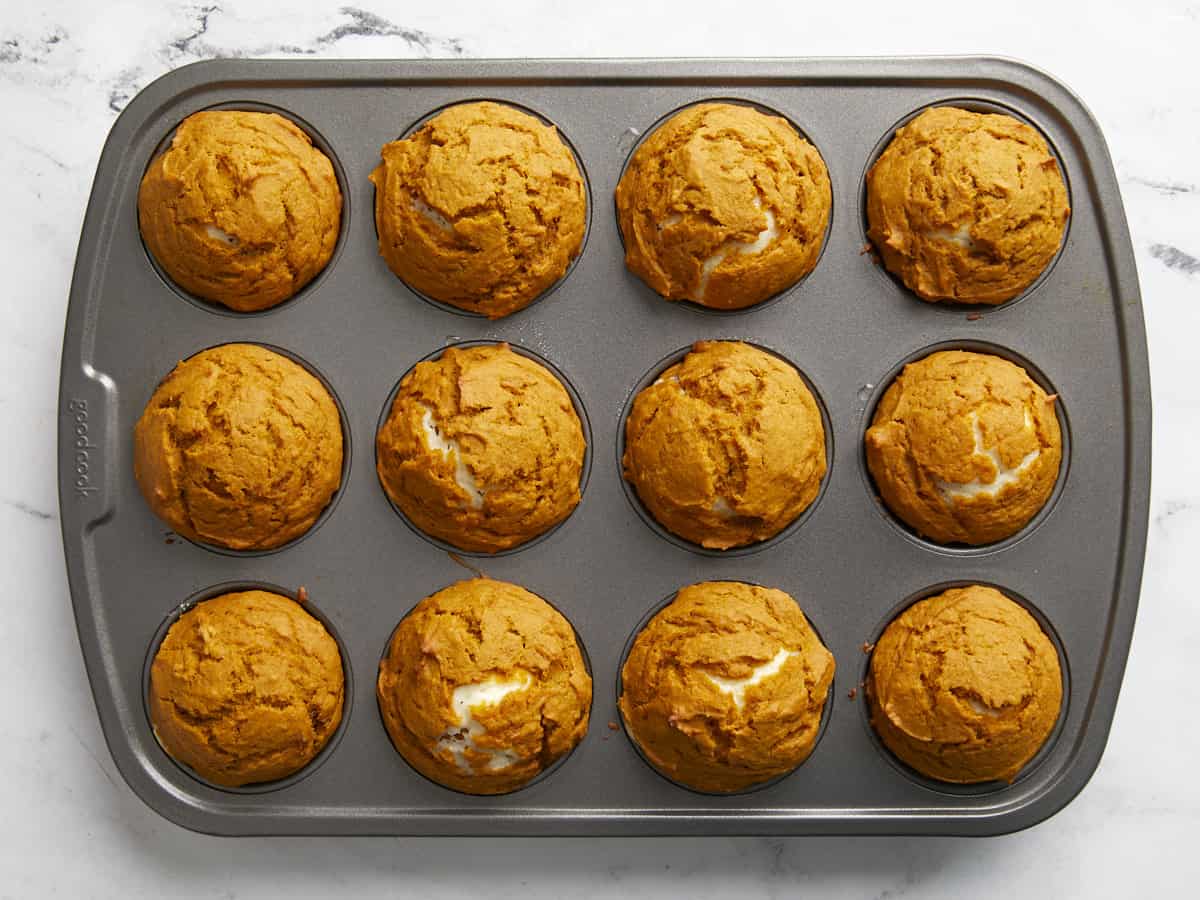
  • Bake the muffins for about 24 minutes, or until fully puffed in the center and slightly cracked on top.
  • Remove the muffins from the oven and let them cool for about 5 minutes before gently removing them from the muffin pan and allowing them to finish cooling on a wire rack.

See how we calculate recipe costs here.

Nutrition

Serving: 1muffin | Calories: 292kcal | Carbohydrates: 39g | Protein: 4g | Fat: 14g | Sodium: 224mg | Fiber: 2g
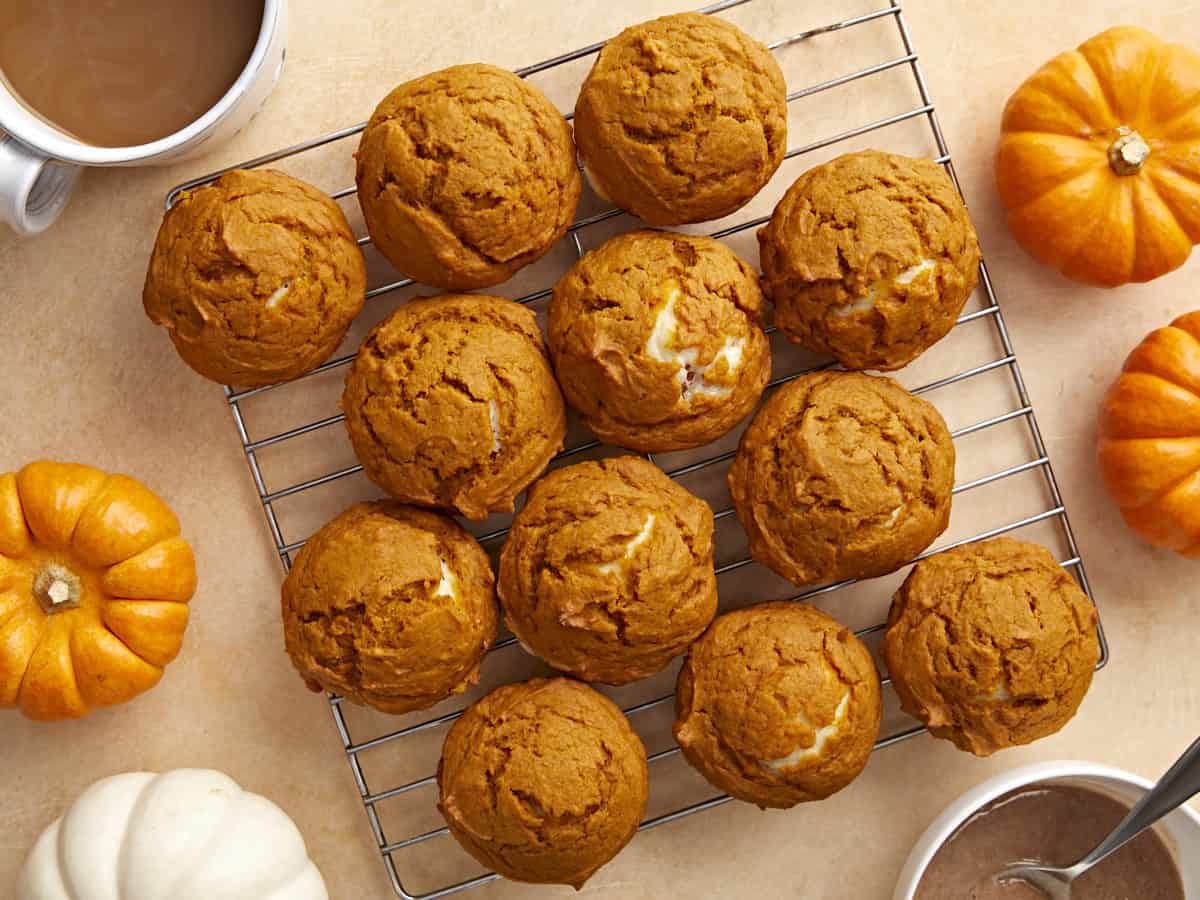
Overhead view of pumpkin muffins on a wire cooling rack.

How to Make Pumpkin Muffins – Step by Step Photos

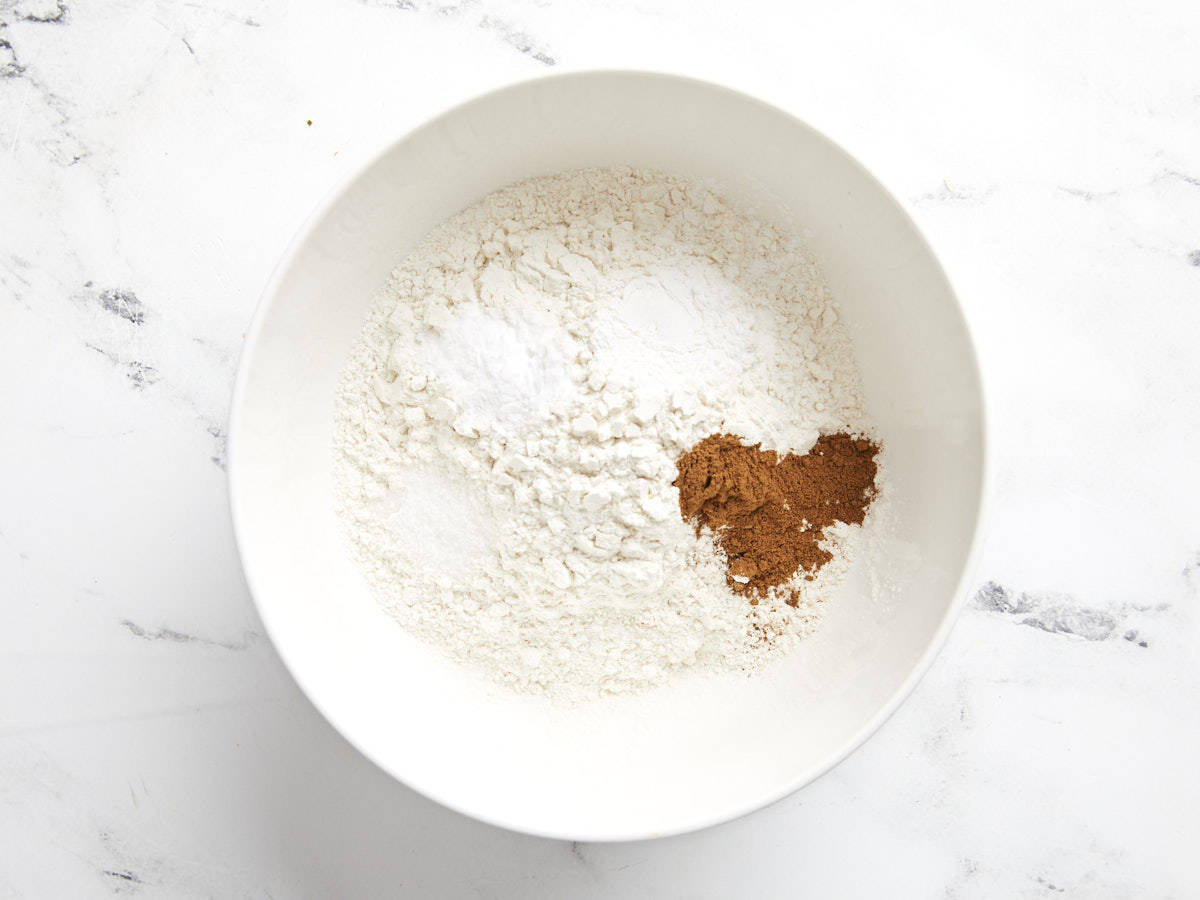
Dry ingredients for pumpkin muffins in a bowl, not mixed together.

Preheat the oven to 350ºF. In a medium bowl, stir together 2 cups all-purpose flour, 1 tsp baking powder, ½ tsp baking soda, ½ tsp salt, and 1 tsp pumpkin pie spice until evenly combined.

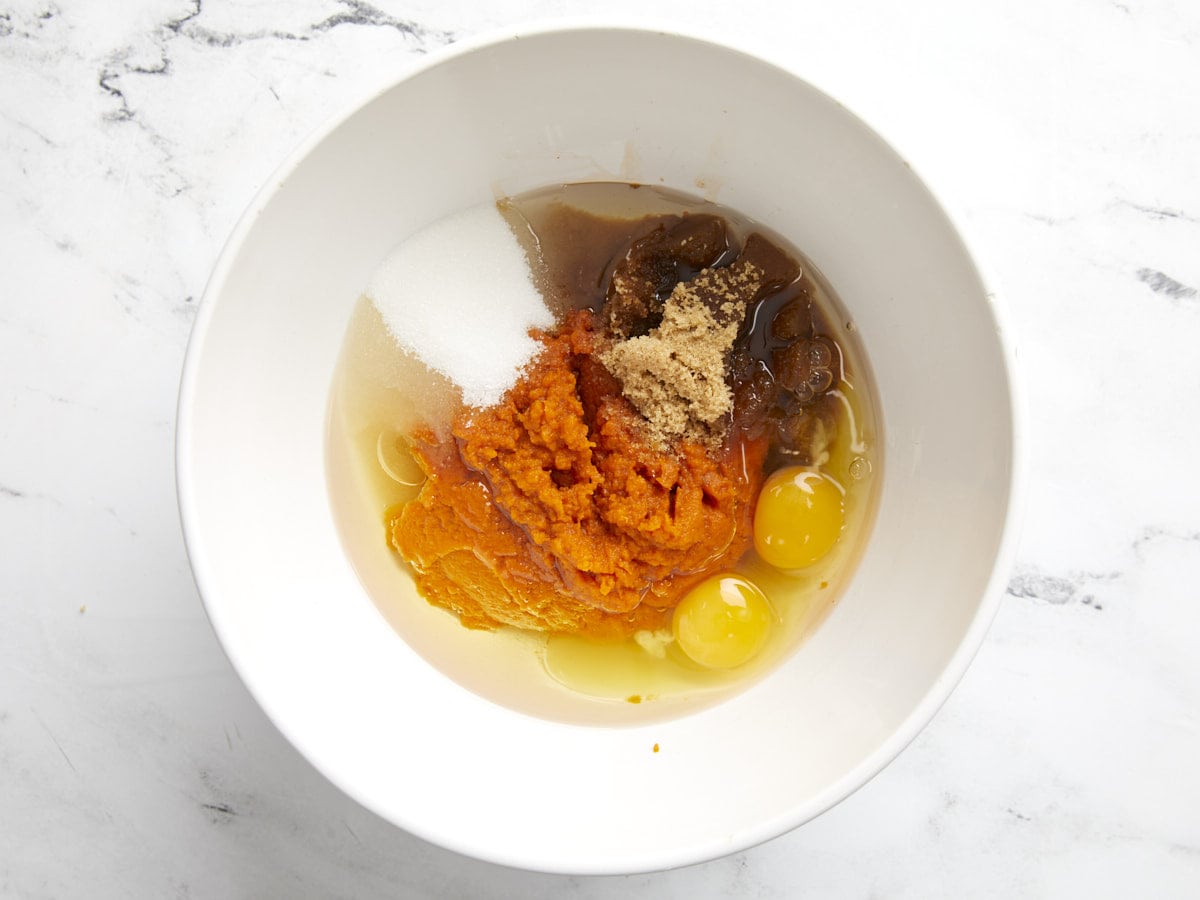
Wet ingredients for pumpkin muffins in a bowl, not stirred together.

In a separate large bowl, stir together one 15oz. can of pumpkin purée, 2 large eggs, ½ cup white sugar, ½ cup brown sugar, ½ cup cooking oil, and 1 tsp vanilla extract until smooth.

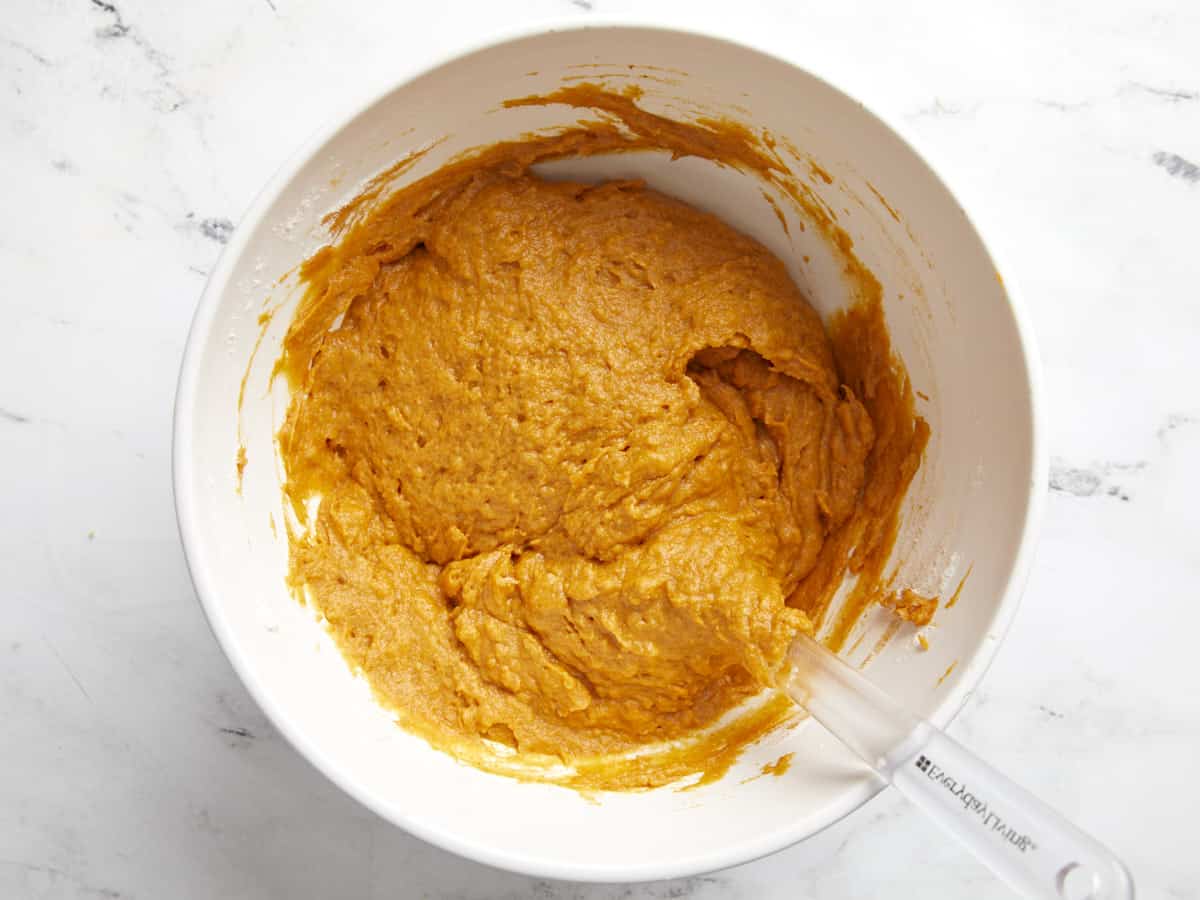
Pumpkin muffin batter mixed together in the bowl.

Add the dry ingredients to the bowl of wet ingredients and stir them together just until combined. A few small lumps are okay, just be careful not to over-stir.

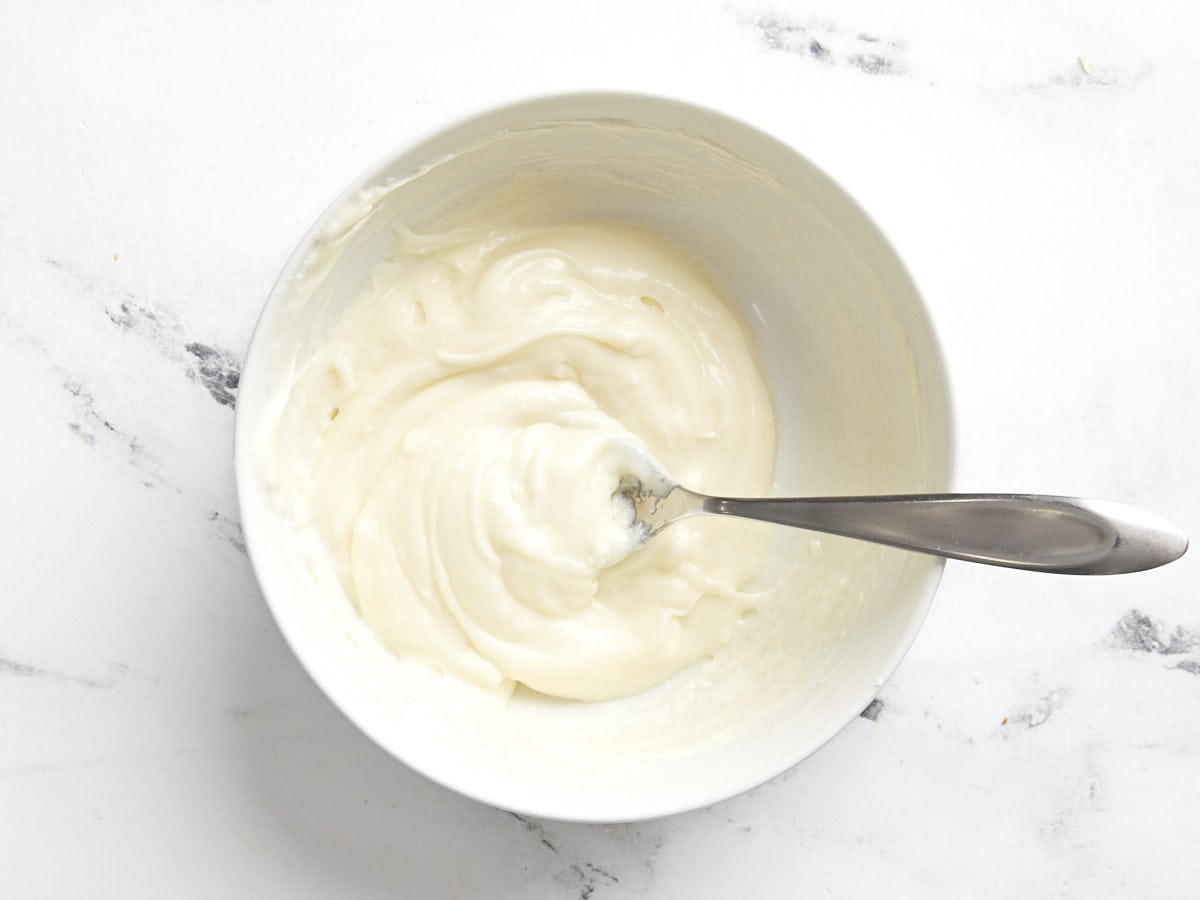
Cream cheese filling mixed in a bowl with a spoon.

To make the cream cheese filling, stir together 4oz. room temperature cream cheese and 2 Tbsp white sugar.

Muffin tin being filled with pumpkin batter and cream cheese filling.

Grease a muffin tin or line with paper liners. Fill each well in the tin about ⅓ full with pumpkin batter, then add a dollop of the sweetened cream cheese on top. Fill the rest of the way with the remaining pumpkin batter. Or, if choosing not to do the cream cheese filling, simply divide the pumpkin batter among the 12 wells of the muffin tin.

Baked pumpkin muffins in the muffin tin.

Bake the muffins in the preheated 350ºF oven for about 24 minutes, or until the muffins are fully puffed in the center and cracked slightly, and a little golden on the edges. Let them cool for about 5 minutes in the muffin pan before gently transferring them to a wire rack to finish cooling.

Close up side view of the pumpkin muffins cooling on a wire rack.

The post Pumpkin Muffins appeared first on Budget Bytes.
Homemade Applesauce

A simple & delicious Homemade Applesauce recipe with no added sugar, four simple ingredients, and lots of cozy fall flavor!

The post Homemade Applesauce appeared first on Budget Bytes.
I always get a warm and cozy feeling anytime I make homemade applesauce. The smell of apples and cinnamon spreads through the kitchen as it cooks and soon the scent of Fall has filled the entire house. Fall is also the best time to make this homemade applesauce recipe because apples are in season so there are a lot of varieties to choose from, their flavor is at their peak, and they’re inexpensive. Sure you can buy store-bought applesauce, but trust me it’s no comparison to the taste of homemade applesauce!

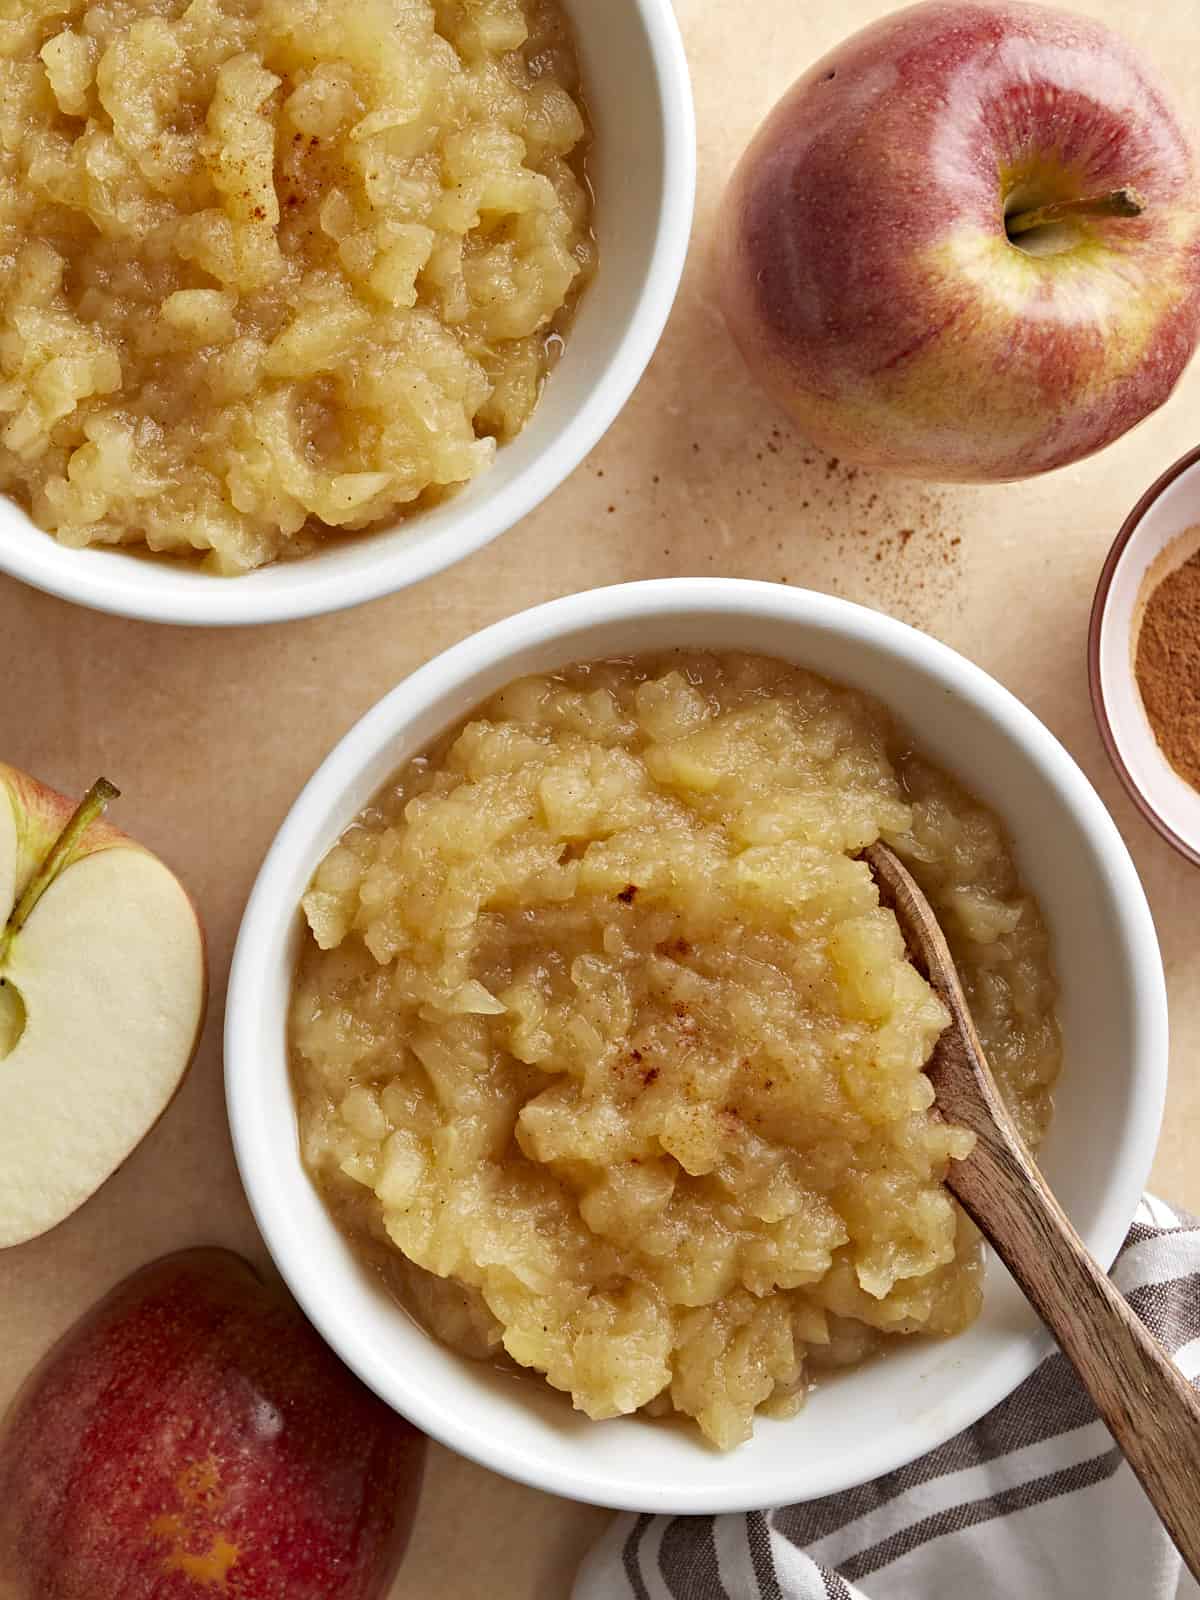
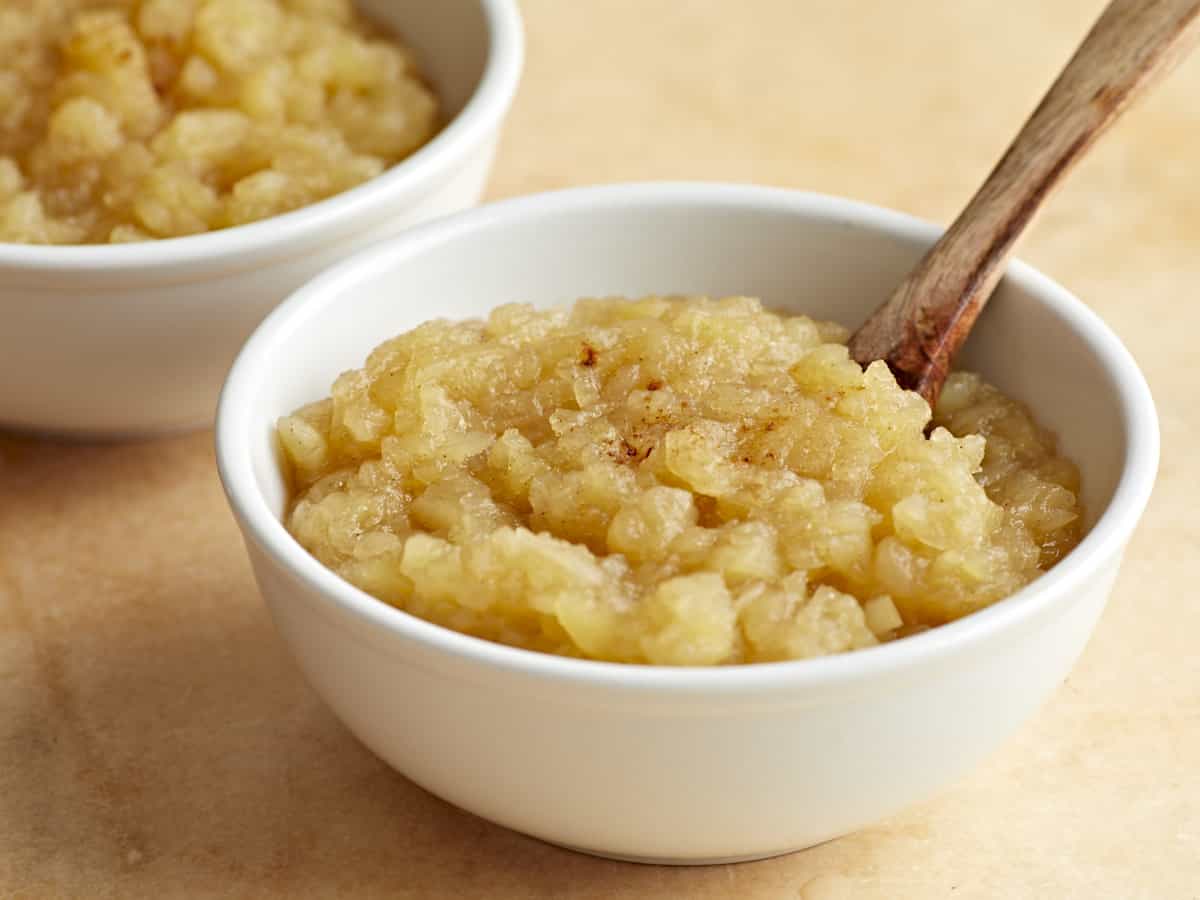
Two small bowls of homemade applesauce with apples and cinnamon on the side.

Ingredients for Homemade Applesauce

You only need 4 simple ingredients to make this easy homemade applesauce recipe:

  • Apples – Of course, there are lots of different apples to choose from when making applesauce, but in general you’ll want to stick with sweet or semi-sweet varieties. If you choose a tart apple, like granny smith, you may want to add some additional sugar. We used Gala apples for this recipe.
  • Water –  Water is used to cook the apples. Using water instead of apple juice or apple cider allows the fresh flavor of the apples to shine through!
  • Ground cinnamon – A touch of ground cinnamon goes a long way and tastes great with cooked apples. It also gives the applesauce just a hint of flavor. 
  • Lemon juice – A little lemon juice brightens up the applesauce and helps the flavors pop. Don’t skip this one!

That’s it! Perfect homemade applesauce and no added sweetener needed.

What Kind of Apples Are Best For Making Applesauce?

You can honestly use several different types of apples to make applesauce. But to keep from having to add any sugar or sweetener, I suggest using a sweeter or semi-sweet variety of apple, like Fuji, Gala, Pink Lady, or Honeycrisp. You can use just one kind or a combination of 2 varieties if you want. And, of course, if you’re making your applesauce during the fall season, you’ll find the best deals and the sweetest apples during this time of year. ;)

Should You Peel The Apples?

This is a great question and it honestly depends on personal preference. I like to peel my apples when making applesauce in order to get a smoother consistency. But it’s definitely not required. If you’re short on time, just give them a good wash and leave the peel on.

How To Store Homemade Applesauce?

Homemade applesauce stores very well in the refrigerator and the freezer. Just store any leftover applesauce in an airtight container in the refrigerator for 4-5 days or in the freezer for up to 3 months. To thaw the applesauce, let it sit in the refrigerator overnight.

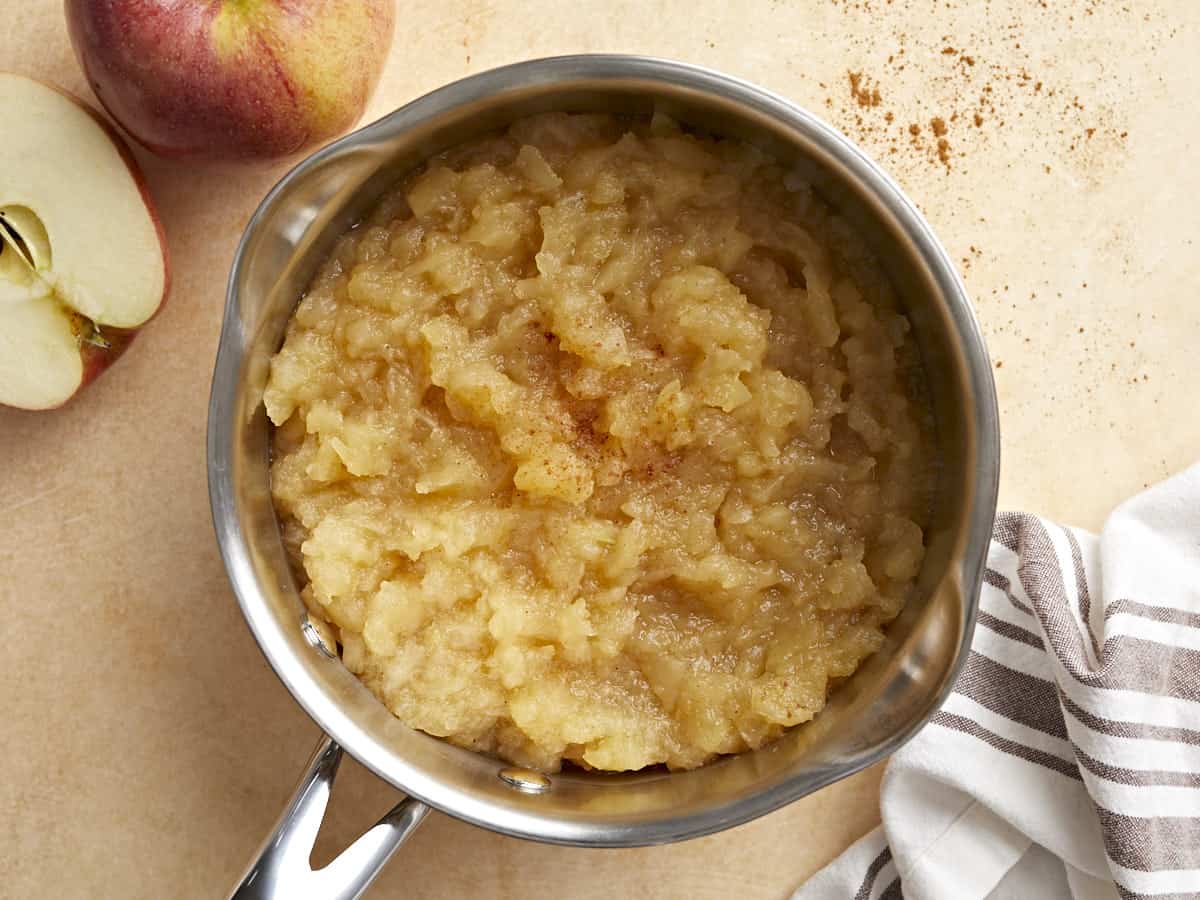
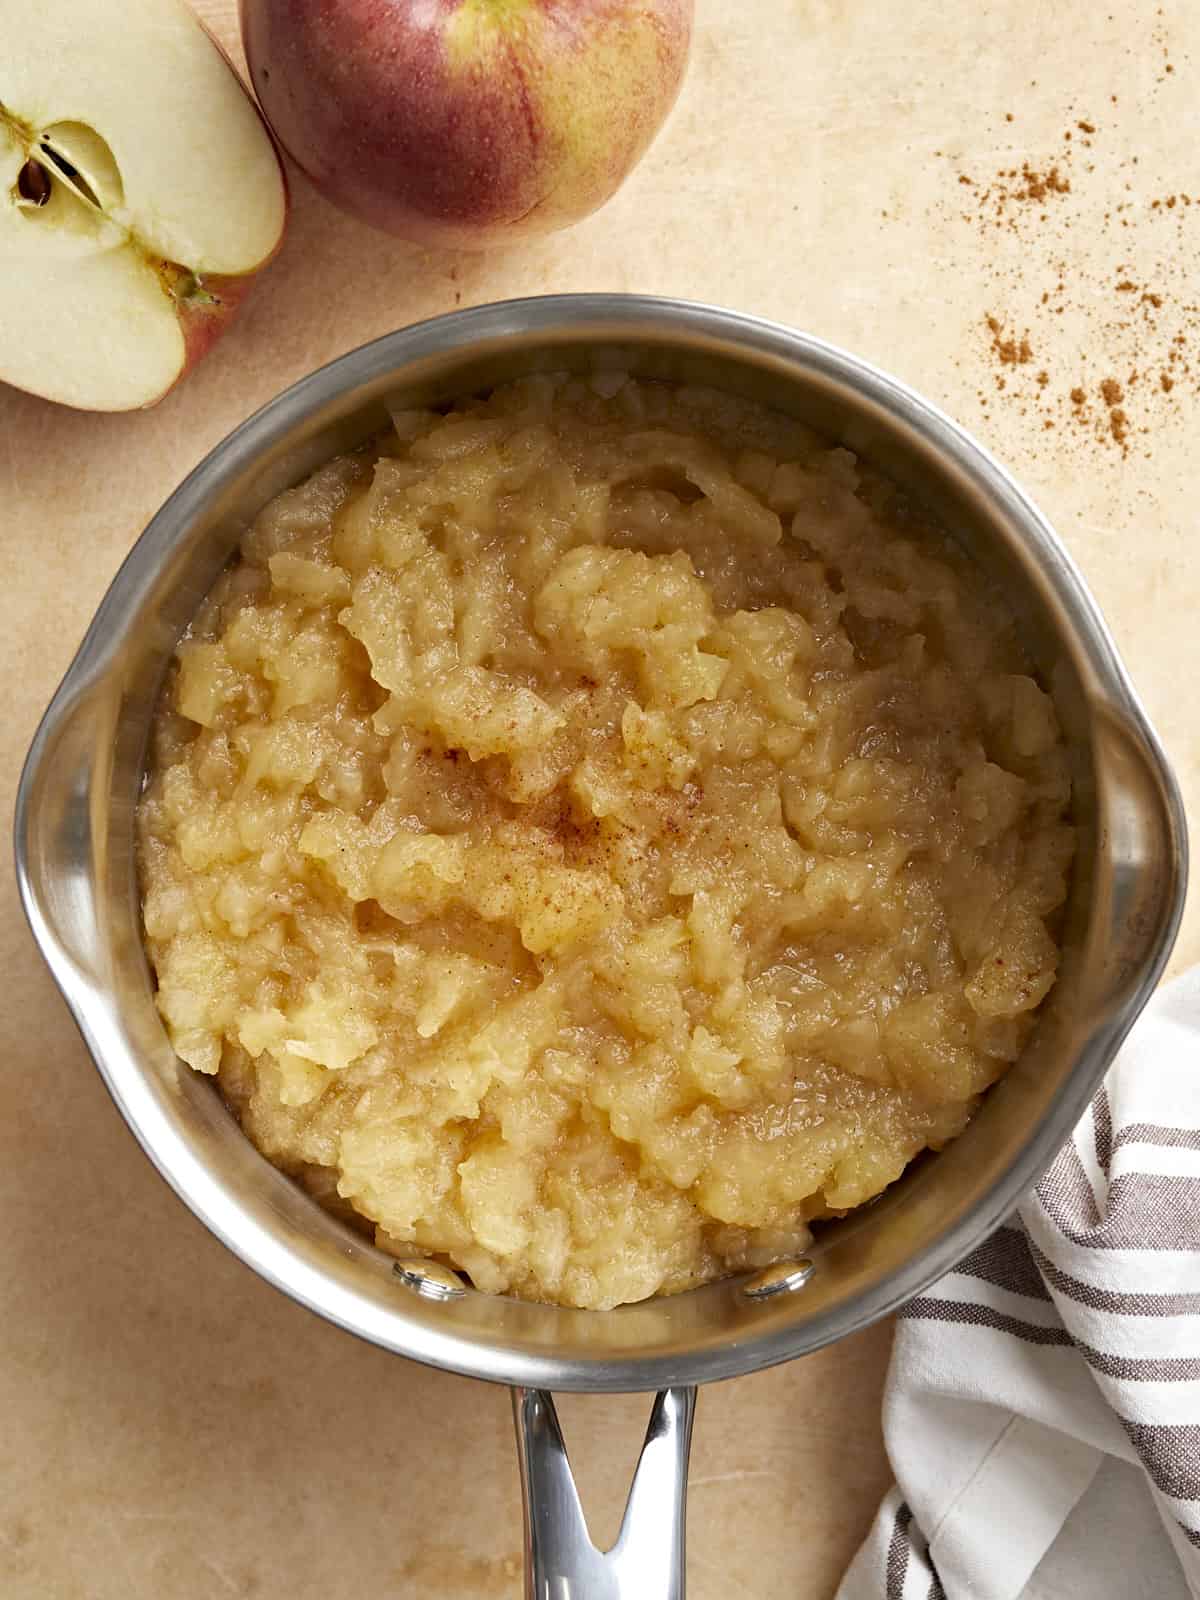
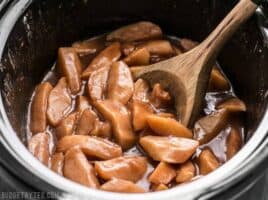
Homemade applesauce in a small saucepan with apples and a napkin on the side.
Two small bowls of homemade applesauce with apples and cinnamon on the side.
Print

Homemade Applesauce

A simple & delicious Homemade Applesauce recipe with no added sugar, four simple ingredients, and lots of cozy fall flavor!
Course Breakfast, Dinner, Lunch
Cuisine American
Total Cost $5.14 recipe / $0.85 serving
Prep Time 10 minutes
Cook Time 20 minutes
Total Time 30 minutes
Servings 6
Calories 190kcal

Equipment

Ingredients

  • 6 large apples (about 3 lbs.) $5.07
  • 1/4 tsp ground cinnamon $0.03
  • 3/4 cup water $0.00
  • 2 tsp lemon juice $0.04

Instructions

  • Wash, peel, and remove the core from the apples. Chop the apples into small 3/4 inch chunks.
  • Add the chopped apples, ground cinnamon and water to a medium pot and place a lid on top. Heat the apples over medium, allowing them to come up to a simmer. Continue to simmer the apples for 15-20 minutes, stirring occasionally, until they are tender. The total cook time will vary depending on the variety of apple used.*
  • Remove the pot from heat. Mash the apples with a potato masher inside the pot for a chunky texture. Or allow the apples to cool slightly and blend with an immersion blender or carefully inside a blender for a smoother texture.
  • Add the lemon juice to the applesauce and stir to combine. Serve homemade applesauce warm or chilled in the refrigerator.

See how we calculate recipe costs here.

Notes

* If the applesauce is too thick you can add a little more water, or if it’s too runny it can be simmered a little longer, without a lid, to thicken.

Nutrition

Serving: 0.5cups | Calories: 190kcal | Carbohydrates: 51g | Protein: 1g | Fat: 1g | Sodium: 7mg | Fiber: 9g
Side view of two bowls of homemade applesauce.

How to Make Homemade Applesauce – Step by Step Photos

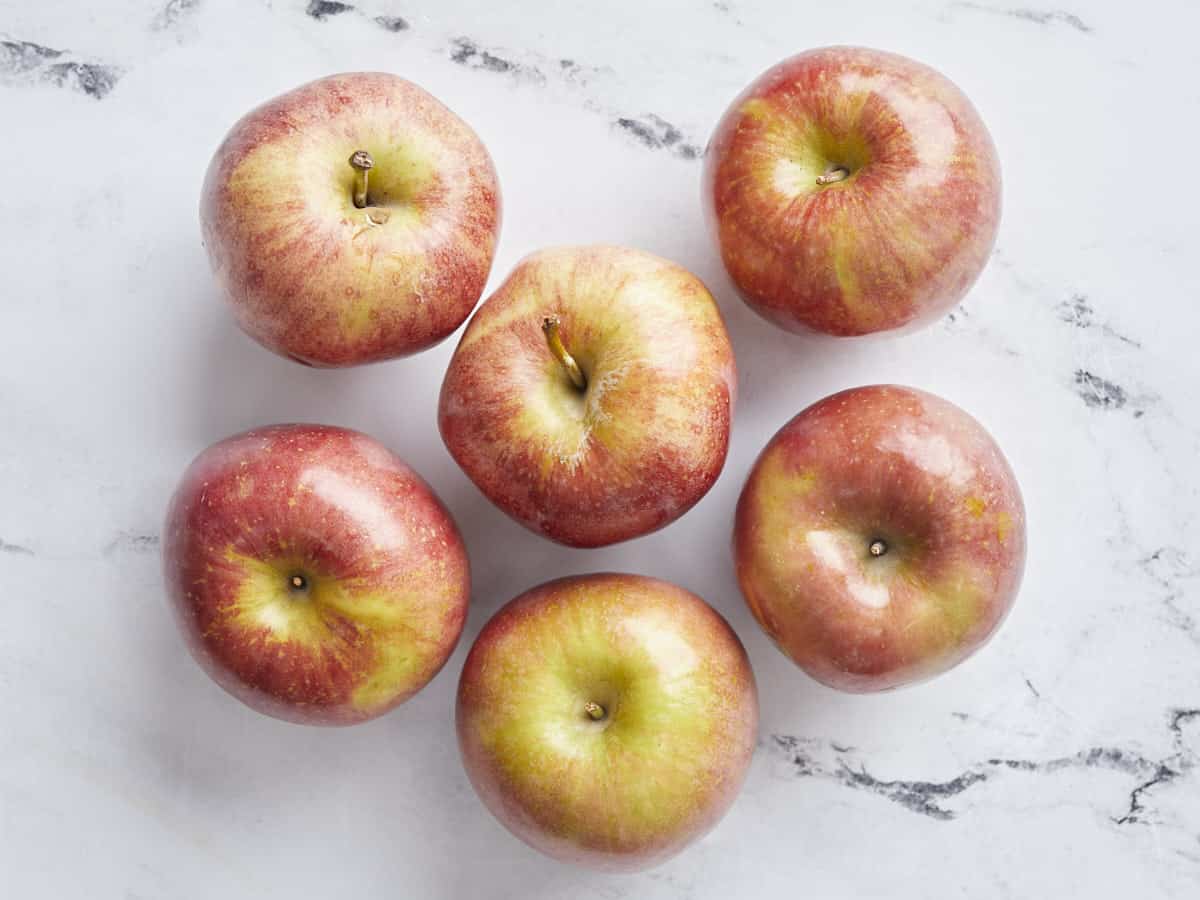
Overhead view of six apples on a counter.

Wash, peel, and remove the core from 6 apples. Chop the apples into 3/4 inch small chunks.

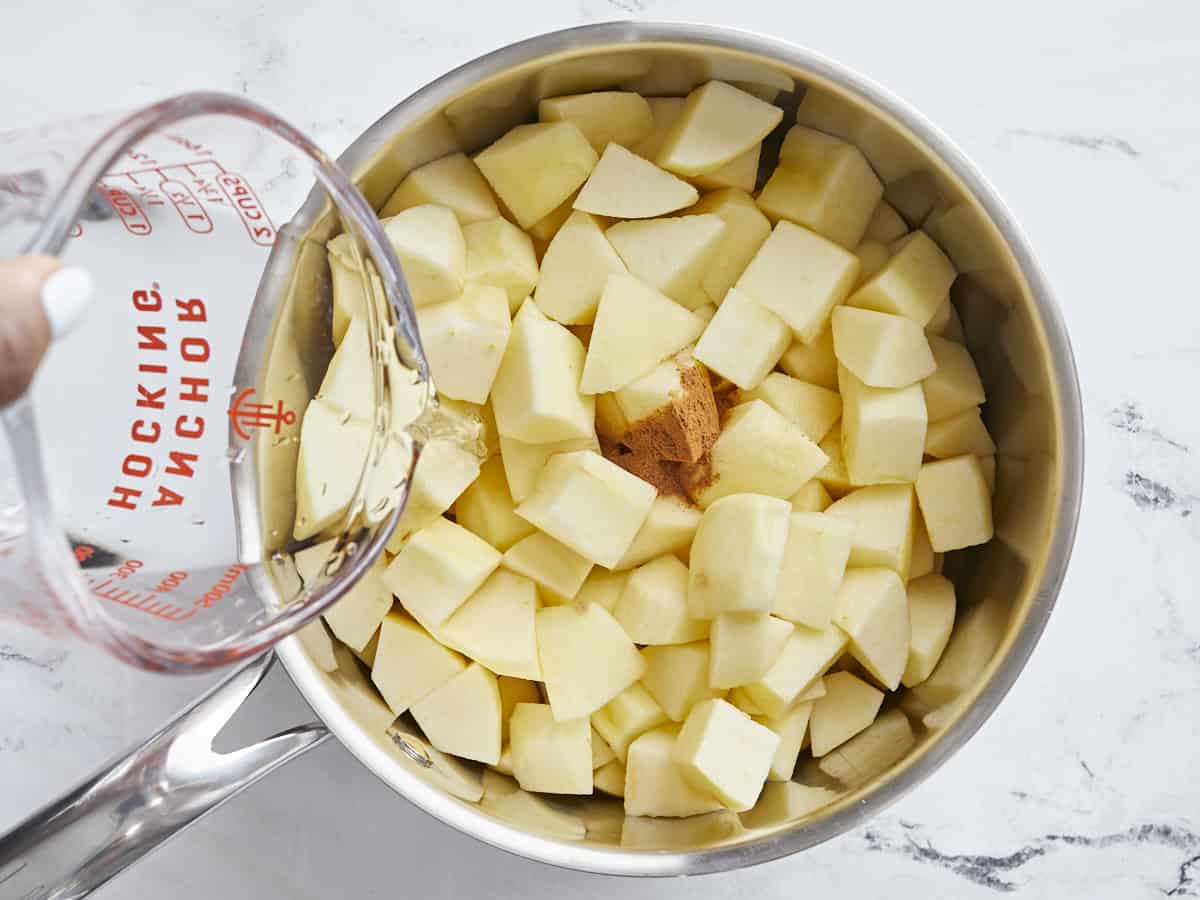
Overhead view of peeled and diced apples in a small saucepan with cinnamon and water being poured on top.

Add the chopped apples, 1/4 tsp ground cinnamon, and 3/4 cup of water to a medium pot and place a lid on top. Heat the apples over medium heat, allowing them to come up to a simmer. Continue to simmer the apples for 15-20 minutes, stirring occasionally, until they are tender. The total cook time will vary depending on the variety of apple used.

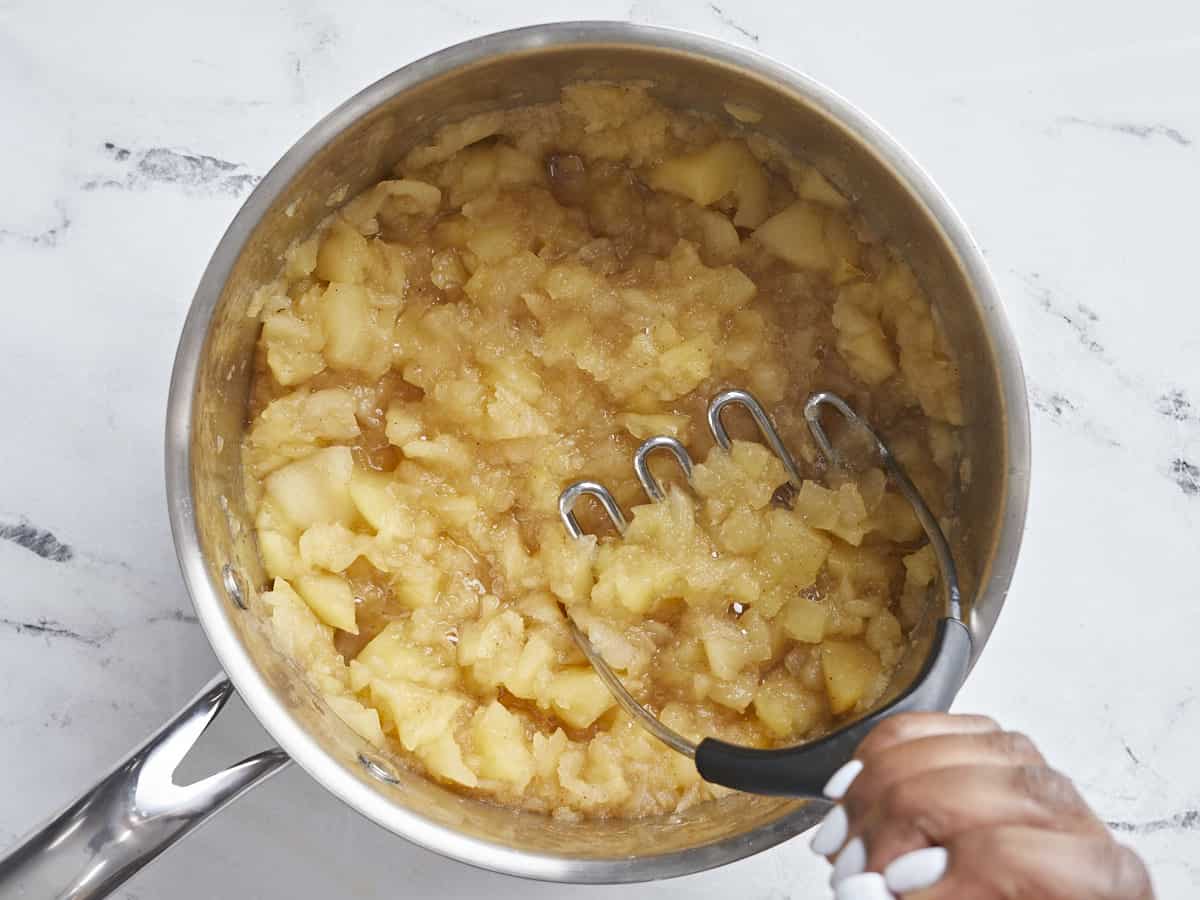
Overhead view of cooked apples in a saucepan being mashed with a potato masher.

Remove the pot from heat. Mash the apples with a potato masher inside the pot for a chunky texture. Or allow the apples to cool slightly and blend with an immersion blender or carefully inside a blender for smoother texture.

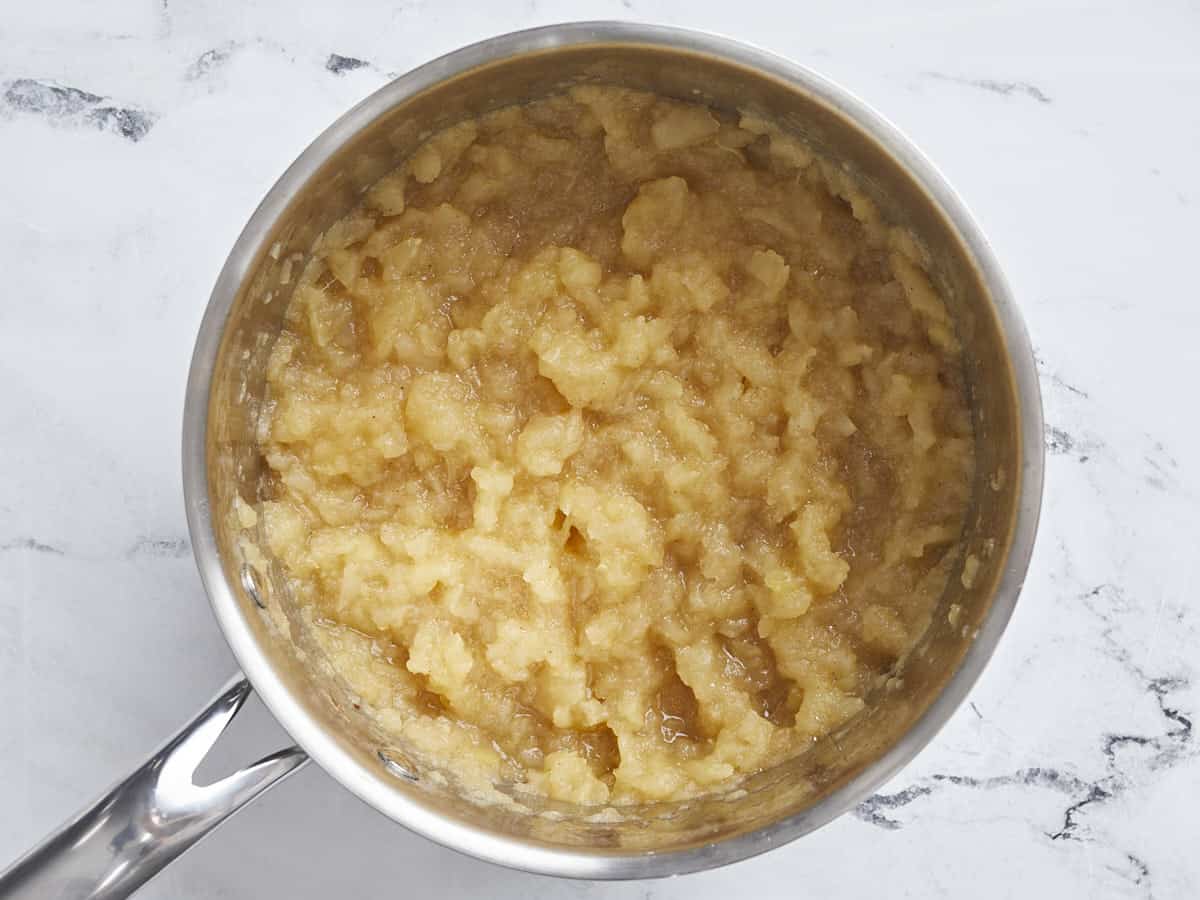
Overhead view of mashed homemade applesauce in a small saucepan.

Add the 2 tsp of lemon juice to the applesauce and stir to combine. Serve homemade applesauce warm or chilled in the refrigerator. Enjoy!

Homemade applesauce in a small saucepan with apples and a napkin on the side.

The post Homemade Applesauce appeared first on Budget Bytes.
What to Eat Christmas Morning (12 Recipes)

A dozen Christmas morning breakfast ideas for anyone trying to figure out what to cook and eat on Christmas morning.

Continue reading What to Eat Christmas Morning (12 Recipes) on 101 Cookbooks

This is for anyone who needs some great Christmas morning breakfast ideas. After the blizzard of wrapping paper quiets, a cozy (but casual!) brunch is one of my favorite Christmas traditions. Everyone is in good spirits and happy to celebrate together. My family typically does a Christmas dinner later in the day, but having a little something special in the morning is always welcome. That said, preparing for the holidays can be tiring, and everyone appreciates recipes you’re able to prep ahead of time. Thankfully, a lot of breakfast recipes fit the bill. Here are a dozen recipes to consider for Christmas morning – a little mix of both naughty and nice!

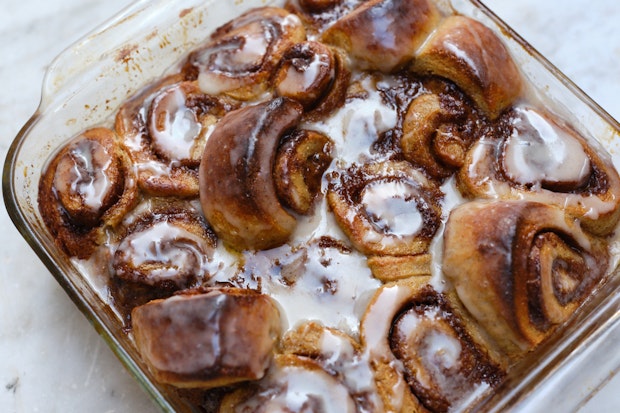
Cinnamon Rolls as part of a list of Christmas morning recipe ideas

1. Cinnamon RollsThis is a great recipe to prep a day ahead. And even if you’ve never baked cinnamon rolls, it is a totally doable recipe. Start a Christmas morning cinnamon bun tradition this year. These are classic, homemade cinnamon rolls made from a favorite cardamom-flecked, buttery, yeast dough with a generous cinnamon-sugar swirl.

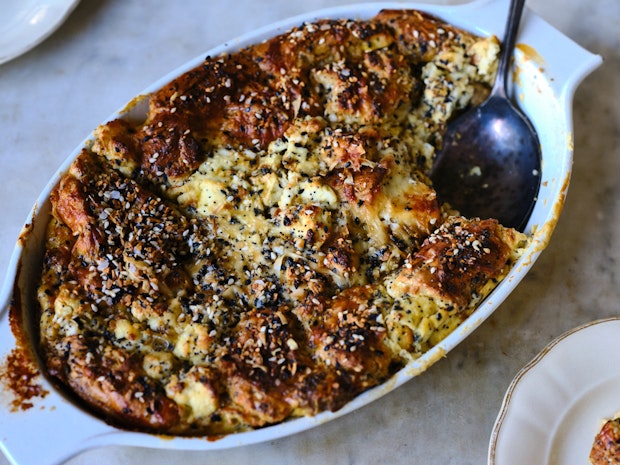
breakfast casserole as as part of list of Christmas morning breakfast recipes

2. Everything Bagel Breakfast Casserole – If you’re looking for a great breakfast casserole, this has you covered. It’s a deep-dish merging of grated cheese, bagels, eggs, plant-based sausage and the crunch and savoriness of everything bagel seasoning.

What to Eat Christmas Morning (12 Recipes)

3. The Best Waffle RecipeMy friends and family might be tired of these. But they are special waffles. So good. These waffles are a year-round go-to, and perfect for Christmas morning. Setting up a waffle bar with toppings is always a hit.

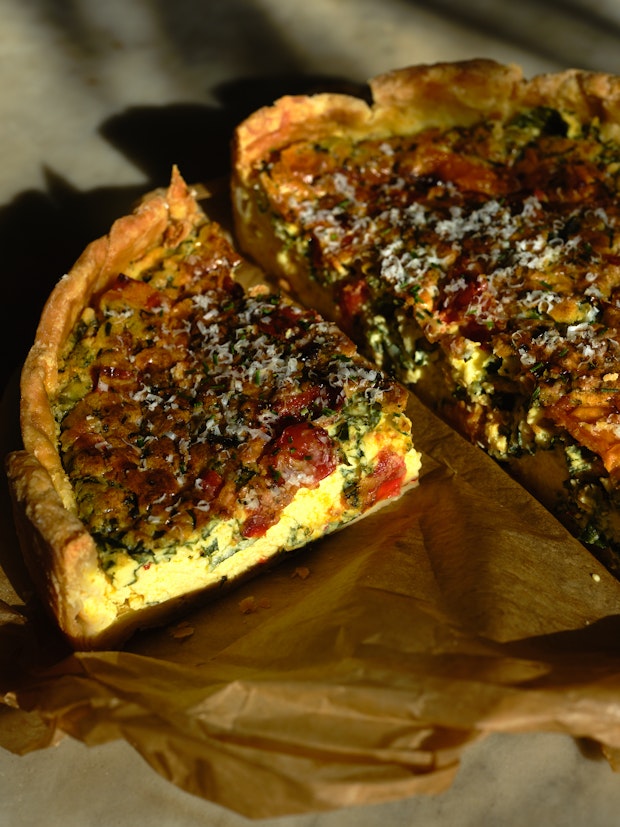
Deep dish quiche being served on a plate

4. Deep Dish QuicheThe deep dish quiche of your dreams. It’s made with a flaky all-butter crust. The filling is silky smooth and creamy, while still being perfectly sliceable. Adding roasted winter squash, caramelized onions, and goat cheese makes for a perfect winter holiday or Christmas quiche.

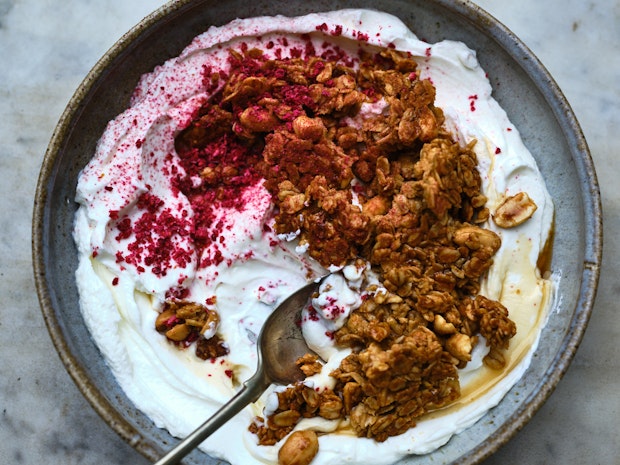
Granola Bowl

5. Good Granola BarIf you have a household of granola lovers, consider making this perfect healthy granola and/or this peanut butter granola. You can set up a topping bar and make granola yogurt parfaits. Load up with fresh fruit, toasted coconut, candied walnuts or whatever else you can dream up.

What to Eat Christmas Morning (12 Recipes)

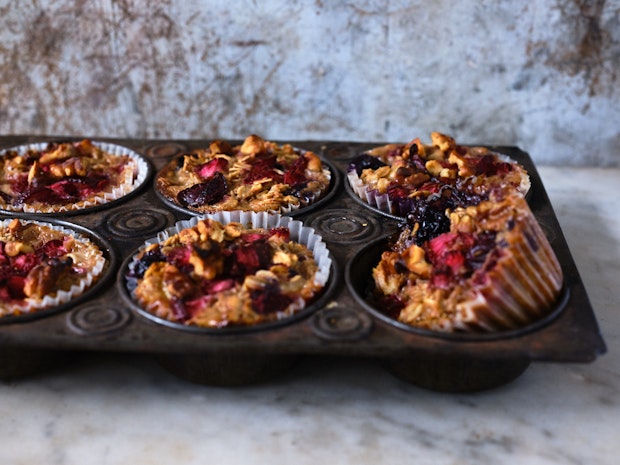
6. Baked Oatmeal Cups Made with oats, bananas, and lots of berries, these baked oatmeal cups are grab-and-go golden deliciousness.

A plate full of gougeres

7. Gougères Everyone is delighted when a pan of these come out of the oven. Gougères are perfect, golden pom-poms of cheese-crusted magic. This one-pan method sets you up for success every time. Keep these little cheese puffs frozen, and they’re ready to bake straight from the freezer on Christmas morning.

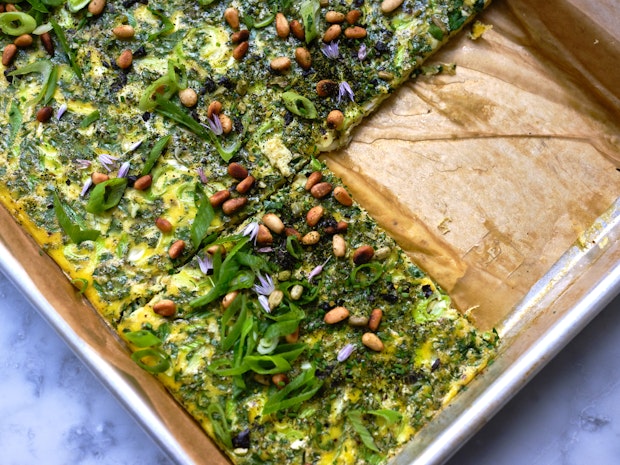
Sheet pan frittata

8. Sheet Pan Frittata Prepare the egg mixture on Christmas Eve, bake a sheet pan frittata with little effort the next morning. Serve with slabs of your favorite toast (for example, this Cheddar Jalapeño Oatmeal Bread), on waffles, or set up a station for people to make their own frittata sandwich with the sheet pan frittata and a few other toppings.

What to Eat Christmas Morning (12 Recipes)

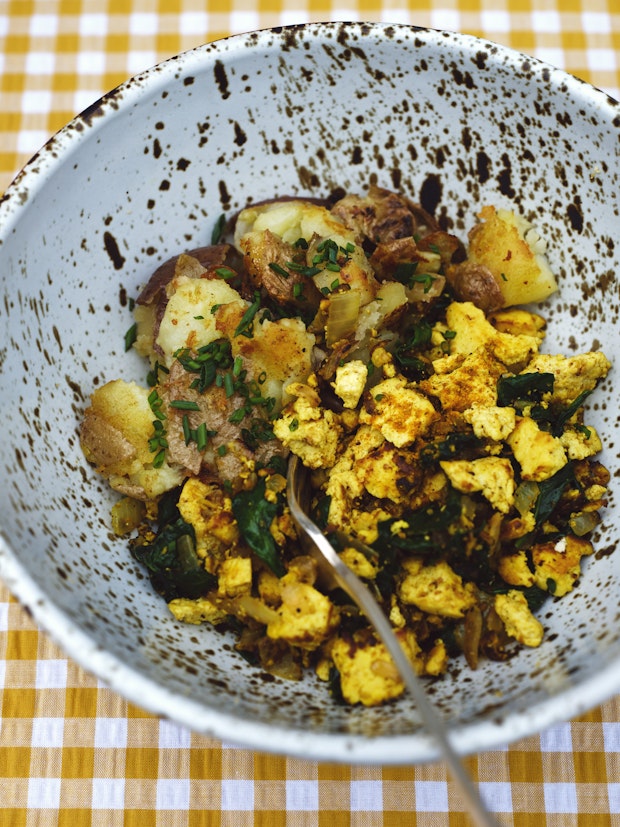
9. Tofu Scramble Tofu Scramble Yes, to this. If you are over cookies, mulled wine and the rest, this is going counterbalance to all the holiday decadence.

Christmas morning breakfast ideas from outside the 101 Cookbooks kitchen.

10. Heuvos a la Plaza de Mercado(Sprouted Kitchen / Tara O’Brady) Sara’s version of Tara’s recipe is a reminder to let your friends and family bring their influences to your table. Make the red sauce and the charred green onion dressing (!) a day or so ahead of time and it’s much easier to put this one together on Christmas morning.

11. Vegan Pumpkin French Toast(Love and Lemons) Love this – French toast that works for the vegans in your family as well.

12. Green Shakshuka(Bon Appétit) Probably not what your 7-year-old wants to see on her plate, but it will bring a smile to the faces of grown-ups, especially if they’ve had one too many glasses of prosecco on Christmas eve.

More Holiday Recipes

Continue reading What to Eat Christmas Morning (12 Recipes) on 101 Cookbooks

Oatmeal Muffins

A rich, crumble-topped oatmeal muffin recipe made with an oatmeal and yogurt base. Golden-topped, wholesome, and a fantastic pocket treat.

Continue reading Oatmeal Muffins on 101 Cookbooks

You want to know what makes these oatmeal muffins next level? They have a big crumble top. It’s a game changer. Beyond that, the rolled oats in the rich batter make them quite substantial — a distant cousin to typical cake muffins. They’re a bit custard-y when hot, and not-at-all when cooled. Craggy and golden-topped, let’s talk through the details!

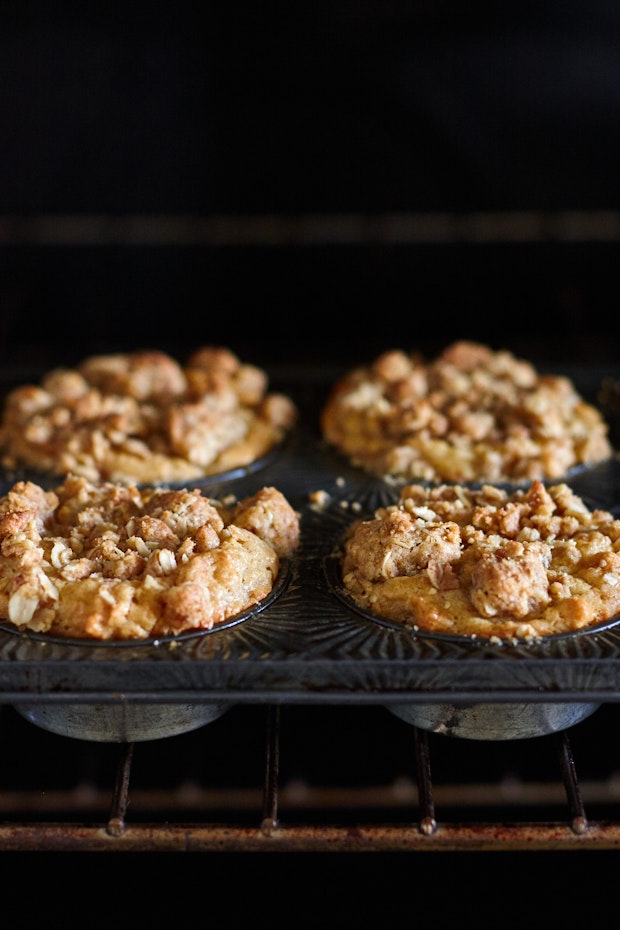
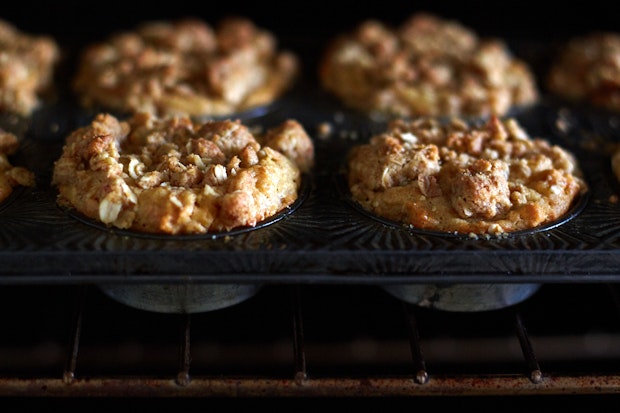
side view of oatmeal muffins baking in a muffin tin

Muffin Meets Crumble

The idea was to put a crumble top on a great, decadent, oatmeal muffin. I used the crumble from the Tutti-Frutti Crumble recipe in Super Natural Every Day. The muffins themselves don’t come across as particularly sweet, but you get a nice amount of sweetness from the topping. Overall, I would say, the muffins might classify as lightly-sweetened. If you have more of a sweet tooth, you can certainly add a drizzle of honey or maple syrup to the wet ingredients. Or, even better, stir in some chopped, sweet fruit.

How To Make Oatmeal Muffins

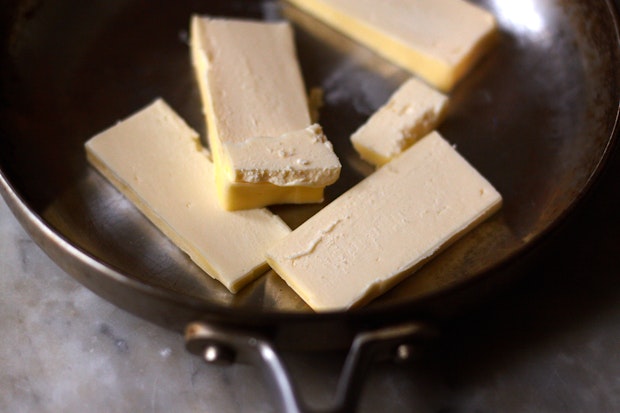
There’s nothing particularly tricky about making these muffins, but there are two main components. The crumble and then the oatmeal muffin batter. You’ll be melting butter for both.

melting butter in a skillet
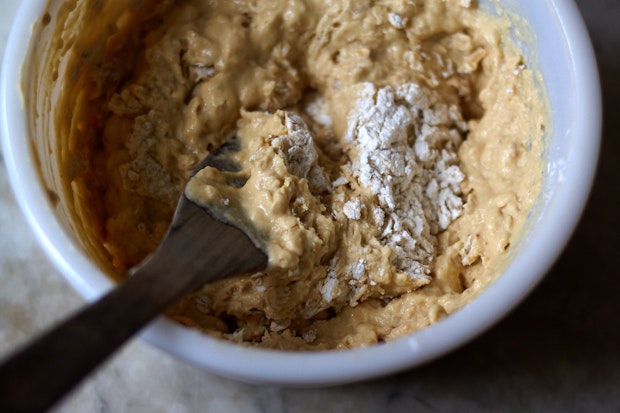
While the crumble is chilling in the freezer, combine the wet and dry muffin batter ingredients. Stirring just enough to bring it all together.

combining wet ingredients with dry ingredients in a bowl resulting in oatmeal muffin batter
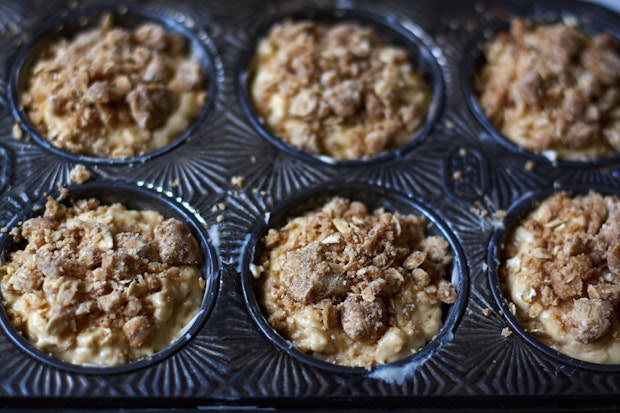
Transfer the muffin batter to muffin tins and top with crumble pieces.
muffin batter in muffin tin before baking
Next, bake until golden and puffy. Remove from the oven, and now (the most important thing)  pop them out of the pan as soon as you can after baking. Let them cool outside the pan on a baking rack. In the pan they steam, and it will impact the texture of the muffins. And not in a good way.
close up of an oatmeal muffin

Oatmeal Muffins: Variations

I kept the recipe here straight forward – rolled oats, yogurt, etc. That said, you can take them in a thousand directions with different spice combinations, or citrus zest, or add-ins like seeds, or berries, or dried fruit. 

  • Apple Season: Kelly notes, “Made these the other day and added 2 grated apples and some cinnamon. WOW – so yummy! My new favourite muffins.”
  • Coconut & Sunflower Seeds: LadyM says, “Awesome… I added some unsalted sunflower seeds, coconut, and raisins. I also used my silicone mini muffin pan and they turned out incredible, just a little bit of crusting around the edges. “
  • Strawberry Magic: Sara mentions, “I didn’t have any plain yogurt (and where I live generally only sells sweetened plain yogurt) so instead I cut the sugar in half and used strawberry yogurt. Came out amazing and tasting lightly of strawberry!”

More Muffin Recipes

Continue reading Oatmeal Muffins on 101 Cookbooks

Big Sur Bakery Hide Bread

From the Big Sur Bakery cookbook, a seed-packed pocket bread recipe contributed by a good friend of the bakery. Sesame, sunflower, flax and poppy seeds, quinoa and oat bran impressively cram themselves into these delicious, hearty rolls.

Continue reading Big Sur Bakery Hide Bread on 101 Cookbooks

The Big Sur Bakery sits back off California’s famous Highway 1 a bit, nestled next to a gas station. The owners, three of them, left the Los Angeles restaurant scene years ago, determined to turn a property with a lackluster track record into something special. They set their sights on a house-turned-abandoned-restaurant, eventually wrangling it into what is now the beloved Big Sur Bakery.

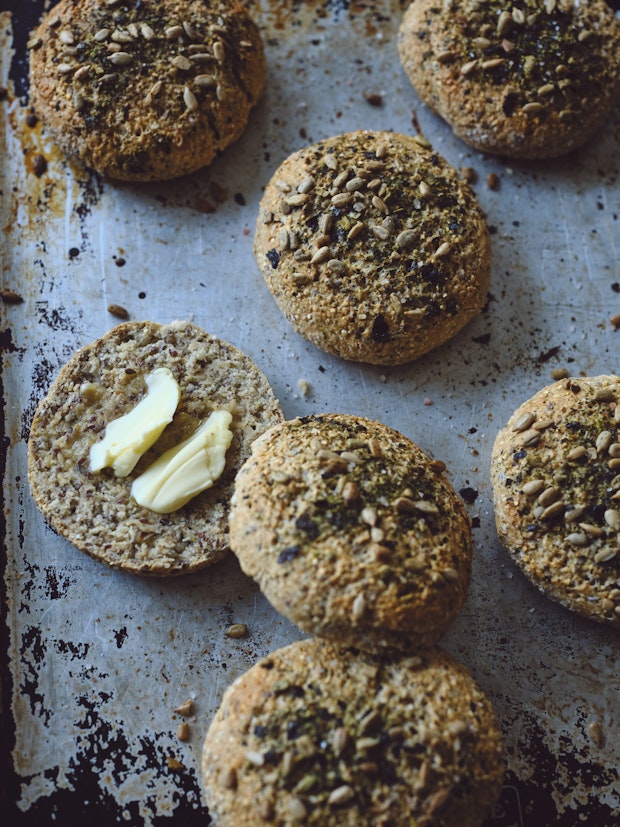
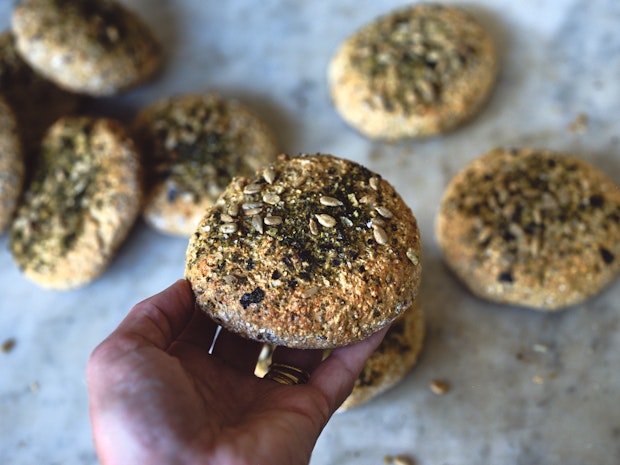
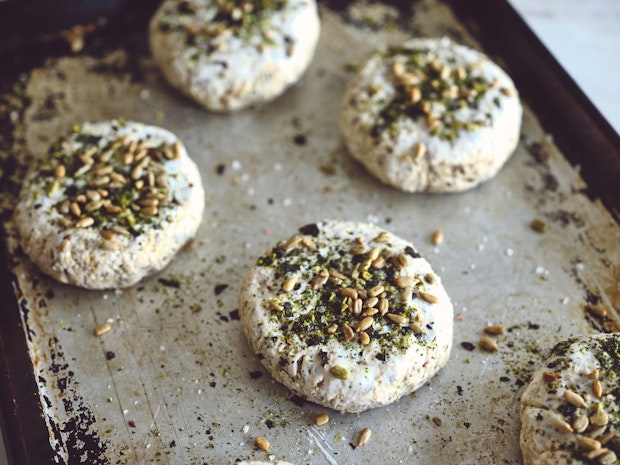
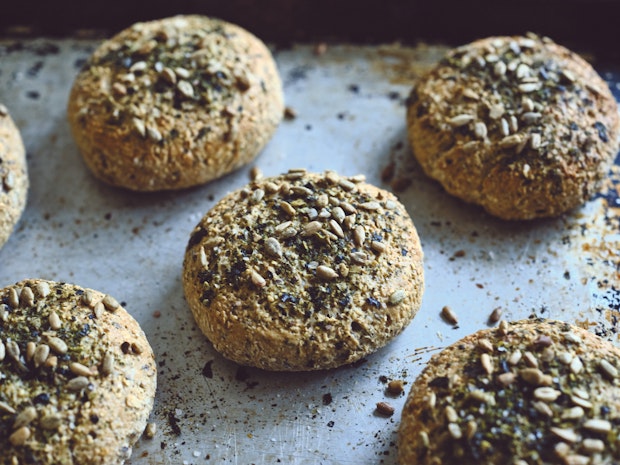
Small round homemade breads topped with seeds and butter on a baking sheet
It was tough choosing a single recipe to feature from their namesake cookbook, but a seed-packed pocket bread contributed by a good friend of the bakery jumped out at me. Sesame, sunflower, flax and poppy seeds, millet, oat bran, and a splash of beer impressively cram themselves into palm-sized hearty rolls in a way that doesn’t disappoint.
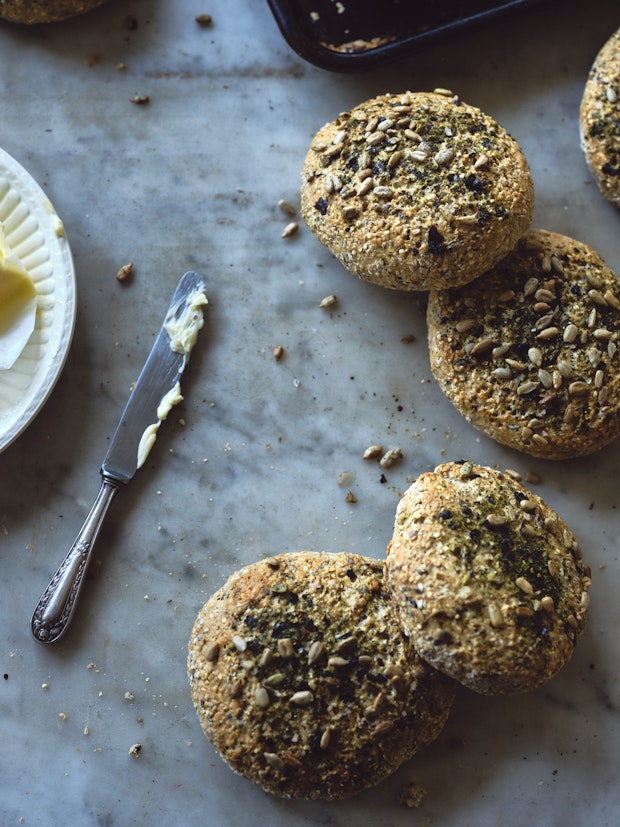
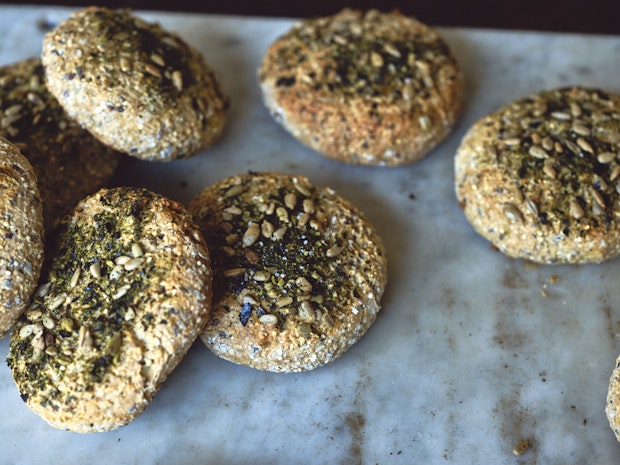
Small round homemade breads topped with seeds on a marble counter

Big Sur Bakery Hide Bread

The recipe is from Terry “Hide” Prince, one of the bakery’s earliest friends. If you can imagine dense, seed and grain-packed soda bread, you’re in the ballpark. Rather than using salt, Terry gathers kelp from the coast and uses it to season the bread. I use sea salt (and salad booster), or dulse flakes if I have them. Use what you have. The key to enjoying these delicious little breads (and I can’t emphasize this enough), is splitting them open, toasting until they are deeply golden, then slathering generously with butter (or drizzling with olive oil). Then sprinkle with a bit more salt. Blissful buttery crunchiness.

Variations

These are divisive little pucks. People either have deep love for them, or….don’t. You can browse the comments for insight into both camps. They also take well to endless variations. As you can see from terry’s comment below, that’s the spirit of it!

  • More from Terry: He says, “There’s no need to be intimidated by making my bread. It was born out of a sea voyage, from Hawaii to New Zealand, because it was easier than yeast bread. I used my friend, Jay’s, Irish soda bread recipe, only I added my own super foods. Amaranth, millet, and quinoa all have the 8 essential amino acids for building muscle, flax seeds for digestion, and kelp or seaweed for vitamins and minerals. I keep a 5 gallon pickle bucket with my dry bread mix, adding whatever sounds healthy.”
  • A gluten-free version: Obsoletepostergirl says, “this recipe adapted very well to gluten free. I used my usual mix of brown rice flour, millet flour, oat flour, and tapioca starch in place of the flour. I used coconut milk in place of buttermilk as well. They turned out wonderfully when toasted!”

Bread in a roll shape topped with seeds held in the palm of a hand

The Big Sur Bakery Cookbook

The cookbook captures a year in the life of the restaurant through a series of vignettes, purveyor profiles, and recipes. Anyone who dreams of starting their own restaurant should have a read. One of the things I like about this book is the way it illustrates many of the things that make creating a restaurant so fulfilling. At the same time it isn’t afraid to touch on some of the stuff that also makes it so difficult. As I’m sure many of you know (or can imagine) Big Sur is remote, and running any sort of business in a town connected by a single power line to Carmel isn’t without its challenges.

How To Make Big Sur Hide Bread

Here’s a quick guide to the major steps needed to make this bread. 

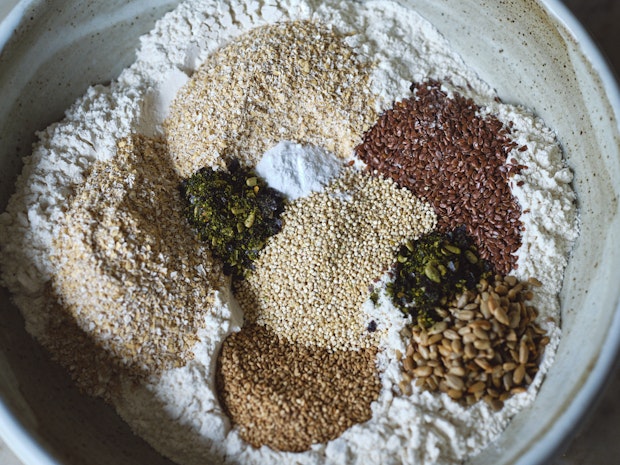
Large mixing bowl with bread ingredients including flax seeds, sunflower seeds, quinoa, flour, and bran

Step 1: This bread comes together like a soda bread. No yeast is called for, it’s a quick bread that comes together in no time with baking soda as the leavener. Start by combining the dry ingredients in a large mixing bowl. Add buttermilk to this dry mixture and stir until everything comes together.

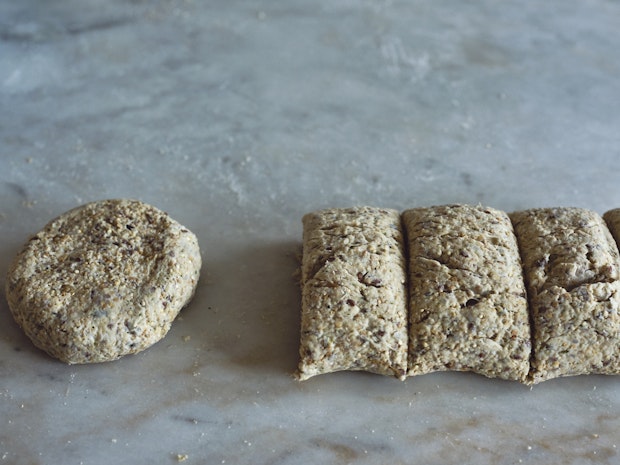
bread dough rolled out on counter and cut into portions
Step 2: Turn the dough out onto a countertop, roll into a wide log. Slice into equal pieces and for into patties. The shape I aim for is like a small English muffin.

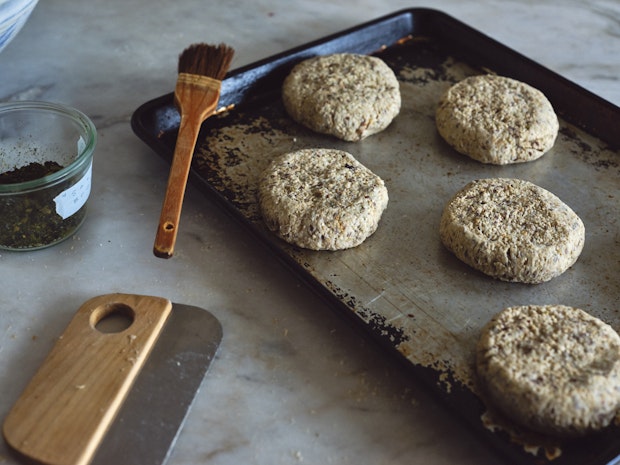
Individual rolls shaped and arranged on metal baking sheet prior to baking
Step 3: Brush the tops of each roll with buttermilk and sprinkle with seeds and seaweed.
Individual bread rolls on baking sheet sprinkled with seeds prior to baking
Step 4: Bake for about 45 minutes or until the bottoms are golden.
Small round homemade breads topped with seeds on a marble counter

A Few Things That Make the Big Sur Bakery Special

I’ve been to the bakery a number of times over the years. I love the dark wood, the beautifully rustic morning pastries, and the mix of locals and people just-traveling-through intersecting at the counter. The bakery serves coffee and pastries in the morning and early afternoon, lunch on certain days, as well as dinner (hours listed here). The heart of the bakery is the wood-fired stove – and much of the food served (and featured in the cookbook) is inspired by it.

A Bit More About the Cookbook

The Big Sur Bakery Cookbook includes a wide range of recipes, not simply pastries and baked treats. Also plenty for vegetarians and non-vegetarians alike. I’ve earmarked the Dresden Stollen (legendary), Nine-Grain Pancakes, Date & Quinoa Muffins, and the Fresh Garbanzo Bean Stew. Sara Remington did the photography for the book – a beautiful combination of portraits, images of Big Sur, meals shared, and of course, no end to the photos of the food. In all, 262 pages, full color. If you haven’t been able to visit in person yet, the book is next best.

Small round homemade breads topped with seeds on a marble counter

More Bread Recipes

Continue reading Big Sur Bakery Hide Bread on 101 Cookbooks

French Toast Casserole

Elevate your mornings with the undeniable charm of our French Toast Casserole. It seamlessly blends the comfort and flavor of classic French
The post French Toast Casserole appeared first on Salty Side Dish Recipes.

Elevate your mornings with the undeniable charm of our French Toast Casserole. It seamlessly blends the comfort and flavor of classic French

The post French Toast Casserole appeared first on Salty Side Dish Recipes.

Kimchi Quesadillas

Kimchi quesadillas are an easy to make quick meal or snack that use only a few simple ingredients that pack a huge flavor punch.

The post Kimchi Quesadillas appeared first on Budget Bytes.
A couple of years ago I ate an appetizer at a restaurant that really wowed me — kimchi pimento cheese dip. I wouldn’t have ever thought about pairing kimchi and cheese together, but ever since I had it I’ve been obsessed with that combo. And since kimchi and eggs also go great together, it only made sense for me to start adding kimchi to my egg and cheese quesadillas (my favorite go-to quick meal). These kimchi quesadillas are the perfect mix of flavors and textures, they’re SO FAST to make, and all of the ingredients last a long time in the fridge, so they’ve quickly become my favorite low-effort, high-reward meal.

Cheese Quesadillas on a plate with a bowl of kimchi on the side.

Why I’m Obsessed with Kimchi Quesadillas

These kimchi quesadillas are incredibly simple to make and only require five simple ingredients: eggs, oil or butter (to cook the eggs), tortillas, cheese, and kimchi. You can make one at a time or more, but I promise, once you eat one you’re going to want seconds. ;) The way the cheese stays gooey on the inside, crisps up with the tortilla on the outside, and the kimchi makes everything a little tangy and spicy… it’s just perfection.

What is Kimchi?

Kimchi is a traditional Korean side dish made with fermented vegetables, like cabbage, radish, scallions, garlic, ginger, and sometimes other vegetables depending on the recipe. It’s flavored with gochugaru (a Korean chili powder) and salted seafood. The flavor is savory, tangy, spicy, salty, and full of umami. It’s served with almost every meal as a small side dish or condiment. The tangy, spicy, salty flavor of kimchi really adds a ton of flavor and dimension to whatever you eat it with, including an egg and cheese quesadilla!

Where to Find Kimchi

Although Kimchi is a staple in Korean cuisine, it is growing in popularity in the U.S. and most major grocery stores now carry at least one brand of kimchi. Because it’s a fermented food containing live cultures, you’ll usually find it in the refrigerated section of grocery stores, near other fermented products like yogurt, fresh sauerkraut, and pickles, or even sometimes near tofu and tempeh.

Even better yet, if you have an Asian grocery store near you, you’ll be able to find several types of authentic kimchi for really good prices compared to large chain U.S. grocery stores.
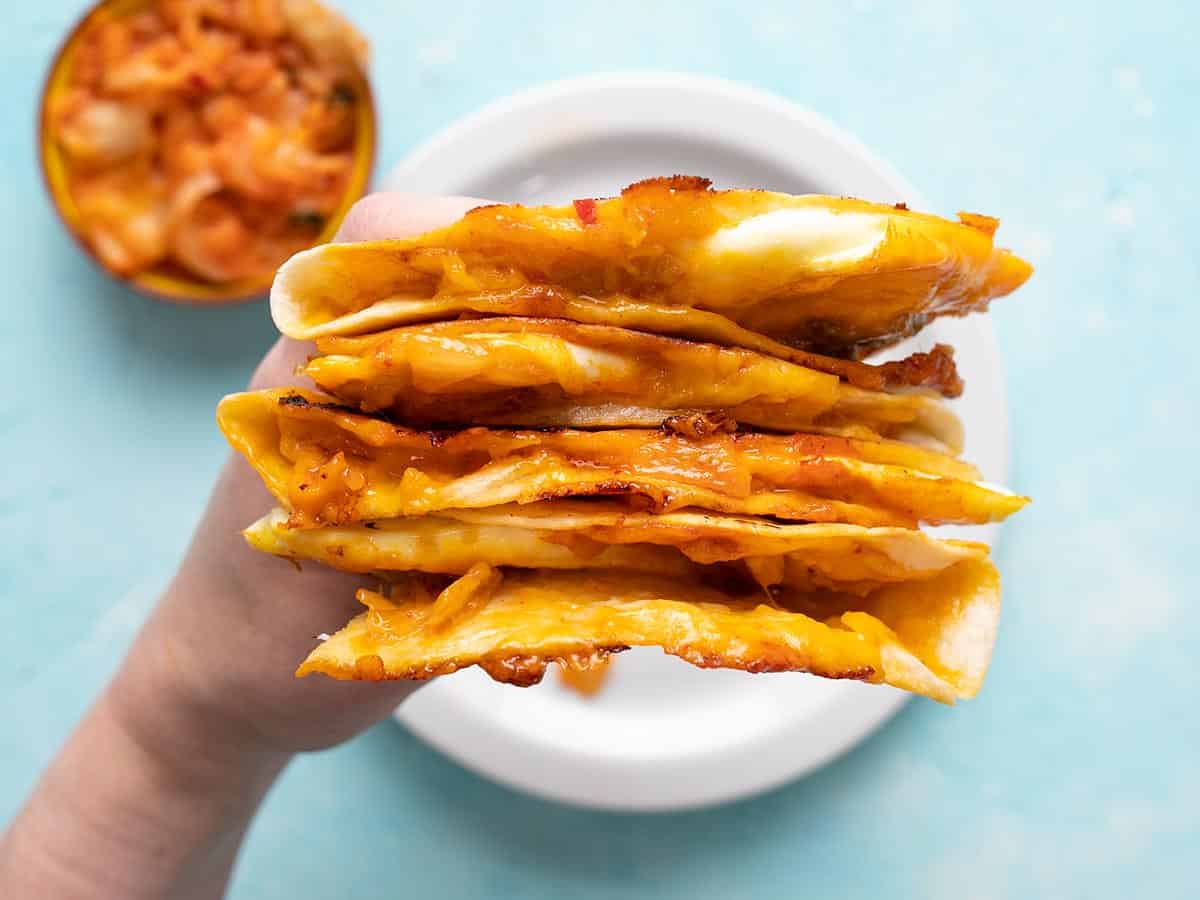
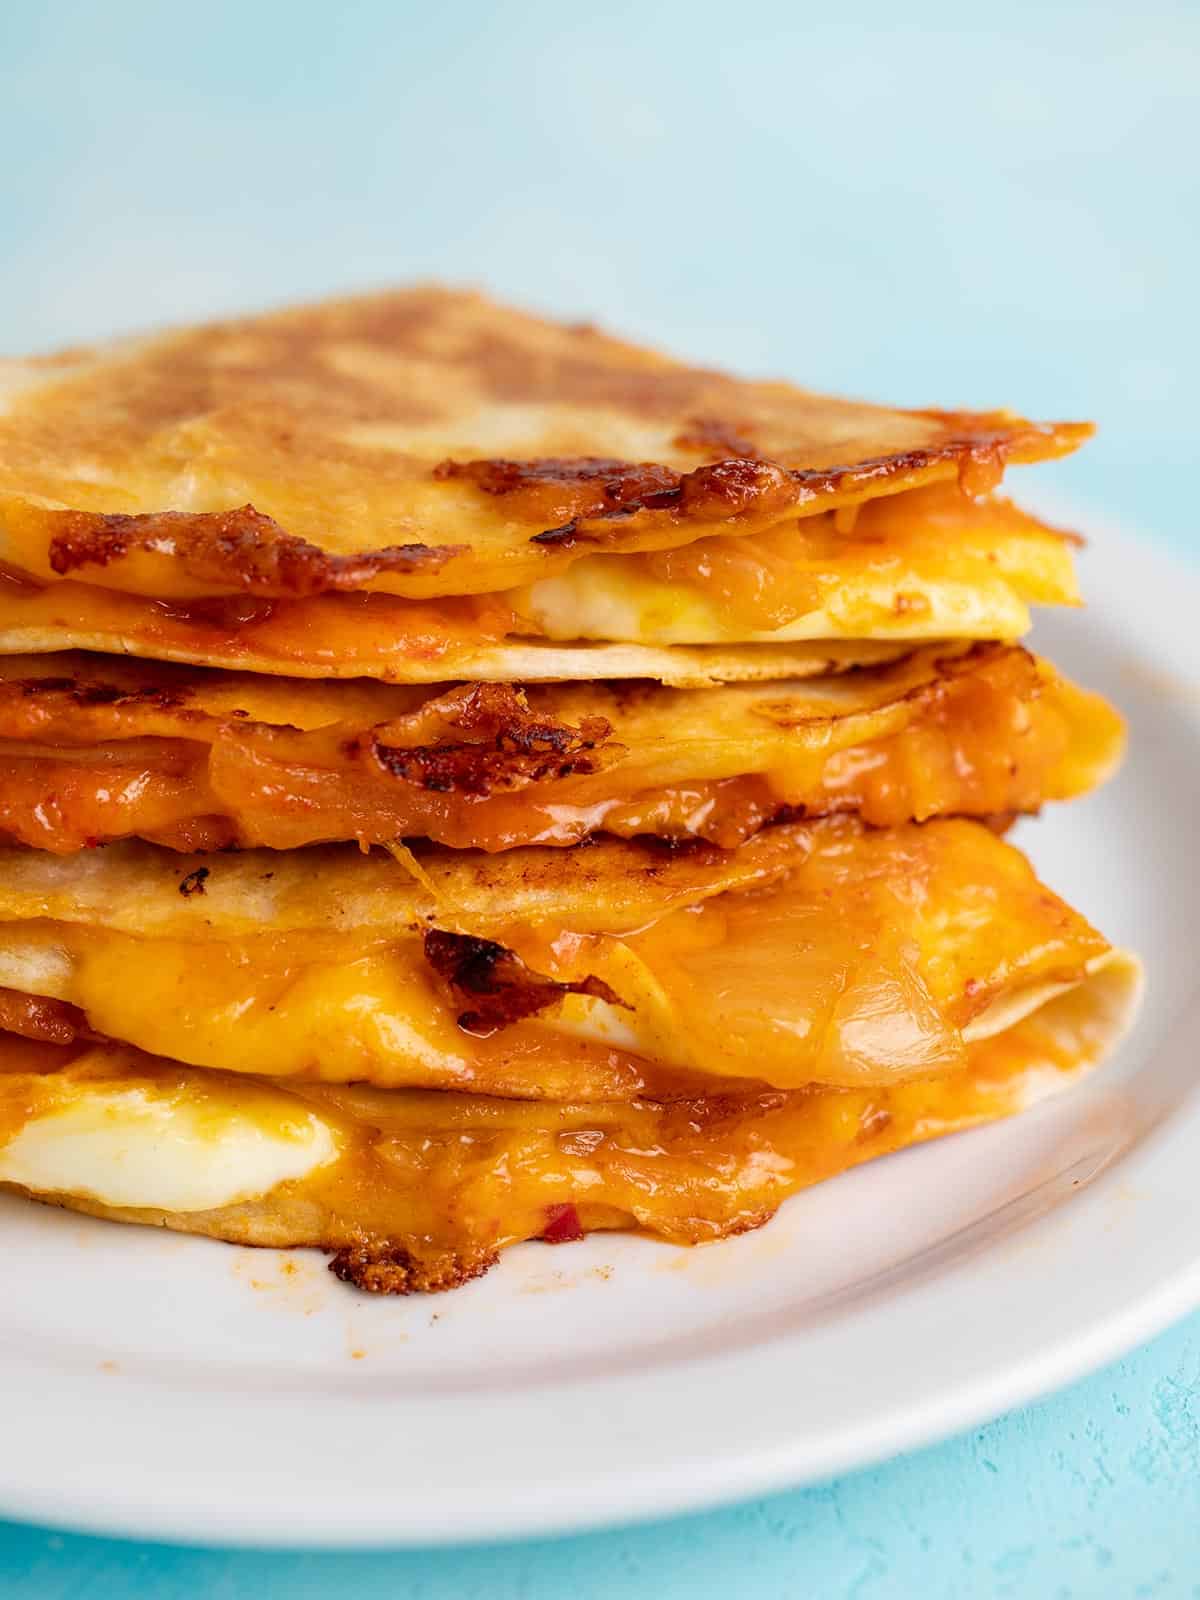
A hand holding a stack of kimchi quesadillas showing the cheese and filling.
Overhead view of sliced kimchi quesadillas on a plate.
Print

Kimchi Quesadillas

Kimchi quesadillas are an easy to make quick meal or snack that use only a few simple ingredients to pack a huge flavor punch.
Course Breakfast, Lunch, Snack
Cuisine American, Korean
Total Cost $1.90 recipe / $0.95 serving
Prep Time 5 minutes
Cook Time 15 minutes
Total Time 20 minutes
Servings 2 (1 quesadilla each)
Calories 331kcal

Ingredients

  • 1/4 cup kimchi $0.78
  • 1/2 cup shredded cheddar cheese $0.58
  • 2 flour tortillas (8" diameter) $0.40
  • 1 Tbsp butter or oil $0.04
  • 2 large eggs $0.18

Instructions

  • Roughly chop the kimchi into smaller pieces. Cover half of each tortilla with shredded cheddar cheese, then add the chopped kimchi on top.
  • Heat a large skillet over medium, then add the butter or oil. Fry or scramble the eggs in the butter or oil until they reach your desired doneness (I like over-medium).
  • Transfer the cooked eggs to the tortillas, placing them on top of the kimchi. Fold the empty side of the tortilla over the filled side to close.
  • Transfer the folded quesadillas back to the same skillet used to cook the eggs and continue to cook over medium heat until the cheese is melted and the tortilla is browned and crispy on each side.
  • Slice the cooked kimchi quesadillas in half and enjoy!

See how we calculate recipe costs here.

Nutrition

Serving: 1quesadilla | Calories: 331kcal | Carbohydrates: 16g | Protein: 16g | Fat: 23g | Sodium: 593mg | Fiber: 1g
Side view of a stack of kimchi quesadillas on a plate.

How to Make Kimchi Quesadillas – Step by Step Photos

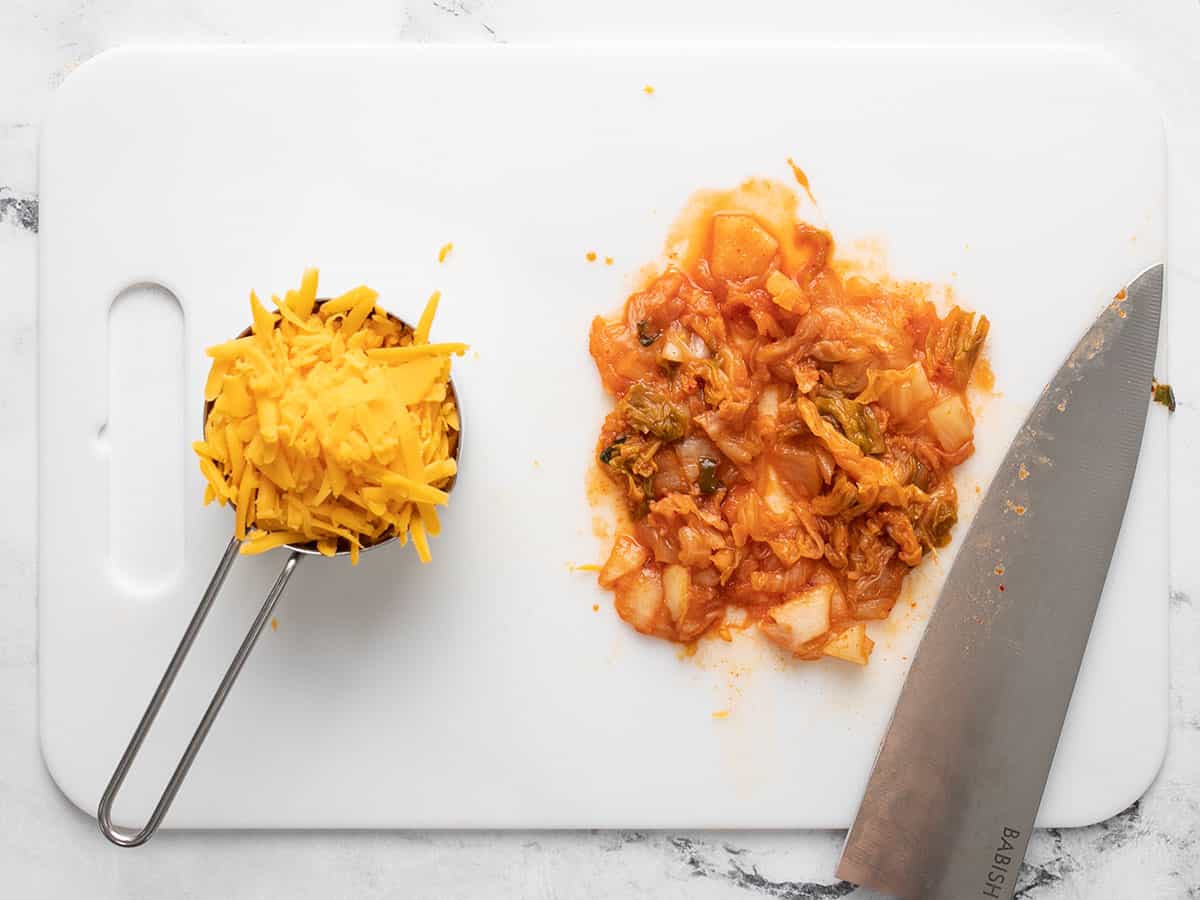
Chopped kimchi on a cutting board with shredded cheddar in a measuring cup on the side.

To make two kimchi quesadillas, roughly chop ¼ cup of kimchi into smaller pieces. Measure ½ cup of shredded cheddar cheese.

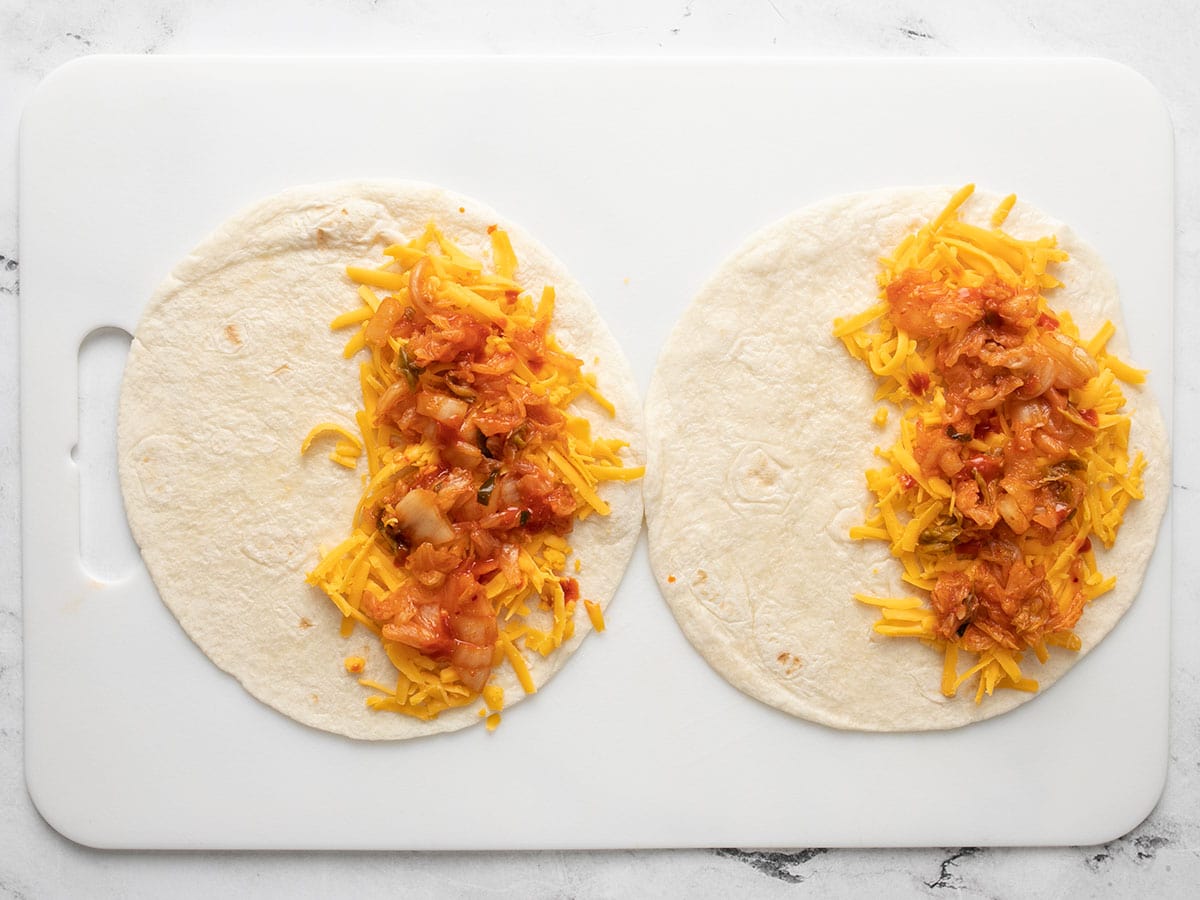
Cheese and kimchi covering half of two tortillas.

Divide the cheese and kimchi between two 8-inch flour tortillas, covering only one side of each tortilla (the empty side will be folded over top to close).

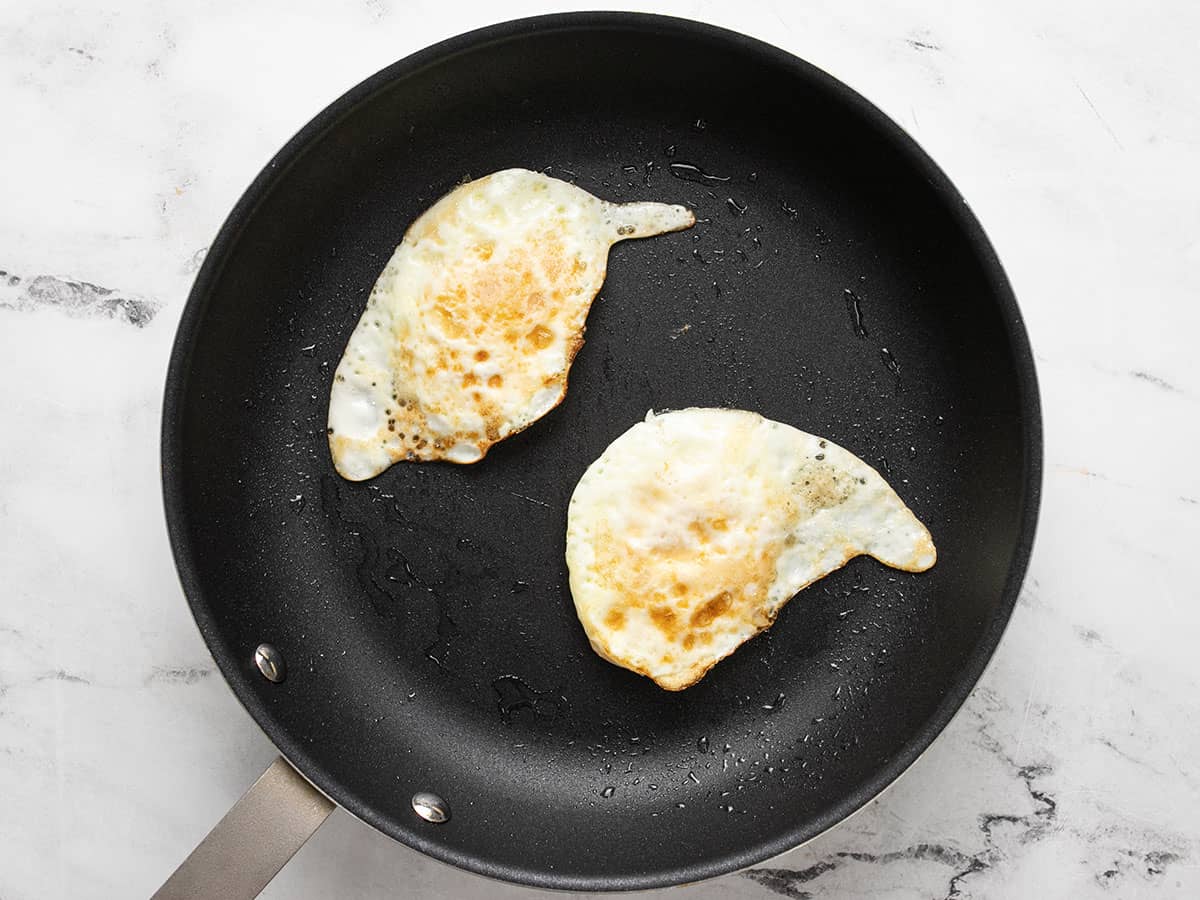
Two fried eggs in a skillet.

Next, fry two large eggs in a skillet with a tablespoon of oil or butter. I like to fry my eggs over medium for quesadillas, but you could also scramble them if that’s easier.

Eggs added on top of cheese and kimchi in the tortillas.

Place one fried egg on top of the cheese and kimchi in each quesadilla. Fold the empty half of the tortilla over the filled side to close.

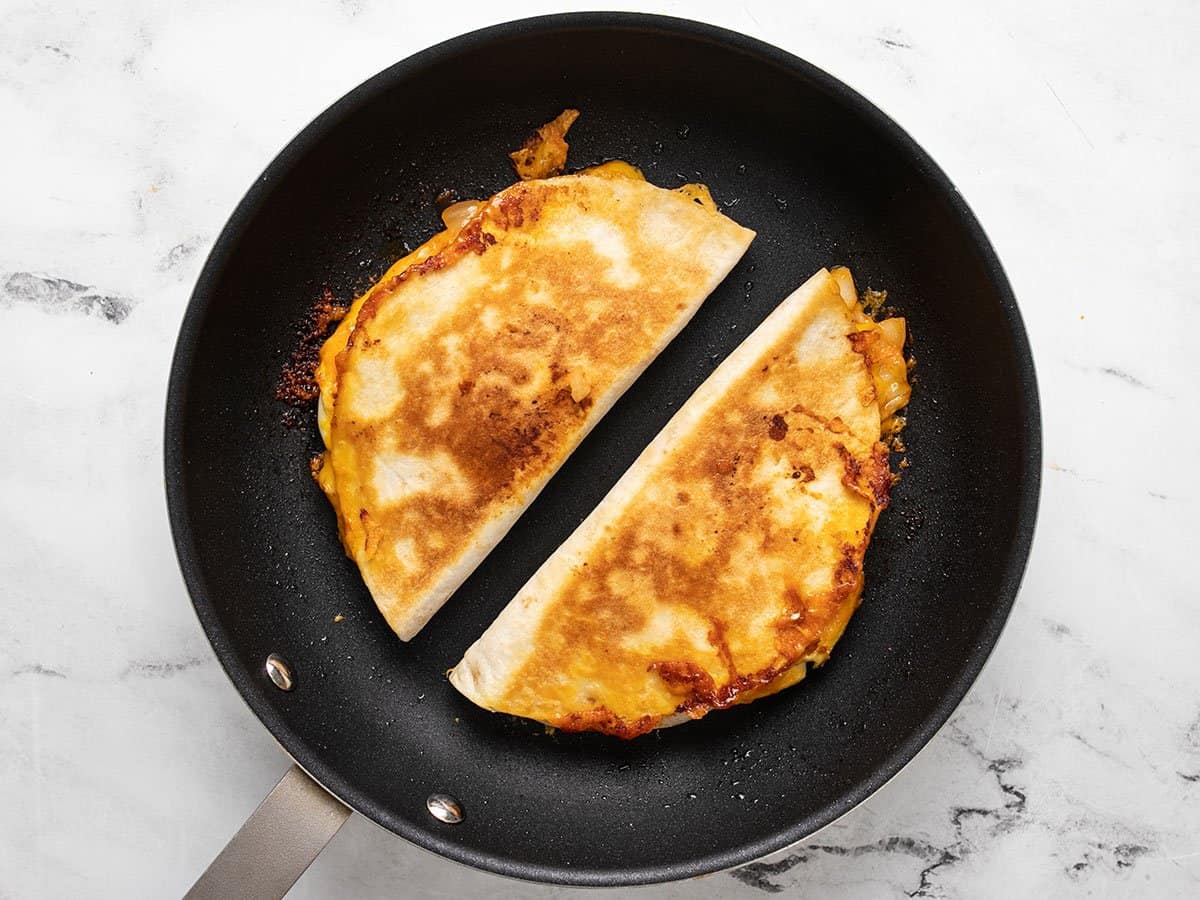
Toasted quesadillas in the skillet.

Return the folded quesadillas to the skillet used to cook the eggs and continue to cook over medium heat until the cheese is melted and the tortillas are golden brown and crispy on each side. Don’t worry if some of the cheese spills out, that will just create extra crispy goodness!

Sliced quesadillas on a cutting board.

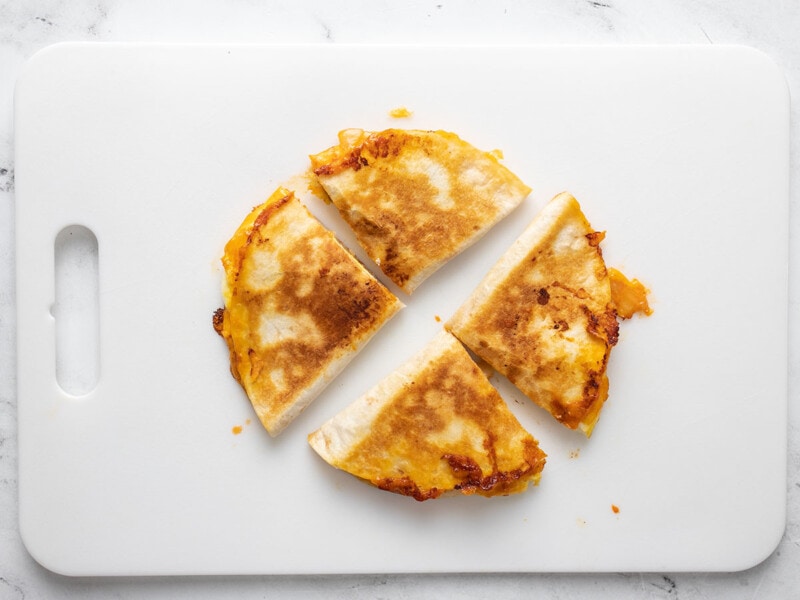
Transfer the cooked quesadillas to a cutting board, slice in half, and enjoy! To keep the filling from spilling out when you cut them, use a pizza cutter or large knife and cut from the outside edge in toward the folded side.

Close up side view of a stack of kimchi quesadillas.

Soooo cheesy, sooo tangy!

The post Kimchi Quesadillas appeared first on Budget Bytes.