Shaker Apple Pie

The defining detail of this traditional Shaker apple pie is the use of rose water in the filling. Sliced apples, brown sugar, and a splash of floral results in a special combination. Pair it with an all-butter crust and you have a beautiful apple pie on your hands.

Continue reading Shaker Apple Pie on 101 Cookbooks

Inspiration for this apple pie struck not long after posting a Shaker lemon pie earlier this year. I stumbled on a book about Shaker life and design in a used book store. My head was still in Shaker world, so I picked it up. It was a large book, the most comprehensive I’ve come across, and including entire sections about communal life, Shaker tools, and even a page about raising flowers. On the topic of flowers, Shakers traditionally did not grow them for beauty or decoration, but only for their culinary purposes or medicinal uses.
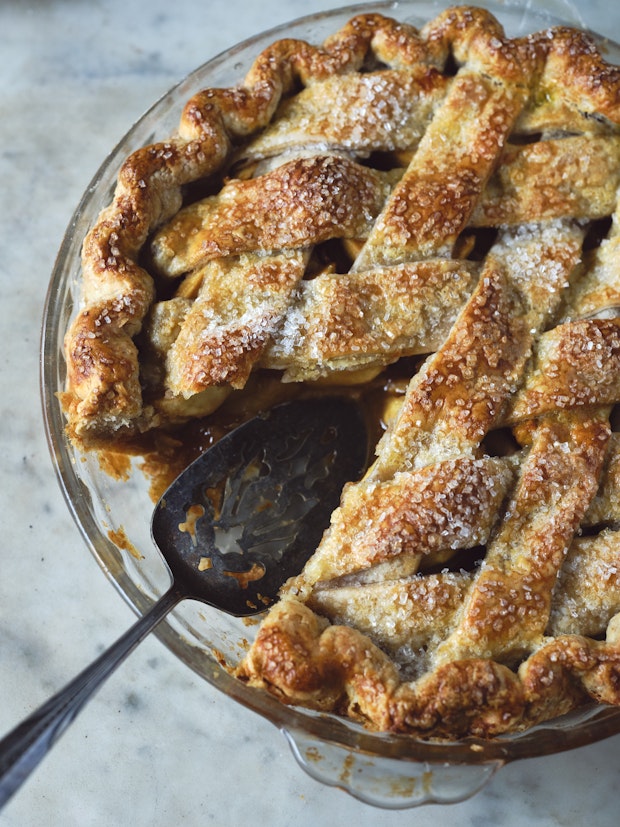
an apple pie with lattice crust in a glass pie dish with a wedge removed

Shaker Apple Pie: The Inspiration

I brought the book home with me and continued reading. The account by Sister Marcia’s Bullard (1821-1899) goes on to inform, “rose petals were gathered and distilled into rose water, which was used medicinally and also as a flavoring in cooking.” Much like we use vanilla today. She then says, “rose water was a traditional ingredient in Shaker apple pies.” And that was the record scratch for me. An apple and rose scented pie? That sounds amazing (and it is!). So here we are. Apparently, rose water was an important flavoring agent in America prior to the availability of vanilla extracts.
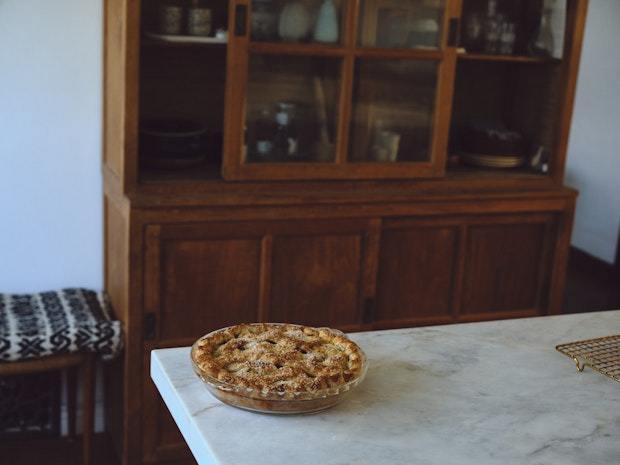
a full apple pie cooling on a countertop after baking in a kitchen

Why I love this Pie

I understand what people love about the type of apple pie that is popular in the United States today. They’re big on cinnamon, warming, nostalgic and cozy. This pie is all those things, minus the warming spices. And because it plays a beautiful floral wildcard, starting now, it will forever have my heart. That one move, one ingredient, changes the entire personality of the pie. If you love apple pie, and want to switch things up a bit this year, give this a try. 
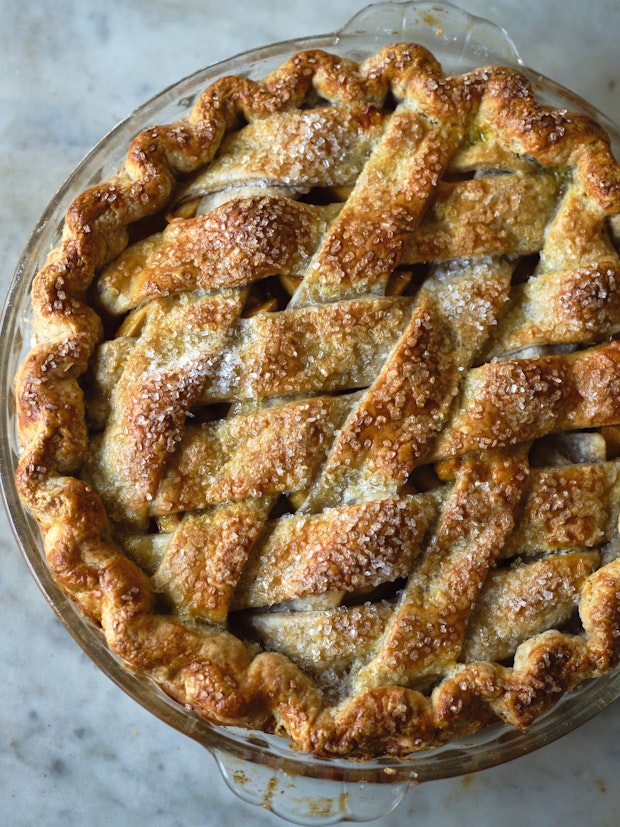
a beautiful apple pie with lattice crust in a glass pie dish

What Kind of Apples for Apple Pie?

Honeycrisp apples are great for pies (and snacking), but they can be a bit tricky to finding certain areas outside of peak apple season. Granny Smith apples are ubiquitous and easy to buy just about anywhere, anytime. Keep your eyes open for pink lady and Braeburn apples as well. And you can always do a blend of apple types. This pie pictured here was baked with honey crisp apples.
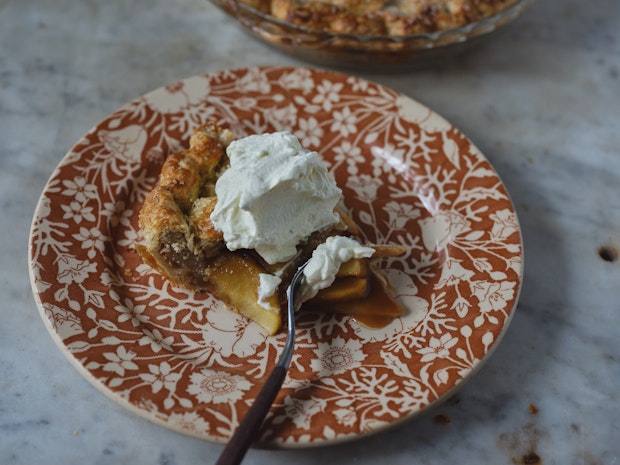
a slice of apple pie on a small plate topped with dollop of whipped cream

Basic Steps to Making an Apple Pie

If this is your first pie, or maybe you’re still gaining confidence on the pie baking front, here are the big steps and general process that goes into making an apple pie.
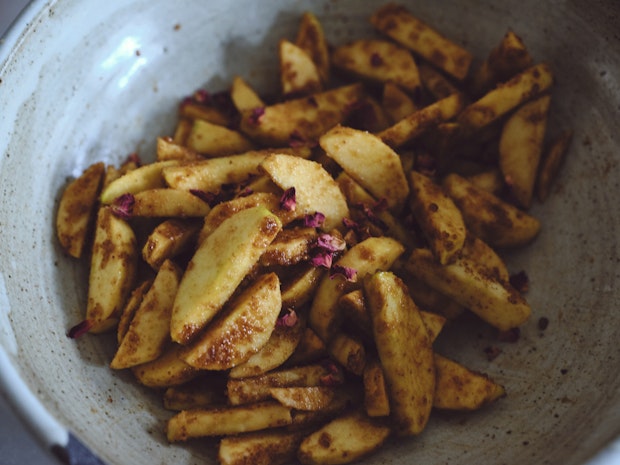
the filling for an apple pie in a large mixing bowl
Step one: make the apple pie filling by mixing the ingredients in a large bowl. No pre-cooking of the apples is necessary for this pie.
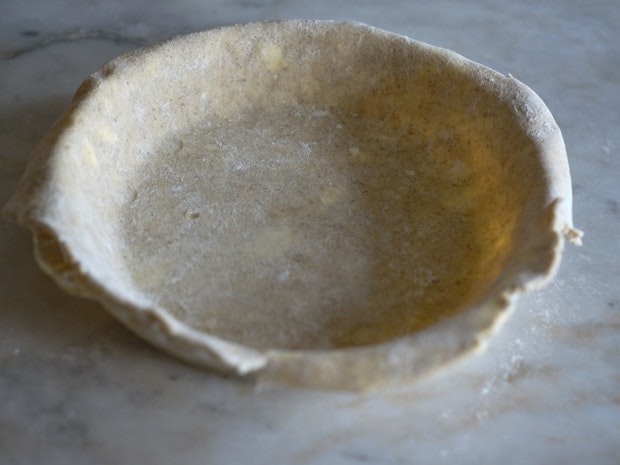
a pie dish lined with pie dough for a bottom crust prior to filling
Step two: roll out bottom pie dough and line the pie dish with the crust. (above)
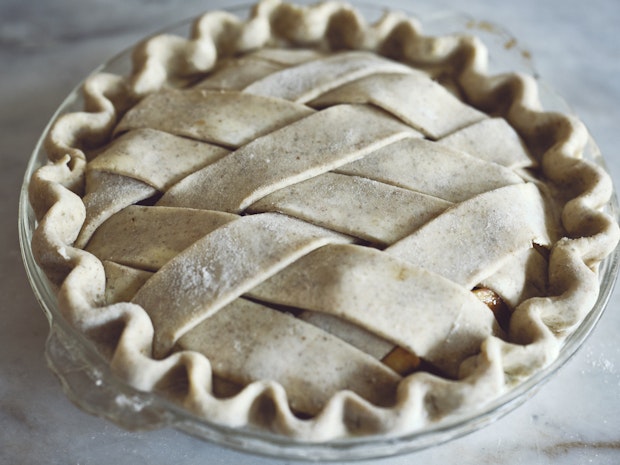
apple pie with lattice crust before baking

Step three: roll out and make the top crust. I share how to make this lattice crust below this section. Alternately, keep it simple! Roll out the top crust into a full circle and use that, cutting a few vents prior to baking to allow steam to escape. Seal and crimp.
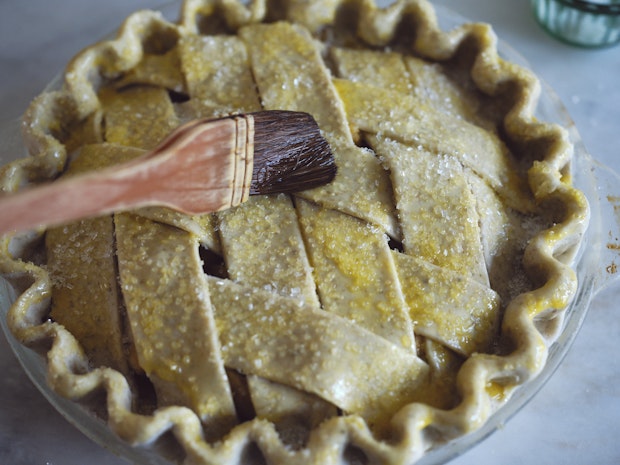
an apple pie before baking being brushed with an egg was and sprinkled with sugar

Step four: Brush with egg, sprinkle with sugar, chill and bake!

To Make a Lattice Pie Crust

You don’t have to make a latticed top for this pie, but you can if you like. Here’s how:
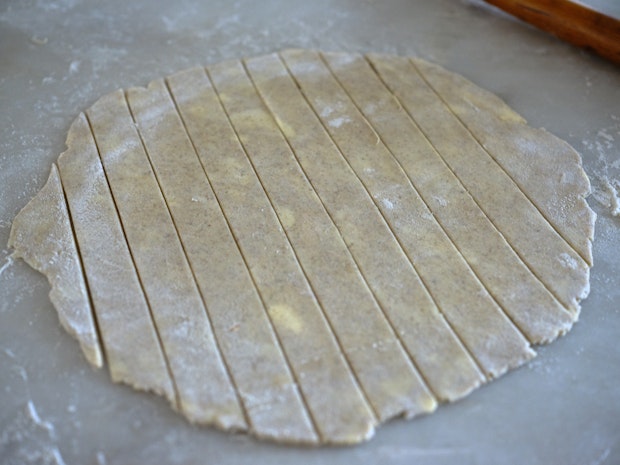
pie dough rolled out on a floured counter and cut into strips
Step one: Roll the pie dough top crust out into a 12 x 12  shape and cut into 1-inch thick strips (pictured above). My shape was too circular here, go for more of a square. 
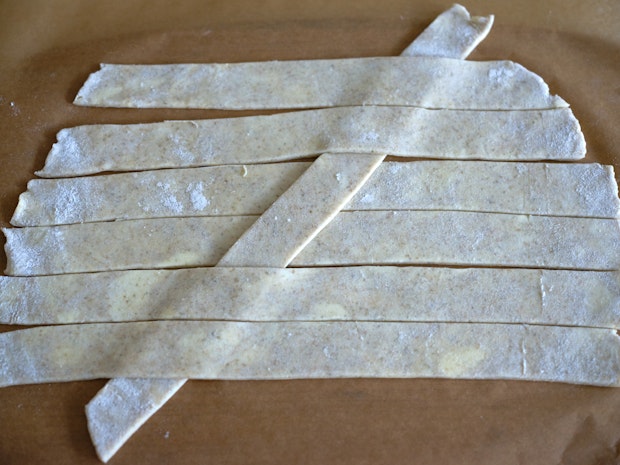
weaving strips of pie dough for a lattice crust
Step two: Arrange 6-7 strips horizontally on a piece of parchment paper. Then, starting in the middle, working quickly with a single strip, make your strips look like this. (above) Under two, over two, under two, at 45 degree angle.
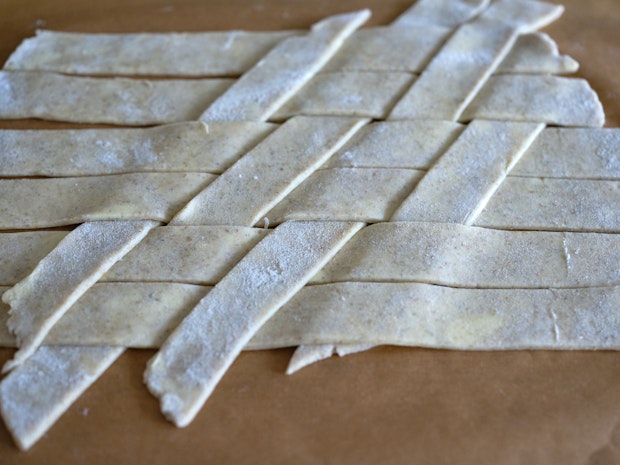
weaving strips of pie dough for a lattice crust
Step three: Grab another single strip and do the opposite next door. So – over two, under two, over two. Keep going working outward, alternating. When you’ve used all your strips transfer the crust to the refrigerator for 5 minutes or so to set a bit. You’ll be able to slide it off the parchment paper into place on the pie. Trim just beyond the edge of the pie dish, crimp or seal, and proceed with the recipe.
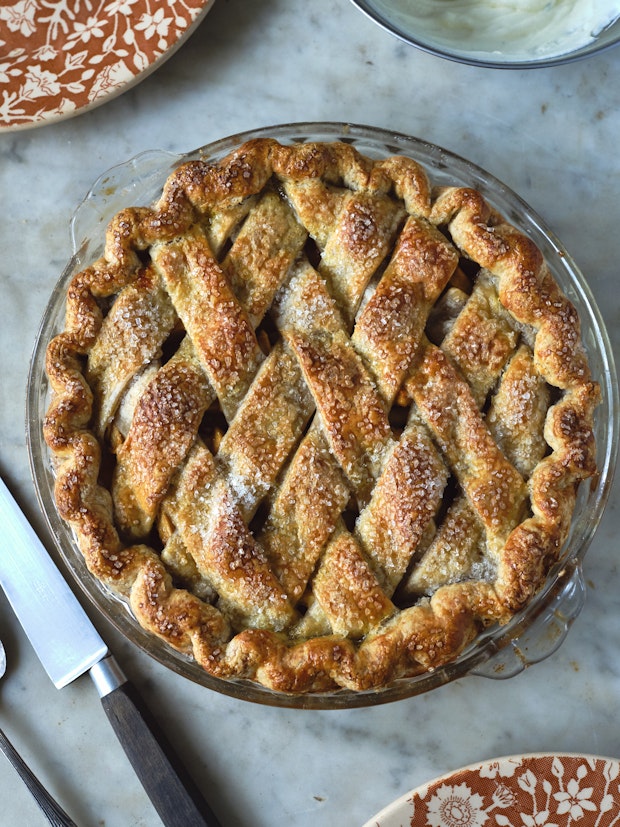
an apple pie with lattice crust in a glass pie dish ready to be sliced

What Kind of Pie Crust is Best?

I’ve baked pies using a range of crusts over the years, but this is my all-time favorite pie dough now. It’s simple, incorporates all the tweaks and techniques I’ve experimented with, and results in a super-flaky all-butter pie crust. It’s absolutely delicious. And, for this pie, it bakes up golden and beautiful thanks to a sugar-crusted egg wash prior to baking. It’s also use it regularly for tarts and this deep dish quiche.
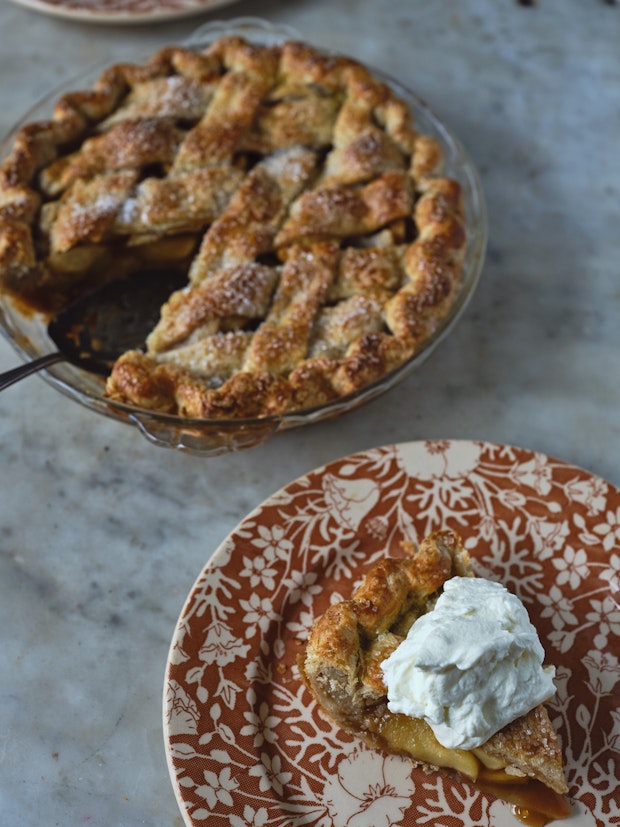
a slice of apple pie on a small plate topped with dollop of whipped cream with remaining pie in the background
I hope you enjoy this pie as much as I do! You see it server here with a dollop of whipped cream sweetened with a bit of sugar.

More Pie Recipes

Continue reading Shaker Apple Pie on 101 Cookbooks
No-Bake Cheesecake

This No-Bake Cheesecake is sweet, rich, and tangy with a buttery graham cracker crust. The perfect easy dessert to satisfy your sweet tooth!

The post No-Bake Cheesecake appeared first on Budget Bytes.

This mouth-wateringly creamy No-Bake Cheesecake is the perfect dessert for when you’re craving something sweet but don’t want to spend much time in the kitchen. It truly doesn’t get much easier when it comes to creating a dessert that feels so extravagant; you’re just crushing cookies and mixing a few ingredients. That’s it! PS You can make this up to 4 days ahead!

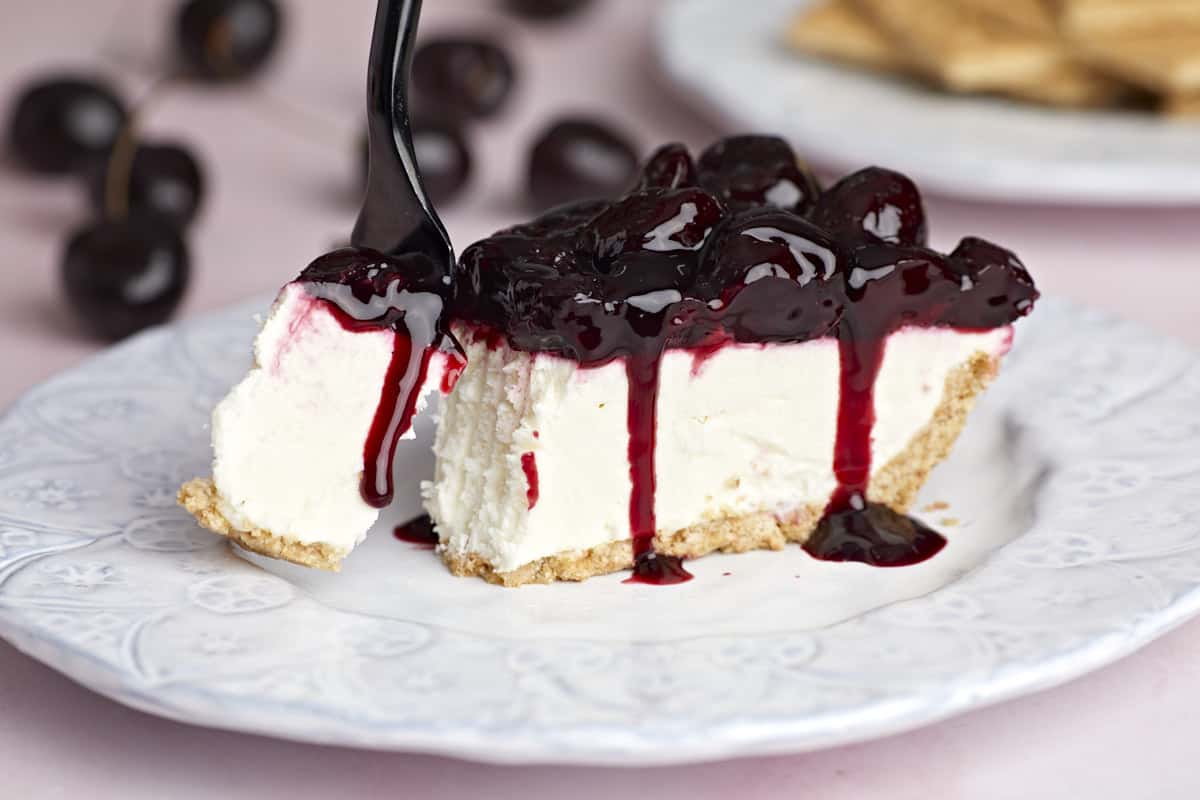
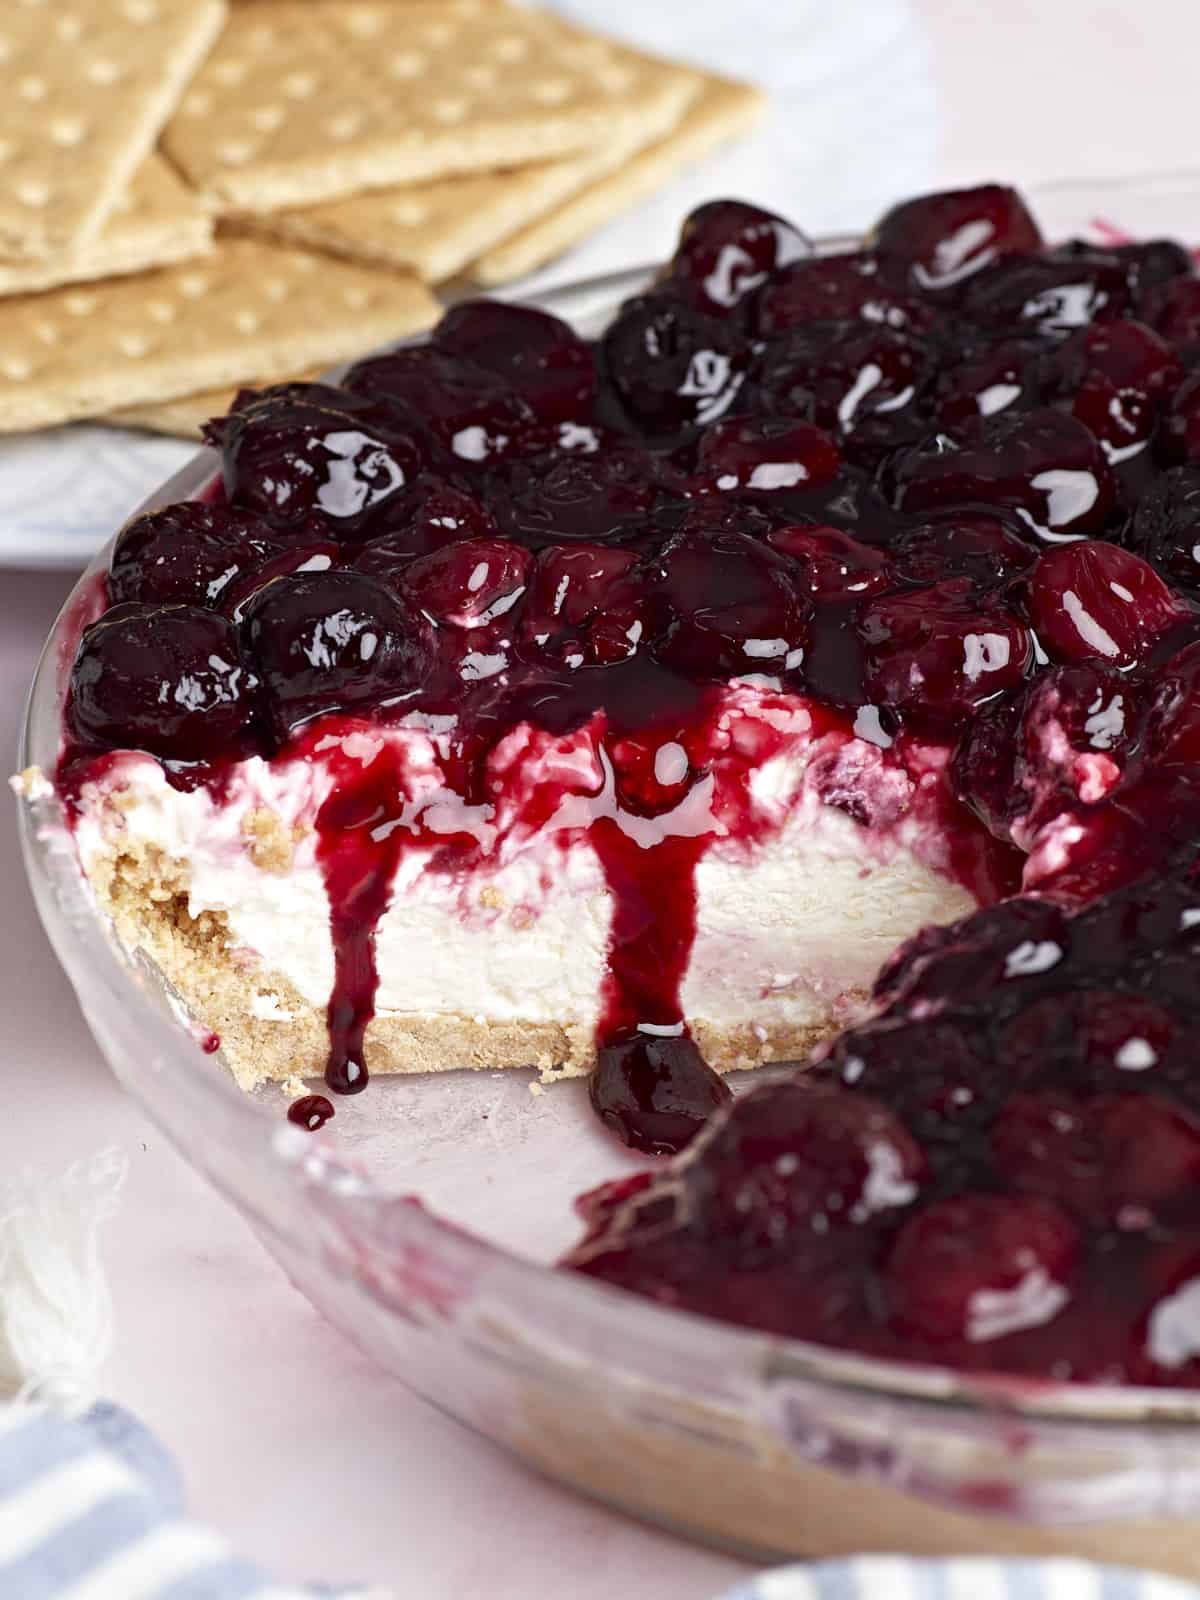
Side view of a no bake cheesecake with cherries on top, one slice removed.

What Is a No-Bake Cheesecake?

Most cheesecakes (like New York, Philadelphia, or Basque) are made with eggs and baked, which gives them a rich, velvety mouthfeel and firm texture. Making traditional cheesecake is a WHOLE THING. Which is why I love No-Bake Cheesecake! It’s regular cheesecake’s less fussy younger cousin. You don’t use eggs. Instead, you use whipped cream to create a much lighter texture than a traditionally baked cheesecake. It’s also really easy to go plant-based when you make a No-Bake Cheesecake!

Ingredients For No-Bake Cheesecake

This easy-to-make No-Bake Cheesecake comes together in fifteen minutes with just a handful of ingredients. My favorite kind of dessert! The hardest part is waiting for it to set. Here’s what you’ll need to get this No-Bake Cheesecake on your table:

  • Honey-Graham Crackers: These cookies are the base of our crust. If you don’t like graham crackers, use your favorite cookie here. Oreos (minus the filling) and Shortbread Cookies are great substitutions.
  • Salted Butter: Helps pull the crust together. If you don’t have salted butter, use unsalted, and add 1/8th teaspoon salt to the crust mixture. If you’re dairy-free, substitute with plant-based butter.
  • Brown Sugar: Helps sweeten the crust. Since cheesecake is served chilled, you won’t be able to taste the sugar as much as if it were a room-temperature dessert. So, we add a touch of sugar to the crumbled cookies to make sure the sweetness shows up. However, if you’re watching your sugar intake and want to leave it out, go for it. The crust will work without it.
  • Heavy Whipping Cream: Will be whipped to stiff peaks to lighten the cream cheese filling. If you’re plant-based, sub with unsweetened coconut cream.
  • Cream Cheese: Because what would a cheesecake be without it? You can use plant-based cream cheese as well.
  • Greek Yogurt: Adds a tanginess to the filling that helps develop a more intricate flavor profile without complicating things. You can substitute it with sour cream. For my dairy-free friends, use a plant-based sour cream or yogurt.
  • Powdered Sugar: Is the best option for sweetening, as it will dissolve immediately into the filling. Make your own by blending 1/2 cup granulated sugar with 1/2 tablespoon cornstarch until the mixture is powdery. You can also sweeten the filling with 1/3 cup of honey.
  • Vanilla: scents the filling and adds depth.

What To Serve With No-Bake Cheesecake 

This easy breezy dessert is perfect topped with our Strawberry Syrup, Lemon Curd, Cherry Sauce, or Blueberry Sauce. If you want to garnish with fruit, frozen and thawed blueberries or cherries are an easy and economical option. You can, of course, top this easy cheesecake with sliced fresh strawberries.

How To Store No-Bake Cheesecake 

This luscious cheesecake can be made up to four days ahead. If you have any leftovers (highly doubtful), wrap them well and store them in an air-tight container for up to five days in the fridge and three months in the freezer.

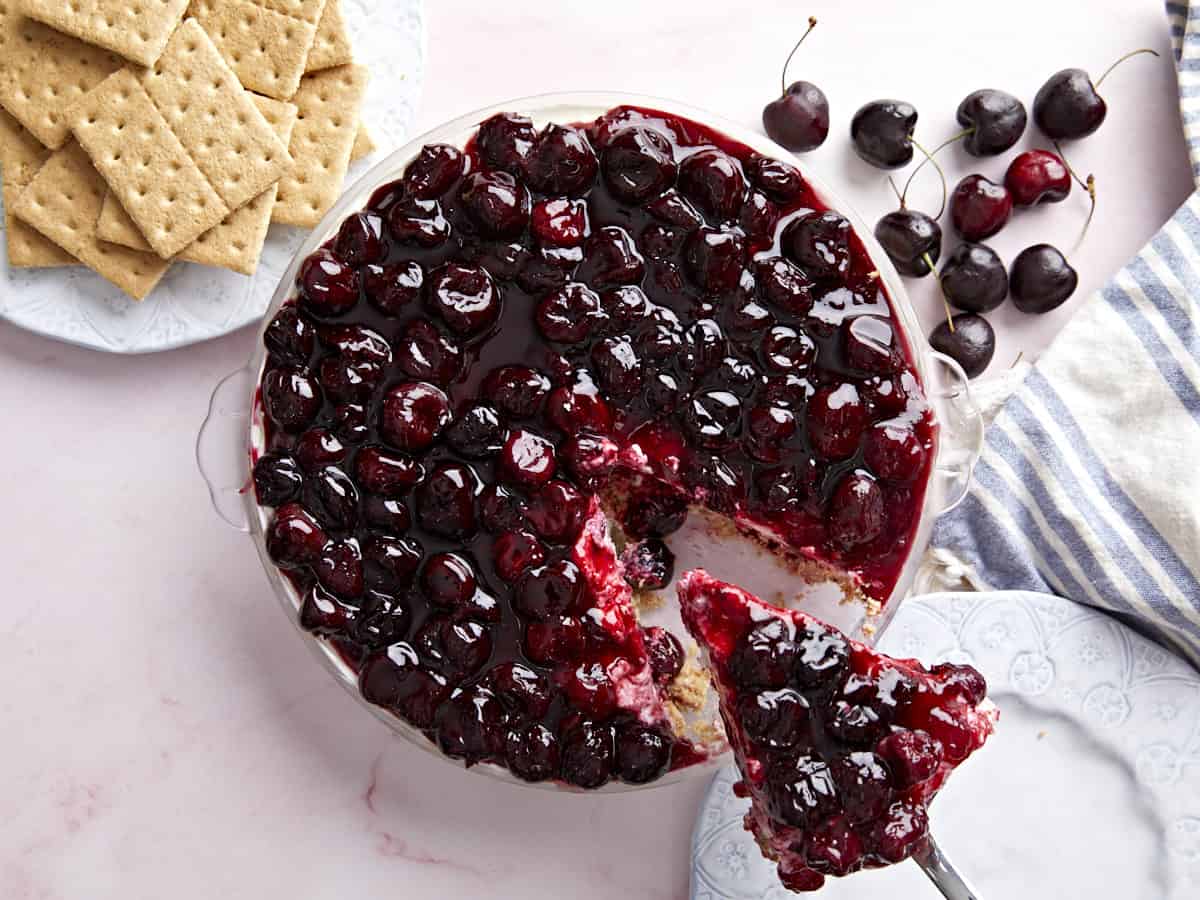
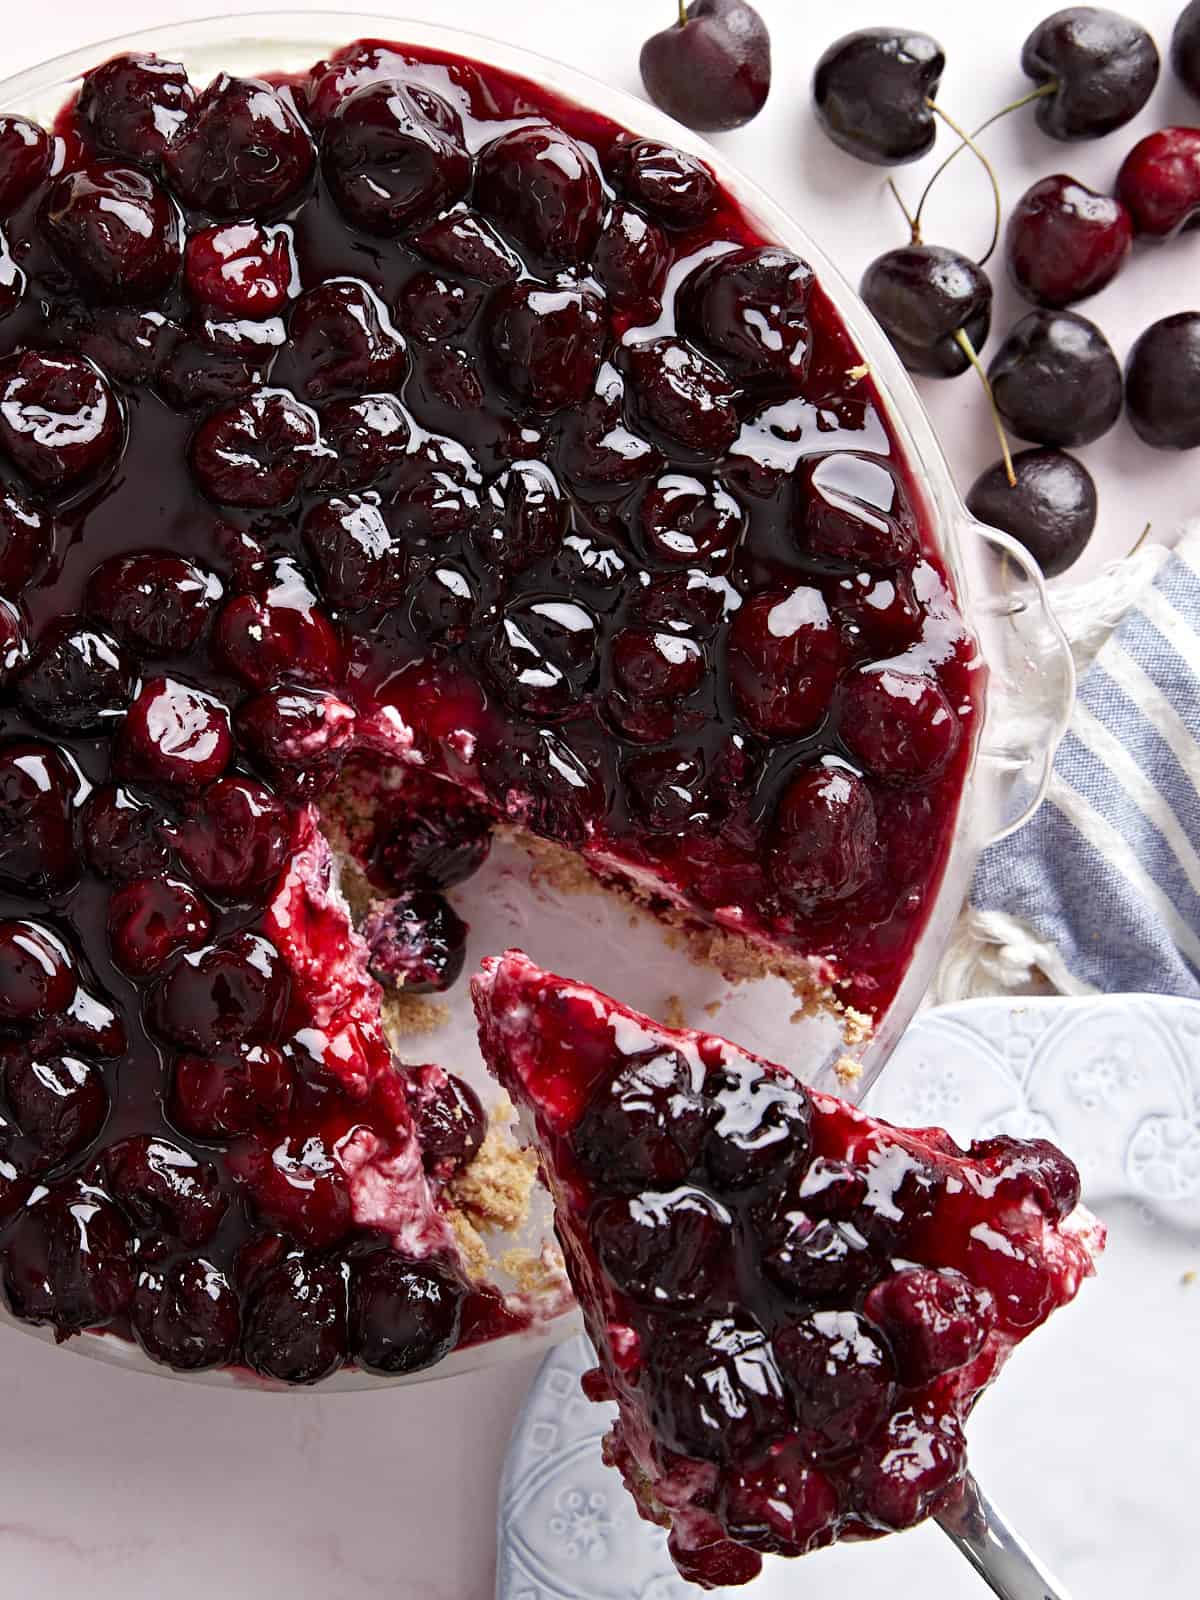
Overhead view of a no bake cheesecake topped with cherries, one slice being lifted out.
Side view of one slice of no bake cheesecake on a plate, a fork taking a bite.
Print

No-Bake Cheesecake

This No-Bake Cheesecake is sweet, rich, and tangy with a buttery graham cracker crust. The perfect easy dessert to satisfy your sweet tooth!
Course Dessert
Cuisine American
Total Cost $14.37 recipe / $1.79 serving
Prep Time 15 minutes
Chill Time 6 hours
Total Time 6 hours 15 minutes
Servings 8 slices
Calories 528kcal

Ingredients

Crust

  • 10 oz. honey graham crackers (2 cups crushed) $1.44
  • 10 Tbsp salted butter, melted $1.28
  • 2 Tbsp brown sugar $0.04

Filling

  • 1 cup heavy whipping cream $1.50
  • 1 cup powdered sugar $0.27
  • 2 8oz. blocks cream cheese, room temperature $4.38
  • 5 oz. non-fat Greek yogurt $1.00
  • 1 tsp vanilla extract $0.58

Topping (optional)

Instructions

Crust

  • Crush the graham crackers to a fine powder in a blender or food processor and add to a medium bowl.
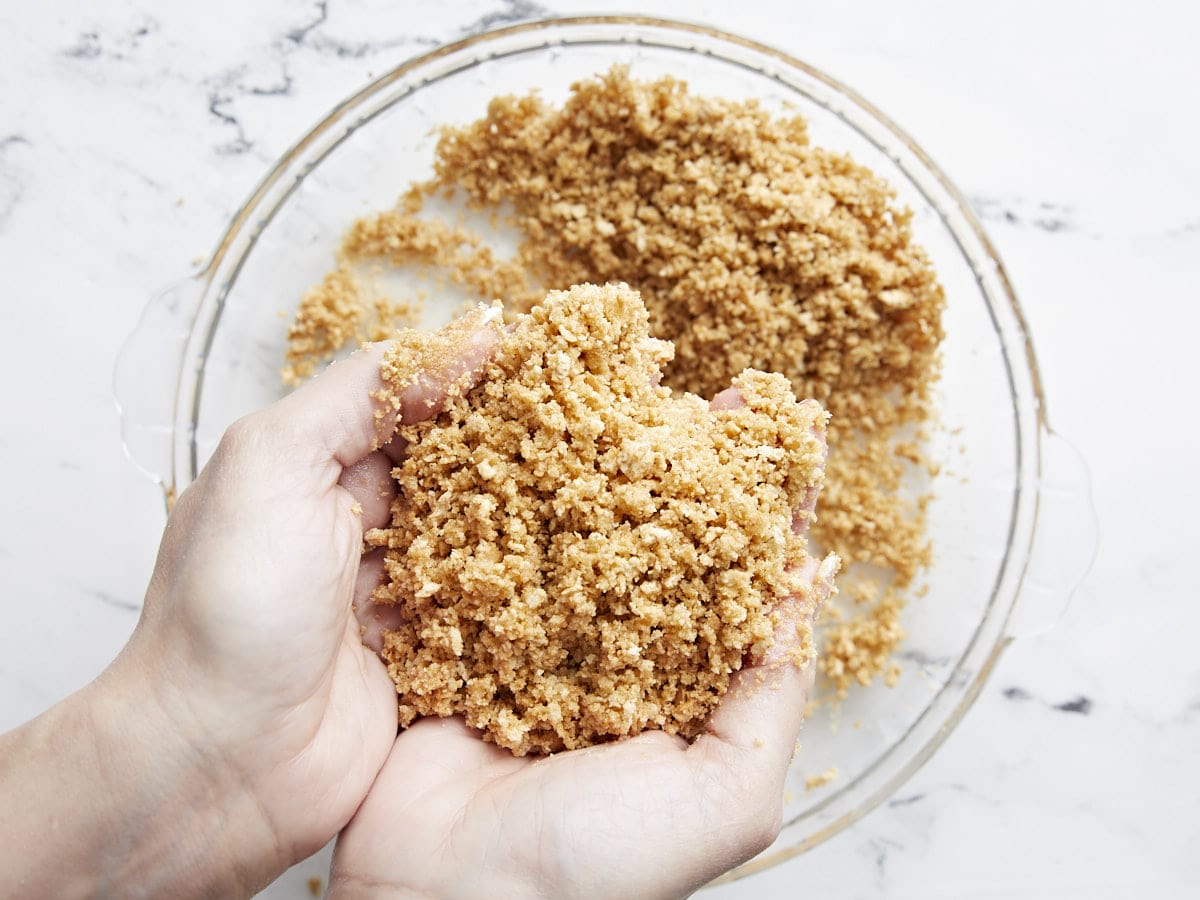
  • Mix the brown sugar into the graham cracker crumbs and then add the melted butter. Use your hands to mix the butter into the crumbs until a sand-like consistency is created.
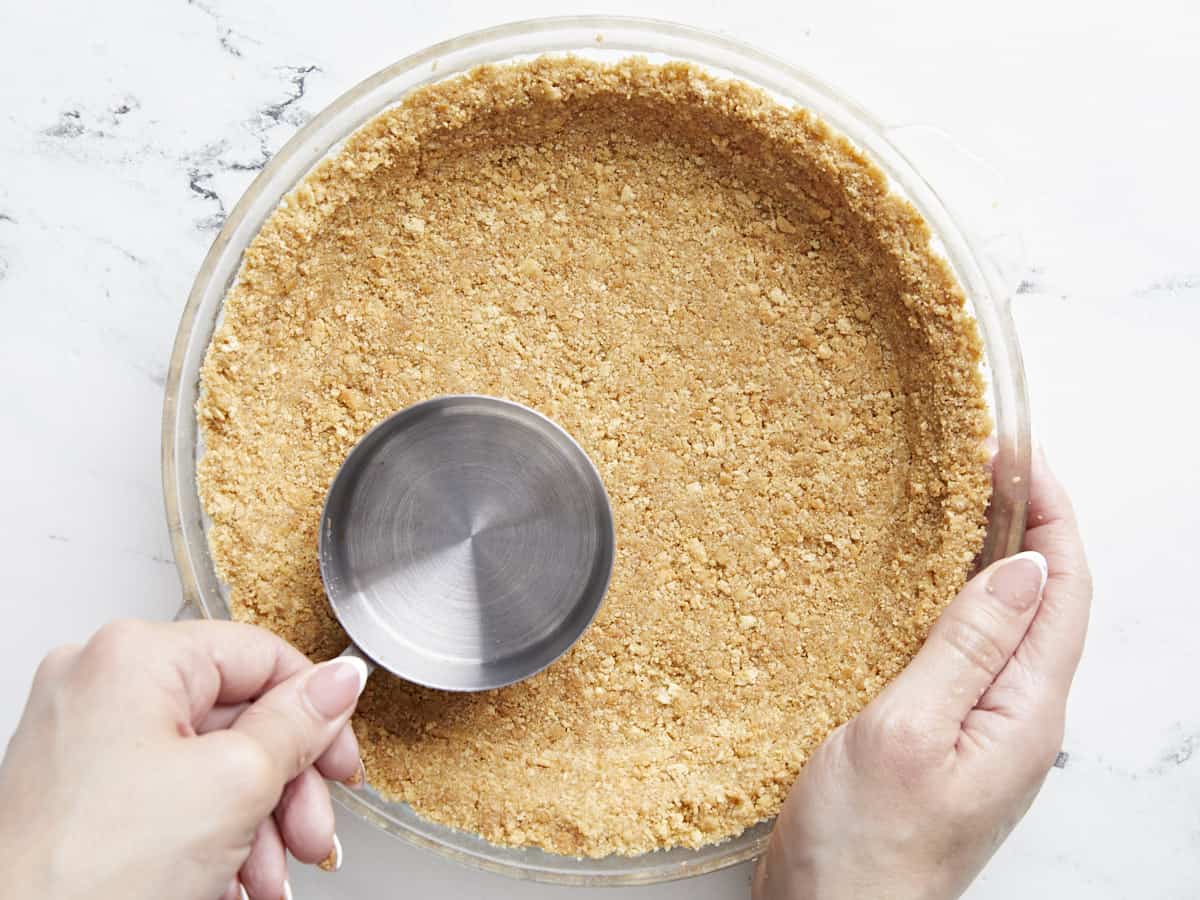
  • Pack the cookie crumb mixture into a 9.5-inch pie plate using the bottom of a measuring cup to press it in well and smooth it out. Press the crumbs from the center, out, and all the way up the sides. Place the pie plate in the freezer while you make the filling.

Filling

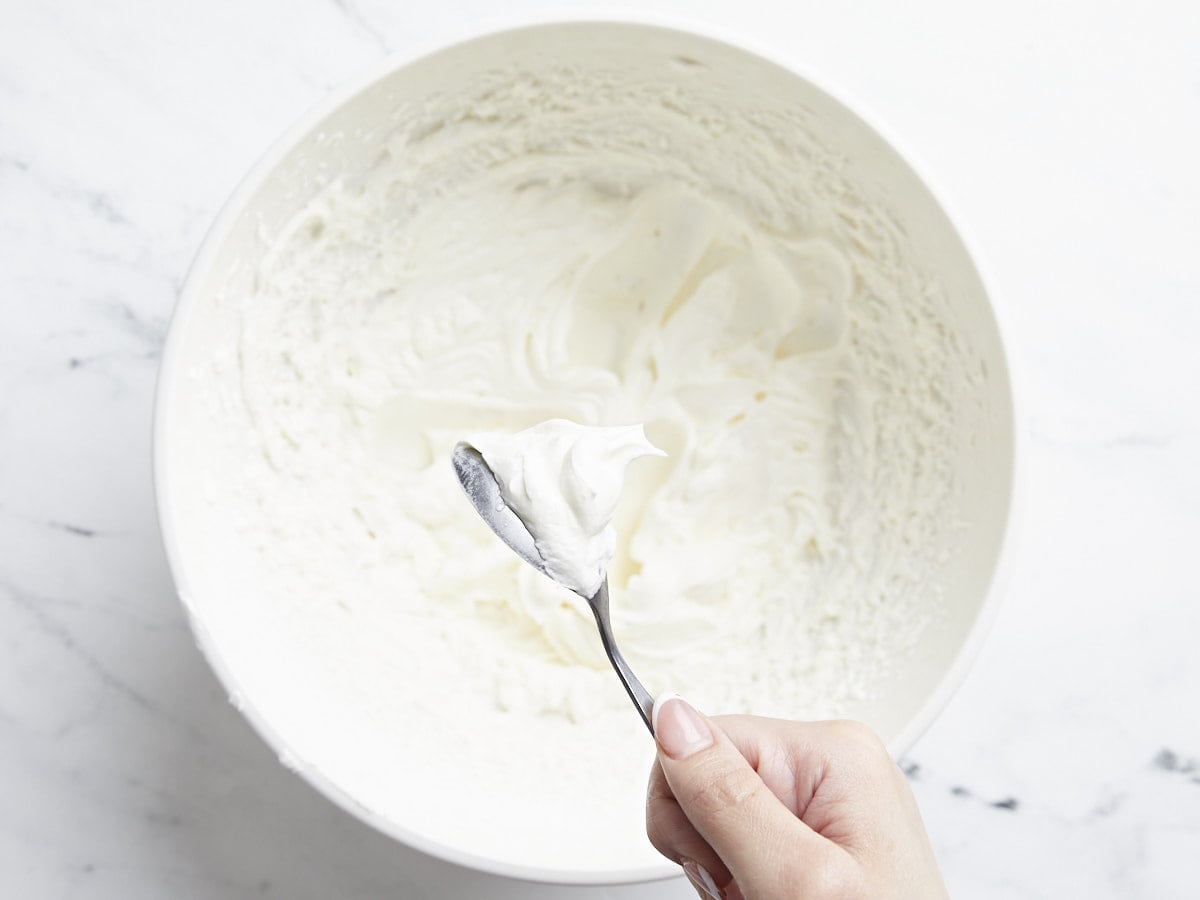
  • Whip the heavy whipping cream and powdered sugar to stiff peaks.
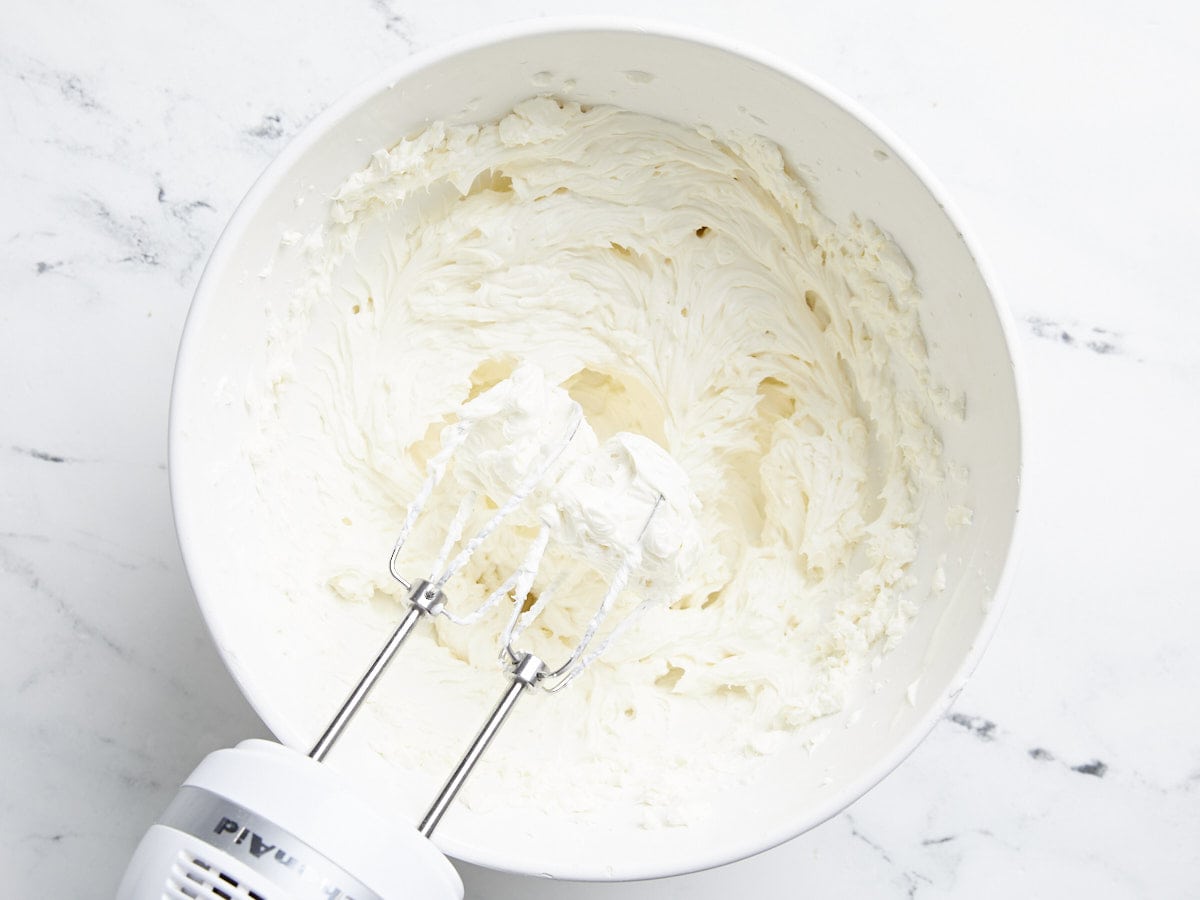
  • In a separate bowl, whip the softened room-temperature cream cheese, Greek yogurt, and vanilla until smooth and creamy.
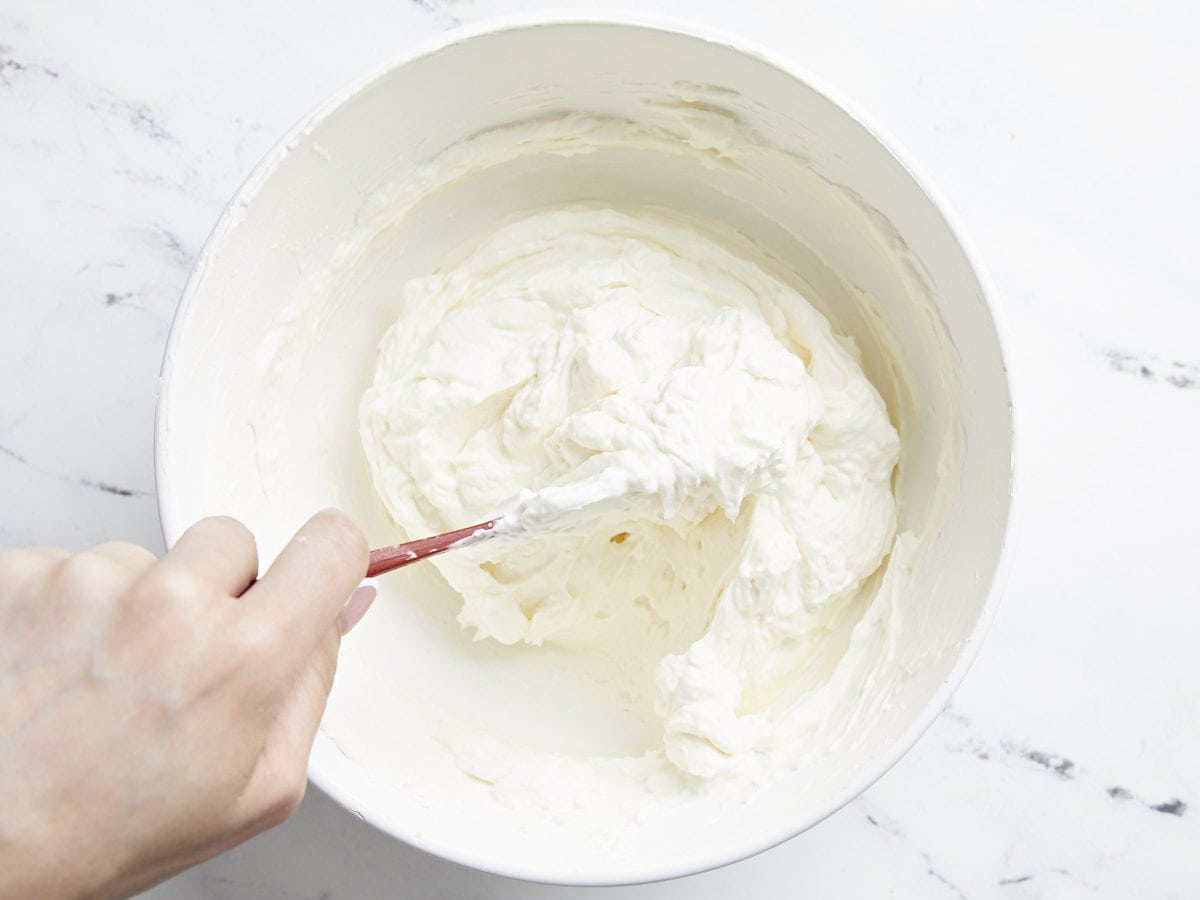
  • Gently fold one-half of the whipped cream into the cream cheese mixture until fully incorporated. Repeat with the remaining whipped cream.
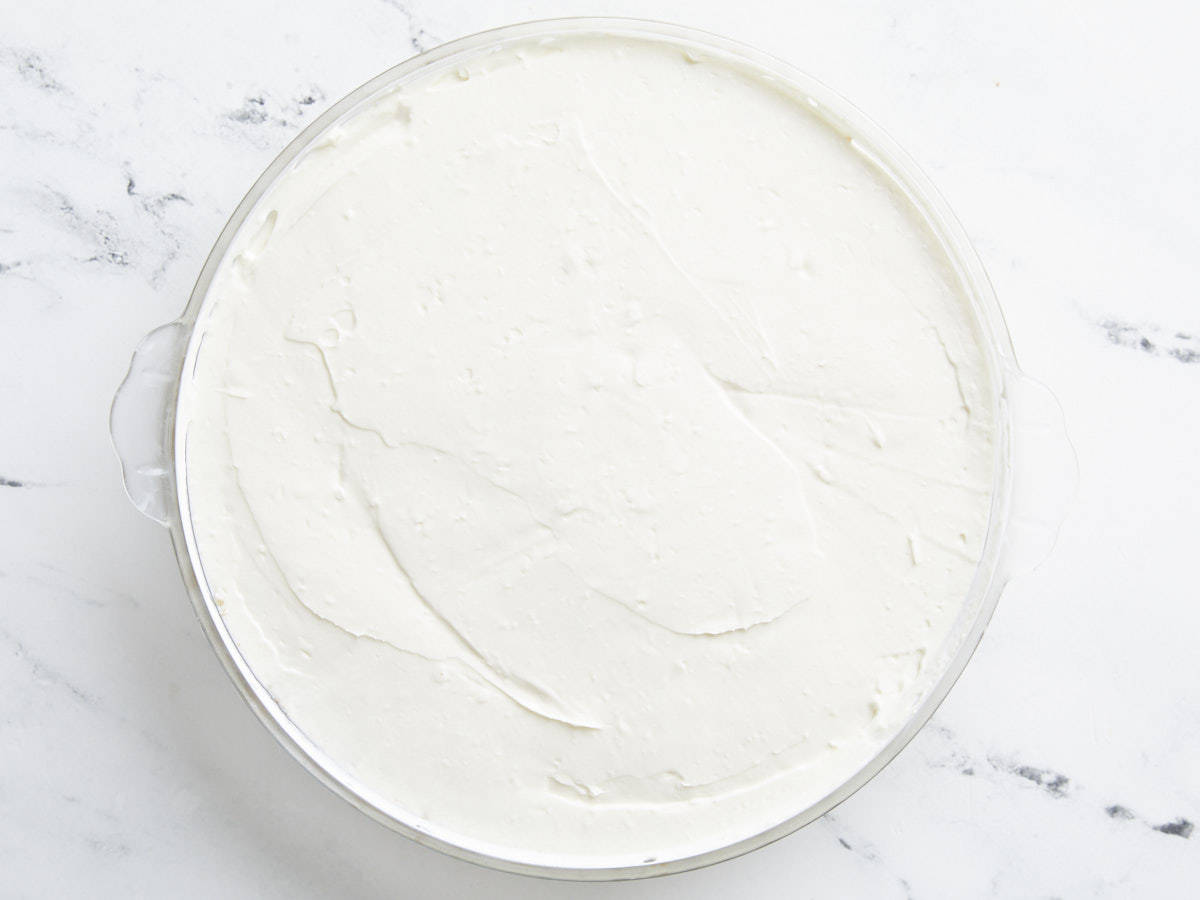
  • Add the filling to your frozen crust gently. Lift the pie plate off the counter a 1/4 inch and gently drop it a few times to remove large air bubbles. Use a spatula or large spoon to smooth out the top.
  • Cover the cheesecake with a sheet of plastic or parchment directly on the surface and then cover it in aluminum foil. Refrigerate for at least 6 hours or until the cheesecake sets and is firm to the touch.
  • Serve the cheesecake as is, or spoon a fruit sauce topping over it before serving. If the crust sticks to the pie plate, wet a dish towel with hot water, squeeze out the excess water, and place the pie plate on top of the towel for a minute to warm and loosen the crust. Enjoy the beauty of this incredible no-fuss dessert before it gets devoured!

See how we calculate recipe costs here.

Notes

*Try other toppings like our Blueberry Sauce, Lemon Curd, Strawberry Sauce, or any store-bought fruit sauce or pie filling.

Nutrition

Serving: 1slice | Calories: 528kcal | Carbohydrates: 63g | Protein: 6g | Fat: 29g | Sodium: 373mg | Fiber: 2g
Side view of one slice of no bake cheesecake on a plate, a fork taking a bite.

How to Make No-Bake Cheesecake – Step by Step Photos

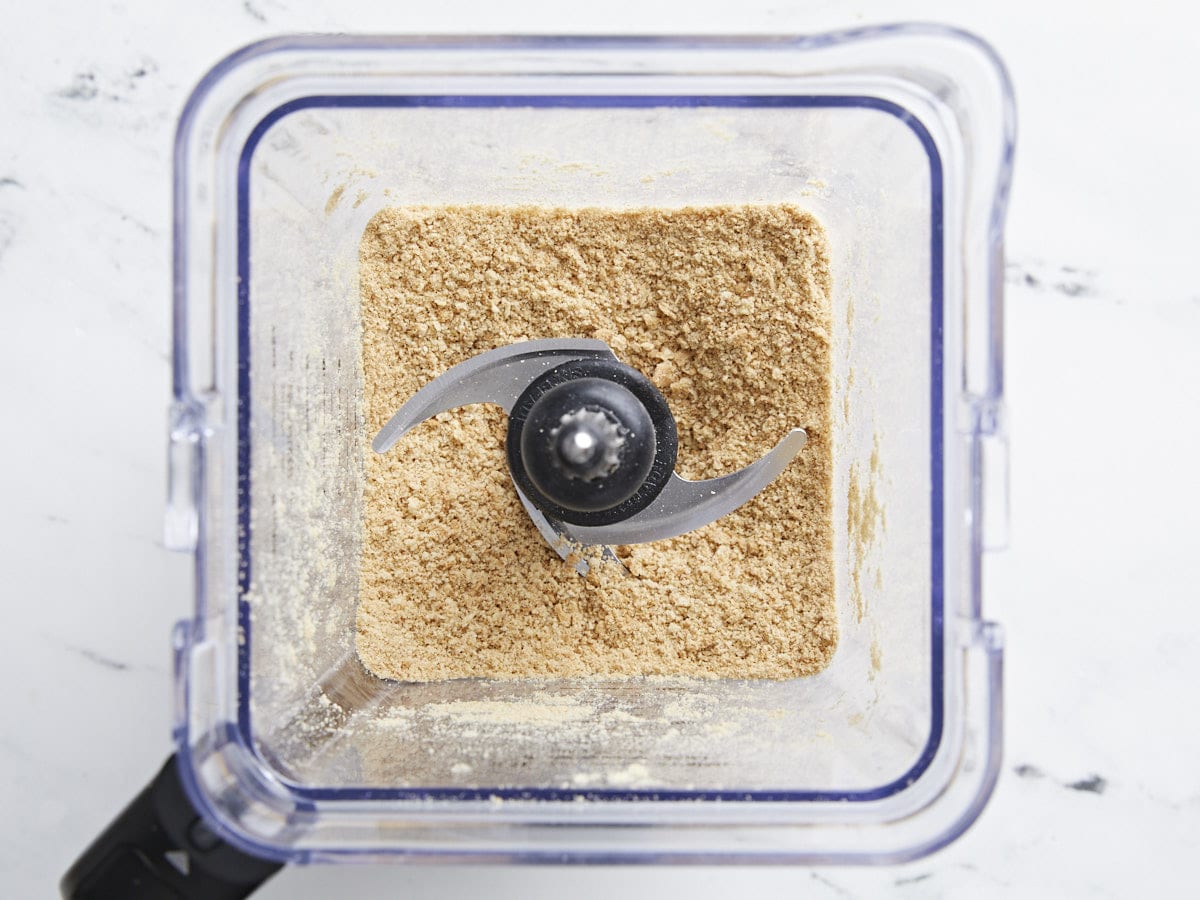
Crushed graham crackers in a blender.

Crush 10 ounces of graham crackers (about 18 crackers) to a fine powder in a blender and add to a medium bowl. You’ll need 2 cups once crushed.

Graham cracker and butter mixture held in a pair of hands.

Mix two tablespoons of brown sugar into the cookie crumbs and then add 10 tablespoons of melted butter. Use your hands to mix the butter into crumbs until a sand-like consistency is created.

Cookie crumbs being pressed into a pie plate with the back of a measuring spoon.

Pack the cookie crumb mixture into a 9.5-inch pie plate using the bottom of a measuring cup to press it in well and smooth it out. Press the crumbs from the center, out, and all the way up the sides. Place the pie plate in the freezer while you make the filling.

Heavy cream whipped to stiff peaks in a white bowl.

Whip 1 cup of heavy whipping cream and 1 cup of powdered sugar to stiff peaks.

Cream cheese, yogurt, and vanilla whipped in a bowl with a hand blender.

In a separate bowl, whip the two 8-ounce blocks of softened room-temperature cream cheese, 5 ounces of Greek yogurt, and 1 teaspoon of vanilla until smooth and creamy.

Cream cheese and whipped cream folded together.

Gently fold one-half of the whipped cream into the cream cheese mixture until fully incorporated. Repeat with the remaining whipped cream.

Cheesecake mixture poured into the pie plate.

Add the filling to your frozen crust gently. Pick the pie plate up a 1/4 inch and gently drop it on the counter a few times to remove large air bubbles. Use a spatula or large spoon to smooth out the top. Cover the cheesecake with a sheet of plastic or parchment directly on the surface and then cover it in aluminum foil. Refrigerate for at least 6 hours or until the cheesecake sets and is firm to the touch.

Close up overhead view of a no bake cheesecake topped with cherries, one slice being removed.

Serve the cheesecake as is, or spoon a fruit sauce topping over it before serving. Try our Cherry Sauce, Blueberry Sauce, Lemon Curd, or Strawberry Sauce. If the crust sticks to the pie plate, wet a dish towel with hot water, squeeze out the excess water, and place the pie plate on top of the towel for a minute to warm and loosen the crust. Enjoy the beauty of this incredible no-fuss dessert before it gets devoured!

The post No-Bake Cheesecake appeared first on Budget Bytes.

Tahini Brownies

Who doesn’t love a good brownie? They’re chocolatey, gooey, and always hit the spot. But have you ever tried tahini brownies? It may sound a bit unconventional, but trust me, this is a game-changer. The nutty flavor of tahini perfectly complements the …

Who doesn't love a good brownie? They're chocolatey, gooey, and always hit the spot. But have you ever tried tahini brownies? It may sound a bit unconventional, but trust me, this is a game-changer. The nutty flavor of tahini perfectly complements the rich chocolatey goodness of the brownies for an even creamier, more indulgent treat....

Read More

This article was written and published by Oh My Veggies. It may not be reproduce or republished without permission of the author. The original article can be found here: Tahini Brownies.

Caramel Apple Empanadas

These Caramel Apple Empanadas are the ultimate Fall treat! Fresh apples, cinnamon-sugar, and caramel are all wrapped up in a flaky pie crust for a totally indulgent dessert. If you’re looking for a delicious and easy dessert that’s perfect for fall, th…

These Caramel Apple Empanadas are the ultimate Fall treat! Fresh apples, cinnamon-sugar, and caramel are all wrapped up in a flaky pie crust for a totally indulgent dessert. If you're looking for a delicious and easy dessert that's perfect for fall, these caramel apple empanadas are the perfect choice. Tangy Granny Smith Apples are tossed...

Read More

This article was written and published by Oh My Veggies. It may not be reproduce or republished without permission of the author. The original article can be found here: Caramel Apple Empanadas.

Banana Cranberry Muffins

If you’re looking for a tasty and healthy breakfast or snack, these banana cranberry muffins are the perfect choice. They’re packed with fresh bananas and cranberries, loaded with fiber rich oats, and they’re bursting with delicious Fall flavors too! T…

If you're looking for a tasty and healthy breakfast or snack, these banana cranberry muffins are the perfect choice. They're packed with fresh bananas and cranberries, loaded with fiber rich oats, and they're bursting with delicious Fall flavors too! There's nothing quite like a soft, fluffy muffin. And these Cranberry Banana Muffins are my new...

Read More

This article was written and published by Oh My Veggies. It may not be reproduce or republished without permission of the author. The original article can be found here: Banana Cranberry Muffins.

Dip Into Fall Desserts

Fall is known for its golden-hued leaves, crisp air, and, of course, an array of mouthwatering flavors. As we bid adieu to
The post Dip Into Fall Desserts appeared first on Salty Side Dish Recipes.

Fall is known for its golden-hued leaves, crisp air, and, of course, an array of mouthwatering flavors. As we bid adieu to

The post Dip Into Fall Desserts appeared first on Salty Side Dish Recipes.

Sopapillas with a side of honey

Sopapillas are total decadence for me. You’d think after concluding a stomach-swelling multi-course meal of chips and salsa, queso, guacamole, tamales, rice, refried beans. and enchiladas that it would be impossible t…

Sopapillas are total decadence for me. You’d think after concluding a stomach-swelling multi-course meal of chips and salsa, queso, guacamole, tamales, rice, refried beans. and enchiladas that it would be impossible to find room for just one...

Source

Zucchini Brownies

This zucchini brownies recipe comes out ultra moist with deep chocolaty flavor! Bookmark this one for a deliciously simple treat.…

A Couple Cooks – Recipes worth repeating.
This zucchini brownies recipe comes out ultra moist with deep chocolaty flavor! Bookmark this one for a deliciously simple treat.

Zucchini Brownies

What do you make when you’ve made all the zucchini bread and zucchini muffins? Zucchini brownies, of course! Stop what you’re doing and gather the ingredients for this recipe that will have your friends and family running for another piece. The brownies come out ultra moist and gooey, with a deep, rich chocolaty flavor. They’re simple to make and you won’t believe the amazing flavor and texture!

Ingredients in this zucchini brownies recipe

The secret to rich and moist brownies? Zucchini! Turns out, adding shredded zucchini to brownies makes for an incredibly moist, gooey texture (which is what we prefer in a good brownie). It also lets you get away with not using eggs, which makes this zucchini brownies recipe accidentally vegan! Here are the ingredients in this recipe:

  • Granulated sugar
  • Neutral oil
  • Zucchini
  • Vanilla extract
  • Cocoa powder
  • Dutch process cocoa powder
  • Cornstarch
  • All-purpose flour
  • Baking soda
  • Kosher salt
  • Chocolate chips
Zucchini Brownies recipe

The flavor key: Dutch process cocoa powder

This zucchini brownies recipe uses a combination of two types of cocoa powder to achieve the deep, dark chocolaty flavor. The key? Dutch process (dark) cocoa powder, a special type of cocoa powder is treated with an alkali to make it pH neutral. This gives it a darker color and milder flavor. It makes the flavor ultra chocolaty, with deep rich notes instead of the lighter fruity notes that you’ll get with regular cocoa powder.

Tips for zucchini brownies

Zucchini brownies are as straightforward as a standard brownies recipe! There are just a few things to note for success:

  • Use a metal pan for baking. This makes for the most consistent bake and a better rise than a glass pan.
  • Finely grate the zucchini. This allows this green vegetable to meld seamlessly into the texture of the brownies.
  • Do not drain the zucchini! This recipe is optimized for undrained zucchini, using the moisture in this vegetable (which is 94% water!).
Zucchini Brownies recipe

Some notes on cooling and cutting

It’s important for recipes like brownies, muffins and quick breads to cool completely. This sets the texture and allows them to hold together better. The flavor is also generally better at room temperature. These zucchini brownies don’t hold together if they are very warm, so make sure to let them cool completely.

For best results, cool for 1 hour in the pan, then remove the brownies from the pan with the foil and allow to cool on a baking rack for another 1 hour until cooled.

To get clean slices, but through the brownies once they are cooled and clean off the knife after each cut.

Brownie variations

If you love non-standard brownies, you’ll love these zucchini brownies! A few other variations you’ll love:

Zucchini Brownies

Leftover storage info

These zucchini brownies hold up well over time! Store them refrigerated for up to 1 week. You can also store at room temperature, but they are so gooey that refrigeration is best: plus, they’ll last longer.

More zucchini bread and muffins

There are so many ways to mix up zucchini bread! This chocolate zucchini bread is our absolute favorite, but a close second is lemon zucchini bread: it’s zingy and bright! It’s the exact opposite of this bread but nearly as satisfying. Here are a few more zucchini recipes:

This zucchini brownies recipe is…

Vegetarian, vegan, plant-based and dairy-free.

Print
Zucchini Brownies

Zucchini Brownies


  • Author: Sonja Overhiser
  • Prep Time: 20 minutes
  • Cook Time: 30 minutes
  • Total Time: 50 minutes
  • Yield: 16

Description

This zucchini brownies recipe comes out ultra moist with deep chocolaty flavor! Bookmark this one for a deliciously simple treat.


Ingredients

  • 1 ¼ cup granulated sugar
  • ⅓ cup neutral oil (grapeseed, organic canola or vegetable oil, or other neutral oil of choice)
  • 2 cups finely shredded zucchini (packed not drained)
  • 1 teaspoon vanilla extract
  • ½ cup cocoa powder (standard)
  • 2 tablespoon Dutch process (dark chocolate) cocoa powder
  • 1 tablespoon cornstarch
  • 1 ¼ cups all-purpose flour
  • ½ teaspoon baking soda
  • ¾ teaspoon kosher salt
  • 1 cup semisweet chocolate chips

Instructions

  1. Preheat the oven to 350°F. Line a 9 x 9″ pan with a piece of aluminum foil.
  2. Stir together the sugar and oil with a spatula. Then stir in the zucchini, vanilla, cocoa powder, Dutch process cocoa powder, cornstarch, flour, baking soda, and salt. Fold in ¾ of the chocolate chips. Allow the batter to stand for 5 minutes to allow it to thicken.
  3. Pour the batter into the pan and top with the remaining ¼ cup chocolate chips. Bake 30 to 35 minutes until a tester comes out with a few clinging crumbs. Cool for 1 hour in the pan, then remove the brownies from the pan with the foil and allow to cool on a baking rack for another 1 to 2 hours until cooled. Slice into 16 pieces and serve (wash the knife after each slice to make for clean cuts). Leftovers store up to 1 week refrigerated. 
  • Category: Dessert
  • Method: Baked
  • Cuisine: Baked
  • Diet: Vegan

Keywords: Zucchini brownies, zucchini brownies recipe

A Couple Cooks - Recipes worth repeating.
Coconut Cream Pie Bars

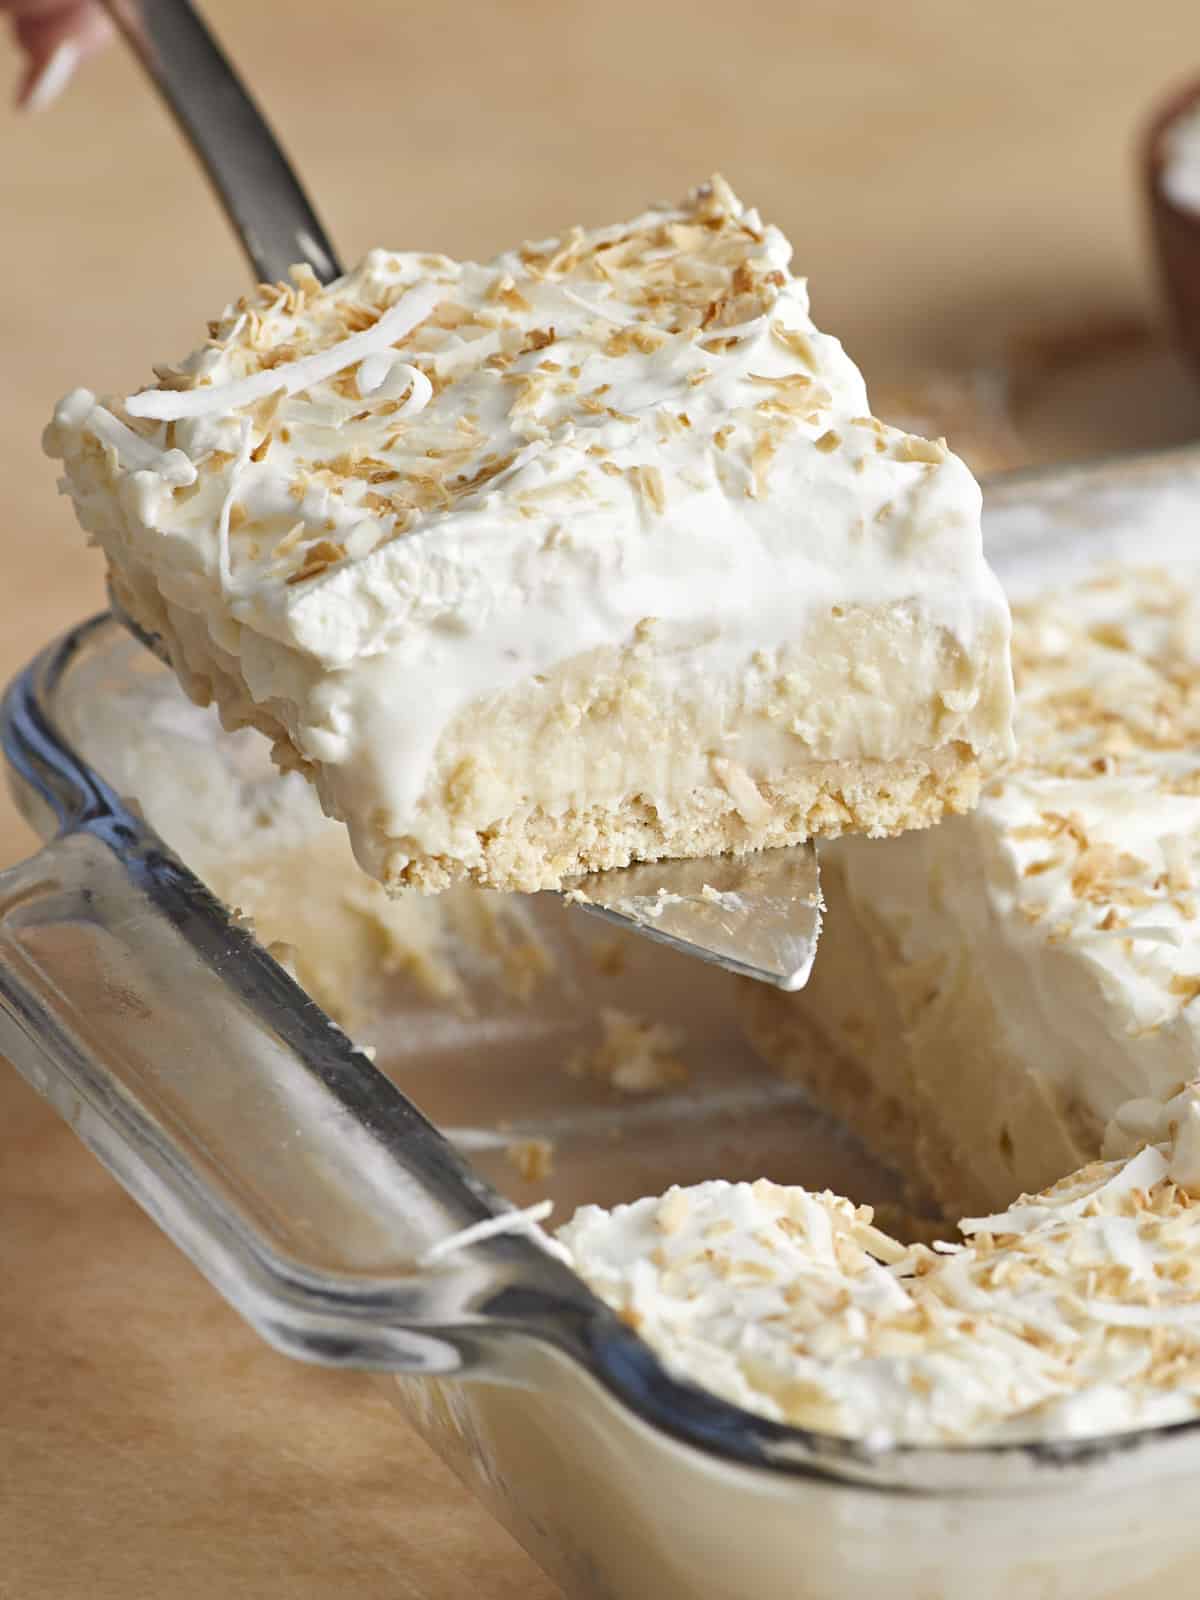
Coconut Cream Pie Bars are made with a buttery cookie crust, a rich and velvety coconut cream filling, and vanilla whipped cream.

The post Coconut Cream Pie Bars appeared first on Budget Bytes.

These Coconut Cream Pie Bars are so decadent that I could eat them for breakfast, lunch, and dinner. (And by could, I mean I HAVE.) They’re made with a buttery vanilla cookie crust and a rich and velvety coconut cream filling and topped with dollops of vanilla-scented whipped cream. You get 24 slices from this easy Coconut Cream Pie Bars recipe, so it’s perfect for a school bake sale or a large get-to-gether. I’m obsessed!

Side view of a coconut cream pie bar being lifted out of the casserole dish.

What Are Coconut Cream Pie Bars?

Coconut Cream Pie Bars are basically a simplified Coconut Cream Pie. Instead of making a pie crust and blind baking it, I use a cookie crust that comes together in seconds. I put the most work into the filling, steeping coconut milk with coconut flakes to really punch in on that tropical flavor. The flakes are strained out to create the silkiest texture, and the whole thing is topped with canned whipped cream (which can withstand a hot summer day without liquifying). The final touch is a generous sprinkle of crunchy toasted coconut flakes.

Ingredients For Coconut Cream Pie Bars

This recipe scores a 100 for convenience. You can make the crust and fill it with custard a day ahead, then refrigerate until it’s go time. You can even freeze it up for up to three months. Just leave the whipped cream topping and coconut flake garnish for when you’re ready to serve. Here’s what you need to make Coconut Cream Pie Bars:

  • Unsweetened Flaked Coconut: helps flavor the coconut milk custard and is used as a garnish. I use unsweetened to control the amount of sugar in the recipe. If you want to use sweetened coconut flakes, skip the sugar. You don’t have to strain the coconut flakes out of the custard, but chunky custard isn’t my thing, so I do.
  • Coconut Milk, Condensed Milk, and Evaporated Milk: create our custard base. If two cans of coconut milk are out of your budget, replace one can with a second can of evaporated milk and steep the mixture for an hour instead of 20 minutes. 
  • Brown Sugar and Granulated Sugar: these sweeten the custard, with the brown sugar adding notes of molasses to deepen the flavor. 
  • All-Purpose Flour and Cornstarch: help thicken the custard.
  • Eggs: Egg yolks thicken the custard and help deepen its color. Reserve the white for a different preparation, or use them to make meringue!
  • Salted Butter: adds a velvety finish to the custard.
  • Vanilla Extract: rounds out the flavor of the filling
  • Whipped Cream Topping: I use canned whipped cream because it’s stabilized and tends to hold up on a hot summer day. But if you’re eating this in a controlled and cool environment, and you’re not scared of the cream getting a little soupy, try it with frozen whipped cream or our easy Homemade Whipped Cream.

How To Store Coconut Cream Pie Bars

Place leftover bars in an airtight container, top with a piece of parchment paper, seal, and refrigerate for up to 3 days or freeze for up to 3 months. If you plan on making the bars to freeze for later, skip the whipped cream topping and coconut flake garnish. Pour the custard into the cookie crust and refrigerate it until it sets. Then top it with a sheet of parchment directly on the surface, wrap it in two layers of aluminum, and keep it in an airtight container (or wrap it in plastic.) Thaw the frozen bars in the refrigerator before topping them with whipped cream and garnishing them with coconut flakes. 

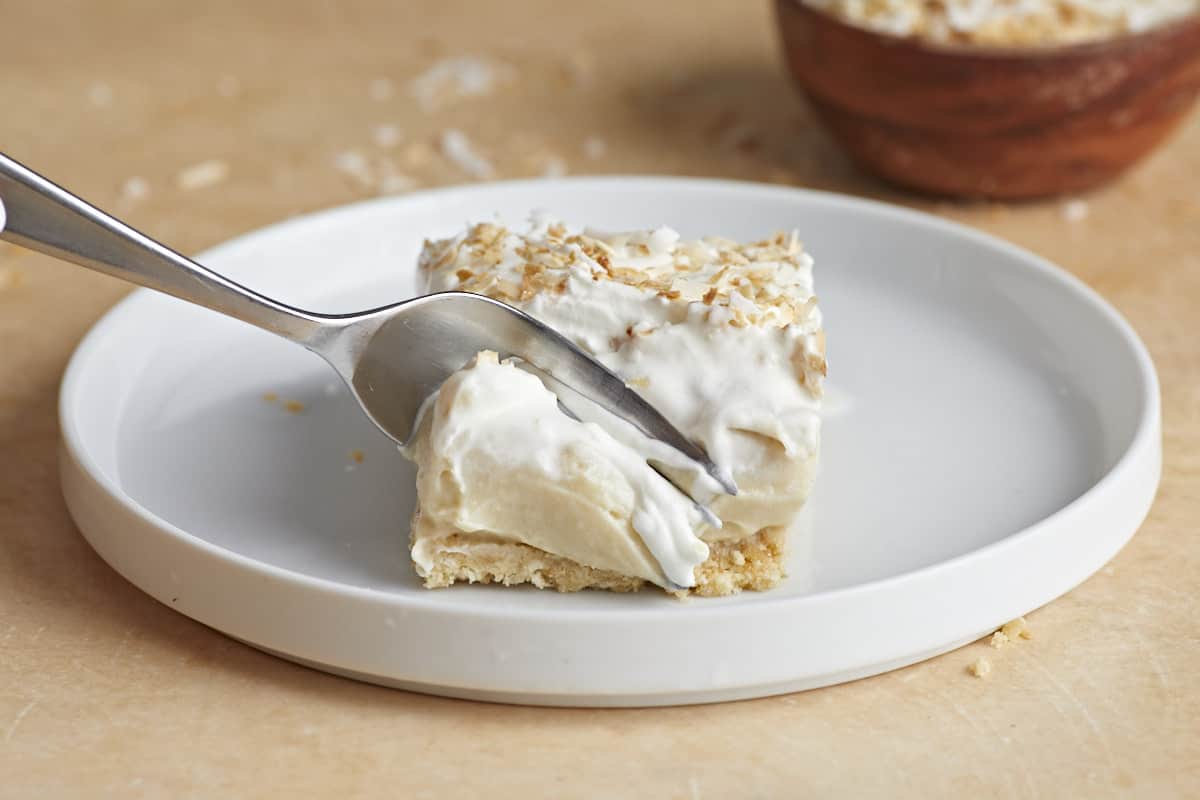
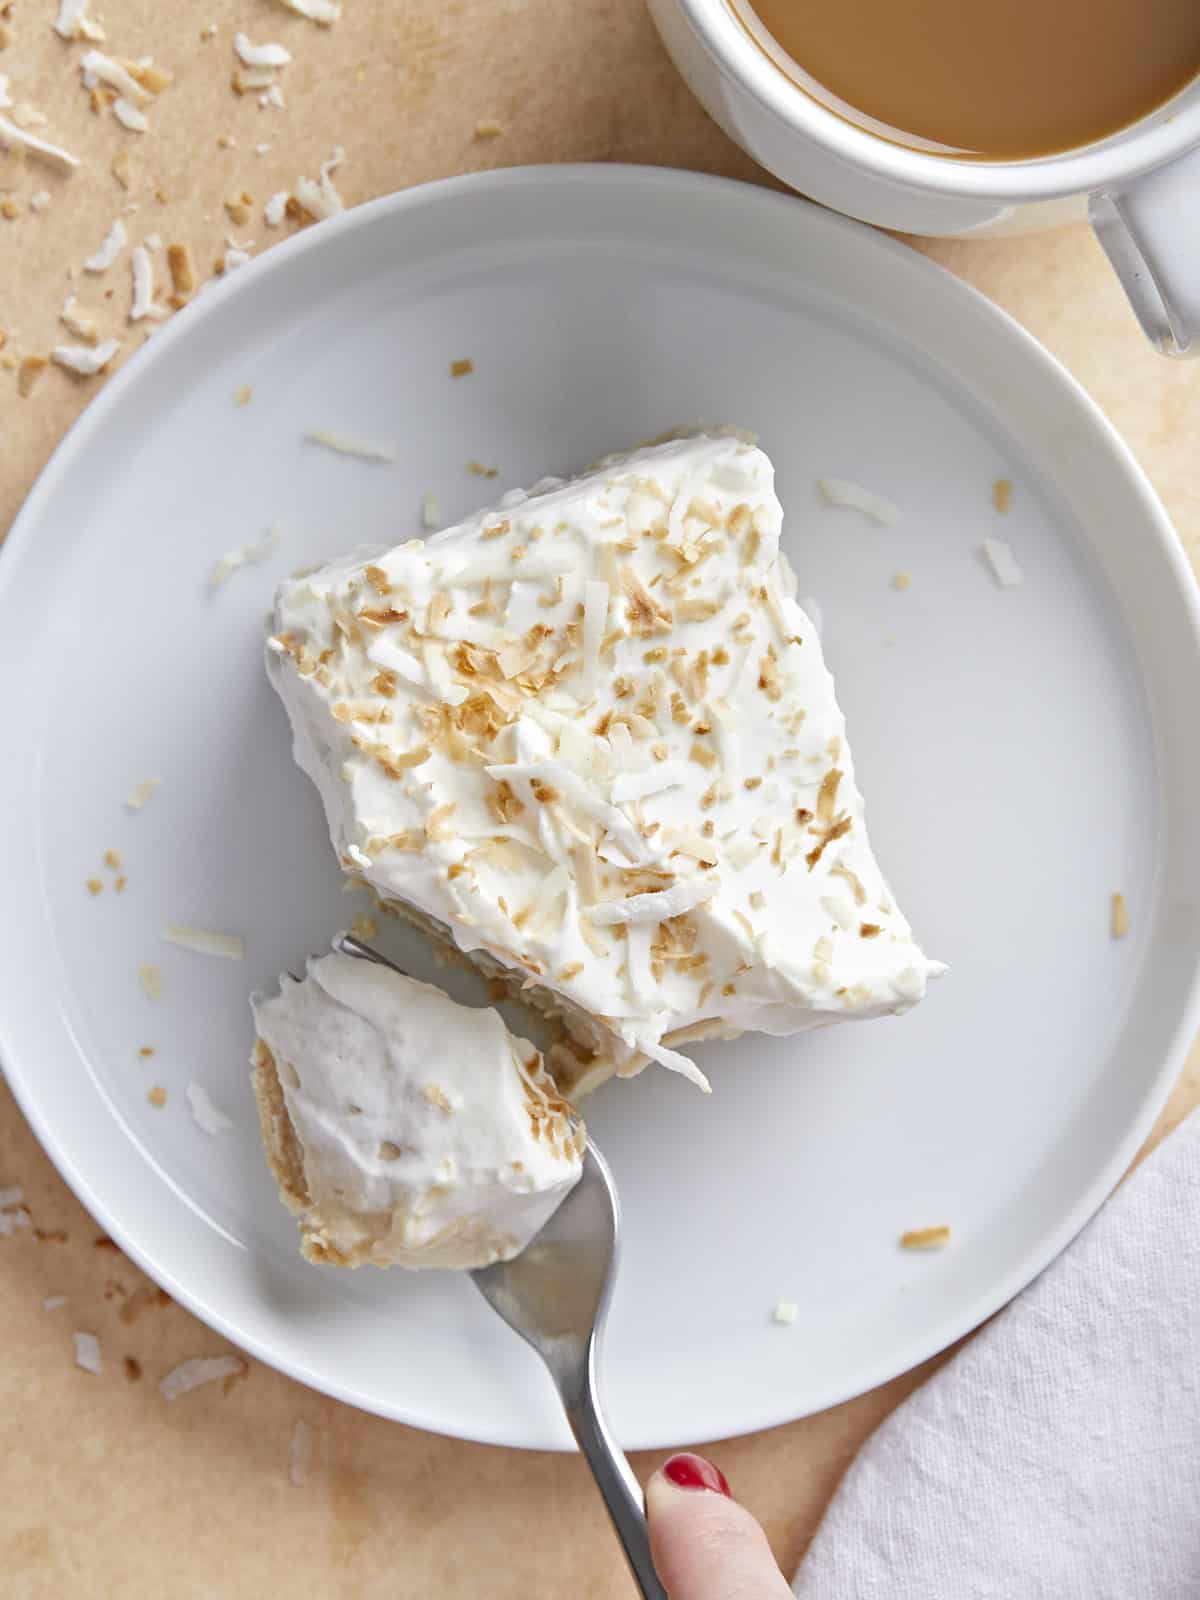
A fork cutting into a coconut cream pie bar on a plate.
Side view of coconut cream pie bar being lifted out of the casserole dish.
Print

Coconut Cream Pie Bars

Coconut Cream Pie Bars are made with a buttery cookie crust, a rich and velvety coconut cream filling, and vanilla whipped cream.
Course Dessert
Cuisine American
Total Cost $16.96 recipe / $0.71 serving
Prep Time 20 minutes
Cook Time 45 minutes
Rest 2 hours
Servings 24 slices
Calories 234kcal

Ingredients

Crust

  • 8 oz. vanilla wafers $1.91
  • 8 Tbsp salted butter, melted $1.00
  • 1 pinch salt $0.01

Filling & Topping

  • 1.5 cups unsweetened flaked coconut, divided $1.19
  • 1 14oz. can sweetened condensed milk $2.19
  • 1 12oz. can evaporated milk $1.50
  • 2 13.5oz. cans coconut milk $5.98
  • 1/4 tsp salt $0.02
  • 1/4 cup brown sugar $0.11
  • 2 Tbsp granulated sugar $0.05
  • 3/4 cup all-purpose flour $0.11
  • 1/4 cup cornstarch $0.12
  • 2 Tbsp water $0.00
  • 3 large eggs yolks, beaten $0.27
  • 4 Tbsp salted butter $0.50
  • 1 tsp vanilla extract $0.72
  • 2 cups whipped cream $1.28

Instructions

Crust

  • In a blender or food processor, blend the vanilla wafers into a sandy consistency.
  • Mix in the melted butter and salt until the cookie crumbs are completely saturated and have deepened in color.
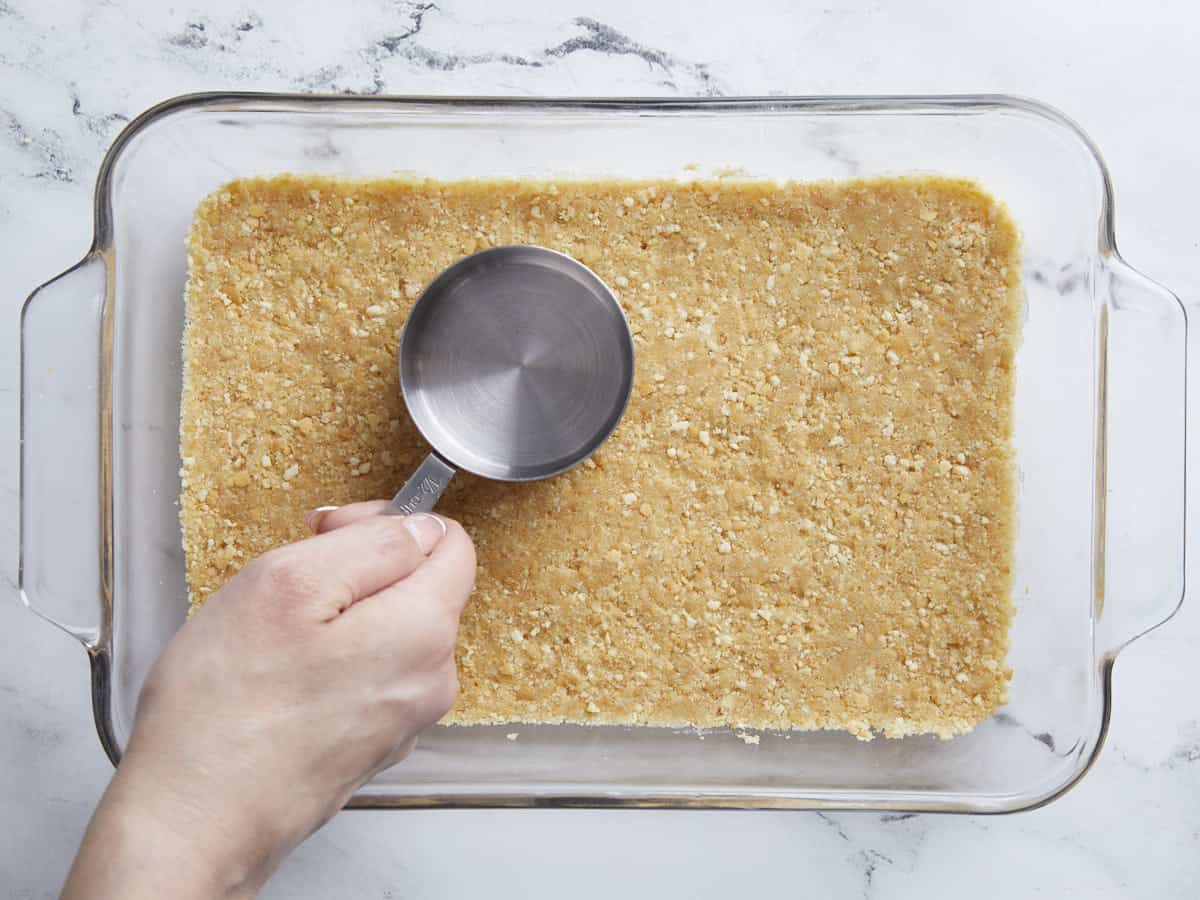
  • Press the cookie crust into an 11×7-inch baking dish in an even layer and freeze. If you don't have an 11×7-inch dish, use any square or rectangle dish with a 10-cup (2.5 qt) volume.

Filling

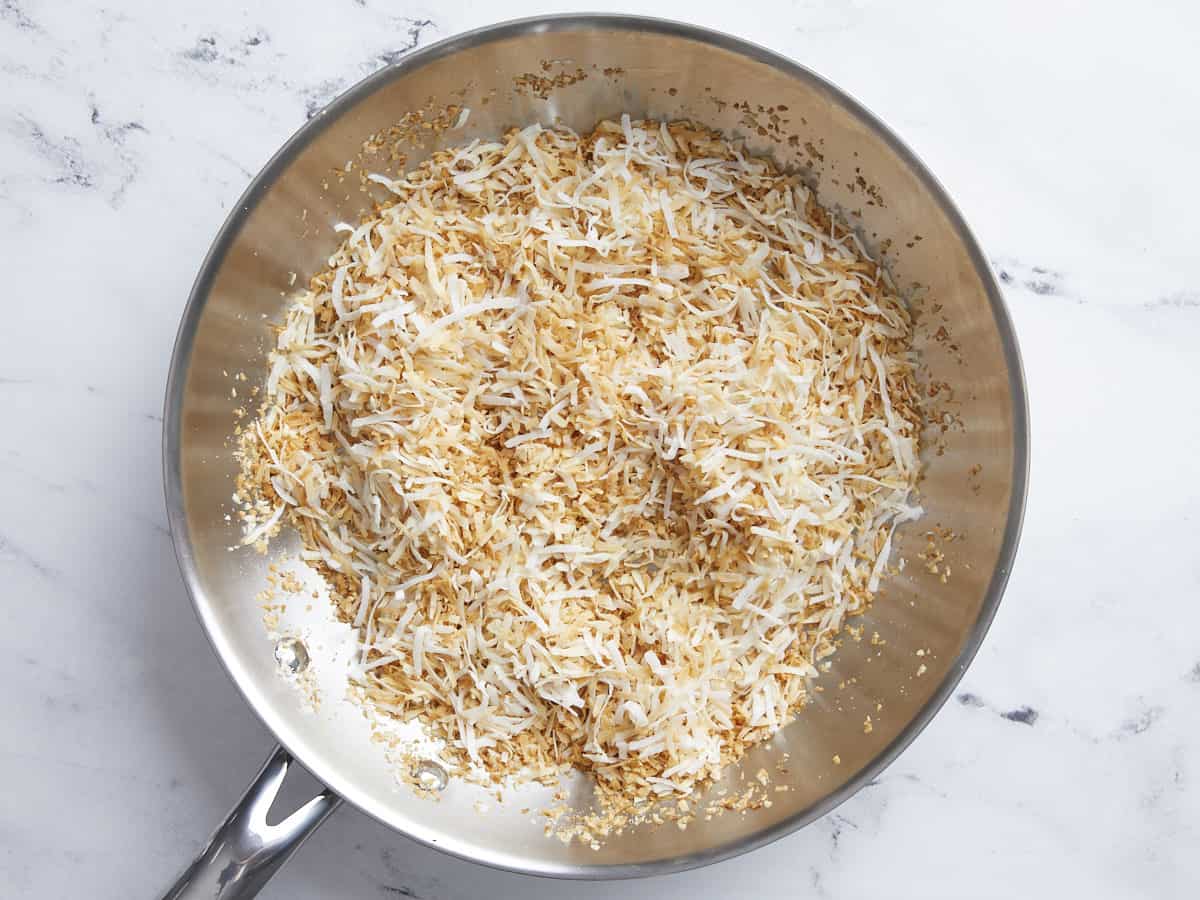
  • Add the unsweetened coconut flakes to a large saucepan set over medium heat. Toast the flakes, stirring occasionally so they don't burn. Remove them from the pan when they are golden brown.
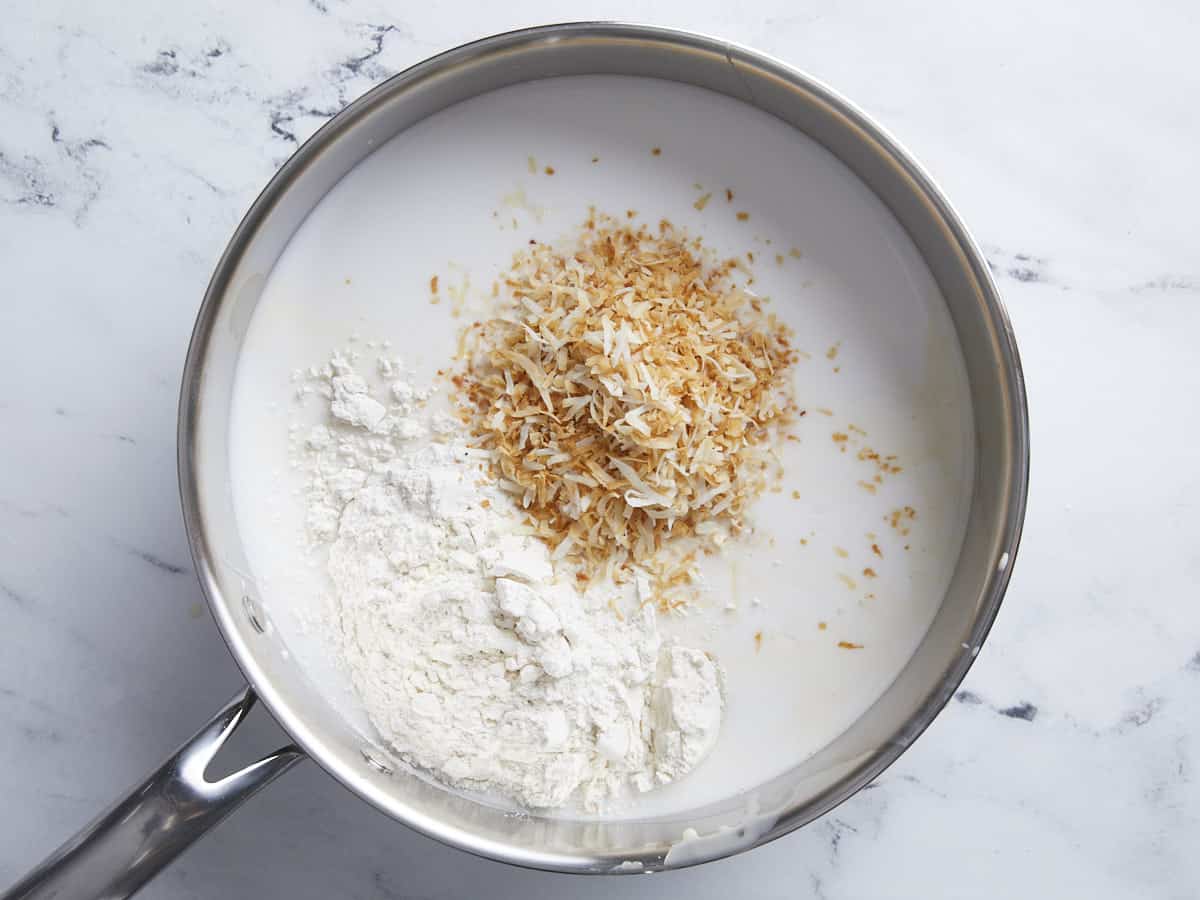
  • Add 1 cup of the toasted coconut flakes, the condensed milk, evaporated milk, coconut milk, salt, and flour to a heavy-bottomed saucepan set over medium heat. Stir until everything is combined and the milk has thickened, about 5 minutes.
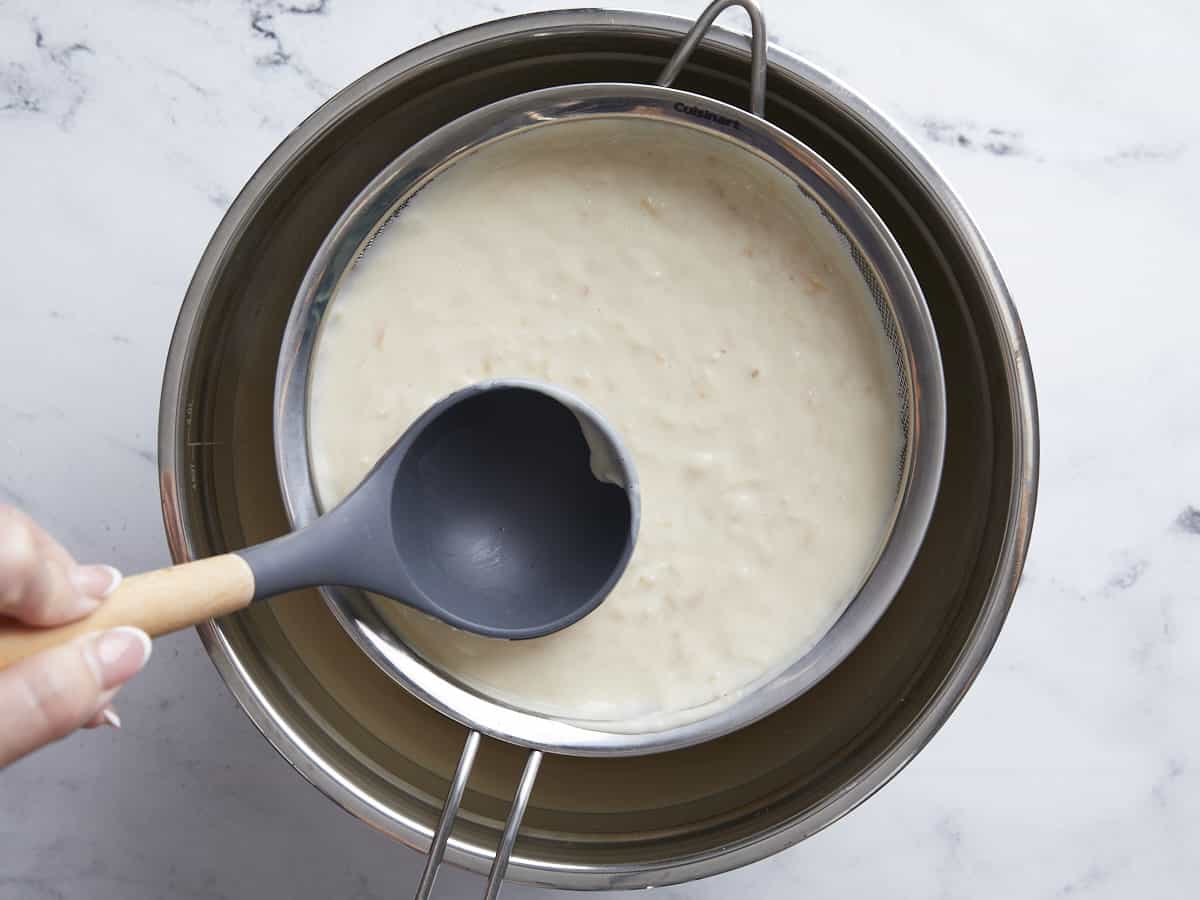
  • Take the milk mixture off the heat and let it steep for 20 minutes. Use a fine-mesh sieve to strain the coconut flakes from the milk mixture and discard. Add the milk mixture back to the pan and set over medium heat.
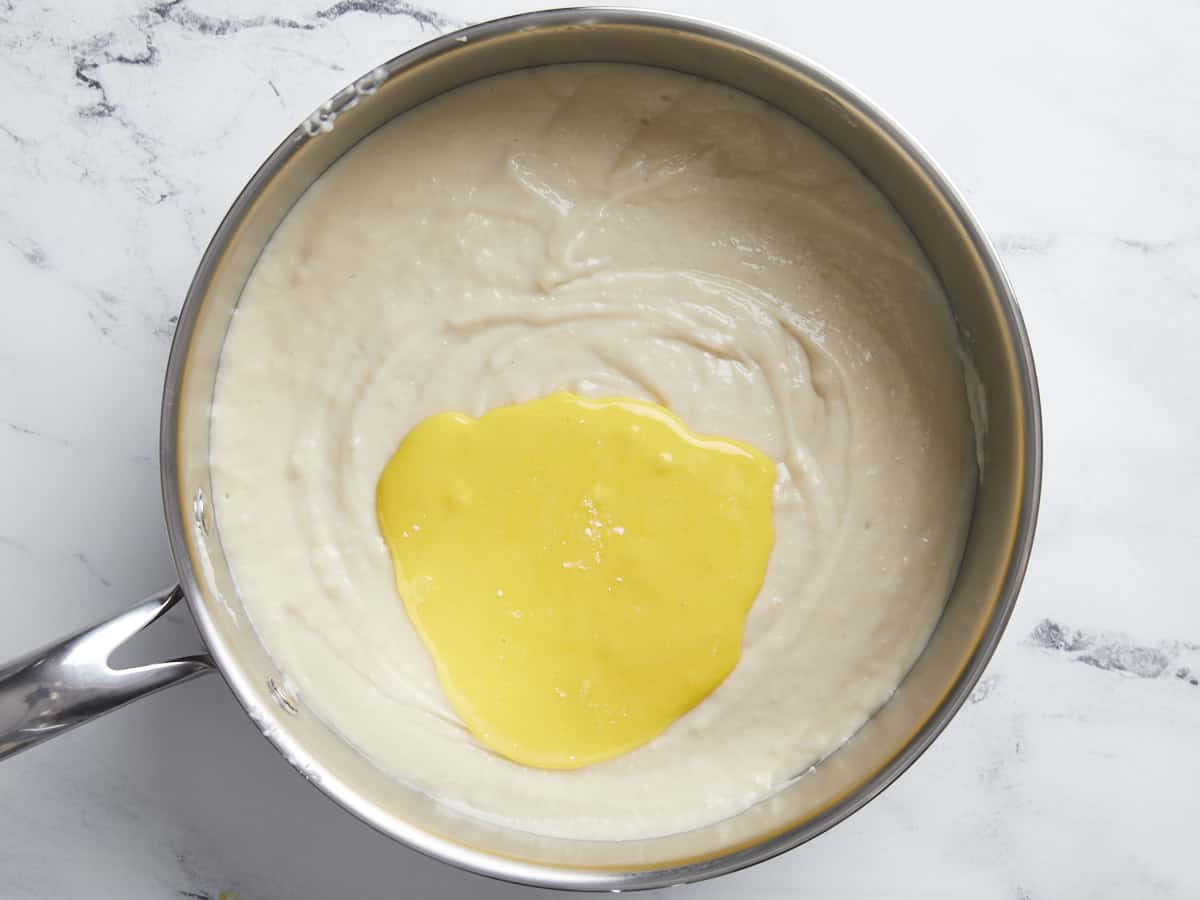
  • In a small bowl, add the water to the egg yolks. Mix in the cornstarch to create a slurry, then add it to the milk mixture in the pan. Cook over medium heat, stirring constantly until the custard bubbles in spurts.
  • Take the pan off the heat and add the butter and vanilla extract. Mix until the butter dissolves.
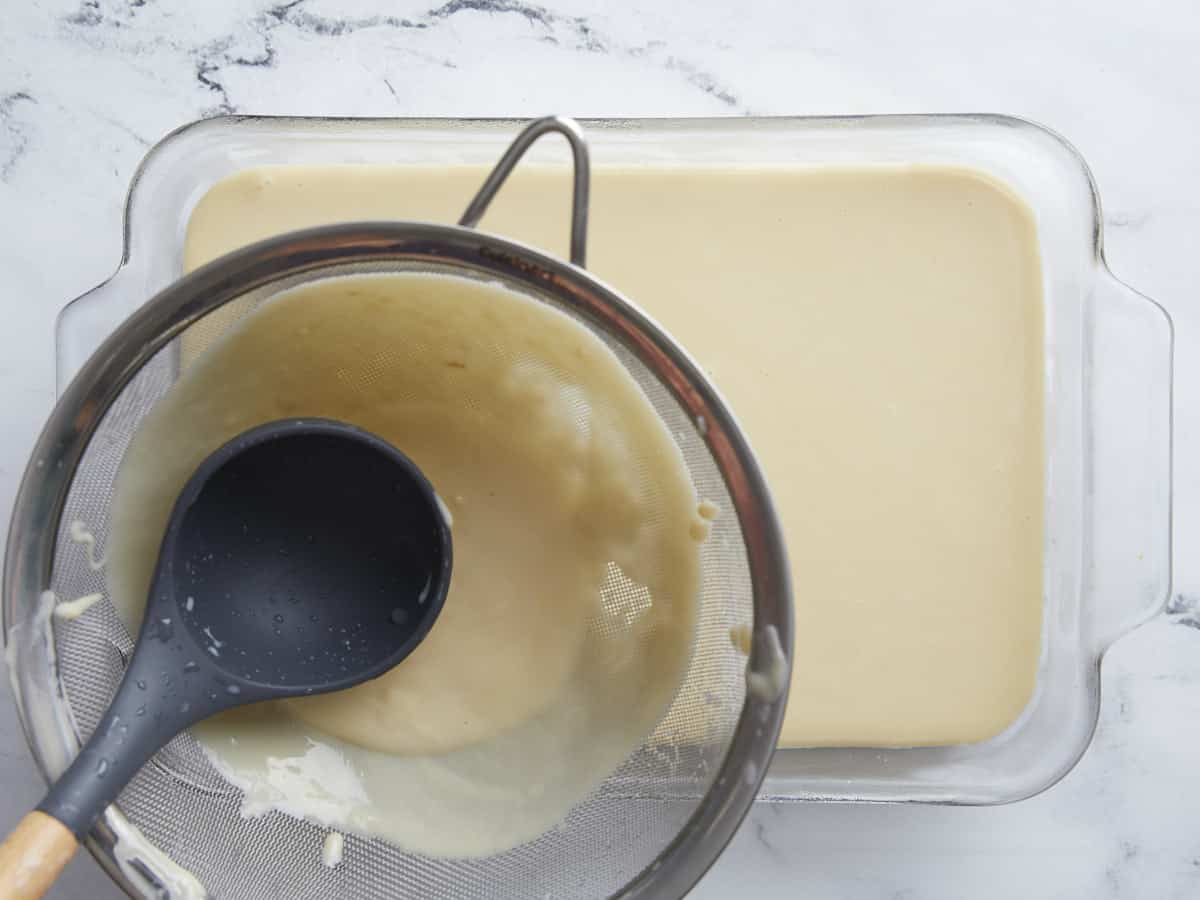
  • Strain the mixture through a fine-mesh sieve directly into the chilled crust. Refrigerate until set, about 2 to 3 hours.
  • Top with whipped cream topping and sprinkle the whipped cream with the remaining 1/2 cup of toasted coconut flakes.

See how we calculate recipe costs here.

Nutrition

Serving: 1bar | Calories: 234kcal | Carbohydrates: 25g | Protein: 3g | Fat: 14g | Sodium: 134mg | Fiber: 1g
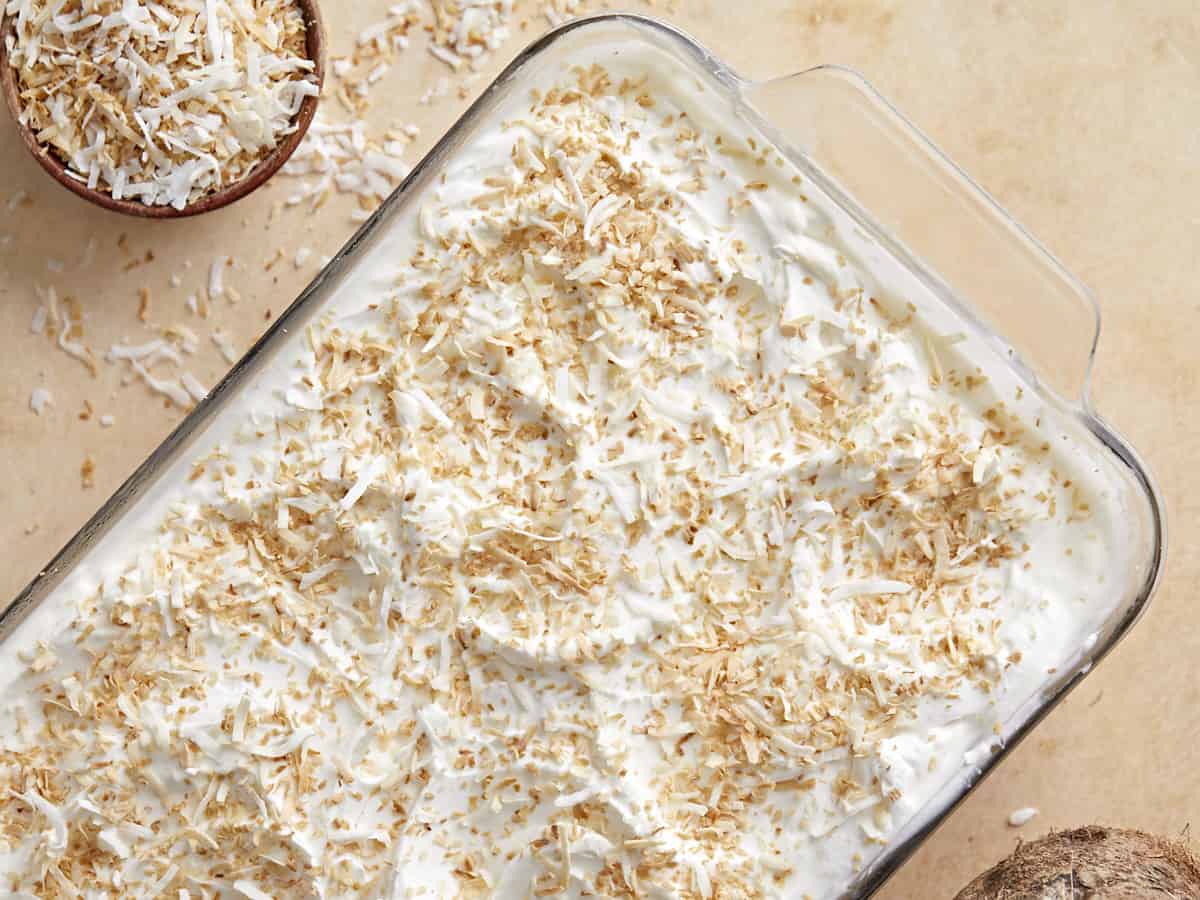
Overhead view of coconut cream pie bars in the casserole dish.

How to Make Coconut Cream Pie Bars – Step by Step Photos

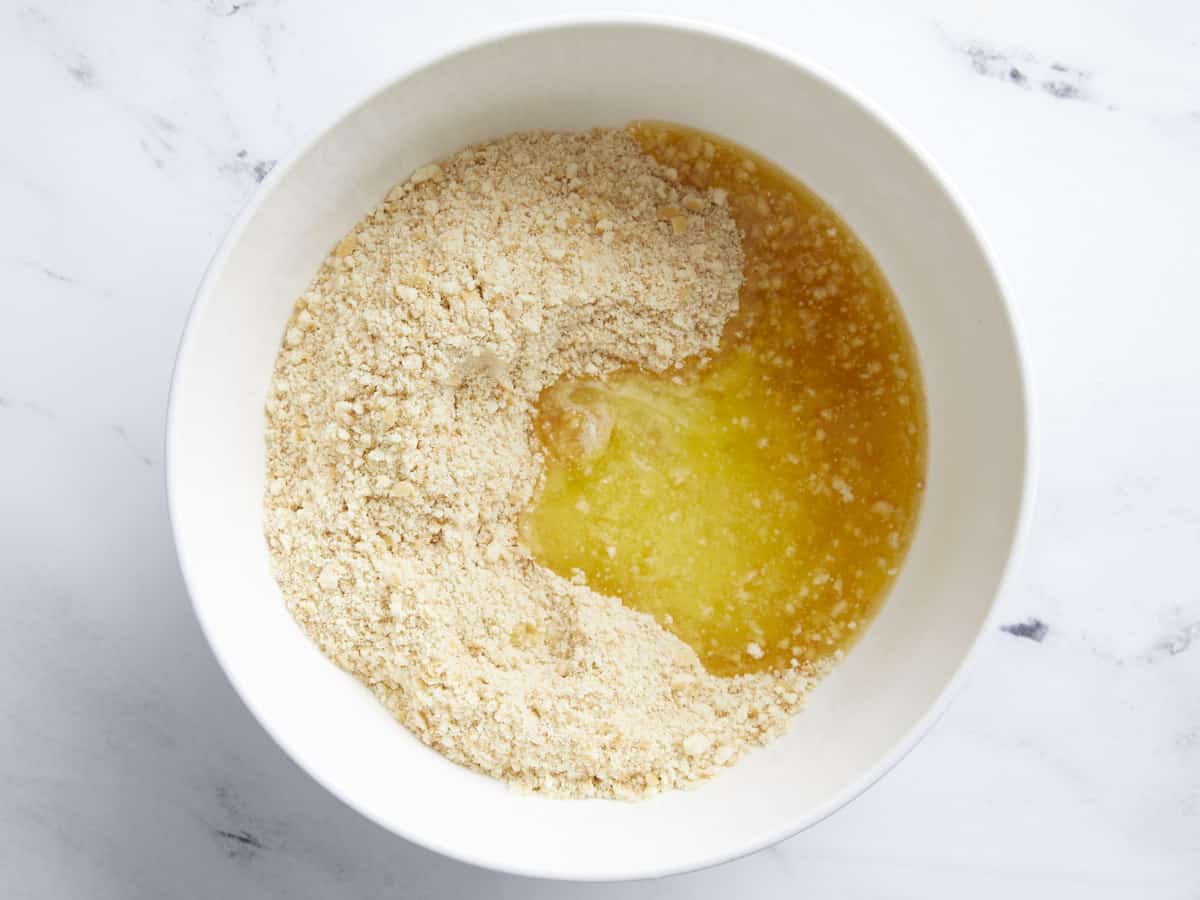
Melted butter added to crushed vanilla wafers in a bowl.

In a blender or food processor, blend the 8 ounces of vanilla wafers into a sandy consistency. Mix in 1/2 cup of melted butter and a pinch of salt until the cookie crumbs are completely saturated and have deepened in color.

Vanilla wafer crust being pressed into a baking dish.

Press the cookie crust into an 11×7-inch baking dish in an even layer and freeze. If you don’t have an 11×7-inch dish, use any square or rectangle dish with a 10-cup volume. 

Toasted coconut in a skillet.

Add the 1 1/2 cups of unsweetened coconut flakes to a large saucepan set over medium heat. Toast the flakes, stirring occasionally so they don’t burn. Remove them from the pan when they are golden brown.

Coconut and canned milk in a saucepot.

Add 1 cup of toasted coconut flakes, one 14oz. can of condensed milk, one 12oz. can of evaporated milk, two 13.5oz. cans of coconut milk, 1/4 teaspoon of salt, and 3/4 cup of flour to a heavy-bottomed saucepan set over medium heat. Stir until everything is combined and the milk has thickened, about 5 minutes.

Coconut and milk mixture being strained through a sieve.

Take the milk mixture off the heat and let it steep for 20 minutes. Use a fine-mesh sieve to strain the coconut flakes from the milk mixture and discard. Add the milk mixture back to the pan and set over medium heat.

Add egg yolk slurry to custard.

In a small bowl, add 2 tablespoons of water to the 3 egg yolks. Mix in the 1/4 cup of cornstarch to create a slurry, then add it to the milk mixture. Cook over medium heat, stirring constantly until the custard bubbles in spurts. 

Butter being melted into the coconut custard.

Take the pan off the heat and add the 4 tablespoons of butter and 1 teaspoon of vanilla extract. Mix until the butter dissolves. 

Coconut custard being strained through a sieve into the baking dish.

Strain the mixture through a fine-mesh sieve directly into the chilled crust.

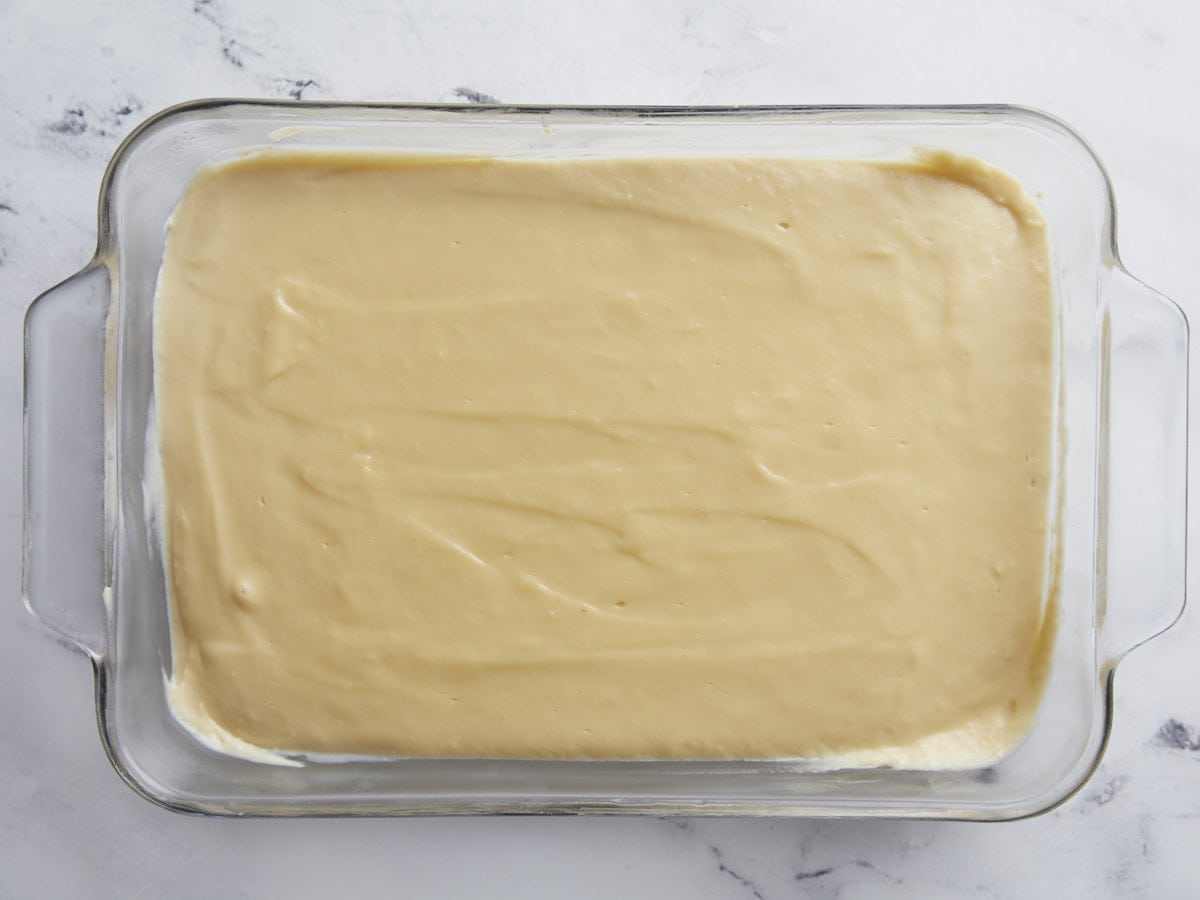
Refrigerated coconut cream pie bars.

Refrigerate until set, about 2 to 3 hours.

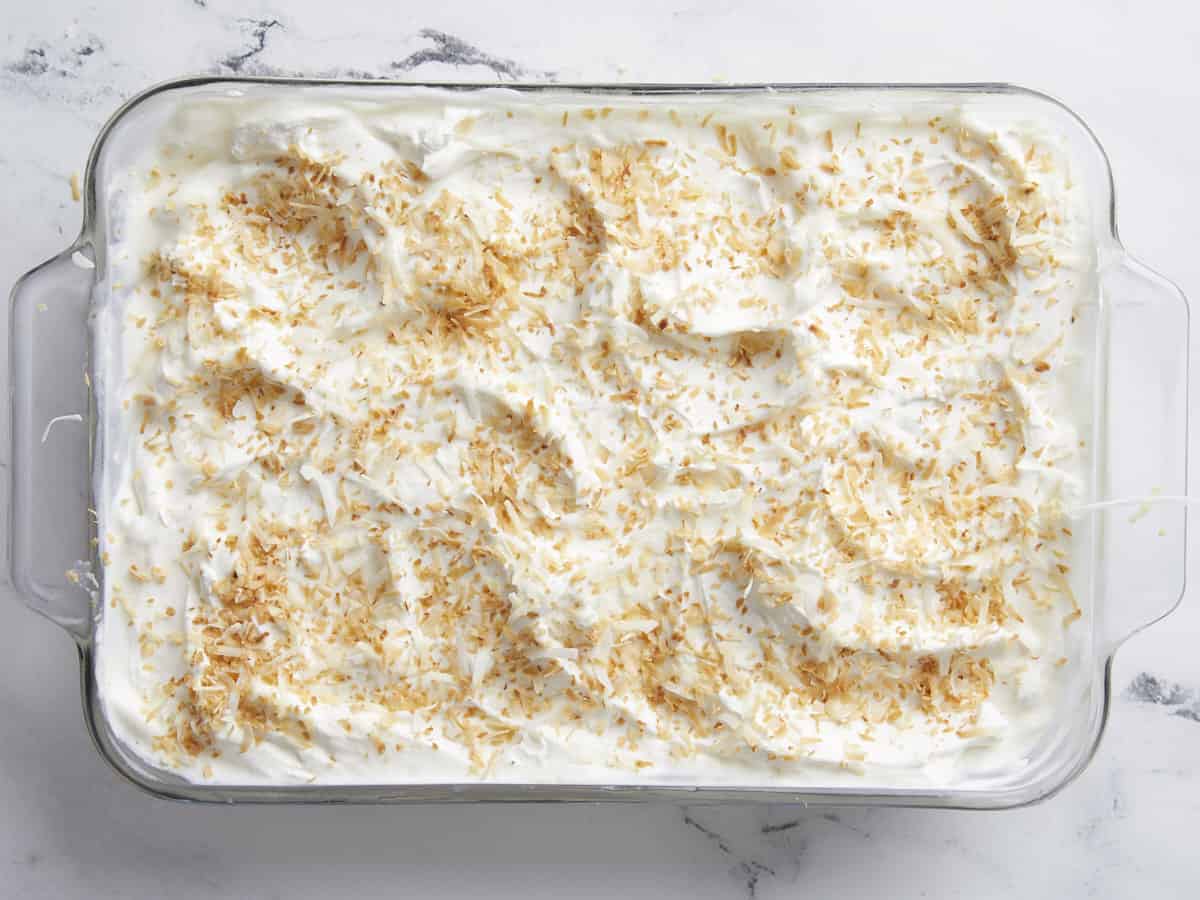
Coconut cream pie bars topped with whipped cream and toasted coconut.

Top with 2 cups of whipped cream topping and sprinkle the whipped cream with the remaining 1/2 cup of toasted coconut flakes.

Coconut cream pie bar on a plate being cut into with a fork.

The post Coconut Cream Pie Bars appeared first on Budget Bytes.