Deviled Eggs are a classic appetizer that’s always fun to serve at parties, Easter, potlucks, and during the holidays. It’s one of my mom’s favorite dishes to make for family gatherings and it always surprises me how fast they disappear! But it doesn’t have to be a special occasion to make these tasty little bites. They’re easy enough to make any day of the week and they’re a lot cheaper to make homemade. Keep the toppings simple or play around with some of our favorites listed below!😉
What Are Deviled Eggs?
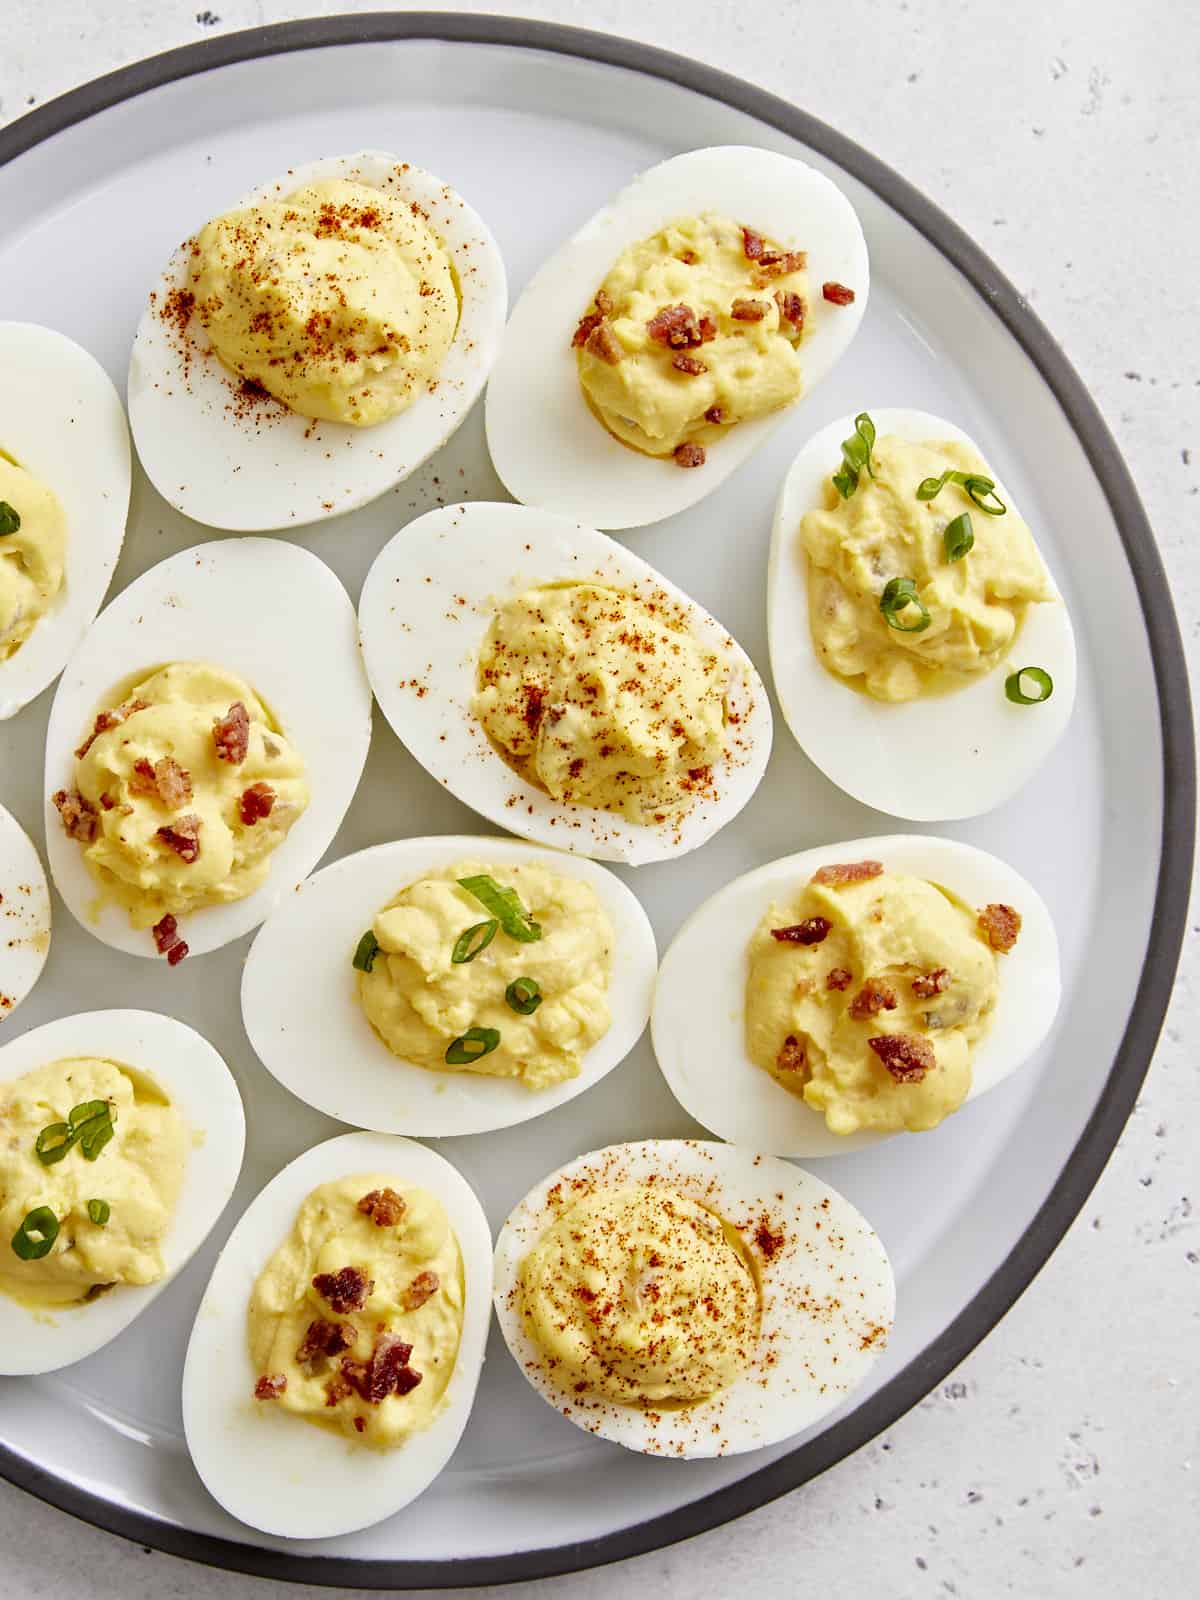
Deviled eggs are eggs that have been hard-boiled, cut in half, then the yolks mixed with other ingredients before stuffing them back into the whites. They can be basic, super fancy, or anywhere in between. They’re perfect for parties, potlucks, family gatherings, and during the holidays. Or during the week when you just have a craving for some tasty deviled eggs! There are so many options and different toppings to choose from when making deviled eggs, which makes them a LOT of fun!
Ingredients For Deviled Eggs
To make things easy we followed the same formula as our small batch deviled eggs recipe, that we already love, with one extra addition. So here’s everything you’ll need:
Mayonnaise: Mayo gives the filling a creamy, smooth texture.
Dijon mustard: Dijon mustard adds great tang and flavor to the deviled eggs.
Seasoning salt: To season the egg mixture we use Tony Chachere’s Creole seasoning, but you can use any brand of seasoning salt like Lawry’s, Morton’s, or even a generic store brand.
Dill relish: Relish is the extra added ingredient and my personal favorite! It adds lots of great dill flavor and some much-needed texture to the filling.
How Long Should You Boil Your Eggs?
When it comes to how long to boil eggs for deviled eggs, I followed our step-by-step guide on How To Make Hard Boiled Eggs and the eggs came out perfect!
The short answer is – boil large eggs for about 12 minutes to make hard boiled eggs. But there are a few other factors to keep in mind. I’ll share more details below.
Topping Ideas
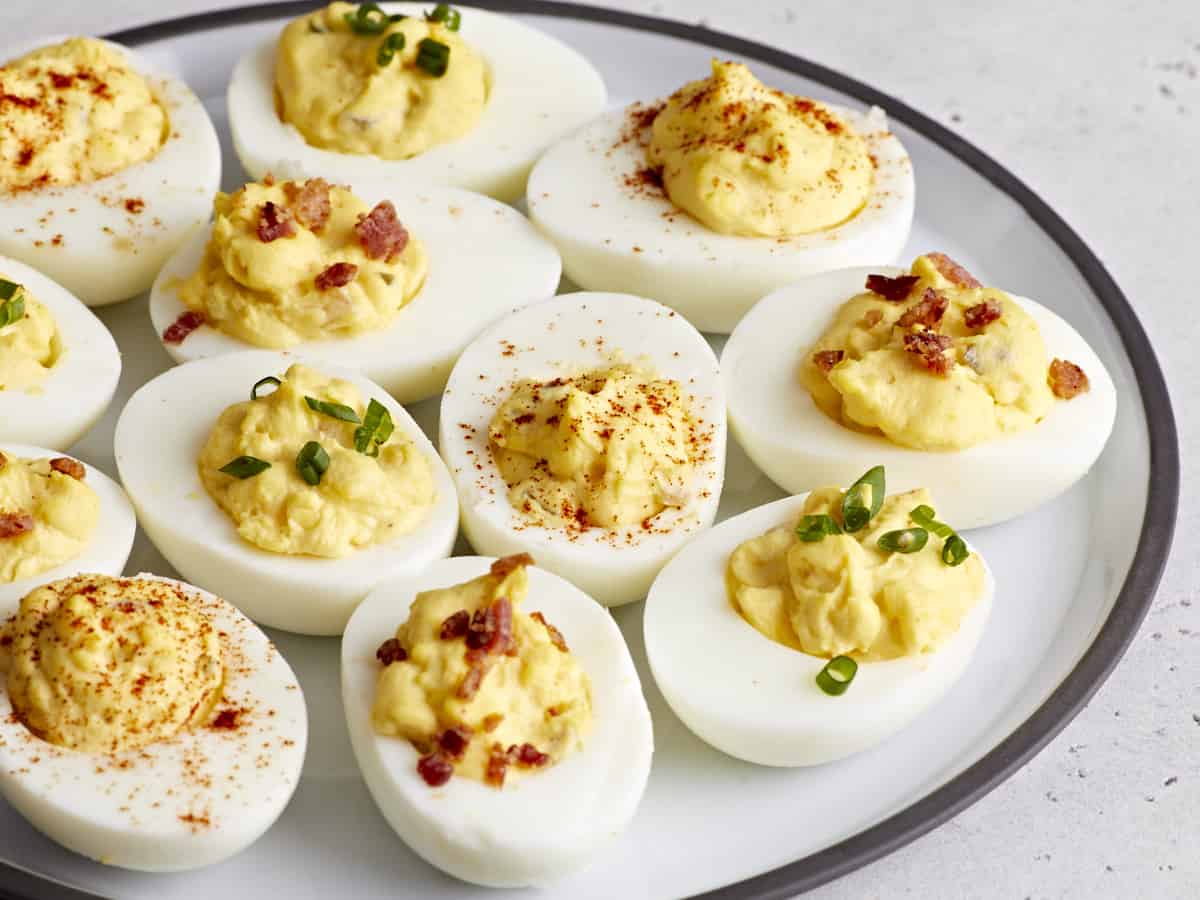
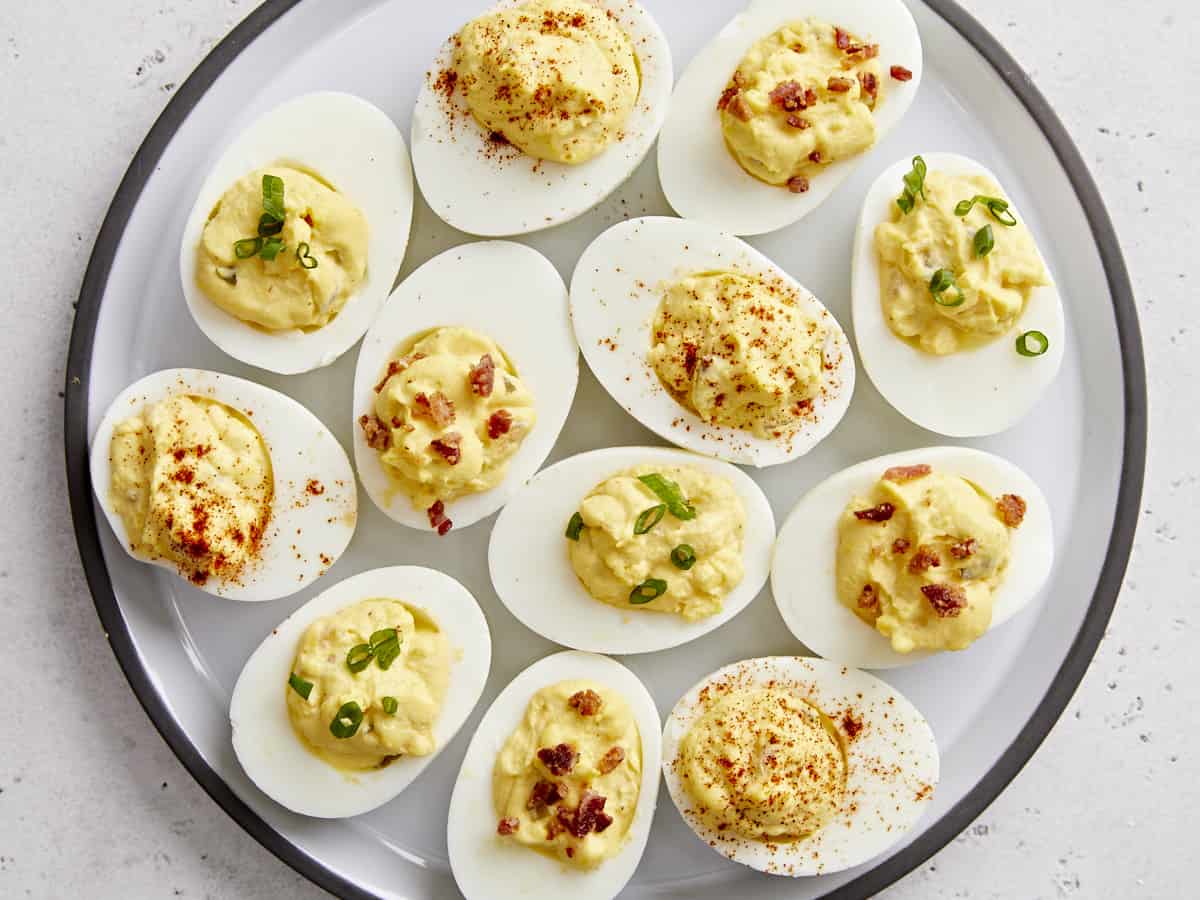
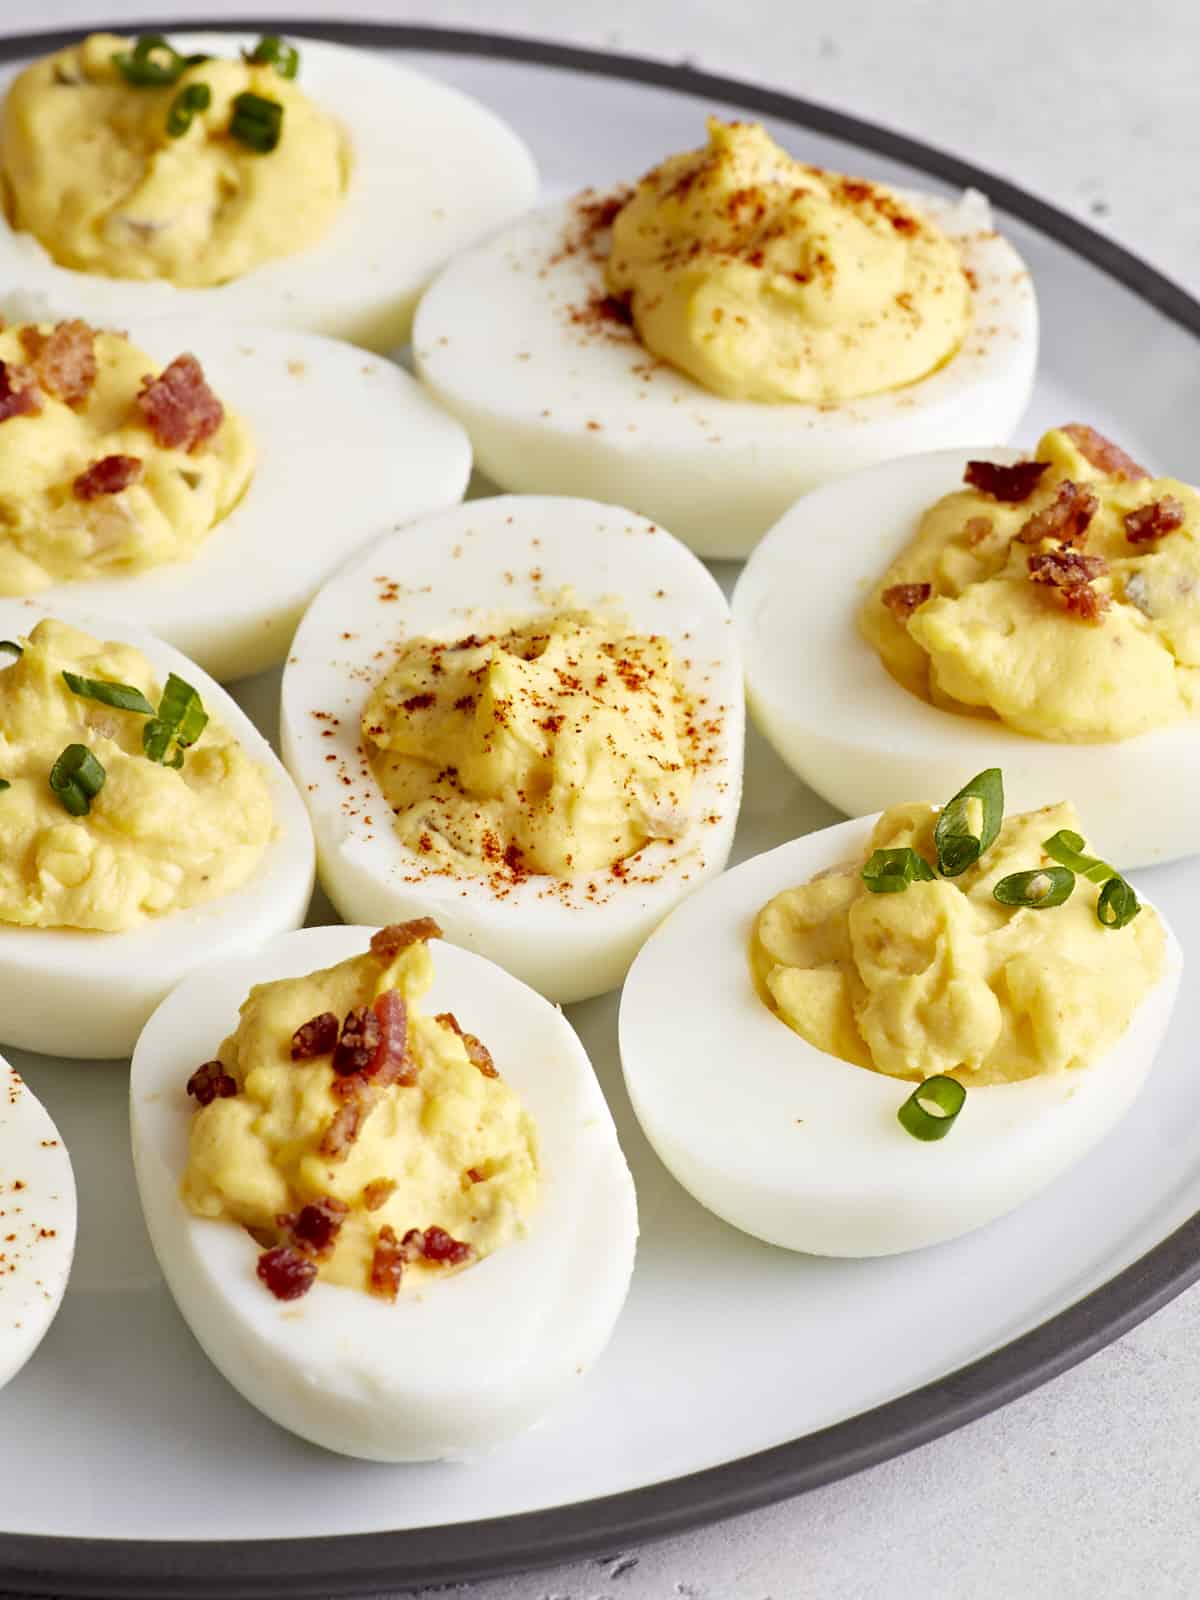
This is where it really gets fun! We topped our deviled eggs with some chopped air fryer bacon, sliced green onions, and a little bit of paprika. But you can use all sorts of other toppings to make them your own or just to use up different ingredients in your fridge. Here are some more ideas for deviled eggs toppings:
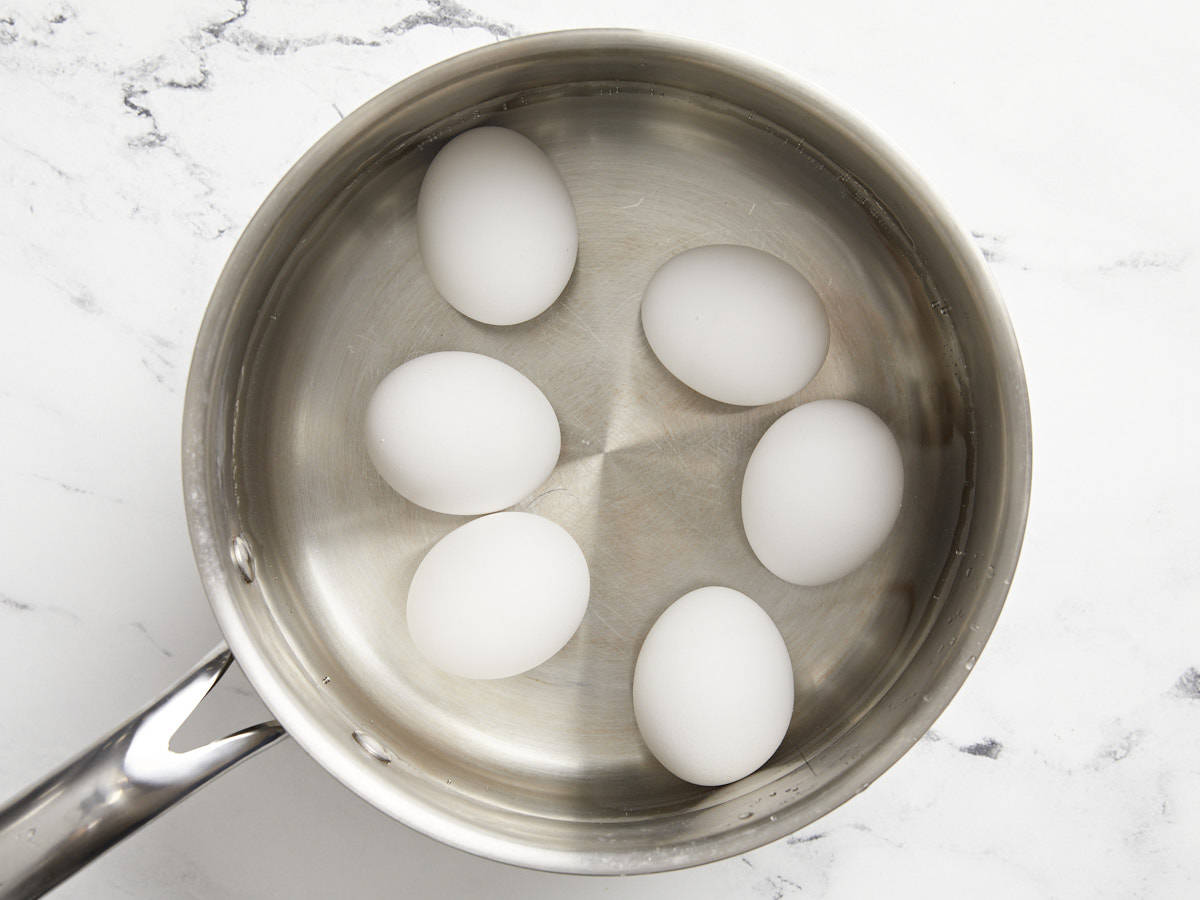
Add the cold eggs to a saucepot. Add enough water to the pot to cover the eggs by one inch.
Place a lid on the pot and bring the water up to a boil over high heat. Once the water reaches a full rolling boil, turn the heat off and leave the pot on the burner (with the lid on) for about 12 minutes.
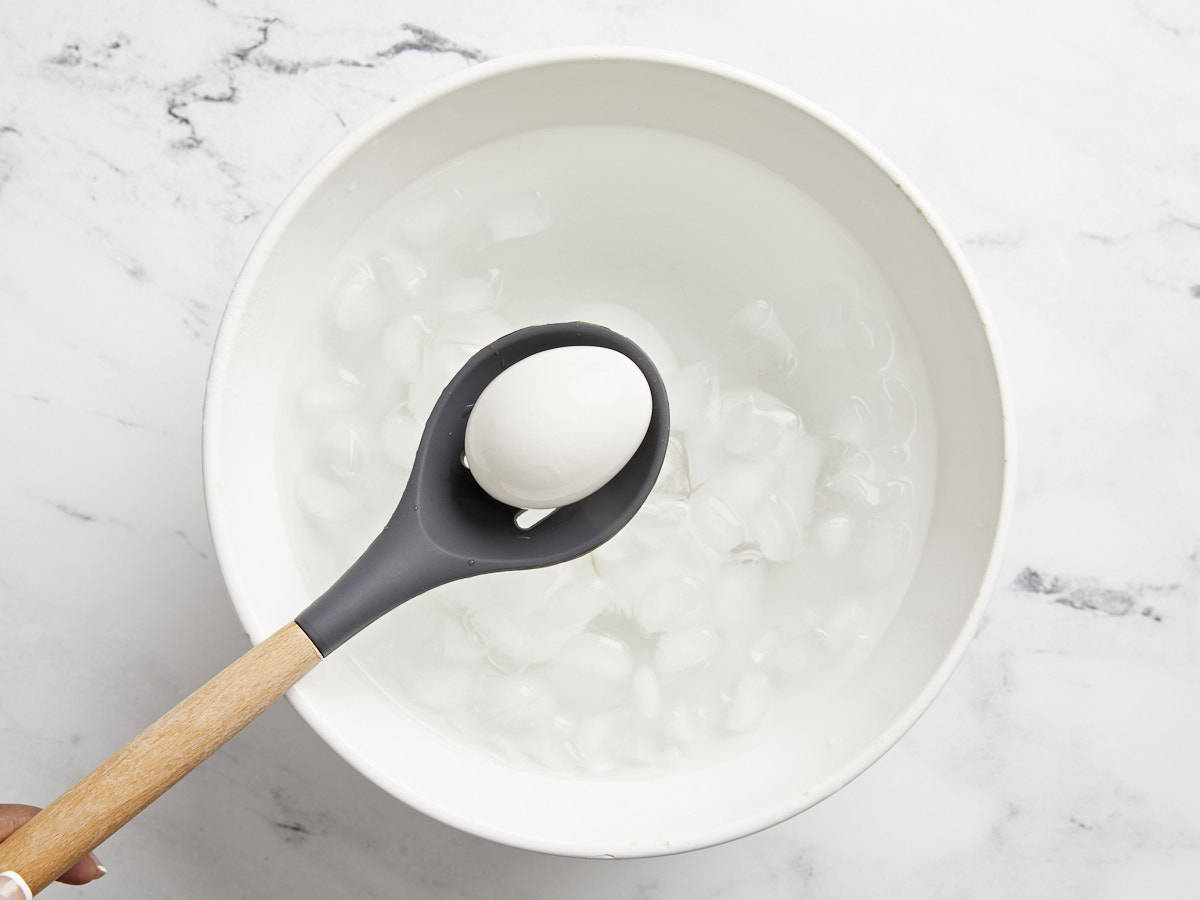
After 12 minutes, transfer the eggs to a bowl of ice water and chill the eggs for about 5 minutes.
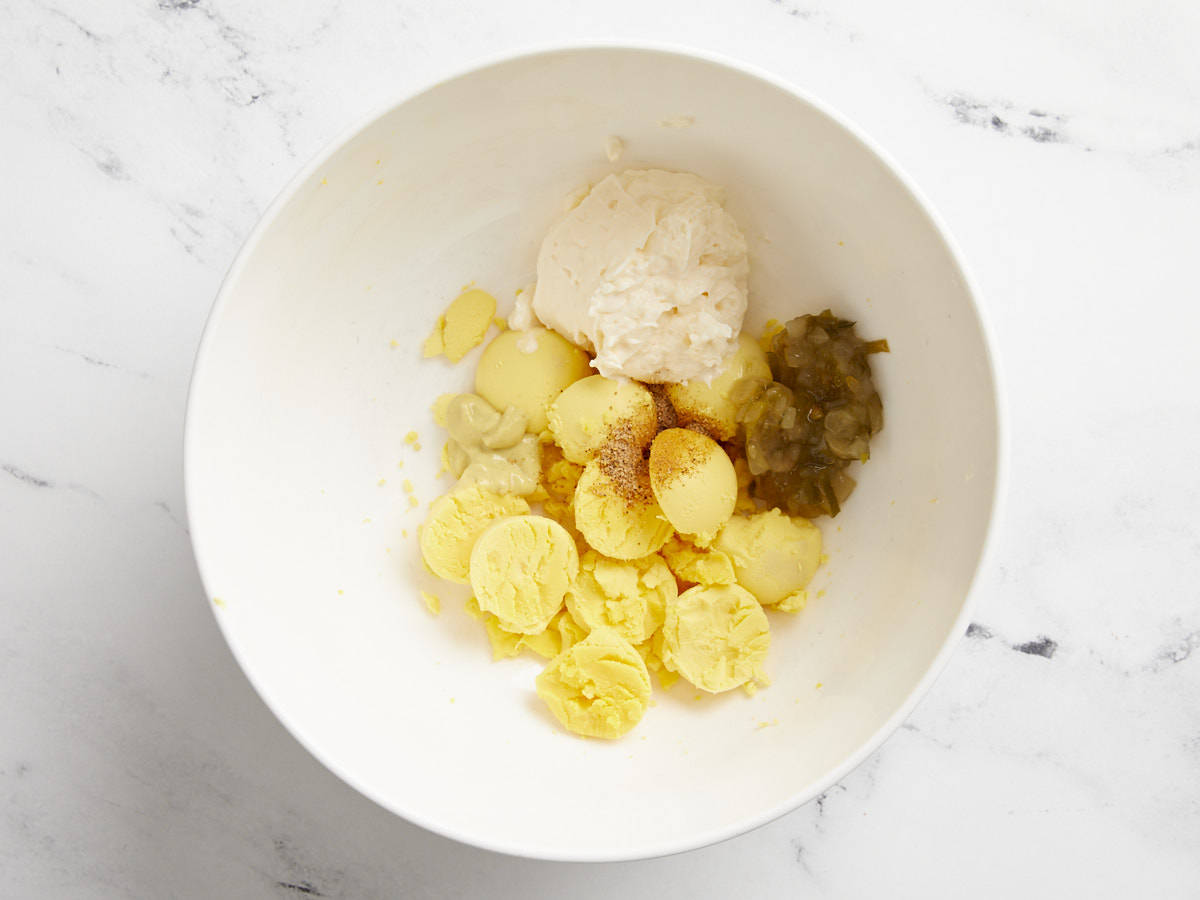
Next, peel the eggs then slice them in half. Pop the yolks out of the white and place them in a bowl. Add the mayonnaise, Dijon mustard, seasoning salt, and dill relish and mash everything together to combine.
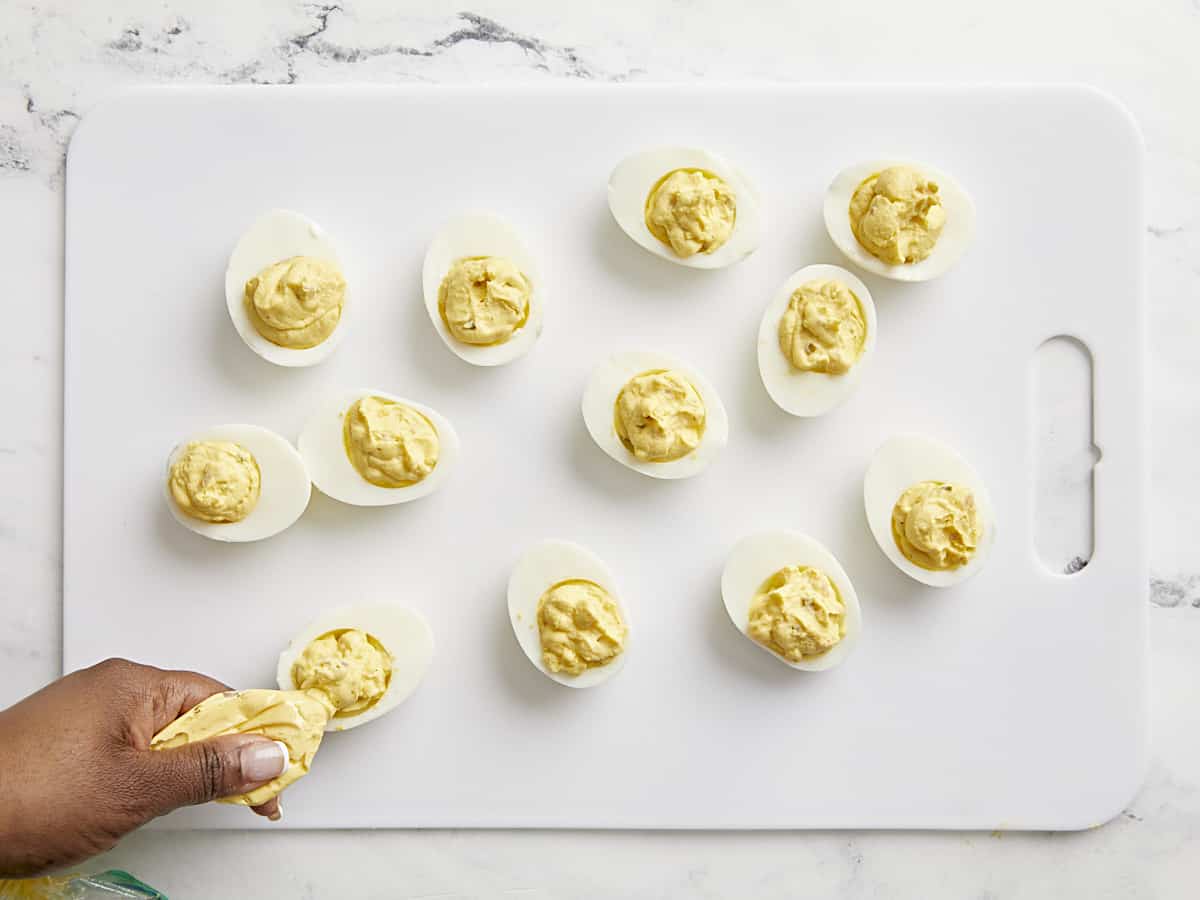
Spoon the seasoned yolk mixture back into the whites or place the mixture in a sandwich or freezer bag, snip off one corner of the bag, and pipe the filling into the egg whites.
Garnish the deviled eggs with your favorite toppings like paprika, chopped bacon, or sliced green onions. Serve and enjoy!
Add 6 large cold eggs to a sauce pot. Add enough water to the pot to cover the eggs by one inch. Place a lid on the pot and bring the water up to a boil over high heat. Once the water reaches a full rolling boil, turn the heat off and leave the pot on the burner (with the lid on) for about 12 minutes.
After 12 minutes, transfer the eggs to a bowl of ice water for about 5 minutes.
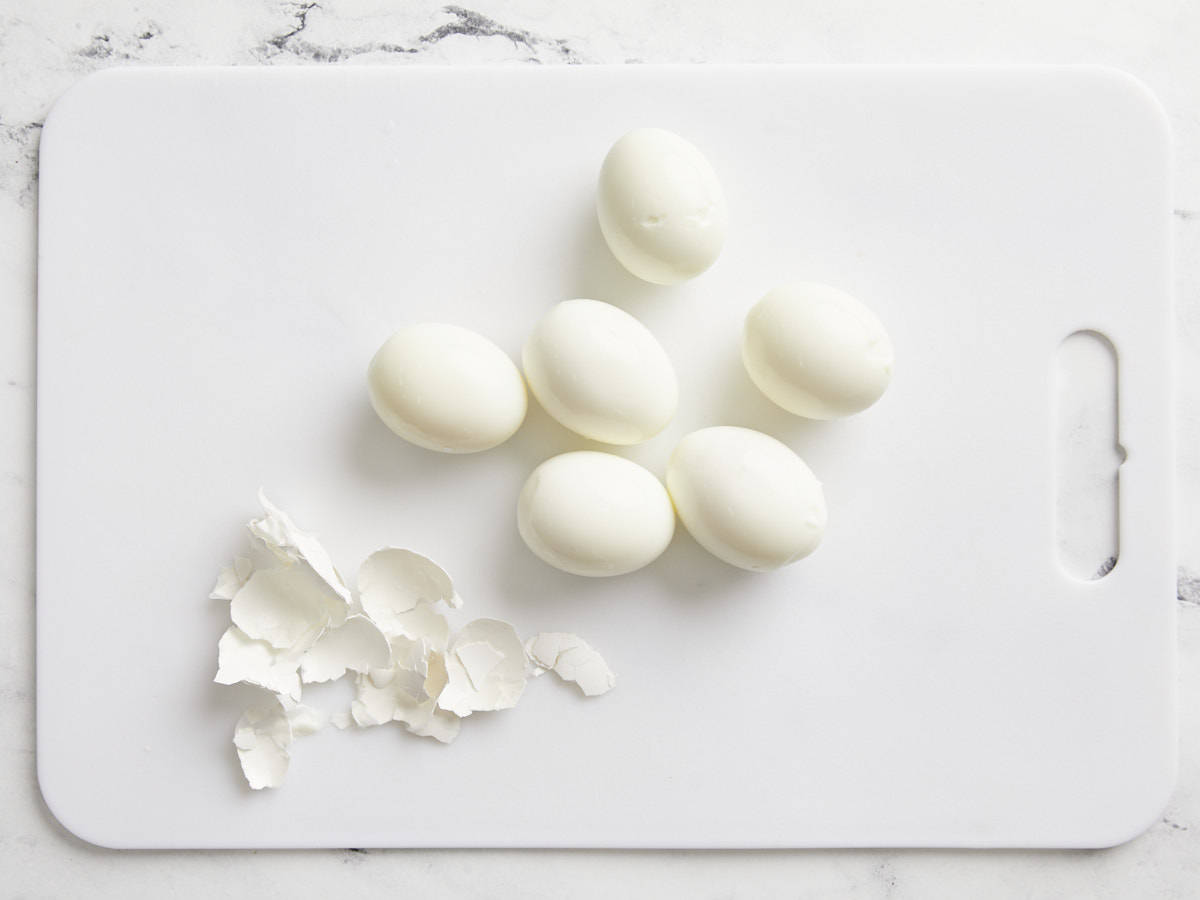
After the eggs have chilled, carefully peel the eggs then slice them in half.
Pop the yolks out of the white and place them in a bowl. Add 1/4 cup mayonnaise, 3/4 tsp Dijon mustard, 1/4 tsp seasoning salt, and 1 Tbsp dill relish.
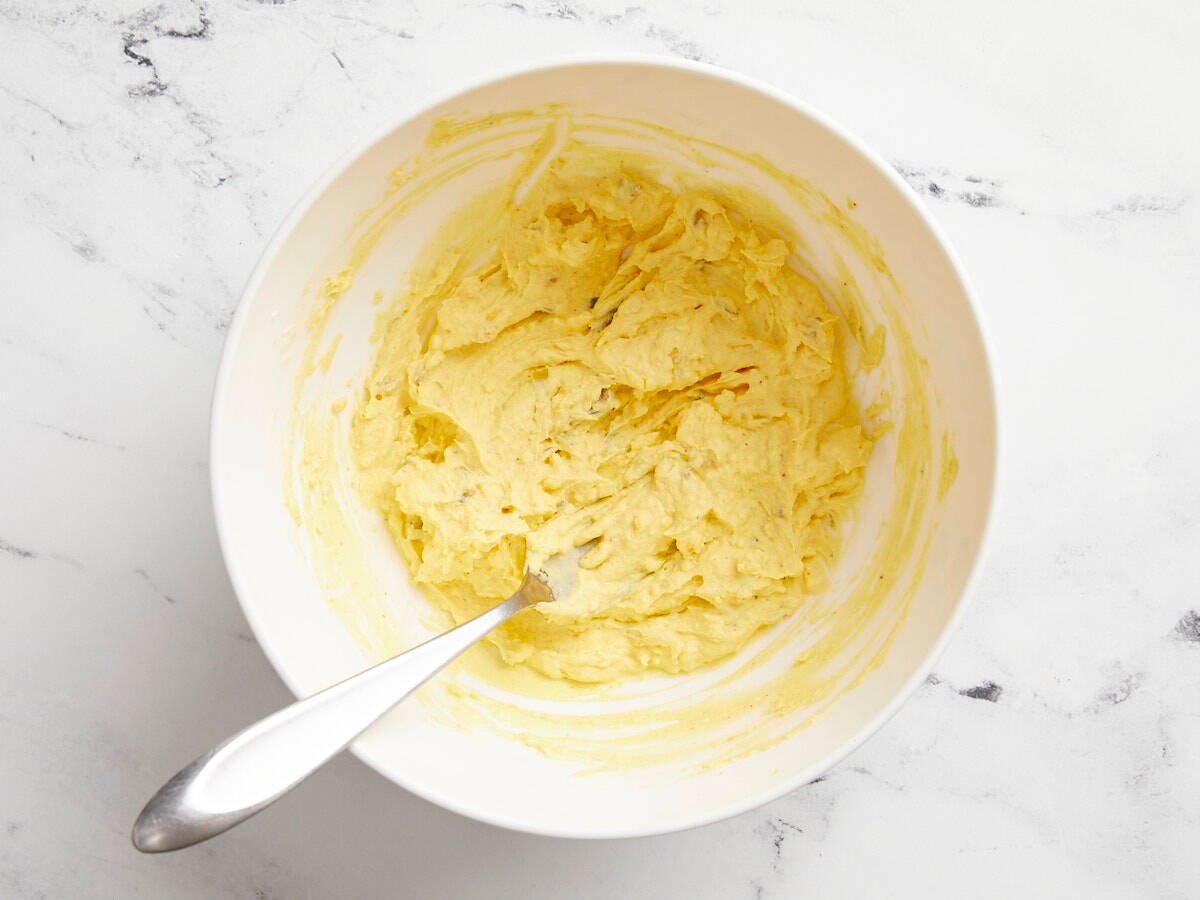
Mash the yolks together with the rest of the ingredients to combine.
Spoon the seasoned yolk mixture back into the whites or place the mixture in a sandwich or freezer bag, snip off one corner of the bag, and pipe the filling into the egg whites.
Garnish the deviled eggs with your favorite toppings like paprika, chopped bacon, or sliced green onions. Serve and enjoy!
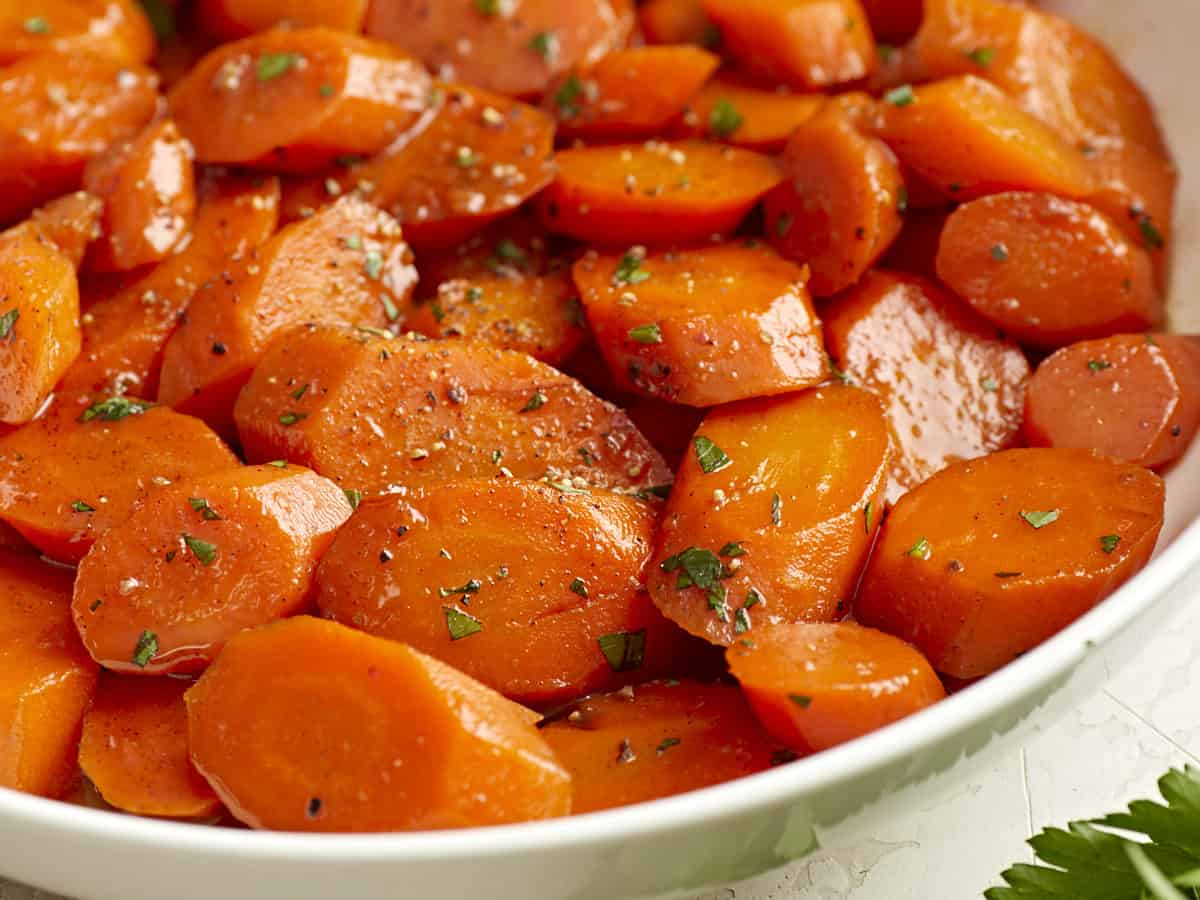
Easy and inexpensive side dishes like these Glazed Carrots are my go-to during busy weeknights. They’re super simple to make, they have the perfect amount of sweetness, and they pair well with so many different meals. They’re not only great for weeknight dinners, but they’re also perfect for special occasions and holidays like Easter and Thanksgiving. This recipe is a favorite in my household, and the best part is…five ingredients and 20 minutes is all you need!
Ingredients For Glazed Carrots
Coming in at under $2 a recipe with only five ingredients, it doesn’t get much easier than these delicious Glazed Carrots! Here’s everything you’ll need:
Carrots: We used whole carrots for this recipe. Look for carrots that are fairly even in length and girth so they’ll cook more evenly. You can either scrub or peel the carrots, however I prefer to peel them.
Butter: Butter adds a rich flavor to the carrots and combines with the brown sugar to help make the delicious glaze.
Brown Sugar: Brown sugar adds the perfect amount of sweetness to the glaze. We used dark brown sugar for a deeper molasses flavor, but feel free to use light brown sugar if that’s what you have on hand.
Cinnamon: I love adding a little bit of ground cinnamon to enhance the overall flavor of the dish.
Salt: Salt to season the carrots and balance the sweetness of the glaze.
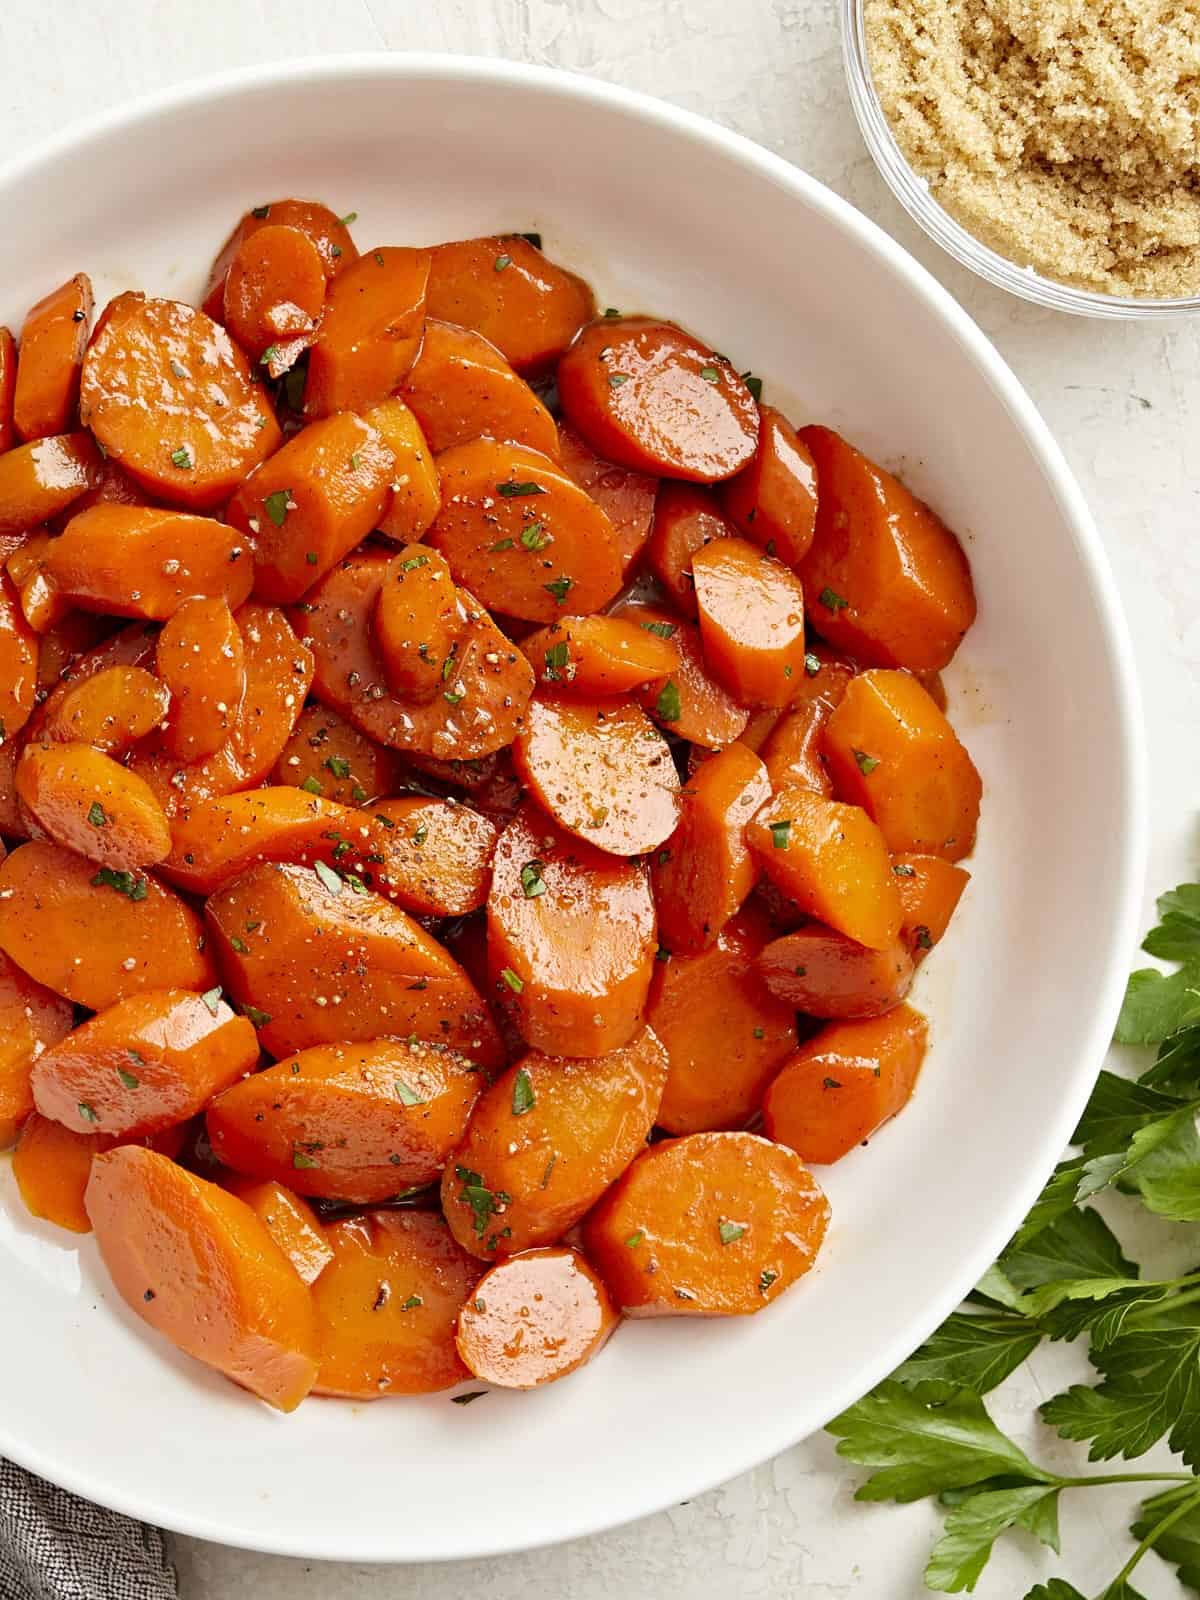
To serve, we also added a little bit of fresh cracked black pepper and fresh parsley (optional).
Recipe Variations
We went with the classic brown sugar glazed carrots for this recipe, but you can certainly switch things up and experiment with flavors based on what you have in your pantry or spice drawer. Here are a few suggestions:
Savory Carrots: If you’re looking for more savory carrots, skip the brown sugar and instead season with just salt, pepper, and garlic powder.
Fresh Herbs: Adding fresh herbs like parsley, thyme, or dill adds a pop of color and more flavor to the dish.
Honey or Maple Syrup: Brown sugar is inexpensive and a lot more budget-friendly, but feel free to substitute the sugar with honey or maple syrup. Both taste equally delicious!
Wash, peel, and slice the carrots diagonally into ½ inch thick slices.
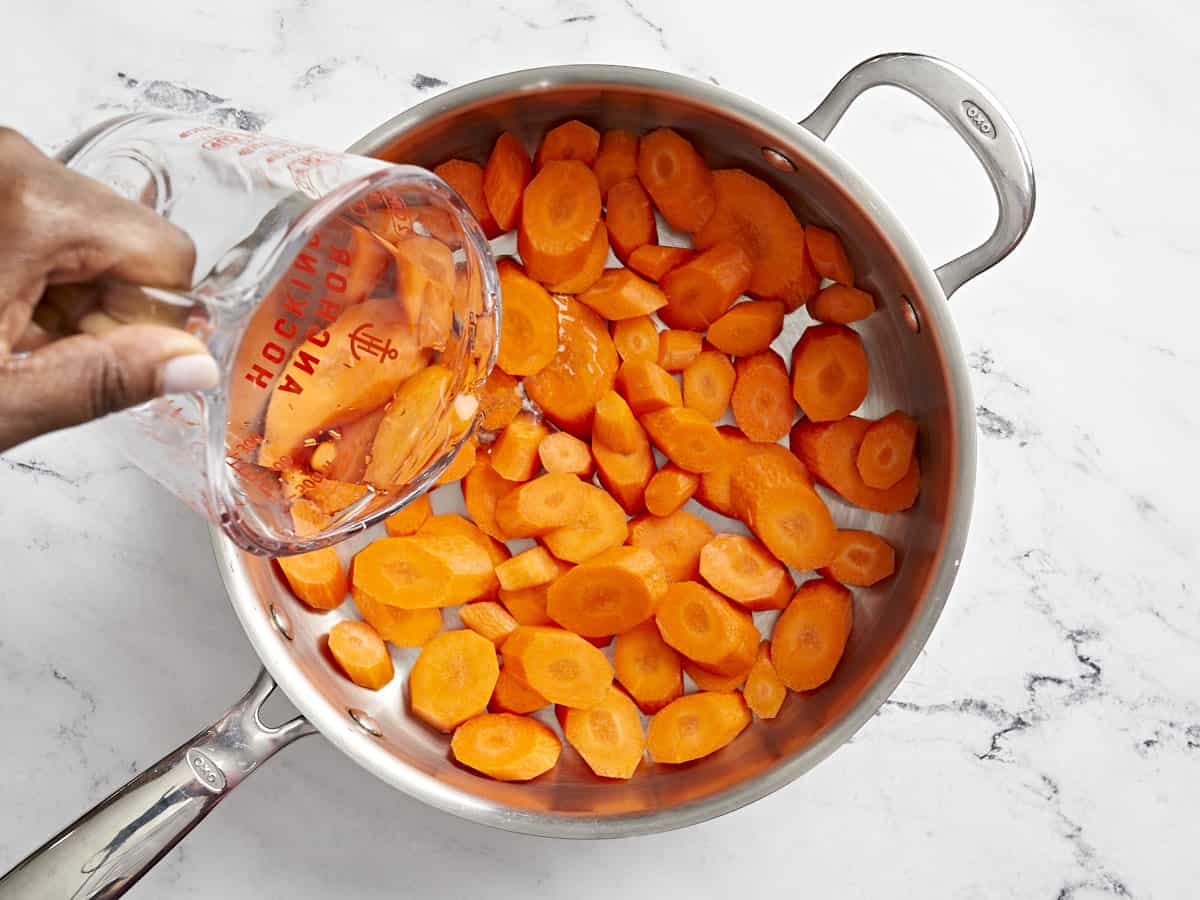
Add the carrots to a large skillet along with the water. Cover with a lid and cook over medium heat for 5-6 minutes or just until the carrots start to soften.
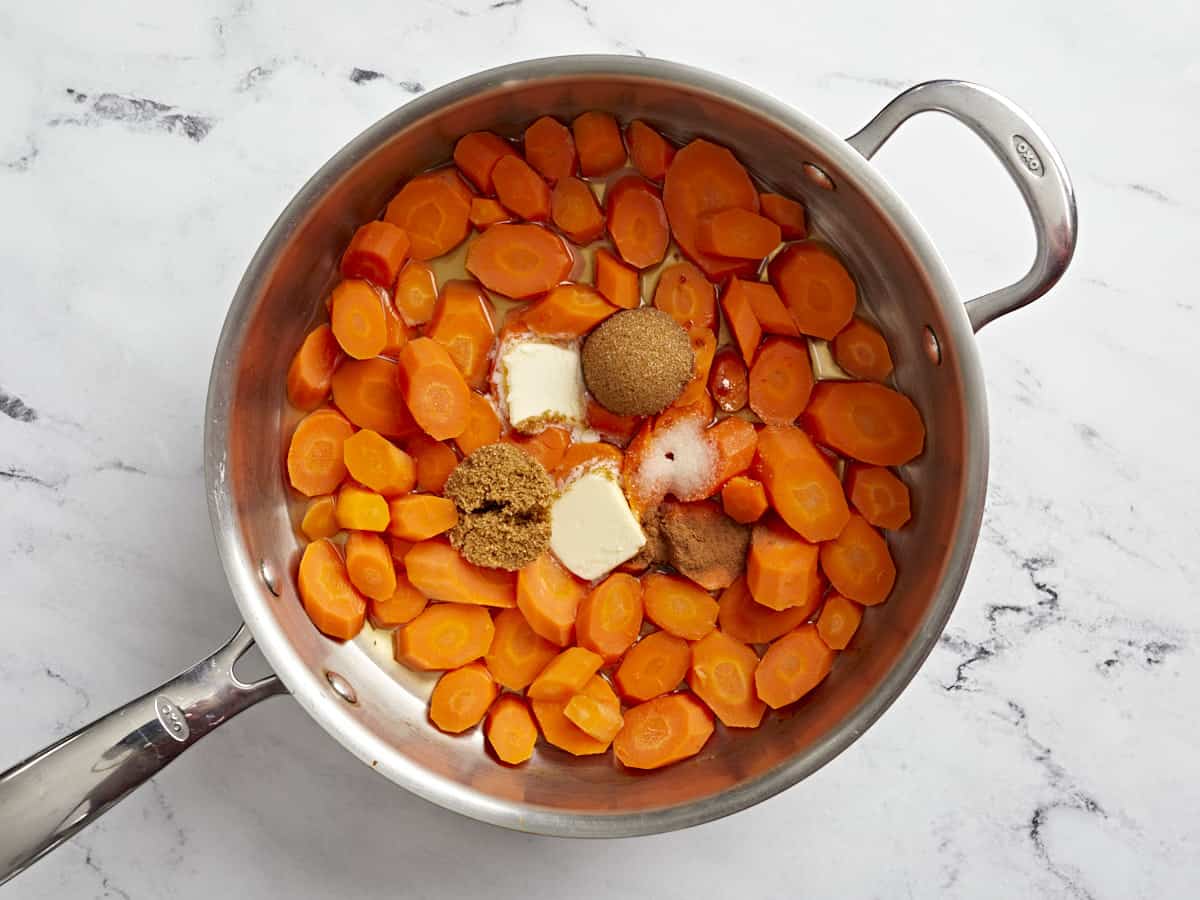
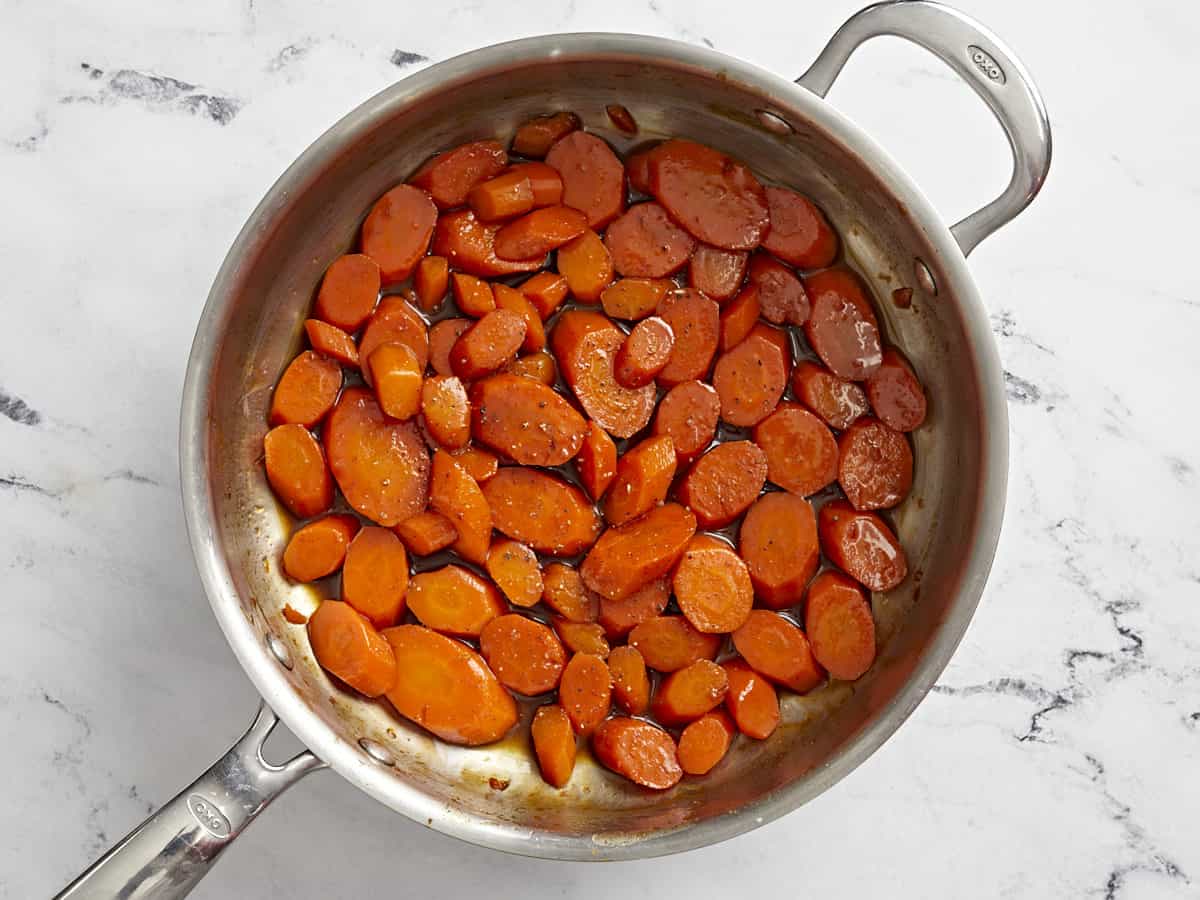
Remove the lid and add the butter, brown sugar, salt and ground cinnamon. Stir until the butter and brown sugar have melted. Leave the lid off and continue cooking the carrots for 7-8 minutes, stirring occasionally, until most of the liquid has evaporated and a glaze starts to form.
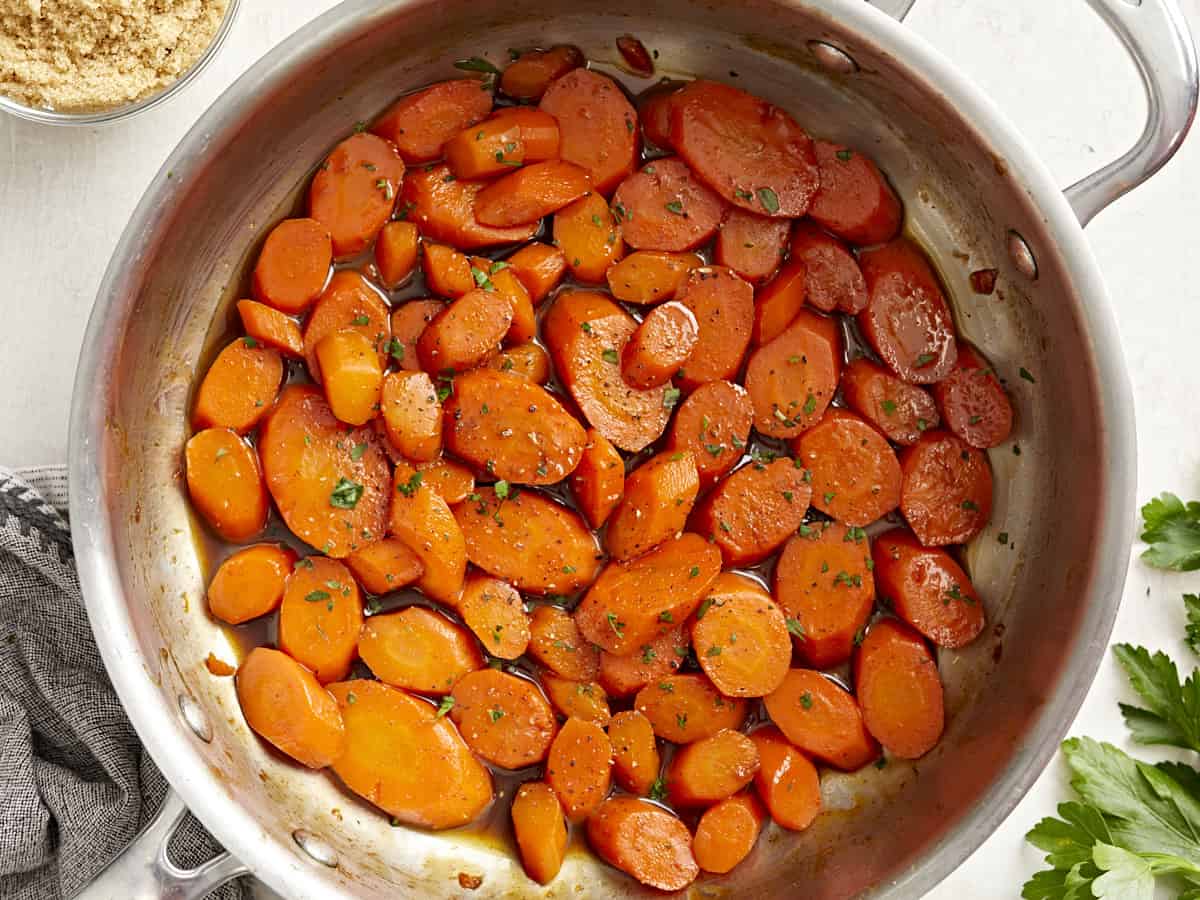
Once the carrots are tender to your liking, remove the skillet from the heat and season with freshly ground black pepper and fresh chopped parsley (optional).
Wash, peel, and slice 1 lb. of carrots diagonally into ½ inch thick slices.
Add the carrots to a large skillet along with 1/2 cup of water. Cover the skillet with a lid and cook over medium heat for 5-6 minutes or just until the carrots start to soften.
Remove the lid and add 2 Tbsp butter, 2 Tbsp brown sugar, 1/2 tsp salt and 1/4 tsp ground cinnamon. Stir until the butter and brown sugar have melted.
Leave the lid off and continue cooking the carrots for 7-8 minutes, stirring occasionally, until most of the liquid has evaporated and a glaze starts to form.
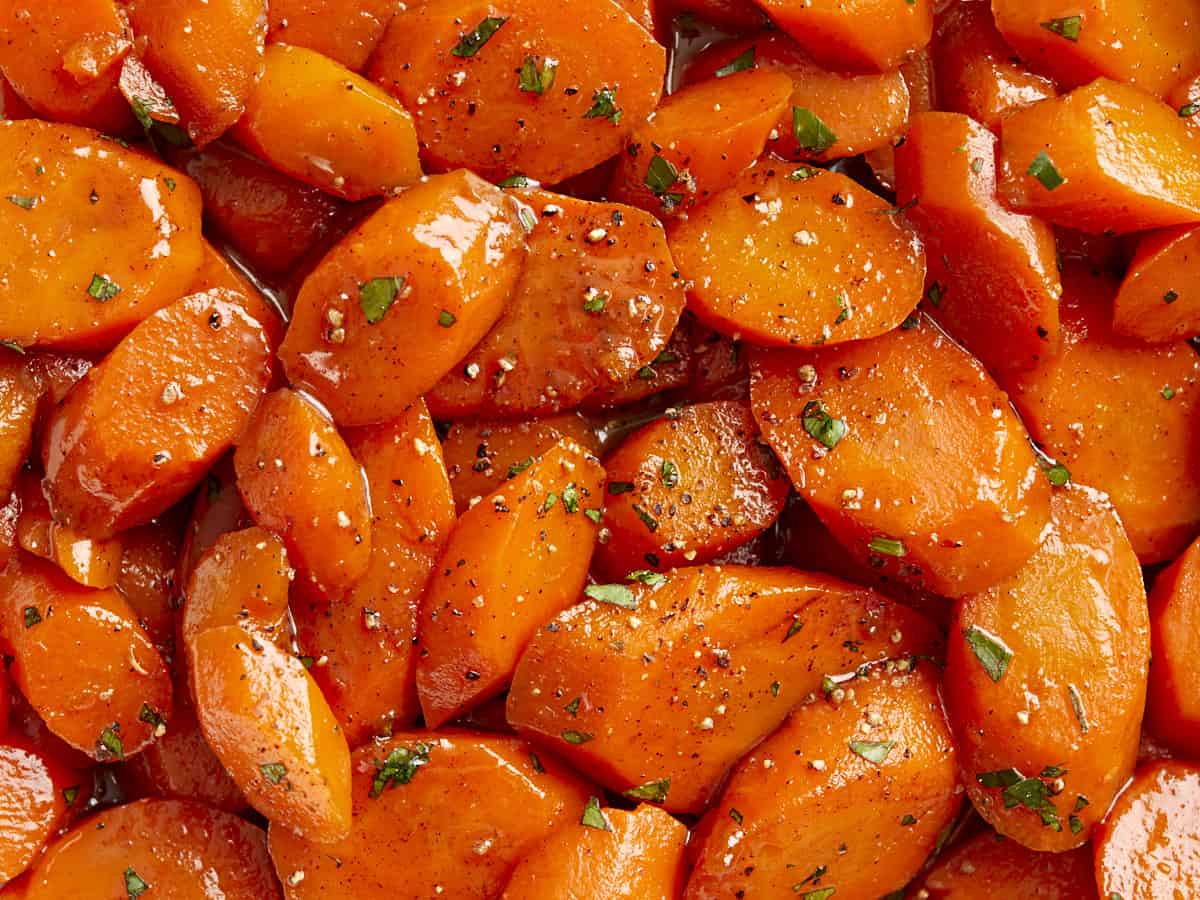
Once the carrots are tender to your liking, remove the skillet from the heat and season with freshly ground black pepper and fresh chopped parsley (optional). Now all that’s left to do is enjoy these delicious glazed carrots with your favorite dinner meal!
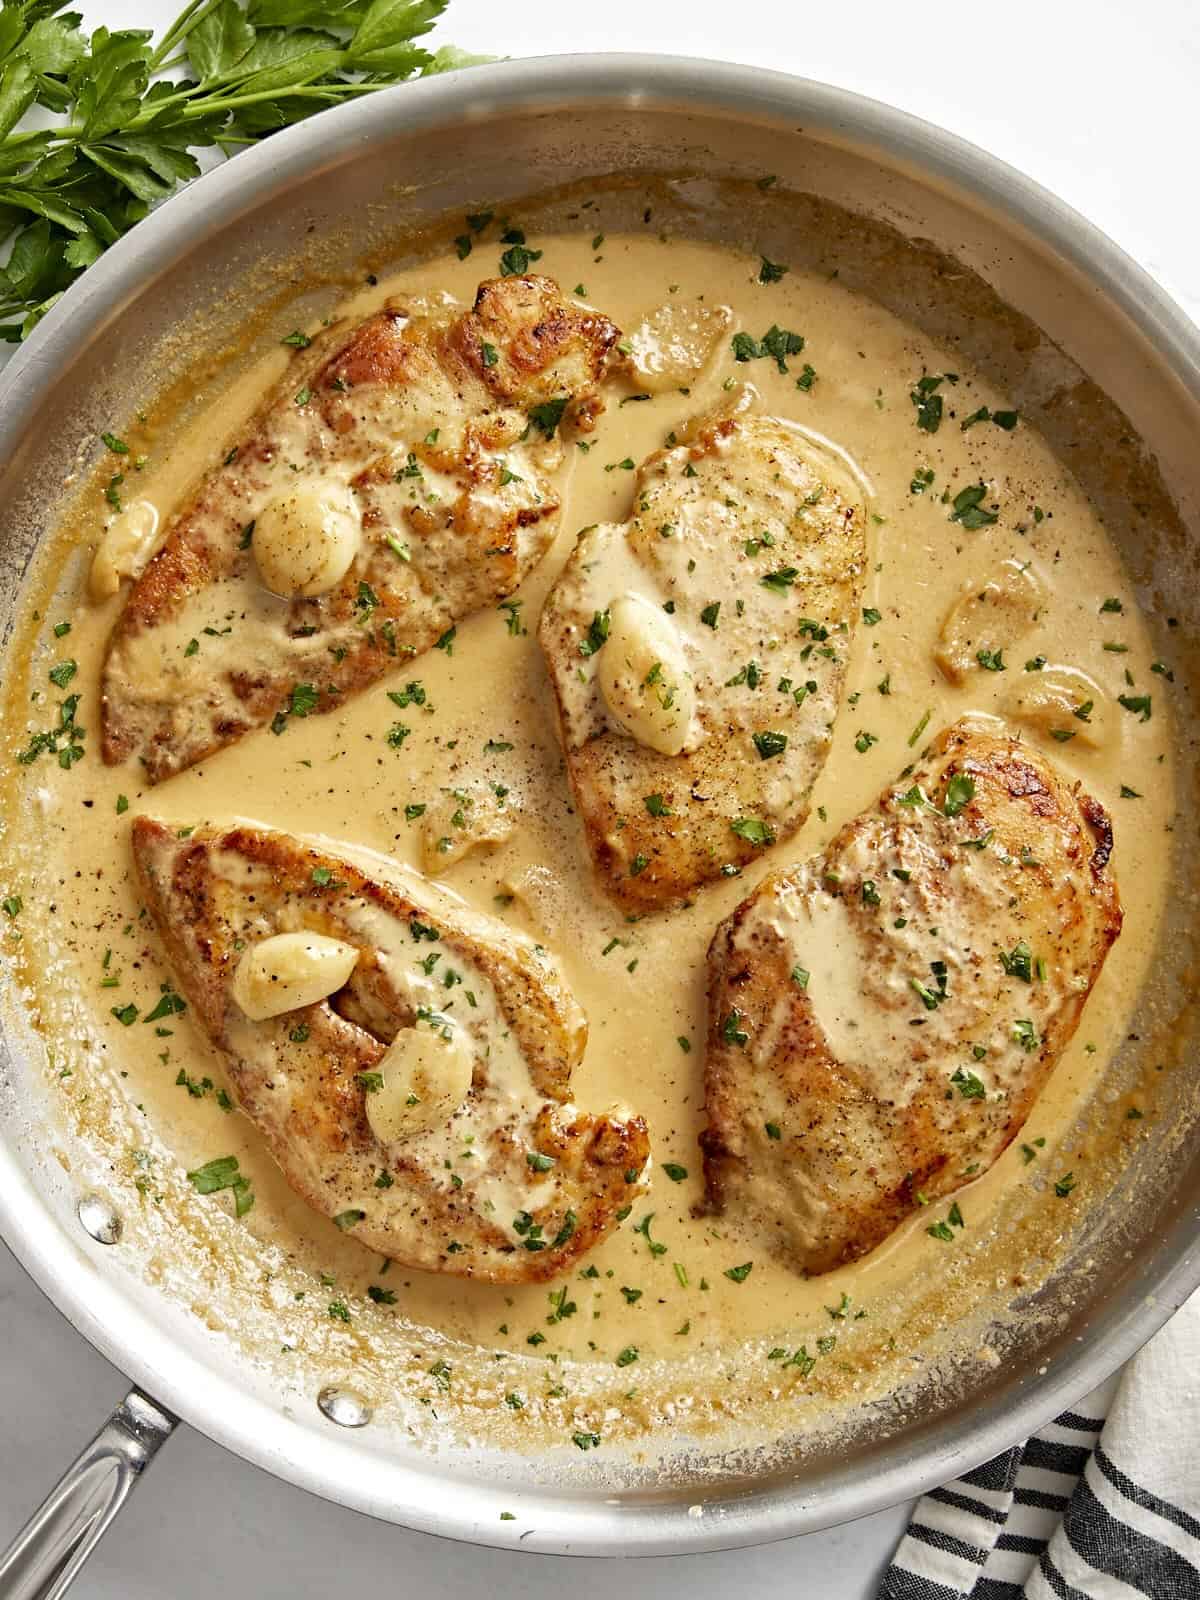
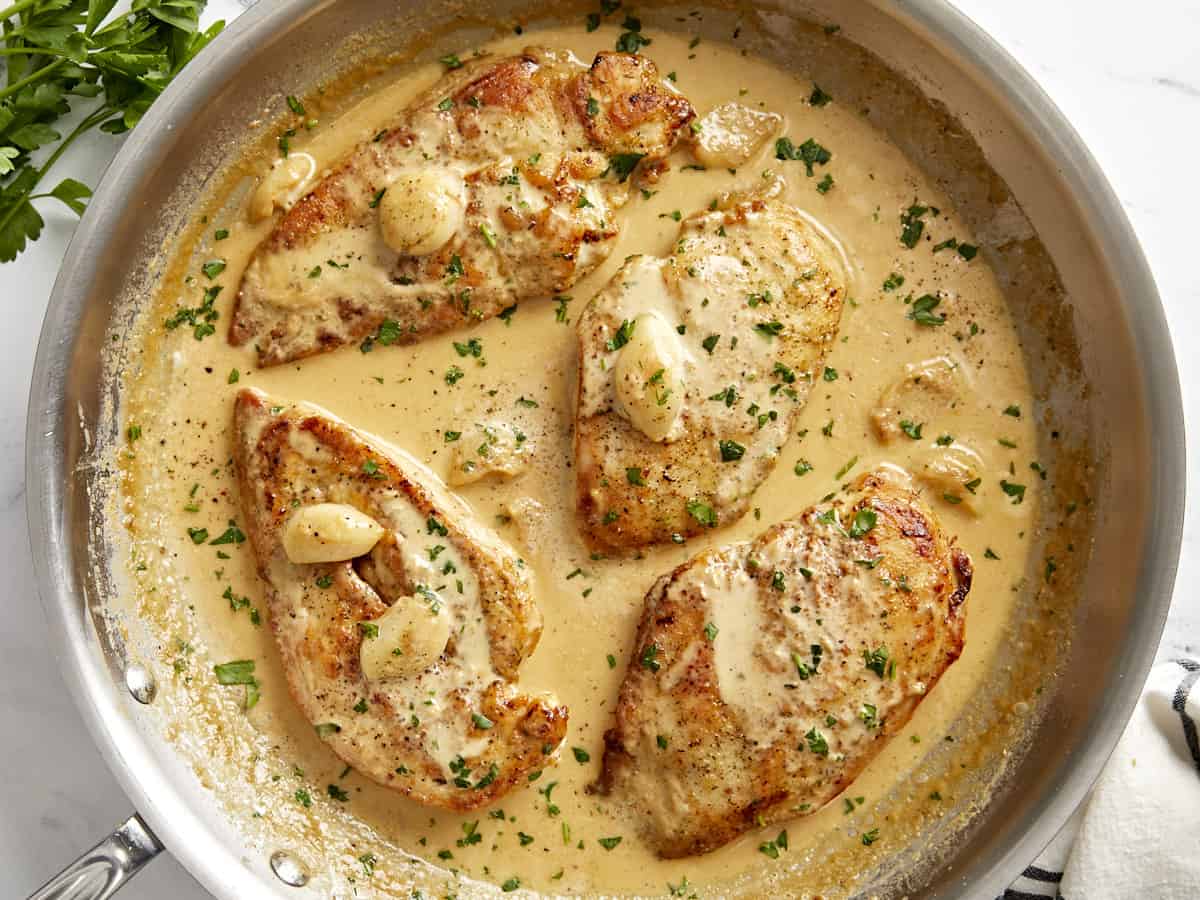
Every now and then you come across one of those recipes that just leaves you speechless. Well, today I’m introducing you to one of those recipes. This Creamy Garlic Chicken is so delicious, so flavorful, and so easy to make for a quick weeknight meal! It starts with tender, pan-seared chicken breasts that are then covered with a creamy, garlic-infused sauce. The moment my family tried this recipe, they instantly loved it! It honestly took everyone’s breath away. If you love simple recipes that are packed with flavor and made with a luscious cream sauce, then make sure to add this one to your weekly rotation!
Ingredients For Creamy Garlic Chicken
Here’s everything you need to make this creamy garlic chicken recipe:
Chicken: If you’ve seen a couple of my recipes, then by now you probably know I love using chicken breasts. So I opted for two boneless, skinless chicken breasts that I cut in half. But you can certainly use boneless, skinless chicken thighs instead.
All-purpose flour: A little bit of flour adds a light breading to the chicken breasts and the perfect compliment to the creamy garlic sauce.
Garlic: Garlic is the star of the show for this dish, so we’re using lots of it. One whole head of garlic to be exact. The garlic cooks down and infuses the sauce without overpowering the dish.
Olive Oil and Butter: Both are used to cook the chicken breasts and a little more butter is used to sauté the garlic cloves.
Chicken Broth and Heavy Cream: The rich garlic sauce is made with a combination of chicken broth and heavy cream. Both of them simmer together, along with the garlic cloves, until a creamy, flavorful sauce is formed.
Seasoning: The chicken breasts are seasoned with a little salt, pepper and Italian seasoning; and the sauce is seasoned with garlic powder plus a little salt & pepper to taste.
Can you eat the garlic cloves?
You may be curious if you can eat the whole garlic cloves with your chicken. The answer is YES! Sautéing the garlic cloves in the butter, then simmering them in the sauce, removes any overpowering, strong garlic taste and leaves a very subtle, delicious flavor. I love to spoon the garlic over the chicken along with the creamy sauce right before serving.
Recipe Tips!
After all the garlic cloves are peeled, I like to carefully smash them with the side of a large chef’s knife by pressing down on the side of the knife with the heel of my hand. Smashing the cloves releases more of their flavorful oils and gives the sauce a stronger garlic flavor.
Make sure you stir the garlic cloves frequently when sautéing them in the skillet with the butter. You don’t want the garlic to burn. As soon as it starts to turn a light brown color, add in the liquids and stir.
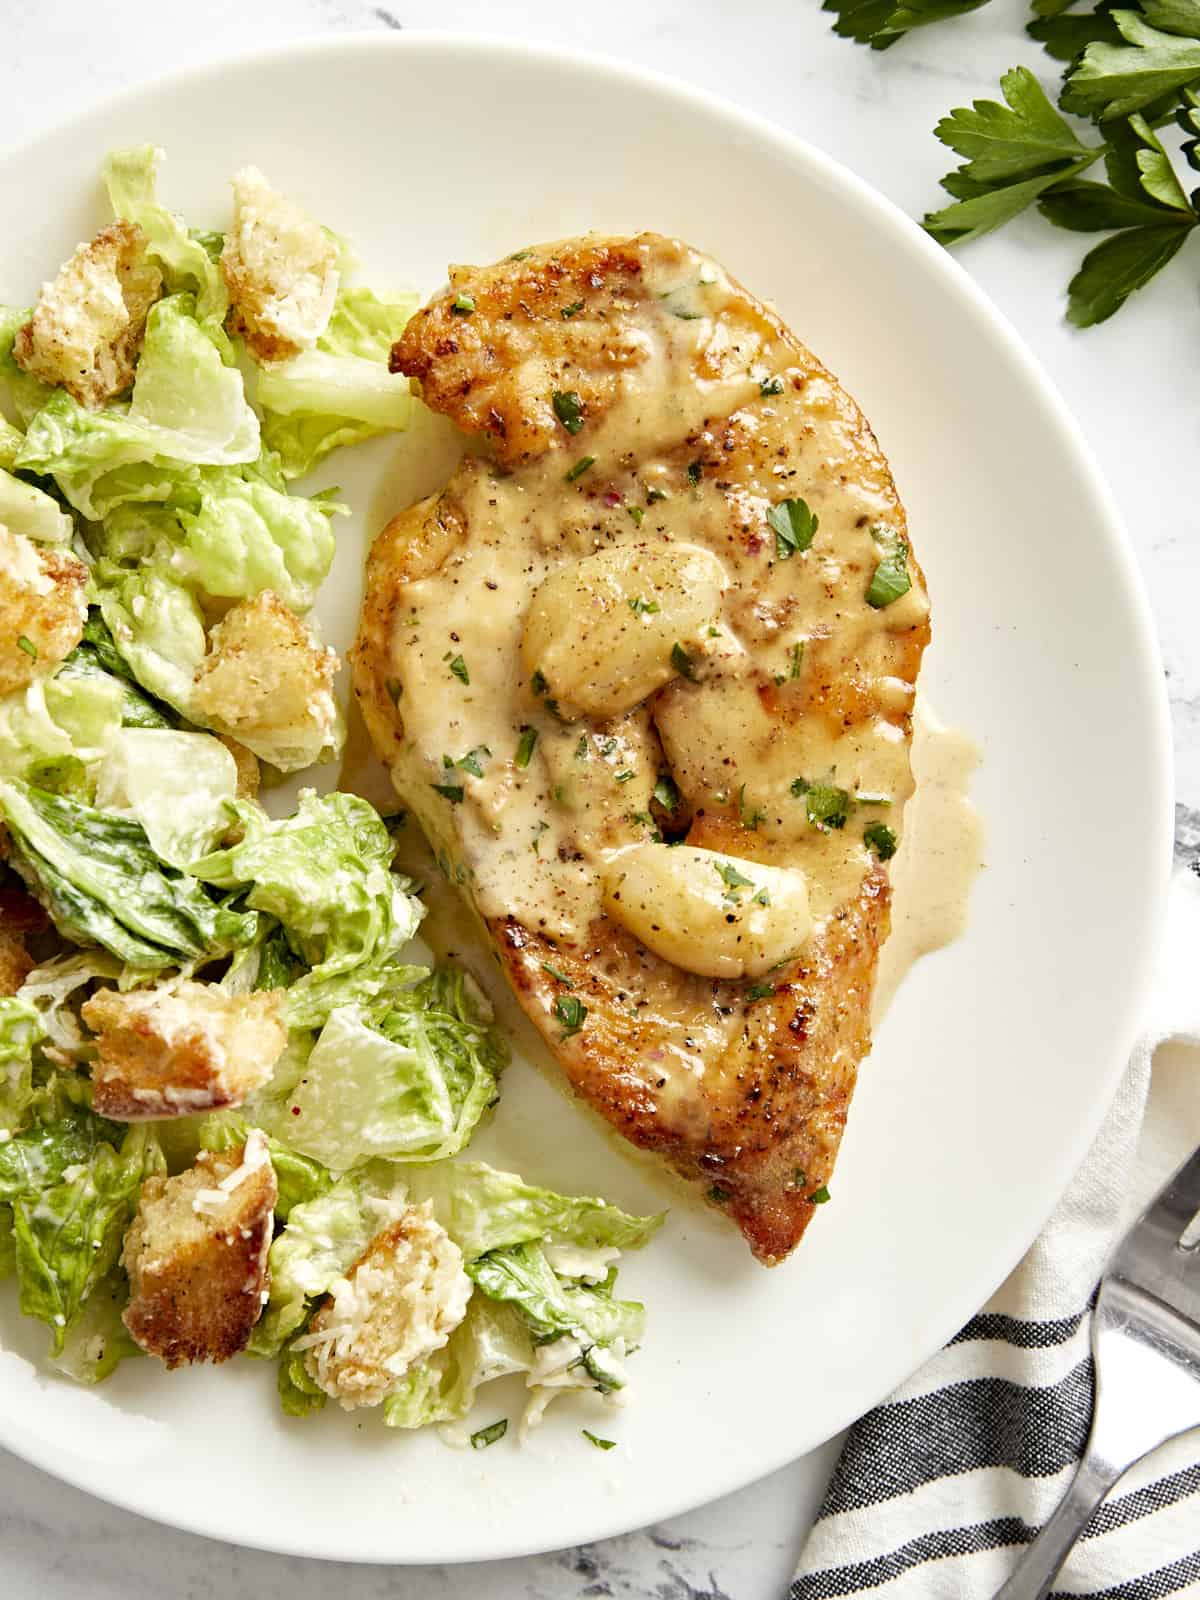
What To Serve With Creamy Garlic Chicken?
Creamy sauce recipes like this creamy garlic chicken are perfect to serve with Mashed Potatoes, so the potatoes can soak up all of that extra sauce. You can also serve the chicken and sauce over a bed of pasta or rice, or serve it with a simple side salad or in our case a Caesar salad. You really can’t go wrong with any side that you choose!
Using a sharp knife, carefully fillet each chicken breast into two thinner cutlets (or use thin-cut chicken breasts).
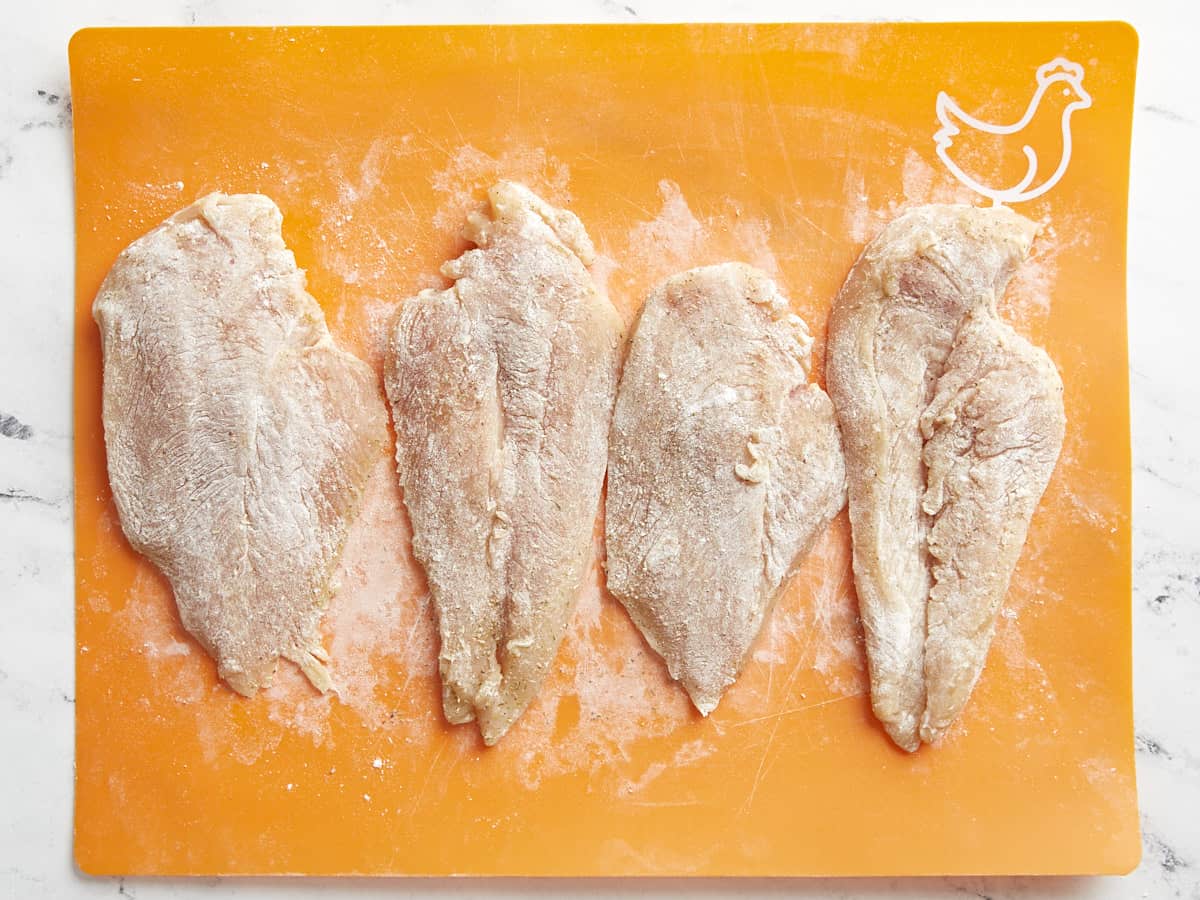
Season each breast with Italian seasoning, salt, and black pepper. Then sprinkle the flour over both sides of the chicken breasts and rub it in until the chicken is evenly coated.
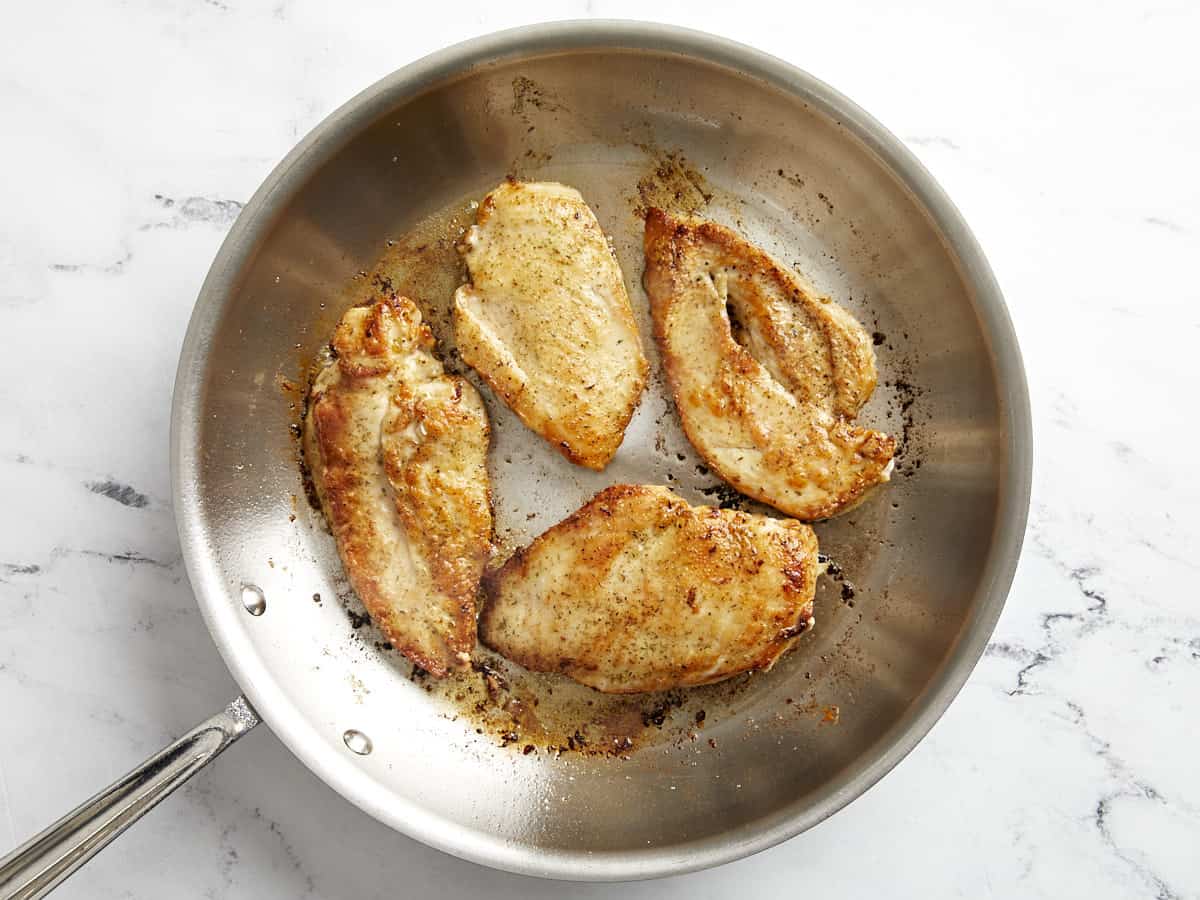
Heat a large skillet over medium heat and add the olive oil and 1 Tbsp of butter. Once the skillet is hot, add the chicken and cook on each side until golden brown and cooked through (about 4 minutes per side). Remove the cooked chicken to a clean plate and cover to keep warm.
While the chicken is cooking, peel the garlic cloves and then carefully smash them with the side of a large chef's knife by pressing down on the side of the knife with the heel of your hand.
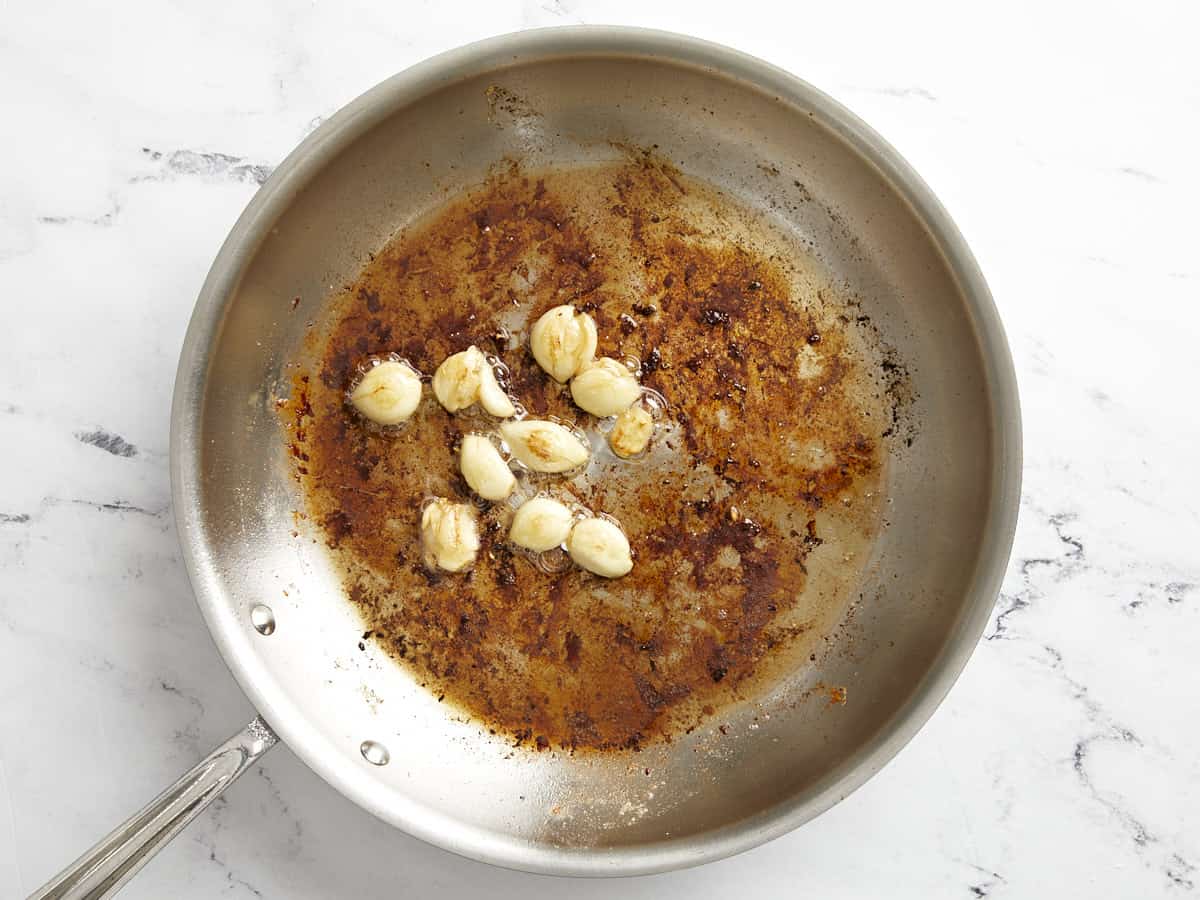
Once the chicken is removed, to the same skillet add the remaining 1 Tbsp of butter, then add the garlic cloves. Turn the heat down to medium-low and sauté the garlic for 3 minutes or until lightly browned and fragrant. Make sure to stir the garlic frequently to prevent it from burning.
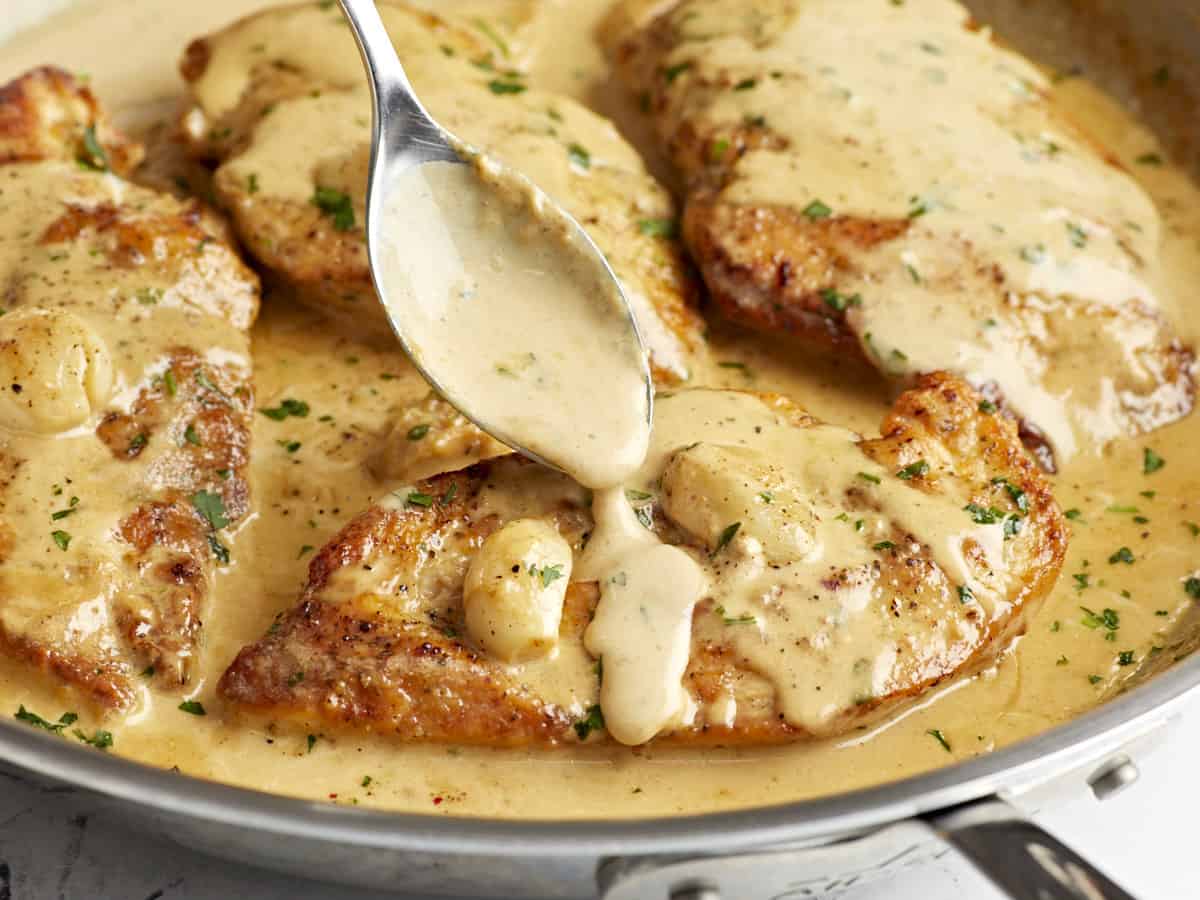
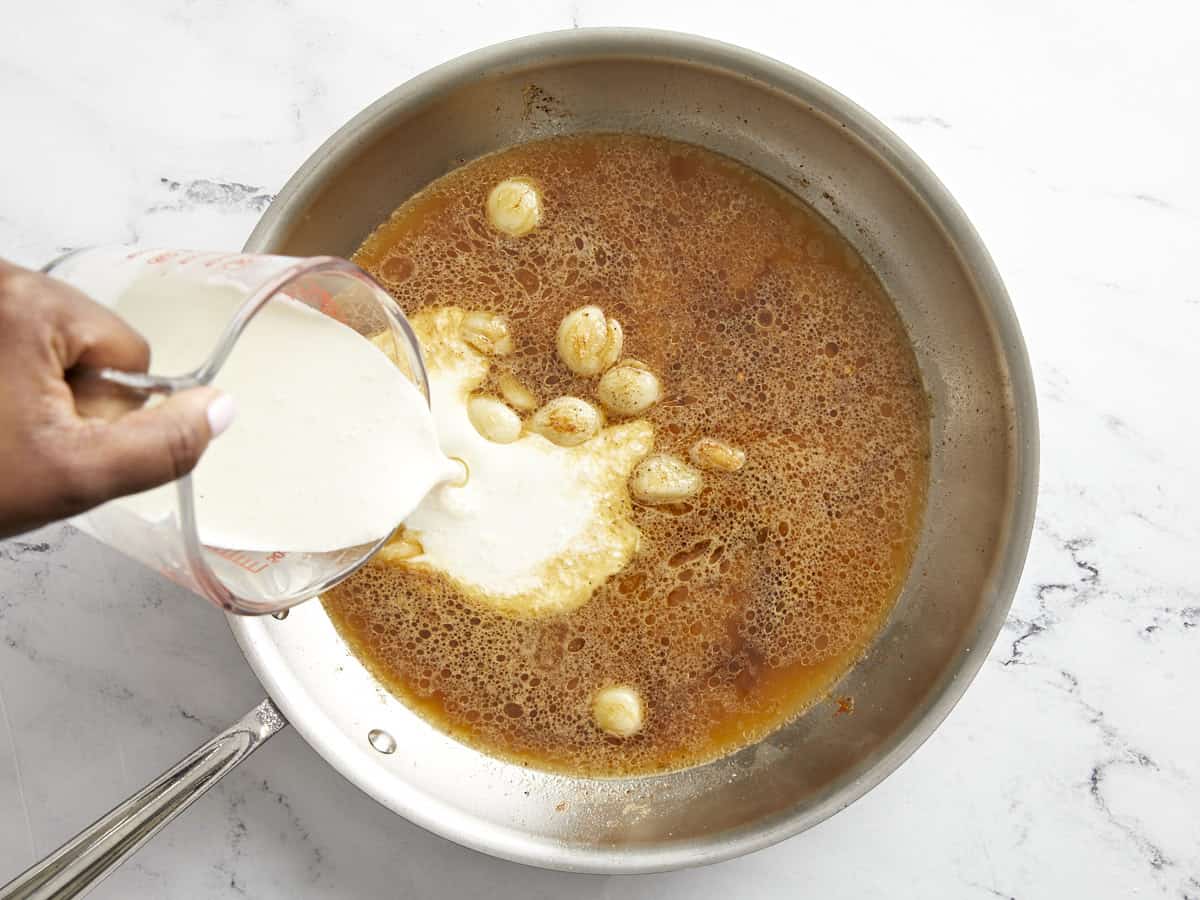
Next pour the chicken broth and heavy cream into the skillet, then add the garlic powder. Stir and scrape up any brown bits from the bottom of the skillet. Allow the sauce to simmer in the skillet for 8-10 minutes, or until it has reduced and thickened by about 50%. Taste the sauce at this point and add salt and pepper if needed (I added about ⅛ tsp of salt and ⅛ tsp of black pepper).
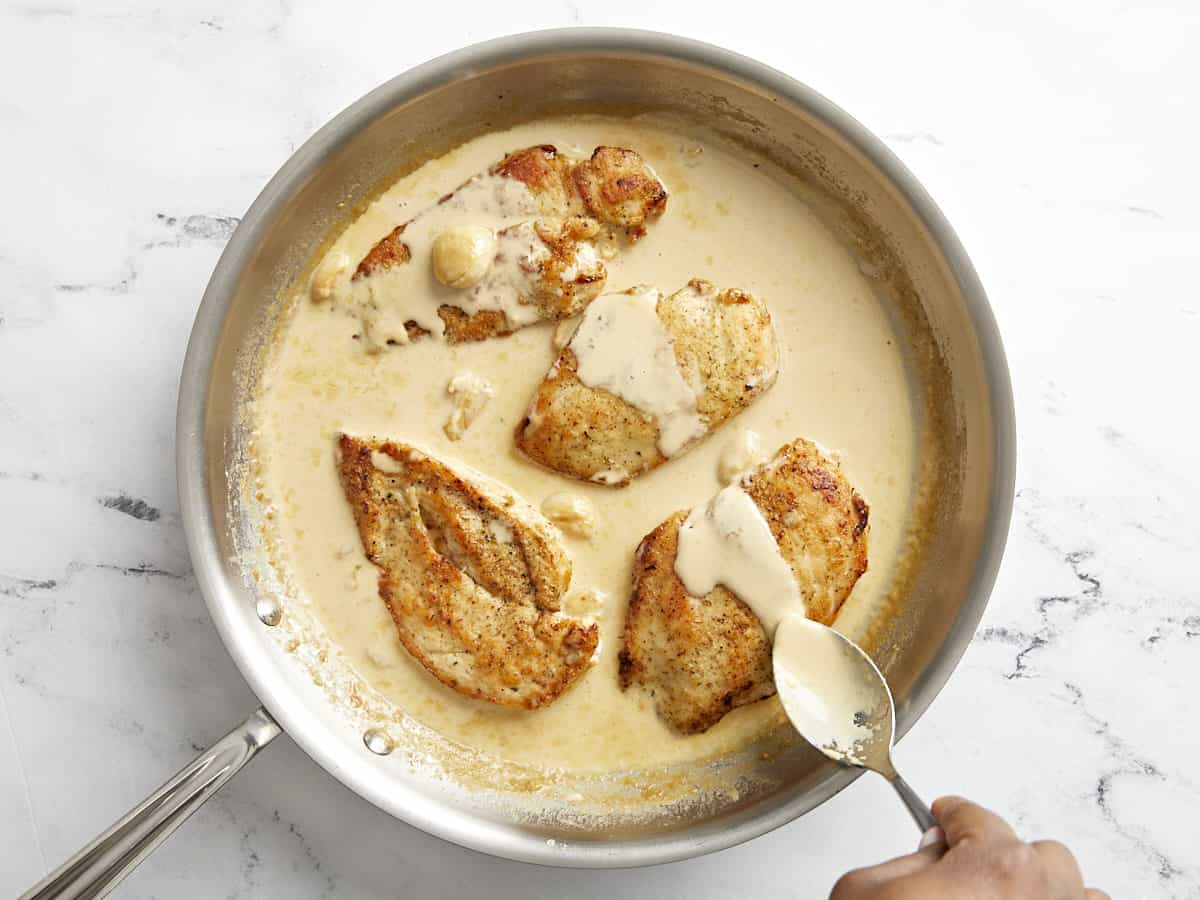
Finally, return the cooked chicken breasts to the skillet and spoon the creamy sauce over top. Allow the chicken to heat through. Serve with fresh chopped parsley (optional), and enjoy!
How to Make Creamy Garlic Chicken – Step by Step Photos
Using a sharp knife, carefully fillet 2 chicken breast into two thinner cutlets (or use thin-cut chicken breasts). Season each breast with 1/2 tsp Italian seasoning, 1/2 tsp salt, and 1/4 tsp freshly cracked black pepper. Then sprinkle 1/4 cup all-purpose flour over both sides of the chicken breasts and rub it in until the chicken is evenly coated.
Heat a large skillet over medium heat and add 2 Tbsp olive oil and 1 Tbsp of butter. Once the skillet is hot, add the chicken and cook on each side until golden brown and cooked through (about 4 minutes per side). Remove the cooked chicken to a clean plate and cover to keep warm.
While the chicken is cooking, peel the garlic cloves from 1 whole head of garlic. Then carefully smash them with the side of a large chef’s knife by pressing down on the side of the knife with the heel of your hand.
Once the chicken is removed, to the same skillet add the remaining 1 Tbsp of butter, then add the garlic cloves. Turn the heat down to medium-low and sauté the garlic for 3 minutes or until lightly browned and fragrant. Make sure to stir the garlic frequently to prevent it from burning.
Next pour 1 cup chicken broth and 3/4 cup heavy cream into the skillet, then add 1/2 tsp garlic powder. Stir and scrape up any brown bits from the bottom of the skillet. Allow the sauce to simmer in the skillet for 8-10 minutes, or until it has reduced and thickened by about 50%.
Taste the sauce at this point and add salt and pepper if needed (I added about ⅛ tsp of salt and ⅛ tsp of black pepper). Return the cooked chicken breasts to the skillet and spoon the creamy sauce over top. Allow the chicken to heat through.
Serve with fresh chopped parsley (optional) and enjoy this creamy, flavorful sauce with mashed potatoes, pasta, or any of your favorite sides.
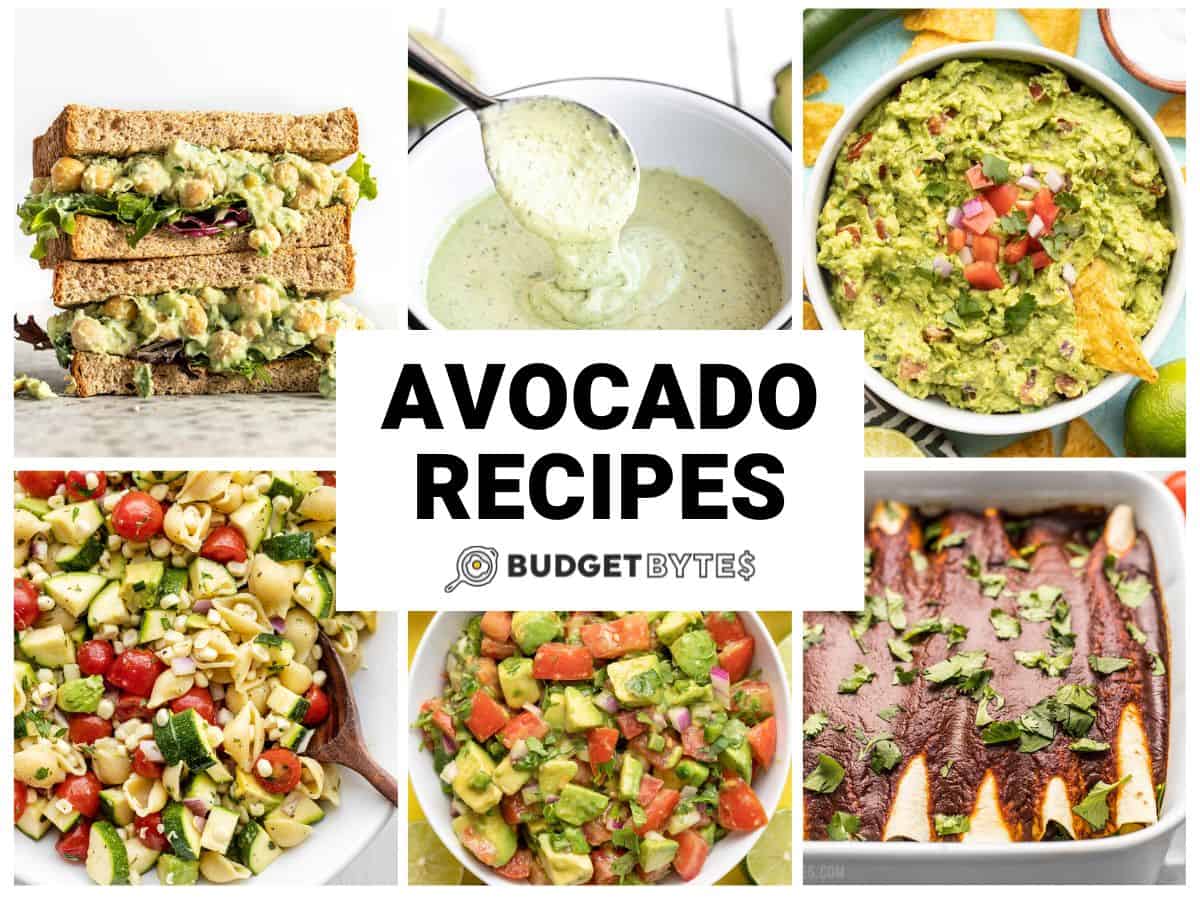
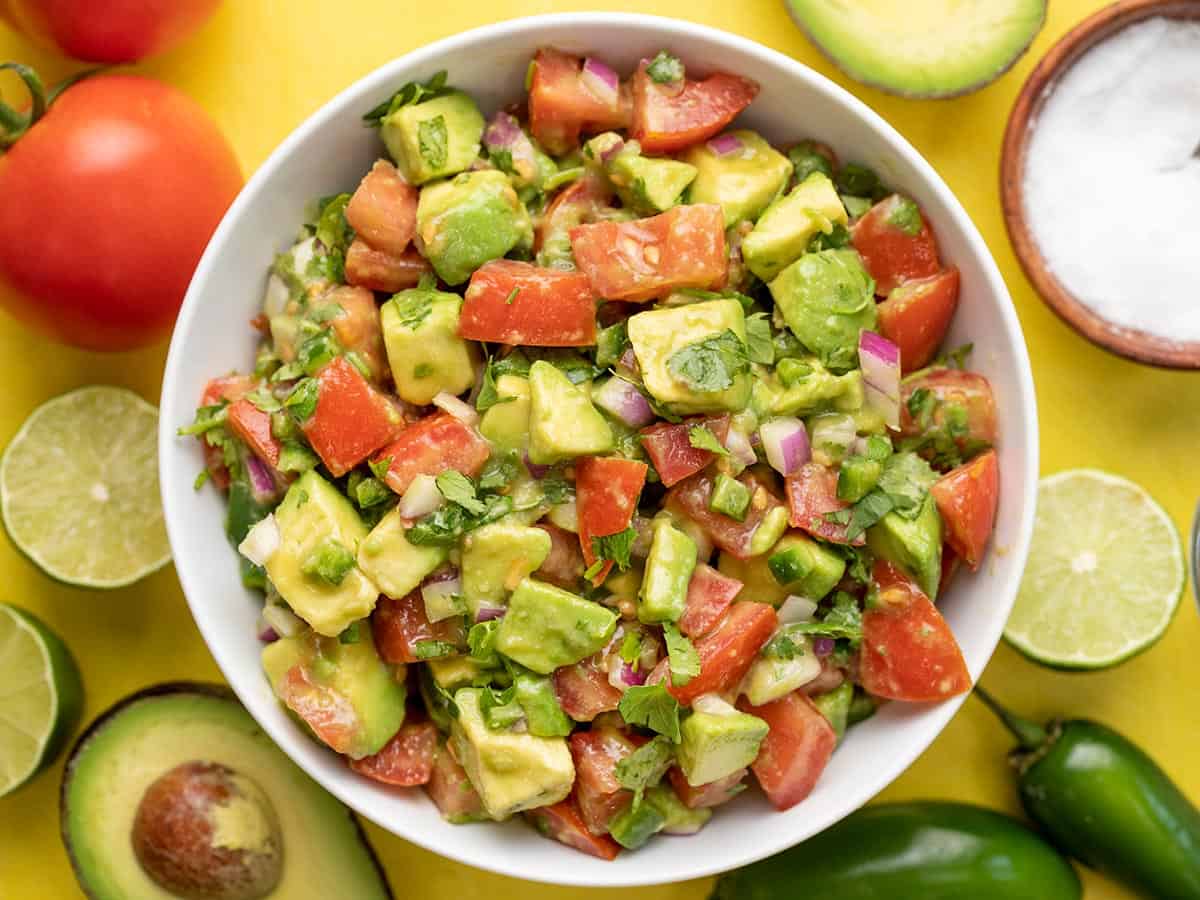
In case you haven’t noticed, we love avocados over here at Budget Bytes. They’re creamy, extremely versatile, and they taste great in avocado salad recipes, avocado dressings, on avocado toast, and of course in guacamole! You’ll often catch us adding avocados on top of breakfast skillets, taco bowls, nachos, and rice bowls. So today we’re sharing some of our favorite avocado recipes that we’re sure you will enjoy!
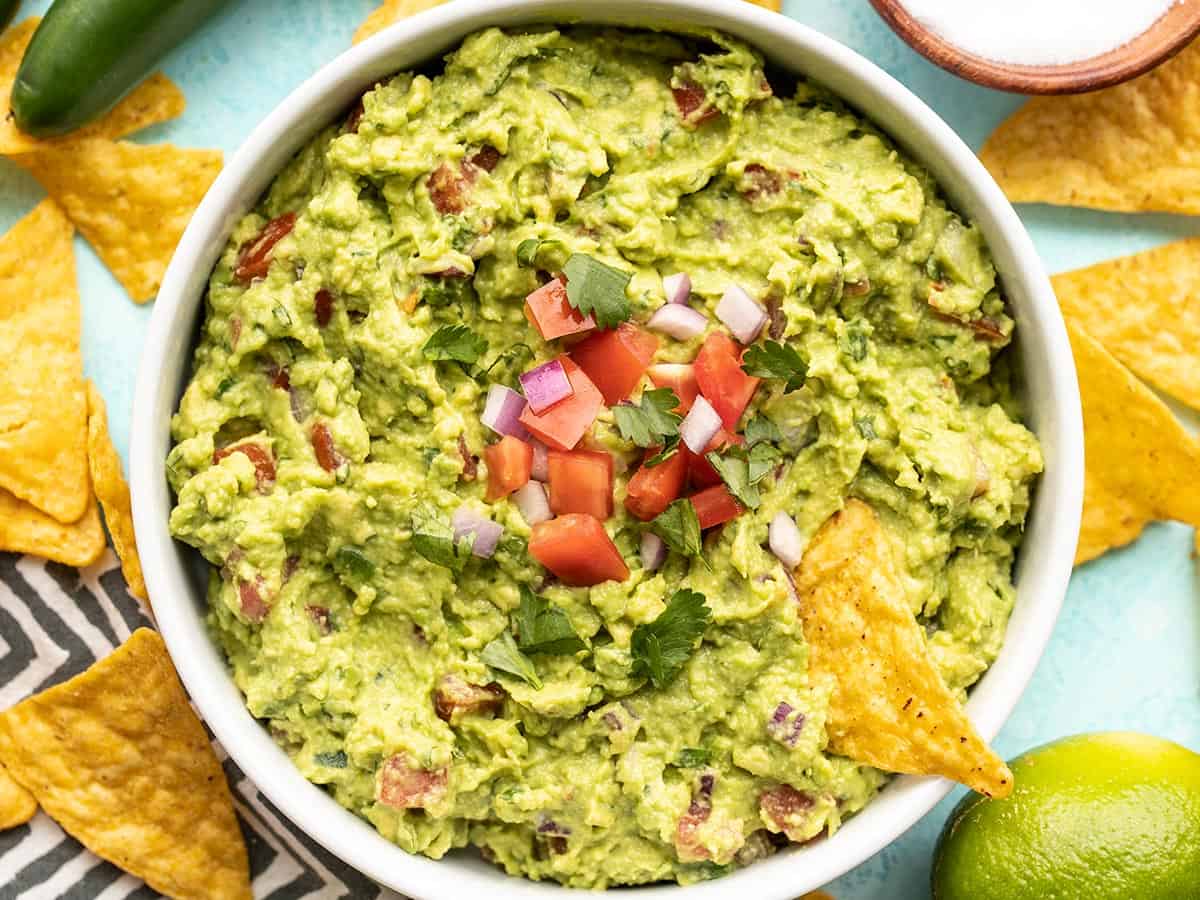
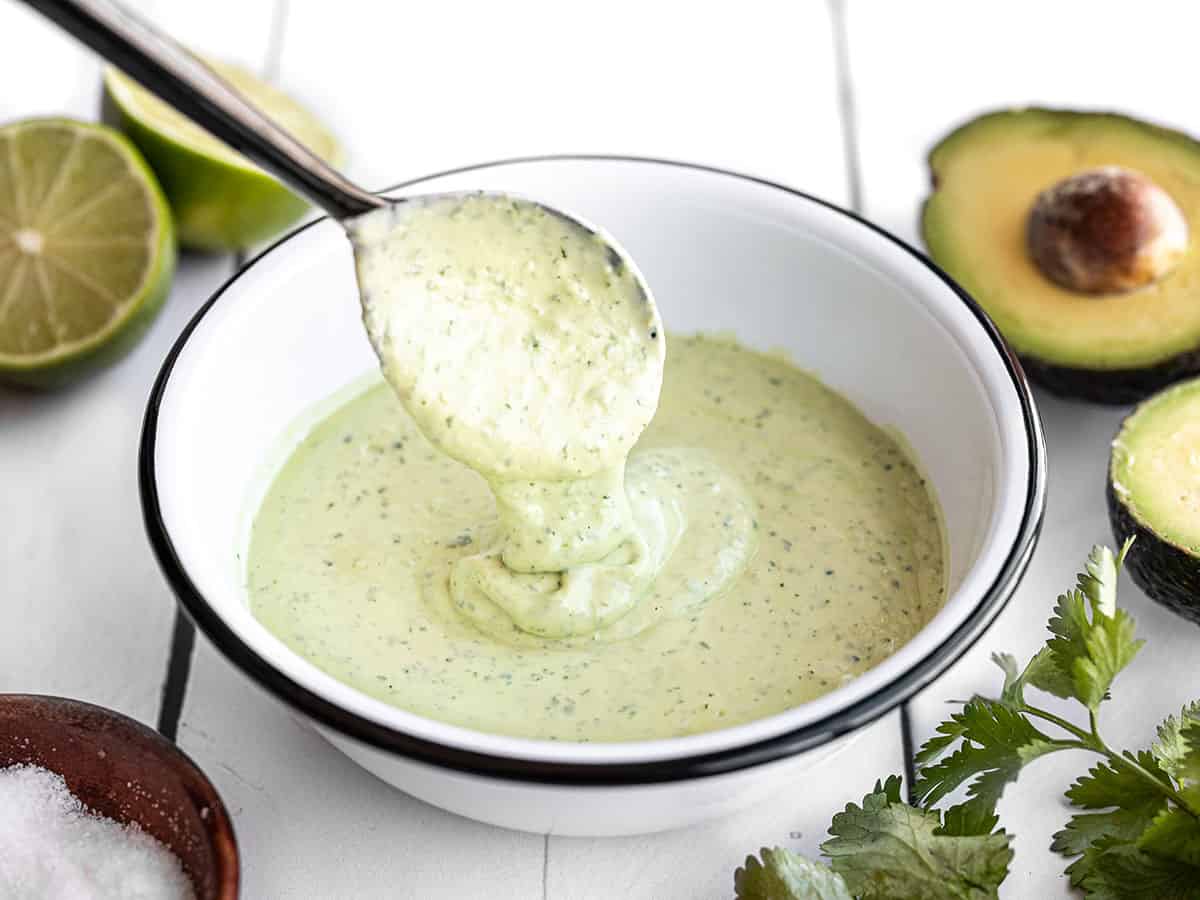
Of course we’re kicking things off with one of our favorite avocado recipes, this easy Homemade Guacamole. It only takes a few minutes to make and the fresh flavor is so good!
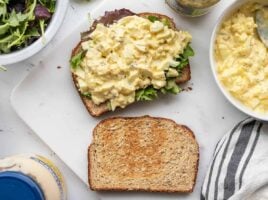
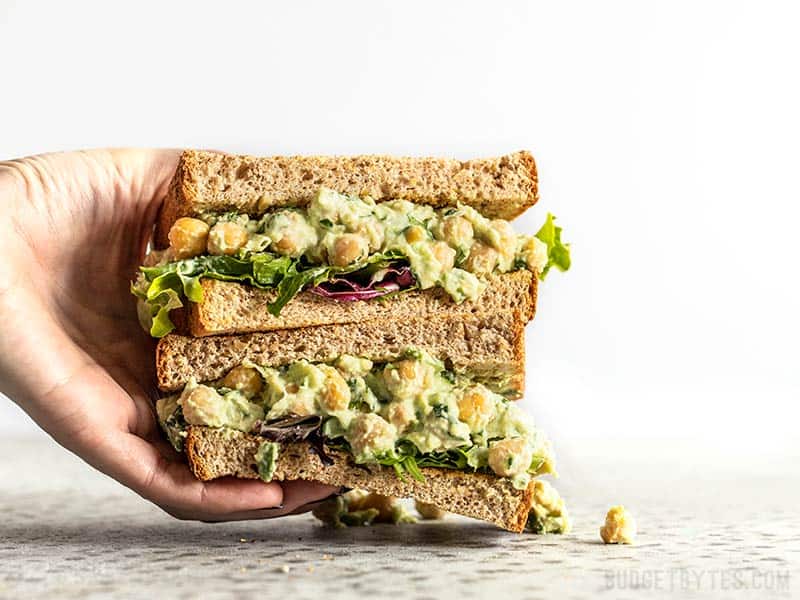
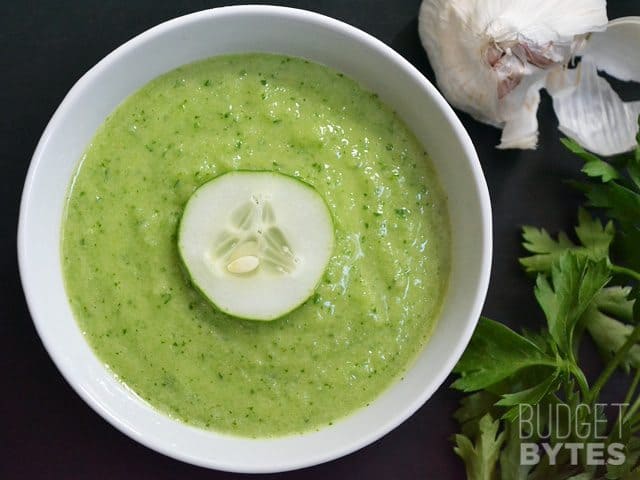
This creamy and delicious Scallion Herb Chickpea Salad includes a mayo-free avocado dressing and can be served as a salad, stuffed into a pita, or piled between two slices of hearty bread. It’s absolutely perfect for Spring!
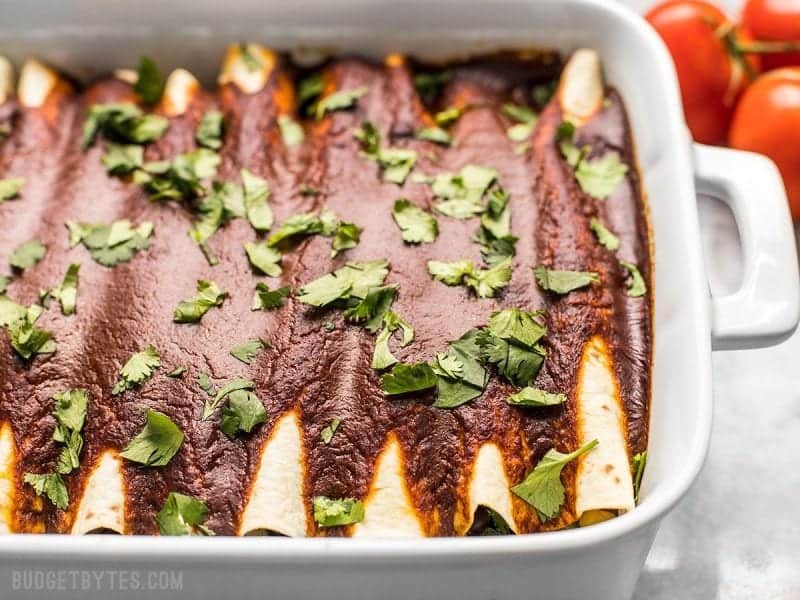
Our popular Black Bean and Avocado Enchiladas are filled with a simple black bean and veggie mixture, then covered with a rich homemade enchilada sauce! SO good!!!
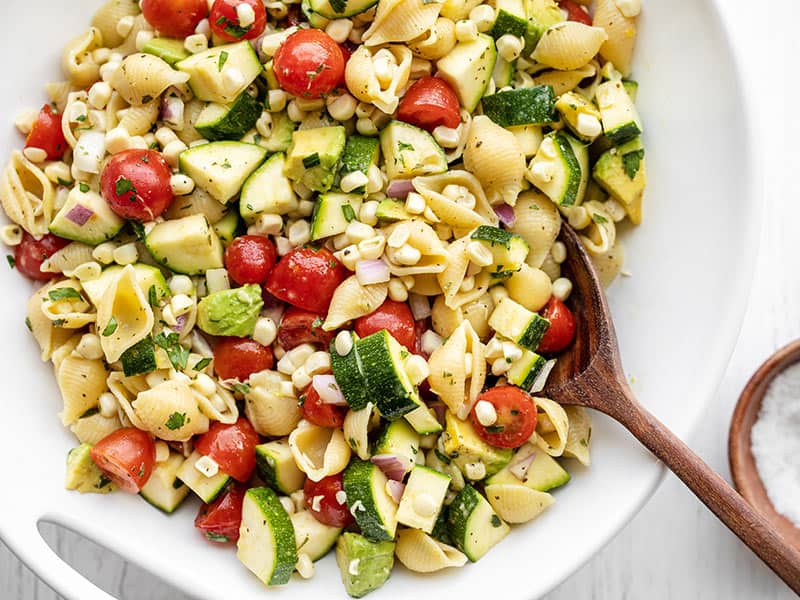
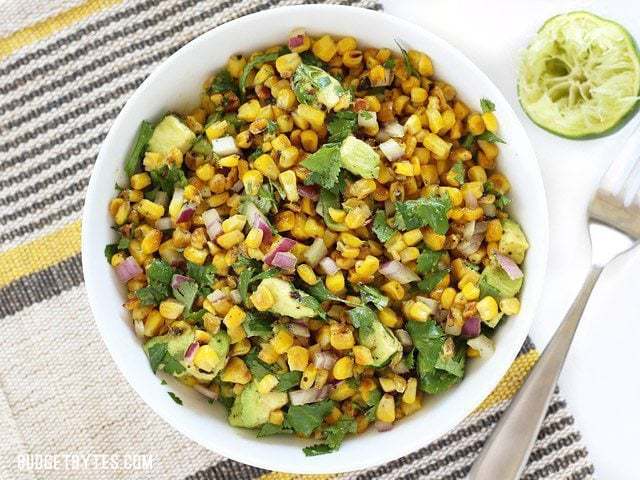
A light, fresh and colorful Summer Sweet Corn Saladis absolutely perfect to enjoy during the warm weather months or any time of the year. It’s also great for cookouts and family gatherings.
This light and fresh Warm Corn and Avocado Salad has cumin, cilantro and lime mixed in and goes perfectly with enchiladas, cilantro lime rice, or even on top of homemade tacos.
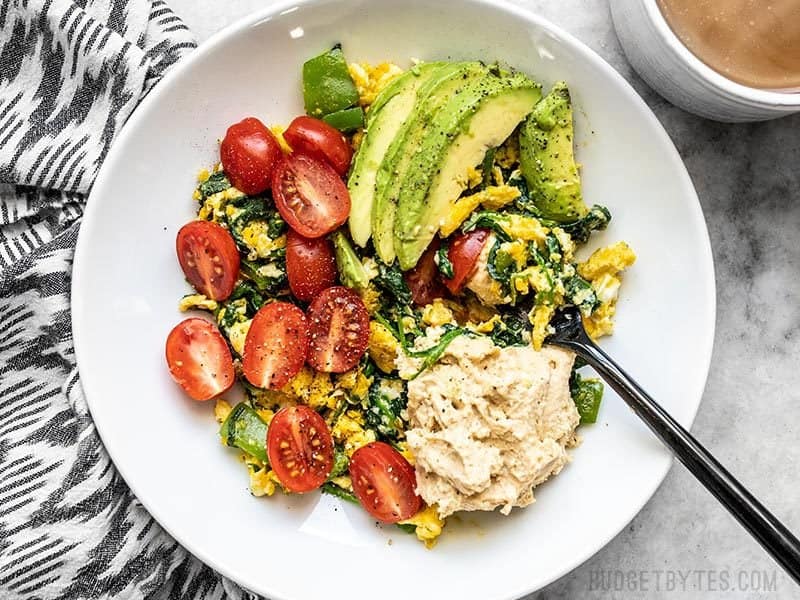
Vegetable Breakfast Scrambles are quick & easy to throw together for a filling breakfast meal in the mornings. You can customize them with different ingredients and toppings and they’re perfect for using up leftover veggies in your fridge to save on waste.
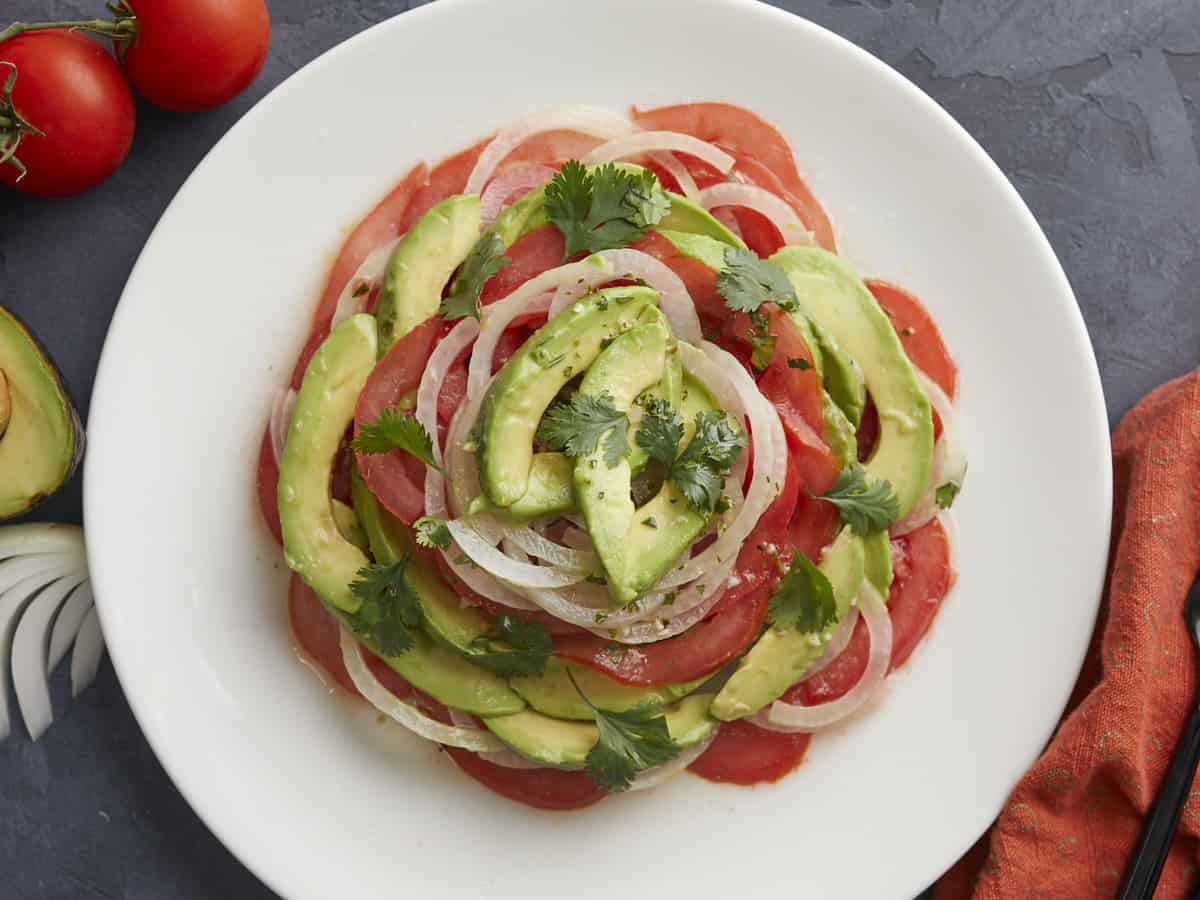
Ensalada de Aguacate, a Puerto Rican-style Avocado Salad, is easy, ready in just ten minutes, and the kind of summer salad that's so refreshing and tasty you'll find yourself craving it on sweltering days.
Ensalada De Aguacate is a creamy avocado salad that’s dressed with a simple mix of oil and vinegar. It’s refreshing and comes together in just 10 minutes!
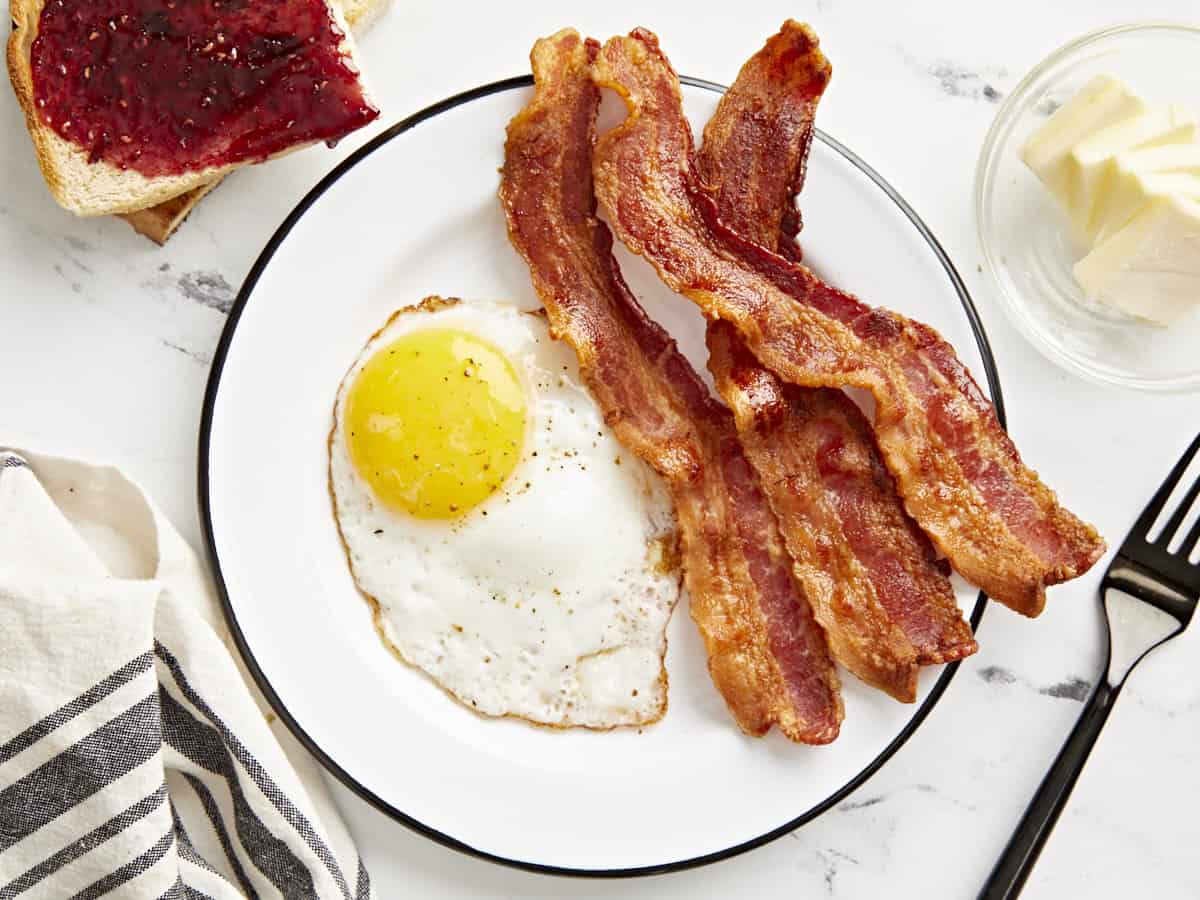
Bacon is my go-to protein of choice for breakfast on the weekends or during the week when I have a little extra time in the mornings. And I love how easy it is to cook Air Fryer Bacon. It’s a lot quicker than cooking bacon in the oven and everything is contained in the air fryer basket, so less splatter on the stovetop. It’s definitely a quick & easy cooking method for all you bacon lovers out there!
Why Cook Bacon In An Air Fryer?
Cooking bacon in the air fryer is all about convenience and saving time. It’s a lot quicker than preheating and baking your bacon inside an oven. It’s also a lot less messier than cooking bacon on the stovetop and having grease splatter everywhere. Everything is contained inside the air fryer basket for easy cooking and simple clean up!
How Long To Cook Air Fryer Bacon?
The cook times for air frying bacon will depend on the thickness of the bacon and how crispy you want your bacon to be. We tried a couple different cook times and temperatures with a few different types of bacon. Our preferred temperature was 360°F. So for regular cut bacon, air fry at 360°F for 7-9 minutes or 12-14 minutes for thick cut bacon.
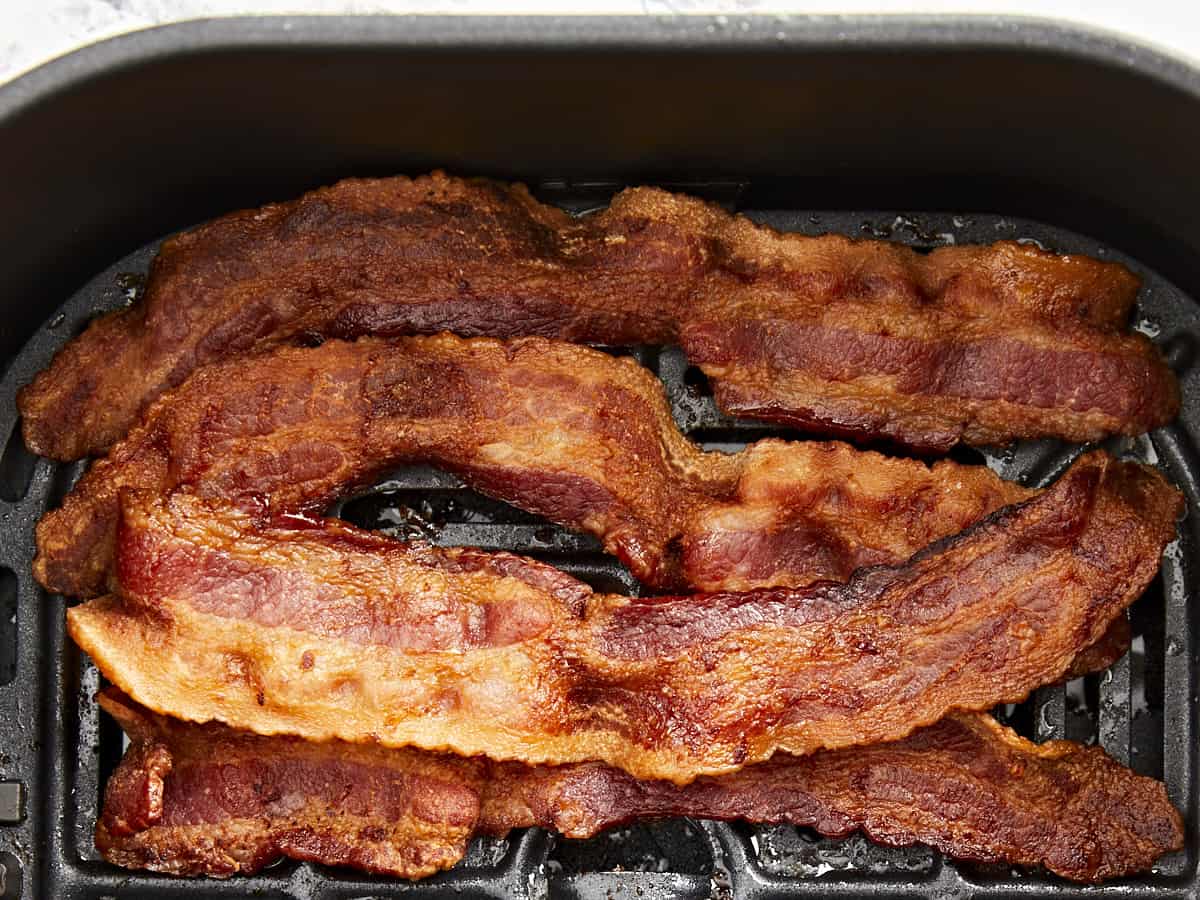
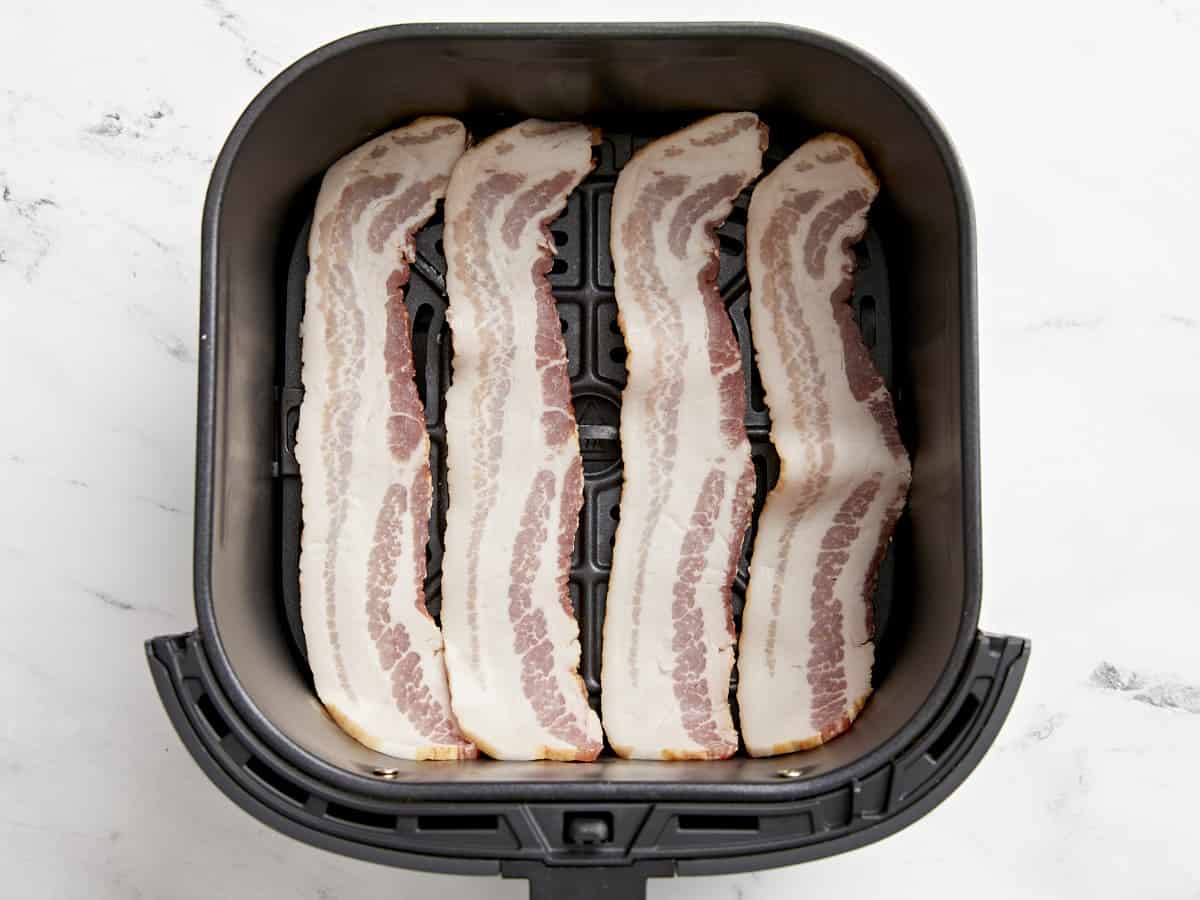
Place the bacon slices evenly, in a single layer, inside the air fryer basket.
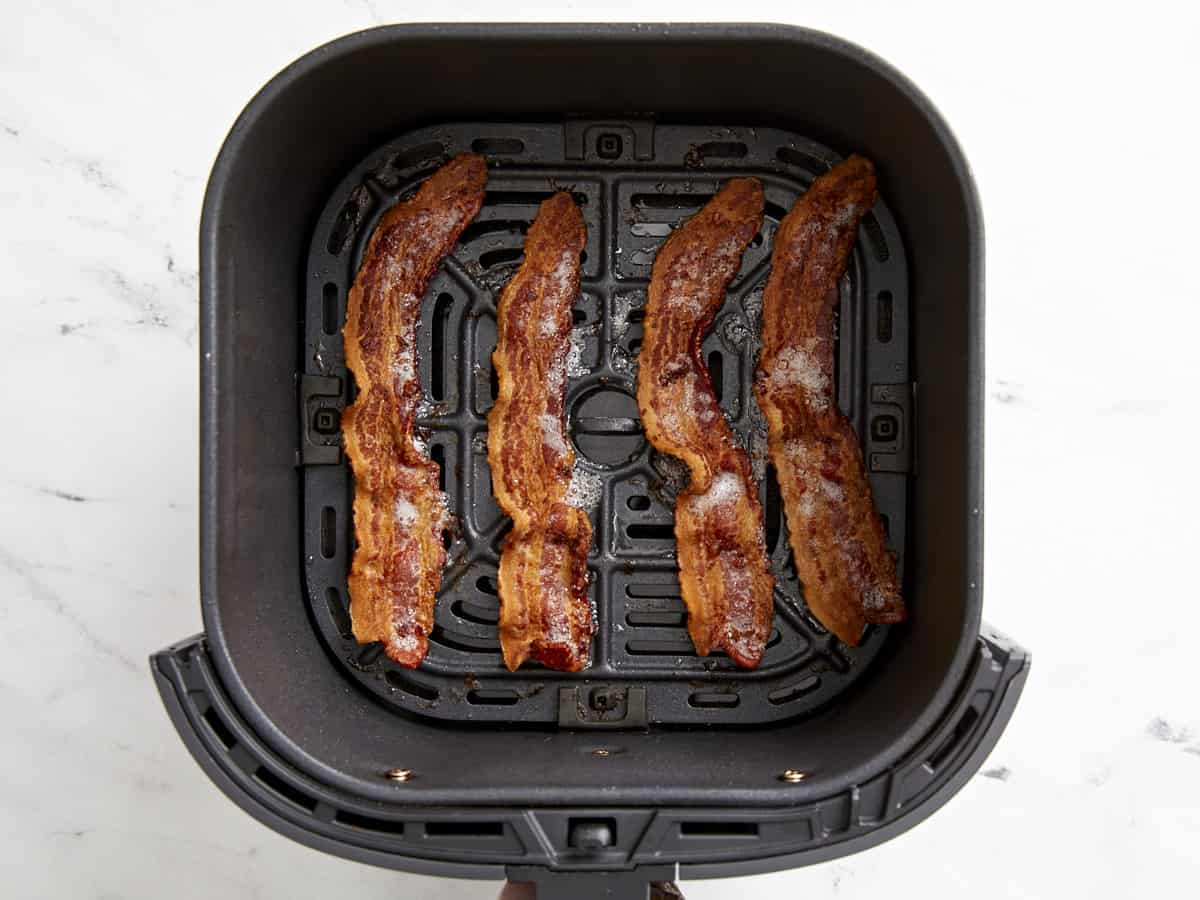
Air fry bacon at 360°F for 7-9 minutes for regular cut bacon or 12-14 minutes for thick cut bacon. We used thick cut bacon for this recipe and cooked it for 13 minutes until crispy.
Remove the cooked bacon from the air fryer and transfer to a paper towel lined plate. If you are cooking another batch, carefully pour out any excess grease, wipe out the bottom of the air fryer basket with a paper towel, then repeat air frying the next batch of bacon.
Place four bacon slices evenly, in a single layer, inside the air fryer basket.
Air fry bacon at 360°F for 7-9 minutes for regular cut bacon or 12-14 minutes for thick cut bacon. We used thick cut bacon for this recipe and cooked it for 13 minutes until crispy. Remove the cooked bacon from the air fryer and transfer to a paper towel lined plate. If you are cooking another batch, carefully pour out any excess grease, wipe out the bottom of the air fryer basket with a paper towel, then repeat air frying the next batch of bacon.
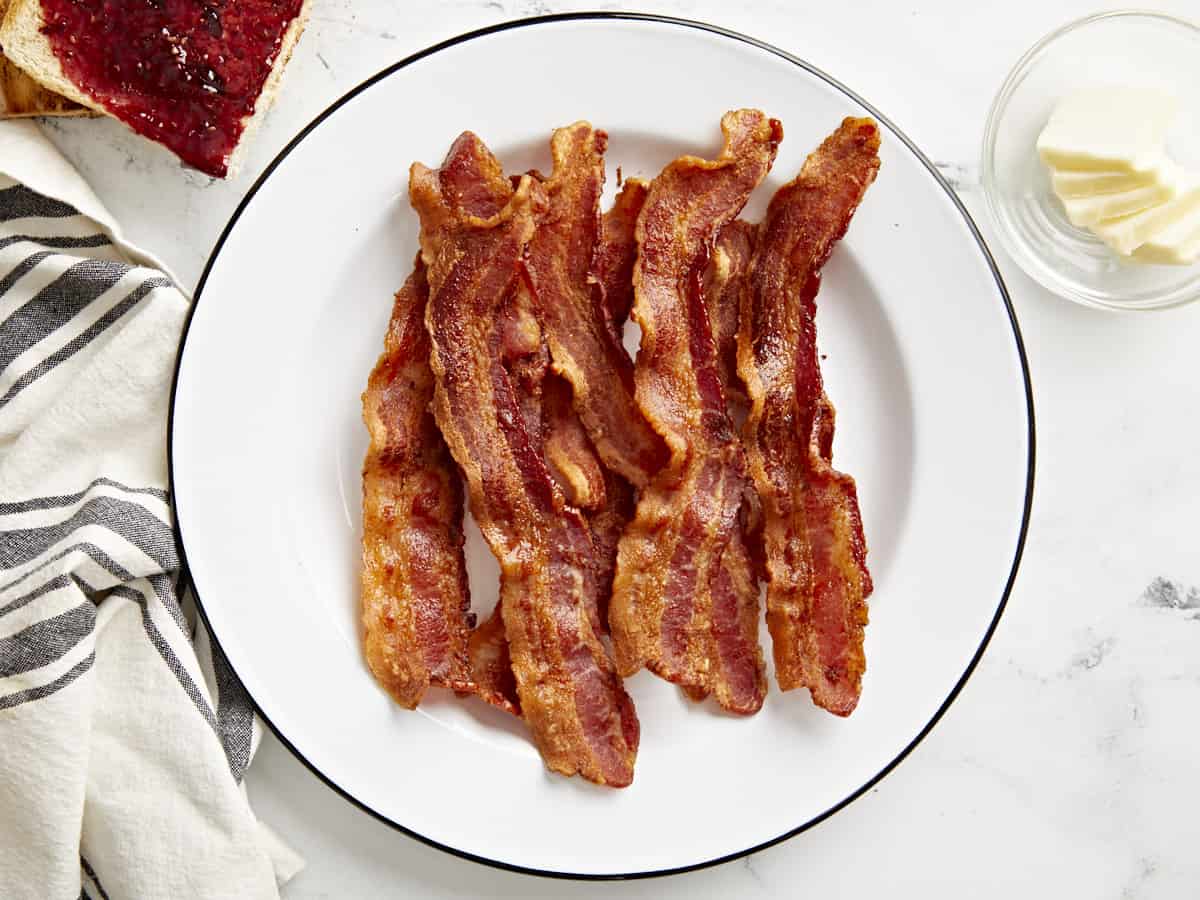
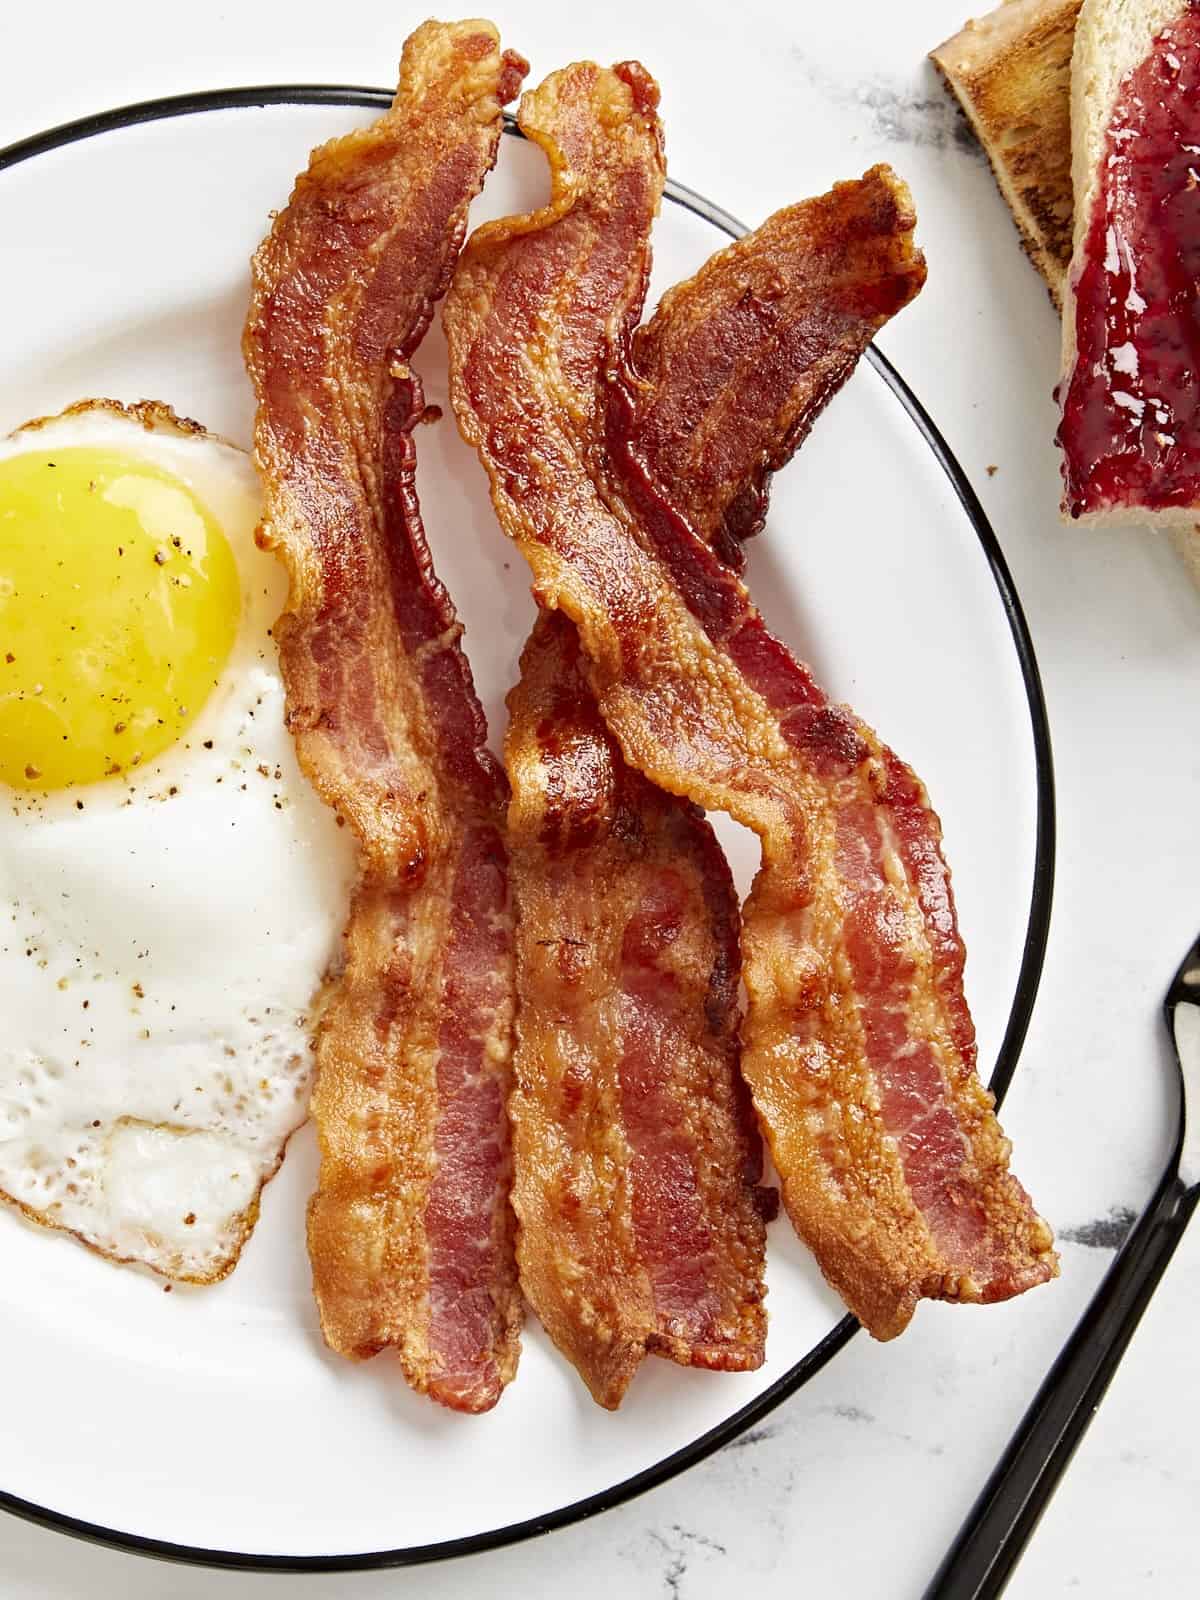
Enjoy your crispy air fryer bacon with your favorite breakfast sides or crumbled and added to your favorite dish!
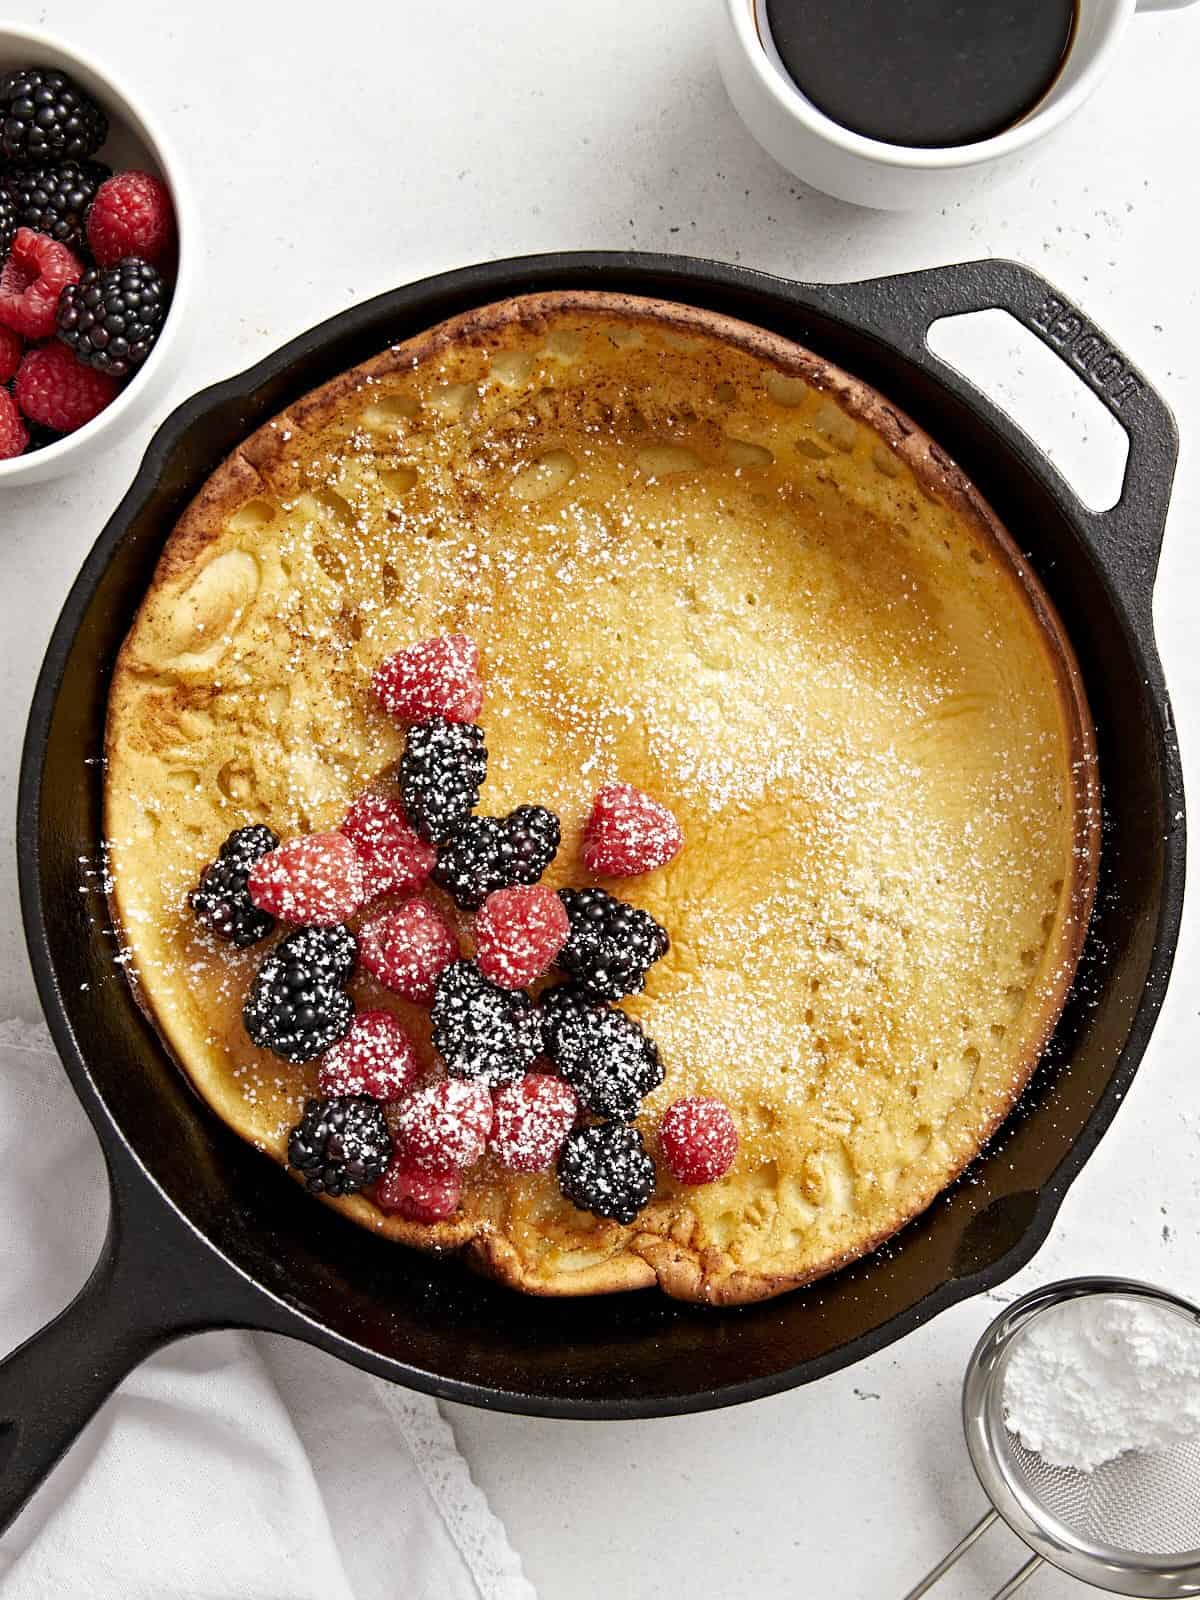
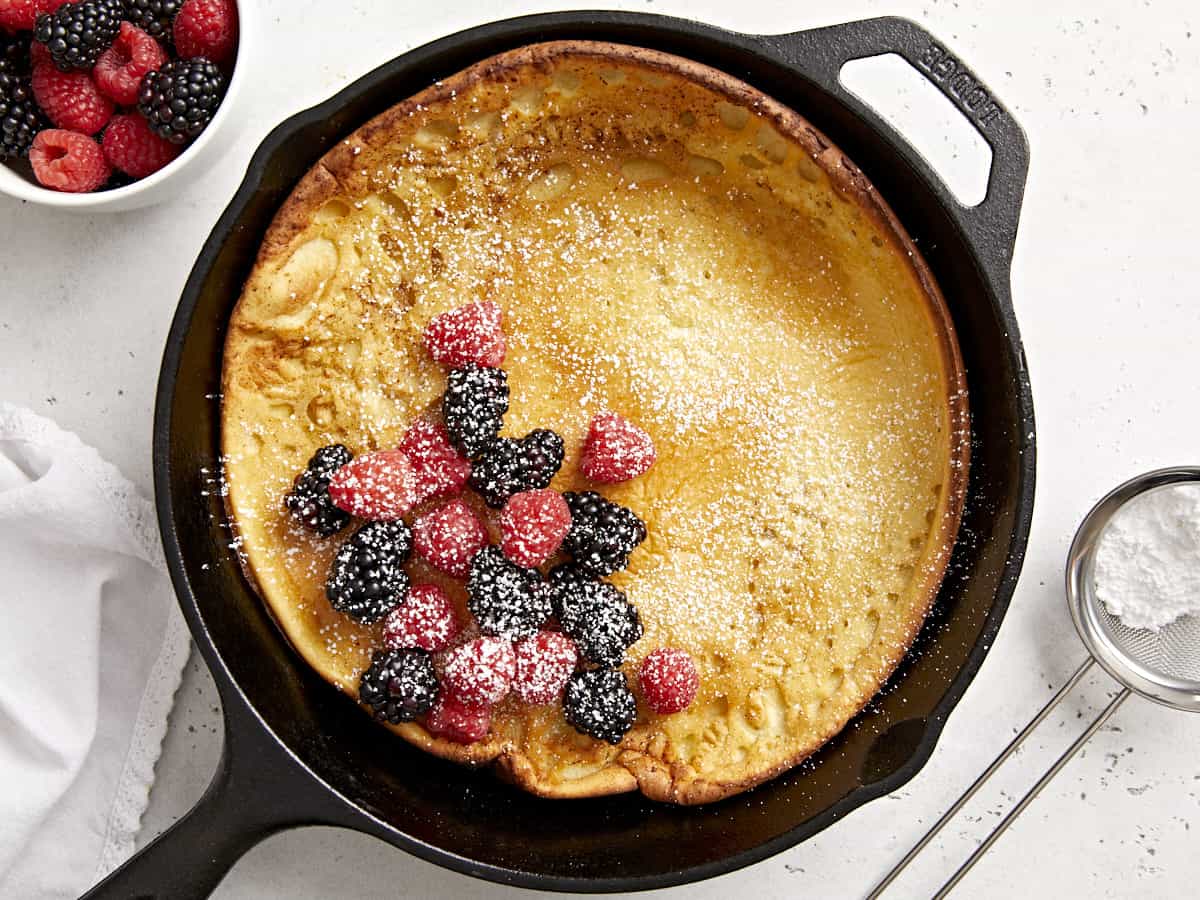
Friends, prepare to fall in love with this easy Dutch Baby recipe. I believe my first words after taking the first bite was “This is the only way I want to eat my pancakes from now on.” Ok, I may have been exaggerating a little bit, but seriously, where have these been all my life?! It’s a very smooth and light pancake that simply melts in your mouth. Not only is it fun to make, but it’s also very easy to make and only requires basic pantry ingredients. It’s definitely a showstopper and perfect to make anytime you want an extra special breakfast.😉
What Is A Dutch Baby?
A Dutch Baby pancake is like a cross between a popover and a crepe. It’s essentially a giant skillet pancake made with a thin, eggy batter that puffs up around the edges as it bakes in the oven. A Dutch baby is light, more eggy, and less cake-like than traditional American pancakes. It looks super fancy, but trust me it’s actually very easy to make.
Ingredients for Making A Dutch Baby
Just a few simple ingredients is all it takes to make this Dutch baby recipe. Here’s what you’ll need:
All-Purpose Flour: Flour adds structure and is the foundation of the pancake.
Milk: Milk combines with the flour to add moisture and helps create the batter.
Egg: Eggs add more moisture and helps hold the pancake together.
Sugar: Just a little bit of sugar adds the perfect amount of sweetness to the pancake.
Vanilla Extract: A small amount of vanilla extract adds a wonderful flavor and depth to the pancake.
Salt: A little bit of salt helps enhance the flavor of the pancake.
Butter: Butter adds flavor and richness to the pancake and it also gives it that beautiful golden brown color around the edges.
DO I HAVE TO USE A CAST IRON SKILLET?
The key to a big fluffy Dutch Baby is that sudden burst of heat when the batter hits the hot skillet and that is definitely best achieved with cast iron. However any oven-safe skillet or baking dish will also work well when pre-heated. We tested this recipe using a cast iron skillet and a 9″ glass pie dish. Although the sides did not rise as much in the pie dish, the Dutch baby still baked quite nicely.
If you do decide to stray from using cast iron, just make sure to preheat the dish with your oven to get it as hot as possible, and use something round, about 9 to 10-inches in diameter.
Recipe Tips!
Although this is a very simple recipe, here are a few key tips to help you make the perfect Dutch Baby:
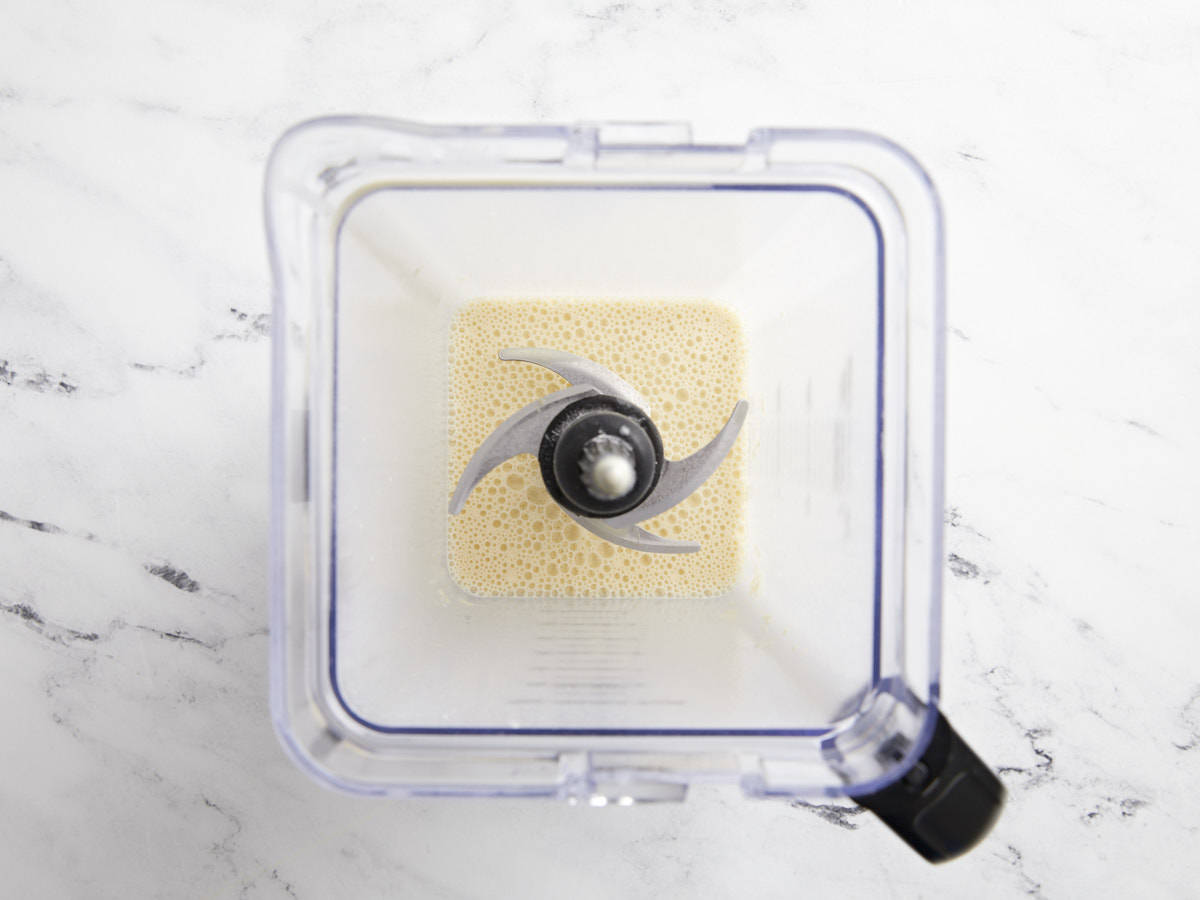
Use a blender to mix the pancake batter. For this recipe you’ll want a very smooth and thin batter with no lumps. After it’s blended, let the batter rest so the ingredients can come to room temperature.
Allow the skillet to heat in the oven while the oven is preheating. This helps ensure your skillet is piping hot when you add the pancake batter.
Move quickly! You’ll want to move quickly (and carefully) when adding the butter and when adding the pancake batter. Try not to let the skillet cool down too much between each step.
How To Serve A Dutch Baby?
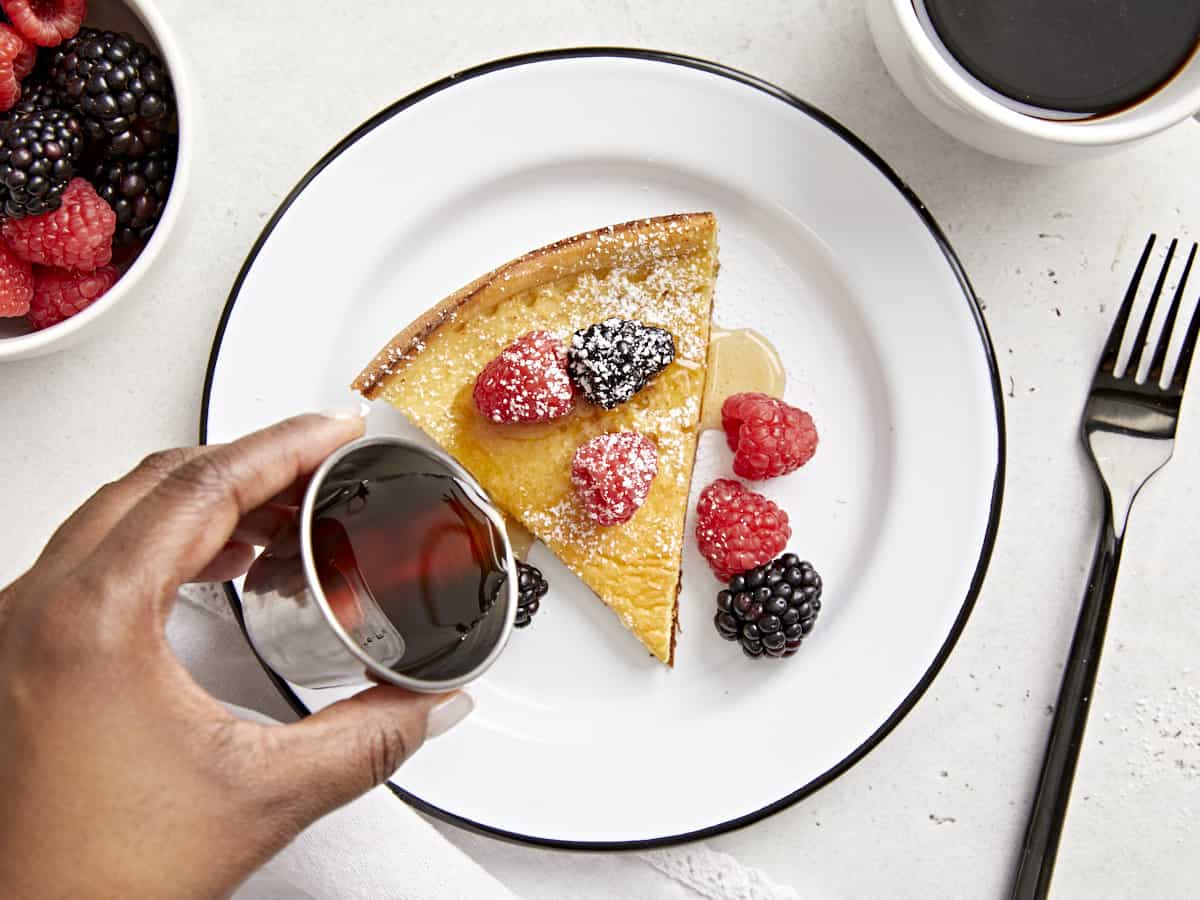
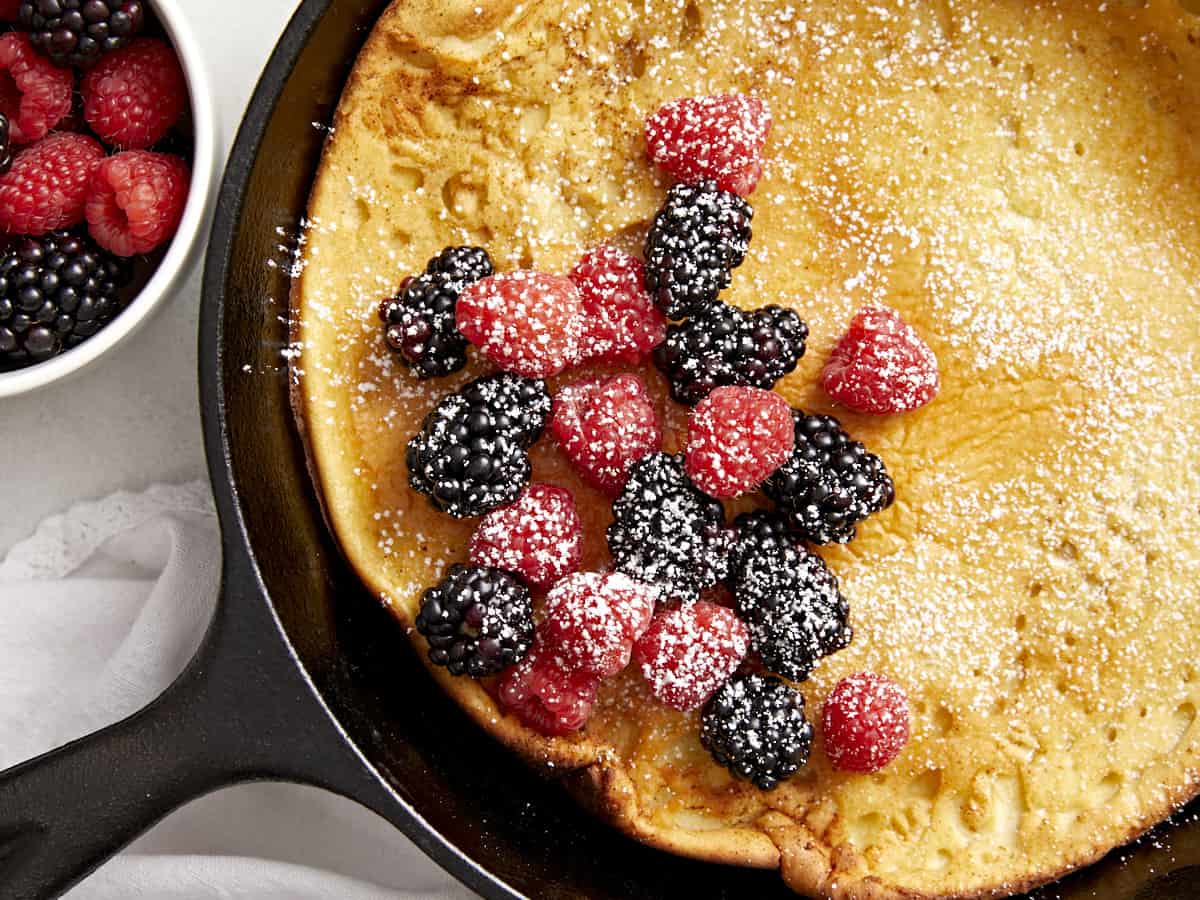
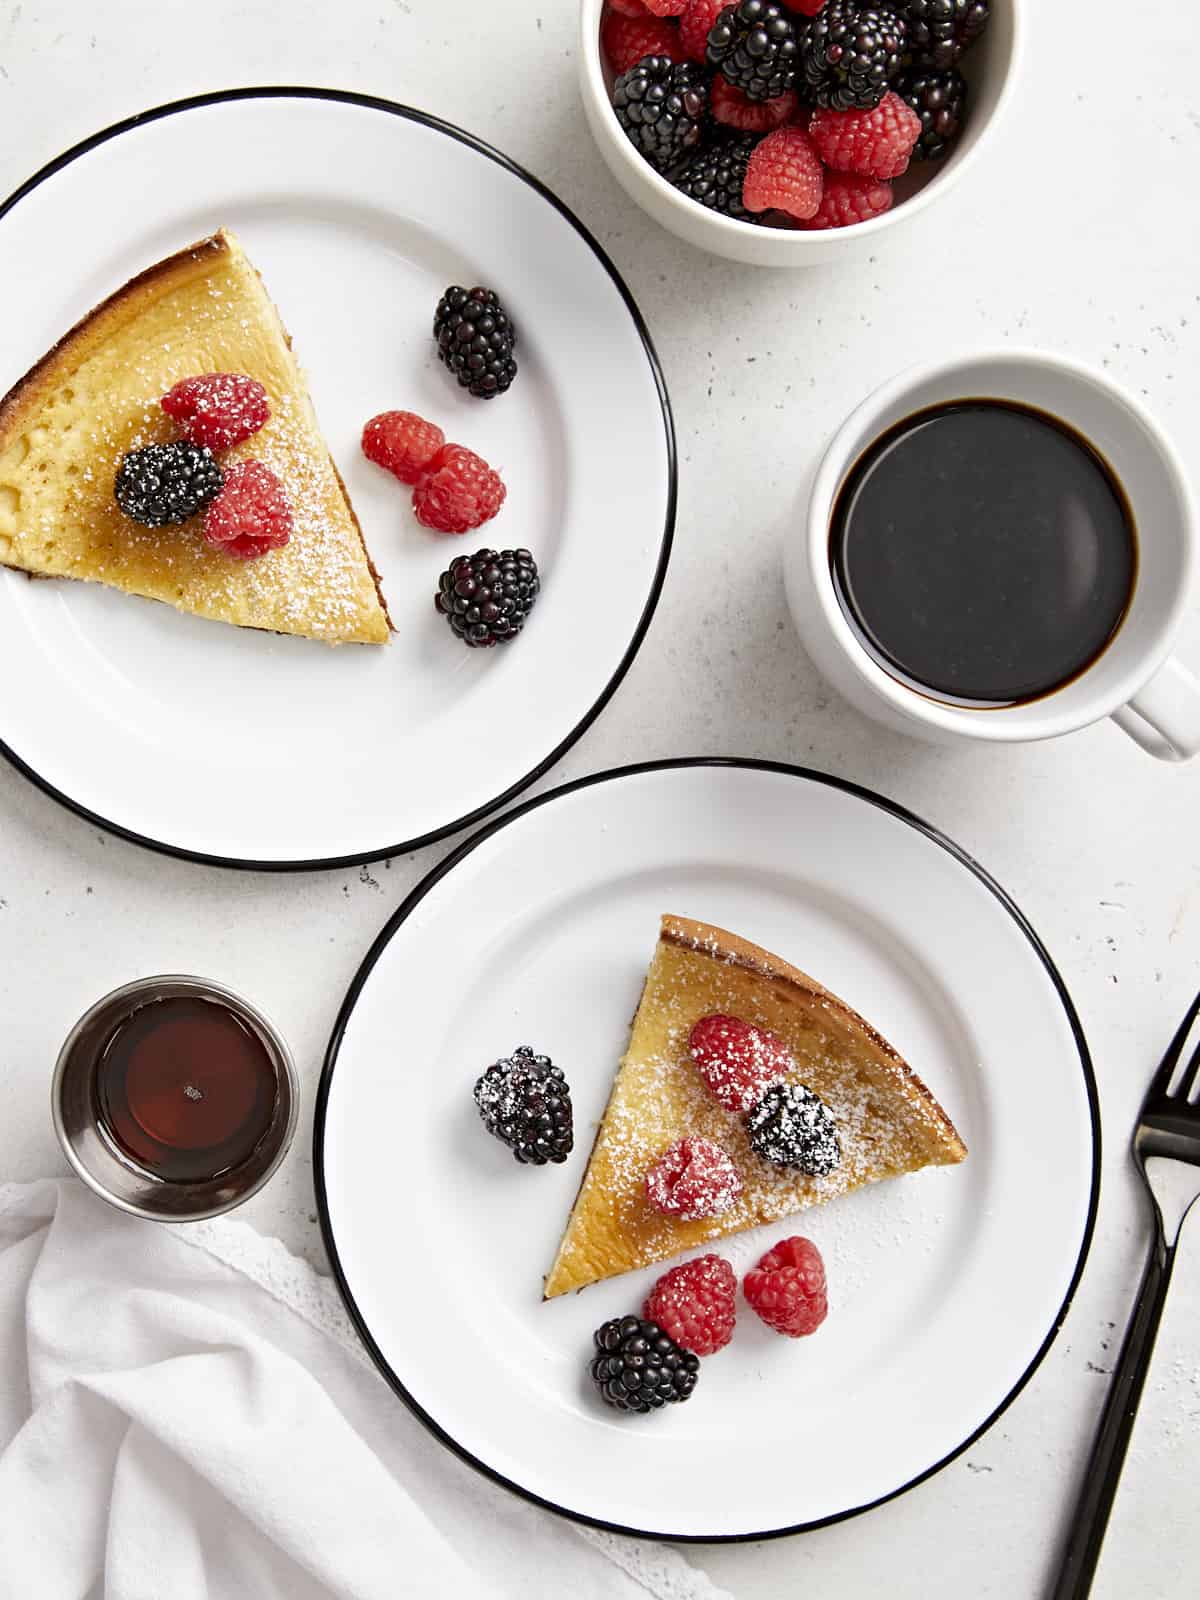
You can easily serve this dutch baby straight from the cast iron skillet or transfer it to a serving plate. We dusted ours with a little bit of powdered sugar and served it with fresh berries and pure maple syrup poured over the top. But feel free to play around with other toppings like whipped cream, hot buttered apples, pecans, yogurt, Nutella, lemon curd, or for a really fun twist try our Almond Dutch Baby with Ricotta and Jam!
Prepare the batter first. In a large blender, add the eggs, milk, all-purpose flour, sugar, salt, and vanilla extract. Blend until completely smooth and no lumps remain. Let the batter sit at room temperature to warm.
Place a 10-inch cast iron skillet in the oven and begin preheating to 425ºF. Let the skillet heat in the oven for an additional 10 minutes once the oven reaches the set temperature.
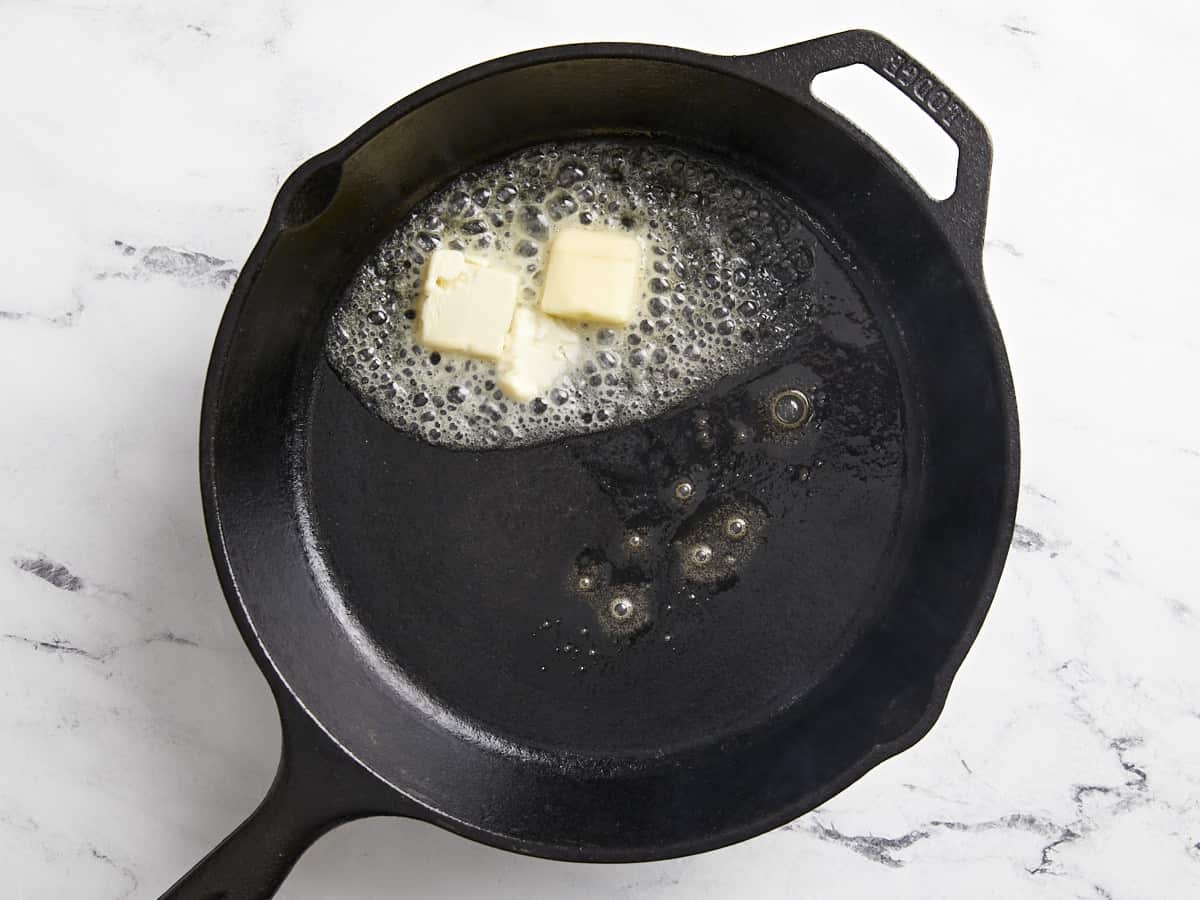
Using an oven mitt, carefully remove the skillet from the oven and add the butter. Swirl the butter around in the skillet and place it back in the oven for 30-60 more seconds until the butter begins to brown (be careful not to let it burn).
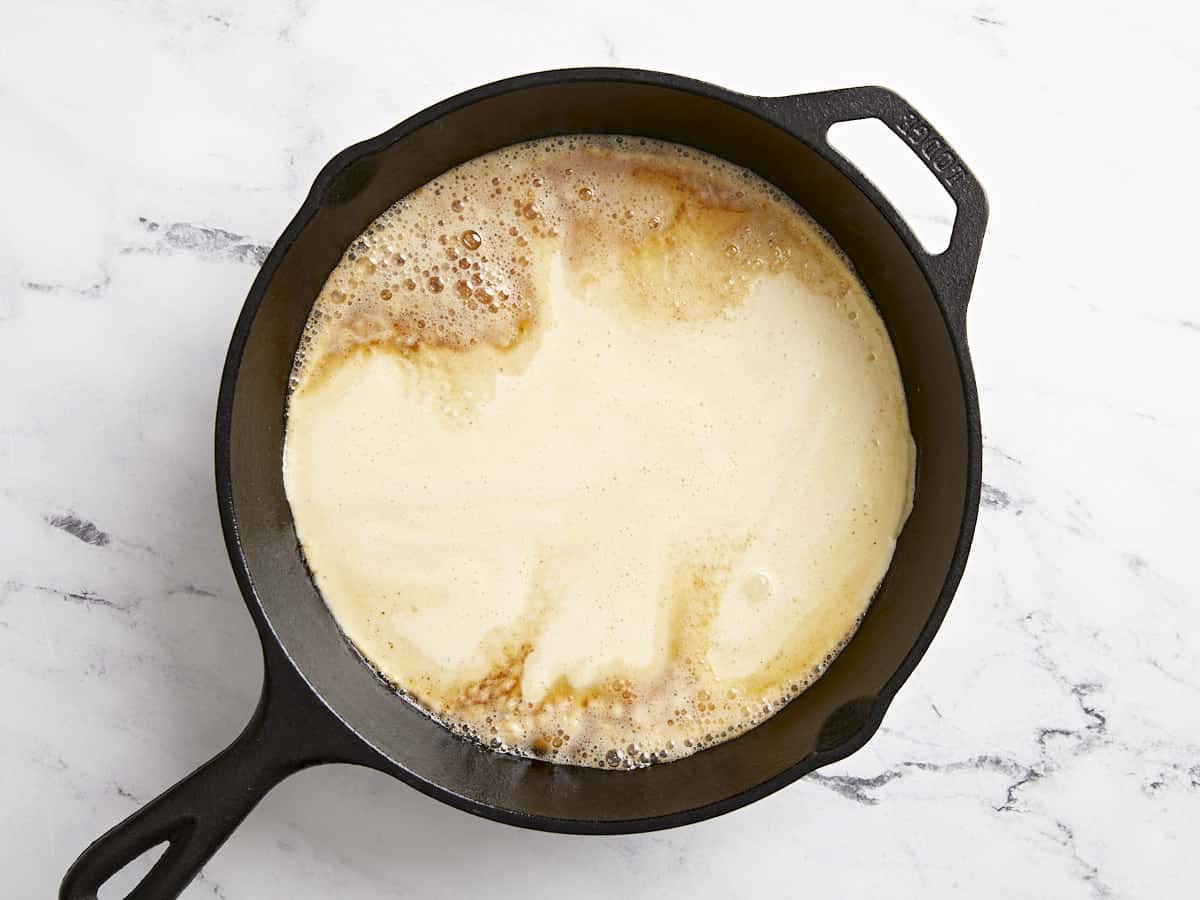
Carefully remove the skillet from the oven again and swirl the butter evenly across the bottom and up the sides of the skillet. Quickly pour the prepared batter into the hot skillet.
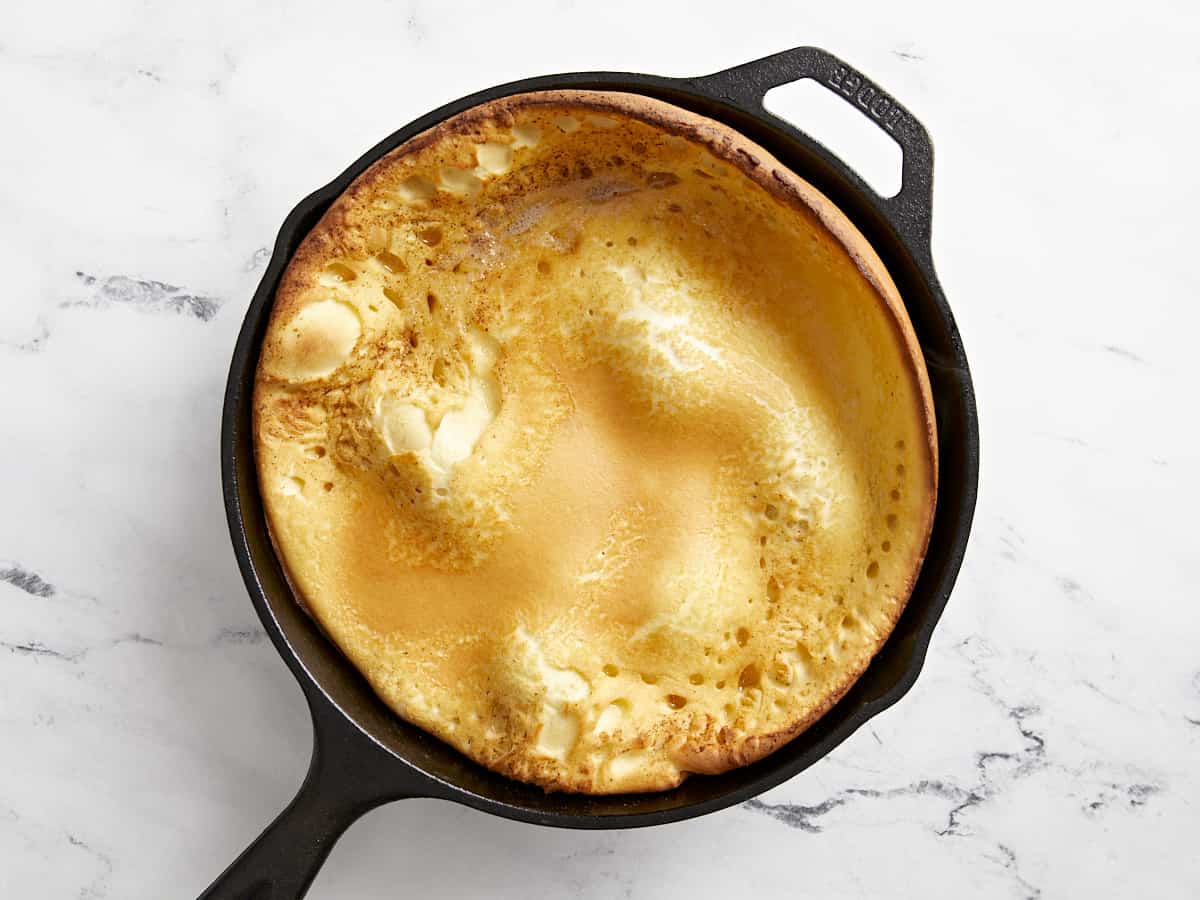
Return the hot skillet to the hot oven and bake for 14-15 minutes, or until it is golden brown and has puffed along the edges and in the center.
Once the Dutch baby has finished baking, slice the pancake into four or six pieces and serve with maple syrup and fresh berries on top (optional).
Prepare the batter first. In a large blender, add 3 large eggs, 2/3 cup whole milk, 2/3 cup all-purpose flour, 2 Tbsp sugar, 1/4 tsp salt, and 1/2 tsp vanilla extract. Blend until completely smooth and no lumps remain. Let the batter sit at room temperature to warm.
Place a 10-inch cast iron skillet in the oven and begin preheating to 425ºF. Let the skillet heat in the oven for an additional 10 minutes once the oven reaches the set temperature. Using an oven mitt carefully, remove the skillet from the oven and add 2 Tbsp of butter. Swirl the butter around in the skillet and place it back in the oven for 30-60 more seconds until the butter begins to brown (be careful not to let it burn).
Carefully remove the skillet from the oven again and swirl the butter evenly across the bottom and up the sides of the skillet. Quickly pour the prepared batter into the hot skillet.
Return the hot skillet to the hot oven and bake for 14-15 minutes, or until it is golden brown and has puffed along the edges and in the center.
Once the Dutch baby has finished baking, slice the pancake into four or six pieces and serve with maple syrup and fresh berries on top (optional).
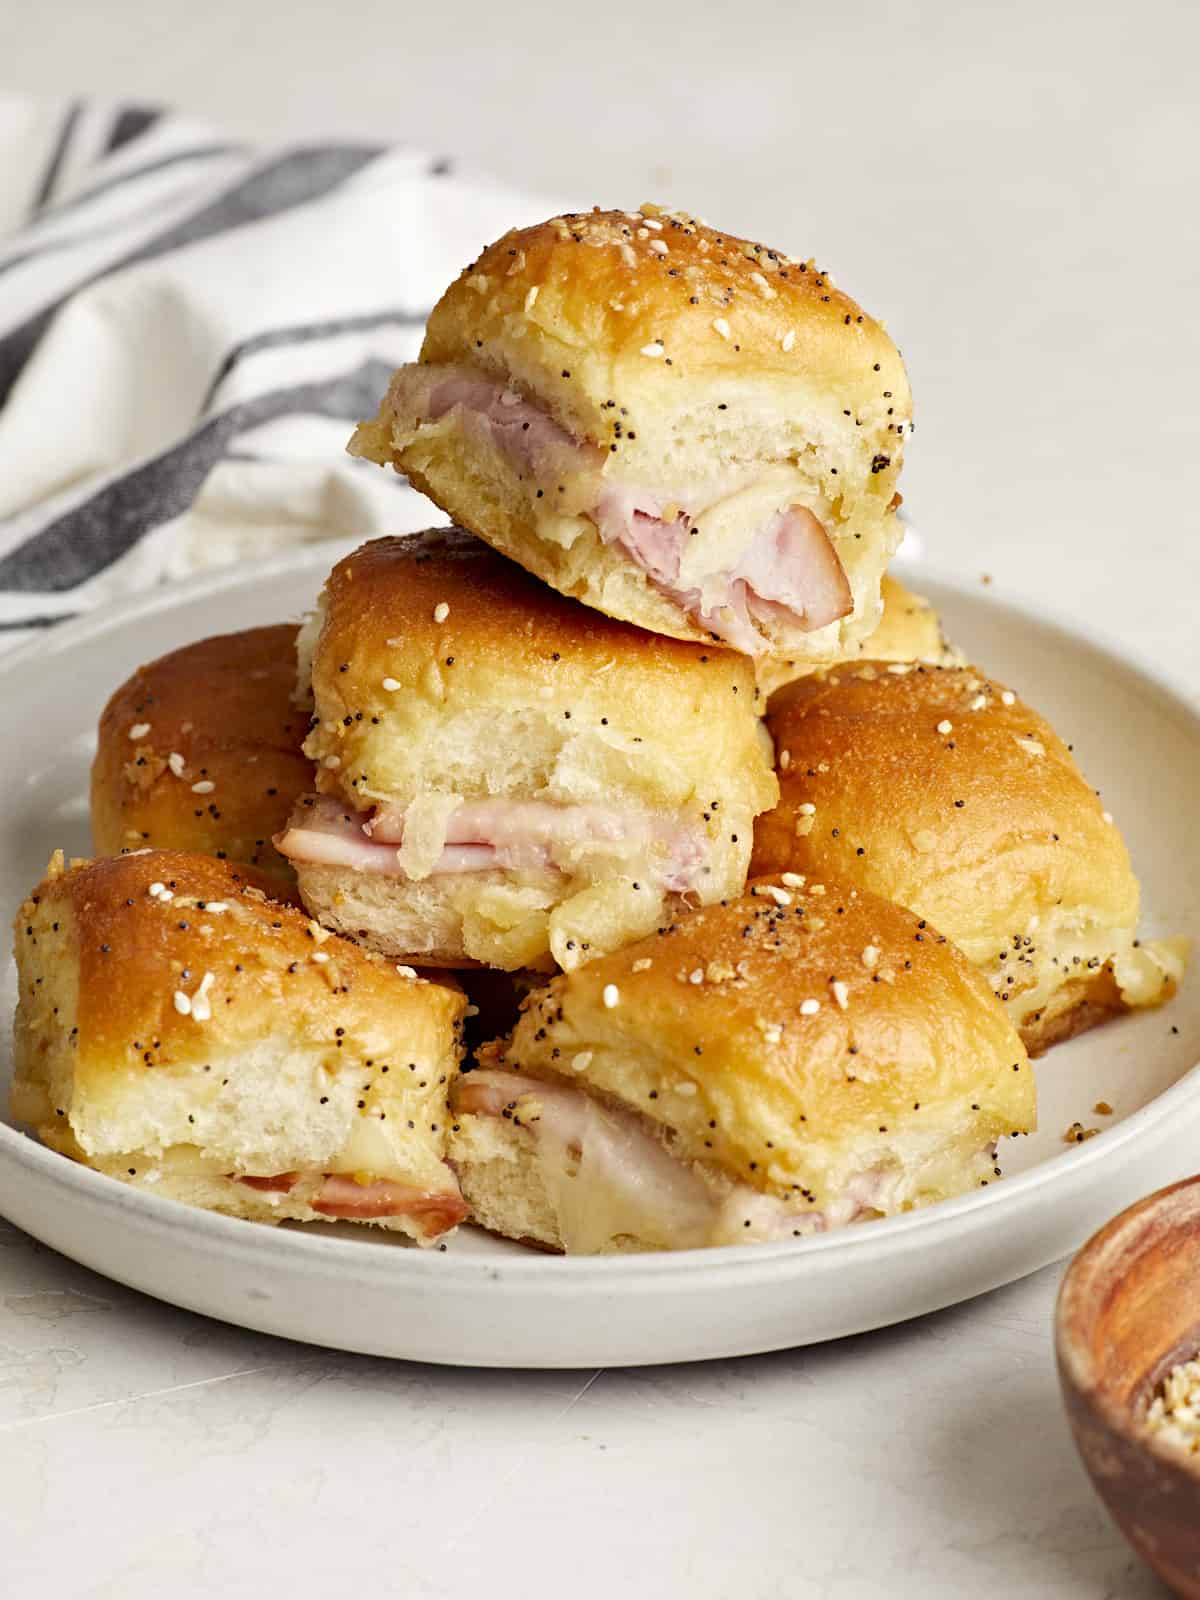
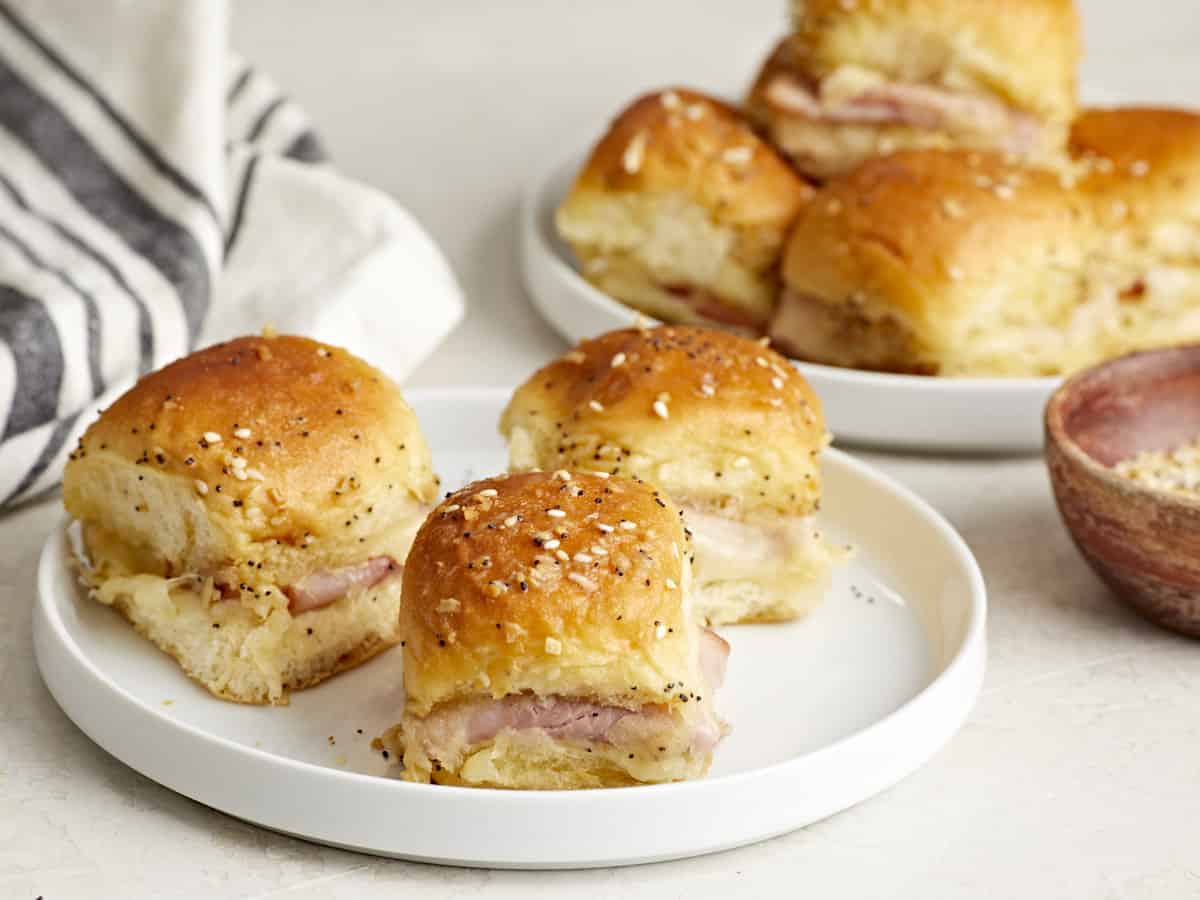
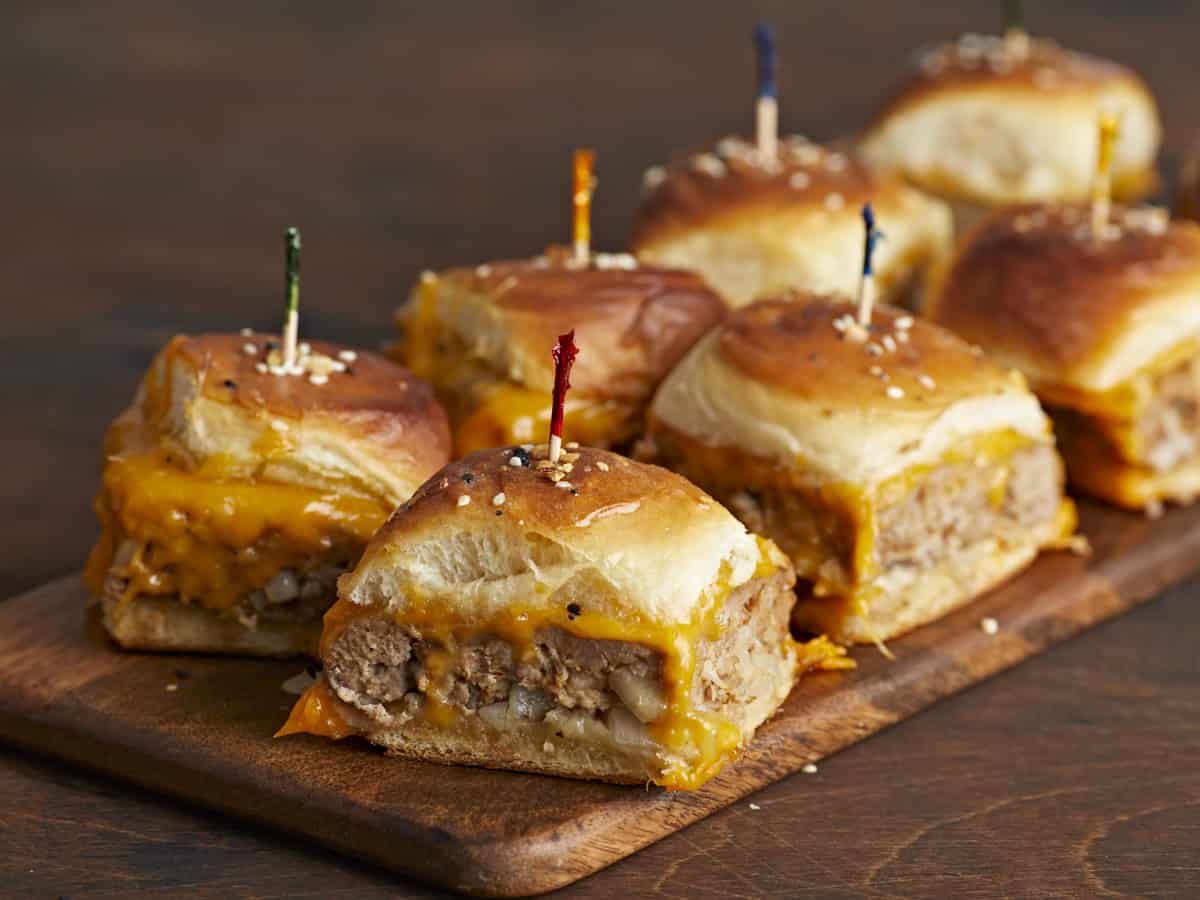
These tasty little Ham and Cheese Sliders might just be the champion of all party food recipes! They’re extremely easy to make, perfect for feeding a hungry crowd, and they’re insanely delicious! With each bite you taste the sweetness of the Hawaiian rolls, the saltiness of the ham, the gooeyness of the cheese, and that irresistible buttery sauce. The combination of everything together is simply unmatched! And although these are absolutely perfect for the big football game tomorrow, they can also be enjoyed all year long!
Ham and cheese sandwiches remind me so much of my childhood, but these sliders are definitely the grown up version. My mom has been making these tasty little ham and cheese sliders for years. And every time she makes them, whether it’s for a family gathering, football game, or a holiday party, they are literally gone in minutes! Needless to say I consider these a must-have to enjoy during the Super Bowl game tomorrow!😉
Ingredients For Ham and Cheese Sliders
These buttery & savory ham and cheese sliders are made with just 7 simple ingredients! Here’s everything you’ll need:
Deli Ham: When picking deli ham you’ll often find thinly sliced or regular sliced ham. I tested both and really liked the thickness of the regular ham slices. It also allowed me to use 1 slice per slider, whereas with the thinly sliced ham I needed to add 2 or 3 slices to make it a full slider sandwich.
Swiss Cheese: Swiss cheese has a milder flavor and pairs perfectly with these sliders, but feel free to use a different cheese if you prefer.
Hawaiian Sweet Rolls: Hawaiian rolls have just the right amount of sweetness to compliment the savory & salty taste of the ham. They’re also the perfect size to make party sliders. If you can’t find Hawaiian rolls at your local store you can also substitute with bakery dinner rolls. Dinner rolls are a little bigger than Hawaiian rolls so you may need to add more ham and cheese to accommodate.
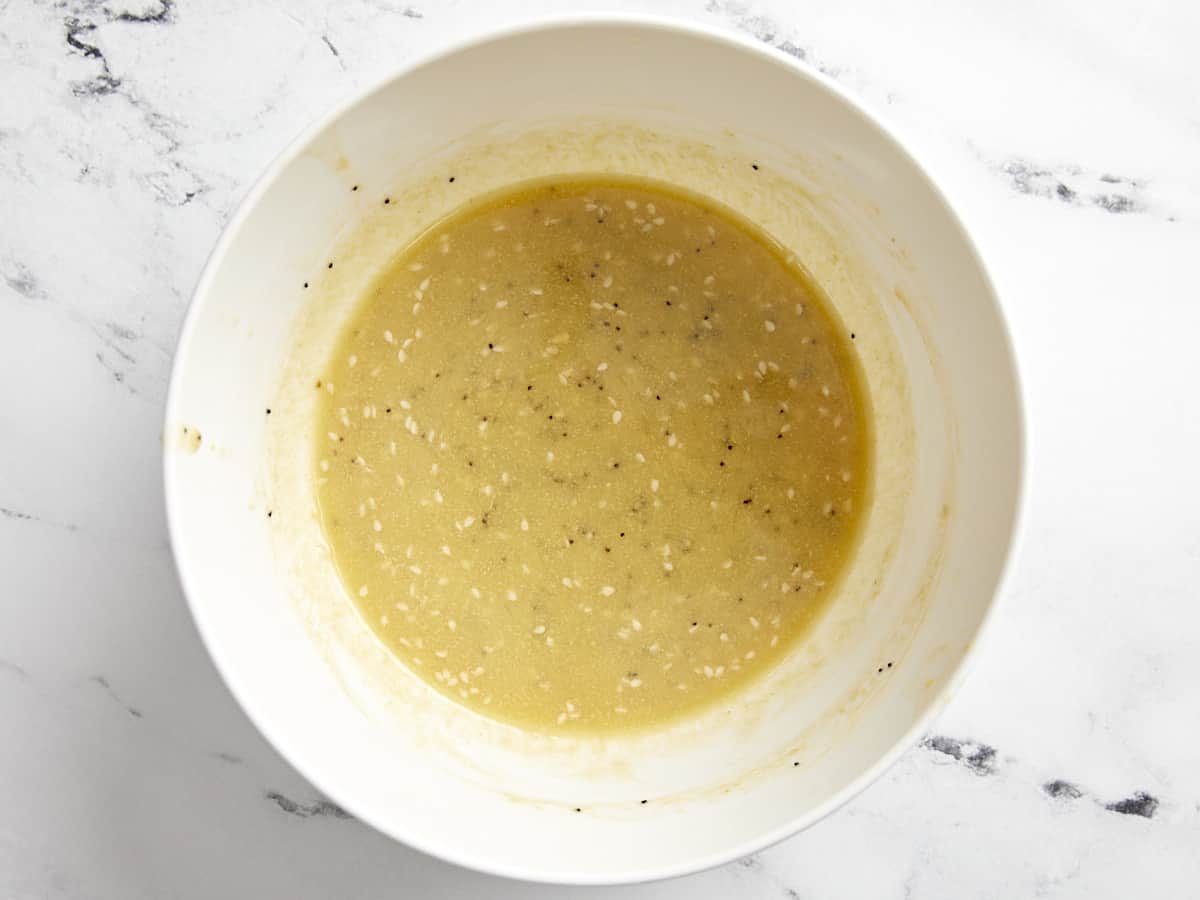
Sauce: The sauce we used to brush over the tops of the sliders is a simple combination of melted butter, Dijon mustard, Worcestershire sauce, and everything bagel seasoning. These flavors combined give the sliders a buttery, tangy taste and compliment the ham and the sweetness of the rolls perfectly!
Recipe Tips and Variations
Use Leftover Ham – If you happen to be making these sandwiches around a special holiday and you have any leftover baked ham, then this recipe works perfectly with your leftover ham.
Turkey and cheese – Not into ham? No worries, this recipe also works well as turkey and cheese sliders!
Everything Bagel Seasoning – A lot of ham and cheese slider recipes use poppy seeds and dried minced onions as part of the butter sauce. However, we rarely have poppy seeds stocked in our pantry. The good news is that Everything Bagel Seasoning has those ingredients included in it along with dried minced garlic, sesame seeds, and a few other spices. So it works perfectly with these tasty little sandwiches!
Storing Leftovers
If you’re lucky enough to have any of these tasty sandwiches leftover, then just store them in an airtight container or a ziplock storage bag in the refrigerator for up to 4 days. Reheat in the microwave or in the oven until warmed through.
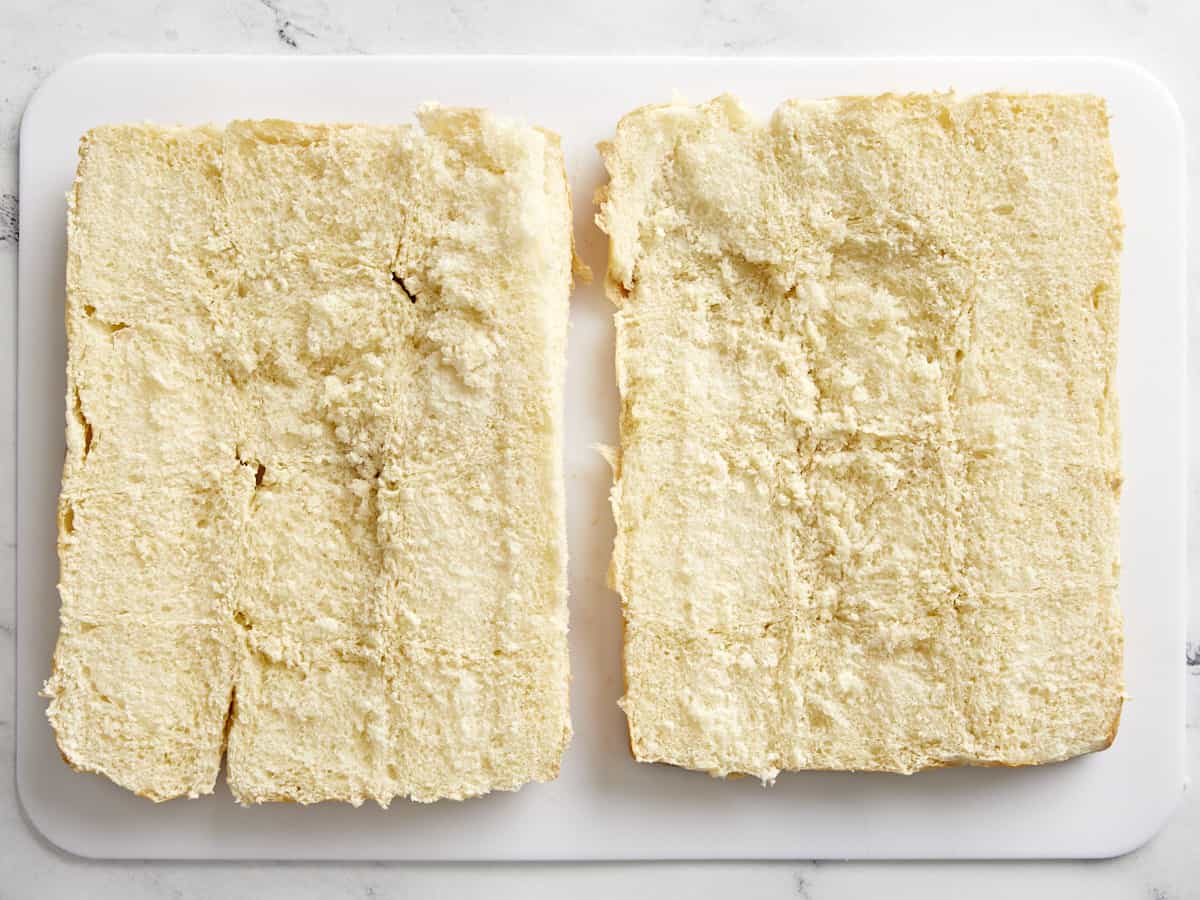
Preheat the oven to 350°F. Slice the rolls in half lengthwise.
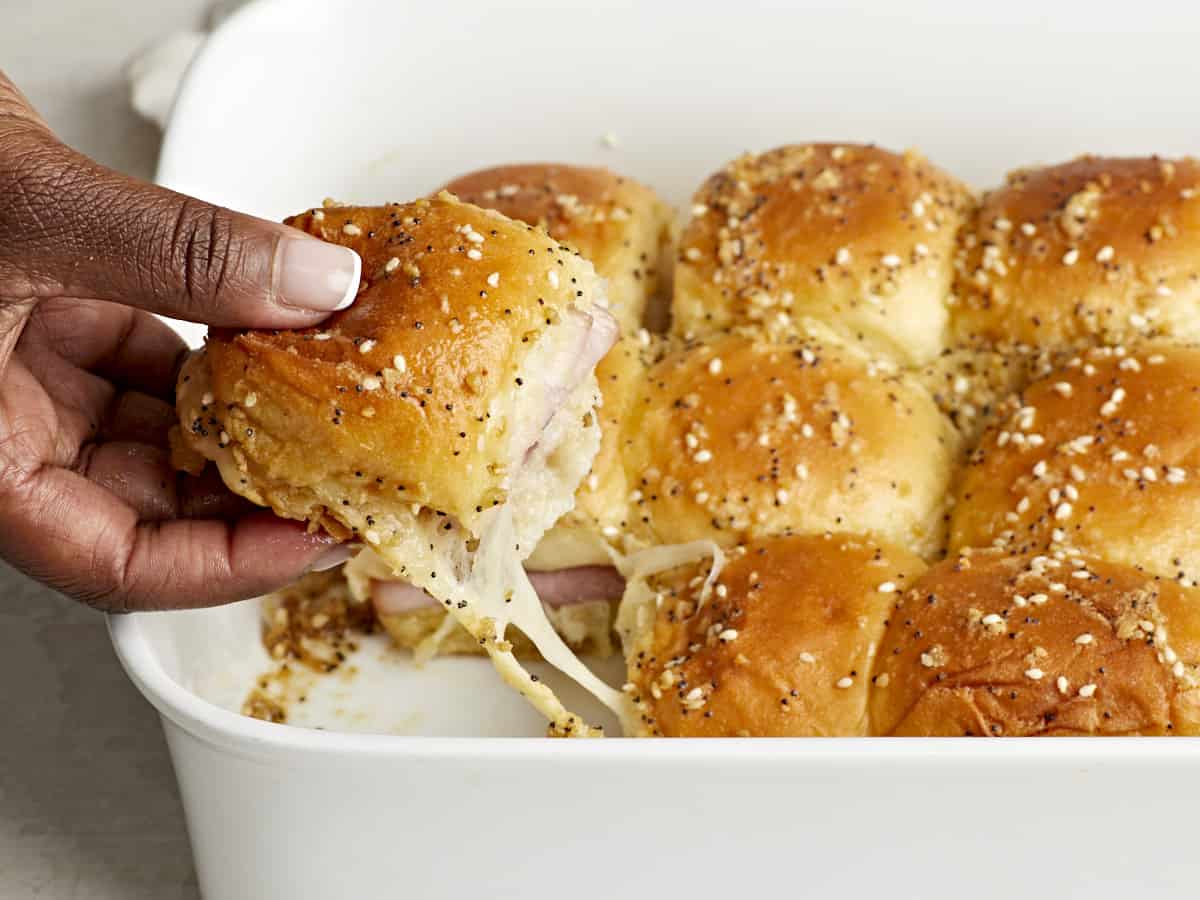
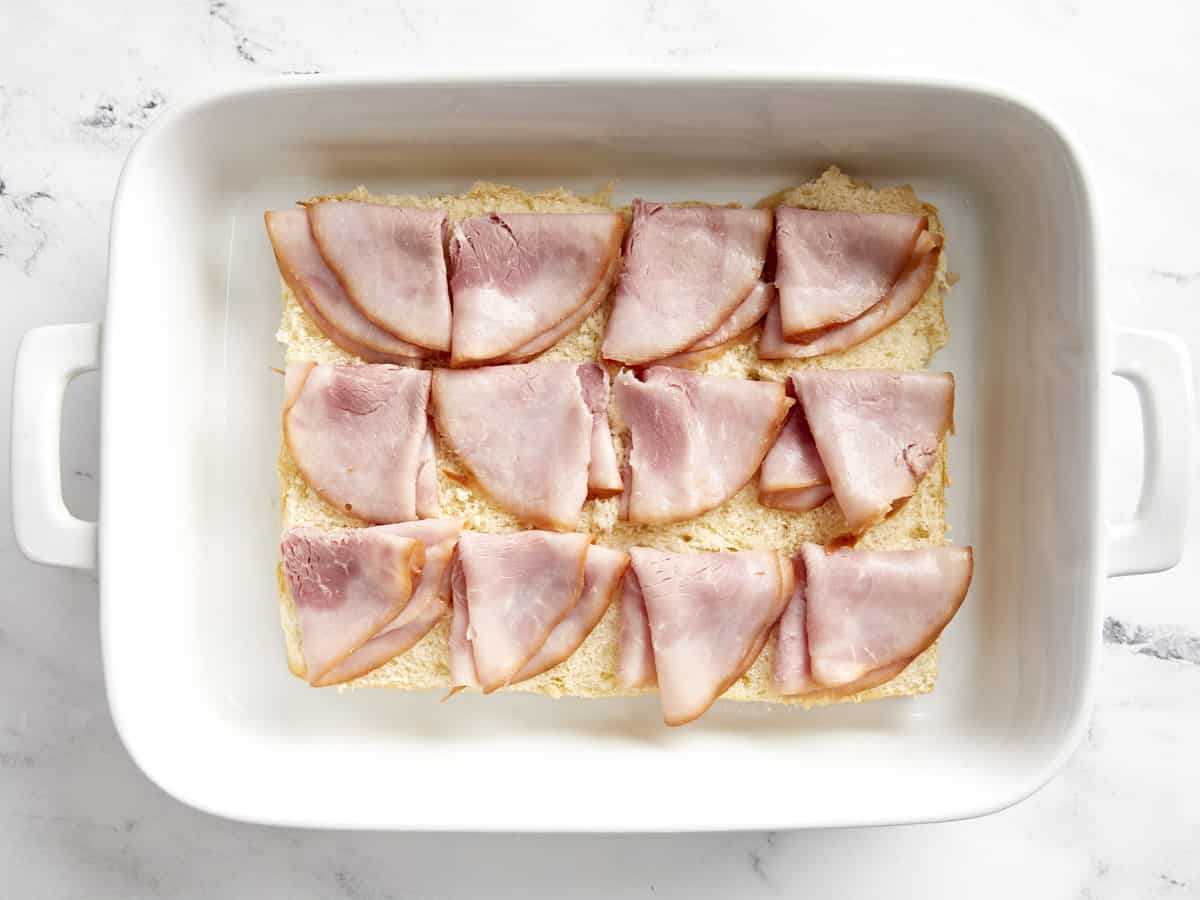
Place the bottom half of the rolls in a 9×13 baking dish. Fold 1 slice of deli ham and place it on top of each roll.
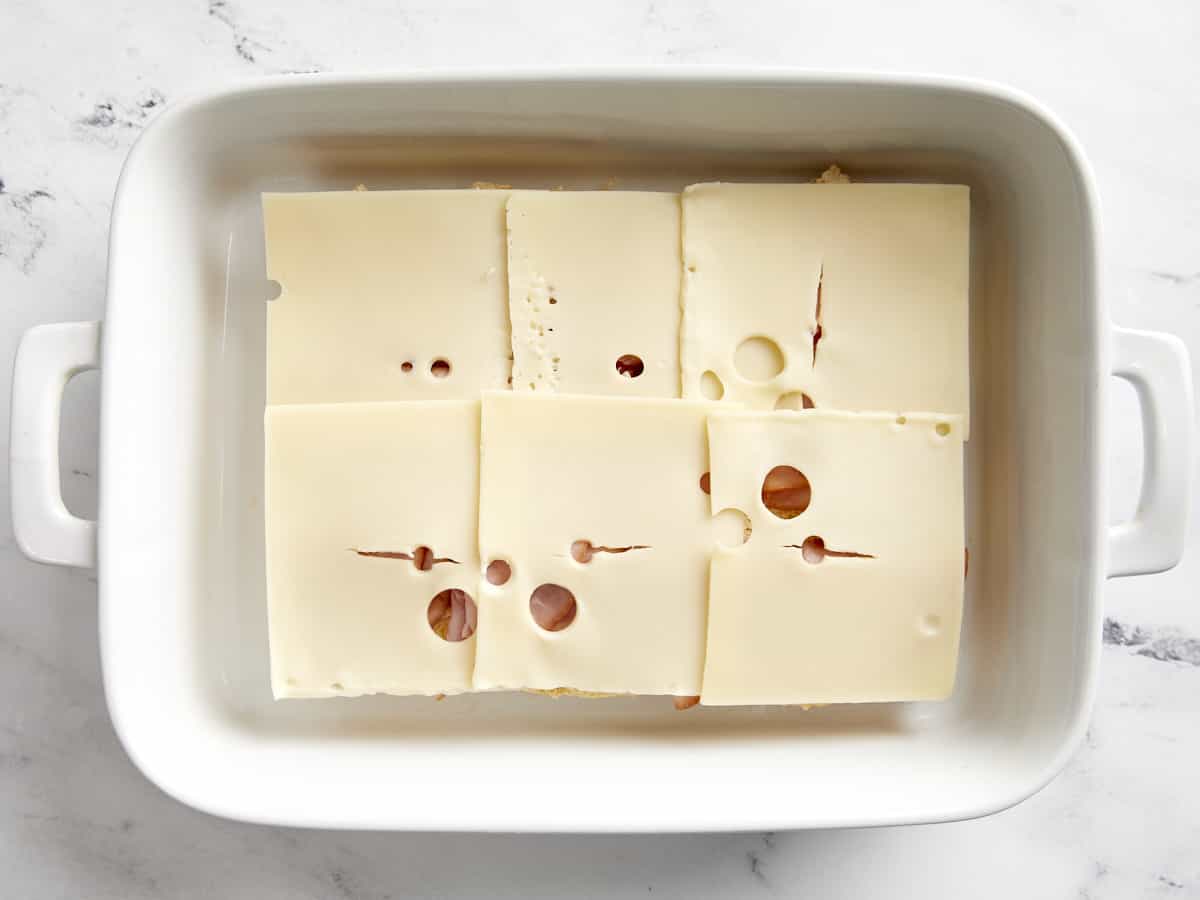
Add the 6 slices of Swiss cheese on top of the deli ham in a single layer.
Now make the butter mixture. Melt the butter in a small bowl in the microwave. Add the Dijon mustard, Worcestershire sauce and everything bagel seasoning to the bowl. Whisk all the ingredients together.
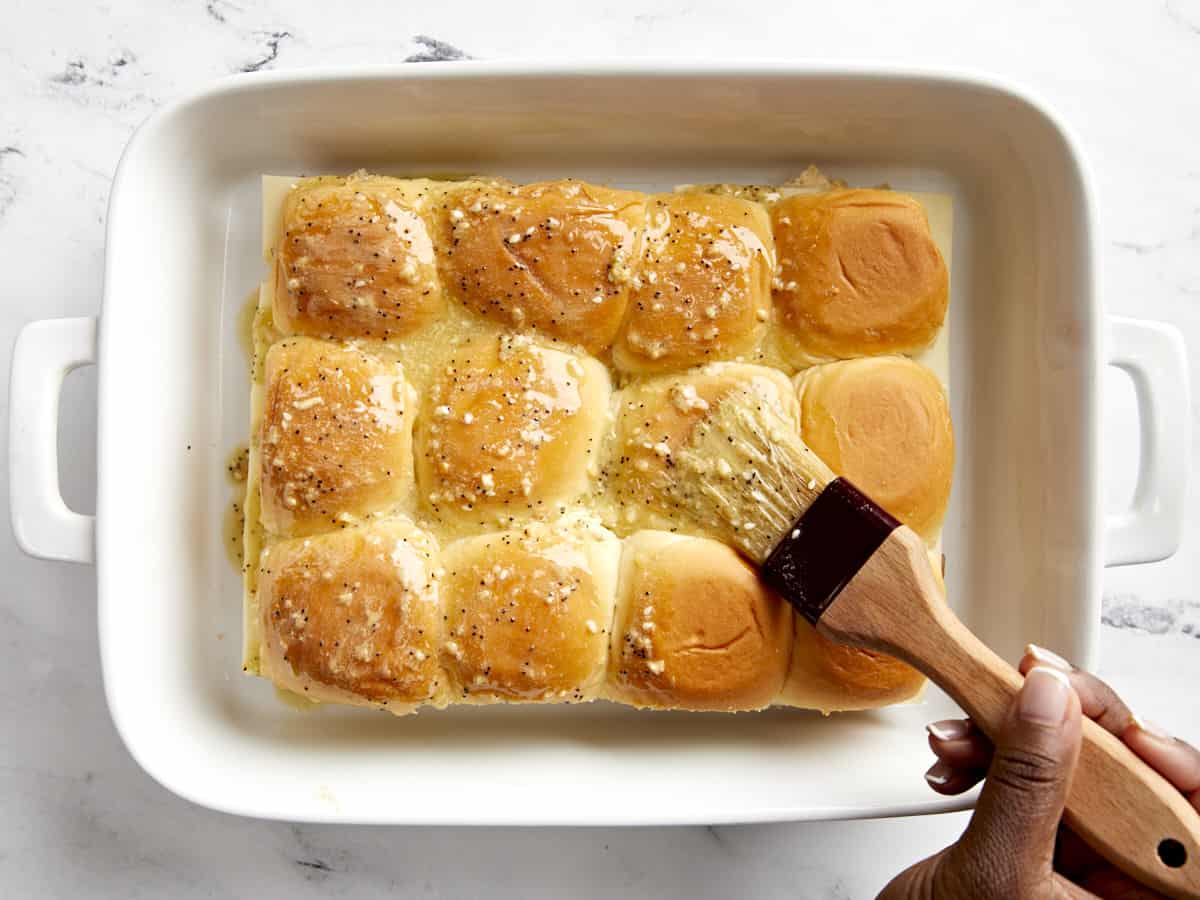
Place the top rolls on top of the ham and cheese. Using a pastry brush, brush the butter mixture over the tops of the rolls and the sides of the sandwiches. Brush several layers of the butter making sure the rolls are well coated. You can also carefully pour the butter mixture over the top if you don't have a pastry brush.
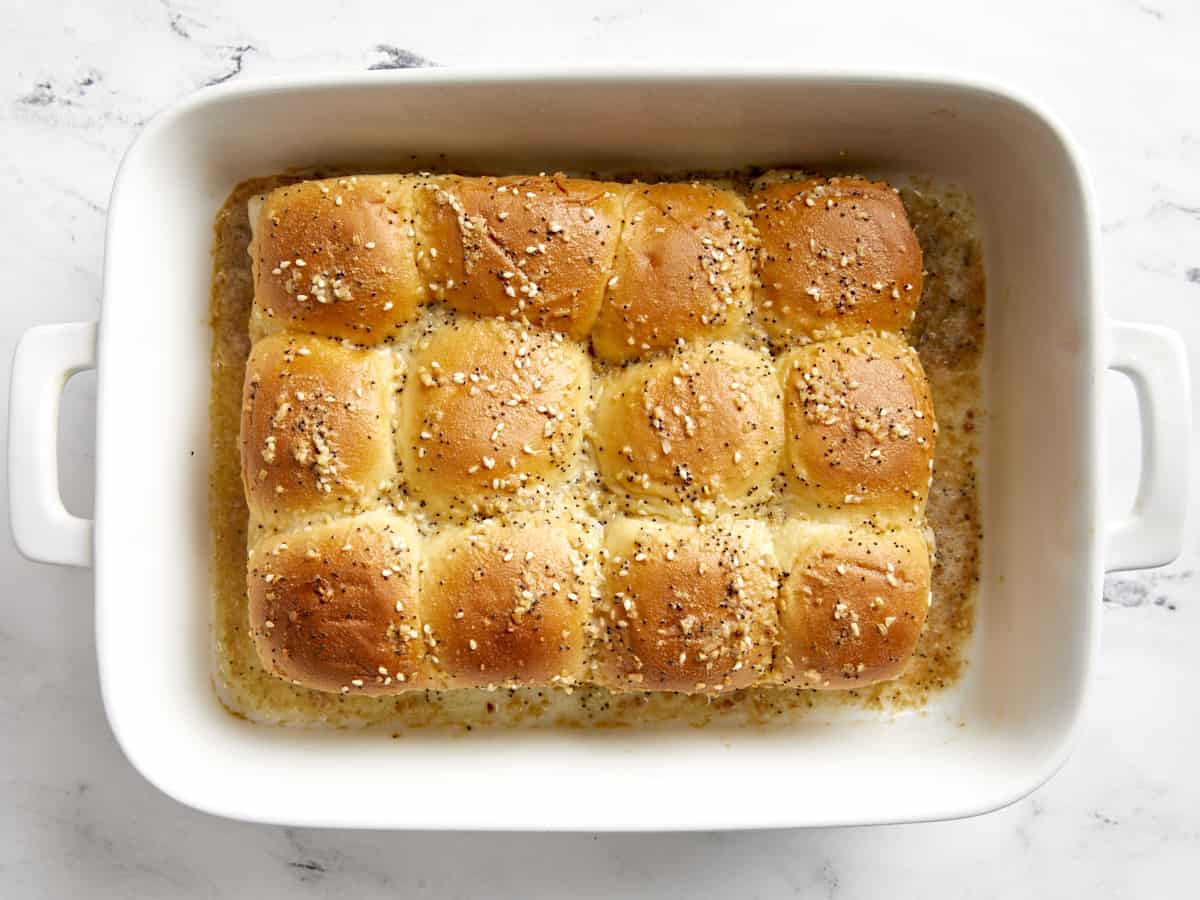
Loosely cover the baking dish with aluminum foil and bake for 15 minutes. After 15 minutes, remove the aluminum foil and continue baking for 5-7 minutes or until lightly golden brown.
How to Make Ham And Cheese Sliders – Step by Step Photos
Preheat the oven to 350°F. Slice 12 Hawaiian sweet rolls in half lengthwise.
Place the bottom half of the rolls in a 9×13″ baking dish. Fold 1 slice of deli ham and place it on top of each roll.
Add 6 slices of Swiss cheese on top of the deli ham in a single layer. It’s ok if the edges of the cheese overlap a little bit.
In a small bowl melt 8 Tbsp (1 stick) of butter in the microwave. Add 1 1/2 tsp Dijon mustard, 1 1/2 tsp Worcestershire sauce and 1 1/2 Tbsp everything bagel seasoning to the bowl. Whisk all the ingredients together until well combined.
Place the top half of the rolls on top of the ham and cheese. Using a pastry brush, brush the butter mixture over the tops of the rolls and the sides of the sandwiches. Brush several layers of the butter making sure the rolls are well coated. You can also carefully pour the butter mixture over the top if you don’t have a pastry brush.
Loosely cover the baking dish with aluminum foil and bake for 15 minutes. After 15 minutes, remove the aluminum foil and continue baking for 5-7 minutes or until lightly golden brown.
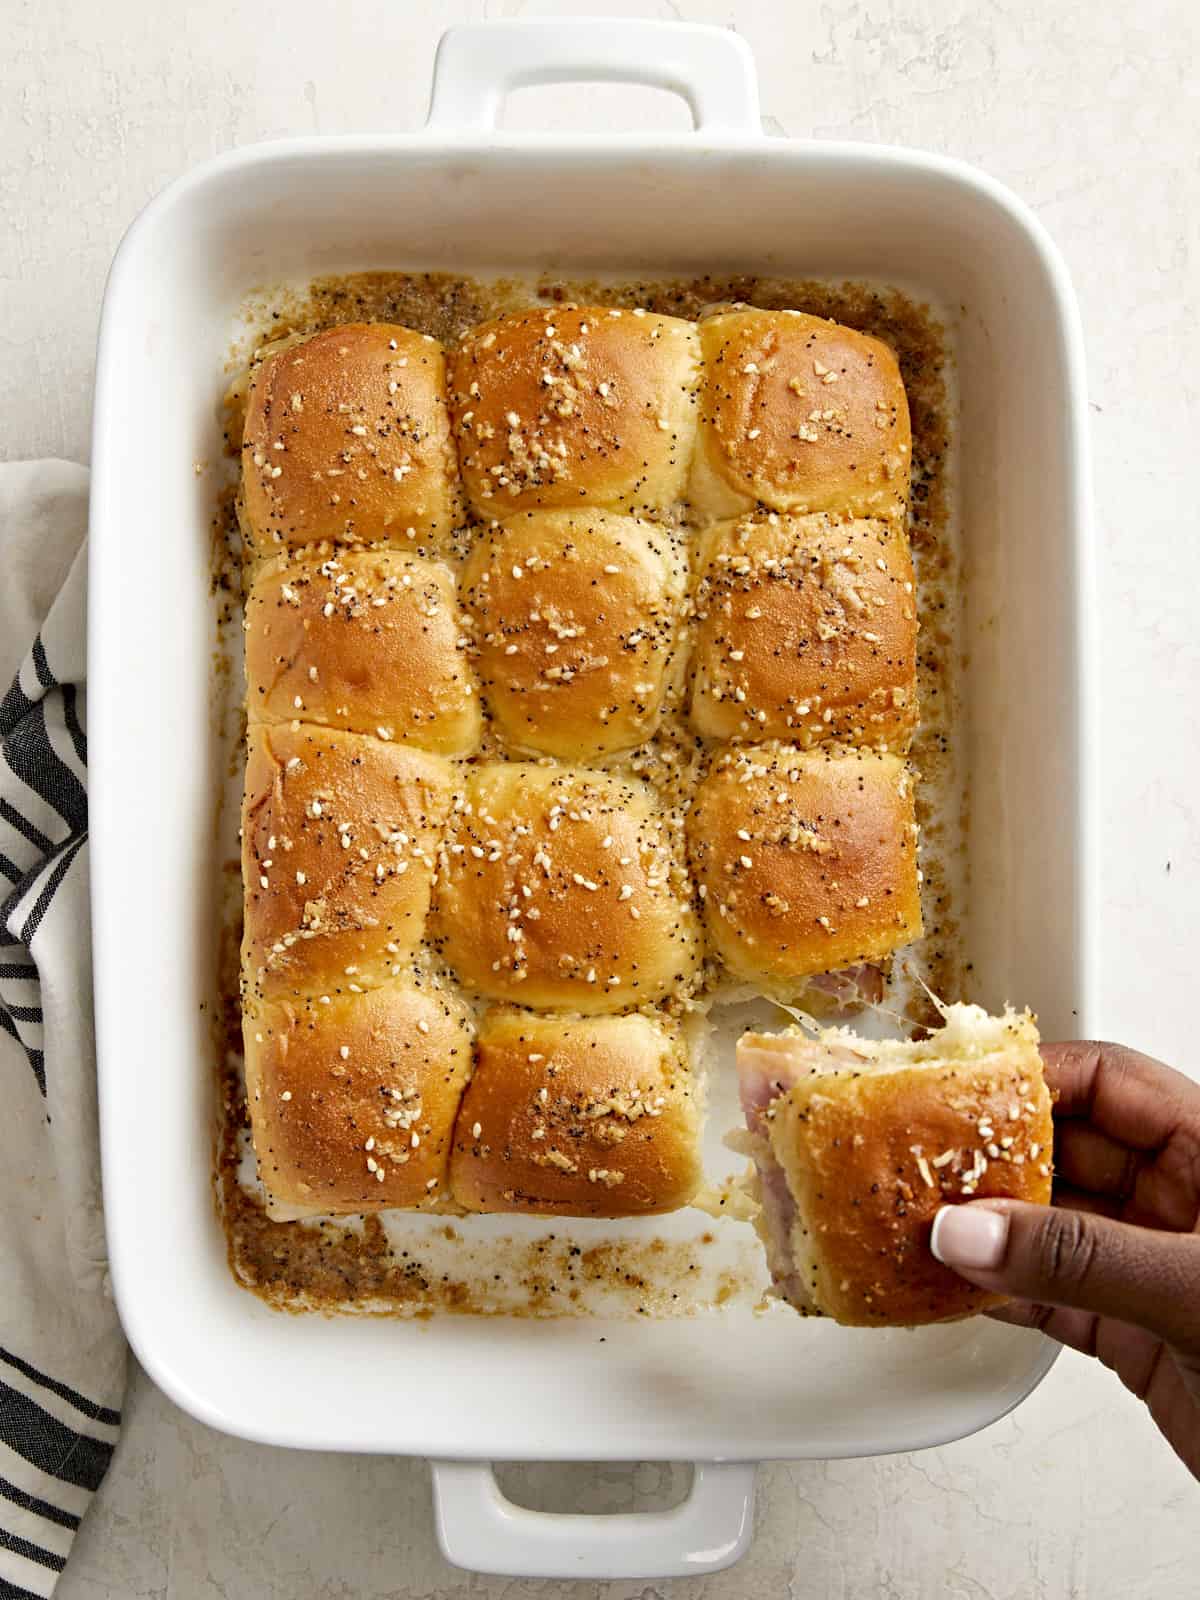
Time to enjoy that buttery goodness that’s baked into each ham and cheese slider. Trust me these won’t last long. Serve warm and enjoy!
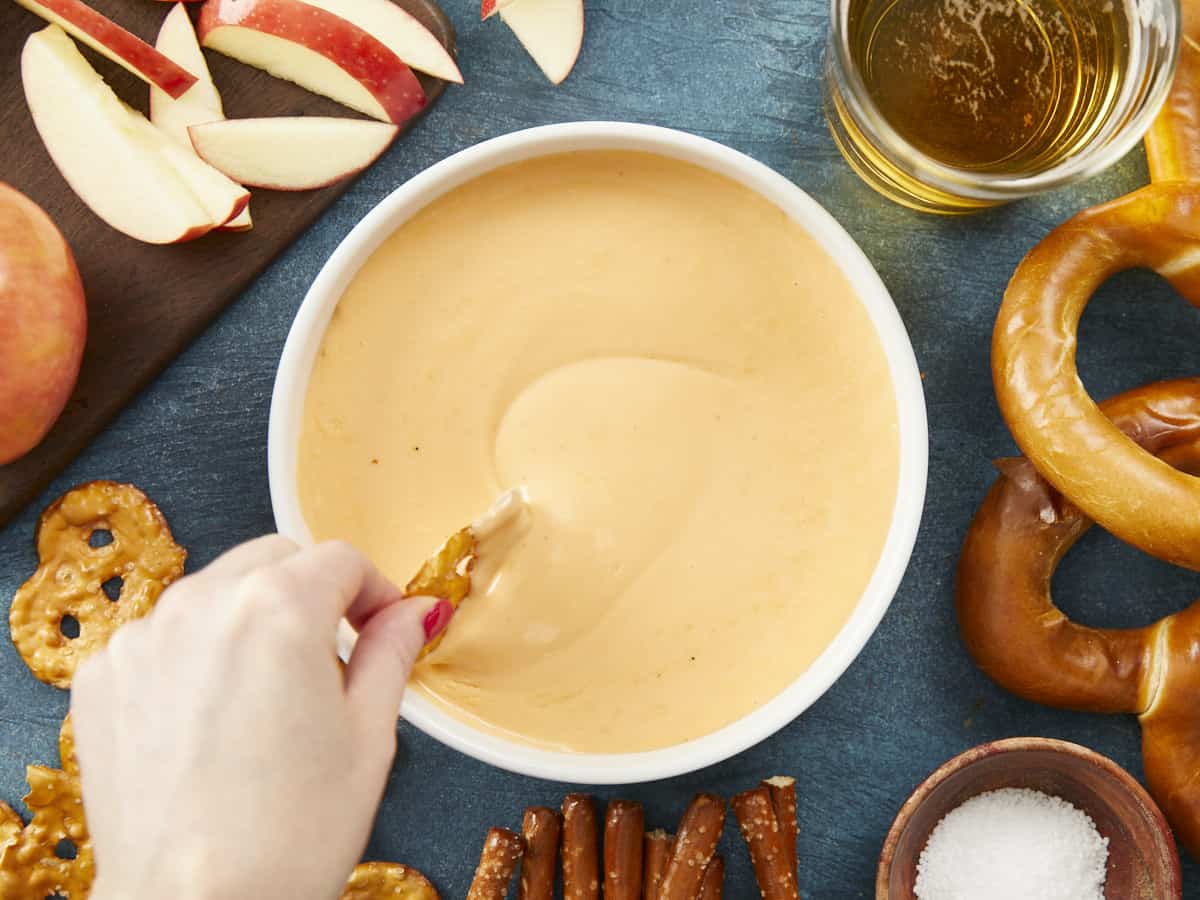
It’s almost time for the biggest football game of the year! And whether you’re rooting for your favorite team or just tuning in to watch the commercials and halftime show🫣, the best part about Super Bowl Sunday is definitely the food! So today we’re sharing over 25 budget-friendly Super Bowl Recipes that are perfect for small gatherings or for feeding a crowd; including buffalo chicken dip, sliders, chicken wings, and more. No matter the final score, we’re certain everyone will have a good time with these crowd-pleasing game day recipes!
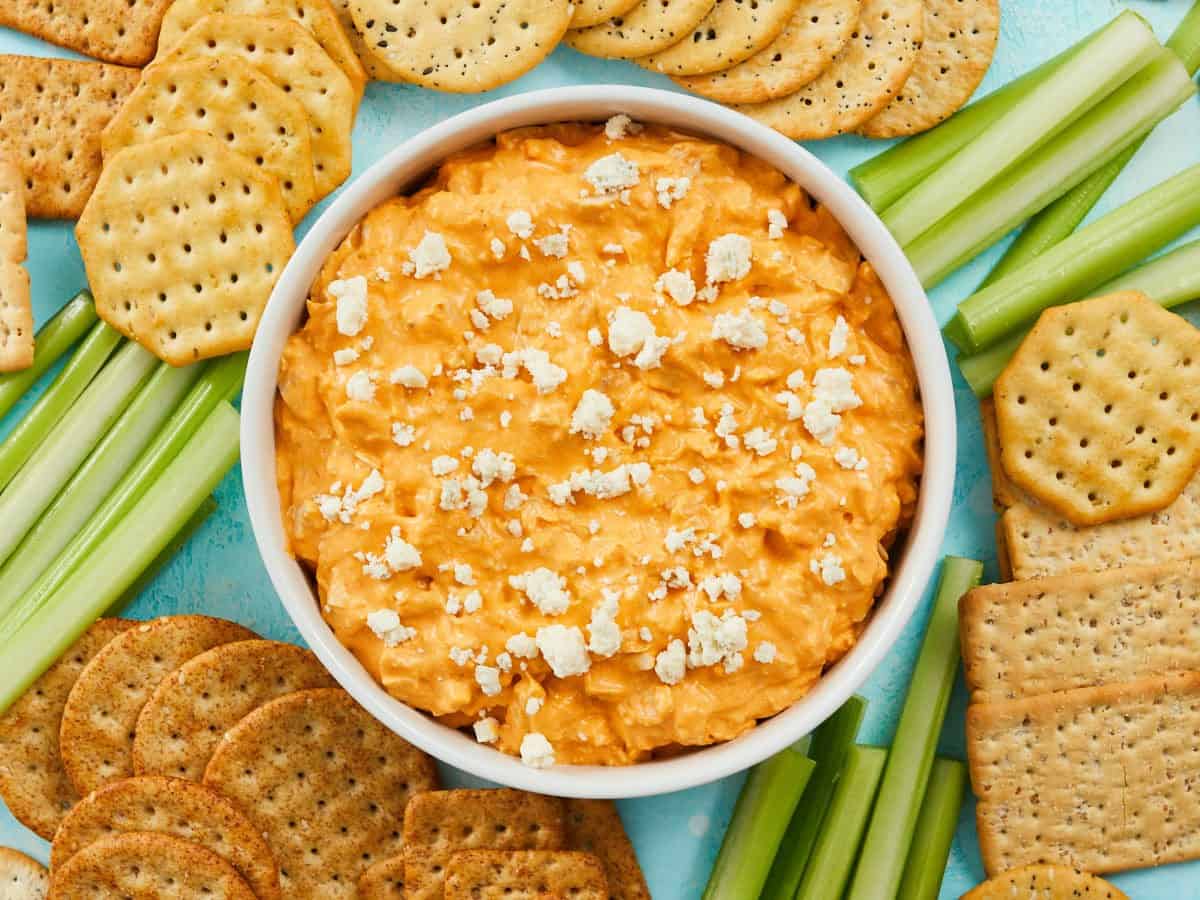
We’re kicking things off with the ultimate fan-favorite Super Bowl recipe, Buffalo Chicken Dip! It’s a classic, must-have, party appetizer that’s always popular at football games and family gatherings. You only need a few simple ingredients to make it and its great served with chips, crackers, or even veggies!
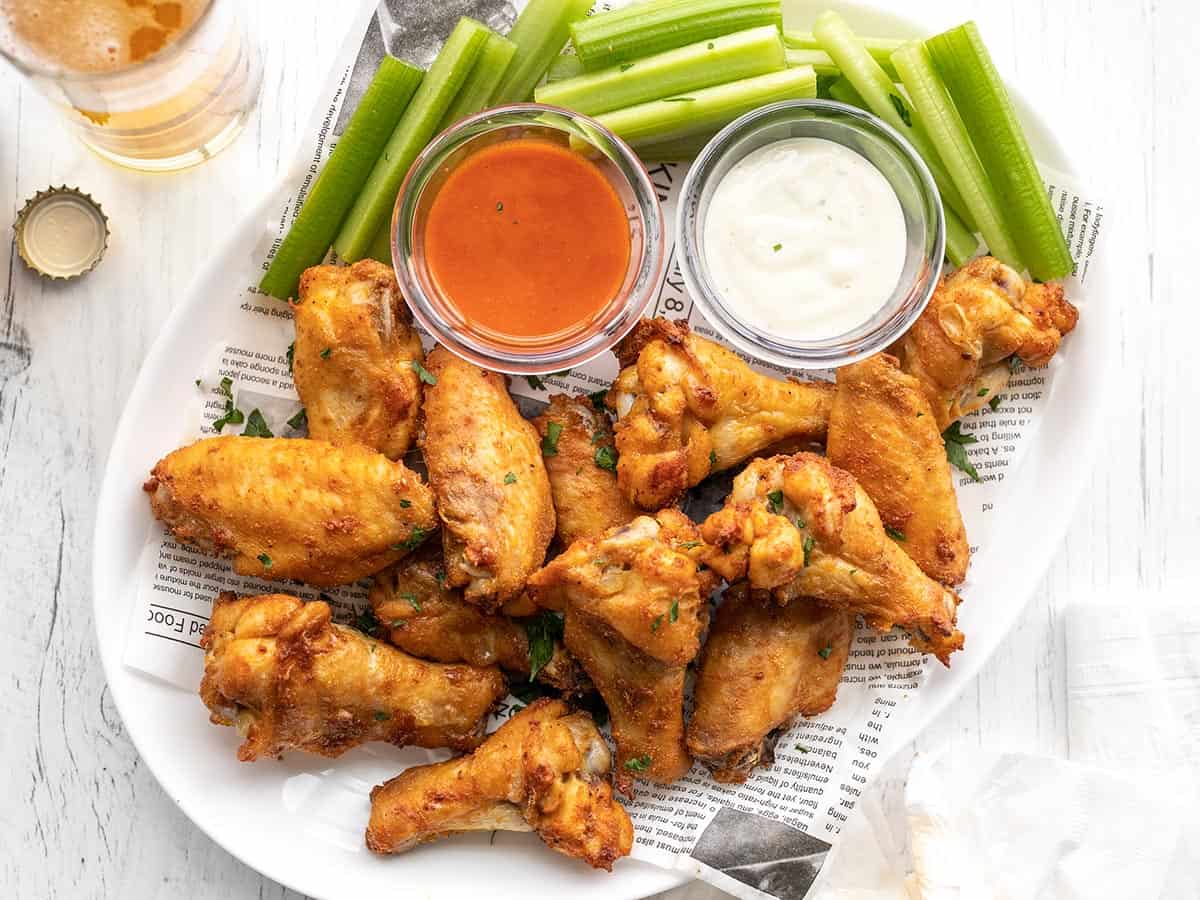
Of course you’ve gotta have some classic recipes for the big game like these Buffalo Wings! They’re spicy, saucy, and baking them in the oven makes the process so easy!
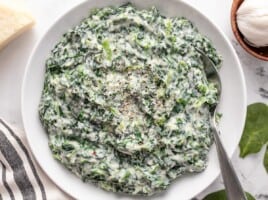
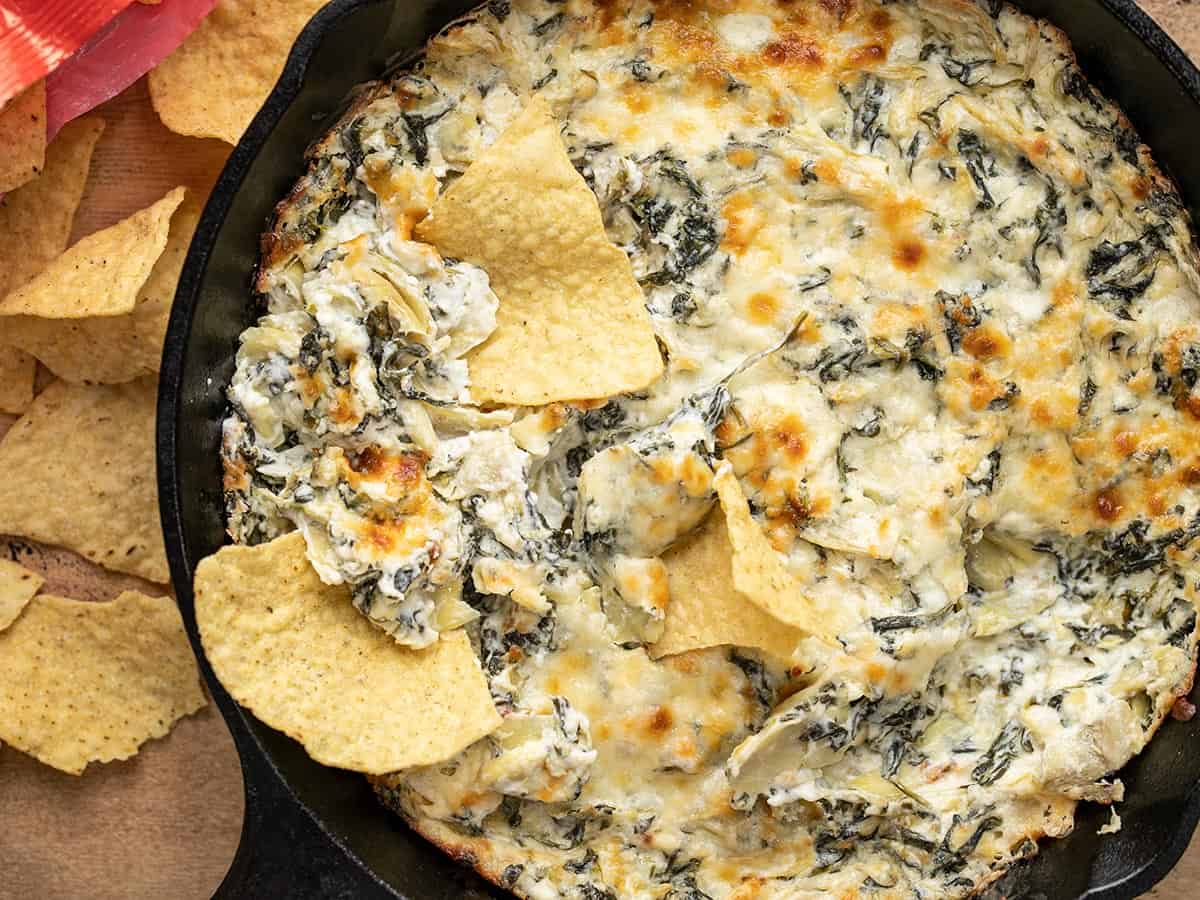
Seriously, who doesn’t love a good spinach dip appetizer?! This Spinach Artichoke Dip is made with lots of cheese, a creamy homemade sauce, and a little splash of hotness to tingle your taste buds. It’s SO good and a must-have for game day!
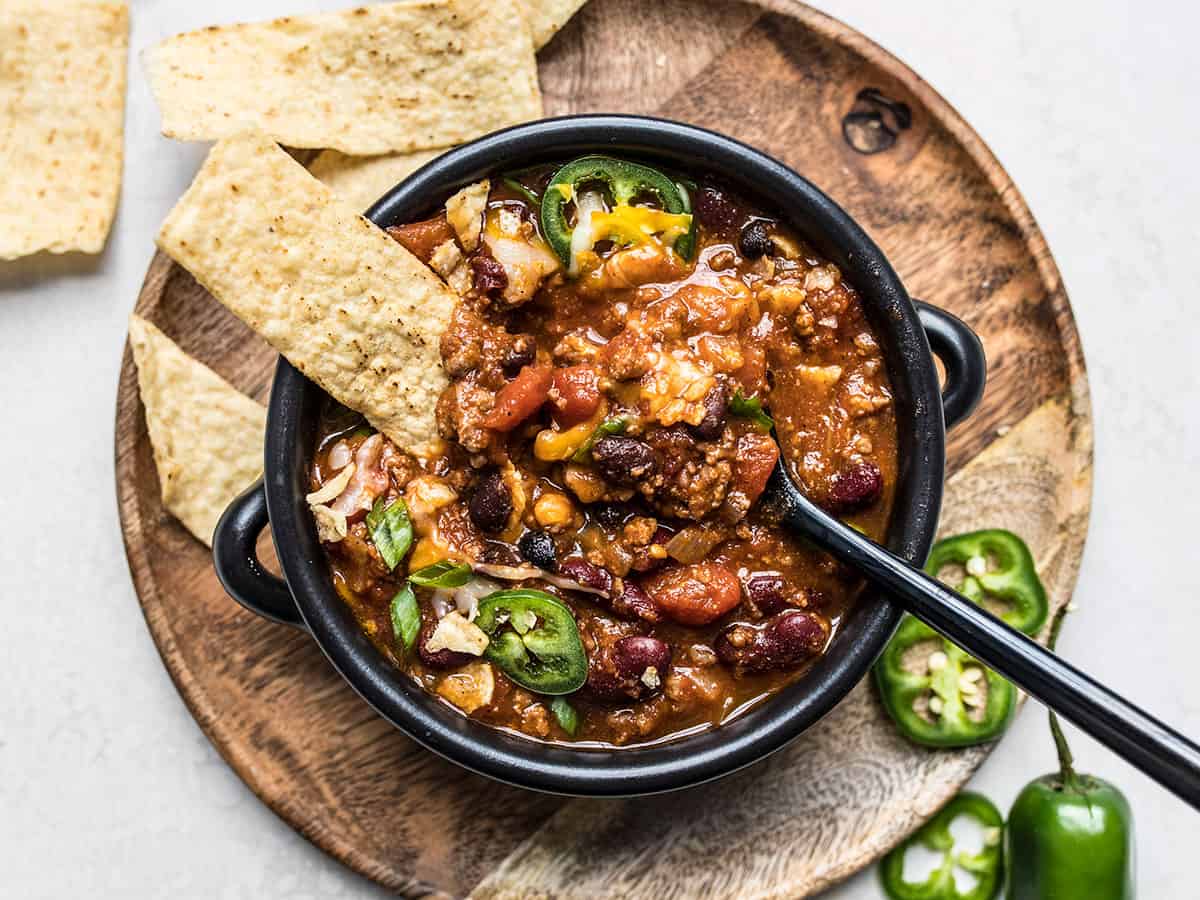
Everyone loves a good Homemade Chili recipe to enjoy while watching football games. It’s easy to serve at parties and you can allow guests to customize it with their own toppings!
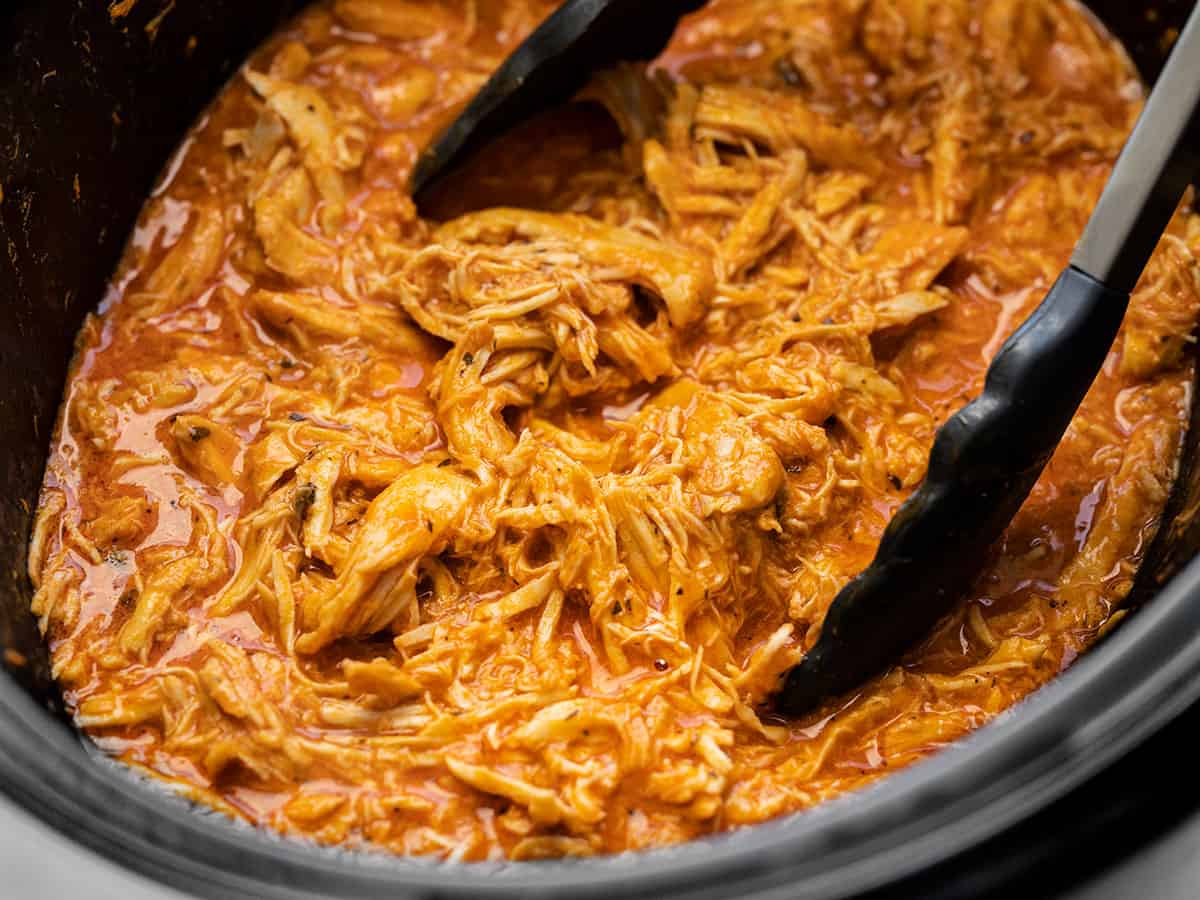
This Slow Cooker Buffalo Chicken is always a favorite at potlucks and parties. Our version goes a step further and uses ranch seasoning which adds a huge burst of flavor to the sauce and makes it even more delicious!
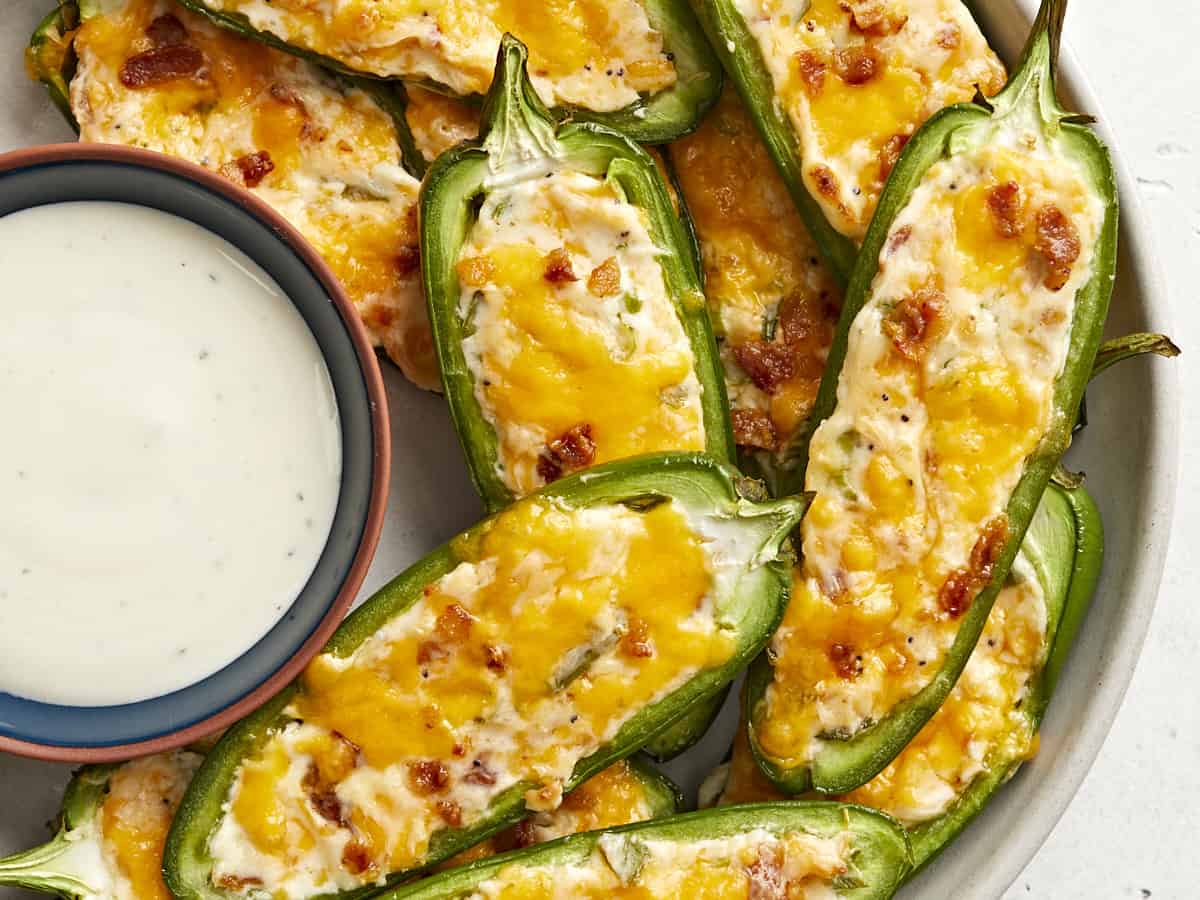
Is there anything better than a cheesy, creamy, spicy flavor combo? I think not. These Jalapeño Poppers are easy enough for a beginner to make (no deep frying!) and delicious enough that you’ll have no regrets.
You’ll definitely steal the show at the party when you make this super fresh and colorful Cowboy Caviar! It’s an easy salsa-type salad that can be served as a chunky dip with chips and only takes 20 minutes to prep!
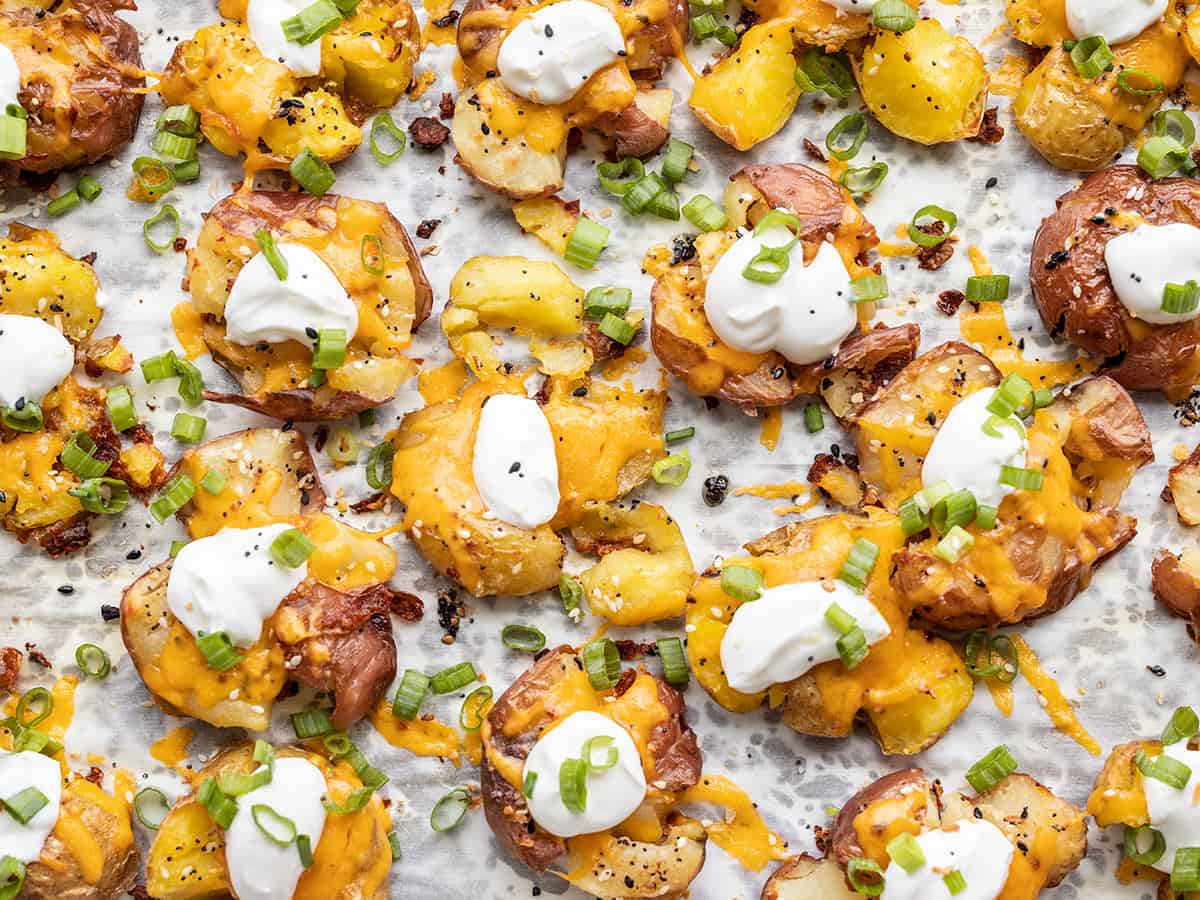
If you’ve never had smashed potatoes before, let’s just say you’re totally missing out! These Loaded Smashed Potatoes are boiled, smashed, and baked until crispy, then loaded with all of your favorite toppings.
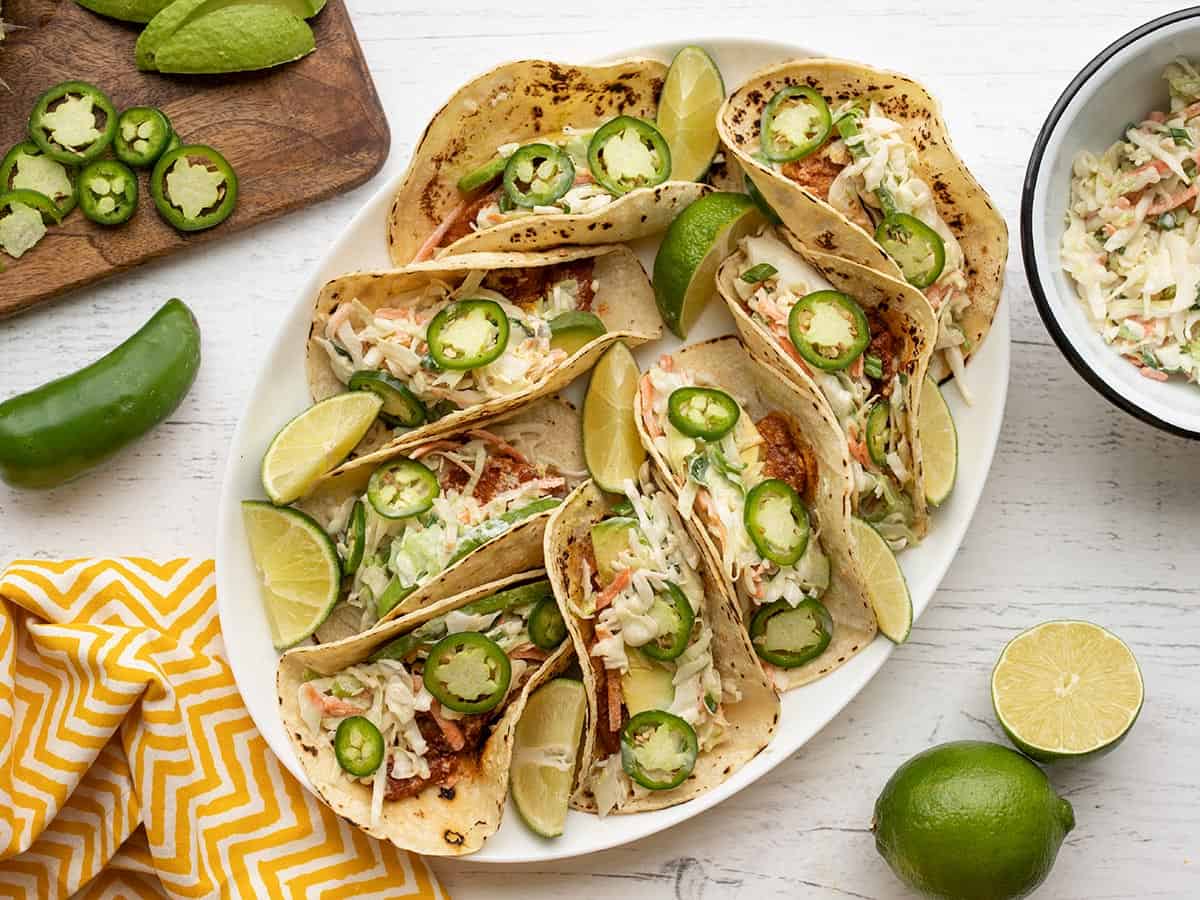
Make sure you give your guests plenty of options to choose from and make these Easy Fish Tacos to add to your menu for the big game! They’re easy, fresh, and so delicious!
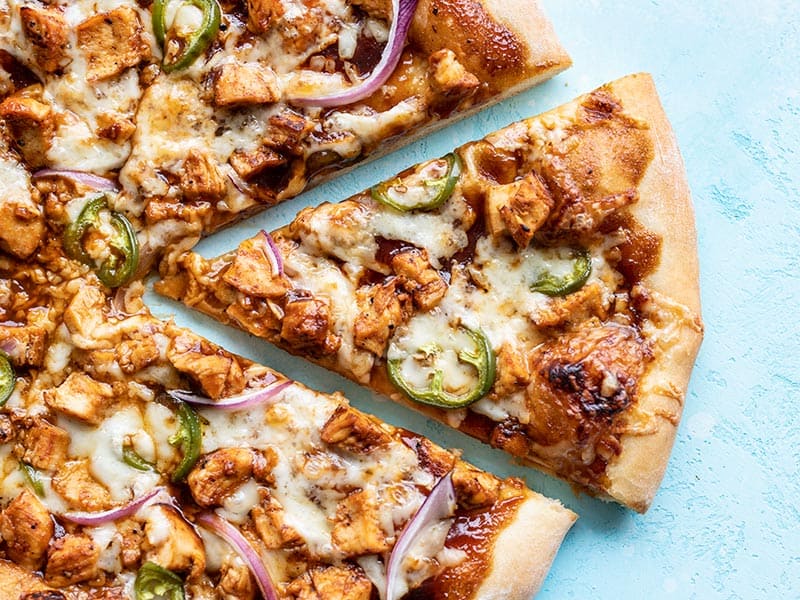
BBQ Chicken Pizza is a classic party food with its sweet and tangy BBQ sauce, bits of juicy chicken, creamy cheese, and savory onions. And it can be sliced into different serving sizes for your guests.
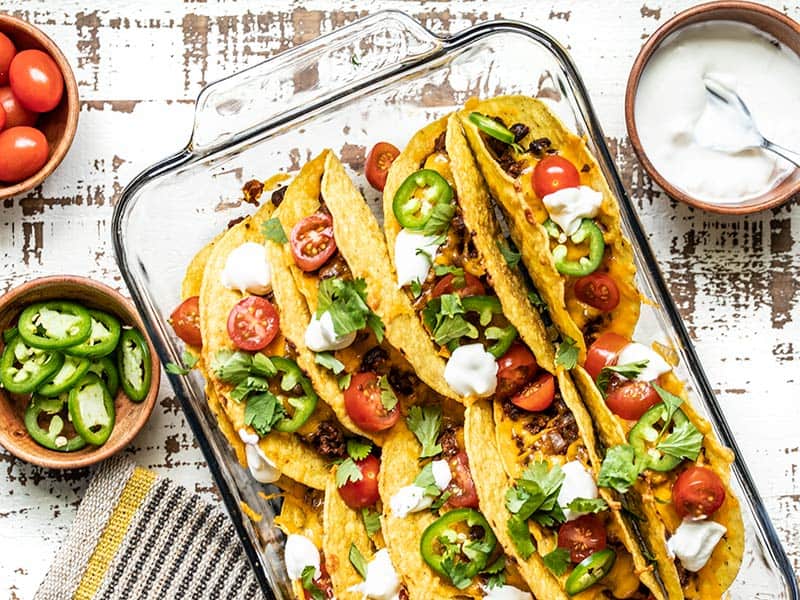
Listen, you had me at tacos!! Tacos are one of my absolute favorite foods and these Baked Beef Tacos with seasoned beef and black bean filling will be the first thing I grab on game day!
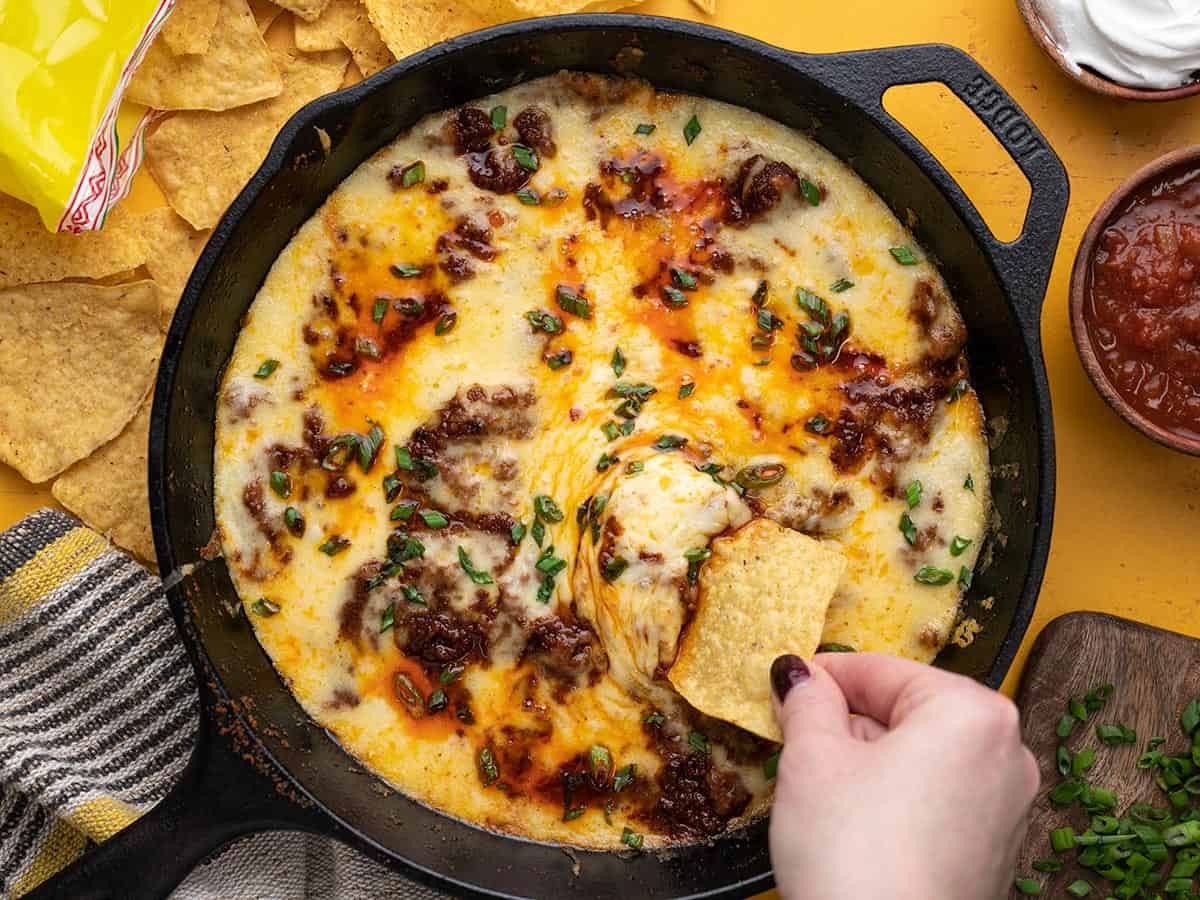
If you're looking for a smash hit appetizer that's easy to make and feeds loads of people, you definitely need to try this simple recipe for unctuous Queso Fundido.
If there’s one recipe that’s sure to bring a crowd together, it’s definitely a good cheese dip! Queso Fundido is a simple recipe made with Mexican chorizo and melted cheese and is always a hit!
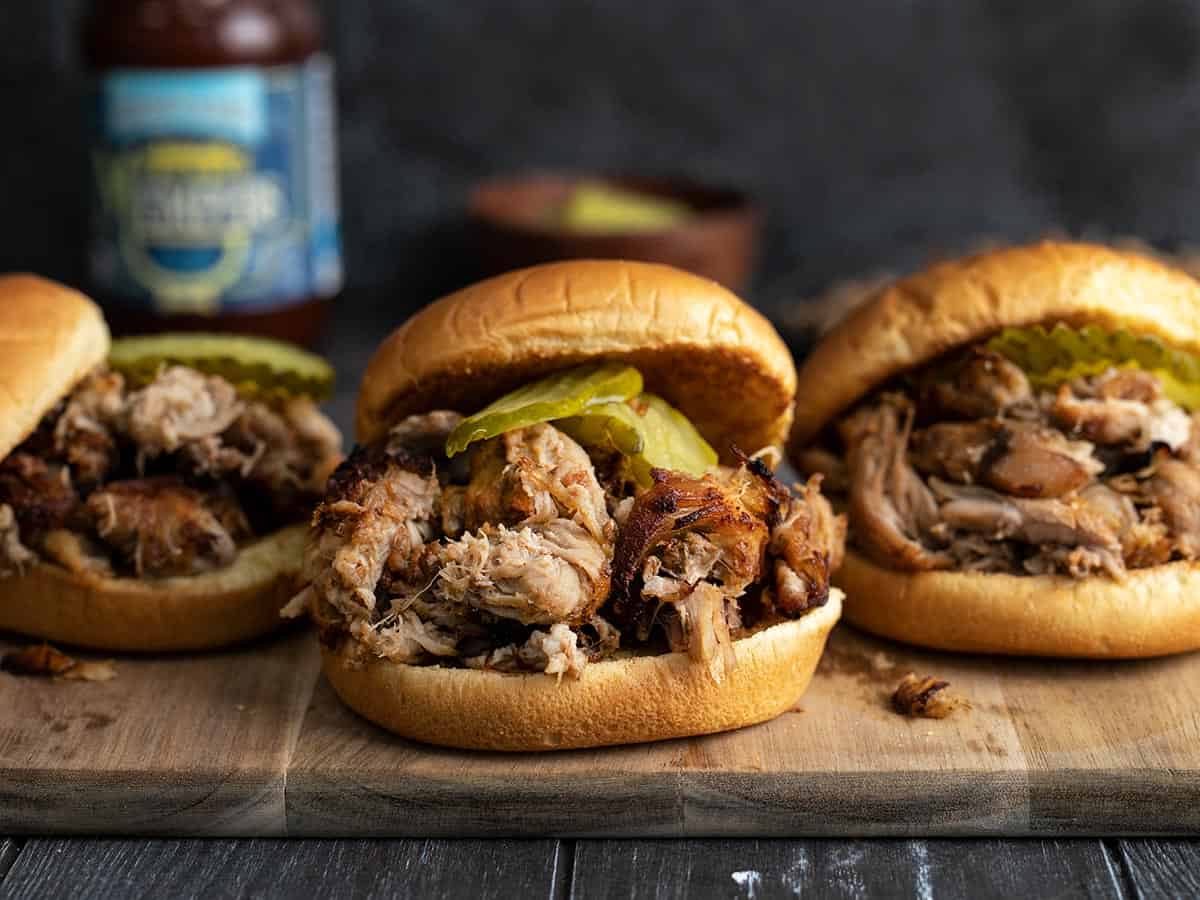
You’ll be surprised just how tender and juicy this Slow Cooker Pulled Pork recipe is after it’s cooked low and slow. It’s perfect for BBQ sandwiches, nachos or any potluck or party meal.
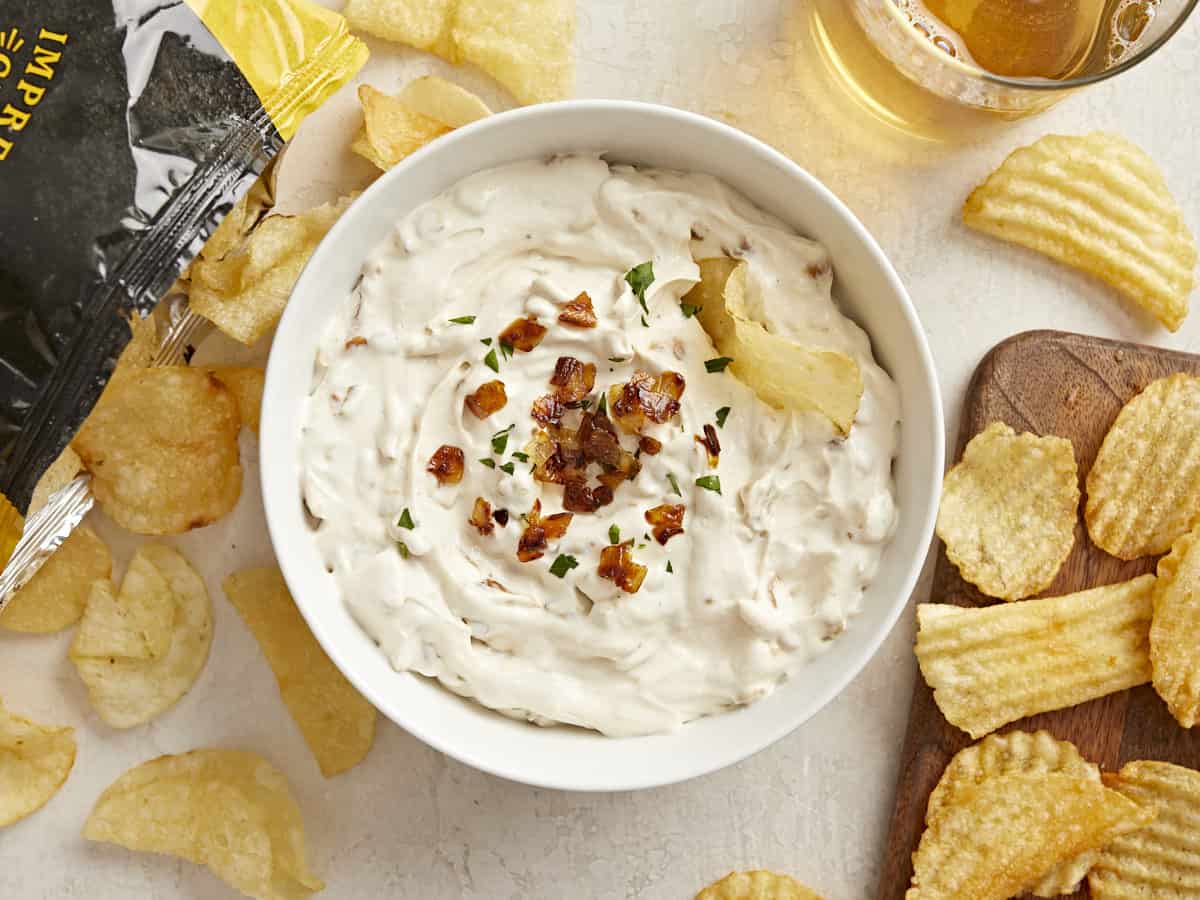
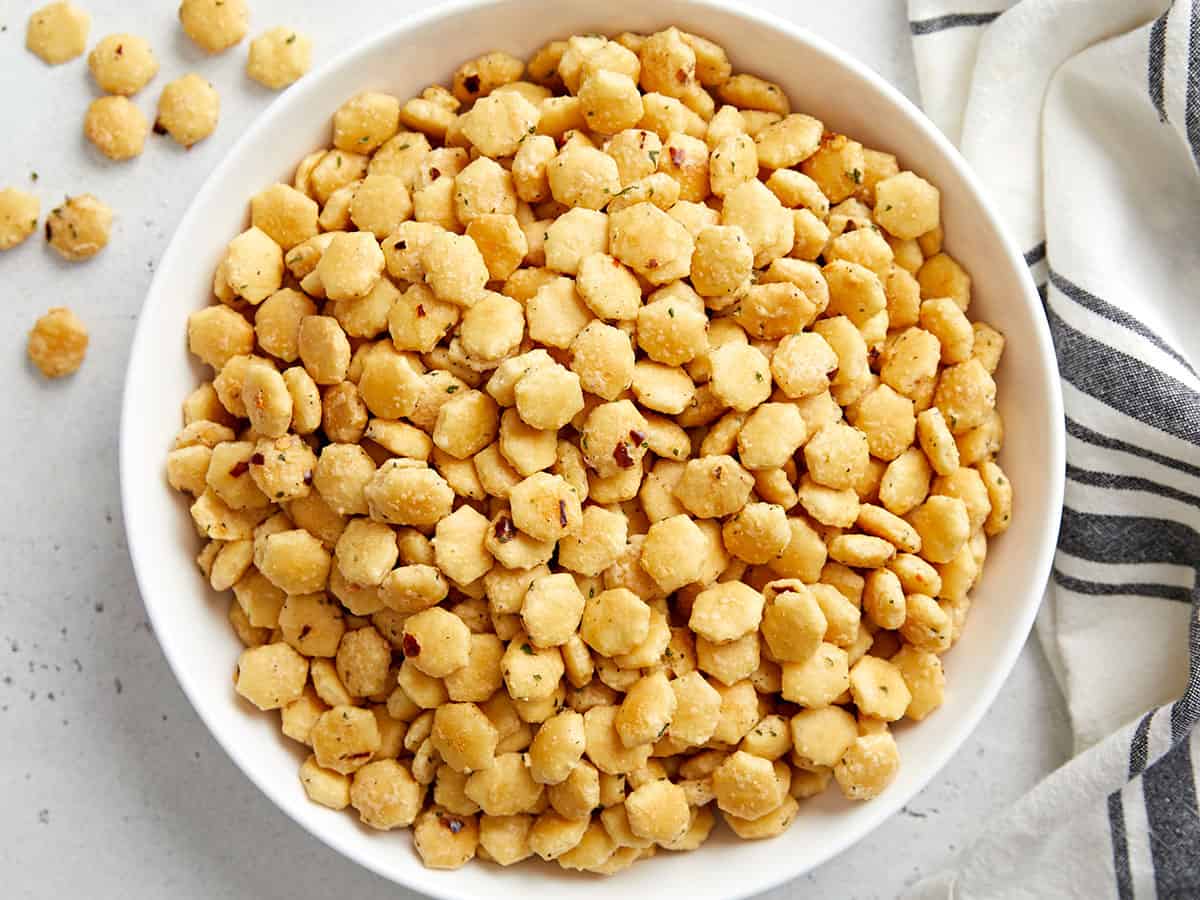
Heads up…you’ll probably want to make a double batch of these rich & buttery Ranch Oyster Crackers! This small and delicious snack is made with just 5 ingredients, it’s absolutely perfect for parties, and will be gone in minutes. Trust me!
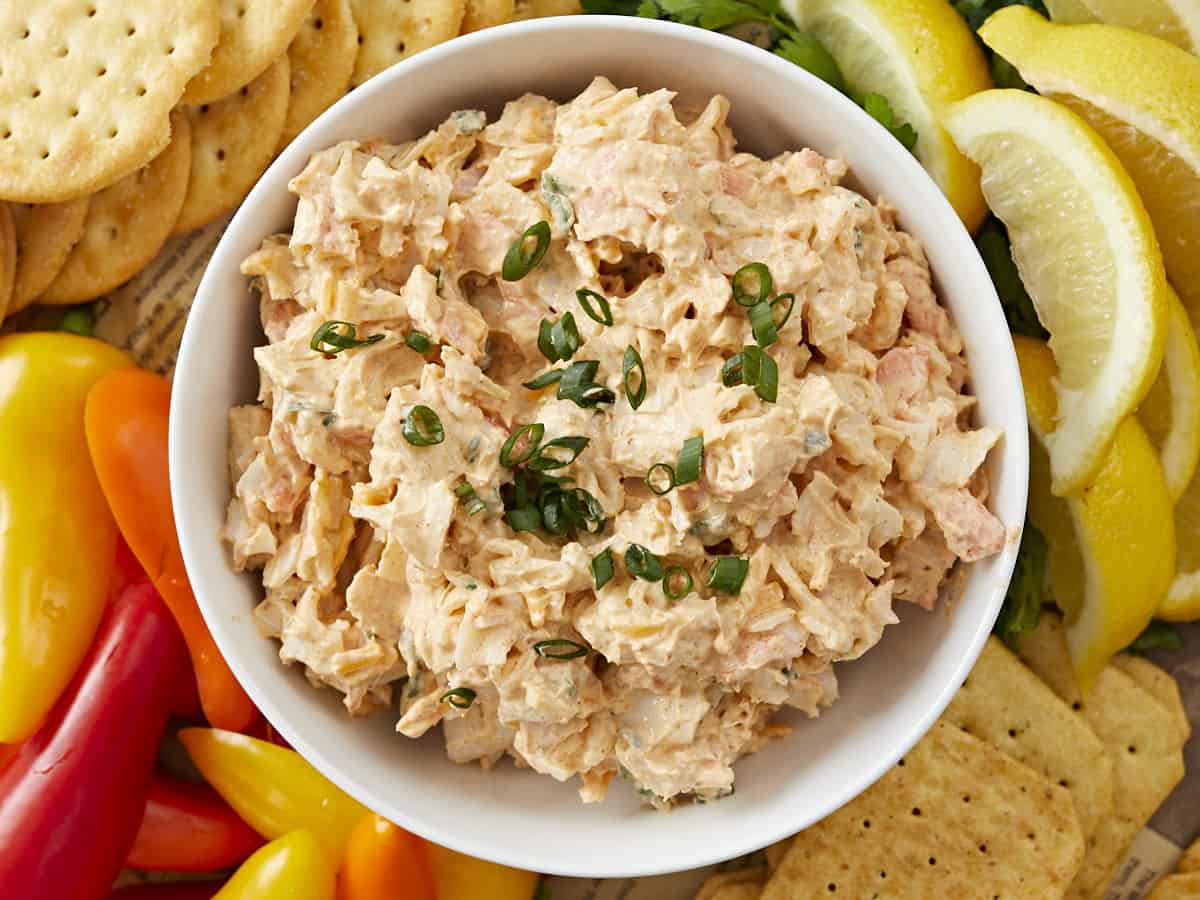
This creamy, spicy crab dip is so good you'll be pushing a cracker into the corners of your serving dish to scoop up the last schmear! It comes together in three easy steps and you can serve it hot or cold.
Ten minutes is all you’ll need to make this super simple Crab Dip recipe. It can be served hot or cold and goes great with crackers, toasted bread, chips, and raw vegetables.
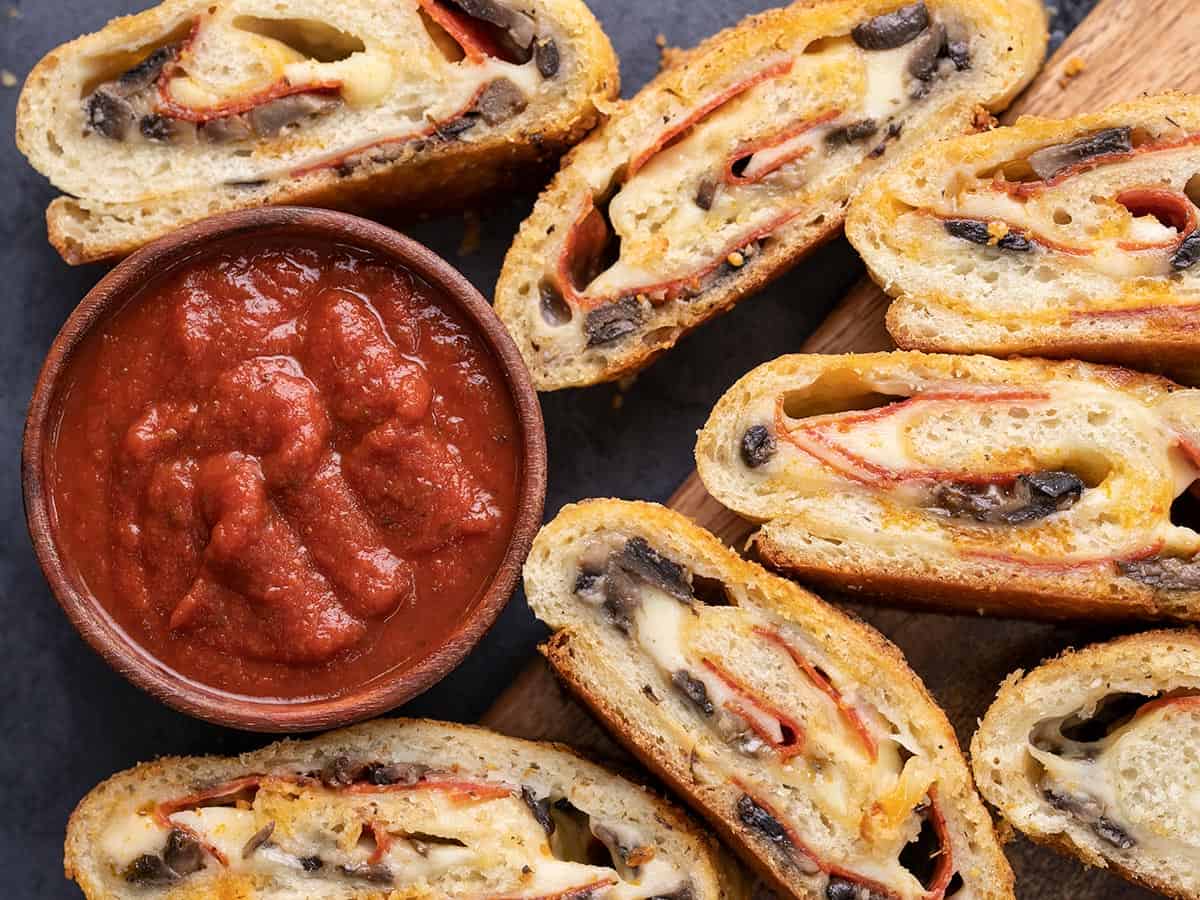
You’ve gotta have some type of pizza on the menu for game day! This Stromboli is a great party appetizer and that’s fun to eat plain or dipped into your favorite marinara sauce.
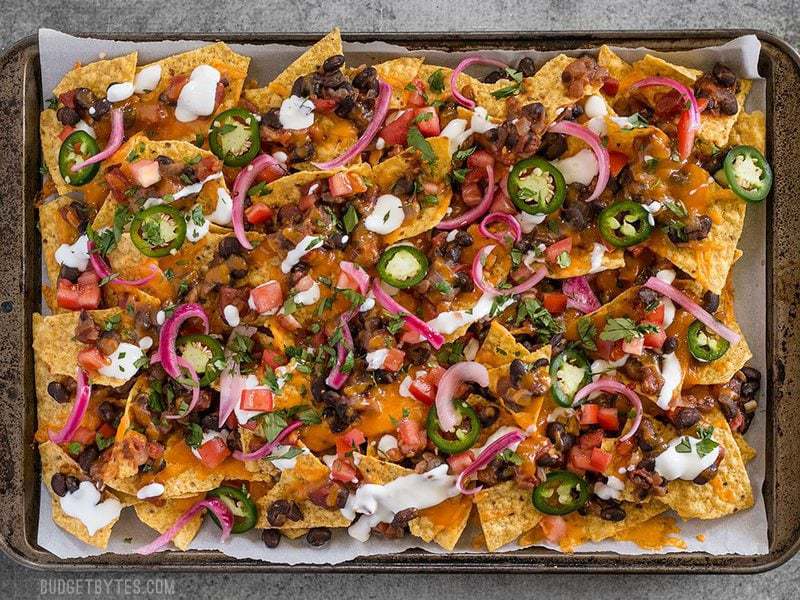
Spicy Baked Black Bean Nachos – Crispy tortilla chips are topped with seasoned black beans and your favorite toppings for a simple, easy, black bean recipe that’s perfect for parties and gatherings!
Homemade Chex Mix is a classic salty, crunchy party snack that’s super easy to make and way less expensive than store-bought Chex mix. It’s also easy to customize and a simple grab-and-go finger food at parties!
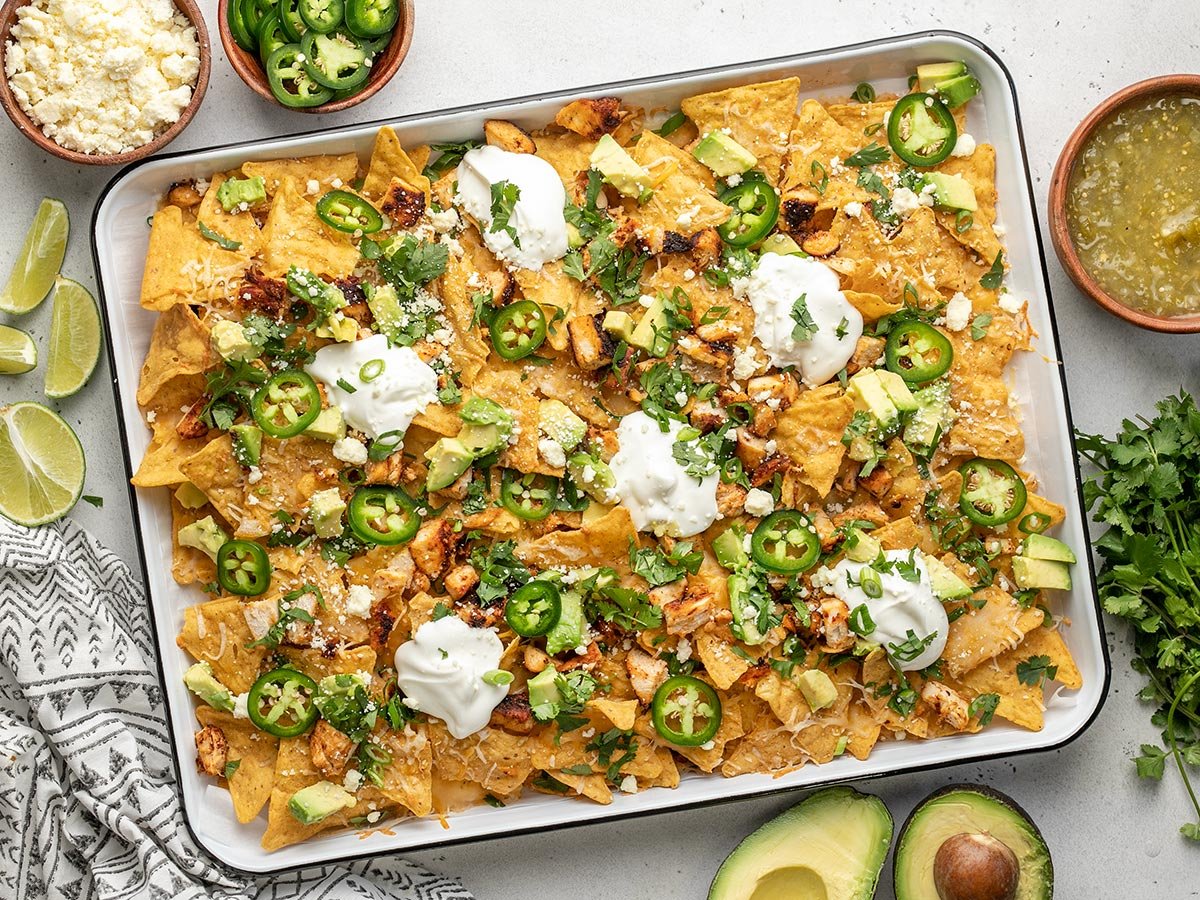
Yes to these crunchy, salty, and cheesy Chicken Nachos!! It includes crispy corn chips, succulent chicken breast, tangy melted cheese and sour cream. What’s not to love?!
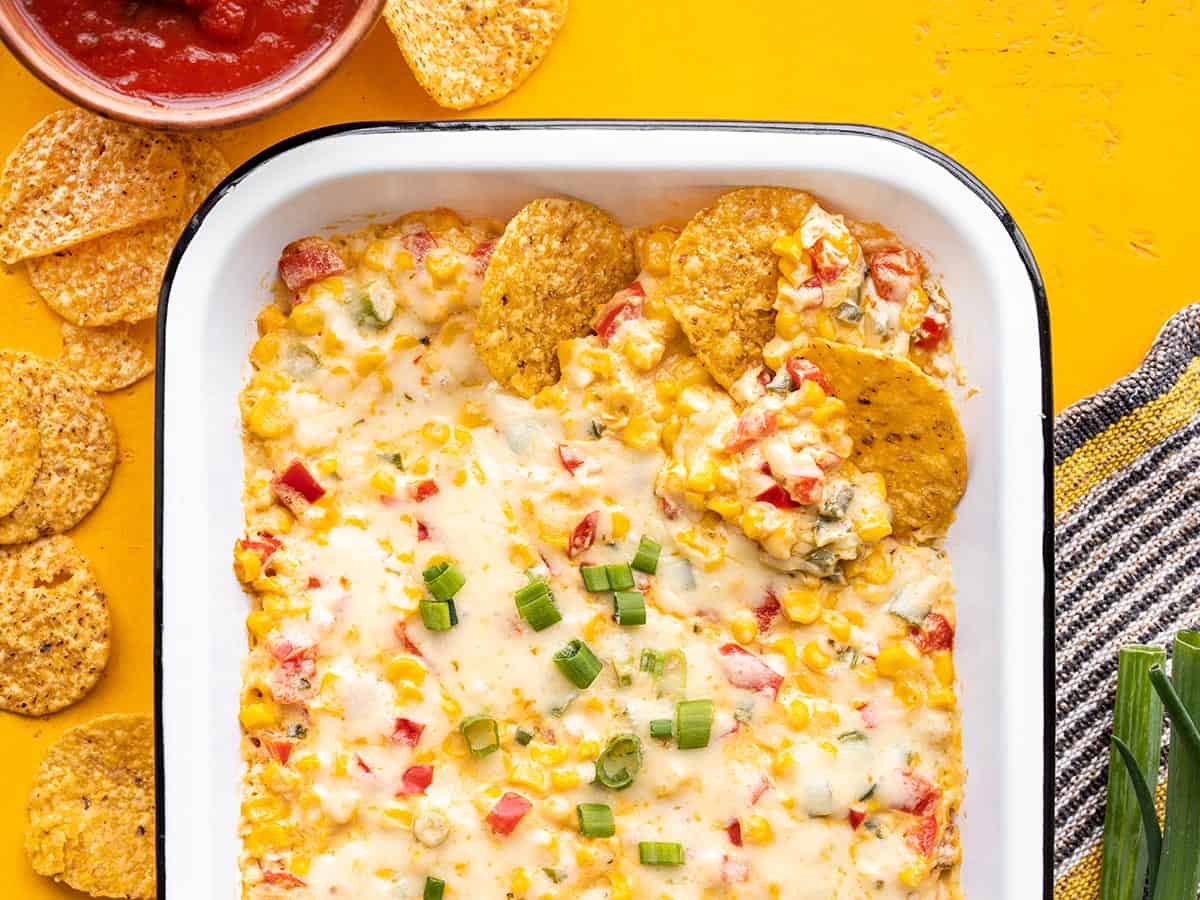
If you like chips and queso, then you’re going to love this Hot Corn Dip. It’s a super creamy, cheesy, slightly spicy dip that you won’t be able to stop dunking chips into.
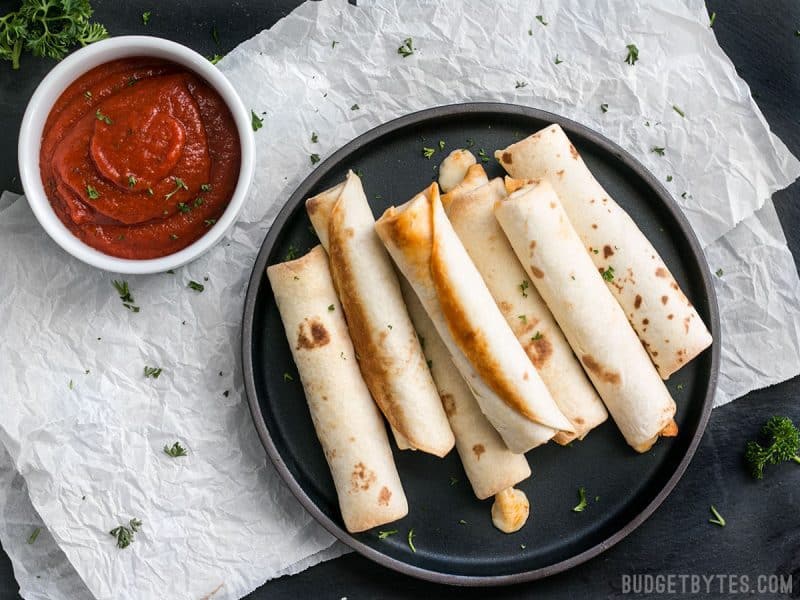
I mean who doesn’t love a good tortilla roll up at parties? These Pizza Roll Upsare perfect as a last minute appetizer and you can get creative by adding your favorite pizza toppings!
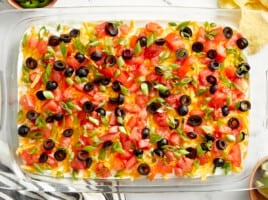
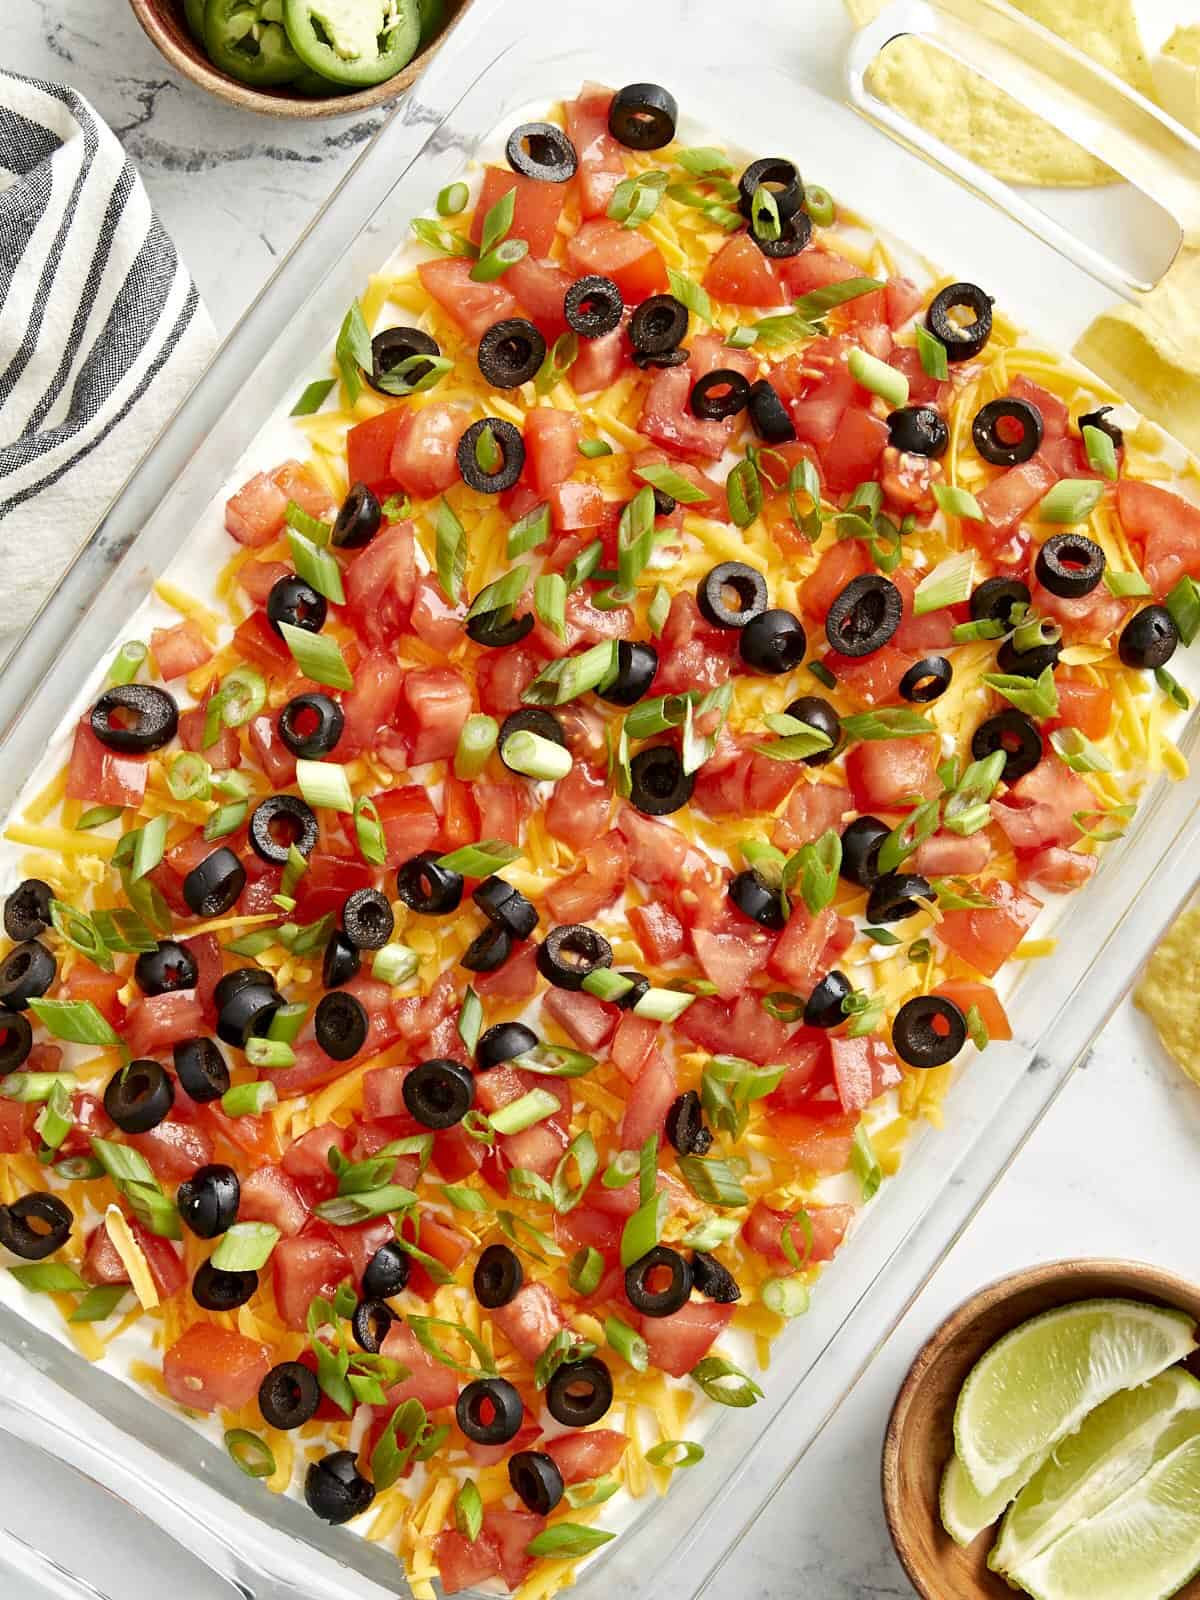
When you need a quick party appetizer that tastes good, is easy to make, and feeds a large crowd…this 7 Layer Dip is the one to make! It has all of my favorite Tex-Mex flavors in one dish and it’s perfect for serving at potlucks, football parties, and family gatherings. I’m always down for any type of chips and dip, but this 7 layer dip takes dips to a whole new level! I’m not sure which part I love the most, the fact that I don’t have to cook anything over a stove to make this recipe or that it comes in at just over $1 per serving. Either way, I highly recommend adding this 7 layer dip recipe to your Super Bowl menu this weekend.😉
What Is 7 Layer Dip?
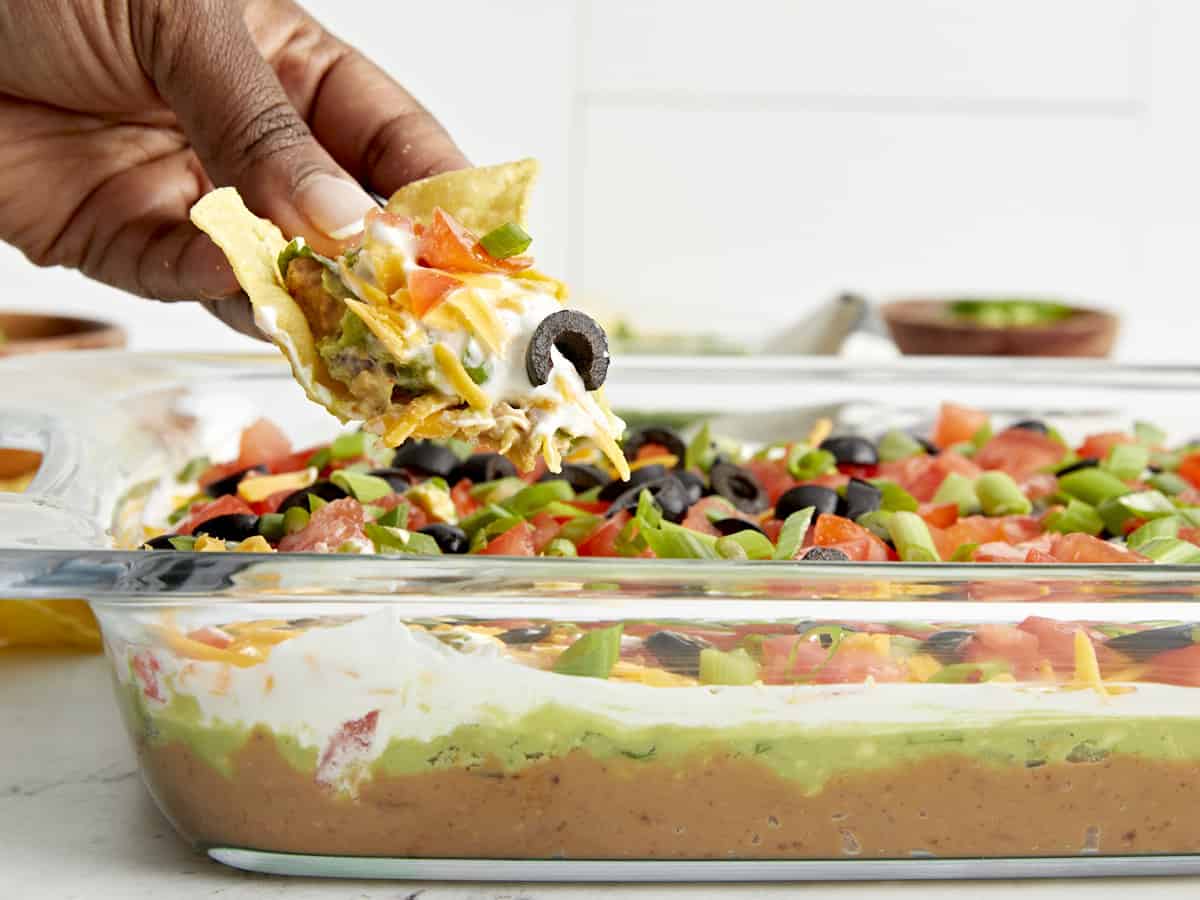
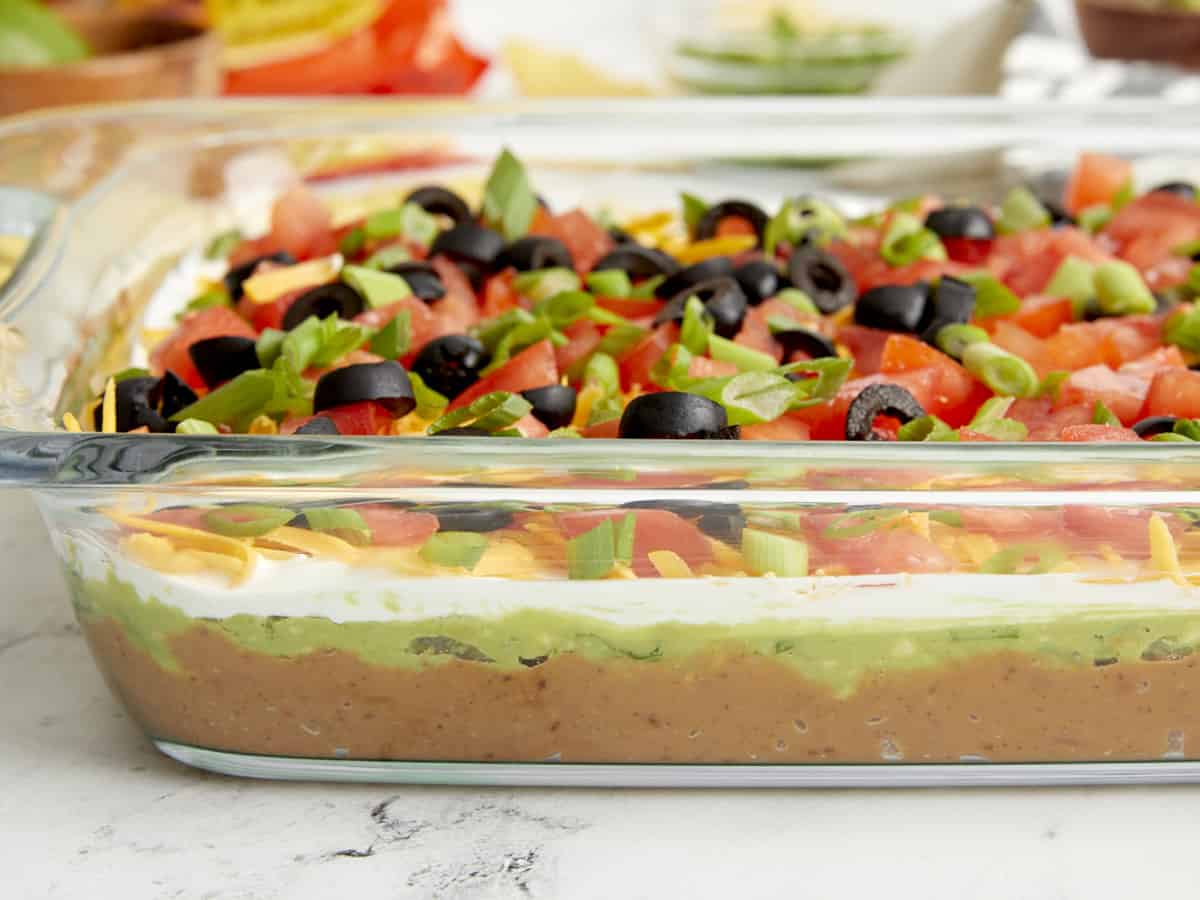
7 layer dip is an easy party appetizer that’s made by building layers of creamy, flavorful, ingredients like refried beans and guacamole into a 9×13” dish. It’s fun to serve at football parties and family gatherings, there’s no need to heat up a stove, and it’s perfect for feeding a crowd!
Ingredients For 7 Layer Dip
Here’s everything you need to make this easy 7 Layer Dip:
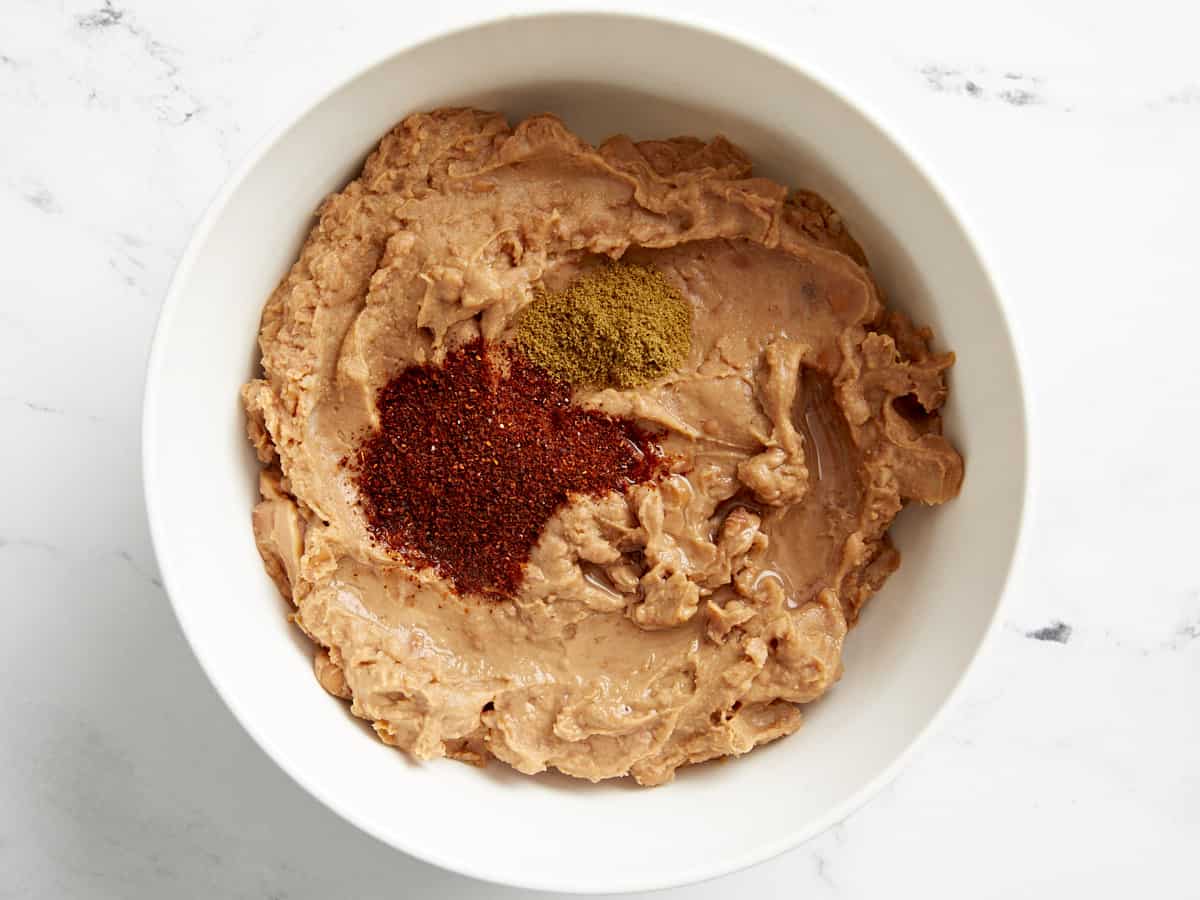
Refried Beans: You can certainly make your own refried beans, but to make things easy we used canned refried beans and seasoned it with a few spices.
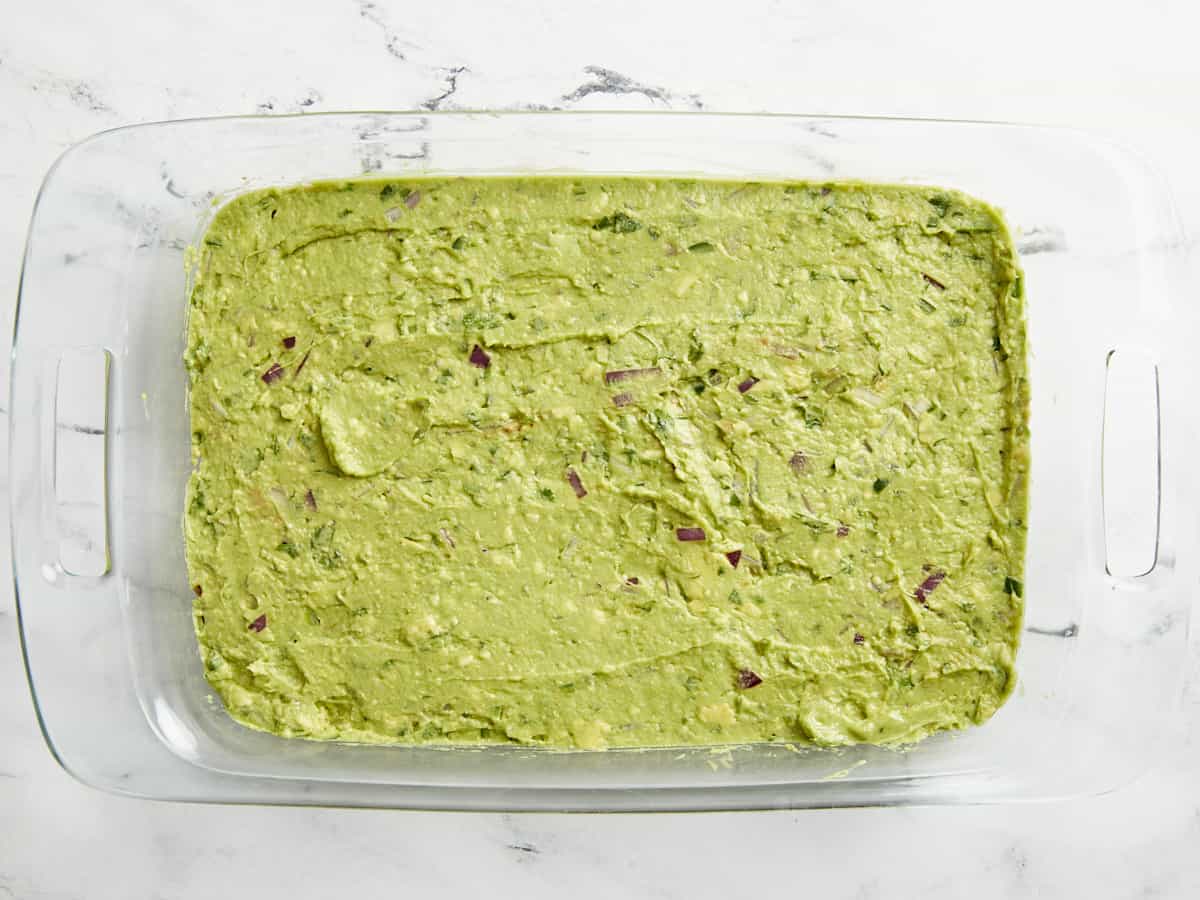
Guacamole: We made a quick batch of our homemade guacamole recipe, but to save time you can easily substitute with your favorite store-bought guacamole.
Sour Cream: No need to overthink this layer, just grab a tub of regular sour cream to spread on top of the guacamole. It adds the perfect creamy and tasty flavor to balance the beans and guacamole.
Cheddar Cheese: We used medium cheddar cheese but you can certainly use mild or a different flavor cheese if you prefer. And we highly recommend buying the cheese in block form and shredding it yourself for this recipe.
Tomatoes: Diced Roma tomatoes or vine-ripe tomatoes both work well and are added on top of the cheese layer.
Black Olives: Black olives add wonderful color, texture, and flavor to the dip. Because olives tend to be salty and tangy with bold flavors, you’ll only need a few of them for this 7 layer dip.
Green Onions: The final layer is a sprinkle of sliced green onions which add not only great flavor, but also a beautiful vibrant color to the dip!
Recipe Variations
Use taco seasoning – If you happen to have a batch of taco seasoning in your panty, use 1 ½ tablespoons of it instead of the chili powder, cumin, and salt to season your refried beans. This will give the beans even more flavor! You can also mix a little bit in to your sour cream to give it an extra boost of flavor.
Add seasoned ground meat – You can make this 7 layer dip even more filling by adding a layer of taco seasoned ground beef or ground turkey. I would add it right after the refried beans layer.
Add salsa – Your favorite thick salsa also works really well with this dip recipe. If you want to add it as a layer, just make sure to drain any excess liquid from the salsa to keep the dip from getting too soggy.
Storing LEftovers
This dip is definitely best served and eaten the same day it’s made, but if you happen to have leftovers, just store any leftovers covered tightly in the refrigerator for 3-4 days. The guacamole may start to brown slightly and the dip may get a bit watery around the edges, but it will still taste delicious!
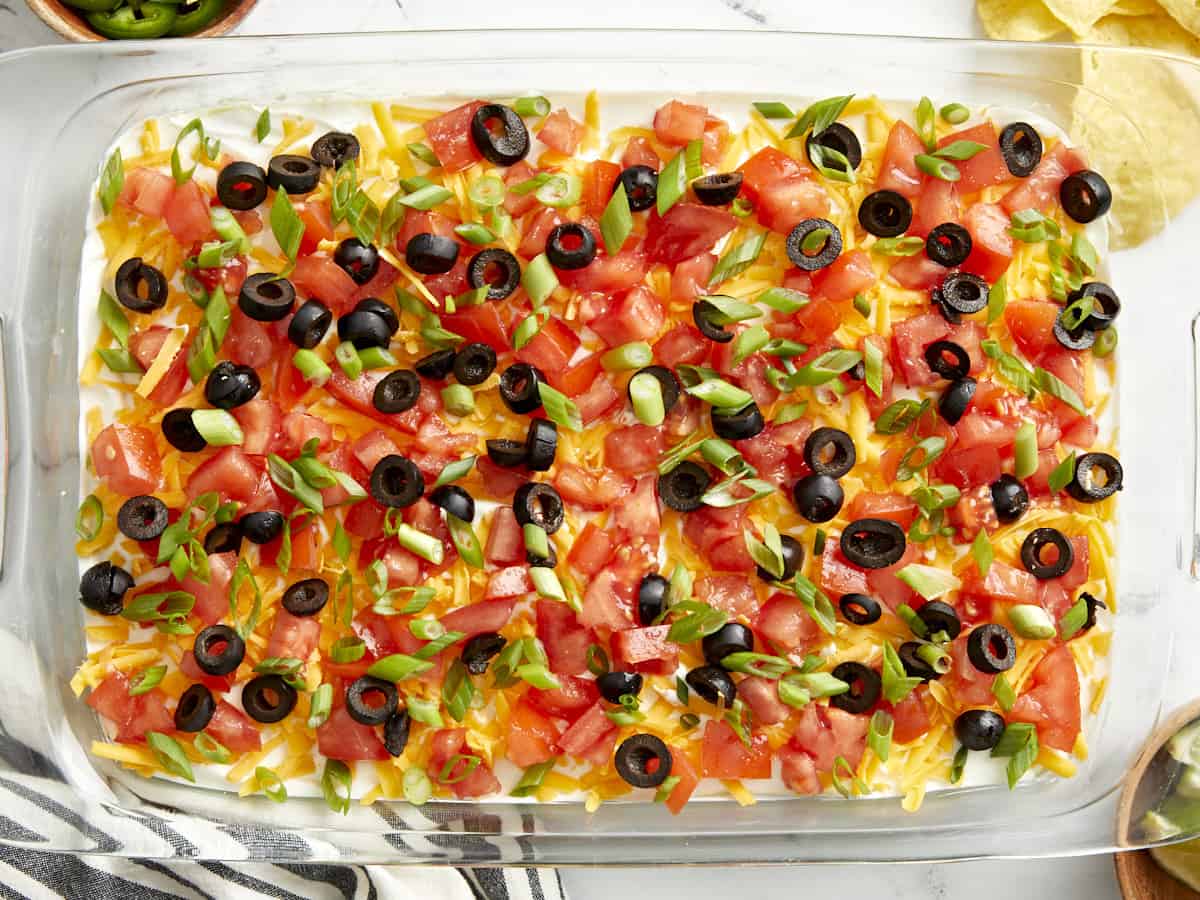
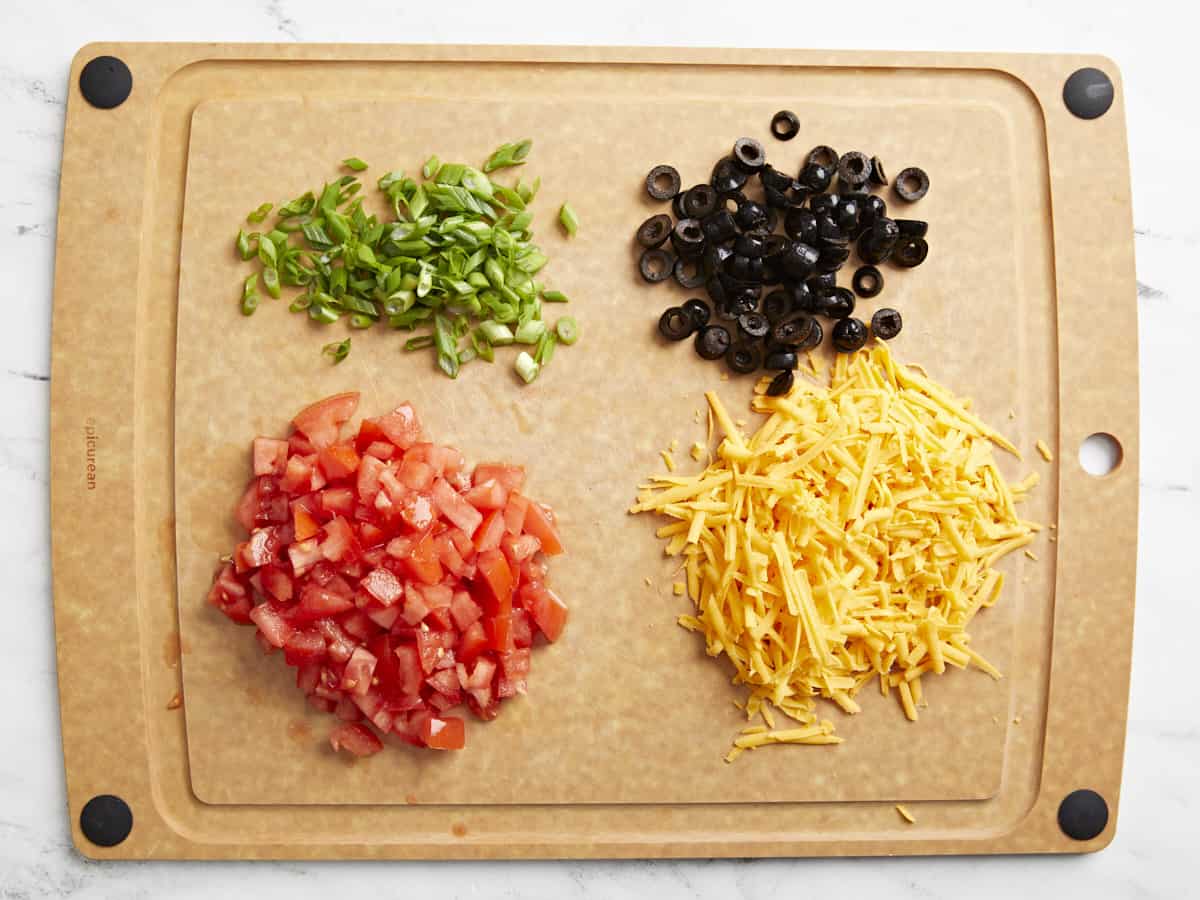
Dice 2 tomatoes, shred 1 1/2 cups of cheddar cheese, drain 1/2 cup black olives, and slice 3 green onions. Set these ingredients to the side.
In a medium bowl add 2-16oz. cans of refried beans along with 1 Tbsp chili powder, 1/2 tsp cumin, 1/4 tsp salt, and 2 Tbsp water. Mix these ingredients together until well combined.
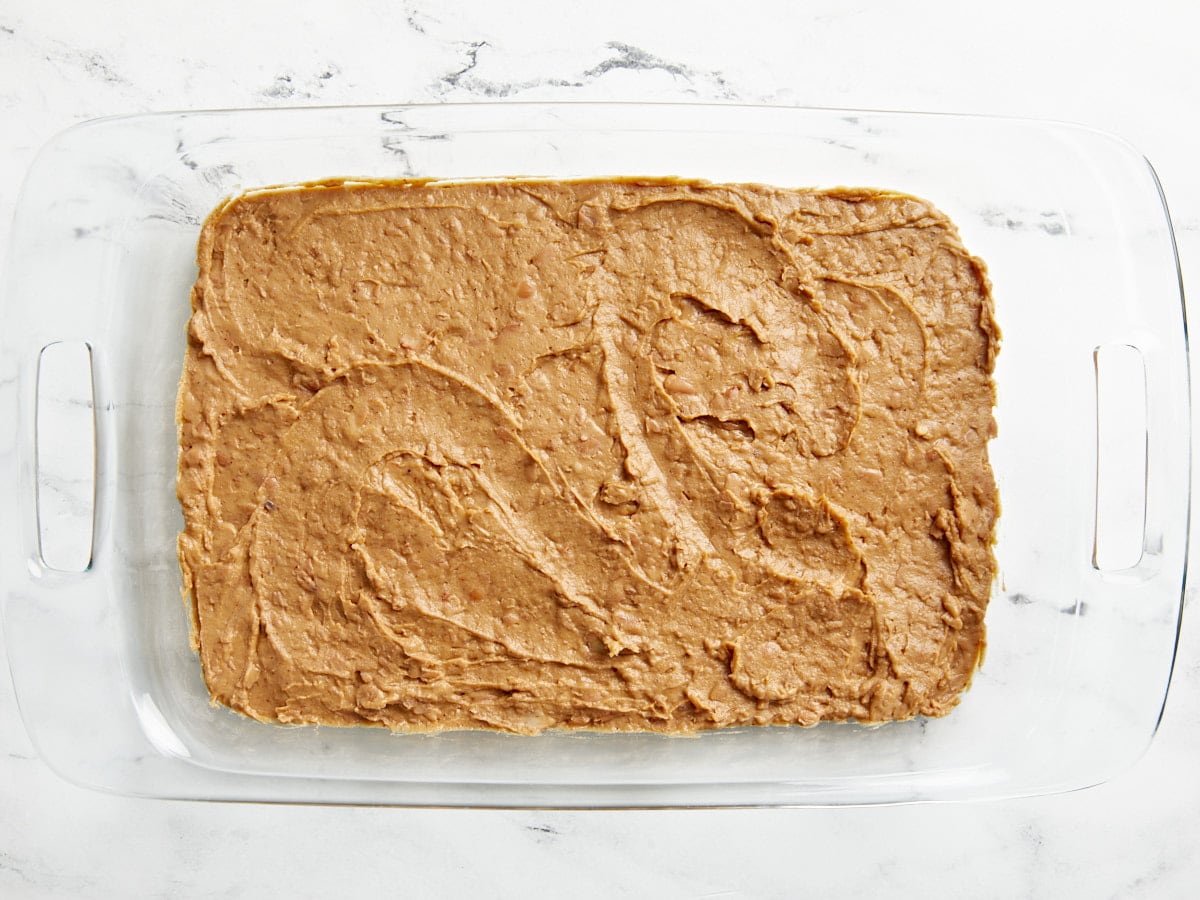
Spread the seasoned refried beans into the bottom of a 9×13” casserole dish.
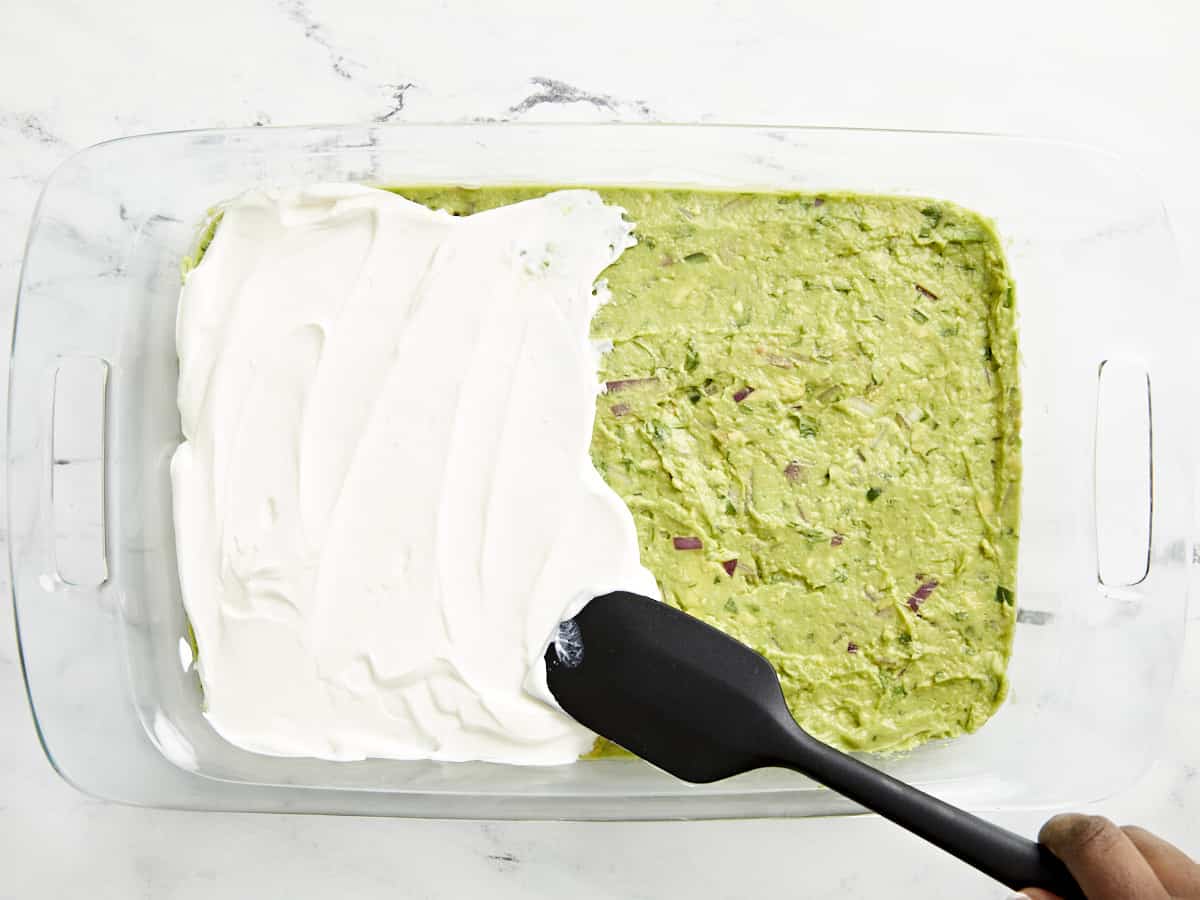
Next spread 2 1/2 cups of guacamole evenly on top of the refried beans.
Then spread 1 1/2 cups of sour cream evenly on top of the guacamole mixture.
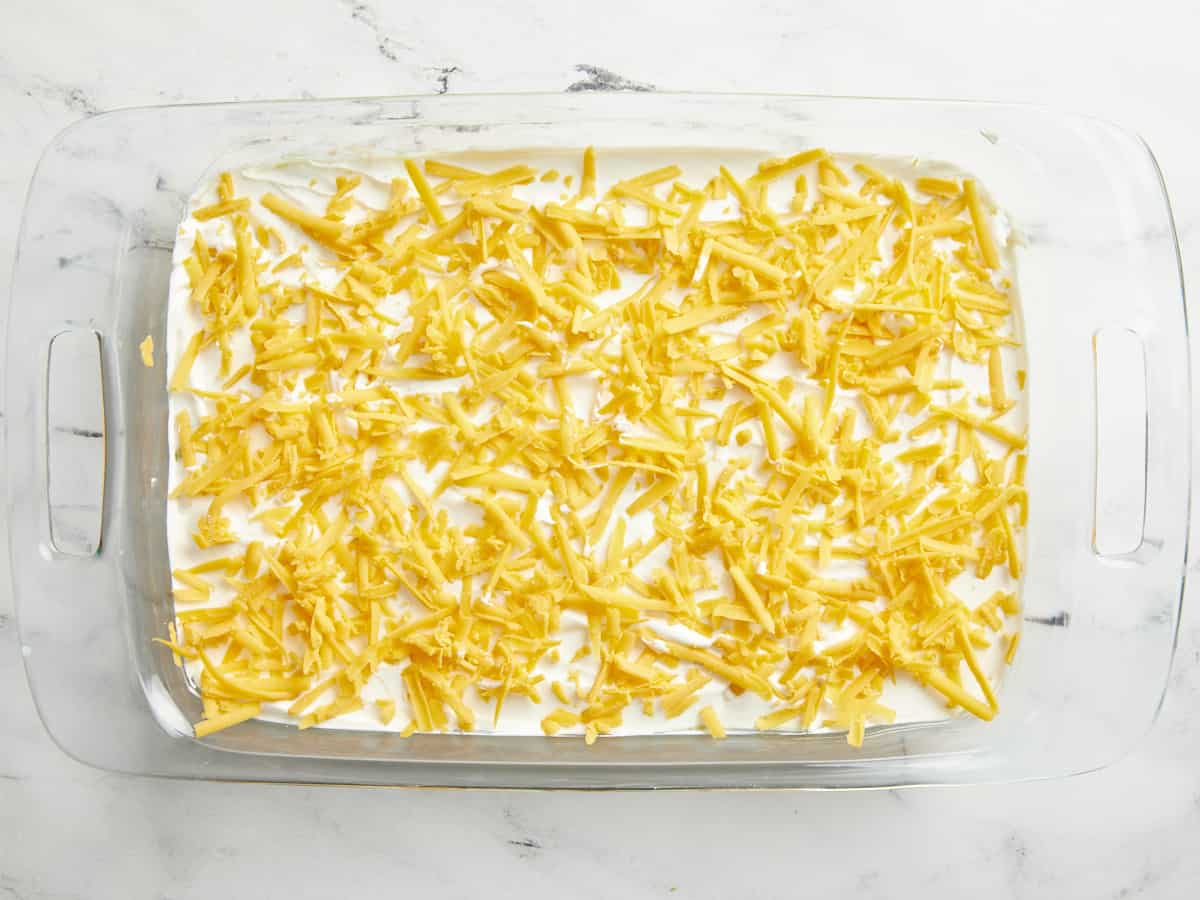
Sprinkle the shredded cheese evenly on top of the sour cream.
Now add the diced tomatoes, black olives, and green onions on top. Make sure everything is spread as evenly as possible.
Enjoy this tasty appetizer dip immediately with tortilla chips or cover and place in the refrigerator until ready to serve.
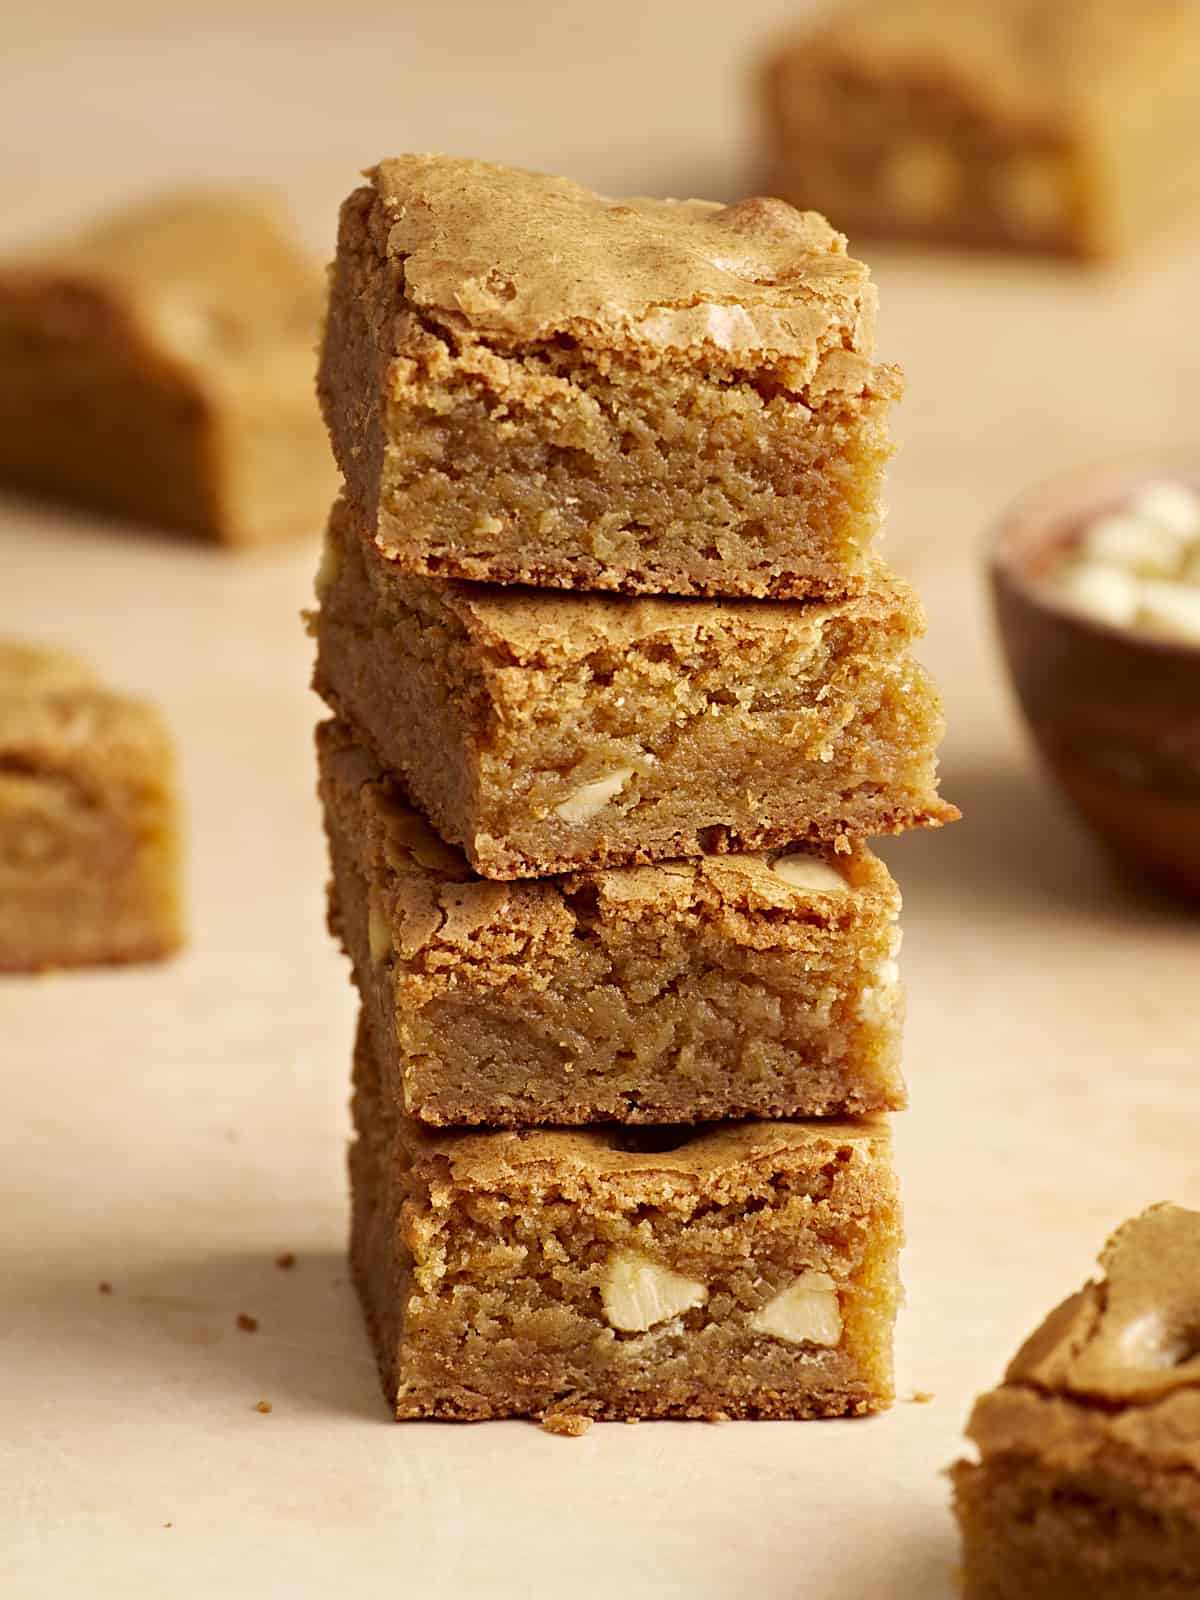
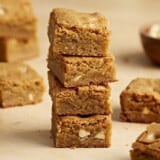
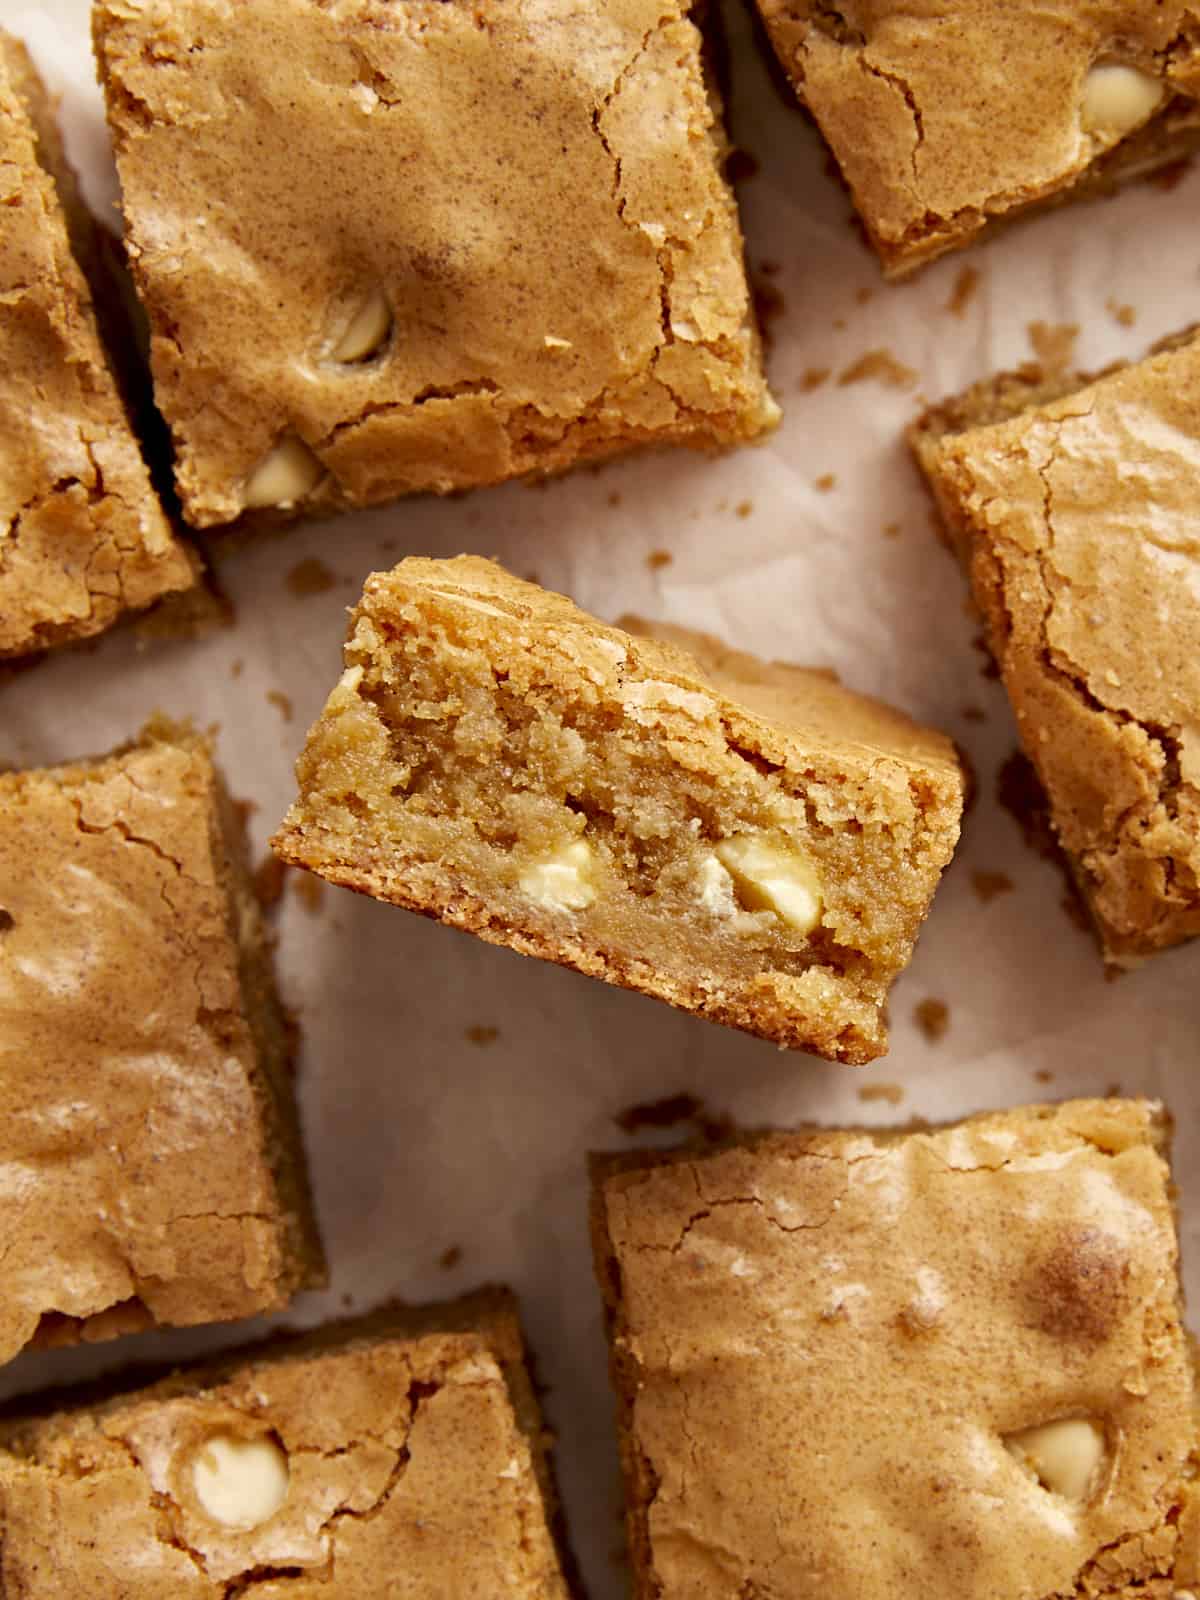
Every now and then I get a taste for something sweet and decadent like homemade cookies, brownies, or carrot cake from my favorite restaurant. But buying pre-made desserts from a store or restaurant can be so expensive. Today, I have a much better option for you! Say hello to these rich, chewy, and buttery Blondies! They’re every bit as delicious as they look and they’re so easy to make. No mixer needed. So if you’re in the mood for baking this weekend or maybe you want to make a sweet treat for Valentine’s Day, these Blondies are sure to be a hit and probably your new favorite dessert!
What Are Blondies?
I like to call these sweet little treats the cousin to our favorite Fudgy Homemade Brownies. Blondies are similar to brownies except they are made without the chocolate flavor of cocoa powder. Instead blondies get their rich flavor from a good amount of brown sugar and vanilla extract. And to make these blondies even more special, we used brown butter, which enhances the flavor and all together gives them a slight caramel, butterscotch taste.
Ingredients For Blondies
Here’s everything you need to make these irresistible Blondie bars:
Brown Butter: We used browned butter to add a rich, nutty, caramel flavor to the blondies. It not only gives it double the flavor, but also adds a beautiful golden brown color to these bars.
Brown sugar & Granulated white sugar: Brown sugar is one of the key ingredients and adds sweetness and lots of moisture to the blondies. We tested this recipe with just brown sugar and also using a combination of brown & white sugar. The use of brown & white sugar was the perfect balance and definitely the winner!
Eggs: Eggs give the blondies strength and helps them bake into a sliceable texture.
Vanilla extract: Vanilla extract adds even more rich flavor to the blondies.
All-purpose flour: Flour provides structure and body to the blondies.
Baking Powder: Baking powder helps the blondies rise.
Salt: A little bit of salt helps the flavors pop.
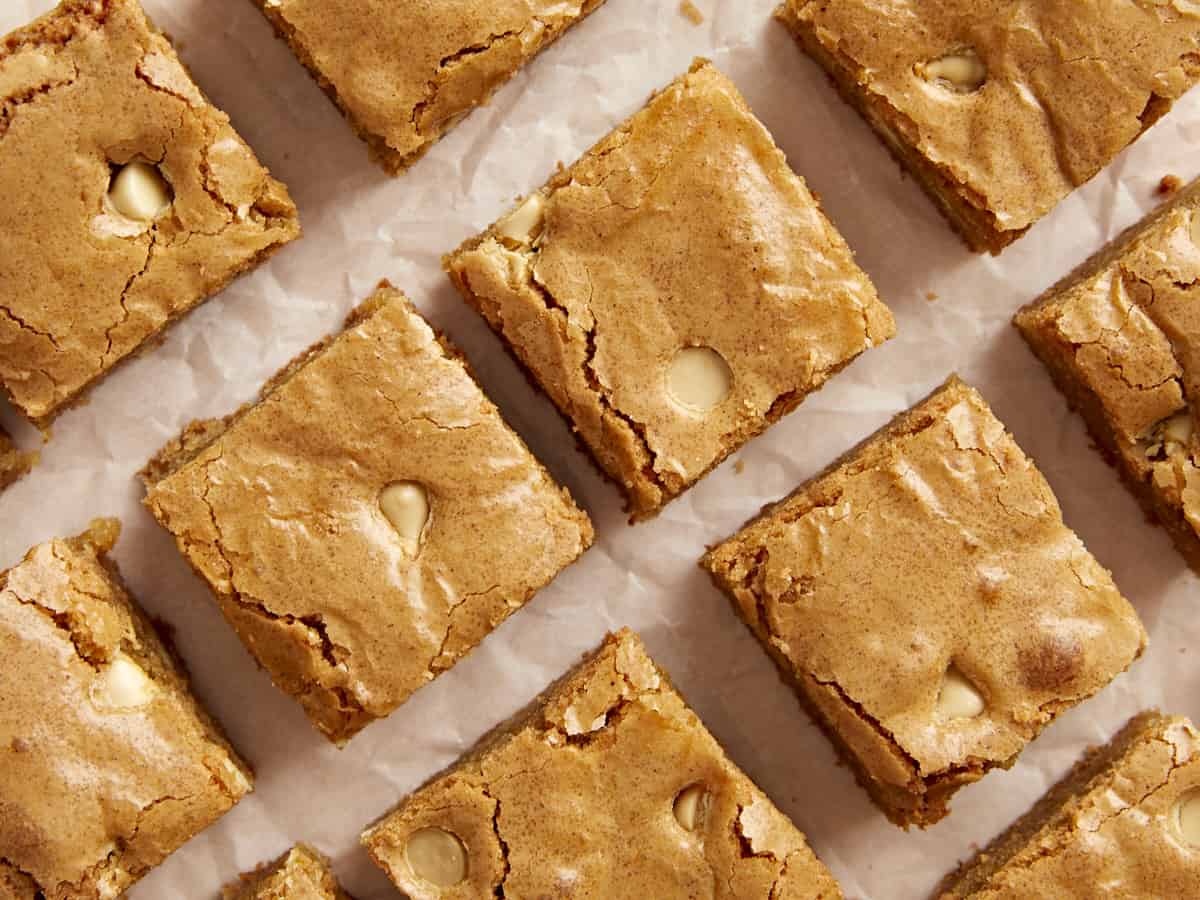
White chocolate chips: Just a few white chocolate chips added a nice contrast and chocolate flavor to the blondies. We only used a small amount because we didn’t want to take away from the deliciousness of the blondie, but feel free to add more if you want!
Blondie Variations
You can easily swap out the white chocolate chips in this recipe for other candies or nuts based on your own personal preference. Here are a few ideas for you:
Butterscotch chips
Dark or Semi-sweet chocolate chips
Peanut butter chips
M&Ms – use festive colored m&ms for special holidays like pastel colors for Easter, red & pink for Valentine’s Day or green & red for Christmas!
Chopped walnuts or pecans
Dried cherries or dried cranberries
A drizzle of Caramel sauce on top of the batter right before baking
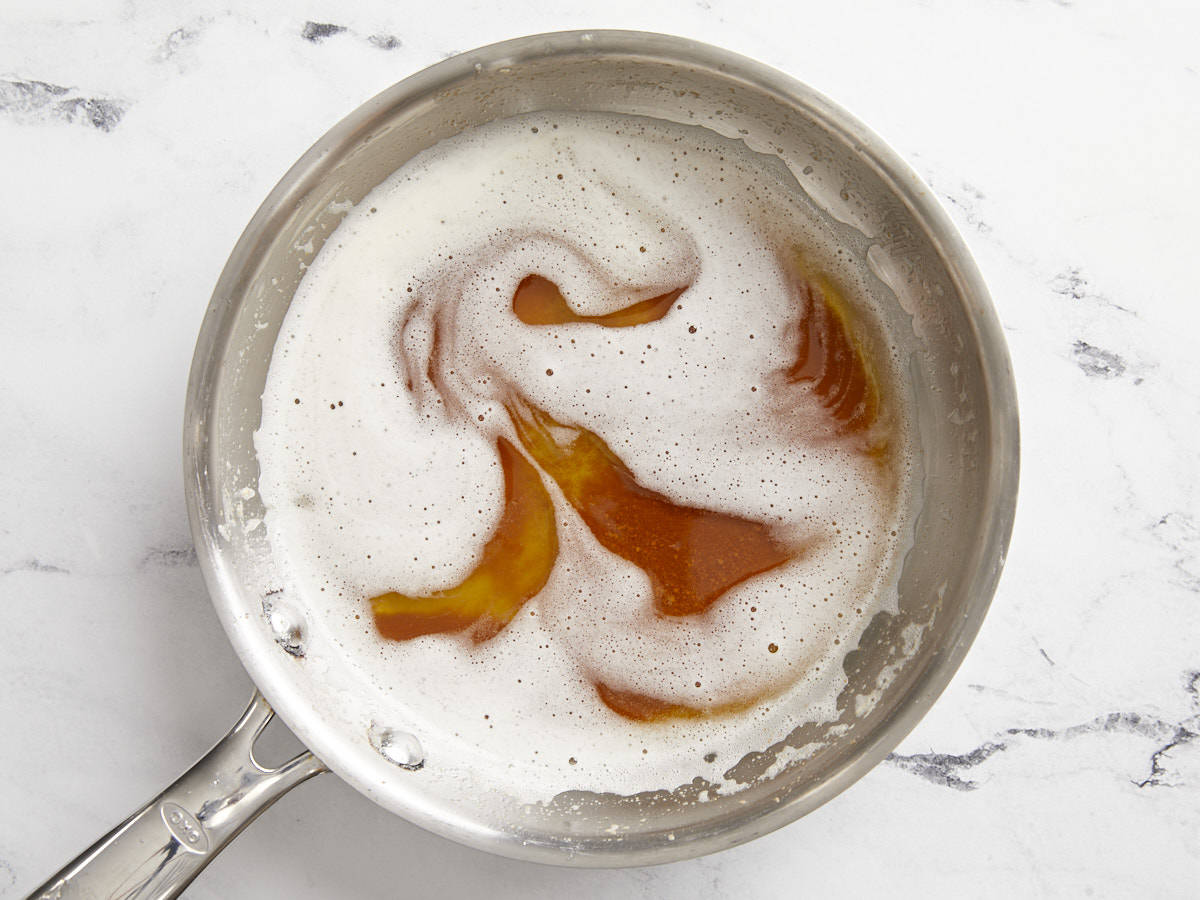
Preheat the oven to 350°F. Cut the butter into several tablespoon-sized chunks and add it to a small light-colored skillet. Heat the butter over medium heat, stirring constantly, until the butter solids turn deep brown and develop a nutty aroma (it will first become foamy, then the solids will sink to the bottom and turn brown).
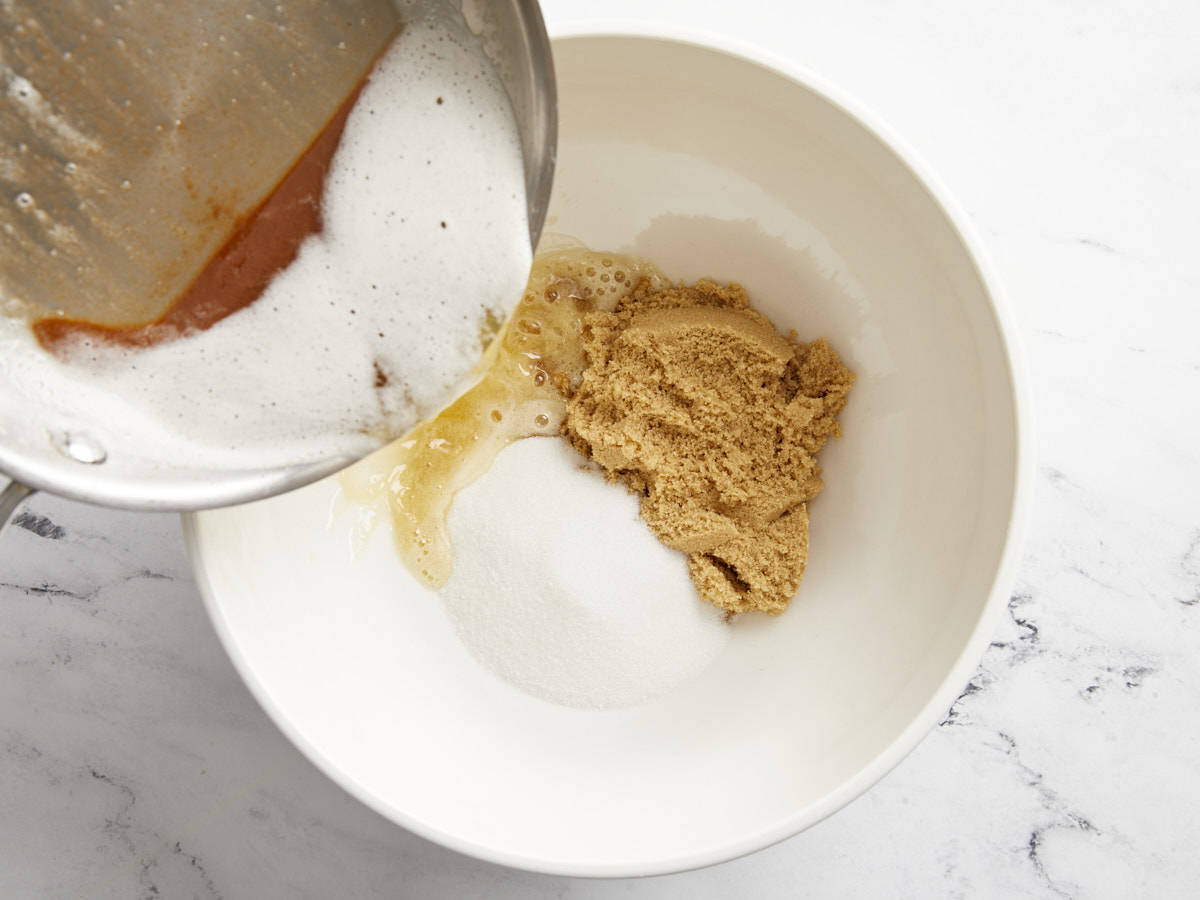
While the butter is browning, add the brown sugar and granulated white sugar to a large mixing bowl.
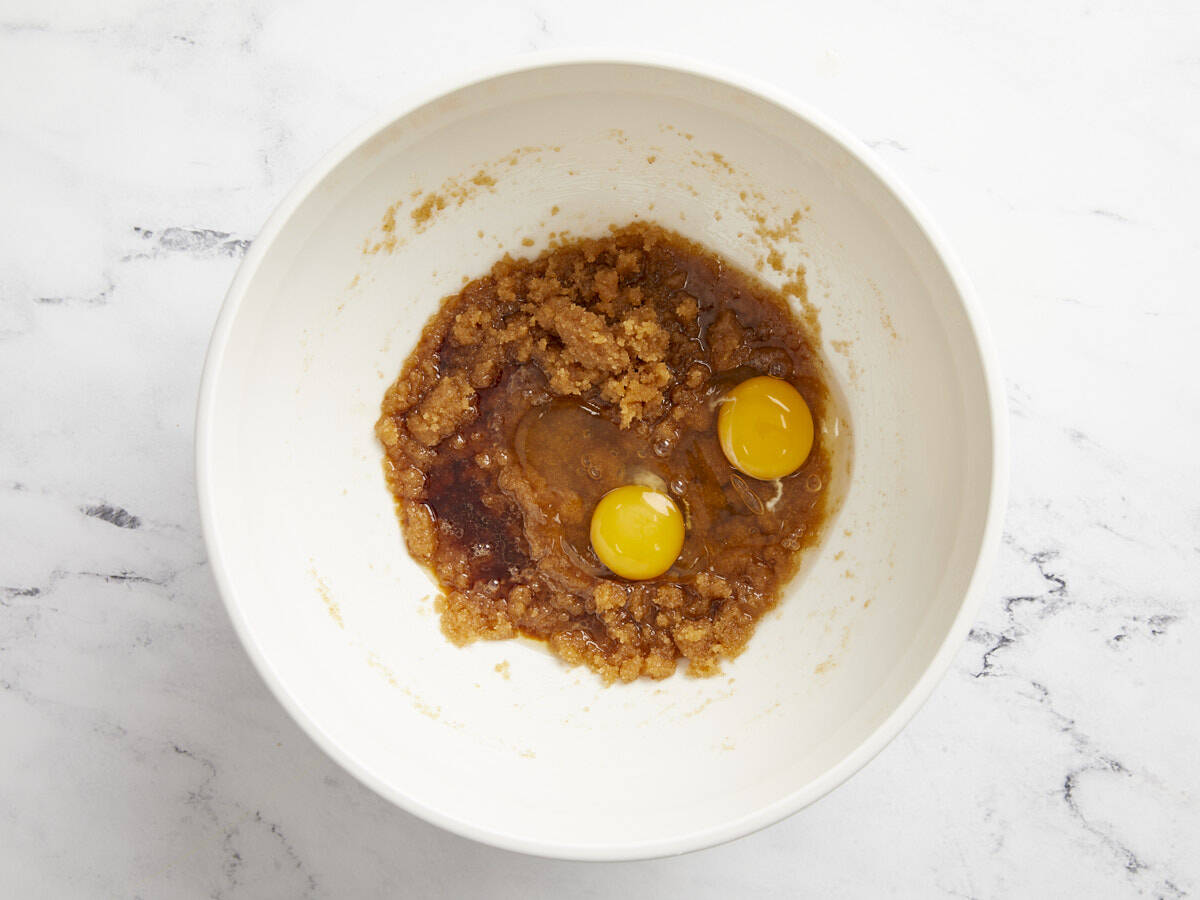
Once the butter has browned, remove it from the heat immediately to prevent burning, and carefully pour it into the mixing bowl with the sugars. Whisk the brown butter and both sugars together until smooth.
Add the eggs and vanilla extract to the bowl and whisk until smooth.
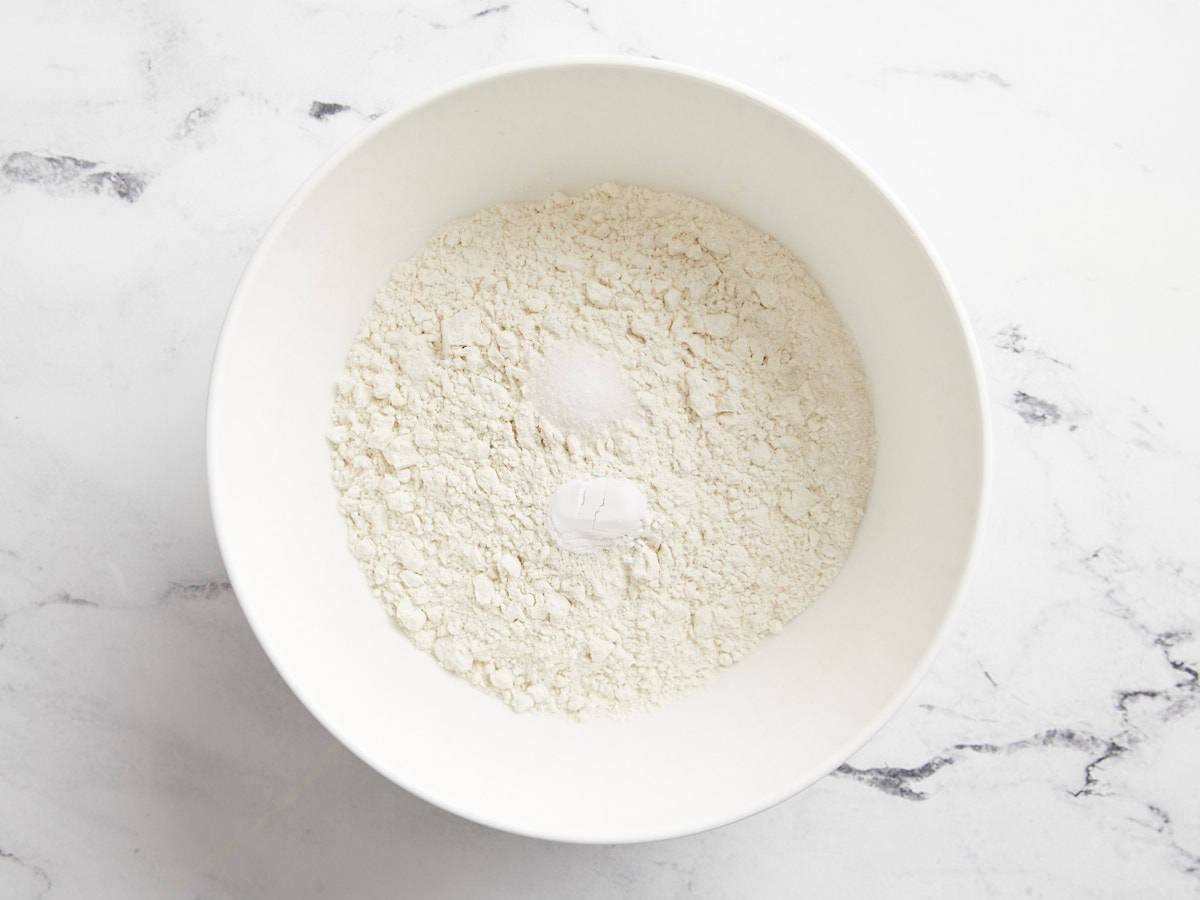
In a separate bowl, stir together the all-purpose flour, baking powder, and salt until well combined. Add the flour mixture to the bowl with the wet ingredients. Use a rubber spatula to stir the flour into the batter until evenly combined.
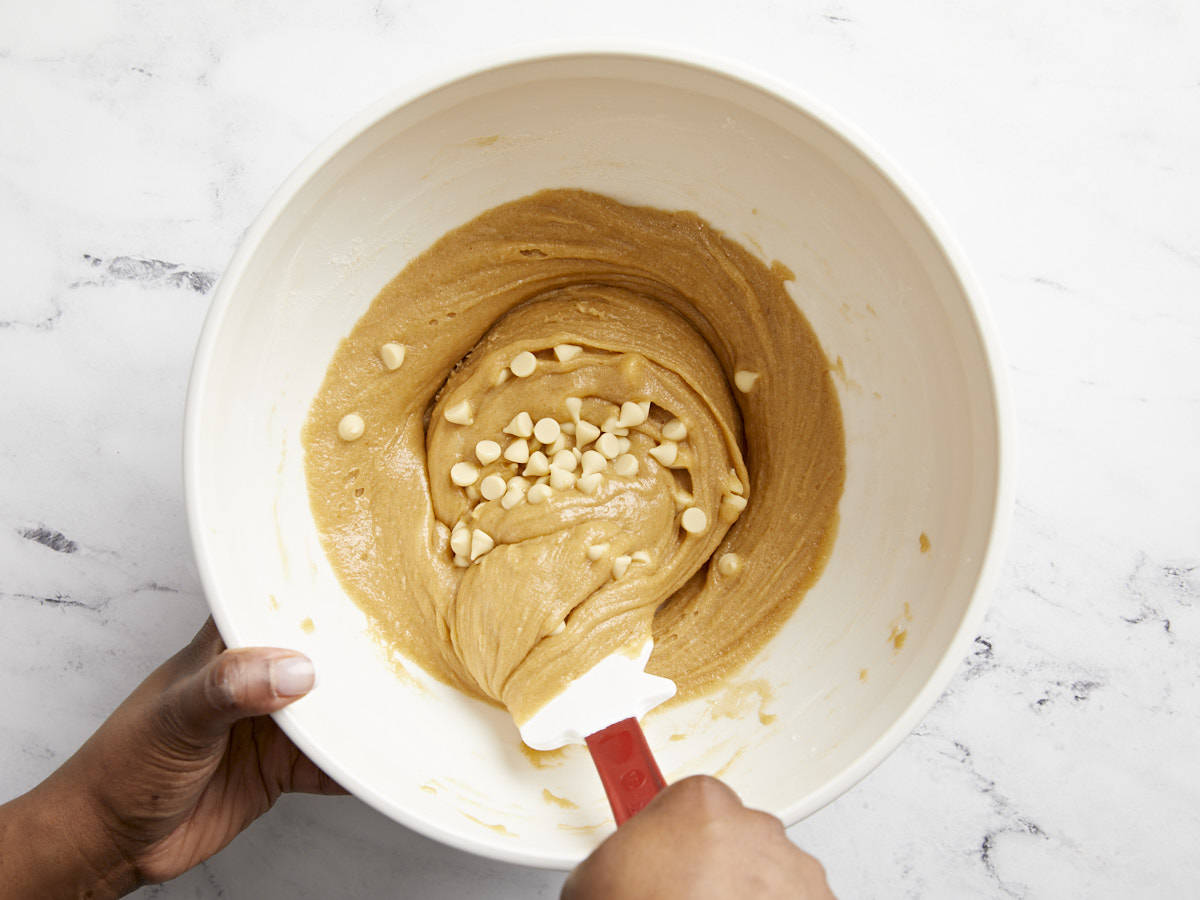
Finally add the white chocolate chips to the batter and fold them in until just combined.
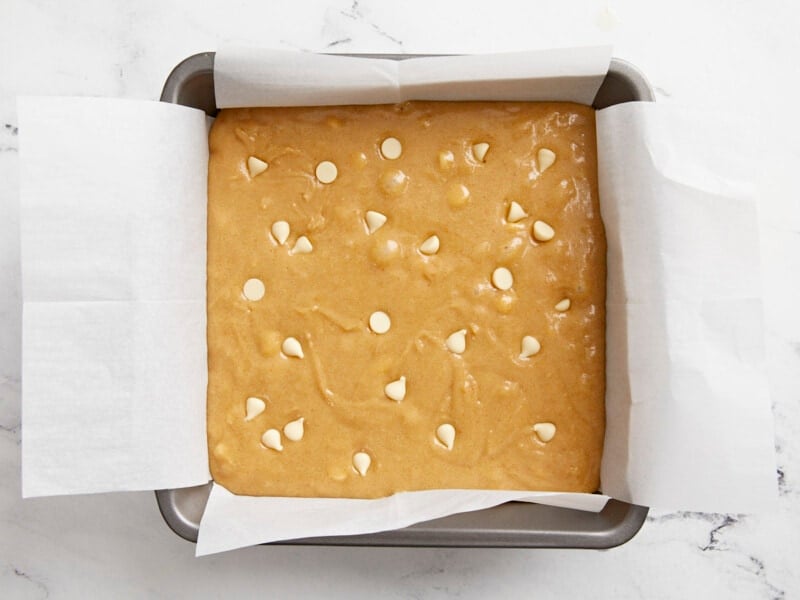
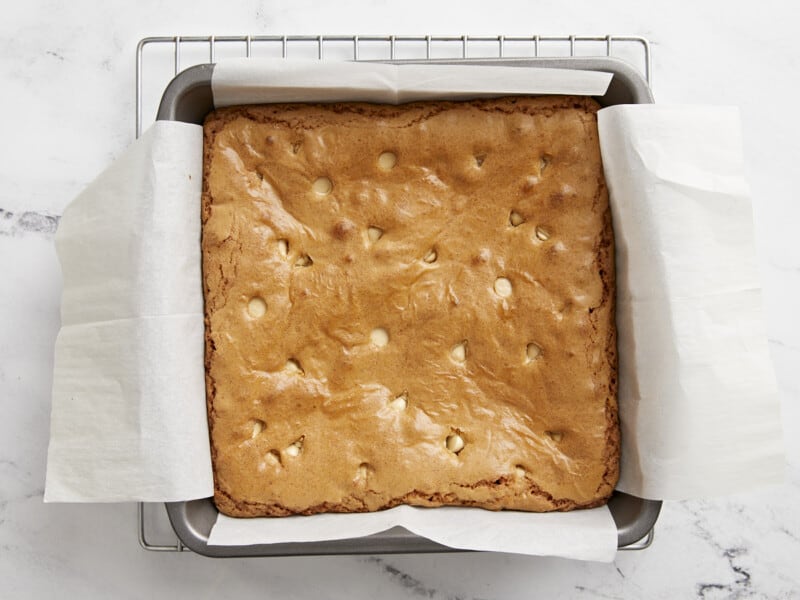
Line an 8×8 baking dish with parchment paper. Add the blondie batter to the baking dish and spread it out evenly. Feel free to add a few more white chocolate chips on top of the batter.
Bake the blondies in the preheated oven for 33-35 minutes or until a toothpick inserted comes out clean.
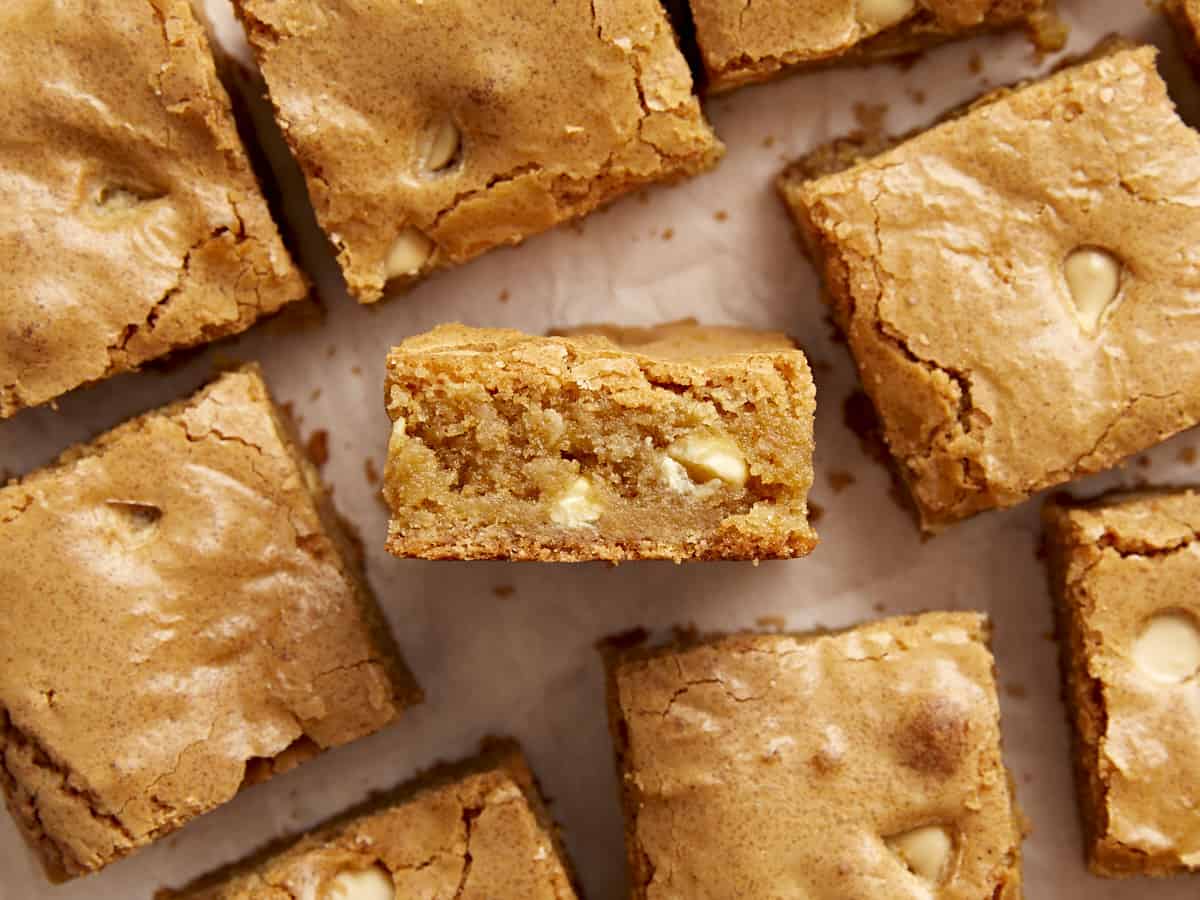
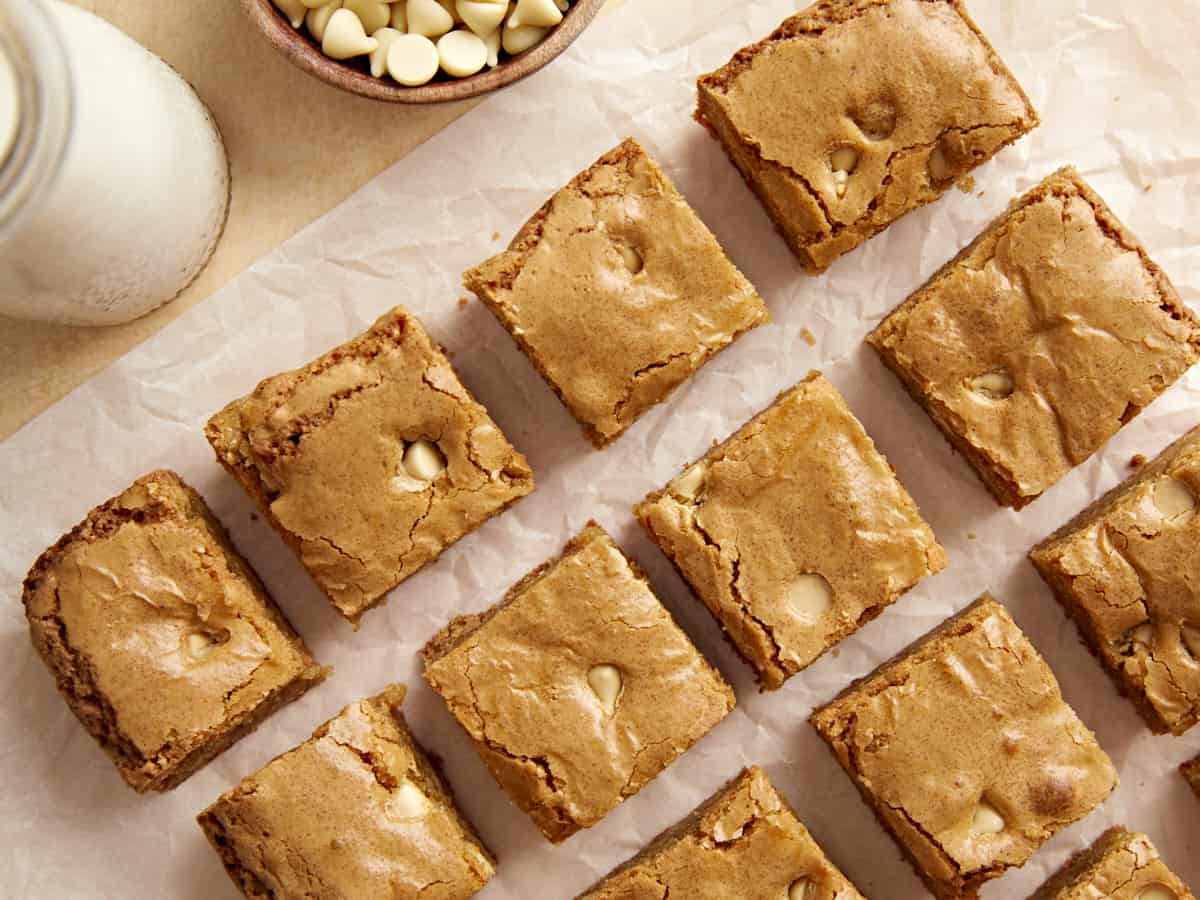
Remove the blondies from the oven and let them cool for 10-15 minutes before lifting the parchment paper out of the baking dish. Slice into 12 bars and serve.
Preheat the oven to 350°F. Cut 12 Tbsps of butter into several tablespoon-sized chunks and add it to a small light-colored skillet. Heat the butter over medium heat, stirring constantly, until the butter solids turn deep brown and develop a nutty aroma (it will first become foamy, then the solids will sink to the bottom and turn brown).
While the butter is browning, add 1 cup brown sugar and 1/2 cup granulated white sugar to a large mixing bowl. Once the butter has browned, remove it from the heat immediately to prevent burning, and carefully pour it into the mixing bowl with the sugars. Whisk the brown butter and both sugars together until smooth.
Add 2 large eggs and 2 tsp vanilla extract to the bowl and whisk until smooth.
In a separate bowl, stir together 1 1/2 cups all-purpose flour, 1/2 tsp baking powder, and 1/4 tsp salt until well combined.
Add the flour mixture to the bowl with the wet ingredients. Use a rubber spatula to stir the flour into the batter until evenly combined.
Finally add 1/4 cup white chocolate chips to the batter and fold until just combined.
Line an 8×8 baking dish with parchment paper. Add the blondie batter to the baking dish and spread it out evenly. Feel free to add a few more white chocolate chips on top of the batter.
Bake the blondies in the preheated oven for 33-35 minutes or until a toothpick inserted comes out clean.
Remove the blondies from the oven and let them cool for 10-15 minutes before lifting the parchment paper out of the baking dish. Slice into 12 bars and enjoy!