BLT Pasta Salad

This BLT pasta salad recipe is the perfect summer meal! It’s easy to make, full of flavor, and perfect for a potluck or picnic.

The post BLT Pasta Salad appeared first on Budget Bytes.

One of my favorite things about summer is a big ol’ juicy BLT sandwich. But until those gorgeous summer tomatoes come in, I’ll be enjoying that BLT flavor in salad form. This BLT Pasta Salad gives me all that creamy, tomatoey, balcony flavor I love but in a cold and refreshing pasta salad form. Plus, it’s great for all your summer BBQs, picnics, and potlucks. So if you haven’t tried this classic summer pasta salad, put it on your list!
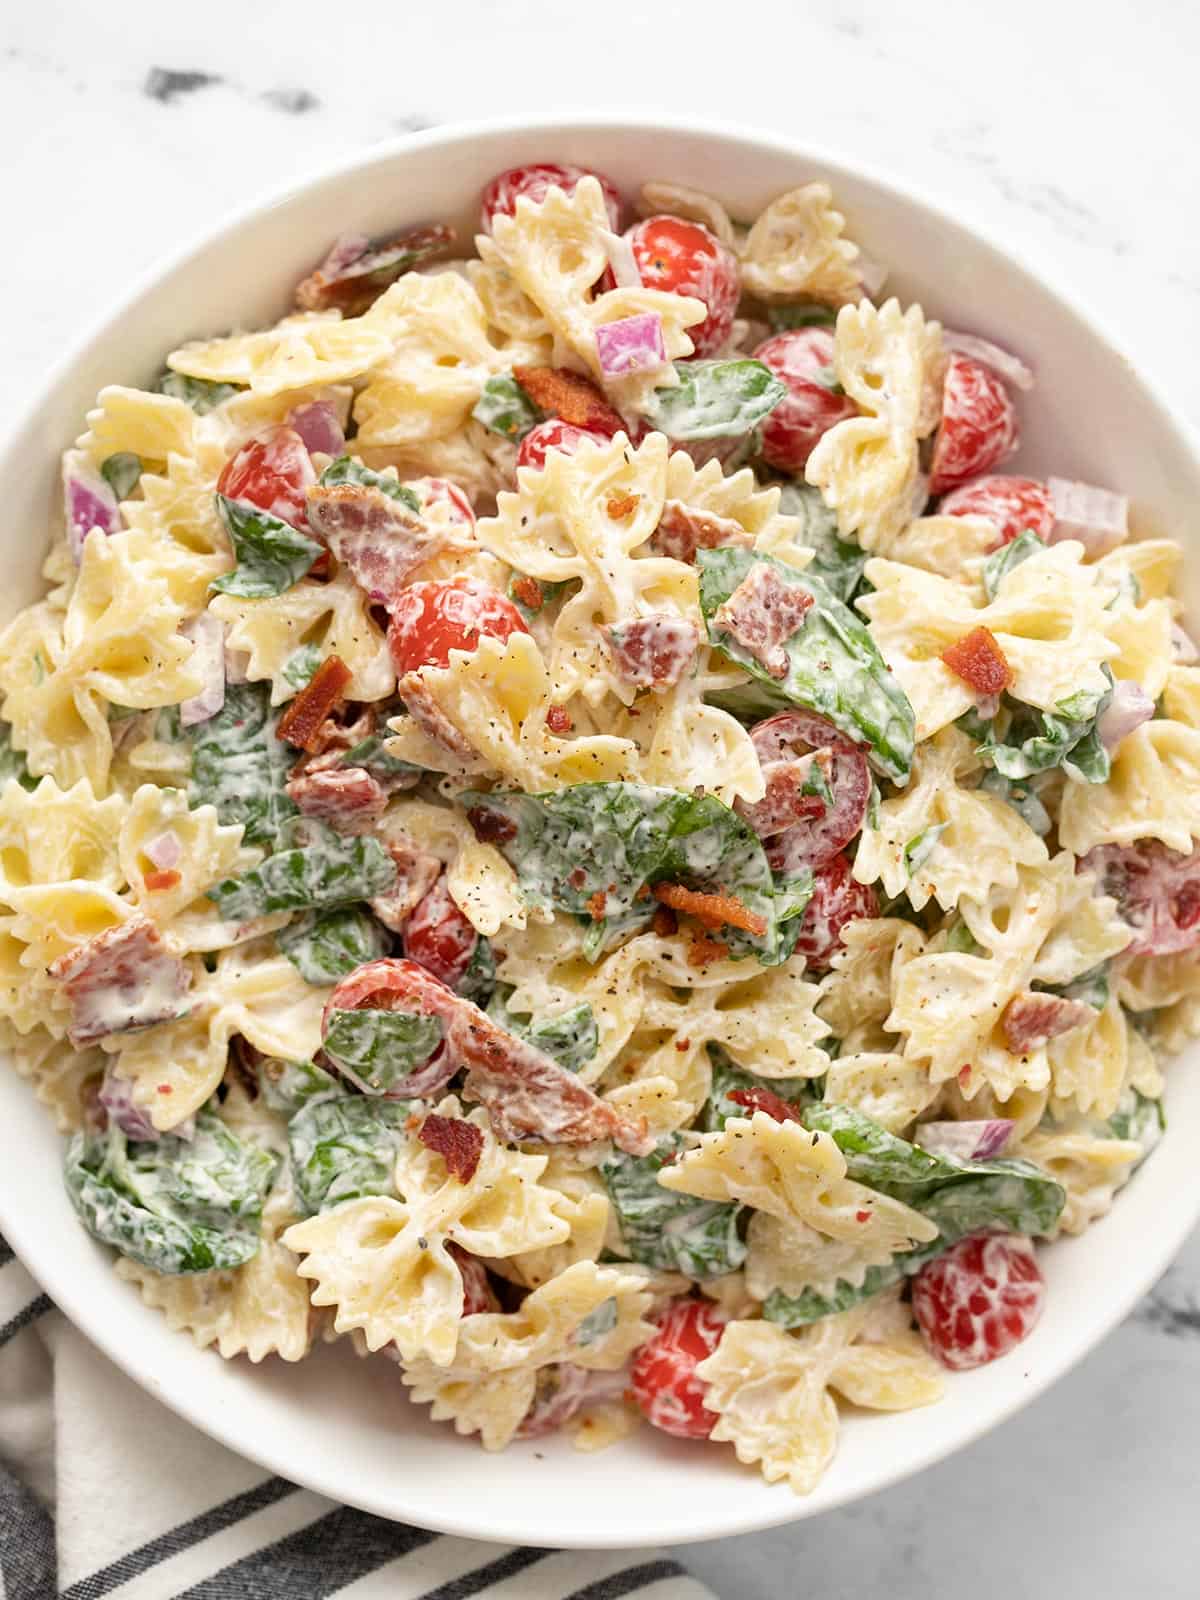
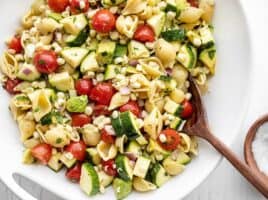
Overhead view of a bowl full of BLT pasta salad.

What’s In BLT Pasta Salad?

Okay, just in case you’ve never experienced the beautiful simplicity of a BLT sandwich, let’s start there. “BLT” stands for “bacon lettuce tomato”. A BLT sandwich is just crispy bacon, fresh lettuce, and sliced tomatoes between two slices of bread, slathered with mayonnaise. It’s simple and perfect.

For BLT Pasta Salad we keep the core flavors the same, but we flesh it out just a bit. I think lettuce is a bit too delicate for pasta salad, so I used fresh spinach instead (I think it holds up better and has better color and texture for a pasta salad). To give the dressing a little more flavor than just plain mayo, we add a little ranch dressing, lemon juice for zing, and some salt and pepper. And then finally, I added a little diced red onion to round out the flavor and texture of the salad. It’s still super simple and totally delish!

What Kind of Pasta to Use

You can use any short pasta shape for this recipe, like rotini, small shells, macaroni, orecchiette, cavatappi, or farfalle (bowtie). I went for bowtie because I thought the shape was super cute in this salad!

How Long Does it Last?

This BLT Pasta Salad benefits from a little time in the fridge (you’ll want it to sit for 10-15 minutes for the best flavor), but it will eventually dry out, so you’ll want to make it the same day if you’re serving it to guests. I ate the leftovers for two days after I originally made the salad and while it was still amazing the next day, it did get a little dry by day two. So for best results, make this salad the same day you plan to serve it and try to eat up those leftovers within a day or so!
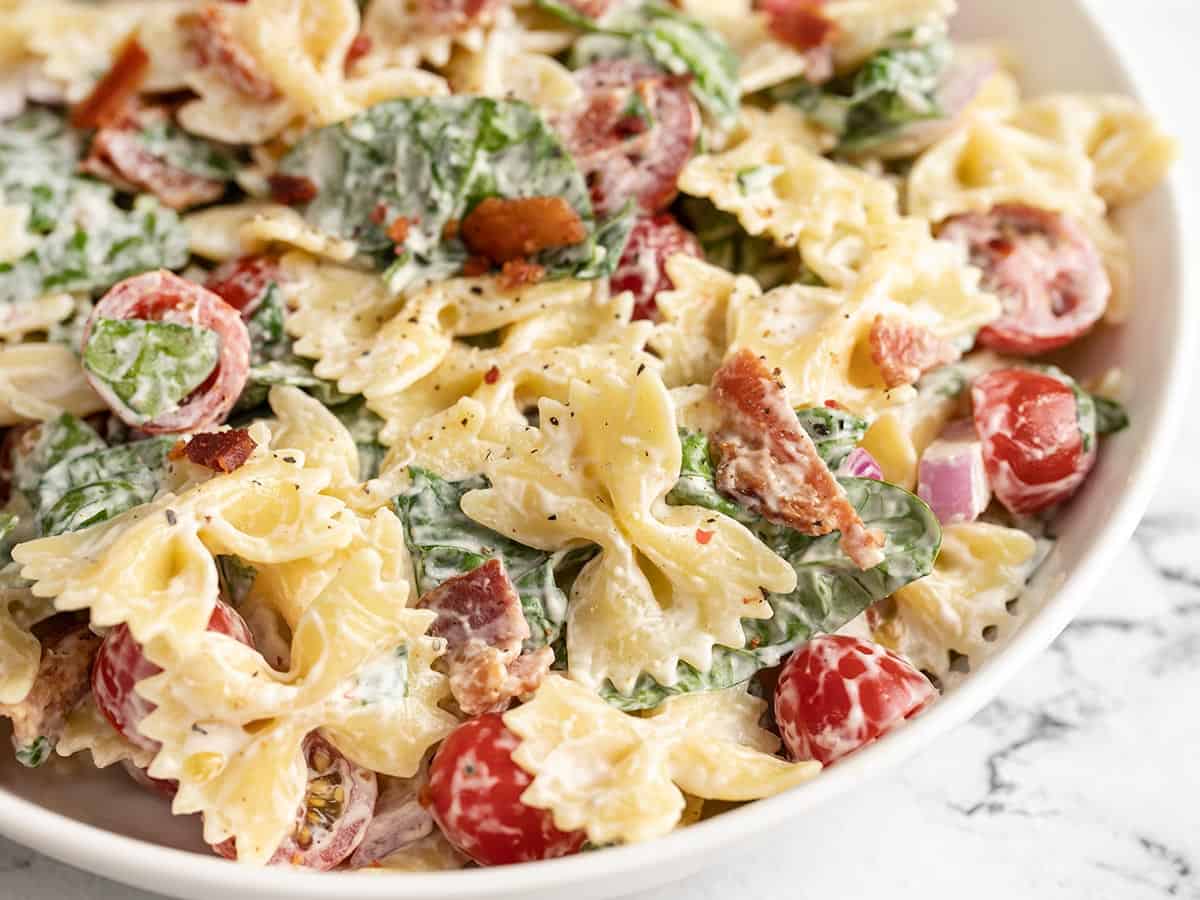
Close up side view of a bowl of BLT pasta.
Print

BLT Pasta Salad

This BLT pasta salad recipe is the perfect summer meal! It's easy to make, full of flavor, and perfect for a potluck or picnic.
Course Lunch, Salad, Side Dish
Cuisine American
Total Cost $7.39 recipe / $0.92 serving
Prep Time 10 minutes
Cook Time 25 minutes
Total Time 35 minutes
Servings 8 1 cup each
Calories 466kcal

Ingredients

  • 8 oz. bacon $2.30
  • 3/4 cup mayonnaise $0.92
  • 1/4 cup ranch dressing $0.30
  • 2 Tbsp lemon juice $0.12
  • 1/2 tsp salt $0.02
  • 1/4 tsp freshly cracked pepper $0.02
  • 12 oz. bowtie pasta* $1.25
  • 1 pint grape tomatoes $1.89
  • 1/4 red onion $0.11
  • 2 cups fresh spinach (packed) $0.46

Instructions

  • Cook the bacon in a large skillet over medium heat until brown and crispy. Transfer the cooked bacon to a paper towel-lined plate to drain and cool. Once cooled, chop or crumble the bacon into smaller pieces.
  • While the bacon is cooking, prepare the dressing. Stir together the mayonnaise, ranch dressing, lemon juice, salt, and pepper. Set the dressing aside.
  • Bring a large pot of salted water to a boil for the pasta. Once boiling, add the pasta and cook until tender (7-8 minutes). Drain the pasta in a colander, rinse it briefly with cool water to cool it down, then let it drain very well.
  • While the pasta is cooking and draining, prepare the vegetables. Slice the grape tomatoes in half, finely dice the red onion, and roughly chop the spinach.
  • Once the pasta is cooled and drained, add it to a large bowl along with the spinach, tomatoes, onions, and dressing. Stir everything together until evenly combined and coated in dressing. Let the pasta sit for 10-15 minutes for the flavors to blend, then stir once more and serve.

See how we calculate recipe costs here.

Nutrition

Serving: 1cup | Calories: 466kcal | Carbohydrates: 36g | Protein: 10g | Fat: 31g | Sodium: 546mg | Fiber: 2g

How to Make BLT Pasta Salad – Step by Step Photos
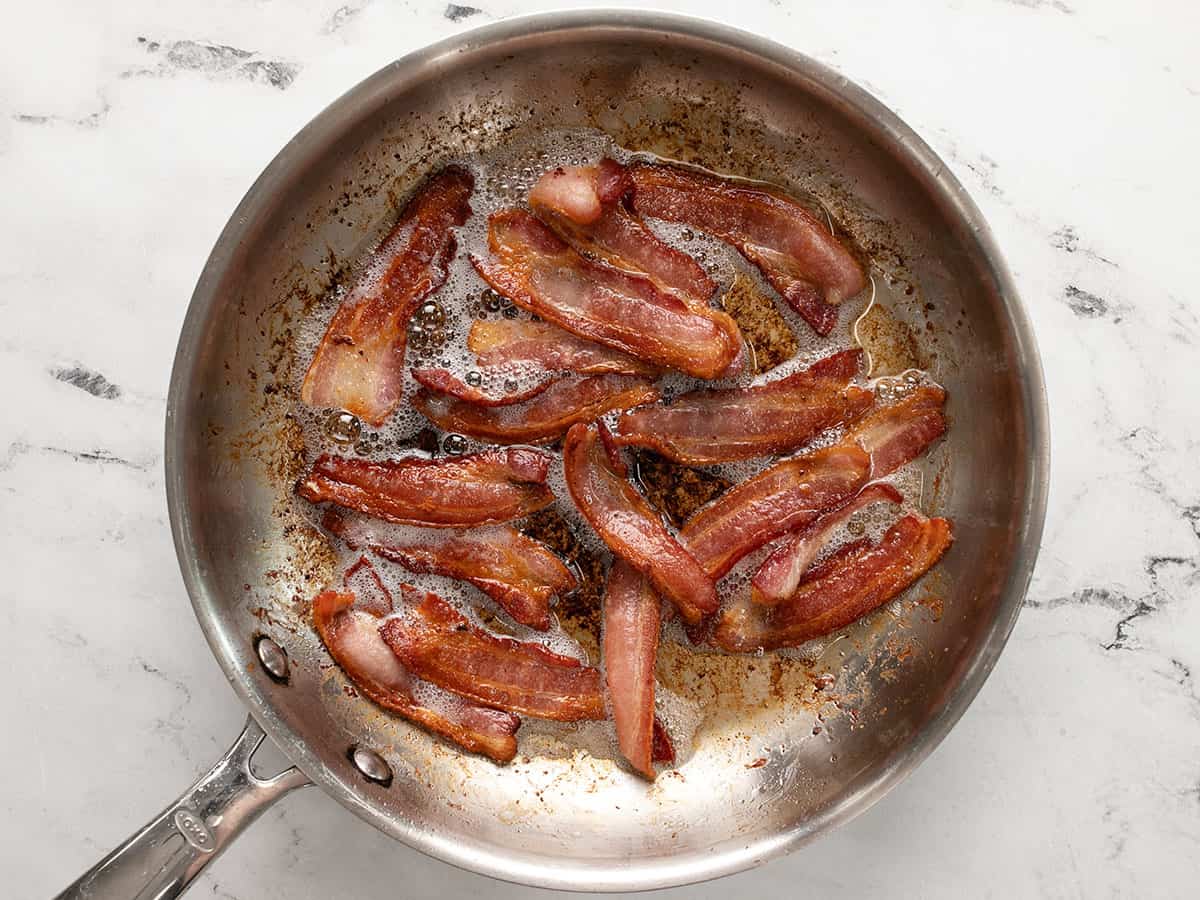
Cooked bacon in a skillet.

Begin by cooking 8oz. of bacon in a skillet over medium heat until it is brown and crispy. Remove the bacon from the skillet and drain on a paper towel-lined plate. Once cooled, chop or crumble the bacon into smaller pieces.
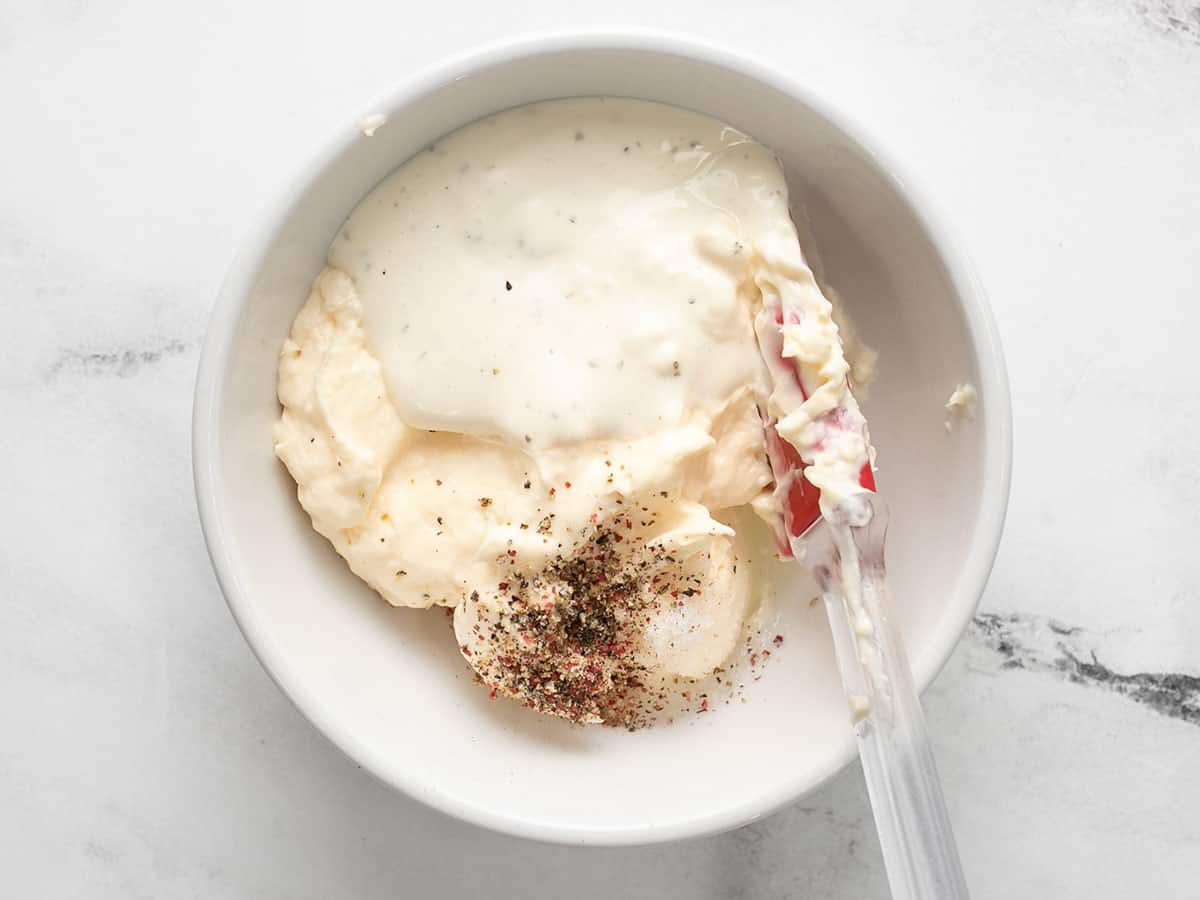
Dressing ingredients in a bowl, not stirred together.

While the bacon is cooking, make the salad dressing. Combine ¾ cup mayonnaise, ¼ cup ranch dressing, 2 Tbsp lemon juice, ½ tsp salt, and ¼ tsp freshly cracked pepper. Set the dressing aside.
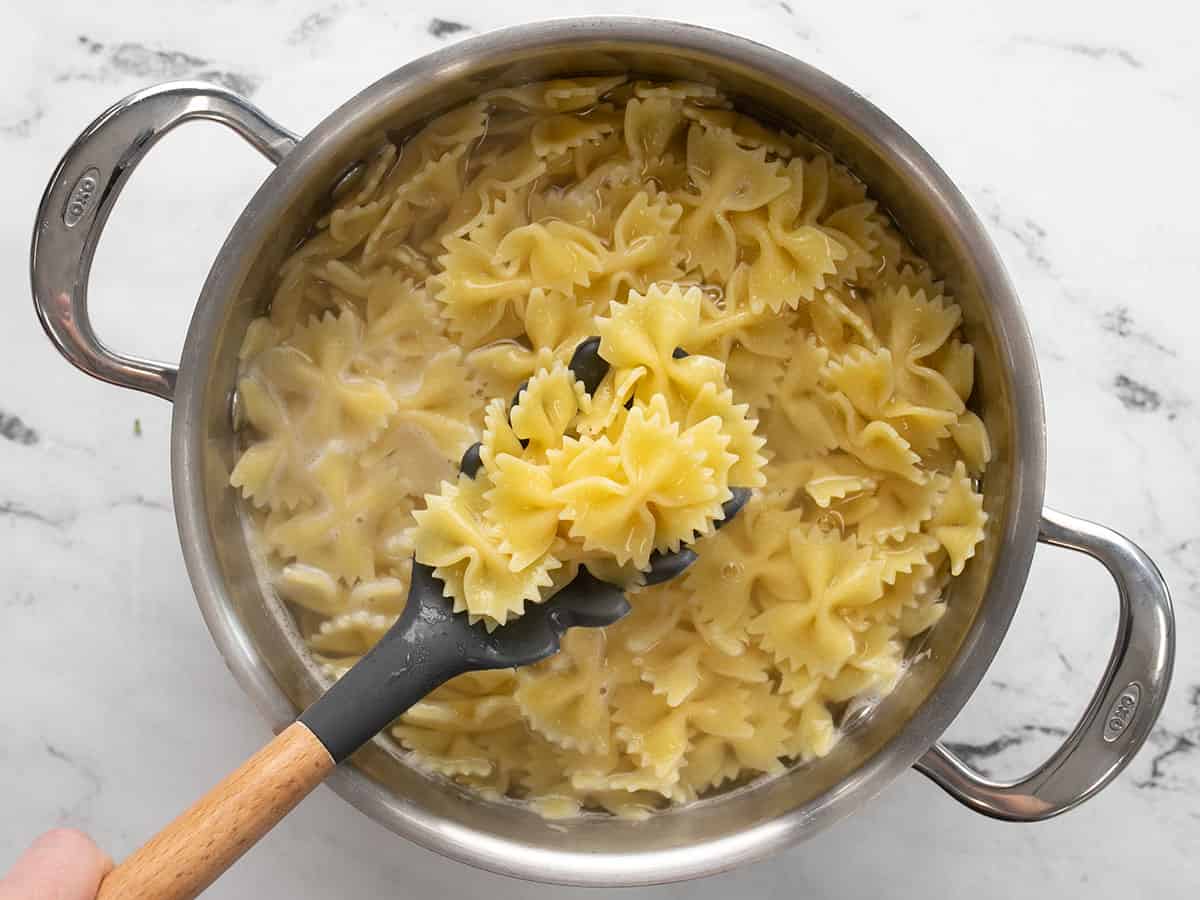
Cooked bowtie pasta in the pot being lifted by a pasta fork.

Add a tablespoon of salt to a large pot of water and bring it to a boil over high heat. Once boiling, add 12oz. bowtie pasta and continue to boil until the pasta is tender (7-8 minutes). drain the pasta in a colander. Give it a quick rinse with cool water to cool it off, then let it drain very well.
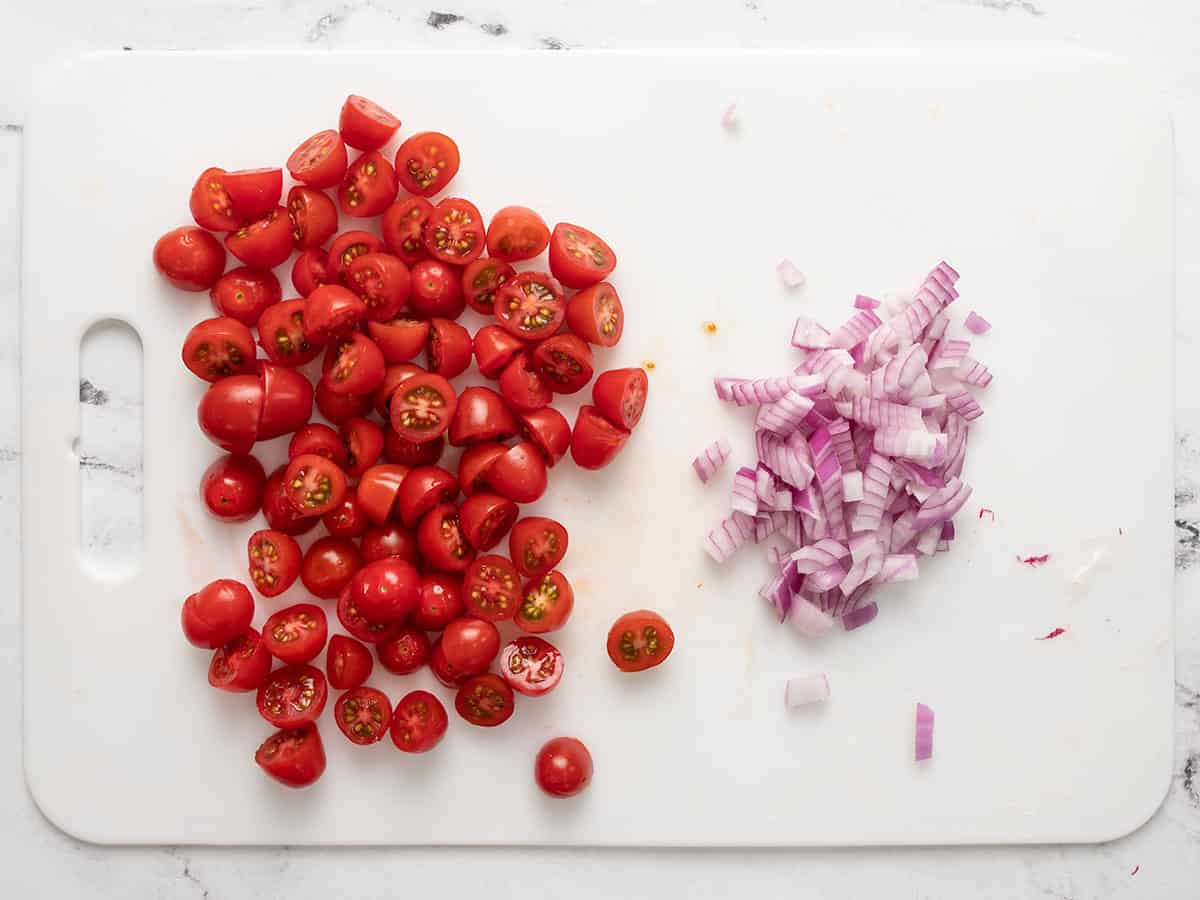
Sliced grape tomatoes and diced red onion on a cutting board.

While the pasta is cooking and draining, slice one pint of grape tomatoes in half and finely dice ¼ of a red onion (about ⅓ cup diced).
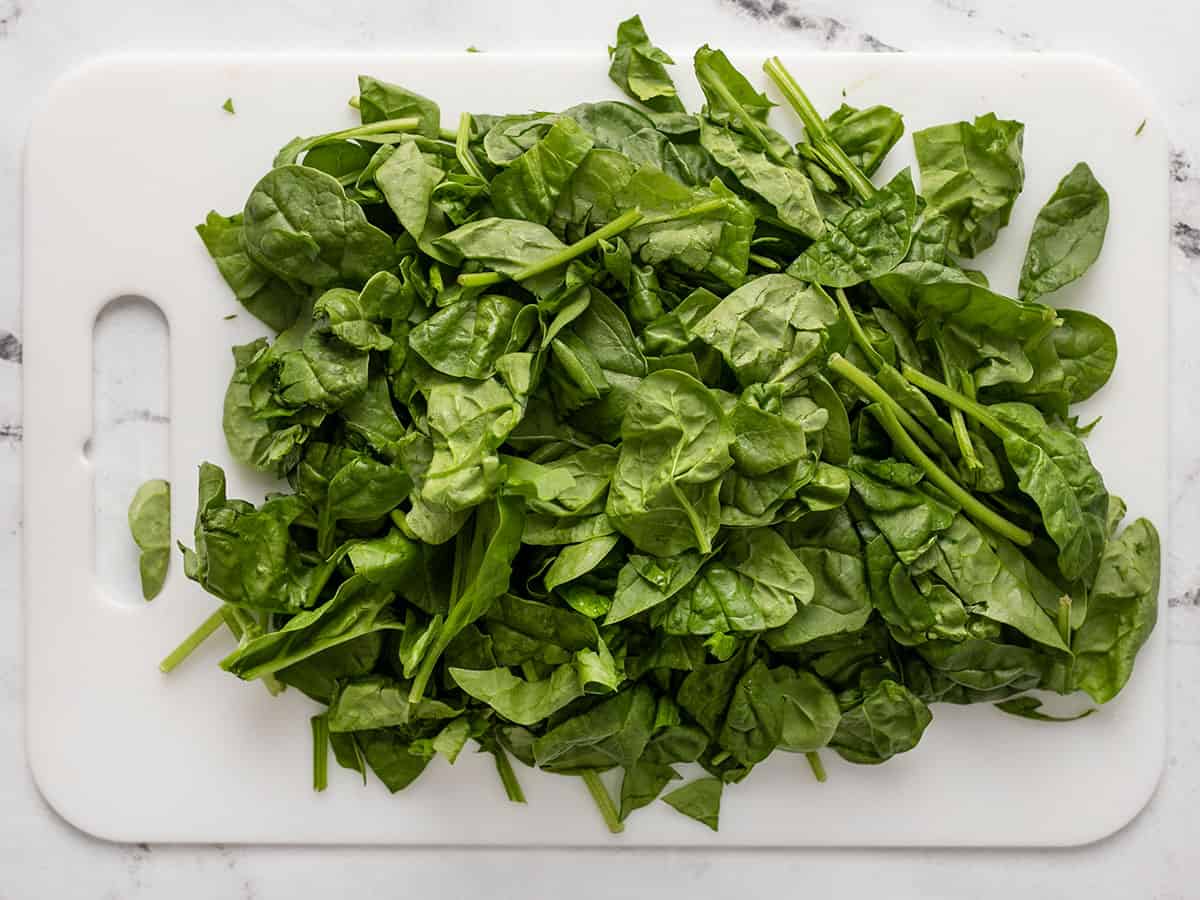
Chopped spinach on a cutting board.

Roughly chop 2 packed cups of fresh spinach into bite-sized pieces.
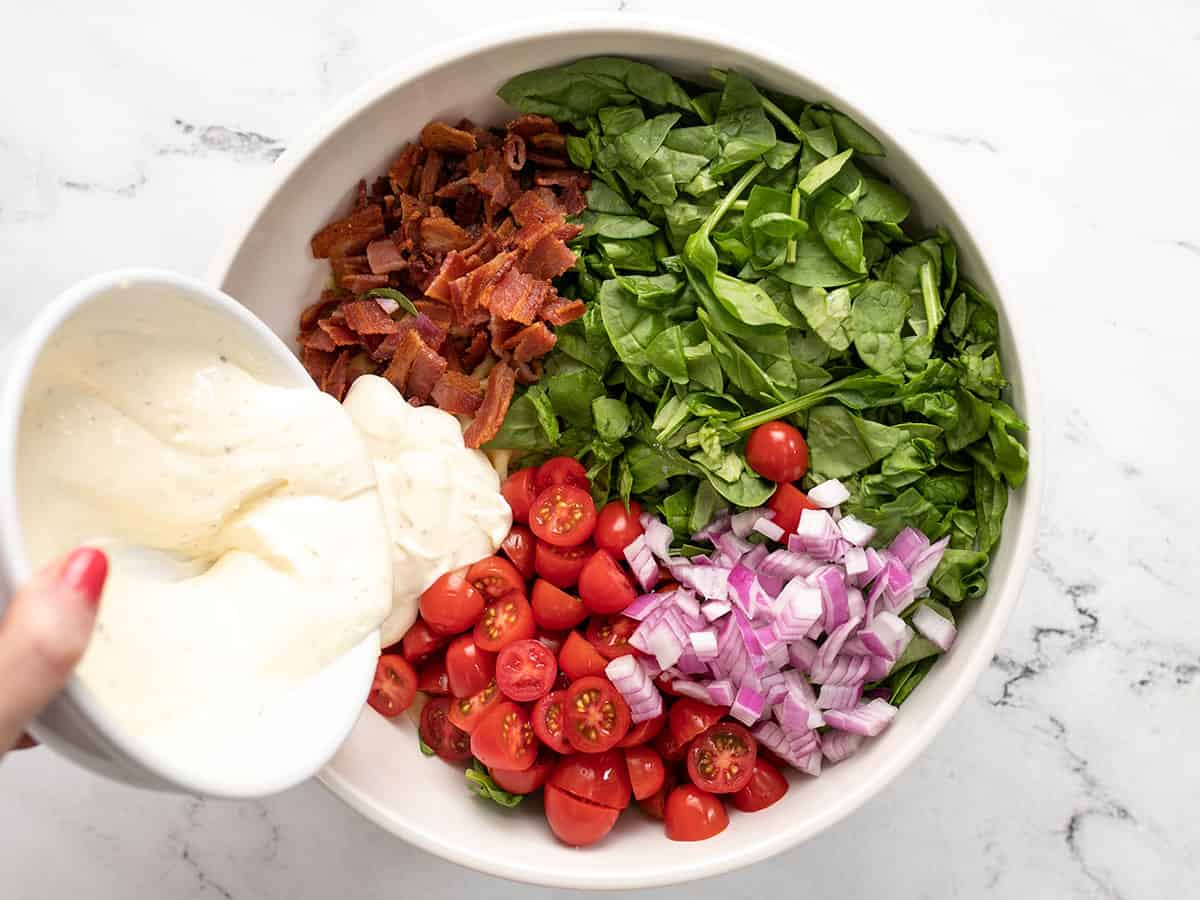
Ingredients for BLT pasta salad being combined in a bowl.

Once the pasta is cooled and well drained, transfer it to a large bowl and add the spinach, tomatoes, onions, and dressing.
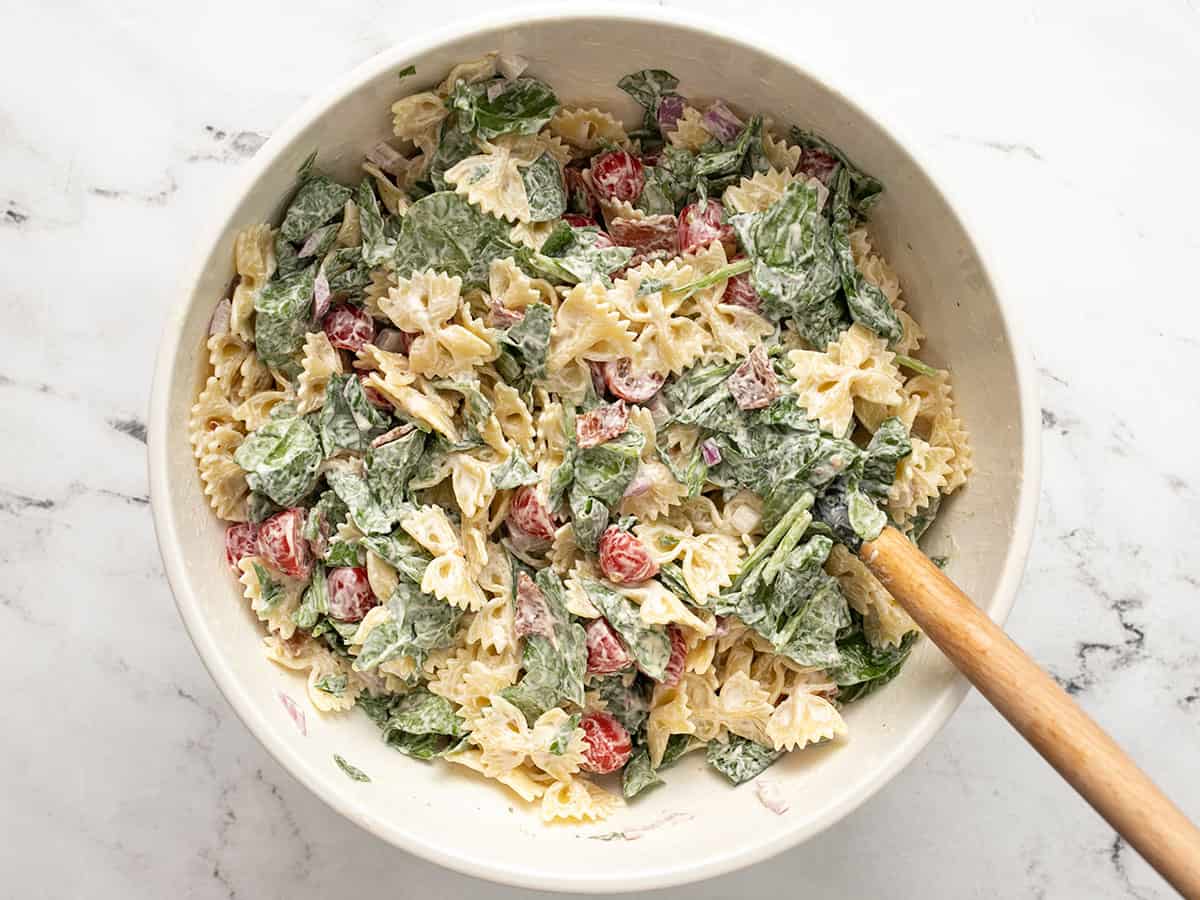
BLT pasta salad after the ingredients are stirred together.

Stir until everything is evenly combined and coated in dressing. Let the salad sit for about 10 minutes for the flavors to blend a little more, then give it one more stir before serving.
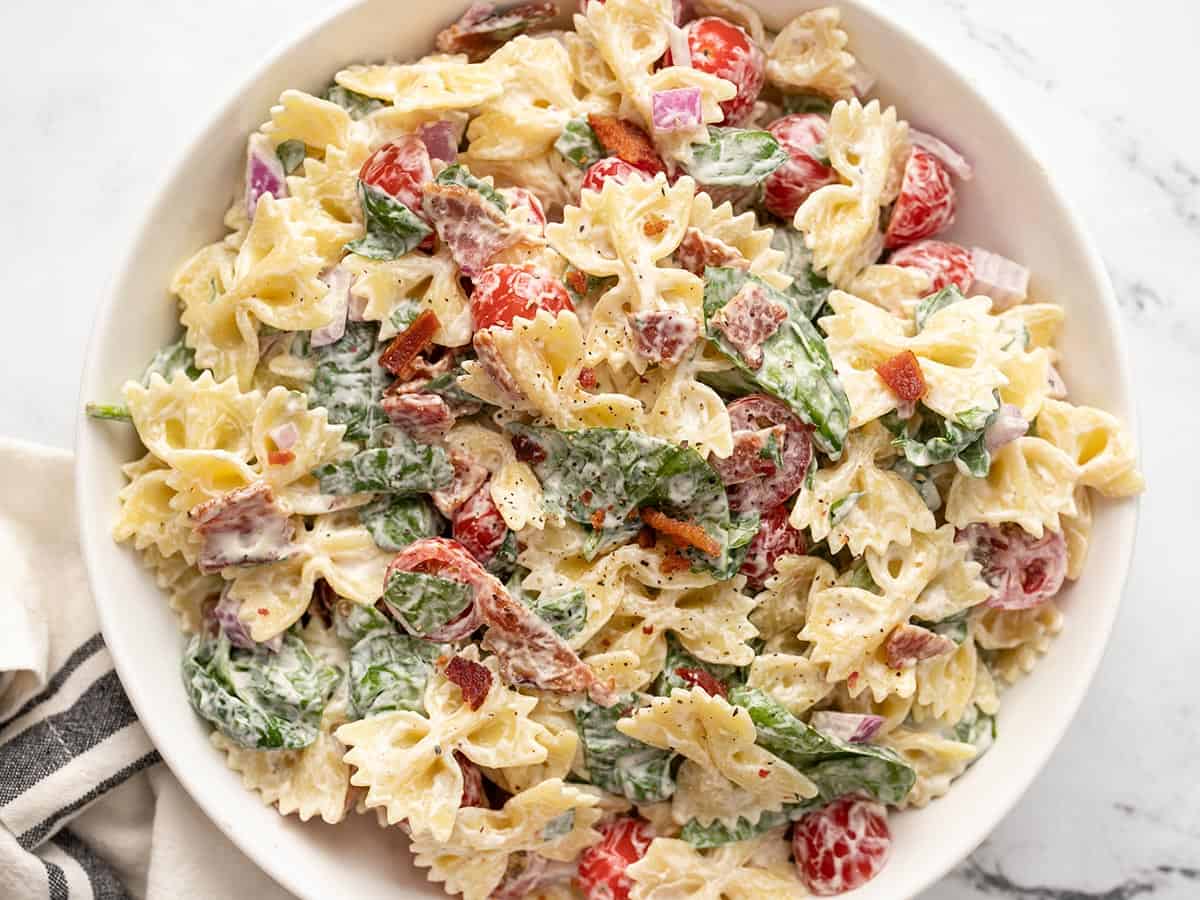
Close up overhead view of BLT pasta salad in a bowl.

So summery!

The post BLT Pasta Salad appeared first on Budget Bytes.

Lemon Meringue Butter Cake

This moist and fluffy butter cake is bursting with bright lemon flavor, topped with a crispy toasted meringue that practically melts in your mouth. Talk about one unique dessert! So you’ve heard of lemon meringue pie… but what about lemon meringue cake? It’s the delicious dessert mashup you never knew you wanted, combining a tender […]

The post Lemon Meringue Butter Cake first appeared on Love and Olive Oil.

This moist and fluffy butter cake is bursting with bright lemon flavor, topped with a crispy toasted meringue that practically melts in your mouth. Talk about one unique dessert!

So you’ve heard of lemon meringue pie… but what about lemon meringue cake? It’s the delicious dessert mashup you never knew you wanted, combining a tender lemon butter cake with swirls of crispy meringue.

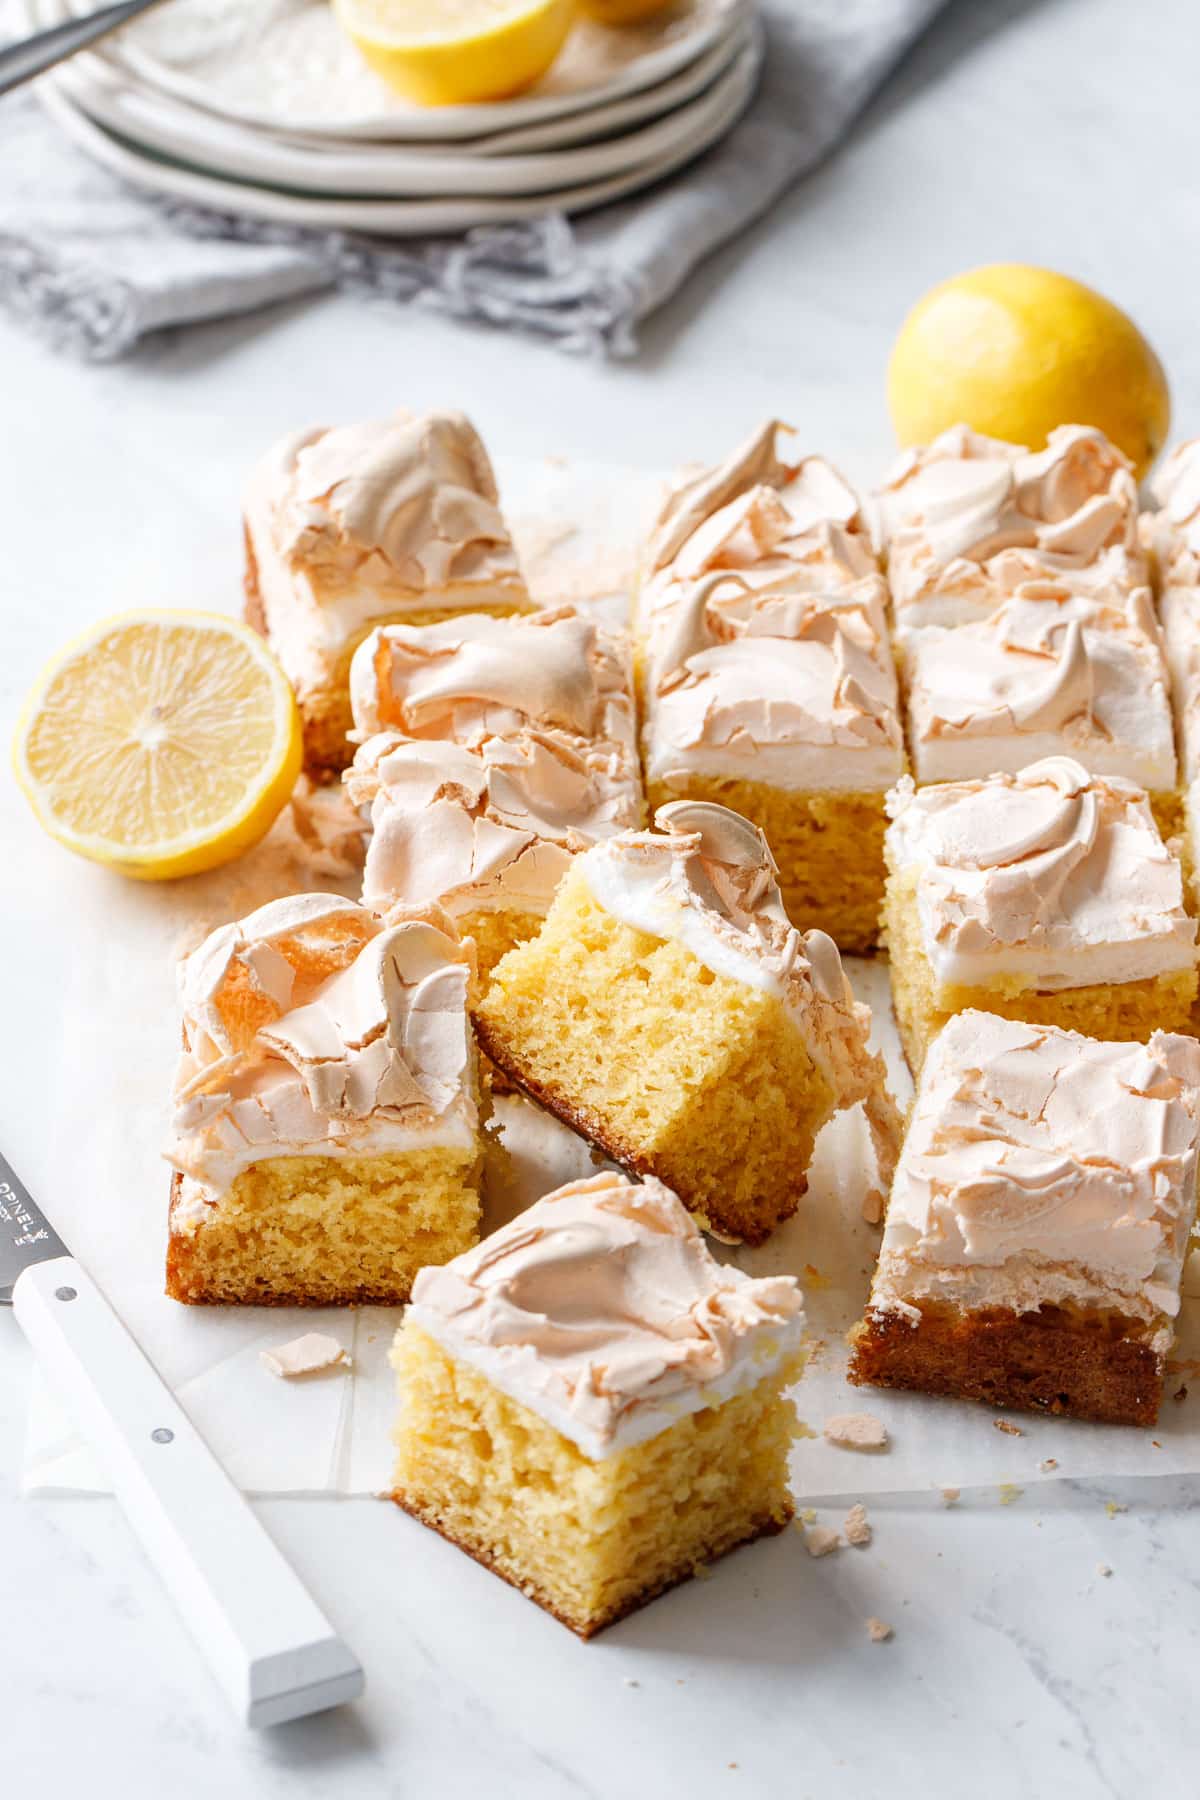
Cut squares of Lemon Meringue Butter Cake on a marble background with white knife and stack of plates in the background.

Baking is as much about texture as it is flavor, and one of my favorite tricks to elevate baked goods is to introduce a textural contrast, in this case via a crispy meringue topping.

I’d actually brainstormed and tested a lemon meringue blondie a few years back, which proved frustratingly problematic (the blondie wouldn’t fully bake with the meringue topping, I still have no idea why).

So when I decided to attempt a cake with a similar meringue topping, I pulled out my first test cake from the oven fully expecting an underbaked disaster.

Disaster it was not.

I was pleasantly surprised, as I fully expected this one to give me a lot more trouble (though I still tested it a few times, tweaking the flavors and the proportion of cake to meringue [my first cake was like 4 inches tall, no exaggeration]).

In the end, the butter cake base bakes perfectly in the time it takes for the meringue to get golden brown and crispy, and the result is ever so satisfying, both tastefully and texturally.

(more…)

Strawberry Passionfruit Lemonade

Welcome summer with this refreshing twist on a classic lemonade, made with Meyer lemons, fresh passionfruit juice, and a ruby red strawberry syrup for the perfect amount of sweetness and strawberry flavor. Sure lemonade is refreshing, but have you ever tried strawberry passionfruit lemonade? The unique combination of fruit results in an extra tart, bright […]

The post Strawberry Passionfruit Lemonade first appeared on Love and Olive Oil.

Welcome summer with this refreshing twist on a classic lemonade, made with Meyer lemons, fresh passionfruit juice, and a ruby red strawberry syrup for the perfect amount of sweetness and strawberry flavor.

Sure lemonade is refreshing, but have you ever tried strawberry passionfruit lemonade? The unique combination of fruit results in an extra tart, bright fruity flavor that folks of all ages will adore.

Three glasses with pretty ombre colored Strawberry Passionfruit Lemonade, with black passionfruit seeds speckled throughout and cut lemons and strawberries scattered around.

We’ve had a lovely spring here in Nashville, but the heat and humidity are definitely upon us now. In this kind of weather there are few things more refreshing than an ice-cold glass of homemade lemonade.

If that lemonade is gussied up with strawberry and passionfruit… well, I’m not complaining (really, it’s all of my favorite flavors in one dewy glass!)

It’s one of those recipes that is ripe for adaptation too (get it? ripe?) whether you use sparkling instead of still water, replace the strawberries with blueberries or blackberries, or even add a splash (or more than a splash) of something boozy for an adults-only variation.

Pouring strawberry syrup into 3 glasses filled with ice and a bright yellow lemon passionfruit juice.

This is an adaptation of my Passion Fruit Meyer Lemonade recipe from a few years back. The main difference being the addition of strawberries, which are cooked down with the sugar syrup. This version also has a bit more lemon juice to passionfruit, mainly because passionfruit is a bit of a rare find these days and I wanted to preserve the precious little I have, but also to give a better balance of flavors and tartness to the final product.

The flavors in this recipe are beautifully balanced; as much as I love strawberry I didn’t want that to be the the only thing you tasted. Instead, you should get equal amounts of strawberry as you do the passionfruit and Meyer lemon.

(more…)

Strawberry Meyer Lemon Tart

The taste of springtime in one show-stopping tart: a velvety smooth Meyer lemon curd and a layer of bright strawberry jam nestled inside a lemon-scented shortbread crust, and topped with fresh strawberries and edible flowers. Lemon and strawberry come together in a tart that’s as bright in flavor as it is in color. Using Meyer […]

The post Strawberry Meyer Lemon Tart first appeared on Love and Olive Oil.

The taste of springtime in one show-stopping tart: a velvety smooth Meyer lemon curd and a layer of bright strawberry jam nestled inside a lemon-scented shortbread crust, and topped with fresh strawberries and edible flowers.

Lemon and strawberry come together in a tart that’s as bright in flavor as it is in color. Using Meyer lemons gives the curd filling a well-balanced sweetness with a vibrant lemon flavor, paired with fresh strawberries and a layer of strawberry jam for a perfect finish.

Rectangular Strawberry Meyer Lemon Tart topped with fresh strawberries, lemon twists and edible flowers.

Technically lemon season is at its end, but, thanks to an over-eager tree trimmer, my aunt had a surplus of lemons that needed to be used immediately. Three days later (the postal service is an amazing thing) I found myself with yet another box full of gorgeous Meyer lemons.

After having already made a lemon loaf cake and lemon mousse cakes and a double batch of homemade limoncello, I decided to revisit an old lemon tart recipe to update and rephotograph.

Well, one thing led to another and I ended up making something entirely different (are you surprised? You shouldn’t be).

Seeing that strawberry season is upon us, combining strawberries and lemons seemed like an obvious choice. While I toyed with the idea of mixing the strawberries into the lemon curd, or even adding a layer of strawberry gelée on top, I ultimately decided to keep it simple and spread a layer of fresh strawberry jam in the bottom of the crust. I was a bit worried the jam would mix with the curd or even migrate to the top in the oven, but, to my surprise, it came out as a beautifully defined layer of strawberry jam beneath a vibrant yellow lemon curd.

(more…)

Mediterranean Turkey Bowls

These Mediterranean Turkey Bowls are the perfect filling and fresh meal prep lunch for Spring and Summer. Plus, they’re super versatile!

The post Mediterranean Turkey Bowls appeared first on Budget Bytes.
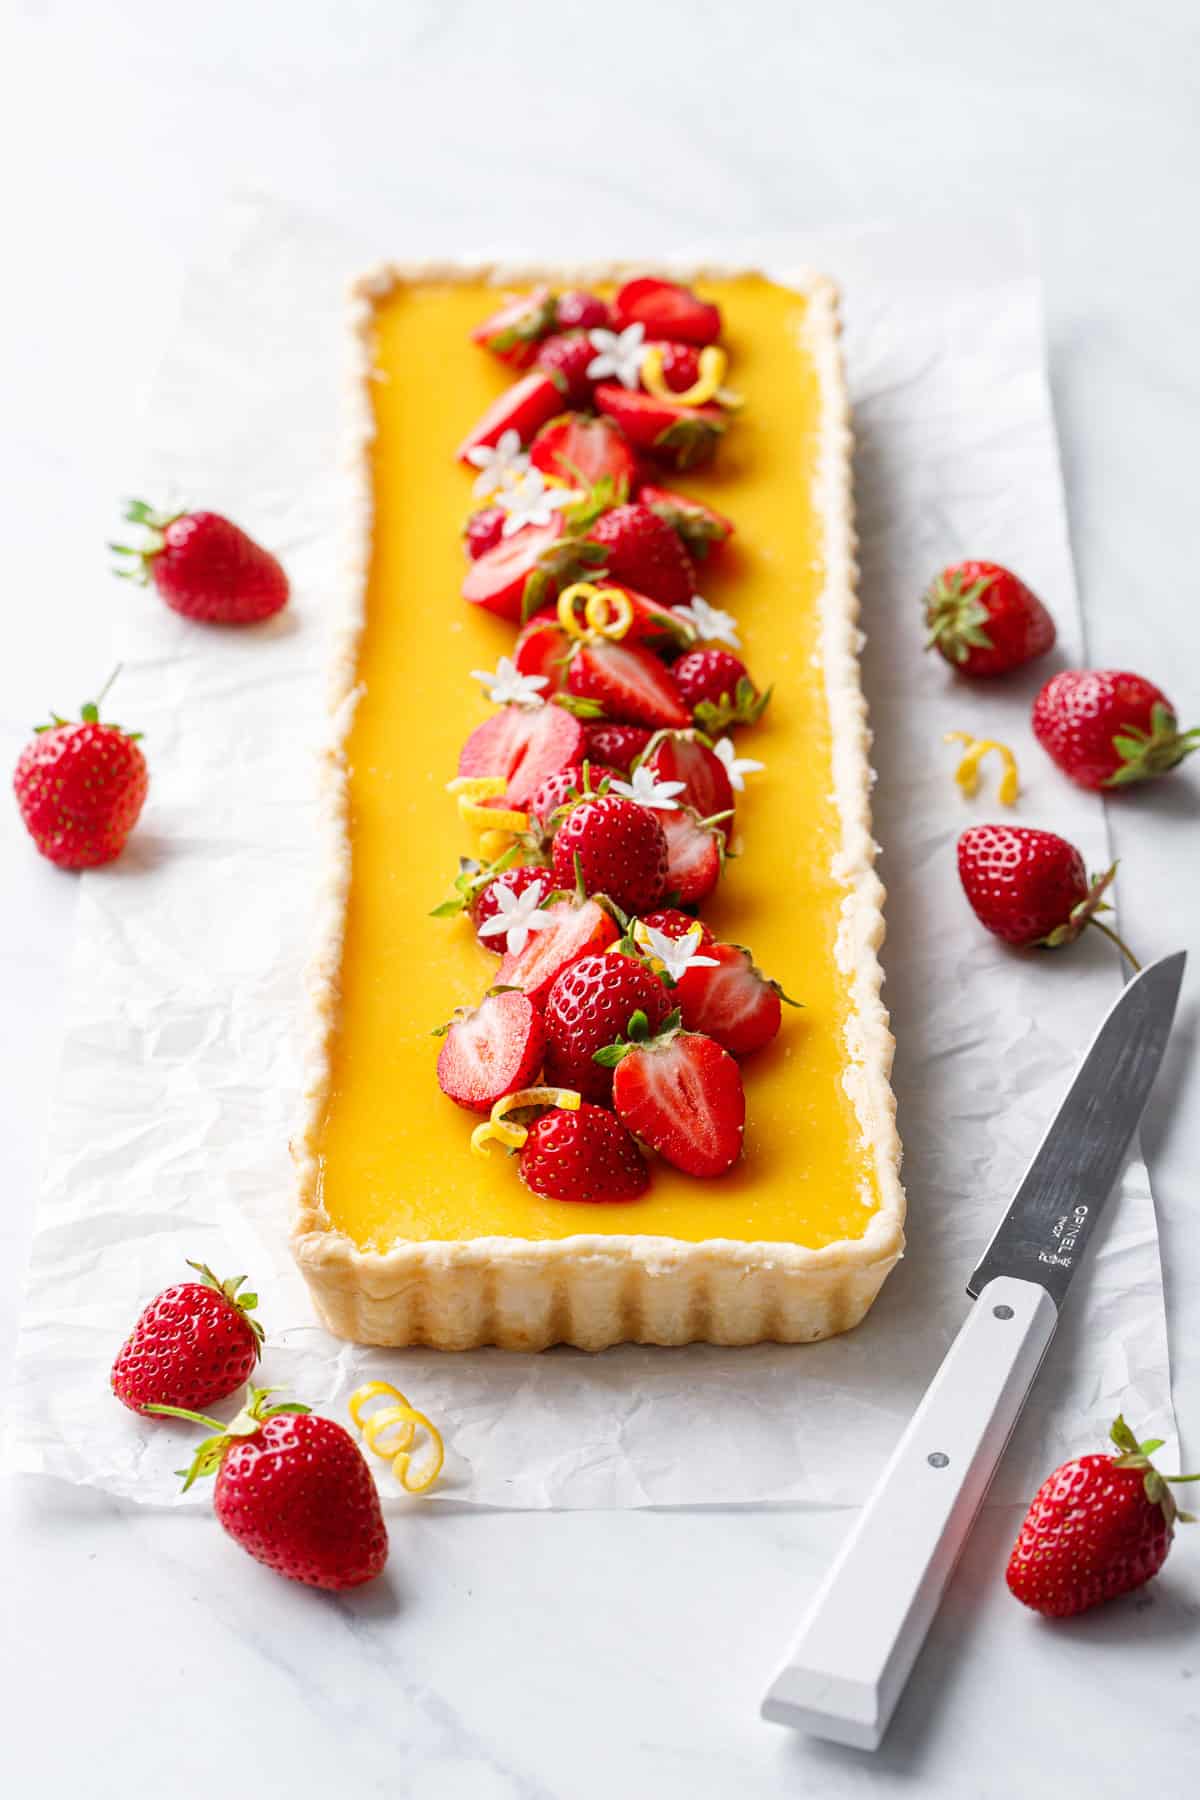
Bowl meals have always been my favorite type of meal because they’re super flexible, you get a lot of colors, textures, and flavors in every bowl, and they’re perfect for meal prep (I LOVE having grab-n-go lunches ready). This week, I made these Mediterranean Turkey Bowls. They’re simple, super fresh, and very filling. Plus, I can swap out ingredients depending on what I have on hand, or what I’m craving. So if you’re looking for something new, easy, and fresh to prep for lunch, give these bowls a try!

Overhead view of Mediterranean Turkey Bowl with ingredients on the sides.

Can I Use Different Meat?

These bowls are endlessly customizable, and that includes the meat or protein. I used some ground turkey that I seasoned with garlic and oregano, but you could easily swap that out for ground beef, or make some Yogurt Marinated Chicken and chop it into pieces before adding it to your bowl.

Want to make it vegetarian? Toss some chickpeas or cannellini beans with the same seasonings that I used for the ground turkey, and maybe a small squeeze of lemon, then add them to your bowl.

What Else Can You Add?

Comb your fridge and freezer for ingredients that have a Mediterranean flair and toss ’em in your bowl! Here are a few delicious ideas:

  • Feta
  • Olives
  • Chickpeas
  • Capers
  • Spinach
  • Green Onion
  • Hummus
  • Bell peppers
  • Artichoke hearts
  • Quinoa
  • Zucchini (fresh or grilled)

P.S. You can also make these bowls over a bed of greens instead of a bed of rice!

How Long Do They Last?

I prepared these bowls for my meal prep and, in general, I only like to prep for four days at a time because I find that the freshness of my prepared meals degrade too much after that amount of time. So I suggest keeping these bowls for up to four days in the fridge for the best flavor and texture. These Mediterranean Turkey Bowls are not a good candidate for freezing due to the fresh vegetables and yogurt sauce.

Are They Served Hot or COld?

I love these bowls both warm and cold. When eating them just after preparation, the rice and turkey will be warm, which contrasts nicely with the fresh cold vegetables. When eating the leftovers as meal prep, I eat them cold like a salad. I think they’re delicious both ways! If you prefer to reheat the rice and turkey for meal preps, just package the rice and turkey in one container and the fresh vegetables in a separate container so you can reheat one and then top with the cold vegetables just before eating.

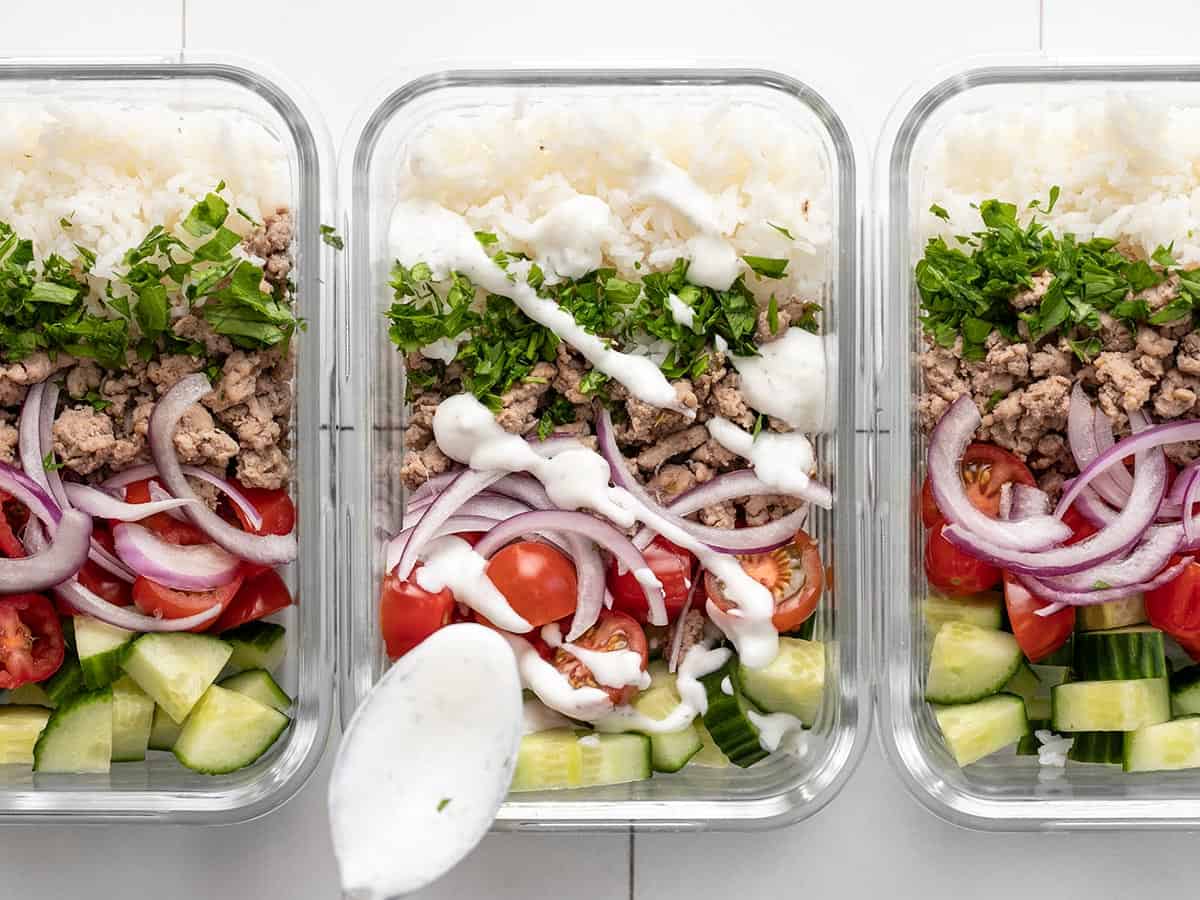
Three meal prep turkey bowls lined up with yogurt sauce being drizzled over the middle one.
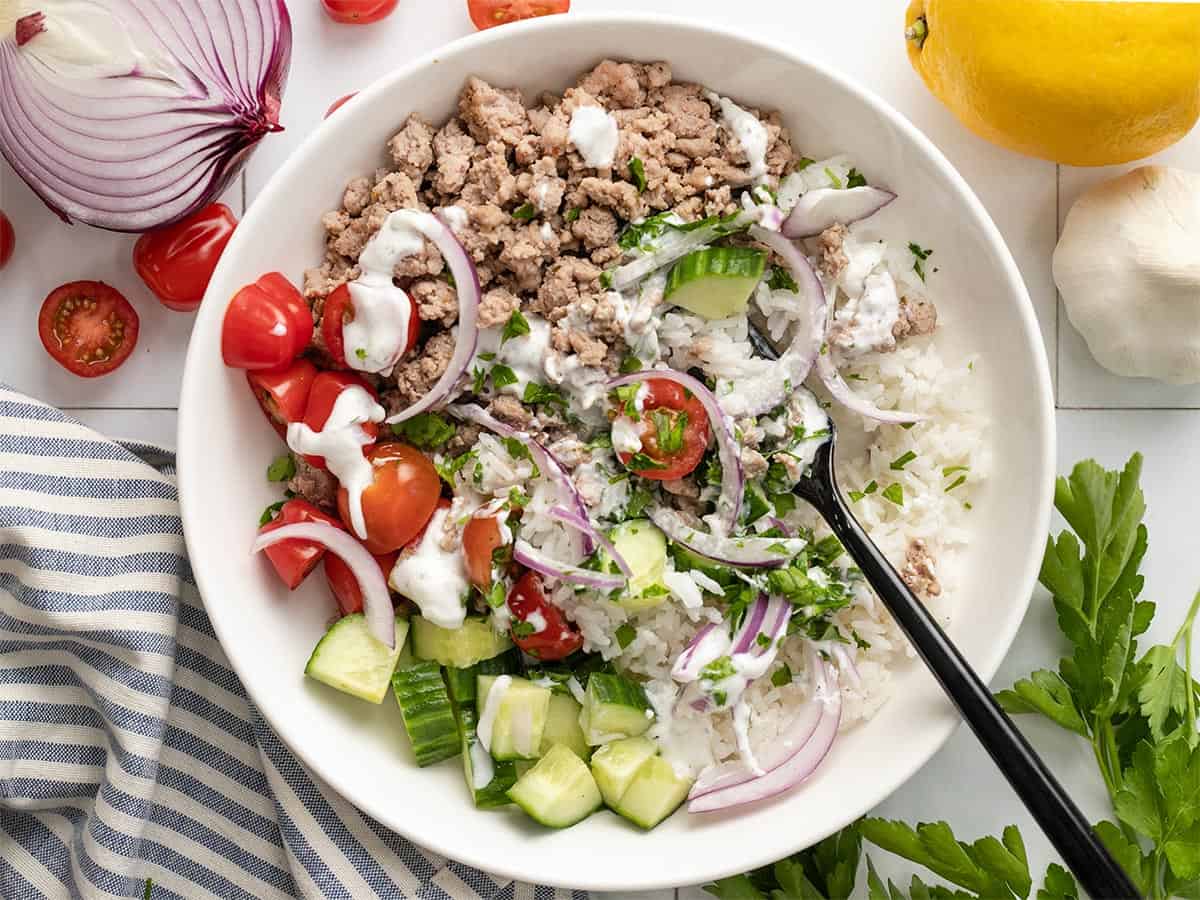
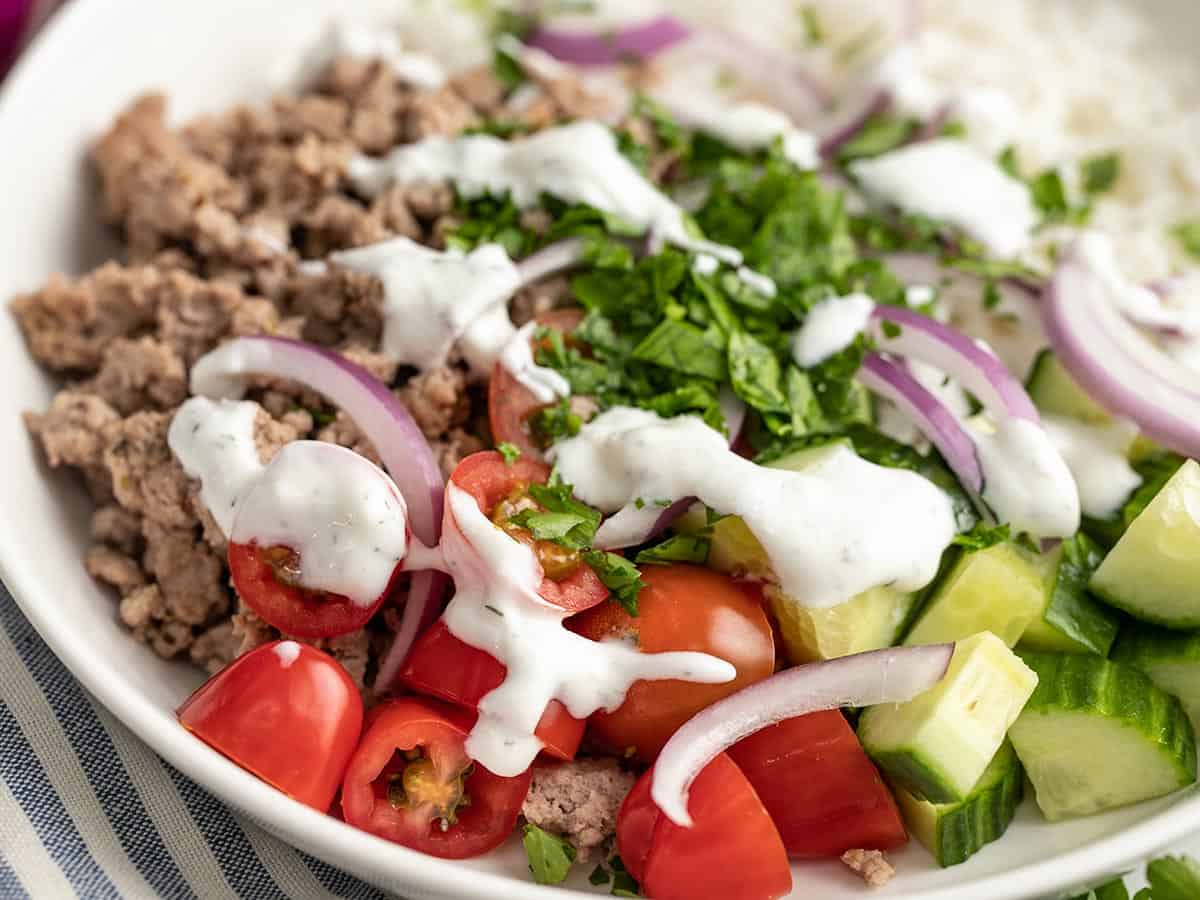
Overhead view of a Mediterranean Turkey Bowl with yogurt sauce drizzled over top.
Print

Mediterranean Turkey Bowls

These Mediterranean Turkey Bowls are the perfect filling and fresh meal prep lunch for Spring and Summer. Plus, they're super versatile!
Course Dinner, Lunch, Main Course
Cuisine American, Mediterranean
Total Cost $10.11 recipe / $2.53 recipe
Prep Time 15 minutes
Cook Time 20 minutes
Total Time 35 minutes
Servings 4
Calories 403kcal

Ingredients

Garlic Dill Yogurt Sauce

  • 1 cup full-fat plain yogurt $1.12
  • 1 Tbsp lemon juice $0.06
  • 1/4 tsp garlic powder $0.02
  • 1/4 tsp dried dill $0.03
  • 1/4 tsp salt $0.02

Ground Turkey

  • 1 Tbsp olive oil $0.12
  • 1 lb. ground turkey $4.99
  • 2 cloves garlic, minced $0.16
  • 1/2 tsp dried oregano $0.05
  • 1/2 tsp salt $0.02
  • 1/4 tsp freshly cracked pepper $0.02

Bowls

  • 1 cup uncooked rice* $0.43
  • 1 pint grape tomatoes $1.89
  • 1 cucumber $0.79
  • 1/4 red onion $0.19
  • 1/4 cup chopped parsley $0.20

Instructions

  • Make the garlic dill yogurt sauce first, so the flavors have time to blend. Stir together the yogurt, lemon juice, garlic powder, dill, salt, and pepper in a bowl. Refrigerate until ready to serve.
  • Next, begin cooking the rice using your preferred method (rice cooker or stove top). You can use any type of rice, just make sure to follow cooking instructions for the type of rice you're using.
  • While the rice is cooking, cook the ground turkey. Add the olive oil to a large skillet and heat over medium. Once hot, add the ground turkey and continue to cook over medium heat.
  • When the turkey is almost cooked through, add the minced garlic, dried oregano, salt, and pepper to the skillet. Stir to combine with the turkey and continue cooking for 2-3 minutes more or until the turkey is cooked through. Remove the turkey from the heat.
  • Slice the grape tomatoes in half, chop the cucumber into quarter-rounds, thinly slice the red onion, and finely chop the parsley.
  • When all of the ingredients are prepped, it's time to build your bowls. Divide the rice, ground turkey, tomatoes, cucumber, red onion, and parsley between four bowls or meal prep containers. Drizzle with the yogurt sauce just before serving and enjoy!

See how we calculate recipe costs here.

Notes

*You can use any type of rice (white, brown, jasmine, basmati, etc). Just make sure to follow the cooking instructions for the particular type of rice chosen. For more help with cooking rice, check out our How to Cook Rice tutorial. 

Nutrition

Serving: 1bowl | Calories: 403kcal | Carbohydrates: 48g | Protein: 34g | Fat: 8g | Sodium: 535mg | Fiber: 3g
Close up side view of a Mediterranean Turkey Bowl.

How to Make Mediterranean Turkey Bowls – Step by Step Photos

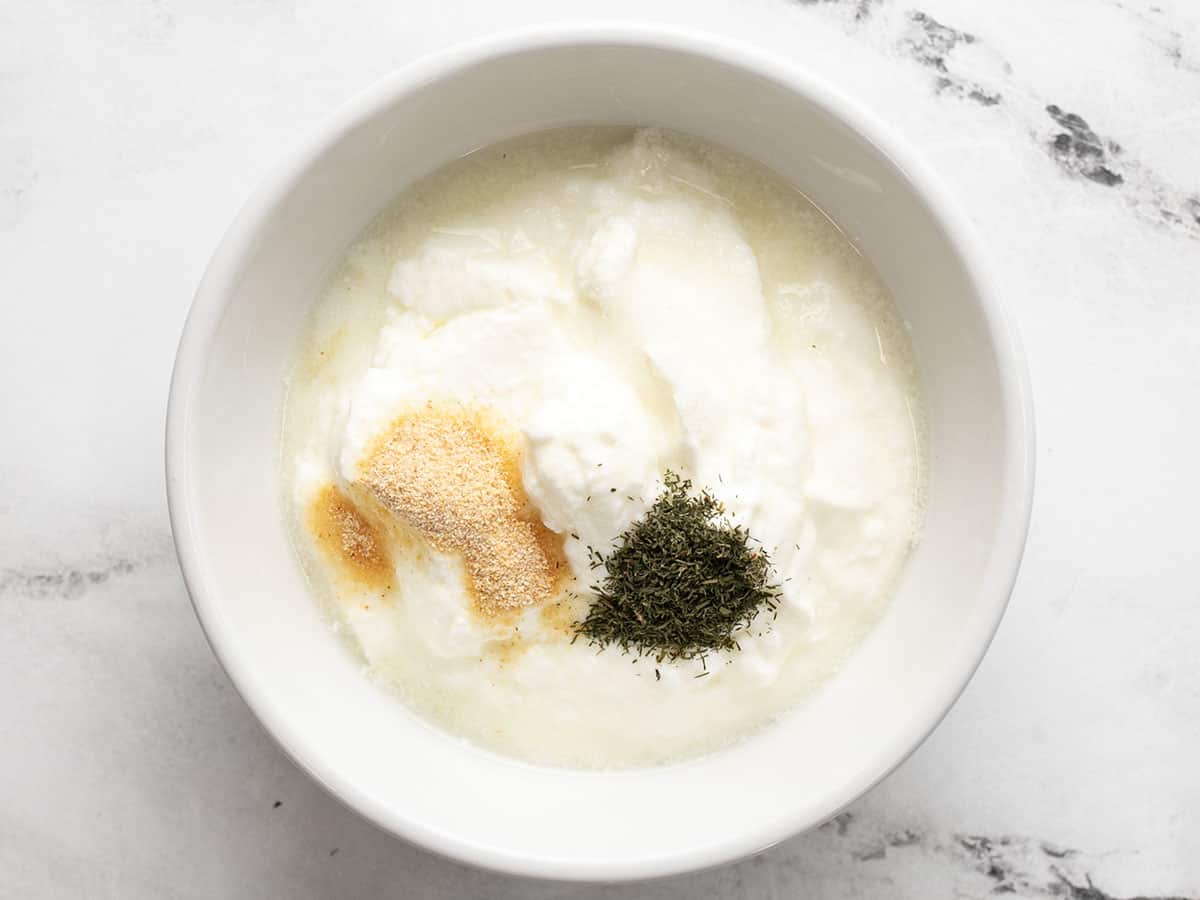
Garlic dill yogur sauce ingredients in a bowl, unstirred.

Prepare the garlic dill yogurt sauce first so the flavors have some time to blend. Combine 1 cup full-fat plain yogurt with 1 Tbsp lemon juice, ¼ tsp garlic powder, ¼ tsp dried dill, and ¼ tsp salt. Refrigerate the sauce until ready to serve.

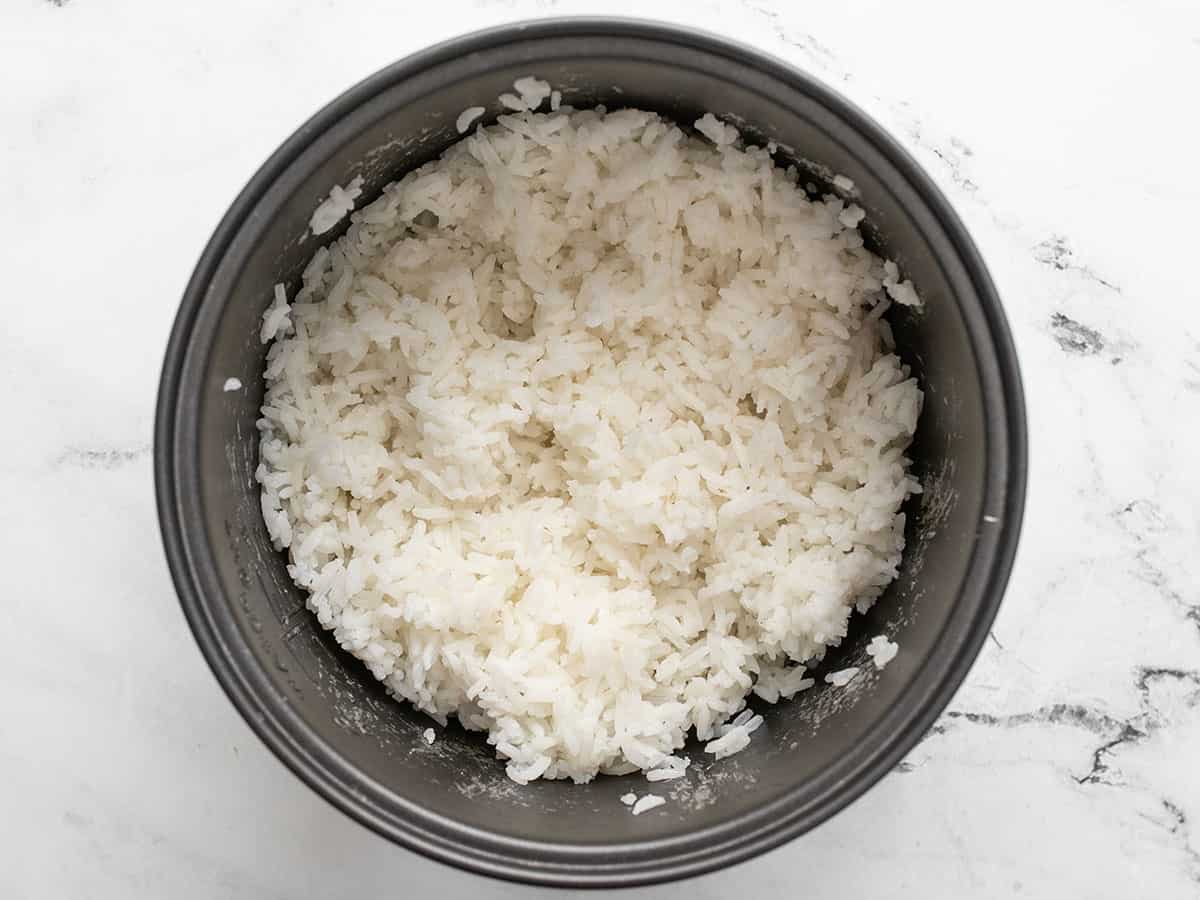
Cooked rice in a rice cooker.

Next, cook one cup rice (one cup uncooked yields about 3 cups once cooked). I used a rice cooker for convenience, but if you’d like to do it on the stove top, check out our How to Cook Rice tutorial.

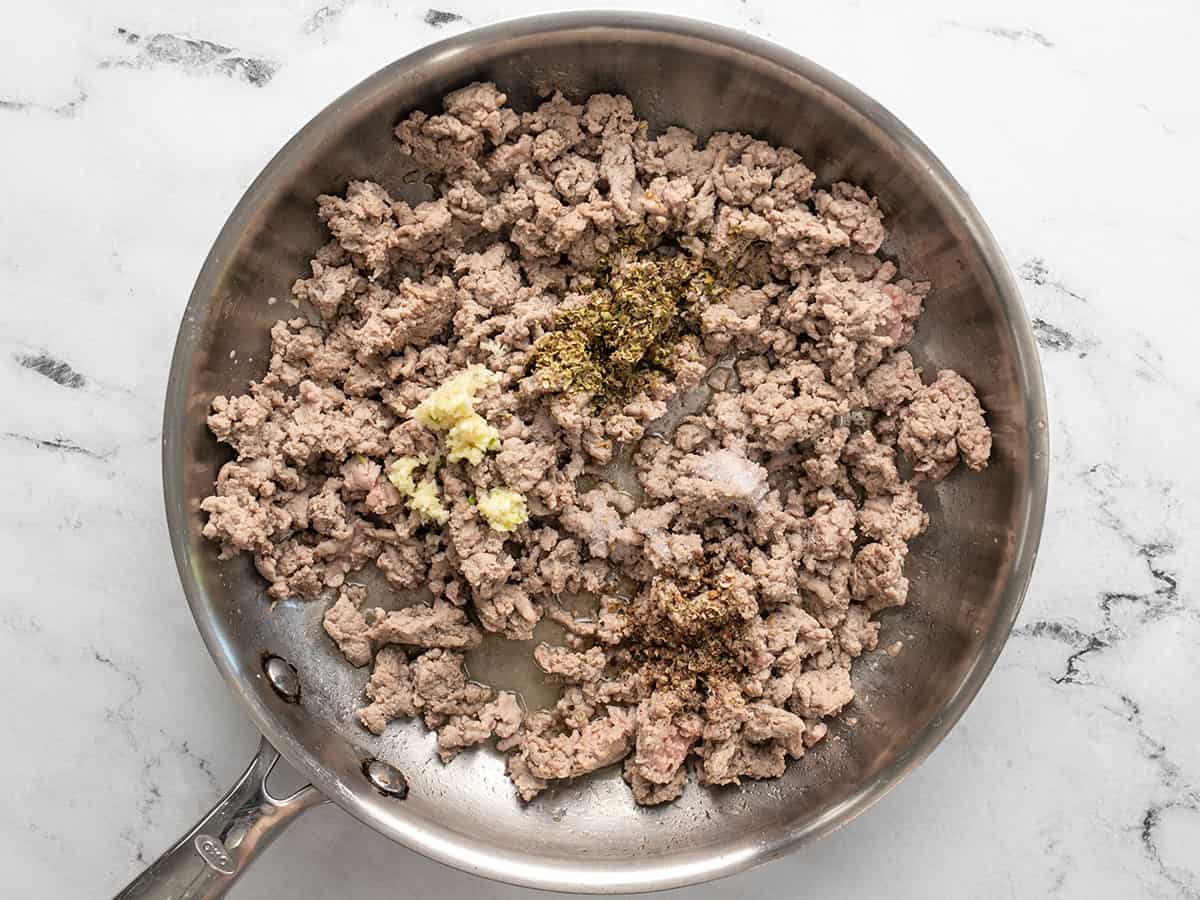
Cooked ground turkey in a skillet with garlic and oregano added on top.

While the rice is cooking, prepare the ground turkey. Add 1 Tbsp olive oil to a large skillet and heat over medium. Once hot, add 1 lb. ground turkey. Cook the turkey over medium heat until it’s almost cooked through. At that point, add 2 minced cloves of garlic, ½ tsp dried oregano, ½ tsp salt, and ¼ tsp freshly cracked pepper. Continue to cook for 2-3 minutes more, or until the turkey is cooked through. Remove the turkey from the heat.

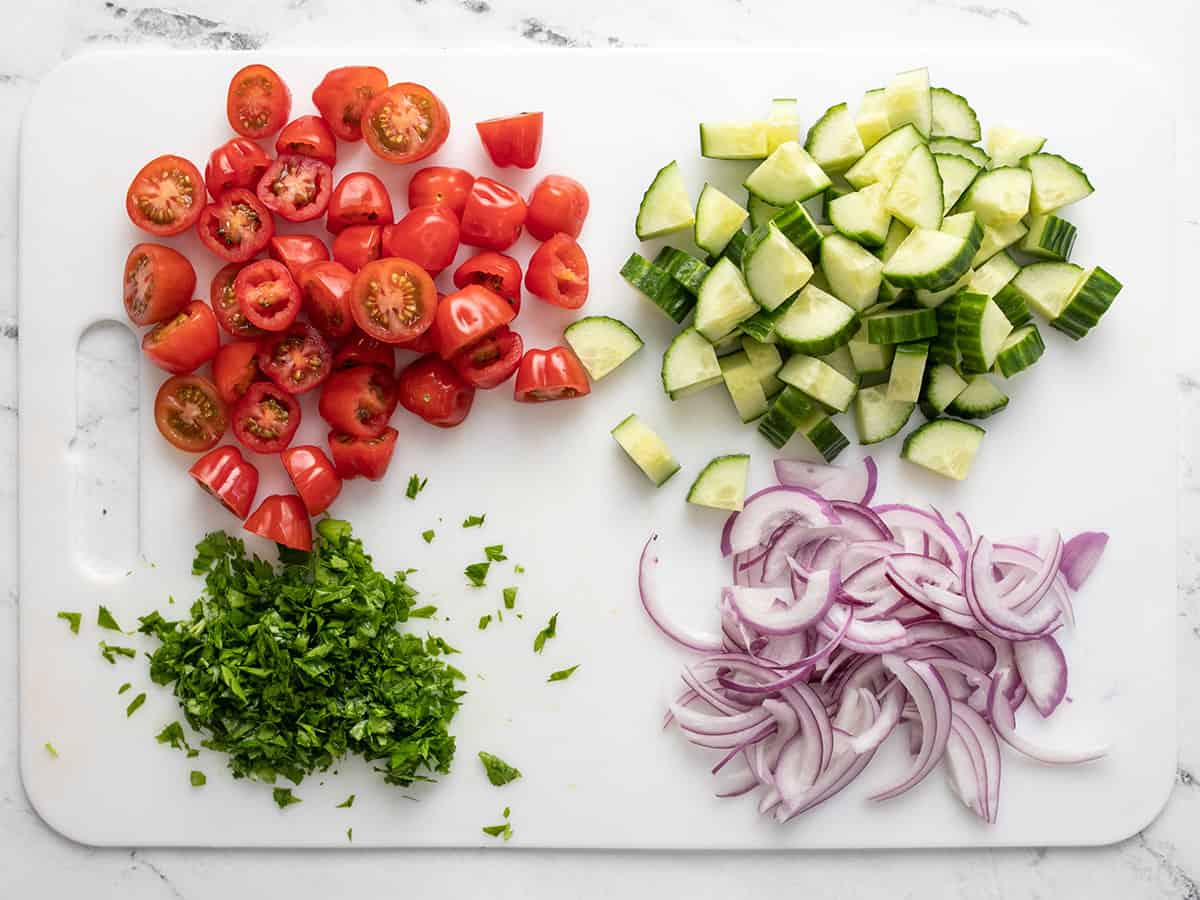
Prepped tomatoes, cucumbers, onions, and parsley on a cutting board.

Slice one pint of grape tomatoes in half, chop one cucumber into quarter-rounds, thinly slice ¼ of a red onion, and finely chop about ¼ cup of fresh parsley. If you want the red onions to be a little more mild, you can soak them in ice water for about five minutes.

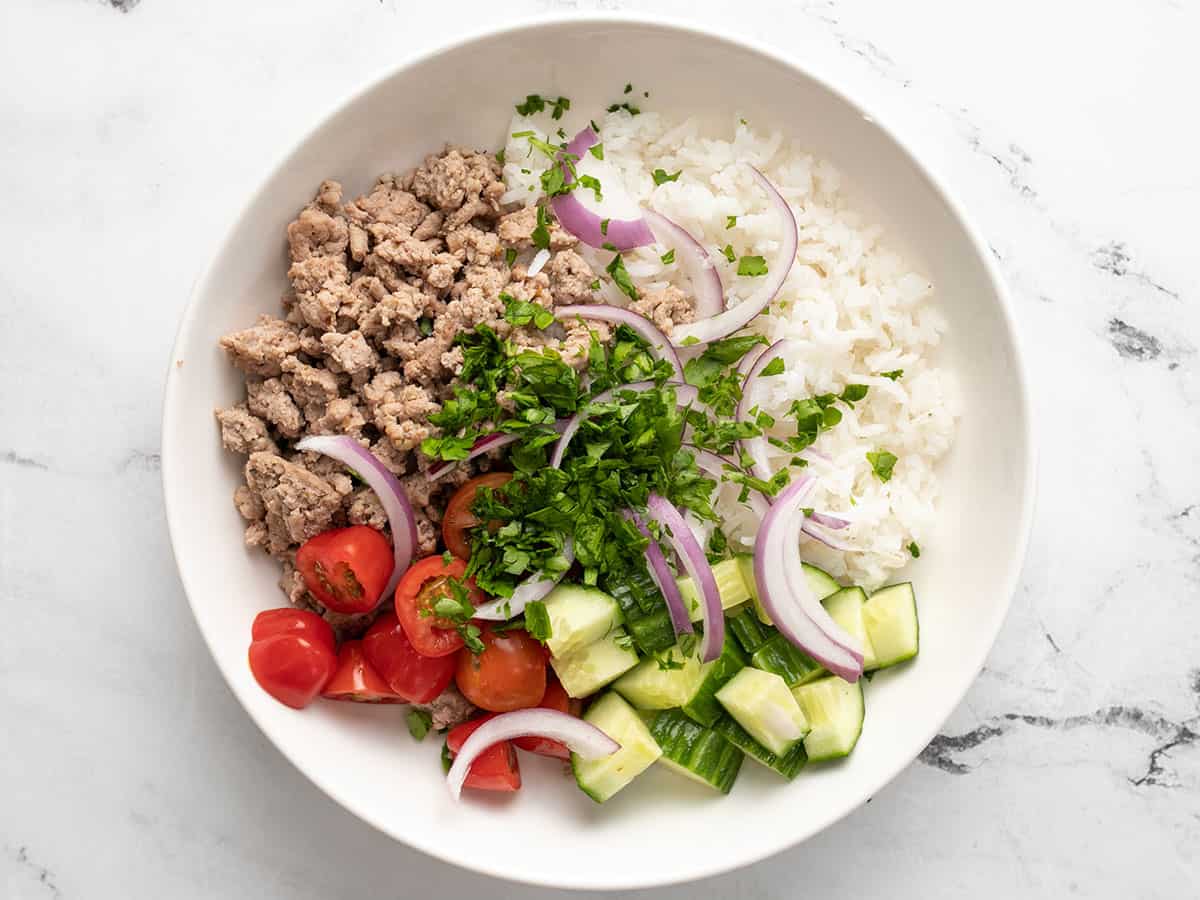
Mediterranean turkey bowls prepped without the yogurt sauce.

Once all of the ingredients are prepped, begin to build the bowls. Add about ¾ cup cooked rice to each bowl, then top with ¼ of the ground turkey. Divide the tomatoes, cucumber, onion, and parsley between the four bowls.

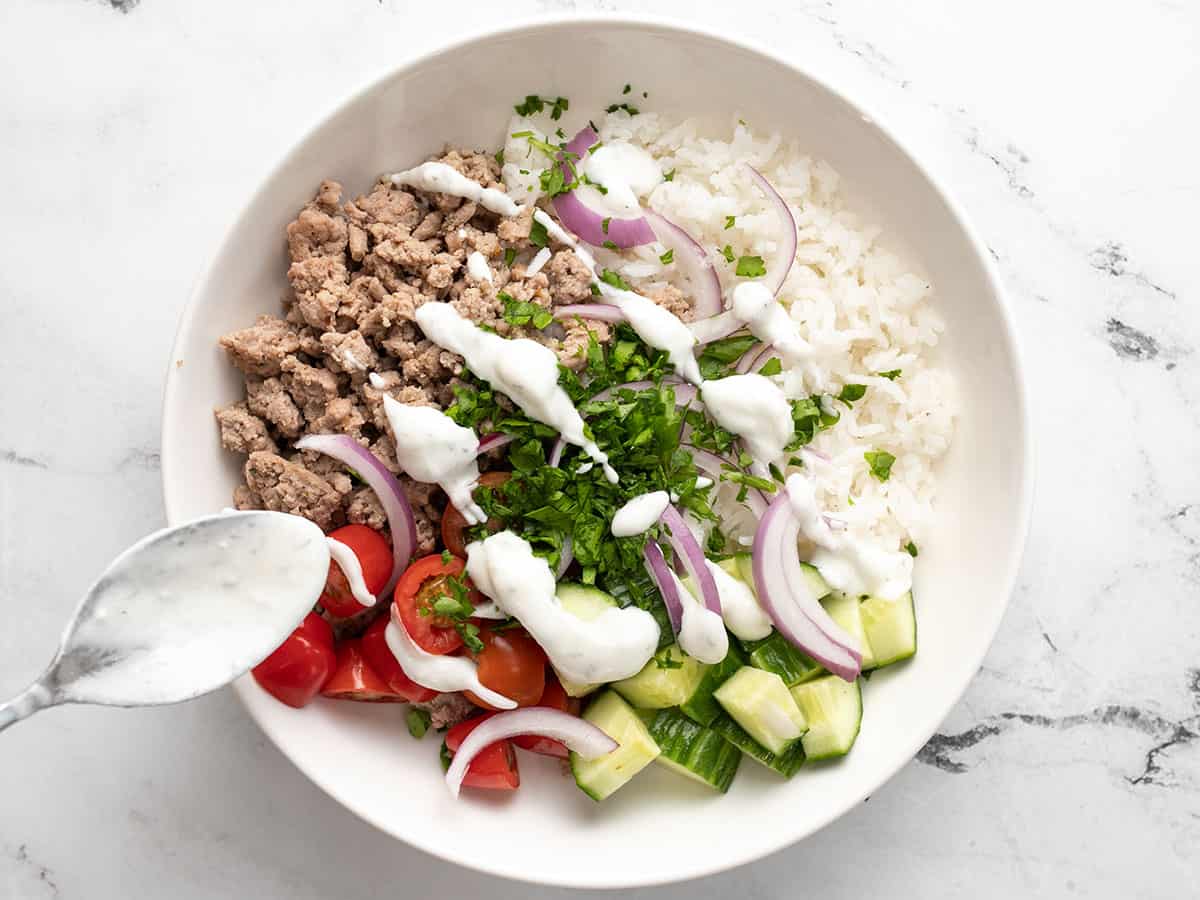
Yogurt sauce being drizzled over top of the turkey bowl.

Just before you’re ready to eat, drizzle the yogurt sauce (about ¼ cup per bowl) over top.

Half eaten Mediterranean Turkey Bowl.

Dig in and enjoy all the fresh flavors!

The post Mediterranean Turkey Bowls appeared first on Budget Bytes.
Cucumber Sandwiches

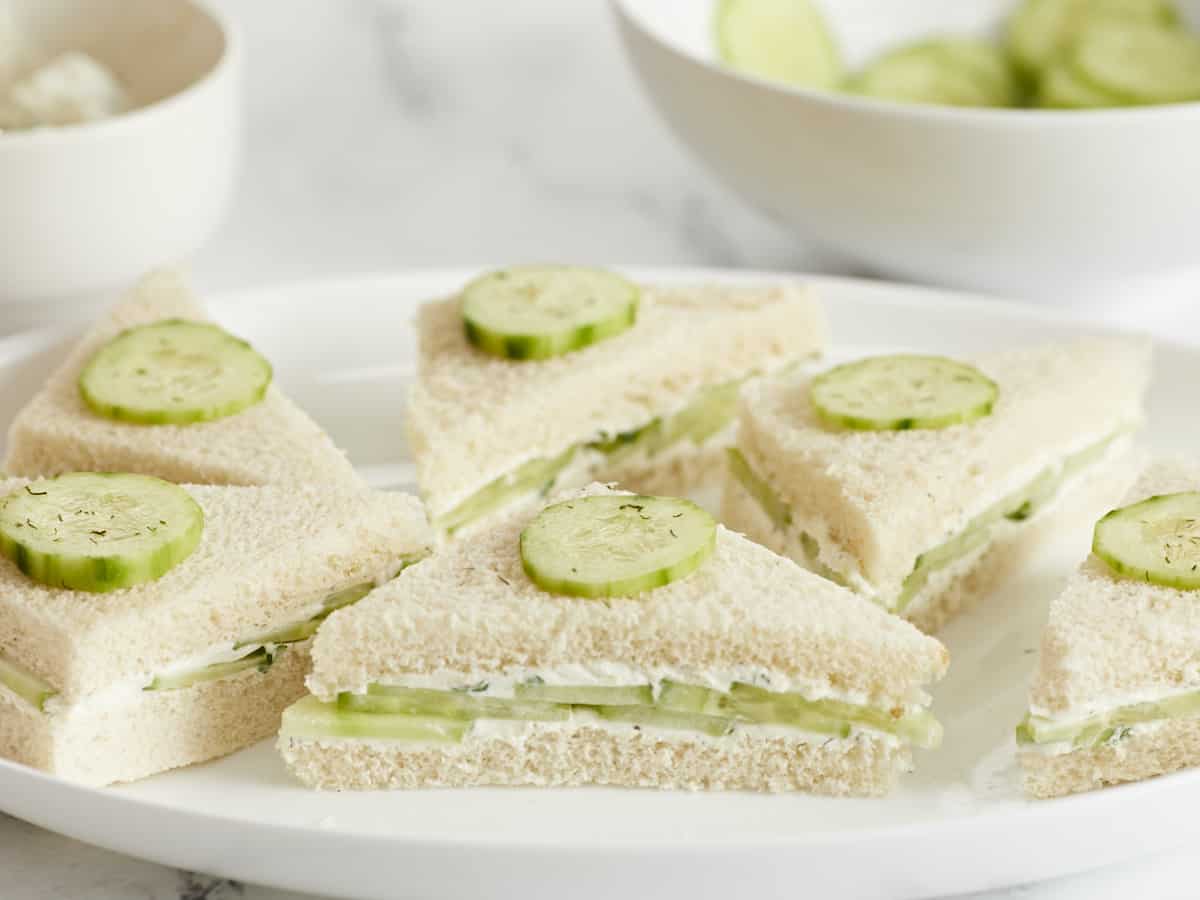
Cucumber sandwiches with a dilly cream cheese spread are a light and refreshing lunch or snack to serve with tea or brunch.

The post Cucumber Sandwiches appeared first on Budget Bytes.
The weather is finally warming up, the sun is shining brightly and I am SO READY for all the fresh produce of spring and summer. These refreshing little cucumber sandwiches with a dilly cream cheese spread are the perfect light lunch for warmer weather or a snack to serve with tea or brunch, Mother’s Day, bridal showers, and more. But they’re so deliciously fresh that you’ll probably end up making them all summer long!

P.S. Bookmark this one if you grow cucumbers and are always looking for a way to use up that bumper crop! Our Creamy Cucumber Salad is great, too!

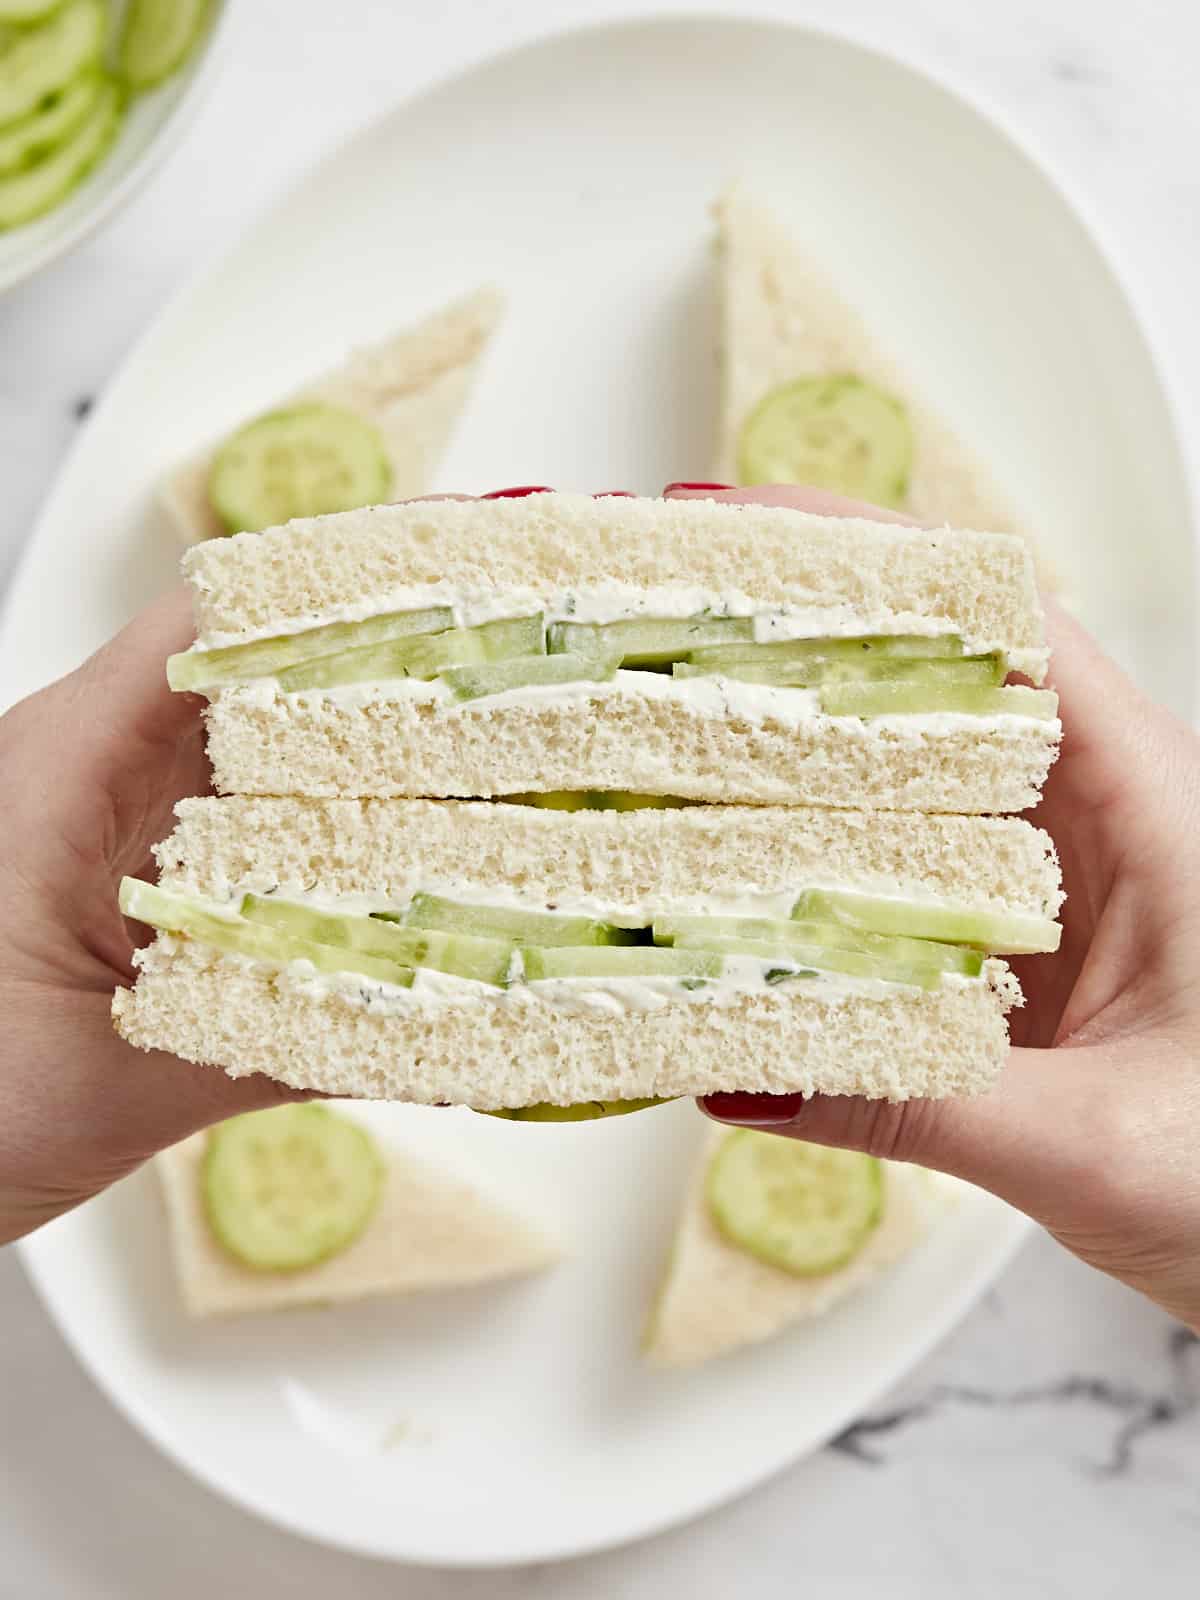
Side view of a hand holding stacks of cucumber sandwiches.

What are Cucumber Sandwiches

There are a lot of interpretations of cucumber sandwiches out there, the most basic being sliced cucumber between two slices of buttered bread, but we took our cucumber sandwiches to the next level with a tangy, dilly, cream cheese spread. The herby flavor of the cream cheese pairs perfectly with the super fresh flavor of the cucumber for an absolutely perfect sandwich. They’re usually made with a soft white bread to match their delicate flavor, but I think it would be fun to experiment with different types of bread for these sandwiches!

How to Serve Cucumber Sandwiches

These dainty little sandwiches are often cut into small bite-sized pieces and served with tea (hence the common name “cucumber tea sandwiches”), but they make the perfect appetizer for any spring or summertime gathering, like Easter, graduation parties, bridal or baby showers, or Mother’s Day brunch. Pair cucumber sandwiches with other fresh summer dishes like Summer Vegetable Pasta Salad, Lemon Cream Pie, Panzanella, or Macaroni Salad.

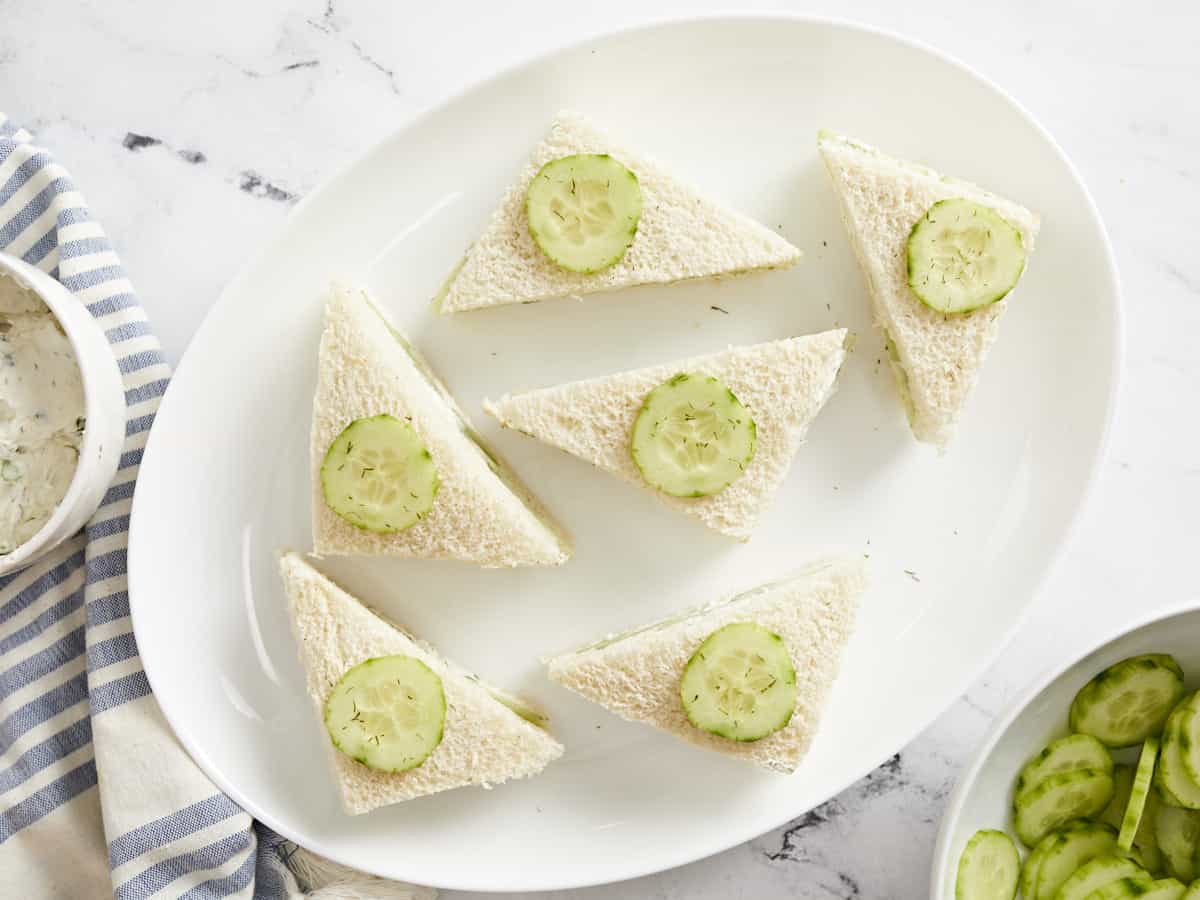
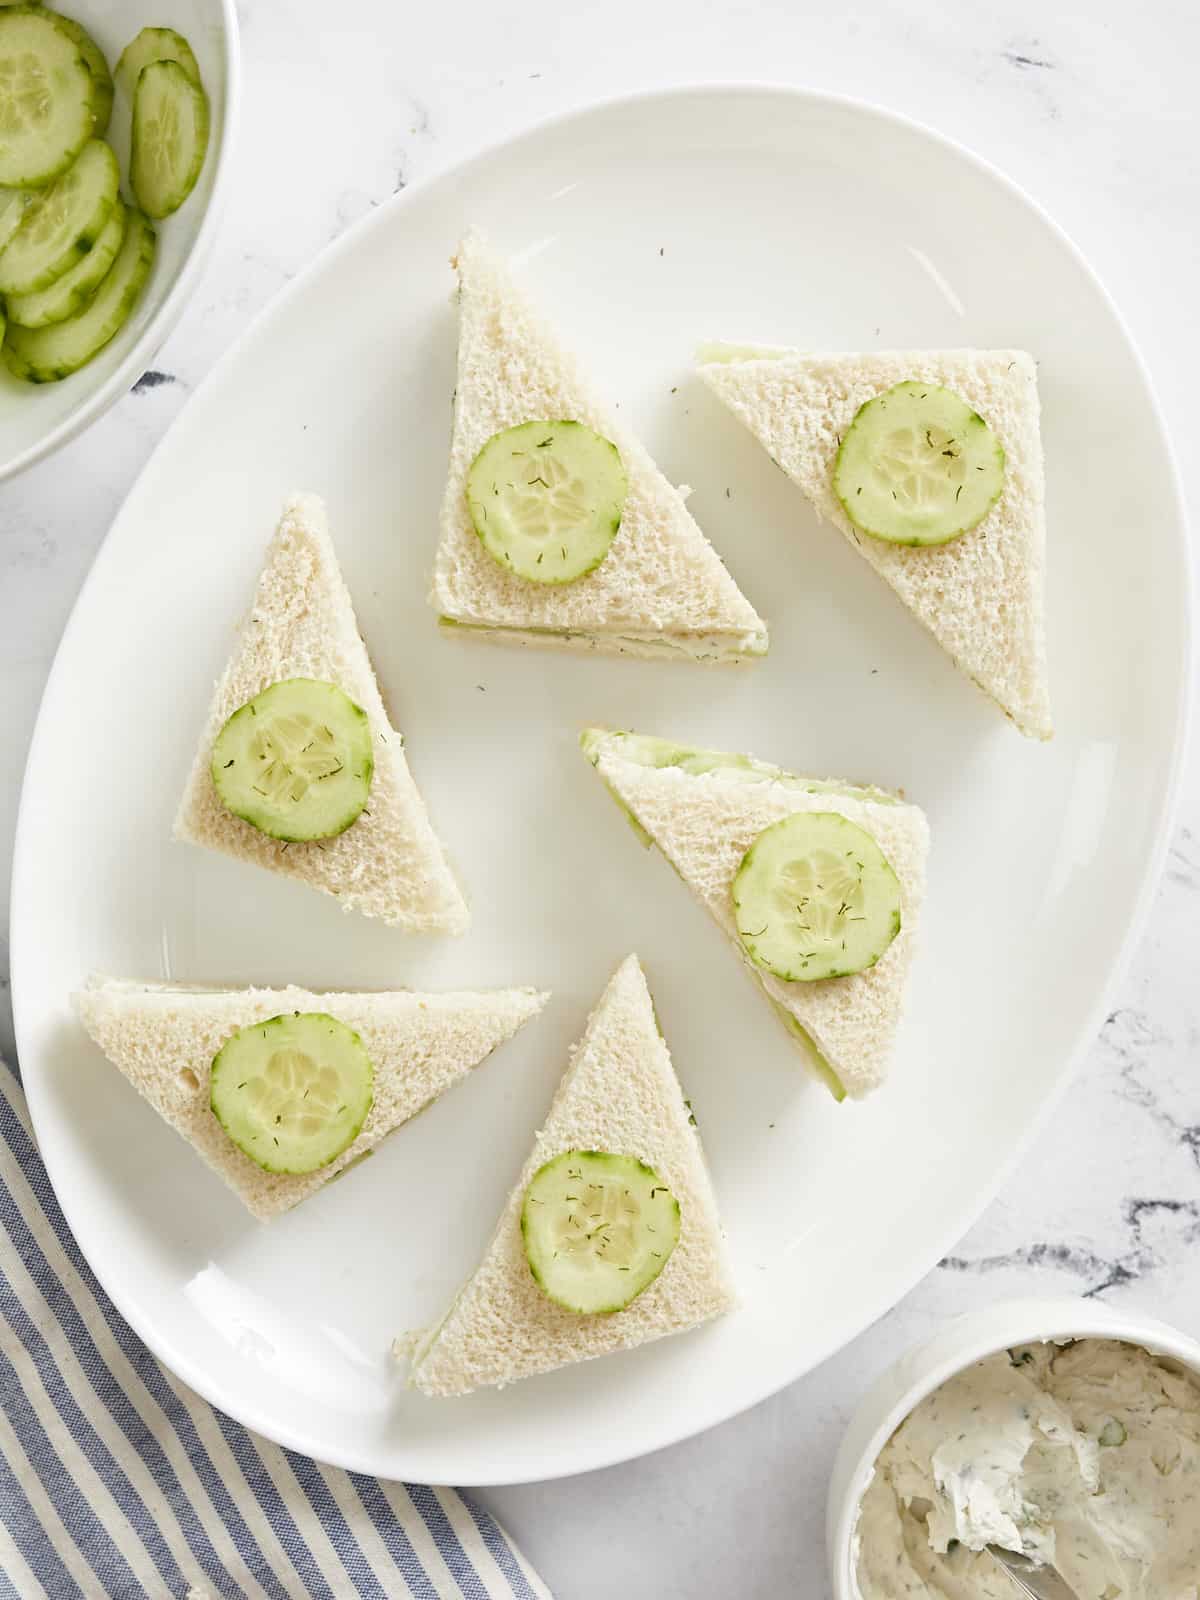
Overhead view of cucumber sandwiches on a plate.

What Kind of Cucumbers are Best?

English cucumbers are by far the best choice for cucumber sandwiches because they have smaller, softer seeds and a thinner, softer skin. You can leave the skin on, peel, or partially peel for more color variation in the cucumber sandwiches. If using regular cucumbers, I would definitely peel them to prevent the tough skin from contrasting with the delicate nature of the sandwich.

How to Keep Cucumber Sandwiches From Getting Soggy

Cucumbers are a high water content vegetable, so if you’re not careful that water can seep out into your sandwich and leave you with soggy bread. Here’s how to keep the bread light and fluffy and the cucumbers crisp!

  1. Make sure to spread the cream cheese from edge to edge on the bread. The cream cheese acts as a moisture barrier between the cucumbers and bread.
  2. Don’t assemble the sandwiches too far ahead. Once assembled, serve your sandwiches within 1-2 hours.
  3. To make the sandwiches ahead, freeze the bread, prepare the cream cheese spread, and slice the cucumbers. Keep the components separate until just before serving.
  4. If you MUST fully assemble the sandwiches ahead of time, you’ll want to lightly salt the sliced cucumbers ahead of time and let them sit for about 15 minutes to draw out some of the water. Blot the salted cucumbers dry, then assemble the sandwiches. The cucumbers won’t be quite as crunchy this way, but it will give the sandwiches extra staying power.

What Else Can I Add?

If a recipe isn’t flexible, it isn’t for me! And cucumber sandwiches are definitely flexible. Here are some other fun ingredients you can add to cucumber sandwiches to make them your own:

  • Fresh herbs – parsley, mint, tarragon, chives
  • Spinach or baby greens – add a layer of greens for even more flavor and texture
  • Goat cheese – swap the cream cheese for chevre
  • Mayonnaise – for a creamy spread, add a couple of tablespoons of mayonnaise to the mix
Side view of cucumber sandwiches on a platter.
Side view of hands holding a stacked cucumber sandwich.
Print

Cucumber Sandwiches

Cucumber sandwiches with a dilly cream cheese spread are a light and refreshing lunch or snack to serve with tea or brunch.
Course Appetizer, Lunch, Snack
Cuisine American, English
Total Cost $5.06 recipe / $0.42 serving
Prep Time 30 minutes
Freeze Time 1 hour
Total Time 1 hour 30 minutes
Servings 12 two bite-sized pieces each (6 sandwiches total)
Calories 139kcal

Ingredients

  • 12 slices white bread $1.04
  • 8 oz. cream cheese, room temperature $2.19
  • 1/2 tsp dried dill $0.05
  • 1/4 tsp garlic powder $0.02
  • 1/4 tsp salt $0.02
  • 1/4 tsp freshly cracked pepper $0.02
  • 2 Tbsp lemon juice $0.13
  • 1 green onion, sliced $0.10
  • 1 large English cucumber $1.49

Instructions

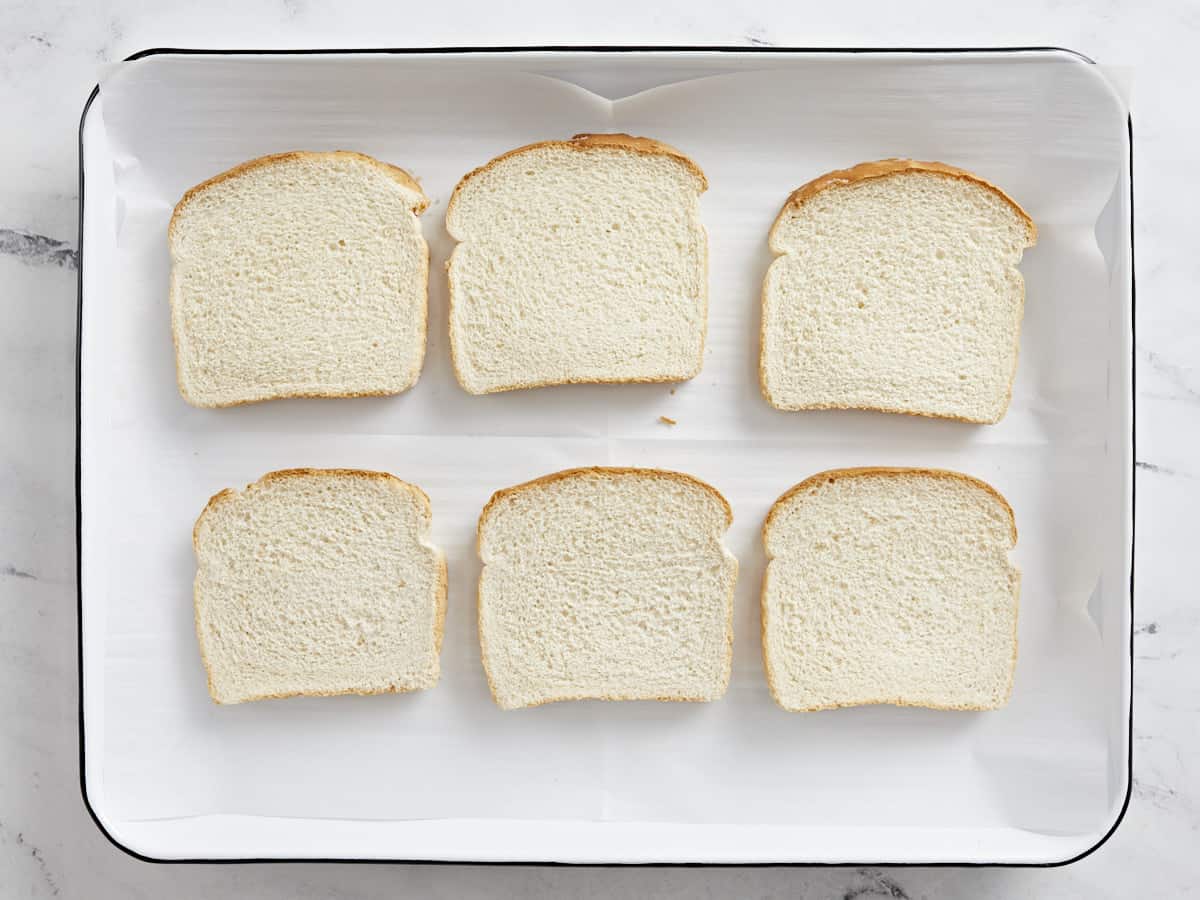
  • Lay the slices of bread out on a parchment-lined baking sheet and freeze for at least one hour. This will make slicing the sandwiches with clean edges a lot easier.
  • Prepare the dilly cream cheese dip. Add the cream cheese, dried dill, garlic powder, salt, pepper, lemon juice, and sliced green onion to a bowl. Whip the ingredients together until everything is evenly mixed and the cream cheese is soft and spreadable.
  • When you're ready to make the sandwiches, peel the cucumber if desired, then slice it very thinly.
  • Take two slices of bread out of the freezer at a time and spread about 1.5 Tbsp cream cheese over the surface of each piece of bread, from edge to edge. Layer the cucumber slices over one piece of bread, then top with the other slice (cream cheese side facing the cucumbers).
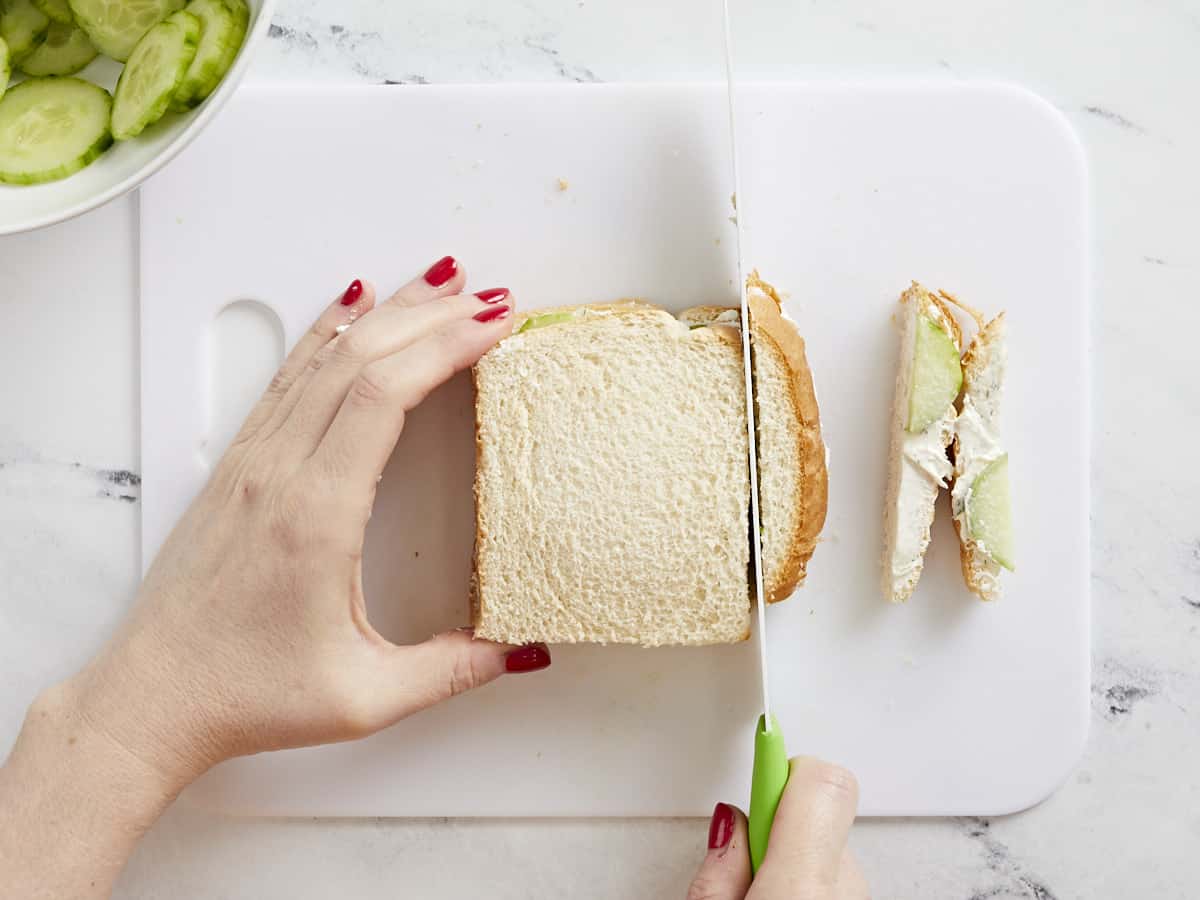
  • Carefully slice the crusts off the bread, then cut the sandwich into two or four pieces (four small pieces is great for finger foods or party appetizers). Repeat until all the sandwiches are assembled. If you have any leftover cucumber slices, place them on top as garnish. Serve within 1-2 hours of assembly.

See how we calculate recipe costs here.

Nutrition

Serving: 2sandwich quarters | Calories: 139kcal | Carbohydrates: 15g | Protein: 4g | Fat: 7g | Sodium: 228mg | Fiber: 1g

How to Make Cucumber sandwiches – Step by Step Photos

Sliced bread on a baking sheet for freezing.

To help the sandwiches slice easily with perfect edges, freeze the bread first. Lay the slices of bread out on a baking sheet lined with parchment. You’ll need 12 slices for this recipe, so you can do two layers of six. Freeze the bread for at least one hour.

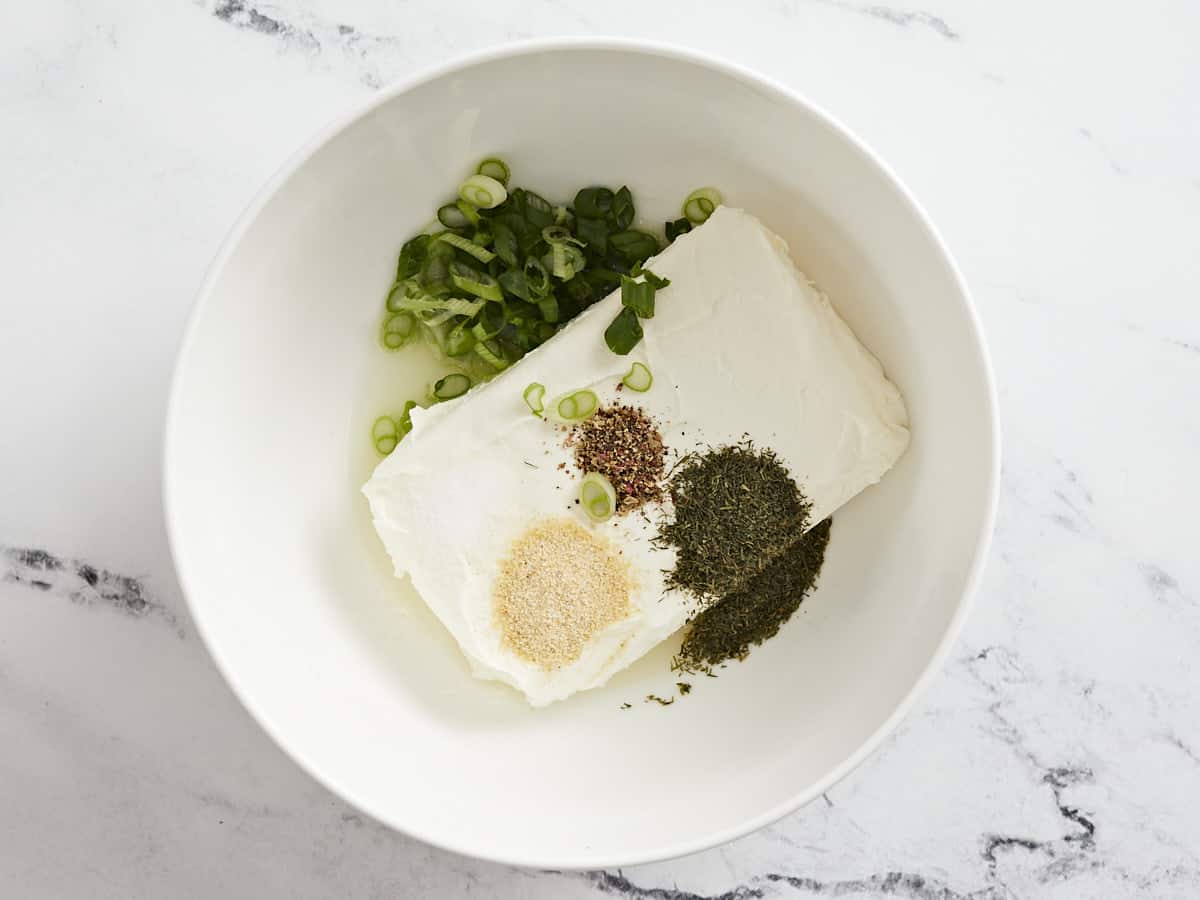
Cream cheese spread ingredients in a bowl, unmixed.

When you’re ready to make the sandwiches, start with the cream cheese spread. Add one 8oz. block of room temperature cream cheese to a bowl along with ½ tsp dried dill, ¼ tsp garlic powder, ¼ tsp salt, ¼ tsp freshly cracked pepper, one sliced green onion, and 2 Tbsp lemon juice.

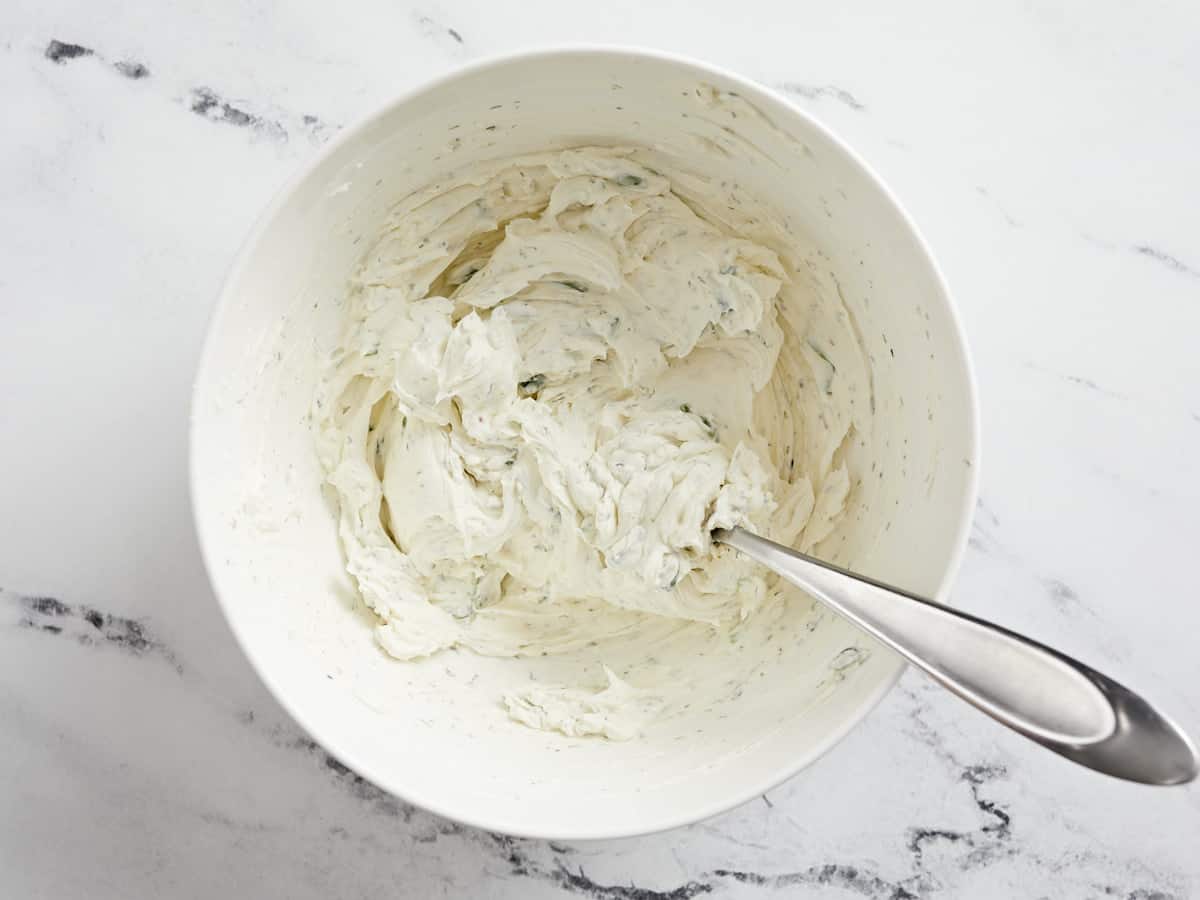
Finished cream cheese spread in the bowl.

Whip the ingredients together until everything is well incorporated and the cream cheese is soft and spreadable.

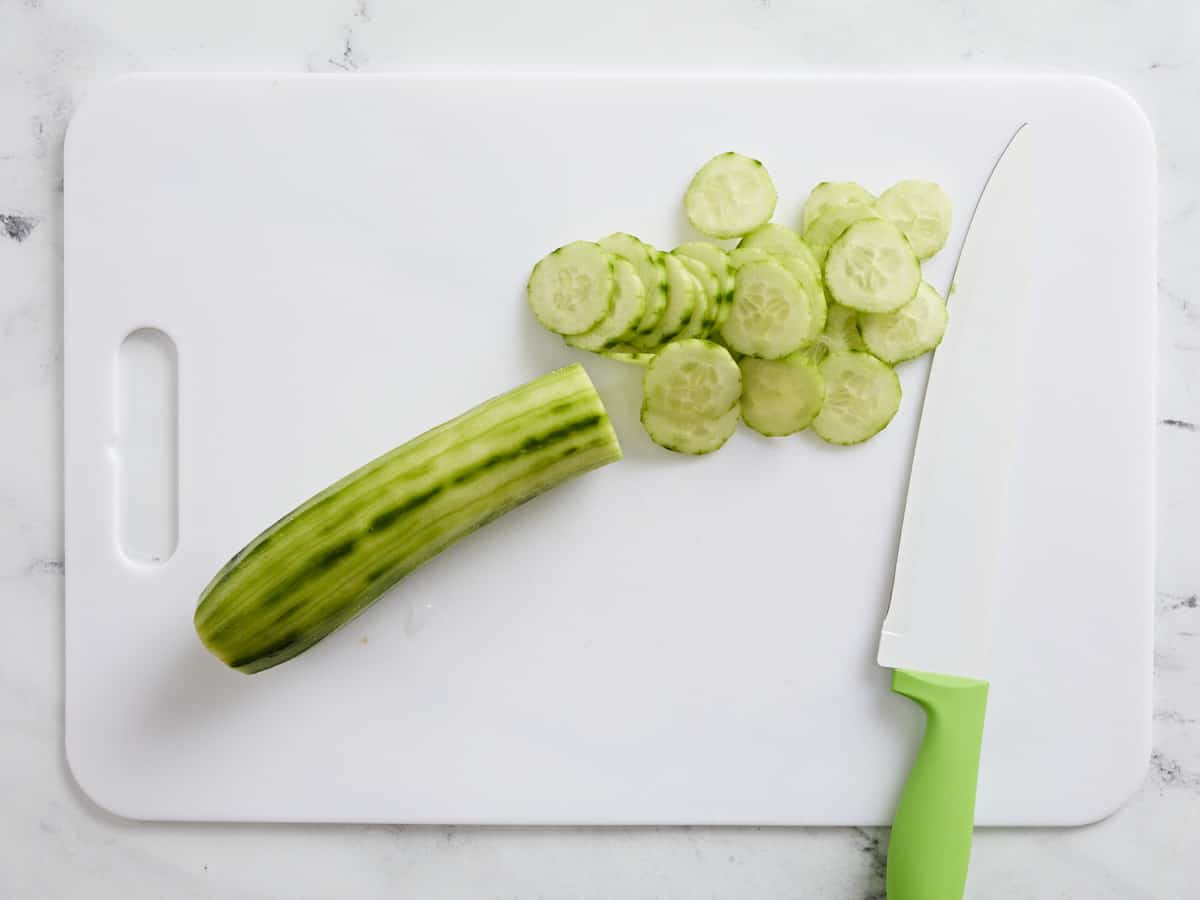
Peeled and sliced cucumber on a cutting board.

Peeling the cucumber is optional (recommended if not using an English cucumber). Thinly slice one cucumber.

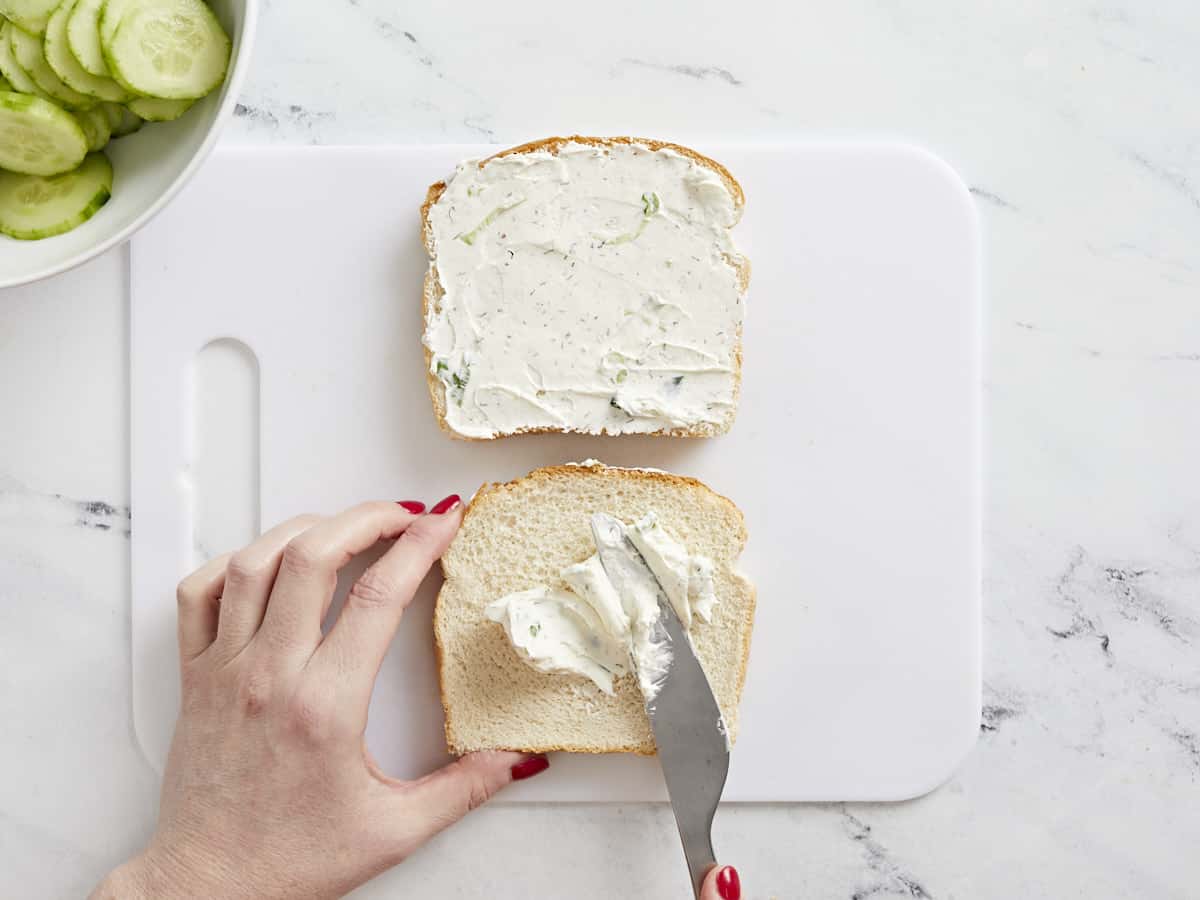
Cream cheese spread on the bread.

Take two slices of bread out of the freezer at a time. Spread about 1.5 Tbsp of the dilly cream cheese spread over the surface of each slice, all the way from edge to edge.

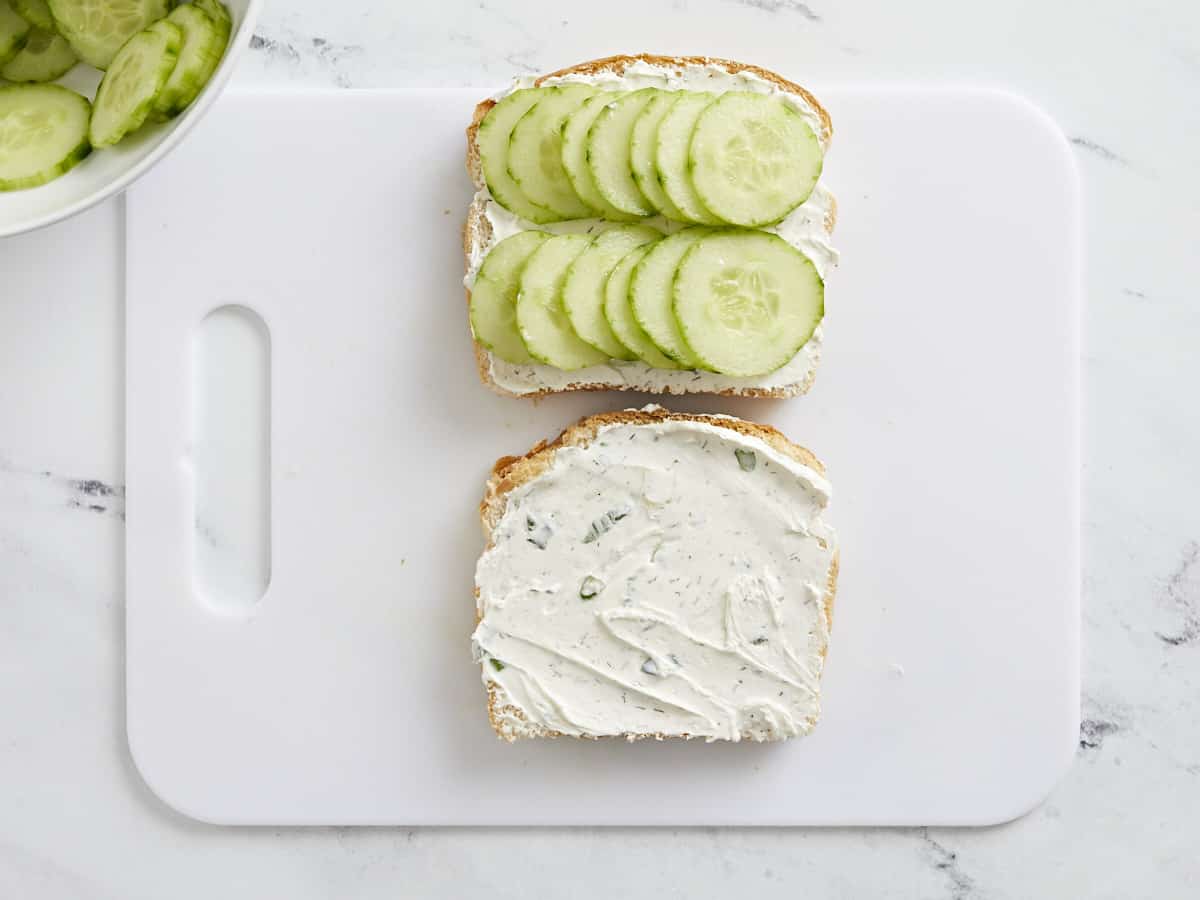
Cucumbers on the bread.

Layer the cucumbers onto one of the slices of bread. Place the second slice of bread over top, with the cream cheese facing the cucumbers.

Crusts being sliced off the sandwich.

The bread should still be mostly frozen at this point, which makes it easier to slice. Carefully slice off the crusts, then cut the sandwich into two or four pieces (four is best if you’re planning to serve it as a finger food or appetizer).

Overhead view of cucumber sandwiches on a platter.

If you have any leftover cucumber slices, place them on top for garnish, along with a sprinkle of dried dill. Serve and enjoy!

The post Cucumber Sandwiches appeared first on Budget Bytes.

Pistachio & Meyer Lemon Mousse Cakes with Mirror Glaze

Lemon lovers, this one’s for you! These bright and sunny entrement cakes feature a core of Meyer lemon curd nestled inside a fluffy lemon and vanilla mousse, with a base of crisp and nutty pistachio dacquoise, all enrobed in a beautifully shiny yellow mirror glaze. Lemon and pistachio is a match made for springtime. With […]

The post Pistachio & Meyer Lemon Mousse Cakes with Mirror Glaze first appeared on Love and Olive Oil.

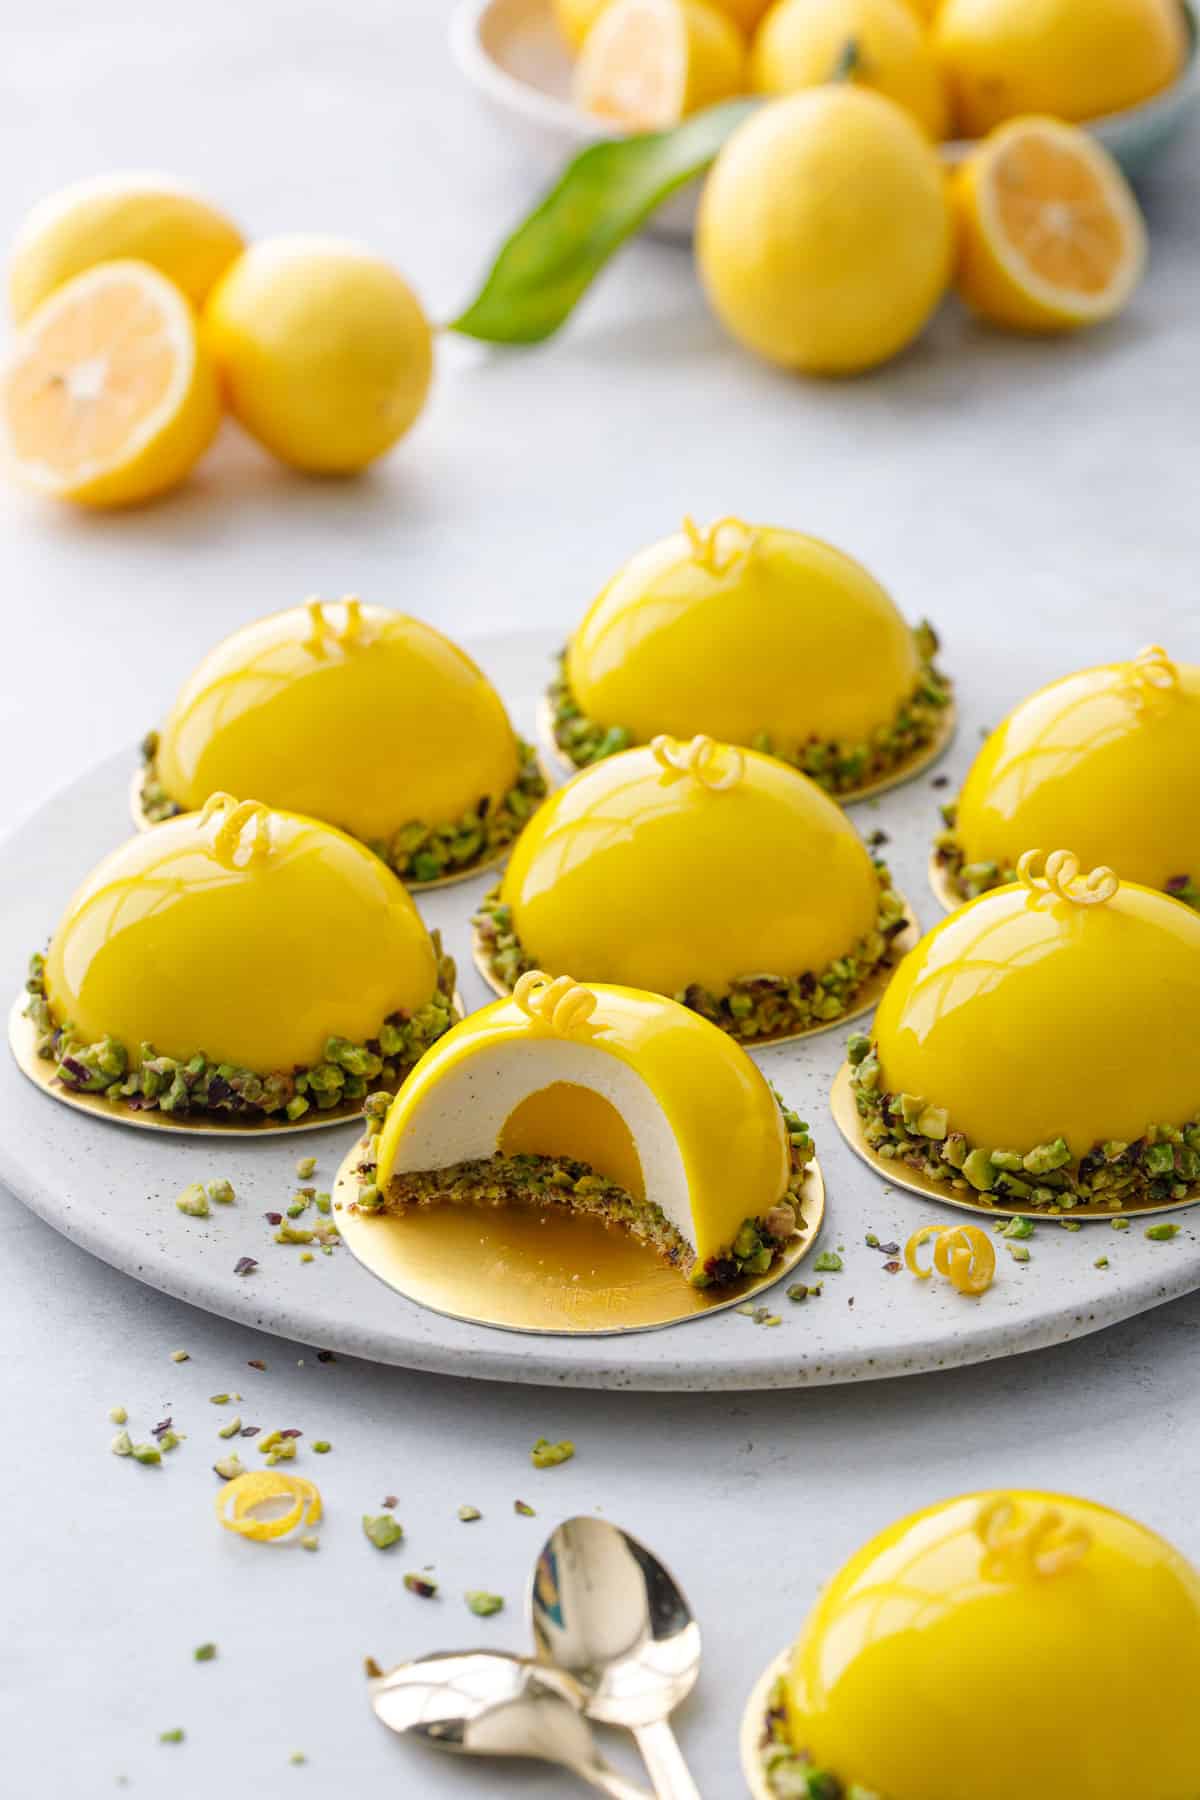
Lemon lovers, this one’s for you! These bright and sunny entrement cakes feature a core of Meyer lemon curd nestled inside a fluffy lemon and vanilla mousse, with a base of crisp and nutty pistachio dacquoise, all enrobed in a beautifully shiny yellow mirror glaze.

Lemon and pistachio is a match made for springtime. With a tangy lemon curd center and a light and airy lemon mousse, these gorgeous Meyer lemon and pistachio mini mousse cakes are dressed to impress with a shiny yellow mirror glaze and bright green pistachio accents.

Round plate with bright yellow dome-shaped mousse cakes, one cut to show the layers inside; bowl of lemons in the background.

Spring means lemons, and while I’m not usually one for lemon desserts, these gorgeous little mousse cakes are most definitely an exception. 

I mean, just look at them! What’s not to love? A joyful combination of lemon, vanilla, and pistachio flavors, they’re like little pops of sunshine… for your tastebuds.

I was the lucky recipient of a box of Meyer lemons from my aunt’s tree in California. Such a delivery always makes me very, very happy, moreso than shoes or clothes or books even. I dedicated about half the lemons for more homemade limoncello (I hope to update the post with more info later this year), but the rest were just sitting in the box, begging me to use them in something unique and delicious.

These lemon and pistachio entremet cakes are certainly that!

(more…)

Crab Dip

This creamy, spicy crab dip is so good you’ll be pushing a cracker into the corners of your serving dish to scoop up the last schmear.

The post Crab Dip appeared first on Budget Bytes.
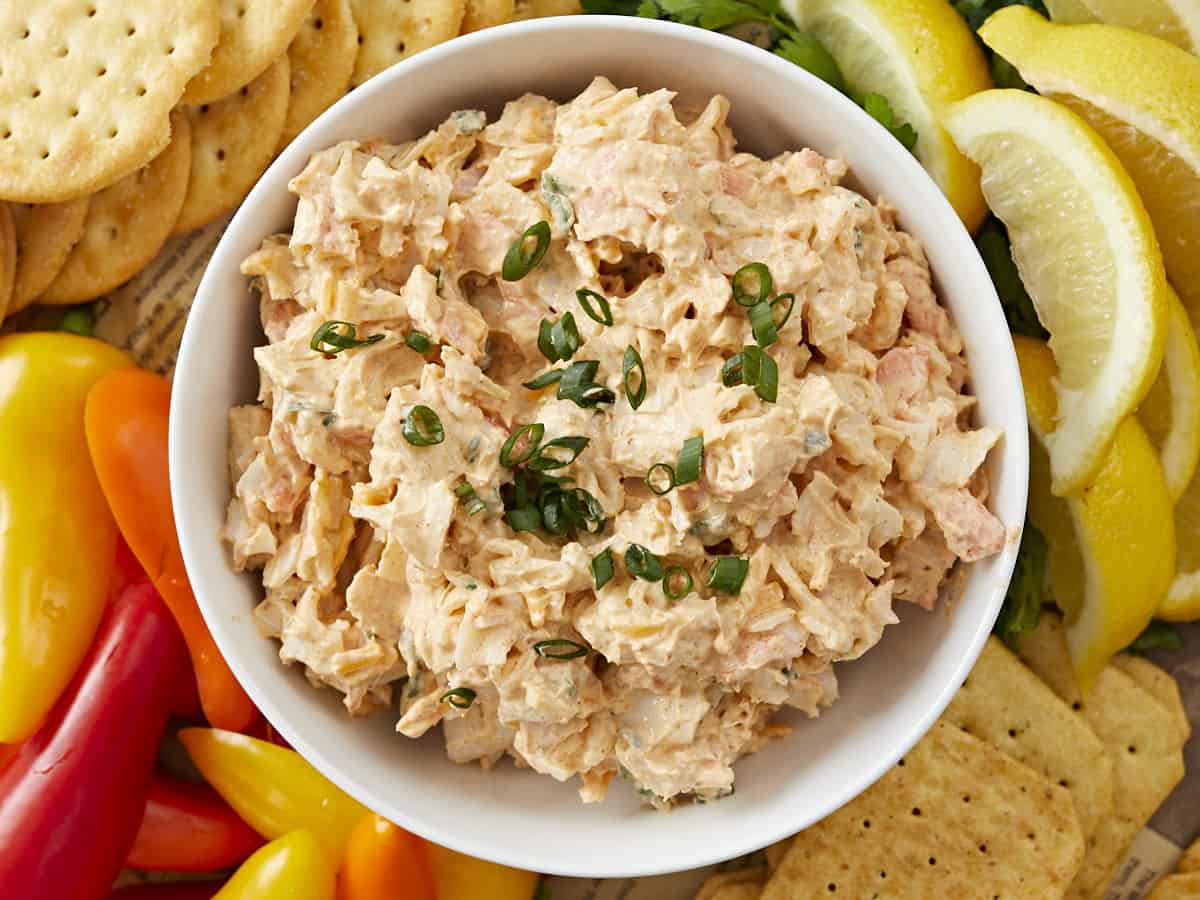
This creamy, spicy crab dip is so good you’ll be pushing a cracker into the corners of your serving dish to scoop up the last schmear. At least that’s what Beth and I did when we annihilated it in the Budget Bytes Kitchen (In the name of research, of course, 😂 ). It’s so easy that it comes together in three steps. And you can serve it hot or cold! Get ready for your new favorite thing to bring to the party.

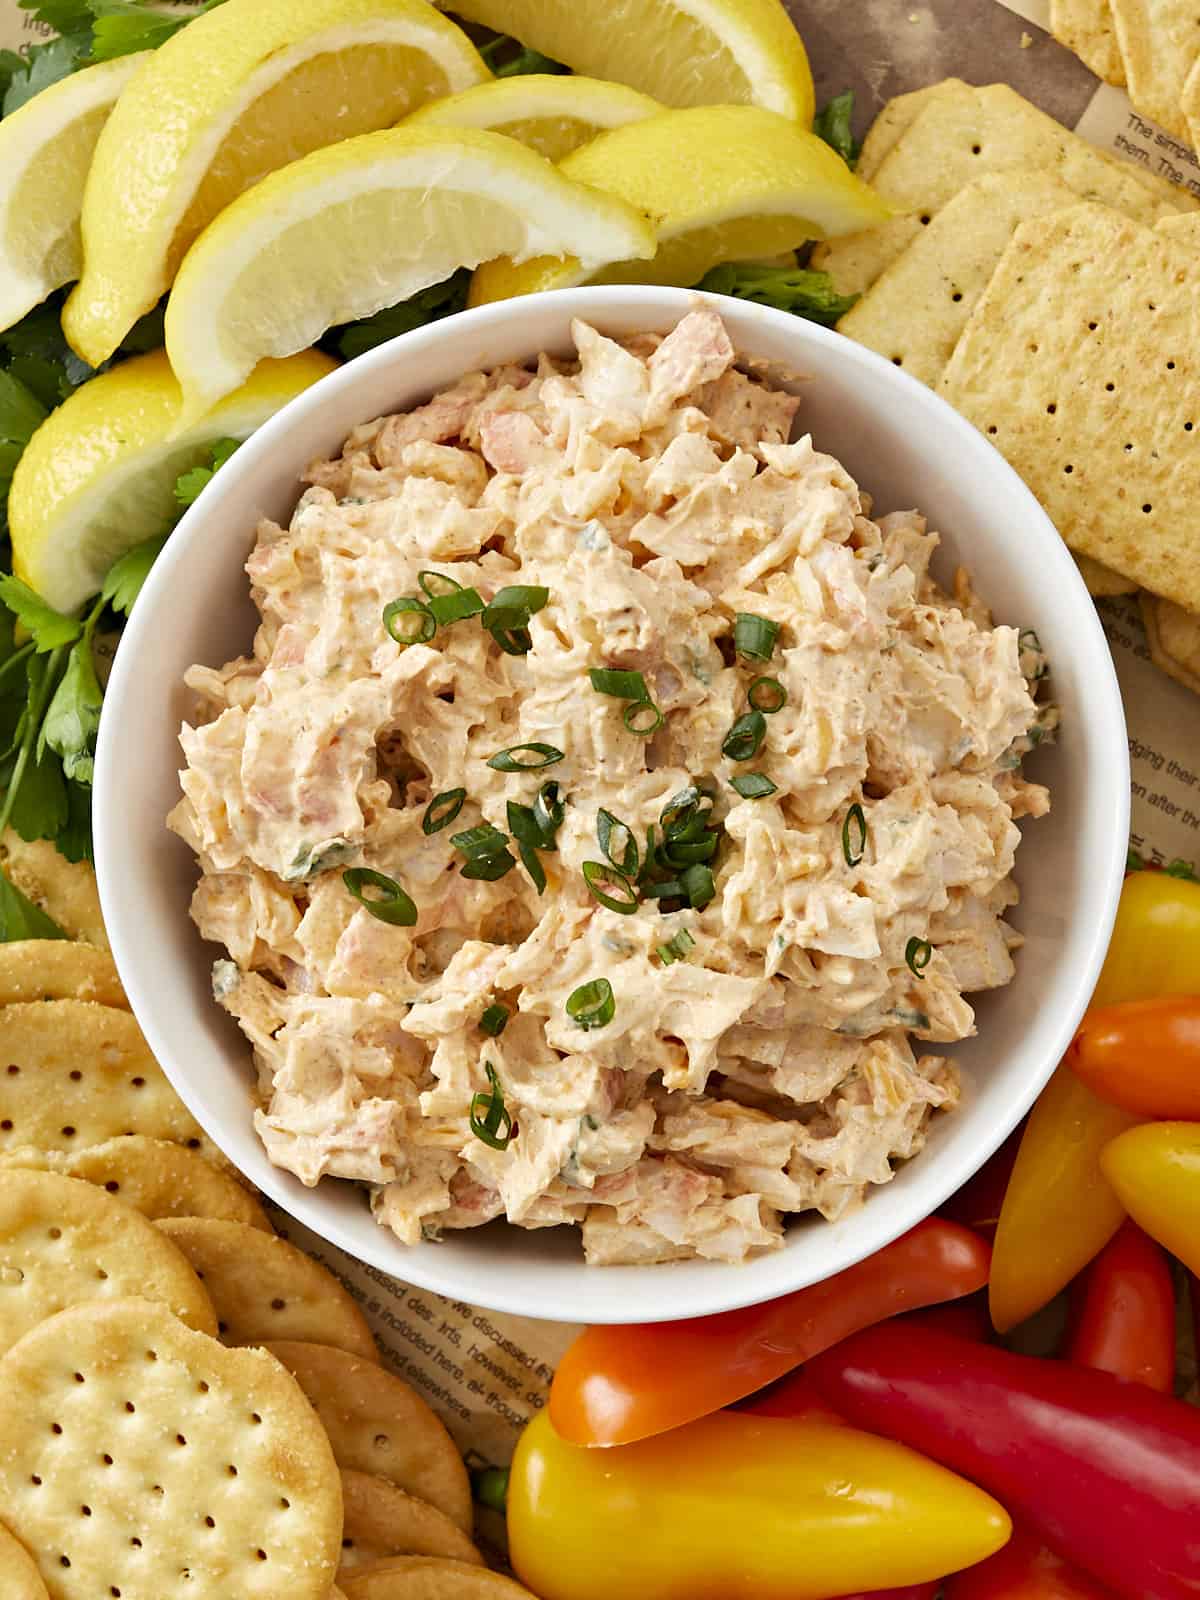
Overhead shot of crab dip in a white bowl surrounded by veggies.

What You’ll Need

This crab dip comes together in ten minutes. You should chill it before serving to thicken the cream cheese base, but you don’t have to if you’re low on time. Just serve it in a container set over ice. You can also bake it for a few minutes if you prefer to serve it hot.

Crab Meat – the real stuff is expensive, so we used imitation crab meat, and the results were divine. Choose your own adventure, but my money’s on the fish forgery. If you use real crab, drain it well, or your dip will end up runny.

Cream Cheese – acts like a binder and helps keep everything together. It also thickens the consistency of your dip.

Sour cream – adds an undeniable tang and smooth mouth feel.

Cheddar Cheese – the shreds will add texture and a sharp, earthy flavor.

Old Bay Seasoning – this blend of celery salt, red and black pepper, mustard powder, cayenne, and paprika adds a citrusy heat that doesn’t overpower the sweetness of the crab meat. You can substitute it with Cajun seasoning or Crab Boil seasoning.

Garlic Powder – raw garlic has a robust flavor that takes over a crab dip. Instead, use garlic powder which has mellow, roasted notes.
Hot Sauce – adds a smoky heat. Use as much (or as little) as your heart desires. You can substitute hot sauce with red pepper flakes or cayenne.
Lemon Juice – you need this hit of acid to break through the fattiness of the cream cheese and sour cream. If you don’t have lemon, use any white vinegar.

Scallions -add a soft onion flavor, texture, and freshness. You can also garnish with chopped Italian parsley or finely chopped raw onion. Soak raw onion in cold water for a minute to decrease its sharpness.

Crackers, Toasted Bread, Chips, Raw Veggies – lean into plain or lightly flavored crackers, so they don’t overpower the crab. Toasted bread and chips should be sturdy so they don’t break when dipped. Sweet peppers, celery sticks, and carrots sticks are all easy and economical choices.

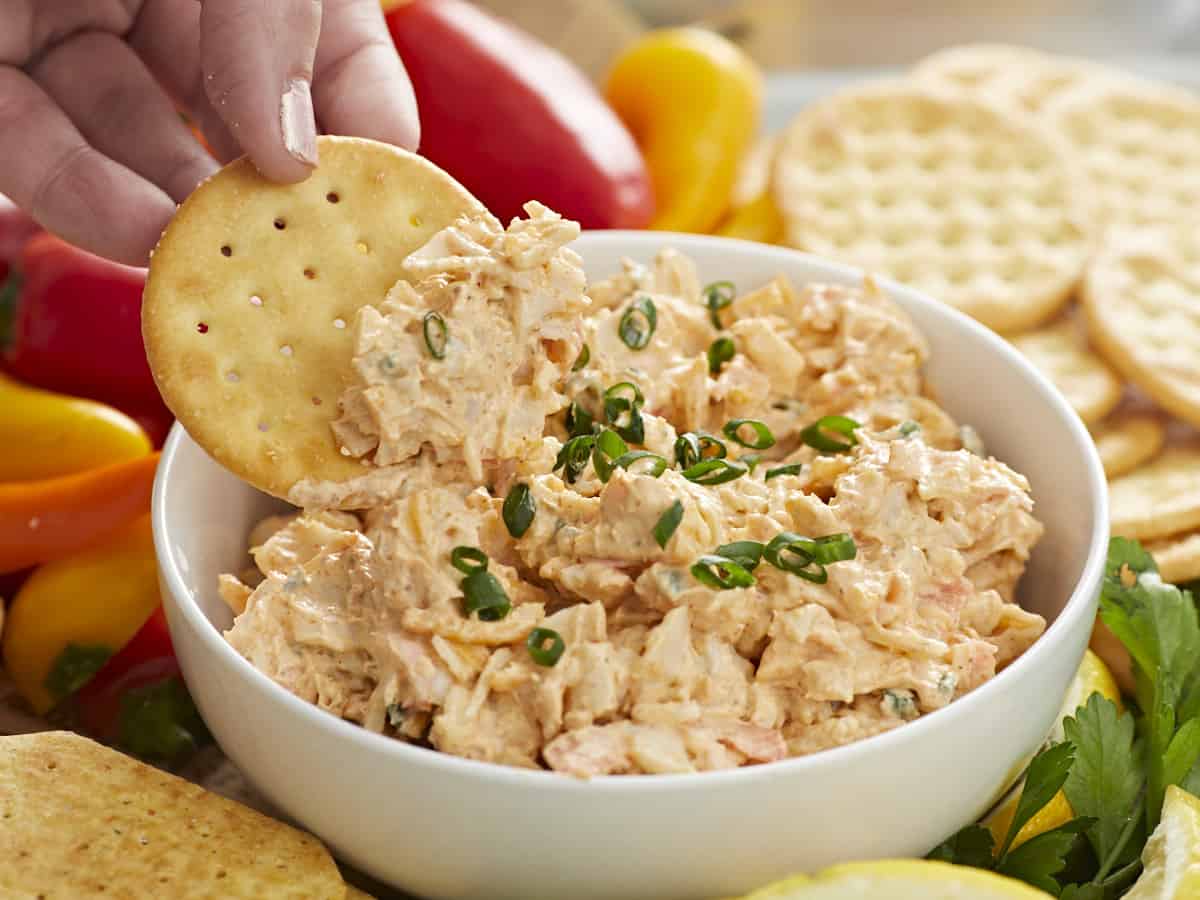
Hand dipping cracker in crab dip.

Do I Serve Crab Dip Hot or Cold?

You can do both! If you want to prepare a hot version, sprinkle an additional 1/4 cup of shredded cheddar over the top and then warm in a 350°F oven until the cheese has melted and the crab dip is bubbly—about fifteen minutes. To serve cold, chill it in the fridge for at least a half hour. If you’re low on time, place the crab dip container over a bed of ice and serve right away.

What Goes With Crab Dip?

Crackers, toasted bread, chips, and raw vegetables are the traditional items served with crab dip. But you can also use it as a spread on toast or chicken. Drizzle it on fried eggs or french fries. Try to stick with milder flavors that won’t overpower the sweetness of the crab.

How To Store Leftovers

Place leftovers in an air-tight container with plastic film or wax paper directly over the surface of the dip. Refrigerate for up to five days and freeze for up to 3 months. Thaw frozen crab dip in the refrigerator overnight. Reheat thawed crab dip that you’d like to serve hot in a 350°F oven.

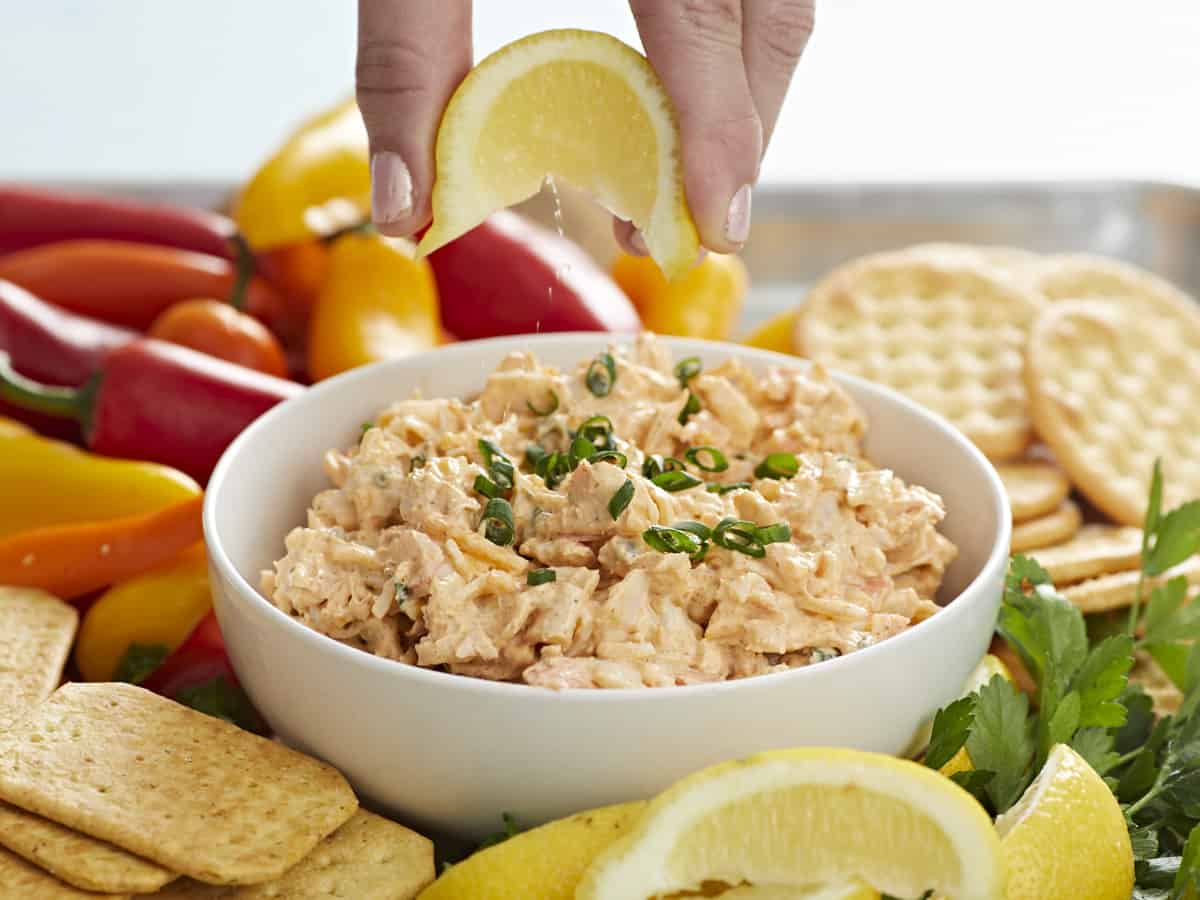
Hand squeezing lime on crab dip.
Overhead shot of crab dip.
Print

Crab Dip

This creamy, spicy crab dip is so good you'll be pushing a cracker into the corners of your serving dish to scoop up the last schmear! It comes together in three easy steps and you can serve it hot or cold.
Course Appetizer
Cuisine American
Total Cost ($5.07 recipe / $0.63 serving)
Prep Time 10 minutes
Servings 8 1/4 cup servings
Calories 109kcal

Ingredients

  • 4 oz cream cheese, softened $1.10
  • 1/4 cup sour cream $0.31
  • 1 tsp Old Bay Seasoning $0.16
  • 1 1/2 tsp lemon juice, freshly squeezed $0.39
  • 2 tsp hot sauce $0.04
  • 1/2 tsp garlic powder $0.04
  • 2 green onions, sliced in 1/8th inch rounds $0.22
  • 8 oz imitation crab, chopped $2.50
  • 1/4 cup sharp cheddar cheese* , shredded $0.31

Instructions

  • In a medium bowl, mix the cream cheese and sour cream until smooth.
  • Mix in Old Bay Seasoning, lemon juice, hot sauce, garlic powder, and green onions.
  • Mix in crab meat and cheddar cheese.
  • Refrigerate for at least 30 minutes and serve.*

See how we calculate recipe costs here.

Notes

*Use 1/4 cup more shredded cheddar to melt on top of the dip if you are serving it hot
*If you are serving the crab dip hot, top it with an additional 1/4 cup of shredded cheddar cheese and warm it in a 350°F oven until the cheese has melted and the crab dip is bubbly, about fifteen minutes.

Nutrition

Serving: 0.25cup | Calories: 109kcal | Carbohydrates: 7g | Protein: 4g | Fat: 8g | Sodium: 256mg | Fiber: 0.4g
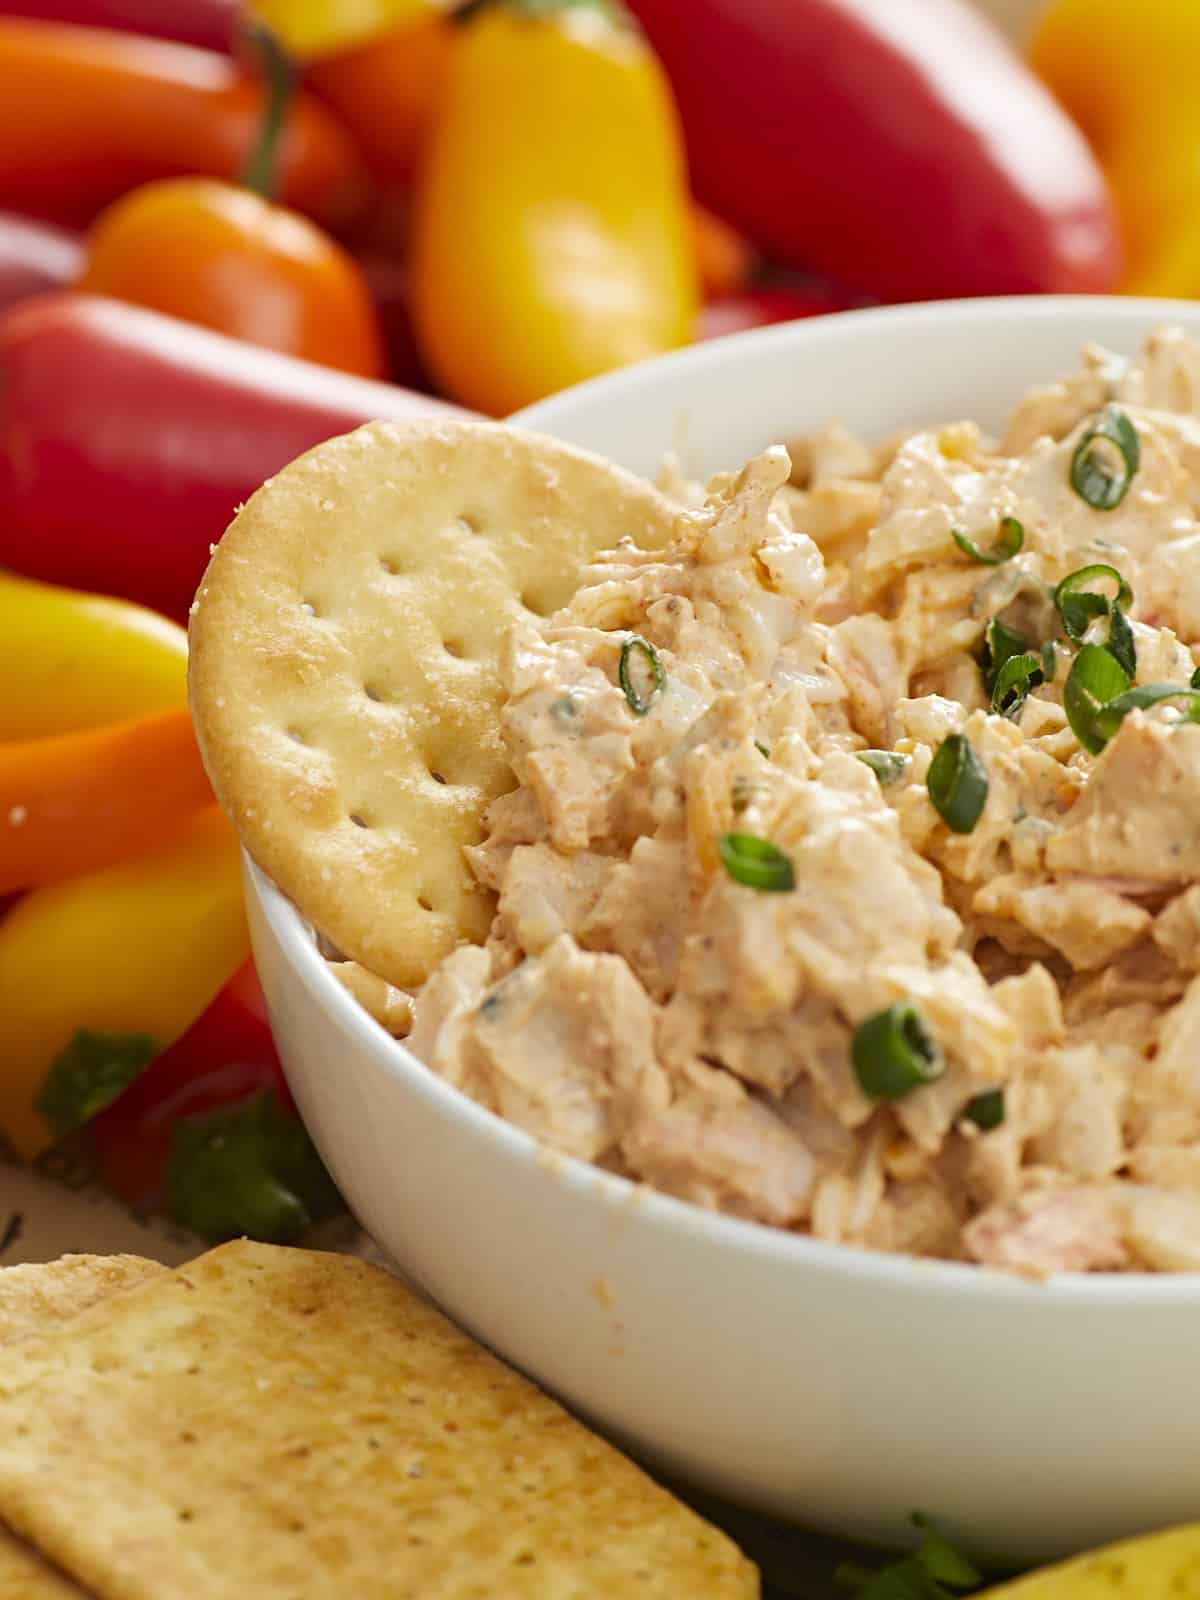
Cracker in a bowl of crab dip.

How to Make Crab Dip – Step by Step Photos

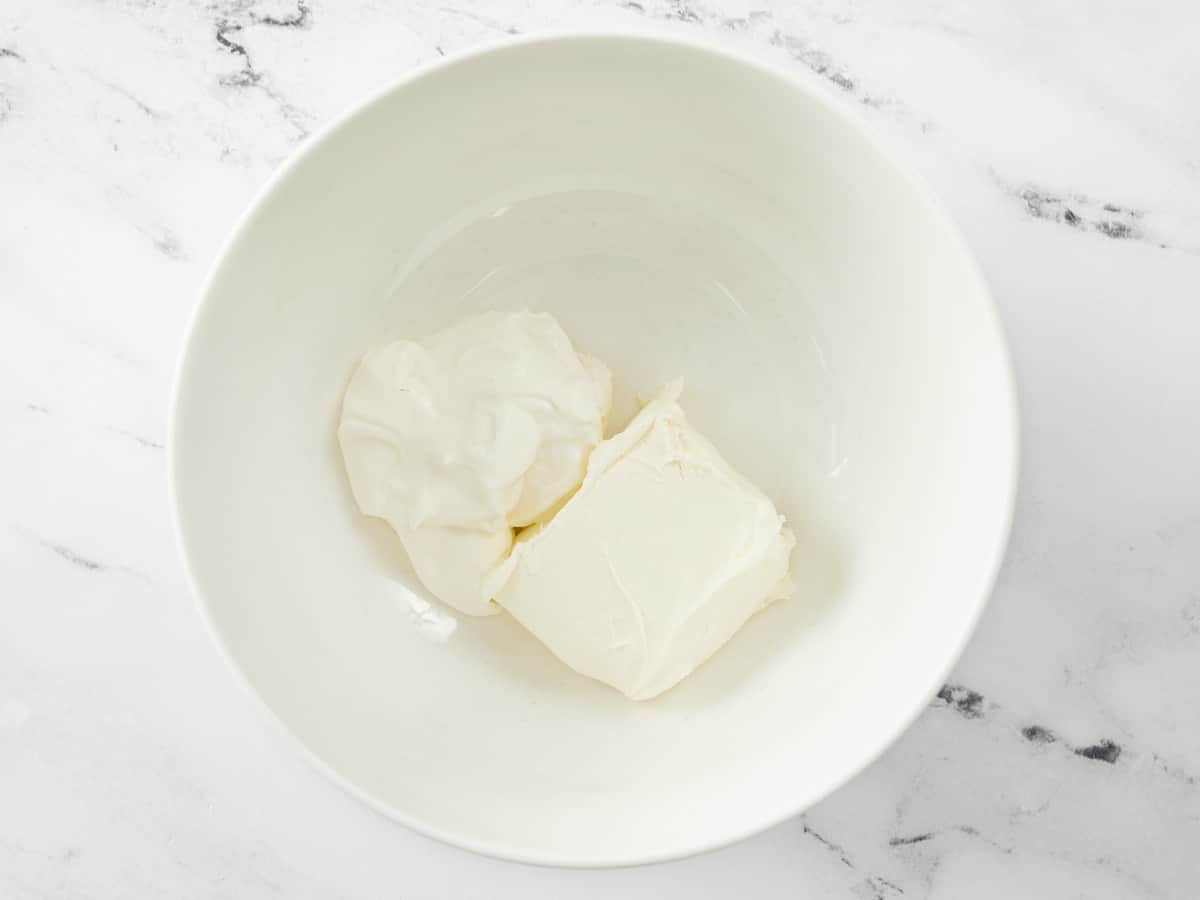
Overhead shot of cream cheese and sourcream.

In a medium bowl, mix the 4 ounces of cream cheese and 1/4 cup of sour cream until smooth.

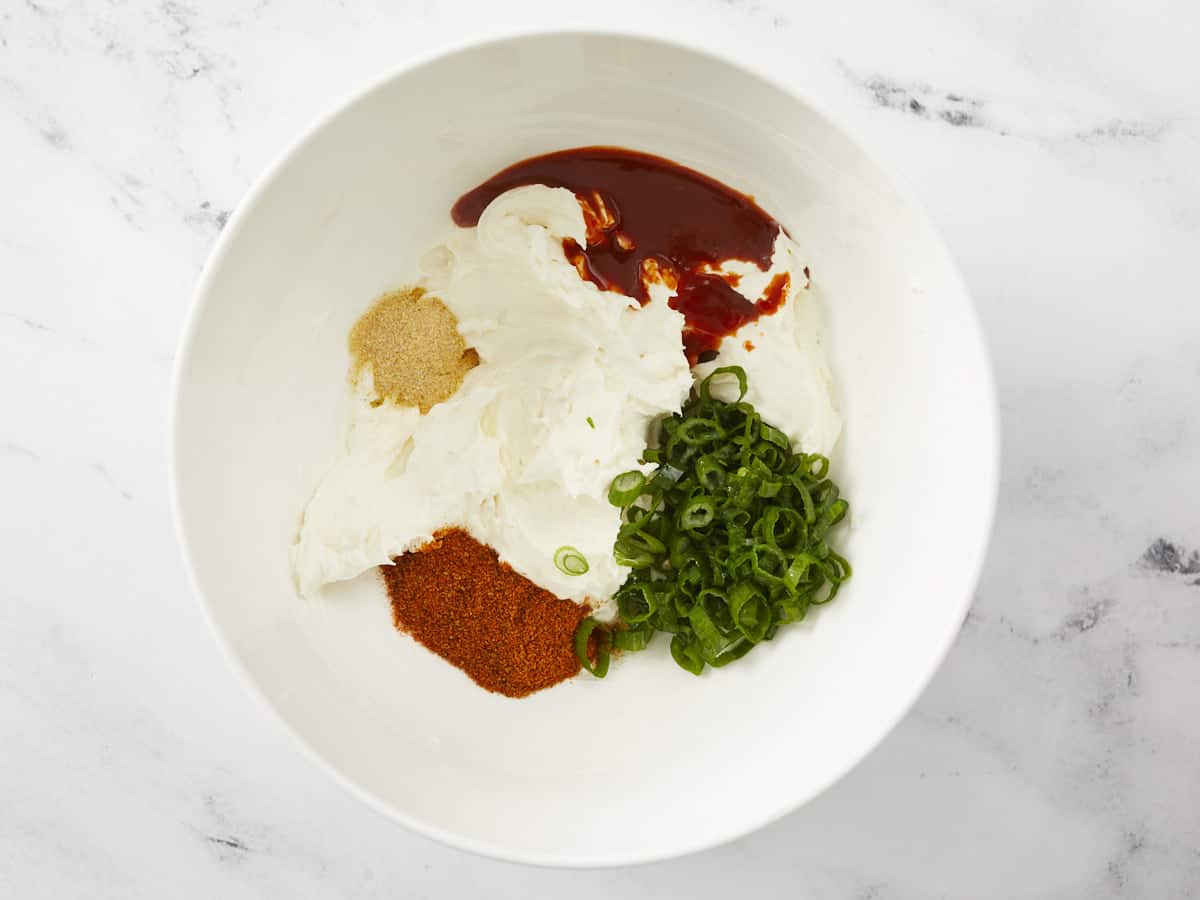
Overhead shot of spices in a bowl.

Mix in 1 1/2 teaspoons of Old Bay Seasoning, 1 1/2 teaspoons of fresh lemon juice, 2 teaspoons of hot sauce, 1/2 teaspoon of garlic powder, and 2 green onions sliced in 1/8th inch rounds (about 2 tablespoons).

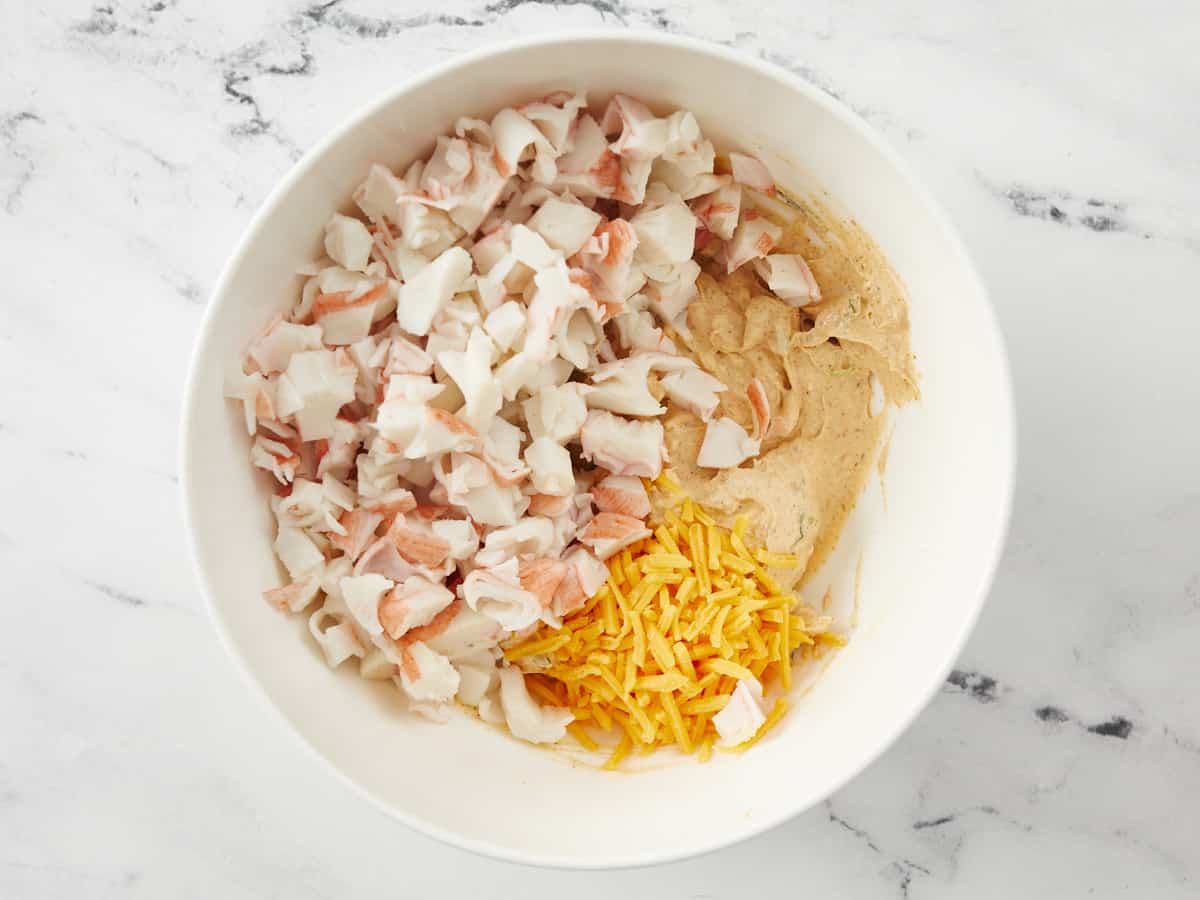
Overhead shot of crab and cheese in a white bowl.

Mix in 8 ounces of imitation crab and 1/4 cup of shredded cheddar cheese.

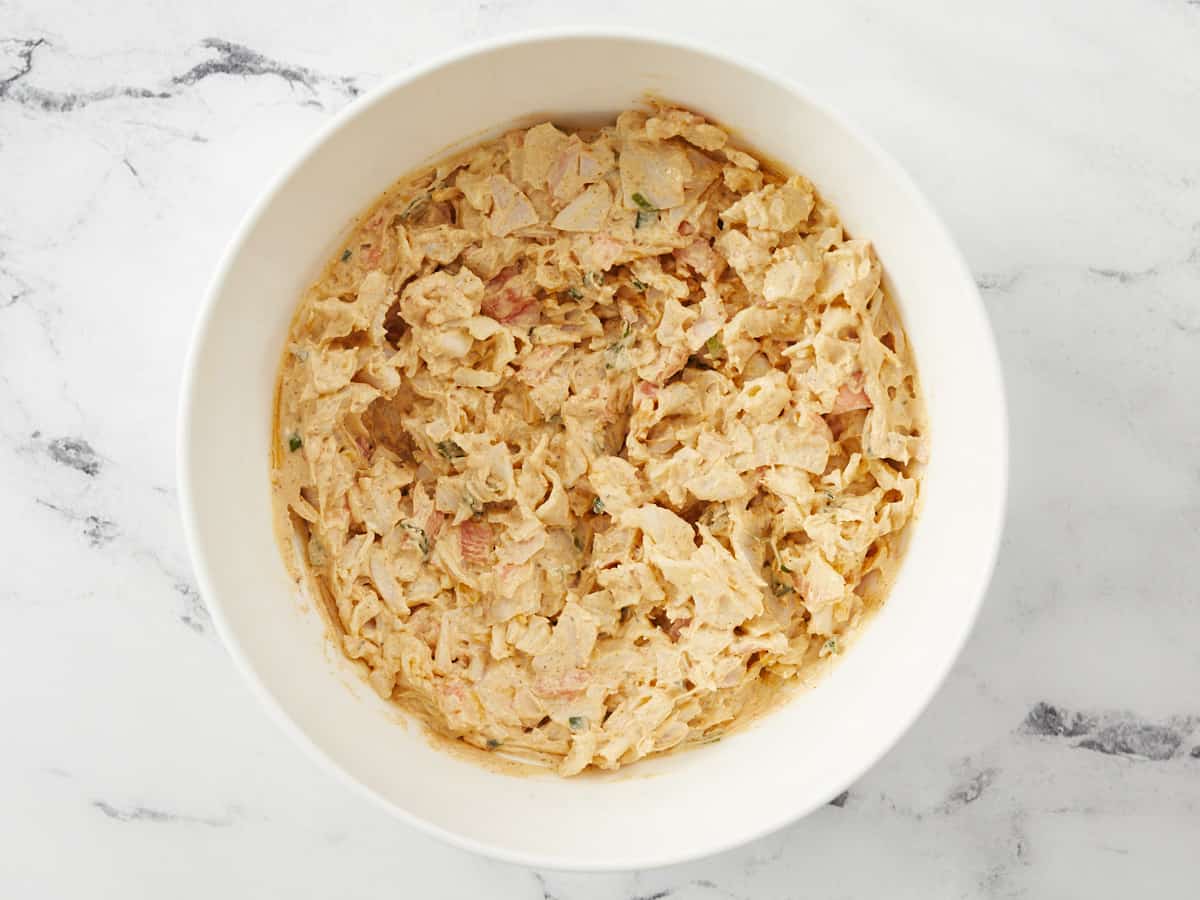
Overhead shot of finished crab dip.

Refrigerate for at least 30 minutes and serve with crackers, bread, chips, or raw veggies. If you’re running low on time, place the serving dish over a bed of ice and serve right away. Get ready for this incredible crab dip to steal the show!

Overhead shot of crab dip.

More Easy Dips

caption

The post Crab Dip appeared first on Budget Bytes.