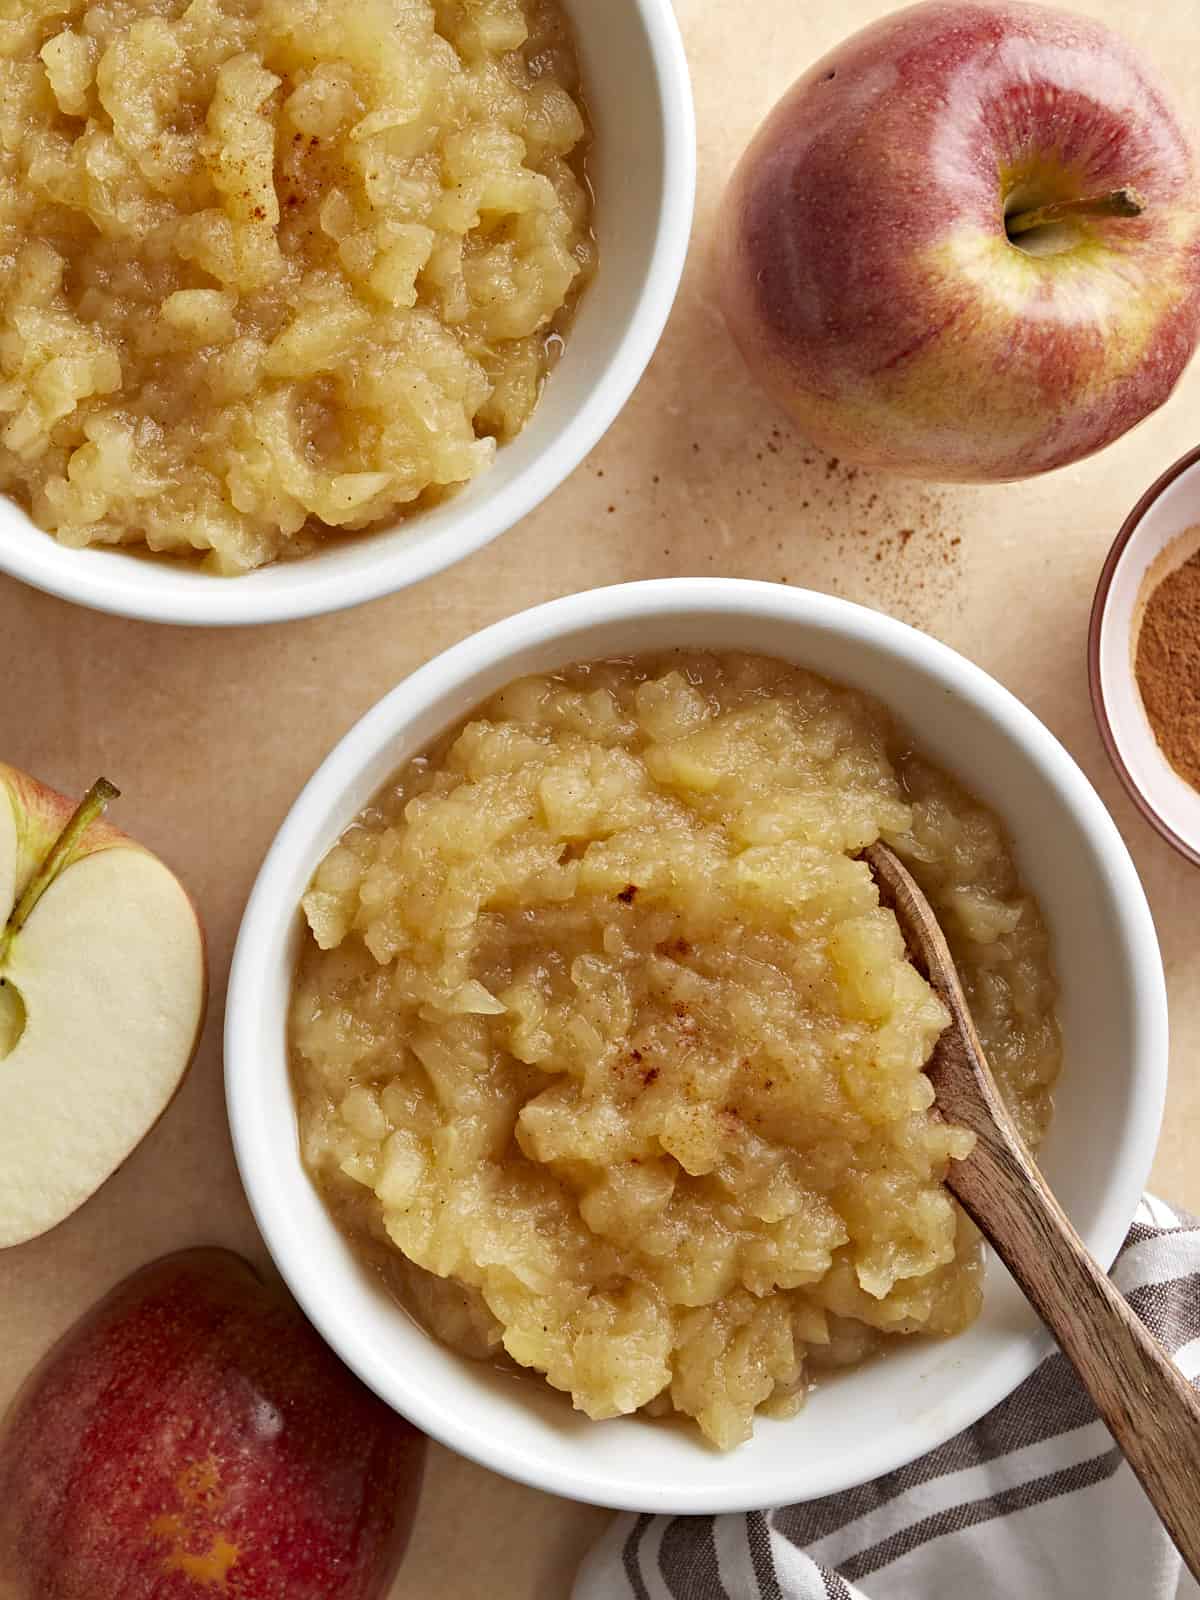
I always get a warm and cozy feeling anytime I make homemade applesauce. The smell of apples and cinnamon spreads through the kitchen as it cooks and soon the scent of Fall has filled the entire house. Fall is also the best time to make this homemade applesauce recipe because apples are in season so there are a lot of varieties to choose from, their flavor is at their peak, and they’re inexpensive. Sure you can buy store-bought applesauce, but trust me it’s no comparison to the taste of homemade applesauce!
Ingredients for Homemade Applesauce
You only need 4 simple ingredients to make this easy homemade applesauce recipe:
Apples – Of course, there are lots of different apples to choose from when making applesauce, but in general you’ll want to stick with sweet or semi-sweet varieties. If you choose a tart apple, like granny smith, you may want to add some additional sugar. We used Gala apples for this recipe.
Water – Water is used to cook the apples. Using water instead of apple juice or apple cider allows the fresh flavor of the apples to shine through!
Ground cinnamon – A touch of ground cinnamon goes a long way and tastes great with cooked apples. It also gives the applesauce just a hint of flavor.
Lemon juice – A little lemon juice brightens up the applesauce and helps the flavors pop. Don’t skip this one!
That’s it! Perfect homemade applesauce and no added sweetener needed.
What Kind of Apples Are Best For Making Applesauce?
You can honestly use several different types of apples to make applesauce. But to keep from having to add any sugar or sweetener, I suggest using a sweeter or semi-sweet variety of apple, like Fuji, Gala, Pink Lady, or Honeycrisp. You can use just one kind or a combination of 2 varieties if you want. And, of course, if you’re making your applesauce during the fall season, you’ll find the best deals and the sweetest apples during this time of year. ;)
Should You Peel The Apples?
This is a great question and it honestly depends on personal preference. I like to peel my apples when making applesauce in order to get a smoother consistency. But it’s definitely not required. If you’re short on time, just give them a good wash and leave the peel on.
How To Store Homemade Applesauce?
Homemade applesauce stores very well in the refrigerator and the freezer. Just store any leftover applesauce in an airtight container in the refrigerator for 4-5 days or in the freezer for up to 3 months. To thaw the applesauce, let it sit in the refrigerator overnight.
Wash, peel, and remove the core from the apples. Chop the apples into small 3/4 inch chunks.
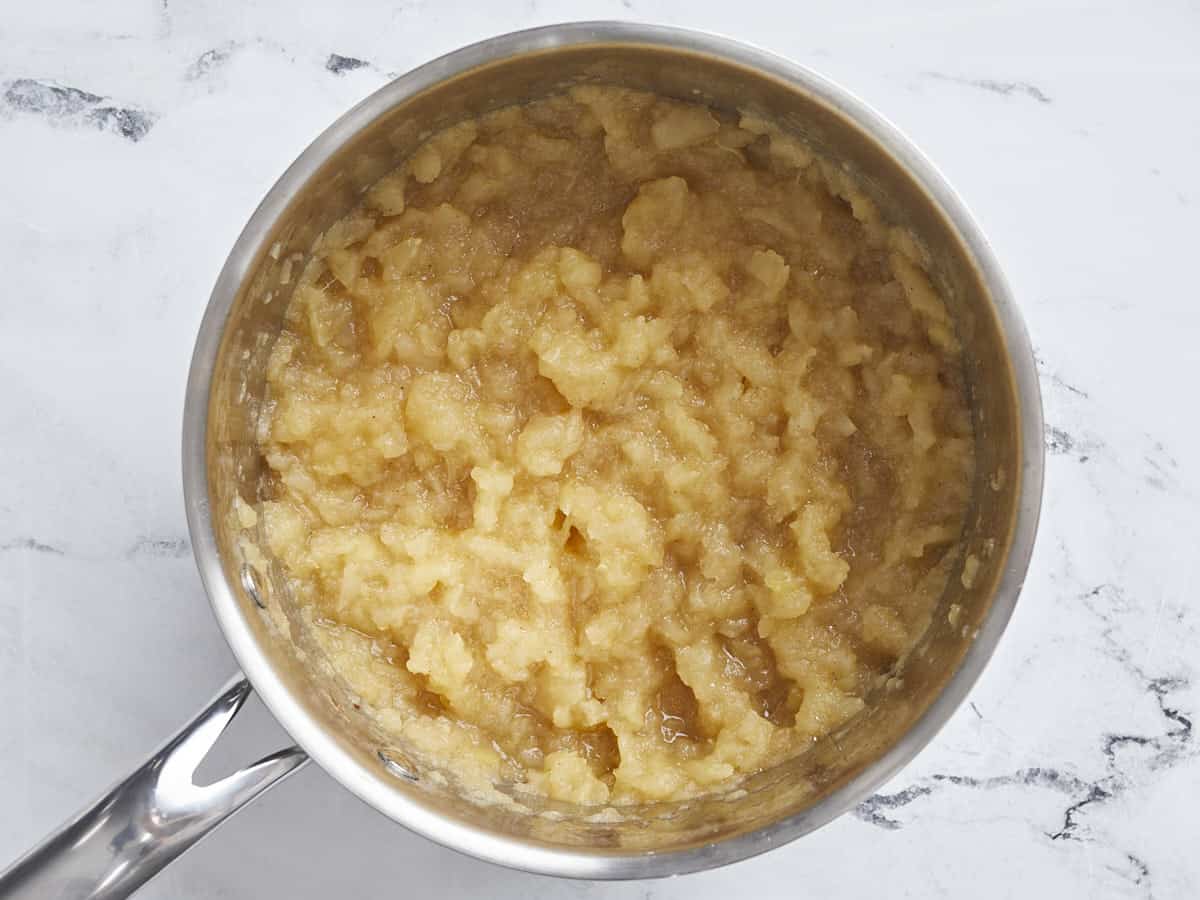
Add the chopped apples, ground cinnamon and water to a medium pot and place a lid on top. Heat the apples over medium, allowing them to come up to a simmer. Continue to simmer the apples for 15-20 minutes, stirring occasionally, until they are tender. The total cook time will vary depending on the variety of apple used.*
Remove the pot from heat. Mash the apples with a potato masher inside the pot for a chunky texture. Or allow the apples to cool slightly and blend with an immersion blender or carefully inside a blender for a smoother texture.
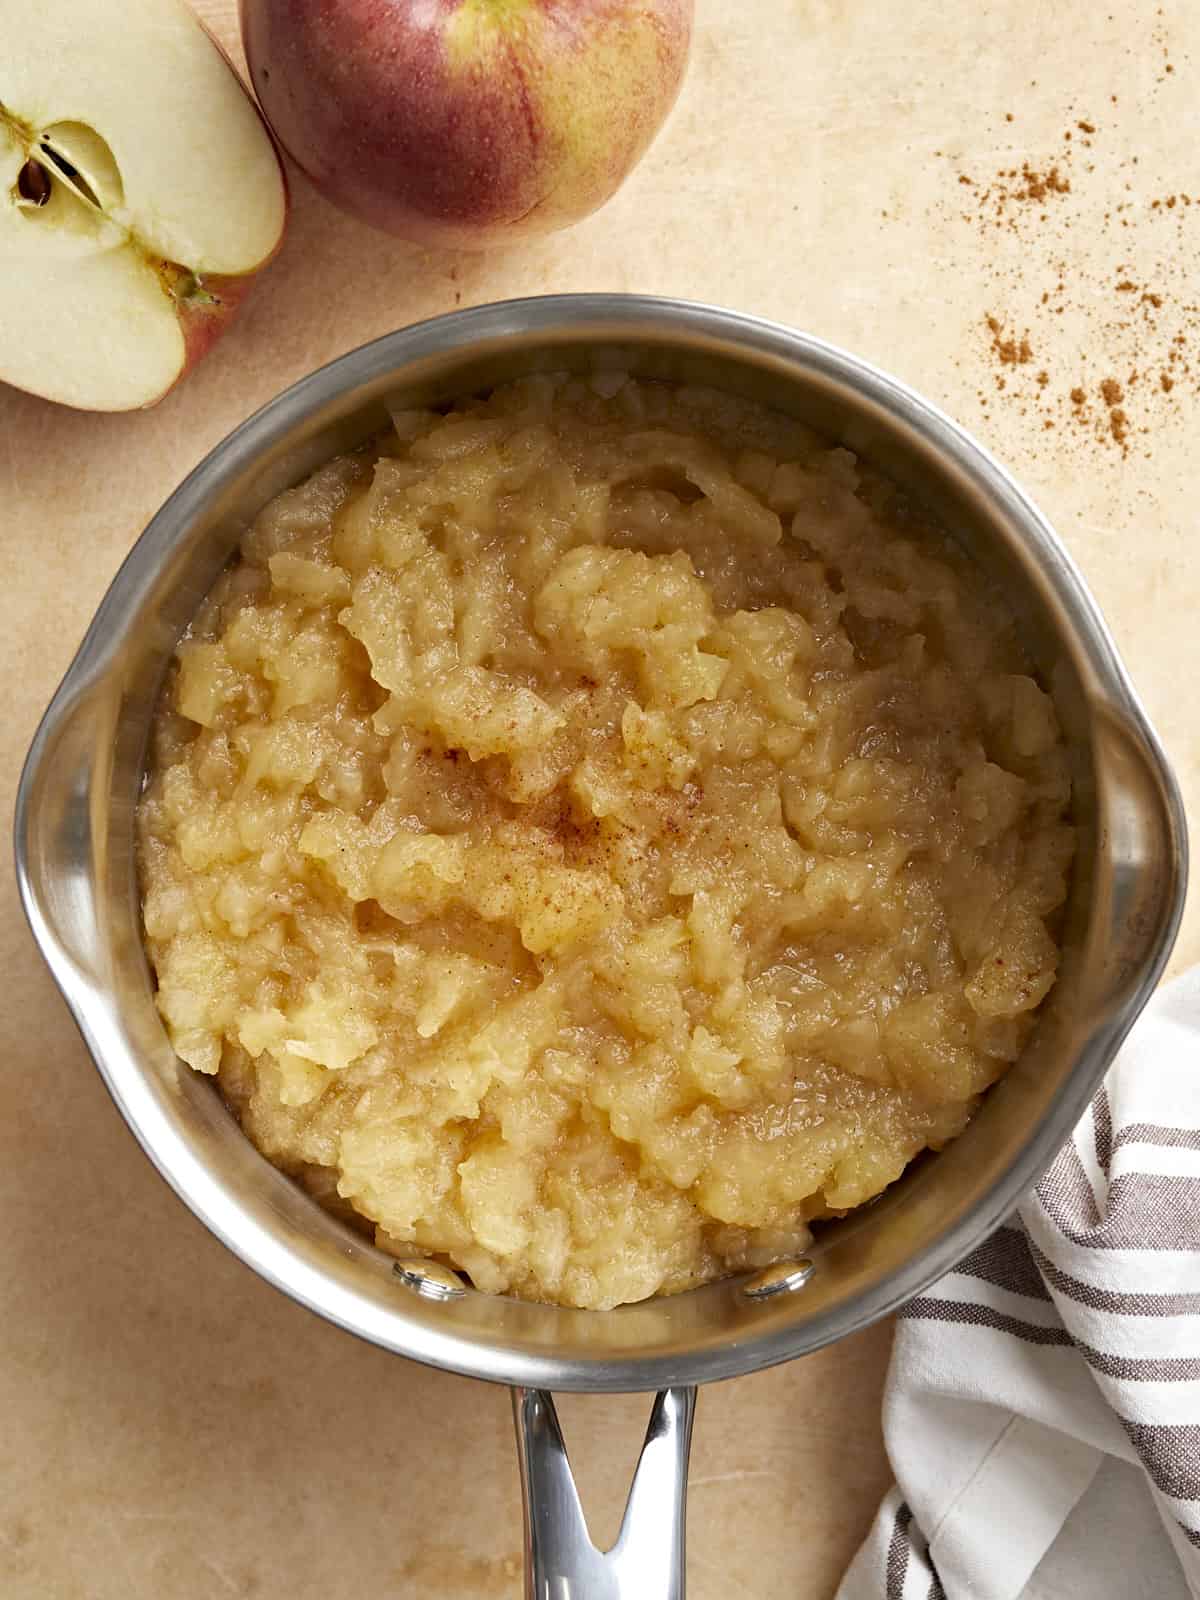
Add the lemon juice to the applesauce and stir to combine. Serve homemade applesauce warm or chilled in the refrigerator.
How to Make Homemade Applesauce – Step by Step Photos
Wash, peel, and remove the core from 6 apples. Chop the apples into 3/4 inch small chunks.
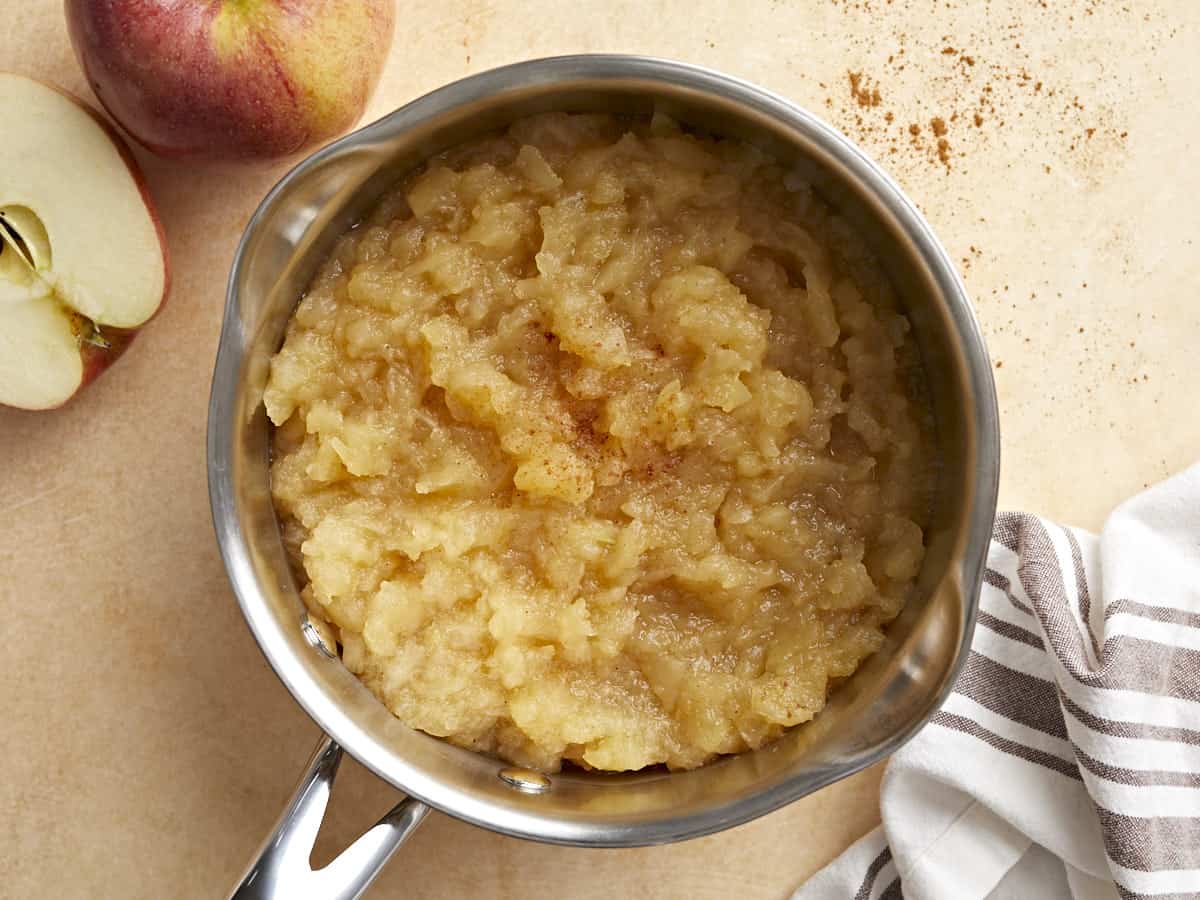
Add the chopped apples, 1/4 tsp ground cinnamon, and 3/4 cup of water to a medium pot and place a lid on top. Heat the apples over medium heat, allowing them to come up to a simmer. Continue to simmer the apples for 15-20 minutes, stirring occasionally, until they are tender. The total cook time will vary depending on the variety of apple used.
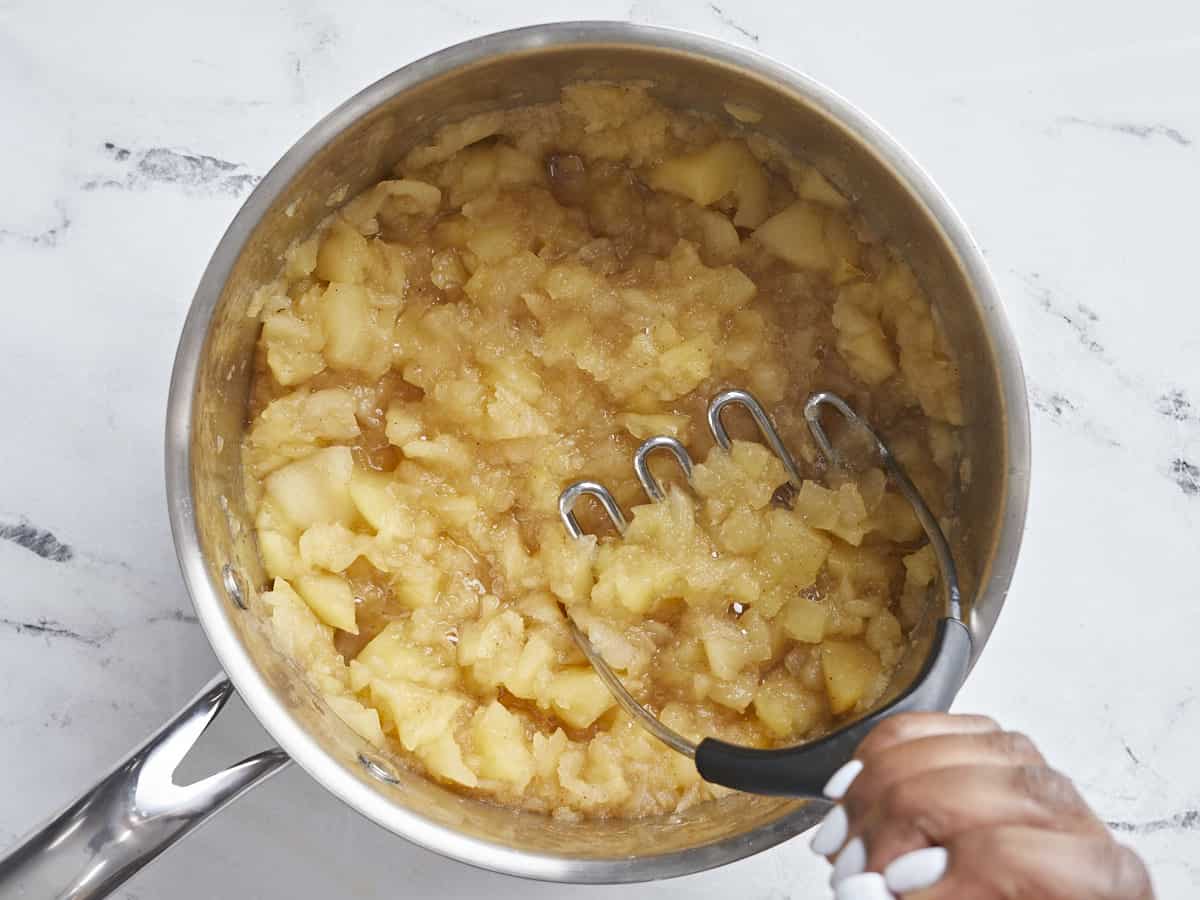
Remove the pot from heat. Mash the apples with a potato masher inside the pot for a chunky texture. Or allow the apples to cool slightly and blend with an immersion blender or carefully inside a blender for smoother texture.
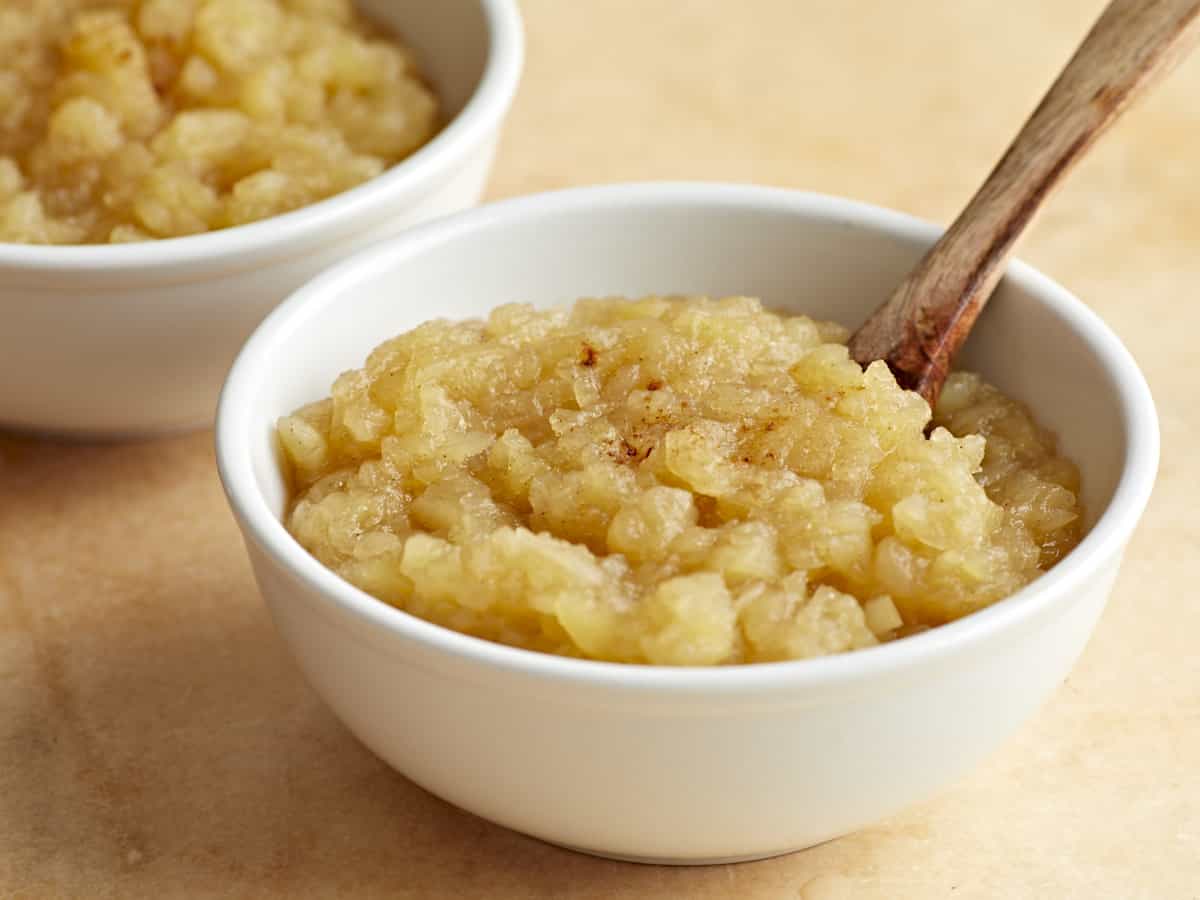
Add the 2 tsp of lemon juice to the applesauce and stir to combine. Serve homemade applesauce warm or chilled in the refrigerator. Enjoy!
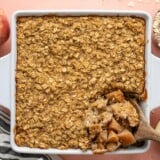
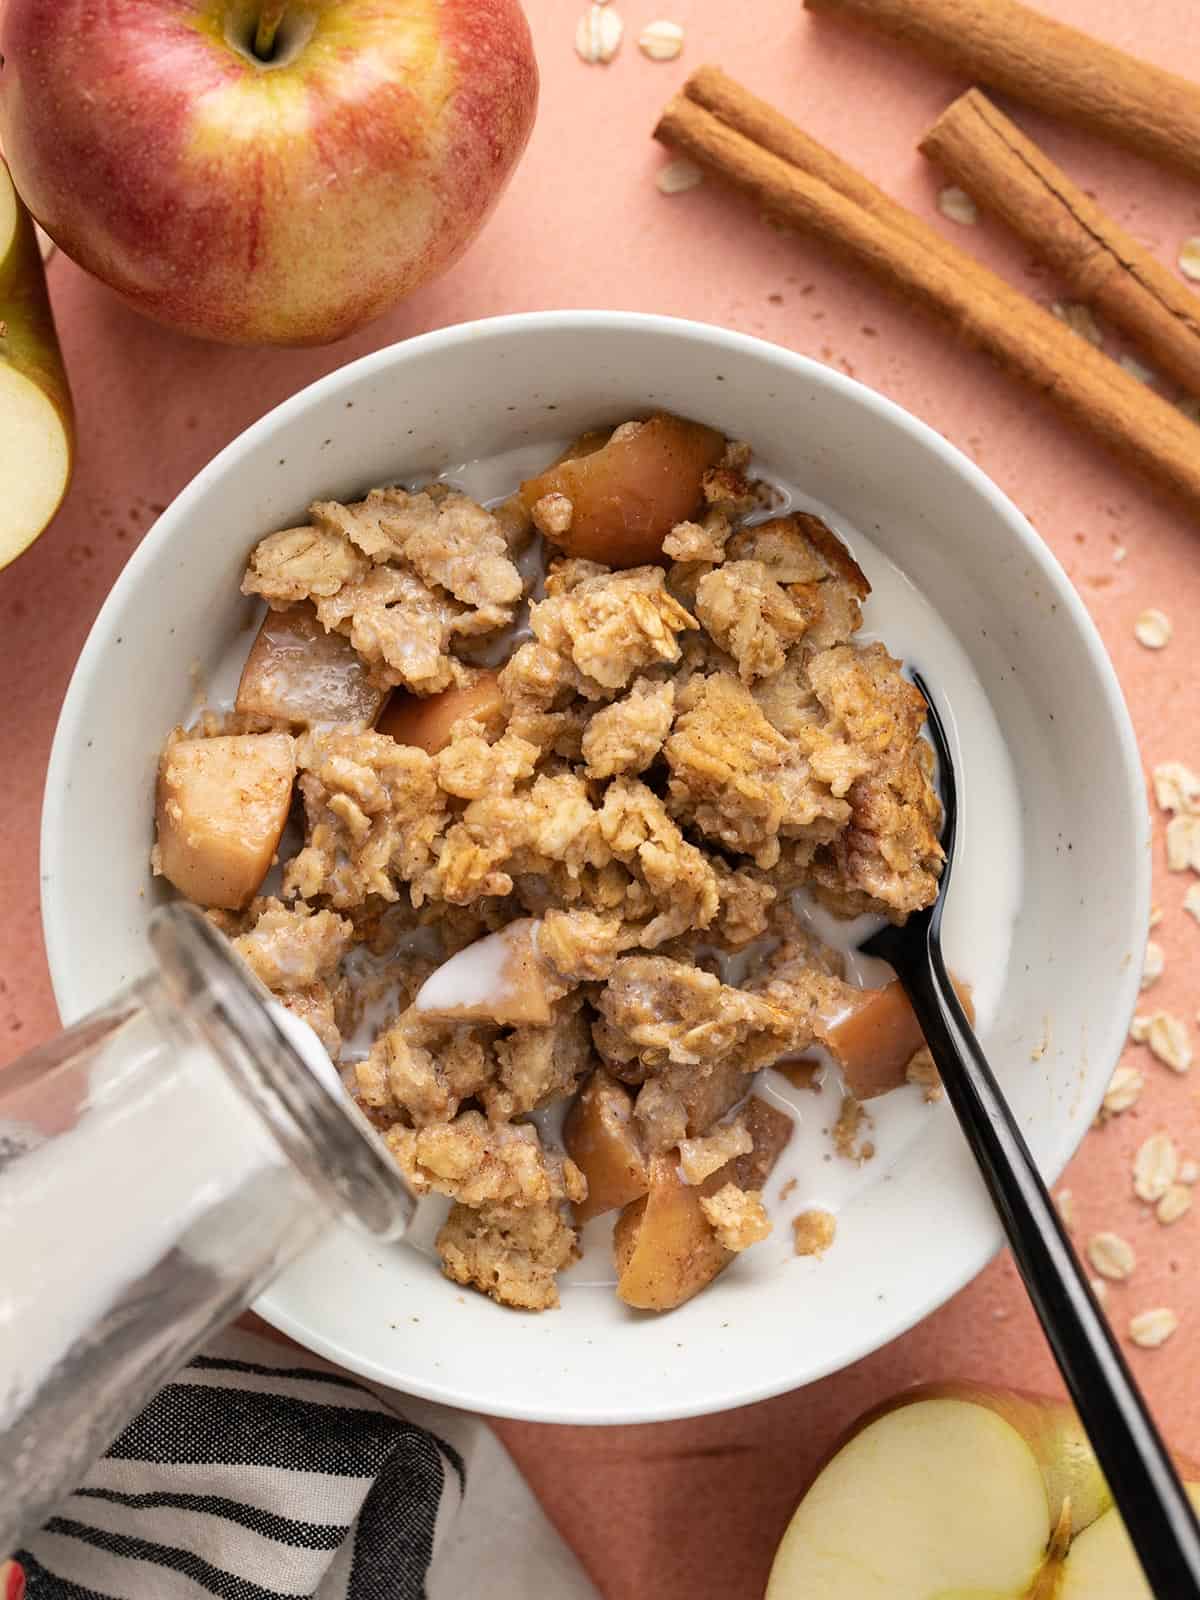
Who needs those autumn-themed candles when you’ve got Apple Cinnamon Baked Oatmeal in the oven? NO ONE. This warm and cozy oatmeal casserole, of sorts, is the epitome of fall vibes. Not only will this baked oatmeal make your house smell amazing, but it’s an easy way to meal prep breakfast for the week ahead. It’s cozy, delicious, filling, and EASY. 🙌
What is Baked Oatmeal?
If you’re new to baked oatmeal, it’s kind of like bread pudding, but made with oats instead of chunks of bread. It’s sweet, rich, hearty, and absolutely amazing. The texture is soft and moist, but not goopy like traditional oatmeal can be, and it gets just a little bit crispy around the edges of the baking dish. You can eat it hot out of the oven and the leftovers can be eaten cold or reheated in the microwave. I like to pour a little cold milk over top for a delicious hot-cold combo. Baked oatmeal can also be frozen in single-serving containers for quick reheatable weekday breakfasts!
Ingredients for Apple Cinnamon Baked Oatmeal
This apple cinnamon baked oatmeal combines our usual baked oatmeal base with apples that are coated in a little cinnamon and sugar, and then baked until they form an apple pie-like layer on the bottom of the oats. Here are the ingredients you’ll need to make this incredible apple cinnamon baked oatmeal:
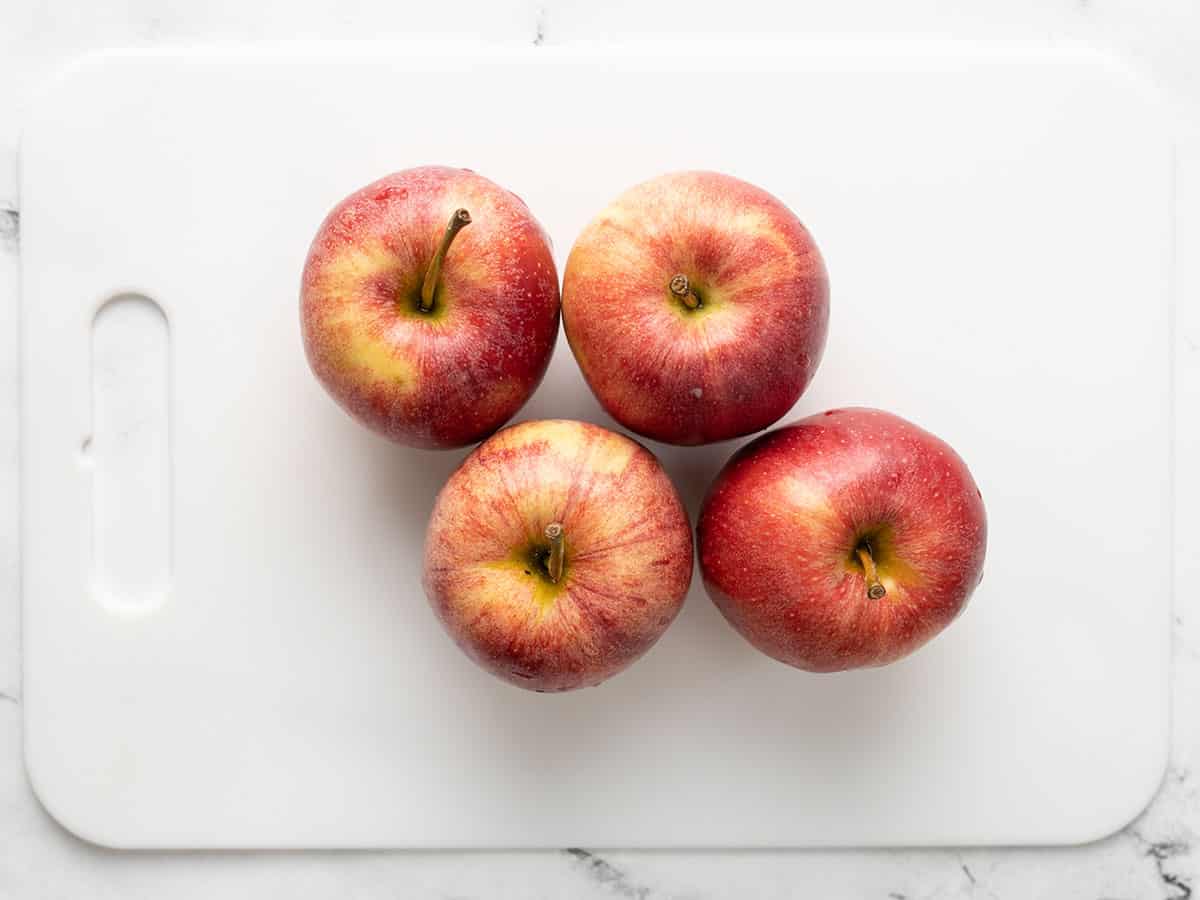
Fresh apples: Pick a sweet or semi-sweet variety of apple, like Fuji, Gala, or Honeycrisp. And, of course, take advantage of the fresh fall apples for the best price and flavor!
Oats: Make sure to use old-fashioned rolled oats for this recipe, not quick oats or minute oats, to achieve the best texture. Quick oats are too thin and will create a mushier texture.
Milk and eggs: Milk and eggs create a custard that keeps the baked oats soft, tender, and moist. I like to use whole milk, but you can substitute it with non-dairy milk if needed.
Brown sugar and applesauce: Using both broth sugar and applesauce to sweeten the baked oatmeal creates an even bigger apple pie-like flavor without having to use too much added sugar.
Spices: Cinnamon, cloves, and vanilla make these baked oats that classic fall aroma!
Lemon juice: A little lemon juice brightens up the baked apples and really makes their flavor shine.
Cornstarch and baking powder: These two ingredients are added for texture. The cornstarch helps thicken the apple juices as they bake, creating a pie-filling-like texture. The baking powder lightens the oat mixture just a touch so it’s not quite so heavy.
How to Serve Apple Cinnamon Baked Oatmeal
Baked oatmeal is pretty versatile. You can eat it either hot OR cold. I love it just out of the oven with a little cold milk poured over top, but it’s also great cold after it’s been refrigerated overnight. You can top it with some nuts or even some whipped cream for an even more dessert-like treat!
How to Store The Leftovers
After baking, divide the oatmeal into single-serving portions and refrigerate until completely cool. The baked oatmeal can be stored in the refrigerator for 4-5 days, or you can transfer it to the freezer for longer storage (about three months). Refrigerated or frozen baked oatmeal can be reheated quickly in the microwave.
Preheat the oven to 375ºF. Core and dice the apples.
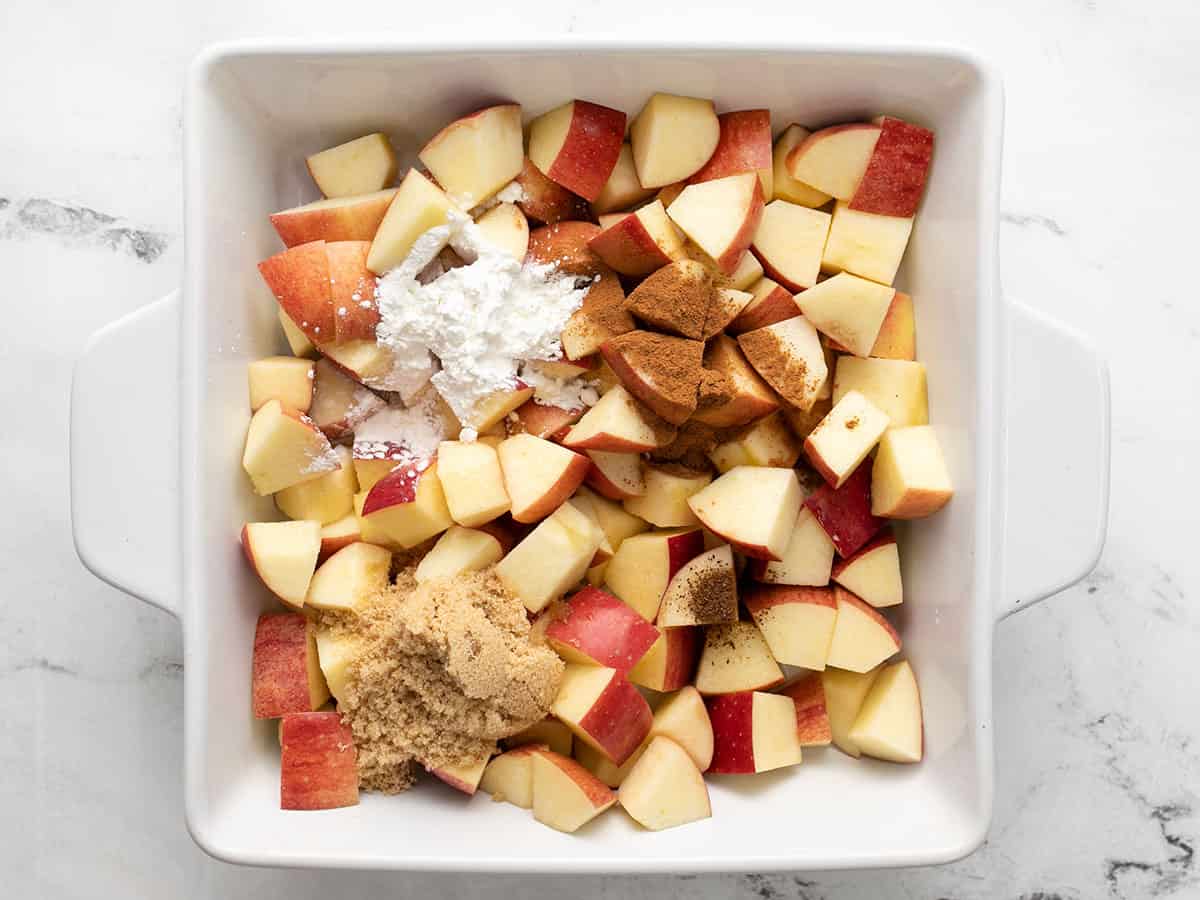
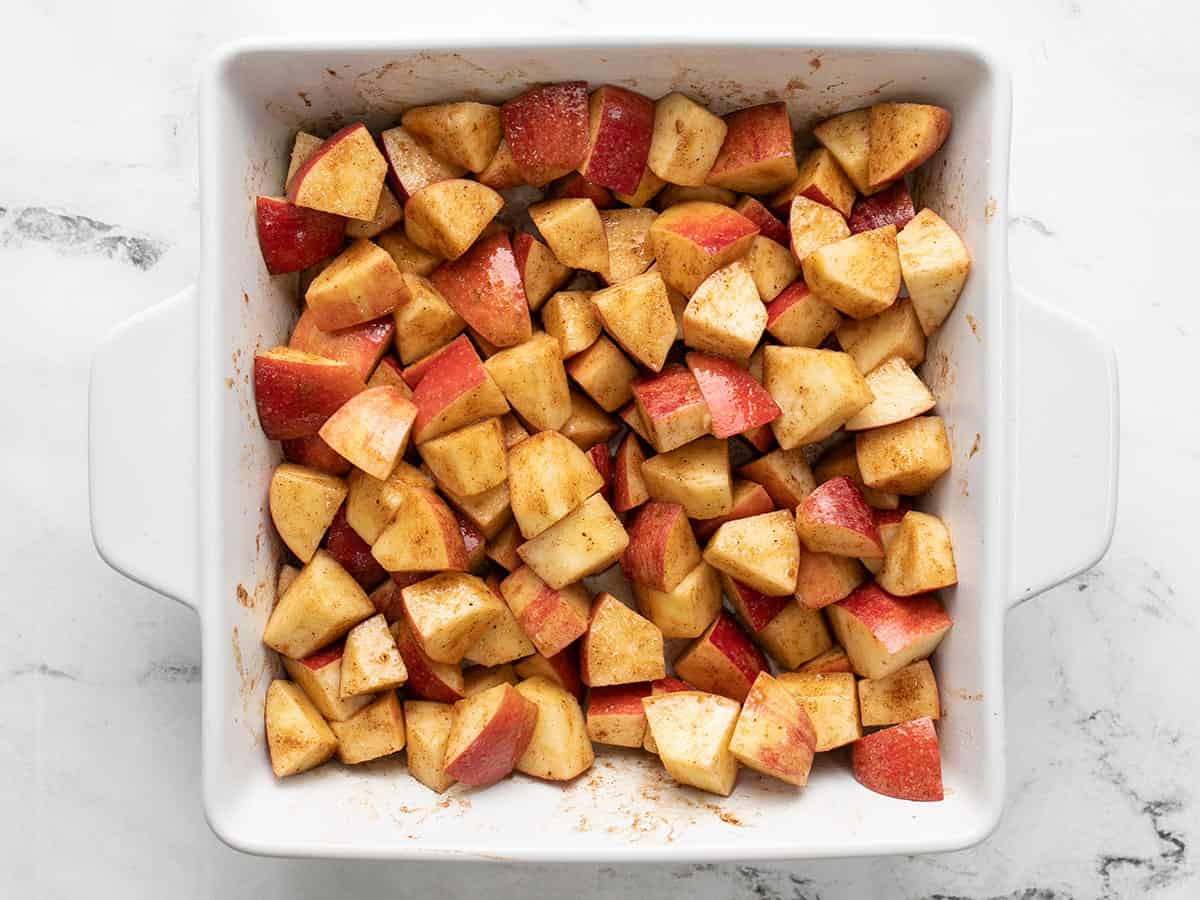
Place the diced apples in the bottom of a 9×9-inch (or 2 qt.) casserole dish. Add the lemon juice, brown sugar, cornstarch, cinnamon, and cloves. Stir until the apples are coated in sugar and spices.
Cover the dish with foil and bake for 15 minutes.
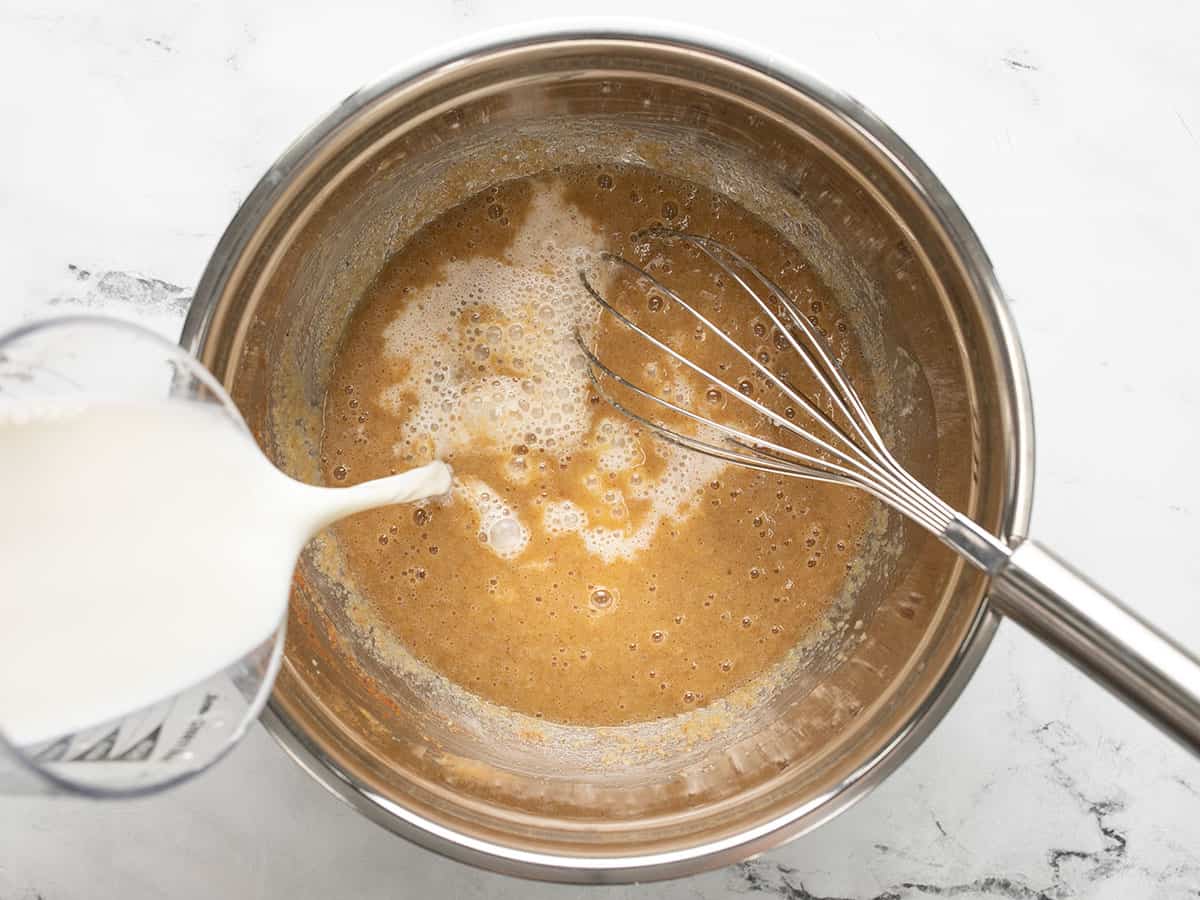
While the apples are baking, prepare the baked oatmeal mixture. In a large bowl, whisk together the applesauce, brown sugar, eggs, vanilla, salt, baking powder, and cinnamon. Then add the milk and whisk to combine again.
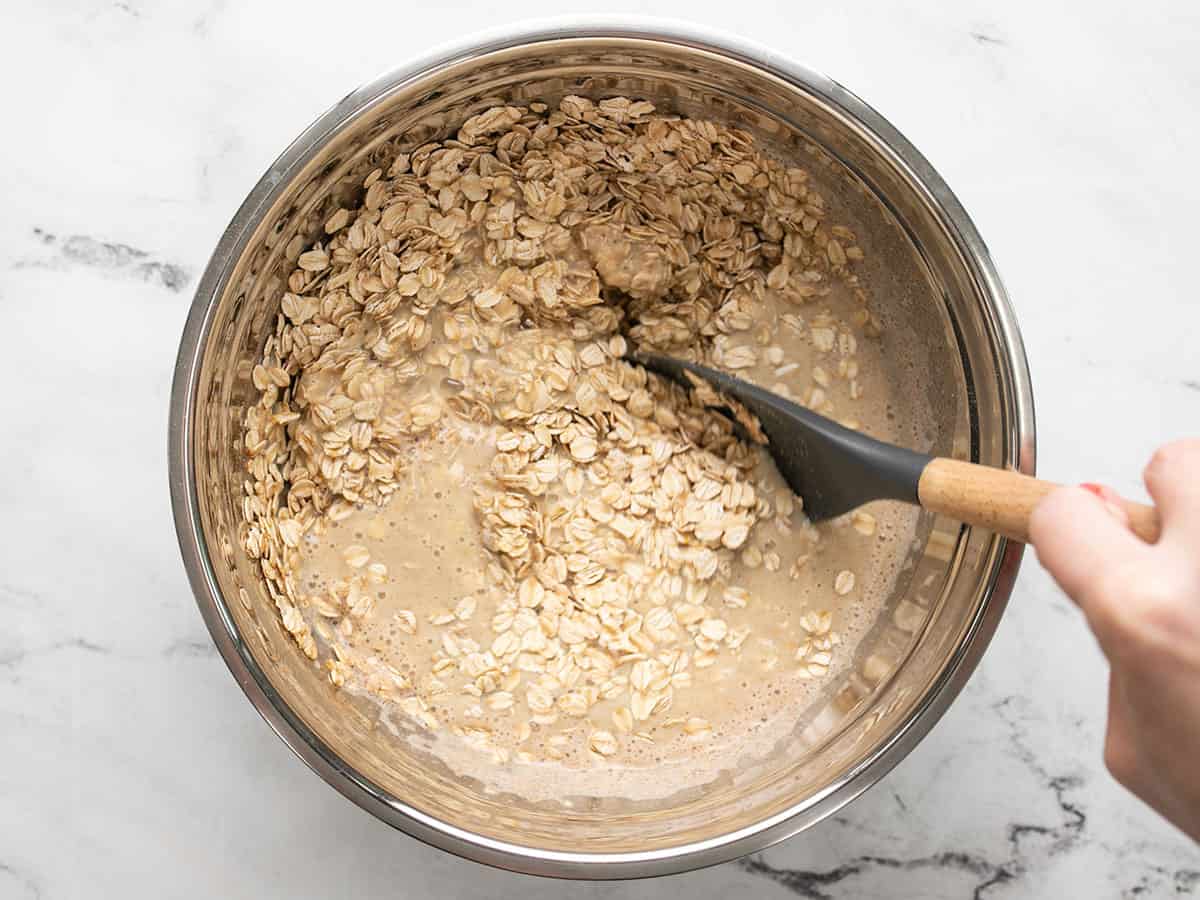
Finally, stir the dry oats into the applesauce mixture and stir until fully combined.
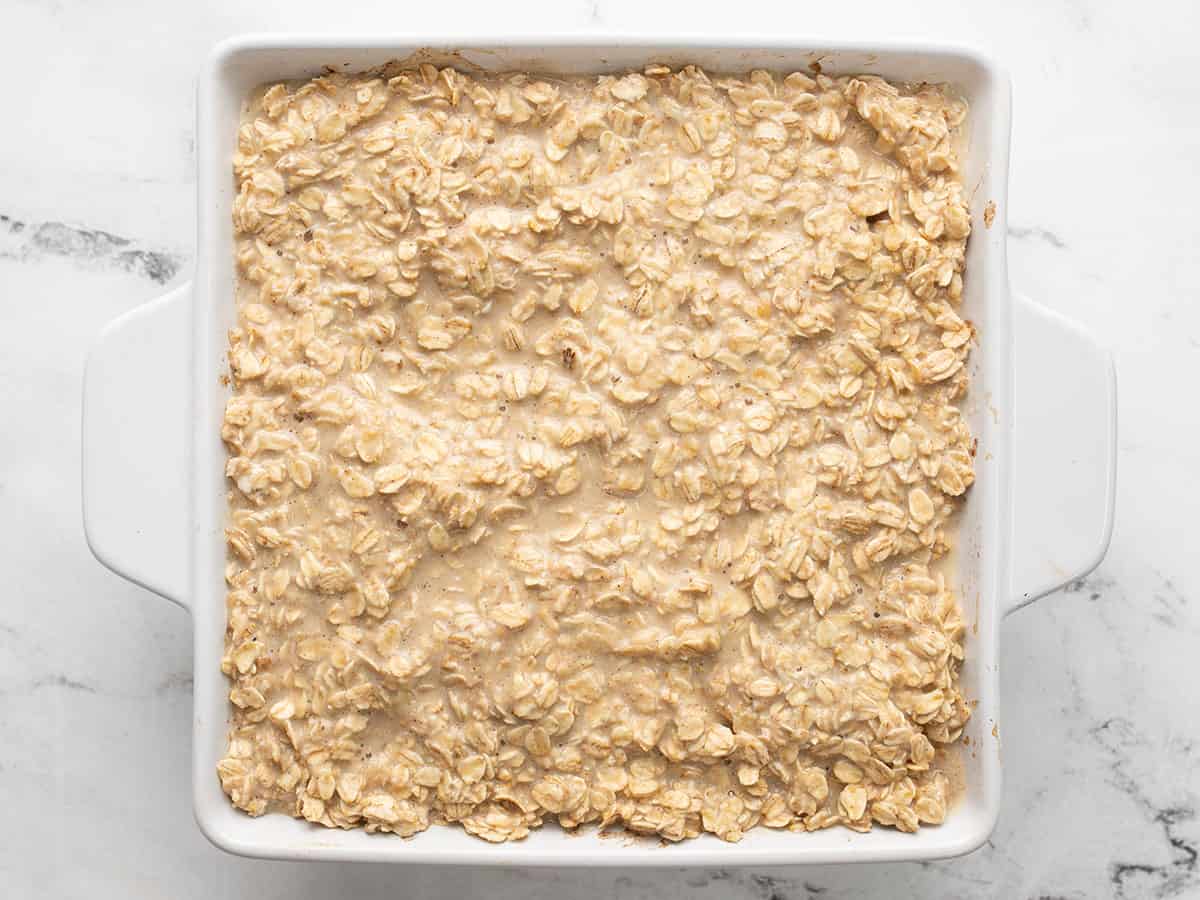
After the apples come out of the oven, give them a good stir, then pour the oat mixture over top. Return the dish to the oven (uncovered) and bake for an additional 30 minutes.
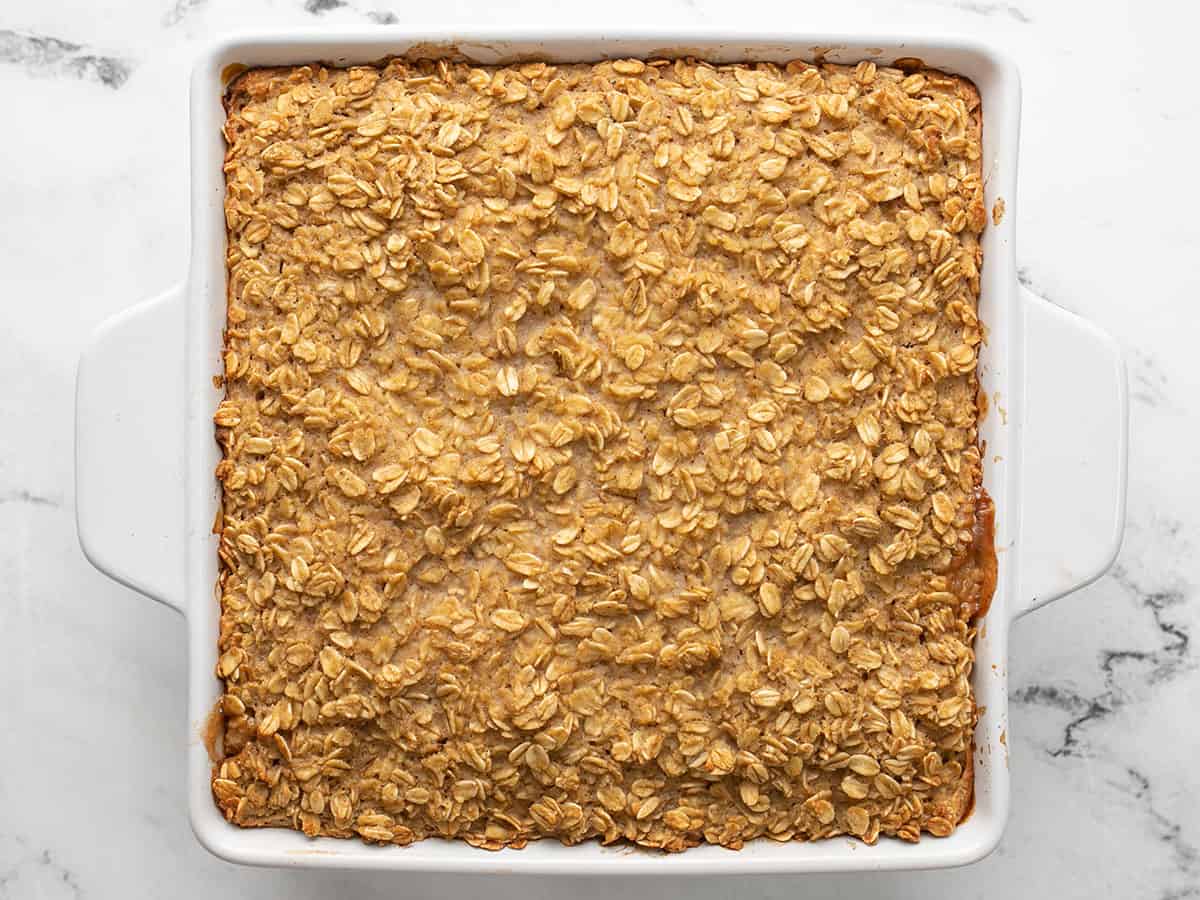
After baking for 30 more minutes the oats should be golden brown on top and you may see some of the apple cinnamon layer bubbling up around the edges. Let the oats cool for about five minutes before serving.
How to Make Apple Cinnamon Baked Oatmeal – Step by Step Photos
Preheat the oven to 375ºF. Core and dice four medium apples (about ½ lb. each).
Place the apples in the bottom of a 9×9-inch or 2-quart casserole dish. Add 1 Tbsp lemon juice, 2 Tbsp brown sugar, 1 Tbsp cornstarch, ½ tsp cinnamon, and ⅛ tsp cloves. Stir until the apples are evenly coated in sugar and spices.
Cover the dish with foil and bake the apples for 15 minutes in the preheated 375ºF oven.
While the apples are baking, begin preparing the oat mixture. In a large bowl, whisk together 2 large eggs, 1.5 cups unsweetened applesauce, 1 tsp vanilla, 1 tsp salt, 1 tsp baking powder, 1 tsp cinnamon, and ¼ cup brown sugar.
Add 1.5 cups milk to the applesauce mixture, then whisk again to combine.
Add 2.5 cups rolled oats (not quick oats) and stir until everything is evenly combined.
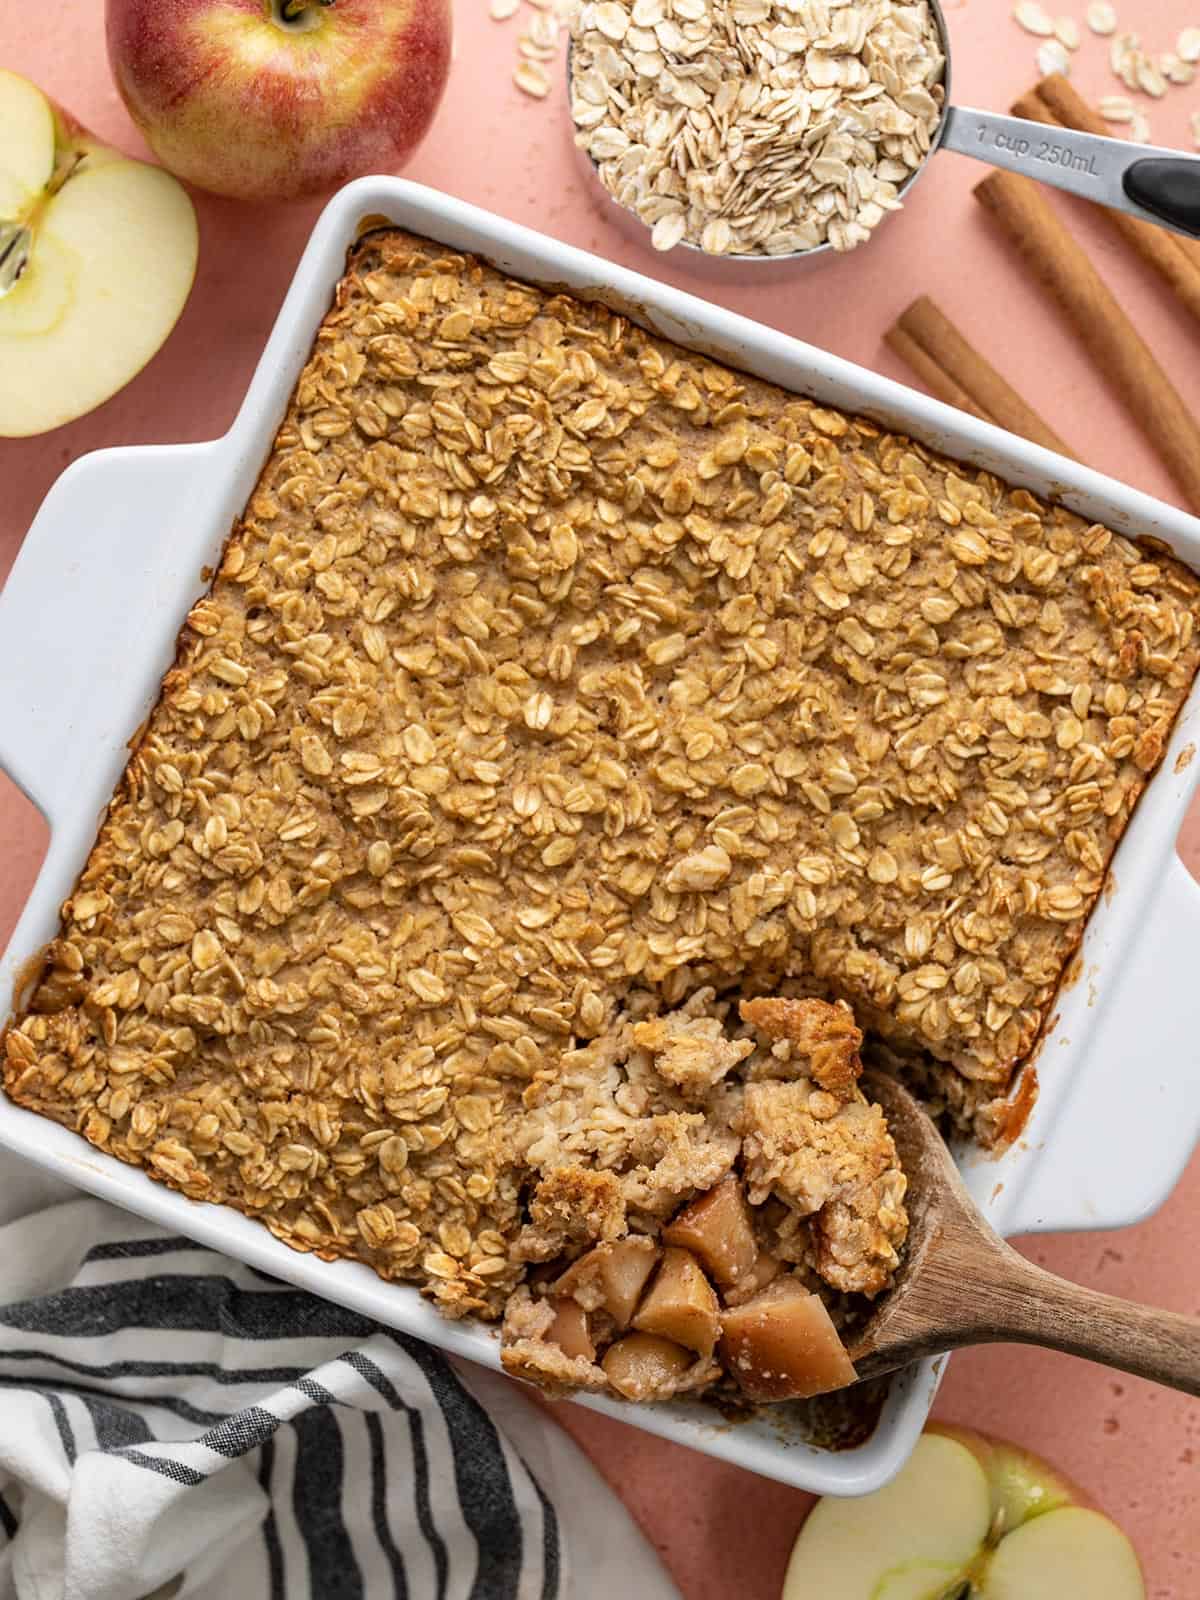
After the baked apples come out of the oven, give them a stir, then pour the oat mixture over top of the apples. Place the dish back into the oven (uncovered) and bake for 30 minutes more.
After 30 minutes the oats should be golden brown around the edges and you might see some of the apple cinnamon layer bubbling up around the edges. Remove the baked oatmeal from the oven and let it cool for about 5 minutes before serving.
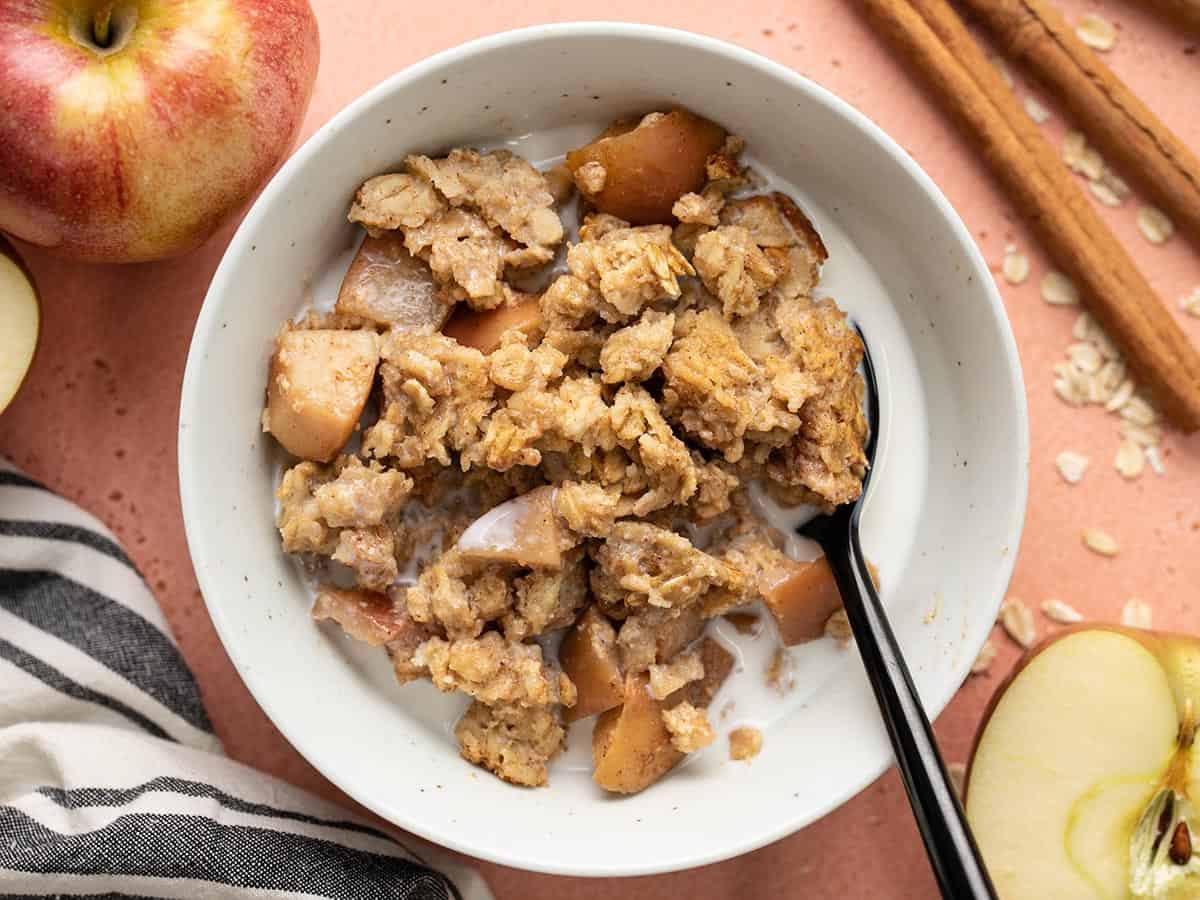
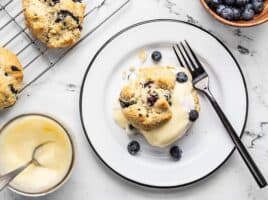
The bottom layer will be sweet and tender baked apples and the top layer will be a soft baked oatmeal. SO GOOD!
I like to eat my apple cinnamon baked oatmeal with a splash of cold milk on top!
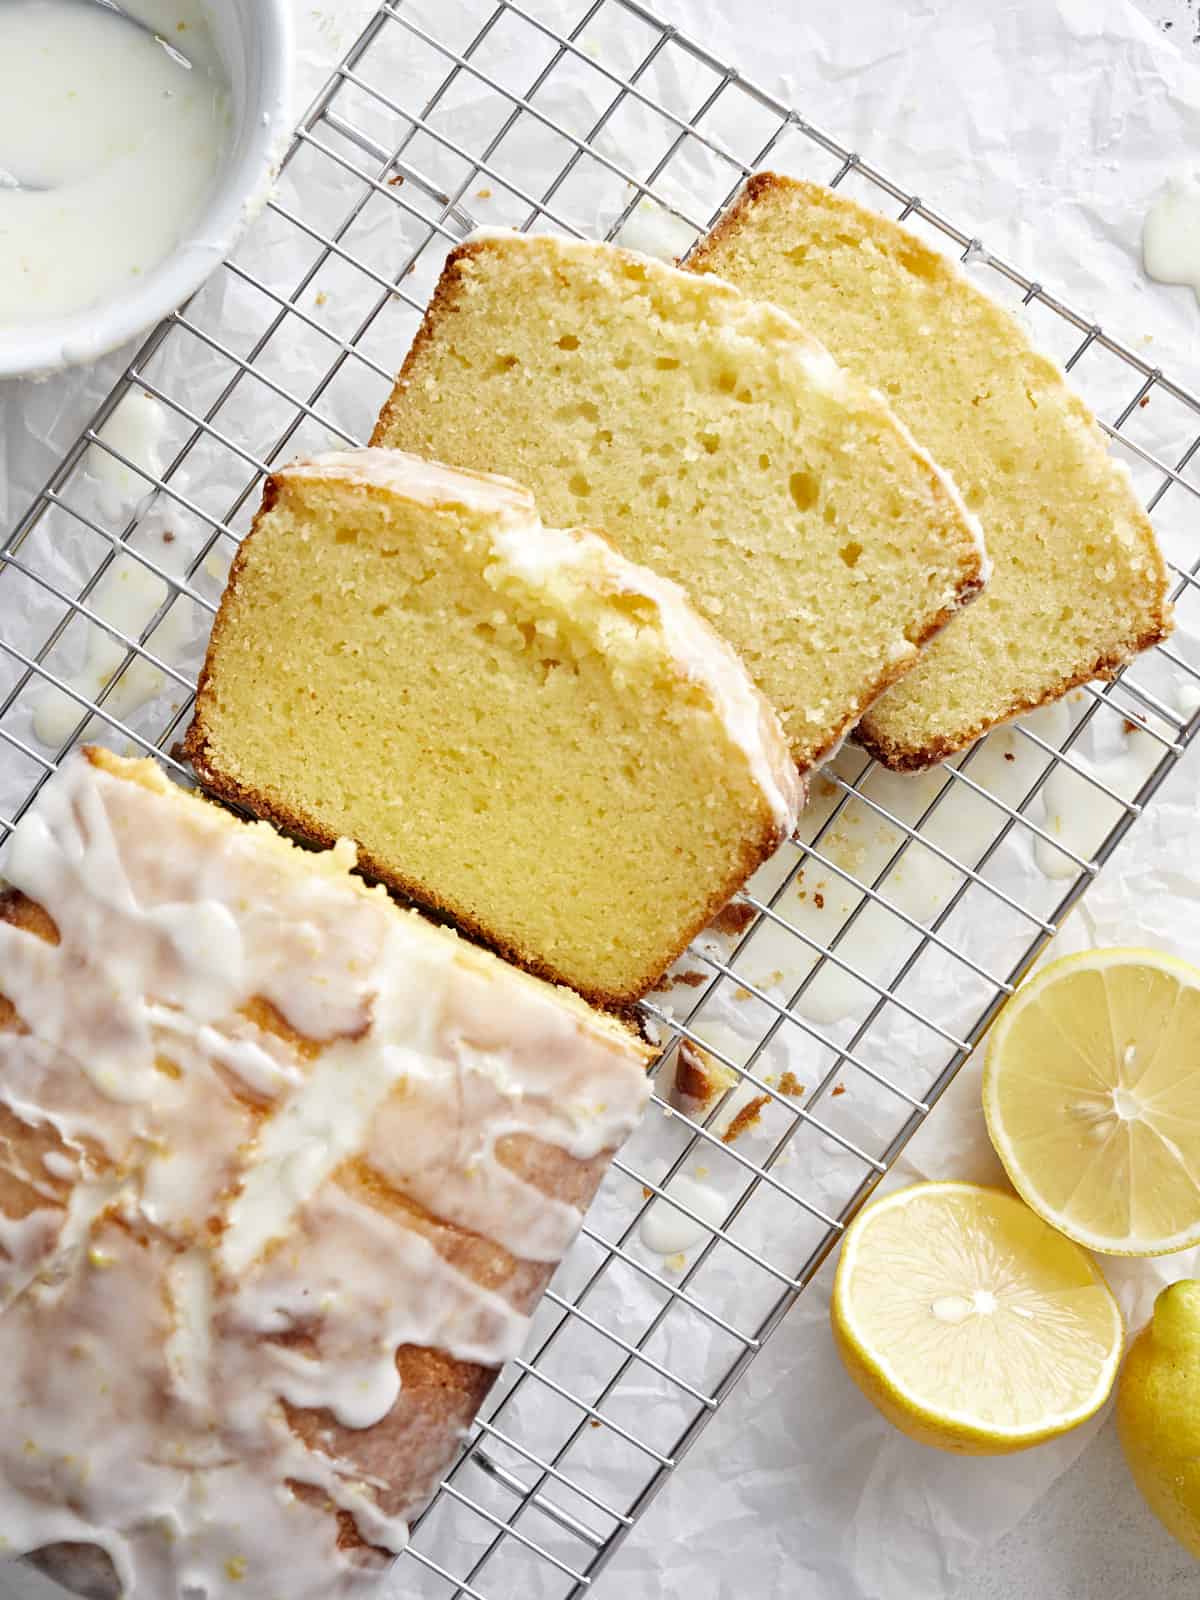
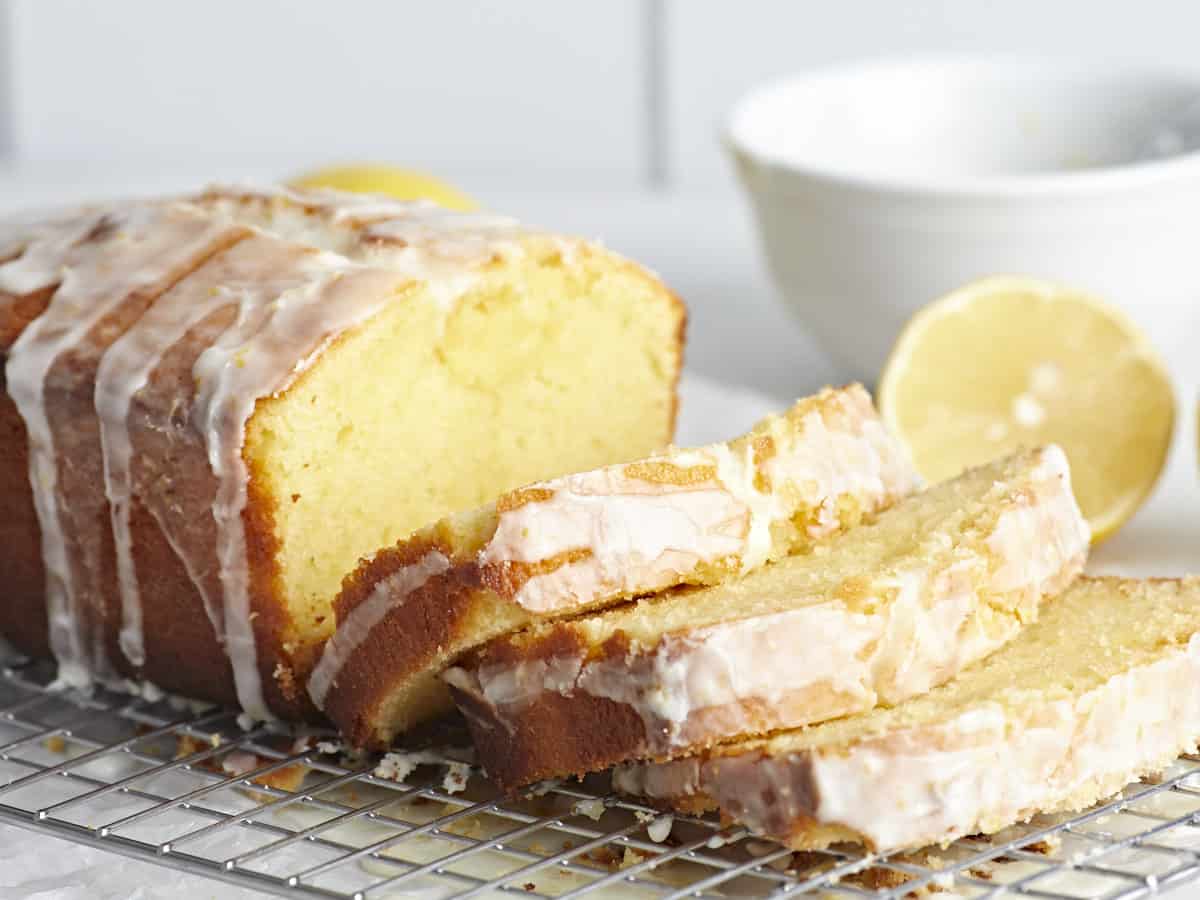
This Lemon Pound Cake will make you swoon! It’s moist, tender, tart, and tangy. The light fluffy crumb is the perfect texture for soaking up the sweet and sour lemon glaze. Even better- it’s the absolute easiest cake to make. I bet you have everything you need in your pantry right now!
What is Lemon Pound Cake?
This classic dessert is baked in a loaf pan and is bursting with refreshing citrus notes that cut through the buttery sweetness of the cake. This easy recipe for Lemon Pound Cake is also one of my favorite ways to use up extra lemons, as the batter and glaze are loaded with lemon juice and zest.
Ingredients for Lemon Pound Cake
This cake is gorgeous and the flavors are zippy and balanced. It’s the perfect easy dessert recipe for a casual dinner or a fancy get-together (or if you’re in the mood for cake that isn’t too sweet.) Here’s what you need to make Lemon Poundcake:
Butter: creates a light, tender texture and helps the cake rise.
Granulated Sugar and Powdered Sugar: these sugars do more than sweeten the cake and the icing. Granulated sugar softens the cake crumb, adds moisture, and balances the tartness of the lemon juice in the batter. Powdered sugar creates structure in icing and helps mellow out the sourness of lemon juice.
Eggs: create structure that helps the cake rise and keeps the crumb airy.
Flour: the base of our batter, it creates the structure of the crumb. While we have not tested this recipe with gluten-free flour, a 1-to-1 gluten-free baking flour should be a great substitute.
Lemons: are the heart of this recipe. If lemons are out of your budget, you can try bottled lemon juice, and though it won’t taste quite as tart and refreshing, it will still be a good cake. If lemons are too tart for you, leave them out and just make plain, buttery, pound cake!
Place leftovers in an air-tight container and store at room temperature for up to 3 days. You can also wrap leftovers tightly in a layer of parchment paper and a second layer of aluminum foil, then freeze for up to 3 months. While you can refrigerate pound cake, it does dull the flavors and changes the texture of the cake. If you choose to refrigerate or freeze it, try warming it in a 350°F with a touch of butter brushed on each slice. I don’t know if you’ve ever tried frozen cake, but it’s delightful straight out of the freezer as well. The crumb stays soft and it’s a perfect treat for a hot summer day.
1cuproom temperature salted butter (plus more for greasing)$2.01
1.5cupsall-purpose flour (plus more for dusting)$0.22
1/2tspbaking powder$0.03
1/4tspbaking soda$0.01
1/4tspsalt$0.02
1cupgranulated sugar$0.39
4largeeggs, beaten$0.36
1/4cupbuttermilk$0.16
3lemons, juiced and zested, divided$1.32
1cuppowdered sugar$0.33
Instructions
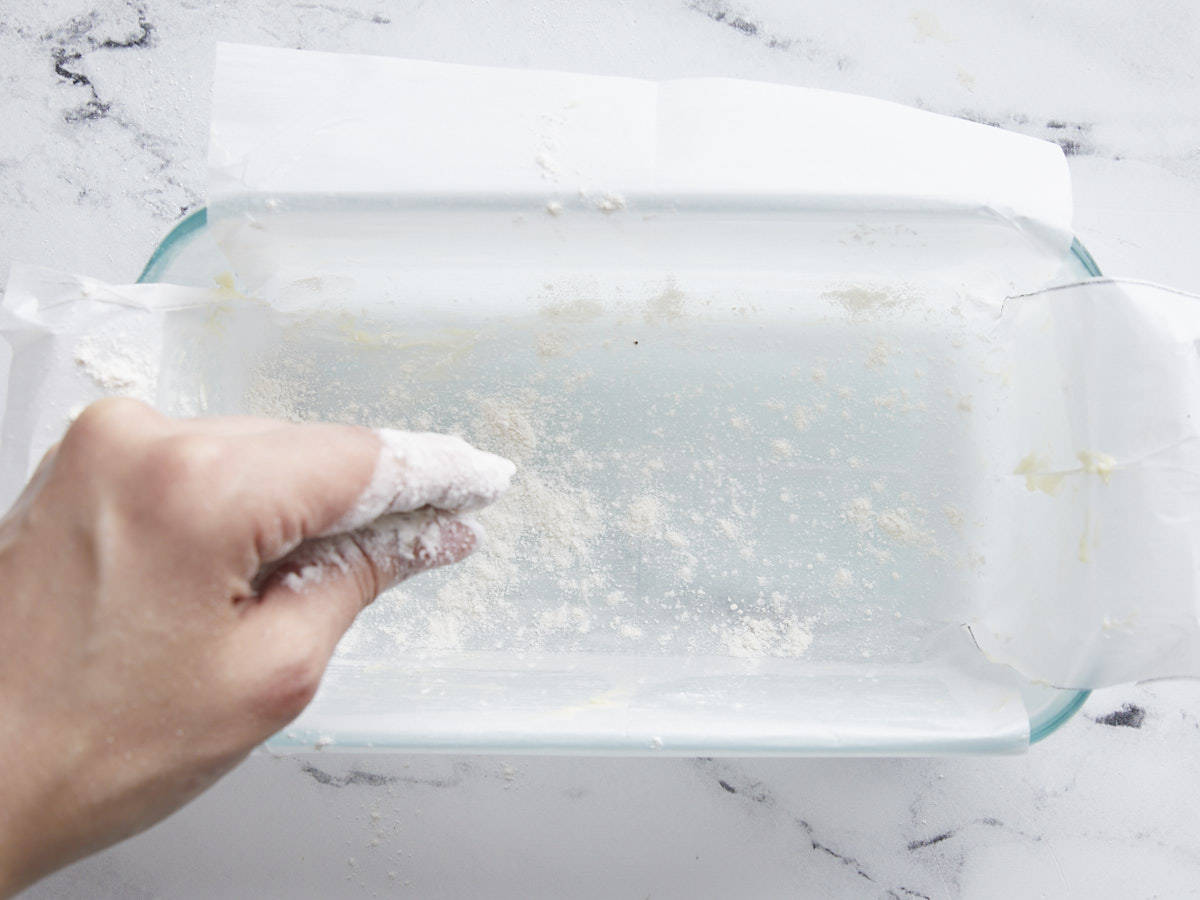
Place an oven rack in the center of your oven and preheat the oven to 350°F. Grease an 8×4 loaf pan with butter. Line the pan with parchment. Butter the parchment and dust with flour, shaking off excess flour.
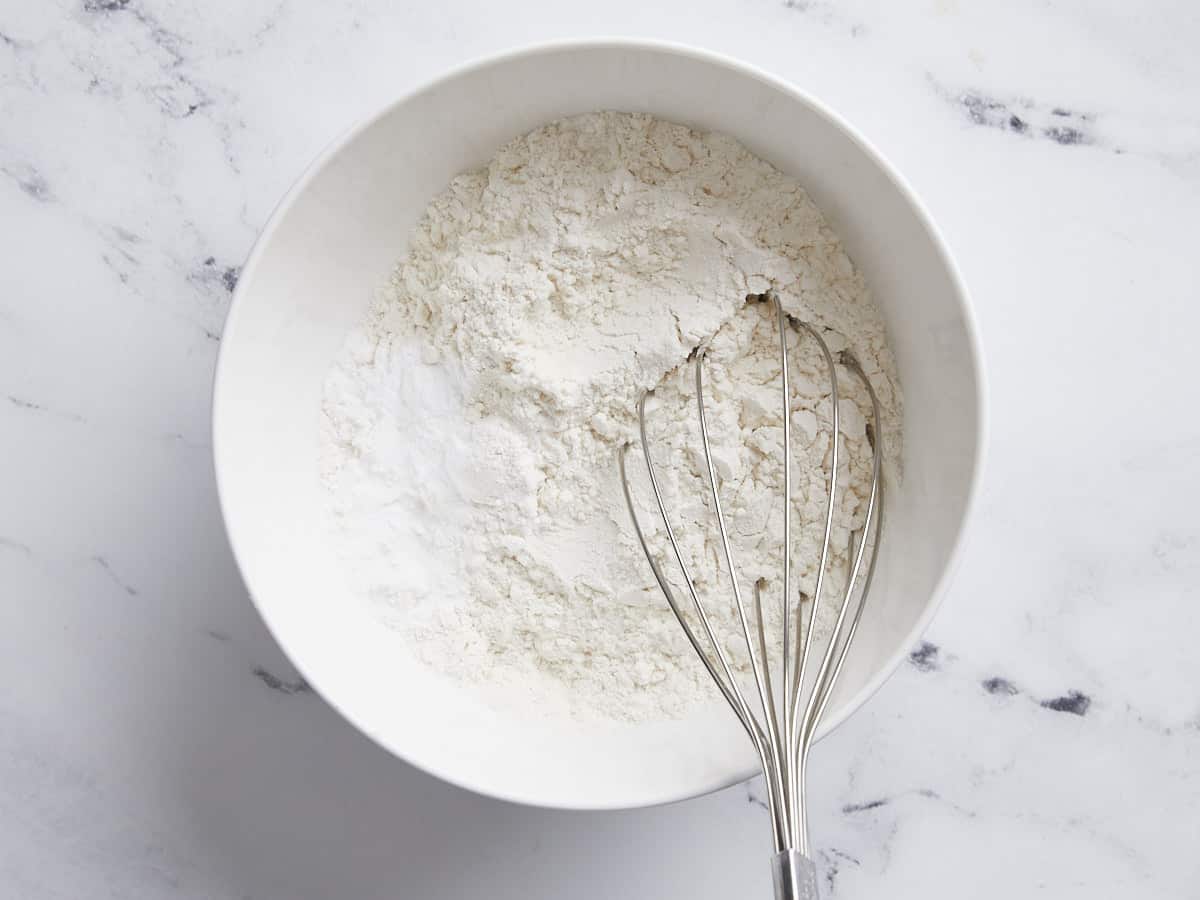
Mix the flour, baking powder, baking soda, and salt in a medium bowl.
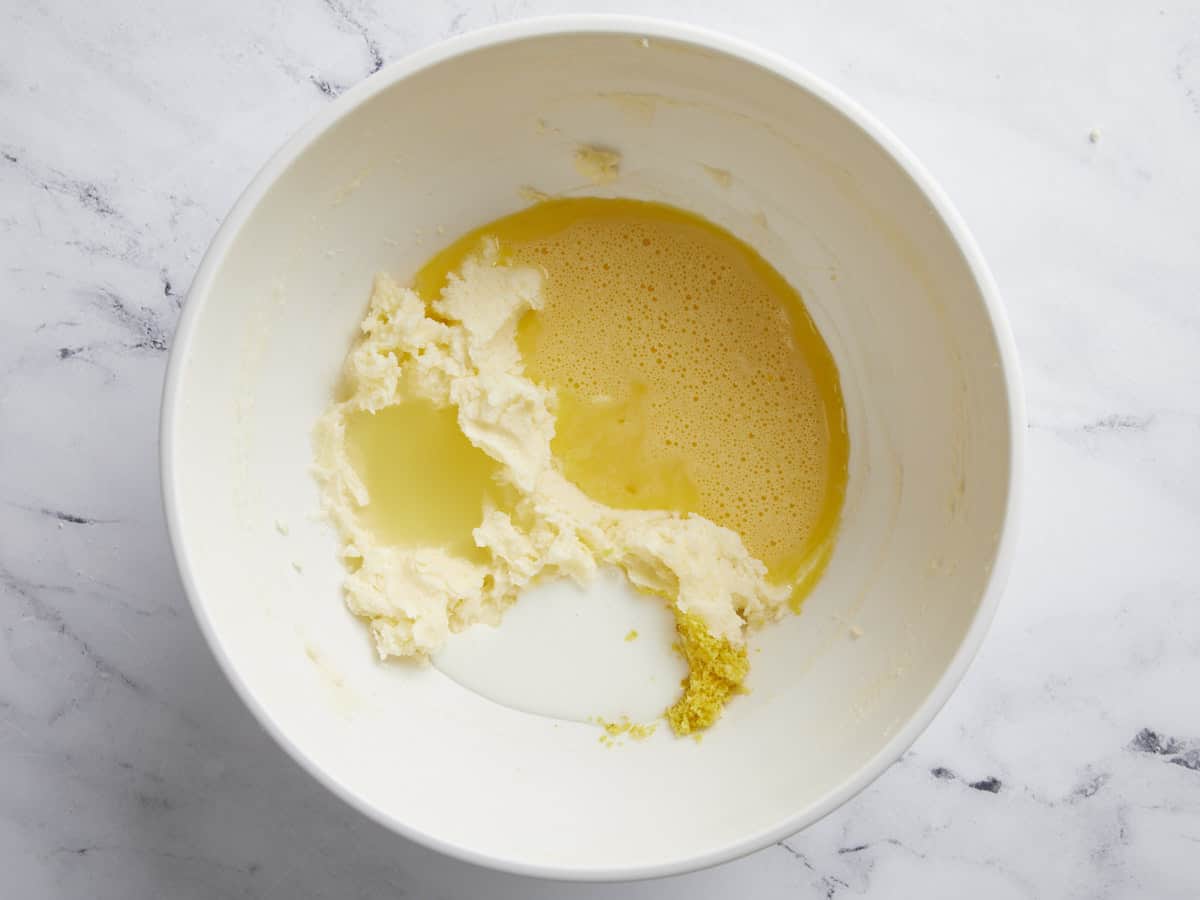
Mix the butter and sugar in a large bowl until light and fluffy. Add the beaten eggs, buttermilk, 1/4 cup lemon juice, and 1 tablespoon zest. Mix until incorporated.
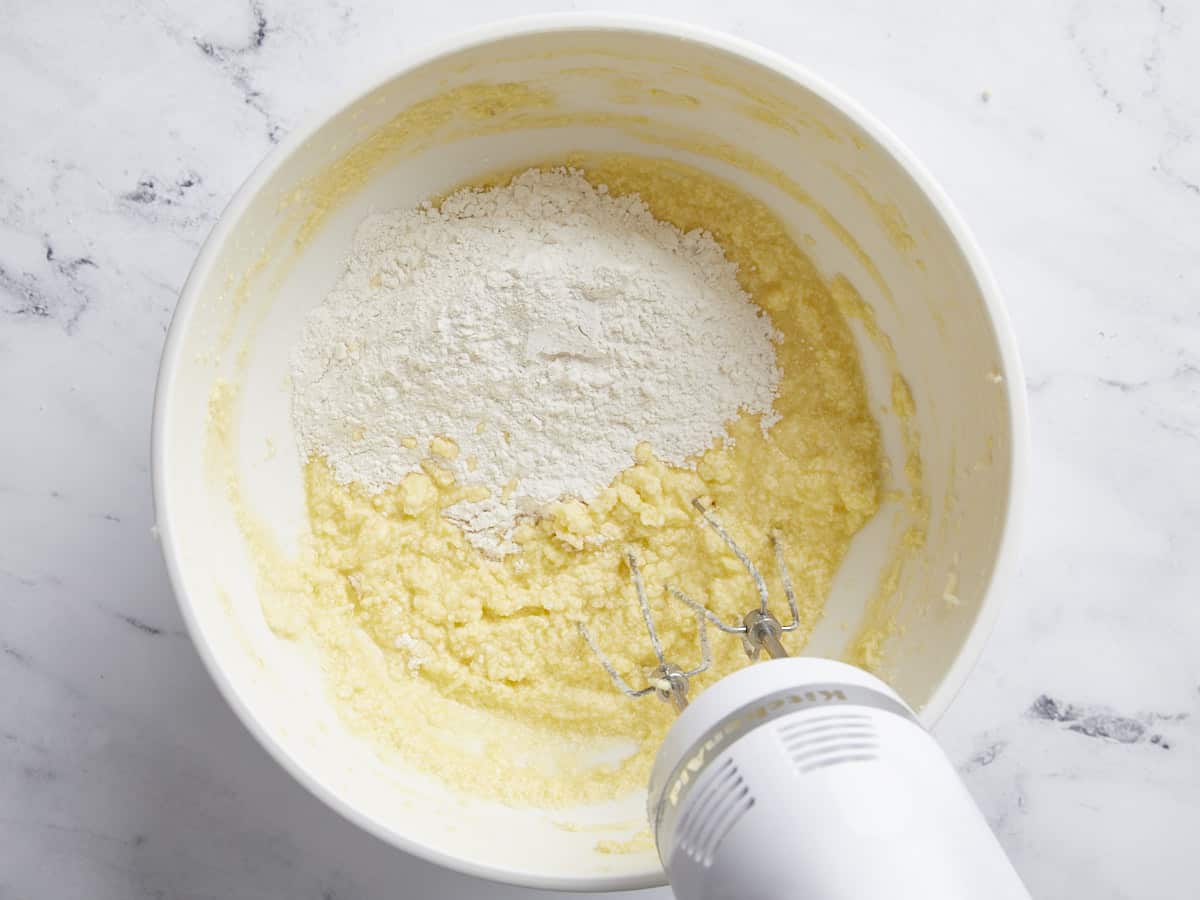
Add the flour mixture to the butter and egg mixture in thirds, mixing after each addition and scraping down the sides before the next addition.
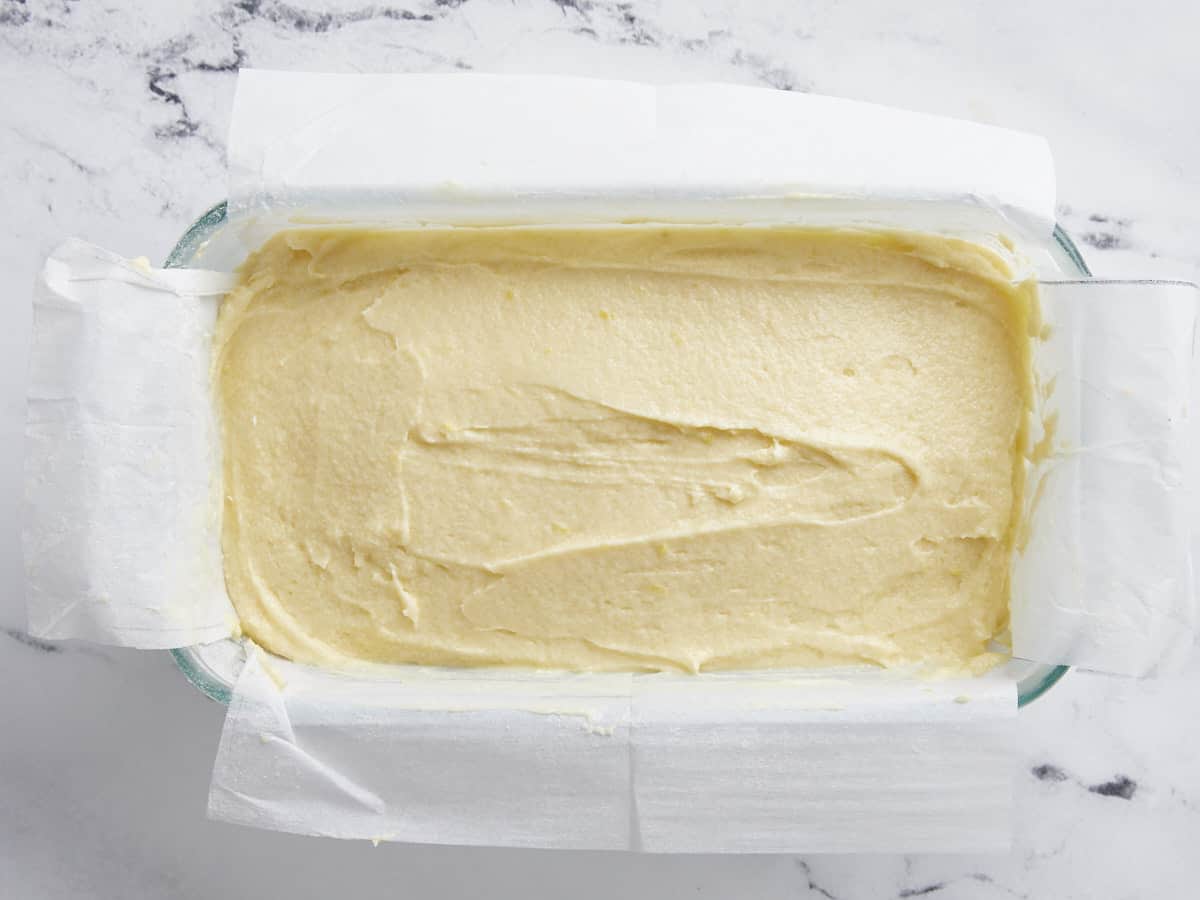
Add batter to the prepared pan. Bake for 50 to 60 minutes in the preheated 350°F oven until the cake springs back when you press the center and a toothpick inserted into the center comes out clean.
Remove the pound cake from the oven and cool for ten minutes before removing it from the pan and placing it on a cooling rack.
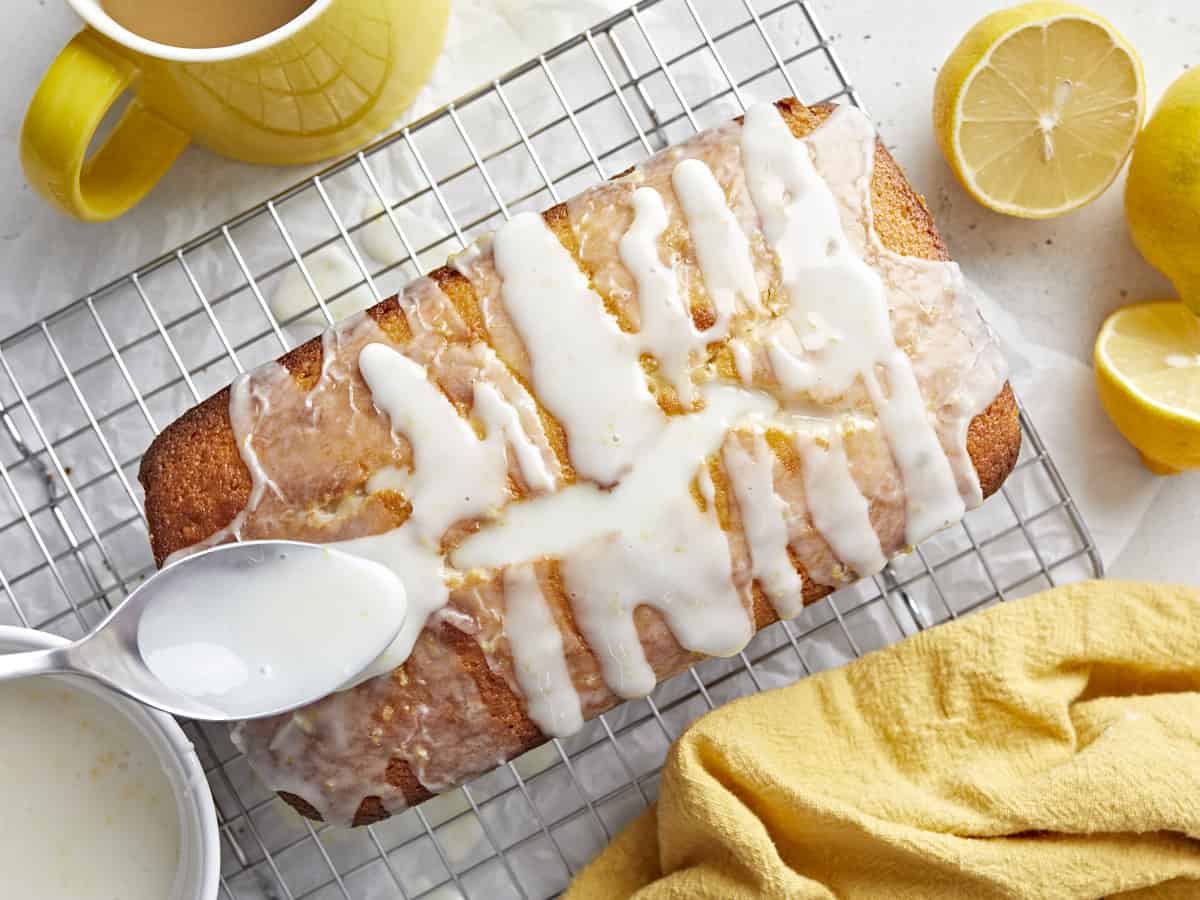
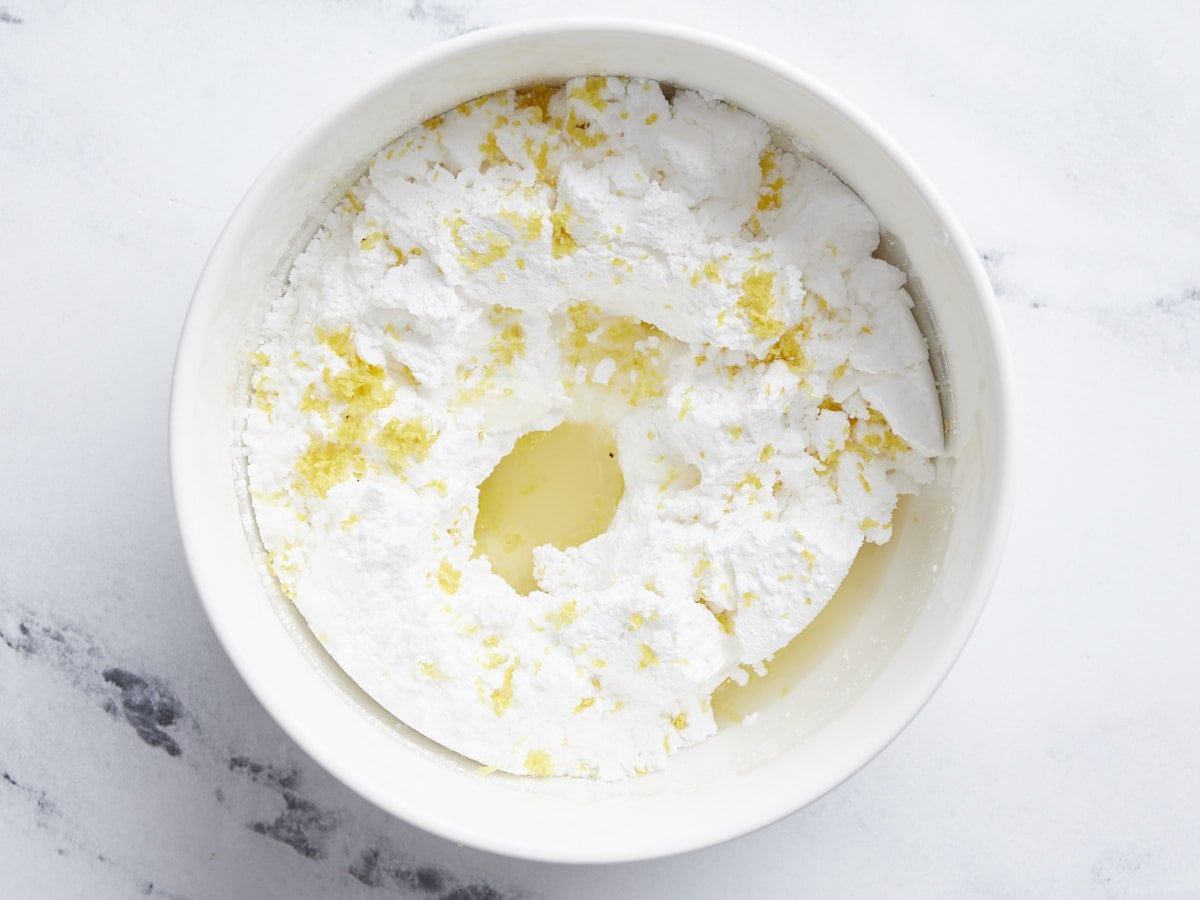
To make the glaze, mix the powdered sugar with 2 tablespoons lemon juice and 1 1/2 teaspoons lemon zest.
Drizzle the glaze on the cooled pound cake and serve!
How to Make Lemon Pound Cake – Step by Step Photos
Place an oven rack in the center of your oven and preheat the oven to 350°F. Grease an 8×4 loaf pan with butter. Line the pan with parchment. Butter the parchment and dust with flour, shaking off excess flour.
Mix 1.5 cups of all-purpose flour, 1/2 tsp baking powder, 1/4 tsp baking soda, and 1/4 tsp salt in a medium bowl.
Mix 1 cup of room-temperature salted butter and 1 cup of granulated sugar in a large bowl until light and fluffy. Add 4 beaten large eggs, 1/4 cup of buttermilk, 1/4 cup lemon juice, and 1 tablespoon zest. Mix until incorporated.
Add the flour mixture to the butter and egg mixture in thirds, mixing after each addition and scraping down the sides before the next addition.
Add batter to the prepared pan. Bake for 50 to 60 minutes in the preheated 350°F oven until the cake springs back when you press the center and a toothpick inserted into the center comes out clean.
Remove the poundcake from the oven and cool for ten minutes before removing it from the pan and placing it on a cooling rack.
To make the glaze, mix 1 cup powdered sugar with 2 tablespoons lemon juice and 1 1/2 teaspoons lemon zest.
Drizzle the glaze on the cooled pound cake and serve!
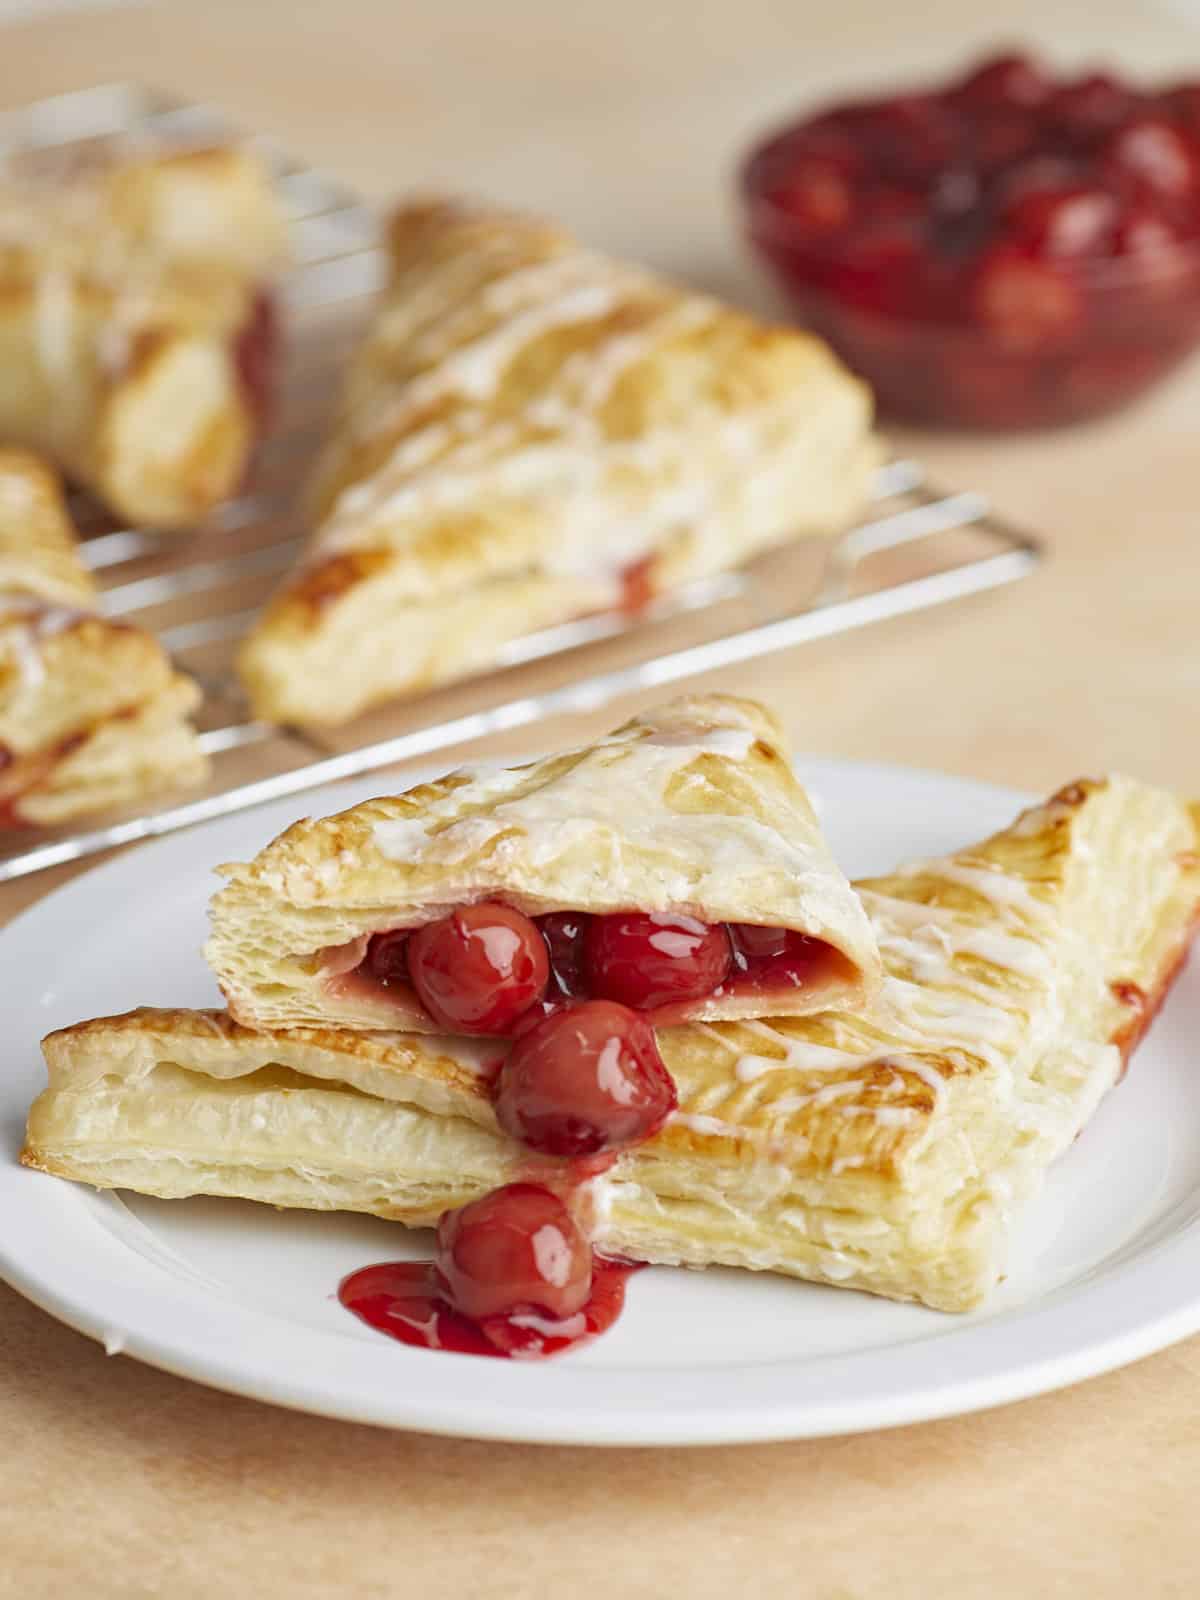
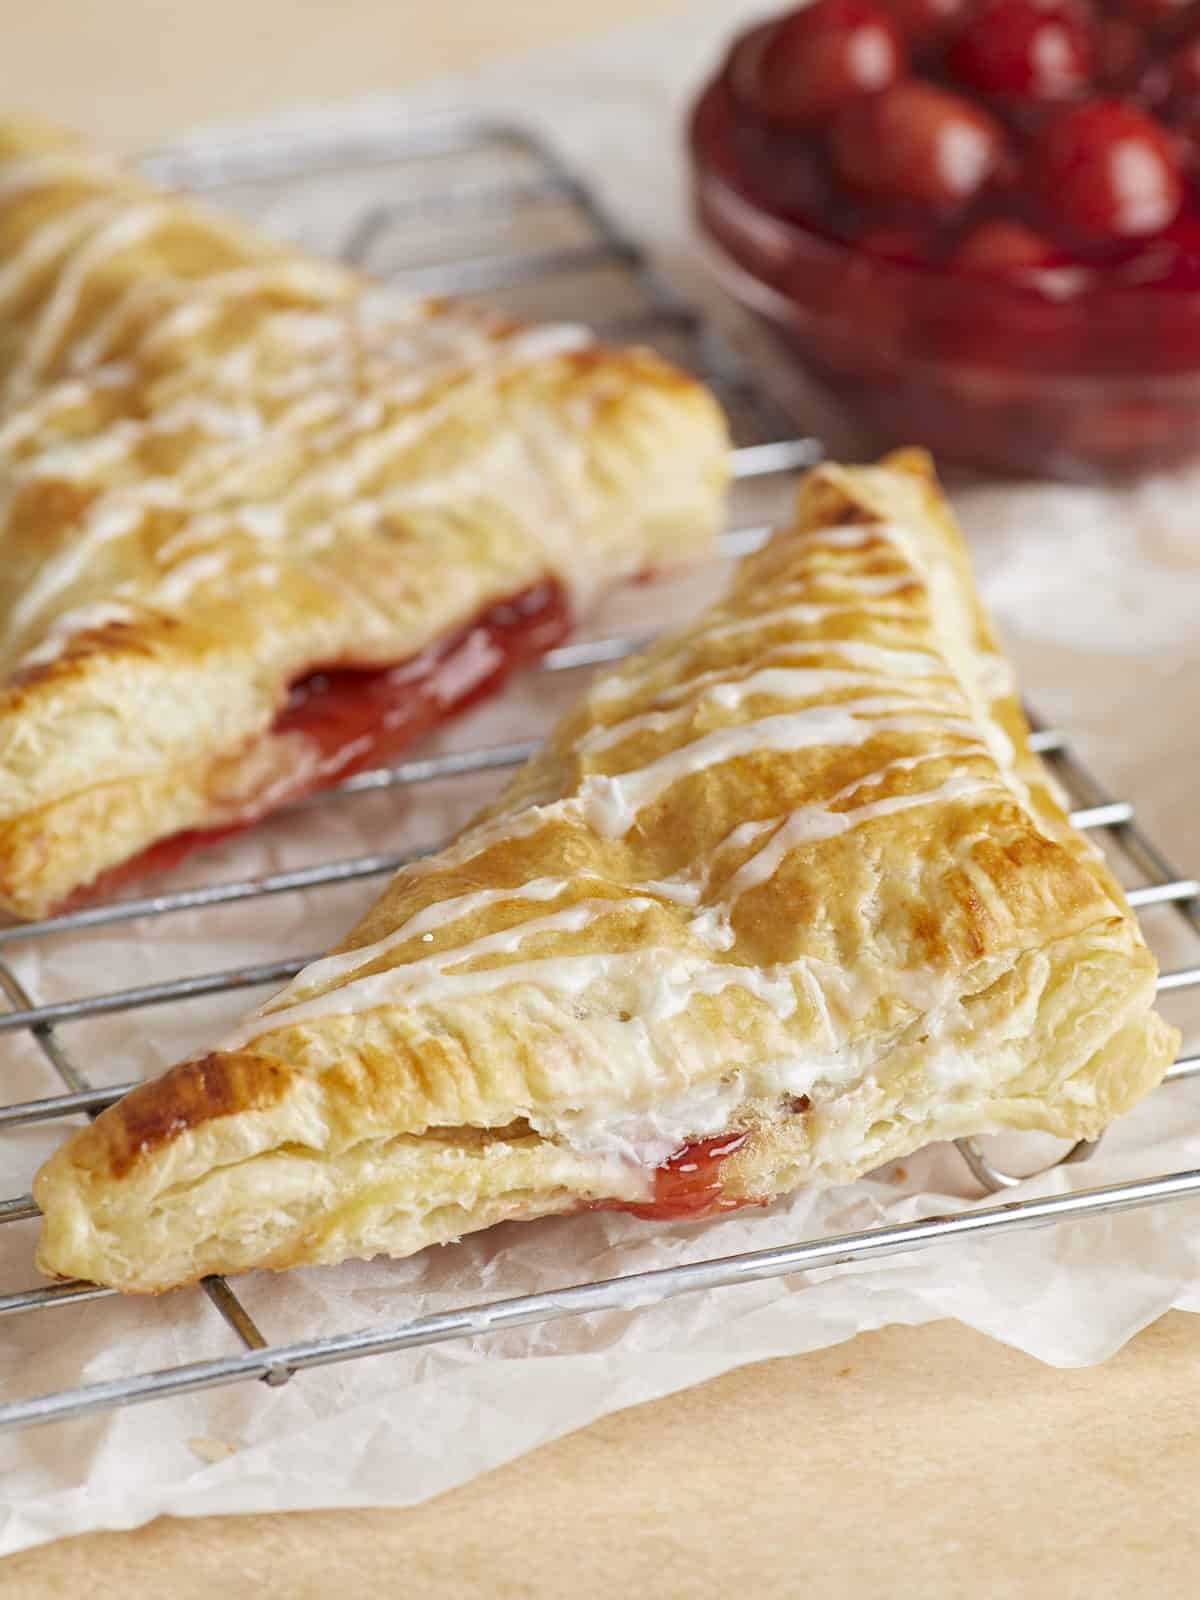
These Cherry Turnovers are a scrumptious dessert that’s super easy to make and land at a little over a dollar per serving! The best part? It takes just 20 minutes to get them in the oven! Get ready to collect loads of compliments after you make this easy Cherry Turnover recipe. Though, I should warn you: The puff pastry shatters into delicious buttery flakes as soon as you bite it, so you’ll want to wipe the crumbs off your shirt before heading into a meeting. (I guess that’s less of a “warning” and more of a “Note-To-Self,” but you catch my drift.)
What Are Cherry Turnovers
Cherry Turnovers are a popular baked dessert made of flaky puff pastry dough filled with sweet and tart Cherry Sauce. Though they’re a fantastic end-of-dinner delight, they can also be enjoyed for breakfast. (Argue all you want about the breakfast part, but you make puff pastry with flour, butter, and sometimes egg, which is basically a pancake. )
Ingredients For Cherry Turnovers
This is one of those perfect desserts that require minimal effort, so it’s a big win in my book. The ready-made dough is folded over the filling (which can also be ready-made). It’s then sealed, baked until golden brown, and drizzled with a sugar glaze. Boom! Heaven. Here’s what you’ll need to make my easy recipe for Cherry Turnovers!
Cherry Filling: I use canned cherry filling. Is it cheaper and better than my Cherry Sauce? No. But it’s convenient, and sometimes that beats the tastiest thing ever. But, if you have a few extra minutes, I highly recommend using my Cherry Sauce recipe.
Puff Pastry Sheets: this ready-made dough’s buttery layers crisp and rise when baked, giving you that thunderous shatter that’s a hallmark of any legit flaky pastry.
Egg: is beaten and used to help seal the seams of the folded dough. It’s also brushed over the dough to create a golden glossy finish. Yes, you can skip it. A golden laminated finish is strictly for presentation, and you can use water or milk to seal the dough. However, water or milk might not hold the bond, so take that gamble with your eyes wide open.
Powdered Sugar: is the foundation of our sugar glaze. If you don’t have powdered sugar, sprinkle granulated sugar on the pastries after washing them with egg to create a sweet textured finish. You can also skip the powdered sugar glaze and the granulated sugar. These pastries will still be knockouts. Promise.
Milk: is used to create a glaze from powdered sugar. You can also use water, though it will be less creamy.
How To Serve Cherry Turnovers
Cherry turnovers can be served warm or at room temperature. (Or cold as a late-night treat while bingeing your favorite Netflix show.) They are great paired with ice cream and will blow your mind when you have them with No-Churn Balsamic Peach Ice Cream or No-Churn Strawbery Ice Cream. As I mentioned, I also enjoy Cherry Turnovers as a breakfast pastry and love them paired with Maizena. They’re also a wonderful addition to any brunch table. (Did I just admit to stuffing my face with Cherry Turnovers 24 hours a day? Only if you read between the lines.)
How To Store Cherry Turnovers
You can store leftover Cherry Turnovers in an airtight container at room temperature for three to four days. (They will not last a day, much less 3 to 4 days, but I honor your hopes and dreams, homie.)
Other Turnover Flavor Ideas
With the magic of puff pastry, you’re always less than an hour away from a delicious, crispy, turnover. What you fill it with is only limited to your imagination! I love turnovers made with these sauces:
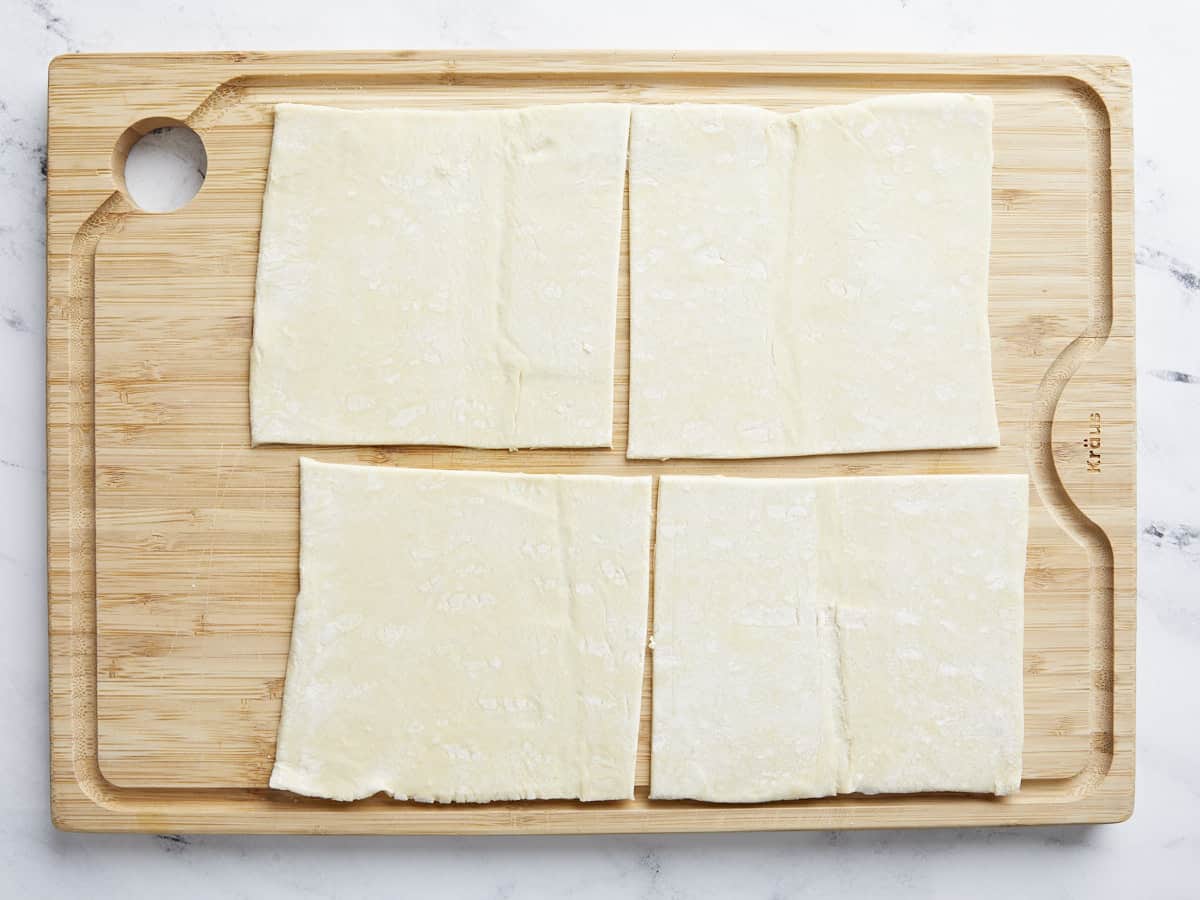
Line a baking sheet with parchment paper. Place an oven rack in the center of the oven and preheat the oven to 400°F. Roll each thawed piece of puff pastry gently into a square, then cut each sheet into 4 squares. Place the 8 squares on the baking sheet.
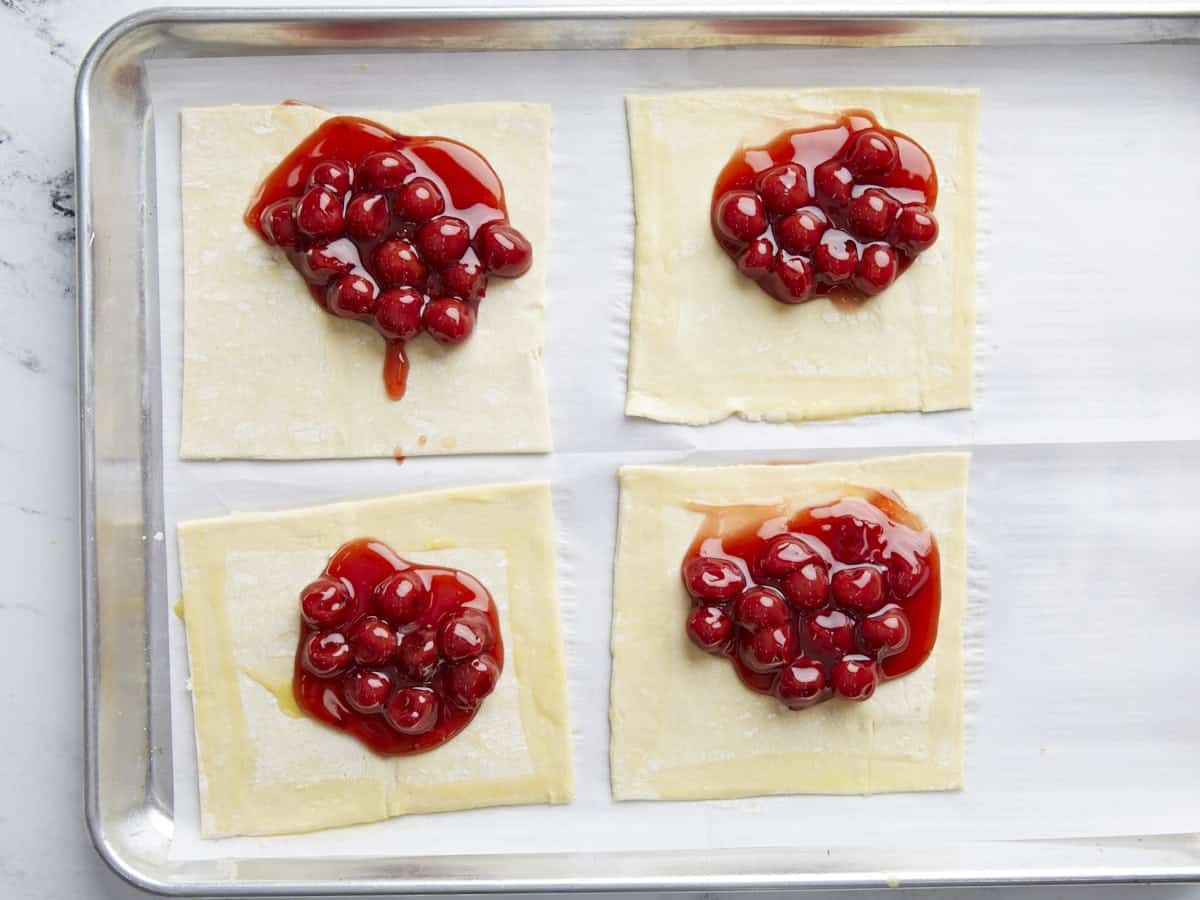
Place 1/4 cup of cherry pie filling into the middle, left of center, of each square.
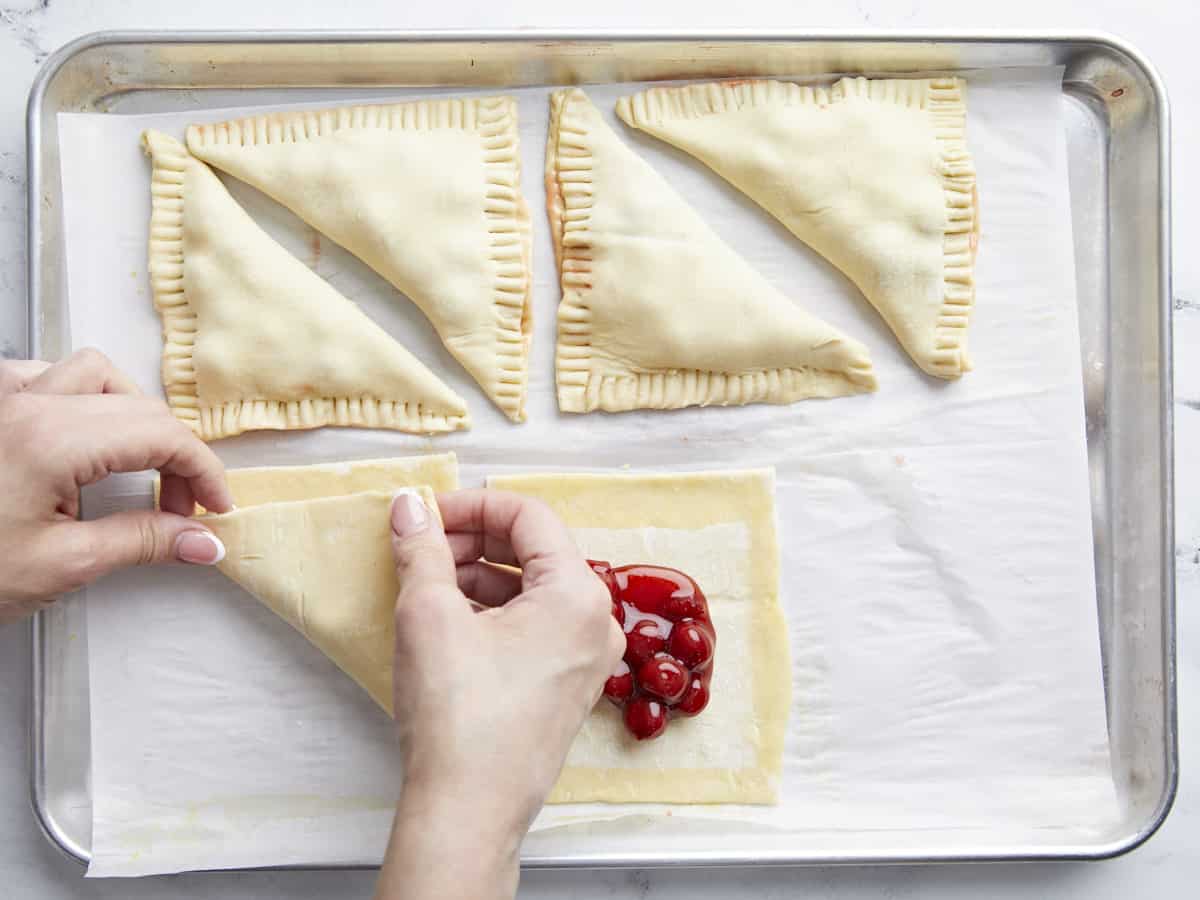
Brush a little of the beaten egg along the outside edges of each puff pastry square.
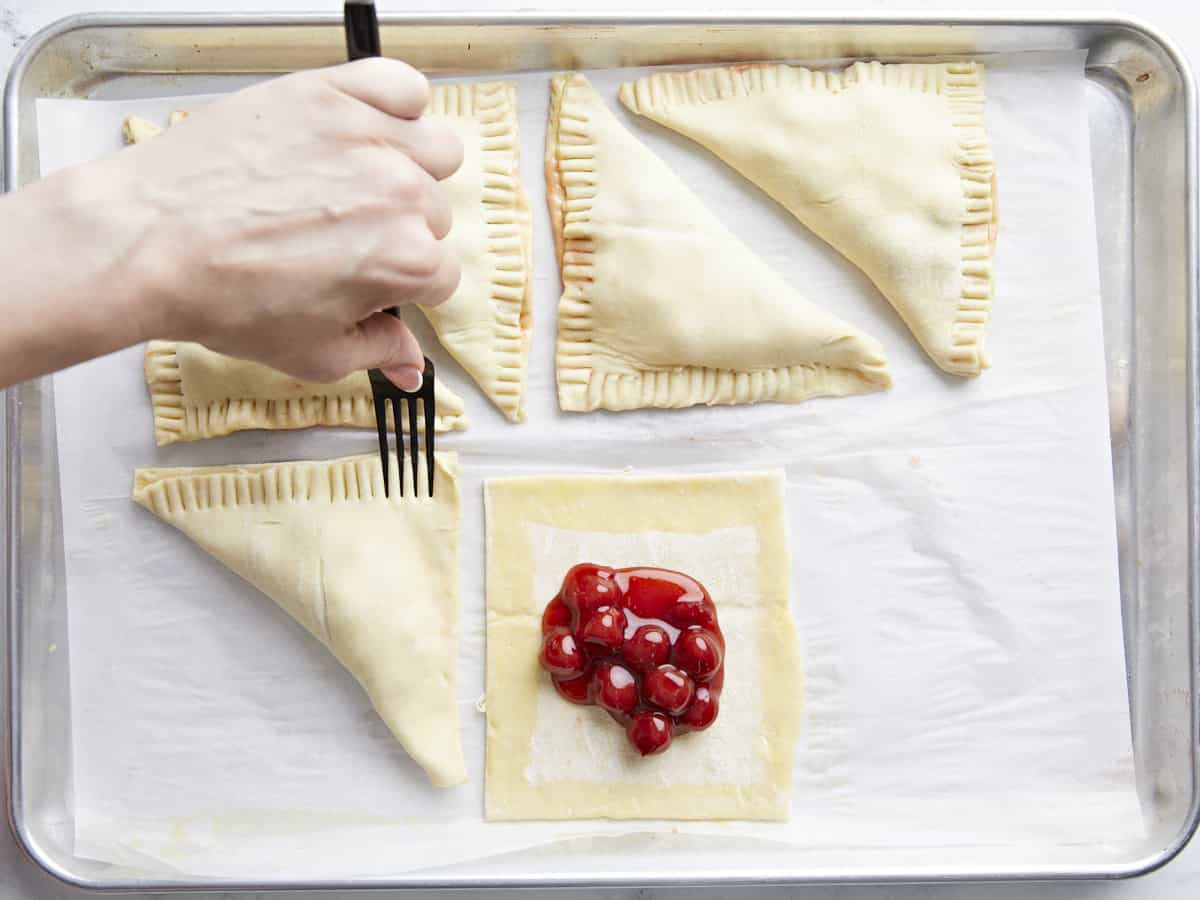
Fold the bottom right corner of the dough over the filling and press it into the top left corner. Seal the edges with a fork.
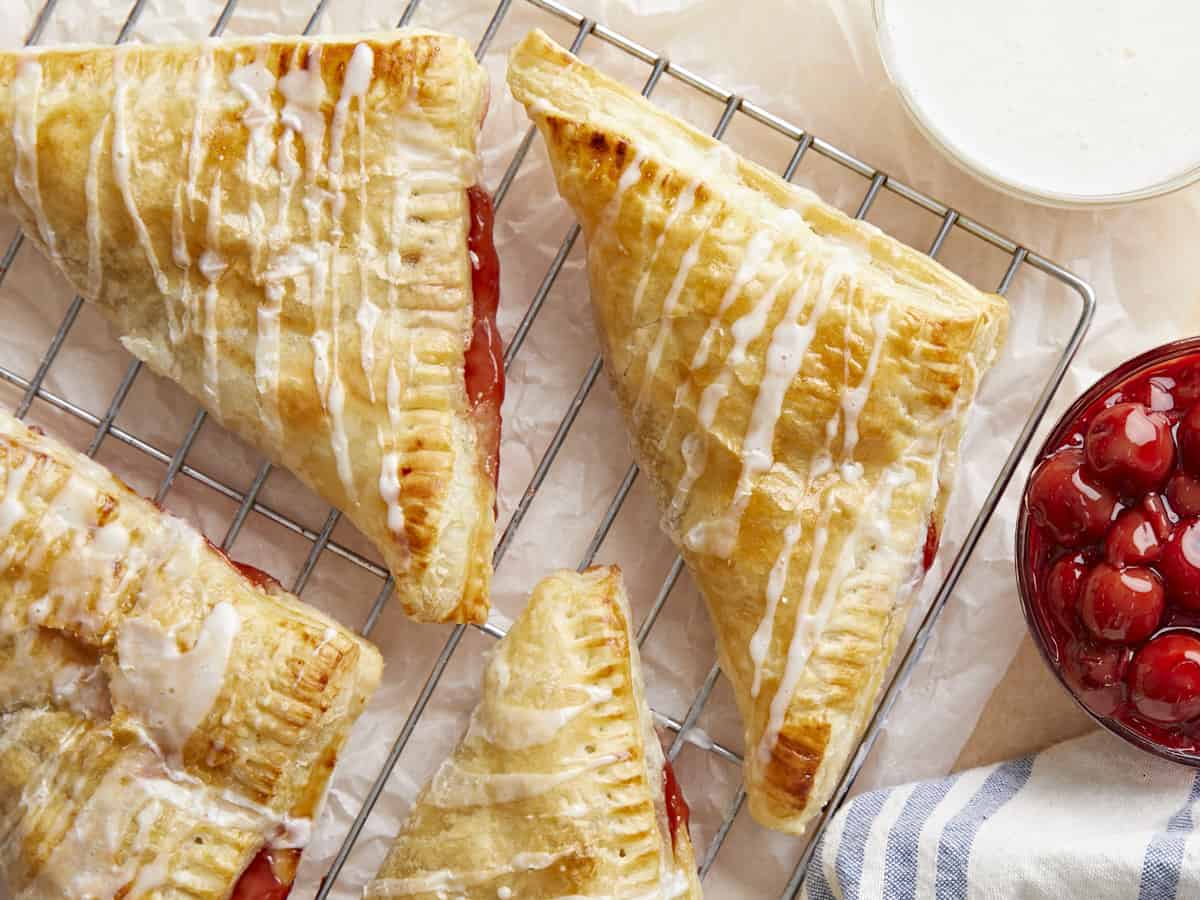
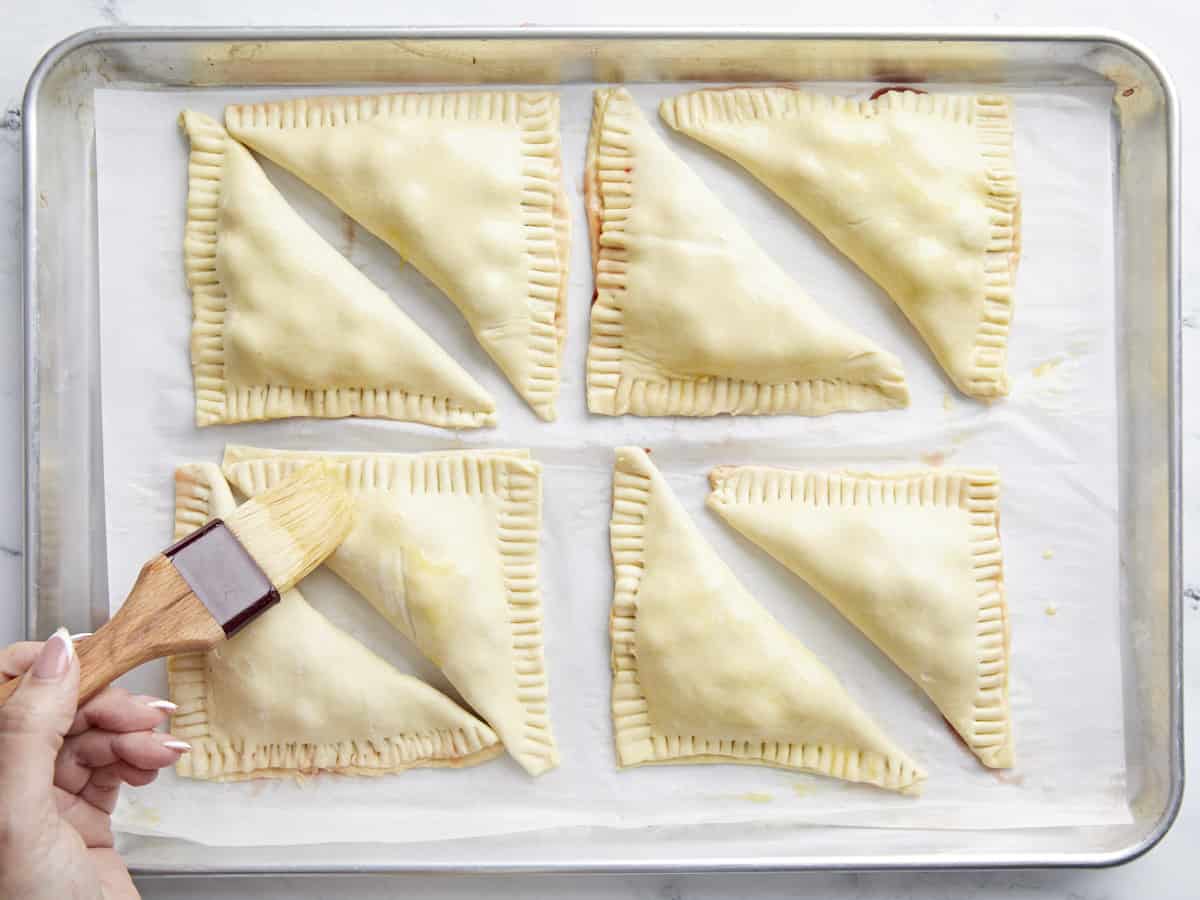
Use a pastry brush or paper towel to add a very light layer of the beaten egg over the top of the puff pastry turnover. Bake for 20 to 25 minutes until the puff pastry has risen and is golden brown. Remove from the oven and allow to cool on the baking sheet for a few minutes before placing the turnovers on a wire cooling rack.
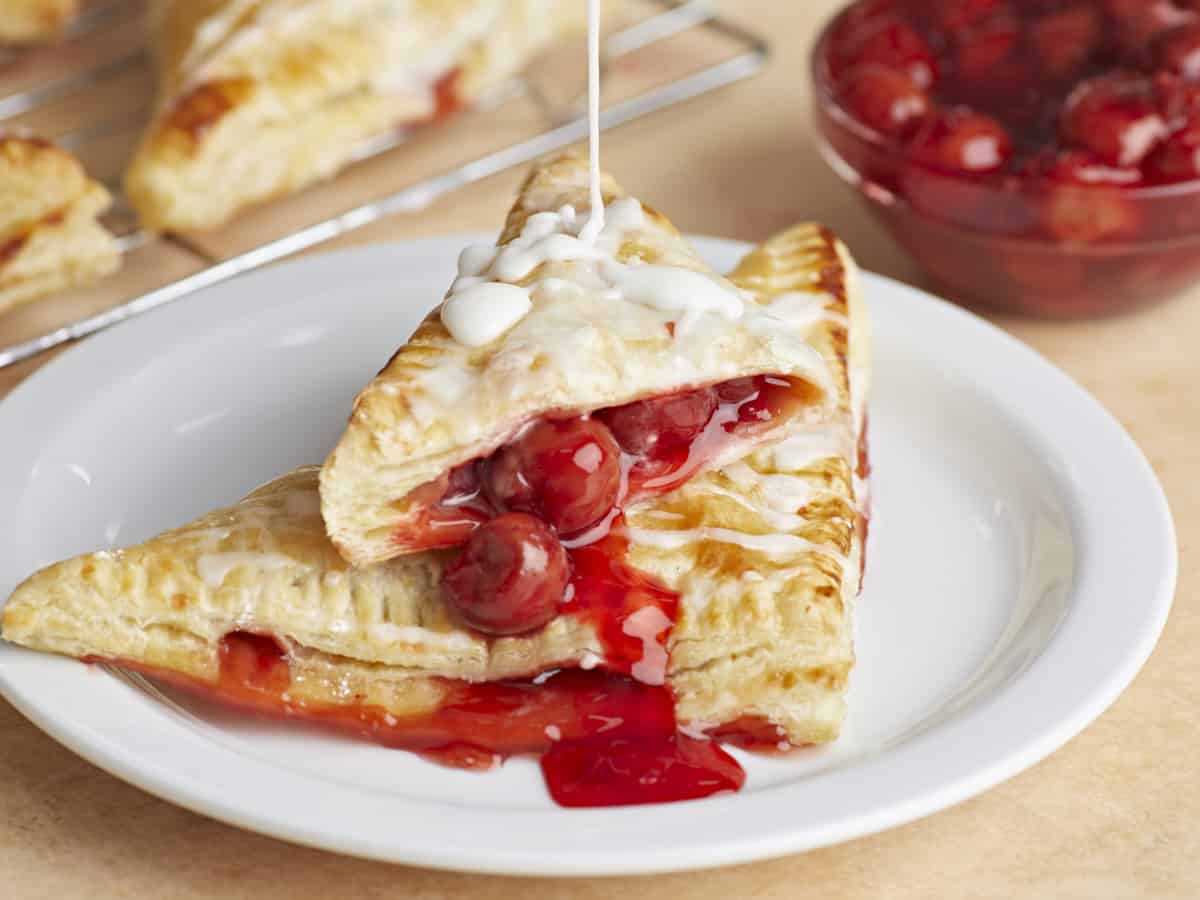
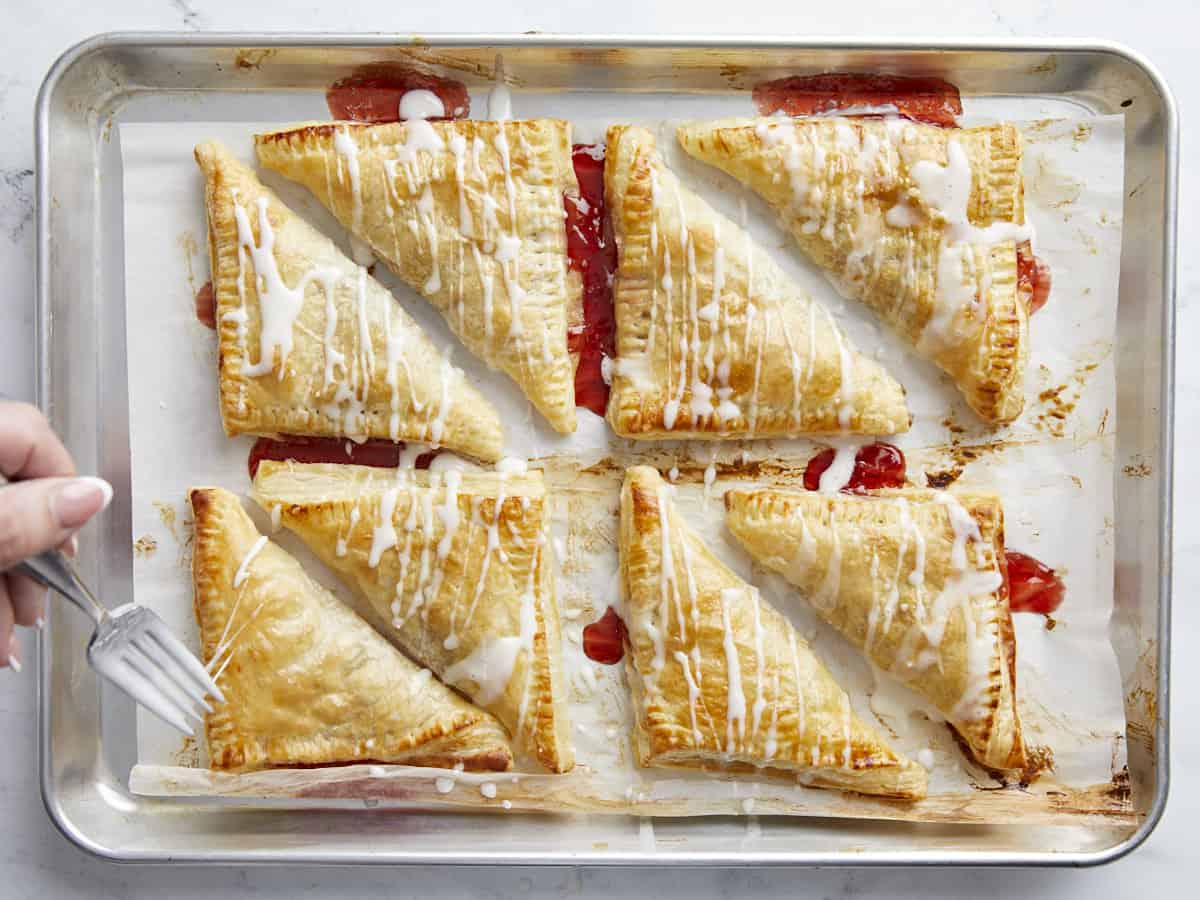
Mix the milk with the powdered sugar to make a glaze. Use a spoon to drizzle the glaze over the turnovers. Then enjoy!
How to Make Cherry Turnovers – Step by Step Photos
Line a baking sheet with parchment paper. Place an oven rack in the center of the oven and preheat the oven to 400°F. Place the floured side of the thawed puff pastry sheet on your work surface and use a rolling pin (or wine bottle) to gently roll each sheet into a 12-inch by 12-inch square. Then cut each puff pastry sheet into four squares. Place the eight squares on the baking sheet.
Place 1/4 cup of cherry pie filling (or Cherry Sauce) into each square’s middle, just left of center, and leave a 1-inch border around the edges. Don’t overfill the turnovers, or they will be difficult to seal.
Use a pastry brush, a paper towel, or your finger to brush a little of the beaten egg along the outside edges of each puff pastry square.
Fold the bottom right corner of the dough over the filling and press it into the top left corner to create a triangle.
Seal the edges of the triangle with a fork. Trim any wonky corners with a small knife.
Use a pastry brush or paper towel to add a very light film of 1 beaten egg over the top of each puff pastry turnover. Bake in your preheated 400°F oven for 10 minutes. Move the baking pan so the front of the baking pan is now facing the back of the oven. Then bake an additional 10 to 15 minutes until the puff pastry rises and turns golden brown. Remove the pastries from the oven and cool on the baking sheet for a few minutes before placing the turnovers on a wire cooling rack.
Once the pastries have cooled, mix 1 tablespoon of milk with the 1/2 cup of powdered sugar until a thick glaze forms. Use a fork or spoon to drizzle the glaze over the turnovers. A fork creates more distinct lines and a spoon drizzles globs of glaze; choose your own adventure. Don’t tell anyone they’re ready until you’ve had at least one and enjoy your second with loved ones!
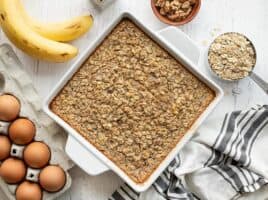
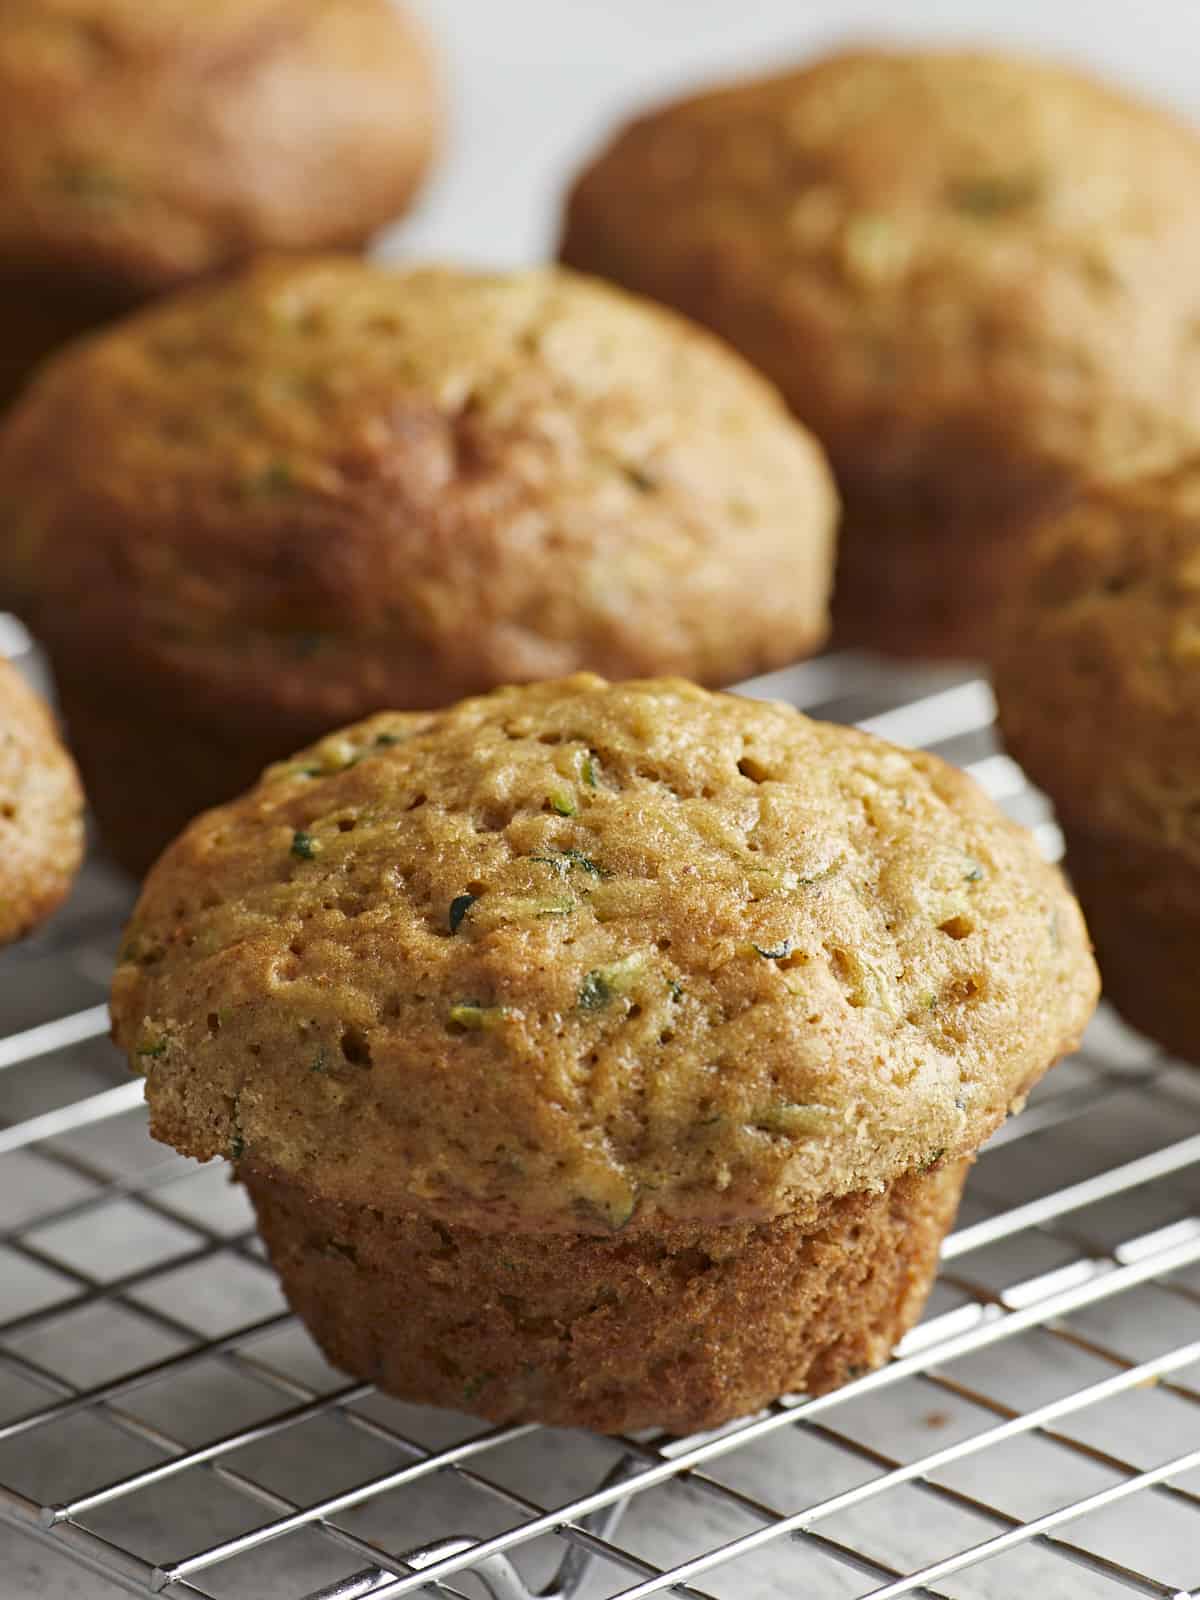
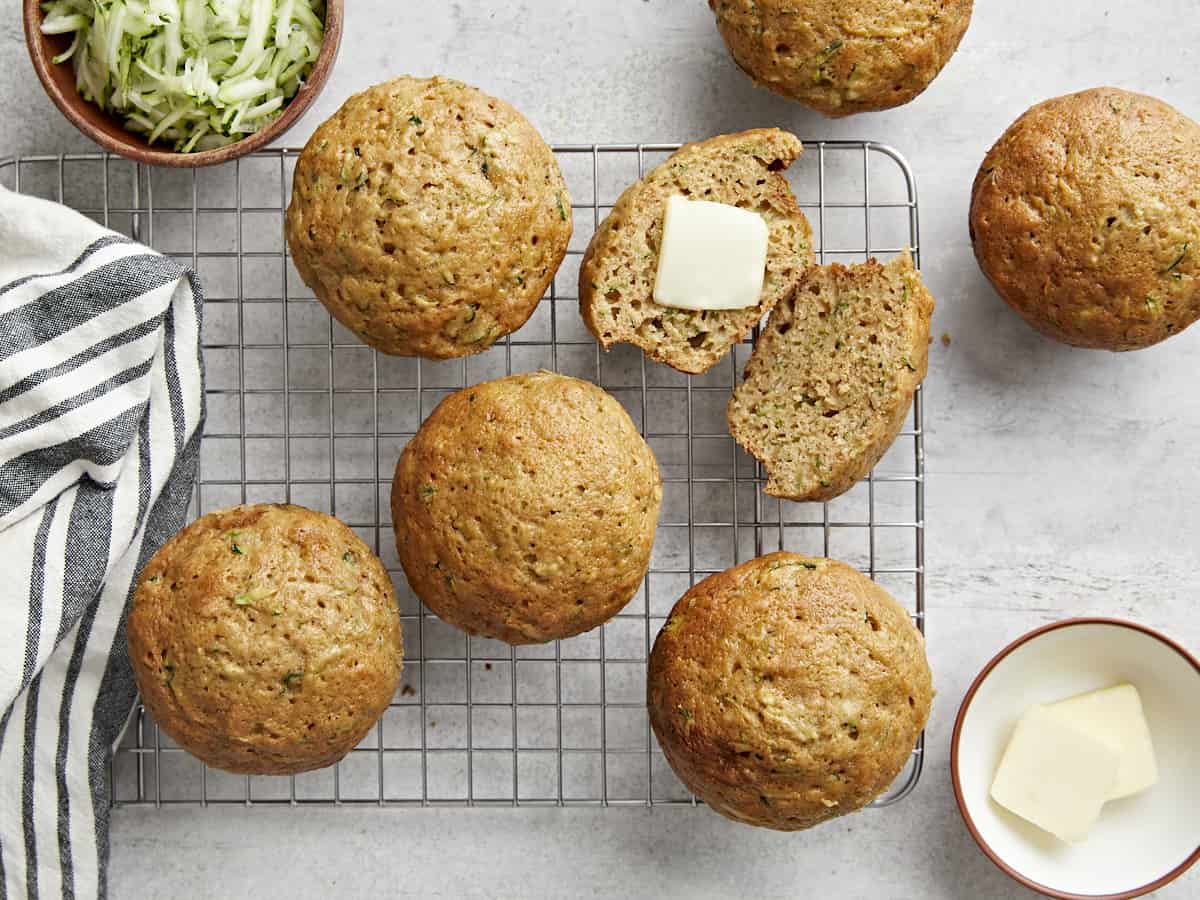
This recipe goes out to all of my fellow zucchini lovers who have an abundance of zucchini growing in their gardens right now. Or maybe you’re like me and just have extra zucchini hanging out in the fridge that you need to use before it goes bad. Either way, one of my favorite ways to use up zucchini is by making these delicious and slightly irresistible Zucchini Muffins. They’re soft, super moist and the perfect way to sneak in a green vegetable!
Ingredients Needed for Zucchini Muffins
What I love about baking recipes is that they often include pantry staple ingredients that you already have on hand. You can easily whip up a batch of these zucchini muffins using the following:
Grated Zucchini – Zucchini naturally contains a lot of water, but there’s no need to pat or squeeze out the excess water for this recipe. In this case the extra liquid helps add moisture to the muffins – saving you an extra step!
All Purpose flour – this gives the muffins structure. We used all-purpose flour, but you can safely substitute up to half of the flour for whole wheat flour without affecting the flavor or texture too much.
Baking Powder & Baking Soda – both are leavening agents to help the muffins rise. We used both due to the extra acidity from the applesauce.
Eggs – to help bind all of the muffin ingredients together.
White Granulated Sugar & Brown Sugar – the combination of both sugars helps to balance the sweetness, moisture and texture of the muffins.
Applesauce & Oil – yes, we’re using both in this recipe! The combination of both oil and applesauce helps keep the muffins moist, but not too oily, and you gain more flavor and moisture by incorporating the applesauce. We’re not making any dry muffins over here! :)
Cinnamon & Vanilla – keeping the added spices simple is key. These two pair nicely together to help enhance the flavor of the zucchini muffins.
Should You Peel the Zucchini Before Grating It
Thankfully there is no need to peel your zucchini before grating it. The skin of the zucchini is very thin and tender, so it’s barely noticeable once baked into the muffins. Just give it a good wash with your hands or a vegetable brush and you’ll be good to go!
A Few Recipe Tips!
Don’t over mix the batter. Overmixing will cause the muffins to become dense and tough instead of light and fluffy. Mix the dry and wet ingredients together until they are just barely combined and there are no traces of dry flour left in the bowl.
Oil your muffin pan well. Even if you are using a nonstick muffin pan, make sure to oil it well or use cupcake liners to prevent your muffins from sticking to the pan.
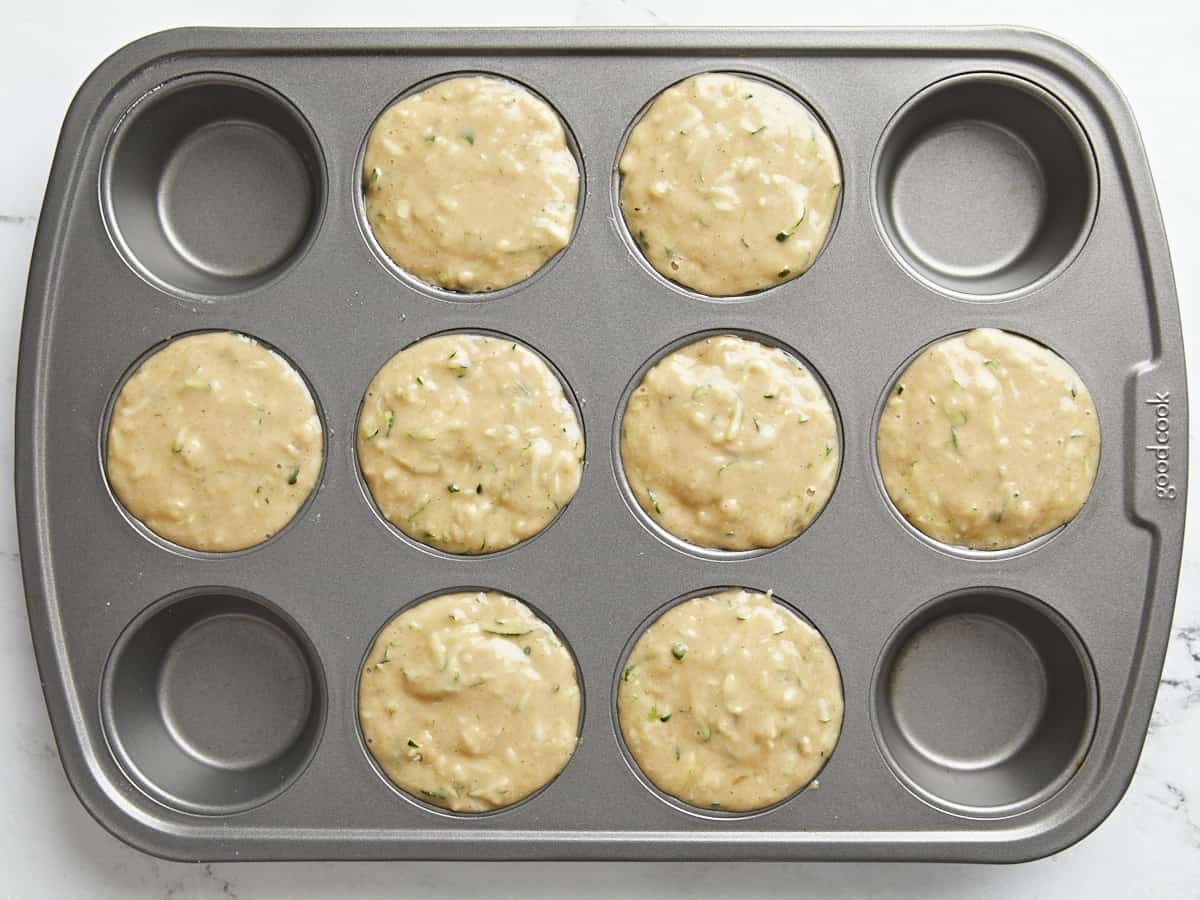
You can easily stretch this batter and get 12 regular size muffins. We were going for larger, bakery style muffins, so we divided the batter into eight muffin wells.
How to Store Zucchini Muffins
Allow the muffins to cool completely at room temperature before storing. You can store leftover zucchini muffins in an airtight container or a food storage bag at room temperature or in the fridge for 4-5 days. For longer storage, store in a freezer-safe storage bag for up to 3 months. Thaw frozen muffins at room temperature or microwave for about 30 seconds until warm, then add a little butter and enjoy!
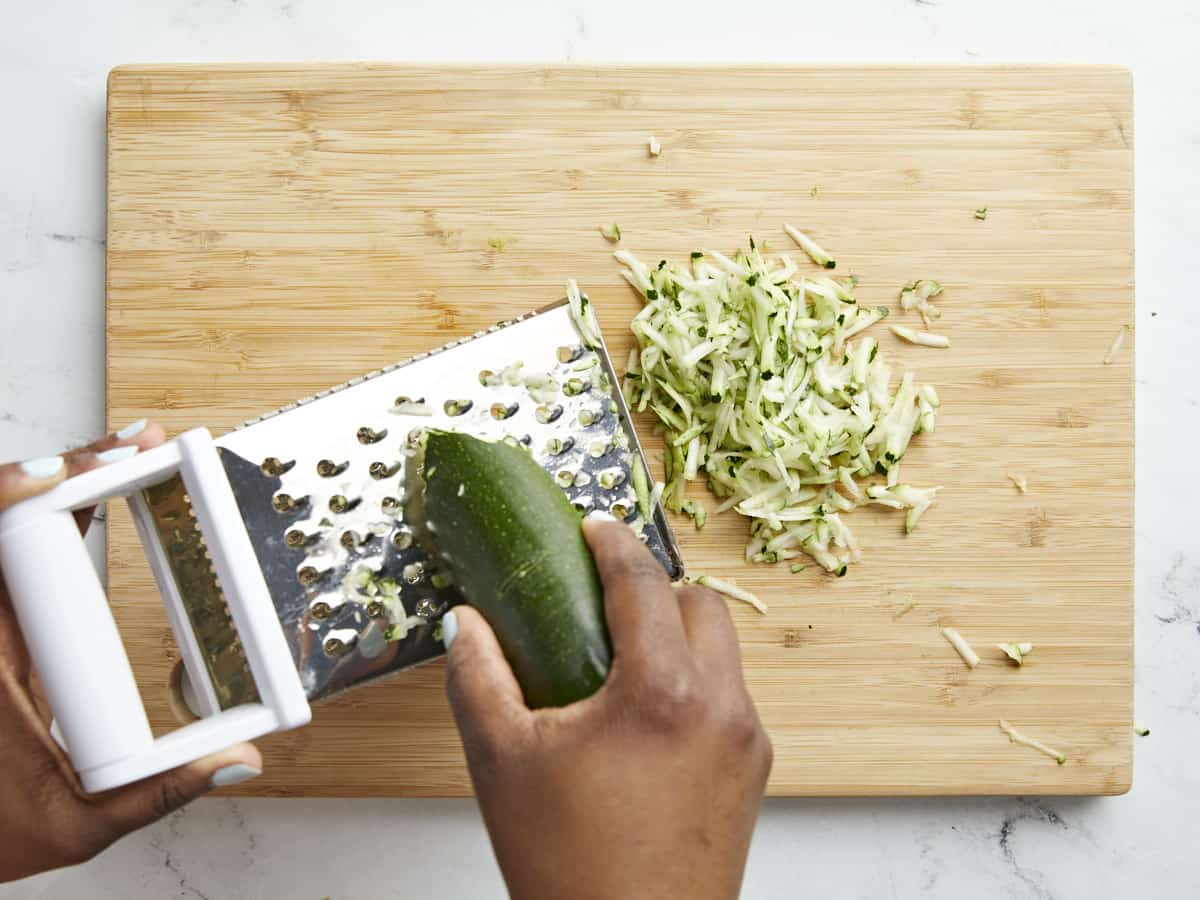
Preheat the oven to 350°F. Next wash the zucchini well, trim off the stem of the zucchini, then using the large holes on a box grater, grate the zucchini and set it to the side.
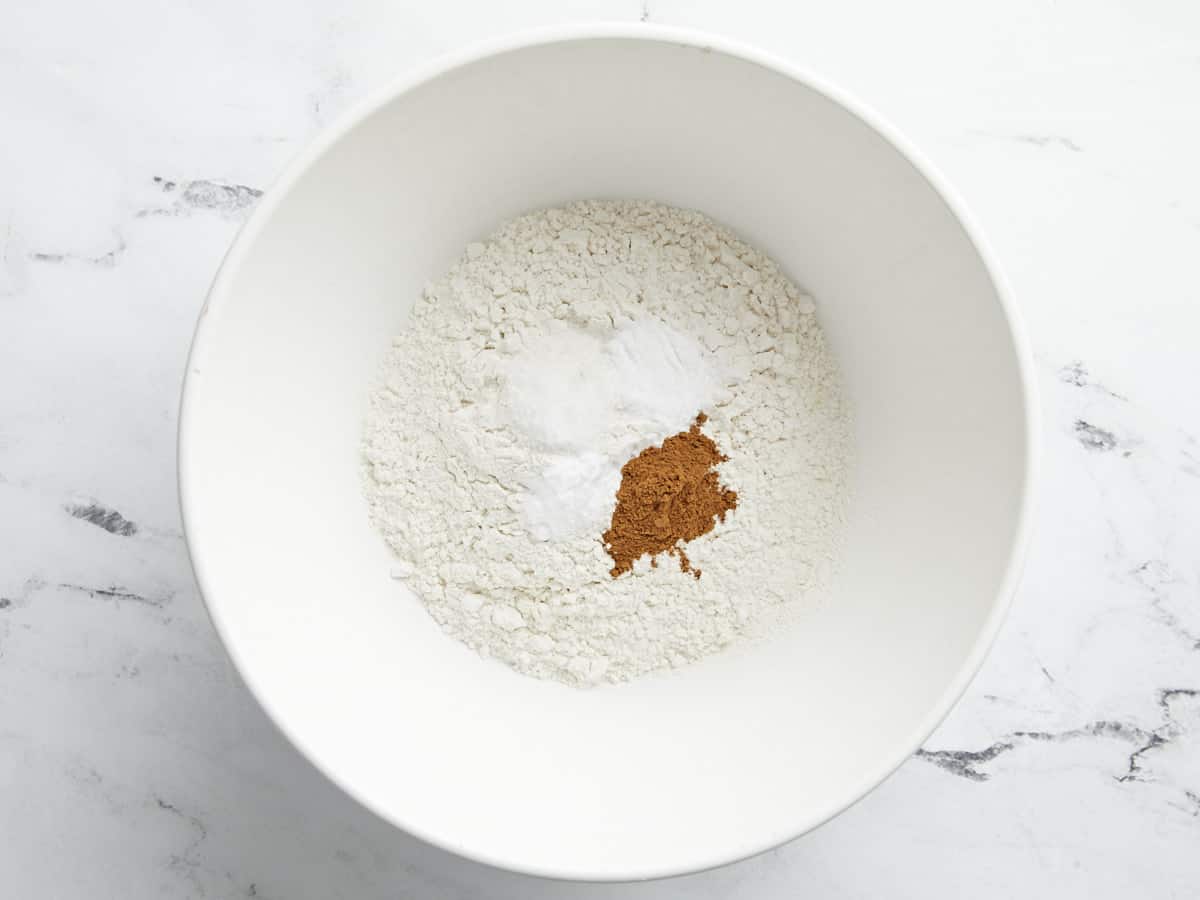
In a large bowl, whisk together the dry ingredients (flour, baking powder, baking soda, salt, and cinnamon) until well combined.
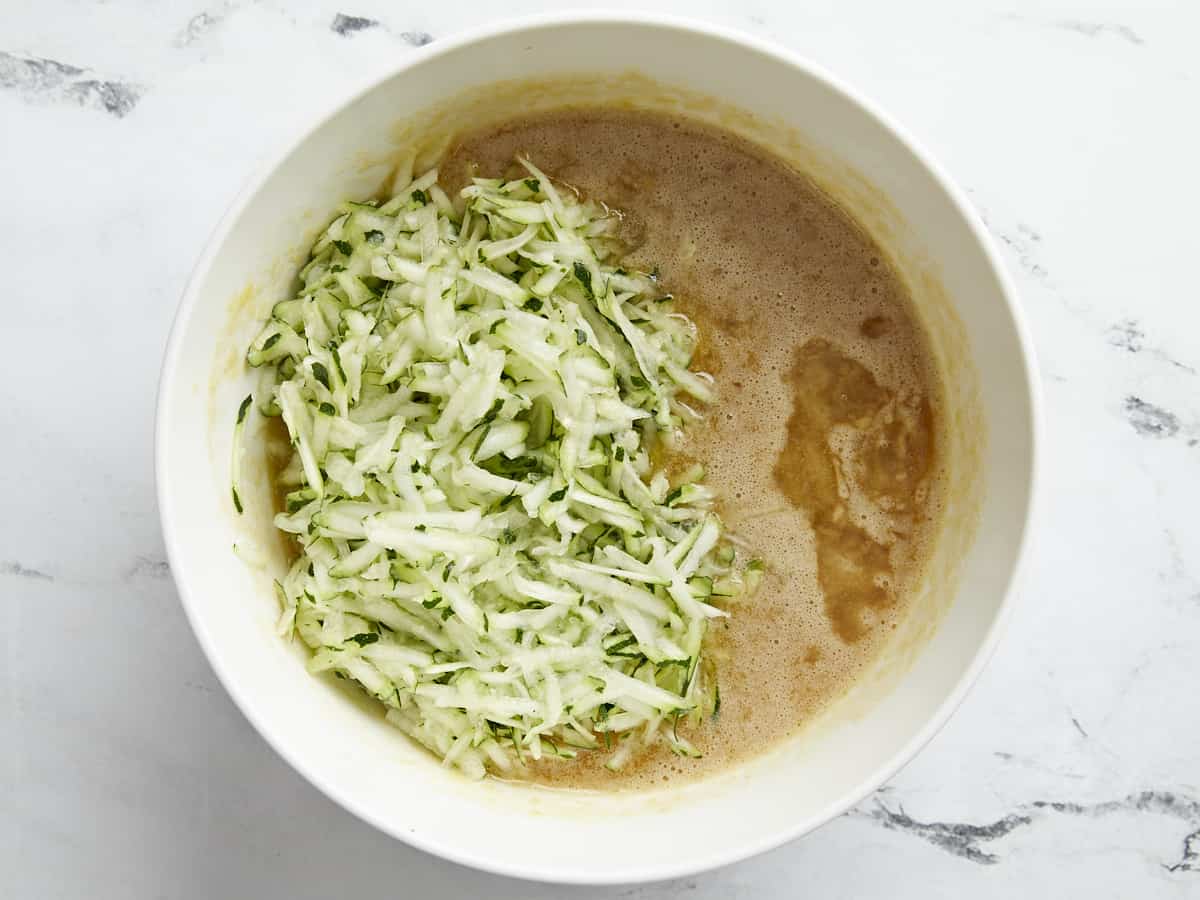
In a separate bowl, whisk together the wet ingredients (eggs, granulated sugar, brown sugar, applesauce, oil and vanilla extract) until well combined.
Add the grated zucchini to the bowl with the wet ingredients. Stir until combined.
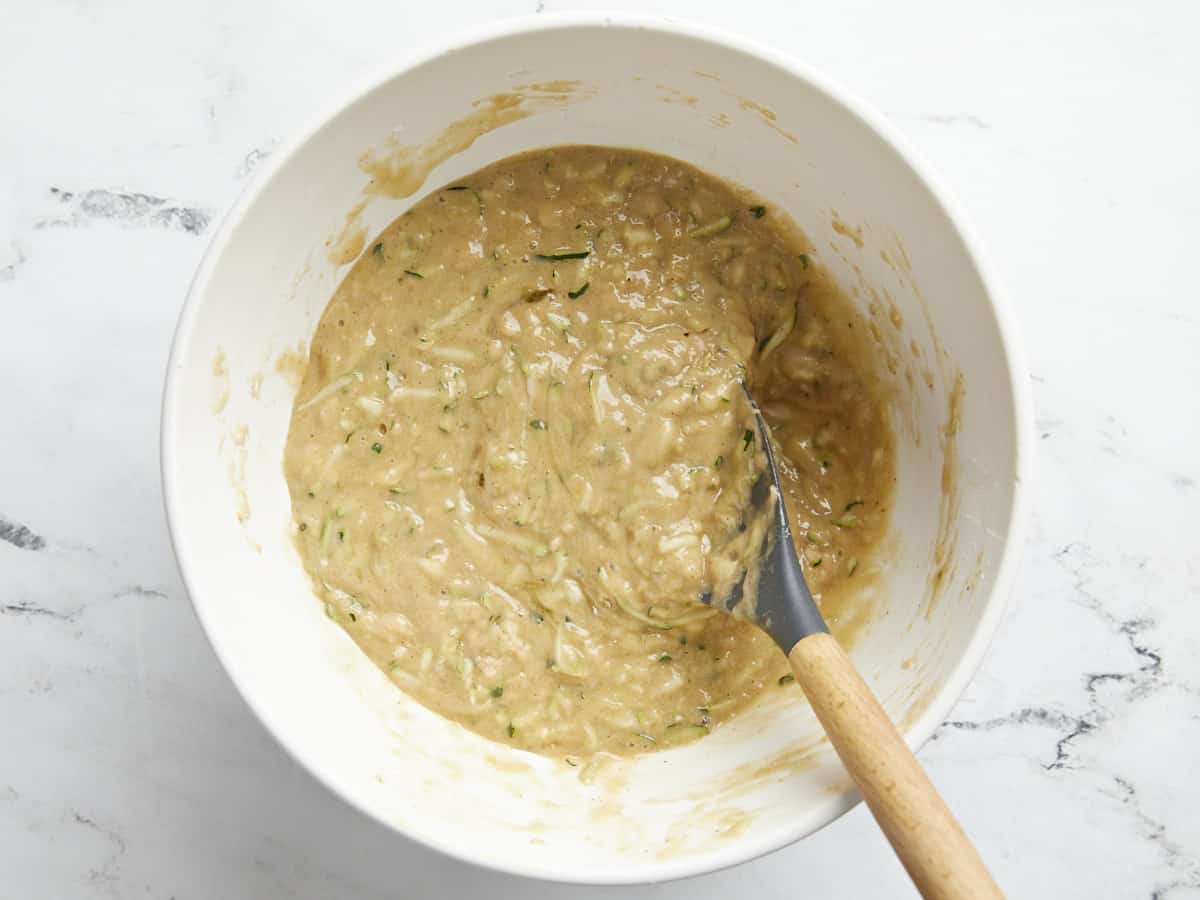
Pour the wet ingredients into the same bowl as the dry ingredients. Stir together until just combined. Be careful not to overmix at this point.
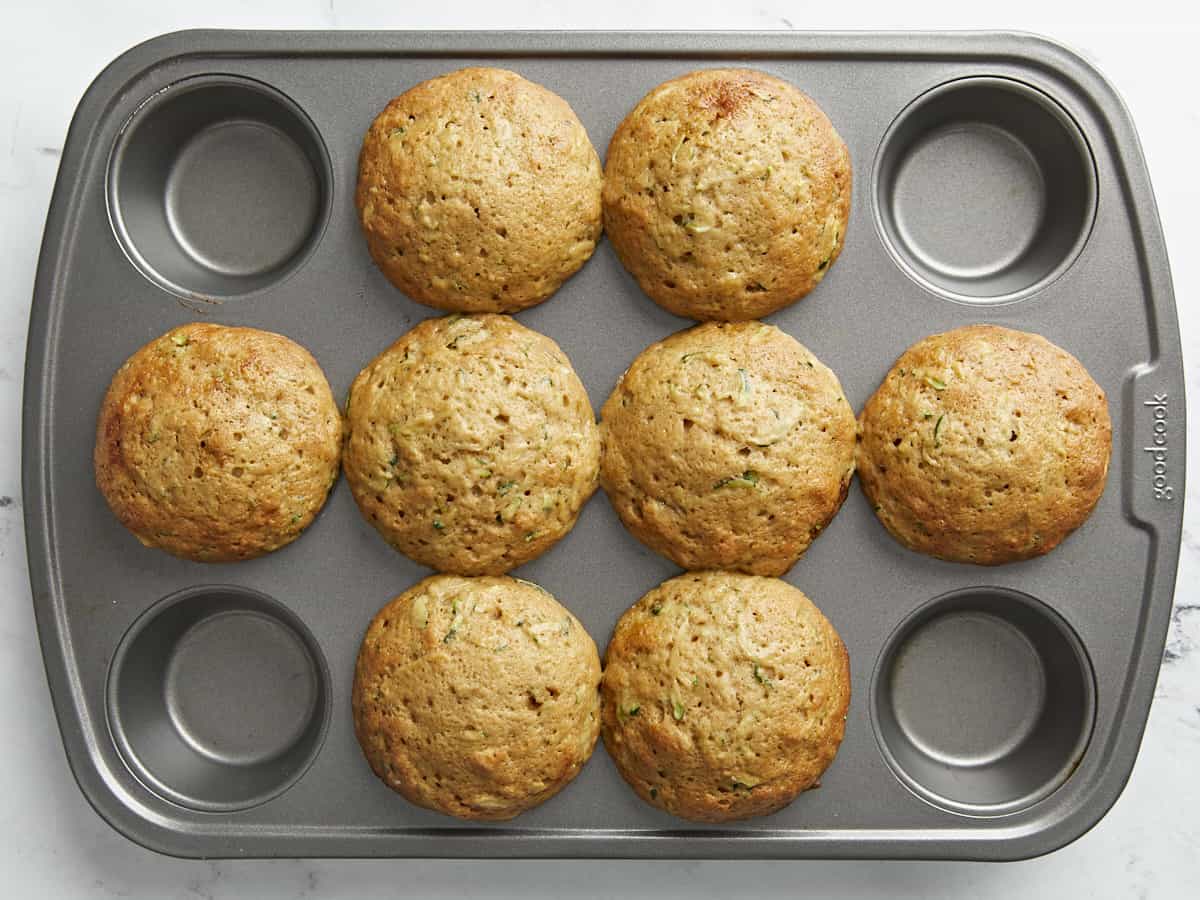
Divide the batter between eight greased or lined muffin wells.
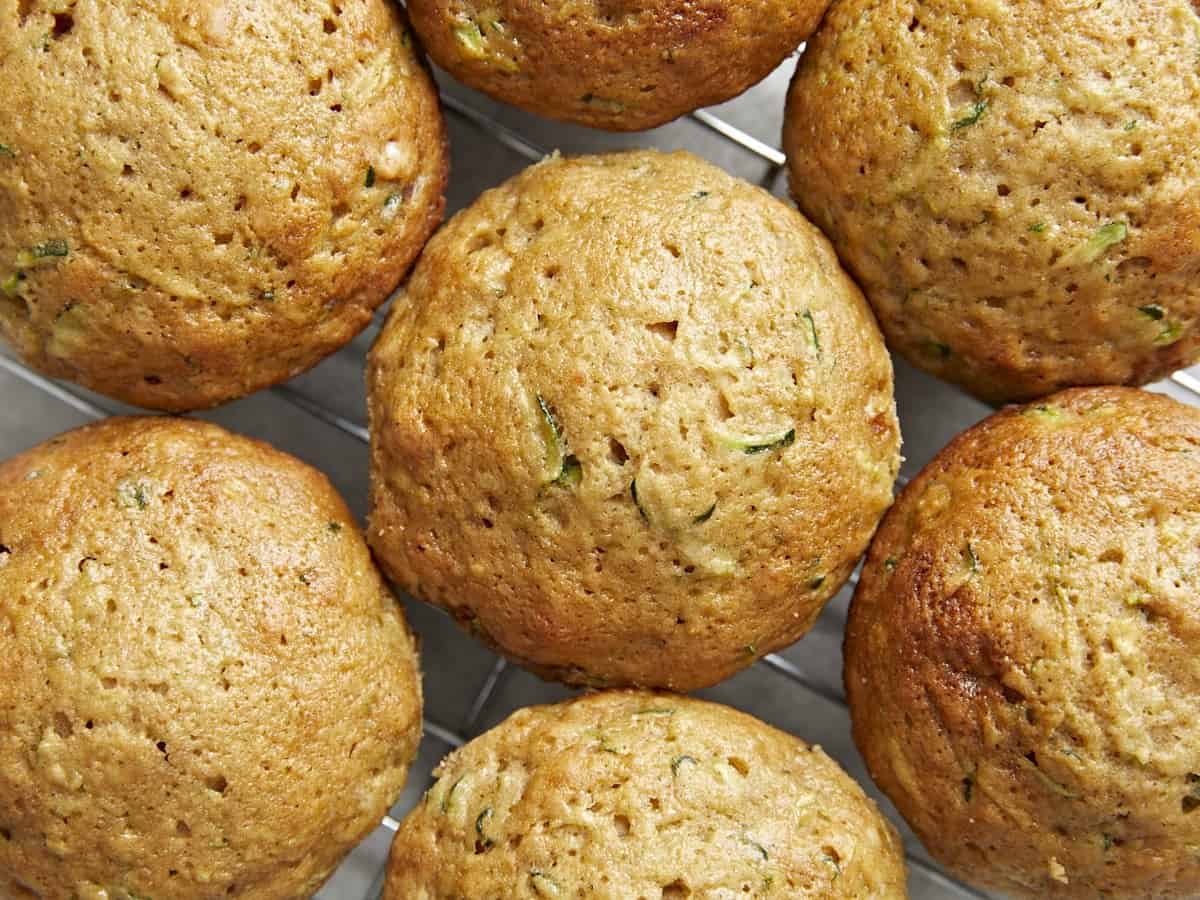
Bake the muffins for about 24 minutes or until golden brown and puffed in the center. Allow the muffins to cool for about 5 minutes, then carefully loosen the edges with a knife and transfer the muffins to a wire rack to finish cooling. Enjoy!
How to Make Zucchini Muffins – Step by Step Photos
Preheat the oven to 350°F. Next wash the zucchini well, trim off the stem of the zucchini, then grate 2 cups of zucchini (roughly about 1 lb.) and set the grated zucchini to the side.
In a large mixing bowl, whisk together 2 cups all-purpose flour, 1 tsp baking powder, 1/2 tsp baking soda, 1/2 tsp salt, and 1 tsp cinnamon until well combined.
In a separate bowl, whisk together 2 large eggs, 1/2 cup granulated sugar, 1/2 cup brown sugar, 1/3 cup applesauce, 1/4 cup cooking oil and 1 tsp vanilla extract until well combined.
Add the 2 cups of grated zucchini to the bowl with the wet ingredients. Stir until well combined.
Pour the wet ingredients into the same bowl as the dry ingredients. Stir together until just barely combined and there are no traces of dry flour left in the bowl. Be careful not to overmix the batter at this point.
Divide the batter between eight greased or lined muffin wells.
Bake for about 24 minutes or until golden brown and puffed in the center. And be prepared for your kitchen to smell amazing! Allow the muffins to cool for about 5 minutes then carefully loosen the edges of the muffin with a knife. Transfer the muffins to a wire rack to finish cooling.
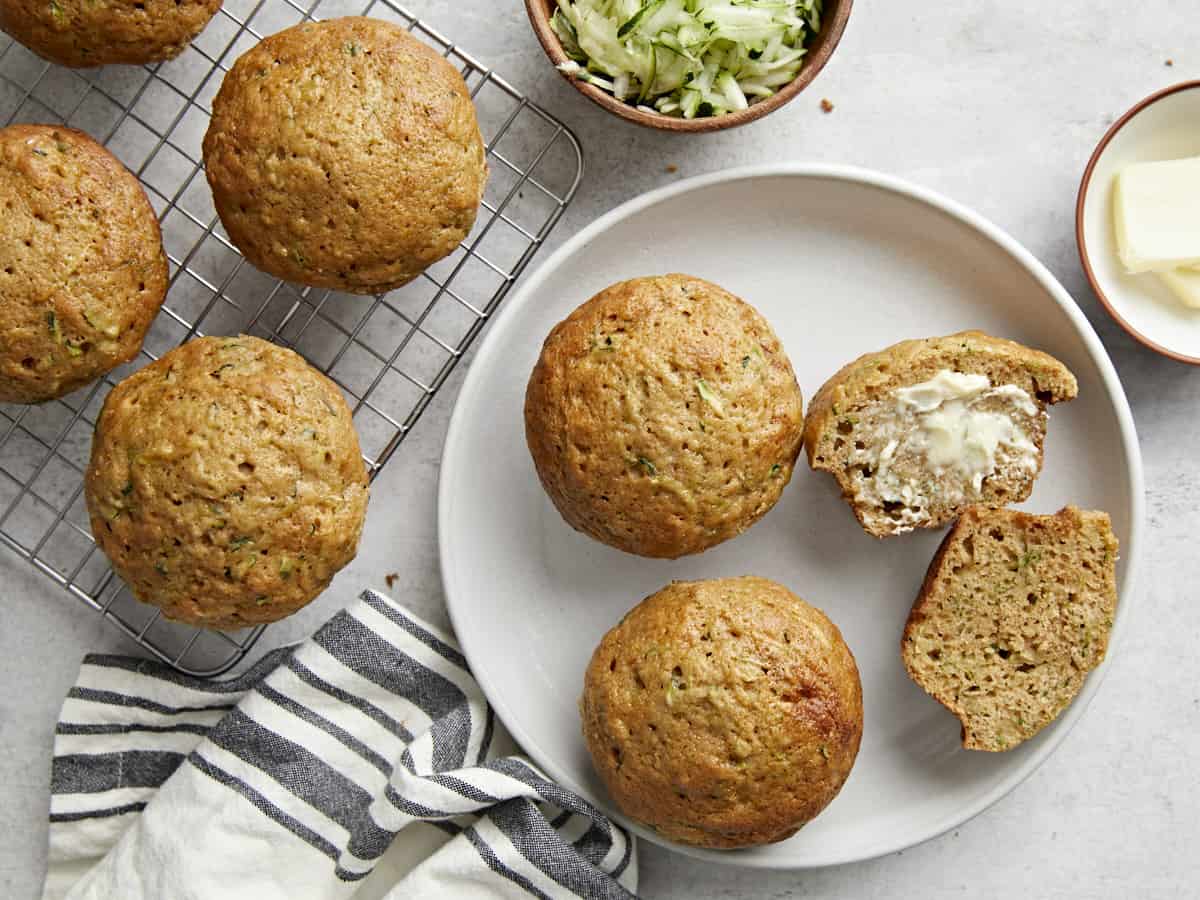
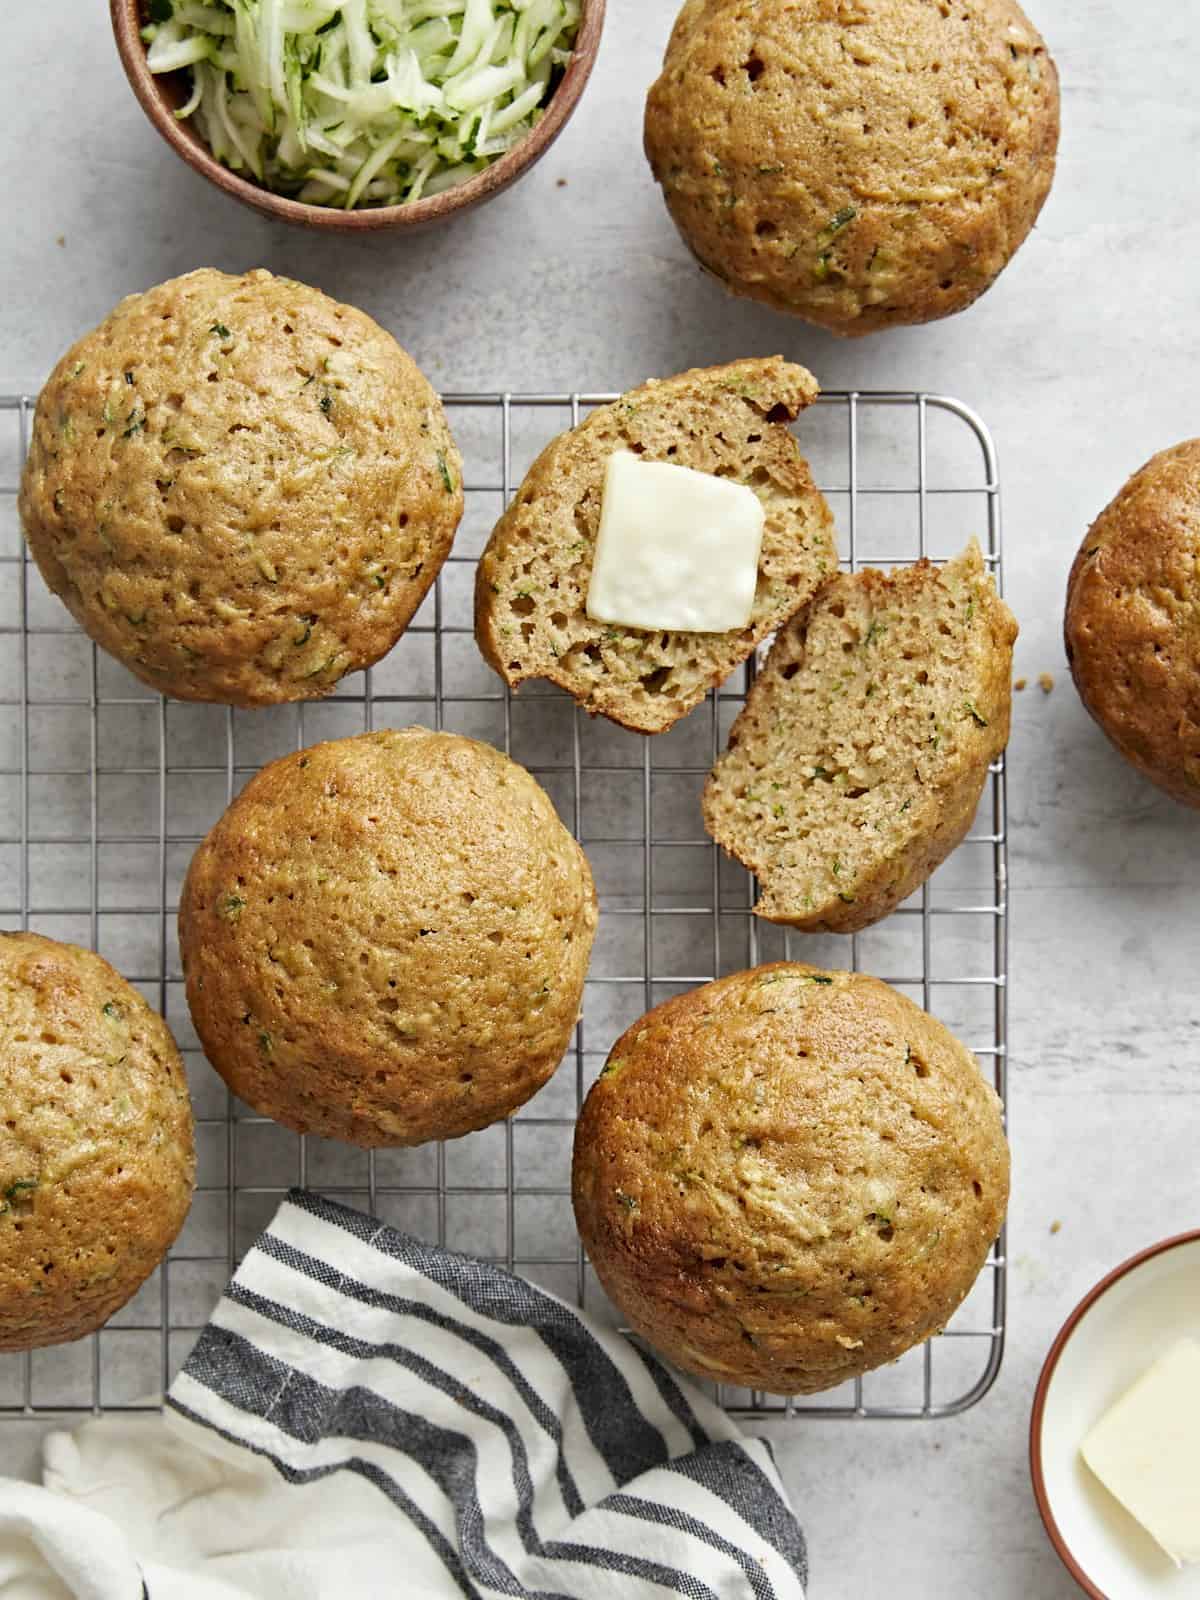
Enjoy these soft, fluffy, and absolutely delicious Zucchini Muffins by themselves or with a little butter spread on top!
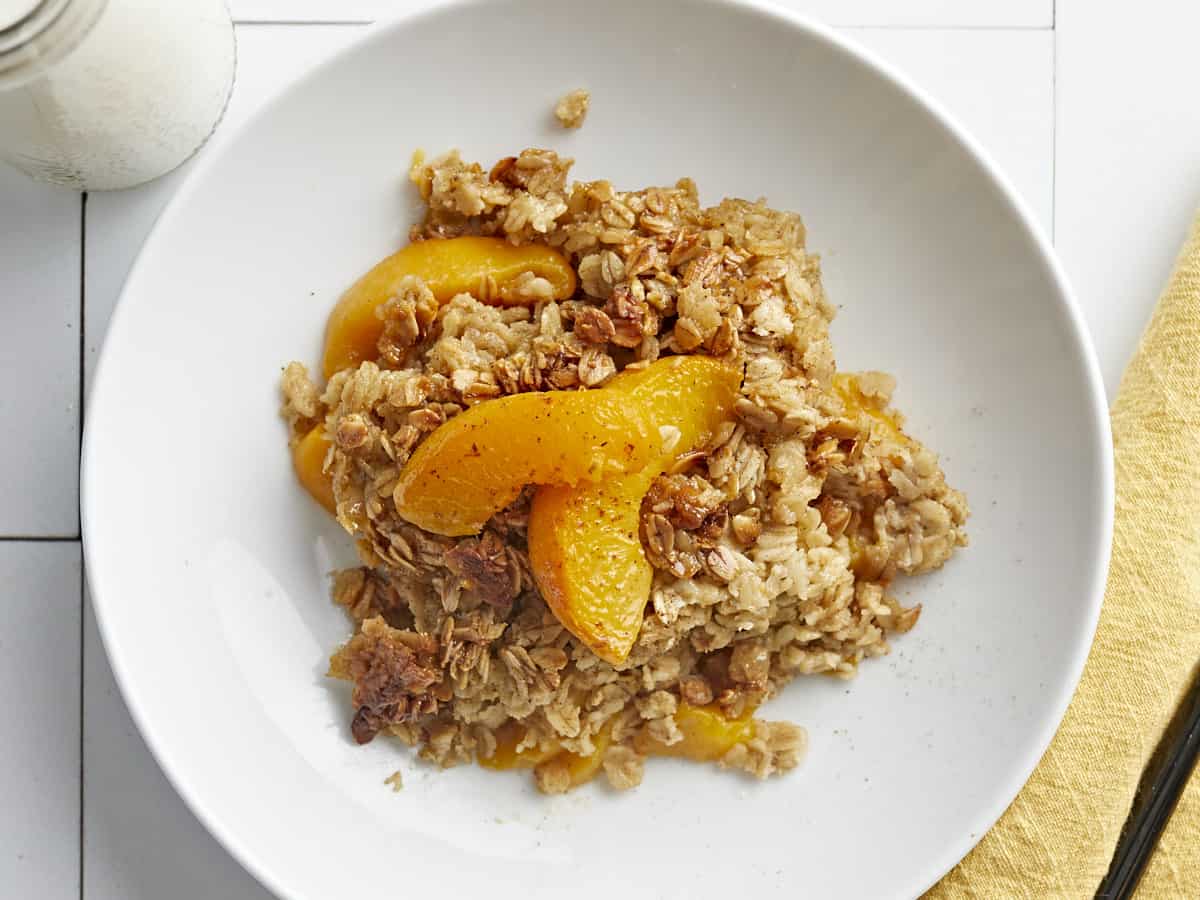
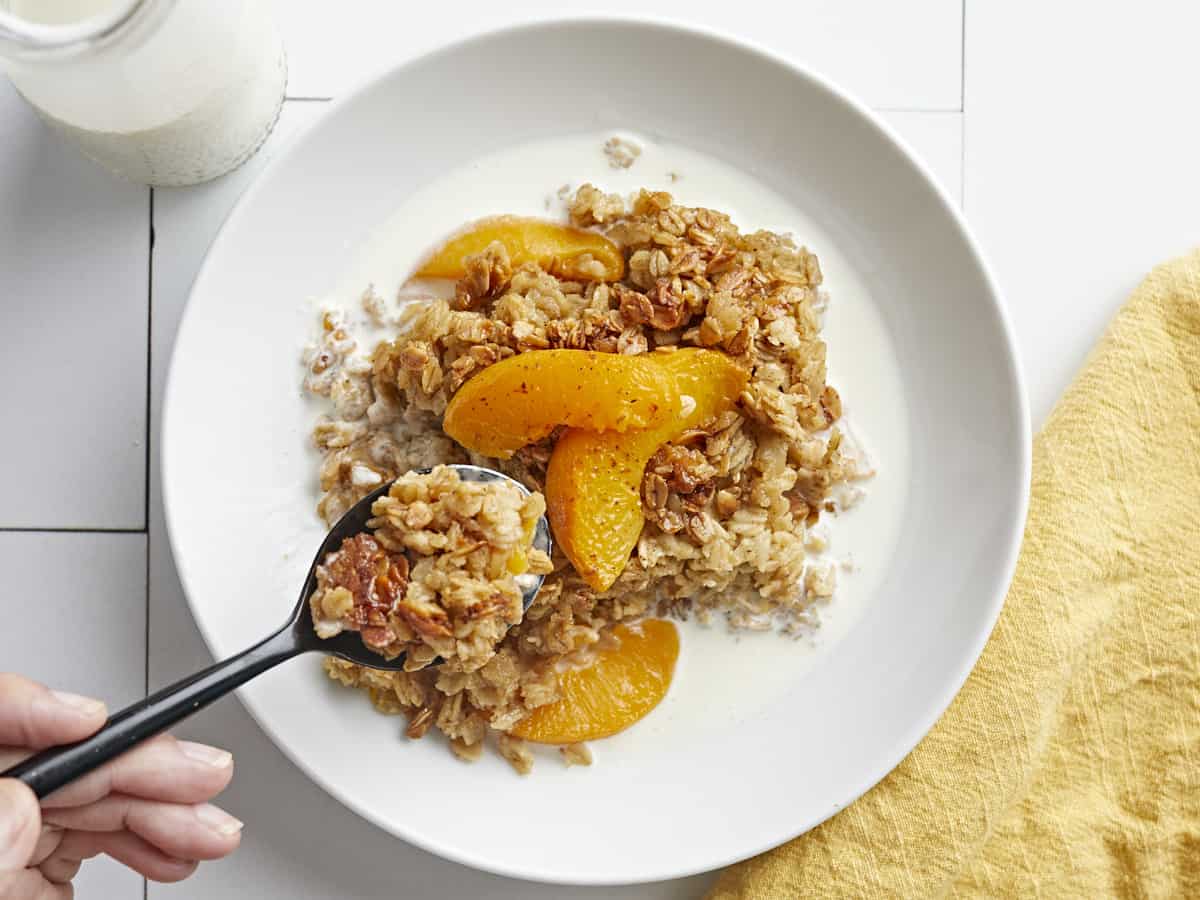
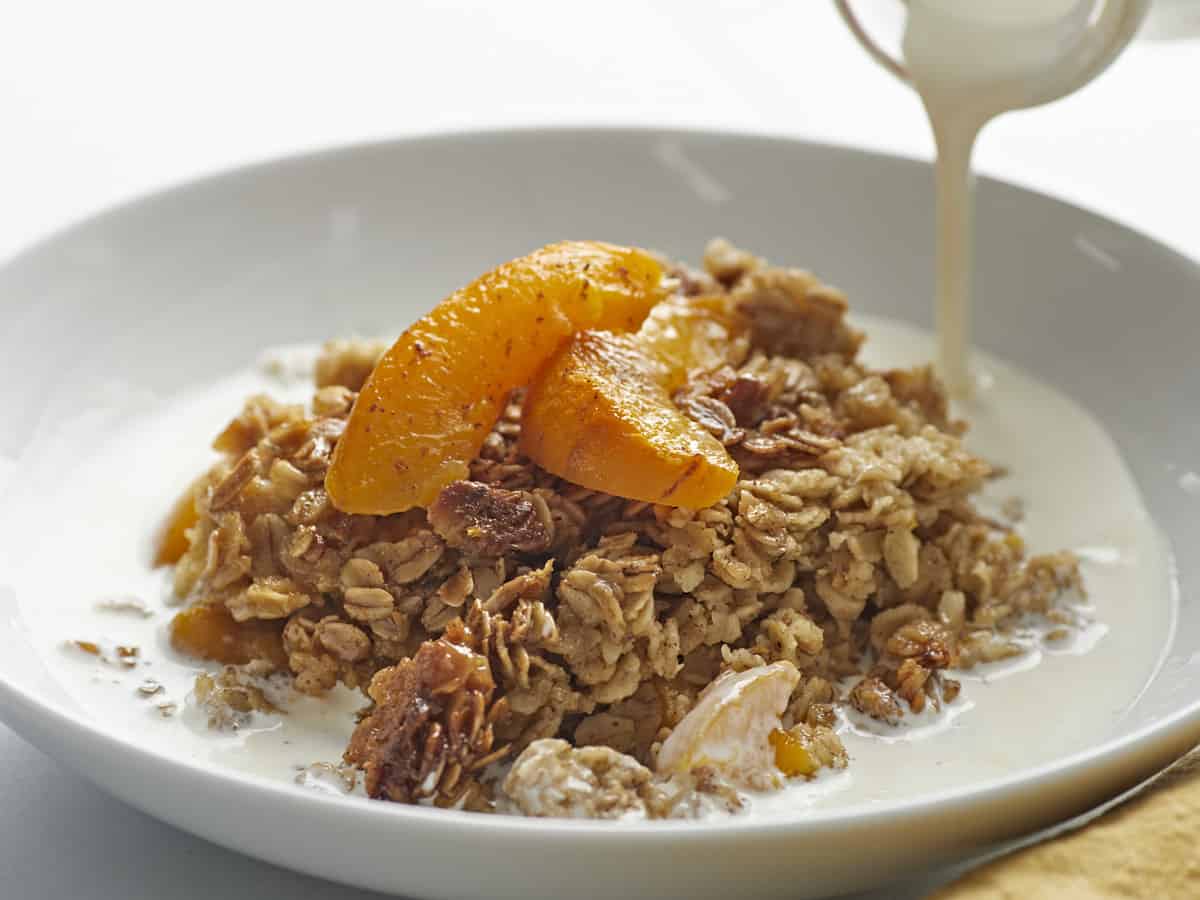
I know this recipe for buttery Peach Baked Oatmeal is awesome because everyone in the studio got quiet when they were eating it, a rare moment with our lively group! Crispy and caramelized on the outside and velvety on the inside, this easy breakfast dish will become a morning favorite. Did I mention this baked oatmeal comes in at a little over a dollar per serving?? You’ve got to make this recipe!
What is Baked Oatmeal?
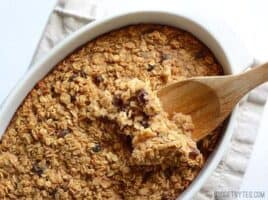
Baked oatmeal is exactly what it sounds like. It’s oats mixed with a liquid, a binder (like eggs), a sweetener, a fat (like butter), and other ingredients to add flavor and texture, like fruit, nuts, and spices. The oatmeal absorbs all of the flavors that were mixed into it so it blossoms when you taste it. My recipe is less custardy than our website’s other baked oatmeal recipes. It has more of a bite, like pasta. That’s because I use less liquid, so the oats retain their shape and get these crispy golden edges… OMG, I have to stop writing about it cause I’m going to end up in my kitchen making baked oatmeal at 10 o’clock at night like a crazy person. Just trust. It’s fantastic.
Ingredients For Baked Oatmeal
The best thing about baked oatmeal is that it’s endlessly customizable. You can use any fruit, nuts, or spices you like. This is what you’ll need to make my favorite combination:
Oatmeal– Skip the instant oats which turn to mush in a heartbeat and stick to old-fashioned, which will give you a better texture. While you can bake steel-cut oats, the liquid-to-oats ratio is different, and I haven’t tested that, so I can’t give you any direction.
Peaches– Canned in their own juices is my go-to, as I use the juices in the recipe. If using fresh or frozen, you’ll need to add a cup of water to the mix. You can substitute peaches with apples, pears, or bananas, also adding a cup of water to the mix.
Butter– because you can’t get those crispy edges without it and those crispy edges are EVERYTHING. Substitute with vegan butter if you’re dairy-free.
Cream– helps create a velvety texture. You can use whole milk as well, though I’d add an additional tablespoon of butter. Use coconut cream if you want to skip the dairy. Just make sure it’s full fat. You need it.
Eggs– will help bind the oatmeal. If you want to skip the eggs you can try using 2 ripe bananas as a binder.
Brown Sugar– mixes with the butter to develop deep caramel notes. You can substitute it with your preferred sweetener.
Cinnamon and Vanilla– season and scent the oatmeal. They also pair exquisitely with peaches and help elevate the fruit’s flavors.
Tips For The Best Baked Oatmeal
Use old-fashioned oats instead of quick oats. Old-fashioned oats will give your baked oatmeal a chewier texture.
Don’t overmix the batter. Overmixing will make your baked oatmeal tough. Fold the ingredients in and mix until they are barely combined.
Bake the oatmeal until it’s cooked through. Underbaked oatmeal will be mushy. You want the oatmeal to have a slight bite.
Baked Oatmeal Toppings
If you’re looking to add a little extra oomph to your Peach Baked Oatmeal, it pairs beautifully with our Homemade Whipped Cream. You can also top it with Strawberry Syrup, Blueberry Sauce, or our Lemon Curd. Or you can go wild and use all four! ( Editor’s Note: I know it seems like too much sugar, Beth- but think of how amazing it would be to start your day with such decadence! Don’t fight it. )
Storing and Reheating Leftovers
Cool leftovers completely before storing them so the oatmeal doesn’t get soggy. Store baked oatmeal in an airtight container. It will keep in the refrigerator for up to three days and in the freezer for three months. To reheat, microwave it for a few minutes until steaming.
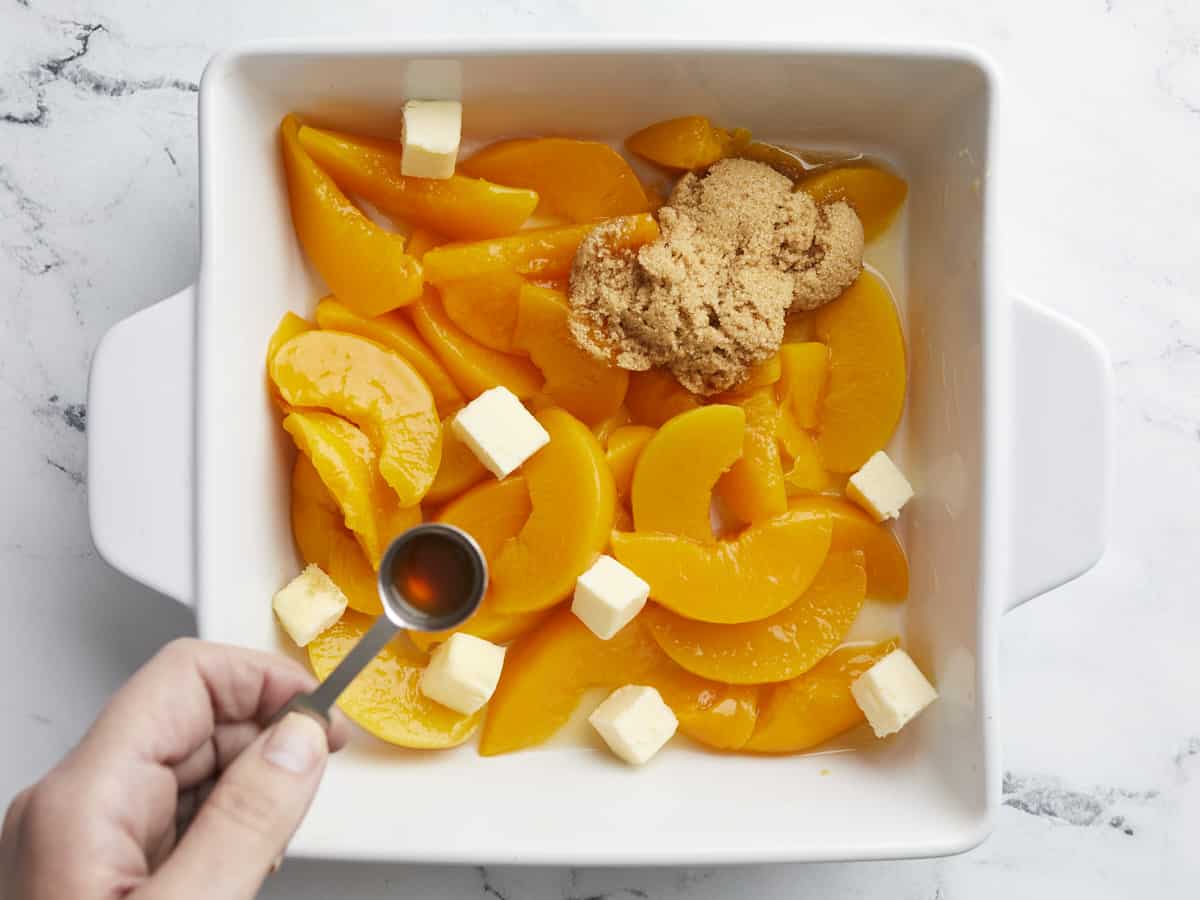
Set an oven rack in the middle of your oven and preheat it to 375°F. Drain the cans of peaches, reserving the juices. Add the drained peaches to a 13×9 inch baking dish, reserving six slices for garnish. Add 1/4cup brown sugar to the peaches. Dice 4 tablespoons of butter and sprinkle over the peaches. Finish with 1/4 teaspoon of vanilla. Mix thoroughly.
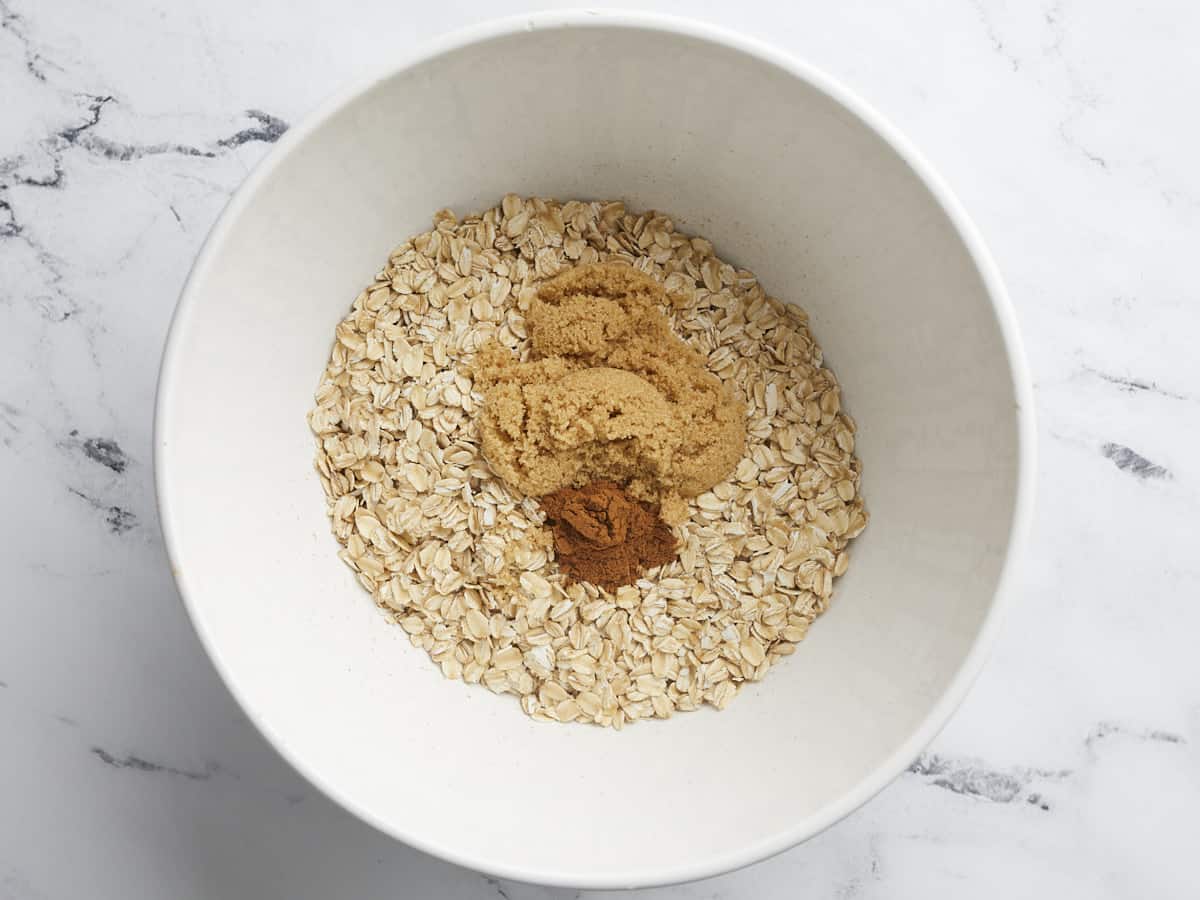
Add the old-fashioned or rolled oats to a large bowl. Add 1/4teaspoon cinnamon and the remaining 1/4cup brown sugar and mix well.
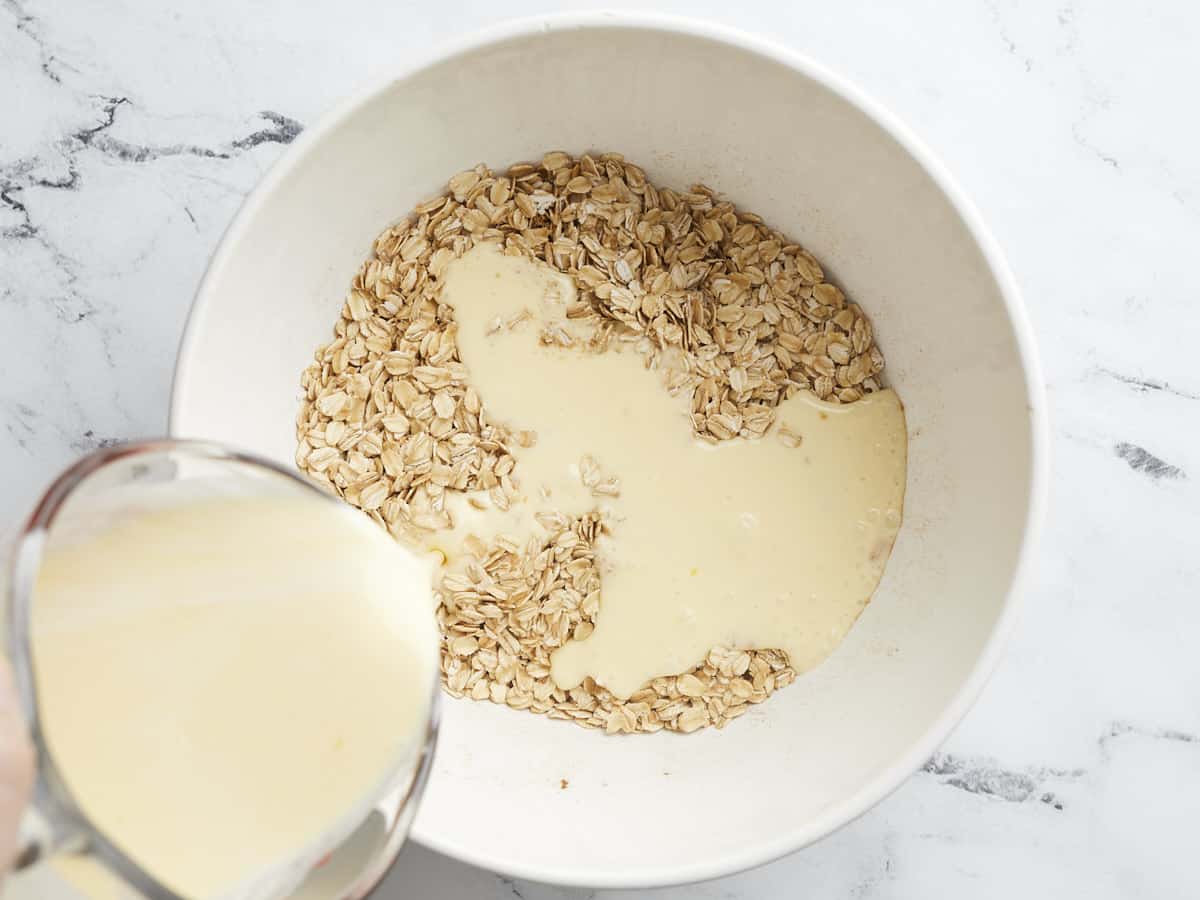
Mix 1 cup of peach juices with the cream and the remaining 1/4 teaspoon of vanilla. Add the beaten eggs and mix. Add the wet mixture to the oatmeal and stir just until incorporated.
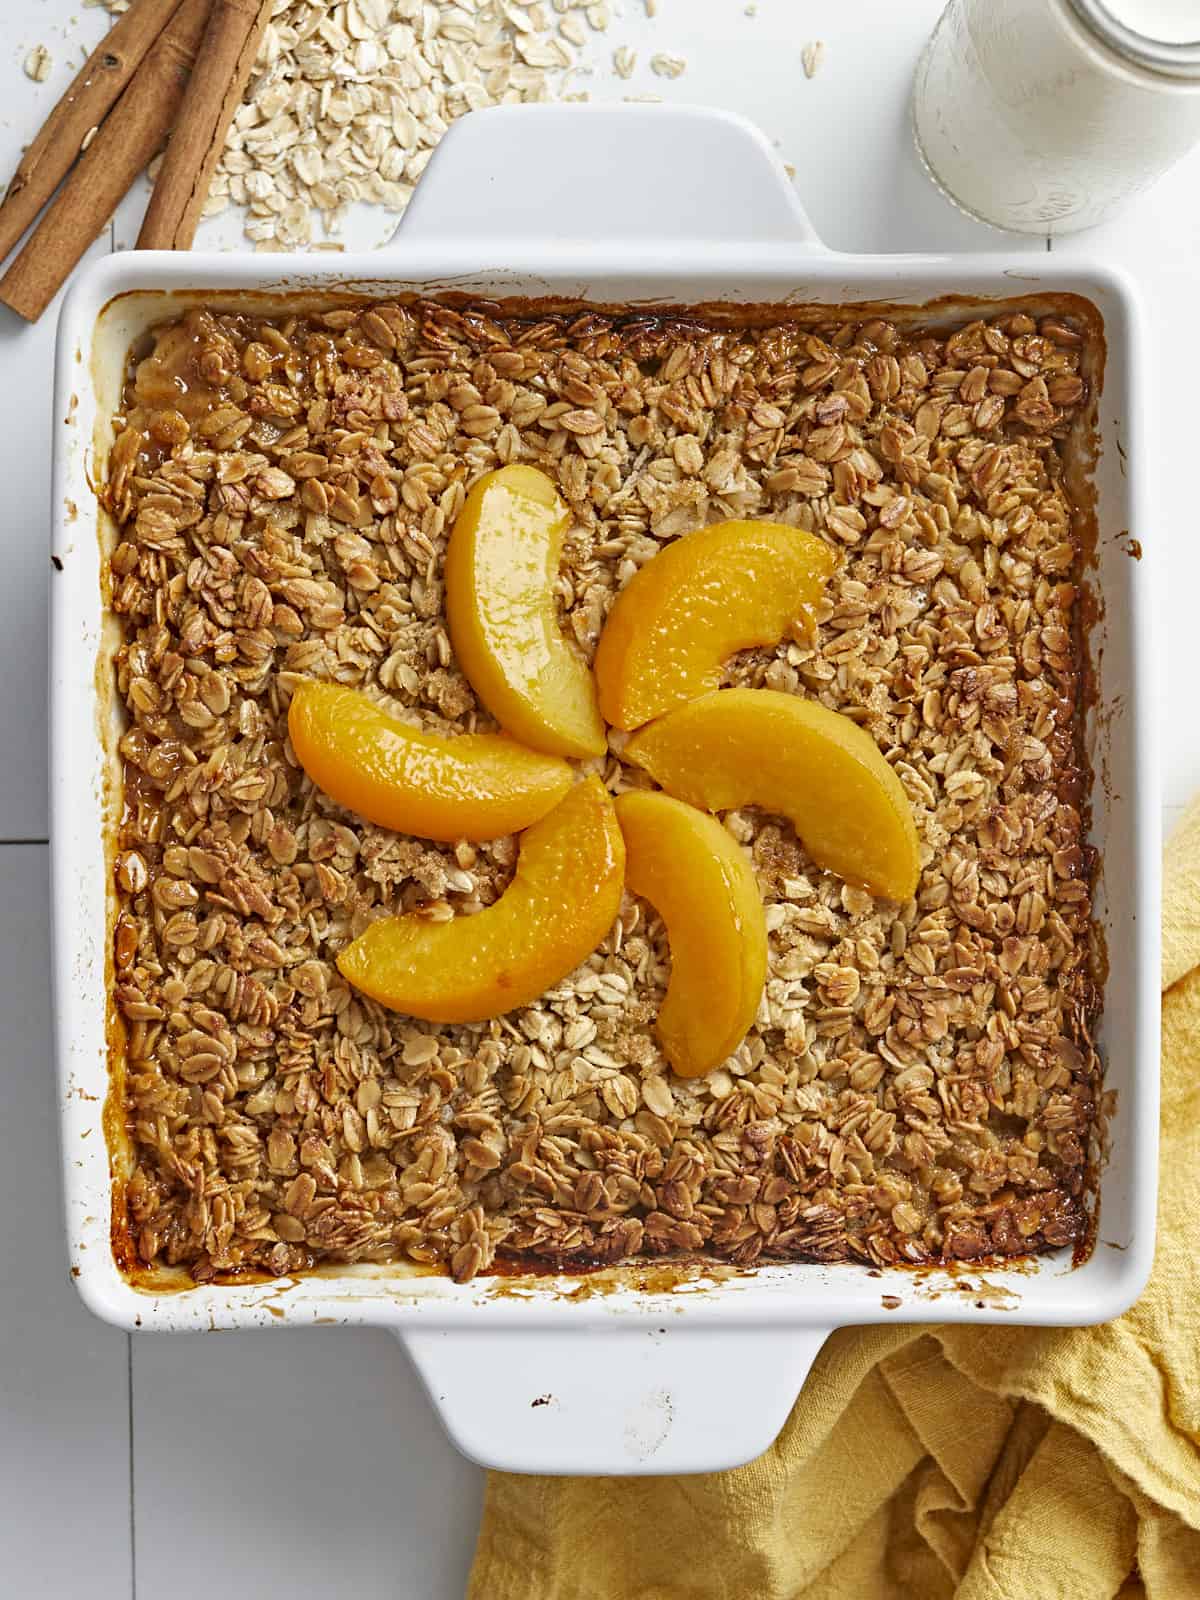
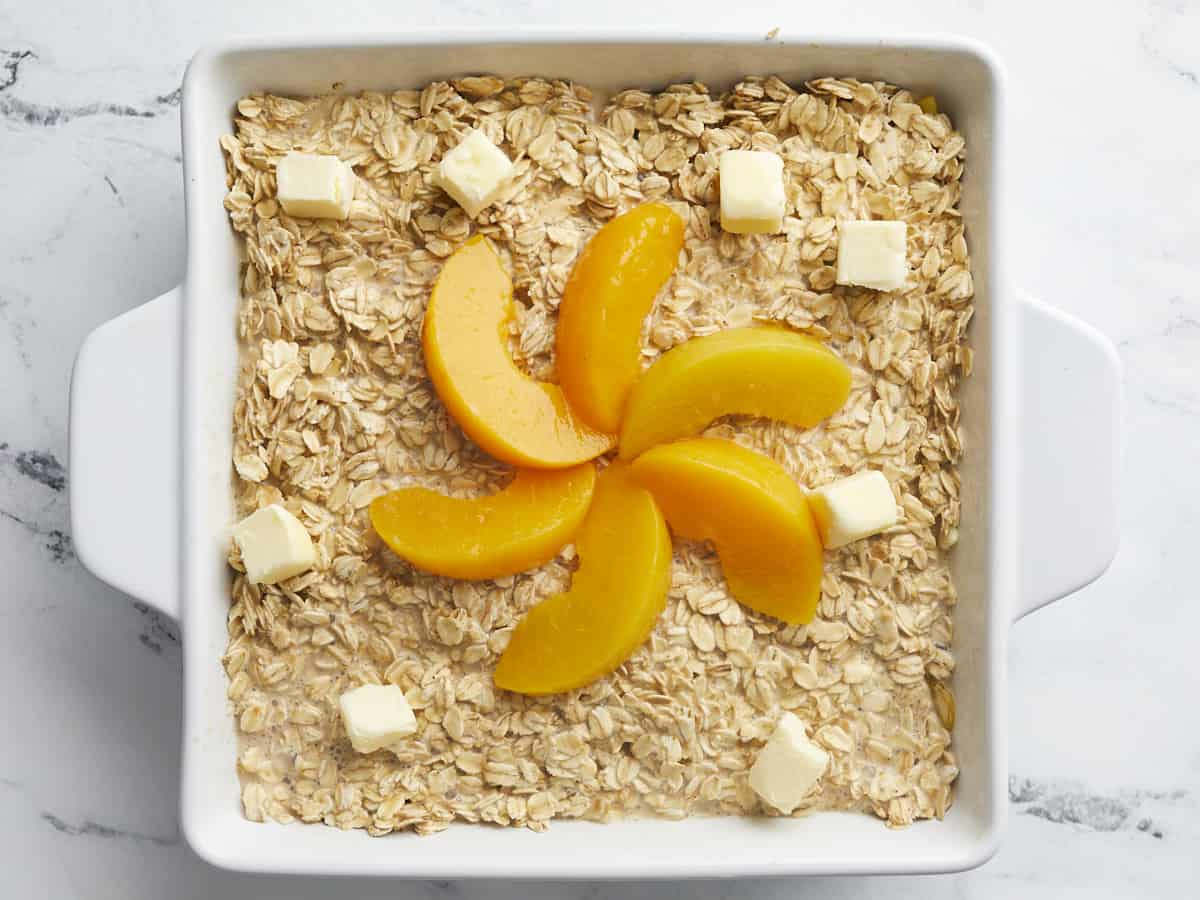
Dollop the oats over the peaches. Dice the remaining 4 tablespoons of butter and sprinkle over the top. Garnish with peach slices.
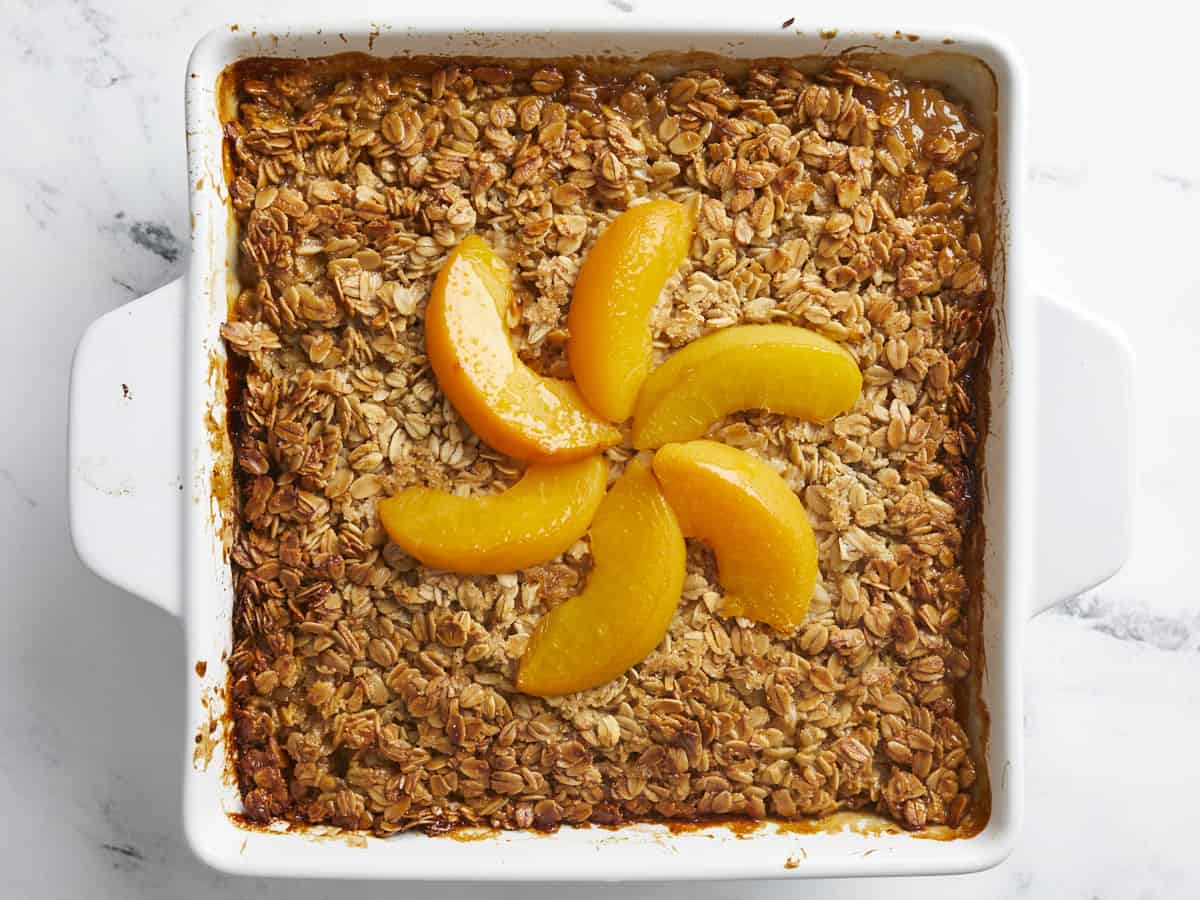
Bake until it is golden brown and crispy, about 45 minutes. Cool for 15 minutes. Enjoy as is or serve with a little cream!
How to Make Peach baked Oatmeal – Step by Step Photos
Set a rack in the middle of your oven and preheat it to 375°F. Drain the 2 (15oz) cans of peaches, reserving the juices. Add the drained peaches to a 13 x 9 baking dish, reserving six slices for garnish. Add 1/4 cup brown sugar to the peaches. Dice 1/2 stick of butter and sprinkle it over the peaches. Finish with 1/4 teaspoon of vanilla.
Add 3 cups of old-fashioned or rolled oats to a large bowl. Add 1/4 teaspoon cinnamon and the remaining 1/4 cup brown sugar and mix well.
Mix 1 cup of peach juice with the 1/2 cup of heavy cream and the remaining 1/4 teaspoon of vanilla. Add the 2 beaten eggs and mix. Add the wet mixture to the oatmeal and stir just until incorporated.
Dollop the oats over the peaches. Dice the remaining 4 tablespoons of butter and sprinkle over the top. Garnish with peach slices.
Bake until it is golden brown and crispy, about 45 minutes. Cool for 15 minutes before serving! (If you can wait for that long. I’ve yet to accomplish this feat. But I don’t mind eating peach-flavored lava. You do you.) I like to serve it with a little cream in a bowl that I refill over and over and over again. Enjoy!
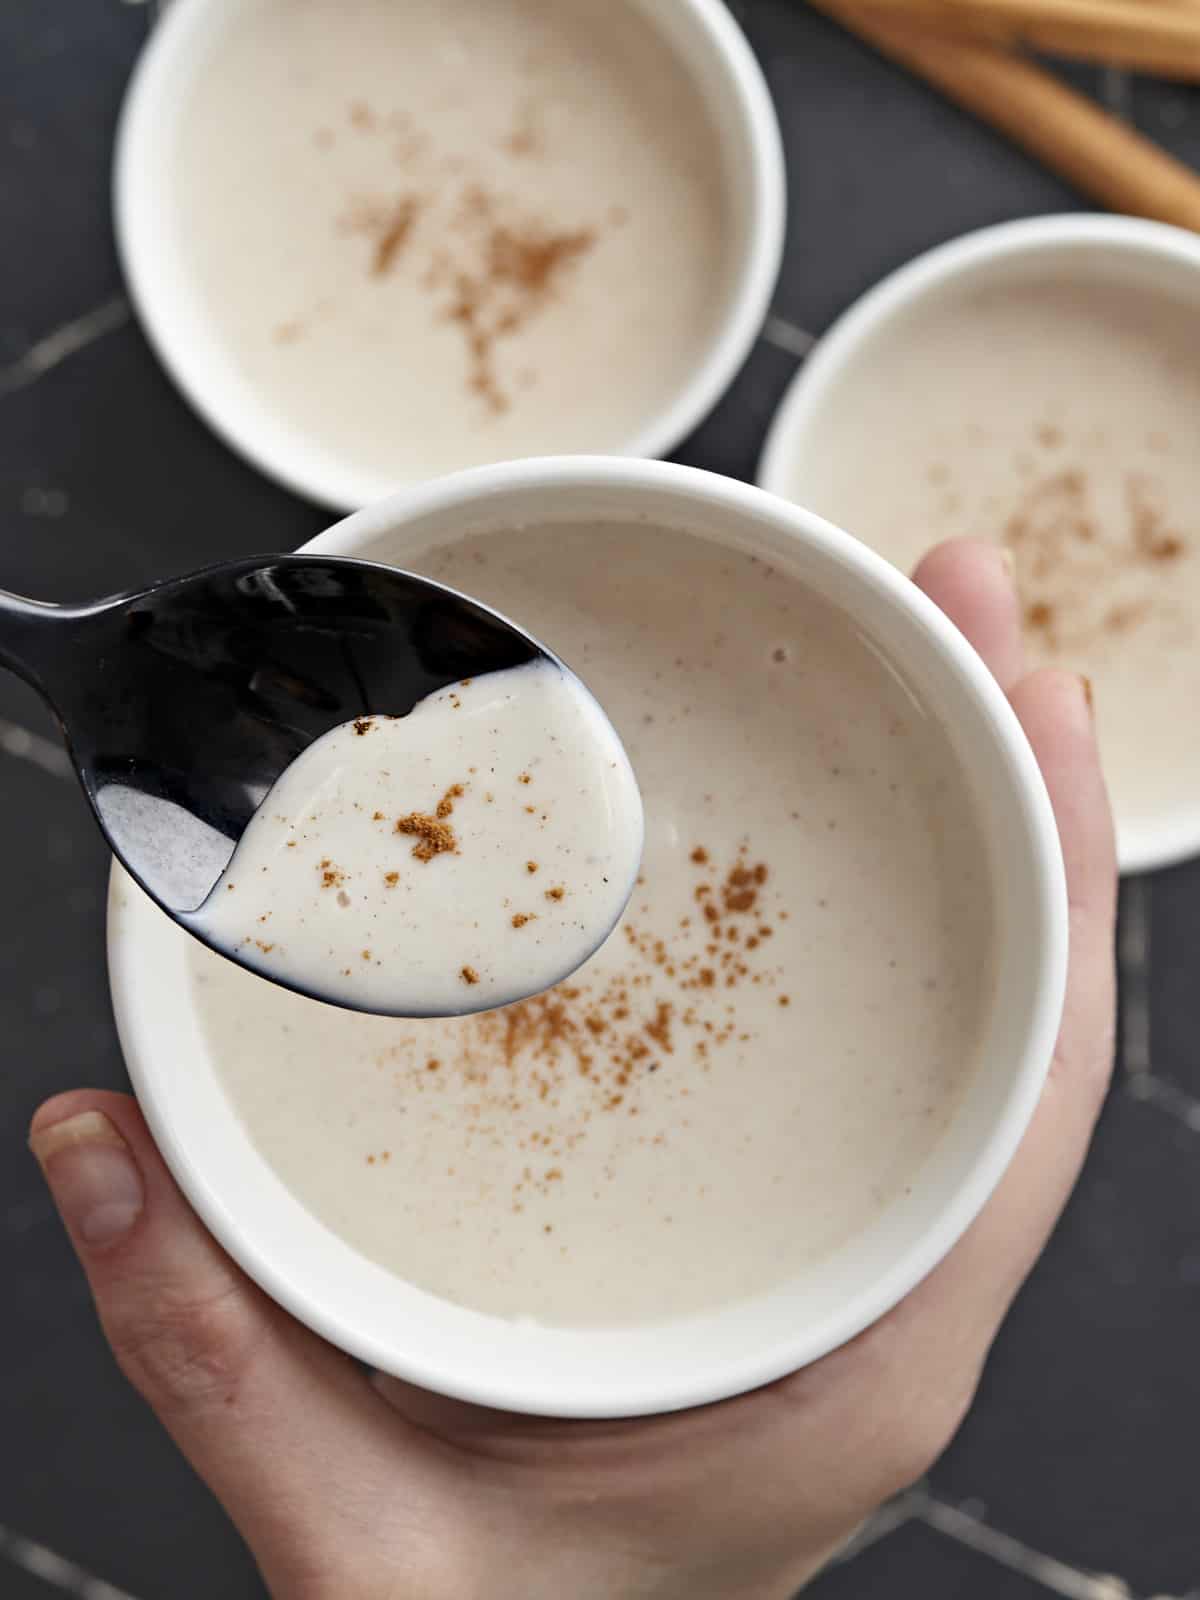
Maizena is a delicious, silky, vanilla-and-cinnamon-scented Puerto Rican breakfast pudding that’s ready in minutes! It’s also ridiculously easy on your wallet and comes in under a dollar a serving. My mother used to make it for me when times were really, really tight. It was so mouthwateringly luscious I had no idea it wasn’t a fancy treat.
What Is Maizena?
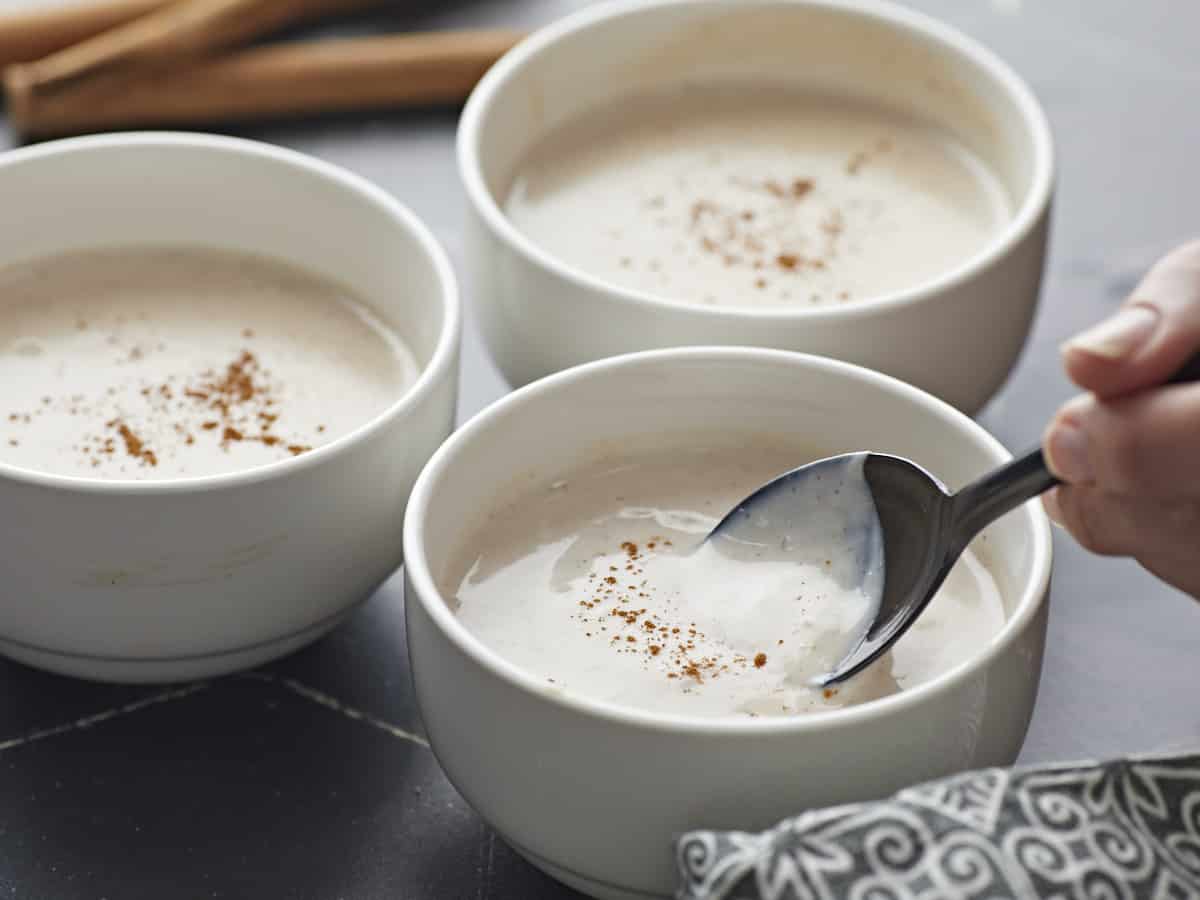
Maizena is a popular Latin milk-based breakfast pudding that gets its name from the brand of cornstarch it’s thickened with. It’s flavored lightly with vanilla and cinnamon and sweetened with granulated sugar. Like any pudding, you can eat it cold, but it’s traditionally consumed while steaming hot. The Maizena I grew up eating was a stark white color. I mix cinnamon and a touch of nutmeg into mine while it cooks to deepen its flavors. This gives my recipe for Maizena a creamier color.
What You Need To Make Maizena
You can get this easy, budget-friendly, and ridiculously delicious breakfast pudding on your table in no time! Here’s what you’ll need:
Whole Milk– is preferred because the fat content helps create a silky mouth feel. But you can use evaporated milk or plant-based milk. If going the plant-based route, make sure you use fatty milk like coconut, soy, or macadamia. It helps create the velvety texture Maizena is known for.
Heavy Cream- adds a satiny finish. If you don’t have cream, just substitute it with a cup of whole milk and a tablespoon of butter. You can also substitute heavy cream with unsweetened coconut cream if you don’t do dairy.
Sugar– granulated sugar is the standard but feel free to use your favorite sweetener. Honey, brown sugar, and agave are all great options.
Cinnamon, Nutmeg, and Vanilla – add earthy flavor, floral notes, and depth. If you want to steer from traditional flavors, you can also use apple pie spice, pumpkin pie spice, orange zest, lemon zest, or mix in some chocolate syrup.
Cornstarch– thickens the pudding and gives it a beautiful glossy finish. If you don’t have cornstarch, you can use double the amount of flour, but the consistency won’t be as silky, and you’ll have to cook it longer to get the taste of raw flour out of the mix.
Storing Maizena
Maizena is best eaten hot and fresh, but you can store it and reheat it. It will last up to 5 days in the fridge. Freezing is not recommended. Place Maizena in an air-tight container with a sheet of plastic or parchment directly on the surface to prevent a thick skin from forming. Before reheating it, mix in a tablespoon of milk per cup to help loosen it. You can warm it in a microwave in 30-second increments until steaming.
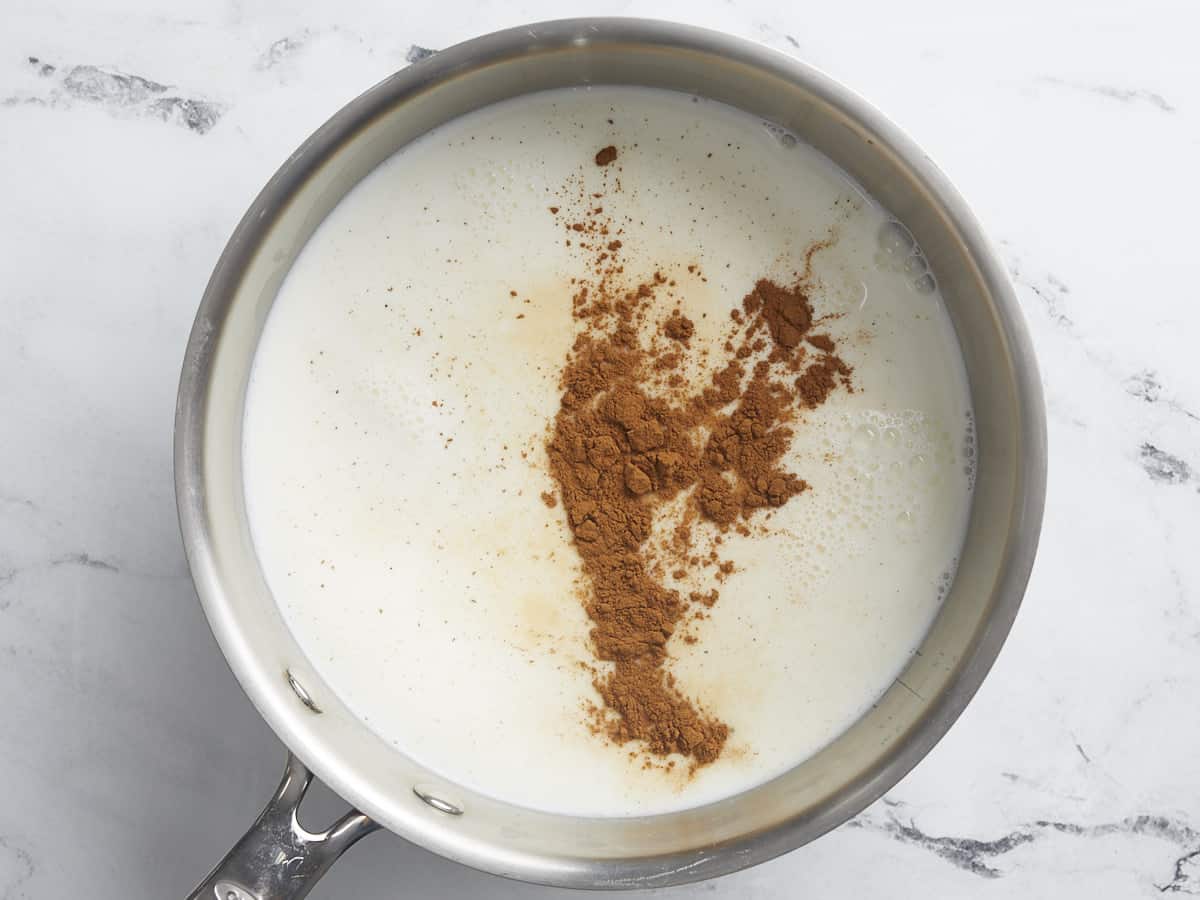
Place a large heavy-bottomed pot over medium heat. Add the 4 cups of milk, 1/4 cup sugar, 1/2 teaspoon cinnamon, a pinch of nutmeg, a pinch of salt, and 1/2 teaspoon vanilla. Mix to incorporate.
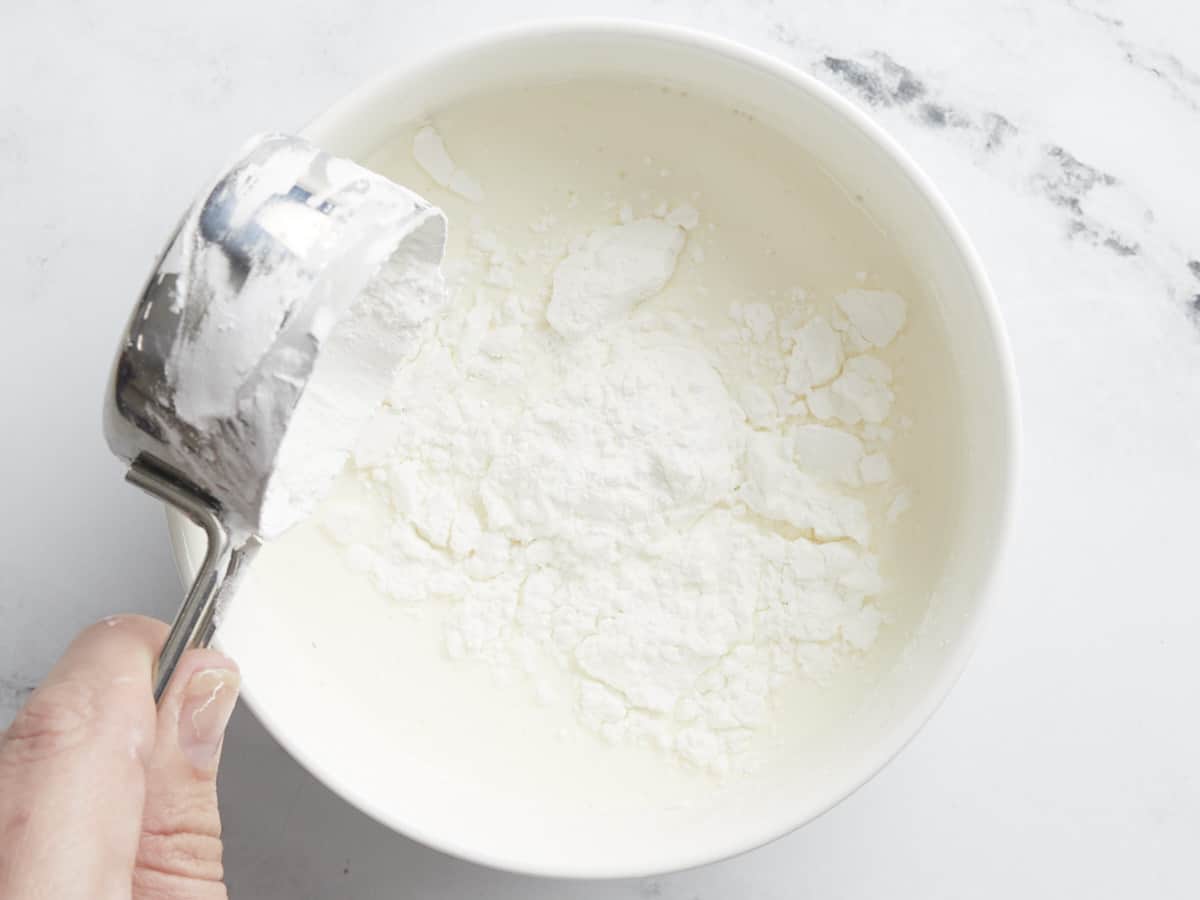
Add 1 cup of heavy cream to a bowl and mix in the 1/4 cup of cornstarch until no lumps remain.
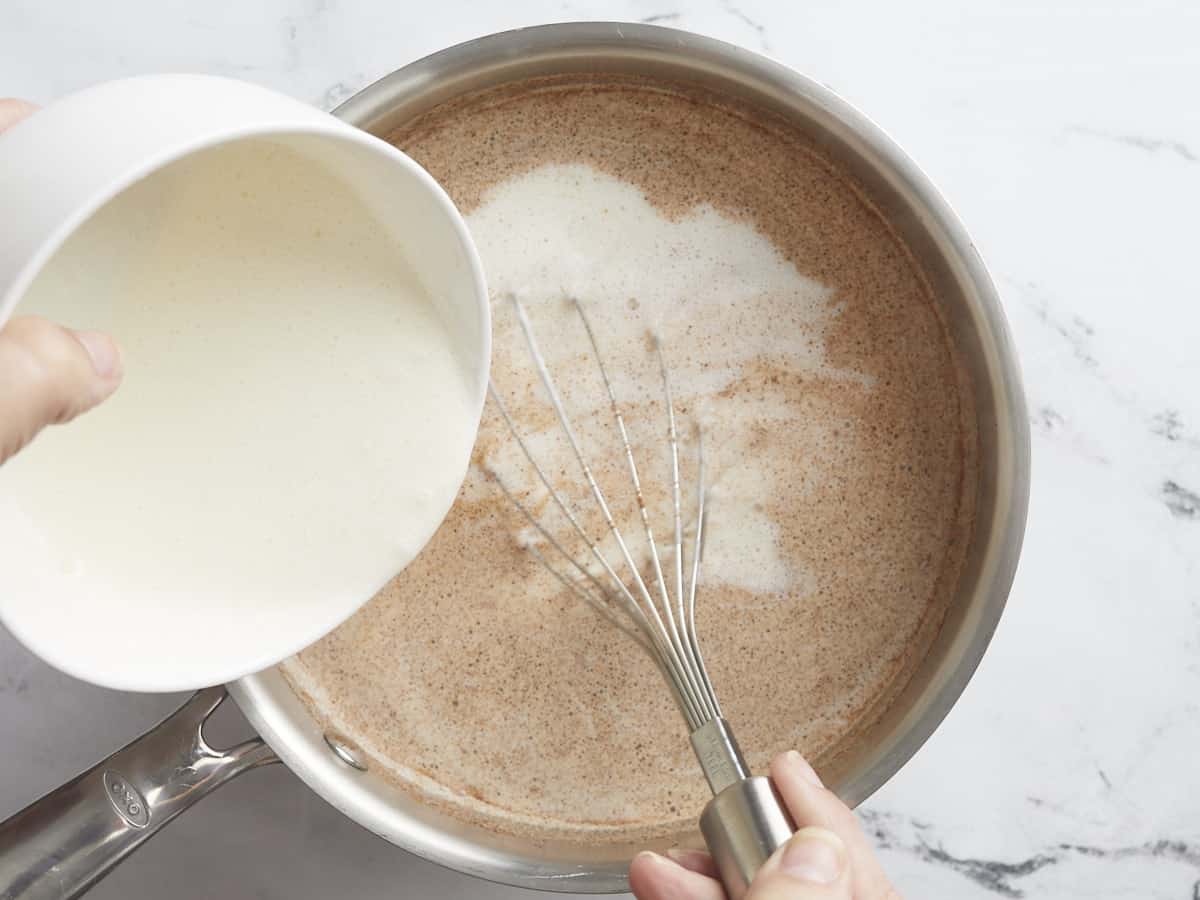
Whisk the cornstarch mixture into the milk mixture little by little.
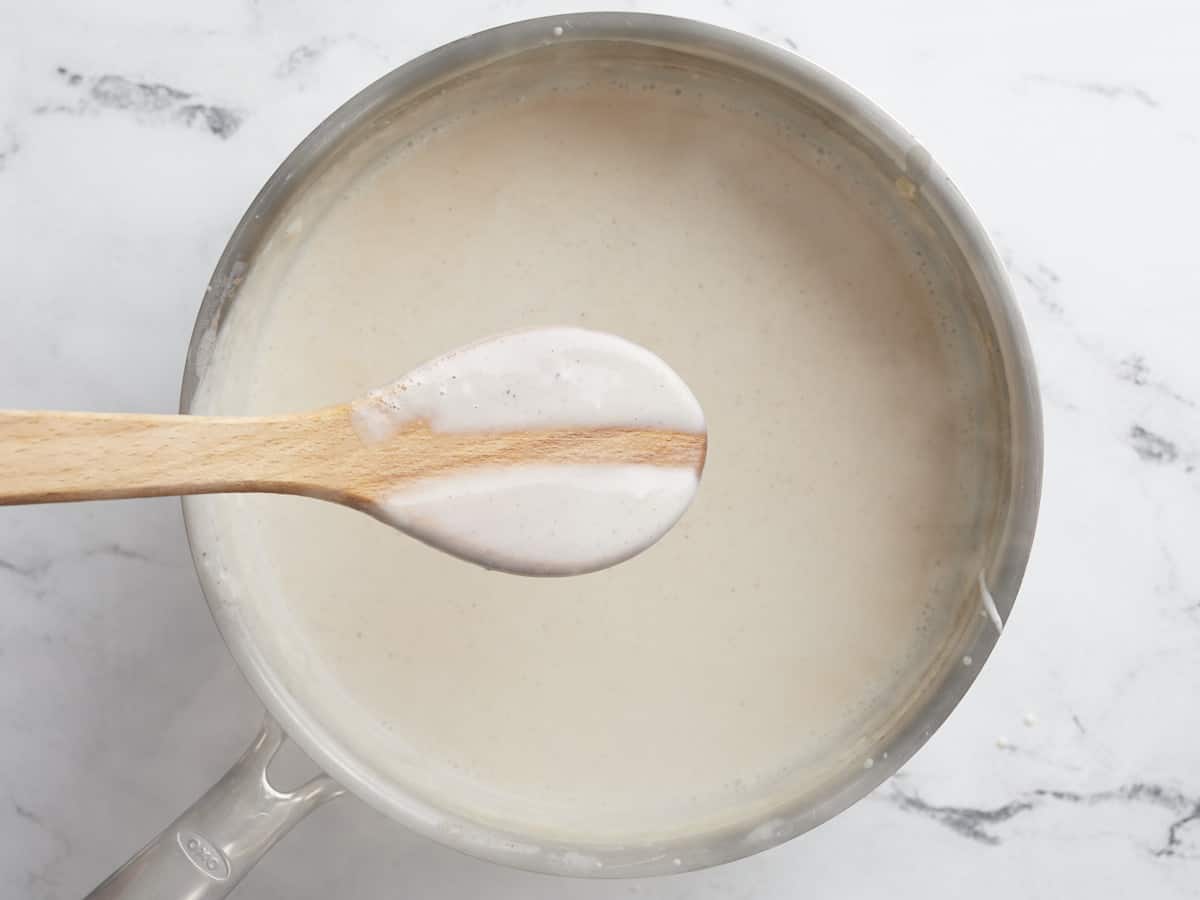
Bring the mixture to a boil and continue to whisk until the milk is pudding consistency, about 3 to 5 minutes. The pudding should coat the back of a wooden spoon and have clearly defined edges when a finger is run through it.
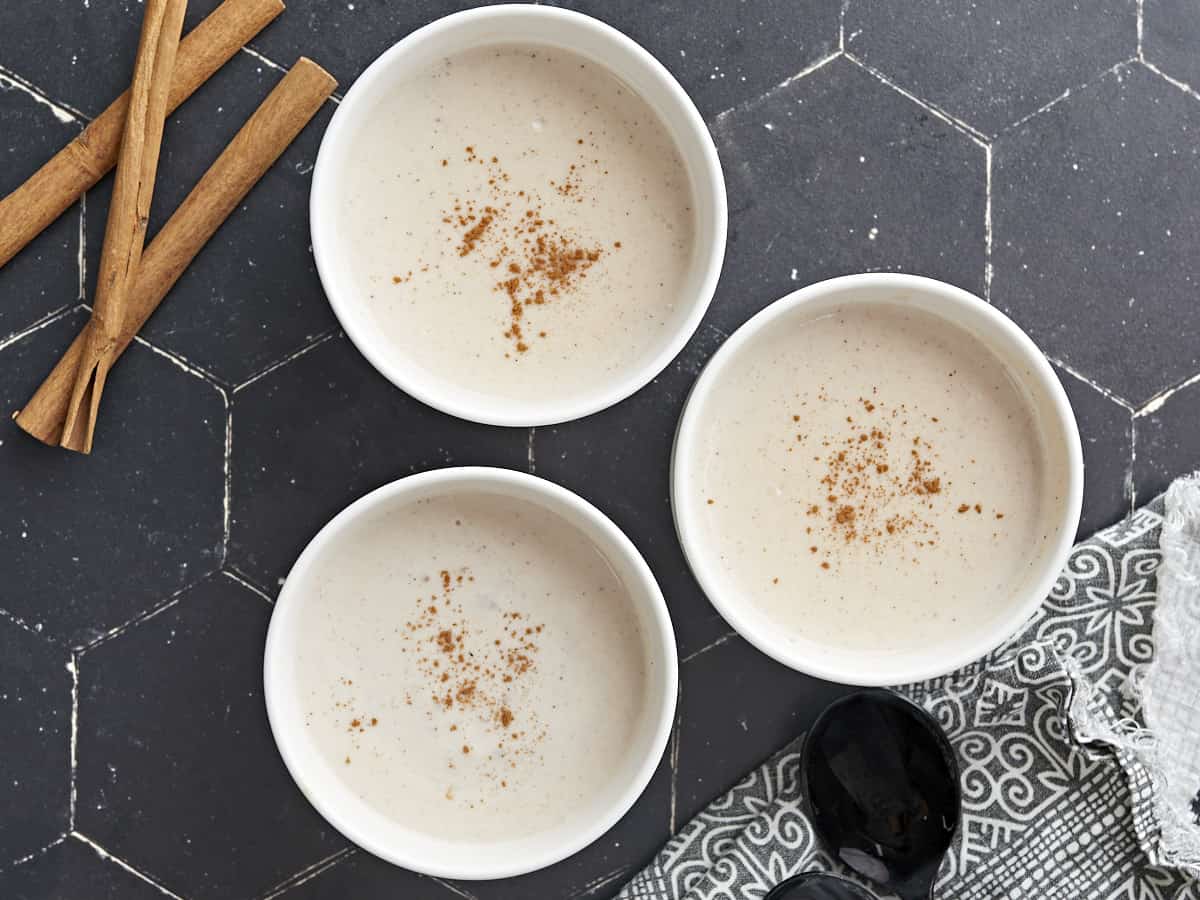
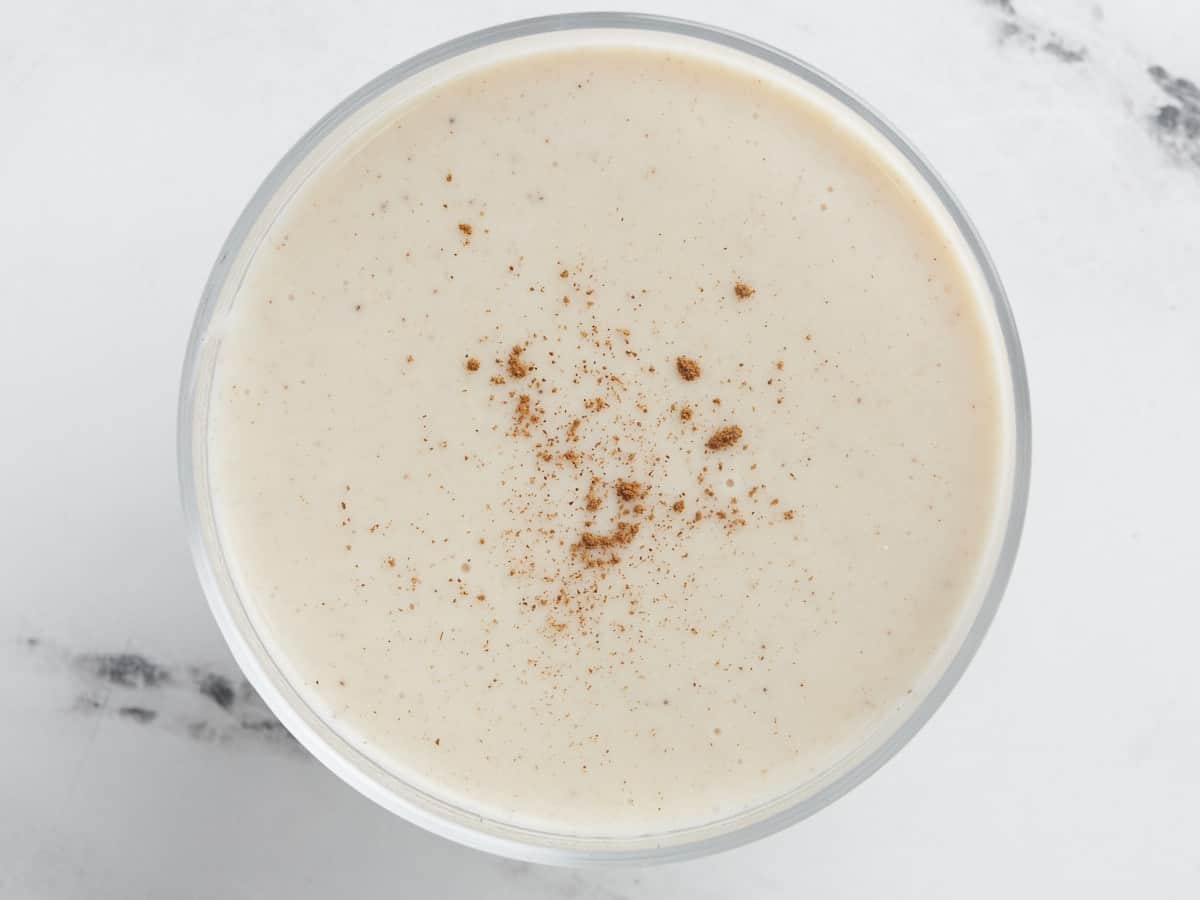
Serve Maizena hot with a bit of cinnamon sprinkled on top. Then give yourself a pat on the back for making a delicious breakfast from scratch without breaking the bank!
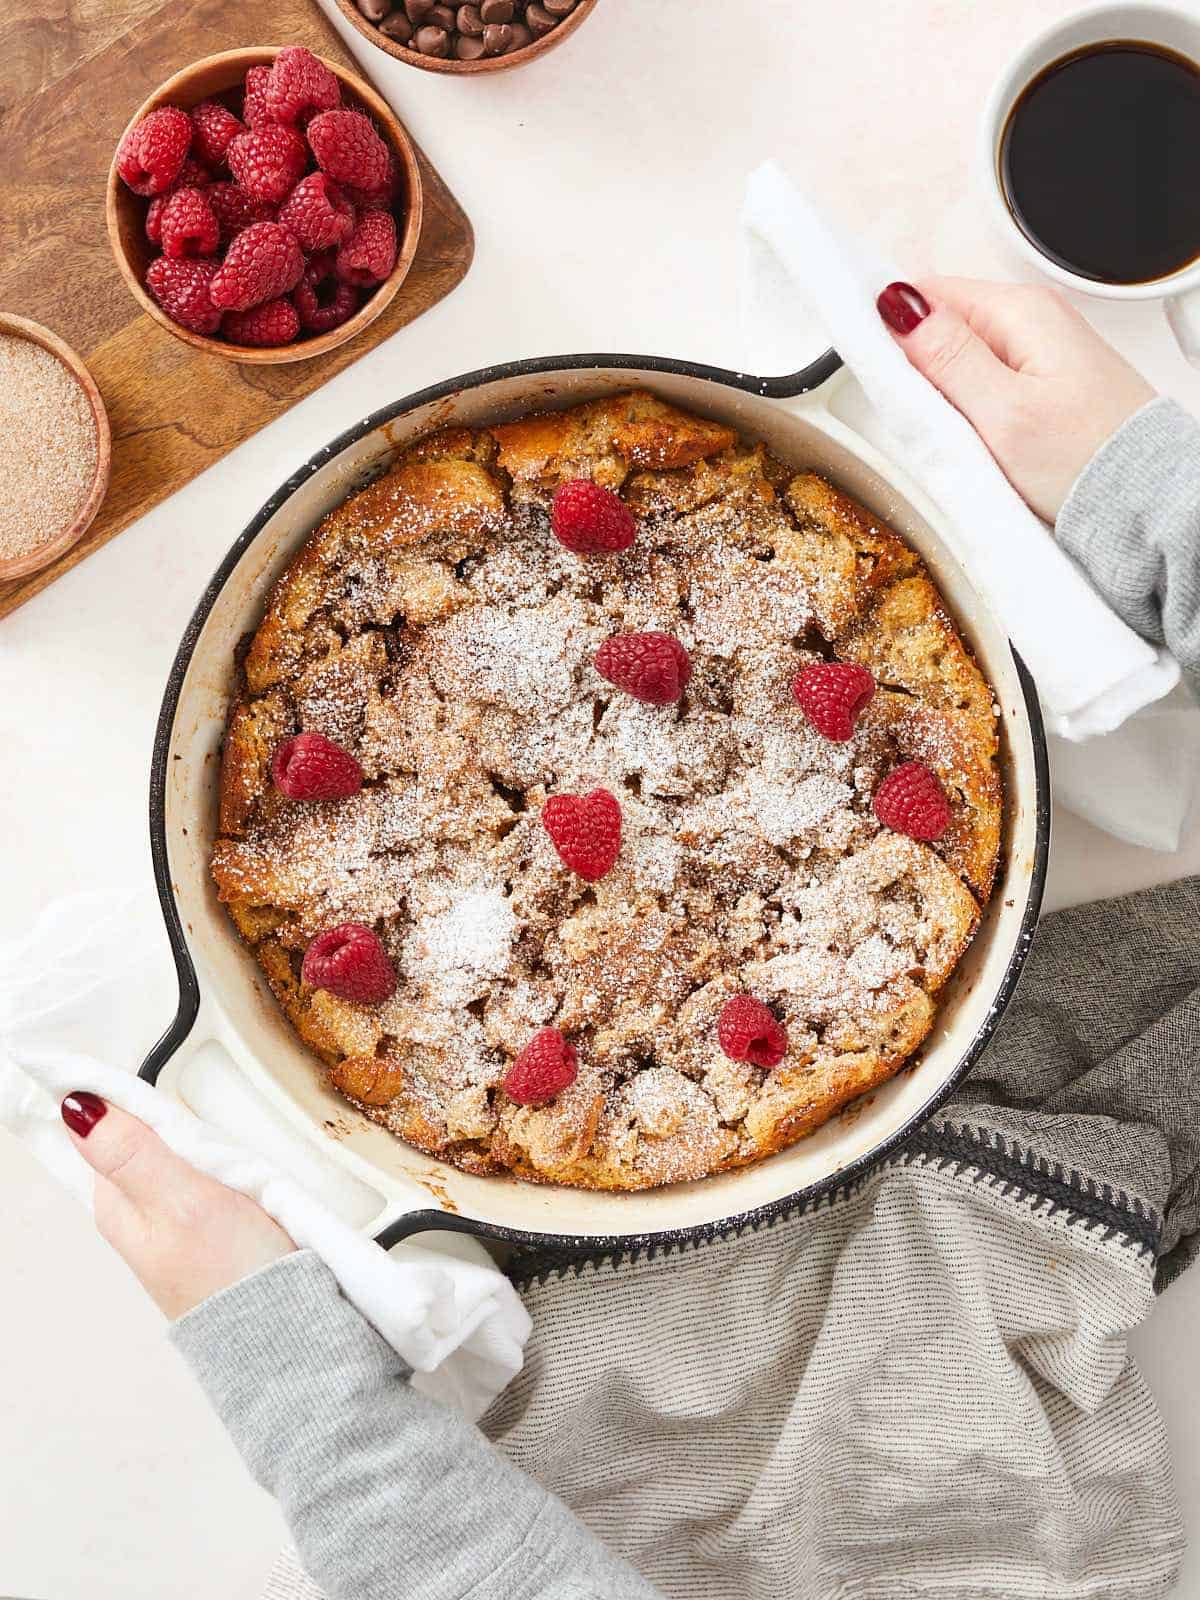
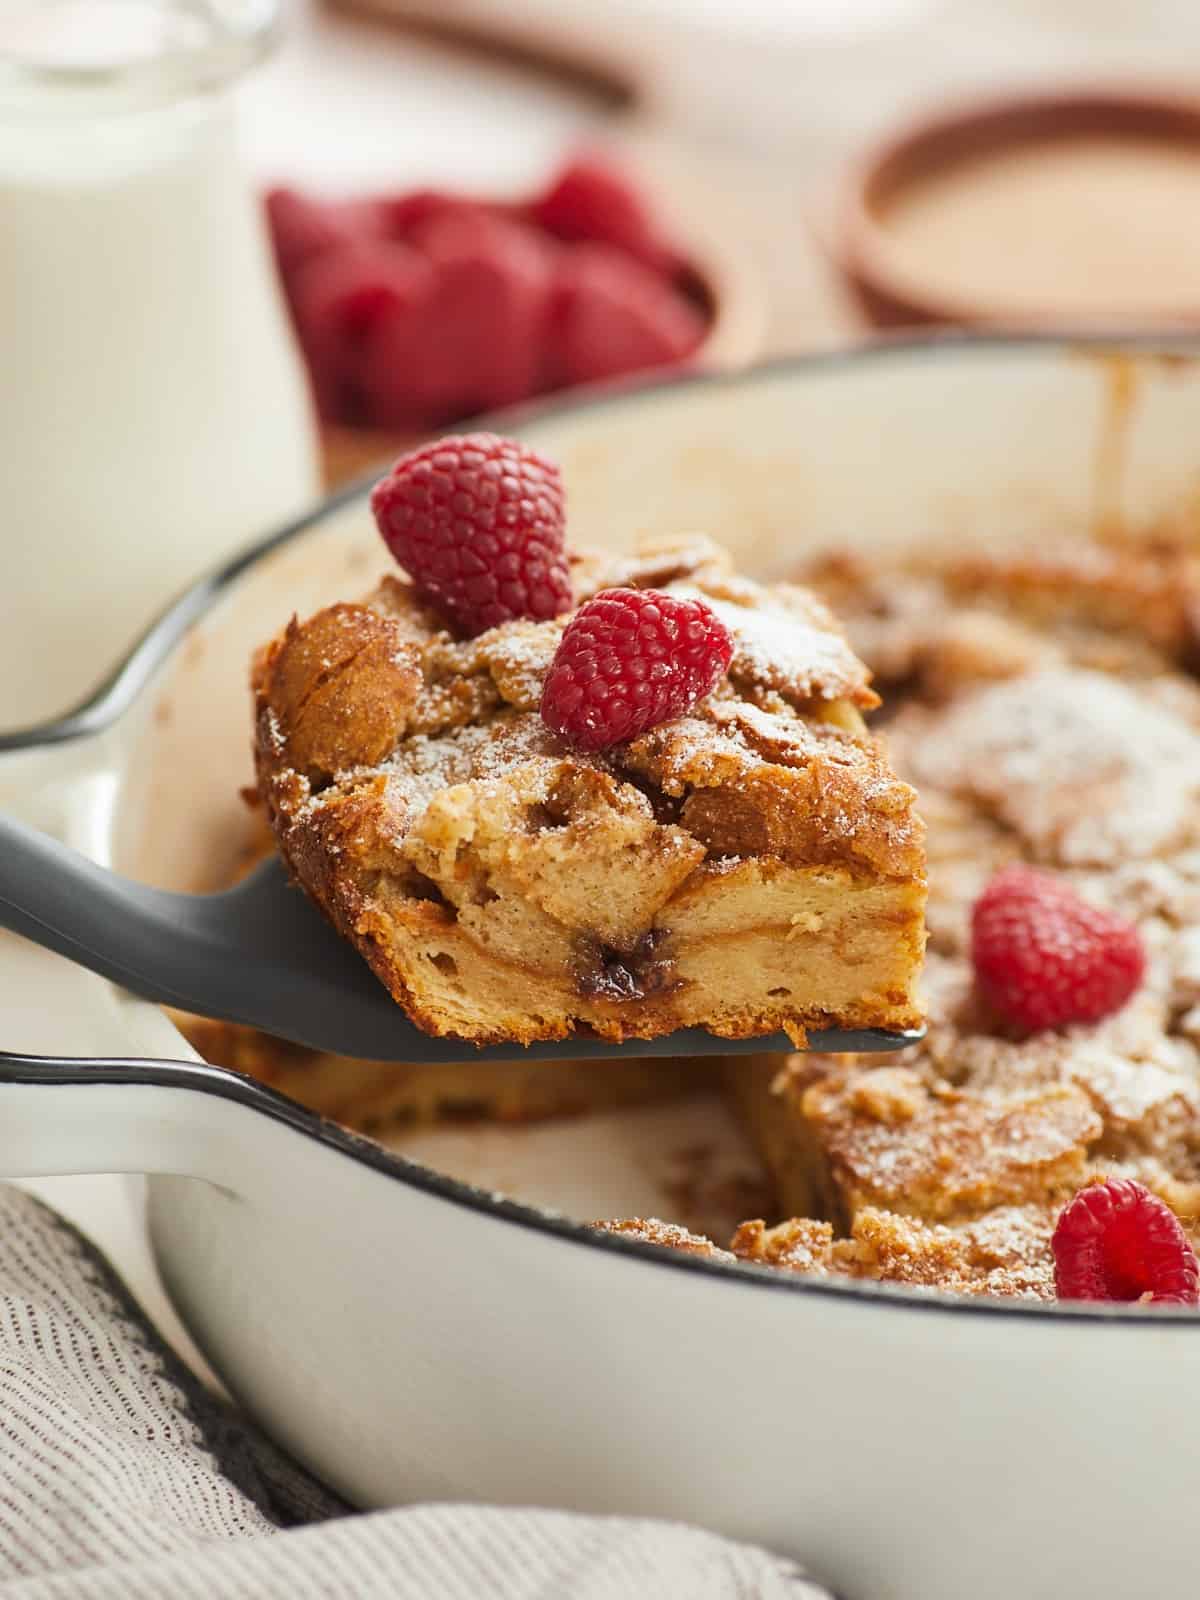
It’s crazy how day-old bread can turn into something as delicious as Bread Pudding! This simple dessert is the perfect way to use up leftover ingredients in a way that feels special—and hopefully, without dropping a dime! Best of all, when it comes to throwing together this recipe, time does most of the work. Bread Pudding is one of my go-to dessert recipes because it is versatile, budget-friendly, and comes together effortlessly.
WHAT IS BREAD PUDDING?
Bread Pudding is a sweet or savory casserole made from torn pieces of day-old bread that are dried out, soaked in custard, and baked. Since the need for repurposing old bread is truly universal, ancient recipes for Bread Pudding can be found in pretty much every cultural cuisine on Earth. Our recipe is loosely inspired by one of Princess Diana’s favorite desserts, “Bread and Butter Pudding.” This Old English version of the dish is flavored with cinnamon, vanilla, and raisins.
The basics of BREAD PUDDING
Aside from eggs and butter (two non-negotiables!), the other ingredients in this simple dessert are quite versatile. They can be adjusted to accommodate whatever you have on hand. Here are some ingredient substitutions for bread pudding:
Bread—Brioche, challah, burger buns, unflavored dinner rolls, sandwich bread, etc.
Dairy—Heavy cream, half & half, whole milk, buttermilk, or an extra-creamy, unsweetened alternative milk. Yogurt, sour cream, and softened cream cheese can also be thinned with milk.
Sugar—Granulated sugar, light or dark brown sugar, honey, maple syrup, etc.
Warming spices—Cinnamon, nutmeg, cardamom, ginger, pumpkin pie spice, etc.
Flavorings—Vanilla extract, almond extract, melted chocolate or peanut butter, etc.
Mix-ins—Chocolate chips, fresh or dried fruit, chopped nuts, coconut flakes, pepitas, sunflower seeds, etc.
Let’s get that bread
You can use virtually any kind of bread for Bread Pudding or combine the leftovers of different types to make up a full loaf. (No need to buy more!) Softer styles of bread will give the pudding a custardy texture while harder types will make the pudding more spongy. You want the bread to be dried out, but not so tough or hard it can’t soak up the custard.
From the Pantry: Tear up the bread and spread it out on a lined sheet tray, and let it sit out for a few hours, uncovered (or inside a cold oven overnight).
From the Freezer: Completely thaw the bread. When tearing, as described above, examine for any rock-hard areas of the bread and discard.
FRESH BREAD:
If the bread is fresh from the package or still not dry enough when you are ready to assemble the Bread Pudding, try this method for drying out bread:
Preheat the oven to its lowest possible setting (150-200℉). Tear up the bread and lay it out on a parchment-lined baking sheet.
Once the oven has preheated, put the tray of torn bread in the oven and immediately turn off the heat. Leave the oven door slightly ajar (if needed, prop it open with a wooden spoon), which will quickly lower the temperature and create air circulation.
The bread should be thoroughly dried out in 8-12 minutes, depending on the type and moisture level of the bread. Keep an eye on it, so it doesn’t turn into toast! The outer edges of the torn bread will be rough to the touch and the pieces should feel slightly dried out, but should not crumble or take on any color.
Mix it up with mix-ins!
This extremely versatile recipe can be made with both sweet and savory flavors. Use your favorites or odds and ends cluttering your pantry! Here are some Bread Pudding flavor combinations we love to help get your wheels turning:
Carrot Cake – grated carrot, cream cheese custard, walnuts, golden raisins, and coconut flakes
Eggnog – Replace the vanilla with dark rum, and nutmeg for the cinnamon
“The Elvis” – banana slices, peanut butter (melted and then mixed into the custard), roasted peanuts, and little pieces of bacon
SERVING & STORING
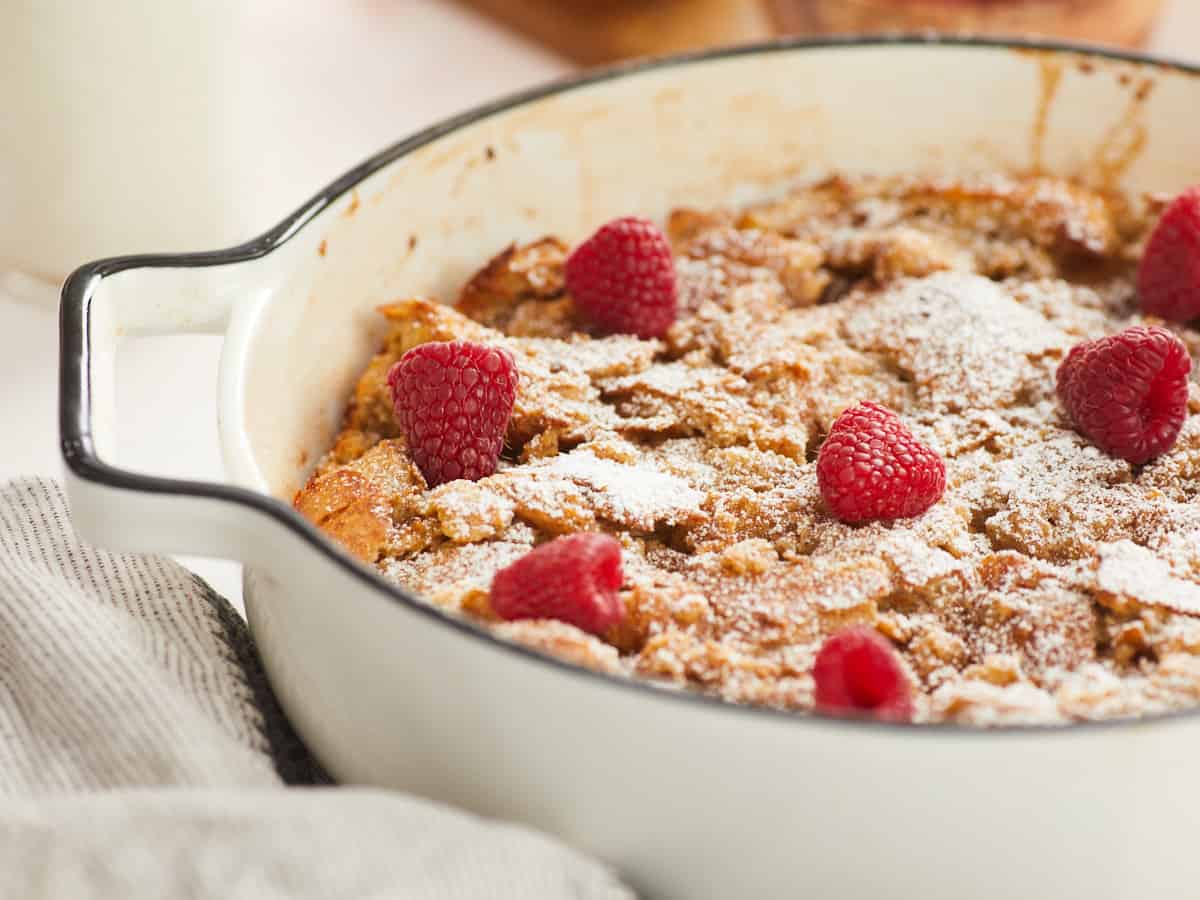
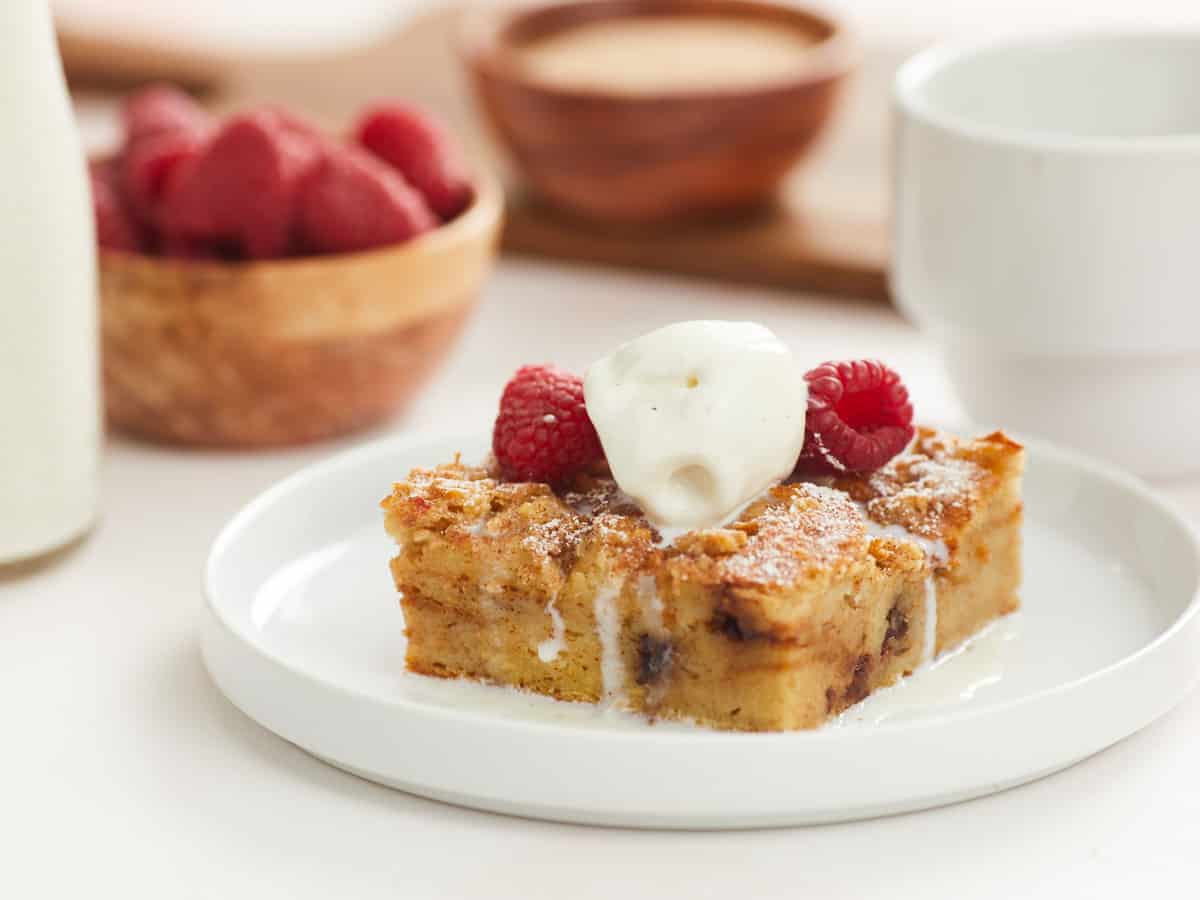
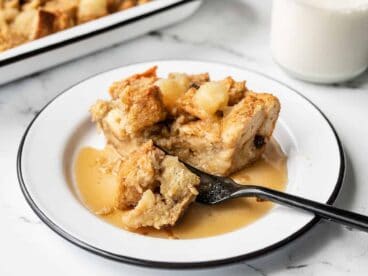
You can serve Bread Pudding warm or cold. Traditionally, it is served with a vanilla-flavored sauce called crème anglaise (a.k.a. melted ice cream). But I love it fresh from the oven, topped with a scoop of vanilla ice cream instead. You could also serve it with whipped cream, fresh or cooked fruit, caramel sauce, or chocolate syrup. Leftovers will keep in the fridge for 4 days. Reheat gently in the oven at 325℉ for 10-15 minutes. We also reheated some in the air fryer – it was excellent! I do not recommend freezing this recipe.
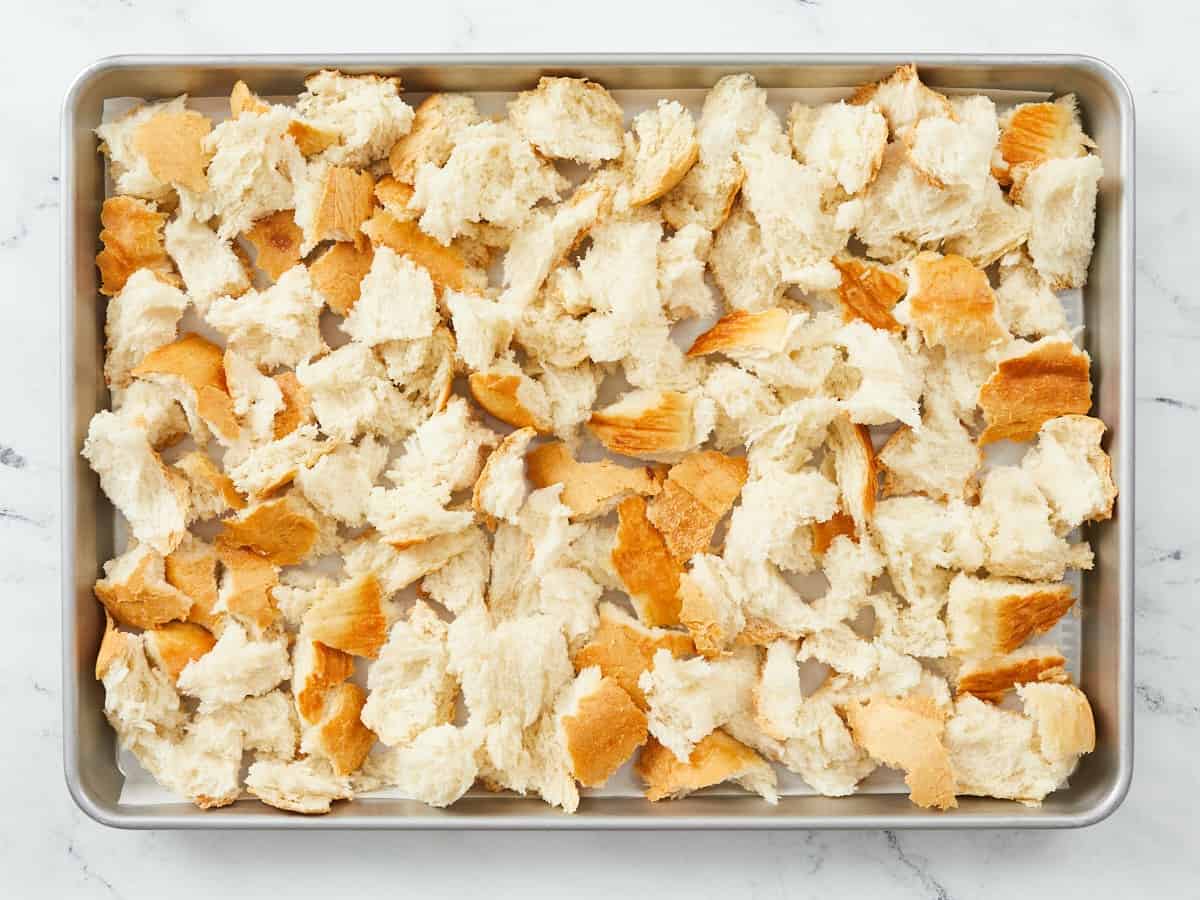
Tear the day-old bread into 1” pieces, and spread them out on a parchment-lined baking sheet until dried out but not hard.
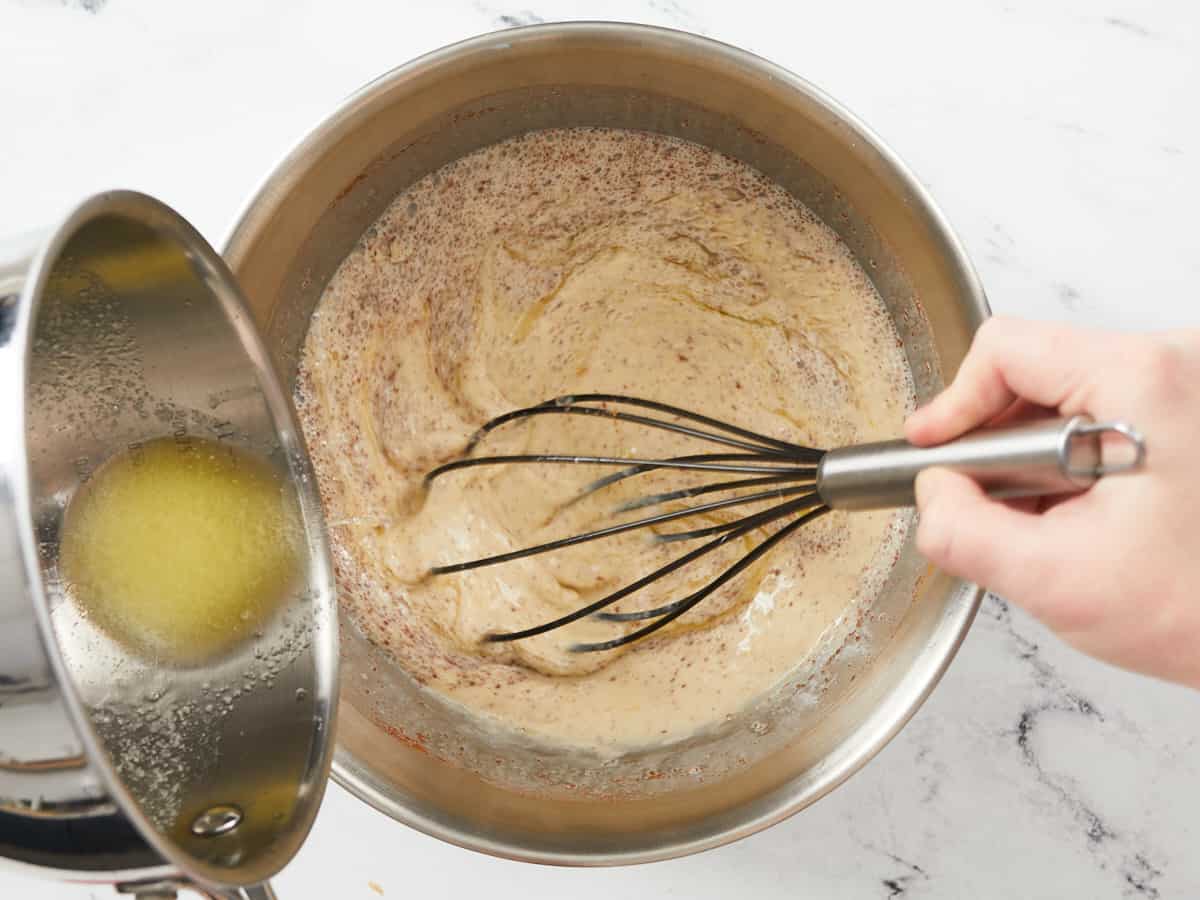
Liberally grease a baking dish with about 1/2 tablespoon of butter. Melt the remaining butter in a small saucepan or microwave. Allow the melted butter to cool slightly but not enough to solidify.
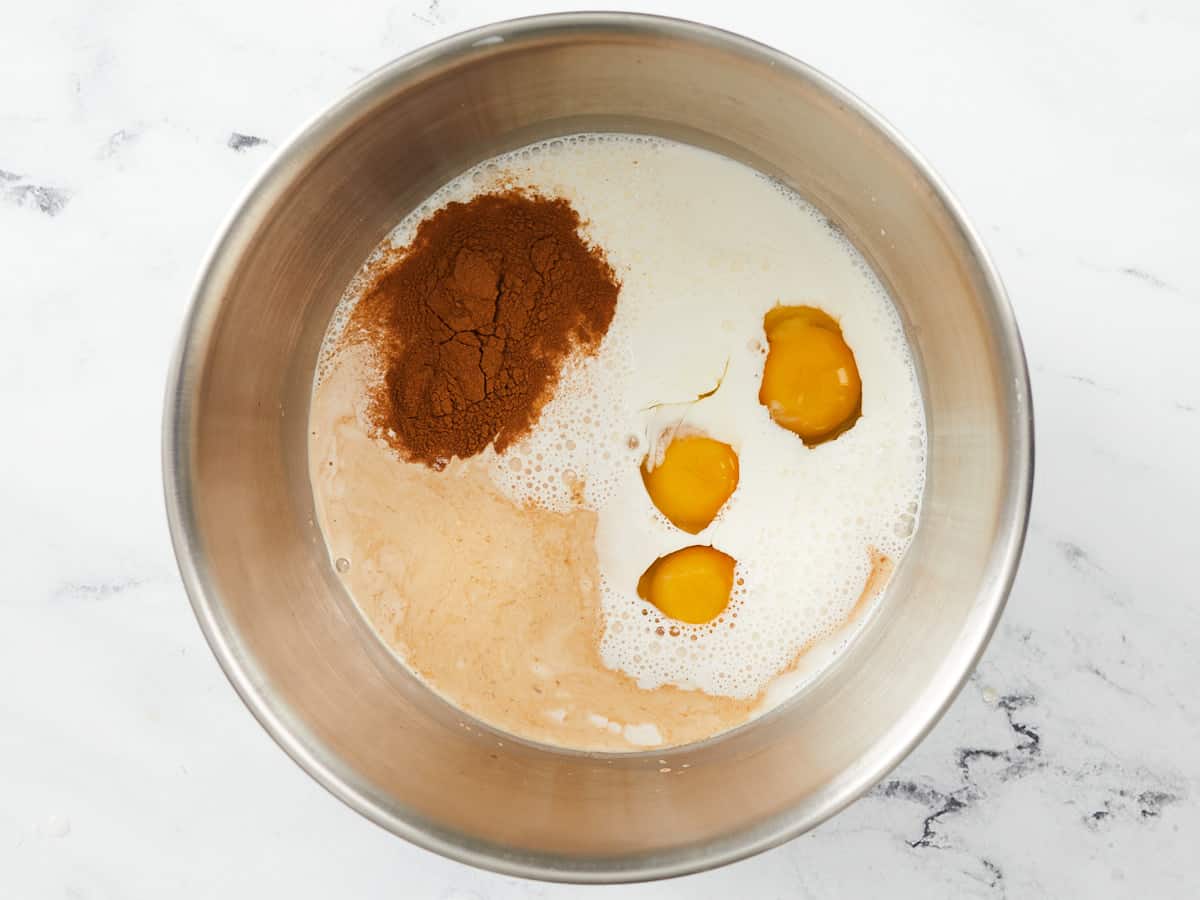
In a large mixing bowl, whisk together the eggs, half & half, vanilla extract, ⅔ cup of sugar, 2 tsp of cinnamon, and salt. Once combined, slowly stream in the melted butter, whisking constantly to incorporate.
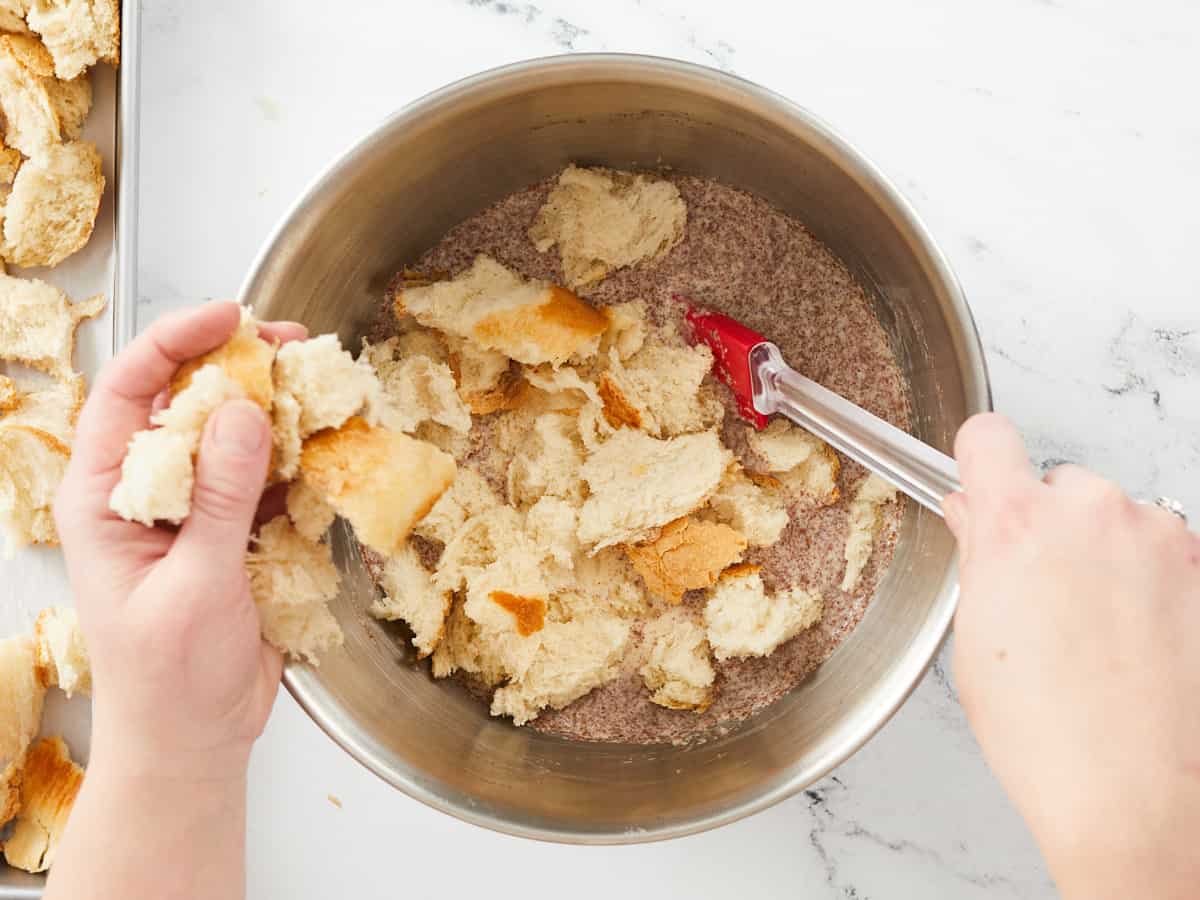
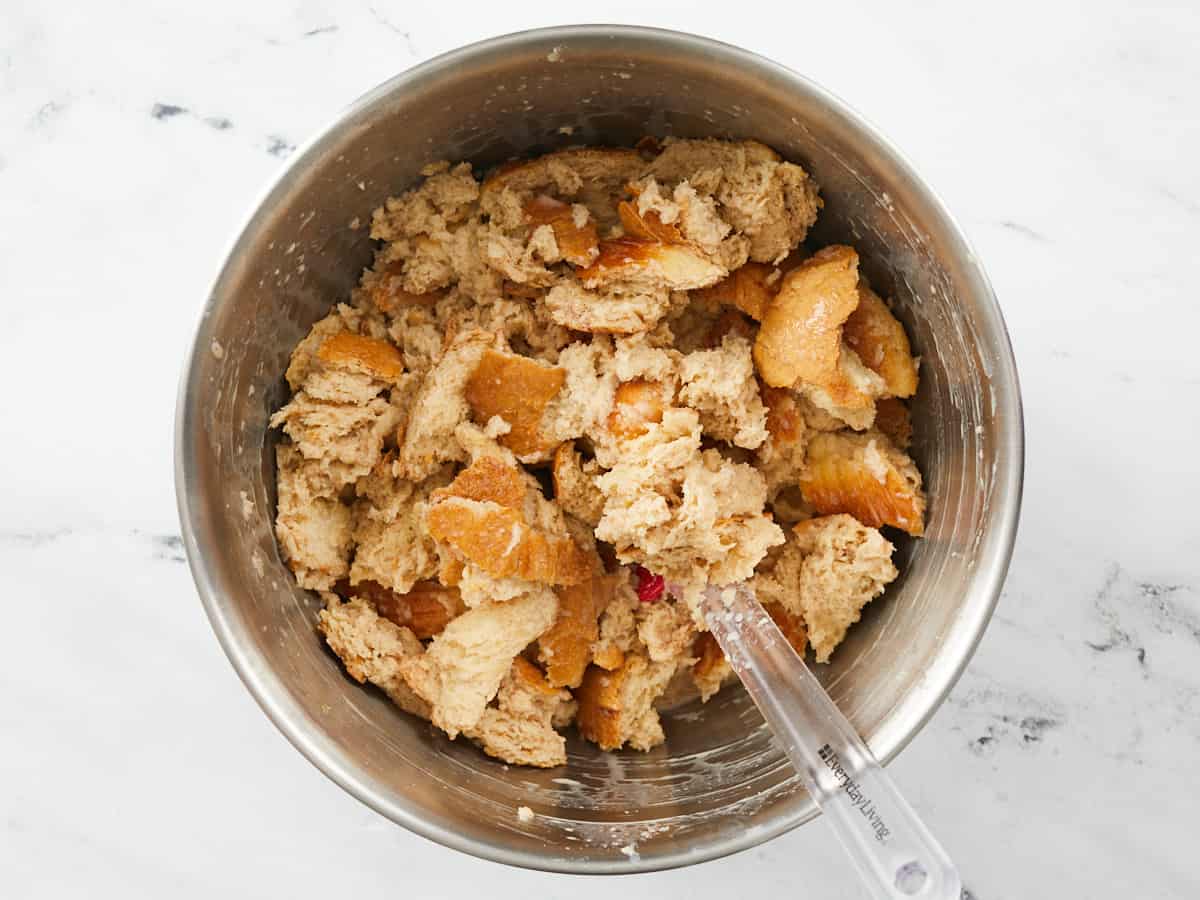
Add the pieces of bread to the egg mixture a few handfuls at a time, tossing gently to coat in the custard. Once all the bread has been added to the bowl, let it sit for 1-2 minutes to soak up as much of the mixture as possible.
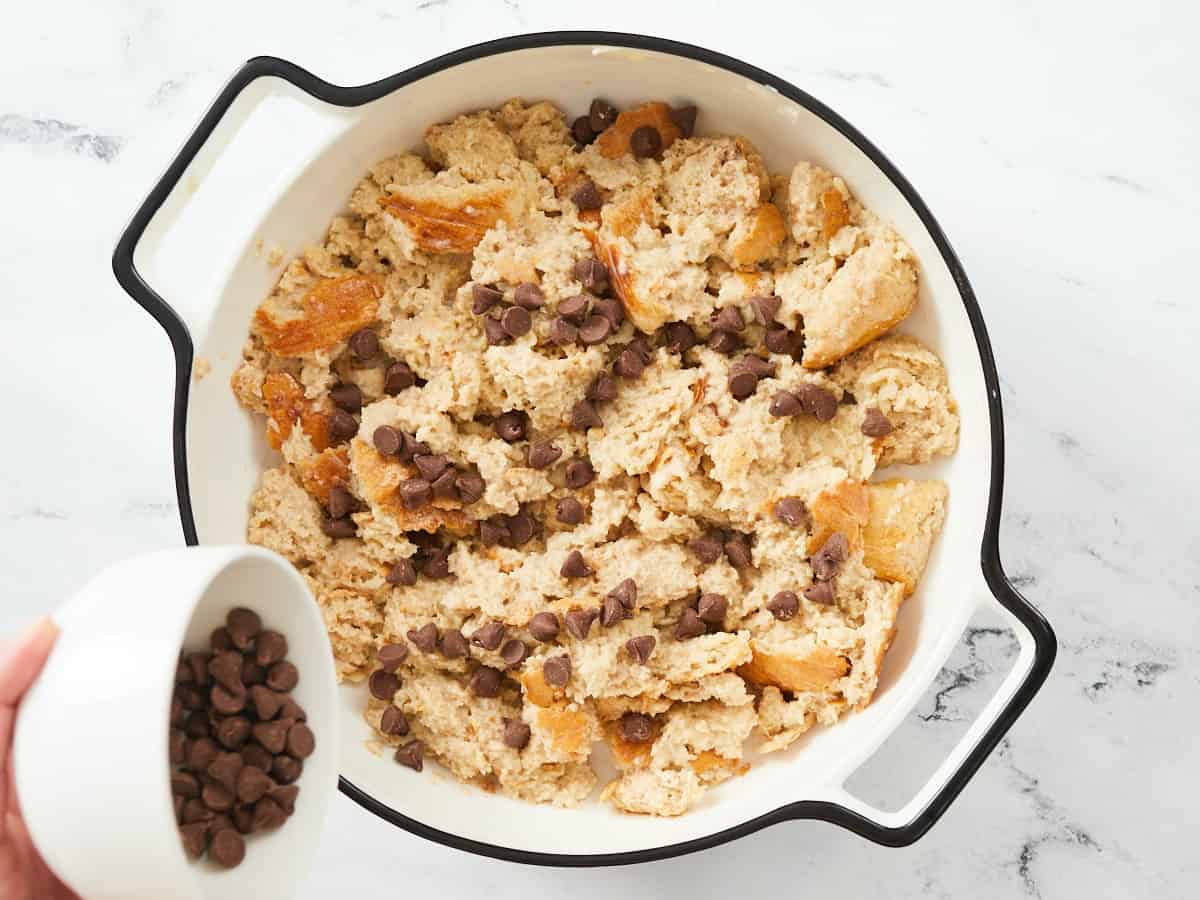
Transfer half of the soaked bread to the prepared baking dish. Sprinkle in the chocolate chips and any other mix-ins you’d like, and then cover with the rest of the soaked bread. Scrape any liquid left in the bowl on top of the casserole. Tuck in any mix-ins (especially chocolate) visible from the top of the bread pudding to keep them from burning in the oven.
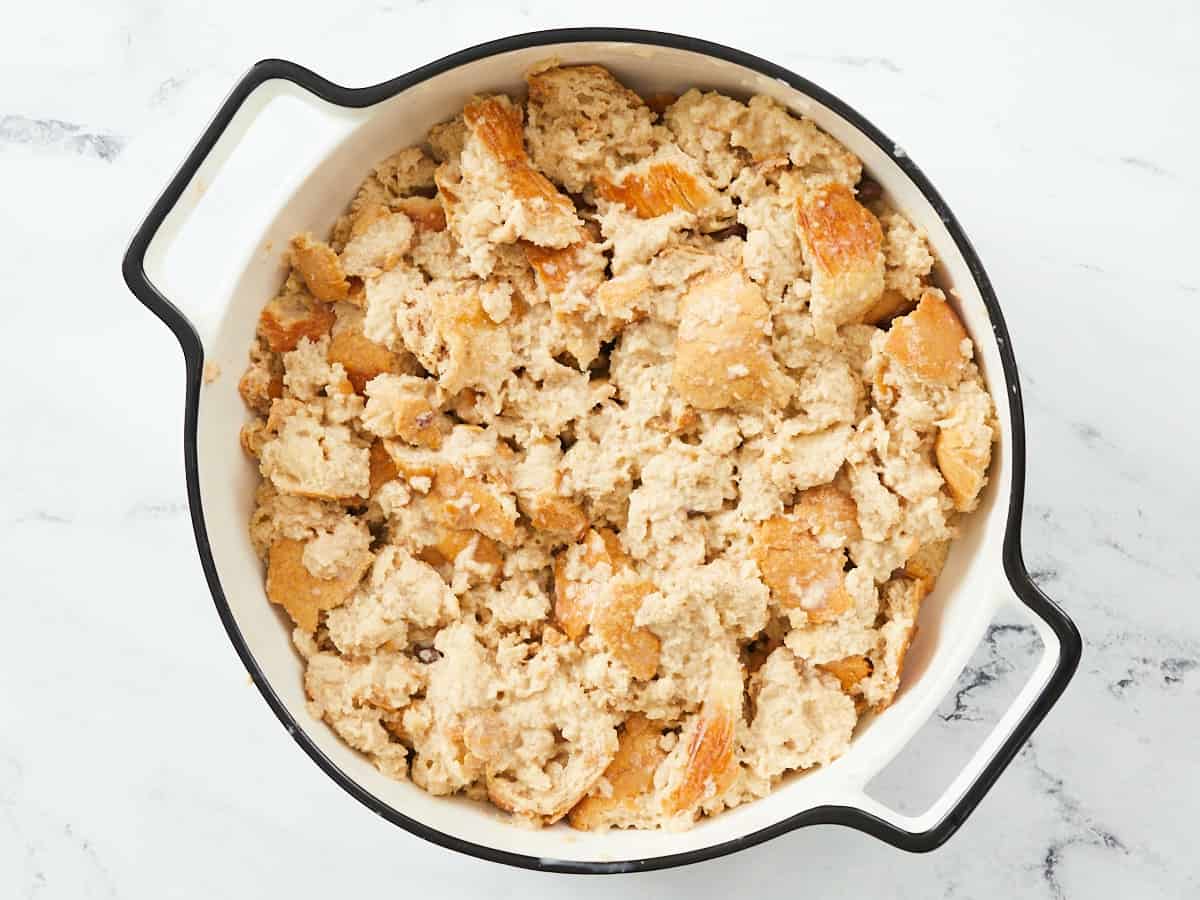
Cover the filled casserole dish with aluminum foil and let it soak at room temperature for least 30 minutes (up to 2 hours), or refrigerate overnight.
Preheat the oven to 375℉. If the bread pudding was refridgerated, let it warm slightly before placing in a hot oven (especially if using a glass baking dish).**
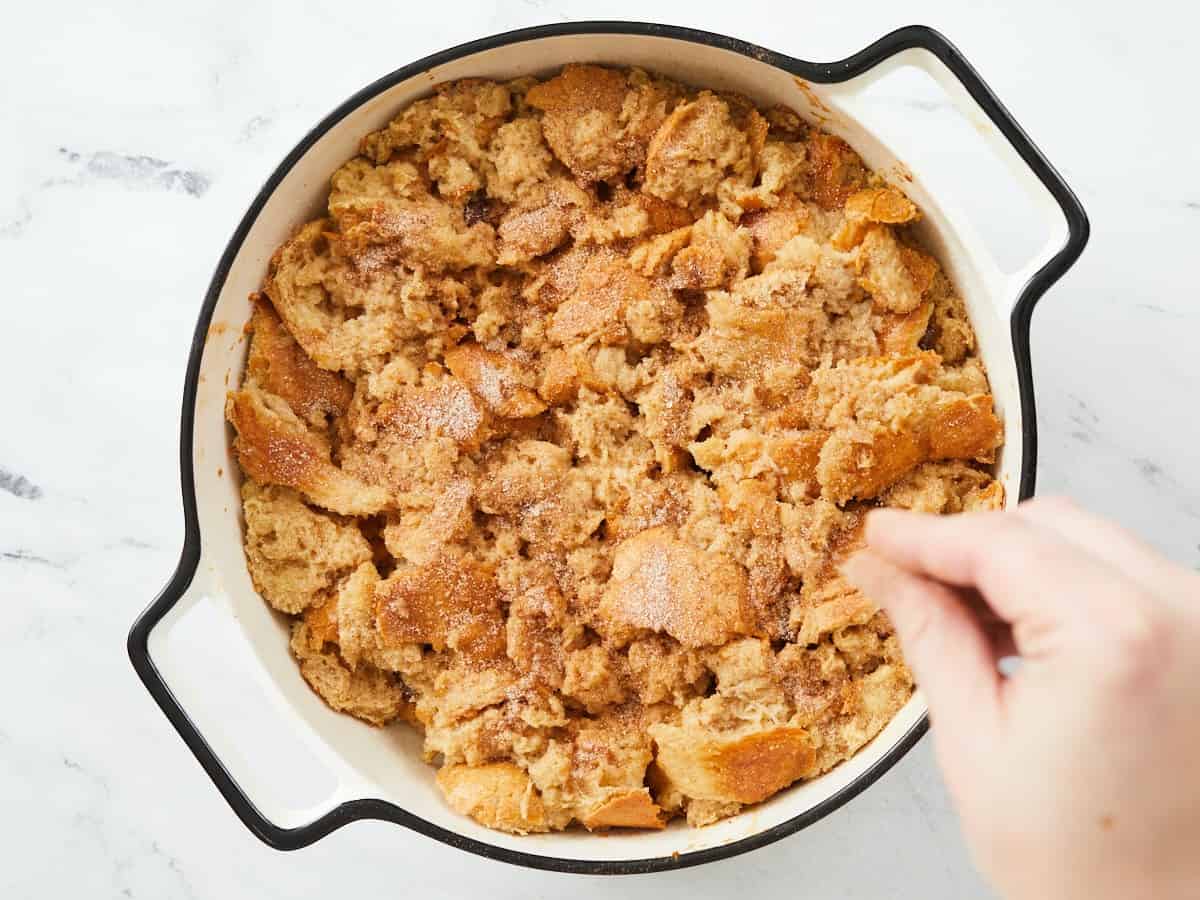
Bake the bread pudding, covered, for 30 minutes. Meanwhile, mix sugar and cinnamon for the topping in a small bowl and set aside.
Remove the foil, and sprinkle the cinnamon-sugar topping evenly over the pudding. Continue baking, uncovered, for another 20-25 minutes or until the top of the casserole is crunchy and deeply golden brown.
* You can also substitute the half & half with 1 cup milk + 1 cup heavy cream ** Ice-cold glass dishes can crack or explode in a hot oven if the temperature change is too extreme.
Tear 8 cups of bread (about 1 loaf) into 1” pieces, and spread them out on a parchment-lined baking sheet until dried out but not hard. For more guidance on how to properly dry out your bread, check out the tips in the blog post above!
In a large mixing bowl, whisk together the 3 eggs, 2 cups of half and half, 1 teaspoon of vanilla extract, ⅔ cup of sugar, 2 tsp of cinnamon, and 1/4 teaspoon of salt to make a custard.
Liberally grease a baking dish with about 1/2 tablespoon of butter. Melt the remaining butter (about 2 1/2 tablespoons) in a small saucepan or in the microwave. Let it cool slightly (to prevent it from scrambling the eggs), and then slowly pour the melted butter into the custard, whisking constantly to incorporate it.
Add the pieces of bread to the egg mixture a few handfuls at a time, tossing gently to coat in the custard.
Once all the bread has been added to the bowl, let it sit for 1-2 minutes to soak up as much of the mixture as possible.
Transfer half of the soaked bread to the prepared baking dish. Sprinkle in the chocolate chips and any other mix-ins you’d like, and then cover with the rest of the soaked bread. Scrape any liquid left in the bowl on top of the casserole. Tuck in any mix-ins (especially chocolate) visible from the top of the bread pudding to keep them from burning in the oven.
Cover the filled casserole dish with aluminum foil and let it soak at room temperature for at least 30 minutes (up to 2 hours), or refrigerate overnight. Preheat the oven to 375℉. If the bread pudding was refridgerated, let it warm slightly before placing it in a hot oven (especially if using a glass baking dish). Bake the bread pudding, covered with aluminum foil, for 30 minutes.
Meanwhile, mix the sugar and cinnamon for the topping in a small bowl and set aside. After the bread pudding has baked the first time, take it out of the oven, remove the aluminum foil, and sprinkle the cinnamon-sugar topping evenly over the pudding.
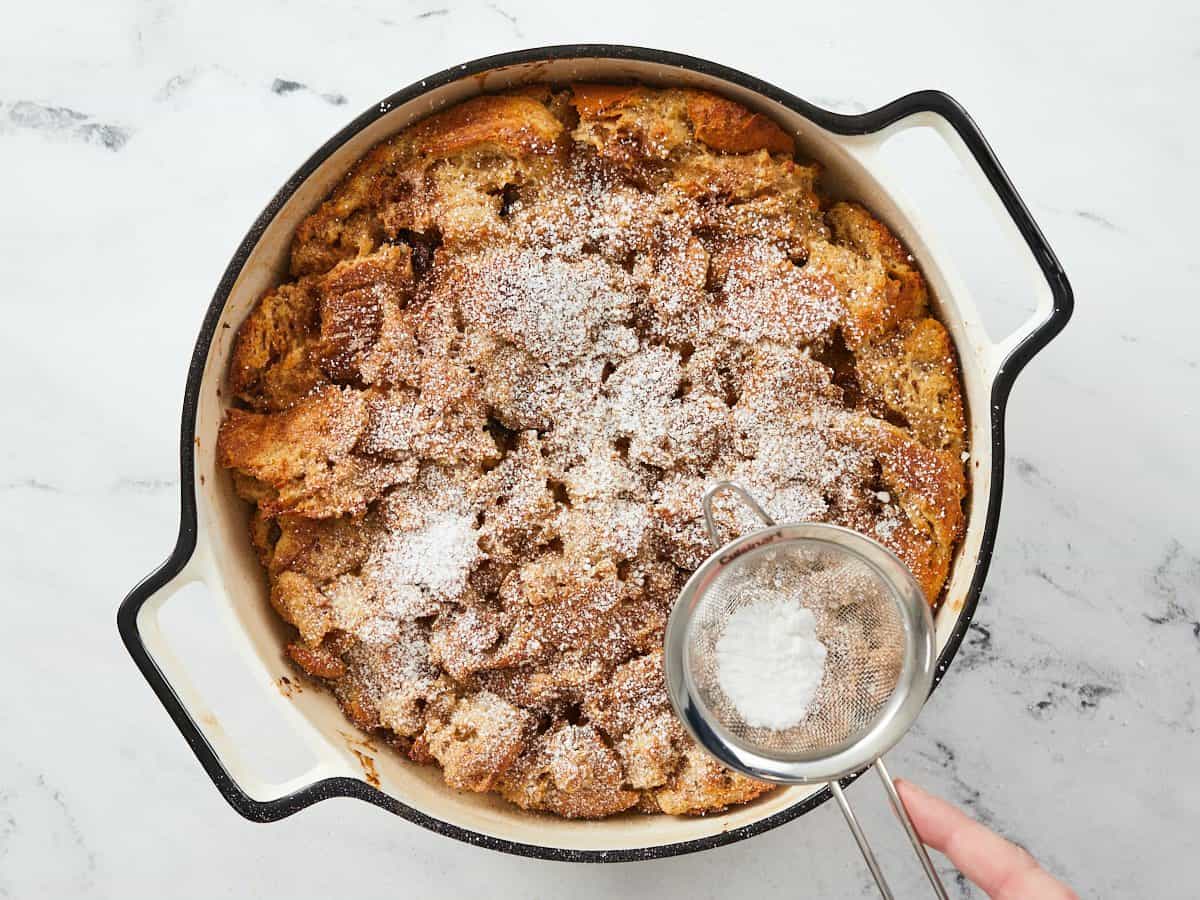
Continue baking, uncovered, for another 20-25 minutes or until the top of the casserole is crunchy and deeply golden brown. If desired, dust the top of the baked casserole with powdered sugar before slicing and serving.
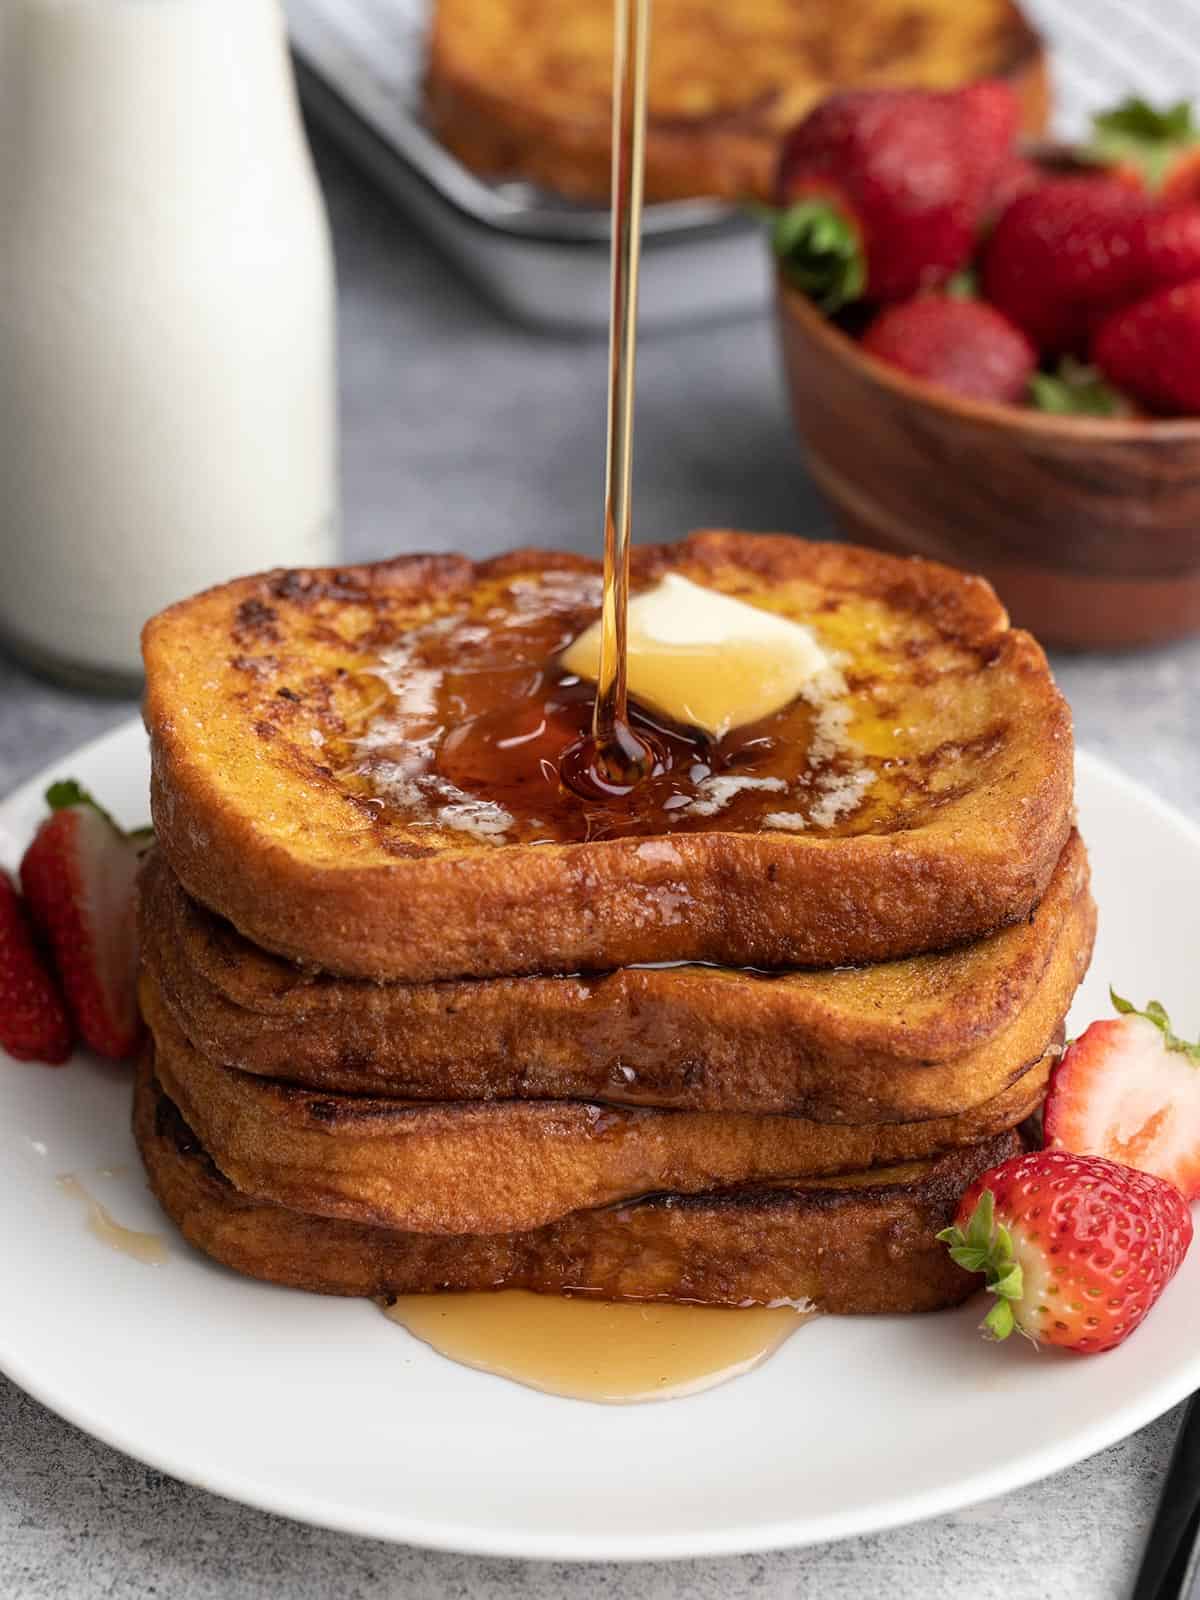
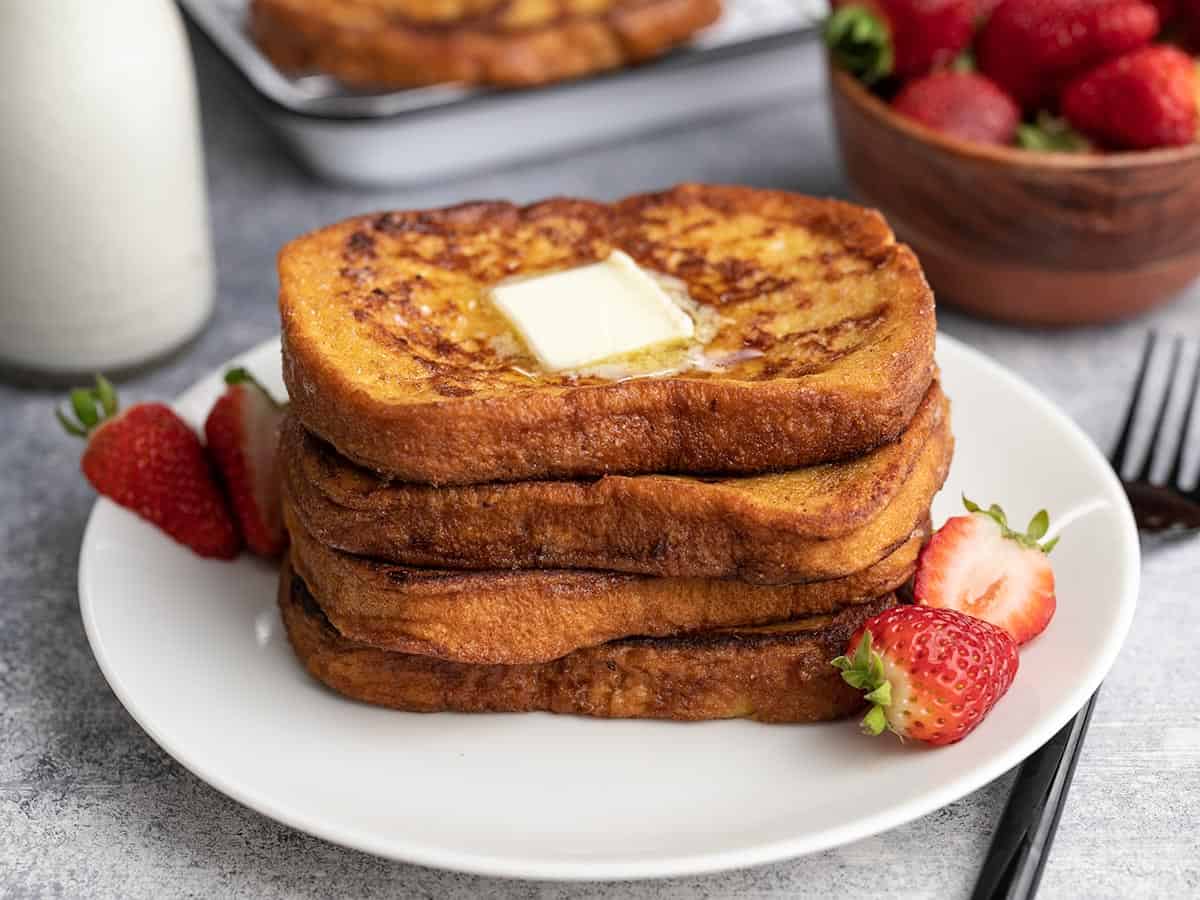
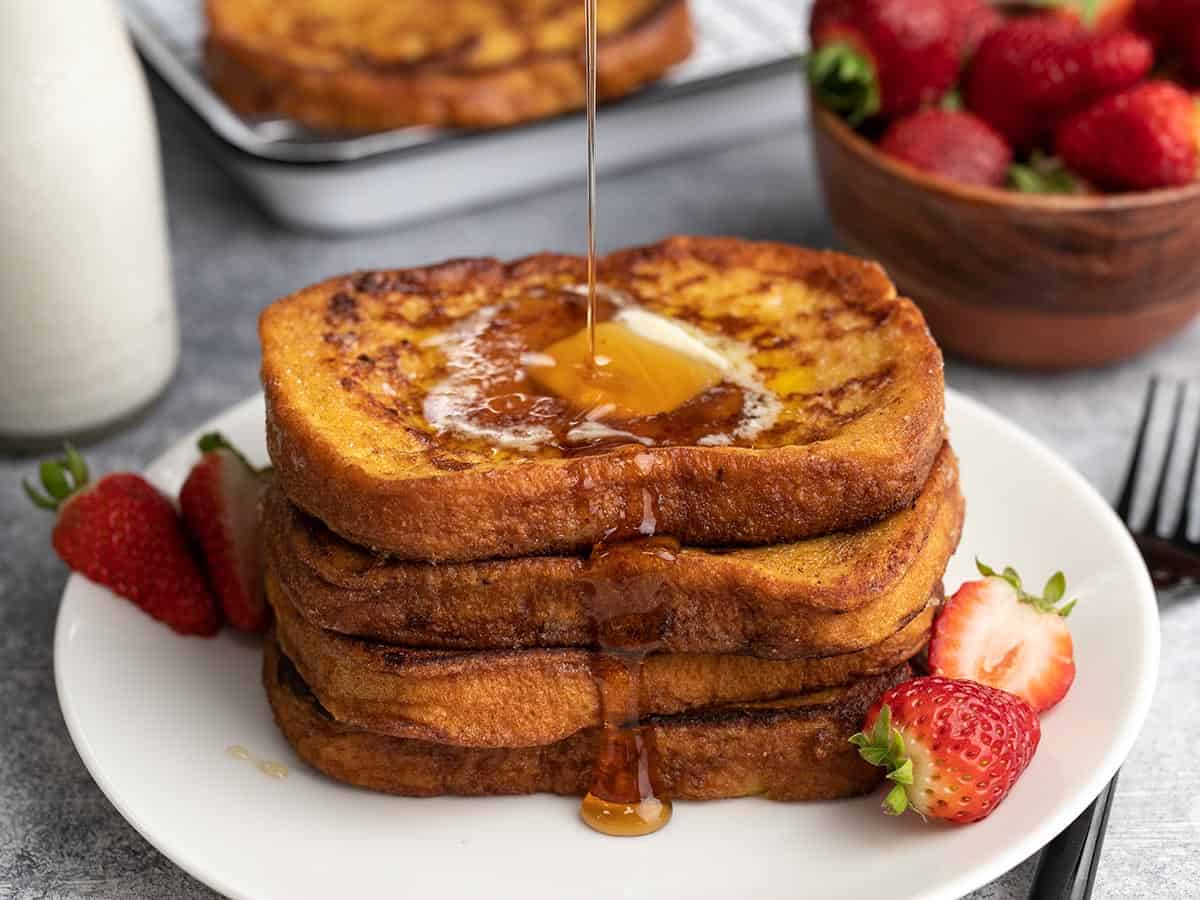
It’s hard not to go “Mmmmm.” when you bite into this crispy, fluffy, custardy, cinnamon and vanilla-scented French toast. And that’s why I love this recipe so much! With a few tricks and just a handful of ingredients, you are just minutes away from the best French toast ever!
INGREDIENTS FOR FRENCH TOAST
Here’s what you’ll need to make the most unforgettably easy and scrumptious French toast ever!
Bread– A thick slice of stale bread with a dense crumb is best for French toast. Try Texas Toast, Challah, Brioche, Milk Bread, a Baguette, or a Croissant.
Whole Eggs – Help to thicken and set the milk and create structure. You can substitute eggs with cornstarch. This technique is explained in the recipe card.
WholeMilk – Softens the bread, creates richness, and helps with browning. You can also use full-fat dairy-free milk, like coconut and almond. You need the fat to create the right mouth feel, so steer clear of low-fat options.
Cinnamon – Flavors the batter. Substitute cinnamon in French toast with pumpkin or apple pie spice, nutmeg, allspice, ginger, cardamom, or cloves.
Vanilla – Flavors the batter. Substitute vanilla in French toast with: orange zest, instant coffee, almond extract, bourbon, and rum (What? I’m Puerto Rican.)
Salt – Balances the sweetness of the sugars in the milk.
Butter – Delivers a flavorful, crispy, golden brown outer layer of French toast.
Cooking Oil – Raises the smoke point of butter and prevents it from burning.
Sugar – Helps brown and caramelize the outer layer of French toast.
what’s the right texture for french toast?
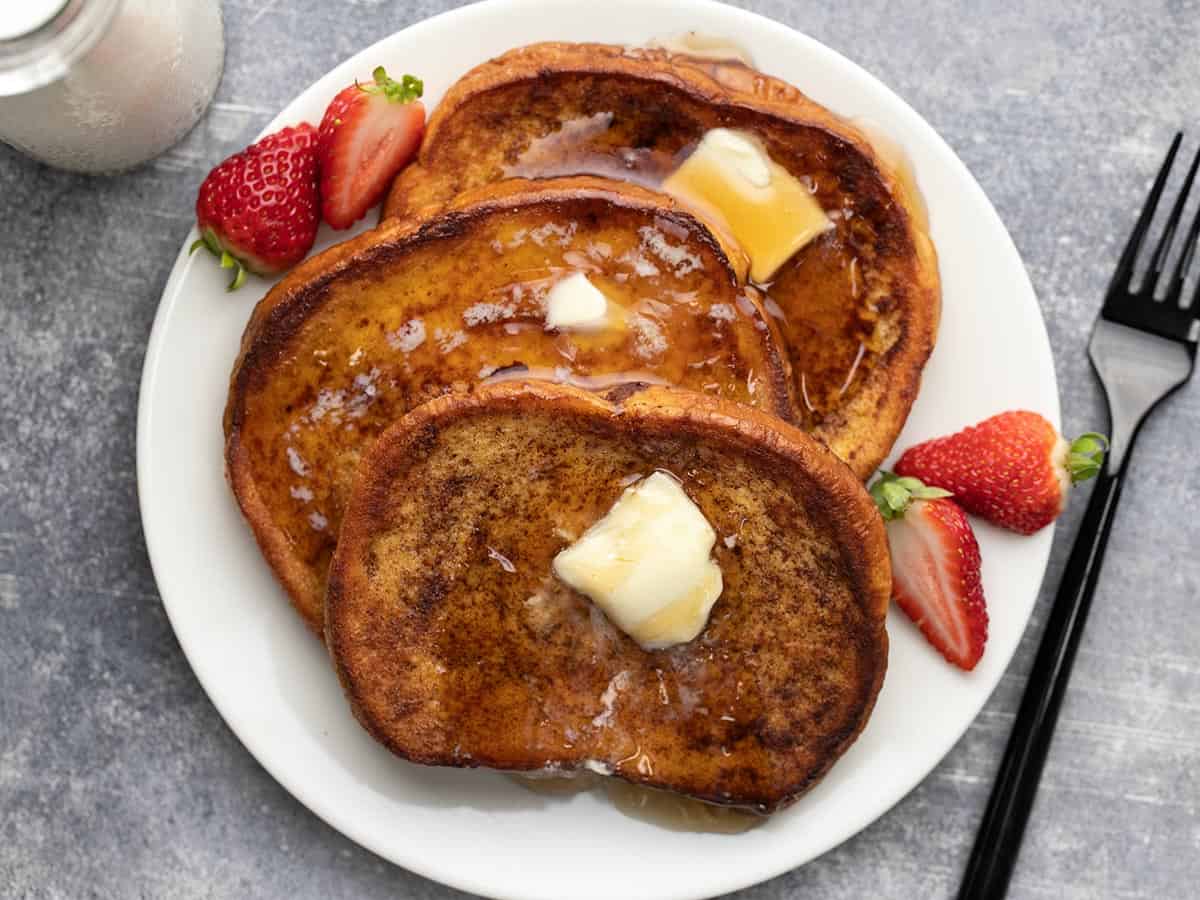
The right texture is a personal preference. French toast has two layers: a crispy outside and a custard-like center. Thin slices of bread give you crispier results, and thicker slices deliver more of that custardy center. You do you.
When IS FRENCH TOAST ready?
The cooking time for French toast varies depending on the thickness of your bread and how much batter it’s soaked up. So instead of relying on a timer, press the center of the toast lightly with your finger. The bread will feel firm and will spring back. If your finger leaves an indentation, keep cooking.
How To Make Perfect French Toast
No one wants soggy French toast that’s burnt on the outside. Follow these tips for French toast perfection:
The Bread: Choose thicker slices of stale bread without holes in the crumb. If you’re using fresh bread, try toasting it in the oven for a few minutes to dry it.
The Batter: Mix the liquids and spices until they run in an uninterrupted line through the tines of a fork.
The Soak: Fresh or thinly sliced bread needs a brief dip in the batter. Thicker, sturdier slices can hang for a minute. Give thick slices of stale bread a few minutes to soak up the batter and rehydrate.
The Fry: Use a heavy-bottomed pan, butter, and oil (which helps keep your butter from burning). Keep your temperature at a steady medium-low, so the outside doesn’t char before the inside cooks.
Your mornings deserve crispy, fluffy, custardy French Toast! With a few tricks and a handful of ingredients, you're just minutes away from the best breakfast ever!
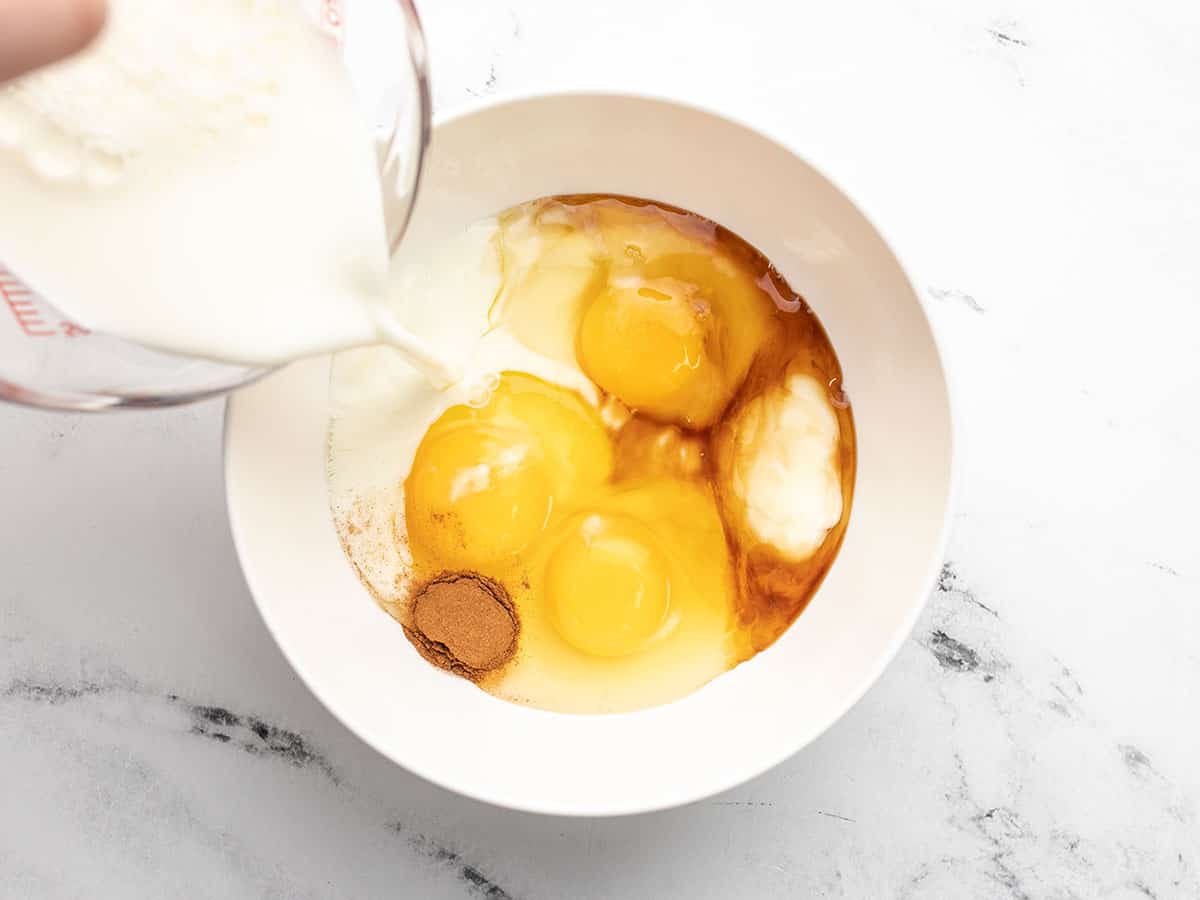
Whisk the eggs, milk, vanilla, cinnamon, and a pinch of salt until they run in an uninterrupted line through the tines of a fork.
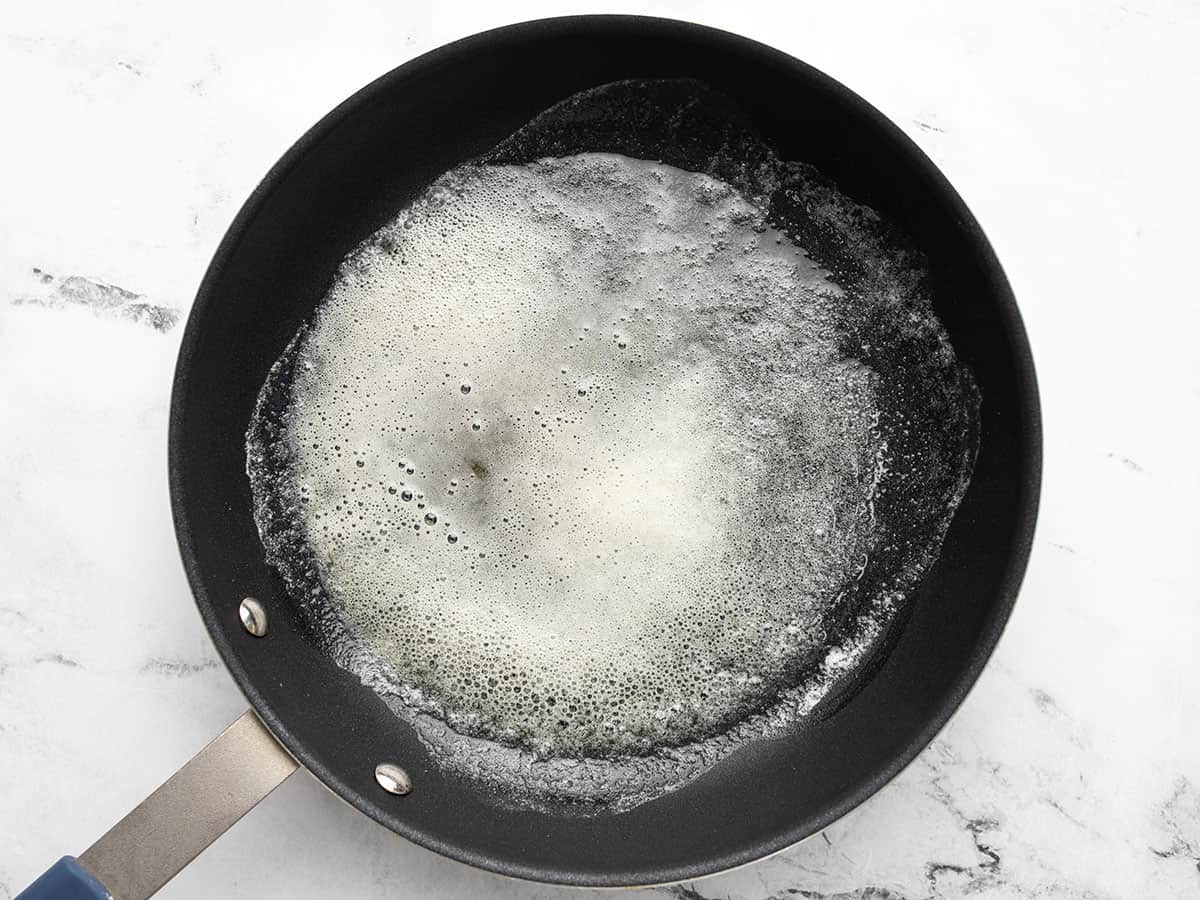
Warm a non-stick pan over medium-low heat. Add 3 tablespoons of butter and a 1/2 tablespoon of cooking oil. Heat until the butter foams.
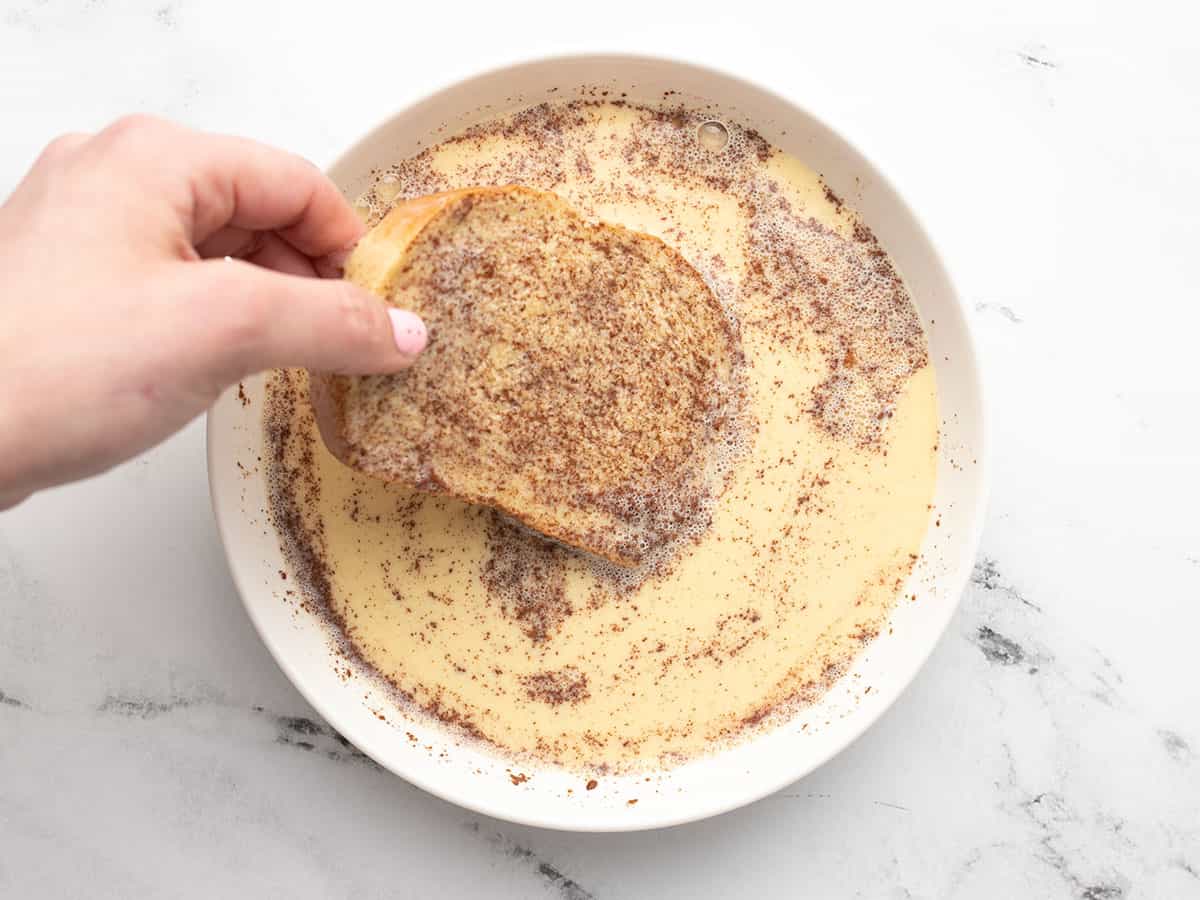
Dip the slices of bread in the batter, covering both sides. The slice should feel heavy, like a wet sponge, but shouldn't drip like a soaking wet sponge.
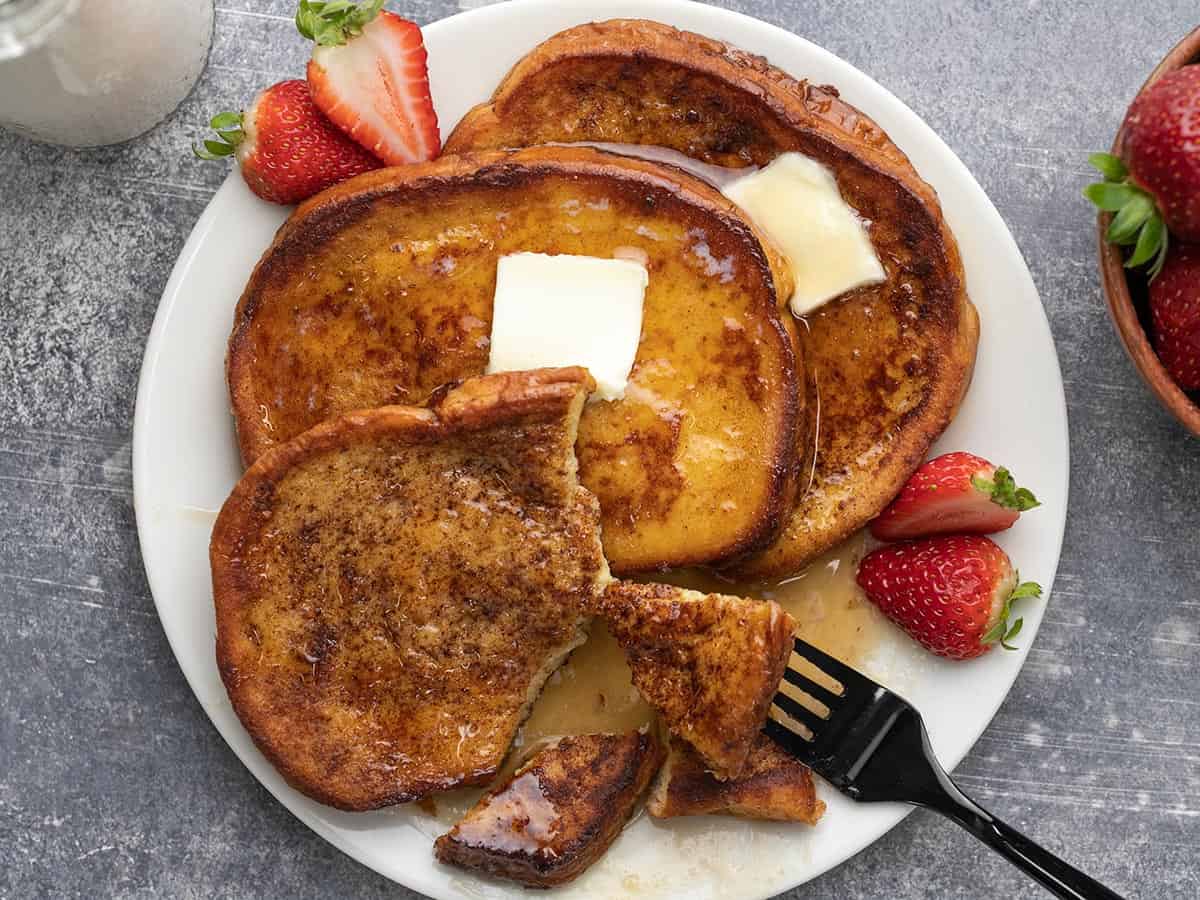
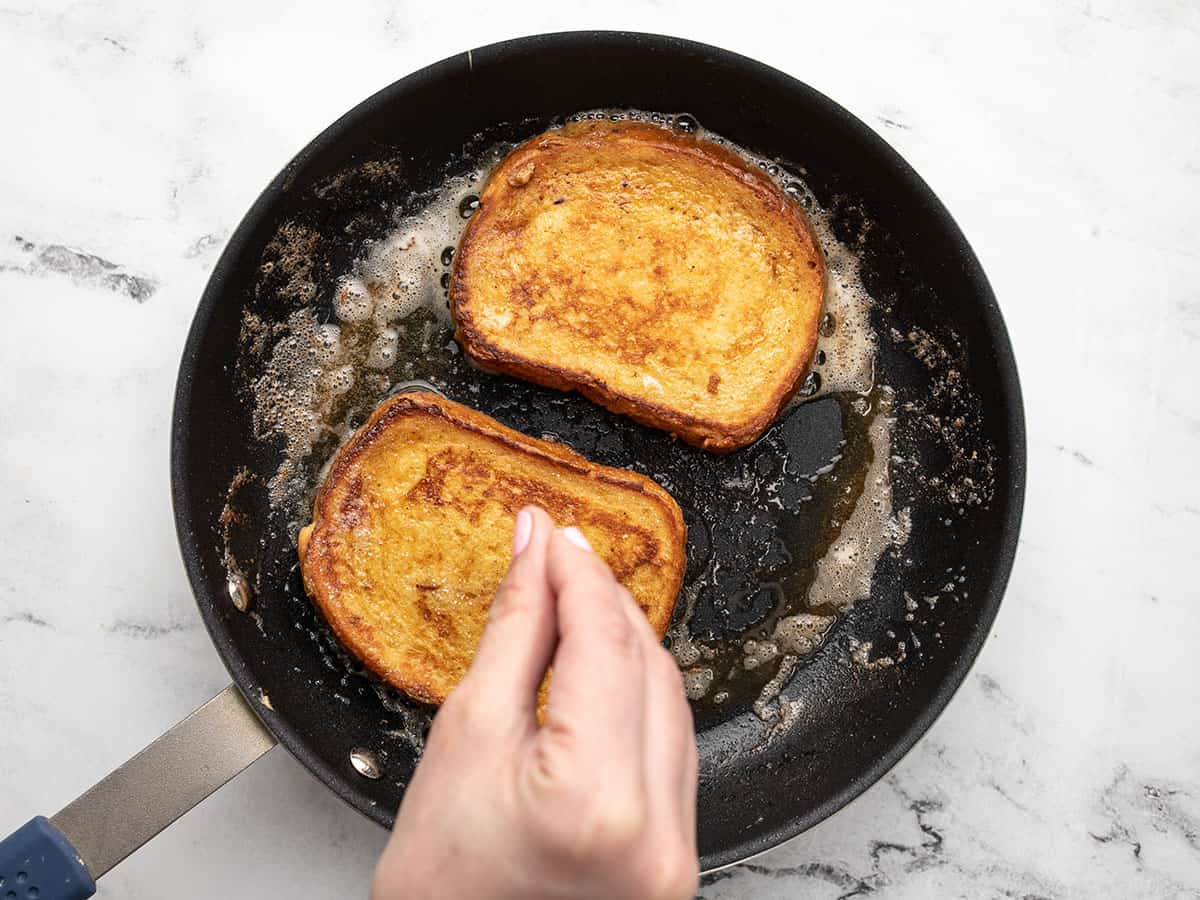
Place the slices in the pan and sprinkle the tops with a pinch of sugar. Cook until they've browned on the bottom. Flip and sprinkle the browned tops with a second pinch of sugar.
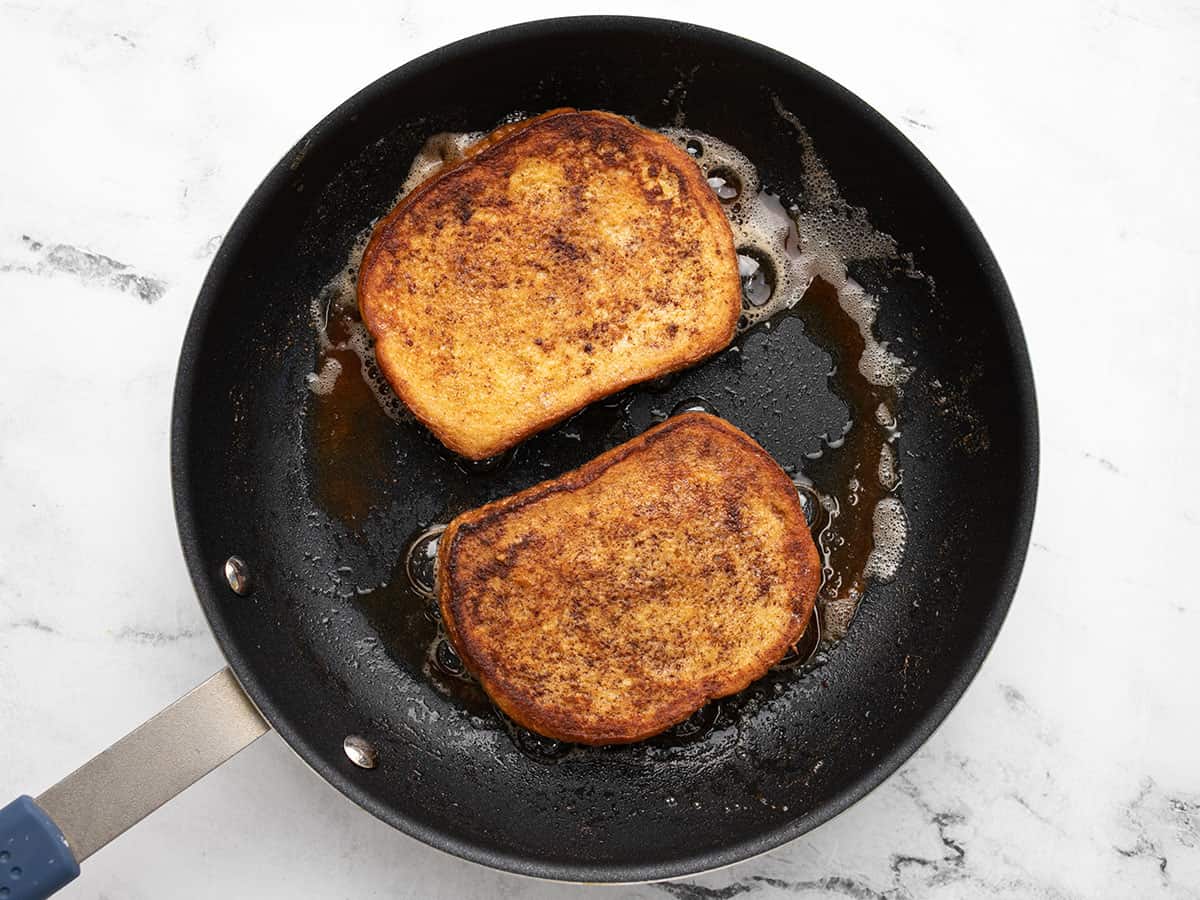
When you press your finger in the slice's center and it springs back, turn it over again and cook briefly to caramelize the last sprinkle of sugar. Repeat for all slices, adding more oil and butter as needed. Slice and serve warm.
*If you want to substitute the eggs, add the milk and spices to a small pot. Whisk in a tablespoon of cornstarch until it’s completely dissolved, then place the milk over medium heat. Continue whisking until the milk comes to a boil. Continue to cook and whisk for 1 minute at a full boil. Take the thickened milk off the heat and cool before dipping the slices of bread into it.
Whisk the eggs, milk, vanilla, cinnamon, and a pinch of salt until they run in an uninterrupted line through the tines of a fork.
Warm a non-stick pan over medium-low heat. Add 3 tablespoons of butter and a 1/2 tablespoon of cooking oil. Heat until the butter foams.
Dip the slices of bread in the batter, ensuring both sides are covered. The amount of time the bread should be left in the batter depends on the type of bread used and the staleness of the bread. The slice should feel like a wet sponge but not a soaking wet sponge.
Place 2 slices in the pan and sprinkle a pinch of sugar over the top. Cook until the slice has browned on the bottom. Flip and sprinkle a pinch of sugar over the browned top.
When you press your finger in the slice’s center, and it springs back, turn it over again and cook briefly to caramelize the sugar. Repeat for all slices, adding more oil and butter as needed.
If you’re making a big batch, keep the slices warm in a 200°F oven. Serve and get ready for all of the high-fives from the fam! This one’s going on repeat!
More “French” Recipes
I can’t say French without thinking of the movie Better Off Dead. Do you remember this scene? In the spirit of one of the best food moments in movie history, check out these other “Fraaanch” recipes: