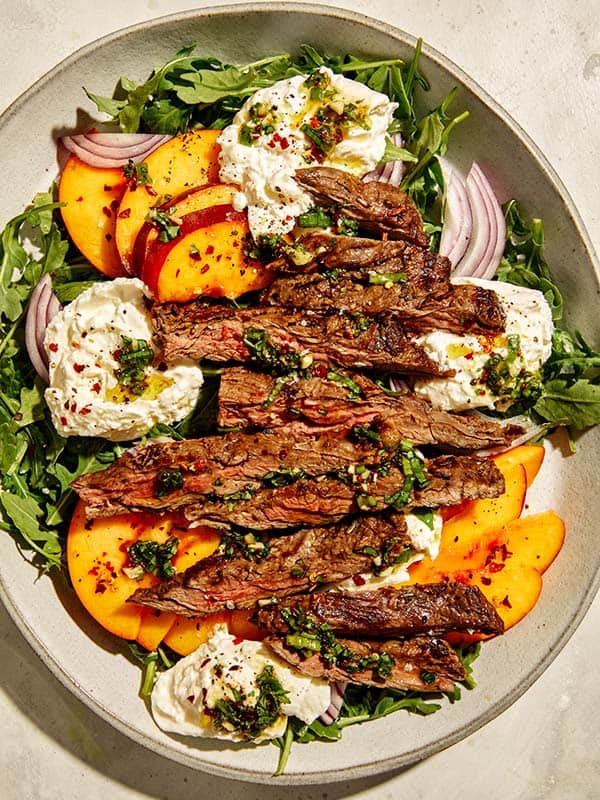
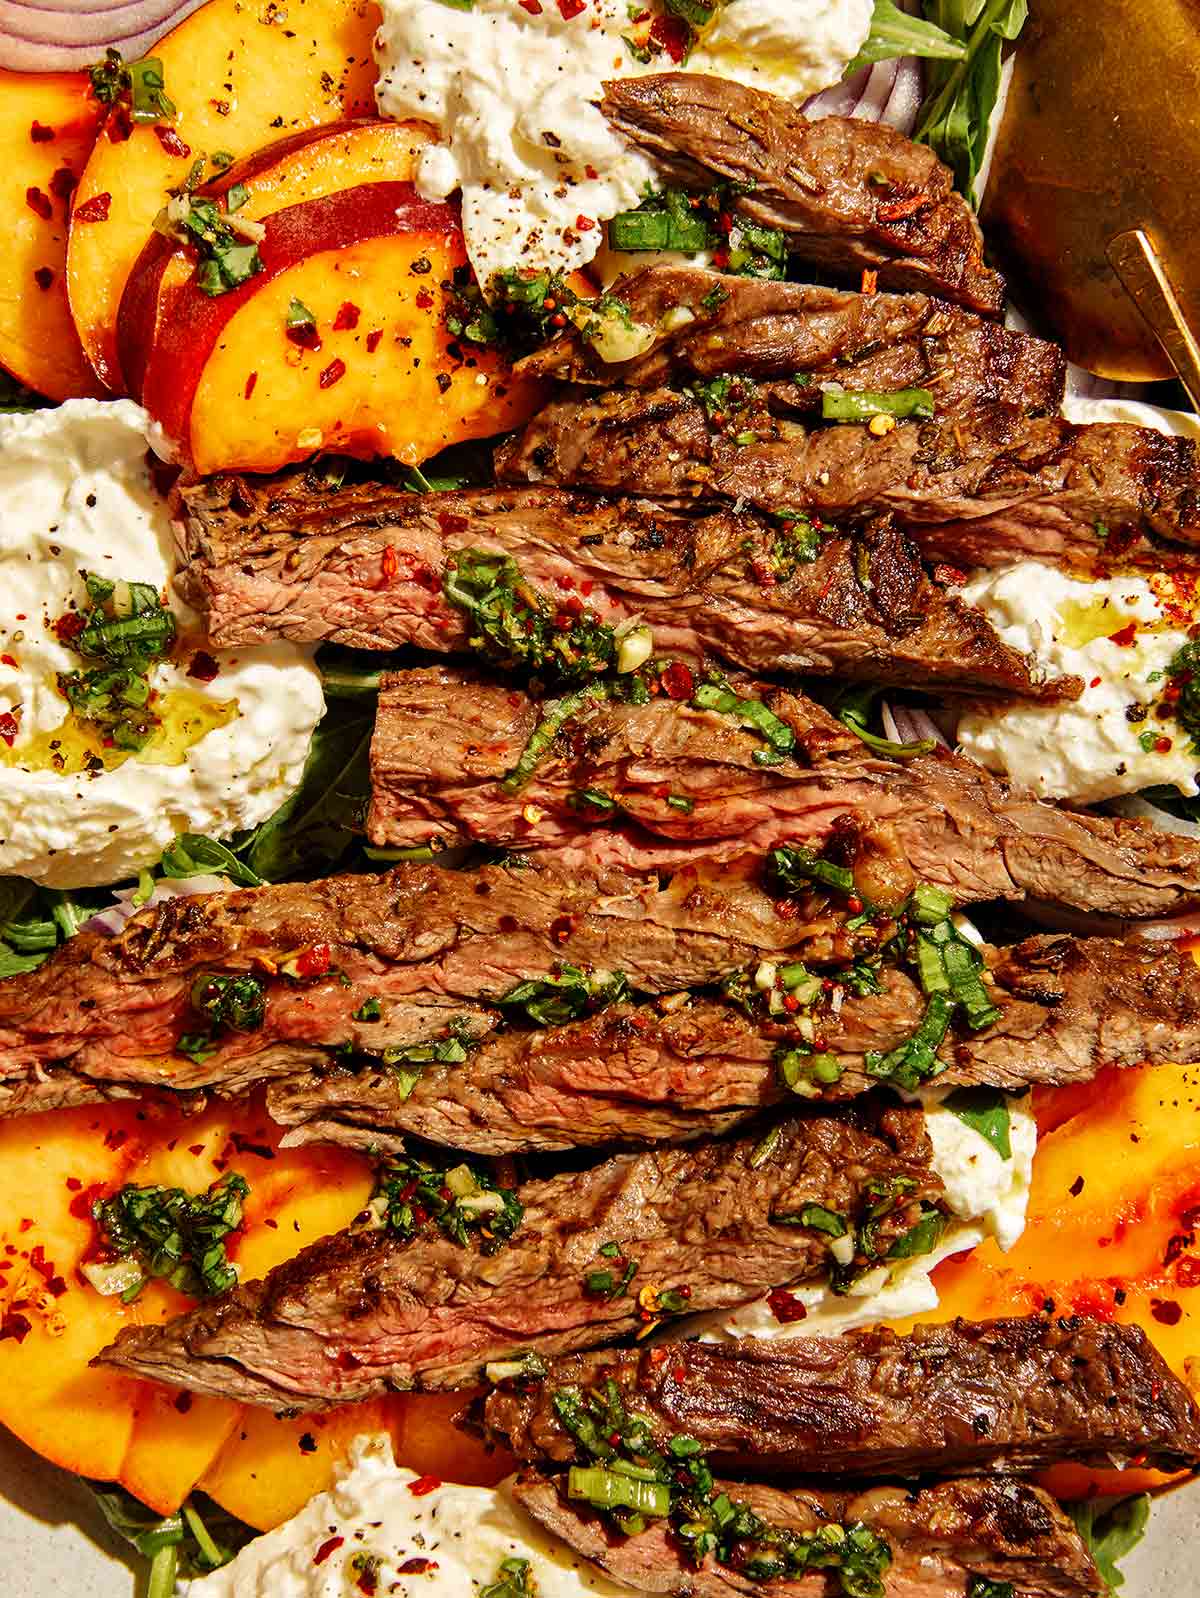
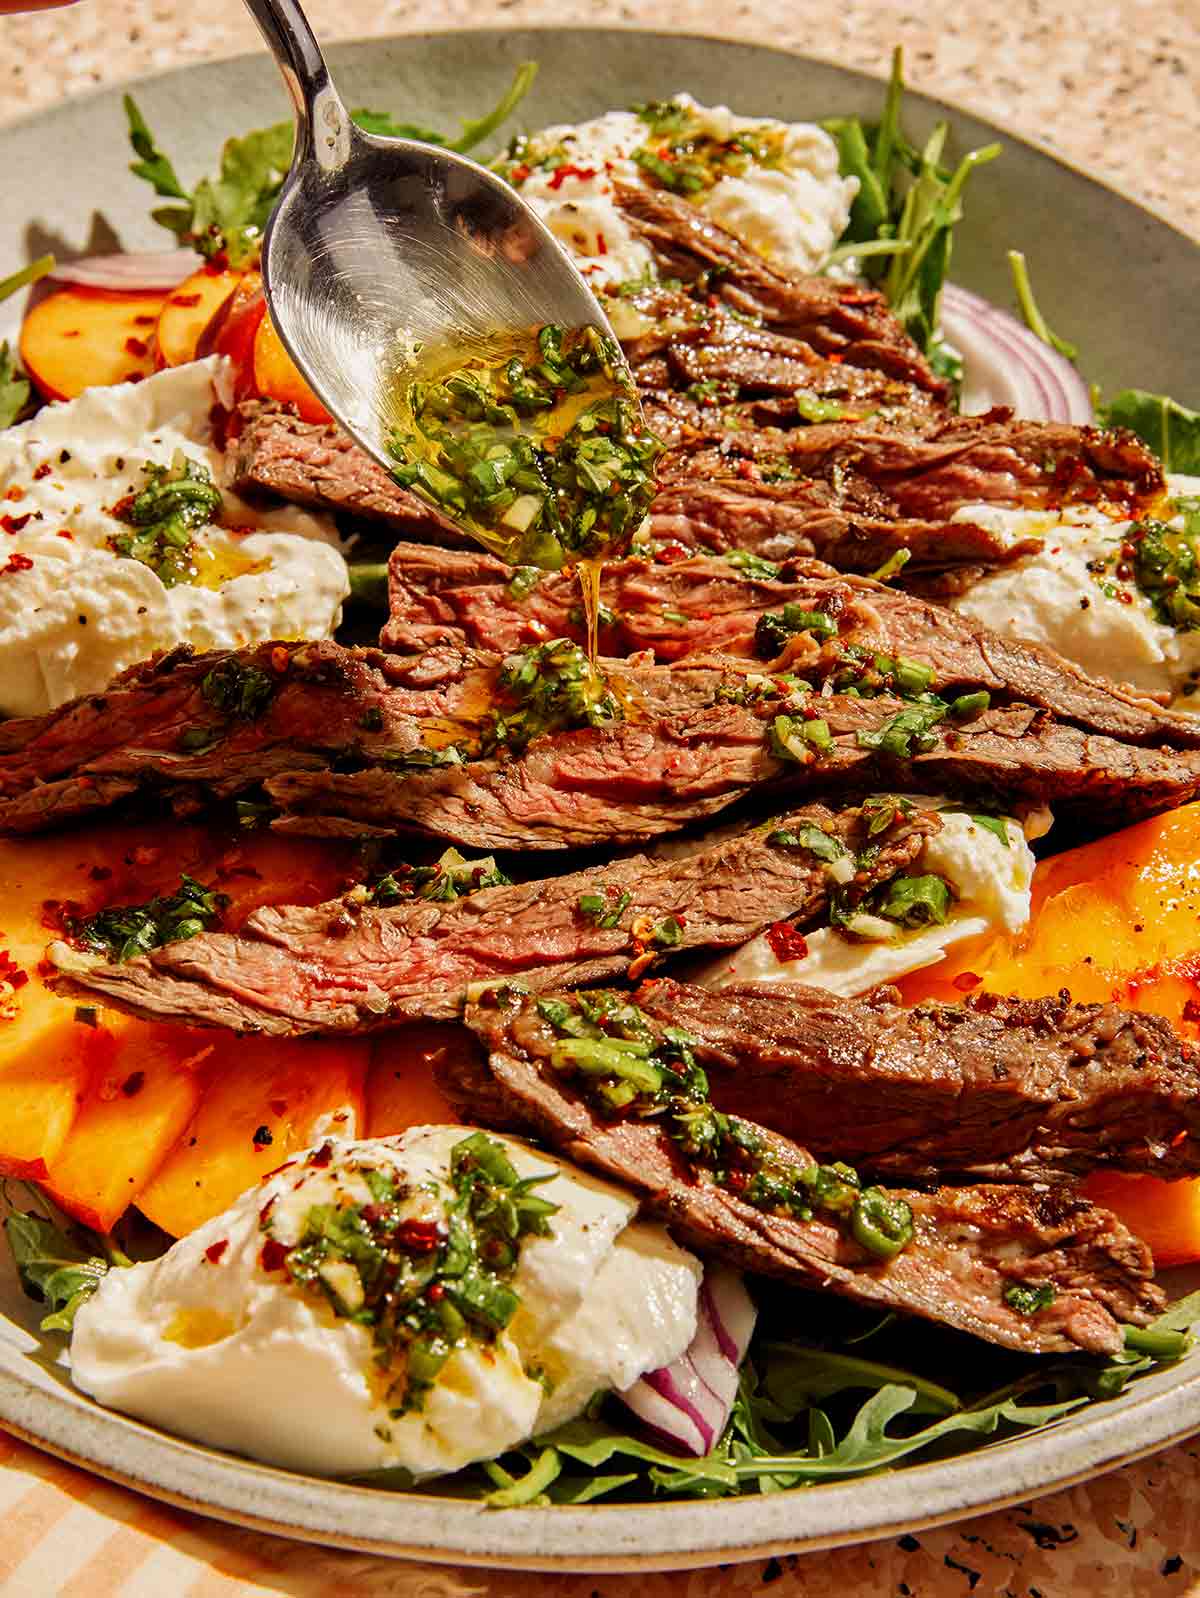
Our Grilled Skirt Steak Salad with fresh peaches and creamy burrata is one of our favorite things to serve guests during the summer. It’s so fresh, packed with so much flavor, super satisfying, and the best part? -it’s very easy to make! Skirt steak is so underrated because it’s not the most tender cut, but it has so much great flavor! Although with our simple marinade you get even more flavor as well as a…
Our Grilled Skirt Steak Salad with fresh peaches and creamy burrata is one of our favorite things to serve guests during the summer. It’s so fresh, packed with so much flavor, super satisfying, and the best part? -it’s very easy to make!
Skirt steak is so underrated because it’s not the most tender cut, but it has so much great flavor! Although with our simple marinade you get even more flavor as well as a nice and tender grilled piece of meat!
How to Make Our Grilled Skirt Steak Salad
Process
MARINADE
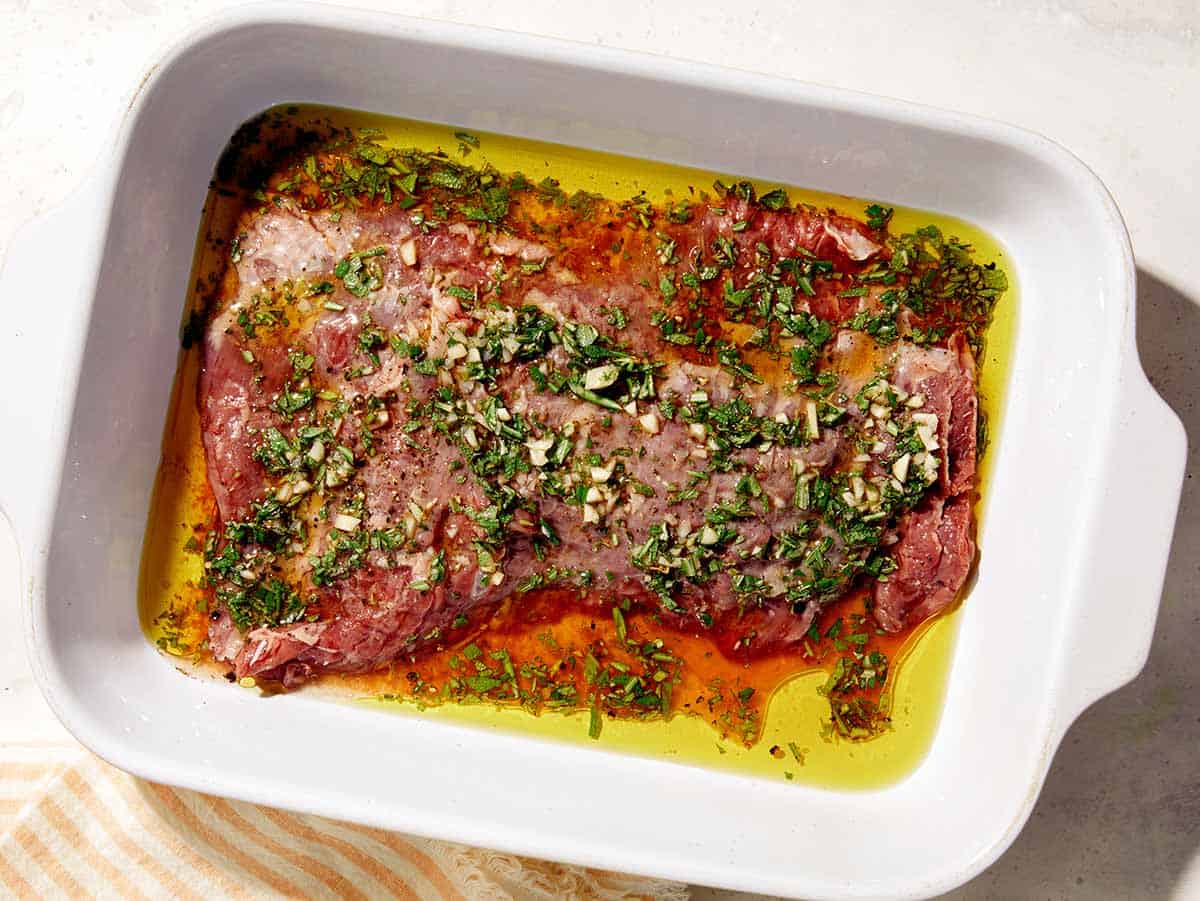
Place all marinade ingredients into a liquid measuring cup and whisk together.
Place skirt steak into a shallow baking dish and pour marinade over steak, flipping to ensure both sides are covered. Cover with plastic wrap and refrigerate for at least 2 hour and up to 24 hours.
VINAIGRETTE
Place all vinaigrette ingredients, except for the oil into the well of a blender or food processor).
With the motor running, slowly begin drizzling the oil into the herb mixture until fully incorporated and emulsified together. Season with salt and pepper and set aside.
SKIRT STEAK
Preheat grill to 375˚F (or set grill pan over medium-high heat). Remove steak from marinade, pat dry, and generously season the steak on both sides with salt and pepper.
Place the steak onto the hot grill surface and grill on each side for 6 to 7 minutes for medium doneness.
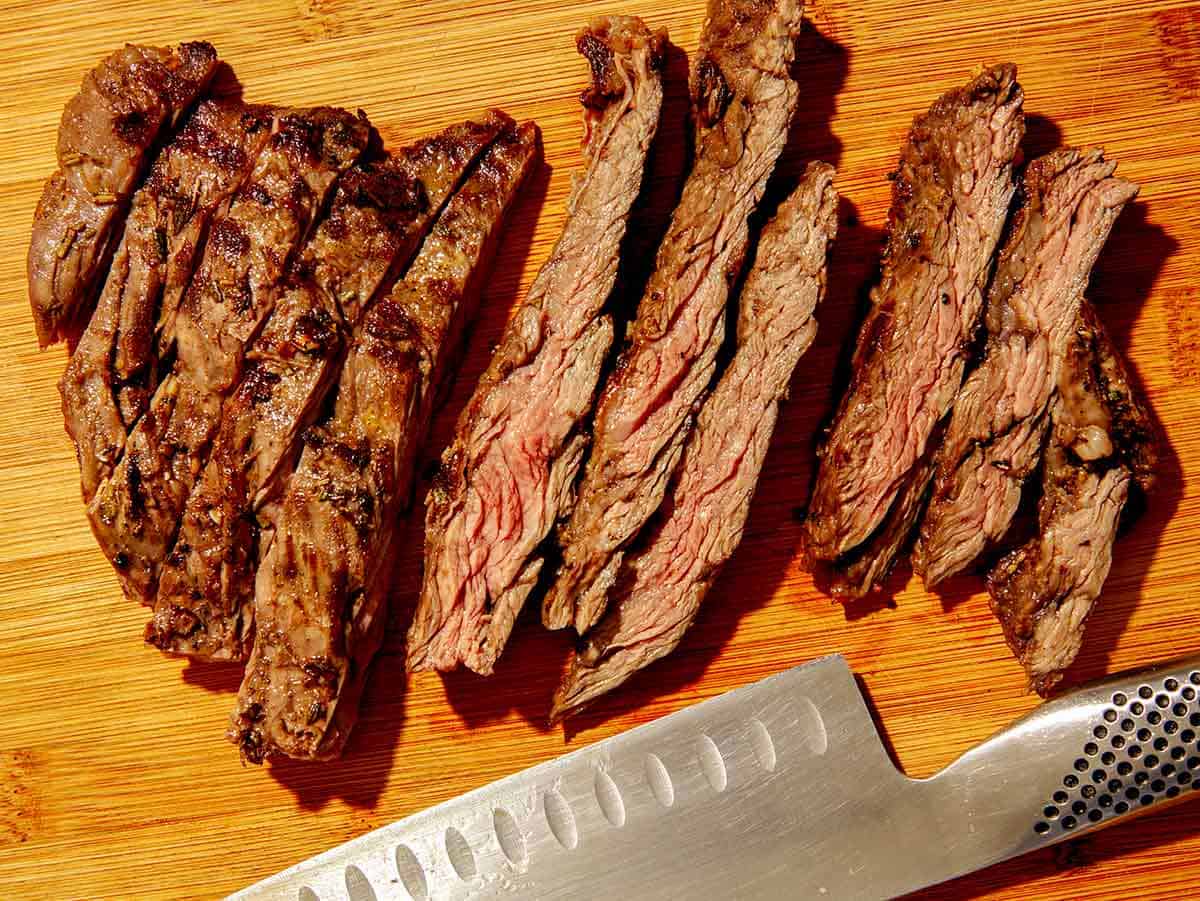
Remove the steak from heat and transfer to a cutting board. Allow the steak to rest for 8 to 10 minutes before slicing against the grain.
ASSEMBLY
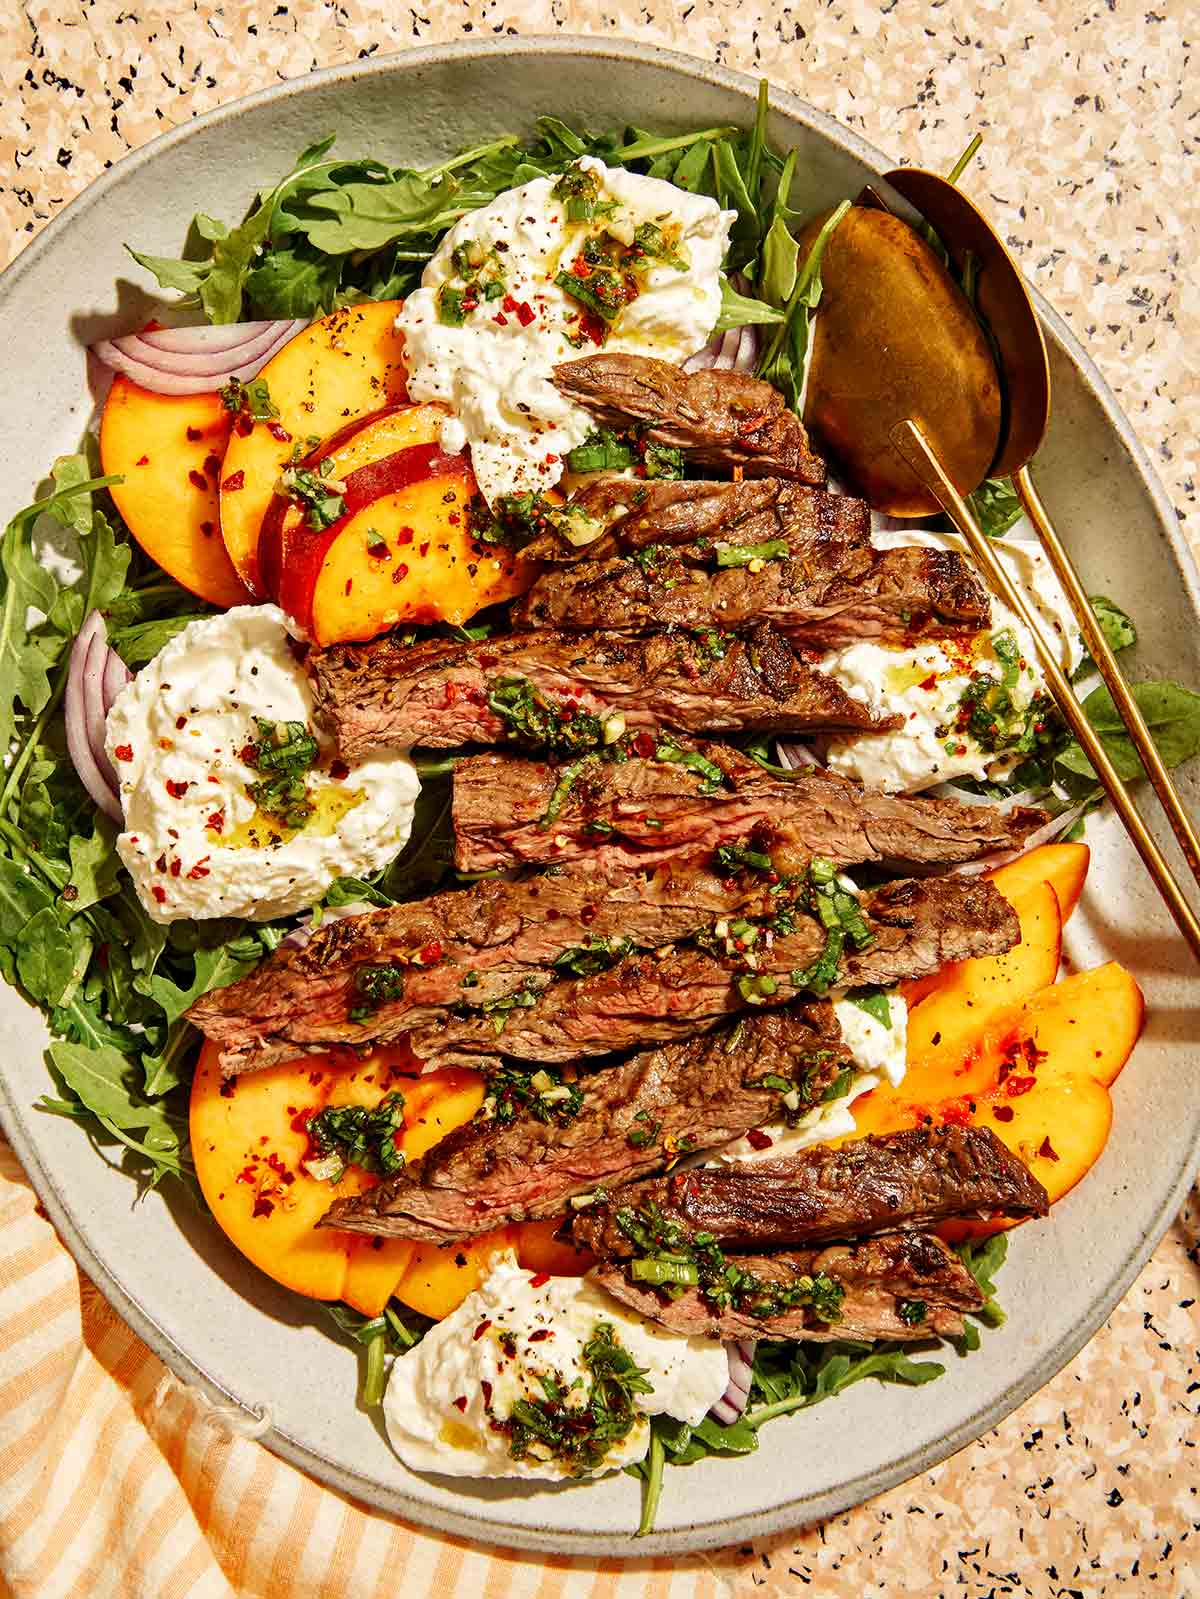
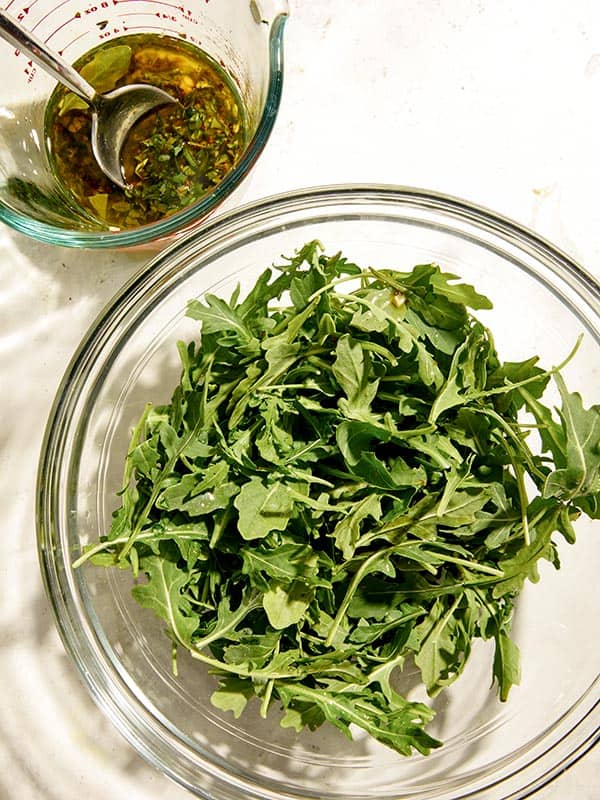
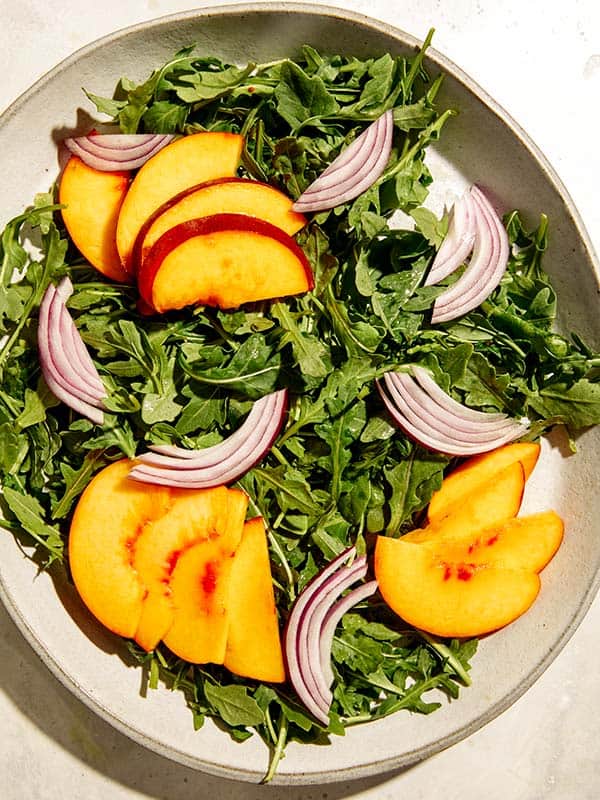
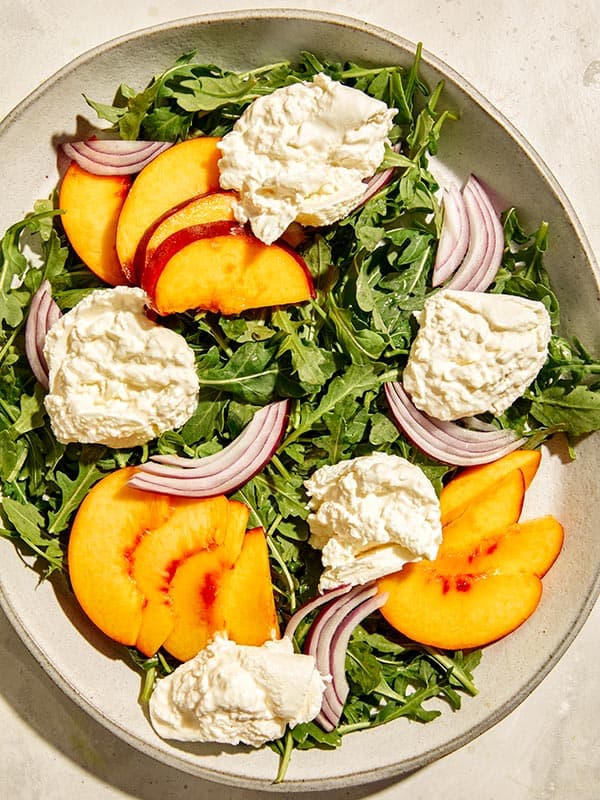
Toss arugula or kale with 1/2 of the vinaigrette and spread onto a large platter. Top with sliced steak, sliced peaches, red onion, burrata, red pepper flake, and dill flowers, if using. Drizzle more vinaigrette over the top and lightly season with sea salt flakes and black pepper.
Why We Love Skirt Steak Cut of Beef
Skirt steak is a cut of beef from the plate (between the brisket and flank). It’s often confused for the hangar and flank, mostly due to the location of the cut. Our top three reasons with love skirt steaks are:
We love the great, natural flavor you get from this particular cut of beef.
It’s fairly inexpensive compared to other cuts of beef (for that reason, you can easy feed a crowd without breaking the bank).
It cooks up very quickly!
Why We Prefer Marinating Skirt Steak
Skirt steak is often overlooked because it’s not considered a tender cut of beef. For this reason we always marinate our skirt steaks. Marinating skirt steaks (especially with an acid component, in this case red wine vinegar and whole grain mustard) really helps to tenderize the steak.
We always recommend marinating skirt steak for at least 6 hours for tenderness, but not more than 24 hours. We often find that marinated skirt steak for over 24 hours breaks the muscle tissue down a little too much, creating a a mushy mess.
Why Grilling Skirt Steak is Our Preferred Cooking Method
This mainly comes down to flavor! We love the char-grilled flavor you get from throwing the steak on the grill.
Skirt steak also really benefits from fast, high temperature cooking, which is great for grilling.
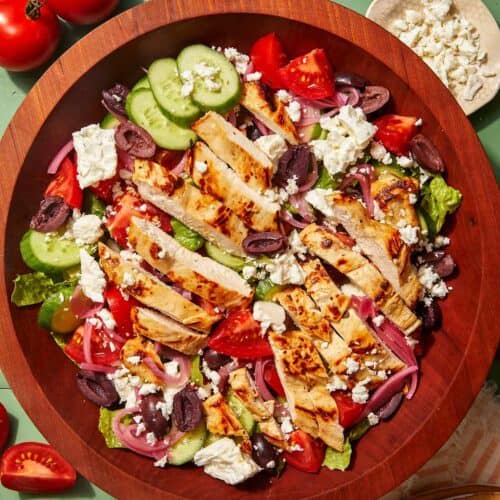
Our Grilled Skirt Steak Salad is the perfect summer salad! It's loaded with a simple marinated skirt steak, fresh sliced peaches and creamy burrata, all atop a bed of spicy arugula that's tossed with an herb vinaigrette. Swap the sliced peaches out for thinly sliced apples for a salad you can enjoy all year long!
Place all marinade ingredients into a liquid measuring cup and whisk together.
Place skirt steak into a shallow baking dish and pour marinade over steak, flipping to ensure both sides are covered. Cover with plastic wrap and refrigerate for at least 2 hour and up to 24 hours.
vinaigrette
Place all vinaigrette ingredients, except for the oil into the well of a blender or food processor).
With the motor running, slowly begin drizzling the oil into the herb mixture until fully incorporated and emulsified together. Season with salt and pepper and set aside.
skirt steak
Preheat grill to 375˚F (or set grill pan over medium-high heat). Remove steak from marinade, pat dry, and generously season the steak on both sides with salt and pepper.
Place the steak onto the hot grill surface and grill on each side for 6 to 7 minutes for medium doneness.
Remove the steak from heat and transfer to a cutting board. Allow the steak to rest for 8 to 10 minutes before slicing against the grain.
assembly
Toss arugula or kale with 1/2 of the vinaigrette and spread onto a large platter. Top with sliced steak, sliced peaches, red onion, burrata, red pepper flake, and dill flowers, if using. Drizzle more vinaigrette over the top and lightly season with sea salt flakes and black pepper.
Notes
Tips and Tricks for Success
Marinate the steak for at least 6 hour to tenderize, but no more than 24 hours, to prevent the meat from breaking down too much and turning mushy.
Don’t overcook the steak – which will only cause the steak to become tough and chewy.
Allow the steak to rest, loosely covered, for 8 to 10 minutes before slicing into it, so the juices don’t leak out (causing the steak to dry out).
Use high heat cooking, for a short amount of time on each side for the best results!
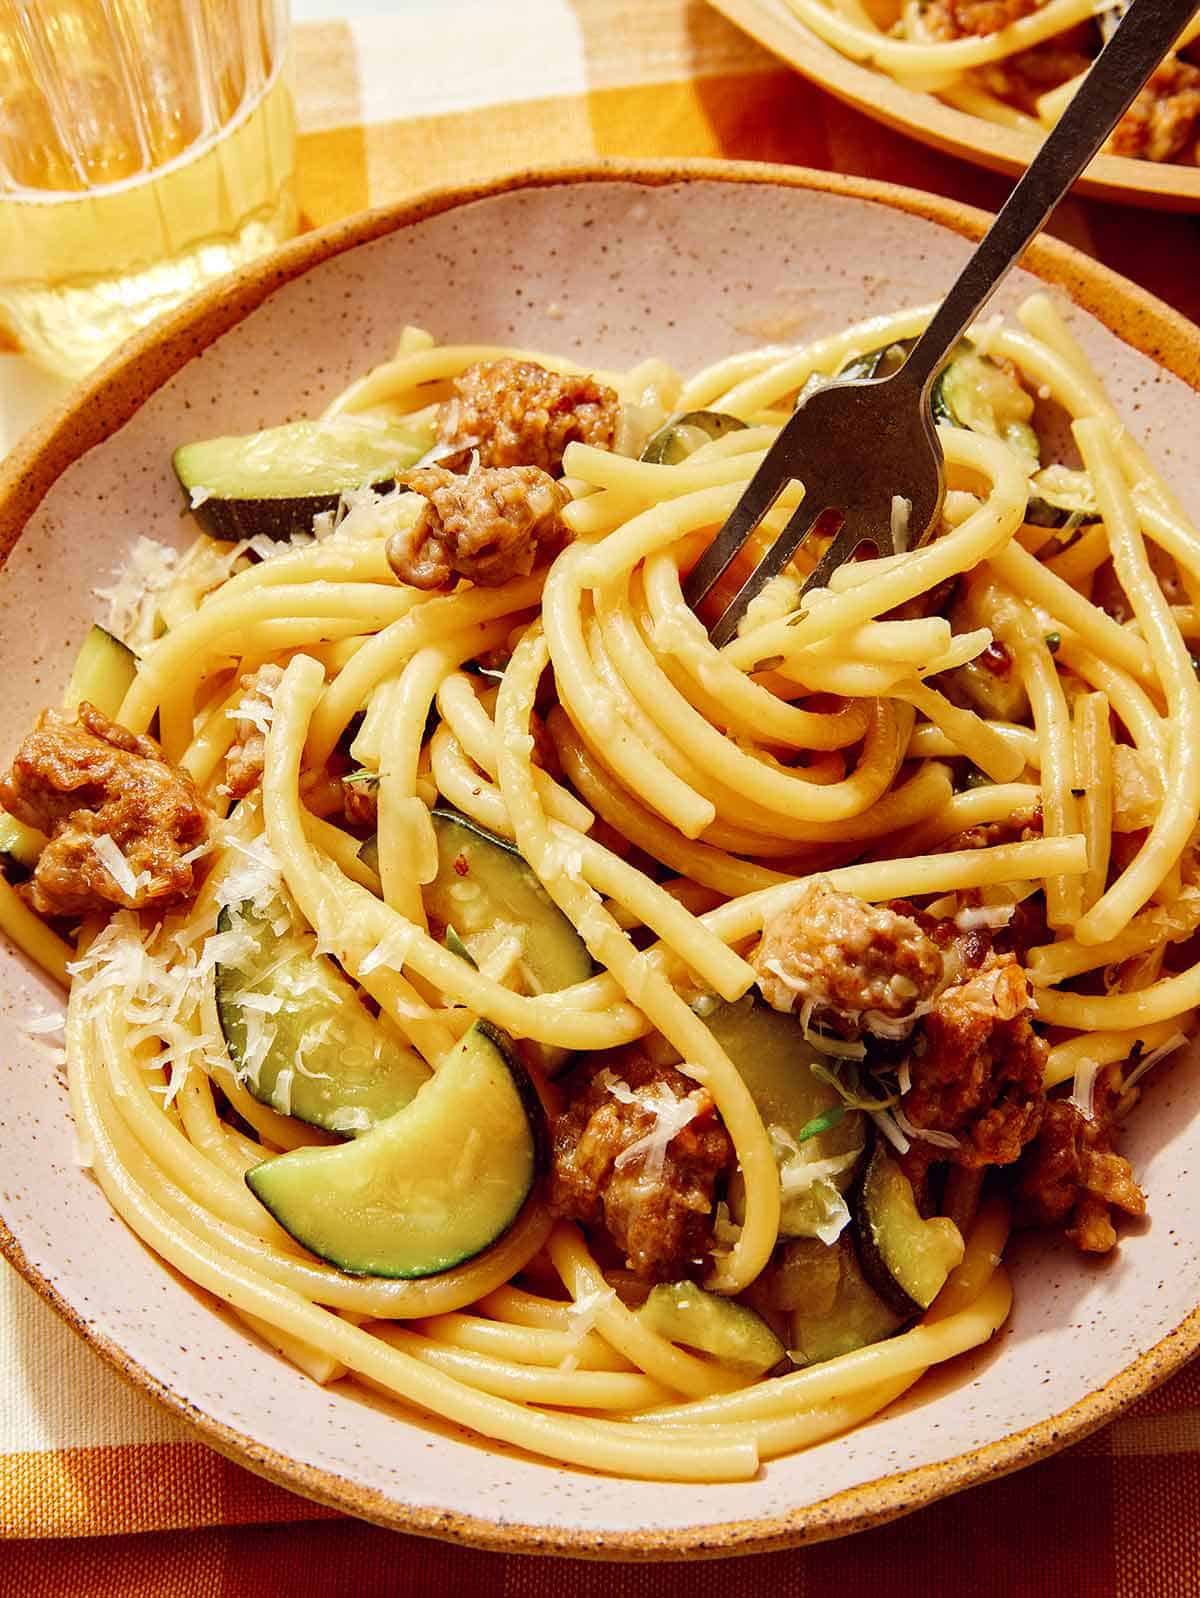
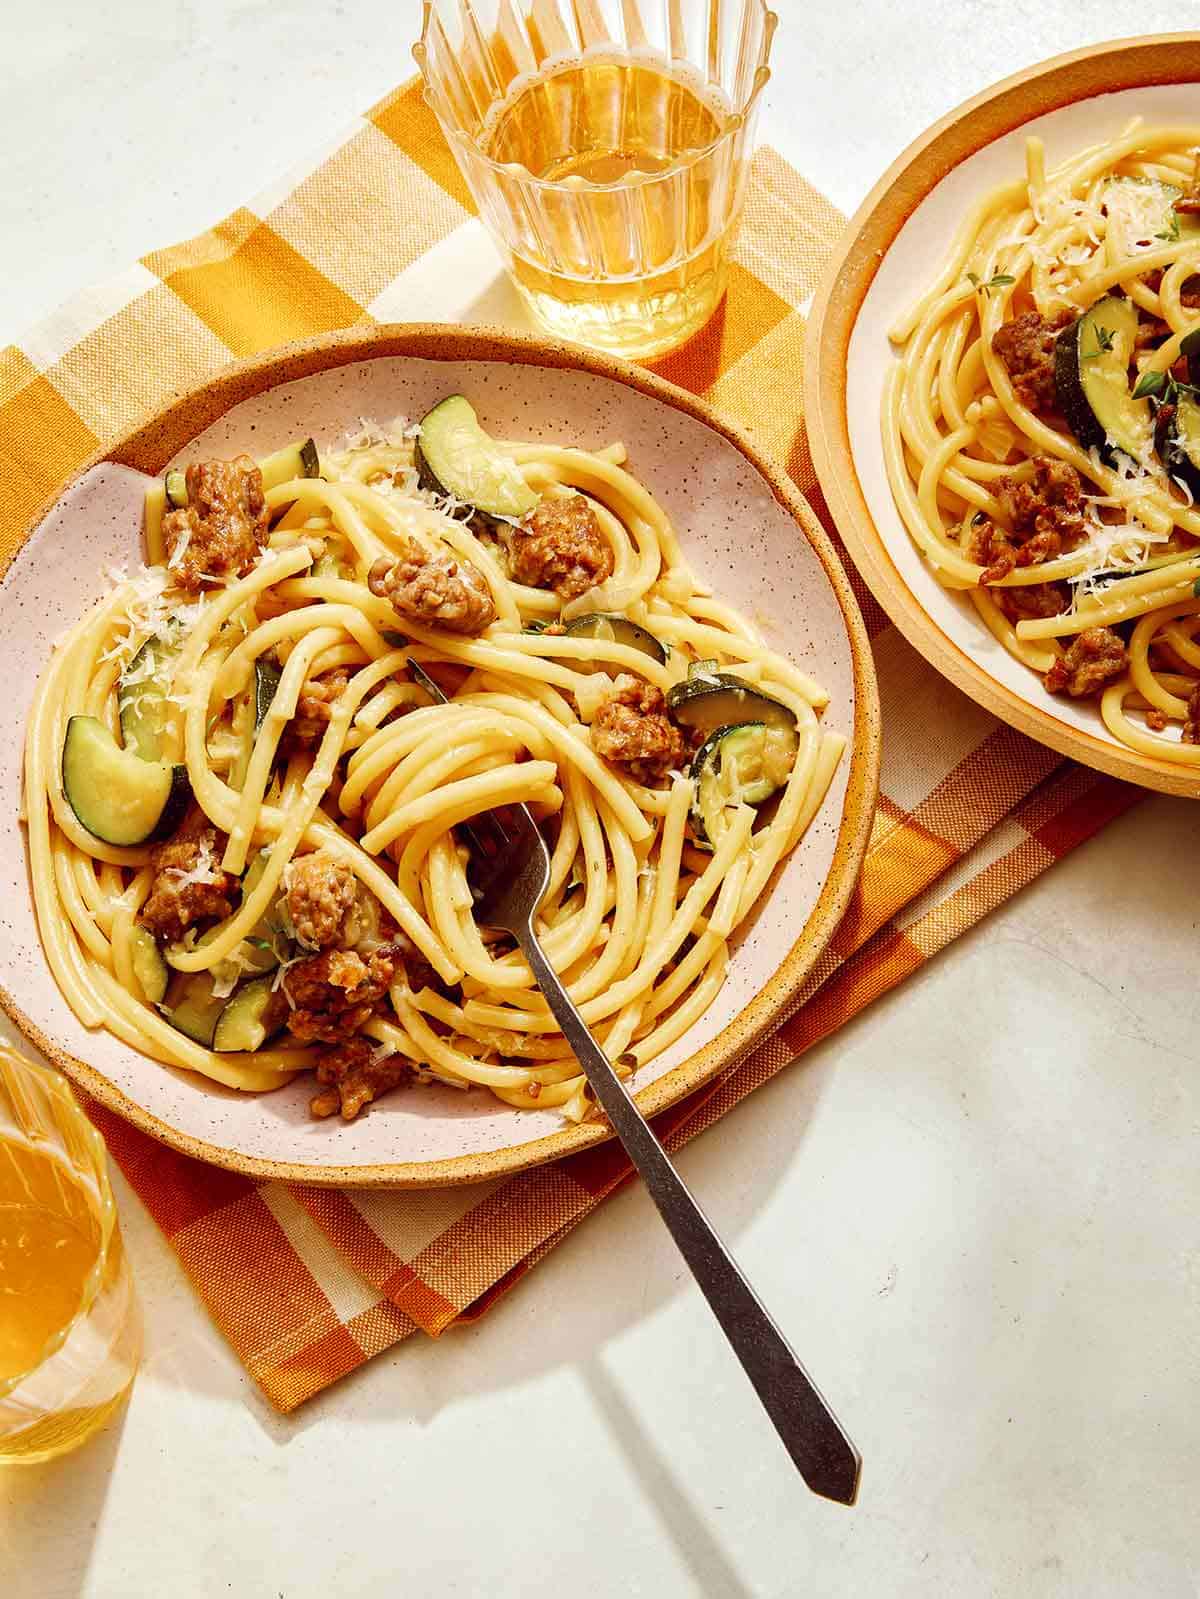
One-pot dinners are our favorite type of weeknight meal. Like our other one-pot meals, Mulligatawny Soup and Fettuccine Alfredo, cooking is as easy as cleaning up with everything being one in one dish. While any one-pot pasta is a clear winner, we’ve combined savory spicy sausage with fresh zucchini, seasonings, plenty of parmesan cheese, and of course, pasta! We love using bucatini for this recipe since its thicker texture holds up well with the chunky…
One-pot dinners are our favorite type of weeknight meal. Like our other one-pot meals, Mulligatawny Soup and Fettuccine Alfredo, cooking is as easy as cleaning up with everything being one in one dish.
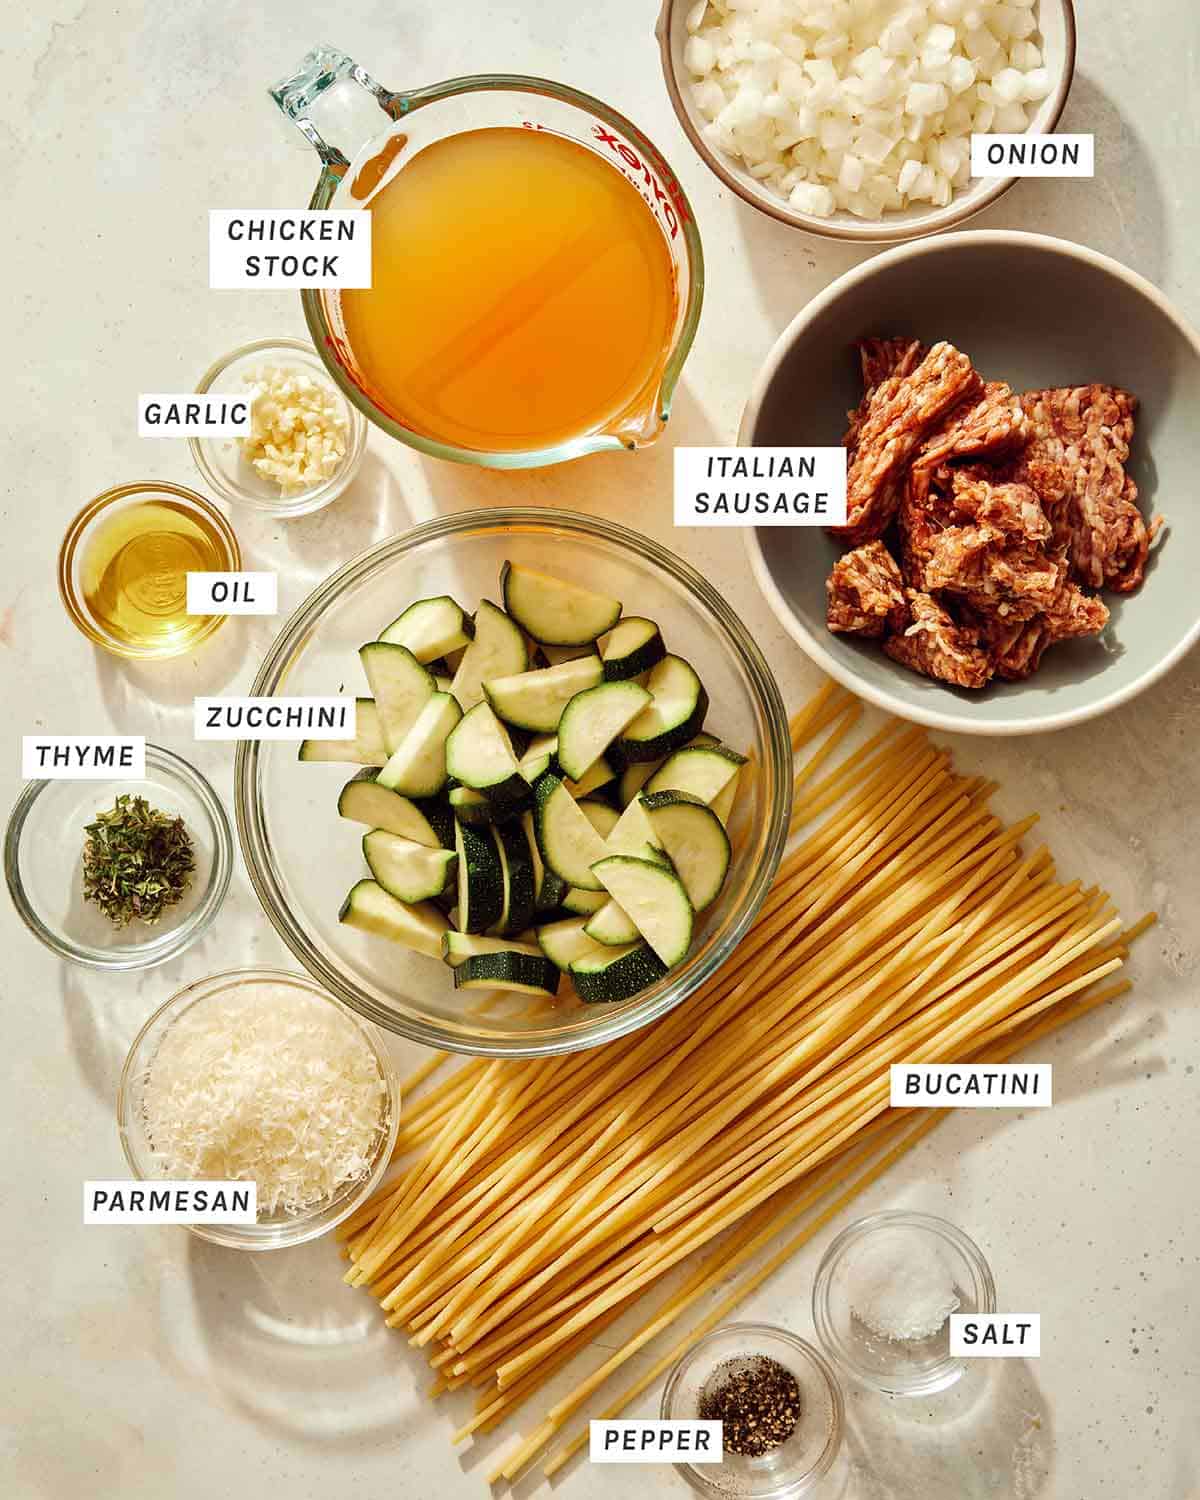
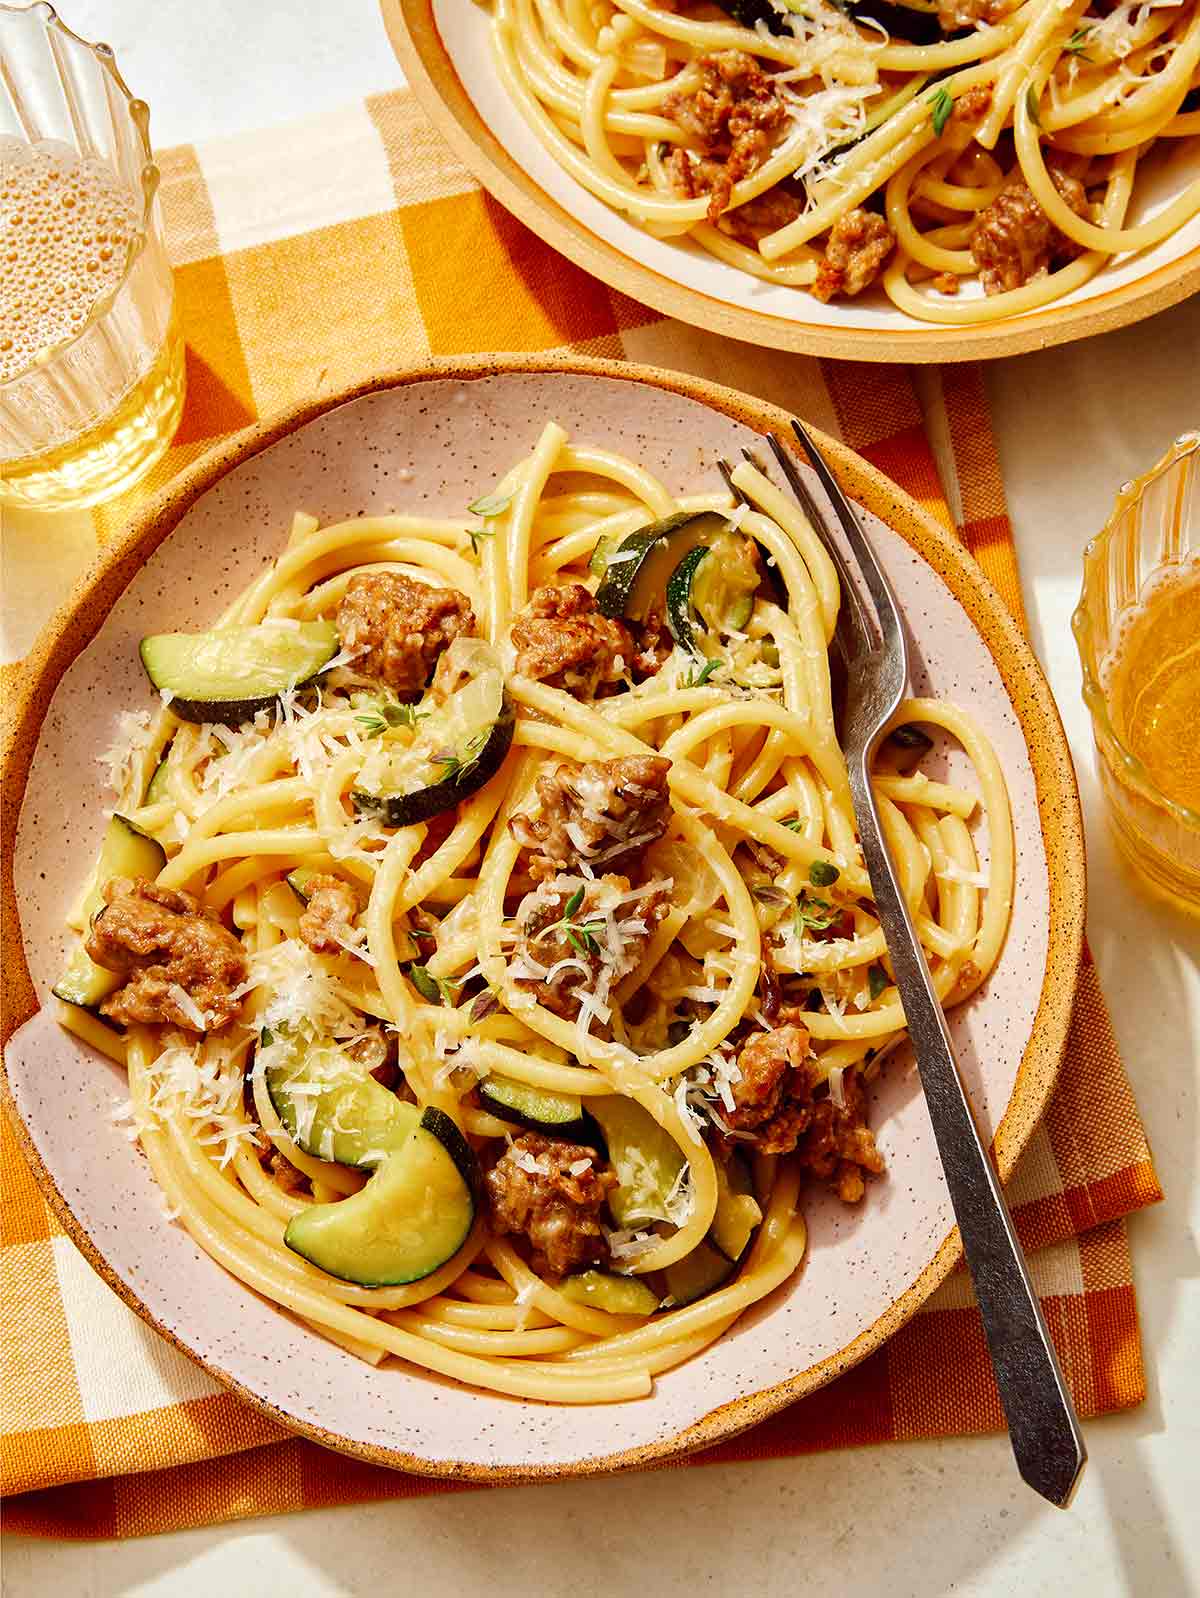
While any one-pot pasta is a clear winner, we’ve combined savory spicy sausage with fresh zucchini, seasonings, plenty of parmesan cheese, and of course, pasta! We love using bucatini for this recipe since its thicker texture holds up well with the chunky sausage and half-moons of zucchini. For an extra special weeknight dinner, serve with a big loaf of garlic bread and a simple side salad.
How to Make Our One Pot Pasta Recipe
Ingredients
Process
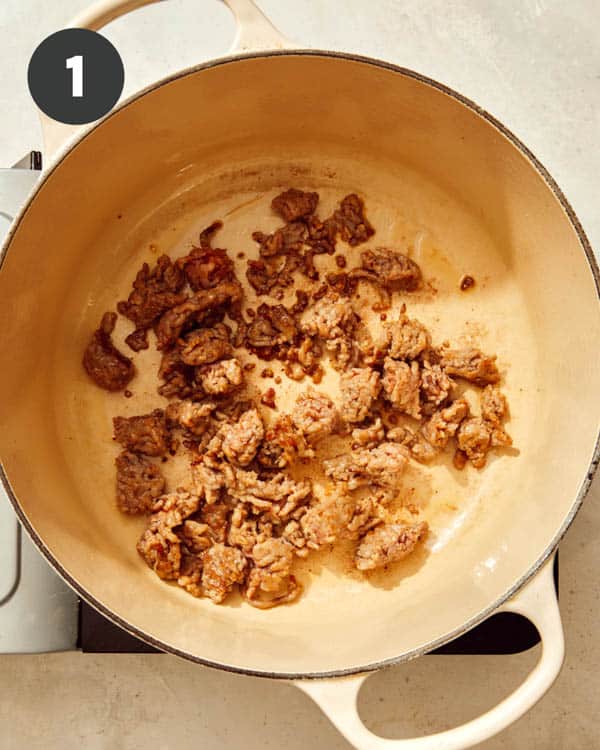
Place a large pot over medium-high heat. Add the oil and sauté the sausage until browned and crumbled, 2 to 3 minutes.
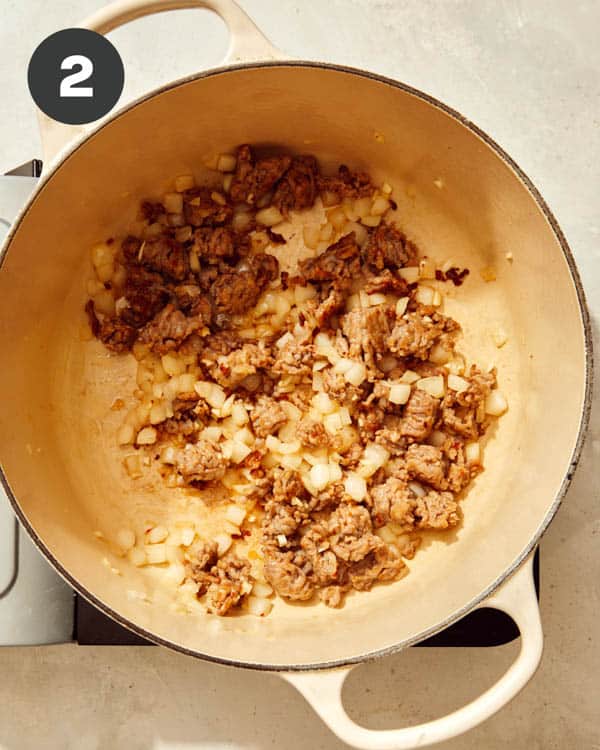
Add onions and sauté for 4 to 5 minutes.
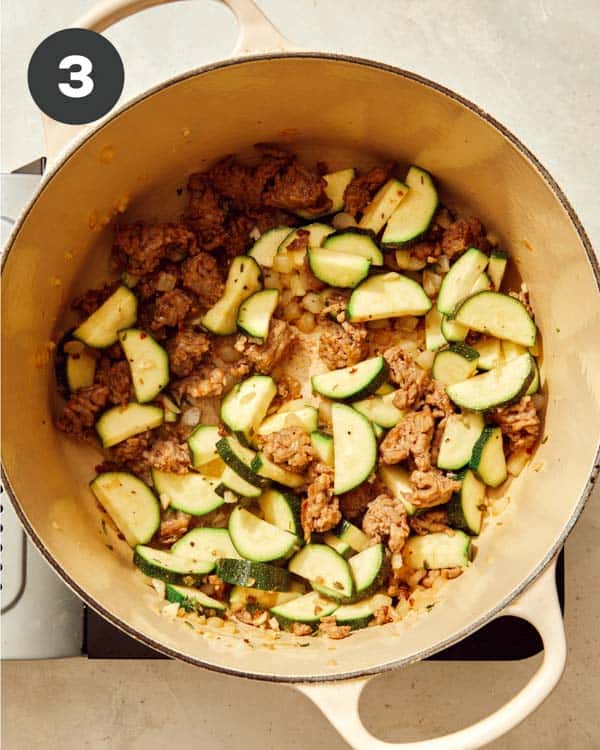
Add the zucchini, garlic and thyme and continue to sauté for 2 minutes, then season with salt and pepper.
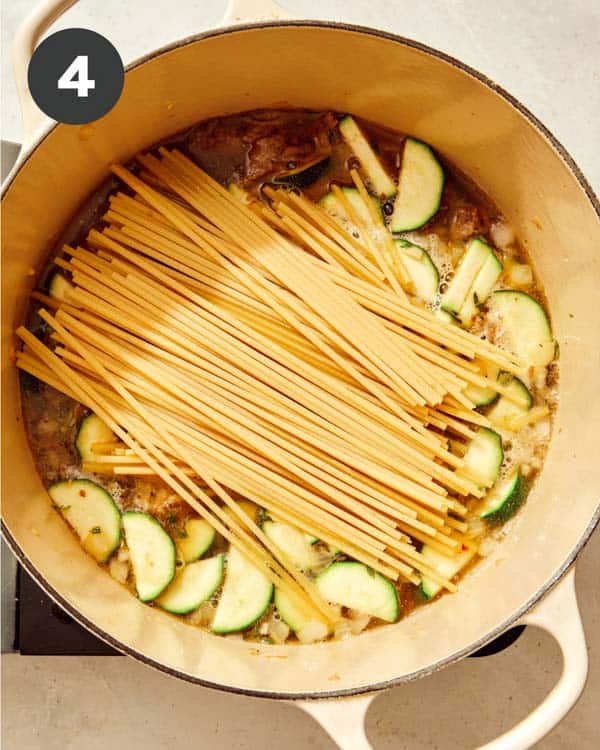
Pour stock into the pot and bring to a boil. Add pasta and lower heat to medium.
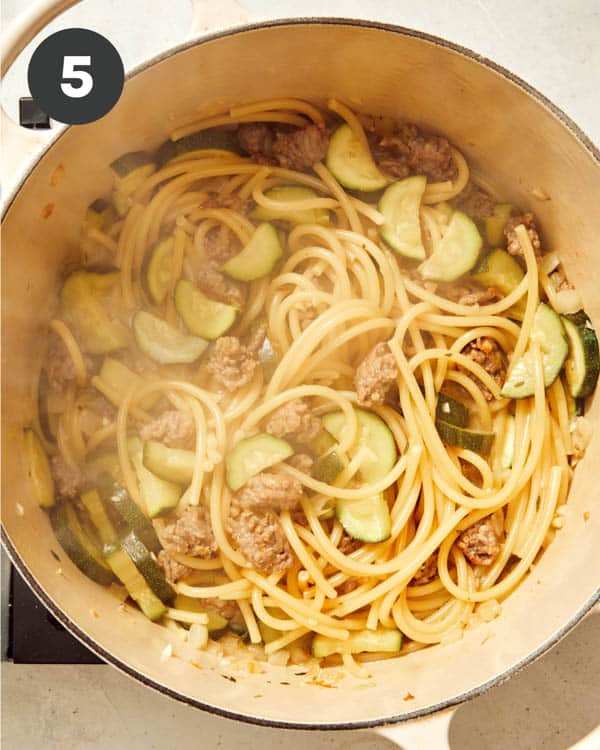
Simmer for 15 to 20 minutes, stirring occasionally, until most of the liquid has evaporated and the pasta is al dente, then season with salt and pepper.
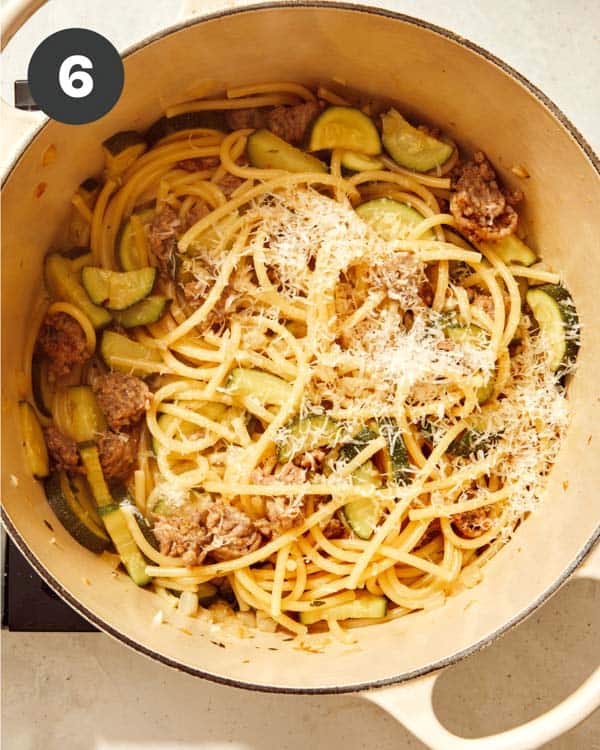
Top with freshly grated parmesan and toss together.
Adjust seasonings and serve with more fresh grated parmesan and thyme.
Tips for the BEST One Pot Pasta
Follow these tips for the best sausage and zucchini one-pot pasta dinner!
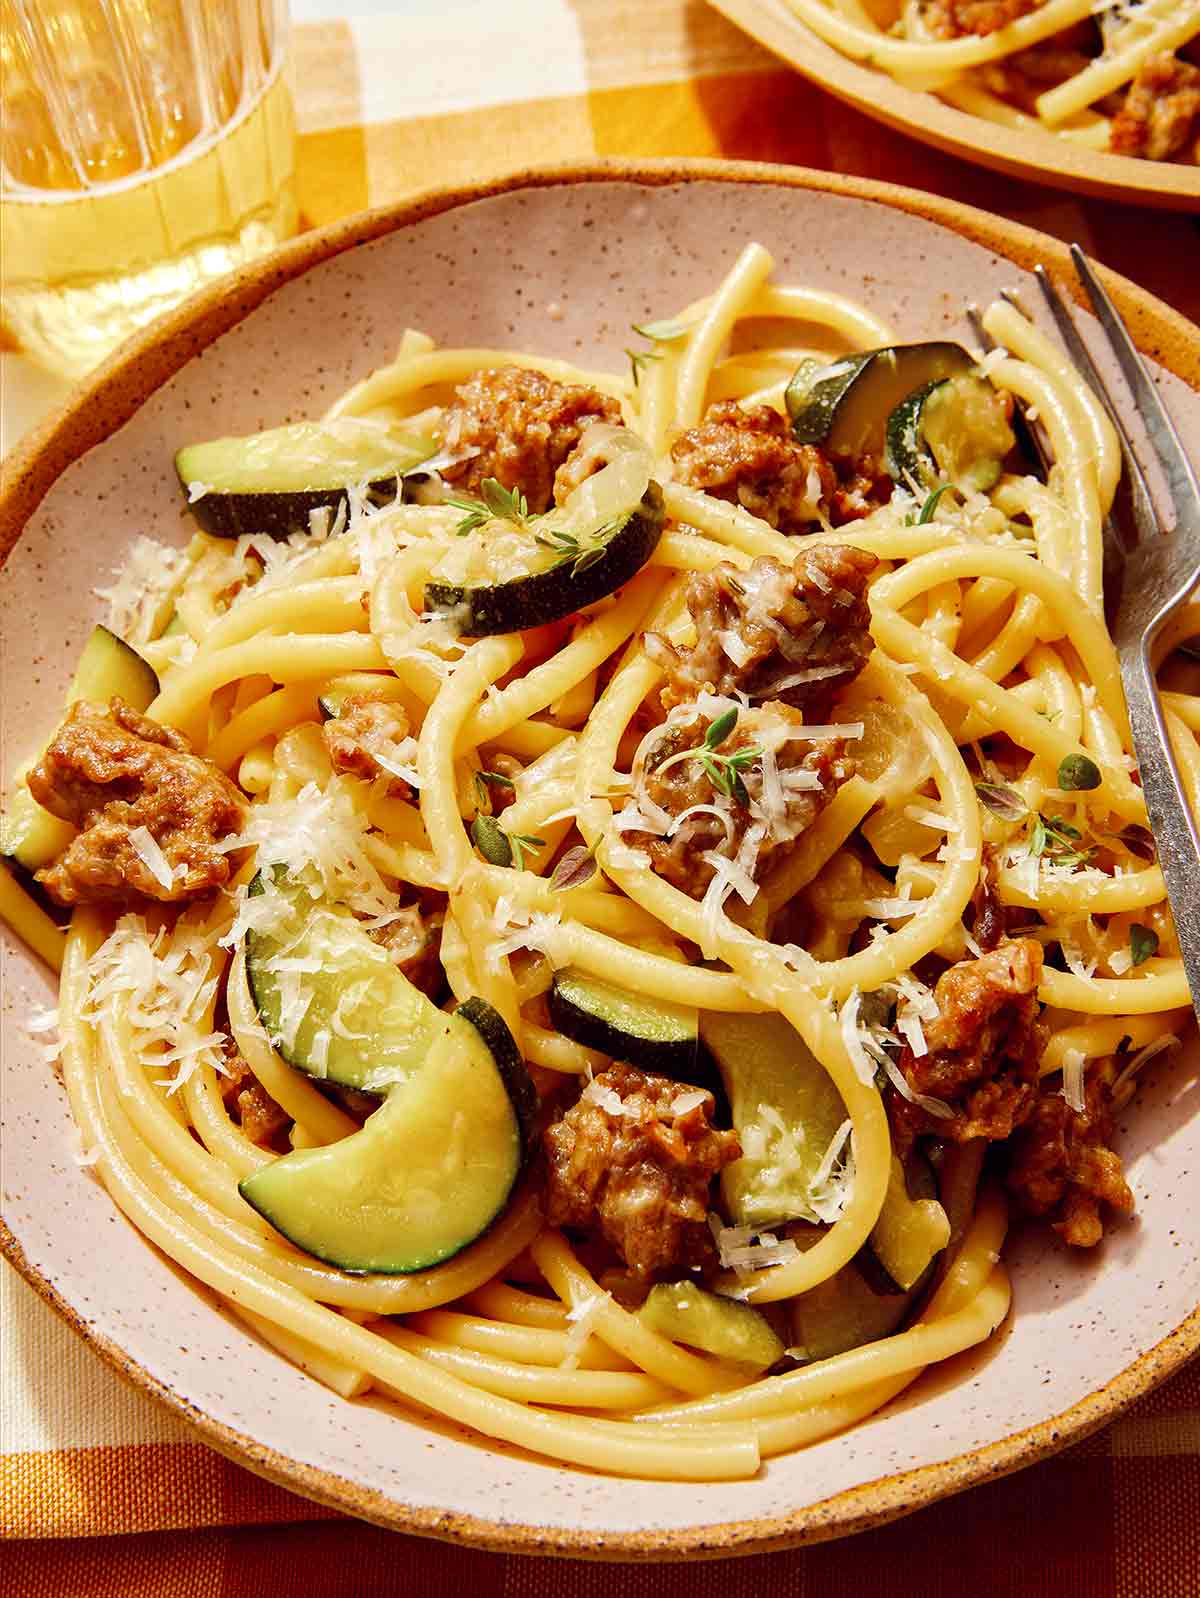
When browning your sausage, crumble it as it cooks with a wooden spoon. We recommend leaving the crumbles a little larger (like in the pictures) to make it easier to get on the fork while eating.
Use freshly grated parmesan cheese. Pre-shredded parmesan can sometimes have anti-caking agents on it that prevent the cheese from melting into the smooth creamy sauce we’re after with this recipe.
If you’re substituting the bucatini with another type of pasta (might we recommend another long noodle like fettuccine or spaghetti), be sure to follow the directions on the box for how long to boil the particular noodles you’re using to prevent over-cooking them.
Variations
To mix things up a bit or use what you have, try these easy variations:
Use yellow summer squash instead of or in addition to the zucchini.
Along with parmesan cheese, you can also use pecorino romano or mozzarella cheese.
Swap the spicy Italian sausage with mild, or use chicken or turkey sausage instead.
If you don’t have bucatini, use spaghetti or fettuccini noodles instead.
Can swap the chicken stock with vegetable stock if needed.
Delicious Side Dishes to Serve with Our One Pot Pasta
While this dish can absolutely be a one-pot meal with the pasta, veggies, and meat in one dish, it also goes amazingly well with:
To store any leftovers, keep this pasta in an airtight container in the refrigerator for up to 4 days.
To reheat, you can either microwave the pasta in 30-second increments until heated through or reheat it on the stovetop over low-medium heat until warmed through. If the pasta seems a little dry, just add a splash of chicken broth, and be sure to top with more freshly grated parmesan before enjoying your leftovers!
Add this delicious and easy one pot pasta recipe to your weeknight menu (this week!) You'll love how simple and flavorful this dish is with spicy sausage, garden-fresh zucchini, and perfectly al dente bucatini pasta! And with only one pot to wash, clean up is just as easy!
2zucchinisliced lengthwise, then thinly sliced (into 1/2 circles)
2minced garlic cloves
1 1/2tablespoonsminced thyme
2 1/2cupschicken stock
1/2poundbucatini
1/2cupfreshly grated Parmesan
salt and pepper to taste
Instructions
Place a large pot over medium-high heat. Add oil and sauté sausage until browned and crumbled, 2 to 3 minutes.
Add oninos and sauté for 4 to 5 minutes.
Add zucchini, garlic and thyme and continue to sauté for 2 minutes. Season with salt and pepper.
Pour stock into the pot and bring to a boil.
Add pasta and lower heat to medium.
Simmer for 15 to 20 minutes, stirring occasionally, until most of the liquid has evaporated and pasta is al dente. Season with salt and pepper.
Top pasta with parmesan and carefully toss until well combined. Adjust seasonings and serve with more fresh grated parmesan and thyme.
Notes
Follow these tips for the best sausage and zucchini one-pot pasta dinner!
When browning your sausage, crumble it as it cooks with a wooden spoon. We recommend leaving the crumbles a little larger (like in the pictures) to make it easier to get on the fork while eating.
Use freshly grated parmesan cheese. Pre-shredded parmesan can sometimes have anti-caking agents on it that prevent the cheese from melting into the smooth creamy sauce we’re after with this recipe.
If you’re substituting the bucatini with another type of pasta (might we recommend another long noodle like fettuccine or spaghetti), be sure to follow the directions on the box for how long to boil the particular noodles you’re using to prevent over-cooking them.
Storing and Reheating LeftoversTo store any leftovers, keep this pasta in an airtight container in the refrigerator for up to 4 days.To reheat, you can either microwave the pasta in 30-second increments until heated through or reheat it on the stovetop over low-medium heat until warmed through. If the pasta seems a little dry, just add a splash of chicken broth, and be sure to top with more freshly grated parmesan before enjoying your leftovers!
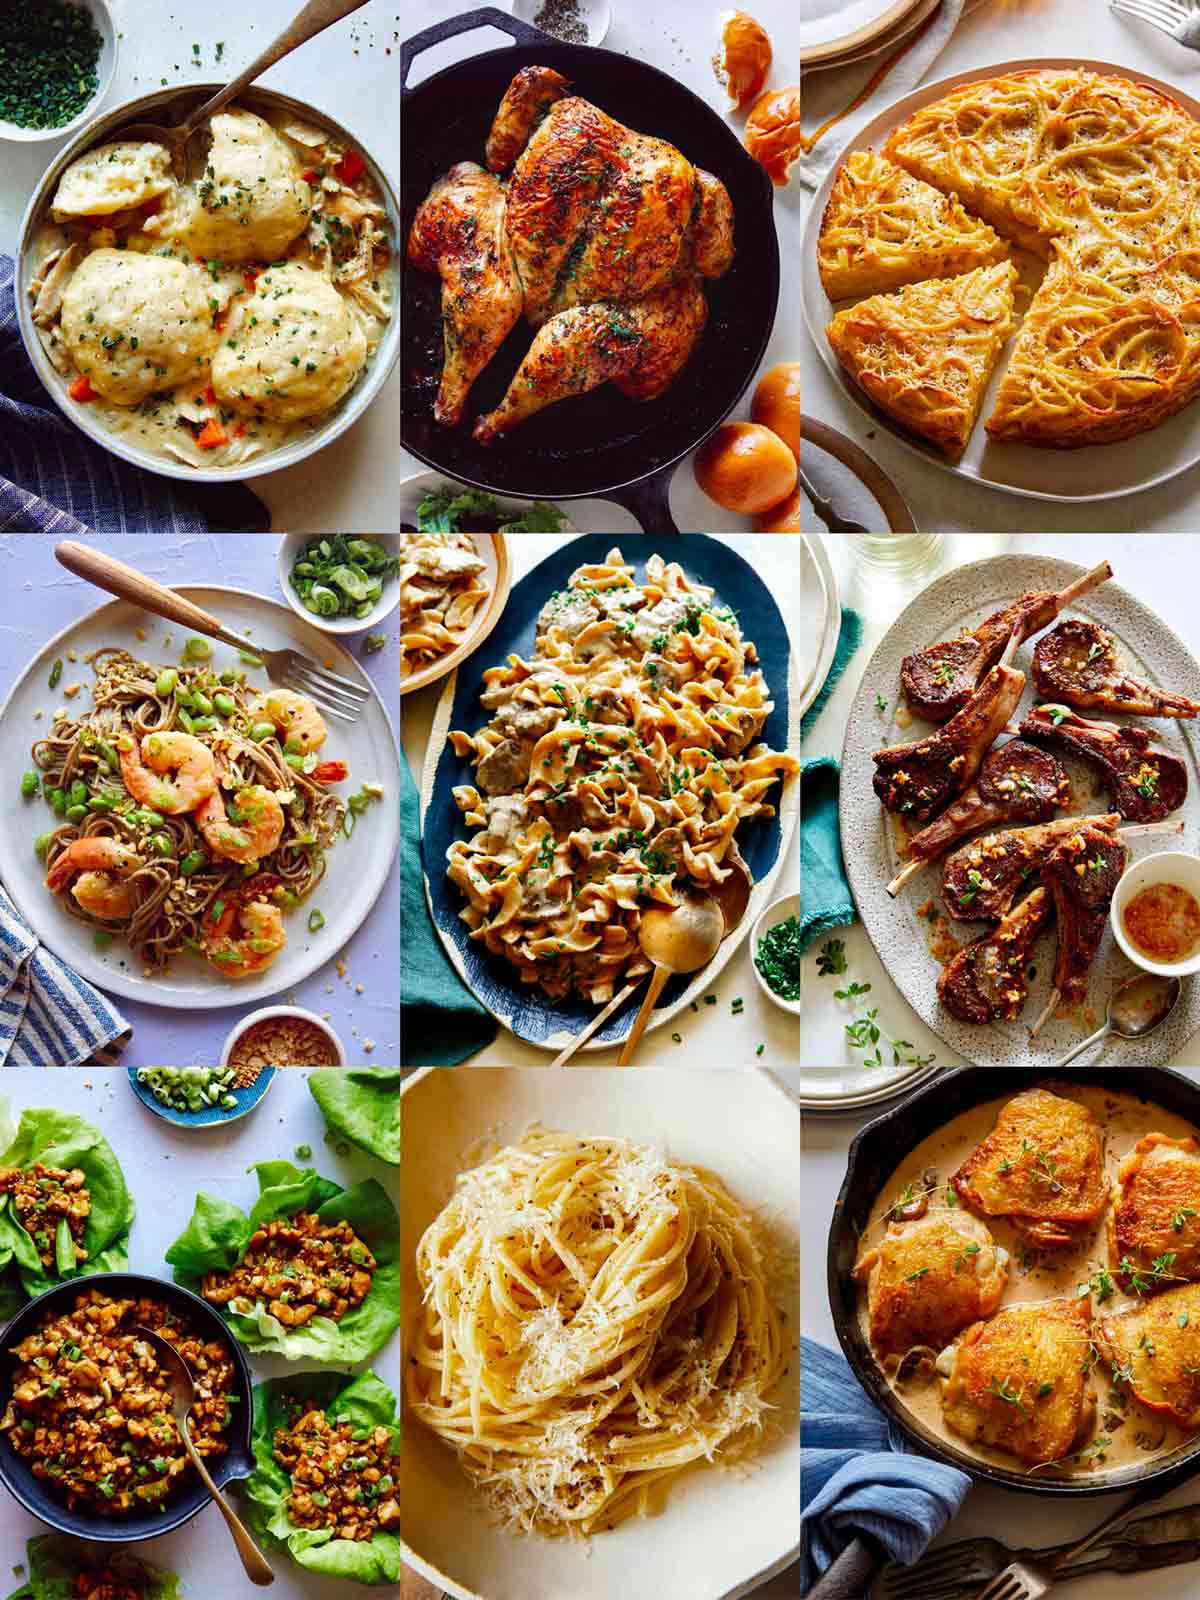
Never wonder what to make for dinner again with our ultimate list of 79 Best Dinner Recipes! We have everything from chicken, pasta, soup, vegetarian and vegan dinners, and one pot wonders for you to choose from! The best fact of life is that we need to eat every day. The most stressful can be choosing what to make and eat. You can end the search for a dinner option here with our biggest list…
Never wonder what to make for dinner again with our ultimate list of 79 Best Dinner Recipes! We have everything from chicken, pasta, soup, vegetarian and vegan dinners, and one pot wonders for you to choose from!
The best fact of life is that we need to eat every day. The most stressful can be choosing what to make and eat. You can end the search for a dinner option here with our biggest list yet. Whether you’re looking for an impressive dinner party meal or you want something simple and easy to get on the table any night of the week, we’ve got you covered!
Our Best Easy Dinner Recipes – Perfect for Busy Weeknights!
On a busy weeknight, you need a meal that’s ready fast and takes minimal prep work. These recipes are our favorite low-prep meals that taste amazing with little effort. You don’t have to settle for takeout or bland meals on busy weeknights with this list of ideas!
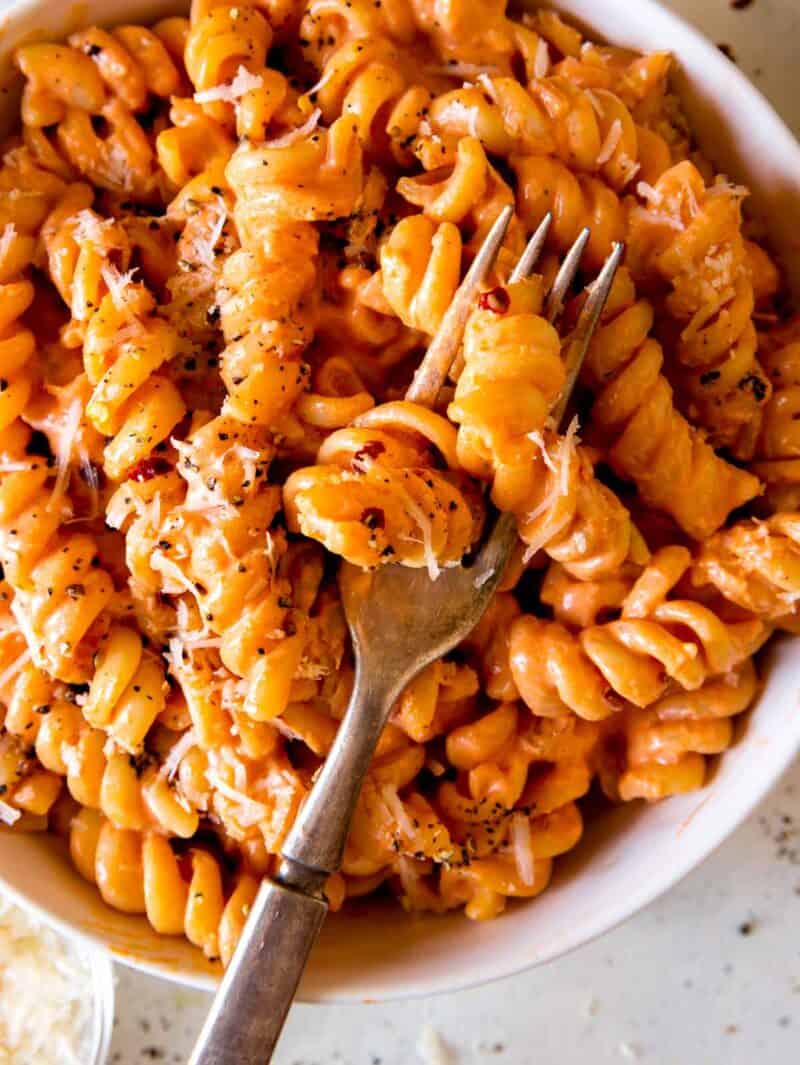
Pasta with Vodka Sauce is one of our favorite easy dinner ideas! With just a few ingredients and less than 30 minutes, you can ave a piping hot and delicious bowl of pasta ready to go!
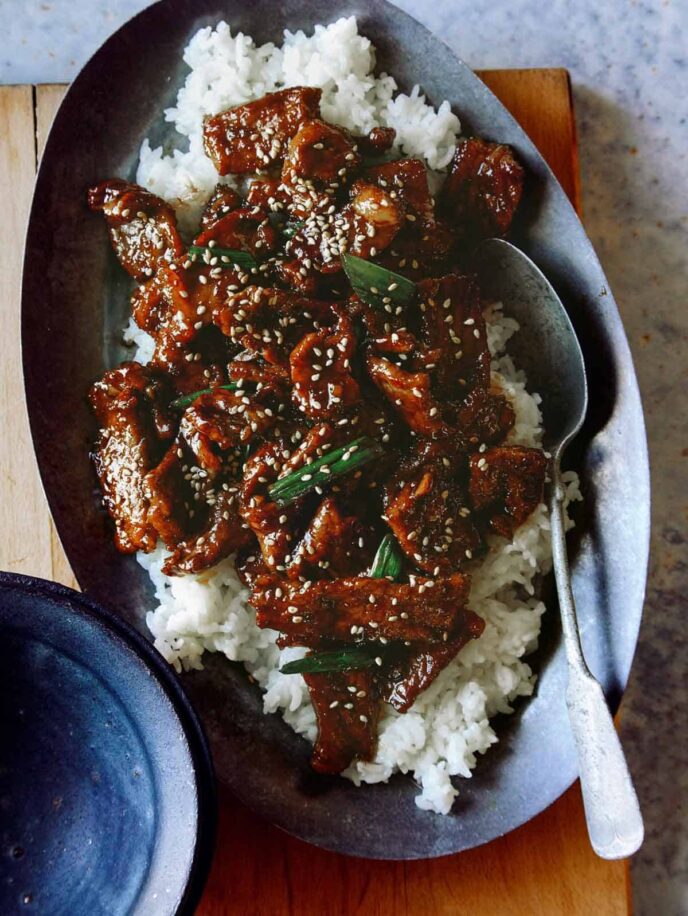
Mongolian Beef is a quick, delicious, and better-for-you version of the popular takeout dish! The whole thing takes 15 minutes to make and pairs perfectly with steamed rice and veggies.
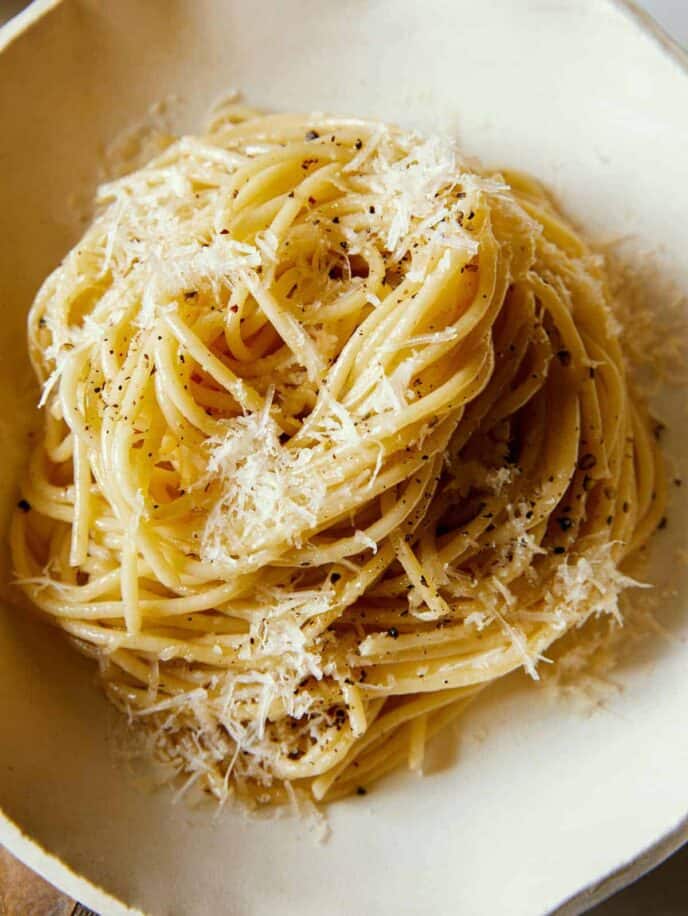
One of our regular go-to’s is Cacio e Pepe. It’s incredible how much flavor this sauceless pasta holds. We love adding protein to the pasta like shrimp or chicken, and serving it alongside a simple salad.
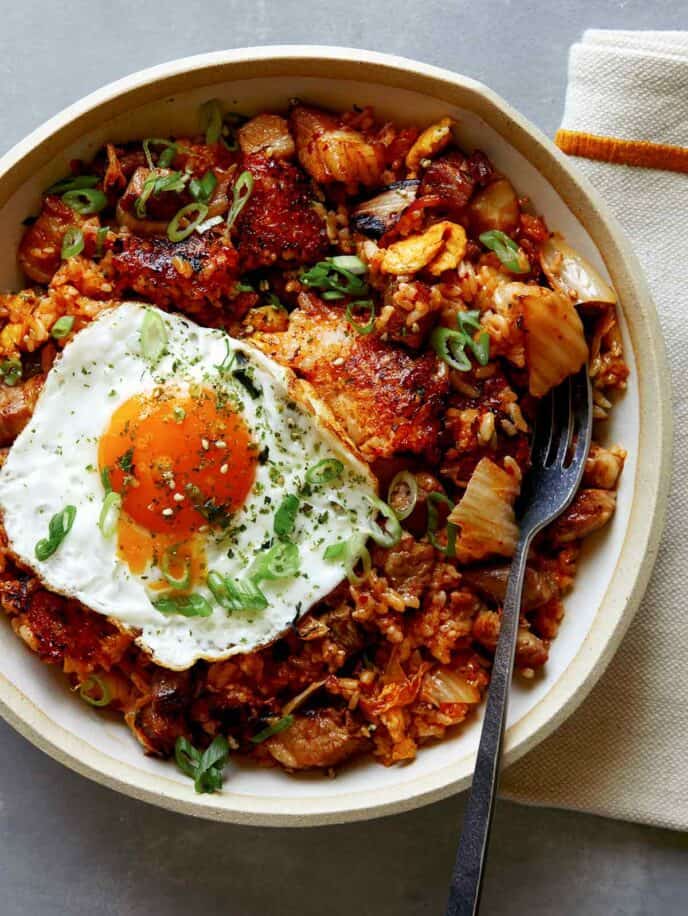
If you want to mix things up while maximizing flavor, our Kimchi Fried Rice is the perfect dinner idea! It’s packed with protein, and we love stirring in a handful of spinach to sneak in some extra greens. Leftovers are even better the next day, so you’ll want to make enough for lunch the next day!
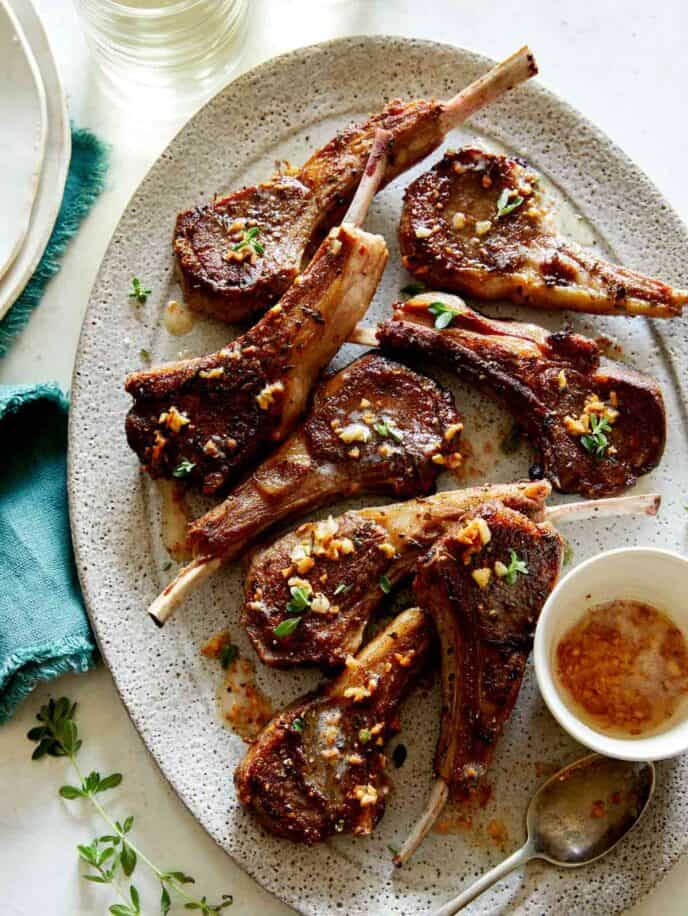
Our Garlic Butter Lamb Chops take only a few steps and less than 15 minutes to cook. You’ll love how delicious, flavorful, and tender this lamb is! We love serving this easy dinner recipe with simple roasted baby potatoes and roasted vegetables.
This Romesco Sauce Rigatoni is one you’ll want to keep in your back pocket! The ridiculously delicious sauce comes together by blending roasted red peppers, herbs, and almonds, then tossing it with cooked pasta. Don’t skip the buttered breadcrumb topping, though, it adds an incredible pop to the whole dish!
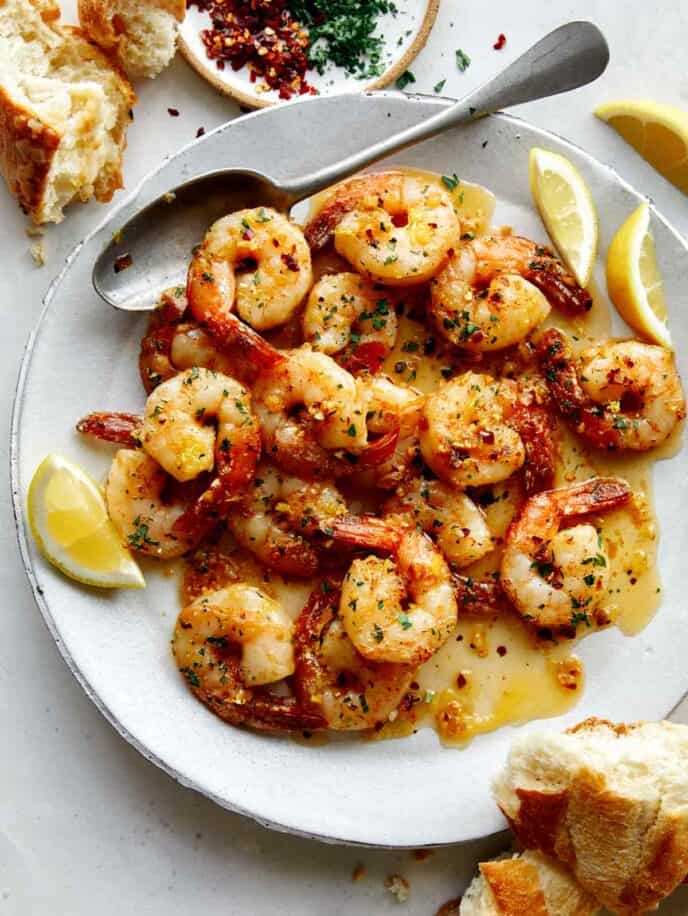
Our Shrimp Scampi has buttery shrimp that we love to serve with crusty bread, so you can sop up any extra garlic butter sauce. Serve with some lemon wedges on the side for a refreshing garnish.
Pistachio Crusted Pork Chops are one of our favorite dinner ideas when we have just a little more time but still want to keep things simple. We love the texture and flavor pairing of the crusted pistachios with the pork chops…so good!
For a simple, all-in-one dinner, whip up a pan of our Fried Rice! You can add any protein you’d like or keep it simple with just eggs for an easy vegetarian weeknight dinner.
These Panko Crusted Lamb Chops look so elegant and delicious it’s hard to believe they take less than 30 minutes from start to finish. This tender lamb coated in a crunchy herb breading goes great with a fresh side salad and mashed potatoes.
One Skillet, One Pan, One Pot Dinners For Easy Clean Up!
What’s the worst part of cooking dinner at home? If you said the dishes, we agree. That’s why we love these one-dish meals that bring maximum flavor with minimal cleanup!
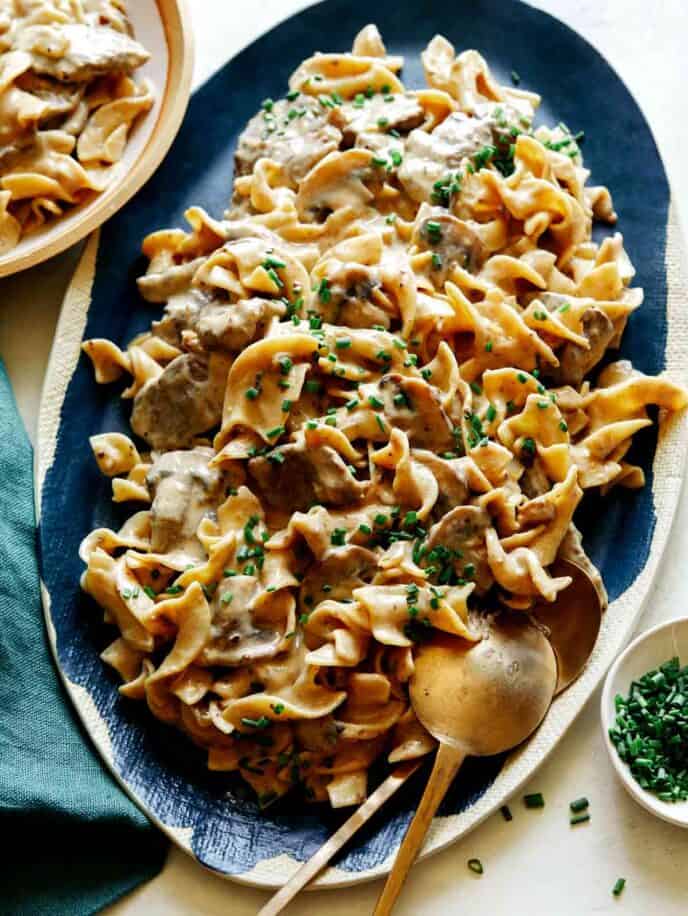
Beef Stroganoff is a 30-minute dinner we love. Savory beef smothered in a creamy, tangy sauce and tossed together with soft egg noodles makes this dish the ultimate easy comfort meal.
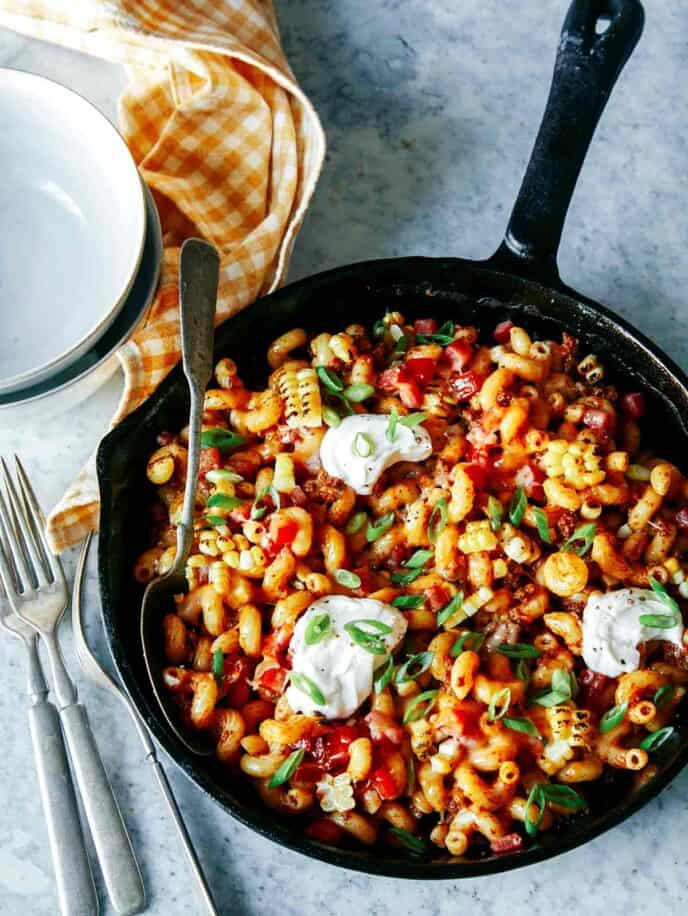
When you can’t decide between tacos or pasta, make our Taco Pasta Skillet! All the flavors of a delicious ground beef taco are tossed together with cavatappi pasta, piled into a skillet, and baked until the cheese is melted and gooey. You can top this pasta with as many or few taco “fixins” as you want, but sour cream is a must!
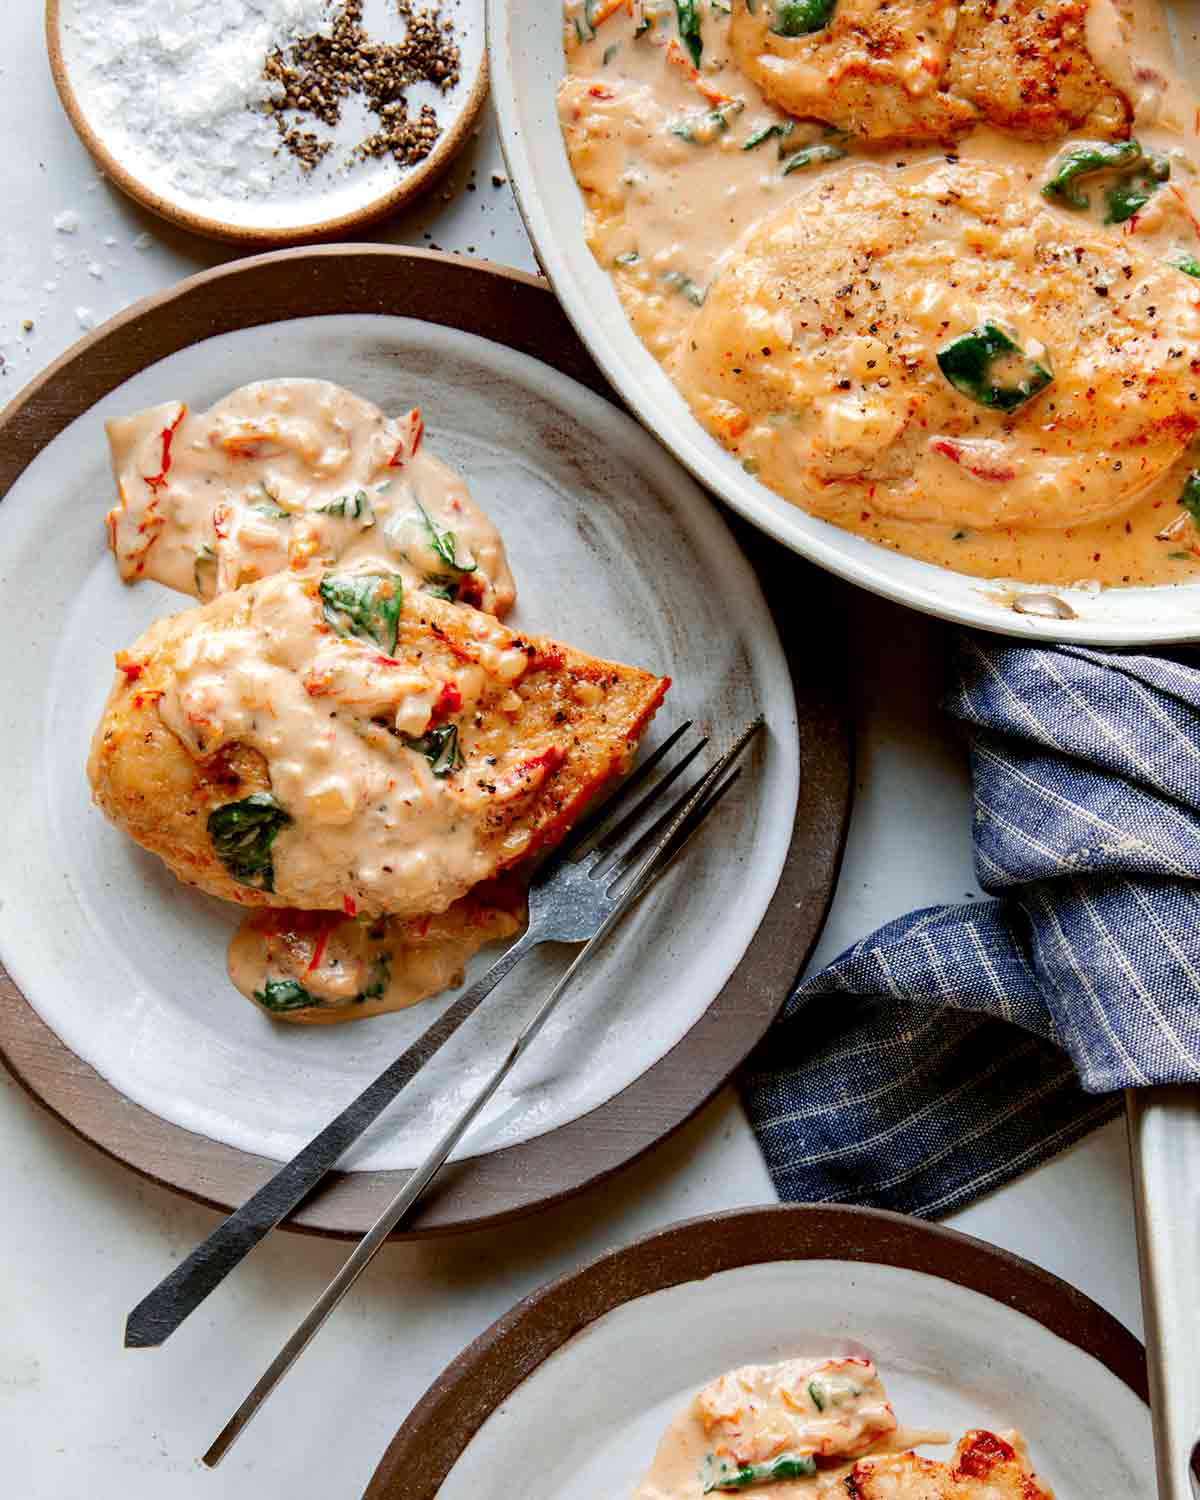
Our creamy Tuscan Chicken is a reader favorite! It’s super quick and easy to make, absolutely delicious, and can be served in a variety of ways! We love chopping the chicken, adding some pasta, and tossing everything together. We also love serving this dish over a bed of steamed rice or mashed potatoes. The options are endless!
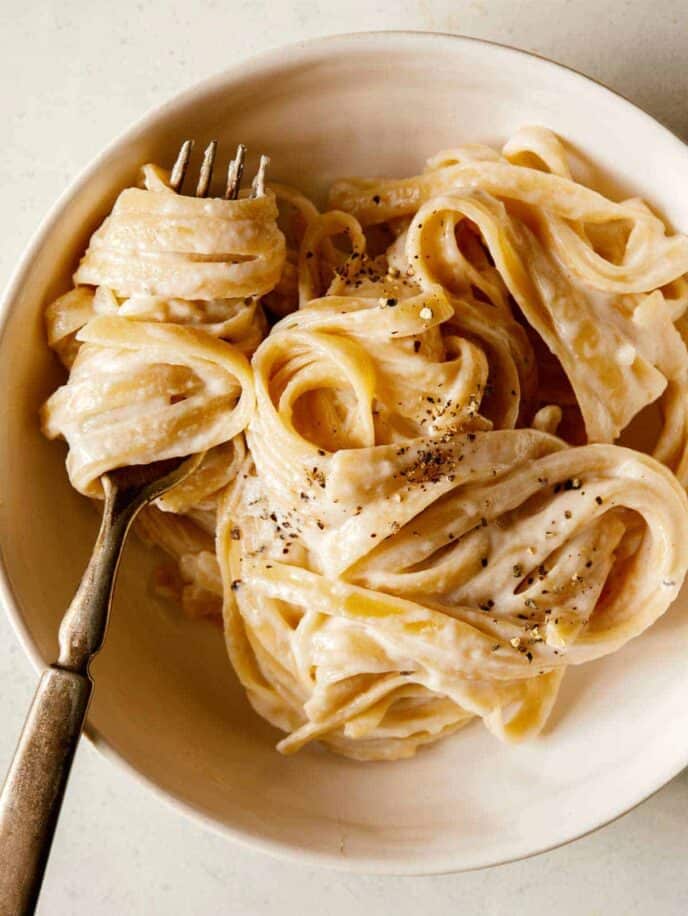
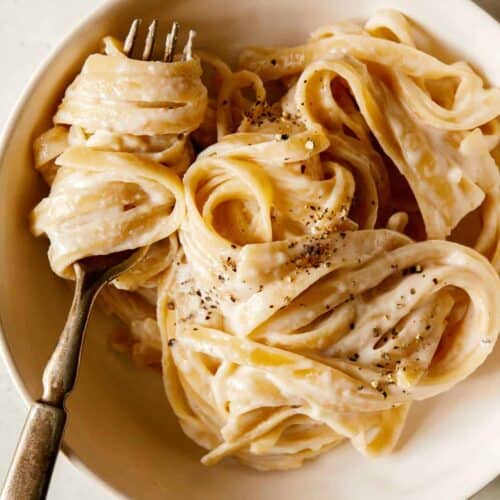
One Pot Fettuccine Alfredo is a dinner that everyone (even the kids) will love. It’s simple to toss together and uses only one pot from start to finish. Add some chicken or shrimp and stir in some spinach or mushrooms for a complete meal!
Sheet Pan Chipotle Chicken Nachos could be an appetizer, but we love them as an easy one-pan dinner! There’s nothing better than piling a bunch of tortilla chips and toppings onto a single sheet pan and calling it a night! We love this nacho recipe just a little more than others because we don’t just melt cheese on the chips. We drown everything in a delicious white cheese sauce! You can even use rotisserie chicken to cut down on your cooking time.
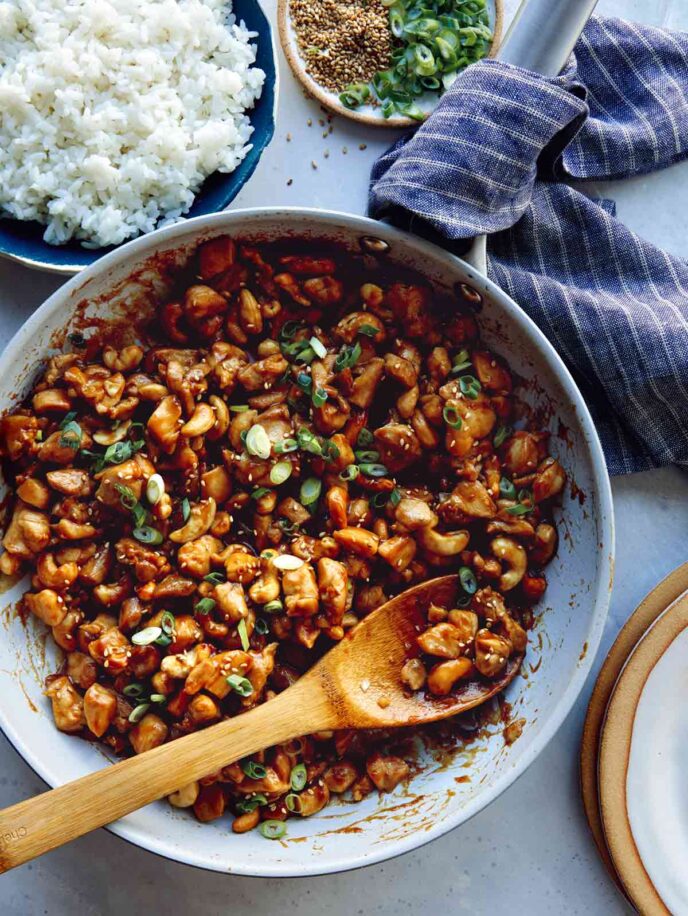
Who doesn’t love Chinese takeout for dinner? Our Cashew Chicken is loaded with so much flavor we recommend doubling the recipe so you have lunch the next day too!
If you love Indian food but have always been intimidated by making it at home, Butter Chicken is the dish to start experimenting with! You will be shocked at how easy it is to make, and we guarantee it’ll become one of your go-to dinner recipes!
Chicken Dinner Recipes
Chicken dinners don’t have to be boring, especially when you can choose from any one of our incredible dinner recipes featuring chicken as the star!
Our Honey Garlic Chicken has a sweet and sour flavor that’s completely addictive. We love serving this dish over steamed rice with roasted broccoli on the side.
We’re making Spatchcock Chicken at least twice a month, if not more. It makes enough to use as three meals, which makes it the perfect meal prep dinner. Serve it with some roasted vegetables and a side of mac and cheese and call it a day!
Our Loaded BBQ Chicken Salad is a hearty dinner salad that’s filled with so many delicious ingredients like bbq chicken, creamy black beans, crunchy jicama, bright tomatoes, sweet corn, and so much more!
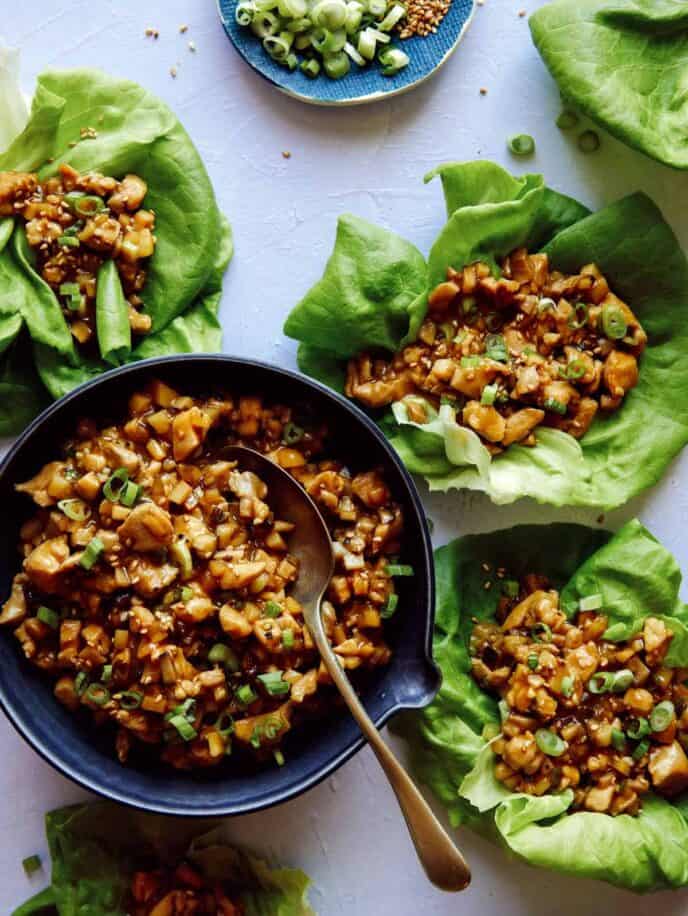
We couldn’t be more obsessed with these Chicken Lettuce Wraps! They’re low-carb, but incredibly satisfying with mushrooms, chicken, bamboo shoots, and water chestnuts all dressed in a savory salty sauce.
Crispy Chicken Thighs in Creamy Mushroom Sauce never disappoints! The skin on these thighs gets incredibly crispy, the meat stays super moist and juicy, and the creamy mushroom sauce is made with yogurt, not cream, for a lighter but equally delicious sauce.
Garlic and Ginger Braised Chicken is another flavor-packed dinner recipe that has earned its place in the regular dinner rotation. The chicken soaks in all the delicious garlic, ginger, soy sauce, and brown sugar for some of the most incredible chicken you’ll ever taste.
Our Baked Nashville Hot Honey Chicken Sandwich is the perfect recipe for those times when you are in a bit of a rut. Juicy chicken breasts are covered in a crisp and flavorful coating and baked for a healthier chicken sandwich.
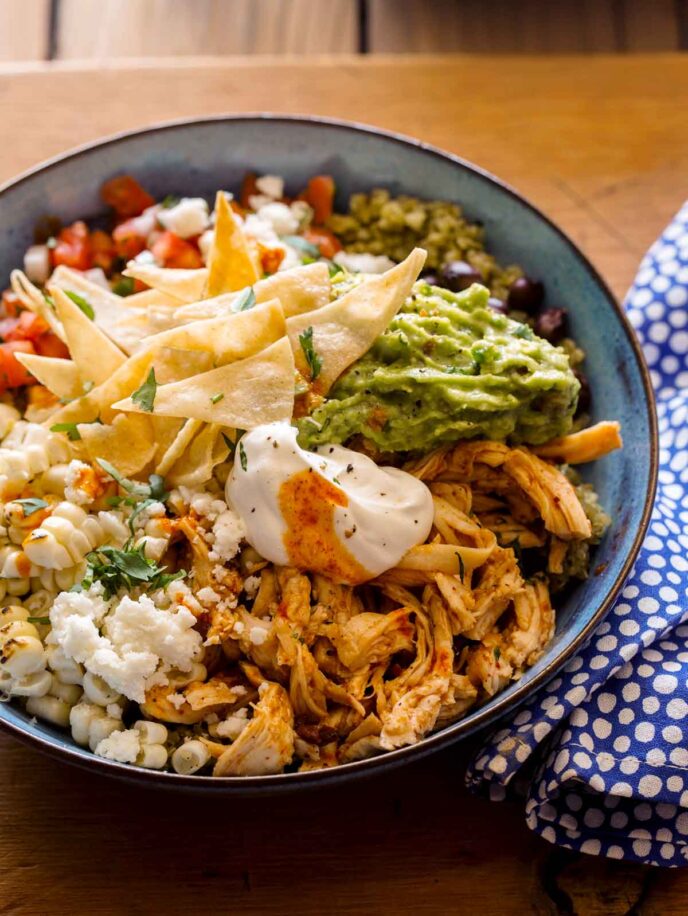
These Honey-Chipotle Chicken Burrito Bowls are perfect for an assemble-yourself type of dinner. If you have picky eaters on your hand, this recipe is great because people can build their own bowls with the abundance of toppings we recommend including!
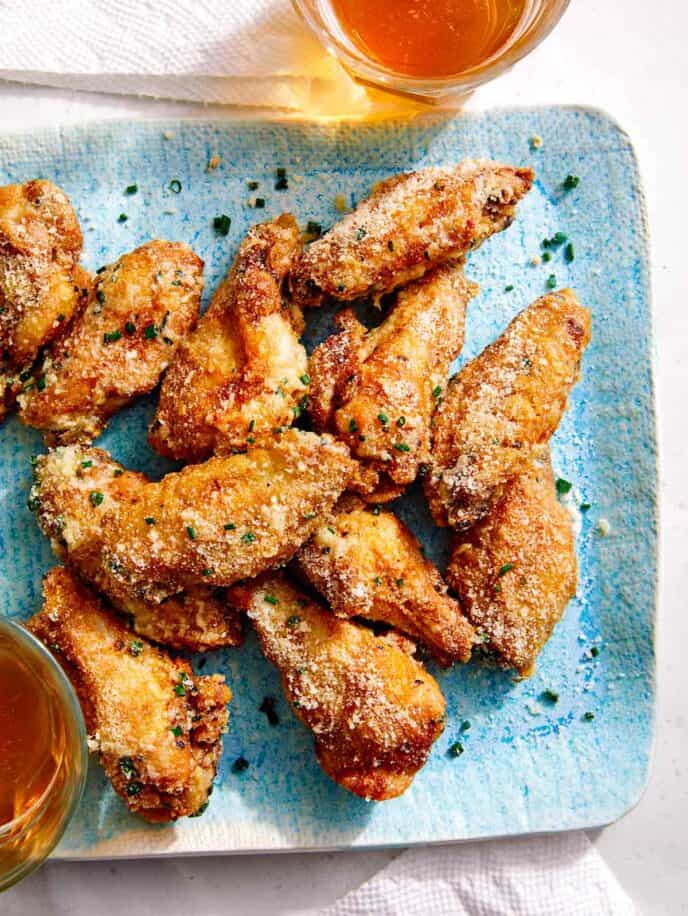
Our Parmesan Dusted Air Fryer Chicken Wings are coated in a delicious dry coating and air-fried to perfection for a crispy and juicy wing everyone will love.
Pasta and Noodle Dinner Recipes
Everyone should have a pasta dinner at least once a week (in our opinion)! Our roundup of pasta and noodle dishes has no shortage of flavors and cuisine, so you’re sure to find your next favorite, no matter your taste!
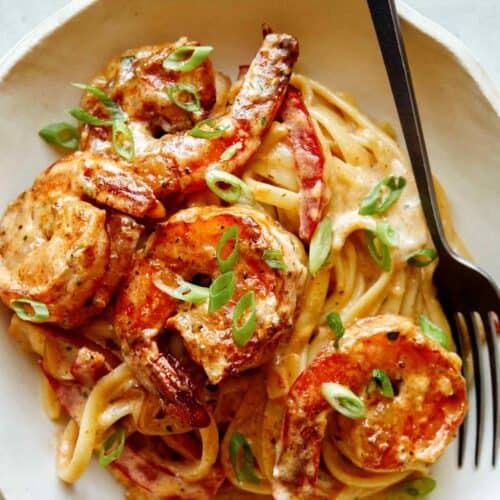
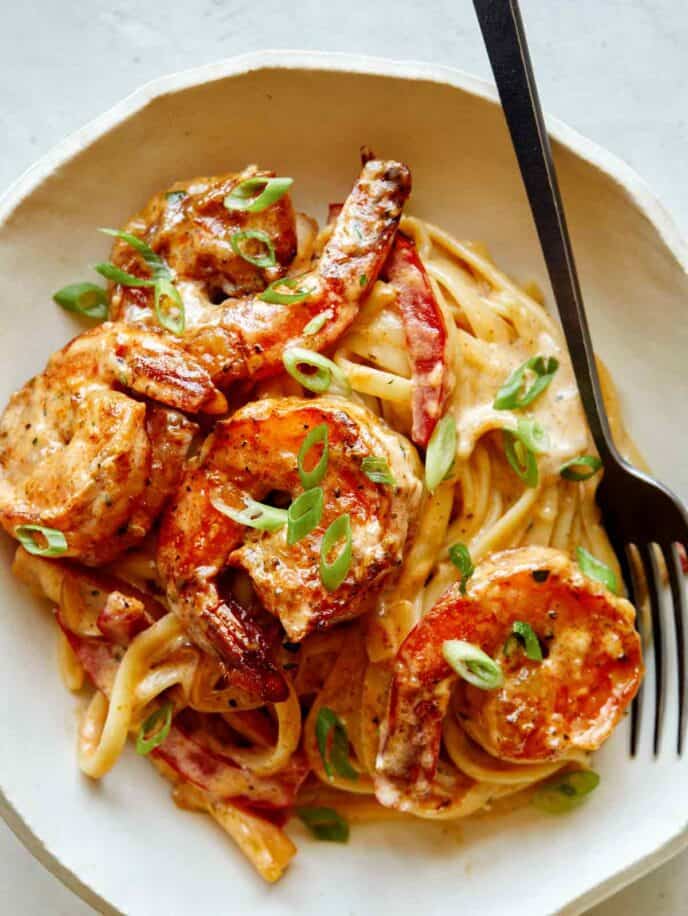
Our Cajun Shrimp Pasta Recipe is everything we love thrown into a decadent pasta dish with plump, buttery shrimp, a creamy sauce with a kick, and bright cajun flavors! It’s pretty unconventional, but that’s one of the reasons it’s one of our favorite pasta dinner ideas.
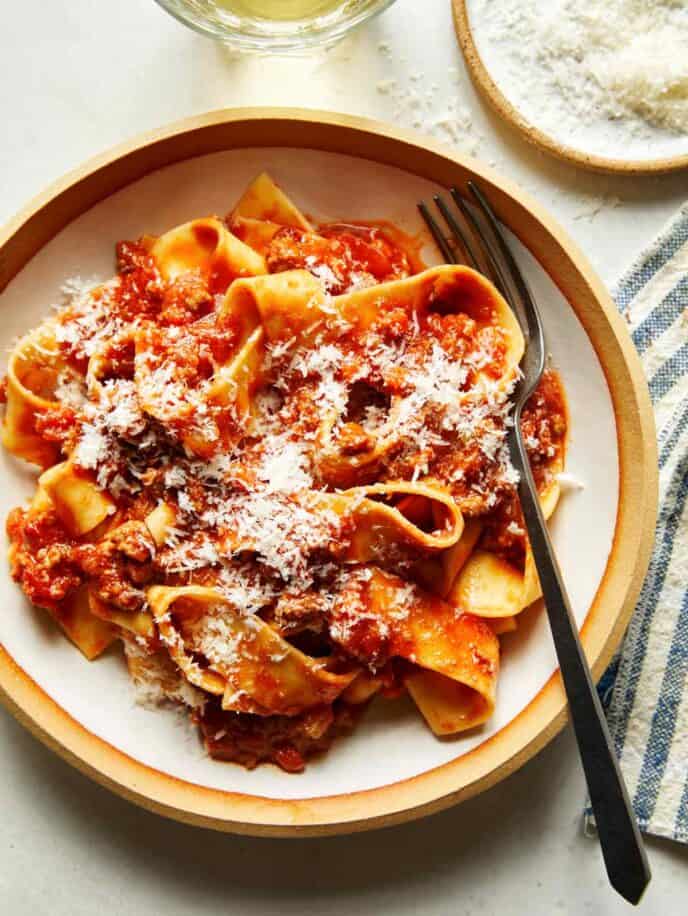
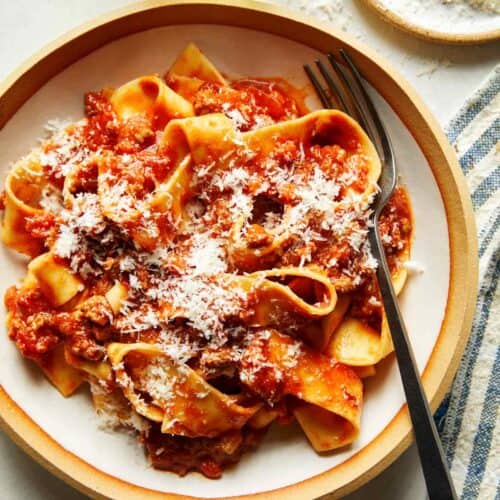
We love our hearty Bolognese Sauce tossed with pappardelle. It’s a simplified version of the classic but with all the delicious flavors you’d expect. Our recipe makes enough to feed 6 to 8 people, and it makes the best leftovers!
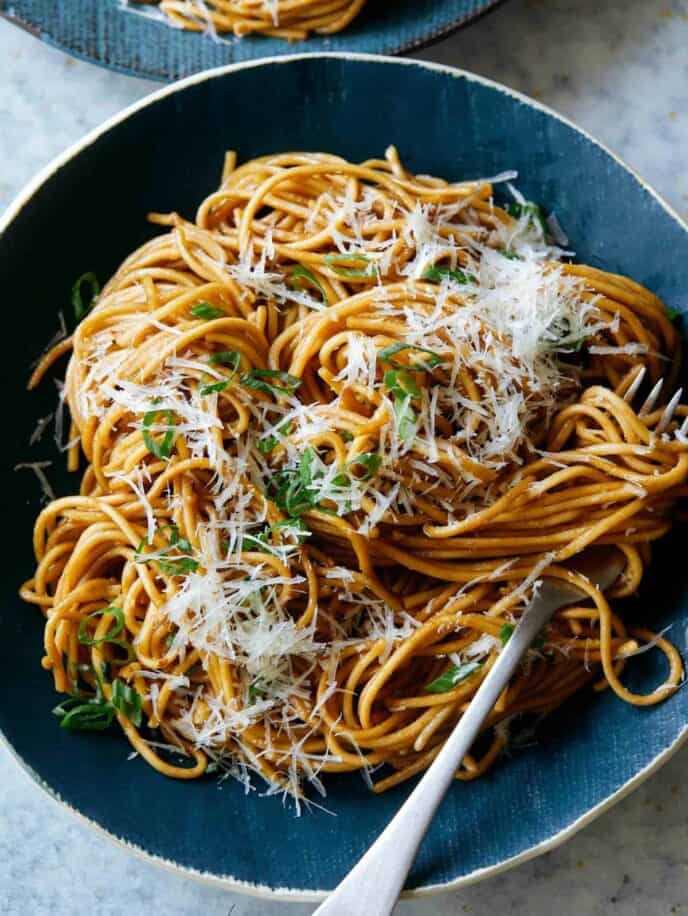
These Garlic Noodles are simple to make and filled with so much umami goodness. While you can eat them on their own, throw some broccoli florets and chicken into the mix to make it a complete meal!
Cacio e Pepe Pasta Pie is another carb-loading dinner we adore. We took our favorite caio e pepe pasta and baked it for slice after slice of delicious cheesy pasta flavor.
Our Chile Oil Garlic Noodles are full of flavor and so simple to make. Eat plain or add a protein like tofu, chicken, or beef and a veggie. Either way, this noodle recipe is a real winner!
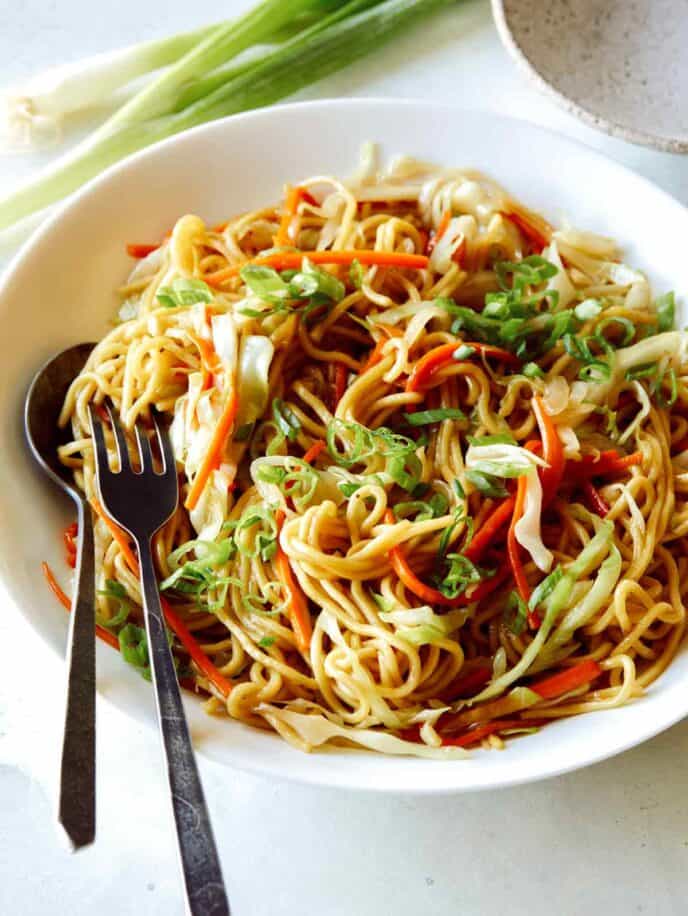
When we realized how easy it is to make Chow Mein we couldn’t believe it! This popular takeout noodle dish can be customized exactly how you like it and enjoyed on its own or with your favorite protein.
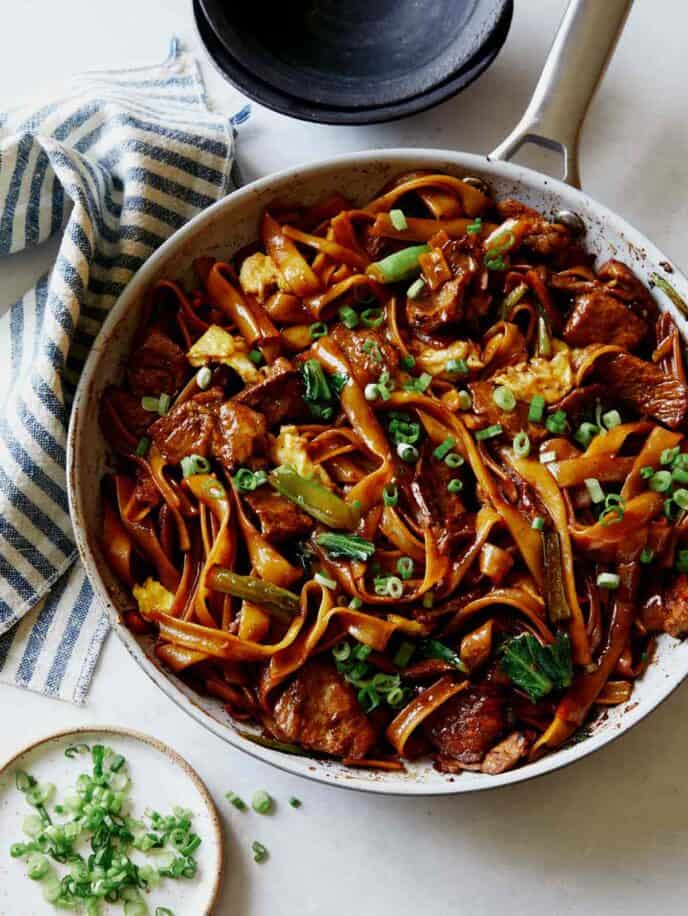
One of our favorite Thai dishes is this Pork Pad See Ew. The slightly chargrilled flavor that comes from caramelizing the noodles in the savory-sweet garlic sauce adds a special element to this dish you can’t find anywhere else!
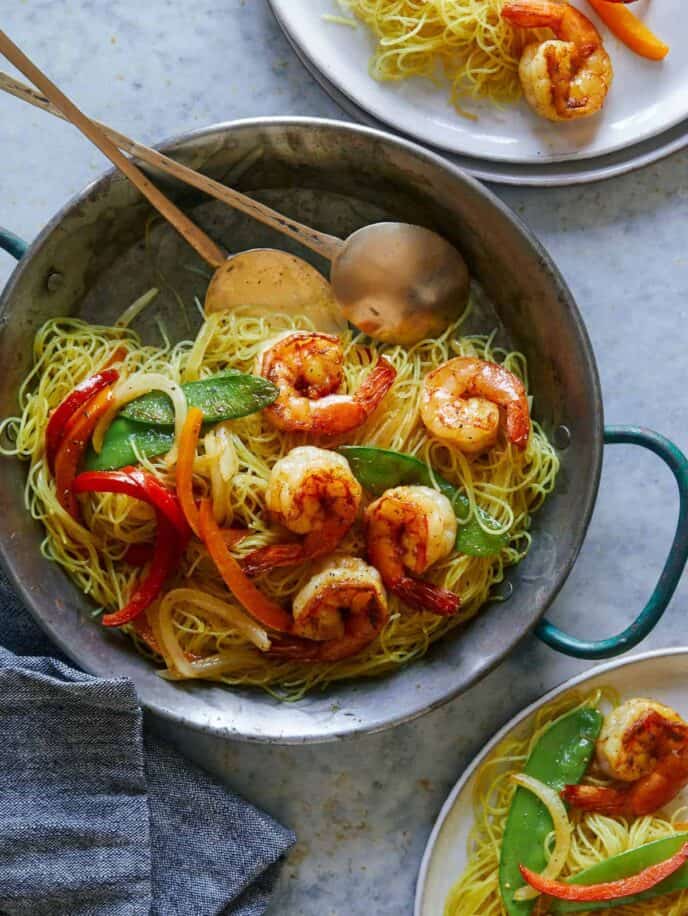
We love a good stir-fry dish, and our Singapore Noodles with Shrimp hit the spot every single time. The combination of curry-infused noodles, sautéed shrimp, snow peas, and bell peppers make this a complete and delicious meal.
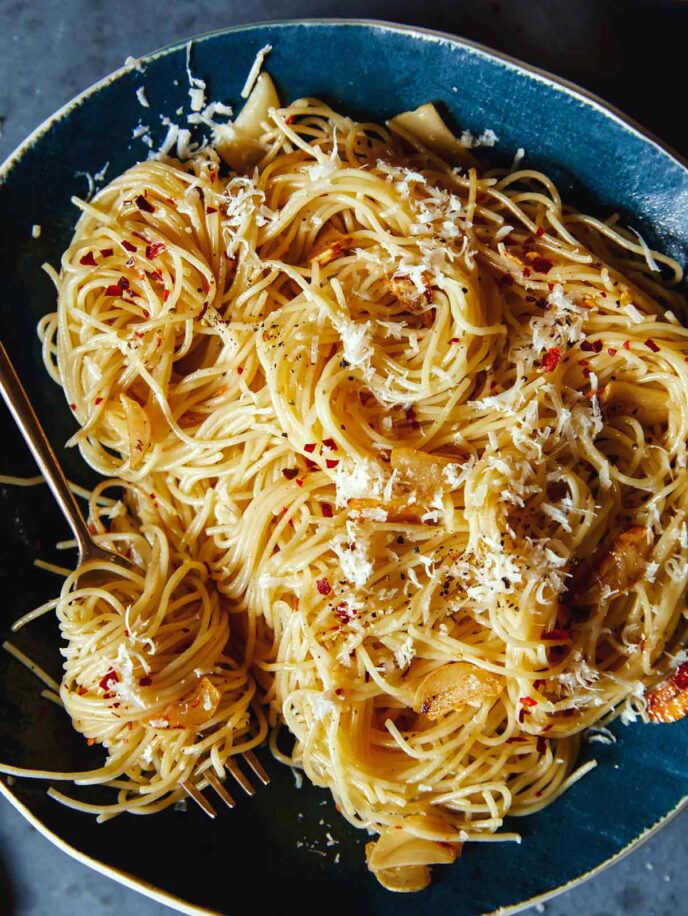
When craving pasta but also wanting something simple with maximum flavor, we turn to our Capellini with Garlic, Lemon, and Parmesan. It’s the deliciously low-maintenance diner idea that everyone loves!
This Garlic Lemon Pasta is the perfect example of when simple is best. In just 20 minutes, you’ll have a deliciously flavorful pasta dish to eat on its own or pair with diced chicken or sauteed shrimp!
The Best Soups To Eat For Dinner
Soup doesn’t just belong on the lunch menu, especially when it’s this hearty with this much flavor. Enjoy any of our soups or stews for an easy dinner that can be enjoyed all week long.
Broccoli Cheddar Soup is so hearty and one of our favorite chilly-weather soups to enjoy! All you need is a handful of basic ingredients and 30 minutes to whip up a batch of this weeknight soup.
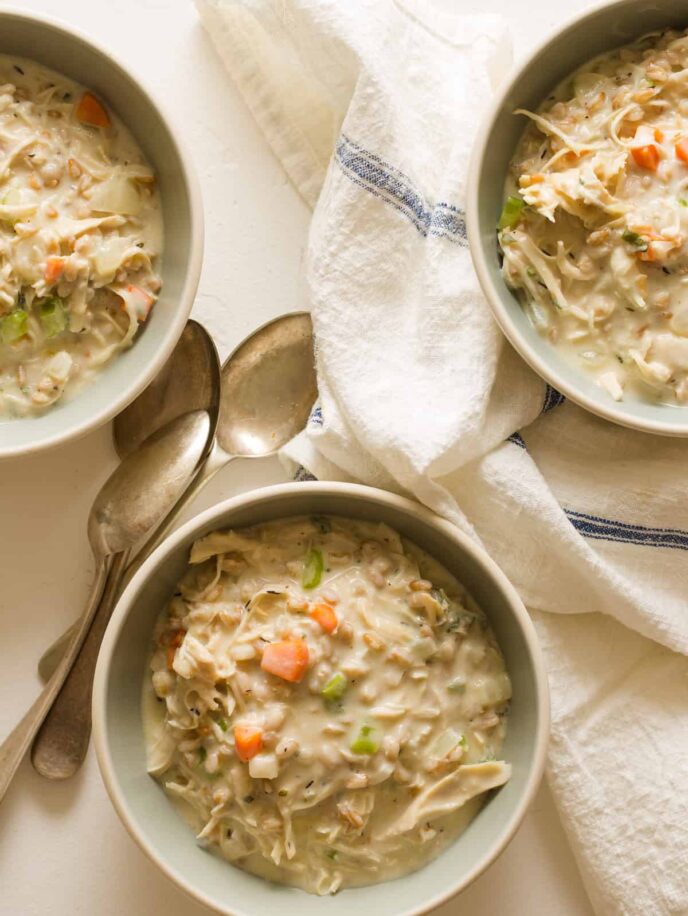
Our Creamy Chicken and Farro Soup is a rift from Chicken and Wild Rice Soup. We love the pop of texture the farro provides in this ridiculously delicious and creamy soup!
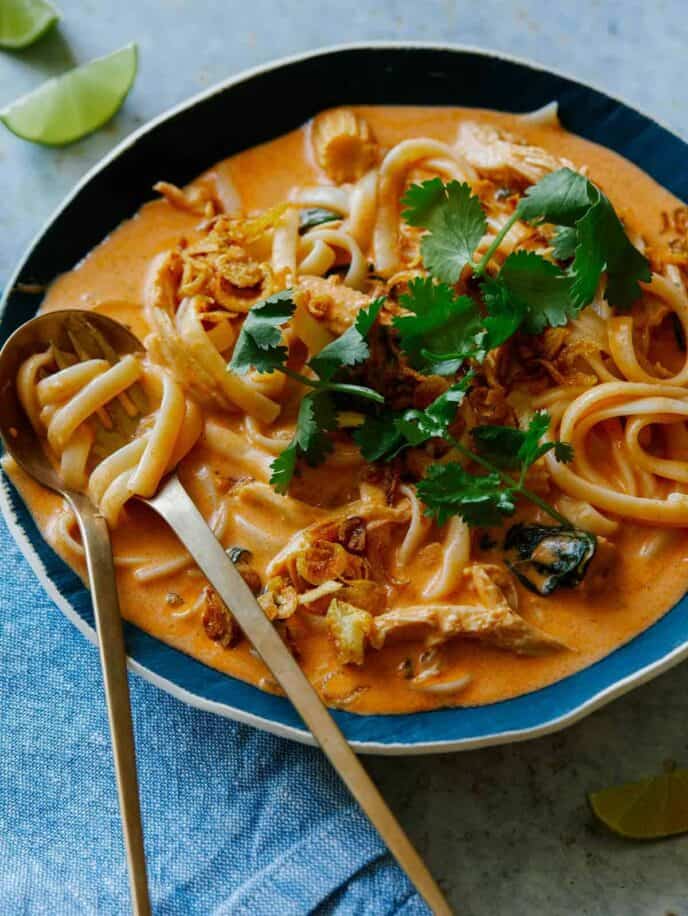
Spicy Red Curry Noodle Soup with Shrimp is super cozy, warming, and packed with bright flavor. We like to switch it up occasionally by swapping the shrimp with shredded chicken or even tofu for a simple vegetarian-friendly, healthy dinner idea.
This Loaded Baked Potato Soup has all the toppings you love to pile on your baked potatoes, wrapped into a creamy and hearty soup.
Our Corn Chowder tastes incredible when fresh, but gets even better the next day. If fresh corn isn’t in season, frozen works just fine, so you can enjoy this hearty soup for dinner all year long!
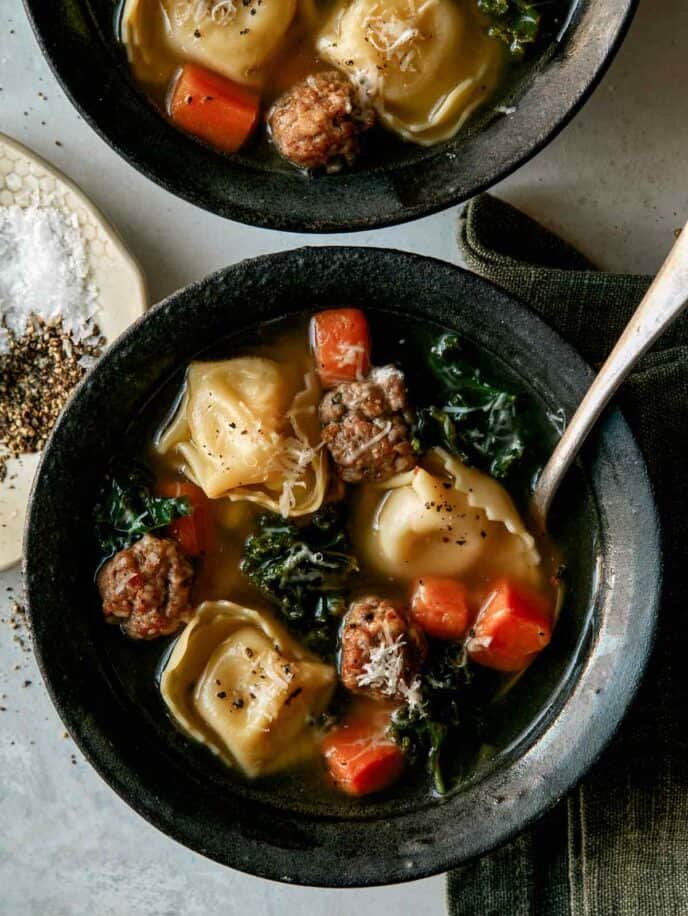
Cheese-filled pasta in soup?! Sign us up! Our simple Tortellini Soup is hearty and filling, but the broth-based soup adds an element of lightness that we love.
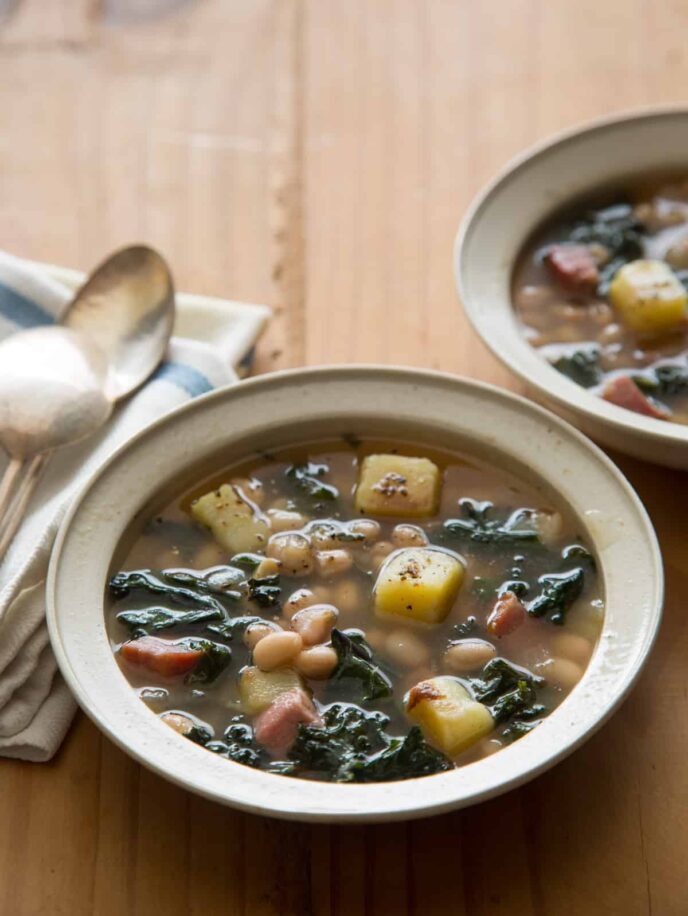
Our Hearty White Bean and Kale Soup is a broth-based soup filled with creamy white beans, torn kale leaves, cubes of ham, and diced white sweet potatoes. Want to make this a vegetarian meal? Just leave out the ham!
Budae Jjigae is an inexpensive kitchen sink type of Korean stew with deep, rich flavors. It’s packed with protein from spam, lil smokies, and tofu, all simmering in a spicy hot pepper sauce.
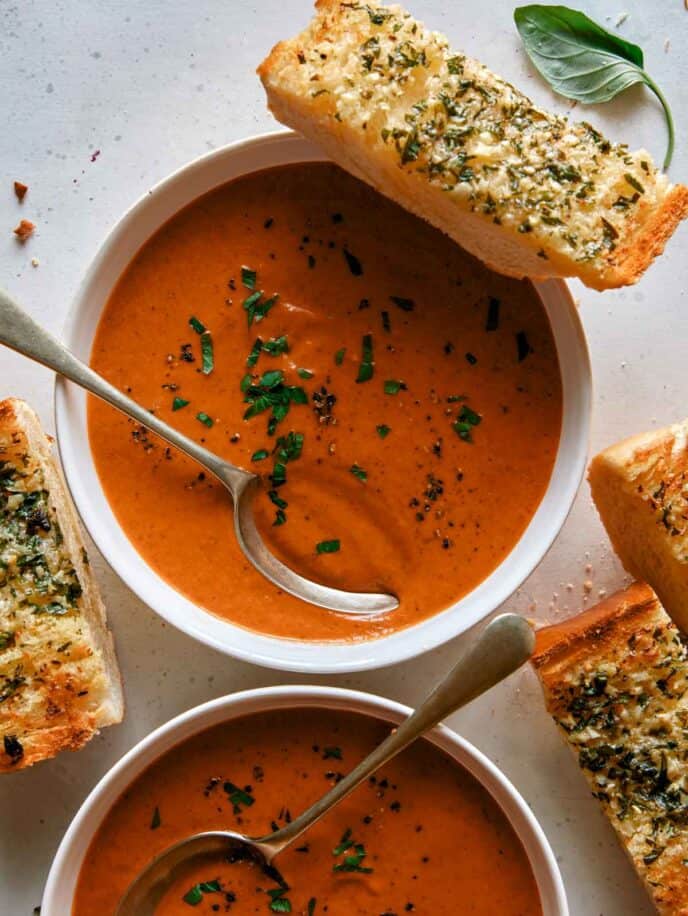
Creamy Tomato Soup is a classic childhood soup that we’re happy to continue to make and eat. It gets a significant upgrade as the fresh tomatoes are roasted to perfection, adding a deep richness to this soup. Pair it with your favorite grilled cheese sandwich for a bit of comfort and nostalgia.
Clam Chowder, especially when served in a crusty bread bowl, is a surprisingly easy dinner recipe for the family to enjoy.
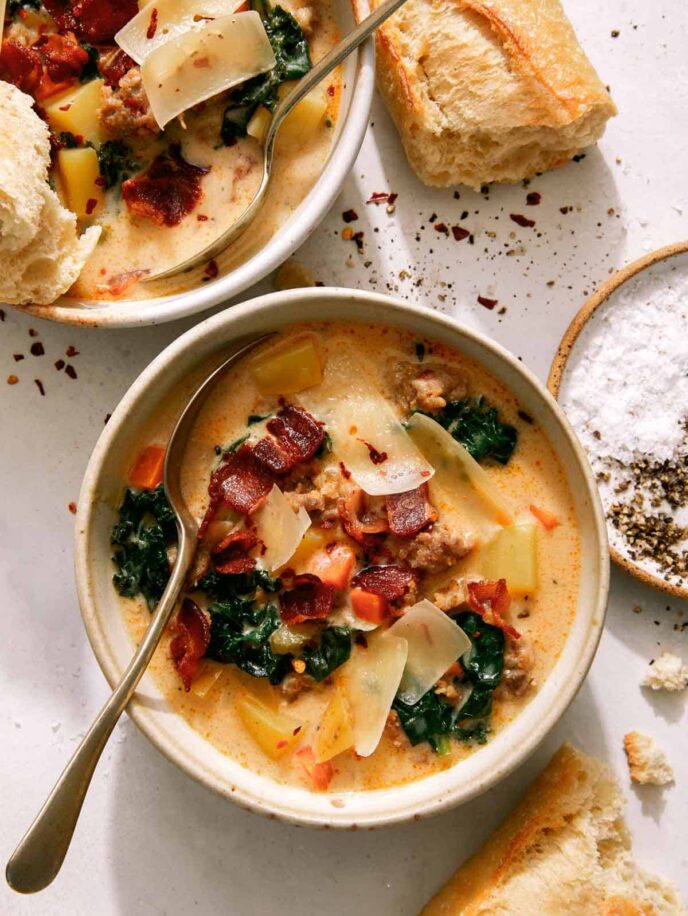
Our Zuppa Toscana is a hearty broth-based soup piled high with Italian sausage, bacon, potatoes, and kale, then topped with shaved Parmesan and crushed red pepper flakes.
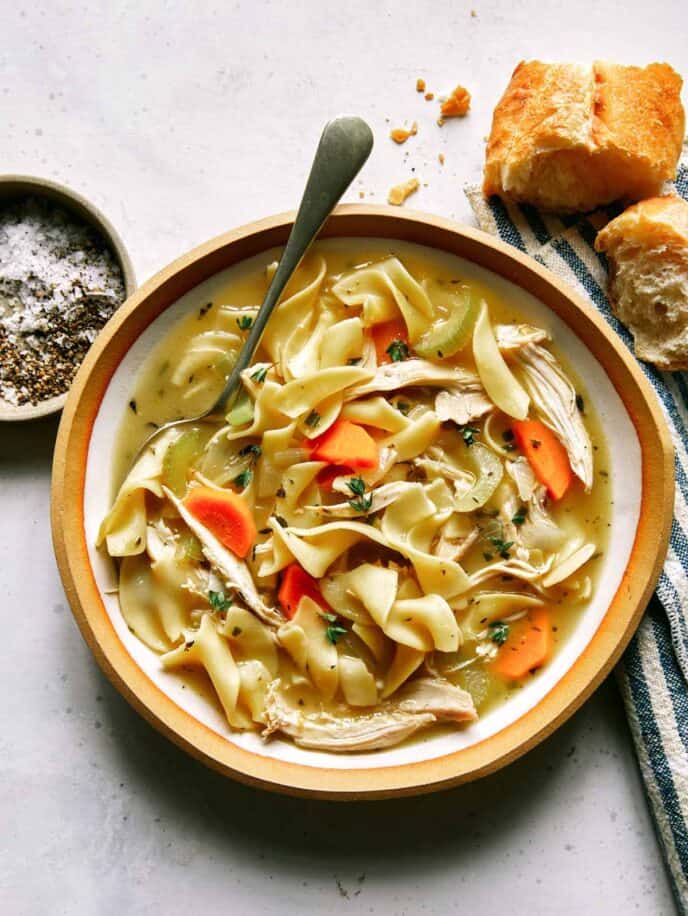
Chicken Noodle Soup is another soup that can double as a hearty dinner. We love making a big batch over the weekend to enjoy throughout the week, especially on chilly nights.
The Best Healthy Dinner Recipes
Looking for something lighter and healthier to serve for dinner? These recipes are packed with vegetables, protein, whole grains, and other goodness for a meal that tastes amazing and will have you feeling just as good!
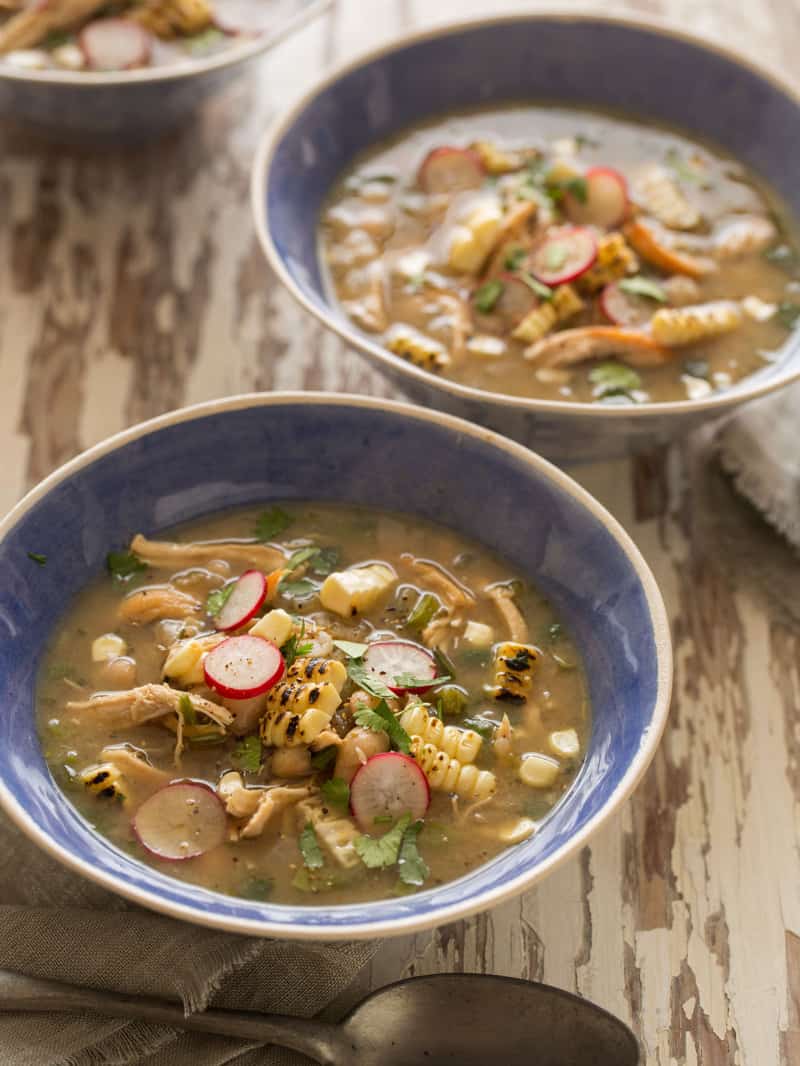
Pozole Verde with chicken is one of my favorite healthy, quick, and easy dinners to make all year long. It’s a flavor-packed soup that’s loaded with vegetables and tastes even better the next day, making it a great soup for meal prep.
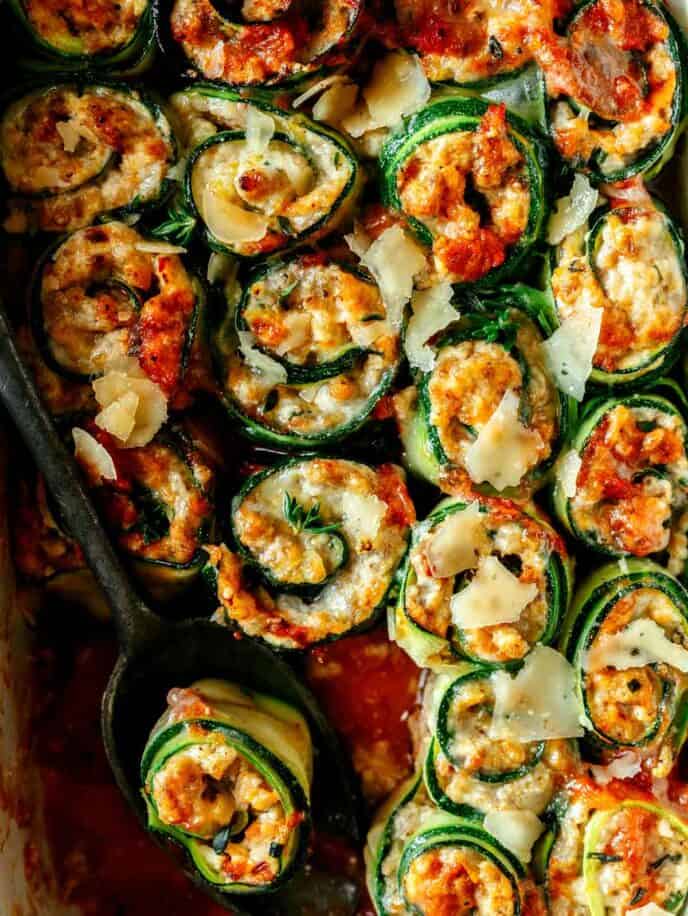
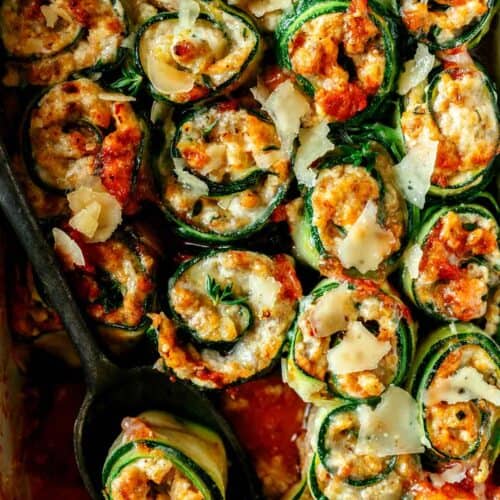
Our Turkey Zucchini Lasagna Roll-Ups are the perfect low-carb dinner version of our more classic lasagna sheet-filled version, but equally as delicious. Swapping turkey for beef and loading on the zucchini makes this a lighter and nutrient-rich dinner.
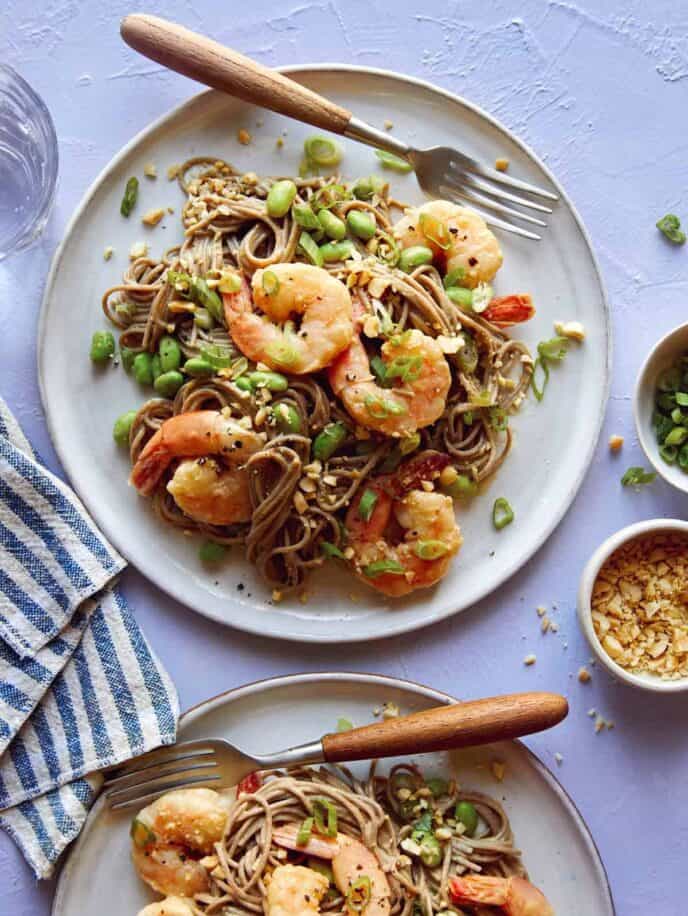
Soba Noodles with Shrimp is not only an easy dinner recipe but a recipe you can also enjoy for lunch. Make sure to follow our little trick to help keep the dish saucy and prevent the noodles from clumping up.
We love a good Buddha Bowl with all the veggies, whole grains, and ridiculously delicious cashew cream sauce. This dish is a vegetarian and vegan dinner recipe that everyone can get on board with!
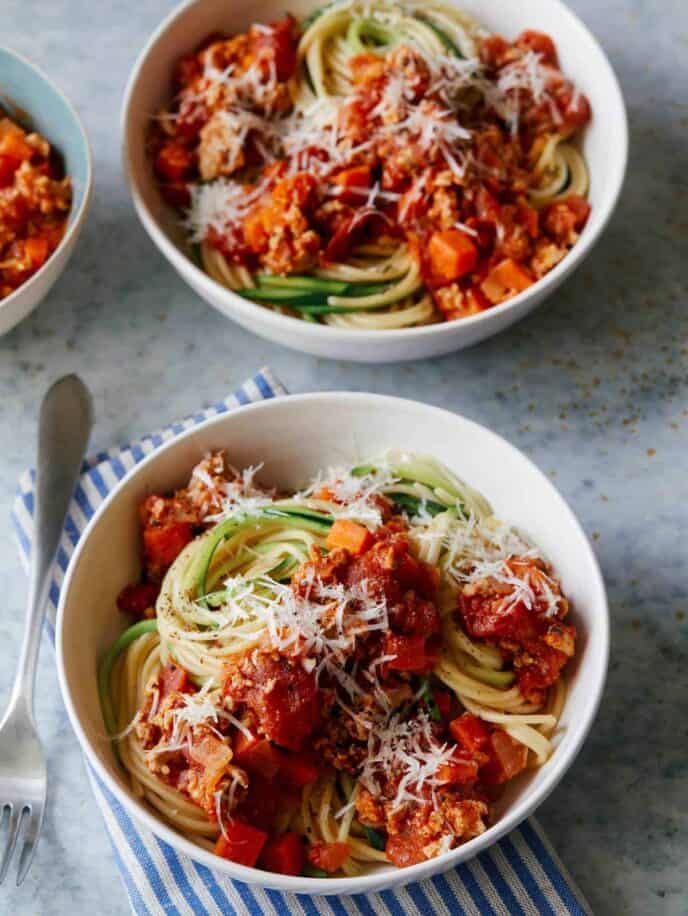
Our Turkey Bolognese with 50/50 Spaghetti and Zucchini Noodles is for when you’re craving that big, hearty bowl of pasta bolognese but also want to try and keep things just a little lighter. The 50/50 pasta-to-zucchini split will satisfy your pasta cravings without weighing you down.
Our Spicy White Bean Chili is a lighter take on the more classic thick, tomato, and spice-based chili. We still load ours with beans but give it a more soupy vibe with the broth base and shredded chicken. It’s a great healthy dinner idea that makes incredible leftovers!
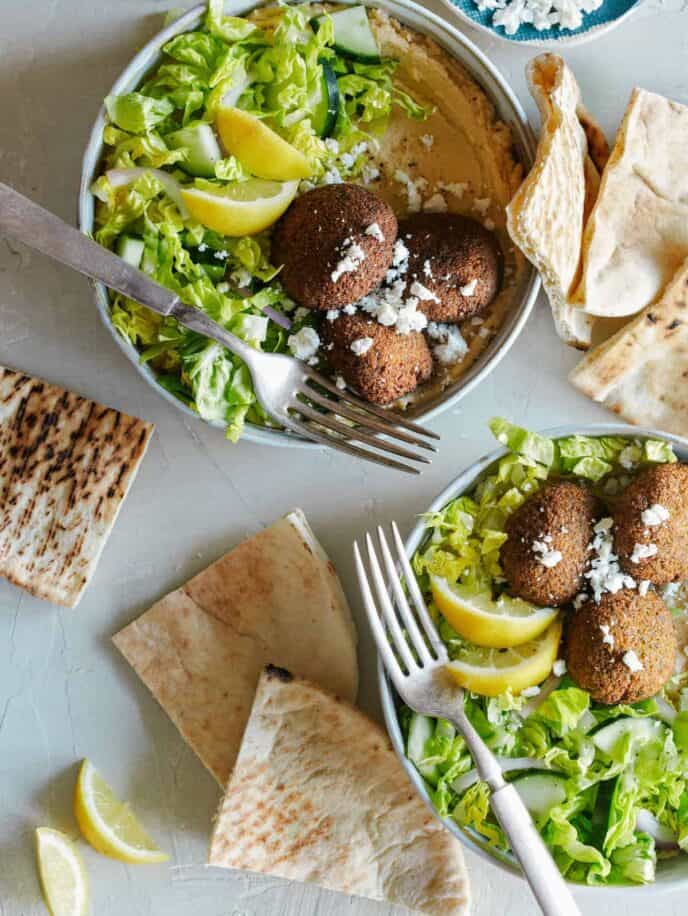
We have a soft spot for delicious falafel, and our Falafel Salad Hummus Bowls always hits the spot. They’re simple, filling, delicious, and healthy!
Easy Dinner Ideas the Whole Family will Love
Is dinner a family affair? Our family-friendly dinners are perfect for adults and kids alike, so everyone can sit down and enjoy a tasty meal and good company.
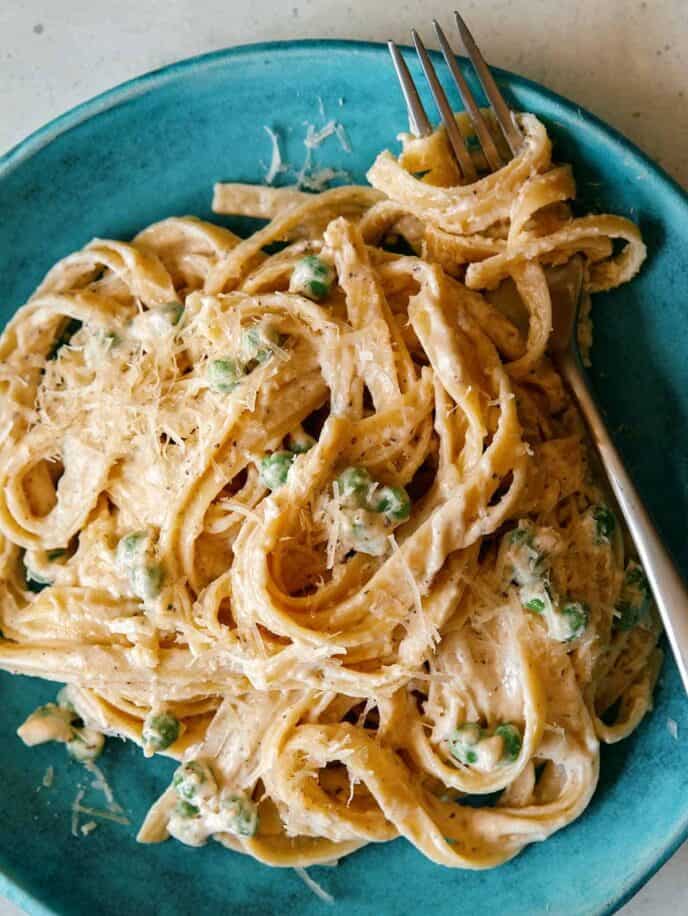
Browned Butter Fettuccine Alfredo is an extra savory and nutty version of a classic fettuccine alfredo. It’s such a simple swap from regular butter to browned, but it takes this dinner to the next level! Everyone will be running back for seconds.
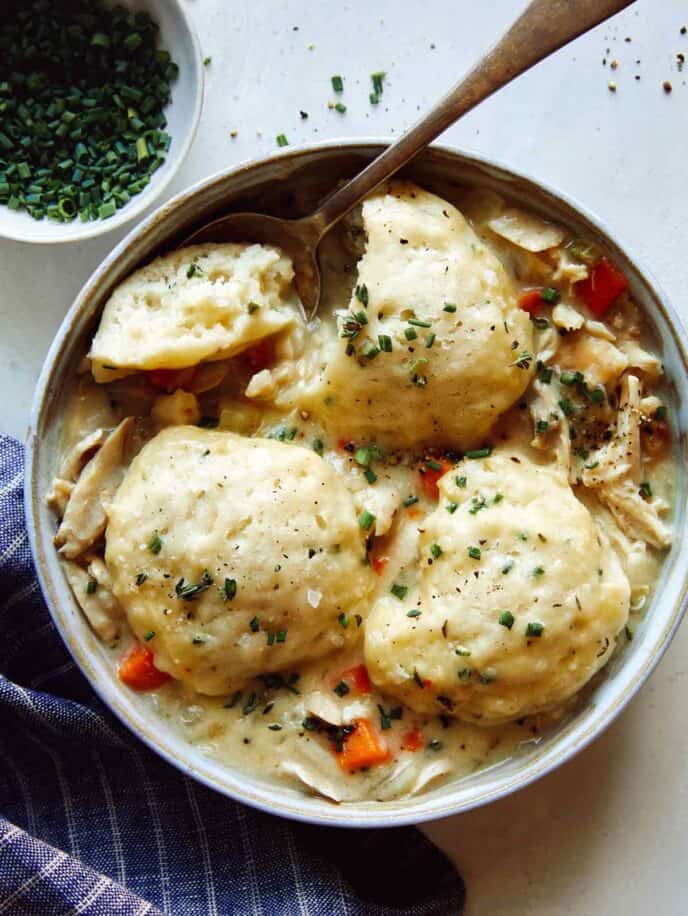
Chicken and Dumplings are our go-to cozy, comfort food to feed our families and ourselves. With fluffy dumplings swimming in the creamy chicken soup, everyone loves this classic winter meal!
Our Honey Garlic Cauliflower will make even the pickiest meat eater happy, and you’ll feel good knowing that your family is being fed a vegetable-heavy meal!
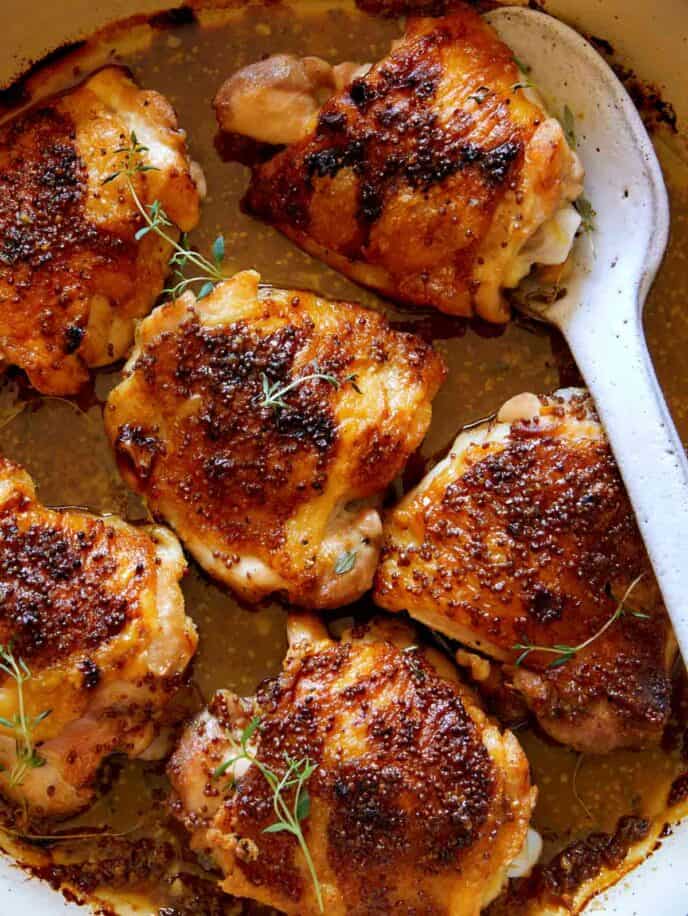
Our Oven Baked Chicken Thighs deserve a spot in your regular dinner rotation. Once you try them, you’ll agree! It’s such an easy dinner to make, and the chicken is infused with the most delicious honey mustard flavor. Serve it with some roasted potatoes and broccoli for a complete meal your family will be asking for again and again.
If you’re looking to spice things up from the typical weekly dinners, try our Korean Beef Bulgogi. Thinly shaved ribeye steak is marinated in a sweet and savory sauce and grilled or sautéed to mouthwatering perfection. It’s a dinner idea that will keep everyone’s tastebuds excited and wanting more!
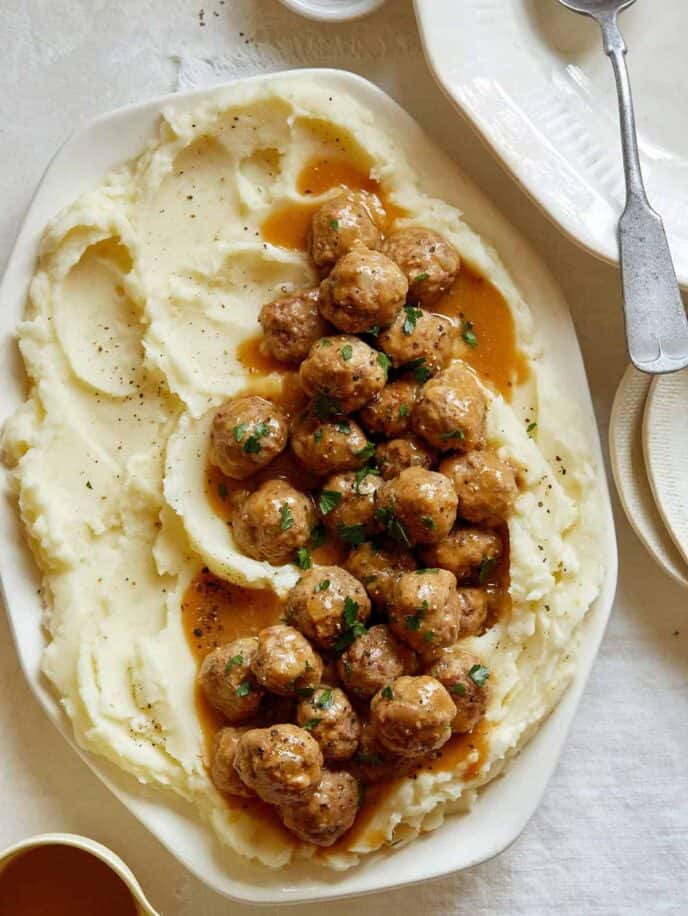
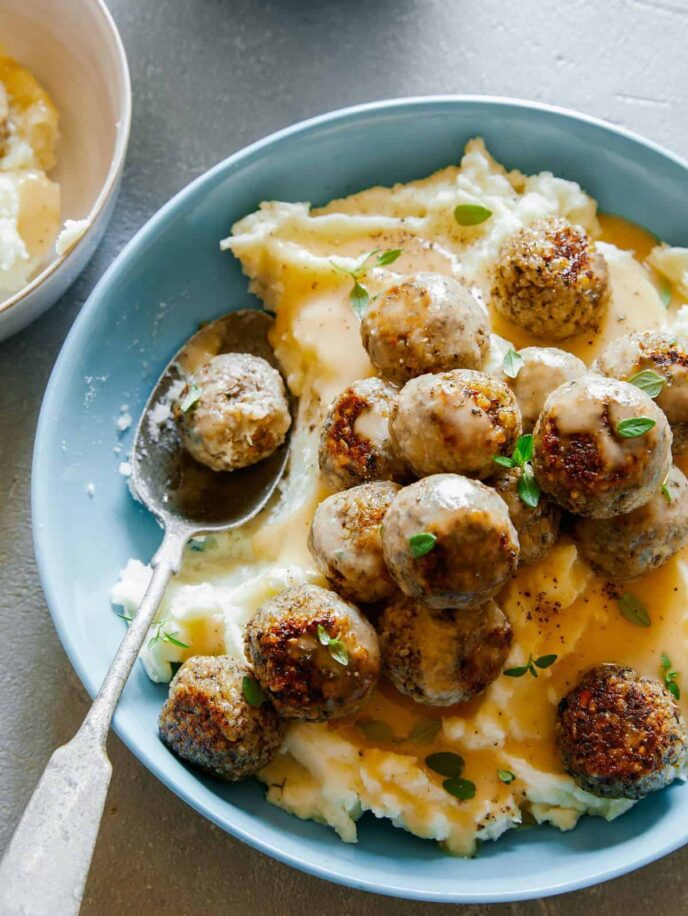
Swedish Meatballs over Mashed Potatoes is an incredibly comforting meal filled with mini flavor-packed meatballs, nestled into creamy, buttery mashed potatoes and swimming in a savory gravy.
If your family loves fast-food fish sandwiches, give them a real treat by making our Filet o Fish at home! The flaky fish and light crispy breading is better than anything you’ve ordered through a drive-thru and make the best sandwiches.
Baked Pasta Dinners
Pasta is great, but baking it adds another element of heartiness that we love. Serve any of our favorite thick and creamy baked pasta dishes to cozy up on a cool night.
Chicken Alfredo Lasagna Roll Ups are delicious carb-filled spirals that are incredibly delicious and are perfect for meal-prepping as they freeze incredibly well.
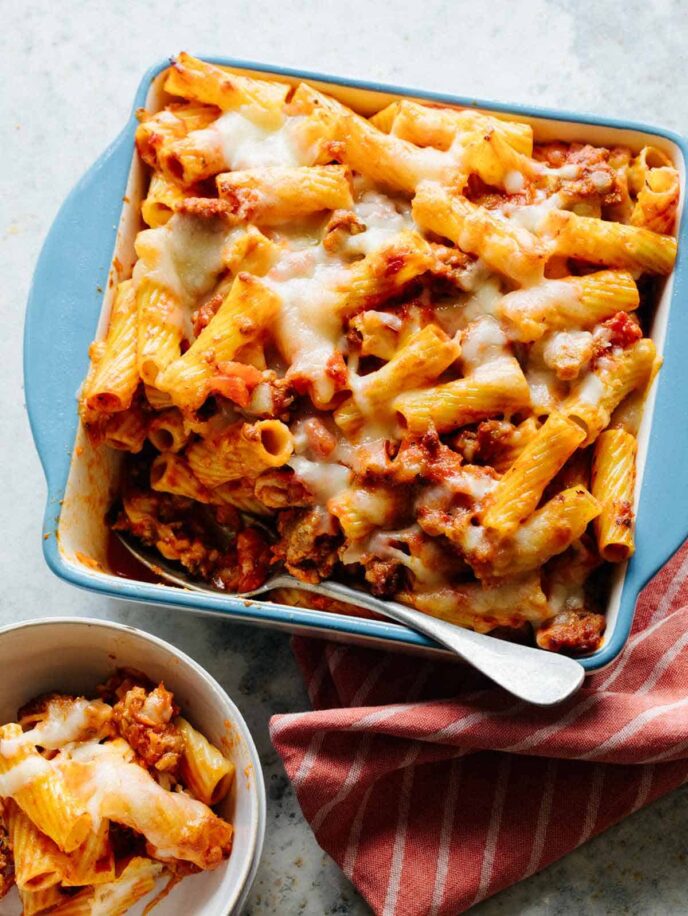
Our Baked Ziti is a cozy dinner idea that we love making on busy weeknights. This dish uses store-bought sauce to make it even simpler and quicker to toss together. We recommend making two – one to enjoy now and one for the freezer for a night you just don’t have time to cook!
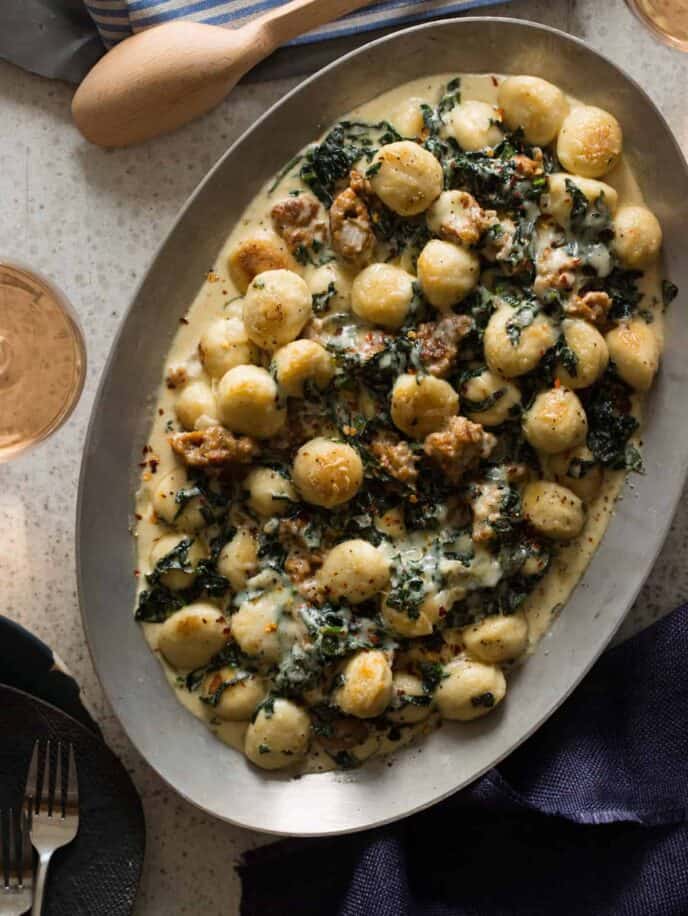
We couldn’t have a baked pasta section without including our Sausage and Kale Baked Gnocchi. The soft and pillowy gnocchi swims in a cream sauce balanced out by the salty turkey sausage and hearty kale. Use your favorite store-bought gnocchi, or make your own!
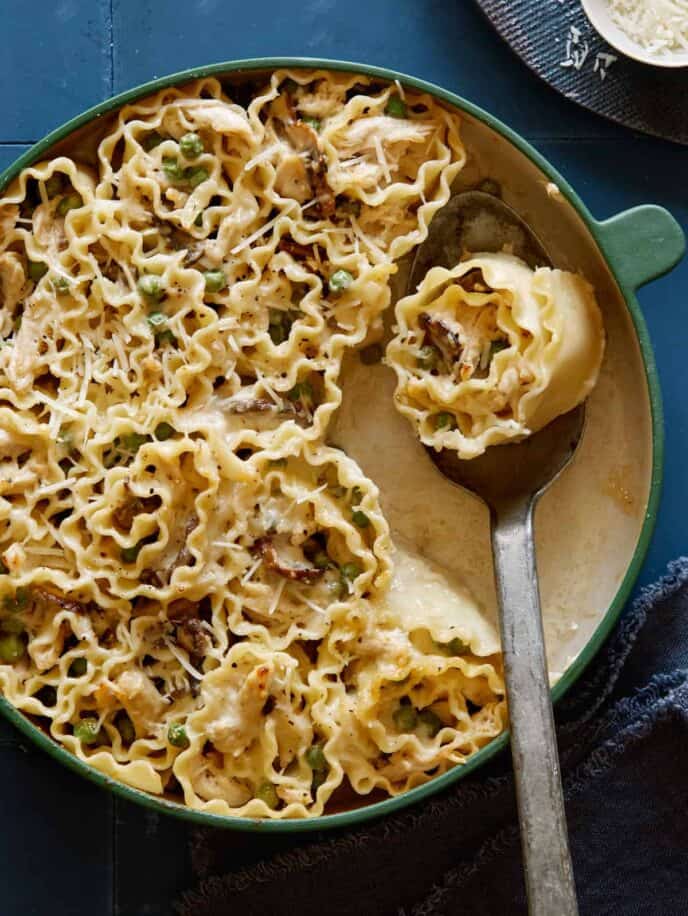
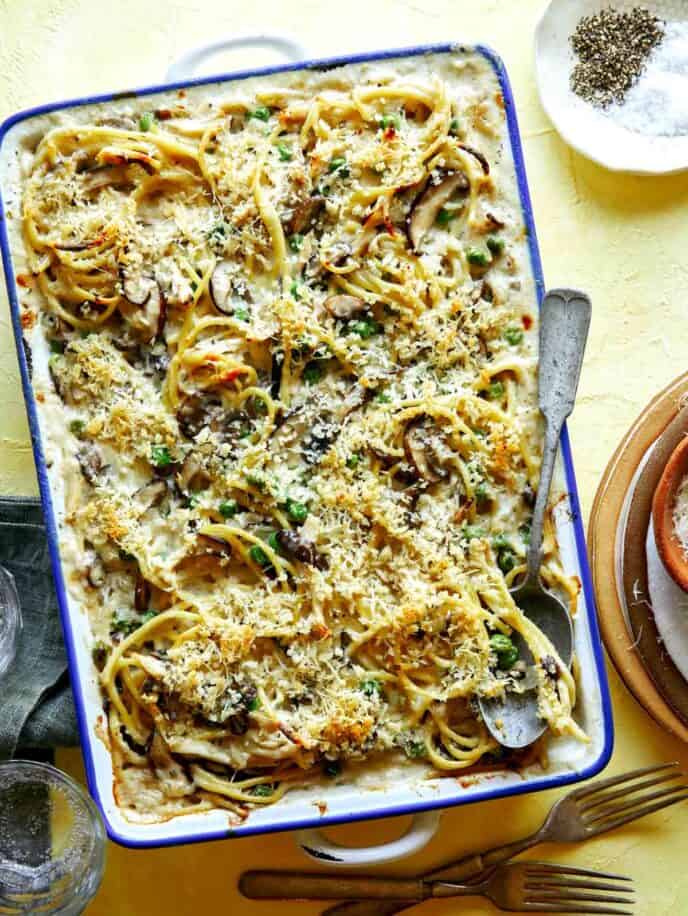
Chicken Tetrazzini is a deliciously retro dinner recipe with spaghetti, shredded chicken, mushroom, and peas tossed together in creamy bechamel and baked until everything is bubbling and hot!
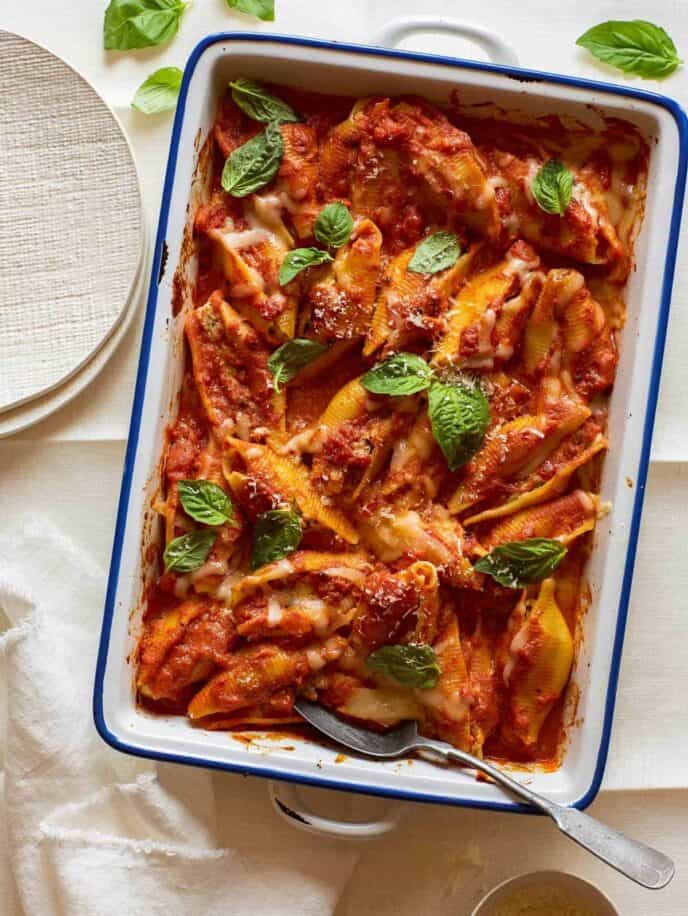
Our Baked Turkey and Mascarpone Stuffed Shells are ultra-rich and creamy and balanced out with the sweet and acidic tomato sauce. It’s a stuffed shell dish everyone will love!
Vegetarian and Vegan-Friendly Dinner Ideas
While we have a few vegetarian dinners sprinkled through our list, these vegan and vegetarian dinners are some of our most popular dishes for those who skip animal products. But don’t worry, we’ve packed so much flavor into these dinners, anyone will love them!
This Vegetable Loaded Vegan Korma is truly a dish for everyone! We love the bold flavors, smooth and creamy texture of the sauce, and wide variety of vegetables it features. Serve it over a bed of steamed white or brown rice and a side of grilled naan bread.
Our baked Buffalo Cauliflower is a vegetarian-friendly version of the incredibly popular buffalo chicken. While we love snacking on these little bites, we also love eating them for dinner over a salad or putting them into tacos or in a grain bowl. So many possibilities and easy dinner ideas can be made with this recipe.
Spaghetti Squash and Broccoli Alfredo is a lower-carb, vegetarian0-friendly, vegetable-heavy dish that’s as healthy as it is flavorful. This meal will satisfy all of your creamy pasta alfredo cravings without the pasta!
We love our Mini Swedish Meatballs so much that we decided to make an equally delicious vegan version! Our Vegan Swedish Meatballs over Mashed Potatoes and Gravy are just as good as the meat and dairy version but slightly healthier. It’s a vegan dinner idea that we promise even non-vegans will love.
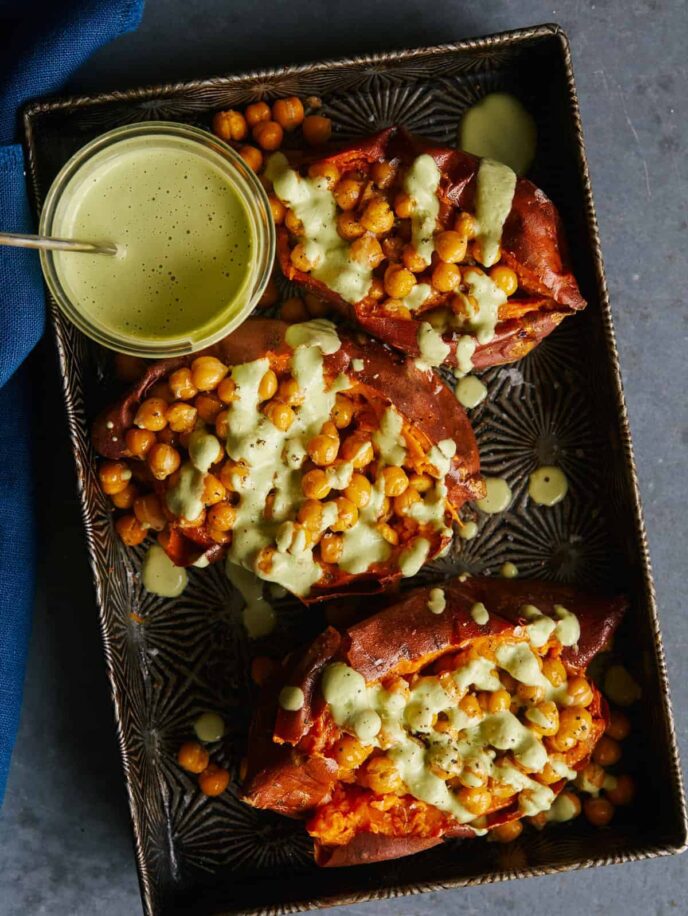
Our Roasted Chickpea Stuffed Sweet Potatoes are a simple and filling dinner that you’ll feel good about. Just don’t forget the cilantro cashew sauce– it takes this meal to a whole new delicious level!
With so many meat alternatives out there these days, we wanted to go back and highlight an old classic and favorite of ours, our Spicy Black Bean Burgers! These black bean patties have so much flavor, a great ‘meaty’ texture that will satisfy any burger craving. You can also crumble it for vegan ground “beef” and toss it into tacos.
Date Night Dinners
Need an elegant dinner idea to serve for date night? These fancy-ish dinners take a bit more time to put together, but the outcome is so impressive, full of flavor, and completely worth the extra effort.
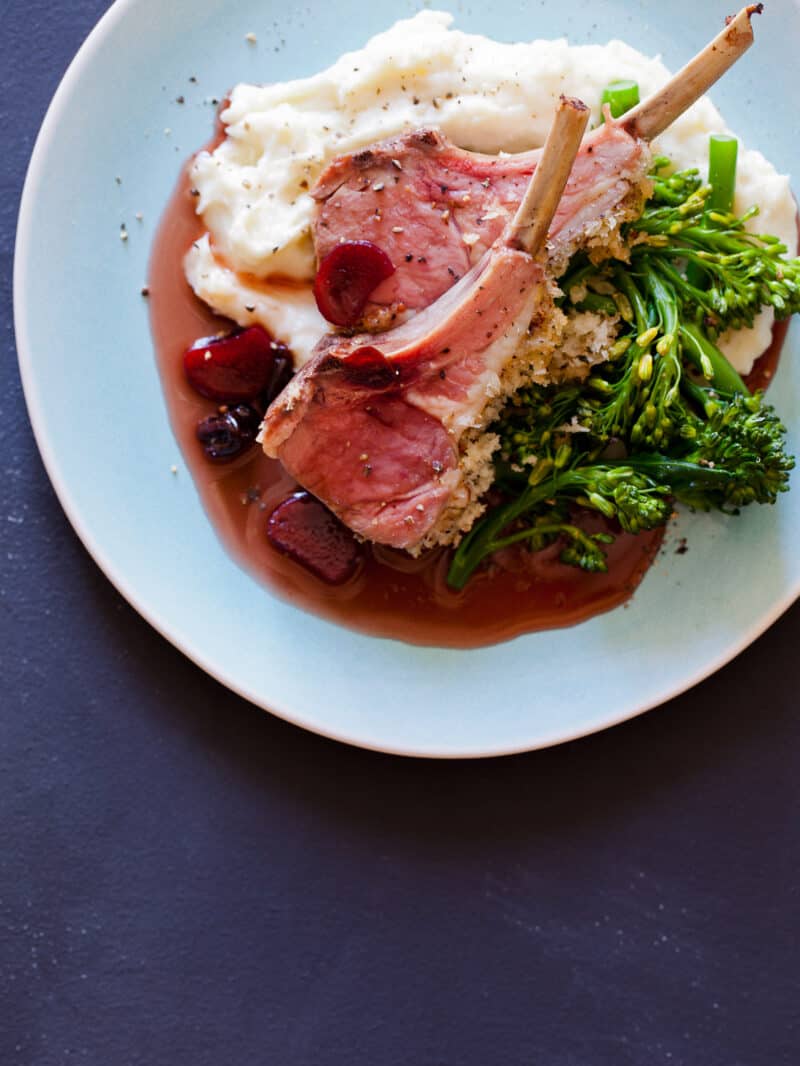
Our Roasted Rack of Lamb with Rhubarb- Sour Cherry Gastrique dinner recipe sounds way more complicated than it is, we promise. While there are a few different components to this dish, it’s all very well worth it for the tremendous flavors this easy and elegant dinner has.
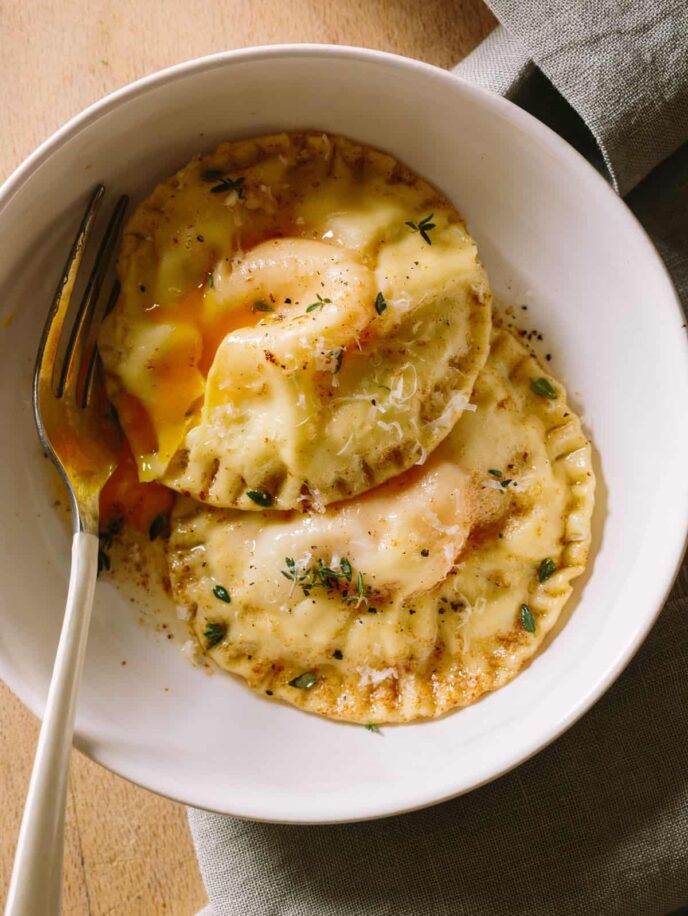
Chicken and Tarragon Poached Yolk Stuffed Ravioli is our go-to for a fancy-ish dinner we all love. Cutting into the giant ravioli and seeing the oozing yolk will impress everyone. Your guests won’t be able to resist the creamy chicken and tarragon filling too! It’s one of our favorite special occasion dinner ideas to make!
We like to think of our Beef Ragu over Polenta as a mix of a comforting and elegant dinner recipe. It’s not something you would make all the time, but it’s well worth the time it takes to braise and simmer into a soft, savory sauce. Don’t have the time but want to make this dish? We’ve included instant pot instructions to cut down on cooking time!
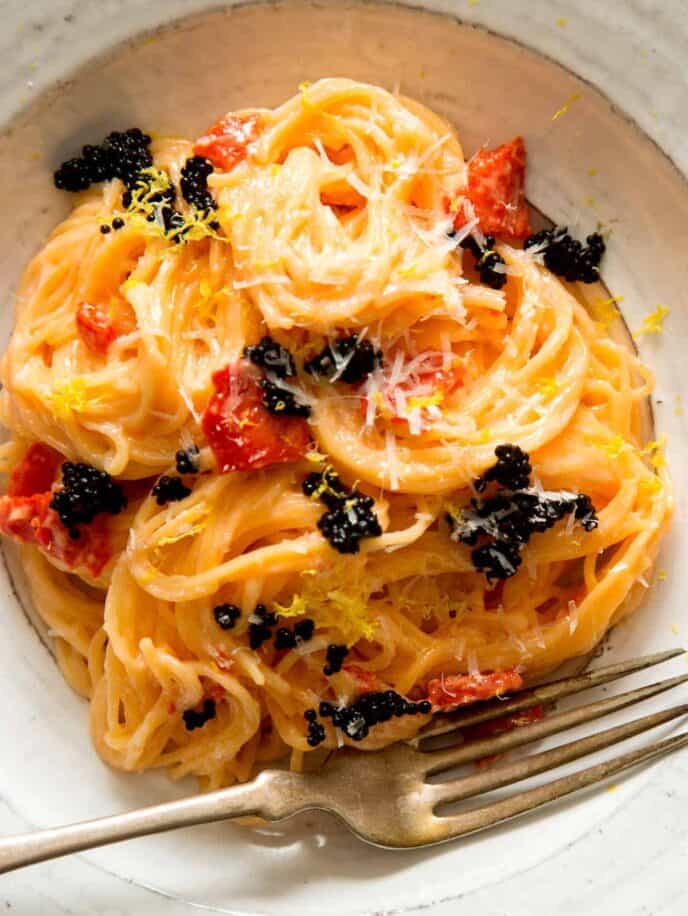
We love this Capellini with Smoked Salmon Cream Sauce. It’s such an easy dinner recipe to make that’s also incredibly delicious. Throw a little caviar on top, and you’ve instantly fancied up a simple dish!
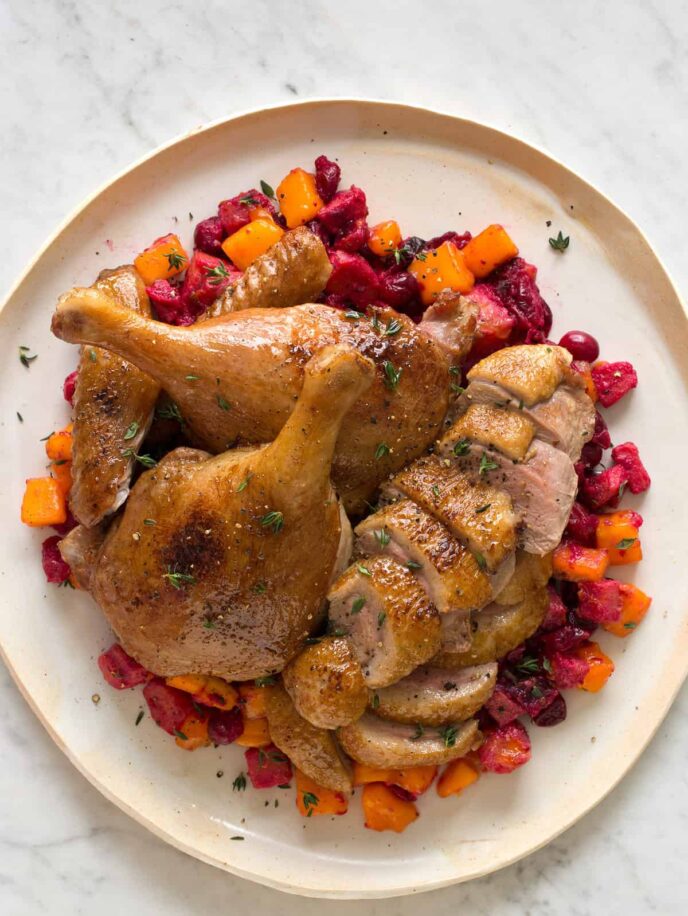
Maple Balsamic Roast Duck is definitely an indulgent, special occasion dinner recipe that yields super crispy skin and juicy meat. Replace your turkey or ham over the holidays with this roast duck for an impressive holiday meal.
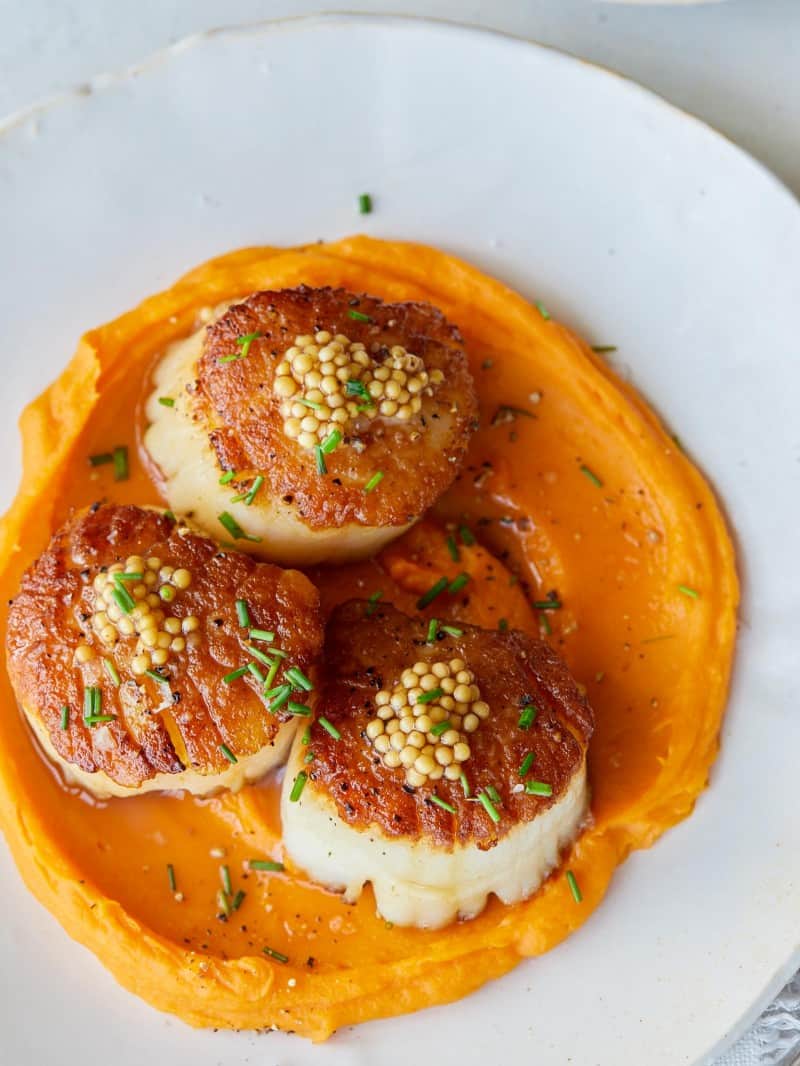
My parents request I make them this Seared Scallops over Roasted Butternut Squash Purée recipe almost every time they’re in town. The perfectly seared scallops are salty and delicious and pair well with the creamy squash puree. Add the “couldn’t be easier to make” pickled mustard seeds to almost any dish for an instant flavor boost!
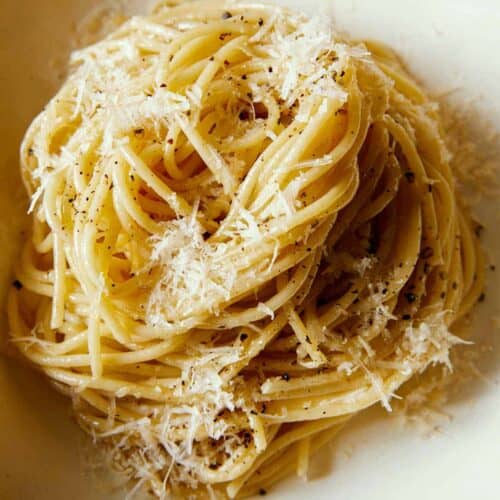
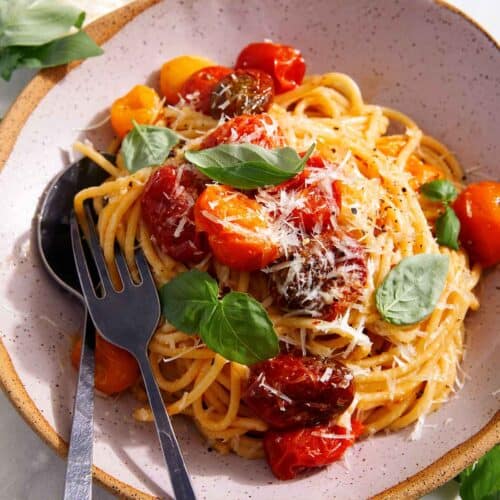
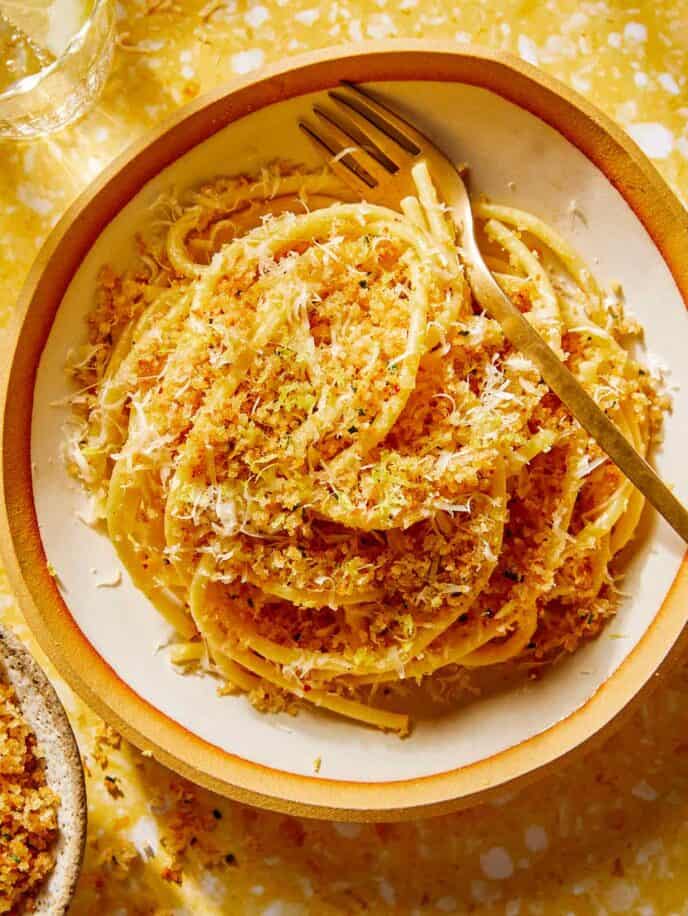
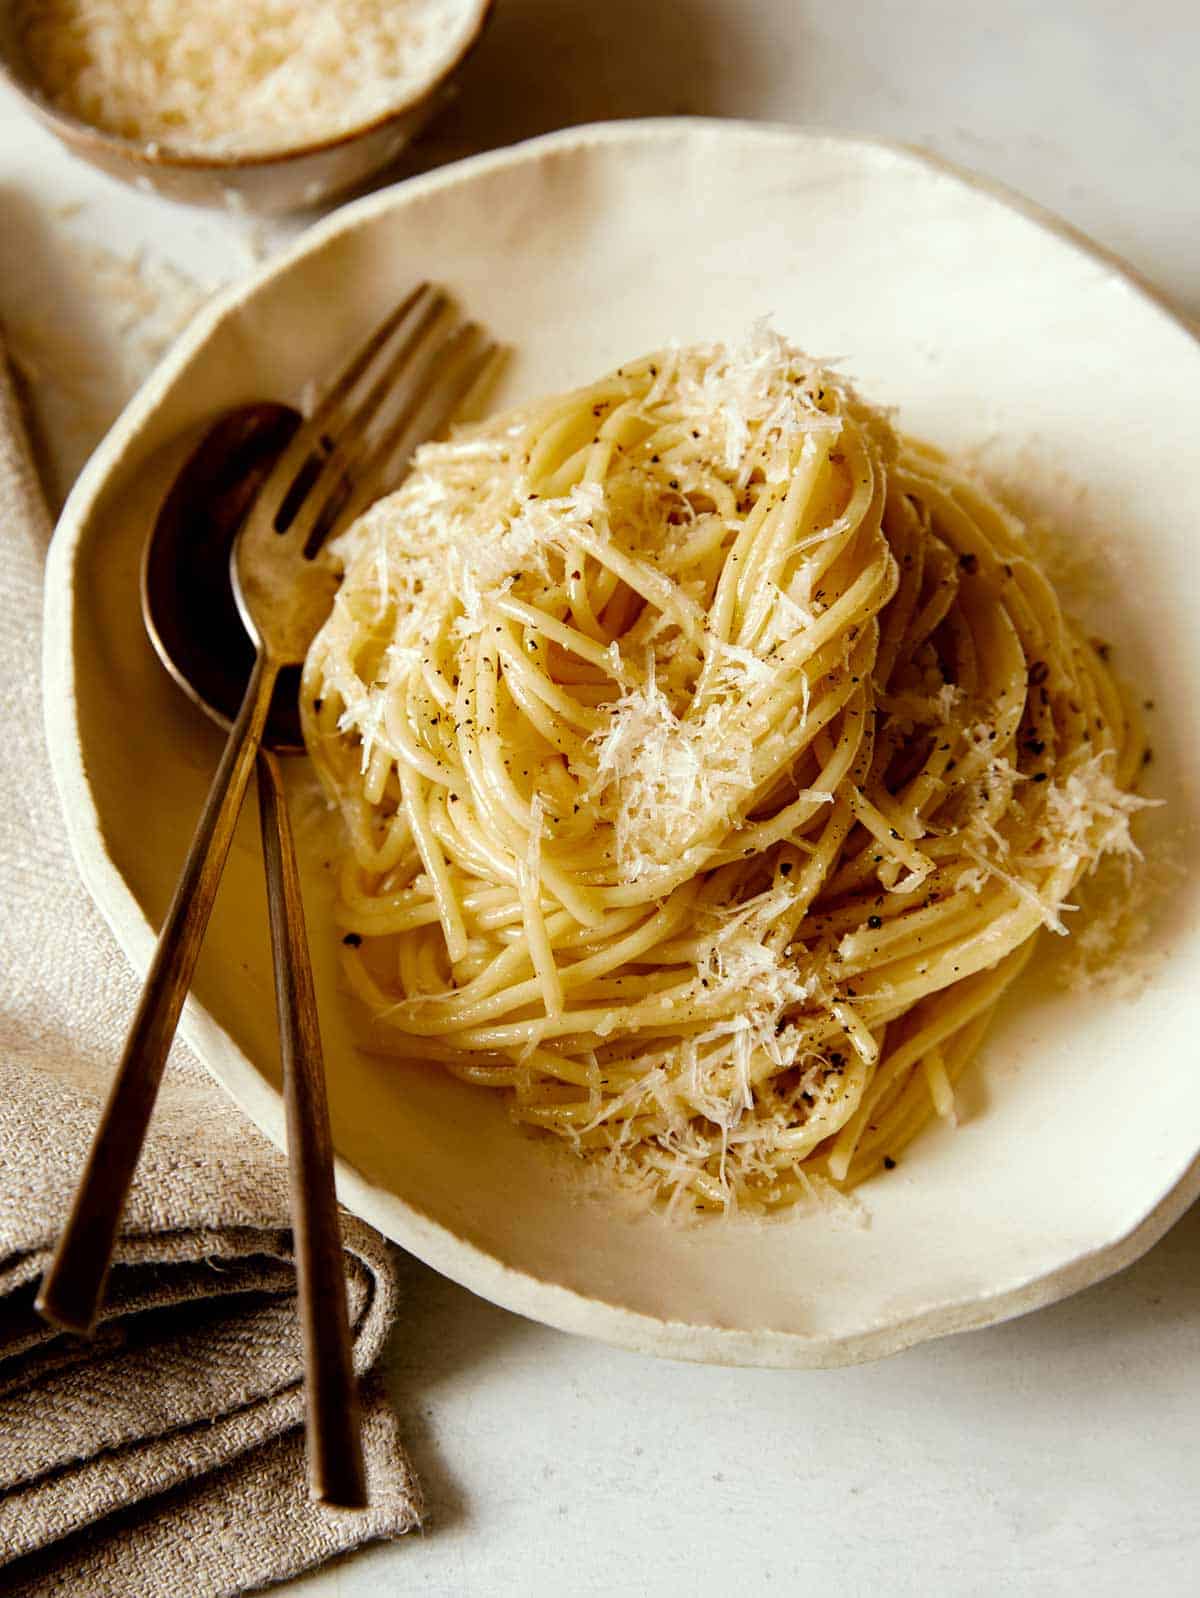
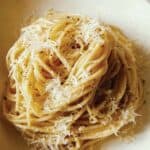
I’ve been on such a simple pasta kick lately and this Cacio e Pepe Recipe is high on that list. I love everything about this pasta – the simplicity, minimal ingredient list, how delicious it is, and how fast it comes together! I promise you’ll love this no brainer, delicious, super quick recipe for your next weeknight dinner! What is Cacio e Pepe? Cacio e Pepe (pronounced ca-cho ee pepe) is a Roman pasta dish…
I’ve been on such a simple pasta kick lately and this Cacio e Pepe Recipe is high on that list. I love everything about this pasta – the simplicity, minimal ingredient list, how delicious it is, and how fast it comes together! I promise you’ll love this no brainer, delicious, super quick recipe for your next weeknight dinner!
What is Cacio e Pepe?
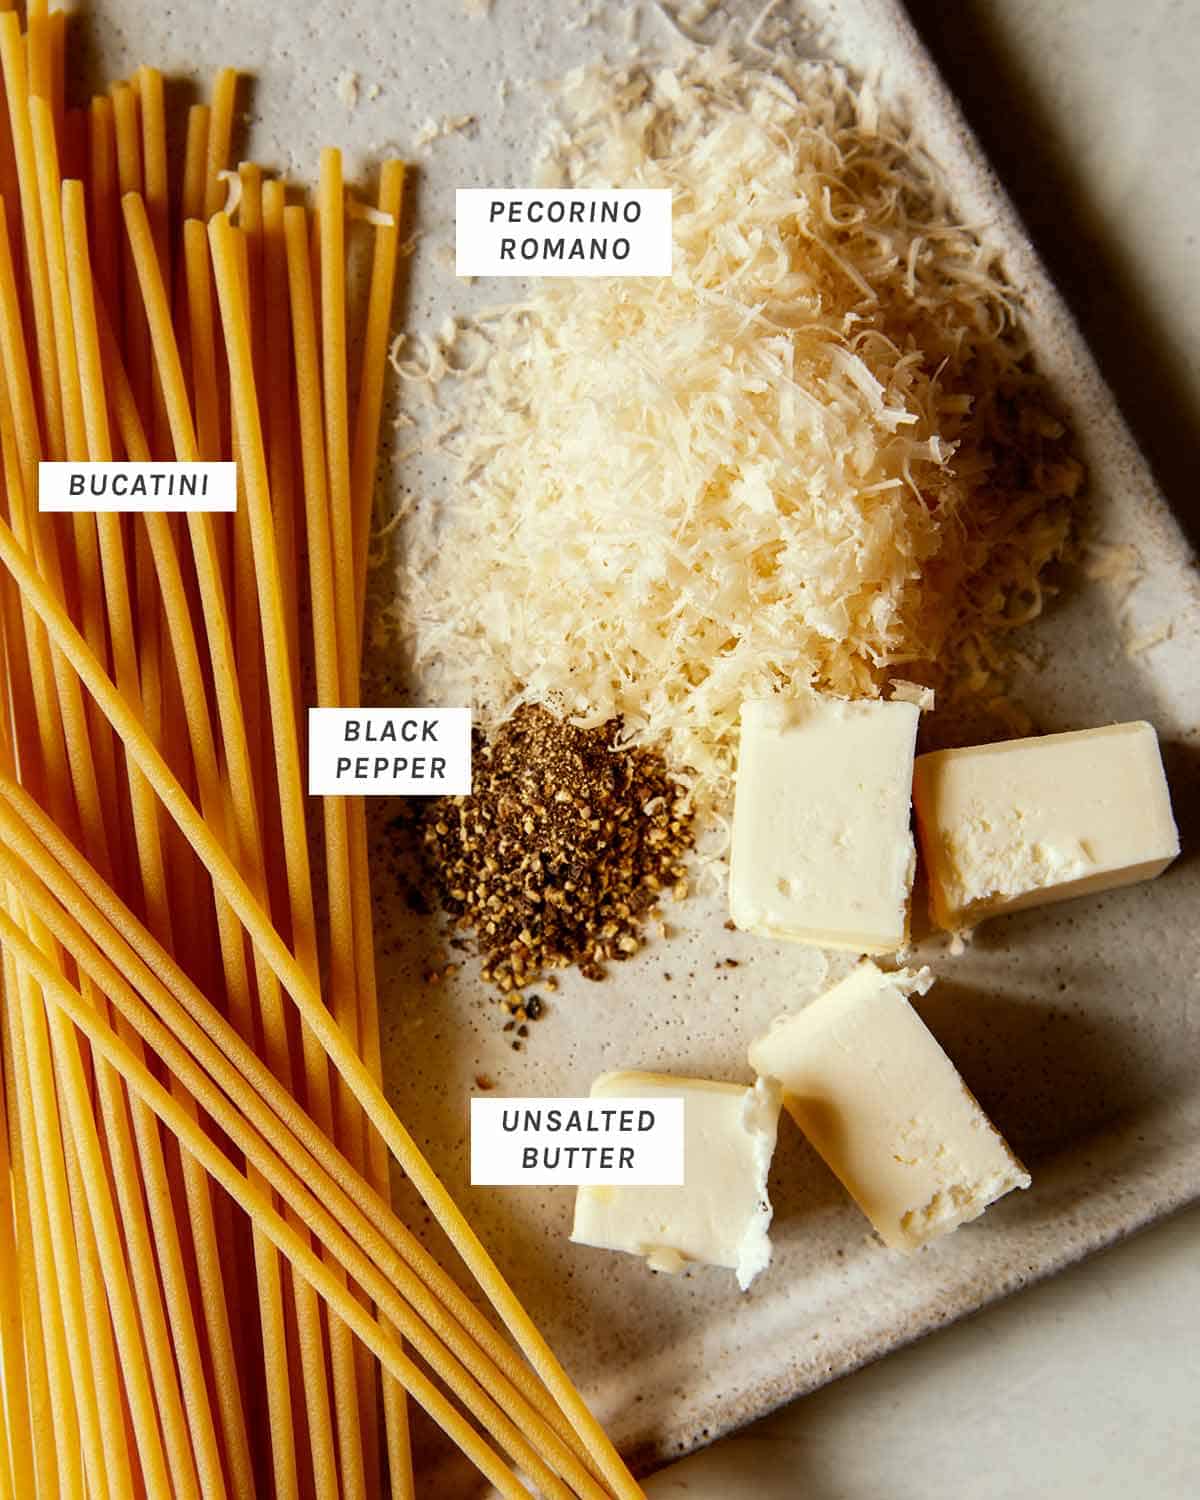
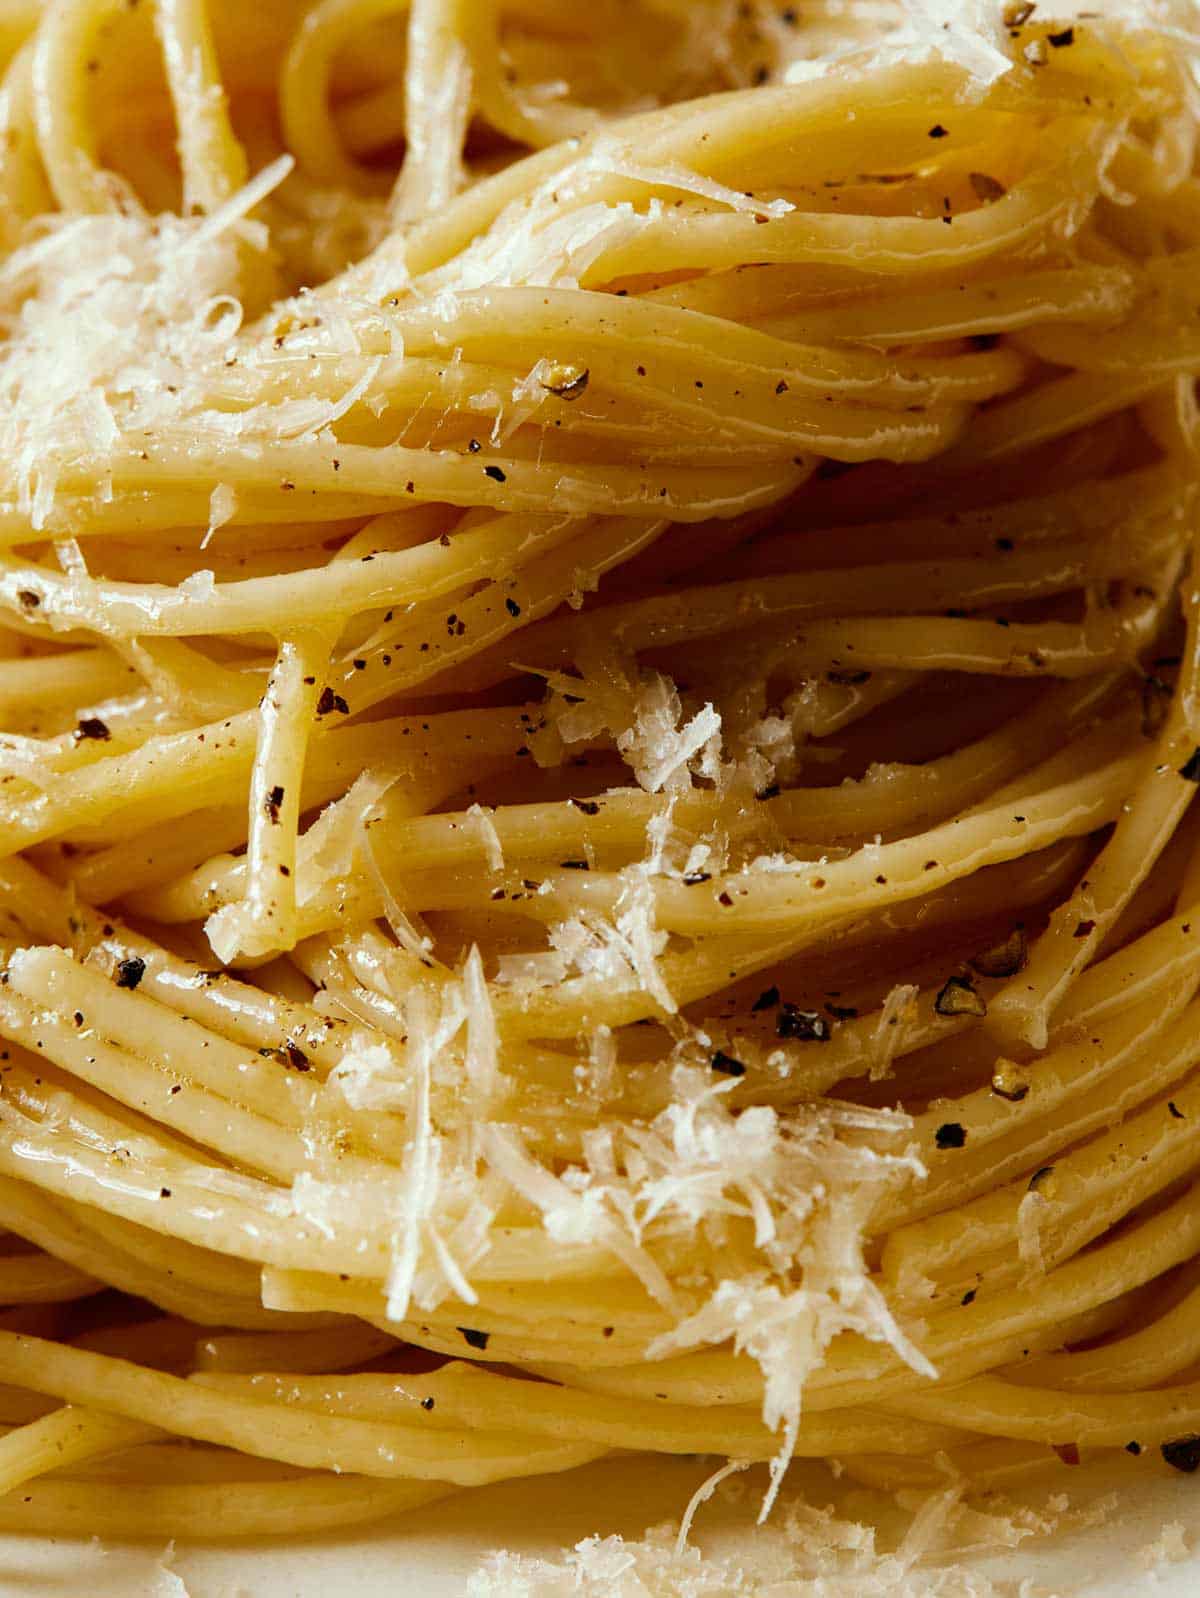
Cacio e Pepe (pronounced ca-cho ee pepe) is a Roman pasta dish that translates to “cheese and pepper”. The simple dish consists of spaghetti, black pepper and Pecorino Romano (and in our case a little butter too!)
How to Make Our Cacio e Pepe Recipe
Ingredients
Ingredients to Note:
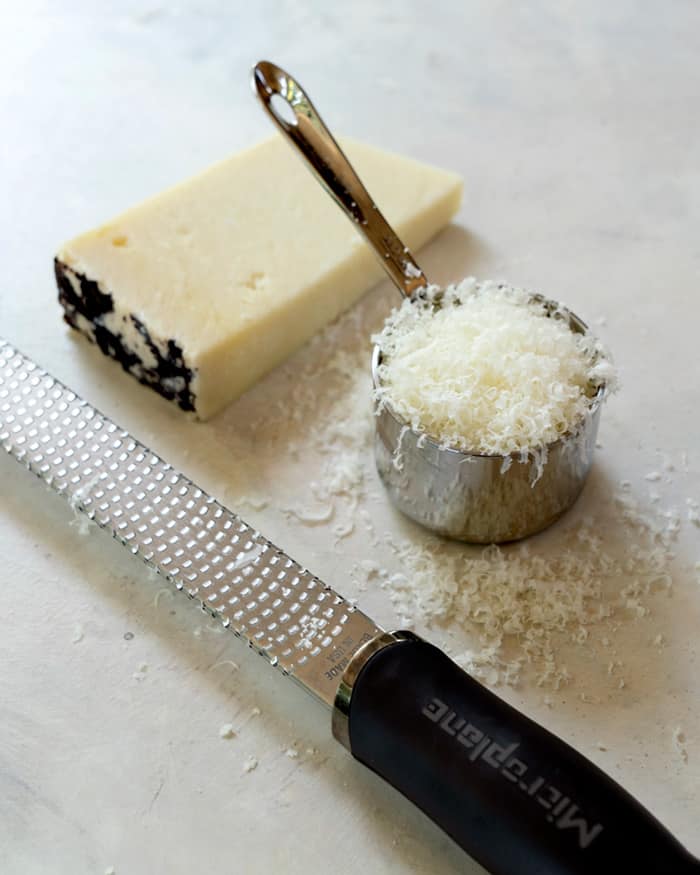
Pecorino Romano: We love using a microplane to grate the cheese. It’s fine grate helps the cheese to melt into the dish really evenly. See our Cacio E Pepe Variations below for alternatives to this cheese.
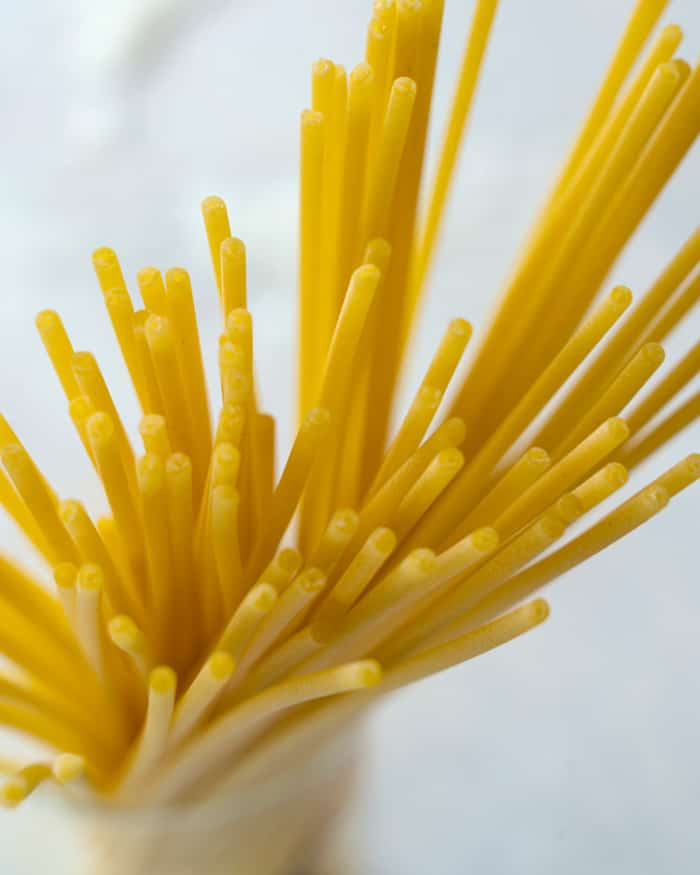
Pasta: Bucatini is kind of like spaghetti, except it’s slightly thicker and is in the form of a tube.
Process
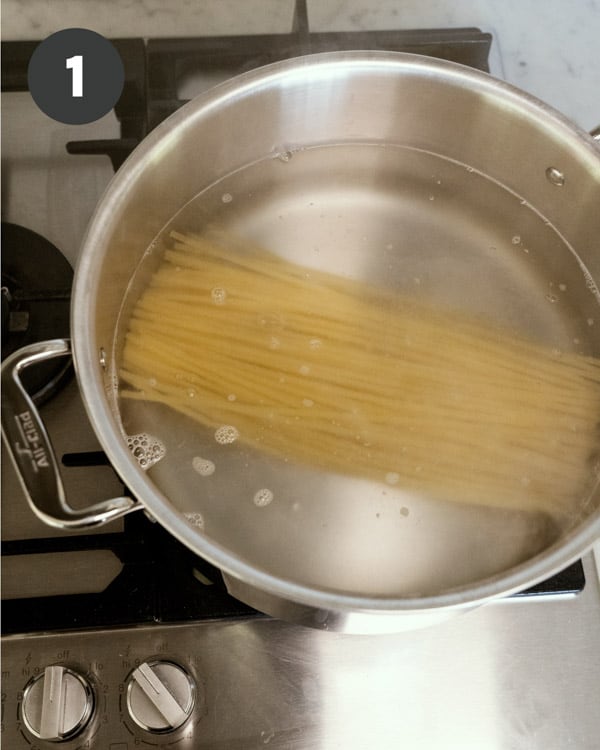
Bring a large pot of water to a boil and generously season with salt. Add pasta and cook until al dente.
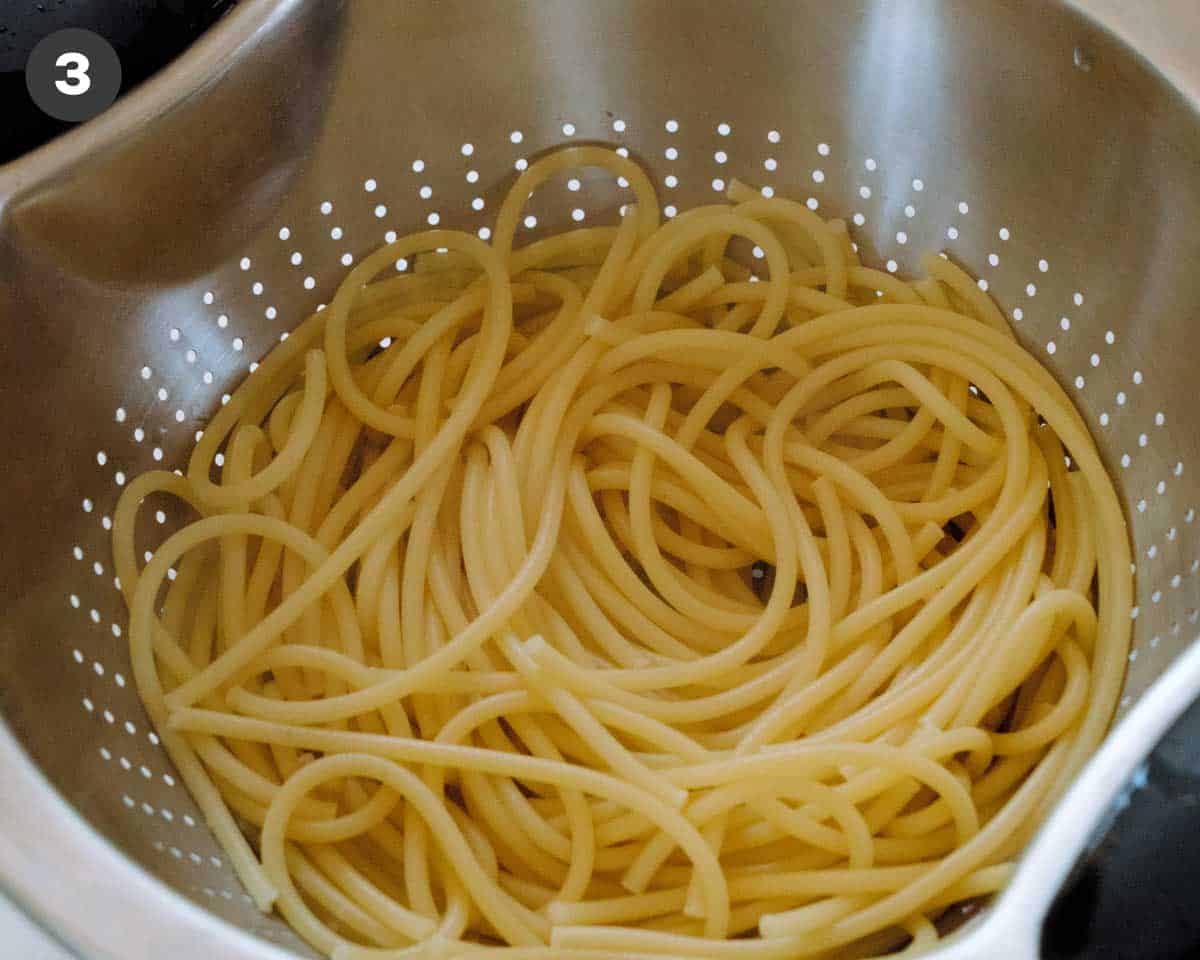
Drain pasta in a colander.
Reserve some pasta water.
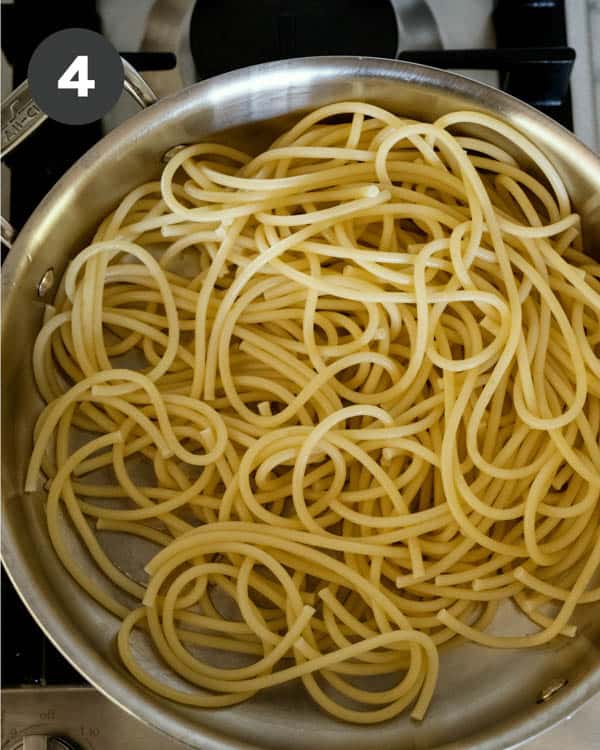
Place skillet (or same pot used to cook pasta) over medium heat and add pasta back into pot.
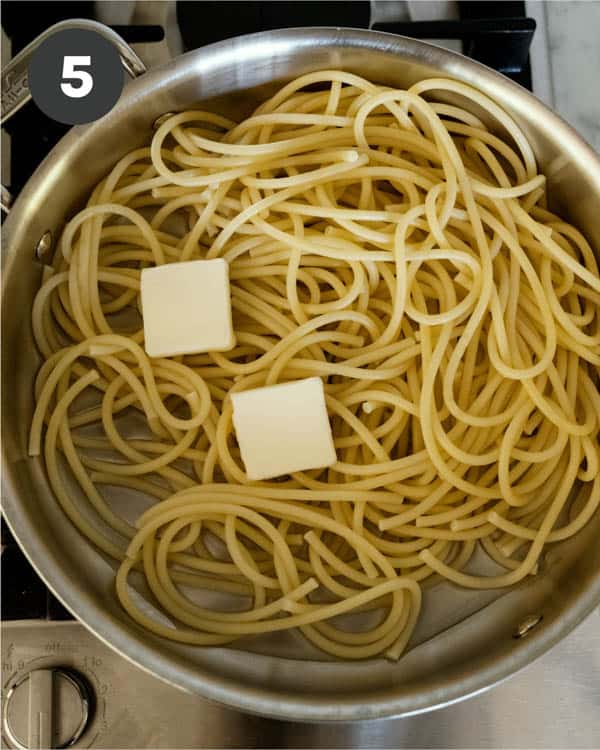
Add reserved pasta water and butter.
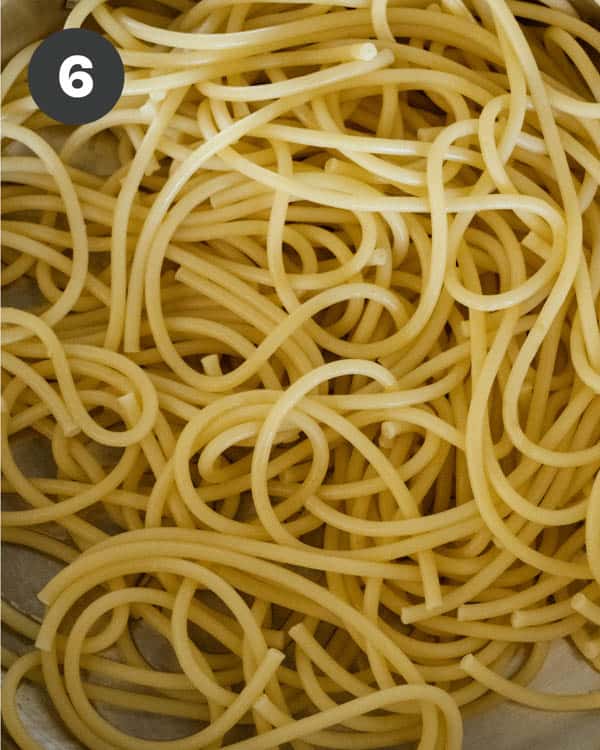
Toss together.
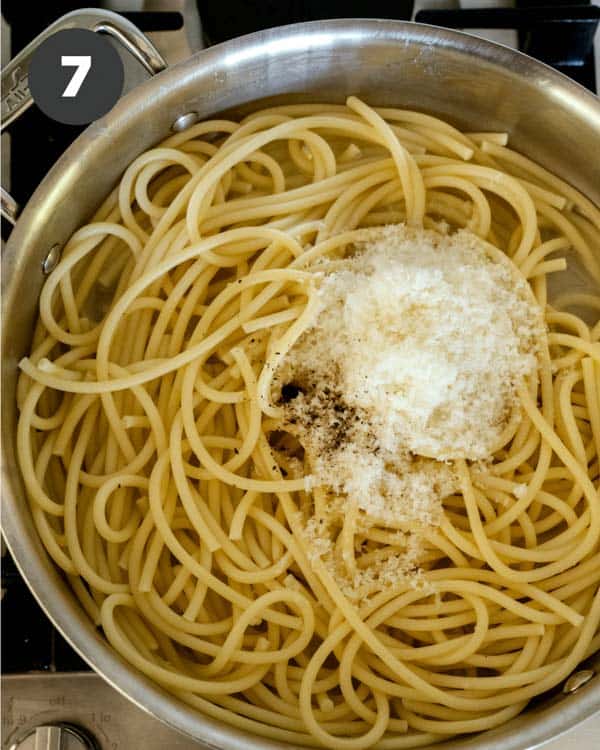
Add grated cheese and black pepper and continue to toss together until sauce comes together and is smooth and creamy.
Pecorino Romano is a hard, Italian sheep’s milk cheese. It has sharp, rich nutty flavor, making it the perfect cheese for this simple pasta dish. If you don’t have it or can’t find it Parmigiano-Reggiano is a totally acceptable alternative.
Make this recipe gluten free by swapping out your favorite gluten free pasta.
Add a protein to the pasta like sautéed shrimp or grilled chicken.
Keep it vegetarian friendly, but bulk it up with some vegetables like steamed peas or steamed/sautéed broccoli.
Bring some heat to the dish with a pinch of crushed red pepper flakes.
Add some texture to the dish by topping it off with some butter toasted breadcrumbs.
Tips and Tricks for Cacio e Pepe Success
This is such a simple recipe, we’re confident anyone can successfully make this dish! The one issue we see people running into when making this dish is the cheese clumping up when tossing it together with the pasta. The addition of warm pasta water is the answer! The starchy water helps to create a creamy, saucy consistency that perfectly coats the pasta.
We rarely have any leftovers with this dish because we tend to inhale the entire thing in one sitting, but if you do happen to have leftovers, we have a couple of easy ways to reheat them to ensure it’s just as good as when you made it fresh! Leftovers can be stored in an airtight container, in the refrigerator for up to 3 days.
To Reheat on Stovetop
Place your leftover pasta in the skillet with a splash of water to help loosen things up. Cook on medium low – and just long enough to heat through. You don’t want to dry out the pasta. Top with more cheese if you have it and serve.
To Reheat in a Microwave
Place your leftover pasta in a microwave safe bowl. Splash a little water into the bowl and microwave for 45 seconds. Take it out and give it a little stir. Don’t worry if it’s still a little watery, this will help steam the pasta back to life. Return to microwave and head for another minute or until fully cooked through. Make sure you don’t overheat this dish, or you will dry the pasta out!
This cacio e pepe recipe is the perfect weeknight dinner to throw together, especially if you’re in a pinch for time and ingredients. I love using this brand of pasta, but you can use any pasta of your choice.
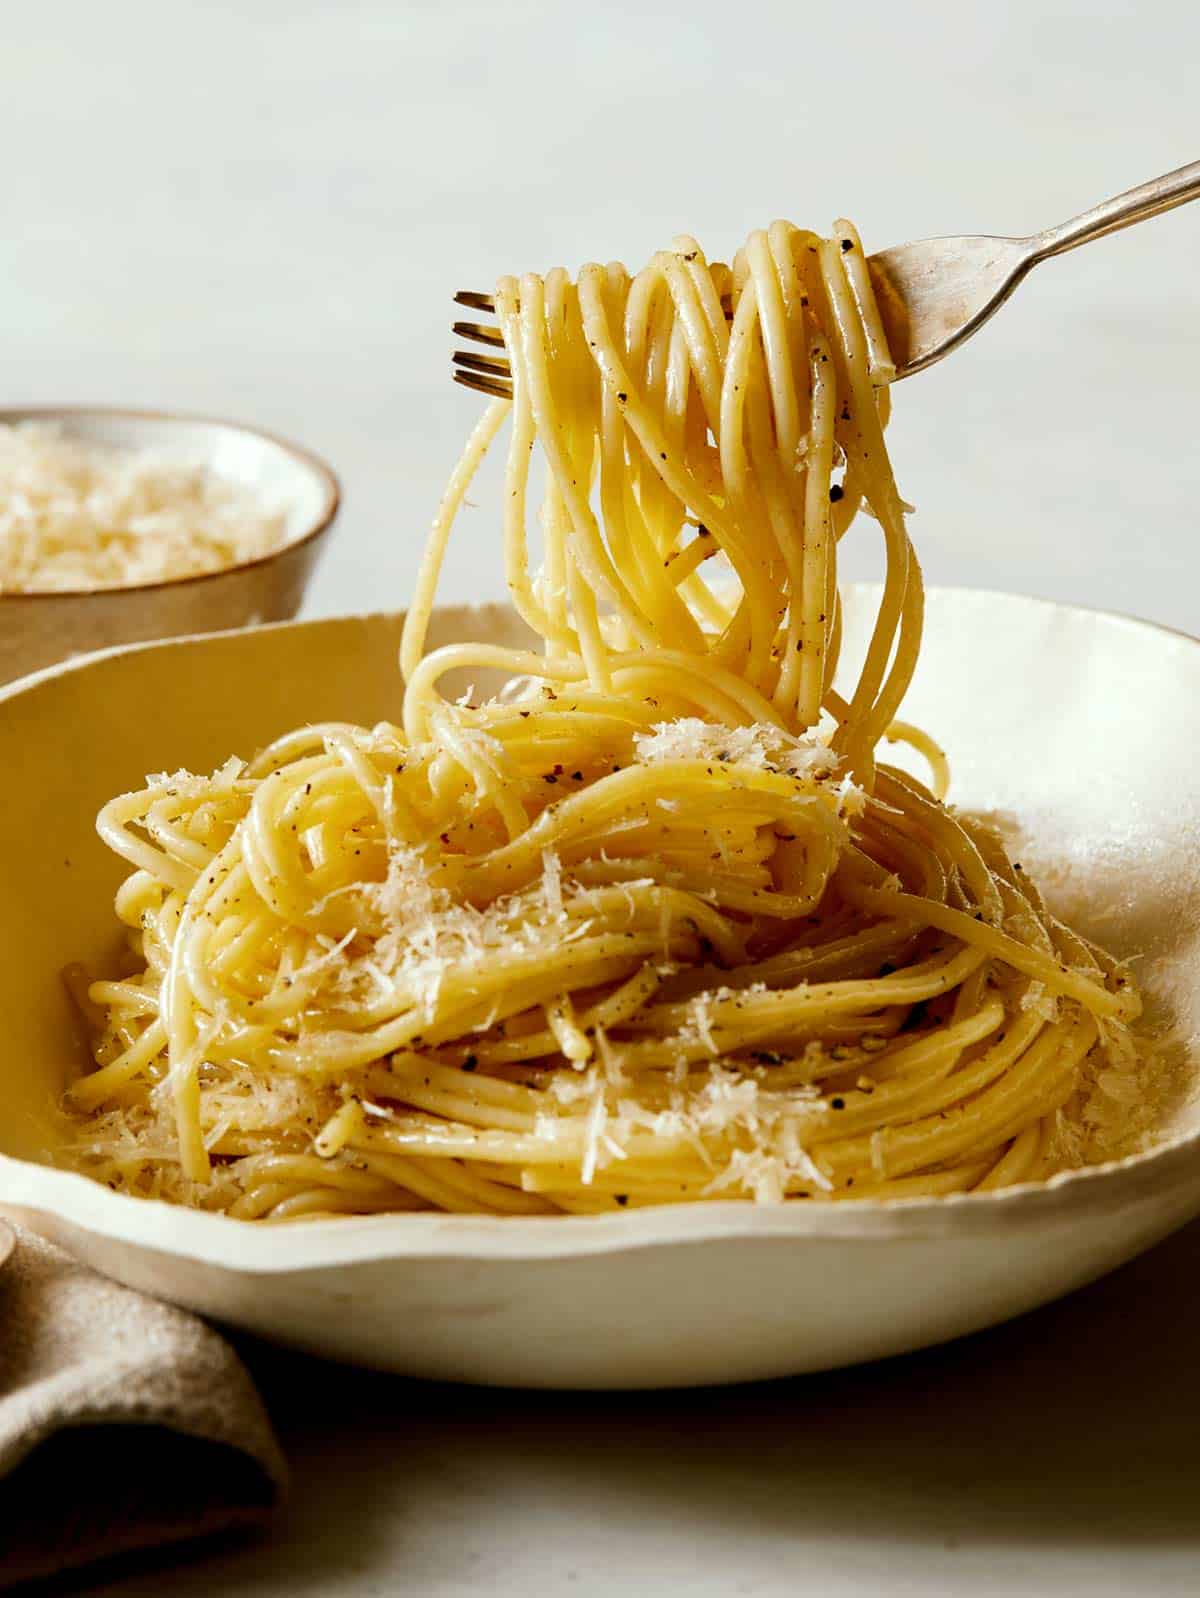
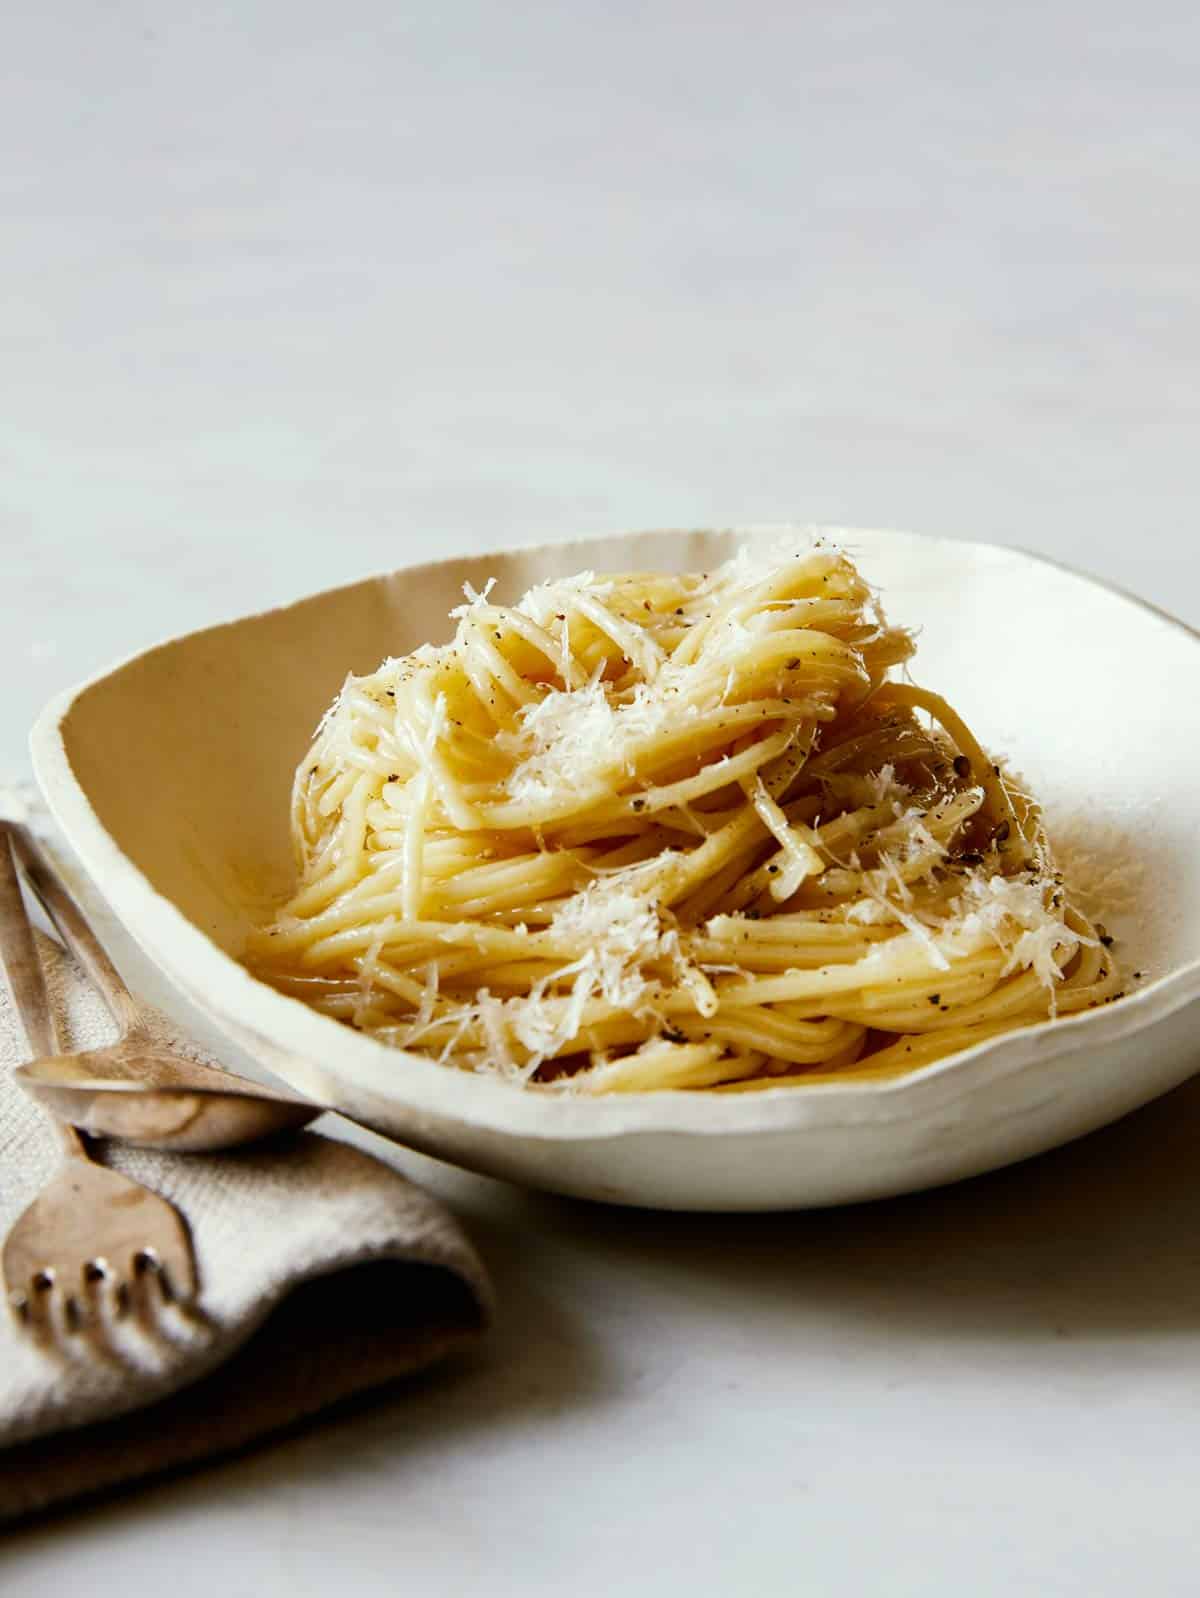
We love this Cacio e Pepe Recipe because it requires only 4 ingredients! It's also really quick to make which makes this perfect for weeknight dinners. This dish is truly indulgent and packs a ton of flavor.
Fill a large pot with water and bring to a boil over high heat.
Add a small handful of salt and pasta to boiling water.
Cook pasta, stirring occasionally until al dente, 6 to 8 minutes.
Drain pasta, reserving 2/3 cup pasta water.
Pour pasta back into pot or into a large skillet and place over low heat.
Add pasta water and butter and toss together until butter just melts.
Add grated cheese and black pepper and continue to toss together until cheese melts and a creamy sauce forms.
Top with more grated cheese and serve.
Video
Notes
Tips and Tricks for SuccessThis is such a simple recipe, we’re confident anyone can successfully make this dish! The one issue we see people running into when making this dish is the cheese clumping up when tossing it together with the pasta. The addition of warm pasta water is the answer! The starchy water helps to create a creamy, saucy consistency that perfectly coats the pasta.
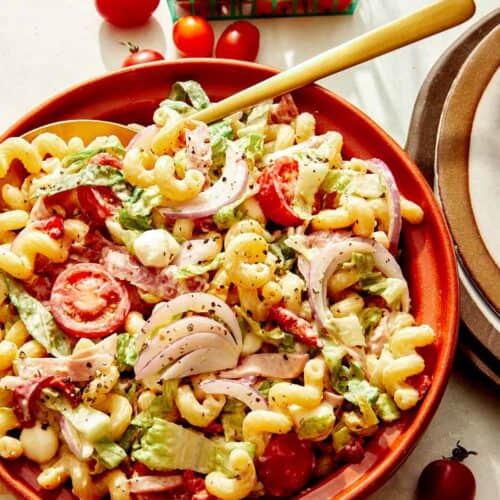
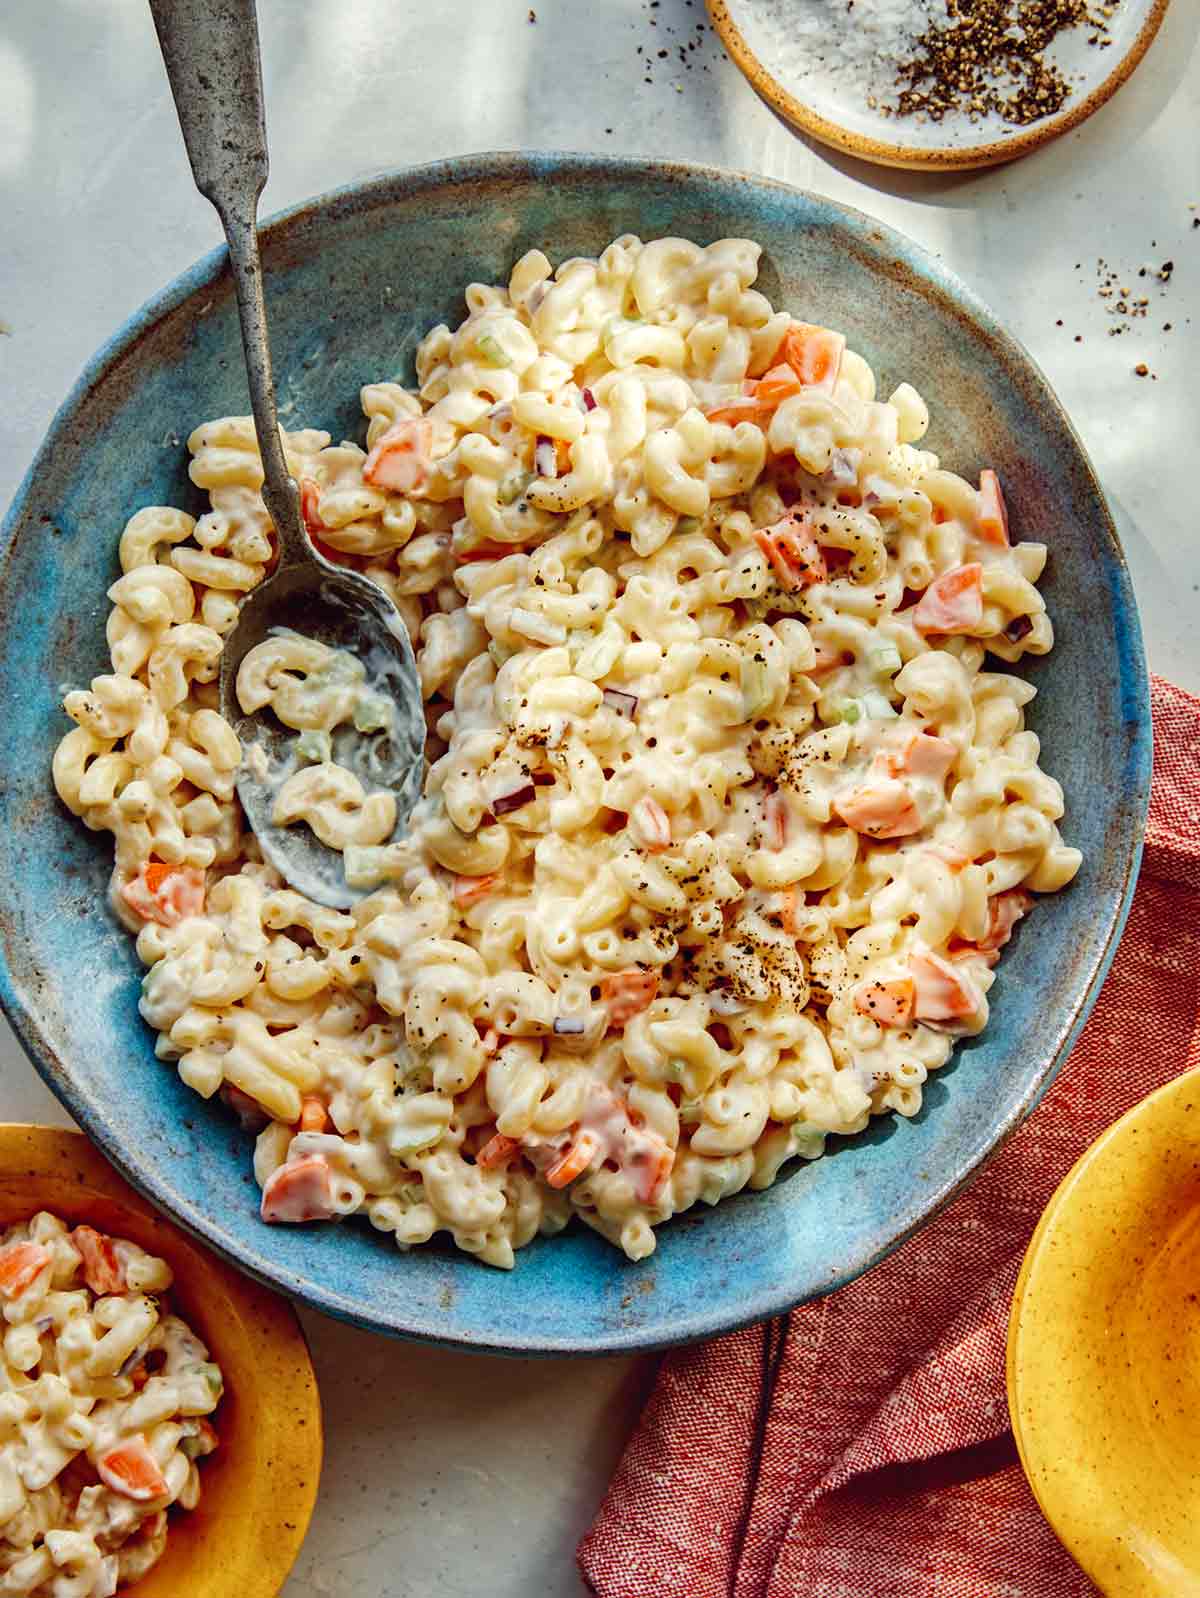
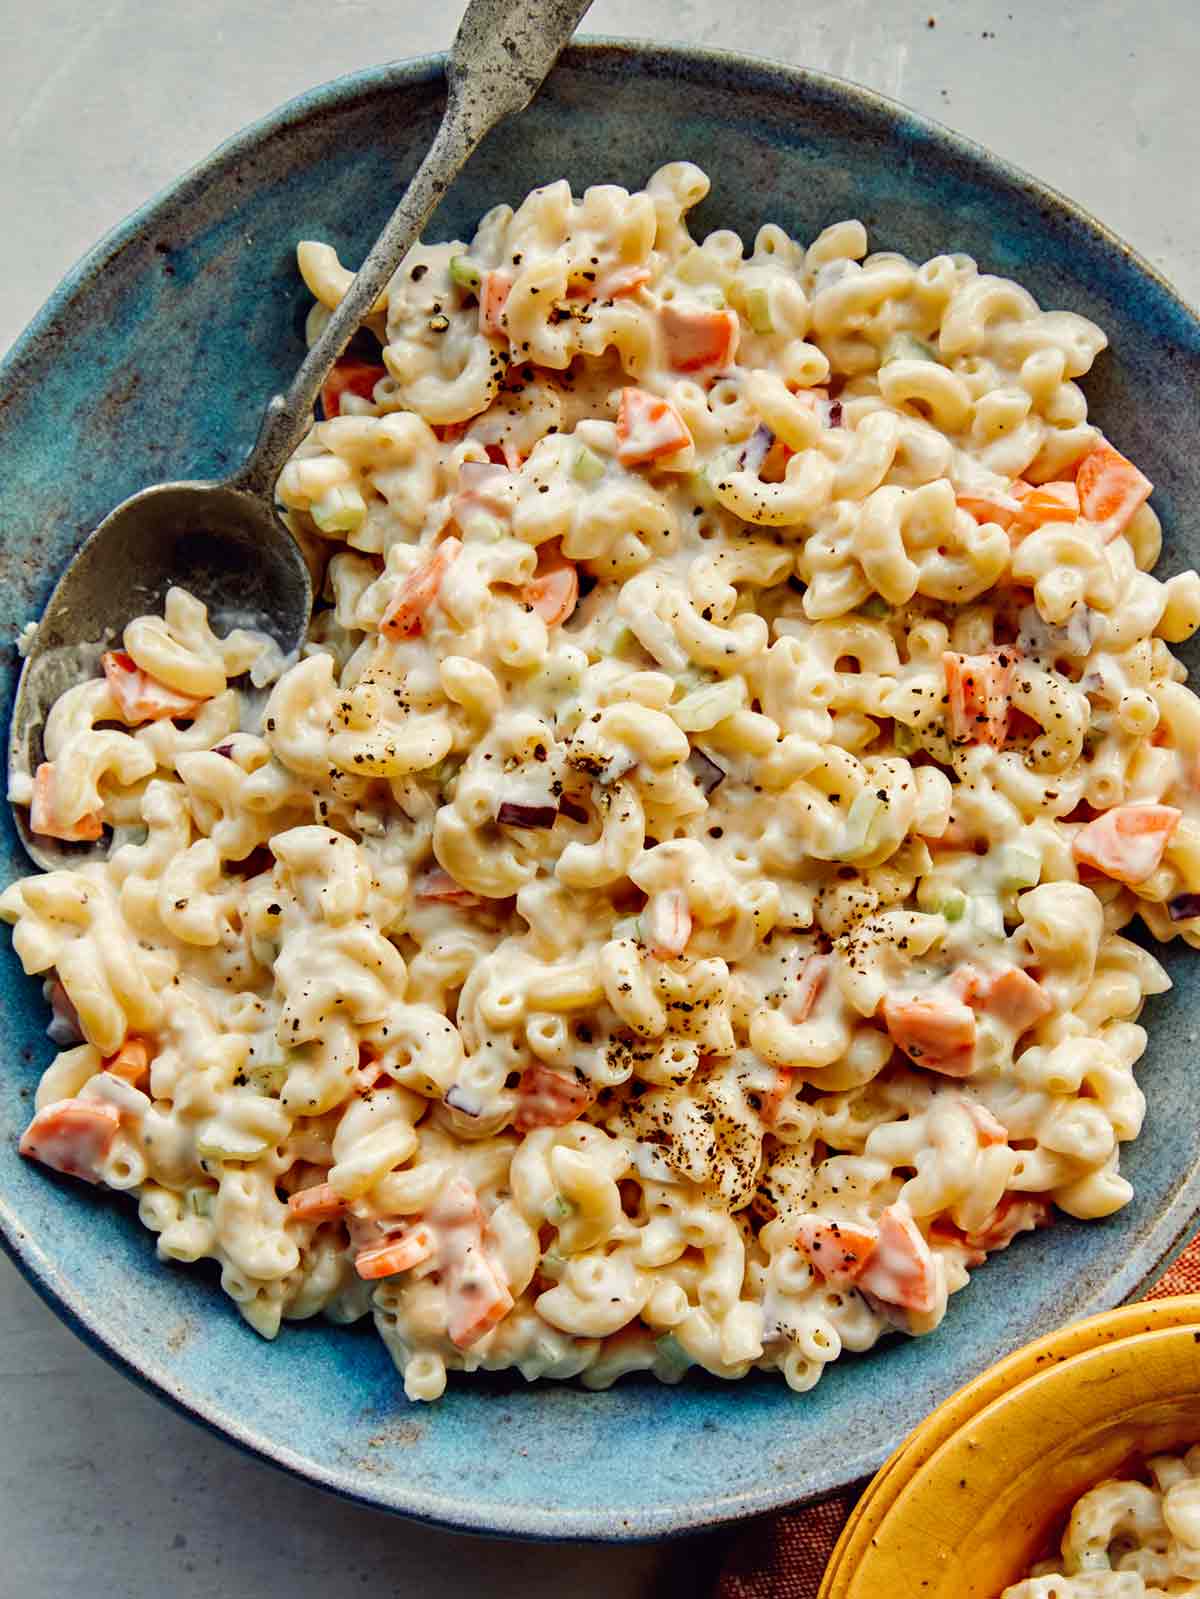
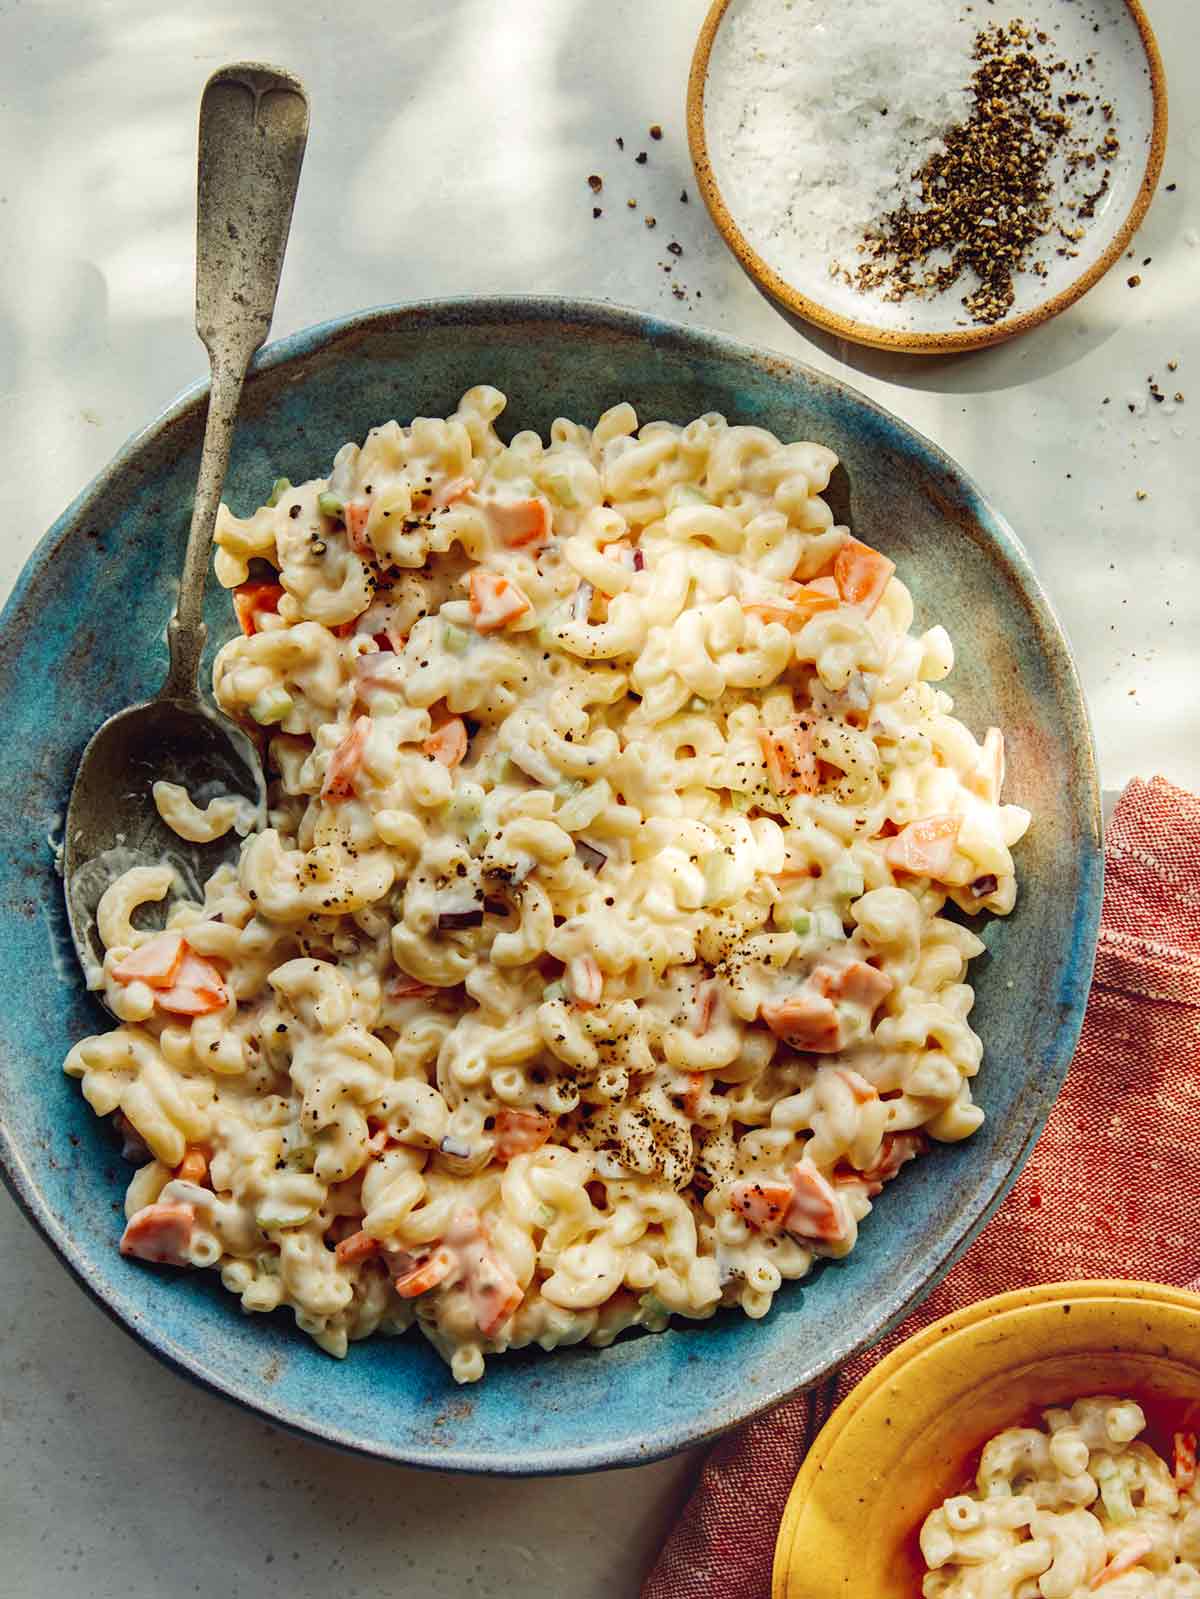
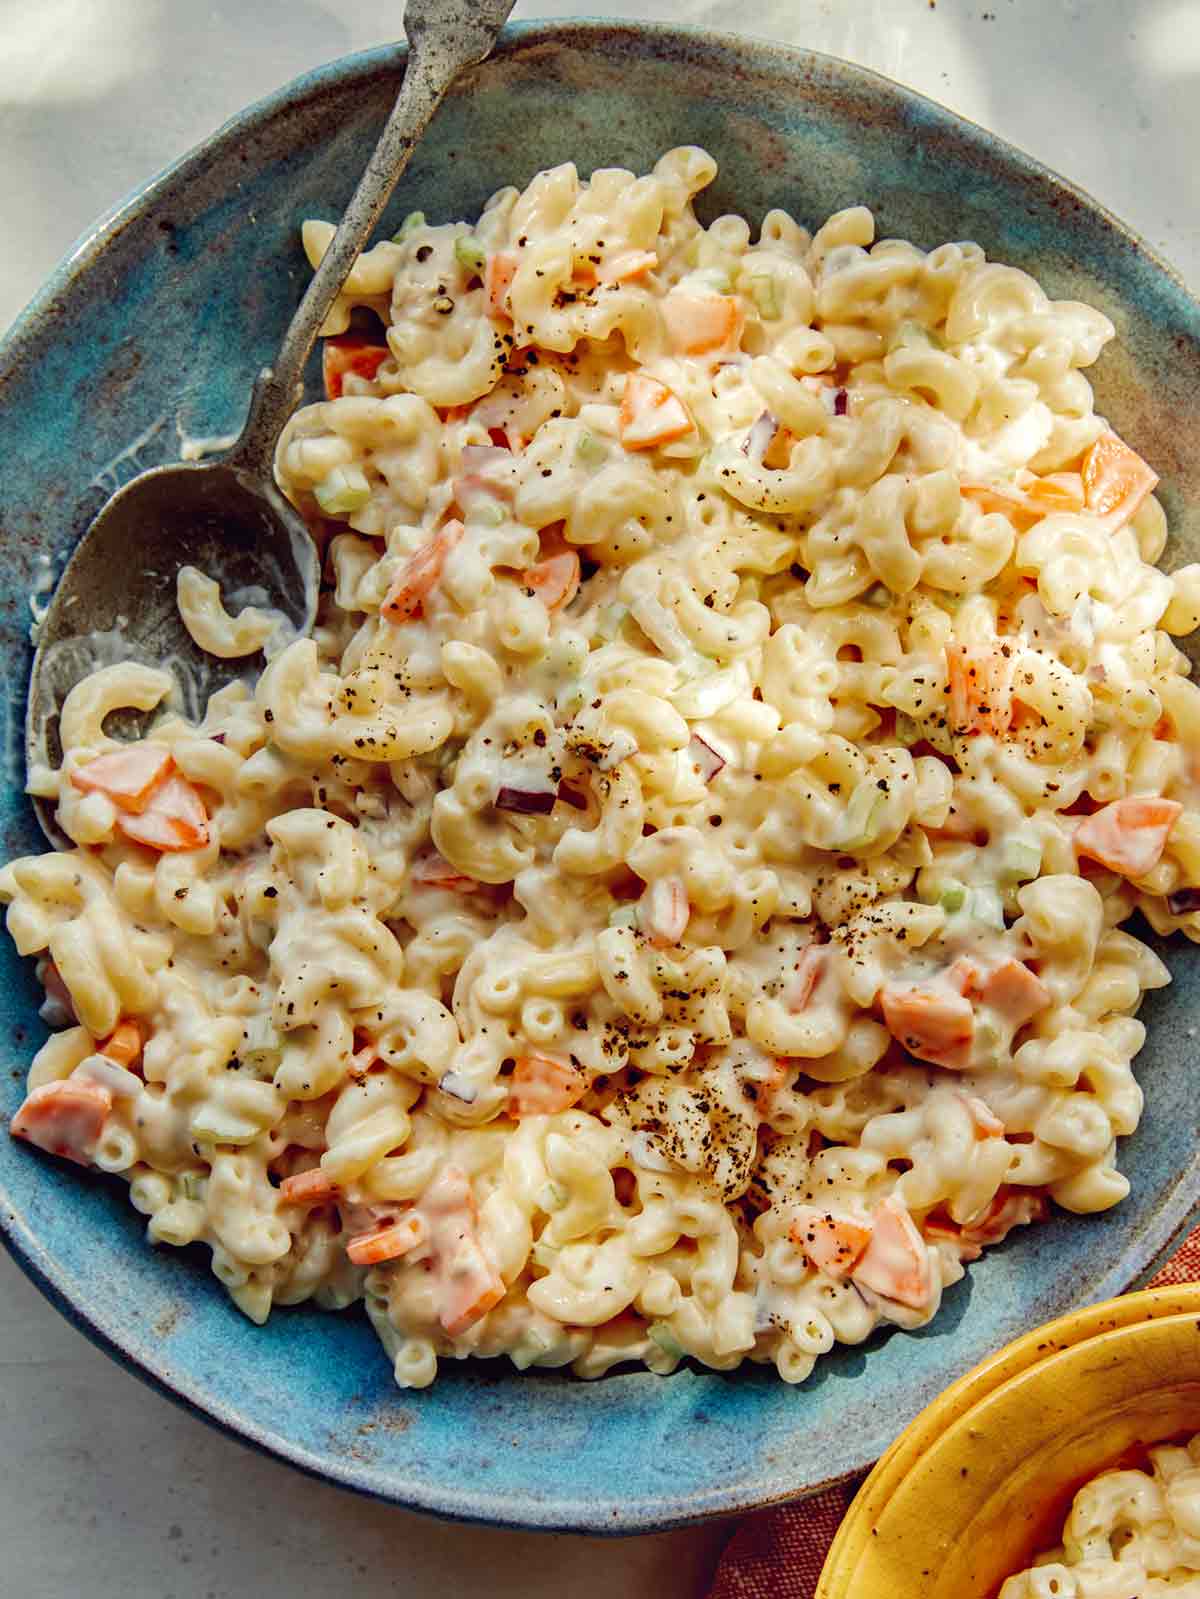
I love Hawaiian Macaroni Salad so much! It’s delicious, creamy and so simple to make! It’s the perfect side dish to bring to a bbq or picnic. It also holds and transports really well and can be made ahead of time! Ours is extra special because we add a small scoop of canned tuna into our mac salad, giving it an extra special, delicious flavor. Trust us, it’s the key ingredient in our simple and…
I love Hawaiian Macaroni Salad so much! It’s delicious, creamy and so simple to make! It’s the perfect side dish to bring to a bbq or picnic. It also holds and transports really well and can be made ahead of time!
Ours is extra special because we add a small scoop of canned tuna into our mac salad, giving it an extra special, delicious flavor. Trust us, it’s the key ingredient in our simple and very delicious Hawaiian macaroni salad!
How to Make Hawaiian Macaroni Salad
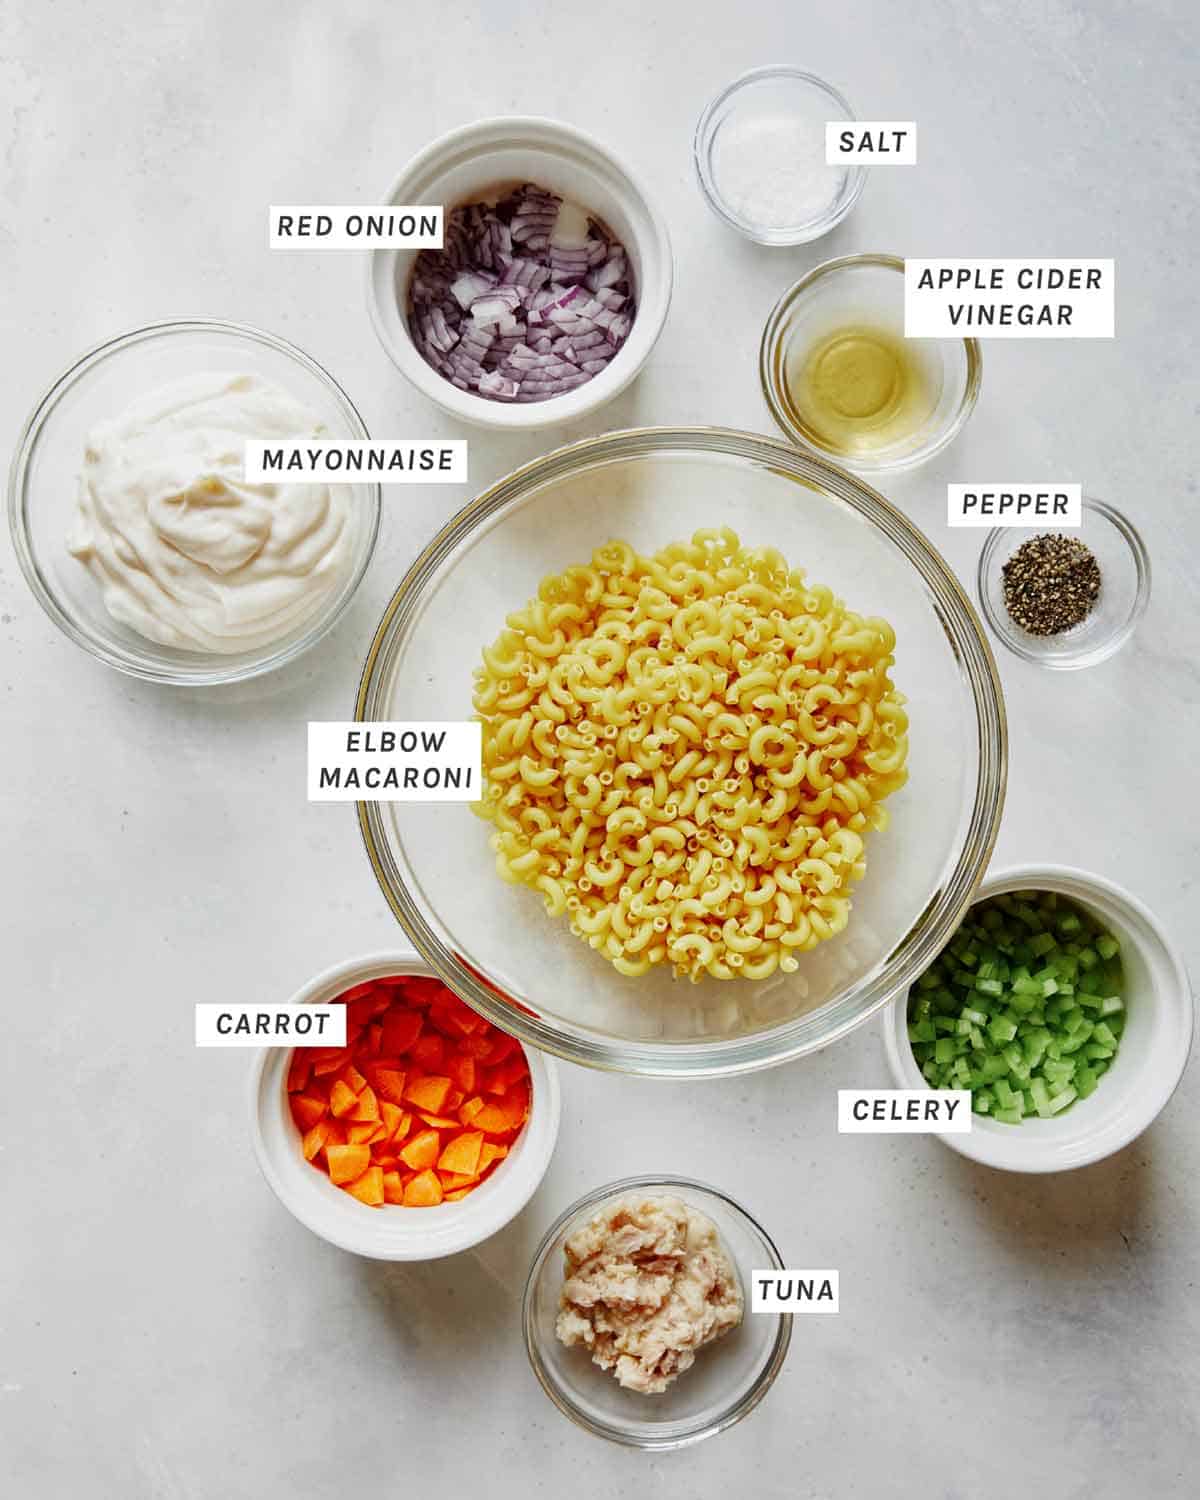
Ingredients
Process
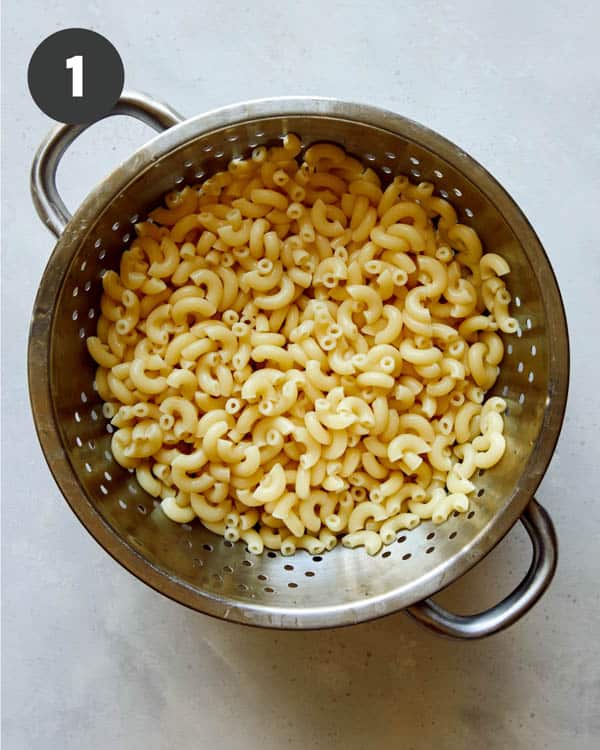
Fill a large pot with water, place over high heat and bring to a boil. Add some salt and the macaroni and stir. Boil macaroni for about 7 to 8 minutes stirring occasionally. Drain and set aside.
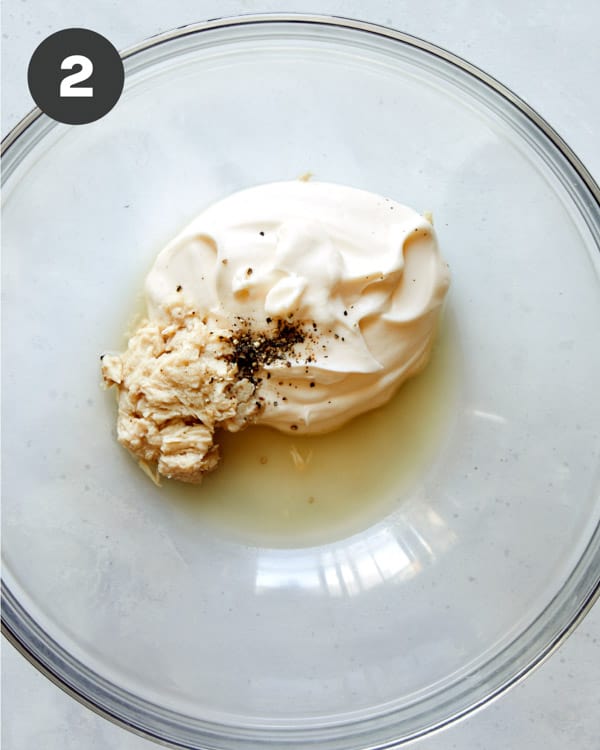
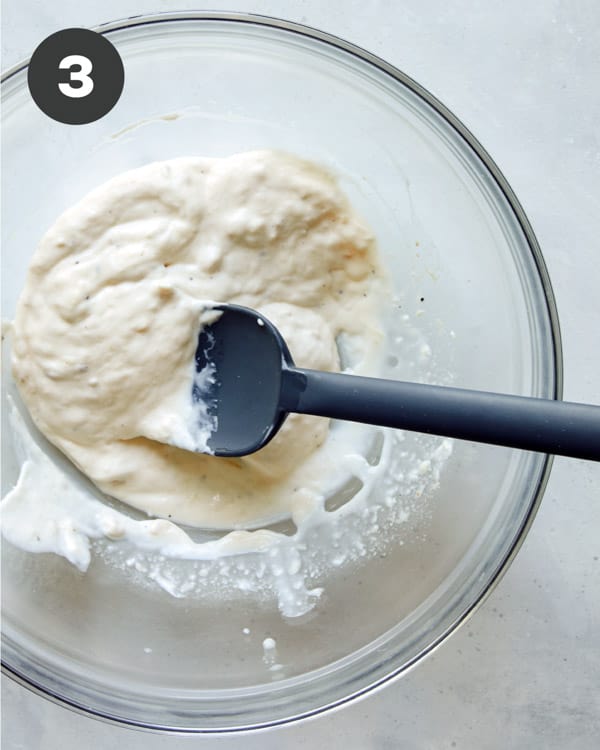
Place mayonnaise, tuna and vinegar in a small bowl. Season with salt and pepper.
Stir together.
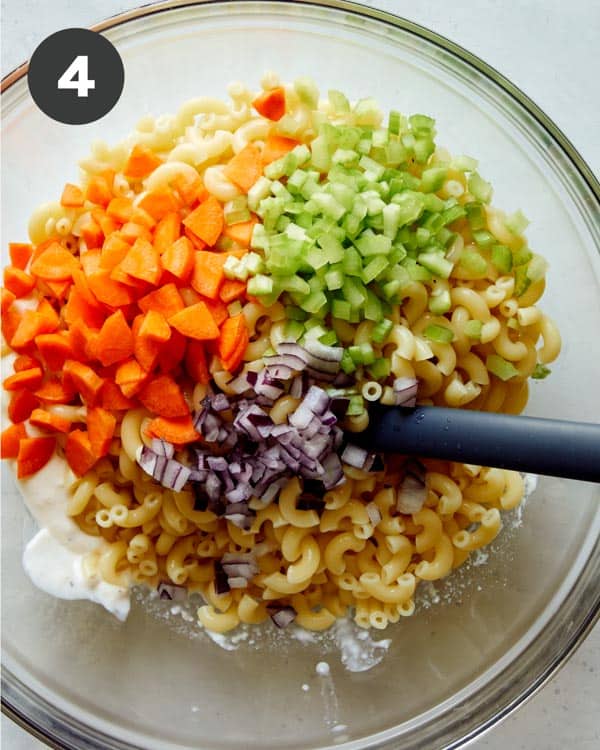
In a large bowl combine macaroni, celery, carrot, red onion, and mayo mixture.
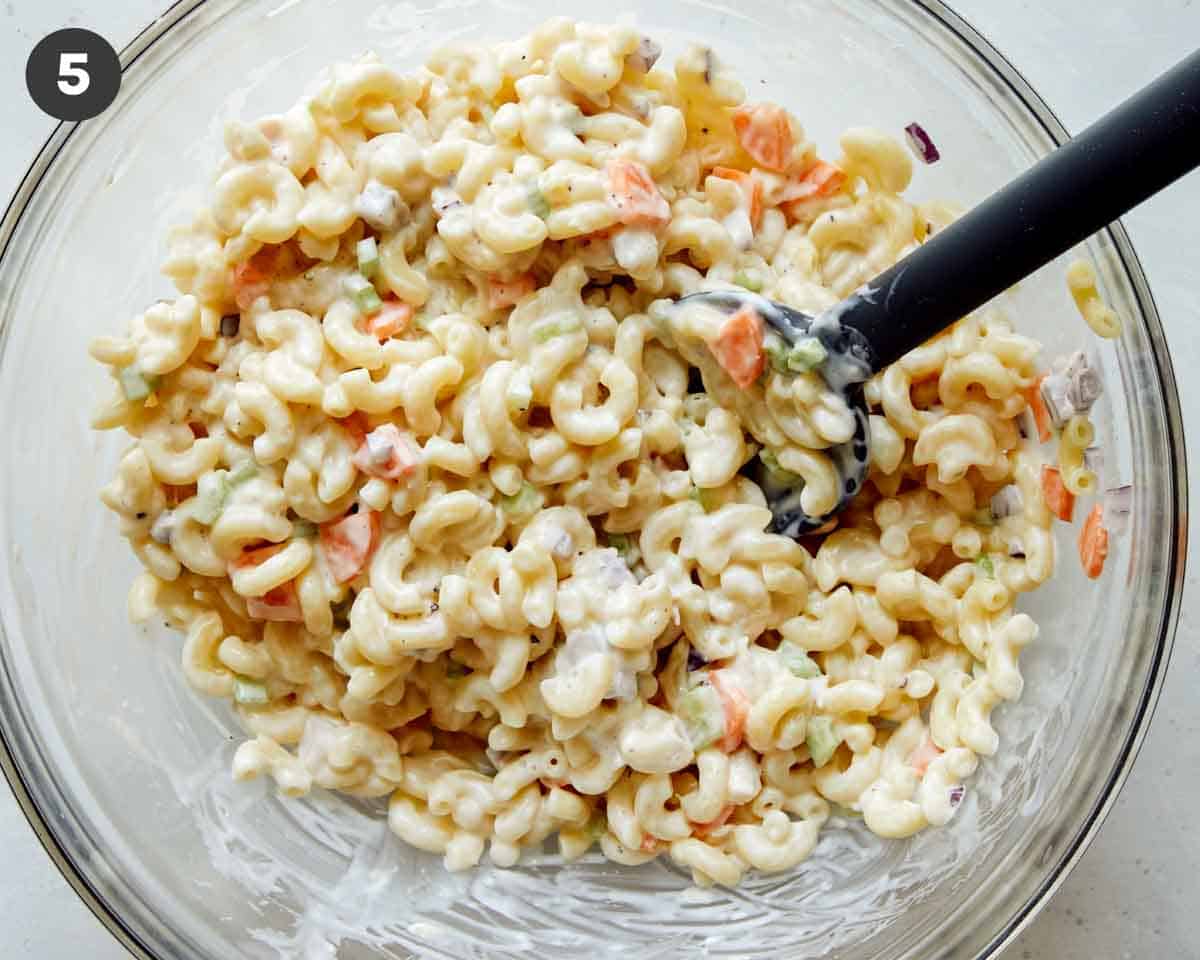
Fold together until thoroughly mixed together. Season with salt and pepper. Place mixture in the refrigerator for at least an hour and season with more salt and pepper, as needed, before serving.
I know the addition of canned tuna might sound strange, but it adds a really nice touch of savory, delicious yet subtle umami flavor to the overall dish – without making the macaroni salad taste fishy at all (I promise!). It’s what makes our Hawaiian macaroni salad truly special!
Variations for our Hawaiian Macaroni Salad
If you want a more authentic version, you can omit the celery and red onion and grate the carrot instead.
Sometimes I like to add bonito flakes, instead of tuna, to the mayo mixture for an even more savory and umami flavor. If replacing the tuna for bonito flakes, just add 1 1/2 teaspoons.
You can swap out the mayo for Kewpie, which is a Japanese mayonnaise. It has a richer, more eggy and slightly sweeter flavor than American mayonnaise and is delicious!
For a vegan version, replace the mayonnaise with veganaise and either omit the tuna or replace it with a tuna alternative, like Good Catch.
Healthier Macaroni Salad
Yes, there’s a lot of mayo in this recipe. It’s what makes the salad extra creamy and delicious, but if you’re looking for a healthier version you can sub some or all of the mayo with plain greek yogurt or some whipped cottage cheese!
Make Ahead Instructions
Our macaroni salad can be made up to 3 days ahead of time and stored in an airtight container in the refrigerator. If making ahead of time, reserve 2/3 cup of the may mixture and fold it into the macaroni salad before serving.
What to Serve with Hawaiian Macaroni Salad
The creamy side dish goes really well with a variety of dishes. Some of our favorite dishes to serve our mac salad with are:
A rich and creamy Hawaiian Macaroni Salad recipe that only requires a handful of ingredients and couldn't be easier to make! It's a delicious side dish that pairs so well with so many different dishes, like Carne Asada, Bulgogi, and BBQ Beef Brisket!
Fill a large pot with water, place over high heat and bring to a boil. Add some salt and the macaroni and stir. Boil macaroni for about 7 to 8 minutes stirring occasionally. Drain and set aside.
Place mayonnaise, tuna and vinegar in a small bowl. Season with salt and pepper and stir together.
In a large bowl combine macaroni, celery, carrot, red onion, and mayo mixture.
Fold together until thoroughly mixed together. Season with salt and pepper.
Place mixture in the refrigerator for at least an hour and season with more salt and pepper, as needed, before serving.
Notes
Healthier Macaroni SaladYes, there’s a lot of mayo in this recipe. It’s what makes the salad extra creamy and delicious, but if you’re looking for a healthier version you can sub some or all of the mayo with plain greek yogurt or whipped cottage cheese!Make Ahead InstructionsOur macaroni salad can be made up to 3 days ahead of time and stored in an airtight container in the refrigerator. If making ahead of time, reserve 2/3 cup of the may mixture and fold it into the macaroni salad before serving.
We are so excited about our Taco Dip Recipe! This recipe is so simple, makes a great appetizer or snack for a crowd and is always devoured in minutes! We love the free form nature of this dip too -you can see all the delicious layers and it’s still very scoop friendly. How to Make Our Taco Dip Recipe Ingredients Process Ground Beef Chipotle Sour Cream Assembly Why We Love This Taco Dip Recipe We…
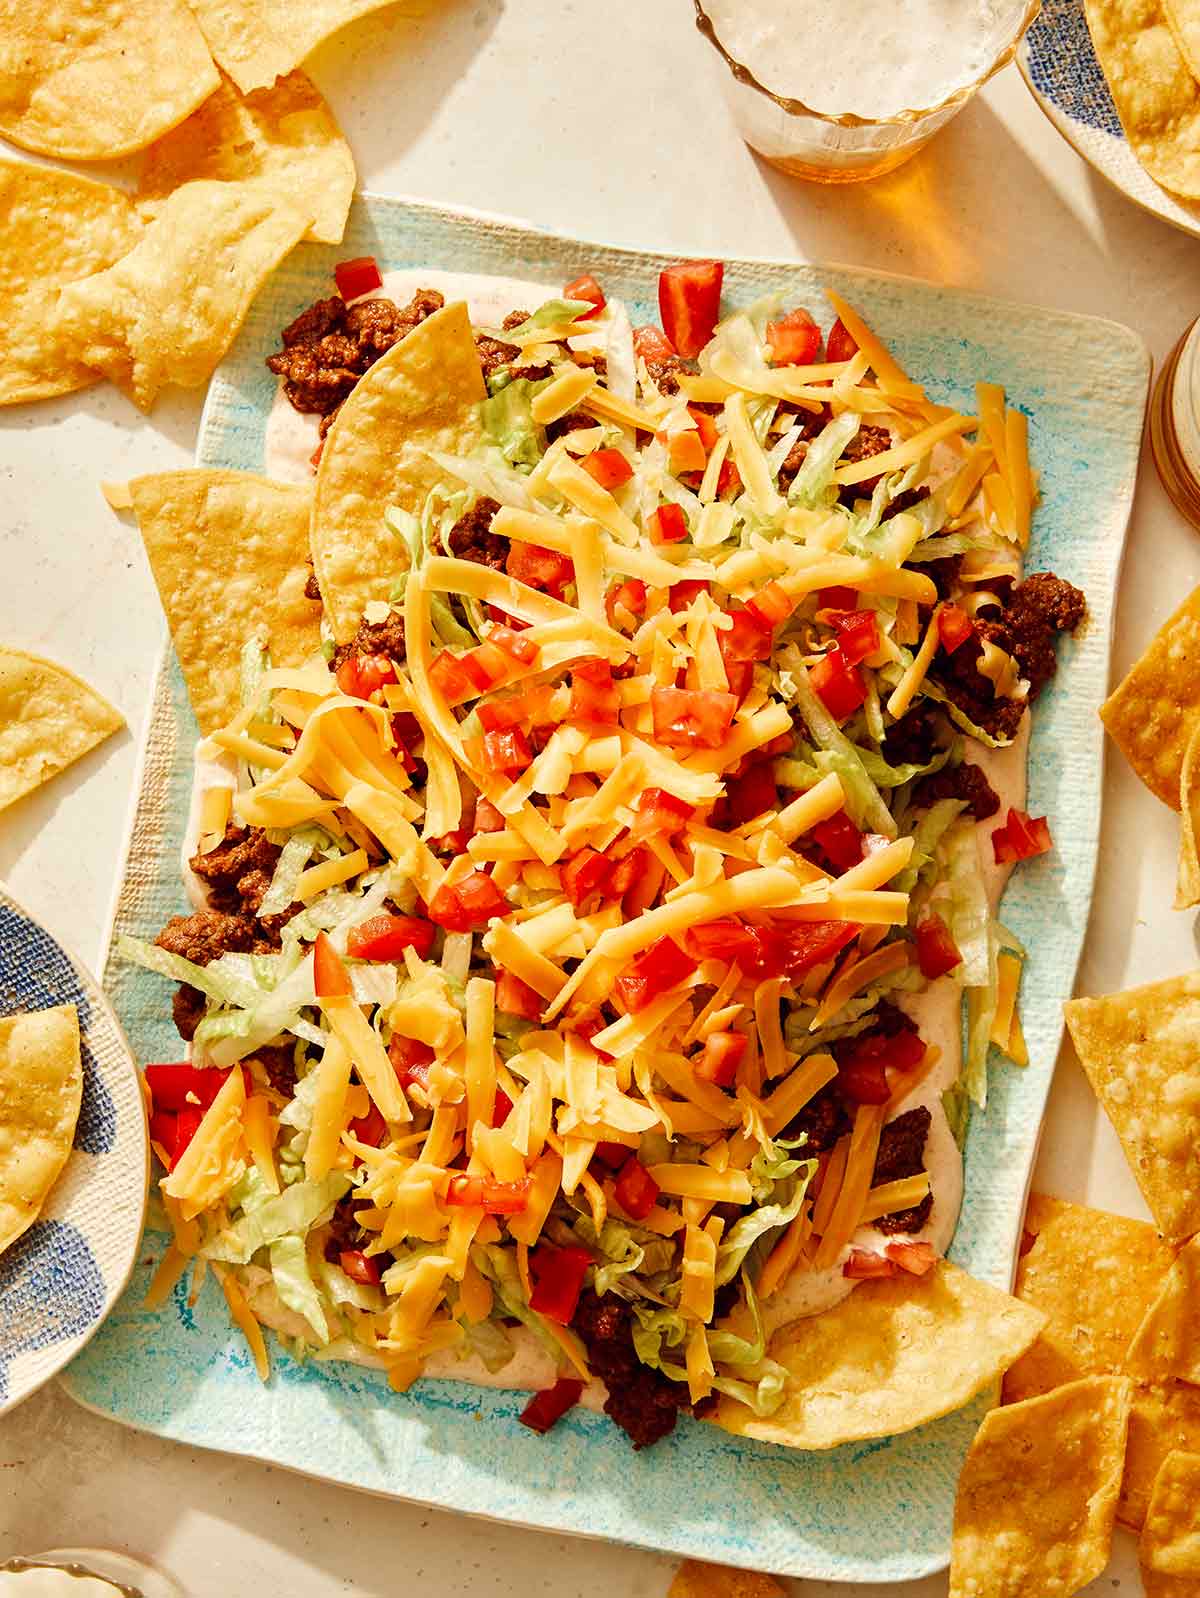
We are so excited about our Taco Dip Recipe! This recipe is so simple, makes a great appetizer or snack for a crowd and is always devoured in minutes! We love the free form nature of this dip too -you can see all the delicious layers and it’s still very scoop friendly.
How to Make Our Taco Dip Recipe
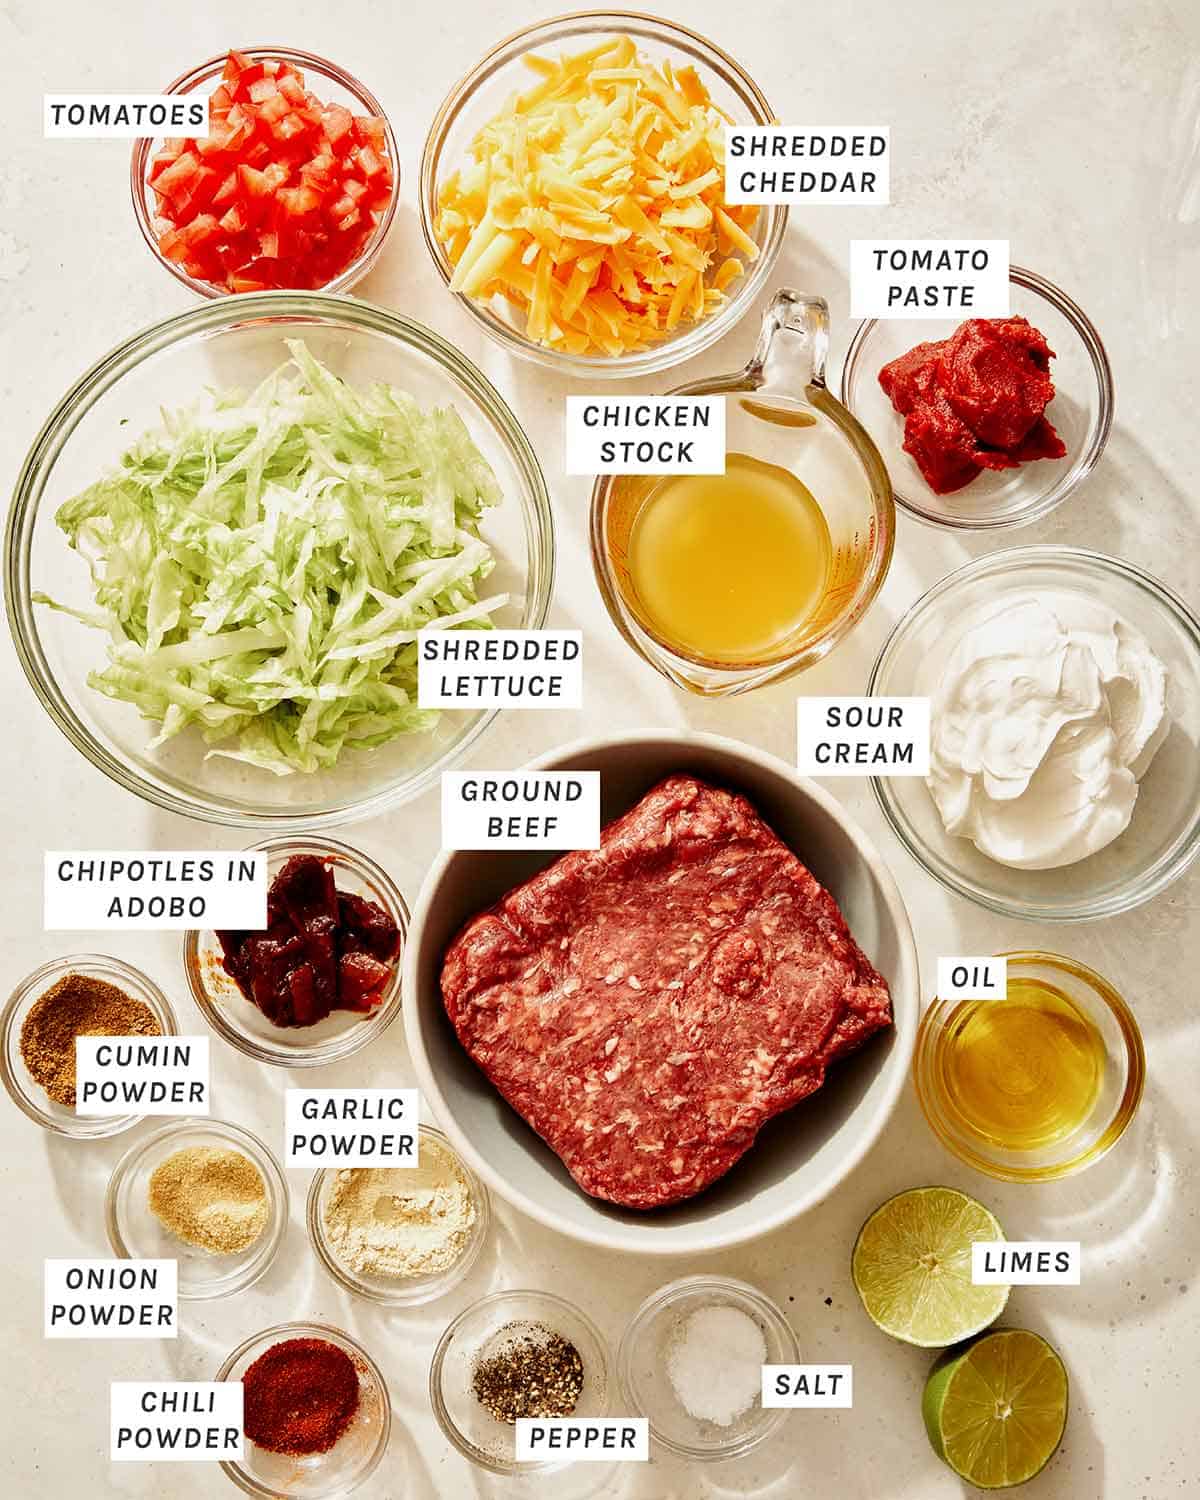
Ingredients
Process
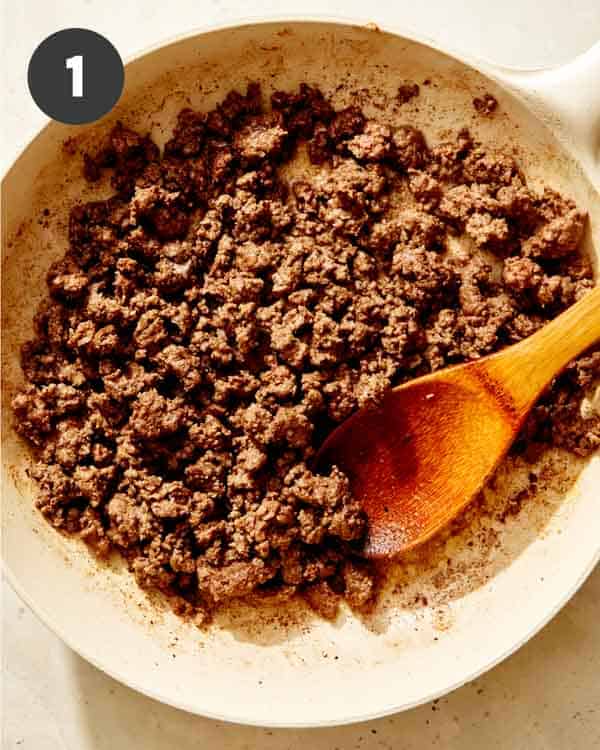
Ground Beef
Place a skillet over medium heat and add oil. Add beef and brown, breaking apart with a wooden spoon. Season with salt and pepper.
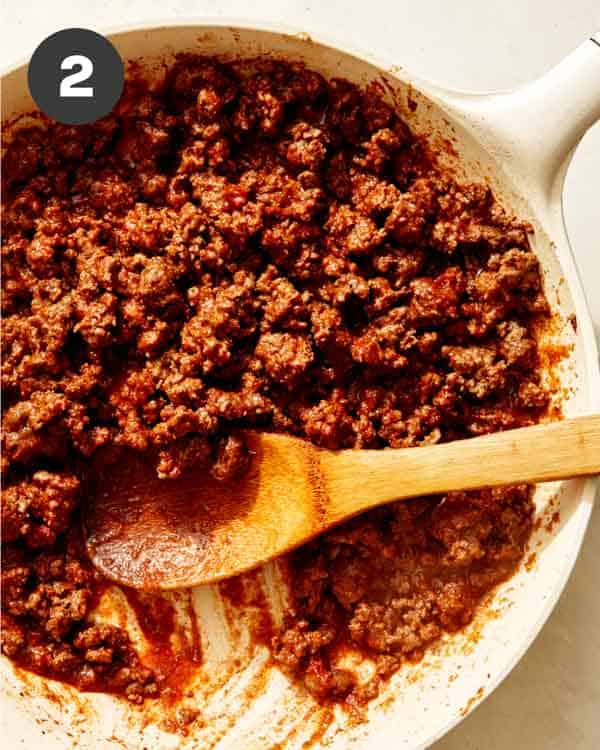
Add cumin, garlic powder, chili powder, onion powder, and smoked paprika and stir together for 1 minute. Stir in tomato paste and stock until bee is evenly coated. Lower heat to medium low and simmer for 5 minutes, stirring occasionally. Set aside and slightly cool.
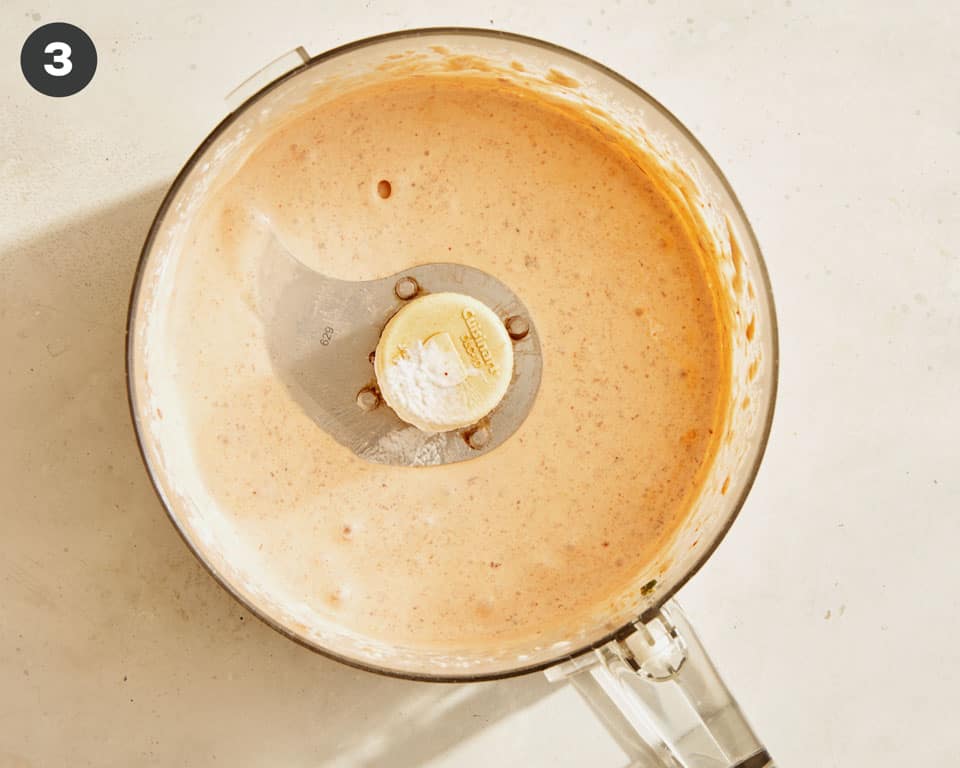
Chipotle Sour Cream
Place sour cream, chipotle peppers and lime juice into a food processor and blend together until smooth.
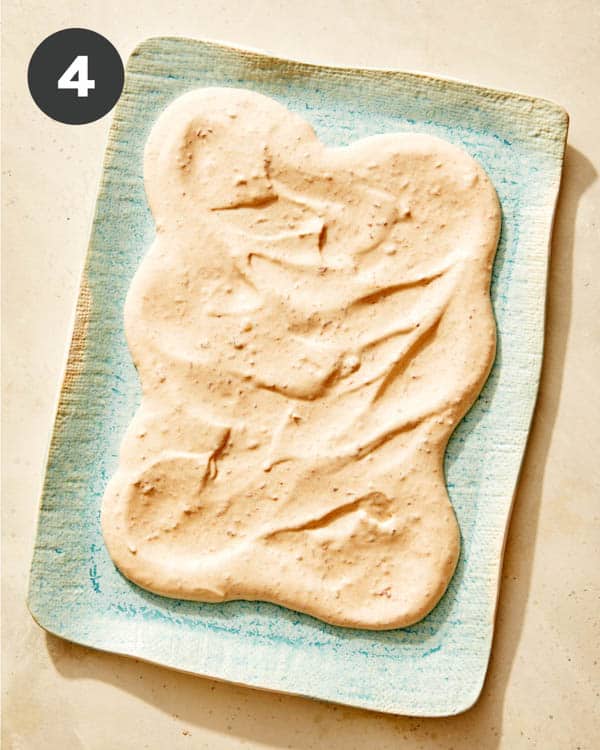
Assembly
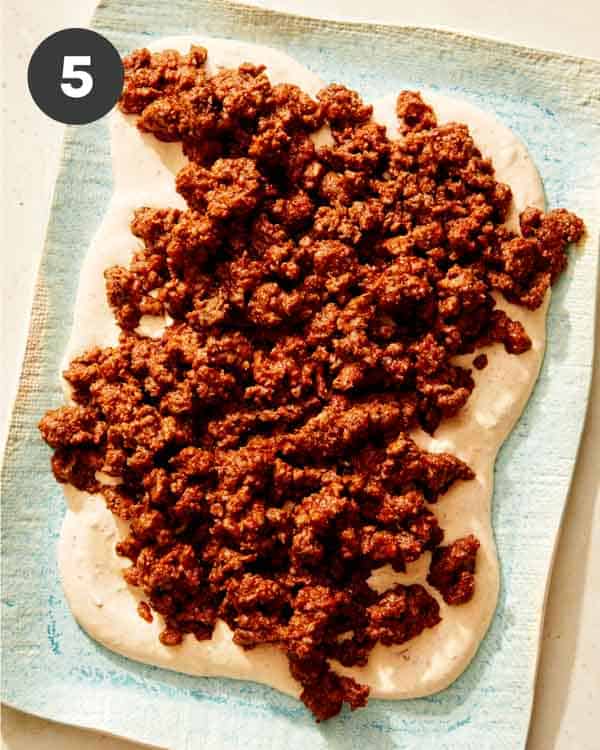
Spread chipotle sour cream in a thin layer onto a platter.
Top with an even layer of ground beef mixture.
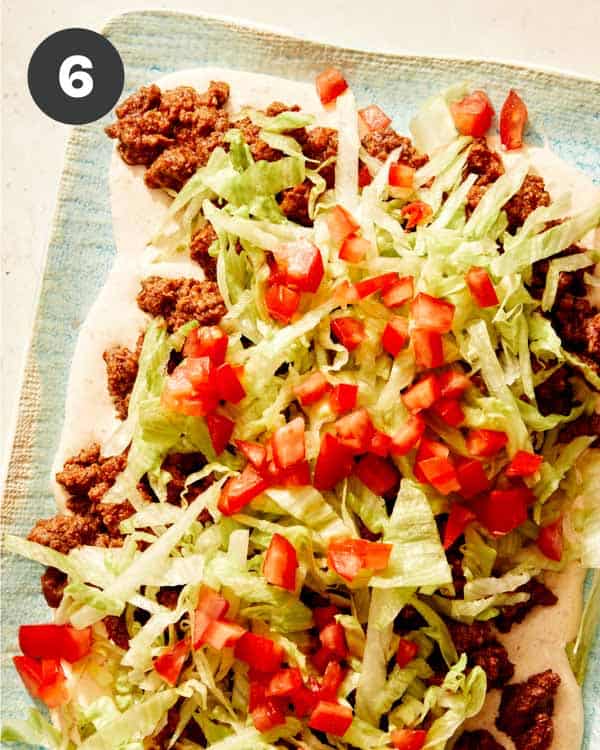
Top beef with shredded lettuce, then half the tomatoes.
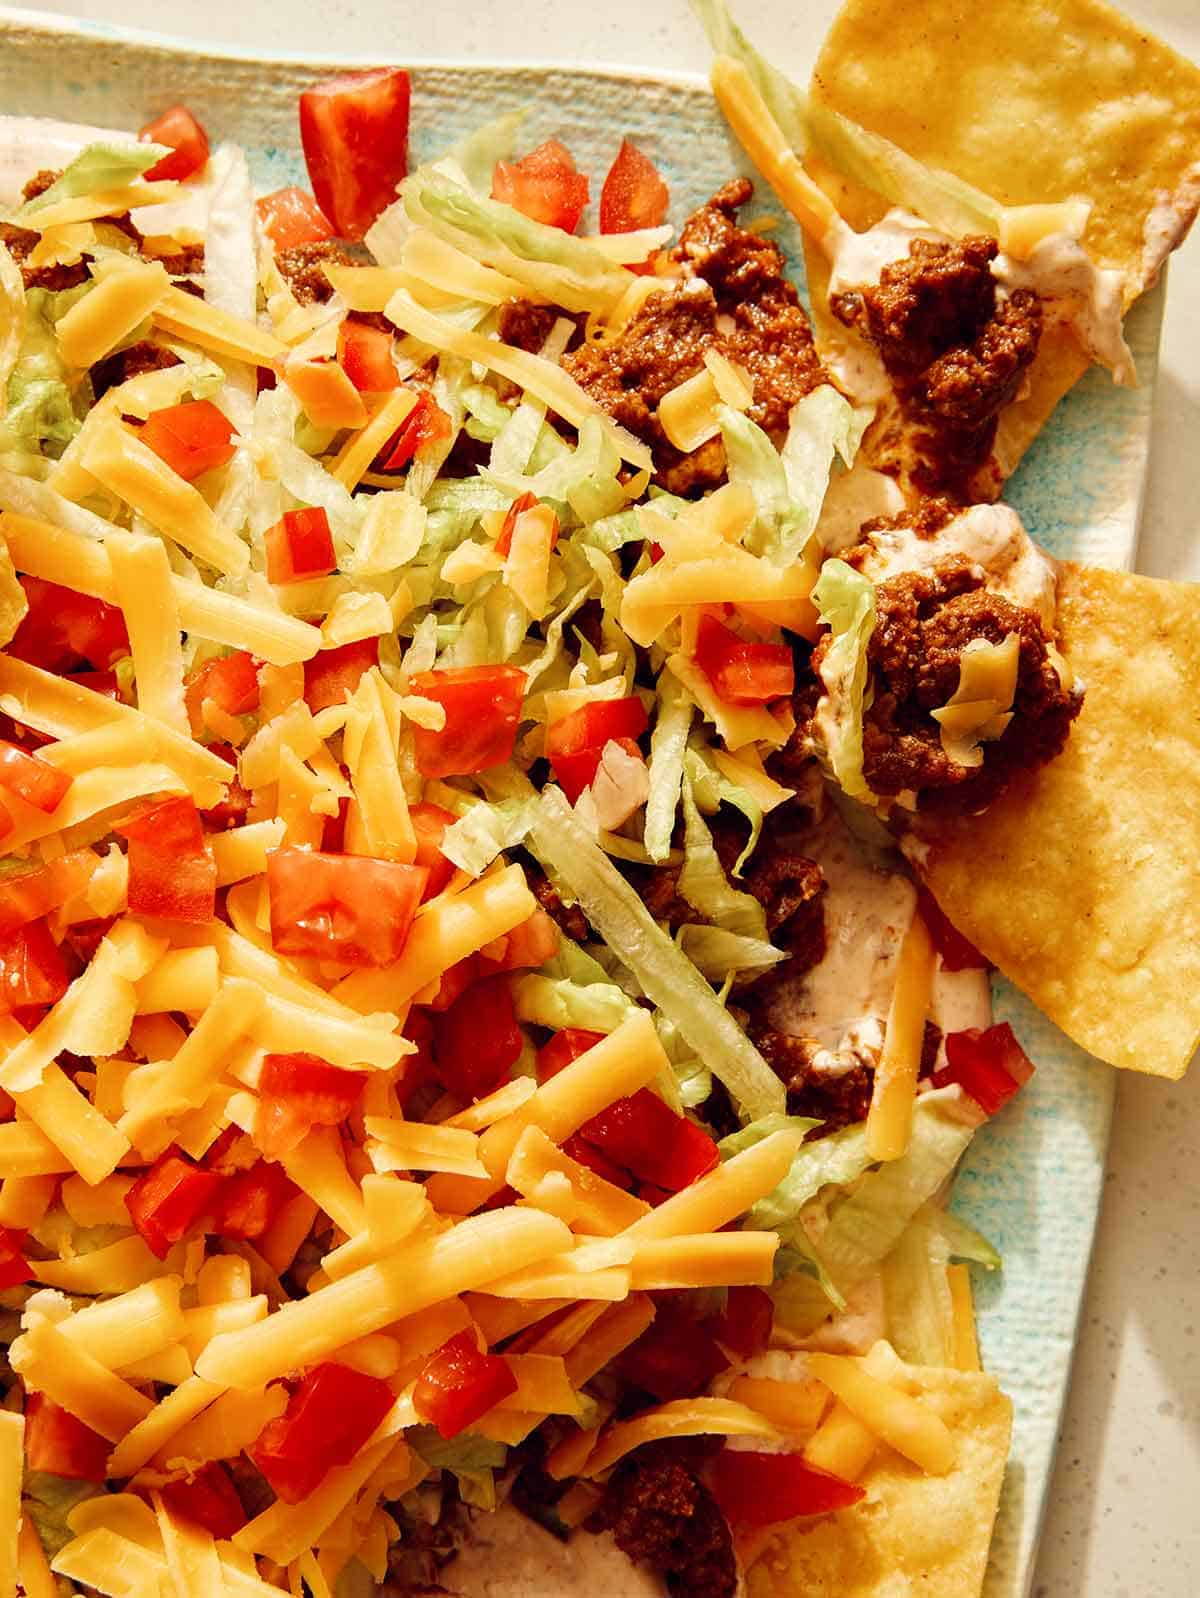
Top with shredded cheese and finally with remaining tomatoes. Season with black pepper and serve with tortilla chips.
Why We Love This Taco Dip Recipe
We love this taco dip recipe for so many reasons! The flavors are so good. It’s really like eating a crunchy ground beef taco in dip form. It’s such an easy appetizer to make and you can prep all of it a day or two ahead of time and assemble it right before serving. We also love this dip because it feeds a crowd and doesn’t cost much to get it all together!
Variations and Substitutions
If you want to go the more traditional 7 layer dip route, you can add a layer of guacamole and a layer of refried beans to this dip.
We love substituting the ground beef for carne asada, ground chicken or turkey or even for some crumbled tofu (for a vegetarian option).
For even more flavor, make a batch of pico de gallo to sprinkle on top instead of just diced tomatoes OR spoon some roasted tomato salsa on top!
Swap the shredded cheddar out for shredded pepper jack cheese or crumbled queso fresco.
Add some fresh sliced or pickled jalapeños for a kick.
Prep Ahead Instructions
All the components can be prepped up to 2 days ahead of time. Keep each component in a separate, airtight container and refrigerate until ready to use.
When ready to serve, heat taco meat up in a skillet over medium-low heat or microwave for 2 to 3 minutes before assembling.
What to Serve with Our Taco Dip Recipe
There are so many delicious dishes that would go great served with our taco dip and some of our favorites are:
A free form Taco Dip Recipe that everyone will love! It tastes just like a crunchy beef taco, but in dip form! We promise it'll be a huge hit at your next party, bbq, picnic, potluck, etc!
Place a skillet over medium heat and add oil. Add beef and brown, breaking apart with a wooden spoon. Season with salt and pepper.
Add cumin, garlic powder, chili powder, onion powder, and smoked paprika and stir together for 1 minute.
Stir in tomato paste and stock until bee is evenly coated. Lower heat to medium low and simmer for 5 minutes, stirring occasionally. Set aside and slightly cool.
chipotle sour cream
Place sour cream, chipotle peppers and lime juice into a food processor and blend together until smooth.
assembly
Spread chipotle sour cream in a thin layer onto a platter.
Top with an even layer of ground beef mixture.
Top beef with shredded cheese, then half the tomatoes.
Top with shredded lettuce and finally with remaining tomatoes.
Season with black pepper and serve with tortilla chips.
Notes
Prep Ahead InstructionsAll the components can be prepped up to 2 days ahead of time. Keep each component in a separate, airtight container and refrigerate until ready to use.When ready to serve, heat taco meat up in a skillet over medium-low heat or microwave for 2 to 3 minutes before assembling.Variations and Substitutions
If you want to go the more traditional 7 layer dip route, you can add a layer of guacamole and a layer of refried beans to this dip.
We love substituting the ground beef for carne asada, ground chicken or turkey or even for some crumbled tofu (for a vegetarian option).
For even more flavor, make a batch of pico de gallo to sprinkle on top instead of just diced tomatoes OR spoon some roasted tomato salsa on top!
Swap the shredded cheddar out for shredded pepper jack cheese or crumbled queso fresco.
Add some fresh sliced or pickled jalapeños for a kick.
Our Baked Eggs recipe is quickly becoming one of our favorite quick and easy breakfasts! The nature of the dish makes it seem fancy, but it’s not at all! Plus, it’s super delicious and can be made on even the busiest of mornings! Serve it with toast sticks for dipping for the best experience! How to Make Baked Eggs Ingredients Process How Long to Cook Baked Eggs? **Something to keep in mind – the thicker…
Our Baked Eggs recipe is quickly becoming one of our favorite quick and easy breakfasts! The nature of the dish makes it seem fancy, but it’s not at all! Plus, it’s super delicious and can be made on even the busiest of mornings! Serve it with toast sticks for dipping for the best experience!
How to Make Baked Eggs
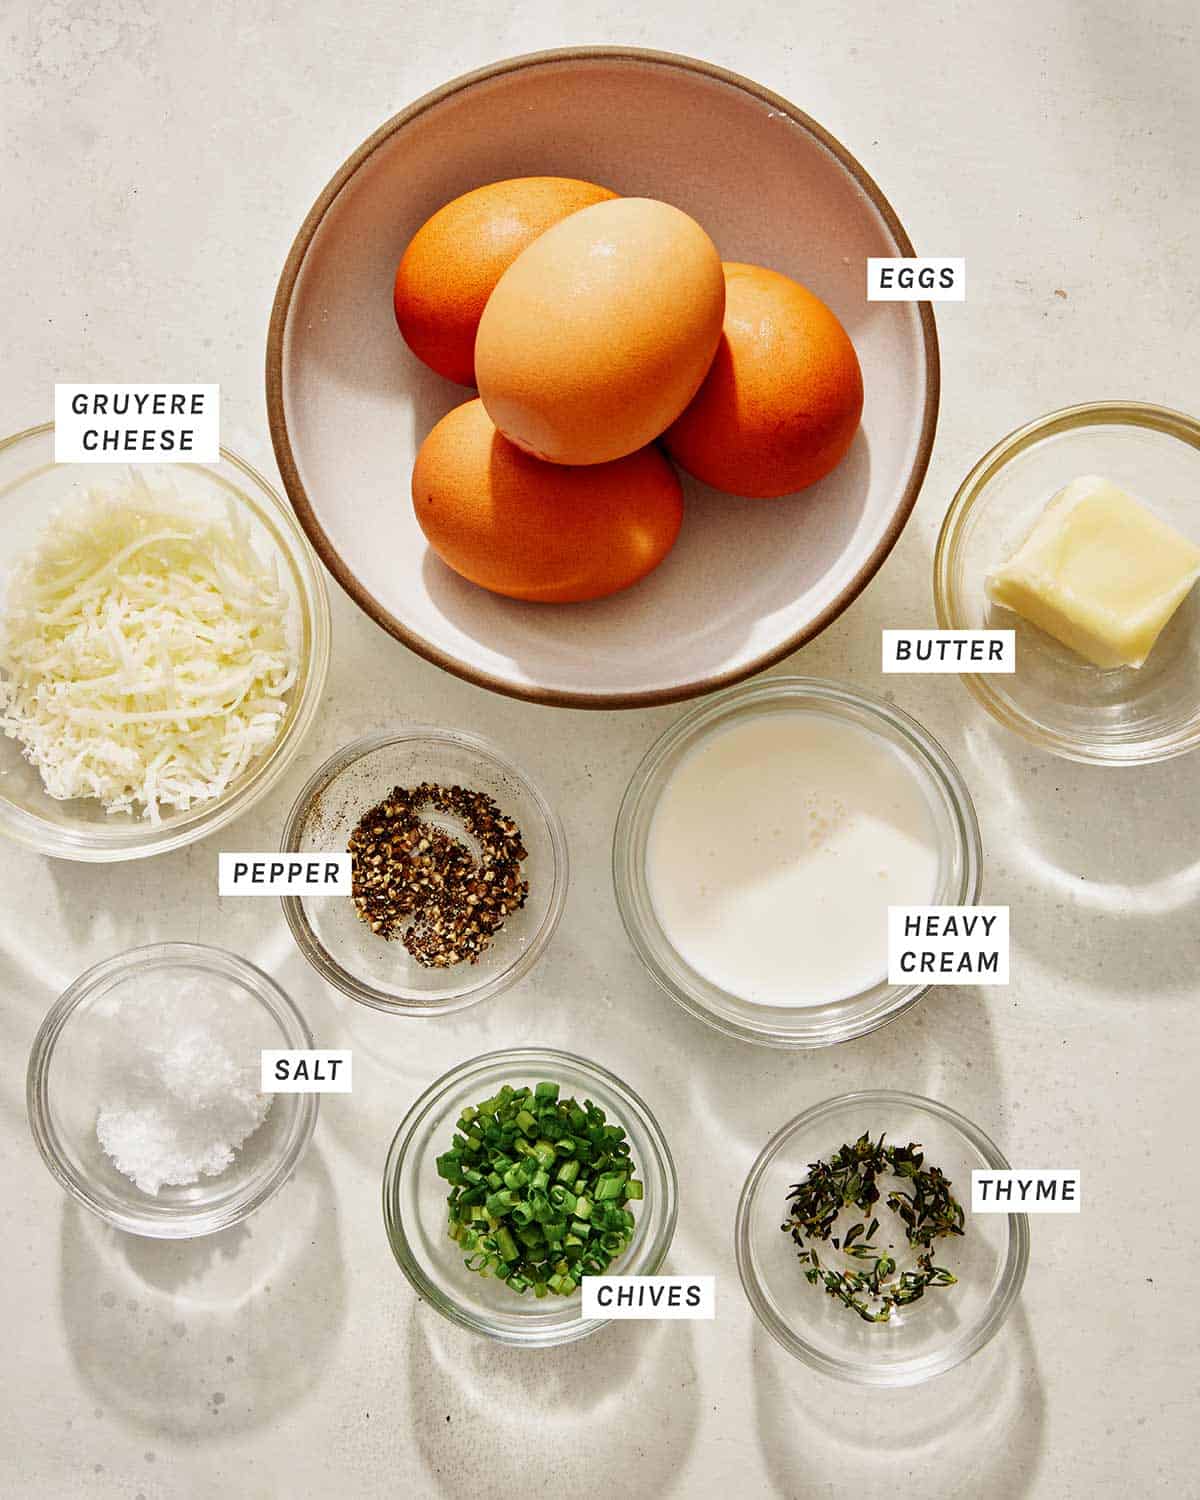
Ingredients
Process
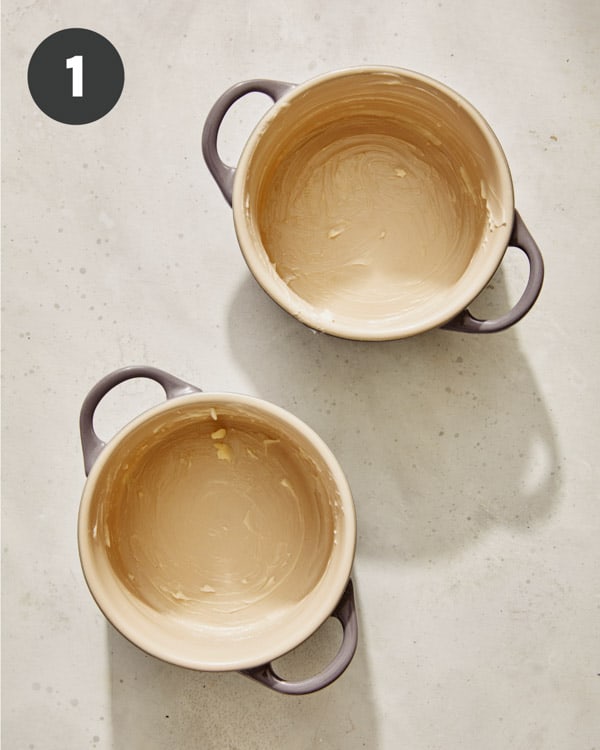
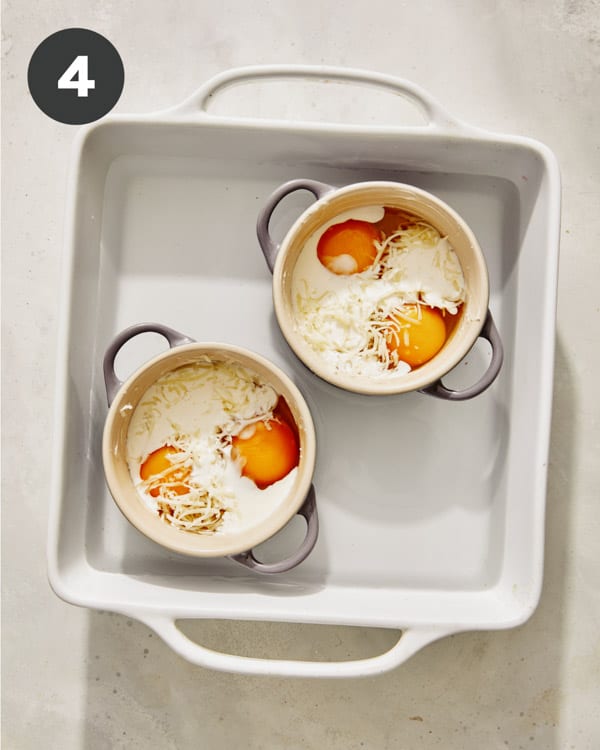
Preheat oven to 350˚F. Bring a kettle of water to a boil. Divide butter into each cocotte (or ramekin) and evenly grease.
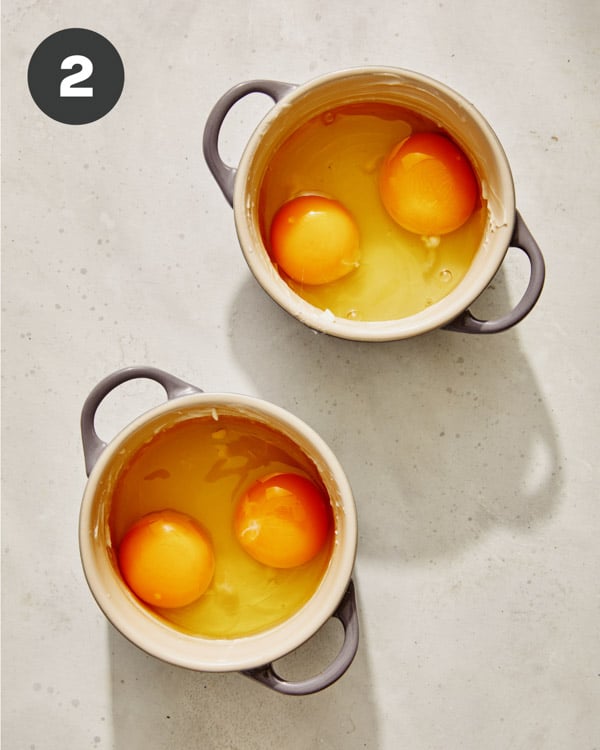
Crack 2 eggs into each vessel.
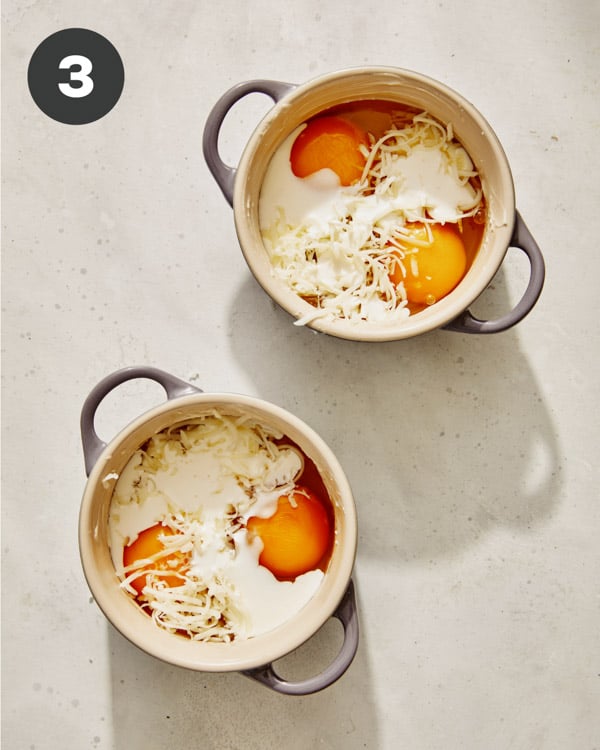
Top with shredded cheese.
Spoon 1 tablespoon cream over each egg.
Cover each cocotte with a lid, or cover each ramekin with foil.
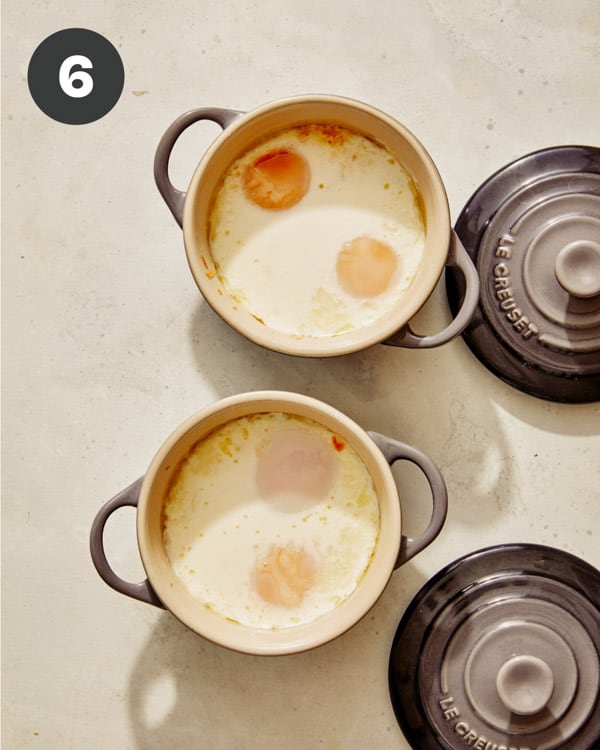
Place vessels into a small baking dish and set onto the middle rack in the oven. Pour boiling water from the kettle into baking dish until halfway up the vessels.
Bake eggs en cocotte for 13 to 16 minutes for runny eggs (or 18 to 24 minutes for jammy to hard boiled eggs). Remove baking dish from oven and gently remove vessels from baking dish. Uncover, sprinkle with chives and thyme, if using. Season with salt flakes and cracked black pepper and serve with crusty bread or crostini.
How Long to Cook Baked Eggs?
13 to 15 minutes will result in a runny yolk
16-19 minutes will give you jammy to medium yolks
20-24 minutes for hard-cooked yolks
**Something to keep in mind – the thicker your baking vessel the longer your baking times will be**
Toppings for Baked Eggs
There are so many delicious toppings you can add to bulk up this dish. It’s not necessary, but a delicious way to mix things up! Some of our favorite toppings are:
sautéed mushrooms (we like cremini or shiitake for this recipe) and spinach
crumbled bacon
crumbled goat cheese or feta
fresh chopped tomatoes or thinly sliced sun-dried tomatoes and chopped basil
diced and sautéed zucchini and corn
What to Serve with Baked Eggs
Our Crispy and Cheesy Hash Browns taste perfect next to this dish. Pro tip: Try dipping the hash browns into the eggs – you’re welcome!
We would never say no to a side of perfectly cooked Oven Bacon…ever!
Baked Eggs (or Eggs En Cocotte) is a delicious and simple breakfast that's perfect for any day of the week. It's a protein filled dish that's very satisfying and can be made in under 30 minutes! We love serving this dish with a side of toast sticks for dipping!
Preheat oven to 350˚F. Bring a kettle of water to a boil.
Divide butter into each cocotte (or ramekin) and evenly grease.
Crack 2 eggs into each vessel and top with shredded cheese.
Spoon 1 tablespoon cream over each egg.
Cover each cocotte with a lid, or cover each ramekin with foil.
Place vessels into a small baking dish and set onto the middle rack in the oven.
Pour boiling water from the kettle into baking dish until halfway up the vessels.
Bake eggs en cocotte for 13 to 15 minutes for runny eggs (or 16 to 24 minutes for jammy to hard boiled eggs).
Remove baking dish from oven and gently remove vessels from baking dish.
Uncover, sprinkle with chives and thyme, if using. Season with salt flakes and cracked black pepper and serve with crusty bread or crostini.
Notes
How Long to Cook Baked Eggs?
13 to 15 minutes will result in a runny yolk
16-19 minutes will give you jammy to medium yolks
20-24 minutes will give you hard-cooked yolks
**Something to keep in mind – the thicker your baking vessel the longer your baking times will be**Toppings for Baked EggsThere are so many delicious toppings you can add to bulk up this dish. It’s not necessary, but a delicious way to mix things up! Some of our favorite toppings are:
sautéed mushrooms (we like cremini or shiitake for this recipe) and spinach
crumbled bacon
crumbled goat cheese or feta
fresh chopped tomatoes or thinly sliced sun-dried tomatoes and chopped basil
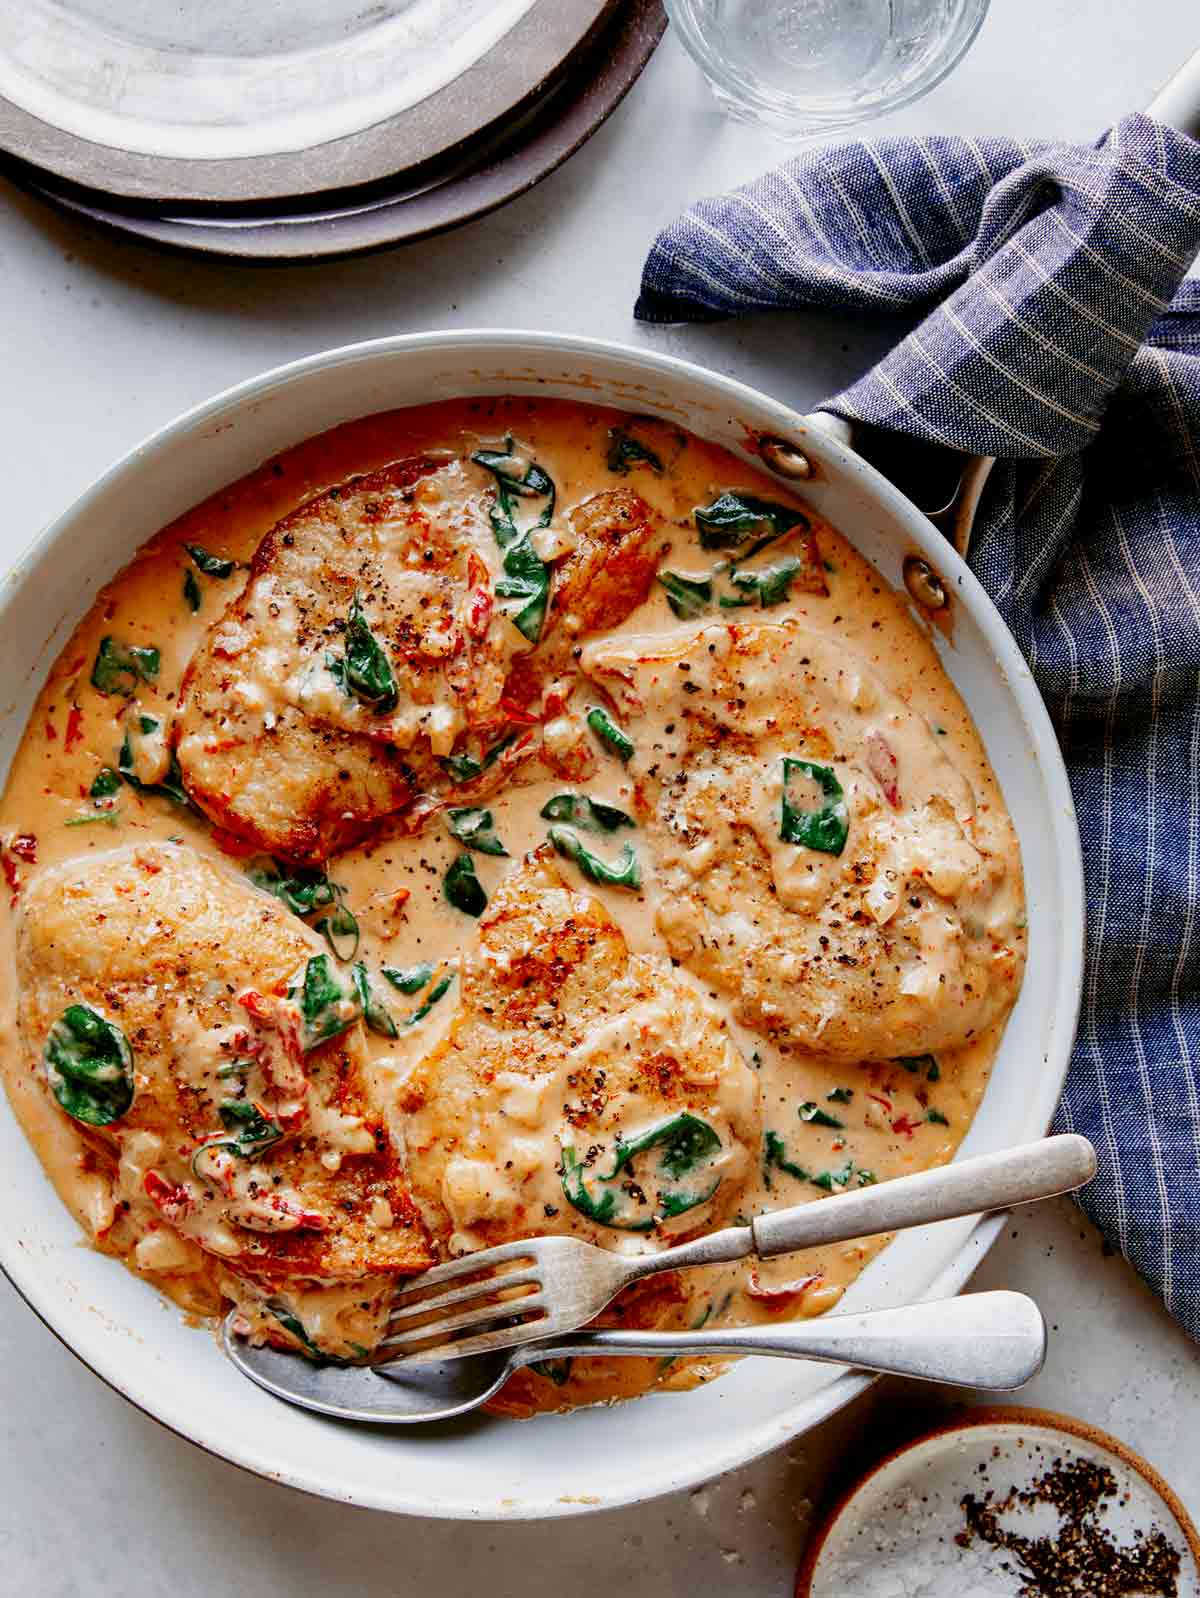
If you’re looking for something quick, easy and delicious to make for dinner. tonight, our Creamy Tuscan Chicken Recipe is your answer! Our recipe only takes 30 minutes to make, uses just a handful of basic ingredients and is incredibly versatile! Is Tuscan Chicken a Dish from Italy? Tuscan chicken actually didn’t originate from Italy, but was created by the Olive Garden years ago and called Tuscan Garlic Chicken! True story. I’ve never actually ordered…
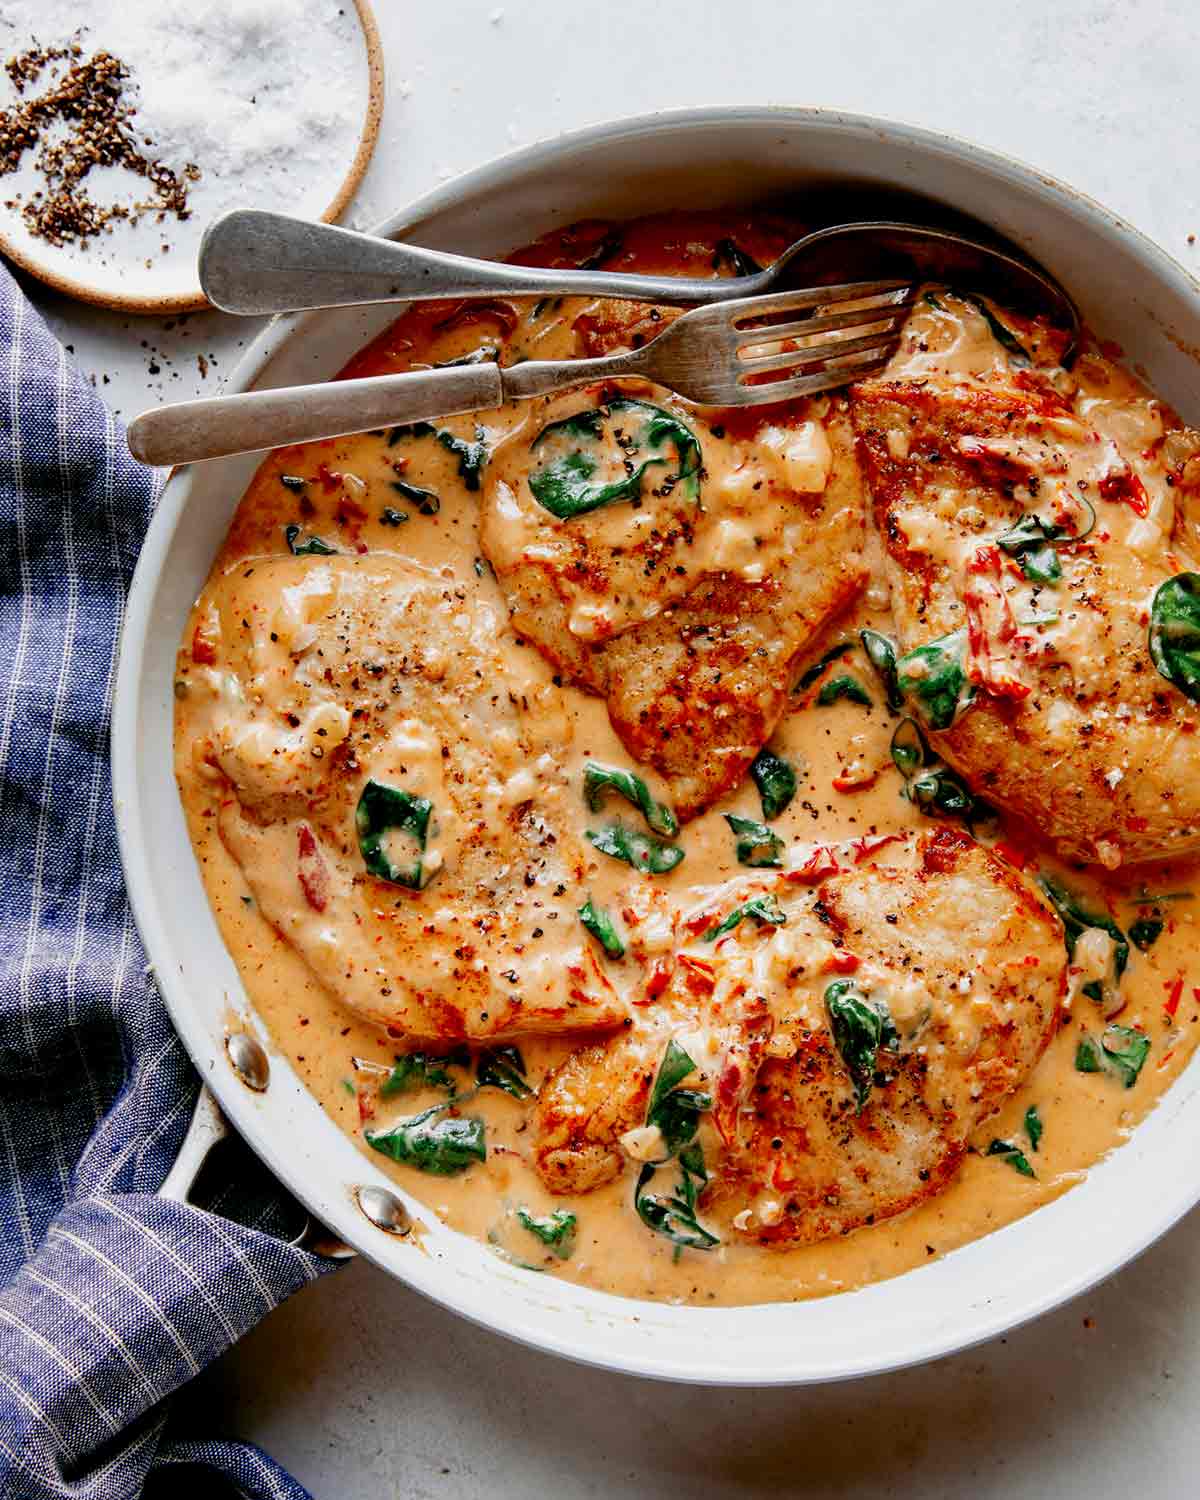
If you’re looking for something quick, easy and delicious to make for dinner. tonight, our Creamy Tuscan Chicken Recipe is your answer! Our recipe only takes 30 minutes to make, uses just a handful of basic ingredients and is incredibly versatile!
Is Tuscan Chicken a Dish from Italy?
Tuscan chicken actually didn’t originate from Italy, but was created by the Olive Garden years ago and called Tuscan Garlic Chicken! True story. I’ve never actually ordered the dish from there, but definitely remember seeing it advertised on tv over a decade ago.
While the original Tuscan chicken recipe uses lightly sautéed strips of red bell peppers, we swapped ours out for thin strips of sun dried tomatoes for a brighter punch of flavor.
How to Make Creamy Tuscan Chicken
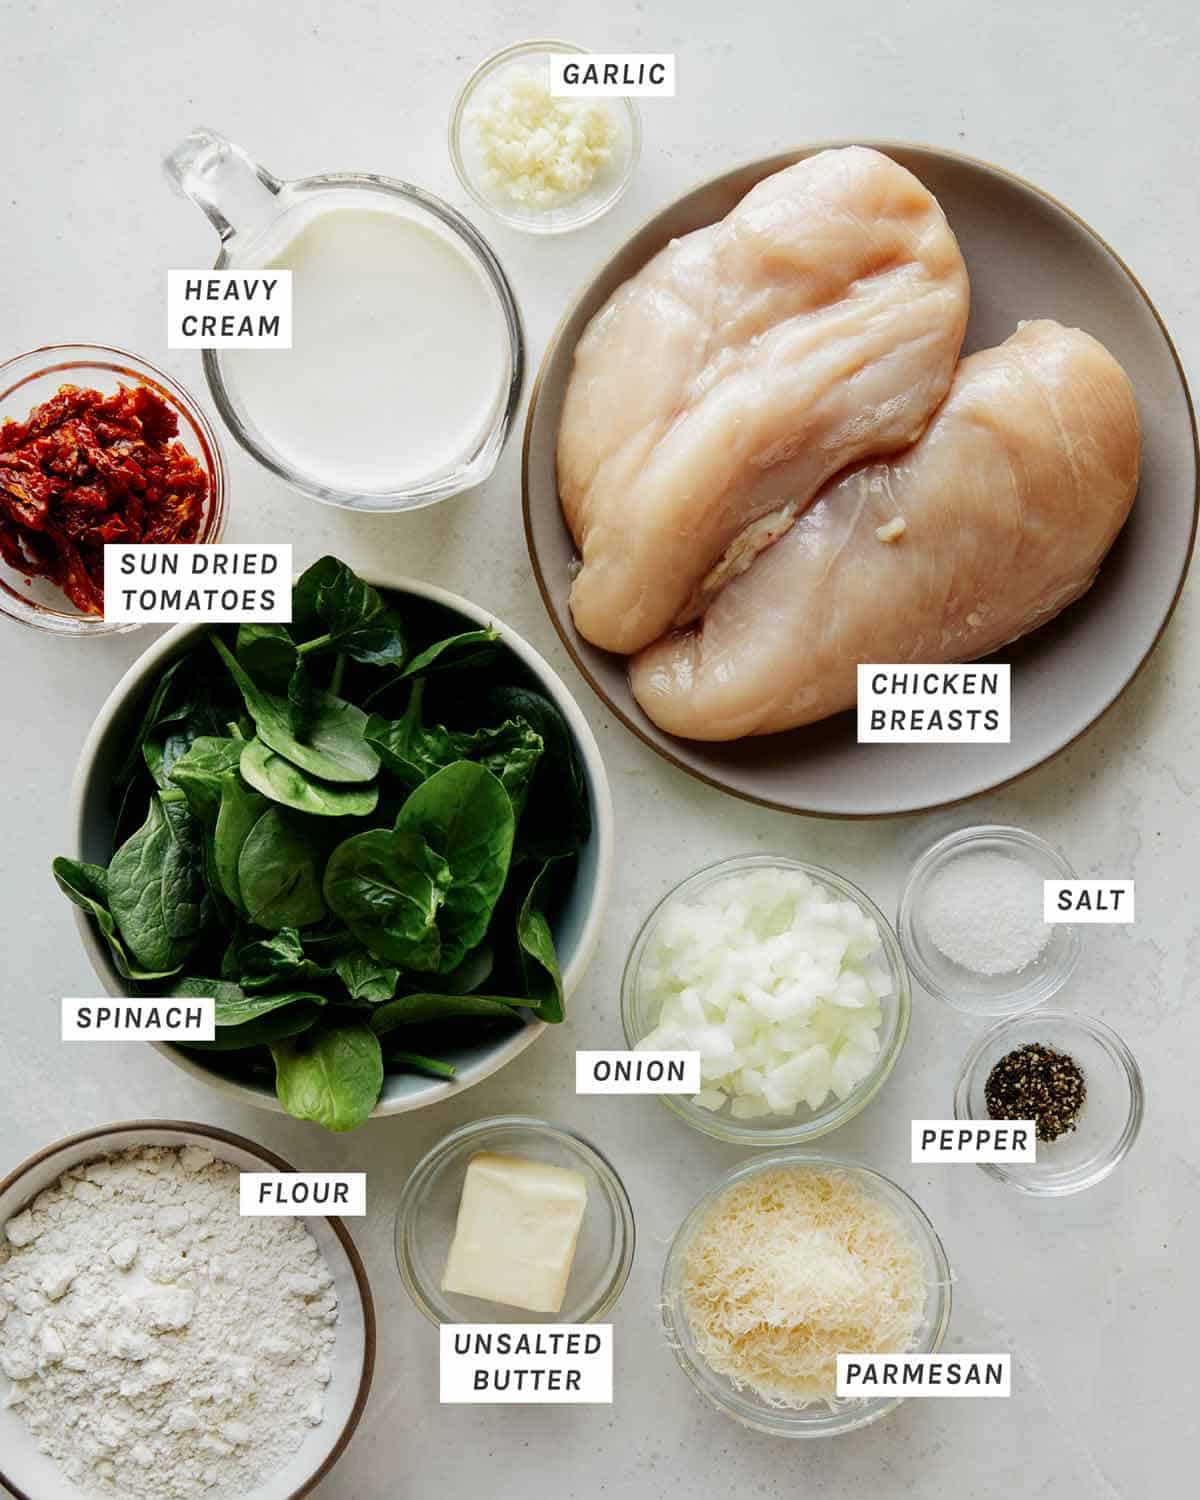
Ingredients
Process
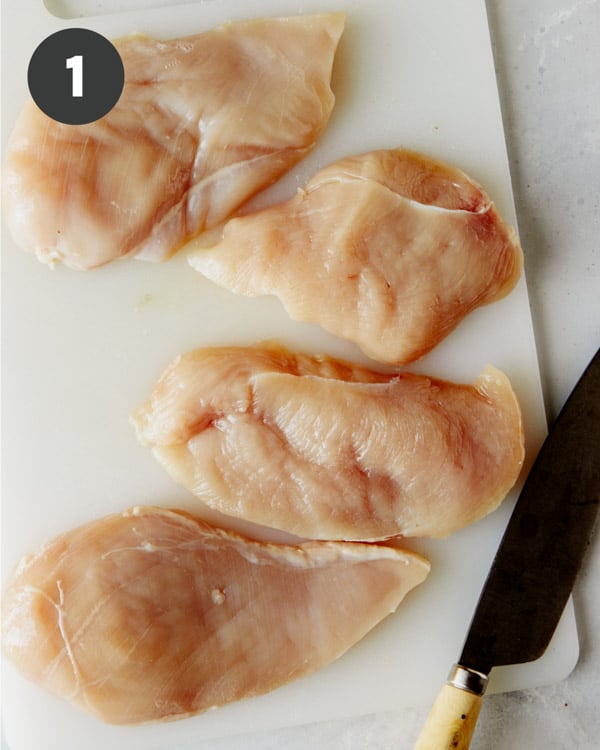
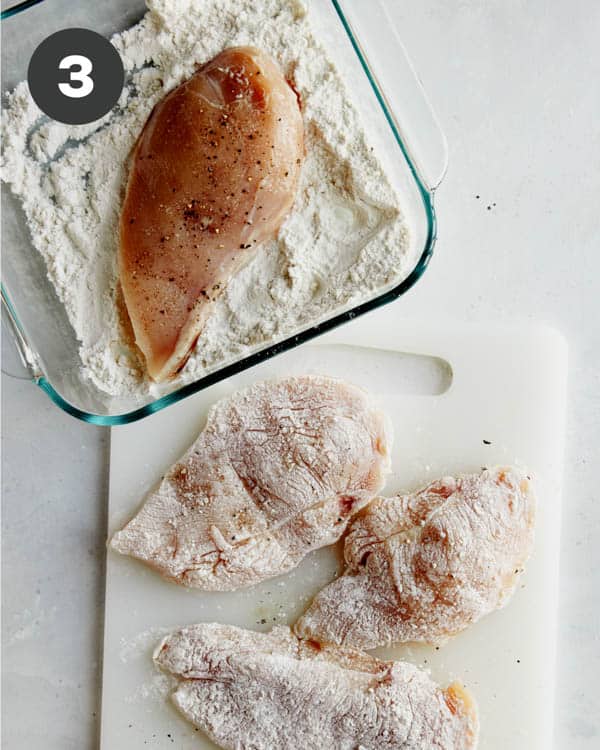
Slice each breast in half lengthwise, so you have 4 thinner breasts.
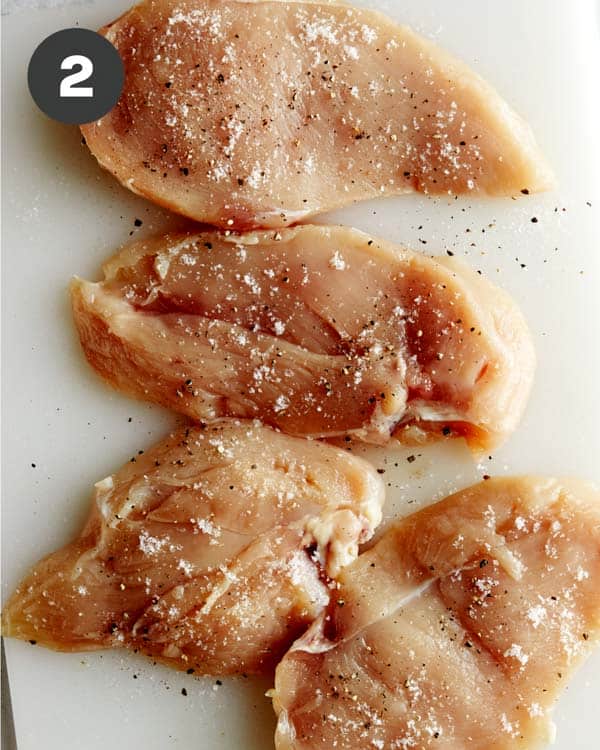
Season with salt and pepper.
Dredge each piece of chicken in flour, shaking off any excess.
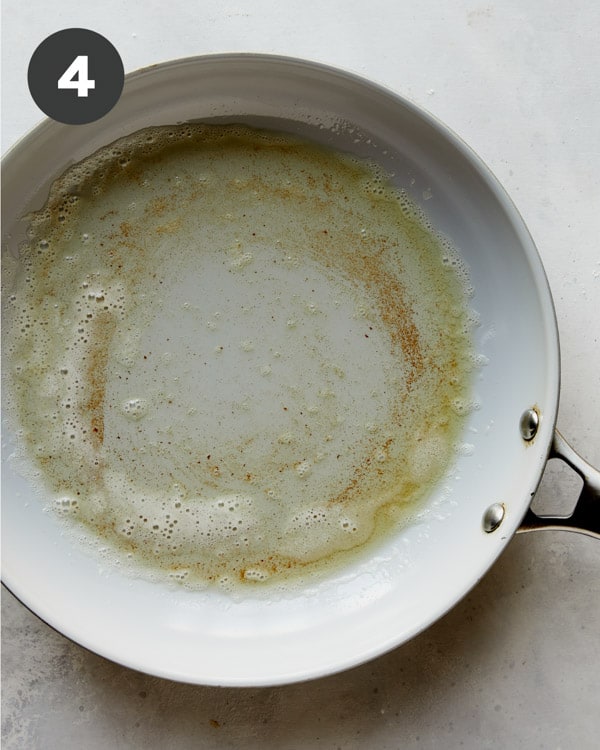
Melt some butter to a skillet.
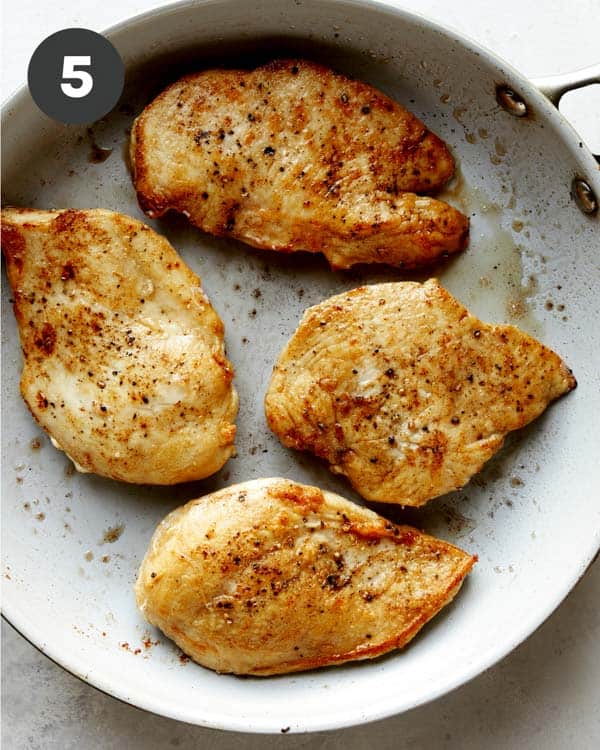
Add coated chicken and sear for a few minutes on each side.
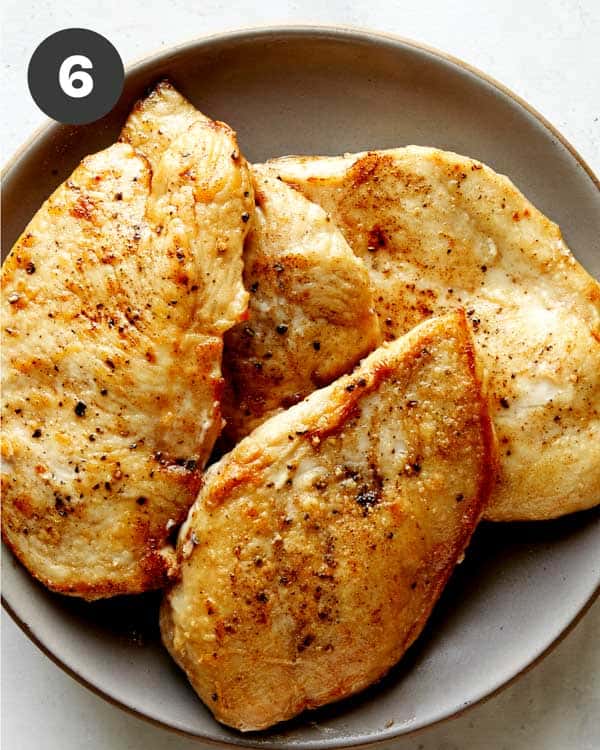
Transfer chicken to a plate and set aside.
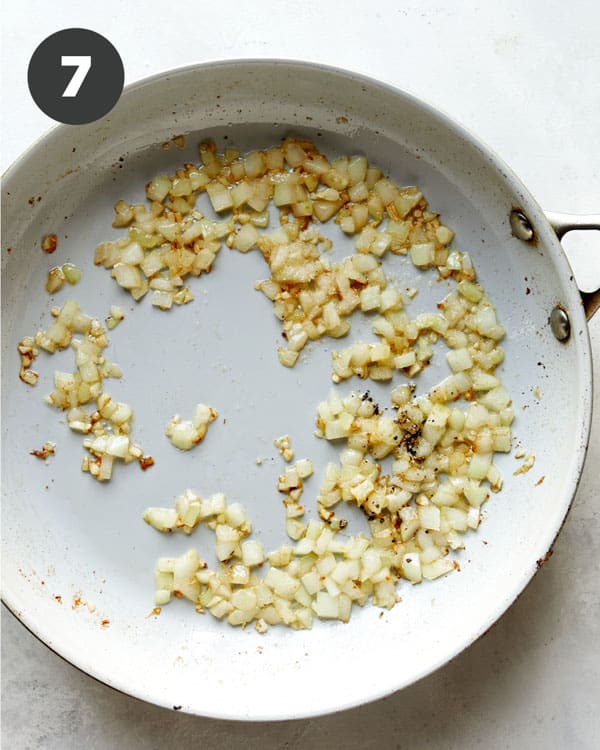
Melt remaining butter and add onion and garlic. Sauté until onions just begin to cook down. Season with salt and pepper.
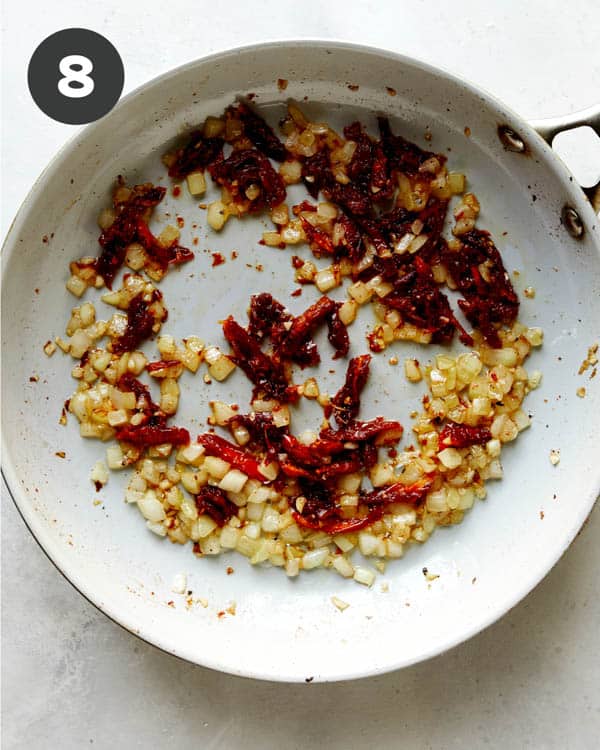
Add sun-dried tomatoes and continue to sauté.
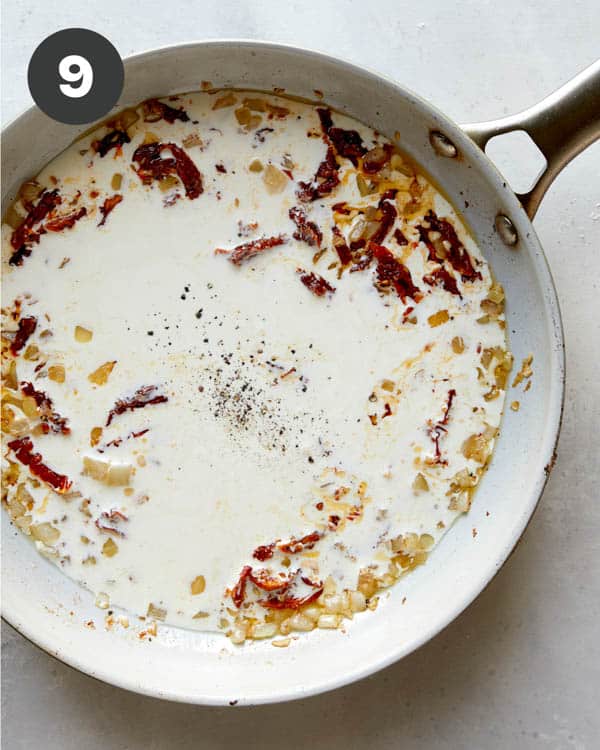
Pour cream into skillet.
Stir together and simmer until cream reduces slightly.
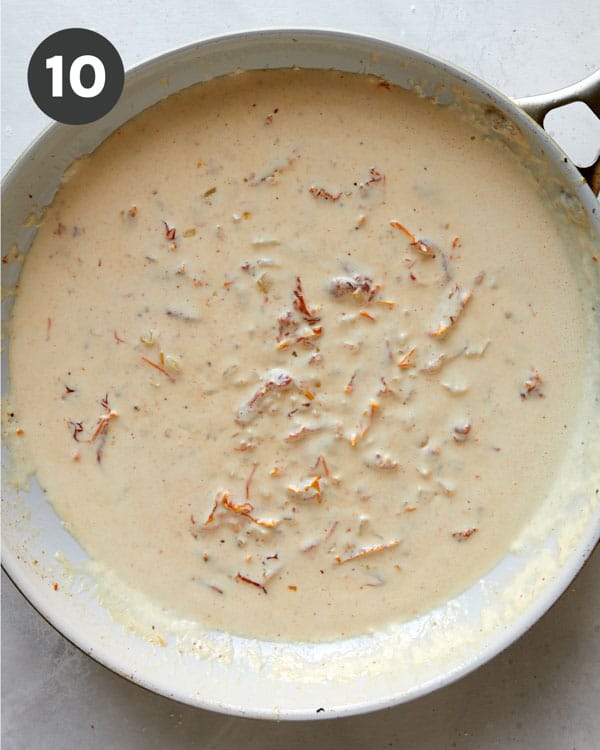
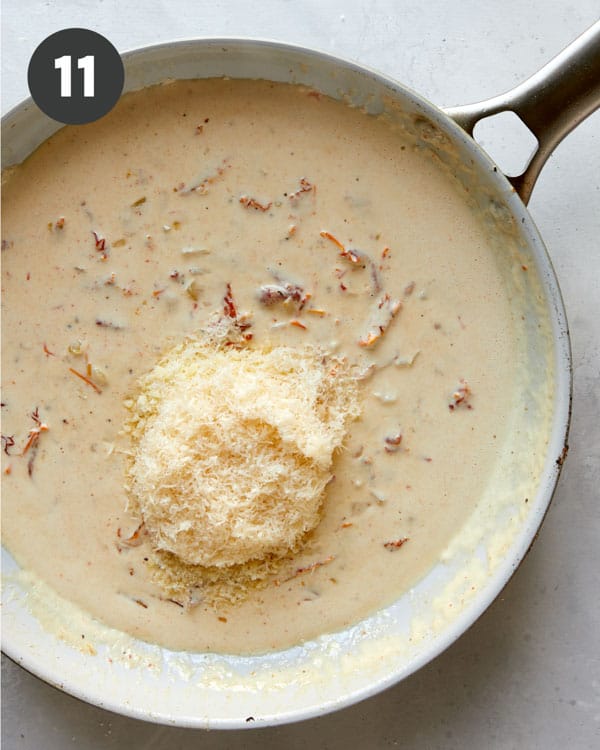
Stir Parmesan into sauce and stir until combined and sauce has slightly thickened.
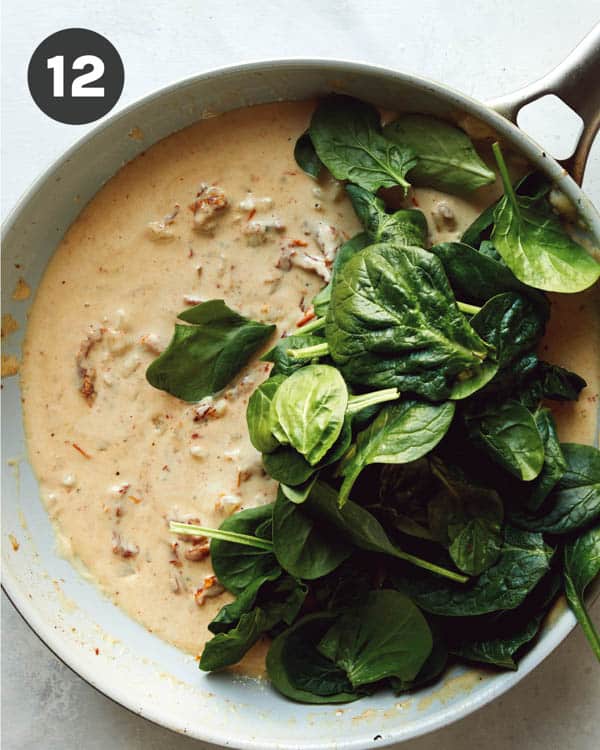
Add spinach to skillet.
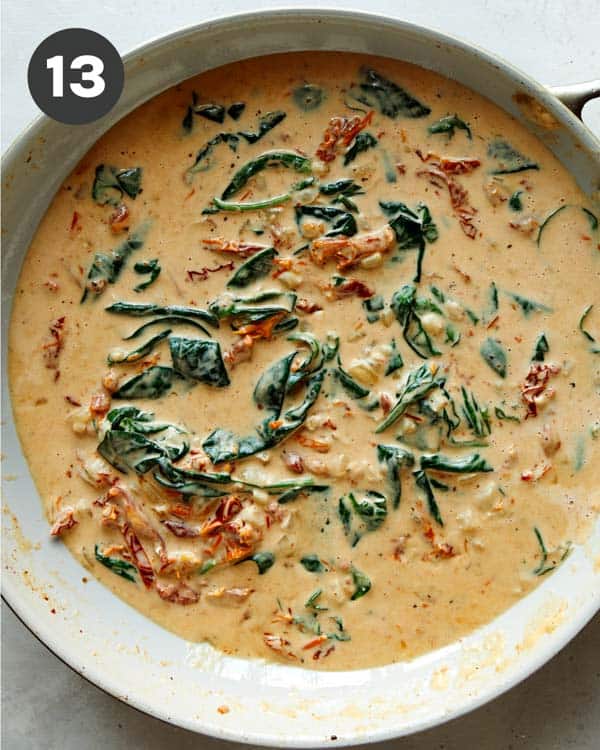
Gently stir spinach into sauce until wilted. Season with salt and pepper.
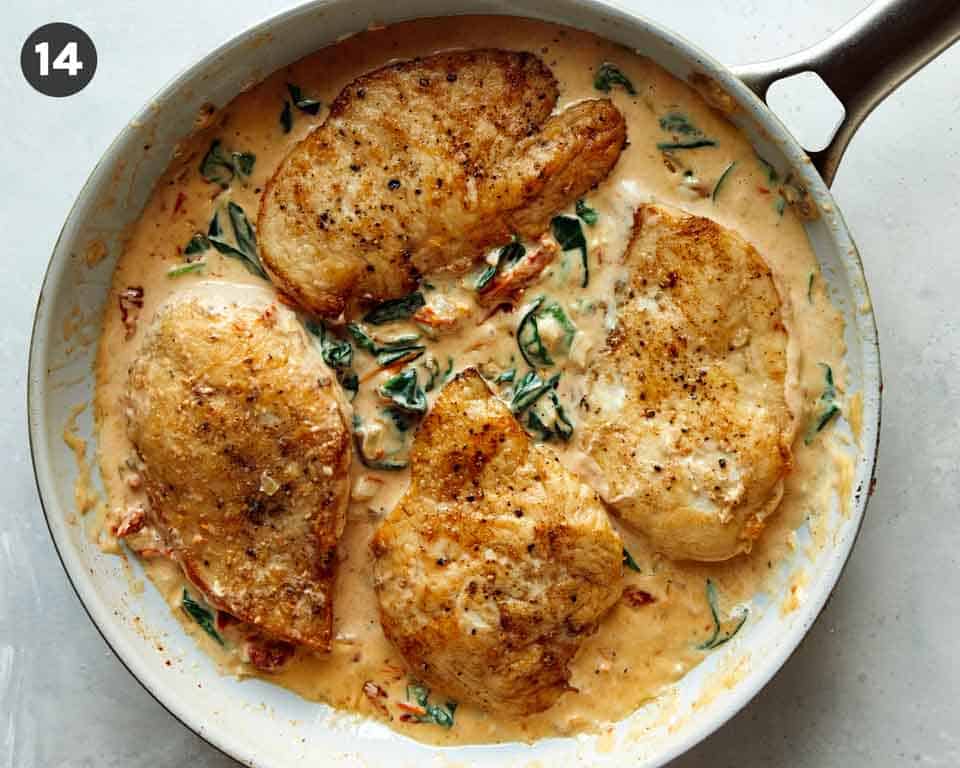
Add chicken back into skillet. Spoon sauce over chicken pieces and simmer until sauce has thickened and chicken has just cooked through. Serve.
Can This Creamy Tuscan Chicken Recipe be Made Ahead of Time?
Yes! Our recipe can be made up to 3 days ahead of time.
Make Ahead
Fully make tuscan chicken as instructed, except don’t add the Parmesan cheese. Cool and transfer dish to an airtight container and store in the refrigerator.
Best Way to Reheat
Pour sauce into a skillet and gently simmer over medium-low heat, stirring occasionally. Stir Parmesan into sauce and continue to simmer until sauce slightly thickens, about 2 minutes. Nestle chicken breasts into the simmering sauce and continue to simmer for 3 to 5 minutes or until chicken has warmed through.
Serving Suggestions
Pasta is most commonly served with this dish, but there are a variety of other serving suggestions that we love:
steamed rice – either white or brown taste delicious.
other grains – some of our favorites are quinoa, farro, bulgar, or a combination!
over a baked potato – that’s right! Give that chicken a quick chop, stir it back into the sauce and ladle everything over the baked potatoes.
steamed or roasted vegetables – and keep it low carb!
a crusty baguette – to soak up all the delicious cream sauce.
Variations
We love the versatility of this recipe. You really can customize it to fit your taste exactly! Some of our favorite variations are:
Sautéed wild mushrooms can be incorporated into the creamy sun-dried tomato and spinach sauce to bulk it up.
Torn kales leaves are a heartier alternative to spinach.
Thinly sliced and sautéed strips of red bell pepper (or roasted red bell pepper) can used used instead of the sun-dried tomatoes.
Fresh diced tomatoes can also replace the sun-dried tomatoes.
Swap the boneless, skinless chicken breasts out for large seared shrimp for a protein alternative for this dish.
Add some heat to the dish with a couple pinches of crushed red pepper flakes.
Make this recipe gluten free by swapping gluten free flour in for the all purpose flour.
The BEST Creamy Tuscan Chicken Recipe you will ever make! Our recipe uses thinly sliced chicken breast, fresh spinach, flavorful sun-dried tomatoes, all swimming in a delicious creamy sauce. Everything comes together in just 30 minutes!
1/4cupsun-dried tomatoes (packed in oil)thinly sliced
1 1/2cupsheavy cream
3ouncesParmesangrated
2 1/2ouncesspinach leaves
salt and pepper to taste
Instructions
Slice each breast in half lengthwise, so you have 4 thinner breasts.
Season each breast on each side with salt and pepper and dredge in flour, shaking off any excess.
Melt 2 tablespoons butter to a skillet over medium heat.
Add coated chicken and sear for about 3 minutes on each side.
Remove chicken from skillet and set aside.
Melt remaining butter and add onion and garlic. Sauté for 5 to 6 minutes or until onions just begin to cook down. Season with salt and pepper.
Add sun-dried tomatoes and continue to sauté for an additional 3 to 4 minutes.
Stir cream into skillet and simmer until cream reduces slightly, about 4 minutes.
Stir Parmesan into cream mixture until smooth creamy.
Add spinach to skillet and stir until spinach leaves have just wilted. Season with salt and pepper.
Add chicken back into skillet, spoon some sauce over each pieces and simmer for 3 to 4 minutes. Serve.
Notes
Make AheadFully make creamy tuscan chicken as instructed, except don’t add the Parmesan cheese. Cool and transfer dish to an airtight container and store in the refrigerator.Best Way to ReheatPour sauce into a skillet and gently simmer over medium-low heat, stirring occasionally. Stir Parmesan into sauce and continue to simmer until sauce slightly thickens, about 2 minutes. Nestle chicken breasts into the simmering sauce and continue to simmer for 3 to 5 minutes or until chicken has warmed through.
This classic Caprese Salad Recipe is bursting with fresh summer flavor for the perfect summer appetizer. Fresh heirloom tomatoes make this dish as beautiful as it is delicious! This classic, Italian-style Caprese Salad comes to mind when I think of summer. You just can’t beat the combination of fresh heirloom tomatoes, aromatic basil, and delicious fresh mozzarella drizzled with olive oil. While the ingredients are simple, the quality of each ingredient shines through. Take your…
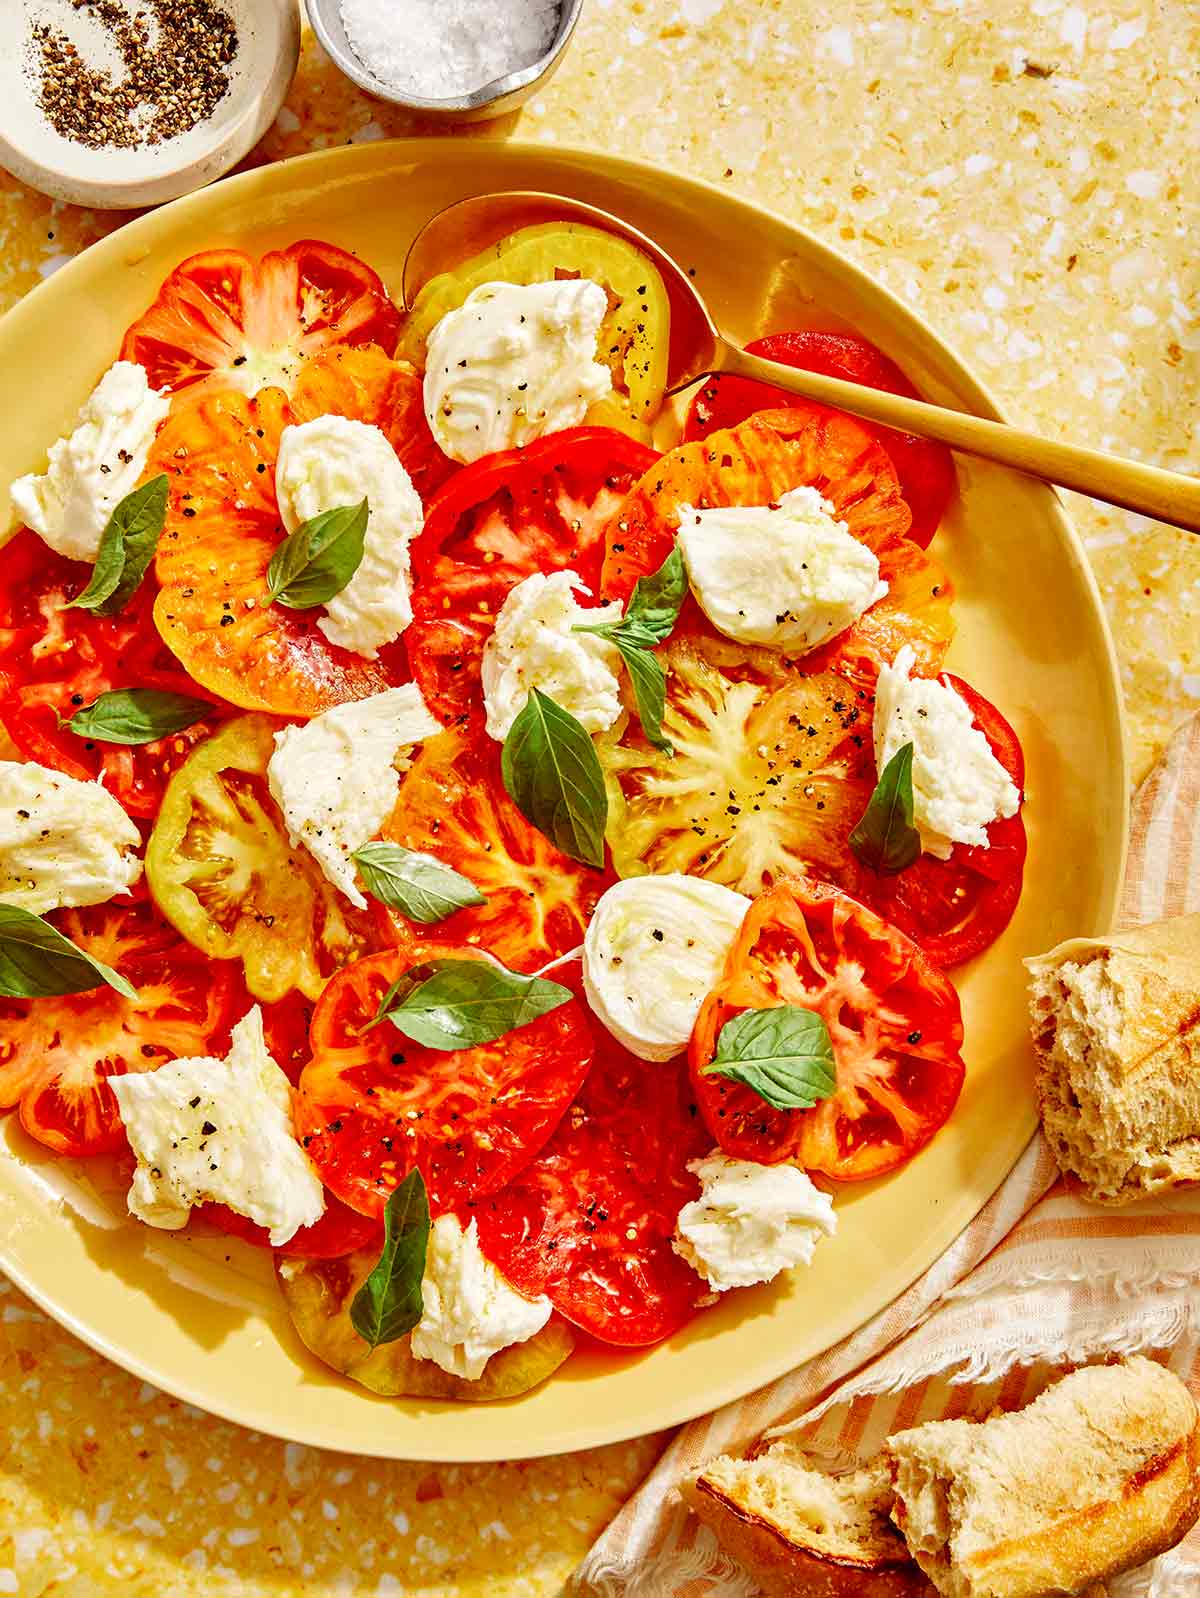
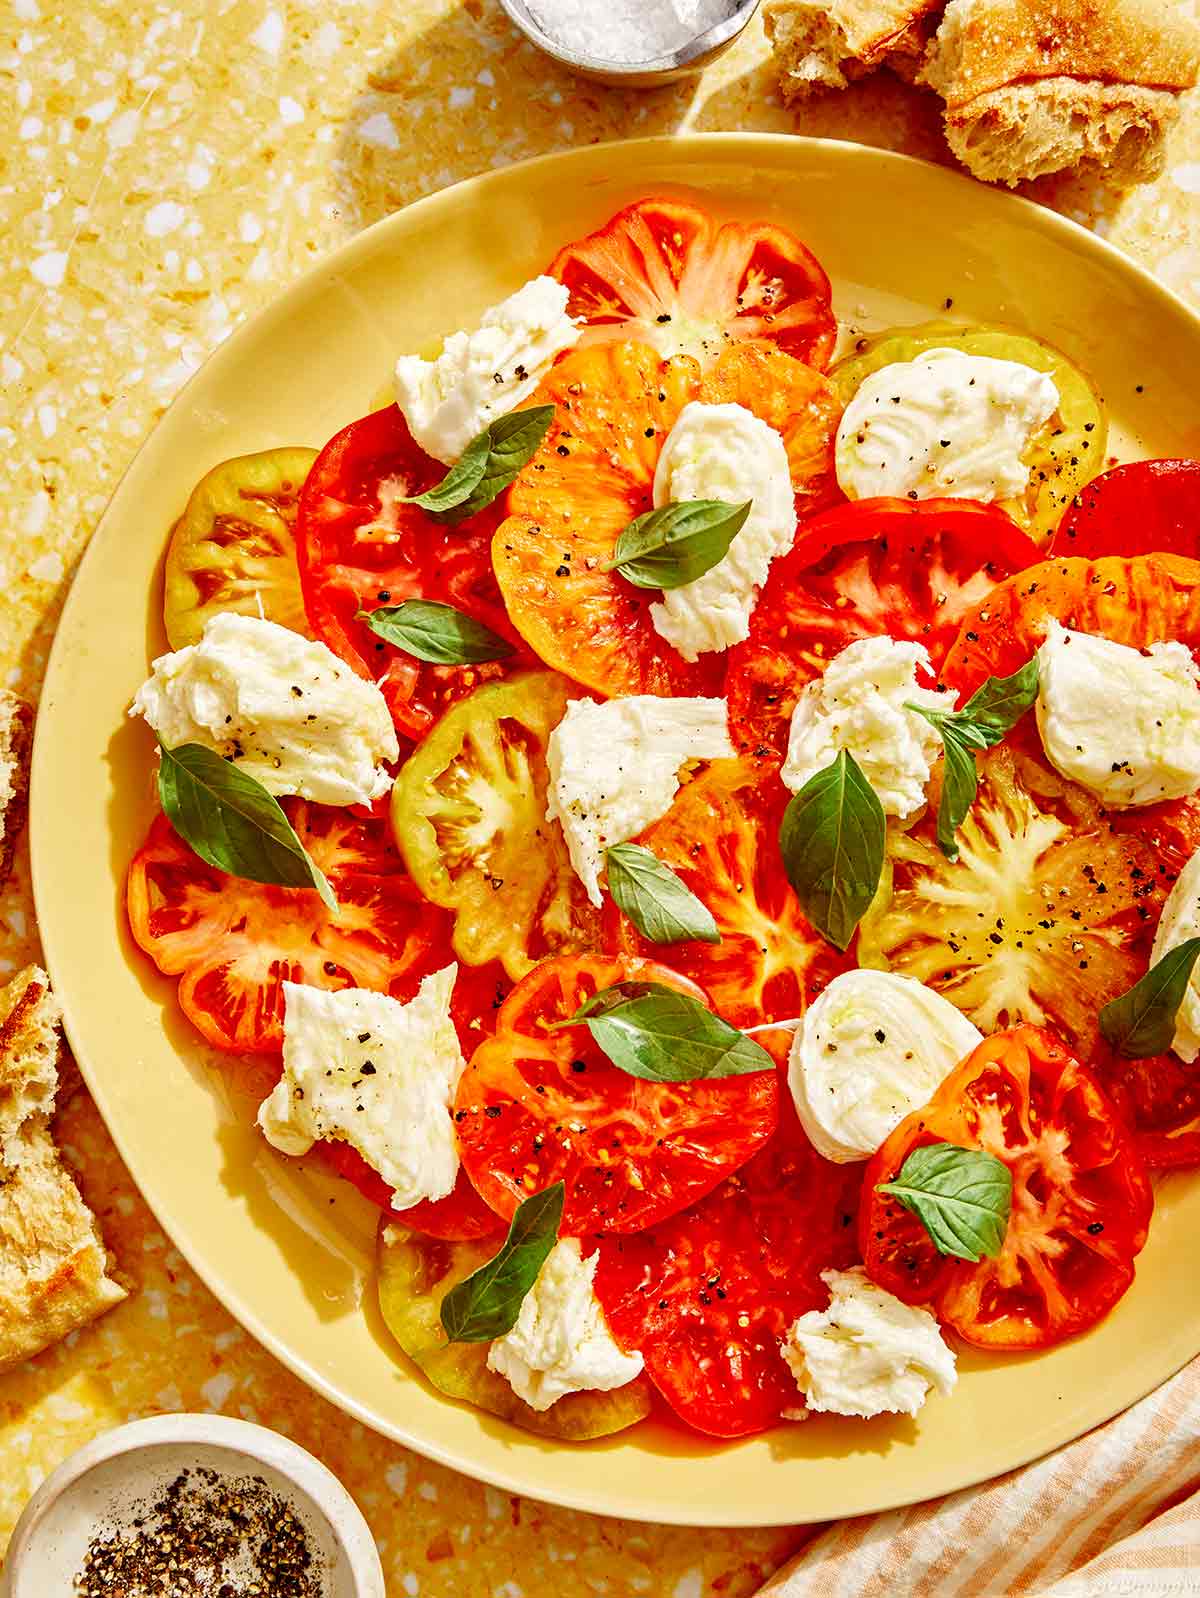
This classic Caprese Salad Recipe is bursting with fresh summer flavor for the perfect summer appetizer. Fresh heirloom tomatoes make this dish as beautiful as it is delicious!
This classic, Italian-style Caprese Salad comes to mind when I think of summer. You just can’t beat the combination of fresh heirloom tomatoes, aromatic basil, and delicious fresh mozzarella drizzled with olive oil.
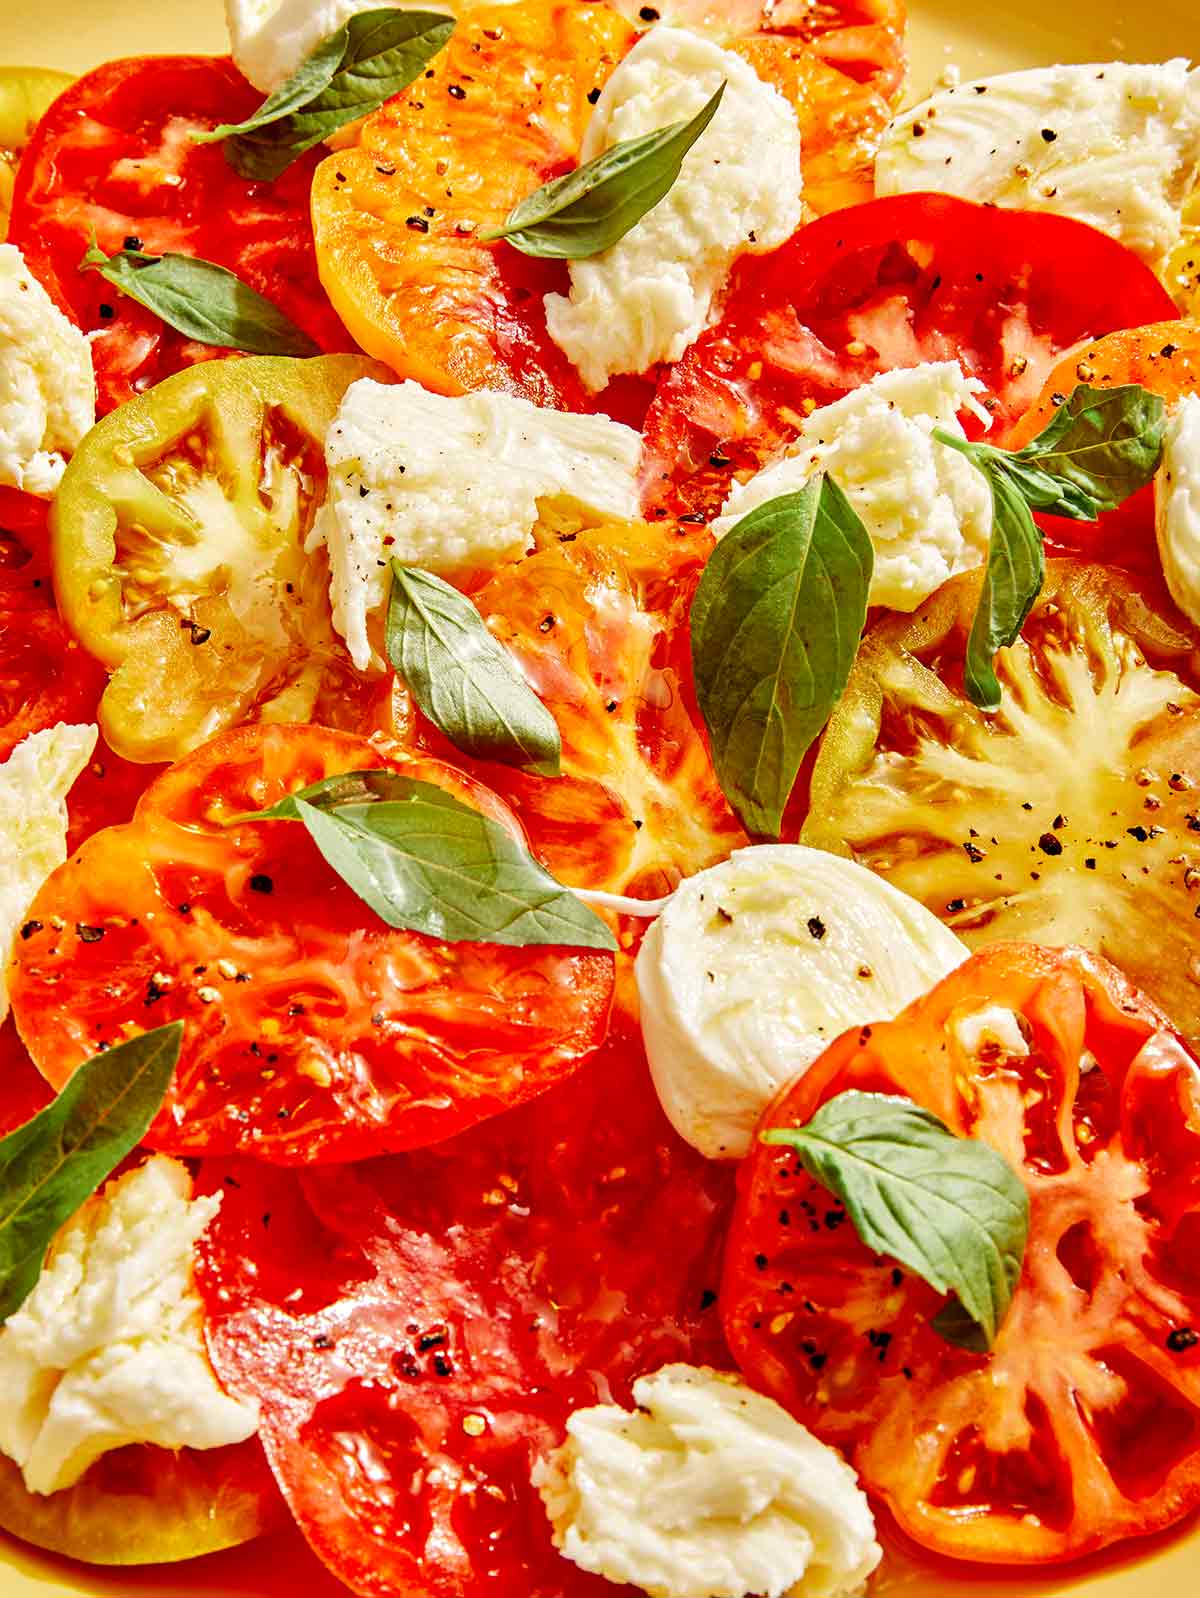
While the ingredients are simple, the quality of each ingredient shines through. Take your time picking out the best tomatoes and the freshest basil, and don’t skimp on the fresh whole-milk mozzarella or the quality of the olive oil.
If you’re lucky enough to have a supply of heirloom tomatoes or can find any of these juicy beauties at your local supermarket, add this recipe to your list, along with our heavenly heirloom tomato tarts and heirloom tomato, peach, and burrata summer plate. This salad can be eaten as an appetizer or as a side dish alongside your dinner on any hot summer day!
What is Caprese Salad?
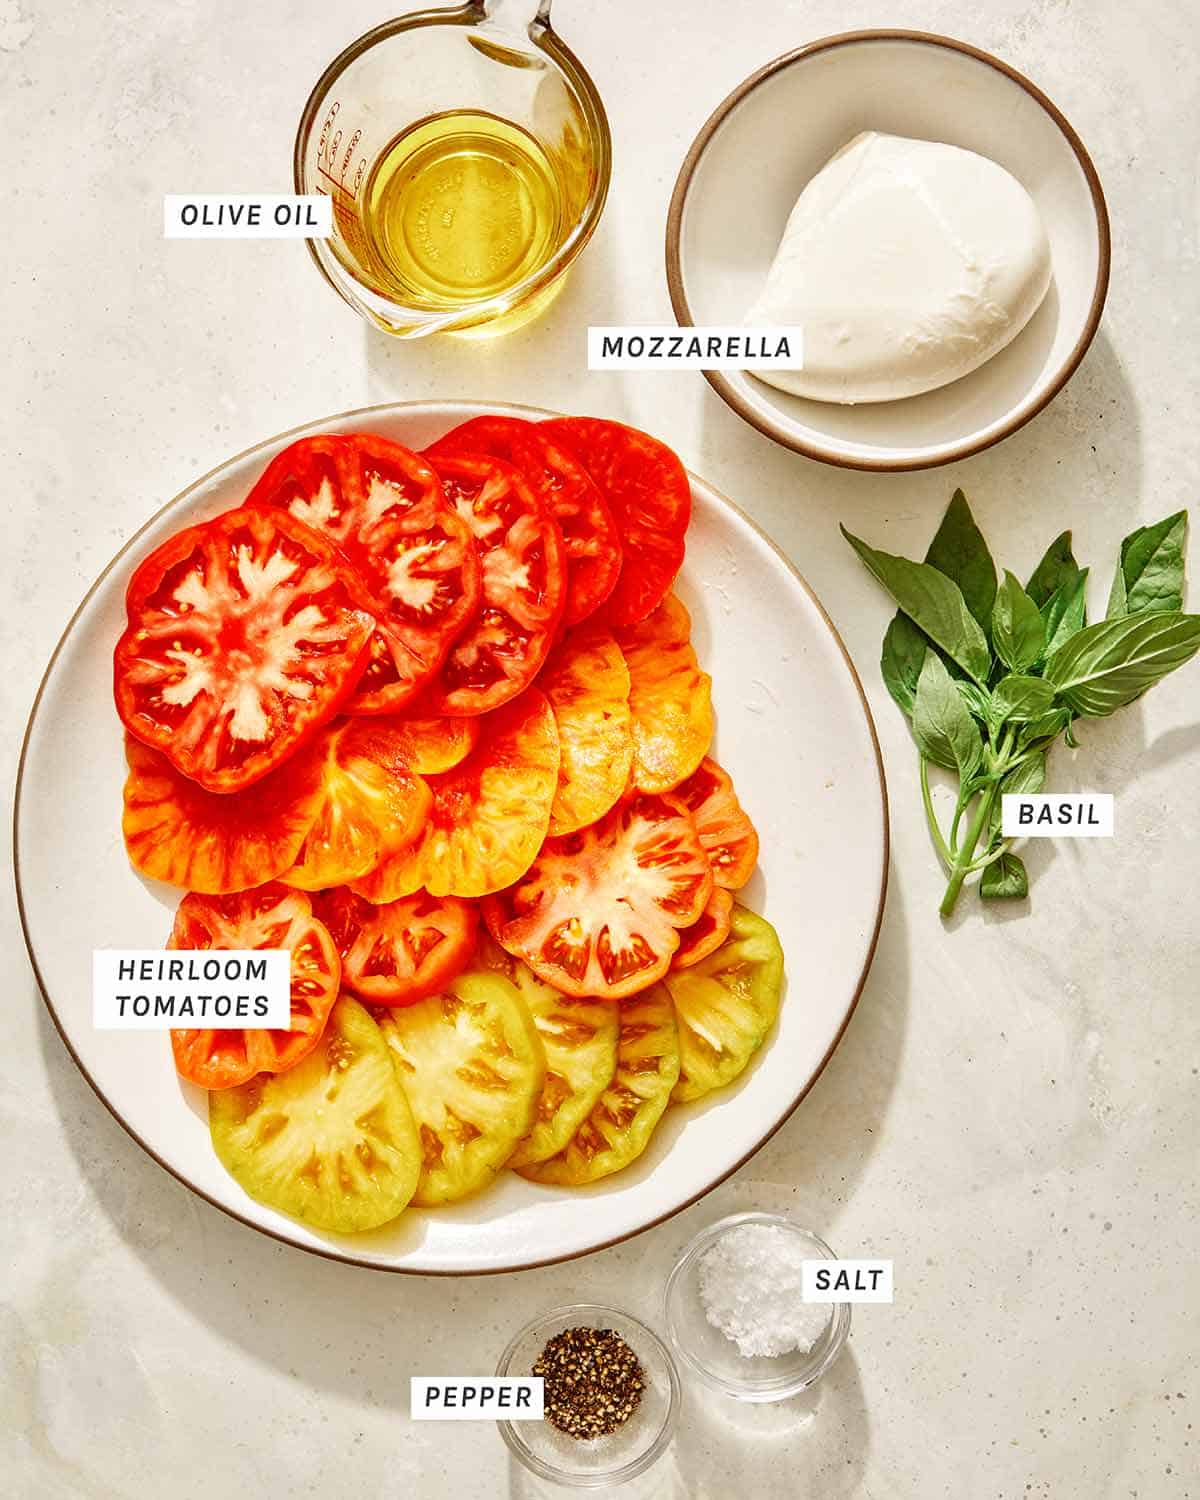
Caprese salad is a simple Italian salad made by layering slices of fresh tomatoes, basil leaves, and fresh mozzarella cheese onto a plate, seasoning with salt and pepper, and drizzling a hefty serving of olive oil over the top.
How to Make Our Easy Caprese Salad Recipe
Ingredients
How to Make Caprese Salad
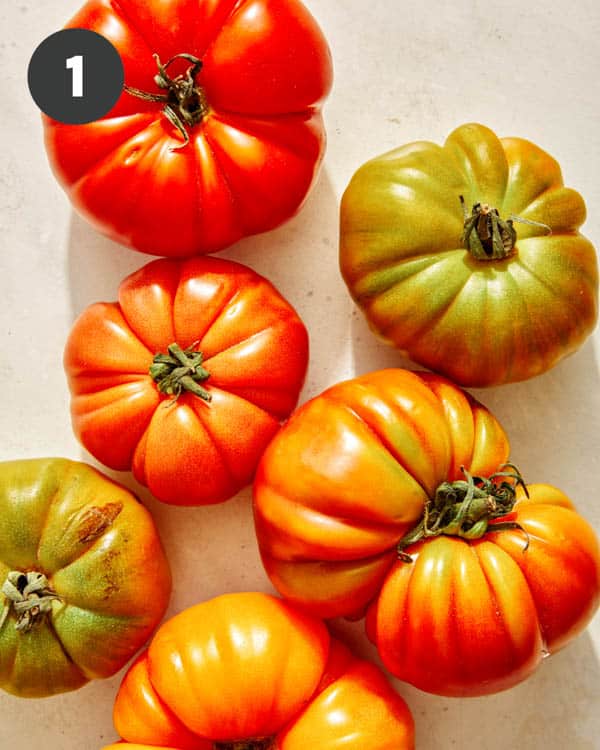
Wash tomatoes.
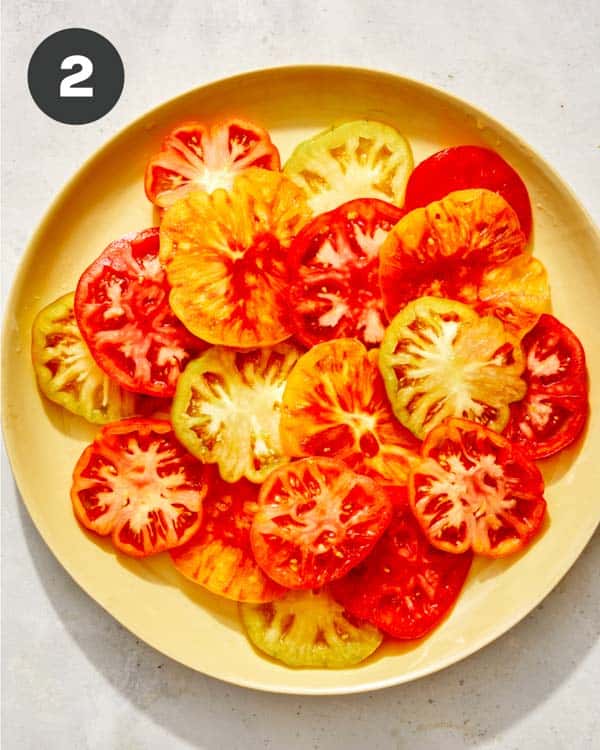
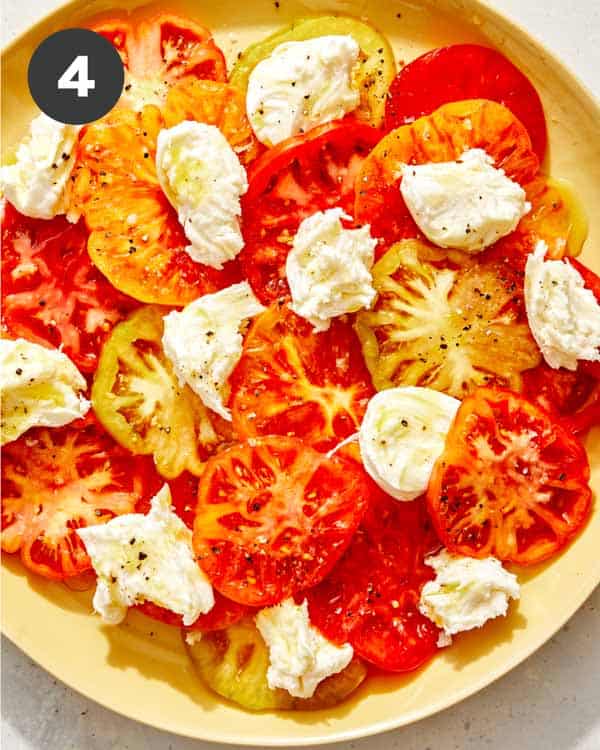
Arrange tomato slices onto a large platter.
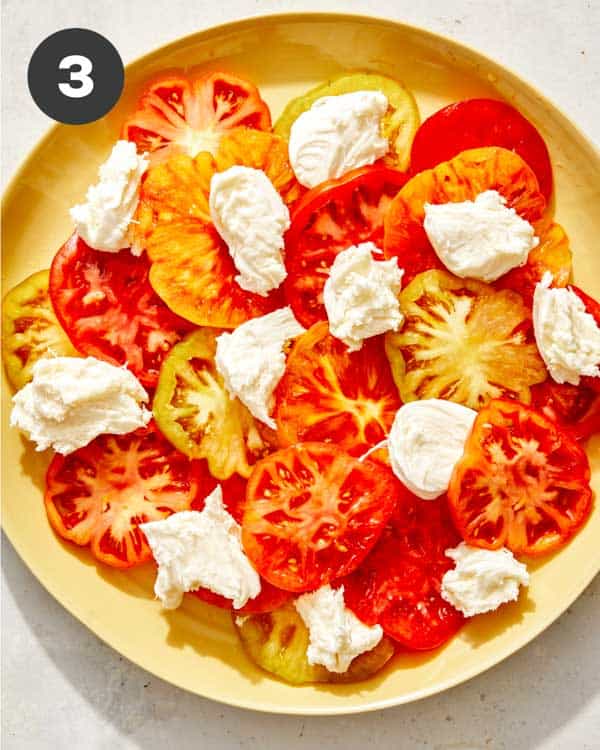
Tear mozzarella balls into pieces and place them on top of the tomato slices.
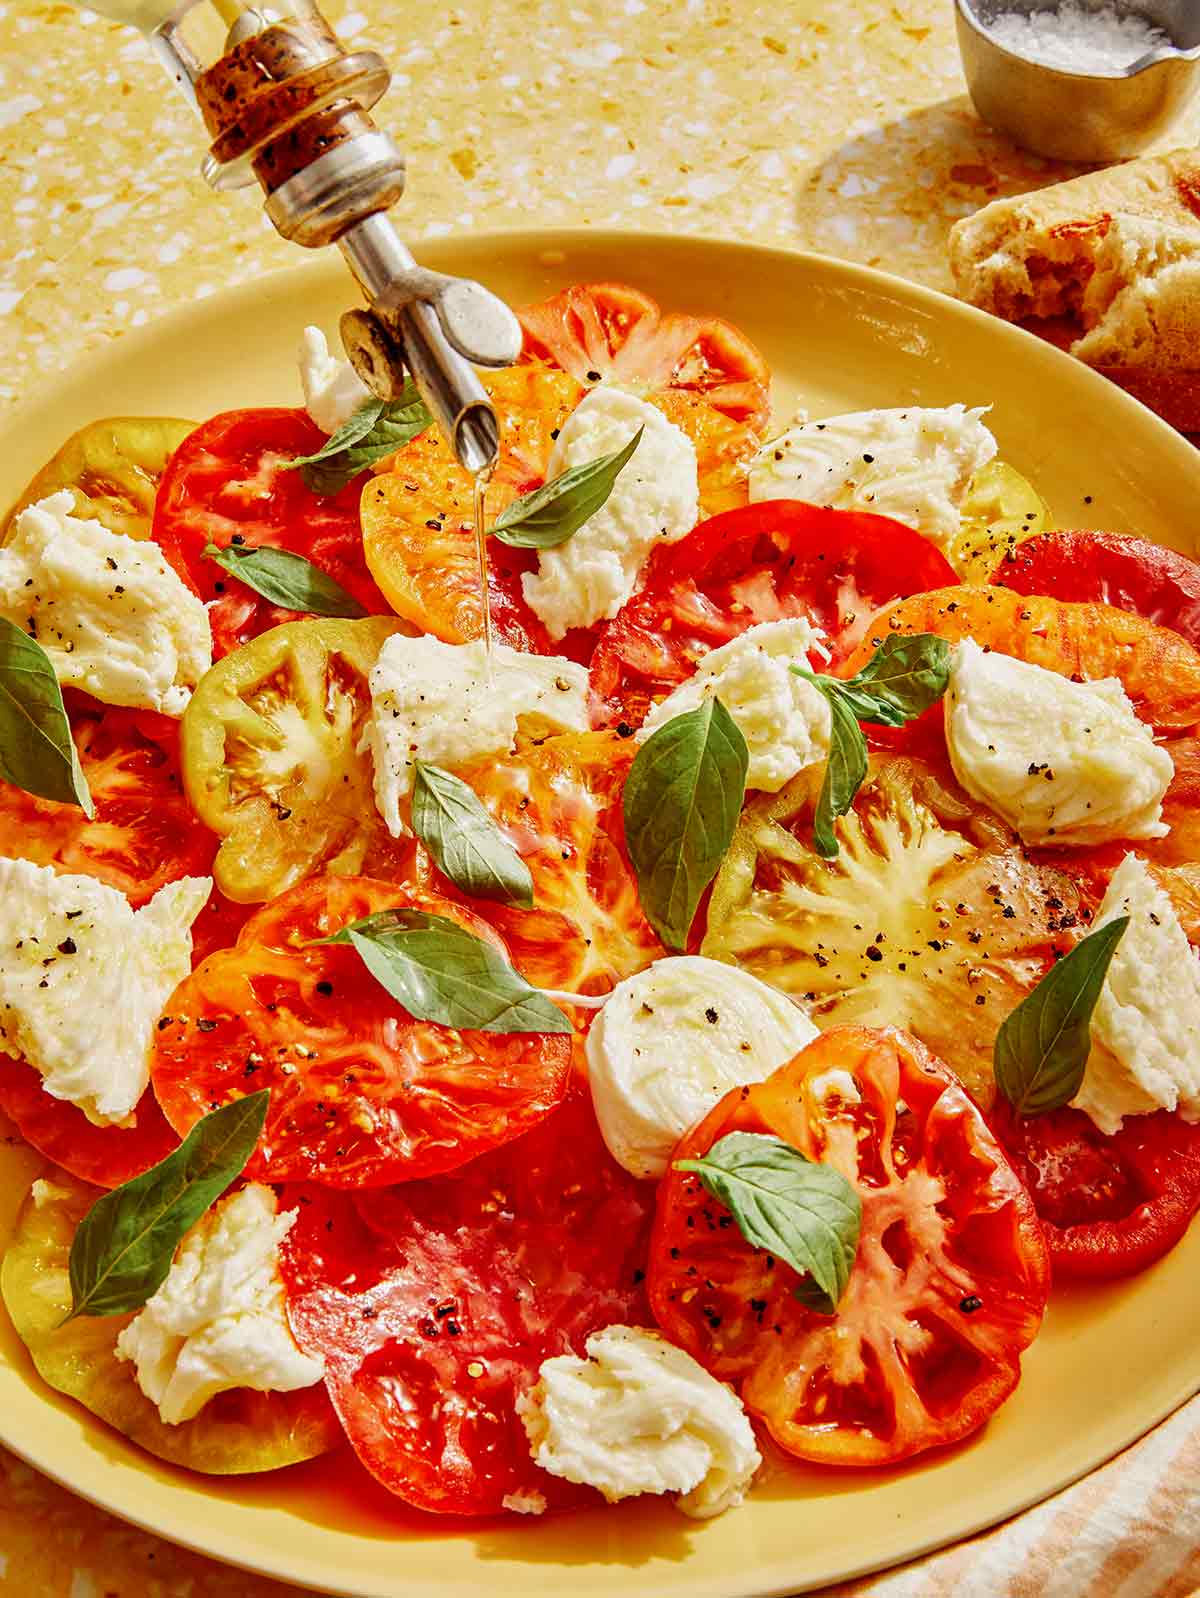
Drizzle oil over tomato and cheese and sprinkle with sea salt flakes and pepper.
Finish with fresh basil leaves and serve with a side of crusty bread.
Variations
While this is a classic recipe for Caprese salad, there are several ways you can switch it up to make it your own!
Use cherry tomatoes, grape tomatoes, or Roma tomatoes if you don’t have heirlooms available or have a surplus of any variety in your garden.
Some recipes call for a balsamic glaze to be drizzled over the top of Caprese salad, along with the olive oil. While this isn’t traditional, it adds a deep splash of flavor to this otherwise light and fresh-tasting dish.
Instead of tearing a large ball of mozzarella cheese, you can purchase the small pre-balled mozzarella and add them straight to the salad.
Can Caprese Salad be Made Ahead of Time?
Caprese salad is best when it’s made just before serving. You can store leftovers in the refrigerator, covered, for up to 2-3 days, but the cheese and basil will begin to take on the juices of the tomato, changing in texture.
To save time, you can pre-slice the tomatoes and the cheese but store them separately until read to serve.
Dishes to Serve with Caprese Salad
Caprese salad is a deliciously versatile dish that goes with such a wide variety of foods, but here are a few of our favorites:
Tear mozzarella balls into pieces and top tomato slices.
Drizzle oil over tomato and cheese and sprinkle with sea salt flakes and pepper.
Finish with fresh basil leaves and serve with a side of crusty bread.
Notes
Pre Ahead and Storing InstructionsCaprese salad is best when it’s made just before serving. You can store leftovers in the refrigerator, covered, for up to 2-3 days, but the cheese and basil will begin to take on the juices of the tomato, changing in texture.To save time, you can pre-slice the tomatoes and the cheese but store them separately until read to serve.
Sandwiches are one of our favorite things to eat and this Tuna Melt Recipe is truly our jam. We love the simplicity, versatility and flavor packed deliciousness that is this sandwich. We love adding a little creaminess, a bit of crunch and some herbaceous goodness, for what we think creates the perfect balance for the best tuna melt ever! How to Make the BEST Tuna Melt Ingredients Process Best Canned Tuna to Use for a…
Sandwiches are one of our favorite things to eat and this Tuna Melt Recipe is truly our jam. We love the simplicity, versatility and flavor packed deliciousness that is this sandwich. We love adding a little creaminess, a bit of crunch and some herbaceous goodness, for what we think creates the perfect balance for the best tuna melt ever!
How to Make the BEST Tuna Melt
Ingredients
Process
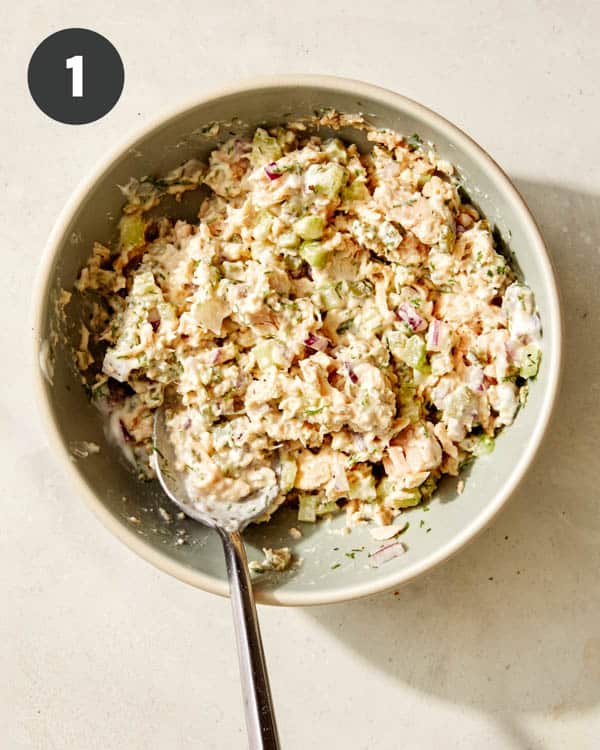
In a mixing bowl combine tuna, mayonnaise, celery, red onion, dill, and cornichons. Season with salt and pepper and stir together.
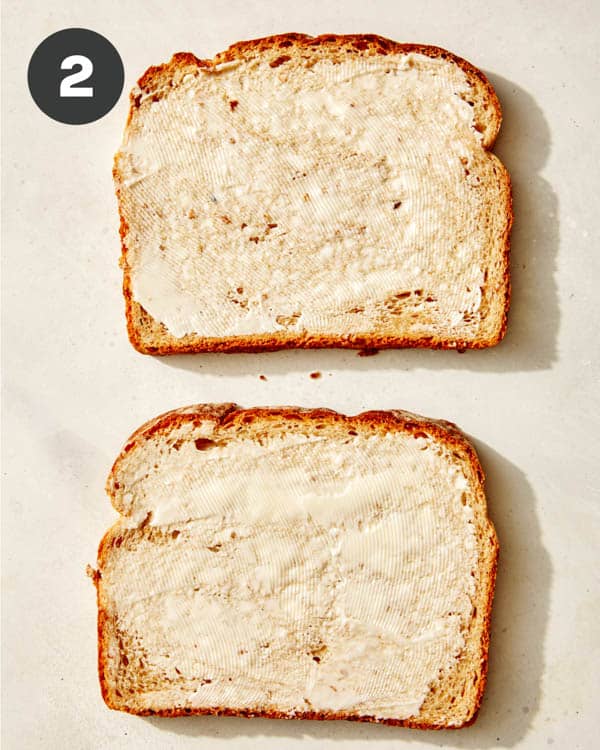
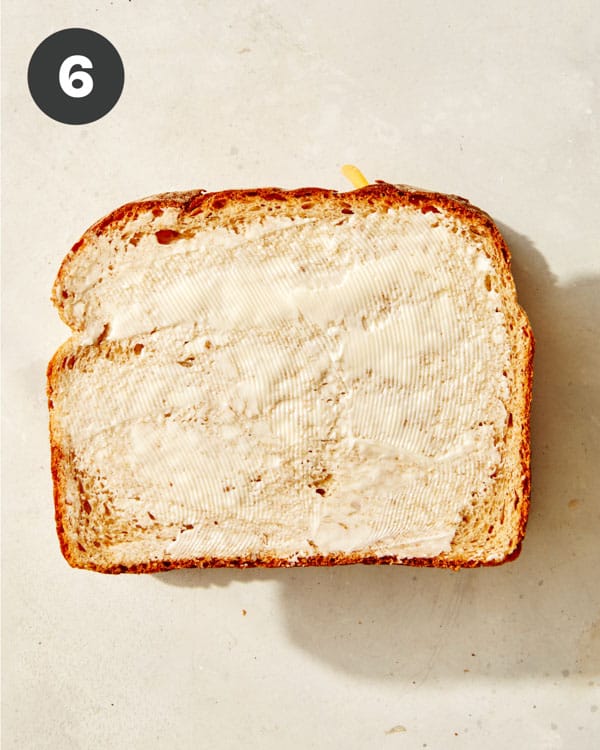
Spread 1/2 tablespoon butter over each slice of bread and turn two slices butter side down.
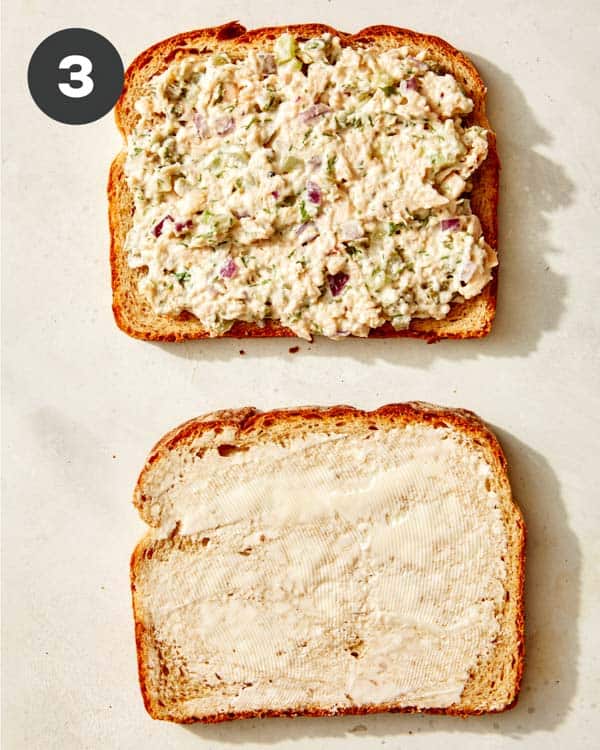
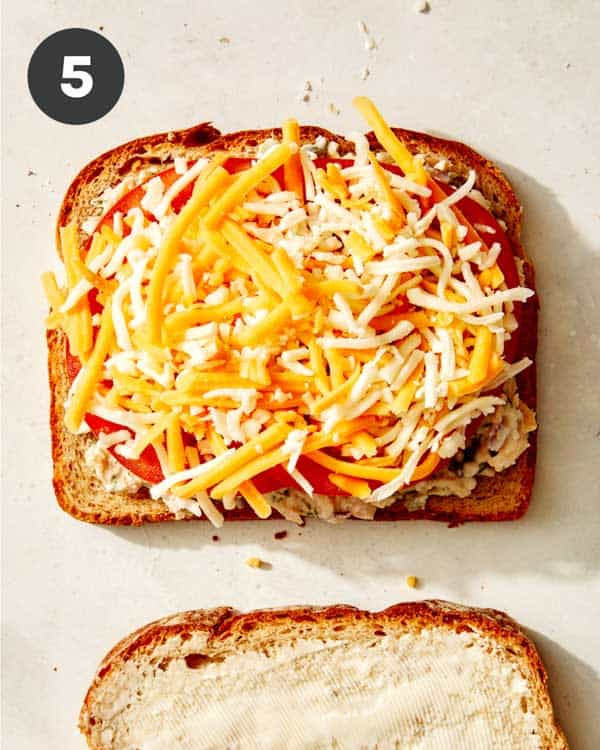
Top each butter side down slice of bread with tuna mixture.
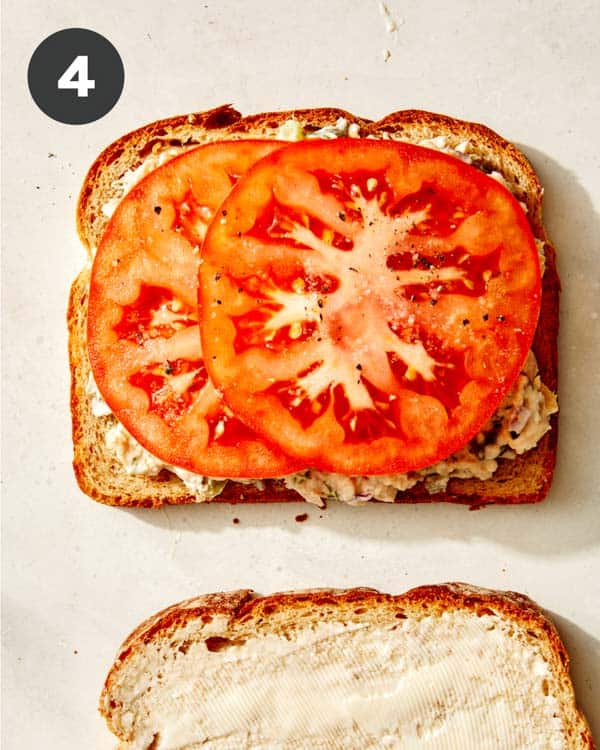
Top with sliced tomatoes.
Top with shredded cheese.
Finally top with remaining slices of bread.
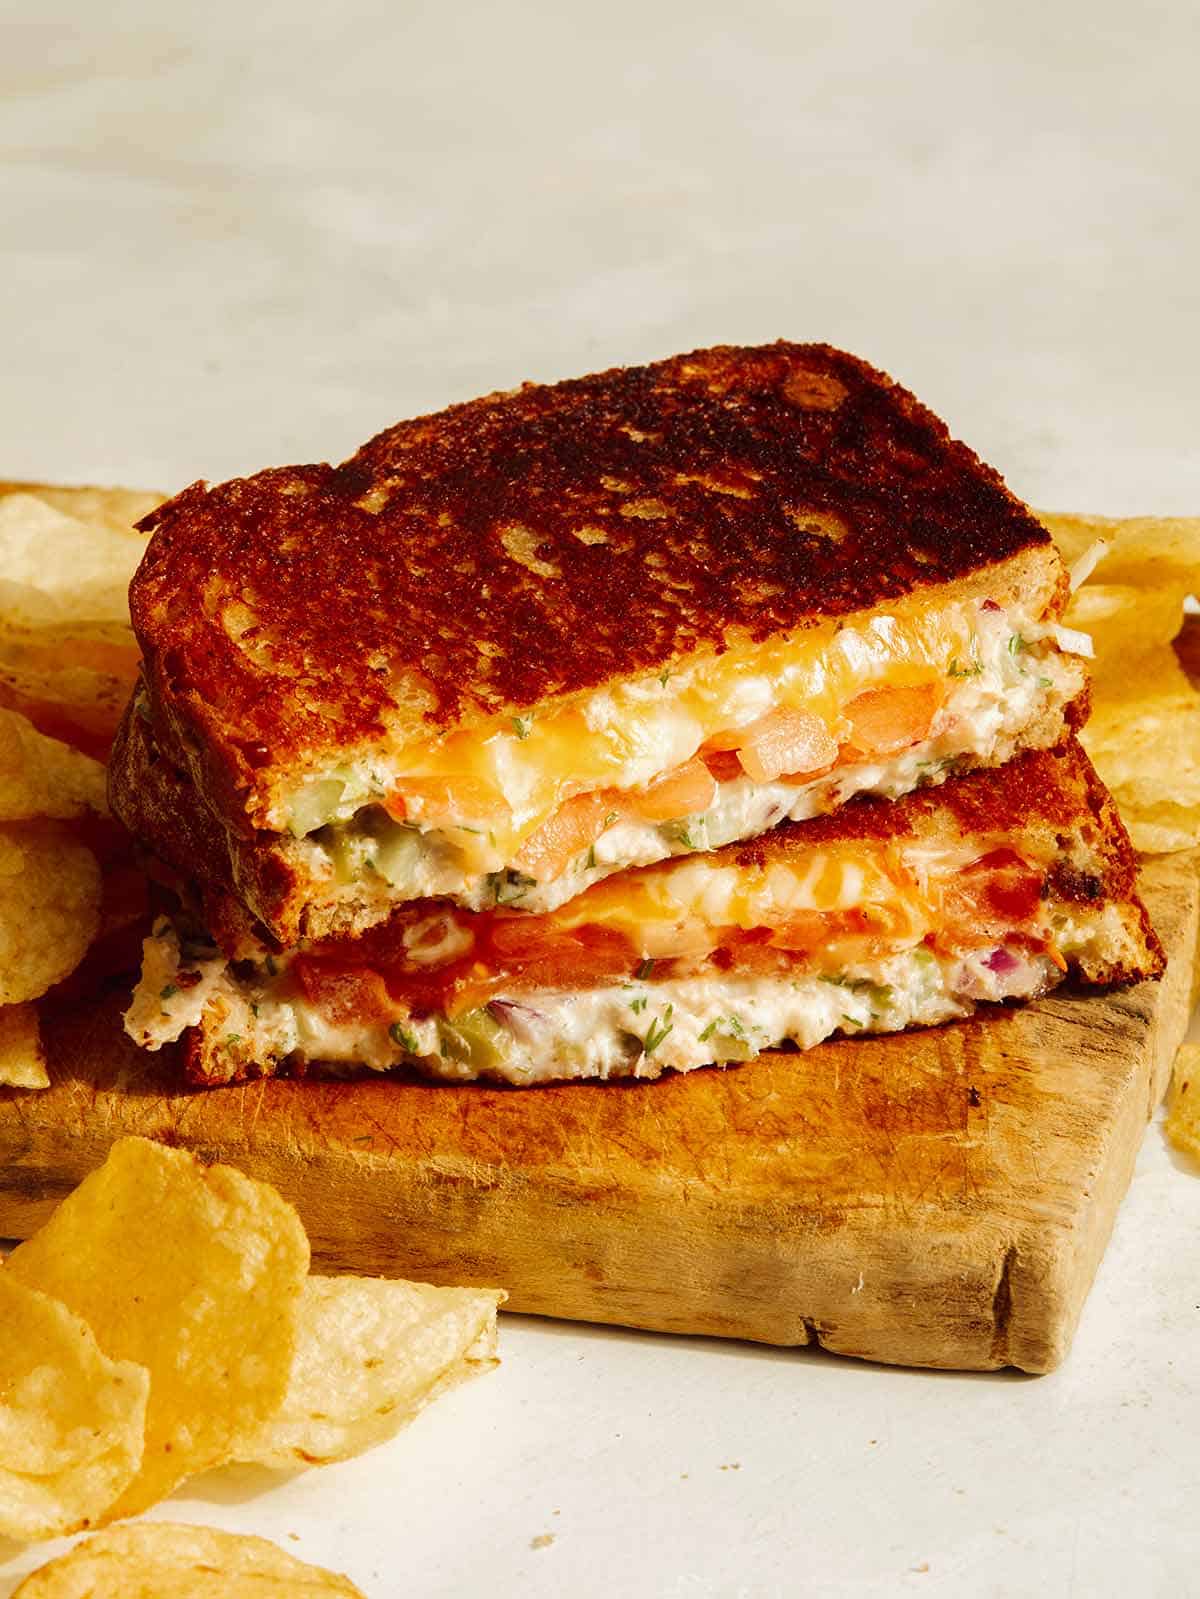
Heat a skillet over medium heat and melt butter. Add sandwich and toast for 4 to 5 minutes or until bread is toasted and cheese begins to melt. Flip sandwich, cover with a lid and continue to toast for an additional 2 to 3 minutes or until bread has toasted and cheese has fully melted. Uncover.
Remove from skillet, slice in half and serve.
Best Canned Tuna to Use for a Tuna Melt
There are so many different brands of canned tuna out there it’s hard to figure out which is the best option for you. Our personal favorite canned tuna, especially for tuna melts is Safe Catch. We love this brand because it’s 100% wild and sustainably caught, slow-cooked for the best flavor and best of all it’s the only brand that tests every single fish they use for mercury!
If you can’t find this brand or don’t love the price point (we get it!) some of our other favorite brands are:
We know making a tuna melt recipe is sort of a no brainer, but there are a few things we do to guarantee the best results!
We don’t go overboard with the mayonnaise! We want the melt to be creamy, but if it’s too creamy and ‘wet’ it won’t hold up nicely while being toasted up!
We add onions, celery and cornichons for taste AND texture! We obviously want the melt to taste good, but we’re also huge on texture, and the combination of bits added to our filling really make this melt shine!
Covering the pan once the melt is flipped. This helps the cheese to melt quicker, without burning the melt or making it soggy and you definitely want the cheese to get nice and melty for it to be a proper tuna melt!
Variations
Replace the cornichons with diced pickles or even some pickle relish
Mix up the herbs by adding some thinly sliced chives, minced thyme, or (our personal favorite) minced tarragon
Add a spoonful of chili paste to the filling, a few dashes of hot sauce, or some minced pickled jalapenos for a little kick!
Our Parmesan Crusted Spicy Tuna Melt Variation (as seen on IG/FB/TikTok)
We took our tuna melt a recipe spiced it up a bit. We simply added 1 tablespoon of calabrian chili pepper paste to the filling for some heat. Then we enhanced the bread by turning it into a parmesan crusted garlic bread! Instructions for that below!
Combine 3 tablespoons softened, unsalted butter, 2 teaspoons thinly sliced chives, 1 1/2 teaspoons garlic powder, 1/2 teaspoon onion powder, and 1/4 teaspoon salt in a small mixing bowl and whisk together.
Spread 1 1/2 tablespoons butter evenly over each slice of bread.
Spread Parmesan onto a plate in an even layer and press one of the butter smeared bread slices (butter side down) into the parmesan. Gently shake to remove excess parm. Repeat with remaining bread slice.
Place a pan over medium-low heat. Once hot add one slice of bread (parm side down).
Top with tuna mixture, sliced tomato and shredded cheese and gently press the other slice of bread (butter/parm out) over the shredded cheese.
Cook for 3 to 4 minutes or until toasted on the bottom and the cheese begins to melt.
Flip the melt, cover with a lid and continue to cook for an additional 2 to 3 minutes or until cheese has melted and bottom is toasted.
Remove from heat, slice and serve.
Prep Ahead Instructions
The tuna filling can be made up to 2 day ahead of time. Once the filling is made, transfer to an airtight container and refrigerate until ready to use.
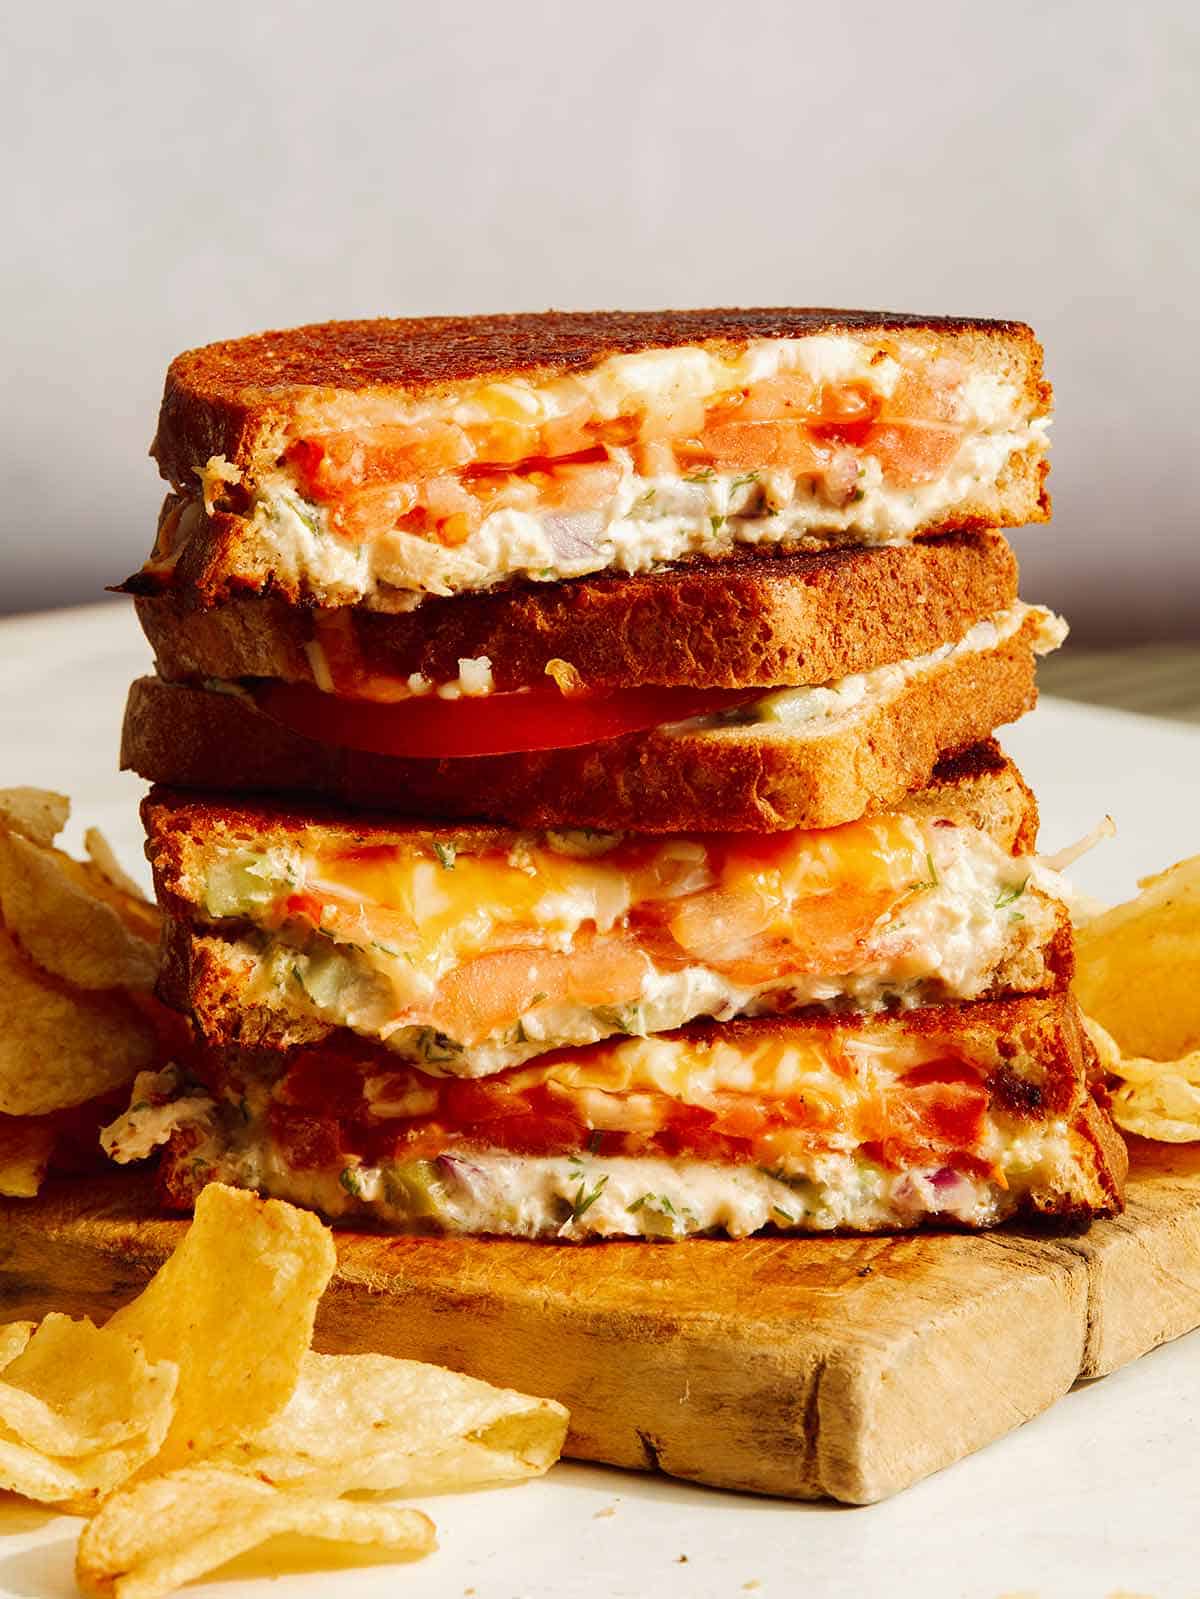
The Perfect Tuna Melt Recipe filled with delicious flavors and textures. Our quick and easy recipe will result in a perfectly made melt that you'll want to make over and over again!
In a mixing bowl combine tuna, mayonnaise, celery, red onion, dill, and cornichons. Season with salt and pepper and stir together.
Spread 1/2 tablespoon butter over each slice of bread and turn two slices butter side down.
Top each butter side down slice of bread with tuna mixture.
Top with sliced tomatoes, shredded cheese and remaining slices of bread.
Heat a skillet over medium heat and melt butter.
Add sandwich and toast for 4 to 5 minutes or until bread is toasted and cheese begins to melt.
Flip sandwich, cover with a lid and continue to toast for an additional 2 to 3 minutes or until bread has toasted and cheese has fully melted.
Uncover, remove from skillet, slice in half and serve.
Notes
Tips and Tricks
We don’t go overboard with the mayonnaise! We want the melt to be creamy, but if it’s too creamy and ‘wet’ it won’t hold up nicely while being toasted up!
We add onions, celery and cornichons for taste AND texture! We obviously want the melt to taste good, but we’re also huge on texture, and the combination of bits added to our filling really make this melt shine!
Covering the pan once the melt is flipped. This helps the cheese to melt quicker, without burning the melt or making it soggy and you definitely want the cheese to get nice and melty for it to be a proper tuna melt!
Prep AheadThe filling can be made up to 2 days in advance. Transfer filling to an airtight container and refrigerate until ready to use.