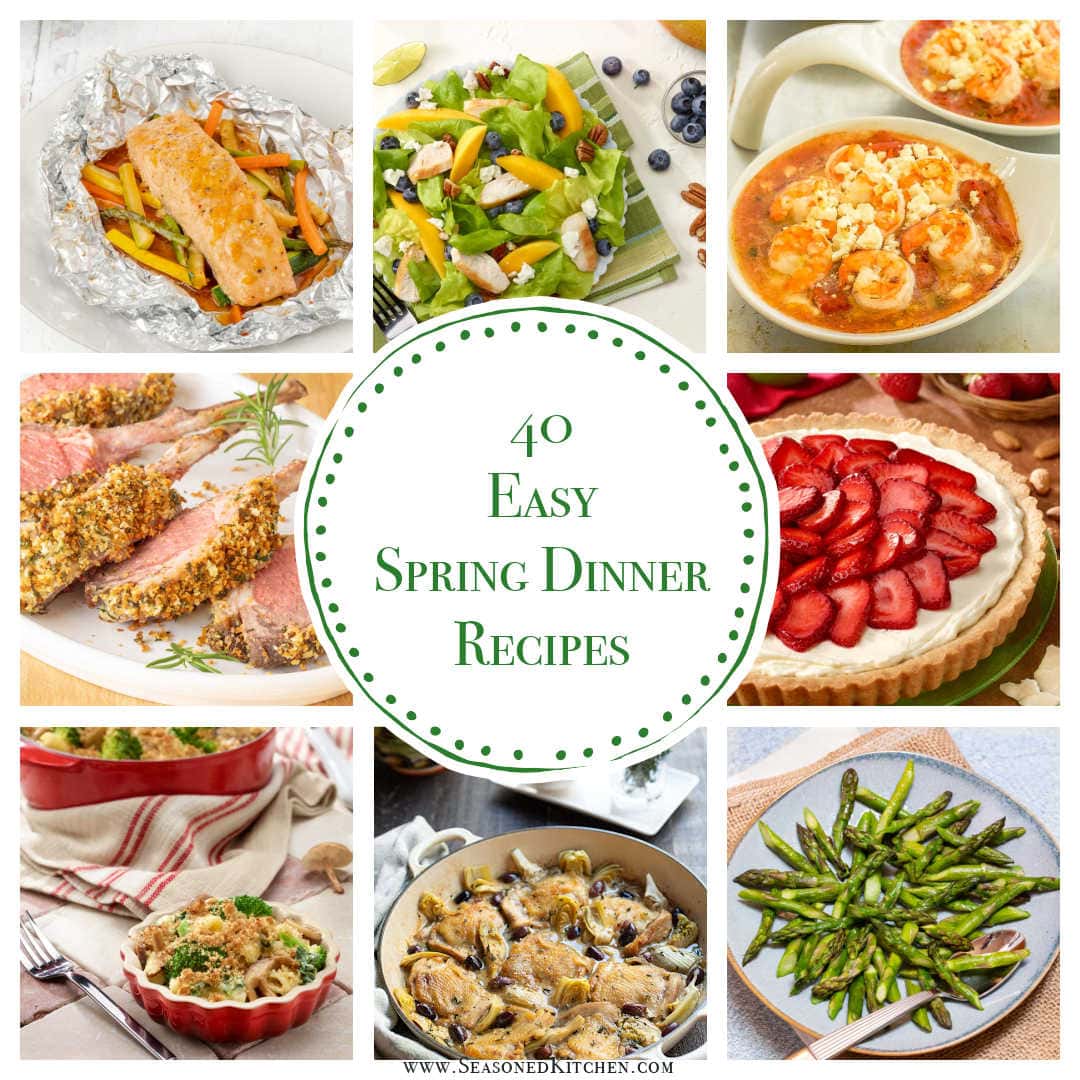
Spring has sprung (at least in my kitchen!). The warmer weather brings with it a renewed desire for fresh flavors and lighter meals. Whether you’re planning for celebratory special occasions or simply want to enjoy delicious dinners that celebrate the season, these 40 Spring Dinner Recipes are sure to inspire you.
We’ve got something for everyone, whether you’re a veggie devotee, a confirmed carnivore, or a seafood fanatic. Think vibrant salads packed with spring’s best produce, or perfectly roasted salmon with a tangy lemon butter sauce. This list is all about celebrating the seasonal, fresh ingredients that come alive this time of year. After all, spring is a time for renewal, and what better way to embrace it than with a delicious feast? So ditch the hearty stews and get ready to enjoy the lighter, livelier flavors of spring!
Flavors of the Season: Spring Ingredients
There are numerous resources online where you can find out what fruits and vegetables are in season. At the Seasonal Food Guide, you can even search by state and by month. My preferred guide to what’s in season overall is the USDA’s Seasonal Produce Guide, where you can browse by season. Here’s their list for spring:
Apples
Apricots
Artichokes
Asparagus
Avocados
Bananas
Broccoli
Cabbage
Carrots
Celery
Collard Greens
Garlic
Herbs
Kale
Kiwifruit
Lemons
Lettuce
Limes
Mushrooms
Onions
Peas
Pineapples
Radishes
Rhubarb
Spinach
Strawberries
Swiss Chard
Turnips
Easy Spring Recipes
The following sections divide the 40 recipes into the following categories:
- Spring-Inspired Fish and Seafood Recipes
- Spring Dinner Ideas for Meat Lovers (Chicken, Pork, Beef, Lamb)
- Spring Vegetarian Dinner Recipes
- Fresh and Vibrant Main Dish Salads
- Spring Side Dishes
- Bright and Luscious Spring Desserts
8 Spring-Inspired Fish and Seafood Recipes
Warmer weather brings delicious, fresh fish like salmon closer to shore, along with plump, flavorful shrimp. These 8 spring recipes are a great way to celebrate the season’s bounty from the sea. And, combining these fresh catches with complementary seasonal vegetables like baby spinach, tender asparagus, and artichokes creates delightful spring dinners perfect for any occasion.
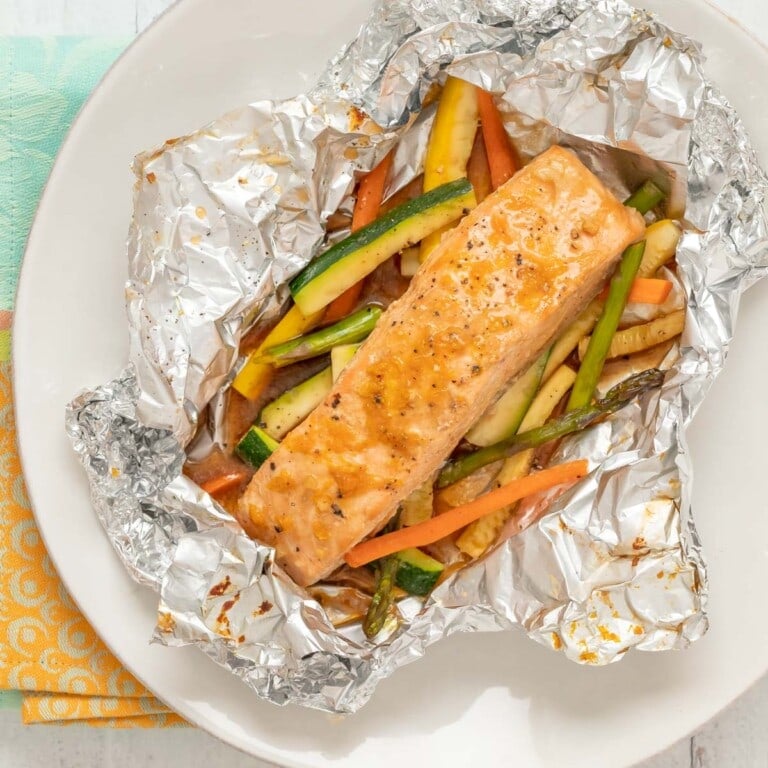
Oven Baked Salmon in Foil with Vegetables
In this fresh and healthy recipe for Salmon and Vegetables en Papillote, fish fillets are paired with a flavorful julienne vegetables and a deeply flavored marinade. These ingredients are then all bundled up in foil (or parchment paper) and either baked or grilled.
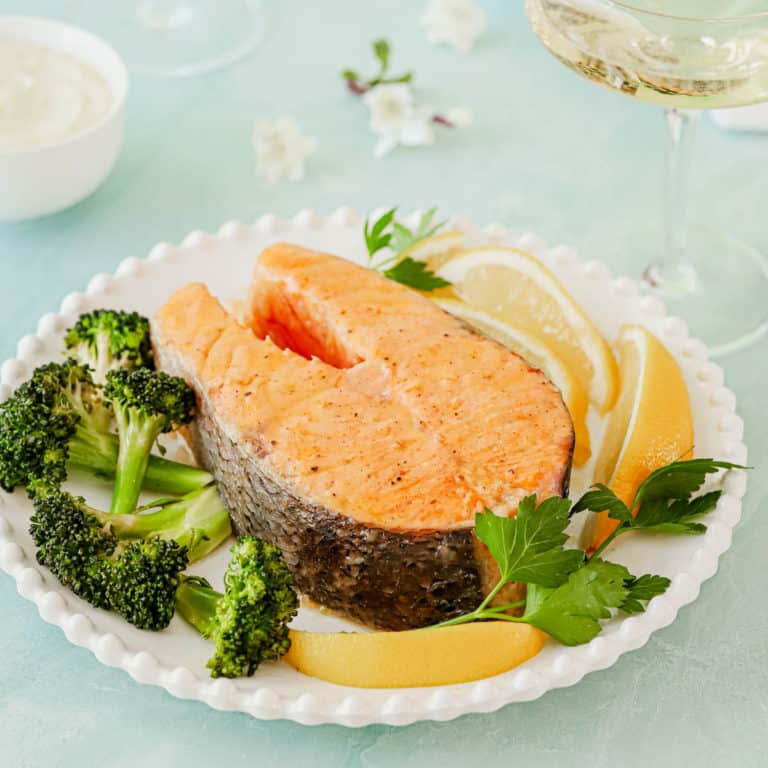
Roasted Salmon Steaks with Lemon Butter Sauce
Indulge in the delightful simplicity of Roasted Salmon Steaks with Lemon Butter Sauce – a dish that effortlessly combines speed and elegance, while showcasing the rich, natural flavor of salmon.

Parmesan Breaded Salmon Recipe with Herb Mayo
Fresh and enticing, Parmesan Breaded Salmon with Herb Mayo will be the star of your next gathering. I’ve been serving this timeless recipe at my dinner parties for years. Plus, it’s easy to prepare and can be assembled ahead of time.

Oven Baked Swordfish Steaks with Lemon and Rosemary
Swordfish is flavored with lemon, rosemary, and garlic and baked in a parchment paper (or foil) package. Whether you’re a seasoned chef or a novice cook, this recipe delivers a mouthwatering meal that will impress even the most discerning seafood connoisseurs!
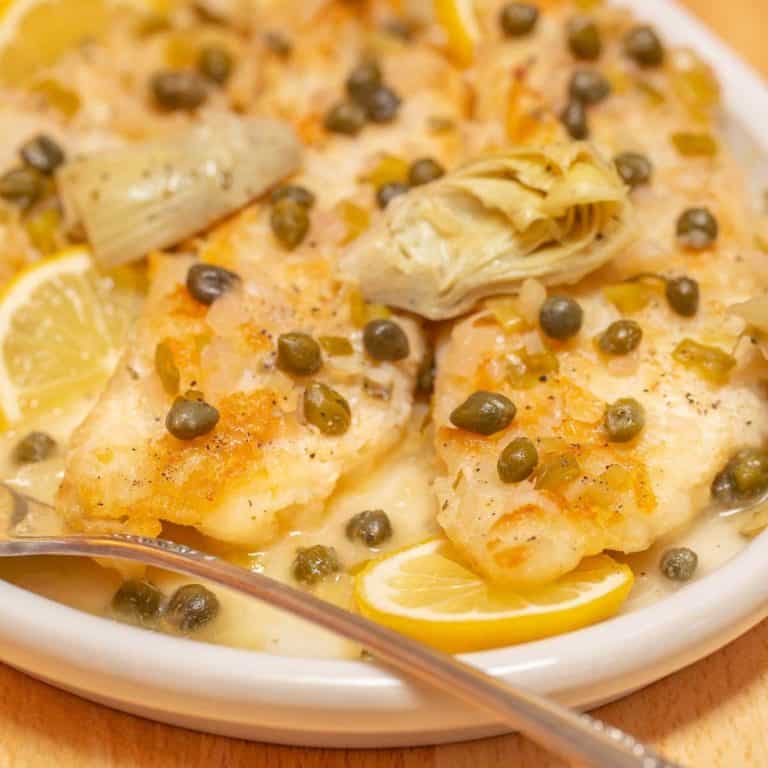
Fish Piccata with Artichokes
Delicious, light and healthy, Easy Fish Piccata with Artichokes is quick enough for every day, elegant enough for entertaining. Fish filets are dredged in flour, sautéed in oil, then served with artichokes and a slightly tangy and scrumptious lemon, butter, caper sauce.
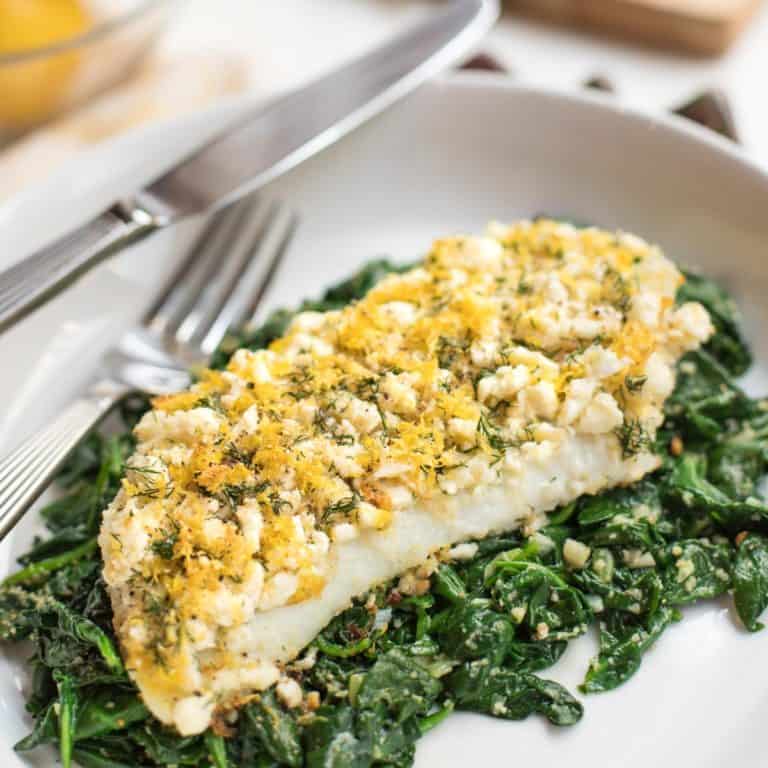
Oven Baked Cod with Lemon and Dill on Spinach
This quick and healthy dish is bursting with flavor! Feta, lemon and dill top flaky cod nestled on garlicky spinach, creating a vibrant and delicious dinner in under 30 minutes.
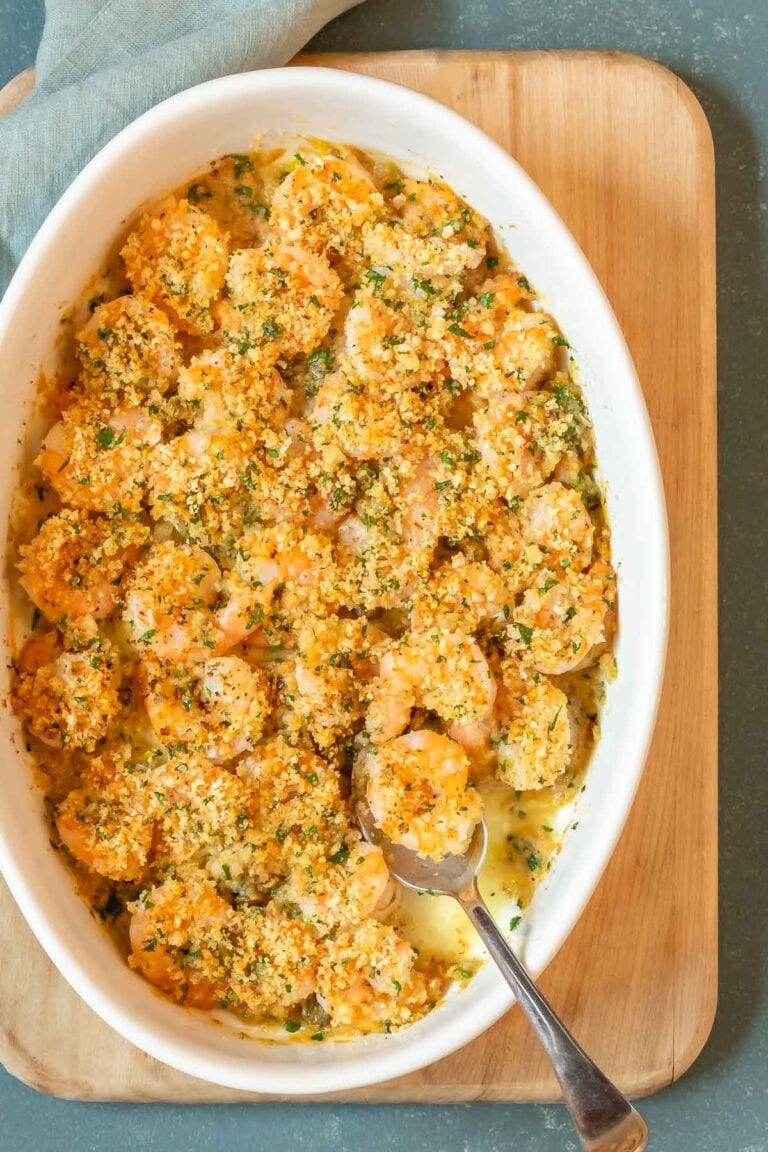
Baked Shrimp Recipe with Breadcrumb Topping
Succulent shrimp, shallots, and capers are baked in a sherry-butter sauce that’s accented by tarragon and marjoram. Lemony breadcrumbs top it off, adding a subtle citrusy pop and contrasting crunch to the sweet, tender shrimp.

Oven Baked Shrimp with Tomatoes and Feta
Flavorful Italian plum tomatoes, briny capers, garlicky shrimp and tangy feta cheese come together in this Oven Baked Shrimp dish to create a perfect balance of sweet, salty and tangy flavors.
7 Spring Dinner Ideas for Meat Lovers (Chicken, Pork, Beef, Lamb)
These 7 meat recipes deliver big on flavor without feeling heavy. From succulent braised chicken with artichokes to mini meatloaves and delightful chicken pasta dishes, we’ve got options to satisfy every comfort food craving with a fresh, springtime twist.
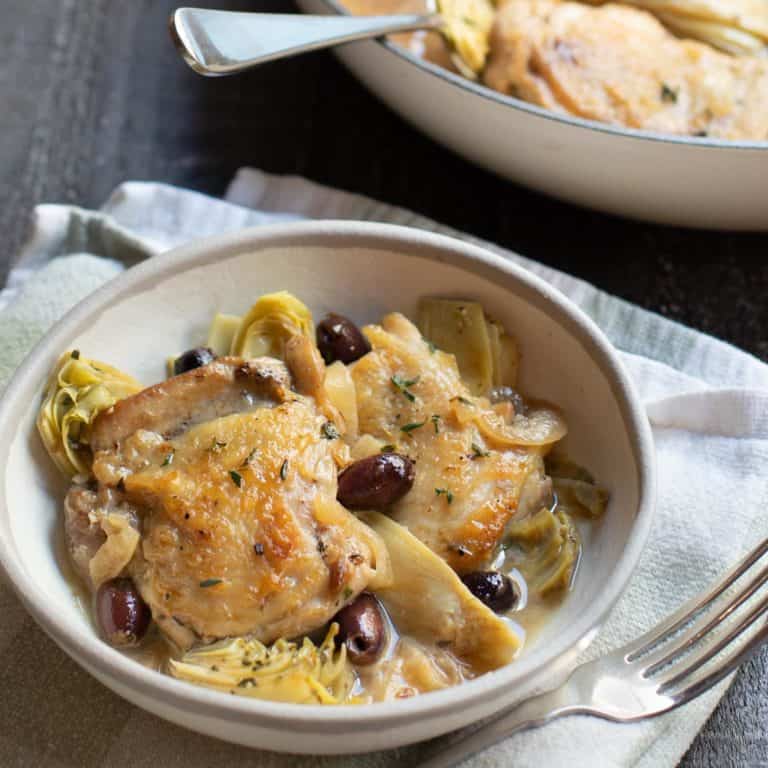
Braised Artichoke Chicken Thighs
Tender braised chicken is accented with Mediterranean flavors in this mouth-watering Braised Chicken with Olives and Artichokes recipe.
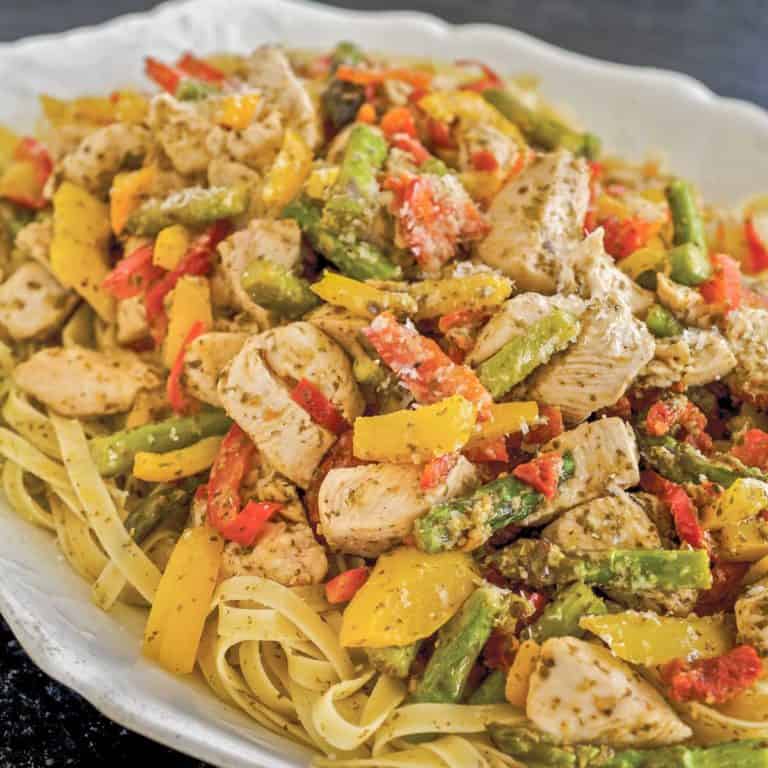
Pesto Chicken and Pasta with Veggies
Easy to prepare in under 25 minutes, this chicken and pasta recipe is perfect for busy night dinner. Use in-season vegetables, and any size or shape pasta. Plus, choose from three unique scrumptious pesto recipes.
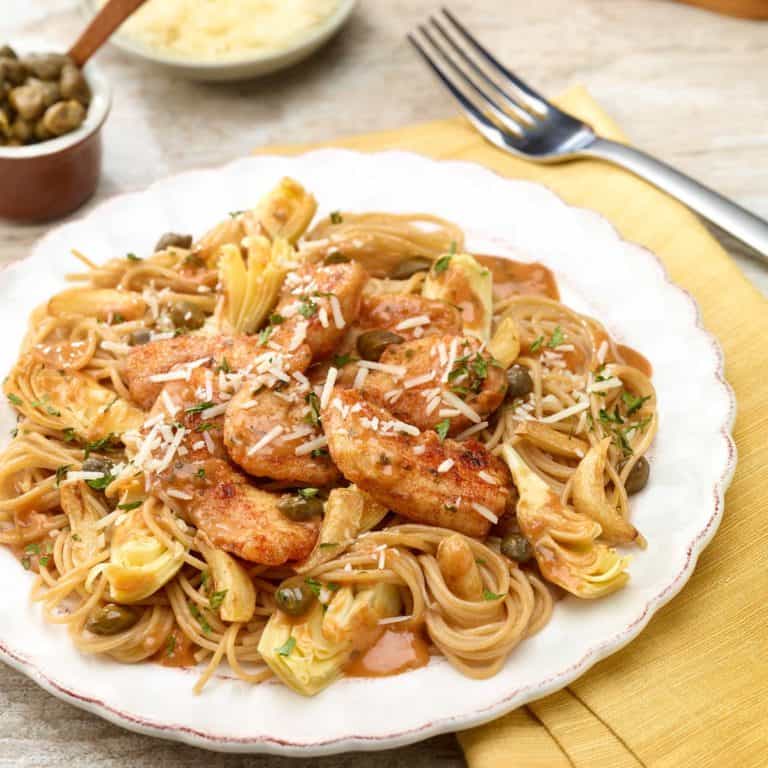
Chicken Artichoke Pasta with Capers
Angel Hair with Chicken and Artichoke-Caper Sauce is a light and healthy pasta dish that’s chock-a-block full of flavor.

Chicken Stir Fry (Healthy!)
Healthy Chicken Stir Fry uses a limited amount of oil to cook a fresh, flavorful and colorful mixture of chicken, pea pods, almonds and green onion.

Mini Meatloaves Wrapped in Prosciutto
Bursting with flavor, Mini Meatloaves Wrapped in Prosciutto combine ground beef and pork with a medley of carrots, celery, onion, bell pepper, garlic, and fresh herbs. Wrapped in a savory embrace of prosciutto, these mini meatloaves will soon be your favorite!

Sausage and Spinach Torte
Mom’s Sausage and Spinach Torte is sophisticated in flavor, tempting to look at, and the perfect main dish for your next picnic, lunch or light dinner gathering.

Crusted Rack of Lamb 3 Ways – Air Fryer, Roasted, or Grilled
Add a touch of elegance to your next gathering by serving mouthwatering Crusted Rack of Lamb. Tender, juicy, lamb coated with Dijon mustard and topped with a lemon-herb breadcrumb crust, this impressive main dish is surprisingly easy to prepare. And, you have your choice of method – in an air fryer, oven-roasted, or grilled.
5 Spring Vegetarian Dinner Recipes
Spring is bursting with fresh flavors, and these 5 vegetarian recipes are the perfect way to celebrate them. We’ve got something for every craving, from comforting pot pie and flavorful filo strudel to exciting curry and vibrant veggie pasta.
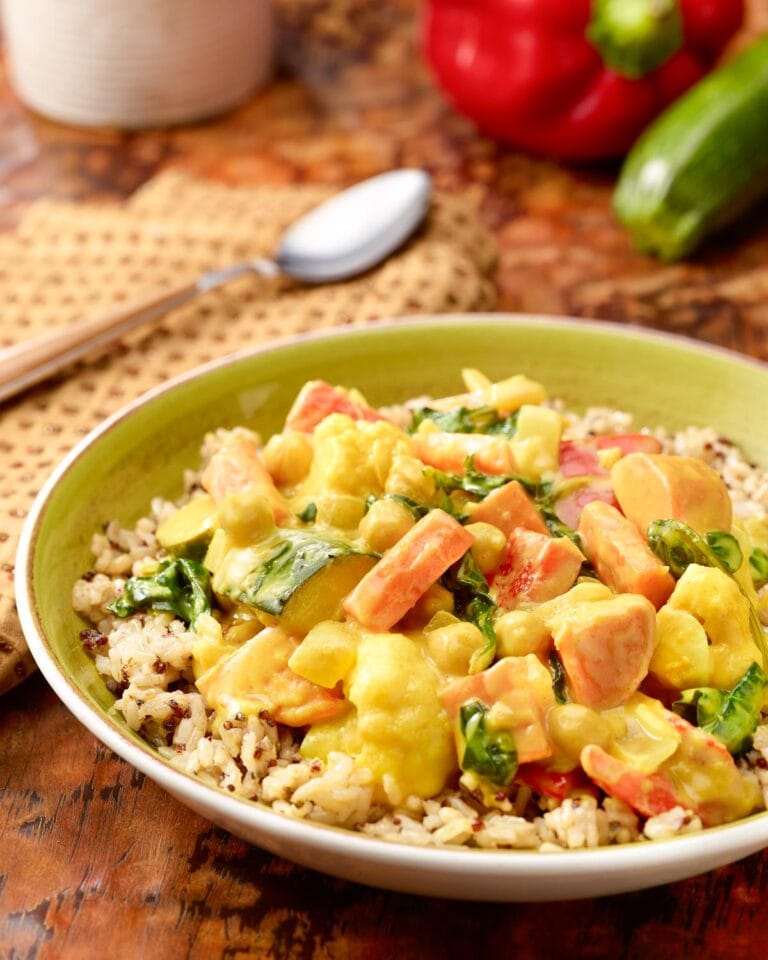
Mixed Vegetable Curry with Fresh Vegetables
Fresh, seasonal vegetables like cauliflower, carrots, zucchini, spinach, and sweet potato star in this dish, bathed in a flavorful Madras curry sauce infused with warm cumin, earthy turmeric, and a touch of cayenne pepper. Creamy coconut milk adds a touch of richness and balance, making this curry a delightful and comforting meal.
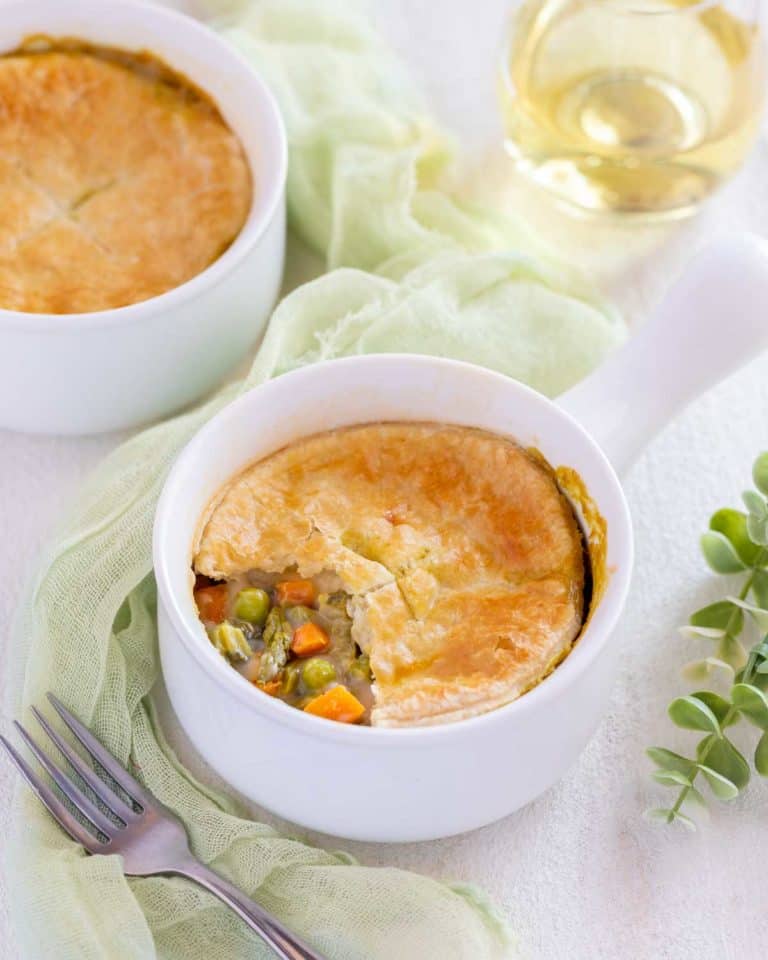
Vegetarian Pot Pie Recipe
Vegetarian Pot Pie celebrates the fresh produce of spring – asparagus, peas, carrots, leeks and baby spinach. Easy to prepare with frozen puff pastry, this healthier version of the classic pot pie switches out the cream for coconut milk and reduces the butter to a mere tablespoon. Plus, it’s flexible – vegetables can be varied based on availability, and baked either as individual potpies or in one dish.
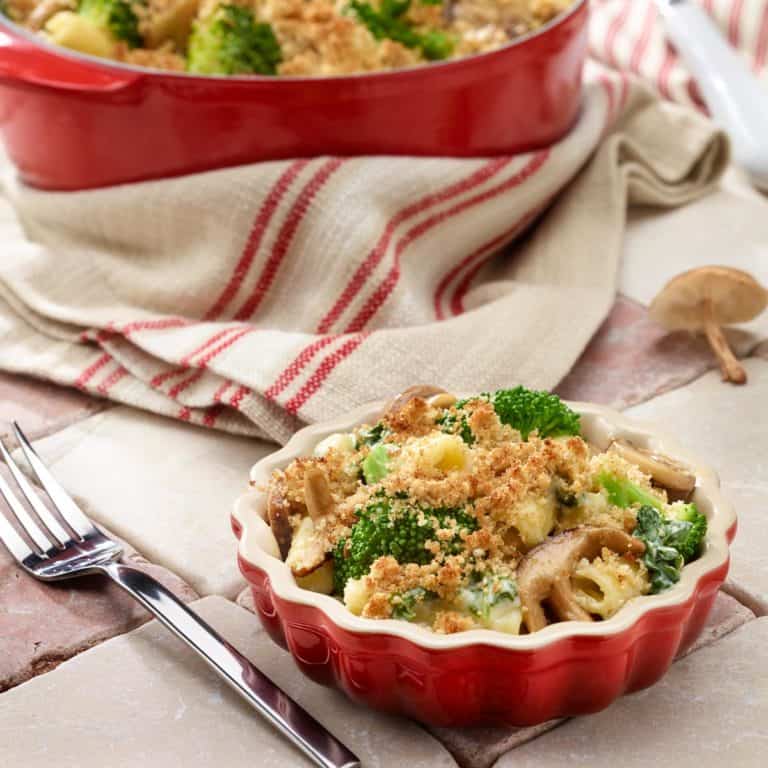
Veggie Casserole with Broccoli, Mushroom, Spinach, and Cheese Pasta
Broccoli, Mushroom, Spinach and Cheese Pasta is a sophisticated and healthier vegetarian version of macaroni and cheese, using Fontina and Parmesan instead of Cheddar cheese. It’s easy to prepare ahead of time, too!
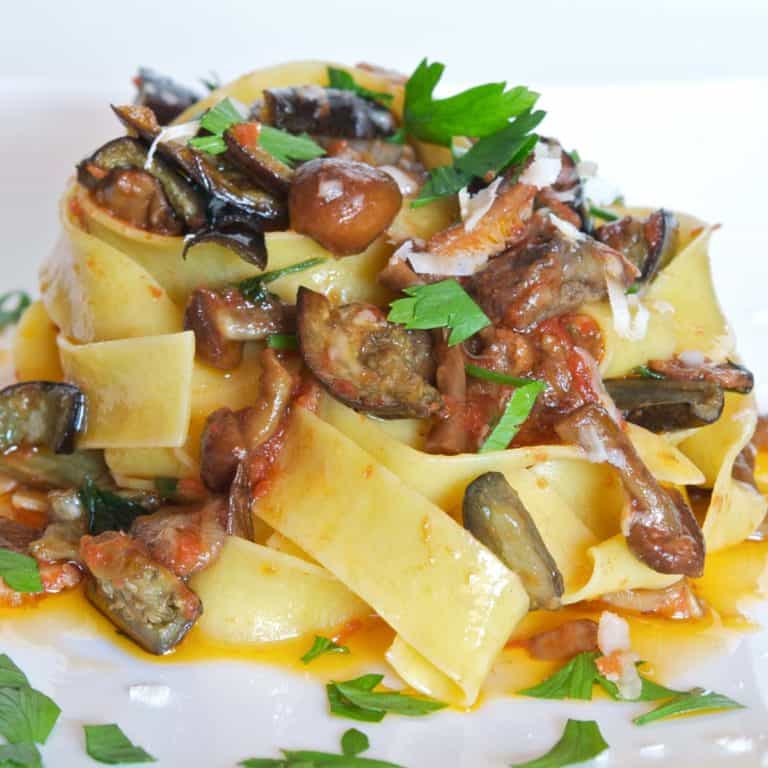
Quick Pappardelle with Mushrooms and Eggplant
A super easy pasta dish to prepare on a busy day, Quick Eggplant and Mushroom Pappardelle from my husband Robert is a crowd-pleaser! A bit sweet, a bit spicy, a bit earthy – it has a mouth-watering combination of flavors.
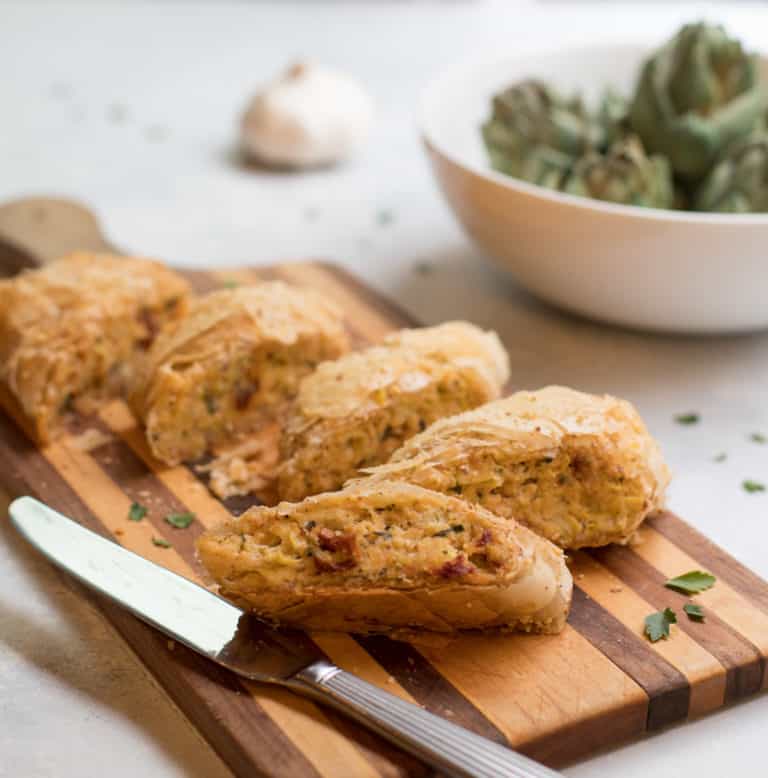
Artichoke and Sundried Tomato Phyllo Strudel
Artichoke and Sundried Tomato Strudel is a delicious vegetarian dish that’s perfect for a luncheon or light dinner. Artichokes and sundried tomatoes are combined with herbs, white wine, shallots garlic, and three cheeses, then rolled in layers of phyllo dough and baked
6 Fresh and Vibrant Main Dish Salads
Salads are a staple during the spring season, and there are endless possibilities for creating fresh and vibrant combinations. Here are six of my long-time favorites. These spring salads showcase creative flavor profiles and unexpected ingredients to turn a fresh salad into a satisfying main course.
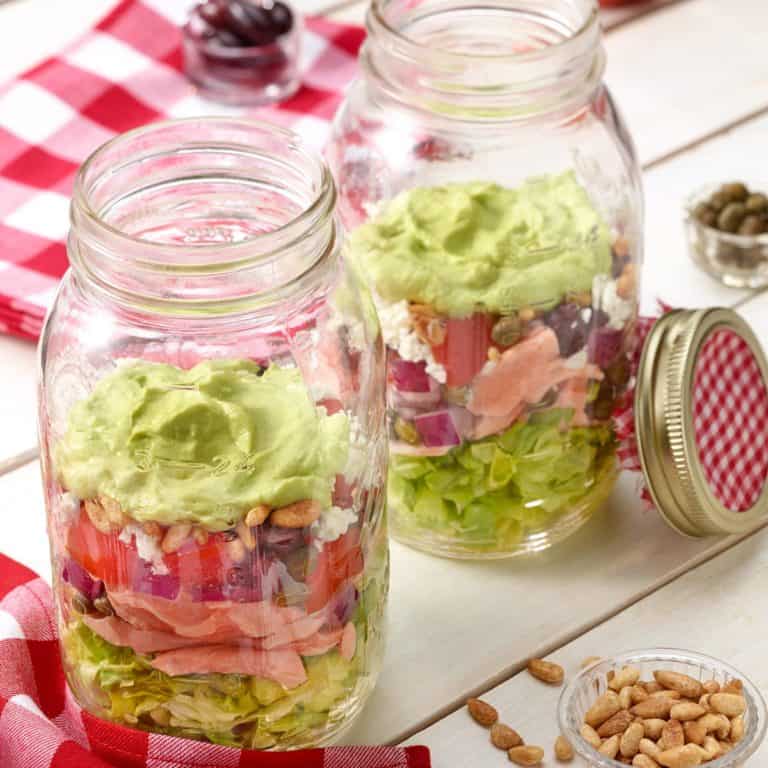
Cold Salmon Salad with Avocado Dressing
In this delightful salad, tender, flaky pieces of cooked salmon are layered atop crisp mixed greens, capers, olives, tomato, onion, goat cheese, pine nuts and creamy Avocado Lime Dressing. It can be served in a variety of ways – as a layered salad, cobb salad-style, or simply tossed and served.
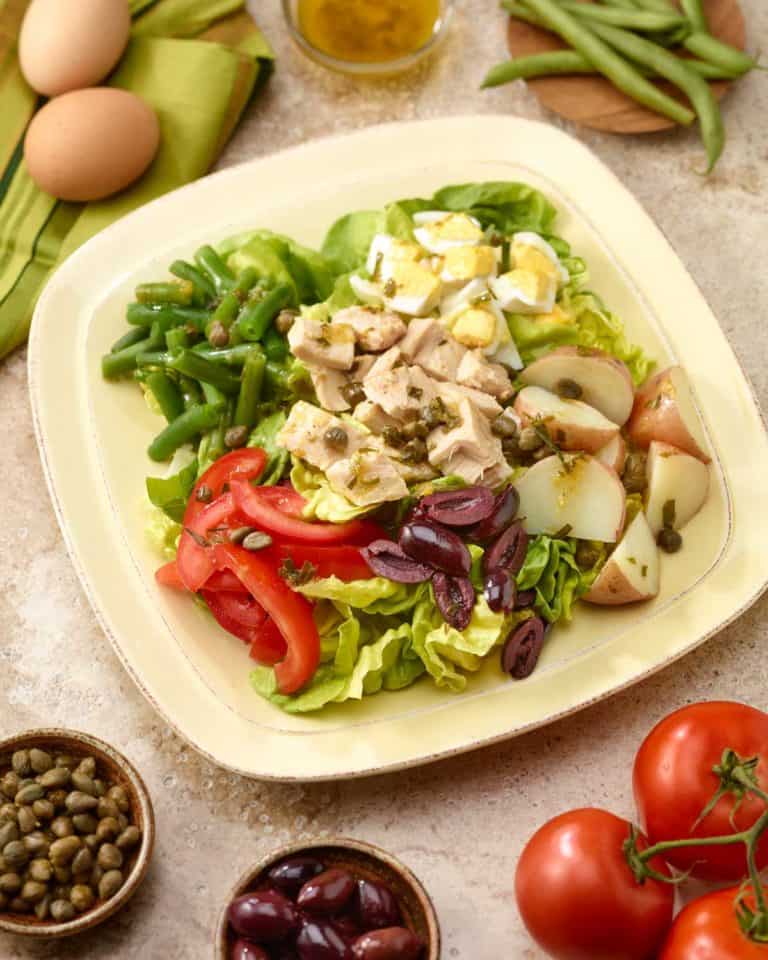
Tuna Salad Niçoise Recipe
Tuna Salad Niçoise is an easy, elegant and impressive entrée that’s perfect for a refreshing lunch or light dinner, especially in spring and summer months. There are numerous takes on this iconic dish from southern France; my version includes tips and tricks to enhance each element, without overpowering or making the dish rich.
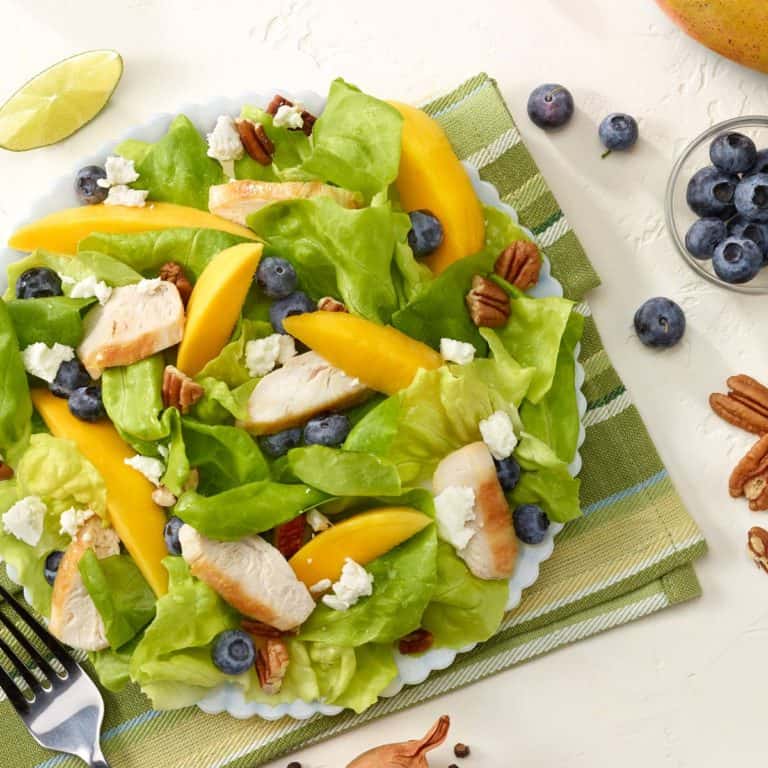
Chicken Blueberry Salad Recipe with Mango Salad Dressing
Chicken, Blueberry and Mango Salad with Mango Vinaigrette is cool, crisp and beautiful. Easy to prepare with readily available ingredients, this main dish chicken salad is perfect for summer dinners.
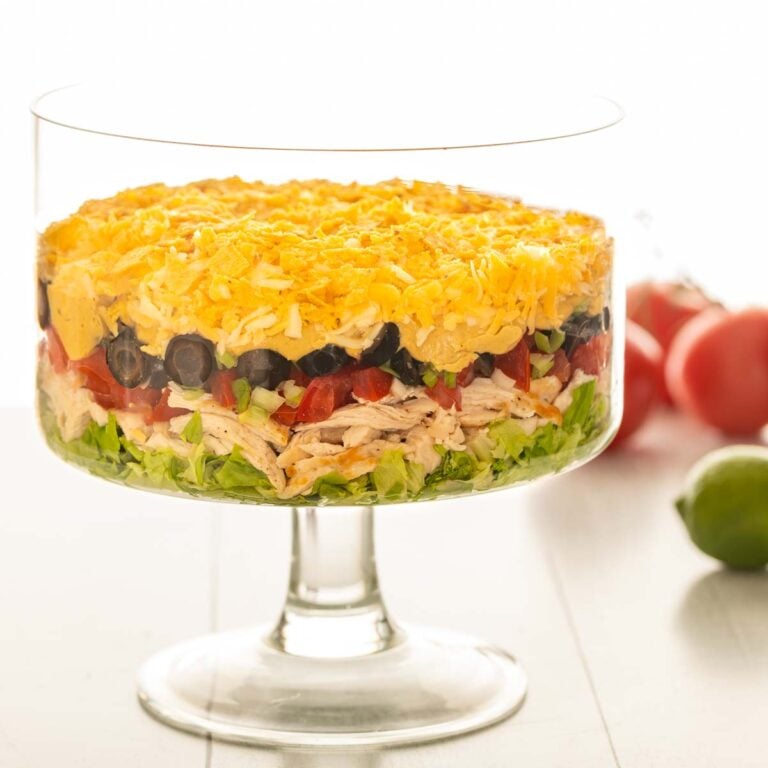
Shredded Chicken Taco Salad
Experience the ultimate flavor explosion with my mom’s Shredded Chicken Taco Salad. What sets it apart? The irresistible Creamy Avocado Dressing, featuring ripe avocados, tangy Greek yogurt, zesty lime juice, and a blend of Mexican spices.
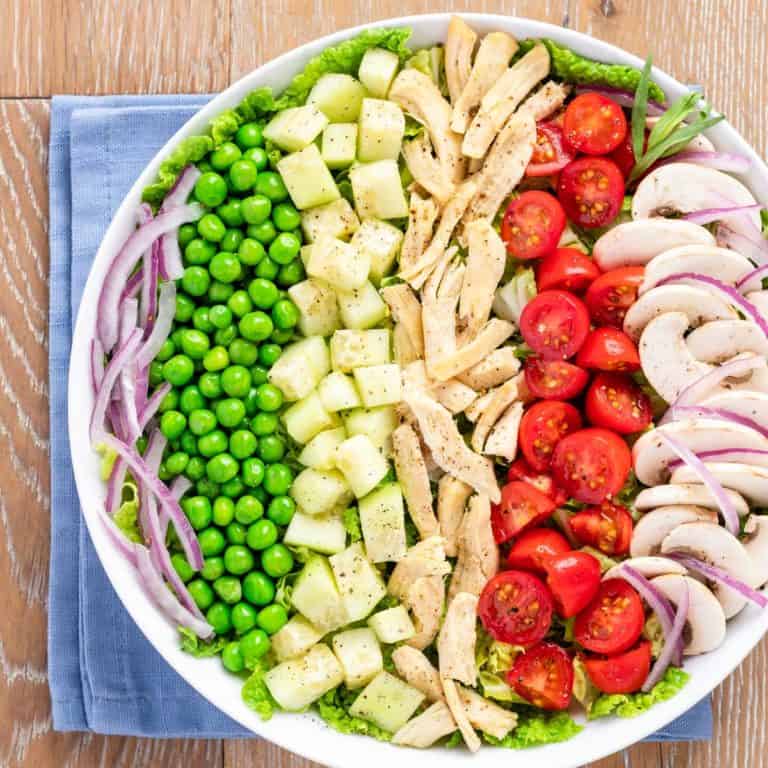
Tarragon Chicken Salad
Our Tarragon Chicken Salad is a unique twist on the iconic deli chicken salad, adding in complementary fresh ingredients as well as offering two elegant presentations to choose from.
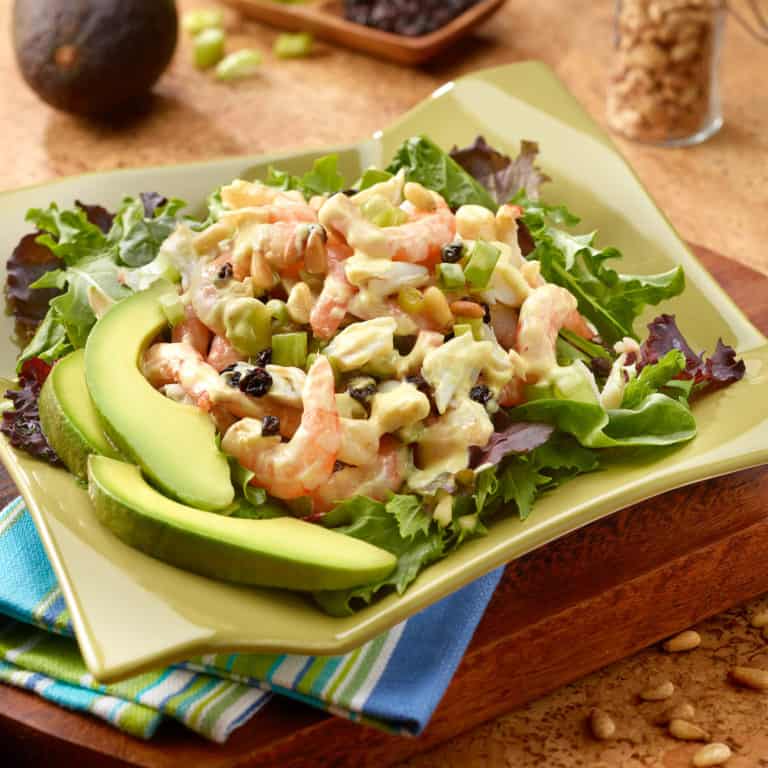
Crab and Shrimp Salad Recipe with Curry-Chutney Dressing
Crab and Shrimp Salad with Curry-Chutney Dressing is a light and refreshing dish that combines succulent seafood with crisp vegetables and an irresistible dressing.
8 Spring Side Dishes
Spring’s bounty shines in these 8 vibrant sides. Sautéed asparagus, crisp green beans, and a peppery arugula salad are just a taste of what awaits. Featuring the season’s best, including sweet green peas and carrots, enjoy spring’s fresh flavors alongside almost any main dish.

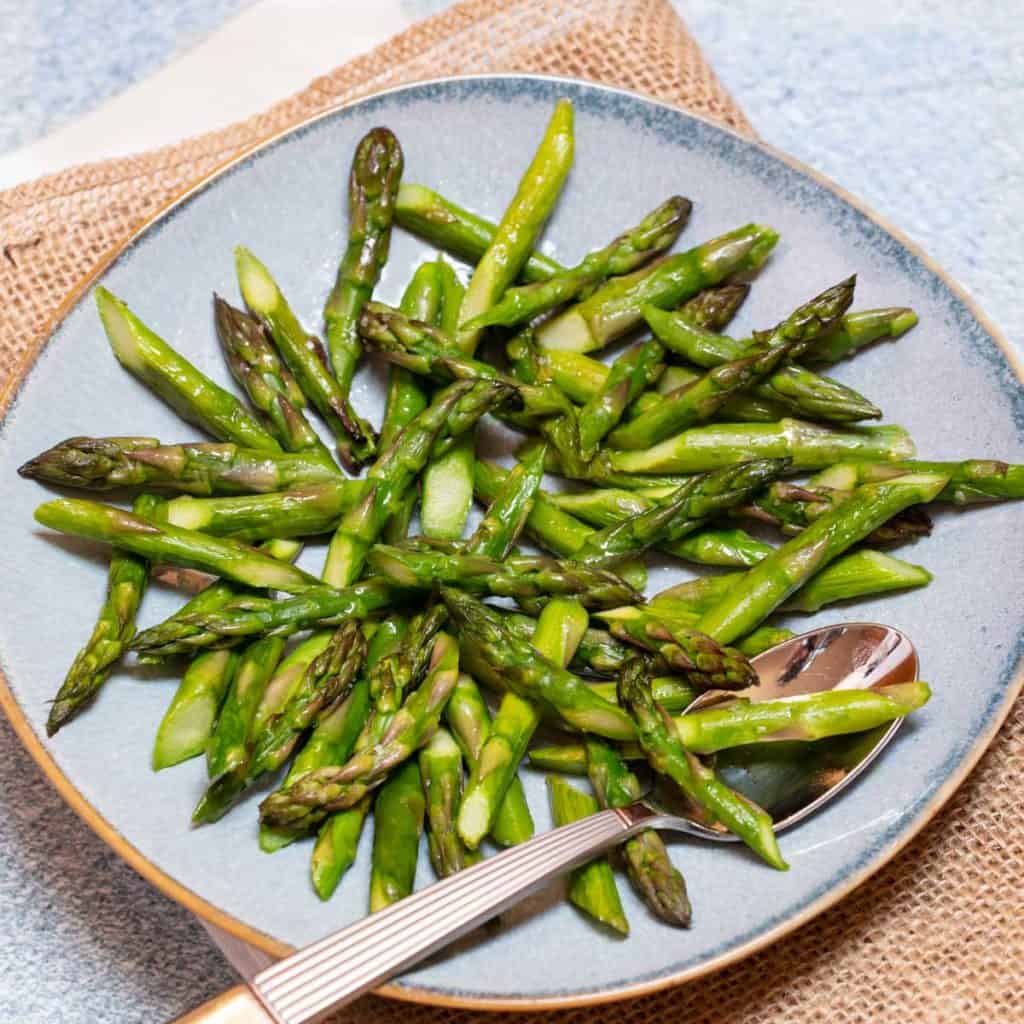
Quick and Easy Recipe for Sauteed Asparagus
For 50 years, I’ve relied on this simple recipe for Sautéed Asparagus. Chopped into one-inch pieces, the asparagus cooks up quickly, transforming into a vibrant and versatile side dish you can have on the dinner table in under 10 minutes.
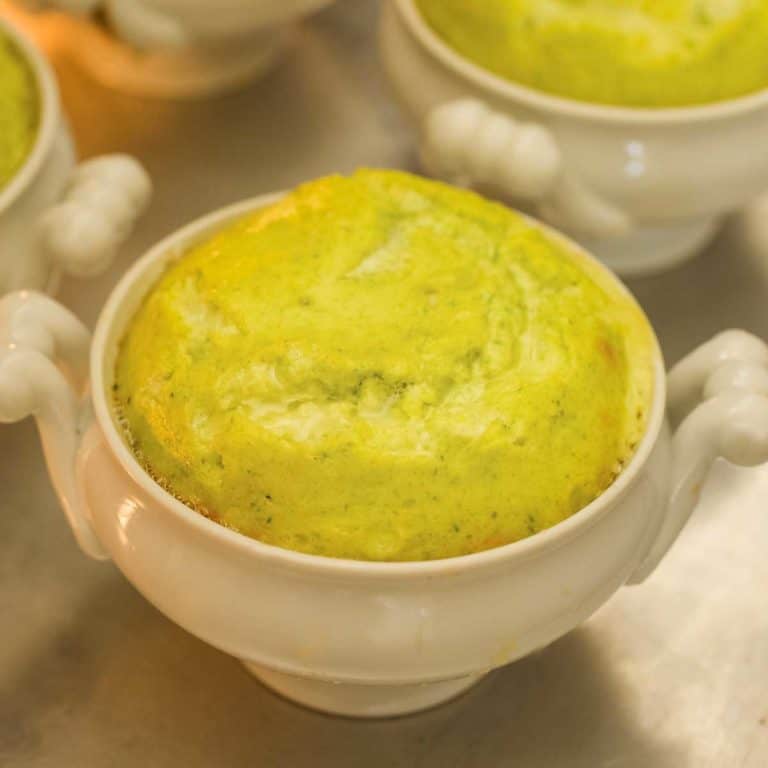
Asparagus Soufflé
Light and airy Asparagus Soufflés are incredibly easy to prepare – no beating or folding of egg whites, no bechamel sauce prep. Everything goes into the food processor (or blender), and presto! you have an elegant and impressive asparagus side dish.
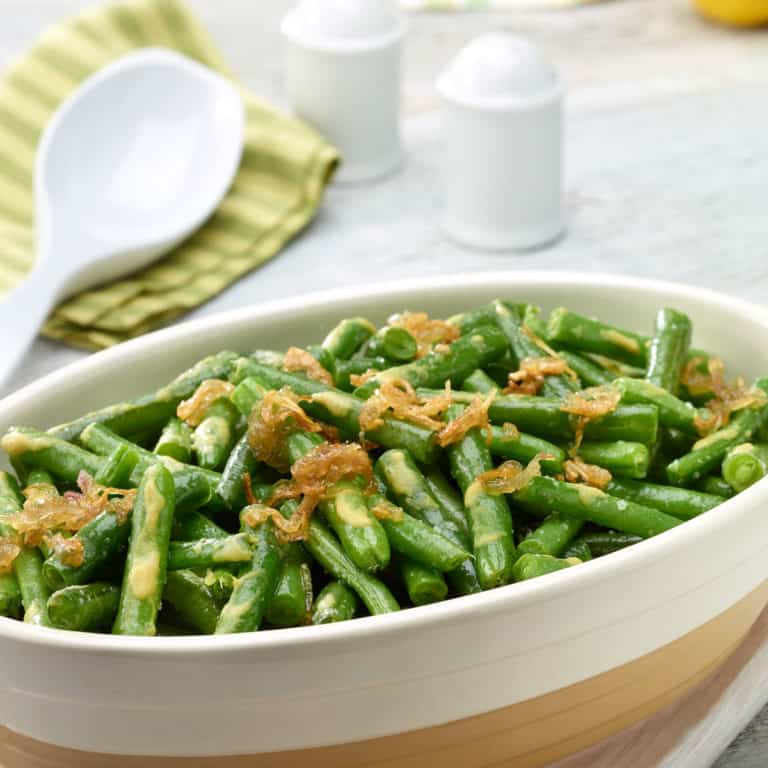
Lemon Green Beans with Dijon Mustard
Indulge your taste buds with these oven-roasted green beans coated with a luscious blend of tangy olive oil, zesty lemon juice, and bold Dijon mustard. Crispy caramelized shallots are sprinkled on top, infusing each bite with a deeply rich sweetness and a bit of crunch.
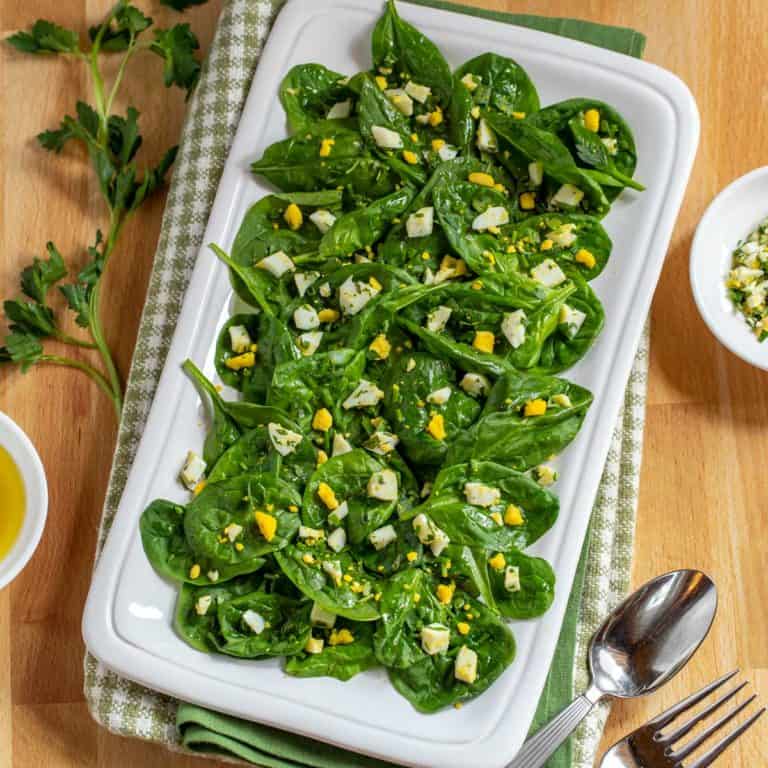
Flavorful Baby Spinach Salad with Lemon Dijon Dressing
Prepared with eggs and fresh herbs, this Baby Spinach Salad is a light, easy to prepare starter or side dish. A tangy Lemon Dijon Dressing keeps it bright and fresh.
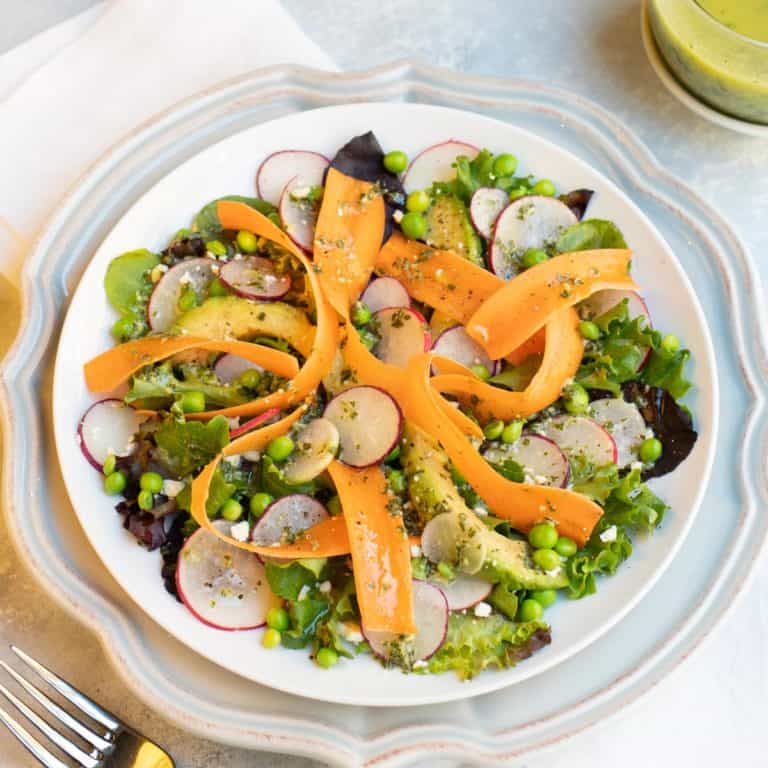
Carrot, Radish and Sweet Pea Salad with Lemon-Basil Vinaigrette
Shaved carrots are paired with crisp radish slices, sweet sugar snap peas, luscious sliced avocado and tangy crumbled feta cheese. It all sits atop fresh baby lettuces and is finished with a scrumptious lemon-basil vinaigrette dressing. Dressing and vegetables can be prepared ahead, too!
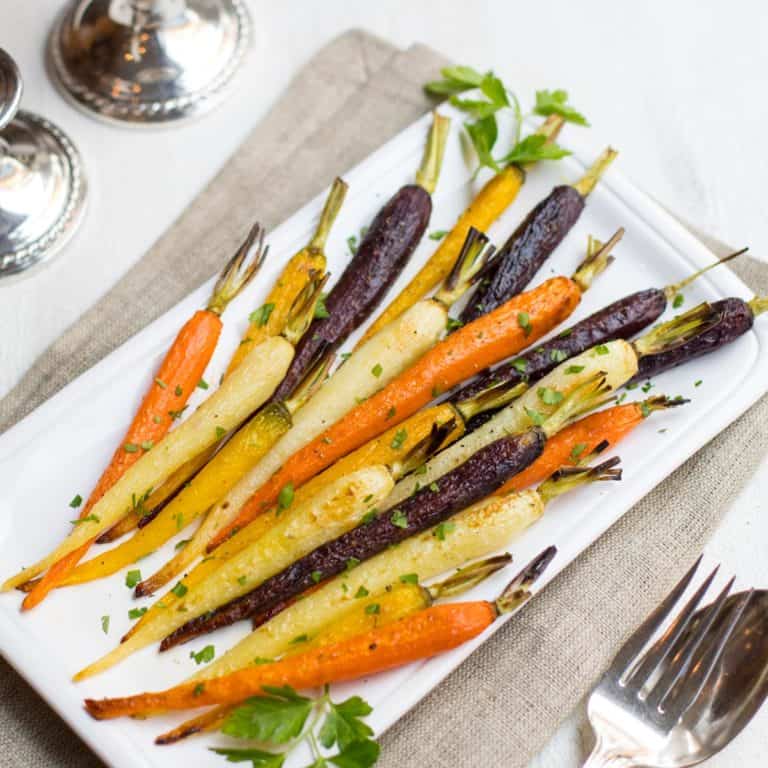
Oven Roasted Carrots Recipe
Roasting brings out carrots’ natural sweetness while giving them a deliciously caramelized exterior. With just a few ingredients, you can transform ordinary carrots into a mouthwatering side dish that will steal the show.
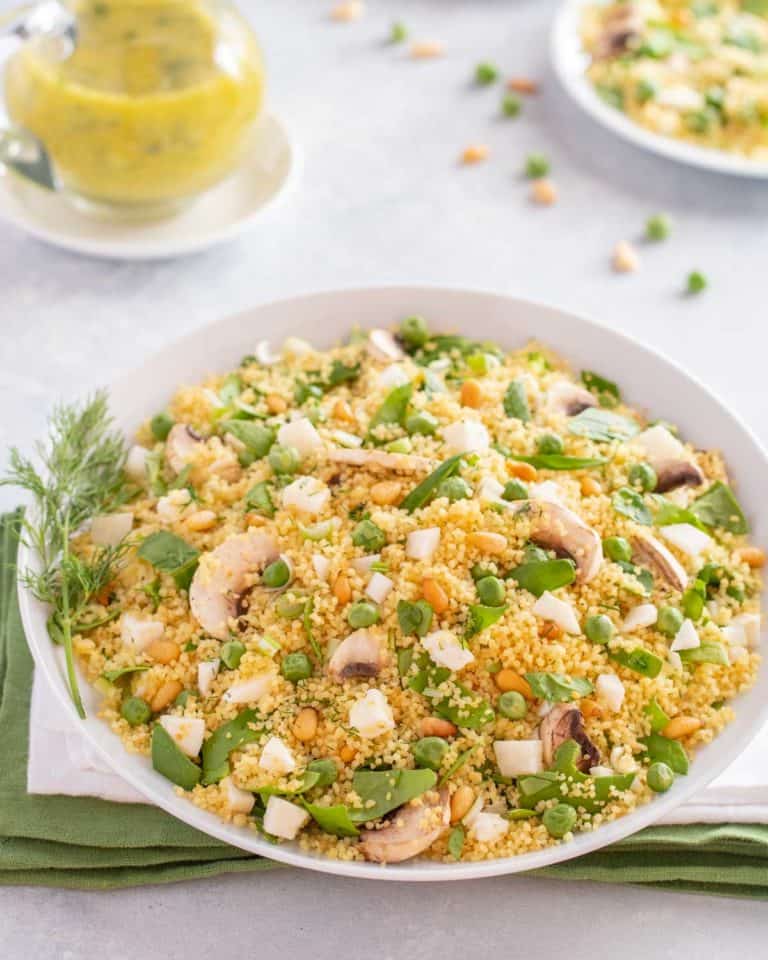
Vegetable Couscous Recipe
Vegetable Couscous is full of vibrant flavors and textures. Nutty couscous is tossed together with fresh spinach, green peas, mushrooms, onions, jicama and mozzarella – then served with a bright Dill Vinaigrette.
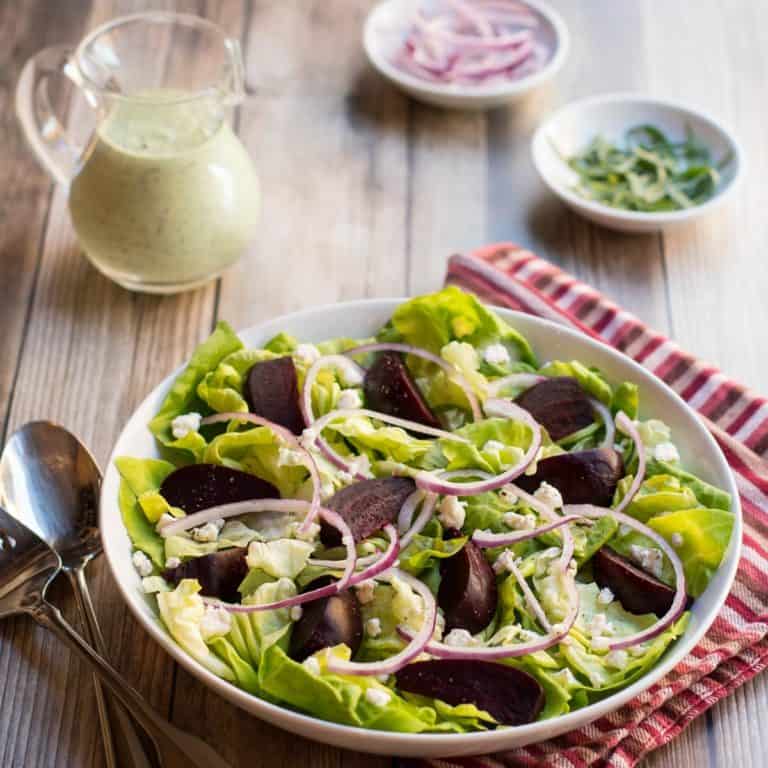
Roasted Beet Salad with Arugula Dressing
Roasted beets, goat cheese and red onion are arranged decoratively atop crisp butter lettuce and served with an amazing arugula dressing!
6 Bright and Luscious Spring Desserts
Spring calls for light and refreshing desserts, and these 6 recipes always receive rave reviews. They include the citrusy sunshine of fresh lemon juice alongside fresh berries in everything from easy soufflés and delightful pudding cakes to elegant tarts and a layered parfait.

Cold Lemon Souffle
Adding gelatin to these Chilled Lemon Soufflés allows them to be prepared ahead of time, so no last minute whipping and folding to create this refreshing and impressive dessert!

Magic Lemon Pudding Cakes
Sweet, tangy and pillowy light, my grandmother Nama’s recipe for these little Lemon Pudding Cakes are a refreshing way to end any meal. They’re made with just one easy batter that magically forms into two layers when baked – fluffy, moist lemon cake on top with creamy lemon pudding below.
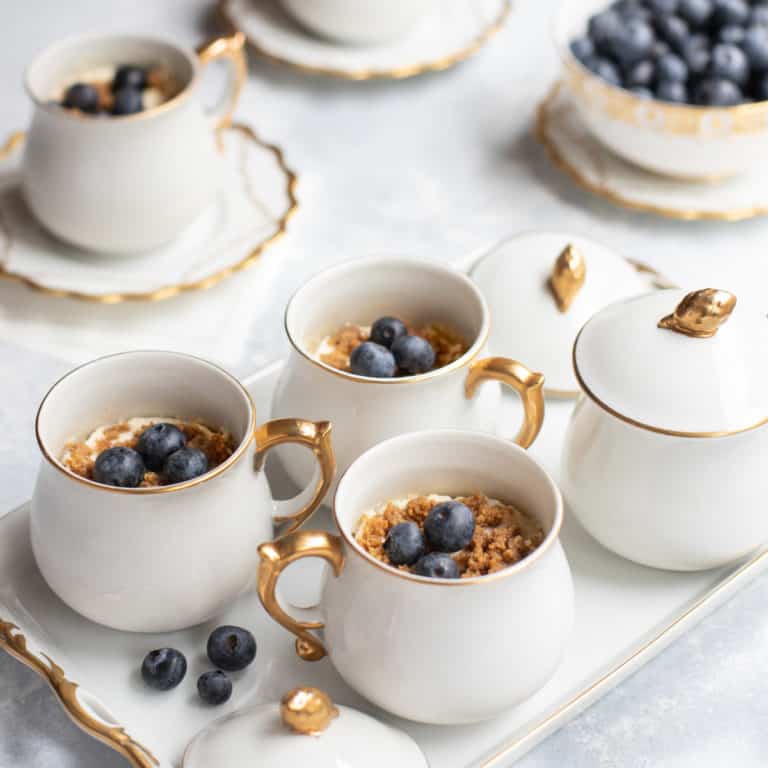
Frozen Lemon Velvet Pots de Crème
Frozen Lemon Velvet Pots de Creme is an easy, make ahead dessert, that’s basically cheesecake with added layers of lemon (zest and juice) and whipped evaporated milk, then frozen in a graham cracker crust. Can also be prepared a single pan.

Ginger Blueberry Lemon Tart
This show-stopping Lemon Ginger Blueberry Tart starts with a gingersnap-rum crust that’s filled with a creamy, lemon-y mixture and topped with fresh blueberries. Yum!
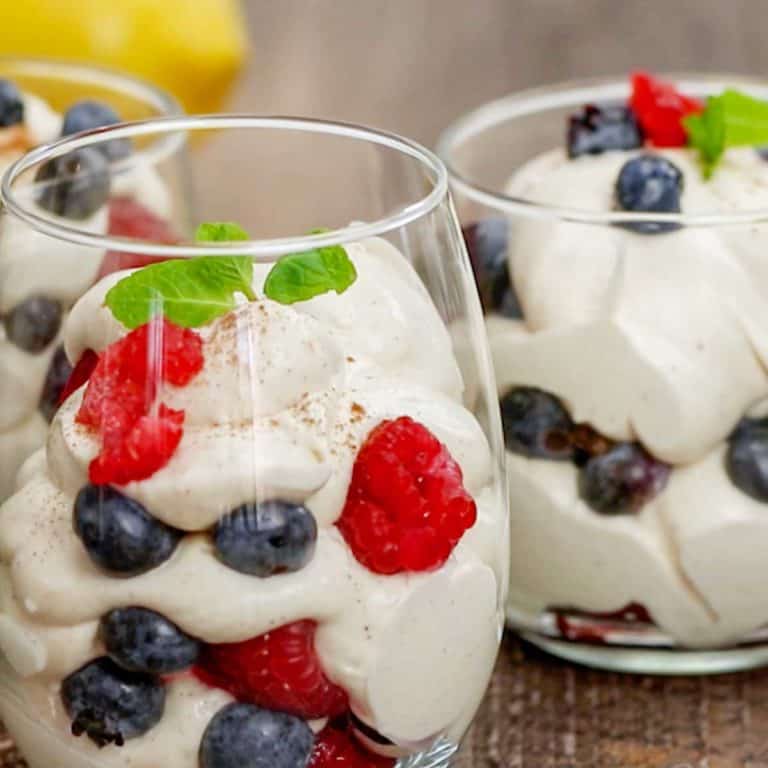
Cream Cheese Berry Dessert Parfait
Berry Cream Parfaits are quick and easy to prepare with only 6 ingredients, with flavors reminiscent of a creamy cheesecake. A blend of cream cheese, crème fraiche (or sour cream), lemon juice, sugar and cinnamon is layered with fresh berries in a fun glass and, presto! you have a scrumptious and beautiful dessert.
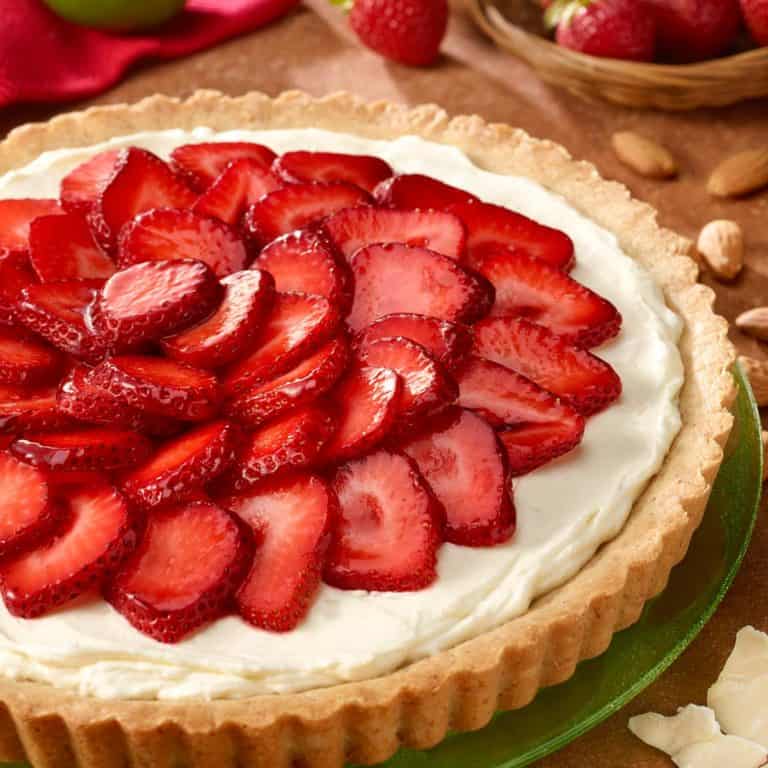
White Chocolate Lime Tart with Strawberries
Sweet and creamy with a bit of tang, this White Chocolate Lime Tart with Strawberries is a show-stopping, scrumptious dessert!
The post 40 Easy Spring Dinner Recipes That Are Fresh and Flavorful appeared first on A Well Seasoned Kitchen.