Crushed Raspberry and Strawberry Pavlova


We are still in a bit of an in between produce season, but the weather is warming up and the sun is out so I am craving fresh fruit desserts like it’s my job. I guess it kind of is my job…I love to make desserts like this pavlova because it is fairly low lift and aside from a low, slow bake in the oven for the meringue (which you can make the day before if it’s not too humid where you live) everything comes together in a few minutes.

The tart crushed raspberries provide some nice sauciness here and contrast well with sweet strawberries and the crisp, pillowy meringue. Make sure to use the best strawberries you can find for this dessert, and adjust the sugar to your personal tastes. In NYC we get some really nice organic berries from California but they are $$ so you may just want to bookmark this until they are in season locally where you live. The mini mint leaves are also totally optional, but they do add a nice freshness and beautiful pop of contrasting color.


Crushed Raspberry and Strawberry Pavlova

Crisp and chewy meringue, pillowy whipped cream, and sweet-tart berries are combined to make this super springy, and fairly simple dessert. Assemble just before serving for the best textural experience as the meringue will weep and melt as it sits.

Meringue

4 large egg whites

1 cup (200g) superfine sugar

1 1/2 teaspoons cornstarch

1/4 teaspoon salt

1/8 teaspoon cream of tartar

1 teaspoon vanilla extract

1 teaspoon white vinegar

Berries

1 pound of the best strawberries you can find

1/2 cup fresh raspberries

2 teaspoons sugar

1/2 vanilla bean, seeds scraped

pinch salt

To Serve

1 cup (240ml) heavy cream 

1 tablespoon sugar

mint leaves

To make the meringue: Preheat the oven to 250ºF (130ºC/Gas Mark 1/2). Trace an 8-inch (20cm) circle onto a piece of parchment paper and flip it upside down on a baking sheet.

Stir the cornstarch and sugar together in a small bowl. In the bowl of a stand mixer fitted with the whisk attachment or with a handheld electric mixer in a large bowl, beat the egg whites, salt, and cream of tartar on high speed until soft peaks form. With the mixer running, slowly add the sugar mixture about one tablespoon at a time until you have added all of the sugar and the egg whites are stiff and glossy about 7 minutes. Add the vanilla extract and vinegar and mix for 30 more seconds.

Dollop the meringue onto the prepared baking sheet and use an offset spatula to spread it evenly to the edges of the traced circle. Make a shallow indent in the center of the meringue which will hold all of the delicious toppings. Bake the meringue for 1-1 1/2 hours or until the outside looks dry and slightly creamy in color. Turn off the oven and prop the door ajar with a wooden spoon. Let the meringue cool completely in the oven. It should feel firm and crackly when you press it, but will be soft and marshmallowy in the center. When cooled, you should be able to gently peel it off of the parchment paper and place it on a serving platter or cake stand.  

To make the topping: Slice the strawberries in half if they are small, quarters if they are large. Combine the raspberries, sugar, vanilla bean seeds and a pinch of salt in a large bowl and crush the berries with a fork. Gently stir in the strawberries and let the fruit macerate for a few minutes. Taste and add a bit more sugar if desired, keeping in mind that the meringue will be quite sweet.

Whip the cream and sugar together to soft peaks. Top the cooled meringue with the whipped heavy cream, followed by the berries. Sprinkle mint leaves over the top and serve immediately.

A Galette Class with Ovenly – May 16th


Hello Friends!

I am hard at work queuing up some new recipes and blog posts for you all, but I wanted to pop in and tell you about a little class I am teaching next month at Ovenly’s new studio in Brooklyn.

It will be a small class all about galettes! Each student will make a batch of dough and galette to take home, and I’ll be sharing all of my top tips for pie and galette success!

I’m not teaching much this year, and there are just 5 spots left so grab one while you can.

Sign up and details can be found HERE. Feel free to contact me through the contact form on the blog if you have any questions. Happy Baking!


Banana Oat Bread

In the last few weeks of pregnancy with Baby N, one of my goals was to fill the deep freeze with meals for after baby arrived. I hoped having a stash of easy-to-prepare meals would make the recovery and transition to motherhood smoother.

After haphazardly throwing together an ingredient list (and making a memorable trip to the grocery store with a very full shopping cart), I spent most of a Saturday in the kitchen prepping meals. Ingredients were tossed into freezer bags to create over a dozen crockpot meals. A soup pot filled with oatmeal boiled away on the stove. The oven ran at a steady 350 degrees for hours. My husband dutifully chopped ten large onions by hand, doing his best to fend off the tears.

It was a production.

With a newly filled freezer, I collapsed on the couch, exhausted but pleased to cross another item off the pre-baby to-do list.

Ironically, a full three and a half months into parenthood, the deep freeze is still full of freezer meals. Although the breakfast sandwiches and oatmeal disappeared quickly, the rest of the thoughtfully prepared meals continue to wait their turn.

Although we hadn’t anticipated it, the act of cooking dinner each evening helped to keep us grounded. In our new role as parents—where everything felt new and unknown—we enjoyed the familiar routine of turning on the stove and cooking simple meals.

It was a way to connect our new lives with the old, as we evolved from a family of two into a family of three.

Lately, however, there is increasingly less space for the frozen meals as the freezer space is steadily being replaced with bags of breastmilk. It’s time to start enjoying the fruits of our labor.

While reorganizing the freezer last weekend, I was delighted to find a hidden loaf of this Banana Oat Bread buried beneath a bag of Italian chicken and a marinated pork shoulder. Needless to say, it disappeared quickly (nursing hunger is real). Unfortunately for me, there are no more loaves hiding away (I double checked), so I’ll have to bake up another one to take its place.

With my free time for baking being limited since going back to work, it would be nice to have a reason to spend an afternoon in the kitchen again. My husband already said he’d take the baby for an afternoon so long as he gets a slice warm from the oven.

I think that’s a fair trade, don’t you?

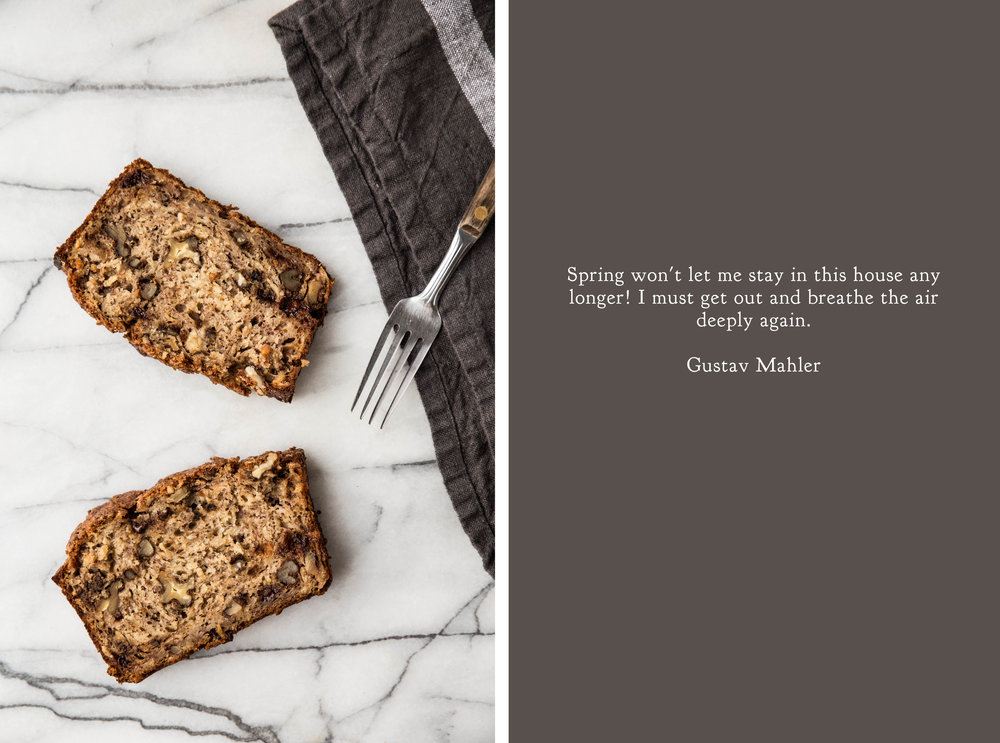
This Banana Oat Bread is simple in construction and customizable to your taste, The bread itself is subtly sweetened with maple syrup, which allows the banana flavor to shine. The addition of oats adds a comforting flavor to the loaf. My preference is to add chocolate chips and chopped walnuts to my loaves, but you can choose your own mix-ins (or forego them completely). While I like to toast each slice and slather it with butter, the bread is equally delicious served at room temperature straight from the pan.

Banana Oat Bread

Yields 5 x 9-inch loaf

4 large ripe bananas, mashed (about 2 cups or 450 grams)
1/2 cup (156 grams) pure maple syrup
1/2 cup (100 grams) vegetable oil
2 large eggs
2 teaspoons vanilla extract
1 teaspoon ground cinnamon
1/2 teaspoon ground nutmeg
1 teaspoon baking powder
1/2 teaspoon baking soda
1/2 teaspoon salt
1 1/3 cups (160 grams) all-purpose flour
1 cup (80 grams) old fashioned oats
1 cup (113 grams) chopped walnuts (optional)
2/3 cup (113 grams) chocolate chips (optional)
1 tablespoon raw or demerara sugar, for topping (optional)

Preheat oven to 350 degrees F (180 degrees C). Grease a 5 x 9-inch loaf pan. Set aside.

In a large mixing bowl, whisk together mashed bananas, maple syrup, vegetable oil, eggs, and vanilla extract until uniform. Whisk in the cinnamon, nutmeg, baking powder, baking soda, and salt. Gradually stir in the flour and oats. Fold in the chopped walnuts and chocolate chips. Set aside.

Pour batter into prepared pan and smooth until level. Sprinkle raw sugar evenly over the top. Bake for 55-65 minutes, or until a toothpick inserted in the center comes out clean. Cool in pan for 10 minutes before removing and placing on a cooling rack to cool completely. 

Blueberry Crumble Doughnuts

After two months, I finally feel like I am settling into motherhood. In the foggy haze of these early days, it simultaneously feels like I have been a parent forever and for no time at all. The transition into motherhood was unexpectedly difficult for me. Since I have wanted to be a mother since I was a young child, I anticipated that the transition would be natural and instinctual. It never occurred to me that I may feel otherwise.

While not all women feel the same, I loved pregnancy. I enjoyed watching my body change, feeling the baby’s kicks and movements, and experiencing the joy of carrying a child. It helped, of course, that my pregnancy was virtually symptom-free—as far as I was concerned, there weren’t any aspects not to love.

When we found out our daughter was growth restricted and would therefore be arriving a few weeks earlier than anticipated, my heart grew heavy. I wasn’t ready for my pregnancy to be over, for this part of the journey my baby and I embarked on to come to a close. I wanted to stay pregnant forever. My body didn’t feel ready to give birth; I wasn’t yet ready to meet my daughter.

I told my husband that I needed more time. If I could somehow be pregnant longer, maybe I would find the emotional and physical connection I needed to say goodbye to my deeply loved pregnancy and welcome a new beginning with the birth of our daughter.

When the big day arrived, I went into the hospital conflicted. Even with more time, I hadn’t been able to shift my unwanted emotions. Yet, I still felt hopeful. After reading so many stories of mothers feeling an instant deep love for their children during birth, I anticipated that these feelings would overtake me when the moment arrived.

During the C-section—when the doctors lifted my daughter over the curtain and I laid eyes on her for the first time—I felt taken aback. While I had no idea what she would look like, her actual appearance took me completely by surprise. The birth experience was shocking to me in a way I did not expect.

When they handed her to me for the first time minutes later, she felt like someone else’s baby. I felt detached and confused. Where was the instant love and connection I was supposed to feel? What kind of mother was I going to be if this is how I felt in these early moments?

I didn’t learn this until later, but over 40% of women do not bond with their babies right away. Even though my husband and I took childbirth education and early parenthood classes, our instructors did not touch on this subject. I wish I had been told my feelings were normal, that parenthood is an enormous adjustment and that sometimes it takes time for emotions to sort themselves out. Instead, I felt like I was somehow failing at this job I just began.

The next couple weeks were rough for me. I had a difficult recovery due to the C-section and resulting complications. I struggled to do the most basic of tasks, unable to sit upright or walk without enormous amounts of pain. Breastfeeding was not going well. Since Baby N was born early and weighed so little, it was vital for her to get the calories she needed to grow, but she also didn’t have the energy necessary to feed. I had to deal with the reality that I would not be able to provide milk for my daughter in the way I had planned.

The postpartum hormones hit me harder than I anticipated. I couldn’t even think about my pregnancy without bursting into tears. I was grieving the loss of being pregnant, of my life before having a child. Even though I’ve wanted to be a mother as long as I can remember (I was ecstatic when I found out I was pregnant), I was dealing with unexpected feelings of remorse—and then guilt that I could ever have these emotions at all. Exhaustion and sleep deprivation only intensified everything I was experiencing.

Life with a newborn is hard.

It was several weeks before I found myself in a better place, before I was able to fully bond with and enjoy time with my daughter. Now, of course, I can’t imagine life without her—her big smiles, goofy mannerisms, and love for sleepy snuggles.

My transition into motherhood was not beautiful or graceful. It has taken time for me to accept that reality doesn’t always match expectations and that’s okay. I expect I will learn this lesson over and over again in my new role as a parent.

Right now, the fog of early parenthood has not completely dissipated, but it is starting to lift. I am still working on finding my new identity both in and out of parenthood. One lesson I have taken away from the transition to motherhood is to have grace with myself.

One day at a time. Everything will eventually fall into place—it always does.

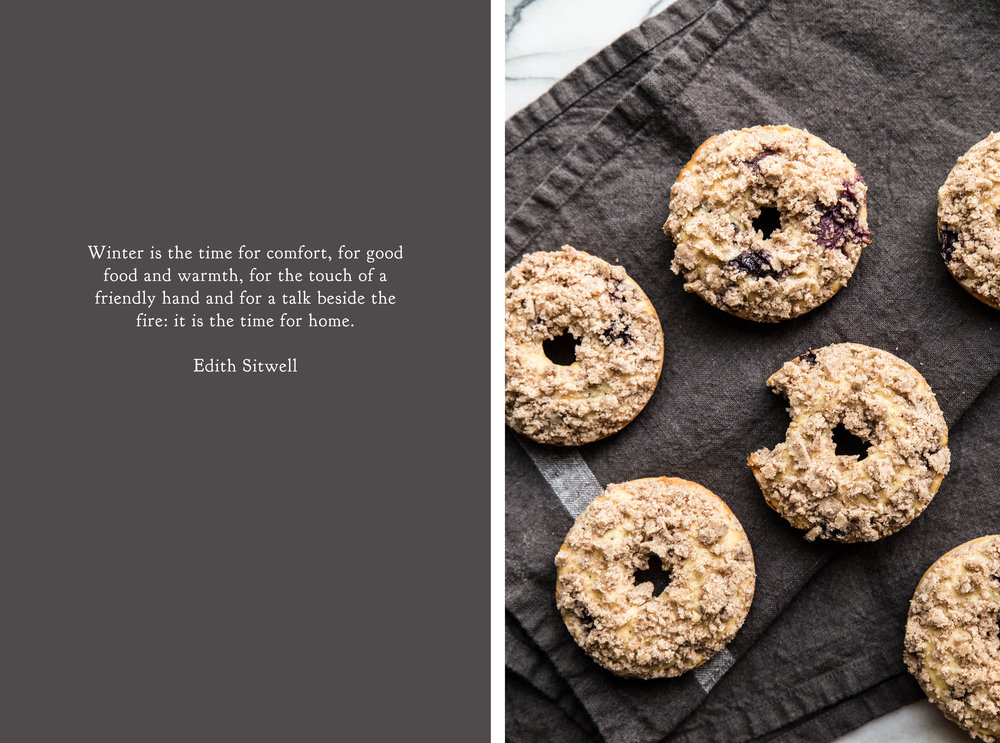
Blueberry Crumble Doughnuts feature a baked, cake-based doughnut. To prepare, blueberries are folded into a vanilla-scented batter. A cinnamon crumble is sprinkled over the top before baking. For best texture, these doughnuts should be enjoyed the same day they are baked, but I still savored the leftovers a day or two later.

Blueberry Crumble Doughnuts

Yields 6-8 doughnuts

Blueberry Doughnuts
1/3 cup (70 grams) granulated sugar
2 tablespoons vegetable oil
1 large egg
1 teaspoon vanilla extract
1 1/4 cups (150 grams) all-purpose flour
1 teaspoon baking powder
1/2 teaspoon salt
1/2 cup (120 mL) milk
4 ounces (113 grams) fresh or frozen blueberries

Crumble Topping
2 tablespoons butter, room temperature
1/4 cup (50 grams) granulated sugar
1/2 cup (60 grams) all-purpose flour
1 teaspoon ground cinnamon

Preheat oven to 350 degrees F (180 degrees C). Grease a standard-size doughnut pan.

In a large mixing bowl, whisk together the sugar, vegetable oil, egg, and vanilla. Stir in the flour, baking powder, and salt. Stir in the milk until uniform. Fold in the blueberries.

Transfer the batter to a pastry bag (or large resealable plastic kitchen bag with the corner snipped off). Fill the depressions in the prepared pan with the batter until 2/3 full (alternatively, you could spread the batter into the pan using an offset spatula, but this results in more unevenly shaped doughnuts).

For the crumble topping, beat together butter and sugar until well combined. Stir in flour and cinnamonuntil crumbly. Crumble the topping evenly over the batter. Bake for 18-24 minutes, or until crumble topping browns and a toothpick inserted into the center comes out clean. Cool in pan for 15-20 minutes before transferring to a cooling rack to cool completely.

Oh, Baby!

My husband and I welcomed our sweet baby girl into the world before the end of 2018! Baby N has completely captured our hearts, and it is already hard to imagine life before her. It has been amazing watching her grow over the last six weeks—each day she is changing and learning new things about the world around her.

Like most birth stories, Baby N’s story is one I could not have predicted. I had an incredibly easy pregnancy. Besides some typical lower back pain, I had no other symptoms except for the growing baby bump—no morning sickness, food cravings, or exhaustion. I feel especially fortunate for this outcome because this pregnancy was considered high risk from the beginning, so Baby N and I were watched particularly closely over our nine months together.

As the weeks passed, we learned that N was going to be a smaller baby. Each ultrasound showed her overall growth percentile decreasing, but her size wasn’t going to become a concern unless she dropped below the tenth percentile. We also learned that N was breech, with her butt down and her head and feet comfortably tucked up under my left ribcage.

While it is possible for babies to flip into the correct position before birth, it becomes less likely in the latter weeks of pregnancy. Even though I didn’t really believe the old wives’ tales on how to flip a breech baby, I spent many evenings positioned upside down anyway, with a bag of frozen blueberries above my bump trying to coax her to flip around to avoid the chill. This method was wildly unsuccessful, along with half a dozen others I tried. Baby N was comfortable and would not be moved.

During our 34 week appointment, N dropped to the eighth percentile and was subsequently diagnosed with intrauterine growth restriction (IUGR). The doctors believed this was due to increased resistance to blood flow through the placenta. We were cautioned that it is possible for the resistance to become so great that the blood flow can reverse direction, which is a very serious situation that calls for an emergency C-section to preserve the health of the baby.

This news hit us especially hard—baby N wasn’t due for another six weeks! Along with weekly appointments to closely monitor her health, we were told to pack and bring our hospital bags to the rest of our visits, just in case.

The reality that we could have a baby in a single week’s time was very overwhelming for me, especially since I assumed I would have several more weeks to prepare everything for her arrival. I spent the next week making lists of each task that needed to get done and frantically tried to get everything in order, both at work and at home.

I hoped that Baby N would be allowed to stay snuggled up under my ribcage a little longer. I still felt blindsided by the news and wasn’t ready for the pregnancy to end. I needed more time to enjoy her kicks and soak up my last few days as a non-parent.

Fortunately, my wish was granted. At our 35 week appointment, we learned the resistance was unexpectedly measuring less than it had before. At 36 weeks, the resistance was measuring completely normal, which no one (including the doctors) had anticipated. However, because N was still measuring so small for her age, the doctors believed she would do better outside of the womb. Our induction date was set for 37 weeks exactly. Baby N was going to be an early (full) term baby.

Since N was still breech, I opted to try an external cephalic version (ECV), in which the doctor manually tries to turn the baby into the correct position for birth. After two failed attempts (where Baby N refused to budge even an inch), she was born via C-section shortly thereafter.

Our little peanut was in perfect health, weighing in at a smidge over 5 pounds with a head full of fuzzy hair.

After spending a few nights in the hospital, we were able to return home in time for a quiet holiday. While the shift to parenthood was a huge adjustment, I’ve enjoyed getting to know and learn all about this little peanut. She loves to stretch for minutes at a time when she is unswaddled, clothes are her worst enemy, and her endless goofy expressions make me laugh. Who knew that simple things, like N discovering her tongue, would bring such joy? In the last couple weeks, she’s graduated to newborn sizes, and we discovered she loves to “dance” to music as she lays on the floor and kicks her legs.

Over the last six weeks, I’ve given myself a leave from the blog and social media to spend much needed quality time with Baby N. Parenthood is certainly going to be a balance, but I’m ready to start devoting more time to myself and get back to doing the things that I enjoy—like baking and sharing it with you.

All photographs are ©Amber Rishavy.

One Bowl Passionfruit Cake with Fluffy Chocolate Frosting

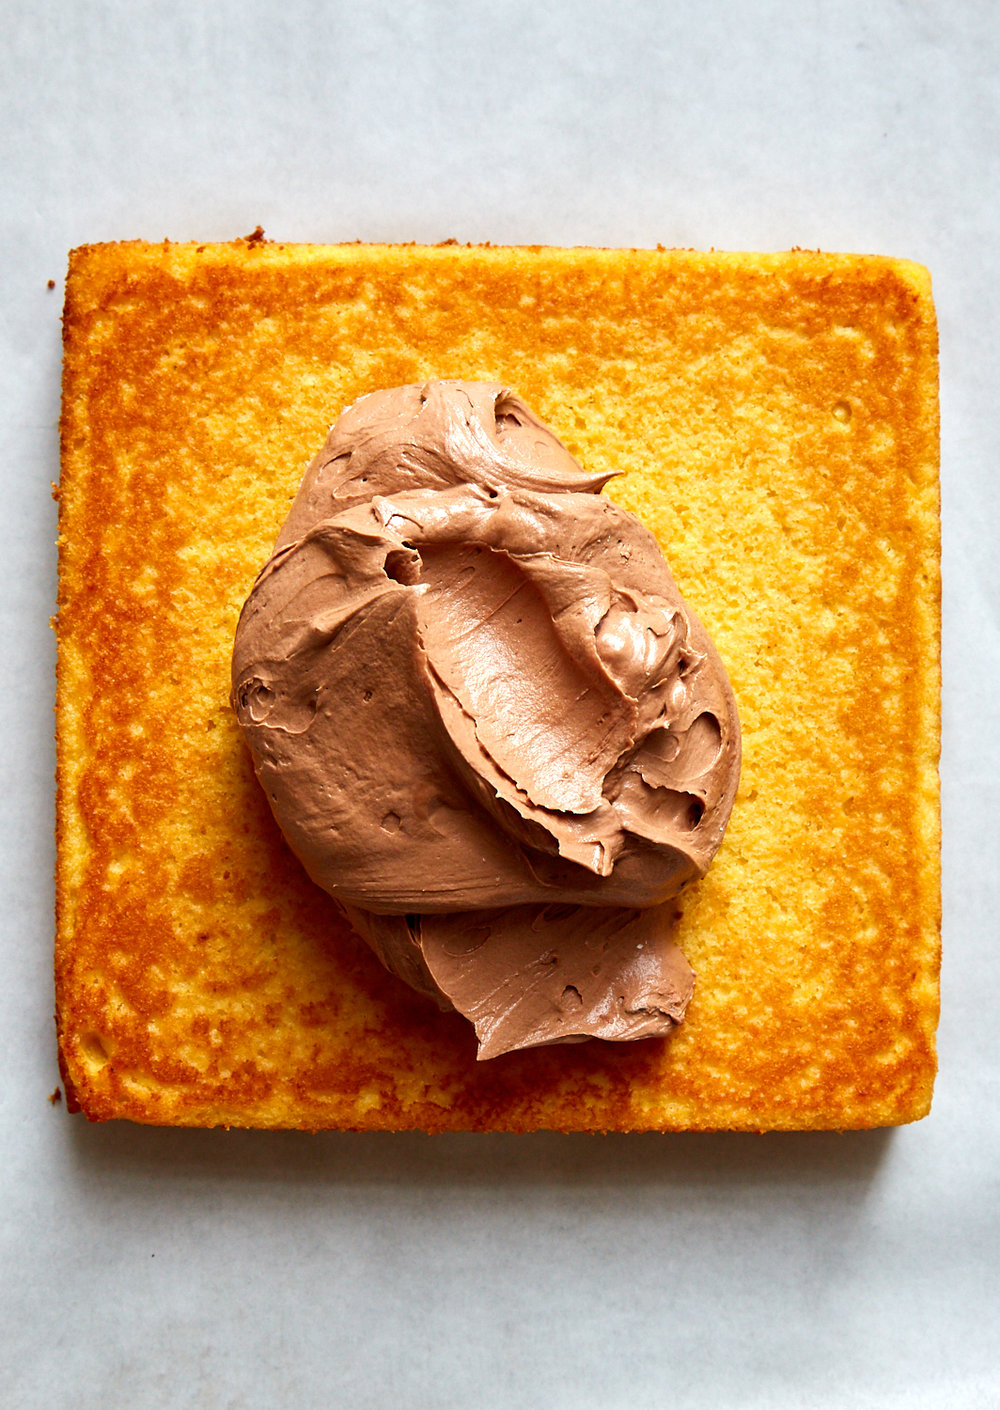
I love a cake that you can stir together in one bowl, and this passionfruit cake fits the bill. It is packed with passionfruit flavor and is mouth-puckering tart, but the *ahem generous* swoops of chocolate frosting balance it quite nicely. You could also add an additional 1/4 cup (50g) sugar for a sweeter cake, but I’m a fan of the contrast. If you aren’t a huge frosting fan you may want to hold a little back when you are topping the cake. The cake is also delicious - tart, floral, and tropical - on its own. If you’d prefer to skip the frosting all together, make a little bit of glaze made from passionfruit and confectioners sugar and drizzle it over the top instead.

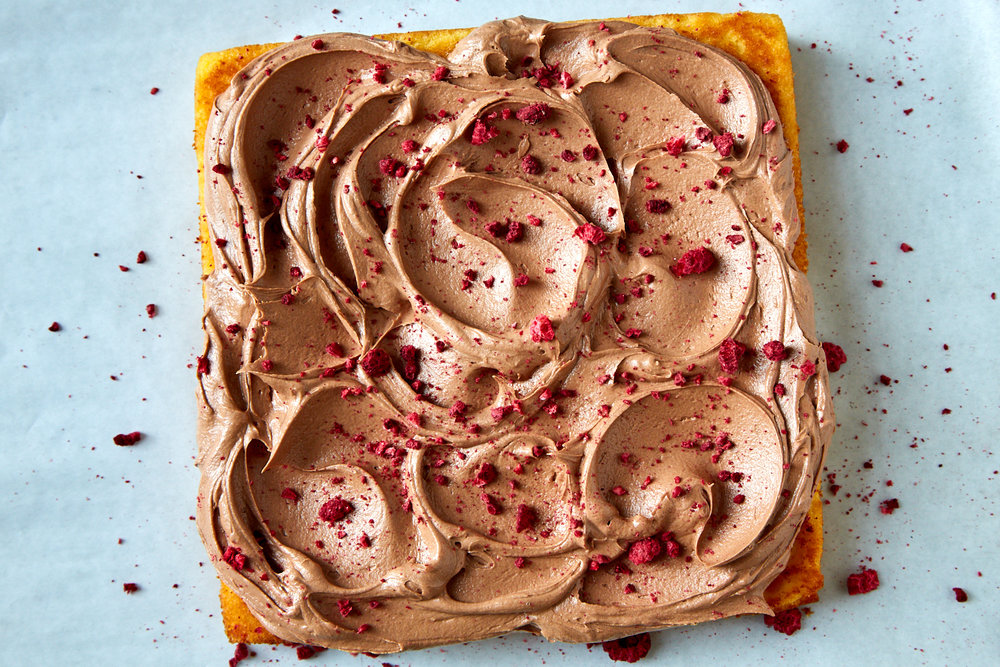
Would you believe that I have misplaced my sprinkles? I’m not sure how it happened, but after my Christmas cookie bonanza I managed to hide ALL OF MY SPRINKLES from myself and I didn’t discover it until I went their normal storage spot to grab some to sprinkle this beaut. In the end it was a blessing because I crushed up a handful of dehydrated raspberries for decor instead and they added a nice tart punch to the topping.

p.s. I use a spoon, instead of an offset spatula, to get these deep swoops and swirls.


One Bowl Passion Fruit Cake with Fluffy Chocolate Frosting

makes one 8-inch square cake

Frosting recipe from Smitten Kitchen’s “I want chocolate cake cake”

I used Goya brand passionfruit puree for this cake which I can find easily at most of the supermarkets in my area. Its also very inexpensive and runs about 3 bucks for 7 ounces. You can certainly make your own puree or use a higher end brand, but I’m here to tell you that the inexpensive stuff works just fine. Choose your own adventure. Although, if you can find fresh passionfruit, a few of the seeds and pulp sprinkled over the top would make a beautiful, crunchy garnish. This cake tastes best the day that it is baked, but holds up for a couple of days at room temperature. If you use dehydrated fruit as a garnish it will soften as it sits.

For a less tart cake use 1 cup (200g) sugar.

One Bowl Passionfruit Cake

3/4 cup (150 grams) granulated sugar

2/3 cup passionfruit puree

1/3 cup (75g) sour cream

4 tablespoons (55g) melted unsalted butter

2 large eggs

1 teaspoon vanilla extract

1/2 teaspoon kosher salt

1 1/4 cups (140g) cake flour

2 teaspoons baking powder

Chocolate Frosting

2 ounces (55 grams) unsweetened (or bittersweet) chocolate, melted and cooled

1 1/2 cups (180 grams) powdered sugar

1/2 cup (115 grams) unsalted butter, at room temperature

1 tablespoons milk, plus more if necessary

1/2 teaspoon vanilla extract

fat pinch of salt

Heat oven to 350ºF and butter and flour or spray an 8x8 inch baking pan with non-stick spray.

In a large bowl, whisk the sugar, passionfruit puree, sour cream, melted butter, eggs, vanilla extract, and salt until combined and smooth.

Combine the flour and baking powder in a fine mesh sieve and sift it into the large bowl. Whisk the batter until smooth and pour into the prepared pan. Slide the pan into the oven and bake until a cake tester inserted into the center comes out clean 20-25 minutes.

Cool the cake in the pan on a rack.

While the cake is cooling make the frosting.

Add all of the frosting ingredients to a large bowl and beat until smooth and fluffy, add a bit more milk if necessary. Alternately, Deb makes the frosting in a food processor.

Spread the frosting evenly over the cooled cake and decorate with a shit-ton of sprinkles. Enjoy immediately! This cake keeps is best the day it’s baked, but will keep for a couple of days, covered at room temperature. The dehydrated raspberries will soften over time.

Teddy and Isaac / Time Marches On

Though I’ve been neglecting this space in favor of other pursuits, I couldn’t not post Matt’s yearly video of the kids. Spoiler: Isaac falls in love with a goat. 

Hope you all are well!


Though I've been neglecting this space in favor of other pursuits, I couldn't not post Matt's yearly video of the kids. Spoiler: Isaac falls in love with a goat. 

Hope you all are well!

Chocolate Ginger Crinkle Cookies

This post is sponsored by Bob’s red mill. Thank you for supporting the brands I love and use in my own kitchen. As always, all thoughts and opinions are my own.

With the holidays right around the corner (and a baby on the way!), December is shaping up to be a busy month for my family. In year’s past, it has been my holiday tradition to spend days in the kitchen meticulously cutting out and decorating my favorite holiday cookies—like these honey, sugar, and chocolate sugar cookies—to share with my family and friends.

This year I honestly don’t have the time to spare.

Instead, I’m going to feel out a new holiday baking tradition. My goal is to spend the next few days filling the freezer with cookies from easy-to-make recipes, and enjoying the remaining days by relaxing before our sweet baby arrives.

These Chocolate Ginger Crinkle Cookies meet all of my criteria this year: simple to make, freeze well, and quickly disappears from the serving plate.

For this cookie recipe, I turned to Bob’s Red Mill Unbleached White All-Purpose Flour. I prefer to use unbleached flour in my baking because it means the flour is not chemically treated. To create the classic light colored appearance and delicate texture of all-purpose flour, the wheat bran and germ are removed during the milling process (which is the key difference between whole wheat and all-purpose flour).

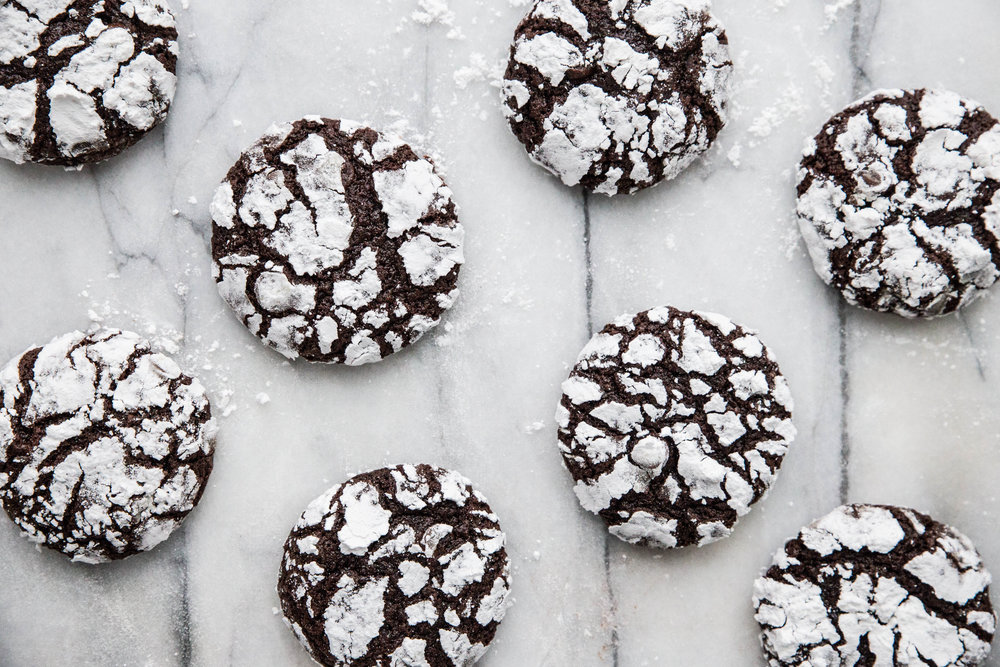
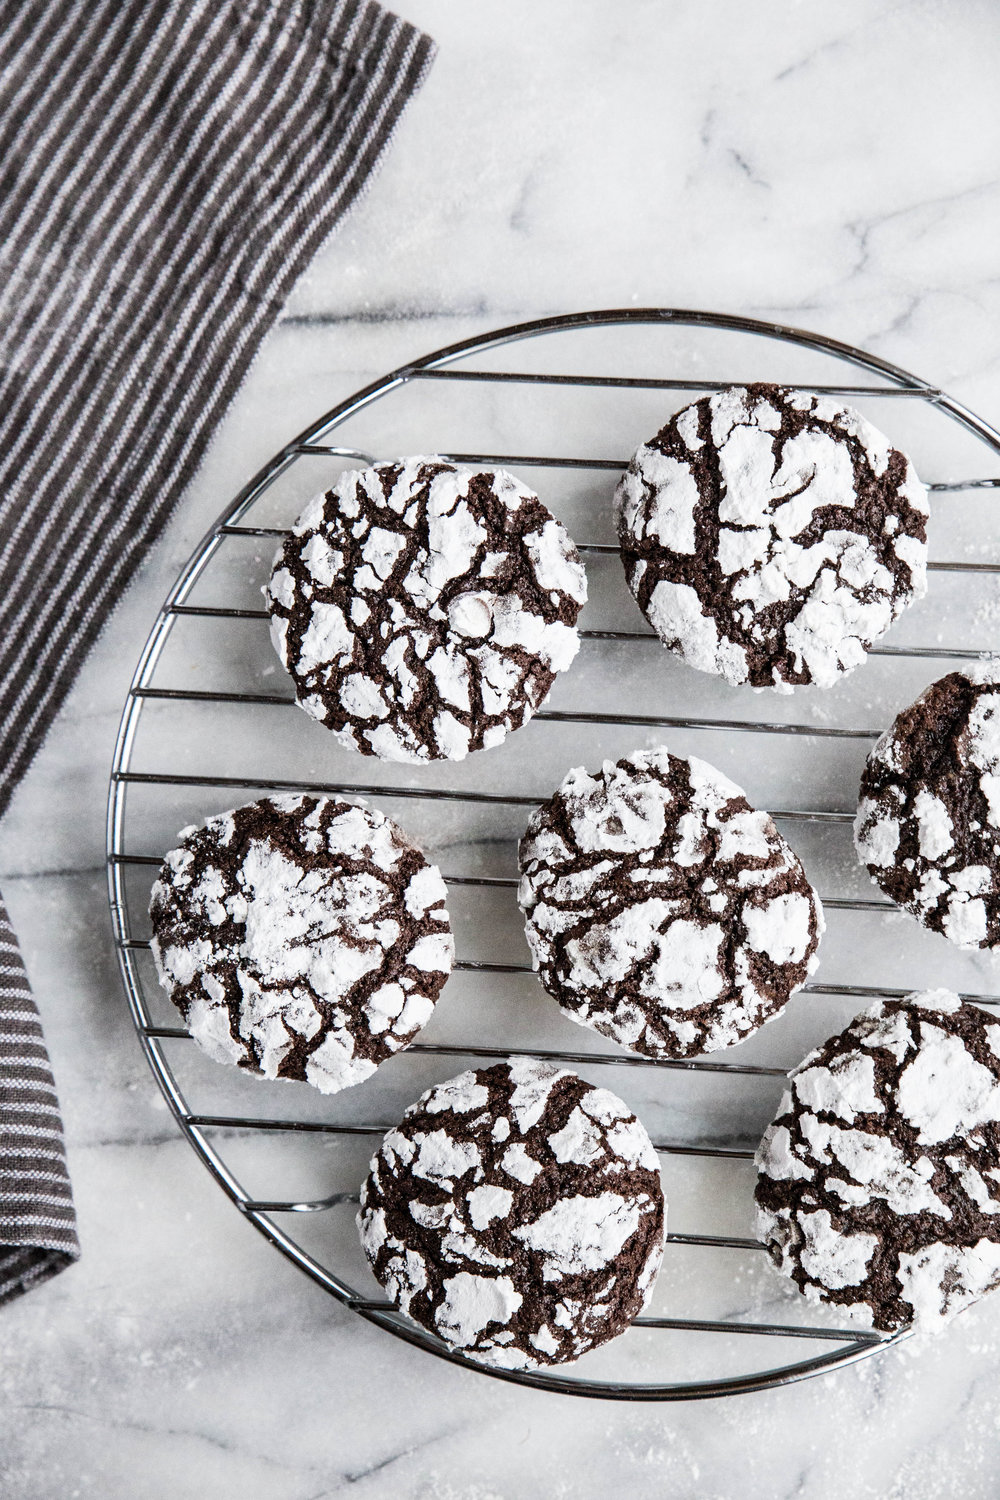
Crinkle cookies get their crackled appearance from being rolled in powdered sugar before baking. The sugar draws out moisture from the outside of the cookie, causing the edges to dry out before the interior is finished baking. This difference in moisture levels causes the top of the cookie to take on a crinkled appearance.

With a handful of chocolate chips to provide a richer chocolate flavor and ground ginger and cinnamon to give the cookie a spiced warmth, these cookies are sure to satisfy your sweet tooth this holiday season.

One of the qualities I look for in a good holiday cookie is its ability to freeze well. Knowing I have homemade cookies stashed away that can be ready at a moment’s notice is a relief during a busy season when events pop up or unexpected guests drop by. Happily, these chocolate ginger crinkle cookies can be easily frozen using two methods.

The first method is to form the cookie dough into balls and freeze them before rolling them in powdered sugar. When ready to bake, the frozen cookie dough balls can be rolled in the sugar and head straight towards the oven. This method is great when you can spare a few minutes to bake or you want to serve hot cookies straight from the oven.

The second method is to bake the cookies as directed and allow them to fully cool before placing them in an airtight container in the freezer. When ready to be served, pull the cookies from the freezer and allow them to thaw. This method is best when you anticipate the cookies being eaten quickly since the powdered sugar can become sticky if the cookies are left out for longer periods of time.

These Chocolate Ginger Crinkle Cookies are a seasonal take on the classic cookie. The chocolatey cookies are spiced with ginger and cinnamon to bring out traditional holiday flavors. After chilling the dough, the cookies are dipped in powdered sugar and baked until they take on a crinkled appearance. These cookies are best served alongside friends and family with a tall glass of milk.

One Year Ago: Marbled Pumpkin Chocolate Cake & Pumpkin Caramel Bread Pudding
Two Years Ago: Chocolate Gingersnap Tart
Three Years Ago: Caramel Apple Crumble Pie & Rosemary Olive Bread
Four Years Ago: Maple Syrup Cake with Toasted Almonds & Pumpkin Pie (Dairy-Free!)
Five Years Ago: Pumpkin Spiced Doughnuts & Stovetop Popcorn
Six Years Ago: Molasses Ginger Cookies, Marbled Butternut Squash Bread, Chai Pear Scones, & Hot Bourbon Apple Cider
Seven Years Ago: Grandma’s Applesauce, Honey Roasted Chickpeas, Caramel Apple Tart, & Cranberry Orange Brioche
Eight Years Ago: Fig & Balsamic Jam, Pumpkin Spice Oatmeal, & Raspberry Vanilla Creme Brulee

Chocolate Ginger Crinkle Cookies

Yield 18-22 cookies

1 cup (120 grams) Bob’s Red Mill Unbleached White All-Purpose Flour
1/2 cup (43 grams) cocoa powder
1/2 cup (100 grams) granulated sugar
1/4 cup (50 grams) brown sugar, packed
1 1/2 teaspoons ground ginger
1/2 teaspoon ground cinnamon
1 teaspoon baking powder
1/4 teaspoon salt
1/4 cup (60 mL) vegetable oil
2 large eggs
1 teaspoon vanilla extract
1/2 cup semisweet chocolate chips
3/4 cup (85 grams) powdered sugar

In a large mixing bowl, whisk together the flour, cocoa powder, granulated sugar, brown sugar, spices, baking powder, and salt. Mix in the vegetable oil, eggs, and vanilla, stirring until a uniform batter forms. Stir in the chocolate chips.

Place cookie dough in the refrigerator for 2 hours (or overnight) until completely chilled through.

Preheat oven to 350 degrees F (180 degrees C).

Place powdered sugar in a small bowl. Set aside.

Roll chilled cookie dough into 1-inch balls. Drop cookie dough balls into the powdered sugar and coat evenly on all sides. Place balls at least 2-inches apart onto a cookie sheet.

Bake for 10-13 minutes, or until cookies have a crackled appearance. Allow cookies to cool for 5 minutes before transferring them to a cooling rack to cool completely.

Our Late Summer Wedding

A huge thank you to our amazing Photographer Brandon Werth For capturing these beautiful Images from our wedding day. ALl images are ©Brandon Werth.

As our families might tell you, our wedding day, August 11th, was a long time coming. After dating for eight and a half years (surviving two years long distance, five moves between three cities, and buying a house together), the question wasn’t if Chris and I were going to get married, but when.

After finding out we were joyously expecting (!), our growing family gave us the nudge we needed to set a date and start planning. We both knew we wanted a small, intimate ceremony with our immediate family. Sharing our day with our closest loved ones felt the most special to us.

With a wedding date set for little more than two months away, we threw ourselves into planning mode and managed to have a majority of the details solidified within a week. Growing up, I had dreams of an outdoor wedding. So, we crossed our fingers against the rain and chose a local arboretum for our ceremony, hoping to enjoy the garden in full bloom.

I thought my wedding dress would prove to be the most difficult, knowing that I had to buy a style off the rack (due to the short deadline) that would also accommodate a baby bump. Moreover, I am notoriously “particular” (as my mother would say). When my sister was married a couple years earlier, we joked how I would have to try on every dress in the city before I would find one.

Yet, despite the restrictions (or perhaps because of them), the second dress I tried on was “the one.”

Although we were working on a short timeline, the ease at which everything came together made it feel as if this was the way it was supposed to be.

Unfortunately, the groom came down with the flu a few days before our wedding day. I kept myself quarantined, making frequent trips to the drug store hoping for some miracle medicine that would quickly cure him. Despite our best efforts, Chris still woke up with a fever on our wedding day. We half-joked that we would have a “first hug” instead of a “first kiss.”

While we had crossed our fingers against rain, we had forgotten to cross them against the flu as well. But, after all, we are committing in sickness and in health, right?

Even so, once the day got started, the whirlwind of getting ready and setting everything up captured our attention and left little room for worrying.

Although I expected to feel nervous about getting married, when the moment was in front of me I found I was pretty calm. After spending so many years together, our life together was already comforting and familiar.

We blocked off a couple hours before the ceremony for photographs, starting with a “first look” in the fern garden. The day may have been hot and humid, but the light was perfect (scattered gently through a Canadian wildfire haze that dappled the ground with occasional pockets of sunlight, before breaking against a clear sky). The time flew by as we wandered the grounds, laughing with our photographer (illness forgotten), and enjoying the last few moments before becoming husband and wife. We picked up a few “friends” along the way, as the tulle on my dress proved to be excellent material for capturing insects of all shapes and sizes.

After taking a few minutes to freshen up (and for my mother to guide the bug friends out from under the layers of tulle), it was time for the big event.

A month earlier, Chris and I made the decision to write our own ceremony, personalizing the details and readings on our relationship together. Instead of the traditional exchange of rings, we chose to “tie the knot,” to signify our two separate lives becoming one. The ceremony ended with our exchange of personal vows. It was short, sweet, and sentimental.

With Ella Fitzgerald’s At Last to send us off—after eight years together it was about time—we were official.

We ended the evening in a private room at a local restuarant, enjoying the several courses of food and family in equal measure.

Our wedding day may have been untraditional in many ways, but it was perfect for us.

Butternut Squash Chocolate Chip Bundt Cake

With less than nine weeks to go before we meet our little one, the nesting phase has been setting in quickly for me. Unfortunately for my husband, this means waking up on the weekend to pressing “to do” lists featuring half a dozen lengthy chores that need to be done right now because we are running out of time.

Last Sunday I pulled out the holiday lights to hang on the roof right after breakfast. My poor husband asked if he could finish his morning coffee before pulling out the ladder.

The desire to get the house organized and ready is more than I bargained for. Even though I wanted to relax and enjoy our time as a couple before we become a family of three, the need to “nest” is proving hard to suppress.

Today’s quote is perhaps more aspirational than reflective of my current state of being, but I trust I’ll find that happy medium soon.

Although autumn squash is primarily featured in savory preparations, as a baker I have a hard time imagining it as anything other than sweet. While pumpkin is the go-to squash when it comes to baking, butternut squash can also work equally well in many of the same recipes.

For this seasonal cake, I started by roasting and pureeing a small butternut squash. The squash is then sweetened in a traditional cake batter. With the addition of cinnamon, nutmeg, ginger, and cloves, the cake takes on the classic autumn flavors.

And, because chocolate only makes things better, I added a cup of chocolate chips to the batter and covered the cake in a thick chocolate glaze. The combination of chocolate and spiced squash is one of my favorites. I hope you’ll enjoy it as much as I do.

This Butternut Squash Chocolate Chip Bundt Cake features the spices of autumn. Butternut squash forms the base flavor of the cake, which is enhanced with spices and chocolate chips. While the cake can certainly stand-alone without the glaze, the addition of the glaze will help seal in the cake’s moisture and enhance the overall chocolate flavor.

Serve with a hot cup of coffee, a rainy windowpane, and a sense of happiness being exactly where you are.

One Year Ago: Apple Pandowdy
Two Years Ago: Apple Cinnamon Muffins & Maple Glazed Pumpkin Scones
Three Years Ago: Pear Almond Tart & Pumpkin Espresso Bundt Cake
Four Years Ago: Pumpkin Molasses Bread, Vegan Caramel & Rustic Apple Tart
Five Years Ago: Butternut Squash Biscuits & Apple Crisp
Six Years Ago: Pumpkin Waffles, Apple Cinnamon SconesPear Crisp, Pumpkin Rolls, & Butternut Squash Cake
Seven Years Ago: Red Wine Chocolate Cake, Pear Spice Cake, Pumpkin Spice Latte Cheesecake, & Apple Cinnamon Cake
Eight Years Ago: Pumpkin Bread Pudding, Apple Tart with Almond Cream, & Fresh Ginger Pear Cake

Butternut Squash Chocolate Chip Bundt Cake

Yields 8-10 servings

Butternut Squash Batter
1 1/2 cups (370 grams) butternut squash puree
4 large eggs
3/4 cup (177 mL) vegetable oil
1 cup (200 grams) brown sugar, packed
3/4 cup (150 grams) granulated sugar
1 teaspoon vanilla extract
2 cups (250 grams) all-purpose flour
2 teaspoons baking powder
1 teaspoon baking soda
2 teaspoons ground cinnamon
1/4 teaspoon ground ginger
1/4 teaspoon ground nutmeg
1/8 teaspoon ground cloves
1 teaspoon salt
1 cup (170 grams) semisweet chocolate chips

Chocolate Glaze
6 ounces (170 grams) semisweet or milk chocolate, coarsely chopped
1/2 cup (120 mL) heavy cream (or full-fat coconut milk)

Preheat oven to 350 degrees F (180 degrees C). Heavily grease a 10-cup Bundt pan. Set aside.

For the butternut squash batter, beat together the butternut squash puree, eggs, oil, brown sugar, granulated sugar, and vanilla extract in a large mixing bowl until well blended. Stir in the flour, baking powder, baking soda, spices, and salt until smooth and uniform in appearance. Stir in the chocolate chips.

In the prepared baking pan, add the cake batter. Bake for 50-60 minutes, or until a toothpick inserted into the center comes out clean. Allow cake to cool in pan for 15 minutes before un-molding and transferring to a cooling rack to cool completely.

For the chocolate glaze, heat the heavy cream in a small saucepan until steaming. Be careful not to boil. Immediately remove from heat and pour over chopped chocolate, allowing the chocolate to melt for 5 minutes before stirring until smooth and uniform. Allow glaze to cool until it reaches a thicker consistency before pouring glaze evenly over the top of the cooled cake.

Serve the cake after the glaze has fully set.