Apple Crumble Cake

I have been keeping some big news from you the last few months—Chris and I are expecting! We are delighted to welcome a baby girl into to our family this January.

The announcement of this baby feels extra sweet because we were not sure this day would ever come to pass. I was born with a heart condition, which carries its own unique set of challenges. Since my teenage years, my doctors have placed a question mark over my head when it comes to the idea of carrying my own children. While I knew I wanted a family someday, the path to creating that family was always in question.

I came to terms with the uncertainty, researching adoption and surrogacy in equal measure. I was fortunate to find a wonderful husband who was open to whichever path life would eventually deal us. Yet, I still fantasized about pregnancy—how could I not? But I knew deep down it was a distant dream that may never be fulfilled.

When I was officially given the doctors’ blessing, it felt like I had been awarded a golden ticket. Happily, I can report that so far this pregnancy has been healthy, for both mother and baby. I was lucky to completely avoid many of the classic pregnancy symptoms, including morning sickness. In many ways, I have felt completely normal except for the ever expanding waistline.

As I near the third trimester, the aches, pains, and exhaustion are slowly starting to set in. Even so, these inconveniences pale in comparison to the moments when our baby shares her little kicks and movements with me. I’m trying to enjoy this time, knowing it is so brief.

I find it hard to believe that we’ll be parents in a few short months.

While this baby hasn’t brought about any food cravings, she does seem to have a preference for salty foods over sweet. Though there will always be room in my diet for cookies, I have been leaning heavily towards natural sugars the last few months, particularly enjoying the sweetness found in summer fruits.

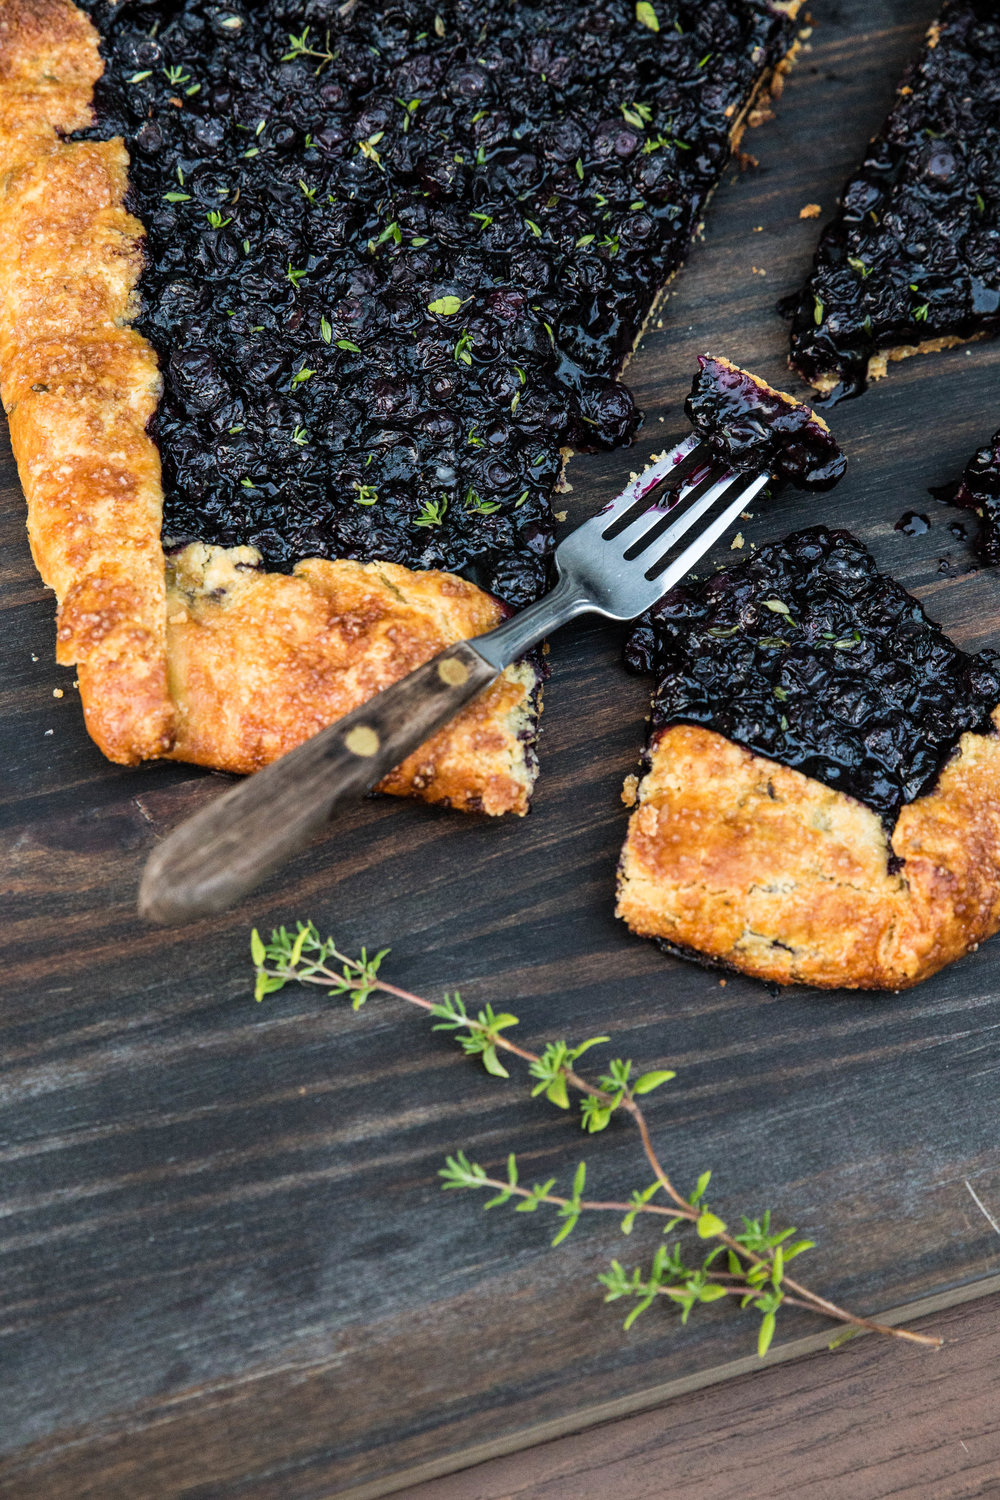
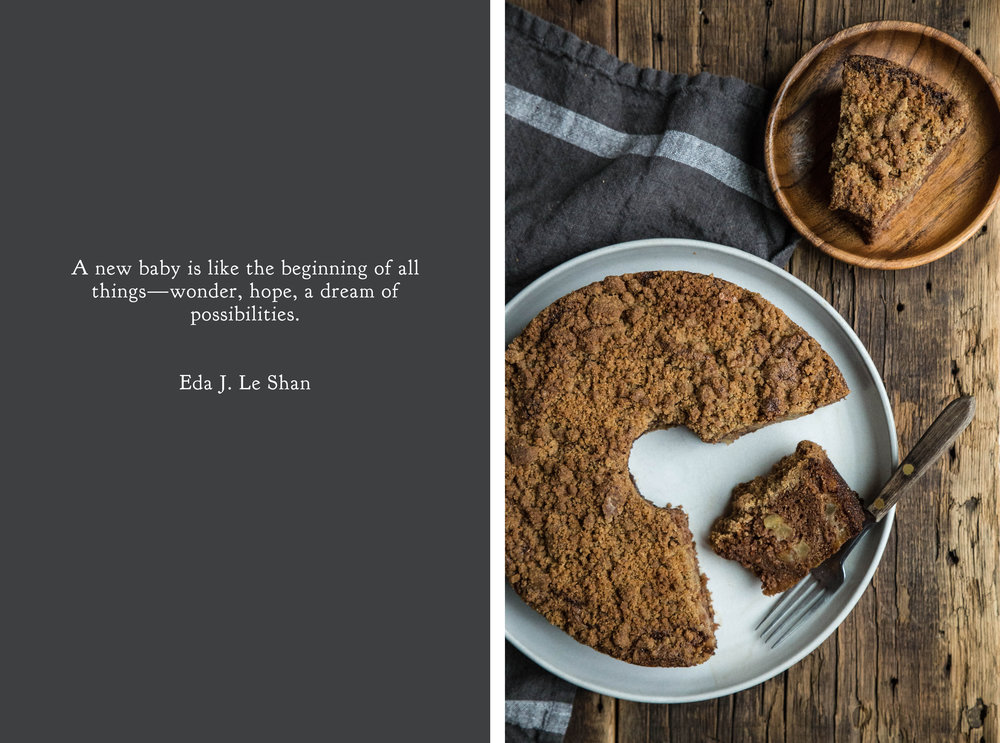
With autumn’s arrival and apple season in full swing, I took the opportunity to create a cake to take advantage of the harvest and fall’s comfort spices. This Apple Crumble Cake is sweetened primarily with honey, which lends the cake a subtle sweetness and depth of flavor that traditional sugar alone cannot provide. Because the cake is not overly sweetened, I recommend using apples that are on the sweeter end of the spectrum, which truly allow the apple flavor to shine.

Along with a cinnamon crumble topping, the slices disappear quickly.

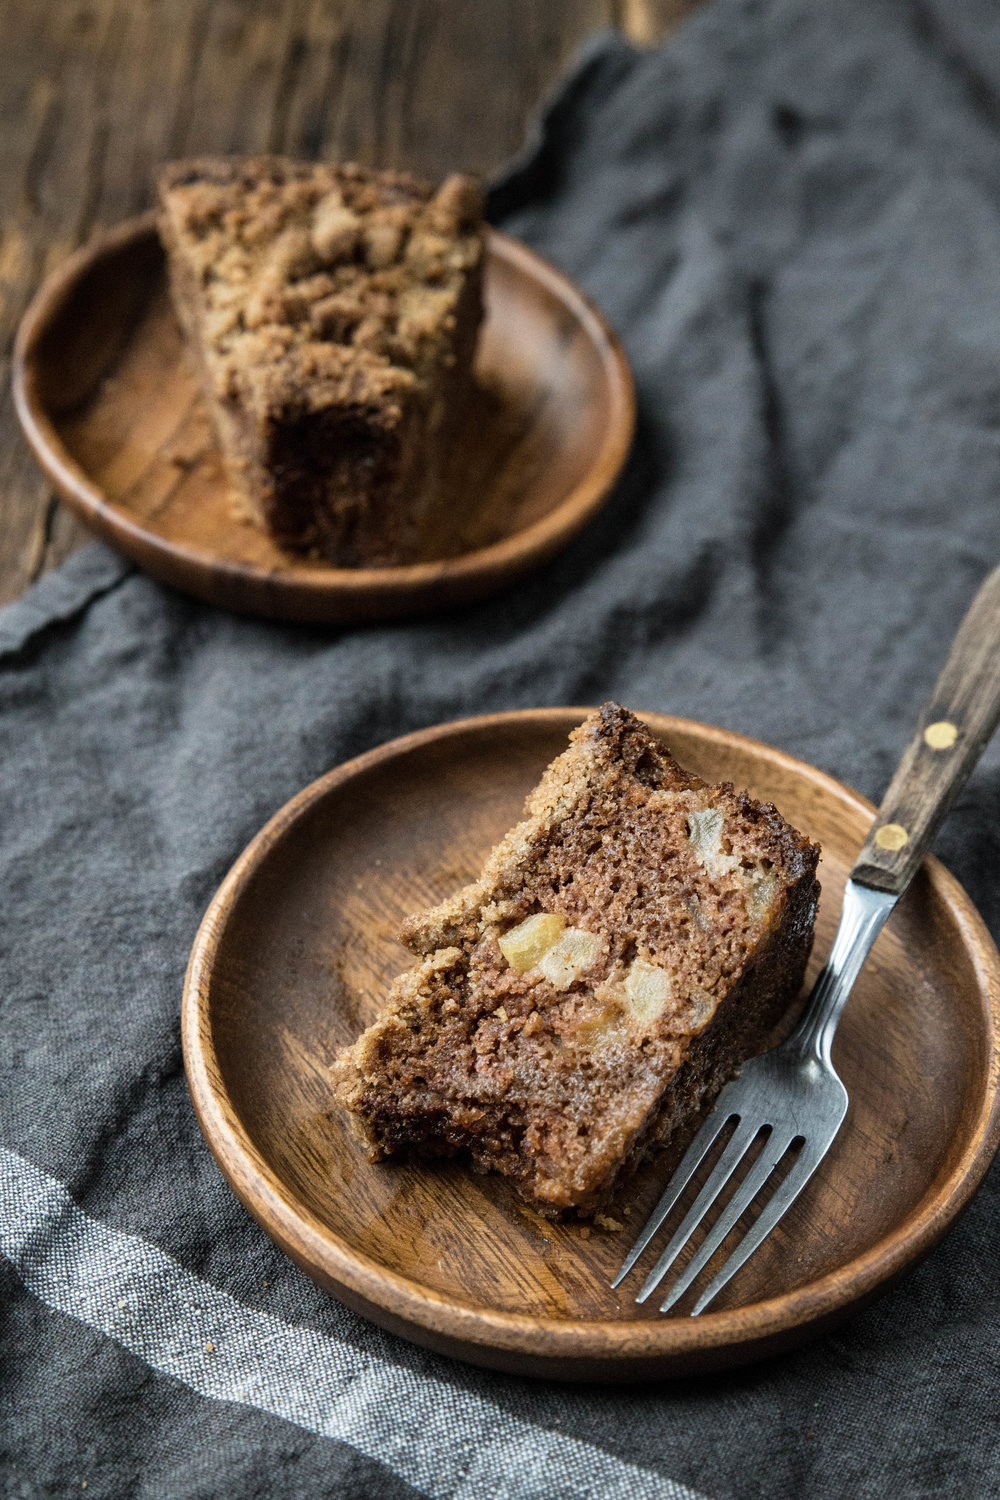
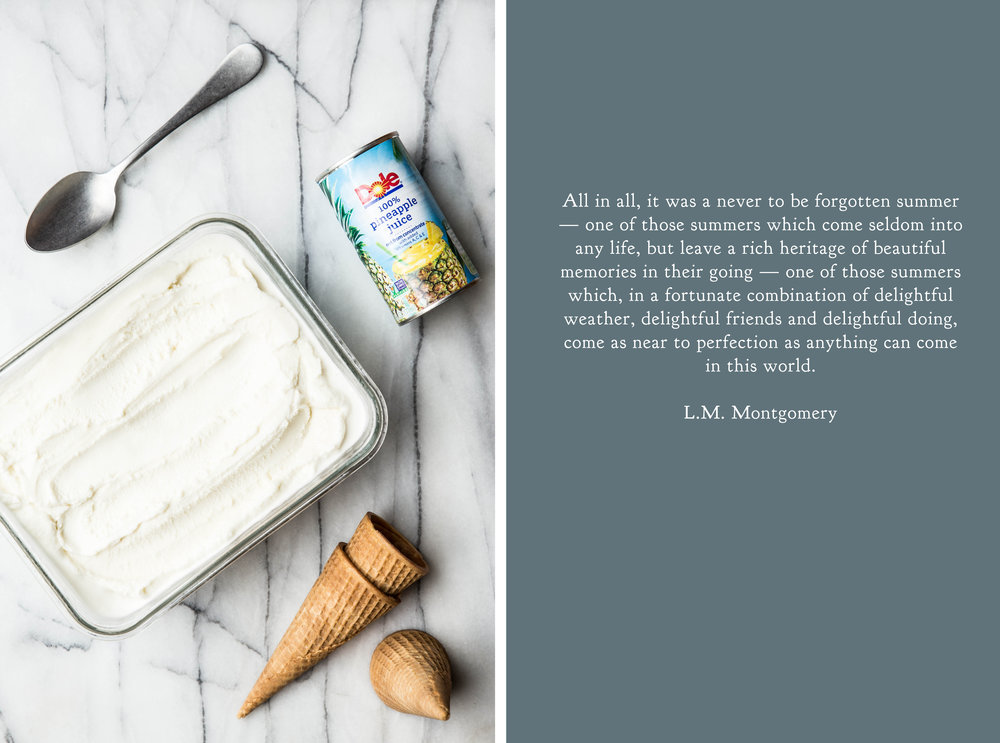
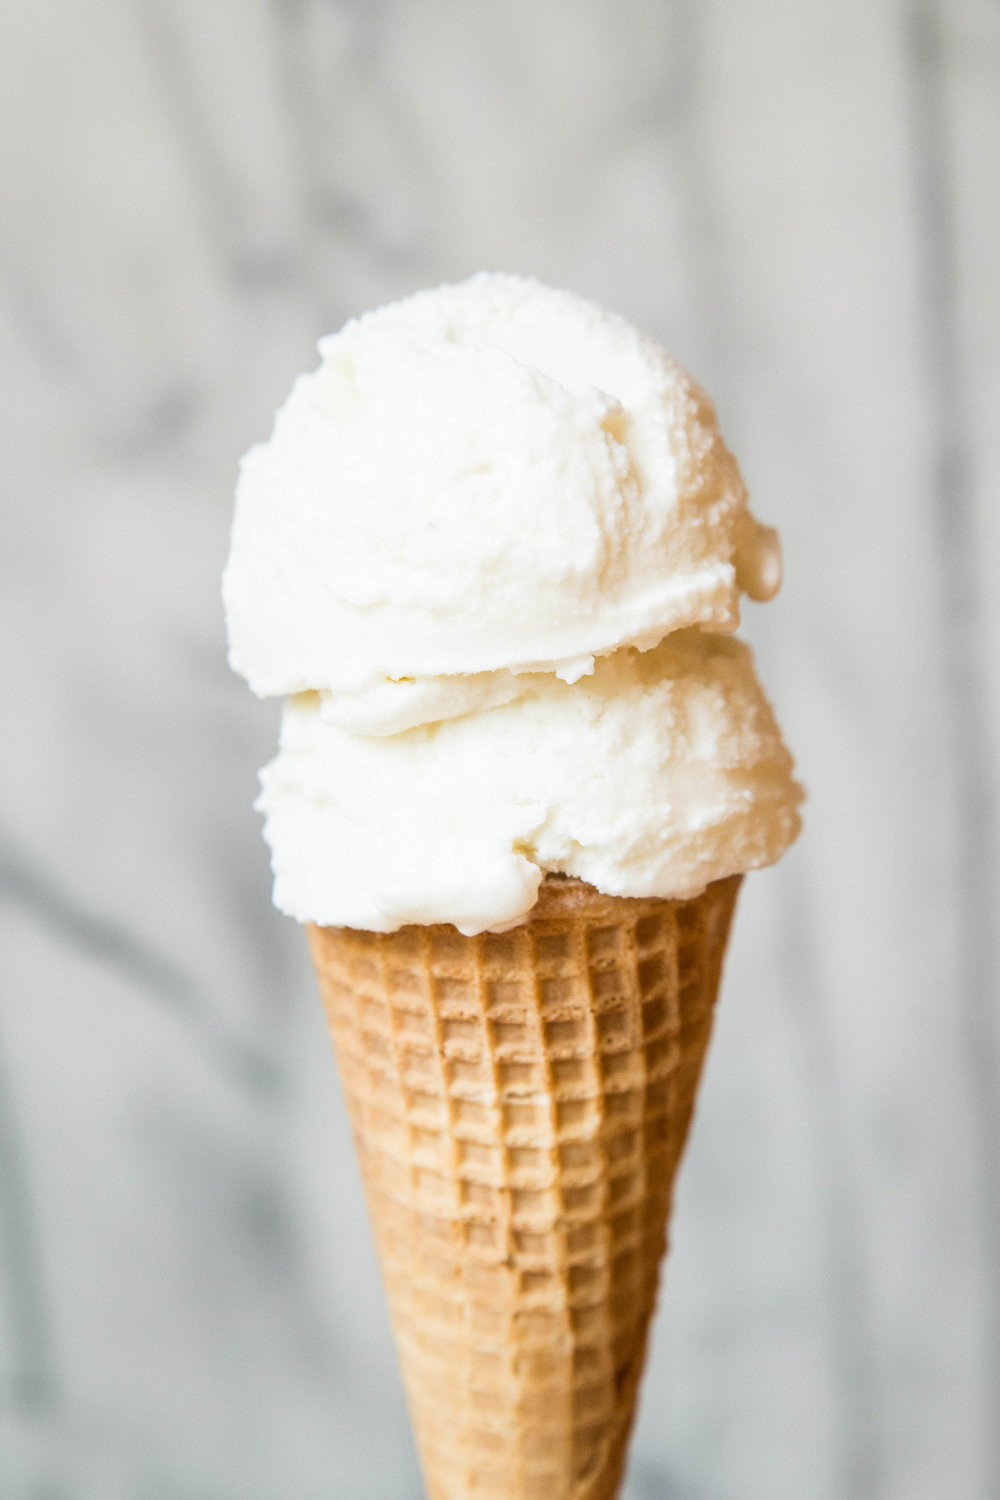
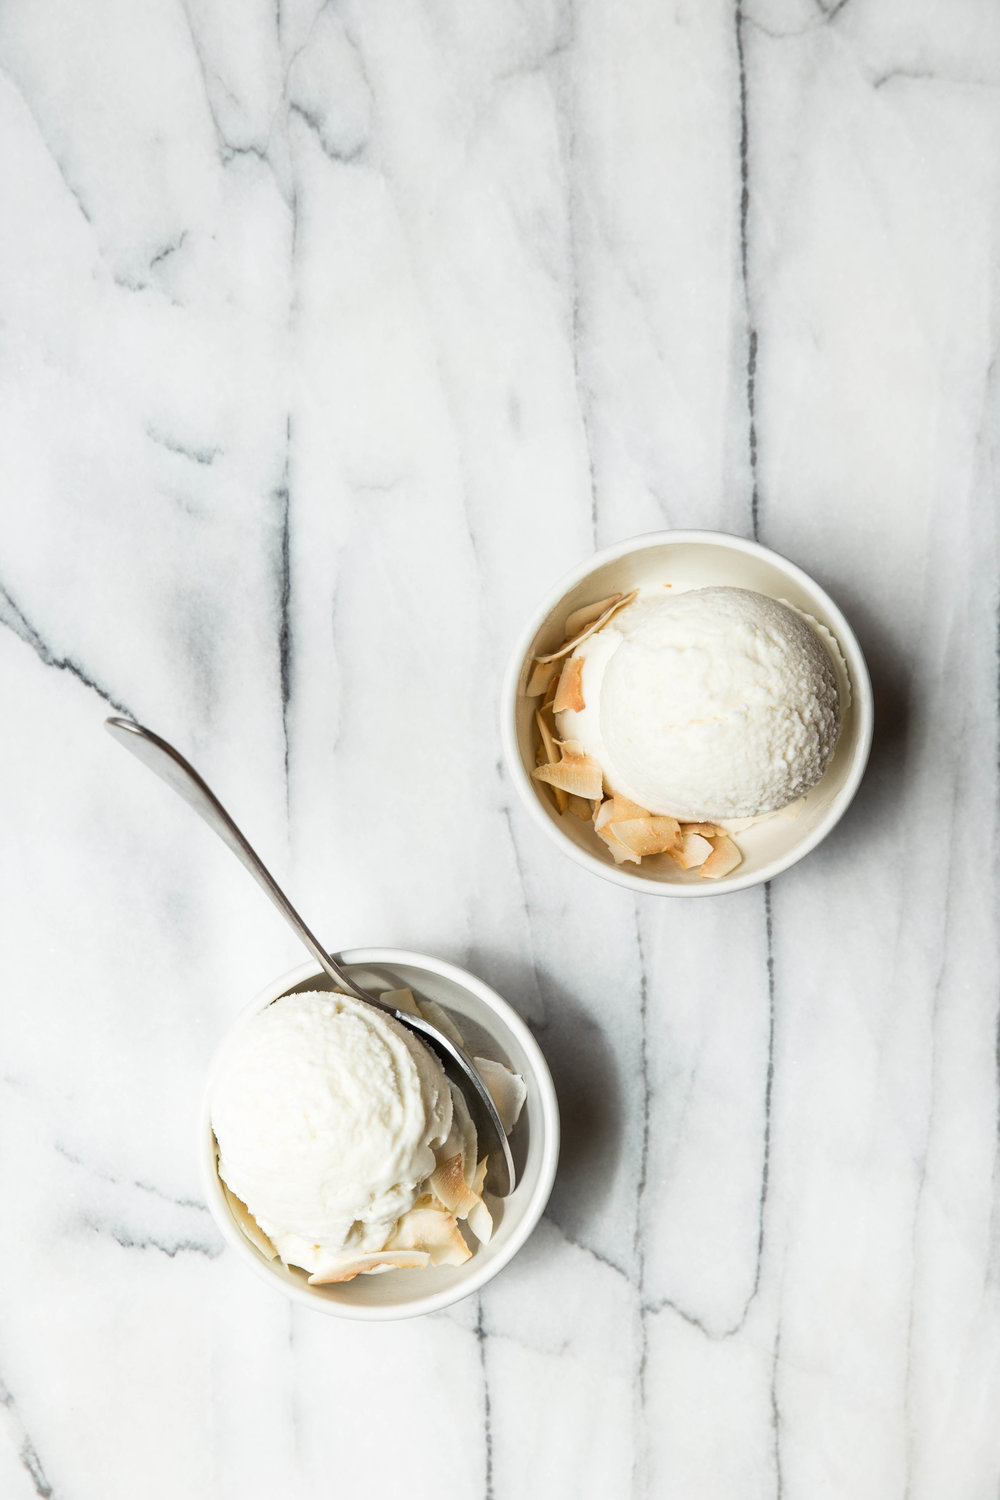
This Apple Crumble Cake celebrates autumn’s apple season. The cake is sweetened with honey and spiced with cinnamon, nutmeg, and ginger. Sweet apple pieces are baked evenly throughout the cake, which provide additional sweetness and texture. After baking, I recommend cooling the cake completely before cutting and serving so the flavors have time to develop. Serve the cake plain or warmed with a scoop of vanilla ice cream.

One Year Ago: Spiced Chocolate Swirled Bread
Two Years Ago: Roasted Fig & Almond Cake
Three Years Ago: Carrot Almond Muffins
Four Years Ago: Espresso Chocolate Chip Coffee Cake & Boiled Cider
Five Years Ago: Vanilla Bean Malt Cake, Cinnamon Raisin Swirl Bread, Apple Cinnamon Pancakes, & Classic Apple Pie
Six Years Ago: Pumpkin Espresso Cake, Triple Coconut CookiesChewy Vanilla Bean Bars, & Peanut Butter Cup Cookies
Seven Years Ago: Pumpkin Granola, Chocolate Cherry Bread, Pumpkin Spice Latte, & Oatmeal Raisin Crisps
Eight Years Ago: Maple Roasted Bananas, Chocolate Avocado Cupcakes, & Butternut Squash Custard

Apple Crumble Cake

Yields 10-12 servings

Apple Cake
2 1/4 cups (270 grams) all-purpose flour
2 teaspoons baking soda
3/4 teaspoon salt
1/4 teaspoon ground ginger
1/4 teaspoon ground nutmeg
2 teaspoons ground cinnamon
1/2 cup (118 mL) vegetable oil
1 cup (340 grams) honey
2 large eggs
4 cups (500 grams or about 4 medium) apples, peeled, cored, and finely diced

Crumble Topping
3/4 cup (90 grams) all-purpose flour
1/3 cup (67 grams) brown sugar, packed
1/4 teaspoon ground cinnamon
1/8 teaspoon ground ginger
1/8 teaspoon ground nutmeg
4 tablespoons (67 grams) butter, melted

Preheat oven to 350 degrees F (180 degrees C). Grease a 10-cup tube pan and set aside.

For the cake, whisk together flour, baking soda, salt, and spices in a large mixing bowl. Mix in the vegetable oil, honey, and eggs until uniform. The batter will be thick. Stir in the diced apples and set aside.

For the crumble, stir together the flour, brown sugar, spices, and butter in a medium mixing bowl until uniform and crumbly. Set aside.

In prepared pan, spread out cake batter evenly. Sprinkle the top with the crumble topping and bake for 50-60 minutes, or until a toothpick inserted in the center comes out clean. Cool in pan for 10 minutes before transferring cake to a cooling rack to cool completely.

Double Chocolate Zucchini Muffins

With a whirlwind of a summer behind me—planning a wedding, getting married (!), and taking a full load of graduate credits at the same time—I feel like I haven't had time to catch my breath before the back-to-school season set in.

As a teacher, the start of a new school year keeps me on my toes as I get my classroom and lessons in order. When classes begin, there is an adjustment period where my feet have to get used to the long hours of standing, my throat has to adapt to a steady stream of talking in the classic teacher voice, and my brain has to refocus on jumping between ideas at a rapid pace.

As my students and I find our new routine, the high energy required in the first couple weeks of school can be draining. This makes weekends a welcome time to recover. 

I stayed close to home last weekend, enjoying a couple walks around the neighborhood, catching up on summer TV shows, and savoring the quiet before another work week. For the first time in what feels like weeks, I also spent some real time in the kitchen.

While the self-watering planters I built this summer did not turn out as planned (only the herbs, green beans, and bell peppers were spared from root rot), luckily the CSA (community supported agriculture) I support has been particularly fruitful.

With an abundance of zucchini filling the drawers of my refrigerator, I baked four loaves of zucchini bread before creating something a little more decadent in these double chocolate zucchini muffins.

These Double Chocolate Zucchini Muffins take advantage of the late season squash. The muffins feature plenty of chocolate chunks and a hint of cinnamon for a warmer touch. I prefer to heat these up for a few seconds in the microwave until the chocolate just begins to melt. With a large glass of milk, these muffins make for a perfect afternoon snack after a long day at school.

Pro tip: Reserve a couple ounces of chocolate to sprinkle over the top to make the muffins look extra delicious. 

One Year Ago: Plum Almond Tart
Three Years Ago: Blueberry Honey Scones
Four Years Ago: Homemade Chocolate Hazelnut Spread 
Five Years Ago: Vanilla Ice Cream Cake, Honeyed Apricot Granola Bars, & Chocolate Banana Chip Cookies
Six Years Ago: Rum Raisin Oatmeal Cookies, Banana Rum Bread, Zucchini Chocolate Chip Muffins, & Pear Chocolate Muffins
Seven Years Ago: 3 Milk Coconut Cake, Tomato Basil Tart, & Whole Wheat Irish Soda Bread
Eight Years Ago: Cinnamon Chocolate Chip Banana Bread 

Double Chocolate Zucchini Muffins

Yields 1 dozen muffins

3/4 cup (150 grams) granulated sugar
1/2 cup (118 ml) vegetable oil
1 large egg
1 teaspoon vanilla extract
1 cup (about 180 grams) grated zucchini, lightly packed
1/2 teaspoon ground cinnamon
1/2 teaspoon baking soda
1/2 teaspoon baking powder
1/2 teaspoon salt
1 1/4 cup (150 grams) all-purpose flour
1/4 cup (21 grams) cocoa powder
6 ounces (170 grams) semi-sweet chocolate, coarsely chopped (or 1 cup semi-sweet chocolate chips)

Preheat oven to 350 degrees F (175 degrees C). Line a muffin pan with baking cups.

In a large bowl, whisk together the sugar, vegetable oil, egg, and vanilla until well combined. Stir in the grated zucchini. Mix in the cinnamon, baking soda, baking powder, and salt. Fold in the flour and cocoa powder, mixing until the batter becomes uniform. Stir in the chopped chocolate.

Fill baking cups 3/4 full and bake for 18-22 minutes, or until a tester inserted in the center comes out clean. For best texture, let the muffins cool before eating.

Blueberry Galette with Cornmeal Thyme Crust

I'm thrilled to be officially married to my best friend! At the moment, married life does not feel very different, but I suppose when you have been together over eight years you are comfortable in your relationship. Although this day was a long time coming, it still feels strange to call Chris my husband.

Our wedding day was a hot, humid ninety-degree day with no wind to provide relief, but the rain blessedly stayed away. The sun was covered by a hazy sky from wildfire smoke which made the dappled, diffuse light perfect for photography. Although the groom was recovering from the flu, the illness was quickly forgotten in the emotion of the day. In front of our immediate family, we said our handwritten vows and became husband and wife.

Our wedding day may have had its share of imperfections, but to us these imperfections are what made it a perfect day.

With no honeymoon planned, we are trying to enjoy the last few slow days of summer as a married couple before the school year begins again. To add a special touch to our evenings, I made us a dessert to share as newlyweds. This blueberry galette made with a cornmeal thyme crust is perfect for both of us—Chris loves desserts with a chewy texture and I adore the flavor of late summer blueberries.

For this galette, the added cornmeal in the pie crust lends a chewy, flaky texture, while the fresh thyme adds a subtle herbed flavor. However, the real star of the galette is the blueberries. While the galette works beautifullywith frozen blueberries, I recommend you find the ripest berries of the season to take it over the top. The wild blueberries I found at the local farmer's market made this galette disappear quickly.

This Blueberry Galette with Cornmeal Thyme Crust allows late summer's seasonal offerings to shine. A galette is similar in many ways to a pie, but I find it easier to throw together, which makes it perfect for the lazy days of summer. The cornmeal thyme crust gives the galette additional flavor and texture, which makes this dessert stand out from others. Serve the galette warm or cold with a scoop of ice cream or coconut whipped cream.

One Year Ago: Fresh Herb Bread
Two Years Ago:  Fig Oatmeal Bars 
Three Years Ago: Iced Matcha Coconut Latte 
Four Years Ago: Salted Chocolate Chunk Cookies & Citrus Zucchini Muffins
Five Years Ago: Blueberry Braided Bread, Date Flapjacks, & Nordic Pancake Cake
Six Years Ago: Summer Berry Pavlova, Mango Coconut Popsicles, French Silk Pie, & Blueberry Cream Cheese Cupcakes
Seven Years Ago: Coconut Pancakes, Chocolate Beet CakeZucchini Bread, & Lemon Blueberry Scones
Eight Years Ago: Chocolate Pear Cake & Brown Sugar Coconut Bubble Tea

Blueberry Galette with Cornmeal Thyme Crust

Yields 8-10 servings

Cornmeal Thyme Pie Crust
1 3/4 cups (210 grams) all-purpose flour
3/4 cup (108 grams) yellow cornmeal
1/2 teaspoon salt
1 tablespoon granulated sugar
1 tablespoon fresh thyme, chopped and lightly packed
1 cup (225 grams) butter, cold and cubed
4-8 tablespoons ice water

In a large bowl, whisk together the flour, cornmeal, salt, sugar, and fresh thyme. Add half of the cold cubed butter and rub the butter and flour between your fingers until it resembles coarse sand. Add the second half the cubed butter and rub in into the flour, but leave it in larger pieces (approximately the size of your thumbnail). Add four tablespoons of ice water and mix the dough together until uniform. Gradually add more water, one tablespoon at a time, until the dough holds together when squeezed in your hand. 

Place the dough on parchment paper and use the paper to press the dough into a uniform disk. Wrap in plastic wrap, and chill for at least a half hour (or up to 2-3 days). For a step-by-step tutorial in making pie dough, follow the instructions here.

Blueberry Filling
2 pints (24 oz or 680 grams) blueberries
2 tablespoons cornstarch
3 tablespoons granulated sugar*
Egg wash (1 large egg + 1 tablespoon water, whisked)
2 tablespoons demerara or raw sugar, for sprinkling

In a mixing bowl, fold together blueberries, cornstarch, and sugar until uniform. Set aside.

On a lightly floured surface, roll out the pie dough into a circle roughly 1/8-inch thick. Place the blueberry mixture into the center of the circle and spread out until it is a uniform thickness, leaving a two-inch border on all edges. Fold the border of the pie dough over the filling, pleating the dough every two or so inches. Brush the visible pie dough with egg wash and sprinkle the demerara sugar evenly over the dough and the filling. Refrigerate for 20-30 minutes to firm up the crust.

Preheat oven to 400 degrees F (204 degrees C).

Bake for 40 to 50 minutes, or until the crust is golden and the blueberries have released their juices. Cool slightly before serving. Serve with a topping of whipped cream or side of vanilla ice cream.

*Add more or less to taste, depending on the sweetness of the berries.

Pineapple Coconut Sorbet

This post is sponsored through a partnership with Dole Sunshine. As always, all thoughts and opinions are my own.

With summer heat in full swing, I've been looking for ways to cool down that don't involve hiding indoors with the air conditioner. It seems I have spent a great deal of this summer behind a computer screen, spending time researching the many details that come with planning a wedding

With less than a month of summer vacation to go, my checklist of summer activities—kayaking the nearby lakes, biking around town, and enjoying free concerts in the park on warm summer nights—have gone unchecked. What summer activities have you checked off your list?  Perhaps I can persuade you to enjoy a little more time in the warm sunshine with this frozen dessert. 

This pineapple coconut sorbet is my favorite frozen dessert so far this year, satisfying my desire for something both fruity and creamy at the same time. 

Sorbet is a great alternative to classic ice cream for several reasons. First, unlike traditional ice cream, the sorbet base does not have to be thickened with egg yolks over the stove. This feature makes the process from idea to final product both simpler and quicker.

Second, sorbet allows real fruit flavors to stand out. For this pineapple coconut sorbet, I wanted the focus to be the tropical sweetness of pineapple so I used Dole 100% Pineapple Juice to keep the flavor bright and pure. Pineapple can also be acidic so the addition of a "creamy" component, like full-fat coconut milk, can mellow the acidity and allow the true flavor to shine through. 

Third, sorbet is vegan, which makes it a wonderful alternative for people who suffer from food intolerances or allergies (like me!). Sorbet is a safe (and delicious) choice to share with family and friends. 

This Pineapple Coconut Sorbet is a sweet treat to help you beat the summer heat. The sorbet only has four ingredients—pineapple juice, coconut milk, sugar, and vanilla extract—which makes it quick and easy to assemble. The creaminess of the coconut balances the acidity of the pineapple, balancing the flavors of the frozen dessert. Serve in a bowl topped with toasted coconut flakes or in a sugar cone.

One Year Ago: Blueberry Basil Galette
Two Years Ago:  Homemade Almond Milk & Blueberry Plum Pie
Three Years Ago: Cherry Hand Pies & Olive Oil Pound Cake
Four Years Ago: Plum Almond Galette, Paris Holiday, & Provence & the French Riviera
Five Years Ago: Nutella Espresso Rolls, Brownie Cookies, & Cookie Dough Cake
Six Years Ago: Banana PB Protein Smoothie, Chocolate Cherry Cake, Coconut Scones, & Strawberry Coconut Ice Cream
Seven Years Ago: Cherry Almond Muffins, Plum Clafouti, S'mores Pie, Grilled Apricots, & Malted Chocolate Cupcakes
Eight Years Ago: Chocolate Prune Cake, Espresso Chocolate Chip Shortbread, & Whole Wheat Wild Blueberry Muffins

Pineapple Coconut Sorbet

Yields 1 quart

14 ounce can (414 mL) full-fat coconut milk
2 cups (475 mL) Dole 100% Pineapple Juice
1/2 cup (100 grams) granulated sugar
1 teaspoon vanilla extract

In a large mixing bowl, whisk together the coconut milk, pineapple juice, granulated sugar, and vanilla extract. When uniform and sugar has dissolved, place in the refrigerator and chill 3-4 hours, or until cold.

Freeze mixture in ice cream maker, following the manufacturer's instructions. Transfer sorbet to an airtight container and freeze for 2-3 hours before serving. The sorbet will keep well for several weeks in the freezer. Serve with a sprinkling of toasted coconut flakes.


This post is sponsored through a partnership with Dole Sunshine. As always, all thoughts and opinions are my own. I am incredibly excited to be working with Dole Sunshine because of the excellent quality of their fruit-based products. Thank you for supporting Pastry Affair & my wonderful sponsors!

Chocolate Espresso Cupcakes

I am thrilled to announce that my longtime boyfriend, Chris, and I are finally getting married! After eight years together, this milestone may appear to be a bit overdue, but I'm excited all the same.

We have survived two years long distance, two separate career changes (both my own),  five moves in three cities and two states,  a masters and a doctorate degree, my first years as a high school teacher (when I rarely emerged from my work), buying our first home together, and all of the small and big moments in-between.

There are two types of marriages: cornerstone and capstone. A cornerstone marriage is one in which the marriage is the starting point, and together a life is created from that point on. A capstone marriage is one in which the marriage is the "capstone," or icing on top, to celebrate a life that has already been built together.

Our engagement story differs from most—less romance, more practicality. We have both felt married for so long already that the actual ceremony feels more like a formality. I suppose you could say we fall firmly into the "capstone" marriage model. 

Sitting on the couch after dinner on a weeknight, the topic of marriage arose.

We should probably get married, shouldn't we?

Yeah, I think we should. But when?

From there, a wedding date was set for two months later, and the rest of the planning very quickly fell into place.

We are having a private outdoor ceremony in our favorite arboretum with family, followed by a nice dinner at a local restaurant. I'm still not sure how we were able to find a ceremony and reception venue, photographer, officiant, and wedding dress within a week for one of the busiest wedding weekends of the year, but I am grateful. A week later we will celebrate in my hometown with friends and extended family.

With everything falling neatly into place, it feels like it was meant to be.

With nearly three weeks left until the big day, there are still dozens of small details to sort out. Instead of letting myself get overwhelmed with the planning, I'm trying to tackle one detail at a time. For the reception, I'm ambitiously planning to bake my own cupcakes to share.

While I baked hundreds of cupcakes for my sister's wedding reception a couple years ago—vanilla beanchocolate, coconut, and dulce de leche—it's a different feat to do it for my own. However, with my own dairy intolerance to manage, I find the dairy-free options from local bakeries lacking both in flavor and texture. So, into the kitchen I must go.

These chocolate espresso cupcakes are a flavor I wanted to give a spin before the big day. Chris and I adore the flavors of chocolate and coffee, so it feels natural to bring them together in this cake.

The cupcakes are infused with chocolate by adding espresso powder and strong coffee to the batter. The frosting is made by mixing strong coffee into semisweet chocolate. The cupcakes are not overly sweet, instead focusing on the deep chocolate and coffee flavors. I topped the finished cupcakes with toffee pieces, but any type of sprinkles will work here (or feel free to keep them plain). Enjoy alongside a cup of coffee or tall glass of milk!

One Year Ago: Grandma's Chocolate Cupcakes
Two Years Ago: Blueberry Crumble Bread & Chocolate Chunk Coconut Oil Cookies (my favorite!)
Three Years Ago: S'mores Tarts, Raspberry Rhubarb Sorbet, & Banana Peanut Butter Green Smoothie
Four Years Ago: Mixed Berry Quinoa Crumble, Cookies & Cream Ice Cream, & Lavender Vanilla Bean Cake
Five Years Ago: Rhubarb Ginger Bars, Berry Cheesecake Tarts, Frozen Strawberry Bars, & Coconut Sorbet
Six Years Ago: Cherry Almond Granola, Vegan Chocolate Chunk Cookies, Cherry Cream Cheese MuffinsBlueberry Breakfast Quinoa, & Vegan Brownies
Seven Years Ago: Bizcochitos, Blueberry Hand Pies, Harry Potter Treats, Cauldron Cakes, Butterbeer, & Butterbeer Cupcakes
Eight Years Ago: Chocolate Chip Oatmeal Raisin Cookies, Mocha Frappuccino, & Roasted Cherry Coconut Ice Cream

Chocolate Espresso Cupcakes

Yield 1 dozen

1 1/2 cups (190 grams) all-purpose flour
3/4 cup (150 grams) granulated sugar
1/3 cup (60 grams) cocoa powder
2 teaspoons espresso powder
1 teaspoon baking soda
1/2 teaspoon salt
1 teaspoon vanilla extract
1/3 cup (78 mL) vegetable oil
1 cup (240 mL) strong coffee, divided
1/2 cup (120 mL) milk of choice
6 ounces (170 grams) semi-sweet chocolate, chopped finely

Preheat oven to 350 degrees F (180 degrees C). Line a cupcake pan with baking cups.

In a mixing bowl, whisk together the flour, sugar, cocoa, espresso powder, baking soda, and salt. Add the vanilla extract, oil, 1/2 cup strong coffee, and milk. Using a spatula, mix the batter until smooth. 

Divide batter evenly between 12 baking cups (about 3/4 full). Bake for 18-22 minutes, or until a toothpick inserted into the center comes out clean. Remove from baking pan and allow to cool to room temperature.

To make the chocolate espresso frosting, place chopped chocolate into a mixing bowl. Warm the remaining 1/2 cup strong coffee to boiling and pour over the chocolate. Allow it to set for 5 minutes then stir until smooth. Allow frosting to rest in the refrigerator, stirring occasionally, until it cools and thickens into a spreadable consistency (anywhere from 30 to 60 minutes).

Place frosting in a pastry bag (or plastic bag with the corner cut out) and pipe frosting onto the cooled cupcakes or spread frosting with an offset spatula. 

Strawberry Rhubarb Pie

Summer is moving quickly. It feels like only a moment has passed since school ended and summer vacation began. I've been working on a project of sorts, which has made free time feel scarce. While I'm going to keep it under wraps a little while longer, I'm excited to share the details with you soon!

In the quiet, everyday moments, I remember to enjoy these summer days. I savor time on the deck watching the vegetable and herb garden grow (perhaps too much , as they have quickly escaped the confines of their planters). I remind myself to turn off the background noise in my life (television and cell phone) to bring my thoughts back down to earth.

And, of course, I bake.

I made this pie a couple of weeks ago, and am finally getting a chance to share it with you. With strawberries and rhubarb in full season, and a holiday around the corner, the timing still feels right. This pie takes full advantage of late spring and early summer's offerings.

I prefer a pie with a bit more bite, so the recipe below results in a pie with a tarter flavor. However, if your tooth is a bit sweeter, add another 1/4 cup of sugar to bring the sweetness to your liking. With a scoop of vanilla ice cream on top, this pie will be sure to please.

This Strawberry Rhubarb Pie celebrates the seasonal produce of June. Two pints of strawberries and a handful of rhubarb stalks come together in this brightly flavored pastry. With cornstarch to thicken, the pie and its juices set up nicely. Serve with a large spoonful of whipped cream or scoop of ice cream to share.

One Year Ago: Chocolate Peanut Butter Pie
Two Years Ago: Dulce de Leche Cake
Three Years Ago: Strawberry Layer Cake & Blueberry Oat Crumble Muffins
Four Years Ago: Mango MargaritaChocolate Cacao Nib Banana Bread, & Chocolate Espresso Custard
Five Years Ago: Vanilla Chia Pudding, Rhubarb Vanilla Pound Cake, Boozy Margarita Lime Cake, & Double Chocolate Muffins
Six Years Ago: Toffee Chocolate Chip Cookies, Coconut Nutmeg Pudding, Lavender Lemonade, & Vegan Chocolate Cupcakes
Seven Years Ago: Whole Wheat Chocolate Chip Cookies, Garlic Parmesan Pull-Apart Bread, & Chocolate Almond Oat Bars
Eight Years Ago: Chocolate Coconut Granola, Bittersweet Chocolate Sherbet, & Tapioca Pudding

Strawberry Rhubarb Pie

Yields one 9-inch pie

1 double crust pie dough recipe
2 pints (24 ounces or 680 grams) strawberries, hulled and sliced
10 ounces (280 grams) fresh rhubarb, sliced into 1/4 inch pieces
1/2 cup (100 grams) granulated sugar
1/4 cup (50 grams) brown sugar, packed
1 teaspoon vanilla extract
4 tablespoons cornstarch
Egg wash (1 large egg + 1 tablespoon water, whisked), for brushing
Raw or demerara sugar, for sprinkling

Preheat oven to 425 degrees F (220 degrees C).

In a large mixing bowl, gently stir together the sliced strawberries, rhubarb, sugars, vanilla, and cornstarch until evenly coated. Set aside.

Form the pie dough into a disk and divide it into a 60/40 ratio (if using a store-bought crust, do not worry about this step). On a lightly floured surface, roll out the larger section of dough into a 14-inch round circle. Carefully transfer it to a 9-inch pie pan and trim the excess pie dough to create a 1-inch overhang. Fill the pie crust with the strawberry-rhubarb mixture.

On a lightly floured surface, roll out the smaller section of pie dough. Using a pizza cutter and a ruler, cut out wide strips of dough. Layer the strips over the top of the pie in a decorative fashion and trim so they are even with the edge of the pie pan. Using your fingers, pinch the bottom and top layers together in a pattern of your choice.

Using a pastry brush, brush the top of the pie crust with egg wash and sprinkle raw sugar over the pie. Bake the pie for 15 minutes at 425 degrees F (220 degrees C). Then, lower the oven temperature to 375 degrees F (190 degrees C). If necessary, cover the edges of the pie crust with aluminum foil to prevent further browning. Bake an additional 50-65 minutes, or until the lattice and crust are evenly browned. 

For perfect slices, cool for at least 3-5 hours (or overnight). Serve with whipped cream or ice cream, if desired.

Cold Brew with Vanilla Almond Milk Creamer


This post is sponsored through a partnership with The J.M. Smucker Company © 2017. DD IP Holder LLC. All thoughts and opinions are my own.


With warmer days approaching (and the end of the school year), my mind drifts towards the slower days of summer.  I've stuffed the sweaters into the back of the closet, bringing the t-shirts front and center.

A defining line between the cold and warm months, however, is my switch from hot coffee to cold brew. 

As a teacher, I drink my fair share of coffee. My favorite moments to enjoy a cup is relaxing after a long day at work, with my feet up on the couch, or on a slow-moving weekend morning.

Lately, I've been drinking Dunkin' Donuts Cold Brew. It's easy to prepare and has a smooth finish, with no acidity or bitter taste.

On Sunday nights, I prep the cold brew by placing two coffee pouches into a two-quart pitcher with four cups of water and leave it to steep in the refrigerator overnight. The next morning, I remove the pouches, add a few cups of water to dilute it to my taste, and it is ready to enjoy. Best of all, the pitcher lasts the rest of the week so the work is complete in two simple steps.

One of my favorite cold brew tricks is to freeze some of the cold brew into ice cubes after it has finished brewing. Then, when it's time to enjoy the coffee, I add a few cold brew cubes. The drink stays cold longer, and the coffee cubes prevent the drink from becoming watered down as the ice melts. 

I prefer my cold brew with creamer to add a hint of flavor and sweetness. After finding disappointment with dairy-free brands, I set out to create my own. As I often do for a dairy-free alternative, I reached for the can of full-fat coconut milk. While homemade coconut milk creamer works well in hot beverages, the fat separates to the top when it hits a cold beverage, rendering it undrinkable.

Almonds, however, do the job and do it well.

This homemade almond milk creamer holds together well in a cold drink and lends itself to customization. To give the creamer its creaminess, I follow a similar approach as I do with my recipe for homemade almond milk. The difference is that I add less water when blending so the almond milk is concentrated. 

With pure vanilla extract for flavor and maple syrup to sweeten to taste, this homemade almond milk creamer is complete. I adore this creamer because it mimics the coffee house experience with simple, wholesome ingredients.

The coffee creamer may appear to separate if it is left to rest, but a quick swirl of the glass will bring it back to a uniform appearance. Use as much or as little as you like in your next glass of cold brew.


This cold brew with homemade vanilla almond milk creamer works as a great afternoon pick-me-up. Brewed with Dunkin' Donuts Cold Brew Coffee Packs, the coffee has a smooth, rich finish. I prefer to enjoy it with homemade creamer flavored with vanilla and sweetened with maple syrup, but you can customize the drink to your taste. Enjoy!

One Year Ago: Strawberry Scones
Two Years Ago: Chocolate Hazelnut Rolls
Three Years Ago: Blueberry Oat Bars (GF)  & Peanut Butter Chocolate Chunk Cookies (GF)
Four Years Ago: Chocolate Blackberry Cupcakes
Five Years Ago:  Sunflower Seed Bread, Blackberry Fool, Lime Curd Tart, & Honey Chocolate Chunk Cookies
Six Years Ago: Tiramisu Cake, Peanut Butter Cornmeal Cookies, Honey Wheat Cake, & Chocolate Almond Ice Cream
Seven Years Ago:  Chocolate-Filled Buns, Malted Chocolate Chip Cookies, & Parmesan Poppy Seed Crackers

Cold Brew with Vanilla Almond Milk Creamer

Yields 6 servings

1 pouch Dunkin’ Donuts Cold Brew Coffee Packs
1 cup (120 grams) raw almonds
3 1/2 cups (830 mL) filtered water, divided
3-5 tablespoons maple syrup, to taste
2 teaspoons pure vanilla extract

The cold brew and almond milk creamer need to be started the evening before serving.

To prepare the cold brew coffee, follow the directions according to the package.

To prepare the almond milk creamer, place almonds in a container and cover with 2 cups filtered water. Seal container and allow to soak overnight, for at least 8 hours or up to 2 days.

Strain almonds and rinse with fresh water. (The almonds release phytic acid while soaking, which prevents the body from absorbing nutrients; rinsing the almonds removes this acid.) Place almonds and 1 1/2 cups filtered water in a blender. Blend on high for 2-3 minutes. Using a nut bag, layered cheesecloth, or fine mesh strainer, strain the almond milk to remove the pulp. If using the fine mesh strainer, run the milk through several times to eliminate pulp. The leftover pulp can be used in smoothies, muffins, or bread, or it can be dehydrated and used in the same manner as almond flour. Add maple syrup and vanilla extract to the almond milk.

Keep the almond milk creamer refrigerated. It should stay fresh for 5 to 7 days. The creamer may undergo separation in the refrigerator. Give the creamer a good shake and it will come back together quickly.

To prepare the cold brew coffee drink, place prepared cold brew in a glass with ice and add almond milk creamer to taste. For best results, freeze some of the cold brew into ice cubes in advance. This method keeps the cold brew chilled and prevents it from getting watered down as the ice melts.


©The J.M. Smucker Company © 2017. DD IP Holder LLC

Chocolate (Strep) Cake with Raspberry Buttercream | Matt’s Birthday

Did you know that small children can be “carriers” of strep throat but not show any visible symptoms? Did you know that Matt is a very open person who shares water glasses with the kids and is ready to receive slobbery kisses on the mouth from the…

Did you know that small children can be "carriers" of strep throat but not show any visible symptoms? Did you know that Matt is a very open person who shares water glasses with the kids and is ready to receive slobbery kisses on the mouth from them at a moment's notice? This is all true and it's also the perfect storm to get strep throat three times in the span of five months. After Matt got it the second time, my mom mentioned the whole "they could be carriers" thing. I took the kids to the pediatricians and found out that yes, they both "had" strep. Point being, when it came time to decorate this cake (in the style of Wolfie of course) those cherry Ricolas felt juuuuuust right in celebrating Matt's year. (The plastic bug thing was Teddy's idea.)
As is the family tradition, when it's your birthday you get to pick what kind of cake you want made for you by me. Matt is typically a vanilla cake and vanilla buttercream kind of guy, but because Teddy's chocolate birthday cake was so delicious, he decided to go for this chocolate/raspberry combo. I used two different recipes: the cake is Lori's Chocolate Midnight Cake via Samin Nosrat. And the icing is from Yossy Arefi's Sweeter Off the Vine.
Isaac wasn't thrilled about the idea of waiting to eat the cake.
I don't think I've ever a made a buttercream the way this recipe instructed me to do it: you whip egg whites and sugar together in a heatproof bowl over simmering water until the sugar is completey dissolved and the mixture syrupy. Then, you whisk it, via an electric mixer, for 7 to 10 minutes, until it's super glossy and can form stiff peaks. Then, once it's at room temperature, you switch to the paddle attachment and add two whole cups of butter, one tablespoon at a time. (Teddy helped me at this stage, plopping each tablespoon in with his buttery fingers.)
The result is superb. It doesn't have that shocking sweetness of frosting made with powdered sugar. And when you get a bite of cake, fresh berry, and buttercream, it tastes like a richly flavored, multi-textured trifle. I like it a lot.  

For those of you who have tuned into Mom Rage, thank you so much! (We fixed an audio glitch so along with some great interviews with fellow parents, in two or three more weeks, you can look forward to some super clean, crisp audio too.)
In short, happy birthday, Matt! May this year bring you joy aaaaaannd far less strep! xoxxo

For chocolate cake recipe, go here:
Raspberry Buttercream via Yossy Arefi's Sweeter Off the Vine

8 ounces (225 grams) raspberries + another 8 ounces for the top of the cake
5 large egg whites
1 1/4 cup (250g) granulated sugar
1/2 teaspoon kosher salt 
2 cups (450g) unsalted butter, soft but cool, cut into tablespoon-size pieces

Use an immersion blender or potato masher to puree the raspberries, then pass the puree through a fine mesh sieve. Discard the seeds (or feed them to a four-year-old kid who is helping you).

In the bowl of a stand mixer or a large heat-safe bowl, whisk the egg whites and sugar together. Place the bowl over a pan of simmering water, ensuring that the bottom of the bowl does not touch the water, but rests just above it. Cook the egg whites and sugar, whisking often, until the sugar dissolves and the egg whites are syrupy and very hot to the touch. 

Remove the egg whites from the double boiler and, with the whisk attachment, whip on high speed until stiff glossy peaks form and the mixture has cooled to room temperature, 7 to 10 minutes. Add the salt. Switch to the paddle attachment and turn the mixer down to medium low. Slowly add the butter to the meringue, tablespoon by tablespoon. During this step, it is likely that the frosting will "break," and you will think you have messed up. You didn't! All you have to do is turn up the speed on the mixer for a few seconds and the buttercream will come back together.

After all the butter has been incorporated and the buttercream is smooth and fluffy, very slowly stream in the raspberry puree and mix until well combined. 

Hot Dog Rice Bowl + Mom Rage!

I wanted to make something special for you to officially announce the launch of my brand new podcast: Mom Rage. I was thinking about something akin to a Mom Rage Pie or Mom Rage brownies. I dunno. It didn’t happen! What you get instead is the above …

I wanted to make something special for you to officially announce the launch of my brand new podcast: Mom Rage. I was thinking about something akin to a Mom Rage Pie or Mom Rage brownies. I dunno. It didn't happen! What you get instead is the above Hot Dog Rice Bowl™. It's kind of an LOL, but also pretty delicious. It's a version of a typical weekday meal for us. Instead of hot dogs, I usually serve it with roasted garbanzo beans and a fried egg or two. If we're going to add hot dogs, I prefer the turkey variety, but alas, they were out of those at the grocery store, so what you see here is a mix of chicken and all-beef hot dogs atop basmati rice with a delicious salad (Kenter Canyon Farms winter greens, cucumbers, goat cheese, and a lemon juice and olive oil dressing). We always serve this kind of bowl with whole-milk yogurt and chili-garlic sauce. Bon appétit, guys! (Looking very forward to this post kicking off a major hot-dog rice bowl trend. You saw it here first!) 

OK, and now introducing: Mom Rage


I hope you'll listen. It's a passion project for me and my friend and co-host, Edan Lepucki. Our goal is to expand the conversation about motherhood. We're approaching this by talking honestly about our own lives as well as talking to other parents. In my more ambitious moments, I like to think about it as a podcast version of Stud Terkel's Working. I've also taken to riffing on a line from Women who Run with the Wolves. The line is: "Every woman is entitled to an Allelujia Chorus." And what I've been saying to Matt is: "Every woman is entitled to an interview on Mom Rage!" 

Here are the first two episodes! You can listen here or wherever you get your podcasts.


Please also note that the fanastic theme song is by Matt, Teddy, and Isaac.

Let's rage!
xoxx

Bury Me in Nam Phrik: Mike Sula’s Exploration of Thai Relishes (Plus Salted Soybean-Pork Rind Relish Recipe)

Around this time last year, I met with some of my friends who are part of Dill Magazine to talk about something I had wanted to see for a long time: a story on Thai relishes, nam phrik. These dishes form the most significant segment of Thai cui…

THAI NAM PHRIK SALTED SOYBEAB PORK RINDS

Around this time last year, I met with some of my friends who are part of Dill Magazine to talk about something I had wanted to see for a long time: a story on Thai relishes, nam phrik. These dishes form the most significant segment of Thai cuisine, but they’re the least understood and the […]

The post Bury Me in Nam Phrik: Mike Sula’s Exploration of Thai Relishes (Plus Salted Soybean-Pork Rind Relish Recipe) appeared first on SheSimmers.