How to make Farmer’s Cottage Cheese at home

How to make farmer’s cottage cheese at home. Perfect for making delicious Syrnyky

MILK. Choose pasteurized milk, preferably the one sold in the refrigerator section. The higher the fat content, the better. Milk with 3.2 – 3.5% fat is an excellent choice as it will result in a creamier taste.

Remember the HYGIENE of your small but important production. The cheesecloth or towel should be clean. After washing, pour boiling water over the cheesecloth and let it dry. Alternatively, iron it before use.

The pot and colander should also be clean. Rinse them with boiling water before using.

STARTER CULTURE. To make the milk curdle, you can use sour cream or yogurt. Each will give a slightly different taste. I prefer using sour cream as it gives a more farmhouse-like taste, while yogurt results in a more diet-friendly option. After the first preparation, you can save some unstrained cottage cheese and use it as a starter culture. It will last for about 7-10 days. I haven’t tried keeping it for longer.

You can use the WHEY after straining the cottage cheese to prepare Okroshka or Pancakes.


How to make FARMER’S COTTAGE CHEESE at home.

Perfect for making delicious Syrnyky

Recipe

PREP TIME MAKES
1-2 days 1 kg / 2,2 lb

INGREDIENTS (for 1 kg / 2,2 lb of cottage cheese)

  • 4 liters / 1 gallon of milk (3.2 – 3.5% fat)
  • 2 tbsp of tasty sour cream

4 STEPS of making cottage cheese:

You can find a short video recipe of FARMER’S COTTAGE CHEESE in my Instagram. Let’s be friends!

  1. CULTURING THE MILK: For this, you need to introduce good bacteria into the milk. Heat the milk until it becomes slightly warm (~ 30°C / 85°F). Add sour cream and mix well with a whisk. Place the milk in a warm place. The warmer it is, the quicker the process will take. The milk should curdle not in the refrigerator but in a warm environment. If it curdles in the fridge or in a cold place, it will become bitter.
    • In summer: You can leave it at room temperature; this will take about 2 days. Just avoid leaving the milk in direct sunlight.
    • In a cold home: Place it near a heater.
    • You can use the oven as well, as I do. Simply turn on the light in the oven and wedge the oven door with a towel to create a small gap. This amount of warmth will be enough for the milk to curdle overnight.
    • Do not leave the milk for too long, or it will go sour. Overly sour milk has an unpleasant, overly acidic smell. If you can’t make the cottage cheese right away, place the milk in the refrigerator, but only for a short time.
  2. HEATING: The milk is ready when you see one large, slightly jelly-like curd (lump) and a bit of whey around it. Heat it on very low flame and gently stir with a spoon, as if cutting through the layers, to ensure even heating.
    • Using a thermometer: Heat the curdled milk to 60°C / 140°F. I like the cottage cheese when heated to this temperature. You can heat it starting from 45°C / 115°F, but the higher the temperature, the firmer the cottage cheese will be.
    • Without a thermometer: Try the temperature with a clean finger. The milk should be hot enough that you can dip your finger in, but you’ll quickly want to take it out. In any case, you’ll have cottage cheese.
  3. COOLING: Strain only when the milk has completely cooled or is slightly warm. Do not strain immediately; the cottage cheese needs to form. 
  4. STRAINING & FORMATION: Take a large bowl, a colander, and a cheesecloth or towel. When the whey has drained completely, hang the cottage cheese or place it under a small weight in the refrigerator overnight. To hang it, you can use the oven rack. If you are going to make syrnyky, remember you need dry, well-drained cottage cheese.

Watch the video recipe of FARMER’S COTTAGE CHEESE on my Instagram. Let’s be friends!


UKRAINIAN HOME COOKING
Favorite recipes with love

The book is available on Amazon in different countries.

50% of each sale will be donated to Charity to help the people of Ukraine.
You may like these too…

New Recipes

New recipes in your inbox

Processing…
Success!

Juicy Brazilian Maminha Baked with Onion and Beer

I will teach you how to make a juicy roasted piece of meat!

What kind of meat can I use? Brazilian maminha is a cut of beef, originating from the triangular area of the sirloin, often hailed as a beloved choice in Brazilian churrascarias.

This juicy and flavorful meat is located on the backside of the animal, nestled between the loin and the thigh.

It is sometimes referred to as «bottom round» due to its position atop the rear legs, encompassing the hips and rump region.

What type of beer can I use? You have the option to use both alcoholic and non-alcoholic beer. For a richer aroma, you can opt for a dark beer.

How long should I roast the meat? The cooking time depends on the weight of the meat. To achieve a medium roast for a piece weighing 1.5-1.8 kg, you will need about 1 hour. For a well-done piece of meat, it will take approximately 80 minutes to cook.


Juicy Brazilian Maminha Baked with Onion and Beer

PREP TIME COOK TIME MAKES
80 minutes 15 minutes 6-8 servings

INGREDIENTS (serves 2)

  • 1 piece of beef for maminha (~1,5 kg / 3,3 lbs)
  • 2 onion
  • 0,33 ml light beer (12 oz)
  • ⅓ cup (70 ml) water
  • 5 garlic cloves
  • 2 sprigs of rosemary
  • 3 tbsp of olive oil for frying
  • 1 tbsp of butter
  • Salt
  • Black pepper

INSTRUCTIONS

You can find a short video recipe of Maminha in my Instagram. Let’s be friends!

  1. Preheat the oven to 200°C / 390°F. Slice the onion into rings or half rings. Transfer to a baking dish. 
  2. Add garlic cloves and rosemary on top. 
  3. Place the meat on top. 
  4. Drizzle vegetable oil for frying on both sides, spread the oil with a brush, and season with salt and pepper. 
  5. The meat should be placed with the fat side up.
  6. Pour beer and water on the sides of the meat. Cover the dish with foil and bake for 1 hourб if you want medium (a pink cut of meat) and 70-80 min for a well done.
  7. Remove the foil, spread butter on top, and bake for an additional 20 minutes until golden brown.


UKRAINIAN HOME COOKING
Favorite recipes with love

The book is available on Amazon in different countries.

50% of each sale will be donated to Charity to help the children and people of Ukraine.

You may like these too…

New Recipes

New recipes in your inbox

Processing…
Success!

TOMATO AND BURRATA PASTA

Is a delicious and creamy dish that combines the sweetness of cherry tomatoes with the rich flavor of burrata cheese.

Pasta with tomatoes and burrata is a classic Italian dish that is beloved all over the world. This simple yet delicious recipe brings together the flavors of fresh tomatoes, creamy burrata cheese, and al dente pasta to create a dish that is both comforting and elegant.

To make pasta with burrata and tomatoes, you will need: pasta, cherry tomatoes, garlic, olive oil, salt, pepper, and of course, burrata cheese. The key to making this dish is to use high-quality ingredients.

Serve the pasta with burrata cheese and tomatoes immediately, garnished with fresh basil, spinach or parsley if desired. The creamy burrata cheese pairs perfectly with the tangy tomatoes and the al dente pasta, creating a dish that is both rich and refreshing.

One of the great things about pasta with tomatoes and burrata is how versatile it is. You can add additional ingredients to the dish, such as fresh herbs or chopped nuts. You can also use different types of pasta, such as spaghetti, penne, bucatini, fettuccine, linguine or fusilli.

Pasta with tomatoes and burrata is a simple yet flavorful dish that is perfect for any occasion. Whether you are cooking for yourself or for a crowd, this dish is sure to impress. So the next time you are looking for a quick and easy meal that is both delicious and nutritious, give pasta with tomatoes and burrata a try!

How to serve burrata on pasta? On the plates gently stir the cheese into the pasta and tomatoes until it is just starting to melt.

On top of individual servings: For a more elegant presentation, you can add a piece of burrata cheese on top of each individual serving of pasta. This works well for dishes like spaghetti or linguine, where the pasta strands can be easily twirled around the cheese.

Garnish: You can also use burrata cheese as a garnish for pasta dishes. For example, you could serve a simple tomato sauce pasta and top it with a small ball of burrata cheese, some fresh herbs like basil or parsley, and a drizzle of olive oil.


Burrata Tomato Pasta

PREP TIME COOK TIME MAKES
10 minutes 10 minutes 2 servings

INGREDIENTS (serves 2)

  • 6,5 oz (180 g) spaghetti
  • 2 ball of burrata cheese
  • 1 cup (150 g) cherry tomatoes
  • 2 regular tomatoes (or 150 g canned tomato puree – passata)
  • 3 sun-dried tomatoes
  • 1 cup spinach leaves
  • 1 clove garlic
  • 2 tbsp pine nuts
  • 2 pinches of oregano or Provencal herbs
  • 1 pinch of chili pepper
  • 1.5 tbsp butter
  • 1.5 tbsp olive oil for frying
  • 1 tbsp extra-virgin olive oil
  • 2 tbsp red wine or 1 splash of balsamic vinegar

INSTRUCTIONS

  1. Blend the regular tomatoes into a puree if not using canned tomato puree.
  2. Cut the cherry tomatoes in half.
  3. Slice the garlic into thin pieces.
  4. In a pan, melt half of the butter and add the frying oil. Add the garlic and cook on low heat for 2-3 minutes, making sure the garlic does not change color.
  5. Add the tomato puree, herbs, and chili pepper. Cook and stir for 5 minutes.
  6. Pour in the wine and cook for 2 minutes until it evaporates.
  7. Meanwhile, cook the pasta according to package instructions.
  8. Add the cherry tomatoes, sun-dried tomatoes, spinach leaves, and pine nuts to the tomato sauce. Season with salt and pepper.
  9. Add the cooked pasta, remaining butter, and 3-4 tbsp of the pasta water. Cook and stir for 1 minute.
  10. Divide the pasta onto plates and place a torn by hand ball of burrata on the side. Season the burrata with salt and drizzle with extra-virgin olive oil.


UKRAINIAN HOME COOKING
Favorite recipes with love

The book is available on Amazon in different countries.

50% of each sale will be donated to Charity to help the children and people of Ukraine.

You may like these too…

New Recipes

New recipes in your inbox

Processing…
Success!

Forshmak

Herring appetizer with potatoes and warm creamy onions

My grandma always made forshmak with potatoes, and everyone I knew growing up made it that way (I’m from Kharkiv, Eastern Ukraine).

So the classic Odessa version with apple and white bread is unusual for me. I also don’t like forshmak that’s been ground into a paste. I like my herring chopped with a knife or twisted with a coarse mesh through a meat grinder to keep the texture. For many, it will seem unusual to add fried onions, but warm fried onions add a lovely creamy note to this dish.

Forshmak with Herring and Potatoes

PREP TIME COOK TIME MAKES
10 minutes 10 minutes 2-3 servings

INGREDIENTS (serves 2-3)

  • 3 (250 g, 9 oz) salted herring fillets
  • 2 (125 g, 4.5 oz) medium potatoes, boiled in their skins
  • 1 (80 g, 3 oz) small onion
  • 1 tbsp butter
  • 1 tbsp oil for  frying 
  • 2 tbsp chopped chopped onion
  • 2 tsp unrefined sunflower oil, optional
  • Black pepper

INSTRUCTIONS

You can find a short video recipe of Forshmak in my Instagram. Let’s be friends!

  1. Boil the potatoes in their skins until tender and peel.
  2. Peel and dice the onions into small cubes. Heat vegetable oil in a frying pan, add butter, add onions and cook, stirring over low heat, until soft. Onions should only slightly change color to light golden and become soft.
  3. Finely chop the herring fillets with the knife.
  4. Shred the potatoes with a fine grater or crush them with a fork. Mix them with fried onions and the oil you used. Then add herring, green onions, unrefined sunflower oil, and black pepper and mix. Serve with warm toast made of dark bread.


UKRAINIAN HOME COOKING
Favorite recipes with love

The book is available on Amazon in different countries.

50% of each sale will be donated to Charity to help the children and people of Ukraine.

You may like these too…

New Recipes

New recipes in your inbox

Processing…
Success!

Thin Pancakes with Caramelized Apples, Walnuts and Raisins

This is a very simple recipe for thin apple crepes.

Recipe

PREP TIME COOK TIME MAKES
20 minutes 30-40 minutes 3-4 servings

INGREDIENTS (serves 3-4)

For Pancakes:

  • 2 eggs
  • 2 tbsp sugar
  • ⅓ tsp salt
  • 1 cup (120 g) all-purpose flour
  • 1 cup (240 ml) milk
  • 4 tbsp (60 ml) water
  • 2.5 tbsp (35 g) melted butter (not hot)
  • Butter for greasing pancakes

Apple Filling for Crepes:

  • 2 apples
  • ½ cup (75 g) raisins
  • ⅔ cup (75 g) walnuts
  • 6 tbsp sugar
  • 1 tsp cinnamon
  • ½ big orange or 1 small (zest and juice)
  • 1 tbsp of butter

INSTRUCTIONS

You can find a short video of Thin Pancakes with Caramelized Apples recipe in my Instagram. Let’s be friends!

Apple Filling for Crepes:

  1. Remove the zest from the orange with a fine grater and squeeze out the juice.
  2. Peel the apples and dice into cubes. Mix orange juice with apples.
  3. Toast the nuts in a dry frying pan. Chop with a knife.
  4. In a saucepan mix sugar with apple, raisins, orange zest and cinnamon. Cook over high heat until the juice boils away. Add butter and walnuts. The liquid should boil away completely.

Pancakes:

  1. Combine the eggs, salt and sugar. Add flour, mix, pour in half of the milk. Stir to get rid of any limps. Pour in the remaining milk and water. Mix. Add melted butter (not hot) and stir again.
  2. Grease the pan with oil every other time, using a brush.
  3. Stack the pancakes and grease the edger with butter. Cover with a lid.
  4. Plate up the pancakes. Put a spoonful of the filling in the middle of each pancake, cover with the free edge and fold in half.
  5. You can also serve them with a scoop of sour cream or vanilla ice-cream.


UKRAINIAN HOME COOKING
Favorite recipes with love

The book is available on Amazon in different countries.

50% of each sale will be donated to Charity to help the children and people of Ukraine.

You may like these too…

New Recipes

New recipes in your inbox

Processing…
Success!

Beet Hummus

An easy and quick Beet Hummus recipe

Bright, deliciously, healthy beet hummus, very easily made recipe for beetroot hummus from baked or boiled beets, chickpeas and tahini. Enjoy with warm pita bread.

Beetroot Hummus

Recipe

PREP TIME COOK TIME MAKES
5 minutes 10 minutes 3-4 servings

INGREDIENTS (serves 2-3)

  • 1 large cooked beetroot (250 g, boiled or baked and peeled)
  • 16 oz (450 g) canned chickpeas (or boiled)
  • 3 tbsp (70g) tahini
  • 2 garlic clove
  • ½ lemon (2-3 tbsp) lemon juice
  • ⅓ tsp coriander
  • ⅓ tsp cumin
  • 1 tbsp olive oil
  • ⅔ tsp salt
  • ⅓ cup (40 g) walnuts for serving

INSTRUCTIONS

You can find a short video Beet Hummus recipe in my Instagram. Let’s be friends!

  1. Cut boiled or baked beets into pieces.
  2. Set aside 2 tbsp of whole chickpeas for garnish.
  3. Put the rest of the chickpeas, beetroot, tahini, lemon juice, chopped garlic, coriander and cumin, olive oil and salt into the blender bowl.
  4. Blend until smooth. Check the texture and try. Add a bit chickpeas water if needed.
  5. Place in refrigerator for at least 30 minutes.
  6. Roast the walnuts in a dry frying pan. Chop with a knife.
  7. Put hummus on a plate in the center. Spread the hummus on a plate with a tablespoon. Move the plate in a circular motion with one hand, and move the spoon from the center to the edges. Garnish with whole chickpeas and walnuts, drizzle with olive oil.


UKRAINIAN HOME COOKING
Favorite recipes with love

The book is available on Amazon in different countries.

50% of each sale will be donated to Charity to help the children and people of Ukraine.

You may like these too…

New Recipes

New recipes in your inbox

Processing…
Success!

Egg Fish Sandwich

A great quick snack recipe.

A great quick snack recipe. You can take the onions out of the recipe and make this for breakfast. For the sandwich, any smoked, salted or even canned fish will do. It can be salmon, tuna, cod, sardine or mackerel.

PREP TIME COOK TIME MAKES
15 minutes 5 minutes 1 servings

INGREDIENTS (serves 1)

  • 3–4 pieces of herring or other fish
  • 1 egg
  • 1 tsp mayonnaise
  • ½ tsp Dijon mustard
  • 1 slice of bread
  • 2 to 3 rings of red onion
  • 1 spring of diil
  • Salt
  • Pepper

INSTRUCTIONS

You can find the video recipe of Egg Sandwich in my InstagramLet’s be friends!

  1. Hard boil an egg. Put into a pot with cold water, bring to boil and boil for about 10 minutes.  Let it cool and peel it from the shell. Dice and place in a bowl.
  2. Mix the eggs with salt and pepper, Dijon mustard and mayonnaise.
  3. In a dry frying pan, toast the toast. You can use a toaster.
  4. Place the egg salad on the toast, top with the pieces of herring, then a sprig of dill and thinly sliced onion rings. 

UKRAINIAN HOME COOKING
Favorite recipes with love

The book is available on Amazon in different countries.

50% of each sale will be donated to Charity to help the children and people of Ukraine.


New recipes in your inbox

Processing…
Success!

You may like these too…

New Recipes

Bestsellers

Beef Stew

This is a scrumptious, simple beef stew recipe that’s perfect for warming your after a long winter day.

This is a scrumptious, simple beef stew recipe that’s perfect for warming your after a long winter day.

My favorite cut of beef is perfect for this roast. This is boneless beef shank, which takes a long time to stew, but the resulting roast is perfect. The shank is one of the meatiest and most collagen-rich parts of the animal.

These chunks are great for goulash, thick winter soups, and stew. They are rich in connective tissue that breaks down into a silky texture when cooked slowly, making a wonderful gravy. The meat is tender and flavorful.

What to serve with the beef stew? Mashed potatoes, pasta with olive oil or butter (sprinkle with cheese if you like), and rice. I love eating it with pickles.

How to thicken beef stew? You can flour the meat before frying. Or when the stew is ready, fry a 1 tbsp of flour in 1 tbsp of butter, pour in half a cup of cold water and stir to avoid lumps. Pour the mixture into the stew. Cook 5 min. But boneless beef shank and vegetables makes a rich gravy.

PREP TIME COOK TIME MAKES
15 minutes 120 minutes 5-6 servings

INGREDIENTS (serves 5-6)

  • 2.2 lbs (1 kg) beef shank (boneless)
  • 2 stalks leek
  • 3 carrots
  • 4 celery stalks
  • 2 big tomatoes 
  • 3 cloves of garlic
  • 1 glass (150 ml) dry red wine

  • 2 tsp paprika
  • ⅓ ground allspice
  • 1 tso ground coriander
  • 1 tsp ground black pepper
  • ½ -1 tsp chili pepper flakes
  • ⅓ tsp grated nutmeg
  • 2 bay leaves
  • 3-4 thyme sprigs
  • 4-5 tbsp oil for frying

INSTRUCTIONS

You can find the video recipe of Beef stew in my InstagramLet’s be friends!

  1. Cut the meat into small pieces. Pour the frying oil into a heavy-bottomed pot or deep frying pan. Put the meat.
  2. Add all the spices except herbs (coriander, ground black pepper, allspice, ground pepper, paprika, grated nutmeg, and chili) to the meat and fry everything together.
  3. Cut the leek lengthwise and chop coarsely. Cut the carrots into thick slices or circles. Coarsely chop the celery and add it, along with the carrots, leek, and finely chopped garlic, to the meat.
  4. Continue frying, then pour in the wine, add the diced tomatoes, thyme, and bay leaves.
  5. Simmer over a very low heat until the meat is tender (this will take about 2 hours).

If, despite the warnings, you were not cooking on a very low heat and you did not get enough gravy, add just a little water.

  1. Salt and add sprigs of parsley 10 minutes before readiness. Serve with mashed potatoes, rice, or pasta.

UKRAINIAN HOME COOKING
Favorite recipes with love

The book is available on Amazon in different countries.

50% of each sale will be donated to Charity to help the children and people of Ukraine.


New recipes in your inbox

Processing…
Success!

You may like these too…

New Recipes

Bestsellers

Zucchini Carrot Fritters

Tasty vegetable fritters for the whole family

Delicious and healthy vegetable pancakes for the whole family. You can use gluten free flour if you like. Serve just like that or I’ll serve it with sour cream, fried eggs and bacon or salty salmon. You can also make these fritters with just zucchini. Remove the carrots and add a double portion of the zucchini.

PREP TIME COOK TIME MAKES
15 minutes 12-20 minutes 2 servings

INGREDIENTS (serves 2)

  • 1 zucchini (480 g, 17 oz)
  • 2 carrots (250 g, 9 oz)
  • ⅓ cup (40 g) all-purpose flour
  • 2 eggs
  • 3 tbsp chopped green onion
  • ½ tsp ground coriander 
  • 1 pinch dried garlic
  • ½ tsp black pepper
  • 1,5 tsp salt

INSTRUCTIONS

  1. Grate the zucchini and carrots on a coarse grater. Salt and stir. Leave for 10 minutes. Squeeze out the juice well.
  2. Add spices, onion, eggs and flour. Stir. 
  3. Heat a frying pan with oil. Spoon the mixture into the frying pan, cover and fry on both sides over medium heat (about 8 minutes each side).

UKRAINIAN HOME COOKING
Favorite recipes with love

The book is available on Amazon in different countries.

50% of each sale will be donated to Charity to help the children and people of Ukraine.


New recipes in your inbox

Processing…
Success!

You may like these too…

New Recipes

Bestsellers

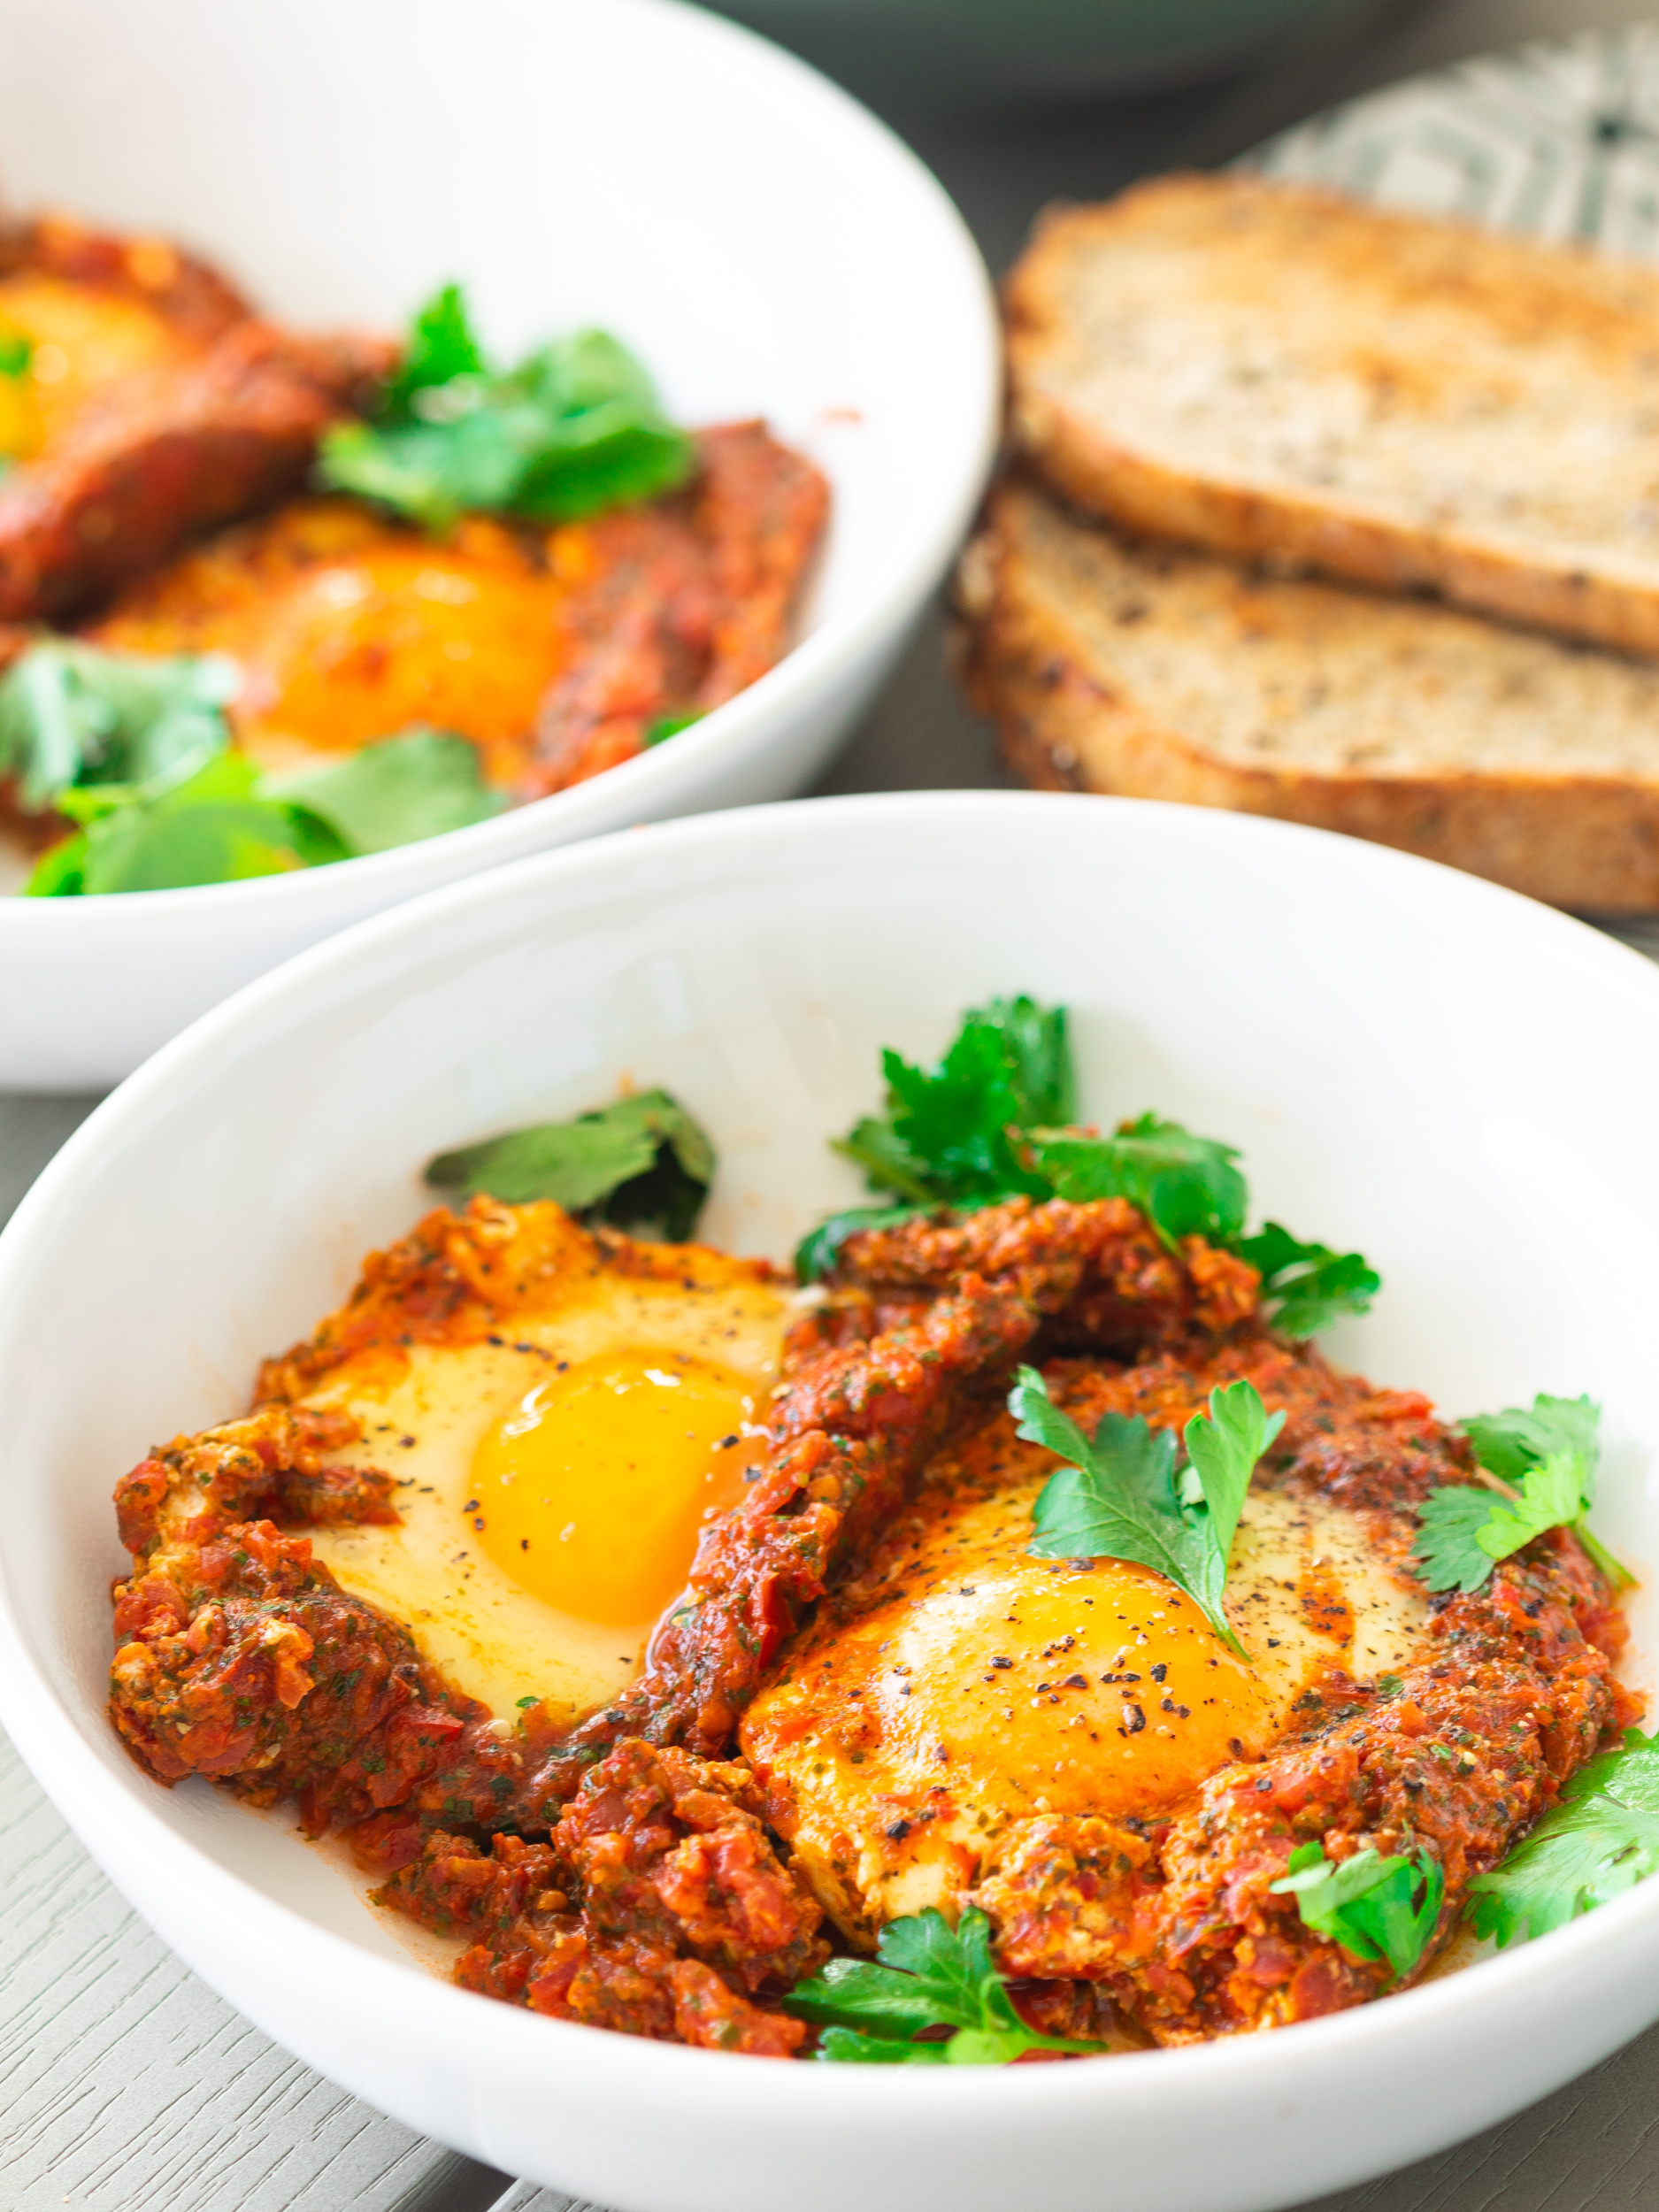
Quick and Easy Shakshuka for Two

This is for everyone who, like me, just loves eggs with tomatoes.

This is for everyone who, like me, just loves eggs with tomatoes. It’s super easy and delicious. You can easily prepare this breakfast for a large group of people. If you can’t make shakshuka without onions, fry ½ a finely chopped onion, then add the tomato sauce.


Quick and Easy Shakshuka for Two

Recipe

PREP TIME COOK TIME MAKES
2-3 minutes 10-15 minutes 2-3 servings

INGREDIENTS (serves 2)

  • 3 medium tomatoes
  • 4-6 eggs
  • ½ bunch cilantro
  • ½ bunch parsley
  • 1 tbsp frying oil
  • ⅓ tsp ground coriander
  • ⅓ tsp ground cumin
  • 1 pinch of dried garlic
  • ½ tsp ground paprika
  • ½ tsp salt
  • Chilli pepper to taste
  • ½ tsp salt

INSTRUCTIONS

  1. You can find a short video recipe in my InstagramLet’s be friends!
  2. Coarsely chop the tomatoes and herbs. Put in a blender bowl, add spices, salt, and oil. Grind.
  3. Bring mixture to a boil in a skillet and saucepan. Beat in the eggs one at a time. When the eggs are slightly cooked, separate them with a wide spatula. Cook until the egg white turns white. To speed up cooking, cover the shakshuka with a lid, just remember to keep an eye on it.

UKRAINIAN HOME COOKING
Favorite recipes with love

The book is available on Amazon in different countries.

50% of each sale will be donated to Charity to help the children and people of Ukraine.


New recipes in your inbox

Processing…
Success!

You may like these too…

New Recipes

Bestsellers