The Best Patty Melt Recipes
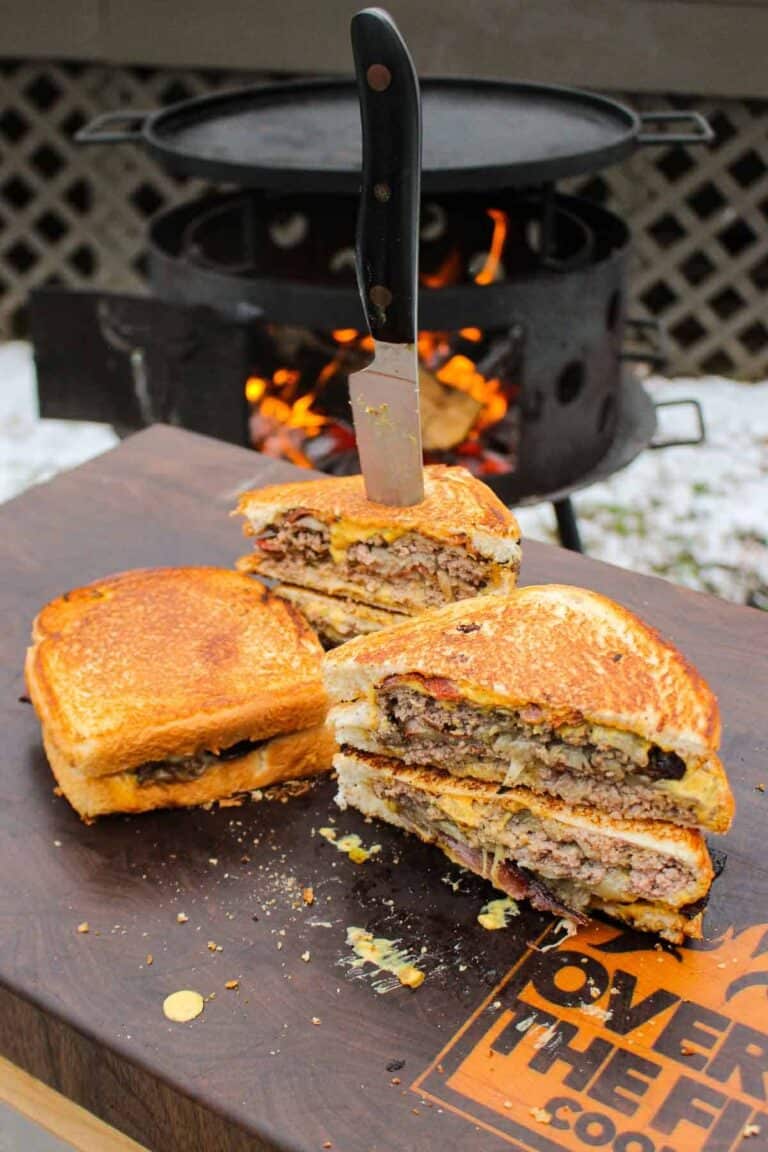
When most people think of patty melts, they think of classic diner food. You know what I’m talking about: ground…
The post The Best Patty Melt Recipes appeared first on Over The Fire Cooking.
When most people think of patty melts, they think of classic diner food. You know what I’m talking about: ground…
The post The Best Patty Melt Recipes appeared first on Over The Fire Cooking.
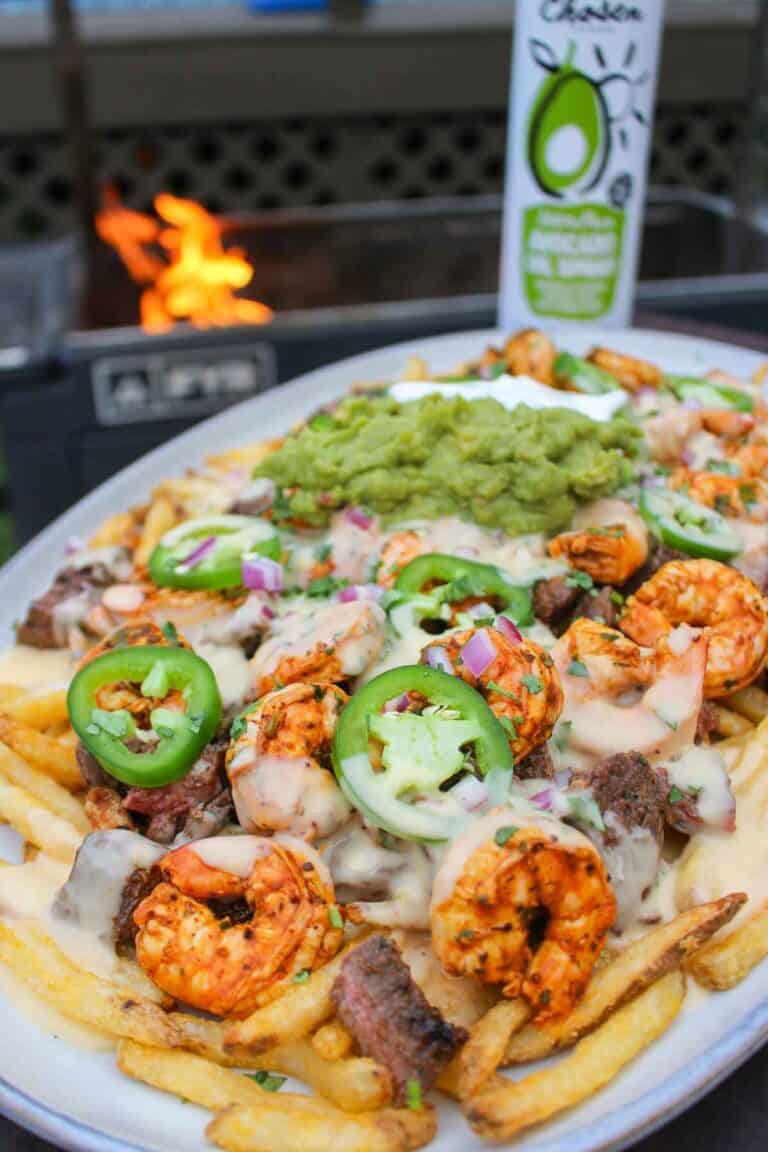
Loaded Steak Fries with Shrimp is my idea of the best Surf and Turf Fries ever. When it comes to…
The post Loaded Steak Fries with Shrimp appeared first on Over The Fire Cooking.
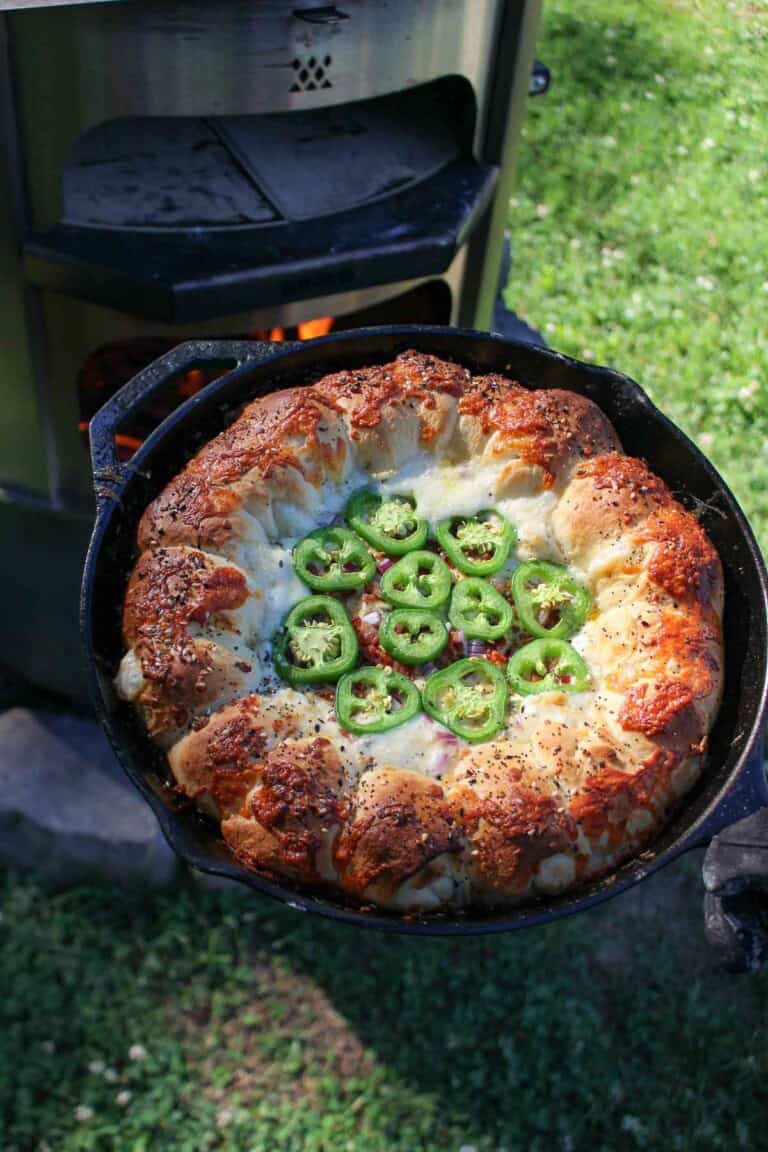
Dips really make everything better, and this jalapeño popper dip recipe is right on target. It’s similar to the Buffalo chicken…
The post Jalapeño Popper Dip appeared first on Over The Fire Cooking.
With summertime in full swing, it feels like the right time for a round-up of my Best Smash Burger Recipes.…
The post Best Smash Burger Recipes appeared first on Over The Fire Cooking.
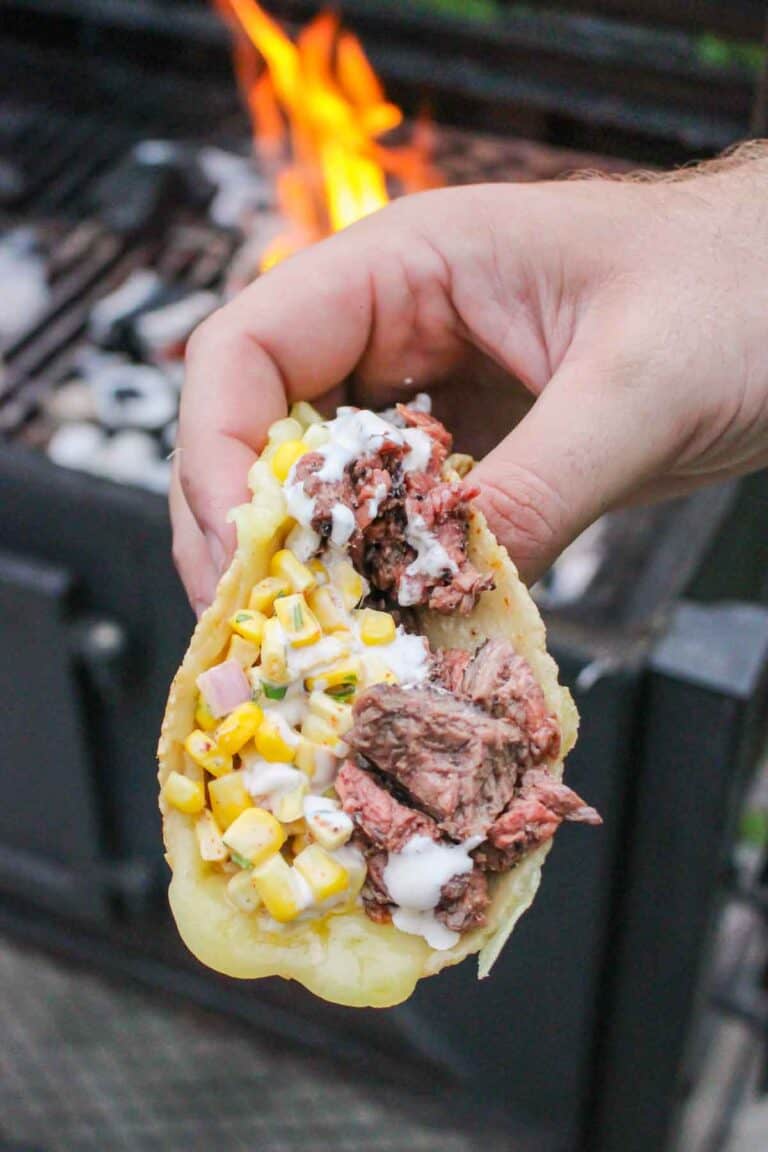
If you’re craving more flavor-packed taco nights, you obviously have to try my Grilled Steak Elote Tacos recipe! This taco…
The post Grilled Steak Elote Tacos appeared first on Over The Fire Cooking.
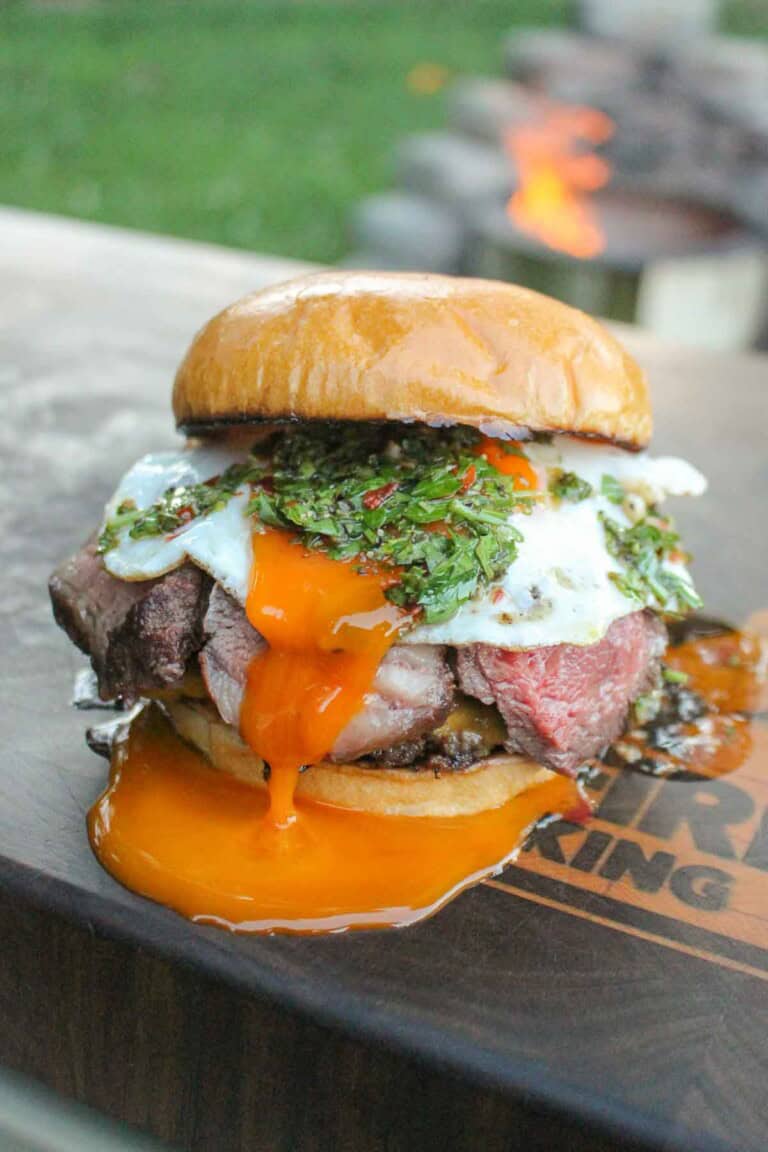
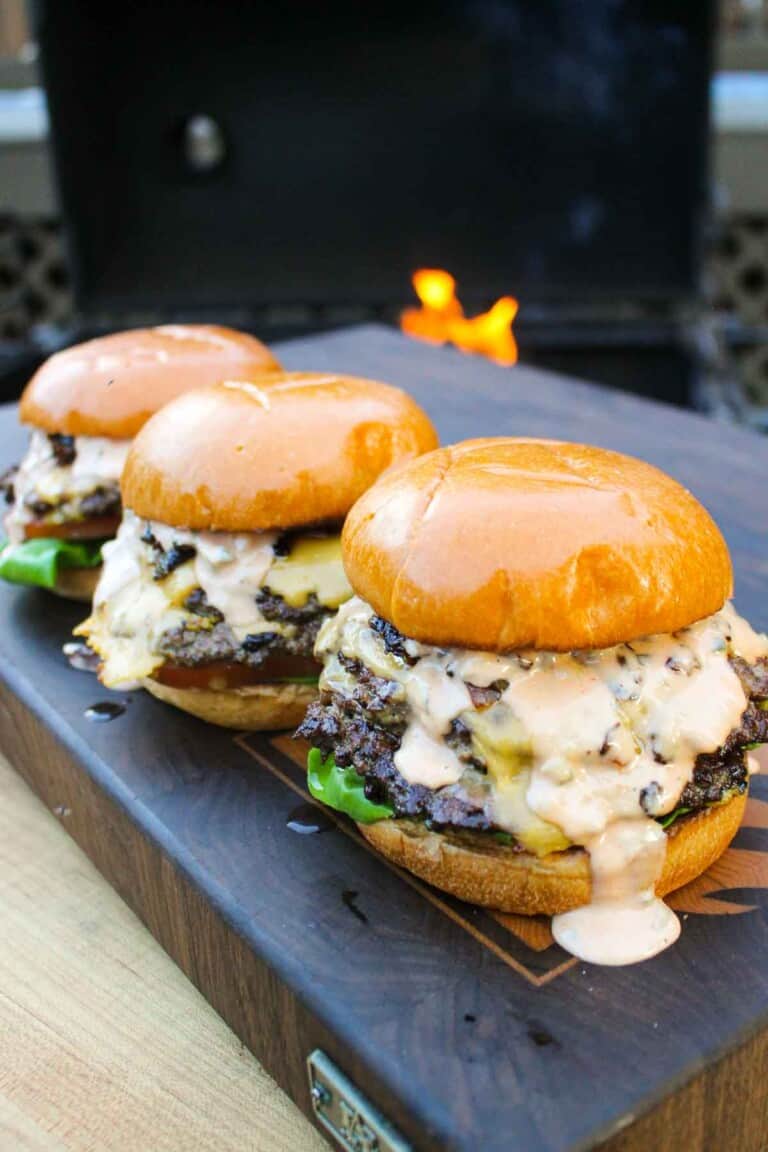
If you love beef burgers as much as I do, you’re going to love the Chimichurri Burger. It’s a different…
The post Chimichurri Burger appeared first on Over The Fire Cooking.
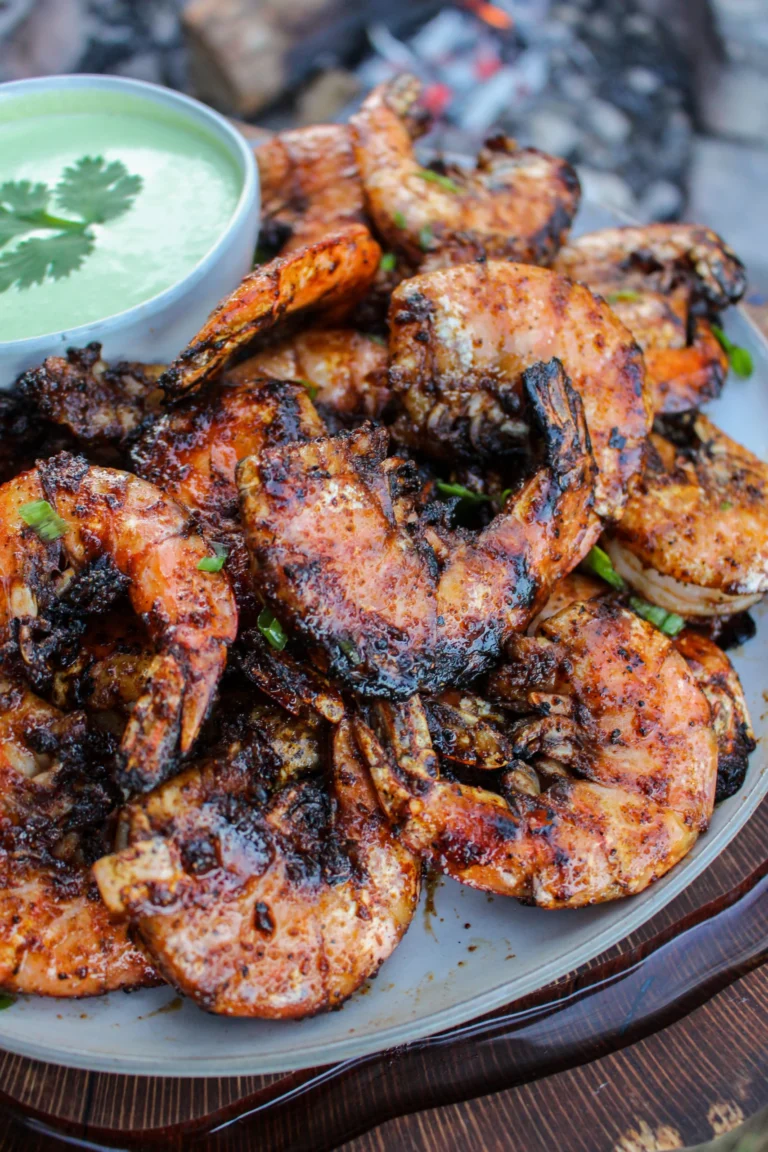
There’s a lot to love about shrimp, which means there’s a lot to love about grilled shrimp recipes! Cooking shrimp…
The post Grilled Shrimp Recipes appeared first on Over The Fire Cooking.
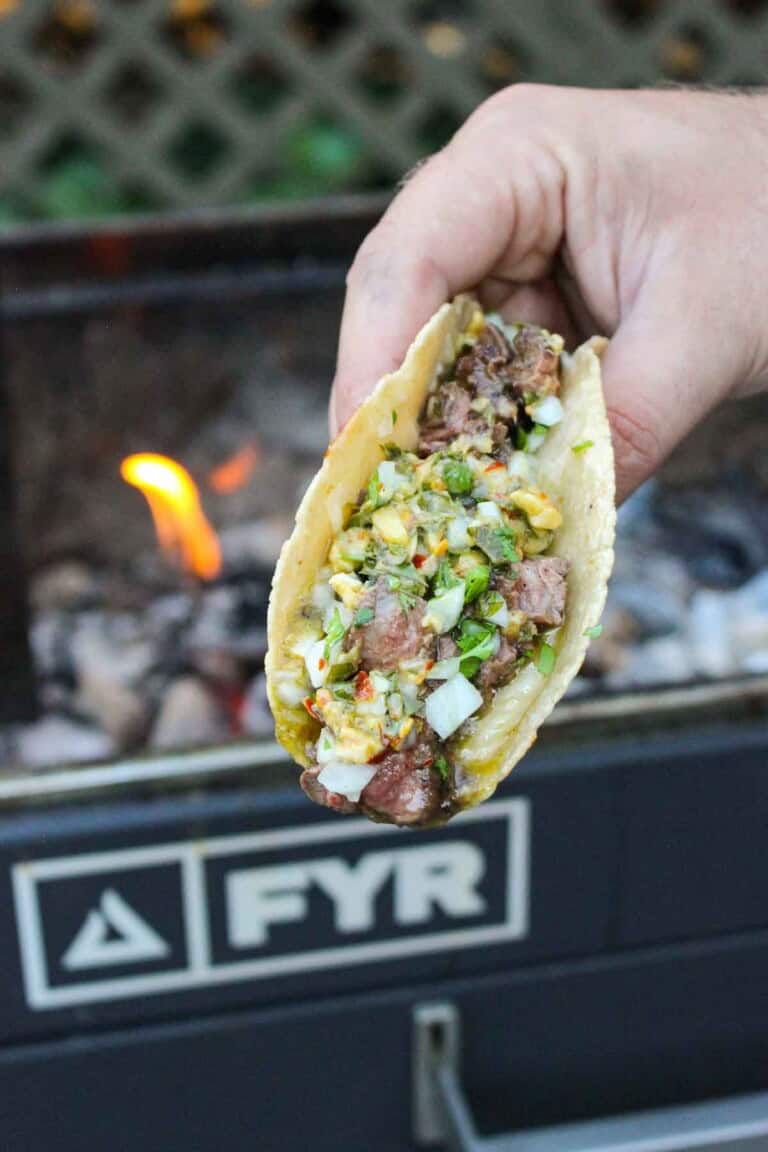
The cowboy butter sliders I made back in June were so freakin’ delicious, I had to try another version of a cowboy…
The post Cowboy Butter Steak Tacos appeared first on Over The Fire Cooking.
Slider recipes have range. Easy meal, busy school nights, game day appetizer, perfect party food — these little guys are…
The post The Best Slider Recipes appeared first on Over The Fire Cooking.
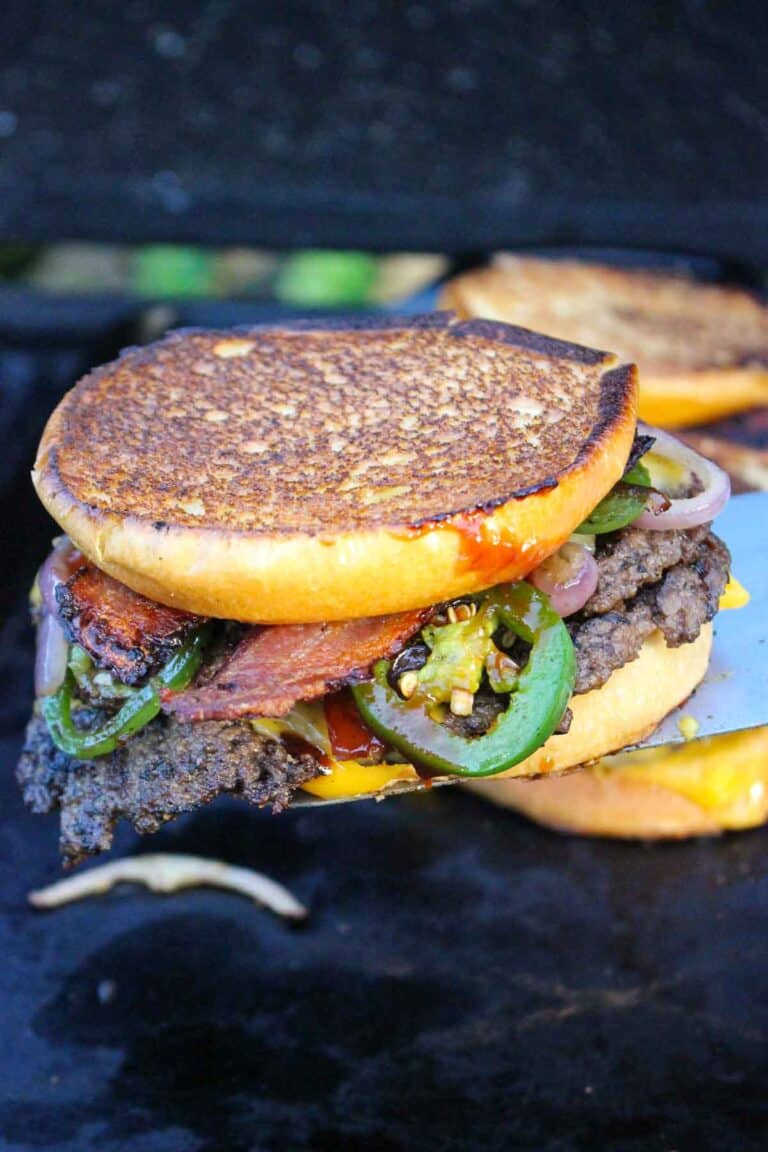
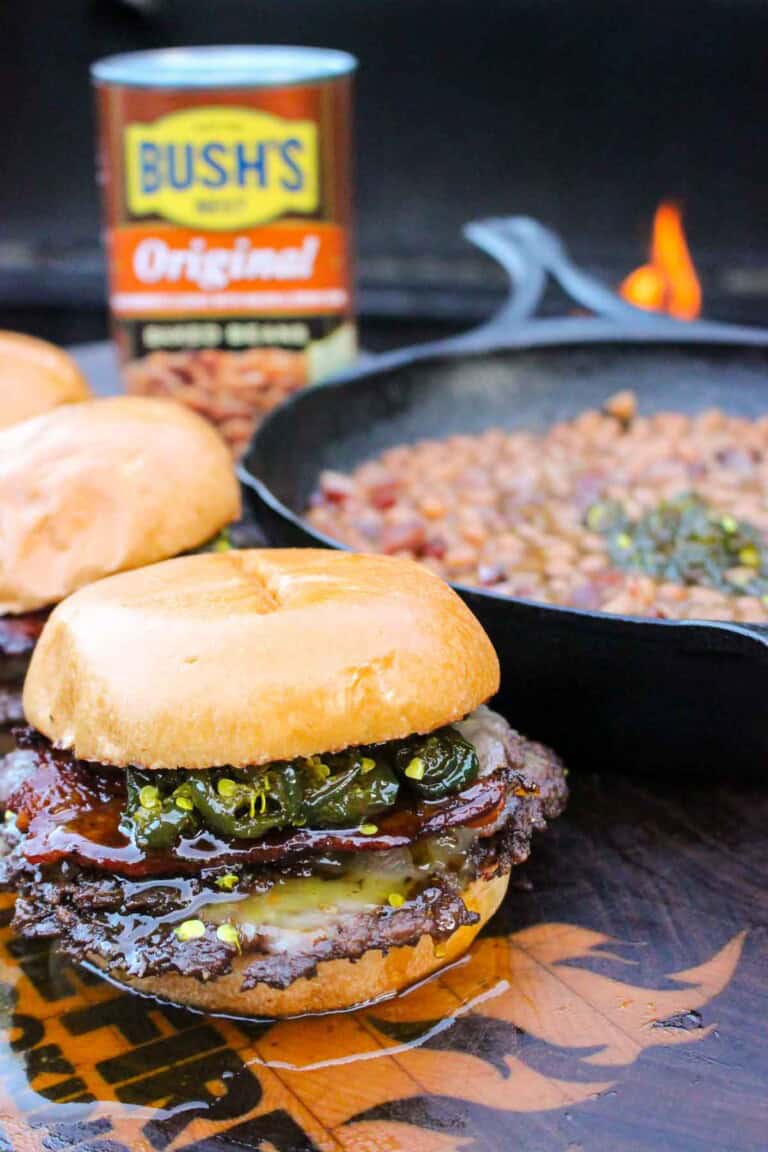
This 4th of July, we are firing up the backyard grill and diving into an all-American classic: the BBQ Bacon…
The post Bacon Patty Melt appeared first on Over The Fire Cooking.
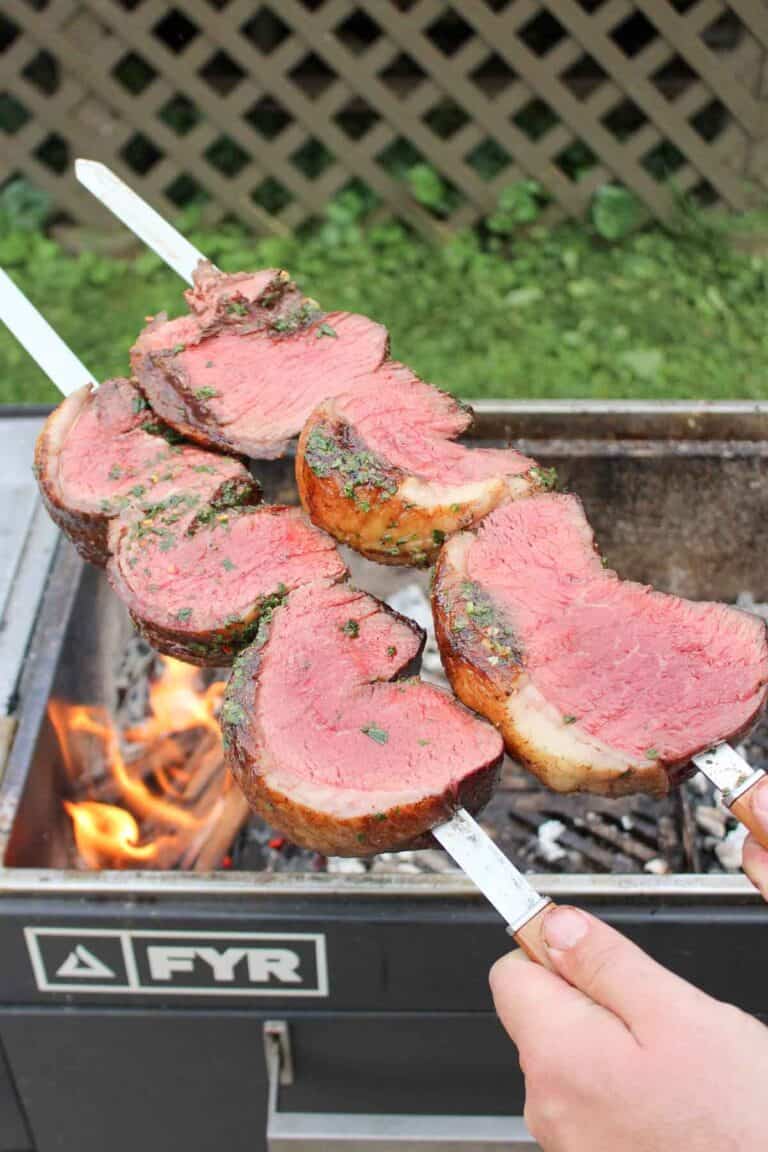
Today at Over the Fire Cooking, I’m giving a great recipe, skewered picanha, a fun twist—literally. I’ll show you how…
The post How to Cook Picanha appeared first on Over The Fire Cooking.
Cowboy candy probably isn’t something you hand out at Halloween — unless your trick-or-treaters are fans of jalapeño peppers! These…
The post Cowboy Candy appeared first on Over The Fire Cooking.
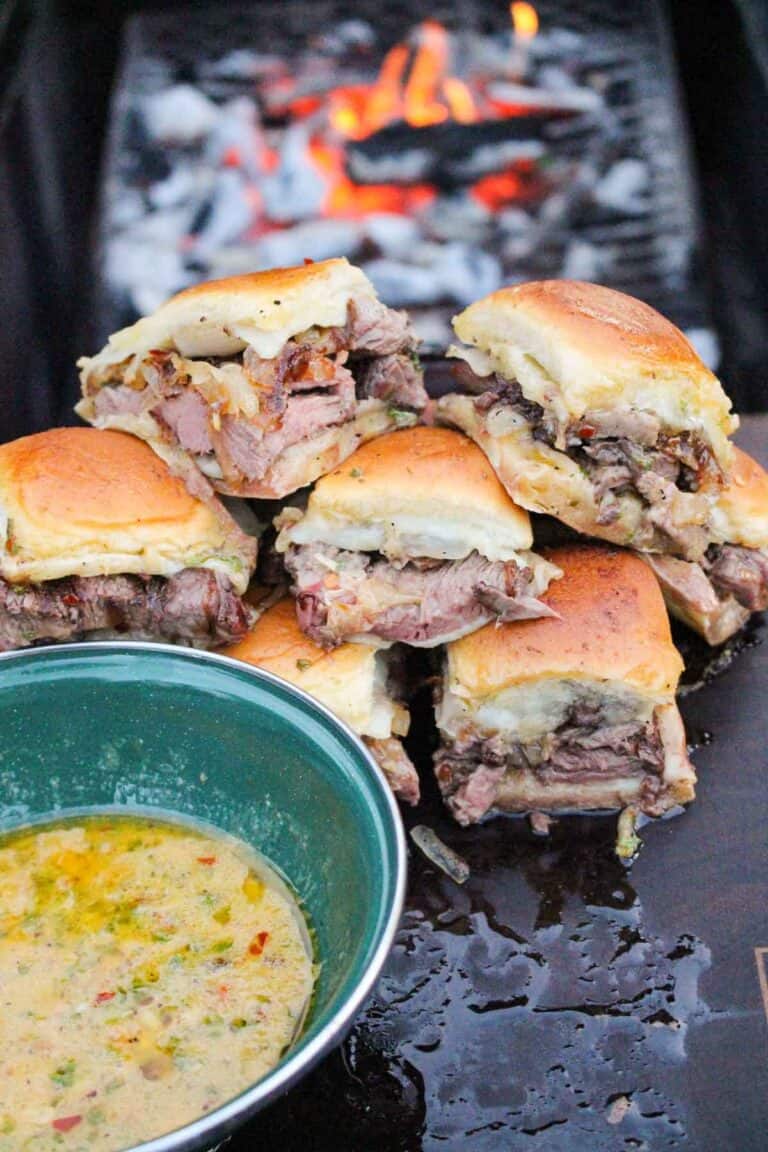
Cowboy Butter Sliders are not your average cheeseburger sliders. I mean the best tender steak, as in filet mignon, is…
The post Cowboy Butter Sliders appeared first on Over The Fire Cooking.
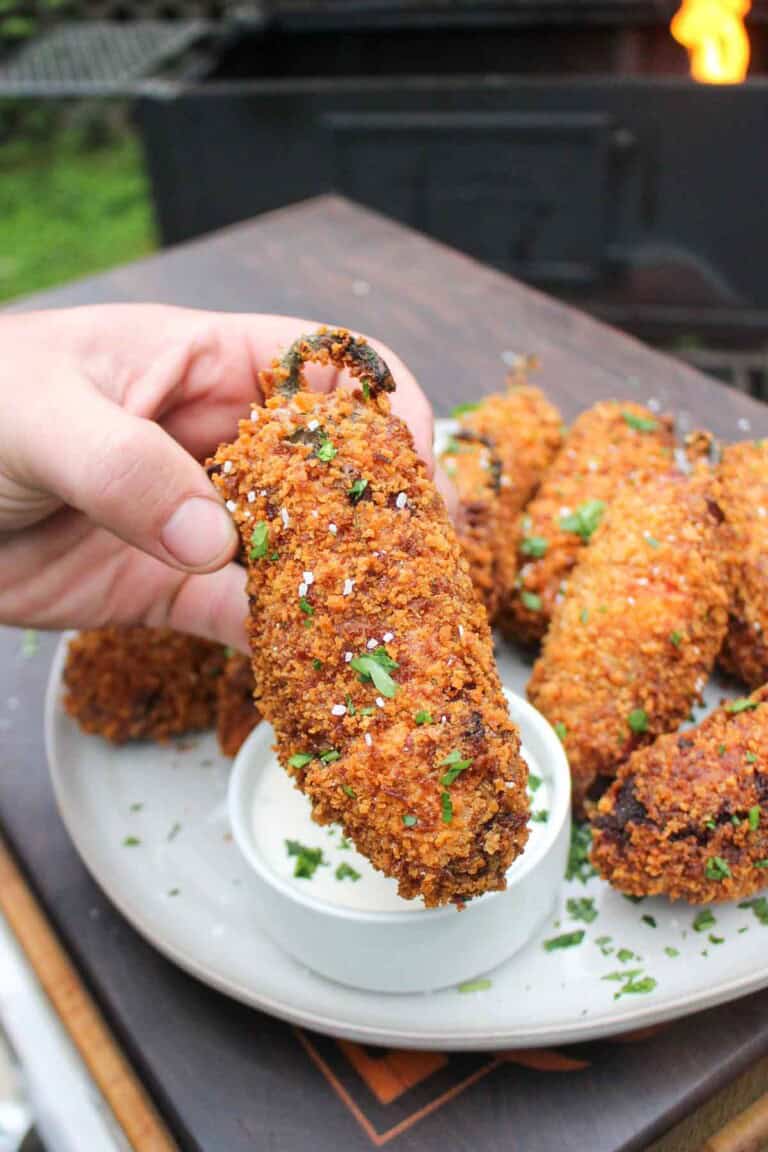
Smoked jalapeño poppers are a classic appetizer, so here’s our delicious twist on perfection. We still smoke the jalapeño poppers…
The post Smoked Fried Jalapeño Poppers appeared first on Over The Fire Cooking.
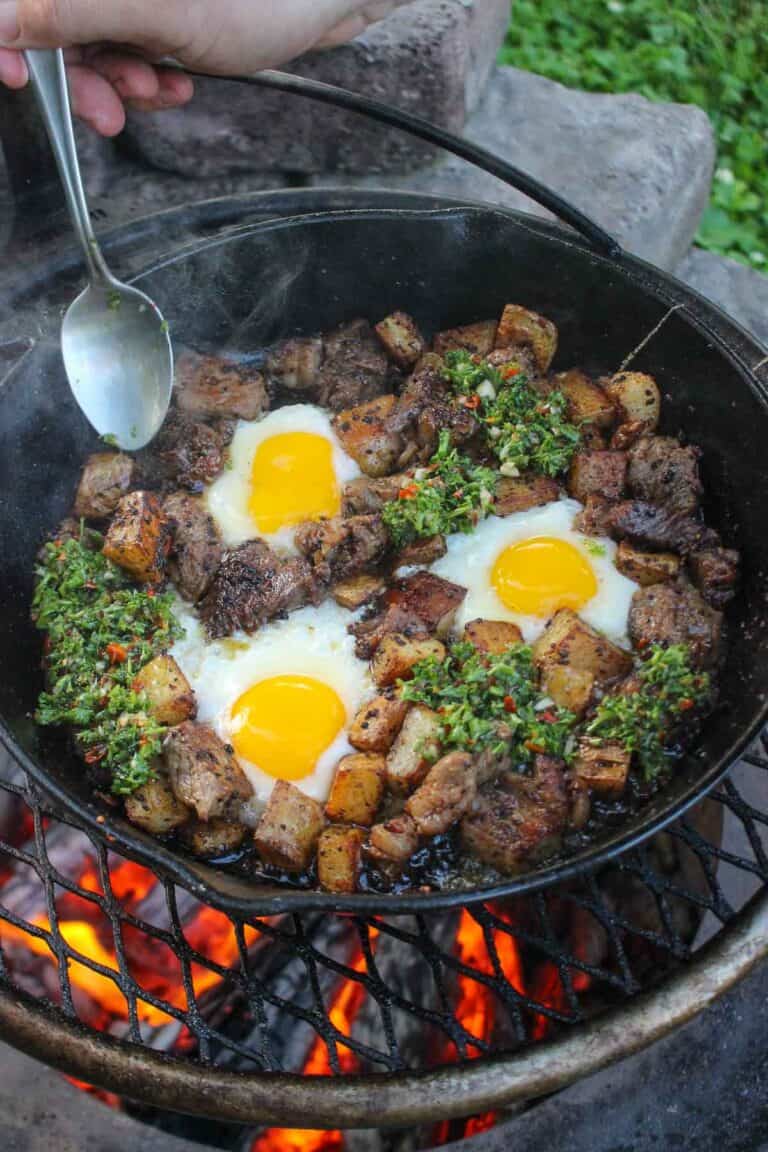
Get your tastebuds ready for the ultimate comfort food because I’m making Steak Bites with Smoked Chimichurri today. This isn’t…
The post Steak Bites with Smoked Chimichurri appeared first on Over The Fire Cooking.
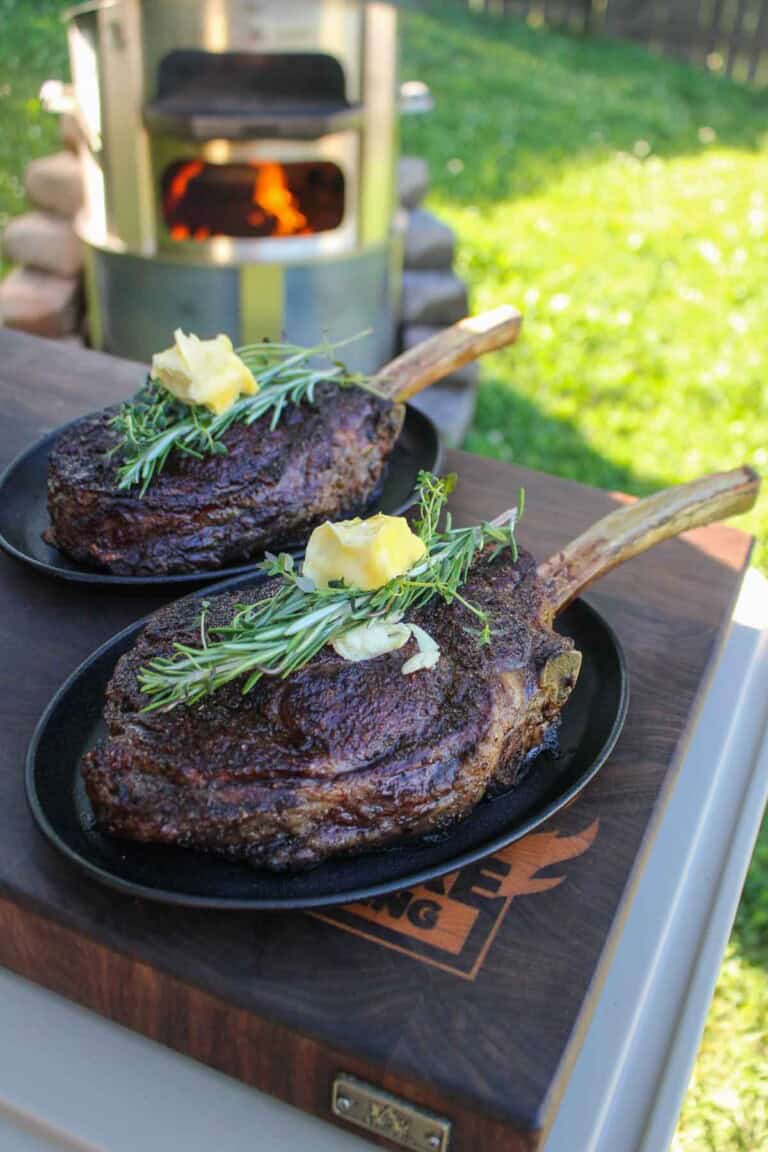
I’m not exaggerating: this is the best tomahawk steak recipe I’ve ever made. The flavor is just next level insane.…
The post The Best Tomahawk Steak appeared first on Over The Fire Cooking.
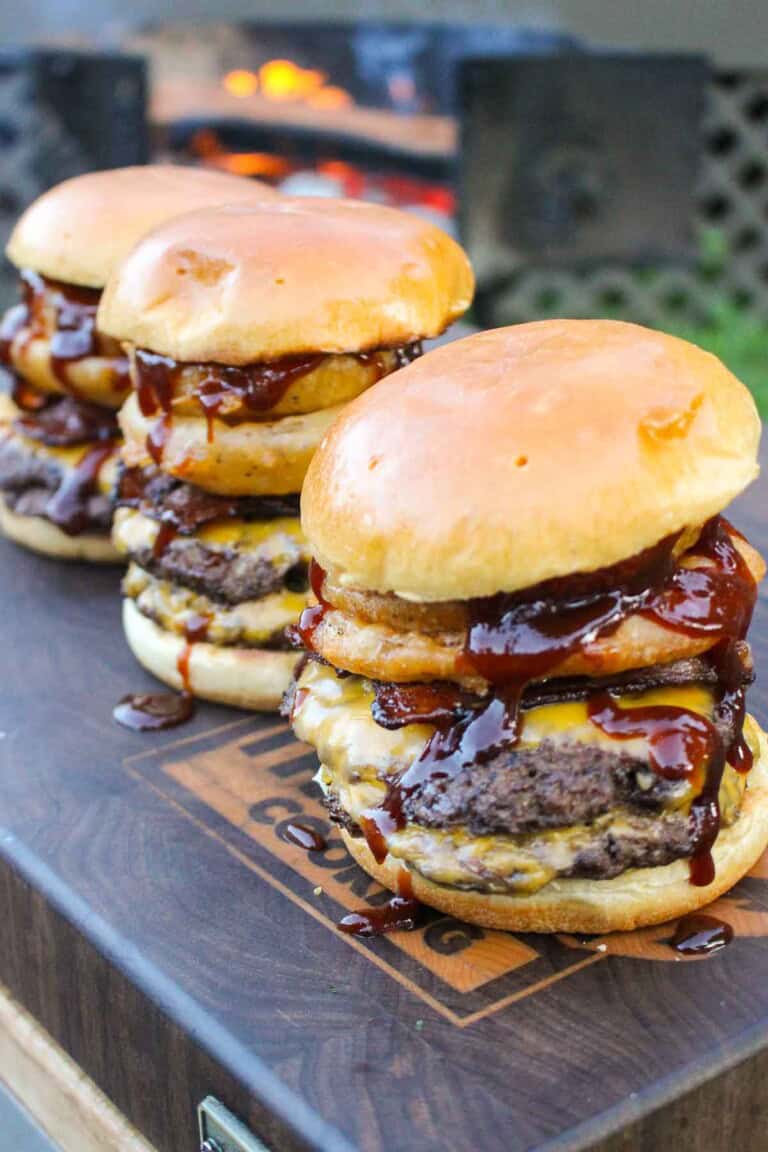
Nothing says summer like sitting outside during golden hour, the smell of charcoal in the air, a juicy burger in…
The post BBQ Bacon Burger appeared first on Over The Fire Cooking.
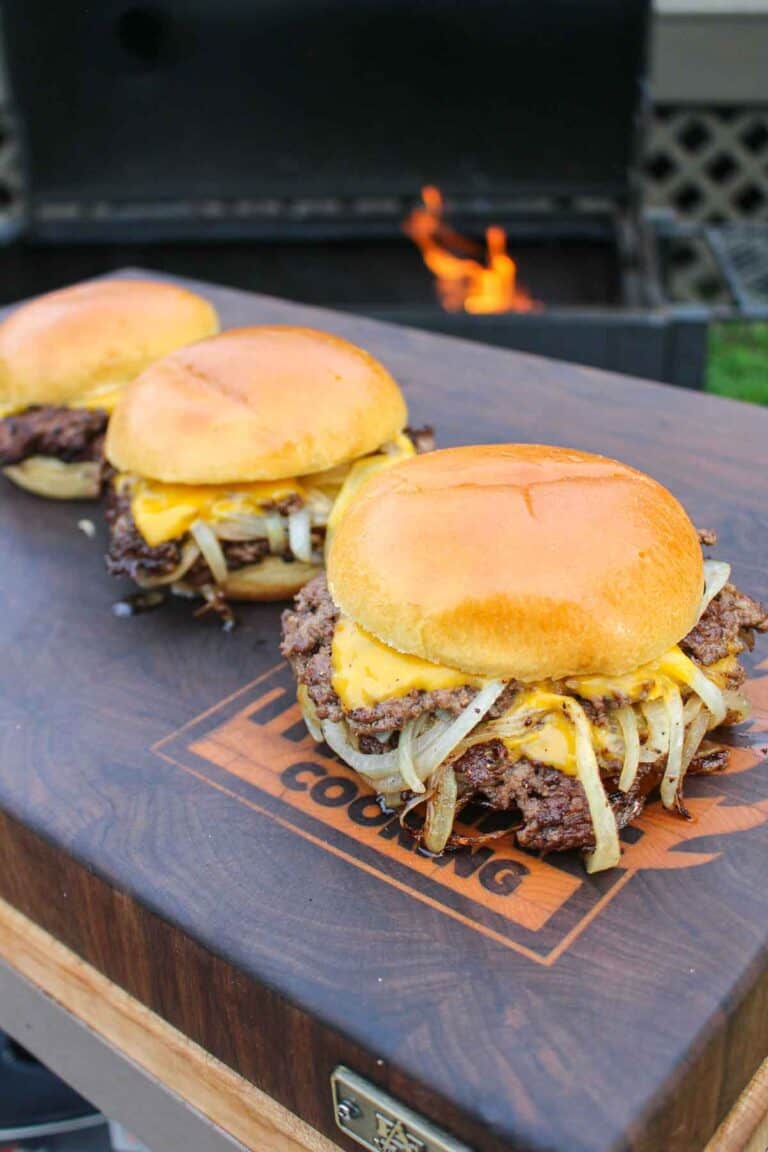
The Oklahoma Onion Burger is a classic all-American recipe. During the hard times of the Great Depression, when jobs were…
The post Oklahoma Onion Burger appeared first on Over The Fire Cooking.