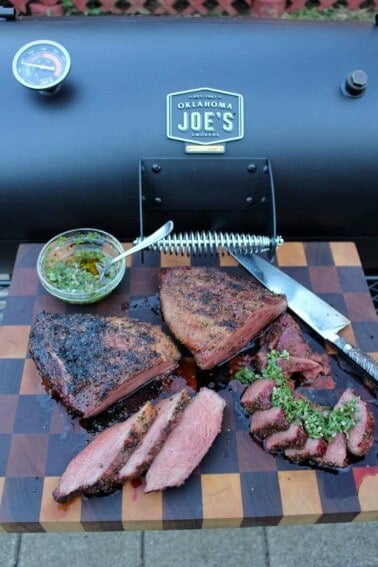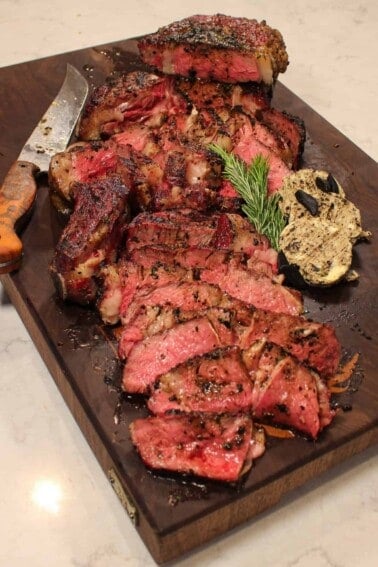
Today at Over the Fire Cooking, I’m giving a great recipe, skewered picanha, a fun twist—literally. I’ll show you how to cook picanha steaks on my new FYR Grill, which I made sure would have a rotating skewer system. If you’ve never heard of this cut of beef before, I wrote an entire What is Picanha? article explaining why it’s so great!
My new FYR grill provides the perfect setup for making Skewered Picanha with Chimichurri Butter rotisserie-style. It’s one of the easiest ways to make picanha steaks taste phenomenal. Without a doubt, when it comes to how to cook picanha in the best way possible, it doesn’t get easier. And this cut of meat with its signature fat cap paired with chimichurri butter makes this recipe so freakin’ delicious!
Now, for more about my FYR Grill and its many virtues, hop over to FYR.com where you can pre-order your very own rig. It’s so versatile and mobile that you’ll wonder how you ever grilled without it.
For this kind of recipe, the 90-degree rotation in each direction ensures a 360-degree global heating source. Forget spending a fortune at the Brazilian steakhouse to enjoy tender, juicy rotisserie-style steak with phenomenal flavor. Undoubtedly, with this new grill, you can bring that cowboy cooking method (and more!) to your own backyard.
Table of Contents
- Why You’ll Love Making Picanha
- How do I achieve the perfect picanha steak?
- Ingredients for Skewered Picanha
- How to Make Skewered Picanha
- Pro Tip
- What to Serve with Skewered Picanha
- How to Handle Leftover Picanha & reheating
- More Picanha
- FAQs for Making Skewered Picanha Steak
- Flavor X Fire & FOOD X Fire
- How to Cook Picanha Steak Recipe
Why You’ll Love Making Picanha
Without a doubt, skewered picanha is a favorite among steak lovers, and there are plenty of reasons why. First off, the beefy flavor of this cut, also known as rump cap or top sirloin cap, is unparalleled. It’s one of the most flavorful cuts of beef you’ll ever taste. When you cook picanha right, it stays incredibly juicy and tender, making each bite a melt-in-your-mouth experience.
One of the best things about picanha is how simple the seasoning can be. In fact, you don’t need a lot to make this cut shine—just some salt enhances the meat’s natural flavors. Additionally, it’s adaptable to various cooking techniques, ensuring you can enjoy it any way you like.
How do I achieve the perfect picanha steak?
The key is to let the meat come to room temperature, use simple seasoning, cook over high heat to form a crust and use a meat thermometer to ensure that you don’t undercook or overcook the meat.
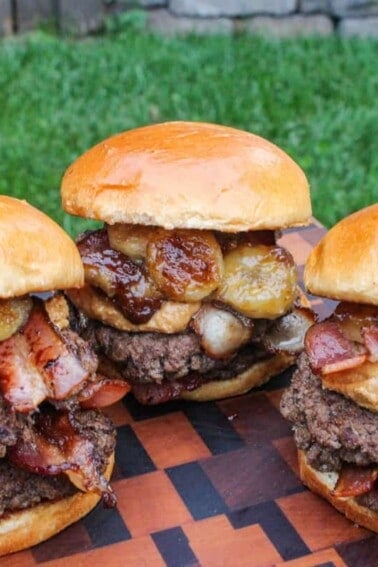
For more recipes that demonstrate how to cook picanha to perfection, check out Picanha Steak Sandwich, Steakhouse Picanha, Rotisserie Picanha with Parmesan Crust and Grilled Garlic Butter Picanha.
Ingredients for Skewered Picanha
- The Steak – Grab two whole picanha (also known as rump cap, top sirloin cap or culotte steak) from your local grocery store or meat market. For the seasoning, we’re keeping it simple with some coarse sea salt (or kosher salt).
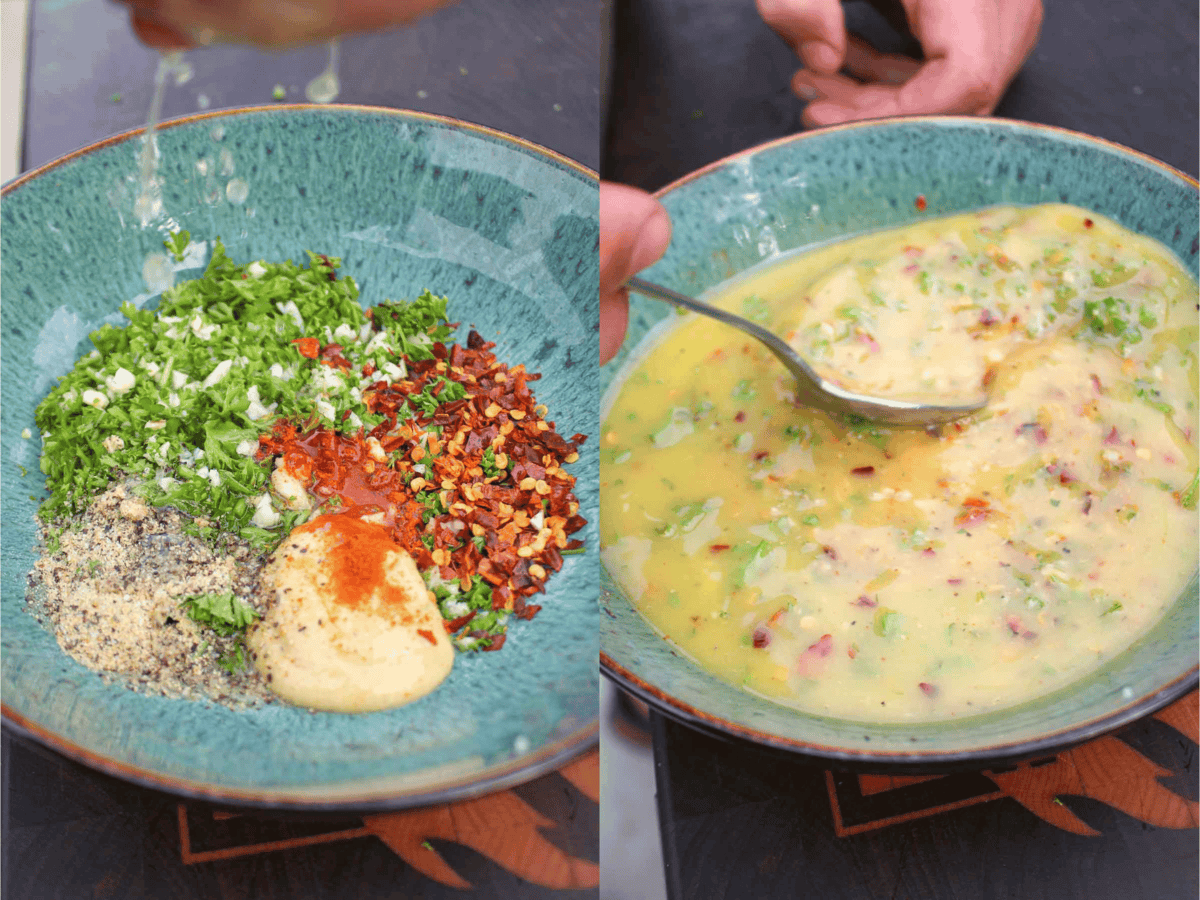
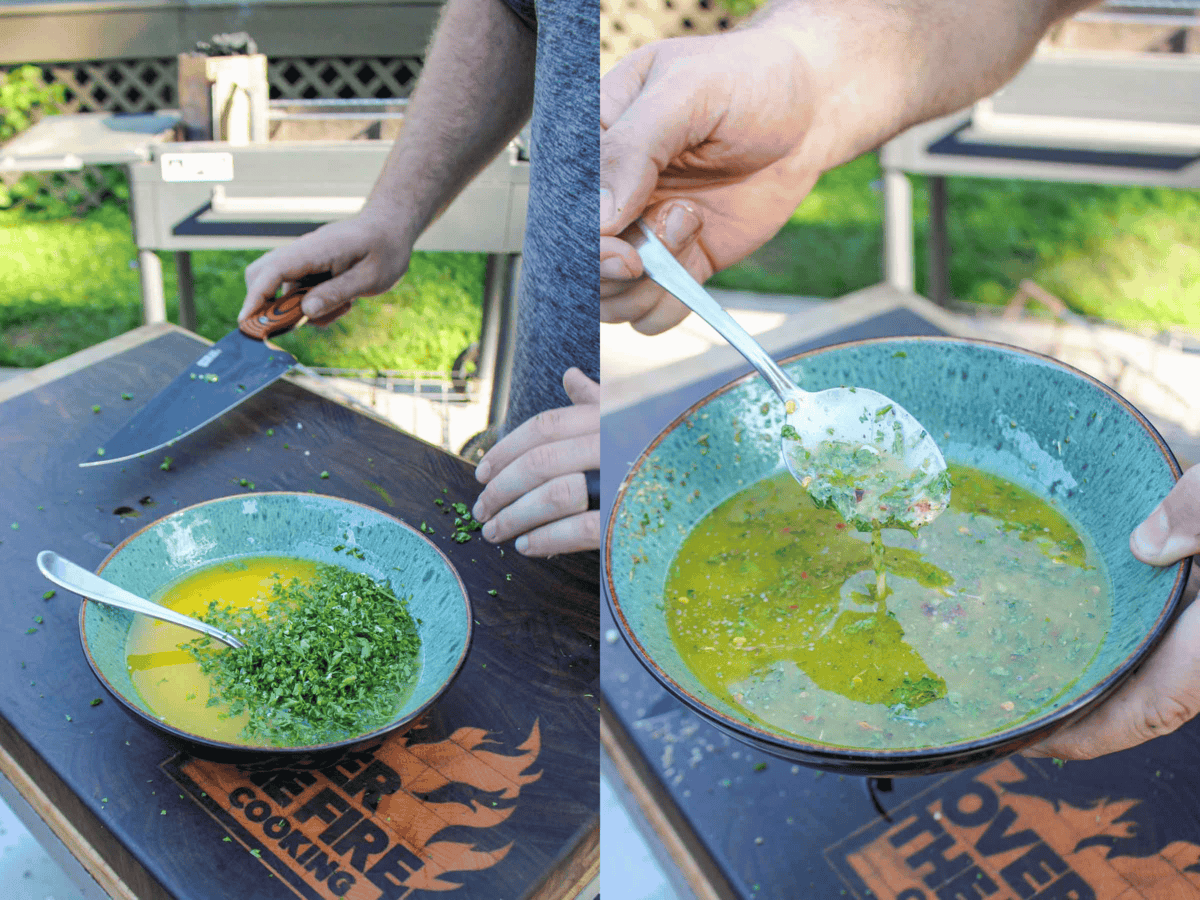
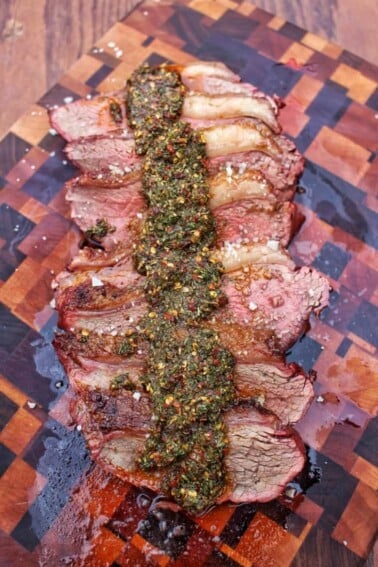
- Chimichurri Sauce – If you’ve never made this Brazilian cowboy sauce before, get ready for an exciting medley of flavors. Usually, you make it with olive oil, but grass-fed butter gives it the perfect rich and savory flavor. You’ll also need chopped parsley, garlic cloves, red wine vinegar, oregano, red pepper flakes, coarse kosher salt and black pepper.
Chimichurri is one of my favorite additions to steak. I’ve made smoked chimichurri, bone marrow chimichurri and even mint chimichurri for a lamb dish. Chimichurri also makes a great addition to steak sandwiches, steak and shrimp, wings and can be used as a marinade like I did with this tri-tip!
How to Make Skewered Picanha
Picanha Steak Prep
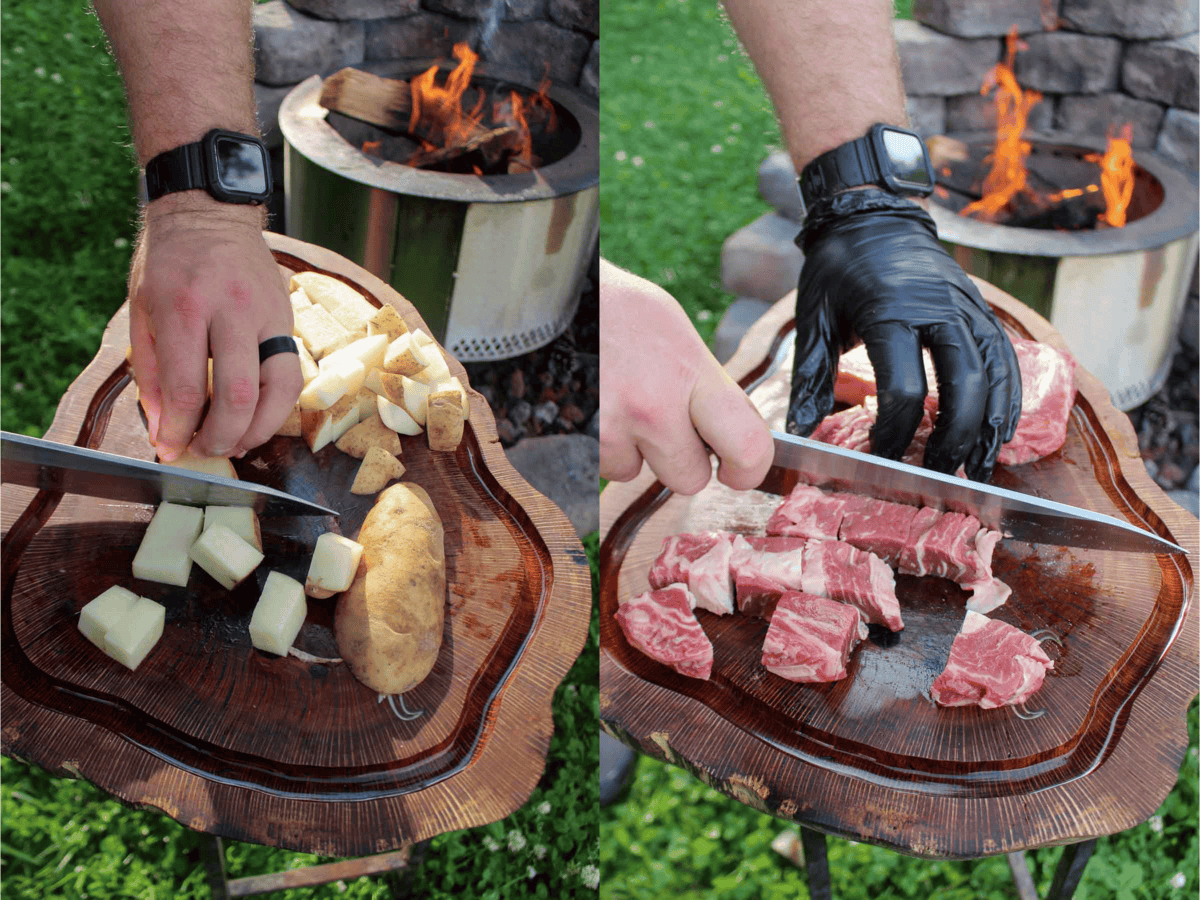
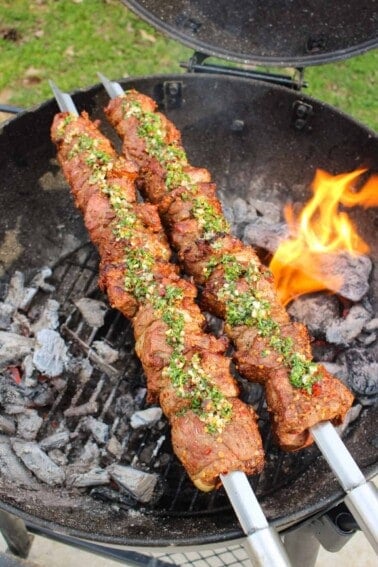
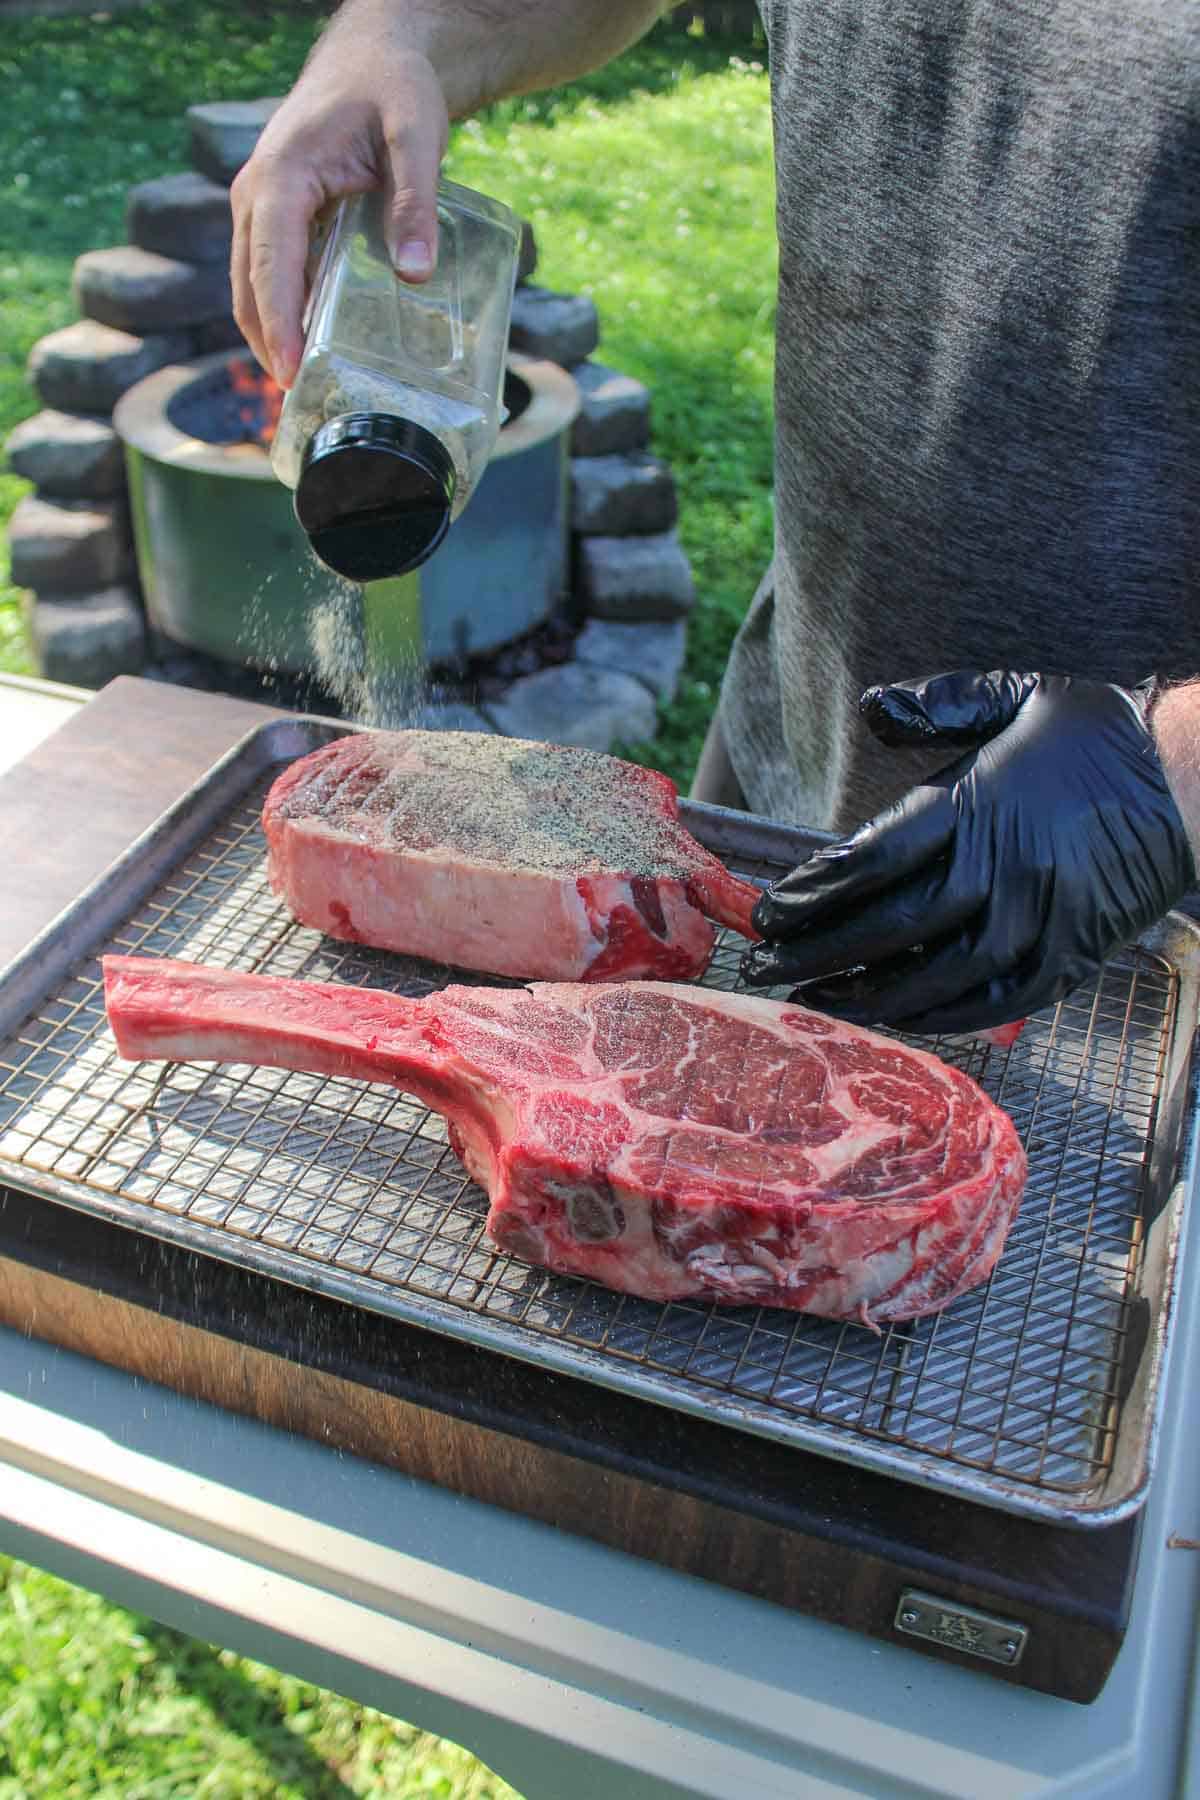
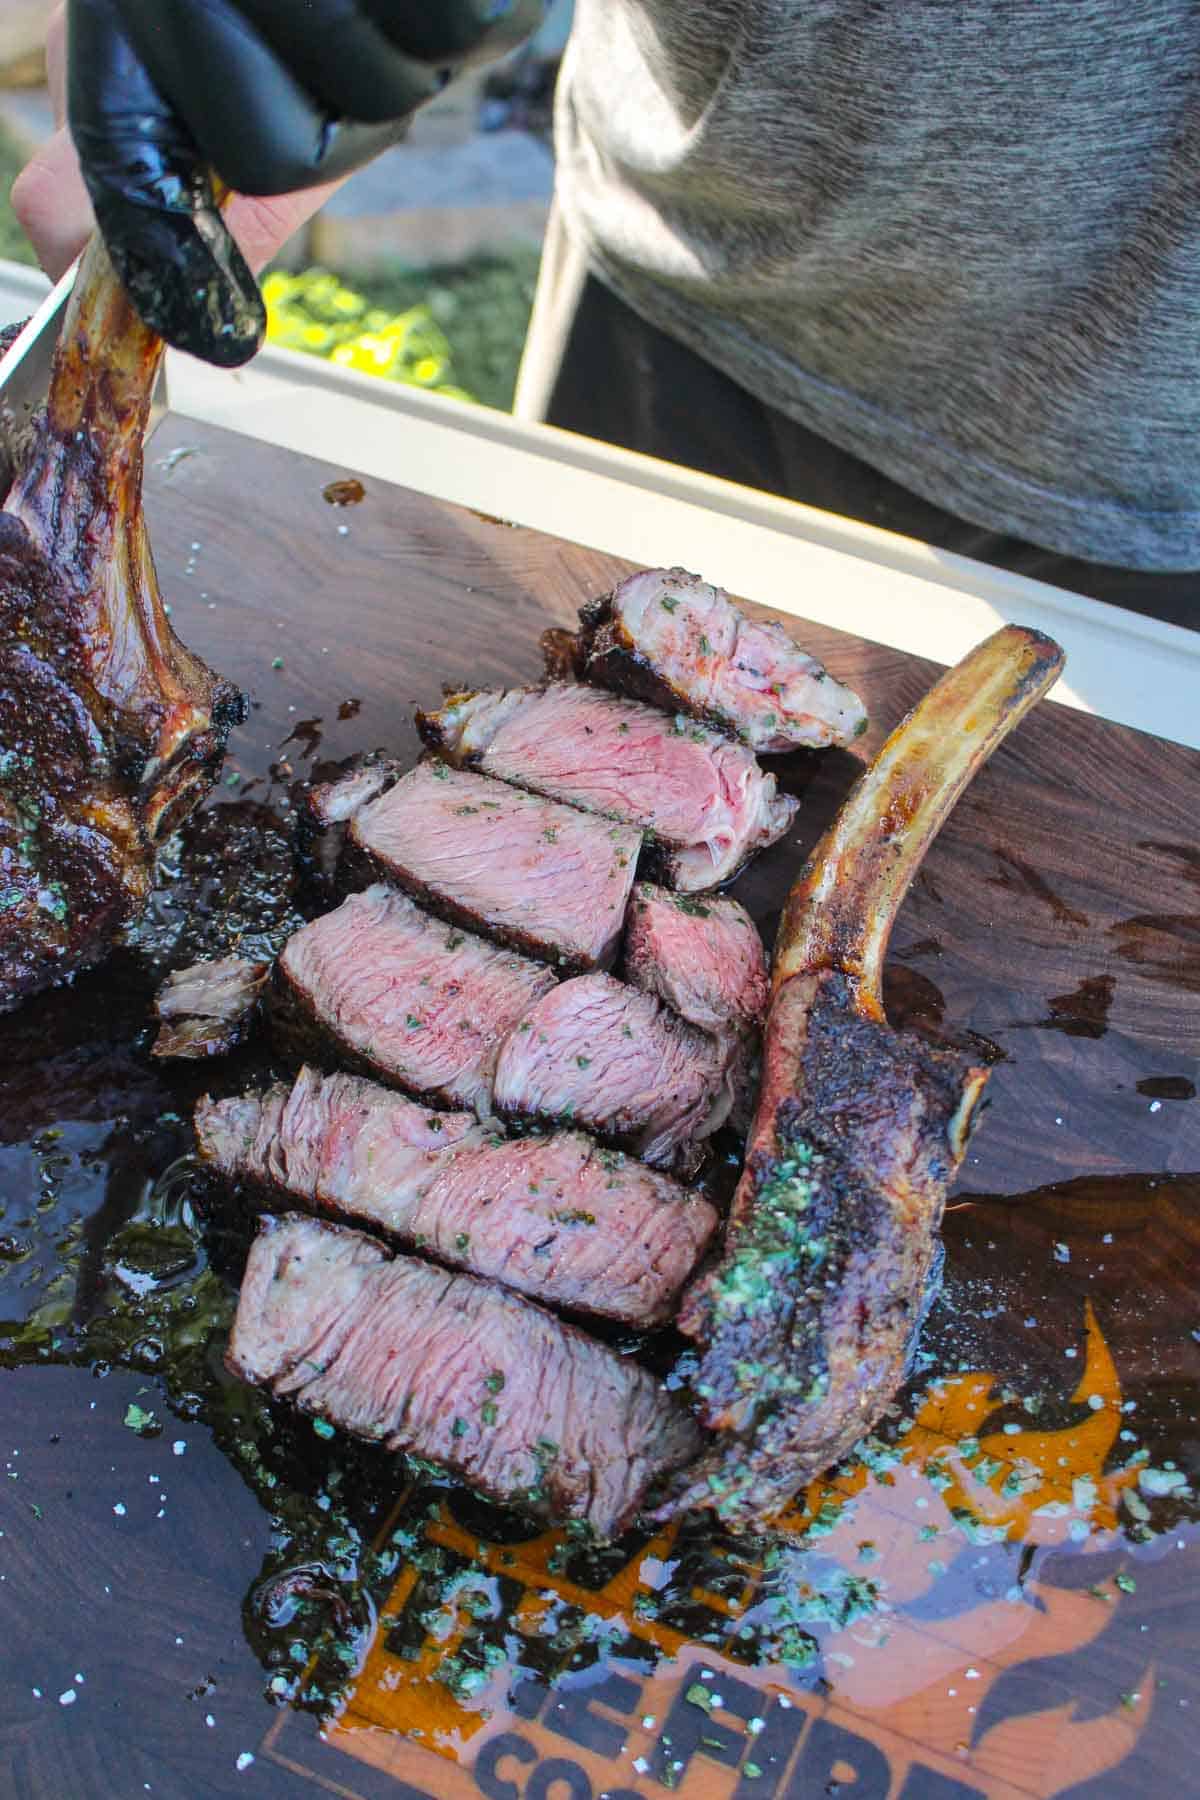
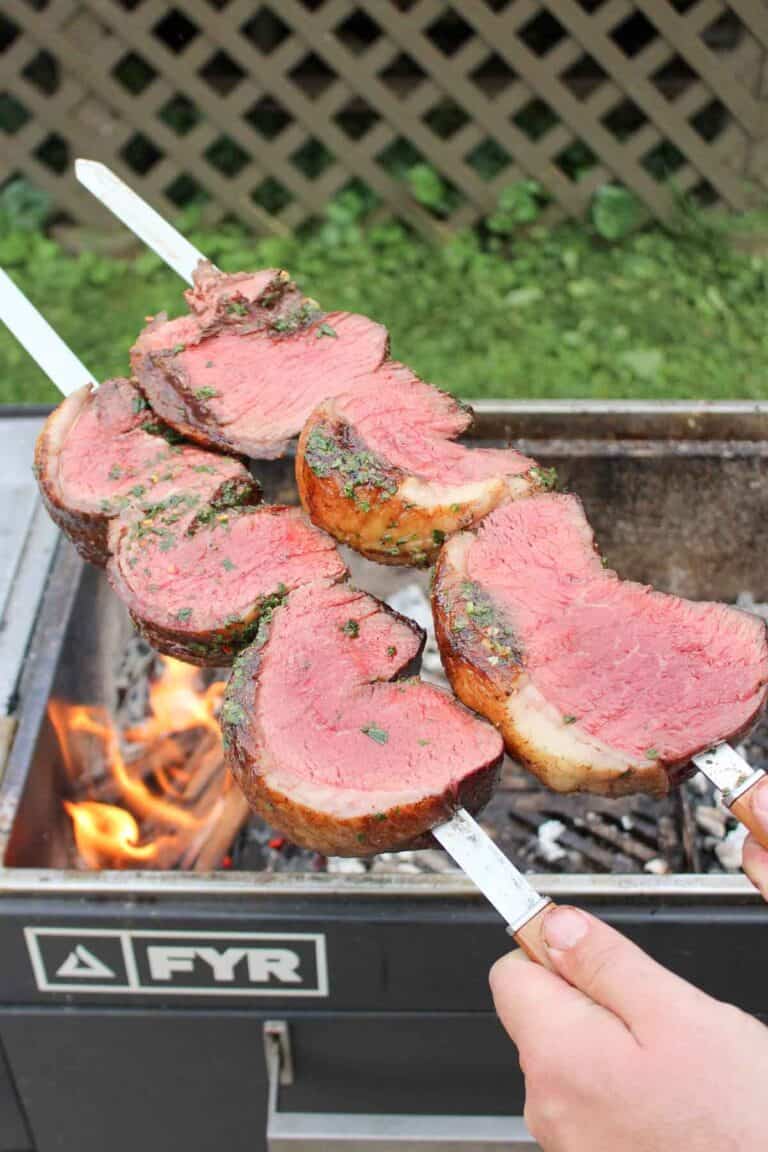
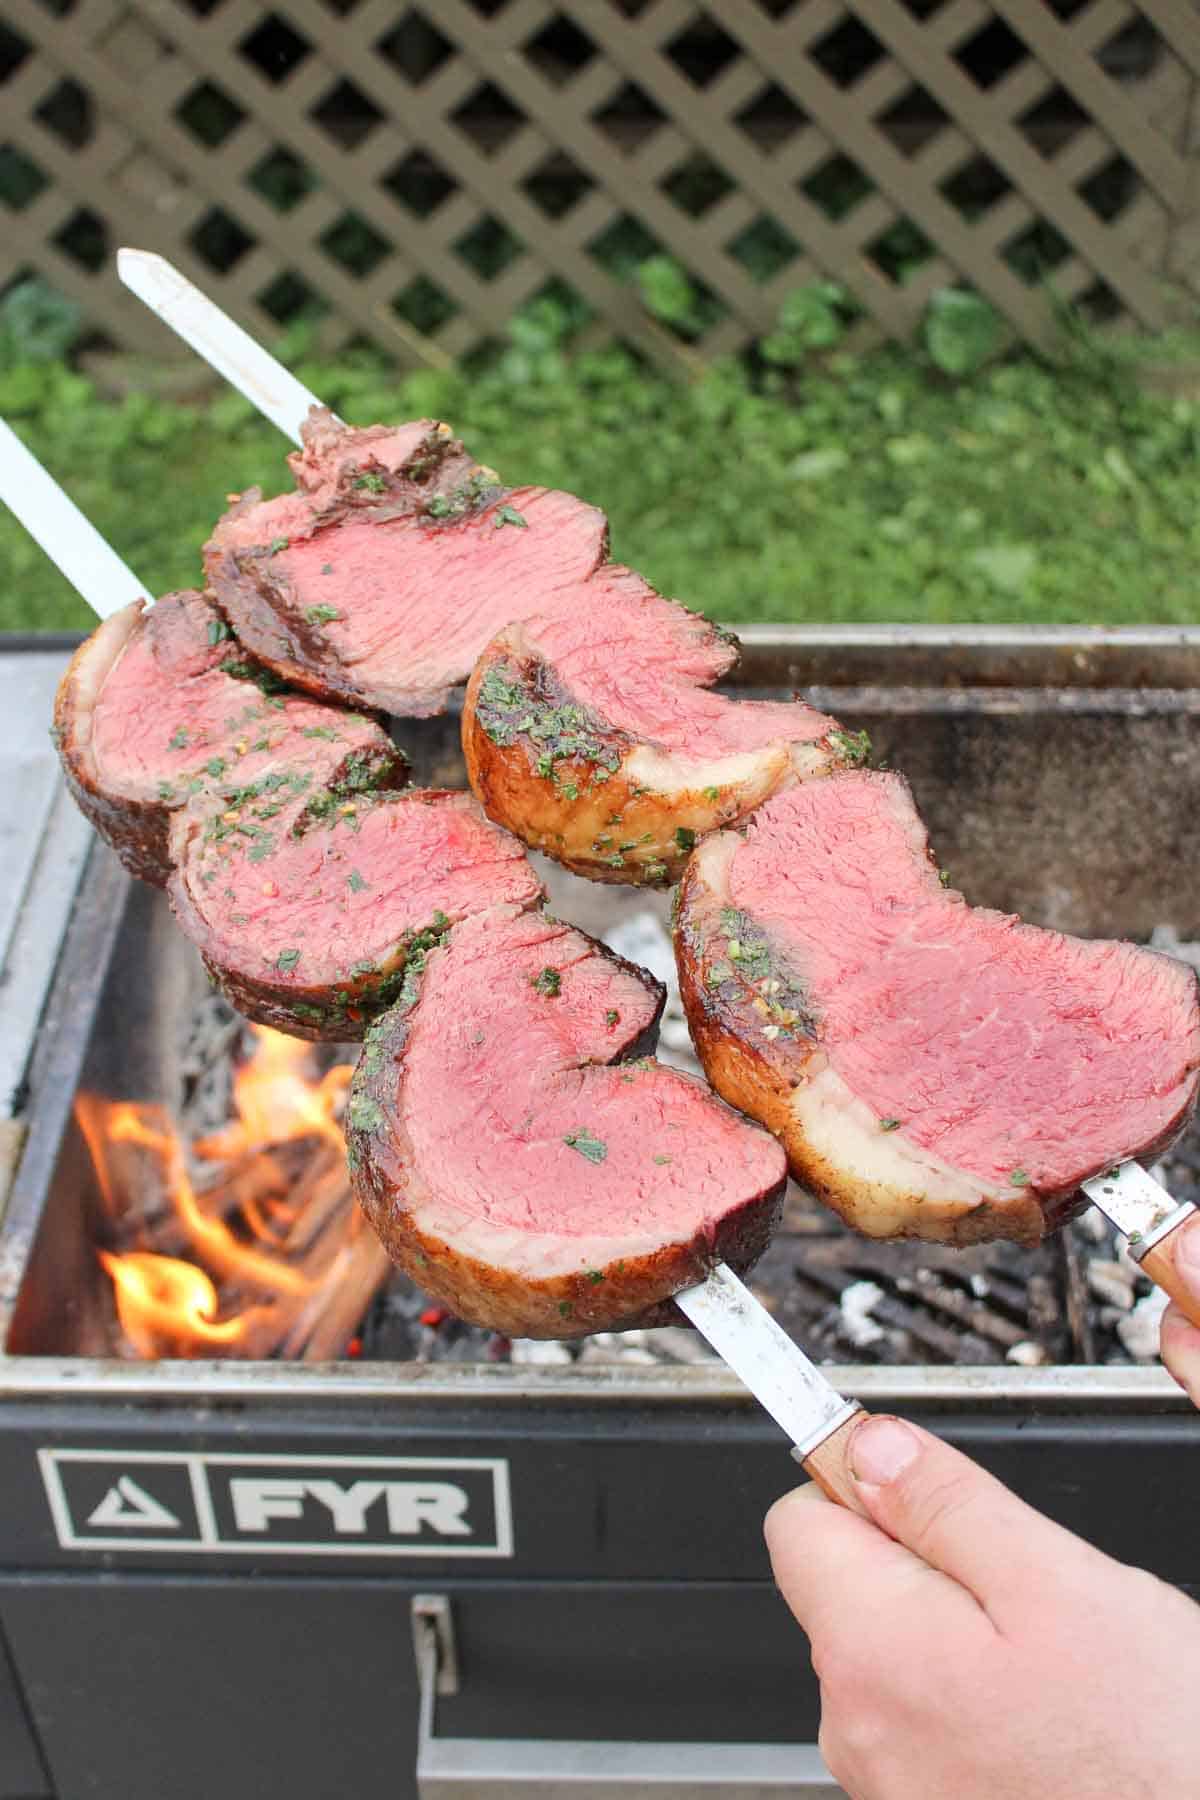
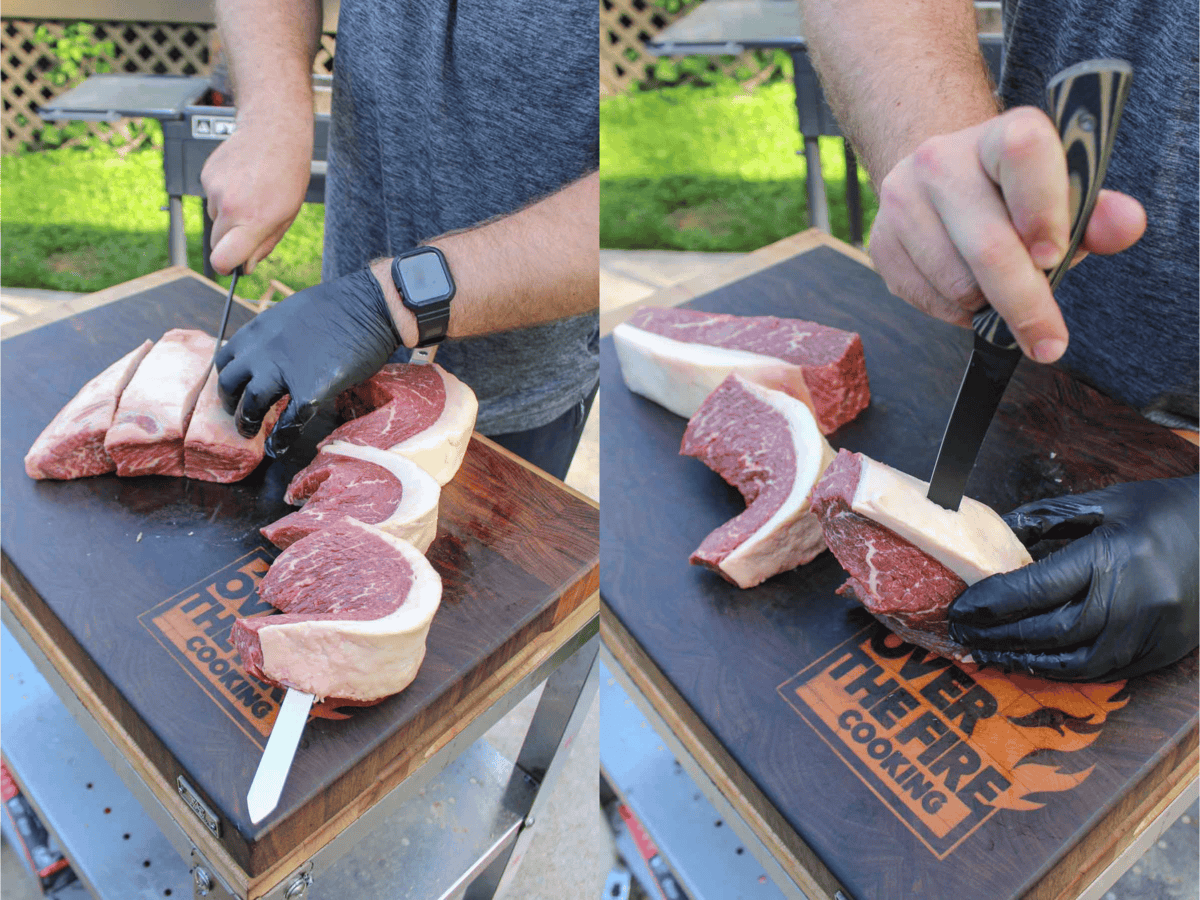
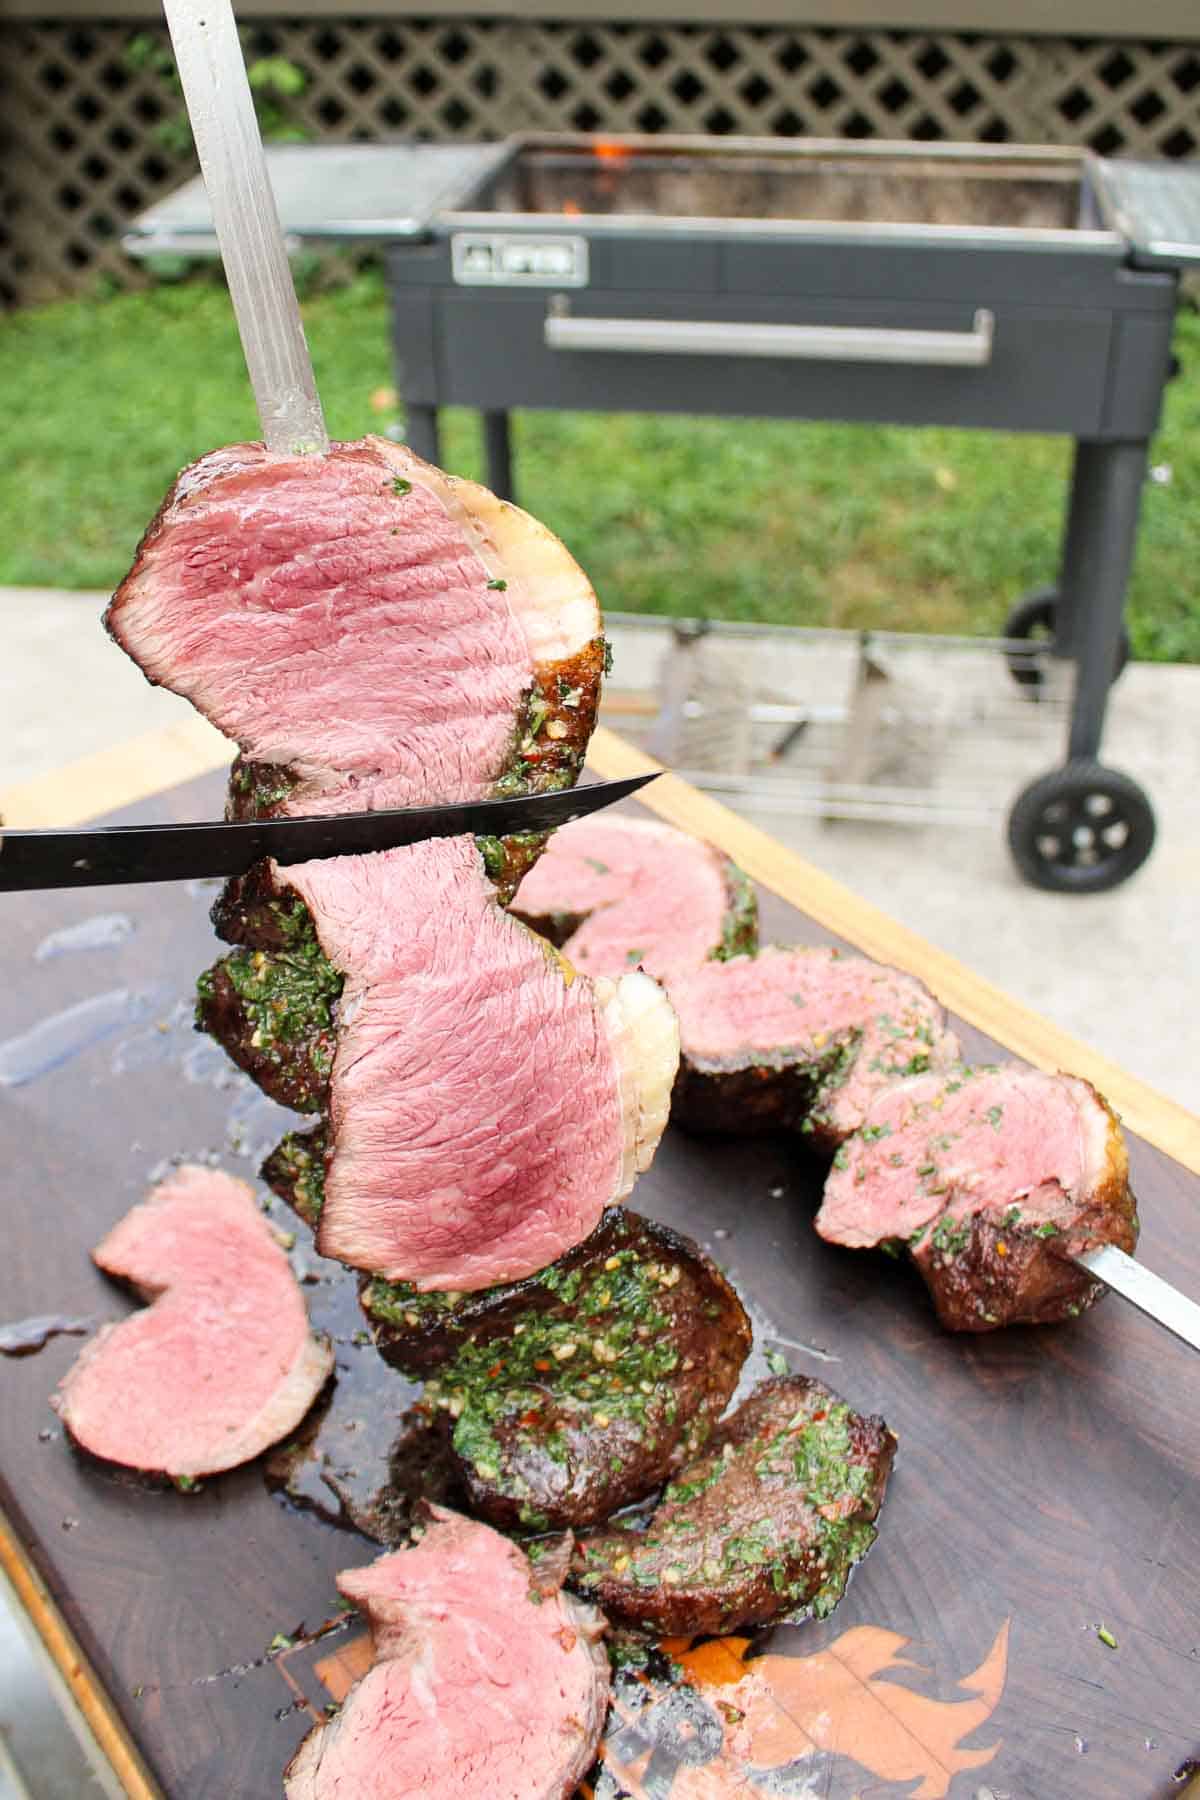
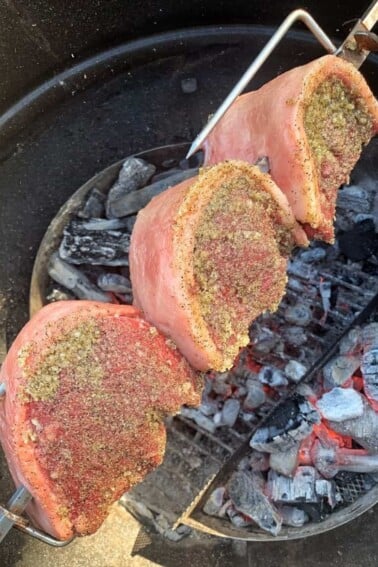
Start by letting your picanha steaks come up to room temperature for about 15-20 minutes. Pat the meat dry with a paper towel. Next, grab your sharp knife and cutting board. Slice the beef into steaks, cutting from edge to edge instead of top to tail. This way, you’ll get those perfect pieces for skewering.
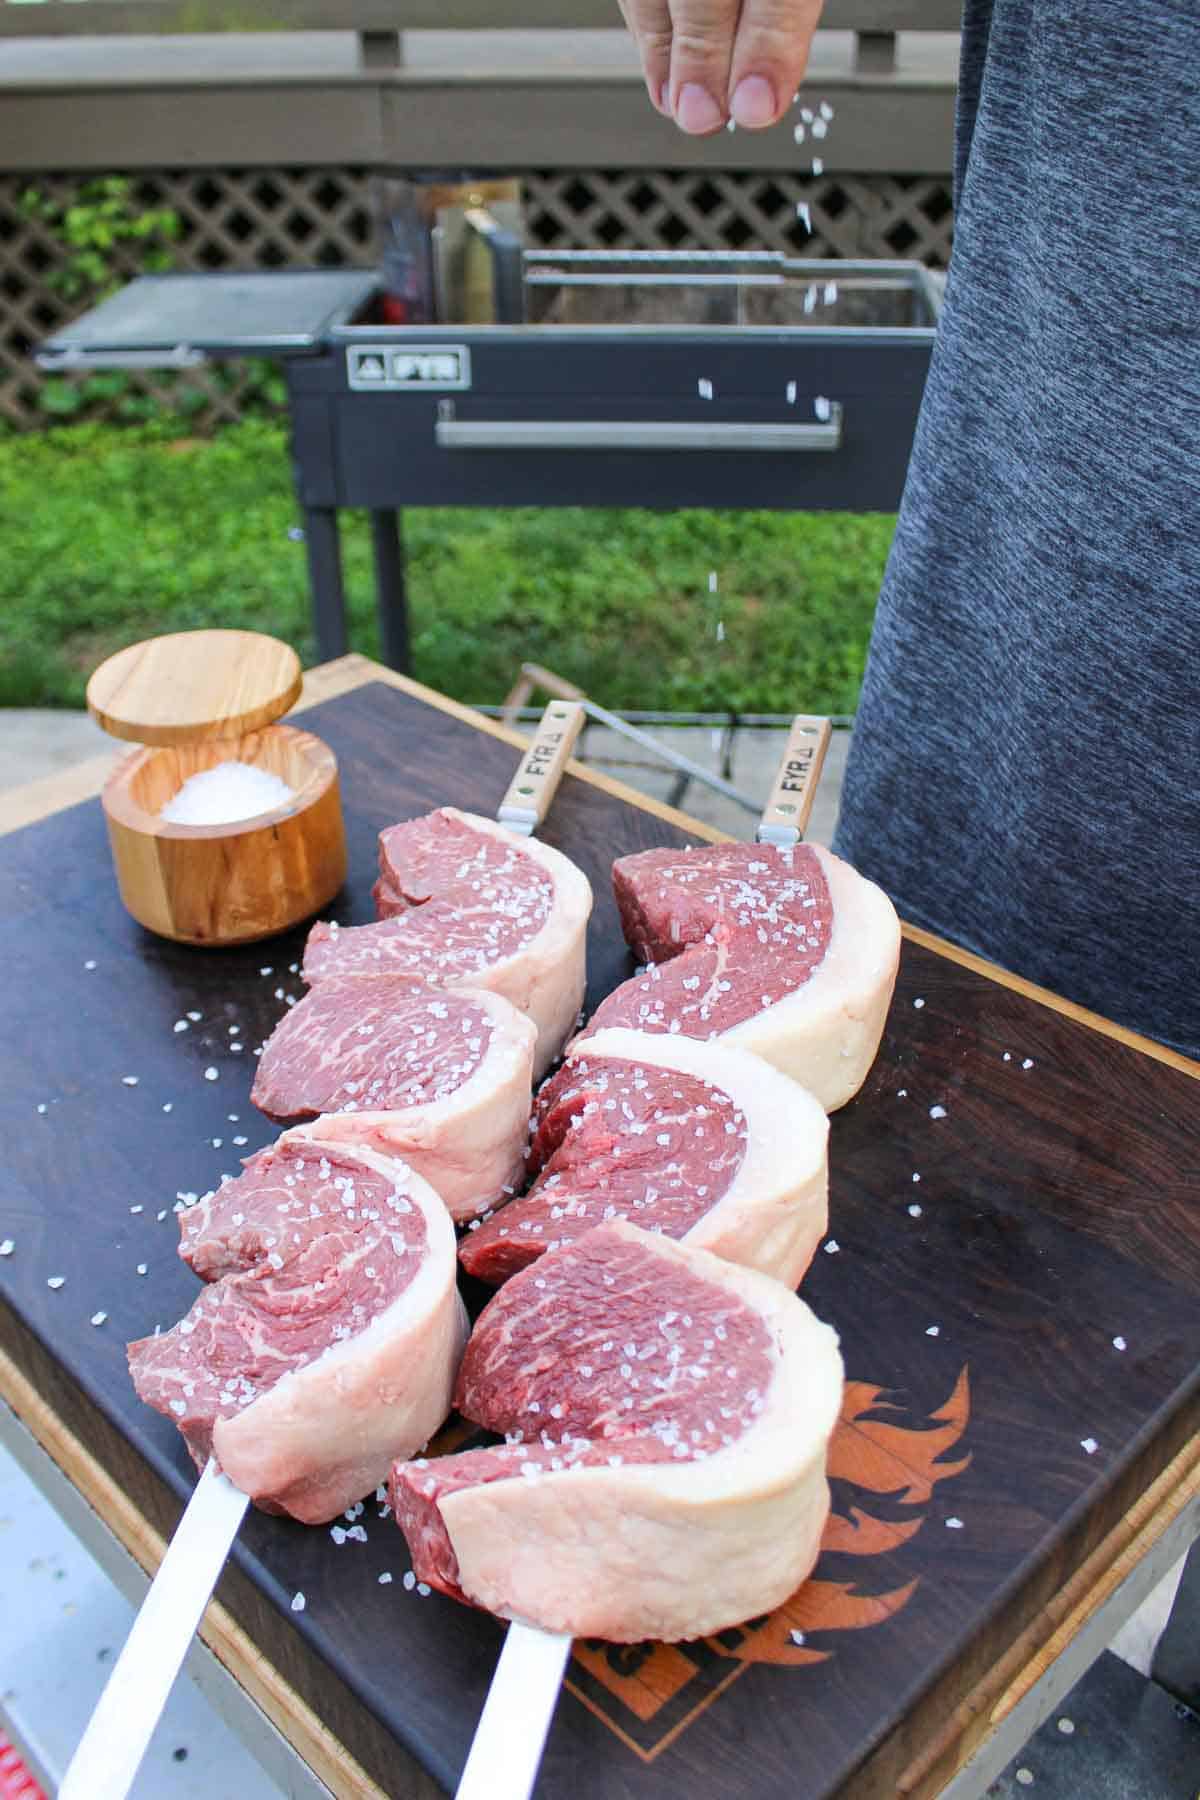
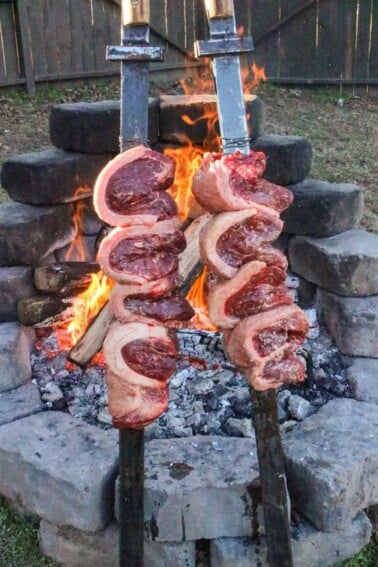
Once you’ve got your steaks, carefully form them into a “C” shape and skewer them onto your metal skewers, making sure to pass through the thick fat cap side. Now, it’s time to lather them in oil and season generously with coarse sea salt. Don’t be shy with the salt—it might seem like a lot, but as the fat renders, you’ll lose some in the cooking process.
Chimichurri Butter & Grilling
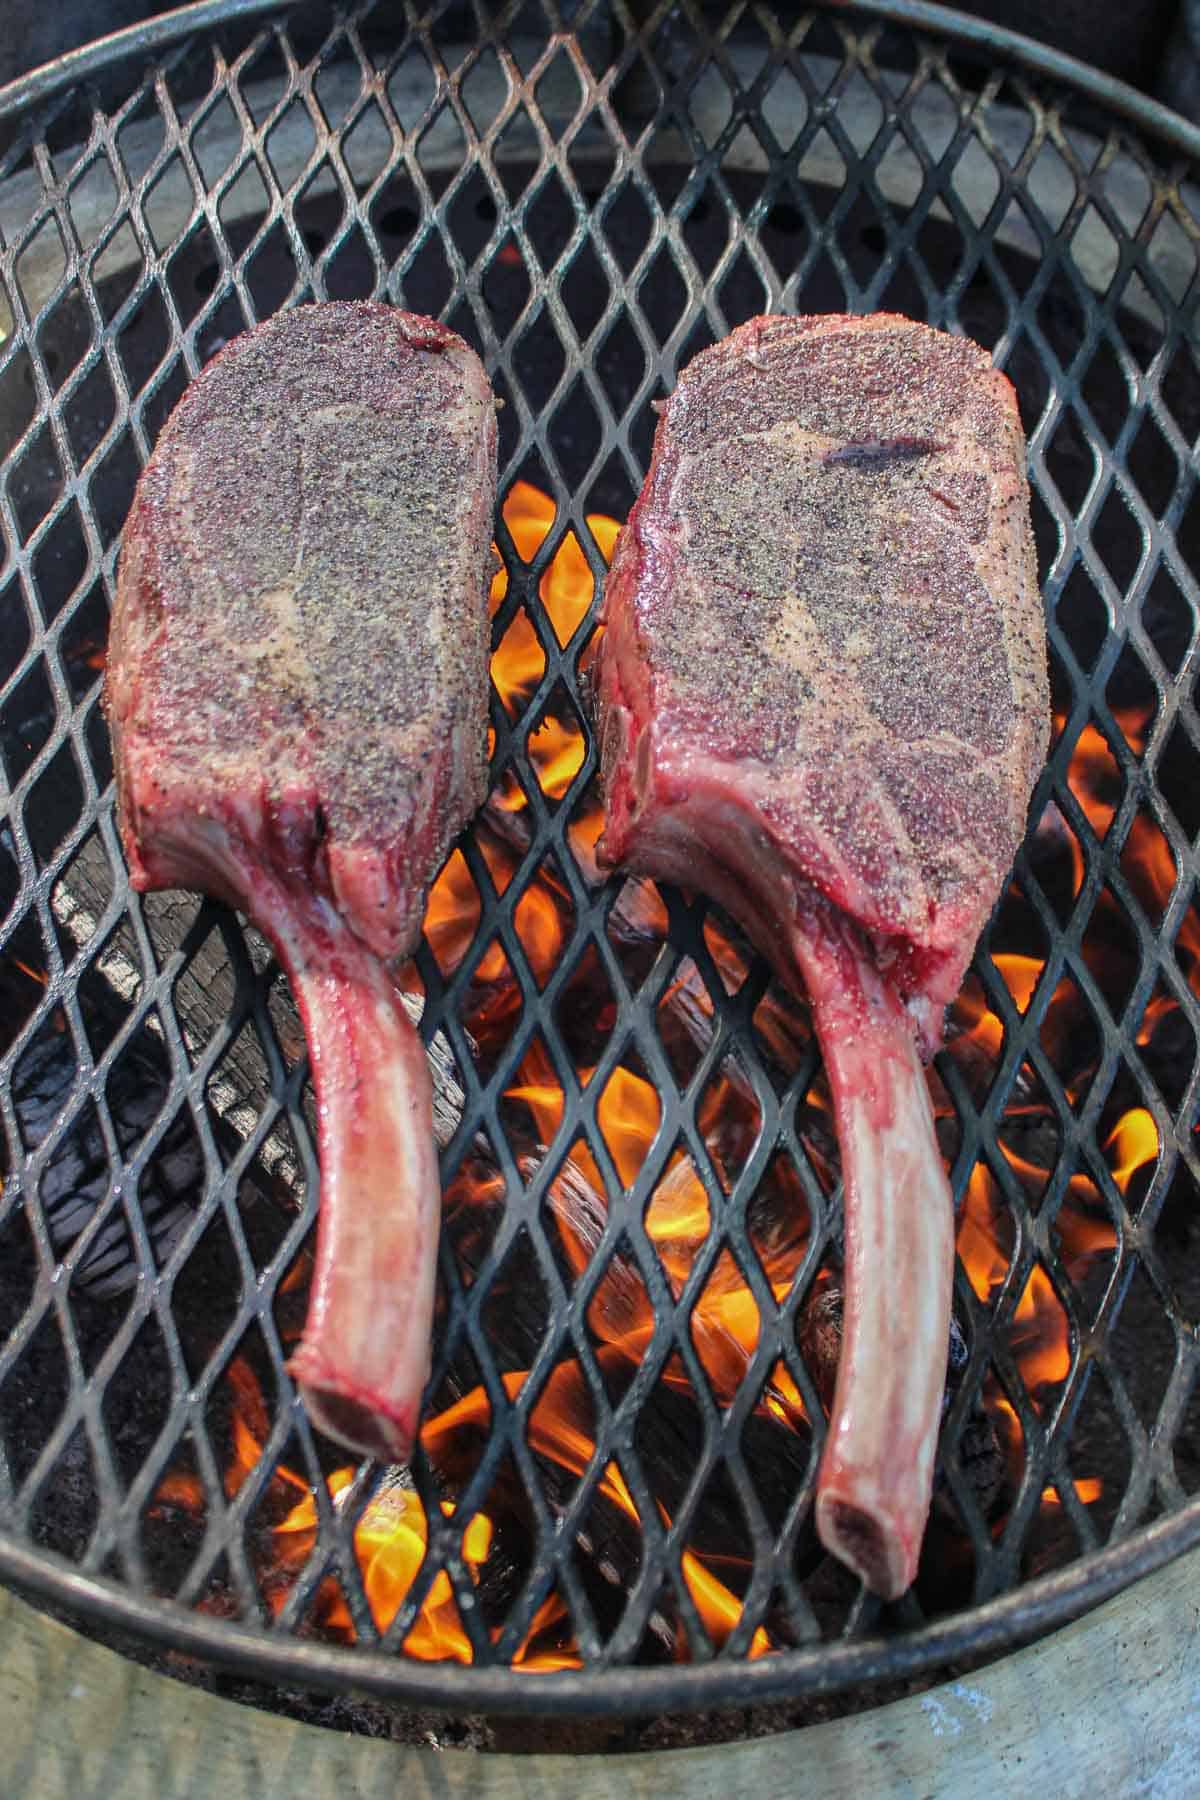
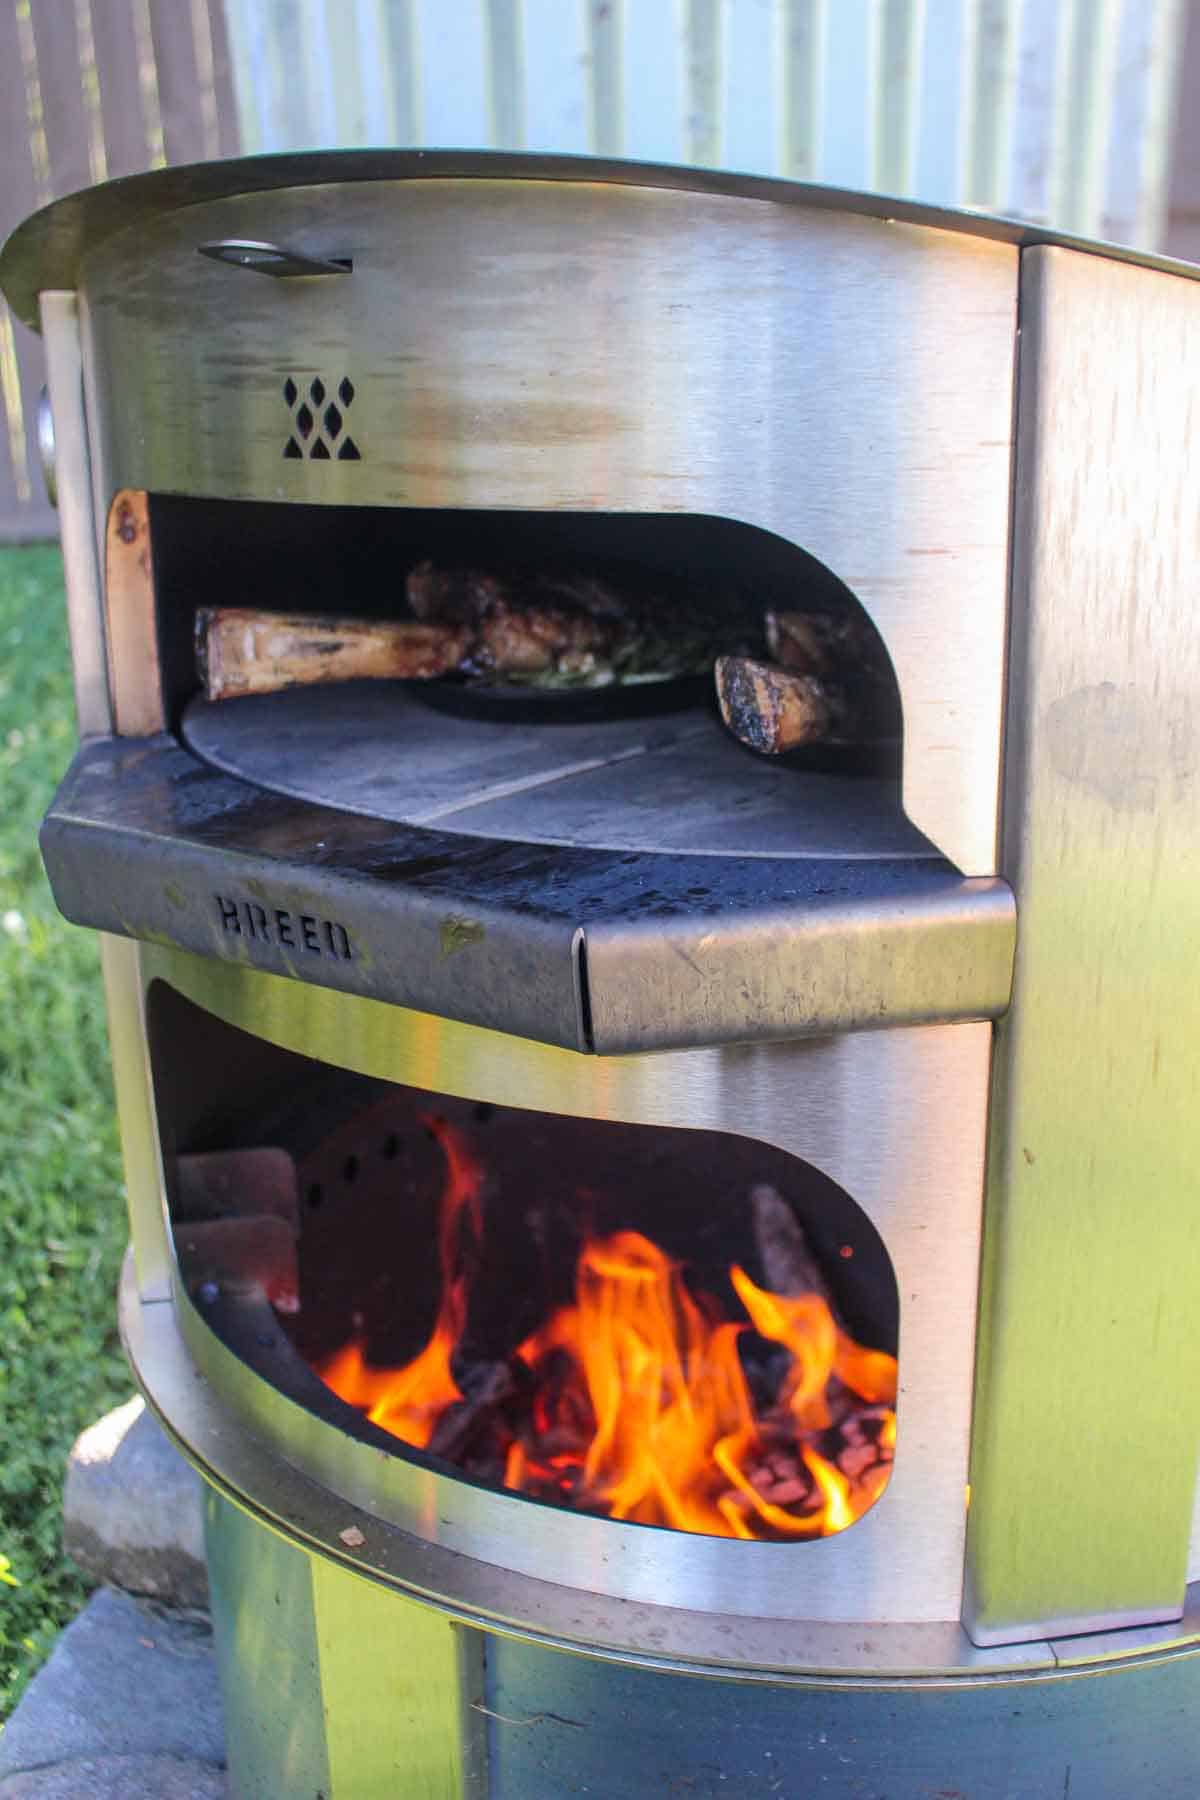
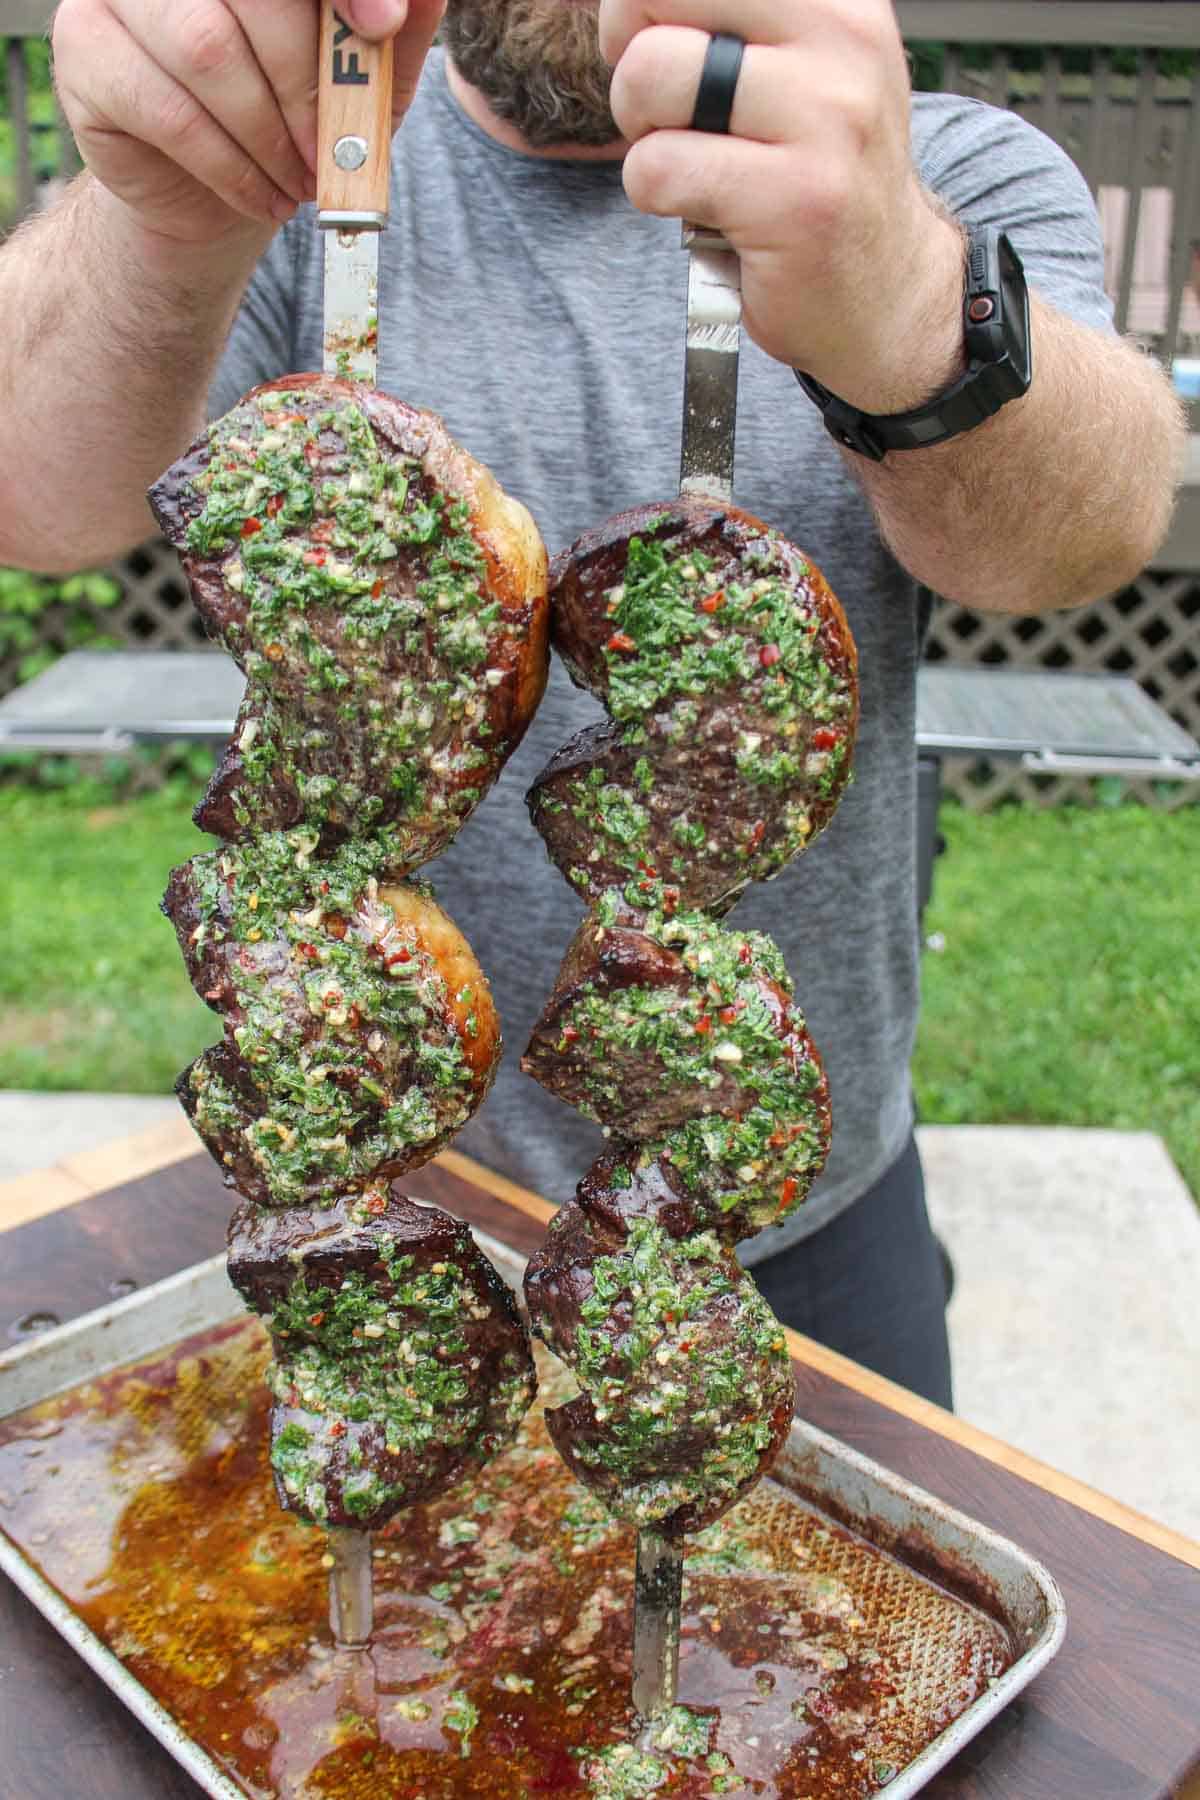
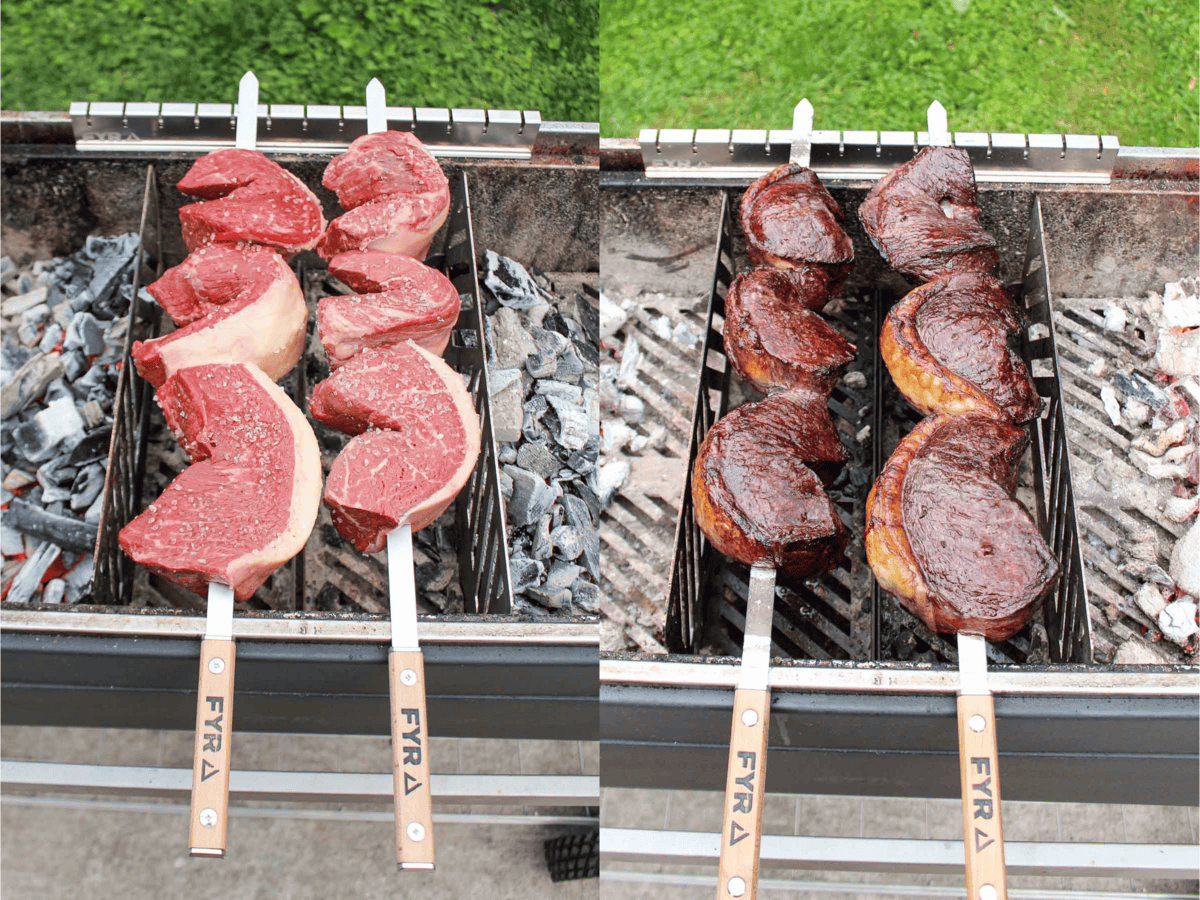
Next, prepare your Chimichurri Butter by mixing all the ingredients in a bowl and setting it aside. Get your charcoal grill up to medium-high heat (about 350 degrees F) for indirect cooking using the three-zone method. Place your skewers between the two coal beds on the hot grill.
After about 15 minutes, check the internal temperature with a meat thermometer. We’re looking for 120 degrees F for medium-rare. Make sure to rotate the skewers every 2-3 minutes to prevent flare-ups, ensure even cooking and ultimately achieve a golden crust. For the best flavor, make sure to cook off some of the fat layer too!
Pro Tip
Most importantly, to handle any flare-ups, douse the fire with a spritz of water from a spray bottle or place a foil bin with a little water at the bottom to catch the oil drippings.
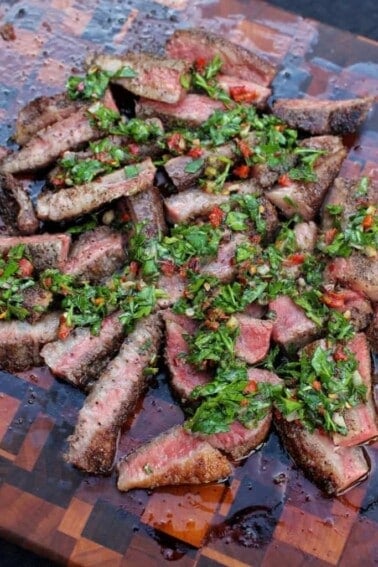
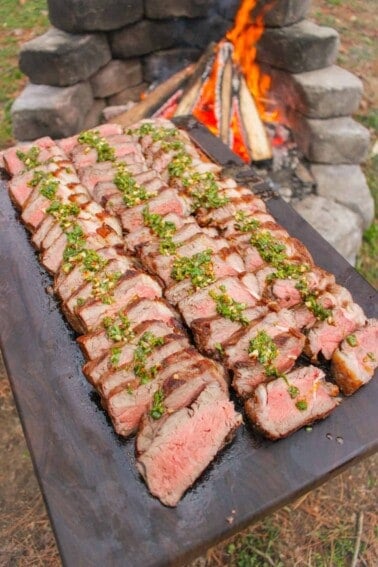
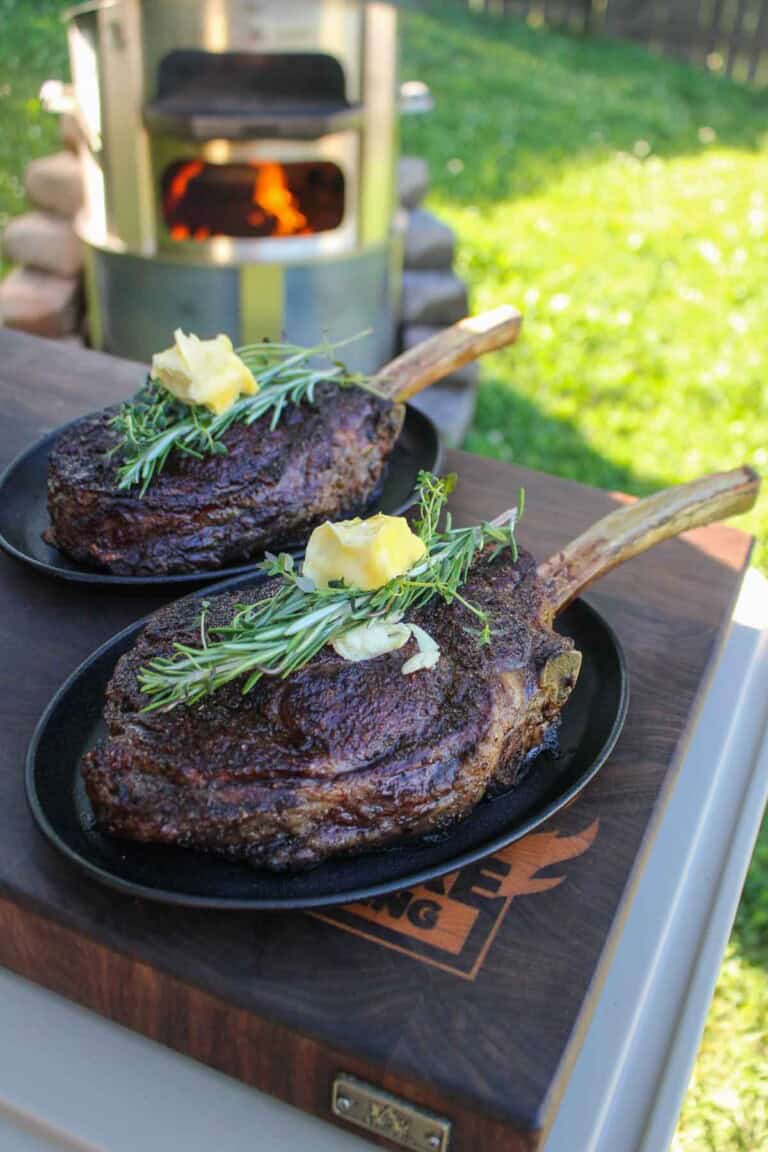
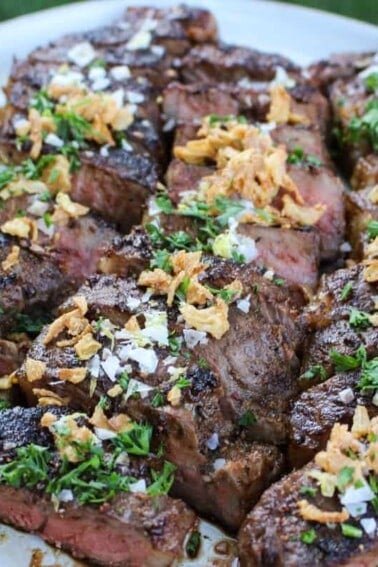
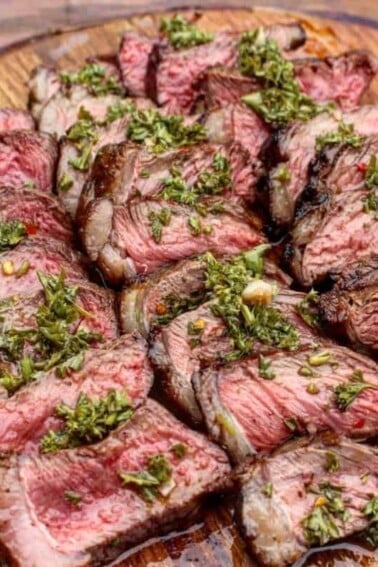
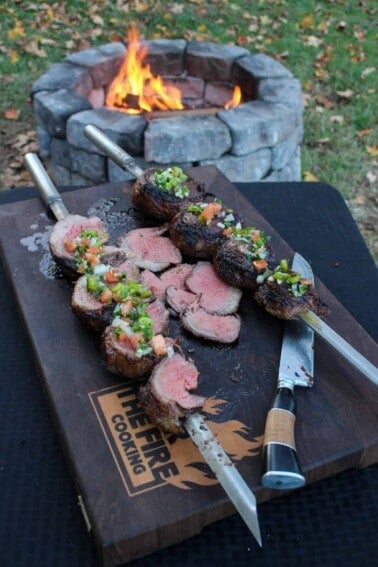
Once you finish cooking the steaks, pull them off the grill, top them with Chimichurri Butter, and let them rest for 8 minutes. Last but not least, slice up those beautiful steaks against the grain and enjoy. Cheers!
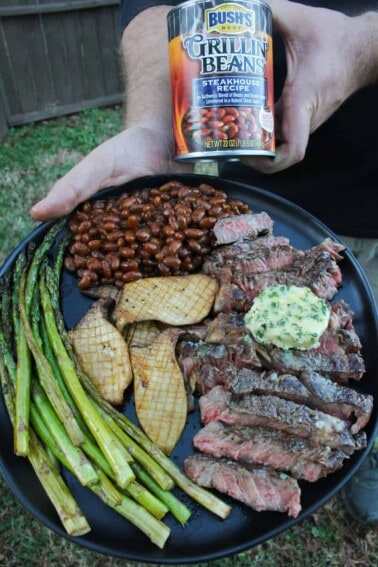
What to Serve with Skewered Picanha
Pair your delicious steak with some fantastic sides to complete the meal. Grilled vegetables like bell peppers, zucchini, and onions are a great choice, adding a nice smoky flavor that complements the beef. Rice and beans are a staple in Brazilian cuisine and also would provide a hearty, satisfying base.
Conversely, for something light and refreshing, a fresh salad balances out the richness of the meat perfectly. These sides obviously enhance the flavors and bring even more interesting textures to your plate.

How to Handle Leftover Picanha & reheating
To store leftover picanha steak, tightly wrap the meat in aluminum foil or plastic wrap. Next, place it in an airtight container. Then, refrigerate it for up to 3 days.
When you’re ready to reheat, wrap the meat in aluminum foil and grill it. Additionally, pour in some beer or broth to maintain its juiciness. Alternatively, you can enjoy the meat cold in some epic Chimichurri sandwiches.
More Picanha
FAQs for Making Skewered Picanha Steak
Picanha, also known as rump cap or top sirloin cap, known for its thick fat cap, is a favorite in Brazilian cooking. When you know how to cook picanha, the resulting beefy flavor is unlike anything else you have ever tasted.
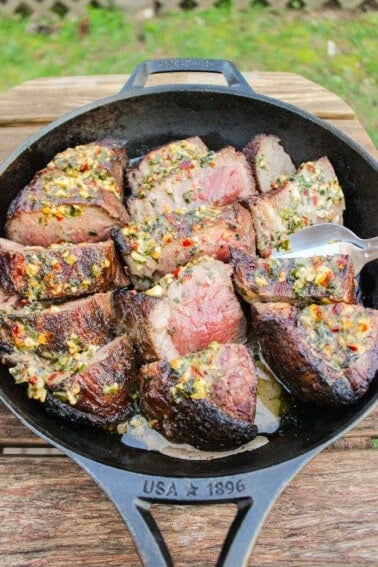
Cooking picanha in a cast iron skillet is a great method. Heat the skillet over a medium-high heat grill, sear each side for 3-4 minutes and finish in the oven if needed.
For this method of cooking picanha steak, you first vacuum-seal the meat in a plastic bag. Next, it is cooked in a water bath at a steady, low temperature.

Get The Cookbooks!
Flavor X Fire & FOOD X Fire
All the major tastes—salty, sour, sweet, bitter, and umami—are explored in depth, along with an investigation of other components you should consider when it comes to flavor, such as aroma, heat, and texture.

How to Cook Picanha Steak
Ingredients
Picanha:
- 2 Whole Picanha
- ½ cup Coarse Sea Salt
Chimichurri Butter:
- 1 cup Unsalted Butter melted
- ½ cup Parsley chopped
- 3-4 cloves Garlic minced
- 1 tbsp Red Wine Vinegar
- 1 tbsp Dried Oregano
- 1 tsp of Red Pepper Flakes
- Salt & Pepper to taste
Instructions
- Begin by slicing your picanha into steaks going from edge to edge instead of top to tail. Once sliced, carefully form them into a “C” shape and skewer them onto the skewers.
- Once they are on the skewers, lather in oil and generously season with the coarse sea salt. Add more salt than you might think, as the fat will render, and you will lose some salt in the cooking process.
- In a bowl, mix together the ingredients for the Chimichurri Butter then set to the side.
- Preheat your fire/charcoal for indirect cooking around 350 degrees F using the three-zone method.
- Add your skewers between the two coal beds and begin cooking.
- Cook for about 15 minutes until they are 120 degrees F internal for medium rare. Rotate them every 2-3 minutes to prevent flare up and so they cook evenly.
- Make sure to cook off some of the fat layer if you desire too! If you do get flare ups, dose the fire with water or add a foil bin with ¼ inch of water at the bottom to catch the oil drippings.
- Once the steaks are done, pull them off, top with the Chimichurri Butter and let them rest for 8 minutes.
- Slice the steaks up and enjoy!
Notes
How do I achieve the perfect picanha steak?
The key is to let the meat come to room temperature, use simple seasoning, cook over high heat to form a crust and use a meat thermometer to ensure that you don’t undercook or overcook the meat.Nutrition
The post How to Cook Picanha appeared first on Over The Fire Cooking.