Sweet Corn Risotto

This Sweet Corn Risotto is infused with the flavors of summer! It’s comforting, simple, and budget-friendly cooking at its finest.

The post Sweet Corn Risotto appeared first on Budget Bytes.

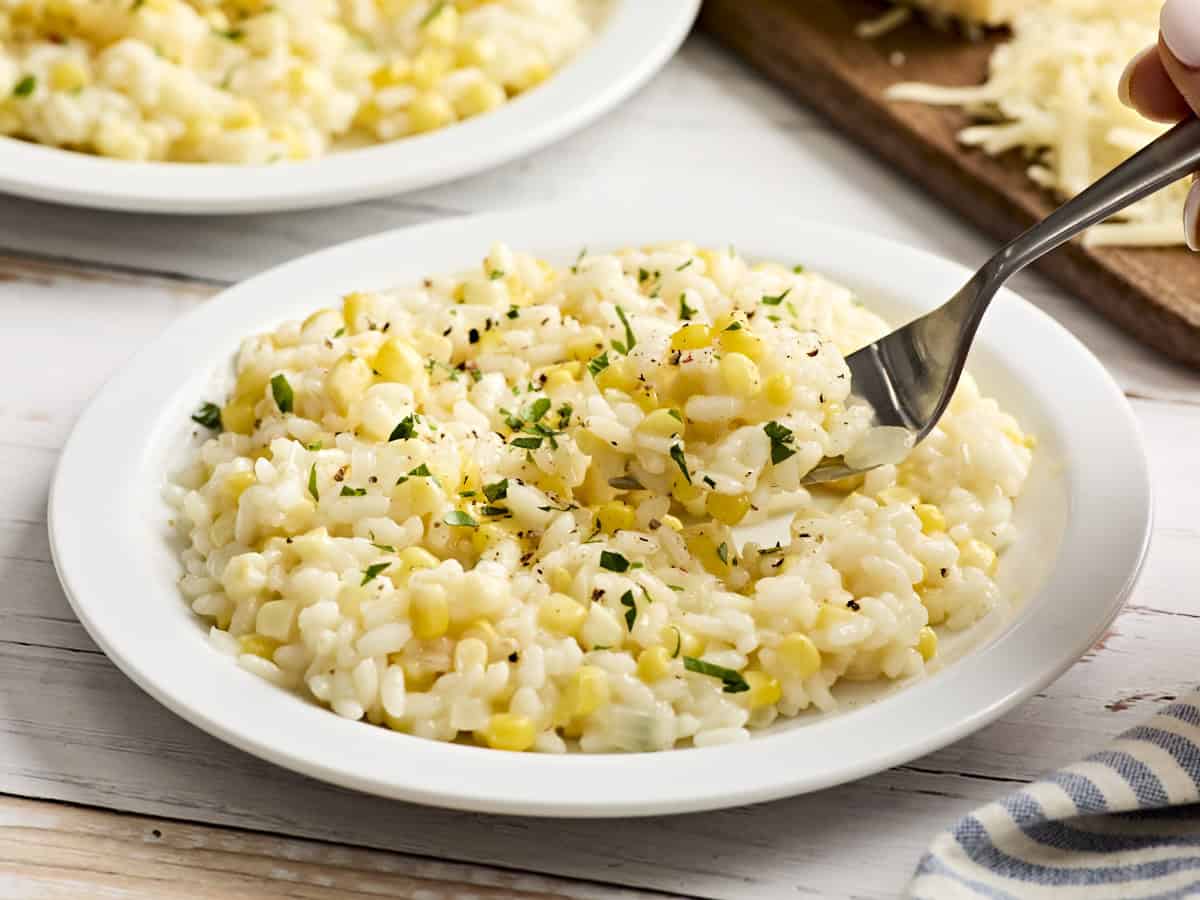
Sweet Corn Risotto is a Summertime treat that shouldn’t be missed. Summer corn flavors infuse this entire dish when you use every scrap while cooking! Corn cobs that would normally be discarded bring extra sweetness and earthy flavor to this risotto, making each bite taste like pure farm-to-table bliss. And don’t even get me started on the texture combo. The kernels give the recipe a little crunch and freshness, while the creamy risotto is smooth and decadent – it’s giving budget-friendly… but make it summery!

A plate of sweet corn risotto.

What is Sweet Corn Risotto?

Oh, how I love a good risotto. This Italian dish is made from starchy, short-grain rice cooked in broth until all those lovely starches are released – giving the recipe its creamy, dreamy texture WITHOUT adding any cream. This sweet corn risotto is similar to my Parmesan risotto but with a summery twist! I shave the corn off the cob and use the bare cobs (yep, we use the whole cob here) to give the broth that sweet corn taste. White wine, butter, arborio rice, and Parmesan cheese round out the flavors, making this recipe a must-try this season.

Ingredients

Here’s what you’ll need to make sweet corn risotto:

  • Arborio Rice: This is the best, and most commonly used, rice for making risotto. It’s short-grain and super starchy. DON’T RINSE THE RICE before using it, or you’ll wash away some of the starch that makes risotto so creamy.
  • Corn Cobs: Use fresh corn cobs for this recipe, and save the cobs after you shave off the kernels. You can also use canned or frozen and thawed corn in a pinch (about 2 cups worth), but the broth won’t have the same fresh corn flavor without the cobs.
  • Sweet Onion: Choose a sweet onion, like Vidalia, Walla Walla, or Maui, if possible. They’re a bit milder and sweeter than yellow or white onions. However, yellow onions are typically cheapest- and they work great, too!
  • Butter: Use salted butter to give the risotto a little extra flavor.
  • White Wine: We don’t often add wine to our recipes because it hikes up the cost, so you can skip it if it’s not in your budget. However, if you can make it work, the wine adds a really nice depth of flavor. Use any crisp, dry white wine you like to drink. I usually use Pinot Grigio or Sauvignon Blanc. Don’t forget, you can freeze wine in ice cube trays for future recipes so nothing goes to waste!
  • Parmesan: The salty, nutty Parmesan cheese is the perfect finish to this summer corn risotto. 
  • Vegetable Broth: Use homemade vegetable broth or your favorite store-bought variety. I used bouillon to keep costs low.

What Else Can I Add?

This sweet corn risotto recipe is delicious as-is, but it’s also the perfect base for adding other ingredients. Here are a few ideas:

Time Saving Tip

This recipe is super simple to make, but risotto is a hands-on process – ain’t nobody denying that. You have to slowly add in the broth and continuously stir while it is absorbed until it’s time to add more. While it only takes about 20 minutes to do this, it’s not a recipe you can walk away from! To make things easier and save some time, I always prep the corn, onion, and shred the Parmesan in advance. They last well in the fridge, so all I have to do is add them in when it’s time to cook. Planning ahead helps!

Serving Suggestions

I love to serve my creamy corn risotto with roasted asparagus and tomatoes, quick garlic butter shrimp, or balsamic roasted vegetables.

How to Store Sweet Corn Risotto

This sweet corn risotto is best eaten fresh but can be stored in an airtight container in the fridge for up to 4 days. Reheat on the stovetop, stirring often, with a splash of broth or water to bring back its creamy texture. I don’t recommend freezing risotto purely because the texture doesn’t hold up well after thawing.
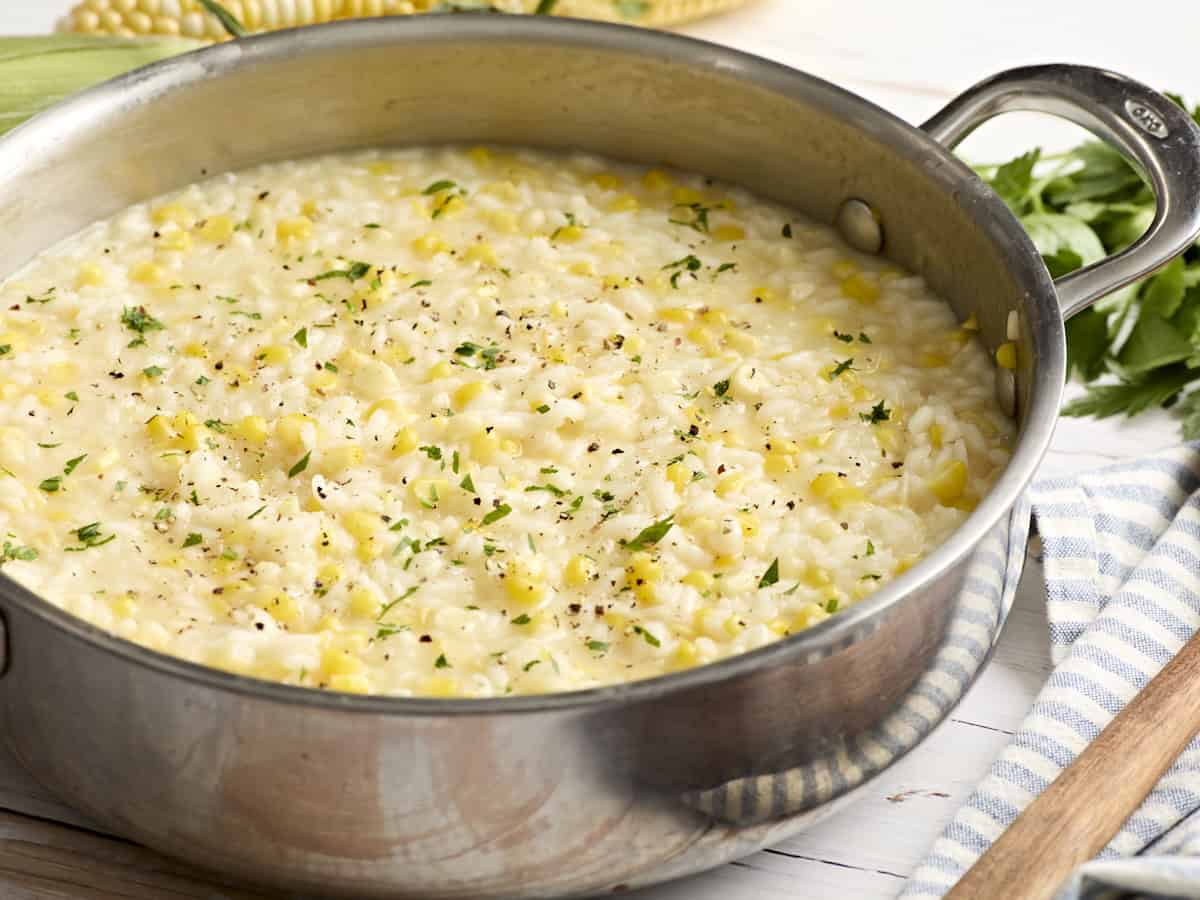
Sweet corn risotto in a skillet topped with fresh herbs.
Sweet corn risotto on a plate.
Print

Sweet Corn Risotto

This Sweet Corn Risotto is infused with the flavors of summer! It's comforting, simple, and budget-friendly cooking at its finest.
Course Main Course
Cuisine Italian
Total Cost ($9.37 recipe / $2.34 serving)
Prep Time 10 minutes
Cook Time 35 minutes
Total Time 45 minutes
Servings 4 servings, about 1.5 cups per serving
Calories 494kcal

Ingredients

  • 3 corn cobs $0.99
  • ½ small sweet onion $0.94
  • 3 Tbsp salted butter, divided $0.42
  • 1 ½ cups arborio rice $2.28
  • ¼ cup white wine* $0.58
  • 5 cups vegetable broth $1.45
  • ½ cup shredded Parmesan cheese $2.71

Instructions

  • Cut corn from cobs and chop the bare cobs in half. Dice the onion, and gather white wine*, shredded Parmesan cheese, butter, and arborio rice.
  • Add bare cobs and veggie broth to a pot and bring to a simmer on low heat while you prepare the risotto:
  • Melt 2 Tbsp butter in a skillet over medium-high heat and cook the onion down until glossy.
  • Add arborio rice to butter and onion and toast for 1-2 minutes.
  • Add corn, cook for an additional minute.
  • Add white wine and cook down.
  • Add one ladle full of corn veggie broth and stir constantly. Wait until the broth is around 75% absorbed by the rice before adding the next ladle. Keep adding ladles of broth until all the stock is used and the risotto is creamy and complete. This step will take about 20 minutes in total.
  • Stir in 1 Tbsp butter and the Parmesan cheese. Serve with parsley or other fresh herbs (optional).

See how we calculate recipe costs here.

Notes

* If wine is not in your budget, it’s ok to skip it. If you can cook with wine, I recommend a crisp, dry white like a Sauvignon Blanc or Pinot Grigio. An unoaked Chardonnay would also work in this risotto! There are super affordable bottles out there that are great for cooking ($5 for Yellowtail and even less dough needed if you pick up a single serving mini bottle!) Did you know you can also freeze wine in ice cube trays for cooking later, so you never waste a bottle?

Nutrition

Serving: 1serving | Calories: 494kcal | Carbohydrates: 81g | Protein: 11g | Fat: 13g | Sodium: 1475mg | Fiber: 4g
A fork scooping some sweet corn risotto off a plate.

how to make SWEET CORN RISOTTO – step by step photos
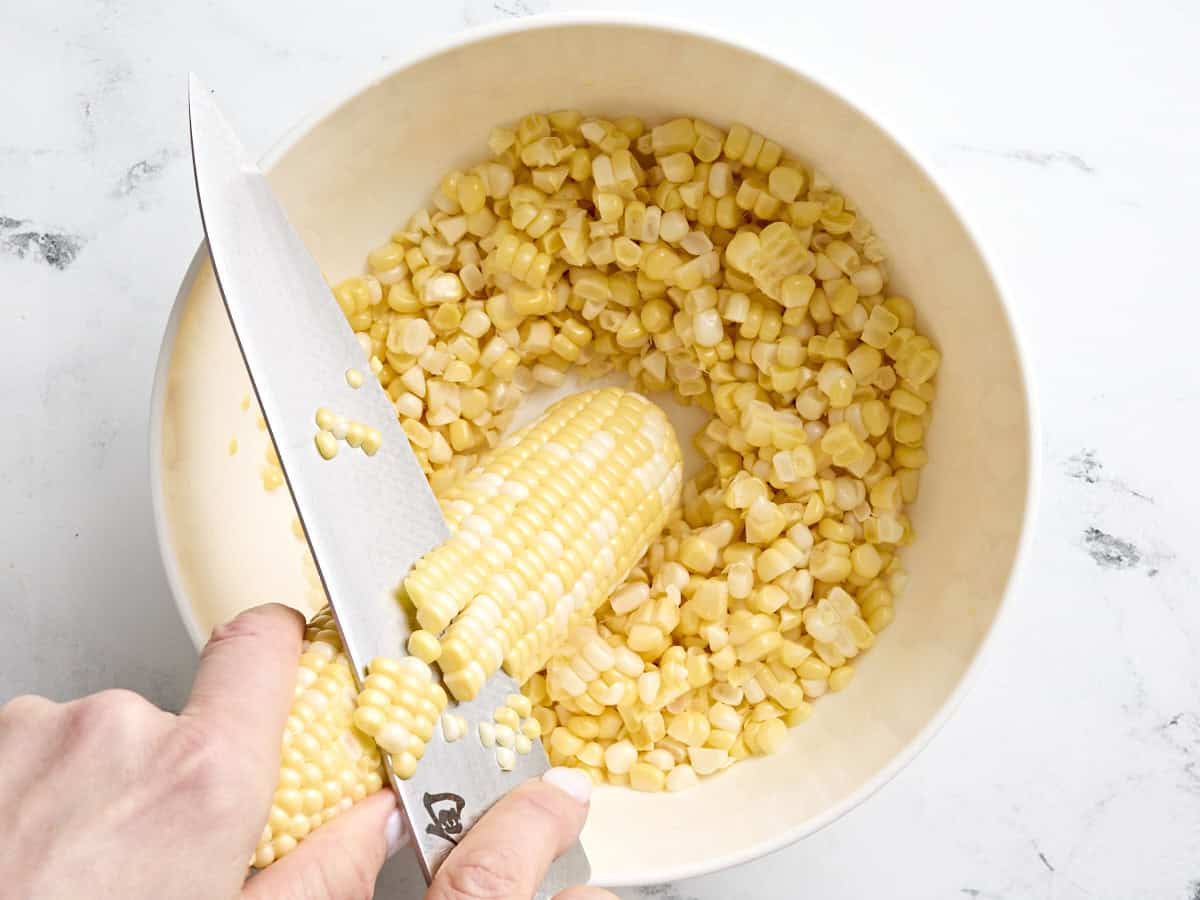
A knife slicing kernels off a corn cob into a bowl.

Using a sharp knife, cut the corn from 3 cobs into a large bowl. Carefully chop the bare cobs in half and set the corn kernels to one side for now.
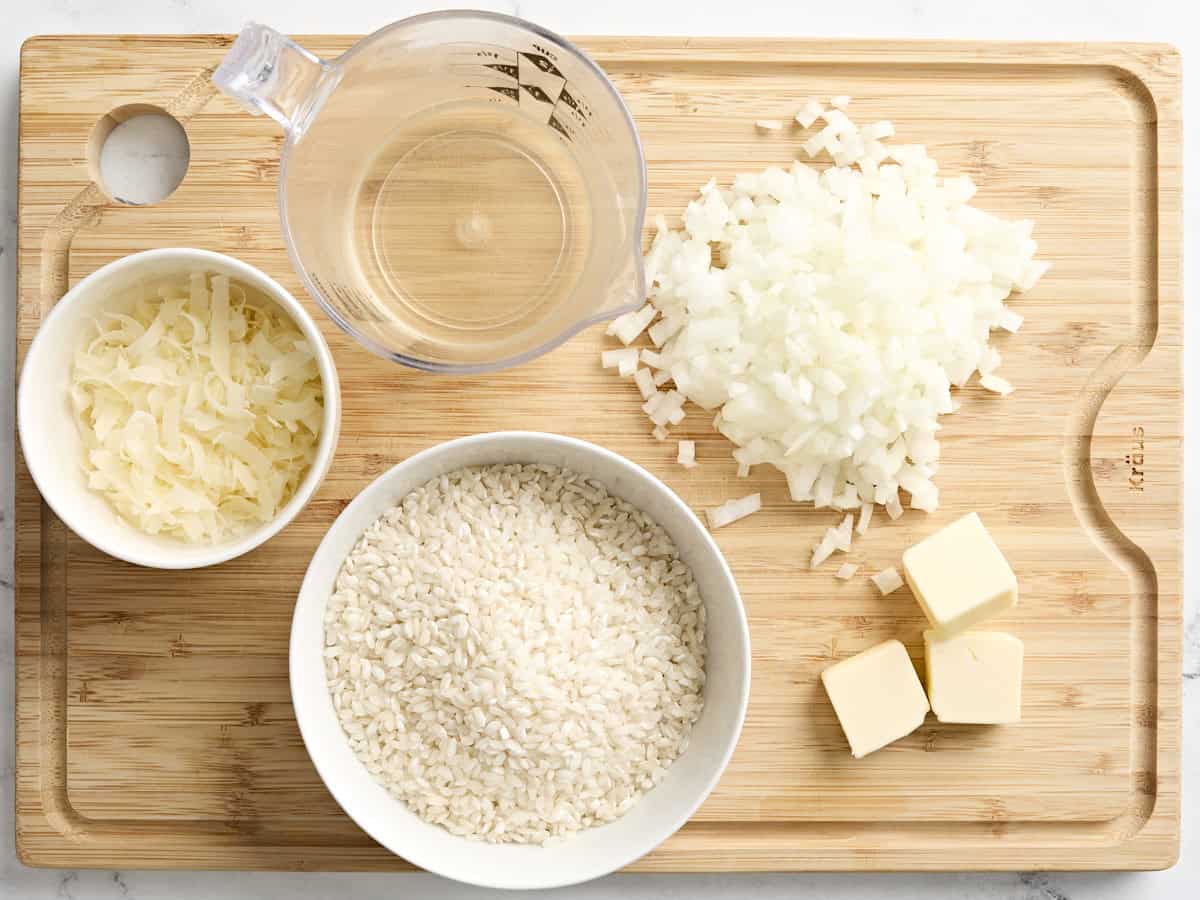
The ingredients to make summer corn risotto.

Dice ½ a small, sweet onion into small pieces. Gather ½ a cup of Parmesan cheese, 3 Tbsp of salted butter (divided), a ¼ cup of white wine (if using), and 1½ cups of arborio rice.
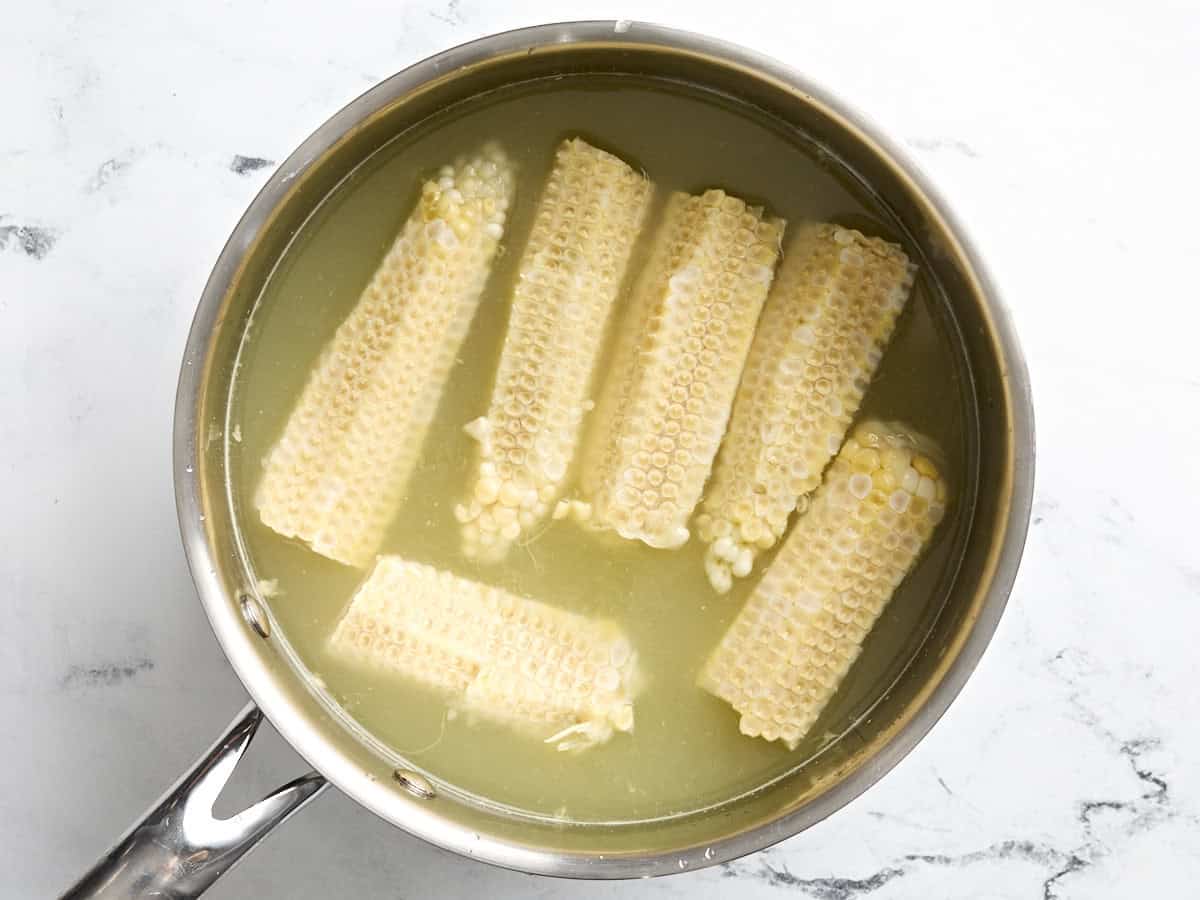
Bare corn cobs and vegetable broth in a pot.

Add the halved corn cobs into a pot and cover with 5 cups of veggie broth. Bring the broth to a simmer over low heat while you prepare the risotto.
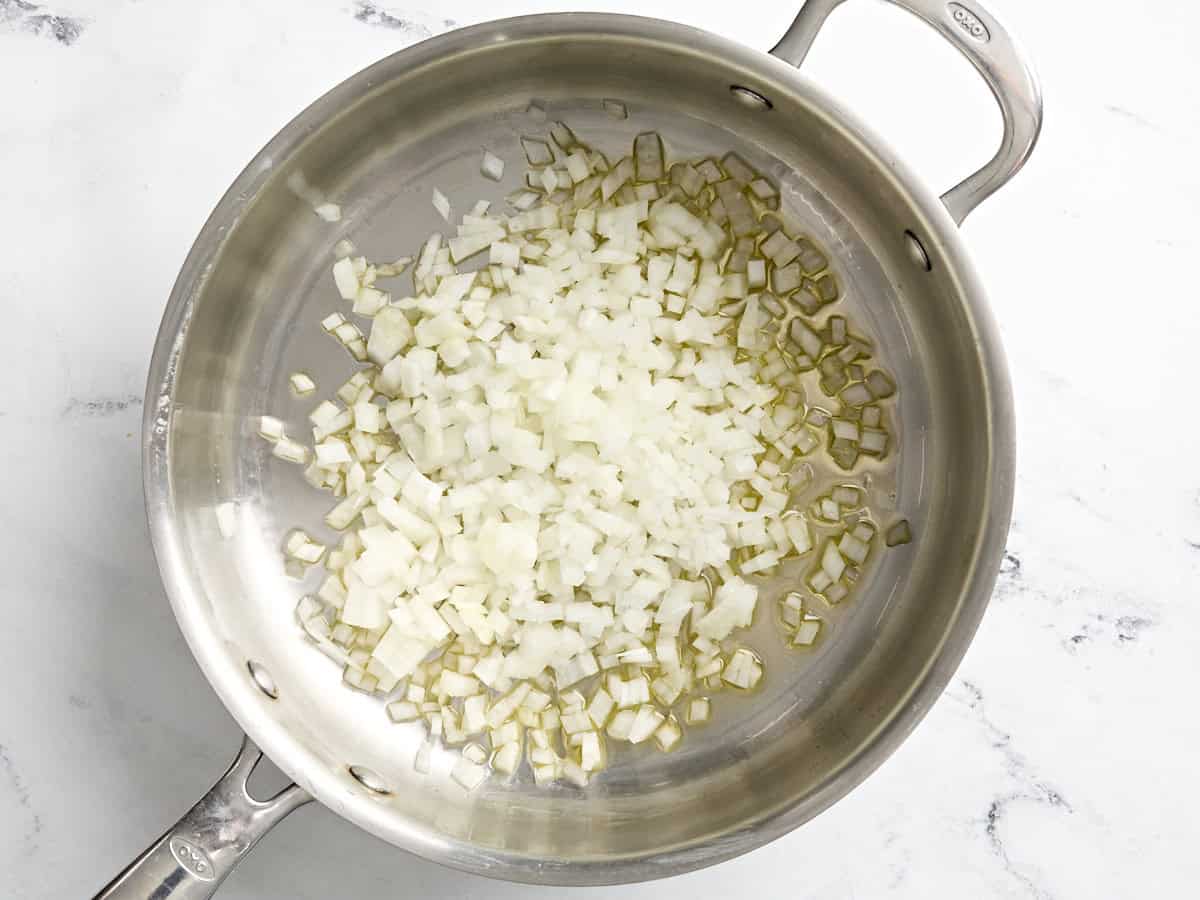
Melted butter and diced onion in a skillet.

Add 2 Tbsp of salted butter to a large skillet over medium-high heat. Once melted, add the diced onion to the butter and cook down until glossy. We don’t want the onion to brown or caramelize; we just want it to become fragrant and soft.
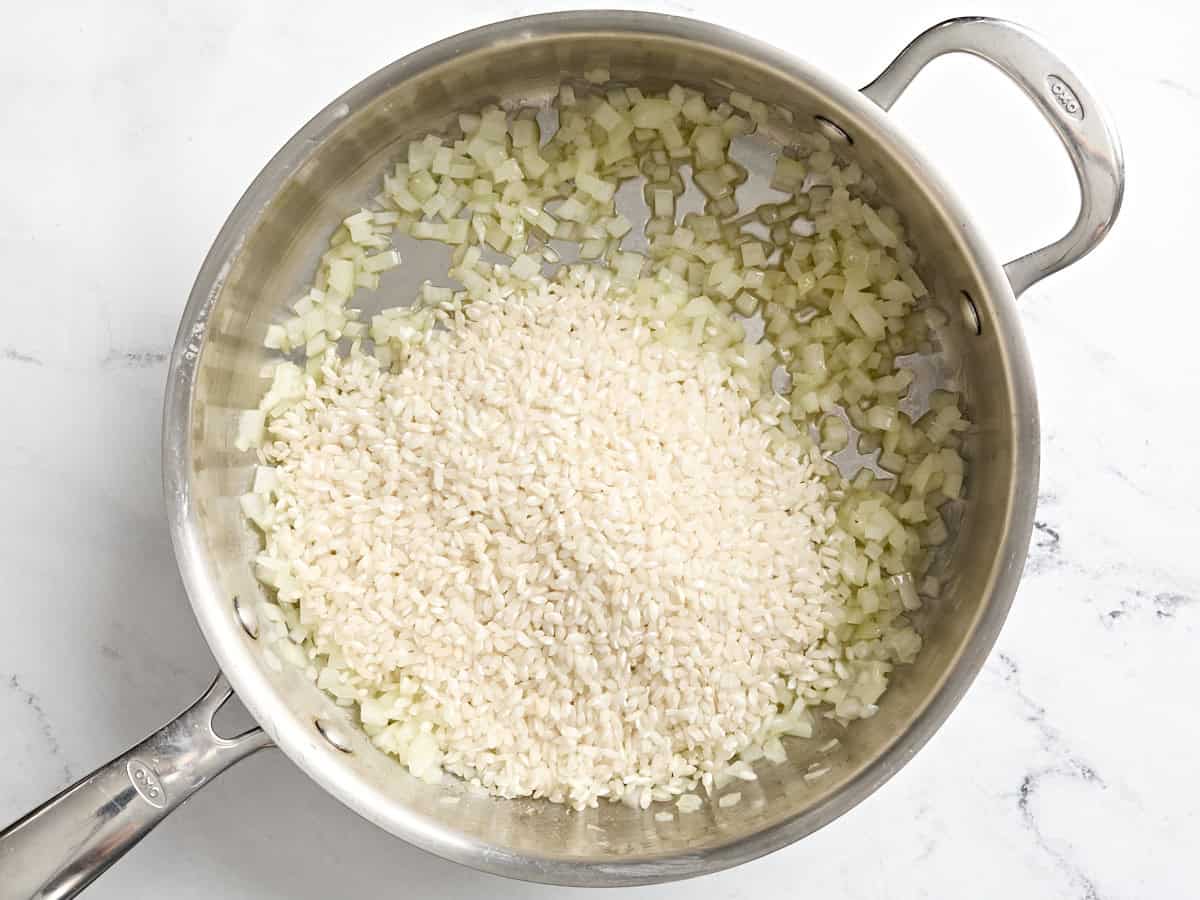
Arborio rice added to diced onions in a skillet.

Add 1½ cups of arborio rice to the skillet with the butter and onions. Allow the rice to toast for 1-2 minutes, stirring occasionally.

Corn kernels added to arborio rice to make sweet corn risotto in a skillet.

Pour the previously prepared corn kernels into the skillet and cook for another minute.
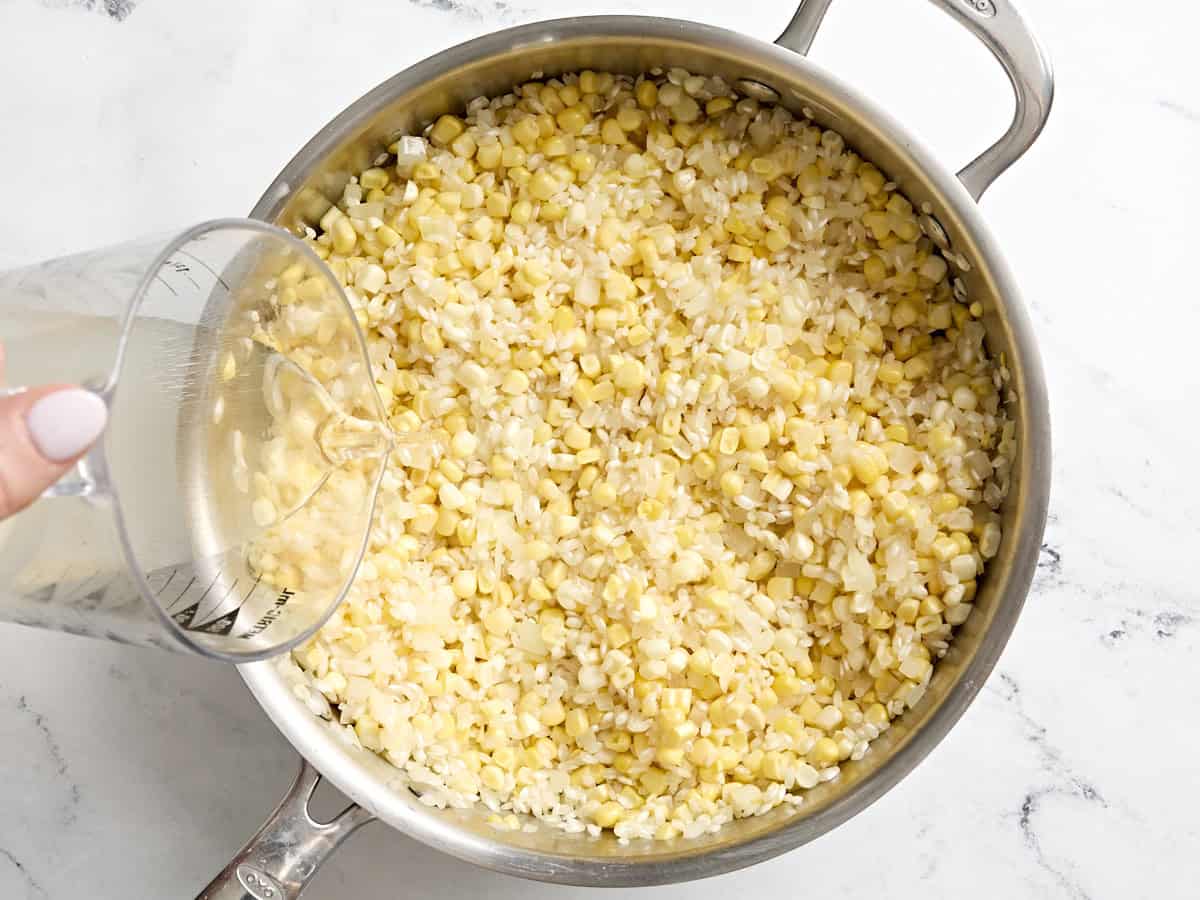
White wine being poured into arborio rice and corn kernels in a skillet.

Add a ¼ cup of white wine to the skillet to release any browned bits from the bottom of the pan (known as deglazing). Stir and allow the wine to cook down for 1-2 minutes.
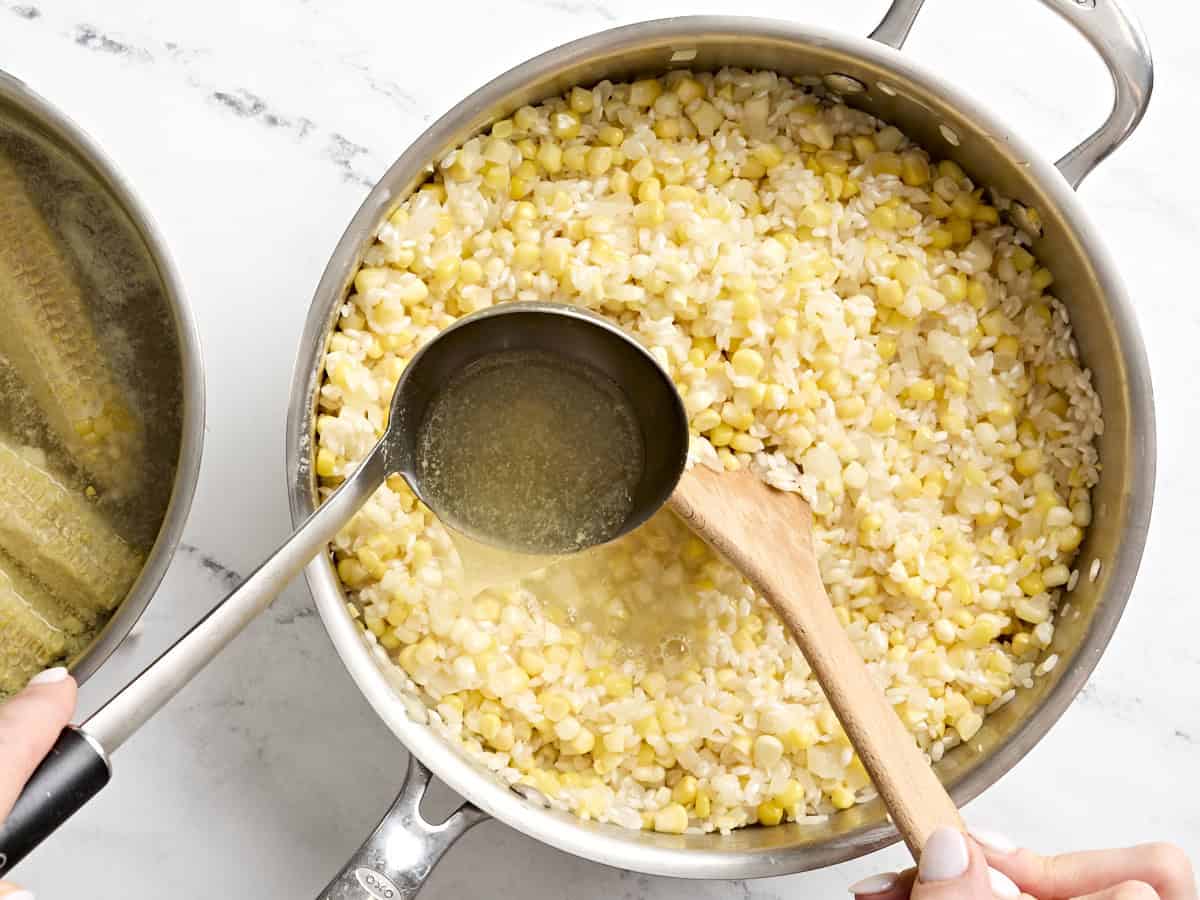
A ladle adding vegetable broth to sweet corn risotto in a skillet.

Slowly ladle 1 cup of hot corn veggie broth into the skillet with the rice, and stir until about 75% of the liquid has been absorbed.
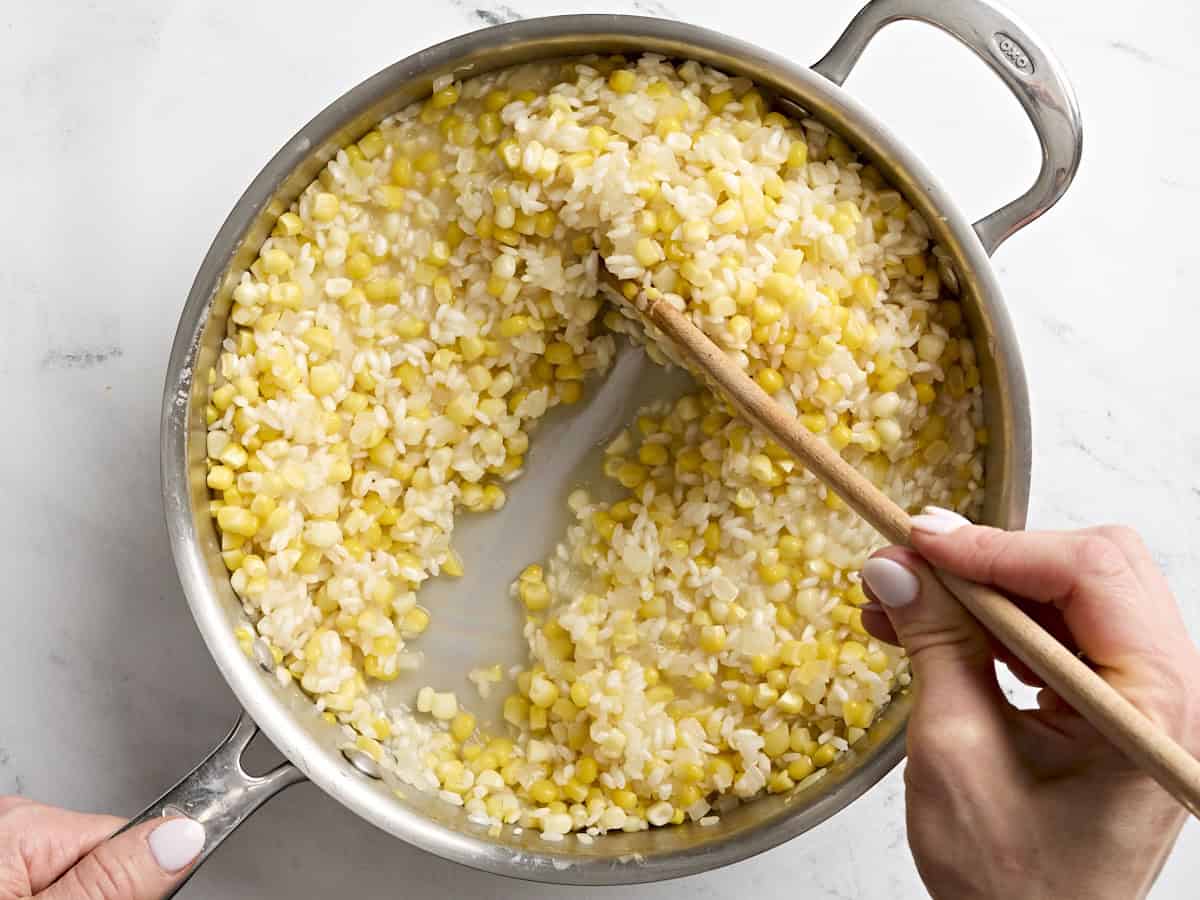
A wooden spoon stirring sweet corn risotto in a skillet.

Add 1 ladle of broth at a time, stirring often, until the rice has mostly absorbed all 5 cups. This will take about 20 minutes in total. Your rice should be al dente, meaning it still has a slight bite to it. The risotto should also be creamy and not soupy.
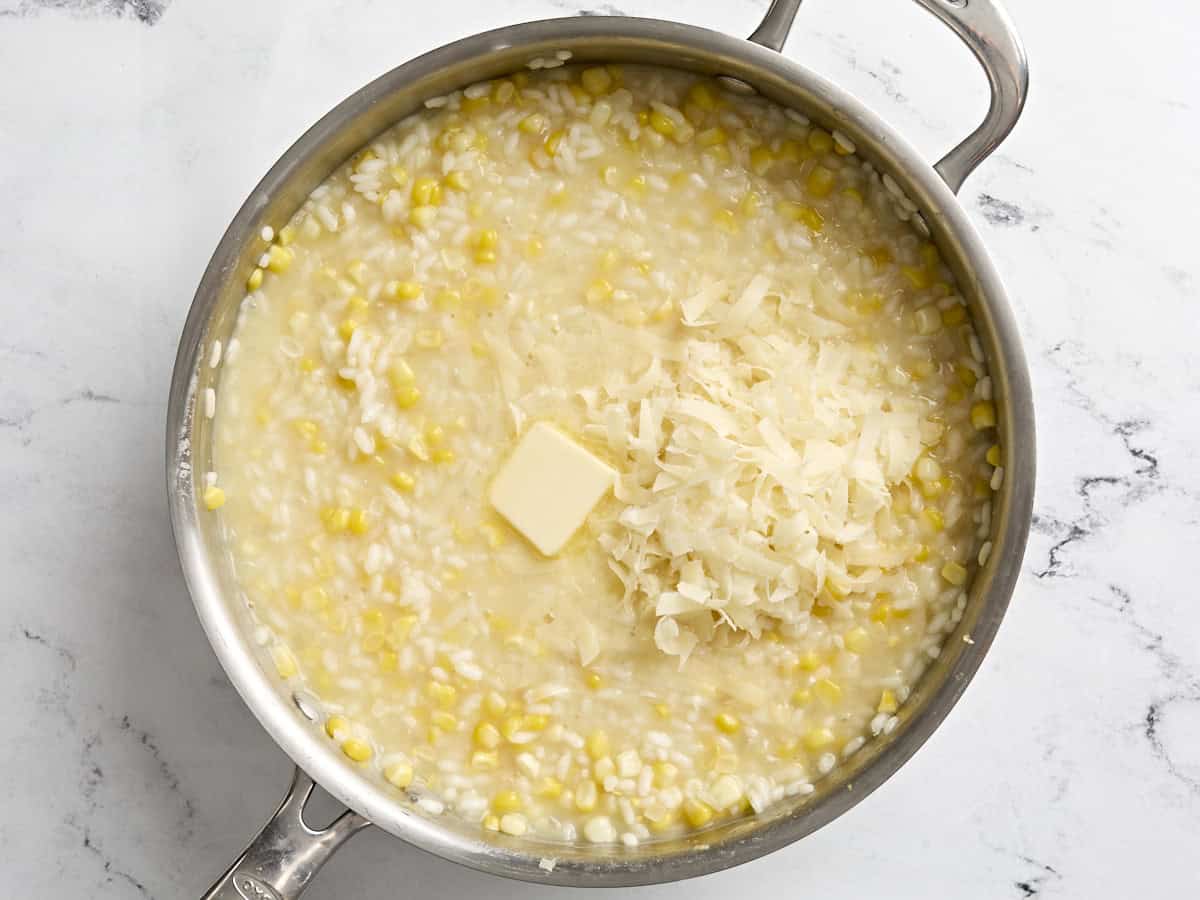
A cube of butter and shredded parmesan cheese added to sweet corn risotto in a skillet.

Add 1 Tbsp of salted butter and ½ a cup of shredded Parmesan cheese to your summer corn risotto and stir until well combined.
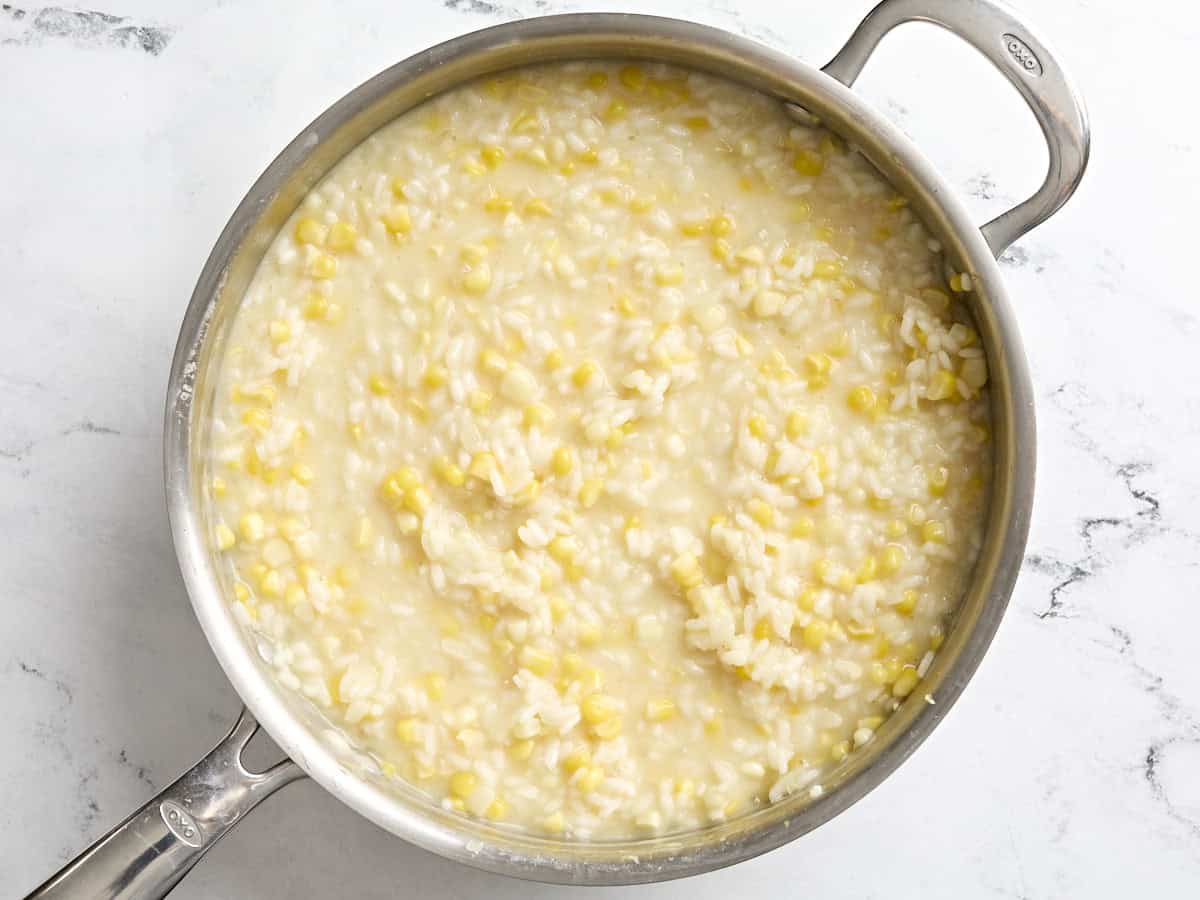
Creamy sweet corn risotto in a skillet.

Serve hot and (optional) garnish with parsley or other fresh herbs.
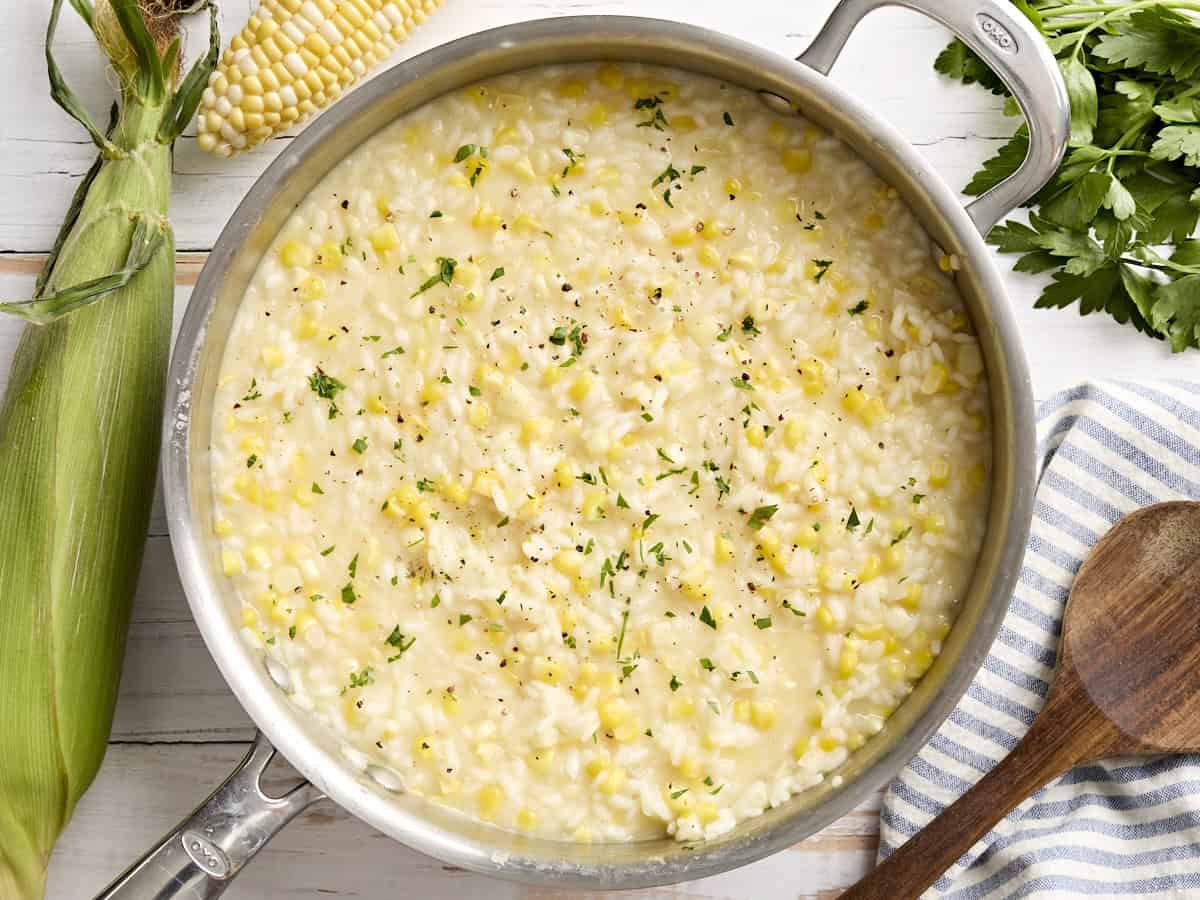
Overhead view of sweet corn risotto in a skillet.

There’s nothing quite like a creamy bowl of sweet corn risotto to fill your belly on a late summer night!

The post Sweet Corn Risotto appeared first on Budget Bytes.
Grilled Vegetables

With just a few ingredients and my easy grilling method, these grilled vegetables are the perfect side dish for any summer BBQ!

The post Grilled Vegetables appeared first on Budget Bytes.

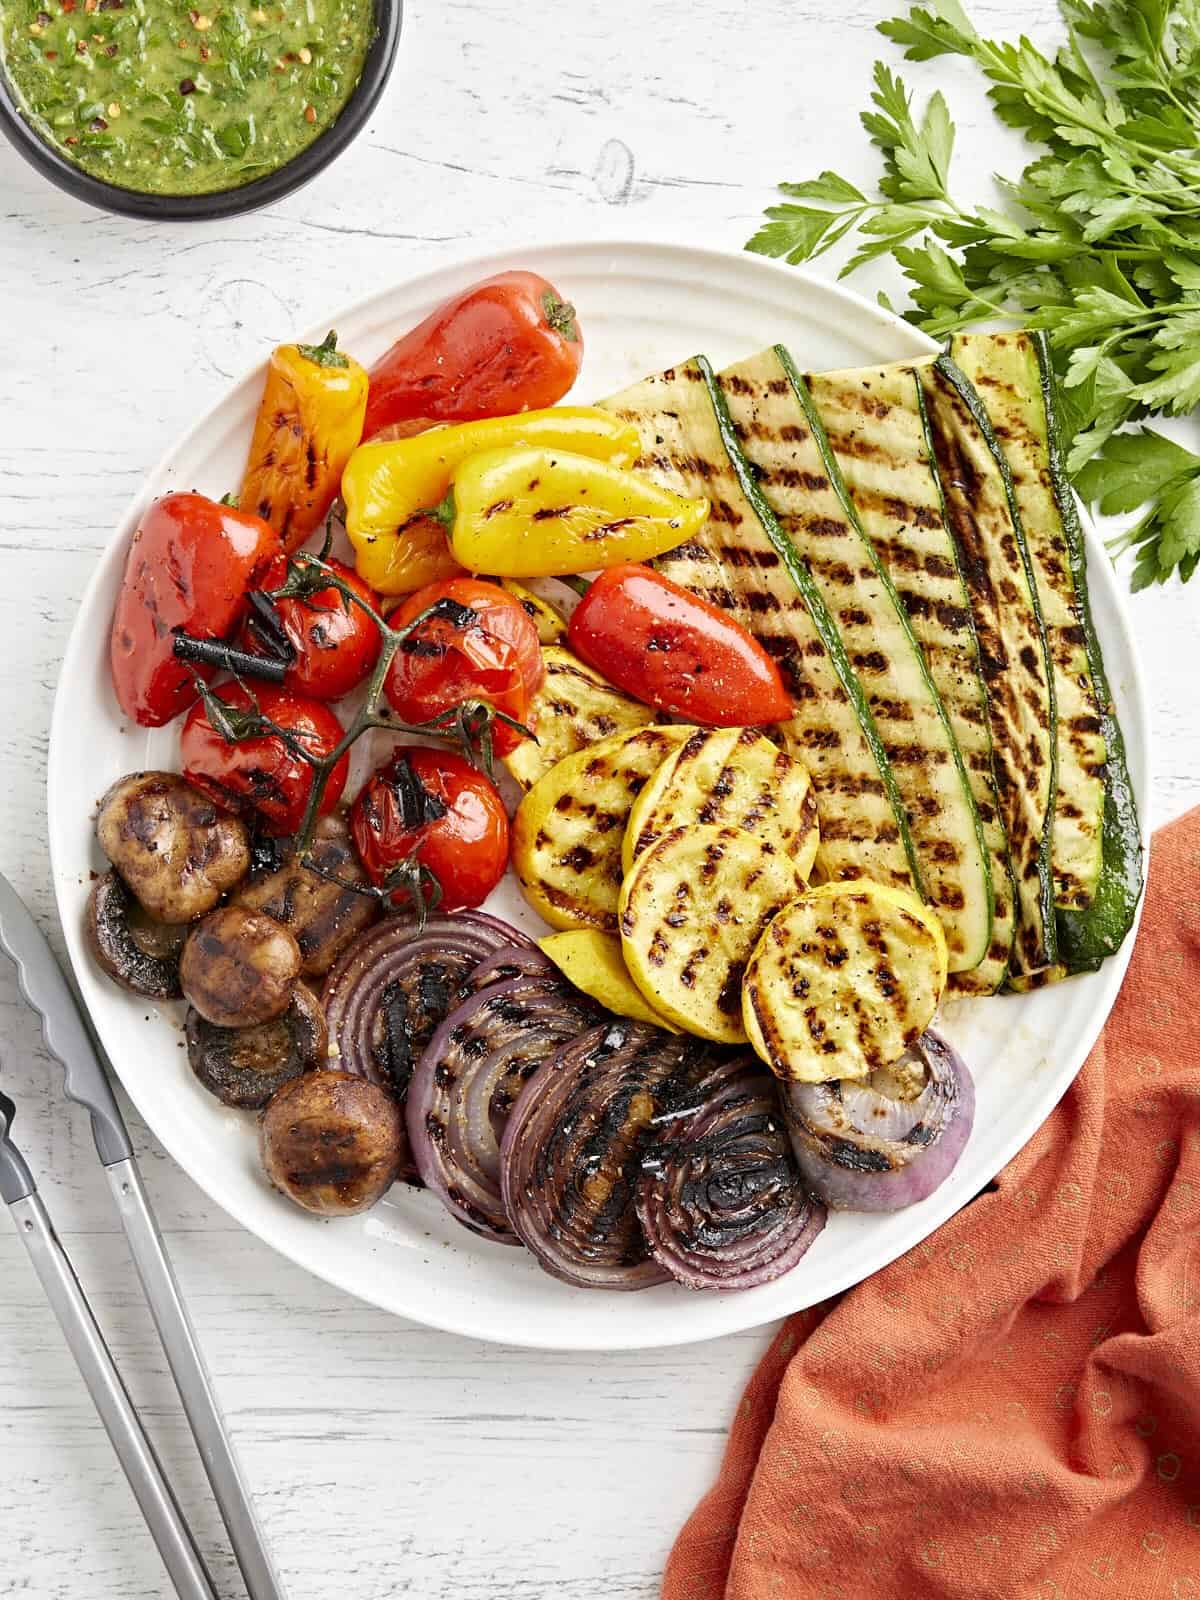
There is no summertime meal that cannot be improved with a heaping side of perfectly Grilled Vegetables! These grilled veggies take very little prep time, and they’re the best option on fridge clean out day (which makes my busy life 100x easier and saves me money!). I’ve perfected grilling all kinds of vegetables including peppers, onion, zucchini, squash, and mushrooms for the ultimate Summer feast. Each healthy bite is infused with a smokey, summery flavor, and this recipe seriously couldn’t be any easier.

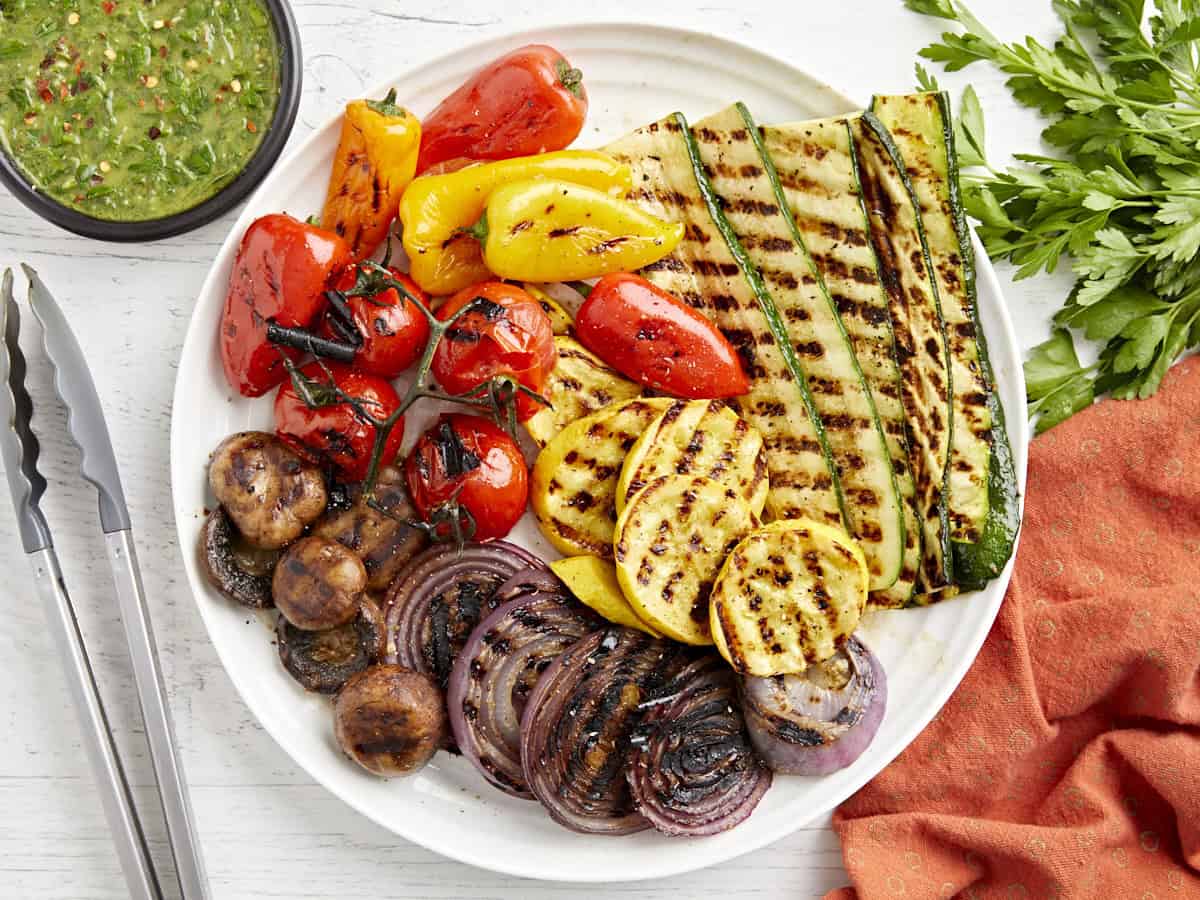
A plate of grilled vegetables.

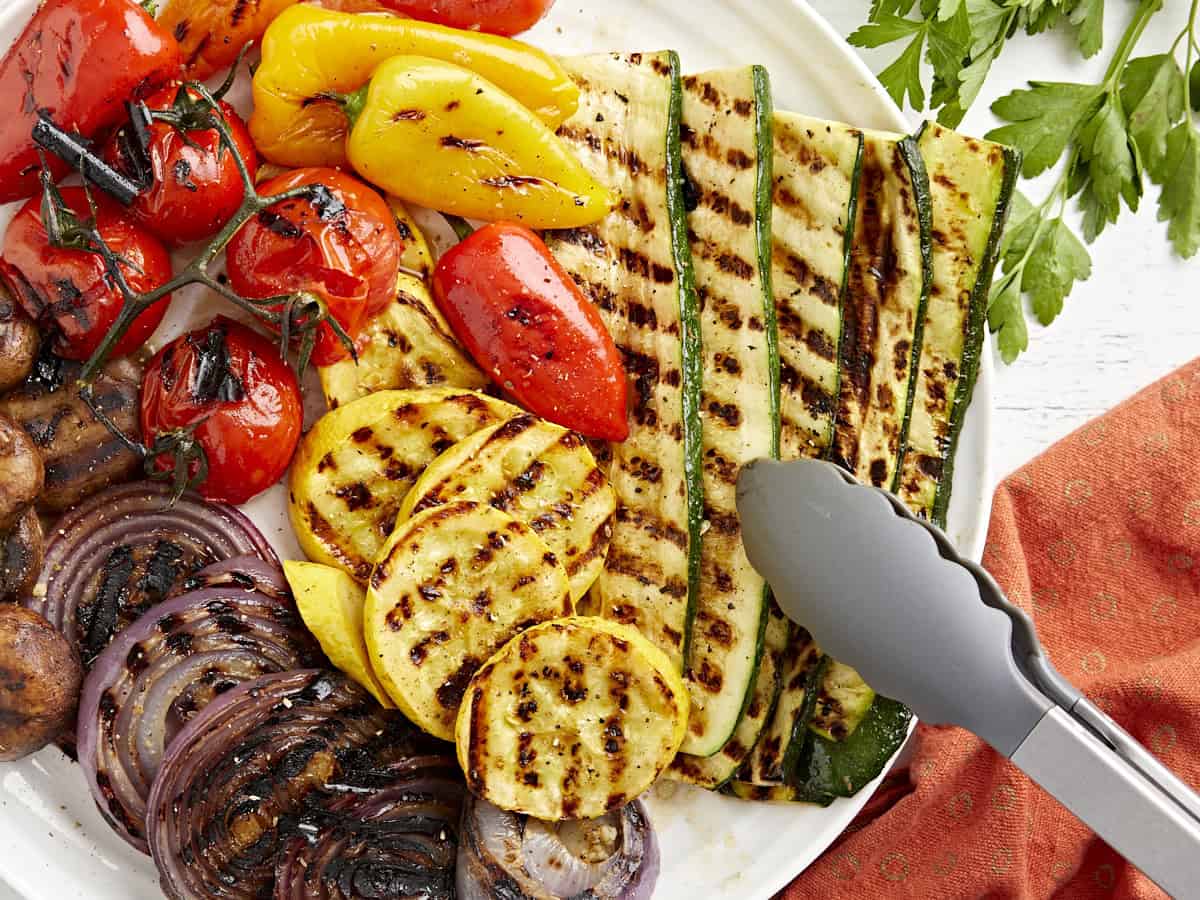
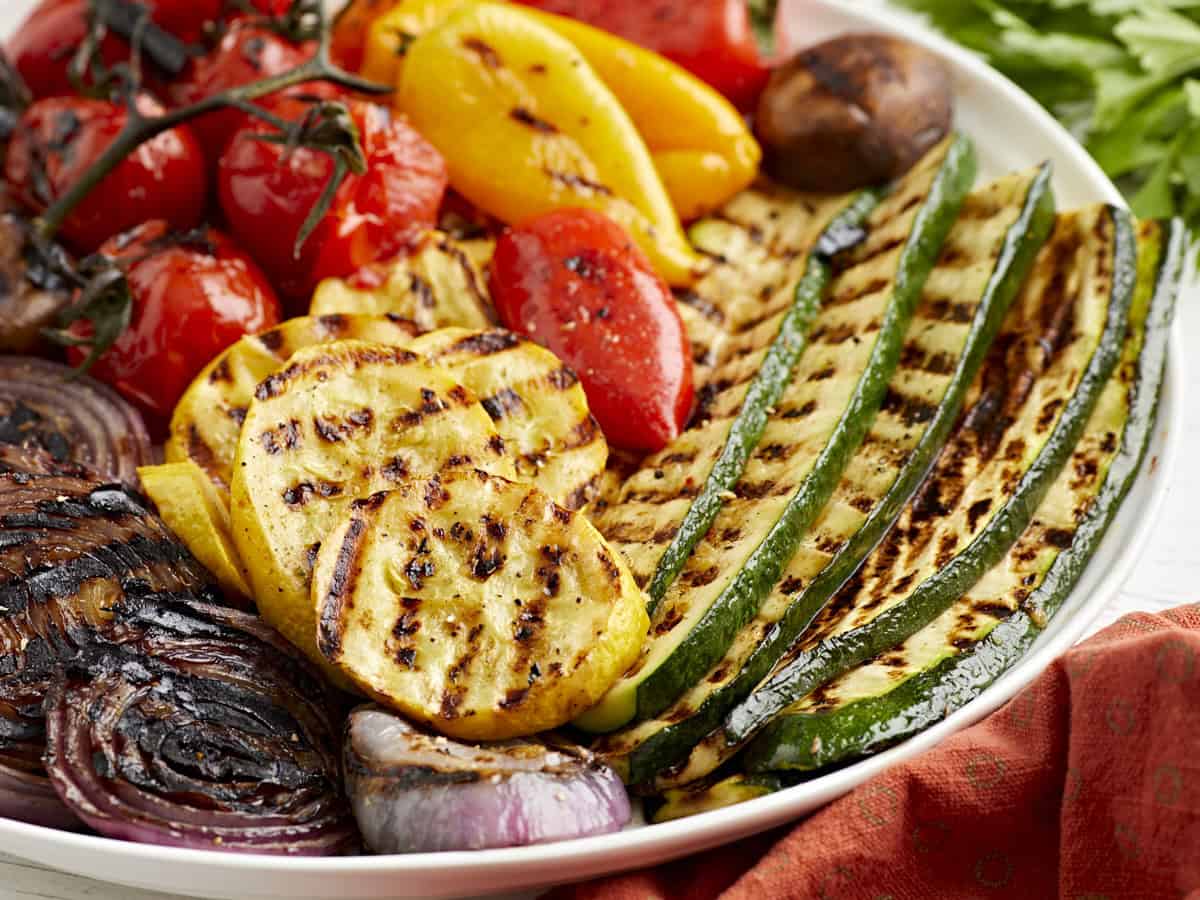
Grilling vegetables to perfection takes practice, but with this very simple and quick method, I promise you’ll never serve another soggy vegetable again. The secret? Less is more! Get that grill nice and hot to achieve those stunning grill marks. Bell peppers, tomatoes, zucchini, mushrooms, and yellow squash soften quickly, so they only need a few minutes on each side. The onions take a little longer to get those caramelized edges we all love – so they go on first!

Any leftovers can be added to all kinds of salads, pasta salads, sandwiches, and more. I could go on all day about the virtues of grilled vegetables, but I’ll spare you and let my easy recipe do the talking!

Ingredients for Grilled Vegetables

Here’s what you’ll need to make the best grilled vegetables EVER:

  • Vegetables: In my opinion, bell peppers, red onion, vine-ripened tomatoes, whole mushrooms, zucchini, and yellow squash are some of the best veggies to grill. They hold up well and cook quickly!
  • Olive Oil: The base of my marinade and stops the vegetables from sticking to the grill.
  • Steak Seasoning: This quick-fix shortcut adds plenty of flavor without any extra effort on your part.
  • Garlic: Freshly minced garlic adds an unbeatable depth of flavor.
  • Sugar: Just a pinch. It helps the veggies caramelize and get those beautiful grill marks.

Should I Boil Vegetables Before Grilling?

Please DON’T boil any of the veggies in this recipe before grilling! You’ll have a huge mess on your hands. Trust me, the high heat of the grill will cook them quickly and evenly without any need for pre-cooking. I’d only suggest parboiling denser vegetables like potatoes or carrots because they need more time to cook through. But for the vegetables in this recipe, grilling them directly is the way to go.

Top Tip

My rule for cooking vegetables using any technique is always: less is more! If you think they’re done, pull them off. There’s nothing wrong with a little crunch. It’s always preferred to an over-cooked, soggy veggie. Seriously, don’t stress over a side dish when you have a fun cookout happening in the background!

Serving Suggestions for grilled vegetables

I couldn’t help but make a big bowl of our chimichurri sauce to serve with this recipe for grilled vegetables. It’s tangy and goes perfectly with the smoky flavors from the veggies. Add in some grilled chicken and stovetop baked beans, and you’ve got yourself an easy summer dinner!

Overhead view of a plate of grilled vegetables with some tongs grabbing the zucchini.

Storage Instructions

This grilled vegetables recipe is great for making ahead of time. Once cooled, store them in an airtight container in the fridge for 3-4 days. I like to add them cold to salads or sandwiches, but you can also reheat them in a pan or on the grill for a few minutes until heated through.

Favorite Cost effective grill

When I was looking for a grill for us to use in the Budget Bytes kitchen, I wanted one that was easy to find, simple to set up, easy to clean, and didn’t make me miss my charcoal grill. I went with the Ninja Sizzle Smokeless Grill after contemplating a few different ones that would be widely available at Walmart, Target, and Amazon. We have been super happy with it in the Budget Bytes kitchen.

The cheapest grill option I found was a simple and small camping charcoal grill. That’s also a great option if you want to grill outside, get that smokier grill flavor, and don’t mind keeping charcoal on hand.

Overhead view of a plate of grilled vegetables.
Print

Grilled Vegetables

With just a few ingredients and my easy grilling method, these grilled vegetables are the perfect side dish for any summer BBQ!
Course Side Dish
Cuisine Amercian
Total Cost $7.64 recipe / $0.95 serving
Prep Time 10 minutes
Cook Time 8 minutes
Total Time 18 minutes
Servings 8 servings (side dish)
Calories 67kcal

Equipment

Ingredients

  • 8 mini bell peppers (or 2 large bell peppers cut into ¼s) $1.44
  • 1 zucchini $0.93
  • 1 red onion $1.23
  • 6-8 cherry tomatoes, whole on vine* $1.66
  • 8 mushrooms** $1.04
  • 1 yellow squash $0.89
  • 1 ½ Tbsp olive oil $0.27
  • 1 clove garlic, minced $0.05
  • 1 tsp steak seasoning $0.12
  • ½ tsp sugar $0.01

Instructions

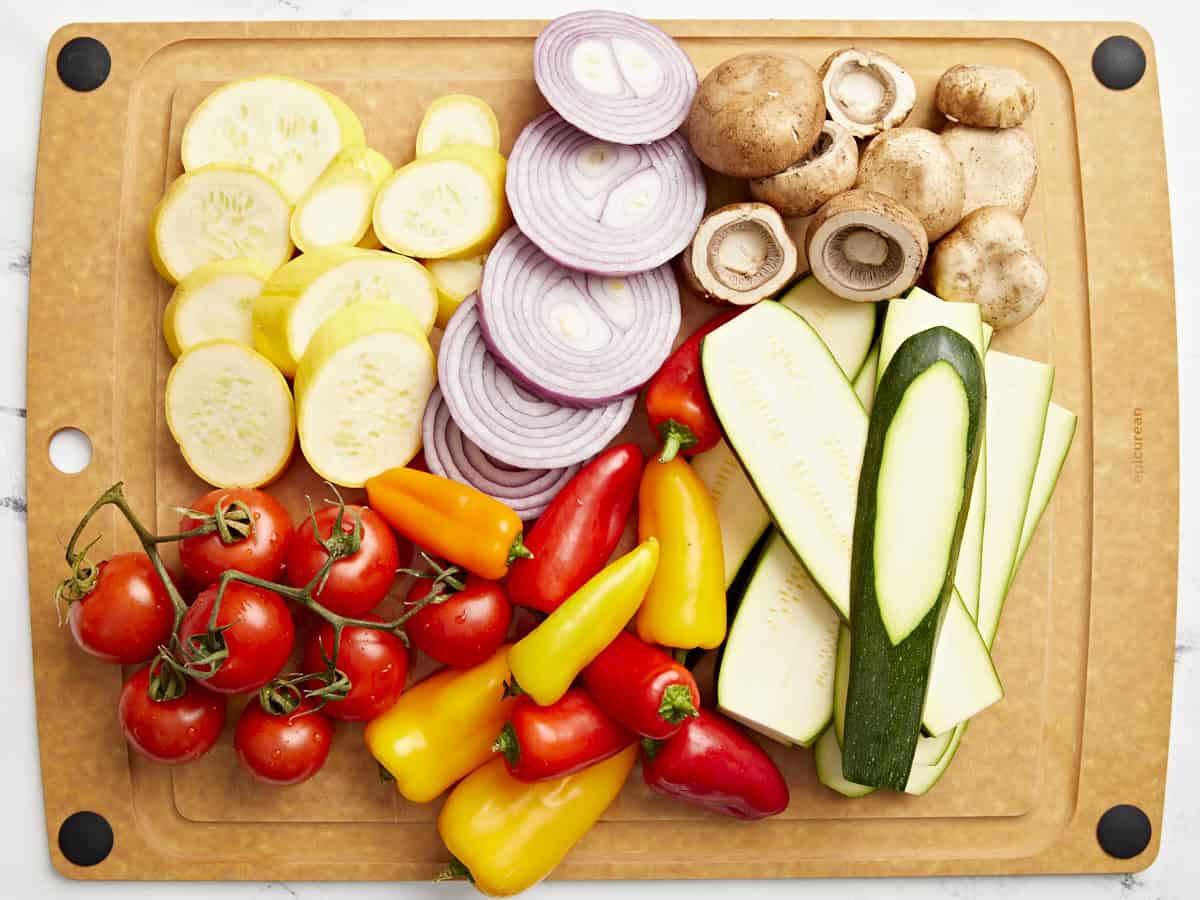
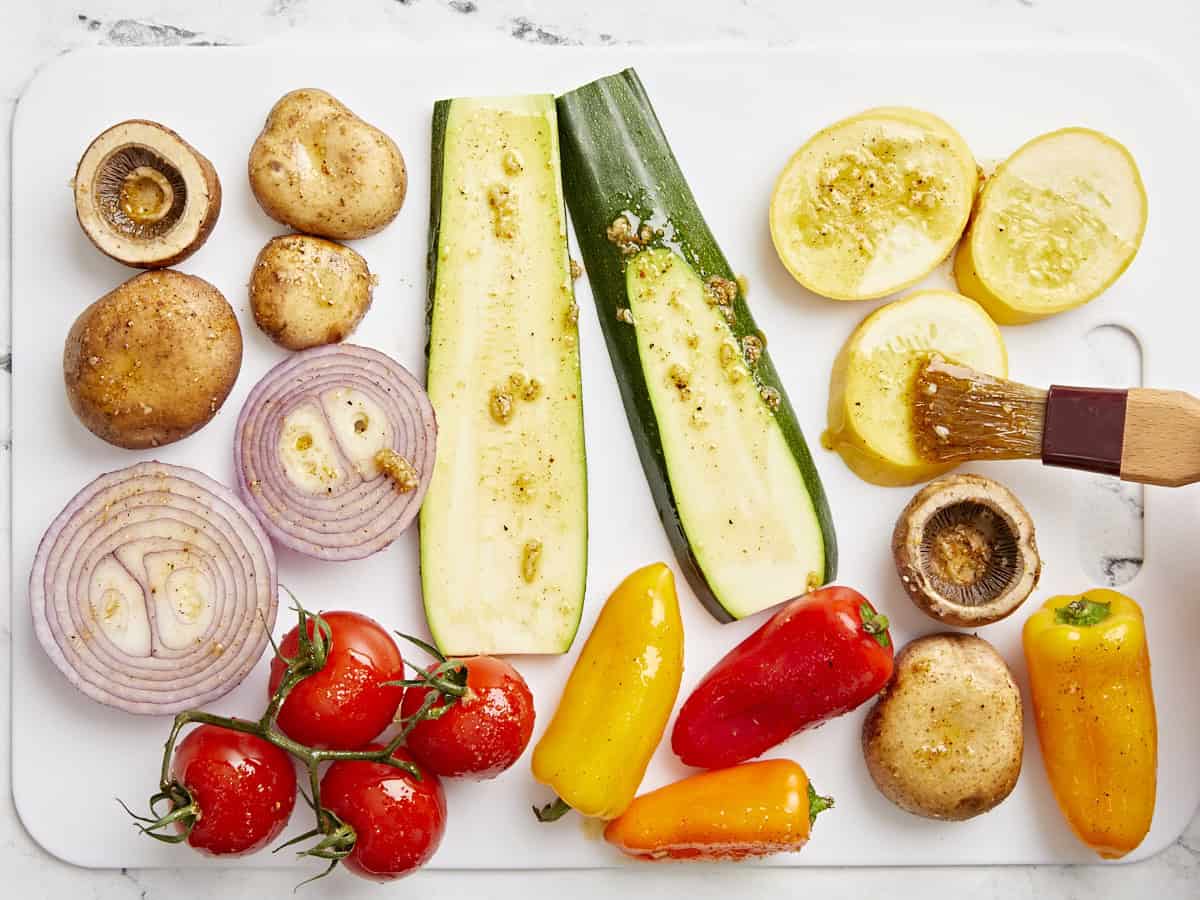
  • Slice zucchini lengthwise, about ¼ thick, using a mandoline on the thickest setting or a knife. Cut red onion into thick rings, destem mushrooms, and cut yellow squash into thick discs, about ¼ thick. Rinse bell peppers and cherry tomatoes.
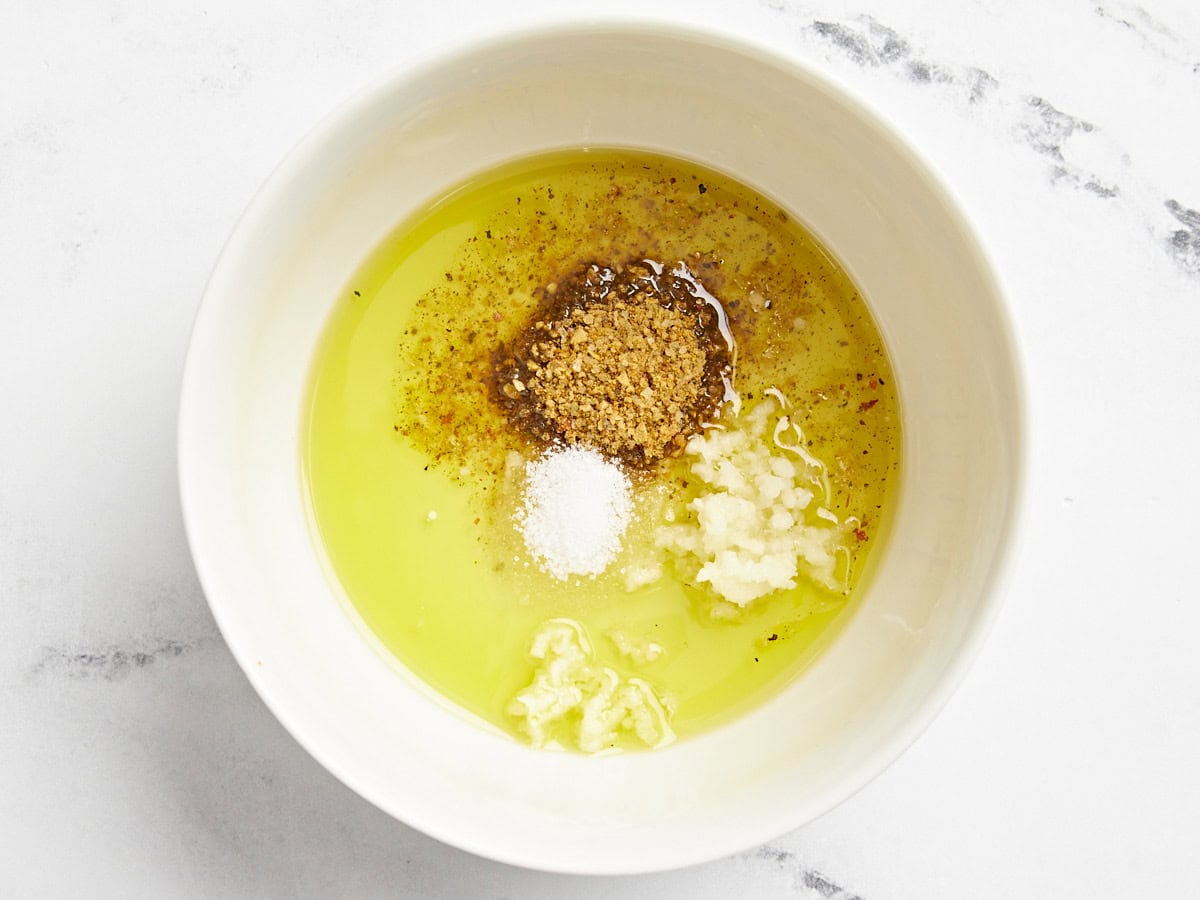
  • Whisk together olive oil, minced garlic, ½ tsp steak seasoning, and sugar in a bowl.
  • Brush olive oil mixture over the veggies.
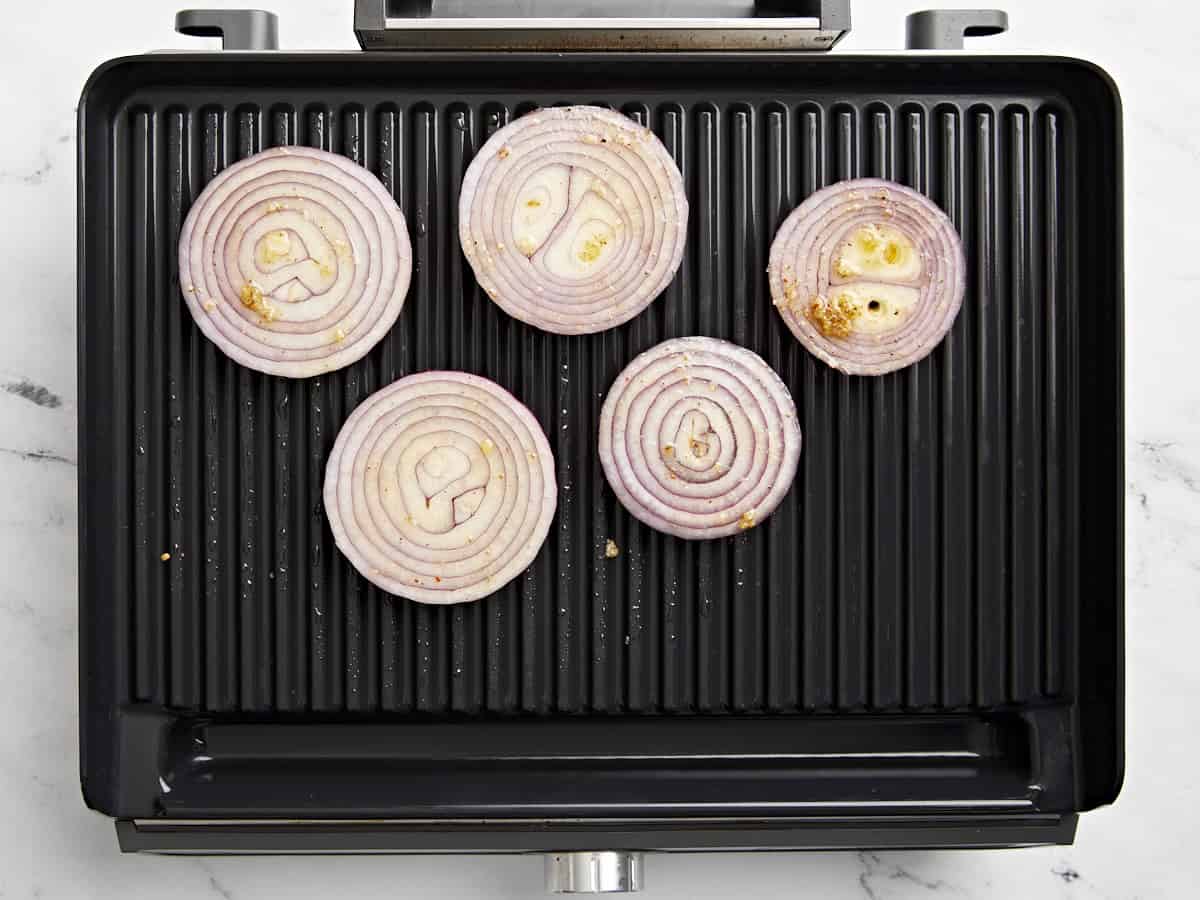
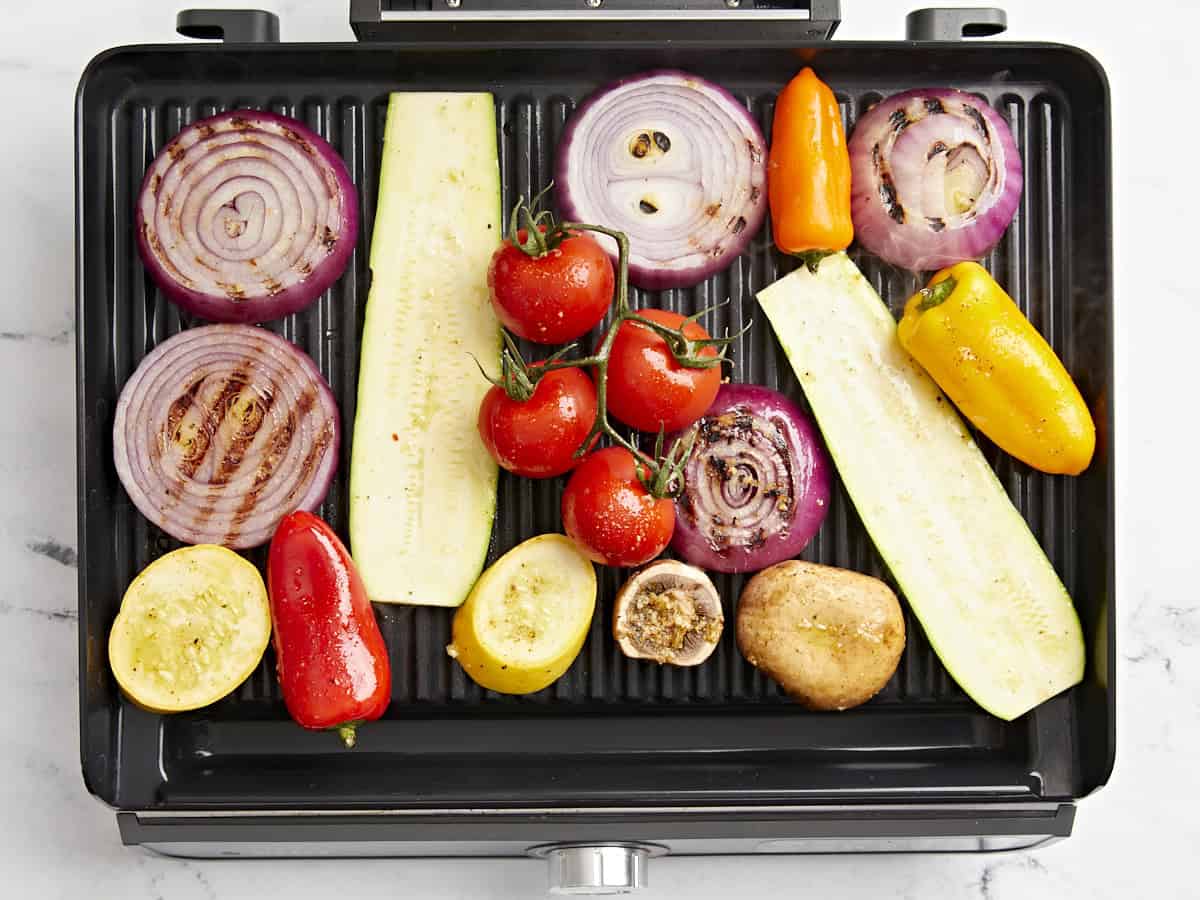
  • Add onions to the grill while preheating to 400 degrees. Add all other veggies to the grill and grill for 4 minutes, until you get distinct grill marks.
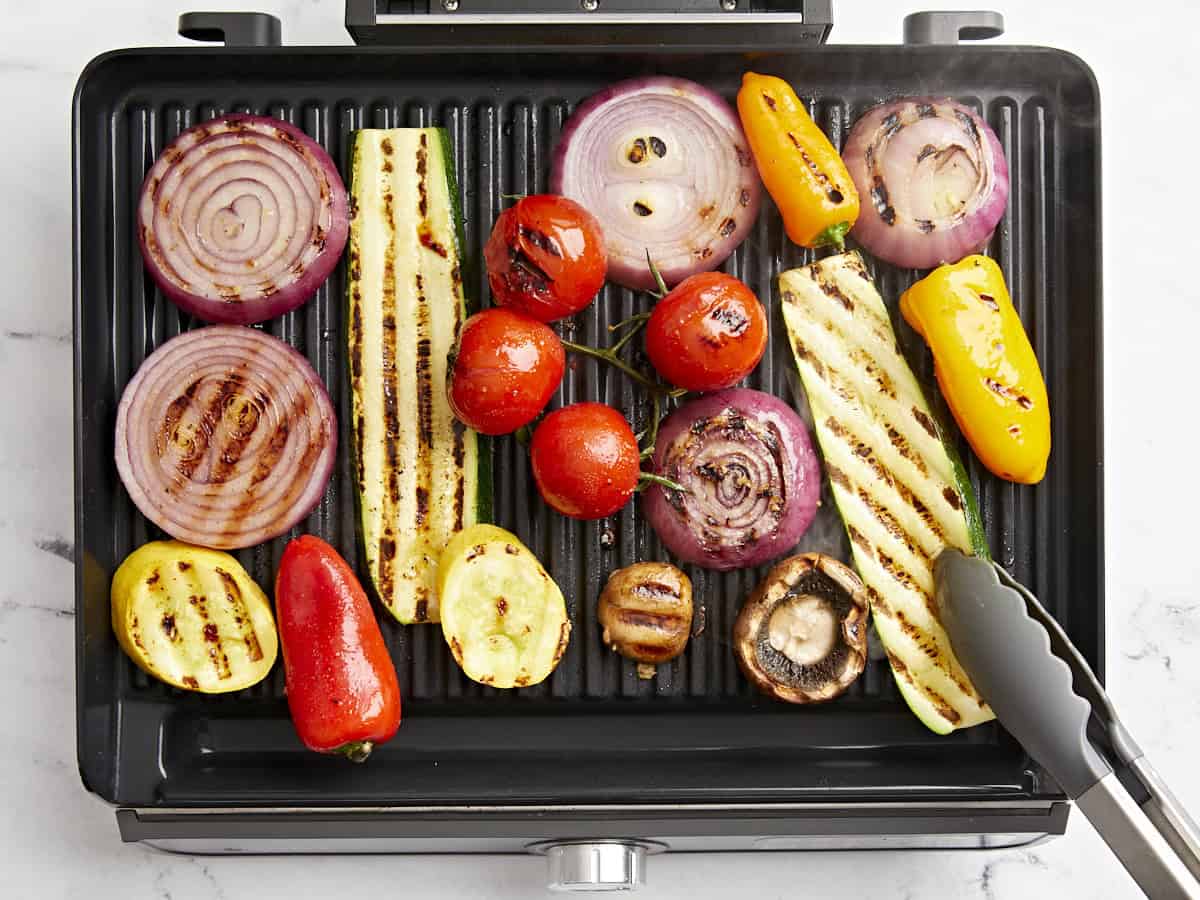
  • Flip and grill for an additional 3-4 minutes or until veggies are done to your liking. I like my grilled vegetables to still have some bite to them, so I am careful to not overcook them! Onions can cook a bit longer and become nice and sweet when they cook down a bit (and help flavor the grill for the other veggies as well!)
  • Sprinkle on the remaining ½ tsp steak seasoning and (optional) serve with BudgetBytes chimichurri!

See how we calculate recipe costs here.

Notes

*You can use any tomato instead of the cherry tomatoes on the vine, but I recommend leaving them whole. The outside will get some nice color, and the inside will be warm and flavorful. They may burst a little but will remain mostly intact if you are gentle with them.
**You can substitute any mushroom for the baby bella mushrooms. Mushrooms are forgiving when it comes to grilling, and they all taste amazing, pretty much no matter what!
This recipe serves 8 people as a side, about 1.5 cups of veggies per person.

Nutrition

Serving: 1serving | Calories: 67kcal | Carbohydrates: 9g | Protein: 2g | Fat: 3g | Sodium: 10mg | Fiber: 3g
Side view of a plate of grilled vegetables.

how to make Grilled Vegetables – step by step photos

Overhead view of chopped vegetables on a wooden chopping board.

Rinse all your veggies under cold water, excluding the onion. Pat them dry before chopping.

Using a knife or a mandoline slicer on the thickest setting, cut 1 zucchini lengthwise, about ¼ inch thick, and remove both ends. Remove the dry skin from 1 red onion and cut it into thick rings. Next, remove the stem from 8 whole mushrooms and cut 1 yellow squash into ¼ inch thick discs. The 8 mini bell peppers should be left whole, and the 6-8 vine tomatoes should still be attached to the vine.

Marinade ingredients for grilled vegetables in a bowl.

In a small bowl, whisk together 1 ½ Tbsp of olive oil, 1 minced garlic clove, ½ tsp of steak seasoning, and ½ tsp sugar.

Sliced vegetables brushed with a marinade.

Brush the olive oil marinade over your veggies, covering all sides.

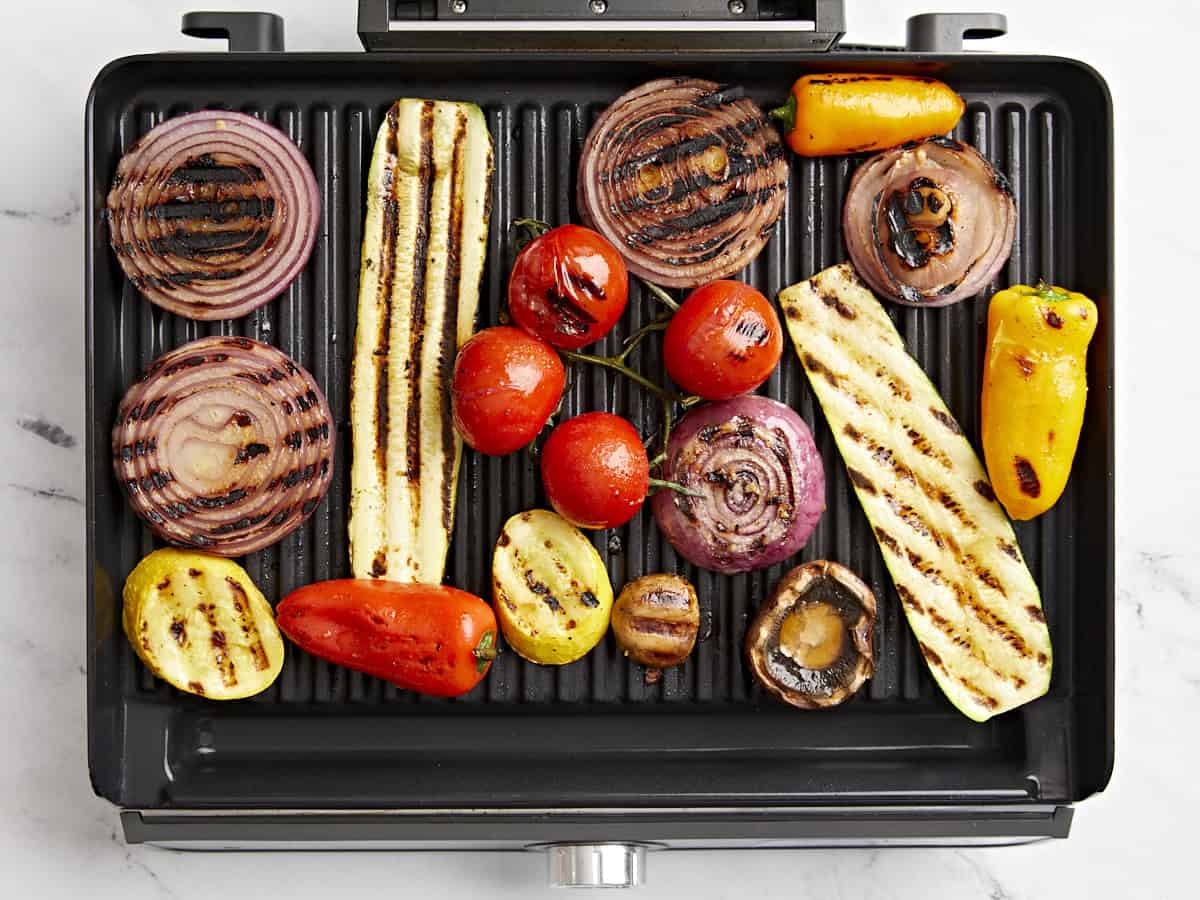
Overhead view of sliced red onions on a grill.

Add the sliced onion rings to your grill as it preheats to 400°F.

Overhead view of sliced vegetables on a grill.

Once the grill is fully heated, flip the onions and place the remaining veggies on the grill. Grill the vegetables for about 4 minutes until you get distinct grill marks.

Grilled vegetables on a grill being flipped with tongs.

Flip the vegetables and grill them for an additional 3-4 minutes or until they’re cooked to your liking. I like my grilled veggies to still have some bite, so I’m careful not to overcook them! I like the onions to cook for the longest as they become nice and sweet when they cook down (and they help flavor the grill for the other veggies!).

Overhead view of grilled vegetables on a grill.

When the vegetables are cooked to your liking, sprinkle over the remaining ½ tsp steak seasoning and (optional) serve with BudgetBytes chimichurri.

Overhead view of a plate of grilled vegetables.

No summer BBQ is complete without a generous serving of these easy grilled vegetables!

The post Grilled Vegetables appeared first on Budget Bytes.

Barley Salad

This Barley Salad recipe combines tomatoes, olives, cucumbers, and feta cheese with high-fiber pearled barley for a rich and filling salad.

The post Barley Salad appeared first on Budget Bytes.

I love a healthy salad with tons of texture, and this Barley Salad recipe is a fresh and juicy flavor bomb! I combined the bold Mediterranean flavors of tomatoes, olives, cucumbers, and feta cheese with high-fiber pearled barley for a rich and filling salad. Tossed in a tangy and herbaceous dressing, this salad is the perfect side for any meal!

overhead view of barley salad in a bowl.

What Is Barley?

Barley is a chewy and nutty cereal grain that is rich in fiber and minerals and is the base of this hearty grain salad. This barley salad is similar to our couscous salad but packed with even more wholesome veggies and feta cheese!

Ingredients for Barley Salad

Here’s what you’ll need to make barley salad:

  • Quaker Oats Quick Pearled Barley: This type of barley has already been hulled, steamed, and polished, so it cooks much faster. If using hulled barley, you’ll need to increase the cooking time significantly.
  • Grape Tomatoes: Add a pop of fresh, juicy flavor.
  • Kalamata Olives: Add a briny flavor.
  • Cucumber: Adds freshness and crunch.
  • Red Bell Pepper: Adds sweetness and crunch.
  • Zucchini: Adds a mild and sweet flavor.
  • Red Onion: Adds a bit of bite!
  • Feta Cheese: Adds creaminess and tanginess to the salad.
  • Fresh Parsley: Adds freshness and color to the dressing.
  • Lemon: I use the juice and zest to make the dressing fresh and zippy!
  • Sugar: Adds a touch of sweetness to the dressing.
  • Spices: Salt, black pepper, and garlic powder add savory flavor to the dressing.
  • Dijon Mustard: Adds a touch of tanginess and spice to the dressing.
  • Red Wine Vinegar: Enhances the tanginess of the dressing.
  • Olive Oil: Helps emulsify the dressing and tone down the acidity.

Storage Instructions

Store leftover barley salad in an airtight container in the refrigerator for up to 5 days. I prefer to enjoy this salad chilled straight from the fridge!

Tips and Notes

  • If you’re in a rush, you can quickly cool the barley by rinsing it in a colander under cold water, and then draining well.
  • For a gluten-free option, swap the barley for brown rice or quinoa (cooked according to the package).
  • If your red onions are particularly strong, you can soak the cut pieces in ice water for 10 minutes to mellow them out.
holding a forkful of barley salad over a serving in a bowl.
overhead view of barley salad in a bowl.
Print

Barley Salad Recipe

This Barley Salad recipe combines tomatoes, olives, cucumbers, and feta cheese with high-fiber pearled barley for a rich and filling salad.
Course Salad
Cuisine Mediterranean
Total Cost ($16.94 recipe / $1.69 serving)
Prep Time 20 minutes
Cook Time 10 minutes
Total Time 30 minutes
Servings 10 (1.5 cups each)
Calories 211kcal

Ingredients

Salad Ingredients:

  • 11 oz. box Quaker Oats Quick Pearled Barley $2.74
  • 1/4 tsp sea salt $0.01
  • 1 cup grape tomatoes, halved $1.98
  • 1/4 cup chopped pitted kalamata olives $1.04
  • 1 cucumber, peeled and diced $0.64
  • 1 red bell pepper, diced $1.48
  • 1 small zucchini, diced (about 1 cup) $0.93
  • 1/2 red onion, diced $0.46
  • 5 oz. crumbled feta cheese (about 1/2 cup) $2.88

Dressing Ingredients:

  • 3 Tbsp minced fresh parsley $0.32
  • 1 lemon, juiced and zested $0.50
  • 1 Tbsp sugar $0.04
  • 1 tsp salt $0.02
  • 1/2 tsp black pepper $0.10
  • 1 Tbsp Dijon mustard $0.06
  • 1 tsp garlic powder $0.15
  • 2 Tbsp red wine vinegar $0.32
  • 3 Tbsp olive oil $0.54

Instructions

  • Stir 2 cups of quick barley into 4 cups of briskly boiling water with 1/4 tsp sea salt.
  • Reduce heat to a simmer and cover, cooking for 10 minutes. Remove from heat and let stand 5 minutes. Fluff finished quick barley with a fork and allow it to cool while you prep your veggies.
  • Halve the grape tomatoes; strain and portion the chopped kalamata olives; peel and the dice cucumber; and seed and dice the red bell pepper, zucchini, and red onion. Crumble 1/2 cup of feta cheese and set aside.
  • Mince the parsley; zest and juice the lemon; and gather the sugar, salt, pepper, Dijon mustard, and garlic powder.
  • Whisk the red wine vinegar, olive oil, parsley, lemon juice, lemon zest, sugar, salt, pepper, mustard, and garlic powder together.
  • Combine the cooked and cooled quick barley, all prepped vegetables, crumbled feta cheese, and dressing in a large mixing bowl.
  • Toss everything to combine. Add salt and pepper if needed. Enjoy!

See how we calculate recipe costs here.

Nutrition

Serving: 1.5cups | Calories: 211kcal | Carbohydrates: 30g | Protein: 6g | Fat: 8g | Sodium: 528mg | Fiber: 6g
overhead view of a serving of barley salad in a white bowl topped with feta.

how to make Barley Salad – step by step photos

barley cooking in a pot of boiling water.

Stir 2 cups of quick barley into 4 cups of briskly boiling water with 1/4 tsp sea salt.

cooked fluffed barley in a pot.

Reduce the heat to a simmer and cover, cooking for 10 minutes. Remove from heat and let stand for 5 minutes. Fluff finished quick barley with a fork and allow it to cool while you prep your veggies.

diced vegetables on a cutting board.

Halve 1 cup grape tomatoes; strain and portion 1/4 cup chopped kalamata olives; peel and dice 1 cucumber; and seed and dice 1 red bell pepper, 1 small zucchini, and 1/2 red onion. Crumble 1/2 cup of feta cheese and set aside.

dressing ingredients in individual bowls.

Mince 3 Tbsp parsley; zest and juice 1 lemon; and gather 1 Tbsp sugar, 1 tsp salt, 1/2 tsp pepper, 1 Tbsp Dijon mustard, and 1 tsp garlic powder.

dressing for barley salad in a white bowl.

Whisk 2 Tbsp red wine vinegar, 3 Tbsp olive oil, parsley, lemon juice, lemon zest, sugar, salt, pepper, mustard, and garlic powder together.

pouring dressing. over barley salad in a white bowl.

Combine the cooked and cooled quick barley, all prepped vegetables, crumbled feta cheese, and dressing in a large mixing bowl.

tossed barley salad in a white bowl.

Toss everything to combine. Add salt and pepper if needed. Enjoy!

closeup of barley salad in a white bowl.

Enjoy this rich and filling barley salad with your next healthy meal!

The post Barley Salad appeared first on Budget Bytes.

Watermelon and Feta Salad

Watermelon and feta salad is sweet, juicy, salty, and tangy! This flavorful salad is always in my top 10 side dishes every summer!

The post Watermelon and Feta Salad appeared first on Budget Bytes.

I am passionate about salads in all forms, and this Watermelon and Feta Salad is no different! Fresh in-season watermelon is so sweet and juicy, and crumbled feta cheese is so wonderfully salty. I drizzled this summery, fruity salad with a tangy vinegar dressing to make the flavors really pop. This flavorful salad is always in my top 10 side dishes every summer!

overhead view of watermelon and feta salad in a white bowl.

I don’t know about you, but one thing that’s never left off my grocery list in the summertime is watermelon! We’re lucky here in Tennessee because you can find the sweetest and juiciest ones at our local farmers’ markets (or your neighbors!), but even if you buy them from the grocery store, they are affordable, especially when you consider how many servings you get out of just one melon! If you’re curious how to cut them without losing a finger, we’ve got you covered.

Ingredients

Here’s what you’ll need to make watermelon and feta salad:

  • White Vinegar: Has a mellow tangy flavor that enhances the flavor of the watermelon without overpowering it.
  • Olive Oil: Adds to mouthfeel, acts as an emulsifier for the dressing, and adds a peppery aroma.
  • Salt and Pepper: Enhance the natural flavors of the watermelon, cheese, and cucumber.
  • Homemade Balsamic Glaze: Enhances the tangy and sweet flavors of this dish.
  • Watermelon: This sweet and juicy fruit is so hydrating on a hot summer day.
  • Feta Cheese: Adds creaminess and saltiness to the salad.
  • Cucumber: Adds a crisp crunch and refreshing flavor.
  • Red Onion: Adds a little bit of bite to the salad to balance out the sweetness.
  • Fresh Herbs: Fresh mint and parsley enhance the refreshing flavors of this salad.

What Else Can I Add?

This watermelon and feta salad is so delicious as is, but it’s also great with these additions:

Storage Tips

Watermelon, as its name suggests, is full of water. I recommend enjoying this salad shortly after it’s made for the best flavor and texture. However, it will keep for up to 2 days in the refrigerator. You may need to drain off excess juice before serving, and I highly recommend giving the salad a good toss!

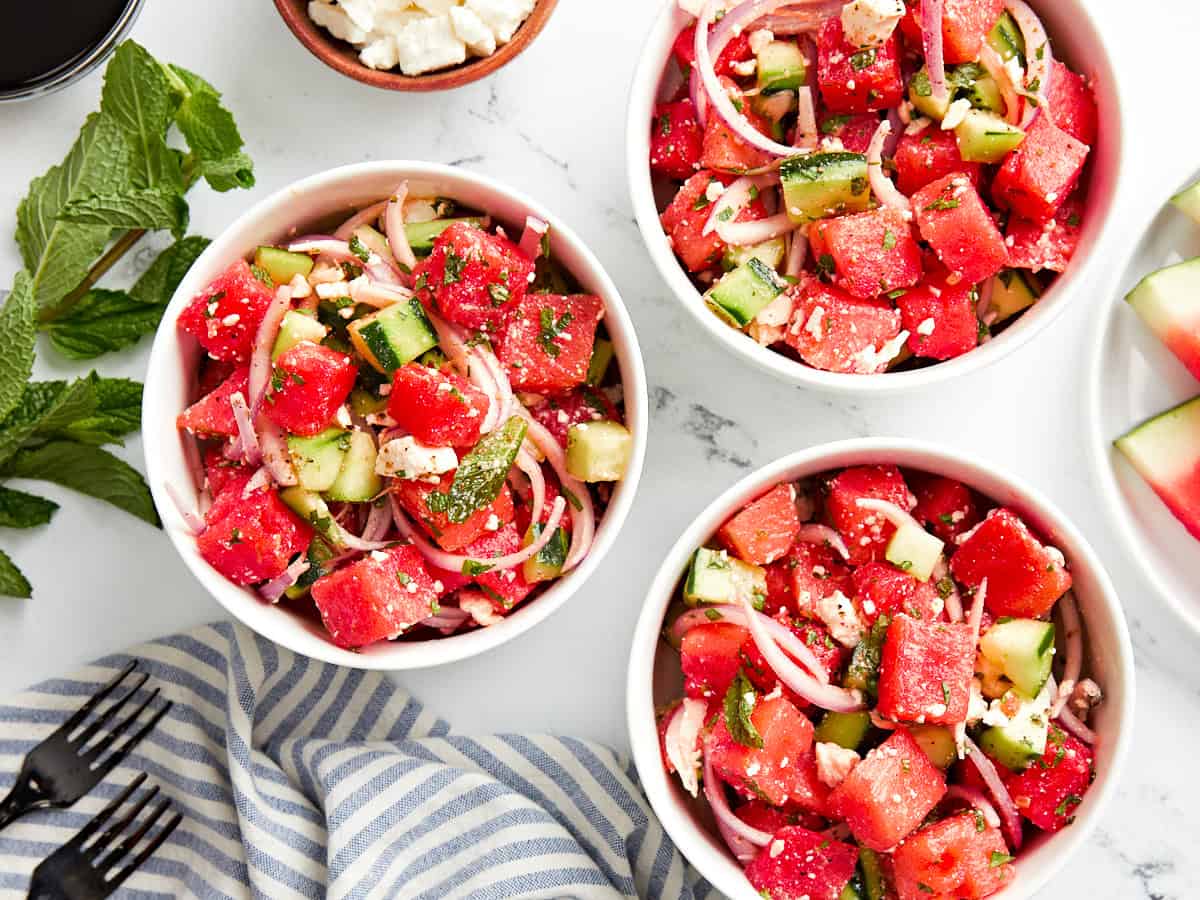
overhead view of 3 servings of watermelon and feta salad.
overhead view of watermelon and feta salad in a white bowl.
Print

Watermelon and Feta Salad

Watermelon and feta salad is sweet, juicy, salty, and tangy! This flavorful salad is always in my top 10 side dishes every summer!
Course Salad
Cuisine American
Total Cost ($8.04 recipe / $1.34 serving)
Prep Time 20 minutes
Total Time 20 minutes
Servings 6 (1.5 cups per person)
Calories 205kcal

Ingredients

Dressing:

Salad:

  • 1/2 small watermelon, diced (about 4 cups) $1.98
  • 1/2 cup crumbled feta cheese $2.88
  • 1 cucumber, peeled and diced $0.64
  • 1/2 red onion, finely julienned $0.46
  • 2 Tbsp minced fresh mint $0.89
  • 2 Tbsp minced fresh parsley $0.16

Instructions

  • To make the dressing, combine white vinegar, olive oil, salt and pepper in a bowl. Whisk to emulsify.
  • Dice watermelon into 1/2-inch cubes.
  • Gather diced watermelon, crumbled feta cheese, diced cucumber, julienned onion, minced parsley and mint.
  • Pour dressing over watermelon salad components.
  • Gently toss the salad in a large mixing bowl until combined. Be careful to not mash up all of the watermelon cubes! I like to let my watermelon feta salad sit in the refrigerator, covered, for a bit (even up to an hour or so!) to let the flavors really meld.
  • Drizzle each portion with a generous swirl of Homemade Balsamic Glaze. Top with extra salt and pepper if needed and enjoy!

See how we calculate recipe costs here.

Nutrition

Serving: 1.5cups | Calories: 205kcal | Carbohydrates: 33g | Protein: 4g | Fat: 8g | Sodium: 343mg | Fiber: 2g
side view of servings of watermelon and feta salad in white bowls with balsamic glaze.

how to make Watermelon and Feta Salad – step by step photos

salad dressing ingredients in a white bowl.

To make the dressing, combine 1 Tbsp white vinegar, 2 Tbsp olive oil, 1/2 tsp salt and 1/2 tsp pepper in a bowl. Whisk to emulsify.

partially diced watermelon on a white cutting board.

Dice 1/2 of a small watermelon into 1/2-inch cubes.

mise en place for watermelon and feta salad on a wood cutting board.

Gather the diced watermelon, 1/2 cup crumbled feta cheese, 1 diced cucumber, 1/2 of a julienned red onion, and 2 Tbsp each minced parsley and mint.

pouring dressing over watermelon and feta salad in a white bowl.

Pour the dressing over watermelon salad components.

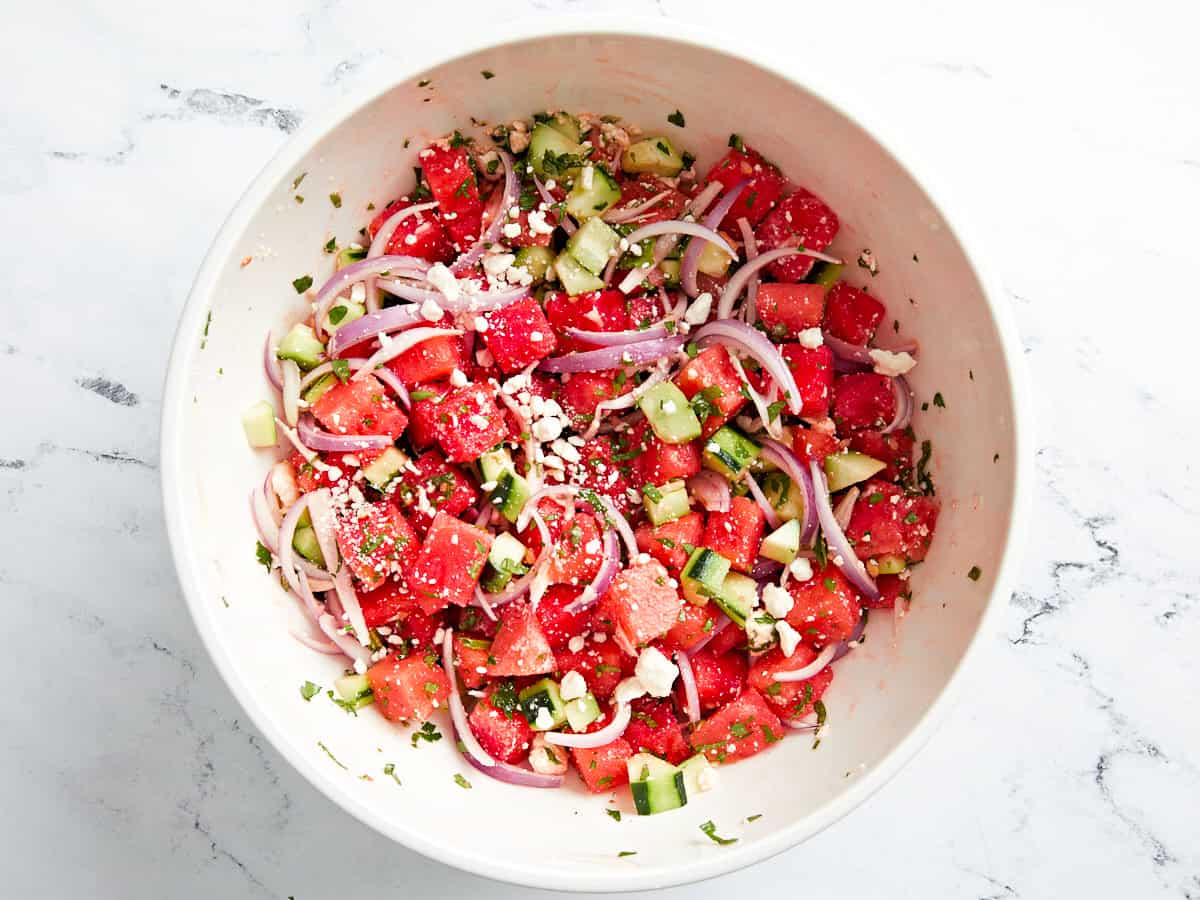
tossed watermelon and feta salad in a white bowl.

Gently toss the salad in a large mixing bowl until combined. Be careful to not mash up all of the watermelon cubes! I like to let my watermelon feta salad sit in the refrigerator, covered, for a bit (even up to an hour or so!) to let the flavors really meld. Drizzle each portion with 1/2 Tbsp Homemade Balsamic Glaze. Top with extra salt and pepper if needed and enjoy!

overhead view of 3 servings of watermelon and feta salad drizzled with balsamic glaze.

This refreshing watermelon and feta salad is about to become your favorite summer side!

The post Watermelon and Feta Salad appeared first on Budget Bytes.

Watermelon Gazpacho

This vibrant, savory-sweet Watermelon Gazpacho is a celebration of the summer season. Chilled soup? Yes, please!

The post Watermelon Gazpacho appeared first on Budget Bytes.
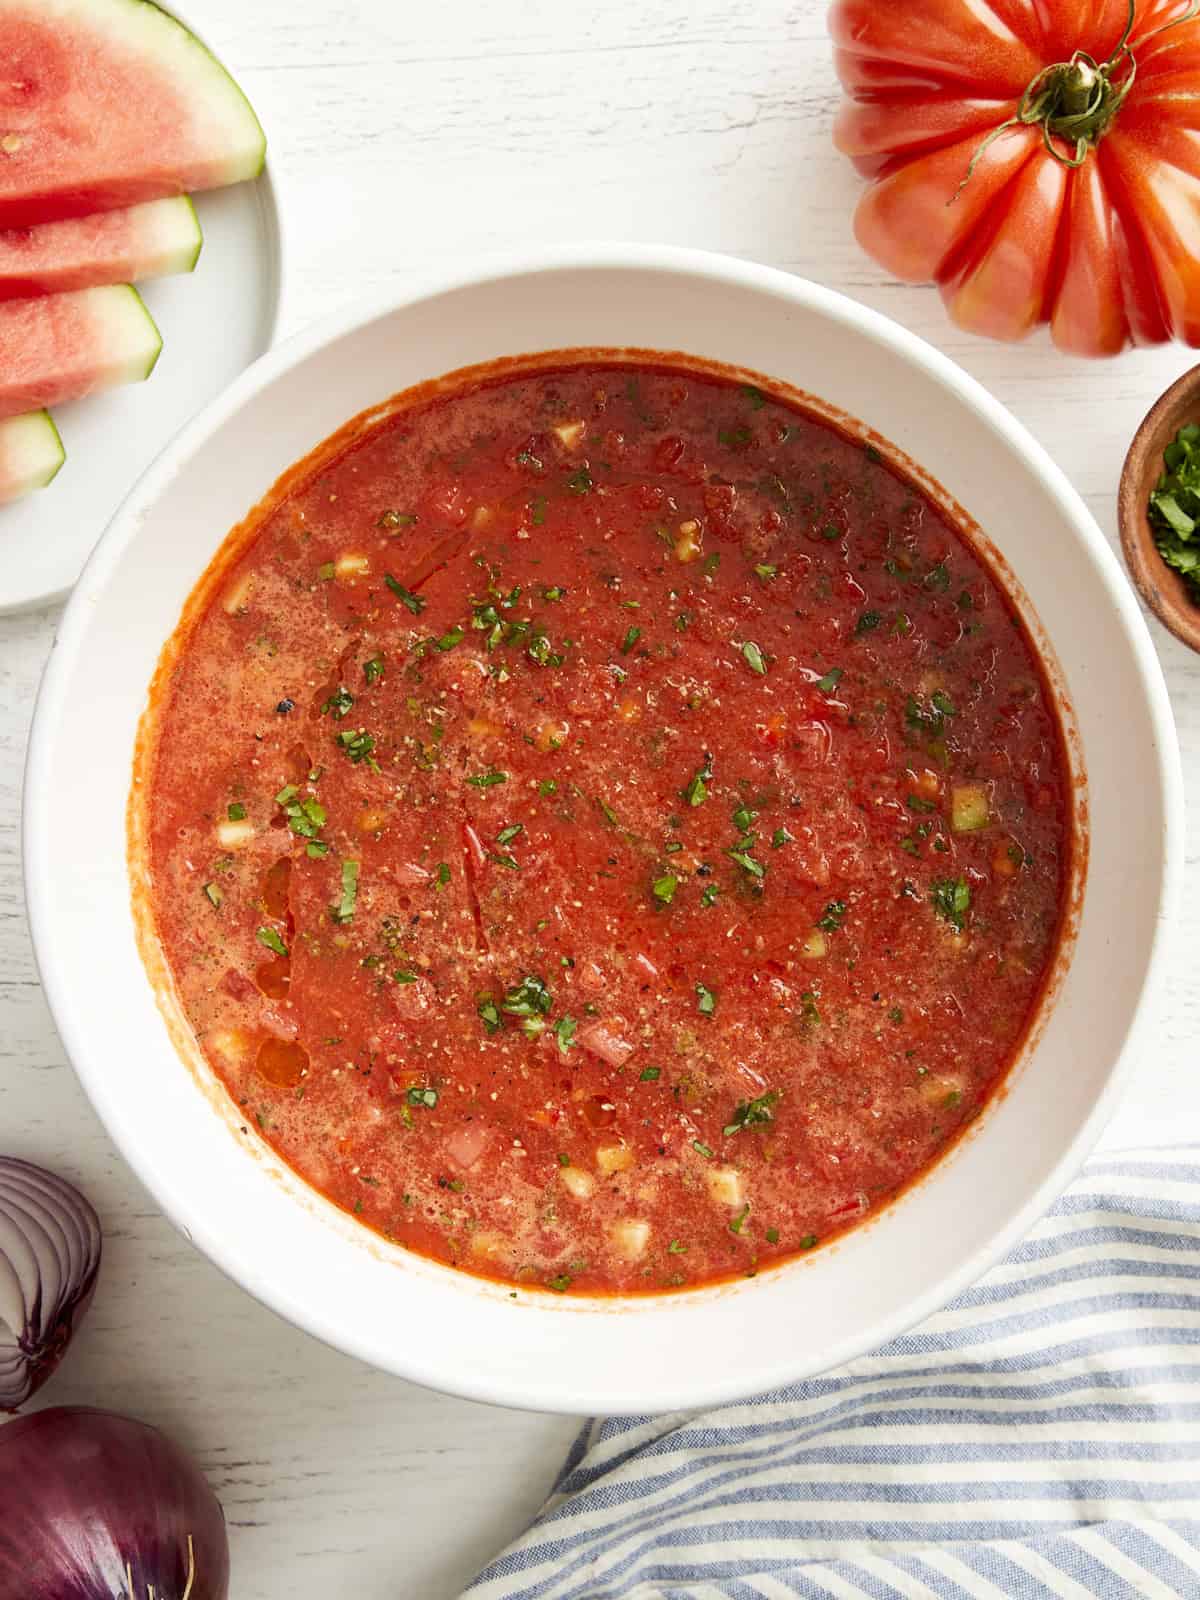
Chilled soup?! No way! To this reaction, I say, “Yes way!” If you haven’t tried gazpacho yet, this vibrant, savory-sweet Watermelon Gazpacho is a great place to start. I love the more common tomato gazpacho, but this watermelon gazpacho is super special and celebratory of my favorite season… Summer.

overhead view of watermelon gazpacho in a white bowl with minced fresh herbs.

What Is Gazpacho?

Gazpacho is a chilled soup made from raw blended vegetables (and sometimes fruits, too!). It is widely enjoyed across Spain and Portugal during the hot summer months since it is so cool and refreshing. It was created for everyday workin’ folks to get the most nutrition with the least amount of ingredients possible. So, as far as budget-friendly, healthy, nutrient-packed recipes go, gazpacho is certainly one you’ll want to try!

I added watermelon to mine for a bit of a twist! Watermelon is 92% water, so it makes a great lightly flavored broth that’s so sweet and refreshing.

Ingredients

Here’s what you’ll need to make watermelon gazpacho:

  • Sherry Vinegar: Adds tanginess to the soup. Rice wine vinegar, apple cider vinegar, or white wine vinegar make great substitutions. Use whichever you have on hand!
  • Olive Oil: Helps to emulsify the soup and gives it a better mouthfeel.
  • Salt and Pepper: Enhance the natural flavor of the soup.
  • Watermelon: Forms the bulk of the soup and adds sweetness.
  • Cucumber: Adds a refreshing and delicate flavor.
  • Red Bell Pepper: Adds savory flavor notes to the soup and deepens the color.
  • Roma Tomatoes: Add a juicy and tangy flavor with subtle acidity.
  • Red Onion: Adds a bit of bite to the soup.
  • Jalapeño: Makes this soup just a little spicy!
  • Fresh Herbs: Basil and parsley add a fresh herbal flavor to the soup. Mint also works.

What Else Can I Add?

This fresh and fruity watermelon gazpacho lends itself so well to extra fruits and veggies on fridge cleanout day. Other melons, like cantaloupe or honeydew, can add more bulk and sweetness. Some strawberries add a touch of sweet and sour flavor. For veggies, beets, zucchini, or summer squash are all great choices.

Storage Instructions

Store leftover watermelon gazpacho in an airtight container in the refrigerator for up to 3 days. Enjoy chilled for the best flavor.

a bowl of chunky watermelon gazpacho.
overhead view of watermelon gazpacho in a white bowl with minced fresh herbs.
Print

Watermelon Gazpacho

This vibrant, savory-sweet Watermelon Gazpacho is a celebration of the summer season. Chilled soup? Yes, please!
Course Soup
Cuisine Spanish
Total Cost $8.10 recipe / $1.35 serving
Prep Time 25 minutes
Cook Time 0 minutes
Total Time 25 minutes
Servings 6 bowls (1.5 cups each)
Calories 195kcal

Equipment

Ingredients

  • 3 Tbsp sherry vinegar* $0.69
  • 3 Tbsp olive oil $0.57
  • 1/2 tsp salt $0.01
  • 1/2 tsp freshly cracked black pepper $0.03
  • 1/2 watermelon, divided (approx. 9 cups)** $2.34
  • 1 cucumber, seeded and diced, divided $0.64
  • 1 red bell pepper, seeded and chopped, divided $1.48
  • 3 roma tomatoes, seeded and diced, divided $0.63
  • 1/4 red onion, diced $0.30
  • 1 jalapeño, seeded and diced small $0.40
  • 1 Tbsp basil, minced $0.89
  • 1 Tbsp parsley, minced $0.12

Instructions

  • Whisk together sherry vinegar, olive oil, salt, pepper.
  • Add 4.5 cups of watermelon, half a peeled and diced cucumber, half of a seeded bell pepper, 2 roma tomatoes, and red onion to blender.
  • Blend until smooth while simultaneously streaming in the vinegar mixture.
  • Pour gazpacho broth into large container and stir in 4.5 cups of diced watermelon, diced cucumber, diced bell pepper, 1 seeded and diced roma tomato, seeded and small-diced jalapeno and fresh herbs.
  • Top with an extra drizzle of olive oil and a crank of salt and pepper if you’ve got it! Enjoy cold.

See how we calculate recipe costs here.

Notes

*Rice wine vinegar, white vinegar, and apple cider vinegar make good substitutions, if needed.
**¼ can be cut into messy larger chunks, it will go in the blender to make broth. The other ¼ should be diced into bite-sized pieces to stir in after blending is done. It adds lovely texture!

Nutrition

Serving: 1.5cups | Calories: 195kcal | Carbohydrates: 32g | Protein: 3g | Fat: 8g | Sodium: 202mg | Fiber: 3g
overhead view of a bowl of chunky watermelon gazpacho.

how to make Watermelon Gazpacho – step by step photos

oil, salt, pepper, and vinegar in a white bowl.

Whisk together 3 Tbsp sherry vinegar, 3 Tbsp olive oil, 1/2 tsp salt, and 1/2 tsp pepper.

ingredients for watermelon gazpacho in blender

Add 4.5 cups of watermelon, half of a peeled and diced cucumber, half of a seeded bell pepper, 2 roma tomatoes, and 1/4 of a diced red onion to blender.

blended watermelon gazpacho in a blender.

Blend until smooth while simultaneously streaming in the vinegar mixture.

a bowl of watermelon gazpacho topped with diced fruits and vegetables.

Pour gazpacho broth into a large container and stir in 4.5 cups of diced watermelon, the remaining half of a peeled and diced cucumber, half of a seeded and diced bell pepper, 1 seeded and diced roma tomato, 1 seeded and brunoised jalapeno, 1 Tbsp minced fresh basil, and 1 Tbsp minced fresh parsley. Top with an extra drizzle of olive oil and a crank of salt and pepper if you’ve got it! Enjoy cold.

a spoon scooping a bite of chunky watermelon gazpacho from a white bowl.

This refreshing watermelon gazpacho is sure to cool you off this summer!

The post Watermelon Gazpacho appeared first on Budget Bytes.
Stovetop Baked Beans

These Stovetop Baked Beans are super-fast to whip up and taste great. They’re made with pantry staples in just 20 minutes!

The post Stovetop Baked Beans appeared first on Budget Bytes.
No barbecue or cookout is complete without a steaming pot of sweet and tangy baked beans… and the fact that there’s no bacon in these beans means everyone can enjoy them, regardless of dietary restrictions. These Stovetop Baked Beans are super-fast to whip up and taste great. I hope, like us, you already have all of these ingredients on hand, too!

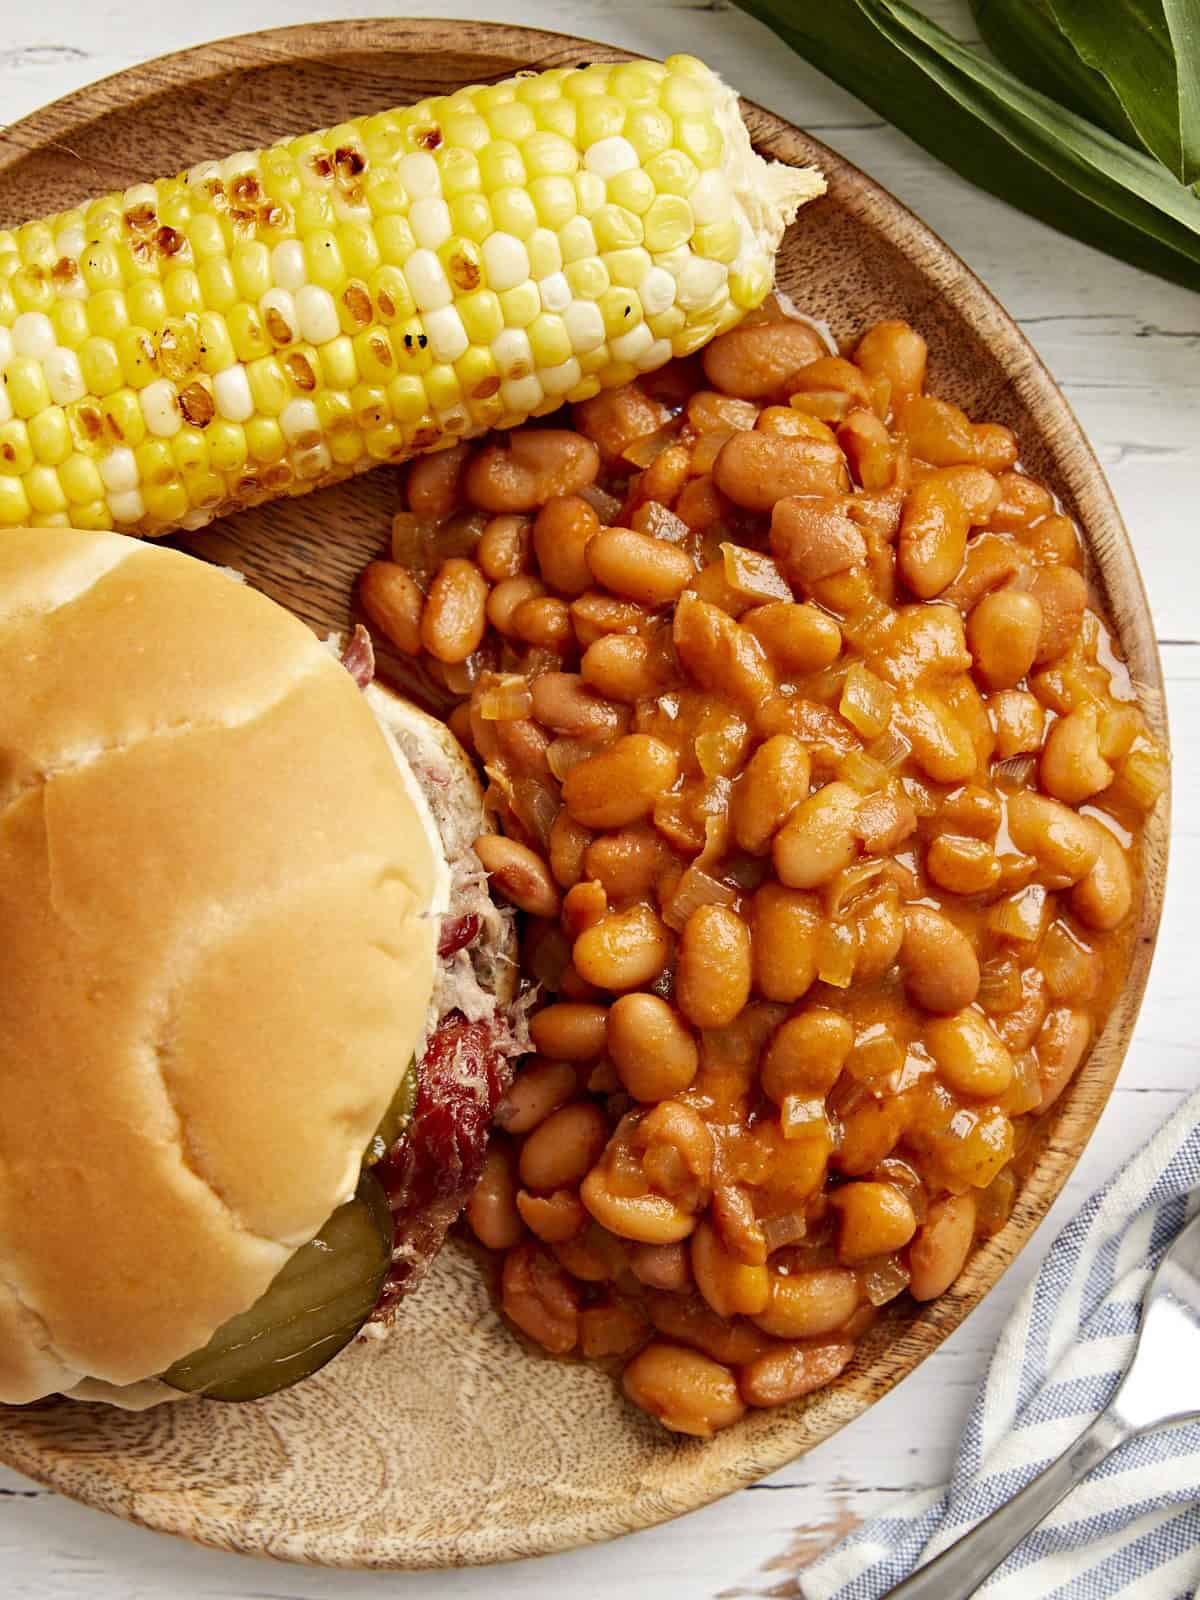
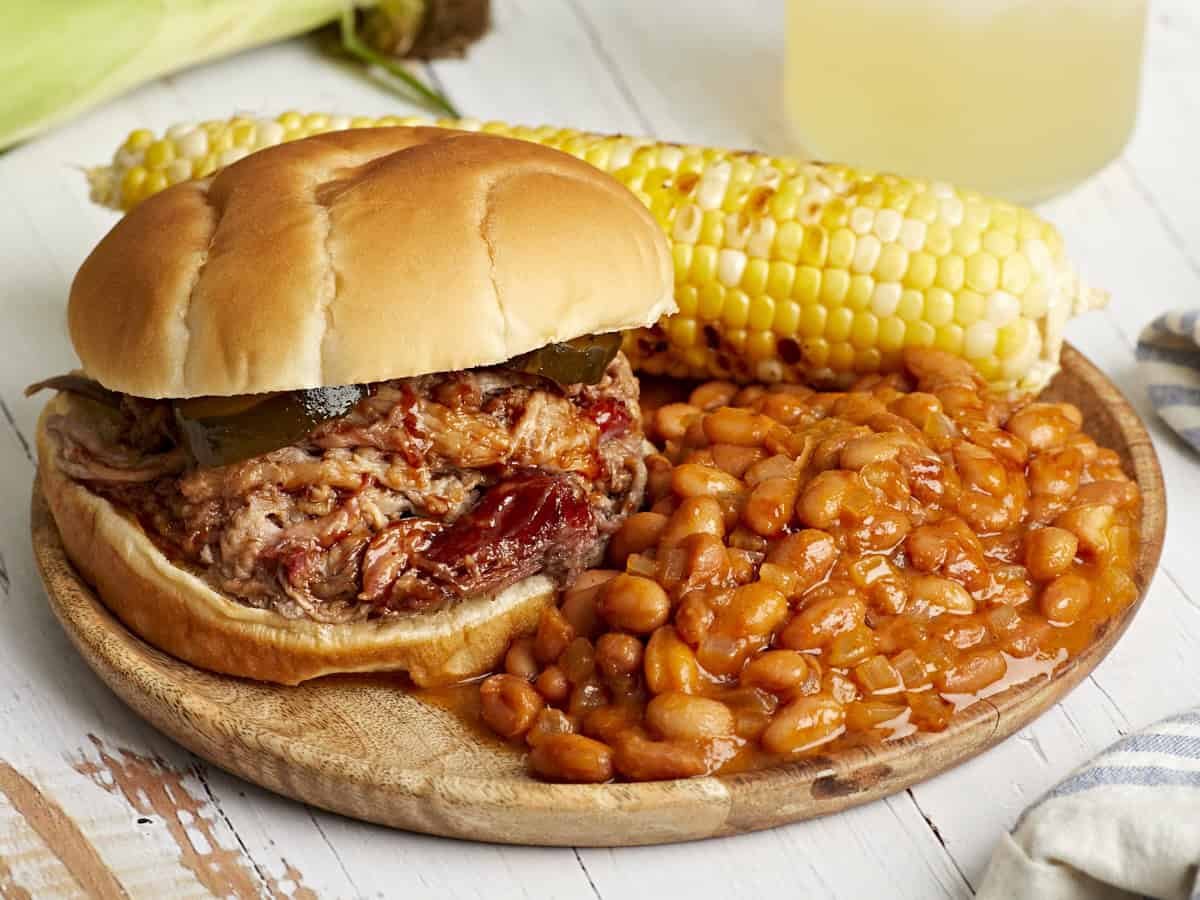
overhead view of a serving of baked beans on a plate with a sandwich and corn on the cob.

We decided this recipe had to go on the blog after seeing it in action… Marsha and I were plating one of our grilled recipes for photos and we realized we didn’t have any canned baked beans on hand—or the time to cook up some bacon and do a more time-consuming oven-baked beans version! (On photography days, we have to move fast!) So, we looked through the pantry and found all of these ingredients right there and threw this together in minutes! We took a bite (because dang! they smelled great!) and knew we had a winner.

Ingredients for Baked Beans

Here’s what you’ll need to make stovetop baked beans:

  • Olive Oil: Helps cook the onions without burning them.
  • Salt: Enhances the natural flavor of the onions.
  • Smoked Paprika: Adds a touch of smokiness.
  • Onion: Add texture and sweetness to the beans.
  • Pinto Beans: While Navy beans are the more traditional choice, we used pinto beans because we always have them on hand. They have a great creamy texture and earthy flavor.
  • Dijon Mustard: Adds a bit of spicy tanginess to the sauce.
  • Ketchup: Adds sweetness, acidity, and umami flavor to the sauce.
  • Worcestershire Sauce: Enhances the umami flavor of the sauce. You can sub soy sauce for Worcestershire or omit it altogether if you are vegan.
  • Apple Cider Vinegar: Enhances the tanginess of the sauce. White vinegar also works well.
  • Brown Sugar: Adds a touch of molasses-y sweetness.
  • Water: Prevents the beans from drying out as they simmer.

What Else Can I Add?

If you’re feeling fancy, you can cook up a few slices of bacon or some diced pancetta for a meatier flavor.

Top Tip

Only use enough water to just cover the beans. The water keeps everything loose and moist, but you don’t want the sauce to turn into a soup broth!

Serving Suggestions

These stovetop baked beans are the perfect easy side for any cookout! I love to serve them alongside slow cooker BBQ chicken and grilled corn on the cob.

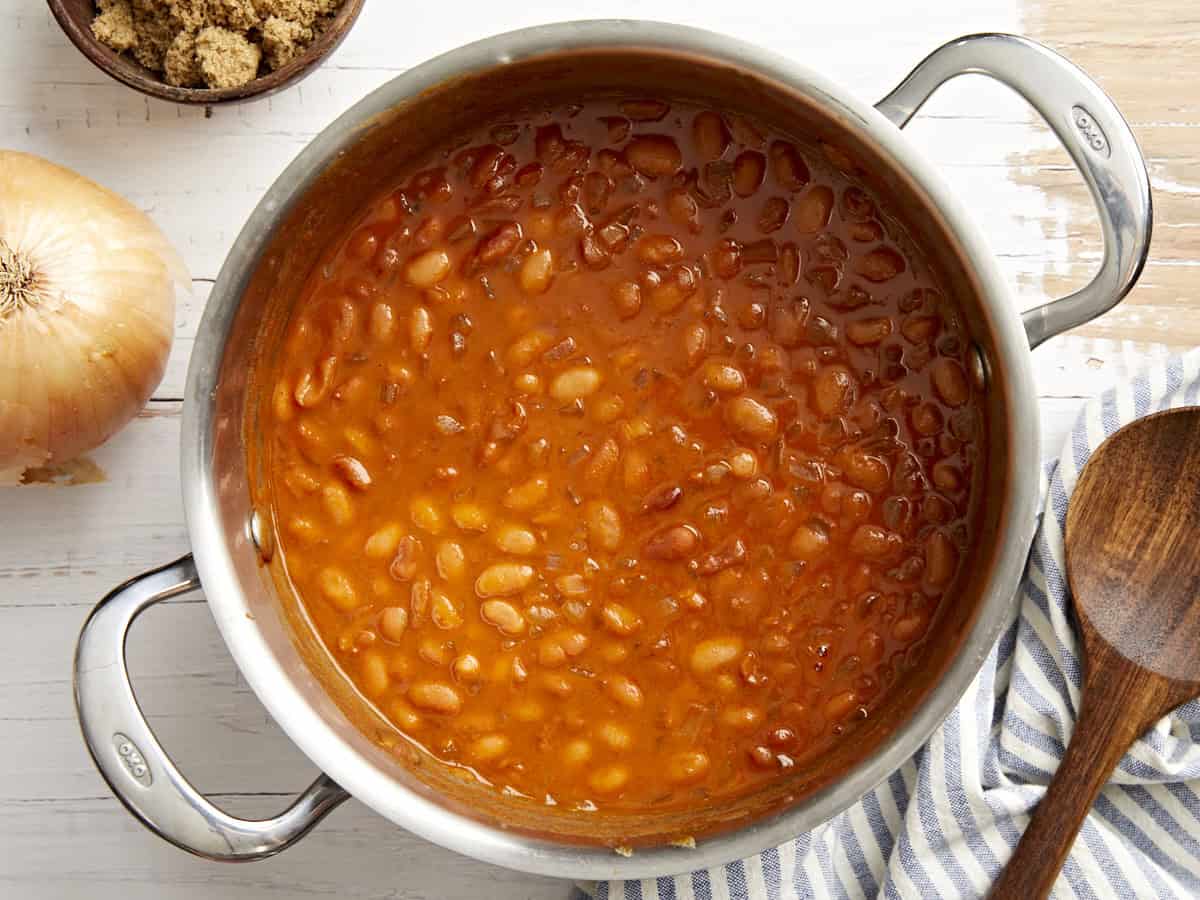
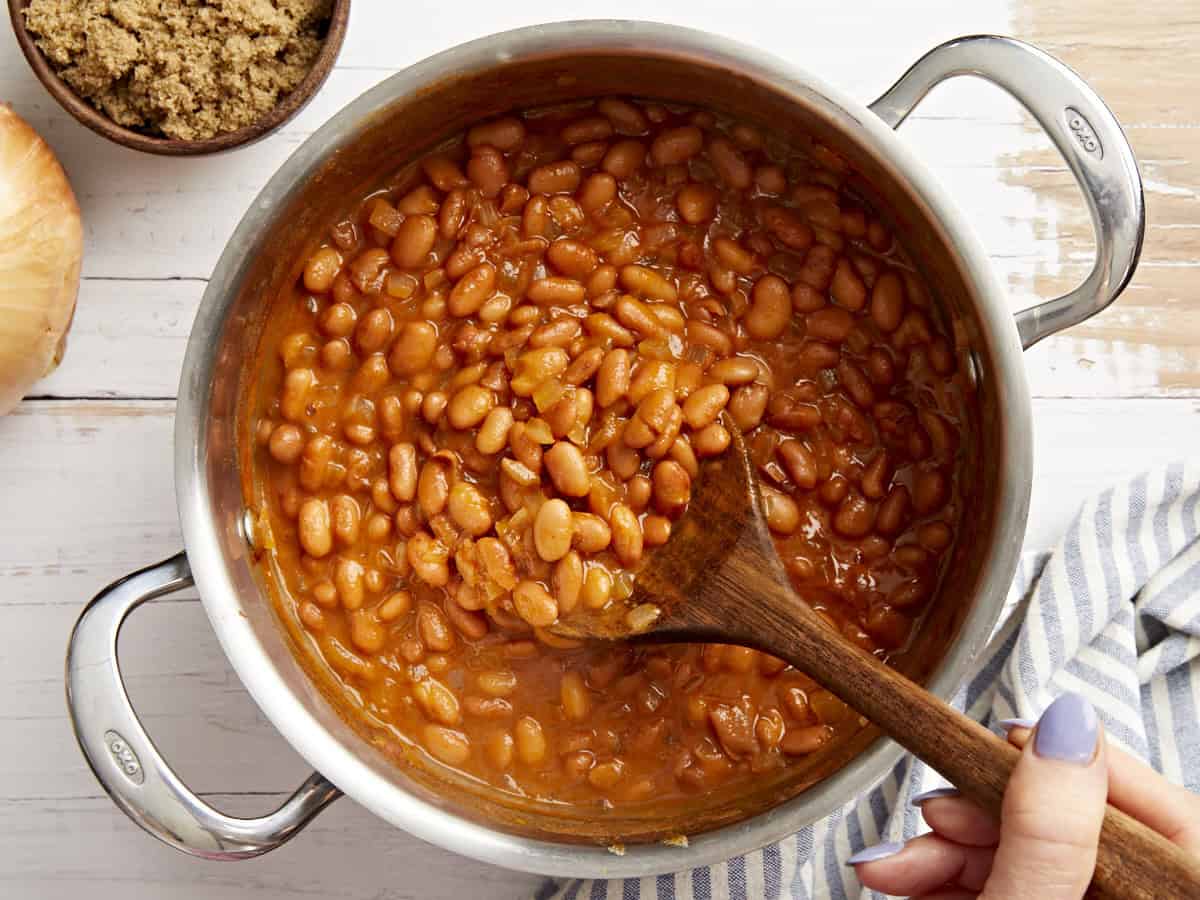
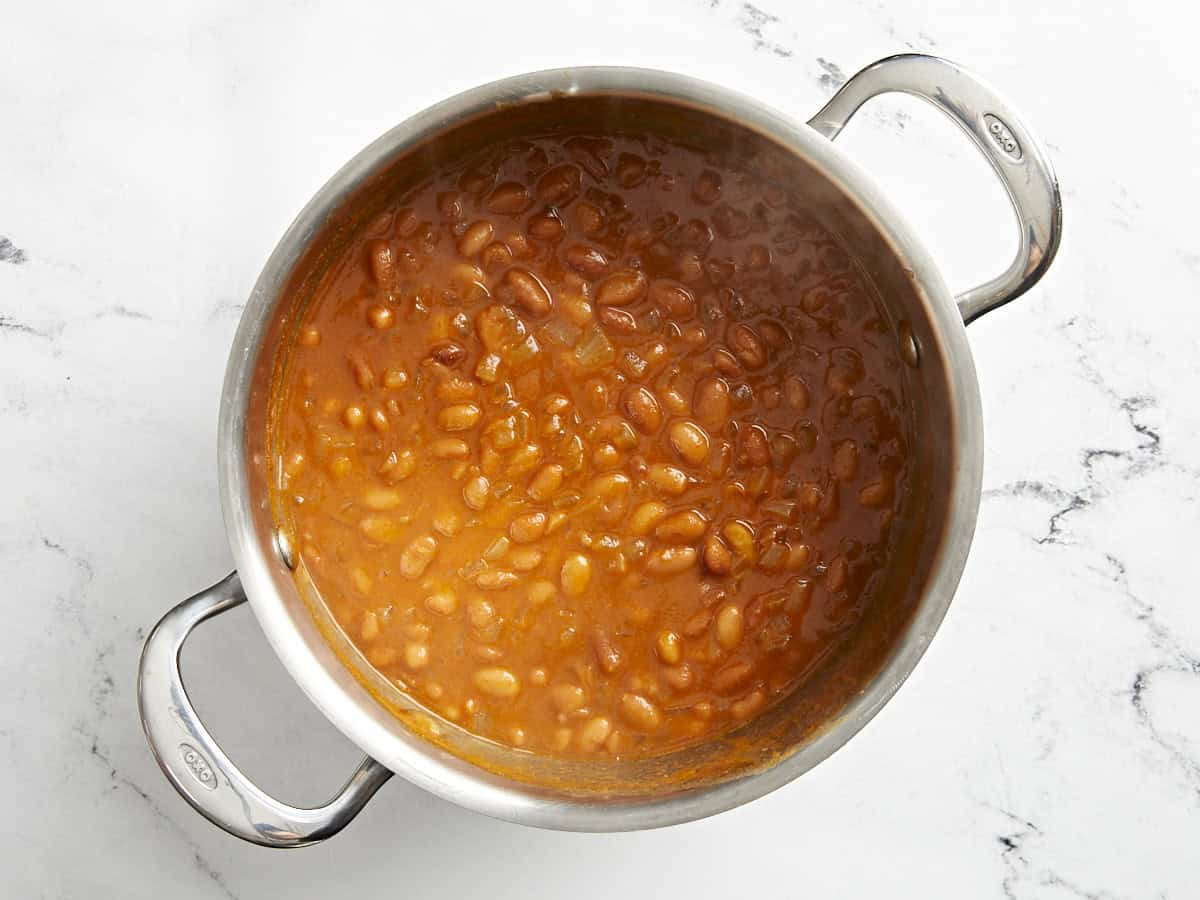
overhead view of baked beans in a pot.
overhead view of a serving of baked beans on a plate with a sandwich and corn on the cob.
Print

Stovetop Baked Beans Recipe

These Stovetop Baked Beans are super-fast to whip up and taste great. They're made with pantry staples in just 20 minutes!
Course Side Dish
Cuisine American
Total Cost ($2.94 recipe / $0.49 serving)
Prep Time 5 minutes
Cook Time 15 minutes
Total Time 20 minutes
Servings 6 (1/2 cup each)
Calories 188kcal

Ingredients

  • 1 Tbsp olive oil $0.19
  • 1 tsp smoked paprika $0.16
  • 1 tsp salt $0.05
  • 1/2 onion, diced small $0.47
  • 2 15-oz. cans pinto beans, drained $1.72
  • 1/2 Tbsp Dijon mustard $0.03
  • 1/4 cup ketchup $0.12
  • 2 dashes Worcestershire sauce $0.02
  • 1 tsp apple cider vinegar $0.01
  • 1/4 cup packed brown sugar $0.17
  • 1 cup water, plus more if needed $0.00

Instructions

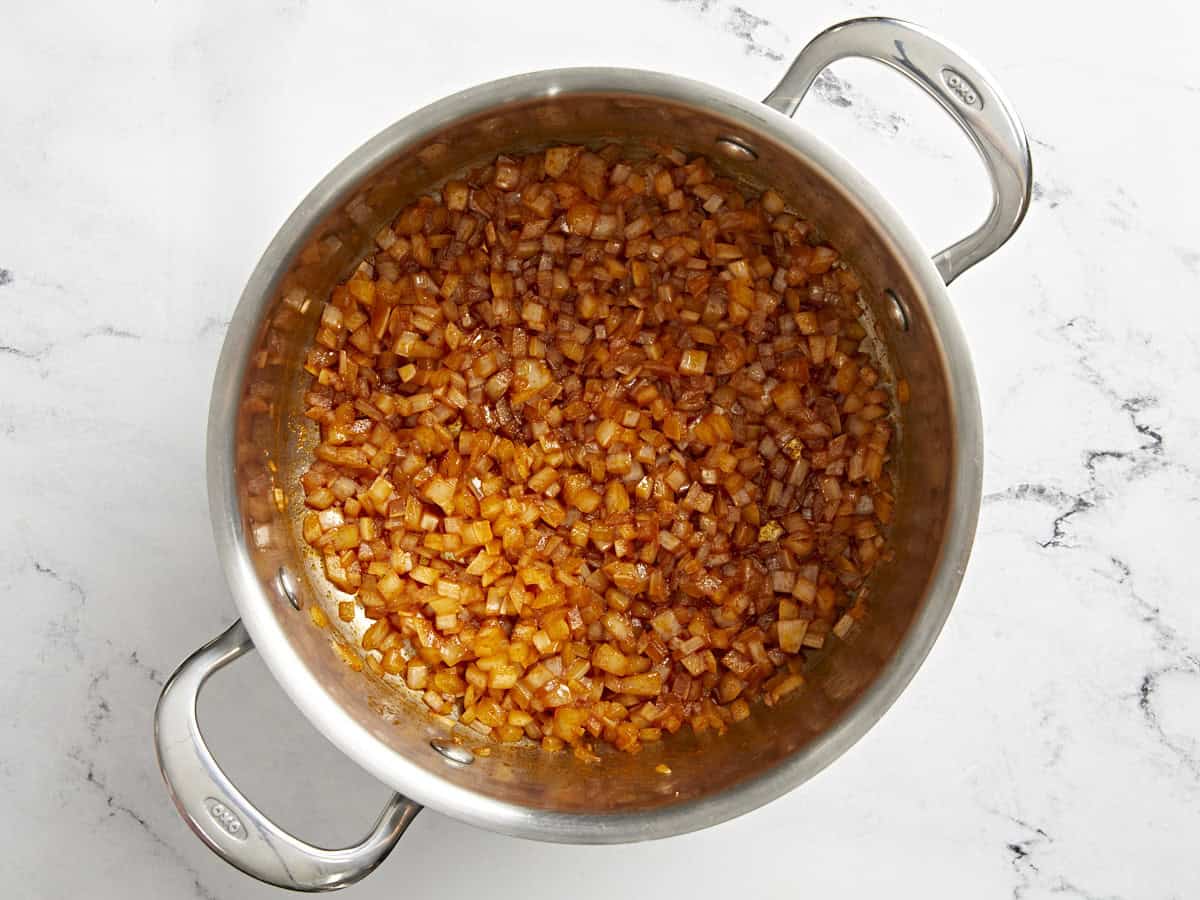
  • Add the olive oil, smoked paprika, salt, and diced onion to a medium pot. Stir and simmer on medium heat until the onions are glossy and soft.
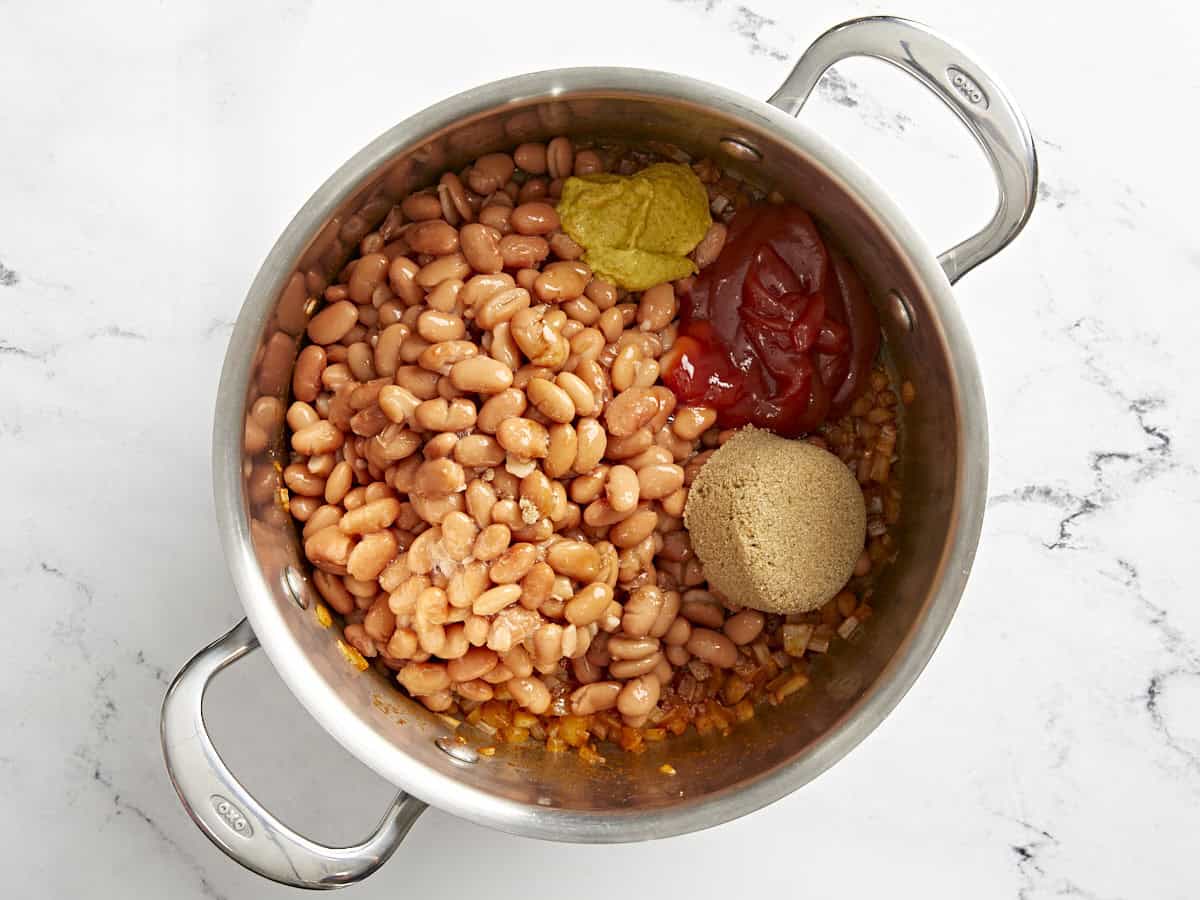
  • To the pot, add the drained beans, Dijon mustard, ketchup, Worcestershire, apple cider vinegar, and brown sugar.
  • Stir to combine and cook on medium heat for 4-5 minutes.
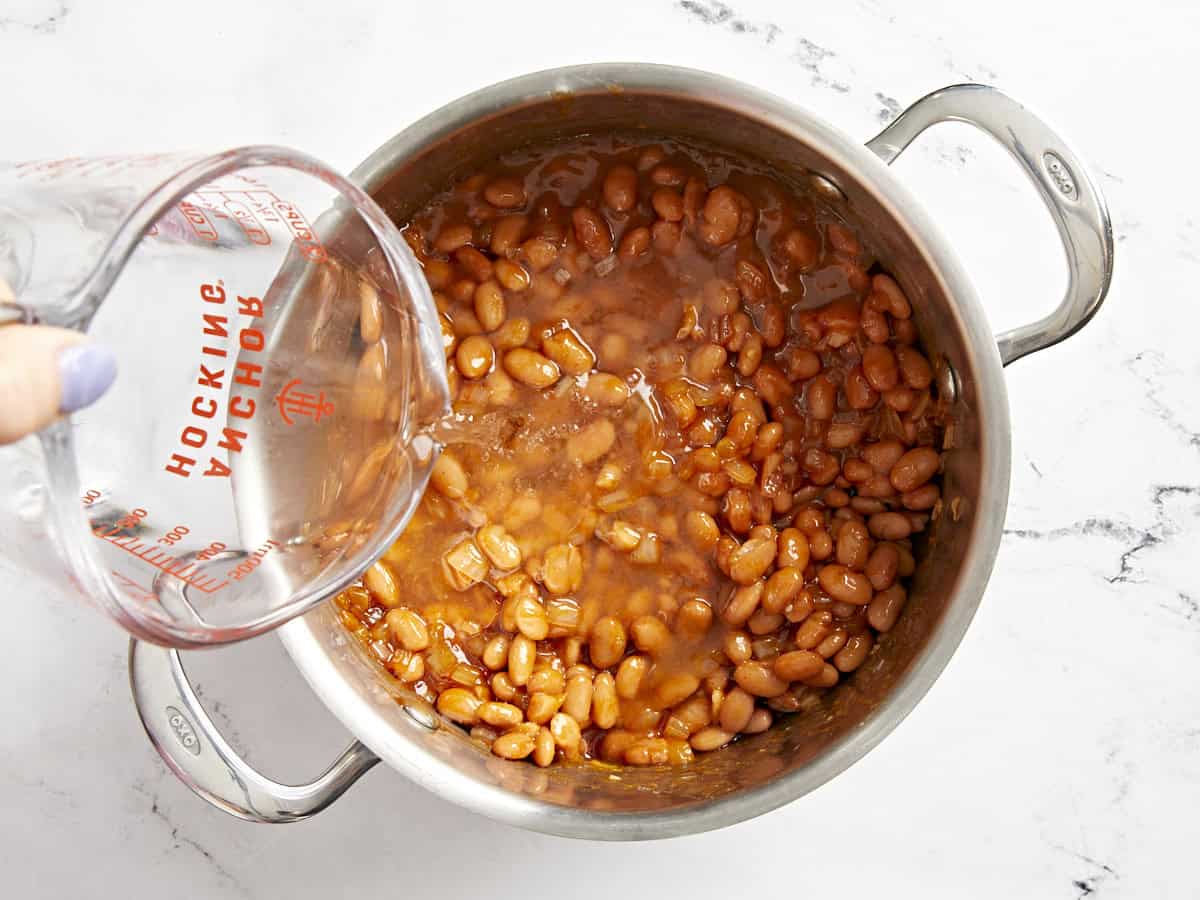
  • Add water, as needed, until beans are just covered. Simmer on medium heat for 5-7 minutes until completely warmed through.

See how we calculate recipe costs here.

Nutrition

Serving: 12cup | Calories: 188kcal | Carbohydrates: 34g | Protein: 7g | Fat: 3g | Sodium: 881mg | Fiber: 7g
stirring a pot of stovetop baked beans with a wooden spoon.

how to make Stovetop Baked Beans – step by step photos

seasoned sautéed onion in a pan.

Add 1 Tbsp olive oil, 1 tsp smoked paprika, 1 tsp salt, and 1/2 diced onion to a medium pot. Stir and simmer on medium heat until the onions are glossy and soft.

beans, brown sugar, ketchup, and mustard added to a pot with sautéed onions.

To the pot, add 2 15-oz. cans drained pinto beans, 1/2 Tbsp Dijon mustard, 1/4 cup ketchup, 2 dashes Worcestershire sauce, 1 tsp apple cider vinegar, and 1/4 cup brown sugar.

pouring water over stovetop baked beans in a pot.

Stir to combine and cook on medium heat for 4-5 minutes.

stovetop baked beans in a pot.

Add 1 cup water, as needed, until beans are just covered. Simmer on medium heat for 5-7 minutes until completely warmed through.

a serving of baked beans on a plate with a pulled pork sandwich and corn on the cob.

These quick and easy stovetop baked beans will be the hero of your next BBQ!

The post Stovetop Baked Beans appeared first on Budget Bytes.
Grilled Corn On The Cob

Nothing says summer to me quite like fresh, juicy Grilled Corn on the Cob. Steamed in the husk and slathered with butter and salt!

The post Grilled Corn On The Cob appeared first on Budget Bytes.
Nothing says summer to me quite like fresh, juicy Grilled Corn on the Cob. I have great memories as a child of horseback riding along a local cornfield and trying to pick a cob as I rode by. Back then, I would peel and eat it right there on horseback. But now, I find it tastes even better cooked on the grill! I grill my corn right in the husk so it steams to juicy perfection. Daubed with a little bit of butter and a sprinkle of salt, this grilled corn tastes like summer!

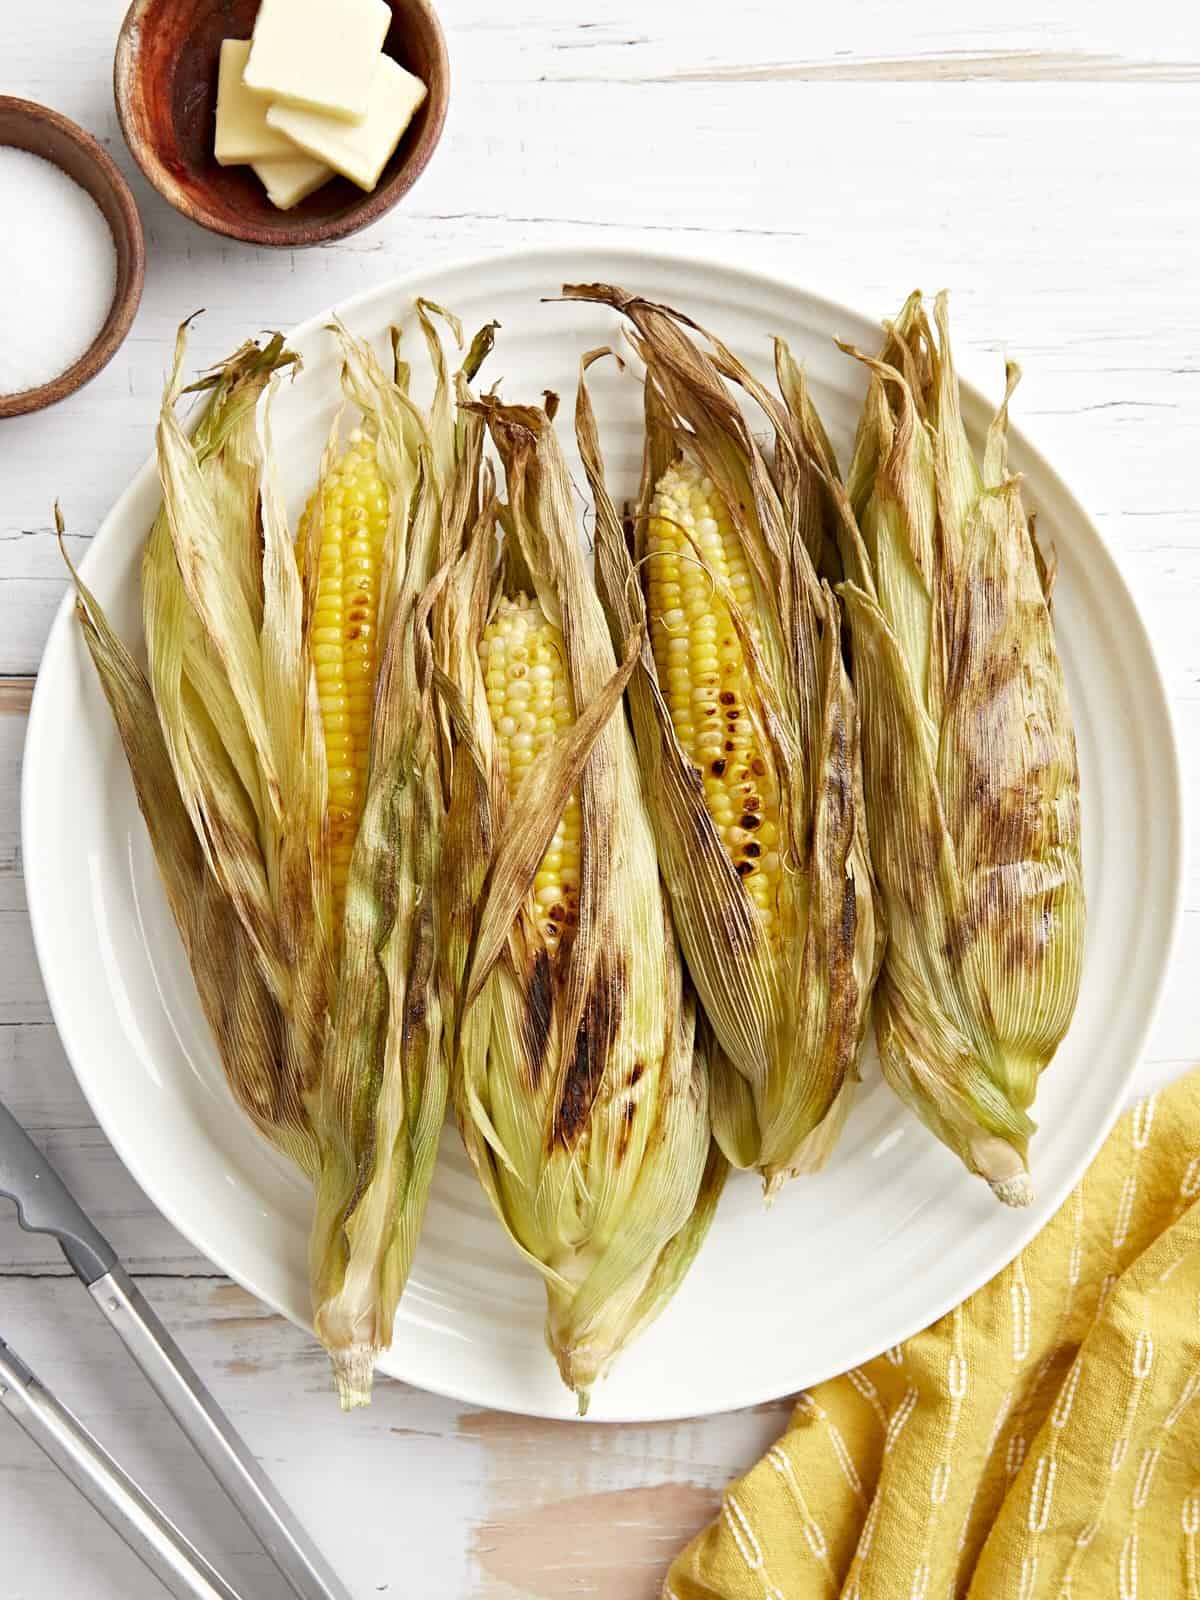
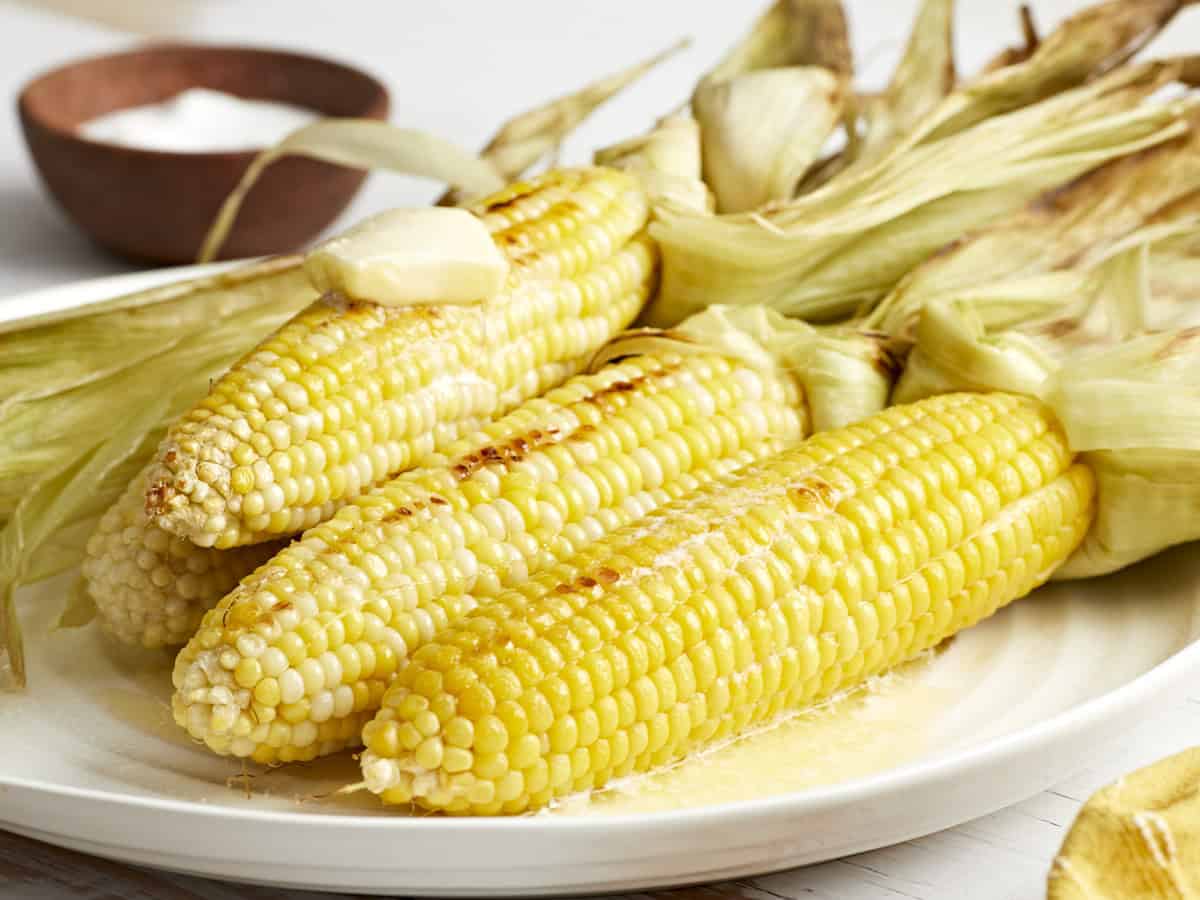
overhead view of 4 ears of grilled corn on a white plate.

Corn is such an interesting food because when fresh, it’s considered a starchy vegetable, but once dried it becomes a grain. It’s so versatile and flavorful all on its own, and I wanted to showcase that with this grilled corn on the cob recipe. I flavored it simply with butter and salt to really let that sweet corn flavor shine!

Ingredients

Here’s what you’ll need to make grilled corn on the cob:

  • Corn: Sweet corn is available in yellow, white, or bicolored. Bicolored, or “butter sugar” corn has the best balance of rich corn flavor with a touch of sweetness.
  • Water: Soaking the corn in cool water hydrates the husks to help steam the corn and prevent them from catching on fire.
  • Canola Oil Spray: Helps the corn husks cook without burning.
  • Sea Salt: Enhances the natural sweet flavor of the corn.
  • Butter: Adds richness to the corn.

Is It Better To Grill Corn In Foil Or Not?

While many folks like grilling their corn in foil, I chose to use the corn’s natural husk to get a similar effect with less cost and waste. The husk protects the corn from burning and helps it steam so it stays nice and moist.

Serving Suggestions

This sweet and juicy grilled corn on the cob pairs perfectly with grilled chicken, homemade hamburgers, or turkey burgers! It’s also the perfect base for street corn topped with mayonnaise, lime crema, chili powder, and Cotija cheese!

4 peeled ears of grilled corn with butter on a white plate.
overhead view of 4 ears of grilled corn on a white plate.
Print

Grilled Corn on the Cob

Nothing says summer to me quite like fresh, juicy Grilled Corn on the Cob. Steamed in the husk and slathered with butter and salt!
Course Side Dish
Cuisine American
Total Cost ($3.15 recipe / $0.78 serving)
Prep Time 15 minutes
Cook Time 10 minutes
Total Time 25 minutes
Servings 4 (1 cob each)
Calories 109kcal

Equipment

Ingredients

  • 4 ears corn, husks on $2.40
  • Water $0.00
  • Canola oil spray $0.06
  • 1 tsp sea salt $0.05
  • 4 Tbsp butter $0.64

Instructions

  • Soak 4 ears of corn in cool water for a least 10 minutes.
  • Gently peel back the green husks half way and remove the silks only, leaving the fibrous green husks intact. Cover the exposed corn with the husks. This will ultimately “steam” the corn as it grills!
  • Spray grill lightly with canola oil and grill corn cobs on high heat, turning every 2-4 minutes until all sides of the outer husks are equally charred. The corn inside should turn a more brilliant yellow and take on some extra color from the grill.
  • Enjoy with a little melted butter and a sprinkle of sea salt, using the peeled back husk as your handle.

See how we calculate recipe costs here.

Nutrition

Serving: 1cob | Calories: 109kcal | Carbohydrates: 2g | Protein: 0.4g | Fat: 12g | Sodium: 672mg | Fiber: 0.2g

how to Grill Corn On The Cob – step by step photos

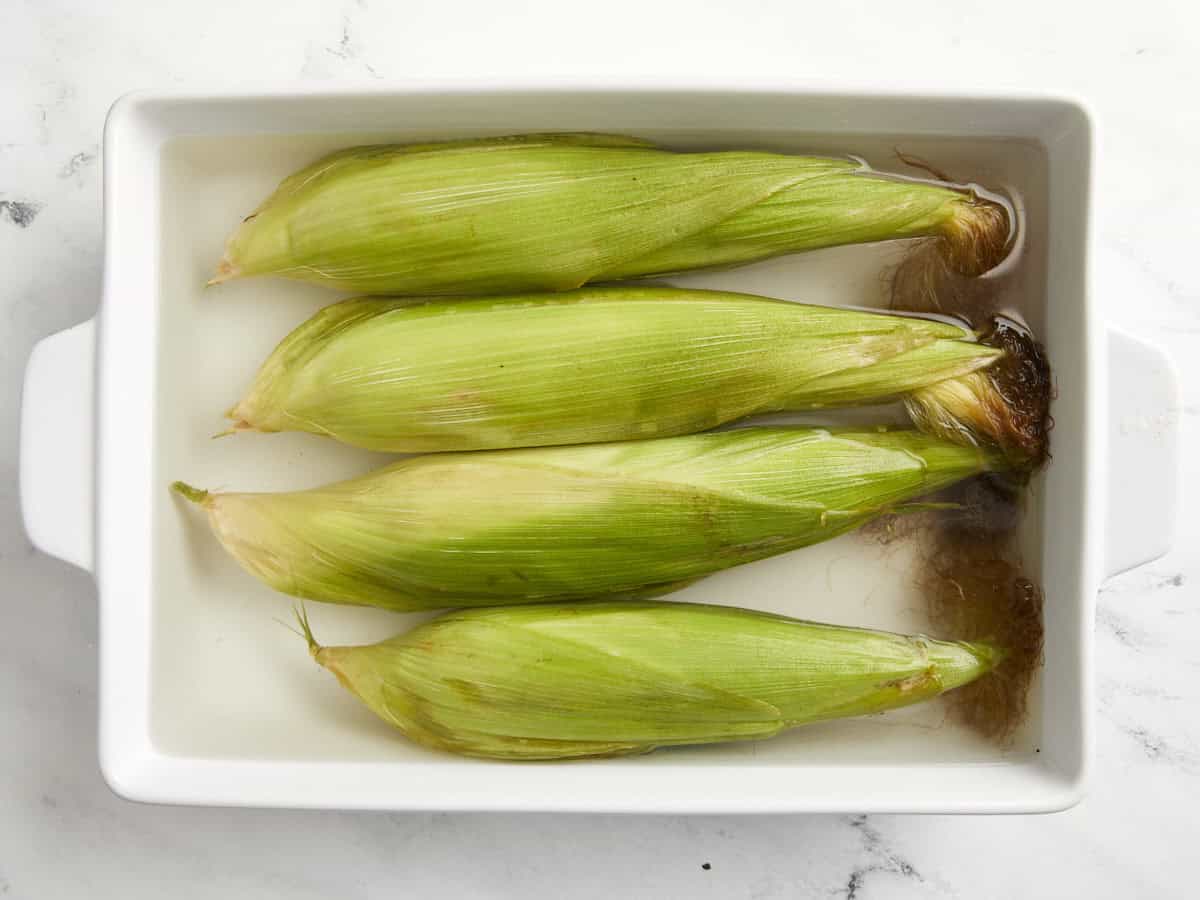
4 ears of corn soaked in water.

Soak 4 ears of corn in cool water for a least 10 minutes.

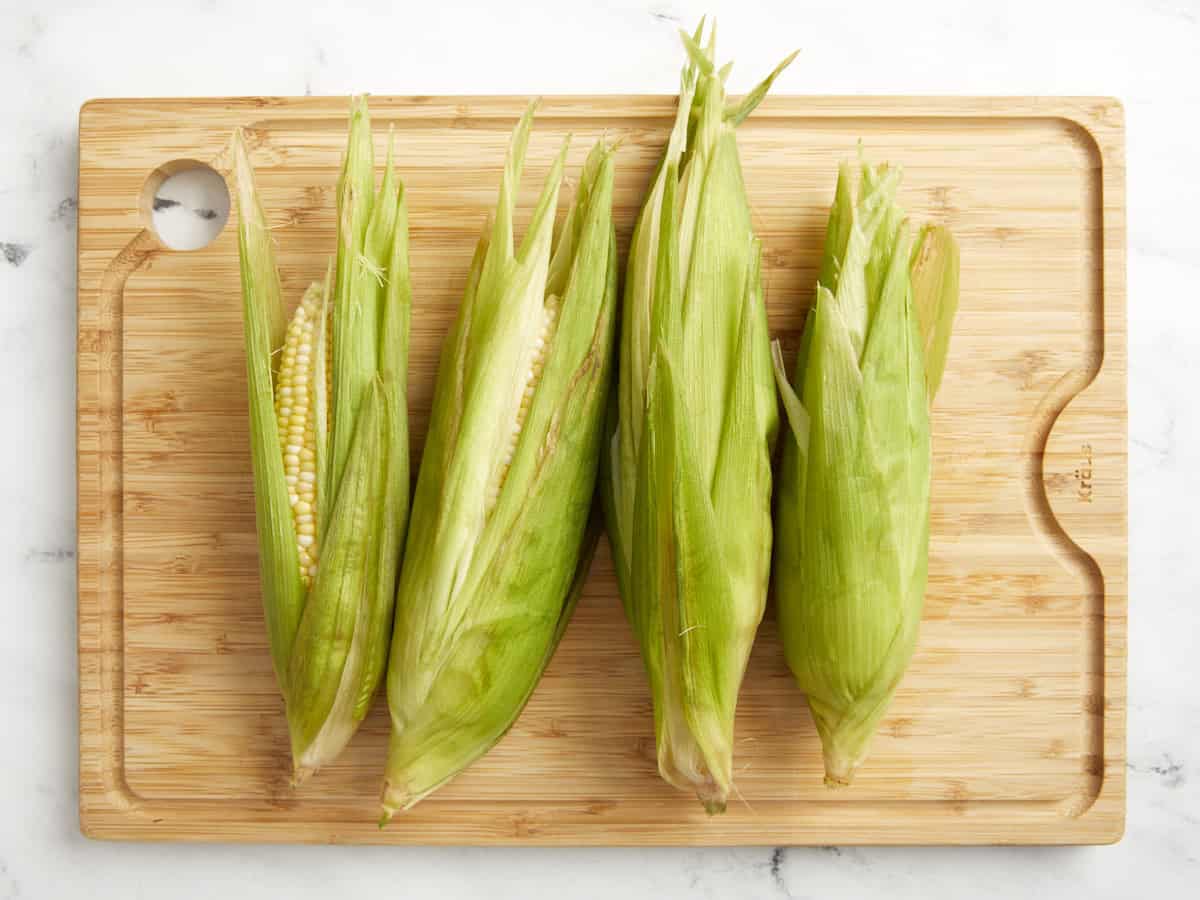
4 peeled ears of corn with the husks pulled back over the cobs.

Gently peel back the green husks half way and remove the silks only, leaving the fibrous green husks intact. Cover the exposed corn with the husks. This will ultimately “steam” the corn as it grills!

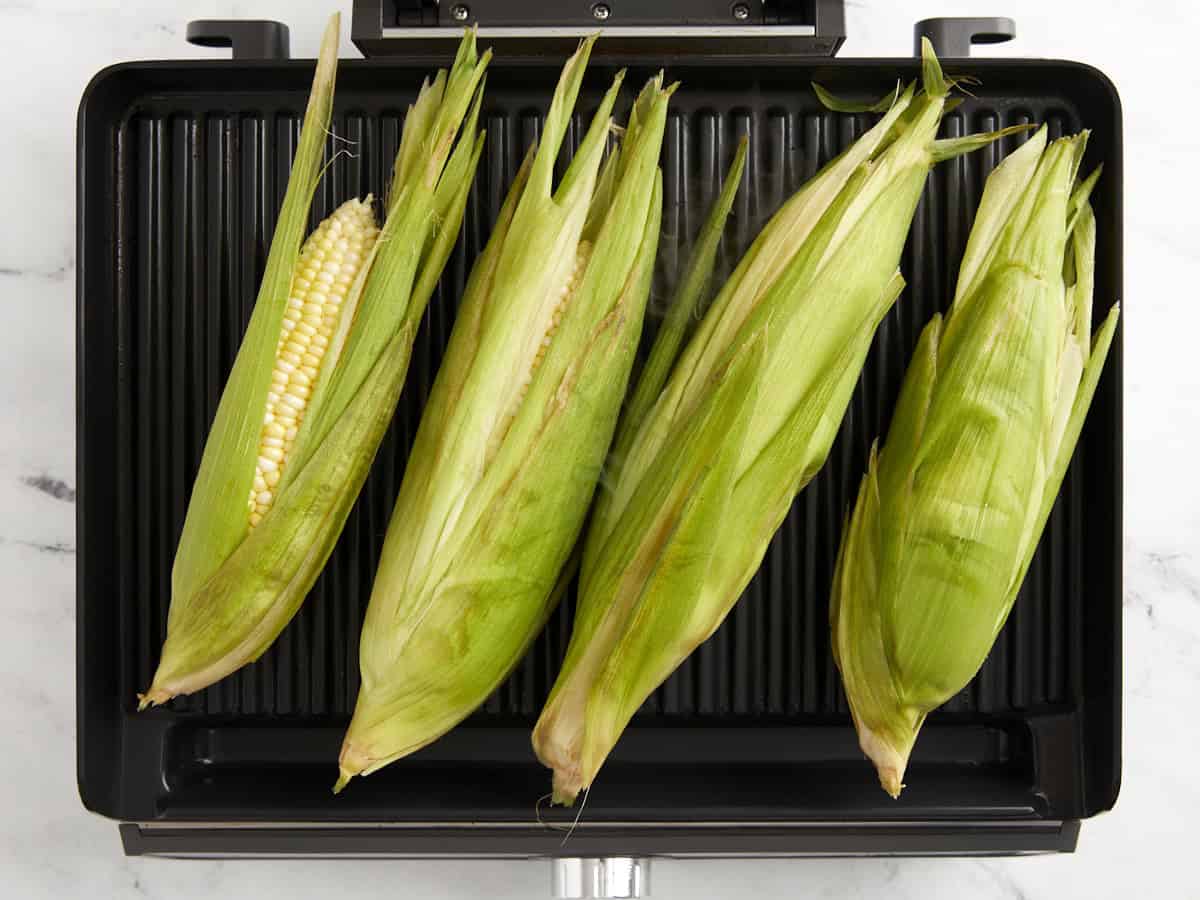
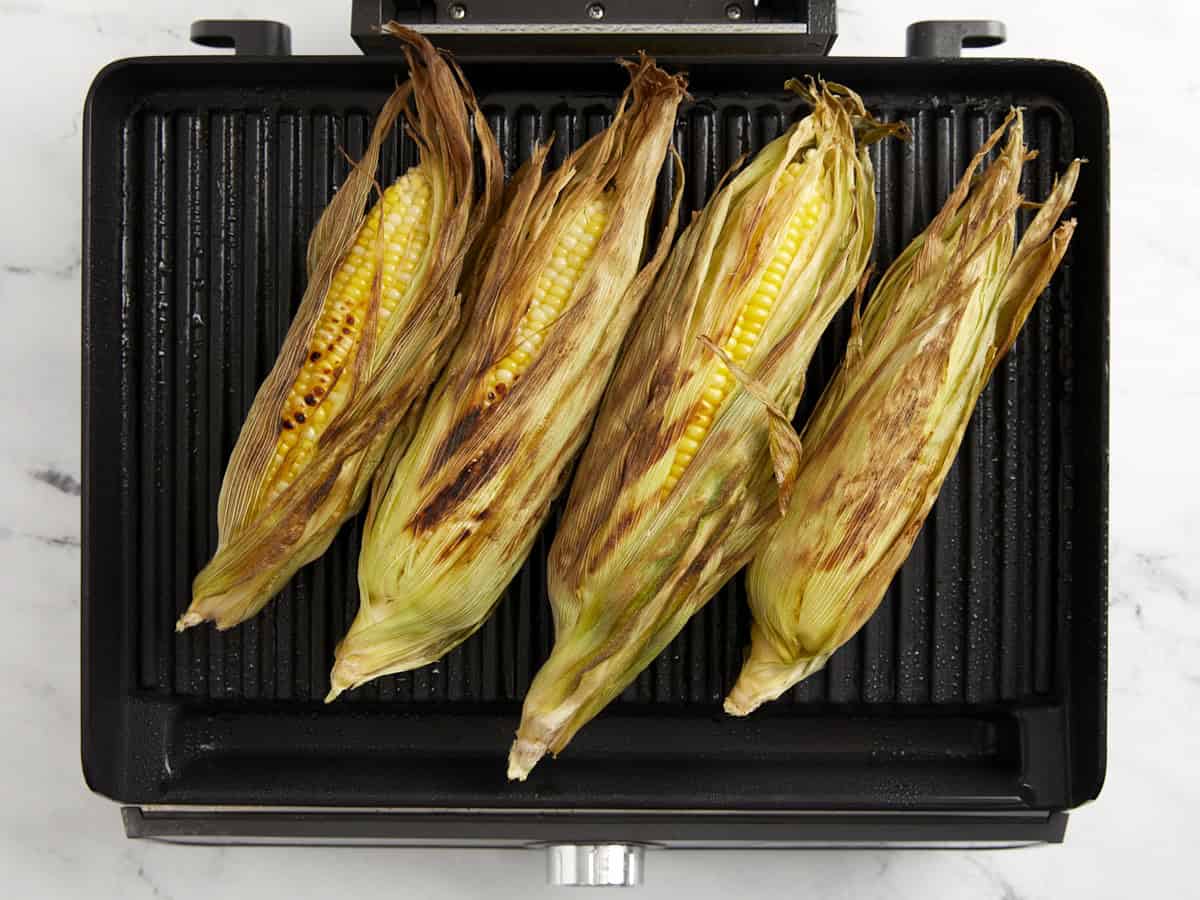
4 ears of corn on a grill pan.

Spray grill lightly with canola oil and grill corn cobs on high heat, turning every 2-4 minutes until all sides of the outer husks are equally charred. The corn inside should turn a more brilliant yellow and take on some extra color from the grill.

grilled ears of corn on a grill pan.

Enjoy with 1 Tbsp melted butter and 1/4 tsp sea salt, using the peeled back husk as your handle.

overhead view of 4 peeled ears of grilled corn with butter on a white plate.

This grilled corn on the cob is Summer on a plate!

The post Grilled Corn On The Cob appeared first on Budget Bytes.
Grilled BBQ Chicken

This perfectly charred grilled BBQ chicken breast, fresh off the grill, glistening with sauce is sure to be the star of any cookout!

The post Grilled BBQ Chicken appeared first on Budget Bytes.
I’m no scientist, but I’m sure there must be data about the gravitational pull at cookouts that brings everyone to the hot plate of juicy BBQ chicken breasts, sizzling and saucy straight from the grill. My grilled BBQ chicken is always the first protein to disappear! I’ve compiled all the best tips and tricks for how to make BBQ Chicken the star of any Summer get together.

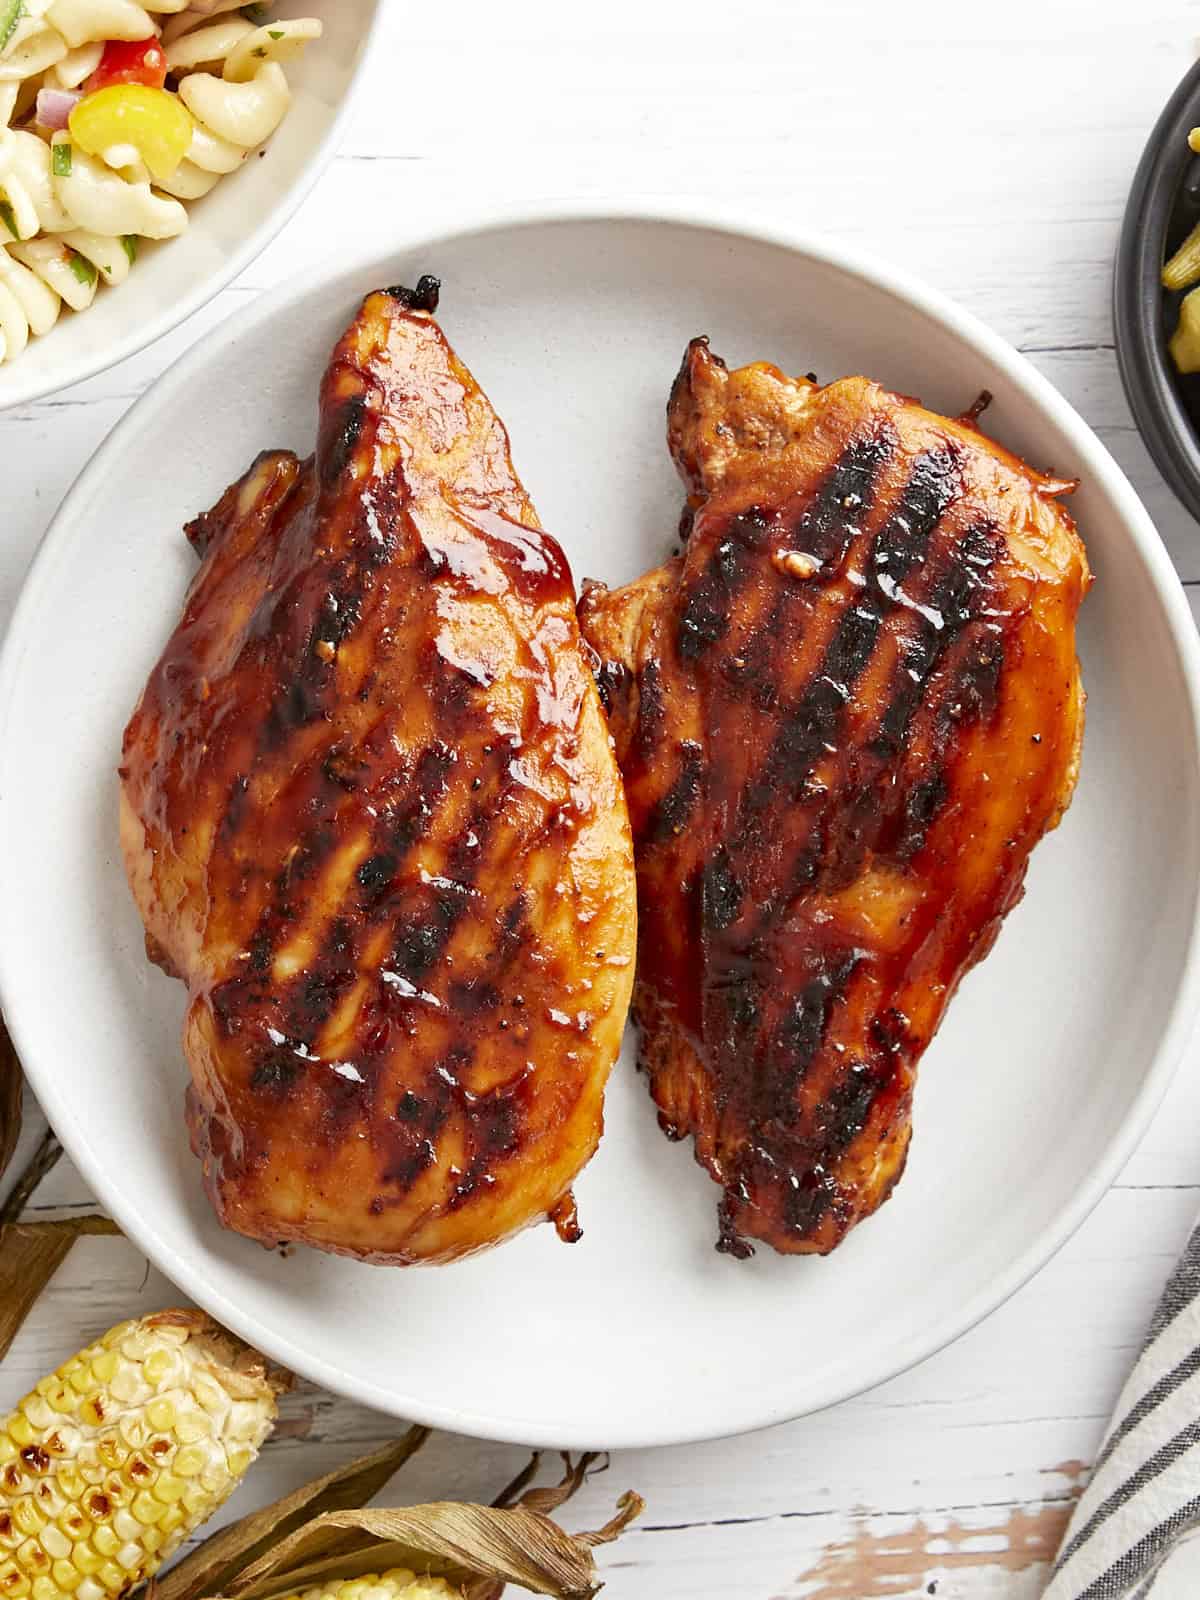
overhead view of 2 grilled bbq chicken breasts on a white plate.

I’m trying to make your life easier with this super simple recipe, but I fear I’m making the grill master at your house put in overtime because, I promise you, this chicken is going to disappear immediately. Look for a value pack and scale this recipe up, because it’s summer and that means it’s grillin’ time!

Ingredients

Here’s what you’ll need to make grilled BBQ chicken:

  • Chicken Breasts: I like large boneless skinless chicken breasts for this recipe. They’re easy to divide in half and pound nice and thin for a tender bite. I grabbed a 2-pack that weighed in at 1.61 lbs. so there was plenty of chicken for everyone.
  • Olive Oil: Helps the spices stick to the chicken.
  • Salt and Pepper: Enhance the natural flavor of the chicken.
  • Smoked Paprika: Adds a delicious smoky flavor to the chicken.
  • Brown Sugar: Adds texture and ensures you’re going to get those grill marks that make everyone salivate. I find that the extra sugar also helps tenderize the meat.
  • BBQ Sauce: Adds moisture and tangy BBQ flavor!

Serving Suggestions

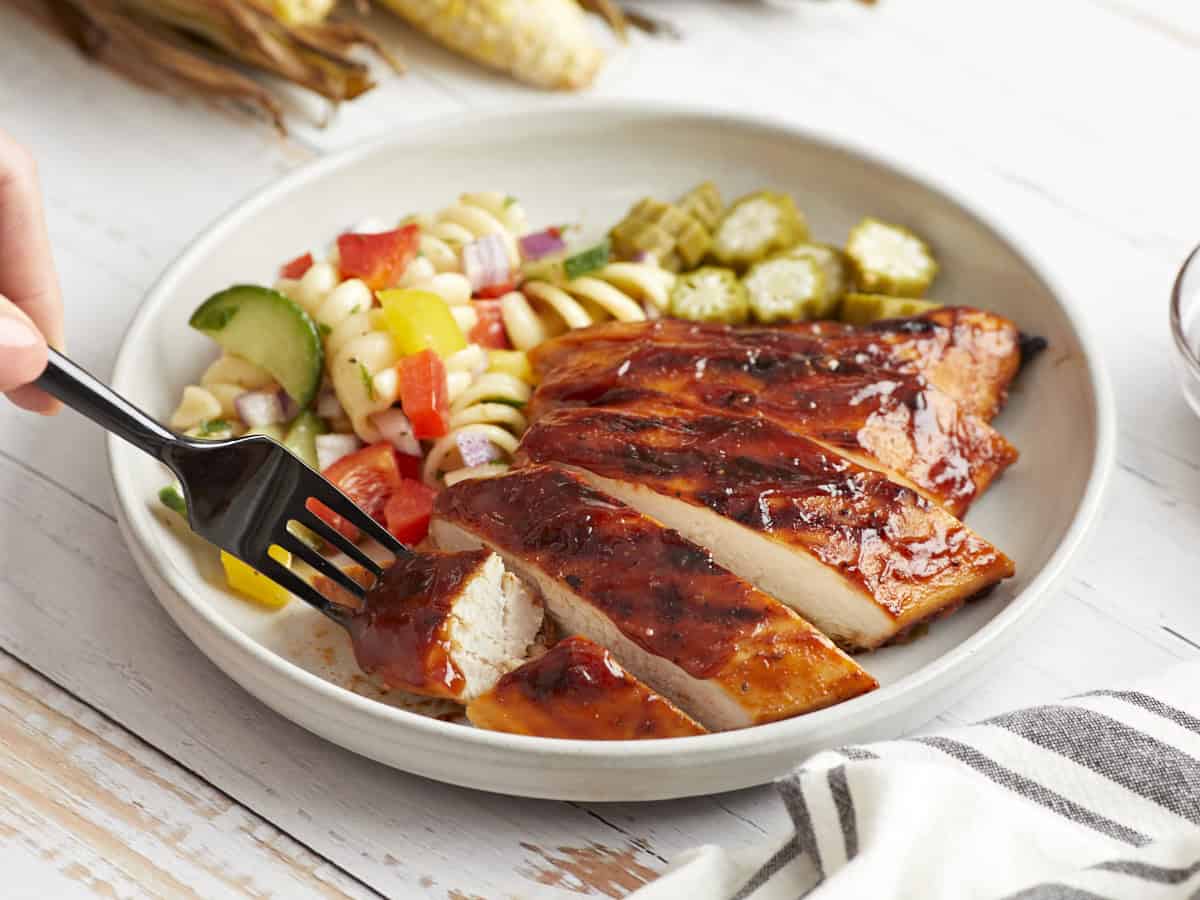
I like to serve this grilled BBQ chicken with extra BBQ sauce for dipping, some fresh okra, grilled cabbage, and a side of pasta salad!

Tips and Notes

  • I used a Ninja Indoor Smokeless grill for this recipe, so, as an option, if you use an indoor grill too, you can put the chicken breasts on the grill while it’s preheating. This way, the inside will get to a safe temperature quicker but the outside of the chicken won’t burn.
  • If I’m having a big get-together, sometimes I will slice the chicken breasts if they are massive when I put them out on the buffet line. It helps stretch my budget a little further and it’s easier for people to try a little bit of everything.

Storage Instructions

I recommend storing leftover grilled BBQ chicken in an airtight container in the refrigerator for up to 3 days. To freeze, wrap individual chicken breasts in plastic wrap or aluminum foil and place them in a Ziplock bag to store for up to 3 months. Let thaw overnight in the refrigerator before reheating in the microwave or on the stovetop over medium-low heat.

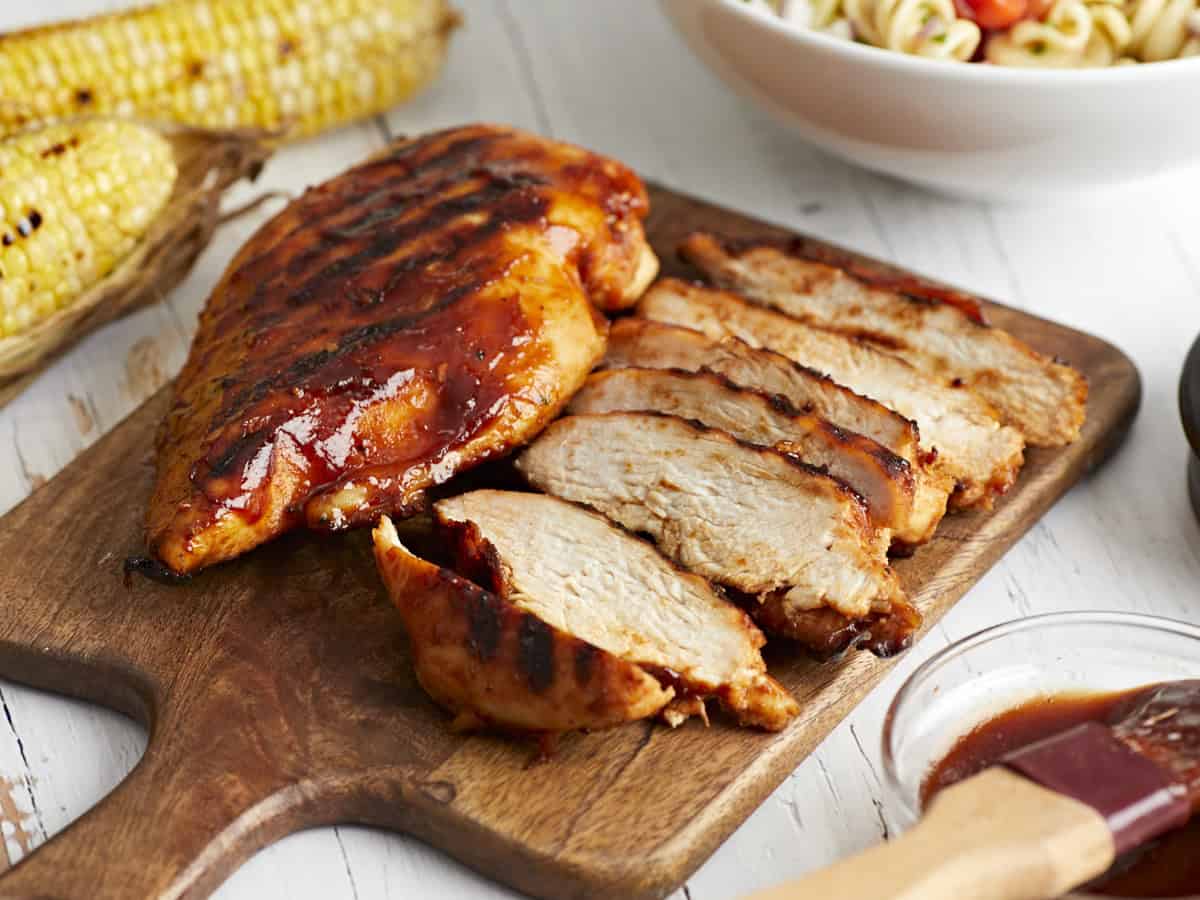
sliced grilled bbq chicken breast on a wood cutting board.
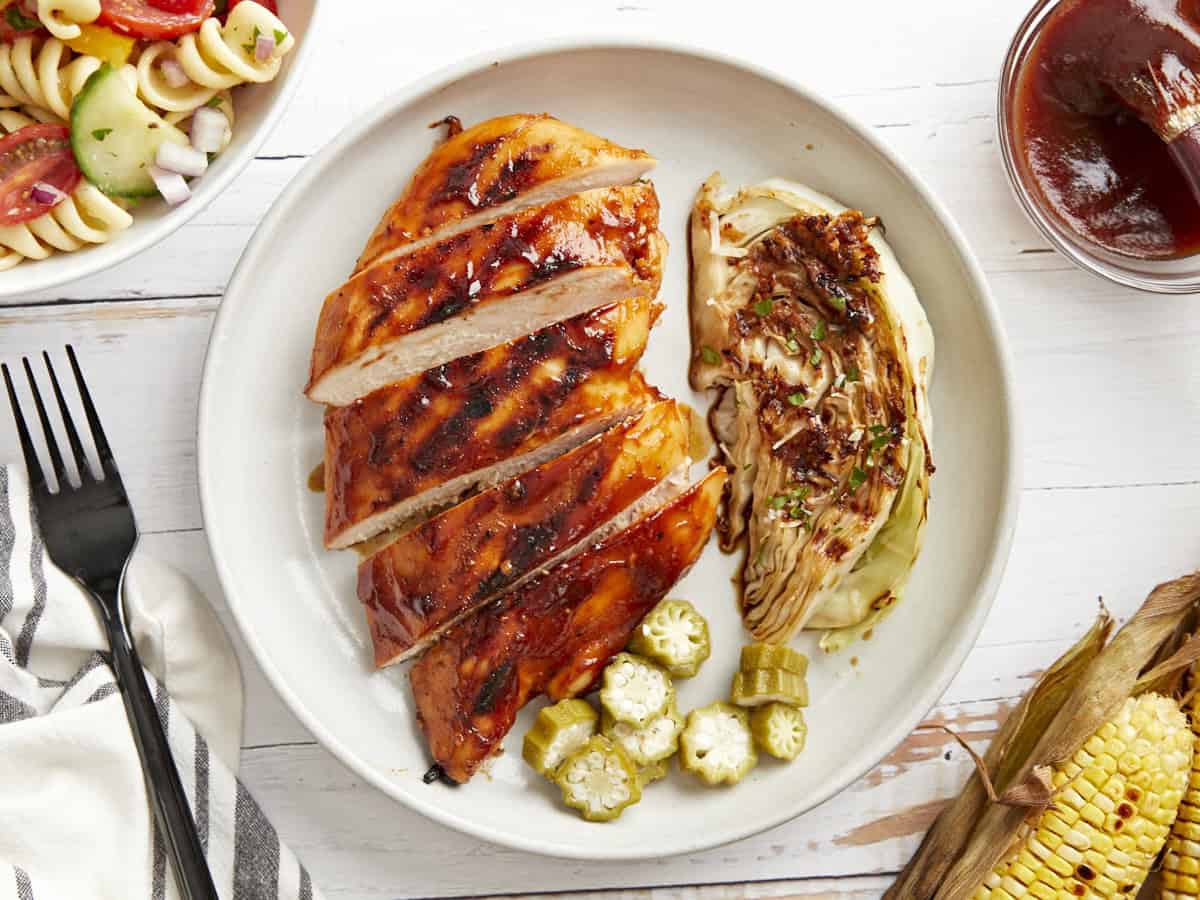
overhead view of 2 grilled bbq chicken breasts on a white plate.
Print

Grilled BBQ Chicken

This perfectly charred grilled BBQ chicken breast, fresh off the grill, glistening with sauce is sure to be the star of any cookout!
Course Dinner, Main Course
Cuisine American
Total Cost ($8.95 recipe / $2.23 serving)
Prep Time 30 minutes
Cook Time 10 minutes
Total Time 40 minutes
Servings 4 (1/2 chicken breast each)
Calories 309kcal

Equipment

Ingredients

Instructions

  • Preheat the grill to 450°F.
  • Place 2 chicken breasts into a heavy-duty baggie and tenderize with a meat mallet or rolling pin, flattening the meat to 1/2-3/4 inch thickness.
  • Rub olive oil over each chicken breast, covering the entire surface area. Rub salt, pepper, brown sugar, and smoked paprika all over each and set aside. Allow chicken to come to room temperature.
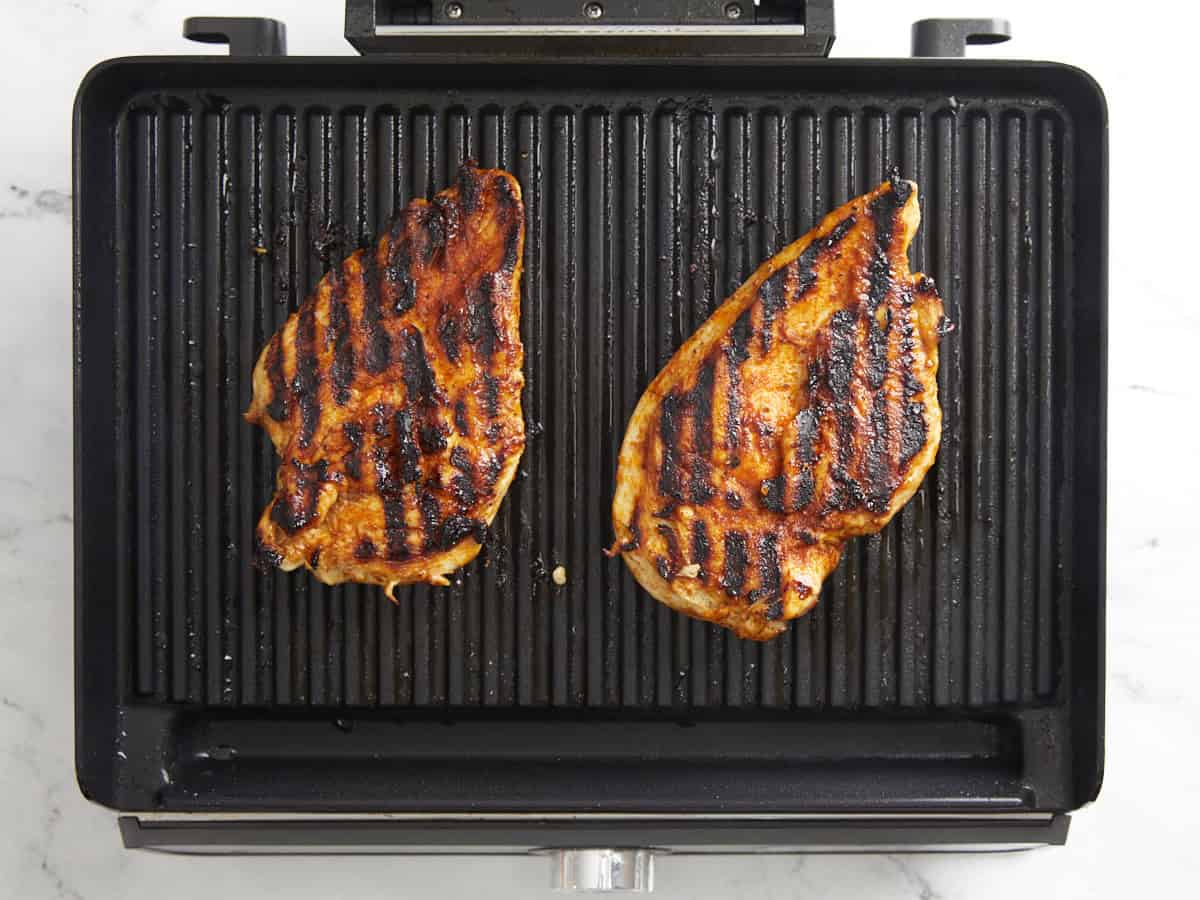
  • Place each chicken breast on the hot grill, preheated to 450°F, and grill on each side for 6 minutes, until they easily move and do not stick to the grates.
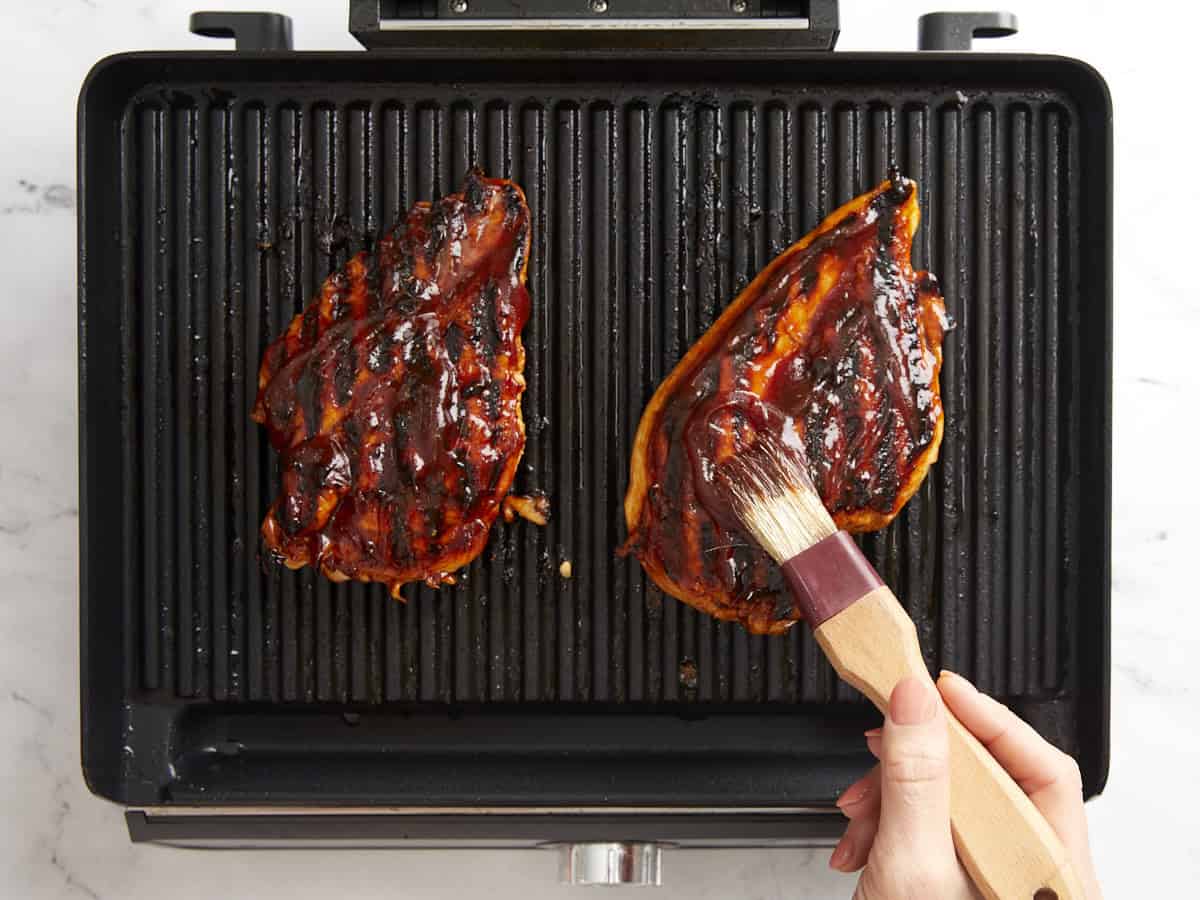
  • Baste each breast with BBQ sauce after the first flip. Cook an additional 2 minutes on each side, or until the internal temperature of the chicken reaches 155-160°F.
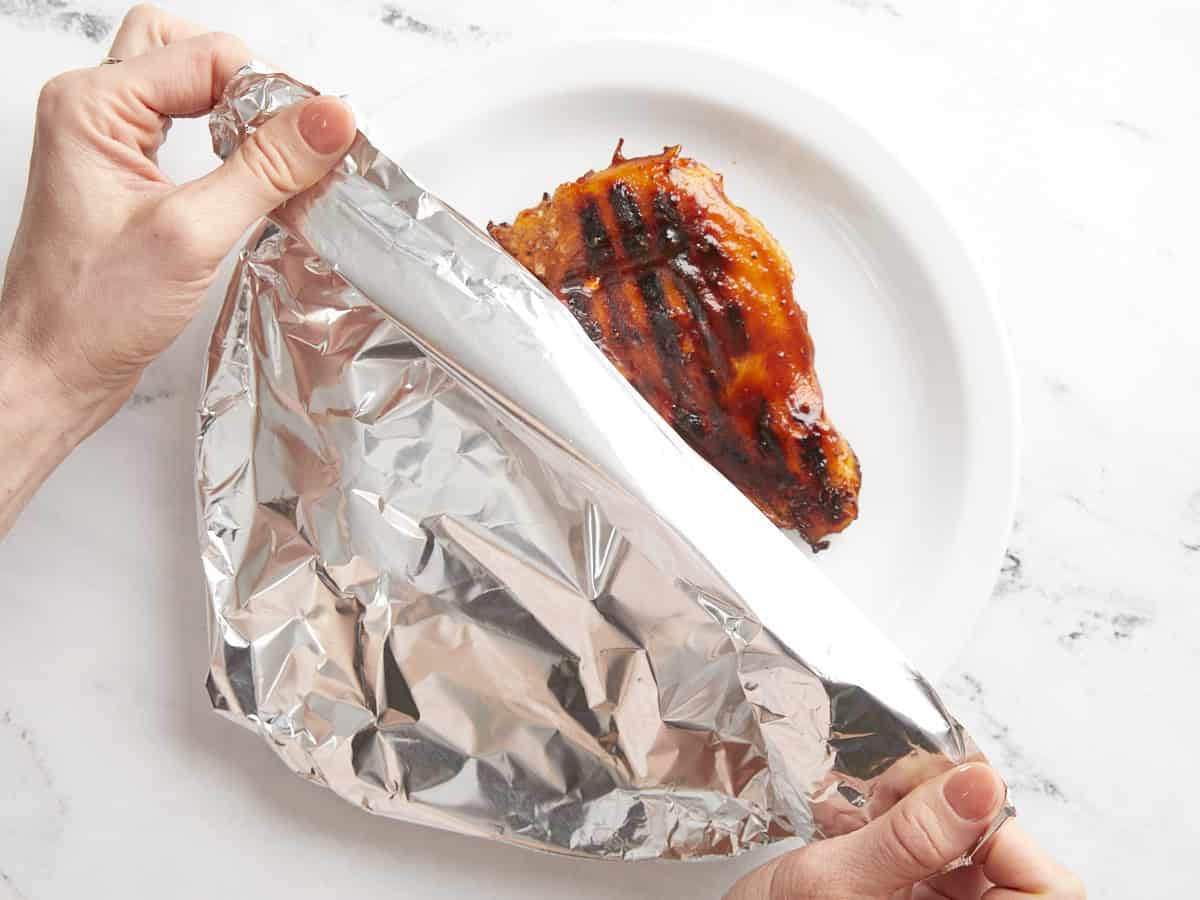
  • Remove the chicken breasts from the grill and allow to rest for 5 minutes, covered with aluminum foil. The breasts will continue to cook in their own juices and reach the safe, mandatory temperature of 165°F.

See how we calculate recipe costs here.

Notes

*For this recipe, 1 serving = 6.4 ounces per person. 3-4 ounces is a typical serving size for chicken, but I was generous and went with 6 ounces per person for this recipe… so you could easily stretch it further if you needed to!

Nutrition

Serving: 6.4ounces | Calories: 309kcal | Carbohydrates: 10g | Protein: 39g | Fat: 12g | Sodium: 686mg | Fiber: 0.4g
overhead view of a serving of grilled bbq chicken with okra and grilled lettuce.

how to make Grilled BBQ Chicken – step by step photos

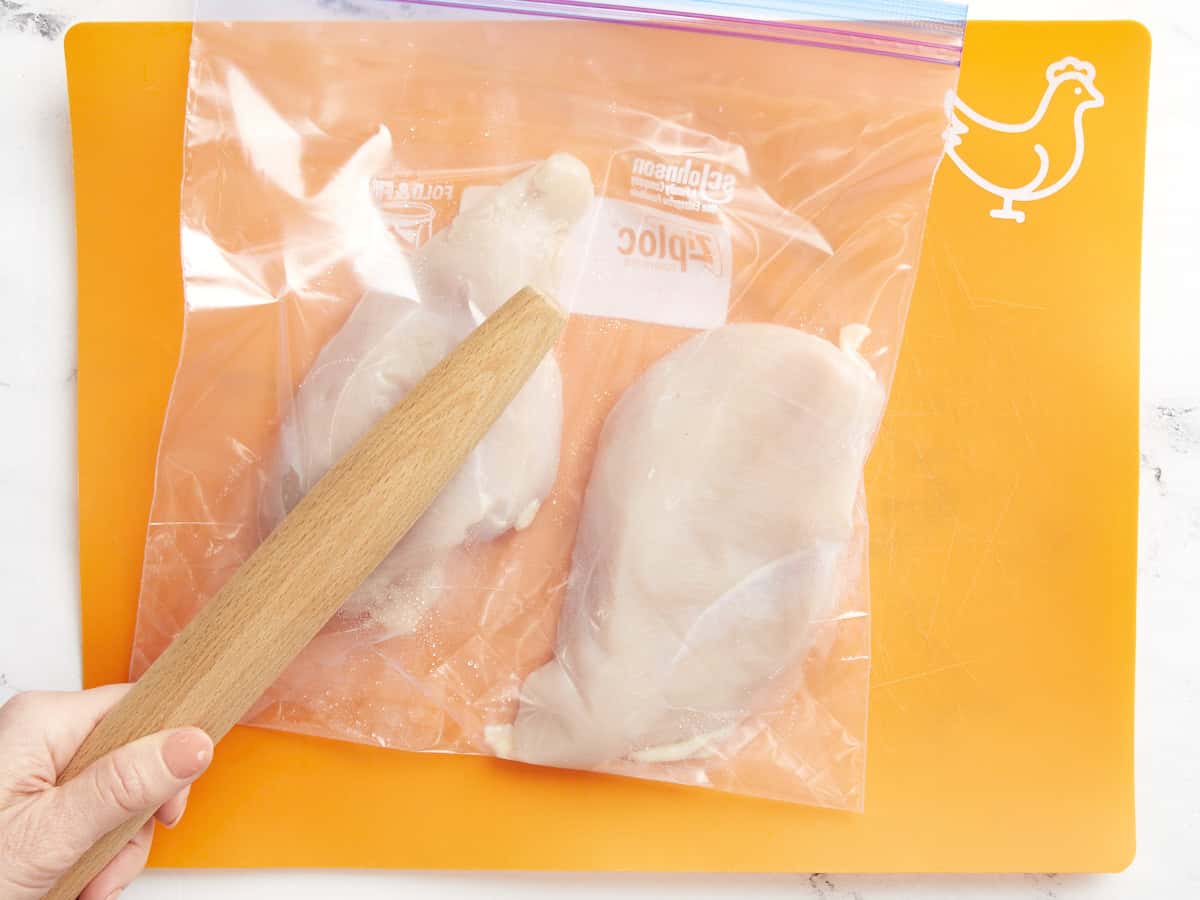
pounding chicken breasts in a ziplock bag with a rolling pin.

Preheat the grill to 450°F. Place 2 boneless, skinless chicken breasts into a heavy-duty baggie and tenderize with a meat mallet or rolling pin, flattening the meat to 1/2-3/4 inch thickness.

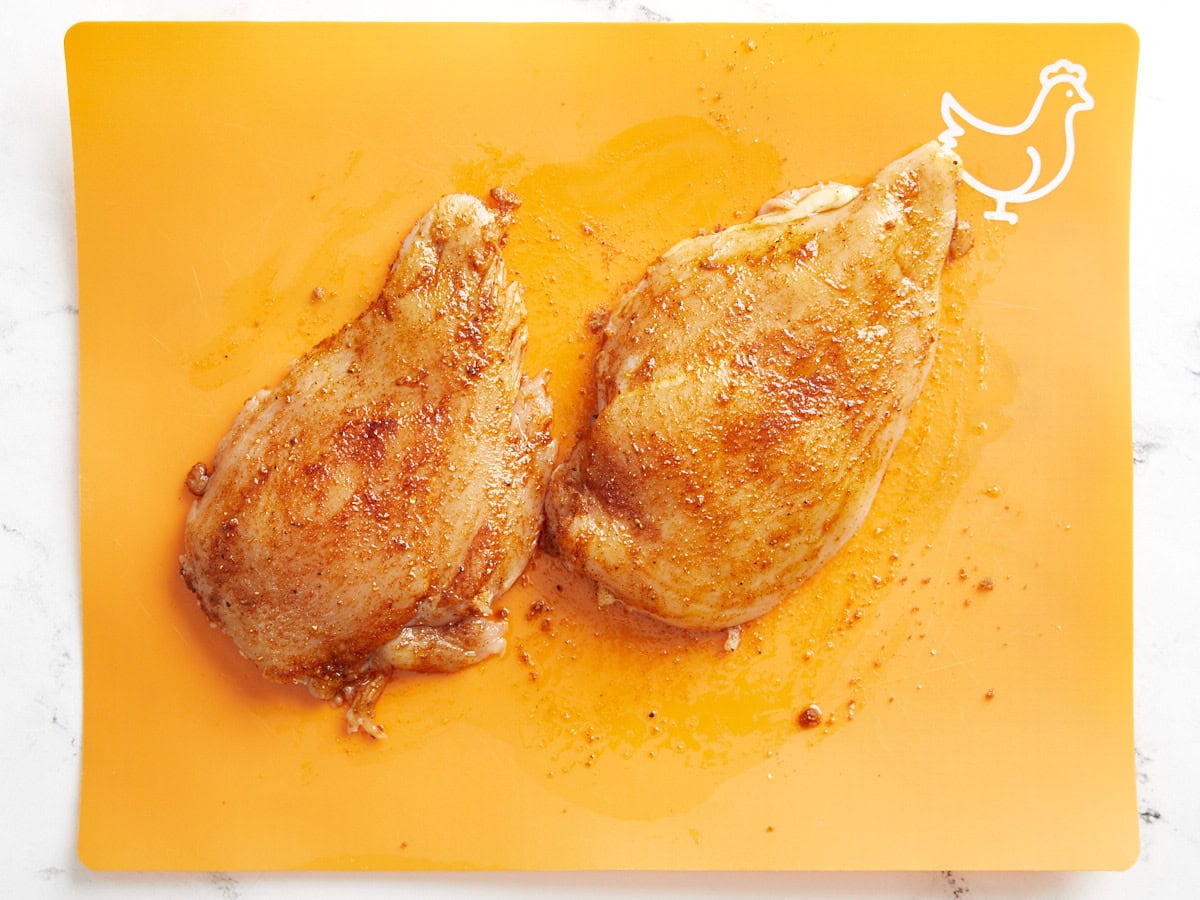
seasoned raw chicken breasts on an orange cutting board.

Rub 2 Tbsp olive oil over each chicken breast, covering the entire surface area. Rub 1/2 tsp salt, 1/2 tsp black pepper, 2 tsp brown sugar, and 1 tsp smoked paprika all over each and set aside. Allow chicken to come to room temperature.

grilled chicken breasts on an indoor grill.

Place each chicken breast on the hot grill, preheated to 450°F, and grill on each side for 6 minutes, until they easily move and do not stick to the grates.

basting grilled chicken breasts with bbq sauce on an indoor grill.

Baste each breast with 1/4 cup BBQ sauce after the first flip. Cook an additional 2 minutes on each side, or until the internal temperature of the chicken reaches 155-160°F.

tenting grilled bbq chicken breasts with foil.

Remove the chicken breasts from the grill and allow to rest for 5 minutes, covered with aluminum foil. The breasts will continue to cook in their own juices and reach the safe, mandatory temperature of 165°F.

a serving of sliced grilled bbq chicken on a white plate with pasta salad and okra.

Tender and juicy grilled BBQ chicken is sure to be the star of any cookout!

The post Grilled BBQ Chicken appeared first on Budget Bytes.

Fried Green Tomatoes

“TOWANDA!” These fried green tomatoes are crispy, crunchy, and so flavorful! Coated in crispy cornmeal and fried to golden perfection!

The post Fried Green Tomatoes appeared first on Budget Bytes.

I absolutely love making my crispy fried green tomatoes with a tangy buttermilk batter. I spent hours testing different versions until I found the perfect recipe. The crispy batter fried onto each slice creates a perfectly crunchy crust. The inside is juicy and the ultimate bite of Summer. These tomatoes are a standout dish that always impresses at any meal!

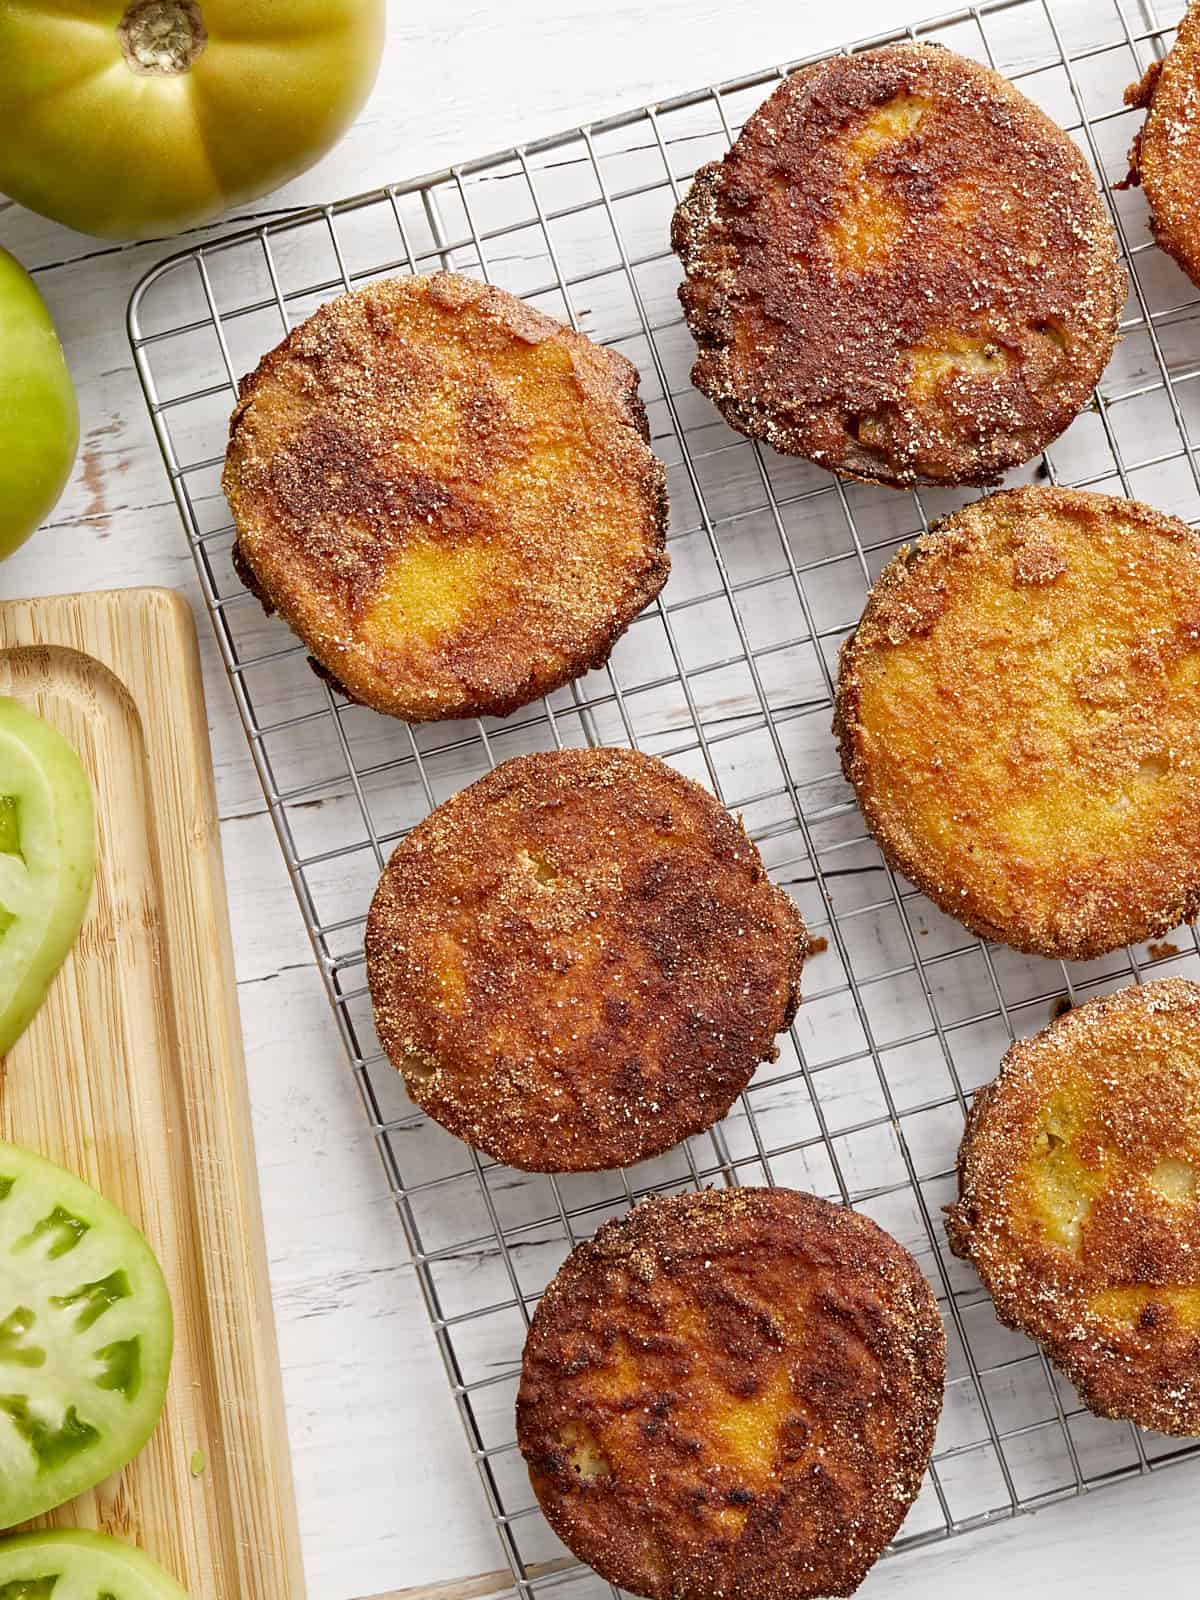
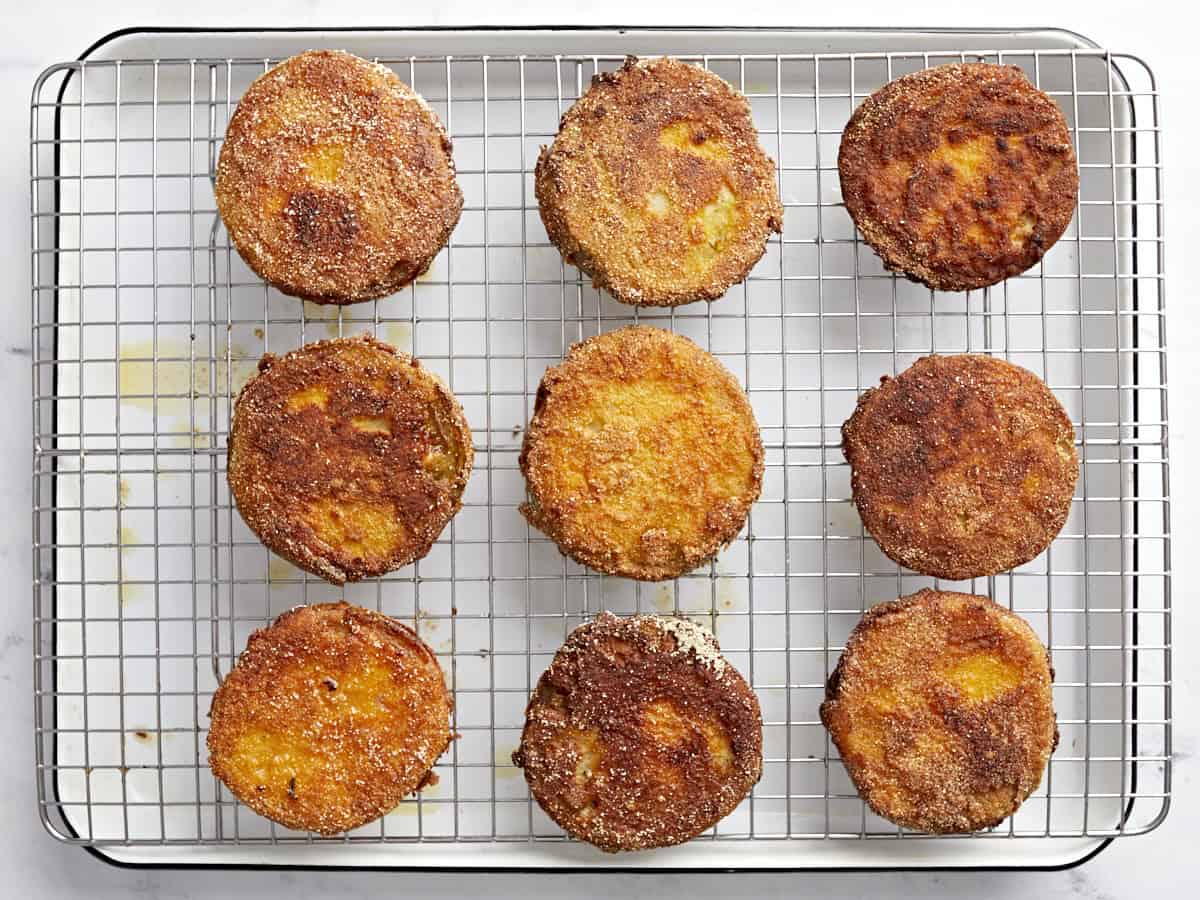
overhead view of fried green tomatoes on a wire rack.

“TOWANDA!” Have you ever seen the 1991 movie, “Fried Green Tomatoes”? If you’ve never seen it, you need to run to the grocery store (or outside to your own garden), gather up some plump green tomatoes, and put this recipe into action. It’s time to plan a movie night with your best girlfriends! It’s one of my favorites— and so is this recipe.

What Are Fried Green Tomatoes?

Fried green tomatoes are just what they sound like— green (unripe) tomatoes coated in a crispy breading and fried to golden perfection! Green tomatoes have a tart flavor and a firmer texture than fully-ripe tomatoes. I made these for Easter Brunch and have made them quite a few times since.

The fry mix really clings to these tomatoes thanks to the initial flour step and the tangy, rich, sticky, and creamy buttermilk egg dredge. The result is a perfect, crisp crust on each and every slice of green tomato. The batter is thick enough to stand up to the thick cuts of tangy green tomato, making these a true showstopper at Sunday Supper. They. Are. Perfect.

Ingredients

Here’s what you’ll need to make fried green tomatoes:

  • Green Tomatoes: These underripe tomatoes can be found at farmers’ markets and the grocery store in early springtime and towards the end of tomato season. If you grow your own tomatoes, don’t be afraid to pluck a few before they ripen!
  • All-Purpose Flour: Helps seal in the moisture of each tomato slice and helps bind the egg and buttermilk to the tomatoes.
  • Cornmeal: Adds a delightful crunch and a slightly sweet flavor. This gives the tomatoes a perfect texture!
  • BBQ Rub Powder: If you can’t find BBQ seasoning, you can skip this and save a little money, but it definitely adds great flavor and contributes to the beautiful color once fried!
  • Salt and Pepper: Enhances the natural flavor of the tomatoes.
  • Eggs and Buttermilk: Form a culinary glue to help the seasoned cornmeal stick to the tomatoes.
  • Canola Oil: Helps the tomatoes fry up crispy and golden brown.

Can I Fry Red Tomatoes?

In my experience, red tomatoes are usually too juicy for frying. They have a softer texture and are too wet for the breading to really stick properly. Underripe green tomatoes are the best choice for this recipe.

Tips and Suggestions

  • I like to slice off just a sliver from the end of each tomato where the rounded bottom and stem are, so I can use as much of the tomato as possible. Doing this ensures there’s enough of the moist inner part of the tomato surface exposed for all of the yummy ingredients to stick to.
  • Using just cornmeal to coat these tomatoes caused the breading to fall off, so I mixed in flour to help bind everything together. The method in this recipe yields a perfect fried crust that covers the tomatoes completely!
  • You can flip the tomatoes as many times as you need to while frying, but I recommend babysitting them a bit! If you burn one batch, the next batch will have a burnt flavor, too. I like mine a little darker in color, but no one likes them burnt! If you watch the film, you’ll see Ruth would agree. ;) Flipping them too often can sometimes make the breading fall off. Just keep an eye on them!
  • Fried treats are yummy in moderation, but leftover cooking oil is no fun! I found some great tips on using leftover fry oil that I thought you might enjoy.

Serving Suggestions

Fried Green Tomatoes can be served on their own (trust me, they are THAT good) or with our sriracha pimento cheese, crumbled goat’s cheese, homemade ranch dressing or BBQ sauce. (As Sipsey would say, “The secret’s in the sauce!”)

They’re also great to jazz up a classic BLT or can be served in a salad over a bed of mixed greens or arugula.

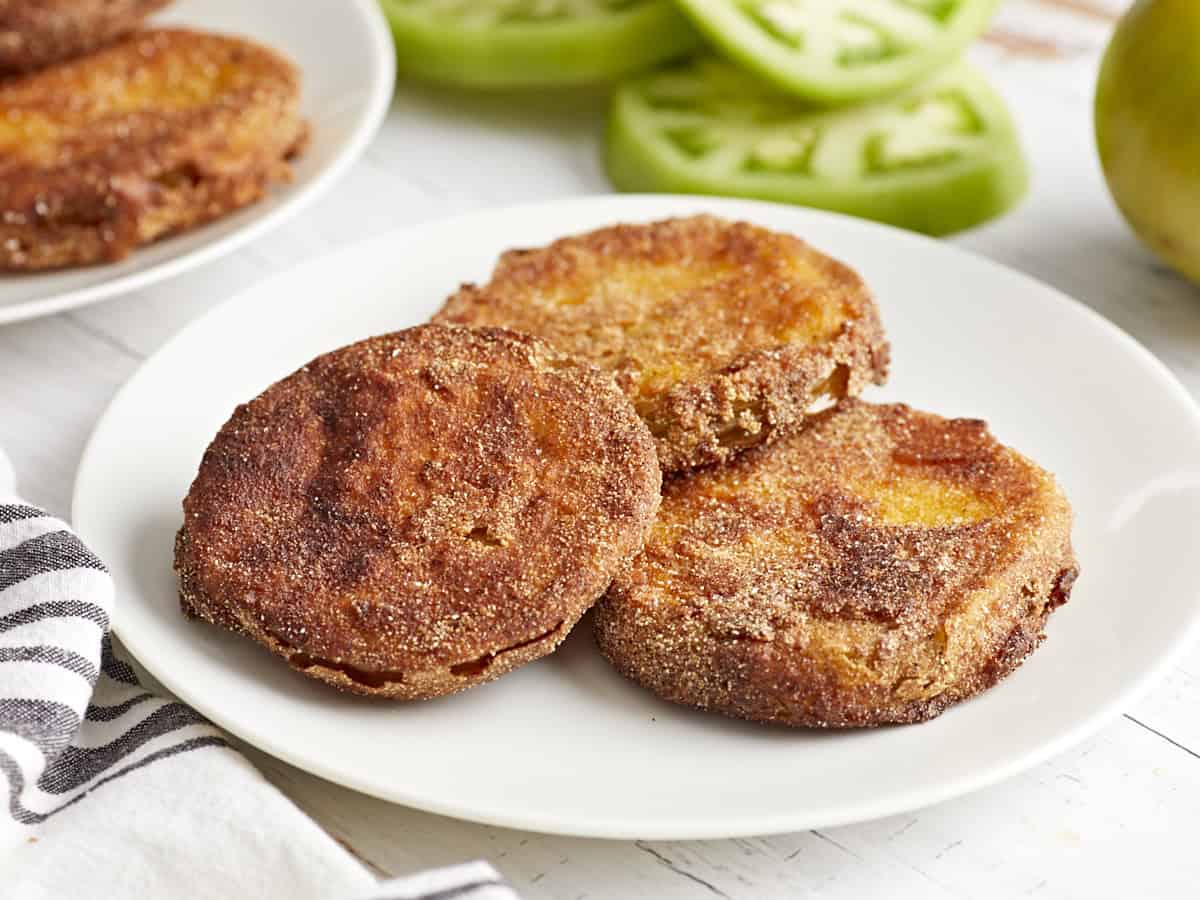
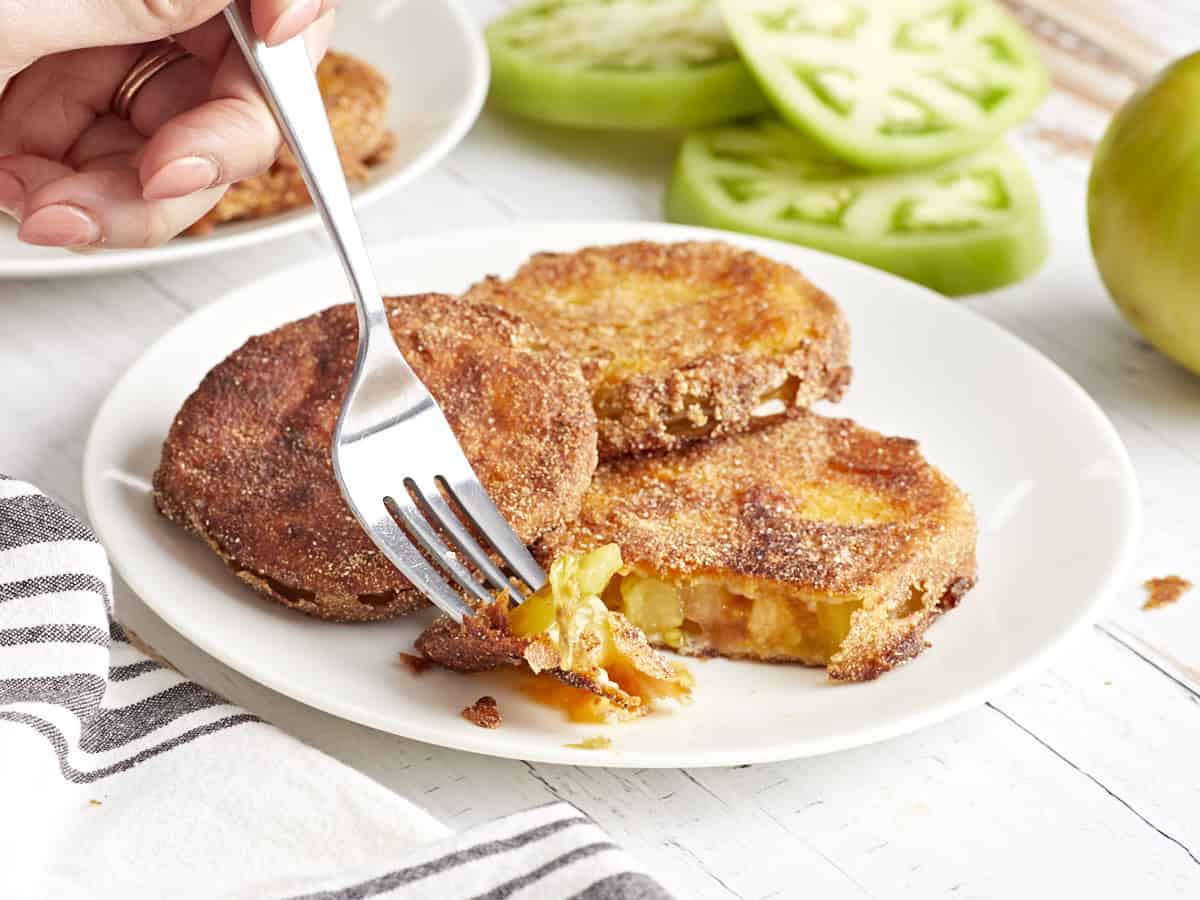
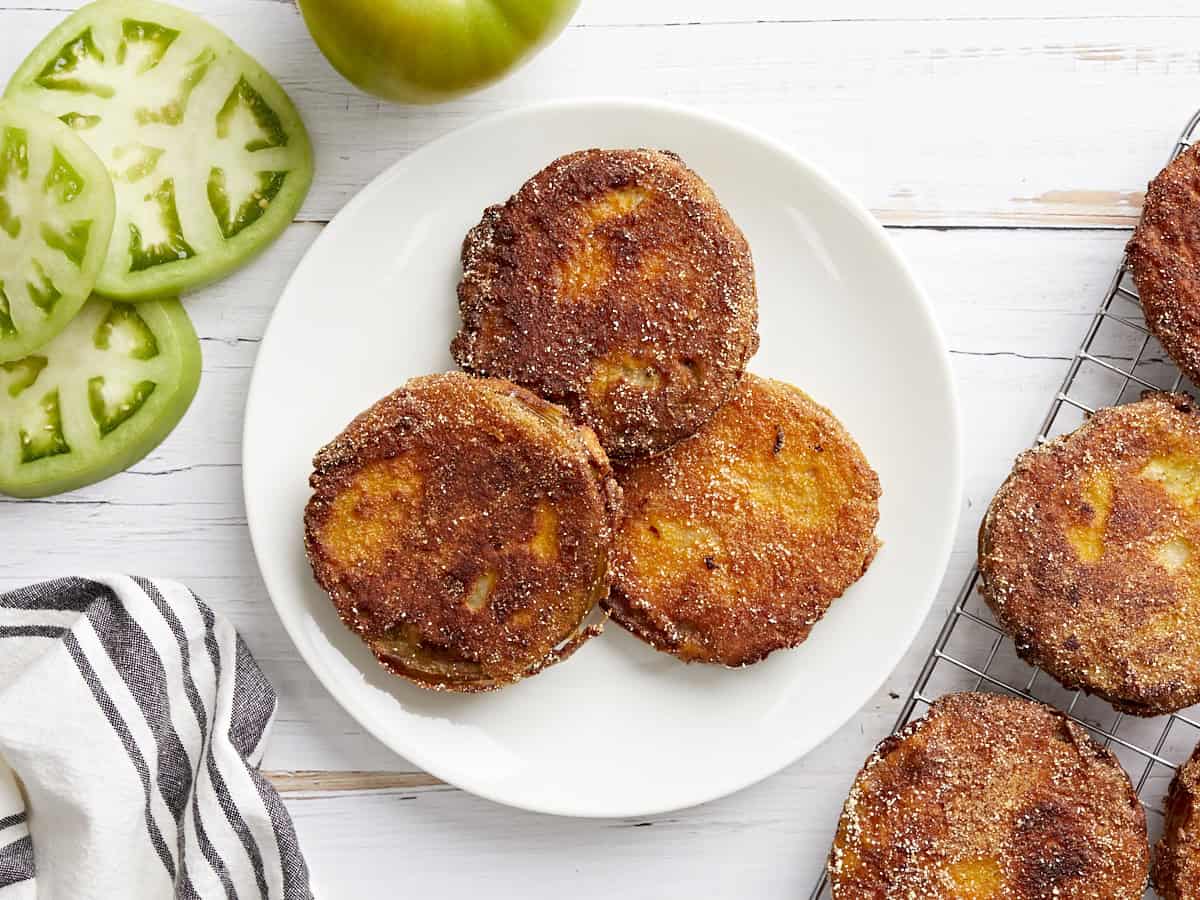
3 fried green tomatoes on a white plate.
overhead view of fried green tomatoes on a wire rack.
Print

Fried Green Tomatoes

I absolutely love making my crispy fried green tomatoes with a tangy buttermilk batter. I spent hours testing different versions until I found the perfect recipe. The crispy batter fried onto each slice creates a perfectly crunchy crust.
Course Appetizer
Cuisine American
Total Cost ($6.57 recipe / $1.31 serving)
Prep Time 30 minutes
Cook Time 20 minutes
Total Time 50 minutes
Servings 5 (3 slices each)
Calories 292kcal

Ingredients

  • 4 large green tomatoes, cut into 1/3-inch slices $3.49
  • 1/2 cup all-purpose flour, divided $0.07
  • 1/2 cup cornmeal $0.38
  • 1 Tbsp BBQ rub powder, optional $0.69
  • 1 tsp salt, divided $0.02
  • 1/2 tsp black pepper $0.03
  • 1/2 cup buttermilk $0.32
  • 2 eggs $0.34
  • 1 1/3 cups canola oil* $1.23

Instructions

  • Cut the tomatoes into 1/3-inch slices horizontally, discarding the end with the stem and the very bottom which is smooth.
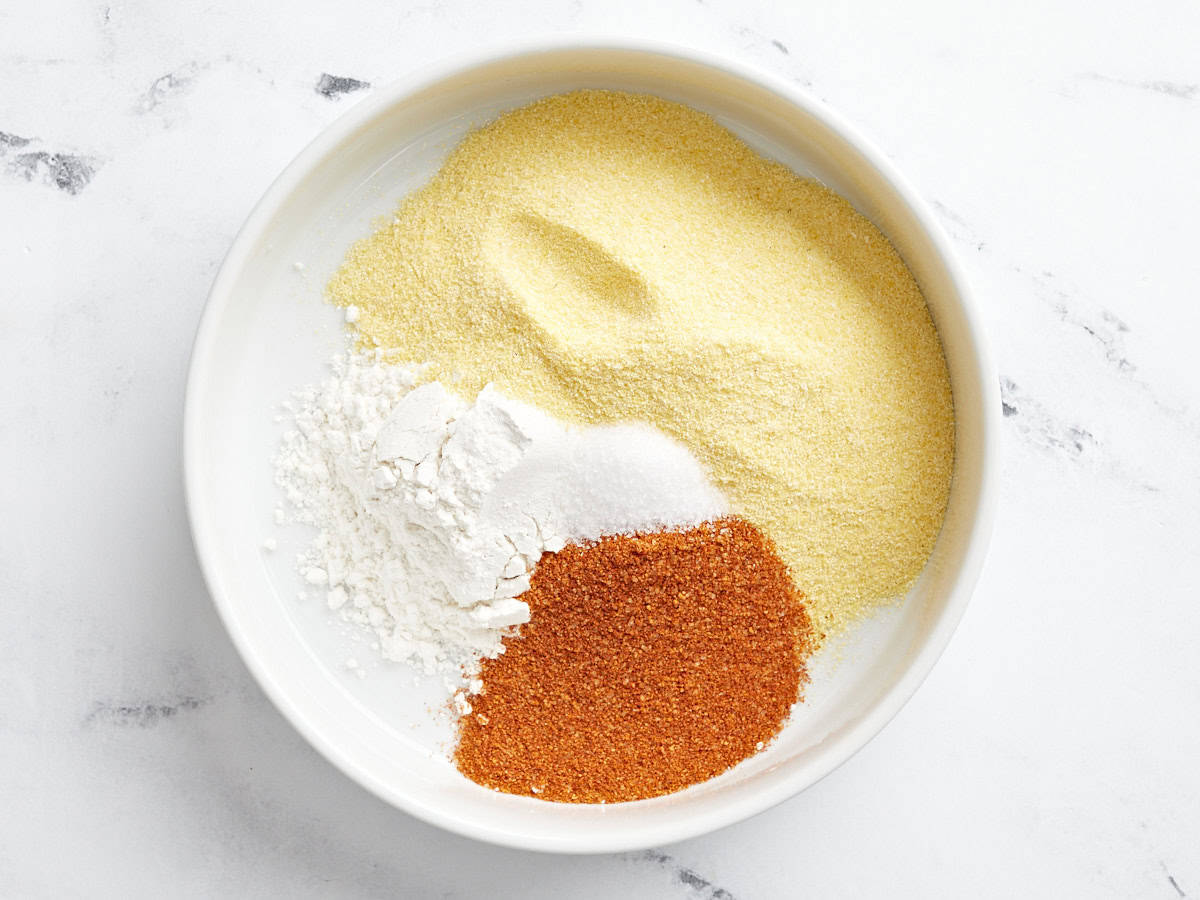
  • Combine 1/4 cup flour, 1/2 cup cornmeal, 1 Tbsp BBQ seasoning powder, and 1/2 tsp salt in one small bowl. Whisk to combine.
  • In another small bowl, pour in the remaining 1/4 cup flour by itself.
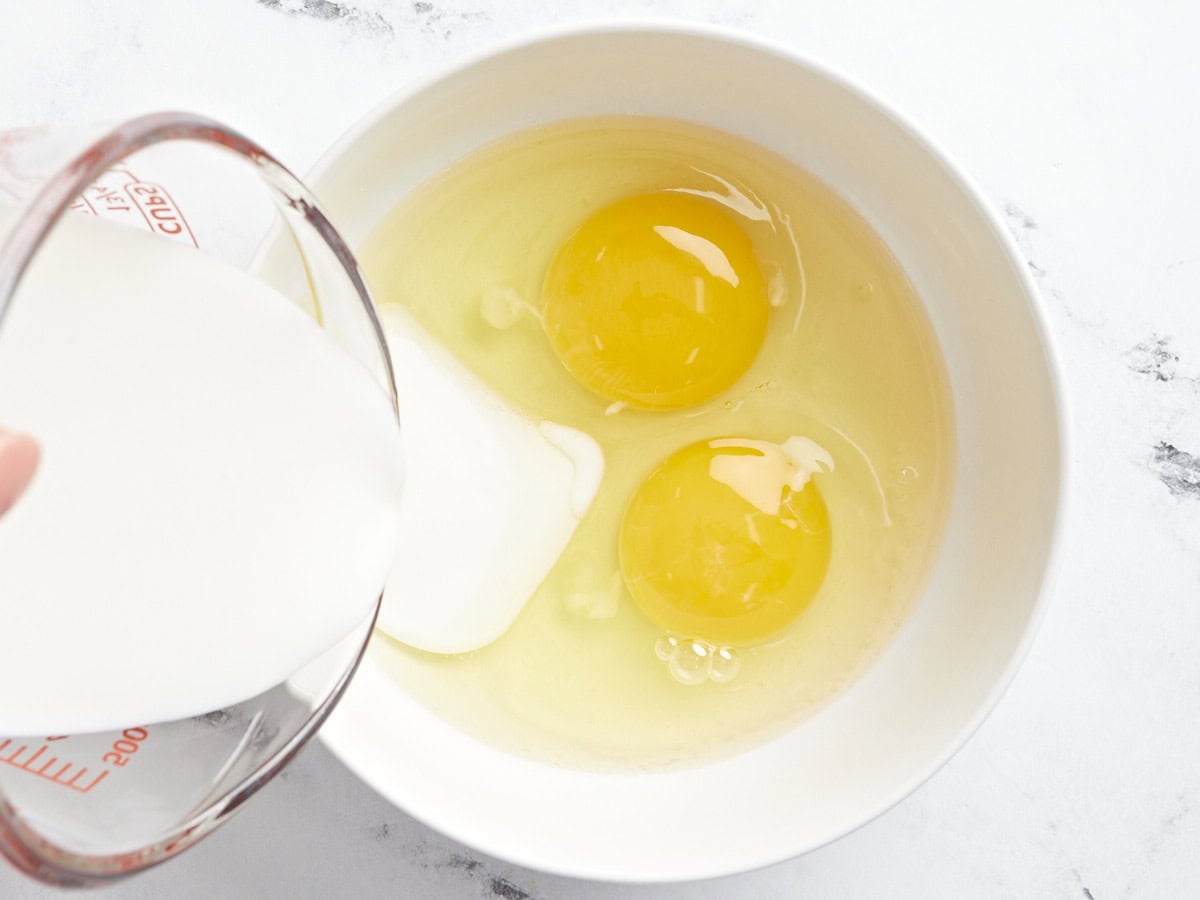
  • In a third bowl, whisk together the eggs and buttermilk.
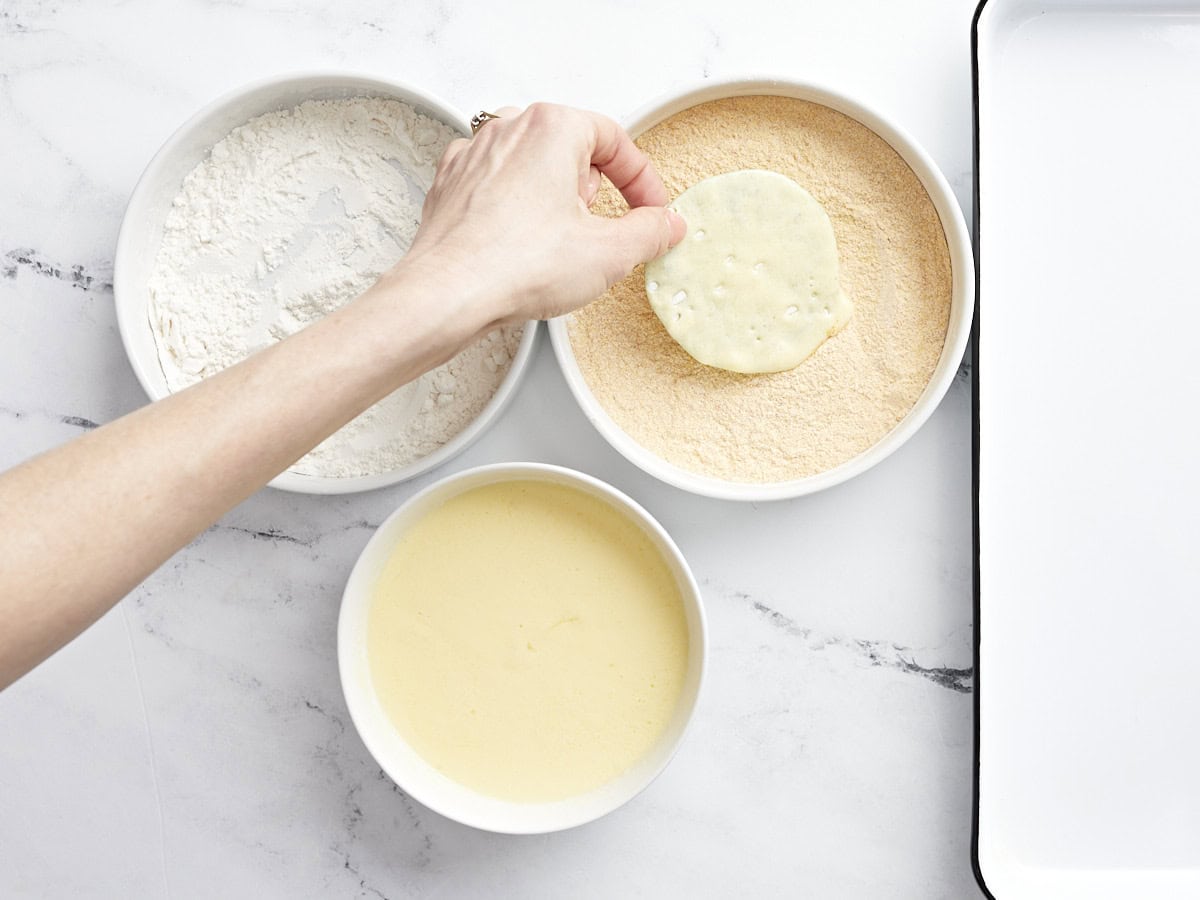
  • In an assembly line fashion, dip your cut tomatoes into the flour, then the buttermilk egg mixture, and finally the cornmeal BBQ seasoning mixture. Place each slice of tomato off to the side and continue this assembly line process until all tomatoes have been dredged in this magical trio!
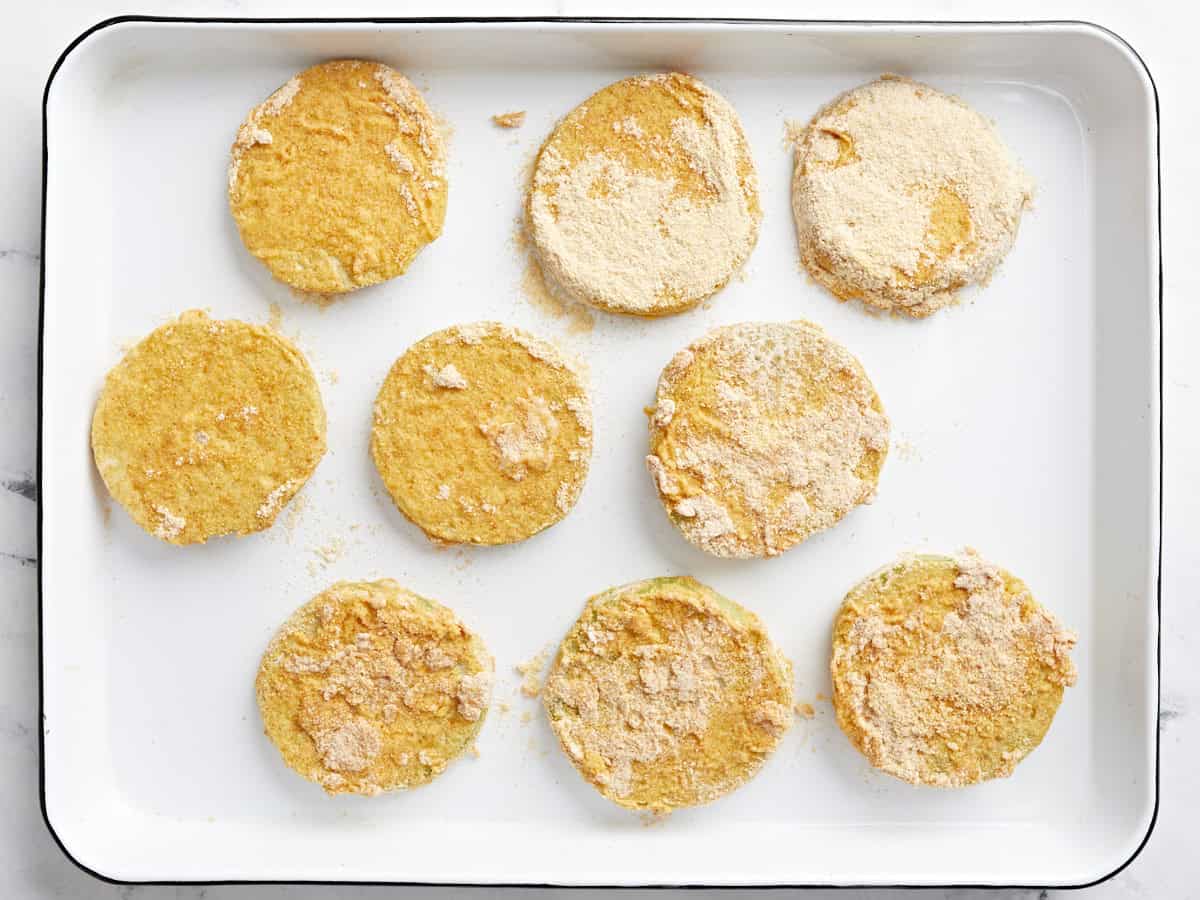
  • Once your tomatoes are dredged and off to the side, heat up the canola oil in a thick bottom pan on high heat until it is very hot! (Take a droplet of water on your finger and drip it into the pan. Once it lands, if it pops and hisses, it’s ready to fry the tomatoes!)
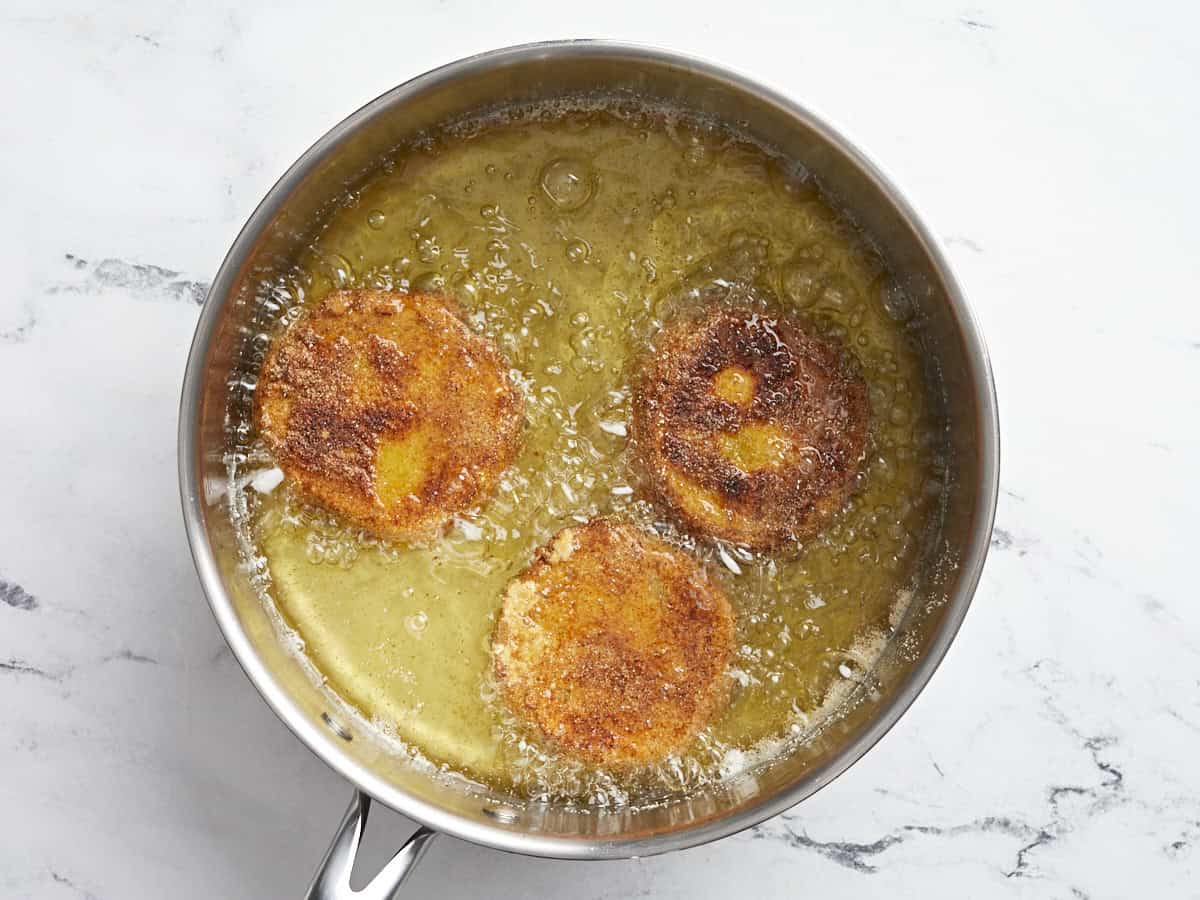
  • Gently place 3-4 tomatoes (depending on the size of your frying pan) into the hot oil using a spatula. Let the tomatoes fry in the shallow oil for 2-3 minutes. Flip and fry the other side for around the same time, sometimes a minute longer.
  • Remove tomatoes as they are done to a paper towel lined plate or cooling rack so they aren’t sitting in any excess oil.

See how we calculate recipe costs here.

Notes

*You want the oil to cover about half of the tomato’s height when it’s in the pan. These aren’t deep fried (completely submerged) so the other side will get nice and crispy when you flip them.
**If you like a thicker crispy fried coating, you can add ½ cup of panko breadcrumbs. The version I tested with ½ cup cornmeal and ½ cup panko also came out fantastic!

Nutrition

Serving: 3tomato slices | Calories: 292kcal | Carbohydrates: 32g | Protein: 8g | Fat: 15g | Sodium: 539mg | Fiber: 4g
overhead view of 3 fried green tomatoes on a white plate.

how to make Fried Green Tomatoes – step by step photos

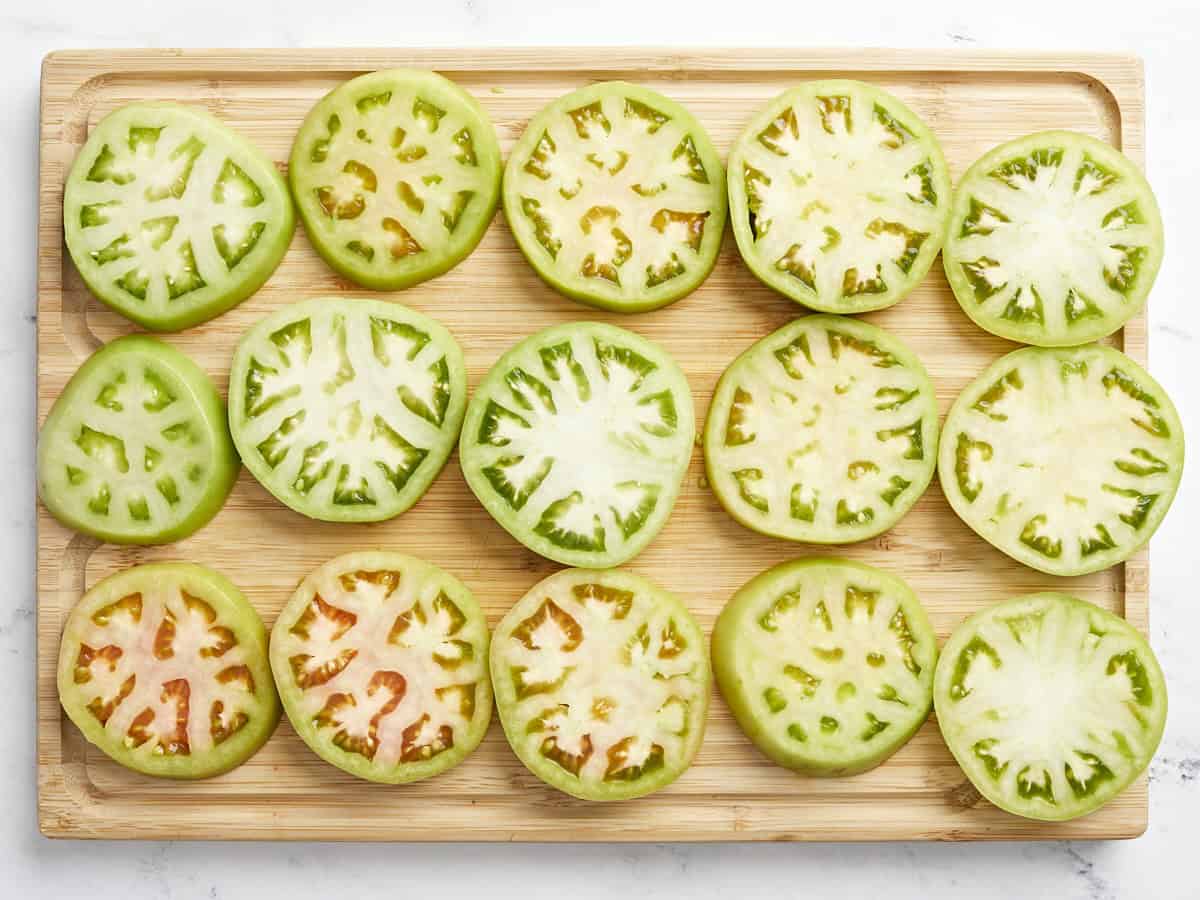
sliced green tomatoes on a cutting board.

Cut 4 large green tomatoes into 1/3-inch slices horizontally, discarding the end with the stem and the very bottom which is smooth.

flour, cornmeal, and bbq seasoning in a white bowl.

Combine 1/4 cup flour, 1/2 cup cornmeal, 1 Tbsp BBQ seasoning powder, and 1/2 tsp salt in one small bowl. Whisk to combine. In another small bowl, pour in the remaining 1/4 cup flour by itself.

pouring buttermilk into a bowl of eggs.

In a third bowl, whisk together 2 eggs and 1/2 cup buttermilk.

dipping a green tomato in seasoned flour and cornmeal.

In an assembly line fashion, dip your cut tomatoes into the flour, then the buttermilk egg mixture, and finally the cornmeal BBQ seasoning mixture. Place each slice of tomato off to the side and continue this assembly line process until all tomatoes have been dredged in this magical trio!

breaded green tomatoes on a baking sheet.

Once your tomatoes are dredged and off to the side, heat up 1 1/3 cups canola oil in a thick bottom pan on high heat until it is very hot! (Take a droplet of water on your finger and drip it into the pan. Once it lands, if it pops and hisses, it’s ready to fry the tomatoes!)

3 fried green tomato slices in oil.

Gently place 3-4 tomatoes (depending on the size of your frying pan) into the hot oil using a spatula. Let the tomatoes fry in the shallow oil for 2-3 minutes. Flip and fry the other side for around the same time, sometimes a minute longer.

fried green tomatoes draining on a wire rack set in a baking sheet.

Remove tomatoes as they are done to a paper towel-lined plate or cooling rack so they aren’t sitting in any excess oil.

a fork stabbing a piece of cut fried green tomato on a white plate.

These crispy, crunchy fried green tomatoes are the perfect summer appetizer!

The post Fried Green Tomatoes appeared first on Budget Bytes.
Grilled Salmon

Grilled salmon is so simple and delicious– perfect for summer when perhaps you’re trying to eat a little lighter.

The post Grilled Salmon appeared first on Budget Bytes.

Salmon is a real treat, but with a little bit of planning, I have found it can be enjoyed any time of year! Nice cuts of salmon are available fresh and/or frozen pretty much everywhere these days, making this Grilled Salmon recipe one that is great to have in your back pocket, especially during Summer.

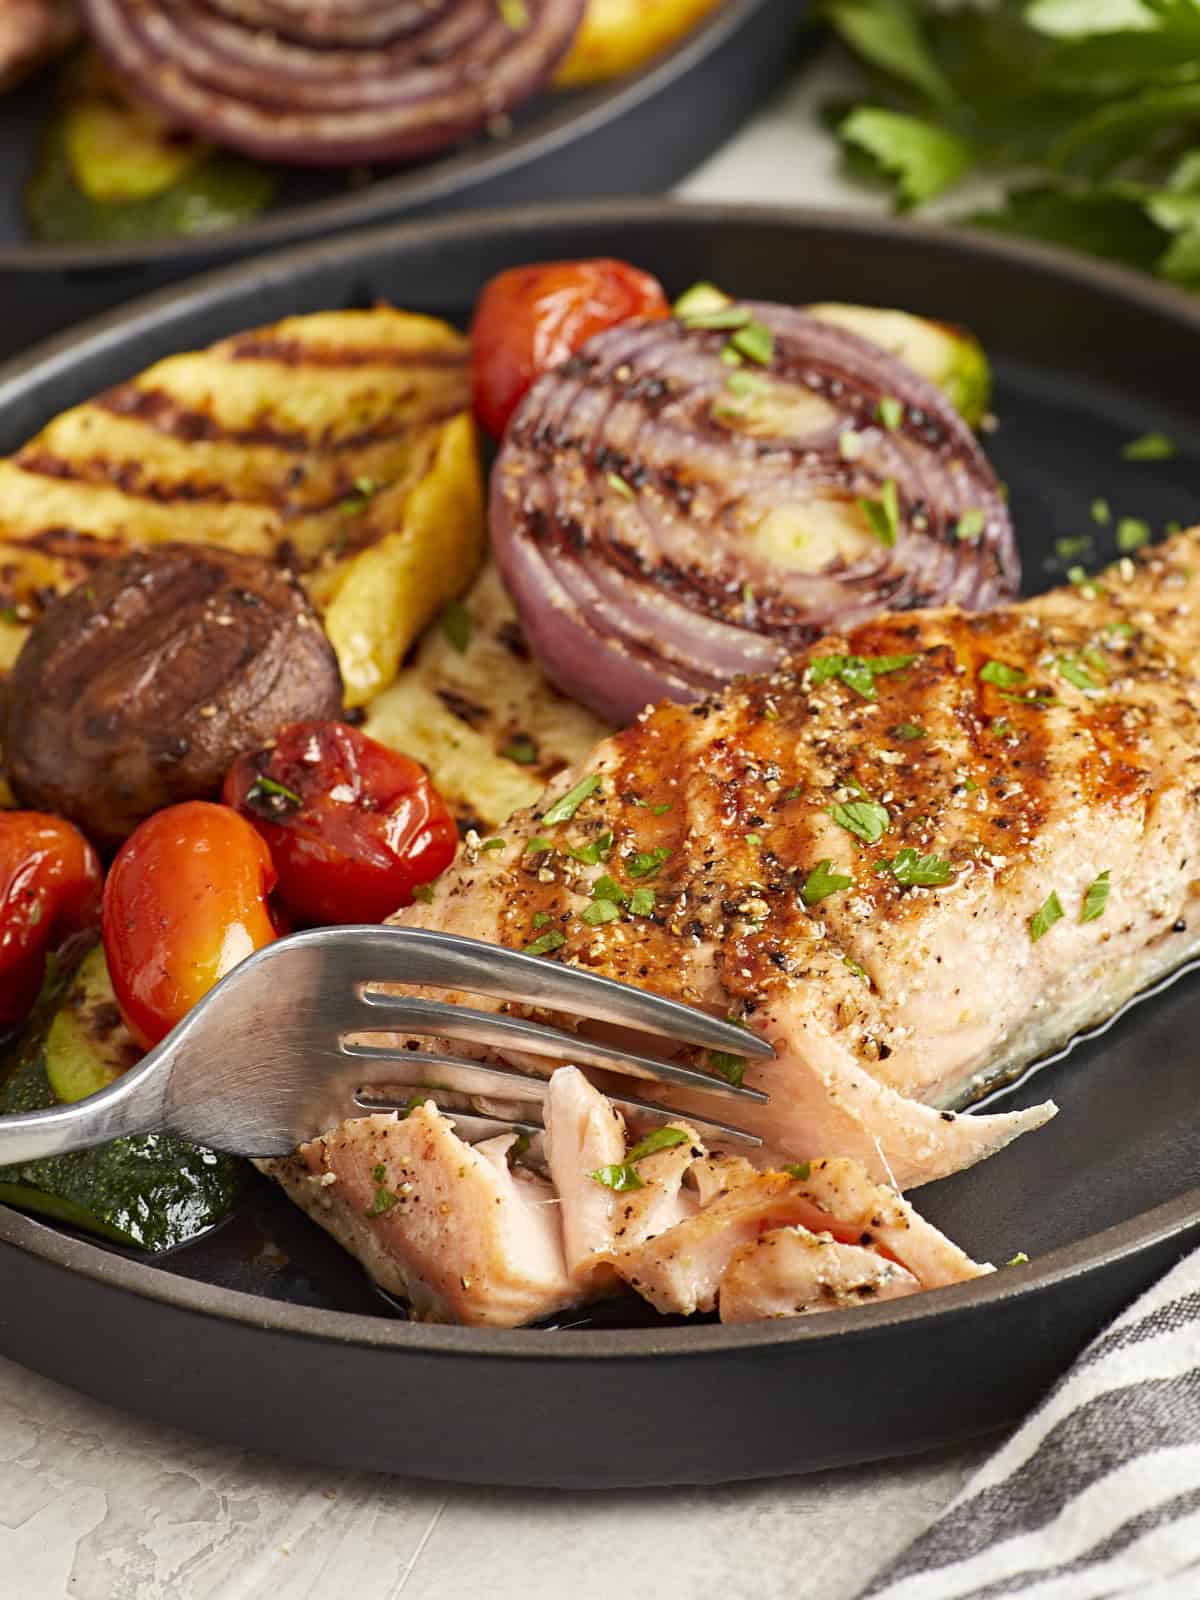
cutting a piece of grilled salmon on a black plate with a fork.

When I was pregnant with my daughter, the only thing I craved that wasn’t sour fruits or crunchy veggies was salmon! My body must have been onto something because this recipe for Grilled Salmon goes perfectly with a squeeze of sour grilled lemon and vegetables of any kind! I found a great deal on skin-on wild-caught salmon at Walmart for this recipe, making it cost effective as well as delicious.

Ingredients

Here’s what you’ll need to make grilled salmon:

  • Salmon: I found fresh Atlantic salmon on a good sale, so that’s what I used. I often find frozen salmon to be cheaper– just thaw before using.
  • Lemon: Adds freshness and a little bit of sourness.
  • Vegetable Oil: Helps the salmon grill without sticking.
  • Salt and Pepper: Enhance the natural flavor of the fish.

What Else Can I Add?

I kept things basic for this grilled salmon recipe, but it’s easy to season with your favorite spice blends, like:

Serving Suggestions

I love this grilled salmon served with rice, sauteed asparagus, wedges of fresh grilled lemon, and a dollop of our Tzaziki Sauce!

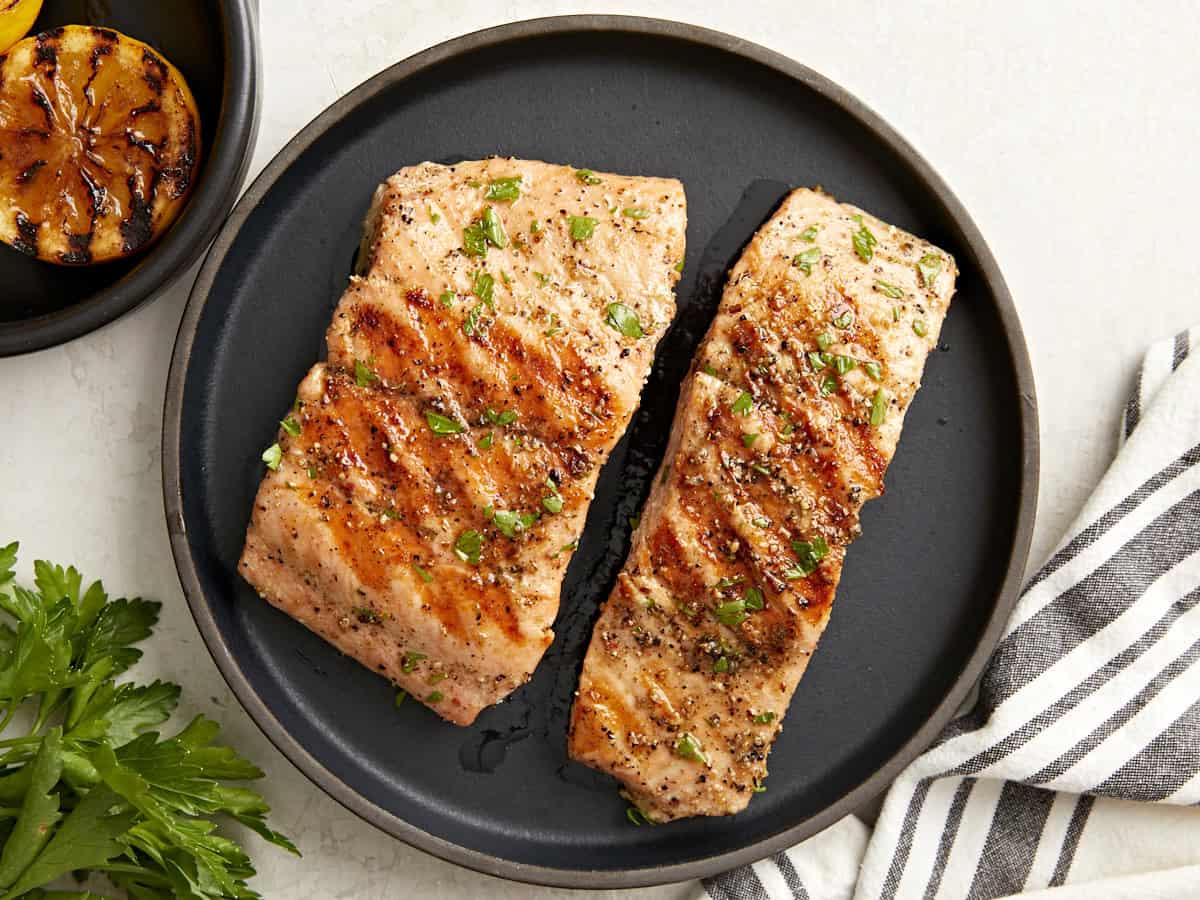
overhead view of 2 grilled salmon fillets on a black plate.
cutting a piece of grilled salmon on a black plate with a fork.
Print

Grilled Salmon

Grilled salmon is so simple and delicious– perfect for summer when perhaps you’re trying to eat a little lighter.
Course Dinner, Main Course
Cuisine American
Total Cost ($9.27 recipe / $3.09 serving)
Prep Time 10 minutes
Cook Time 10 minutes
Total Time 20 minutes
Servings 3 (4-ounce fillets)
Calories 208kcal

Equipment

Ingredients

  • 2 6-oz. pieces skin-on Atlantic salmon $8.61
  • 1 lemon, sliced in half $0.50
  • 1 Tbsp vegetable oil $0.04
  • 1 tsp sea salt $0.02
  • 1/2 tsp freshly cracked black pepper $0.10

Instructions

  • Preheat grill on high, 450-500°F. In a small bowl, combine 1 Tbsp vegetable oil, 1 tsp sea salt, and 1 tsp black pepper.
  • Brush lemon halves and salmon on all sides with oil and season with salt and pepper
  • Grill salmon (skin side down) and lemons (cut side down) to grill and grill for 6 minutes.
  • Flip lemons and salmon and grill for 4 minutes or until internal temp reaches about 135°F. Remove from grill and allow salmon to rest for a few minutes, where it will finish cooking and reach the perfect internal temperature of 145°F.

See how we calculate recipe costs here.

Nutrition

Serving: 4ounces | Calories: 208kcal | Carbohydrates: 2g | Protein: 23g | Fat: 12g | Sodium: 826mg | Fiber: 1g
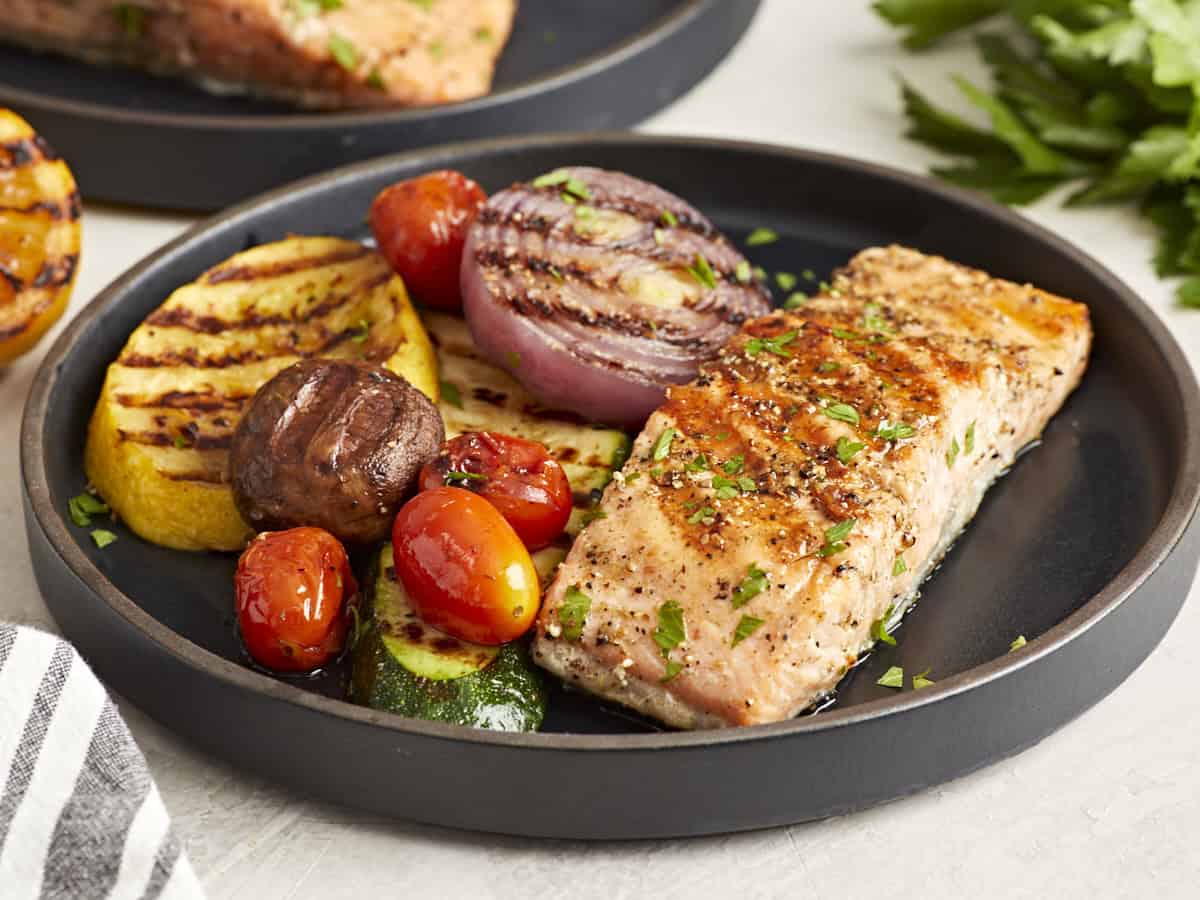
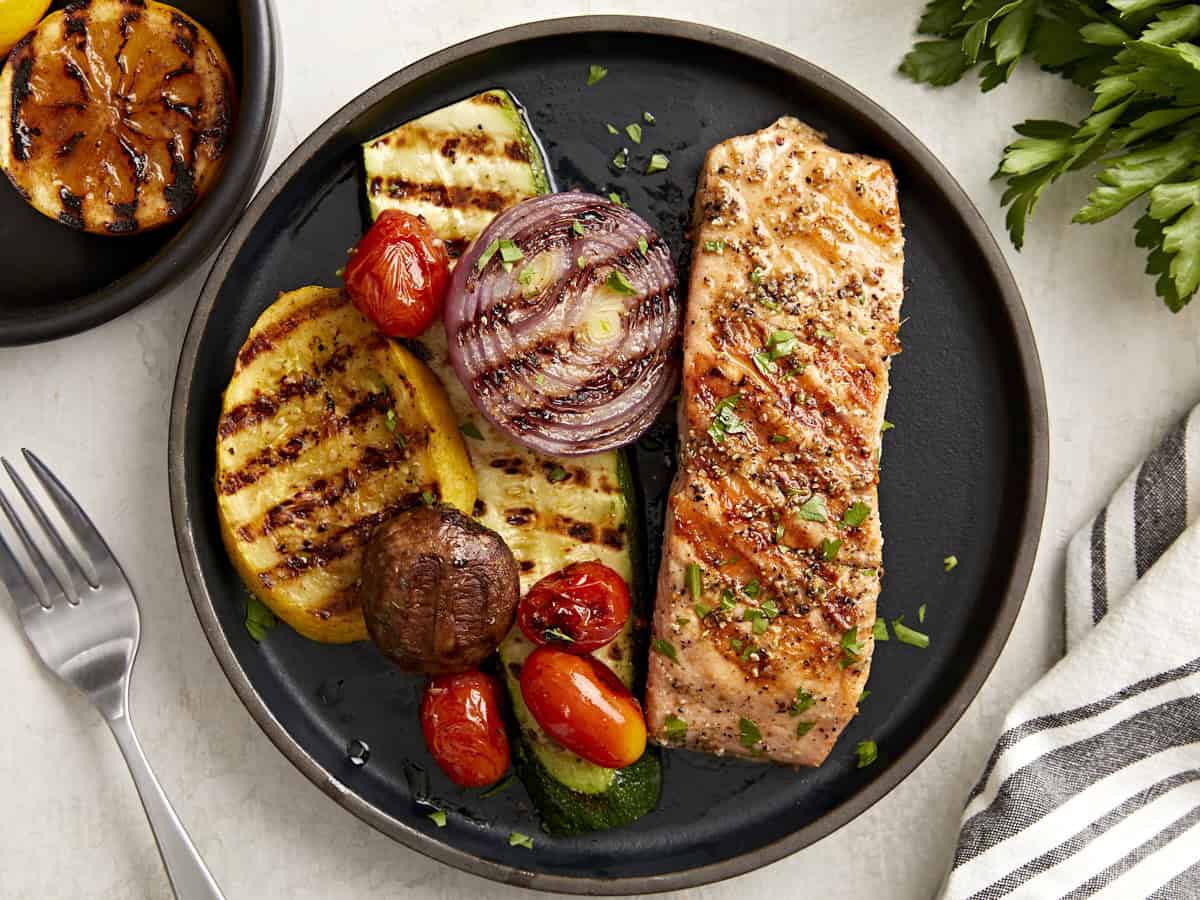
a serving of grilled salmon and grilled vegetables on a black plate.

how to make Grilled Salmon – step by step photos

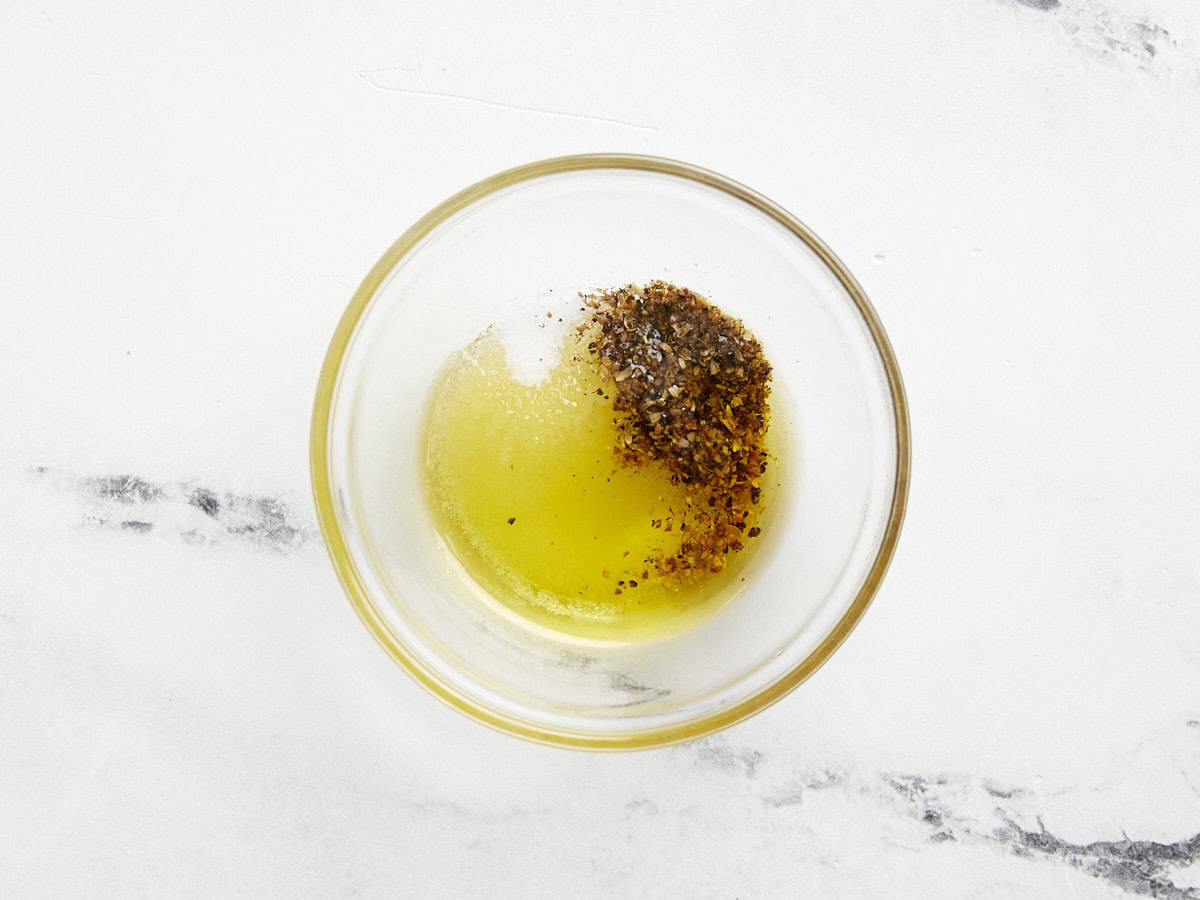
oil and spices in a glass dish.

Preheat grill on high, 450-500°F. In a small bowl, combine 1 Tbsp vegetable oil, 1 tsp sea salt, and 1/2 tsp black pepper.

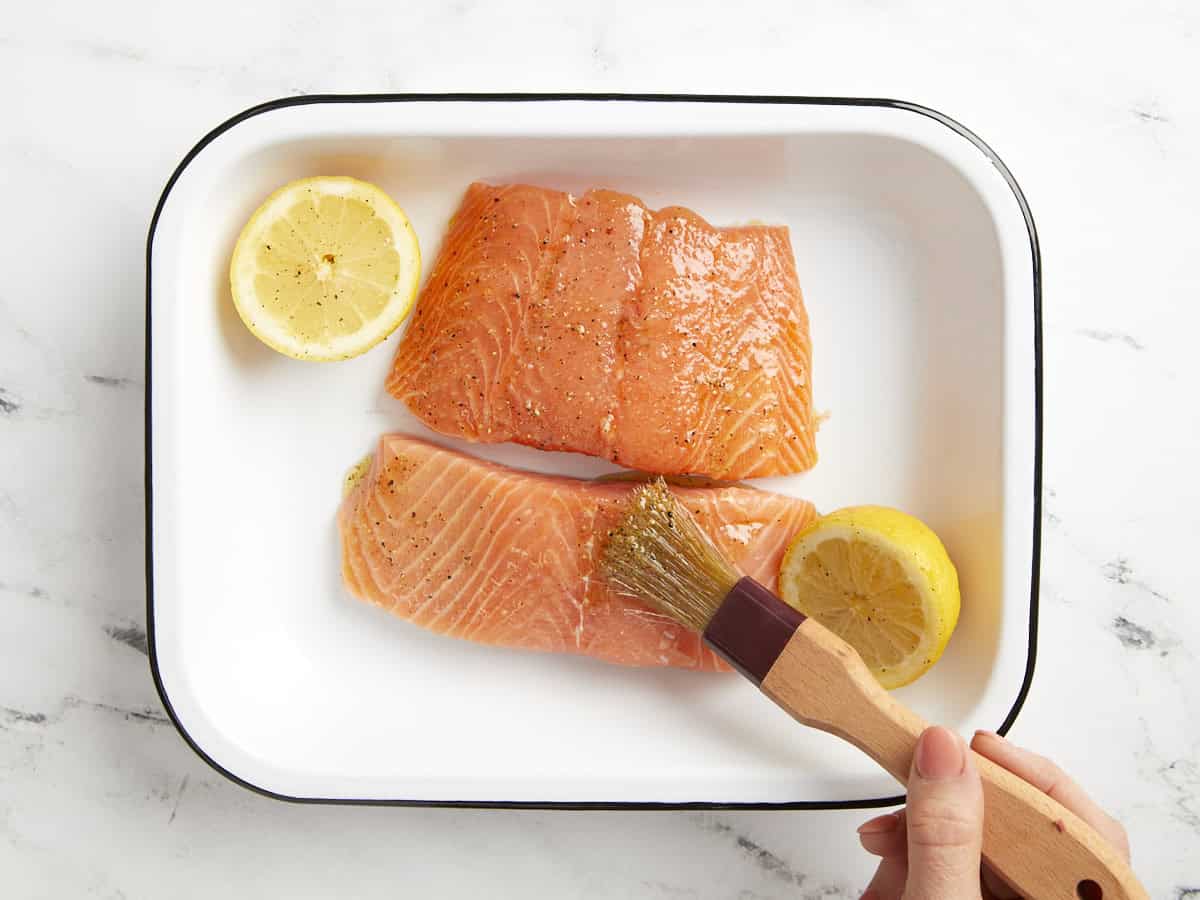
brushing oil over salmon fillets.

Brush the halves of 1 lemon and 2 6-oz. salmon fillets on all sides with oil and season with salt and pepper.

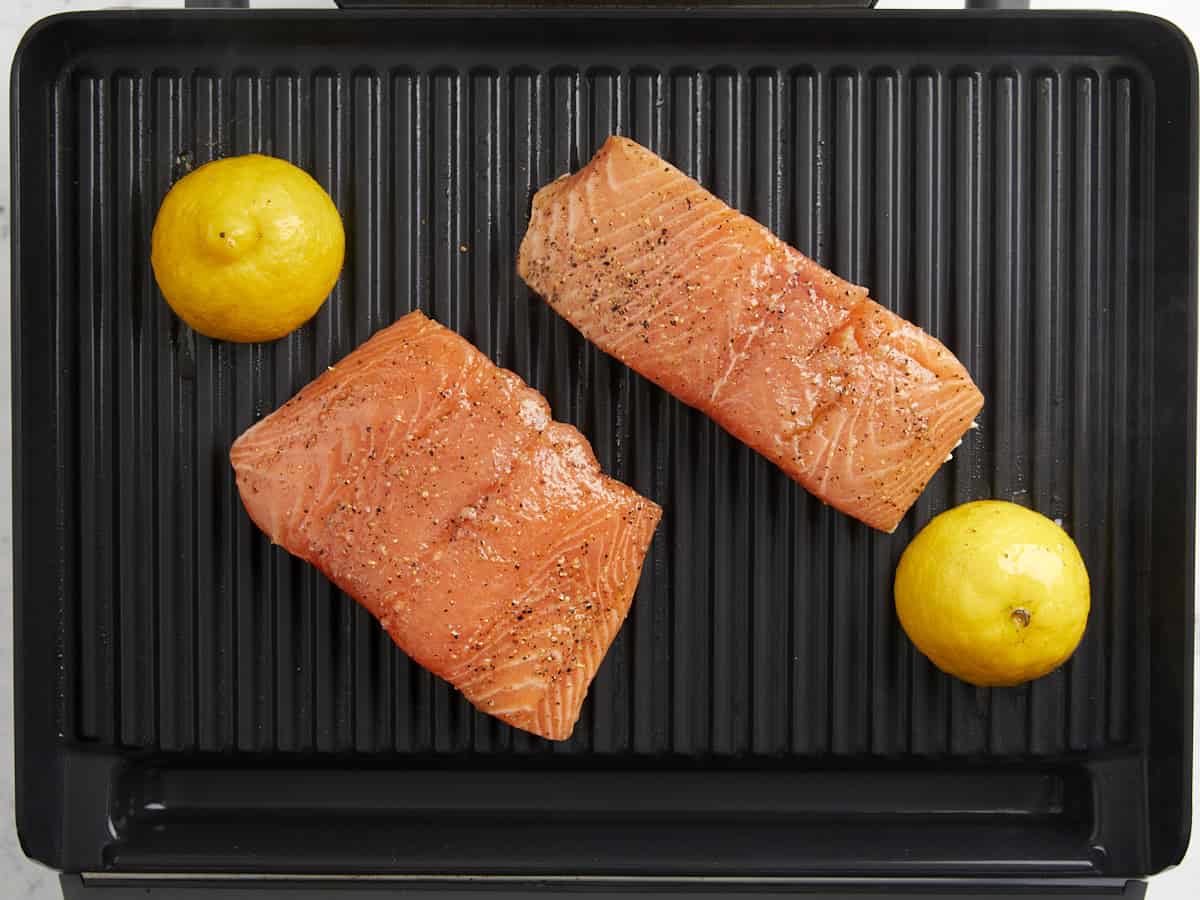
2 salmon fillets and lemon halves on a grill pan.

Grill salmon (skin side down) and lemons (cut side down) to grill and grill for 6 minutes.

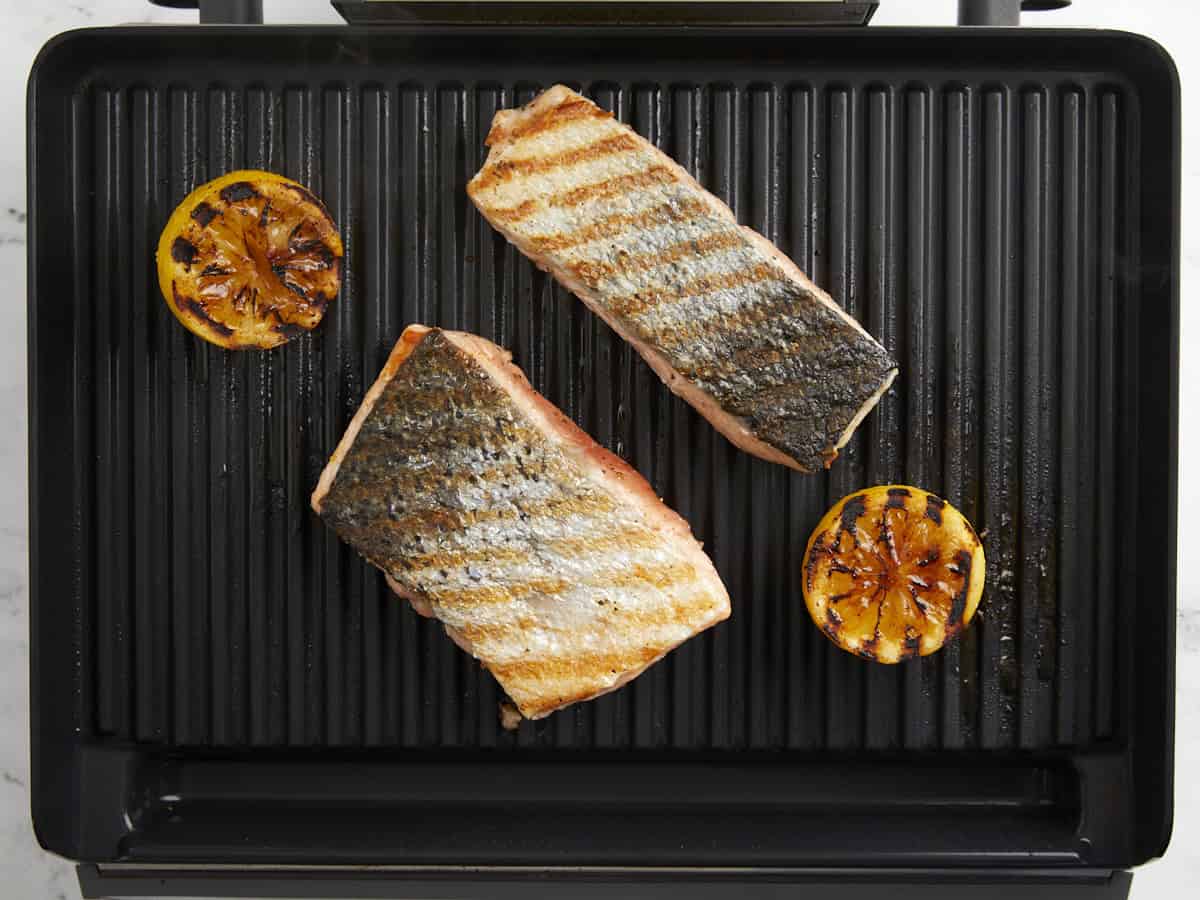
partially grilled salmon fillets on a grill pan.

Flip lemons and salmon and grill for 4 minutes or until internal temp reaches about 135°F. Remove from grill and allow salmon to rest for a few minutes, where it will finish cooking and reach the perfect internal temperature of 145°F.
overhead view of a serving of grilled salmon and grilled vegetables on a black plate.

Break out the grill for this easy weeknight meal!

The post Grilled Salmon appeared first on Budget Bytes.