Jalapeño Cornbread

A piece of Jalapeño Cheddar Cornbread with a slice of butter and a drizzle of honey on top.This cheddar Jalapeño Cornbread recipe is moist and packed full of flavor! It only takes 15 minutes to prep and everyone will think you got it from a restaurant. Want more bread recipes? Try Garlic Knots, Cheesy Breadsticks, Easy Homemade Breadsticks, or the Best Homemade Rolls! How to make Jalapeño Cornbread: Make Batter: Combine flour,…

A piece of Jalapeño Cheddar Cornbread with a slice of butter and a drizzle of honey on top.

This cheddar Jalapeño Cornbread recipe is moist and packed full of flavor! It only takes 15 minutes to prep and everyone will think you got it from a restaurant.

Want more bread recipes? Try Garlic Knots, Cheesy Breadsticks, Easy Homemade Breadsticks, or the Best Homemade Rolls!

A piece of Jalapeño Cheddar Cornbread with a slice of butter and a drizzle of honey on top.

Jalapeño Cornbread is irresistible.

The balance of light sweetness and tiny hint of spice in cornbread is such a winning combination. Our recipe uses buttermilk for a moist and tender crumb, and speckles of cheddar cheese throughout. I’m telling you, it’s restaurant worthy! My favorite part is how versatile it is; Serve with your favorite soup, chili, BBQ Ribs, or BBQ chicken, or a million other things.

And if you love cornbread, be sure to try our buttermilk cornbread, skillet cornbread, and cornbread dressing!

How to make Jalapeño Cornbread:

Make Batter: Combine flour, cornmeal, baking soda, baking powder, brown sugar, and salt. In a separate bowl, mix together melted butter, honey, and buttermilk. Stir in eggs then pour wet ingredients into dry ingredients. Mix until combined then fold in jalapeño peppers and shredded cheese. Don’t over mix, a few lumps are fine.

Two images showing how to make jalapeno cornbread by putting the dry ingredients in a bowl then after adding the wet ingredients and fresh chopped jalapenos and cheddar cheese.

Bake: Grease an 8″ pan then pour in the cornbread batter and bake at 350°F for 25-30 minutes, or until a toothpick only comes out with a few moist crumbs when inserted.

Two images showing cheesy jalapeno cornbread freshly baked with the middle three slices on its side, then one square on a plate with butter and honey drizzled on top.

Storing and Freezing Instructions:

To Store: Cover and store at room temperature for 1-2 days or in the fridge for up to a week.

To Freeze: Store in an airtight container or freezer safe bag and freeze for up to 3 months. Thaw completely in the refrigerator overnight, then rewarm in the microwave for a few seconds or with foil on top in the oven on low heat.

Recipe Variations:

  • Cornbread Muffins: Grease a 12-cup muffin pan or use muffin cup liners. Divide batter evenly and bake for 15-20 minutes, or until a toothpick comes out with a few moist crumbs when inserted.
  • Skillet Cornbread: Pour batter into a greased 9 or 10 inch oven safe skillet. Bake at the same time and same duration as the recipe states.
  • Buttermilk Cornbread has a more sweet, cake-like texture.

Serve Jalapeño Cornbread With:

Follow me for more great recipes

A piece of Jalapeño Cheddar Cornbread with a slice of butter and a drizzle of honey on top.
Print

Jalapeño Cornbread

Our delicious cheddar Jalapeño Cornbread recipe only takes 15 minutes, and is made moist and flavorful from the buttermilk, honey and cheddar cheese.
Course Side Dish
Cuisine American
Prep Time 15 minutes
Cook Time 25 minutes
Total Time 40 minutes
Servings 9 people
Calories 274kcal
Cost $4

Equipment

Ingredients

Instructions

  • Dry Ingredients: Mix the flour, cornmeal, baking powder, baking soda, brown sugar and salt in a large bowl.
  • Wet Ingredients: In another bowl, mix together the melted butter, buttermilk, and honey until well combined. Whisk in the eggs.
  • Combine: Add the wet ingredients to the dry ingredients and stir just until combined. Stir in the jalapeño peppers and shredded cheese. Do not over mix; it's okay if there are a few lumps.
  • Bake: Pour into a greased 8’’ pan and bake in a preheated 350 degrees oven for 25 to 30 minutes or until a toothpick inserted in the center comes out with moist crumbs.

Video

Notes

Storage Instructions: Cover and store at room temperature for 1-2 days or in the fridge for up to a week.
Freezing Instructions: Store in an airtight container or freezer safe bag and freeze for up to 3 months. Thaw completely in the refrigerator overnight, then rewarm in the microwave for a few seconds or with foil on top in the oven on low heat.
To make Muffins: Grease a 12-cup muffin pan or use muffin cup liners. Divide batter evenly and bake for 15-20 minutes, or until a toothpick comes out with a few moist crumbs when inserted.
Skillet Jalapeño Cornbread: Pour batter into a greased 9 or 10 inch oven safe skillet. Bake at the same time and same duration as the recipe states.
Buttermilk Cornbread has a more sweet, cake like texture.

Nutrition

Calories: 274kcal | Carbohydrates: 34g | Protein: 5g | Fat: 13g | Saturated Fat: 7g | Polyunsaturated Fat: 1g | Monounsaturated Fat: 4g | Trans Fat: 0.4g | Cholesterol: 67mg | Sodium: 413mg | Potassium: 130mg | Fiber: 2g | Sugar: 11g | Vitamin A: 428IU | Vitamin C: 2mg | Calcium: 75mg | Iron: 2mg

Follow Me

Get recipe ideas weekly!

I originally shared this recipe October 2021. Updated October 2024.

Peanut Butter Popcorn

Peanut Butter Popcorn in a large white bowl with Reese's Pieces sprinkled throughout.This easy Peanut Butter Popcorn recipe has fresh popped popcorn tossed in an incredible 4-ingredient peanut butter sauce! I love to toss in some Reese’s Pieces and enjoy this 15 minute treat for movie and game nights! Looking for more snack recipes? Try Caramel Popcorn, Cowboy Caviar, Sweet Chex Mix, or Chex Mix! How to…

Peanut Butter Popcorn in a large white bowl with Reese's Pieces sprinkled throughout.

This easy Peanut Butter Popcorn recipe has fresh popped popcorn tossed in an incredible 4-ingredient peanut butter sauce! I love to toss in some Reese’s Pieces and enjoy this 15 minute treat for movie and game nights!

Looking for more snack recipes? Try Caramel Popcorn, Cowboy Caviar, Sweet Chex Mix, or Chex Mix!

Peanut Butter Popcorn in a large white bowl with Reese's Pieces sprinkled throughout.

15-minute snack hack Peanut Butter Popcorn

There’s lots to love about this easy Peanut Butter Popcorn recipe, made with pantry staples in about 15 minutes. I’ll whip it up for a family movie night or a “late night” snack for my kids when they have friends over.

Make it your own by customizing the base recipe with other mix-ins. I like to replace a few cups of the popcorn with pretzels, Chex cereal, and other candy like marshmallows, candy corn, or chopped up candy bars.

How to make Peanut Butter Popcorn:

Pop popcorn and add to a extra large bowl.

Make Sauce: Stir together honey and sugar in a pot over medium heat. Boil for 2 minutes, stirring constantly. Remove from heat and stir in peanut butter and vanilla, mixing until smooth.

Two images showing an easy 4 ingredient peanut butter sauce with the ingredients dumped in a saucepan, then after it's incorporated for the best peanut butter popcorn recipe.

Combine: Slowly pour HALF of the peanut butter sauce over the popcorn, gently stirring to coat. Add more, to your liking (you may not use it all). Allow to cool for a few minutes before serving.

Two images showing how to make peanut butter popcorn by drizzling an easy peanut butter sauce on top of freshly popped popcorn then adding Reese's Pieces.

Recipe Variations:

  • Fall Party Mix: Replace one cup of popcorn with one cup of pretzels. Add some candy corn and Reese’s Pieces or M&M’s.
  • Toppings: After tossing the popcorn in the creamy peanut butter sauce, add some M&M’s, Reese’s Pieces, chocolate chips, or chopped Butterfinger.
  • Chocolate Peanut Butter Popcorn: Allow peanut butter popcorn to cool, then drizzle with melted chocolate.

More No-Bake Treats:

Follow me for more great recipes

Peanut Butter Popcorn in a large white bowl with Reese's Pieces sprinkled throughout.
Print

Peanut Butter Popcorn

This easy Peanut Butter Popcorn recipe has fresh popped popcorn tossed in an incredible 4-ingredient peanut butter sauce! I love to toss in some Reese's Pieces and enjoy this 15 minute treat for movie and game nights!
Course Dessert, Snack
Cuisine American
Prep Time 5 minutes
Cook Time 8 minutes
Total Time 13 minutes
Servings 10
Calories 352kcal
Cost $5

Equipment

Ingredients

  • 10-11 cups popped popcorn

Peanut Butter Sauce:

Instructions

  • Pop popcorn and add to an extra large mixing bowl.
  • Peanut butter sauce: In medium saucepan over medium heat add honey and sugar and stir well to combine. Bring to a boil then boil for 2 minutes, stirring. Remove from heat and stir in peanut butter and vanilla, mixing until smooth.
  • Combine: Slowly pour HALF of the peanut butter sauce over the popcorn and gently stir to coat. Drizzle more peanut butter sauce, until your desired coating is reached (you may not use it all, depending on preference). Add Reese's pieces, chocolate chips or other candy, if desired.
  • Allow to cool for a few minutes before eating.

Video

Notes

Yield: about 10 cups popcorn. Serving size 1 cup.
Storing Instructions: Store peanut butter popcorn in an airtight container for up to one week.
Fall Party Mix: Replace one cup of popcorn with one cup of pretzels. Add some candy corn and Reese’s Pieces or M&M’s.
Toppings: After tossing the popcorn in the creamy peanut butter sauce, add some M&M’s, Reese’s Pieces, chocolate chips, or chopped Butterfinger.
Chocolate Peanut Butter Popcorn: Allow peanut butter popcorn to cool, then drizzle with melted chocolate.

Nutrition

Calories: 352kcal | Carbohydrates: 56g | Protein: 7g | Fat: 14g | Saturated Fat: 3g | Polyunsaturated Fat: 3g | Monounsaturated Fat: 7g | Sodium: 113mg | Potassium: 200mg | Fiber: 3g | Sugar: 44g | Vitamin A: 22IU | Vitamin C: 0.2mg | Calcium: 16mg | Iron: 1mg

Follow Me

Get recipe ideas weekly!

I originally shared this post October 2016. Updated August 2021 and October 2024.

The material in this blog post references the trademarked brand “Reese’s.” The use of this trademark is for informational and editorial purposes only and does not imply sponsorship or endorsement by The Hershey Company or any of its affiliates.

Caramel Sauce

A homemade Caramel Sauce recipe in a glass jar with some caramel dripping off a spoon to show the smooth consistency.The easiest homemade Caramel Sauce made in minutes, with just 5 basic ingredients. Enjoy it on top of ice cream, in your hot chocolate, or literally over anything! If you love caramel, you have to try my Homemade Caramels, Caramel Apples, Caramel Popcorn, Chocolate Covered Pretzels, or Chocolate Covered Marshmallows! How to make Caramel Sauce:…

A homemade Caramel Sauce recipe in a glass jar with some caramel dripping off a spoon to show the smooth consistency.

The easiest homemade Caramel Sauce made in minutes, with just 5 basic ingredients. Enjoy it on top of ice cream, in your hot chocolate, or literally over anything!

If you love caramel, you have to try my Homemade Caramels, Caramel Apples, Caramel Popcorn, Chocolate Covered Pretzels, or Chocolate Covered Marshmallows!

A homemade Caramel Sauce recipe in a glass jar with some caramel dripping off a spoon to show the smooth consistency.

Homemade Caramel sauce is a big reward for little effort.

Before you even think about buying an artificially flavored caramel sauce from the store, let me tell you how EASY it is to make yourself. You get that real, rich caramel flavor, with no of the additives or preservatives, and it will keep in the fridge for weeks. Drizzle it over pumpkin cheesecake, apple crisp, or better than sex cake. Use it for ice cream sundaes (with brownies and hot fudge, too), or as a dip for fresh sliced apples.

How to make Caramel Sauce:

Combine: Grease the sides of a saucepan, then add butter, brown sugar, water, and salt, and cook over medium-low, stirring constantly until butter is melted. Bring mixture to a boil then simmer on low for 5-8 minutes, stirring constantly. It should be golden brown and thickened (it will continue to thicken as it cools).

Two images showing how to make homemade caramel by combining butter, brown sugar, water, and salt in a saucepan then after it has been boiled and is a golden brown color.

Remove from heat and stir in vanilla and evaporated milk. Add additional evaporated milk if you want a thinner consistency. Serve easy caramel sauce over ice cream, apple bundt cake, chocolate chip skillet cookie, or drizzle over pumpkin eggnog or hot cocoa.

Two images showing evaporated milk being poured in a saucepan with a bubbly brown mixture, then after the easy caramel sauce has been mixed and poured in a glass jar for serving.

Storage and Freezing Instructions:

To Store: Refrigerate leftover caramel sauce for up to 2 weeks. Rewarm in the microwave for a few seconds.

To Freeze: Store in a freezer-safe container and freeze for up to 3 months. Thaw completely in the refrigerator before using.

Serve Caramel Sauce With:

Follow me for more great recipes

A homemade Caramel Sauce recipe in a glass jar with some caramel dripping off a spoon to show the smooth consistency.
Print

Homemade Caramel Sauce

This homemade Caramel Sauce recipe transforms five basic pantry staples into a rich and creamy caramel sauce. Enjoy it on top of ice cream, in your hot chocolate, or literally over anything! It's so easy and only takes 10 minutes to make!
Course Dessert
Cuisine American
Prep Time 5 minutes
Cook Time 5 minutes
Total Time 10 minutes
Servings 10
Calories 261kcal

Equipment

  • saucepan

Ingredients

  • 3/4 cup butter
  • 1 1/2 cups light brown sugar , firmly packed
  • 2 Tablespoons water
  • 1/4 teaspoon salt
  • 1 Tablespoon vanilla extract
  • 1/2 cup evaporated milk , or heavy cream, or more, to thin the sauce

Instructions

  • Grease the sides of a medium saucepan with oil or non-stick spray. Add butter, brown sugar, water, and salt to saucepan and cook over medium-low heat, stirring constantly, until the butter has melted.
  • Bring the mixture to a boil., stirring constantly. Reduce heat to a simmer and cook for 5-8 minutes, stirring, until golden brown and thickened (keep in mind it will continue to thicken as it cools).
  • Remove from heat and stir in vanilla and ½ cup evaporated milk. Add more evaporated milk if you'd like a thinner consistency. 
  • Store caramel sauce in a covered container or jar in the refrigerator for 1-2 weeks. Re-warm in the microwave for a few seconds, or on the stove over low heat.

Video

Notes

Yield: about 2 cups.
Butter: salted butter can be used. Reduce salt to ⅛ teaspoon, or to taste.
For Salted Caramel: Use unsalted butter and replace salt with Sea Salt, adding extra salt, to taste.
To Freeze: Store in a freezer-safe container and freeze for up to 3 months. Thaw completely in the refrigerator before using.

Nutrition

Calories: 261kcal | Carbohydrates: 34g | Protein: 1g | Fat: 14g | Saturated Fat: 9g | Polyunsaturated Fat: 1g | Monounsaturated Fat: 4g | Trans Fat: 1g | Cholesterol: 37mg | Sodium: 192mg | Potassium: 92mg | Sugar: 34g | Vitamin A: 476IU | Vitamin C: 0.2mg | Calcium: 69mg | Iron: 0.3mg

Follow Me

Get recipe ideas weekly!

I originally shared this recipe September 2015. Updated May 2020 and October 2024.

Original recipe adapted from Food.com

Instant Pot Pasta and Meatballs

A bowl of Instant Pot Pasta and Meatballs topped with grated parmesan cheese and strips of basil, ready to enjoy.Instant Pot Pasta and Meatballs is one of my favorite busy weeknight dinners. Just add all the uncooked ingredients to the pot, press a button, and let the Instant pot do the work. Instant Pot recipes are so convenient! Try Beef Gyros, Instant Pot Mashed Potatoes, Instant Pot Spaghetti, Instant Pot Short Ribs, or Instant…

A bowl of Instant Pot Pasta and Meatballs topped with grated parmesan cheese and strips of basil, ready to enjoy.

Instant Pot Pasta and Meatballs is one of my favorite busy weeknight dinners. Just add all the uncooked ingredients to the pot, press a button, and let the Instant pot do the work.

Instant Pot recipes are so convenient! Try Beef Gyros, Instant Pot Mashed Potatoes, Instant Pot Spaghetti, Instant Pot Short Ribs, or Instant Pot Meatloaf!

A bowl of Instant Pot Pasta and Meatballs topped with grated parmesan cheese and strips of basil, ready to enjoy.

Every busy family needs this Instant Pot Pasta and Meatballs recipe.

This recipe has saved me more than once, and made me look like the most put together Mom in the world, when I’m actually just trying not to drop every ball I’m juggling. It doesn’t get easier than adding uncooked pasta, frozen meatballs, tomato sauce and spices to a pot, and voila, dinner is ready at the press of a button. It still has an elevated edge to it, with a homemade sauce, rather than jarred, and you could use from-scratch frozen cooked meatballs, too.

If you’re new to the Instant Pot, here are my tips for how to use your Instant Pot, and all of my Instant Pot recipes.

How to make Instant Pot Pasta with Meatballs:

Layer Ingredients: Add frozen meatballs to Instant pot and add uncooked pasta on top. Add water, followed by crushed tomatoes, seasonings, and tomato sauce. Make sure the sauce is covering all of the noodles.

Two images showing how to make instant pot meatballs and pasta by layering meatballs and penne pasta then after water, tomatoes, sauce, and seasonings.

Cook: Cook on manual, high pressure, for half of the cook time it instructs on the box of pasta. Quick release to release pressure. Serve instant pot pasta with grated parmesan cheese and some breadsticks or garlic knots on the side.

Two images of instant pot penne and meatballs after it's cooked then once it's garnished with parmesan cheese and fresh basil.

Recipe Variations:

  • Homemade Meatballs: prepare homemade meatball, but to cook, use the instant pot, on sauté setting, brown them lightly on all sides, in a little oil. You don’t need to cook them all the way through. Continue with recipes steps as instructed, adding uncooked pasta, sauces, spices and water on top, and cooking at high pressure.
  • Spicy: use crushed fire roasted tomatoes instead of the crushed tomatoes, and add a dash of crushed red pepper flakes to the sauce.
  • Veggies: Stir in fresh spinach at the end.

More Recipes with Meatballs:

Follow me for more great recipes

A bowl of Instant Pot Pasta and Meatballs topped with grated parmesan cheese and strips of basil, ready to enjoy.
Print

Instant Pot Pasta and Meatballs

Instant Pot Pasta and Meatballs is one of my favorite busy weeknight dinners! Dump uncooked pasta, meatballs, and a simple sauce ingredients to the Instant Pot then minutes later dinner is on the table! This is a family meal staple everyone needs!
Course Main Course
Cuisine American, Italian
Prep Time 5 minutes
Cook Time 25 minutes
Total Time 30 minutes
Servings 8
Calories 547kcal

Equipment

Ingredients

Instructions

  • DISCLAIMER: I developed and tested this recipe using my 6-QUART INSTANT POT DUO. If you’re using a larger IP or a newer brand you may need to add more liquid so that you don’t get a burn notice. (The new IP are much more sensitive). Refer to this article for more information on adapting recipes for your instant pot.
  • Layer ingredients in Instant Pot: Spray the bottom of the instant pot with nonstick cooking spray. Add frozen meatballs, then dry pasta, spreading into an even layer. Pour water over pasta. Add crushed tomatoes, seasonings and tomato sauce and gently tomato sauce and seasonings. Smooth the sauce to completely cover the noodles.
  • Cook on High Pressure (Manual) for 4-5 minutes (half the cook time listed on the box of pasta).
  • Do a controlled quick release when timer beeps. Stir. Allow to cool for 5-10 minutes before serving. Serve with fresh grated parmesan on top, and extra chopped fresh basil, if desired.

Video

Notes

Homemade Meatballs: prepare homemade meatball, but to cook, use the instant pot, on sauté setting, brown them lightly on all sides, in a little oil. You don’t need to cook them all the way through. Continue with recipes steps as instructed, adding uncooked pasta, sauces, spices and water on top, and cooking at high pressure.
Spicy: use crushed fire roasted tomatoes instead of the crushed tomatoes, and add a dash of crushed red pepper flakes to the sauce.
Veggies: Stir in fresh spinach at the end of cooking.

Nutrition

Calories: 547kcal | Carbohydrates: 51g | Protein: 28g | Fat: 25g | Saturated Fat: 9g | Cholesterol: 81mg | Sodium: 332mg | Potassium: 809mg | Fiber: 4g | Sugar: 6g | Vitamin A: 360IU | Vitamin C: 11.2mg | Calcium: 72mg | Iron: 3.3mg

Follow Me

Get recipe ideas weekly!

I originally shared this recipe February 2019. Updated August 2022 and October 2024.

Pumpkin Cinnamon Rolls

A homemade Pumpkin Cinnamon Rolls recipe in a white baking dish with a cinnamon cream cheese frosting spread on top.This homemade Pumpkin Cinnamon Rolls recipe is soft, fluffy, and tastes like fall! The cinnamon sugar filling has hints of ginger, nutmeg, and cloves, and a luscious cinnamon cream cheese frosting on top. Fall is for pumpkin recipes, like my favorite Pumpkin Cheesecake, Pumpkin Cupcakes, Pumpkin Chocolate Chip Bread, or Pumpkin French Toast! How to…

A homemade Pumpkin Cinnamon Rolls recipe in a white baking dish with a cinnamon cream cheese frosting spread on top.

This homemade Pumpkin Cinnamon Rolls recipe is soft, fluffy, and tastes like fall! The cinnamon sugar filling has hints of ginger, nutmeg, and cloves, and a luscious cinnamon cream cheese frosting on top.

Fall is for pumpkin recipes, like my favorite Pumpkin Cheesecake, Pumpkin Cupcakes, Pumpkin Chocolate Chip Bread, or Pumpkin French Toast!

A homemade Pumpkin Cinnamon Rolls recipe in a white baking dish with a cinnamon cream cheese frosting spread on top.

Pumpkin Cinnamon Rolls turn any day into a treat.

They bring the smell and taste of Fall into our home every year. My favorite part is the cinnamon roll filling with fall spices like ginger, nutmeg, and cloves. But the cream cheese frosting truly puts these pumpkin cinnamon rolls over the top! There are so many ways to make them ahead of time or freeze them so they’re ready for any occasion.

How to make Pumpkin Cinnamon Rolls:

Make Dough: Proof yeast with warm milk and a pinch of sugar and set aside until foamy. Add remaining sugar, melted butter, pumpkin, and egg and mix until combined. Add 2 cups of flour, baking powder, baking soda, salt and mix well.

Knead and Rise: Add ½ cup of flour at a time mixing until the dough starts to pull away from the sides of the bowl. Knead until the dough is smooth and elastic. Place in a greased bowl, cover and rise until doubled, about 1 ½ hours.

Two images showing how to make pumpkin cinnamon roll dough by combining ingredients then after the dough has risen.

Fill and slice: In a small bowl, combine brown sugar, cinnamon, nutmeg, ginger, and cloves. Punch down dough then roll out into an 18×20 inch rectangle. Spread soft butter all over dough then roll up into a log, starting on the shorter side. Pinch the ends to seal then roll them underneath. Slice into 12 pieces (about 1 ½ inches wide) and place in a greased 9×13 baking dish.

2nd Rise: Cover the cinnamon rolls with a cloth and allow to rise for an hour.

Two images showing a Pumpkin Spice Cinnamon Roll recipe being rolled and sliced.

Bake: Bake at 375°F for 17-25 minutes, until the centers are no longer doughy. Spread cinnamon cream cheese frosting over warm homemade pumpkin cinnamon rolls.

Two images showing pumpkin pie cinnamon rolls freshly baked then being served with a metal spatula after frosting is spread on all of them.

Make Ahead and Freezing Instructions:

To Make Ahead: Make and shape the cinnamon rolls, but for the second rise, cover the pan tightly and refrigerate overnight. Remove from the fridge and allow to rise and come to room temperature before baking.

To Store: Store in an airtight container in the fridge for up to 3 days. Rewarm in the microwave individually for about 15 seconds, or until soft and warm.

To Freeze: Freeze baked pumpkin cinnamon rolls in a freezer-safe container for up to 3 months. To freeze unbaked pumpkin cinnamon rolls, assemble them as instructed and bake for 10 minutes at 375°F. Cool completely then cover pan well with plastic wrap and aluminum foil and freeze for up to 3 months. Thaw overnight in the refrigerator then return to the oven for 10-15 minutes more until cooked through. 

More Roll Recipes:

Follow me for more great recipes

A homemade Pumpkin Cinnamon Rolls recipe in a white baking dish with a cinnamon cream cheese frosting spread on top.
Print

Pumpkin Cinnamon Rolls

Our homemade Pumpkin Cinnamon Rolls recipe has the fall flavors you love and a delicious cinnamon cream cheese frosting on top.
Course Dessert
Cuisine American
Prep Time 30 minutes
Cook Time 18 minutes
Total Time 11 hours 20 minutes
Servings 12
Calories 445kcal

Equipment

Ingredients

Filling:

Cinnamon Cream Cheese Frosting:

Instructions

  • Proof yeast: In a large bowl or stand mixer add warmed milk, yeast, and a pinch of the sugar. Stir to combine then let mixture sit for a few minutes, until yeast has proofed and is foamy.
  • Make dough: Add the remaining sugar, melted butter, pumpkin and egg then mix until well combined. Add salt, baking powder, baking soda, and 2 cups of flour. Mix well.
  • Knead: Add additional flour, ½ cup at a time, mixing well between each addition until the dough starts to pull away from the sides of the bowl. Mix for several minutes until the dough is smooth and elastic. It should be soft and slightly sticky, but not stick to a clean finger. Add more flour if needed.
  • First Rise: Place dough in a well greased bowl, cover with a towel and allow to rise for 1 to 1 ½ hours, or until doubled in size.
  • Make the filling: Mix brown sugar, cinnamon, ginger, nutmeg and cloves.
  • Roll Out: Punch dough down, place on a lightly floured counter and roll into a 18×20 inch rectangle. Spread softened butter all over the dough, leaving 1'' border, and sprinkle sugar mixture evenly on top. Starting on the shorter (18'' side) roll up into a log. Pinch the ends to seal them and tuck them under the roll.
  • Cut the dough into 12 slices (about 1 ½ inches wide) and place the cut rolls in a greased 9x13inch baking dish, or on a jelly-roll pan.
  • 2nd Rise: Cover with a cloth and allow to rise for 1 hour.
  • Bake: Preheat oven to 375 degrees. Bake for 17-25 minutes, until centers are no longer soft/doughy.
  • Cinnamon Cream Cheese Frosting: Mix the butter and cream cheese for 2 minutes, until smooth and fluffy. Add vanilla, powdered sugar and cinnamon and whip for a few more minutes. Smooth forsting over warm cinnamon rolls.

Video

Notes

Storing Instructions: Store in an airtight container in the fridge for up to 3 days. Rewarm in the microwave individually for about 15 seconds, or until soft and warm.
Make Ahead Instructions: Make and shape the cinnamon rolls, but for the second rise, cover the pan tightly and refrigerate overnight. Remove from the fridge and allow to rise and come to room temperature before baking.
Freezing Instructions: Freeze baked pumpkin cinnamon rolls in a freezer-safe container for up to 3 months. To freeze unbaked pumpkin cinnamon rolls, assemble them as instructed and bake for 10 minutes at 375°F. Cool completely then cover pan well with plastic wrap and aluminum foil and freeze for up to 3 months. Thaw overnight in the refrigerator then return to the oven for 10-15 minutes more until cooked through. 

Nutrition

Calories: 445kcal | Carbohydrates: 67g | Protein: 6g | Fat: 18g | Saturated Fat: 11g | Polyunsaturated Fat: 1g | Monounsaturated Fat: 5g | Trans Fat: 1g | Cholesterol: 60mg | Sodium: 230mg | Potassium: 126mg | Fiber: 2g | Sugar: 37g | Vitamin A: 2168IU | Vitamin C: 0.5mg | Calcium: 66mg | Iron: 2mg

Follow Me

Get recipe ideas weekly!

I originally shared this recipe September 2013. Updated October 2019 and October 2024.

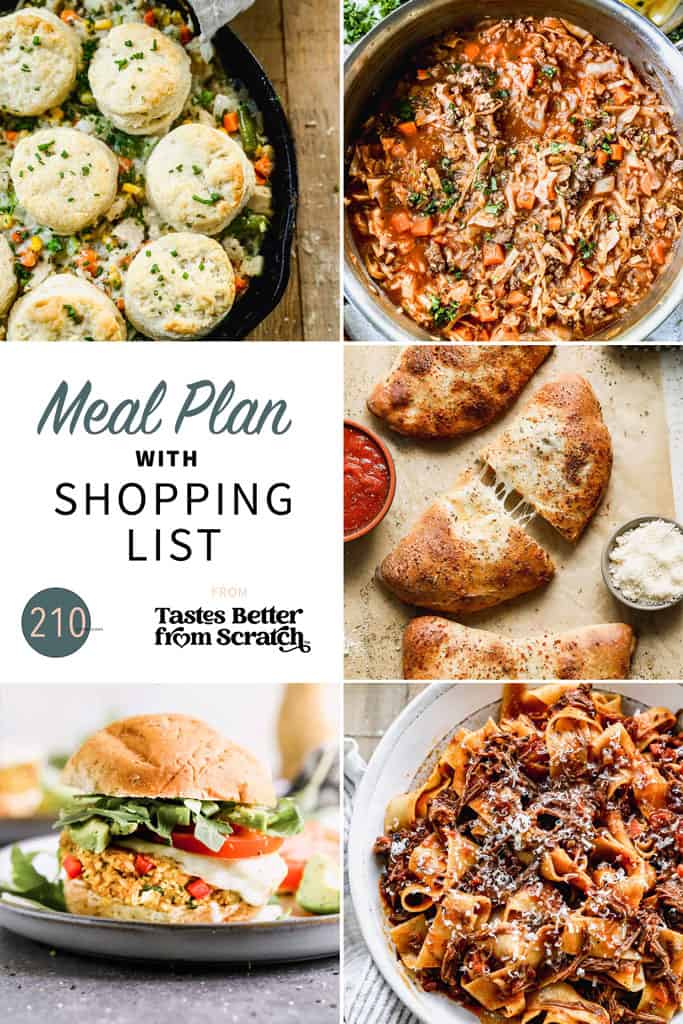
Meal Plan (199)

A collage of 5 dinner recipes from meal plan 199.Using a weekly meal plan is the best way to cook healthier for your family, save money, and time! This week’s menu includes our popular Dirty Rice, One Pan Pesto Chicken & Veggies, Lentil Soup, Halloween Pizza, and Cuban Sandwich. Did you know you can customize this meal plan, swap out recipes, and make your…

A collage of 5 dinner recipes from meal plan 199.

Using a weekly meal plan is the best way to cook healthier for your family, save money, and time! This week’s menu includes our popular Dirty Rice, One Pan Pesto Chicken & Veggies, Lentil Soup, Halloween Pizza, and Cuban Sandwich.

Did you know you can customize this meal plan, swap out recipes, and make your own shopping list? Register for a FREE account or login to get started!

A collage of 5 dinner recipes from meal plan 199.

Print Shopping List

Monday: Dirty Rice $14.66

Tuesday: One Pan Pesto Chicken & Veggies $13.55

Wednesday: Lentil Soup $14.60

Thursday: Halloween Pizza $6.68 (price without toppings)

Friday: Cuban Sandwich $15.53

Shopping list for meal plan 199.

Looking for more meal plans? View our entire collection here!

Frequently Asked Meal Plan Questions:

How Do I Sign Up To Receive Weekly Meal Plans?

Sign up here to get our meal plans delivered right to your email every single week. 

Can I Adjust The Serving Size?

Yes! Create a free account and you can increase or decrease the serving size of each recipe, and then print a new shopping list to reflect those changes.

What If I Don’t Like One Of These Recipes?

We know families each have unique needs, that’s why we’ve worked hard to make our meal plans fully customizable. You can swap out recipes, change serving sizes, and change the shopping list (All for FREE). Learn more here.

Budget information

Not only are these meal plans FREE but we’ve also included a rough estimate of budget info for each recipes to help you with your grocery planning. You can also swap out recipes and add more budget friendly recipes with just a few clicks. Learn more here.

How Do I Find My Saved Recipes?

Make sure you age logged in and view your saved recipes here!

Prep Ahead Instructions

Our meal plans come with prep-ahead instructions for every recipe. Even 5 minutes of cutting veggies or prepping a sauce ahead of time will make all the difference in your attitude about making dinner that night. 

5 Kitchen Gadgets on Sale Right Now!

Sign Up For FREE Weekly Meal Plans

Each 5-day meal plan includes a printable grocery shopping list with budget information, to help save time and money!

Yes, I want free meal plans!
cropped-Hawaiiian-Bowls-Web-8.jpgDay 1
Day 2
Mongolian beef on a plate with rice and chopped green onion on top.Day 3
Chicken Fajita Pasta served in a skillet with a scoop of salsa on top.Day 4
Five chicken taquitos lined on a plate with a bowl of salsa on the side.Day 5

Follow me for more great recipes

Chicken and Wild Rice Soup

A bowl of creamy Chicken and Wild Rice Soup packed with veggies and ready to enjoy.This creamy Chicken and Wild Rice Soup recipe has tender chicken, wild rice, and chopped veggies in a creamy, flavorful broth. It comforting and healthy, and you can make it on the stovetop in a slow cooker. If you love soup recipes, try our Chicken and Dumplings, Roasted Cauliflower Soup, Creamy Zuppa Toscana, Creamy Tortellini…

A bowl of creamy Chicken and Wild Rice Soup packed with veggies and ready to enjoy.

This creamy Chicken and Wild Rice Soup recipe has tender chicken, wild rice, and chopped veggies in a creamy, flavorful broth. It comforting and healthy, and you can make it on the stovetop in a slow cooker.

If you love soup recipes, try our Chicken and Dumplings, Roasted Cauliflower Soup, Creamy Zuppa Toscana, Creamy Tortellini Soup, Potato Leek Soup, or Broccoli Cheese Soup.

A bowl of creamy Chicken and Wild Rice Soup packed with veggies and ready to enjoy.

Soul-Warming Chicken & Wild Rice Soup

I love everything about this soup! It absolutely delicious, plus it’s a complete meal, with grains, veggies, and protein, and it will actually leave you feeling full. If you want an extra hearty, cozy meal, serve it with homemade rolls, breadsticks or level it up by serving in a bread bowl!

How to make Chicken and Wild Rice Soup:

Sauté Veggies: Saute celery, carrots, and onion in oil. Add garlic and sauté 30 seconds. ADD butter and flour and whisk for 1 minute. Stir in the chicken broth, bouillon, thyme, sage, rosemary, salt and pepper.

Two images showing chopped carrots, onion, and celery being sautéed then chicken broth being poured into the pot for easy chicken and rice soup.

Add Chicken and bring soup to a boil. Cover, reduce heat, and simmer for 10 minutes, or until chicken is cooked through. Remove chicken to a cutting board and rest for 5 minutes before chopping or shredding into small pieces. Stir evaporated milk, shredded chicken, and cooked wild rice into the soup.

Two images showing raw chicken breasts added to a large pot of soup, then after the healthy chicken and wild rice soup is done and served in a bowl.

Make Ahead Instructions:

To Make Ahead: This homemade chicken and wild rice soup recipe can be completely prepped ahead then stored in an airtight container in the fridge for 1-2 days.

Recipe Variations:

Slow Cooker Instructions: Sauté veggies in skillet as directed, adding butter and flour. Pour into slow cooker, whisking in broth, seasonings and chicken. Cook on low for 3-4 hours or High for 2 hours then shred chicken and return to soup. Stir in milk and cooked rice. Taste and adjust seasonings as needed.

Vegetarian Wild Rice Soup: Omit chicken and use vegetable broth in place of chicken broth.

More 30-Minute Meals:

Follow me for more great recipes

A bowl of creamy Chicken and Wild Rice Soup packed with veggies and ready to enjoy.
Print

Chicken and Wild Rice Soup

This creamy Chicken and Wild Rice Soup recipe has tender chicken, wild rice, and chopped veggies in a delicious flavorful broth. It's the perfect soup to enjoy on a cold day and can be made on the stovetop or slow cooker!
Course Main Course, Soup
Cuisine American
Prep Time 20 minutes
Cook Time 20 minutes
Total Time 40 minutes
Servings 6
Calories 354kcal
Cost $15

Ingredients

Instructions

  • Sauté Veggies: Heat a large pot over medium heat. Add oil. Once hot, add celery, carrots and onion and sauté for 3 minutes. Add garlic and sauté for 30 seconds. Add butter and flour and whisk well for 1 minute.
  • Add Broth and Seasonings: Gradually stir in the chicken broth and bouillon, scraping up anything stuck to the bottom of the pot. Add thyme, sage, rosemary, salt and pepper.
  • Add chicken and bring mixture to a boil. Cover the pot with a lid, reduce heat and simmer for 10 minutes, or until chicken is cooked through. Remove chicken to a cutting board and rest for 5 minutes before chopping or shredding into small pieces.
  • Stir in evaporated milk and cooked wild rice. Taste broth and adjust seasonings, adding more bouillon or spices, if needed, before serving.

Notes

Yield: Makes about 9 cups soup. Serving size is about 1 ½ cups.
Wild Rice: I like the Harvest Wild Rice Blend from Costco and Lundberg Wild Rice, cooked in chicken broth. Or you can cook one box of Rice-a-Roni Wild Rice. Any type of leftover cooked rice would also work great.
Slow Cooker Instructions: Sauté veggies in skillet as directed, adding butter and flour. Pour into slow cooker, whisking in broth, seasonings and chicken. Cook on low for 3-4 hours or High for 2 hours then shred chicken and return to soup. Stir in milk and cooked rice. Taste and adjust seasonings as needed.
Vegetarian Wild Rice Soup: Omit chicken and use vegetable broth in place of chicken broth.

Nutrition

Calories: 354kcal | Carbohydrates: 21g | Protein: 25g | Fat: 18g | Saturated Fat: 10g | Cholesterol: 101mg | Sodium: 259mg | Potassium: 637mg | Fiber: 1g | Sugar: 4g | Vitamin A: 3175IU | Vitamin C: 3mg | Calcium: 85mg | Iron: 1.3mg

Follow Me

Get recipe ideas weekly!

*I originally shared this recipe February 2015. Updated February 2019 and October 2024.

Spider Cookies

A plate of Halloween Spider Cookies with chocolate legs piped on with melted chocolate.As far as Halloween treats go, you can’t find easier or cuter than these Spider Cookies. They’re approachable for any age, and require no special equipment or ingredients. I love making Halloween recipes each year, like Halloween Brownies, Witch Hat Cupcakes, Halloween Pizzas, Halloween Cupcakes, or Pumpkin Cupcakes! How to make Spider Cookies: Make chocolate…

A plate of Halloween Spider Cookies with chocolate legs piped on with melted chocolate.

As far as Halloween treats go, you can’t find easier or cuter than these Spider Cookies. They’re approachable for any age, and require no special equipment or ingredients.

I love making Halloween recipes each year, like Halloween Brownies, Witch Hat Cupcakes, Halloween Pizzas, Halloween Cupcakes, or Pumpkin Cupcakes!

A plate of Halloween Spider Cookies with chocolate legs piped on with melted chocolate.

Spider Cookies are the creepiest, yet cutest, treats on the block!

These Halloween Spider cookies are on my MUST make list every Halloween season! They are such cute Halloween cookies and always a crowd pleaser – who can resist a classic chocolate chip cookie? Skip the store and don’t worry about buying any fancy kitchen gadgets or cut outs, you don’t need any special equipment for these! I love how they are ready for any party or gathering in just 30 minutes!

How to make Spider Cookies:

Make chocolate chip cookie dough: Bake chocolate chip cookies, and immediately after pulling the hot cookies out of the oven, place 3-4 chocolate chips on each cookie with the point facing up. Melt additional chocolate chips in a double boiler or a glass bowl in the microwave heating on low, stirring every 30 seconds until melted.

Two images showing freshly baked chocolate chip cookies with three chocolate chips on each cookie then a bowl of melted chocolate to make spooky spider cookies.

Draw Spider legs: Pour melted chocolate into a small ziplock bag and cut off a tiny bit on the corner to make a very small hole. Pipe the spider legs on both sides of each chocolate chip to make easy spider cookies.

Two images showing how to make spider cookies by piping on chocolate spider legs on chocolate chip cookies.

Make Ahead and Freezing Instructions:

To Make Ahead: Keep any leftover spider cookies at room temperature in an airtight container for 1-2 days or freeze in a freezer safe bag or container.

To Freeze: Let cookies cool completely then place in an airtight container or bag safe for the freezer and freeze for up to 3 months.

More Fall Recipes:

Follow me for more great recipes

A plate of Halloween Spider Cookies with chocolate legs piped on with melted chocolate.
Print

Spider Cookies

These homemade Spider Cookies are equal parts easy to make, creepy, and cute! They're ready in 30 minutes, with no special equipment or ingredients needed.
Course Dessert
Cuisine American
Prep Time 20 minutes
Cook Time 10 minutes
Total Time 30 minutes
Servings 15
Calories 433kcal
Cost 7

Equipment

Ingredients

  • 2 cups + 2 Tablespoons all-purpose flour
  • ½ teaspoon baking soda
  • ½ teaspoon salt
  • 12 Tablespoons butter , melted and cooled until warm
  • 1 cup light brown sugar
  • 1/2 cup granulated sugar
  • 1 large egg
  • 1 large egg yolk
  • 2 teaspoons vanilla extract
  • 2 cups semi-sweet chocolate chips , divided

Instructions

  • Preheat oven to 350 degrees F.
  • Make Cooking Dough: In a medium bowl mix together flour, salt, and baking soda. In a separate large mixing bowl beat the butter and sugars together with an electric mixer until well blended. Add the egg, egg yolk, and vanilla. Stir in the dry ingredients and mix until just combined. Gently stir in ¾ cup chocolate chips. The dough will be soft.
  • Bake: Scoop dough into balls and place on a parchment lined cookie sheet. Bake for 10-12 minutes. 
  • Add chocolate chips on top: Remove from oven and place 3-4 chocolate chips into the tops of each cookie, point side up.
  • Melt Chocolate: Add remaining chocolate chips to a microwave safe bowl and microwave, on low power, stirring every 30 seconds, until melted. 
  • Draw Spider legs: Spoon the melted chocolate into a ziplock bag. Use scissors to cut the smallest slit from one of the corners (you want the hole to be very small to make your spider legs). Squeeze the melted chocolate through the small hole, next to the chocolate chips on top of the cookie, to make 8 spider legs.

Video

Notes

Make Ahead Instructions: Keep any leftover spider cookies at room temperature in an airtight container for 1-2 days or freeze in a freezer safe bag or container.
Freezing Instructions: Freeze baked cookies for up to 3 months.

Nutrition

Calories: 433kcal | Carbohydrates: 59g | Protein: 6g | Fat: 19g | Saturated Fat: 11g | Polyunsaturated Fat: 1g | Monounsaturated Fat: 5g | Trans Fat: 0.4g | Cholesterol: 50mg | Sodium: 199mg | Potassium: 201mg | Fiber: 3g | Sugar: 30g | Vitamin A: 327IU | Calcium: 38mg | Iron: 3mg

Follow Me

Get recipe ideas weekly!

I originally shared this recipe October 2015. Updated October 2022 and October 2024.

Skillet Cornbread

A Southern Skillet Cornbread recipe fresh out of the oven and ready to slice and enjoy.This cast iron Skillet Cornbread recipe has buttermilk, cornmeal, and real corn. We love this Southern method that makes a crispier, rich and flavorful crust. Cornbread is my weakness! Make sure to try my Jalapeño Cornbread, Buttermilk Cornbread, and my Cornbread Dressing. How to make Skillet Cornbread: Batter: Preheat cast-iron skillet in the oven at…

A Southern Skillet Cornbread recipe fresh out of the oven and ready to slice and enjoy.

This cast iron Skillet Cornbread recipe has buttermilk, cornmeal, and real corn. We love this Southern method that makes a crispier, rich and flavorful crust.

Cornbread is my weakness! Make sure to try my Jalapeño Cornbread, Buttermilk Cornbread, and my Cornbread Dressing.

A Southern Skillet Cornbread recipe fresh out of the oven and ready to slice and enjoy.

There’s a reason I constantly crave this Southern Skillet Cornbread.

It’s because of the magic that happens when you melt butter in hot cast-iron skillet, and pour cornbread batter on top, that creates the greatest texture and flavor. It’s savory, buttery, and has delicious corn pieces throughout. It’s FANTASTIC and very easy to make.

It’s less sweet than Northern style cornbread, and we serve it alongside ribs and baked beans, baked mac and cheese, or a pot full of classic homemade chili!

How to make Skillet Cornbread:

Batter: Preheat cast-iron skillet in the oven at 375°F. Mix cornmeal, baking powder, flour, and salt together. In a liquid measuring cup, stir together baking soda and buttermilk. In a large mixing bowl, combine oil and sugar then mix in eggs. Pour in buttermilk mixture and creamed corn then stir.

Combine: Pour dry ingredients over wet ingredients and stir just until combined (don’t over-mix, it’s okay if it’s lumpy). Fold in the corn.

Two images showing how to make skillet cornbread by combining the wet ingredients then mixing in the dry ingredients and corn.

Bake: Melt butter in the cast iron skillet in the oven. Swirl butter in the skillet to coat the bottom then immediately pour batter into the pan, smoothing into an even layer. Bake for 27-35 minutes, or until a toothpick inserted in the center comes out with few moist crumbs. Slice cast iron skillet cornbread into wedges and enjoy with butter and honey, or serve with Jambalaya or Fried Chicken.

Two images showing cast iron skillet cornbread after it's baked then one wedge removed to be served.

Freezing Instructions:

To Freeze: Allow skillet cornbread to cool completely then remove from skillet. Wrap in plastic wrap then store in a freezer safe container or bag and freeze for 2-3 months. Thaw completely at room temperature.

Recipe Variations:

  • Gluten-Free: Use gluten-free flour instead of all purpose.
  • No Buttermilk: Make my recipe for a buttermilk substitute using milk and lemon juice or vinegar.
  • No Cast Iron Skillet: Bake in a 8-inch square pan or make my classic cornbread recipe.
  • Sugar: Sometimes I use half granulated sugar and half brown sugar to deepen the dark molasses flavor.

Soups To Serve Cornbread With:

Follow me for more great recipes

A Southern Skillet Cornbread recipe fresh out of the oven and ready to slice and enjoy.
Print

Skillet Cornbread

This cast iron Skillet Cornbread recipe a crispy, buttery crust, with moist cornbread center and real corn kernels. It's a Southern classic and pairs well with any meal.
Course Appetizer, Side Dish
Cuisine American
Prep Time 10 minutes
Cook Time 25 minutes
Total Time 35 minutes
Servings 8
Calories 328kcal

Ingredients

Instructions

  • Preheat cast-iron skillet inside an oven preheating to 375 degrees F.
  • Dry Ingredients: In small bowl, stir together cornmeal, flour, baking powder and salt.
  • Wet Ingredients: Measure buttermilk in a liquid measuring cup. Stir baking soda into buttermilk and set aside. In a large mixing bowl, mix the oil and sugar together. Mix in the eggs. Add the buttermilk and creamed corn and mix to combine.
  • Combine: Add the dry ingredients to the mixing bowl and stir just until combined (don’t over-mix! The batter doesn't need to be completely smooth). Fold in thawed corn kernels.
  • Bake: Add butter to hot cast iron skillet inside oven and allow to melt. Remove the skillet from the oven and swirl the butter around to coat the bottom and sides of the pan. Pour the batter immediately into the pan, smoothing into an even layer. Bake for about 27-35 minutes, or until a toothpick inserted in the center comes out clean or with few moist crumbs. Remember it will continue to cook as it cools in the hot cast iron pan, so don't overcook it.
  • Slice cornbread into wedges and serve.

Video

Notes

Buttermilk: If you don’t have buttermilk on hand, mix 1 Tablespoon lemon juice or vinegar with 1 scant cup of milk. Allow to rest for 5 minutes before using.
Sugar: Traditional southern cornbread doesn’t have very much, if any, sugar and although this recipe isn’t very sweet at all, you could reduce the sugar if desired.
Freezing Instructions: Allow cornbread to cool completely and remove from cast iron skillet. Wrap tightly in plastic wrap and freeze in a freezer safe container for 2-3 months.  Thaw at room temperature.

Nutrition

Calories: 328kcal | Carbohydrates: 43g | Protein: 7g | Fat: 15g | Saturated Fat: 4g | Polyunsaturated Fat: 3g | Monounsaturated Fat: 7g | Trans Fat: 0.2g | Cholesterol: 56mg | Sodium: 642mg | Potassium: 194mg | Fiber: 3g | Sugar: 9g | Vitamin A: 253IU | Vitamin C: 1mg | Calcium: 135mg | Iron: 2mg

Follow Me

Get recipe ideas weekly!

I originally shared this recipe February 2015. Updated June 2020 and October 2024.

Pumpkin Mug Cake

An easy pumpkin mug cake with chocolate chips ready to be eaten.Satisfy your sweet tooth with an easy Pumpkin Mug Cake recipe in just 5 minutes! It’s so flavorful, with the perfect cake-like taste and texture. Pumpkin recipes are my favorite! Try Pumpkin Spice Eggnog, Pumpkin Pancakes, Pumpkin Chocolate Chip Cookies, or Pumpkin Snickerdoodles! Ingredients Needed: How to make Pumpkin Mug Cake: Mix sugar, flour, cinnamon,…

An easy pumpkin mug cake with chocolate chips ready to be eaten.

Satisfy your sweet tooth with an easy Pumpkin Mug Cake recipe in just 5 minutes! It’s so flavorful, with the perfect cake-like taste and texture.

Pumpkin recipes are my favorite! Try Pumpkin Spice Eggnog, Pumpkin Pancakes, Pumpkin Chocolate Chip Cookies, or Pumpkin Snickerdoodles!

An easy pumpkin mug cake with chocolate chips ready to be eaten.

Pumpkin Mug Cake is a sweet little treat for any day.

I’m still amazed that you can make a single-serving mug cake in the microwave. It seems too good to be true, but I’m telling you it’s so legit! (Try my vanilla mug cake and chocolate mug cake, too!). I particularly love this pumpkin version, with cinnamon sugar and pumpkin pie spice. It’s cozy, with all the fall vibes, and ready in 5 minutes!

Ingredients Needed:

All of the ingredients needed to make a single serving of a pumpkin chocolate chip mug cake.

How to make Pumpkin Mug Cake:

Mix sugar, flour, cinnamon, baking powder, pumpkin pie spice, and salt in a mug. Stir in pumpkin, milk, melted butter, and vanilla until smooth, scraping the bottom of the mug. Fold in the chocolate chips.

Microwave for 70-90 seconds. The cake should be set but still a little shiny on top. Let it rest and cool for a few minutes before eating. Serve with a dollop of whipped cream if you’d like.

  • All microwaves are different, so start with 70 seconds then wait 1 minute while it cools. If it’s not set, add an extra 15-25 seconds as needed.
Two images showing all of the ingredients for a pumpkin spice mug cake in a mug then after it's baked and topped with whipped cream and a sprinkle of cinnamon.

More Mug Cake Recipes:

Follow me for more great recipes

An easy pumpkin mug cake with chocolate chips ready to be eaten.
Print

Pumpkin Mug Cake

Satisfy your sweet tooth with an easy Pumpkin Mug Cake recipe in about 5 minutes! It's moist, flavorful, and will become your new Fall obsession.
Course Dessert
Cuisine American
Prep Time 5 minutes
Cook Time 2 minutes
Total Time 7 minutes
Servings 1
Calories 454kcal
Cost 1

Ingredients

Instructions

  • Mix flour, sugar, cinnamon, pumpkin pie spice, baking powder, and salt in a mug. Stir in milk, pumpkin, melted butter and vanilla extract until smooth, being sure to scrape the bottom of the mug. Stir in chocolate chips, if desired.
  • Microwave for 70-90 seconds* (until cake is just set, but still barely shiny on top). Allow to rest in microwave for a few minutes before eating.

Video

Notes

*Because all microwaves are different, it’s difficult to give a precise cook time. Start with 70 seconds, wait 1 minute while it cools, then look to see if it is set. Add an additional 15-25 seconds if needed. The trick with mug cakes is to stop cooking the cake earlier than you think, because you want it to be soft on the inside, and the cake will also continue to cook as it cools.

Nutrition

Calories: 454kcal | Carbohydrates: 73g | Protein: 5g | Fat: 17g | Saturated Fat: 11g | Polyunsaturated Fat: 1g | Monounsaturated Fat: 3g | Trans Fat: 0.5g | Cholesterol: 34mg | Sodium: 209mg | Potassium: 161mg | Fiber: 1g | Sugar: 47g | Vitamin A: 2736IU | Vitamin C: 1mg | Calcium: 125mg | Iron: 2mg

Follow Me

Get recipe ideas weekly!

I originally shared this recipe October 2020. Updated October 2024.