Apple Pie Bars

This apple pie bars recipe is easy and full of cozy flavor, with a spiced fruit filling, streusel topping, and…

A Couple Cooks – Recipes worth repeating.

This apple pie bars recipe is easy and full of cozy flavor, with a spiced fruit filling, streusel topping, and tasty maple glaze!

Apple Pie Bars

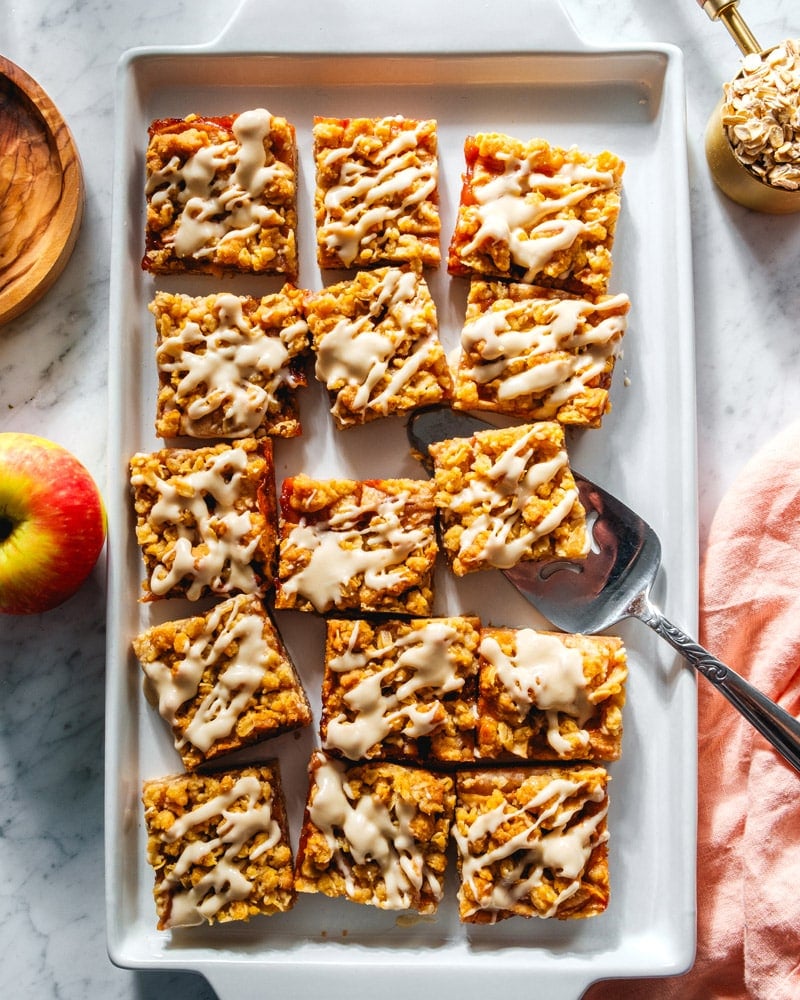
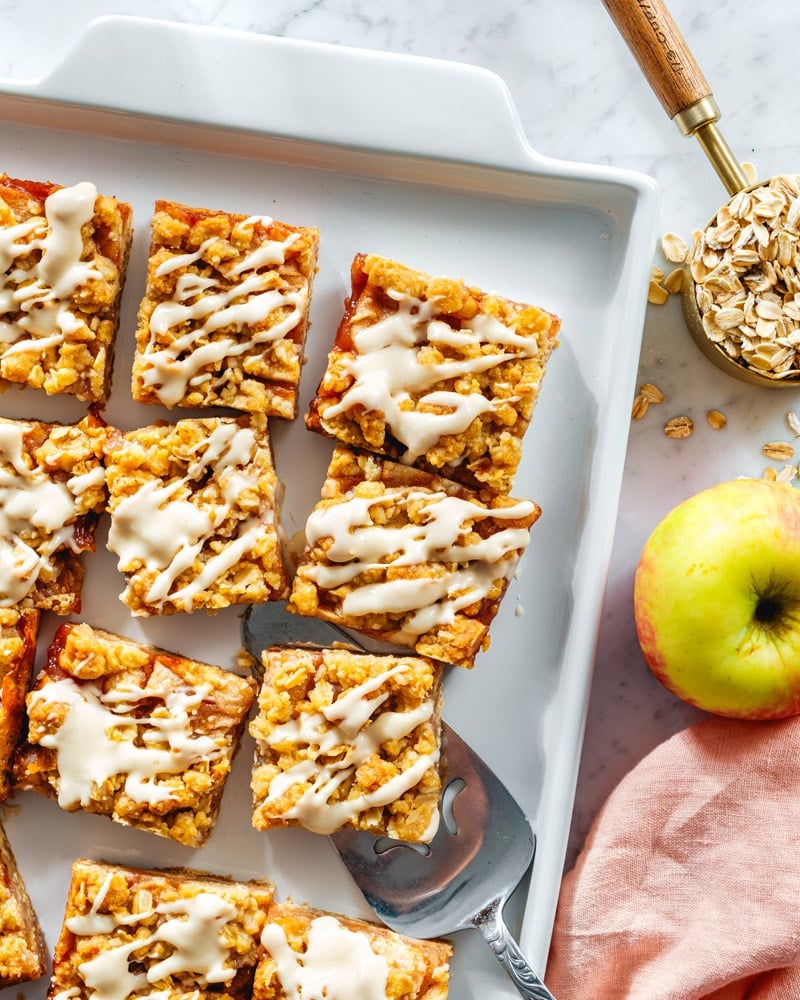
Looking for an easy dessert that will have everyone talking? Try this apple pie bars recipe! It’s simple to whip up this handheld treat: the same dough makes a sturdy bottom crust and buttery crumbles of streusel topping! Sandwiched in between the layers is a cinnamon-spiced apple filling, and it’s topped with a sweet maple icing drizzle that tastes a bit like melty vanilla ice cream. These are absolutely fabulous and one of our favorite fall desserts yet.

What you need for apple pie bars

These apple pie bars are and easy dessert for several reasons: there’s no special equipment required, the peeling and slicing time is minimal, and the same dough makes the crust and crumble topping. It bakes up in a square pan, making 16 servings delightful handheld apple pie slices. Bars are great for holidays and pitch ins because they’re both easy to serve and make: and we’d make these any day of the year!

Here’s what you’ll need for this recipe, grouped by type (or jump to the recipe):

  • Baking ingredients: All purpose flour, brown sugar, granulated sugar, Old Fashioned rolled oats, cornstarch, kosher salt
  • Spices: Cinnamon and nutmeg
  • Dairy: Unsalted butter
  • Fruits: Apples, lemon juice
  • Baking pan: 8 x 8 inch [20 cm] or 9 x 9 inch [22 cm]
  • Time: 25 minutes to prep, 1 hour to bake, 1 ½ to 2 hours to cool, 10 minutes to cut and glaze
Apple bars

Best type of apples for cookies

The best variety of fruit for apple pie bars is the same as any baked apple recipe (like cobbler, cookies, or crisp): select a firm, crisp tart apple. The tartness accents the sweet crust and topping, and the crisp texture helps it hold its shape while baking. Other apple varieties can end up in a mushy filling that’s not nearly as satisfying. Here are some of the best types apples for baking and cooking:

  • Pink Lady
  • Jonathon or Jonagold
  • Granny Smith
  • Honeycrisp
Apple bars

Tips for apple pie bars

Apple pie bars are almost like an apple crumble with a bottom crust. They’re simple to make, but just a few tips to know the process.

  • Grease the pan, then line it with parchment paper. This makes them easy to remove from the pan. Cut the parchment so that it extends on two sides to easily remove it from the pan. Greasing the entire pan helps the parchment stick to the bottom.
  • Allow the bars to cool to room temperature before glazing. This lets the texture set, firming it up so it’s the ideal texture for eating. If you’d like to speed up the process, you can cool for about 30 minutes at room temperature then refrigerate for 1 hour.
  • Cut into squares before glazing. We like cutting into 16 even squares first, then glazing the individual bars.

For the maple glaze

The best part of these apple pie bars, in our opinion, is the simple maple glaze! It tastes almost like that melty vanilla ice cream on the top of the pie. You can leave it out if desired, but we think it really takes these bars over the top.

The maple glaze has just a few ingredients and comes together quickly: just powdered sugar, butter, milk, maple syrup, and maple extract. The maple extract brings a bold, maple-forward flavor to the icing and we recommend finding it if at all possible! But you can leave it out if desired: it still tastes great.
Apple Pie Bars

Dietary swaps

A few simple swaps make these into vegan apple pie bars! Simply use vegan butter or refined coconut oil in place of butter. Do the same in the maple glaze, and use oat milk or your favorite non-dairy milk for the milk.

To make gluten-free apple pie bars, use almond flour in place of all-purpose flour. The texture will be slightly different, but it’s still delicious! Almond flour works well to make gluten-free crisps and crumbles, like this Gluten Free Apple Crisp.

Storage info

Storage for apple pie bars is tricky because of the moisture in the apples and the glaze. They last for 1 day at room temperature if iced and 2 days if unfrosted, loosely covered (or place a paper towel instead a container to reduce moisture). But it’s best to store them refrigerated if possible. Make sure to store them with parchment paper between each layer so they don’t stick to each other. These apple bars last:

  • 1 day at room temperature, loosely covered or with a paper towel inside the container to reduce moisture; 2 days if unfrosted
  • 1 week refrigerated, bringing them to room temperature before serving
  • 3 months frozen
Apple Pie Bars

More apple recipes

And that’s it! These apple bars are one of our favorite easy dessert recipes to make with this crisp tart fruit. They’re perfect for Thanksgiving, Christmas, fall, or anytime you need a simple treat. Here are a few more tasty apple recipes we love, from desserts to breakfast:

This apple pie bars recipe is…

Vegetarian. For vegan, use vegan butter. For gluten-free, use almond flour.

Print
Apple pie bars

Easy Apple Pie Bars


  • Author: Sonja Overhiser
  • Prep Time: 30 minutes
  • Cook Time: 1 hour
  • Total Time: 1 hour 30 minutes
  • Yield: 16

Description

This apple pie bars recipe is easy and full of cozy flavor, with a spiced fruit filling, streusel topping, and tasty maple glaze!


Ingredients

  • 1 ¼ cup (175 g) all-purpose flour
  • ¾ cup light brown sugar
  • 1 cup Old Fashioned rolled oats
  • ½ teaspoon kosher salt
  • 12 tablespoons unsalted butter, sliced into small pieces
  • 4 cups crisp tart baking apples (about 4 medium), peeled and thinly sliced (1/4-inch thick)
  • 1/3 cup granulated sugar
  • 1 tablespoon cornstarch
  • 1 tablespoon lemon juice
  • ½ tablespoon ground cinnamon
  • ⅛ teaspoon ground nutmeg
  • 1/2 recipe Maple Glaze

Instructions

  1. Preheat the oven to 375°F. Butter an 8 x 8 or 9 x 9 baking dish. Line the pan with a piece of parchment paper, cut so that it extends on two sides to easily remove it from the pan.
  2. In a medium bowl, mix the flour, brown sugar, oats, and kosher salt. Cut in the butter with a pastry cutter or fork. As it incorporates, use fingers to knead until it becomes an even, consistent dough with no more dry bits of flour (this takes a while, so be patient!). Use your fingers to crumble it into small crumbles and measure out 1 ½ cup for the topping.
  3. Pour the remaining crumbles into the prepared pan, and press it into an even layer for the crust of the bars. Use the bottom of a measuring cup to press in the dough and make it flat and even.
  4. In a medium bowl, mix the peeled and sliced apples, granulated sugar, cornstarch, lemon juice, and cinnamon and nutmeg. Spread them in an even layer over the crust.
  5. Add the reserved crumbles over the top in an even layer.
  6. Bake for 55 minutes to 1 hour, until the top and edges are golden brown. Remove from the oven and cool on cooling rack for 20 to 30 minutes, then lift out the bars with the parchment. If desired transfer to the refrigerator and for 1 hour, or simply cool to room temperature on the counter.
  7. Once the bars are room temperature, cut into 16 even squares. Drizzle on Maple Glaze with a fork, if desired. Store bars up to 1 day at room temperature, 1 week refrigerated (with parchment paper between the layers if stacked; bring to room temperature before serving), or 3 months frozen.
  • Category: Dessert
  • Method: Baked
  • Cuisine: Dessert
  • Diet: Vegetarian

Keywords: Apple pie bars, apple bars, apple pie bars recipe

A Couple Cooks - Recipes worth repeating.

Our Best Banana Bread Recipe

This easy banana bread recipe is simply the best! This moist, sweet, golden quick bread is a kitchen essential. Banana…

A Couple Cooks – Recipes worth repeating.

This easy banana bread recipe is simply the best! This moist, sweet, golden quick bread is a kitchen essential.

Banana Bread Recipe

Banana bread is a kitchen staple, and we’re confident this one needs to make its way into your recipe rotation. This easy banana bread recipe uses just one bowl and common pantry ingredients to make the very best loaf. It bakes up golden, moist, perfectly sweet and scented with a hint of cinnamon. There’s no need for secret ingredients: just ripe bananas and 15 minutes. Here’s how to make banana bread and ideas for how to customize it with mix-ins, glazes, and more!

Ingredients in this easy banana bread recipe

Banana bread is an old American standard: it started appearing the 1930’s in cookbooks when home cooks had access to baking powder and bananas. It may have stemmed from the Great Depression as a way to use up ripe bananas. Over the years, it’s become as essential to American culture as apple pie. It’s the most popular way to use ripe bananas in baked goods.

This banana bread recipe uses common pantry ingredients to make a moist, sweet loaf. Some recipes include tricks like sour cream to add moisture, but this recipe doesn’t need it. Here’s what you need for the best banana bread:

  • Very ripe bananas
  • Eggs
  • Granulated and brown sugar
  • Melted butter or neutral oil
  • Vanilla extract
  • Baking soda
  • Cinnamon
  • Kosher salt
Banana Bread Recipe

Use very ripe bananas

The key to the best banana bread is using very ripe bananas. Bananas with a blackened peel bring added moisture, sweetness, and pure fruity flavor to baked goods like bread, muffins, pancakes, cookies, cake, and more.

  • Do not use unripe bananas! The peel should have a large amount of black spots, or be uniformly black in color.
  • If the bananas have mold on the peel, do not use them. Bananas with mold or those leaking liquid should be discarded.
  • You can freeze very ripe bananas and use them in baked goods later. If you don’t have time to us very ripe bananas, freeze them by peeling them and slicing into rounds. You can use them later for bread, muffins and more: just make sure to include the liquid that separates from the fruit in the batter.

Butter vs oil in banana bread

This banana bread recipe uses melted butter in the batter, which makes it easy to make in one bowl with no mixer required! Here are a few notes on butter versus oil in breads:

  • Butter lends a richer flavor and makes a more even crumb. Using a dairy fat brings a tender, even crumb and texture to a quick bread.
  • Oil makes it even moister, and works as a substitute. The texture is a little spongier with oil, but it works well! You can substitute a neutral oil like vegetable or grapeseed for the butter here.
  • Or, you can use a combination of the two. Using half butter and half oil also has great results.

Another pro to using butter: cook it a few minutes longer when melting to make brown butter, which adds a toasty, caramel flavor to the bread. Vegan butter also works as a substitute.

Banana Bread Recipe

Pan size variations

This banana bread recipe works for both 9 x 5″ and 8 x 4″ pan sizes with a slight modification. Here are a few notes:

  • 8 x 4 pan: This pan size works well if you only have 1 ½ cups mashed bananas (and not 2 cups, as called for in the recipe below). You can make this recipe in an 8 x 4″ loaf pan using 1 ½ cups bananas and 1 ½ cups all-purpose flour. Watch the bake time and adjust accordingly.
  • 9 x 5″ pan: Make the recipe as written below for a 9 x 5″ loaf pan. You can also make it with 1 ½ cups bananas and flour, but it will not be as tall in shape. Again, adjust the bake time accordingly.

How to know when banana bread is done

The only tricky part about baking quick breads like this banana bread recipe is how to know when they are done. Here are a few visual cues to look for:

  • Banana bread is done when the top is set and springs back, and a tooth pick inserted comes out with a few clinging crumbs. The toothpick test does not have to be fully clean! In fact, if it comes out clean the bread may be overdone.
  • The bread is cooked when the internal temperature is 200°F. You can also insert the probe of a food thermometer to assess when the bread is cooked through.
Banana Bread

Banana bread variations: mix-ins and toppings

Banana bread is a canvas for endless variations! Here are a few ideas for additions to this banana bread recipe:

  • Toasted nuts: Fold ½ cup toasted pecans or toasted walnuts into the batter.
  • Chocolate chips: Fold ¾ cup semi-sweet or dark chocolate chips into the batter, then top with another ¼ cup.
  • Blueberries: Toss 1 ½ cups blueberries with 1 tablespoon flour, then fold them into the batter (the flour helps to prevent sinking).
  • Cinnamon sugar topping: Mix 2 tablespoons granulated or brown sugar with ½ teaspoon ground cinnamon, and sprinkle it across the top.
  • Streusel topping: Mix ¼ cup sugar, ¼ cup flour and 1 teaspoon cinnamon. Cut 2 tablespoons room temperature butter into small pieces, then use your fingers to rub it into the dry ingredients until crumbles form. Sprinkle over the bread and bake. Cover with foil at 30 to 45 minutes to prevent burning.
  • Brown butter: Make the bread with brown butter instead of melted butter to add nutty and caramel notes.
  • Glazes: Allow the bread to cool fully, then drizzle with vanilla glaze, cream cheese glaze or maple glaze.
  • Frosting: Allow the bread to cool fully, then top with cream cheese frosting.
Banana Bread Recipes

Ways to serve banana bread

There are a few creative ways to serve banana bread if you want to re-purpose leftovers. Try Banana Bread French Toast by cutting it into slices, then dipping it in an egg mixture and frying it for breakfast. Or serve it as a dessert “a la mode” by topping a slice with ice cream, salted caramel sauce, and chopped pecans.

Dietary swaps

There are a few ways to change up a banana bread recipe to make it vegan or gluten-free! Here are a few notes:

Banana bread storage

Banana bread holds up well over time. It lasts 5 days at room temperature wrapped in aluminum foil or refrigerated for 10 days. You can also freeze it for up to 3 months: slice it into pieces and wrap it in plastic wrap then a freezer-safe bag or container.

Let us know what you think of this recipe in the comments below. We hope you love it as much as our family does!

More banana bread recipes

This classic recipe has many variations. Here are a few more banana bread recipes to try:

Print
Banana Bread Recipe

Our Best Banana Bread Recipe


  • Author: Sonja Overhiser
  • Prep Time: 15 minutes
  • Cook Time: 60 minutes
  • Total Time: 1 hour 15 minutes
  • Yield: 12

Description

This easy banana bread recipe is simply the best! This moist, sweet, golden quick bread is a kitchen essential.


Ingredients

  • 2 cups* mashed ripe bananas (3 very large or 5 medium bananas)
  • 2 large eggs
  • ½ cup granulated sugar
  • ½ cup brown sugar
  • ½ cup melted butter** (or neutral oil)
  • 1 teaspoon vanilla extract
  • 1 teaspoon baking soda
  • 1 teaspoon cinnamon
  • ¾ teaspoon kosher salt
  • 2 cups [280 g] all-purpose flour
  • Optional mix ins: ½ cup chopped toasted pecans or toasted walnuts, ¾ cup chocolate chips

Instructions

  1. Preheat the oven to 350°F. Butter a 9 x 5″ loaf pan. Line the pan with a piece of parchment paper, cut so that it extends on two sides to easily remove the bread from the pan.
  2. Mash the bananas in the bottom of a large bowl, enough for 2 cups. Whisk in the eggs. Switch to a spatula and stir in the granulated sugar, brown sugar, butter, and vanilla extract.
  3. Stir in the baking soda, cinnamon, and kosher salt. Add the flour and gently stir until just combined and no streaks of flour remain. 
  4. Pour the batter into the prepared loaf pan. Bake 55 to 60 minutes*, until the top is set and a toothpick inserted into the center of the loaf comes out with a few clinging crumbs (or the internal temperature is 200°F). 
  5. Cool in the pan for 15 minutes. Then run a knife around the edge and invert the loaf onto a cooling rack. Serve warm or at room temperature. (If desired, allow to cool fully and top with a glaze.***)
  6. Storage info: The bread lasts 5 days at room temperature wrapped in aluminum foil, refrigerated for 10 days, or frozen for 3 months (slice it into pieces and wrap it in plastic wrap then a freezer-safe bag or container).

Notes

*If you only have 1 ½ cups mashed bananas, you can make this recipe in an 8 x 4″ loaf pan using 1 ½ cups bananas and 1 ½ cups all-purpose flour. You can also make it with 1 ½ cups bananas and flour in a 9 x 5″ pan, but it will not be as tall in shape. The bake time will vary based on pan size and batter amount, so watch and adjust accordingly.

**To make brown butter banana bread, brown the butter and then cool it in the freezer for 15 minutes before using in the bread.

***Try maple glaze, cream cheese glaze or vanilla glaze. See the section above for notes about cinnamon sugar or streusel toppings. 

  • Category: Bread
  • Method: Baked
  • Cuisine: American
  • Diet: Vegetarian

Keywords: Banana bread recipe, banana bread, how to make banana bread, best banana bread, easy banana bread

A Couple Cooks - Recipes worth repeating.

Apple Cookies

This apple cookies recipe makes irresistibly soft snickerdoodles, spiced with cinnamon and full of bursts of sweet tart fruit! If…

A Couple Cooks – Recipes worth repeating.

This apple cookies recipe makes irresistibly soft snickerdoodles, spiced with cinnamon and full of bursts of sweet tart fruit!

Apple Cookies

If you’re looking for an easy baking project with apples, this apple cookies recipe will have your heart! They’re essentially apple snickerdoodles, irresistibly soft, with a sweet coating of cinnamon and sugar. Each bite has a burst of sweet tart apple! They take no time to whip up and don’t require any refrigeration of the dough before baking: which means you can sink your teeth into that soft, spiced cookie as soon as possible. These were big winners are our house!

Ingredients in this apple cookies recipe

Here at A Couple Cooks, we love it when we can make a recipe without a trip to the store. Such is this apple cookies recipe, a simple snickerdoodle that only requires the normal baking cast of characters: flour, sugar, butter, eggs, and of course, cinnamon! If you’ve got one apple, you can make this recipe. The cookies are ideal as a fall dessert, but they work in any season! A friend of ours taste tested these and said she couldn’t stop eating them (a good sign!). Here’s what you’ll need:

  • Sweet tart apple
  • All purpose flour
  • Cream of tartar
  • Baking soda
  • Kosher salt
  • Unsalted butter
  • Granulated sugar
  • Egg
  • Vanilla extract
  • Cinnamon
Apple Cookies

Best type of apples for cookies

The best variety of fruit for apple cookies is the same as with apple cobbler or apple crisp: select a firm, crisp tart apple. The tangy tartness accents the sweetness of baked goods, and the crisp texture stays together while baking. Other apple varieties can end up in a mushy, sweeter filling that’s not as satisfying as with a crisp tart apple. Here are some of the best types apples for baking and cooking:

  • Pink Lady
  • Jonathon or Jonagold
  • Granny Smith
  • Honeycrisp
  • Fuji

Tip: make sure to finely dice the apple

This apple cookies recipe is very simple: the dough comes together quickly and you don’t even have to refrigerate it before baking! The most important part of putting together the recipe is this: dice the apple as finely as possible. If the apple pieces are too large, they can cause the cookies to crack and bread when baked.

We cut our apples into pieces that were about 3/8-inch wide (between ¼ and 1/8-inch). You don’t have to measure, simply cut them as small as you can.

Apple Cookies Recipe

Another tip for this apple cookies recipe is the quality of pans matters! We made half of these cookies on a shiny aluminum pan with parchment paper, and the size and shape were completely off. However, the half of the batch baked on our non-stick cookie sheet worked great.

So, we recommend using two of these non-stick cookie sheets for the most even bake! The entire batch baked on these, rotating the sheets in the middle of baking, came out beautifully consistent.

Storage info for apple cookies

The final important thing to know about this apple cookies recipe is to store them refrigerated! The cookies are a little delicate because of the apple pieces, which contain moisture. So for best results, store them refrigerated for up to 2 weeks.

Place the cookies in a sealed container with parchment paper between the layers. Make sure to let the cookie stand at room temperature for about 5 minutes before enjoying: it tastes better that way!

Apple Cookies Recipe

More apple recipes

When it’s apple season, we love making all things with apples: breakfast, desserts, and more! Here are some of our favorite apple recipes:

This apple cookies recipe is…

Vegetarian.

Print
Apple Cookies

Apple Cookies


  • Author: Sonja Overhiser
  • Prep Time: 20 minutes
  • Cook Time: 15 minutes
  • Total Time: 35 minutes
  • Yield: 20 cookies

Description

This apple cookies recipe makes irresistibly soft snickerdoodles, spiced with cinnamon and full of bursts of sweet tart fruit!


Ingredients

For the apple cookies

  • 1 cup sweet tart apple, peeled and finely diced into 3/8-inch pieces (1 large apple)
  • 1 ¾ cups [245 g] all-purpose flour
  • 1 teaspoon cream of tartar
  • ½ teaspoon baking soda
  • ½ teaspoon kosher salt
  • ½ cup unsalted butter, at room temperature
  • 1 cup granulated sugar
  • 1 large egg
  • 2 teaspoons vanilla extract

For rolling

  • 3 tablespoons granulated sugar
  • ½ tablespoons ground cinnamon

Instructions

  1. Preheat the oven to 350°F. Finely dice the apple into very small pieces (about 3/8-inch wide; the smaller the better*).
  2. In a medium bowl, whisk the all-purpose flour, cream of tartar, baking soda, and kosher salt.
  3. In the bowl of a stand mixer fitted with the paddle attachment, beat the room temperature butter and sugar until light and creamy, about 2 minutes. Scrape down the sides of the bowl with a spatula. Add the egg and vanilla extract and beat until combined, about 1 minute.
  4. Turn off the mixer and add the dry ingredients. Then mix on low until just combined. Add the chopped apples and mix for about 5 seconds until combined.
  5. Roll the cookie dough into 20 balls, using about 2 tablespoons of dough per cookie (a cookie dough scoop is helpful).
  6. In a small bowl, combine the sugar and cinnamon. Roll each of the dough balls into the cinnamon sugar mixture until generously coated.
  7. Place the dough balls onto two non-stick cookie sheets (we recommend these non-stick cookie sheets for the most even bake**). Bake for 12 to 14 minutes or until they are puffed and the edges are set, reversing the trays in the oven at 7 minutes. Keep in mind the cookies will set after they cool.
  8. Remove the baking sheet from the oven and let the cookies cool on the sheet for 5 minutes. Transfer to a wire cooling rack and cool completely. Important: Store these cookies refrigerated in a sealed container with parchment between the layers for up to 2 weeks; bring to room temperature before serving.

Notes

*If the apple pieces are too large, they can cause the cookies to crack and bread when baked.

**We found that the bake good on a shiny aluminum baking sheet with parchment paper, so the quality matters! These non-stick sheets made an even bake with the entire batch in the oven at once.

  • Category: Dessert
  • Method: Baked
  • Cuisine: American
  • Diet: Vegetarian

Keywords: Apple cookies, apple cookies recipe, apple cookie recipe

A Couple Cooks - Recipes worth repeating.

Apple Bread Recipe

This apple bread recipe is cozy and sweet, with a tender crumb and brown sugar cinnamon swirl. A great baking…

A Couple Cooks – Recipes worth repeating.

This apple bread recipe is cozy and sweet, with a tender crumb and brown sugar cinnamon swirl. A great baking project for apple season!

apple bread recipe

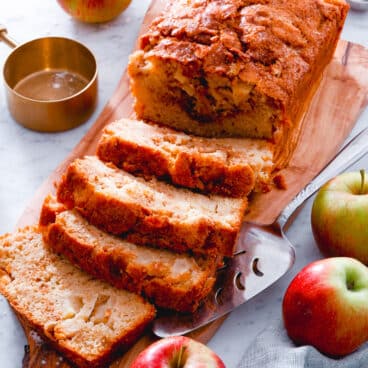
Here’s a cozy, fun quick bread to make any time of the year: try this Apple Bread recipe! It’s got a moist, tender crumb, and is bursting with tangy fruit, warm spices, and a brown sugar cinnamon swirl. It’s a total crowd pleaser! Everyone loves this spiced bread, and it makes the kitchen smell incredible. We couldn’t stop sneaking bites!

Ingredients in this apple bread recipe

This apple bread was inspired by a trip to the apple orchard for picking, but since apples are readily available you can make it any time of the year! The cinnamon and nutmeg are ideal for fall and winter baking, but it’s seasonal any time of the year. The magic ingredient is buttermilk, which makes an incredible fluffy tender crumb. Here are the ingredients you’ll need:

  • Brown sugar
  • Cinnamon and nutmeg
  • Apples
  • All-purpose flour
  • Baking powder
  • Baking soda
  • Kosher salt
  • Granulated sugar
  • Buttermilk
  • Butter
  • Neutral oil
  • Eggs
  • Vanilla extract
Apple bread recipe

Best types of apples for bread

What variety of apple is best for baking into a bread recipe? First off, avoid those bright red delicious apples at the store. The ideal variety for sauteed apples is a firm, crisp tart apple. Crisp tart apples cook well and the tangy tartness accents the sweetness of baked goods. Here are some of the best apples for baking and cooking:

  • Pink Lady
  • Jonathon or Jonagold
  • Granny Smith
  • Fuji

Of course, apple bread will taste great with most types of apples! But if you use a sweeter variety, you won’t get the delightful pop of sweet tart that a crisp tart apple brings.

Apple bread recipe

Secrets to a light and fluffy apple bread

Quick breads can be notoriously dense, dry, or filled with air pockets. But this apple bread recipe has the perfect velvety, soft crumb. Here are a few keys to the texture in this recipe:

  • Use real buttermilk (no substitutes!). Buttermilk is crucial to making a fluffy quick bread with a tender crumb. Don’t be tempted to use even a buttermilk substitute here! It’s got to be the real thing.
  • Use both butter and oil. Butter and oil work uniquely in baked goods. Often we use oil in our quick breads and muffins, but we love the richness in flavor and texture that butter adds.

Tips for baking this apple bread recipe

Apple bread is simple to whip up, but there are a few tricks to getting the best end result. Here’s what to know:

  • Use an aluminum pan (9 x 5 inch). The key to an even bake is in the pan. The best results for a quick bread are with an aluminum pan.
  • For the swirl, insert a butter knife straight down into the dough. Then make a few S shapes across the length of the pan. This swirls the brown sugar cinnamon mixture into the bread, and makes an interesting texture to the top of the bread.
Apple bread recipe

Storage info

How to store it? This apple bread recipe tastes best the day it’s baked, but it holds up well over time!

  • Refrigerator: This bread stores well in the refrigerator for up to 1 week! Let the slices stand at room temperature for a few minutes before eating: it’s not quite as tasty cold.
  • Freeze: Freeze in a sealable container and store up to 3 months.

More apple recipes

This apple bread recipe is one of our top ways to bake with this tasty fruit! Here are a few more apple recipes to try:

This apple bread recipe is…

Vegetarian.

Print
apple bread recipe

Apple Bread Recipe


  • Author: Sonja Overhiser
  • Prep Time: 30 minutes
  • Cook Time: 1 hour
  • Total Time: 1 hour 30 minutes
  • Yield: 12

Description

This apple bread recipe is cozy and sweet, with a tender crumb and brown sugar cinnamon swirl. A great baking project for apple season!


Ingredients

  • ⅓ cup brown sugar
  • 2 teaspoons ground cinnamon, divided
  • 2 cups sweet tart apples, peeled and diced into 1/4-inch pieces (about 1 pound)
  • 2 cups [280 g] all purpose flour
  • 2 teaspoons baking powder
  • ¼ teaspoon baking soda
  • ¾ teaspoon kosher salt
  • ¼ teaspoon ground nutmeg
  • 1 cup granulated sugar
  • ¾ cup buttermilk*
  • 5 tablespoons melted unsalted butter
  • ⅓ cup neutral oil (grapeseed, canola, or vegetable oil)
  • 2 eggs
  • 1 teaspoon vanilla extract

Instructions

  1. Preheat the oven to 350°F. 
  2. Mix the brown sugar and 1 teaspoon of the cinnamon in a small bowl and reserve it.
  3. Peel and chop the apples into 1/4-inch pieces. Butter a 9 x 5-inch aluminum loaf pan.
  4. In a large bowl, whisk the flour, baking powder, baking soda, salt, nutmeg, and 1 teaspoon of the cinnamon. Make a well in the center.
  5. In a medium bowl, whisk the granulated sugar, buttermilk, melted butter, neutral oil, eggs, and vanilla extract.
  6. Pour the wet ingredients from the batter into the well in the dry ingredients. Mix gently until just combined and there are no longer streaks of flour.
  7. Add the apples and fold them in with a spatula, taking care not to overwork the batter.
  8. Pour half of the batter into the prepared pan. Sprinkle with ½ of the brown sugar mixture. Add the remaining batter on top and sprinkle the remaining brown sugar mixture on top. Insert a butter knife into the batter and draw a few S shapes through the pan to swirl. 
  9. Place the pan in the oven. Bake until golden brown and a toothpick inserted in the center comes out with a few crumbs, rotating the pan halfway through baking, about 55 to 65 minutes. Allow to cool in the pan for 30 minutes. 
  10. Run a knife around the edge and invert the loaf onto a cooling rack. Allow to cool fully to room temperature (about 1 hour) before slicing into pieces. This bread is best the day it’s made, but you can store refrigerated for up to 1 week: make sure to bring to room temperature before enjoying. Alternatively, store frozen for up to 3 months.

Notes

*Buttermilk is the magic ingredient which makes the most consistent texture and rise! Don’t be tempted to leave it out or use a buttermilk substitute. It’s worth it (we promise).

  • Category: Baked good
  • Method: Baked
  • Cuisine: Baked
  • Diet: Vegetarian

Keywords: Apple bread recipe, apple bread

A Couple Cooks - Recipes worth repeating.

Pumpkin Chocolate Chip Muffins

These pumpkin chocolate chip muffins are deliciously moist and cozy-spiced: the perfect baking project for the season! Here’s a baking…

A Couple Cooks – Recipes worth repeating.

These pumpkin chocolate chip muffins are deliciously moist and cozy-spiced: the perfect baking project for the season!

Pumpkin chocolate chip muffins

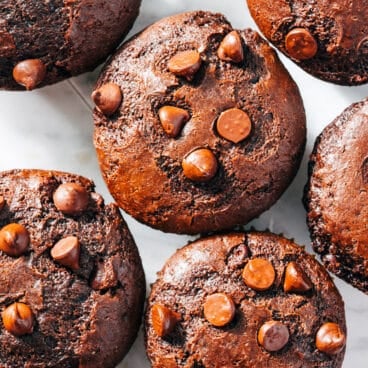
Here’s a baking project for when you’re ready for fall-spiced everything: try these pumpkin chocolate chip muffins! These tall mounds of dough have a tender crumb and the perfect dose of pumpkin spices, with rich chocolaty morsels in each bite. They’re simple to whip up and the best fall treat for an afternoon snack, dessert, or even to gift to friends and neighbors! Here are all our secrets.

Ingredients in pumpkin chocolate chip muffins

There are infinite ways to make pumpkin chocolate chip muffins, but here’s what you’ll need for our family recipe. A hefty dose of pumpkin puree keeps them moist, and using both sugar and maple syrup gives a nuance to the sweetness. Using cinnamon and pumpkin spices is also key to the cozy-spiced flavor. Here’s what you’ll need:

  • Neutral oil
  • Granulated sugar
  • Pumpkin puree
  • Maple syrup
  • Eggs
  • Vanilla extract
  • Apple cider vinegar
  • Baking powder and baking soda
  • Kosher salt
  • Cinnamon
  • Pumpkin pie spices (purchased or homemade)
  • Flour
  • Chocolate chips
Pumpkin chocolate chip muffins

Why pumpkin spice + cinnamon?

This pumpkin muffins recipe uses both pie spices and cinnamon. Are they both required? Yes! In the many pumpkin recipes we’ve developed, we’ve noticed it’s essential to have both for that classic “pumpkin” flavor.

Cinnamon brings in the sweet notes, and pumpkin spices bring in the spicy, cozy and more bitter elements. The combination of the two makes the best balanced flavor. We also use this trick in our pumpkin bars and pumpkin spice pancakes.

Keys to tall pumpkin chocolate chip muffins

It’s no fun to bake a batch of stubby muffins, and we love the look of a bakery-style muffin. These pumpkin chocolate chip muffins are tall and hefty, with beautifully-domed tops! Here are a few keys to how to achieve evenly-baked tall muffins:

  • Fill every other cup in two 12-cup muffin tins. This makes for the most even bake, as the muffin tops don’t grow into each other when baking. It’s not required, but helpful for perfect muffins.
  • Use a recipe that’s optimized for tall muffins, like this one! This recipe is optimized so you have plenty of batter; you’ll fill the muffin cups very full up to the top.
  • Baking at 400°F makes a taller muffin. Many muffin recipes baked at 350°F, but a slightly hotter oven makes a taller and fluffier muffin. This recipe also has a hefty amount of leavener (baking powder and baking soda), which makes for a good rise.
Pumpkin chocolate chip muffins

Storage info

These pumpkin chocolate chip muffins store well over time, and become even more moist after storage! Here’s what to know:

  • Room temperature: Store up to 4 days at room temperature in a sealed container: they become even more moist over time!
  • Refrigerator: Store refrigerated for up to 1 week! Let them stand at room temperature for a few minutes before eating.
  • Freeze: Freeze in a sealable container and store up to 3 months.
Chocolate chip pumpkin muffins

More pumpkin recipes

These pumpkin chocolate chip muffins are a favorite baking project, but there are so many more fun things to make with this seasonal squash! Here are a few more pumpkin recipes to try:

This pumpkin chocolate chip muffins recipe is…

Vegetarian.

Print
Pumpkin chocolate chip muffins

Pumpkin Chocolate Chip Muffins


  • Author: Sonja Overhiser
  • Prep Time: 30 minutes
  • Cook Time: 25 minutes
  • Total Time: 55 minutes
  • Yield: 12

Description

These pumpkin chocolate chip muffins are deliciously moist and cozy-spiced: the perfect baking project for the season!


Ingredients

  • ½ cup neutral oil
  • 1 ¼ cup granulated sugar
  • 1 cup pumpkin puree
  • 2 tablespoons maple syrup
  • 2 large eggs
  • 2 teaspoons vanilla extract
  • ½ teaspoon apple cider vinegar or lemon juice
  • 2 teaspoons baking powder
  • ¼ teaspoon baking soda
  • ¾ teaspoon kosher salt
  • 1 tablespoons cinnamon
  • 2 teaspoons pumpkin spice
  • 1 ¾ cups [245 g] all-purpose flour
  • 1 cup semi-sweet chocolate chips, plus ¼ cup for topping

Instructions

  1. Preheat oven to 400°F. Line a standard muffin tin with 12 muffin paper liners (or for the most even bake, place muffin wrappers in every other cup of two 12-cup tins).
  2. Stir the oil, sugar, pumpkin, maple syrup,  eggs, vanilla, and apple cider vinegar. Stir in the baking powder, baking soda, salt, cinnamon, and pumpkin spices.
  3. Use a spatula to mix in the flour until a thick smooth batter forms, mixing just until there are no longer streaks of dry ingredients. Fold in 1 cup chocolate chips, mixing gently a few times.
  4. Scoop the batter evenly into the muffin cups: the cups will be full to the top, using about a heaping ¼ cup per muffin. Sprinkle additional chocolate chips onto the tops of the muffins.
  5. Bake the muffins for 22 to 26 minutes, until puffed and the tops are golden and a toothpick comes out with a few clinging crumbs.
  6. Cool for 5 minutes in the pan, then transfer to a rack to cool fully, about 1 hour. Eat immediately or they taste even better the next day after storage in a sealed container at room temperature. Store up to 4 days in a sealed container at room temperature, refrigerated up to 1 week or more (allow to come to room temperature before serving), or frozen up to 3 months.
  • Category: Muffin
  • Method: Baked
  • Cuisine: Muffins
  • Diet: Vegetarian

Keywords: Pumpkin chocolate chip muffins, chocolate chip pumpkin muffins

A Couple Cooks - Recipes worth repeating.

Coffee Cake Muffins

This coffee cake muffins recipe is moist and fluffy, with a crumbly streusel topping! They’re perfect for breakfast or afternoon…

A Couple Cooks – Recipes worth repeating.

This coffee cake muffins recipe is moist and fluffy, with a crumbly streusel topping! They’re perfect for breakfast or afternoon snack.

Coffee cake muffins

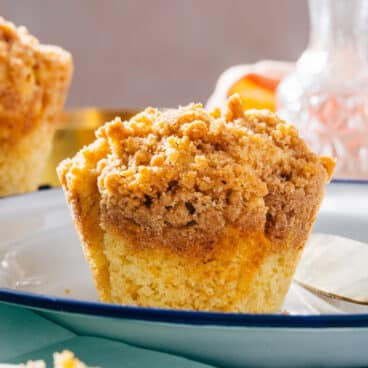
Love a good coffee cake, with a tender, moist crumb and a cinnamon crumbly topping? Then you must try this coffee cake muffins recipe! These muffins taste just like coffee cake, but they’re quicker and easier to make. Buttermilk makes a beautifully tender crumb, and they’re topped with a sweet cinnamon streusel that gives a crunch to each bite. You won’t want to put these down! They’re ideal for breakfast or a sweet afternoon pick-me-up.

Ingredients in this coffee cake muffins recipe

Coffee cake muffins are a fun sweet treat; honestly, they’re really more like cupcakes! But call them a muffin and they work for breakfast too. They’re ideal paired with a cup of coffee to cut the sweetness. The secret ingredient? Buttermilk is essential for a tall and fluffy muffin. Outside of that, you’ll need the typical cast of baking characters. The ingredients for coffee cake muffins are:

  • All-purpose flour
  • Granulated sugar and brown sugar
  • Baking powder, baking soda, and salt
  • Buttermilk
  • Butter
  • Neutral oil
  • Eggs
  • Vanilla
  • Cinnamon
Coffee cake muffins recipe

Tricks for baking coffee cake muffins

This coffee cake muffins recipe incorporates a few tricks from one of our favorite bakers: Sarah’s Kieffer and her new baking cookbook, 100 Morning Treats. Sarah is an author and trained baker, and we’re lucky enough to have her as a real life friend too (she lives in Minnesota where I’m from originally!). This recipe is not in Sarah’s book, but we took a few pointers from her muffins method. Here are a few tricks to why this recipe works:

  • Use real buttermilk. Buttermilk is crucial to making a light and fluffy crumb. Don’t be tempted to use even a buttermilk substitute here! Milk and lemon juice works in a pinch, but it doesn’t make the rich beautiful texture of real buttermilk.
  • Use both butter and oil. Butter and oil work uniquely in baked goods. Butter adds richness in flavor and oil adds moisture.
  • Use tulip muffin liners. It’s not required, but using tulip muffin liners helps the streusel topping to stay on top of the muffins and not melt down the sides.
Coffee cake muffins recipe

Keys to tall muffins

These coffee cake muffins are tall with lovely domed tops. They look like a bakery style muffin, which can be tricky to achieve in at-home baking! Here are a few keys to how to achieve tall muffins:

  • Fill every other cup in two 12-cup muffin tins. Here’s a key to even baking for muffins: fill every other in a tin! It helps This helps them to have beautiful domed tops and an even bake. It’s not required, but helpful for perfect muffins.
  • Fill the muffin cups up to the top. This recipe is optimized so you have plenty of batter; you’ll fill the muffin cups very full up to the top. This avoids stubby muffins!
  • Baking at 375°F makes a taller muffin. Many muffin recipes baked at 350°F, but a slightly hotter oven makes a taller and fluffier muffin. This recipe also has a hefty amount of leavener (baking powder and baking soda) for a good rise.

Storage info

These coffee cake muffins taste best the day they’re baked. But they hold up well over time, making them ideal for making ahead. You’ll want to keep them refrigerated because of the crunchy topping, which can become soggy stored at room temperature. Here’s what to know:

  • Refrigerator: Store refrigerated for up to 1 week! Let them stand at room temperature for a few minutes before eating.
  • Freeze: Freeze in a sealable container and store up to 3 months.
Coffee cake muffins

More muffin recipes

This coffee cake muffins recipe is a favorite sweet treat of ours: it’s perfect for special breakfasts or brunches! Here are a few more muffin recipes to try:

This coffee cake muffins recipe is…

Vegetarian.

Print
Coffee cake muffins

Coffee Cake Muffins


  • Author: Sonja Overhiser
  • Prep Time: 30 minutes
  • Cook Time: 20 minutes
  • Total Time: 50 minutes
  • Yield: 12

Description

This coffee cake muffins recipe is moist and fluffy, with a crumbly streusel topping! They’re perfect for breakfast or afternoon snack.


Ingredients

For the streusel

  • ¼ cup light brown sugar
  • ¼ cup granulated sugar
  • ½ cup all purpose flour
  • 1 teaspoon ground cinnamon
  • ⅛ teaspoon kosher salt
  • 4 tablespoons unsalted butter, softened

For the muffins

  • 2 cups [280 g] all purpose flour
  • 2 teaspoons baking powder
  • ¼ teaspoon baking soda
  • ¾ teaspoon kosher salt
  • 1 cup granulated sugar
  • ¾ cup buttermilk*
  • 5 tablespoons melted unsalted butter
  • ⅓ cup neutral oil
  • 2 eggs
  • 2 teaspoons vanilla extract

Instructions

  1. Preheat the oven to 375°F. Place muffin wrappers in every other muffin cup of two 12-cup muffin tins.**
  2. Make the streusel topping: In a medium bowl, combine the light brown sugar, granulated sugar, flour, cinnamon and salt. Use a fork to mash the softened butter into the mixture until completely combined and crumbly. Refrigerate until using.
  3. In a large bowl, whisk the flour, baking powder, baking soda, and kosher salt. Make a well in the center.
  4. In a medium bowl, whisk the granulated sugar, buttermilk, melted butter, neutral oil, eggs, and vanilla extract. Pour the wet ingredients into the well in the dry ingredients. Mix gently until just combined and there are no longer streaks of flour. (If desired, you can store the batter up to 24 hours before baking.)
  5. Scoop the batter into the muffin papers using a dough scoop: it should fill to the top of the muffin papers. Sprinkle the tops with the streusel.
  6. Bake until the tops are golden brown and a toothpick in the center comes out with a few crumbs, about 20 to 23 minutes total (rotate the pans halfway through baking). Allow to cool for 5 minutes, then transfer to a baking rack to fully cool (about 30 minutes to 1 hour). The muffins are best eaten the day they are made, but they store very well in an airtight container in the refrigerator and last up to 1 week or frozen for up to 3 months.

Notes

*Buttermilk is the magic ingredient which makes the most consistent texture and rise! Don’t be tempted to leave it out or use a buttermilk substitute. It’s worth it (we promise).

**Baking in every other tin makes for a more consistent bake. If all you have is a 12-cup muffin tin, you can use that too.

  • Category: Muffin
  • Method: Baked
  • Cuisine: American
  • Diet: Vegetarian

Keywords: Coffee cake muffins

A Couple Cooks - Recipes worth repeating.