Bacon Fat Peanut Butter Cookies
Using bacon drippings in place of butter makes these can’t-stop-at-just-one cookies both frugal and indulgent at the same time. And let’s not overlook their salty, smoky, sweetly lovely taste.
all things food
Using bacon drippings in place of butter makes these can’t-stop-at-just-one cookies both frugal and indulgent at the same time. And let’s not overlook their salty, smoky, sweetly lovely taste.
Can’t wait for your boxes of Girl Scout Thin Mints to arrive? No worries. We got you with this trusty gluten free recipe.
Expect a slightly ginormous, squat, thin cookie that’s chewy in the center, crisp at the edges, and uncommonly good through and through.
Crisp edges. Chewy center. Caramelized awesomeness that defies words. And a marginal healthfulness from oats that makes it entirely too easy to justify having another one.
This graham cracker recipe has it all over store-bought crackers. No contest. And a glass of milk on the side doesn’t do any harm.
The classic cookie benefits enormously from a hit of ginger here with these surprise sleeper hits of your Christmas season.
The holidays incarnate. That’s what these cookies are to us. They’re magnificently and traditionally spiced and are crinkly and chewy. All in the best possible sort of way.
…

The holiday season is upon us—the ground is covered in snow, the tree is up, and the radio station in the car is set for classic holiday tunes. Last year around this time, my husband and I were anxiously awaiting the birth of our daughter who was born shortly before Christmas.
As soon as we returned home from the hospital, our family was there to exchange gifts and meet our newest addition. It is safe to say I had no holiday spirit while recovering from a c-section and adjusting to life with a newborn.
Perhaps to make up for last year, I am in particularly bright spirits this year. I am excited to create a new set of holiday traditions for my daughter to enjoy, even if she is too young to fully enjoy them right now.


Last weekend, we all bundled up and went out to pick our tree (which she slept through). She’s already found her gifts beneath the tree (and tried to eat the wrapping paper). We listen to our favorite Christmas songs delivered by the same animated piano-playing snowman I enjoyed when I was young (she tries to make it a duet by playing the piano too).
The tradition I am most looking forward to sharing with her is baking and decorating Christmas cookies. I grew up with the tradition and continued it on my own as I’ve grown older. While I was rolling and cutting out these Almond Sugar Cookies, she was beside me on the floor, playing with a mixing bowl and spatula.
I plan to decorate these cookies with her later in the season, coloring some yogurt so she can fingerpaint her own masterpieces.
The holiday season feels new with a little one crawling around, and I can’t wait to create memorable experiences for her childhood.


These Almond Sugar Cookies are a more flavorful take on the traditional cut-out cookies. Almond paste and almond extract are added to the dough, which give the cookie a deep nutty flavor. The dough is easy to roll and cut out, and bakes up smooth and flat to decorate. If you are looking for a sugar cookie with more flavor, add this cookie to your holiday line-up!
Almond Sugar Cookies
Yields 2-3 dozen, depending on size of the cookie
3/4 cup (170 grams) butter
1 cup (200 grams) granulated sugar
4 ounces (113 grams) almond paste
2 large eggs
1 teaspoon vanilla extract
1/2 teaspoon almond extract
2 3/4 cups (330 grams) all-purpose flour
1 teaspoon baking powder
1/2 teaspoon salt
In a large mixing bowl, beat together the butter and sugar until light and fluffy, about 3-5 minutes. Beat in the almond paste. Add in the eggs one at a time, mixing well between each addition. Beat in the vanilla and almond extract. Mix in the flour, baking powder, and salt until well combined. Wrap the dough in plastic wrap and refrigerate for one hour to firm up the dough.
Preheat oven to 350 degrees F (180 degrees C). Line baking sheets with parchment paper or a non-stick baking mat for best cookie removal.
Roll out the dough on a lightly floured surface to 1/4-inch thickness and cut out the cookies using cookie cutters (follow these tips for the best cookies). The dough that is not being handled should be kept refrigerated. Bake cookies for 6-8 minutes, depending on the size of the cookie. Cool completely on a cooling rack before frosting.
…

Last summer, I built a trio of large, self-watering cedar planters to start a deck garden. Our home is blessed with a large deck and, since the main living space overlooks the deck, I wanted to give it a little more life. Although we have plenty of yard space for a garden, we also have many critters (and deer) visiting frequently so it made more sense to elevate the garden to keep the plants safe from late night nibblers.
Each planter is 2 ft. by 6 ft., which leaves plenty of room for experimentation.
My interest in gardening is relatively new, but this hobby has quickly turned me into an enthusiastic plant lady. After killing every houseplant I attempted to grow up for many years, I was astonished when my black thumb seemingly turned green after moving into our house.
Apparently the trick for a green thumb is simply having large southeast facing windows—who knew?


Unfortunately, the first attempt at gardening in the outdoor planters was not very successful. In my eagerness to grow my own vegetables, I overplanted the space and didn’t do enough research on how to individually care for each plant. In addition, because the planters are self-watering (through a process of diffusion and soil osmosis), the plants with deep root systems ended up with root rot by midsummer.
By summer’s end, the only “successful” plants were the bell peppers (which grew only one picture perfect pepper each), the green beans, and the herb garden. Everything else—the tomatoes, cabbages, cucumbers, etc.—ended up producing very little or finally completing their slow death.
While the self-watering feature was definitely a curse, I only needed to water the plants once the entire season, so my laziness is more than willing to find a way to work within these constraints.
This year I am taking the failures of the previous summer and using them to (hopefully) do better this time around. To start, I did a little more planning and left more space for the plants to expand. Only plants with shallow root systems are allowed (peppers, onions, shallots, lettuce, carrots, herbs, green beans, flowers); the plants with larger root systems have been relegated to individual, well-draining containers (tomatoes).
I have my fingers crossed for now, but it will be another month or two before I’ll be able to label it a success or failure. Stay tuned.


I have plans to do a little landscaping and put in a rhubarb plant later this summer, but it will still be a couple years before we can harvest. Until then, the farmer’s market has everything I need.
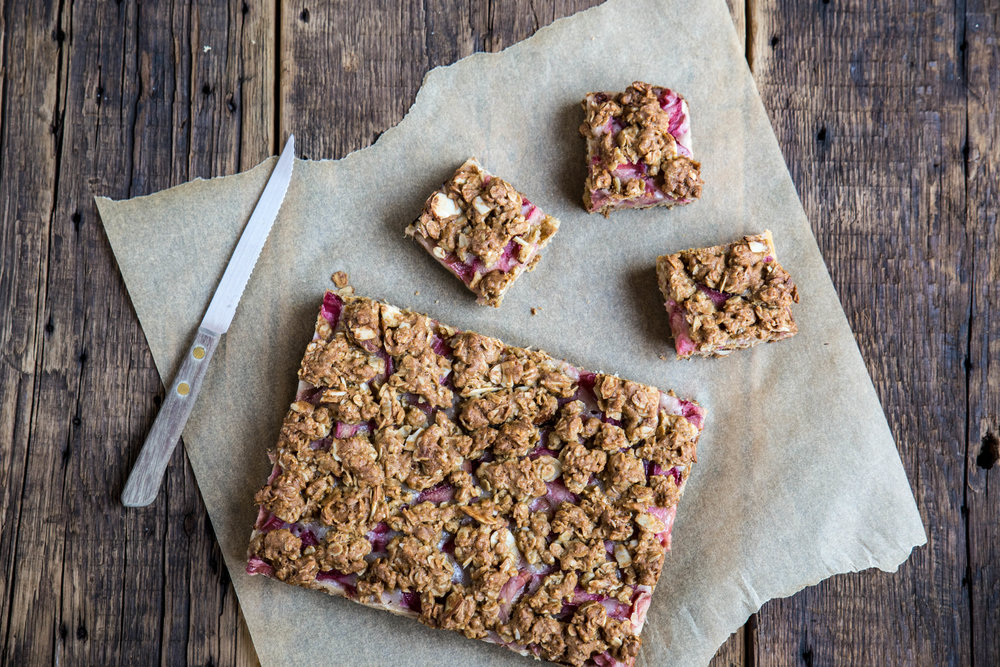
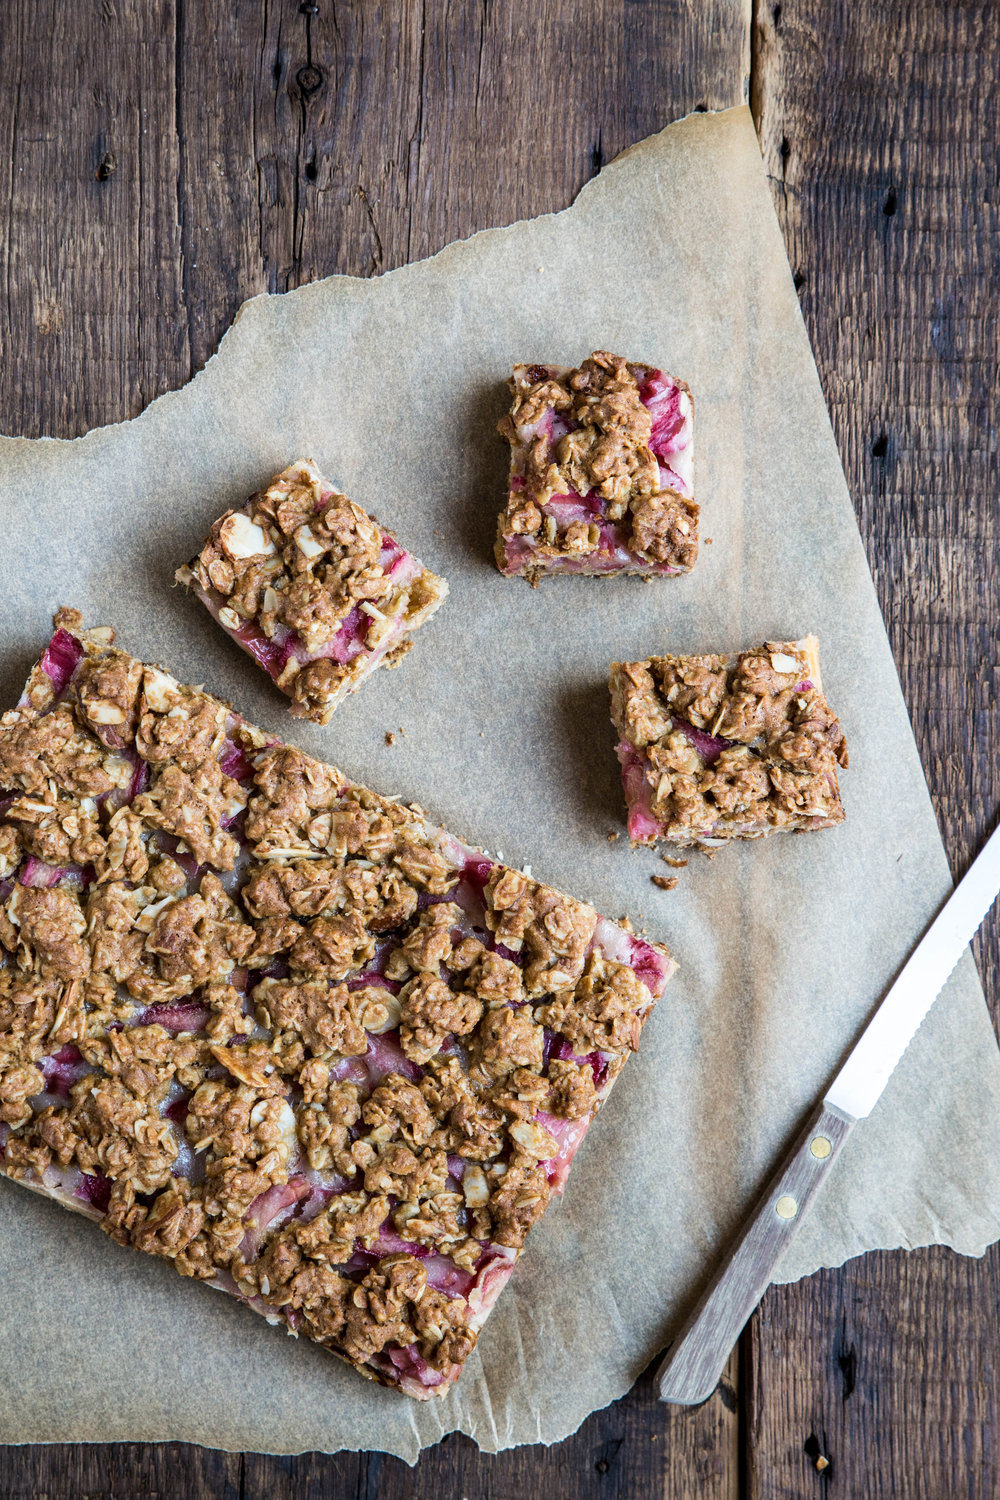
I originally planned to make a strawberry rhubarb dessert, but I didn’t get around to baking until after the strawberries were past their prime. This recipe is all the better for it, because it allows the rhubarb flavor to truly shine. Paired with an almond oatmeal crust, these rhubarb-filled bars are a new way to enjoy this spring vegetable.

This recipe for Rhubarb Almond Bars is an easy way to use and enjoy rhubarb. Almonds and oatmeal come together to form the base of the bars. Sliced raw rhubarb is added to the center (no cooking required!) before the bars are topped with the remaining crust and placed in the oven to bake. The nutty almond flavor compliments the tart rhubarb well. Cut into squares and serve warm, cold, or room temperature.
Rhubarb Almond Bars
Yields 16 servings (or 8 x 8-inch pan)
Almond Bars
6 tablespoons (100 grams) butter, room temperature
3/4 cup (150 grams) brown sugar, packed
1 large egg
1 teaspoon vanilla extract
1 teaspoon almond extract
1 1/2 cups (150 grams) old-fashioned oats
1 cup (120 grams) all-purpose flour
1/2 cup (45 grams) sliced almonds
1/2 teaspoon baking soda
1/2 teaspoon salt
Rhubarb Filling
3 cups (~14 ounces or 400 grams) fresh rhubarb, cut into 1/4-inch slices
1/4 cup (50 grams) granulated sugar
2 tablespoons cornstarch
Preheat oven to 350 degrees F (180 degrees C). Lightly grease an 8 x 8-inch pan.
For the almond base, beat together the butter and brown sugar in a large mixing bowl until uniform. Beat in the egg, vanilla, and almond extract, mixing until blended. Stir in the oats, flour, sliced almonds, baking soda, and salt. The batter will be slightly sticky. Using greased hands, press 2/3 of the batter into the bottom of the prepared pan. Set aside remaining batter.
For the rhubarb filling, stir together the sliced rhubarb, sugar, and cornstarch.
Spread the rhubarb filling over the top of the almond base. Crumble the remaining batter evenly on top. Bake for 40-45 minutes, or until lightly browned. Allow to cool slightly in pan before serving.
…

This post is sponsored by Bob’s red mill. Thank you for supporting the brands I love and use in my own kitchen. As always, all thoughts and opinions are my own.
With the holidays right around the corner (and a baby on the way!), December is shaping up to be a busy month for my family. In year’s past, it has been my holiday tradition to spend days in the kitchen meticulously cutting out and decorating my favorite holiday cookies—like these honey, sugar, and chocolate sugar cookies—to share with my family and friends.
This year I honestly don’t have the time to spare.
Instead, I’m going to feel out a new holiday baking tradition. My goal is to spend the next few days filling the freezer with cookies from easy-to-make recipes, and enjoying the remaining days by relaxing before our sweet baby arrives.

These Chocolate Ginger Crinkle Cookies meet all of my criteria this year: simple to make, freeze well, and quickly disappears from the serving plate.
For this cookie recipe, I turned to Bob’s Red Mill Unbleached White All-Purpose Flour. I prefer to use unbleached flour in my baking because it means the flour is not chemically treated. To create the classic light colored appearance and delicate texture of all-purpose flour, the wheat bran and germ are removed during the milling process (which is the key difference between whole wheat and all-purpose flour).
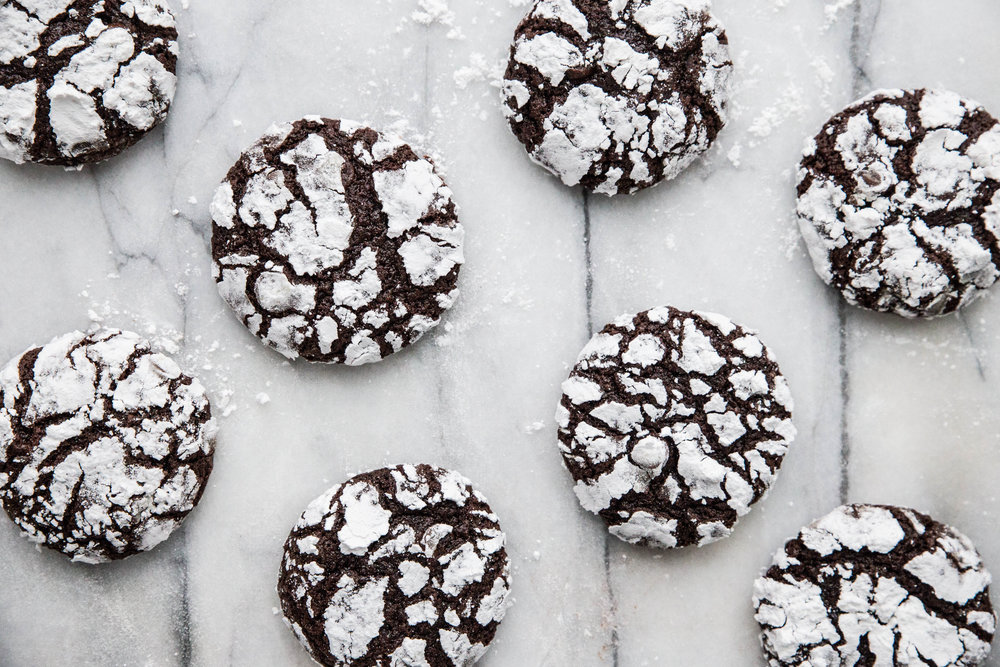
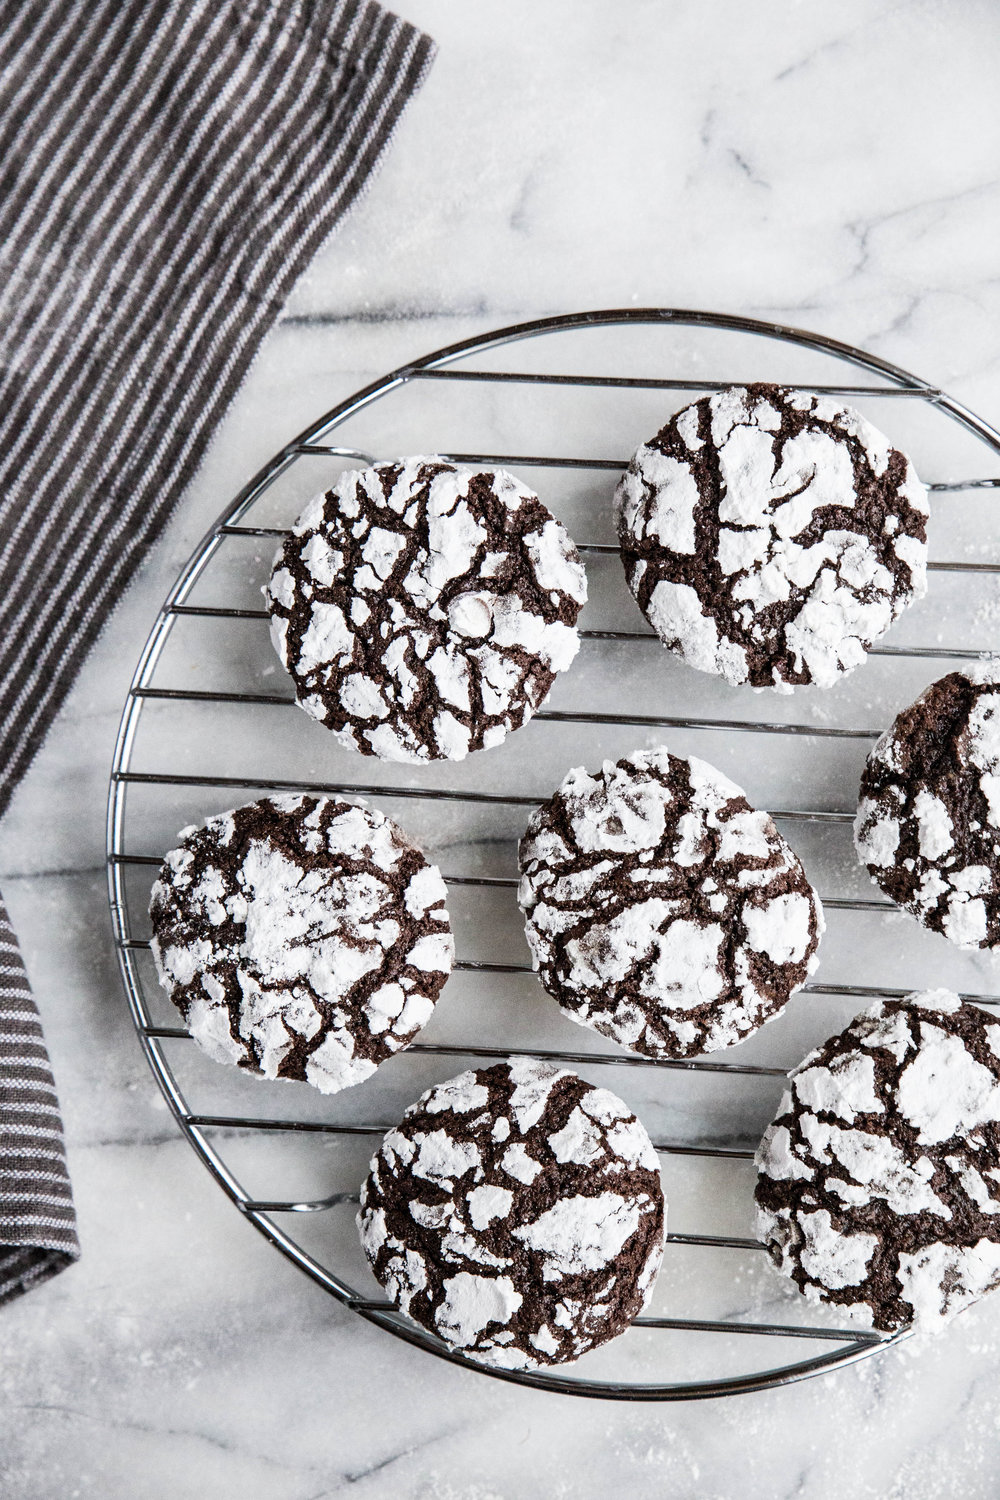
Crinkle cookies get their crackled appearance from being rolled in powdered sugar before baking. The sugar draws out moisture from the outside of the cookie, causing the edges to dry out before the interior is finished baking. This difference in moisture levels causes the top of the cookie to take on a crinkled appearance.
With a handful of chocolate chips to provide a richer chocolate flavor and ground ginger and cinnamon to give the cookie a spiced warmth, these cookies are sure to satisfy your sweet tooth this holiday season.


One of the qualities I look for in a good holiday cookie is its ability to freeze well. Knowing I have homemade cookies stashed away that can be ready at a moment’s notice is a relief during a busy season when events pop up or unexpected guests drop by. Happily, these chocolate ginger crinkle cookies can be easily frozen using two methods.
The first method is to form the cookie dough into balls and freeze them before rolling them in powdered sugar. When ready to bake, the frozen cookie dough balls can be rolled in the sugar and head straight towards the oven. This method is great when you can spare a few minutes to bake or you want to serve hot cookies straight from the oven.
The second method is to bake the cookies as directed and allow them to fully cool before placing them in an airtight container in the freezer. When ready to be served, pull the cookies from the freezer and allow them to thaw. This method is best when you anticipate the cookies being eaten quickly since the powdered sugar can become sticky if the cookies are left out for longer periods of time.

These Chocolate Ginger Crinkle Cookies are a seasonal take on the classic cookie. The chocolatey cookies are spiced with ginger and cinnamon to bring out traditional holiday flavors. After chilling the dough, the cookies are dipped in powdered sugar and baked until they take on a crinkled appearance. These cookies are best served alongside friends and family with a tall glass of milk.
One Year Ago: Marbled Pumpkin Chocolate Cake & Pumpkin Caramel Bread Pudding
Two Years Ago: Chocolate Gingersnap Tart
Three Years Ago: Caramel Apple Crumble Pie & Rosemary Olive Bread
Four Years Ago: Maple Syrup Cake with Toasted Almonds & Pumpkin Pie (Dairy-Free!)
Five Years Ago: Pumpkin Spiced Doughnuts & Stovetop Popcorn
Six Years Ago: Molasses Ginger Cookies, Marbled Butternut Squash Bread, Chai Pear Scones, & Hot Bourbon Apple Cider
Seven Years Ago: Grandma’s Applesauce, Honey Roasted Chickpeas, Caramel Apple Tart, & Cranberry Orange Brioche
Eight Years Ago: Fig & Balsamic Jam, Pumpkin Spice Oatmeal, & Raspberry Vanilla Creme Brulee
Chocolate Ginger Crinkle Cookies
Yield 18-22 cookies
1 cup (120 grams) Bob’s Red Mill Unbleached White All-Purpose Flour
1/2 cup (43 grams) cocoa powder
1/2 cup (100 grams) granulated sugar
1/4 cup (50 grams) brown sugar, packed
1 1/2 teaspoons ground ginger
1/2 teaspoon ground cinnamon
1 teaspoon baking powder
1/4 teaspoon salt
1/4 cup (60 mL) vegetable oil
2 large eggs
1 teaspoon vanilla extract
1/2 cup semisweet chocolate chips
3/4 cup (85 grams) powdered sugar
In a large mixing bowl, whisk together the flour, cocoa powder, granulated sugar, brown sugar, spices, baking powder, and salt. Mix in the vegetable oil, eggs, and vanilla, stirring until a uniform batter forms. Stir in the chocolate chips.
Place cookie dough in the refrigerator for 2 hours (or overnight) until completely chilled through.
Preheat oven to 350 degrees F (180 degrees C).
Place powdered sugar in a small bowl. Set aside.
Roll chilled cookie dough into 1-inch balls. Drop cookie dough balls into the powdered sugar and coat evenly on all sides. Place balls at least 2-inches apart onto a cookie sheet.
Bake for 10-13 minutes, or until cookies have a crackled appearance. Allow cookies to cool for 5 minutes before transferring them to a cooling rack to cool completely.