Olive Salad

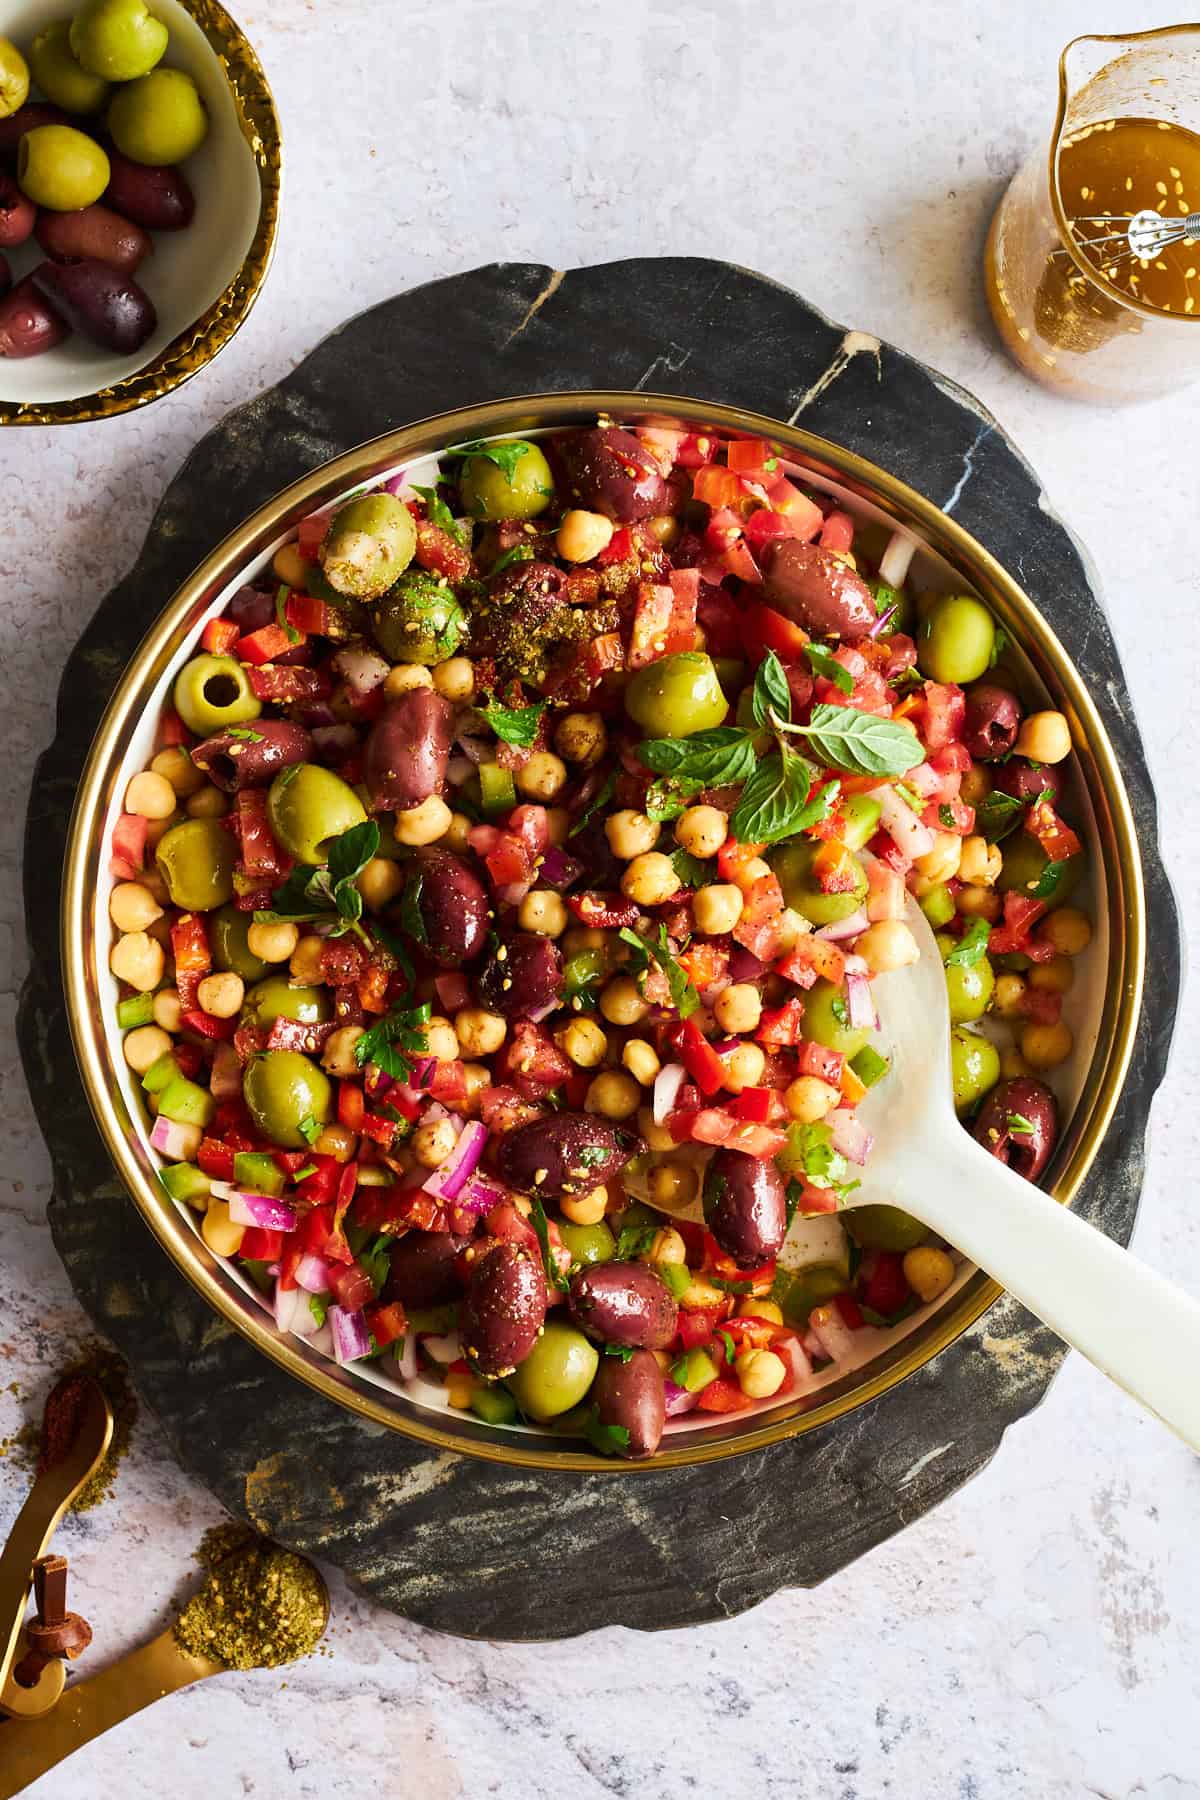
A bowl of olive salad.This Mediterranean-inspired olive salad recipe features olives, fresh veggies, chickpeas, and a tangy olive oil dressing for a vibrant side!
A bowl of olive salad.

This absolutely drool-worthy Olive Salad recipe is one of our favorite side dishes and snacks! It’s a perfect blend of flavors and textures and is packed full of fresh ingredients topped with a tangy, aromatic dressing, There’s no way any olive-lover will be able to turn down this delectable dish!

A bowl of olive salad with a spoon sticking out.

What is Olive Salad?

This olive salad is a vibrant, Mediterranean-inspired dish that’s as delicious as it is nutritious. It’s an amazing medley of hearty chickpeas, tangy olives, and fresh vegetables, all brought together by a zesty, aromatic dressing. The combination of juicy tomatoes, crunchy red pepper, and a hint of jalapeño provides an absolute symphony of flavors and textures, while fresh herbs like parsley and mint add a refreshing touch. 

The dressing, made with rich olive oil, lemon juice, and a blend of sumac and za’atar, infuses the salad with a fun and flavorful twist. We love this olive salad because it’s not only bursting with bold, bright flavors but it’s also packed with wholesome ingredients that make it a satisfying and healthy choice for any meal.

Ingredients You Need

  • Chickpeas – Chickpeas add a hearty, protein-packed base to our olive salad, making it both filling and nutritious! Be sure to drain and rinse them.
  • Kalamata Olives – Kalamata olives bring a rich, briny flavor that gives our salad the perfect Mediterranean twist. Make sure they’re pitted!
  • Green Olives – Green olives add a nice contrast with their slightly tangy and savory taste, balancing the flavors perfectly. Don’t forget to ensure these are pitted, too. 
  • Red Pepper – Red pepper adds a burst of color and a sweet crunch that brightens up every bite.
  • Tomato – Juicy, ripe tomatoes lend a fresh, summery flavor that makes the salad oh-so-refreshing.
  • Red Onion – Soaking red onion in water mellows its sharpness, adding just the right amount of zing without overpowering the salad.
  • Jalapeño – A touch of jalapeño brings a hint of heat, adding a little kick to our dish. Be sure to discard the seeds and chop it finely.
  • Parsley – Fresh parsley adds a pop of green and a herby brightness that ties all the flavors together.
  • Mint – Mint gives the salad a cool and refreshing flavor. 
A bowl of red and green olives, fresh herbs, red onion, bell peppers, and chickpeas.

Dressing

  • Olive Oil – Olive oil is the rich, silky base for our dressing, bringing all the ingredients together with its luscious texture and flavor.
  • Juice Of Lemon – A squeeze of fresh lemon juice adds a zesty tang that brightens up the entire salad.
  • Salt – A pinch of salt enhances all the natural flavors, making each ingredient pop.
  • Pepper – Just the right amount of pepper adds a subtle kick and depth to our salad.
  • Sumac – Sumac lends a unique, tangy, and slightly citrusy flavor that gives our salad a unique twist.
  • Za’atar – Za’atar brings in an aromatic blend of herbs and spices, infusing our salad with authentic Middle Eastern flair.
  • Garlic Clove – Minced garlic adds a punch of savory goodness, making every bite irresistibly flavorful.

How to Make This Super-Easy Olive Salad Recipe

  1. Combine Salad. Add all of the salad ingredients to a large bowl and toss until combined. 
  2. Make the Dressing. Pour all of the dressing ingredients into a small bowl and stir. 
  3. Bring Together. Add the dressing to the salad mixture and stir to coat. 
  4. Refrigerate. Chill the dressed salad in the fridge for at least half an hour before serving.
Close up view of olive salad with chickpeas, tomatoes, red onion, and herbs.

Variations

  • Beans – Instead of chickpeas, try using other beans like cannellini beans or black beans for a different texture and flavor.
  • Different Olive Types – Experiment with various olive varieties such as Castelvetrano, Niçoise, or Cerignola for unique taste profiles.
  • Citrus – Swap lemon juice for lime or orange juice to add a different citrusy zing to the dressing.
  • Spice it Up – Enhance the dressing with a pinch of crushed red pepper flakes or cayenne pepper for a spicy kick.
  • Herbs – Incorporate different fresh herbs like basil, oregano, or cilantro along with or instead of parsley and mint for varied herbal notes.
  • Veggies – Mix in additional veggies like cucumber, avocado, or artichoke hearts to add extra freshness and crunch.
  • Nuttiness – Add toasted pine nuts, almonds, or walnuts for a nutty flavor and satisfying crunch.
  • Cheese – Sprinkle crumbled feta, goat cheese, or Parmesan on top for a creamy, salty addition to the salad.
  • Sweetness – For a hint of sweet flavor, toss in some diced mango, pomegranate seeds, or dried cranberries.
  • Protein – While we’ve already included some plant-based protein, you can also incorporate grilled chicken, shrimp, or tofu.

Can I Store Leftovers? 

This simple salad is so easy to store and you don’t have to deal with any sogginess! 

Refrigerator – Store this salad in an airtight container for 3-5 days so you can snack on it all week or serve it alongside other dishes.

Freezer – While you likely can freeze this dish we don’t recommend it. Most of the ingredients will not retain their original texture once thawed. 

More Mediterranean-Style Recipes

Want more mouthwatering Mediterranean dishes to amp up your meal-planning or side dish game? You’re in luck! Here are a few of our favorites. 

Mediterranean Cobb Salad

Vegetable Galette

Mediterranean Tuna Salad

Sun-Dried Tomato Chicken Meatballs

A bowl of olive salad with a spoon sticking out.
Print Recipe
No ratings yet

Easy Olive Salad Recipe

This Mediterranean-inspired olive salad recipe features olives, fresh veggies, chickpeas, and a tangy olive oil dressing for a vibrant side!
Prep Time10 minutes
Marinade Time30 minutes
Total Time40 minutes
Course: Appetizer, Main Course, Side Dish
Cuisine: American, Mediterranean
Keyword: olive salad, olive salad recipe
Servings: 4 serving
Author: Food Dolls

Equipment

Ingredients

Olive Salad:

  • 1 can chickpeas drained and rinsed
  • 1/2 cup Kalamata olives pitted
  • 1/2 cup Manzanilla green olives pitted
  • 1/2 red pepper diced
  • 1 medium roma tomato diced
  • 1/2 medium red onion thinly sliced (soaked in water)
  • 1 jalapeño seeded and finely chopped
  • 1/4 cup chopped parsley
  • 1/4 cup chopped mint

Dressing:

  • 1/2 cup olive oil
  • Juice of 1/2 lemon
  • 1 teaspoon salt
  • 1/2 teaspoon pepper
  • 1 teaspoon sumac
  • 1 teaspoon za’atar
  • 1 garlic clove minced

Instructions

  • In a large bowl, combine the chickpeas, Kalamata olives, green olives, diced red pepper, diced tomato, soaked red onion, chopped jalapeño, chopped parsley, and chopped mint.
    1 can chickpeas, 1/2 cup Kalamata olives, 1/2 cup Manzanilla green olives, 1/2 red pepper, 1 medium roma tomato, 1/2 medium red onion, 1 jalapeño, 1/4 cup chopped parsley, 1/4 cup chopped mint
  • In a separate small bowl, whisk together the olive oil, lemon juice, salt, pepper, sumac, za’atar, and minced garlic to create the dressing.
    1/2 cup olive oil, Juice of 1/2 lemon, 1 teaspoon salt, 1/2 teaspoon pepper, 1 teaspoon sumac, 1 teaspoon za’atar, 1 garlic clove
  • Pour the dressing over the salad ingredients and toss well to coat everything evenly.
  • Let the salad marinate for at least 30 minutes before serving to allow the flavors to meld.

Nutrition

Serving: 1serving | Calories: 409kcal | Carbohydrates: 21g | Protein: 7g | Fat: 35g | Saturated Fat: 5g | Polyunsaturated Fat: 4g | Monounsaturated Fat: 24g | Sodium: 1429mg | Potassium: 356mg | Fiber: 8g | Sugar: 2g | Vitamin A: 1356IU | Vitamin C: 35mg | Calcium: 85mg | Iron: 3mg

Mediterranean Tuna Salad (Quick + Easy)

This Mediterranean tuna salad gives the classic recipe an upgrade with a sweet and savory vinaigrette and lots of fresh veggies!
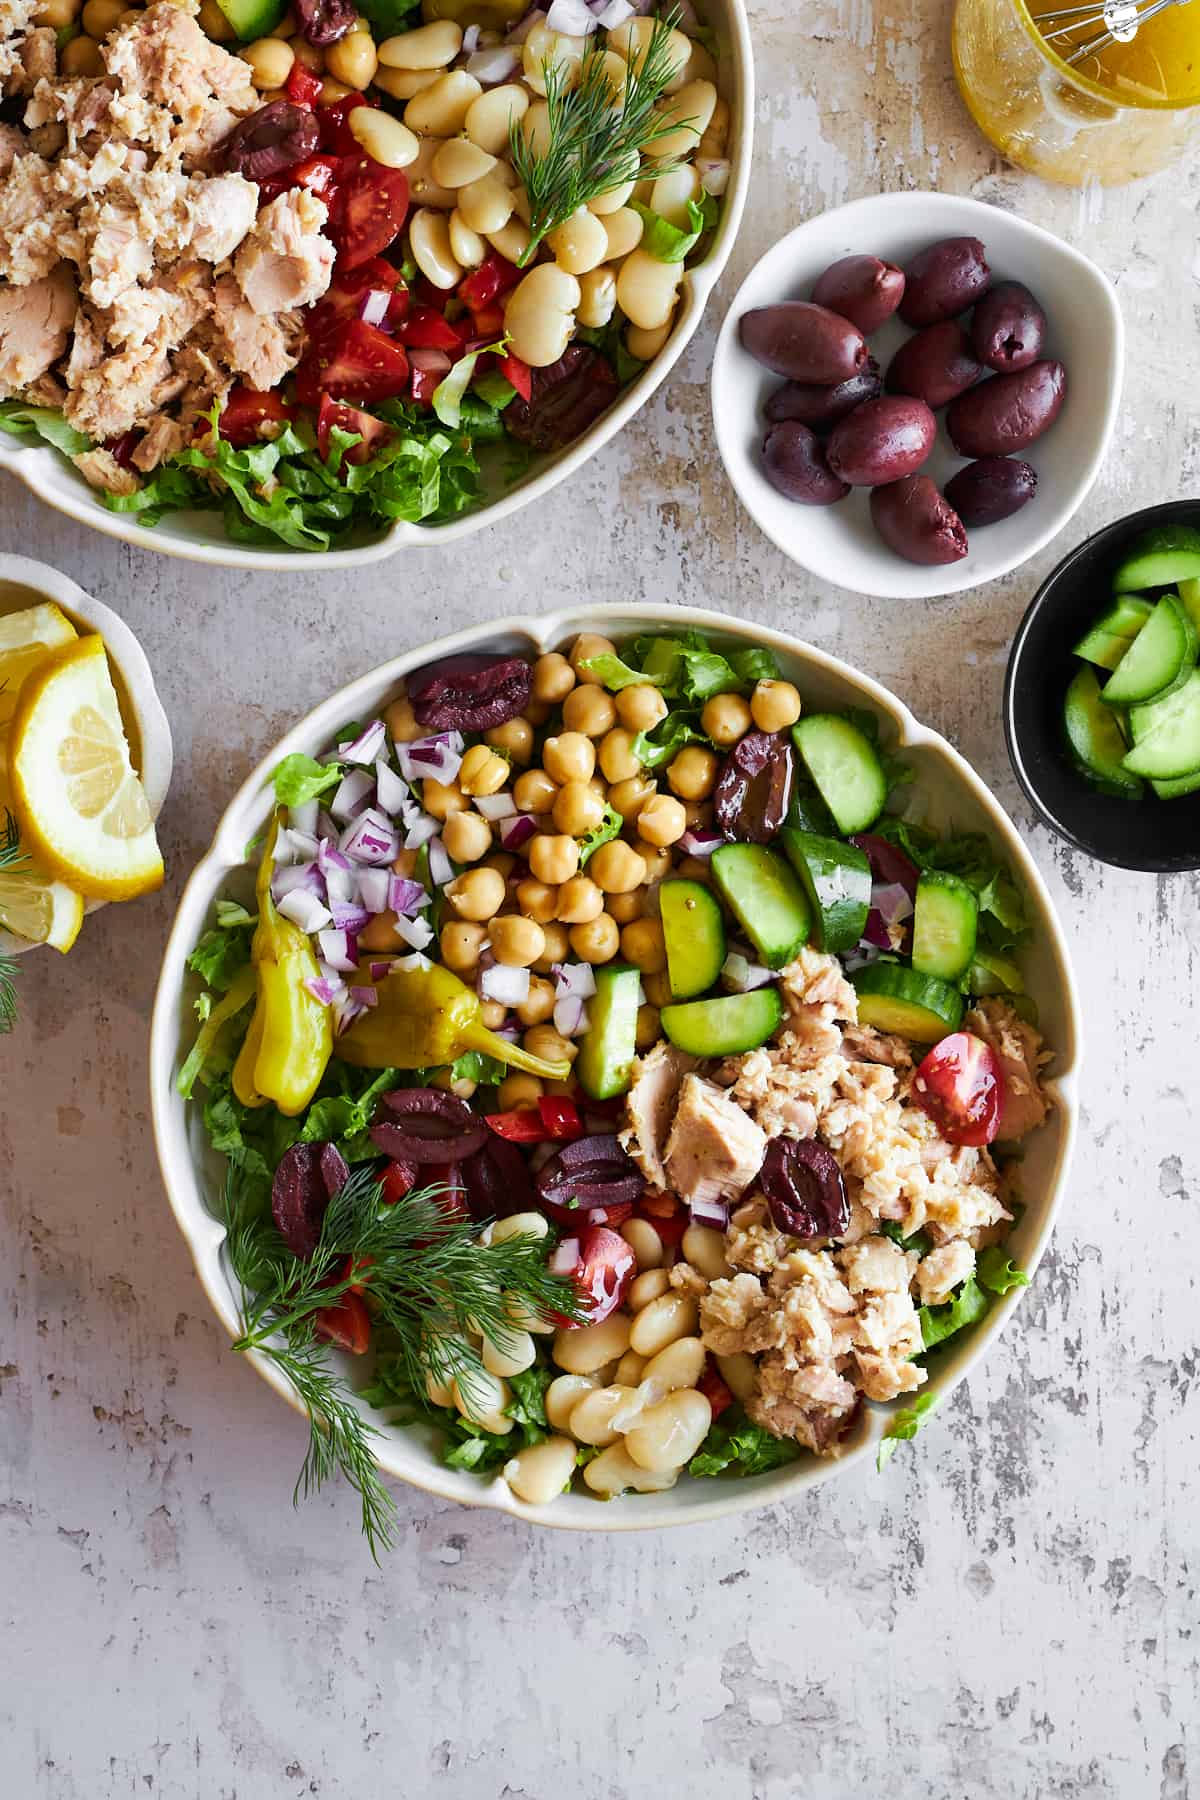
Get ready to jazz up your salad game with our mouthwatering Mediterranean tuna salad. Filled with vibrant veggies, tasty tuna, and a zesty vinaigrette, this salad will have you counting down the minutes until mealtime!

Two bowls of Mediterranean tuna salad.

What is Mediterranean Tuna Salad?

This Mediterranean tuna salad is one of our absolute favorites when we’re looking for a quick, easy, and healthy meal. And we love that it’s as much a feast for our eyes as it is for our taste buds! With all of its vibrant colors and flavors, it’s like a rainbow on your plate. 

We start with crisp romaine lettuce for the base and add other veggies like juicy cherry tomatoes and crunchy cucumber slices. We toss in butter beans and chickpeas, too, for a creamy texture,. Then we top it all off with savory tuna, tangy pepperoncini, briny Kalamata olives, and zesty red onion. 

And in our opinion, no salad is complete without dressing! Our vinaigrette is a light combination of olive oil, lemon juice, and a hint of honey, all whisked together with Dijon mustard and aromatic herbs. It’s a sweet and savory combination that’s going to have you craving this salad on the regular!

Vinaigrette being poured over a bowl of Mediterranean tuna salad.

Ingredients You Need

Salad

  • Butter beans – These butter beans add a deliciously nutty flavor and an unbeatable, satisfyingly smooth texture.
  • Chickpeas – These little protein-packed morsels will keep you feeling full and energized with their fiber-rich goodness.
  • Solid or chunk tuna in water or olive oil – Tuna adds a savory punch of flavor and gives the salad a protein boost.
  • Halved cherry tomatoes – Bursting with juicy sweetness, cherry tomatoes add a pop of color and freshness to the salad.
  • Sliced cucumber – Cucumber slices give the salad a crisp and refreshing crunch!
  • Shredded or chopped romaine lettuce – Romaine is the perfect base for the salad — it’s light and fresh, and it mingles well with all the other tasty ingredients.
  • Chopped pepperoncini – Spice up your salad with these zesty pepperoncini! These fiery little peppers bring the heat and add a tangy kick to every forkful.
  • Chopped parsley and basil – Say hello to our herbaceous heroes, parsley, and basil! They’re here to bring a fresh and fragrant vibe to the salad, turning up the flavor volume to eleven.
  • Pitted kalamata olives – These salty superstars are the Mediterranean mavens of our salad scene, adding a rich and briny flavor that’ll transport your taste buds to sunny shores.
  • Chopped red onion – Red onions are a bold and beautiful addition, bringing their sharp and tangy flavor to the salad. Be sure to soak them for a few minutes before adding them so that they can mellow out a little.

Master Vinaigrette: 

  • Olive oil – Olive oil is the base of the vinaigrette — it gives it a luxurious texture and a hint of Mediterranean flavor.
  • Lemon juice – Fresh lemon juice adds a burst of tangy brightness to the mix.
  • White or red wine vinegar – Vinegar gives the vinaigrette a subtle tang that balances out the other ingredients.
  • Honey – Honey smooths out any sharp flavors and gives the dressing a touch of sweetness.
  • Dijon mustard – We love how Dijon gives this dressing a touch of tangy earthiness. 
  • Cloves of garlic – Garlic adds a kick of aromatic flavor. Be sure to mince it finely and evenly before adding it to the vinaigrette. 
  • Dried oregano – Oregano infuses the vinaigrette with Mediterranean flavor.
  • Salt – Salt enhances the other ingredients making the vinaigrette perfectly balanced and full of flavor! 
  • Coarsely ground black pepper – Sprinkle in just a bit of spice with a dash of black pepper.
A bowl of Mediterranean tuna salad with two peppers and a fork on top.

How to Make Mediterranean Tuna Salad

  • Combine beans. Drain and rinse the butter beans and chickpeas and add them to a large bowl. 
  • Add remaining ingredients. Place the tuna, vegetables, and herbs in the bowl with the beans. 
  • Make dressing. Add all of the ingredients for the vinaigrette to a separate bowl and whisk until fully combined. 
  • Toss. Transfer the vinaigrette to the bowl with the salad and toss together to coat the veggies, tuna, and beans.
  • Serve. Immediately serve or chill the salad.

Variations

  • Grilled Vegetables – Kick things up a notch by adding some smoky grilled zucchini, bell peppers, or eggplant.
  • Quinoa or Farro – Mix things up a bit by throwing in some cooked quinoa or farro for a hearty, wholesome twist.
  • Feta Cheese – Sprinkle some crumbled feta over your salad for a burst of tangy goodness!
  • Avocado – Slide in some creamy slices for a dose of healthy fats.
  • Artichoke Hearts – Toss in some marinated artichoke hearts for a touch of even more Mediterranean flair. 
  • Toasted Nuts – Sprinkle toasted pine nuts, almonds, or walnuts over your salad for a satisfying crunch and a burst of nutty flavor. 
  • Sun-Dried Tomatoes – Chop up some sun-dried tomatoes for concentrated sweet and savory flavor. 
  • Fresh Herbs – Experiment with fresh herbs like mint, cilantro, or dill to add a pop of freshness and aroma to your salad. 
  • Balsamic – Swap out the regular vinegar for balsamic to add a touch of sweetness and depth to your dressing.
  • Maple Mustard – Trade honey for maple syrup and swap Dijon for whole grain mustard for a unique flavor profile. 
  • Greek Yogurt – Mix the vinaigrette with Greek yogurt for a tangy, creamy dressing.

Can I Store Leftovers? 

One of the best parts about this Mediterranean tuna salad is that it lasts for days which makes it perfect for meal prep! Just don’t freeze it — it will be soggy when thawed. 

Store this quick and easy salad in an airtight container in the fridge for 3-4 days. We recommend storing it separately from the dressing so that the greens don’t wilt or become soggy.

More Easy + Fishy Recipes

We absolutely adore how quickly you can whip up a fish dish! If you are on Team Fish like we are, check out more of our simple recipes that are packed full of flavor.

Easy Mediterranean Tilapia

Baked Feta Salmon

Air Fried Tilapia

Parmesan Crusted Salmon with Mango Salsa

A bowl of Mediterranean tuna salad.
Print Recipe
No ratings yet

Mediterranean Tuna Salad Recipe

This Mediterranean tuna salad gives the classic recipe an upgrade with a sweet and savory vinaigrette and lots of fresh veggies!
Course: Appetizer, Main Course
Cuisine: American, Mediterranean
Keyword: mediterranean tuna salad
Servings: 2 servings
Author: Food Dolls

Ingredients

Mediterranean Tuna Salad

  • 1 15 ounce can butter beans, drained and rinsed
  • 1 15 ounce can chickpeas drained and rinsed
  • 3 (4.5 ounces) cans of solid or chunk tuna in water or olive oil
  • 1/2 cup Halved cherry tomatoes
  • 1 large sliced cucumber
  • 3 cups shredded or chopped romaine lettuce
  • Chopped parsley to taste
  • Chopped basil to taste
  • 1/4 cup pitted Kalamata olives
  • 1/4 cup chopped red onion soaked in water for 5 min
  • 1/4 cup chopped peperoncini pepper

Master Vinaigrette

  • 1/4 cup olive oil
  • 3 Tablespoons lemon juice
  • 3 Tablespoons white or red wine vinegar
  • 1 Tablespoon honey
  • 1 Tablespoon Dijon mustard
  • 2 cloves garlic minced
  • 1 teaspoon dried oregano
  • 1/2 teaspoon salt
  • 1/2 teaspoon coarsely ground black pepper

Instructions

  • In a large bowl, combine the drained and rinsed butter beans and chickpeas.
    1 15 ounce can, 1 15 ounce can chickpeas
  • Add in the solid or chunk tuna from the glass jars or cans.
    3 (4.5 ounces) cans of solid or chunk tuna in water or olive oil
  • Mix in the halved cherry tomatoes, sliced cucumber, shredded or chopped romaine lettuce, chopped parsley and basil, pitted kalamata olives, and chopped red onion, peperoncini.
    1/2 cup Halved cherry tomatoes, 1 large sliced cucumber, 3 cups shredded or chopped romaine lettuce, Chopped parsley to taste, Chopped basil to taste, 1/4 cup pitted Kalamata olives, 1/4 cup chopped red onion soaked in water for 5 min, 1/4 cup chopped peperoncini pepper
  • In a separate bowl, whisk together the olive oil, lemon juice, white or red wine vinegar, honey, Dijon mustard, minced garlic, dried oregano, salt, and black pepper to make the Master Vinaigrette.
    1/4 cup olive oil, 3 Tablespoons lemon juice, 3 Tablespoons white or red wine vinegar, 1 Tablespoon honey, 1 Tablespoon Dijon mustard, 2 cloves garlic, 1 teaspoon dried oregano, 1/2 teaspoon salt, 1/2 teaspoon coarsely ground black pepper
  • Pour the vinaigrette over the salad ingredients and toss until everything is evenly coated.
  • Serve immediately or refrigerate until ready to serve.

Nutrition

Serving: 1serving | Calories: 840kcal | Carbohydrates: 67g | Protein: 69g | Fat: 34g | Saturated Fat: 5g | Polyunsaturated Fat: 4g | Monounsaturated Fat: 22g | Trans Fat: 0.01g | Cholesterol: 92mg | Sodium: 1509mg | Potassium: 2139mg | Fiber: 20g | Sugar: 21g | Vitamin A: 6720IU | Vitamin C: 40mg | Calcium: 176mg | Iron: 12mg

Easy Mulukhiya Recipe (Molokiyah) 

A bowl of mulukhiya.Get ready to whip up a scrumptious batch of classic Egyptian mulukhiya (molokiyah) using just a handful of ingredients! Savory,…
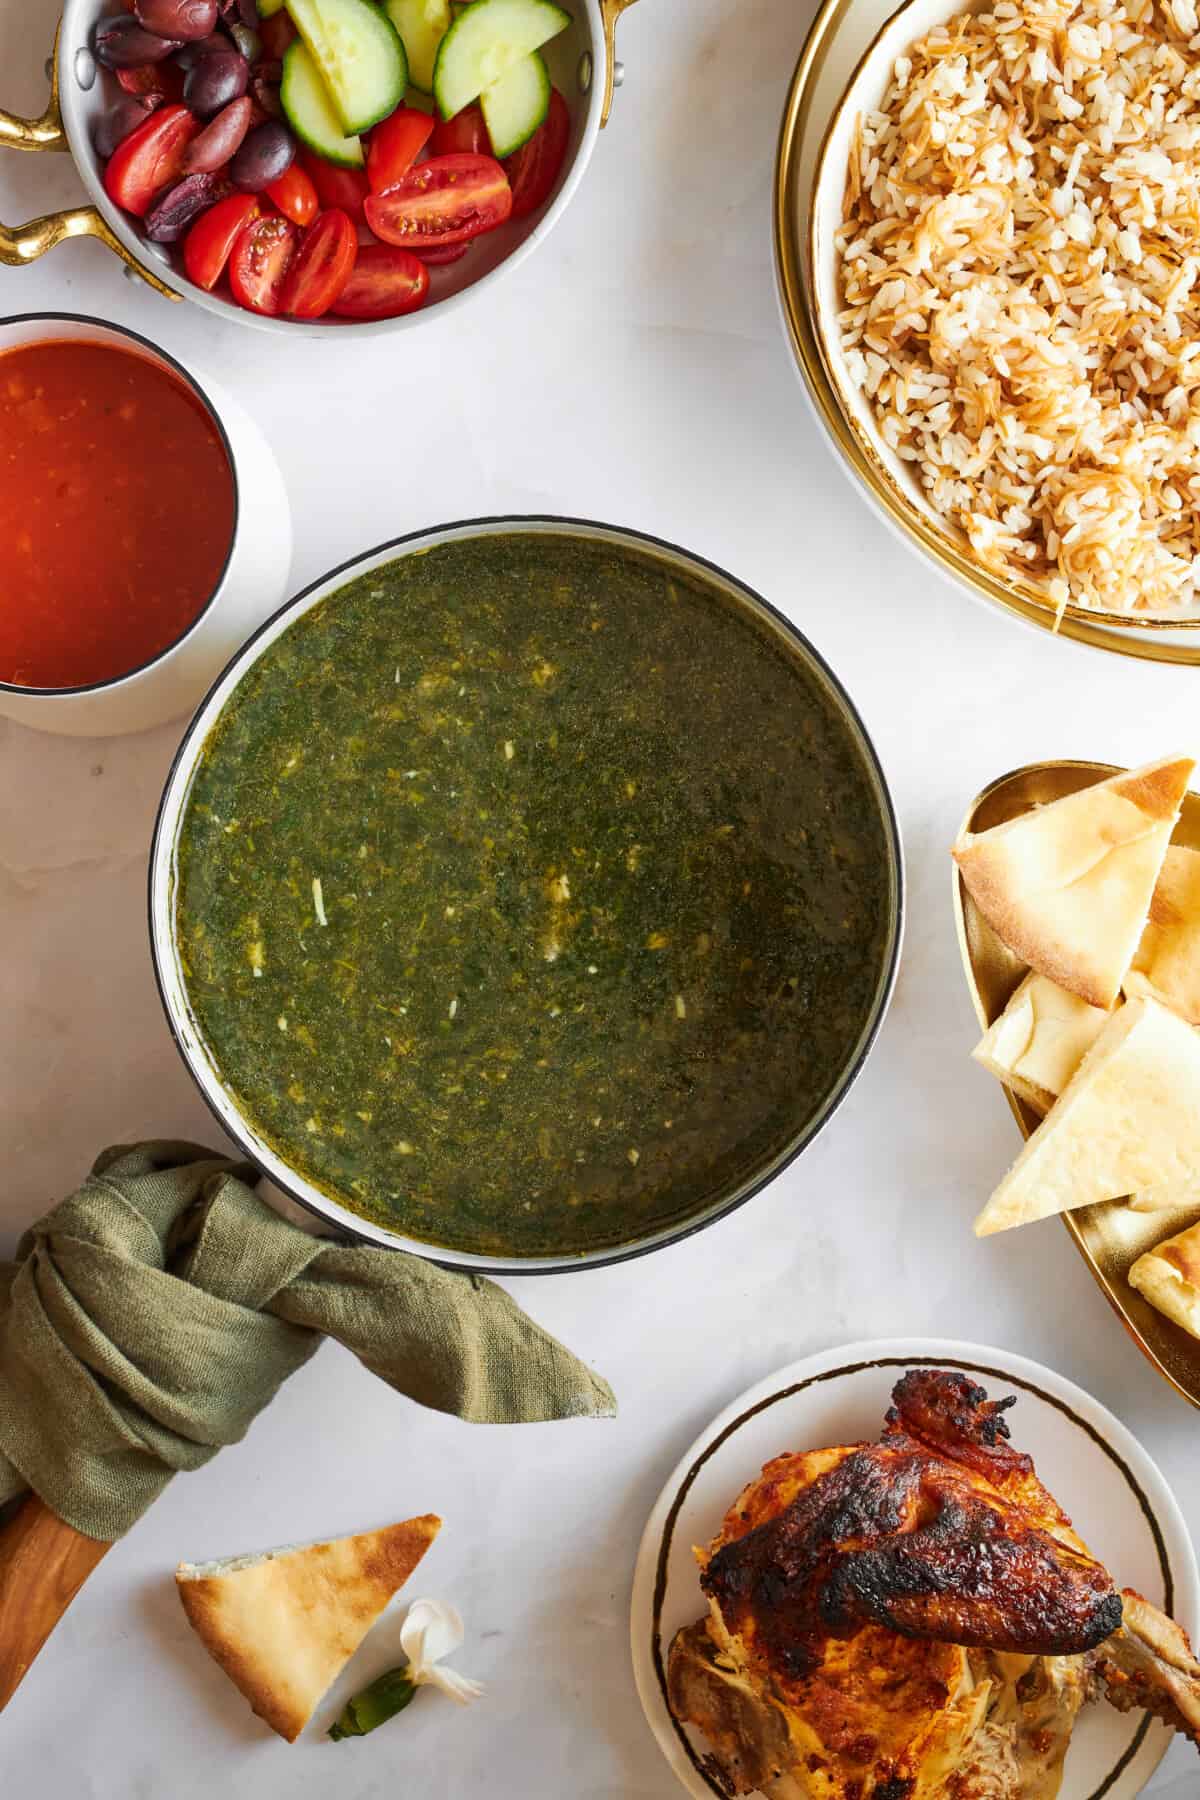
A bowl of mulukhiya.

Get ready to whip up a scrumptious batch of classic Egyptian mulukhiya (molokiyah) using just a handful of ingredients! Savory, aromatic, and oh-so-easy to create, it’s like a warm hug for your taste buds, packed with plenty of wholesome goodness.

A bowl of mulukhiya.

What Is Mulukhiyah? 

Mulukhiyah, also known as mulukhiya, mulukhia, or molokhia, or in Arabic ملوخية, is a staple recipe in Middle Eastern cuisine. Translated to mean Jew’s Mallow, mulukiyah is a type of leafy green vegetable that becomes gel-like when cooked. 

The dish originates from Egypt and was enjoyed by pharaohs for its health benefits. Fresh mulukhiya, the key component of this dish, is only available during the summer. So, many people purchase it in large quantities and take it back and forth from the markets in a Mezzaluna, storing it for later. 

Every region and household has a different take on the dish. However, we’re sharing the recipe we grew up eating. During our visits to Egypt our grandma would make this dish for us so it holds a special place in our hearts.

Ingredients You Need

Below is an overview of the ingredients and instructions for this recipe. Be sure to scroll down to the recipe card below for the complete details! 

  • Molokhia Leaves – Find these in Middle Eastern grocery stores or online. 
  • Broth – Use either chicken or vegetable broth (like we use in our Middle Eastern orzo soup) to cook the leaves and add rich flavor to the dish. 
  • Coriander – This flavors the broth and adds a warm, savory taste to the leaves. 
  • Garlic – Fresh cloves are best! Grind it with a mortar and pestle.
  • Butter – We use unsalted butter to sauté the garlic, creating a savory, pungent flavor base. 
  • Salt and Pepper – Adjust to taste. 

How to Make This Easy Mulukhiyah Recipe

  1. Prepare the Molokhia leaves. If you’re using fresh leaves, wash them thoroughly. Then, remove any tough stems. Or, if you’re using dry leaves, thaw them before cooking. 
  2. Sauté. Melt the butter in a large pot over medium heat. Add the garlic and ground coriander, and sauté until soft and fragrant. 
  3. Boil. Add the broth to the pot, and bring the mixture to a boil. Next, reduce the heat to low, and continue to simmer. 
  4. Add the Molokhia. Stir the Molokhia leaves into the pot. Then, continue to simmer, stirring occasionally. 
  5. Season. Adjust the seasonings to taste, adding a squeeze of lemon juice if desired. 
  6. Serve. Once the leaves soften, remove the pot from the heat, and enjoy warm! 
Perfect Pot

Shop our favorite pot!

We earn a commission if you make a purchase, at no additional cost to you.

Serving Suggestions

We love to serve this Molokiyah recipe over vermicelli rice with a side of pita bread for dipping! However, it’s also great with crushed beans or Middle Eastern chicken

A bowl of vermicelli rice topped with mulukhiya and tomatoes with pita bread on the side.

Common Questions About This Mulukhiyah Recipe

What does Molokiyah taste like? 

Molokiyah is similar to spinach or okra with a slightly different mouthfeel. When cooked with aromatics and butter, it becomes savory and tangy. 

What is the English name for the Molokhia plant? 

Molokhia is known as Egyptian spinach, jute mallow, and Jew’s mallow in English. 

Is Molokhia the same as okra? 

The Molokhia plant belongs to the same family as okra, but the two are different vegetables. 

More of Our Favorite Egyptian Recipes

We love whipping up the dishes that our mom and grandmother made for us almost as much as we like giving them our own spin so we can get in and out of the kitchen fast. Check out more of our super easy Egyptian recipes!

A bowl of vermicelli rice topped with mulukhiya and tomatoes with pita on the side.
Print Recipe
No ratings yet

Easy Mulukhiya Recipe (Molokiyah) 

Learn how to make a traditional Egyptian Mulukhiya recipe with just one pot and seven ingredients for a nutritious comfort food dish! 
Prep Time5 minutes
Cook Time35 minutes
Total Time40 minutes
Course: Main Course
Cuisine: egyptian, middle eastern
Keyword: mulukhiya, mulukhiya recipe
Servings: 4 servings
Author: Food Dolls

Equipment

Ingredients

  • 1 pound molokhia leaves fresh or frozen
  • 3 Tablespoons butter
  • 5 cloves garlic minced with mortar and pestle
  • 1 teaspoons ground coriander
  • 3 cups chicken or vegetable broth + 1/2 teaspoon coriander
  • Salt to taste
  • Black pepper to taste
  • Cooked rice or bread, for serving

Instructions

  • If using fresh molokhia leaves, wash them thoroughly and remove any tough stems. If using frozen molokhia, thaw it out before cooking for a few minutes.
    1 pound molokhia leaves
  • In a large pot, melt the butter over medium heat. Add the minced garlic and ground coriander, and sauté until they’re soft and fragrant.
    5 cloves garlic, 3 Tablespoons butter, 1 teaspoons ground coriander
  • Pour in the chicken or vegetable broth (like we use in our orzo soup but without the noodles), and bring the mixture to a boil. Once it's boiling, reduce the heat to low and let it simmer for about 10-15 minutes.
    3 cups chicken or vegetable broth + 1/2 teaspoon coriander
  • Add the molokhia leaves to the pot, and stir them into the broth. Let the mixture simmer for another 10-15 minutes, stirring occasionally.
  • Season the Molokhia with salt and pepper to taste. If desired, add a squeeze of lemon juice for extra flavor.
    Salt to taste, Black pepper to taste
  • Once the Molokhia is cooked and the leaves have softened, remove the pot from the heat.
  • Serve the Molokhia hot, with cooked rice or bread on the side for dipping or scooping. Enjoy the delicious and nutritious Molokhia stew!
    Cooked rice or bread, for serving

Nutrition

Serving: 1serving | Calories: 119kcal | Carbohydrates: 6g | Protein: 5g | Fat: 9g | Saturated Fat: 6g | Polyunsaturated Fat: 1g | Monounsaturated Fat: 2g | Trans Fat: 0.3g | Cholesterol: 26mg | Sodium: 812mg | Potassium: 688mg | Fiber: 3g | Sugar: 1g | Vitamin A: 10900IU | Vitamin C: 33mg | Calcium: 132mg | Iron: 3mg

Creamy Tahini Dressing

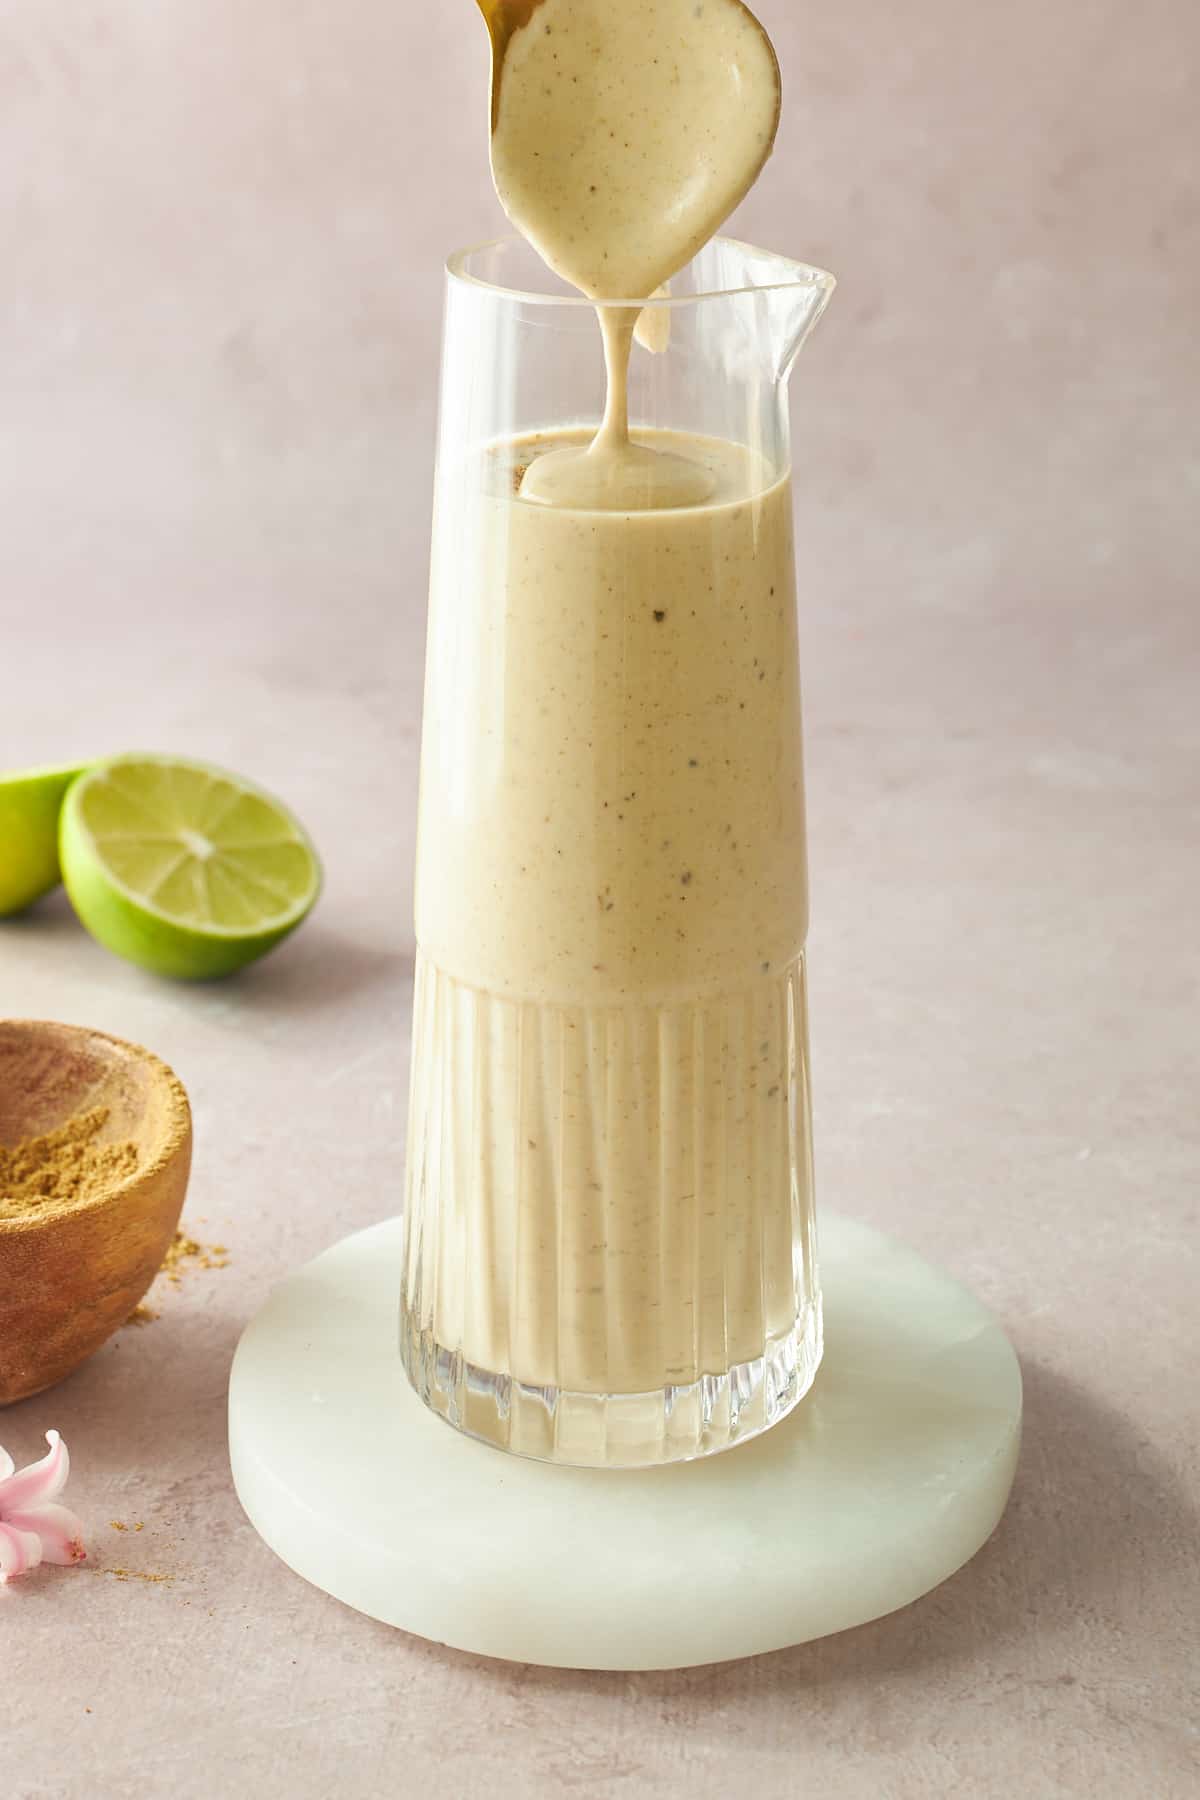
A glass jar of tahini dressing.Skip the store-bought options, and make this creamy tahini dressing recipe with less than ten ingredients and just a few minutes instead!
A glass jar of tahini dressing.

This homemade Creamy Tahini dressing is a must-try, with its smooth, nutty, and savory flavor profile that will elevate your salads, sandwiches, and more. It’s become a kitchen staple for us — we always have a jar ready in the fridge!

A glass container of tahini dressing.

Incredibly versatile, this dressing is perfect for drizzling over grilled veggies and meats or you can use it as a delicious dip. While store-bought are out there, there’s something super special about crafting your own creamy, warmly spiced tahini dressing at home.

What is Tahini? 

Tahini, also known as tahina, is a type of paste or spread made with ground sesame seeds. A staple in Middle Eastern cuisine, it can be used on its own or to make other dips such as hummus or baba ganoush

What is Tahini Sauce Made Of? 

Full ingredients and instructions are in the recipe card below! 

  • Tahini Paste – This forms the base of the dressing. 
  • Lime Juice – Freshly squeezed is best! The acidity helps cut through some of the bitterness of the tahini. If preferred, lemon juice will also work.
  • Spices – Ground cumin, salt, and pepper build the savory flavor of the dressing. 
  • White Vinegar – Vinegar helps to emulsify the ingredients, creating a smooth consistency. It’s acidity also balances the sauce.
  • Garlic – Use fresh garlic cloves, and adjust to taste. 

Blend and Serve: How to Make Creamy Tahini Dressing

  1. Combine the ingredients. Add all the ingredients to the bowl of a food processor. Pulse until smooth. Or, whisk everything together in a bowl.
  2. Adjust. Add more water as needed to create a smooth consistency. 
  3. Serve. Transfer your tahini sauce to a serving bowl, and garnish with fresh parsley. 

Note: Tahini sauce typically has a light, runny texture similar to salad dressing. However, you can make it as thin or as thick as you like! 

We earn a commission if you make a purchase, at no additional cost to you.
03/13/2024 02:04 pm GMT

Serving Suggestions

There’s not much this tahini dressing doesn’t pair well with! We love to use it with veggies, salads, meats, and snacks. Here are just a few of the recipes we take to the next level with this sauce:

How to Store

Store leftover tahini dressing in an airtight container in the fridge for up to one week. Just give it a good stir or shake before using it! 

The tahini may thicken over time. Add more water as needed to loosen it back up before serving. 

Common Questions About Tahini Dressing

Why is my tahini dressing so bitter? 

Sesame seeds are naturally slightly bitter. However, roasting at too high of a temperature can cause them to be even more bitter. Feel free to add maple syrup or honey to balance some of the bitterness.

What does tahini taste like? 

Tahini has a nutty, earthy, slightly bitter flavor. 

Is tahini healthy? 

Tahini is a good source of healthy fats. However, it is high in calories and should be consumed in moderation. Consult your doctor with any specific concerns! 

More Dressing, Dips, and Spreads

A container of tahini dressing.
Print Recipe
5 from 3 votes

Tahini Dressing Recipe

Skip the store-bought options, and make this creamy tahini dressing recipe with less than ten ingredients and just a few minutes instead! 
Prep Time5 minutes
Total Time5 minutes
Course: condiment
Cuisine: egyptian, middle eastern
Keyword: easy tahini dressing, tahini dressing recipe, tahini sauce
Servings: 12 servings
Author: Food Dolls

Equipment

Ingredients

  • 1/2 cup of tahini paste stirred
  • 3 Tablespoons fresh lime juice
  • 3 Tablespoons cold water or more if needed
  • 1 teaspoon ground cumin
  • 1 teaspoon white vinegar
  • 1/2 teaspoon sea salt
  • ¼ teaspoon black pepper
  • 1 clove garlic
  • Fresh Italian parsley for garnish

Instructions

  • In a food processor, add the tahini, lime juice, water, cumin, vinegar, salt, pepper, and garlic. Process the ingredients until well combined. If needed, add more water to achieve the desired consistency. Or, add all the ingredines to a bowl, and whisk until smooth.
    1/2 cup of tahini paste, 3 Tablespoons fresh lime juice, 3 Tablespoons cold water, 1 teaspoon ground cumin, 1 teaspoon white vinegar, 1/2 teaspoon sea salt, ¼ teaspoon black pepper, 1 clove garlic
    Tahini dressing ingredients in a bowl.
  • Transfer the tahini dressing to a serving bowl.
    A bowl of tahini dressing.
  • Garnish with fresh Italian parsley.
    Fresh Italian parsley for garnish

Nutrition

Serving: 1serving | Calories: 61kcal | Carbohydrates: 3g | Protein: 2g | Fat: 5g | Saturated Fat: 1g | Polyunsaturated Fat: 2g | Monounsaturated Fat: 2g | Sodium: 101mg | Potassium: 55mg | Fiber: 1g | Sugar: 0.1g | Vitamin A: 11IU | Vitamin C: 2mg | Calcium: 17mg | Iron: 1mg

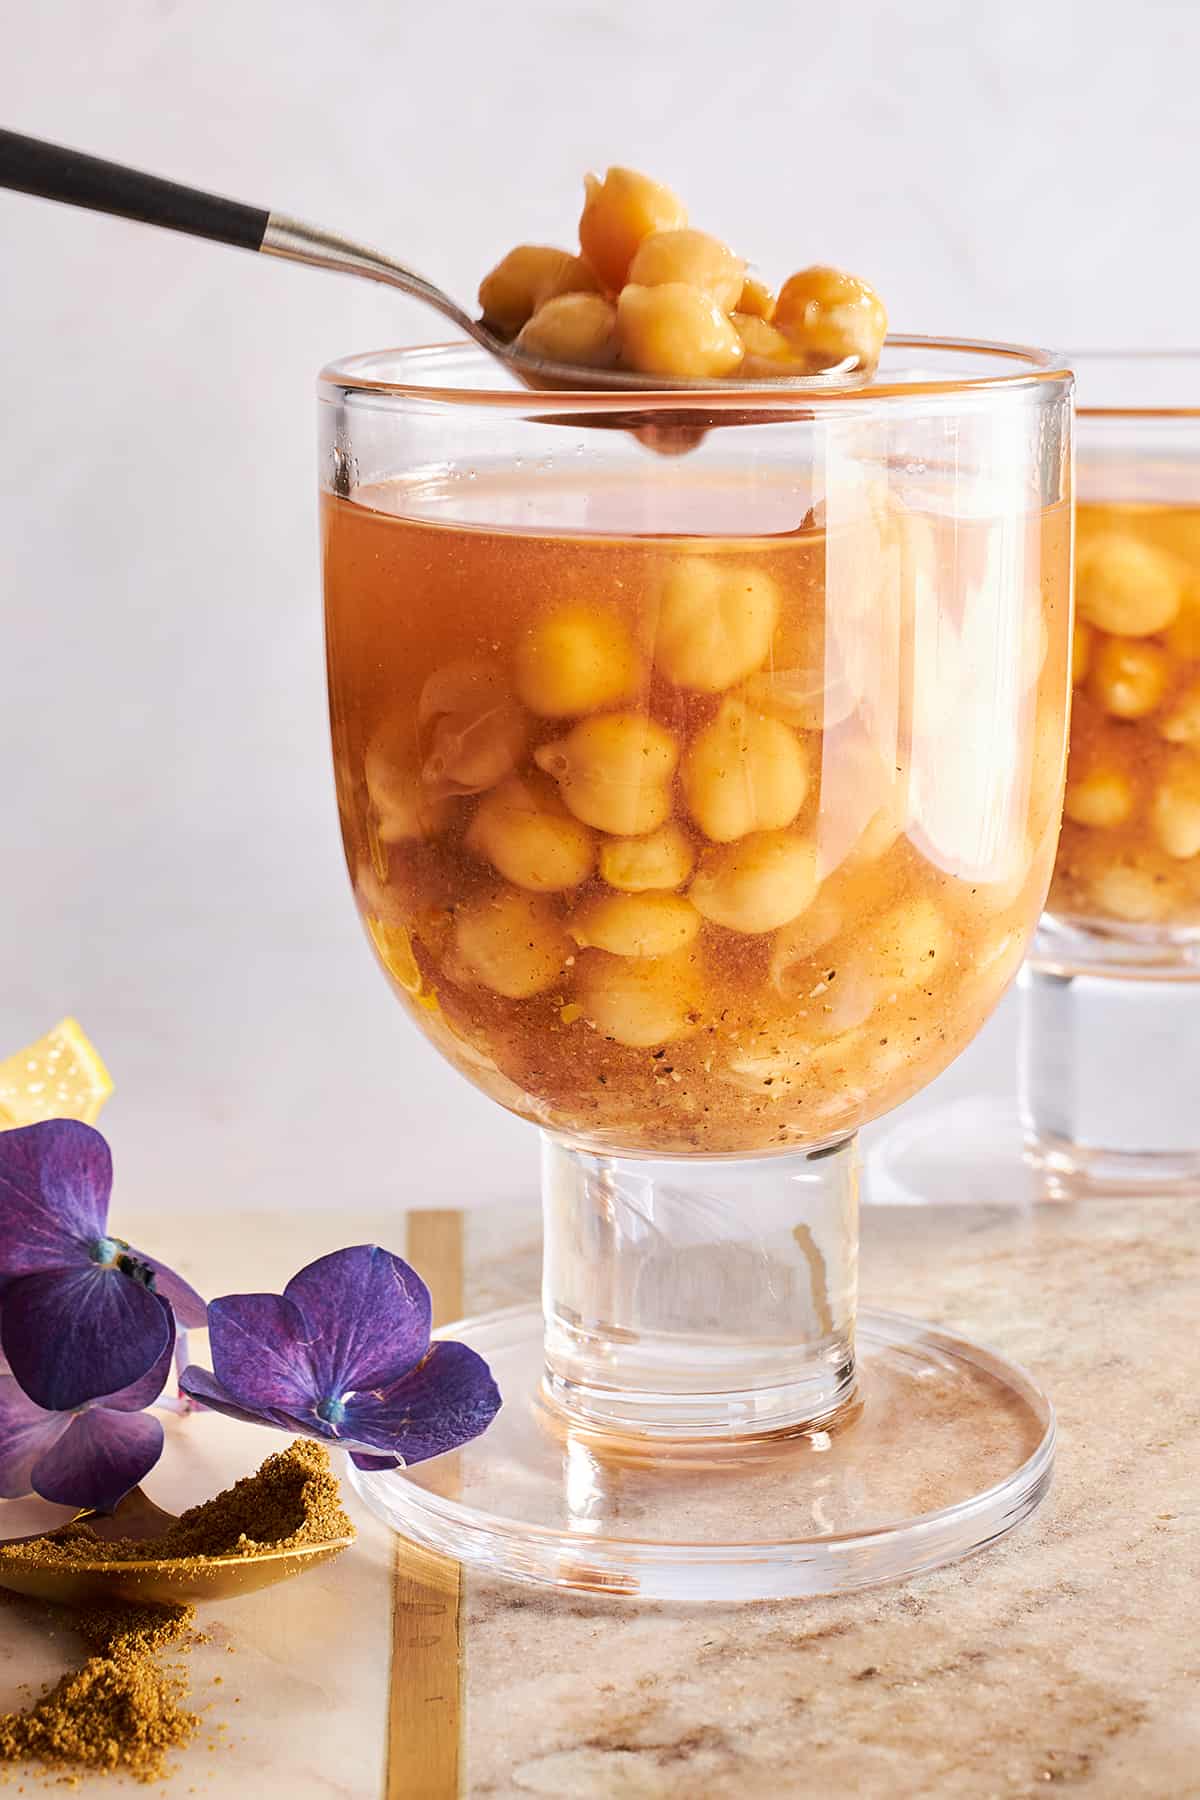
Hummus el Sham

A cup of hummus el sham.If you’re looking for the best way to warm up on a cold day, this Hummus el Sham recipe is…
A cup of hummus el sham.

If you’re looking for the best way to warm up on a cold day, this Hummus el Sham recipe is exactly what you need! This warmly spiced Egyptian recipe is a family favorite that may just have you kissing cocoa and coffee goodbye!

What is Hummus el Sham?

When you hear “hummus el sham” you may be thinking that this is going to be a variation of classic hummus. However, it’s totally different from the dip — instead, it’s a warm and inviting drink or soup! 

Commonly served during the chillier months on Egyptian food carts, hummus el sham is a combination of chickpeas, spices, and aromatics that come together to create a comforting dish that can be slurped by the spoonful or simply sipped from a mug. It’s a nostalgic favorite of ours since our momma made it regularly during the incredibly cold winters here in Minnesota.

Close up image of hummus el sham.

Ingredients You Need

  • Dried chickpeas – These chickpeas are the heart and soul of your hummus el sham! Soaking them overnight helps to soften them up so they’re ready to be boiled, simmered, and savored.
  • Lemon – Fresh lemon juice adds a burst of tangy brightness to your hummus el sham, balancing out the rich flavors and giving it that refreshing zing.
  • Medium garlic cloves – Garlic brings that irresistible savory punch to the table. Just the right amount of minced garlic cloves will infuse classic garlicky goodness.
  • Large ripe tomato – Adding diced ripe tomatoes to your hummus el sham brings a subtle sweetness and just a touch of juicy freshness to the mix!
  • Medium shallot – Shallots offer a milder and sweeter onion flavor compared to regular onions, making them perfect for adding depth without overpowering the other ingredients.
  • Ground cumin – Ground cumin is like the secret spice that ties everything together in your hummus el sham. It adds warm, earthy notes and a hint of smokiness that elevates the overall flavor.
  • Sea salt – A pinch of sea salt is the key to bringing out the flavors of all the ingredients.
  • Black pepper – Freshly ground black pepper adds a subtle kick and gentle heat.
  • Water – Using water during cooking or blending helps achieve the desired consistency of your hummus el sham, ensuring it’s smooth and creamy without being too thick or thin.
  • Crushed red pepper (for garnish) – Sprinkling some crushed red pepper on top adds a spicy kick and some color!
  • Fresh lemon juice (for garnish) – A drizzle of fresh lemon juice as a final garnish not only adds extra zing but also brightens up the colors and flavors of your hummus el sham, making it absolutely irresistible!

How to Make This Super Simple Hummus el Sham

  1. Rinse and soak. Place the chickpeas in a colander and rinse them before placing them in an airtight container with water to soak overnight. 
  2. Drain and cook. Strain all of the water from the soaked chickpeas and transfer them to a large pot. Add water to the pot to cover the chickpeas before also adding the half of a lemon. Then, bring to a boil. 
  3. Skim. Once the chickpeas have become tender, skim the foam from the surface of the water. 
  4. Blend. Add the garlic, diced tomato, chopped shallot, ground cumin, sea salt, black pepper, and remaining water to a food processor or blender and pulse until silky smooth. 
  5. Combine. Transfer the processed mixture to the cooked chickpeas in the pot and use a wooden spoon to completely combine. 
  6. Simmer. Leave the mixture on the stove to continue to simmer so that all of the flavors can come together. 
  7. Serve. Before serving, adjust the salt to taste. Then, ladle into mugs or bowls and garnish with cumin, red pepper, or cayenne pepper powder. 

Variations

While we are already in love with our classic mom-made version of this easy recipe, you can absolutely experiment and make your own! Here are some ideas for inspiration: 

  • Roasted Garlic – Instead of using raw garlic cloves, roast the garlic beforehand for a milder, sweeter flavor. 
  • Harissa – Add a spoonful of harissa paste to the blended mixture for a spicy kick and a vibrant red color. It’s a flavorful twist that adds a Mediterranean flair!
  • Herbs – Blend fresh herbs like parsley, cilantro, or basil into the mixture for a burst of green freshness and herbaceous flavor. 
  • Smokiness – Add a pinch of smoked paprika or chipotle powder for a smoky flavor. 
  • Nuttiness – Mix some tahini or toasted pin nuts into the mixture to add nutty flavor.
  • Citrus – Add more concentrated lemony flavor with a bit of lemon zest! 
  • Spiced Hummus – Experiment with different spices like paprika, cayenne pepper, or za’atar to add layers of flavor! Adjust the spice level to your preference for a personalized touch.

Can I Store Leftovers? 

We don’t often find that we have leftovers of this delicious drink, but if you do, you can store it and reheat it later. 

Transfer any leftover hummus el sham to a mason jar or lidded pitcher and store it in the fridge for 3-4 days

Freeze hummus el sham for up to 3 months in a freezer-safe container and thaw it in the refrigerator. 

More Chickpea-Based Recipes

It’s probably fair to say that we’re obsessed with chickpeas and all the plant-based protein they bring to the table! Check out more of our recipes that take advantage of the goodness of chickpeas: 

Marinated Chickpeas with Whipped Feta

Easy Marinated Chickpeas

Chickpea and Cucumber Tahini Salad

Chickpea Hummus

Ingredients:

A cup of hummus el sham.
Print Recipe
No ratings yet

Hummus el Sham

If you’re looking for the best way to warm up on a cold day, this Hummus el Sham recipe is exactly what you need! This warmly spiced Egyptian recipe is a family favorite that may just have you kissing cocoa and coffee goodbye!
Prep Time10 minutes
Cook Time15 minutes
Soak Time12 hours
Total Time12 hours 25 minutes
Course: beverage, Snack
Cuisine: middle eastern
Keyword: hummus el sham
Servings: 2 servings
Author: Food Dolls

Ingredients

  • 16 ounces dried chickpeas soaked overnight
  • 1/2 lemon
  • Water for cooking
  • 3 medium garlic cloves
  • 1 large ripe tomato diced
  • 1 medium shallot chopped
  • 1 teaspoon ground cumin
  • 1 1/2 teaspoon sea salt
  • 1 teaspoon black pepper
  • Crushed red pepper for garnish
  • Fresh lemon juice for garnish

Instructions

  • Rinse chickpeas and soak overnight in water. Drain and place them in a pot and cover with fresh water, ensuring they are completely submerged. Add half lemon into the pot.
    16 ounces dried chickpeas, 1/2 lemon, Water
  • Bring the pot of chickpeas to a boil, then reduce the heat to medium-low and simmer for about 15 minutes, or until the chickpeas are tender. Skim off any foam that rises to the surface.
  • In a food processor, combine the garlic, diced tomato, chopped shallot, ground cumin, sea salt, black pepper, and 1/4 cup of water. Process until smooth.
    3 medium garlic cloves, 1 large ripe tomato, 1 medium shallot, 1 teaspoon ground cumin, 1 1/2 teaspoon sea salt, 1 teaspoon black pepper
  • Once the chickpeas are cooked, add the processed mixture to the pot with the chickpeas. Stir well to combine.
  • Continue to simmer the mixture for another 30 minutes to allow the flavors to meld together.
  • To serve, ladle the hummus into serving bowls. Garnish each serving with a sprinkle of ground cumin, crushed red pepper or cayenne pepper, and a squeeze of fresh lemon juice. Adjust salt to taste.
    Crushed red pepper, Fresh lemon juice

Nutrition

Serving: 1serving | Calories: 1733kcal | Carbohydrates: 294g | Protein: 91g | Fat: 28g | Saturated Fat: 3g | Polyunsaturated Fat: 12g | Monounsaturated Fat: 7g | Sodium: 3613mg | Potassium: 4518mg | Fiber: 84g | Sugar: 55g | Vitamin A: 1379IU | Vitamin C: 69mg | Calcium: 558mg | Iron: 31mg

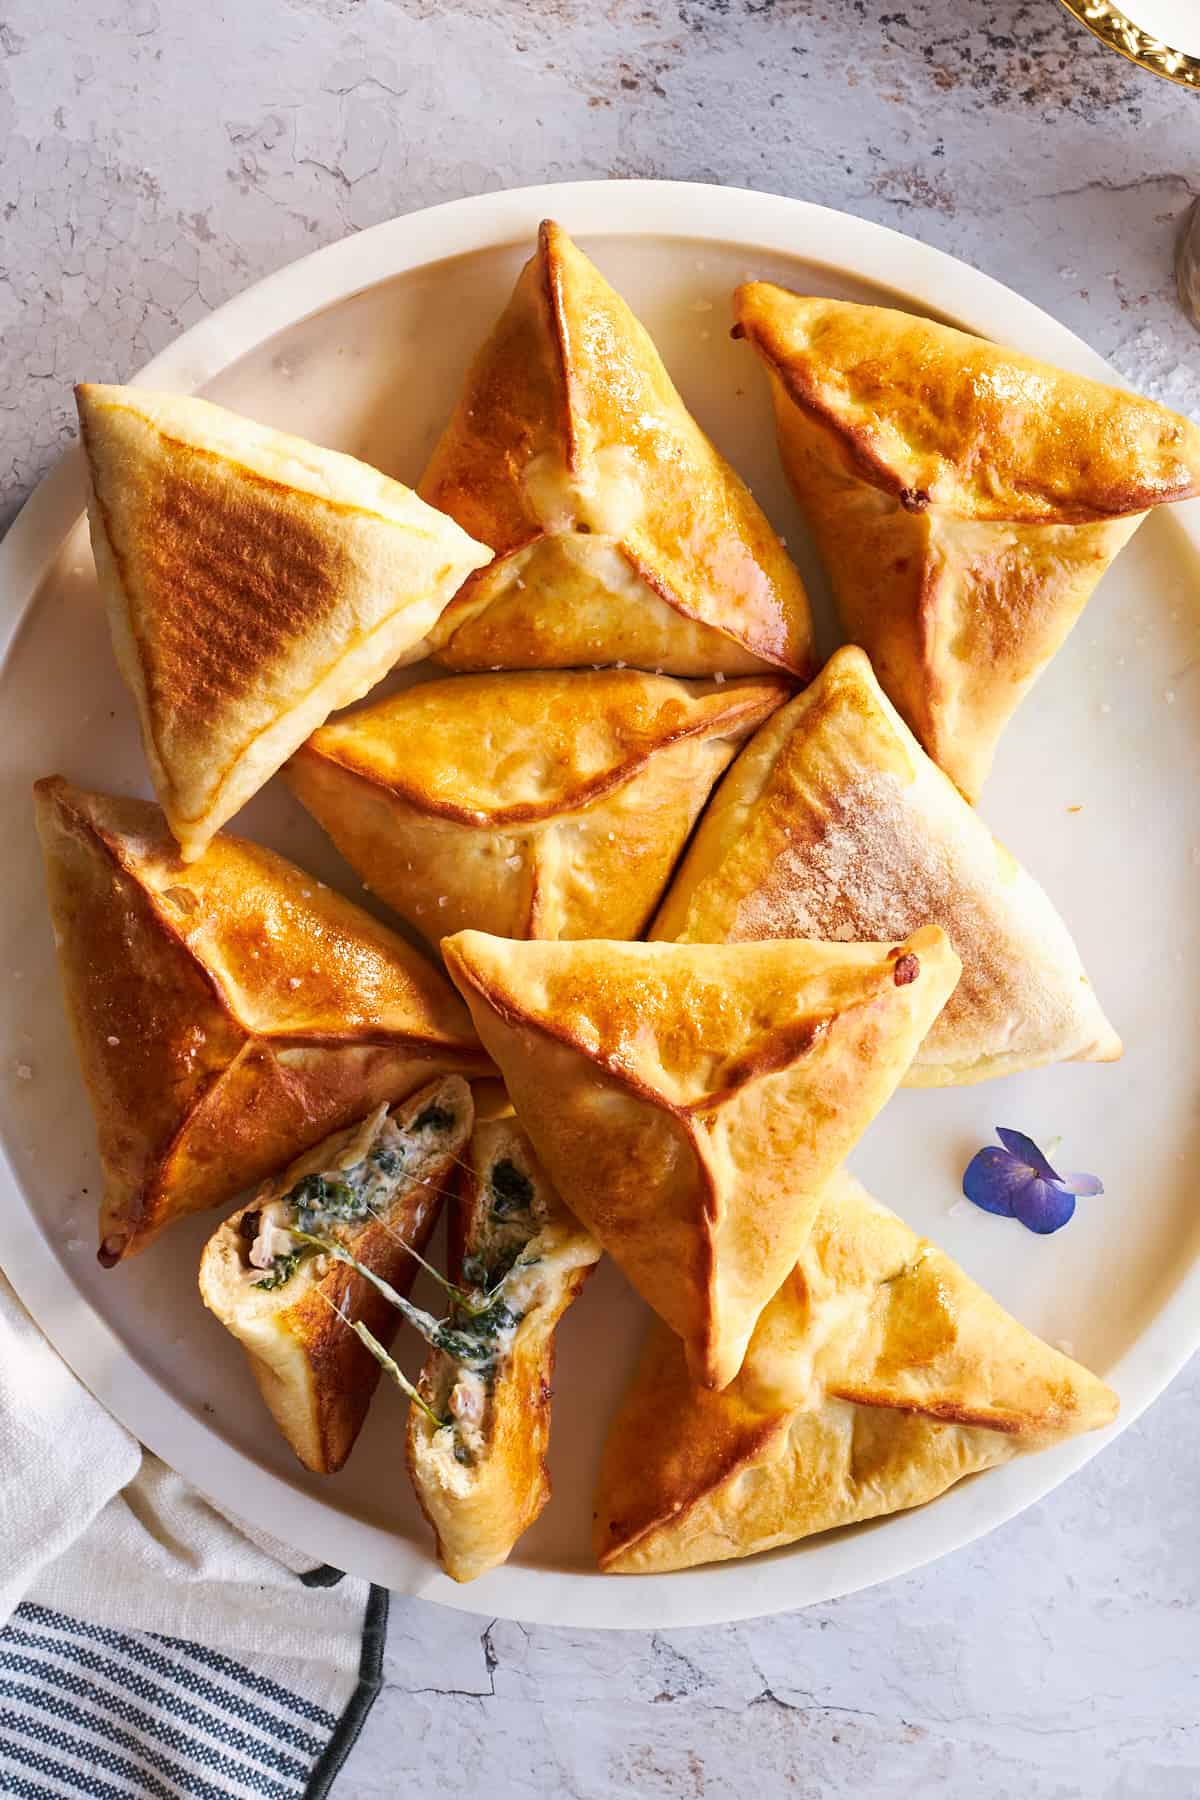
Easy Fatayer

Baked fatayer on a plate.If you’re craving ooey-gooey goodness wrapped in an undeniably simple yet delicious crust, this easy fatayer recipe is for you!…
Baked fatayer on a plate.

If you’re craving ooey-gooey goodness wrapped in an undeniably simple yet delicious crust, this easy fatayer recipe is for you! And while these decadent cheese and spinach stuffed morsels can typically take a bit of time to craft, we have a simple hack that will get fatayer on your table in nearly no time.

Fatayer on a plate.

What is Fatayer?

Fatayer are savory hand pies that are popular throughout the Middle East. They are made by stuffing a yeast dough with spinach, or sometimes seasoned meat, then baking. The result is a golden brown crust that envelops the warmly spiced veggie or meat fillings.

While fatayer is typically made with homemade bread, we turned this into a timesaving version that uses store-bought rolls instead. Also, fatayer doesn’t typically include cheese but we couldn’t resist putting our own cheesy spin on them. You can thank us later!

Ingredients You Need

  • Frozen dinner rolls – These are your shortcut to delicious fatayer dough, no fussing around with making it from scratch! Just make sure to thaw them ahead of time. 
  • Fresh spinach – This green goodness not only adds color but also packs a punch of freshness and healthiness to your fatayer.
  • Small shallot – These little guys bring in that subtle onion flavor that plays so well with the spinach and makes your fatayer savory and tasty.
  • Cream cheese – We’re firm believers that cream cheese makes everything better! It gives your fatayer filling a creamy, indulgent texture that you just can’t resist.
  • Salt – Salt is the magic touch that brings out all of the flavor of your other ingredients!
  • Pepper – A dash of pepper adds a bit of zing and spice, giving your fatayer filling that little extra kick.
  • Smoked paprika – This spice is perfect for adding a smoky flavor to your fatayer filling. 
  • Crumbled feta cheese – We love the salty, tangy flavor of feta and it pairs perfectly with the spinach.
  • Shredded mozzarella cheese – Mozzarella cheese gets melty and gooey in the fatayer, making it absolutely irresistible. 
  • Egg – While this is optional, we’ve found that simply whipping up an egg wash and brushing it on the fatayer before baking it gives them an amazing beautiful golden-brown crust.
Raw dinner rolls on a baking sheet.

Making Fatayer the Easy Way

  1. Defrost. Follow the directions on the package to thaw the rolls. 
  2. Sauté. Add spinach and shallots to a large skillet and cook until the spinach has wilted. The shallot should also be soft. 
  3. Combine. After removing the spinach and shallots from the stove, make the filling by placing the spinach mixture in a large mixing bowl with cream cheese, salt, pepper, smoked paprika, and crumbled feta cheese. Fold all of the ingredients together until they’re completely combined. 
  4. Form. Place a thawed dinner roll on a work surface that has been lightly floured and press down to flatten it. Then, place a small amount of the spinach and cheese mixture on the roll and top with mozzarella before folding the dough over and sealing the edge. Repeat with the remaining dough and mixture. 
  5. Prepare for baking. After placing each of the fatayer on a prepared baking sheet, use a pastry brush to apply egg wash to the tops. 
  6. Bake. Place the baking sheet in the preheated oven and bake until crispy and golden brown. 
  7. Serve. Serve the fatayer warm after allowing them to cool briefly.

Variations

We love these little pieces of cheesy heaven just how they are! But if you want to get creative, you can change up some of the ingredients. Here are some ideas for inspiration: 

  • Dough – If you love baking, you can make your own homemade dough instead of using the rolls. Or, replace the dough with phyllo to make them more like spanakopita.
  • Cheese – Swap out the cream cheese for ricotta or whipped cottage cheese. Or, replace the mozzarella with shredded parmesan or cheddar. You can also try using goat cheese instead of feta. 
  • Fillings – For extra flavor and texture, fold in add-ins like olives, pine nuts, sun-dried tomatoes, or lemon zest. You can even add seasoned ground meat or potatoes, too!
  • Toppings – Make these fatayer even more visually appealing by sprinkling them with sesame seeds or fresh herbs.
Baked spinach and cheese fatayer.

Can I Store Leftovers? 

We suggest serving these savory treats right after baking when they’re at their best but you can store them, too. Just keep in mind that the bread may not be quite as crisp when you reheat them after they’ve been in the fridge or freezer. 

Place fatayer in an airtight container or resealable plastic bag and refrigerate for 2-3 days
To freeze fatayer, place them in a freezer-safe container in a single layer (or separate layers with parchment paper). Then, freeze for up to 3 months.

Baked spinach and cheese fatayer with one split in half.

More Easy Bready Recipes

If you’re as big a fan of bread as we are, you’re going to want to check out our other crave-worthy bread-based creations! 

No Knead Focaccia Bread Art

Easy Garlic Bread

Quick Focaccia with Za’atar Seasoning

Garlic Caprese Bread

Spinach and cheese fatayer with one split in half.
Print Recipe
5 from 2 votes

Cheese and Spinach Fatayer

Easy fatayer feature a savory cheese and spinach filling wrapped in soft bread rolls and baked until golden.
Prep Time20 minutes
Cook Time25 minutes
Total Time45 minutes
Course: Appetizer, Side, Snack
Cuisine: middle eastern
Keyword: easy fatayer, fatayer, fatayer recipe
Servings: 10 servings
Author: Food Dolls

Ingredients

  • 10 frozen dinner rolls thawed according to instructions (e.g., Rhodes brand)
  • 4 cups fresh spinach
  • 1 small shallot finely chopped
  • 4 ounces cream cheese softened
  • 1/2 teaspoon salt
  • 1/2 teaspoon pepper
  • 1/2 teaspoon smoked paprika
  • 1/2 cup crumbled feta cheese
  • 1/3 cup shredded mozzarella cheese
  • 1 egg whisked (for egg wash)

Instructions

  • Preheat the oven to 350°F
  • Thaw the frozen dinner rolls according to the package instructions.
    10 frozen dinner rolls
    Dinner rolls on a baking sheet being thawed.
  • In a skillet, sauté the fresh spinach and shallot over medium heat until the spinach is wilted and the shallot is softened. Remove from heat and let the mixture cool.
    4 cups fresh spinach, 1 small shallot
    Spinach and shallot being sautéed in a skillet.
  • In a mixing bowl, combine the softened cream cheese, wilted spinach and shallot mixture, salt, pepper, smoked paprika, and crumbled feta cheese. Mix well until all ingredients are evenly combined.
    4 ounces cream cheese, 1/2 teaspoon salt, 1/2 teaspoon pepper, 1/2 teaspoon smoked paprika, 1/2 cup crumbled feta cheese
    Fatayer filling being mixed.
  • On a floured surface, take one of the thawed dinner rolls and flatten it down with your hands to make a larger circle.
  • Spoon a portion of the spinach and cheese mixture onto the center of the flattened dinner roll, leaving some space around the edges.
  • Sprinkle about 2 tablespoons of shredded mozzarella cheese over the spinach mixture.
    1/3 cup shredded mozzarella cheese
    A dinner roll topped with a spinach and cheese mixture and shredded cheese.
  • Fold the edges of the dough over the filling to form a triangle shape, pinching the edges to seal the fatayer.
    A raw fatayer triangle.
  • Repeat steps 5-8 with the remaining dinner rolls and spinach mixture.
  • Place the assembled fatayer on a baking sheet lined with parchment paper, leaving some space between each one.
  • Brush the tops of the fatayer with the whisked egg to create an egg wash.
    1 egg
    Fatayer on a baking sheet being brushed with egg wash.
  • Bake the fatayer in the preheated oven at 350°F for 25 minutes, or until they are golden brown and the cheese is melted and bubbly.
    Baked fatayer on a baking sheet.
  • Once baked, remove the fatayer from the oven and let them cool slightly before serving.

Nutrition

Serving: 1serving | Calories: 85kcal | Carbohydrates: 2g | Protein: 4g | Fat: 7g | Saturated Fat: 4g | Polyunsaturated Fat: 0.4g | Monounsaturated Fat: 2g | Trans Fat: 0.002g | Cholesterol: 37mg | Sodium: 282mg | Potassium: 109mg | Fiber: 0.4g | Sugar: 1g | Vitamin A: 1408IU | Vitamin C: 4mg | Calcium: 85mg | Iron: 1mg

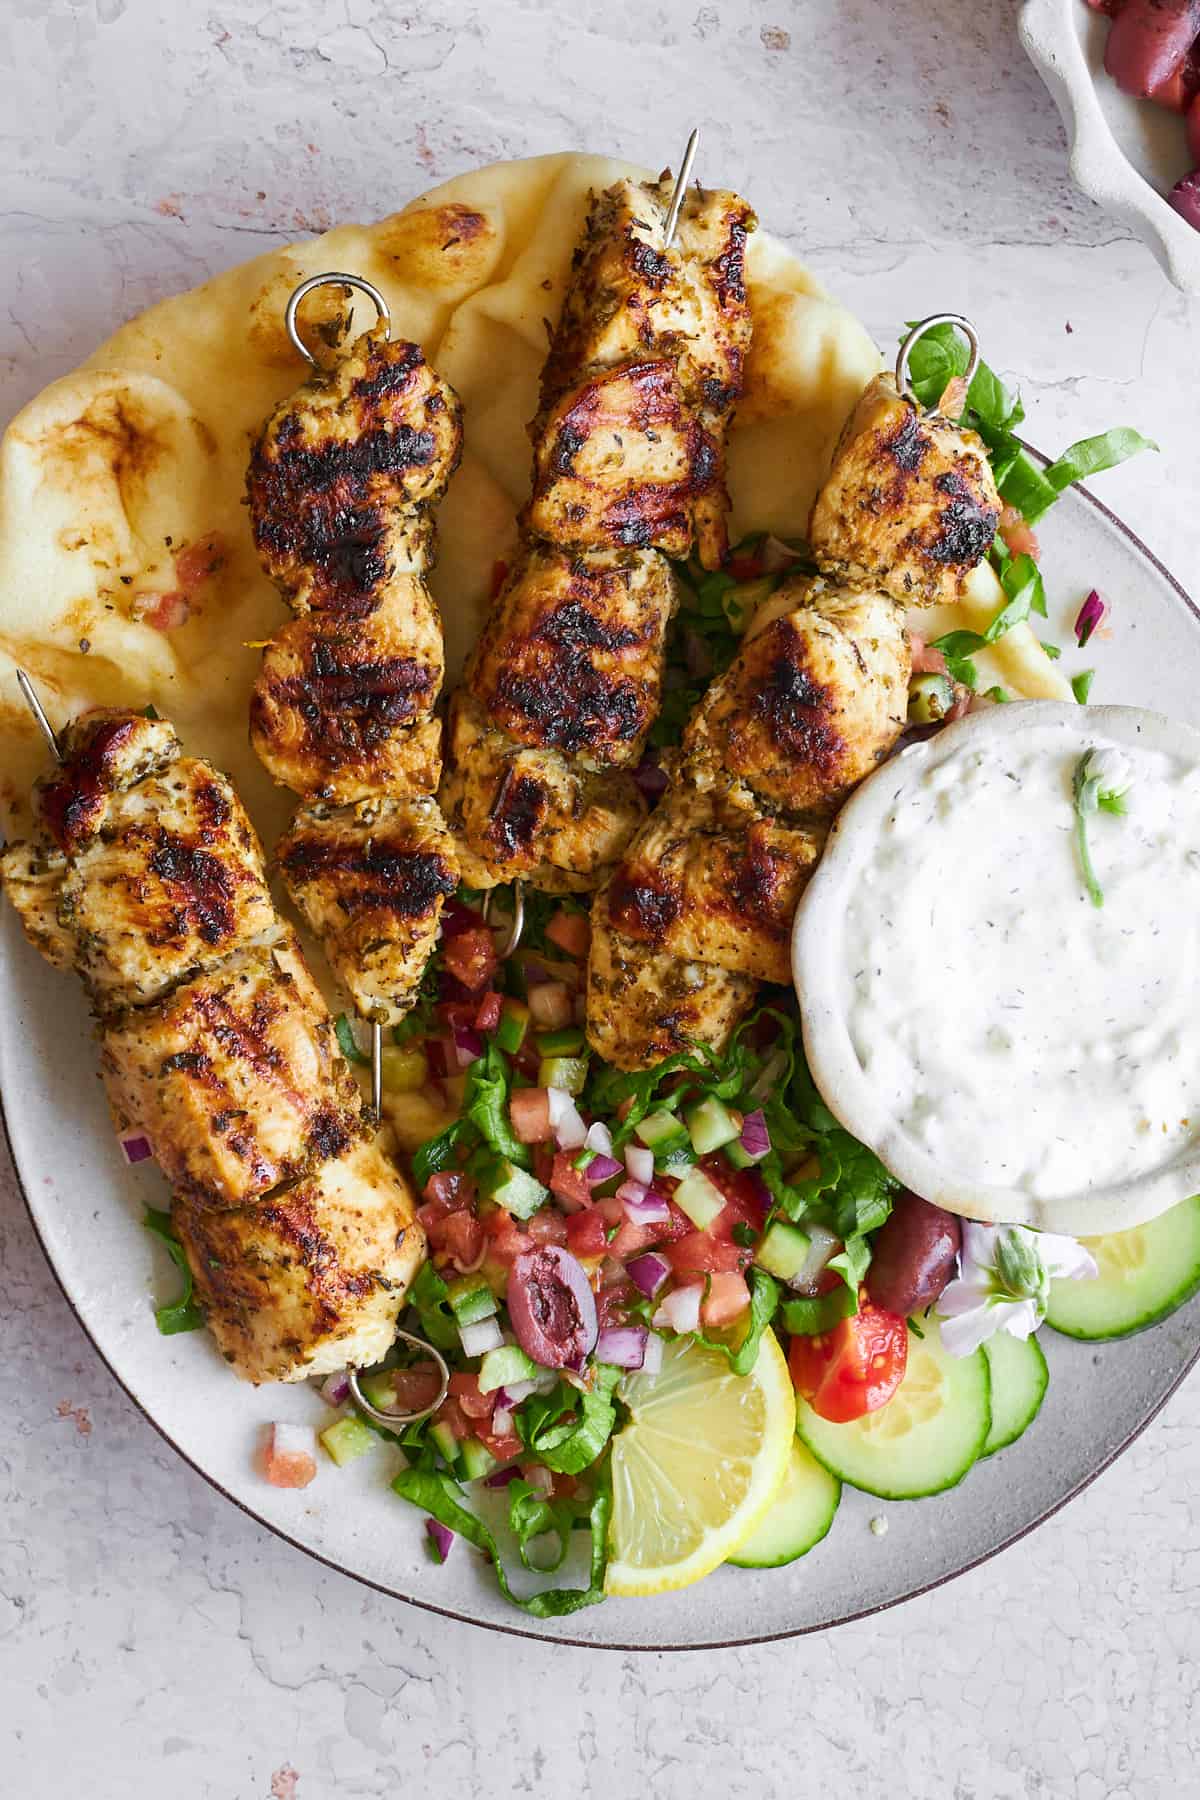
Greek Chicken Souvlaki

A plate of chicken souvlaki skewers with naan, shirazi salad, and tzatziki.This easy Chicken Souvlaki is bursting with fresh Mediterranean vibes! Plump chicken pieces mingle with a marinade made of zesty…
A plate of chicken souvlaki skewers with naan, shirazi salad, and tzatziki.

This easy Chicken Souvlaki is bursting with fresh Mediterranean vibes! Plump chicken pieces mingle with a marinade made of zesty lemon juice, rich olive oil, and by aromatic herbs and spices before they sizzle on the grill. Get ready for everyone to be running to the table for this one!

A plate of Greek chicken souvlaki skewers with salad, naan bread, and tzatziki.

What is Chicken Souvlaki?

Chicken souvlaki is a Greek dish made with mouthwateringly tender chicken that has been soaked in a flavorful marinade of lemon juice, olive oil, and herbs like oregano, thyme, and marjoram before being skewered and grilled. Lamb, pork, or beef can be used for souvlaki as well.

 
For this recipe, we serve the chicken straight off the skewers, but you can also serve it wrapped in Greek flatbread or pita bread with veggies like grilled onions and peppers. You can even add the veggies to the skewer with the chicken! We also love it paired with a more-than-generous dollop of tangy tzatziki!

Ingredients You Need

  • Dried oregano – Oregano is basically the Mediterranean flavor champion for your chicken souvlaki. It gives the chicken its signature herby flavor.
  • Dried marjoram – Marjoram also brings herbal goodness to the table. It adds a hint of sweetness and freshness that takes your marinade to the next level.
  • Dried thyme – Using thyme is like adding a cozy blanket of flavor for your chicken. It brings in warm and earthy notes that turn your souvlaki into a hug on a plate!
  • Garlic cloves – This aromatic powerhouse is a favorite of ours, especially in this recipe! It infuses your chicken with bold and savory flavor!
  • Sea salt – Salt is your chicken’s best friend. It not only seasons the meat perfectly but also helps to tenderize it, keeping it nice and juicy.
  • Black pepper – Freshly ground black pepper adds a little kick to your marinade, giving your chicken an extra layer of flavor and a subtle heat.
  • Onion powder – Onion powder brings in that delicious onion flavor — we use onion powder instead of fresh onions to make sure there’s an even amount throughout the marinade.
  • Fresh lemon juice – Lemon juice is like a burst of sunshine in your marinade! It adds brightness and tanginess perfect complements the richness of the meat.
  • Extra virgin olive oil – Olive oil is the secret to juicy and succulent chicken souvlaki. It not only binds all the flavors together but also adds a subtle fruity and peppery note to your marinade.
  • Boneless, skinless chicken breasts – While you can cut the chicken breasts in other shapes, we prefer cubes so that they are easy to skewer and have the most surface area to soak up the marinade. Be sure that all of the cubes are close in size so that they cook evenly.

Simple Steps to Make Chicken Souvlaki

  1. Make the marinade. Add the olive oil, minced garlic, lemon juice, oregano, marjoram, thyme, sea salt, black pepper, and onion powder to a large bowl and whisk to completely combine. 
  2. Marinate the chicken. Place the cubes of chicken in the marinade, ensuring they are all coated with it. 
  3. Refrigerate. Place a lid, aluminum foil, or plastic wrap over the top of the bowl and refrigerate. 
  4. Soak. Place wooden skewers in water for at least half an hour (metal skewers do not need to be soaked). 
  5. Skewer the chicken. Press the cubes of chicken onto the skewers. 
  6. Cook. Set the skewered chicken on a grill pan or grill grates and cook on each side until the chicken reaches the desired internal temperature. Chicken should be cooked to at least 165 degrees Fahrenheit. 
  7. Prepare to serve. Pull the chicken off of the skewers and allow them to rest briefly before serving.
Close up image of Greek chicken souvlaki over shirazi salad.

Variations

It would be an understatement to say that we are huge fans of this classic souvlaki recipe just the way it is! But, we’re also always up for experimenting in the kitchen! Here are a few ideas for how to switch up this traditional souvlaki: 

  • Herbs – Use fresh herbs instead of dried ones for a more vibrant flavor profile – try fresh oregano, marjoram, and thyme if available.
  • Garlic Alternatives – Instead of minced garlic, you can use garlic paste or roasted garlic for a milder and sweeter garlic flavor.
  • Citrus – Experiment with different citrus juices such as lime or orange in place of lemon juice for a unique tangy taste.
  • Spices – Add a pinch of smoked paprika or cayenne pepper to the marinade for a smoky or spicy kick.
  • Yogurt Marinade – Substitute part of the olive oil with plain yogurt to create a creamy marinade that tenderizes the chicken and adds a tangy note.
  • Mediterranean Spice Blend – Use a pre-made Mediterranean spice blend containing herbs like oregano, thyme, and marjoram along with spices like cumin and coriander for a convenient and flavorful marinade.
  • Veggies – Skewer the chicken with cherry tomatoes, bell peppers, onions, and zucchini for a colorful and well-balanced meal.

Can I Store Leftovers? 

If making meal prep easier is your endgame, this chicken souvlaki will be your savior! It’s super easy to make and store, meaning lunch or dinner throughout the week is made way more simple when you whip up this dish.

Refrigerate chicken souvlaki for 3-4 days in an airtight container or resealable plastic storage bag. 

Freeze chicken souvlaki for up to 3 months in a freezer-safe container or resealable freezer bag. Allow the chicken to thaw overnight in the refrigerator or reheat it in the oven or microwave straight from the freezer.

More Chicken Recipes

We love that this simple protein is such a canvas for creativity! These are some of our other favorite ways to make flavorful chicken dishes everyone loves:

Grilled Honey Garlic Chicken

Whole Roasted Chicken Tikka

Greek Lemon Chicken

Creamy Mushroom Chicken

A plate of Greek chicken souvlaki skewers with salad.
Print Recipe
4.75 from 8 votes

Greek Chicken Svoulaki

This Greek chicken souvlaki recipe features plump chicken seasoned with a zesty marinade and grilled to perfection!
Prep Time10 minutes
Cook Time10 minutes
Marinade Time30 minutes
Total Time50 minutes
Course: Main Course
Cuisine: middle eastern
Keyword: chicken souvlaki, Greek chicken souvlaki
Servings: 6 servings
Author: Food Dolls

Equipment

Ingredients

  • 1/4 cup extra virgin olive oil
  • 8 garlic cloves minced
  • 1/4 cup fresh lemon juice from about 2 lemons
  • 2 Tablespoons dried oregano
  • 2 teaspoons dried marjoram fresh marjoram can also be used if available
  • 1 teaspoon dried thyme
  • 1 teaspoon sea salt
  • 1 teaspoon black pepper freshly ground is recommended
  • 1 teaspoon onion powder
  • 2 pounds boneless skinless chicken breasts, cut into 1-inch cubes

Instructions

  • In a large mixing bowl, combine the olive oil, minced garlic, lemon juice, dried oregano, marjoram, thyme, sea salt, black pepper, and onion powder. Mix well to create the marinade.
    1/4 cup extra virgin olive oil, 8 garlic cloves, 1/4 cup fresh lemon juice, 2 Tablespoons dried oregano, 2 teaspoons dried marjoram, 1 teaspoon dried thyme, 1 teaspoon sea salt, 1 teaspoon black pepper, 1 teaspoon onion powder
    Chicken souvlaki marinade being prepared.
  • Add the chicken cubes to the marinade and toss until all the pieces are evenly coated. Cover the bowl and marinate the chicken in the refrigerator for at least 30 minutes. For best results, marinate overnight to allow the flavors to meld.
    2 pounds boneless
    Raw chicken pieces marinading in a bowl of souvlaki marinade.
  • If using wooden skewers, soak them in water for about 30 minutes before grilling to prevent burning. If using metal skewers, no soaking is necessary.
  • Preheat the grill pan to medium-high heat. (This can be made on an outdoor grill)
  • Thread the marinated chicken cubes onto skewers.
    Raw marinaded souvlaki chicken being threaded on skewers.
  • Grill the chicken skewers for about 4-5 minutes on each side, or until the chicken is fully cooked through and has nice grill marks. Cooking time may vary depending on the thickness of the chicken cubes and the heat of your grill.
    Greek chicken souvlaki skewers cooking on a grill pan.
  • Once cooked, remove the skewers from the grill and let them rest for a few minutes before serving.

Nutrition

Serving: 1serving | Calories: 267kcal | Carbohydrates: 4g | Protein: 33g | Fat: 13g | Saturated Fat: 2g | Polyunsaturated Fat: 2g | Monounsaturated Fat: 8g | Trans Fat: 0.02g | Cholesterol: 97mg | Sodium: 565mg | Potassium: 617mg | Fiber: 1g | Sugar: 0.4g | Vitamin A: 86IU | Vitamin C: 7mg | Calcium: 49mg | Iron: 2mg

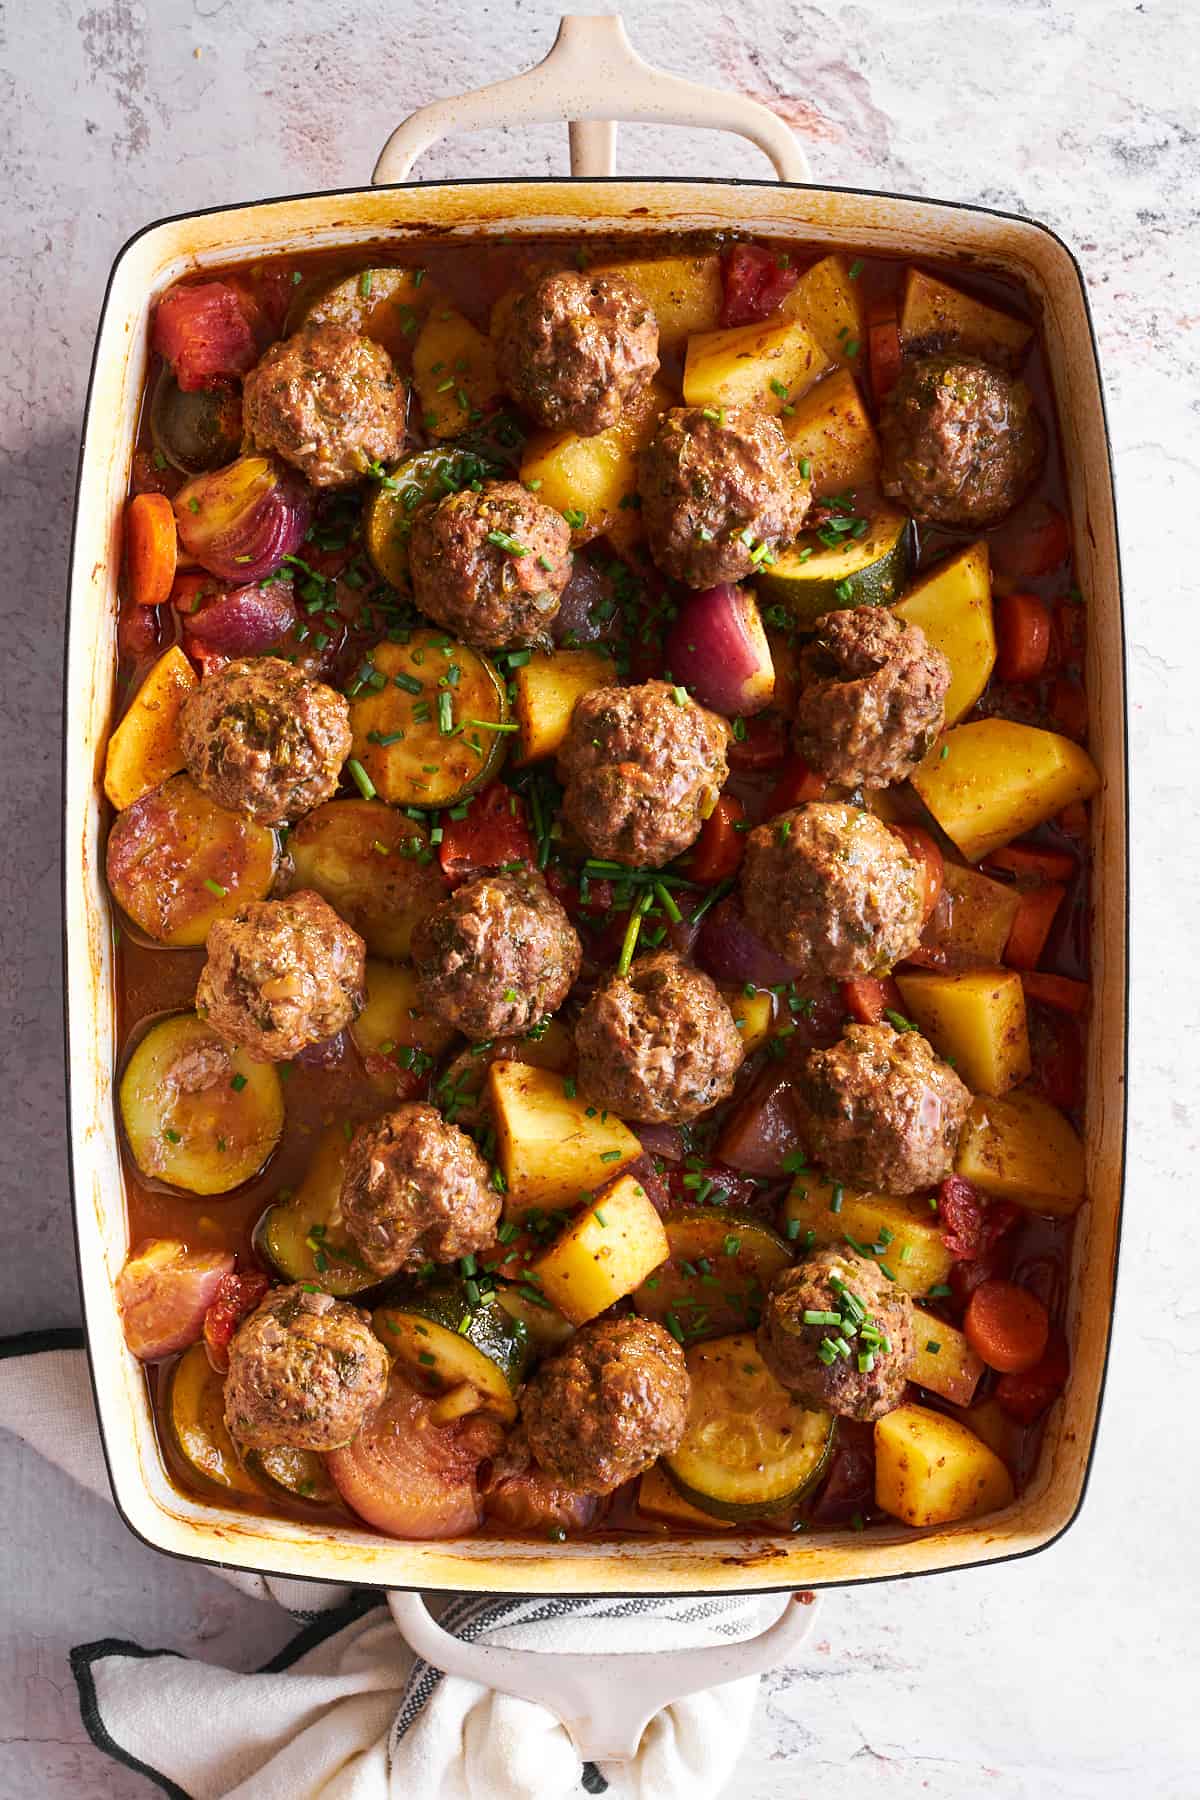
Beef Kofta Bake

Beef kofta bake.This Beef Kofta Bake recipe takes all of the traditional goodness of kofta and kicks it up a notch with…
Beef kofta bake.

This Beef Kofta Bake recipe takes all of the traditional goodness of kofta and kicks it up a notch with smoky paprika and spicy jalapeños. Plus, we’ve made it even easier to make by skipping the skewers and cooking everything over a bed of nutritious veggies. It’s a mouthwatering blend of savory spices, tender beef, and wholesome vegetables that will have everyone asking for more!

Beef kofta bake.

What Is Beef Kofta Bake?

Traditional beef kofta is a popular dish in the Middle East and India. It combines ground beef with warm spices and is skewered and grilled, similar to a kabob. 

For this recipe, we turned the classic dish into a more hands-off baked version that requires only a few minutes of prep. Instead of skewering and grilling the meat, we make simple meatballs that are baked with an array of veggies all in one dish. It’s a complete meal that’s as absolutely delicious as it is easy!

Ingredients You Need

  • Zucchinis – Zucchinis add a pop of color and healthy nutrients to the kofta bake.
  • Medium potatoes – We love using potatoes to make this dish nice and hearty. Yukon Gold or Russet potatoes are good options but you can use red potatoes, too.
  • Large carrot – Carrots add a bit of natural sweetness. Plus, they still retain a little crunchiness which adds texture to the bake.
  • Large red onion– Red onions bring a nice savory kick to the kofta bake — plus they add bright color!
  • Garlic cloves – Garlic gives the kofta an aromatic punch that makes your kitchen smell amazing and your kofta bake taste incredible.
  • Canned diced tomatoes – These tomatoes add a tangy twist to your kofta. 
  • Salt  – Salt brings out the best in all your ingredients. Be sure to divide it ahead of time for adding to the veggies first, then to the beef.
  • Pepper – Pepper adds a little kick without being overwhelming. Also measure it out separately so that it’s ready to be added to the vegetables and meat.
  • Smoked paprika – This is where the smoky magic happens! Smoked paprika gives your kofta a rich, earthy flavor.
  • Olive oil – A drizzle of olive oil adds a bit of flavor and heart-healthy fat.
  • Ground beef – The star of the show! Ground beef is what makes your kofta hearty and satisfying.
  • Chopped parsley – Parsley adds a pop of freshness and color. 
  • Chopped cilantro – Cilantro brings a bright, citrusy note to the kofta. It’s that extra layer of flavor that makes it irresistible.
  • Jalapeño – These little peppers add just the right amount of heat to your kofta without overpowering the other flavors.
  • Large egg – The egg is the binder that keeps everything together. It ensures your kofta meatballs stay perfectly formed while cooking.
  • Breadcrumbs – These crumbs do wonders for texture. They absorb excess moisture and give your kofta that tender, melt-in-your-mouth consistency.

How To Whip Up This Easy Beef Kofta Bake 

  1. Combine the veggies and seasoning. Add the zucchini, potatoes, carrots, red onion, garlic cloves, diced tomatoes, and paprika to a large baking dish. 
  2. Toss. Drizzle with oil and sprinkle with a portion of the salt and pepper, then toss until all of the ingredients are coated. 
  3. Mix the beef and seasonings. Place the ground beef, parsley, cilantro, jalapeño, egg, breadcrumbs, and remaining salt and pepper in a separate bowl. With your hands or a wooden spoon, combine the ingredients together. 
  4. Form. Make the meatballs and add them to the baking dish.
  5. Bake. Once all of the meatballs have been formed and placed in the dish, cover it with aluminum foil and bake. 
  6. Remove. When the vegetables are tender and the beef is cooked, remove the dish from the oven. 
  7. Rest and serve. Let the meatballs rest briefly before serving.
Close up image of beef kofta bake.

Ways to Switch Up Beef Kofta Bake

  • Squash – Instead of zucchini, try adding squash. The texture will stay the same but it will add bright yellow color to the dish. 
  • Tomatoes – Swap out the canned variety for fresh, small grape tomatoes.
  • Cilantro – If you don’t enjoy the taste of cilantro, try using Thai basil or more parsley. 
  • Heat – Want more spicy flavor? Increase the amount of jalapenos or sprinkle in some cayenne pepper powder.
A bowl of beef kofta bake with meatballs and veggies.

Can I Store Leftovers? 

What we love about this easy bake (outside of how delicious it is!) is that it’s easy to store which makes it perfect for meal prep! You can even store it all together in its original dish which cuts back on cleanup — just cover it with foil!

Store the kofta bake in the refrigerator for 3-4 days and reheat in the oven or in the microwave. 
Transfer the meat and veggies to a freezer-safe container or resealable plastic bag and store for up to 3 months. You can thaw it overnight in the fridge or just heat it straight from the freezer.

More Beefy Recipes

Want more beefy goodness in your recipe repertoire? Check out more of our easy and hearty beef recipes!

Slow Cooker Beef Stroganoff

Middle Eastern Crockpot Beef Stew

Beef Rolls

Hummus with Ground Beef

A baking dish full of beef kofta bake.
Print Recipe
3.15 from 7 votes

Beef Kofta Bake

This Beef Kofta Bake recipe takes all of the traditional goodness of kofta and kicks it up a notch with smoky paprika and spicy jalapeños!
Prep Time10 minutes
Cook Time1 hour 10 minutes
Total Time1 hour 20 minutes
Course: Main Course
Cuisine: middle eastern
Keyword: beef kofta bake, kofta bake
Servings: 6 servings
Author: Food Dolls

Ingredients

  • 2 zucchinis sliced
  • 2 medium potatoes peeled and cut into quarters
  • 1 large carrot sliced
  • 1 large red onion quartered
  • 10 garlic cloves
  • 1 can (16 ounces) diced tomatoes
  • 1 teaspoon salt divided
  • 1/2 teaspoon pepper divided
  • 1/2 teaspoon smoked paprika
  • 1 Tablespoon olive oil
  • 1 pound ground beef
  • 1/4 cup chopped parsley
  • 1/4 cup chopped cilantro
  • 1 jalapeño seeded
  • 1 large egg
  • 1/4 cup breadcrumbs

Instructions

  • Preheat the oven to 375°F.
  • In a large baking dish, toss together the sliced zucchinis, quartered potatoes, sliced carrot, quartered red onion, garlic cloves, diced tomatoes, 1/2 tsp salt, 1/4 tsp pepper, smoked paprika, and olive oil until the vegetables are evenly coated.
    2 zucchinis, 2 medium potatoes, 1 large carrot, 1 large red onion, 10 garlic cloves, 1 can, 1 teaspoon salt, 1/2 teaspoon pepper, 1/2 teaspoon smoked paprika, 1 Tablespoon olive oil
    Zucchini, bell peppers, onions, tomatoes, and spices in a baking dish.
  • In a separate bowl, combine the ground beef, chopped parsley, chopped cilantro, seeded jalapeño, remaining 1/2 tsp salt, remaining 1/4 tsp pepper, egg, and breadcrumbs. Mix until well combined.
    1 pound ground beef, 1/4 cup chopped parsley, 1/4 cup chopped cilantro, 1 jalapeño, 1 large egg, 1/4 cup breadcrumbs
    Beef kofta meatball mixture in a bowl.
  • Form the beef mixture into balls and place them on top of the vegetable mixture in the baking dish.
    Raw beef kofta meatballs over veggies in a baking dish.
  • Cover the baking dish with foil and bake in the preheated oven for 1 hour and 10 minutes, or until the beef is cooked through and the vegetables are tender.
    Beef kofta bake.

Nutrition

Serving: 1serving | Calories: 377kcal | Carbohydrates: 23g | Protein: 22g | Fat: 22g | Saturated Fat: 8g | Polyunsaturated Fat: 2g | Monounsaturated Fat: 10g | Trans Fat: 1g | Cholesterol: 204mg | Sodium: 549mg | Potassium: 847mg | Fiber: 3g | Sugar: 4g | Vitamin A: 2414IU | Vitamin C: 35mg | Calcium: 86mg | Iron: 4mg

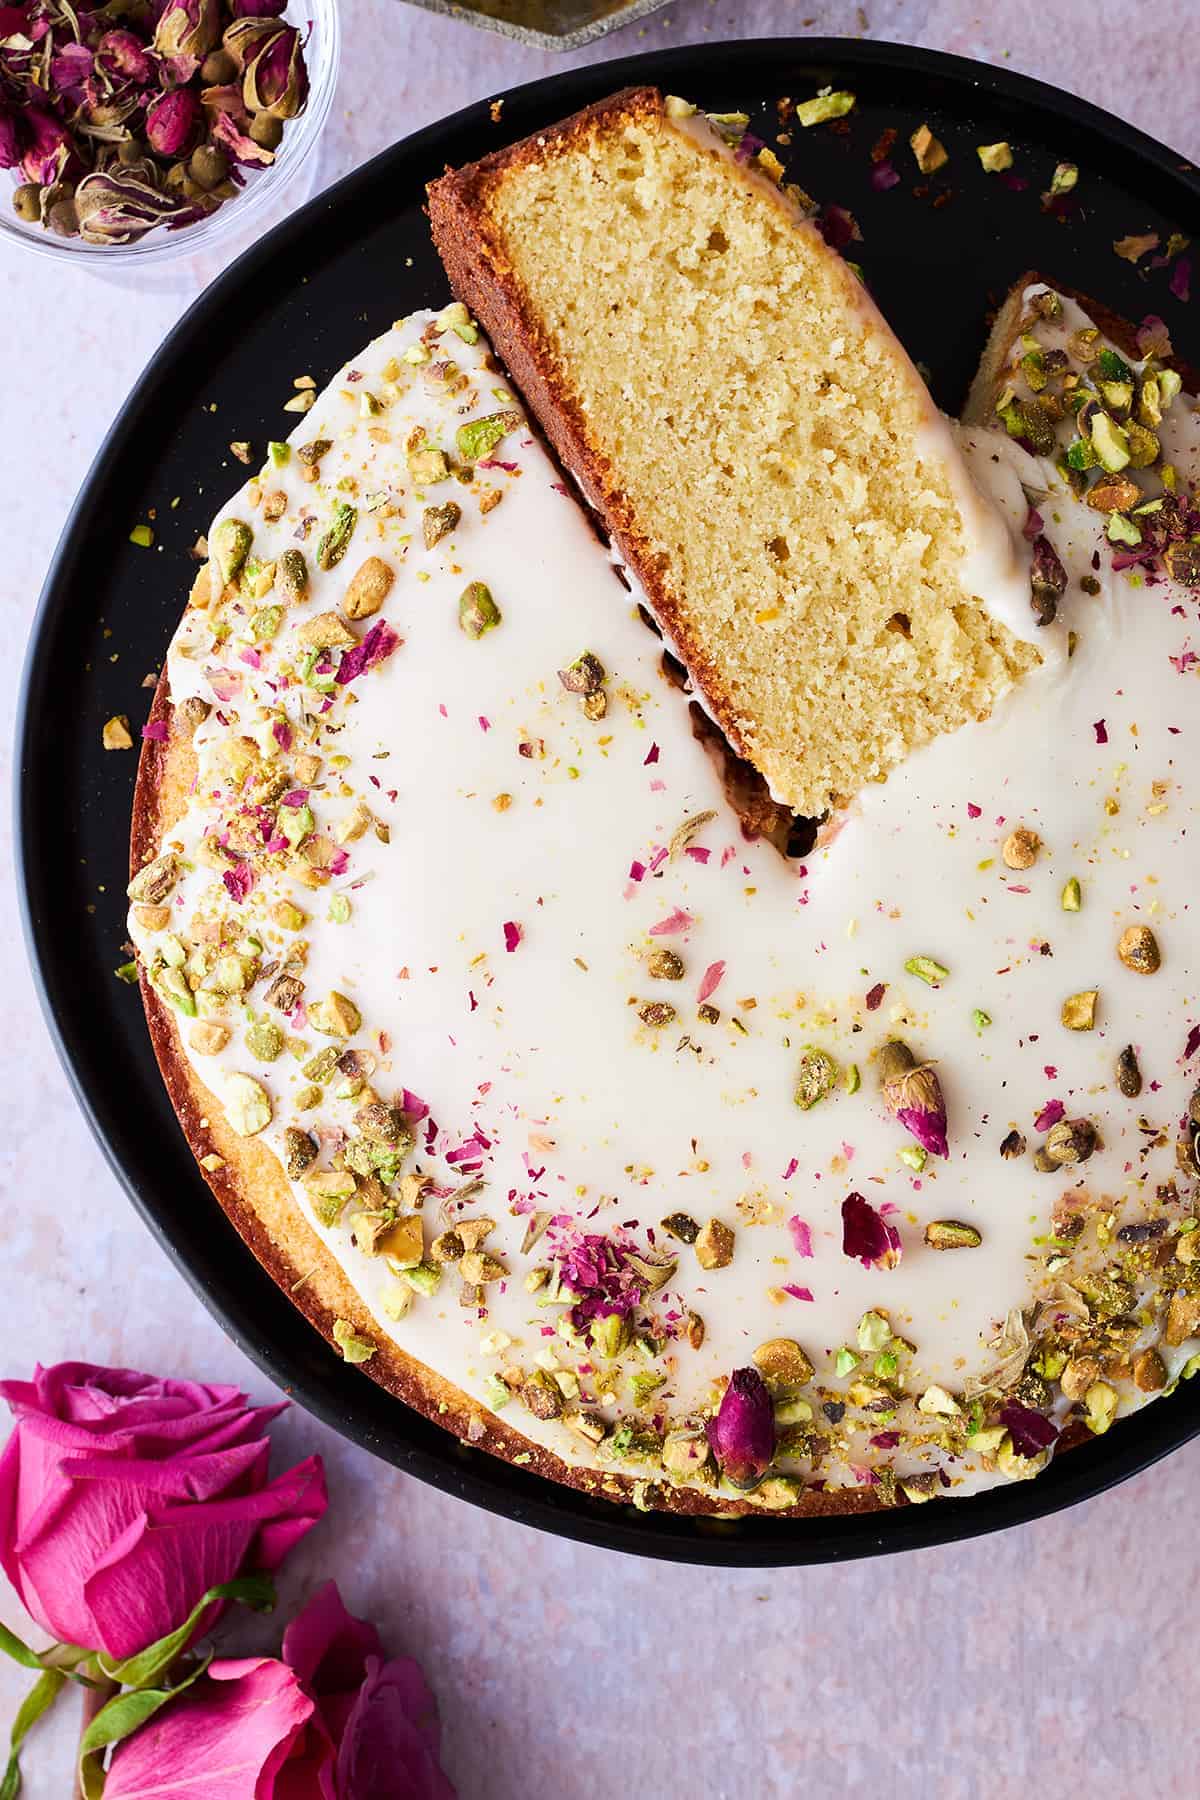
Persian Love Cake

Persian love cake with a piece on its side.Our Persian Love Cake recipe is nothing short of heavenly! This gorgeous cake features a light and subtly spiced batter…

Persian love cake with a piece on its side.

Our Persian Love Cake recipe is nothing short of heavenly! This gorgeous cake features a light and subtly spiced batter that’s a total treat for your taste buds. Then, it’s topped with a luscious orange citrus glaze, delicate rose petals, and crunchy crushed pistachios.

Perfect for special occasions or as a scrumptious everyday snack, our Persian love cake is as much a feast for your taste buds as it is for your eyes!

Persian love cake with a piece on its side.

What Is Persian Love Cake? 

A popular dessert, Persian love cake is a light, moist cake. Unlike any other desert, it is flavored with notes of bright citrus, warm cardamom and cinnamon, and floral rosewater. 

Then, it is finished with orange glaze, rose petals, and crushed pistachios. The result is a beautiful sweet cake that is packed full of flavor without being overpowering. 

What is the History of Love Cake? 

The exact origins of love cake are unknown, but there are many theories. One thought is that is an adaptation of Portuguese love cake which was transformed into semolina cake often served during Christmastime. 

From Sri Lanka, where the cake was turned into Semolina, the recipe is said to have made its way to Iran. There, it was flavored with rosewater. 

That said, many Iranians are not actually familiar with Persian love cake and only learn about it through Western influence. So, who knows how the cake actually came about!

Either way, we’re glad it did because its flavor is truly unlike anything else. The sweet, soft dessert is perfect for Mother’s Day, spring celebrations, Christmas, and every event in between! 

A Persian love cake topped with orange glaze, rose petals, and pistachios.

What Is Love Cake Made Of? 

Most of the ingredients in this recipe are baking staples that can easily be found at your local grocery store! Here’s an overview of what you need: 

For the Cake

  • Butter – We recommend using unsalted butter for baking. 
  • Sugar – Granulated sugar adds the perfect touch of sweetness to the batter. 
  • Eggs – These add a rich taste and help the cake hold its shape. 
  • Spices – Cardamom, ground cinnamon, and ground cloves create the warm flavor Persian love cake is known for.  
  • Flour – A combination of all-purpose flour and almond flour forms the base of the cake, keeping it light with a slightly earthy taste. 
  • Orange – Orange juice and orange zest infuse the batter with a bright, citrus flavor. 
  • Rose Water – This adds a floral taste. Find it in the baking or international food aisles of your local grocery store. Or, purchase rose flower water online
  • Yogurt – Full-fat plain yogurt adds a tender crumb and a delicious tangy flavor. 

For the Topping

  • Confectioner’s Sugar – Also known as powdered sugar. Granulated sugar will not work for the icing! 
  • Orange Juice – Freshly squeezed is best! 
  • Garnishes Dried rose petals and crushed pistachios create a bakery-worthy appearance! 
Persian love cake with pieces missing and one piece sliced.

Cake Directions So Simple You’ll Fall in Love! 

Before you begin, preheat your oven. Then, grease a springform pan, and line it with parchment paper

  1. Beat the butter and sugar. Add the butter and sugar to a large mixing bowl, and beat until fluffy. 
  2. Add the wet ingredients. Beat the eggs in one at a time, scraping the sides of the bowl in between. Then, mix in the yogurt, orange zest, orange juice, rose water, and vanilla extract. 
  3. Mix the dry ingredients. In a separate bowl, combine the all-purpose flour, almond flour, baking powder, cardamom, cinnamon, cloves, and salt. 
  4. Combine the wet and dry ingredients. Working slowly, mix the dry ingredients in with the bowl of wet ingredients just until smooth. 
  5. Bake. Pour the batter into the prepared cake pan, spreading it out evenly. Bake until the cake is set and a toothpick inserted into the center comes out clean. 
  6. Cool. Transfer the pan to a wire rack, and let the cake cool slightly. Then, invert it onto a platter to cool completely. 
  7. Prepare the topping. In a small bowl, whisk together the confectioner’s sugar and fresh orange juice until smooth. 
  8. Garnish. Spoon the icing over the cake. Then, sprinkle the garnishes on top. 
We earn a commission if you make a purchase, at no additional cost to you.
03/20/2024 05:20 pm GMT

Tips for Success

  • Avoid Overmixing. Be careful to combine the ingredients just until smooth. Continuing to mix will result in a dense, tough cake. 
  • Don’t Use Almond Meal. Almond meal and almond flour are not the same things! Almond meal still contains some of the almond skins, which will impact the texture of your cake. 
  • Cool the Cake. Do not ice your cake before it cools completely! Doing so will cause the glaze to run all over the place. 
Side view of an iced Persian love cake slice.

Why Did My Love Cake Sink in the Middle? 

Overmixing the batter is the most common cause for your cake to sink in the middle. Be sure to mix just until smooth, and allow it to cool completely!

How to Store

Store leftover cake in an airtight container in the refrigerator for up to five days. Allow it to come to room temperature before serving. 

More Cake Recipes 

If you’re like us, and can’t ever have too many cake recipes up your sleeve, here are some more of our favorites!

Persian love cake with a piece on its side.
Print Recipe
5 from 1 vote

Persian Love Cake

Make this easy Persian love cake recipe with simple ingredients for a light, fluffy cake full of floral, citrus flavor!
Prep Time15 minutes
Cook Time45 minutes
Total Time1 hour
Course: Dessert
Cuisine: middle eastern, Persian
Keyword: persian love cake, persian love cake recipe
Servings: 12 servings
Author: Food Dolls

Ingredients

Cake:

  • 1 3/4 sticks 14 Tablespoons unsalted butter, at room temperature
  • 1 1/4 cup granulated sugar
  • 4 large eggs at room temperature
  • 1/2 cup full-fat plain yogurt
  • Zest of 1 orange
  • 3 Tablespoons fresh squeezed orange juice
  • 1 Tablespoon rose water optional
  • 2 teaspoons vanilla extract
  • 1 1/2 cups all-purpose flour sifted
  • 1 3/4 cups almond flour
  • 1 1/2 teaspoons baking powder
  • 1 teaspoon ground cardamom
  • 1/2 teaspoon ground cinnamon
  • 1/8 teaspoon ground cloves
  • 1/2 teaspoon sea salt

Icing:

  • 1 1/4 cups confectioners’ sugar
  • 1-2 Tablespoons fresh orange juice

Garnish:

  • Chopped pistachios and dried rose petals optional

Instructions

  • Preheat the oven to 325 degrees Fahrenheit. Grease a 9-inch springform pan, and line it with parchment paper.
  • In a large mixing bowl, using a hand mixer or stand mixer, beat the butter and granulated sugar until fluffy.
    1 3/4 sticks, 1 1/4 cup granulated sugar
  • Add the eggs one at a time, beating well after each addition. Then mix in the yogurt, orange zest, orange juice, rose water (if using), and vanilla extract until combined.
    4 large eggs, 1/2 cup full-fat plain yogurt, Zest of 1 orange, 3 Tablespoons fresh squeezed orange juice, 1 Tablespoon rose water, 2 teaspoons vanilla extract
  • In a separate bowl, combine the all-purpose flour, almond flour, baking powder, cardamom, cinnamon, cloves, and salt.
    1 1/2 cups all-purpose flour, 1 1/2 teaspoons baking powder, 1 teaspoon ground cardamom, 1/2 teaspoon ground cinnamon, 1/8 teaspoon ground cloves, 1/2 teaspoon sea salt, 1 3/4 cups almond flour
  • Gradually add the dry ingredients to the wet ingredients, mixing until just combined. Be careful not to overmix.
  • Pour the batter into the prepared pan and spread it evenly.
  • Bake for about 45 minutes, or until the cake is set and a toothpick inserted into the center comes out clean.
  • Remove the cake from the oven and transfer the pan to a wire rack. Let it cool slightly and invert onto a platter and cool completely.
  • In a small bowl, whisk together the confectioners’ sugar and fresh orange juice until smooth.
    1 1/4 cups confectioners’ sugar, 1-2 Tablespoons fresh orange juice
  • Spoon the icing over the cooled cake. Garnish with chopped pistachios and dried rose petals.
    Chopped pistachios and dried rose petals

Nutrition

Serving: 1serving | Calories: 263kcal | Carbohydrates: 51g | Protein: 7g | Fat: 10g | Saturated Fat: 1g | Polyunsaturated Fat: 0.4g | Monounsaturated Fat: 1g | Trans Fat: 0.01g | Cholesterol: 56mg | Sodium: 177mg | Potassium: 71mg | Fiber: 2g | Sugar: 23g | Vitamin A: 104IU | Vitamin C: 4mg | Calcium: 89mg | Iron: 2mg

Dried Fruit Compote Drink (Khoshaf)

Glasses of dried fruit compote drink.Wait until you try this delightful dried fruit compote drink, also known as khoshaf! Imagine a burst of sweet and…
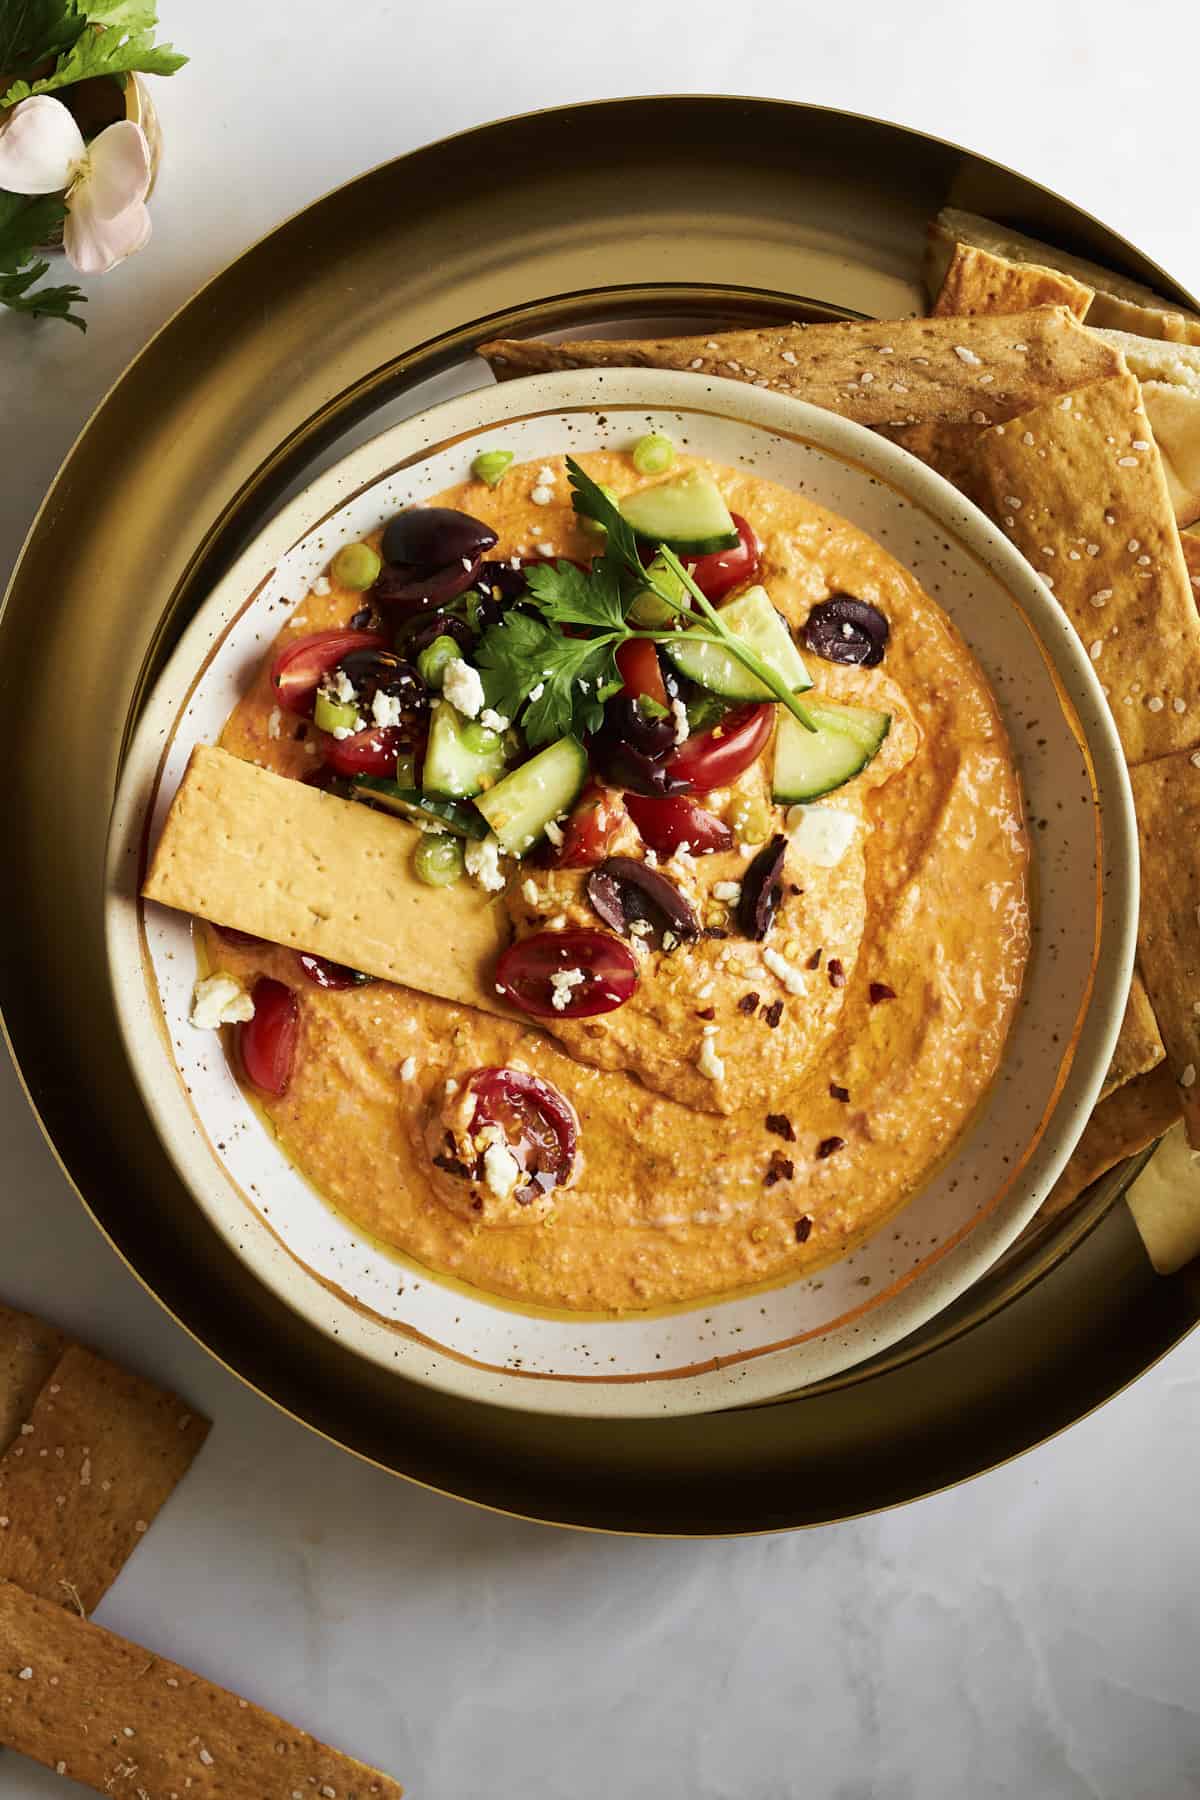
Glasses of dried fruit compote drink.

Wait until you try this delightful dried fruit compote drink, also known as khoshaf! Imagine a burst of sweet and fruity flavors swirling together to create the most irresistible drink that you won’t want to put down.

Khoshaf is perfect before or after fasting for Ramadan or serving during special holiday celebrations. And the best part? It’s super easy to whip up with just a few simple steps!

A glass of dried fruit compote drink.

What is a Dried Fruit Compote Drink? 

Khoshaf is a dried fruit compote drink made with an assortment of dried fruits and water. Left to steep, the natural sugars bleed into the water, making it sweet and flavorful. 

Somewhere between a drink and a snack, this recipe is popular during Ramadan, especially in our homes! Typically, it is enjoyed for suhoor before the day begins. Or, it can be eaten after a long day of fasting. 

It is meant to be good fuel to sustain you throughout the day or to recharge in the evening. Beautiful in appearance, it’s a recipe we always look forward to sipping! 

Ingredients You Need

Below is an overview of the ingredients and instructions for this recipe. Be sure to scroll down to the recipe card below for the complete details! 

  • Dried Fruit –  We use a combination of dried dates, dried apricots, dried prunes, dried figs, and golden raisins. Feel free to mix and match any combination you like best! 
  • Nuts – Pine nuts, slivered almonds, or walnuts serve as a garnish, adding lots of crunch and a nutty taste. 
  • Optional Sugar – Some people like to serve their khoshaf with a sprinkle of sugar or a drizzle of honey. We find the dates make it sweet enough, but it’s an option if you prefer recipes on the sweeter side! 
Glass of dried fruit compote.

Chop, Cover, Serve! The Easiest Recipe You’ll Ever Make

  1. Chop all the fruit into equal-sized pieces. 
  2. Transfer the ingredients to a large bowl, and add enough water to cover the pieces completely. 
  3. Cover, and set the mixture aside until the fruit is soft. 
  4. Divide the fruit compote into cups or bowls, and garnish with nuts. 
Stem Glasses
$32.99 ($2.06 / Count)
We earn a commission if you make a purchase, at no additional cost to you.
03/20/2024 07:30 pm GMT

Tips for Success

  • Make sure all your fruit is dry! Otherwise, it won’t steep properly, and you’ll just have mushy fruit water. 
  • Swap the water for milk if you prefer a slightly richer flavor and creamier consistency. 
  • Add the nuts to the fruit mixture, and allow them to steep if you prefer a softer texture. 
  • Use room temperature water, not cold water, or the fruit won’t soften. 
A wine glass full of khoshaf.

Common Questions About This Dried Fruit Compote Drink

What is the difference between stewed fruit and fruit compote? 

A compote features fruit cooked in water and sugar. Stewed fruit features fruit cooked slowly in water. So, they’re essentially the same things! 

Can I make this recipe ahead of time? 

This recipe is best made at least six to eight hours in advance so the fruit has plenty of time to soften. 

How do you make dried fruit taste better? 

Feel free to add sugar or honey to suit your preference for sweetness! Some people also like to add fruit juice, orange blossom water, or vanilla extract. 

More Ramadan Recipes

Get ready to tantalize your taste buds with some more of our favorite Ramadan recipes. From savory dishes to sweet treats, we’ve got a feast waiting for you!

Dried fruit compote drink in a glass.
Print Recipe
5 from 3 votes

Dried Fruit Compote Drink (Khoshaf)

Make this Middle Eastern dried fruit compote drink for a sweet breakfast, snack, or dessert full of nutrients and flavor!
Prep Time5 minutes
Steep Time8 hours
Total Time8 hours 5 minutes
Course: Breakfast, Dessert
Cuisine: middle eastern
Keyword: dried fruit compote, khoshaf
Servings: 6 servings
Author: Food Dolls

Equipment

Ingredients

  • 12 dried dates pitted and diced (not fresh)
  • 6 dried apricots chopped into 4 pieces
  • 6 dried prunes cut in half
  • 6 cups dried figs
  • 1/3 cup golden raisins
  • 1/2 cup pine nuts or slivered almonds, or walnuts. (See note)

Instructions

  • Chop all the fruit until all the same size. Transfer to a large bowl. Add enough room temperature water just until all the fruit is covered. Cover and let stand for 6-8 hours or until all the fruit has softened.
    12 dried dates, 6 dried apricots, 6 dried prunes, 6 cups dried figs, 1/3 cup golden raisins
  • Serve in a glass cup or bowl and garnish with optional pine nuts or almonds for garnish.
    1/2 cup pine nuts

Notes

*Some people like to add the nuts with the fruit to allow it to soften with the fruit. We prefer to add them right before eating so they stay crunchy. 
Feel free to add a sprinkle of sugar or a drizzle of honey if you prefer a sweeter recipe. 
All the fruits MUST be dried!

Nutrition

Serving: 1serving | Calories: 554kcal | Carbohydrates: 125g | Protein: 8g | Fat: 9g | Saturated Fat: 1g | Polyunsaturated Fat: 4g | Monounsaturated Fat: 2g | Sodium: 17mg | Potassium: 1398mg | Fiber: 18g | Sugar: 94g | Vitamin A: 386IU | Vitamin C: 2mg | Calcium: 262mg | Iron: 4mg