Peach Jam

Homemade Peach Jam in glass jars, ready to enjoy!You can make the best Peach Jam recipe using fresh (or frozen) peaches and it will keep in the freezer for up to one year. If you’re hooked on homemade jam, try my Blackberry Jam, Chia Seed Jam, Orange Marmalade, Strawberry Jam, or Raspberry Jam! How to make Peach Jam: Peel Peaches and Prep Containers:…

Homemade Peach Jam in glass jars, ready to enjoy!

You can make the best Peach Jam recipe using fresh (or frozen) peaches and it will keep in the freezer for up to one year.

If you’re hooked on homemade jam, try my Blackberry Jam, Chia Seed Jam, Orange Marmalade, Strawberry Jam, or Raspberry Jam!

Homemade Peach Jam in glass jars, ready to enjoy!

Peach Freezer Jam is a no-brainer.

I’m telling you, this is the EASIEST method for making jam; no special equipment, no processing in a steamer or water-bath. You just need peaches, sugar and pectin, and in a few short minutes you’ll have peach jam that will keep in the freezer for one year.

And, don’t miss our free peach jam labels for gifting friends, neighbors etc (or use for a bake sale). We give freezer jam and homemade bread for teacher appreciation each year.

How to make Peach Jam:

Peel Peaches and Prep Containers: Have clean glass or plastic containers and lids ready. Use my easy method of peeling peaches, and remove the pits.

Dice Peaches or pulse in food processor until diced. Measure exactly 3 cups of peaches into a large heat-proof bowl then add one cup of sugar. Stir well, then allow to rest for 5 minutes. Repeat with remaining sugar, stirring well and letting it rest in between. Stir in lemon juice then let rest for 10 minutes. Taste, and if the sugar is still grainy at all, place the bowl over a small saucepan of simmering water, stirring often, to help the sugar dissolve.

Two images showing how to make an easy peach jam recipe by pouring sugar on top of diced peaches, then stirring as the sugar dissolves.

Add Pectin: Whisk water and pectin in a saucepan and bring to a boil, stirring constantly. Boil for 1 minute then remove from heat and whisk into peach mixture. Stir jam constantly for 3 minutes. The jam should start to slightly thicken–if it seems overly runny (or you had very juice peaches) you can repeat pectin process and add ½ or a full additional box of pectin, if needed.

Two images showing how to make peach jam with sure-jell pectin being poured in a small saucepan with water, then the mixture being poured on top of peach jam.

Fill Jars and Enjoy: Pour jam into jars or plastic containers, leaving ½ inch headspace. Wipe rims of jars, cover with lids. Rest at room temperature for 24 hours before storing in the freezer.

Two images showing peach preserves being poured into jars then after they are filled.

Storing Instructions:

Freeze for up to one year, or refrigerate for up to 3-4 weeks.

Enjoy Jam With:

Follow me for more great recipes

Homemade Peach Jam in glass jars, ready to enjoy!
Print

Peach Freezer Jam

Our favorite Peach Freezer Jam recipe uses fresh or frozen peaches and can be kept in the freezer for up to a year! It is so easy to make you will never go back to store-bought.
Course Side Dish, Snack
Cuisine American
Prep Time 40 minutes
Cook Time 5 minutes
Total Time 45 minutes
Servings 56
Calories 68kcal
Cost 10

Equipment

Ingredients

Instructions

  • Gather containers: make sure they are clean and dry. Plastic or glass freezer-safe containers will work.
  • Prep Peaches: Peel and pit peaches (here's my method for how to easily peel peaches). Finely dice peaches and measure exactly 3 cups of diced peaches into a large bowl.
  • Dissolve Sugar: Add one cup of sugar to the bowl and stir well. Rest for 5 minutes. Repeat with remaining sugar, adding it a little at a time and resting in between, to help the sugar dissolve completely. Stir in lemon juice. Let mixture rest for 10 min. Taste the mixture and if it's still grainy from the sugar don't proceed until the sugar has dissolved! (If needed, you could place the heat-proof bowl or peaches over a saucepan of warm water on the stove. Gently stir the mixture and the heat will help the sugar to dissolve.)
  • Add Pectin: Whisk water and pectin in a saucepan and bring to a boil, stirring constantly. Boil for 1 minute then remove from heat and whisk into peach mixture. Stir jam constantly for 3 minutes. The jam will start to thicken, and will thicken more as it rests. If it seems overly runny (maybe you had very juice peaches) you can repeat pectin process and add ½ or a full additional box of pectin, if needed.
  • Fill containers, leaving ½ inch headspace. Wipe rim of jars clean and cover with lids. Let stand at room temperature for 24 hours before freezing. This allows the jam time to set up, but feel free to enjoy one of the jars right away.
  • Store jam in the refrigerator for up to 3 weeks or freeze for up to 1 year.

Video

Notes

Yield: Makes about 7 cups
Serving Size for nutritional label: 2 Tablespoons
For Frozen Peaches: Allow peaches to thaw completely, then dice and use as instructed.
Troubleshooting Runny Peach Jam: If your peaches are extra juicy and your jam hasn’t set up with one box of pectin, repeat step 4 and cook another package of pectin and add half or all of the mixture to thicken the jam more. 
Free Printable Peach Jam labels with these sheets make a great gift!
More Jam Recipes: Strawberry, Raspberry, Blackberry, Chia Jam, Orange Marmalade
Recipe adapted from Surejell

Nutrition

Calories: 68kcal | Carbohydrates: 18g | Protein: 0.1g | Fat: 0.1g | Saturated Fat: 0.002g | Polyunsaturated Fat: 0.01g | Monounsaturated Fat: 0.01g | Sodium: 3mg | Potassium: 11mg | Fiber: 0.2g | Sugar: 17g | Vitamin A: 27IU | Vitamin C: 1mg | Calcium: 1mg | Iron: 0.1mg

Follow Me

Get recipe ideas weekly!

I originally shared this recipe in August 2013. Updated July 2019 and July 2024.

Easy Homemade Fruit Pops

Homemade fruit popsicles made with sliced strawberries, bananas, and apple juice.These healthy Fruit Pops are made with just three ingredients. They’re an easy and fun summer treat you can feel good about giving your kids. Looking for more frozen desserts? Try our Ice Cream Sandwiches, Chocolate Milkshake, or Orange Ice Cream! How to make Fruit Pops: Combine Ingredients: Add fruit to your popsicle mold (I…

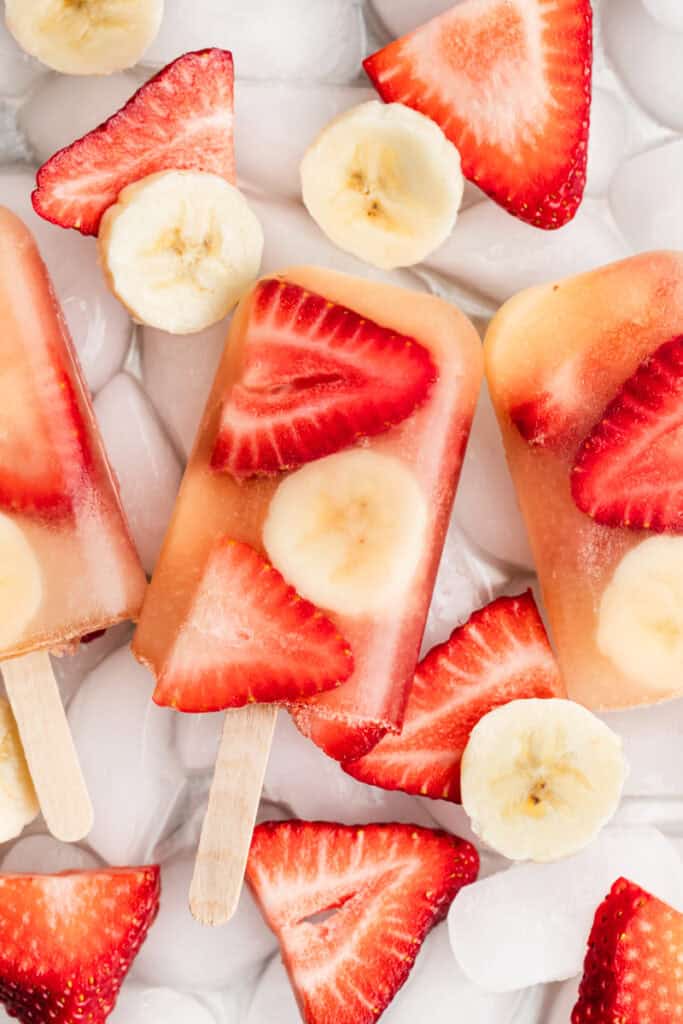
Homemade fruit popsicles made with sliced strawberries, bananas, and apple juice.

These healthy Fruit Pops are made with just three ingredients. They’re an easy and fun summer treat you can feel good about giving your kids.

Looking for more frozen desserts? Try our Ice Cream Sandwiches, Chocolate Milkshake, or Orange Ice Cream!

Homemade fruit popsicles made with sliced strawberries, bananas, and juice.

Keep Cool with 3-Ingredient Fruit Pops

Not only are they delicious, but making fruit popsicles with your kids makes for a fun and easy summer activity, too. They’re healthier than store-bought popsicles, with nothing artificial; just fresh fruit and juice. I use these popsicles trays from Amazon.

How to make Fruit Pops:

Combine Ingredients: Add fruit to your popsicle mold (I use this one). Fill the mold with apple juice, leaving at least ⅛ in headspace and place the popsicle stick inside. Freeze fruit popsicles for at least 6 hours or overnight.

Two images showing how to make fruit pops by adding fresh fruit to a popsicle mold, then after pouring in apple juice and adding the lids and popsicle sticks.

More Healthy Snacks:

Follow me for more great recipes

Homemade fruit popsicles made with sliced strawberries, bananas, and apple juice.
Print

Homemade Fruit Popsicles

These healthy Fruit Pops are made with just three ingredients. They're an easy and fun summer treat you can feel good about giving your kids.
Course Snack
Cuisine American
Prep Time 10 minutes
Freeze 3 hours
Total Time 3 hours 10 minutes
Servings 6
Calories 35kcal

Equipment

Ingredients

  • 1 large banana* , cut into small pieces (frozen bananas work too)
  • 4 large fresh strawberries* sliced or cut into small pieces
  • ½ – 1 cups apple juice* no sugar added, or other favorite fruit juice

Instructions

  • Assemble: Add fruit to your popsicle mold (I use this one), alternating different kinds of fruit until the molds are filled almost to the top. Gently fill the mold with apple juice, leaving at least ⅛ in headspace and place the popsicle stick inside.
  • Freeze for at least 6 hours or overnight.

Video

Notes

Fruit: any type of fresh or frozen fruit will work.
Juice: Any type of fruit juice will work.

Nutrition

Calories: 35kcal | Carbohydrates: 9g | Protein: 0.4g | Fat: 0.2g | Saturated Fat: 0.03g | Polyunsaturated Fat: 0.1g | Monounsaturated Fat: 0.02g | Sodium: 1mg | Potassium: 130mg | Fiber: 1g | Sugar: 6g | Vitamin A: 17IU | Vitamin C: 13mg | Calcium: 6mg | Iron: 0.2mg

Follow Me

Get recipe ideas weekly!

*I first shared this recipe in August 2013. Updated January 2019 and June 2024.

Taco Seasoning

A jar with homemade Taco Seasoning being scooped with a wooden teaspoon.We always opt for making this easy Taco Seasoning recipe because it’s healthier, cheaper, and more flavorful than any packet from the store. It only takes 5 minutes to stir together a few simple spices. You can use this easy taco seasoning in a variety of Mexican recipes, like Taco Salad, Taco Pie, Mexican Pizza…

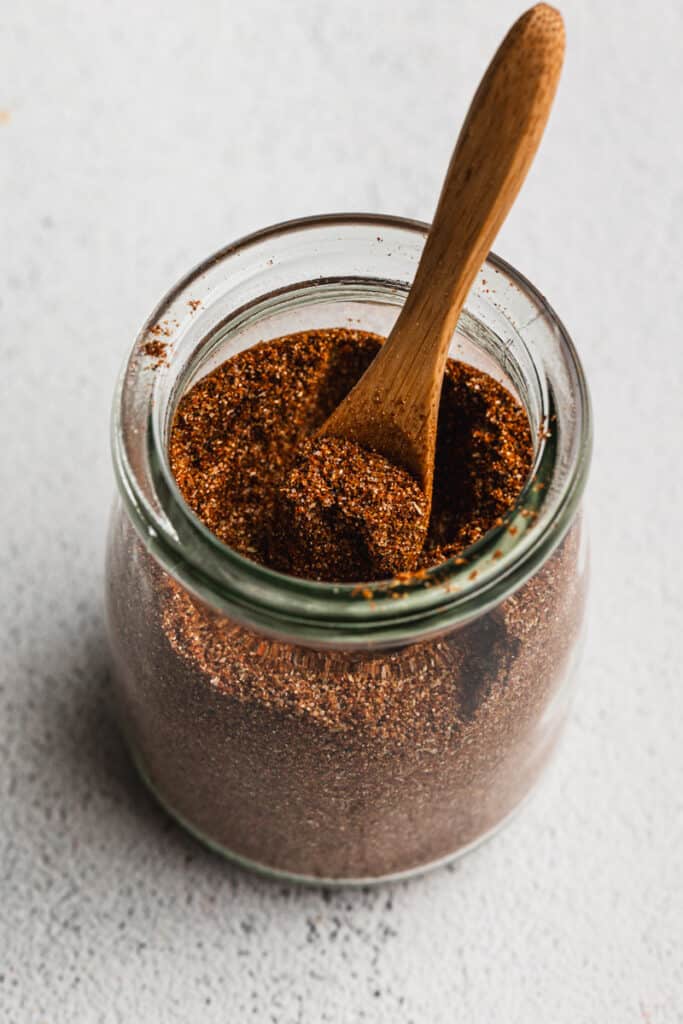
A jar with homemade Taco Seasoning being scooped with a wooden teaspoon.

We always opt for making this easy Taco Seasoning recipe because it’s healthier, cheaper, and more flavorful than any packet from the store. It only takes 5 minutes to stir together a few simple spices.

You can use this easy taco seasoning in a variety of Mexican recipes, like Taco Salad, Taco Pie, Mexican Pizza and Walking Tacos.

A jar with homemade Taco Seasoning being scooped with a wooden teaspoon.

Homemade Taco Seasoning is the flavor hero of our Taco Night.

The two main reasons I like to make my own taco seasoning are: 1. it’s healthier than store bought, with ingredients you recognize and have on hand. 2. It’s so much more flavorful than anything in a packet! So let’s ditch the seasoning packets that often have unhealthy fillers and we’ll take our Taco Tuesdays to the next level! And if you’re a true taco enthusiast, you absolutely must make our easy baked tacos, birria tacos or tacos al pastor.

The Cast of Characters:

All of the ingredients needed to make homemade taco seasoning.

How to make Taco Seasoning:

Combine: Mix all ingredients in a bowl. Voila!

Use 2 Tablespoons of mix for one seasoning packet called for in a recipe. Refer to recipe card notes for single packet serving measurements.

Two images showing easy taco seasoning with all the spices stirred together in a bowl, then after it's in a spice jar with a scoop of seasoning in a teaspoon.

Store taco seasoning in an airtight container in your spice cupboard for up to 6 months.

Follow me for more great recipes

A jar with homemade Taco Seasoning being scooped with a wooden teaspoon.
Print

Taco Seasoning

This homemade Taco Seasoning recipe is completely natural, healthy, and made in 5 minutes with simple spices from your pantry. It's cheaper and tastes better than any packet from the store.
Course Main Course, Side Dish
Cuisine American, Mexican
Prep Time 5 minutes
Total Time 5 minutes
Servings 4
Calories 64kcal
Cost 3

Ingredients

Instructions

  • Mix all spices together until well combined. (See note for one single packet recipe).
  • Use 2 tablespoons in place of one "packet" of taco seasoning, or to season one pound of meat.
  • Store taco seasoning in an airtight container in a cool, dry place, for up to 6 months.

Notes

Yield: about ½ cup taco seasoning. Serving size: 2 Tablespoons.
For ONE Packet Taco Seasoning replacement: 
  • 1 tablespoon chili powder
  • ¼ teaspoon garlic powder
  • ¼ teaspoon onion powder
  • Pinch of cayenne pepper
  • ¼ teaspoon dried oregano
  • ½ teaspoon paprika
  • 1 ½ teaspoons ground cumin
  • 1 teaspoon salt
  • ½ teaspoon black pepper

Nutrition

Calories: 64kcal | Carbohydrates: 11g | Protein: 3g | Fat: 3g | Saturated Fat: 0.5g | Polyunsaturated Fat: 1g | Monounsaturated Fat: 1g | Sodium: 2575mg | Potassium: 401mg | Fiber: 6g | Sugar: 1g | Vitamin A: 4981IU | Vitamin C: 1mg | Calcium: 96mg | Iron: 5mg

Follow Me

Get recipe ideas weekly!

Photography by Nikole from The Travel Palate.

I originally shared this recipe June 2020. Updated June 2024.

7-Layer Dip

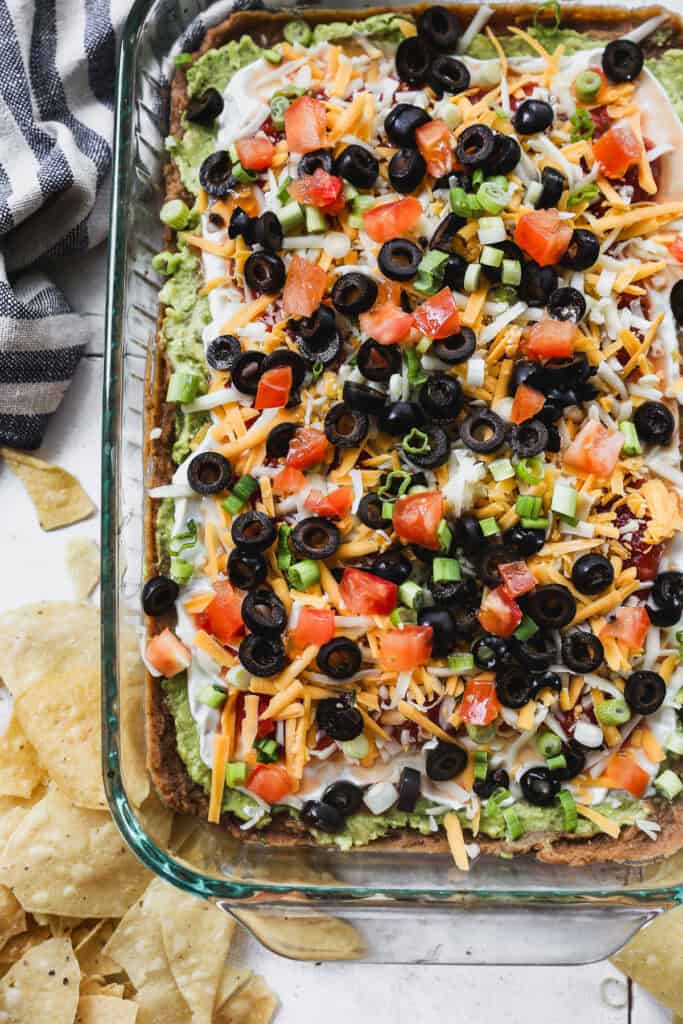
A 7 layer bean dip recipe with seasoned refried beans, guacamole, sour cream, salsa, cheese, olives, and green onions in a 9x13 pan, ready to serve.This easy 7 Layer Dip recipe has seasoned refried beans, guacamole, sour cream, salsa, cheese, olives, and green onion. It is a total classic that everyone is always excited about. Dip recipes are guaranteed party pleasers, like our Buffalo Chicken Dip, Whipped Goat Cheese, Spinach Artichoke Dip, or Easy Homemade Salsa. How to Make 7-Layer…

A 7 layer bean dip recipe with seasoned refried beans, guacamole, sour cream, salsa, cheese, olives, and green onions in a 9x13 pan, ready to serve.

This easy 7 Layer Dip recipe has seasoned refried beans, guacamole, sour cream, salsa, cheese, olives, and green onion. It is a total classic that everyone is always excited about.

Dip recipes are guaranteed party pleasers, like our Buffalo Chicken Dip, Whipped Goat Cheese, Spinach Artichoke Dip, or Easy Homemade Salsa.

A 7 layer bean dip recipe with seasoned refried beans, guacamole, sour cream, salsa, cheese, olives, and green onions in a 9x13 pan, ready to serve.

7-Layer Bean Dip is layers of perfection, ready in minutes.

I think a good ol’ fashioned 7-layer dip is just about the easiest and quickest dip to make. I love how easy it is to prep, with ingredients I usually keep on hand. Everyone loves it, and my kids even eat it with a spoon instead of chips.

How to Make 7-Layer Bean Dip:

Flavor Beans: if using canned refried beans, it’s crucial to give them some extra flavor. We season them with cumin, garlic powder, and chili powder. My mom always used to squirt a little of this green sauce in there too. There are no strong rules here – just make them taste good! It will make a big difference in the end result.

Mash Avocado: Add 1 Tablespoon of lime or lemon juice to prevent the avocado from going brown.

Two images showing seasoning being added to refried beans, and a lemon being squeezed on top of a bowl of mashed avocado.

Layer: Spread the refried beans into an even layer in a platter, then cover with mashed avocados, sour cream, salsa, shredded cheese, olives, and sprinkle the green onion on top. You are welcome to add any more of your favorite toppings. Refrigerate this easy 7 layer dip until ready to serve with tortilla chips, or feel free to eat it plain!

Four images showing a 7 layer dip recipe being layered.

More Easy Party Appetizers:

Follow me for more great recipes

A 7 layer bean dip recipe with seasoned refried beans, guacamole, sour cream, salsa, cheese, olives, and green onions in a 9x13 pan, ready to serve.
Print

7 Layer Bean Dip

This easy 7 Layer Dip recipe is a total classic for a reason. It's easy to make, inexpensive and everyone loves it.
Course Appetizer
Cuisine Mexican
Prep Time 15 minutes
Total Time 15 minutes
Servings 10
Calories 239kcal
Cost $10

Ingredients

  • 2 cans refried beans (black or pinto)
  • 2 teaspoons chili powder
  • 1 teaspoon ground cumin
  • 1/2 teaspoon garlic powder
  • 3 avocados , peeled and seeded
  • 1 Tablespoon lime juice (or lemon juice)
  • 8 oz sour cream
  • 3/4 cup salsa
  • 1 1/2 cups shredded Mexican blend cheese , cheddar or Monterrey Jack
  • 6 ounces sliced black olives
  • 2 green onions , chopped
  • 1 roma tomato diced, for garnish (optional)
  • tortilla chips , for serving

Instructions

  • Season beans: Add the refried beans to a mixing bowl. Season with chili powder, cumin and garlic powder. Taste and add more seasoning if desired. Spread beans into a single layer on a large serving plate or in a 9×13'' pan.
  • Mash avocado: Add avocado and lemon/lime juice to a bowl and mash well with a fork. Spread into an even layer, over the beans.
  • Layer: Spread cream into an even layer, over the avocado. Dollop small spoonfuls of salsa next. Sprinkle with cheese, olives, and lastly, green onion. We also like to add a diced tomato for garnish (optional).
  • Refrigerate until ready to serve (can be made a day in advance). Serve with tortilla chips.

Video

Notes

Make-Ahead Instructions: 7-layer dip can be made 1 day ahead of time, covered tightly with plastic wrap and stored in the refrigerator.

Nutrition

Calories: 239kcal | Carbohydrates: 15g | Protein: 10g | Fat: 16g | Saturated Fat: 5g | Polyunsaturated Fat: 2g | Monounsaturated Fat: 9g | Trans Fat: 0.001g | Cholesterol: 17mg | Sodium: 803mg | Potassium: 432mg | Fiber: 7g | Sugar: 4g | Vitamin A: 598IU | Vitamin C: 8mg | Calcium: 180mg | Iron: 1mg

Follow Me

Get recipe ideas weekly!

I originally shared this recipe September 2017. Updated February 2021 and June 2024.

Arroz con Leche

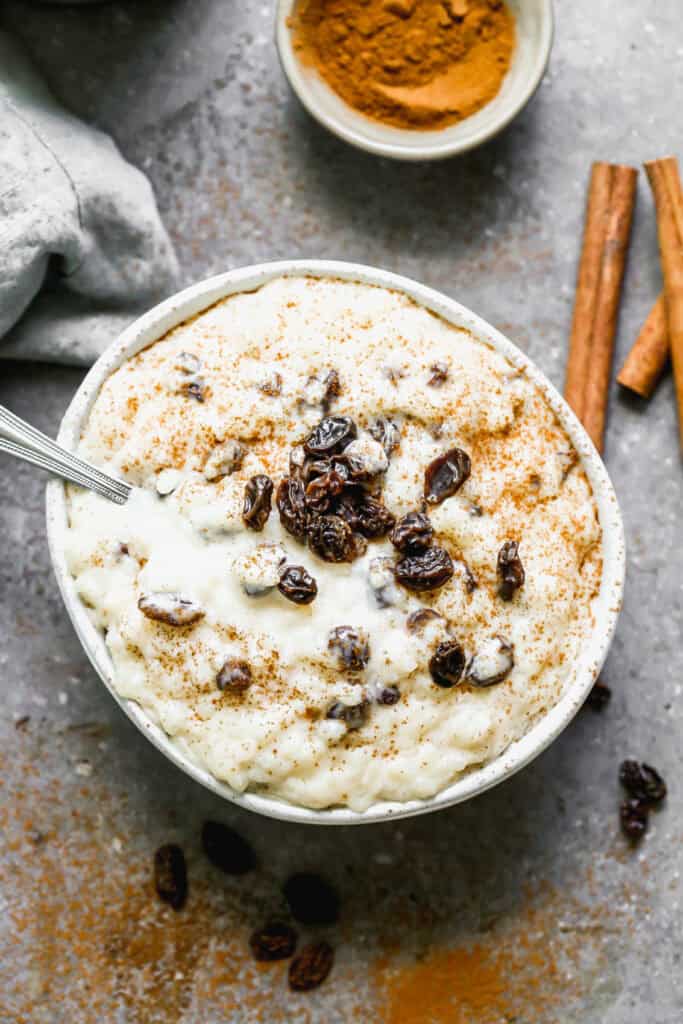
Arroz con Leche receta in a bowl with a dusting of cinnamon sugar and topped with some raisins.Our creamy Arroz con Leche recipe is the epitome of comfort food and so easy to make with simple pantry ingredients. We enjoy it hot or cold! If you love pudding recipes, this Panna Cotta, Banana Pudding, and Tapioca Pudding are some of my favorites! How to make Arroz con Leche: Cook Rice in Milk:…

Arroz con Leche receta in a bowl with a dusting of cinnamon sugar and topped with some raisins.

Our creamy Arroz con Leche recipe is the epitome of comfort food and so easy to make with simple pantry ingredients. We enjoy it hot or cold!

If you love pudding recipes, this Panna Cotta, Banana Pudding, and Tapioca Pudding are some of my favorites!

Arroz con Leche receta in a bowl with a dusting of cinnamon sugar and topped with some raisins.

Enjoy the Warmth of Creamy Arroz con Leche!

During my first Spanish class in middle school my teacher taught us a song called “arroz con leche” and made us some to try. I think of her every time I make this recipe.

I’m a huge rice pudding fan, and love both the American-style baked rice pudding and this Mexican rice pudding. The biggest difference between them is the way the rice is cooked. American rice pudding typically uses leftover rice and is baked or cooked on the stove. Arroz con leche is made with raw rice that cooks right in the creamy, cinnamon milk mixture and often contains sweetened condensed milk.

How to make Arroz con Leche:

Cook Rice in Milk: Wash rice until water runs clear (to remove the outer starch layer). Combine milk, cinnamon stick, and salt in a medium saucepan over medium heat then bring to a low boil. Add rice and simmer, stirring occasionally, until rice is tender, about 1 hour and 15 minutes. Add raisins to a bowl then cover with very hot water to allow them to “plump” for a few minutes. Drain and set aside.

Two images showing how to make arroz con leche by simmering the ingredients in a saucepan, before and after it's thickened.

Finish: Remove cinnamon stick from cooked rice mixture. Stir in sugar and raisins then cook for 10-15 minutes more, stirring often to avoid burning. Remove from heat then stir in butter, condensed milk, and vanilla. Serve warm or cold, sprinkled with ground cinnamon on top!

Two images showing raisins being mixed into an easy arroz con leche recipe and then after it's done and ready to serve.

Storing Instructions:

To Store: This Mexican rice pudding can be kept in the fridge in an airtight container for up to 3 days. For best results, reheat on low in a pot on the stove. Add a splash of milk if it’s too thick.

Recipe Variations:

  • Use leftover rice: Heat 3 cups of cooked rice, 2 cups whole milk, and 1 can sweetened condensed milk in a saucepan.  Boil and simmer 15 minutes then remove from heat and stir in raisins, vanilla, and 1 tsp cinnamon.
  • Cuban style arroz con leche– Stir in zest from 1 lemon.
  • Mix-Ins: stir in coconut, nuts, or dried fruit.
  • Brown Rice: Follow my instructions for my Brown Rice Pudding.

Follow me for more great recipes

Arroz con Leche receta in a bowl with a dusting of cinnamon sugar and topped with some raisins.
Print

Arroz con Leche

This creamy and delicious Arroz con Leche recipe is made with simple pantry ingredients, and impressive enough to serve guests. It's the epitome of comfort food, served hot or cold.
Course Dessert
Cuisine Mexican, Spanish
Prep Time 5 minutes
Cook Time 1 hour 30 minutes
Total Time 1 hour 35 minutes
Servings 8
Calories 341kcal
Cost 5

Ingredients

  • 1 cup short or medium grain rice
  • 4 1/2 cups whole milk
  • 12 oz can evaporated milk
  • pinch of salt
  • 1 Mexican cinnamon stick
  • 1/2 cup granulated sugar or sub brown sugar or honey
  • 1/2 cup raisins
  • 1 Tablespoon butter
  • 1/4 cup sweetened condensed milk
  • 1 teaspoon vanilla extract

Instructions

  • Wash rice until the water runs clear.
  • To a medium saucepan over medium heat add milk, cinnamon stick, and salt. Bring to a low boil. Add rice and simmer, stirring occasionally, until rice is tender, about 1 hour 15 minutes.
  • Plump raisins: Add raisins to a bowl and cover with very hot water to allow them to “plump” for a few minutes. Drain and set aside.
  • Finish: Remove cinnamon stick from cooked rice mixture. Stir in sugar and raisins and cook for 10-15 minutes more, stirring often to avoid burning. If it seems too runny, continue cooking and it will thicken further.  If you would like it creamier, stir in a few tablespoons of milk.
  • Remove from heat then stir in butter, condensed milk and vanilla. Serve warm or cold, sprinkled with ground cinnamon on top.
  • Store leftovers in the fridge for a few days. Reheat on low in a pot on the stove. Add a splash of milk it needed, to thin it out.

Video

Notes

Mix-In Ideas: Add your choice of coconut, nuts, or dried fruit.
Brown Rice: Follow my instructions for my Brown Rice Pudding.

Nutrition

Calories: 341kcal | Carbohydrates: 59g | Protein: 11g | Fat: 7g | Saturated Fat: 4g | Polyunsaturated Fat: 0.3g | Monounsaturated Fat: 2g | Trans Fat: 0.1g | Cholesterol: 25mg | Sodium: 127mg | Potassium: 481mg | Fiber: 1g | Sugar: 29g | Vitamin A: 459IU | Vitamin C: 1mg | Calcium: 323mg | Iron: 2mg

Follow Me

Get recipe ideas weekly!

I originally shared this recipe April 2020. Updated April 2022 and June 2024.

Air Fryer Tofu

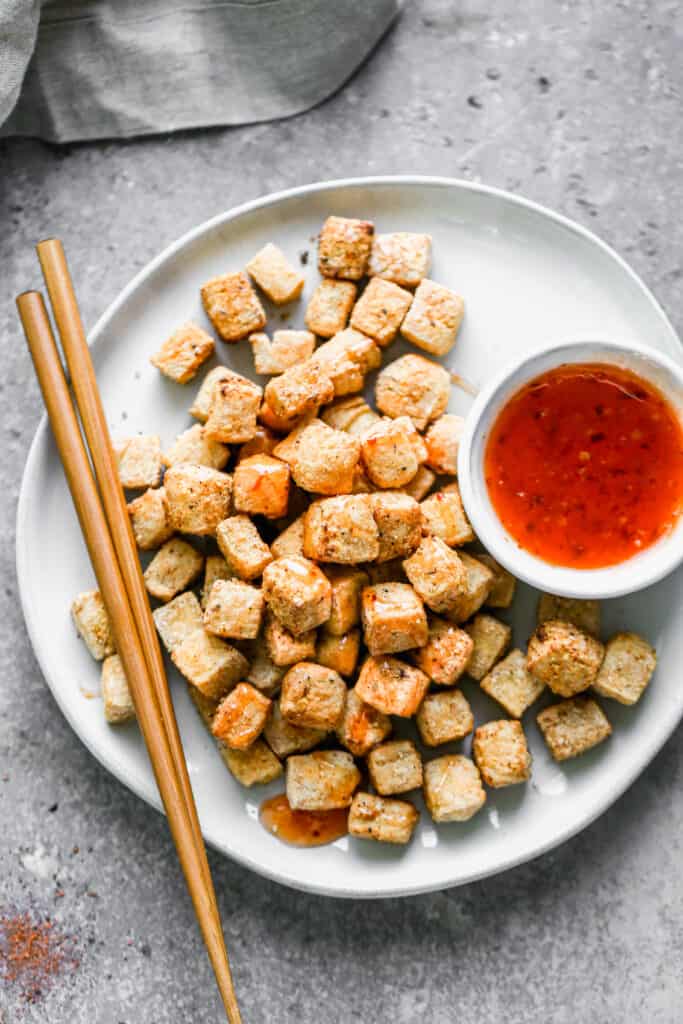
A plate of crispy air fryer tofu with chopsticks and a side of sweet and sour sauce.This 10 minute crispy Air Fryer Tofu is the perfect snack or great to add in to your favorite vegetarian bowl or entrée. It’s so versatile and can be seasoned in so many ways. My kids love eating these tofu nuggets! Looking for more vegetarian recipes? You have to try Vegetarian Stuffed Peppers, Quinoa Burger,…

A plate of crispy air fryer tofu with chopsticks and a side of sweet and sour sauce.

This 10 minute crispy Air Fryer Tofu is the perfect snack or great to add in to your favorite vegetarian bowl or entrée. It’s so versatile and can be seasoned in so many ways. My kids love eating these tofu nuggets!

Looking for more vegetarian recipes? You have to try Vegetarian Stuffed Peppers, Quinoa Burger, or Veggie Enchiladas!

A plate of crispy air fryer tofu with chopsticks and a side of sweet and sour sauce.

Air Fryer Tofu is a must try!

What I love most about this Air Fryer Tofu is you’re left with crispy little protein nuggets that are a blank canvas for seasoning and serving in so many different ways. Toss them into pad thai, curry, top on a Buddha Bowl, in a wrap, or on a salad. We also enjoy dipping air fryer tofu nuggets in sweet and sour sauce, ranch dressing, or even BBQ sauce.

The air fryer gives tofu the perfect crispy outside without all the extra fat and calories of deep frying. I’d love to teach you how to use your air fryer, if you need any help!

How to Make Air Fryer Tofu:

Press the Tofu: We want to remove as much liquid from the tofu as possible, so it can get crispy in the air fryer. Cut your tofu slab in half lengthwise and wrap each half in several paper towels. Lay the halves side by side and place a large cutting board on top. Place something heavy on the cutting board (a block of knives, cast iron pan, a few cans) and rest for 15 minutes to allow liquid to be pressed out of the tofu.

Two images showing how to press tofu with just a cutting board and paper towels.

Cut and Season: Cut tofu slabs into ½’’ cubes or smaller (the smaller the cubes, the crispier the tofu will air fry). Mix cornstarch, salt, pepper, garlic powder, and onion powder in a ziplock bag, tofu and gently toss to coat on all sides.

Two images showing pressed tofu being cut into cubes and then put in a bag with seasoning to make easy air fryer tofu nuggets.

Air Fry: Preheat air fryer to 400 degrees F. Place tofu in single layer in air fryer. Spray the top of the tofu with cooking spray, air fry for 5 minutes, flip, and repeat once or twice more, until it’s crisp to your liking.

Two images showing how to make tofu crispy by using an air fryer, then after they are golden, crispy, and ready to eat.

Make Ahead and Freezing Instructions:

To Make Ahead: Tofu can be pressed then cut up to a day or two in advance. Once pressed, store in airtight container in the refrigerator.

To Store: Cooked tofu can be stored covered in the fridge for up to 4 days. Reheat in the air fryer or in a hot pan for a few minutes.

Follow me for more great recipes

A plate of crispy air fryer tofu with chopsticks and a side of sweet and sour sauce.
Print

Air Fryer Tofu

This 10 minute crispy Air Fryer Tofu is the perfect snack or great to add in to your favorite vegetarian bowl or entrée. It's so versatile and can be seasoned in so many ways. My kids love eating these tofu "nuggets"!
Course Appetizer, main, Snack
Cuisine American
Diet Vegan, Vegetarian
Prep Time 30 minutes
Cook Time 10 minutes
Total Time 40 minutes
Servings 4
Calories 80kcal
Cost $3

Ingredients

Instructions

  • Press Liquid From Tofu: cut your tofu slab in half lengthwise and wrap each half in several paper towels. Lay the halves side by side and place a large cutting board over top.  Place something heavy on the cutting board (a block of knives, cast iron pan, cans) and let it rest for 15 minutes, to press some of the liquid out. The more liquid removed, the crispier it will get.
  • Mix Seasoning: Add cornstarch, salt, pepper, garlic powder, and onion powder to a ziplock bag.
  • Cut Tofu: Cut tofu slabs into ½’’ cubes or smaller (the smaller the cubes, the crispier it will get). Add tofu to seasoning mixture and gently toss to coat on all sides.
  • Air Fry: Pre-heat air fryer to 400 degrees F. Place tofu in single layer (trying to separate them so that they don’t touch) in air fryer, cooking in multiple batches if needed. Spray the top of the tofu with cooking spray and air fry for 5 minutes. Open the basket, flip tofu, spray tops again and air fry 3-5 more minutes or until crisp to your liking.
  • Serve Air Fryer Tofu with dipping sauce or add to your favorite bowl, burrito, wrap, or salad.

Video

Notes

Seasonings: tofu will take on the flavors of whatever seasoning is added. Play around with seasoning to pair the crispy tofu with many different types of cuisine, like Mediterranean (season with Za’atar, Harissa or sumac), Italian (season with Italian Seasonings), Cajun (season with Slap Ya Mama cajun seasoning) and Thai or Indian (season with Curry powders)
Make Ahead Instructions: You can press and cut the Tofu up to a day or two in advance. Store in airtight container in the refrigerator.
Storage Instructions: Store cooked tofu covered in the fridge for up to 4 days. Reheat in the air fryer or in a hot skillet for a few minutes, until crisp.

Nutrition

Calories: 80kcal | Carbohydrates: 8g | Protein: 7g | Fat: 2g | Saturated Fat: 0.3g | Polyunsaturated Fat: 1g | Monounsaturated Fat: 0.3g | Sodium: 354mg | Potassium: 162mg | Fiber: 0.3g | Sugar: 1g | Vitamin A: 1IU | Vitamin C: 0.1mg | Calcium: 33mg | Iron: 1mg

Follow Me

Get recipe ideas weekly!

I originally shared this recipe March 2021. Updated June 2024.

Ginger Shots

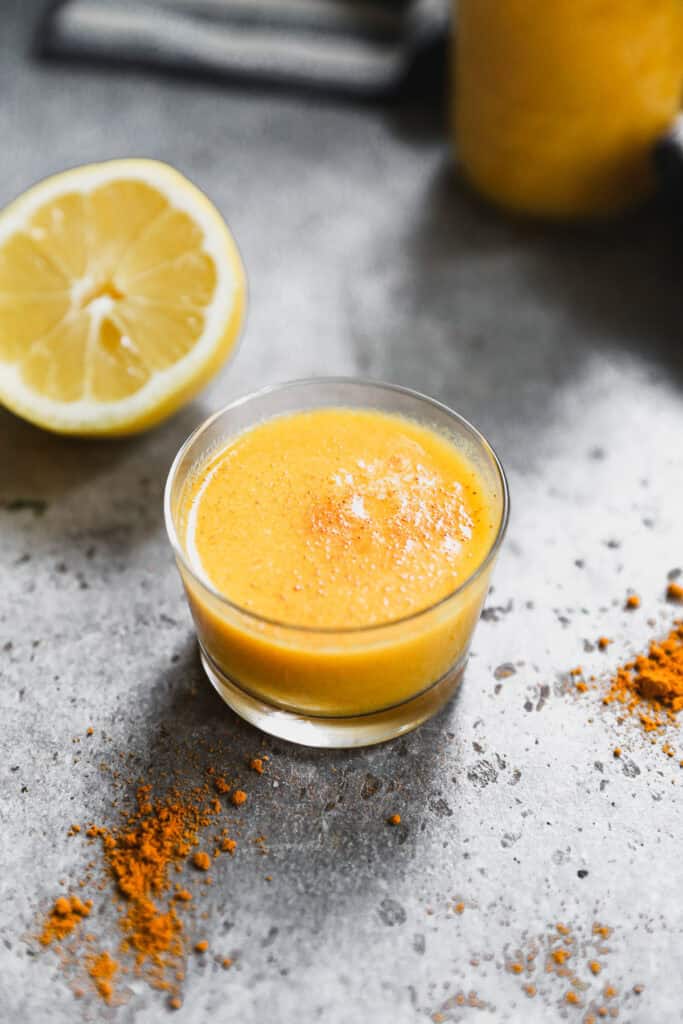
A homemade Ginger Shot recipe in a glass with turmeric dusted on top, ready to enjoy.This Ginger Shots recipe is ready in just 10 minutes and costs a small fraction of what it does at the store. It’s fresh, flavorful, and delicious! If you also love yummy drinks to start your day, you have to try our Green Smoothie, Strawberry Banana Smoothie, Vanilla Protein Shake, or Chocolate Protein Shake! How…

A homemade Ginger Shot recipe in a glass with turmeric dusted on top, ready to enjoy.

This Ginger Shots recipe is ready in just 10 minutes and costs a small fraction of what it does at the store. It’s fresh, flavorful, and delicious!

If you also love yummy drinks to start your day, you have to try our Green Smoothie, Strawberry Banana Smoothie, Vanilla Protein Shake, or Chocolate Protein Shake!

Lemon Ginger Shots recipe in a little glass, ready to enjoy.

Homemade Ginger Shots: Your Secret Weapon Against Overpriced Wellness

We’re a little obsessed with these Ginger Shots that give your immune system a healthy boost (you can read what the experts have to say about why Ginger Shots are good for you, here), and our homemade recipe is SO much more affordable. These are often $3 each at the grocery store. With this recipe, you can make five days of ginger shots for a fraction of the cost. Plus, no fancy juicer needed; just a blender and strainer and you’ll be enjoying your ginger shot in 10 minutes. You just became your own wellness boss.

How to make Ginger Shots:

Blend: Add pineapple, ginger, and water to a blender and blend on high speed until smooth.

Two images showing pineapple, ginger, and water being blended for easy ginger shots.

Strain through a fine mesh strainer. Stir in lemon juice, ground turmeric, and add a dash of cayenne, if you like a little kick of heat. Enjoy homemade ginger shots in a 2 oz portion, 1x daily. Store leftovers in the fridge for up to 7 days.

Two images showing how to make ginger shots by straining the mixture then serving in a small glass with a dusting of turmeric.

Storage Instructions:

To Store: Keep leftovers in the fridge for up to 7 days. Enjoy a 2oz portion each day.

More Healthy Recipes:

Follow me for more great recipes

A homemade Ginger Shot recipe in a glass with turmeric dusted on top, ready to enjoy.
Print

Ginger Shots

We love starting our day with these homemade Ginger Shots, made in just 10 minutes and they cost a small fraction of the store-bought counterpart. What a flavorful and delicious way to boost your immune system.
Course Beverage
Servings 5
Calories 38kcal

Ingredients

  • 2 cups pineapple , fresh, chopped
  • 10 grams fresh ginger , peeled and chopped
  • 1/4 cup water
  • 3 Tbsp fresh lemon juice
  • 1 teaspoon ground turmeric
  • 1 dash cayenne pepper , optional

Instructions

  • Add pineapple, ginger, and water to a blender and blend on high speed until smooth. Strain through a fine mesh strainer. Stir in lemon juice, ground turmeric, and add a dash of cayenne, if desired.
  • To serve, enjoy a 2 oz portion, 1x daily. Store leftovers in the fridge for up to 7 days.

Notes

Yield: 10oz (1 ¼ cups)
Serving Size: 2oz (makes 5, two oz portions)

Nutrition

Calories: 38kcal | Carbohydrates: 10g | Protein: 0.5g | Fat: 0.2g | Saturated Fat: 0.03g | Polyunsaturated Fat: 0.04g | Monounsaturated Fat: 0.02g | Sodium: 2mg | Potassium: 100mg | Fiber: 1g | Sugar: 7g | Vitamin A: 47IU | Vitamin C: 35mg | Calcium: 11mg | Iron: 0.4mg

Follow Me

Get recipe ideas weekly!