Banana Cream Pie

Classic Banana Cream Pie with a cookie crumb crust, vanilla pudding, fresh bananas, and fresh whipped cream is the treat you need right now.

Classic Banana Cream Pie with a cookie crumb crust, vanilla pudding, fresh bananas, and fresh whipped cream is the treat you need right now.

This Classic Banana Cream Pie is from Erin Jean McDowell’s STUNNING new MASTERPIECE - The Book on Pie (affiliate link). This book has something for everyone from brand new beginners to experienced bakers looking to up their game.

There are recipes for everything from perfect dough to some of the most beautiful decorative crusts, juicy fruit fillings, and towering gorgeous toppings I’ve ever seen. For my first bake from the book, I wanted to choose a classic and also something with PUDDING and whipped cream. Because, hello, pudding is an incredibly delicious food that doesn’t get enough credit.

Erin’s version of this classic has a roll out crust, but had some chocolate cookies and biscoff to use up (and I didn’t have the patience to chill pie dough) so I went the crumb crust route, but I don’t think Erin would mind. The book is made to mix and match crusts, toppings, and fillings to your hearts content, and every recipe has amazing troubleshooting tips and variations too. Happy Pie Baking everyone!


Classic Banana Cream Pie

Excerpted from THE BOOK ON PIE © 2020 by Erin Jeanne McDowell. Photography © 2020 by Mark Weinberg. Reproduced by permission of Houghton Mifflin Harcourt. All rights reserved. 

MAKES: ONE 9-INCH/23-CM PIE

DIFFICULTY: MEDIUM

FILLING

452 g / 2 cups whole milk

118 g / 1/2 cup heavy cream

150 g / 3/4 cup granulated sugar

37 g / 1/3 cup cornstarch

3 g / 3/4 teaspoon fine sea salt

56 g / 2 large eggs

64 g / 3 large egg yolks

28 g / 1 ounce / 2 tablespoons unsalted butter

10 g / 2 teaspoons vanilla extract 

One 9-inch / 23-cm pie crust (see below), blind-baked, and cooled completely

450 g / 3 or 4 medium bananas, peeled and thickly sliced

Full Batch of Classic Whipped Cream (page 111/below)

1.     Make the filling: In a medium pot, bring the milk and heavy cream, to a simmer over medium heat, stirring occasionally.

2.     Meanwhile, in a medium bowl, whisk the granulated sugar, cornstarch, and salt to combine. Add the eggs and yolks and whisk well to combine.

3.     When the milk mixture comes to a simmer, pour about one quarter of it into the eggs, whisking constantly to temper them. Pour this mixture back into the pot, whisking constantly. Reduce the heat to medium-low, switch to a silicone spatula, and cook, stirring constantly, until the mixture thickens and large bubbles break the surface. Remove from the heat and stir in the butter until it’s melted and the pudding is smooth. Stir in the vanilla.

4.     Strain the pudding into the cooled pie crust and spread into an even layer. Cover the filling with plastic wrap placed directly against the surface and refrigerate until fully cooled and set, at least 2 hours (or up to 24 hours).

5.     When ready to serve, remove the plastic wrap and arrange the bananas in an even layer on top of the pie, overlapping the slices so they are well packed together. Spread, spoon, or pipe the whipped cream topping on top. 

MAKE AHEAD AND STORAGE

The crust can be blind-baked up to 24 hours head. The pie can be prepared through step 4 up to  24 hours ahead and kept refrigerated. Store leftovers in the refrigerator in an airtight container.

 Basic Crumb Crust

MAKES: ONE 9-INCH/23-CM PIE

DIFFICULTY: EASY

Crumb crusts are even easier than press-in cookie crusts. You don’t even have to bake them—see the variation at right. The crumbs can be made out of cookies, crackers, cereal, pretzels, even potato chips! Sometimes sugar or other flavorings are added to the crumbs (here the sugar is optional), and then fat (usually melted butter) is added to bind the mixture to form a crust. The crumbs can be coarse, for a crunchier texture, or finer, for a smoother texture. Different base ingredients will behave differently, so the first time I test a crumb crust with a new ingredient, I always have a little extra on hand in case I need more crumbs, or a little extra melted butter, should it be needed.

Crumb crusts don’t generally require chilling before baking, but you can refrigerate for up to 1 hour or freeze for 15 minutes, if desired, to firm them up before baking. I’m also including information in a chart on page 40 to help you adapt this easy recipe for any pan size.

 210 g / 1¾ cups cookie, cereal, chip, or cracker crumbs (I used half chocolate cookies and half biscoff -Yossy)

Up to 50 g / ¼ cup granulated sugar (optional) (I skipped it because my cookies were very sweet - Yossy)

2 g / ½ teaspoon fine sea salt

85 g / 3 ounces / 6 tablespoons unsalted butter, melted, plus more if needed

1.     In a medium bowl, stir the crumbs, sugar, if using, and salt together to combine. Stir in the melted butter and mix to combine. The crust should easily hold together in clumps when you press it together between your fingers (if it doesn’t, add a little more melted butter, 14 g /  1 tablespoon at a time, until it does).

2.     Press the crust evenly into the bottom and up the sides of an ungreased 9-inch / 23-cm pie plate: First make an even layer in the bottom of the pan, then press the rest of the crumbs up the sides (or halfway up the sides—see page 61). Sometimes I use the bottom of a small dry measuring cup to help press the crust in evenly; this is especially helpful in the corners of the pan.

3.     Preheat the oven to 350°F / 175°C (don’t use a Baking Steel/stone when baking a crumb crust). To parbake the crust, bake (no docking or pie weights required) for 10 to 12 minutes, until it begins to lightly brown at the edges (or, for darker crumbs, smells lightly toasty). To blind-bake the crust, bake for 15 to 17 minutes, until it is deeply golden brown and/or smells toasty.

PIE PEP TALK

What to Do When a Crumb Crust Shrinks: One of the most common problems I’ve seen with crumb crusts is that they can shrink or slump down the side of the pie plate when the crust is parbaked. Luckily, this is easily corrected. If you notice that your crust is starting to shrink, remove it from the oven and use a crust tamper (see page 20) or a small metal measuring cup to press the crust that slumped down back up the sides of the pie plate. If this happens consistently when you make crumb crusts, try tamping them down more aggressively and/or refrigerating for 30 minutes before baking.

Classic Whipped Cream

MAKES: 141, 283, OR 422 G / 1, 3, OR 4 CUPS, DEPENDING ON THE BATCH YOU CHOOSEDIFFICULTY: 

DIFFICULTY: EASY

It’s never a bad idea to serve pie with plenty of whipped cream. Think your pie is sweet enough? You can leave the sugar out—ain’t nothin’ wrong with plain ol’ whipped cream. For a luxurious twist, try the mascarpone variation below.

 FULL BATCH (for generously covering the whole pie)

235 g / 1 cup heavy cream

50 g / 1/4 cup granulated sugar

5 g / 1 teaspoon vanilla extract (optional)

1.     In the bowl of a stand mixer fitted with the whip attachment, whip the cream on medium-low speed until it begins to thicken, 1 to 2 minutes. Increase the speed to medium and add the sugar in a slow, steady stream, then continue to whip to medium peaks. Add the vanilla, if using, and mix to combine.

 MAKE AHEAD AND STORAGE

Plain whipped cream is best made just before it is used, but you can intentionally under-whip the cream (to just under soft peaks), then finish by whipping by hand when you’re ready to serve. It will hold this way for up to 4 hours. The mascarpone variation can be made up to 6 hours ahead and held in the refrigerator. Whip a few times gently to refresh before using.


Excerpted from THE BOOK ON PIE © 2020 by Erin Jeanne McDowell. Photography © 2020 by Mark Weinberg. Reproduced by permission of Houghton Mifflin Harcourt. All rights reserved. 


The Spring Supper Salad

Greetings, friends! For fun I am resurrecting one of the blog posts I wrote back in 2010 – a warm butter bean salad bowl, garlic-roasted carrots and wild rice. Why I am re-publishing a decade-old recipe? Well, for one I thought that there are a…

The post The Spring Supper Salad appeared first on My New Roots.

Greetings, friends! For fun I am resurrecting one of the blog posts I wrote back in 2010 – a warm butter bean salad bowl, garlic-roasted carrots and wild rice. Why I am re-publishing a decade-old recipe? Well, for one I thought that there are a bunch of new followers around here who have never even seen this delight (hello, by the way)! Second, most of you who have been here since the beginning may have forgotten about it. Third, it’s the ideal pantry staple recipe. And lastly, because it’s very, very delicious. Creamy butter beans, golden garlic-y carrots coins, chewy wild rice, crisp and bright pickled onions, silky kale, and refreshing dill, all coming together with a lick-your-lips mustardy dressing that is divine on just about everything – this salad and beyond.

I’ve also re-named it the Spring Supper Salad because it’s the perfect seasonal transition meal (yea baby, it’s definitely a meal) incorporating both winter and spring produce and flavours, as we make our way into the light of the upswing! Hooray!

This recipe brings back so many memories for me. It was around this time that I had been working in restaurants in Copenhagen for about 3 years. I loved my job, and could hardly believe that someone actually paid me to spend all day in a hot, cramped kitchen, cooking a dozen new dishes every day without a menu or recipes – definitely still in the honeymoon phase. I felt confident in the food I was making, applying my deep understanding of nutrition to recipe development, and I used every day to push myself creatively, keenly aware of how fast I was learning and growing. I was certainly in the vortex, and it was a very exciting time of my life. 

I started my shift around 8 am, and the majority of my dishes needed to be ready at 12 noon when we opened the doors for lunch. This is a relatively short window of time to pump out 200 servings of anything, but after some years, I developed short cuts that would deliver a lot of flavour in a hurry. One of these short cuts, was garlic oil – the first thing I would make after tying my apron strings, that would act as a marinade, a roasting medium, and a base for soups, stews, dressings and sauces for the entire day. In fact, I don’t think that there were many dishes coming off of my station that didn’t have garlic in them back then (such an easy way to make things taste good!). This oil sat on my bench and it got tossed into all the things, and all the people kept coming back for more. 

One thing I loved using the garlic oil on, was winter veggies. I could toss them in said liquid gold, crank up the oven, and in half an hour, I’d have a blistered, glistening pile of roasted rainbow roots to serve, only needing a squeeze of lemon juice and a smattering of fresh herbs to make it presentable. Who wouldn’t want to dive into that?! Plus, it was cheap. Like most restaurants, we were always looking at the bottom line and how we could make even the most humble foods taste exquisite. Garlic oil was the ticket. 

At the restaurant, my signature move was combining veggies, grains, and beans in exciting ways (which was very novel at the time!) so this dish emerged from a commercial oven’s worth of garlic-roasted carrots needing a home. With some tender and creamy butter beans coming off the stove, and some day-old, steamed wild rice calling out to me from the fridge, this combination came together very organically, taking the varied textures, colours, and flavours into consideration. 

The secret to this dish is the consistency of the garlic in the oil. Different from mincing garlic and adding it to oil, here you must must must grate it or blend it up together so it becomes almost paste-like. This way, the garlic goes everywhere the oil does, and evenly caramelizes into the most divine, delectable gold, that’s mellow and sweet and roast-y. You will not hate it.

Stop! Fiber time.

Fiber is probably the least sexy and alluring of all the nutrients we hear about. It’s all about Protein! Fat! And if you hear about carbohydrates, it’s probably something ignorant and unfair (I really hate jerks picking on macronutrients, back off!). Fiber seems pretty boring and something only your grandmother cares about, so why do you need to?  

One reason that plant-rich diets are so health-sustaining, is not only due to their high fiber content, but their potential for fiber diversity. In the past, fiber has been broken down into two main categories: soluble and insoluble. What’s new and exciting in this field of research, is that we can see that fiber can be broken down into several more categories (viscous, non-viscous, non-starch polysaccharides, resistant starches etc.) each one bringing forth the potential for diversified food sources for our gut bacteria. In short, the greater the diversity of plants we eat, the greater the diversity of our microbiome. 

Why does this matter? Because our gut is the foundation for our overall health. If we’ve got a wide range of troops on the front lines of our immune system, the better our chances are for not just surviving, but thriving. The fiber we eat also feeds our good bacteria, and specific types of fiber feed specific types of bacteria. Enjoy eating the widest variety of plants you can, to ensure that you’re supporting the widest variety of good guys in your digestive system. They will repay you in spades I’m tellin’ ya! 

The foods with the highest amounts of fiber are beans and lentils, vegetables, fruits, grains, and nuts and seeds (remember that there is no fiber in animal-based foods). Different proportions of soluble, insoluble fiber, as well as viscous / non-viscous fiber, and fermentable fiber can be found in all of these food groups, it is highly recommended that you eat from each of them. And instead of focusing on grams (the minimum daily recommended intake is a measly 25g, not that we’re talking about that…), we need to focus on diversity. Enjoy as many plant-based foods as you can, and experience the terrain of your body slowly begin to change. Everything comes back to the gut, and not just what you are eating, but what your gut-bacteria are eating too.

With this dish, you’ll be feeding those good guys with fiber from six different plants! Talk about a solid mix. Beans, whole grains, 3 different veggies, plus herbs, add up to serious fiber diversity. Good, good, good fiberations! 😉

The fun thing about revisiting this recipe, was seeing if there was anything I would change this time around. I have learned so much and grown incredibly as a cook in the past ten years, so I was surprised that I didn’t have many tweaks to make. The only two things I felt this salad needed was a dark leafy green and a pickle – classic Sarah B moves at this point! Since we still don’t have any spring greens happening yet, I decided kale was the winner, and obviously it needed to be massaged! I turned the red onions in the original recipe into a quick pickle, as this is another indispensable kitchen technique that I’ve learned since posting the first time around.

This salad-meal has everything you need and crave from a single bowl: it’s super flavourful and filling, with all of the textures in the mix to satisfy your noshing desires. The elements can all be made separately, even on separate days, if it seems like too many things to cook at once for a single dish. If you go the rollover route, boil the beans and rice a day or so before (and make extra while you’re at it, because meal prep is for winners), and pickle the onions up to a week ahead. The kale can be prepped / massaged a day or so in advance, but the carrots should be roasted right before serving. 

If you don’t have butter beans, any white bean would work (navy, cannellini, Great Northern, or baby lima beans are some varieties) and if you want to switch up the grain, any kind of rice would work – even millet or quinoa would be delicious! Instead of carrots, use any root veg you have kicking around your crisper: beets, sweet potato, turnip, or winter squash would taste great in the garlic oil. And if dill isn’t the herb of your dreams, try substituting it with flat-leaf parsley, cilantro, basil, or tarragon. 

I really hope you enjoy this delicious and satisfying meal soon. These days are asking so much of us, and I continue to come back to the kitchen for grounding, clarity, and connection. There are no answers, just presence. And in that presence I find myself over a cutting board, being grateful for just what is front of me, slicing a carrot, then another, saying thank you for simple things.

Love to you all. Stay well and safe out there.
xo, Sarah B

The post The Spring Supper Salad appeared first on My New Roots.

Any Fruit Galette

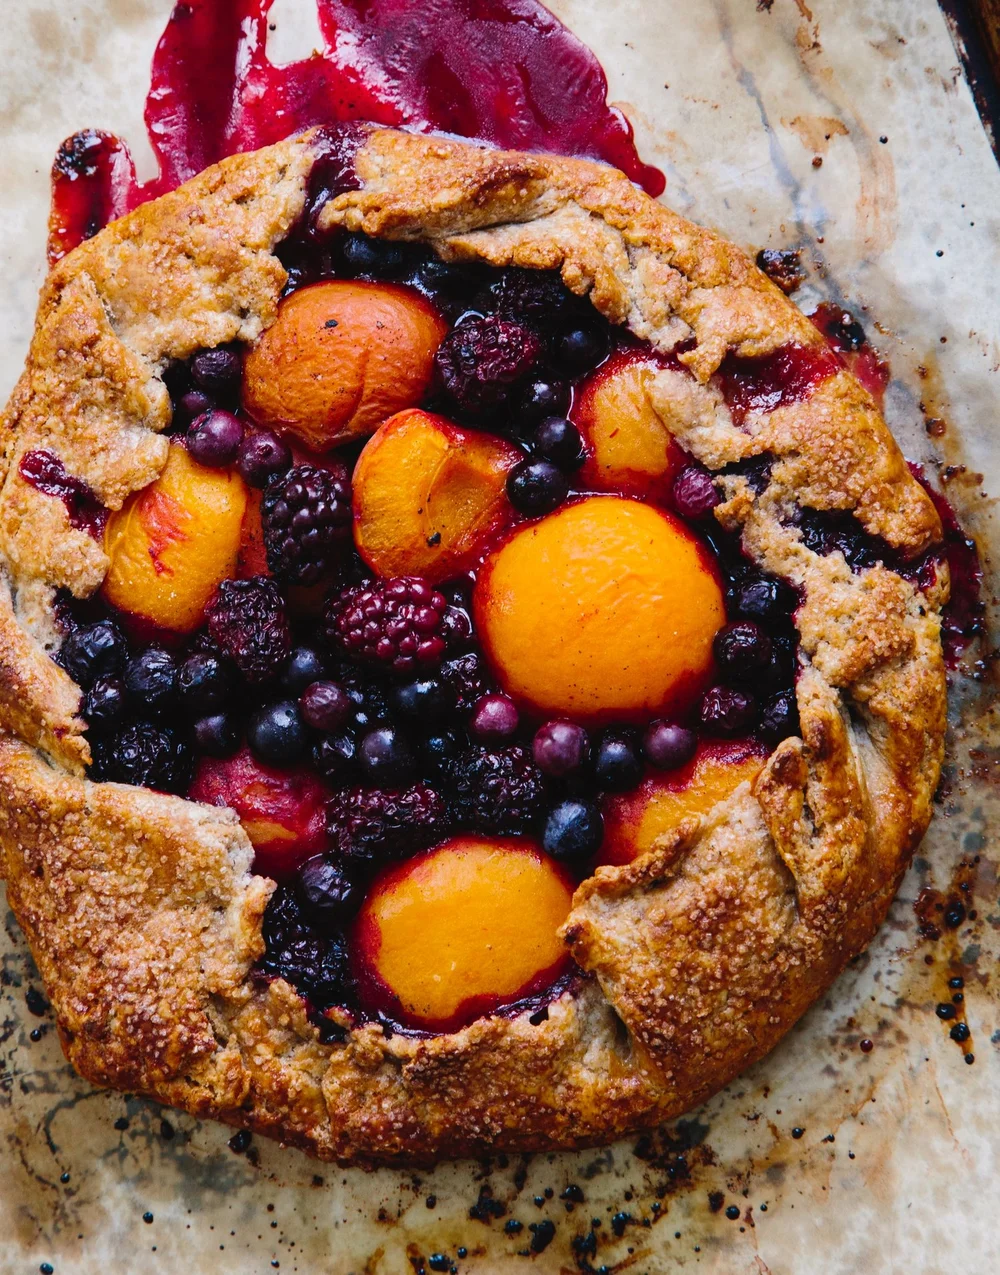
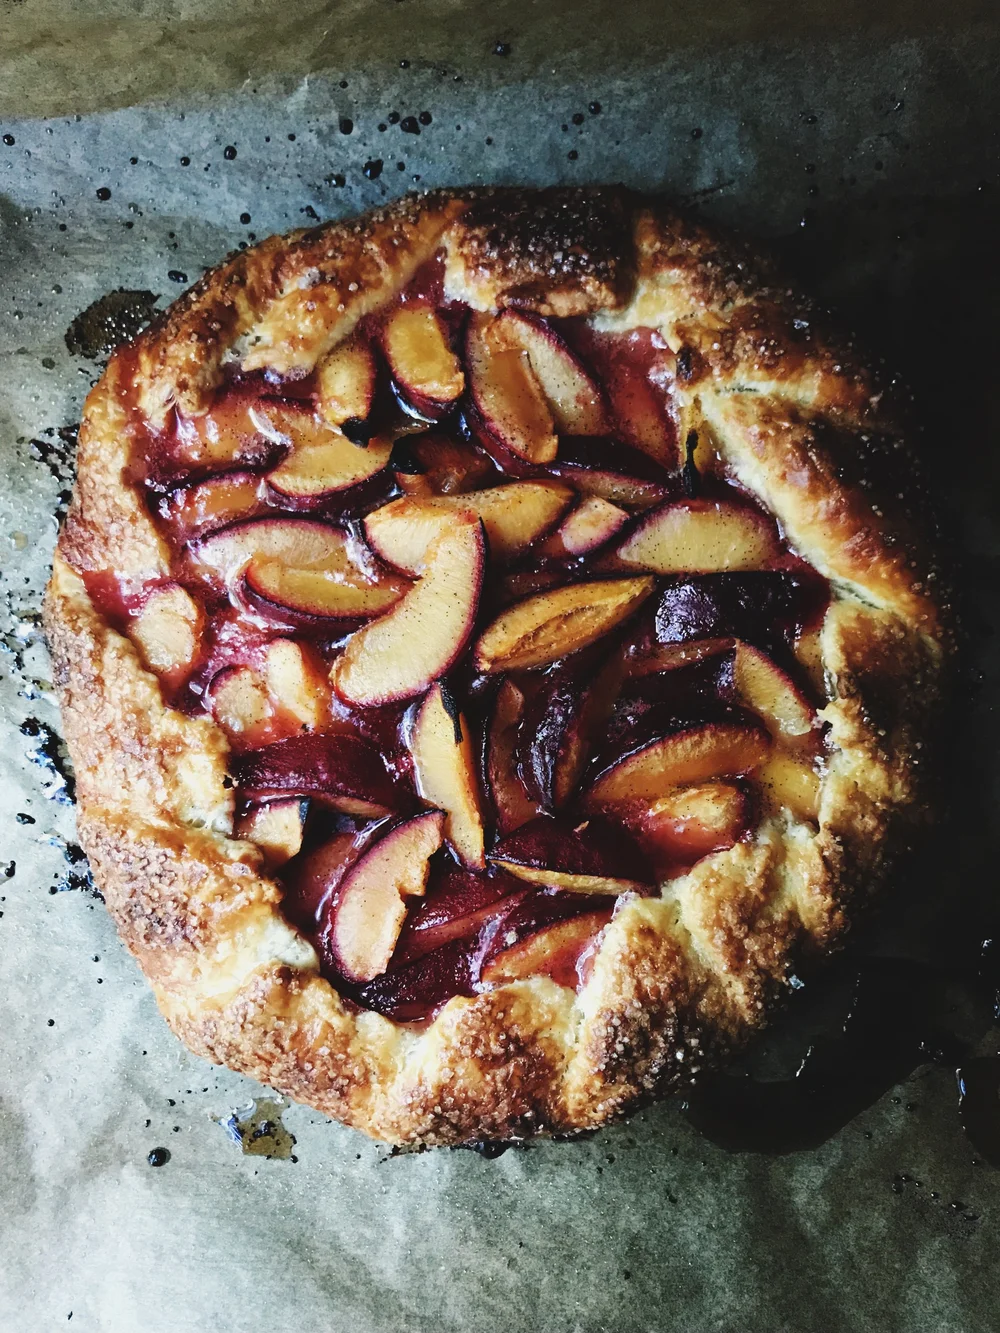
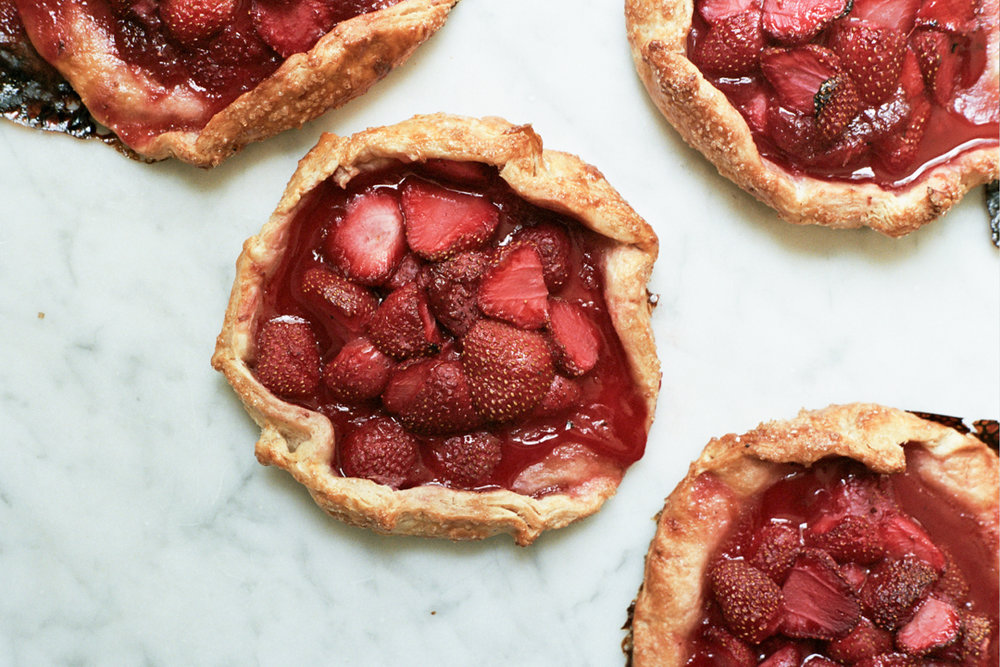
Hello! This post is a little refresh of my very favorite recipe - Galettes! If you follow me on instagram you know that I am a galette evangelist. I think galettes are the very best and most fun dessert because they are so easy to make and adaptable, but my recipe was a little bit hidden in the archives so I am pulling it out into the spotlight with this easy to find post. You can use just about any fruit you like or a combination of fruits, and feel free to adjust the sugar to taste. Be free! Don’t worry about it too much! Have fun!

If you bake a galette make sure to tag me and #summerofgalettes on instagram and feel free to message me with any questions. I love seeing what you bake!

All Butter Pie Crust

All pie crust is made from the same basic ingredients: flour, fat, water, and salt. I am partial to an all-butter crust because I think it tastes the best. The key to flaky pie crust is to keep the ingredients nice and cold— especially the butter and water—and to work quickly and intentionally. I like to mix pie crust with my hands rather than a food processor or pastry blender because I can control the exact size and shape of the butter pieces for the flakiest results. Add a few teaspoons of sugar if you prefer a sweetened crust.

Ingredients

2 2⁄3 cups (340g) all purpose flour

1 teaspoon kosher salt

1 cup plus 2 tablespoons (255g) very cold unsalted butter

1 tablespoon apple cider vinegar

8-10 tablespoons (120ml) ice water

Whisk the flour and salt together in a large bowl, cut the butter into 1⁄2-inch cubes, and add the apple cider vinegar to the ice water.

Working quickly, add the butter to the flour and toss to coat. Then use your fingers or the palms of your hands to press each cube of butter into a flat sheet. Keep tossing the butter in the flour as you go to ensure that each butter piece is coated with flour. The idea is to create flat, thin shards of butter that range from about the size of a dime to about the size of a quarter. If at any time the butter seems warm or soft, briefly refrigerate the bowl.

Sprinkle about 6 tablespoons of the icy cold vinegar-water mixture over the flour mixture. Use a gentle hand or wooden spoon to stir the water into the flour until just combined. If the dough seems dry, add more cold water a couple of teaspoons at a time. You have added enough water when you can pick up a handful of the dough and easily squeeze it together without it falling apart.

Press the dough together, then split it in half. Form each half into a disk, and wrap each disk in plastic wrap. Chill the dough for at least 2 hours before using, but preferably overnight. Keeps for up to three months in the freezer wrapped in a double layer of plastic wrap and a layer of foil. Thaw in the refrigerator before using.

VARIATIONS: For a rye variation, substitute 11⁄3 cups (175g) rye flour for an equal amount of the all purpose flour. For a spelt variation, substitute 11⁄3 cups (175g) spelt flour for an equal amount of the all purpose flour. You also may need a bit more water to bind the dough for these variations.

Any Fruit Galette

Yield: One 8-inch galette

You can use this formula with just about any seasonal fruit. For apples, pears, and stone fruit peel if desired then slice into 1/4-1/3-inch slices. Apricots (my fave!) can be gently torn in half or cut into quarters. Slice strawberries in halves or quarters if they are large. Rhubarb can be sliced into thin batons or 1/2-inch chunks. Feel free to experiment with combining your favorite fruits. I love stone fruit and berries together in the summer. Also, the apricot jam can be replaced with any jam or marmalade you like that will compliment the fruit you are using.

1 disc pie crust

3/4 pound (340g) fresh fruit

1/4 cup apricot jam

1/4 cup (50g) granulated sugar, to taste

2 tablespoons flour

1/2 teaspoon lemon zest

seeds of one vanilla bean (optional)

pinch salt

1 egg, for egg wash

turbinado sugar and flaky salt for sprinkling

Arrange a rack in the oven in the lower third and preheat oven to 425ºF. Line a baking sheet with parchment paper.

Combine the sugar vanilla bean seeds, lemon zest, flour and salt in a bowl. Add the fruit to a large bowl and sprinkle the sugar mixture over the top, but don’t stir quite yet.

On a lightly floured surface roll the dough into a rough circle between 1/8-1/4-inch thick and transfer it to a parchment lined baking sheet. Gently stir the fruit mixture until well combined.

Spread the jam onto the center of the dough, then pour the fruit into the center of the galette. Press gently to compact the fruit into an even layer. Fold the edges of the dough up and over the fruit and press the folds gently to seal. Refrigerate the formed galettes until the dough is very firm.

Brush the galette with egg wash, sprinkle with turbinado sugar and flaky salt if desired and bake until deep golden brown and bubbling, 45-55 minutes. Serve warm with vanilla ice cream.

Crushed Raspberry and Strawberry Pavlova


We are still in a bit of an in between produce season, but the weather is warming up and the sun is out so I am craving fresh fruit desserts like it’s my job. I guess it kind of is my job…I love to make desserts like this pavlova because it is fairly low lift and aside from a low, slow bake in the oven for the meringue (which you can make the day before if it’s not too humid where you live) everything comes together in a few minutes.

The tart crushed raspberries provide some nice sauciness here and contrast well with sweet strawberries and the crisp, pillowy meringue. Make sure to use the best strawberries you can find for this dessert, and adjust the sugar to your personal tastes. In NYC we get some really nice organic berries from California but they are $$ so you may just want to bookmark this until they are in season locally where you live. The mini mint leaves are also totally optional, but they do add a nice freshness and beautiful pop of contrasting color.


Crushed Raspberry and Strawberry Pavlova

Crisp and chewy meringue, pillowy whipped cream, and sweet-tart berries are combined to make this super springy, and fairly simple dessert. Assemble just before serving for the best textural experience as the meringue will weep and melt as it sits.

Meringue

4 large egg whites

1 cup (200g) superfine sugar

1 1/2 teaspoons cornstarch

1/4 teaspoon salt

1/8 teaspoon cream of tartar

1 teaspoon vanilla extract

1 teaspoon white vinegar

Berries

1 pound of the best strawberries you can find

1/2 cup fresh raspberries

2 teaspoons sugar

1/2 vanilla bean, seeds scraped

pinch salt

To Serve

1 cup (240ml) heavy cream 

1 tablespoon sugar

mint leaves

To make the meringue: Preheat the oven to 250ºF (130ºC/Gas Mark 1/2). Trace an 8-inch (20cm) circle onto a piece of parchment paper and flip it upside down on a baking sheet.

Stir the cornstarch and sugar together in a small bowl. In the bowl of a stand mixer fitted with the whisk attachment or with a handheld electric mixer in a large bowl, beat the egg whites, salt, and cream of tartar on high speed until soft peaks form. With the mixer running, slowly add the sugar mixture about one tablespoon at a time until you have added all of the sugar and the egg whites are stiff and glossy about 7 minutes. Add the vanilla extract and vinegar and mix for 30 more seconds.

Dollop the meringue onto the prepared baking sheet and use an offset spatula to spread it evenly to the edges of the traced circle. Make a shallow indent in the center of the meringue which will hold all of the delicious toppings. Bake the meringue for 1-1 1/2 hours or until the outside looks dry and slightly creamy in color. Turn off the oven and prop the door ajar with a wooden spoon. Let the meringue cool completely in the oven. It should feel firm and crackly when you press it, but will be soft and marshmallowy in the center. When cooled, you should be able to gently peel it off of the parchment paper and place it on a serving platter or cake stand.  

To make the topping: Slice the strawberries in half if they are small, quarters if they are large. Combine the raspberries, sugar, vanilla bean seeds and a pinch of salt in a large bowl and crush the berries with a fork. Gently stir in the strawberries and let the fruit macerate for a few minutes. Taste and add a bit more sugar if desired, keeping in mind that the meringue will be quite sweet.

Whip the cream and sugar together to soft peaks. Top the cooled meringue with the whipped heavy cream, followed by the berries. Sprinkle mint leaves over the top and serve immediately.

Burnt carrots with yogurt inspired by Sunday Suppers’ Simple Fare

Last week I announced I will be teaching a food styling and photo workshop at Sunday Suppers in Brooklyn 9/30 and 10/1. Any chance I have to visit the studio I’m there. And did you know that Sunday Suppers just … Continue reading →

Burnt carrots by Aran GoyoagaLast week I announced I will be teaching a food styling and photo workshop at Sunday Suppers in Brooklyn 9/30 and 10/1. Any chance I have to visit the studio I’m there. And did you know that Sunday Suppers just … Continue reading

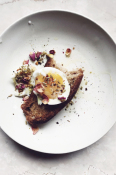
A recipe for eggs with dukkah and a Sunday Suppers workshop | 9.30 & 10.1 Brooklyn

I’m happy to announce a food and photography workshop with me at the Sunday Suppers studio in Brooklyn on September 30th and October 1st. You can sign up for one or both days. Here is a brief description. FOR TICKETS, … Continue reading &#8…

Eggs with dukkah by Aran GoyoagaI’m happy to announce a food and photography workshop with me at the Sunday Suppers studio in Brooklyn on September 30th and October 1st. You can sign up for one or both days. Here is a brief description. FOR TICKETS, … Continue reading

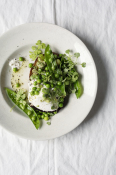
English peas, favas and burrata

I am craving warmth and sun after what it feels like the longest winter in recent history. Slowly we are getting there. The first signs of Spring have appeared. Blossoms, ramps, morels, peas and favas. Every Spring there is a … Continue reading &…

edoc_S3A1036_bI am craving warmth and sun after what it feels like the longest winter in recent history. Slowly we are getting there. The first signs of Spring have appeared. Blossoms, ramps, morels, peas and favas. Every Spring there is a … Continue reading