Lemon Brownies

close up on a stack of yellow vegan lemon brownies topped with a lemon glaze.These gooey and fudgy Lemon Brownies feel like classic brownies but have the same bright and zesty flavors as lemon bars. A simple lemon glaze on top adds a burst of sweet lemon flavor to every bite! If you love lemon desserts as much as I do, then you’ll definitely want to check out my…

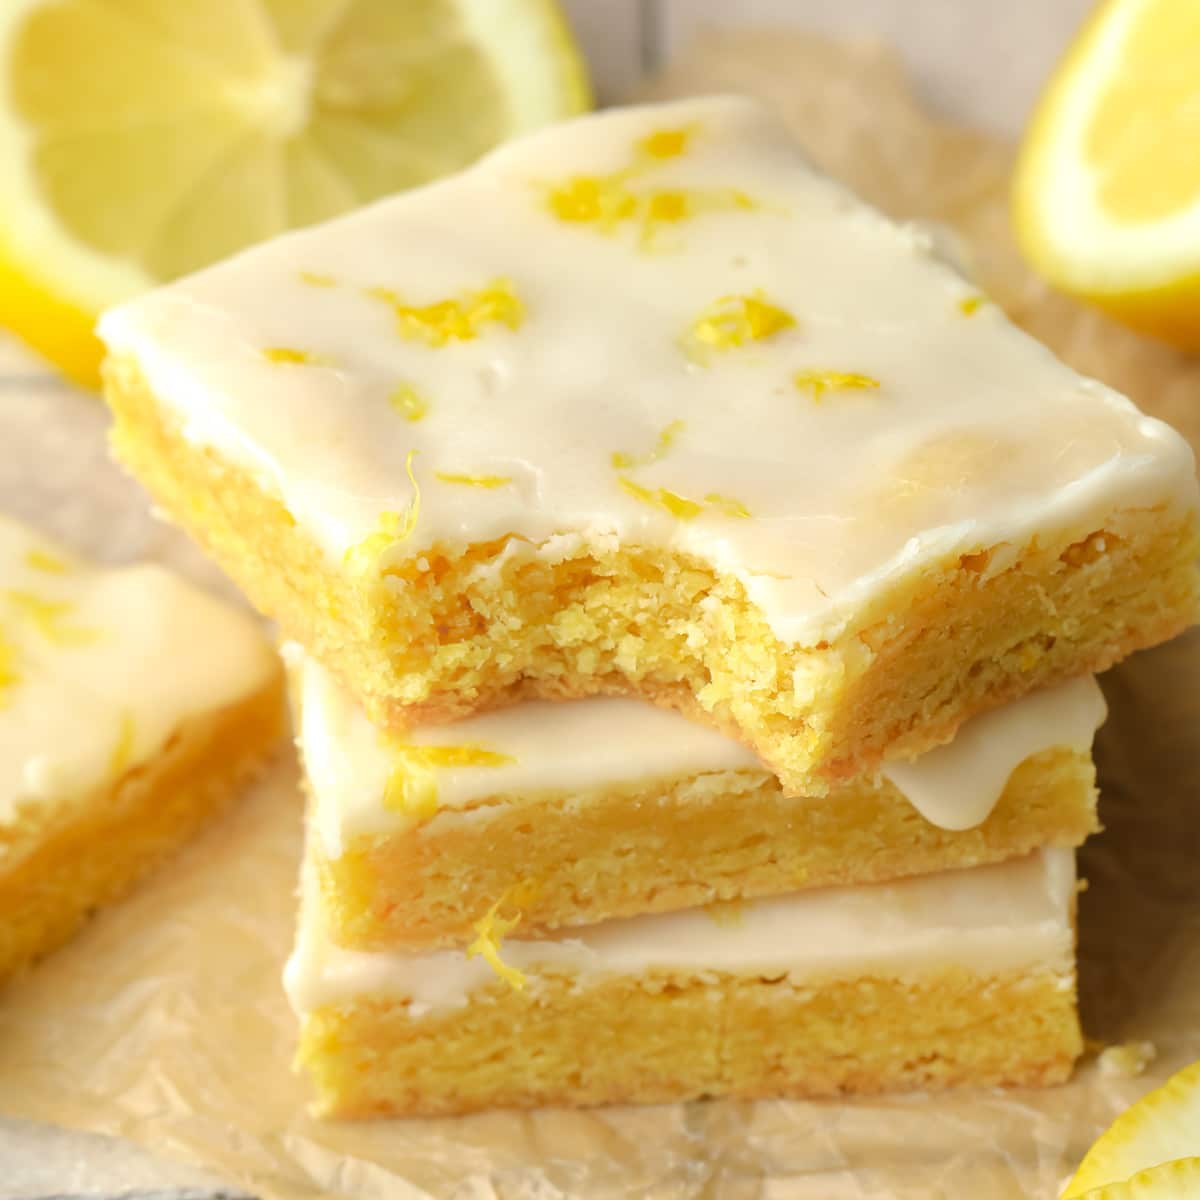
close up on a stack of yellow vegan lemon brownies topped with a lemon glaze.

These gooey and fudgy Lemon Brownies feel like classic brownies but have the same bright and zesty flavors as lemon bars. A simple lemon glaze on top adds a burst of sweet lemon flavor to every bite!

If you love lemon desserts as much as I do, then you’ll definitely want to check out my Lemon Cupcakes, Lemon Blueberry Bread, Lemon Crinkle Cookies, and Lavender Lemon Bars!

a stack of yellow vegan lemon brownies topped with a lemon glaze.

Gooey vegan brownies + zesty lemon bars + chewy blondies = these irresistible vegan lemon brownies!

This easy vegan lemon brownie recipe is perfect for spring. Just like classic brownies and blondies, they’re rich and chewy but are bursting with bright and refreshing lemon flavors! A simple lemon glaze on top is the perfect finishing touch, adding just the right amount of sweetness to every bite. 

If you can’t stand the thought of brownies without chocolate, then fine, call them lemon cookie bars. 😉

Why you’ll love these lemon brownies

  • A brownie-lemon bar hybrid – With a moist, gooey, and fudgy texture and a fresh lemon flavor, these brownie-lemon bar hybrids are a unique and delicious dessert!
  • Bright and zesty – Fresh lemon juice, lemon zest, lemon extract, and a 2-ingredient lemon glaze fill these glazed lemon brownies with bright and refreshing flavors.
  • A treat for spring – While I love gooey eggless brownies year-round, these lemon blondies are a perfectly refreshing treat for spring!
side view of a stack of yellow vegan lemon brownies topped with a lemon glaze.

Frequently asked questions

What can you add to lemon brownies?

It hasn’t been tested, but you can experiment with this recipe by folding ½ cup to ¾ cup of vegan white chocolate chips or fresh blueberries, 1 to 2 teaspoons of dried culinary lavender, or up to 2 tablespoons of poppy seeds into the batter.

Can you replace the lemon glaze?

Instead of the lemon glaze, decorate the brownies with a dusting of powdered sugar, spread a layer of my Whipped Lemon Buttercream or Vegan Cream Cheese Frosting on top, replace it with a simple vanilla glaze instead (replace the lemon extract with vanilla extract), or add a few dollops of my Vegan Lemon Curd on top for double the lemon goodness!

Can these brownies be made gluten-free?

Yes! Just replace the all-purpose flour with a quality gluten-free flour blend.

How long do they last?

The brownies keep well for up to 3 days when stored in an airtight container at room temperature. They can also be stored for up to 1 week in the refrigerator.

Can you freeze lemon brownies?

I haven’t tried it, but the brownies should freeze well for about 2 to 3 months in an airtight container.

a stack of yellow vegan lemon brownies topped with a lemon glaze.
close up on a stack of yellow vegan lemon brownies topped with a lemon glaze.
Print

Lemon Brownies

These gooey and fudgy Lemon Brownies feel like classic brownies but have the same bright and zesty flavors as lemon bars. A simple lemon glaze on top adds a burst of sweet lemon flavor to every bite!
Course Dessert
Cuisine American
Prep Time 15 minutes
Cook Time 25 minutes
Total Time 40 minutes
Servings 16 bars
Calories 172kcal

Ingredients

  • 1/2 cup vegan butter softened to room temperature
  • 1 cup granulated sugar
  • 1 teaspoon pure vanilla extract
  • 1 teaspoon lemon extract
  • 3 teaspoons fresh grated lemon zest
  • 3 tablespoons fresh lemon juice
  • 2 drops yellow food coloring optional
  • 1 3/4 cups all purpose flour
  • 1 tablespoon cornstarch
  • 1/2 teaspoon baking soda
  • 1/4 teaspoon salt

Glaze

Instructions

  • Preheat the oven to 350 degrees F and lightly grease a 9×9 (or 8×8) inch baking pan. Or line it with parchment paper for easy removal.
  • In the bowl of a stand mixer with the paddle attachment, or using a handheld mixer, beat the softened vegan butter and sugar until creamy.
  • Add the vanilla, lemon extract, lemon zest, juice and optional yellow food coloring. Mix until combined, scraping the sides and bottom of the bowl as needed.
  • Stop the mixer and add the flour, followed by the cornstarch, baking soda and salt. Turn the mixer on low speed and mix until just combined.
  • Spread in the prepared pan, using an offset spatula. The dough is thick, like cookie dough, so be patient and get it as even as possible with either your hands or the spatula.
  • Bake for 25 minutes, until just set in the center. Don't over bake, or they will be dry.
  • Let them cool in the pan for about 15 minutes, then lift out using the parchment paper (if using) and let cool completely on a wire rack.
  • In a small bowl, mix the powdered sugar and lemon juice until thick but pourable. Add additional powdered sugar if needed. Spread over the cooled brownies.
  • Let the glaze harden before slicing and serving. Enjoy! You can sprinkle a little extra lemon zest on top, if you want.

Notes

  1. Leftover lemon brownies will keep for up to a week in the refrigerator, or about 3 days on the countertop in a covered container.
  2. Gluten free? Substitute a gluten free flour.

Nutrition

Serving: 1of 16 | Calories: 172kcal | Carbohydrates: 31g | Protein: 1g | Fat: 5g | Saturated Fat: 1g | Polyunsaturated Fat: 1g | Monounsaturated Fat: 2g | Sodium: 117mg | Potassium: 22mg | Fiber: 0.4g | Sugar: 20g | Vitamin A: 270IU | Vitamin C: 2mg | Calcium: 3mg | Iron: 1mg

Homemade Granola Bars

I try to always have homemade granola bars in the fridge for an easy grab and go breakfast or snack. These granola bars are easy to make and made with basic pantry ingredients. They are satisfying, sweet, and taste so much better than store bought gran…

I try to always have homemade granola bars in the fridge for an easy grab and go breakfast or snack. These granola bars are easy to make and made with basic pantry ingredients. They are satisfying, sweet, and taste so much better than store bought granola bars. These are our favorite granola bars because we…

Scotcheroos

Scotcheroos!!!! If you’ve had a scotcheroo, you know of their goodness. And if you haven’t, get ready to be WOWED! Scotcheroos are similar to Rice Krispie Treats but they are loaded with peanut butter, chocolate, and butterscotch. They are …

Scotcheroos!!!! If you’ve had a scotcheroo, you know of their goodness. And if you haven’t, get ready to be WOWED! Scotcheroos are similar to Rice Krispie Treats but they are loaded with peanut butter, chocolate, and butterscotch. They are soft, chewy, super sweet, and a little salty, thanks to the flaky sea salt that gets…

Brown Butter Salted Caramel Snickerdoodle Blondies

If you like my brown butter salted caramel snickerdoodles, the best cookies on the planet, you will LOVE these blondies! I decided it was time to make a bar version of my all-time favorite cookie recipe. And let me tell you, these snickerdoodle blondie…

If you like my brown butter salted caramel snickerdoodles, the best cookies on the planet, you will LOVE these blondies! I decided it was time to make a bar version of my all-time favorite cookie recipe. And let me tell you, these snickerdoodle blondies are outstanding. Maybe one of my top 10 desserts EVER! Yeah,…

Apple Pie Bars

This apple pie bars recipe is easy and full of cozy flavor, with a spiced fruit filling, streusel topping, and…

A Couple Cooks – Recipes worth repeating.

This apple pie bars recipe is easy and full of cozy flavor, with a spiced fruit filling, streusel topping, and tasty maple glaze!

Apple Pie Bars

Looking for an easy dessert that will have everyone talking? Try this apple pie bars recipe! It’s simple to whip up this handheld treat: the same dough makes a sturdy bottom crust and buttery crumbles of streusel topping! Sandwiched in between the layers is a cinnamon-spiced apple filling, and it’s topped with a sweet maple icing drizzle that tastes a bit like melty vanilla ice cream. These are absolutely fabulous and one of our favorite fall desserts yet.

What you need for apple pie bars

These apple pie bars are and easy dessert for several reasons: there’s no special equipment required, the peeling and slicing time is minimal, and the same dough makes the crust and crumble topping. It bakes up in a square pan, making 16 servings delightful handheld apple pie slices. Bars are great for holidays and pitch ins because they’re both easy to serve and make: and we’d make these any day of the year!

Here’s what you’ll need for this recipe, grouped by type (or jump to the recipe):

  • Baking ingredients: All purpose flour, brown sugar, granulated sugar, Old Fashioned rolled oats, cornstarch, kosher salt
  • Spices: Cinnamon and nutmeg
  • Dairy: Unsalted butter
  • Fruits: Apples, lemon juice
  • Baking pan: 8 x 8 inch [20 cm] or 9 x 9 inch [22 cm]
  • Time: 25 minutes to prep, 1 hour to bake, 1 ½ to 2 hours to cool, 10 minutes to cut and glaze
Apple bars

Best type of apples for cookies

The best variety of fruit for apple pie bars is the same as any baked apple recipe (like cobbler, cookies, or crisp): select a firm, crisp tart apple. The tartness accents the sweet crust and topping, and the crisp texture helps it hold its shape while baking. Other apple varieties can end up in a mushy filling that’s not nearly as satisfying. Here are some of the best types apples for baking and cooking:

  • Pink Lady
  • Jonathon or Jonagold
  • Granny Smith
  • Honeycrisp
Apple bars

Tips for apple pie bars

Apple pie bars are almost like an apple crumble with a bottom crust. They’re simple to make, but just a few tips to know the process.

  • Grease the pan, then line it with parchment paper. This makes them easy to remove from the pan. Cut the parchment so that it extends on two sides to easily remove it from the pan. Greasing the entire pan helps the parchment stick to the bottom.
  • Allow the bars to cool to room temperature before glazing. This lets the texture set, firming it up so it’s the ideal texture for eating. If you’d like to speed up the process, you can cool for about 30 minutes at room temperature then refrigerate for 1 hour.
  • Cut into squares before glazing. We like cutting into 16 even squares first, then glazing the individual bars.

For the maple glaze

The best part of these apple pie bars, in our opinion, is the simple maple glaze! It tastes almost like that melty vanilla ice cream on the top of the pie. You can leave it out if desired, but we think it really takes these bars over the top.

The maple glaze has just a few ingredients and comes together quickly: just powdered sugar, butter, milk, maple syrup, and maple extract. The maple extract brings a bold, maple-forward flavor to the icing and we recommend finding it if at all possible! But you can leave it out if desired: it still tastes great.

Apple Pie Bars

Dietary swaps

A few simple swaps make these into vegan apple pie bars! Simply use vegan butter or refined coconut oil in place of butter. Do the same in the maple glaze, and use oat milk or your favorite non-dairy milk for the milk.

To make gluten-free apple pie bars, use almond flour in place of all-purpose flour. The texture will be slightly different, but it’s still delicious! Almond flour works well to make gluten-free crisps and crumbles, like this Gluten Free Apple Crisp.

Storage info

Storage for apple pie bars is tricky because of the moisture in the apples and the glaze. They last for 1 day at room temperature if iced and 2 days if unfrosted, loosely covered (or place a paper towel instead a container to reduce moisture). But it’s best to store them refrigerated if possible. Make sure to store them with parchment paper between each layer so they don’t stick to each other. These apple bars last:

  • 1 day at room temperature, loosely covered or with a paper towel inside the container to reduce moisture; 2 days if unfrosted
  • 1 week refrigerated, bringing them to room temperature before serving
  • 3 months frozen
Apple Pie Bars

More apple recipes

And that’s it! These apple bars are one of our favorite easy dessert recipes to make with this crisp tart fruit. They’re perfect for Thanksgiving, Christmas, fall, or anytime you need a simple treat. Here are a few more tasty apple recipes we love, from desserts to breakfast:

This apple pie bars recipe is…

Vegetarian. For vegan, use vegan butter. For gluten-free, use almond flour.

Print
Apple pie bars

Easy Apple Pie Bars


  • Author: Sonja Overhiser
  • Prep Time: 30 minutes
  • Cook Time: 1 hour
  • Total Time: 1 hour 30 minutes
  • Yield: 16

Description

This apple pie bars recipe is easy and full of cozy flavor, with a spiced fruit filling, streusel topping, and tasty maple glaze!


Ingredients

  • 1 ¼ cup (175 g) all-purpose flour
  • ¾ cup light brown sugar
  • 1 cup Old Fashioned rolled oats
  • ½ teaspoon kosher salt
  • 12 tablespoons unsalted butter, sliced into small pieces
  • 4 cups crisp tart baking apples (about 4 medium), peeled and thinly sliced (1/4-inch thick)
  • 1/3 cup granulated sugar
  • 1 tablespoon cornstarch
  • 1 tablespoon lemon juice
  • ½ tablespoon ground cinnamon
  • ⅛ teaspoon ground nutmeg
  • 1/2 recipe Maple Glaze

Instructions

  1. Preheat the oven to 375°F. Butter an 8 x 8 or 9 x 9 baking dish. Line the pan with a piece of parchment paper, cut so that it extends on two sides to easily remove it from the pan.
  2. In a medium bowl, mix the flour, brown sugar, oats, and kosher salt. Cut in the butter with a pastry cutter or fork. As it incorporates, use fingers to knead until it becomes an even, consistent dough with no more dry bits of flour (this takes a while, so be patient!). Use your fingers to crumble it into small crumbles and measure out 1 ½ cup for the topping.
  3. Pour the remaining crumbles into the prepared pan, and press it into an even layer for the crust of the bars. Use the bottom of a measuring cup to press in the dough and make it flat and even.
  4. In a medium bowl, mix the peeled and sliced apples, granulated sugar, cornstarch, lemon juice, and cinnamon and nutmeg. Spread them in an even layer over the crust.
  5. Add the reserved crumbles over the top in an even layer.
  6. Bake for 55 minutes to 1 hour, until the top and edges are golden brown. Remove from the oven and cool on cooling rack for 20 to 30 minutes, then lift out the bars with the parchment. If desired transfer to the refrigerator and for 1 hour, or simply cool to room temperature on the counter.
  7. Once the bars are room temperature, cut into 16 even squares. Drizzle on Maple Glaze with a fork, if desired. Store bars up to 1 day at room temperature, 1 week refrigerated (with parchment paper between the layers if stacked; bring to room temperature before serving), or 3 months frozen.
  • Category: Dessert
  • Method: Baked
  • Cuisine: Dessert
  • Diet: Vegetarian

Keywords: Apple pie bars, apple bars, apple pie bars recipe

A Couple Cooks - Recipes worth repeating.

Chocolate Rice Krispie Treats

Whenever we need an EASY treat, we often make Rice Krispie Treats. They only take 10 minutes to make and are always a crowd pleaser. We love classic Rice Krisipie Treats, peanut butter, Oreo, s’mores, Biscoff, and more! We also LOVE these Chocola…

Whenever we need an EASY treat, we often make Rice Krispie Treats. They only take 10 minutes to make and are always a crowd pleaser. We love classic Rice Krisipie Treats, peanut butter, Oreo, s’mores, Biscoff, and more! We also LOVE these Chocolate Rice Krispie Treats. They are filled with chocolate flavor thanks to the…

Oreo Brownies

My One Bowl Brownies are the perfect brownie recipe. I make them ALL of the time. But whenever I am feeling extra, I make Oreo Brownies. They are EXTRA delicious! The brownies are rich, fudgy, and filled with chopped up Oreo cookies. The brownie recipe…

My One Bowl Brownies are the perfect brownie recipe. I make them ALL of the time. But whenever I am feeling extra, I make Oreo Brownies. They are EXTRA delicious! The brownies are rich, fudgy, and filled with chopped up Oreo cookies. The brownie recipe is easy to make and the end results are amazing!…