Roasted Veggie Enchiladas with Black Bean Sauce

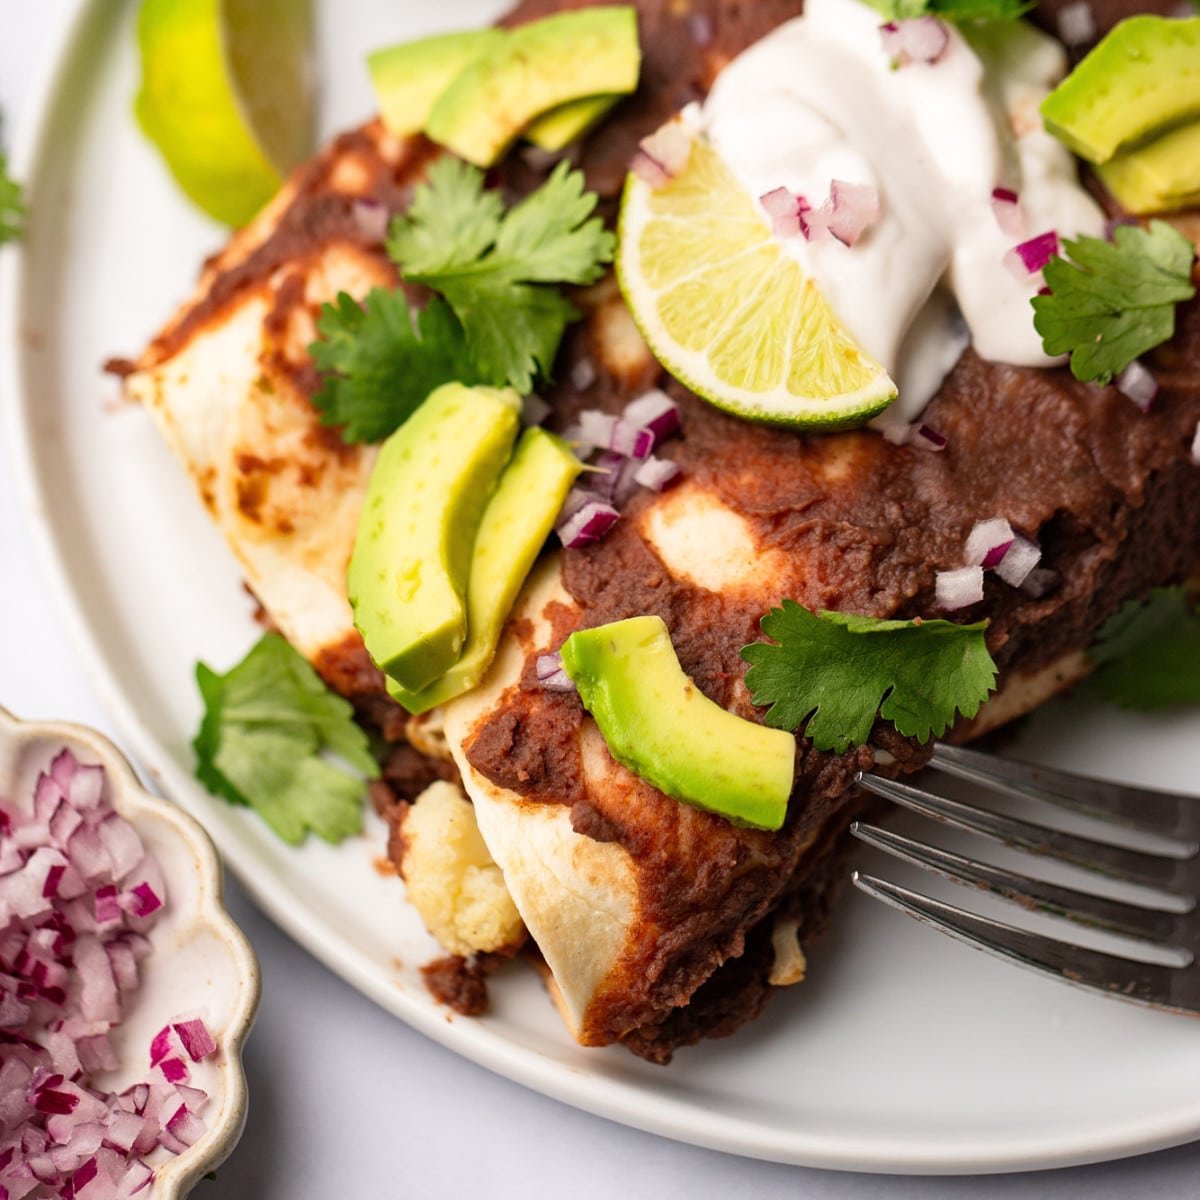
close up on Roasted Veggie Enchiladas with Black Bean Sauce on a white plate with a fork on the side.These Roasted Veggie Enchiladas are packed with roasted vegetables and drenched in a chipotle garlic black bean sauce. Best served with sour cream, crushed tortilla chips or strips, avocado chunks, red onion and a squeeze of lime juice. For more fun and delicious vegan enchilada recipes, check out my Skillet Enchiladas, Vegan Sour Cream Enchiladas,…

close up on Roasted Veggie Enchiladas with Black Bean Sauce on a white plate with a fork on the side.

These Roasted Veggie Enchiladas are packed with roasted vegetables and drenched in a chipotle garlic black bean sauce. Best served with sour cream, crushed tortilla chips or strips, avocado chunks, red onion and a squeeze of lime juice.

For more fun and delicious vegan enchilada recipes, check out my Skillet Enchiladas, Vegan Sour Cream Enchiladas, and Vegan Enchilada Casserole!

close up on Roasted Veggie Enchiladas with Black Bean Sauce on a white plate with a fork on the side.

These Roasted Veggie Enchiladas are loaded with a medley of warm roasted vegetables and smothered in a smoky black bean sauce before being baked to perfection. They’re a fun take on the classic enchilada recipe, a perfect “clean out your fridge” meal, and a great way to use up those cans of black beans in your cupboard.

Why you’ll love these veggie black bean enchiladas

  • Loaded with your favorite vegetables – I made these vegetarian enchiladas with a medley of fresh roasted vegetables, like potatoes, zucchini, and cauliflower. Feel free to swap what’s in the recipe card for any vegetables you like or need to use up.  
  • Warm and smoky black bean sauce – Instead of the classic fiery red enchilada sauce, I covered these enchiladas in an easy, no-cook blended black bean sauce. It’s smoky, savory, and has sneaky protein!
Roasted Veggie Enchiladas with Black Bean Sauce topped with avocado, onions, and cilantro in a baking dish.

Ingredients needed (with substitutions)

  • Vegetables – Onion, mushrooms, zucchini, potatoes, and cauliflower florets are lightly seasoned and roasted in the oven for the enchilada filling. Feel free to customize the recipe with the fresh or frozen veggies of your choice!
  • Olive oil
  • Salt and pepper
  • Black beans – I like using canned black beans for convenience but cooked dry black beans will also work.
  • Garlic and onion
  • Chipotle peppers in adobo sauce – Both the chipotle peppers and adobo sauce add smoky, spicy-ish flavors to the black bean sauce. If you’re not a fan of spicy food, only use 1 chipotle pepper and 1 tablespoon of adobo sauce. 
  • Vegetable broth
  • Oregano
  • Tortillas – I used flour tortillas but corn tortillas work just as well and are naturally gluten-free.
  • Toppings – You can top the cooked enchiladas with tortilla strips or crushed tortilla chips, vegan sour cream, chopped fresh cilantro, shredded vegan cheese, lettuce, red onion, salsa, jalapenos, chipotle sauce, avocado, and/or guacamole.
ingredients for Roasted Veggie Enchiladas with Black Bean Sauce.

How to make roasted veggie enchiladas

Find the complete recipe with measurements in the recipe card below.

Place the chopped vegetables on a large sheet pan and drizzle the oil over top. Toss to coat, then sprinkle with salt and pepper.

Roast the vegetables until tender.

roasted vegetables on a baking sheet.

To make the black bean sauce, add all of the sauce ingredients to a blender and blend until silky smooth. Taste and adjust the salt or spice level as needed.

For an extra spicy black bean enchilada sauce, make it with 3 chipotle peppers.

black bean sauce in a blender.

To assemble, spread some of the black bean sauce on the bottom of a baking dish. 

Fill each tortilla with some of the roasted vegetables, roll to close, and place them seam-side down in the baking dish.

Pour the rest of the black bean sauce over the rolled tortillas.

assembling Roasted Veggie Enchiladas with Black Bean Sauce in a baking dish.
pouring black bean sauce over rolled tortillas in a baking dish.

Cover the dish with foil and bake until the enchiladas are warmed through and the sauce is bubbly.

baked veggie enchiladas covered in black bean sauce in a baking dish.

Top with your desired toppings, then serve the enchiladas right away. Enjoy!

Roasted Veggie Enchiladas with Black Bean Sauce topped with avocado, onions, and cilantro in a baking dish.

Frequently asked questions

What other vegetables can I use?

Chopped sweet potatoes, spinach, kale, butternut squash, broccoli, yellow squash, bell peppers, corn kernels, and poblano peppers would all be delicious in this roasted enchilada recipe!

Do frozen vegetables work?

Frozen veggies are a really quick and convenient substitute for fresh vegetables. Plus, there’s no chopping or thawing required! Season the frozen vegetables as normal and roast for 15 to 30 minutes, depending on what kind of vegetables you’re roasting.

Can I add vegan cheese?

Absolutely! Top the black bean sauce-covered enchiladas with a layer of shredded vegan cheese or my Vegan Nacho Cheese Sauce, then cover and bake as normal before removing the foil and baking again until the cheese is melted or bubbly.

Can I make the enchiladas ahead of time?

Yes, the enchiladas can be assembled in the baking dish, kept covered, and refrigerated overnight or frozen for up to 3 months. Bake them as normal when you’re ready to eat but add an extra 5 to 10 minutes to the cooking time.

How long do the leftovers last?

The leftover enchiladas will keep for 3 days in the refrigerator or 3 months in the freezer. Wait for the leftovers to cool before transferring them to an airtight container.

two Roasted Veggie Enchiladas with Black Bean Sauce on a white plate with a fork on the side.
close up on Roasted Veggie Enchiladas with Black Bean Sauce on a white plate with a fork on the side.
Print

Roasted Veggie Enchiladas with Black Bean Sauce

These Roasted Veggie Enchiladas are packed with roasted vegetables and drenched in a chipotle garlic black bean sauce. Best served with sour cream, crushed tortilla chips or strips, avocado chunks, red onion and a squeeze of lime juice.
Course Main Dish
Cuisine Mexican-inspired
Prep Time 20 minutes
Cook Time 55 minutes
Total Time 1 hour 15 minutes
Servings 6 servings
Calories 401kcal

Ingredients

Roasted Veggies

  • 1/2 medium white onion diced
  • 8 ounces cremini mushrooms sliced
  • 1 medium zucchini chopped
  • 2 medium yukon gold potatoes peeled and diced
  • 3 cups cauliflower florets chopped small
  • 2 tablespoons olive oil
  • salt + pepper, to taste

Black Bean Sauce

  • (2) 15-ounce cans black beans drained and rinsed
  • 3 cloves garlic peeled
  • 1/2 cup chopped white onion
  • 2 chipotles in adobo sauce
  • 2 tablespoons adobo sauce
  • 2 cups vegetable broth
  • 1/4 teaspoon oregano
  • 1/2 teaspoon salt more to taste

The Rest

  • 15 corn tortillas, or about 8 medium flour tortillas warmed
  • tortilla strips or crushed tortilla chips
  • vegan sour cream
  • chopped fresh cilantro, lettuce, red onion diced, jalapenos, avocado

Instructions

  • Prep oven and dish – Preheat the oven to 400 degrees F and lightly grease a 9×13 inch baking dish.
  • Roasted the veggies – Add the vegetables to a large sheet pan. Drizzle with olive oil and toss until coated. Sprinkle with salt and pepper. Transfer to the oven and bake for 30 minutes, or until the vegetables and potatoes are tender. Remove from the oven and set aside.
  • Make the black bean sauce – In a high powered blender, add all sauce ingredients and blend until silky-smooth. Taste; add more chipotles for spice, or more salt as desired.
  • Assemble – Evenly spread 1/2 cup of the black bean sauce on the bottom of the baking dish. Fill each tortilla with about 1/4 cup of the veggies (more for flour tortillas), roll and place seam side down in the dish. Pour the rest of the black bean sauce over the rolled tortillas, leaving the edges a little dry.
  • Bake enchiladas – Cover and bake for 15 minutes, then uncover and bake for 10 more minutes.
  • Garnish with toppings of choice and serve immediately.

Notes

  1. Feel free to substitute any vegetables or potatoes that you want, like sweet potatoes, broccoli, butternut squash, kale and so on.
  2. For gluten free, use corn tortillas.
  3. Add some shredded vegan cheese on top before baking, if desired.

Nutrition

Serving: 1of 6 servings | Calories: 401kcal | Carbohydrates: 72g | Protein: 16g | Fat: 7g | Saturated Fat: 1g | Polyunsaturated Fat: 2g | Monounsaturated Fat: 4g | Sodium: 742mg | Potassium: 1240mg | Fiber: 18g | Sugar: 5g | Vitamin A: 243IU | Vitamin C: 47mg | Calcium: 141mg | Iron: 5mg

Sweet Potato Curry with Chickpeas

Sweet Potato Curry with Chickpeas served with white rice in a white bowl.Sweet Potato Curry with Chickpeas and Spinach is an easy one-pot meal you can make for weeknight dinners and meal prep! It’s comforting, flexible, and loaded with flavor. Craving more easy curry recipes? You’ll have to try my Thai Red Curry, Easy Vegan Curry, and Vegan Thai Green Curry recipes as well! When you’re searching…
Sweet Potato Curry with Chickpeas served with white rice in a white bowl.

Sweet Potato Curry with Chickpeas and Spinach is an easy one-pot meal you can make for weeknight dinners and meal prep! It’s comforting, flexible, and loaded with flavor.

Craving more easy curry recipes? You’ll have to try my Thai Red Curry, Easy Vegan Curry, and Vegan Thai Green Curry recipes as well!

Sweet Potato Curry with Chickpeas served with white rice in a white bowl.

When you’re searching for winter comfort foods, you’ll typically stumble on hearty stews and creamy soups, but I’m a bigger fan of curry recipes. They’re the ultimate cozy meal, with warm spices, creamy sauces, and loads of seasonal veggies in every bite. It’s everything you need in a winter meal!

That’s why you’ll find this Easy Sweet Potato Curry Recipe on my dinner menu almost weekly when it’s cold outside. I can’t get enough of the hearty sweet potatoes and protein-packed chickpeas swimming in the aromatic and creamy red curry sauce! It also doesn’t hurt that it quickly comes together in one pan.

Just like my Butternut Squash Curry, you can quickly throw this red curry recipe together for a comforting family dinner or during your Sunday meal prep. It stays fresh and flavorful for days and even freezes well!

Why you need to try this sweet potato curry recipe

  • A seasonal Thai-inspired curry recipe – Sweet potatoes give this Thai-inspired curry a fall and winter twist, while the spicy-ish curry sauce warms you up.
  • Quick, easy, and made in one pan! This has to be one of the easiest fall dinner recipes. All you have to do is toss everything in a skillet, simmer until the potatoes are tender, then serve!
  • Make it your own – Add more vegetables, swap the sweet potatoes for pumpkin, or tone down the heat. The ways to make this recipe your own are endless!
using a wooden spoon to scoop sweet potato curry in a black skillet.

Ingredients needed (with substitutions)

  • Vegetable oil
  • Garlic and ginger
  • Red curry paste – My favorite red curry paste is by Thai Kitchen because it’s vegan, full of flavor, and easy to find in most well-stocked grocery stores.
  • Ground turmeric
  • Sweet potatoes – The star of the curry! Use regular sweet potatoes, yams, or swap them for peeled and diced pumpkin or butternut squash to make a recipe that’s similar to my Butternut Squash Curry.
  • Coconut milk – Use canned full-fat coconut milk to make the curry super creamy. You can substitute plain yogurt or cashew cream, or even some sort of vegan cream like Ripple brand half and half.
  • Water – Or vegetable broth.
  • Chickpeas – I like to use canned chickpeas for convenience, but freshly cooked chickpeas are delicious here, too. Or, instead of using chickpeas, make the curry with pre-cooked or canned green or brown lentils.
  • Salt and pepper
  • Spinach – For a hint of green in the curry. Kale works, too.
  • Sugar – This is optional but balances the flavors very well.
  • Lime juice
ingredients for Sweet Potato Curry with Chickpeas in individual white bowls.

How to make sweet potato curry with chickpeas

Find the complete recipe with measurements in the recipe card below.

Start by sautéing the garlic and ginger in an oiled skillet over medium heat. 

cooking garlic in a black skillet.

Stir in the red curry paste and turmeric to coat the aromatics, then pour in the coconut milk and water/broth. Stir to combine and use a wooden spoon to loosen any bits of food stuck to the bottom of the pan.

stirring red curry sauce with a wooden spoon in a black skillet.

Add the sweet potatoes, chickpeas, salt, and pepper to the curry.

Heat to a boil, then lower the heat and simmer until the potatoes are fork tender.

For deeper layers of flavor, roast the sweet potatoes (tossed in a little olive oil) in a 400ºF oven for 30 to 45 minutes, then add them to the curry with the chickpeas and only simmer for 10 to 15 minutes.

stirring sweet potatoes into a red curry sauce with a wooden spoon in a black skillet.

To finish, stir the spinach, sugar, and lime juice into the curry and cook until the spinach is wilted. 

Take the skillet off the heat and serve the curry right away over cooked basmati rice with cilantro or Thai basil on top. Enjoy!

fresh spinach on top of red curry in a black skillet.

Frequently asked questions

What else can I add to vegan curry?

As with most curry recipes, you can add all kinds of different vegetables or plant proteins to make the recipe your own. Add fresh or frozen vegetables, swap the chickpeas for white beans, lentils, cauliflower florets, or broccoli florets, and/or add fried tofu cubes for extra protein.

Is red curry paste spicy?

Most red curry paste has a mild to medium level of heat, but it varies from brand to brand. In this recipe, most of the heat is tempered by the coconut milk, so you won’t set your mouth on fire.

If you’re still worried about it being too spicy, you can start with only 1 1/2 tablespoons of red curry paste, then gradually add more until you reach just the right amount of heat.

I can’t find red curry paste. What can I use instead?

Don’t use yellow curry paste or green curry paste as a substitute. They will completely change the flavor profile! Instead, replace the red curry paste with 1 tablespoon of garam masala, 2 teaspoons of curry powder, and 1/4 teaspoon of ground cumin. The flavor will be different but will complement the veggies and warm flavors well.

How do I store leftover sweet potato curry?

Wait for the curry to cool before transferring it to an airtight container. Store the leftovers in the fridge for 4 to 5 days or in the freezer for up to 3 months.

Sweet Potato Curry with Chickpeas served with white rice in a white bowl.
Print

Sweet Potato Curry with Chickpeas

Sweet Potato Curry with Chickpeas and Spinach is an easy one-pot meal you can make for weeknight dinners and meal prep! It’s comforting, flexible, and loaded with flavor.
Course Main Dish
Cuisine Thai-inspired
Prep Time 10 minutes
Cook Time 20 minutes
Total Time 30 minutes
Servings 5 servings
Calories 335kcal

Ingredients

Sweet Potato Curry

  • 2 tablespoons vegetable oil
  • 3 large cloves garlic minced
  • 1 tablespoon minced fresh ginger
  • 3 tablespoons red curry paste vegan friendly
  • 1/2 teaspoon ground turmeric
  • 2 medium sweet potatoes peeled and chopped into 1/2 inch chunks
  • 13.5 ounce can full fat coconut milk
  • 1/2 cup water
  • 15 ounce can chickpeas or lentils, drained and rinsed
  • 1 teaspoon salt
  • 1/4 teaspoon black pepper
  • 4 cups baby spinach or kale
  • 1 tablespoon granulated sugar optional
  • 2 tablespoons fresh lime juice

For Serving

Instructions

  • Heat the oil in a large skillet over medium heat. Once hot, add the garlic and ginger and cook, stirring frequently for 1-2 minutes.
  • Stir in the red curry paste and turmeric, then pour in the coconut milk and water. Stir to combine and scrape any stuck bits from the bottom.
  • To the pan, add the sweet potatoes, chickpeas or lentils, salt and pepper. Bring to a boil, then lower the heat and simmer for about 15 minutes, or until the sweet potatoes are fork tender.
  • Stir in the baby spinach, sugar and lime juice. Cook until the spinach is wilted, then remove from heat and serve over cooked rice with cilantro or basil.

Notes

  1. Any kind of sweet potato will work here, or yams. Pumpkin or squash would be a good substitute if you have it.
  2. If you don’t have red curry paste, you can substitute 1 tablespoon of garam masala, 2 teaspoons curry powder and 1/4 teaspoon ground cumin. The flavor will be quite different.
  3. You can leave out the chickpeas/lentils if desired. Add some cauliflower florets or even broccoli, instead.
  4. Nutritional information is an estimate only and does not include rice.

Nutrition

Serving: 1of 5 servings | Calories: 335kcal | Carbohydrates: 37g | Protein: 8g | Fat: 19g | Saturated Fat: 15g | Polyunsaturated Fat: 1g | Monounsaturated Fat: 1g | Sodium: 782mg | Potassium: 756mg | Fiber: 7g | Sugar: 7g | Vitamin A: 16509IU | Vitamin C: 13mg | Calcium: 113mg | Iron: 5mg

Peanut Butter Energy Balls

close up on peanut butter energy balls next to a small bowl of peanut butter on a parchment lined baking sheet.Need a boost of energy? Grab one of these no-bake Peanut Butter Energy Balls! They’re an easy 5-ingredient snack you can take on the go or freeze for later. If you’re looking for more easy and energizing snacks, you’ll also love my Vegan Chocolate Peanut Butter Bars, Vegan Granola, and Vegan No Bake Cookies. These…
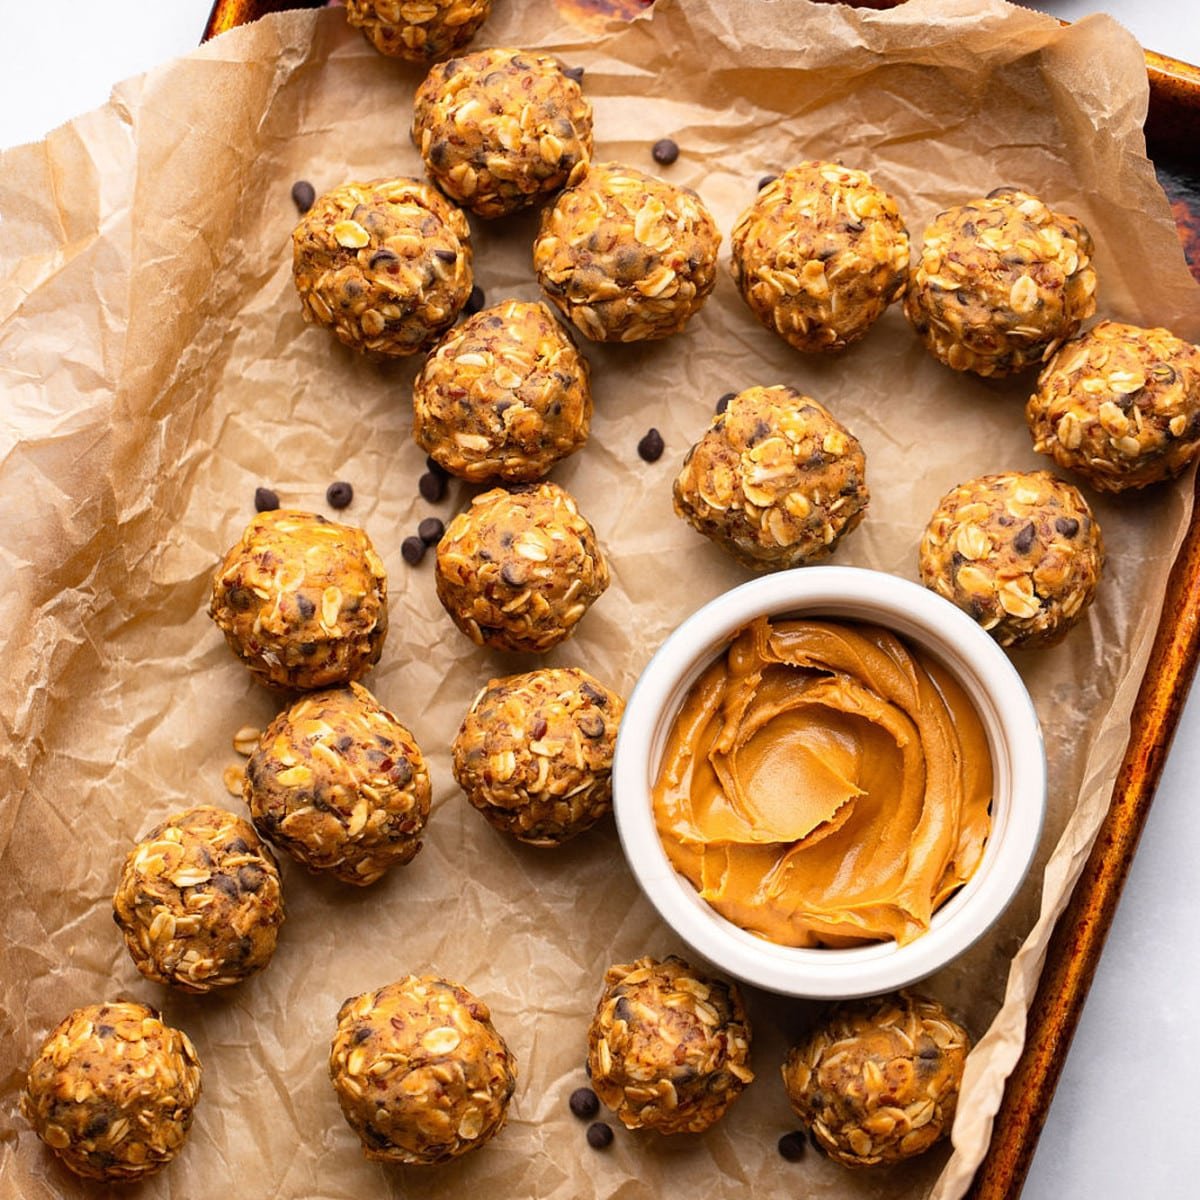
close up on peanut butter energy balls next to a small bowl of peanut butter on a parchment lined baking sheet.

Need a boost of energy? Grab one of these no-bake Peanut Butter Energy Balls! They’re an easy 5-ingredient snack you can take on the go or freeze for later.

If you’re looking for more easy and energizing snacks, you’ll also love my Vegan Chocolate Peanut Butter Bars, Vegan Granola, and Vegan No Bake Cookies.

peanut butter energy balls next to a small bowl of peanut butter on a parchment lined baking sheet.

These no-bake Peanut Butter Energy Balls taste like a mix between an oatmeal chocolate chip cookie and a peanut butter cookie! They’re just as chewy, sweet, and addictive, but a little better for you thanks to the 5 wholesome ingredients. Plus, as a no-bake recipe, they’re ready to eat in a matter of minutes.

You’ll always find a batch of peanut butter and oat balls in my fridge or freezer because they’re a convenient way to power me through a sleepy afternoon. One or two energy bites later, and I’m feeling like myself again!

I can’t get enough of the mix of peanut butter, old-fashioned oats, and vegan chocolate chips in each one, but you can easily put your own spin on the recipe with your favorite add-ins. Shredded coconut, protein powder, or warm spices are all welcome! Whatever you do, I know you’ll love this fun, easy, and energizing snack.

Why this is the best peanut butter energy balls recipe

  • An easy no-bake treat – Just stir the 5 feel-good ingredients together in one bowl, roll into bite-sized balls, and enjoy!
  • Perfect for an energy boost! Grab one or two chocolate chip energy balls whenever you need a quick pick-me-up (that isn’t a cup of coffee).
  • Make them your own – I’ve included a bunch of add-in ideas and flavor boosters to help you customize your energy bites.
close up on peanut butter energy balls next to a small bowl of peanut butter on a parchment lined baking sheet.

Ingredients needed

  • Creamy peanut butter: Or use crunchy if you’d like some texture. You can use natural peanut butter (the kind that needs to be stirred) but I prefer the no stir variety.
  • Old-fashioned rolled oats: I haven’t tried using quick oats as a substitute, but they should work. Use gluten free certified if needed.
  • Ground flaxseeds – Or chia or hemp seeds.
  • Maple syrup or agave
  • Mini vegan chocolate chips: Check out the other mix-in ideas below!
ingredients for Peanut Butter Energy Balls in individual white bowls.

How to make peanut butter energy balls

Find the complete recipe with measurements in the recipe card below.

Stir all of the ingredients together in a medium-sized mixing bowl until combined.

stirring the ingredients for Peanut Butter Energy Balls in a glass bowl.

Place the bowl in the fridge for 30 minutes so the oat mixture can chill and firm up slightly.

Afterward, use a cookie scoop or a spoon to roll the oat mixture into 1-inch balls. Enjoy the balls right away or chill them for later.

Are the oats sticking to your hands? Wet your hands with a little water to keep the oat mixture from sticking as much.

a glass bowl with an oat-peanut butter mixture beside rolled peanut butter energy balls on a white plate.

Variations

Put your own spin on this energy bites recipe with these variation ideas:

  • Peanut butter energy bars – Instead of rolling it into bite-sized balls, press the oat mixture into a parchment-lined 9×13 baking dish and chill until they’re solid. Cut into bars and enjoy!
  • Chocolate energy balls – Mix 1 tablespoon of cocoa powder with the oats and peanut butter.
  • Add protein powder – Add 1 scoop of peanut butter, vanilla, chocolate, or unflavored vegan protein powder. You may need to add a little more peanut butter or maple syrup if the mixture is dry.
  • Add warm flavor boosters – Add 1 teaspoon of vanilla extract for a little sweetness or 1 teaspoon of pumpkin pie spice for warmth.
  • More add-in ideas – Feel free to swap the chocolate chips with chopped nuts (almonds, peanuts, walnuts, etc.), dried fruit (dates, cranberries, raisins, etc.), rainbow sprinkles, or shredded coconut.
close up on peanut butter energy balls next to a small bowl of peanut butter on a parchment lined baking sheet.

Frequently asked questions

Are these peanut butter oat energy balls gluten-free?

Yes, these oat balls are naturally gluten-free as long as you use certified gluten-free rolled oats.

Do I have to use peanut butter?

Nope! You can use an equal amount of almond butter instead if you’d like. Or, for a nut-free alternative, use sunflower seed butter.

I don’t have flaxseed. What can I use instead?

An equal amount of chia seeds or hemp seeds will work just as well.

How do I store energy balls?

The rolled energy balls can be stored in an airtight container in the fridge for up to 1 week.

Can I freeze them?

Yes, the oat balls freeze very well! Flash-freeze them on a baking sheet until they’re solid, transfer them to an airtight container or large ziplock bag, and freeze for up to 3 months.

a peanut butter energy ball with a bite taken out of it on a parchment-lined baking sheet.
close up on peanut butter energy balls next to a small bowl of peanut butter on a parchment lined baking sheet.
Print

Peanut Butter Energy Balls

Need a boost of energy? Grab one of these no-bake Peanut Butter Energy Balls! They’re an easy 5-ingredient snack you can take on the go or freeze for later.
Course Snack
Cuisine American
Prep Time 15 minutes
Total Time 15 minutes
Servings 20 balls
Calories 148kcal

Ingredients

Instructions

  • In a medium sized bowl, stir all the ingredients together until well combined.
  • Place the bowl in the refrigerator for 30 minutes to chill. This makes rolling the balls easier.
  • Once chilled, roll into 1 inch balls. If it's too sticky, get your hands slightly damp every so often.
  • Store in the refrigerator for 1 week, or freeze them for longer.

Notes

  1. May use a combination of flax and chia seeds, or even hemp seeds if you want.
  2. Use almond butter instead of peanut for a different variation, or sunflower seed butter for nut allergy.

Nutrition

Serving: 1of 20 balls | Calories: 148kcal | Carbohydrates: 13g | Protein: 5g | Fat: 10g | Saturated Fat: 2g | Polyunsaturated Fat: 3g | Monounsaturated Fat: 4g | Cholesterol: 1mg | Sodium: 60mg | Potassium: 130mg | Fiber: 2g | Sugar: 6g | Vitamin A: 10IU | Vitamin C: 0.1mg | Calcium: 28mg | Iron: 1mg

Butternut Squash and Sweet Potato Soup

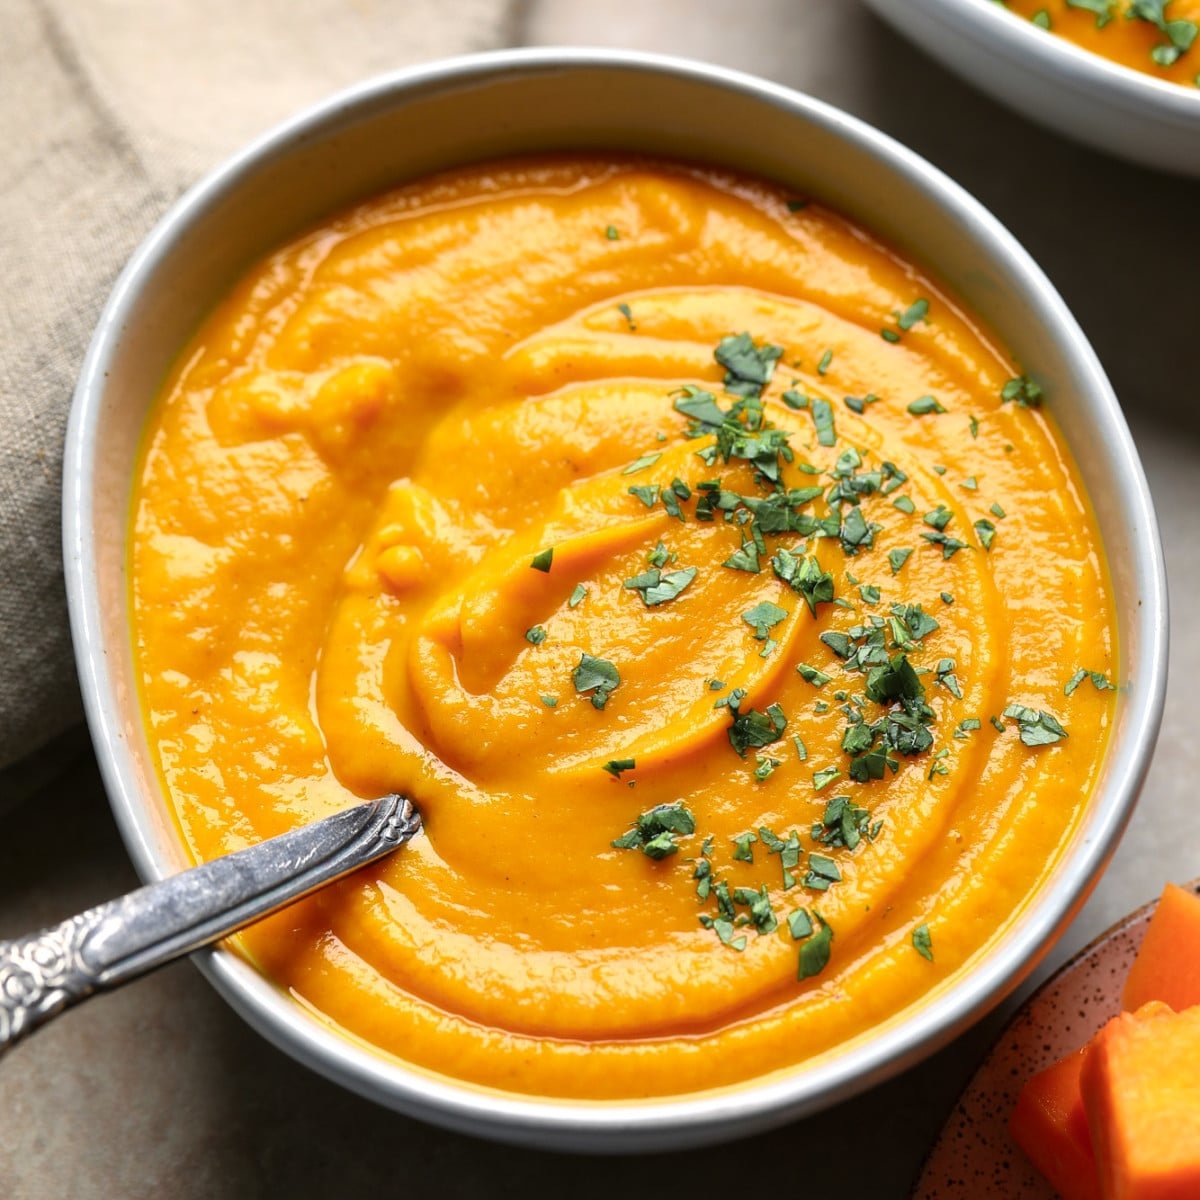
a bowl of Butternut Squash and Sweet Potato Soup topped with chopped herbs.This Butternut Squash and Sweet Potato Soup is an easy, healthy, and creamy fall side dish packed with simple seasonal vegetables! Perfect for your holiday celebrations or weeknight dinners. If you’re looking for more creamy autumn soup recipes, you’ll also love my Vegan Mushroom Soup with Wild Rice, Creamy Carrot and Lentil Soup, and Vegan…
a bowl of Butternut Squash and Sweet Potato Soup topped with chopped herbs.

This Butternut Squash and Sweet Potato Soup is an easy, healthy, and creamy fall side dish packed with simple seasonal vegetables! Perfect for your holiday celebrations or weeknight dinners.

If you’re looking for more creamy autumn soup recipes, you’ll also love my Vegan Mushroom Soup with Wild Rice, Creamy Carrot and Lentil Soup, and Vegan Pumpkin Soup!

a bowl of Butternut Squash and Sweet Potato Soup topped with chopped herbs.

Crisp fall days call for this vegan Butternut Squash and Sweet Potato Soup. It’s one of my favorite seasonal side dishes because it fills my home with the rich, comforting aromas of fall as it simmers on the stove! Luckily, it’s ready in about 1 hour, so I don’t have to wait long to treat myself to a bowl.

What sets this butternut squash and sweet potato soup recipe apart from others is that the vegetables are roasted, not steamed or boiled. This takes the flavors to a whole new level because the heat of the oven draws out the veggies’ hidden nutty-earthy flavors, making them extra flavorful and beautifully caramelized. 

The roasted vegetables are blended with aromatics, warm winter spices, and vegetable broth until you’re left with a comforting, silky smooth, and wholesome side dish! I love curling up with a bowl when it’s cold outside and it’s always a hit at Thanksgiving dinner. Luckily, this recipe makes plenty of soup for everyone and the leftovers freeze well, too!

Why you’ll love this cozy autumn soup

  • The best fall produce in every spoonful – Like my Vegan Butternut Squash soup, this recipe makes classic fall vegetables the star.
  • Warm, comforting, and creamy – The key here is to roast the vegetables before blending them into the soup. This unlocks their hidden flavors, and when combined with winter spices and caramelized aromatics, every slurp is taken to another level.
  • A foolproof, 10-ish ingredient fall side dish – This cozy vegan fall soup is ready in about 1 hour. All you have to do is roast the veggies, toss them in a pot with aromatics, spices, and broth, then blend until smooth!

How to make sweet potato and butternut squash soup

Find the complete recipe with measurements in the recipe card below.

Lay the chopped squash and potatoes on a baking sheet and drizzle with olive oil. Toss to coat, then season with salt and pepper. Roast the vegetables until they’re fork tender.

roasted cubes of butternut squash and sweet potatoes on a sheet pan.

After they’re done roasting, cook the onion in a large oiled pot over medium heat. Once soft, add the garlic and ginger and cook until fragrant.

Transfer the roasted butternut squash and potatoes to the soup pot along with the cinnamon, nutmeg, broth, and salt. Stir to combine.

Blend the soup until it’s silky smooth. Cook for another 10 minutes to warm it up, then serve in bowls with a drizzle of coconut milk or cashew cream. Enjoy!

a wooden spoon in a pot of butternut squash and sweet potato soup.

Frequently asked questions

What goes well with butternut squash sweet potato soup?

Serve every bowl with a drizzle of coconut milk, coconut cream, vegan cream, or cashew cream to make it extra luxurious. If you want some texture, add pumpkin seeds, chopped pecans, fried sage leaves, or croutons on top as well. 

This recipe makes enough soup for a crowd, so it’s perfect for your Thanksgiving or Christmas dinner! Its warm flavors complement the Vegan Turkey Roast, Green Bean Casserole, and other classics so well. 

You can also enjoy it as an appetizer or side dish with everyday family dinners. Serve it alongside any vegan main dish you like, such as Stuffed Jumbo Shells or Cheesy Broccoli Rice Casserole. Some crusty bread is always a must for dunking, too!

Should I peel the butternut squash and sweet potatoes?

I recommend peeling the squash and potatoes to make the soup as smooth as possible. I know this step can be a pain but buying pre-peeled and cubed butternut squash will save you lots of time and effort!

How do I store vegan butternut squash sweet potato soup?

Wait for the soup to cool to room temperature before transferring it to an airtight container. It will keep for up to 5 days when stored in the refrigerator or up to 3 months in the freezer.

a hand lifting a spoon out of a bowl of Butternut Squash and Sweet Potato Soup.
a bowl of Butternut Squash and Sweet Potato Soup topped with chopped herbs.
Print

Butternut Squash and Sweet Potato Soup

This Butternut Squash and Sweet Potato Soup is an easy, healthy, and creamy fall side dish packed with simple seasonal vegetables! Perfect for your holiday celebrations or weeknight dinners.
Course Soup
Cuisine American
Prep Time 20 minutes
Cook Time 45 minutes
Total Time 1 hour 5 minutes
Servings 6 servings
Calories 256kcal

Ingredients

Roasted Vegetables

  • 1 large butternut squash (5 cups cubed)
  • 2 medium-large sweet potatoes (3 cups peeled and cubed)
  • 1/4 cup olive oil
  • salt + black pepper

The Rest

  • 1 tablespoon olive oil
  • 1 medium sweet onion diced
  • 5 cloves garlic minced
  • 1 tablespoon grated fresh ginger or 1/2 tsp dried
  • 1/2 teaspoon ground cinnamon
  • 1/4 teaspoon ground nutmeg
  • 4 cups vegetable broth
  • 1 teaspoon salt or to taste
  • drizzle of coconut milk or cashew cream optional, for serving

Instructions

  • Prepare – Preheat the oven to 400 degrees F and get out a large rimmed baking sheet.
  • Roast vegetables – Place the chopped squash and potatoes on the baking sheet and drizzle with olive oil. Toss right in the pan to coat with oil, then sprinkle with salt and pepper. Roast in the oven for about 35-45 minutes, until fork tender and golden brown in some places.
  • Start this process when the vegetables are done roasting – In a large pot over medium heat, cook the onion in the oil for about 5 minutes, until translucent. Now add the garlic and ginger and cook for 1 more minute, until fragrant.
  • The rest – Transfer the squash/sweet potatoes from the baking pan to the soup pot, carefully. Now add the cinnamon, nutmeg, broth and salt. Stir well. Use a high powered blender to blend the soup in batches for a silky smooth soup. Alternatively, use an immersion blender. Cook for about 10 minutes until warm; taste and add more salt/pepper or spices as desired. Serve with a drizzle of coconut milk, cashew cream if desired.

Nutrition

Serving: 1of 6 servings | Calories: 256kcal | Carbohydrates: 38g | Protein: 3g | Fat: 12g | Saturated Fat: 2g | Polyunsaturated Fat: 1g | Monounsaturated Fat: 8g | Sodium: 708mg | Potassium: 838mg | Fiber: 6g | Sugar: 10g | Vitamin A: 25842IU | Vitamin C: 37mg | Calcium: 110mg | Iron: 2mg

Pumpkin Oatmeal

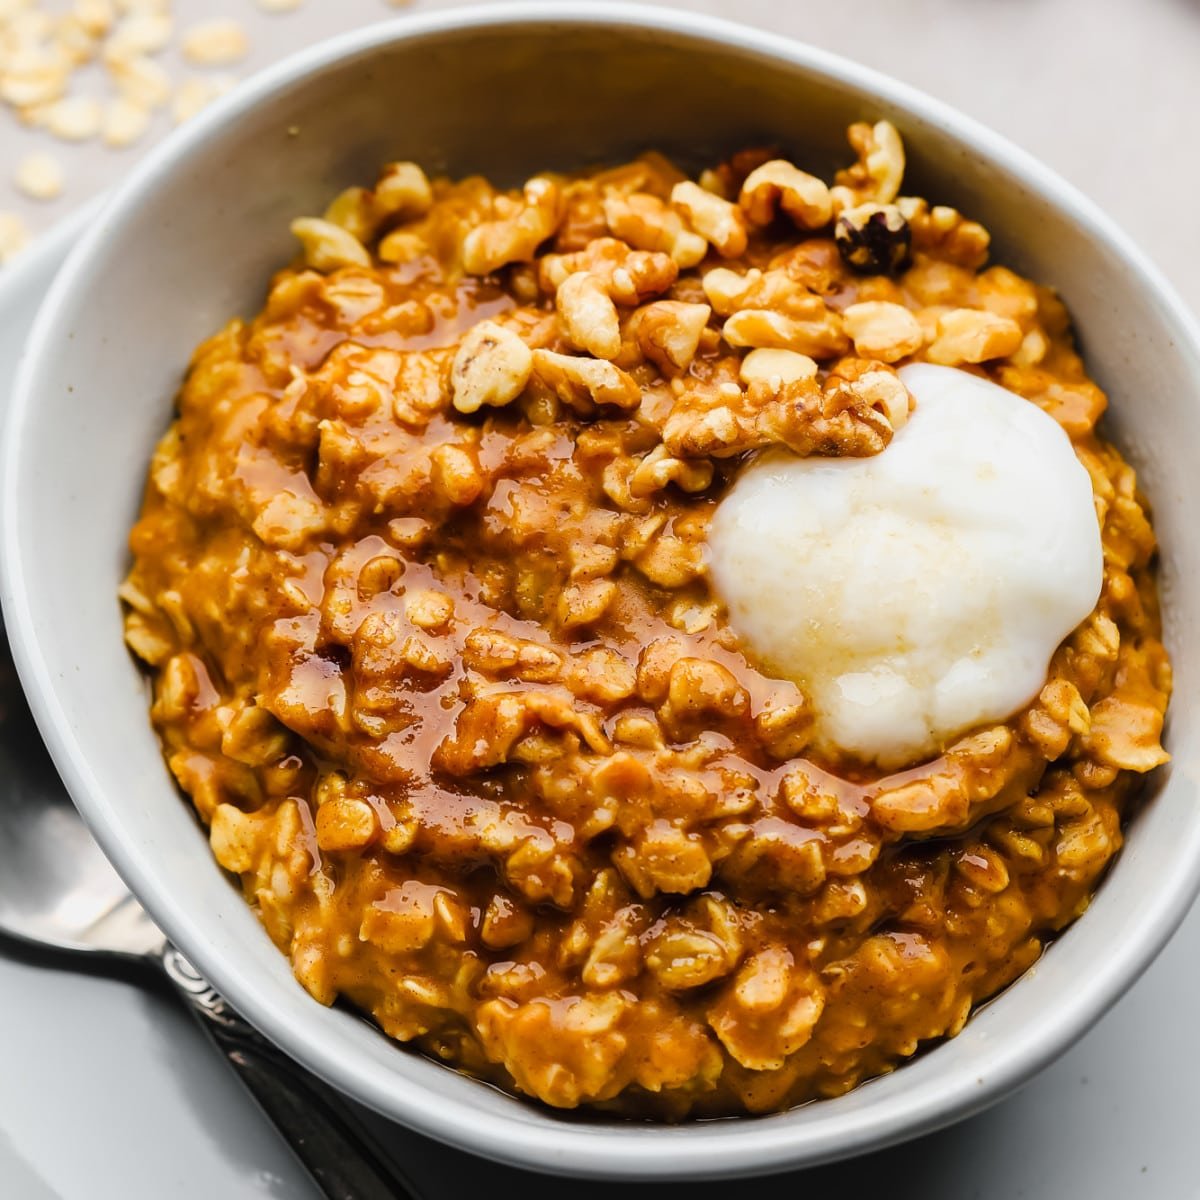
pumpkin oatmeal in a white bowl with a dollop of vegan yogurt on top.Start your day with a bowl of warm and cozy Vegan Pumpkin Oatmeal! It’s a quick, easy, and healthy breakfast made with 7 ingredients, like real pumpkin and pumpkin pie spice. Craving more vegan pumpkin breakfast recipes? You’ll also love my Vegan Pumpkin Waffles, Vegan Pumpkin Pancakes, and Pumpkin French Toast. As much as I…
pumpkin oatmeal in a white bowl with a dollop of vegan yogurt on top.

Start your day with a bowl of warm and cozy Vegan Pumpkin Oatmeal! It’s a quick, easy, and healthy breakfast made with 7 ingredients, like real pumpkin and pumpkin pie spice.

Craving more vegan pumpkin breakfast recipes? You’ll also love my Vegan Pumpkin Waffles, Vegan Pumpkin Pancakes, and Pumpkin French Toast.

pumpkin oatmeal in a white bowl with a dollop of vegan yogurt on top.

As much as I would love to eat a slice of vegan pumpkin pie for breakfast during the fall (and sometimes I do!), a bowl of this Pumpkin Spice Oatmeal is the next best thing and it’s a bit healthier. Luckily, it’s a sweet and ultra-cozy breakfast that tastes just like the classic fall dessert!

Pumpkin oats couldn’t be easier to make. Just combine the simple ingredients, like oats, pumpkin puree, pumpkin pie spice, and milk, in a pot on the stove and simmer until the oats are soft and creamy. Voila! You have a comforting fall breakfast that will keep you full and warm you up.

If you’re looking for a baked oatmeal recipe, try my Pumpkin Oatmeal Bake instead.

Why you’ll love this cozy fall breakfast

  • A perfect fall breakfast – Rolled oats are simmered with milk, pumpkin, and warm spices to give you a quick breakfast that will warm you from head to toe.
  • For pumpkin lovers – If you’ve been counting down the days to pumpkin season, then you’ve gotta enjoy this pumpkin oatmeal for breakfast, vegan pumpkin soup for lunch, and pumpkin gnocchi for dinner!
  • Quick, easy, and good for you – A bowl of this fiber-rich and warmly-spiced oatmeal will not only warm you up but also keep you full for hours.

How to make pumpkin spice oatmeal

Find the complete recipe with measurements in the recipe card below.

Combine the oats, pumpkin, milk, pumpkin pie spice, salt, and the sweetener of your choice in a small pot. Heat to a simmer over medium heat and cook until the oats are soft.

Serve the warm pumpkin oatmeal in bowls with a drizzle of maple syrup, chopped pecans or walnuts, a splash of non-dairy milk, vegan whipped cream, or vegan yogurt on top. Enjoy!

the ingredients for pumpkin oatmeal in a pot.

Variations

  • Gluten-free – Use certified gluten-free rolled oats to keep this recipe gluten-free. Not all oats are gluten-free, as some are processed in factories with other wheat products.
  • Nut-free – Instead of topping the oatmeal with chopped nuts, use pumpkin seeds or sunflower seeds instead.
  • Use quick oats – Use an equal amount of quick oats and cook them for slightly less time.
  • Instead of pumpkin – Use sweet potato or butternut squash puree or sweet potato as a substitute.

Frequently asked questions

Can I turn this recipe into overnight oats?

Yes, you can easily turn this into a pumpkin overnight oats recipe if you’d like to prepare it ahead of time or take your breakfast with you on the go. For overnight oats, stir all of the ingredients together in a large bowl, cover it with a lid or transfer the oats into individual mason jars, and place in the fridge to soak overnight.

The overnight oats can be refrigerated for up to 4 days. Before serving, heat up the oats in the microwave or enjoy them cold.

How long do the leftovers last?

The leftover cooked oats will keep for 3 to 4 days when stored in an airtight container in the fridge. I love making a double batch and saving the leftovers for quick and easy breakfasts.

Can you freeze pumpkin oatmeal?

Yes, pumpkin oatmeal freezes well for up to 3 months. After the leftovers cool to room temperature, transfer them to freezer-safe airtight containers or ziplock bags. Thaw the oatmeal in the refrigerator before reheating in the microwave or in a pot on the stove.

cooking pumpkin oatmeal in a pot.
pumpkin oatmeal in a white bowl with a dollop of vegan yogurt on top.
Print

Pumpkin Oatmeal

Start your day with a bowl of warm and cozy Vegan Pumpkin Oatmeal! It’s a quick, easy, and healthy breakfast made with 7 ingredients, like real pumpkin and pumpkin pie spice.
Course Breakfast
Cuisine American
Prep Time 5 minutes
Cook Time 5 minutes
Total Time 10 minutes
Servings 2 servings
Calories 283kcal

Ingredients

  • 1 cup rolled oats
  • 1/2 cup pumpkin puree
  • 1 1/2 cups soy milk or any other milk
  • 1 teaspoon pumpkin pie spice
  • 1/2 teaspoon pure vanilla extract
  • pinch of salt
  • 1-2 tablespoons brown sugar or pure maple syrup, to taste
  • Toppings chopped walnuts or pecans, more sweetener, more milk, yogurt or whipped topping

Instructions

  • Add the oats, pumpkin, milk, pumpkin pie spice, pinch of salt and sweetener of choice to a small pot.
  • Bring to a simmer over medium heat, and cook, stirring frequently, for about 3-4 minutes, until the oats are softened.
  • Serve in bowls topped with additional sweetener, nuts, milk, whipped topping or yogurt. Enjoy!

Notes

  1. The leftovers will keep for 3-4 days. I love making a double batch to have on hand for a few days. Simply reheat in the microwave or in a pot.
  2. For overnight oats, add all ingredients to a bowl with a lid and stir well to combine. Let it sit in the fridge overnight and up to 4 days. When ready to serve, you can either heat them up a bit in the microwave, or stir and enjoy cold.
  3. If you don’t have pumpkin pie spice mix, you can use the following spice mix instead: 3/4 teaspoon cinnamon, 1/4 teaspoon ground ginger, 1/8 teaspoon ground nutmeg.
  4. The nutrition information does not include any optional toppings.

Nutrition

Serving: 1of 2 servings | Calories: 283kcal | Carbohydrates: 45g | Protein: 11g | Fat: 6g | Saturated Fat: 1g | Polyunsaturated Fat: 3g | Monounsaturated Fat: 2g | Sodium: 96mg | Potassium: 539mg | Fiber: 7g | Sugar: 13g | Vitamin A: 10231IU | Vitamin C: 16mg | Calcium: 297mg | Iron: 4mg

Roasted Tomato Pasta

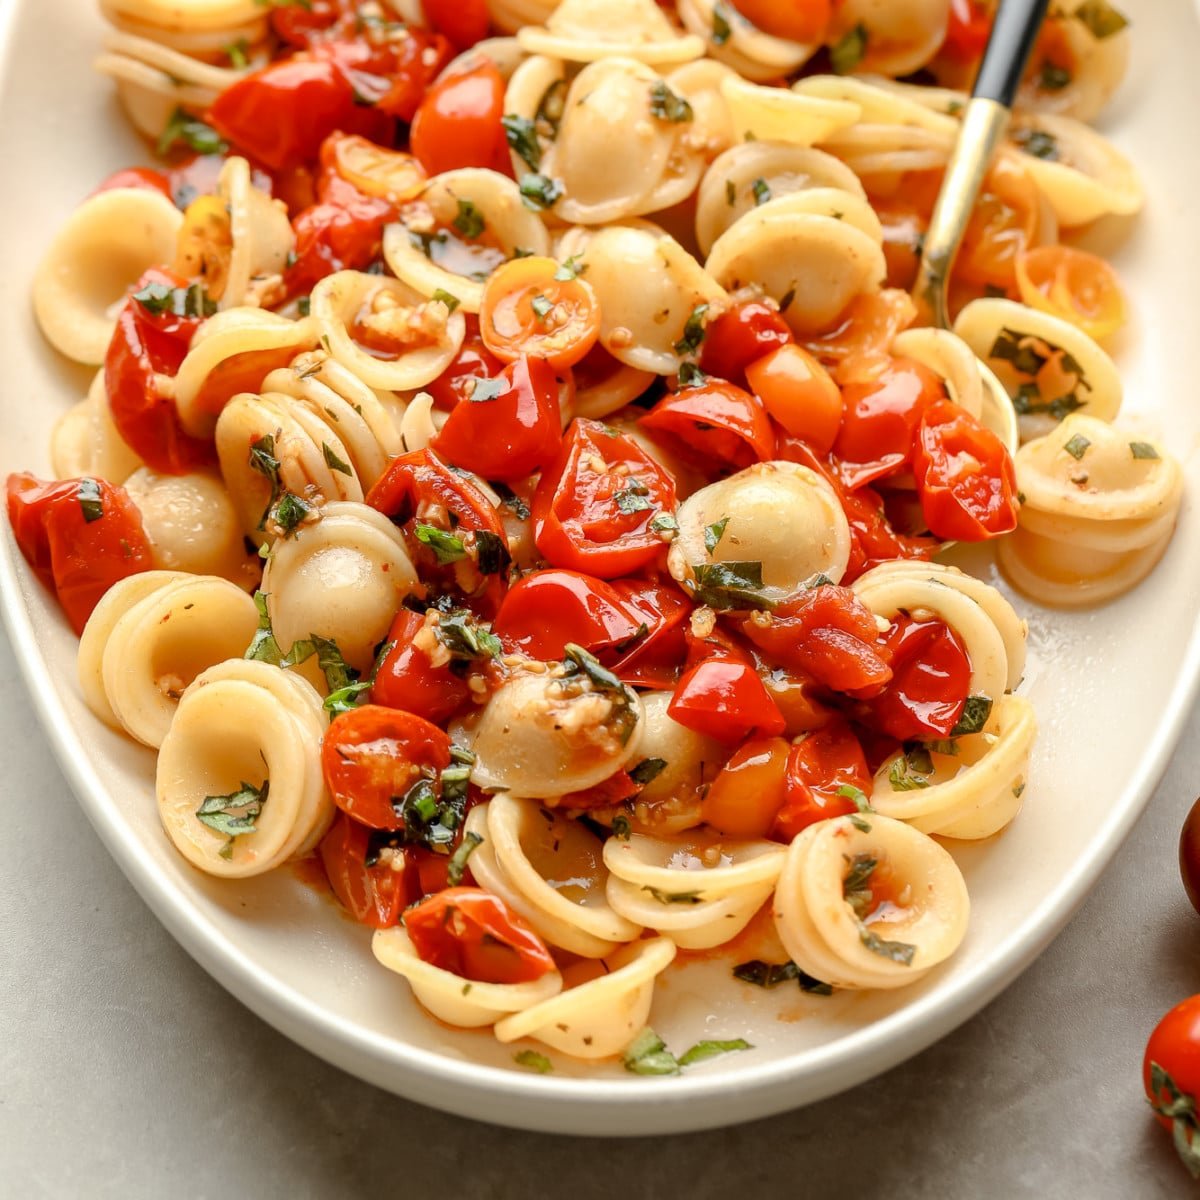
close up on roasted tomato pasta in a white serving dish.Make this super simple 30-minute Roasted Tomato Pasta for an unforgettable late summer dinner! With beautifully blistered roasted tomatoes, garlic, herbs, and al dente pasta in every bite, you’ll be making this recipe on repeat. Looking for more light and fresh pasta recipes to add to your dinner menu? Check out my Green Pasta, 15…

close up on roasted tomato pasta in a white serving dish.

Make this super simple 30-minute Roasted Tomato Pasta for an unforgettable late summer dinner! With beautifully blistered roasted tomatoes, garlic, herbs, and al dente pasta in every bite, you’ll be making this recipe on repeat.

Looking for more light and fresh pasta recipes to add to your dinner menu? Check out my Green Pasta, 15 Minute Lemon Pasta, and One Pot Vegan Pasta recipes as well.

Roasted Tomato Pasta in a white serving dish with a spoon.

Cozy and delicious dinners don’t have to be complicated. Just look at this simple Vegan Roasted Tomato Pasta recipe! By roasting tomatoes with aromatics, cooking pasta on the stove, and then tossing the two together, you’re left with an addictively delicious meal that only takes 30 minutes.

Why roast tomatoes for pasta? Obviously, tossing raw cherry tomatoes with cooked pasta is faster and easier, but taking the time to roast them in the oven takes every bite to the next level. The heat of the oven draws out their natural sugars and hidden flavors, and when combined with garlic and herbs, you get a hands-off, umami-packed, and perfectly sweet cherry tomato sauce.

Simple, quick, and healthy, the whole family is going to love this meal, especially when it’s served with a few dollops of my Almond Ricotta Cheese!

Why you’ll love this easy roasted tomato pasta

  • Simplicity at its finest – Roast the tomatoes with herbs and aromatics, cook the pasta, and then toss the two together. That’s all it takes to make this 30-minute dinner!
  • A must for tomato season – Tomatoes thrive during late summer and you will too after trying this recipe. Roasted tomatoes—whether you use cherry tomatoes, Roma tomatoes, or Campari tomatoes—pack every bite of this summer pasta with sweet and umami goodness.
  • Picky eater approved – Its simplicity and layers of Italian flavors make this meal hard to resist, even by the pickiest eaters.

How to make vegan roasted tomato pasta

Find the complete recipe with measurements in the recipe card below.

Slice the cherry tomatoes in half and place them in a baking dish. Drizzle with olive oil, then add the minced garlic, salt, oregano, and thyme. Toss to coat.

Roast the tomatoes in the oven until they’re soft, juicy, and slightly charred.

sliced cherry tomatoes and garlic topped with dry herbs in a white baking dish.
roasted cherry tomatoes in a large white baking dish.

Meanwhile, cook the pasta on the stove according to the package instructions. Drain and set aside.

I used orecchiette pasta but any kind of pasta will work here. Use spaghetti, penne, fettucini, bowtie, gluten-free, zoodles, gnocchi, or any other type you have at home.

Dump the cooked pasta in the baking dish with the tomatoes, along with the chopped basil and lemon juice. Toss to combine.

cooked pasta and fresh herbs on top of roasted tomatoes in a white baking dish.

Serve the pasta right away with vegan parmesan cheese or dollops of my creamy Vegan Ricotta Cheese and more basil on top. Enjoy!

pasta, roasted tomatoes, and herbs tossed together in a white baking dish.

Frequently asked questions

What should I serve with roasted tomato pasta?

This pasta dinner only gets better with vegan parmesan, balls of mozzarella, vegan ricotta, a drizzle of balsamic reduction, and/or fresh basil on top. You could even add a dollop (or two) of my Vegan Pesto Sauce for a fresh and herbaceous twist.

Serve the warm tomato pasta in bowls with vegan garlic bread or dinner rolls on the side. For a complete dinner, pair the pasta with simple side dishes, like a white bean salad, vegan caesar salad, roasted squash and zucchini, or roasted ratatouille.

What kind of tomatoes are best for roasted tomato pasta?

Almost any type of tomato can be roasted, but as a general rule of thumb, smaller varieties are best (small tomatoes = more flavor). I used cherry tomatoes for this recipe, but grape, Campari, Roma, or plum tomatoes all work well, too.

What else can I add to this pasta dinner?

Feel free to roast sliced red onions, red bell peppers, shallots, carrots, zucchini, or mushrooms alongside the tomatoes and garlic. Or, after roasting, stir capers or green or black olives in with the tomatoes and pasta for a briny burst.

How do you store the leftovers?

Transfer the leftover pasta to an airtight container and store it in the refrigerator for 2 to 3 days. When it’s time to eat, reheat the leftovers in the microwave or in a lightly oiled skillet on the stove.

Roasted Tomato Pasta in a white serving dish with a spoon.
close up on roasted tomato pasta in a white serving dish.
Print

Roasted Tomato Pasta

Make this super simple 30-minute Roasted Tomato Pasta for an unforgettable late summer dinner! With beautifully blistered roasted tomatoes, garlic, herbs, and al dente pasta in every bite, you’ll be making this recipe on repeat.
Course Main Course
Cuisine Italian-inspired
Prep Time 10 minutes
Cook Time 30 minutes
Total Time 40 minutes
Servings 4 servings
Calories 373kcal

Ingredients

  • 4 cups cherry tomatoes about 2 pints
  • 4 tablespoons olive oil
  • 8 cloves garlic minced
  • 1 teaspoon salt
  • 1/2 teaspoon dried oregano
  • 1/2 teaspoon dried thyme
  • 8 ounces pasta of choice
  • 1/4 cup chopped fresh basil
  • 2 tablespoons fresh lemon juice

Instructions

  • Preheat oven to 400 degrees F.
  • Slice the cherry tomatoes in half, and place in an oven safe baking dish. Pour the olive oil on top of the tomatoes, then add the minced garlic, salt, oregano and thyme. Stir in the pan to combine.
  • Place in the oven and roast for about 30 minutes, until the tomatoes are collapsing and slightly charred.
  • While the tomatoes roast, cook the pasta according to package instructions.
  • Once the tomatoes are done, remove the dish from the oven. Add the cooked pasta, along with the chopped basil and lemon juice. Toss to combine.
  • Serve with some grated parmesan (I used Violife) and more basil.

Notes

  1. This is also good with some dollops of vegan ricotta throughout.
  2. For gluten free, use gluten free pasta noodles or zucchini noodles.
  3. For some added protein, consider serving with grilled tofu.

Nutrition

Serving: 1of 4 servings | Calories: 373kcal | Carbohydrates: 51g | Protein: 9g | Fat: 15g | Saturated Fat: 2g | Polyunsaturated Fat: 2g | Monounsaturated Fat: 10g | Sodium: 603mg | Potassium: 492mg | Fiber: 3g | Sugar: 5g | Vitamin A: 818IU | Vitamin C: 39mg | Calcium: 49mg | Iron: 2mg

Easy Blackberry Cobbler

a scoop of Vegan Blackberry Cobbler on a white plate with a dollop of vegan whipped cream on top and a fork on the side.This Easy Blackberry Cobbler requires zero baking skills, so if you’re not a natural baker, fear not! It’s filled with juicy blackberries and topped with a sugary, buttery cobbler crust. Serve warm with vanilla ice cream or whipped cream. If you love berry-licious desserts as much as I do, then you’ll also get a kick…

a scoop of Vegan Blackberry Cobbler on a white plate with a dollop of vegan whipped cream on top and a fork on the side.

This Easy Blackberry Cobbler requires zero baking skills, so if you’re not a natural baker, fear not! It’s filled with juicy blackberries and topped with a sugary, buttery cobbler crust. Serve warm with vanilla ice cream or whipped cream.

If you love berry-licious desserts as much as I do, then you’ll also get a kick out of my Raspberry Bars, Blackberry Bars, and Blueberry Cake recipes!

a scoop of Vegan Blackberry Cobbler on a white plate with a dollop of vegan whipped cream on top and a fork on the side.

Summer is berry season and I can’t think of a better way to celebrate than with a warm scoop of this Easy Blackberry Cobbler paired with vanilla ice cream. Yum!

If you’re wondering what the difference is between cobblers, crisps, and crumbles, it mostly has to do with the dough. The dough in a cobbler is usually more like biscuit dough, while crisps and crumbles use an oat or oat-less streusel. But one thing is for sure: whether you make this blackberry cobbler recipe, my Blueberry Crisp, or my Apple Crumble, you’re treating yourself to a fuss-free treat that’s deliciously sweet and comforting.

Why you’ll love this blackberry cobbler recipe

  • The easiest summer dessert – Mix the 6-ingredient dough together, dump it in a pan, and sprinkle the berries and sugar on top. Bake until moist and golden, then dig into this easy blackberry dessert.
  • Studded with fresh blackberries – Whether you have heaps of fresh blackberries from your local farmer’s market or harvested from the blackberry bushes in your neighborhood, the easiest way to enjoy them is in this comforting cobbler.
  • Warm, cozy, and sweet – The only way to make a bowl full of cobbler better is to serve it fresh out of the oven with a scoop (or two) of ice cream!

How to make a vegan blackberry cobbler

Find the complete recipe with measurements in the recipe card below.

Pour the melted butter into a large cast iron pan or baking dish. (Or you can simply melt the butter right in the pan.)

In a medium bowl, whisk the flour, sugar, baking powder, and salt together. Stir in the milk until just combined. Pour the mixture over the melted butter in the skillet/baking dish and use a spatula to spread it into an even layer.

melted butter in a black skillet.
melted butter and cobbler dough in a black skillet.

Evenly distribute the blackberries over the dough, then sprinkle the sugar on top. 

Bake the cobbler until the dough is firm in the middle and golden brown around the edges. Scoop it into bowls and serve warm with vanilla ice cream or whipped cream. Enjoy!

an unbaked and assembled blackberry cobbler in a black skillet.

Frequently asked questions

Should I use fresh or frozen blackberries?

Both fresh and frozen blackberries work well here. Do not thaw the frozen berries before adding them to the cobbler or else they’ll bleed into the dough.

Do I have to use blackberries?

Not if you don’t want to. This cobbler recipe would be just as delectable if made with fresh or frozen peaches, cherries, nectarines, blueberries, or strawberries.

Can it be made gluten-free?

Yes! Simply use a gluten-free all-purpose flour instead of regular all-purpose flour.

Can I make this cobbler ahead of time?

I wouldn’t recommend it. The cobbler is best when it’s served hot out of the oven, although the leftovers will still be good after chilling in the refrigerator for 2 to 3 days. Serve the leftovers chilled or warm them up in the oven.

using a spoon to serve a baked blackberry cobbler from a black skillet.
a scoop of Vegan Blackberry Cobbler on a white plate with a dollop of vegan whipped cream on top and a fork on the side.
Print

Easy Blackberry Cobbler

This Easy Blackberry Cobbler requires zero baking skills, so if you're not a natural baker, fear not! It's filled with juicy blackberries and topped with a sugary, buttery cobbler crust. Serve warm with vanilla ice cream or whipped cream.
Course Dessert
Cuisine American
Prep Time 10 minutes
Cook Time 30 minutes
Total Time 40 minutes
Servings 12 servings
Calories 188kcal

Ingredients

  • 1/2 cup melted butter I used Earth Balance vegan butter
  • 1 cup all purpose flour
  • 1 cup granulated sugar
  • 2 teaspoons baking powder
  • 1/4 teaspoon salt
  • 3/4 cup soy milk or other milk
  • 3 cups blackberries
  • 2-4 tablespoons coarse sugar optional
  • whipped cream or vanilla ice cream for serving

Instructions

  • Preheat the oven to 350 degrees F. Pour the melted butter in a 10-inch cast iron pan, or a 9×9/3-quart baking dish.
  • In a medium bowl, mix the flour, sugar, baking powder and salt. Now stir in the milk until just combined. Pour the mixture over the melted butter in the baking dish and smooth into an even layer.
  • Distribute the blackberries throughout the top; they will sink in some as it bakes.
  • Sprinkle 2-4 tablespoons coarse (or regular) sugar on top of the dough and berries.
  • Bake for 25-35 minutes, until golden brown on the edges and there is no wet batter in the middle. Serve warm with a scoop of ice cream or whipped cream.

Notes

  1. Feel free to substitute another fruit, such as blueberries, peaches, raspberries, nectarines or another fruit you like.
  2. For a less rich cobbler, you can leave out the melted butter part. I would first grease the pan though so the cobbler dough doesn’t stick.

Nutrition

Serving: 12servings | Calories: 188kcal | Carbohydrates: 29g | Protein: 2g | Fat: 8g | Saturated Fat: 1g | Polyunsaturated Fat: 2g | Monounsaturated Fat: 4g | Trans Fat: 1g | Sodium: 115mg | Potassium: 160mg | Fiber: 2g | Sugar: 19g | Vitamin A: 135IU | Vitamin C: 9mg | Calcium: 62mg | Iron: 1mg

Grilled Tofu

a pile of grilled tofu pieces on a black plate.This Grilled Tofu recipe marinates thick slabs of tofu in a delicious marinade before they’re charred to perfection on the grill. It’s an easy way to cook tofu and one of the best plant proteins for grilling season! Take your tofu from blah to yum! with my Perfect Fried Tofu, Crispy Baked BBQ Tofu, Air…

a pile of grilled tofu pieces on a black plate.

This Grilled Tofu recipe marinates thick slabs of tofu in a delicious marinade before they’re charred to perfection on the grill. It’s an easy way to cook tofu and one of the best plant proteins for grilling season!

Take your tofu from blah to yum! with my Perfect Fried Tofu, Crispy Baked BBQ Tofu, Air Fryer Tofu, and Crispy Baked Tofu recipes as well.

a pile of grilled tofu pieces on a black plate.

Introducing my new favorite way to cook tofu: on the grill! This recipe will show you how to make tofu taste amazing using a simple marinade and a hot grill. Who knew it could be so easy?

The blocks of tofu are sliced into wide and thick slabs and then dunked in a savory marinade made from 5 pantry staples. The tofu soaks in those wonderful flavors for a few hours before it’s fired on the grill. From the gorgeous grill marks to the classic barbecue flavors to the endless ways to enjoy them, these grilled tofu steaks are too good to pass up!

Pair them with all of your grilling season go-to’s, like my Sticky BBQ Tempeh Ribs, Vegan Veggie Kebabs, the Best Veggie Burgers, and more.

Why you’ll love this grilled tofu recipe

  • Golden on the outside, meaty on the inside – The high heat gives the marinated tofu steaks irresistible golden grill marks on the outside while the inside stays tender and meaty.
  • An easy summer protein – Make in advance and fire the pieces on the grill anytime you need an easy and delicious plant protein for your summer dinners.
  • The easiest and most delicious marinade – Like my Marinated Tofu recipe, I marinated the tofu slices in a 5-ingredient marinade to give them rich and savory flavors.

How to grill tofu

Find the complete recipe with measurements in the recipe card below.

Press the blocks of tofu for at least 30 minutes. Meanwhile, whisk the soy sauce, avocado oil, seasoned rice vinegar, sesame oil, and garlic powder together in a small bowl.

Pro tip: Use extra firm or super firm tofu for this recipe! Softer varieties, like medium or soft tofu, will crumble and fall through the grill grates.

Slice the tofu block into thick slices and place them in a large shallow dish or large ziplock bag. Pour the marinade over the tofu, then cover the dish or seal the bag and leave it to marinate in the fridge.

Take the tofu slabs out of the marinade and place them on a preheated grill. Grill the tofu on both sides until golden brown grill marks appear. When done, transfer the grilled tofu steaks to a platter and cover them with aluminum foil to keep them warm.

Before serving, simmer the reserved marinade in a saucepan until it thickens slightly, then pour it over the tofu. Enjoy!

Tofu sticking to grill?

There are a few tricks to get your tofu to release easily from the grill (or a grill pan).

  1. Use only extra-firm or even super-firm tofu. And press extra-firm tofu to get rid of excess water.
  2. Use oil on the grill, and in the marinade.
  3. Don’t attempt to move the tofu for several minutes, until marks form and it cooks long enough on one side. This helps it to release easily. Use a fork to slowly and carefully pop them off to release the tofu from the grill without tearing. Don’t roughly handle the tofu with tongs, or it may fall apart and rip.
rectangular tofu pieces and a marinade in a large ziplock bag.

Frequently asked questions

Do I have to press the tofu?

Yes, pressing the water out of the tofu blocks is a crucial step. Pressed tofu not only has a firmer and meatier texture but also absorbs flavors more easily. 

To press the tofu, either use a tofu press or wrap each block in a few paper towels, place a plate or pan on top, and put a couple of heavy books on top of that. The only way to avoid pressing tofu is to use the super firm variety in a vacuum pack.

How long should you marinate tofu?

I recommend marinating the tofu for at least 1 hour at room temperature or in the refrigerator overnight. Basically, the longer you marinate, the more flavorful they’ll be. Just don’t go over the 24-hour mark or else the tofu will start to crumble.

How long does it take to grill tofu?

Depending on how thick you slice the tofu, each piece should need to cook for about 5 to 7 minutes per side on a medium-high heat grill. The tofu is grilled perfectly when you see golden brown grill marks.

What goes well with grilled tofu steaks?

All of your summer favorites! Once they’re slathered in the marinade or barbecue sauce, I like to serve the tofu with my Vegan Broccoli Salad, Vegan Potato Salad, and Vegan Baked Beans on the side. Some grilled vegetables, like zucchini, corn, and bell peppers, would be amazing, too.

You can also repurpose the grilled tofu and serve it on top of a salad or grain bowl, layer it in a sandwich, or fold it in a veggie wrap for more protein and flavor. The sky’s the limit!

a pile of grilled tofu pieces on a black plate.
Print

Grilled Tofu

This Grilled Tofu recipe marinates thick slabs of tofu in a delicious marinade before they’re charred to perfection on the grill. It’s an easy way to cook tofu and one of the best plant proteins for grilling season!
Course Side Dish
Cuisine Asian-inspired
Prep Time 15 minutes
Cook Time 15 minutes
Pressing and marinating 1 hour 30 minutes
Total Time 2 hours
Servings 4 servings
Calories 335kcal

Ingredients

  • (2) 14.5 ounce blocks extra-firm tofu or super firm
  • 1/2 cup low sodium soy sauce or tamari
  • 1/4 cup avocado oil or canola oil
  • 6 tablespoons seasoned rice vinegar
  • 2 teaspoons toasted sesame oil
  • 1/2 teaspoon garlic powder

Instructions

  • Press the tofu: Wrap the block of tofu in paper towels. Place a plate or pan on top of the wrapped tofu, and put a couple of heavy books on top of that. Let the tofu press for 30 minutes, or up to an hour.
  • In a small bowl, whisk the soy sauce, avocado oil, seasoned rice vinegar, sesame oil and garlic powder to combine.
  • Slice the tofu into thick slices, about 4 slices per block of tofu. Place in a large shallow dish (or large ziplock type bag), then pour the marinade over the tofu.
  • Cover and place in the refrigerator to marinate for at least 1 hour, or even overnight. The longer you marinate, the more flavor. But I wouldn't go over 24 hours.
  • Preheat an outdoor grill (or indoor grill pan) over medium-high heat and lightly oil. Remove the tofu from the marinade (but keep it nearby) and place on the hot grill. Cook for about 5-7 minutes on each side until golden brown marks appear. Turn with a metal spatula or fork, carefully loosening the tofu from the grate. Cook 5-7 minutes on the other side, then transfer to a platter and cover to keep warm.
  • If desired, pour the reserved marinade into a saucepan and simmer for about 3 minutes. Pour as much as desired over the tofu for even more flavor and serve.

Notes

  1. Use only extra-firm tofu that has been pressed well, OR the super firm variety (which does not need pressing).
  2. May use gluten free tamari for gluten free grilled tofu.
  3. Another vegetable oil works in place of avocado, like vegetable, canola or even olive oil.
  4. Leftover tofu keeps in the refrigerator for 4-5 days.

Nutrition

Serving: 1of 4 servings | Calories: 335kcal | Carbohydrates: 7g | Protein: 21g | Fat: 25g | Saturated Fat: 3g | Polyunsaturated Fat: 8g | Monounsaturated Fat: 13g | Sodium: 1156mg | Potassium: 117mg | Fiber: 2g | Sugar: 1g | Vitamin C: 0.01mg | Calcium: 268mg | Iron: 3mg

Veggie Chili

a small bowl of veggie chili topped with vegan cornbread.This Veggie Chili features a colorful combination of mushrooms, carrots, bell peppers, zucchini and corn. It includes two kinds of beans and bulgur, which adds a meaty texture. The ultimate vegetarian chili for every kind of eater. If you’re a chili lover like me, you’ll also get a kick out of these Ultimate Vegan Chili…

a small bowl of veggie chili topped with vegan cornbread.

This Veggie Chili features a colorful combination of mushrooms, carrots, bell peppers, zucchini and corn. It includes two kinds of beans and bulgur, which adds a meaty texture. The ultimate vegetarian chili for every kind of eater.

If you’re a chili lover like me, you’ll also get a kick out of these Ultimate Vegan Chili (uses tofu as “meat”), Lentil Chili, and Sweet Potato Black Bean Chili recipes!

a small bowl of veggie chili topped with vegan cornbread.

This Veggie Chili is a fuss-free, one-pot dish that’s packed with fresh veggies, canned beans, smoky seasonings, and bulgur. Just one bowl will keep you full and satisfied for hours!

While other vegetarian chili recipes are often made with vegan ground “beef”, this recipe makes tender mushrooms, a medley of sautéed vegetables, bulgur and canned beans the stars. This keeps everything under budget without sacrificing flavor.

Pair each veggie-packed bowl with a batch of my Vegan Cornbread and all the toppings you want, like avocado chunks, vegan sour cream, and tortilla chips.

Why you’ll love this vegan chili recipe

  • Hearty and nourishing – Chock full of veggies and beans, this chili doesn’t skimp on the plant-based protein or fiber. 
  • One-pot meal – Just cook everything in a pot, let the chili simmer for 25 minutes, then enjoy!
  • Make it your own – Customize it with your favorite vegetables, beans and seasonings. And the more toppings, the better!
womans hand using a spoon to stir a batch of veggie chili in a large pot.

How to make veggie chili

Find the complete recipe with measurements in the recipe card below.

Add the mushrooms to a large pot and sauté over medium-high heat until they start to soften. Add the onion, carrots, and bell pepper to the pot, sauté for 5 minutes, then add the garlic.

cooking a medley of vegetables in a large pot.

Stir in the rest of the chili ingredients, bring to a boil, and then lower the heat to a simmer. Let the chili simmer until it’s thickened and the bulgur is tender and cooked through.

Is the chili too thick? Thin the consistency by stirring in a splash of water or vegetable broth at a time until it’s thinned to your liking.

Serve the chili in bowls and top with a dollop of vegan sour cream, crushed tortilla chips, shredded cheese, avocado chunks, or any other chili toppings you like. Enjoy with vegan cornbread for dunking and enjoy!

cooking veggie chili in a large pot.

Frequently asked questions

Can I make vegan chili in the slow cooker instead?

Yes! To make slow cooker veggie chili, add all of the chili ingredients to your slow cooker and cook on high for 6 to 8 hours or on low for 4 to 6 hours.

What about the Instant Pot?

Yes, this chili is just as easy to make in the Instant Pot. Cook the veggies in the pot as normal using Sauté mode, then mix in the seasonings and cook until fragrant. Cancel Sauté mode and stir in the water, beans, and bulgur.

Secure the lid, place the steam release valve on sealing, and cook on high pressure for about 15 minutes. Allow the pressure to release using the venting mode, then remove the lid, taste, and adjust the flavors as needed.

Is this chili recipe gluten-free?

This recipe isn’t inherently gluten-free because bulgur is made from durum wheat. To make it gluten-free, swap the bulgur for an equal amount of cooked quinoa, white rice, or brown rice.

What can I use instead of the beans?

You can swap the black beans or pinto beans for kidney beans or chickpeas instead. Or, if you’re not a fan of beans, feel free to use cooked green or brown lentils, vegan beef crumbles (like Impossible or Beyond ground “beef”), soy curls, or crumbled tofu instead.

What else can I add to this vegetarian chili recipe?

Make this recipe your own by swapping any of the vegetables in the recipe card with your favorites. I love making chili with sweet potatoes, butternut squash, and jalapenos, but you can also keep things simple with a bag of frozen vegetables instead.

How do you store the leftovers? Can you freeze them?

Once the leftover chili has cooled to room temperature, transfer it to an airtight container and store it in the fridge for 3 to 4 days or in the freezer for up to 3 months. Allow the leftovers to thaw in the fridge before reheating in the microwave or in a pot on the stove.

a small bowl of veggie chili topped with vegan cornbread.
Print

Veggie Chili

This Veggie Chili features a colorful combination of mushrooms, carrots, bell peppers, zucchini and corn. It includes two kinds of beans and bulgur, which adds a meaty texture. The ultimate vegetarian chili for every kind of eater.
Course Soup
Cuisine American
Prep Time 20 minutes
Cook Time 35 minutes
Total Time 55 minutes
Servings 8 servings
Calories 266kcal

Ingredients

  • 8 ounces cremini mushrooms chopped small or sliced
  • 1 medium onion diced small
  • 4 medium carrots peeled and diced
  • 1 medium red bell pepper seeded and diced
  • 4 cloves garlic minced
  • 1 medium zucchini diced
  • 1 cup fresh or frozen corn
  • (2) 28-ounce cans diced tomatoes
  • (2) 15-ounce cans black beans drained and rinsed
  • (1) 15-ounce can pinto beans drained and rinsed
  • 1/3 cup bulgur
  • 3 tablespoons chili powder
  • 2 teaspoons ground cumin
  • 1 teaspoon smoked paprika
  • 1 tablespoon cocoa powder
  • 1 tablespoon pure maple syrup
  • 1 1/2 cups water
  • 1 teaspoon salt or more to taste

Instructions

  • In a large pot over medium-high heat, add the chopped mushrooms. Sauté the mushrooms until the start to release their oils (about 5 minutes), then add the onion, carrots and bell pepper and sauté for 5 minutes.
  • Add the garlic and cook for 1 more minute, until fragrant.
  • Now add the rest of the ingredients and stir to combine. Bring to a boil, then lower the heat and simmer for 20-25 minutes, stirring occasionally. If the chili gets too thick, add a little more water to thin.
  • Taste; add more salt or seasonings to taste. For a spicier chili, add a pinch of cayenne pepper. Serve with vegan sour cream, cornbread, tortilla chips and/or shredded cheese.

Notes

  1. Leftovers will keep for up to 4 days in the refrigerator and the chili also freezes well. I like to freeze in individual containers for quick meals.
  2. Feel free to substitute any veggies or leave anything out you don’t like.
  3. For gluten free, leave out the bulgur or replace it with quinoa or rice.

Nutrition

Serving: 1of 8 servings | Calories: 266kcal | Carbohydrates: 54g | Protein: 14g | Fat: 2g | Saturated Fat: 0.4g | Polyunsaturated Fat: 1g | Monounsaturated Fat: 0.4g | Sodium: 900mg | Potassium: 1347mg | Fiber: 17g | Sugar: 12g | Vitamin A: 6917IU | Vitamin C: 50mg | Calcium: 172mg | Iron: 6mg

Marry Me Chickpeas

close up on a wooden spoon stirring a batch of Marry Me Chickpeas in a large skillet.This one-pan Marry Me Chickpeas recipe puts a vegan twist on the viral comfort food, Marry Me Chicken! Get ready to fall in love with this indulgent 15-minute meal. For more easy ways to use the canned chickpeas in your cupboard, check out my Chickpea Salad Sandwich, Italian Chickpea Soup, Chickpea Burger, and Biscuit Topped…

close up on a wooden spoon stirring a batch of Marry Me Chickpeas in a large skillet.

This one-pan Marry Me Chickpeas recipe puts a vegan twist on the viral comfort food, Marry Me Chicken! Get ready to fall in love with this indulgent 15-minute meal.

For more easy ways to use the canned chickpeas in your cupboard, check out my Chickpea Salad Sandwich, Italian Chickpea Soup, Chickpea Burger, and Biscuit Topped Chickpea Pot Pie recipes!

a wooden spoon stirring a batch of Marry Me Chickpeas in a large skillet.

The viral Marry Me Chicken recipe is no match for my vegan-friendly Marry Me Chickpeas. It’s as creamy, indulgent, and family-friendly as the original, but made without dairy or meat!

What’s better is that this one-pan meal is totally foolproof. Just simmer the protein-packed chickpeas in the dreamy Tuscan sun dried tomato cream sauce for 15 minutes, then enjoy it for family dinners or date nights at home. Don’t forget the hunks of crusty bread for scooping up every luxurious bite!

Why you’ll love this easy plant based recipe

  • Rich Tuscan-inspired flavors – Like my Tuscan Vegan Gnocchi, vegan marry me chickpeas feature incredible Italian-inspired flavors that will keep you going back for more.
  • Packed with protein – Two cans of chickpeas pack this dish with about 30 grams of plant-based protein!
  • An easy one-pan meal – The everyday ingredients in this dish are cooked together in one pan in just 15 minutes.
a piece of bread dunked in a bowl of Marry Me Chickpeas.

How to make marry me chickpeas

Find the complete recipe with measurements in the recipe card below.

Warm the olive oil in a large pan over low-medium heat. Once hot, add the garlic and sauté until fragrant. Stir in the sun dried tomatoes, oregano, red pepper flakes, salt, and ground black pepper.

Add the chickpeas, vegetable broth, tomato paste, vegan cream, and spinach to the pan. Simmer until the sauce is warmed through and the spinach is wilted.

Garnish the Tuscan chickpeas with chopped fresh basil and vegan parmesan. Scoop up every bite with crusty bread or serve it over rice, pasta, or baked sweet potatoes. Enjoy!

fresh spinach in a large pan with chickpeas and cream sauce.

Frequently asked questions

What is Marry Me Chicken?

Marry Me Chicken is a dish that combines cooked chicken with a sun dried tomato and garlic cream sauce. The original recipe is made with heavy cream and chicken breasts, but in vegan marry me chicken recipes, they’re swapped for vegan cream and canned chickpeas.

Why is it called Marry Me Chickpeas?

It’s simple: the silky smooth cashew cream sauce, Italian flavors, and hearty chickpeas in every bite are so good that you’re bound to get a marriage proposal from anyone you serve it to!

What can I use instead of chickpeas?

Canned cannellini beans or another white bean will work well. For a meatier dish, you can use my Vegan Chicken recipe, homemade seitan bites, or baked tofu.

My cream sauce is too thin. How can I thicken it?

I recommend making the cream sauce with cashew cream for a thick and luxurious consistency. While store-bought vegan cream (I love Ripple’s dairy free half and half) or coconut milk also work, they’ll make the sauce slightly thinner. To help thicken it, stir a cornstarch slurry (made by mixing 1 tablespoon cornstarch with 3 tablespoons water in a small bowl) into the sauce at the end and gently simmer until it thickens.

How do you store the leftovers?

The leftovers will keep for up to 5 days when stored in an airtight container in the fridge. Enjoy them for quick and easy meals or meal prep throughout the week! To reheat, zap the chickpeas and sauce in the microwave or warm them in a saucepan on the stove until heated through.

using a piece of bread to scoop up a bite of Marry Me Chickpeas from a skillet.
close up on a wooden spoon stirring a batch of Marry Me Chickpeas in a large skillet.
Print

Marry Me Chickpeas

This one-pan Marry Me Chickpeas recipe puts a vegan twist on the viral comfort food, Marry Me Chicken! Get ready to fall in love with this indulgent 15-minute meal.
Course Main Course
Cuisine Italian-inspired
Prep Time 5 minutes
Cook Time 10 minutes
Total Time 15 minutes
Servings 6 servings
Calories 294kcal

Ingredients

  • 1 tablespoon olive oil
  • 5 cloves garlic minced
  • 1/2 cup sun dried tomatoes chopped
  • 1/2 teaspoon oregano
  • 1/2 teaspoon red chili flakes
  • 1 teaspoon salt
  • 1/4 teaspoon ground black pepper
  • (2) 15-ounce cans chickpeas drained and rinsed
  • 1 cup vegetable broth
  • 1 tablespoon tomato paste
  • 1 cup vegan cream See Notes
  • 2 cups baby spinach sliced
  • 4-5 fresh basil leaves chopped
  • optional: 1/2 cup grated vegan parmesan cheese I used Violife

Instructions

  • In a large sauté pan over low-medium heat, warm the olive oil. Add the garlic and cook for 1-2 minutes, stirring frequently, until fragrant.
  • Stir in the sun dried tomatoes, oregano, red chili flakes, salt and black pepper. Cook for 1 minute.
  • Now add the chickpeas, broth, tomato paste, cream and spinach and stir well. Bring to a gentle simmer over medium heat and cook for about 5 minutes, until warm and the spinach has wilted. Taste; add more salt, pepper or red pepper flakes as desired.
  • Remove from heat and stir in the fresh basil and grated parmesan. Serve immediately with crusty bread for dipping, or on to of cooked rice, pasta or even a baked sweet potato. Enjoy!

Notes

  1. For vegan marry me chicken, try substituting the chickpeas for any vegan chicken you like, including my homemade seitan chicken. Or make my crispy baked tofu and use that instead.
  2. For the cream, you can use any store bought dairy free creamer (I love Ripple’s Half and Half), full fat coconut milk, another unsweetened plant milk or best of all, homemade cashew cream.
  3. To make cashew cream for the cream – Bring 2-3 cups of water to a boil (I use my tea kettle). Pour the hot water over ¾ cup raw cashews and let soak for 5 minutes or up to an hour. Drain the cashews and add to a high powered blender with 1 cup of fresh water and blend until creamy and smooth.
  4. If you use a store bought cream or coconut milk, you may want to thicken the chickpeas as the sauce won’t be as thick. To do this, mix 1 tablespoon cornstarch and 3 tablespoons water in a bowl, then stir it into the chickpea mixture at the end. It should thicken up nicely.

Nutrition

Serving: 1of 6 servings | Calories: 294kcal | Carbohydrates: 33g | Protein: 10g | Fat: 15g | Saturated Fat: 8g | Polyunsaturated Fat: 1g | Monounsaturated Fat: 3g | Sodium: 690mg | Potassium: 736mg | Fiber: 8g | Sugar: 8g | Vitamin A: 1231IU | Vitamin C: 9mg | Calcium: 83mg | Iron: 5mg