The Best Butter Recipes

Dipping meats with a fork in butter

This roundup is all about my favorite thing to take steak, seafood, vegetables — basically anything you grill — to…

The post The Best Butter Recipes appeared first on Over The Fire Cooking.
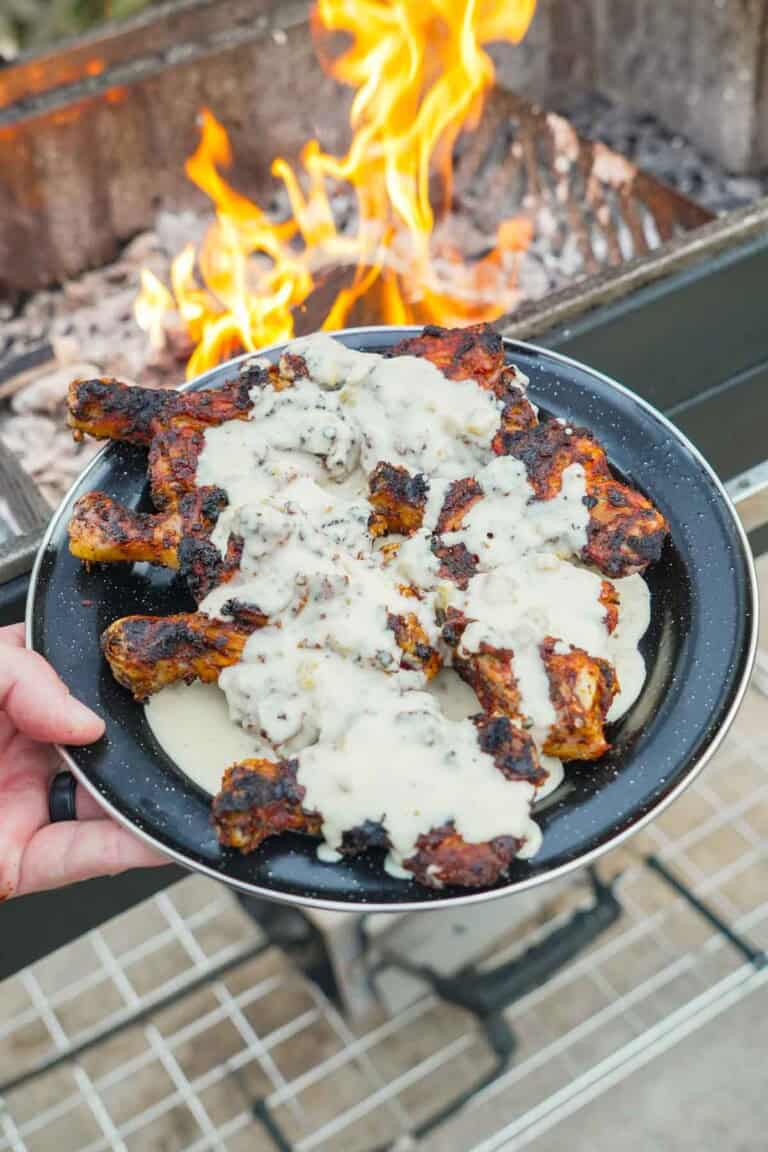
Dipping meats with a fork in butter

This roundup is all about my favorite thing to take steak, seafood, vegetables — basically anything you grill — to the next level: flavored butter recipes! Whether you’re making herb butter, cowboy butter or smoked butter, know that homemade butter is your best friend in boosting flavor. I’m stoked to share all my techniques in my favorite recipes for butter! 

Grilled steak with cowboy butter sliced and ready to serve.

Why You’ll Love Butter Recipes

If you’ve ever taken a bite of your dinner and thought it needed a little oomph to make it so freakin’ delicious, you’ve come to the right place. Flavored butter recipes — also often known as compound butter recipes — are an easy way to inject a kick into grilled meats and veggies. Because you mix butter with fresh herbs, spices, roasted garlic and more, the possibilities are endless. Once you make your own compound butter, you won’t want to stop! 

A cowboy butter steak taco being held up to the camera.

Butter Recipe Basics

  • Start with clarified butter. Clarified butter is definitely better in high-heat cooking and grilling recipes. This is because the savory butter also has a higher smoke point. You could use regular unsalted butter for our compound butters too, but just keep in mind that the milk solids and water in regular butter can burn during smoking. That can leave you with some odd flavors, which no one wants! Don’t stress, though. I’ve got a tip on the best way to make your own clarified butter below. You can also find clarified butter at your local grocery store if you’d rather go that route.
  • Be ready with fresh ingredients. Depending on your recipe, you’ll want basic ingredients like garlic, a combination of herbs like parsley or cilantro, lemon zest, lime zest or even orange zest. We’ll mix those ingredients in a small bowl with our butter.
  • Give it a twist with pantry ingredients. My FYR Hot Sauces, honey, black pepper and kosher salt are all a great way to make a better butter. 
  • If you’re making smoked butter, do NOT use a briquette. Since we’re infusing our butter with flavor from a smoking-hot coal, you want high-quality charcoal here. Please only use real wood or natural lump charcoal. Do not use briquettes or any charcoal that has been treated with chemicals. I always reach for Cowboy Charcoal because it burns super hot and super clean. That’s exactly what we need in these recipes.
A mason jar of herb butter with smoke billowing out of the top.

Get stoked for life

This sauce is FYR!

an all-new line created for live fire cooking

Born from a deep passion for food and flavor. Whether you’re grilling in the backyard or live fire cooking around the world, we have what you need to transform every meal into an adventure.

How to Make Clarified Butter

First, grab your unsalted butter — you’ll want about four sticks. Melt the sticks of butter slowly over direct heat (low setting) in a small saucepan. The goal is to let the butter melt gradually and completely without boiling it. As it melts, you’ll notice the milk solids start to separate from the butter “oil.” Next, pour the liquified butter into a clear glass container and let cool for two minutes. As it cools, the milk solids will sink to the bottom of the jar. Then, pour the top portion of the butter into a new jar. That is the golden, pure yellow portion of the butter, aka the clarified butter. Try to keep any of the white, milk solids from getting poured into the new jar. That’s all there is to it! Now, you have your very own clarified butter.

The Best Herb Butter Recipes

​Garlic herb butter is classic here, but there are as many herbed butter recipes are there are plants in an herb garden! Let me know your favorite in the comments below!

Venison Rack with Wild Herb Butter

Venison Rack with Herb Butter

Venison Rack with Wild Herb Butter for something unique. Low and slow is the perfect game for a smoker, so that’s exactly what we did!
View Recipe
Herb Butter American Lamb Steaks

Herb Butter American Lamb Steaks

Grab some leg of lamb steaks and grill them over the fire with some herb butter sauce in this recipe!
View Recipe
Stuffed Lobster Tails with garlic butter as they finish cooking on the grill.

Stuffed Lobster Tail with Garlic Butter

Lobster tails stuffed with crab and all doused in a savory garlic butter. Yes, please!
View Recipe
Grilled Steak and Shrimp with BLK Garlic Butter assembled on a cutting board and ready to serve.

Grilled Steak and Shrimp with BLK Garlic Butter

Grilled Steak and Shrimp with BLK Garlic Butter for a spicy surf and turf dinner!
View Recipe
Garlic butter shrimp with crusty bread

Garlic Butter Shrimp

Garlic butter shrimp is a tangy twist on Hawaiian-style garlic butter shrimp, with great garlic-citrus flavor and a crispy crunch.
herb butter ny strip

Herb Butter NY Strip

Prime cut NY Strips basted in herb butter sauce for the win!
View Recipe
grilled picanha topped with garlic butter held next to a fire pit

Grilled Garlic Butter Picanha

This Grilled Garlic Butter Picanha is perfect for a backyard dinner! It's made with golden-brown picanha steaks and spicy garlic butter. 
View Recipe
Garlic Parmesan Mussels

Parmesan Garlic Butter Mussels

Make something unique yet quick over the fire with these Garlic Parmesan Mussels. They are simple seafood steamed over the fire in cast iron perfect for an appetizer or dinner!
View Recipe
Close up of Reverse Seared Ribeyes.

Reverse Seared Ribeyes with Black Garlic Butter

These Reverse Seared Ribeyes with Black Garlic Butter are savory, sweet and everything you need to make right now!
View Recipe
Chipotle Garlic butter Shrimp

Chipotle Garlic Butter Shrimp

Nothing better to warm you up than this Chipotle Garlic Butter Shrimp on a snowy day! A quick cook for a delicious meal!
View Recipe
Garlic Butter Steak and Shrimp Recipe

Grilled Steak & Shrimp with Garlic Herb Butter

View Recipe
Grilled Garlic Butter Lobster Recipe

Grilled Lobster With Garlic Butter

View Recipe

The Best Smoked Butter Recipes

I’ve been on a kick of infusing butters, chimichurri and salsa verde with extra smoke flavor from a white-hot coal off the grill. It’s a simple technique, but make sure you follow the directions to get the best results. That hot honey butter is one of my favorite ways to dress up a steak right now!

Smoked Butter

As crazy as it sounds, we're dropping hot charcoal into a savory and spicy butter sauce that levels up ANY dish!
View Recipe
Smoke billowing out of the butter sauce.

Smoked Steak Butter

Smoked Steak Butter will not only elevate your grilled steak, but will make almost anything taste incredible!
View Recipe
Hot honey butter

Hot Honey Butter

Hot honey butter combines sweet, spicy and smoky flavors, and it's so freakin' delicious on steak, seafood and more.
View Recipe

The Best Cowboy Butter Recipes

Cowboy butter is really just a catch-all term for a spicy herb and garlic butter. It’s a pretty versatile butter because it’s a delicious topping that can be served melted or as classic cold butter.

The Cowboy Butter Burger is the ultimate bite.

Cowboy Butter Burgers

Cowboy Butter Burgers bring the best of beef and butter together for one epic bite!
View Recipe
Cowboy butter steak taco

Cowboy Butter Steak Tacos

Cowboy butter steak tacos are another way to use this spicy garlic herb butter, which is freakin' delicious on everything.
View Recipe
Cowboy Butter Sliders

Cowboy Butter Sliders

Cowboy Butter Sliders are the ultimate comfort food. Tender sliced filets are slathered in the zesty spicy butter and paired with caramelized onions and gooey mozzarella cheese.
View Recipe
One sliced and one whole Grilled Ribeye with Cowboy Butter.

Grilled Ribeye with Cowboy Butter

Grilled Ribeye with Cowboy Butter
View Recipe
The coffee crusted venison rack sitting with potatoes and bacon wrapped asparagus.

Coffee Crusted Venison Rack with Cowboy Butter

Coffee Crusted Venison Rack for a perfectly cooked venison dinner.
View Recipe

Chili Butters & Other Spicy Butters

For those of you that like something with a kick. Remember, you can also turn the heat up or down, and adding chilis, hot sauces and cajun seasoning can be just the thing a butter needs!

Chili Butter Steak and Shrimp plated and served.

Chili Butter Steak and Shrimp

Chili Butter Steak and Shrimp for a spicy, savory surf and turf experience.
View Recipe
Sliced steaks ready to eat.

Coffee Crusted Ribeyes with Honey Chili Butter

These Coffee Crusted Ribeyes are coated in a smoky coffee spice rub and topped with a sweet and spicy homemade honey chili butter.
View Recipe
Smoked Lobster Tails

Smoked Lobster Tails with Spicy Garlic Butter

View Recipe
grilled lobster tails

Grilled Lobster Tails with Honey Cajun Butter

Simple and easy grilled lobster tails basted with a honey cajun butter sauce. This is the ideal backyard cook for those that need some sweet and spicyness!
View Recipe
dirty lobster tails

Dirty Lobster Tails with Hatch Chile Butter Sauce

Delicious dirty lobster tails cooked right on top of some hot Cowboy Charcoal. Then, these Lobster Tails are then finished with a Hatch Chile Butter Sauce for extra flavor.
View Recipe
Grilled Lobster with Hot Honey Butter placed together on a serving platter.

Grilled Lobster with Hot Honey Butter

Grilled Lobster with Hot Honey Butter for a sweet, spicy lobster treat.
View Recipe
delicious sriracha butter lobster tails

Sriracha Butter Lobster Tails

These Sriracha Butter Lobster Tails are the ticket to amp up any backyard barbecue. Spicy and tangy with delicious cold water lobster.
View Recipe
Surf and Turf Butter Burger

Surf and Turf Burger with Sriracha Chive Compound Butter

Surf and Turf Butter Burger Recipe for a fist full of deliciousness!
View Recipe
Smoked Citrus Chile Chicken Wings

Steakhouse Ribeyes with Horseradish Butter

We can all use a really good steak every once in a while. This Steakhouse Ribeye is loaded with garlic salt and paired with king oyster mushrooms, charred asparagus, horseradish butter and BUSH’S® Steakhouse Recipe Grillin’ Beans.
View Recipe
Steak Frites with Garlic Chili Butter displayed on a serving platter.

Steak Frites with Garlic Chili Butter

Steak Frites with Garlic Chili Butter for your elevated steak and fries dish.
View Recipe

Other Buttery Ideas

Cilantro Lime Butter Scallops

Cilantro Lime Butter Scallops

These Cilantro Lime Butter Scallops are perfectly seared then topped off with a zesty citrus butter over top. A great seafood dinner!
View Recipe
Smoked Tequila Butter Shrimp

Smoked Tequila Butter Shrimp

Another seafood recipe swimming in butter? Heck yes! Today we have a Smoked Tequila Butter Shrimp Recipe cooked over fire.
View Recipe

What to Serve with the Best Butter Recipes

As I like to say, the better question is what NOT to serve with these butter recipes. They take steaksseafoodburgers and other meats to the next level. I also think it’s a great dipping sauce for cornbread, dinner rolls, or a slice of fresh bread. 

Dipping meats with a fork in butter

Another favorite sauce of mine is chimichurri. If you want another sauce to add to your meals that’s fresh and herby, then make sure to check out my Best Chimichurri Recipes!

Leftovers and Reheating

Once you’ve crafted your delicious butter mixture, proper storage is key to maintaining its rich flavor and quality. After you’ve prepared it, let the butter cool to room temperature (no longer than a couple of hours) before placing it in the fridge for up to 2 weeks. You can also freeze the butter in ice cube trays for up to 6 months.

FAQs

​What kind of butter should I use? 

For best results in these butter recipes, go for unsalted butter, since you can season to your favorite flavor more so than with salted butter. There’s a lot of good quality butter in grocery stores! Sample a few store-bought butter brands and see what you like best. I’d love to hear what you find out in your butter taste-testing journey. 

Should I brown my butter? 

Brown butter works great in lots of other settings, but I try not to do it here. That’s because I don’t want the bold flavor to overpower the other ingredients in our beautiful butter.

Can I swap the herbs or other ingredients?

Definitely! Just keep an eye on the recipe, because you don’t want to create conflicting flavors. For Tex-Mex style dishes, I like to stick with cilantro and parsley. Those two herbs are super versatile, since cilantro is great with Thai and Indian flavors too. Parsley really goes with pretty much anything. For Italian-inspired dishes, rosemary, fresh thyme and oregano are great options too. There are so many different ways to make the perfect spread, I could go on and on!

Get The Cookbooks!

Flavor X Fire & FOOD X Fire

By Derek Wolf

All the major tastes—salty, sour, sweet, bitter, and umami—are explored in depth, along with an investigation of other components you should consider when it comes to flavor, such as aroma, heat, and texture.

The post The Best Butter Recipes appeared first on Over The Fire Cooking.

Smoked Salsa Verde

Smoked Salsa Verde

Grilling up some Smoked Salsa Verde in your backyard is one of the best ways to celebrate the art of…

The post Smoked Salsa Verde appeared first on Over The Fire Cooking.

Smoked Salsa Verde

Grilling up some Smoked Salsa Verde in your backyard is one of the best ways to celebrate the art of homemade salsas. If it’s your first time making your own tomatillo salsa verde, buckle up. This is one of my favorite creative outdoor cooking recipes.

Smoked Salsa Verde is ready to eat.

The great flavor of this easy recipe will blow your mind. It’s all about those heaps of fresh flavor with a hint of smokiness that’ll make you rethink store-bought green salsa.

Now that your taste buds are fired up, let’s fire up the grill and get this fiesta started. This is a freakin’ delicious and flavorful salsa that I happen to love drizzling over my spiced flank steak and eggs.

Why You’ll Love Smoked Salsa Verde

So, why should you be stoked about this smoked salsa verde recipe? First off, it’s unlike any salsa you’ve ever tasted. Undoubtedly, my favorite part of the recipe is the charring process on my FYR Grill. The fire caramelizes the veggies and brings out their natural smokiness without any artificial flavors. Plus, adding a lump of coal at the end is pure fun. This amps up the smokiness to another level.

The green sauce is drizzled over sliced flank steak and eggs and served with rice and beans.

If you need some more inspiration about how to use your smoky green sauce, check out these recipes: Cheesy Skewered Skirt Steak with Salsa Verde, Steak Tacos with Corn Salsa, Steak and Egg Tacos, Grilled Steak Burrito Bowl, and Easy Steak Quesadilla. All of which are great candidates to substitute or add these smoked salsa verde to!

Salsa Verde Sauce Ingredients Roundup 

Okay, so before jumping into the full recipe, let’s go through the list of items you need from the local grocery store. Make sure to snag the freshest and best ingredients for this salsa verde recipe. You’ll need tomatillos, a white onion, a couple of jalapeño peppers, garlic cloves, fresh cilantro, green onions, fresh lime juice, and a bit of vegetable oil. Don’t forget to grab some kosher salt or sea salt to season everything just right. Simple, right?

What kind of charcoal should I use to put into the salsa for the smoke?

For the best smoky flavor, I recommend using Cowboy Charcoal. It burns hot and clean, giving your salsa a great smoky taste without any unwanted chemicals or flavors. Just make sure to use a small, smoldering piece to avoid overpowering the salsa.

How to Make Smoked Salsa Verde

Alright, let’s get to the fun part – making the salsa! First things first, preheat your grill to a high heat temperature, around 400 degrees F. We want it nice and hot to get a good char on those veggies.

While the grill is heating up, remove the husks from your tomatillos. Once your grill is ready, place the tomatillos, quartered onion, and jalapeno peppers directly on the grates. Let them char until they’re blackened and caramelized. Trust me, this step is crucial for developing that smoky flavor that makes this salsa verde recipe stand out.

The fresh vegetables are grilled on the FYR Grill.

Once your veggies are nicely charred, pull them off the grill and let them cool for a bit. Then, add them to your food processor (or immersion blender) along with the garlic cloves, lime juice, and a bit of water. Blend everything until you reach the consistency of your salsa preference. Some folks like it chunky, others smooth. In the end, it’s totally up to you!

The grilled veggies are blended for the perfect texture.

After blending, mix in the chopped cilantro and green onion, which add even more flavor to your homemade salsa.

Now, for the smoky twist – place your salsa in a Mason jar and add a smoldering coal from the grill. Cover it quickly to trap the smoke, then set it aside to marinate for about 20-30 minutes.

Next, all you need to do is enjoy. Cheers!

The green sauce is literally smoked with charcoal.

What to Serve with Smoked Salsa Verde

This flavorful salsa is perfect with some crunchy tortilla chips, but don’t stop there! It’s also fantastic on top of grilled meats like flank steak or spare ribs or as a tangy topping for tacos and burritos. The touch of smoke and fresh ingredients make it versatile enough to complement a wide range of dishes.

The steak, eggs, rice, and beans are plated and drizzled with the Smoked Salsa Verde.

How to Store Leftover Salsa

If you have any leftover smoked salsa verde, store it in an airtight container in the refrigerator. It should keep its fresh flavor for about 3-5 days. Give it a good sniff before serving to ensure it’s still fresh. You can also freeze it in ice cube trays if you want to save small portions for later.

For More Smoked Sauces

FAQs

What are Tomatillos Anyway?

Tomatillos are small, green fruits that are a staple in Mexican cuisine. They look like little green tomatoes, but they have a tangy, slightly citrusy flavor that’s perfect for making green salsa. They come with a papery husk that you need to remove before cooking. 

If I don’t have tomatillos can I use Roma tomatoes instead? 

You can, but keep in mind that Roma tomatoes will give you a different flavor profile. Tomatillos have a tangy, slightly citrusy taste that’s pivotal for that classic salsa verde flavor. 

How can I make my sauce spicier?

If you like a bit of heat, add more jalapeno peppers or even throw in some serrano peppers. Adjust the amount to suit your taste.

Get The Cookbooks!

Flavor X Fire & FOOD X Fire

By Derek Wolf

All the major tastes—salty, sour, sweet, bitter, and umami—are explored in depth, along with an investigation of other components you should consider when it comes to flavor, such as aroma, heat, and texture.

Smoked Salsa Verde
Print

Smoked Salsa Verde

Get ready to make my absolute favorite Smoked Salsa Verde. it's a fun way to add a genuine smoky flavor to all your foods, even when you don't have a smoker.
Course Sauce
Cuisine American, Mexican
Prep Time 5 minutes
Cook Time 30 minutes
Total Time 35 minutes
Servings 4 people
Calories 71kcal
Author Derek Wolf

Ingredients

Smoked Salsa Verde Ingredients

  • 5-6 Tomatillos husks removed
  • 1 White Onions quartered
  • 2-3 Jalapeno Peppers
  • 2-3 Garlic Cloves
  • 1/2 cup Chopped Cilantro
  • ¼ cup Chopped Green Onions
  • 2 Limes juiced
  • ¼ cup Water
  • Kosher Salt to taste
  • 1 tbsp Vegetable Oil

Instructions

  • Preheat your grill to high heat temperature (around 400F).
  • Add your tomatillos, onion and jalapenos to the grill to char until blackened. Pull off once done.
  • Add all the ingredients (but the cilantro and green onion) to a food processor and blend until the consistency that you like. Mix in the green onion and cilantro at the end.
  • Add the salsa to a mason jar along with a smoldering coal from the fire (ideally white hot). Cover quickly to encapsulate the smoke, then set to the side to marinate for 20-30 minutes.

Notes

What kind of charcoal should I use to put into the salsa for the smoke?
For the best smoky flavor, I recommend using Cowboy charcoal. It burns hot and clean, giving your salsa a great smoky taste without any unwanted chemicals or flavors. Just make sure to use a small, smoldering piece to avoid overpowering the salsa.

Nutrition

Calories: 71kcal | Carbohydrates: 10g | Protein: 1g | Fat: 4g | Saturated Fat: 1g | Polyunsaturated Fat: 2g | Monounsaturated Fat: 1g | Trans Fat: 0.02g | Sodium: 130mg | Potassium: 236mg | Fiber: 3g | Sugar: 4g | Vitamin A: 391IU | Vitamin C: 20mg | Calcium: 31mg | Iron: 1mg

The post Smoked Salsa Verde appeared first on Over The Fire Cooking.
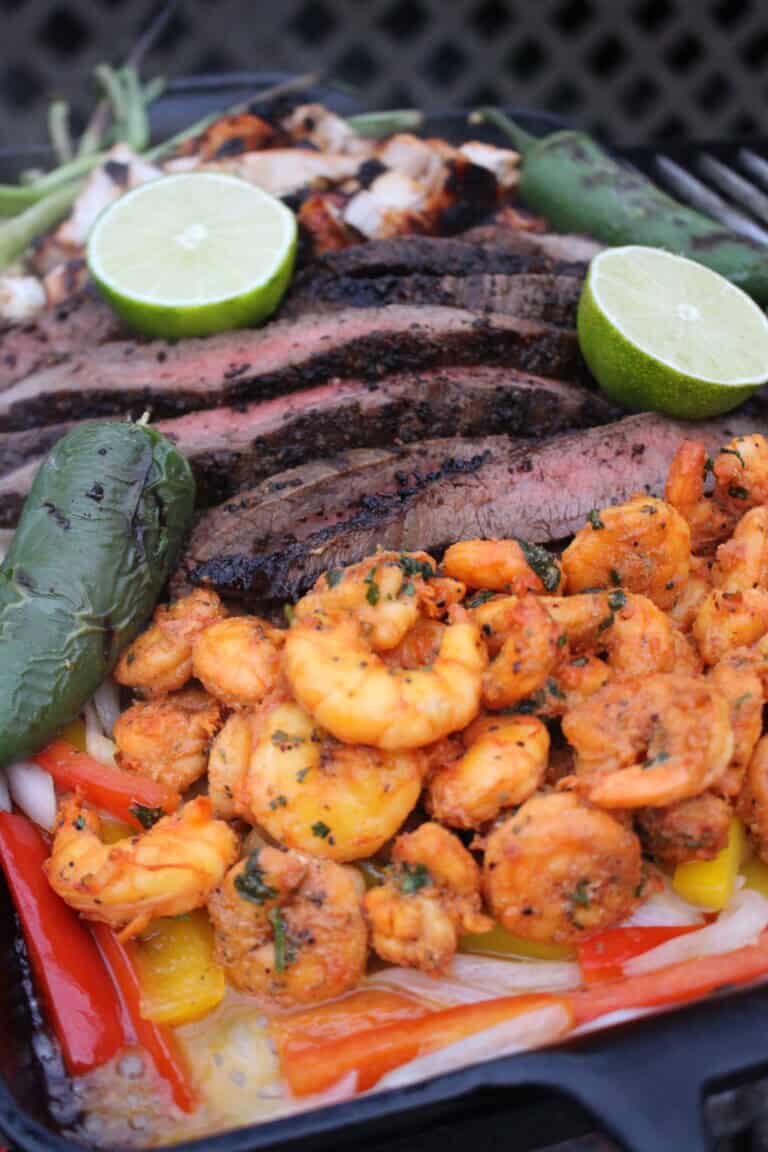
Texas Fajitas

Texas fajitas, a massive platter of meats

OK, I know what your first question is: why are they called Texas fajitas? Answer: I have no idea. But…

The post Texas Fajitas appeared first on Over The Fire Cooking.
Texas fajitas, a massive platter of meats

OK, I know what your first question is: why are they called Texas fajitas? Answer: I have no idea. But what I do know is this massive loaded platter of meat with veggies is so freakin’ delicious and is perfect to feed a crowd. Remember, everything’s bigger in Texas.

Texas fajitas, a massive platter of meats

Why You’ll Love Texas Fajitas

Say goodbye to wishing you got the beef fajitas instead of chicken, or chicken fajitas instead of shrimp. Basically, these Texas fajitas have it all. Make sure to serve them sizzling hot with warm tortillas, cheese, sour cream, guacamole, lettuce, fresh pico de gallo or any of your favorite toppings.

Cooking Texas fajitas on the new FYR Grill

I grilled these fajitas on our new FYR Grill, which is incredibly versatile, easy to use and has plenty of room to cook up steak, chicken and shrimp in this recipe. Because it checks every outdoor fire box I could think of, it’s outrageously fun to cook on. 

For more Texan inspired recipes, check out my Chopped Texas Patty Melt, Texas Smoked Brisket Recipe and Texas Twinkies.

Texas Fajitas Ingredients

Chicken, steak and shrimp on the FYR Grill

Easy Guacamole

Guacamole can seem intimidating, but it’s so easy! Mash up three ripe avocados with a minced jalapeño, a couple tablespoons of chopped red onion, a couple tablespoons of chopped fresh cilantro, juice from two limes and kosher salt to taste. That’s it! If you want to play with the spice level, you can use more or less jalapeño. Or, you can leave the seeds and ribs in if you want to keep things fiery. 

How to Make Texas Fajitas

Am I allowed to say “yee-haw” now that we’re cooking these Texas fajitas? Because I am stoked for the great things to come. 

Seasoning the Proteins

First up, we’ve got to get the steak, chicken and shrimp ready for the grill. Slather your flank steak in 2 tablespoons of FYR BLK Hot Sauce and canola oil as needed, then season the steak with 1/2 cup Mesquite Peppercorn Lager rub. Set the steak the side.

Next, slather 3-4 chicken thighs in 1 tablespoon FYR GLD and canola oil as needed. Then, season with 1/2 cup Sweet Carolina Blonde Rub and mix with juice from two limes and 2.5 tablespoons of chopped cilantro to make your chicken fajita marinade. Set to the side.

Seasoning steak and chicken for fajitas

Finally, mix your 1.5 pounds of shrimp with 2.5 tablespoons achiote paste, 1 tablespoon Smoked Garlic Jalapeño Lager Rub, 2.5 tablespoons cilantro, 1 tablespoon FYR RED Hot Sauce, canola oil as needed and kosher salt to taste. Set to the side.

Grilling the Texas Fajitas

Preheat your FYR Grill to high heat, about 400 degrees Fahrenheit. Then, add a cast iron skillet over the hot coals and drizzle some canola oil in to coat the bottom. Add four sliced bell peppers and three sliced white onions with about 1.5 tablespoons Jalapeño Lime Pilsner Rub, then sauté for 5-7 minutes until softened. Remove the pepper strips and onions from the grill the cool.

Grilling chicken and steak on FYR Grill

Next on the grill: your steak and chicken. Place steak on the grill, which you’ll want to cook the steak until it reaches 120 degrees internal, about 8-10 minutes per side. You can place the chicken on the grill now too since it has the same cooking time, though you’ll want to make sure the internal temperature reaches 165 degrees before you pull it off the grill.

To cook the shrimp, place the cast iron skillet back on the grill with a little oil, then add this protein. Because we want them tender, the shrimp should only take 2-3 minutes to cook. Once everything is done, pull off and let the meat rest for 5 minutes. Did I mention how much I love having all this space to cook on the grill? 

Seasoning shrimp and grilling proteins for Texas fajitas

Serving Texas Fajitas

To finish the Texas fajitas, slice up your chicken and steak, going against the grain of the meat for the steak.

Slicing steak and chicken for Texas fajitas

Then, heat up a large skillet until it’s smoking hot, add a bed of veggies and top with steak, chicken and shrimp. Serve these freakin’ delicious fajitas sizzling hot with fresh tortillas, cheese, sour cream, guacamole, lettuce and more, just like you’d get at your favorite Tex-Mex restaurants. 

What to Serve with Texas Fajitas

Chips and salsa would be a great starter for these fajitas. For your sides, because we’ve got such a loaded plate of meats, I’d recommend a simple slaw with lots of lime or an easy green salad. 

For More Fajita (and Similar) Recipes

Leftovers and Reheating

If you have leftover steak, wrap it tightly and store it in an airtight container in the fridge. To reheat, wrap the steak in aluminum foil and heat it at 250 degrees F on the grill or in the oven until warmed through. I’d recommend the same for the chicken thighs.

For the shrimp and veggies, store in separate airtight containers in the fridge. When you want to eat, reheat gently on the stovetop — they won’t need a lot of time to warm up. Keep your favorite toppings on hand so you can make these anytime!

FAQs

Can I use different cuts of beef or chicken for the Texas fajitas? 

Sure! Skirt steak is a great option, though you’ll only need to cook for 2-3 minutes per side. For the chicken, you can also use chicken breasts, though they might be a little drier than the thighs.

What other toppings can I use? 

Go wild here! Fresh chiles, queso, pickled jalapeños and more would bring great flavor to these Texas fajitas.

​When can I get the new FYR Grill? 

Good things take time, right? We expect to ship these grills in the first quarter of 2025! You can find out more info on our Kickstarter page.

Get The Cookbooks!

Flavor X Fire & FOOD X Fire

By Derek Wolf

All the major tastes—salty, sour, sweet, bitter, and umami—are explored in depth, along with an investigation of other components you should consider when it comes to flavor, such as aroma, heat, and texture.

Texas fajitas, a massive platter of meats
Print

Texas Fajitas

This massive loaded platter of meat — steak, chicken and shrimp — lives up to its state namesake. Everything's bigger with Texas fajitas.
Course Dinner, Main Course
Cuisine American, Mexican
Prep Time 15 minutes
Cook Time 30 minutes
Total Time 45 minutes
Servings 4 people
Calories 600kcal
Author Derek Wolf

Ingredients

Steak:

Chicken:

Shrimp:

Veggies:

Instructions

  • Slather you flank steak in FYR BLK Hot Sauce and oil then season with the Mesquite Peppercorn Lager rub. Set to the side.
  • Slather your chicken in FYR GLD and oil then season with Sweet Carolina Blonde Rub and mix with lime juice and chopped cilantro. Set to the side.
  • Mix your shrimp with the achiote paste, Smoked Garlic Jalapeno Lager Rub, cilantro, FYR RED, oil and salt. Set to the side.
  • Preheat your grill to a high heat temperature (around 400F).
  • Add a cast iron skillet over the hot coals with oil. Add your bell peppers and onions with some Jalapeno Lime Pilsner Rub to saute for 5-7 minutes until softened. Pull off once done to cool.
  • First add your steak and chicken to the grill to cook. Add a cast iron skillet with a little oil and add your shrimp to the skillet. Steak should be about 8-10 minutes per side or until 120F internal. Chicken should be 8-10 minutes per side or until 165F internal. Shrimp should only take 2-3 minutes to cook. Once everything is done, pull off and let rest for 5 minutes.
  • Slice up your chicken and steak. Then, heat up a large skillet till it’s smoking hot and add a bed of veggies and top with steak, chicken and shrimp. Serve sizzling hot with a side of tortillas, cheese, sour cream, guacamole, lettuce and more if you like!

Notes

Easy Guacamole
Guacamole can seem intimidating, but it’s so easy! Mash up three ripe avocados with a minced jalapeño, a couple tablespoons of chopped red onion, a couple tablespoons of chopped fresh cilantro, juice from two limes and kosher salt to taste. That’s it! If you want to play with the spice level, you can use more or less jalapeño. Or, you can leave the seeds and ribs in if you want to keep things fiery. 

Nutrition

Calories: 600kcal | Carbohydrates: 37g | Protein: 66g | Fat: 24g | Saturated Fat: 6g | Polyunsaturated Fat: 6g | Monounsaturated Fat: 10g | Trans Fat: 0.1g | Cholesterol: 391mg | Sodium: 665mg | Potassium: 1691mg | Fiber: 11g | Sugar: 12g | Vitamin A: 10818IU | Vitamin C: 181mg | Calcium: 313mg | Iron: 10mg

The post Texas Fajitas appeared first on Over The Fire Cooking.
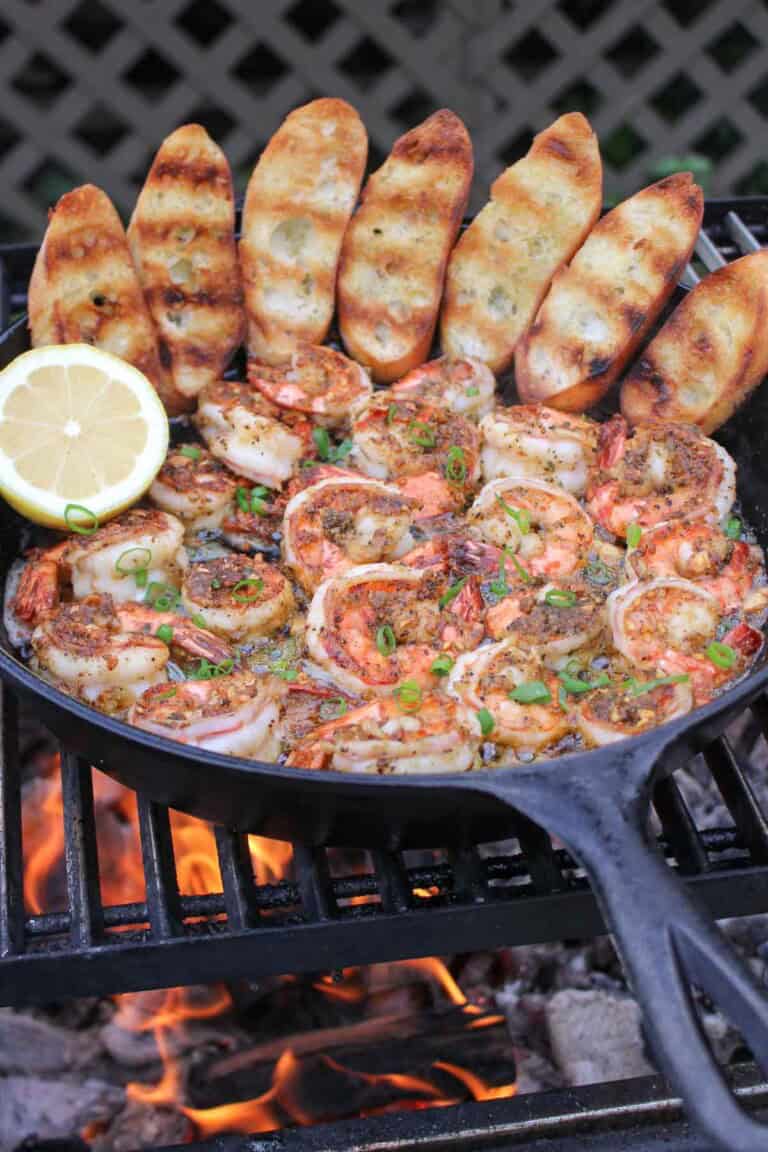
Garlic Butter Shrimp

Garlic butter shrimp with crusty bread

Raise your hand if you always go for the crunchy shrimp appetizer at parties. For those of you like me…

The post Garlic Butter Shrimp appeared first on Over The Fire Cooking.

Garlic butter shrimp with crusty bread

Raise your hand if you always go for the crunchy shrimp appetizer at parties. For those of you like me with your hands in the air, these garlic butter shrimp will rise to the top of your easy shrimp recipes list.

Our tangy twist is inspired by freakin’ delicious Hawaiian-style garlic butter shrimp, and we’re using flour to get that super crispy outer crunch. This easy garlic butter shrimp recipe makes a great appetizer for all you seafood lovers, or even as part of a main course with bread, pasta or white rice. 

Garlic butter shrimp with crusty bread

Why You’ll Love Garlic Butter Shrimp

Hawaiian-style garlic butter shrimp is famous because of its crunch and the best flavor, with lots of fresh garlic and citrus. You can find it at food trucks all over the island! Because we want to do this recipe justice, we use all-purpose flour to get that crunch. The crunch has another purpose here: it creates lots of craggy texture for the garlic butter to cling to the shrimp.

We don’t use white wine here, which is generally in buttery shrimp recipes like this one. If you feel like you’re missing it, you can certainly add it in, or even use beer or chicken broth to deglaze the skillet. 

For a roundup of my favorite seafood recipes, make sure to also check out Best Lobster Tail Recipes and Grilled Shrimp Recipes.

Garlic Butter Shrimp Ingredients

This easy recipe has an simple ingredients list to go with it!

  • Shrimp, peeled and deveined
  • Garlic, minced, and lots of it
  • My Smoked Garlic Jalapeño Lager Rub, which kicks up that delicious garlic flavor
  • Unsalted butter and a little olive oil
  • Fresh lemon juice
  • Chopped green onions for our garnish
Seasoning shrimp with Smoked Garlic Jalapeno Rub

Fresh or Frozen Shrimp? 

Here’s a little secret: the “fresh” shrimp you see at your local supermarket were most likely already frozen, then defrosted at the fish counter. When fisherman catch shrimp, they freeze them on the boats within a very short time of being out of the water. That move keeps that shrimp flavor from when they were caught. So, unless you’re sure the so-called fresh shrimp you’re seeing for our garlicky shrimp are right off the boat, you’re better off buying frozen shrimp. 

How to Make Garlic Butter Shrimp

Bring your fire to medium-high heat (around 350 degrees Fahrenheit) for direct cooking. Next, add a large skillet — preferably cast iron — to the fire for about a minute before you start cooking.

Pat your 1.5 pounds of shrimp completely dry, then generously season the raw shrimp with 1/4 cup Smoked Garlic Jalapeño Lager Rub (or your favorite seafood rub) and 2 tablespoons of all-purpose flour. 

Cooking shrimp in a skillet

Next, add 2 tablespoons olive oil and 6 tablespoons of unsalted butter to melt in the skillet. Then, add the 1/4 cup minced garlic and let it brown for 90 seconds. Once the garlic has browned, add your shrimp in batches to the skillet. Make sure to not overcrowd the pan and cook those shrimp for about 90 seconds on the first side.

Flip the shrimp over, stir and continue to cook the shrimp for another 1-2 minutes until fully done. It should only take about 2-3 minutes to cook the shrimp. When the sauteed shrimp are done, pull the whole skillet off the fire to cool.

Garnish the skillet with chopped green onions, juice from 1 medium lemon and crusty bread. Serve and enjoy!

The served, final dish.

What to Serve with Garlic Butter Shrimp

These lemony garlic butter shrimp are a great appetizer, but you can easily turn them into a complete meal. For an easy and delicious dinner, serve with the crusty bread I recommend and a simple green salad. You could also serve the garlic butter shrimp white rice, cauliflower rice, your favorite pasta shape or zucchini noodles. 

Leftovers and Reheating

Because you don’t want to lose that crunch, these succulent shrimp are best eaten on the day they’re made. Still, if you do end up with leftovers, store the shrimp in an airtight container in the fridge. Once you’re ready to eat, heat them in a 350-degree oven or your air fryer for 5-10 minutes. Just enough to warm them up!

For More Shrimp

FAQs

What size shrimp should I use for garlic butter shrimp? 

The selection for your favorite shrimp recipes can be overwhelming! You’ll see mini, medium, large, jumbo and colossal at the grocery store. All these sizes also have a number on them, which details how many shrimp you get per pound.

Smaller shrimp tend to be best for pastas or salads. For dishes like this, where the shrimp is the star, you want to go big for the size of your shrimp. For that reason, a larger shrimp like jumbo shrimp are the best, which gets you 21-25 shrimp per pound.

How do I peel and devein shrimp? 

To clean the shrimp for this lemon garlic butter shrimp recipe, you’ll need to remove the shell and use a paring knife to make a small slit along the back of the shrimp. Then, use the tip of the knife to get under the vein and gently pull it out.

I can think of fewer people out there who have cooked more shrimp than Emeril Lagasse. He’s got a great step-by-step video to show you how to do it!

If I go that route, what kind of beer or wine should I use to deglaze the pan?

Because white wine is classic here, you can’t go wrong with using that liquid. If you choose beer, I think a light lager would be perfect, since the flavor would pair nicely with the Smoked Jalapeño Lager Rub!

Garlic butter shrimp with crusty bread
Print

Garlic Butter Shrimp

Garlic butter shrimp is a tangy twist on Hawaiian-style garlic butter shrimp, with great garlic-citrus flavor and a crispy crunch.
Course Main Course
Cuisine American
Prep Time 15 minutes
Cook Time 15 minutes
Total Time 30 minutes
Servings 2 people
Calories 857kcal
Author Derek Wolf

Ingredients

  • 1.5 lbs Shrimp peeled & deveined
  • 1/4 cup Minced Garlic
  • 2 tbsp All Purpose Flour
  • 1/4 cup Smoked Garlic Jalapeno Lager Rub
  • 6 tbsp Butter unsalted
  • 2 tbsp Olive Oil
  • 1 medium Lemon juiced
  • Chopped Green Onions garnish

Instructions

  • Preheat a medium high heat fire (around 350F) for direct cooking. Add a cast iron skillet to the fire about 1 minute before cooking.
  • Pat your shrimp completely dry, then generously season with Smoked Garlic Jalapeno Lager Rub (or your favorite seafood rub) and your flour.
  • First, add your olive oil and butter to melt in the skillet. Next, add the minced garlic and let it brown for 90 seconds.
  • Add your shrimp in batches to the skillet (make sure to not overcrowd the pan) and cook for about 90 seconds on the first side. Flip the shrimp over.
  • Continue to cook the shrimp for another 1-2 minutes until fully done. When the shrimp are done, pull the whole skillet off the fire to cool.
  • Garnish the skillet with chopped green onions, lemon juice and crusted bread. Serve and enjoy!

Notes

Fresh or Frozen Shrimp? 
Here’s a little secret: the “fresh” shrimp you see at your local supermarket were most likely already frozen, then defrosted at the fish counter. When fisherman catch shrimp, they freeze them on the boats within a very short time of being out of the water. That move keeps that shrimp flavor from when they were caught. So, unless you’re sure the so-called fresh shrimp you’re seeing for our garlicky shrimp are right off the boat, you’re better off buying frozen shrimp. 

Nutrition

Calories: 857kcal | Carbohydrates: 35g | Protein: 74g | Fat: 51g | Saturated Fat: 24g | Polyunsaturated Fat: 4g | Monounsaturated Fat: 20g | Trans Fat: 1g | Cholesterol: 638mg | Sodium: 685mg | Potassium: 1452mg | Fiber: 10g | Sugar: 2g | Vitamin A: 1225IU | Vitamin C: 34mg | Calcium: 405mg | Iron: 6mg

The post Garlic Butter Shrimp appeared first on Over The Fire Cooking.

Hot Honey Butter

Hot honey butter

After making smoked chimichurri and smoked butter, I had to do the next logical thing: keeping expanding our sauce horizons with hot honey…

The post Hot Honey Butter appeared first on Over The Fire Cooking.
Hot honey butter

After making smoked chimichurri and smoked butter, I had to do the next logical thing: keeping expanding our sauce horizons with hot honey butter. This spicy honey butter hits all the right notes, as it’s sweet, spicy and smoky from the coals. Call it a trifecta of flavor! Trust me, it’s a 10/10, a so freakin’ delicious recipe that you’ll want to make over and over again. 

Smoke rising from the hot honey butter in a mason jar.

Why You’ll Love Hot Honey Butter

I know I don’t need to sell you on the merits of butter, but here goes. Hot honey butter combines the sweetness of honey, a healthy spice kick from red pepper flakes and FYR Red Hot Sauce, fresh and dried herbs and smoke flavor to round it out. This perfect balance is fantastic with beef and seafood, so it makes the perfect topping for surf and turf. But really, you can use this honey butter sauce on any dish, like chicken wings or even spicy salami pizza. 

Steak and oysters topped with butter.

For more steak recipes that would be perfect with this hot honey butter, check out The Best Grilled Steak Recipes.

Hot Honey Butter Ingredients

The biggest thing here is you want high-quality natural charcoal from your grill to drop into the jar. ***Please note, you should not make this recipe with a briquette!*** The natural, lump charcoal plays a very important role in taking this spicy butter to the next level. Here’s what goes in the rest of the jar:

  • Clarified, Melted Butter: Don’t stress, I’ve got a recipe tip for you for clarified butter below! Alternatively, you can also find it at most major grocery stores.
  • Local Honey: Obviously. 
  • Pantry Ingredients: My FYR Red Hot Sauce, kosher salt, smoked paprika, black pepper, onion powder, dried oregano, dried thyme, cayenne pepper and red chili flakes bring the heat to this butter.
  • Fresh Ingredients: We add freshness with minced garlic, chopped parsley and lemon juice. 
Ingredients for hot honey butter.

How to Make Clarified Butter

Clarified butter has a higher smoke point than regular butter, making it perfect for high-heat cooking and grilling. It’s worth the extra time to get this recipe right for the hot honey butter!

First, grab your unsalted butter — you’ll want about four sticks. Melt the blocks of butter slowly over direct heat (low setting) in a small saucepan. The goal is to let the butter melt gradually and completely without boiling it. As it melts, you’ll notice the milk solids start to separate from the butter “oil”. Next, pour the liquified butter into a clear glass container and let cool for two minutes. As it cools, the milk solids will sink to the bottom of the jar.

Then, pour the top portion of the butter into a new jar. That is the golden, pure yellow portion of the butter, aka the clarified butter. Try to keep any of the white, milk solids from getting poured into the new jar. That’s all there is to it! Now, you have your very own clarified butter.

Get stoked for life

This sauce is FYR!

an all-new line created for live fire cooking

Born from a deep passion for food and flavor. Whether you’re grilling in the backyard or live fire cooking around the world, we have what you need to transform every meal into an adventure.

How to Make Hot Honey Butter

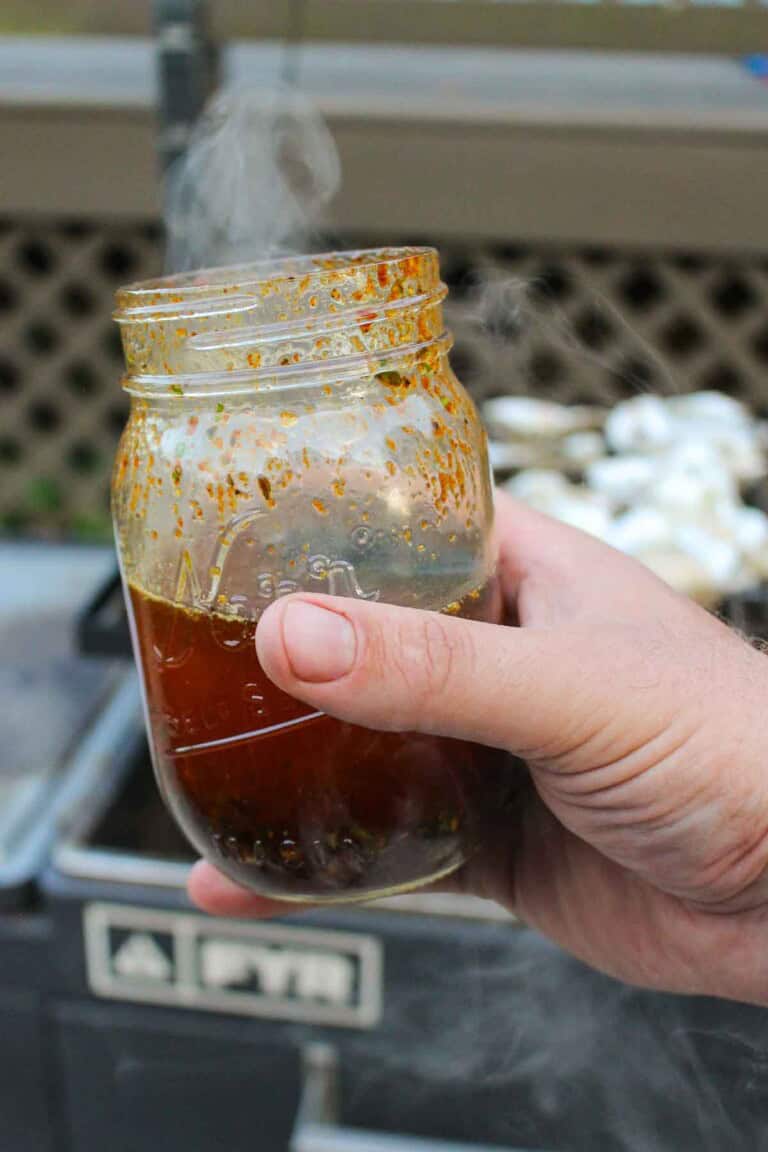
Super easy, super flavorful. The effort to results ratio doesn’t get much better than this. Whisk butter and all your ingredients in a mason jar, then add a smoldering coal (not a briquette, real charcoal only) from your grill fire. Ideally, you want this coal to be white hot. So, use tongs to grab one! Cover the jar quickly to capture the smoke, then set to the side to marinate for 20-30 minutes. 

Letting the coal smoke in the jar.

If you want to adjust the amount of smoke flavor in the hot honey butter, then just reduce or increase up the amount of time the coal sits in the butter. I found the 20-30 minute time range to be the sweet spot, but figure out what works best for your taste buds. 

What to Serve with Hot Honey Butter

Oh man. The better questions is what NOT to serve with hot honey butter. This little miracle takes steaks, seafood, burgers and other meats to the next level. I also think it’s a great dipping sauce for cornbread or a slice of hearty sourdough. Let me know how you use it in the comments!

Another favorite sauce of mine is chimichurri. If you want another sauce to add to your meals that’s fresh and herby, then make sure to check out my Best Chimichurri Recipes!

Mixing the hot honey butter in the mason jar.

Storing and Reheating

Once you’ve made your hot honey butter, let it cool to room temperature (no longer than a couple of hours) before placing it in the fridge for up to two weeks. You can also freeze the butter in ice cube trays for up to six months.

For More Butter Flavor

FAQs

Do I have to use clarified butter? 

Clarified butter is definitely better in high-heat cooking and grilling recipes because of its higher smoke point. You can use regular butter for the hot honey butter recipe, but just keep in mind that the milk solids and water in regular butter can burn during smoking, which leaves you with some odd flavors. 

What type of charcoal should I use for hot honey butter? 

If you’ve been here a while, you know I think Cowboy Charcoal is the best thing. The coals get super hot and burn really clean, which is ideal here.

What smoked sauce are you making next? 

You tell me! I think this charcoal method can work in a variety of settings, so I’d love to hear your ideas. Smoked pesto butter over grilled chicken seems like a solid possibility…

Get The Cookbooks!

Flavor X Fire & FOOD X Fire

By Derek Wolf

All the major tastes—salty, sour, sweet, bitter, and umami—are explored in depth, along with an investigation of other components you should consider when it comes to flavor, such as aroma, heat, and texture.

Hot honey butter
Print

Hot Honey Butter

Hot honey butter combines sweet, spicy and smoky flavors, and it's so freakin' delicious on steak, seafood and more.
Course Sauce
Cuisine American
Prep Time 5 minutes
Cook Time 20 minutes
Total Time 25 minutes
Servings 4 people
Calories 677kcal
Author Derek Wolf

Ingredients

  • 1.5 cup Unsalted Butter clarified & melted
  • 2.5 tbsp Local Honey
  • 2 tbsp Minced Garlic
  • 2 tbsp Chopped Parsley
  • 1.5 tbsp FYR RED Hot Sauce
  • 2.5 tsp of Kosher Salt
  • 2.5 tsp of Smoked Paprika
  • 1 tsp of Black Pepper
  • 1 tsp of Onion Powder
  • 1 tsp of Dried Oregano
  • 1 tsp of Dried Thyme
  • 1 tsp of Cayenne Powder
  • 1 tsp Red Chili Flakes
  • 1 small Lemon juiced

Instructions

  • Add all the ingredients for the butter to the mason jar and mix.
  • Then add a smoldering coal from the fire (ideally white hot) to the mason jar. Cover quickly to encapsulate the smoke. Then set to the side to marinate for 20-30 minutes.
  • Remove coal from mason jar before stirring the butter one more time and serving with your meal of choice.

Notes

How to Make Clarified Butter
Clarified butter has a higher smoke point than regular butter, making it perfect for high-heat cooking and grilling. It’s worth the extra time to get this recipe right for the hot honey butter!
First, grab your unsalted butter — you’ll want about four sticks. Melt the blocks of butter slowly over direct heat (low setting) in a small saucepan. The goal is to let the butter melt gradually and completely without boiling it. As it melts, you’ll notice the milk solids start to separate from the butter “oil”. Pour the liquified butter into a clear glass container and let cool for two minutes. As it cools, the milk solids will sink to the bottom of the jar.
Pour the top portion of the butter into a new jar. That is the golden, pure yellow portion of the butter, aka the clarified butter. Try to keep any of the white, milk solids from getting poured into the new jar. That’s all there is to it! Now, you have your very own clarified butter.

Nutrition

Calories: 677kcal | Carbohydrates: 17g | Protein: 2g | Fat: 70g | Saturated Fat: 44g | Polyunsaturated Fat: 3g | Monounsaturated Fat: 18g | Trans Fat: 3g | Cholesterol: 183mg | Sodium: 1.604mg | Potassium: 168mg | Fiber: 2g | Sugar: 12g | Vitamin A: 3.317IU | Vitamin C: 23mg | Calcium: 59mg | Iron: 1mg

The post Hot Honey Butter appeared first on Over The Fire Cooking.
Smoked Steak Butter

Smoke billowing out of the butter sauce.

Smoked Steak Butter is the next evolution of our smoked butter and smoked chimichurri journey. Adding that charcoal to the…

The post Smoked Steak Butter appeared first on Over The Fire Cooking.

Smoke billowing out of the butter sauce.

Smoked Steak Butter is the next evolution of our smoked butter and smoked chimichurri journey. Adding that charcoal to the sauce for added savory smokiness really does change the flavor! It will amplify your steaks whether you cooked them over the new FYR Grill or just on your skillet inside your house. It really makes a huge difference!

ANNOUNCEMENT – FYR Grill goes live for orders on Tuesday July 9th! Check it out and get ready.

Steak being dipped in the Smoked Steak Butter
Smoke billowing out of the butter sauce.
Print

Smoked Steak Butter

Smoked Steak Butter will not only elevate your grilled steak, but will make almost anything taste incredible!
Course Sauce
Cuisine American
Prep Time 5 minutes
Cook Time 1 hour
Total Time 1 hour 5 minutes
Servings 4 people
Calories 850kcal
Author Derek Wolf
Cost $10

Ingredients

Smoked Steak Butter:

  • 2 cups Clarified Butter melted
  • 1/2 cup Garlic Confit
  • 2 tbsp Chopped Parsley
  • 2 tsp Chopped Chives
  • 2 tsp Dried Rosemary
  • 2 tsp Dried Thyme
  • 1 tsp of Kosher Salt
  • 1 tsp Black Pepper
  • Smoking Charcoal

Confit Garlic:

  • 12-15 Garlic Cloves
  • Oil enough to cover the garlic

Instructions

  • Add a small skillet with your garlic cloves and enough oil to cover the cloves. Add to a medium heat fire and let gently simmer for at least 30-45 minutes until softened and dark amber brown. Pull off and cool, then smash up for the butter.
  • Add all the ingredients for the butter to the mason jar along with a smoldering coal from the fire (ideally white hot). Cover quickly to encapsulate the smoke, then set to the side to marinate for 20-30 minutes.

Nutrition

Calories: 850kcal | Carbohydrates: 14g | Protein: 3g | Fat: 90g | Saturated Fat: 56g | Polyunsaturated Fat: 3g | Monounsaturated Fat: 26g | Cholesterol: 230mg | Sodium: 591mg | Potassium: 179mg | Fiber: 1g | Sugar: 0.4g | Vitamin A: 217IU | Vitamin C: 15mg | Calcium: 86mg | Iron: 1mg

The post Smoked Steak Butter appeared first on Over The Fire Cooking.

How to Cook Picanha

Skewered Picanha with Chimichurri Butter made on the FYR Grill.

Today at Over the Fire Cooking, I’m giving a great recipe, skewered picanha, a fun twist—literally. I’ll show you how…

The post How to Cook Picanha appeared first on Over The Fire Cooking.

Skewered Picanha with Chimichurri Butter made on the FYR Grill.

Today at Over the Fire Cooking, I’m giving a great recipe, skewered picanha, a fun twist—literally. I’ll show you how to cook picanha steaks on my new FYR Grill, which I made sure would have a rotating skewer system. If you’ve never heard of this cut of beef before, I wrote an entire What is Picanha? article explaining why it’s so great!

My new FYR grill provides the perfect setup for making Skewered Picanha with Chimichurri Butter rotisserie-style. It’s one of the easiest ways to make picanha steaks taste phenomenal. Without a doubt, when it comes to how to cook picanha in the best way possible, it doesn’t get easier. And this cut of meat with its signature fat cap paired with chimichurri butter makes this recipe so freakin’ delicious!

How to cook picanha and Skewered Picanha with Chimichurri Butter recipe.

Now, for more about my FYR Grill and its many virtues, hop over to FYR.com where you can pre-order your very own rig. It’s so versatile and mobile that you’ll wonder how you ever grilled without it.

For this kind of recipe, the 90-degree rotation in each direction ensures a 360-degree global heating source. Forget spending a fortune at the Brazilian steakhouse to enjoy tender, juicy rotisserie-style steak with phenomenal flavor. Undoubtedly, with this new grill, you can bring that cowboy cooking method (and more!) to your own backyard.

Why You’ll Love Making Picanha

Without a doubt, skewered picanha is a favorite among steak lovers, and there are plenty of reasons why. First off, the beefy flavor of this cut, also known as rump cap or top sirloin cap, is unparalleled. It’s one of the most flavorful cuts of beef you’ll ever taste. When you cook picanha right, it stays incredibly juicy and tender, making each bite a melt-in-your-mouth experience.

Skewered Picanha with Chimichurri Butter

One of the best things about picanha is how simple the seasoning can be. In fact, you don’t need a lot to make this cut shine—just some salt enhances the meat’s natural flavors. Additionally, it’s adaptable to various cooking techniques, ensuring you can enjoy it any way you like.

How do I achieve the perfect picanha steak?

The key is to let the meat come to room temperature, use simple seasoning, cook over high heat to form a crust and use a meat thermometer to ensure that you don’t undercook or overcook the meat.

For more recipes that demonstrate how to cook picanha to perfection, check out Picanha Steak Sandwich, Steakhouse Picanha, Rotisserie Picanha with Parmesan Crust and Grilled Garlic Butter Picanha.

Ingredients for Skewered Picanha

  • The Steak – Grab two whole picanha (also known as rump cap, top sirloin cap or culotte steak) from your local grocery store or meat market. For the seasoning, we’re keeping it simple with some coarse sea salt (or kosher salt). 
The picanha steaks are seasoned with coarse salt.
  • Chimichurri Sauce – If you’ve never made this Brazilian cowboy sauce before, get ready for an exciting medley of flavors. Usually, you make it with olive oil, but grass-fed butter gives it the perfect rich and savory flavor. You’ll also need chopped parsley, garlic cloves, red wine vinegar, oregano, red pepper flakes, coarse kosher salt and black pepper. 

Chimichurri is one of my favorite additions to steak. I’ve made smoked chimichurri, bone marrow chimichurri and even mint chimichurri for a lamb dish. Chimichurri also makes a great addition to steak sandwiches, steak and shrimp, wings and can be used as a marinade like I did with this tri-tip!

How to Make Skewered Picanha

Picanha Steak Prep

Start by letting your picanha steaks come up to room temperature for about 15-20 minutes. Pat the meat dry with a paper towel. Next, grab your sharp knife and cutting board. Slice the beef into steaks, cutting from edge to edge instead of top to tail. This way, you’ll get those perfect pieces for skewering.

The steaks are formed into a "C" shape before getting skewered.

Once you’ve got your steaks, carefully form them into a “C” shape and skewer them onto your metal skewers, making sure to pass through the thick fat cap side. Now, it’s time to lather them in oil and season generously with coarse sea salt. Don’t be shy with the salt—it might seem like a lot, but as the fat renders, you’ll lose some in the cooking process.

Chimichurri Butter & Grilling

Next, prepare your Chimichurri Butter by mixing all the ingredients in a bowl and setting it aside. Get your charcoal grill up to medium-high heat (about 350 degrees F) for indirect cooking using the three-zone method. Place your skewers between the two coal beds on the hot grill.

The Chimichurri Butter is easy to make and so freakin' delicious on the meat.

After about 15 minutes, check the internal temperature with a meat thermometer. We’re looking for 120 degrees F for medium-rare. Make sure to rotate the skewers every 2-3 minutes to prevent flare-ups, ensure even cooking and ultimately achieve a golden crust. For the best flavor, make sure to cook off some of the fat layer too! 

The steaks rotate over the fire for full coverage and a great rendering of the fat cap.

Pro Tip

Most importantly, to handle any flare-ups, douse the fire with a spritz of water from a spray bottle or place a foil bin with a little water at the bottom to catch the oil drippings.

Once you finish cooking the steaks, pull them off the grill, top them with Chimichurri Butter, and let them rest for 8 minutes. Last but not least, slice up those beautiful steaks against the grain and enjoy. Cheers! 

The picanha steaks are cut against the grain.

What to Serve with Skewered Picanha

Pair your delicious steak with some fantastic sides to complete the meal. Grilled vegetables like bell peppers, zucchini, and onions are a great choice, adding a nice smoky flavor that complements the beef. Rice and beans are a staple in Brazilian cuisine and also would provide a hearty, satisfying base.

Conversely, for something light and refreshing, a fresh salad balances out the richness of the meat perfectly. These sides obviously enhance the flavors and bring even more interesting textures to your plate.

The chimichurri butter is slathered over the picanha steaks after resting.

How to Handle Leftover Picanha & reheating

To store leftover picanha steak, tightly wrap the meat in aluminum foil or plastic wrap. Next, place it in an airtight container. Then, refrigerate it for up to 3 days.

When you’re ready to reheat, wrap the meat in aluminum foil and grill it. Additionally, pour in some beer or broth to maintain its juiciness. Alternatively, you can enjoy the meat cold in some epic Chimichurri sandwiches.

More Picanha

FAQs for Making Skewered Picanha Steak

What is picanha?

Picanha, also known as rump cap or top sirloin cap, known for its thick fat cap, is a favorite in Brazilian cooking. When you know how to cook picanha, the resulting beefy flavor is unlike anything else you have ever tasted.

HOW TO COOK PICANHA in a cast iron skillet?

Cooking picanha in a cast iron skillet is a great method. Heat the skillet over a medium-high heat grill, sear each side for 3-4 minutes and finish in the oven if needed.

What is the Sous Vide Method for Picanha Steak?

For this method of cooking picanha steak, you first vacuum-seal the meat in a plastic bag. Next, it is cooked in a water bath at a steady, low temperature.

Get The Cookbooks!

Flavor X Fire & FOOD X Fire

By Derek Wolf

All the major tastes—salty, sour, sweet, bitter, and umami—are explored in depth, along with an investigation of other components you should consider when it comes to flavor, such as aroma, heat, and texture.

Skewered Picanha with Chimichurri Butter made on the FYR Grill.
Print

How to Cook Picanha Steak

If you want to know how to cook picanha steak to perfection, look no further. Today, we're firing up my newly designed grill to make Skewered Picanha with Chimichurri Butter.
Course Dinner, Lunch, Main Course
Cuisine American, Brazilian
Prep Time 15 minutes
Cook Time 30 minutes
Total Time 45 minutes
Servings 4 people
Calories 653kcal
Author Derek Wolf

Ingredients

Picanha:

  • 2 Whole Picanha
  • ½ cup Coarse Sea Salt

Chimichurri Butter:

  • 1 cup Unsalted Butter melted
  • ½ cup Parsley chopped
  • 3-4 cloves Garlic minced
  • 1 tbsp Red Wine Vinegar
  • 1 tbsp Dried Oregano
  • 1 tsp of Red Pepper Flakes
  • Salt & Pepper to taste

Instructions

  • Begin by slicing your picanha into steaks going from edge to edge instead of top to tail. Once sliced, carefully form them into a “C” shape and skewer them onto the skewers.
  • Once they are on the skewers, lather in oil and generously season with the coarse sea salt. Add more salt than you might think, as the fat will render, and you will lose some salt in the cooking process.
  • In a bowl, mix together the ingredients for the Chimichurri Butter then set to the side.
  • Preheat your fire/charcoal for indirect cooking around 350 degrees F using the three-zone method.
  • Add your skewers between the two coal beds and begin cooking.
  • Cook for about 15 minutes until they are 120 degrees F internal for medium rare. Rotate them every 2-3 minutes to prevent flare up and so they cook evenly.
  • Make sure to cook off some of the fat layer if you desire too! If you do get flare ups, dose the fire with water or add a foil bin with ¼ inch of water at the bottom to catch the oil drippings.
  • Once the steaks are done, pull them off, top with the Chimichurri Butter and let them rest for 8 minutes.
  • Slice the steaks up and enjoy!

Notes

How do I achieve the perfect picanha steak?
The key is to let the meat come to room temperature, use simple seasoning, cook over high heat to form a crust and use a meat thermometer to ensure that you don’t undercook or overcook the meat. 

Nutrition

Calories: 653kcal | Carbohydrates: 2g | Protein: 24g | Fat: 62g | Saturated Fat: 36g | Polyunsaturated Fat: 3g | Monounsaturated Fat: 20g | Trans Fat: 2g | Cholesterol: 191mg | Sodium: 14225mg | Potassium: 397mg | Fiber: 1g | Sugar: 0.2g | Vitamin A: 2237IU | Vitamin C: 11mg | Calcium: 67mg | Iron: 3mg

The post How to Cook Picanha appeared first on Over The Fire Cooking.

Steak Bites with Smoked Chimichurri

Steak Bites with Smoked Chimichurri

Get your tastebuds ready for the ultimate comfort food because I’m making Steak Bites with Smoked Chimichurri today. This isn’t…

The post Steak Bites with Smoked Chimichurri appeared first on Over The Fire Cooking.

Steak Bites with Smoked Chimichurri

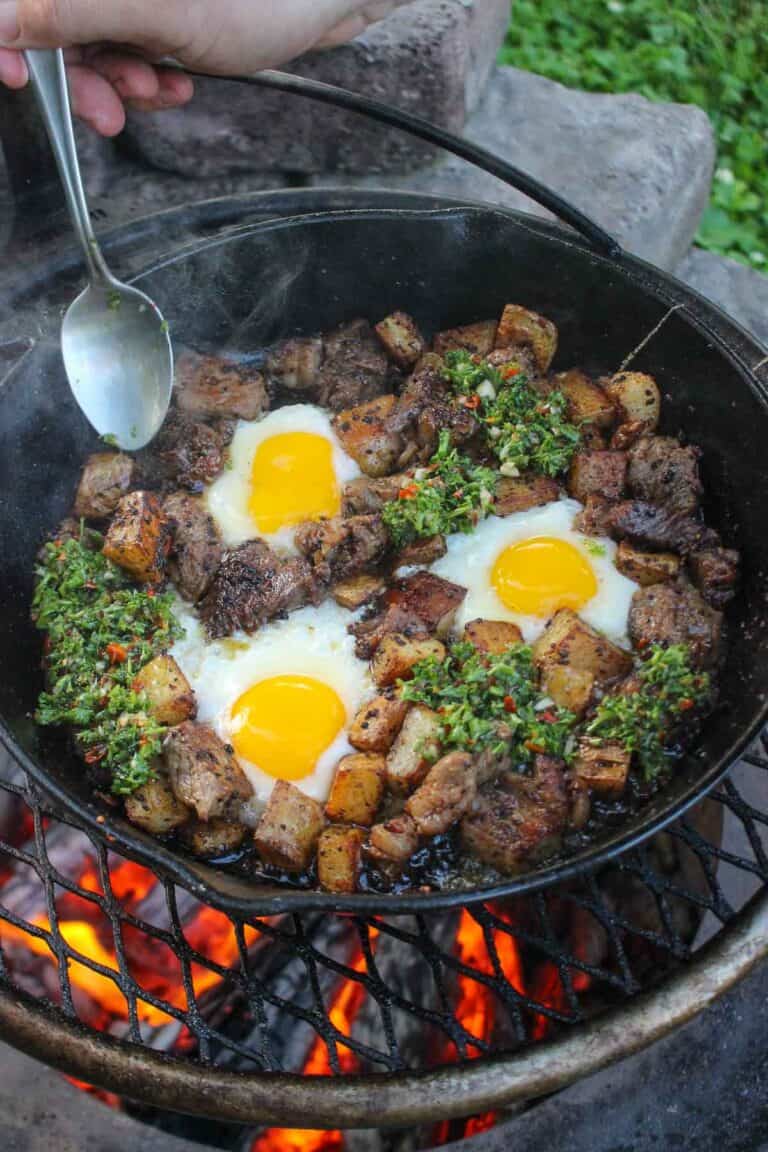
Get your tastebuds ready for the ultimate comfort food because I’m making Steak Bites with Smoked Chimichurri today. This isn’t your typical steak, egg and potato recipe—the smoked chimichurri sauce is the star. And, when I say smoked, I mean it! We’ll take a smoldering hot lump of hardwood right from the fire and place it directly in a Mason jar with the sauce.

The Smoked Chimichurri is created when a hot hardwood coal is dropped into the jar and covered.

I know it sounds risky, but trust me, some sort of alchemy happens when the smoke mingles with the ingredients. After I first saw my buddy @Salvalacocina doing it, I knew I had to give it a shot. He said it was crazy, and he was right—it’s crazy good!

Invest in the best charcoal

Here’s a pro tip for getting the best results from your backyard grilling every time: head over to Cowboy Charcoal. They make a full range of all-natural hardwood charcoals that always deliver an authentic smoky taste. Made without chemicals or additives, it’s perfect for adding smoky flavor to our chimichurri sauce and to the steak bites. Trust me, you won’t go back once you try Cowboy Charcoal!

Why You’ll Love Steak Bites with Smoked Chimichurri

The smoky chimichurri sauce is a great way to enhance the flavor of steak bites, farm-fresh eggs and potatoes. The flavorful smoky sauce on the perfectly cooked steak, eggs, and potatoes is more than a meal—it’s an epic experience! It’s also a straightforward breakfast recipe that you can turn into a simple dinner or lunch any time of year.

While I normally think of Grilled Skirt Steak with Chimichurri as the most classic use for the sauce, I’ve also stuffed chimichurri into a picanha, made a bone marrow chimichurri and used it for a chimichurri marinated tri tip recipe! It’s a very versatile sauce, and one that you should definitely add to your saucy arsenal.

Steak Recipe Ingredients Run Down 

  • Juicy Steak Bites  I went with ribeye steak for the tasty bite size pieces. To season the steaks, you’ll need your favorite vegetable oil (canola oil, avocado oil or extra-virgin olive oil all work) and my favorite Mesquite Peppercorn Lager seasoning. 

Add flavor to everything you’re cooking

shop over the fire spice lines

  • Fried Eggs – Farm fresh eggs from happy free-ranging hens might cost a dollar or two more, but they are so worth it. The yolks pop with a deeper orange color, and they taste way better. Most grocery stores carry them these days. 
  • Crispy Potatoes – Your favorite variety of potatoes is seasoned with kosher salt, black pepper and garlic powder. 
  • Smoked Chimichurri – Gather up your fresh parsley, garlic cloves, olive oil, red wine vinegar, oregano, red pepper flakes, salt and pepper to make the smoked sauce that marries all the ingredients together.
Steak Bites with Smoked Chimichurri is an epic complete meal and comfort food dish.

Alrighty, now that we know which simple ingredients we need from the store, let’s dive into the step-by-step instructions for making the recipe. 

How to make Steak Bites with Smoked Chimichurri

Smoked Chimichurri Prep Time

First, let’s start by prepping the epic smoked chimichurri sauce. Grab a Mason jar (or other covered container). Add some dried oregano, a generous pinch of red pepper flakes and hot water. Let this mixture steep for about 5 minutes. This allows for a “flowering”—otherwise known as a rehydration of the herbs—to amp up their flavor. 

The Smoked Chimichuri sauce is prepared in the Mason jar.

Next, add all the chimichurri ingredients to the jar. With your tongs, grab a smoldering, white-hot piece of hardwood from the fire and place it carefully into the jar. Quickly cover the container to trap the smoke inside, and then set it aside for 20-30 minutes. This will give your chimichurri that unique smoky flavor that I can’t stop talking about—because it’s so freakin’ delicious! 

You could also use this sauce to make a Chimichurri Steak Sandwich with it’s added smoky flare! If the charcoal addition is off-putting to you, give my Steak and Eggs with Charred Scallion Chimichurri because it’s very similar to this recipe, but with a different chimichurri. If you’re a land and sea meat over, I can also say that chimichurri works well with steak and shrimp!

Steak Skillet

Now, let’s move on to making the steak bites. Slice your room temperature ribeyes into 1.5-inch steak cubes. Slather those bad boys with oil and season them generously with my Mesquite Peppercorn Lager rub.

The potatoes are cubed on the cutting board, and the ribeyes are sliced into cubes.

If you don’t have this tasty seasoning yet, sprinkle the steaks with kosher salt, black pepper and garlic powder. Set the seasoned steaks aside and fire up your grill. Let it reach a medium-high heat of around 375 degrees F. Place an oiled cast iron skillet on the fire to preheat for about 2 minutes. 

Once the skillet is ready to go, add your steak bites in a single layer and cook them for about 1.5 minutes on each side. When they’re perfectly seared, pull them off the heat and keep them warm. 

The steak is cooked in a cast-iron skilled over the Breeo grill.

Next, add the diced potatoes to the skillet. Let them cook for 15-20 minutes until they’re browned and crispy on the outside, but soft on the inside. When the potatoes are done, add the steak bites back to the skillet and make small divots for the eggs. We love a steak and egg situation, especially when it involves potatoes!

Divots are made for the farm-fresh eggs to cook alongside the potatoes.

Crack the eggs into the skillet and cook them to your desired level of doneness. Right before finishing, drizzle the smoked chimichurri over the steak, eggs, and potatoes. Just don’t forget to remove the charcoal ember from the chimichurri sauce before doing so!

Once everything is cooked to perfection, pull the skillet off the heat and let it cool slightly.

Finally, the feast is ready to devour. The only thing left to do is enjoy the complex flavors in your smoked chimichurri masterpiece. Cheers! 

What to Serve with Steak Bites with Smoked Chimichurri

The Steak Bites with Smoked Chimichurri recipe creates a complete meal unto itself, so there’s no urgent need to add more of your favorite sides. However, you could easily complement this dish with some crusty French bread and some softened garlic butter. 

If you love skillet meals as much as I do, you may want to hope over to these recipes: Country Breakfast Skillet, Grilled Steak with Skillet Potatoes, Ron Swanson Breakfast Skillet, Southwestern Breakfast Skillet, Chipotle Coffee Rub Steak & Eggs Skillet.

The completed dish sizzling over the fire.

Leftovers & Reheating

While I don’t recommend saving any leftover eggs, the steak and potatoes can be wrapped tightly in aluminum foil and stored in an airtight container for up to 3 days. Keep the chimichurri in its Mason jar and keep it up for a week to add flavor to any other meals you are making. 

Make chimichurri sandwiches with leftover steak, or reheat the steak and potatoes in a cast-iron skillet over medium heat. Add some oil to prevent sticking and cook until they are warmed through about 5-7 minutes. You could also throw them in the air fryer for 10 minutes. 

More with Chimichurri

FAQs for Steak Bites with Smoked Chimichurri

Can I use another cut of steak other than ribeye for the steak bites?

Absolutely! While ribeye is a fantastic choice due to its marbling and flavor, you can definitely use other cuts of steak. Sirloin steak tips, filet mignon, or New York strip steak are great alternatives that will work well for steak bites. Just make sure to adjust the cooking time accordingly, as leaner cuts may cook faster and can dry out if overcooked.

Should I blend the chimichurri sauce in a food processor? 

For this recipe, we’re keeping the sauce rustic, so there’s no need to make it smooth. We want to taste the pieces of hydrated oregano and leaves of fresh parsley in every bite. 

Can I use any kind of charcoal to go inside the chimichurri sauce jar? 

Great question! Make sure to avoid using charcoal briquettes that contain additives or lighter fluid, as they can impart unwanted flavors to the sauce. Instead, opt for natural lump charcoal or hardwood chunks, which will provide a clean, smoky flavor without any added chemicals. Always exercise caution when handling hot charcoal.

Get stoked for life

This sauce is FYR!

an all-new line created for live fire cooking

Born from a deep passion for food and flavor. Whether you’re grilling in the backyard or live fire cooking around the world, we have what you need to transform every meal into an adventure.

Steak Bites with Smoked Chimichurri
Print

Steak Bites with Smoked Chimichurri

Steak Bites with Smoked Chimichurri isn't your typical steak, egg, and potato recipe – the smoked chimichurri sauce is the hero!
Course Breakfast, Brunch, Lunch
Cuisine American
Prep Time 15 minutes
Cook Time 30 minutes
Total Time 45 minutes
Servings 4 people
Calories 970kcal
Author Derek Wolf

Ingredients

Steak:

Eggs:

  • 3-4 Farm Fresh Eggs

Potatoes:

  • 1.5 cups Diced Potatoes
  • 1 tsp Kosher Salt
  • 1 tsp Black Pepper
  • 1 tsp Garlic Powder
  • Neutral Oil as needed

Smoked Chimichurri:

  • 1.5 cups Parsley chopped
  • 3-4 cloves Garlic minced
  • 1.25 cups Olive Oil
  • 1/4 cup Red Wine Vinegar
  • 1/8 cup Hot Water
  • 1 tbsp Dried Oregano
  • 1 tsp of Red Pepper Flakes
  • Salt & Pepper to taste

Instructions

Smoked Chimichurri:

  • Add the oregano, red chili flakes and hot water to a Mason jar and let steep for 5 minutes.
  • Add all the ingredients for the chimichurri to the Mason jar along with a smoldering coal from the fire (ideally white hot). Cover quickly to encapsulate the smoke, then set to the side to let the smoke infuse for 20-30 minutes.

Steak Skillet:

  • Slice your steaks into 1.5” bite sized pieces.
  • Slather your steaks with oil and season thoroughly with my Mesquite Peppercorn Lager rub or your favorite beef rub. Set to the side.
  • Get your fire for direct cooking at medium high heat (around 375F). Add a cast iron skillet with oil to preheat 2 minutes before cooking.
  • Add your steak bites to the skillet and cook for 1.5 minutes per side. Once they are done, pull them off and keep warm.
  • Add the potatoes to the skillet and let cook for 15-20 minutes until they have browned and are crispy on the outside but soft on the inside.
  • When done, add the steak back to the skillet and make 3-4 divots for the eggs.
  • Crack the eggs into the skillet and cook to your desired liking. Right before you are done, drizzle the Smoked Chimichurri over the top of the skillet and pull off to cool.
  • Serve and enjoy!

Notes

ProTip: Invest in the best charcoal
Here’s a pro tip for getting the best results from your backyard grilling every time: head over to Cowboy Charcoal. They make a full range of all-natural hardwood charcoals that always deliver an authentic smoky taste. Made without chemicals or additives, it’s perfect for adding smoky flavor to our chimichurri sauce and to the steak bites. Trust me, you won’t go back once you try Cowboy Charcoal!

Nutrition

Calories: 970kcal | Carbohydrates: 20g | Protein: 30g | Fat: 87g | Saturated Fat: 18g | Polyunsaturated Fat: 9g | Monounsaturated Fat: 58g | Trans Fat: 0.01g | Cholesterol: 192mg | Sodium: 717mg | Potassium: 903mg | Fiber: 4g | Sugar: 1g | Vitamin A: 2265IU | Vitamin C: 48mg | Calcium: 99mg | Iron: 6mg

The post Steak Bites with Smoked Chimichurri appeared first on Over The Fire Cooking.

Birria Egg Rolls

Birria Egg Rolls

Your taste buds are about to do a mariachi dance because we’re grilling up the most epic Birria Egg Rolls…

The post Birria Egg Rolls appeared first on Over The Fire Cooking.

Birria Egg Rolls

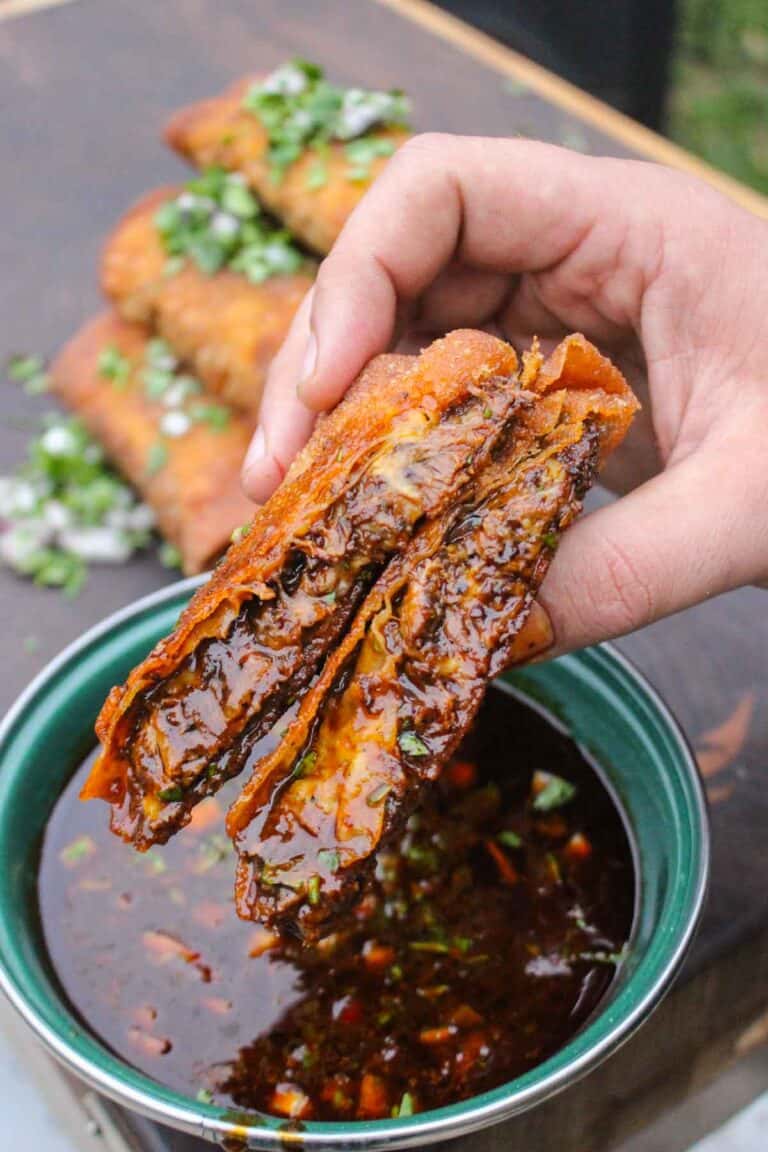
Your taste buds are about to do a mariachi dance because we’re grilling up the most epic Birria Egg Rolls you’ve ever tasted. Tender and spicy shredded beef plus oozy melted cheese in a crunchy egg roll wrapper? Yes, please! Beef Birria tucked inside the crispy goodness of Chinese egg rolls is so freakin’ delicious!

Post sponsored by Cowboy Charcoal.
Birria Egg Rolls are dipped in the braising liquid for the perfect bite.

This rich and tasty flavor explosion happens with the magic touch of my favorite Cowboy Charcoal. Made from natural hardwood with no added chemicals or fillers, their hard lump wood charcoal never robs your food of its authentic flavor. If you haven’t switched over yet, now is the time!

Why You’ll Love Delicious Birria Egg Rolls

Birria originated in the state of Jalisco in western Mexico, near Guadalajara. That’s the same city that gave us tequila and mariachi music, so you know anything with birria meat is gonna be good! Variations of birria are everywhere now and have thus made a permanent home in my backyard cooking.

I love birria, and have made it a plethora of times. It goes great on everything from fries to potatoes, added to burgers or even stuffed in a grilled cheese sandwich! However, my favorite of all has to be Quesabirria Tacos!

Birria is popular for good reason: the tender and spicy meat is a great way to elevate tacos, quesadillas and burritos. In other words, when you slow-cook beef with chili peppers and spices, something magical happens.

Additionally, Birria Egg Rolls can be paired with some Smoked Chorizo Queso and BBQ Wings to make a delicious appetizer table for game day or your next gathering. Skip to the recipe card or keep scrolling to find out what ingredients you’ll need to pull this dish together. 

Birria Egg Rolls Ingredients

  • Beef – Firstly, these tasty appetizers start with a whole chuck roast, sliced and seasoned with kosher salt, black pepper and garlic powder. My FYR BLK Hot Sauce kicks up the heat index! 

Get stoked for life

This sauce is FYR!

an all-new line created for live fire cooking

Born from a deep passion for food and flavor. Whether you’re grilling in the backyard or live fire cooking around the world, we have what you need to transform every meal into an adventure.

  • Chili Paste – The signature birria flavors in the water-based paste come from charred ancho and guajillo chiles and garlic, which are then combined with chipotle in adobo. 
  • Braising Liquid – Beef broth is infused with deep flavor from white onion, Mexican oregano, black pepper, sea salt, cinnamon and bay leaves. After braising, the seasoned broth is strained and used for dipping.
  • Other Recipe Essentials – Finally, to complete this recipe, you’ll need to grab some egg roll wrappers, jack cheese, cilantro, a red onion and frying oil
The egg rolls are stacked and sprinkled with cilantro and red onion.

How to Make Birria Egg Rolls

Birria

Alright, let’s get cooking! First up, birria. Add your Cowboy Charcoal and get your grill’s fire up to medium-high heat, roughly 375 degrees F. Grab your Dutch oven and let it warm up over the fire for a few minutes. 

Next, toss into the Dutch oven your ancho and guajillo chiles, along with those garlic cloves. Let them get a nice char, about 30-45 seconds per side. Next, pour in some water and let everything simmer over the fire for about 7-8 minutes. When that’s done, take the Dutch oven off the heat.

The chile paste is created and then combined with beef broth, onions, cinnamon, and bay leaves.

Next, grab a food processor (or immersion stick blender). Combine the sautéed chiles with some chipotle in adobo. Blend until it’s all nice and smooth, before pouring the spicy paste into a bowl.

Chuck Roast

Now onto the beef. Slather the sliced chuck roast with FYR BLK Sauce and season it with salt, pepper, and garlic powder. Get that Dutch oven back on the fire. Sear off each side of the beef until it’s nice and browned.

the beef is sliced and covered with hot sauce.

Next, add the chile paste, beef broth and seasonings. Cover everything up. Let the seasoned broth simmer over medium-high heat until it is fork-tender, which could take up to 4-5 hours.

When the beef is easily shredded, take it out of the braising liquid. Remove the bay leaves, onions, and cinnamon sticks. Strain the braising sauce until it’s nice and clean. Then pour it into a new bowl to make a flavorful consomé for dipping. 

Start shredding your beef and place it in the fridge to cool for about 30 minutes.

Birria Egg Rolls

The beef and cheese is rolled into the egg roll wrappers.

Alright, finally onto those egg rolls! Grab your cooled shredded beef and shredded cheese, and mix them in a bowl. Lay out an egg roll wrapper and spoon some of the beef mixture into the center. Wet the edges with water, then roll and fold it into an egg roll.

Heat some frying oil to about 350 degrees F in a cast iron pan. Carefully add your egg rolls to cook for 1-2 minutes per side until they’re golden brown and crispy. Once they’re done, take them out, and then set them on a paper towel. Let them cool for a bit.

The egg rolls are fried in a cast iron pan.

For another epic egg roll recipe, check out my Jalapeno Popper Egg Rolls.

Perfect egg roll TIPS

Don’t Overstuff: While it’s tempting to pack in as much filling as possible, overstuffing can lead to messy egg rolls that are difficult to roll and cook evenly.

Fry to Perfection: Make sure the oil is hot enough (use your thermometer) so that the egg rolls cook quickly without absorbing too much oil and avoid burning.

What to Serve with Birria Egg Rolls

Now that the egg rolls are ready, go ahead and serve them up with that reserved dipping sauce. Sprinkle on some chopped cilantro and diced red onions into the sauce and over the rolls.

To create a Mexican feast to go with the tastiest egg rolls ever, consider making some Mexican rice, refried black beans, guacamole, and fresh salsa. A fresh green salad would be the perfect complement to the deep-fried egg rolls.

More Latin American Inspired Recipes

How to Store Leftovers & Reheating Steps

To store leftover birria egg rolls safely, allow them to cool to room temperature before wrapping them tightly in aluminum foil or placing them in an airtight container. Refrigerate them for up to 3-4 days. If freezing, ensure they are tightly wrapped to prevent freezer burn, and they can last for 1-2 months. 

The final result: juicy, cheesy, crunchy egg rolls.

When ready to reheat frozen egg rolls, let them unthaw in the refrigerator, then warm them in the grill, oven or air fryer at 350 degrees F for 10 minutes or until heated through. Always check the internal temperature to ensure the beef reaches 165 degrees F before serving.

FAQs

Can I make birria egg rolls ahead of time?

Yes! You can assemble them, wrap them tightly, and then store them in the refrigerator until you’re ready to cook them. Alternatively, you can also freeze them for longer-term storage. Just make sure to thaw them before reheating.

Can I customize the filling of birria egg rolls?

Absolutely! While traditional birria egg rolls typically contain shredded beef cooked in a spicy broth, you can customize the filling. Experiment with different meats such as chicken or pulled pork.

What other dipping sauces pair well with birria egg rolls?

Birria egg rolls pair well with a variety of dipping sauces. A creamy avocado crema made with sour cream provides a cooling contrast. Experiment with different sauces to find your favorite combo!

Get The Cookbooks!

Flavor X Fire & FOOD X Fire

By Derek Wolf

All the major tastes—salty, sour, sweet, bitter, and umami—are explored in depth, along with an investigation of other components you should consider when it comes to flavor, such as aroma, heat, and texture.

Birria Egg Rolls
Print

Birria Egg Rolls

These Birria Egg Rolls are the perfect appetizer. They balance spicy beef flavor, cheesy goodness, and an insanely good crispy texture from the egg roll wrapper.
Course Appetizer
Cuisine American, Asian, Mexican
Prep Time 45 minutes
Cook Time 6 hours
Total Time 6 hours 45 minutes
Servings 6 people
Calories 528kcal
Author Derek Wolf

Ingredients

Beef:

  • 1 Whole Chuck Roast cubed
  • 1.5 tbsp Kosher Salt
  • 1.5 tbsp Black Pepper
  • 1.5 tbsp Garlic Powder
  • FYR BLK Hot Sauce

Chiles:

  • 3 ancho chiles stemmed & seeded
  • 3 guajillo chiles stemmed & seeded
  • 2 tbsp Chipotle in Adobo
  • 8-10 garlic cloves
  • 2 cups of Water

Braising + Seasonings:

  • 2-3 cups beef broth
  • 1/2 white onion sliced
  • 1.5 tablespoons mexican oregano
  • 2 tablespoons black pepper
  • 1 tablespoons sea salt
  • 2 cinnamon sticks
  • 2 bay leaves

Egg Rolls:

  • 8-10 Egg Roll Wrappers
  • 1.5 cups Jack Cheese shredded
  • Chopped Cilantro garnish
  • Diced Red Onions garnish
  • Frying Oil

Instructions

Birria:

  • Preheat your fire to medium high temperature (around 375F). Add a Dutch oven over the fire to preheat for 3-4 minutes.
  • Add your ancho chile, guajillo chile and garlic cloves to your Dutch oven and let char for 30-45 seconds per side. Once charred, add your water to the skillet and let simmer over the fire for 7-8 minutes.
  • Once simmered, pull the Dutch oven off of the heat. Add your sauteed chiles and your chipotle in adobo to a food processor (or use an immersion stick blender). Blend until completely smooth. Pour your paste into a bowl.
  • Slather your chuck roast pieces with FYR BLK Sauce and liberally season with salt, pepper and garlic powder.
  • Place them in the Dutch oven along with the chile paste, beef broth and all of the seasonings.
  • Cover and let simmer over medium-high heat until the beef is fork-tender (about 4-5 hours). Skim any fat off of the top, as needed, throughout the cooking process.
  • Once the beef is tender, pull it off and dispose of the bay leaves, onions and cinnamon sticks.
  • Strain your braising sauce from the meat until it is a clean consomme. Add the consomme to a new bowl.
  • Begin to shred your beef then place in the fridge to cool for 30 minutes.

Egg Rolls:

  • In a bowl, add your cooled shredded beef and shredded cheese. Mix thoroughly.
  • Lay out an egg roll wrapper and place a scoop of the beef mixture in the center.
  • Wet the outer edges of the wrapper with water, then roll and fold into an egg roll.
  • Preheat some frying oil to 350F in a cast iron pan and add your egg rolls to cook for 1-2 minutes per side. Once golden brown and crispy, pull off and let cool.
  • Serve with the consume topped with chopped cilantro and diced red onions. Enjoy!

Notes

Perfect egg roll tips
Don’t Overstuff: While it’s tempting to pack in as much filling as possible, overstuffing can lead to messy egg rolls that are difficult to roll and cook evenly. 
Fry to Perfection: Make sure the oil is hot enough (use your thermometer) so that the egg rolls cook quickly without absorbing too much oil and avoid burning. 

Nutrition

Calories: 528kcal | Carbohydrates: 32g | Protein: 42g | Fat: 28g | Saturated Fat: 13g | Polyunsaturated Fat: 2g | Monounsaturated Fat: 11g | Trans Fat: 1g | Cholesterol: 130mg | Sodium: 3619mg | Potassium: 1060mg | Fiber: 9g | Sugar: 9g | Vitamin A: 5385IU | Vitamin C: 8mg | Calcium: 320mg | Iron: 6mg

The post Birria Egg Rolls appeared first on Over The Fire Cooking.