Our easy Cowboy Caviar recipe is the ultimate fresh, healthy side dish that pairs with anything. It’s budget friendly and only takes 10-minutes to make. If you love this dip recipe, make sure to try 7-Layer Dip, Hummus, Pimento Cheese Dip, or Easy Homemade Salsa. How to make Cowboy Caviar: Rinse Beans: Drain and rinse…
Our easy Cowboy Caviar recipe is the ultimate fresh, healthy side dish that pairs with anything. It’s budget friendly and only takes 10-minutes to make.
Budget-Friendly, Crowd-Approved: Saddle Up for the Easiest Cowboy Caviar.
Our easy Cowboy Caviar recipe is a staple from my childhood. We called it Cowboy Salsa growing up, and I know it’s also called Texas Caviar, since it originated in Texas. Bottom line, you wont find an easier, healthier recipe that’s this budget friendly. It’s a perfect game day food, or side dish for a BBQ or potluck with a bag of chips.
How to make Cowboy Caviar:
Rinse Beans: Drain and rinse beans and corn and add to a large serving bowl with chopped tomatoes, and onion.
Combine: Add avocado and cilantro and squeeze fresh lime juice on top with a pinch of salt, to taste. Stir and serve with your favorite chips.
Make Ahead Instructions:
Chop the onion and cilantro, rinse the beans, but keep all the ingredients separately in airtight containers in the fridge. Don’t cut and slice avocado until ready to serve. When you’re ready to serve, combine all ingredients in a bowl and add fresh avocado, lime juice, and salt. Store leftover cowboy salsa in the fridge for 2-3 days.
Recipe Variations:
Cheese: Add crumbly cheese like feta or gorgonzola, or small chunks of cheddar or mozzarella.
Beans: Use whatever beans you have on hand and they will substitute fine.
Veggies: Toss in some shredded carrot or diced cucumber or celery if you want extra veggies.
Flavor Twist: Add some Italian dressing, to give a different flavor.
Our easy Cowboy Caviar recipe has fresh, healthy ingredients and is perfect for game day or potlucks! It serves a crowd, is budget friendly, and only takes 10 minutes to make.
Combine: In a large bowl combine beans, corn, tomatoes, and onion. Stir in avocados and cilantro.
Season: Squeeze lime juice into the bowl and add a pinch of sea salt. Stir to combine. Add more sea salt, to taste. Refrigerate until ready to serve.
Video
Notes
Make Ahead Instructions: ingredients and store them separately (leaving the avocado unpeeled). Then, when you are ready to serve the cowboy caviar, combine all the ingredients in a bowl and add the fresh avocado. Store leftover cowboy caviar in the fridge for 2-3 days.Variations:
Cheese: Add crumbly cheese like feta or gorgonzola, or small chunks of cheddar or mozzarella.
Beans: Use whatever beans you have on hand and they will substitute fine.
Veggies: Toss in some shredded carrot or diced cucumber or celery if you want extra veggies.
Flavor Twist: Add some Italian dressing, to give a different flavor.
Our homemade Pico de Gallo recipe takes 10 minutes to make and instantly elevates any dish (or serve it with tortilla chips!) If you’re looking for delicious dip recipes try Homemade Hummus, Pepper Jelly, Easy Homemade Salsa, or Street Corn Dip! How to make Pico de Gallo: Combine chopped tomatoes, onion, cilantro and jalapeño in…
Our homemade Pico de Gallo recipe takes 10 minutes to make and instantly elevates any dish (or serve it with tortilla chips!)
I keep ingredients for this irresistible pico on hand at all times. It instantly adds a splash of color, burst of flavor, and elevates every dish. Obviously you’ll want to serve it with Mexican faves like tacos, burritos, and quesadillas, but it’s also a mighty friend to eggs, avocado toast, grilled chicken or fish, or just scoop up with tortilla chips.
(Let’s not confuse fresh pico de gallo–made with fresh tomatoes, onion, cilantro and jalapeño–with homemade salsa, which has more of a chunky sauce consistency, and can be made with cooked, roasted, canned or fresh tomatoes). When I’m looking for fresh and bold topping, pico de gallo is my go to.
How to make Pico de Gallo:
Combine chopped tomatoes, onion, cilantro and jalapeño in a bowl. Season with salt and a spritz of lime juice. Serve on your favorite Mexican dishes, or with chips. Store in the fridge for up to 5 days.
Make Ahead and Storage Instructions:
To Make Ahead: Pico is my favorite when made an hour or two in advance. It can be kept in the fridge for about a week, depending on the freshness of your ingredients.
Recipe Variations:
Spicy Pico de Gallo: Keep the jalapeño seeds and add extra jalapeño peppers if you’d like.
Add Avocado: Stir in some diced avocado right before serving.
Add Mango: Stir in diced avocado right before serving, for a fun flavor twist.
This homemade Pico de Gallo recipe only takes 10 minutes and is made with fresh tomatoes, cilantro, red onion, and jalapeño. It is bursting with fresh flavors and instantly elevates any dish, or can be enjoyed with chips.
Combine diced tomatoes, onion, cilantro and jalapeño in a bowl. Season with salt and add lime juice to taste.
Top on your favorite Mexican food, eggs, avocado toast, chicken, or serve with chips.
Video
Notes
Yield: Makes about 4 cups.Make Ahead Instructions: prepare Pico de Gallo an hour or two in advance, stored in the fridge. Leftovers will keep for a few days in the fridge.Spicy Pico de Gallo: Keep the jalapeño seeds and add extra jalapeño peppers if you’d like.Add Avocado: Stir in some diced avocado right before serving.Add Mango: Stir in diced avocado right before serving, for a fun flavor twist.
Consider this Tomato Relish your new go-to “I have so many tomatoes, I don’t know what to do with them!” recipe. It’s tangy, sweet, slightly spicy, and PACKED with fresh flavors. Basically, it’s everything store-bought relish wishes it could be. I’ve kept the recipe super simple (no rest time or canning here!), meaning it’s quick and easy to whip up a batch whenever you have an abundance of ripe tomatoes. Jar it up and give it away as gifts, or keep it all to yourself for topping burgers, sandwiches, and more!
Making a cheese board and need something to cut through the creaminess? Add some sweet tomato relish. Got leftover pulled pork in the fridge? Or how about a grilled cheese sandwich? You guessed it, add some of this relish! Juicy red tomatoes, zesty limes, mild red onion, simple seasonings, and sugar create the perfect balance of flavors in this recipe. And don’t worry, you don’t need any fancy equipment to make it. Everything comes together effortlessly in one pan on the stove—so easy.
Ingredients You’ll Need
Here’s what you’ll need to make homemade tomato relish:
Tomatoes: The base of the relish and what gives it that bright, tangy flavor. Use any type of fresh tomatoes you have on hand.
Limes: Adds a zesty tang to balance out the sweetness.
Ginger: Use fresh, grated ginger for a subtle fiery kick.
Sugar: Adds sweetness and helps thicken the relish.
Spices: Red pepper flakes, cumin, and ground cloves add a little spice and warmth. If you don’t have ground cloves, you can leave them out or substitute them with a pumpkin spice blend (trust me, it works!).
Red Onion: Infuses the relish with a mild onion flavor and adds some texture.
Whats The Difference Between Chutney and Relish?
Both are made from chopped veggies and/or fruit, an acid (often vinegar, but in this case, lime juice), and spices. So, in many ways, they’re very similar. The biggest difference between chutney and relish has to be the consistency. Chutneys, like our mango pineapple chutney, are usually thicker and spreadable as they’re cooked for longer. Relish is cooked for less time and has a chunkier, sweet and sour taste, with the fruit/veggies retaining more of their texture. Both are DELICIOUS and worth making at home!
Tips and Notes
Any tomatoes will work in this tomato relish recipe. I went with 12 Roma tomatoes and a handful of grape tomatoes I had left from making roasted asparagus and tomatoes. Cherry and grape tomatoes have a super concentrated, yummy flavor, and the seeds are tiny and tender. Romas are super easy to seed and are pretty “meaty,” so they’re a great way to bulk up the relish. Use what you’ve got!
Cooking time may vary depending on how juicy your tomatoes are, so you’ll want to keep an eye on your relish to make sure the sugars don’t burn. Once your relish looks like it’s the same consistency as store-bought pickle relish and deepens in color and aroma, it’s done!
Don’t worry about peeling the tomatoes, but I do recommend removing the seeds from larger varieties. They can be quite bitter and make the texture of the tomato relish less than ideal.
How To Use Tomato Relish
This recipe for tomato relish would make a great holiday gift, so make as much as you want! I love homemade gifts, especially if my friends and family grew the tomatoes themselves or picked them up at our local farmers’ market! Those kinds of gifts are the most thoughtful and delicious from start to finish. This recipe yields about 6 mini 8oz jars, filled with about ¾ cups of relish per jar (you’ll want to leave a little space at the top of each sterilized mason jar, filling just to the designated “fill line”).
Here are some other ways I like to use tomato relish:
Paired with cheeses and fresh bread for an extra special charcuterie board.
Store your tomato relish in an airtight container in the fridge for up to 2 weeks. If you want it to last longer, you can freeze it for up to 3 months. Use a freezer-safe container and leave about an inch of space at the top for expansion. When you’re ready to use the relish, thaw it in the fridge overnight and enjoy!
Zest and juice limes, dice onion, and gather chopped tomatoes, grated ginger, spices, and seasonings.
Combine all ingredient in a large sauce pan or skillet and stir together.
Simmer on medium heat, stirring every couple of minutes or so while the tomatoes and onions begin to cook down. The sugar will dissolve and everything will become nice and juicy.
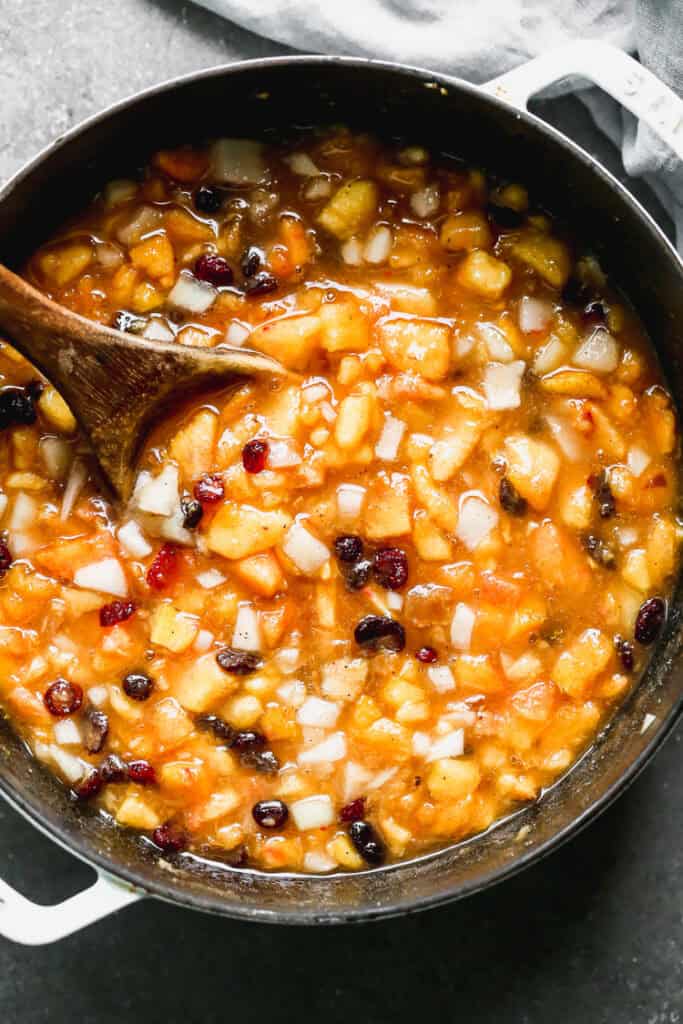
Simmer and stir until the relish deepens in color and the juice cooks down by 1/4. When the relish becomes a thicker consistency (but still juicy, like any store-bought relish) it is done. Mine took about 30 minutes.
* You can use any tomatoes you have on hand to make this relish, just make sure you have 5 cups diced for this recipe. No need to seed smaller varieties like grape or cherry tomatoes. I used about 12 Roma tomatoes and a small handful of cherry tomatoes.** If you don’t have any clove on hand, you could leave it off or substitute with a pumpkin spice blend. I know it sounds weird, but pumpkin spice includes cinnamon, ginger, nutmeg, allspice, and cloves… all of which would complement this relish!
Zest and juice 2 limes (this will yield roughly 3 Tbsp of juice) and dice ½ a red onion into small pieces. Gather 5 cups of roughly chopped and seeded tomatoes*, 1 Tbsp grated and peeled fresh ginger, 1 cup of sugar, ½ tsp red pepper flakes, ½ tsp ground cumin, and ⅛ tsp ground cloves**.
Add all the ingredients to a large pan and mix until combined.
Over medium heat, simmer the relish mix until the tomatoes and onions start cooking down. Stir the relish every few minutes to stop it from sticking to the bottom of the pan. The sugar will dissolve, and the mixture will become juicy as it cooks.
Continue simmering until the tomato relish cooks down by ¼ and deepens to a rich red color. Once the relish thickens but is still juicy, it’s done! Mine took about 30 minutes to get to this stage. Turn off the heat and either use the relish right away while it’s hot or let it cool down and store it in sterilized jars for later!
Say goodbye to store-bought tomato relish and hello to homemade goodness!
This creamy Tzatziki sauce is cool, refreshing, easy to make, and tastes good on just about anything! Perfect as a dip or sauce on your favorite meals.
A cool, creamy, and refreshing sauce that tastes good on just about anything…well hello my favorite Tzatziki sauce recipe! Tzatziki sauce has been a favorite of mine for many years. It’s so fresh and tastes great on lots of things including grilled meats, sandwiches and wraps, veggies and more! This week I served it as a dip with some zucchini fritters, but I also grabbed some pita chips and lots of veggies to serve on the side. We literally could not stop eating it at the studio. It’s easy to make, budget-friendly, and perfect this time of year.
Originally posted 5-10-10, updated 7-19-24.
What is Tzatziki?
Tzatziki is a popular sauce or dip made with Greek Yogurt, cucumber, and garlic. It also often includes fresh mint, dill, vinegar or lemon juice. It’s light, fresh, cool, and delicious as a sauce or as a dip with fresh vegetables. Once you taste tzatziki sauce you’ll want to slather it on everything! Of course our version has been adapted for the budget bytes kitchen, but here is an Authentic Tzatziki from Olive Tomato if you’re interested.
Ingredients For Tzatziki Sauce
I personally prefer this sauce over mayo-based sauces and dressings any day! Here’s what you need to make this creamy tzatziki recipe:
Greek Yogurt: plain Greek yogurt is the base for this creamy dip. I used whole milk Greek yogurt, but you can certainly use a low-fat Greek yogurt instead.
Cucumber: Grated cucumber is also a signature ingredient and adds a cool and refreshing taste.
Garlic & Dill: Garlic and fresh dill adds lots of flavor to the tzatziki sauce.
Lemon: Lemon juice adds just a touch of acidity. You can use white wine vinegar or red wine vinegar instead if that’s what you have on hand.
Olive Oil: Use a good quality extra-virgin olive oil for the best flavor.
Salt & Black Pepper: Salt and pepper to season and enhance the flavors of the dip.
Sugar (optional): Although not part of the authentic recipe, after testing this dip a few times, adding just a very small amount of granulated sugar really helped balance the tangy flavors in the sauce.
Serving suggestions
You can enjoy this delicious tzatziki sauce with just about anything. It’s perfect on with grilled meats, sandwiches and wraps, or gyros. You can also add it to salads, grilled vegetables, and grain bowls. And if you just need a quick snack, it’s great as a creamy dip for fresh veggies, breads, and pita chips!
Recipe Tips!
Make sure to squeeze out as much water as you can from the grated cucumber before mixing it with the yogurt. This helps keep the tzatziki sauce from being too watery.
Fresh ingredients really make a difference with this recipe. I used fresh garlic, lemon juice, and fresh dill.
Although not authentic, the small amount of sugar in this recipe really helps balance the tanginess of the Greek yogurt and lemon juice. It’s optional, but highly recommended :)
Be sure to use thick, plain Greek style yogurt for this recipe. The cucumber adds a lot of moisture and will cause regular yogurt to become too thin.
How To Store Leftovers
You can store any leftover Tzatziki sauce in an airtight container in the refrigerator for 5-7 days. The flavors will intensify as it refrigerates. If liquid separates out from the sauce during refrigeration, simply stir to reincorporate before serving.
This creamy Tzatziki sauce is cool, refreshing, easy to make, and tastes good on just about anything! Perfect as a dip or sauce on your favorite meals.
Wash the cucumber well. Then using the large holes on a box grater, grate half of the cucumber. Save the other half of the cucumber to serve with the tzatziki sauce.
Place the grated cucumber in a fine mesh cheesecloth or nut milk bag.** Squeeze out as much liquid as you possibly can into a bowl or over the sink. You should end up with roughly ½ cup of grated cucumber after most of the water is squeezed out.
In a medium mixing bowl add the Greek yogurt, grated cucumber, minced garlic, dill, lemon juice, olive oil, salt, black pepper, and sugar. Stir well to combine.
Refrigerate the tzatziki sauce for at least 30 minutes to allow the flavors to marry and blend together. Enjoy served cold. If liquid separates out from the sauce during refrigeration, simply stir to reincorporate before serving.
*Save the other half of the cucumber, cut it into slices, and serve with the tzatziki sauce.**If you don’t have a cheesecloth or nut milk bag, you can can squeeze the excess water from the cucumber using clean hands or a thick paper towel.
Wash 1 cucumber well. Then using the large holes on a box grater, grate half of the cucumber. Save the other half of the cucumber to serve with the tzatziki sauce.
Place the grated cucumber in a fine mesh cheesecloth or nut milk bag. Squeeze out as much liquid as you possibly can into a bowl or over the sink. You should end up with roughly ½ cup of grated cucumber after most of the water is squeezed out.
In a medium mixing bowl add 1 1/2 cups plain Greek yogurt, the grated cucumber, 1 garlic clove (finely minced), 1 Tbsp fresh dill (finely minced), 1 Tbsp lemon juice, 1 Tbsp extra virgin olive oil, 1/2 tsp salt, 1/8 tsp freshly cracked black pepper, and 1/4 tsp white sugar.
Stir everything together well to combine.
Cover and refrigerate the tzatziki sauce for at least 30 minutes to allow the flavors to marry and blend together. If liquid separates out from the sauce during refrigeration, simply stir to reincorporate before serving. Enjoy served cold with veggies, pita chips, wraps, or on top of your favorite meals!
This easy 7 Layer Dip recipe has seasoned refried beans, guacamole, sour cream, salsa, cheese, olives, and green onion. It is a total classic that everyone is always excited about. Dip recipes are guaranteed party pleasers, like our Buffalo Chicken Dip, Whipped Goat Cheese, Spinach Artichoke Dip, or Easy Homemade Salsa. How to Make 7-Layer…
This easy 7 Layer Dip recipe has seasoned refried beans, guacamole, sour cream, salsa, cheese, olives, and green onion. It is a total classic that everyone is always excited about.
7-Layer Bean Dip is layers of perfection, ready in minutes.
I think a good ol’ fashioned 7-layer dip is just about the easiest and quickest dip to make. I love how easy it is to prep, with ingredients I usually keep on hand. Everyone loves it, and my kids even eat it with a spoon instead of chips.
How to Make 7-Layer Bean Dip:
Flavor Beans: if using canned refried beans, it’s crucial to give them some extra flavor. We season them with cumin, garlic powder, and chili powder. My mom always used to squirt a little of this green sauce in there too. There are no strong rules here – just make them taste good! It will make a big difference in the end result.
Mash Avocado: Add 1 Tablespoon of lime or lemon juice to prevent the avocado from going brown.
Layer: Spread the refried beans into an even layer in a platter, then cover with mashed avocados, sour cream, salsa, shredded cheese, olives, and sprinkle the green onion on top. You are welcome to add any more of your favorite toppings. Refrigerate this easy 7 layer dip until ready to serve with tortilla chips, or feel free to eat it plain!
Season beans: Add the refried beans to a mixing bowl. Season with chili powder, cumin and garlic powder. Taste and add more seasoning if desired. Spread beans into a single layer on a large serving plate or in a 9×13'' pan.
Mash avocado: Add avocado and lemon/lime juice to a bowl and mash well with a fork. Spread into an even layer, over the beans.
Layer: Spread cream into an even layer, over the avocado. Dollop small spoonfuls of salsa next. Sprinkle with cheese, olives, and lastly, green onion. We also like to add a diced tomato for garnish (optional).
Refrigerate until ready to serve (can be made a day in advance). Serve with tortilla chips.
Video
Notes
Make-Ahead Instructions: 7-layer dip can be made 1 day ahead of time, covered tightly with plastic wrap and stored in the refrigerator.
Are you looking for a delicious, unique cheese dip to wow your guests? Look no further! This Queso Ranch Dip recipe is a crowd-pleaser that’s easy to make and reminiscent of the famous Chuy’s queso recipe they drop off at the table while you are …
Are you looking for a delicious, unique cheese dip to wow your guests? Look no further! This Queso Ranch Dip recipe is a crowd-pleaser that’s easy to make and reminiscent of the famous Chuy’s queso recipe they drop off at the table while you are reading your menu. This cheesy, creamy dip combines Chihuahua cheese,...
I absolutely love making deviled cheesecake strawberries. Sliced strawberries stuffed with my homemade recipe for cheesecake strawberry dip and sprinkled with a dusting of graham crackers are basically the perfect dessert. No cook and easy to make last…
I absolutely love making deviled cheesecake strawberries. Sliced strawberries stuffed with my homemade recipe for cheesecake strawberry dip and sprinkled with a dusting of graham crackers are basically the perfect dessert. No cook and easy to make last minute, this low stress dessert recipe also looks stunning on a dessert display tray. Stuffed Strawberry Ingredients...
—————————————————— Thank you for reading! This is a premium post available to subscribers only. While most of the site is open to all, if you’d like access to this and…
Source
------------------------------------------------------ Thank you for reading! This is a premium post available to subscribers only. While most of the site is open to all, if you'd like access to this and...
I’m that person who always chooses queso or spinach dip when I go out to my favorite restaurants. Dips are my absolute favorite appetizer and they’re perfect for sharing at parties and family gatherings. This 4-ingredient Taco Dip is creamy, super easy to make, and has the perfect amount of spice. Toppings are optional but I loved adding some tomatoes, jalapeños and sliced green onions on top of mine. And you don’t have to wait until the next big event to make this taco dip recipe…treat yourself this weekend to some chips & dip, you deserve it!😉
What’s In Taco Dip?
When I say this dip recipe is super easy, I really mean it. It’s one of those recipes you can memorize after making it one time and it’s easy to keep all the ingredients on hand for whenever you want to whip up a quick batch. For this taco dip we simply used cream cheese, sour cream, taco seasoning, and a little bit of salsa. That’s it! You can customize it by adding your favorite toppings or keep it simple and enjoy with lots of tortilla chips!
Can I Add Meat?
Oftentimes you may see taco dip made similar to our 7 layer dip recipe with ground beef added and layered with lots of veggies. I opted for a simpler version that can be made quickly with fewer ingredients, but still packs in lots of those Mexican-inspired flavors that I love. With that being said, you can definitely add some seasoned taco meat if you want to make this dip more filling. I suggest adding ½ lb. of seasoned ground beef on top of the cream cheese layer, then finish with your favorite toppings.
Topping Ideas
I love adding my favorite nacho-style toppings to this creamy dip. You can keep things simple like we did with a few tomatoes, sliced jalapeños, and sliced green onions or have fun adding any of these toppings listed below:
You can easily make this taco dip ahead of time and just wait to add on any extra toppings. Follow the recipe listed below then cover the dip tightly with plastic wrap or in an airtight container and place it in the refrigerator until you’re ready to serve. Store any leftovers covered tightly in the refrigerator for up to 3 days.
In a large bowl combine the softened cream cheese, sour cream, taco seasoning, and salsa.
Using a hand mixer blend all the ingredients together until completely smooth and the cream cheese is fully incorporated.
Add the taco dip to a serving dish and top with your favorite toppings. I topped mine with some grape tomatoes, sliced jalapeño, and sliced green onions. Enjoy!
*Make sure your cream cheese is softened so the ingredients can blend easily and smoothly.**You can use our homemade taco seasoning recipe or a store-bought taco seasoning packet. The store-bought packets are about 3 Tbsp of seasoning mix. You can use the entire packet for a more intense flavor or measure out 2 Tbsps and save the rest for later. I tested this recipe with 2 Tbsp of seasoning mix vs. the entire seasoning packet, and 2 Tbsp was definitely the way to go!
In a large bowl combine 8 oz. softened cream cheese, 1 cup sour cream, 2 Tbsp taco seasoning, and 1/4 cup salsa. I like using chunky mild salsa.
Using a hand mixer blend all the ingredients together until completely smooth and the cream cheese is fully incorporated.
Transfer the taco dip to a serving dish or bowl and top with your favorite toppings. I topped mine with some grape tomatoes, sliced jalapeño, and sliced green onions.
Now just grab a bag or tortilla chips and enjoy by yourself or with your family and friends!
—————————————————— Thank you for reading! This is a premium post available to subscribers only. While most of the site is open to all, if you’d like access to this and…
Source
------------------------------------------------------ Thank you for reading! This is a premium post available to subscribers only. While most of the site is open to all, if you'd like access to this and...