Reuben Eggrolls
Make viral Reuben Eggrolls with this easy recipe! Enjoy a unique twist on the classic Reuben, all wrapped up in a crispy, golden eggroll wrapper!
all things food
Make viral Reuben Eggrolls with this easy recipe! Enjoy a unique twist on the classic Reuben, all wrapped up in a crispy, golden eggroll wrapper!
This vegan crab cake recipe is easy to make, bursting with flavor and has the perfect crab meat texture and consistency. Dollop with our homemade vegan tartar sauce and fresh dill and enjoy as a delicious vegan seafood appetizer!
The post Easy Vegan Crab Cakes with Tartar Sauce appeared first on Sweet Simple Vegan.
This vegan crab cake recipe is easy to make, bursting with flavor, and has the perfect crab meat texture and consistency. Dollop with our homemade vegan tartar sauce and fresh dill and enjoy as a delicious vegan seafood appetizer!
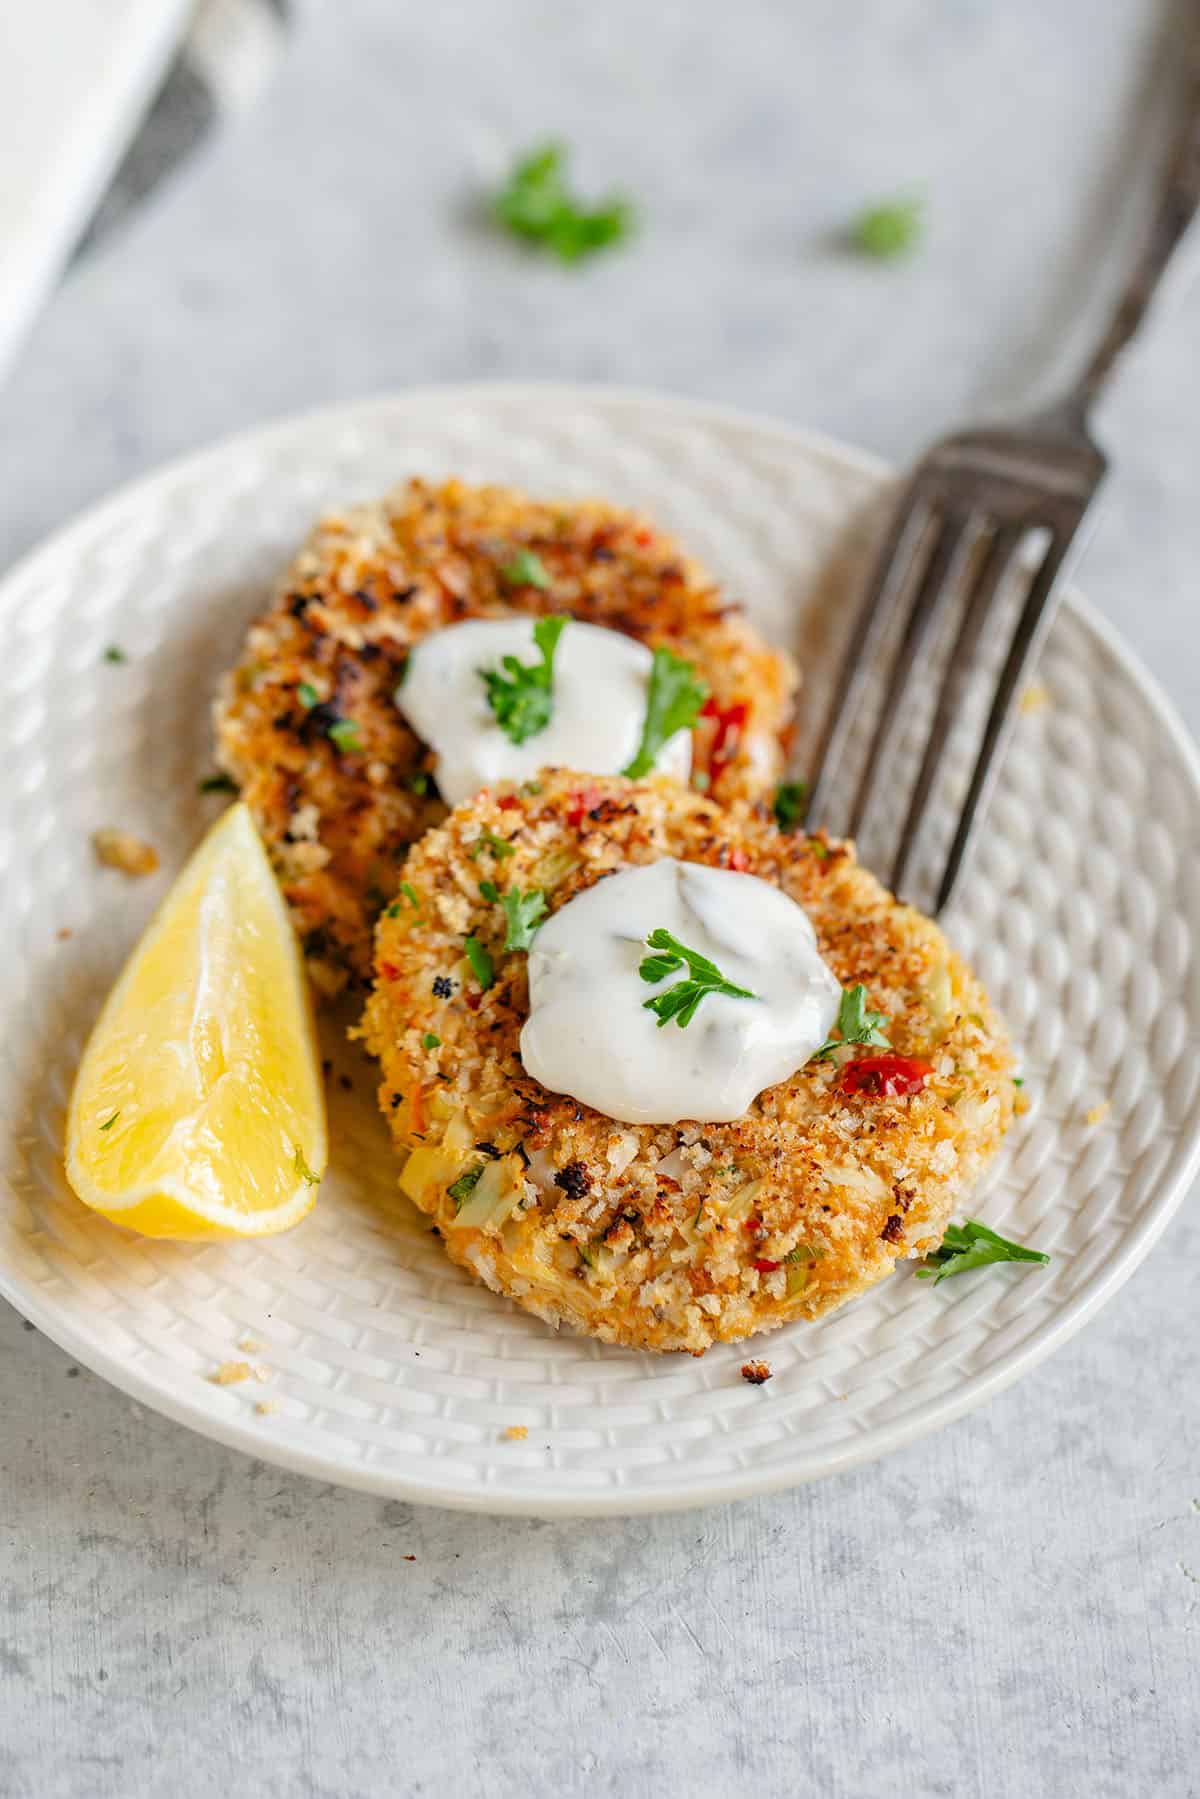
Over the years we’ve gotten very creative when it comes to mimicking the texture of seafood. To date we’ve made Vegan Calamari and Vegan Scallops from oyster mushrooms, Vegan Tuna from chickpeas, and Smoked Salmon from carrots.
Today we’re recreating the flaky texture of crab meat with chickpeas and hearts of palm…say what?! It may sound obscure, but we promise this trio of ingredients works so well to recreate crab cakes you won’t be missing the real thing!


We serve these crab cakes most often as a delicious vegan appetizer with Vegan Tartar Sauce, or other dipping sauces like Vegan Aioli or Cilantro Dill Cream Sauce.
If you prefer to enjoy them as a main dish, turn them into vegan crab cake sliders or pair them with a simple green salad, pan fried asparagus, and/or roasted vegetables.

Vegan crab cakes are best enjoyed fresh while they’re hot and crispy, but leftovers will keep for up to 5 days in an airtight container in the refrigerator.

Gluten Free
Breakfast
Appetizers and Sides
Make sure you tag us on Instagram @sweetsimplevegan and @consciouschris and hashtag #sweetsimplevegan if you make this recipe. We love to see your photos!
Print
This vegan crab cake recipe is easy to make, bursting with flavor and has the perfect crab meat texture and consistency. Dollop with our homemade vegan tartar sauce and fresh dill and enjoy as a delicious vegan seafood appetizer!
Nutrition facts label provided by Nutri Fox.
Disclaimer: This page may contain affiliate links, which simply means that we earn a commission if you purchase through those links, but your price remains the same. Thank you for supporting Sweet Simple Vegan!
The post Easy Vegan Crab Cakes with Tartar Sauce appeared first on Sweet Simple Vegan.
Smoked jalapeño poppers are a classic appetizer, so here’s our delicious twist on perfection. We still smoke the jalapeño poppers…
The post Smoked Fried Jalapeño Poppers appeared first on Over The Fire Cooking.
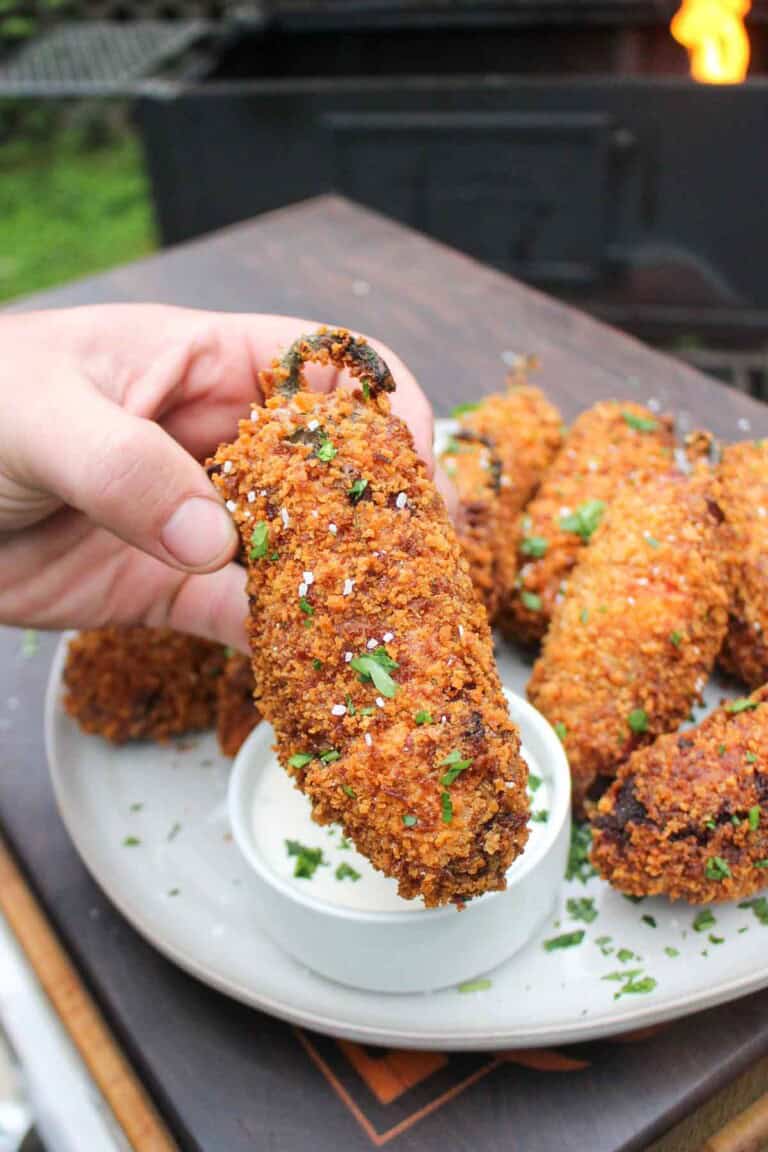
Smoked jalapeño poppers are a classic appetizer, so here’s our delicious twist on perfection. We still smoke the jalapeño poppers until the bacon is done, but to make this smoked jalapeño popper recipe so freakin’ delicious, we then dredge and fry ’em up. It’s not that complicated, but there are a few tricks that make a huge difference for these little bites.
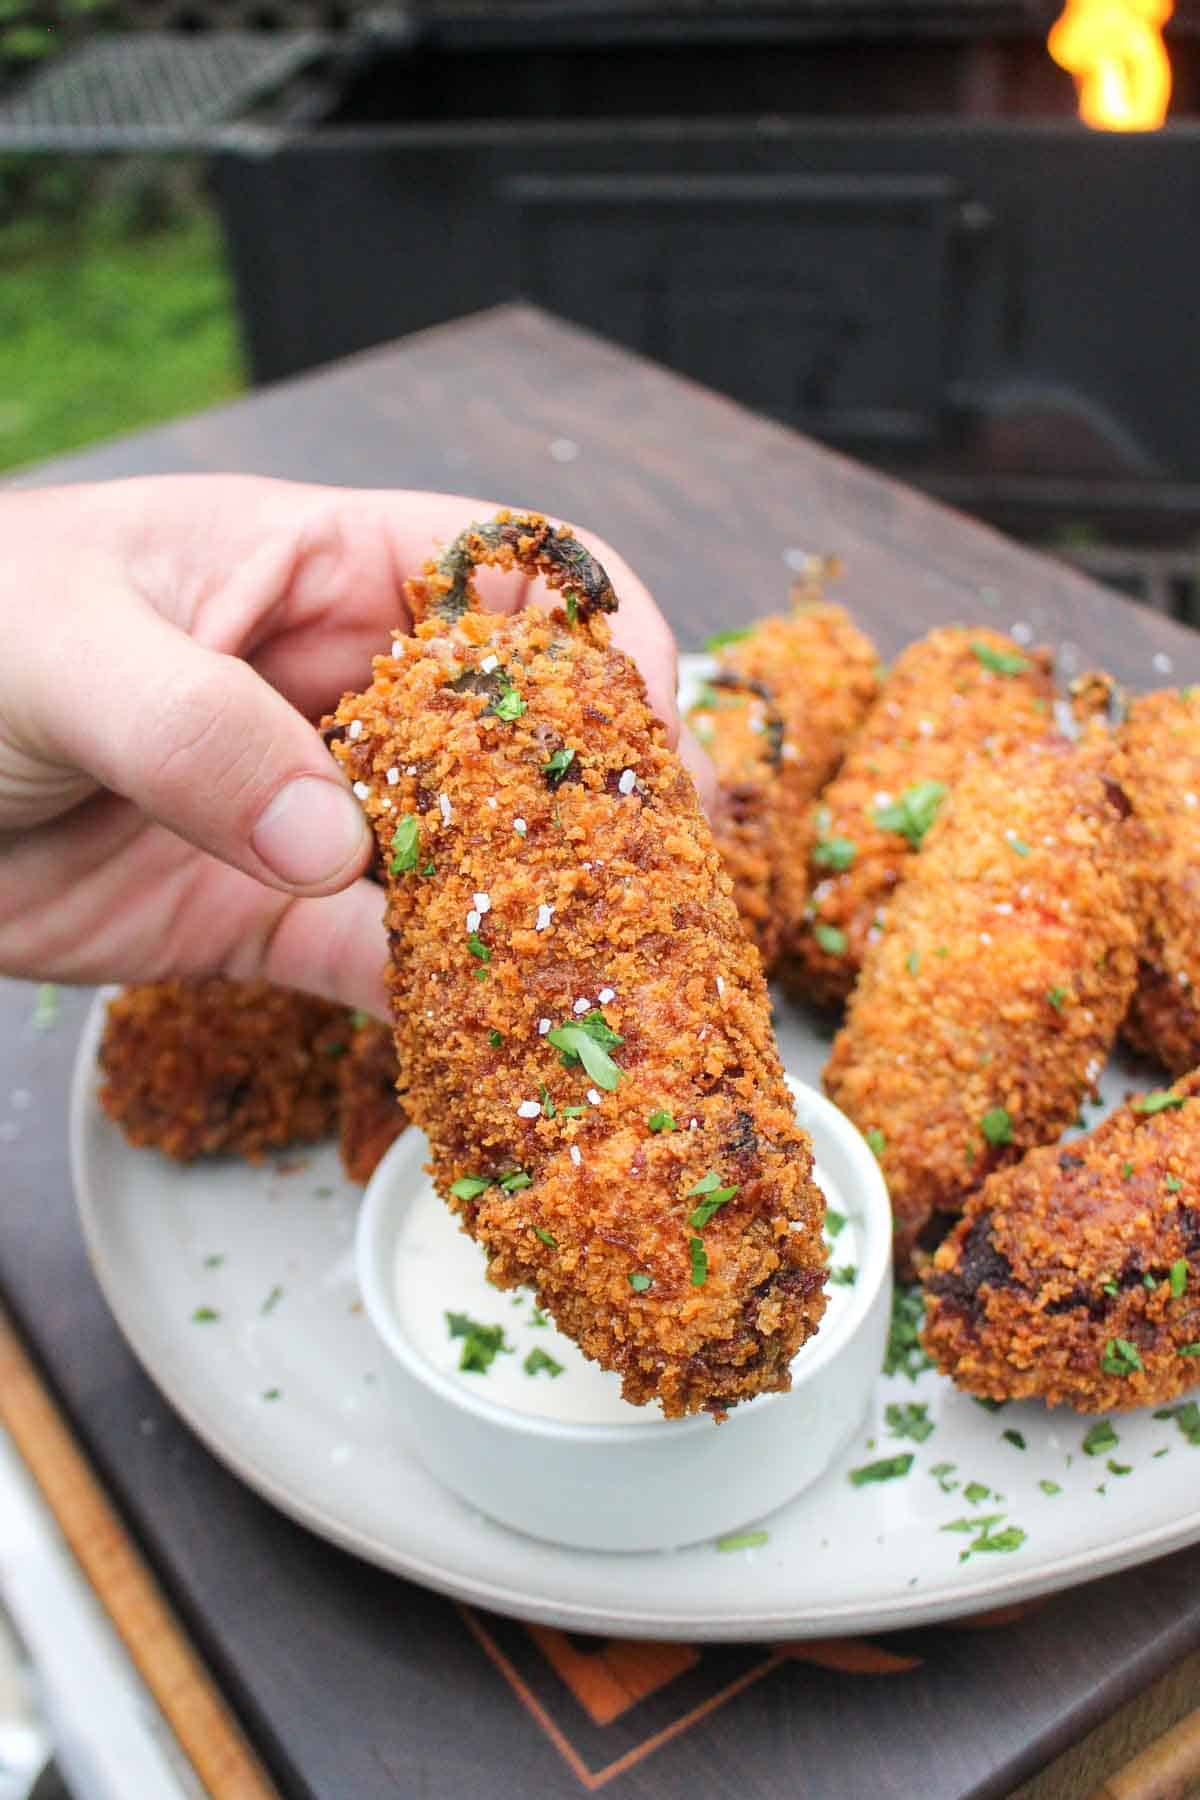
We get even more smoky flavor in this recipe from Cowboy Charcoal. The coals from Cowboy Charcoal burn really clean, so they’re ideal for any grilling recipe. I’ve used this stuff for everything from grilled steak nachos to birria egg rolls and stuffed lobster tails. Those coals get super hot and make it so we get the best poppers!
A jalapeño poppers recipe is always a hit for game day or a special occasion, and with good reason — that little extra kick from fresh jalapeño peppers, the different flavors in the cream cheese and the umami from the savory bacon make this classic appetizer hard to resist. By going the extra mile and frying these bad boys, you know that dish of poppers is going to disappear as soon as it hits the table.
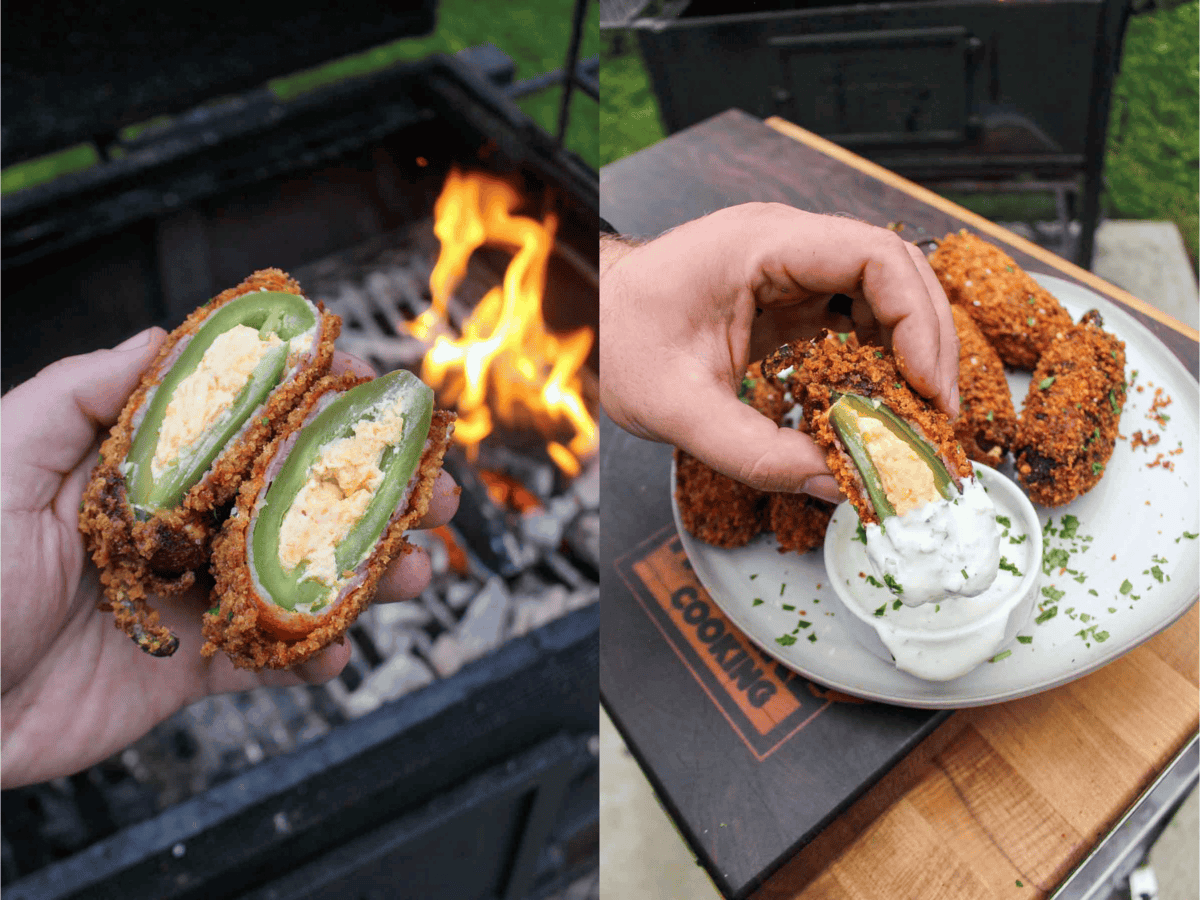
Here’s what to keep in mind for a successful smoked fried jalapeño popper. First, make sure the bacon is wrapped super tight on the poppers. If you need to, stick toothpicks through the poppers so the bacon strips don’t fall off. Then, dredge the wrapped peppers twice in the batter for the best results when it comes to coating. The frying doesn’t take too long, so keep an eye on the clock so you don’t burn the outside batter.
For other ways to enjoy our jalapeño popper combo, you can check out my shrimp jalapeño poppers. I’ve also made a surf and tuff popper that included lobster claw meat and beef bacon strips, or even something called Texas Twinkies which offer a version of poppers that include stuffing them with brisket!
I also paid these smoke fried jalapeño poppers with a ranch dressing for dipping because it’ll help cool any of the remaining heat from the popper. You can use store bought ranch dressing if you’d like, or check out my homemade recipe below!
Ranch dressing from scratch is super simple. In a small bowl, mix together 1/2 cup of sour cream, 1/3 cup of buttermilk, 2 tablespoons of mayonnaise, 2 teaspoons of lemon juice, 1/2 teaspoon of kosher salt, 1 minced fresh garlic clove and chopped fresh herbs of your choice (I like to use cilantro, dill and parsley). Stick it in the fridge for about 15 minutes to let the flavors meld, then serve and enjoy.
Game on! I’m so stoked for you to try these smoked jalapeño poppers. It might be my new favorite appetizer.
To make the smoked jalapeño popper filling, mix one block of full-fat cream cheese and 1 cup of shredded cheddar cheese together in a bowl.
Next, pick up one of your fresh jalapeños and slice a “T” shape into it, with the top slice underneath the steam and the long slice going the length of the pepper. Using gloves or a small spoon, scoop out the seeds and ribs from the inside of the jalapeño. Be careful not to break off the stem.
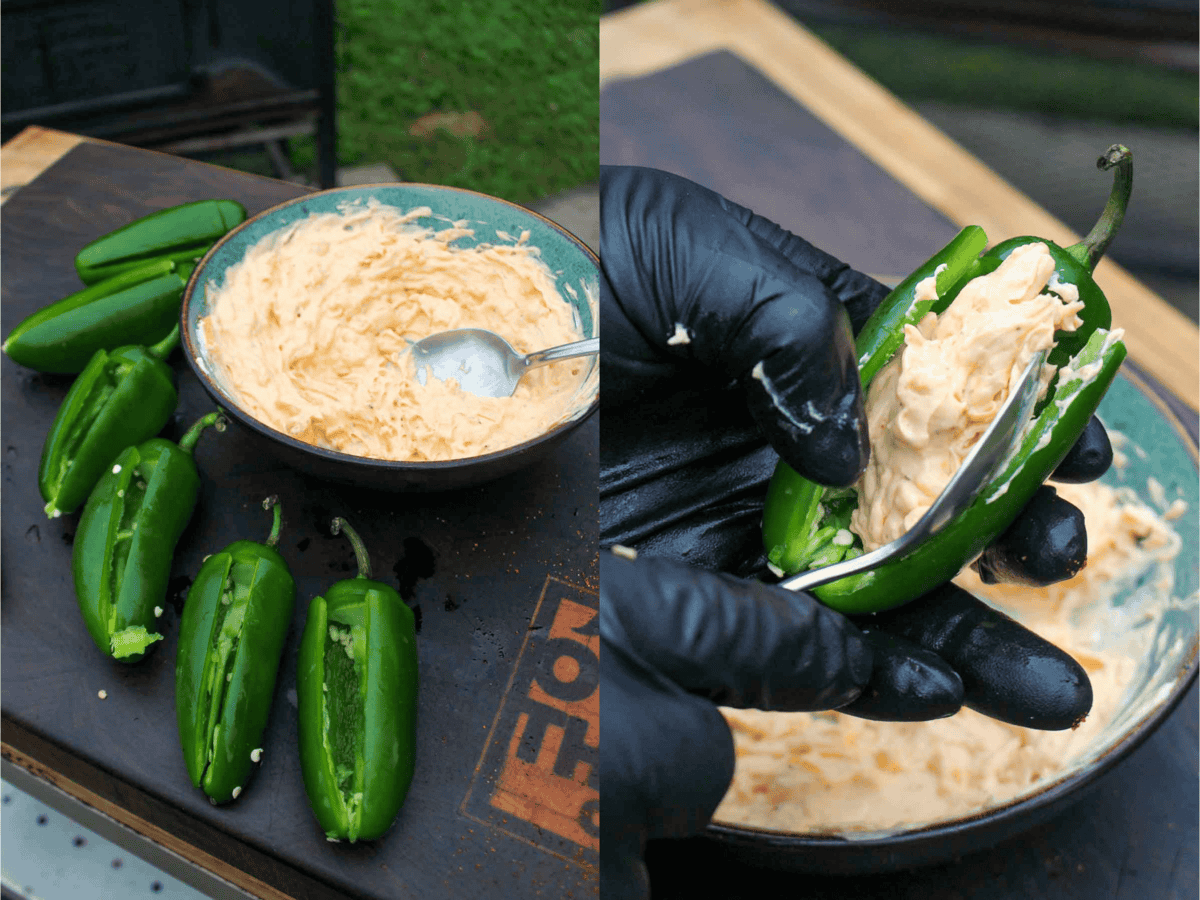
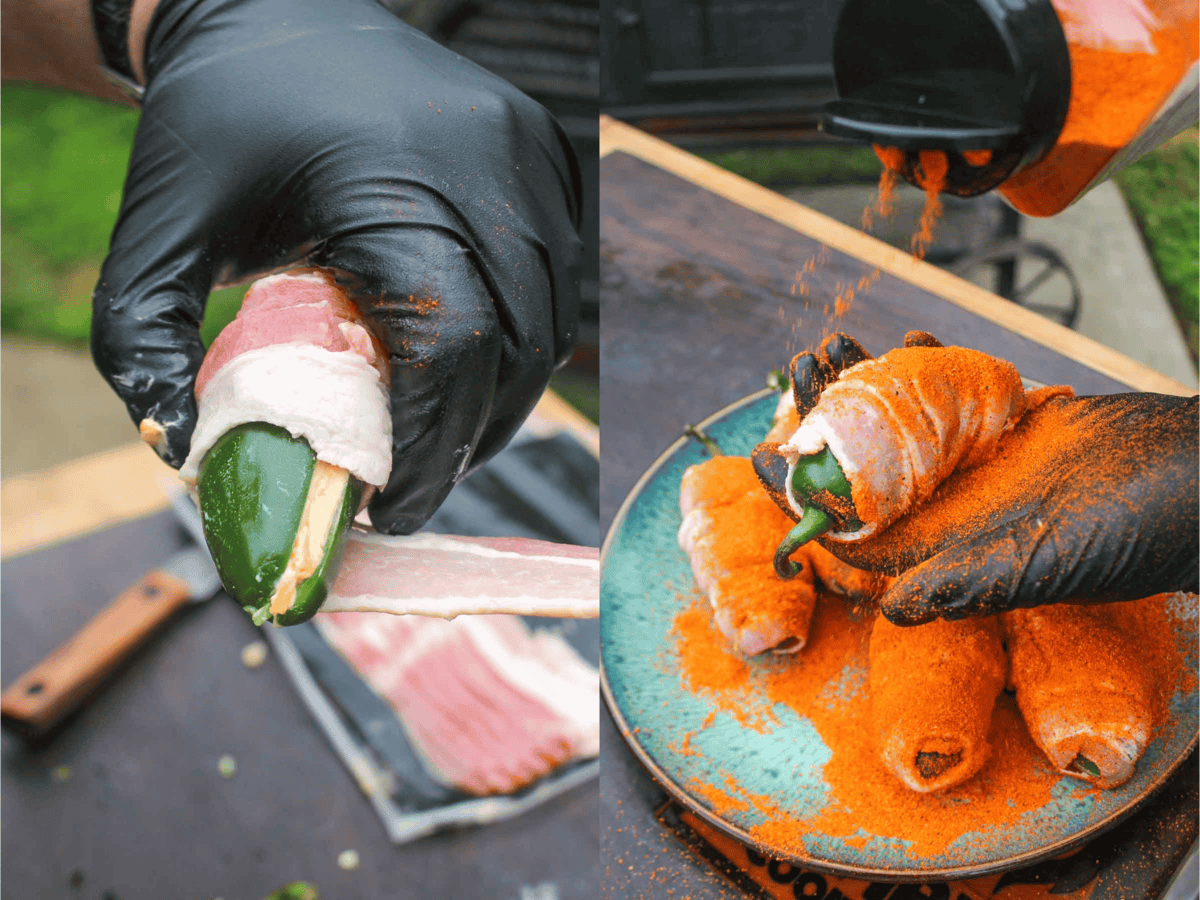
Once you’ve cleaned out the jalapeño, stuff the pepper with the cream cheese mixture. Next, take 1-2 slices of uncooked bacon and carefully wrap those around the whole jalapeño, making sure to fully encase the pepper.
Season the outside of the strips of bacon with your favorite BBQ seasoning and set aside. Repeat this process for your other seven jalapeños.
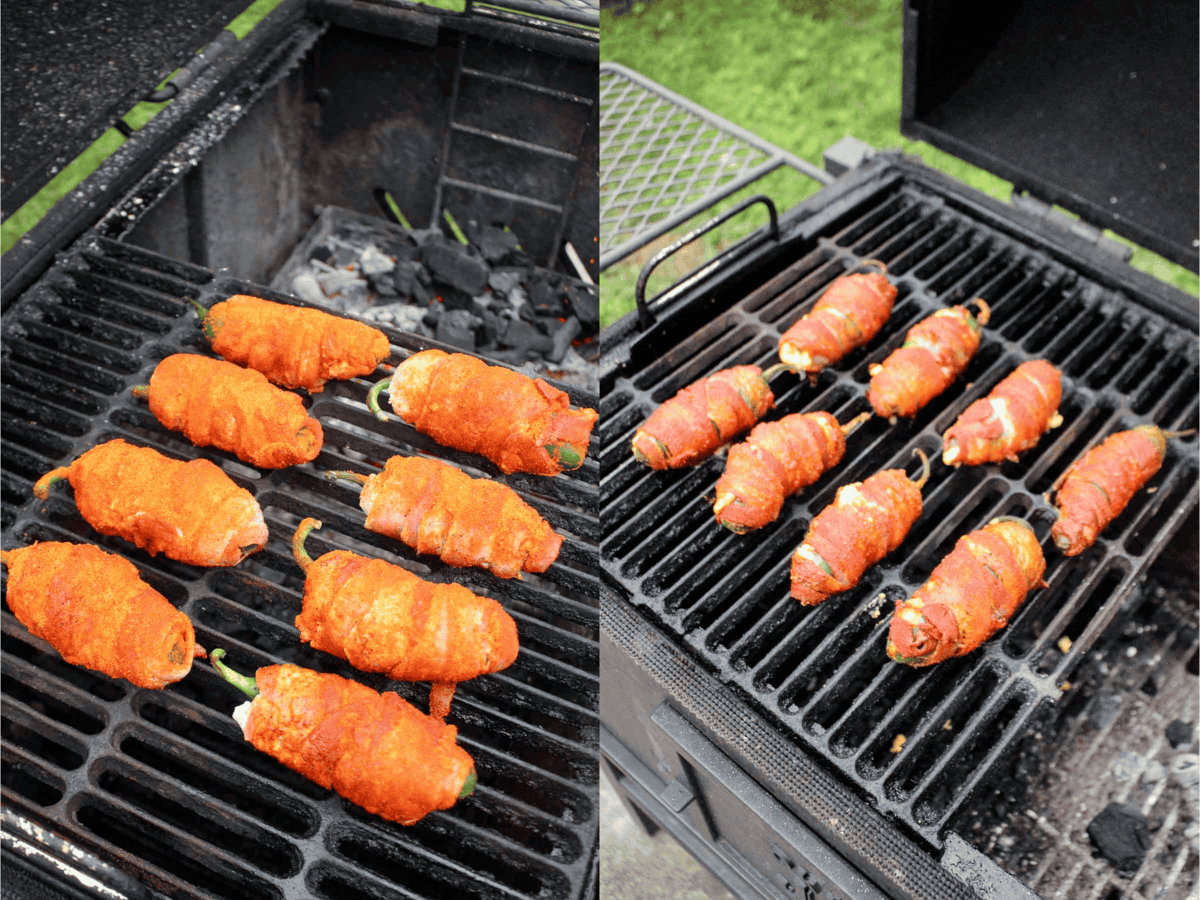
Preheat your smoker or grill to 250 degrees F for indirect heat cooking. Add some wood chips or wood chunks for added smoke flavor. Then, place your jalapeño poppers on the smoker and cook for about 90 minutes, or until the thick cut bacon has become dark amber and crispy. Once the peppers are done, pull them off and place them in the freezer for 15-20 minutes to fully cool.
Preheat your frying oil to 350 degrees F. I like to use enough oil to get 2-3 inches in the skillet.
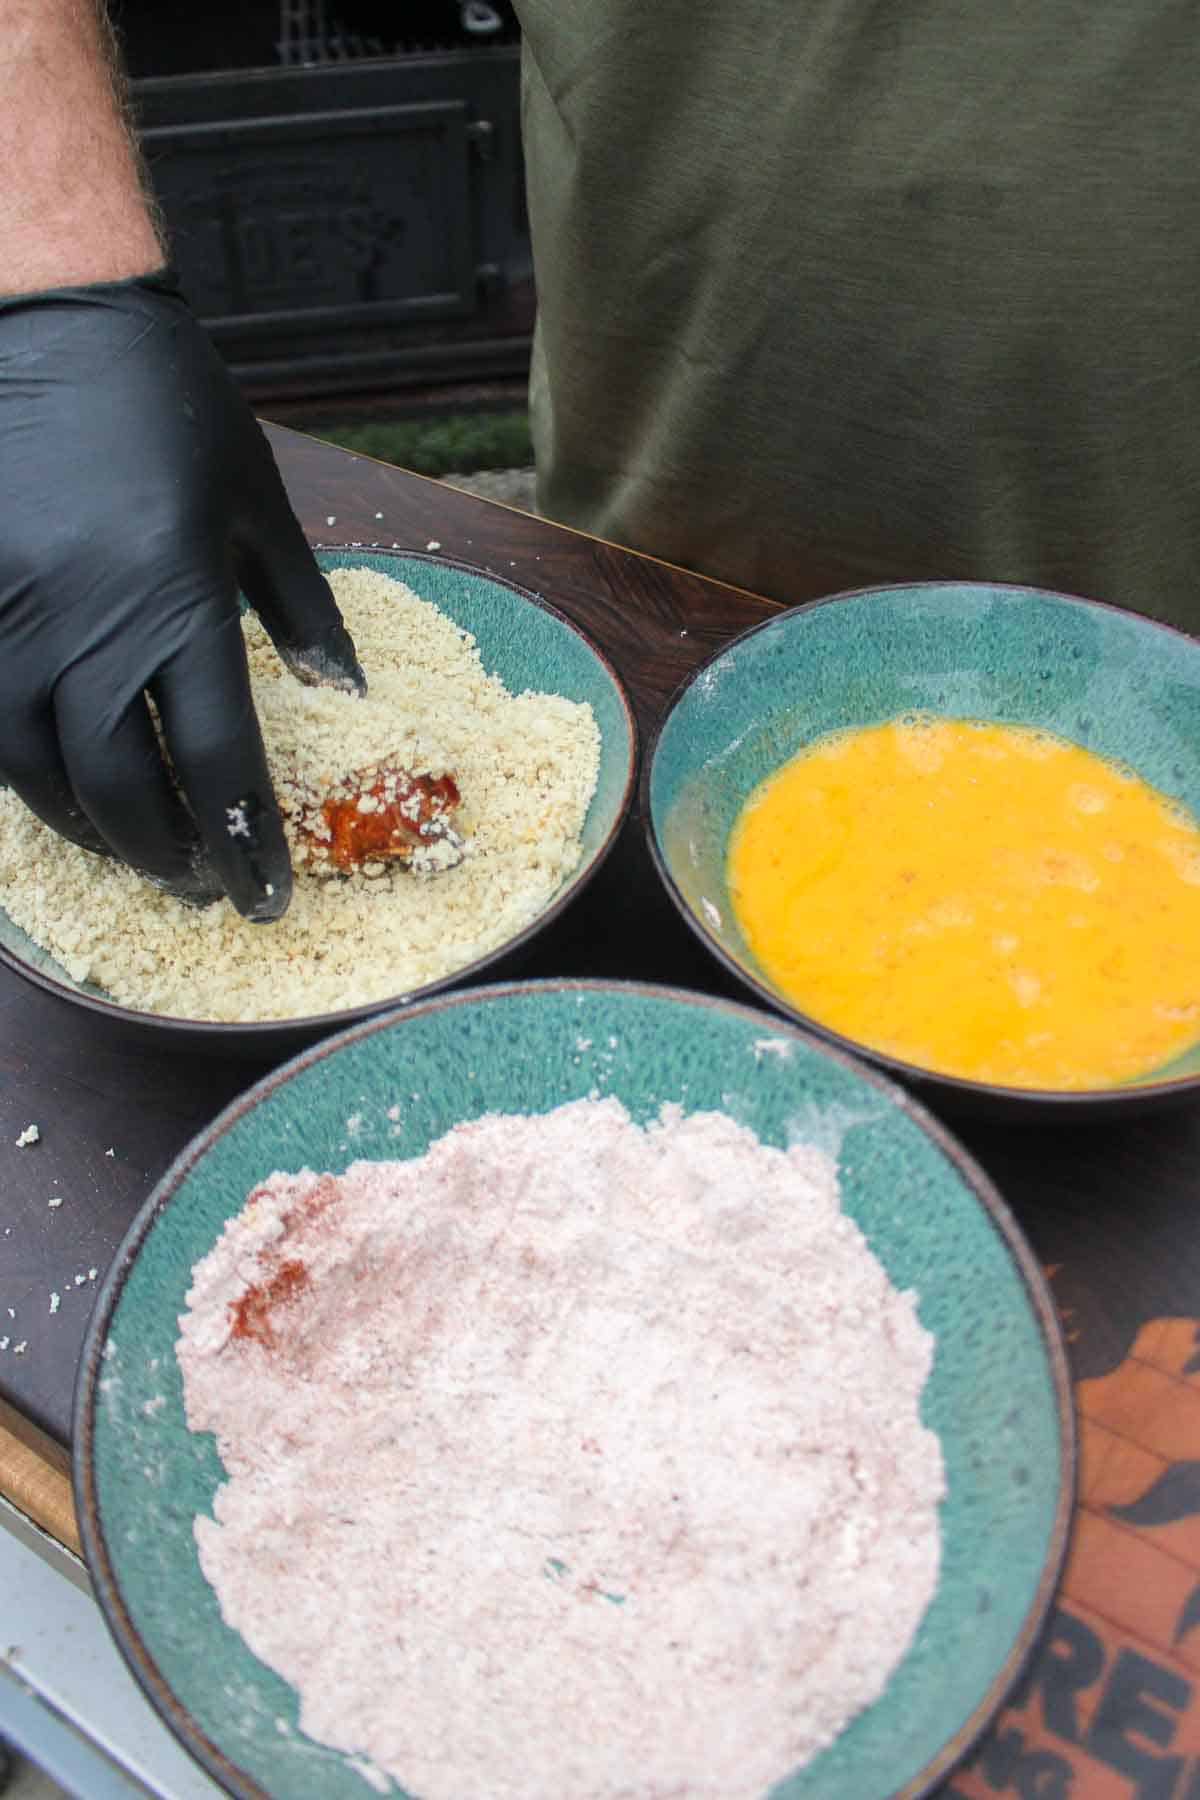
Mix 2 cups of white flour, 1 tablespoon of kosher salt, 1 tablespoon of garlic powder, 1 tablespoon of black pepper, 1 tablespoon of paprika and 1 tablespoon of cayenne pepper in a bowl. Then, whip 3-4 fresh eggs in another bowl. Finally, place 2 cups of panko breadcrumbs in a third bowl.
Next, take the cooled smoked jalapeño poppers out of the freezer. Dredge them in the seasoned flour, then coat them thoroughly in the egg wash, and finish by dredging in the panko crumbs. Set that little smokie aside and repeat for all of the poppers.
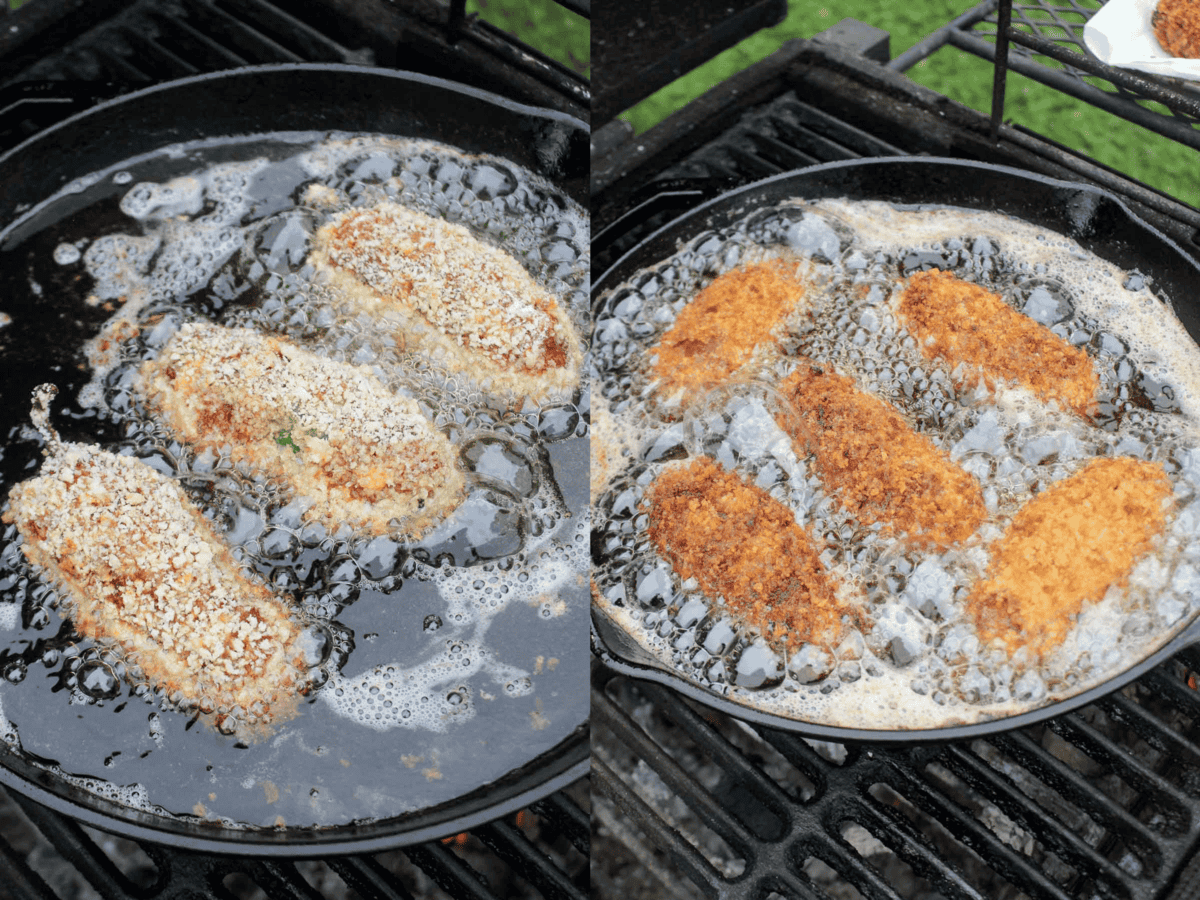
Add the smoked jalapeño poppers to the oil and fry for 3-4 minutes, or until golden crispy brown. Once done, place them on a paper towel-lined plate and let them cool. Serve this spicy bite with some ranch dressing or sour cream and enjoy!
These delicious smoked jalapeño poppers will be right at home kicking off a game day spread. Think burgers, nachos, grilled chicken, sausages or even steak if you’re feeling fancy.
If you have leftover poppers, store them in an airtight container in the fridge for up to three days. Then, reheat on a grill or in a 350-degree oven until warmed. Just know that we find that the texture of smoked jalapeño poppers is best the day of, right off the grill.
The size of your peppers should be about 3 inches long. If they’re bigger than that, they get floppy and hard to eat with your hands. If they’re smaller than that, they can be hard to stuff and get all that extra flavor!
Ever cut a spicy pepper and touched your eyeball? WORST! The easiest way to prevent this experience is to wear disposable gloves while you’re cutting the peppers.
Make sure you wash your hands well afterward, along with your cutting board and the knife you used to cut. If you do get some capsaicin — the compound in hot peppers that gives it the kick we all love — on your hands and it causes a burning sensation, you can use dish soap, rubbing alcohol or even yogurt to cool things down.
Cowboy Charcoal has built a well-earned reputation as some of the cleanest and best stuff around, so you can find it almost anywhere. Check out the company’s store locator to see which hardware stores carry it near you.

Get The Cookbooks!
All the major tastes—salty, sour, sweet, bitter, and umami—are explored in depth, along with an investigation of other components you should consider when it comes to flavor, such as aroma, heat, and texture.

The post Smoked Fried Jalapeño Poppers appeared first on Over The Fire Cooking.
Crispy fried taco shells stuffed with a creamy decadent cherry filling make these cherry cheesecake tacos the best way to end your meal.
Here’s how to make sunny side up eggs with a perfectly runny yolk! Eat them for breakfast, sandwiches, rice bowls,…
Here’s how to make sunny side up eggs with a perfectly runny yolk! Eat them for breakfast, sandwiches, rice bowls, and more.

Want to make anything into a meal? Put an egg on it! Alex and I learned that slogan early in our cooking journey, and we still use it to this day. Eggs aren’t just for breakfast: they make a rice bowl or sesame noodles into a filling meal.
So here’s one of our top kitchen basic skills for you: how to make sunny side up eggs! This easy technique makes perfectly cooked whites and a runny, gooey egg yolk: and it’s perfect for breakfast, lunch or dinner. Ready to get frying?
How to make the very best sunny side up eggs? We’ve got your covered. There are a few tips you’ll need to know before you jump into the frying pan, so to speak! Here’s what to know:

Ready to start frying? Remember: you’ll want to cook eggs on medium low or low heat. The slower the better with eggs, since they’re delicate and can easily be overcooked. Here are the basic steps to a perfectly cooked sunny side up egg:
Step 1: Heat ½ tablespoon butter over medium low heat.
Step 2: Add 1 or 2 eggs and sprinkle with a pinch of kosher salt and a few grinds black pepper.
Step 3: Cook for 2 to 3 minutes, until the whites are firm but the yolk is still runny (don’t flip). Remove to a plate and serve.
The best spatula to use is a fish spatula for a cast iron pan or a nylon spatula for a non-stick pan. The cooking process is simple, but it does require a little finesse and confidence. The more you practice, the easier it becomes!
There’s not much that doesn’t taste better with an egg on it! You can literally add an egg to anything and it’s a fantastic boost of protein. (See below for more egg nutrition.) And eggs aren’t just for breakfast! Here are our top ways to serve sunny side up eggs:

Eggs are some of the most nutritious foods on the planet, though they sometimes get a bad rap! Recent research has found that instead of avoiding eggs for cholesterol reasons, they can increase the good cholesterol the body needs. Eggs are an affordable and easy-to-eat source of high quality protein. They’re also especially helpful for vegetarian diets as a natural source of B12. One egg has:
Want to know how to cook eggs…every way possible? Here are tutorials on the most popular ways to cook eggs:

This sunny side up eggs recipe is vegetarian, dairy-free, and gluten-free.
Sunny side up eggs are cooked with the yolk unbroken, while fried eggs can have the yolk broken or cooked all the way through. Sunny side up eggs typically have a slightly runny yolk and crispy whites.
Fresh eggs with firm yolks are ideal for sunny side up. Crack the egg on a flat surface first to check for cracks. Use a gentle touch when sliding it into the pan.
Sunny side up eggs pair well with various breakfast sides:
Toast (perfect for soaking up the runny yolk!)
Bacon, sausage, or ham
Hash browns or home fries
Sautéed vegetables
Avocado toast
Sunny side up eggs are generally safe as long as the whites are cooked through. However, if you’re concerned about consuming raw egg whites (due to a weakened immune system), consider cooking them to a firmer consistency.
While a non-stick pan makes flipping the eggs easier, you can use any pan with a good heat distribution. Cast iron skillets are a popular choice for achieving crispy whites.

Here’s how to make sunny side up eggs with a perfectly runny yolk! Eat them for breakfast, sandwiches, rice bowls, and more.
*Fresh eggs are best for frying because the whites hold their shape. The whites on older eggs tend to spread: simply use a spatula to pull back the egg whites towards the middle (it just won’t look as pretty!).
**The slower the better with eggs: they can easily get overcooked. Note that if you’re cooking a second batch, you may need to lower the heat to avoid overcooking the egg since the skillet is already hot.
This is the non-stick skillet we use. This is the cast-iron skillet we use.